Agen Allwedd Isles Inlet trip 05/03/2024
Unless otherwise stated, camera, setups, lighting, edits and gallery effects by Tarquin. Modelling and lighting at various points will be Steph Andrews.
 Just after the logbook in Ogof Gam, the normal entrance to Agen Allwedd.
Modelling by Steph, lighting by Tarquin and Steph
Just after the logbook in Ogof Gam, the normal entrance to Agen Allwedd.
Modelling by Steph, lighting by Tarquin and Steph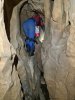 First clamber in Ogof Gam, past some boulder obstacles.
Modelling by Steph, lighting by Tarquin and Steph
First clamber in Ogof Gam, past some boulder obstacles.
Modelling by Steph, lighting by Tarquin and Steph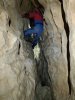 The traverses which are optional, larger cavers may prefer to traverse, smaller cavers may choose to walk at the bottom, climbing up and down over rocks.
Modelling by Steph, lighting by Tarquin and Steph
The traverses which are optional, larger cavers may prefer to traverse, smaller cavers may choose to walk at the bottom, climbing up and down over rocks.
Modelling by Steph, lighting by Tarquin and Steph A couple of crawls marks the end of Ogof Gam. One of these has a spit in the ceiling, which was used to pull the rock apart with a rope, after it had been blasted.
Modelling by Steph, lighting by Tarquin and Steph
A couple of crawls marks the end of Ogof Gam. One of these has a spit in the ceiling, which was used to pull the rock apart with a rope, after it had been blasted.
Modelling by Steph, lighting by Tarquin and Steph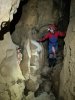 Tool Shed, where the taped off Agen Allwedd entrance comes in from the right (seen here on the left). From this point onwards, we are in the Entrance Series of Agen Allwedd (Aggy).
Modelling by Steph, lighting by Tarquin and Steph
Tool Shed, where the taped off Agen Allwedd entrance comes in from the right (seen here on the left). From this point onwards, we are in the Entrance Series of Agen Allwedd (Aggy).
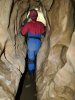
Modelling by Steph, lighting by Tarquin and Steph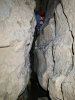 A traverse then avoids crawling in puddles, but this one is harder. It is best navigated by sitting or kneeling in the rift.
Modelling by Steph, lighting by Tarquin and Steph
A traverse then avoids crawling in puddles, but this one is harder. It is best navigated by sitting or kneeling in the rift.
Modelling by Steph, lighting by Tarquin and Steph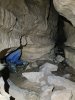 At the next junction, the inviting passage ahead splits into Purgatory on the left and Toothpaste Tube on the right. However, the normal mnemonic for the Entrance Series is "go right out or get left in" (which works for every junction except obviously silly roof tubes), so we crawl under the wall to the left.
Modelling by Steph, lighting by Tarquin and Steph
At the next junction, the inviting passage ahead splits into Purgatory on the left and Toothpaste Tube on the right. However, the normal mnemonic for the Entrance Series is "go right out or get left in" (which works for every junction except obviously silly roof tubes), so we crawl under the wall to the left.
Modelling by Steph, lighting by Tarquin and Steph The Entrance Series then offers a lengthy section of walking, with only occasional stoops or boulders, and a couple of easy traverses. It then becomes more rocky after the junction with Stream Passage.
Modelling by Steph, lighting by Tarquin and Steph
The Entrance Series then offers a lengthy section of walking, with only occasional stoops or boulders, and a couple of easy traverses. It then becomes more rocky after the junction with Stream Passage.
Modelling by Steph, lighting by Tarquin and Steph A rocky patch.
Modelling by Steph, lighting by Tarquin and Steph
A rocky patch.
Modelling by Steph, lighting by Tarquin and Steph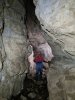 Getting bigger.
Modelling by Steph, lighting by Tarquin and Steph
Getting bigger.
Modelling by Steph, lighting by Tarquin and Steph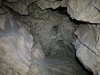 The decorative marbling of the ceiling in the bigger section, normally with a significant number of bats in winter.
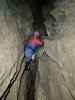 Traverse ledges, with a push-off to one side at the end.
Modelling by Steph, lighting by Tarquin and Steph
Traverse ledges, with a push-off to one side at the end.
Modelling by Steph, lighting by Tarquin and Steph The large section beneath the aven of Angel's Roost, another section often adorned with bats.
Modelling by Steph, lighting by Tarquin and Steph
The large section beneath the aven of Angel's Roost, another section often adorned with bats.
Modelling by Steph, lighting by Tarquin and Steph The aven leading into Angel's Roost, one of the few side passages that leads off to the left. The name is the name of a person, and should probably be pronounced as the Spanish name Ángel, not the English word angel. More like "Ang-chel" in Welsh (that "ch" is the same sound as in the English word "loch", unless you pronounce that "lock", in which case you are wrong in all languages).
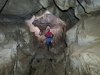 Start of the beautiful keyhole section near Queer Street.
Modelling by Steph, lighting by Tarquin and Steph
Start of the beautiful keyhole section near Queer Street.
Modelling by Steph, lighting by Tarquin and Steph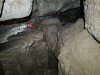 Then there are a choice of routes. Either a climb up a boulder route followed by a balancing act along the ledge, or a narrow slot walk favoured by smaller cavers.
Modelling by Steph, lighting by Tarquin and Steph
Then there are a choice of routes. Either a climb up a boulder route followed by a balancing act along the ledge, or a narrow slot walk favoured by smaller cavers.
Modelling by Steph, lighting by Tarquin and Steph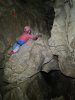 Next is the choice of over or under the suspended boulders. Under looks easier at first, but requires a tricky climb through a boulder slot. Over is walking.
Modelling by Steph, lighting by Tarquin and Steph
Next is the choice of over or under the suspended boulders. Under looks easier at first, but requires a tricky climb through a boulder slot. Over is walking.
Modelling by Steph, lighting by Tarquin and Steph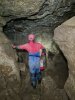 The over route has a beautiful nodular bed ceiling, which is a popular winter bat winter site.
Modelling by Steph, lighting by Tarquin and Steph
The over route has a beautiful nodular bed ceiling, which is a popular winter bat winter site.
Modelling by Steph, lighting by Tarquin and Steph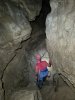 Down into an awkward dip where the lower route rejoins.
Modelling by Steph, lighting by Tarquin and Steph
Down into an awkward dip where the lower route rejoins.
Modelling by Steph, lighting by Tarquin and Steph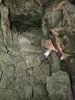 Start of First Choke (or First Boulder Choke). The way on is down through the rocks on the right.
Modelling by Steph, lighting by Tarquin and Steph
Start of First Choke (or First Boulder Choke). The way on is down through the rocks on the right.
Modelling by Steph, lighting by Tarquin and Steph The drop down through the rocks is always a fun challenge. The hole in the floor needs to be avoided when landing. At some point, someone added an annoying scaffolding bar which took all the fun out of this section, but fortunately that has been removed, and we can be actual cavers again.
Modelling by Steph, lighting by Tarquin and Steph
The drop down through the rocks is always a fun challenge. The hole in the floor needs to be avoided when landing. At some point, someone added an annoying scaffolding bar which took all the fun out of this section, but fortunately that has been removed, and we can be actual cavers again.
Modelling by Steph, lighting by Tarquin and Steph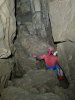 The only time you turn right is when you have no other option. At this point, the way ahead chokes, so we turn right into Draught Passage.
Modelling by Steph, lighting by Tarquin and Steph
The only time you turn right is when you have no other option. At this point, the way ahead chokes, so we turn right into Draught Passage.
Modelling by Steph, lighting by Tarquin and Steph Immediately, a hidden junction marks the lext left, crawling under the wall. This is the easiest place to go wrong on the way out, forgetting to turn right, and heading off down Draught Passage instead.
Modelling by Steph, lighting by Tarquin and Steph
Immediately, a hidden junction marks the lext left, crawling under the wall. This is the easiest place to go wrong on the way out, forgetting to turn right, and heading off down Draught Passage instead.
Modelling by Steph, lighting by Tarquin and Steph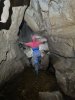 Short section of stream between the chokes.
Modelling by Steph, lighting by Tarquin and Steph
Short section of stream between the chokes.
Modelling by Steph, lighting by Tarquin and Steph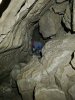 The main section of First Choke then starts. At this point, we are underneath the start of Main Passage.
Modelling by Steph, lighting by Tarquin and Steph
The main section of First Choke then starts. At this point, we are underneath the start of Main Passage.
Modelling by Steph, lighting by Tarquin and Steph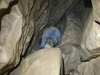 The choke has a distinctive slope up through rocks, and this particular rock is perfectly placed to catch men when they slide down on the way out.
Modelling by Steph
The choke has a distinctive slope up through rocks, and this particular rock is perfectly placed to catch men when they slide down on the way out.
Modelling by Steph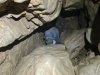 A climb up through the choke then reaches the undercuts of Baron's Chamber, marking the end of the Entrance Series.
Modelling by Steph, lighting by Tarquin and Steph
A climb up through the choke then reaches the undercuts of Baron's Chamber, marking the end of the Entrance Series.
Modelling by Steph, lighting by Tarquin and Steph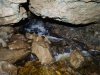 First Inlet in Southern Stream Passage, which was running very high. The crawls below rocks in Southern Stream were very wet as a result. This stream comes from Trident Passage, which in turn comes from Ace Of Spades Inlet, and it is not drinkable.
Modelling by Steph, lighting by Tarquin and Steph
First Inlet in Southern Stream Passage, which was running very high. The crawls below rocks in Southern Stream were very wet as a result. This stream comes from Trident Passage, which in turn comes from Ace Of Spades Inlet, and it is not drinkable.
Modelling by Steph, lighting by Tarquin and Steph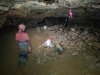 A new camp in Priory Road, for those pushing roof tubes. It's a terrible place to camp, since it has no water, and no toilet.
Modelling by Steph, lighting by Tarquin and Steph
A new camp in Priory Road, for those pushing roof tubes. It's a terrible place to camp, since it has no water, and no toilet.
Modelling by Steph, lighting by Tarquin and Steph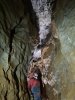 Start of Trafalgar in Isles Inlet, one of the best decorated parts of the cave.
Modelling by Steph
Start of Trafalgar in Isles Inlet, one of the best decorated parts of the cave.
Modelling by Steph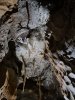 Ceiling of Trafalgar, sadly very difficult to photograph, because it is too far up. I have previously climbed up to photograph it, and do not intend to repeat it.
Lighting by Steph
Ceiling of Trafalgar, sadly very difficult to photograph, because it is too far up. I have previously climbed up to photograph it, and do not intend to repeat it.
Lighting by Steph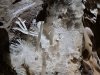 Detail of Trafalgar's ceiling.
Lighting by Steph
Detail of Trafalgar's ceiling.
Lighting by Steph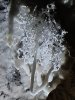 Detail of Trafalgar's ceiling.
Lighting by Steph
Detail of Trafalgar's ceiling.
Lighting by Steph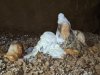 A wise man with a beard, seated at a table, whose guest has not yet arrived.
Lighting by Tarquin and Steph
A wise man with a beard, seated at a table, whose guest has not yet arrived.
Lighting by Tarquin and Steph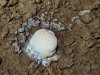 Stalagmite that wants to be a puffball mushroom.
 Anthodite column, anthodites, and stalactites covered in selenite crystals.
Modelling by Steph
Anthodite column, anthodites, and stalactites covered in selenite crystals.
Modelling by Steph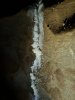 And anthodites all in a row.
 Anthodites.
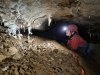 One of the best helictite clusters is part way along the crawl at the end of Trafalgar.
Modelling by Steph, lighting by Tarquin and Steph
One of the best helictite clusters is part way along the crawl at the end of Trafalgar.
Modelling by Steph, lighting by Tarquin and Steph The helictite cluster, which we are sure is a chilli tree, complete with fruiting chillis.
Lighting by Steph
The helictite cluster, which we are sure is a chilli tree, complete with fruiting chillis.
Lighting by Steph A little column with its own elaborate helictites.
 Misaligned columns. They appear to have grown at a different angle, then slid or toppled sideways, and continued to grow.
Lighting by Tarquin and Steph
Misaligned columns. They appear to have grown at a different angle, then slid or toppled sideways, and continued to grow.
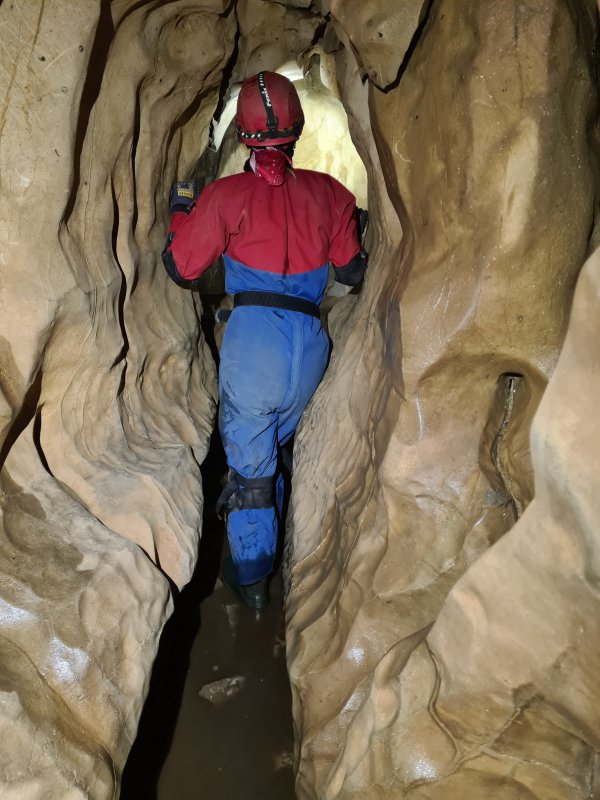
Lighting by Tarquin and Steph Bottom of The Corkscrew, one of the toughest squeezes on the route. It is not particularly tight, but it requires a diagonal climb with very little to use for footholds.
Modelling by Steph, lighting by Tarquin and Steph
Bottom of The Corkscrew, one of the toughest squeezes on the route. It is not particularly tight, but it requires a diagonal climb with very little to use for footholds.
Modelling by Steph, lighting by Tarquin and Steph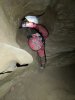 The top is the hardest part, since you need to avoid slipping down into the slot, while somehow keeping your body up into the wider part above using your arm, which doesn't reach the floor.
Modelling by Steph, lighting by Tarquin and Steph
The top is the hardest part, since you need to avoid slipping down into the slot, while somehow keeping your body up into the wider part above using your arm, which doesn't reach the floor.
Modelling by Steph, lighting by Tarquin and Steph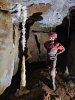 The highlight of Corkscrew Chamber, and the entire trip, is The Courtesan, a very impressive helictite-covered stalactite, with its contrastingly plain stalagmite.
Modelling by Steph, lighting by Tarquin and Steph
The highlight of Corkscrew Chamber, and the entire trip, is The Courtesan, a very impressive helictite-covered stalactite, with its contrastingly plain stalagmite.
Modelling by Steph, lighting by Tarquin and Steph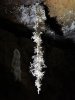 Top of The Courtesan.
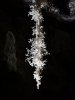 The most elaborate part of The Courtesan.
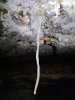 Intricate helictite bunch surrounding a stalactite.
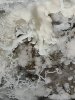 Long, elaborate helictite.
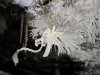 Anthodite with a long proboscis. This certainly seems like a living animal.
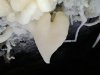 Heart-shaped stalactite.
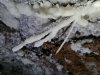 Ribbed helictite, a type seen in parts of Ogof Draenen.
 Just after the logbook in Ogof Gam, the normal entrance to Agen Allwedd.
Modelling by Steph, lighting by Tarquin and Steph
Just after the logbook in Ogof Gam, the normal entrance to Agen Allwedd.
Modelling by Steph, lighting by Tarquin and Steph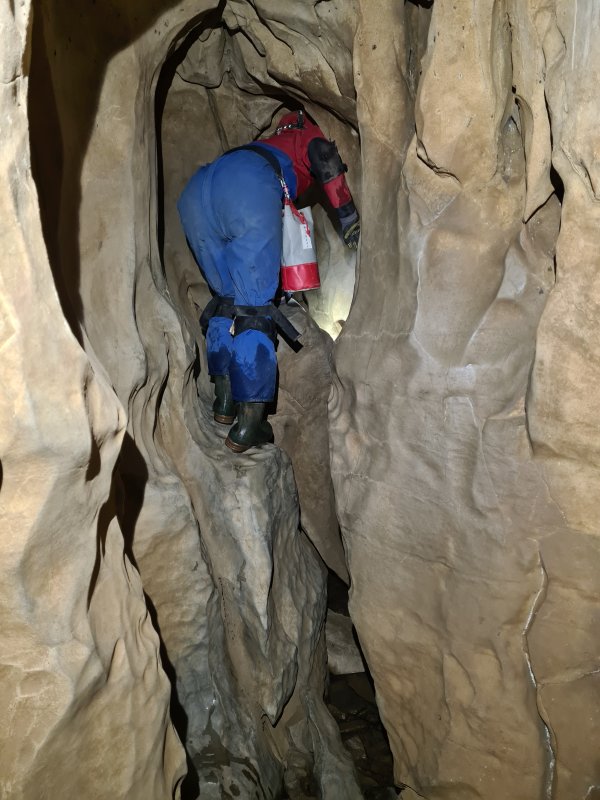 First clamber in Ogof Gam, past some boulder obstacles.
Modelling by Steph, lighting by Tarquin and Steph
First clamber in Ogof Gam, past some boulder obstacles.
Modelling by Steph, lighting by Tarquin and Steph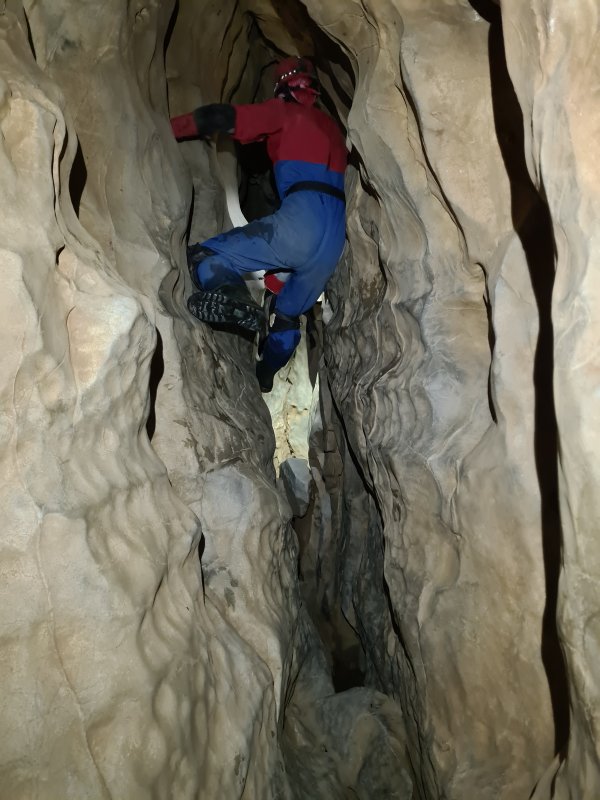 The traverses which are optional, larger cavers may prefer to traverse, smaller cavers may choose to walk at the bottom, climbing up and down over rocks.
Modelling by Steph, lighting by Tarquin and Steph
The traverses which are optional, larger cavers may prefer to traverse, smaller cavers may choose to walk at the bottom, climbing up and down over rocks.
Modelling by Steph, lighting by Tarquin and Steph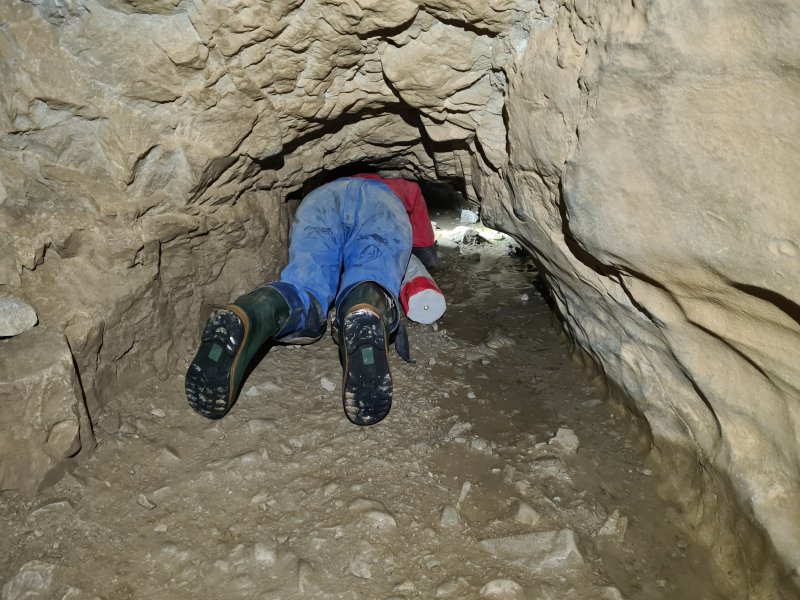 A couple of crawls marks the end of Ogof Gam. One of these has a spit in the ceiling, which was used to pull the rock apart with a rope, after it had been blasted.
Modelling by Steph, lighting by Tarquin and Steph
A couple of crawls marks the end of Ogof Gam. One of these has a spit in the ceiling, which was used to pull the rock apart with a rope, after it had been blasted.
Modelling by Steph, lighting by Tarquin and Steph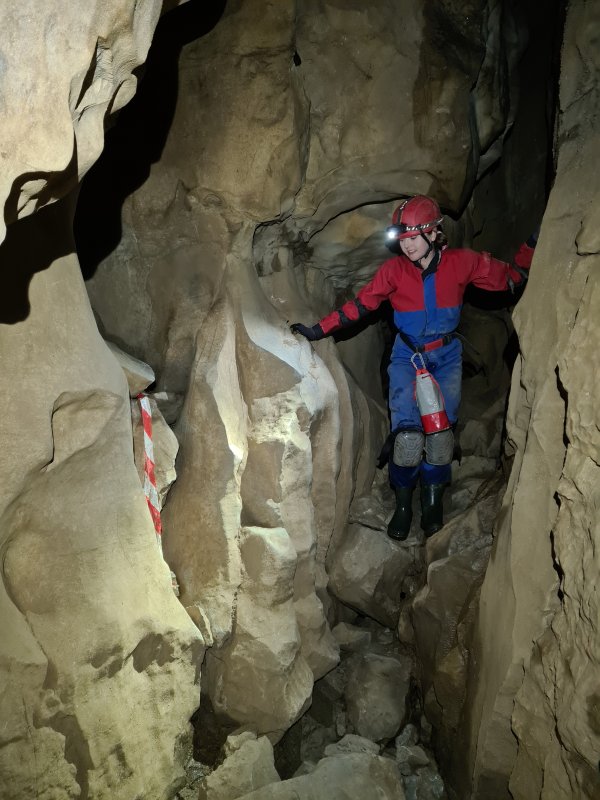 Tool Shed, where the taped off Agen Allwedd entrance comes in from the right (seen here on the left). From this point onwards, we are in the Entrance Series of Agen Allwedd (Aggy).
Modelling by Steph, lighting by Tarquin and Steph
Tool Shed, where the taped off Agen Allwedd entrance comes in from the right (seen here on the left). From this point onwards, we are in the Entrance Series of Agen Allwedd (Aggy).
Modelling by Steph, lighting by Tarquin and Steph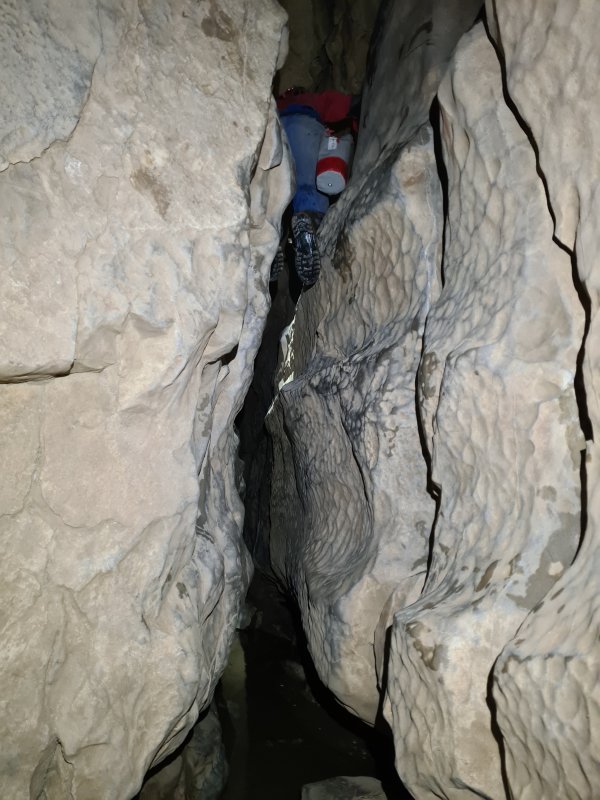 A traverse then avoids crawling in puddles, but this one is harder. It is best navigated by sitting or kneeling in the rift.
Modelling by Steph, lighting by Tarquin and Steph
A traverse then avoids crawling in puddles, but this one is harder. It is best navigated by sitting or kneeling in the rift.
Modelling by Steph, lighting by Tarquin and Steph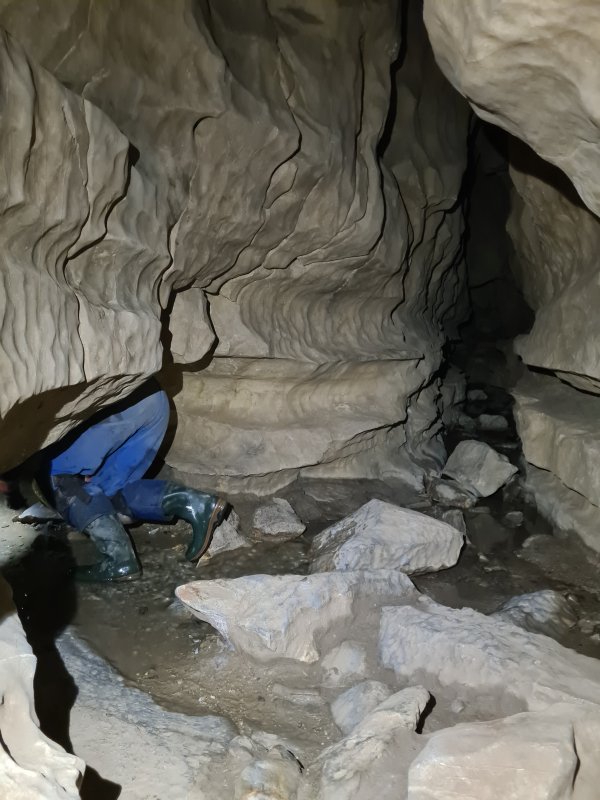 At the next junction, the inviting passage ahead splits into Purgatory on the left and Toothpaste Tube on the right. However, the normal mnemonic for the Entrance Series is "go right out or get left in" (which works for every junction except obviously silly roof tubes), so we crawl under the wall to the left.
Modelling by Steph, lighting by Tarquin and Steph
At the next junction, the inviting passage ahead splits into Purgatory on the left and Toothpaste Tube on the right. However, the normal mnemonic for the Entrance Series is "go right out or get left in" (which works for every junction except obviously silly roof tubes), so we crawl under the wall to the left.
Modelling by Steph, lighting by Tarquin and Steph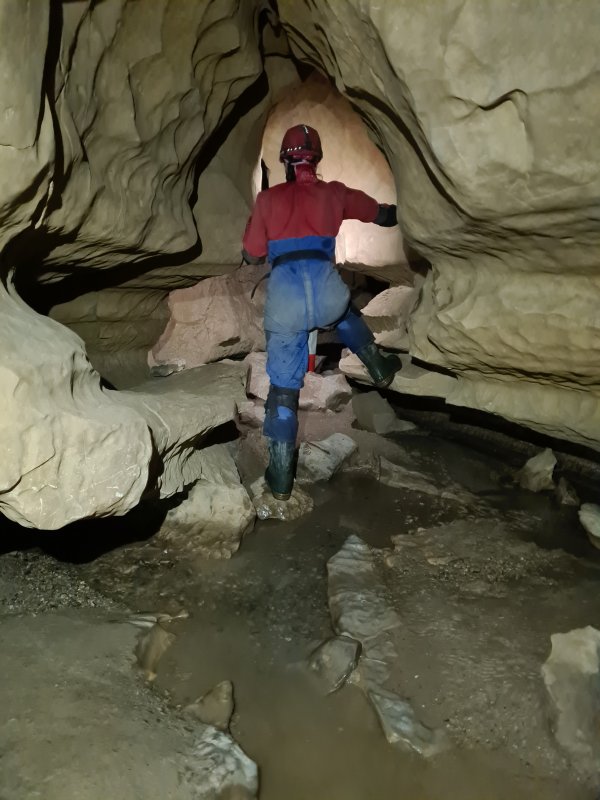 The Entrance Series then offers a lengthy section of walking, with only occasional stoops or boulders, and a couple of easy traverses. It then becomes more rocky after the junction with Stream Passage.
Modelling by Steph, lighting by Tarquin and Steph
The Entrance Series then offers a lengthy section of walking, with only occasional stoops or boulders, and a couple of easy traverses. It then becomes more rocky after the junction with Stream Passage.
Modelling by Steph, lighting by Tarquin and Steph A rocky patch.
Modelling by Steph, lighting by Tarquin and Steph
A rocky patch.
Modelling by Steph, lighting by Tarquin and Steph Getting bigger.
Modelling by Steph, lighting by Tarquin and Steph
Getting bigger.
Modelling by Steph, lighting by Tarquin and Steph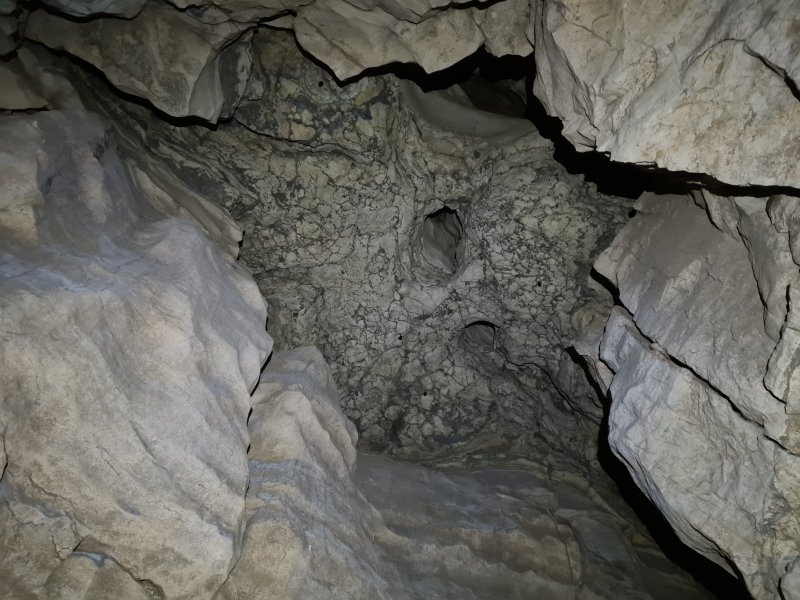 The decorative marbling of the ceiling in the bigger section, normally with a significant number of bats in winter.
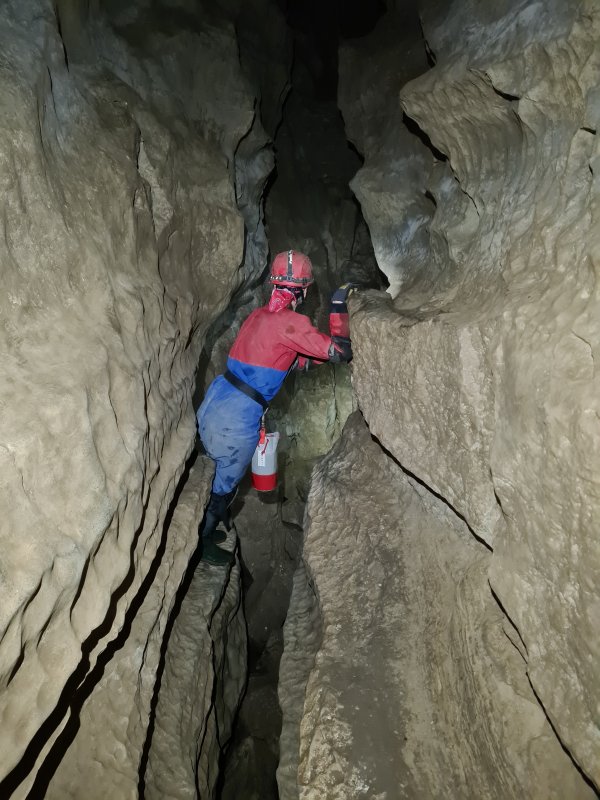 Traverse ledges, with a push-off to one side at the end.
Modelling by Steph, lighting by Tarquin and Steph
Traverse ledges, with a push-off to one side at the end.
Modelling by Steph, lighting by Tarquin and Steph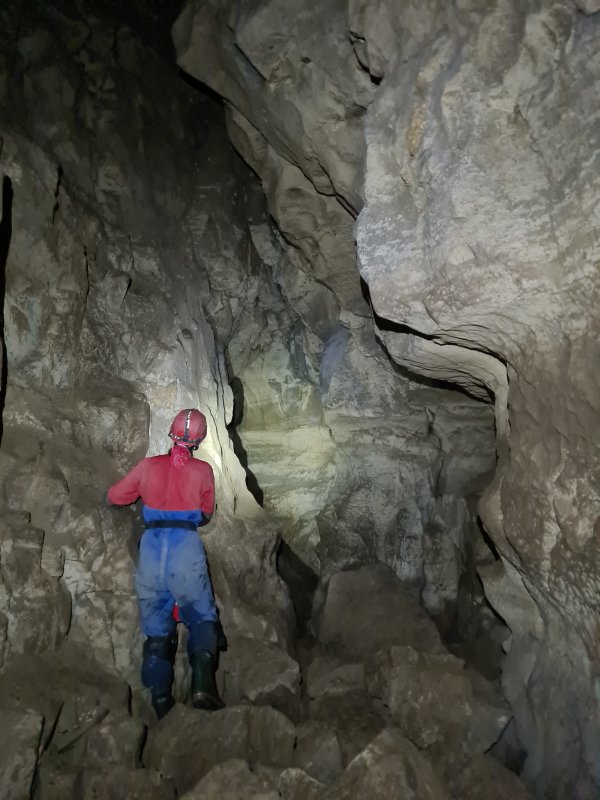 The large section beneath the aven of Angel's Roost, another section often adorned with bats.
Modelling by Steph, lighting by Tarquin and Steph
The large section beneath the aven of Angel's Roost, another section often adorned with bats.
Modelling by Steph, lighting by Tarquin and Steph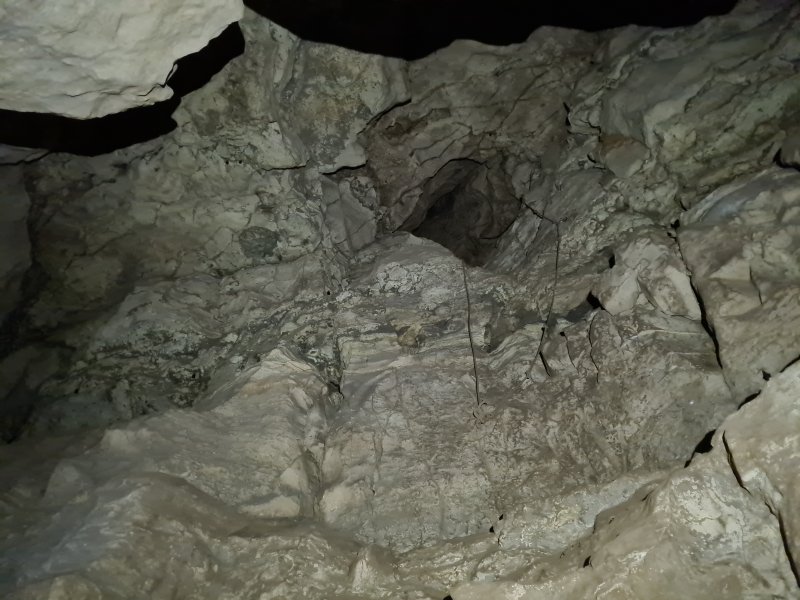 The aven leading into Angel's Roost, one of the few side passages that leads off to the left. The name is the name of a person, and should probably be pronounced as the Spanish name Ángel, not the English word angel. More like "Ang-chel" in Welsh (that "ch" is the same sound as in the English word "loch", unless you pronounce that "lock", in which case you are wrong in all languages).
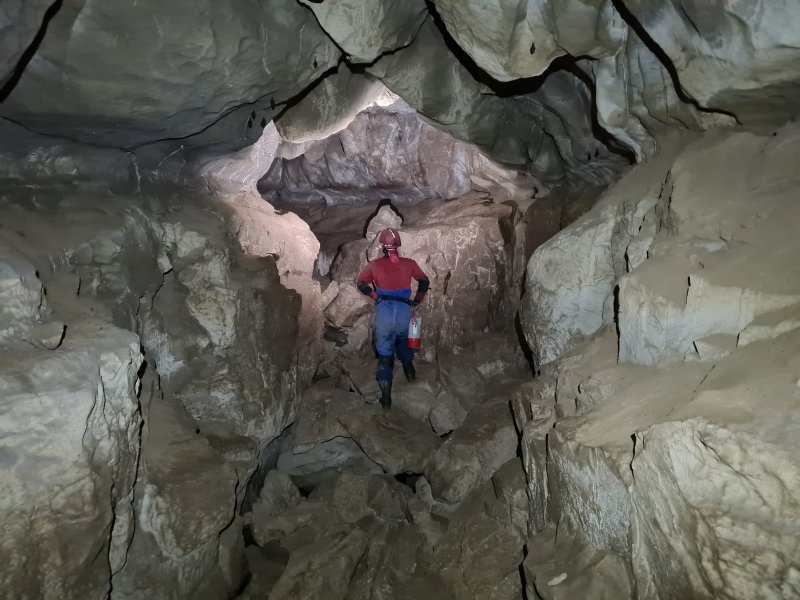 Start of the beautiful keyhole section near Queer Street.
Modelling by Steph, lighting by Tarquin and Steph
Start of the beautiful keyhole section near Queer Street.
Modelling by Steph, lighting by Tarquin and Steph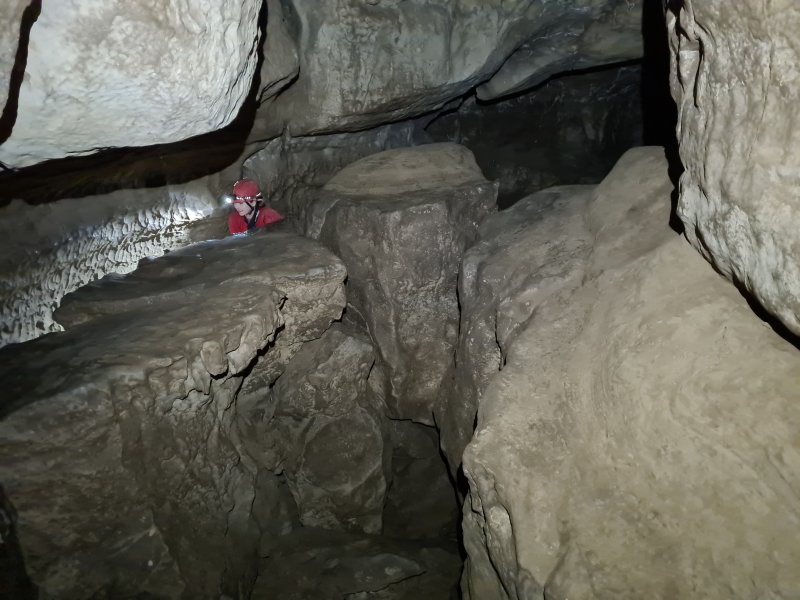 Then there are a choice of routes. Either a climb up a boulder route followed by a balancing act along the ledge, or a narrow slot walk favoured by smaller cavers.
Modelling by Steph, lighting by Tarquin and Steph
Then there are a choice of routes. Either a climb up a boulder route followed by a balancing act along the ledge, or a narrow slot walk favoured by smaller cavers.
Modelling by Steph, lighting by Tarquin and Steph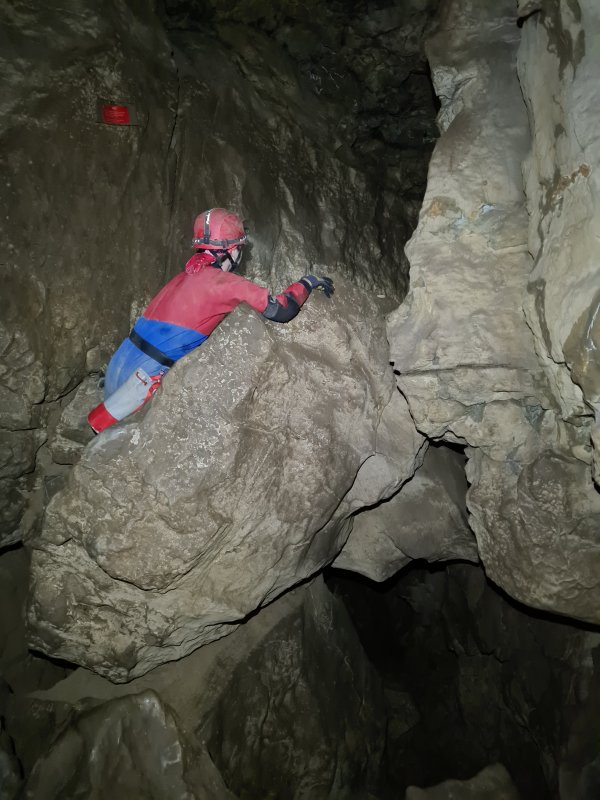 Next is the choice of over or under the suspended boulders. Under looks easier at first, but requires a tricky climb through a boulder slot. Over is walking.
Modelling by Steph, lighting by Tarquin and Steph
Next is the choice of over or under the suspended boulders. Under looks easier at first, but requires a tricky climb through a boulder slot. Over is walking.
Modelling by Steph, lighting by Tarquin and Steph The over route has a beautiful nodular bed ceiling, which is a popular winter bat winter site.
Modelling by Steph, lighting by Tarquin and Steph
The over route has a beautiful nodular bed ceiling, which is a popular winter bat winter site.
Modelling by Steph, lighting by Tarquin and Steph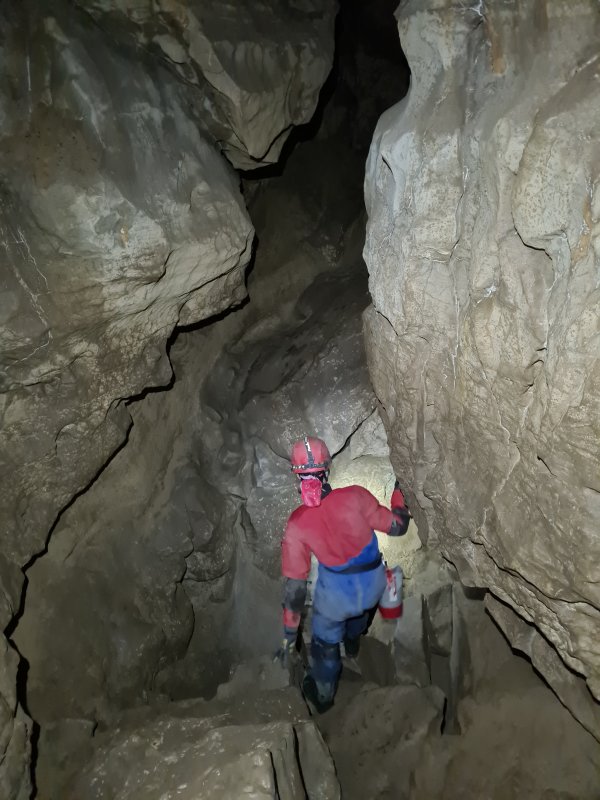 Down into an awkward dip where the lower route rejoins.
Modelling by Steph, lighting by Tarquin and Steph
Down into an awkward dip where the lower route rejoins.
Modelling by Steph, lighting by Tarquin and Steph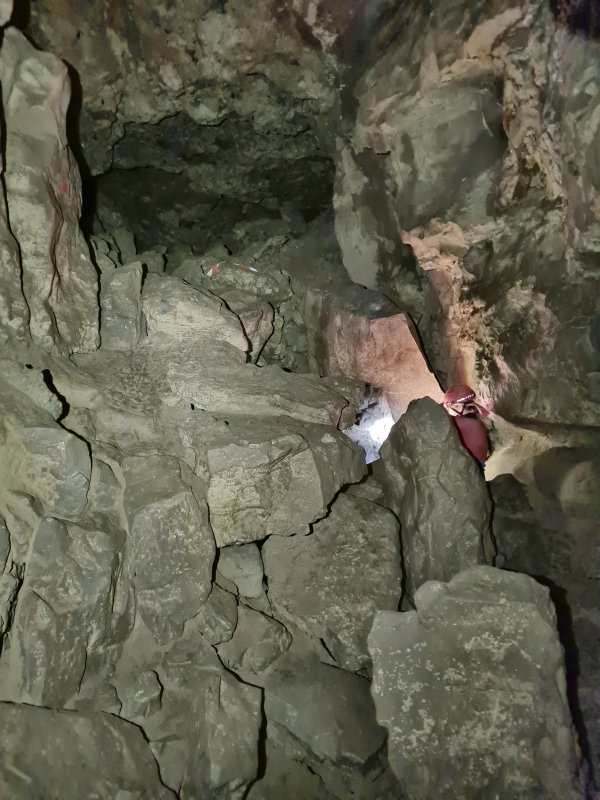 Start of First Choke (or First Boulder Choke). The way on is down through the rocks on the right.
Modelling by Steph, lighting by Tarquin and Steph
Start of First Choke (or First Boulder Choke). The way on is down through the rocks on the right.
Modelling by Steph, lighting by Tarquin and Steph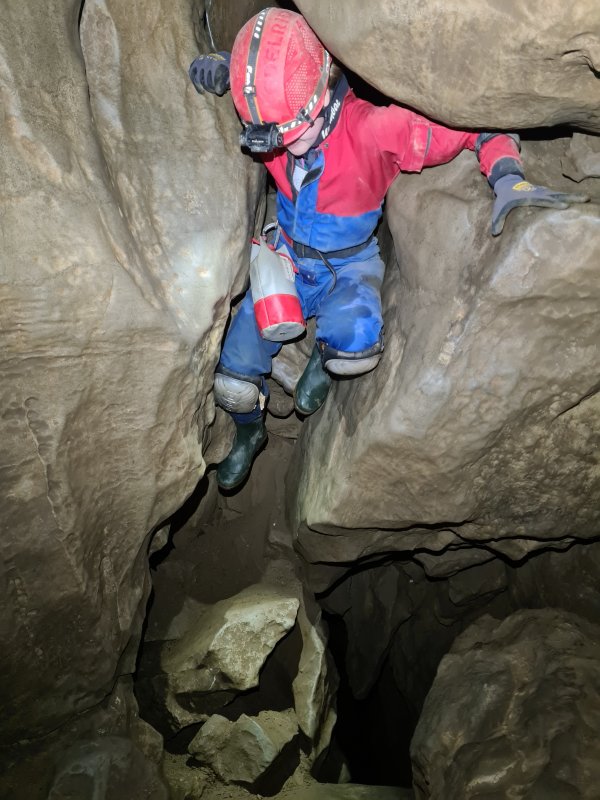 The drop down through the rocks is always a fun challenge. The hole in the floor needs to be avoided when landing. At some point, someone added an annoying scaffolding bar which took all the fun out of this section, but fortunately that has been removed, and we can be actual cavers again.
Modelling by Steph, lighting by Tarquin and Steph
The drop down through the rocks is always a fun challenge. The hole in the floor needs to be avoided when landing. At some point, someone added an annoying scaffolding bar which took all the fun out of this section, but fortunately that has been removed, and we can be actual cavers again.
Modelling by Steph, lighting by Tarquin and Steph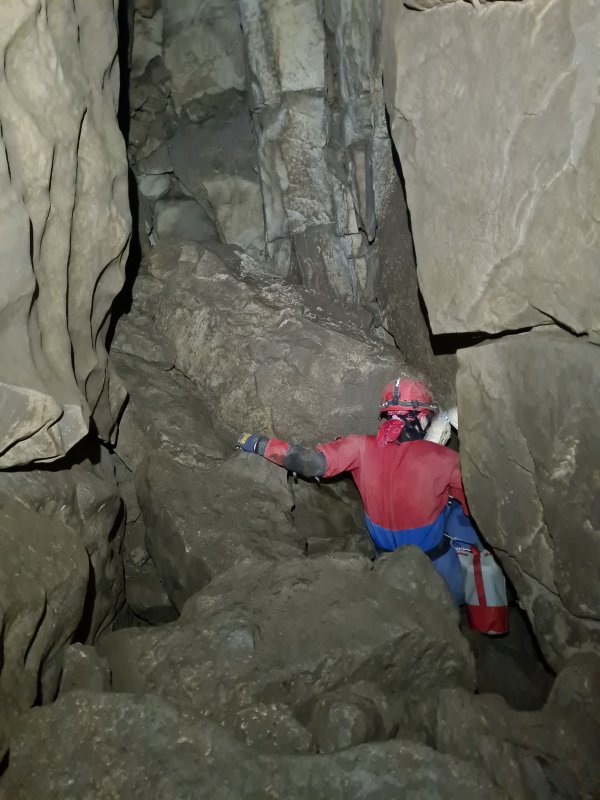 The only time you turn right is when you have no other option. At this point, the way ahead chokes, so we turn right into Draught Passage.
Modelling by Steph, lighting by Tarquin and Steph
The only time you turn right is when you have no other option. At this point, the way ahead chokes, so we turn right into Draught Passage.
Modelling by Steph, lighting by Tarquin and Steph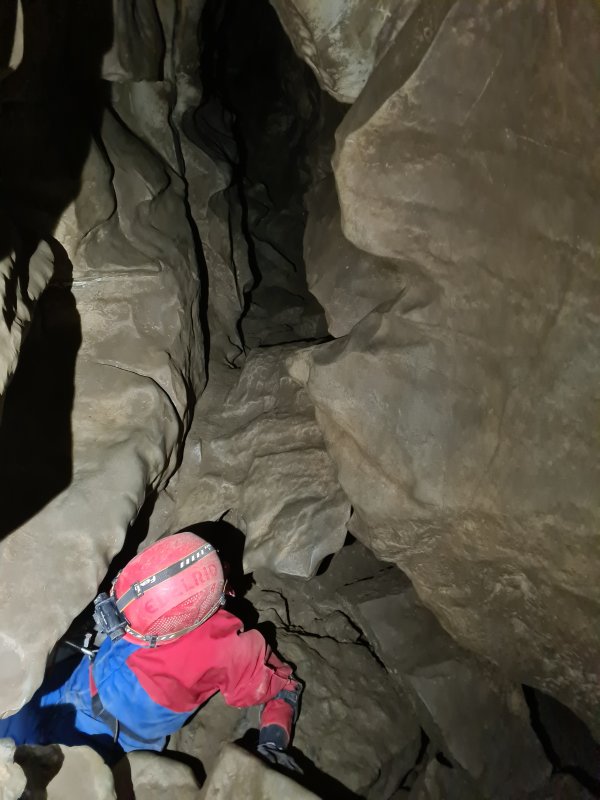 Immediately, a hidden junction marks the lext left, crawling under the wall. This is the easiest place to go wrong on the way out, forgetting to turn right, and heading off down Draught Passage instead.
Modelling by Steph, lighting by Tarquin and Steph
Immediately, a hidden junction marks the lext left, crawling under the wall. This is the easiest place to go wrong on the way out, forgetting to turn right, and heading off down Draught Passage instead.
Modelling by Steph, lighting by Tarquin and Steph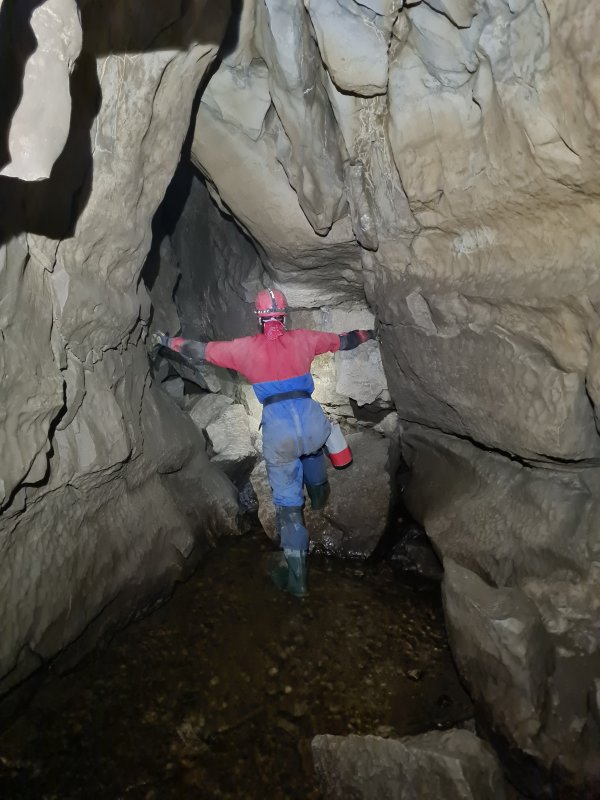 Short section of stream between the chokes.
Modelling by Steph, lighting by Tarquin and Steph
Short section of stream between the chokes.
Modelling by Steph, lighting by Tarquin and Steph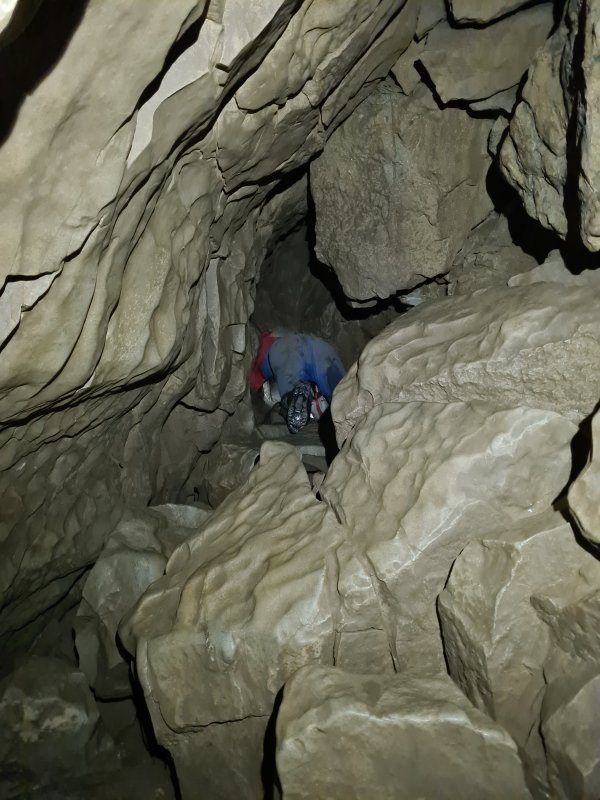 The main section of First Choke then starts. At this point, we are underneath the start of Main Passage.
Modelling by Steph, lighting by Tarquin and Steph
The main section of First Choke then starts. At this point, we are underneath the start of Main Passage.
Modelling by Steph, lighting by Tarquin and Steph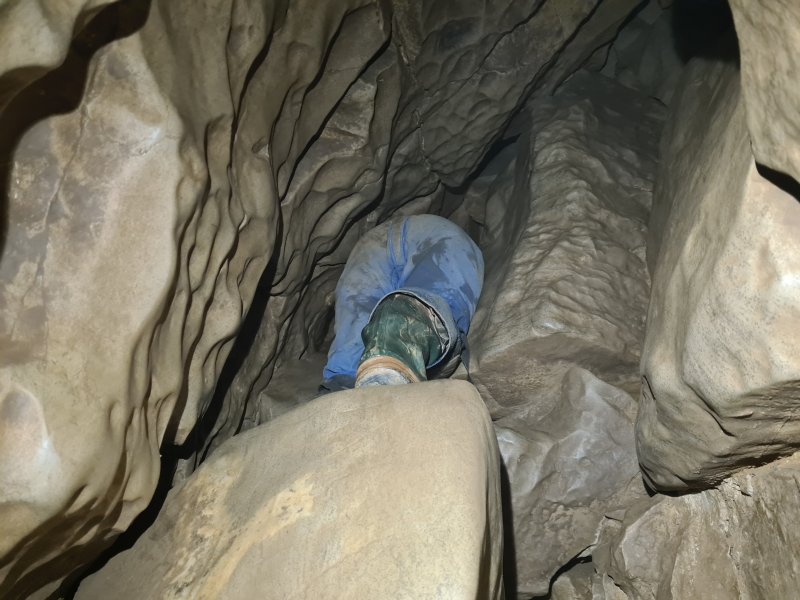 The choke has a distinctive slope up through rocks, and this particular rock is perfectly placed to catch men when they slide down on the way out.
Modelling by Steph
The choke has a distinctive slope up through rocks, and this particular rock is perfectly placed to catch men when they slide down on the way out.
Modelling by Steph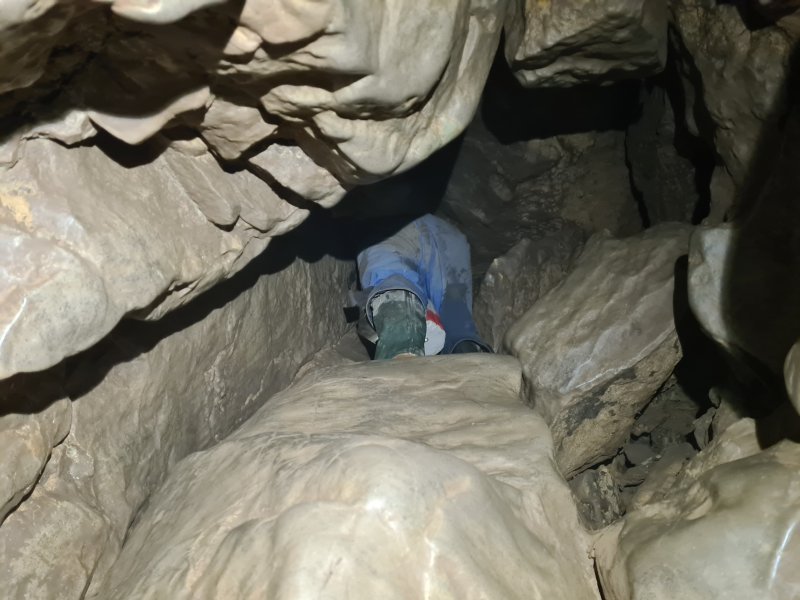 A climb up through the choke then reaches the undercuts of Baron's Chamber, marking the end of the Entrance Series.
Modelling by Steph, lighting by Tarquin and Steph
A climb up through the choke then reaches the undercuts of Baron's Chamber, marking the end of the Entrance Series.
Modelling by Steph, lighting by Tarquin and Steph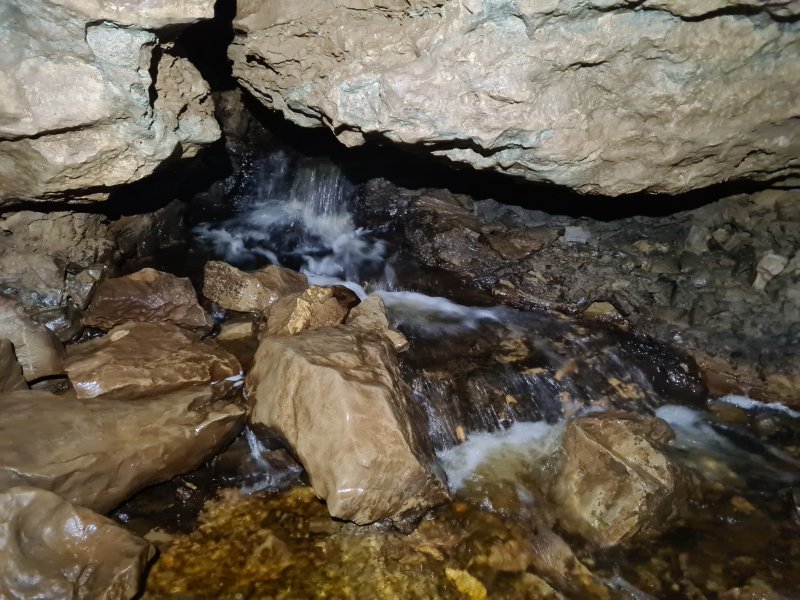 First Inlet in Southern Stream Passage, which was running very high. The crawls below rocks in Southern Stream were very wet as a result. This stream comes from Trident Passage, which in turn comes from Ace Of Spades Inlet, and it is not drinkable.
Modelling by Steph, lighting by Tarquin and Steph
First Inlet in Southern Stream Passage, which was running very high. The crawls below rocks in Southern Stream were very wet as a result. This stream comes from Trident Passage, which in turn comes from Ace Of Spades Inlet, and it is not drinkable.
Modelling by Steph, lighting by Tarquin and Steph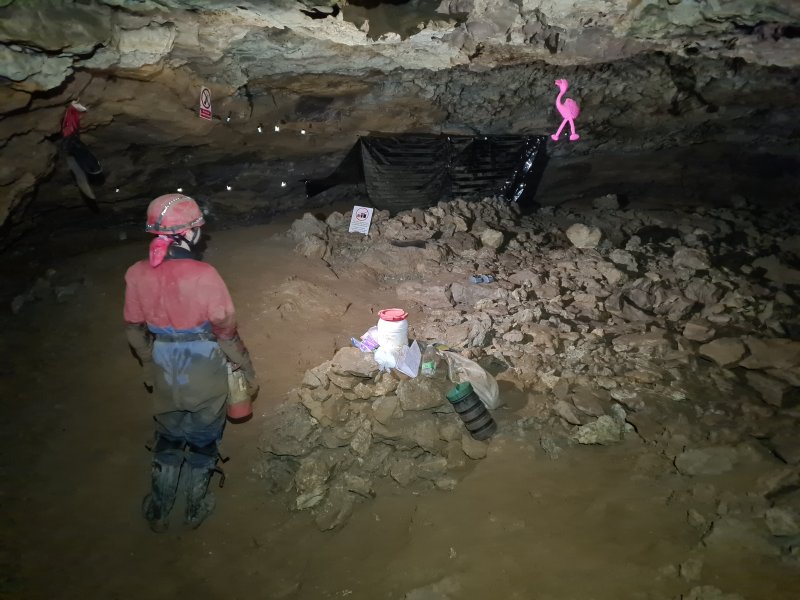 A new camp in Priory Road, for those pushing roof tubes. It's a terrible place to camp, since it has no water, and no toilet.
Modelling by Steph, lighting by Tarquin and Steph
A new camp in Priory Road, for those pushing roof tubes. It's a terrible place to camp, since it has no water, and no toilet.
Modelling by Steph, lighting by Tarquin and Steph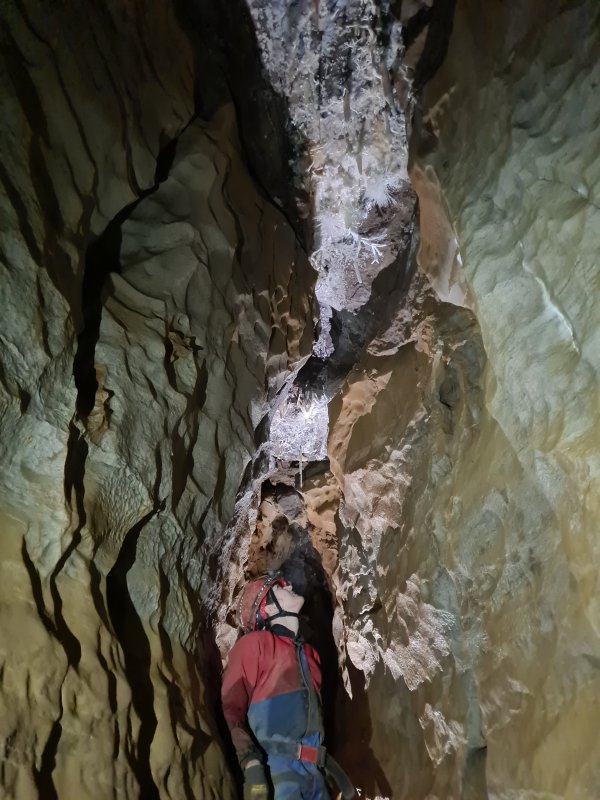 Start of Trafalgar in Isles Inlet, one of the best decorated parts of the cave.
Modelling by Steph
Start of Trafalgar in Isles Inlet, one of the best decorated parts of the cave.
Modelling by Steph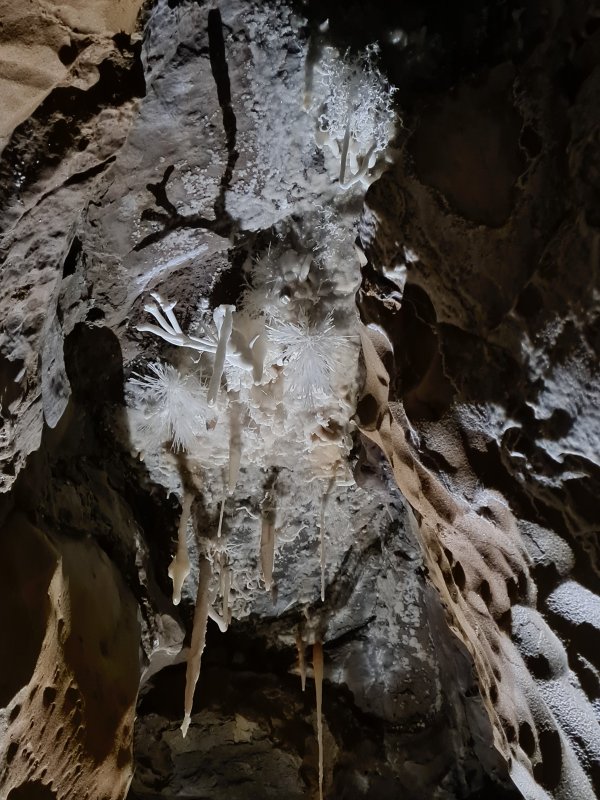 Ceiling of Trafalgar, sadly very difficult to photograph, because it is too far up. I have previously climbed up to photograph it, and do not intend to repeat it.
Lighting by Steph
Ceiling of Trafalgar, sadly very difficult to photograph, because it is too far up. I have previously climbed up to photograph it, and do not intend to repeat it.
Lighting by Steph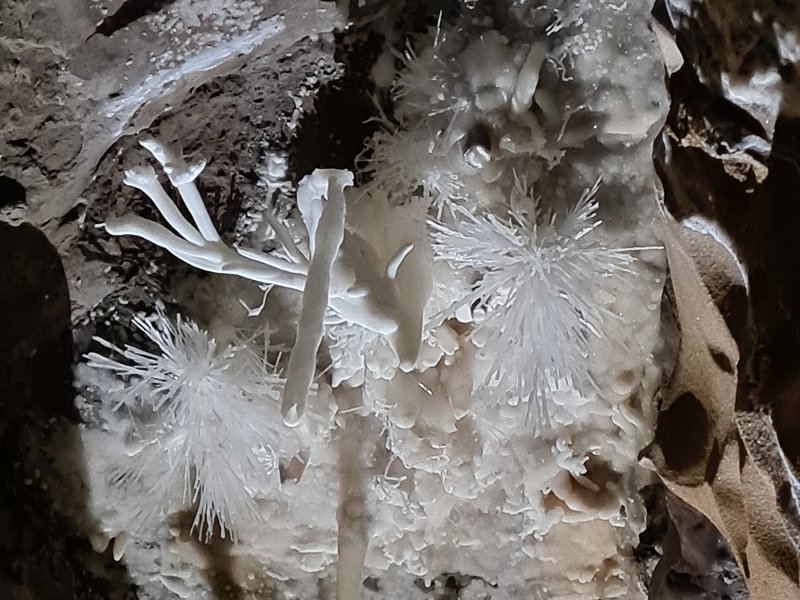 Detail of Trafalgar's ceiling.
Lighting by Steph
Detail of Trafalgar's ceiling.
Lighting by Steph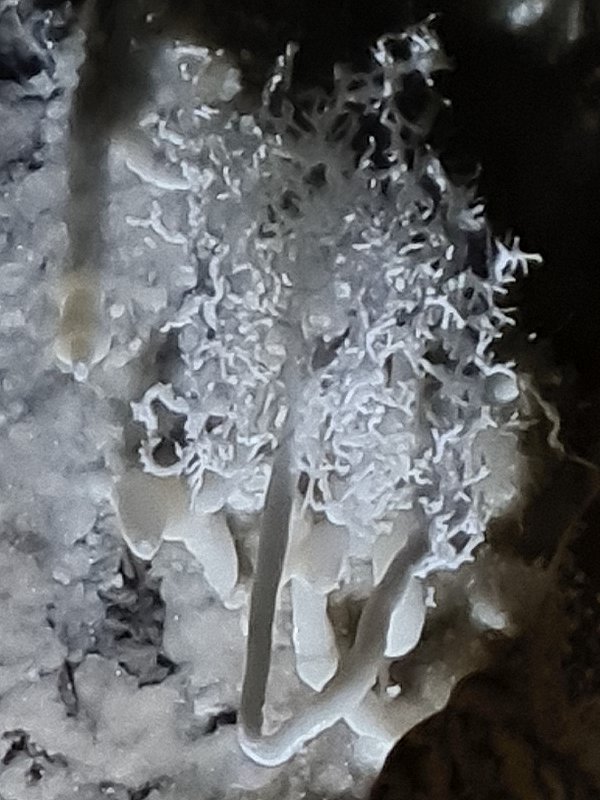 Detail of Trafalgar's ceiling.
Lighting by Steph
Detail of Trafalgar's ceiling.
Lighting by Steph A wise man with a beard, seated at a table, whose guest has not yet arrived.
Lighting by Tarquin and Steph
A wise man with a beard, seated at a table, whose guest has not yet arrived.
Lighting by Tarquin and Steph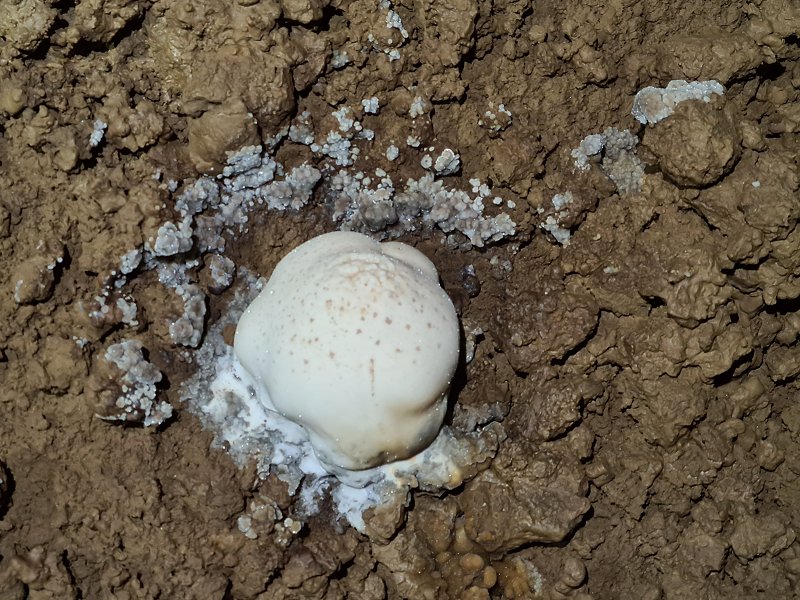 Stalagmite that wants to be a puffball mushroom.
 Anthodite column, anthodites, and stalactites covered in selenite crystals.
Modelling by Steph
Anthodite column, anthodites, and stalactites covered in selenite crystals.
Modelling by Steph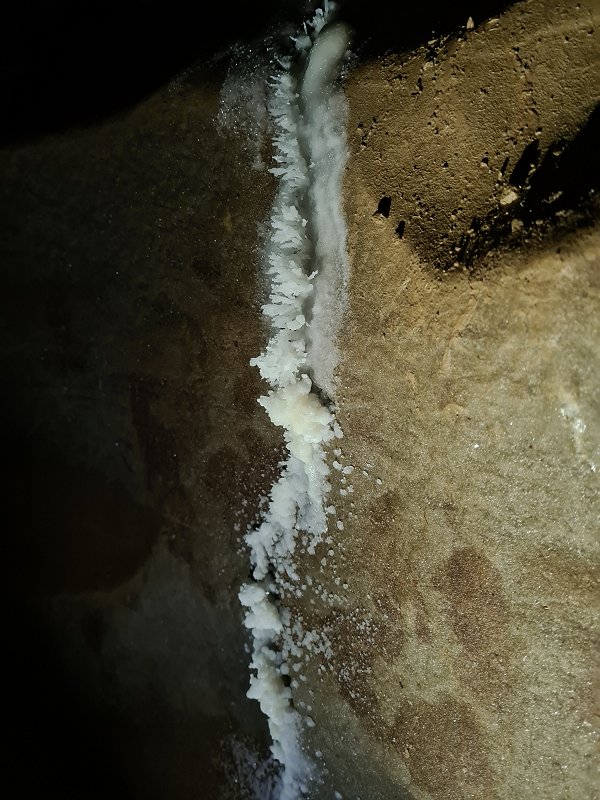 And anthodites all in a row.
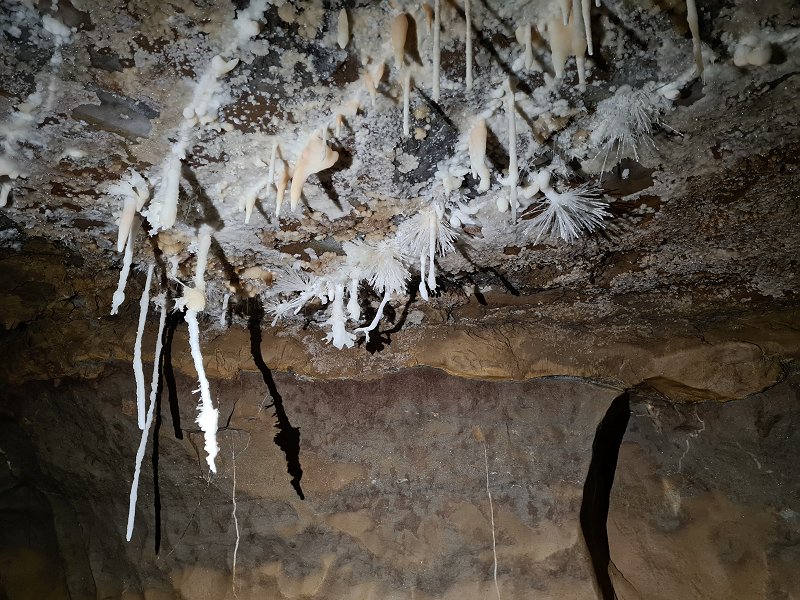 Anthodites.
 One of the best helictite clusters is part way along the crawl at the end of Trafalgar.
Modelling by Steph, lighting by Tarquin and Steph
One of the best helictite clusters is part way along the crawl at the end of Trafalgar.
Modelling by Steph, lighting by Tarquin and Steph The helictite cluster, which we are sure is a chilli tree, complete with fruiting chillis.
Lighting by Steph
The helictite cluster, which we are sure is a chilli tree, complete with fruiting chillis.
Lighting by Steph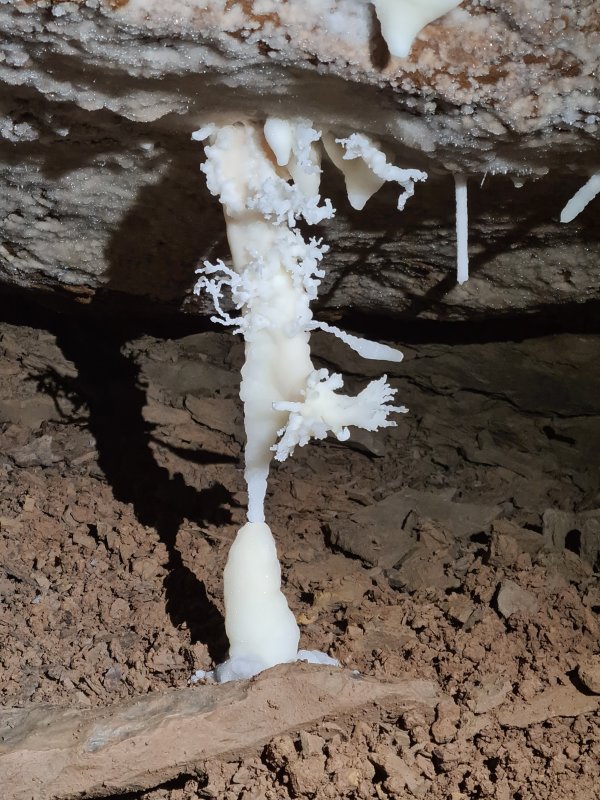 A little column with its own elaborate helictites.
 Misaligned columns. They appear to have grown at a different angle, then slid or toppled sideways, and continued to grow.
Lighting by Tarquin and Steph
Misaligned columns. They appear to have grown at a different angle, then slid or toppled sideways, and continued to grow.
Lighting by Tarquin and Steph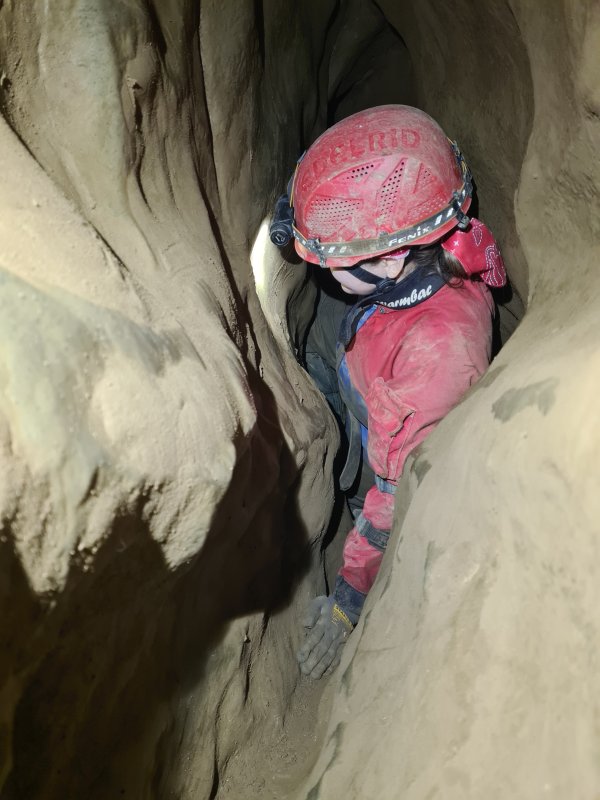 Bottom of The Corkscrew, one of the toughest squeezes on the route. It is not particularly tight, but it requires a diagonal climb with very little to use for footholds.
Modelling by Steph, lighting by Tarquin and Steph
Bottom of The Corkscrew, one of the toughest squeezes on the route. It is not particularly tight, but it requires a diagonal climb with very little to use for footholds.
Modelling by Steph, lighting by Tarquin and Steph The top is the hardest part, since you need to avoid slipping down into the slot, while somehow keeping your body up into the wider part above using your arm, which doesn't reach the floor.
Modelling by Steph, lighting by Tarquin and Steph
The top is the hardest part, since you need to avoid slipping down into the slot, while somehow keeping your body up into the wider part above using your arm, which doesn't reach the floor.
Modelling by Steph, lighting by Tarquin and Steph The highlight of Corkscrew Chamber, and the entire trip, is The Courtesan, a very impressive helictite-covered stalactite, with its contrastingly plain stalagmite.
Modelling by Steph, lighting by Tarquin and Steph
The highlight of Corkscrew Chamber, and the entire trip, is The Courtesan, a very impressive helictite-covered stalactite, with its contrastingly plain stalagmite.
Modelling by Steph, lighting by Tarquin and Steph Top of The Courtesan.
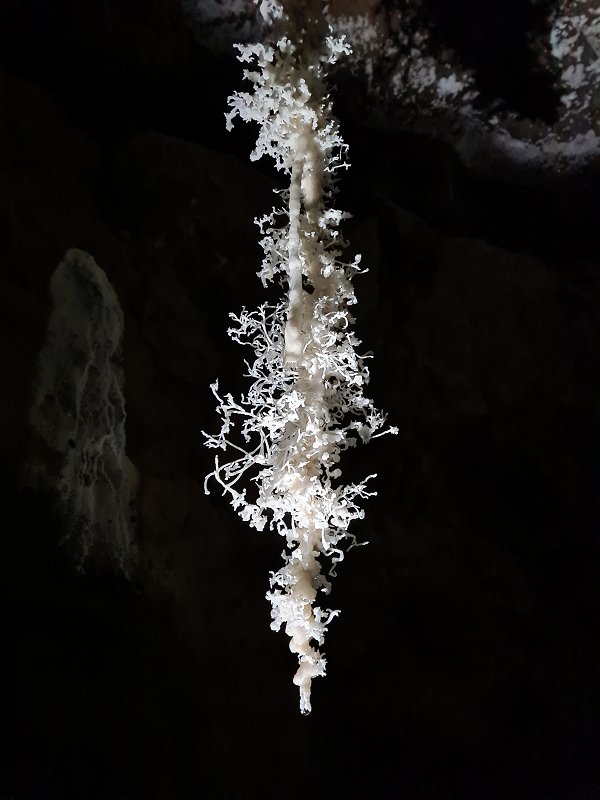 The most elaborate part of The Courtesan.
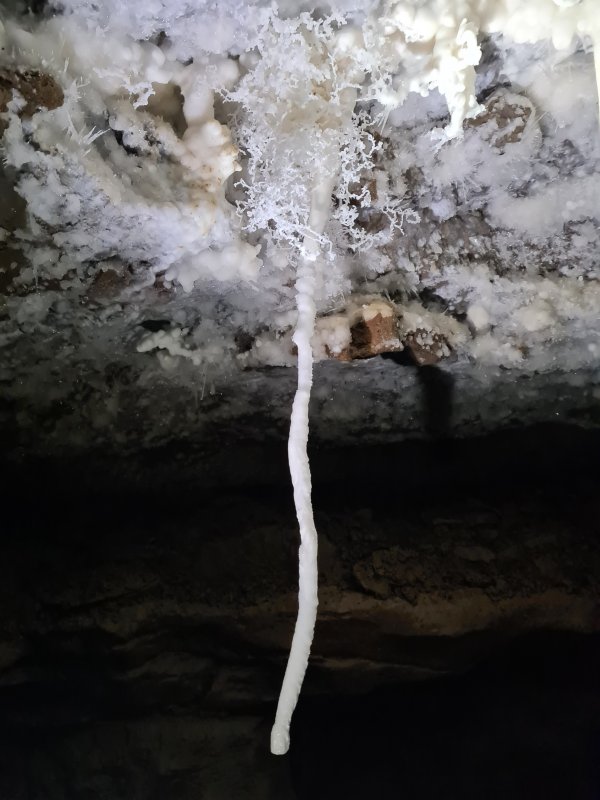 Intricate helictite bunch surrounding a stalactite.
 Long, elaborate helictite.
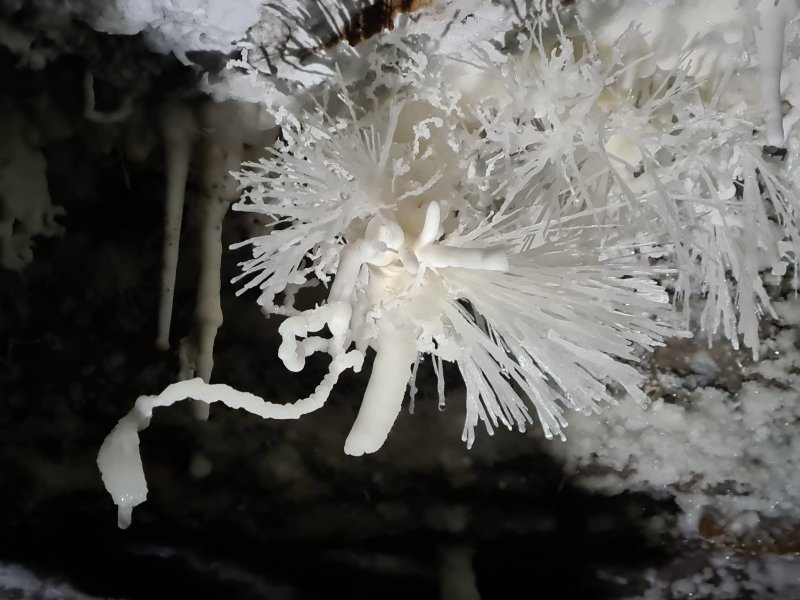 Anthodite with a long proboscis. This certainly seems like a living animal.
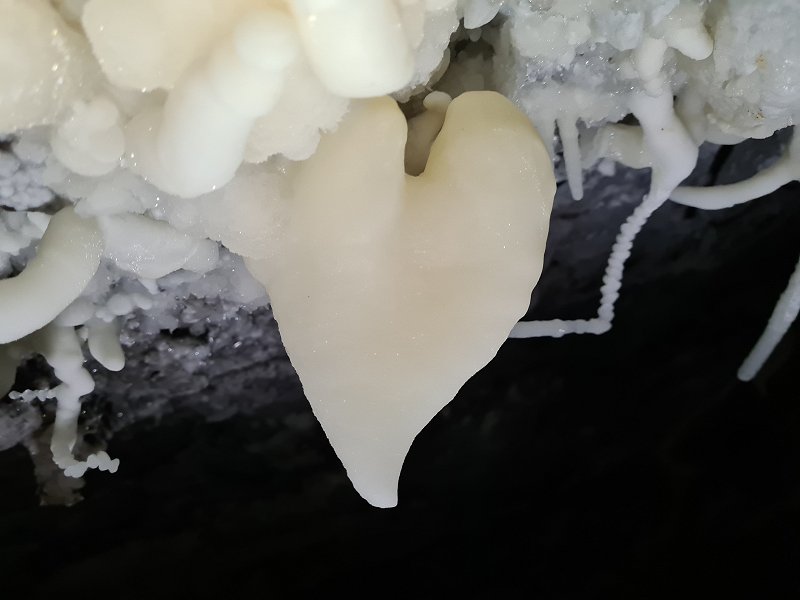 Heart-shaped stalactite.
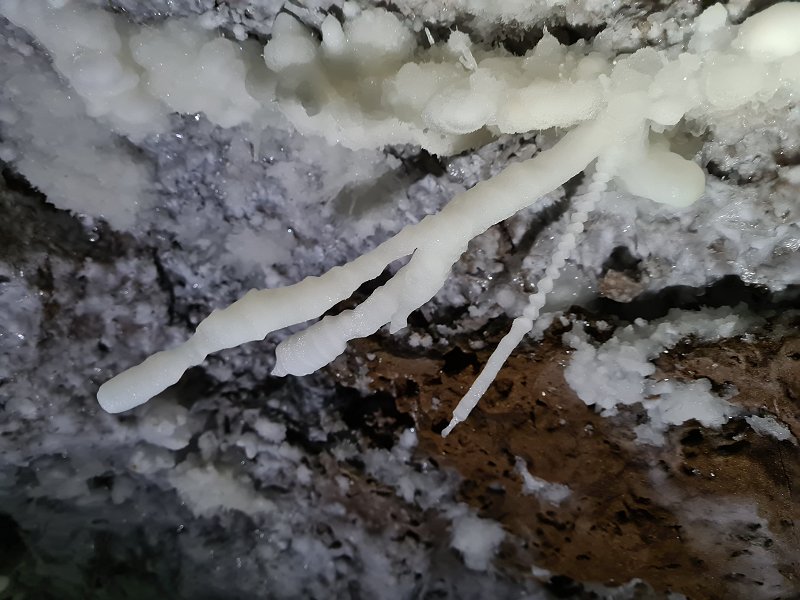 Ribbed helictite, a type seen in parts of Ogof Draenen.