Agen Allwedd Aven Series and Crystal Gallery trip 09/09/2018
This was intended to be a much more significant club trip, but that had to be cancelled at short notice. Instead, Helen and I did a trip to pick up several collector's pieces of Aggy.
Unless otherwise stated, camera, setups, lighting, edits and gallery effects by Tarquin. Modelling and lighting at various points will be Helen Pemberton.
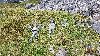 Sculptures on the route to the cave.
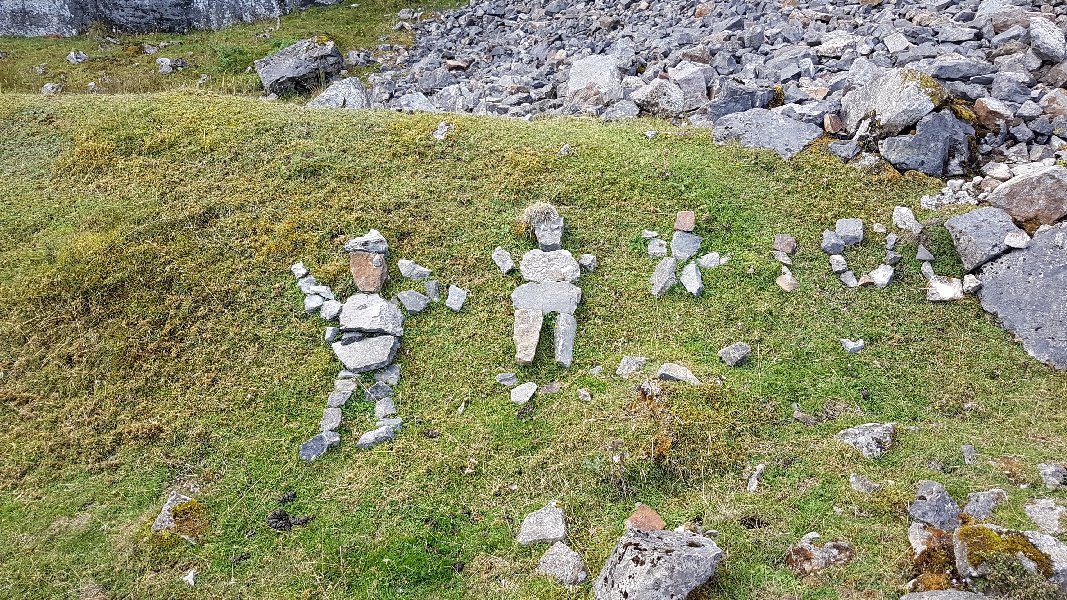
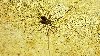 Harvestman in the entrance passage. Clearly not a spider, as it lacks the body segments. Perhaps a colour morph of Leiobunum rotundum.
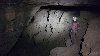 The best part of the Cliffs Of Dover, near the end of Main Passage. This is where Ace of Spades inlet leads off, with Africa Passage above it.
Lighting by Tarquin and Helen
The best part of the Cliffs Of Dover, near the end of Main Passage. This is where Ace of Spades inlet leads off, with Africa Passage above it.
Lighting by Tarquin and Helen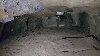 Cairn marking the entry point to Aven Series. There is a short passage in the aven above it, as well as the main Aven Series on the right.
Lighting by Tarquin and Helen
Cairn marking the entry point to Aven Series. There is a short passage in the aven above it, as well as the main Aven Series on the right.
Lighting by Tarquin and Helen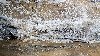 Gypsum on the wall in North Wing.
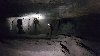 Looking back from the end of North Wing. On the left is a short series of side passages.
Lighting by Tarquin and Helen
Looking back from the end of North Wing. On the left is a short series of side passages.
Lighting by Tarquin and Helen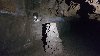 Entrance to Aven Series above the cairn.
Lighting by Tarquin and Helen
Entrance to Aven Series above the cairn.
Lighting by Tarquin and Helen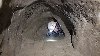 Crawling through Aven Series.
Lighting by Tarquin and Helen
Crawling through Aven Series.
Lighting by Tarquin and Helen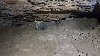 Awkward slide through a minimal ruckle at the end of the crawl.
Lighting by Tarquin and Helen
Awkward slide through a minimal ruckle at the end of the crawl.
Lighting by Tarquin and Helen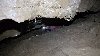 Emerging from an undercut.
Lighting by Tarquin and Helen
Emerging from an undercut.
Lighting by Tarquin and Helen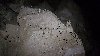 Mud sculptures in the large passage.
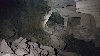 The undercut emerges into an unexpectedly big fragment of passage, which abruptly ends in each direction. At the far end on the right is a passage that ends over Africa Passage and very close to Ace Of Spades Inlet. Behind the left wall is a wide bedding plane oxbow accessed via two descending passages. At the far end of the oxbow is the much smaller Copper Passage, the only significant side passage, which ends at a small chamber. Exactly why this fragment of giant passage is here remains a mystery, since it is parallel to the North Wing. Perhaps the North Wing meandered through it on its way to Eglwys Faen, before filling with sediment. Or perhaps it is a parallel trunk passage, but if so where did it connect to the rest of the system?
Lighting by Tarquin and Helen
The undercut emerges into an unexpectedly big fragment of passage, which abruptly ends in each direction. At the far end on the right is a passage that ends over Africa Passage and very close to Ace Of Spades Inlet. Behind the left wall is a wide bedding plane oxbow accessed via two descending passages. At the far end of the oxbow is the much smaller Copper Passage, the only significant side passage, which ends at a small chamber. Exactly why this fragment of giant passage is here remains a mystery, since it is parallel to the North Wing. Perhaps the North Wing meandered through it on its way to Eglwys Faen, before filling with sediment. Or perhaps it is a parallel trunk passage, but if so where did it connect to the rest of the system?
Lighting by Tarquin and Helen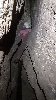 Ace Of Spades is a much more demanding passage, accessed via a drop through boulders. Sometimes, progress is best made by traversing on ledges near roof level.
Lighting by Tarquin and Helen
Ace Of Spades is a much more demanding passage, accessed via a drop through boulders. Sometimes, progress is best made by traversing on ledges near roof level.
Lighting by Tarquin and Helen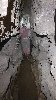 Sometimes it is easier to stay at stream level. The stream supplies the water to Trident Passage, which then becomes First Inlet in Southern Stream Passage.
Lighting by Tarquin and Helen
Sometimes it is easier to stay at stream level. The stream supplies the water to Trident Passage, which then becomes First Inlet in Southern Stream Passage.
Lighting by Tarquin and Helen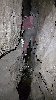 Or sometimes a traverse half way between.
Lighting by Tarquin and Helen
Or sometimes a traverse half way between.
Lighting by Tarquin and Helen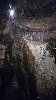 The aven which supplies the water, requiring a climb down to stream level.
Lighting by Tarquin and Helen
The aven which supplies the water, requiring a climb down to stream level.
Lighting by Tarquin and Helen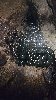 The inlet provides a black coating over all of the surfaces, giving the passage its name. The water presumably comes from a peat bog on the surface. The water does not come from the nearby Eglwys Faen, even though the passage heads in that direction.
Lighting by Tarquin and Helen
The inlet provides a black coating over all of the surfaces, giving the passage its name. The water presumably comes from a peat bog on the surface. The water does not come from the nearby Eglwys Faen, even though the passage heads in that direction.
Lighting by Tarquin and Helen A scramble back up the other side of the aven leads to a series of small passages and digs.
Lighting by Tarquin and Helen
A scramble back up the other side of the aven leads to a series of small passages and digs.
Lighting by Tarquin and Helen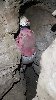 By taking each left turn, a parallel streamway is gained.
Lighting by Tarquin and Helen
By taking each left turn, a parallel streamway is gained.
Lighting by Tarquin and Helen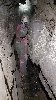 The parallel streamway then joins the main Ace Of Spades streamway just downstream of the aven, creating a short round trip.
Lighting by Tarquin and Helen
The parallel streamway then joins the main Ace Of Spades streamway just downstream of the aven, creating a short round trip.
Lighting by Tarquin and Helen Small shrimps in Meander Passage, a tributary to the main streamway, and a source of drinking water. Presumably, these are Nymphargus.
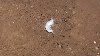 Shrimp.
Lighting by Tarquin and Helen
Shrimp.
Lighting by Tarquin and Helen The bold step between the two parts of Second Choke, just after Midnight Passage's oxbow. The route here is to step around the corner into the side passage (following the rope), then climb down and turn around to emerge back at floor level (where the light is).
Lighting by Tarquin and Helen
The bold step between the two parts of Second Choke, just after Midnight Passage's oxbow. The route here is to step around the corner into the side passage (following the rope), then climb down and turn around to emerge back at floor level (where the light is).
Lighting by Tarquin and Helen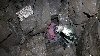 The start of Second Choke proper, dropping down through the boulders to river level. This is the part where the boulders moved in 1985. There is a bypass above if needed, but it requires ropes.
Lighting by Tarquin and Helen
The start of Second Choke proper, dropping down through the boulders to river level. This is the part where the boulders moved in 1985. There is a bypass above if needed, but it requires ropes.
Lighting by Tarquin and Helen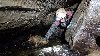 Crawling through the stream. This section floods in severe flood conditions, and is the only section of this passage to do so.
Lighting by Tarquin and Helen
Crawling through the stream. This section floods in severe flood conditions, and is the only section of this passage to do so.
Lighting by Tarquin and Helen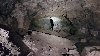 Start of Keyhole Chamber, my favourite passage. In spite of its name, it is a passage, not a chamber. This is the site of the old rescue dump, and is a common place to stop for refreshments. The streamway runs below this section, and this is approximately the location of the Pwll-y-Pasg inlet below, as well as the Upper Keyhole Passage above.
Lighting by Tarquin and Helen
Start of Keyhole Chamber, my favourite passage. In spite of its name, it is a passage, not a chamber. This is the site of the old rescue dump, and is a common place to stop for refreshments. The streamway runs below this section, and this is approximately the location of the Pwll-y-Pasg inlet below, as well as the Upper Keyhole Passage above.
Lighting by Tarquin and Helen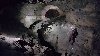 Keyhole Traverse, the highlight of Keyhole Chamber. Despite being my favourite passage, I had failed for decades to take a good picture of it. This is at last a picture that I am happy with. The fixed rope is relatively new, and feels a bit too much like hand holding. However, having personally seen someone nearly fall down it, I understand why it is here. It does, however, encourage cavers to lean towards the wall in an unsafe manner; it is best to lean away from the wall slightly to get a better grip on the sloping footholds. The cleft is about 12 metres deep, and there is an alternative route to the floor here, via a ledge and silly squeeze behind a boulder.
Lighting by Tarquin and Helen
Keyhole Traverse, the highlight of Keyhole Chamber. Despite being my favourite passage, I had failed for decades to take a good picture of it. This is at last a picture that I am happy with. The fixed rope is relatively new, and feels a bit too much like hand holding. However, having personally seen someone nearly fall down it, I understand why it is here. It does, however, encourage cavers to lean towards the wall in an unsafe manner; it is best to lean away from the wall slightly to get a better grip on the sloping footholds. The cleft is about 12 metres deep, and there is an alternative route to the floor here, via a ledge and silly squeeze behind a boulder.
Lighting by Tarquin and Helen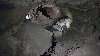 This is such a classic phreatic tube and vadose canyon keyhole though, that it would be a shame to miss it. The usual route onwards is to continue at the top, jumping over the cleft when needed to swap sides and back. The tube then abruptly ends at the choke in the distance.
Lighting by Tarquin and Helen
This is such a classic phreatic tube and vadose canyon keyhole though, that it would be a shame to miss it. The usual route onwards is to continue at the top, jumping over the cleft when needed to swap sides and back. The tube then abruptly ends at the choke in the distance.
Lighting by Tarquin and Helen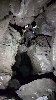 The three-stage climb back down to the river at the end, which can be tricky for shorter cavers. At the bottom, the alternative route rejoins via a wet duck under a boulder.
Lighting by Tarquin and Helen
The three-stage climb back down to the river at the end, which can be tricky for shorter cavers. At the bottom, the alternative route rejoins via a wet duck under a boulder.
Lighting by Tarquin and Helen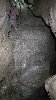 Just around the corner downstream, a rope climb up the wall reaches a higher ledge.
Lighting by Tarquin and Helen
Just around the corner downstream, a rope climb up the wall reaches a higher ledge.
Lighting by Tarquin and Helen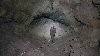 A scamble up a gap between boulders then breaks out into Crystal Gallery. This is another fragment of the Keyhole Chamber tube, choking immediately in one direction right next to Keyhole Chamber's choke, then heading off perpendicular to the stream. It passes through another choke, but the way on has remained elusive.
Lighting by Tarquin and Helen
A scamble up a gap between boulders then breaks out into Crystal Gallery. This is another fragment of the Keyhole Chamber tube, choking immediately in one direction right next to Keyhole Chamber's choke, then heading off perpendicular to the stream. It passes through another choke, but the way on has remained elusive.
Lighting by Tarquin and Helen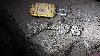 The mud on a boulder immediately beside the point of entry conceals a surprisingly large amount of cryostal.
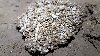 Normally, mud would be bad news for cryostal, but here, it has protected and preserved it, keeping it safe when the choke caused the passage to pond up with muddy water, then preventing it from washing away when the stream cut the vadose trench below the passage.
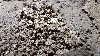 Cryostal revealed when the mud was raised.
Lighting by Tarquin and Helen
Cryostal revealed when the mud was raised.
Lighting by Tarquin and Helen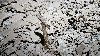 The passage is named after the large selenite needles which protrude from the mud in large quantities.
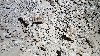 Emerging like molehills from the soil.
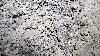 Presumably, these are cryogenic in origin, as they are often found in the same place as cryostal, frost-lifted bobbly mud, and freeze-thaw breakdown. This association is the reason that cryostal was discovered in this passage.
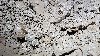 Selenite crystals.
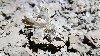 Selenite crystals.
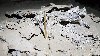 Some of the longest crystals are 15-20 cm (6-8 inches) in length.
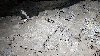 Selenite crystals.
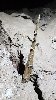 Selenite crystal.
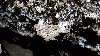 Gypsum crystals coating the wall, just for a change of pace. Gypsum and selenite are basically the same thing; calcium sulfate dihydrate. Selenite simply refers to the crystalline structure, and most gypsum crystals found in caves are of the selenite variety.
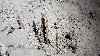 Some final selenite crystals.
 Sculptures on the route to the cave.
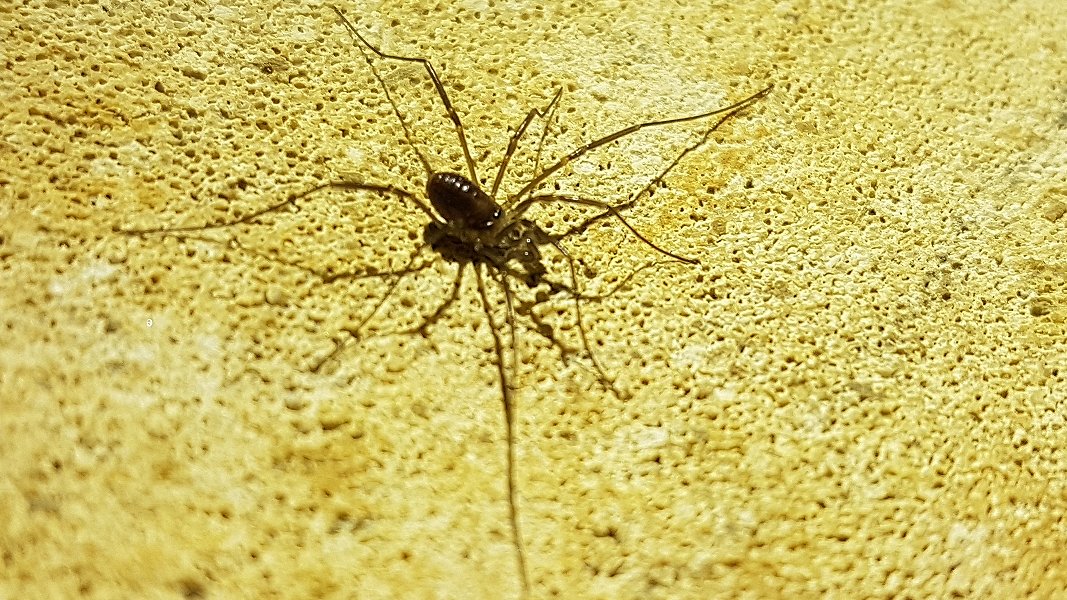 Harvestman in the entrance passage. Clearly not a spider, as it lacks the body segments. Perhaps a colour morph of Leiobunum rotundum.
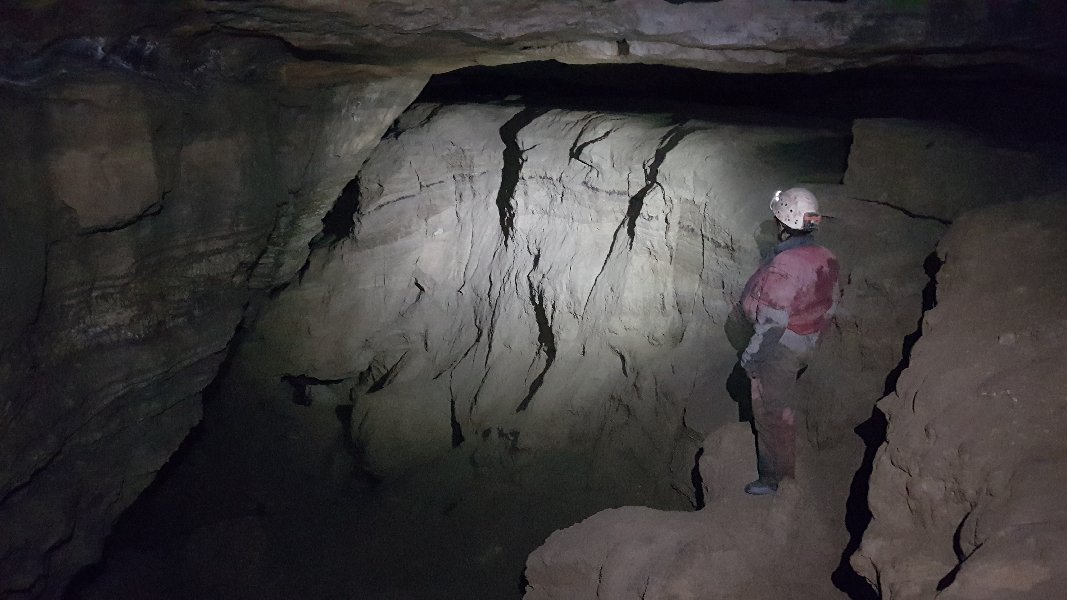 The best part of the Cliffs Of Dover, near the end of Main Passage. This is where Ace of Spades inlet leads off, with Africa Passage above it.
Lighting by Tarquin and Helen
The best part of the Cliffs Of Dover, near the end of Main Passage. This is where Ace of Spades inlet leads off, with Africa Passage above it.
Lighting by Tarquin and Helen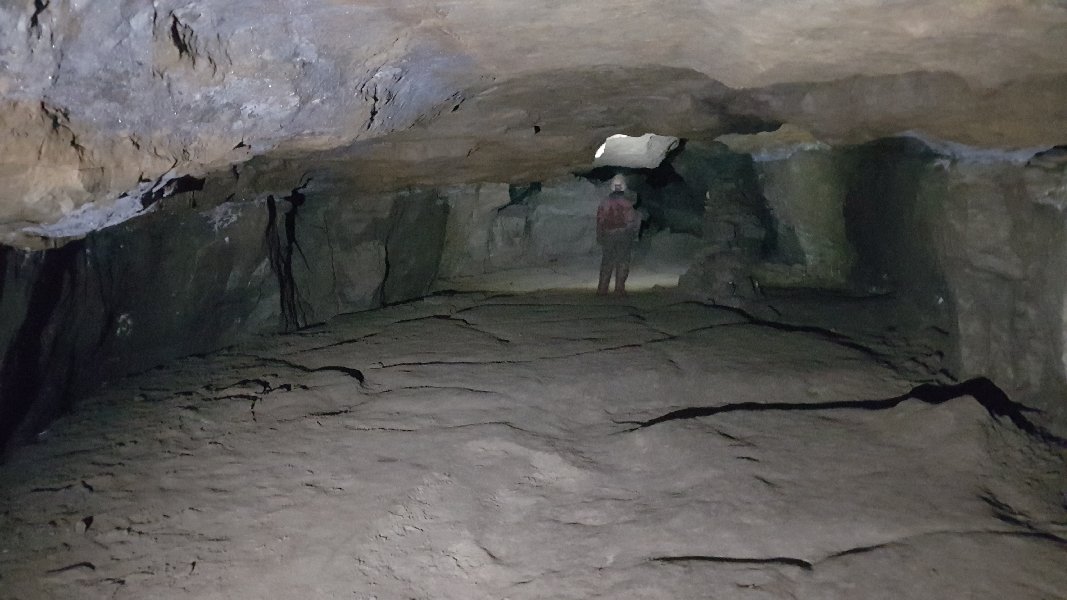 Cairn marking the entry point to Aven Series. There is a short passage in the aven above it, as well as the main Aven Series on the right.
Lighting by Tarquin and Helen
Cairn marking the entry point to Aven Series. There is a short passage in the aven above it, as well as the main Aven Series on the right.
Lighting by Tarquin and Helen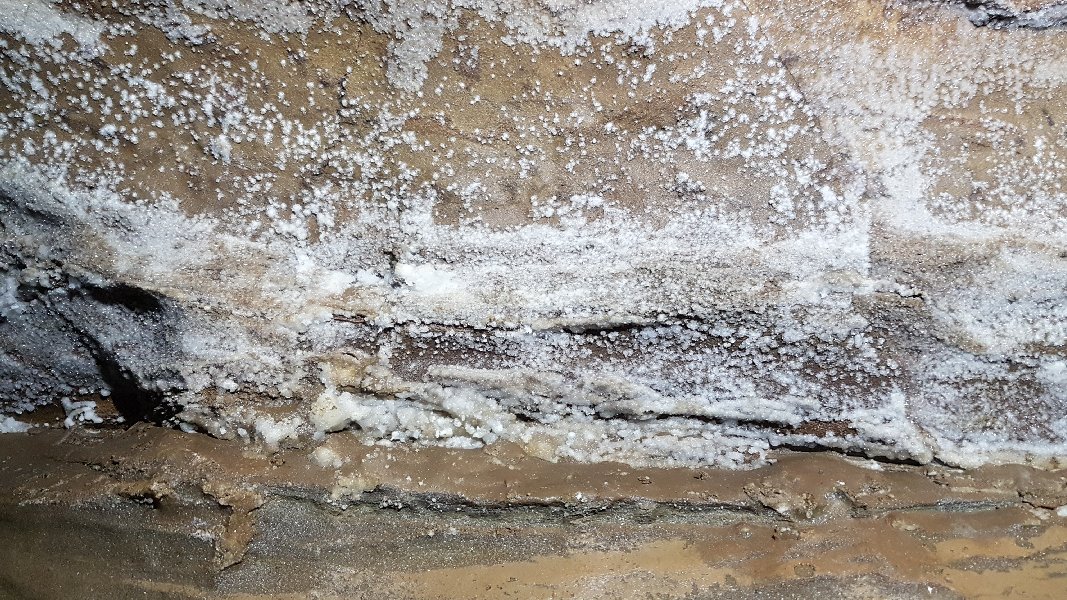 Gypsum on the wall in North Wing.
 Looking back from the end of North Wing. On the left is a short series of side passages.
Lighting by Tarquin and Helen
Looking back from the end of North Wing. On the left is a short series of side passages.
Lighting by Tarquin and Helen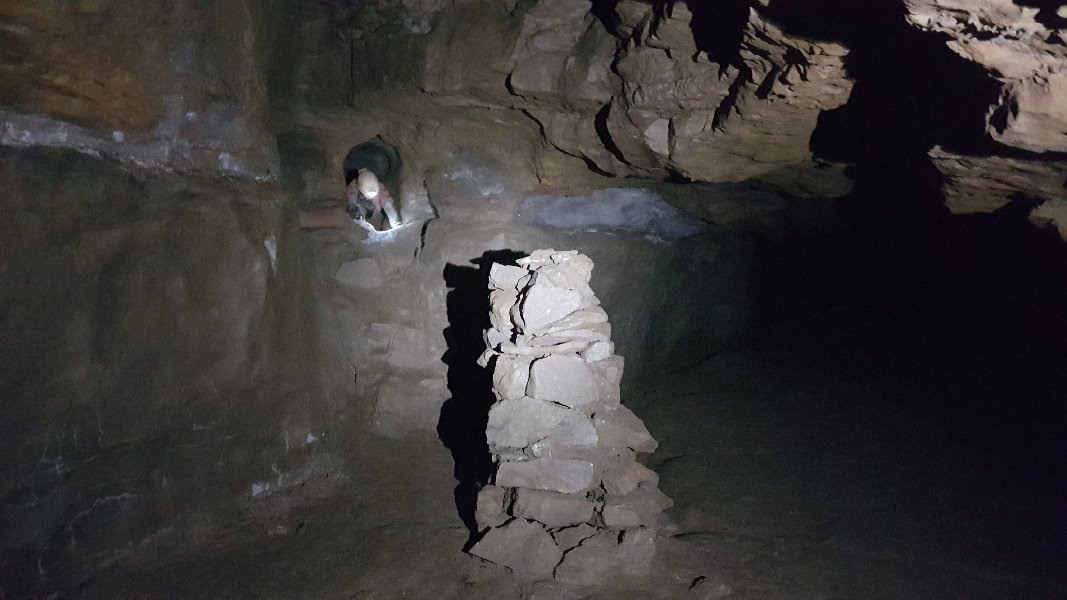 Entrance to Aven Series above the cairn.
Lighting by Tarquin and Helen
Entrance to Aven Series above the cairn.
Lighting by Tarquin and Helen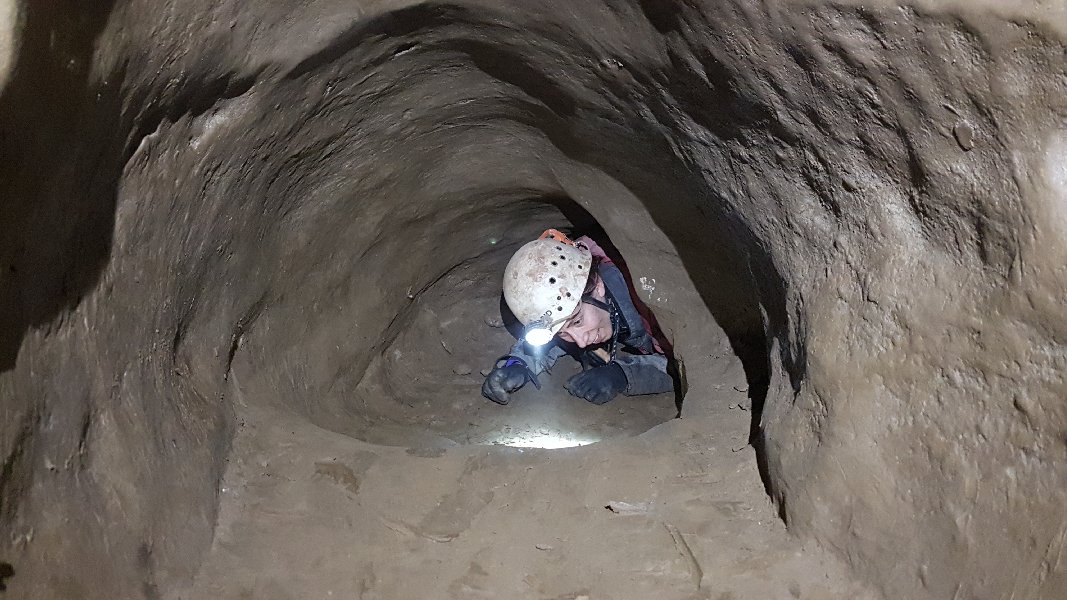 Crawling through Aven Series.
Lighting by Tarquin and Helen
Crawling through Aven Series.
Lighting by Tarquin and Helen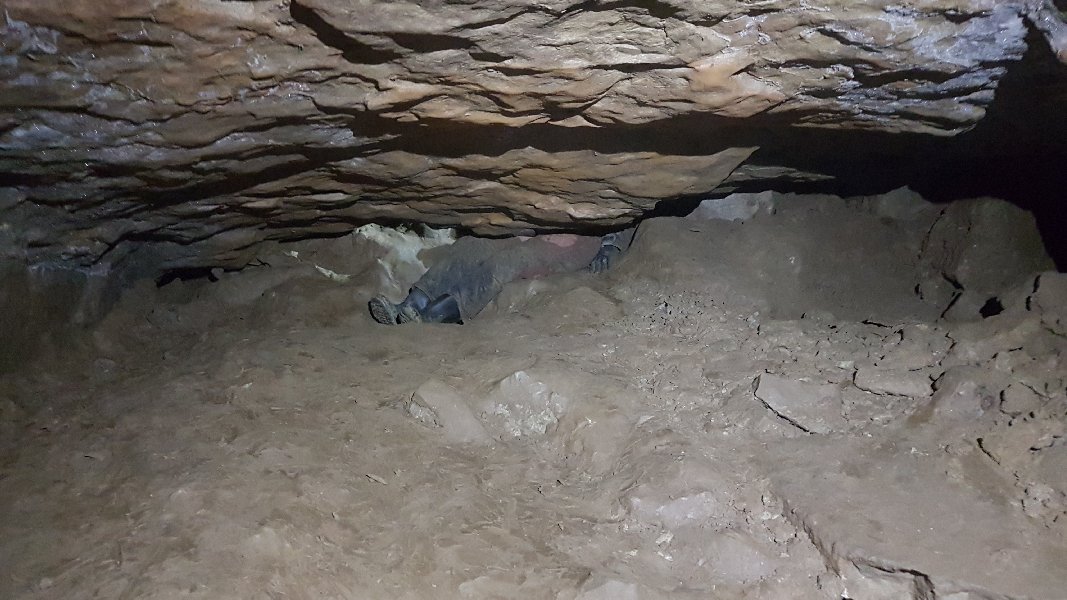 Awkward slide through a minimal ruckle at the end of the crawl.
Lighting by Tarquin and Helen
Awkward slide through a minimal ruckle at the end of the crawl.
Lighting by Tarquin and Helen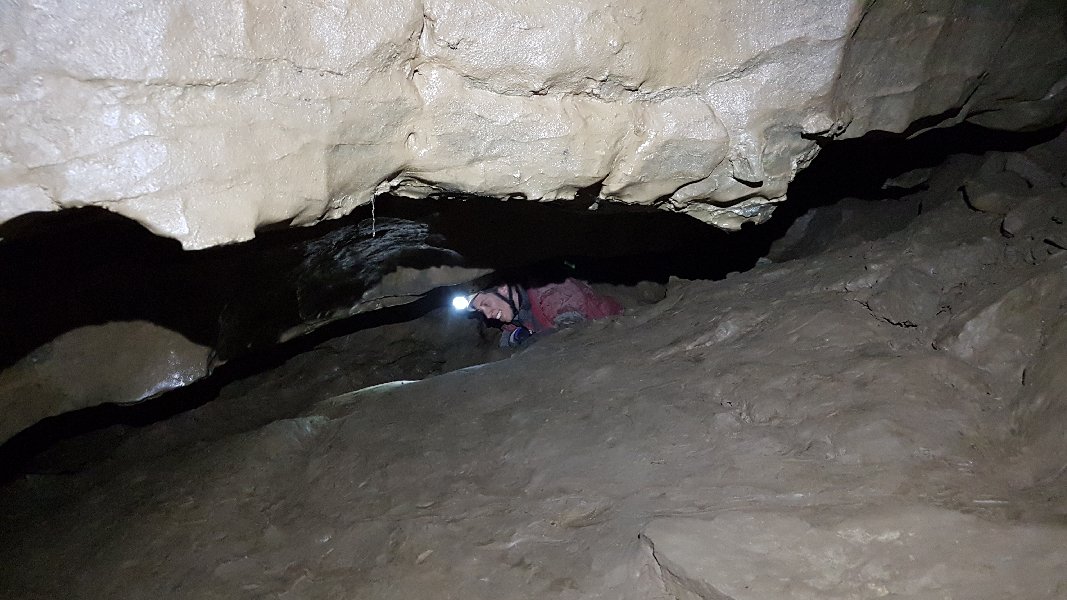 Emerging from an undercut.
Lighting by Tarquin and Helen
Emerging from an undercut.
Lighting by Tarquin and Helen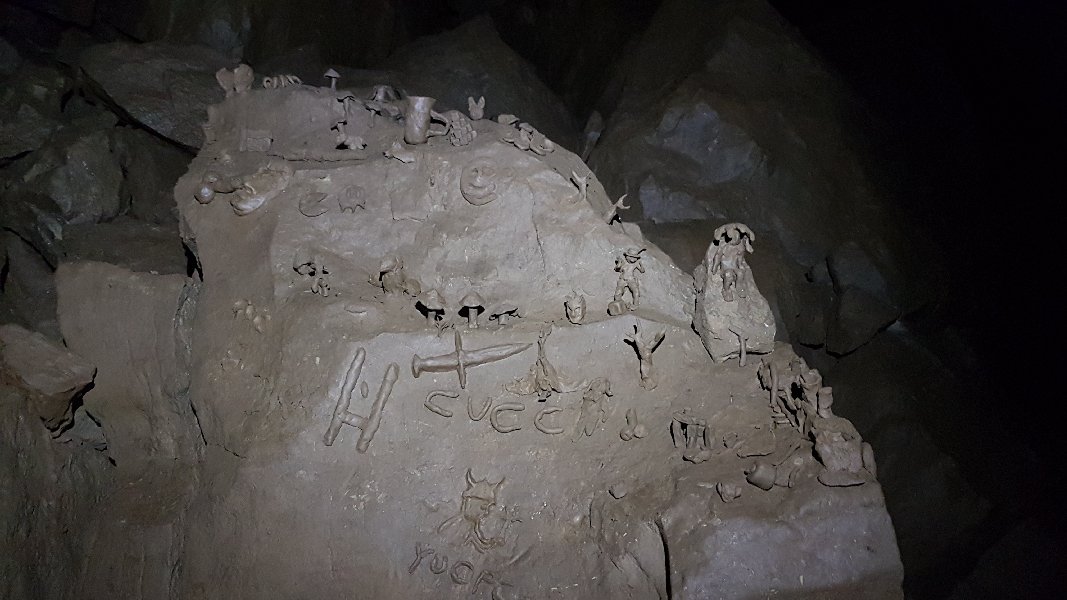 Mud sculptures in the large passage.
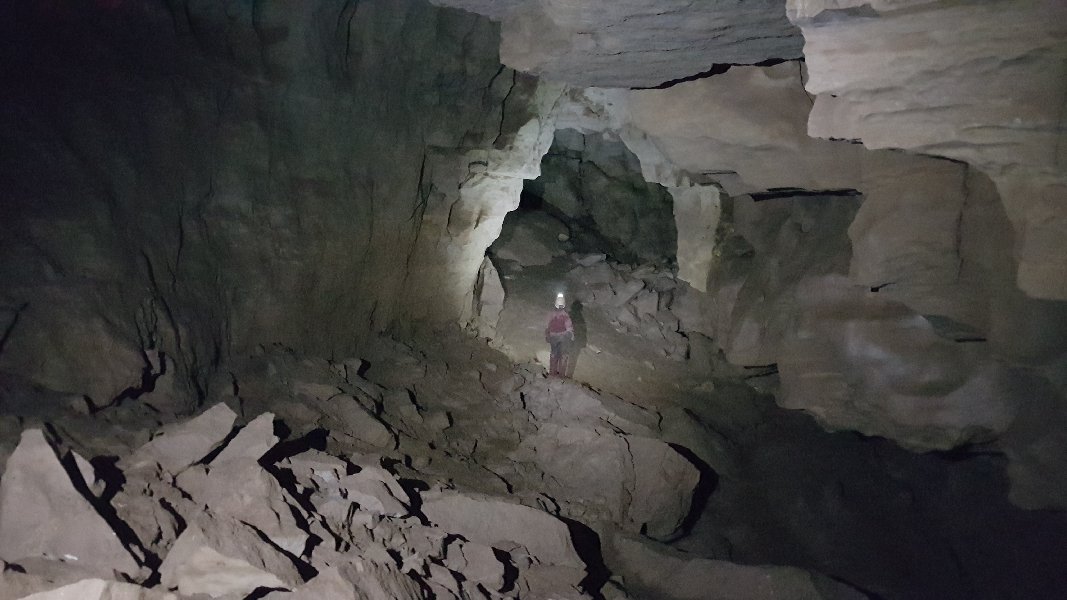 The undercut emerges into an unexpectedly big fragment of passage, which abruptly ends in each direction. At the far end on the right is a passage that ends over Africa Passage and very close to Ace Of Spades Inlet. Behind the left wall is a wide bedding plane oxbow accessed via two descending passages. At the far end of the oxbow is the much smaller Copper Passage, the only significant side passage, which ends at a small chamber. Exactly why this fragment of giant passage is here remains a mystery, since it is parallel to the North Wing. Perhaps the North Wing meandered through it on its way to Eglwys Faen, before filling with sediment. Or perhaps it is a parallel trunk passage, but if so where did it connect to the rest of the system?
Lighting by Tarquin and Helen
The undercut emerges into an unexpectedly big fragment of passage, which abruptly ends in each direction. At the far end on the right is a passage that ends over Africa Passage and very close to Ace Of Spades Inlet. Behind the left wall is a wide bedding plane oxbow accessed via two descending passages. At the far end of the oxbow is the much smaller Copper Passage, the only significant side passage, which ends at a small chamber. Exactly why this fragment of giant passage is here remains a mystery, since it is parallel to the North Wing. Perhaps the North Wing meandered through it on its way to Eglwys Faen, before filling with sediment. Or perhaps it is a parallel trunk passage, but if so where did it connect to the rest of the system?
Lighting by Tarquin and Helen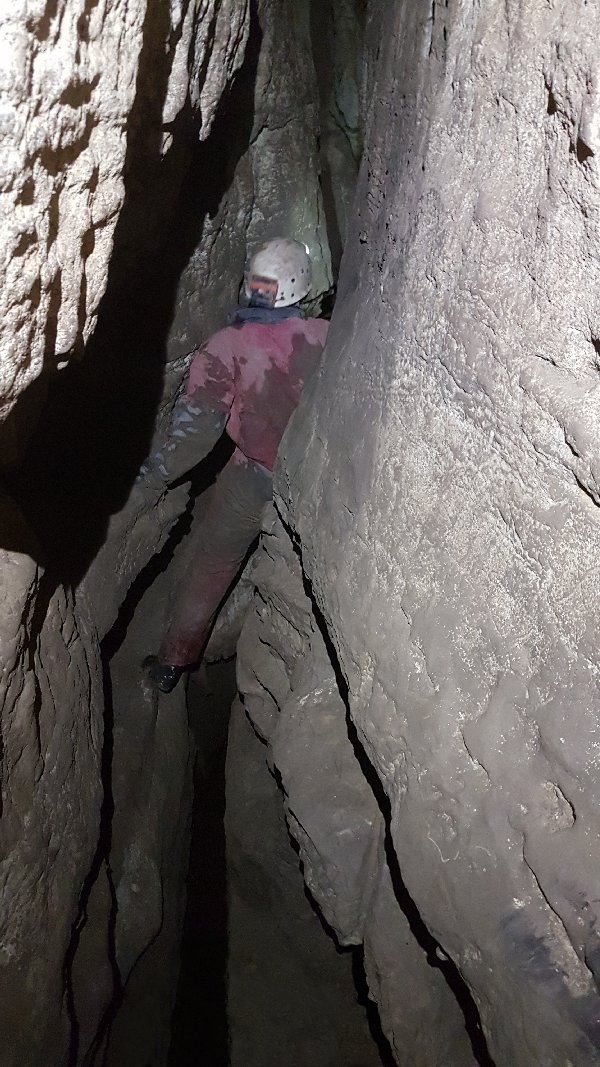 Ace Of Spades is a much more demanding passage, accessed via a drop through boulders. Sometimes, progress is best made by traversing on ledges near roof level.
Lighting by Tarquin and Helen
Ace Of Spades is a much more demanding passage, accessed via a drop through boulders. Sometimes, progress is best made by traversing on ledges near roof level.
Lighting by Tarquin and Helen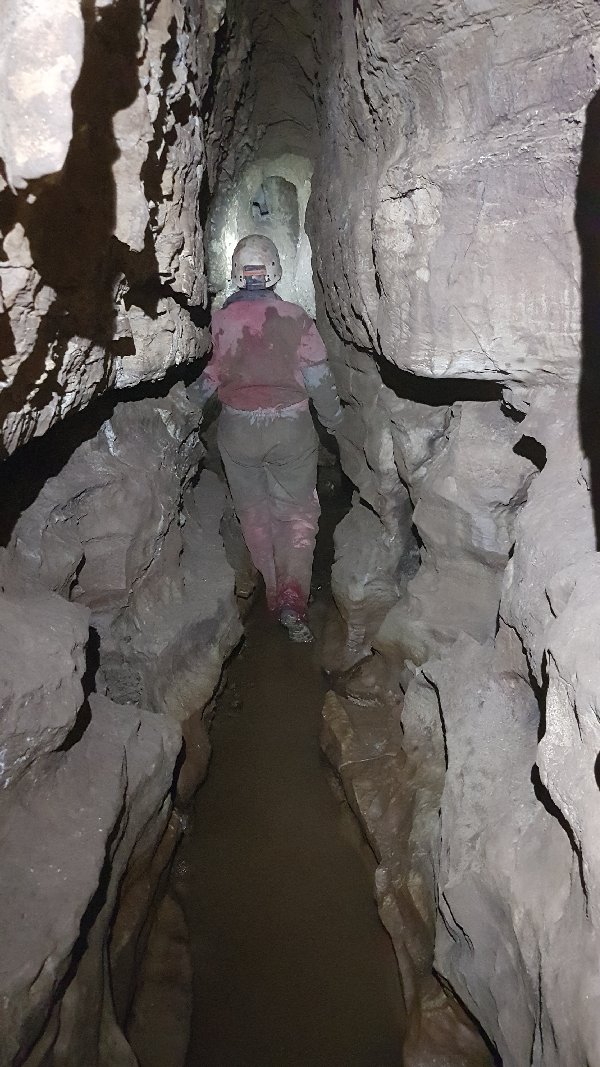 Sometimes it is easier to stay at stream level. The stream supplies the water to Trident Passage, which then becomes First Inlet in Southern Stream Passage.
Lighting by Tarquin and Helen
Sometimes it is easier to stay at stream level. The stream supplies the water to Trident Passage, which then becomes First Inlet in Southern Stream Passage.
Lighting by Tarquin and Helen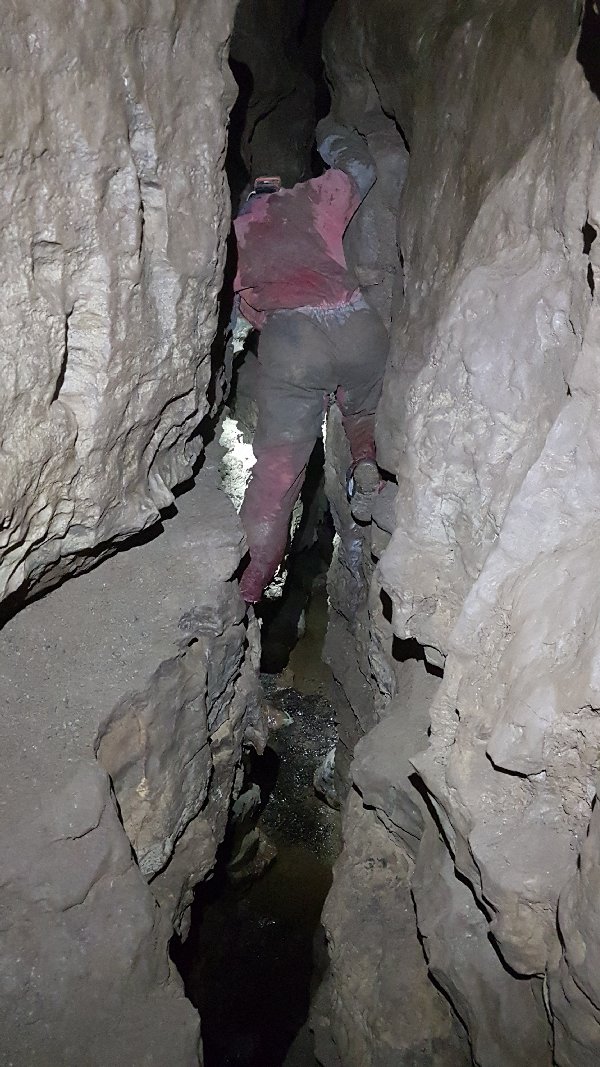 Or sometimes a traverse half way between.
Lighting by Tarquin and Helen
Or sometimes a traverse half way between.
Lighting by Tarquin and Helen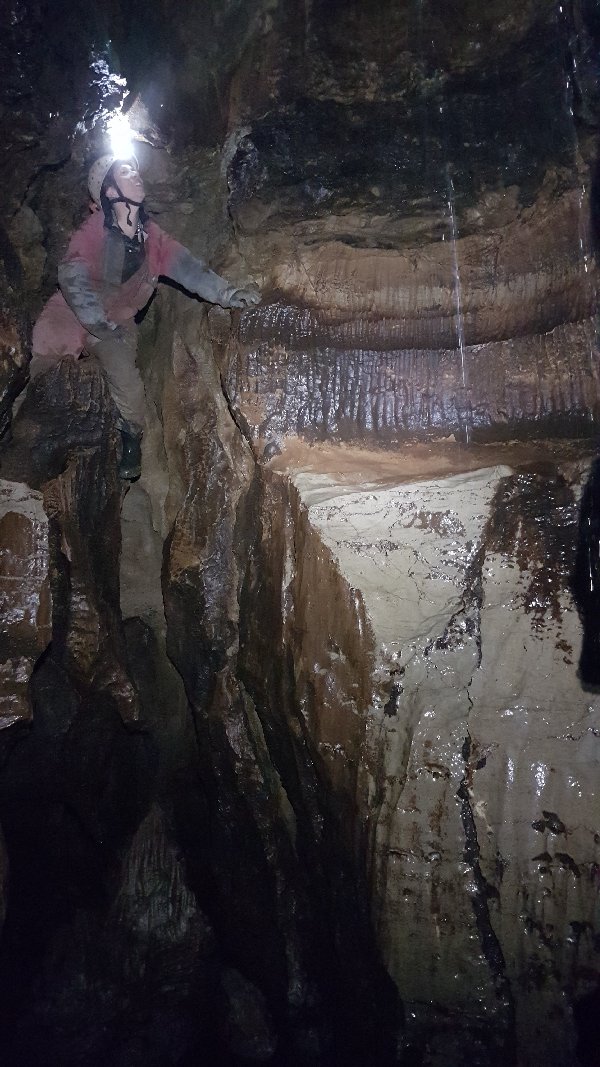 The aven which supplies the water, requiring a climb down to stream level.
Lighting by Tarquin and Helen
The aven which supplies the water, requiring a climb down to stream level.
Lighting by Tarquin and Helen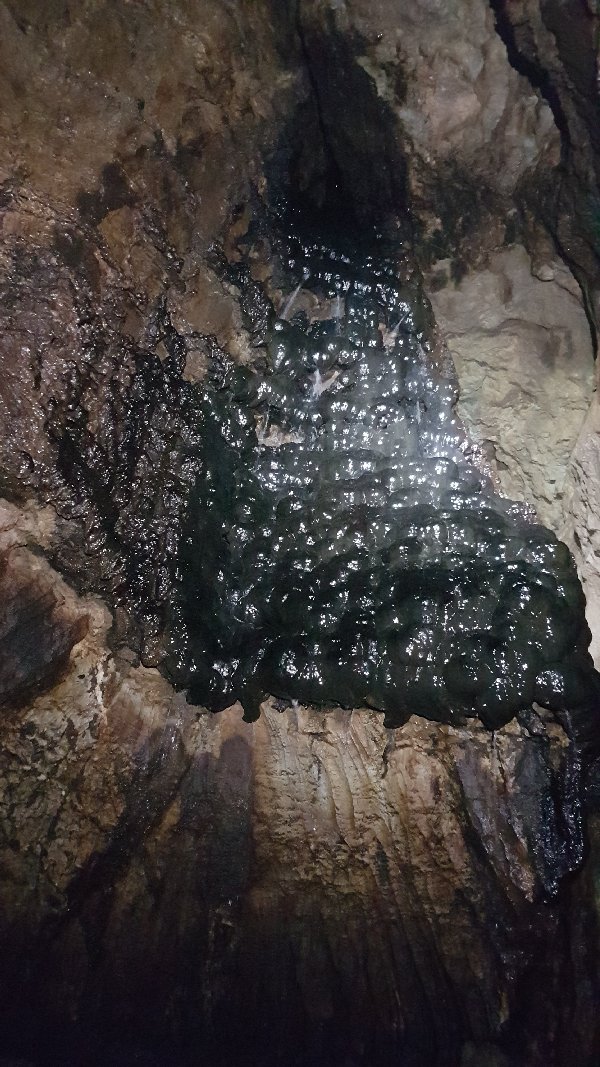 The inlet provides a black coating over all of the surfaces, giving the passage its name. The water presumably comes from a peat bog on the surface. The water does not come from the nearby Eglwys Faen, even though the passage heads in that direction.
Lighting by Tarquin and Helen
The inlet provides a black coating over all of the surfaces, giving the passage its name. The water presumably comes from a peat bog on the surface. The water does not come from the nearby Eglwys Faen, even though the passage heads in that direction.
Lighting by Tarquin and Helen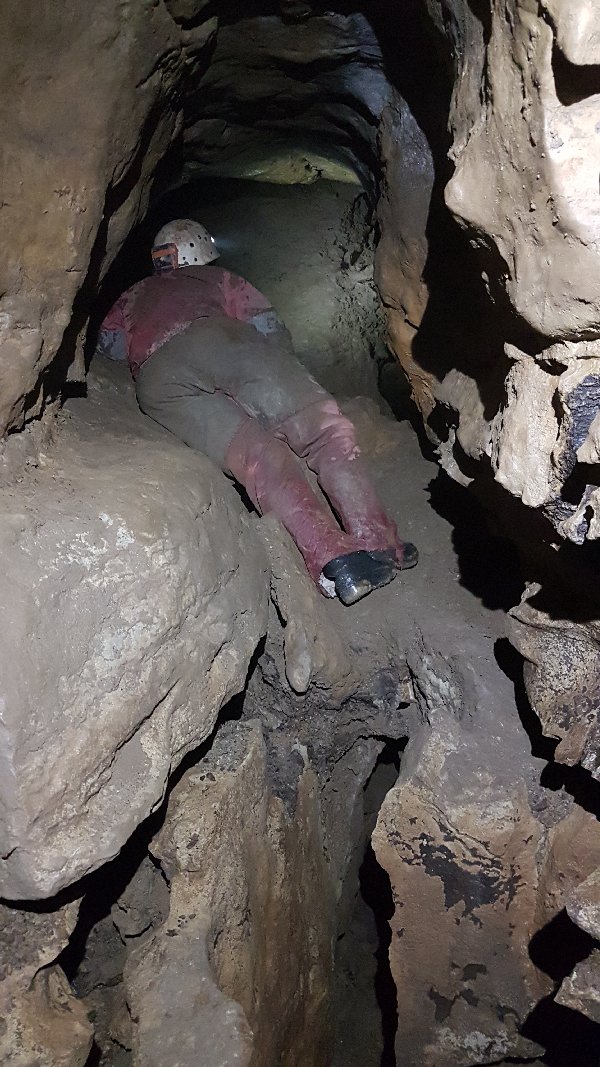 A scramble back up the other side of the aven leads to a series of small passages and digs.
Lighting by Tarquin and Helen
A scramble back up the other side of the aven leads to a series of small passages and digs.
Lighting by Tarquin and Helen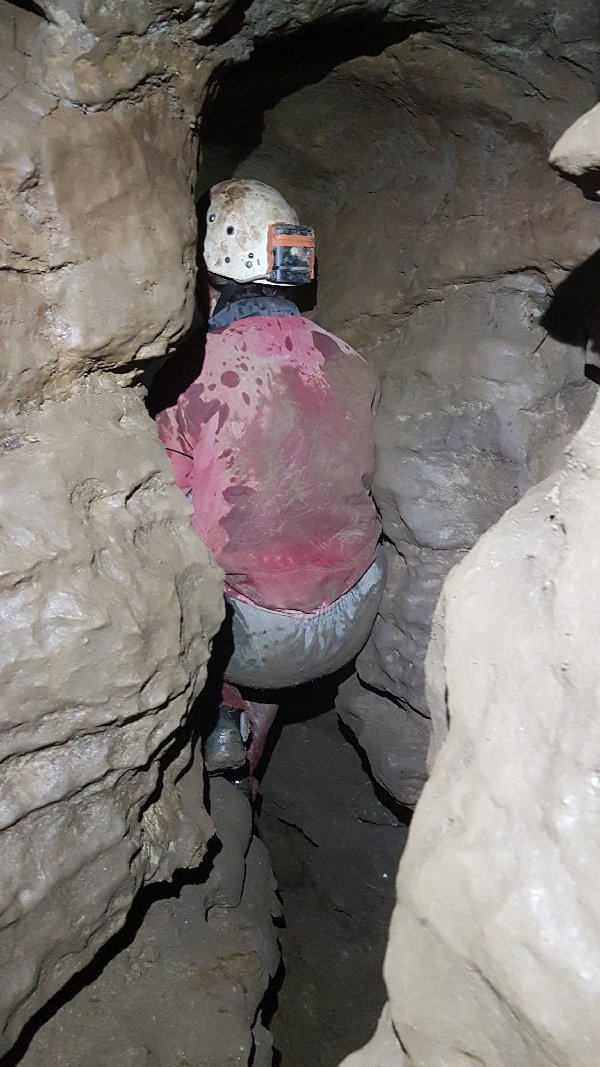 By taking each left turn, a parallel streamway is gained.
Lighting by Tarquin and Helen
By taking each left turn, a parallel streamway is gained.
Lighting by Tarquin and Helen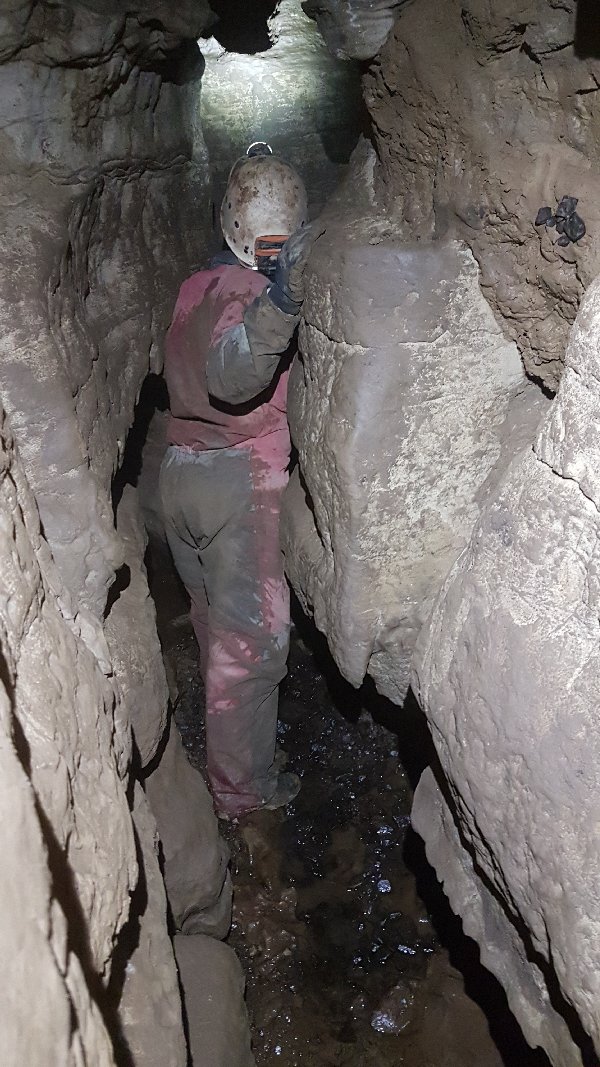 The parallel streamway then joins the main Ace Of Spades streamway just downstream of the aven, creating a short round trip.
Lighting by Tarquin and Helen
The parallel streamway then joins the main Ace Of Spades streamway just downstream of the aven, creating a short round trip.
Lighting by Tarquin and Helen Small shrimps in Meander Passage, a tributary to the main streamway, and a source of drinking water. Presumably, these are Nymphargus.
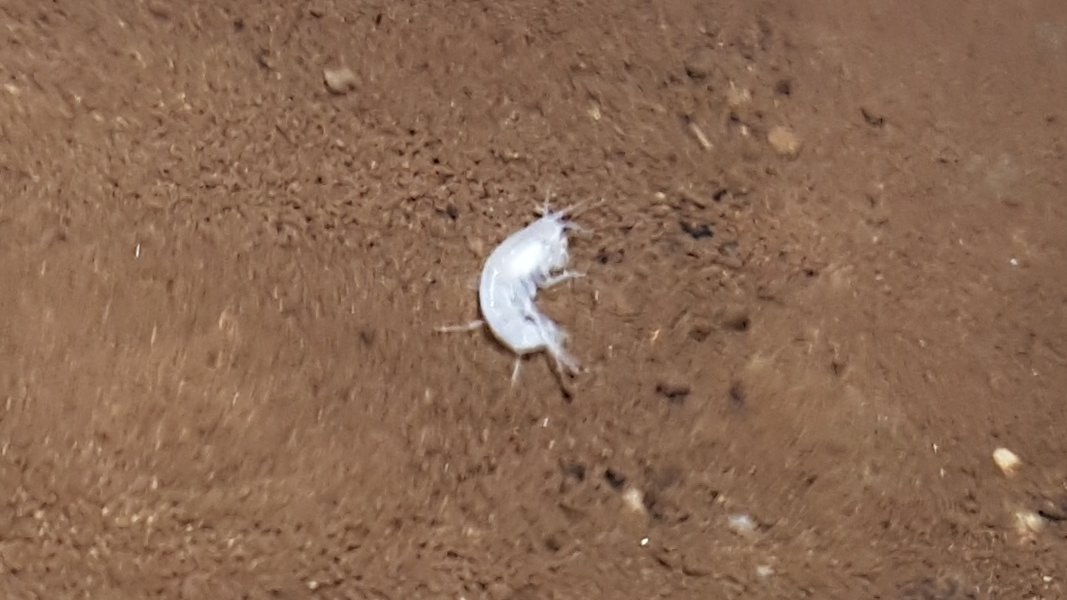 Shrimp.
Lighting by Tarquin and Helen
Shrimp.
Lighting by Tarquin and Helen The bold step between the two parts of Second Choke, just after Midnight Passage's oxbow. The route here is to step around the corner into the side passage (following the rope), then climb down and turn around to emerge back at floor level (where the light is).
Lighting by Tarquin and Helen
The bold step between the two parts of Second Choke, just after Midnight Passage's oxbow. The route here is to step around the corner into the side passage (following the rope), then climb down and turn around to emerge back at floor level (where the light is).
Lighting by Tarquin and Helen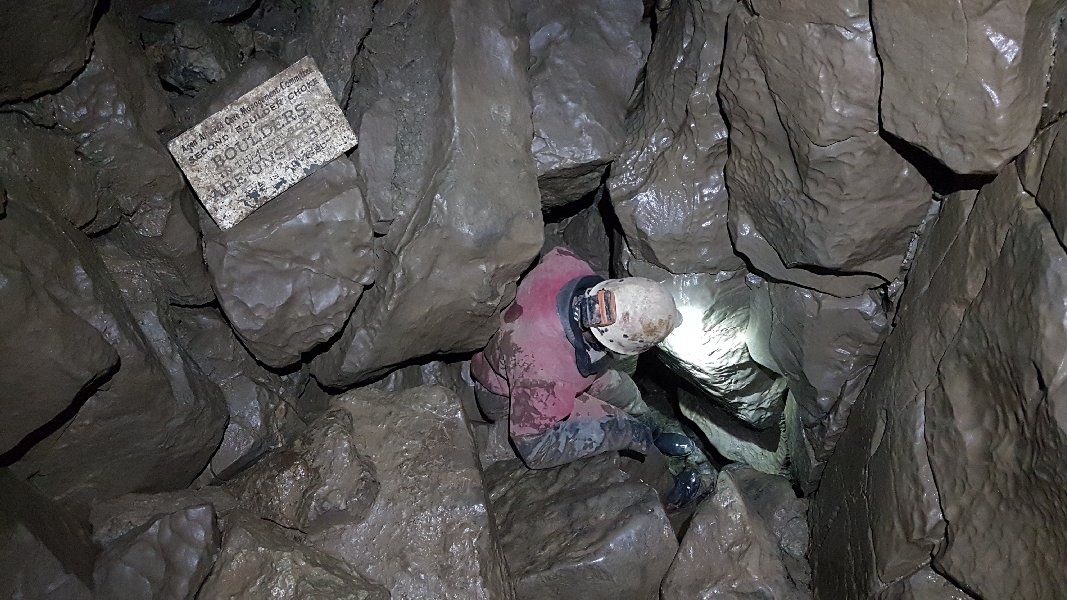 The start of Second Choke proper, dropping down through the boulders to river level. This is the part where the boulders moved in 1985. There is a bypass above if needed, but it requires ropes.
Lighting by Tarquin and Helen
The start of Second Choke proper, dropping down through the boulders to river level. This is the part where the boulders moved in 1985. There is a bypass above if needed, but it requires ropes.
Lighting by Tarquin and Helen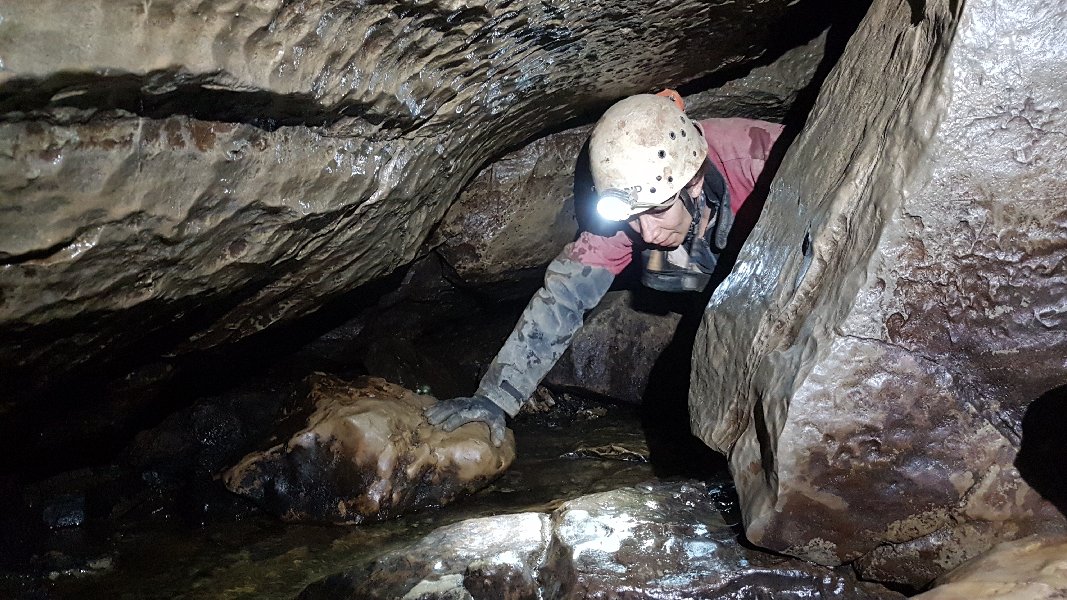 Crawling through the stream. This section floods in severe flood conditions, and is the only section of this passage to do so.
Lighting by Tarquin and Helen
Crawling through the stream. This section floods in severe flood conditions, and is the only section of this passage to do so.
Lighting by Tarquin and Helen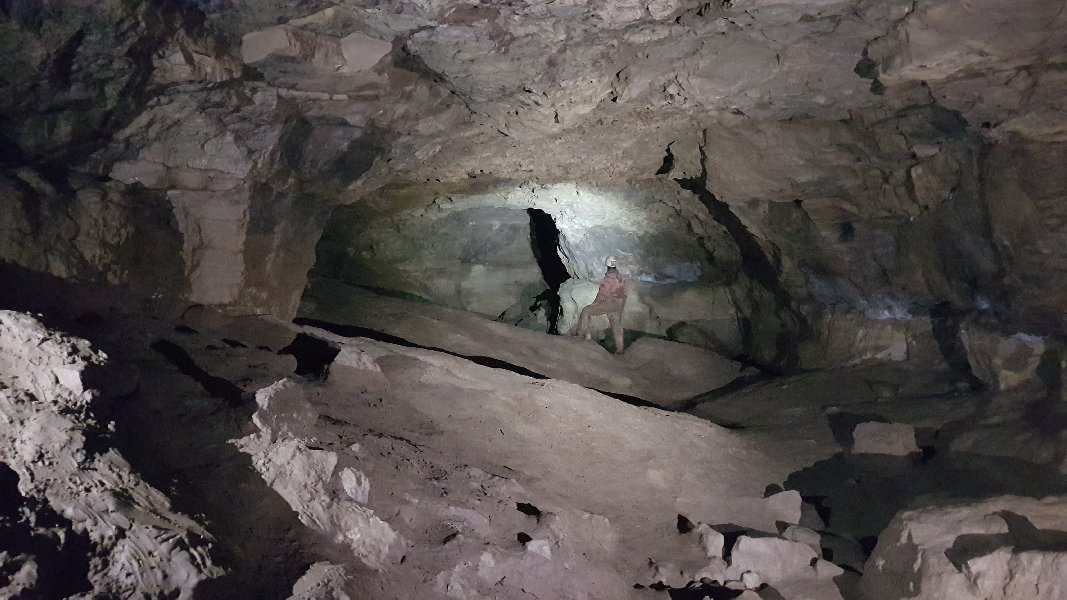 Start of Keyhole Chamber, my favourite passage. In spite of its name, it is a passage, not a chamber. This is the site of the old rescue dump, and is a common place to stop for refreshments. The streamway runs below this section, and this is approximately the location of the Pwll-y-Pasg inlet below, as well as the Upper Keyhole Passage above.
Lighting by Tarquin and Helen
Start of Keyhole Chamber, my favourite passage. In spite of its name, it is a passage, not a chamber. This is the site of the old rescue dump, and is a common place to stop for refreshments. The streamway runs below this section, and this is approximately the location of the Pwll-y-Pasg inlet below, as well as the Upper Keyhole Passage above.
Lighting by Tarquin and Helen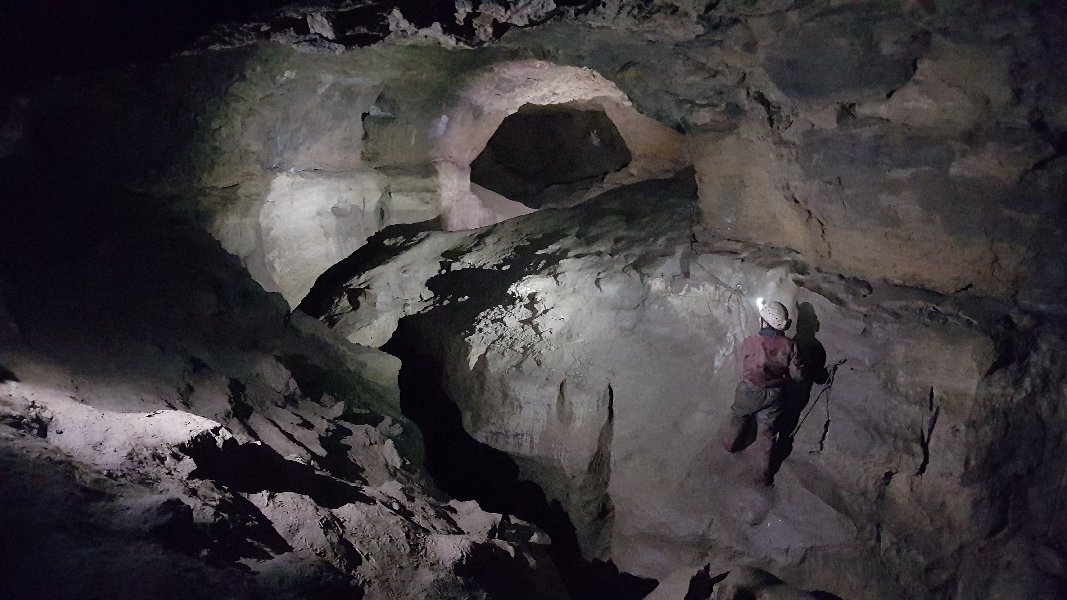 Keyhole Traverse, the highlight of Keyhole Chamber. Despite being my favourite passage, I had failed for decades to take a good picture of it. This is at last a picture that I am happy with. The fixed rope is relatively new, and feels a bit too much like hand holding. However, having personally seen someone nearly fall down it, I understand why it is here. It does, however, encourage cavers to lean towards the wall in an unsafe manner; it is best to lean away from the wall slightly to get a better grip on the sloping footholds. The cleft is about 12 metres deep, and there is an alternative route to the floor here, via a ledge and silly squeeze behind a boulder.
Lighting by Tarquin and Helen
Keyhole Traverse, the highlight of Keyhole Chamber. Despite being my favourite passage, I had failed for decades to take a good picture of it. This is at last a picture that I am happy with. The fixed rope is relatively new, and feels a bit too much like hand holding. However, having personally seen someone nearly fall down it, I understand why it is here. It does, however, encourage cavers to lean towards the wall in an unsafe manner; it is best to lean away from the wall slightly to get a better grip on the sloping footholds. The cleft is about 12 metres deep, and there is an alternative route to the floor here, via a ledge and silly squeeze behind a boulder.
Lighting by Tarquin and Helen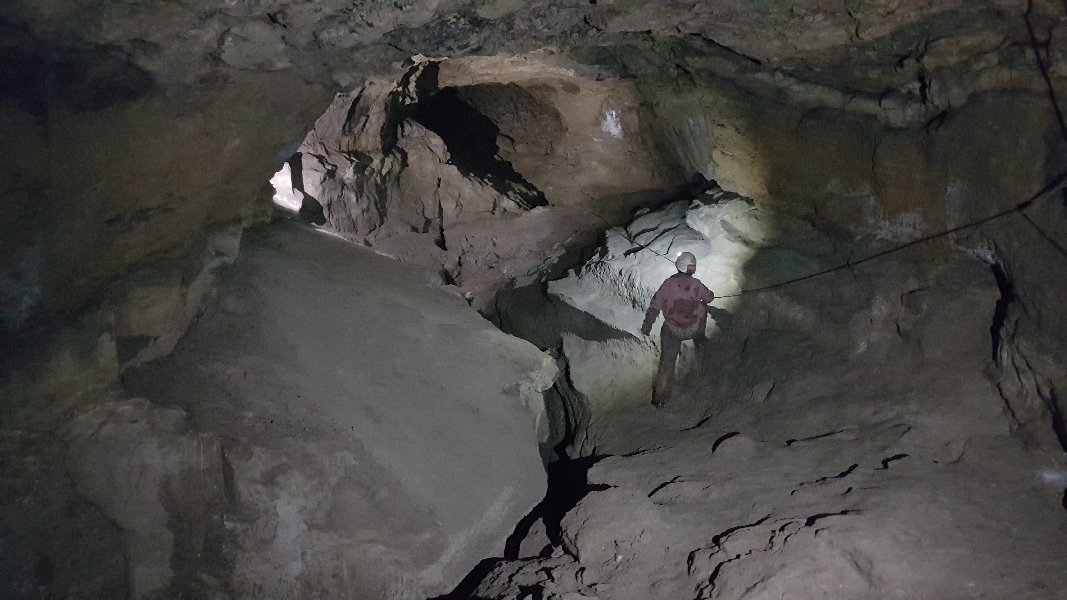 This is such a classic phreatic tube and vadose canyon keyhole though, that it would be a shame to miss it. The usual route onwards is to continue at the top, jumping over the cleft when needed to swap sides and back. The tube then abruptly ends at the choke in the distance.
Lighting by Tarquin and Helen
This is such a classic phreatic tube and vadose canyon keyhole though, that it would be a shame to miss it. The usual route onwards is to continue at the top, jumping over the cleft when needed to swap sides and back. The tube then abruptly ends at the choke in the distance.
Lighting by Tarquin and Helen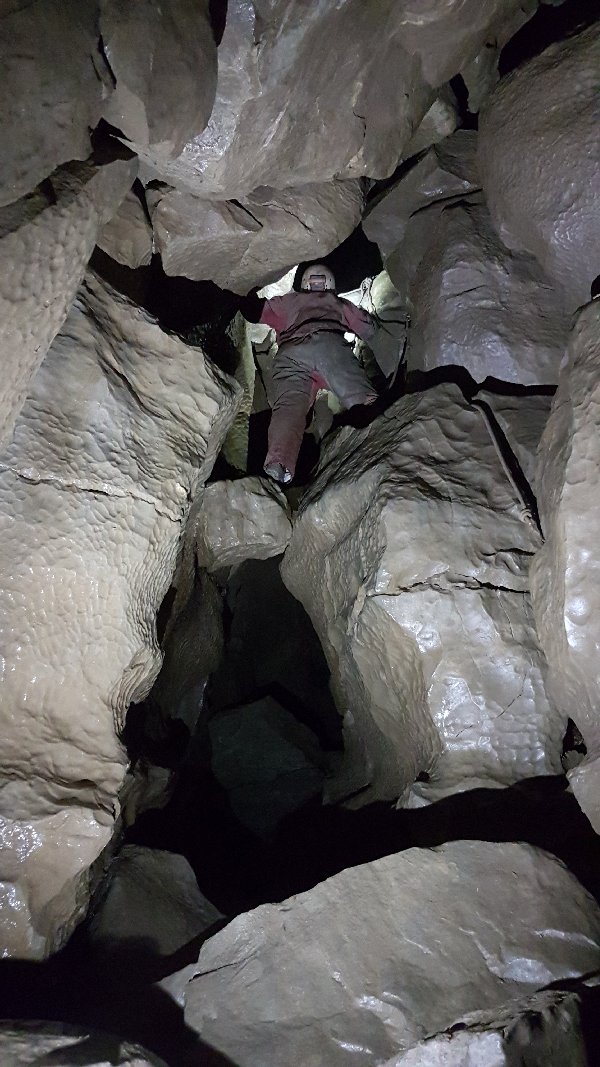 The three-stage climb back down to the river at the end, which can be tricky for shorter cavers. At the bottom, the alternative route rejoins via a wet duck under a boulder.
Lighting by Tarquin and Helen
The three-stage climb back down to the river at the end, which can be tricky for shorter cavers. At the bottom, the alternative route rejoins via a wet duck under a boulder.
Lighting by Tarquin and Helen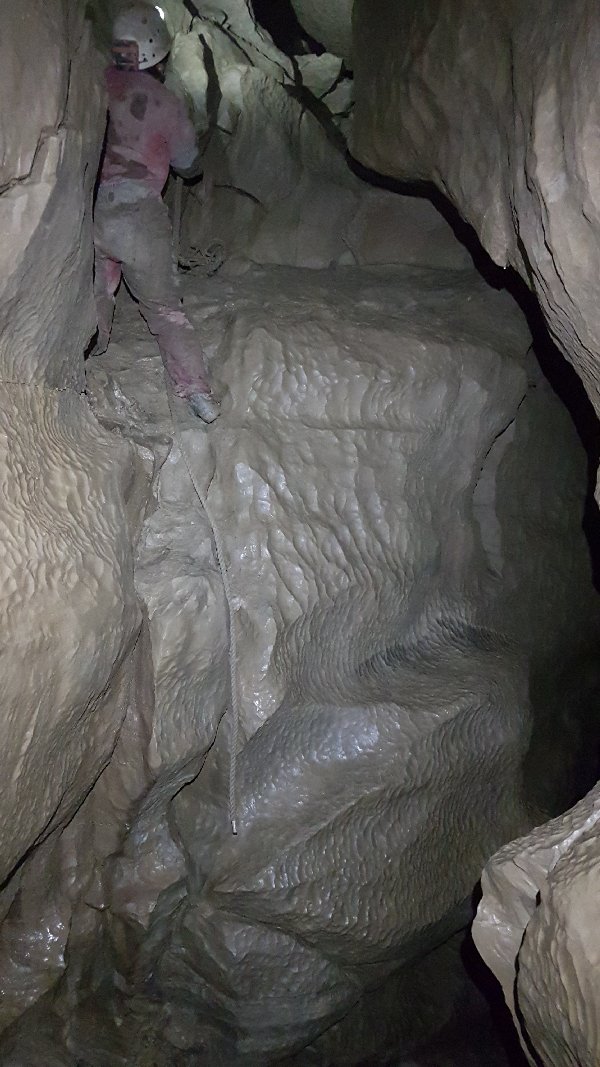 Just around the corner downstream, a rope climb up the wall reaches a higher ledge.
Lighting by Tarquin and Helen
Just around the corner downstream, a rope climb up the wall reaches a higher ledge.
Lighting by Tarquin and Helen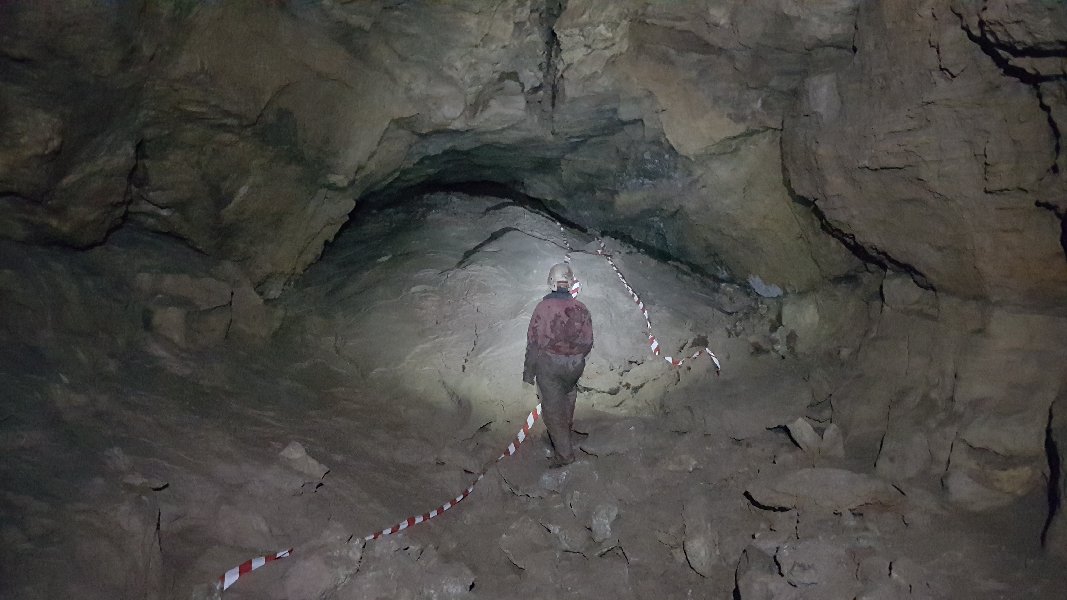 A scamble up a gap between boulders then breaks out into Crystal Gallery. This is another fragment of the Keyhole Chamber tube, choking immediately in one direction right next to Keyhole Chamber's choke, then heading off perpendicular to the stream. It passes through another choke, but the way on has remained elusive.
Lighting by Tarquin and Helen
A scamble up a gap between boulders then breaks out into Crystal Gallery. This is another fragment of the Keyhole Chamber tube, choking immediately in one direction right next to Keyhole Chamber's choke, then heading off perpendicular to the stream. It passes through another choke, but the way on has remained elusive.
Lighting by Tarquin and Helen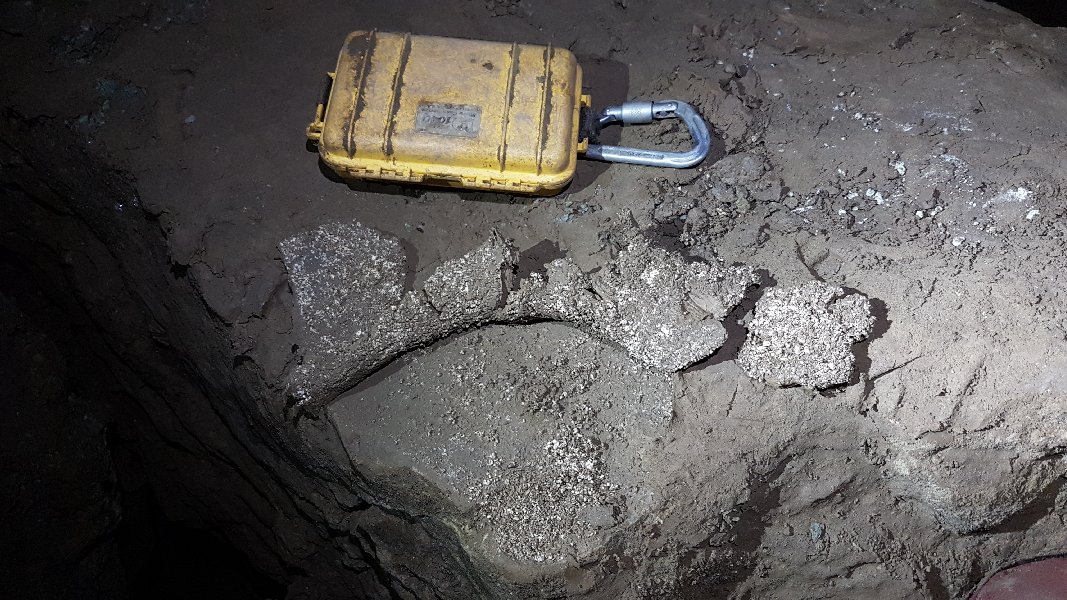 The mud on a boulder immediately beside the point of entry conceals a surprisingly large amount of cryostal.
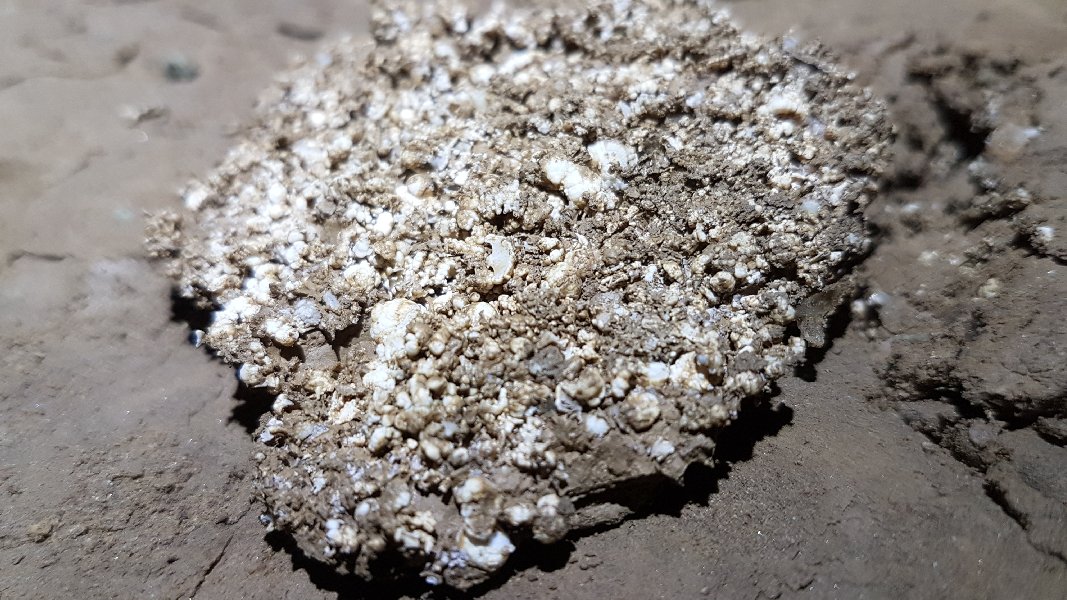 Normally, mud would be bad news for cryostal, but here, it has protected and preserved it, keeping it safe when the choke caused the passage to pond up with muddy water, then preventing it from washing away when the stream cut the vadose trench below the passage.
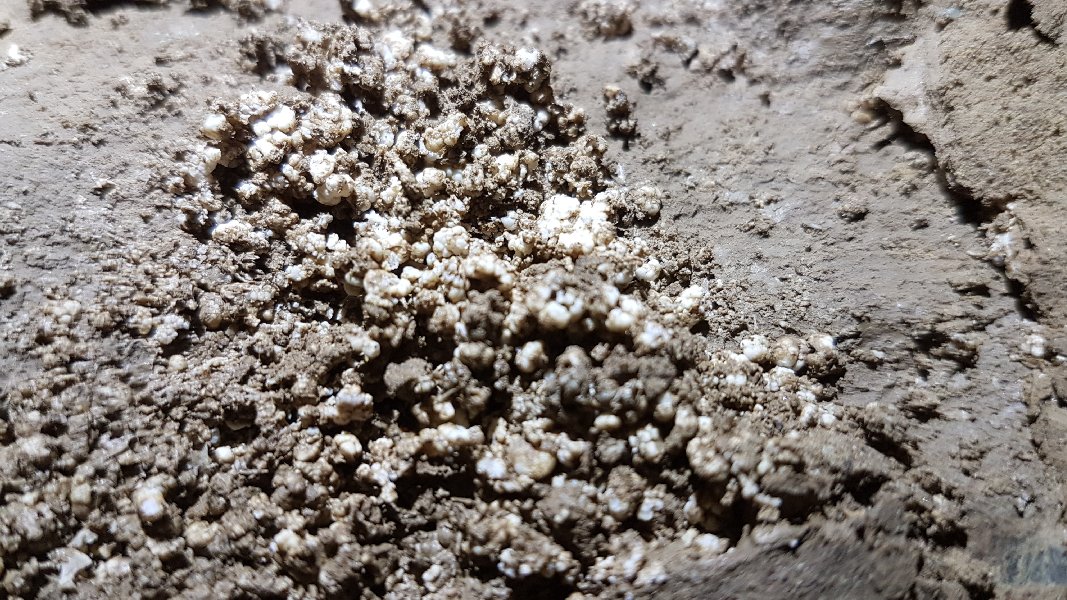 Cryostal revealed when the mud was raised.
Lighting by Tarquin and Helen
Cryostal revealed when the mud was raised.
Lighting by Tarquin and Helen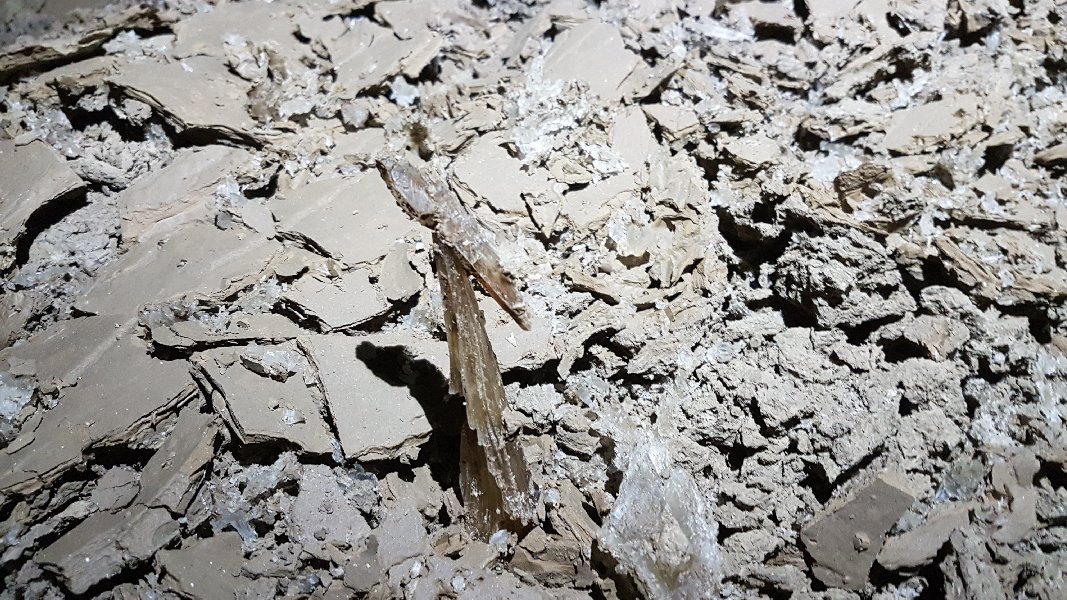 The passage is named after the large selenite needles which protrude from the mud in large quantities.
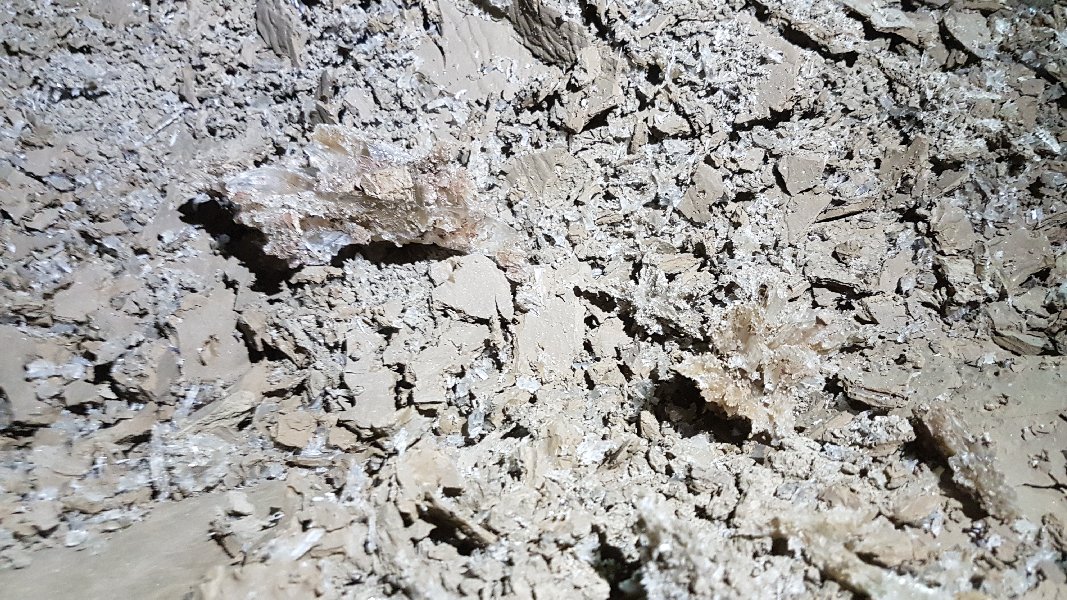 Emerging like molehills from the soil.
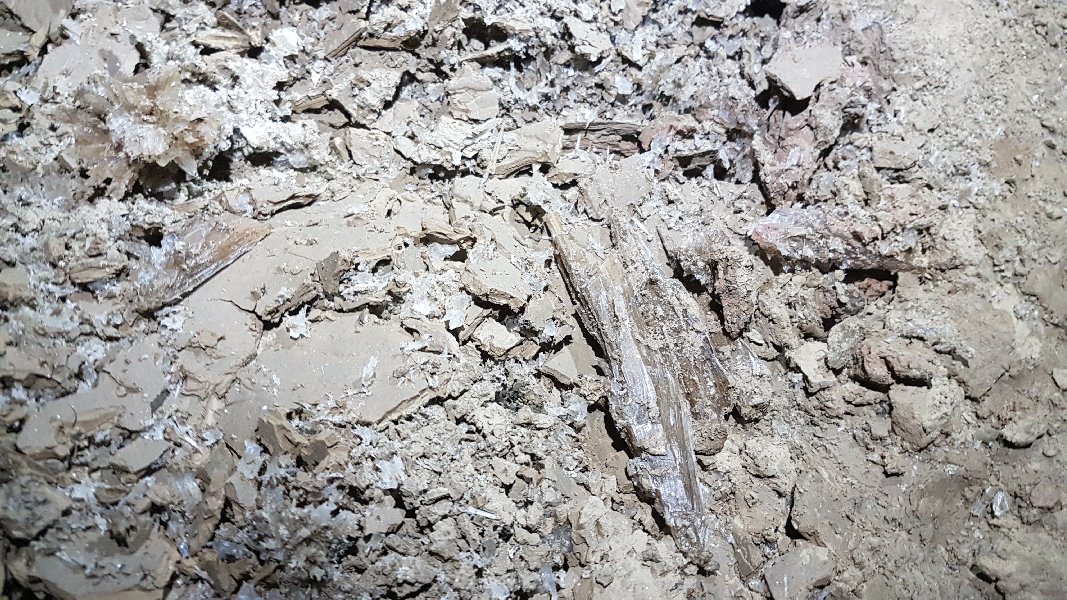 Presumably, these are cryogenic in origin, as they are often found in the same place as cryostal, frost-lifted bobbly mud, and freeze-thaw breakdown. This association is the reason that cryostal was discovered in this passage.
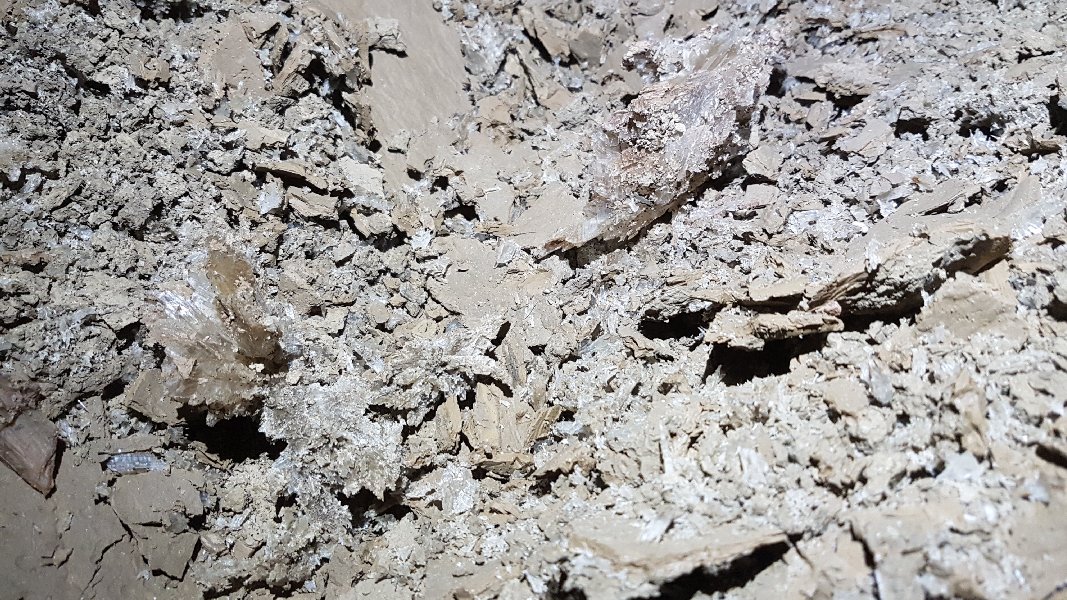 Selenite crystals.
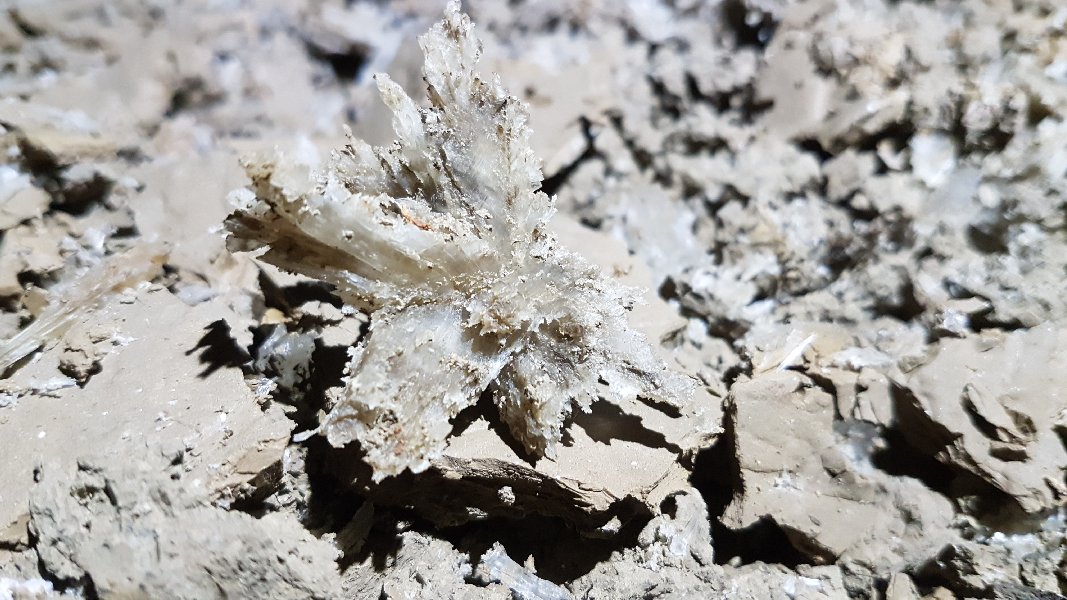 Selenite crystals.
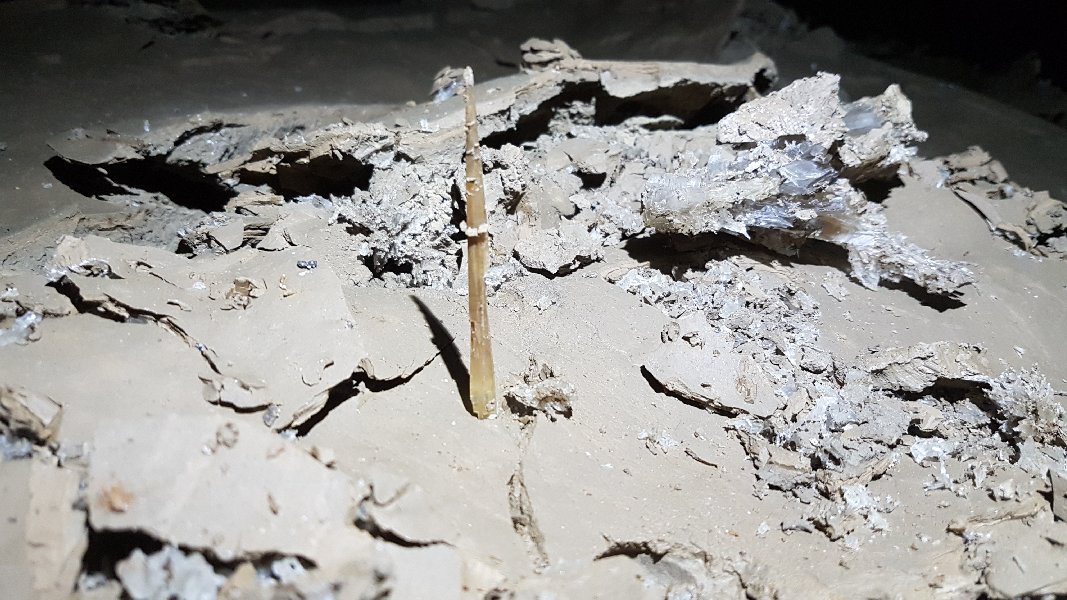 Some of the longest crystals are 15-20 cm (6-8 inches) in length.
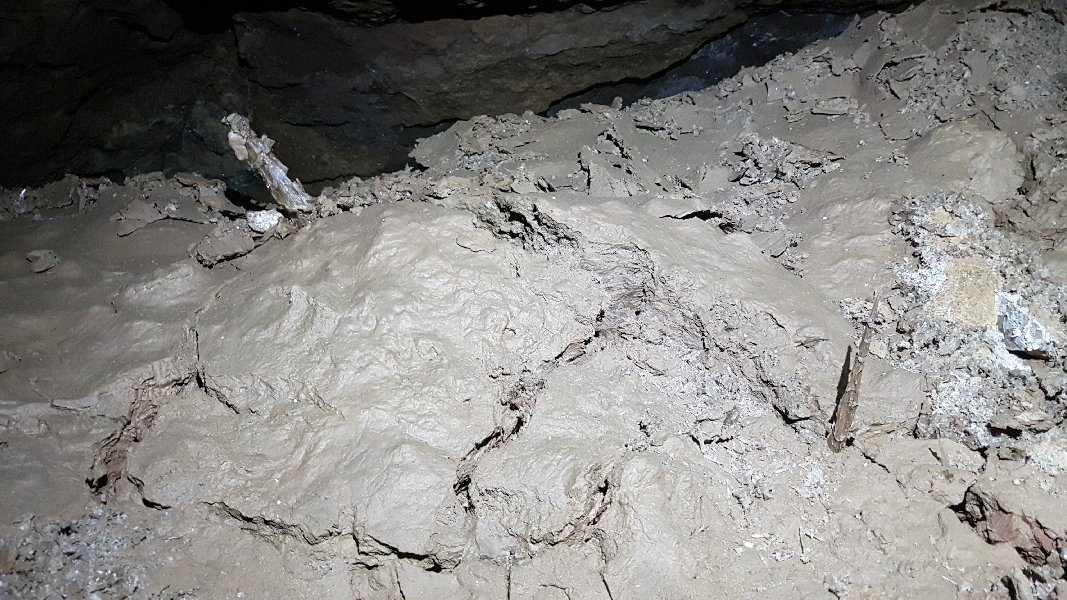 Selenite crystals.
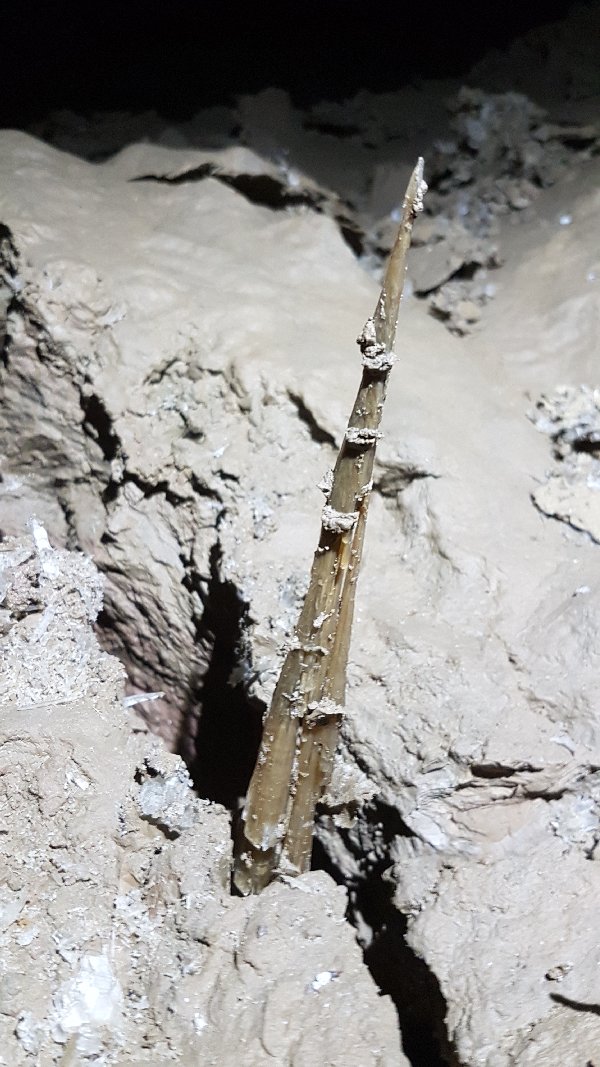 Selenite crystal.
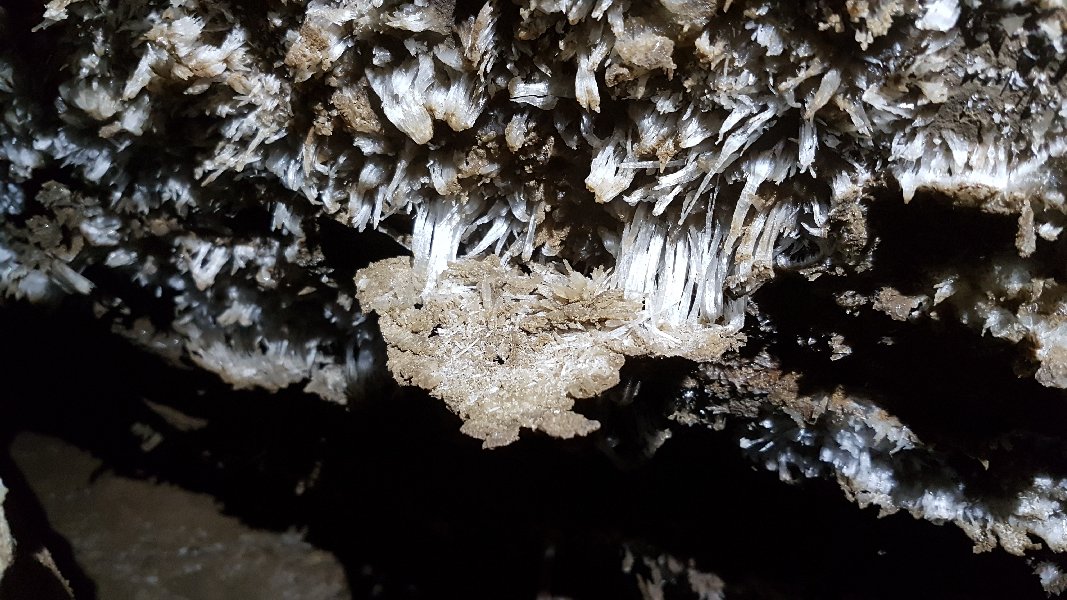 Gypsum crystals coating the wall, just for a change of pace. Gypsum and selenite are basically the same thing; calcium sulfate dihydrate. Selenite simply refers to the crystalline structure, and most gypsum crystals found in caves are of the selenite variety.
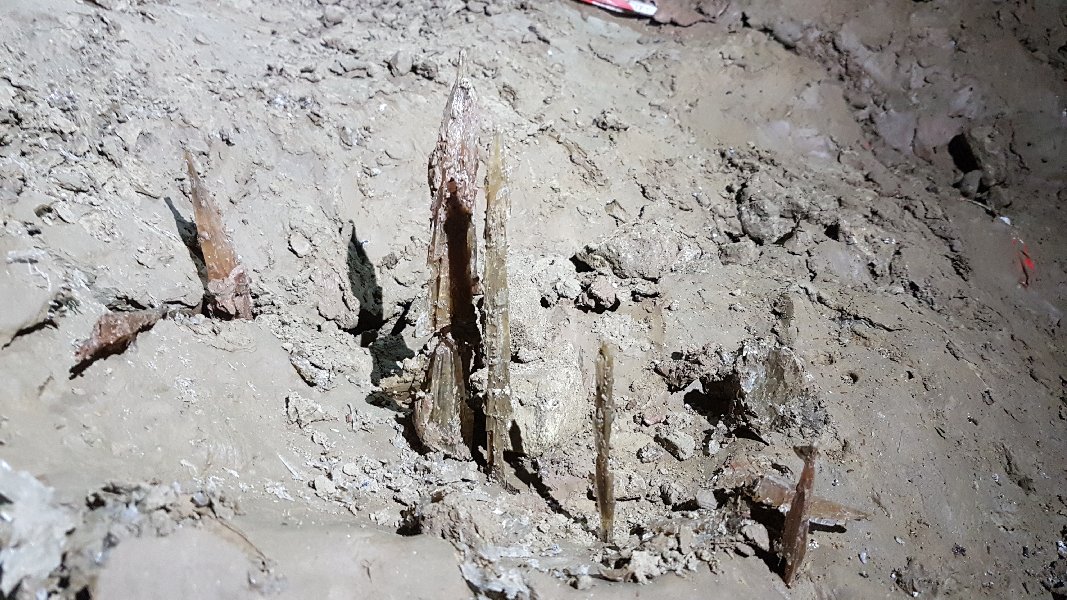 Some final selenite crystals.