Agen Allwedd Priory Road trip 20/01/2018
Unless otherwise stated, camera and setups by Tarquin, modelling by Pete Bolt, lighting by Tarquin, edits and gallery effects by Tarquin.
Agen Allwedd has traditionally apppeared to be a cave with almost no formations. There is in fact plenty of grand old stal in Turkey Streamway, a large cluster of attractive straws in Maytime, and a few side passages with minimal decorations, but there had been no areas matching the stunning helictite formations seen in all other major caves in the area. That all changed in 2005 when Isles Inlet was extended, and the cave finally gained its share. Other galleries have already covered the Entrance Series and Main Passage, so this gallery begins in Southern Stream.
 Southern Stream Passage can be roughly divided into thirds. The first "third" is about 500 m long, alternating between stooping and standing with a very occasional crawl, where the monotony is broken up by First Inlet at about half way. The section ends at Second Inlet, which provides drinking water.
Lighting by Tarquin and Pete
Southern Stream Passage can be roughly divided into thirds. The first "third" is about 500 m long, alternating between stooping and standing with a very occasional crawl, where the monotony is broken up by First Inlet at about half way. The section ends at Second Inlet, which provides drinking water.
Lighting by Tarquin and Pete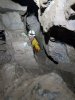 The second "third" is much more demanding, 600 metres alternating between stooping and crawling over boulder obstacles, with a very occasional standing section. This is the tightest squeeze, and is not particularly bad.
 Many of the crawls in this section are in the stream. While it is possible to stay dry by only leaning on the edges and occasional rocks, the passage already saps enough energy, so it is best to just get hands and knees wet.
Lighting by Tarquin and Pete
Many of the crawls in this section are in the stream. While it is possible to stay dry by only leaning on the edges and occasional rocks, the passage already saps enough energy, so it is best to just get hands and knees wet.
Lighting by Tarquin and Pete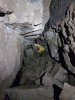 The second "third" eventually offers a substantial amount of walking, with the stream dropping significantly, but this is still broken up by occasional awkward spots.
Lighting by Tarquin and Pete
The second "third" eventually offers a substantial amount of walking, with the stream dropping significantly, but this is still broken up by occasional awkward spots.
Lighting by Tarquin and Pete A very obvious waterfall marks Waterfall Chamber, and the end of the difficult section.
Lighting by Tarquin and Pete
A very obvious waterfall marks Waterfall Chamber, and the end of the difficult section.
Lighting by Tarquin and Pete The final "third" is almost all walking, with only a couple of boulder obstacles, and narrower sections. As it approaches Main Stream, it requires awkward traversing on muddy ledges, but the route to Priory Road starts before that.
Lighting by Tarquin and Pete
The final "third" is almost all walking, with only a couple of boulder obstacles, and narrower sections. As it approaches Main Stream, it requires awkward traversing on muddy ledges, but the route to Priory Road starts before that.
Lighting by Tarquin and Pete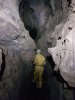 A large phreatic tube joins in the roof, which soon departs on its own to become Gothic Passage, our way on.
Lighting by Tarquin and Pete
A large phreatic tube joins in the roof, which soon departs on its own to become Gothic Passage, our way on.
Lighting by Tarquin and Pete Tucked into alcoves in the upper tube are several large senelite crystals.
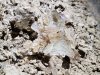 These are similar to the ones seen in Main Passage and in side passages beyond Keyhole Passage, as well as Draenen's Megadrive, but much larger.
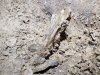 Their origin is not fully understood. Perhaps some are cryogenic, since they are often found in the same sort of mud as cryostal, but the ones in Main Passage are on very different mud without evidence of permafrost effects.
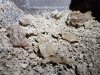 Crystals.
 Stoops and crawls then lead into Priory Road, which begins with some very obvious deposits of cryostal and gypsum snowdrifts, sitting on the characteristic bobbly mud.
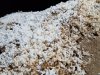 Beautiful textured cryostal.
 Unexpectedly, this cryostal is a very long way underground, nearly twice the depth that it is seen in Draenen. This implies that the ice age that created it was particularly powerful, causing permafrost to reach this incredible depth.
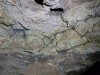 The passage intersects the Nodular Bed. In other parts of the cave, the nodules often can be seen to be fossil brain corals, separated by mudstone. These would appear to be some examples too.
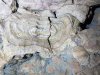 A beautiful example with elaborate growth rings.
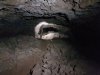 The largest and most impressive part of Priory Road, which remains walking or stooping for most of the route to Isles Inlet. After that, it becomes lower, with a crawl that turns into a sand swim.
Lighting by Tarquin and Pete
The largest and most impressive part of Priory Road, which remains walking or stooping for most of the route to Isles Inlet. After that, it becomes lower, with a crawl that turns into a sand swim.
Lighting by Tarquin and Pete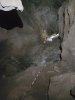 The sand swim ends abruptly at Glevum Hall, an unexpectedly large, phreatic chamber, with avens that have been climbed, one of which was adorned with a badly rusted ladder and SRT rope.
Lighting by Tarquin and Pete
The sand swim ends abruptly at Glevum Hall, an unexpectedly large, phreatic chamber, with avens that have been climbed, one of which was adorned with a badly rusted ladder and SRT rope.
Lighting by Tarquin and Pete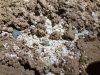 Once again, there is some cryostal on the floor.
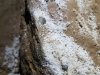 Cryostal.
 The way on soon degenrates to an area with mud fill, and several crawls and squeezes finally give access to a warren of extensive digs, at the Sick Parrot Extensions. The camp here must have seen a great deal of very determined use, with an immense amount of digging effort taking place in any possible side passage. We had heard a recent rumour of a possible connection here with Daren Cilau, and checked all of the likely places (and most of the unlikely ones), but did not find anything. We left a few that were simply too tight to want to check out, and lined with undisturbed mould.
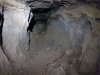 Isles Inlet begins as a twisting phreatic passage, with some crazy digs and multiple squeezes.
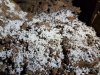 Cryostal in Isles Inlet. This part of the passage is right beside Glevum Hall, so the two sets of deposits may be related.
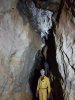 The character changes completely at Trafalgar Passage, where the passage suddenly gains a very impressive set of formations.
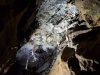 The formations in Trafalgar Passage.
Lighting by Pete
The formations in Trafalgar Passage.
Lighting by Pete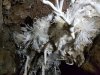 Trafalgar Passage anthodites and helictites.
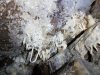 Trafalgar Passage helictites.
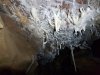 Coat hooks.
 Stalagmites below the anthodites.
Lighting by Tarquin and Pete
Stalagmites below the anthodites.
Lighting by Tarquin and Pete Stalagmites below the helictites.
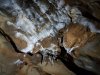 Whitewashed ceiling.
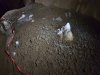 Stalagmites below the whitewash. The white ring is a splash ring, calcite deposited by the drips splashing on the stalagmite. It is not cryostal, even though it sits on the correct mud.
Lighting by Tarquin and Pete
Stalagmites below the whitewash. The white ring is a splash ring, calcite deposited by the drips splashing on the stalagmite. It is not cryostal, even though it sits on the correct mud.
Lighting by Tarquin and Pete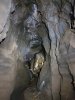 The formations become less elaborate.
Lighting by Tarquin and Pete
The formations become less elaborate.
Lighting by Tarquin and Pete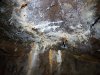 Some meagre little stalactites.
 Flowstone and crystal pools below.
 The incredible anthodites then return, with some straws.
Lighting by Tarquin and Pete
The incredible anthodites then return, with some straws.
Lighting by Tarquin and Pete Anthodites on straw colums. The straws are so covered in crystals that they appear furry.
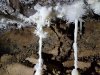 Anthodite columns.
Lighting by Pete
Anthodite columns.
Lighting by Pete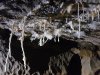 Anthodite urchins.
Lighting by Pete
Anthodite urchins.
Lighting by Pete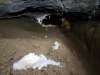 Another superb set adorn the passage where it becomes crawling sized.
Lighting by Tarquin and Pete
Another superb set adorn the passage where it becomes crawling sized.
Lighting by Tarquin and Pete These may be the last helictites in the passage, but they are also one of the best sets, with incredible detail, and even some fallen helictites on the mud.
 The last stal. From here, the passage lowers to a dig, which descends steeply, and ends abruptly at a dig face. It will connect with The Bunker in Priory Road, which is only a few metres away.
Lighting by Pete
The last stal. From here, the passage lowers to a dig, which descends steeply, and ends abruptly at a dig face. It will connect with The Bunker in Priory Road, which is only a few metres away.
Lighting by Pete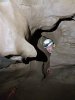 A side passage immediately before the first Trafalgar Passage formations leads up a slightly awkward and steeply sloping squeeze into Corkscrew Chamber.
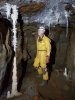 The absolute highlight of Corkscrew Chamber is The Courtesan, the most elaborate helictite formation in the cave, and over a metre long. By comparison, the similarly tall stalagmite seems abnormally plain. The entry squeeze to the chamber can be seen to the left, at knee height.
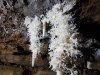 The highly elaborate top of The Courtesan.
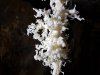 Thicker helictites in the middle.
Lighting by Pete
Thicker helictites in the middle.
Lighting by Pete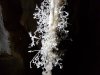 The incredibly intricate part near the bottom of The Courtesan.
Lighting by Pete
The incredibly intricate part near the bottom of The Courtesan.
Lighting by Pete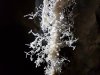 The Courtesan - the same part near the bottom.
Lighting by Pete
The Courtesan - the same part near the bottom.
Lighting by Pete Helictites and thick straws at the start of Corkscrew Chamber.
 Corkscrew Chamber left wall.
Lighting by Tarquin and Pete
Corkscrew Chamber left wall.
Lighting by Tarquin and Pete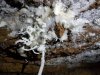 Left wall.
 Helictites and anthodites on the left wall.
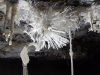 Anthodite detail.
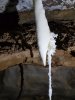 A stalactite that changed its mind.
Lighting by Pete
A stalactite that changed its mind.
Lighting by Pete Furry straw.
Lighting by Pete
Furry straw.
Lighting by Pete Right wall.
Lighting Pete
Right wall.
Lighting Pete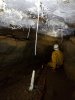 End of Corkscrew Chamber.
Lighting by Tarquin and Pete
End of Corkscrew Chamber.
Lighting by Tarquin and Pete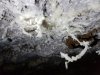 End of Corkscrew Chamber.
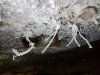 End of Corkscrew Chamber.
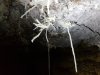 End of Corkscrew Chamber.
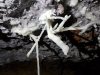 End of Corkscrew Chamber.
 End of Corkscrew Chamber.
Lighting by Tarquin and Pete
End of Corkscrew Chamber.
Lighting by Tarquin and Pete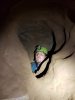 Very awkward squeeze leading onwards. Feet first, up 2 foot into the eyehole, then down 4 foot on the other side. Pete found this impossible, and was not able to turn the corner, so I did the rest of the passage alone. Several further squeezes then ended up in the low and muddy Broadside. A side passage to the right ends in a dig, with a tight side branch ascending through a choke with a strong smell of recent chemical engineering, and a high level side rift that was not checked but shows as pinching out on the survey. A side passage on the left and the end of the chamber itself both end in digs pointing towards Daren Cilau.
Camera, setup and lighting by Pete, modelling by Tarquin
Very awkward squeeze leading onwards. Feet first, up 2 foot into the eyehole, then down 4 foot on the other side. Pete found this impossible, and was not able to turn the corner, so I did the rest of the passage alone. Several further squeezes then ended up in the low and muddy Broadside. A side passage to the right ends in a dig, with a tight side branch ascending through a choke with a strong smell of recent chemical engineering, and a high level side rift that was not checked but shows as pinching out on the survey. A side passage on the left and the end of the chamber itself both end in digs pointing towards Daren Cilau.
Camera, setup and lighting by Pete, modelling by Tarquin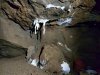 Formations in Broadside.
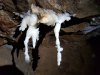 Formations in Broadside.
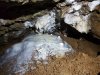 Formations in Broadside.
 Formations in Broadside.
 Formations in Broadside.
 The final formation in Broadside, and the end of this branch of the cave.
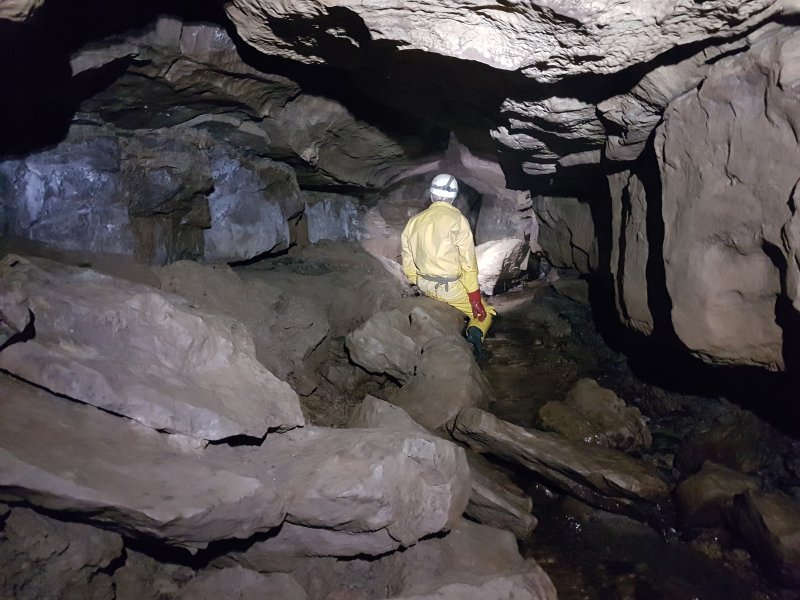 Southern Stream Passage can be roughly divided into thirds. The first "third" is about 500 m long, alternating between stooping and standing with a very occasional crawl, where the monotony is broken up by First Inlet at about half way. The section ends at Second Inlet, which provides drinking water.
Lighting by Tarquin and Pete
Southern Stream Passage can be roughly divided into thirds. The first "third" is about 500 m long, alternating between stooping and standing with a very occasional crawl, where the monotony is broken up by First Inlet at about half way. The section ends at Second Inlet, which provides drinking water.
Lighting by Tarquin and Pete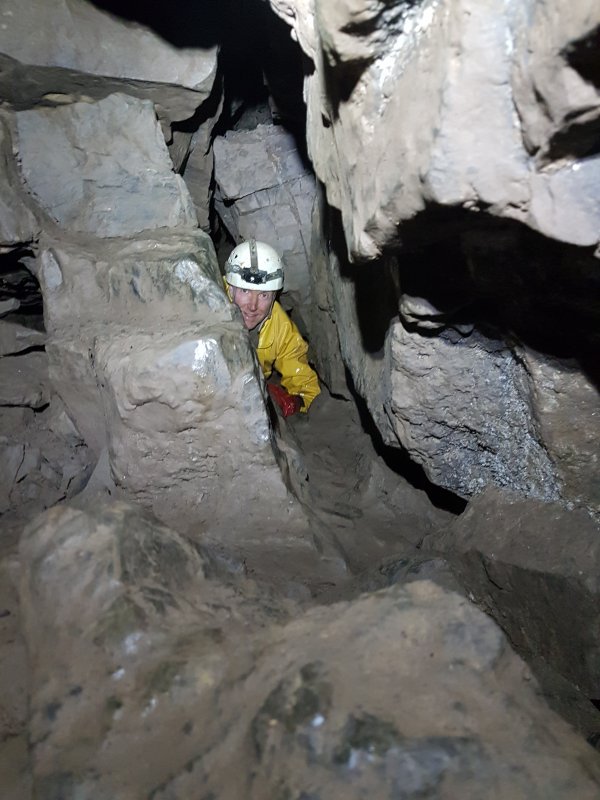 The second "third" is much more demanding, 600 metres alternating between stooping and crawling over boulder obstacles, with a very occasional standing section. This is the tightest squeeze, and is not particularly bad.
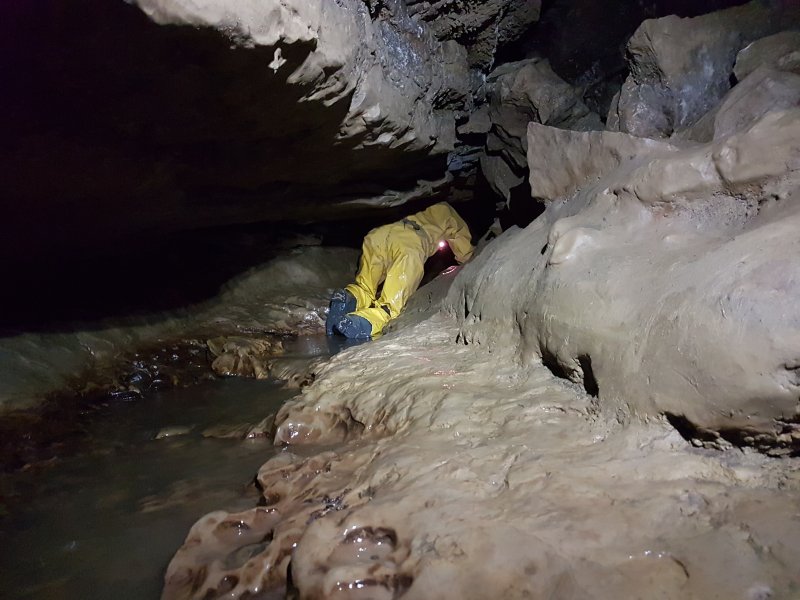 Many of the crawls in this section are in the stream. While it is possible to stay dry by only leaning on the edges and occasional rocks, the passage already saps enough energy, so it is best to just get hands and knees wet.
Lighting by Tarquin and Pete
Many of the crawls in this section are in the stream. While it is possible to stay dry by only leaning on the edges and occasional rocks, the passage already saps enough energy, so it is best to just get hands and knees wet.
Lighting by Tarquin and Pete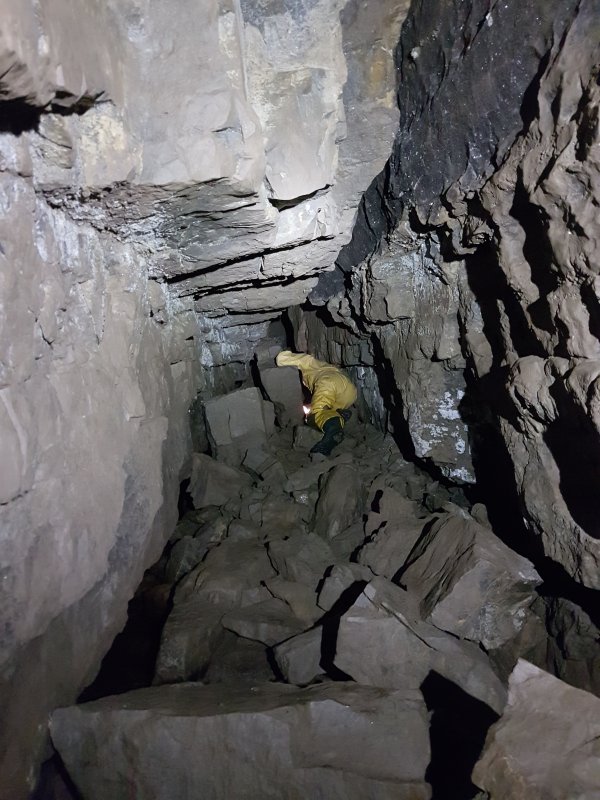 The second "third" eventually offers a substantial amount of walking, with the stream dropping significantly, but this is still broken up by occasional awkward spots.
Lighting by Tarquin and Pete
The second "third" eventually offers a substantial amount of walking, with the stream dropping significantly, but this is still broken up by occasional awkward spots.
Lighting by Tarquin and Pete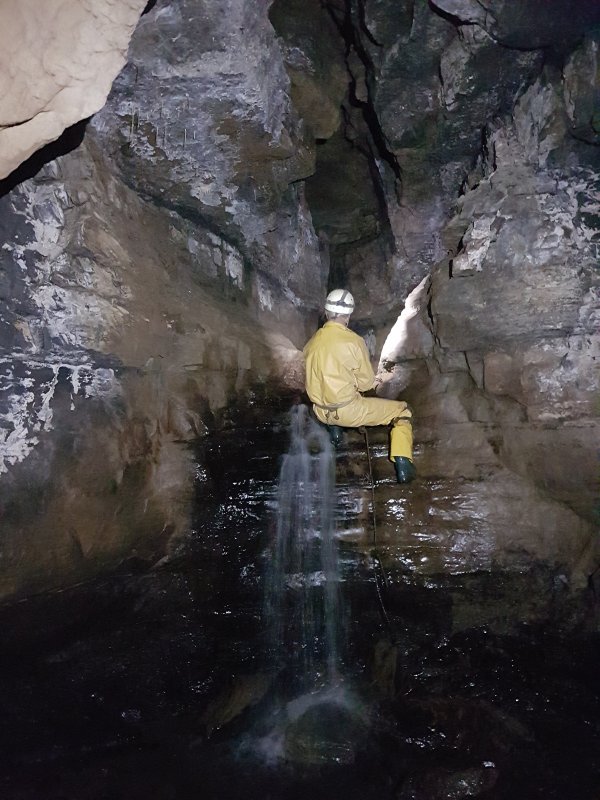 A very obvious waterfall marks Waterfall Chamber, and the end of the difficult section.
Lighting by Tarquin and Pete
A very obvious waterfall marks Waterfall Chamber, and the end of the difficult section.
Lighting by Tarquin and Pete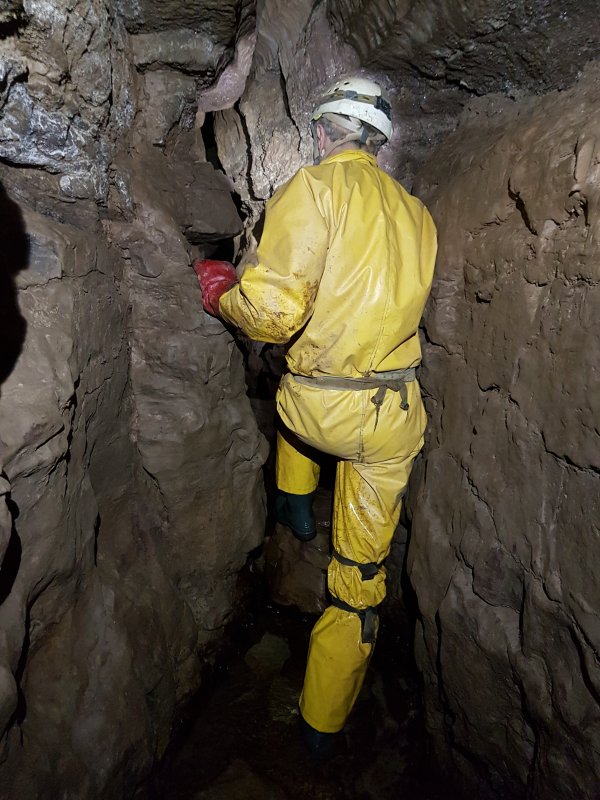 The final "third" is almost all walking, with only a couple of boulder obstacles, and narrower sections. As it approaches Main Stream, it requires awkward traversing on muddy ledges, but the route to Priory Road starts before that.
Lighting by Tarquin and Pete
The final "third" is almost all walking, with only a couple of boulder obstacles, and narrower sections. As it approaches Main Stream, it requires awkward traversing on muddy ledges, but the route to Priory Road starts before that.
Lighting by Tarquin and Pete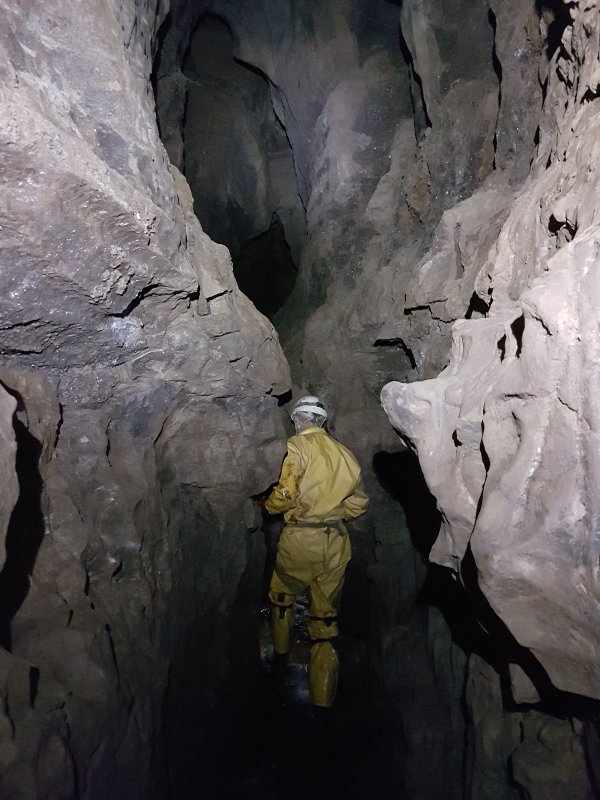 A large phreatic tube joins in the roof, which soon departs on its own to become Gothic Passage, our way on.
Lighting by Tarquin and Pete
A large phreatic tube joins in the roof, which soon departs on its own to become Gothic Passage, our way on.
Lighting by Tarquin and Pete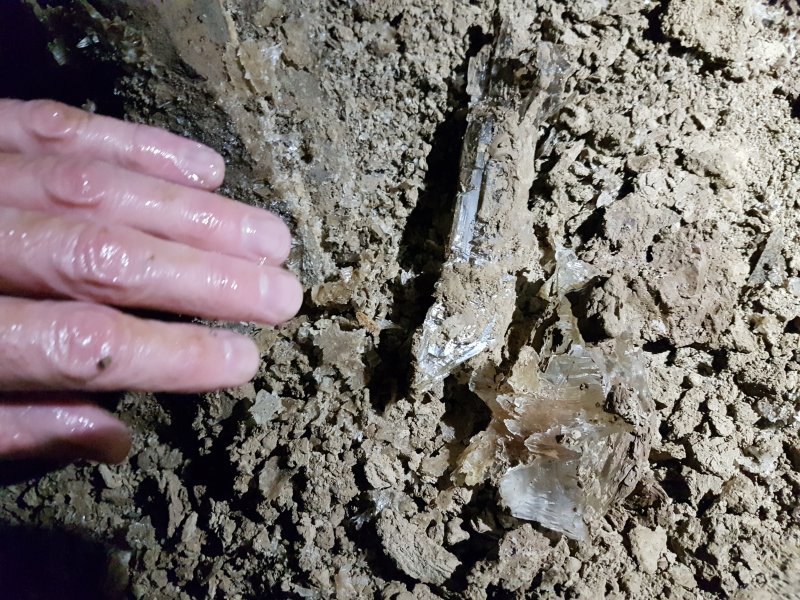 Tucked into alcoves in the upper tube are several large senelite crystals.
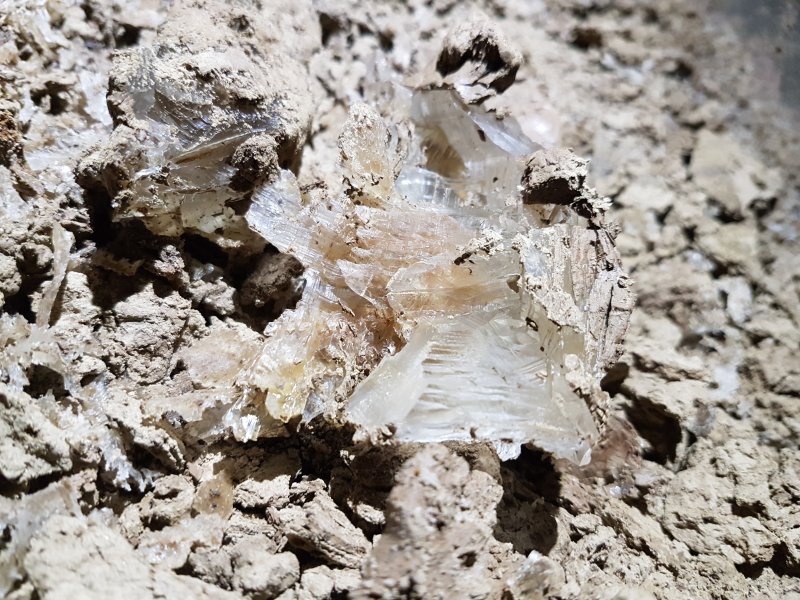 These are similar to the ones seen in Main Passage and in side passages beyond Keyhole Passage, as well as Draenen's Megadrive, but much larger.
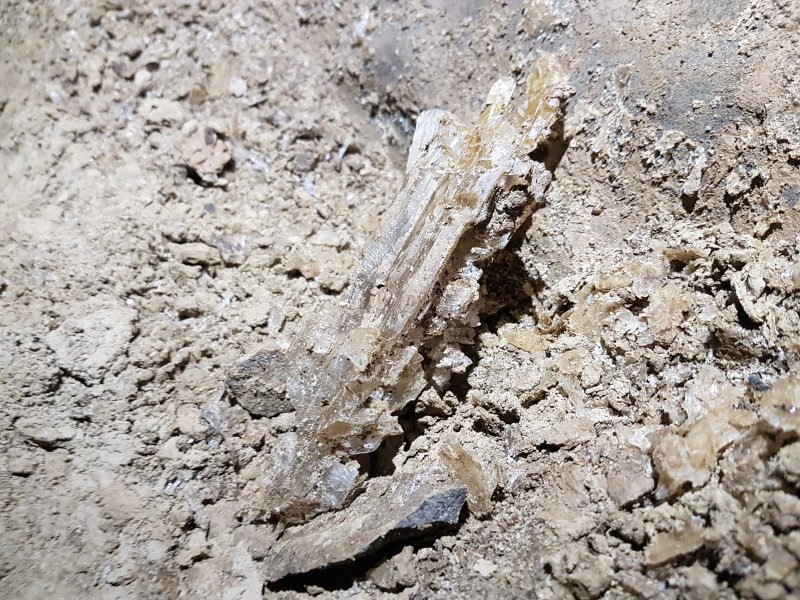 Their origin is not fully understood. Perhaps some are cryogenic, since they are often found in the same sort of mud as cryostal, but the ones in Main Passage are on very different mud without evidence of permafrost effects.
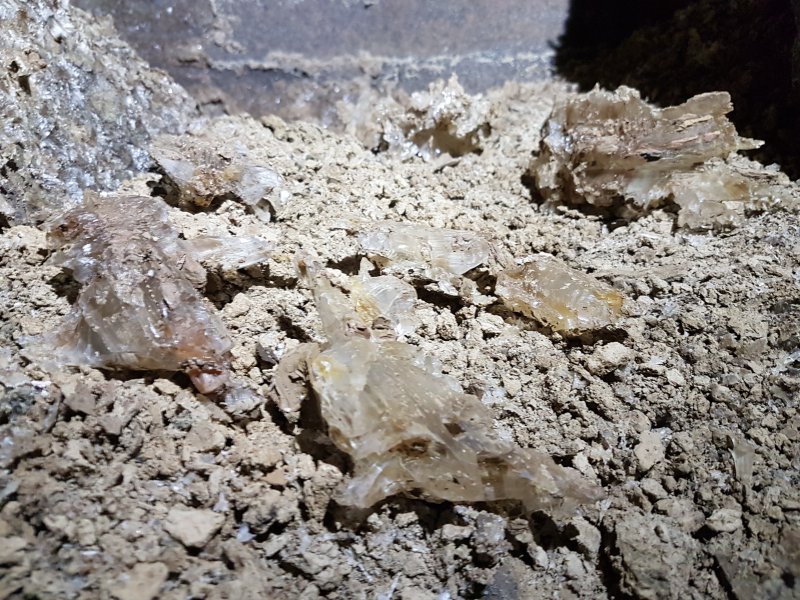 Crystals.
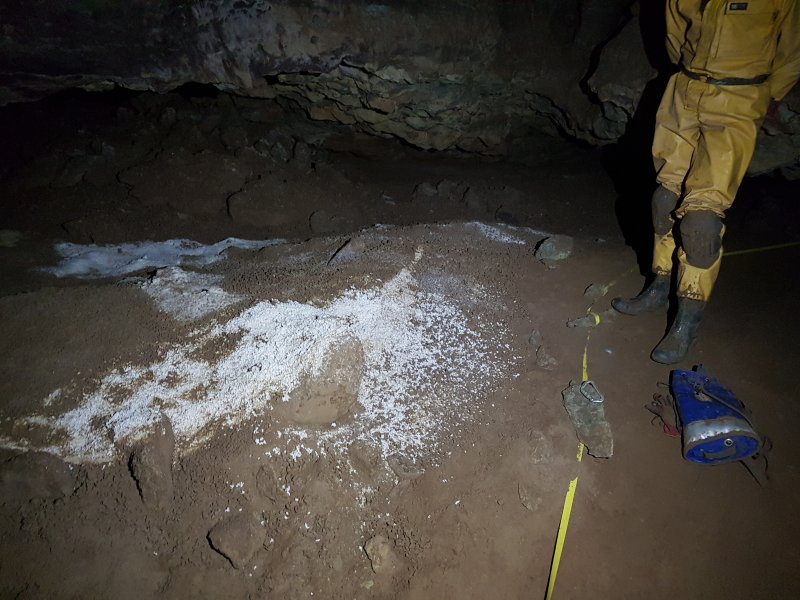 Stoops and crawls then lead into Priory Road, which begins with some very obvious deposits of cryostal and gypsum snowdrifts, sitting on the characteristic bobbly mud.
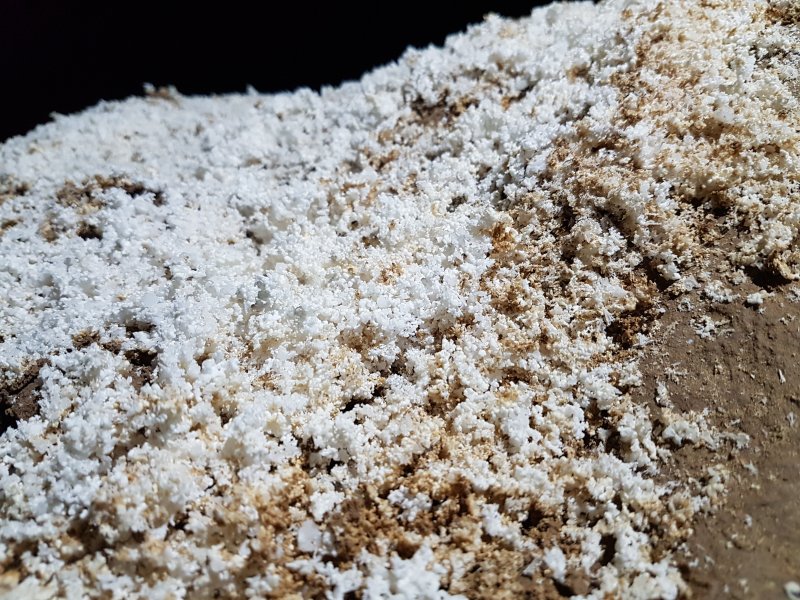 Beautiful textured cryostal.
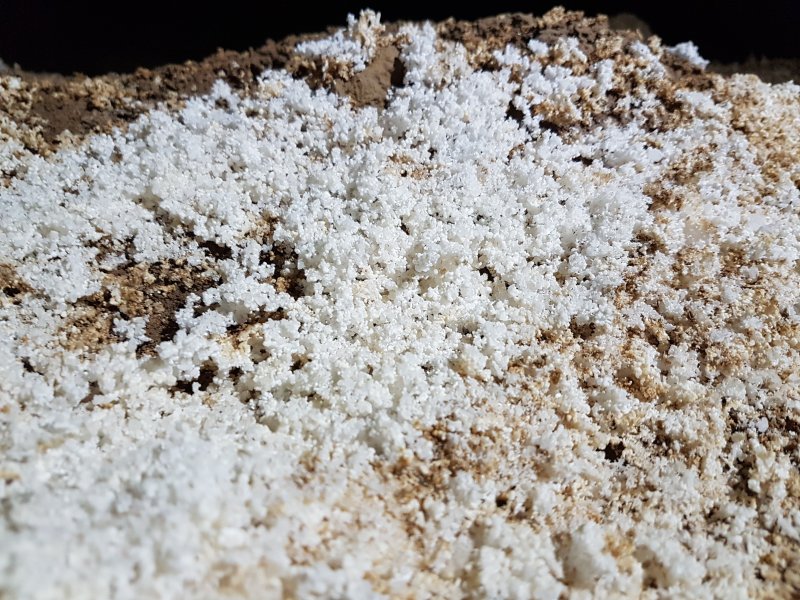 Unexpectedly, this cryostal is a very long way underground, nearly twice the depth that it is seen in Draenen. This implies that the ice age that created it was particularly powerful, causing permafrost to reach this incredible depth.
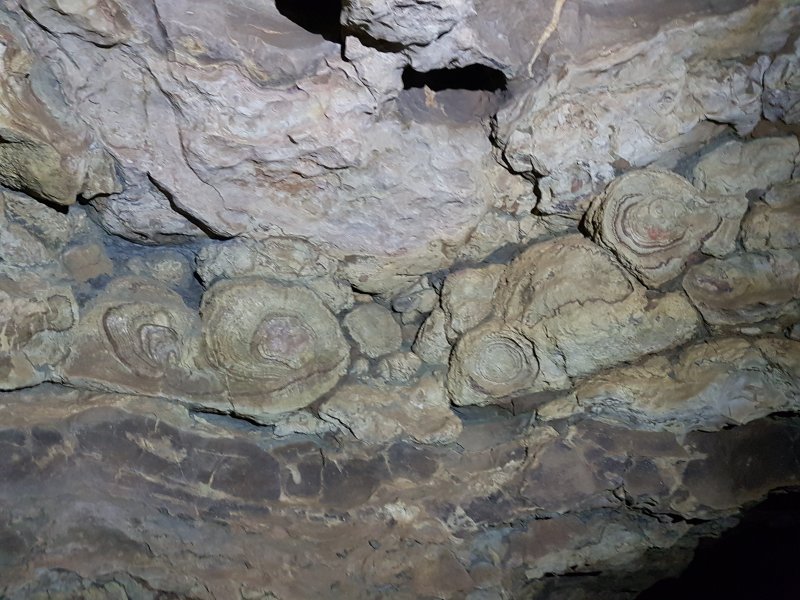 The passage intersects the Nodular Bed. In other parts of the cave, the nodules often can be seen to be fossil brain corals, separated by mudstone. These would appear to be some examples too.
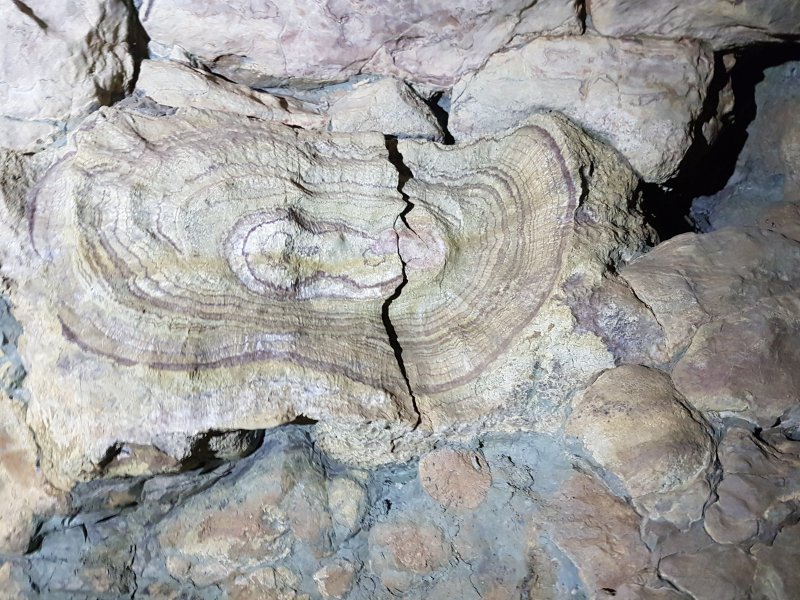 A beautiful example with elaborate growth rings.
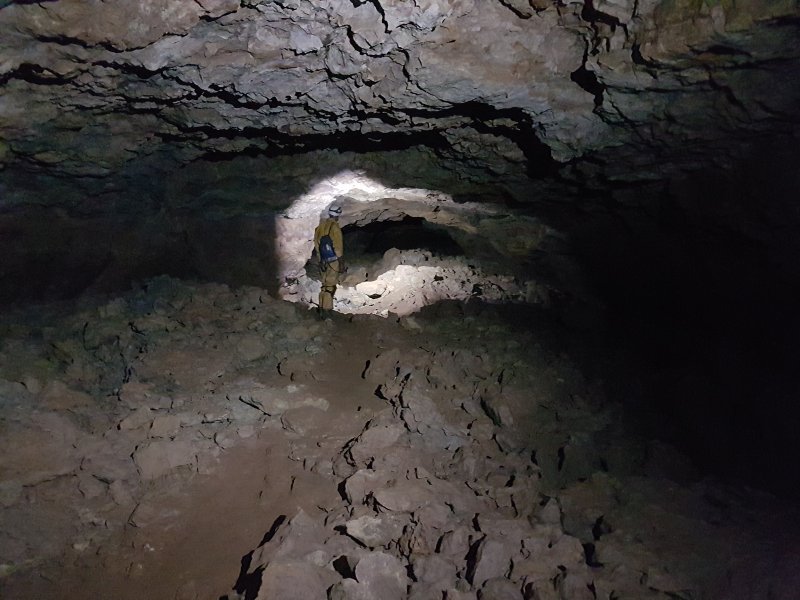 The largest and most impressive part of Priory Road, which remains walking or stooping for most of the route to Isles Inlet. After that, it becomes lower, with a crawl that turns into a sand swim.
Lighting by Tarquin and Pete
The largest and most impressive part of Priory Road, which remains walking or stooping for most of the route to Isles Inlet. After that, it becomes lower, with a crawl that turns into a sand swim.
Lighting by Tarquin and Pete The sand swim ends abruptly at Glevum Hall, an unexpectedly large, phreatic chamber, with avens that have been climbed, one of which was adorned with a badly rusted ladder and SRT rope.
Lighting by Tarquin and Pete
The sand swim ends abruptly at Glevum Hall, an unexpectedly large, phreatic chamber, with avens that have been climbed, one of which was adorned with a badly rusted ladder and SRT rope.
Lighting by Tarquin and Pete Once again, there is some cryostal on the floor.
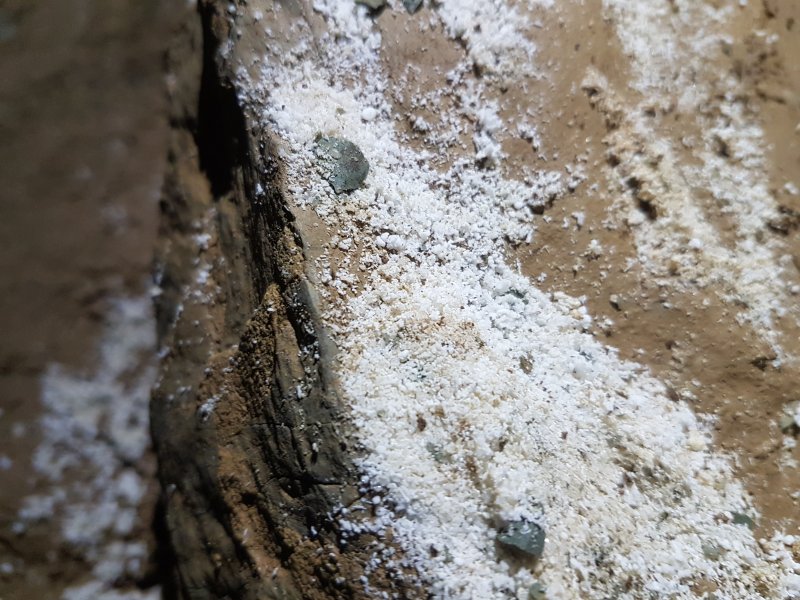 Cryostal.
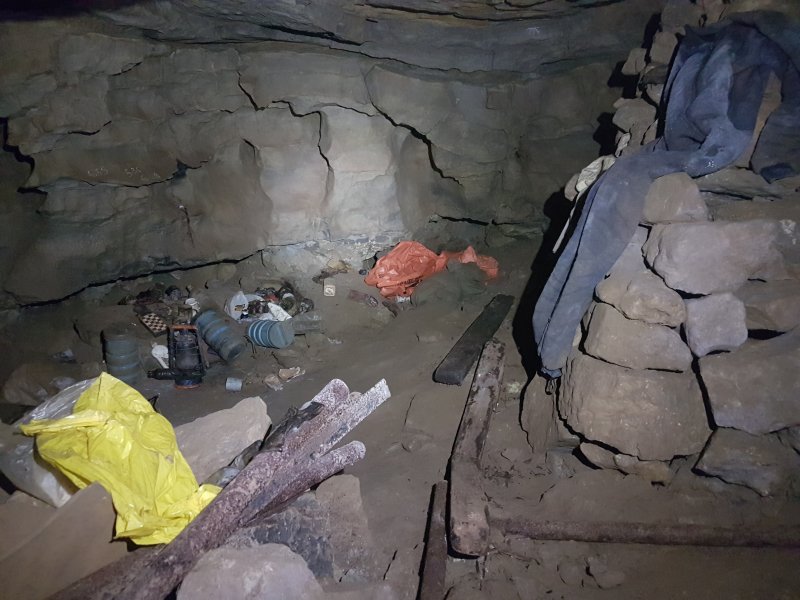 The way on soon degenrates to an area with mud fill, and several crawls and squeezes finally give access to a warren of extensive digs, at the Sick Parrot Extensions. The camp here must have seen a great deal of very determined use, with an immense amount of digging effort taking place in any possible side passage. We had heard a recent rumour of a possible connection here with Daren Cilau, and checked all of the likely places (and most of the unlikely ones), but did not find anything. We left a few that were simply too tight to want to check out, and lined with undisturbed mould.
 Isles Inlet begins as a twisting phreatic passage, with some crazy digs and multiple squeezes.
 Cryostal in Isles Inlet. This part of the passage is right beside Glevum Hall, so the two sets of deposits may be related.
 The character changes completely at Trafalgar Passage, where the passage suddenly gains a very impressive set of formations.
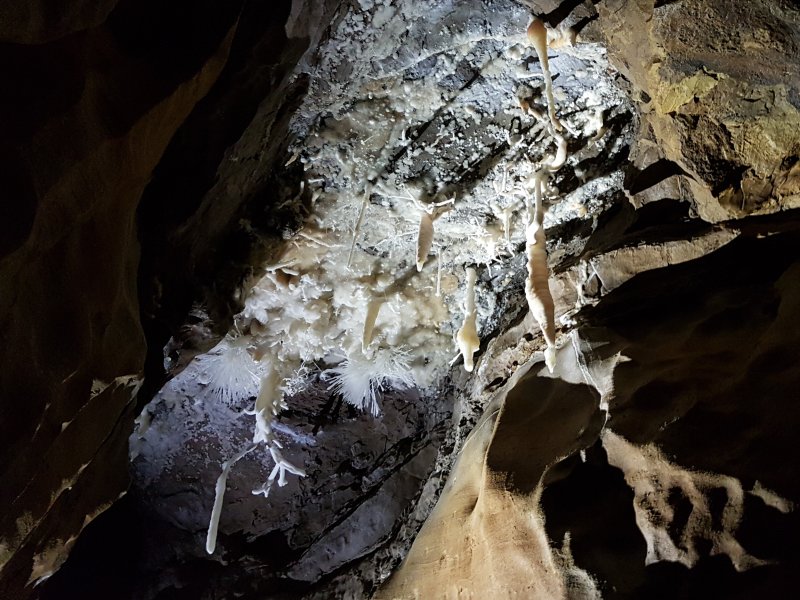 The formations in Trafalgar Passage.
Lighting by Pete
The formations in Trafalgar Passage.
Lighting by Pete Trafalgar Passage anthodites and helictites.
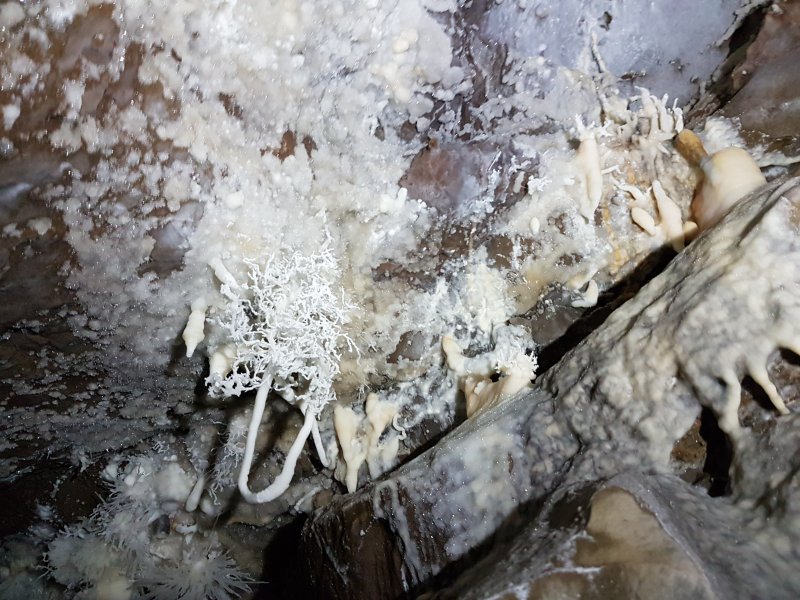 Trafalgar Passage helictites.
 Coat hooks.
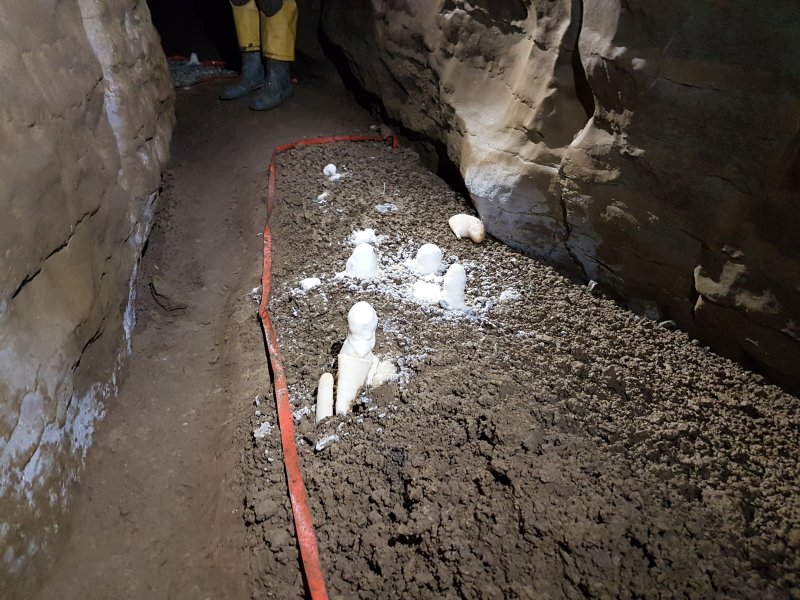 Stalagmites below the anthodites.
Lighting by Tarquin and Pete
Stalagmites below the anthodites.
Lighting by Tarquin and Pete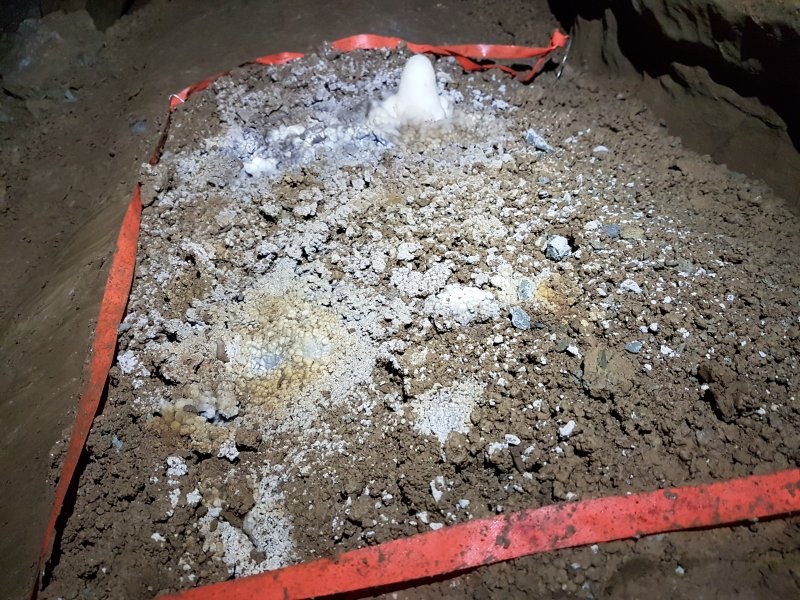 Stalagmites below the helictites.
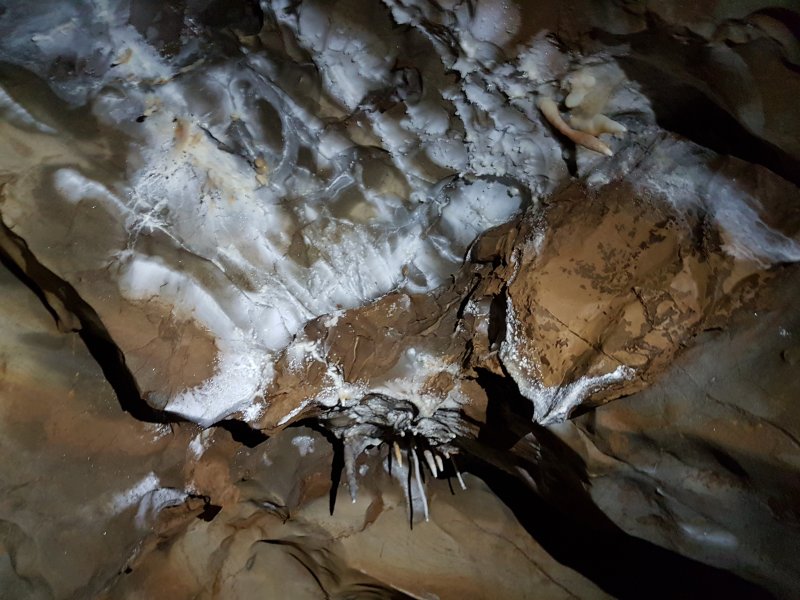 Whitewashed ceiling.
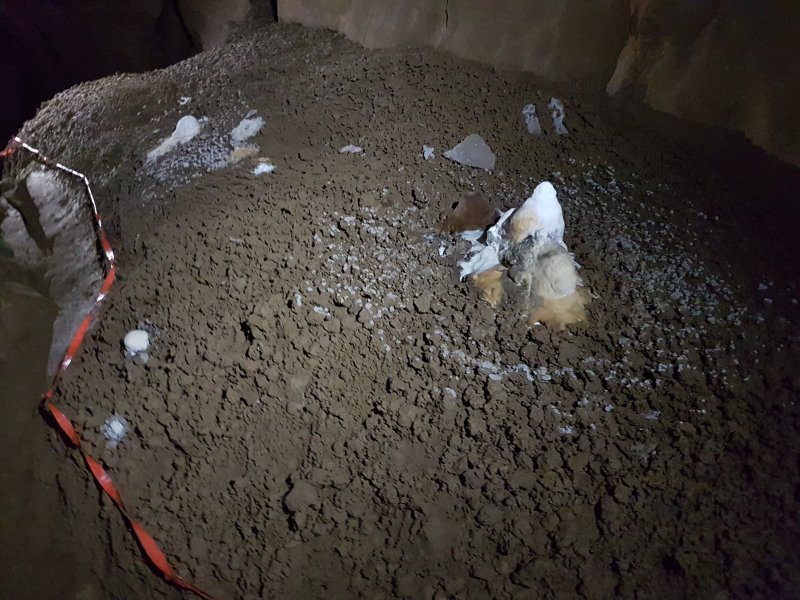 Stalagmites below the whitewash. The white ring is a splash ring, calcite deposited by the drips splashing on the stalagmite. It is not cryostal, even though it sits on the correct mud.
Lighting by Tarquin and Pete
Stalagmites below the whitewash. The white ring is a splash ring, calcite deposited by the drips splashing on the stalagmite. It is not cryostal, even though it sits on the correct mud.
Lighting by Tarquin and Pete The formations become less elaborate.
Lighting by Tarquin and Pete
The formations become less elaborate.
Lighting by Tarquin and Pete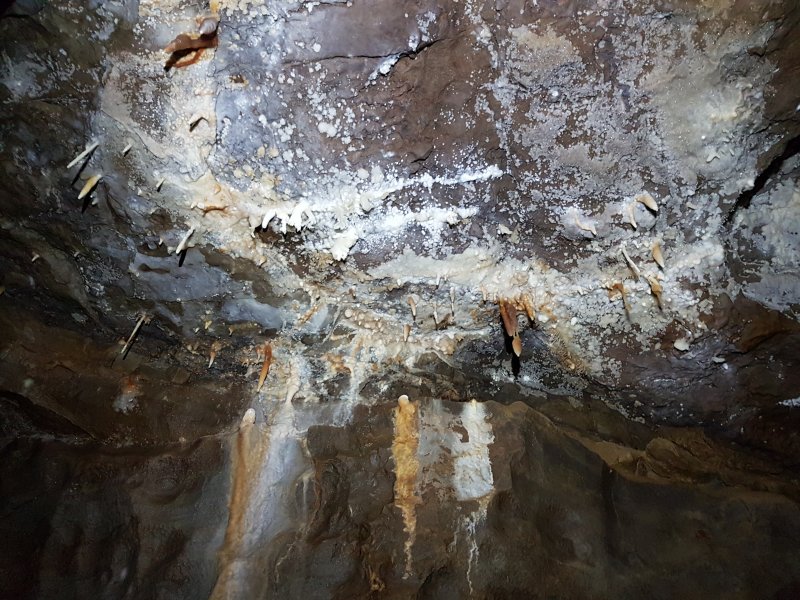 Some meagre little stalactites.
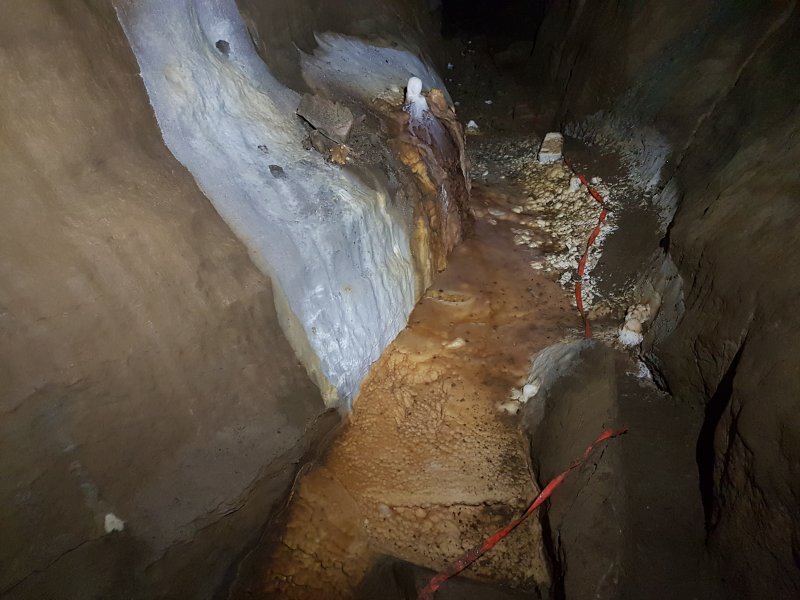 Flowstone and crystal pools below.
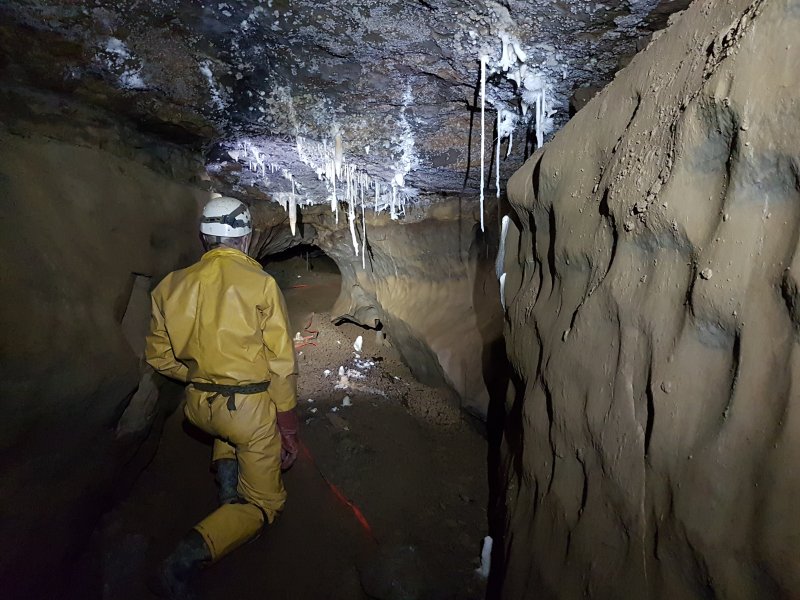 The incredible anthodites then return, with some straws.
Lighting by Tarquin and Pete
The incredible anthodites then return, with some straws.
Lighting by Tarquin and Pete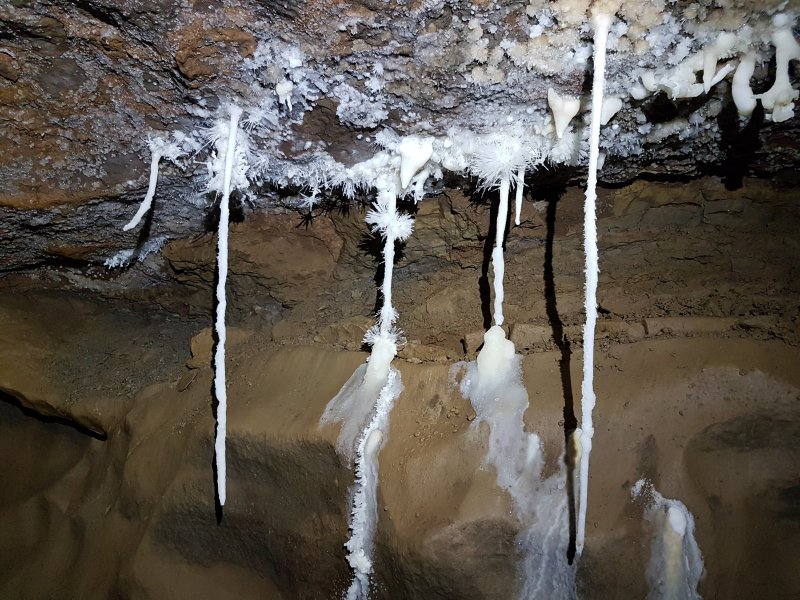 Anthodites on straw colums. The straws are so covered in crystals that they appear furry.
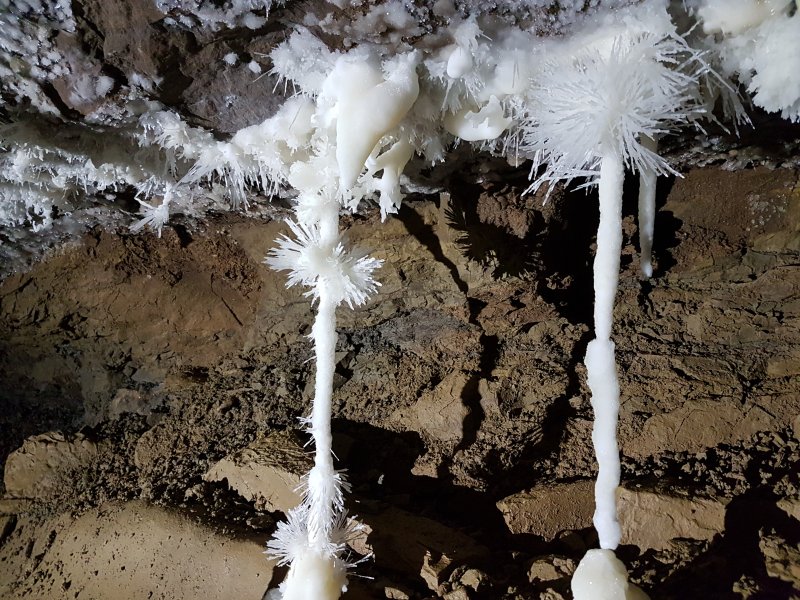 Anthodite columns.
Lighting by Pete
Anthodite columns.
Lighting by Pete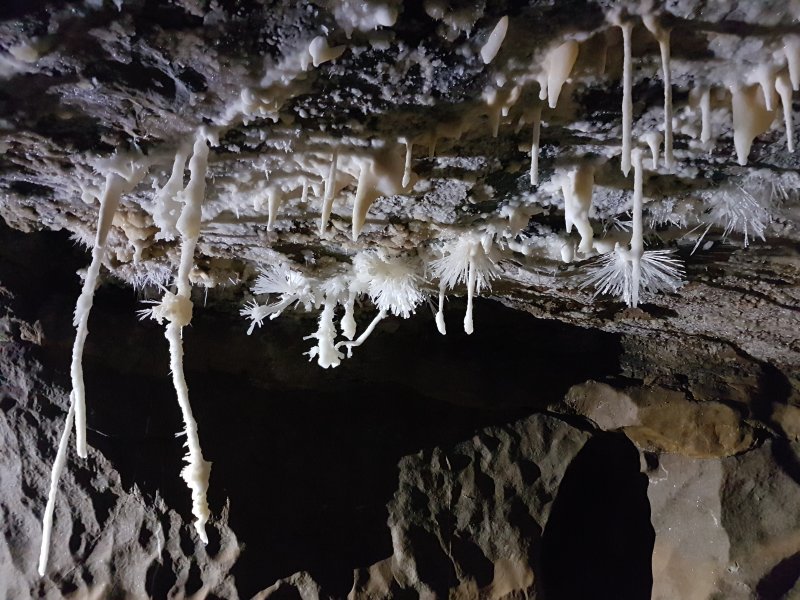 Anthodite urchins.
Lighting by Pete
Anthodite urchins.
Lighting by Pete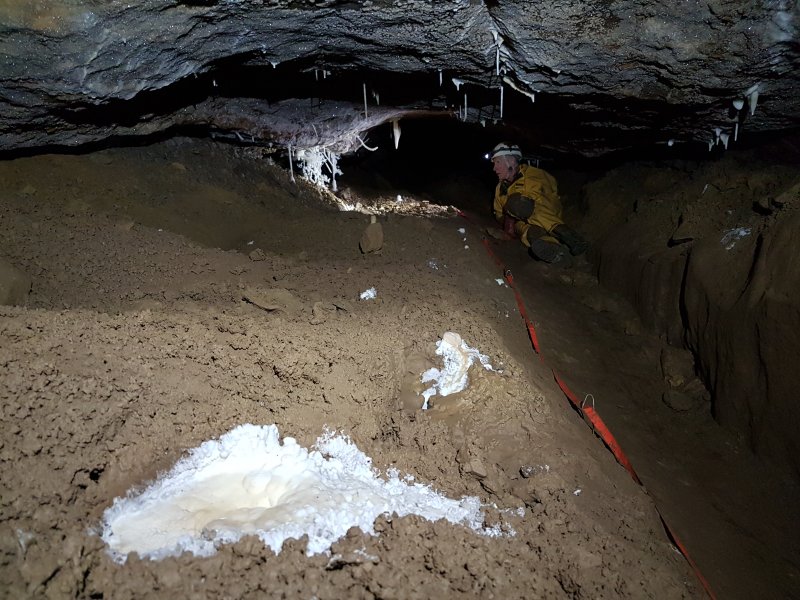 Another superb set adorn the passage where it becomes crawling sized.
Lighting by Tarquin and Pete
Another superb set adorn the passage where it becomes crawling sized.
Lighting by Tarquin and Pete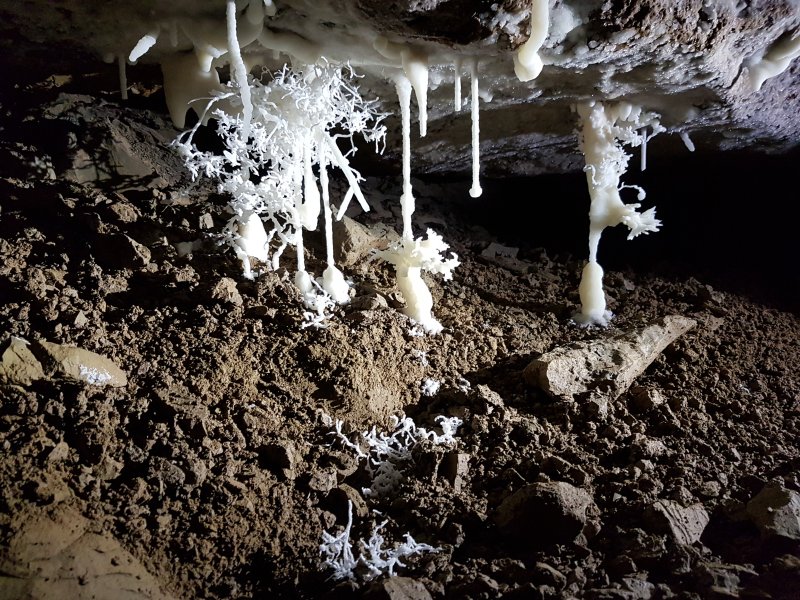 These may be the last helictites in the passage, but they are also one of the best sets, with incredible detail, and even some fallen helictites on the mud.
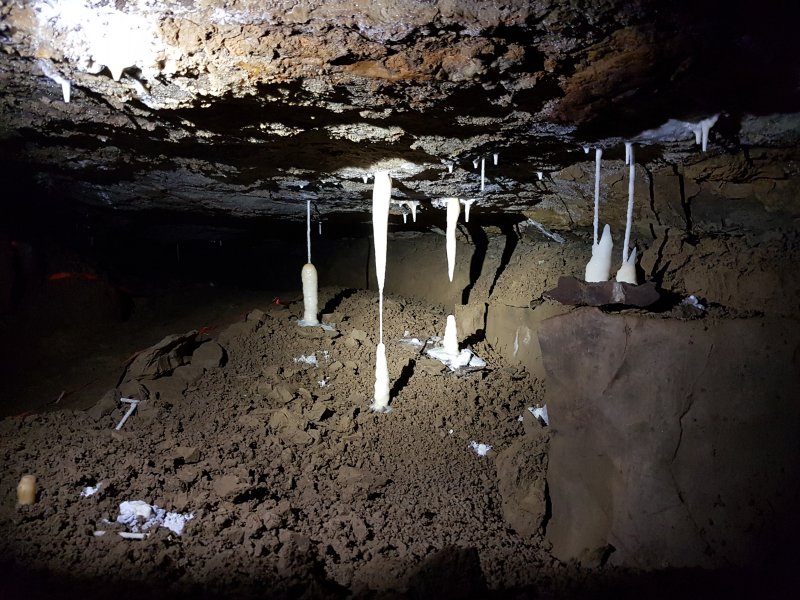 The last stal. From here, the passage lowers to a dig, which descends steeply, and ends abruptly at a dig face. It will connect with The Bunker in Priory Road, which is only a few metres away.
Lighting by Pete
The last stal. From here, the passage lowers to a dig, which descends steeply, and ends abruptly at a dig face. It will connect with The Bunker in Priory Road, which is only a few metres away.
Lighting by Pete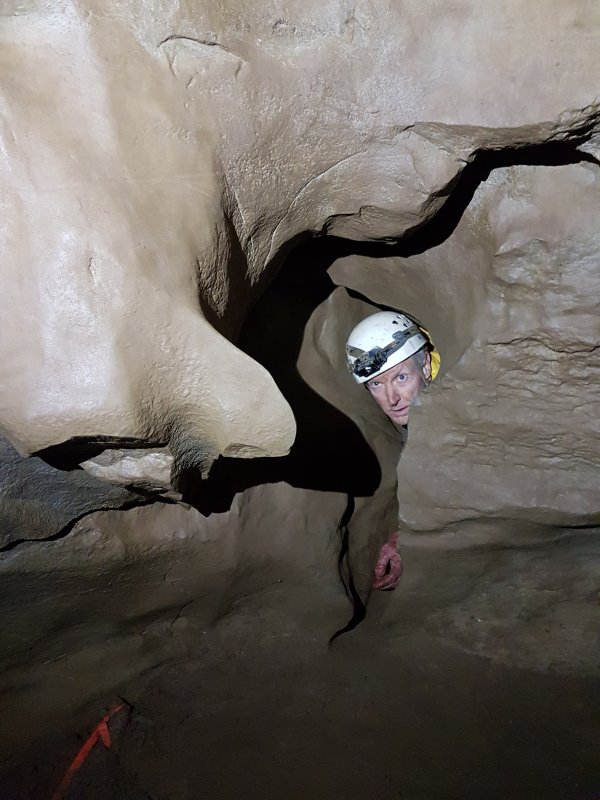 A side passage immediately before the first Trafalgar Passage formations leads up a slightly awkward and steeply sloping squeeze into Corkscrew Chamber.
 The absolute highlight of Corkscrew Chamber is The Courtesan, the most elaborate helictite formation in the cave, and over a metre long. By comparison, the similarly tall stalagmite seems abnormally plain. The entry squeeze to the chamber can be seen to the left, at knee height.
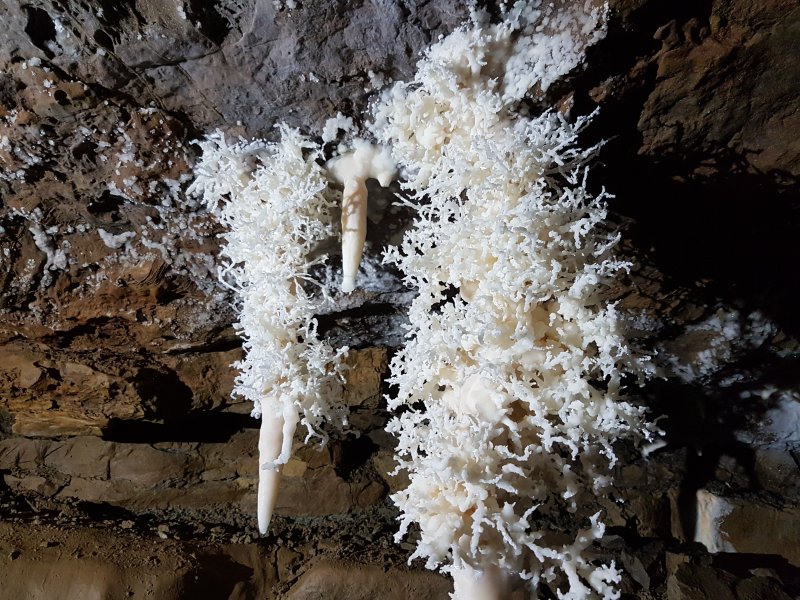 The highly elaborate top of The Courtesan.
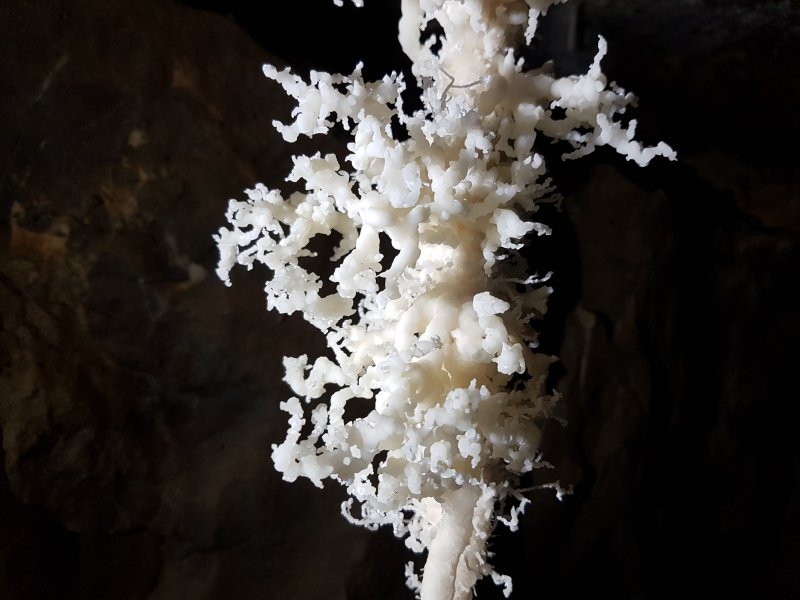 Thicker helictites in the middle.
Lighting by Pete
Thicker helictites in the middle.
Lighting by Pete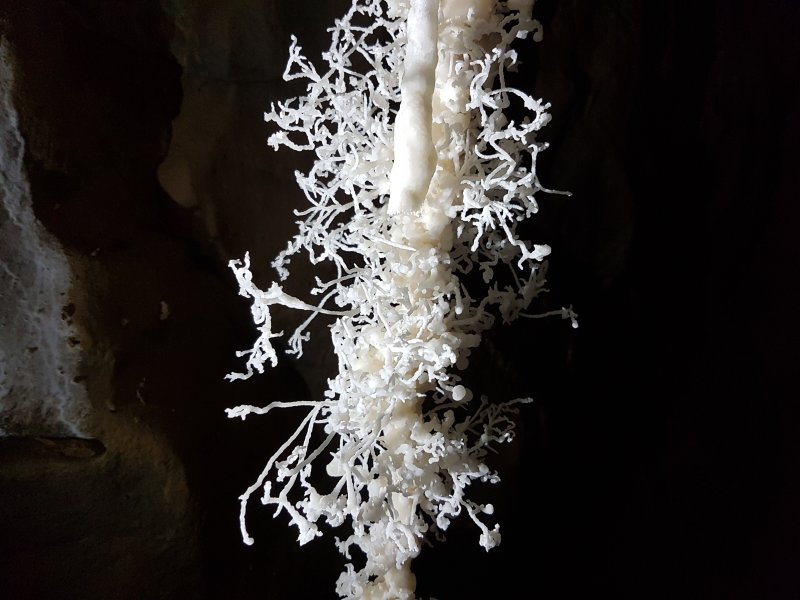 The incredibly intricate part near the bottom of The Courtesan.
Lighting by Pete
The incredibly intricate part near the bottom of The Courtesan.
Lighting by Pete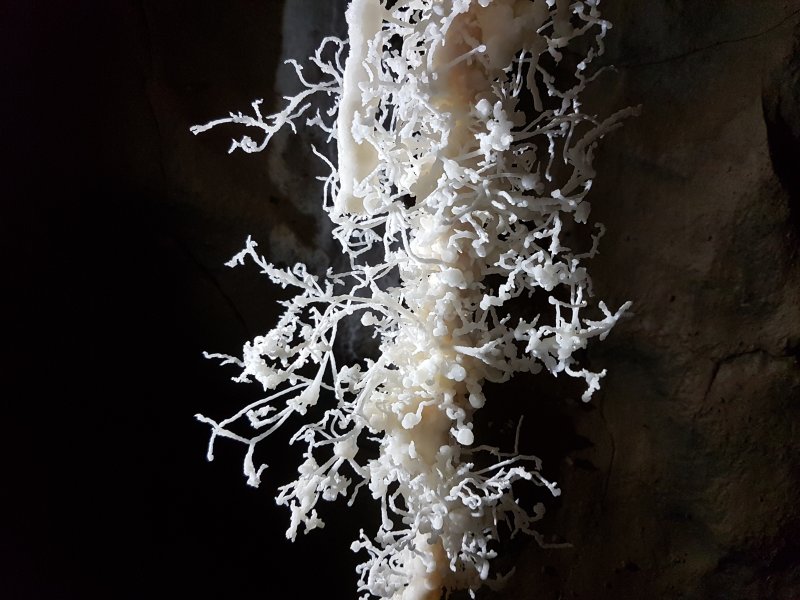 The Courtesan - the same part near the bottom.
Lighting by Pete
The Courtesan - the same part near the bottom.
Lighting by Pete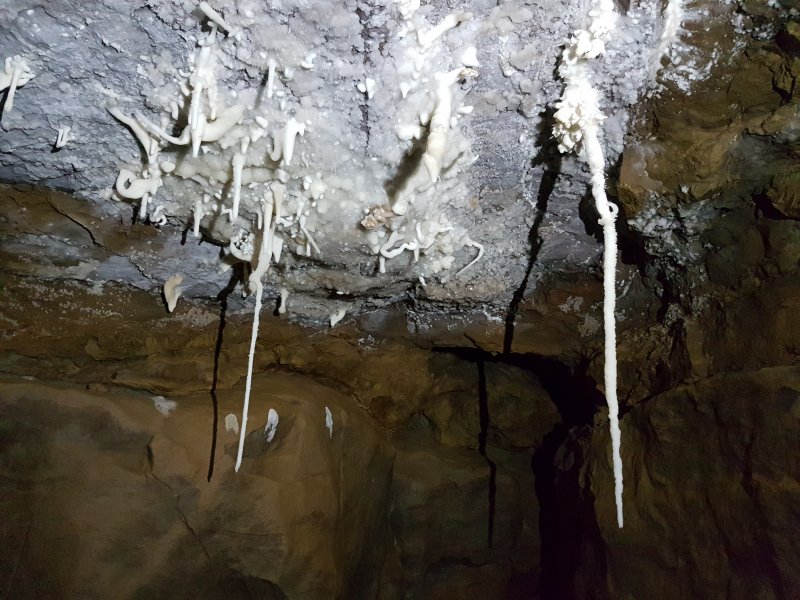 Helictites and thick straws at the start of Corkscrew Chamber.
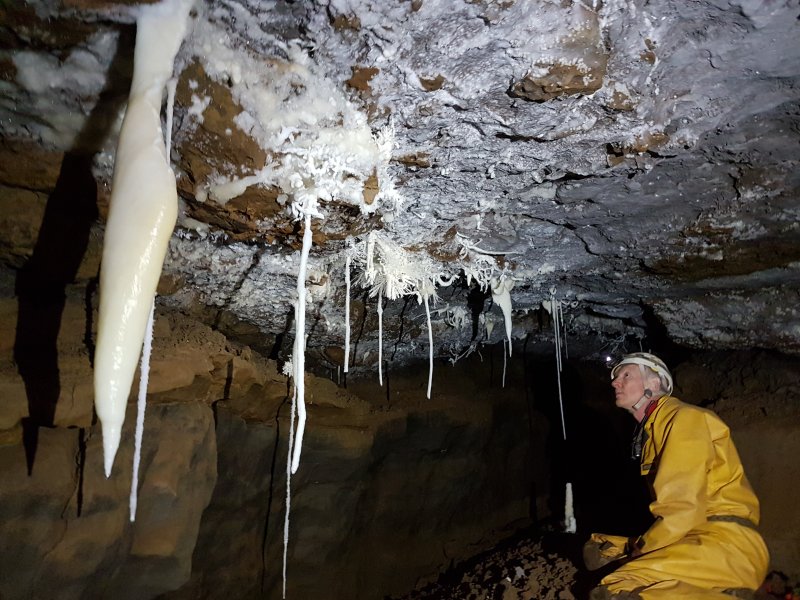 Corkscrew Chamber left wall.
Lighting by Tarquin and Pete
Corkscrew Chamber left wall.
Lighting by Tarquin and Pete Left wall.
 Helictites and anthodites on the left wall.
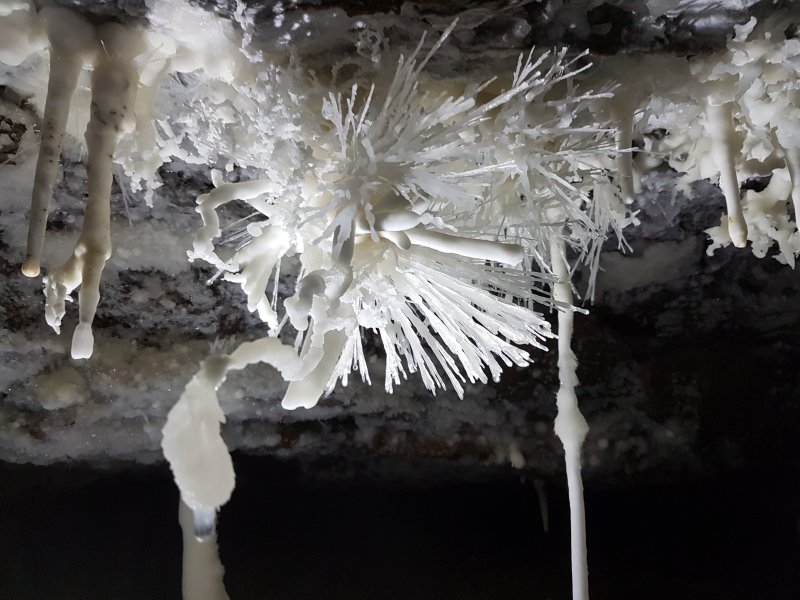 Anthodite detail.
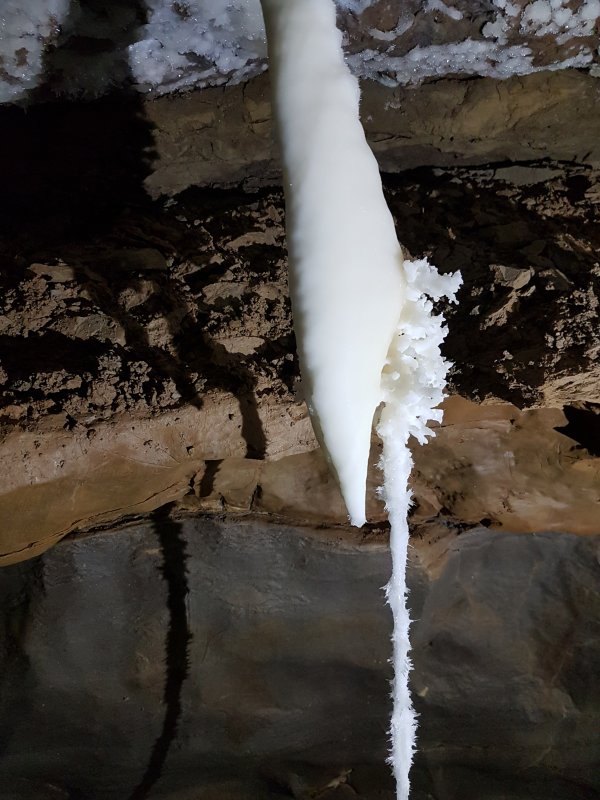 A stalactite that changed its mind.
Lighting by Pete
A stalactite that changed its mind.
Lighting by Pete Furry straw.
Lighting by Pete
Furry straw.
Lighting by Pete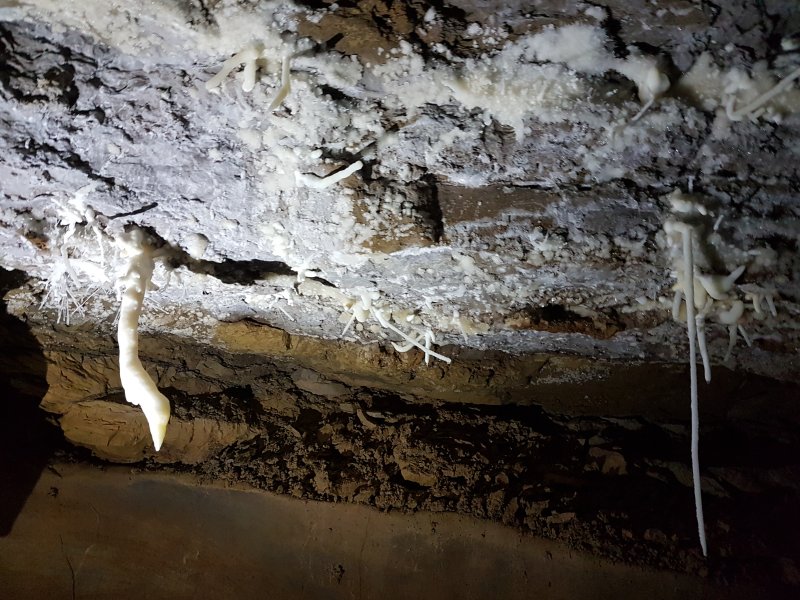 Right wall.
Lighting Pete
Right wall.
Lighting Pete End of Corkscrew Chamber.
Lighting by Tarquin and Pete
End of Corkscrew Chamber.
Lighting by Tarquin and Pete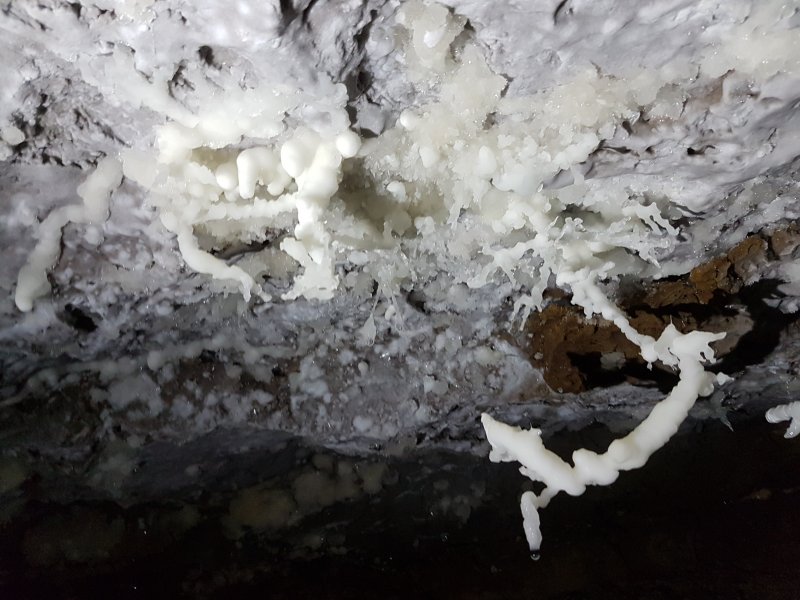 End of Corkscrew Chamber.
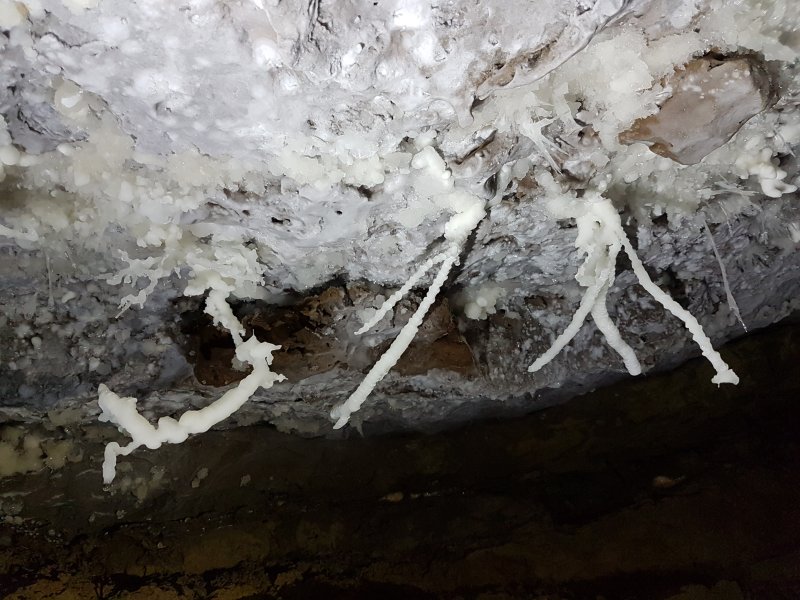 End of Corkscrew Chamber.
 End of Corkscrew Chamber.
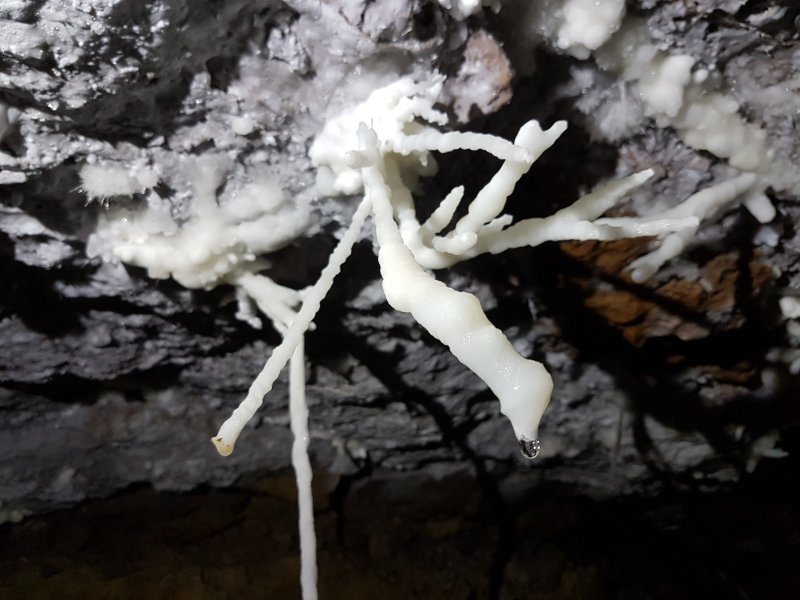 End of Corkscrew Chamber.
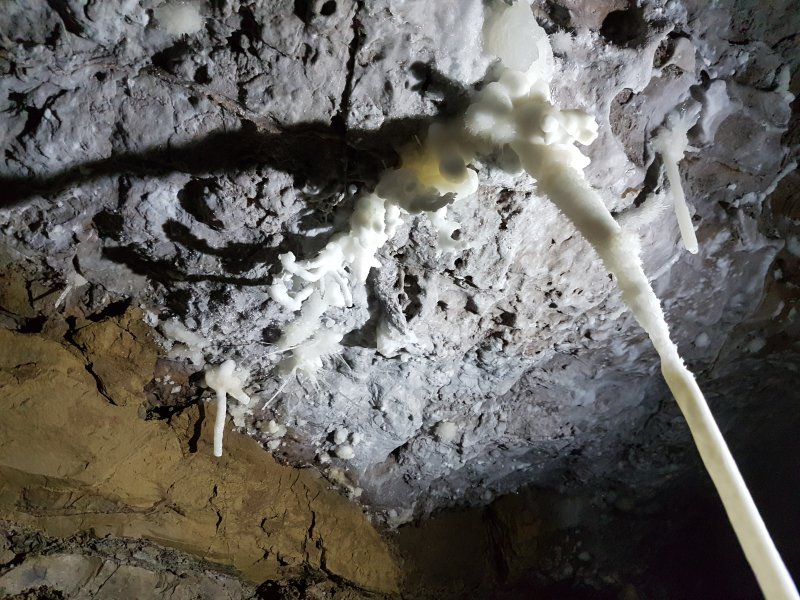 End of Corkscrew Chamber.
Lighting by Tarquin and Pete
End of Corkscrew Chamber.
Lighting by Tarquin and Pete Very awkward squeeze leading onwards. Feet first, up 2 foot into the eyehole, then down 4 foot on the other side. Pete found this impossible, and was not able to turn the corner, so I did the rest of the passage alone. Several further squeezes then ended up in the low and muddy Broadside. A side passage to the right ends in a dig, with a tight side branch ascending through a choke with a strong smell of recent chemical engineering, and a high level side rift that was not checked but shows as pinching out on the survey. A side passage on the left and the end of the chamber itself both end in digs pointing towards Daren Cilau.
Camera, setup and lighting by Pete, modelling by Tarquin
Very awkward squeeze leading onwards. Feet first, up 2 foot into the eyehole, then down 4 foot on the other side. Pete found this impossible, and was not able to turn the corner, so I did the rest of the passage alone. Several further squeezes then ended up in the low and muddy Broadside. A side passage to the right ends in a dig, with a tight side branch ascending through a choke with a strong smell of recent chemical engineering, and a high level side rift that was not checked but shows as pinching out on the survey. A side passage on the left and the end of the chamber itself both end in digs pointing towards Daren Cilau.
Camera, setup and lighting by Pete, modelling by Tarquin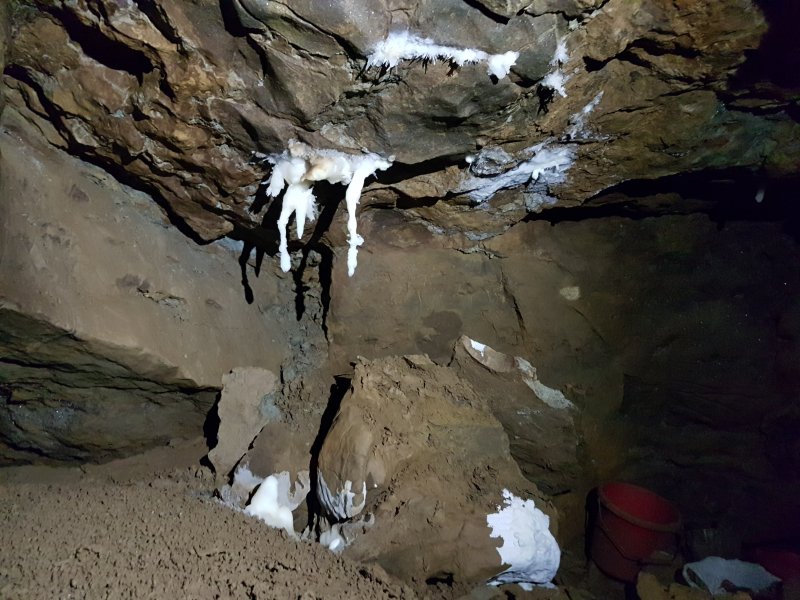 Formations in Broadside.
 Formations in Broadside.
 Formations in Broadside.
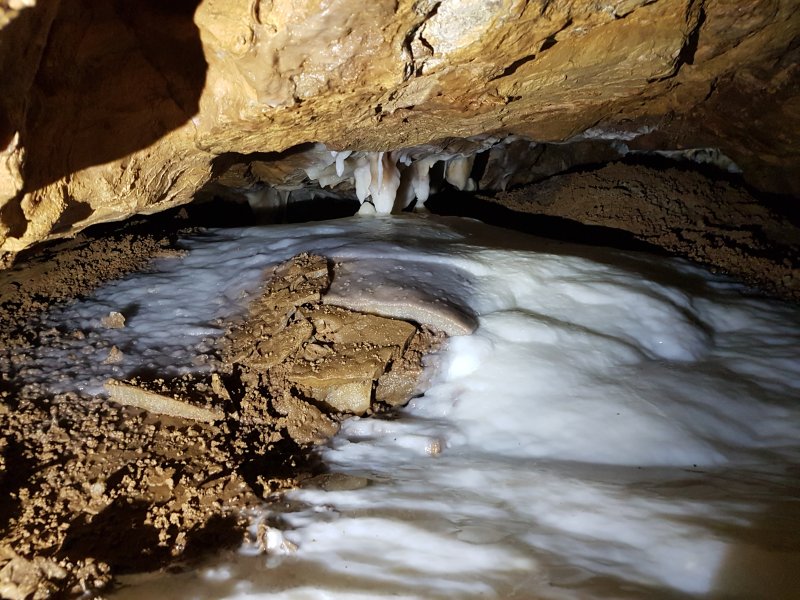 Formations in Broadside.
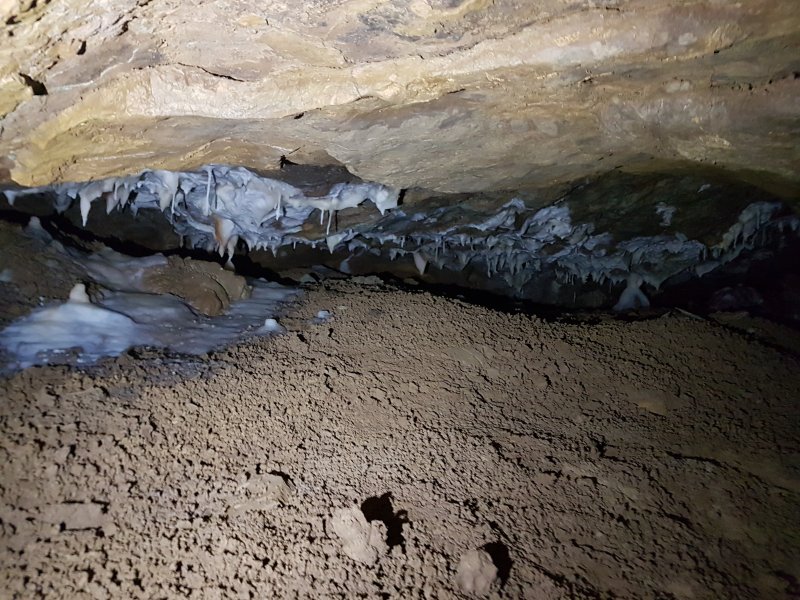 Formations in Broadside.
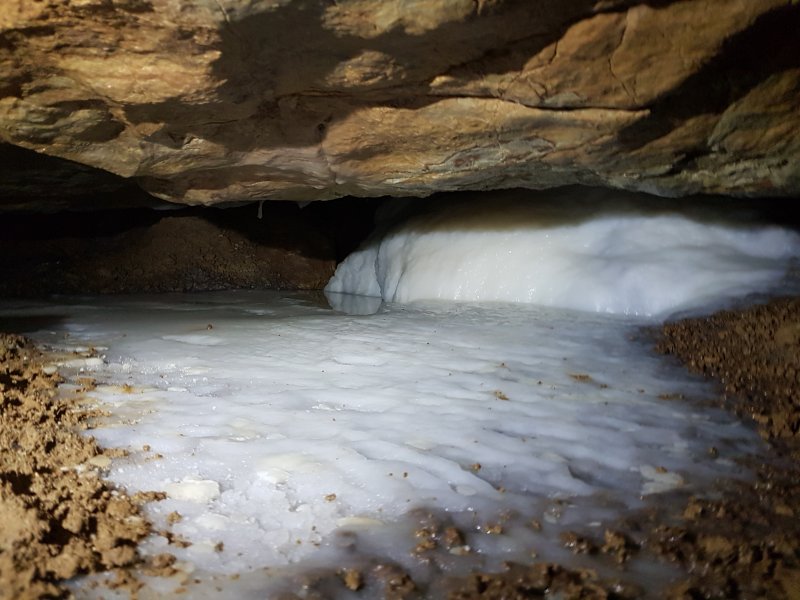 The final formation in Broadside, and the end of this branch of the cave.