Brechfa canyoning and mines 26/08/2018
This is a mixed gallery, partly being surface canyoning, and partly mine exploration. We used full caving gear with wetsuits instead of undersuits. SRT gear for the canyoning was limited to a basic harness and descender, with one of us having simple ascenders, just in case. We needed about 30 metres of pull-through rope and a single krab for rigging.
Unless otherwise stated, camera, setups, lighting, edits and gallery effects by Tarquin. Modelling and lighting at various points will be Phil Knight.
 Canyoning starts at the upper end of Nant Cwm-marydd, 2.5 km northwest of Brechfa in Carmarthenshire, where it is crossed by a forestry track. According to the maps, there are no waterfalls here. The maps are very definitely wrong. The terrain is far too rough for this to be a walking route, so to see the waterfalls, it has to be canyoning.
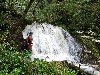 The first waterfalls can be very carefully skirted, or a rope can be used for abseiling. The rope approach is definitely safer.
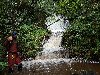 The weather had been very wet recently, and the roads had turned into streams. These waterfalls are normally less dramatic.
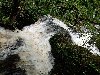
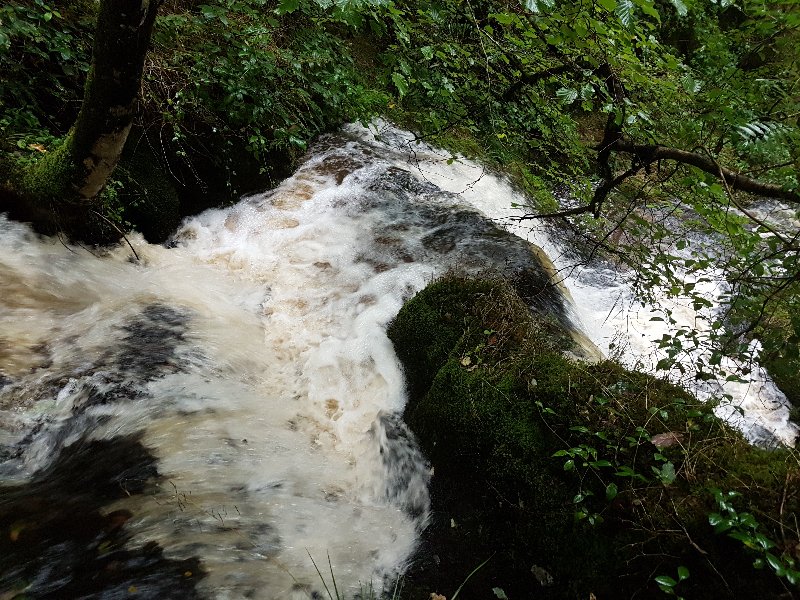
 Climbing the easier cascades, trying not to get washed down by the floodwaters.
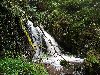 Some of the cascades were best avoided due to fallen branches.
 The top of the tallest waterfall. The pool is definitely not deep enough to jump.
 The waterfall is about 8 metres tall, and the sides are perilously steep. There are no large trees to abseil from, so we had to attach the rope to a mess of smaller saplings, hoping that if one bent over too far, the others might take the strain. The extra length of rigging used up all our spare rope. With rope-joining knots, we had only between 20 and 25 metres of rope, and it wasn't really enough for this drop.
 The smallest drops seem to have the deepest pools.
 Fallen trees were the normal obstacle, but in this case, it is a living tree, perfectly positioned to snag a passing Phil.
 Down the water chute.
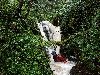 Yup, that was fun.
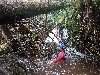 This mess was much more difficult, requiring a scramble over branches in a deep plunge pool.
 Water slide.
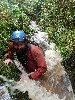 Also great fun.
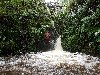 The second biggest drop, with its distinctive ricochet waterfall. The pool is about waist deep, so it is also a little too shallow for jumping. At least there is a convenient tree for the abseil.
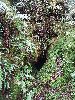 Just above the next cascade is the entrance to Brechfa Lead Mine, on the eastern bank.
Lighting by Tarquin and Phil
Just above the next cascade is the entrance to Brechfa Lead Mine, on the eastern bank.
Lighting by Tarquin and Phil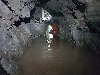 The first part is a canal with knee-deep water.
Lighting by Tarquin, Phil and Sol
The first part is a canal with knee-deep water.
Lighting by Tarquin, Phil and Sol This may look like a mineral deposit, but it is actually a microbial growth.
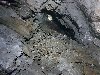 The passage looks like it chokes completely, but it is possible to continue over an unstable roof collapse on a quartz vein. The ceiling does not want to be touched. Beyond this, the passage ends at a blank wall.
Lighting by Tarquin and Phil
The passage looks like it chokes completely, but it is possible to continue over an unstable roof collapse on a quartz vein. The ceiling does not want to be touched. Beyond this, the passage ends at a blank wall.
Lighting by Tarquin and Phil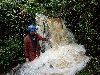 The next cascade, where it was not possible to climb down the cascade itself, since it lacked holds.
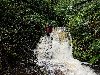 A further climb then took us directly below the Brechfa Lead Mine entrance.
 Phil pointed to the opposite bank, and mentioned that it would be likely that the same vein existed there, and the miners might have tried to locate it. As if by magic, scratching around behind moss and fallen trees exposed the entrance to another trial adit, just above stream level. It has not been recorded previously on the mine exploration registry.
Lighting by Sol and Phil
Phil pointed to the opposite bank, and mentioned that it would be likely that the same vein existed there, and the miners might have tried to locate it. As if by magic, scratching around behind moss and fallen trees exposed the entrance to another trial adit, just above stream level. It has not been recorded previously on the mine exploration registry.
Lighting by Sol and Phil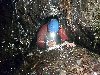 Heading into the unknown. We think this picture shows the first rediscovery visit into this mine adit since it was dug in the 1880s.
Lighting by Tarquin, Sol and Phil
Heading into the unknown. We think this picture shows the first rediscovery visit into this mine adit since it was dug in the 1880s.
Lighting by Tarquin, Sol and Phil Wading through the stench of rotting vegitation.
Lighting by Tarquin and Phil
Wading through the stench of rotting vegitation.
Lighting by Tarquin and Phil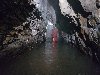 Brechfa Lead Mine's Western Trial Adit turned out to be about 10 metres long, with a thigh-deep canal for its entire length, ending at a blank wall. Nothing spectacular, but still exciting to rediscover.
Lighting by Tarquin and Phil
Brechfa Lead Mine's Western Trial Adit turned out to be about 10 metres long, with a thigh-deep canal for its entire length, ending at a blank wall. Nothing spectacular, but still exciting to rediscover.
Lighting by Tarquin and Phil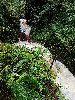 After washing off back in the river, we resumed course downstream. This tricky scramble lands in a deep pool.
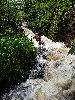 Followed by another great water slide.
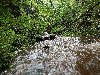 The stream then abruptly changes style and becomes much more gentle. There are no further waterfalls.
 Tree loop.
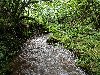 The lower stream.
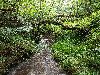 It then becomes too overgrown to follow. Up on the right bank is the overgrown remains of a railway cutting, which could have been used to take away material, if the trial mine had been successful.
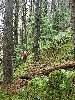 Instead, we returned to the last cascade, and started our ascent back up through the forest on the eastern bank. There is a hint of a path.
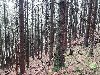 Tall trees as we approach the top above the trial mines, now without any path.
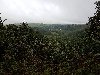 View through the pass into the Afon Gwili valley.
 View over Brechfa. The village lies in front of the deep Afon Cothi valley in the centre of the picture. The main road south passes through the shallower green valley on the right. The main road north passes up the shallow valley on the left, with the upstream Afon Cothi valley being the more obvious valley behind it.
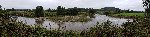 The Afon Tywi/River Towy, from the B4300 beside Pen-lan, where the next set of mines are located. This meander is the usual tidal limit point of the river. The hill on the right is Merlin's Hill fort (150 metres), while on the left is Penlan Voss (167 metres) above Carmarthen.
 View from Allt Cystanog over the Nant Pibwr valley, towards Nantycaws (cheese-stream - what a name). The major A48 route across South Wales runs along the distant ridge. The mines all lie beneath the field on the left.
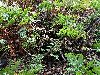 Horrifyingly hidden entrance to a crown hole, that looks like a bell pit, amongst the bracken. This sits above all of the mines, and it most likely connects with a choked passage in the Penlan levels. Not to worry, there are some branches over the entrance, which were not too rotten during our visit...
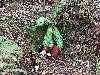 Heading into the Cystanog Lead Mine's Penlan 2 entrance, which dates from 1878-1882, but was reworked after 1889.
 Remains of the powder store.
Lighting by Tarquin and Phil
Remains of the powder store.
Lighting by Tarquin and Phil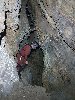 Stope leading down to the Penlan 1 entrance.
Lighting by Tarquin and Phil
Stope leading down to the Penlan 1 entrance.
Lighting by Tarquin and Phil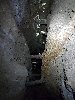 Looking down the stope.
Lighting by Tarquin and Phil
Looking down the stope.
Lighting by Tarquin and Phil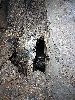 When crossing the stope, you realise that the rubble floor is not actually solid.
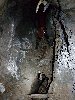 Instead, it is a false floor of planks, overlaying the props. This is not a comfortable place to be. Walk on the rock ledges on the sides instead.
Lighting by Tarquin and Phil
Instead, it is a false floor of planks, overlaying the props. This is not a comfortable place to be. Walk on the rock ledges on the sides instead.
Lighting by Tarquin and Phil The passage eventually ends at an ore pass into the lower passages.
Lighting by Tarquin and Phil
The passage eventually ends at an ore pass into the lower passages.
Lighting by Tarquin and Phil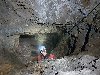 The ore pass is used as a pitch to reach the lower levels. The floor chokes where it would connect with Penlan 1, but a traverse on the left leads towards Cystanog 3.
Lighting by Tarquin and Phil
The ore pass is used as a pitch to reach the lower levels. The floor chokes where it would connect with Penlan 1, but a traverse on the left leads towards Cystanog 3.
Lighting by Tarquin and Phil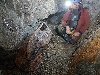 An old wheelbarrow between the levels. The passages on either side have been almost filled with debris, marooning this wheelbarrow in here. The miners abandoned it.
Lighting by Tarquin and Phil
An old wheelbarrow between the levels. The passages on either side have been almost filled with debris, marooning this wheelbarrow in here. The miners abandoned it.
Lighting by Tarquin and Phil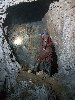 Old end of Penlan 2, where a small crawl leads into Cystanog 3.
Lighting by Tarquin and Phil
Old end of Penlan 2, where a small crawl leads into Cystanog 3.
Lighting by Tarquin and Phil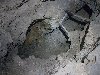 Cystanog 3 ends at a collapsed winze. This used to lead down into an alcove with wheelbarrows, but the deads (stacked rocks held back by rotting timbers) that lined the shaft bulged out and collapsed while someone was exploring the winze (!). Thankfully, nobody was hurt, but the alcove is no longer accessible. Until 2006, there was a wooden platform on top of the deads, with a hole down into the shaft. This collapsed completely in 2006, leaving this crater where the wooden platform had been. This is not a safe place to be, so we did not stay here long.
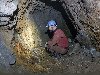 Cystanog 3.
Lighting by Tarquin and Phil
Cystanog 3.
Lighting by Tarquin and Phil The formations look nice, but not as nice as this picture makes it look. The yellow stain is likely a sulphur mineral rather than ochre.
 Likewise, this looks very impressive, possibly a copper ore such as malachite. However, on returning to find it again, I was very disappointed to see that it was merely a faded, pale green, and the camera had over-enhanced this picture. Or more likely, it could simply be a microbial stain (or lichen), which had died back by the time I next visited. In either case, there is no viable mineral here.
 Cave spider egg sac in Cystanog 3.
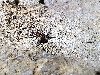 Passing through Cystanog 3 means running the gauntlet surrounded by cave spiders. This is a female, and fortunately they are harmless, in spite of their large size.
 Another female.
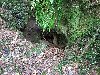 Through trip exit at Cystanog 3 (formerly known as the upper level). This is not a good entrance, as the rocks force a squeeze surrounded by spiders. The rocks have slipped and the soil threatens to release more, so the entrance could block itself at some point.
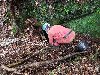 The entrance to the Cystanog Lead Mine's Allt Cystanog Level 2 (formerly known as the lower level or the shallow level), rediscovered by Phil. This is the most extensive mine in the area, and probably dates from the 1850s, and reworked in the 1890s. In total, there may be as much as 2 km of passage in here.
Lighting by Sol and Phil
The entrance to the Cystanog Lead Mine's Allt Cystanog Level 2 (formerly known as the lower level or the shallow level), rediscovered by Phil. This is the most extensive mine in the area, and probably dates from the 1850s, and reworked in the 1890s. In total, there may be as much as 2 km of passage in here.
Lighting by Sol and Phil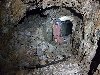 Start of the Allt Cystanog Level 2.
Lighting by Tarquin and Phil
Start of the Allt Cystanog Level 2.
Lighting by Tarquin and Phil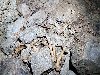 Badger bones in an oxbow.
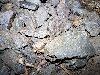 Two badger skulls. Presumably, they were using this as a set.
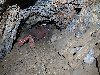 The first choke. Phil and his team had dug through this, installing a pipe to make it possible to squirm through without risking further collapse. This mine has not been open for long, and it has not stabilised. Deads are stacked in many places without great support.
Lighting by Tarquin and Phil
The first choke. Phil and his team had dug through this, installing a pipe to make it possible to squirm through without risking further collapse. This mine has not been open for long, and it has not stabilised. Deads are stacked in many places without great support.
Lighting by Tarquin and Phil Beyond the choke.
Lighting by Tarquin and Phil
Beyond the choke.
Lighting by Tarquin and Phil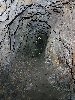 The passage heads away from the river, even though the lower entrance to the mine is further downhill, closer to the river.
Lighting by Tarquin and Phil
The passage heads away from the river, even though the lower entrance to the mine is further downhill, closer to the river.
Lighting by Tarquin and Phil More yellow stained mineral, presumably also sulphur. It would have had no value at all as a mineral.
 Crystals in three shades - black, white and clear - growing on the rocks. These have no value since they were discarded by the miners, but they are nice to see.
Lighting by Tarquin and Phil
Crystals in three shades - black, white and clear - growing on the rocks. These have no value since they were discarded by the miners, but they are nice to see.
Lighting by Tarquin and Phil A horrifying sight; deads stacked above the passage in a small aven. The wood is rotting, and has been here since 1902 at least. At some point, it will collapse, and drop tonnes of rocks into the passage. Earlier collapses had produced yet more chokes that Phil's team had dug through.
 The next aven gives a view over the top of the deads. The wooden boards can be seen poking through the pile of rocks.
Lighting by Tarquin and Phil
The next aven gives a view over the top of the deads. The wooden boards can be seen poking through the pile of rocks.
Lighting by Tarquin and Phil Wheelbarrow beyond the deads. This superb piece of adit is a great reward for the choke digs.
Lighting by Tarquin and Phil
Wheelbarrow beyond the deads. This superb piece of adit is a great reward for the choke digs.
Lighting by Tarquin and Phil Another choke, this time with scaffolding preventing further collapse.
Lighting by Tarquin and Phil
Another choke, this time with scaffolding preventing further collapse.
Lighting by Tarquin and Phil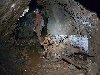 This choke gave the major breakthrough, into a very substantial passage, complete with a wheelbarrow - a different design from the last one.
Lighting by Tarquin and Phil
This choke gave the major breakthrough, into a very substantial passage, complete with a wheelbarrow - a different design from the last one.
Lighting by Tarquin and Phil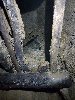 A slope to a short upper level. Various artefacts were found up here, including some of a chemical nature (these are no longer in the mine, for obvious reasons)
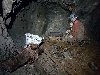 Artefacts in a side alcove, including a hand powered winch, bucket, and munitions box.
Lighting by Tarquin and Phil
Artefacts in a side alcove, including a hand powered winch, bucket, and munitions box.
Lighting by Tarquin and Phil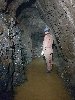 Grand side passage.
Lighting by Tarquin and Phil
Grand side passage.
Lighting by Tarquin and Phil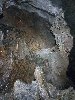 The side passage ends beyond a choke.
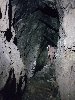 The main passage passes over a large hole. This served as an ore pass, but also had the hand powered winch above it (now moved to the side passage), so it was also a winze.
Lighting by Tarquin and Phil
The main passage passes over a large hole. This served as an ore pass, but also had the hand powered winch above it (now moved to the side passage), so it was also a winze.
Lighting by Tarquin and Phil Tall stope above the winze. Some of these may have passage at the top, but large poised rocks guard them and prevent exploration.
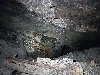 The winze has the remains of a rotting ladder, and drops a long way down into the darkness.
Lighting by Tarquin and Phil
The winze has the remains of a rotting ladder, and drops a long way down into the darkness.
Lighting by Tarquin and Phil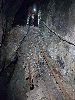 There was once a tramway rail crossing the winze (but it seems that they used the rail as a footbridge rather than a tramway), but the rails have snapped long ago, and the boards are completely rotten. We used the scaffolding pole to cross it. The rope is not a safety support, as it is not load bearing. Its purpose is only to steady yourself for psychological support while passing over the deep hole. This isn't scary at all, honestly.
Lighting by Tarquin and Phil
There was once a tramway rail crossing the winze (but it seems that they used the rail as a footbridge rather than a tramway), but the rails have snapped long ago, and the boards are completely rotten. We used the scaffolding pole to cross it. The rope is not a safety support, as it is not load bearing. Its purpose is only to steady yourself for psychological support while passing over the deep hole. This isn't scary at all, honestly.
Lighting by Tarquin and Phil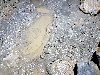 Phil and his team found remarkably well preserved footprints in the mud. These appear to be from 1890s hobnailed boots. The mine was abandoned in 1902.
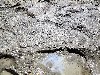 Though some boot prints are less defined, they are probably all from the same era. It is unlikely that any date from previous mining operations.
 One wall is covered with needle-sized crystals. Perhaps these are selenite.
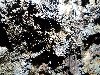 Crystal needles.
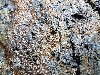 Crystal needles.
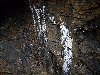 The passage then ended at a collapsed level, with what looks like calcite flow on the wall, but is actually hydrozincite.
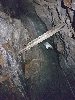 We abseiled down one of the earlier shaft holes towards the lower level. This was supposed to be a pull-through (if the bottom entrance had been open). However, while taking this picture, I disturbed some deads which rose more than 10 metres above my head all the way up to the ceiling of the shaft. Large rocks began to fall the final few metres to the floor, and while trying not to become a target, I speed-traversed over the bottom of the shaft, and pulled myself back up the rope, hand over hand, since I had neglected to attach my chest harness, and could not switch to prusiking quickly enough. I love seeing mines, but I hate them at the same time. Caves are relatively stable, meant to be there, tested for thousands of years by nature. Mines were never meant to be there, and nature is still busy reclaiming them. One touch, and several tonnes of rock can come crashing down.
Lighting by Tarquin and Phil
We abseiled down one of the earlier shaft holes towards the lower level. This was supposed to be a pull-through (if the bottom entrance had been open). However, while taking this picture, I disturbed some deads which rose more than 10 metres above my head all the way up to the ceiling of the shaft. Large rocks began to fall the final few metres to the floor, and while trying not to become a target, I speed-traversed over the bottom of the shaft, and pulled myself back up the rope, hand over hand, since I had neglected to attach my chest harness, and could not switch to prusiking quickly enough. I love seeing mines, but I hate them at the same time. Caves are relatively stable, meant to be there, tested for thousands of years by nature. Mines were never meant to be there, and nature is still busy reclaiming them. One touch, and several tonnes of rock can come crashing down.
Lighting by Tarquin and Phil From the bottom of the shaft, there is a passage leading all the way out to the bottom entrance (Cystanog 1, formerly the Deep Adit), but we had checked beforehand, and the bottom entrance had collapsed (it also swallowed Phil's phone, burying it in mud to block the signal, and it was only by excavating that it was found by chance disguised among the muddy rocks). We would have to wait for the winze to stabilise before trying to view the bottom levels again another day. Closer to the river, there is a 51 metre deep shaft with levels extending beneath the river. This is completely flooded now.
 The parking area has its own view from the nearby river. The hill in the background is an unnamed 175 m rise above Nantgaredig.
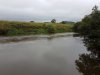 The river near the parking area.
 Next to a layby is West Level, sometimes referred to as part of the Llangunnor Lead Mines, even though it is actually part of the Allt Cystanog Lead Mines. This sits right next to the road, so it sees more than its share of unwelcome visitors, who dump litter.
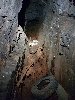 Dumped tyes in a side passage.
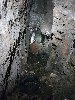 Dumped tyres in the main passage, where a greater horshoe bat was resting.
Lighting by Tarquin and Phil
Dumped tyres in the main passage, where a greater horshoe bat was resting.
Lighting by Tarquin and Phil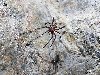 At least the spiders don't seem to mind. This is a juvenile.
 Flooded shaft and dumped tyre. The colour is beautiful, but the idea of falling in ... not so much. That rusty ladder would not be much help.
Lighting by Tarquin and Phil
Flooded shaft and dumped tyre. The colour is beautiful, but the idea of falling in ... not so much. That rusty ladder would not be much help.
Lighting by Tarquin and Phil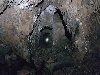 A very straight passage.
Lighting by Tarquin and Sol
A very straight passage.
Lighting by Tarquin and Sol All of the branches end abruptly, except for one which is backfilled.
 Canyoning starts at the upper end of Nant Cwm-marydd, 2.5 km northwest of Brechfa in Carmarthenshire, where it is crossed by a forestry track. According to the maps, there are no waterfalls here. The maps are very definitely wrong. The terrain is far too rough for this to be a walking route, so to see the waterfalls, it has to be canyoning.
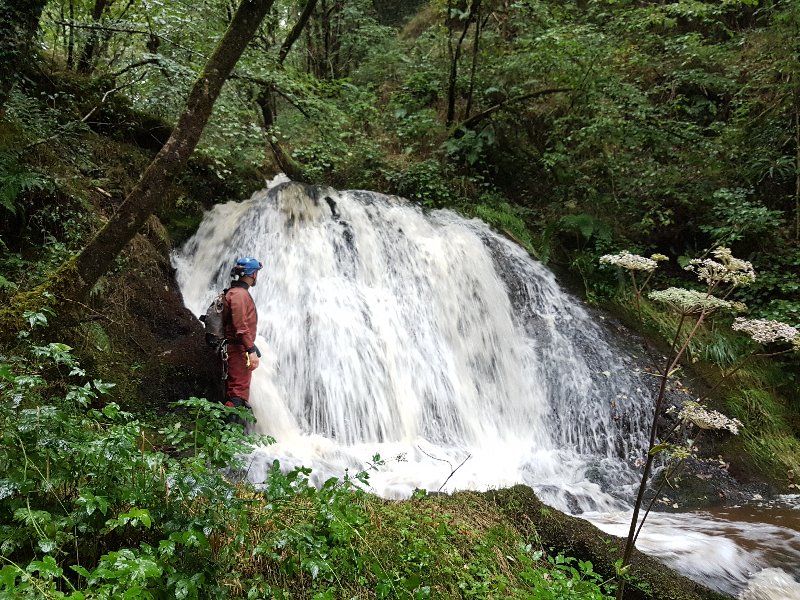 The first waterfalls can be very carefully skirted, or a rope can be used for abseiling. The rope approach is definitely safer.
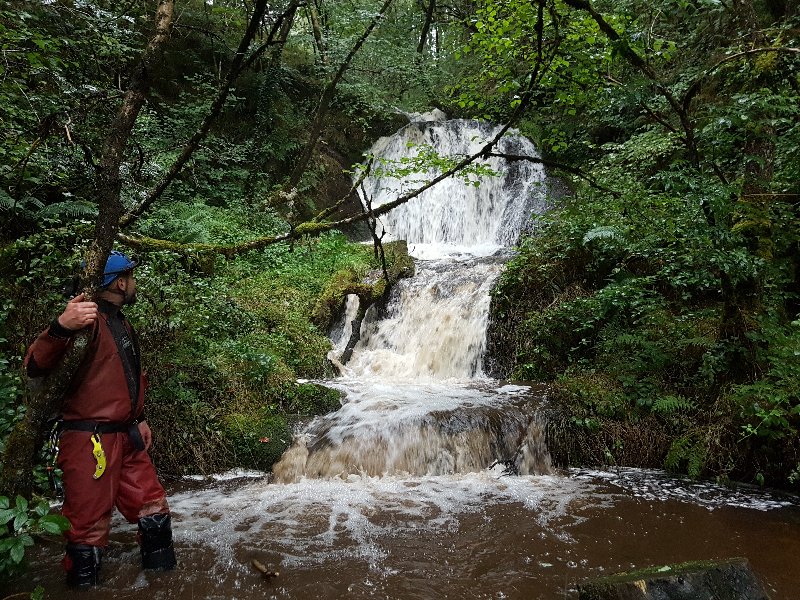 The weather had been very wet recently, and the roads had turned into streams. These waterfalls are normally less dramatic.
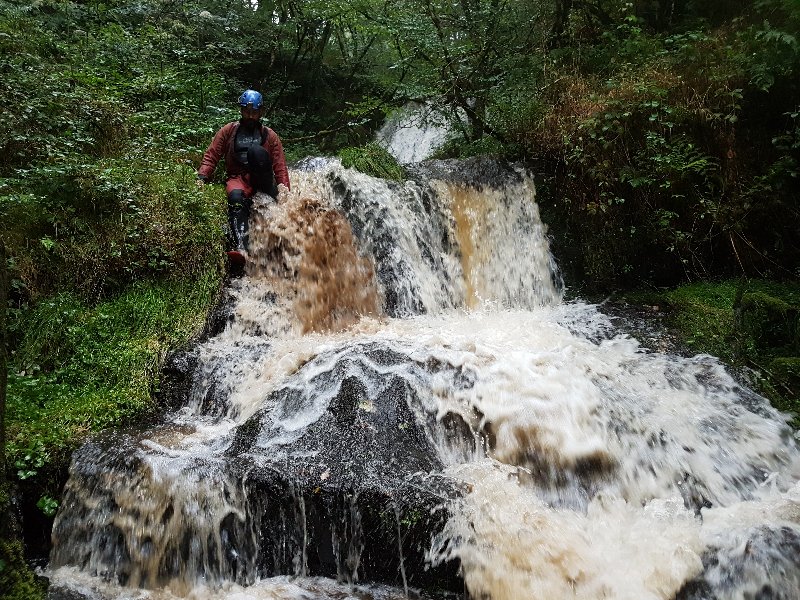 Climbing the easier cascades, trying not to get washed down by the floodwaters.
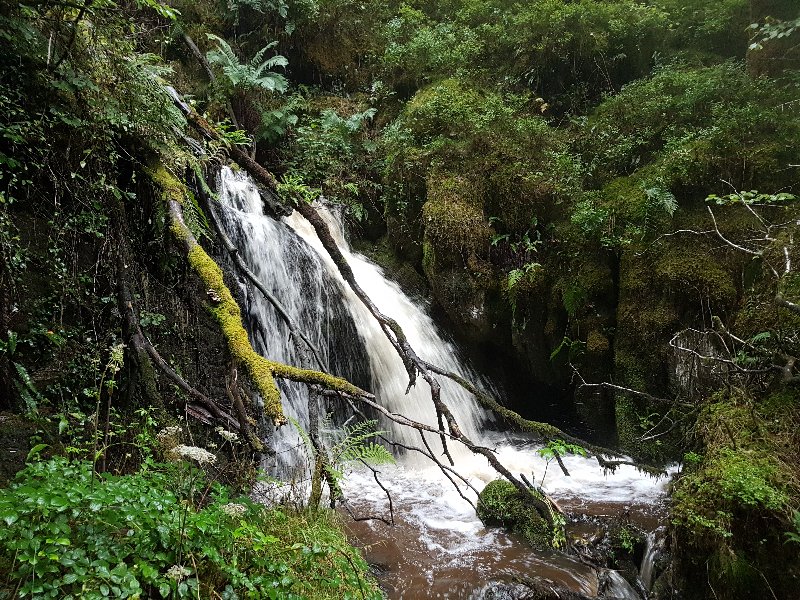 Some of the cascades were best avoided due to fallen branches.
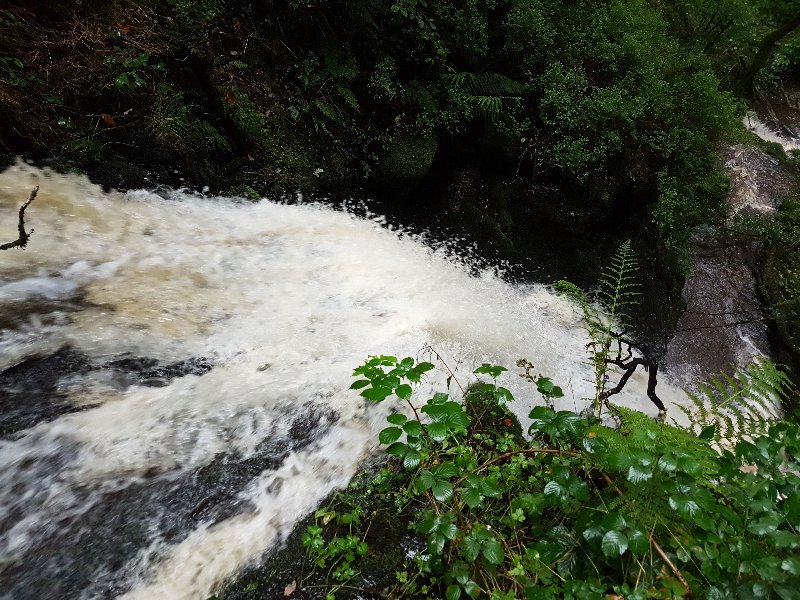 The top of the tallest waterfall. The pool is definitely not deep enough to jump.
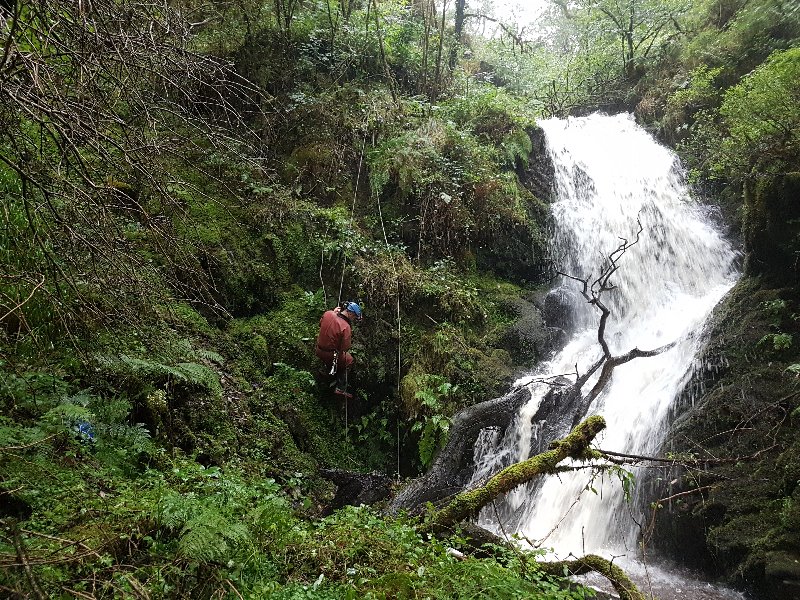 The waterfall is about 8 metres tall, and the sides are perilously steep. There are no large trees to abseil from, so we had to attach the rope to a mess of smaller saplings, hoping that if one bent over too far, the others might take the strain. The extra length of rigging used up all our spare rope. With rope-joining knots, we had only between 20 and 25 metres of rope, and it wasn't really enough for this drop.
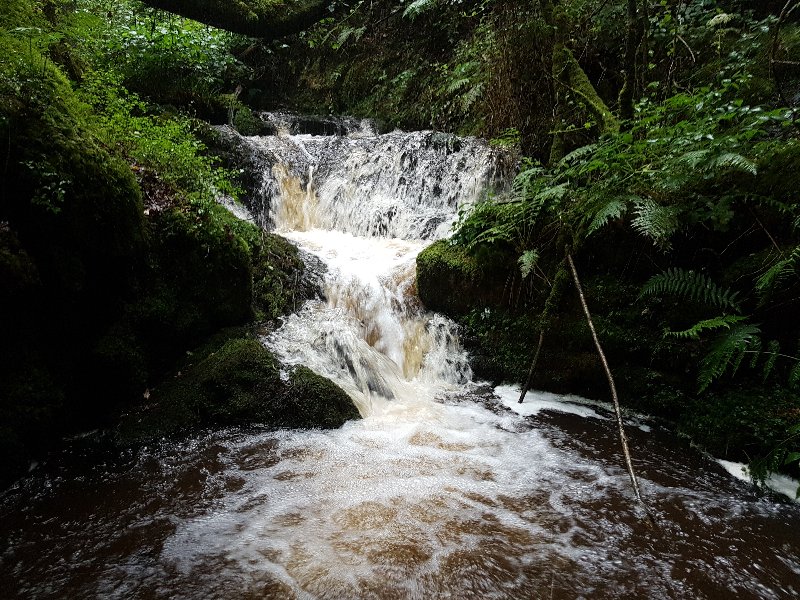 The smallest drops seem to have the deepest pools.
 Fallen trees were the normal obstacle, but in this case, it is a living tree, perfectly positioned to snag a passing Phil.
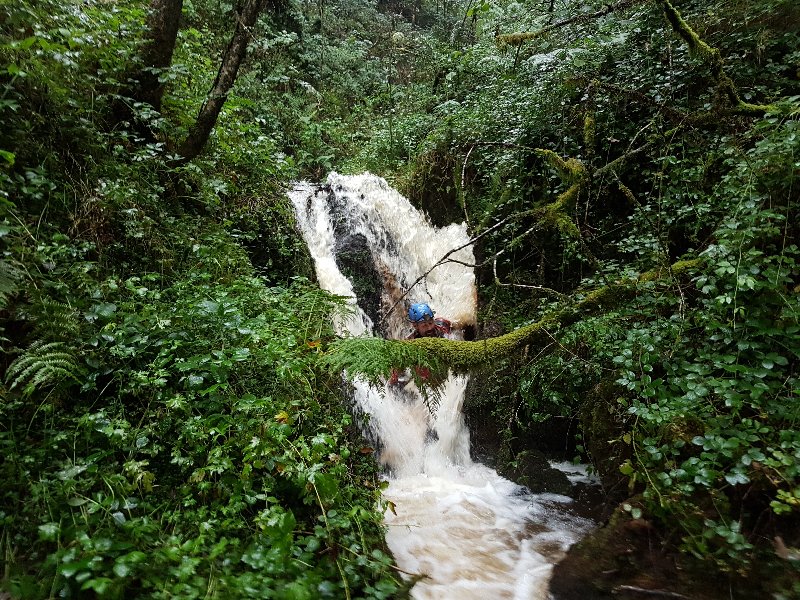 Down the water chute.
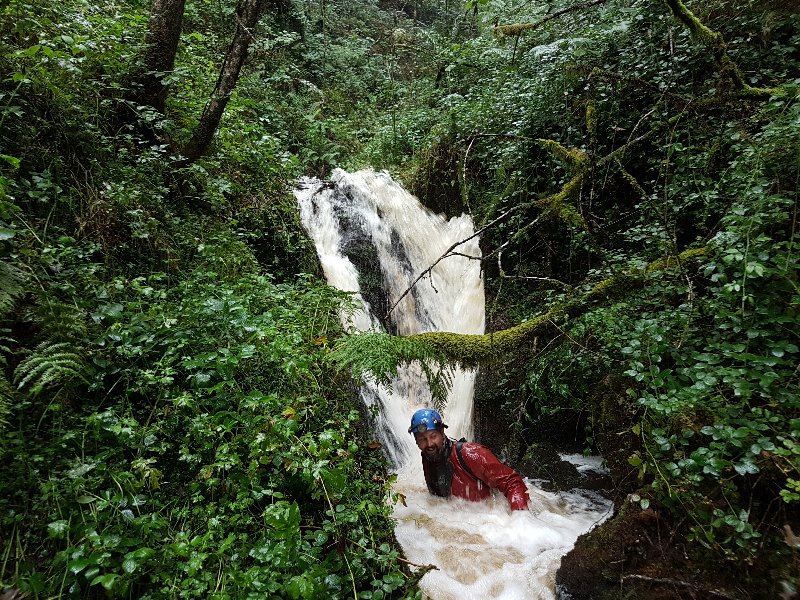 Yup, that was fun.
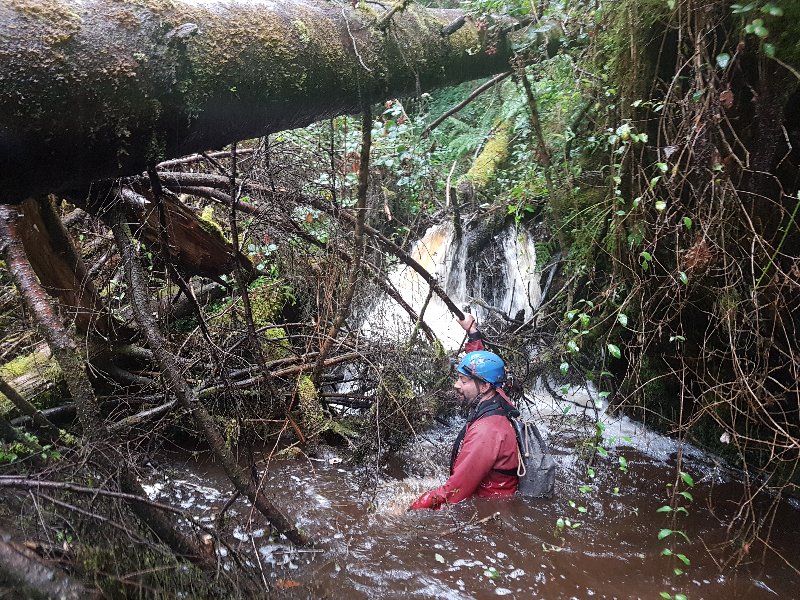 This mess was much more difficult, requiring a scramble over branches in a deep plunge pool.
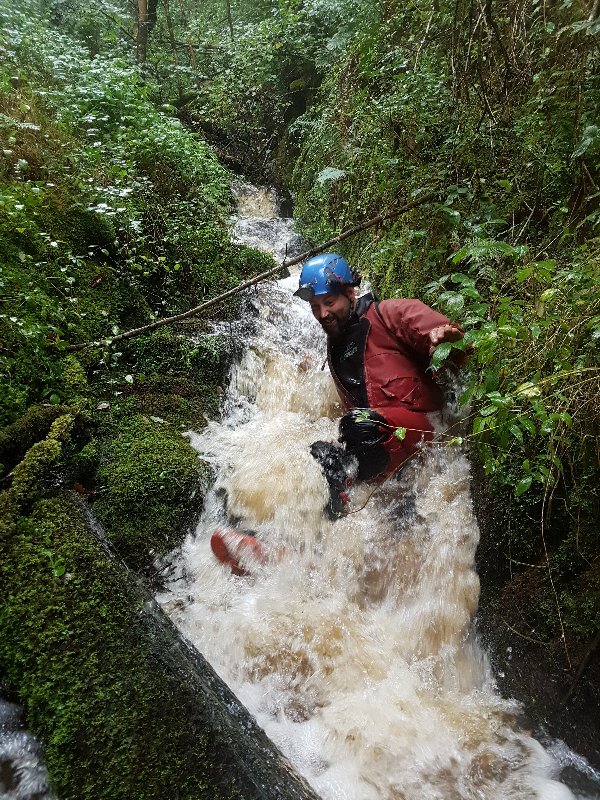 Water slide.
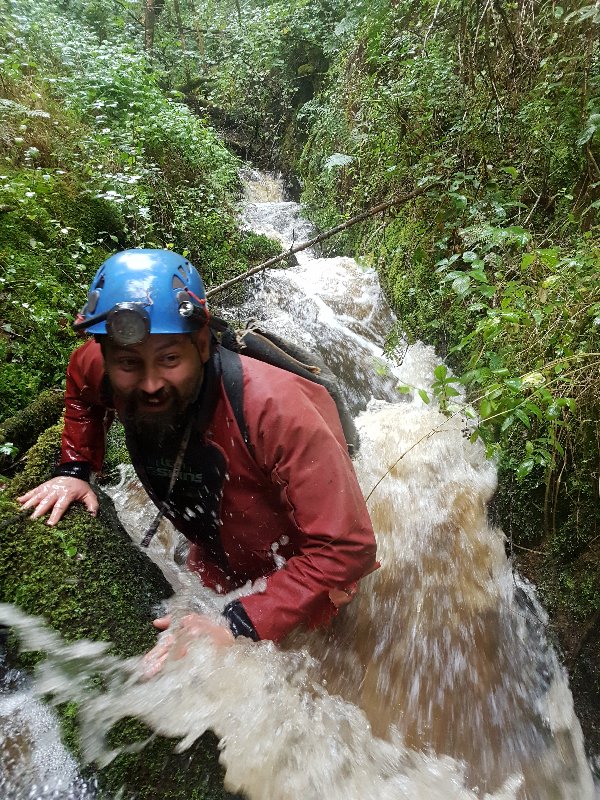 Also great fun.
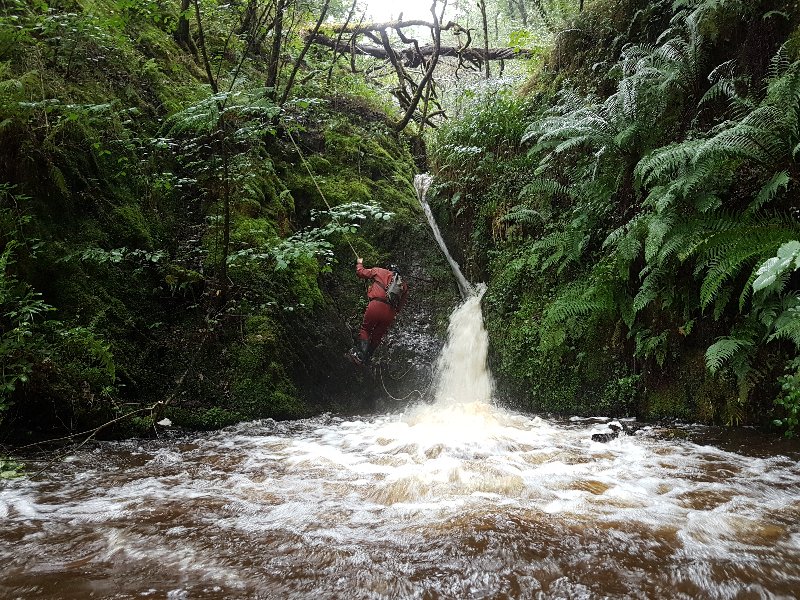 The second biggest drop, with its distinctive ricochet waterfall. The pool is about waist deep, so it is also a little too shallow for jumping. At least there is a convenient tree for the abseil.
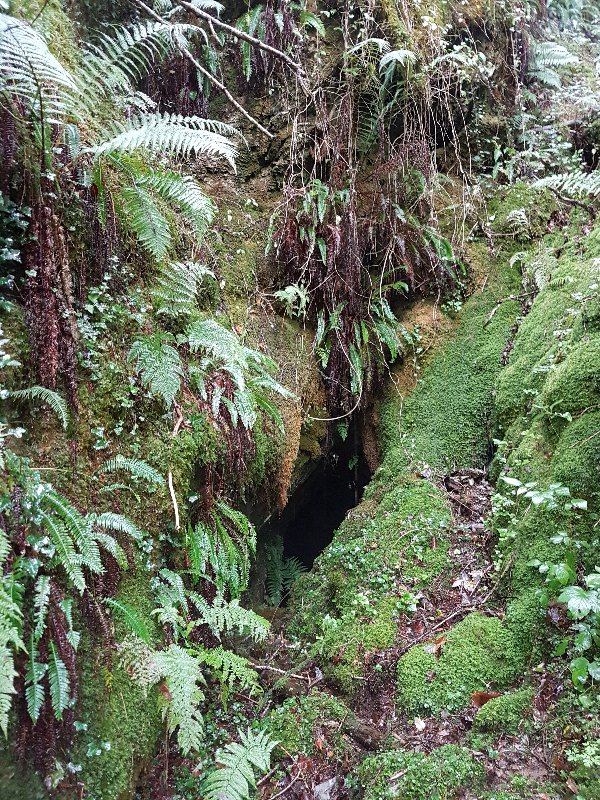 Just above the next cascade is the entrance to Brechfa Lead Mine, on the eastern bank.
Lighting by Tarquin and Phil
Just above the next cascade is the entrance to Brechfa Lead Mine, on the eastern bank.
Lighting by Tarquin and Phil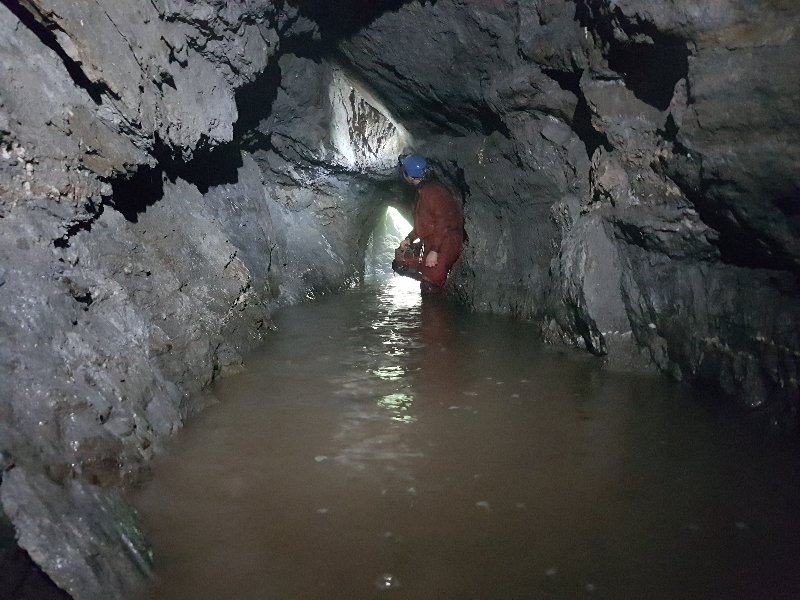 The first part is a canal with knee-deep water.
Lighting by Tarquin, Phil and Sol
The first part is a canal with knee-deep water.
Lighting by Tarquin, Phil and Sol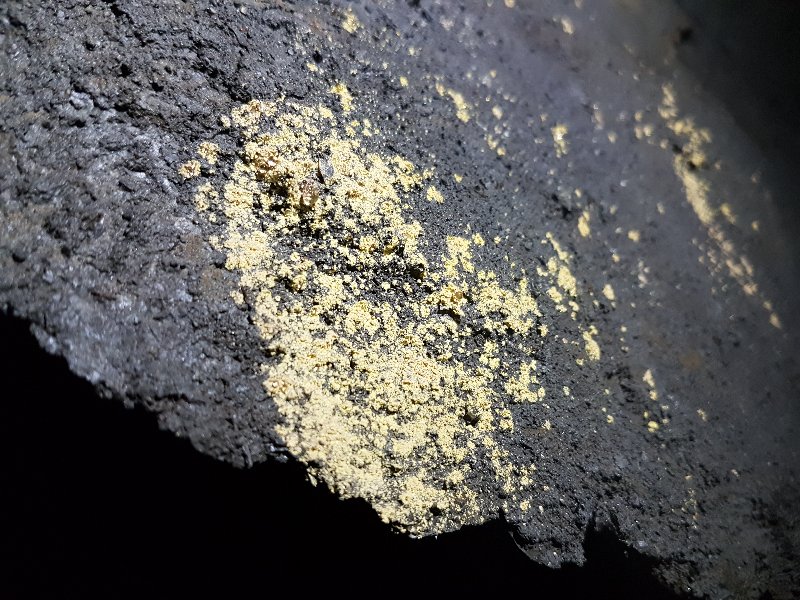 This may look like a mineral deposit, but it is actually a microbial growth.
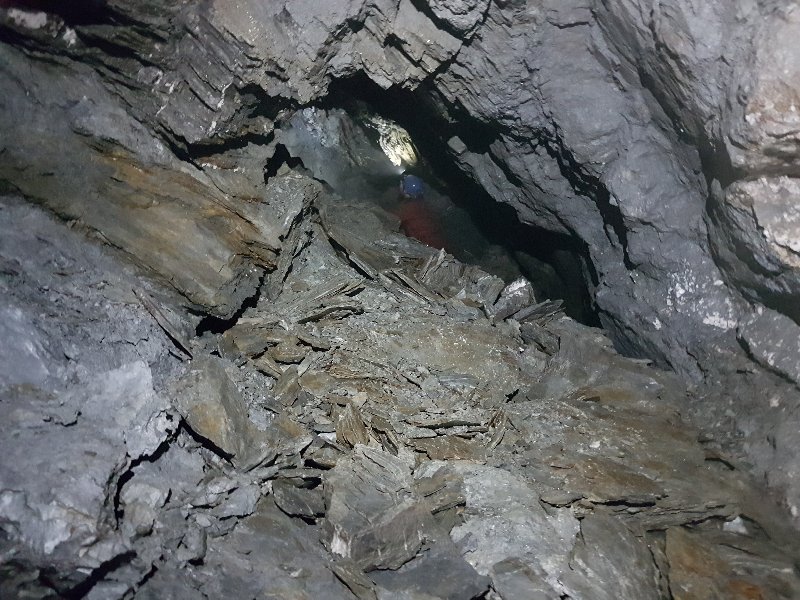 The passage looks like it chokes completely, but it is possible to continue over an unstable roof collapse on a quartz vein. The ceiling does not want to be touched. Beyond this, the passage ends at a blank wall.
Lighting by Tarquin and Phil
The passage looks like it chokes completely, but it is possible to continue over an unstable roof collapse on a quartz vein. The ceiling does not want to be touched. Beyond this, the passage ends at a blank wall.
Lighting by Tarquin and Phil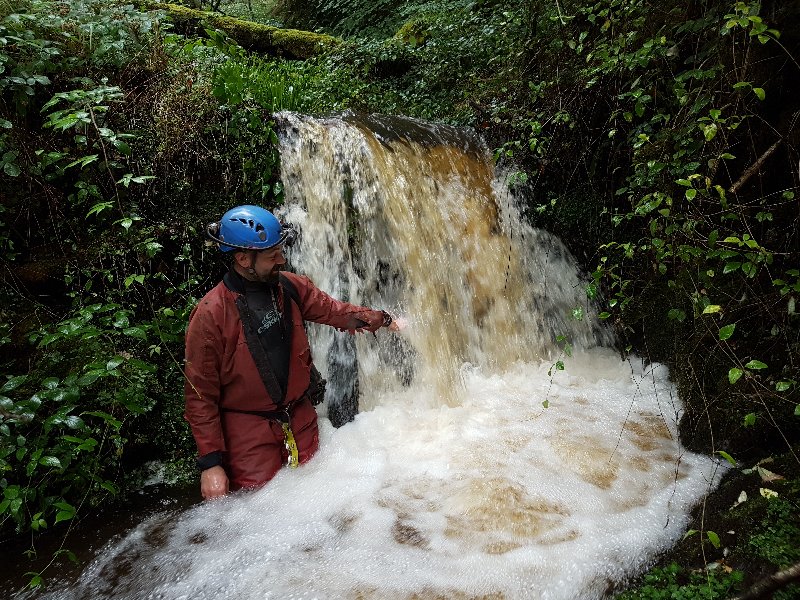 The next cascade, where it was not possible to climb down the cascade itself, since it lacked holds.
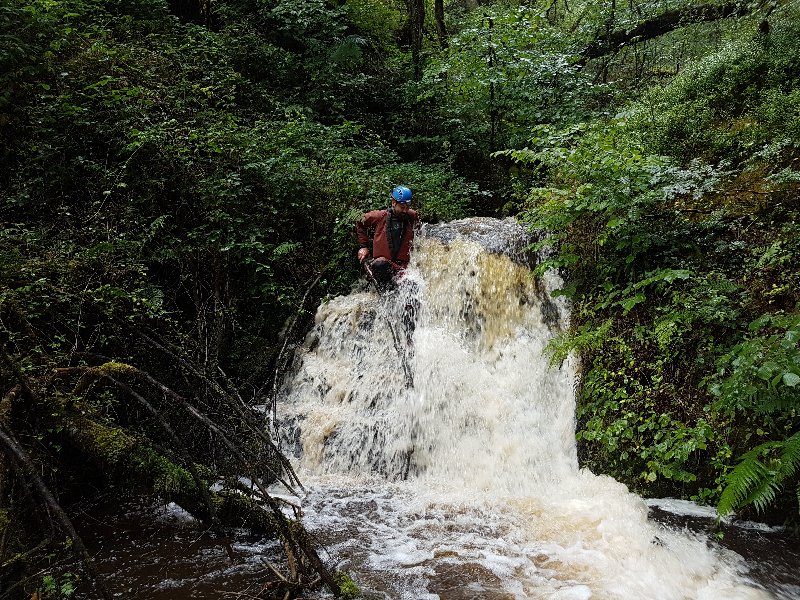 A further climb then took us directly below the Brechfa Lead Mine entrance.
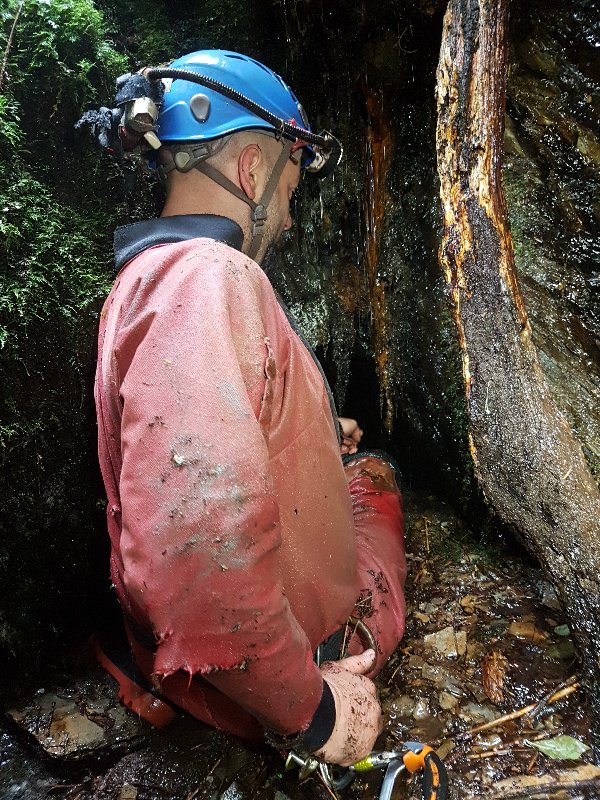 Phil pointed to the opposite bank, and mentioned that it would be likely that the same vein existed there, and the miners might have tried to locate it. As if by magic, scratching around behind moss and fallen trees exposed the entrance to another trial adit, just above stream level. It has not been recorded previously on the mine exploration registry.
Lighting by Sol and Phil
Phil pointed to the opposite bank, and mentioned that it would be likely that the same vein existed there, and the miners might have tried to locate it. As if by magic, scratching around behind moss and fallen trees exposed the entrance to another trial adit, just above stream level. It has not been recorded previously on the mine exploration registry.
Lighting by Sol and Phil Heading into the unknown. We think this picture shows the first rediscovery visit into this mine adit since it was dug in the 1880s.
Lighting by Tarquin, Sol and Phil
Heading into the unknown. We think this picture shows the first rediscovery visit into this mine adit since it was dug in the 1880s.
Lighting by Tarquin, Sol and Phil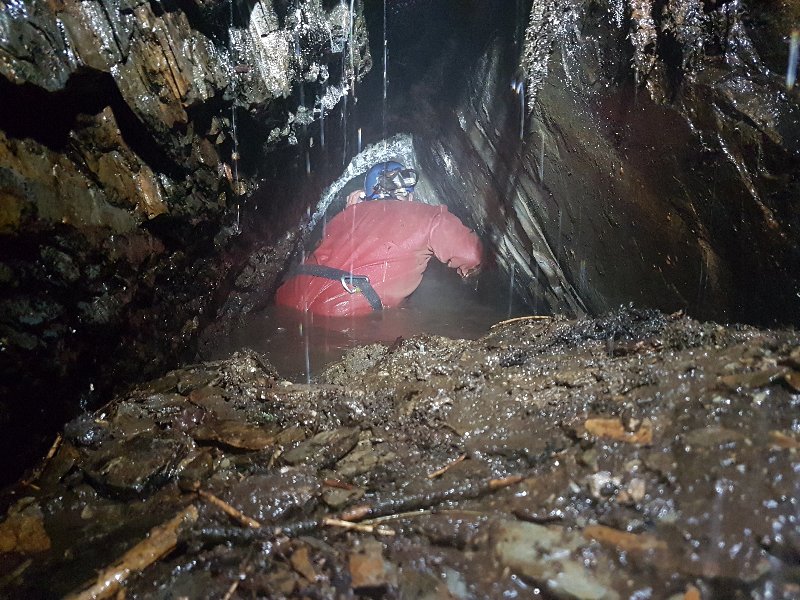 Wading through the stench of rotting vegitation.
Lighting by Tarquin and Phil
Wading through the stench of rotting vegitation.
Lighting by Tarquin and Phil Brechfa Lead Mine's Western Trial Adit turned out to be about 10 metres long, with a thigh-deep canal for its entire length, ending at a blank wall. Nothing spectacular, but still exciting to rediscover.
Lighting by Tarquin and Phil
Brechfa Lead Mine's Western Trial Adit turned out to be about 10 metres long, with a thigh-deep canal for its entire length, ending at a blank wall. Nothing spectacular, but still exciting to rediscover.
Lighting by Tarquin and Phil After washing off back in the river, we resumed course downstream. This tricky scramble lands in a deep pool.
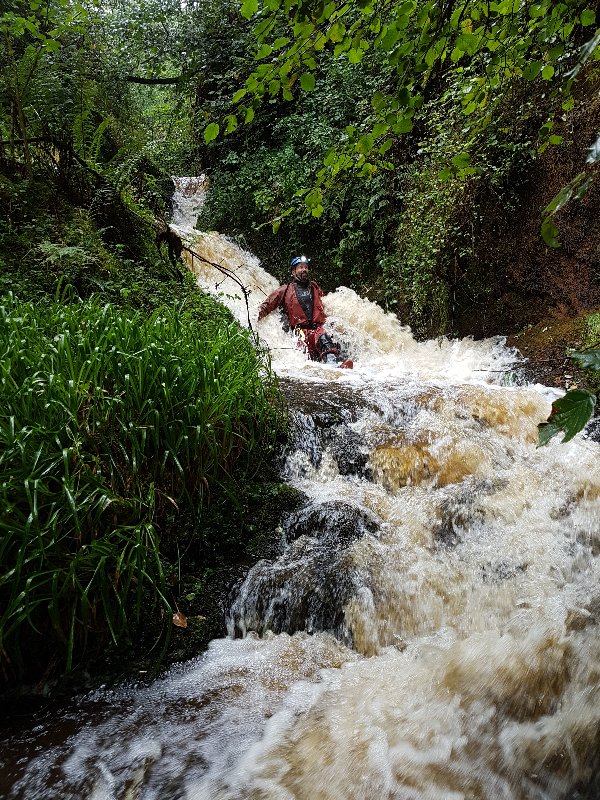 Followed by another great water slide.
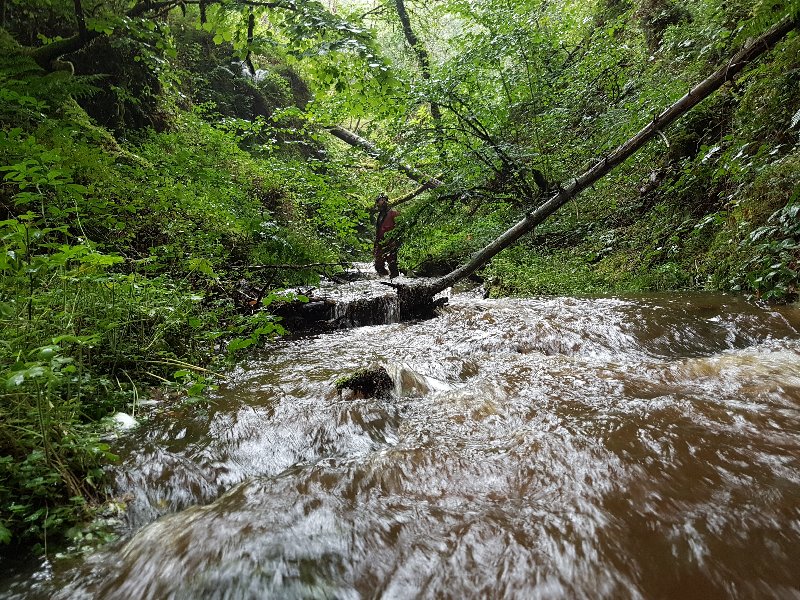 The stream then abruptly changes style and becomes much more gentle. There are no further waterfalls.
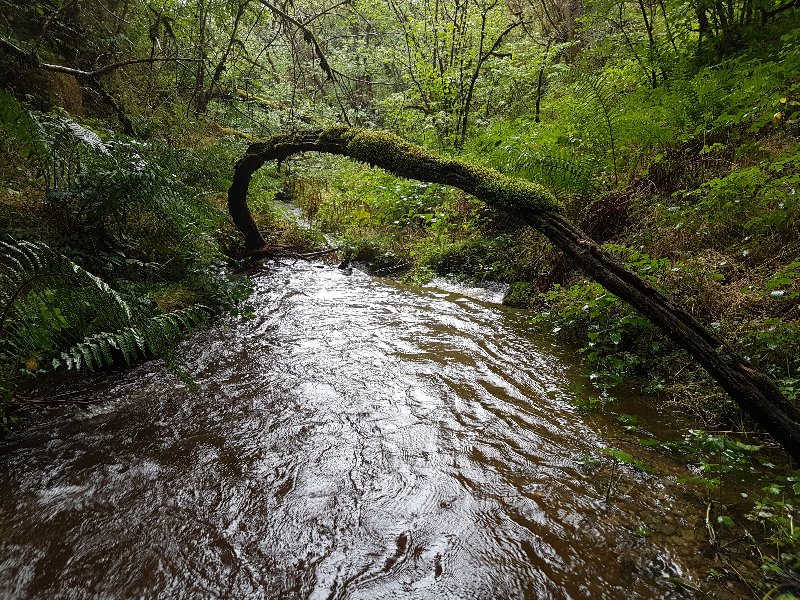 Tree loop.
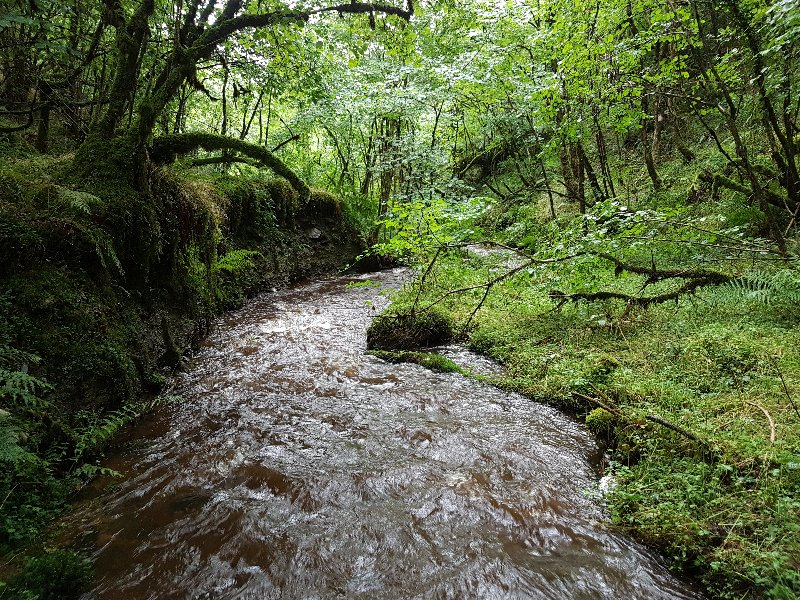 The lower stream.
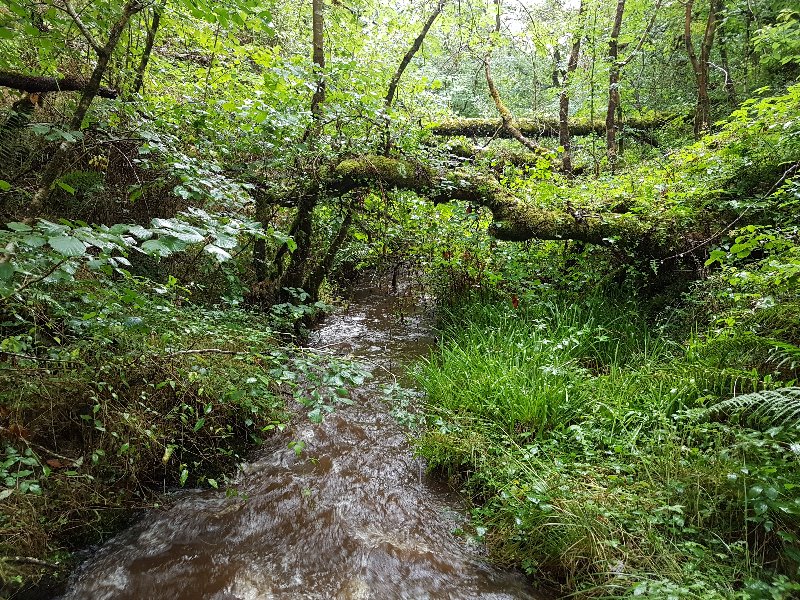 It then becomes too overgrown to follow. Up on the right bank is the overgrown remains of a railway cutting, which could have been used to take away material, if the trial mine had been successful.
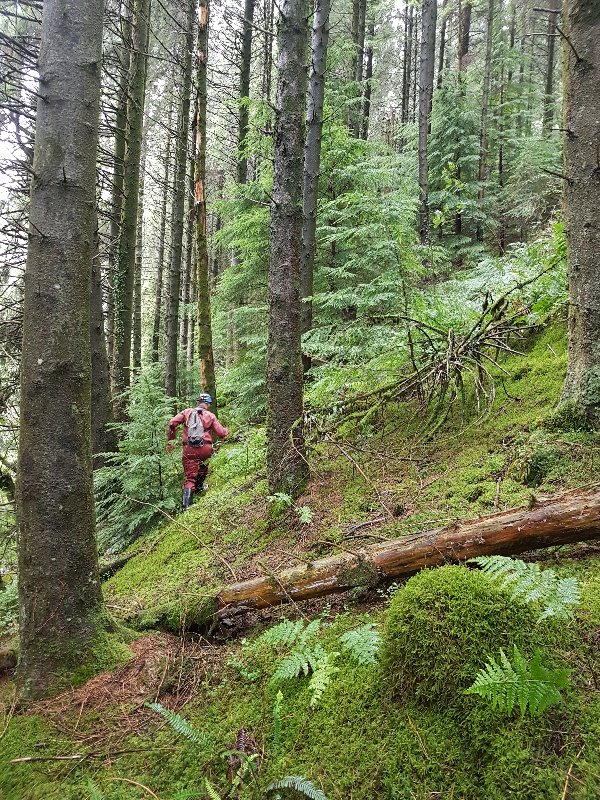 Instead, we returned to the last cascade, and started our ascent back up through the forest on the eastern bank. There is a hint of a path.
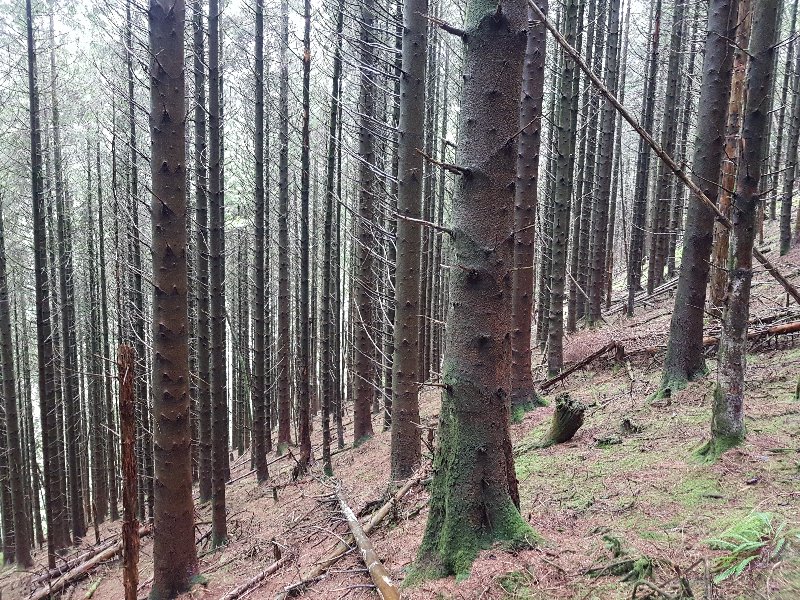 Tall trees as we approach the top above the trial mines, now without any path.
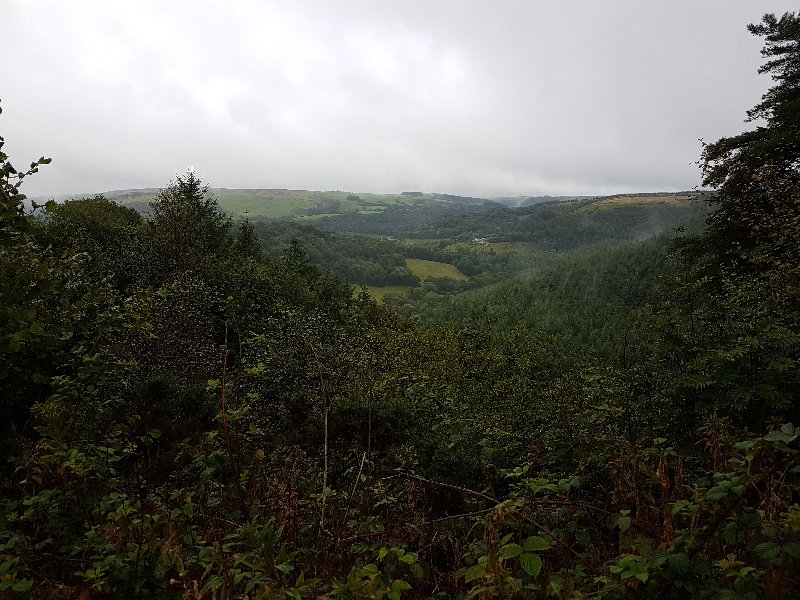 View through the pass into the Afon Gwili valley.
 View over Brechfa. The village lies in front of the deep Afon Cothi valley in the centre of the picture. The main road south passes through the shallower green valley on the right. The main road north passes up the shallow valley on the left, with the upstream Afon Cothi valley being the more obvious valley behind it.
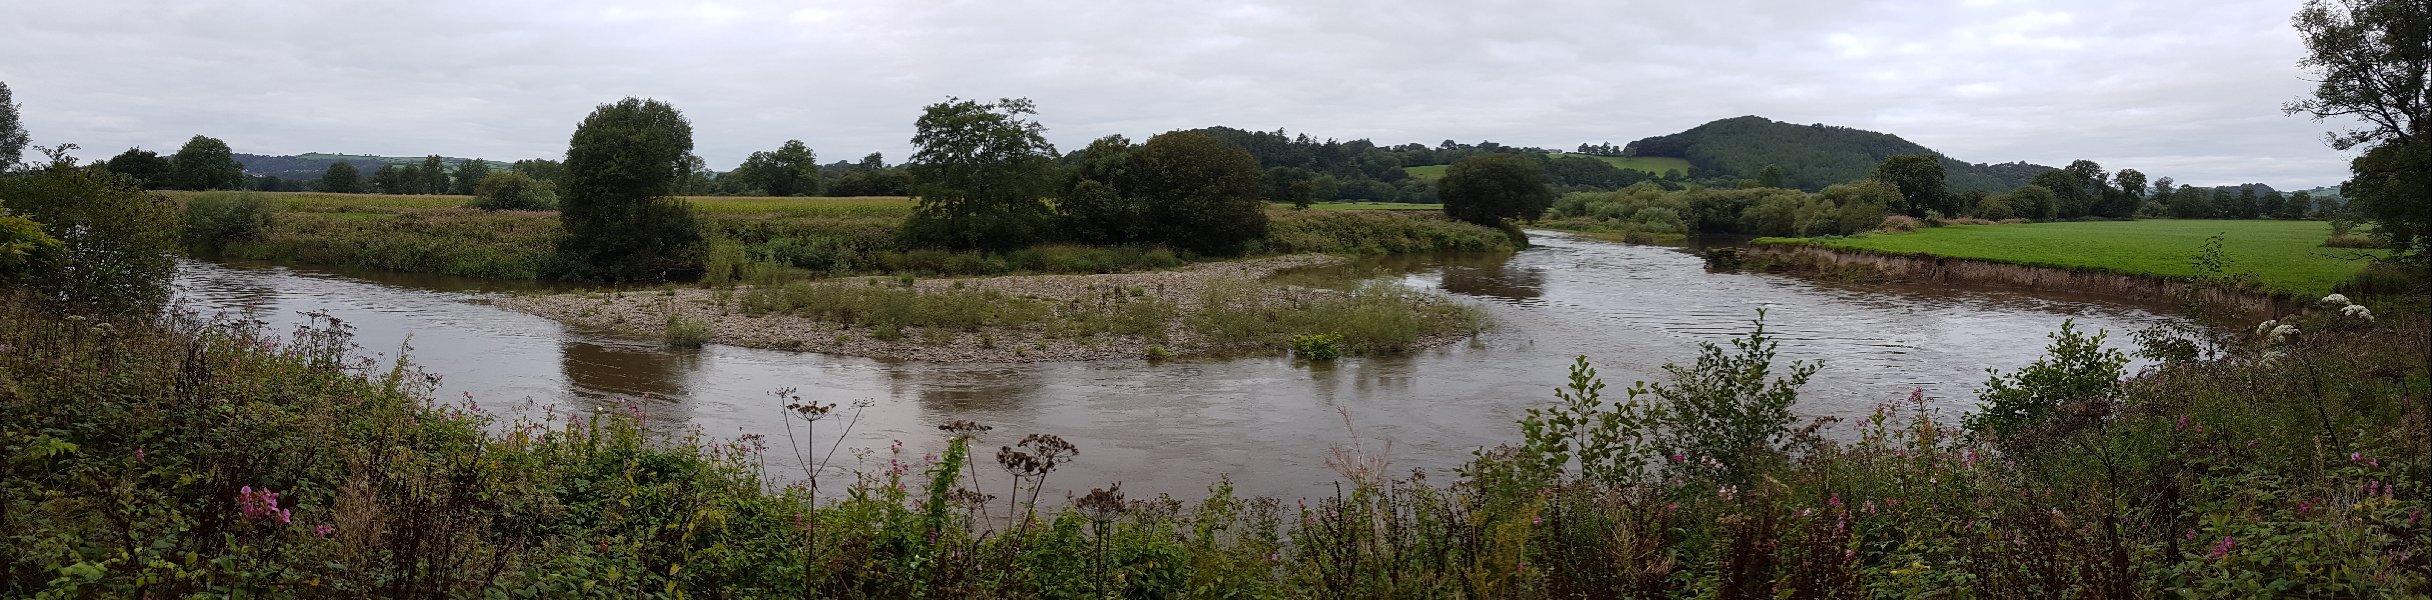 The Afon Tywi/River Towy, from the B4300 beside Pen-lan, where the next set of mines are located. This meander is the usual tidal limit point of the river. The hill on the right is Merlin's Hill fort (150 metres), while on the left is Penlan Voss (167 metres) above Carmarthen.
 View from Allt Cystanog over the Nant Pibwr valley, towards Nantycaws (cheese-stream - what a name). The major A48 route across South Wales runs along the distant ridge. The mines all lie beneath the field on the left.
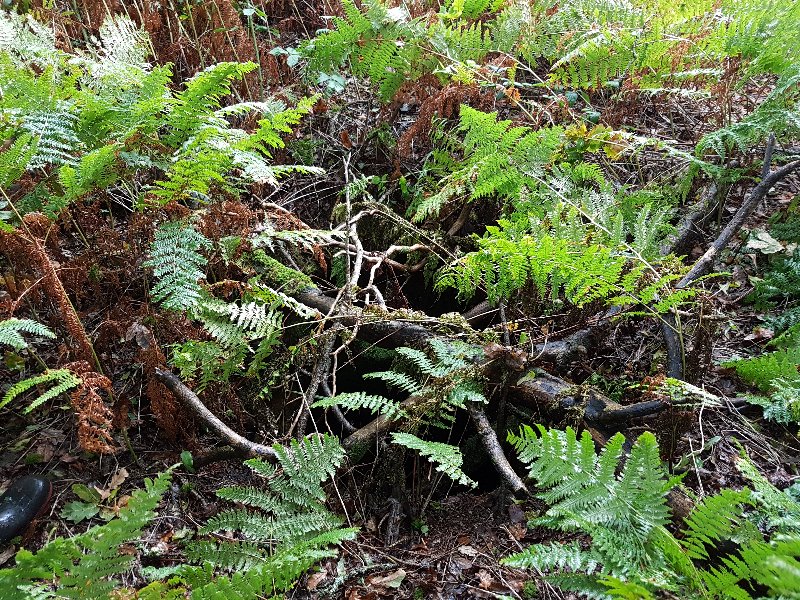 Horrifyingly hidden entrance to a crown hole, that looks like a bell pit, amongst the bracken. This sits above all of the mines, and it most likely connects with a choked passage in the Penlan levels. Not to worry, there are some branches over the entrance, which were not too rotten during our visit...
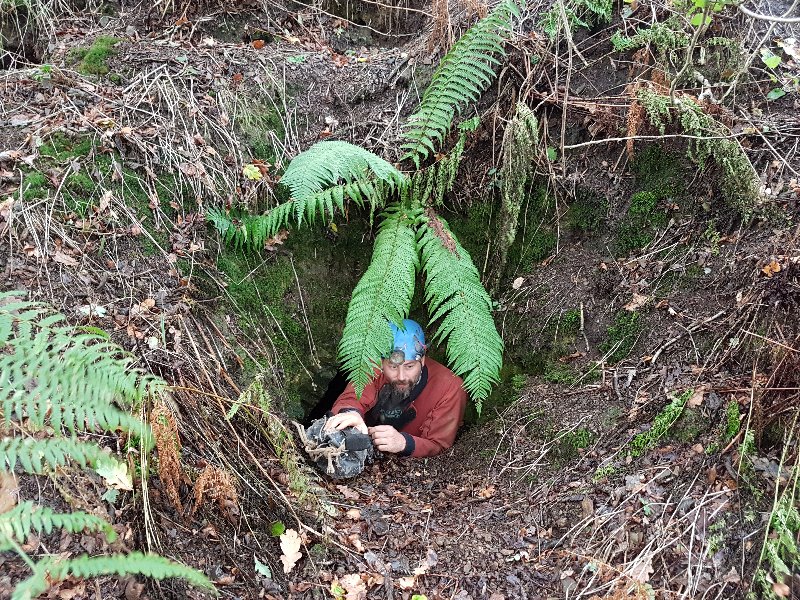 Heading into the Cystanog Lead Mine's Penlan 2 entrance, which dates from 1878-1882, but was reworked after 1889.
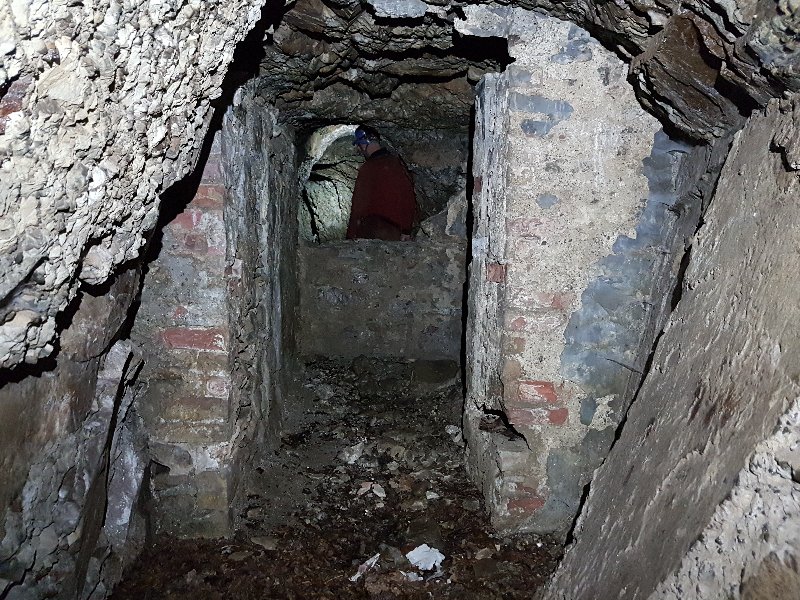 Remains of the powder store.
Lighting by Tarquin and Phil
Remains of the powder store.
Lighting by Tarquin and Phil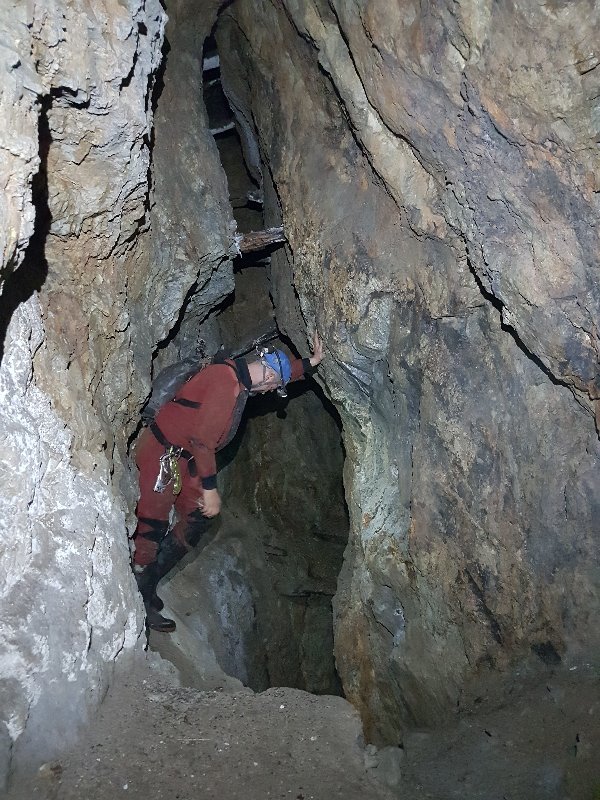 Stope leading down to the Penlan 1 entrance.
Lighting by Tarquin and Phil
Stope leading down to the Penlan 1 entrance.
Lighting by Tarquin and Phil Looking down the stope.
Lighting by Tarquin and Phil
Looking down the stope.
Lighting by Tarquin and Phil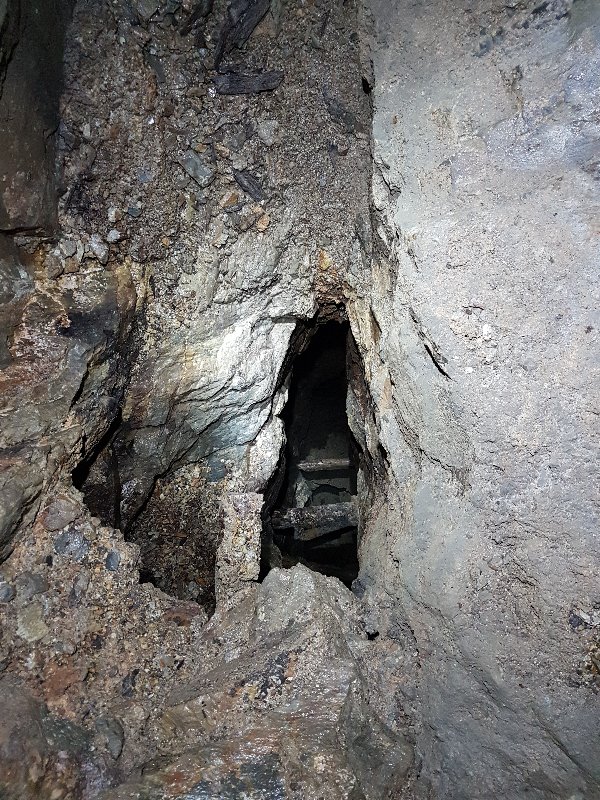 When crossing the stope, you realise that the rubble floor is not actually solid.
 Instead, it is a false floor of planks, overlaying the props. This is not a comfortable place to be. Walk on the rock ledges on the sides instead.
Lighting by Tarquin and Phil
Instead, it is a false floor of planks, overlaying the props. This is not a comfortable place to be. Walk on the rock ledges on the sides instead.
Lighting by Tarquin and Phil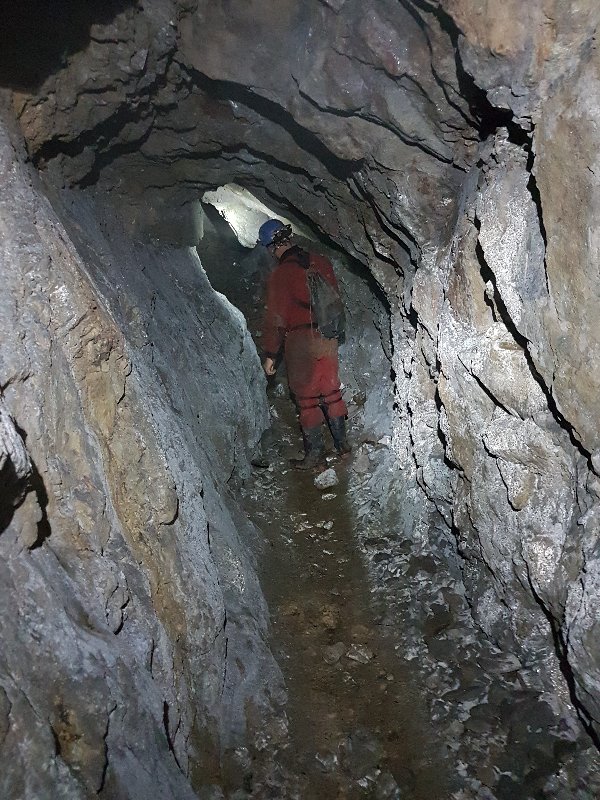 The passage eventually ends at an ore pass into the lower passages.
Lighting by Tarquin and Phil
The passage eventually ends at an ore pass into the lower passages.
Lighting by Tarquin and Phil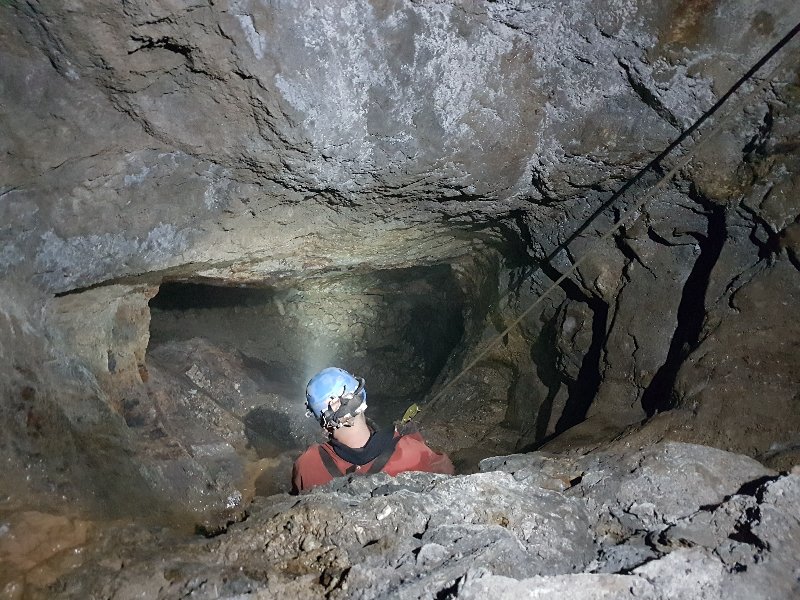 The ore pass is used as a pitch to reach the lower levels. The floor chokes where it would connect with Penlan 1, but a traverse on the left leads towards Cystanog 3.
Lighting by Tarquin and Phil
The ore pass is used as a pitch to reach the lower levels. The floor chokes where it would connect with Penlan 1, but a traverse on the left leads towards Cystanog 3.
Lighting by Tarquin and Phil An old wheelbarrow between the levels. The passages on either side have been almost filled with debris, marooning this wheelbarrow in here. The miners abandoned it.
Lighting by Tarquin and Phil
An old wheelbarrow between the levels. The passages on either side have been almost filled with debris, marooning this wheelbarrow in here. The miners abandoned it.
Lighting by Tarquin and Phil Old end of Penlan 2, where a small crawl leads into Cystanog 3.
Lighting by Tarquin and Phil
Old end of Penlan 2, where a small crawl leads into Cystanog 3.
Lighting by Tarquin and Phil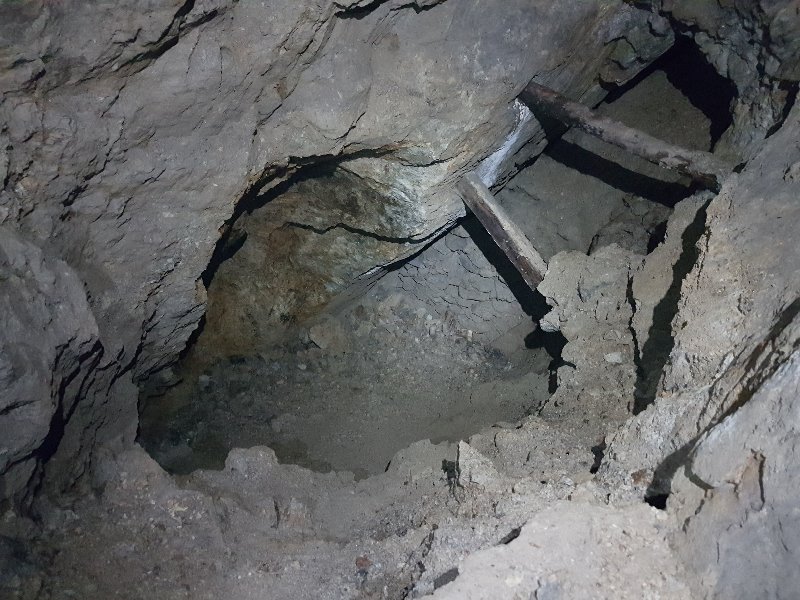 Cystanog 3 ends at a collapsed winze. This used to lead down into an alcove with wheelbarrows, but the deads (stacked rocks held back by rotting timbers) that lined the shaft bulged out and collapsed while someone was exploring the winze (!). Thankfully, nobody was hurt, but the alcove is no longer accessible. Until 2006, there was a wooden platform on top of the deads, with a hole down into the shaft. This collapsed completely in 2006, leaving this crater where the wooden platform had been. This is not a safe place to be, so we did not stay here long.
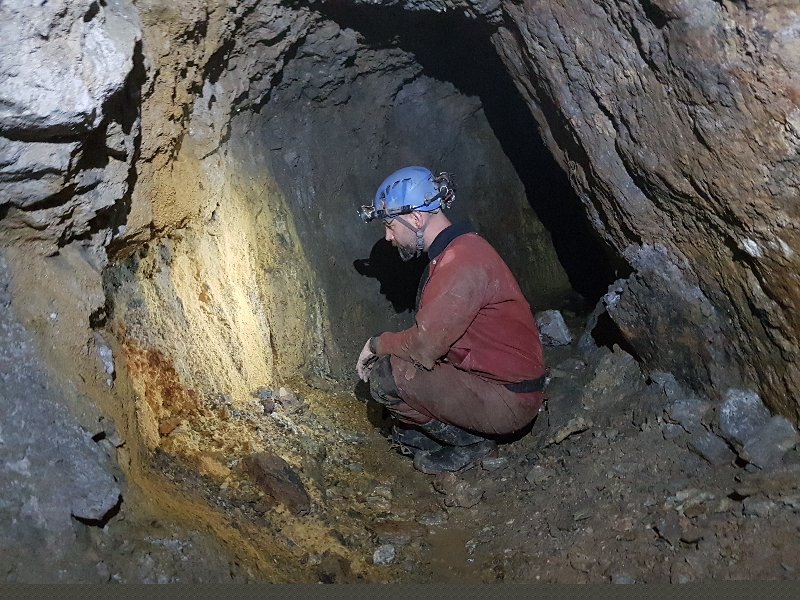 Cystanog 3.
Lighting by Tarquin and Phil
Cystanog 3.
Lighting by Tarquin and Phil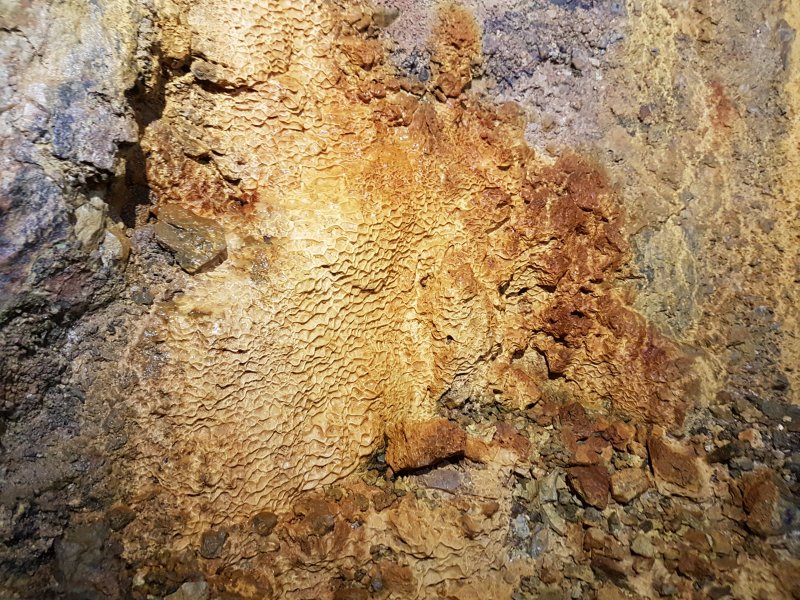 The formations look nice, but not as nice as this picture makes it look. The yellow stain is likely a sulphur mineral rather than ochre.
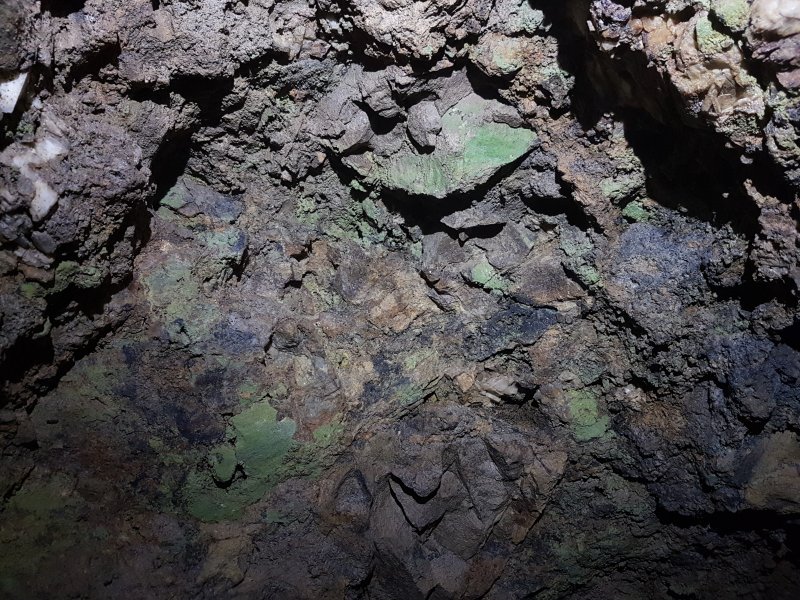 Likewise, this looks very impressive, possibly a copper ore such as malachite. However, on returning to find it again, I was very disappointed to see that it was merely a faded, pale green, and the camera had over-enhanced this picture. Or more likely, it could simply be a microbial stain (or lichen), which had died back by the time I next visited. In either case, there is no viable mineral here.
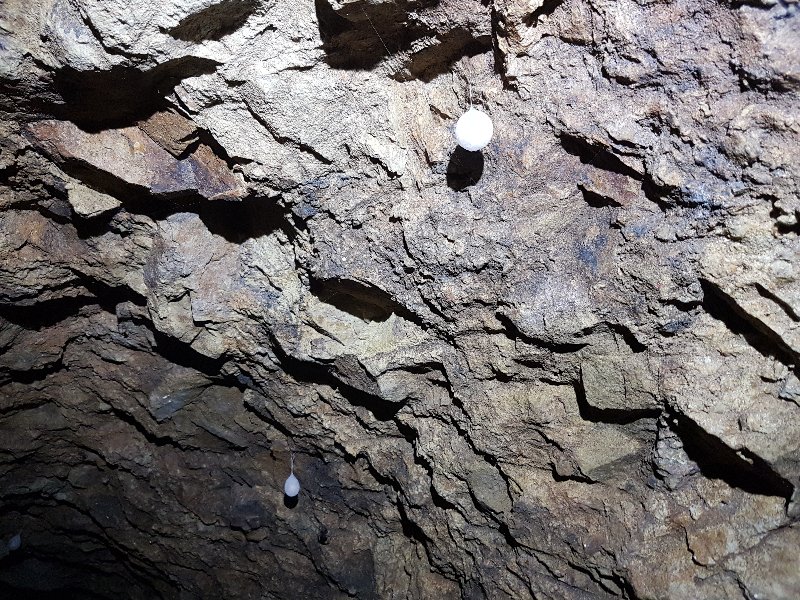 Cave spider egg sac in Cystanog 3.
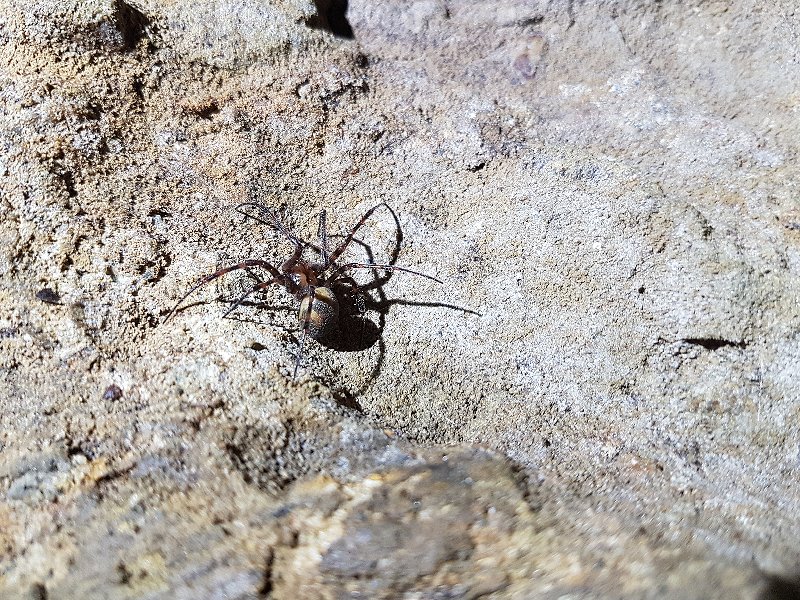 Passing through Cystanog 3 means running the gauntlet surrounded by cave spiders. This is a female, and fortunately they are harmless, in spite of their large size.
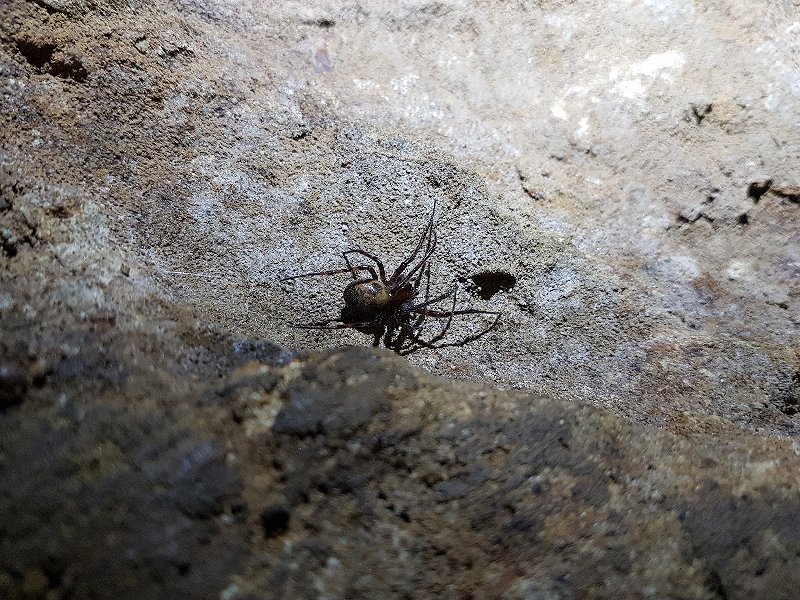 Another female.
 Through trip exit at Cystanog 3 (formerly known as the upper level). This is not a good entrance, as the rocks force a squeeze surrounded by spiders. The rocks have slipped and the soil threatens to release more, so the entrance could block itself at some point.
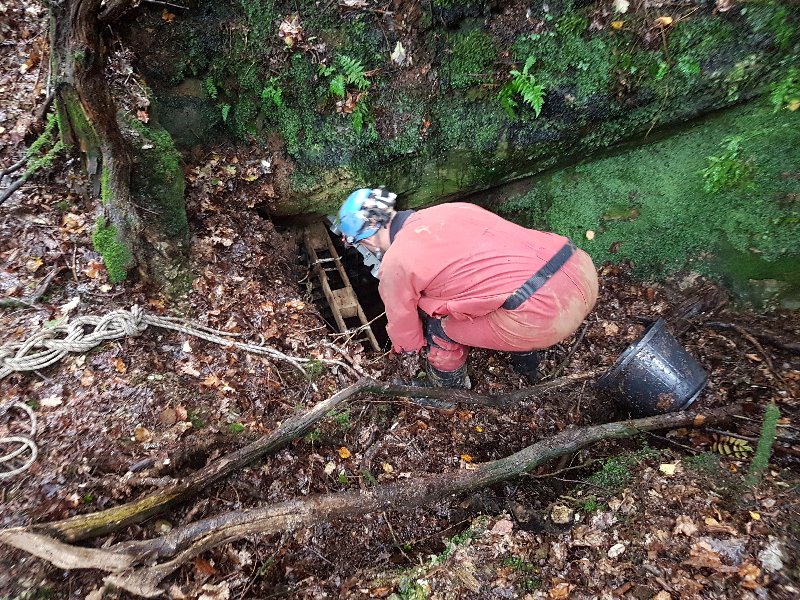 The entrance to the Cystanog Lead Mine's Allt Cystanog Level 2 (formerly known as the lower level or the shallow level), rediscovered by Phil. This is the most extensive mine in the area, and probably dates from the 1850s, and reworked in the 1890s. In total, there may be as much as 2 km of passage in here.
Lighting by Sol and Phil
The entrance to the Cystanog Lead Mine's Allt Cystanog Level 2 (formerly known as the lower level or the shallow level), rediscovered by Phil. This is the most extensive mine in the area, and probably dates from the 1850s, and reworked in the 1890s. In total, there may be as much as 2 km of passage in here.
Lighting by Sol and Phil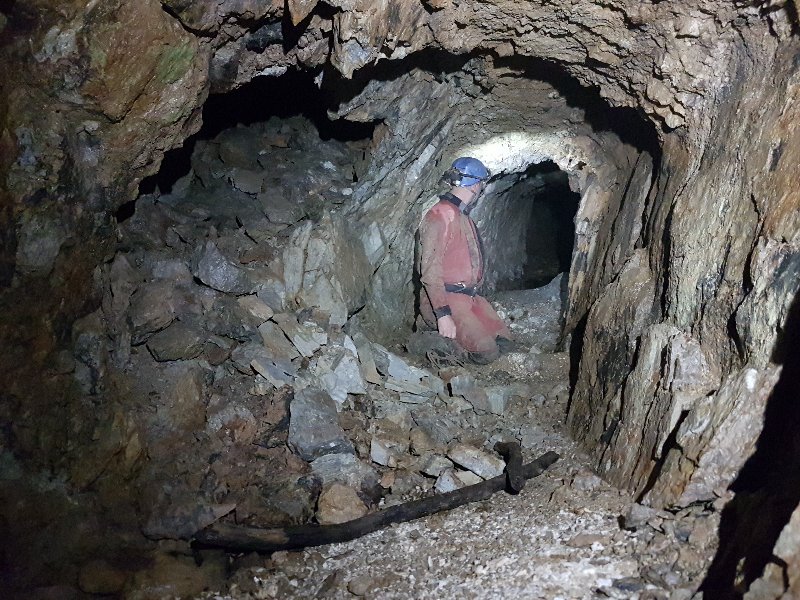 Start of the Allt Cystanog Level 2.
Lighting by Tarquin and Phil
Start of the Allt Cystanog Level 2.
Lighting by Tarquin and Phil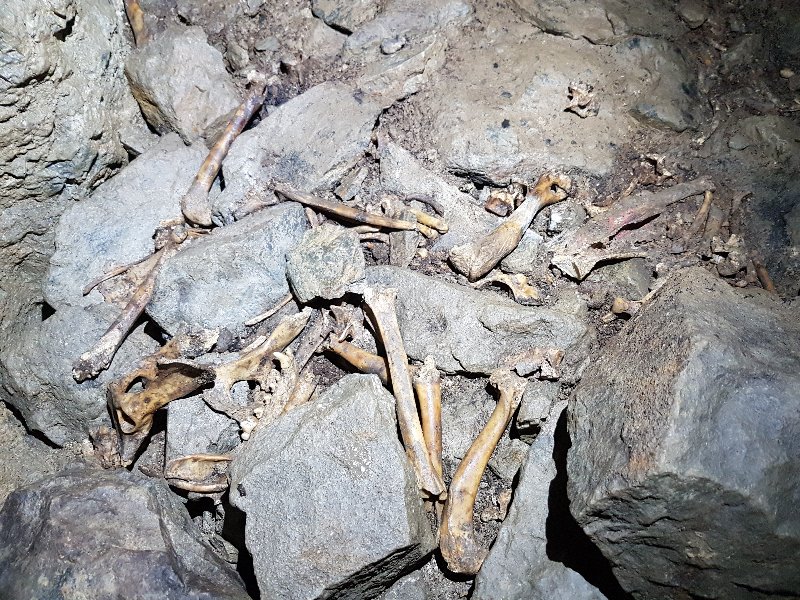 Badger bones in an oxbow.
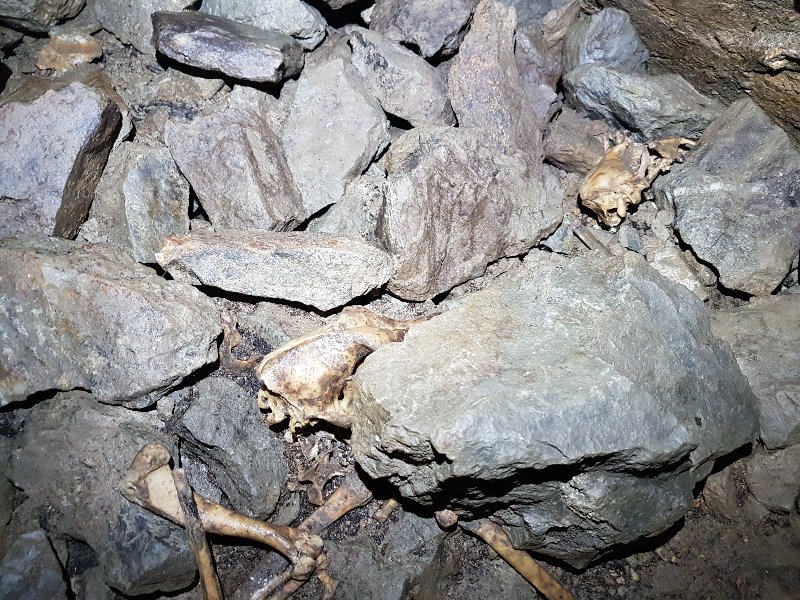 Two badger skulls. Presumably, they were using this as a set.
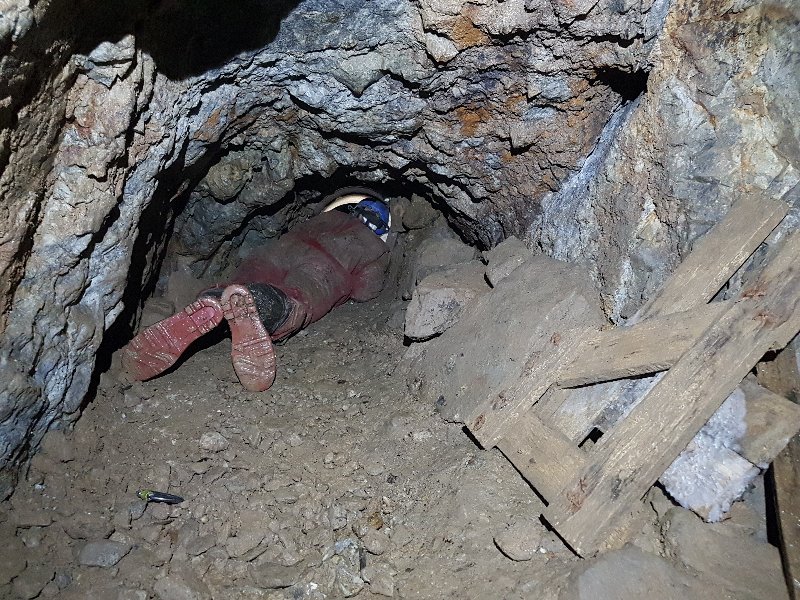 The first choke. Phil and his team had dug through this, installing a pipe to make it possible to squirm through without risking further collapse. This mine has not been open for long, and it has not stabilised. Deads are stacked in many places without great support.
Lighting by Tarquin and Phil
The first choke. Phil and his team had dug through this, installing a pipe to make it possible to squirm through without risking further collapse. This mine has not been open for long, and it has not stabilised. Deads are stacked in many places without great support.
Lighting by Tarquin and Phil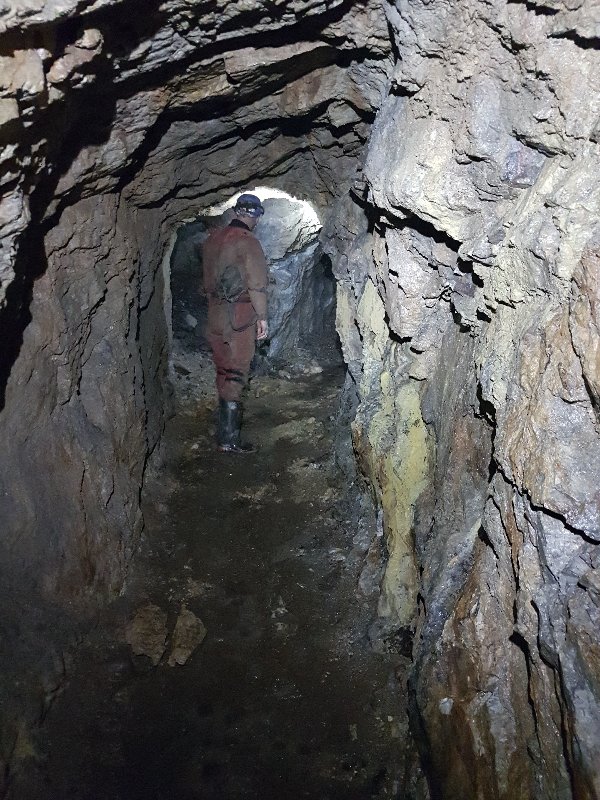 Beyond the choke.
Lighting by Tarquin and Phil
Beyond the choke.
Lighting by Tarquin and Phil The passage heads away from the river, even though the lower entrance to the mine is further downhill, closer to the river.
Lighting by Tarquin and Phil
The passage heads away from the river, even though the lower entrance to the mine is further downhill, closer to the river.
Lighting by Tarquin and Phil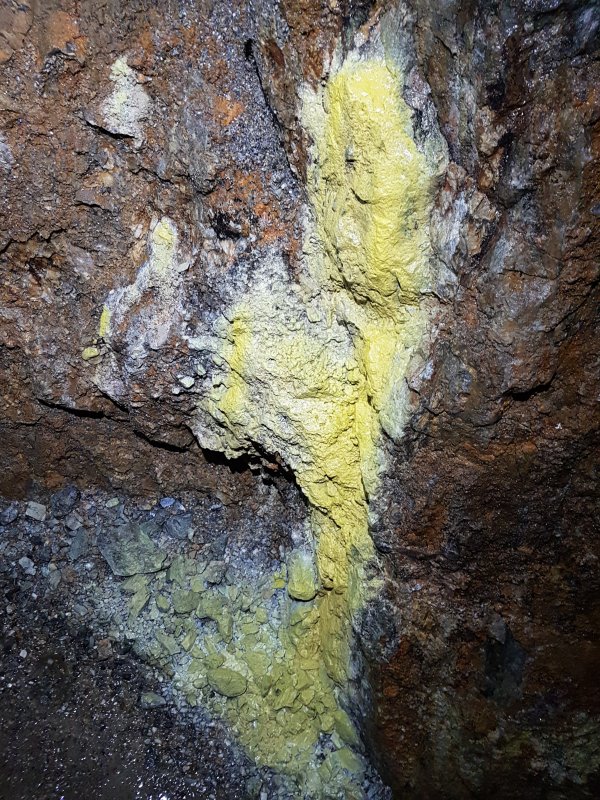 More yellow stained mineral, presumably also sulphur. It would have had no value at all as a mineral.
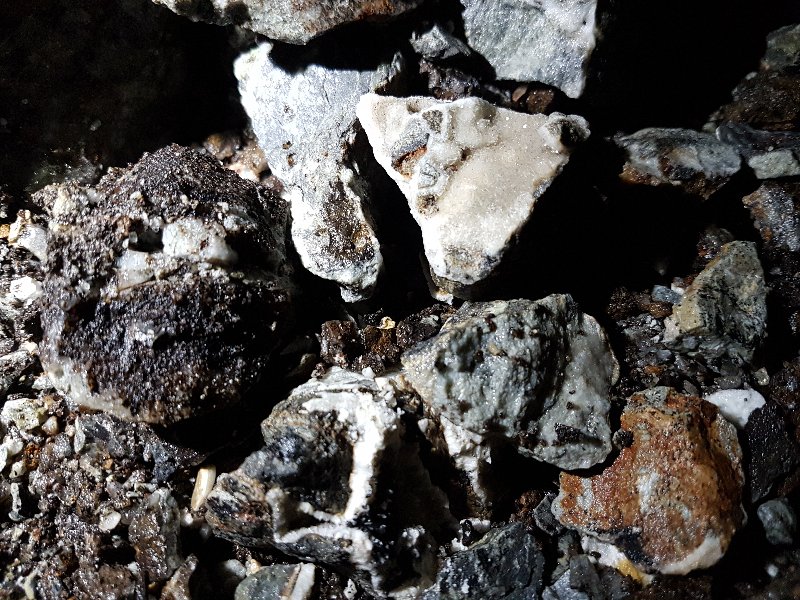 Crystals in three shades - black, white and clear - growing on the rocks. These have no value since they were discarded by the miners, but they are nice to see.
Lighting by Tarquin and Phil
Crystals in three shades - black, white and clear - growing on the rocks. These have no value since they were discarded by the miners, but they are nice to see.
Lighting by Tarquin and Phil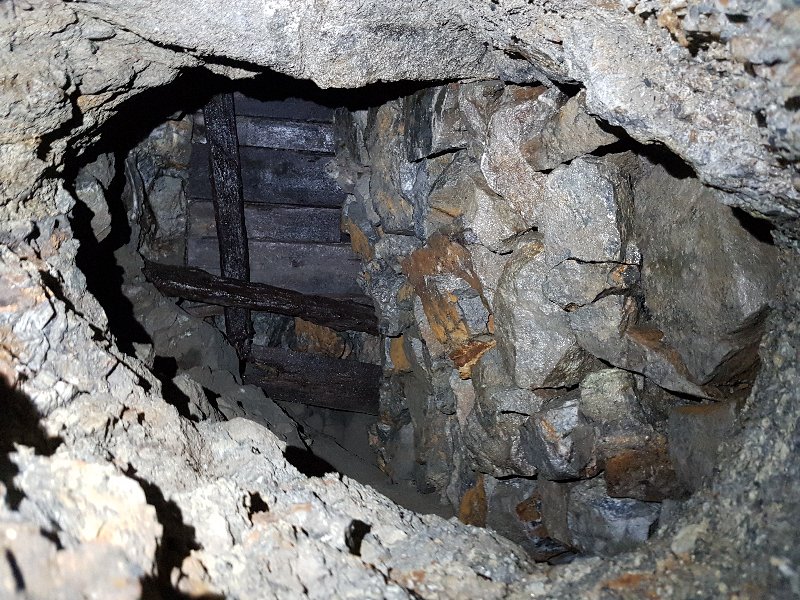 A horrifying sight; deads stacked above the passage in a small aven. The wood is rotting, and has been here since 1902 at least. At some point, it will collapse, and drop tonnes of rocks into the passage. Earlier collapses had produced yet more chokes that Phil's team had dug through.
 The next aven gives a view over the top of the deads. The wooden boards can be seen poking through the pile of rocks.
Lighting by Tarquin and Phil
The next aven gives a view over the top of the deads. The wooden boards can be seen poking through the pile of rocks.
Lighting by Tarquin and Phil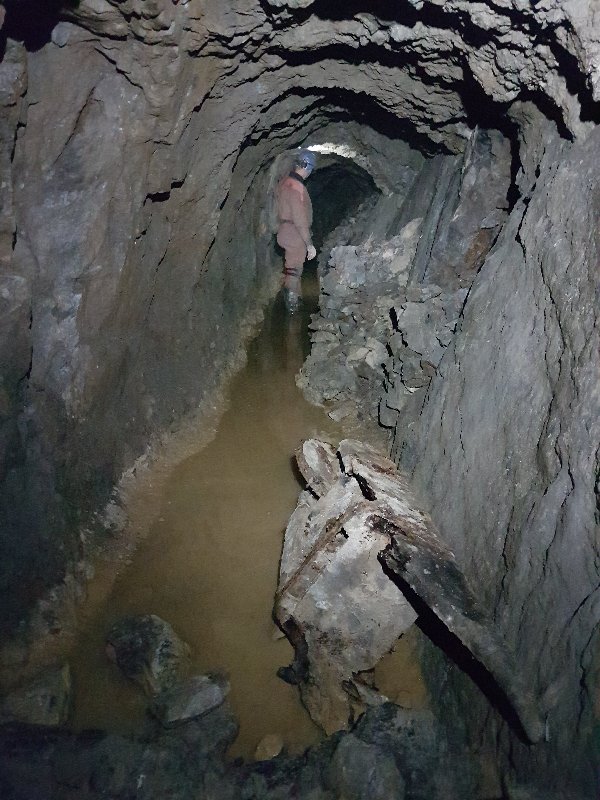 Wheelbarrow beyond the deads. This superb piece of adit is a great reward for the choke digs.
Lighting by Tarquin and Phil
Wheelbarrow beyond the deads. This superb piece of adit is a great reward for the choke digs.
Lighting by Tarquin and Phil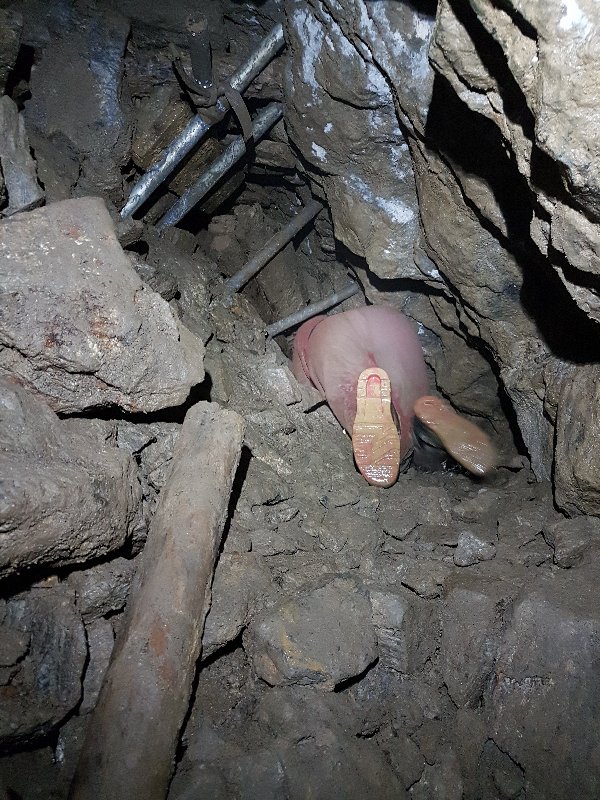 Another choke, this time with scaffolding preventing further collapse.
Lighting by Tarquin and Phil
Another choke, this time with scaffolding preventing further collapse.
Lighting by Tarquin and Phil This choke gave the major breakthrough, into a very substantial passage, complete with a wheelbarrow - a different design from the last one.
Lighting by Tarquin and Phil
This choke gave the major breakthrough, into a very substantial passage, complete with a wheelbarrow - a different design from the last one.
Lighting by Tarquin and Phil A slope to a short upper level. Various artefacts were found up here, including some of a chemical nature (these are no longer in the mine, for obvious reasons)
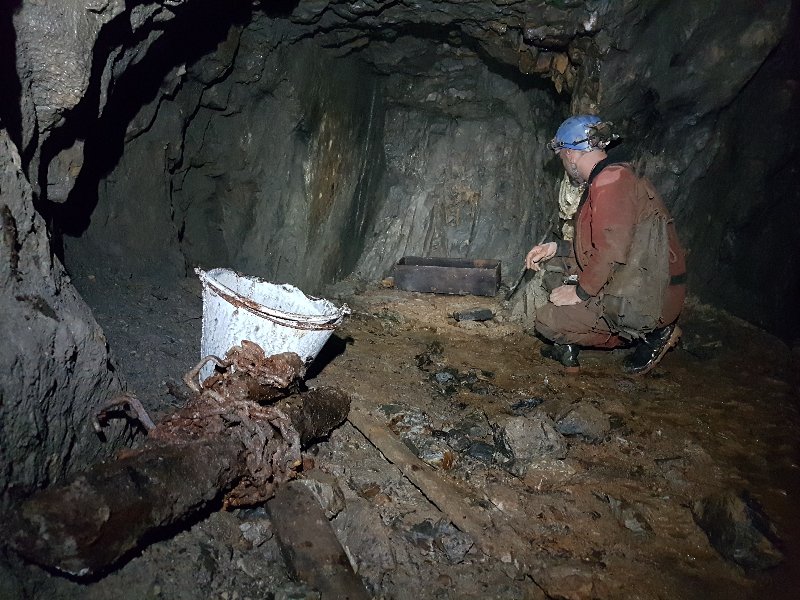 Artefacts in a side alcove, including a hand powered winch, bucket, and munitions box.
Lighting by Tarquin and Phil
Artefacts in a side alcove, including a hand powered winch, bucket, and munitions box.
Lighting by Tarquin and Phil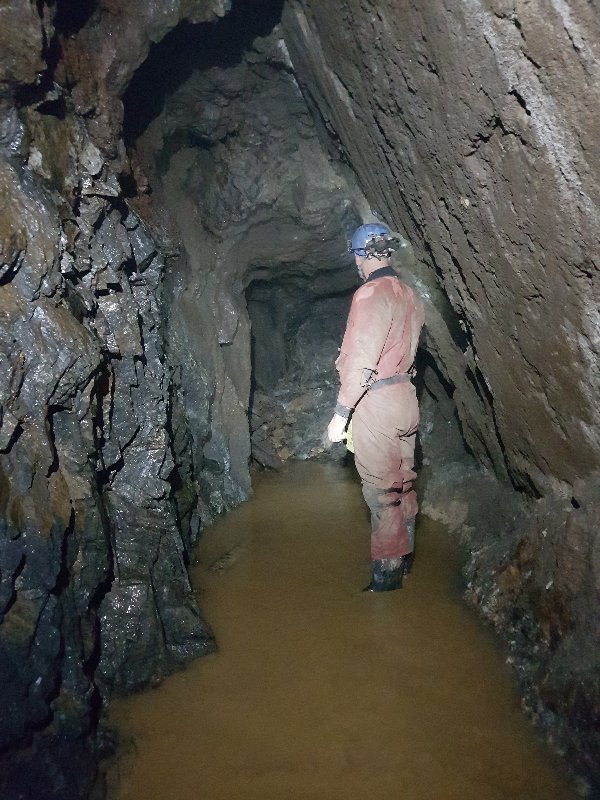 Grand side passage.
Lighting by Tarquin and Phil
Grand side passage.
Lighting by Tarquin and Phil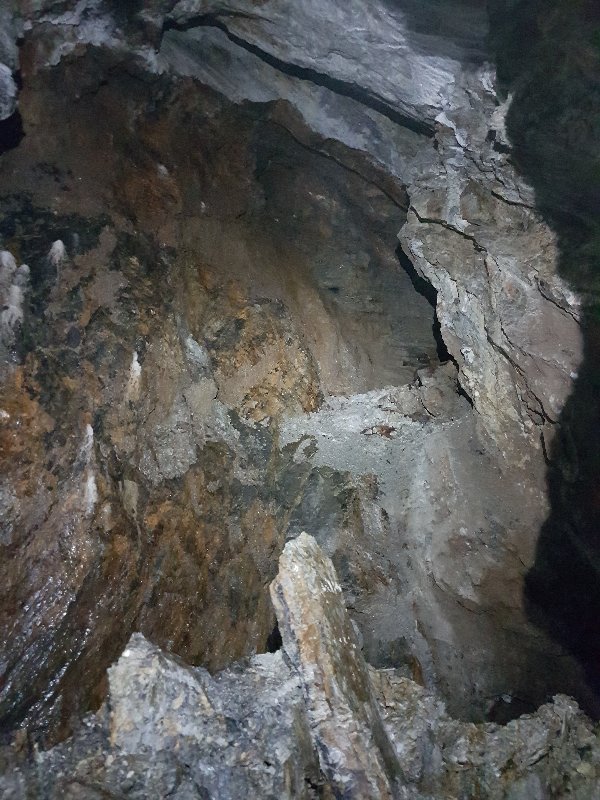 The side passage ends beyond a choke.
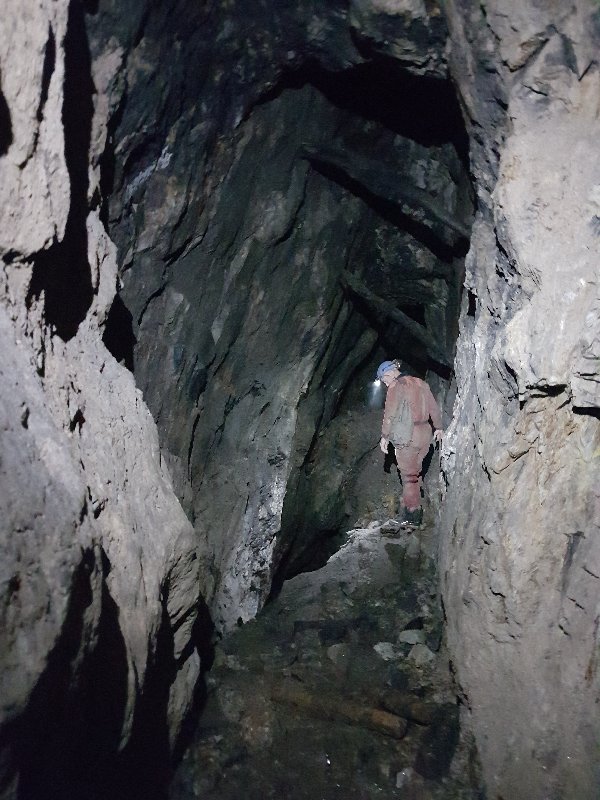 The main passage passes over a large hole. This served as an ore pass, but also had the hand powered winch above it (now moved to the side passage), so it was also a winze.
Lighting by Tarquin and Phil
The main passage passes over a large hole. This served as an ore pass, but also had the hand powered winch above it (now moved to the side passage), so it was also a winze.
Lighting by Tarquin and Phil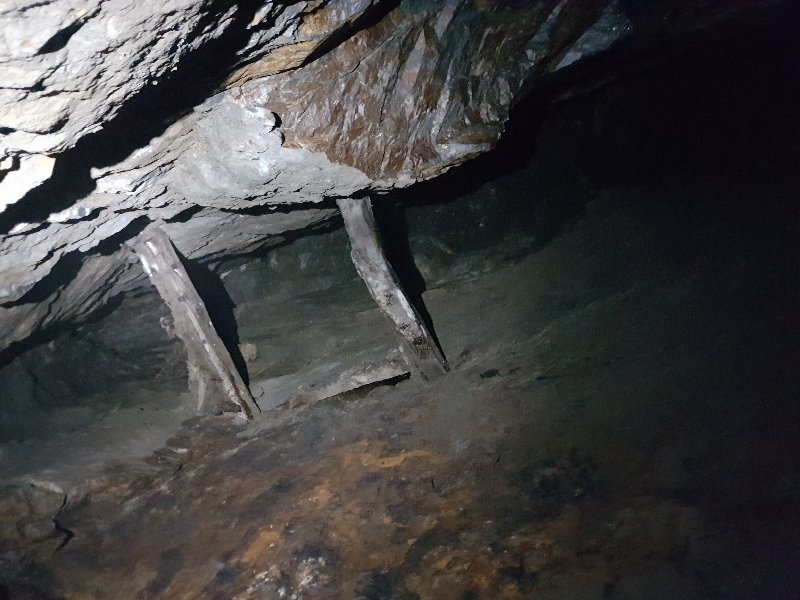 Tall stope above the winze. Some of these may have passage at the top, but large poised rocks guard them and prevent exploration.
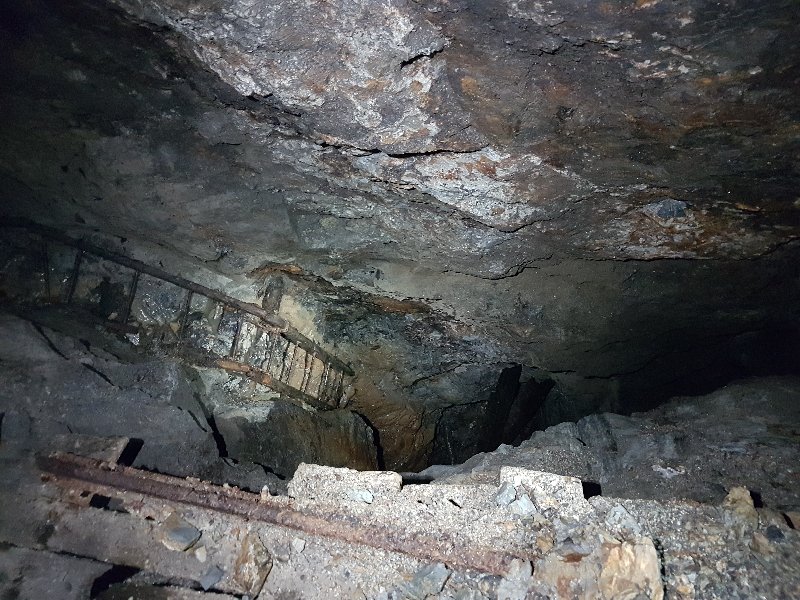 The winze has the remains of a rotting ladder, and drops a long way down into the darkness.
Lighting by Tarquin and Phil
The winze has the remains of a rotting ladder, and drops a long way down into the darkness.
Lighting by Tarquin and Phil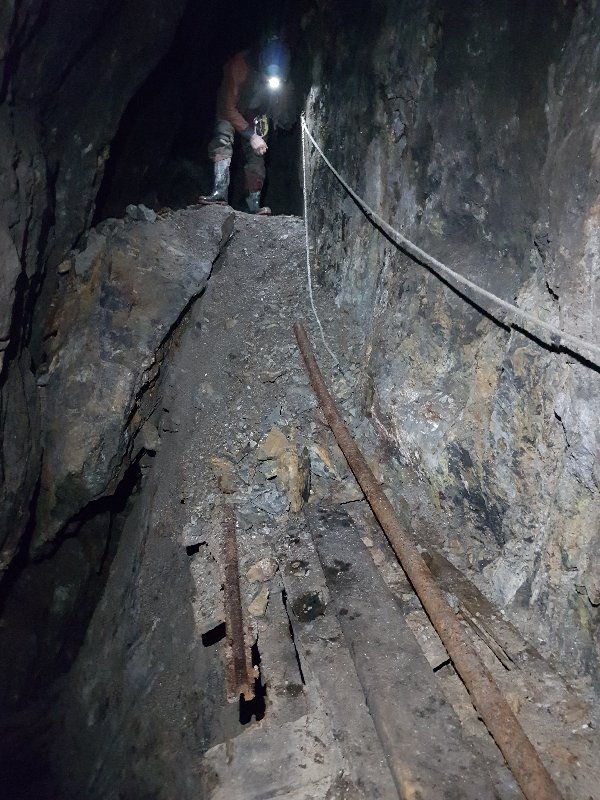 There was once a tramway rail crossing the winze (but it seems that they used the rail as a footbridge rather than a tramway), but the rails have snapped long ago, and the boards are completely rotten. We used the scaffolding pole to cross it. The rope is not a safety support, as it is not load bearing. Its purpose is only to steady yourself for psychological support while passing over the deep hole. This isn't scary at all, honestly.
Lighting by Tarquin and Phil
There was once a tramway rail crossing the winze (but it seems that they used the rail as a footbridge rather than a tramway), but the rails have snapped long ago, and the boards are completely rotten. We used the scaffolding pole to cross it. The rope is not a safety support, as it is not load bearing. Its purpose is only to steady yourself for psychological support while passing over the deep hole. This isn't scary at all, honestly.
Lighting by Tarquin and Phil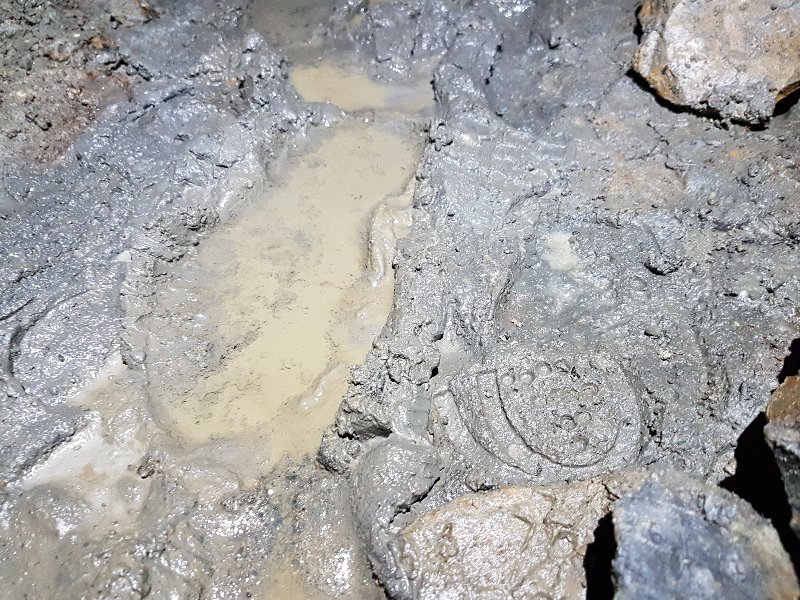 Phil and his team found remarkably well preserved footprints in the mud. These appear to be from 1890s hobnailed boots. The mine was abandoned in 1902.
 Though some boot prints are less defined, they are probably all from the same era. It is unlikely that any date from previous mining operations.
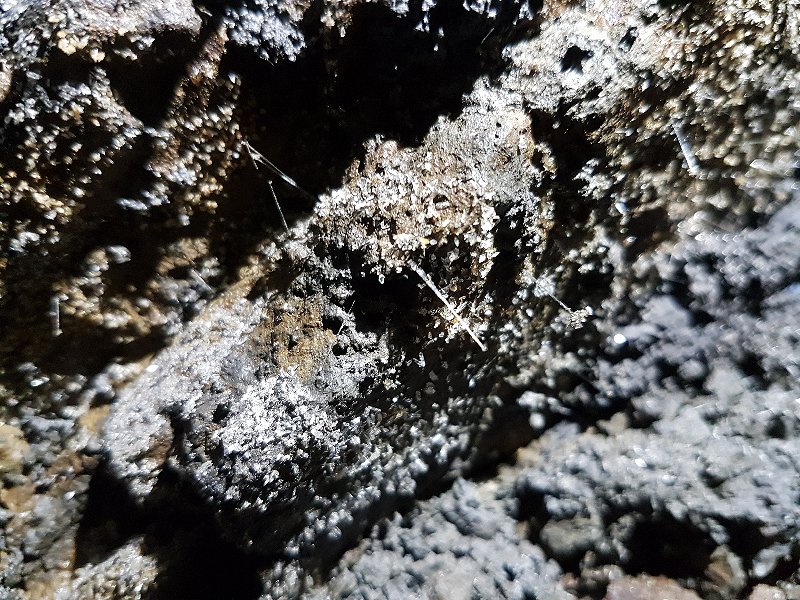 One wall is covered with needle-sized crystals. Perhaps these are selenite.
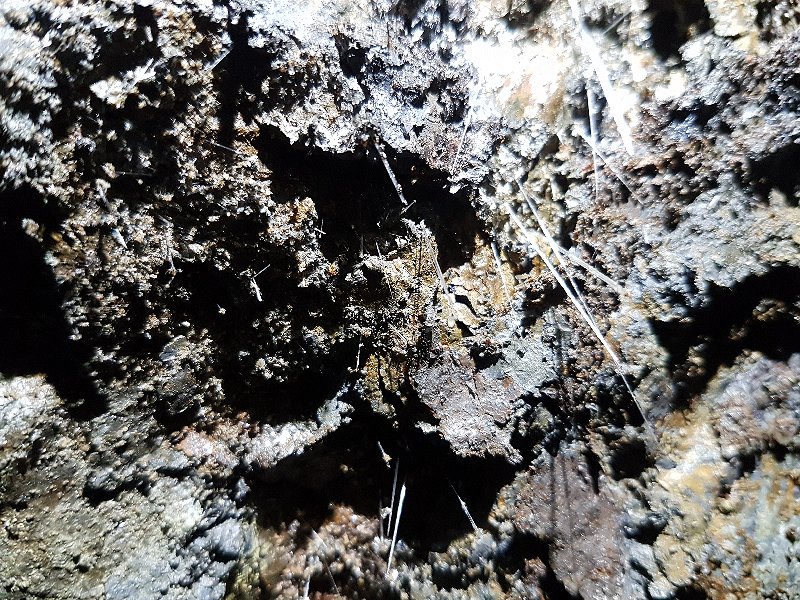 Crystal needles.
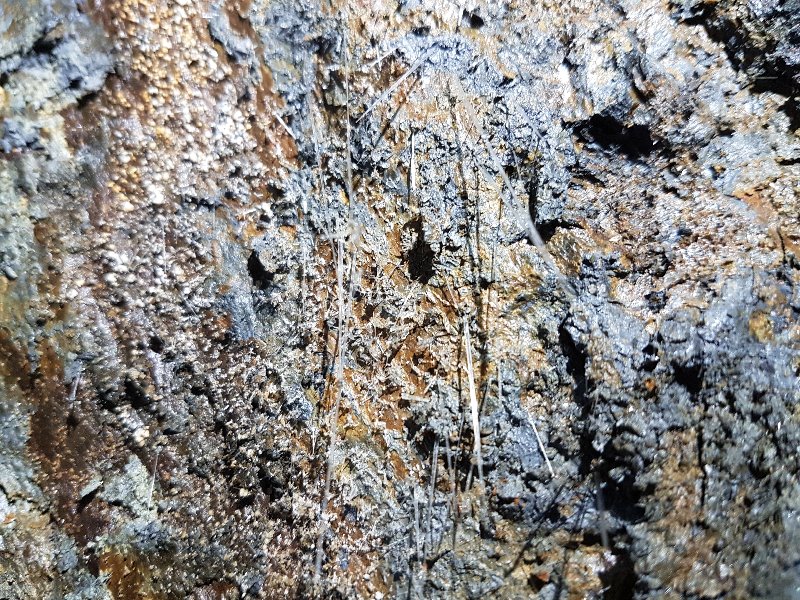 Crystal needles.
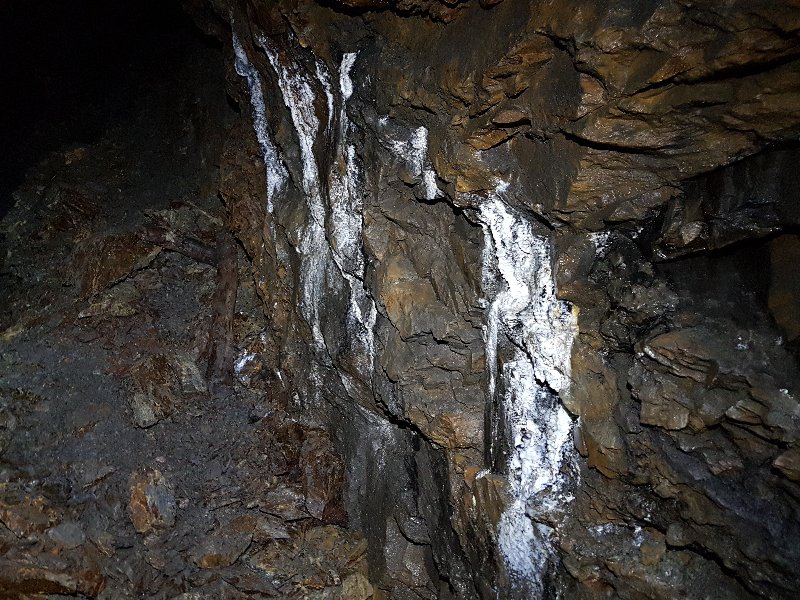 The passage then ended at a collapsed level, with what looks like calcite flow on the wall, but is actually hydrozincite.
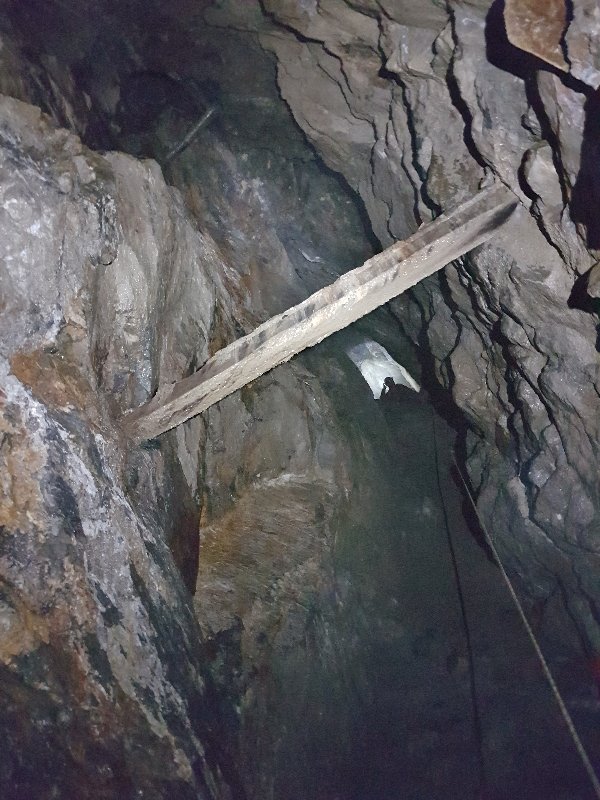 We abseiled down one of the earlier shaft holes towards the lower level. This was supposed to be a pull-through (if the bottom entrance had been open). However, while taking this picture, I disturbed some deads which rose more than 10 metres above my head all the way up to the ceiling of the shaft. Large rocks began to fall the final few metres to the floor, and while trying not to become a target, I speed-traversed over the bottom of the shaft, and pulled myself back up the rope, hand over hand, since I had neglected to attach my chest harness, and could not switch to prusiking quickly enough. I love seeing mines, but I hate them at the same time. Caves are relatively stable, meant to be there, tested for thousands of years by nature. Mines were never meant to be there, and nature is still busy reclaiming them. One touch, and several tonnes of rock can come crashing down.
Lighting by Tarquin and Phil
We abseiled down one of the earlier shaft holes towards the lower level. This was supposed to be a pull-through (if the bottom entrance had been open). However, while taking this picture, I disturbed some deads which rose more than 10 metres above my head all the way up to the ceiling of the shaft. Large rocks began to fall the final few metres to the floor, and while trying not to become a target, I speed-traversed over the bottom of the shaft, and pulled myself back up the rope, hand over hand, since I had neglected to attach my chest harness, and could not switch to prusiking quickly enough. I love seeing mines, but I hate them at the same time. Caves are relatively stable, meant to be there, tested for thousands of years by nature. Mines were never meant to be there, and nature is still busy reclaiming them. One touch, and several tonnes of rock can come crashing down.
Lighting by Tarquin and Phil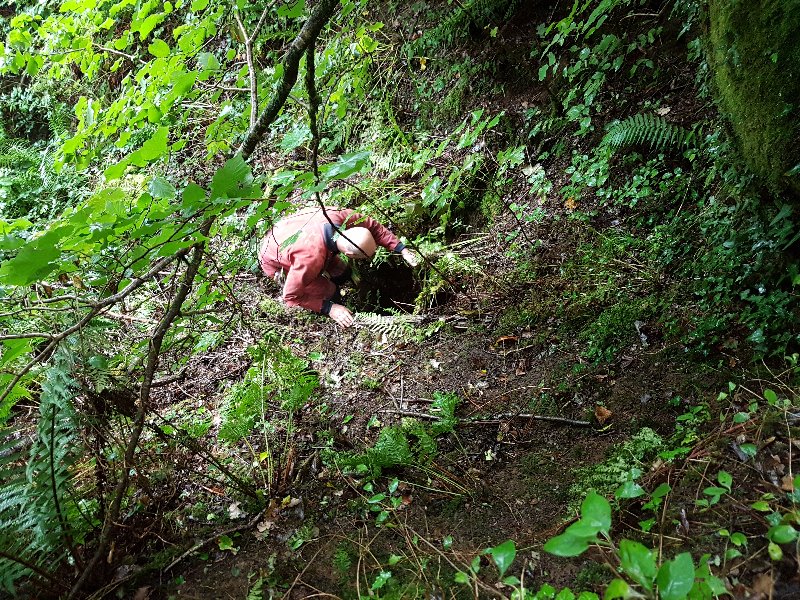 From the bottom of the shaft, there is a passage leading all the way out to the bottom entrance (Cystanog 1, formerly the Deep Adit), but we had checked beforehand, and the bottom entrance had collapsed (it also swallowed Phil's phone, burying it in mud to block the signal, and it was only by excavating that it was found by chance disguised among the muddy rocks). We would have to wait for the winze to stabilise before trying to view the bottom levels again another day. Closer to the river, there is a 51 metre deep shaft with levels extending beneath the river. This is completely flooded now.
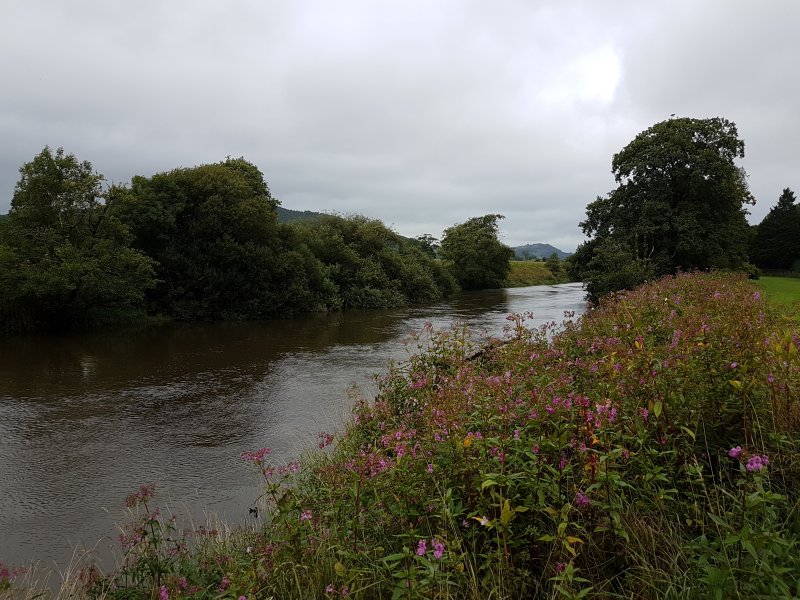 The parking area has its own view from the nearby river. The hill in the background is an unnamed 175 m rise above Nantgaredig.
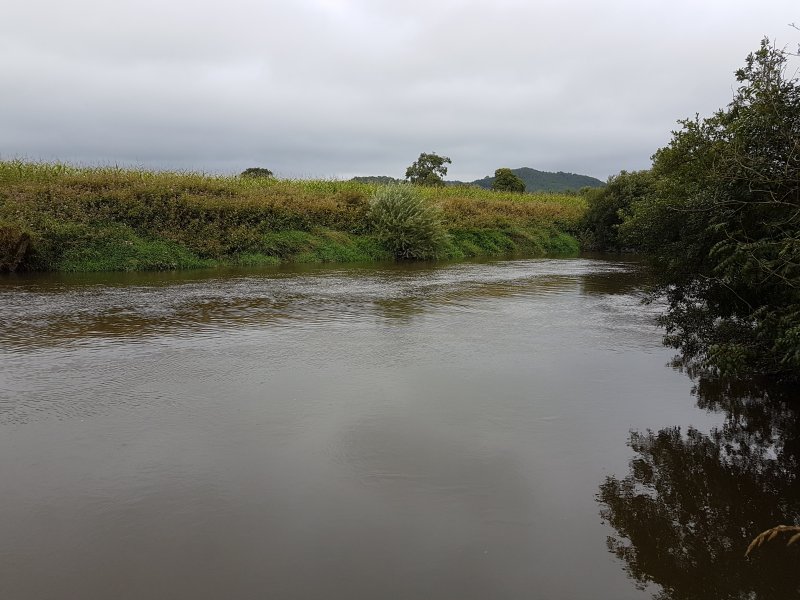 The river near the parking area.
 Next to a layby is West Level, sometimes referred to as part of the Llangunnor Lead Mines, even though it is actually part of the Allt Cystanog Lead Mines. This sits right next to the road, so it sees more than its share of unwelcome visitors, who dump litter.
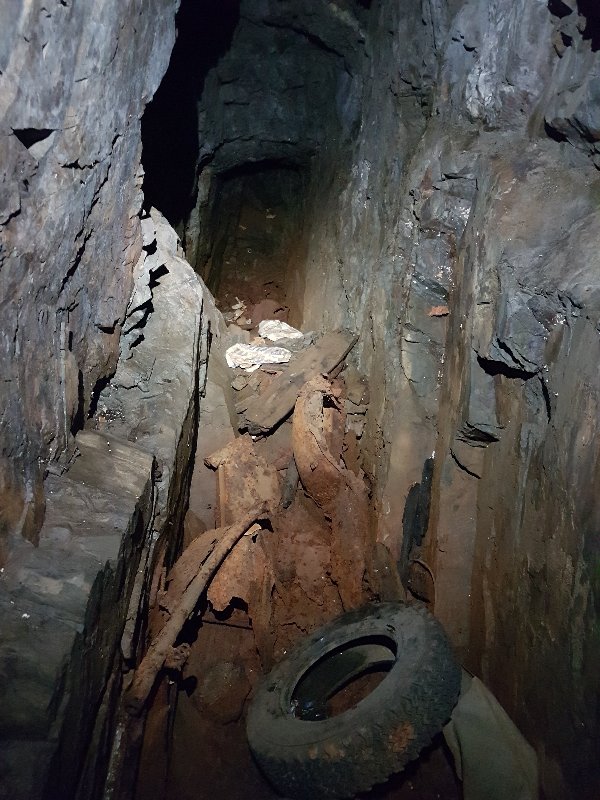 Dumped tyes in a side passage.
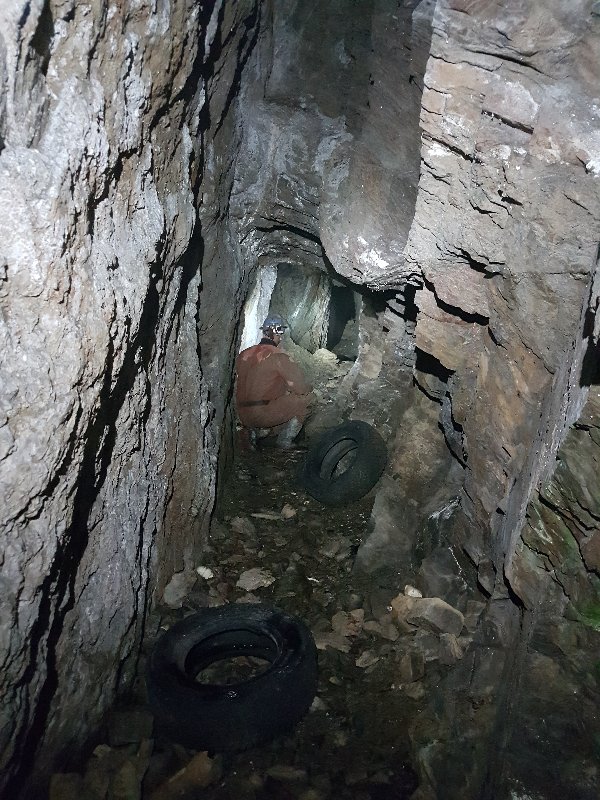 Dumped tyres in the main passage, where a greater horshoe bat was resting.
Lighting by Tarquin and Phil
Dumped tyres in the main passage, where a greater horshoe bat was resting.
Lighting by Tarquin and Phil At least the spiders don't seem to mind. This is a juvenile.
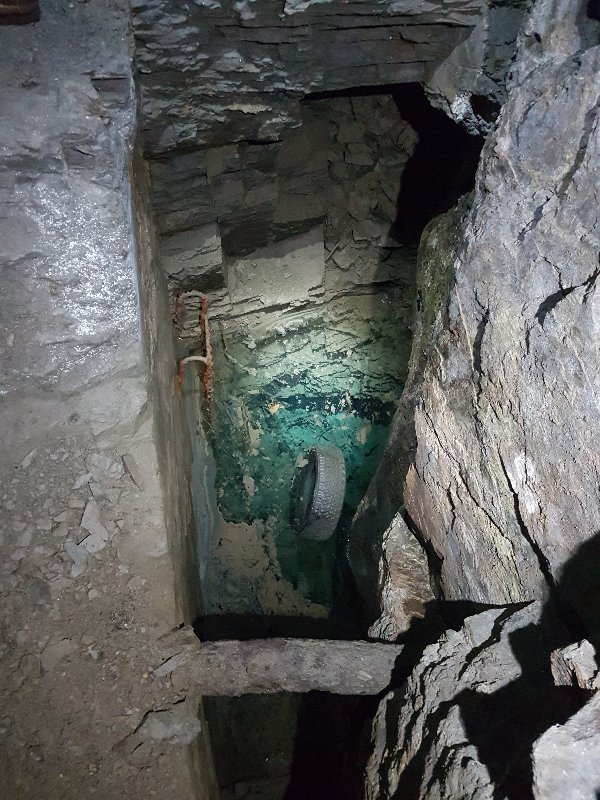 Flooded shaft and dumped tyre. The colour is beautiful, but the idea of falling in ... not so much. That rusty ladder would not be much help.
Lighting by Tarquin and Phil
Flooded shaft and dumped tyre. The colour is beautiful, but the idea of falling in ... not so much. That rusty ladder would not be much help.
Lighting by Tarquin and Phil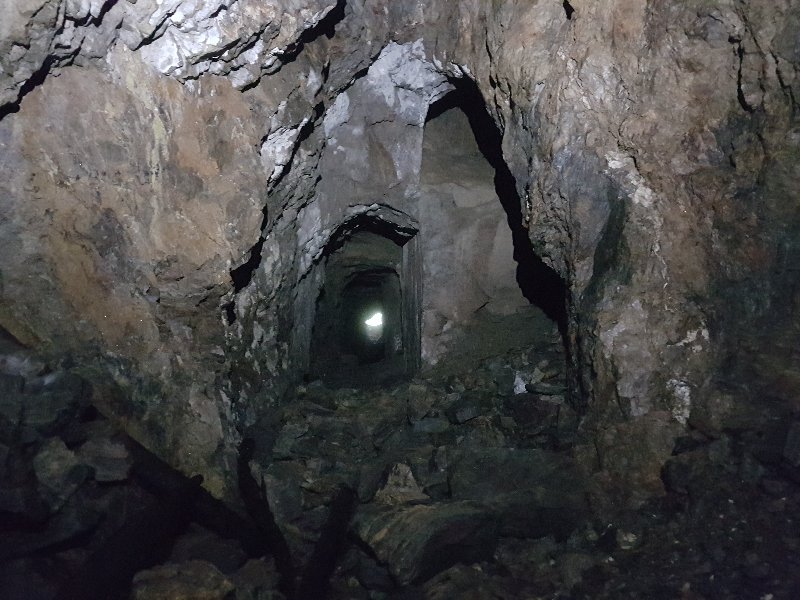 A very straight passage.
Lighting by Tarquin and Sol
A very straight passage.
Lighting by Tarquin and Sol All of the branches end abruptly, except for one which is backfilled.