Ogof Daren Cilau to Ogof Cnwc through trips 05/05/2018 and 16/12/2018
Unless otherwise stated, camera, setups, lighting, edits and gallery effects by Tarquin. Modelling at various points will be Helen Stewart, Phill Thomas, Huw Jones, Paul Stacey, and Celestine Crabbe.
These were my first ever trips to the eastern branch of the cave, and its extensive formations will get a lot of photographs. The other major branch was photographed on a very extensive trip earlier in the same year. For those who are interested, we took it very gently, allowing a lot of time for photographs and a large team, and the trip took just under 5.5 hours on the first trip and 4.75 on the second trip.
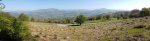 Tremendous view over The Black Mountains: Mynydd Llangorse (515 metres), Mynydd Troed (609 metres), Pen Allt-mawr (719 metres), Pen Cerrig-calch (701 metres), Pen Twyn Mawr (658 metres), Crug Mawr (550 metres), Hatterall Hill (531 metres), the Sugar Loaf (596 metres) and The Skirrid (486 metres).
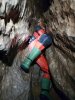 Heading into The Vice, the notorious squeeze 80 metres into the cave.
Modelling by Phill, lighting by Tarquin and Phill
Heading into The Vice, the notorious squeeze 80 metres into the cave.
Modelling by Phill, lighting by Tarquin and Phill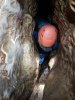 The Vice is not particularly tight, but it is awkward, trying to stop yourself and any tackle bags from slipping into the rift below.
Modelling by Helen, lighting by Tarquin and Helen
The Vice is not particularly tight, but it is awkward, trying to stop yourself and any tackle bags from slipping into the rift below.
Modelling by Helen, lighting by Tarquin and Helen The Vice ends with a bend, which can be awkward if you chose to lie on the wrong side.
Modelling by Helen, lighting by Tarquin and Helen
The Vice ends with a bend, which can be awkward if you chose to lie on the wrong side.
Modelling by Helen, lighting by Tarquin and Helen A great deal of the "550 metre" (actually 517 metre) entrance passage is crawling or wriggling in the stream. However, it is possible to stand in a few spots. The final third (after the second inlet) is mostly stooping sized, ending at the Calcite Squeezes.
Modelling by Phill, lighting by Tarquin and Phill
A great deal of the "550 metre" (actually 517 metre) entrance passage is crawling or wriggling in the stream. However, it is possible to stand in a few spots. The final third (after the second inlet) is mostly stooping sized, ending at the Calcite Squeezes.
Modelling by Phill, lighting by Tarquin and Phill A little optimistic. The fastest times through the entrance series are 12.5 minutes (for 2 cavers) and 14 minutes (for a solo caver), which would give a speed of 2.5 and 2.2 KPH (1.5 and 1.4 MPH). Pretty fast considering that typical cavers move at an average of about 1 KPH in regular caves. We were taking it easy through the crawl, and took 1 hour 5 minutes; an average of 0.5 KPH (0.3 MPH). The fastest I have ever managed was just under 20 minutes, an average of 1.6 KPH (1 MPH).
Modelling by Phill and Paul's arm, lighting by Tarquin, Phill and Paul
A little optimistic. The fastest times through the entrance series are 12.5 minutes (for 2 cavers) and 14 minutes (for a solo caver), which would give a speed of 2.5 and 2.2 KPH (1.5 and 1.4 MPH). Pretty fast considering that typical cavers move at an average of about 1 KPH in regular caves. We were taking it easy through the crawl, and took 1 hour 5 minutes; an average of 0.5 KPH (0.3 MPH). The fastest I have ever managed was just under 20 minutes, an average of 1.6 KPH (1 MPH).
Modelling by Phill and Paul's arm, lighting by Tarquin, Phill and Paul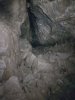 Old Main Rift, the original cave, which ended at a chamber not much further ahead. Early visitors would do the crawl, just to get into this rift and the chamber, before returning through the crawl.
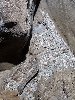 The floor of Old Main Rift has some cryostal hidden amongst the piles of spent carbide.
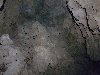 The route to Old Main Chamber is relatively tough, with plenty of scrambling over boulders in the narrow rift. I was the only one who bothered to visit, and without a survey, I stopped too early at the first enlargement instead of the chamber itself.
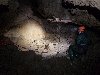 To the left in Old Main Rift ends almost immediately at a large dried crystal pool and flowstone formation.
Modelling by Helen, lighting by Tarquin and Helen
To the left in Old Main Rift ends almost immediately at a large dried crystal pool and flowstone formation.
Modelling by Helen, lighting by Tarquin and Helen The crystal pool.
Lighting by Tarquin and Helen
The crystal pool.
Lighting by Tarquin and Helen In 1984, the way on was discovered; Jigsaw Passage.
Modelling by Phill, Paul, Helen and Huw, lighting by Tarquin, Phill, Paul, Helen and Huw
In 1984, the way on was discovered; Jigsaw Passage.
Modelling by Phill, Paul, Helen and Huw, lighting by Tarquin, Phill, Paul, Helen and Huw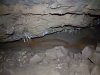 Formations in Jigsaw Passage.
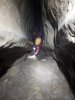 The Wriggle, where the passage abruptly shrinks, then returns to its large size.
Modelling by Paul, lighting by Tarquin and Paul
The Wriggle, where the passage abruptly shrinks, then returns to its large size.
Modelling by Paul, lighting by Tarquin and Paul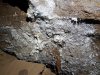 Anthodites in Jigsaw Passage.
 Epocalypse Way, shortly after Big Chamber Nowhere Near The Entrance. The holes in the floor on the right drop down into an alternative undercut bedding that can be used instead.
Modelling by Paul and Phill, lighting by Tarquin, Paul and Phill
Epocalypse Way, shortly after Big Chamber Nowhere Near The Entrance. The holes in the floor on the right drop down into an alternative undercut bedding that can be used instead.
Modelling by Paul and Phill, lighting by Tarquin, Paul and Phill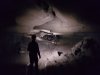 Beautifully shaped passage in Epocalypse Way, approaching the pretties.
Modelling and lighting by Huw, Paul and Helen
Beautifully shaped passage in Epocalypse Way, approaching the pretties.
Modelling and lighting by Huw, Paul and Helen The White Company, which extends into the distance.
Modelling by Huw and Helen, lighting by Tarquin, Huw and Helen
The White Company, which extends into the distance.
Modelling by Huw and Helen, lighting by Tarquin, Huw and Helen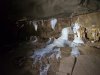 The White Company.
Modelling by Huw, lighting by Tarquin, Huw, Phill and Paul
The White Company.
Modelling by Huw, lighting by Tarquin, Huw, Phill and Paul First formations of The White Company.
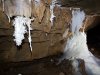 The main part of The White Company.
Lighting by Tarquin, Phill and Helen
The main part of The White Company.
Lighting by Tarquin, Phill and Helen The main part of The White Company.
Lighting by Tarquin, Phill, Paul and Huw
The main part of The White Company.
Lighting by Tarquin, Phill, Paul and Huw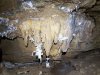 To the right of the main set
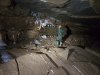 The middle group of helictites.
Modelling by Helen, lighting by Tarquin and Helen
The middle group of helictites.
Modelling by Helen, lighting by Tarquin and Helen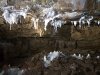 The middle group.
Lighting by Tarquin and Paul
The middle group.
Lighting by Tarquin and Paul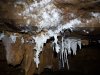 The middle group's main helictites and anthodites.
 The right group.
Modelling by Helen, lighting by Tarquin and Helen
The right group.
Modelling by Helen, lighting by Tarquin and Helen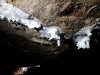 Helictites on a ceiling fracture.
Lighting by Tarquin and Helen
Helictites on a ceiling fracture.
Lighting by Tarquin and Helen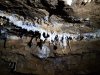 First part of the right set.
 Stalagmites at the right set.
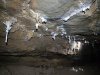 Main part of the right set.
Lighting by Tarquin and Helen
Main part of the right set.
Lighting by Tarquin and Helen Anthodites.
Lighting by Tarquin and Helen
Anthodites.
Lighting by Tarquin and Helen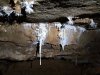 The best helictites in the right set.
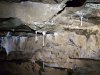 Nearing the end.
Lighting by Tarquin and Helen
Nearing the end.
Lighting by Tarquin and Helen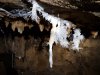 Superb anthodites, the last of The White Company.
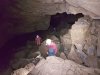 Epocalypse Way then reverts to breakdown.
Modelling by Paul, Phill, Helen and Huw, lighting by Tarquin, Paul, Phill, Helen and Huw
Epocalypse Way then reverts to breakdown.
Modelling by Paul, Phill, Helen and Huw, lighting by Tarquin, Paul, Phill, Helen and Huw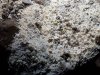 Cryostal on the boulders.
 Another patch of cryostal.
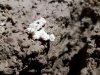 Another patch of cryostal, at the entrance to Urchin Oxbow.
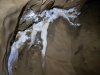 Anthodites on the high ceiling at the start of Urchin Oxbow.
 Splash layers on a stalagmite at the entrance to Urchin Oxbow.
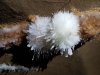 The seams of the passage are literally bursting with anthodites - The Urchins.
 Urchins.
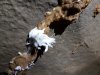 Urchins.
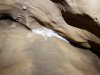 Urchins in the roof.
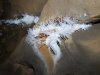 Urchins.
 Urchins.
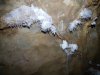 Urchins.
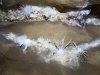 Long-spined urchins.
 Urchins and helictites.
 Urchins.
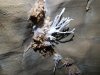 Helictites.
 The last urchins.
 Old stal and helictites.
 The helictites.
 Old stal.
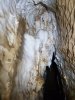 Old stal and straws. These partly block the passage, and to avoid damage, the continuing passage is taped off. It can be more easily reached from Antler Passage instead.
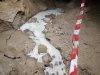 Stal flow in the continuation of Urchin Oxbow.
 Stal flow, the last of the Urchin Oxbow decorations.
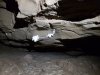 Back in Epocalypse Way, these anthodites are tucked into an undercut.
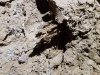 Epocalypse Way then switches to very impressive selenite crystals growing from the mud. These are as big as any in Agen Allwedd or Draenen, but absolutely everywhere.
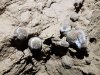 And then a set of very unusual spherical formations (balls to you), with a selenite frosting, looking like little chocolate truffles. Each sphere is about 2-3 cm in diameter. Perhaps they are just coated river pebbles, but they sit on top of the silt mud, surrounded by selenite crystals. The original explorers thought they looked like rusty ball bearings.
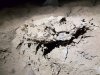 Selenite crystals.
 Selenite crystals.
 More truffles. This time with some yellow lumps that appear to be cryostal. Is that what the truffles are too?
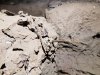 Selenite crystals.
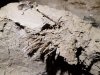 Selenite crystals. Most are about 10 cm (4 inches) long.
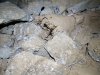 They only form on the mud, while smaller gypsum crystals form on the rocks.
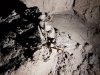 Selenite crystals.
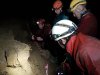 You're surrounded! How many people does it take to take a picture?
Modelling by Phill, Paul, Helen and Huw, lighting by Tarquin, Phill, Paul, Helen and Huw
You're surrounded! How many people does it take to take a picture?
Modelling by Phill, Paul, Helen and Huw, lighting by Tarquin, Phill, Paul, Helen and Huw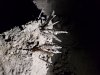 The victims.
 Longer crystals further away in a trench. These are about 15 cm long in most cases.
Lighting by Tarquin and Paul
Longer crystals further away in a trench. These are about 15 cm long in most cases.
Lighting by Tarquin and Paul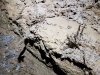 Some of the longer selenite crystals.
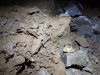 Whether these are formed by growing from the mud, or by evaporation (wicking) of water saturated with selenite within the mud, remains unknown. If the latter, the water in the mud must have been highly saturated when it was happening, and not something you would want to drink. It is also notable that these crystals tend to be found in places where cryogenic processes have also left visible effects, so maybe they have cryogenic origins as well.
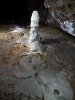 The next formation is an unusual stalagmite, with distinctive ledges, reminiscent of The Pagoda in Craig a Ffynnon (though the ledges are not of the same quality). This stalagmite is therefore also called The Pagoda, and is about 60 cm (2 feet) tall. (The stalagmite nearly caused Epocalypse Way to be called Penis Passage.) The surrounding wall has more evaporation formations.
Lighting by Tarquin, Paul, Helen and Huw
The next formation is an unusual stalagmite, with distinctive ledges, reminiscent of The Pagoda in Craig a Ffynnon (though the ledges are not of the same quality). This stalagmite is therefore also called The Pagoda, and is about 60 cm (2 feet) tall. (The stalagmite nearly caused Epocalypse Way to be called Penis Passage.) The surrounding wall has more evaporation formations.
Lighting by Tarquin, Paul, Helen and Huw The stalactite above, which is also very ... distinctive. No, I did not say "ugly". Why, do you think I should? It looks like a bee's stinger and venom gland.
Lighting by Tarquin, Paul, Helen and Huw
The stalactite above, which is also very ... distinctive. No, I did not say "ugly". Why, do you think I should? It looks like a bee's stinger and venom gland.
Lighting by Tarquin, Paul, Helen and Huw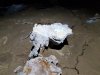 False floor, like Dan-yr-Ogof's Mushroom.
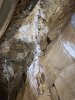 Formations in the roof.
Lighting by Tarquin and Paul
Formations in the roof.
Lighting by Tarquin and Paul Formations in the roof, as we approach The Kitchen.
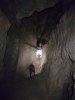 A relatively small tube then gains the large Antler Passage, the most significant side passage in this part of the cave. In the shadow on the left is the other end of Urchin Oxbow.
Modelling by Paul, Helen and Phill, lighting by Tarquin, Huw, Paul, Helen and Phill
A relatively small tube then gains the large Antler Passage, the most significant side passage in this part of the cave. In the shadow on the left is the other end of Urchin Oxbow.
Modelling by Paul, Helen and Phill, lighting by Tarquin, Huw, Paul, Helen and Phill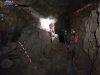 The left wall then becomes decorated with another set of impressive helictite formations, The Antlers. This was a common destination before the through trip was established.
Modelling by Huw, Helen, Paul and Phill, lighting by Tarquin, Huw, Helen, Paul and Phill
The left wall then becomes decorated with another set of impressive helictite formations, The Antlers. This was a common destination before the through trip was established.
Modelling by Huw, Helen, Paul and Phill, lighting by Tarquin, Huw, Helen, Paul and Phill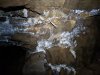 A lonely antler. The large helictites are likely to be aragonite rather than calcite.
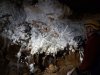 The Antlers.
Modelling by Paul, lighting by Huw
The Antlers.
Modelling by Paul, lighting by Huw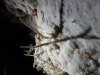 The Antlers. The muddy marks are thought to be caused by bats hanging from the formations, leaving tiny amounts of mud from their feet. Miniature vandals.
Lighting by Huw
The Antlers. The muddy marks are thought to be caused by bats hanging from the formations, leaving tiny amounts of mud from their feet. Miniature vandals.
Lighting by Huw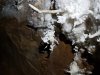 Helictites on the left.
 Intricate helictites below The Antlers.
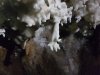 The hand-shaped helictite below The Antlers.
 Helictites on a wall seam beyond The Antlers.
 A section with translucent helictites, like extra-skimmed milk.
 Translucent stal.
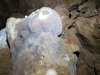 Translucent stalagmite, which glistens so much that it almost looks like velvet.
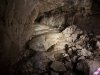 Antler Passage then turns its only significant corner, where this beautiful flowstone formation fills a choked side passage. This is the closest point to Ogof Craig a Ffynnon's Promised Land, and is almost certainly related to it. However, digging through here would destroy the formations, so it has been left untouched. In theory it might be possible to dig beneath it, shoring up the rubble above, but that would be a major operation in such a remote location.
Lighting by Tarquin, Paul, Phill, Helen and Huw
Antler Passage then turns its only significant corner, where this beautiful flowstone formation fills a choked side passage. This is the closest point to Ogof Craig a Ffynnon's Promised Land, and is almost certainly related to it. However, digging through here would destroy the formations, so it has been left untouched. In theory it might be possible to dig beneath it, shoring up the rubble above, but that would be a major operation in such a remote location.
Lighting by Tarquin, Paul, Phill, Helen and Huw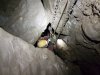 Antler Passage may be fairly large, but it has numerous obstacles and boulder collapses that need scrambles and ladders to get along it. Two ladders up, one down, a rope climb down, a chain traverse and a choke before the final chamber.
Modelling by Paul and Phill's arm, lighting by Tarquin, Paul, Phill and Helen
Antler Passage may be fairly large, but it has numerous obstacles and boulder collapses that need scrambles and ladders to get along it. Two ladders up, one down, a rope climb down, a chain traverse and a choke before the final chamber.
Modelling by Paul and Phill's arm, lighting by Tarquin, Paul, Phill and Helen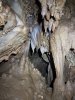 A stal obstruction, which needs care to avoid smearing mud on the stal, while passing through a crawling-sized gap. There is an alternative slot below it, needing a traverse in a slippery rift.
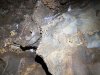 Old stal and helictites on the wall.
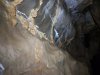 More old stal and helictites on wall fractures.
 Calcited ceiling, with some helictites and a distinctive stalagmite.
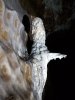 Stalagmite with its own diving board. Either that or a southern cassowary's head.
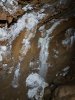 Elaborate calcite icing on the wall.
 Aragonite needle fringe on the icing.
 Calcite icing.
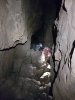 A little over half way along Antler Passage, showing the typical shape and style. Somewhere under the rocks is a small stream.
Modelling by Phill and Helen, lighting by Tarquin, Phill and Helen
A little over half way along Antler Passage, showing the typical shape and style. Somewhere under the rocks is a small stream.
Modelling by Phill and Helen, lighting by Tarquin, Phill and Helen Helictites on the ceiling.
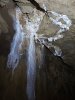 Helictites on the ceiling.
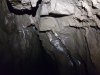 Helictites on the ceiling.
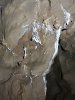 Helictites on the ceiling.
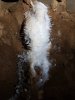 Thick bunch of aragonite needles.
 Small selection of stal on the wall.
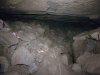 This chamber was the end of Antler Passage in 1984. The way on was found to the right of the inlet choke in 1985, into a short extension. The water comes from Ogof Pen Eryr, which has so far not been connected.
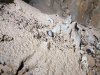 Hoodoos in the 1984 terminal chamber. Pebbles protect the mud from falling drips, leaving a tower where the mud has not been washed away, topped with the pebble. The brightly coloured pebbles are clearly not limestone.
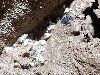 Cryostal in the 1984 terminal chamber, being mashed into the floor under the feet of passing cavers.
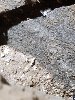 Cryostal in the 1984 terminal chamber.
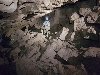 The 1985 extension, which was the end of the cave for almost a decade.
Modelling by Celestine, lighting by Tarquin and Helen
The 1985 extension, which was the end of the cave for almost a decade.
Modelling by Celestine, lighting by Tarquin and Helen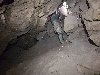 The ladder climb up through the choke.
Modelling by Helen, lighting by Tarquin and Celestine
The ladder climb up through the choke.
Modelling by Helen, lighting by Tarquin and Celestine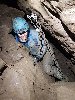 The awkward pitch head requires a scramble behind the ladder chains, which seems very silly.
Modelling by Celestine
The awkward pitch head requires a scramble behind the ladder chains, which seems very silly.
Modelling by Celestine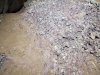 A short crawl through the top of the choke reaches the 1993 Busman's Holiday extensions. The first part has some purple mud, suggesting that the cave is immediately below the Llanelly Shales.
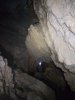 An enormous jammed boulder, which seems to be held up by only a few small rocks and a crumbling pillar.
Modelling by Helen, lighting by Tarquin, Paul and Helen
An enormous jammed boulder, which seems to be held up by only a few small rocks and a crumbling pillar.
Modelling by Helen, lighting by Tarquin, Paul and Helen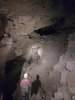 Bridge Cavern, the first part of Busman's Holiday.
Modelling by Paul and Huw, lighting by Tarquin, Helen, Paul and Huw
Bridge Cavern, the first part of Busman's Holiday.
Modelling by Paul and Huw, lighting by Tarquin, Helen, Paul and Huw A plant, making a valiant but futile attempt to grow in a crawl. Presumably from someone's granola bar.
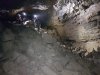 The crawl ends, and the passage becomes abruptly bigger.
Modelling by Phill, Huw, Helen and Paul, lighting by Tarquin, Phill, Huw, Helen and Paul
The crawl ends, and the passage becomes abruptly bigger.
Modelling by Phill, Huw, Helen and Paul, lighting by Tarquin, Phill, Huw, Helen and Paul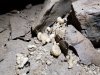 Large pieces of cryostal at the start of the big section. The big beads are about 2 cm (nearly an inch) in diameter)
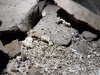 Big cryostal, with the distinctive flat side of the beads.
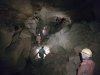 Busman's Holiday.
Modelling by Paul, Helen, Phill and Huw, lighting by Tarquin, Paul, Helen, Phill and Huw
Busman's Holiday.
Modelling by Paul, Helen, Phill and Huw, lighting by Tarquin, Paul, Helen, Phill and Huw The longest and most impressive part of Busman's Holiday.
Modelling by Helen, Phill and Huw, lighting by Paul, Helen, Phill and Huw
The longest and most impressive part of Busman's Holiday.
Modelling by Helen, Phill and Huw, lighting by Paul, Helen, Phill and Huw A beautifully decorated chamber. A hole on the right enters Orange Blossom Way, a short streamway.
Modelling by Huw and Phill, lighting by Tarquin, Helen, Paul, Huw and Phill
A beautifully decorated chamber. A hole on the right enters Orange Blossom Way, a short streamway.
Modelling by Huw and Phill, lighting by Tarquin, Helen, Paul, Huw and Phill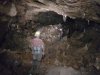 A well decorated chamber, Price's Prophecy, the largest part of Busman's Holiday. The name is a reference to a 1950 prediction by Brian Price that this big cave would be here, which seemed unlikely when digging in the tiny passages of Prices (Old) Dig. The dig was officially renamed to Ogof Cnwc after the connection was made (Brian had always referred to it with that name, but others had not). The way out is on the left at the end of the chamber.
Modelling by Paul, Helen, Huw and Phill, lighting by Tarquin, Paul, Helen, Huw and Phill
A well decorated chamber, Price's Prophecy, the largest part of Busman's Holiday. The name is a reference to a 1950 prediction by Brian Price that this big cave would be here, which seemed unlikely when digging in the tiny passages of Prices (Old) Dig. The dig was officially renamed to Ogof Cnwc after the connection was made (Brian had always referred to it with that name, but others had not). The way out is on the left at the end of the chamber.
Modelling by Paul, Helen, Huw and Phill, lighting by Tarquin, Paul, Helen, Huw and Phill Flowstone and crystal pools in Price's Prophecy.
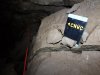 OK, this is stupid, and not a good idea. Yes, people occasionally fail to find the way on. Sure, but that's the whole point of cave navigation. It doesn't matter if a couple of them have to turn back - they will learn the routes slowly, like we all do. It takes the challenge and skill away if you leave signposts. And where does it end? Should there be one at every major junction? This is not a show cave. We are cavers, not tourists.
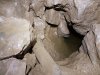 Sump in Ogof Cnwc. The original connection was made through this sump in 2002, and orginal through trips went through it! It would usually be attempted only when it had partially drained after a drought.
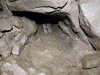 Bypass to the sump, the connection between the two caves that was dug open in 2008.
Modelling by Phill
Bypass to the sump, the connection between the two caves that was dug open in 2008.
Modelling by Phill The bypass ends at the other end of the sump, at a scaffolded shaft.
Modelling by Paul, lighting by Tarquin and Paul
The bypass ends at the other end of the sump, at a scaffolded shaft.
Modelling by Paul, lighting by Tarquin and Paul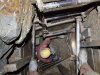 Scaffolded shaft. This was once the end of Price's (Old) Dig.
Modelling and lighting by Tarquin and Paul
Scaffolded shaft. This was once the end of Price's (Old) Dig.
Modelling and lighting by Tarquin and Paul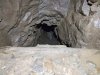 Sliding down a plank into the continuing crawl.
Modelling by Phill
Sliding down a plank into the continuing crawl.
Modelling by Phill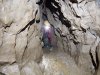 The crawl appears to have been "chemically enlarged", since there used to be a duck here.
Modelling by Paul, lighting by Tarquin and Paul
The crawl appears to have been "chemically enlarged", since there used to be a duck here.
Modelling by Paul, lighting by Tarquin and Paul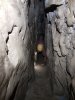 Narrow rift in Ogof Cnwc.
Modelling by Paul, lighting by Tarquin and Paul
Narrow rift in Ogof Cnwc.
Modelling by Paul, lighting by Tarquin and Paul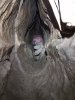 A muddy tube, reminiscent of the Daren Cilau entrance passage, without the water to keep it clean. Thankfully it is also much shorter, with only about 45 metres of crawling in total needed through all of these small crawling sections.
Modelling by Phill
A muddy tube, reminiscent of the Daren Cilau entrance passage, without the water to keep it clean. Thankfully it is also much shorter, with only about 45 metres of crawling in total needed through all of these small crawling sections.
Modelling by Phill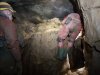 Calcite Chamber, the highlight of the original Price's (Old) Dig.
Modelling by Paul and Phill, lighting by Tarquin, Paul and Phill
Calcite Chamber, the highlight of the original Price's (Old) Dig.
Modelling by Paul and Phill, lighting by Tarquin, Paul and Phill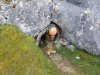 Ogof Cnwc entrance. In 1950, this was completely filled with silt, and was entirely excavated.
Modelling by Helen, lighting by Sol and Helen
Ogof Cnwc entrance. In 1950, this was completely filled with silt, and was entirely excavated.
Modelling by Helen, lighting by Sol and Helen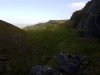 View from the entrance, with the Darren Disgwylfa crags of Mynydd Llangatwg (529 and 530 metres), Ysgyryd Fach (270 metres) and The Blorenge (561 metres).
 Tremendous view over The Black Mountains: Mynydd Llangorse (515 metres), Mynydd Troed (609 metres), Pen Allt-mawr (719 metres), Pen Cerrig-calch (701 metres), Pen Twyn Mawr (658 metres), Crug Mawr (550 metres), Hatterall Hill (531 metres), the Sugar Loaf (596 metres) and The Skirrid (486 metres).
 Heading into The Vice, the notorious squeeze 80 metres into the cave.
Modelling by Phill, lighting by Tarquin and Phill
Heading into The Vice, the notorious squeeze 80 metres into the cave.
Modelling by Phill, lighting by Tarquin and Phill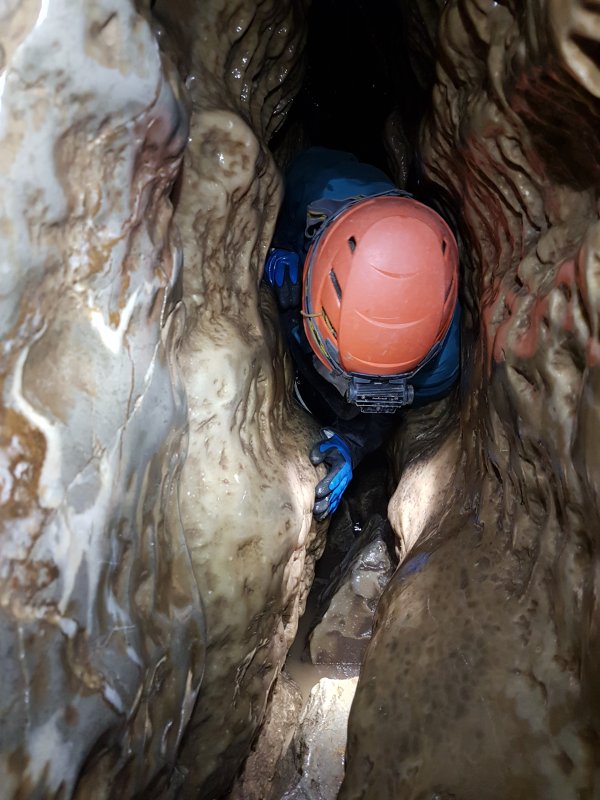 The Vice is not particularly tight, but it is awkward, trying to stop yourself and any tackle bags from slipping into the rift below.
Modelling by Helen, lighting by Tarquin and Helen
The Vice is not particularly tight, but it is awkward, trying to stop yourself and any tackle bags from slipping into the rift below.
Modelling by Helen, lighting by Tarquin and Helen The Vice ends with a bend, which can be awkward if you chose to lie on the wrong side.
Modelling by Helen, lighting by Tarquin and Helen
The Vice ends with a bend, which can be awkward if you chose to lie on the wrong side.
Modelling by Helen, lighting by Tarquin and Helen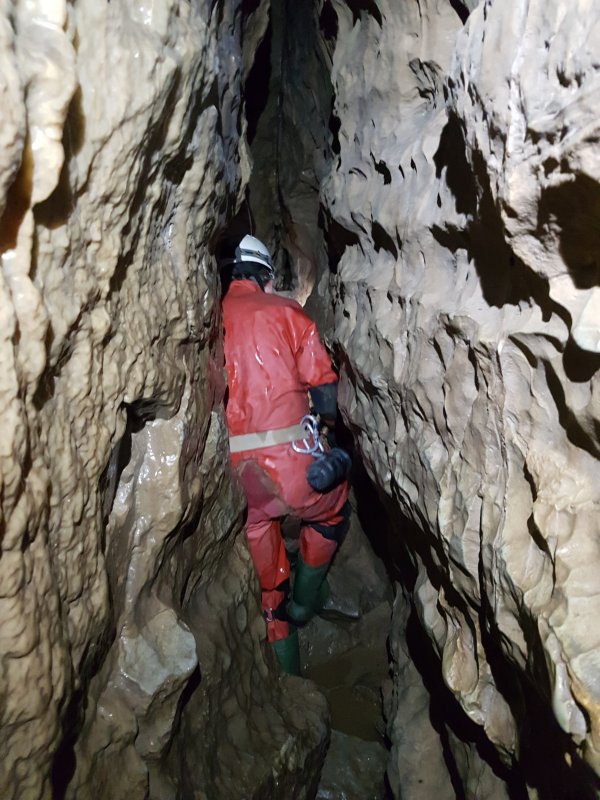 A great deal of the "550 metre" (actually 517 metre) entrance passage is crawling or wriggling in the stream. However, it is possible to stand in a few spots. The final third (after the second inlet) is mostly stooping sized, ending at the Calcite Squeezes.
Modelling by Phill, lighting by Tarquin and Phill
A great deal of the "550 metre" (actually 517 metre) entrance passage is crawling or wriggling in the stream. However, it is possible to stand in a few spots. The final third (after the second inlet) is mostly stooping sized, ending at the Calcite Squeezes.
Modelling by Phill, lighting by Tarquin and Phill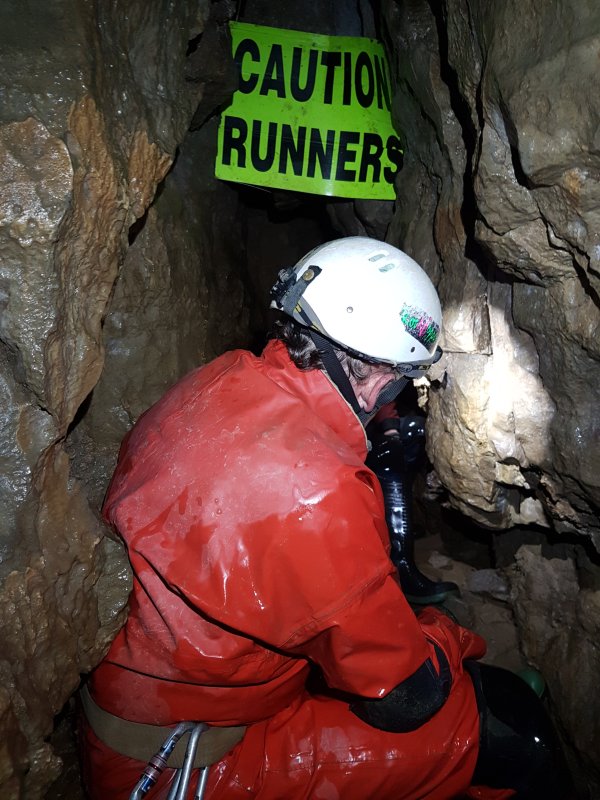 A little optimistic. The fastest times through the entrance series are 12.5 minutes (for 2 cavers) and 14 minutes (for a solo caver), which would give a speed of 2.5 and 2.2 KPH (1.5 and 1.4 MPH). Pretty fast considering that typical cavers move at an average of about 1 KPH in regular caves. We were taking it easy through the crawl, and took 1 hour 5 minutes; an average of 0.5 KPH (0.3 MPH). The fastest I have ever managed was just under 20 minutes, an average of 1.6 KPH (1 MPH).
Modelling by Phill and Paul's arm, lighting by Tarquin, Phill and Paul
A little optimistic. The fastest times through the entrance series are 12.5 minutes (for 2 cavers) and 14 minutes (for a solo caver), which would give a speed of 2.5 and 2.2 KPH (1.5 and 1.4 MPH). Pretty fast considering that typical cavers move at an average of about 1 KPH in regular caves. We were taking it easy through the crawl, and took 1 hour 5 minutes; an average of 0.5 KPH (0.3 MPH). The fastest I have ever managed was just under 20 minutes, an average of 1.6 KPH (1 MPH).
Modelling by Phill and Paul's arm, lighting by Tarquin, Phill and Paul Old Main Rift, the original cave, which ended at a chamber not much further ahead. Early visitors would do the crawl, just to get into this rift and the chamber, before returning through the crawl.
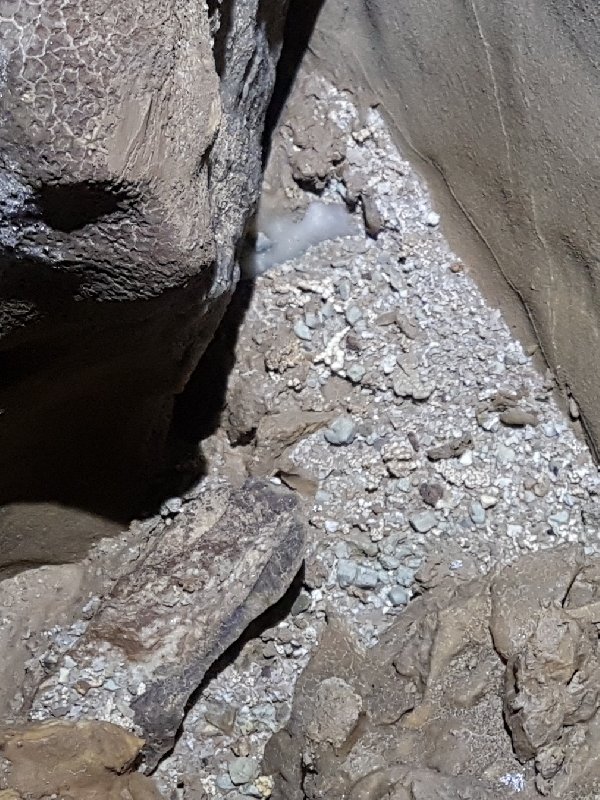 The floor of Old Main Rift has some cryostal hidden amongst the piles of spent carbide.
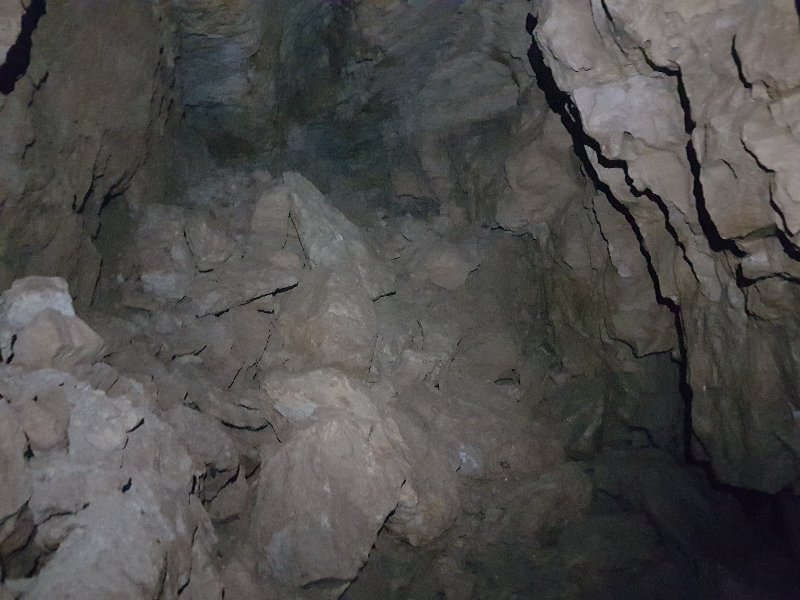 The route to Old Main Chamber is relatively tough, with plenty of scrambling over boulders in the narrow rift. I was the only one who bothered to visit, and without a survey, I stopped too early at the first enlargement instead of the chamber itself.
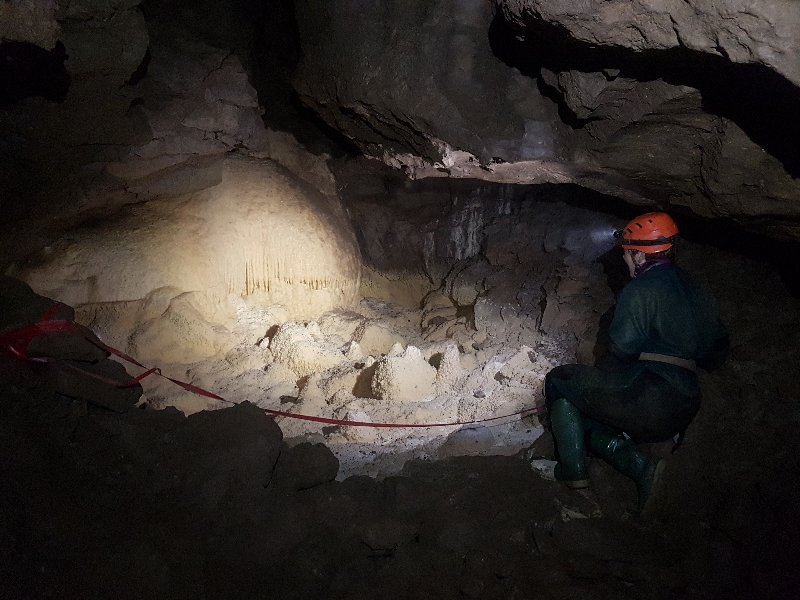 To the left in Old Main Rift ends almost immediately at a large dried crystal pool and flowstone formation.
Modelling by Helen, lighting by Tarquin and Helen
To the left in Old Main Rift ends almost immediately at a large dried crystal pool and flowstone formation.
Modelling by Helen, lighting by Tarquin and Helen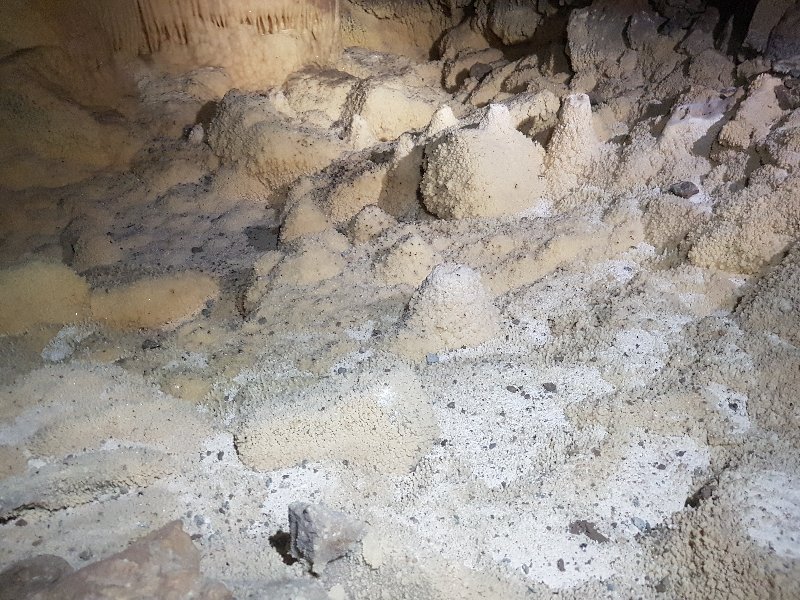 The crystal pool.
Lighting by Tarquin and Helen
The crystal pool.
Lighting by Tarquin and Helen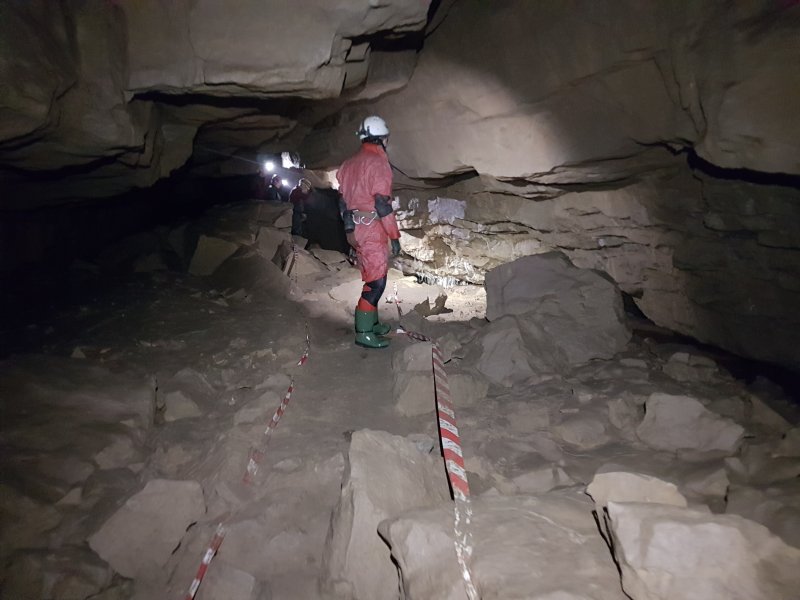 In 1984, the way on was discovered; Jigsaw Passage.
Modelling by Phill, Paul, Helen and Huw, lighting by Tarquin, Phill, Paul, Helen and Huw
In 1984, the way on was discovered; Jigsaw Passage.
Modelling by Phill, Paul, Helen and Huw, lighting by Tarquin, Phill, Paul, Helen and Huw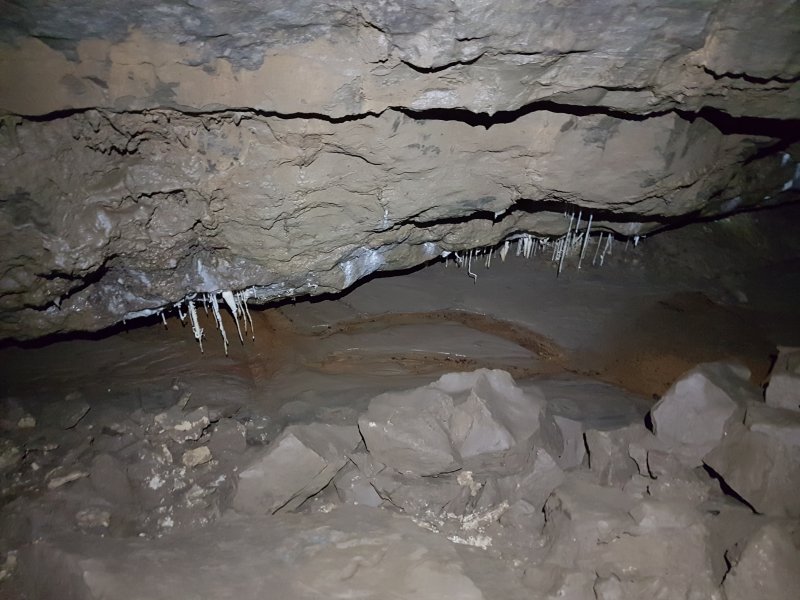 Formations in Jigsaw Passage.
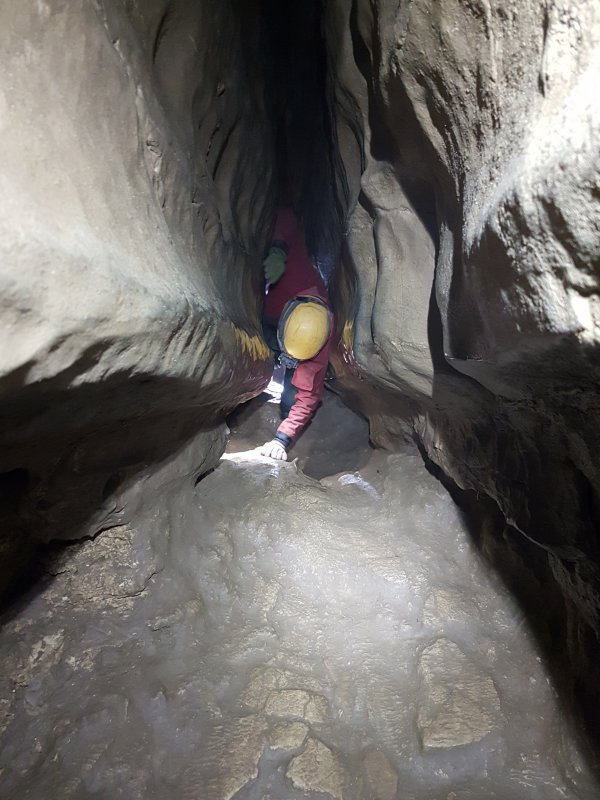 The Wriggle, where the passage abruptly shrinks, then returns to its large size.
Modelling by Paul, lighting by Tarquin and Paul
The Wriggle, where the passage abruptly shrinks, then returns to its large size.
Modelling by Paul, lighting by Tarquin and Paul Anthodites in Jigsaw Passage.
 Epocalypse Way, shortly after Big Chamber Nowhere Near The Entrance. The holes in the floor on the right drop down into an alternative undercut bedding that can be used instead.
Modelling by Paul and Phill, lighting by Tarquin, Paul and Phill
Epocalypse Way, shortly after Big Chamber Nowhere Near The Entrance. The holes in the floor on the right drop down into an alternative undercut bedding that can be used instead.
Modelling by Paul and Phill, lighting by Tarquin, Paul and Phill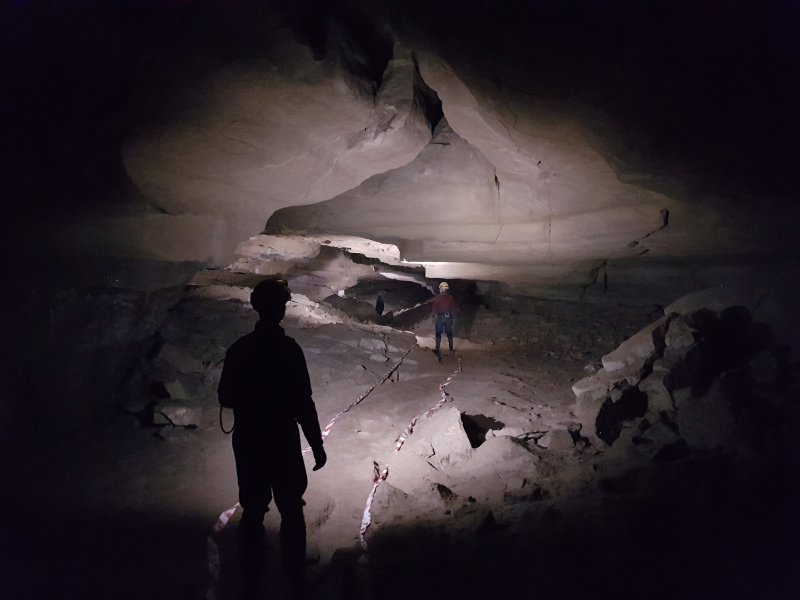 Beautifully shaped passage in Epocalypse Way, approaching the pretties.
Modelling and lighting by Huw, Paul and Helen
Beautifully shaped passage in Epocalypse Way, approaching the pretties.
Modelling and lighting by Huw, Paul and Helen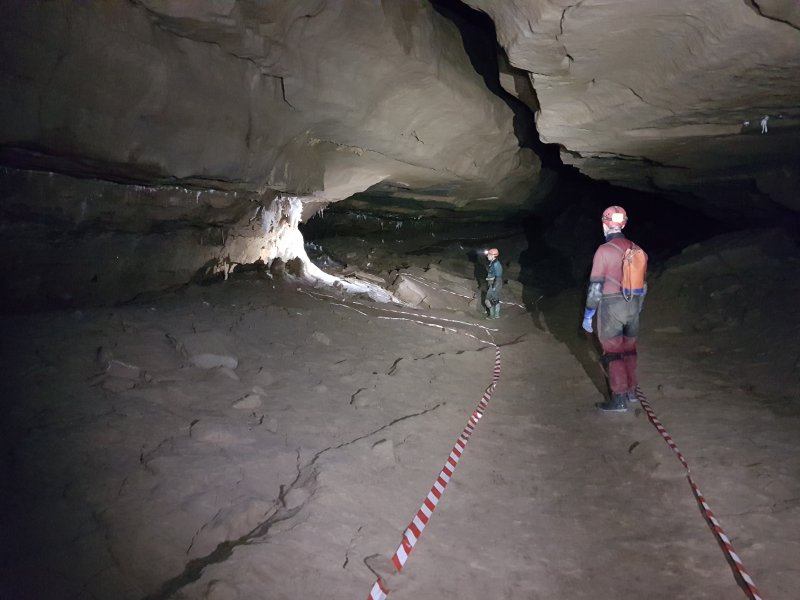 The White Company, which extends into the distance.
Modelling by Huw and Helen, lighting by Tarquin, Huw and Helen
The White Company, which extends into the distance.
Modelling by Huw and Helen, lighting by Tarquin, Huw and Helen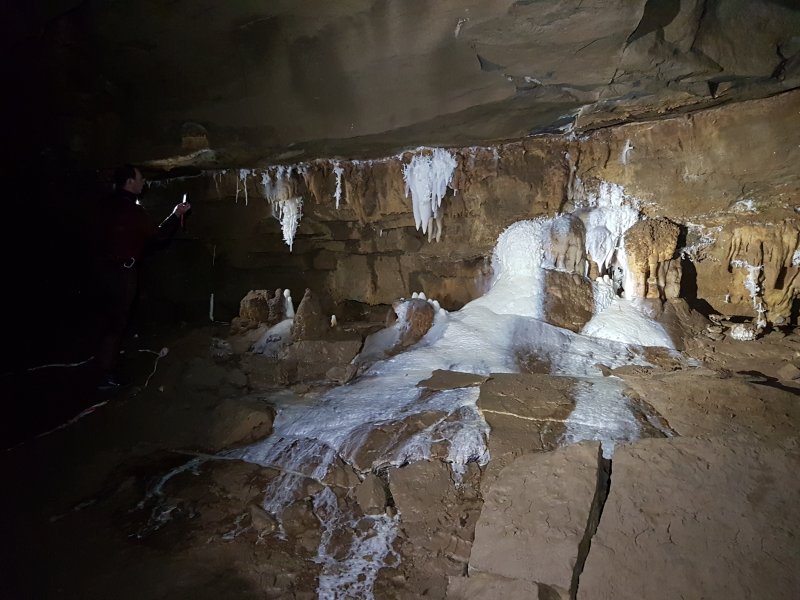 The White Company.
Modelling by Huw, lighting by Tarquin, Huw, Phill and Paul
The White Company.
Modelling by Huw, lighting by Tarquin, Huw, Phill and Paul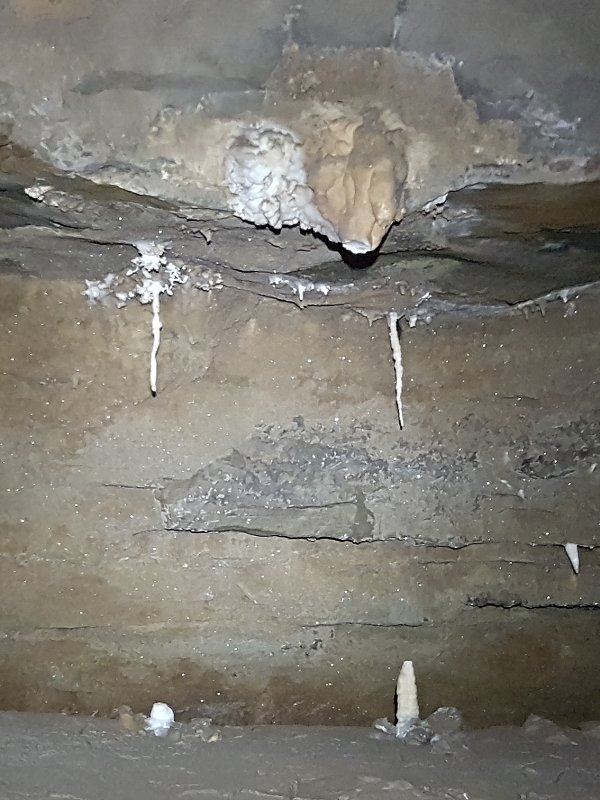 First formations of The White Company.
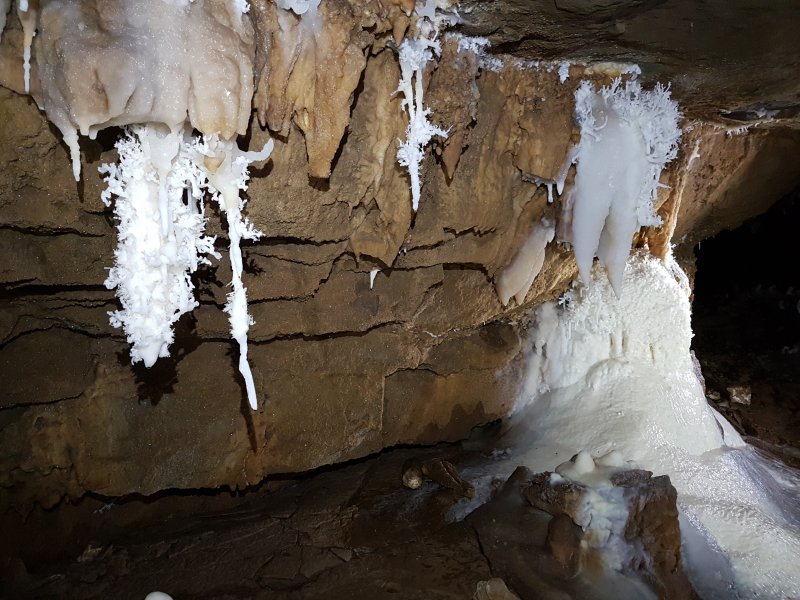 The main part of The White Company.
Lighting by Tarquin, Phill and Helen
The main part of The White Company.
Lighting by Tarquin, Phill and Helen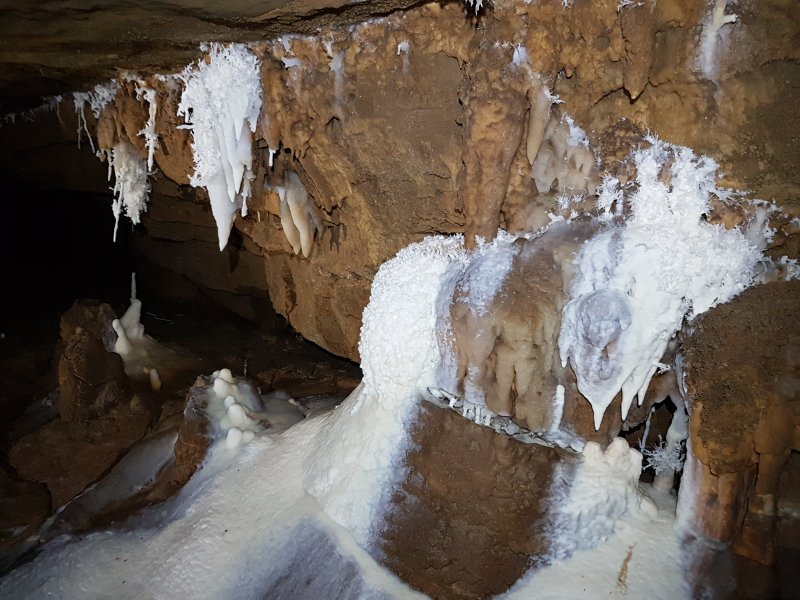 The main part of The White Company.
Lighting by Tarquin, Phill, Paul and Huw
The main part of The White Company.
Lighting by Tarquin, Phill, Paul and Huw To the right of the main set
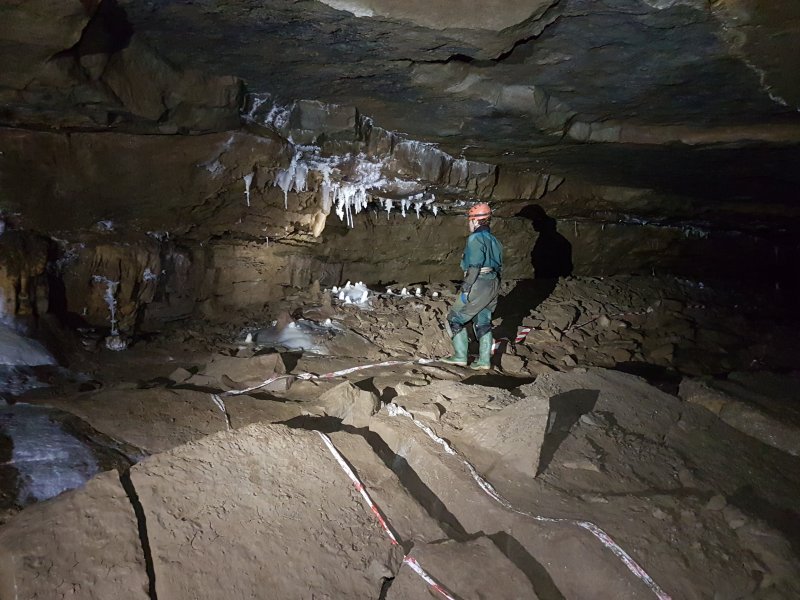 The middle group of helictites.
Modelling by Helen, lighting by Tarquin and Helen
The middle group of helictites.
Modelling by Helen, lighting by Tarquin and Helen The middle group.
Lighting by Tarquin and Paul
The middle group.
Lighting by Tarquin and Paul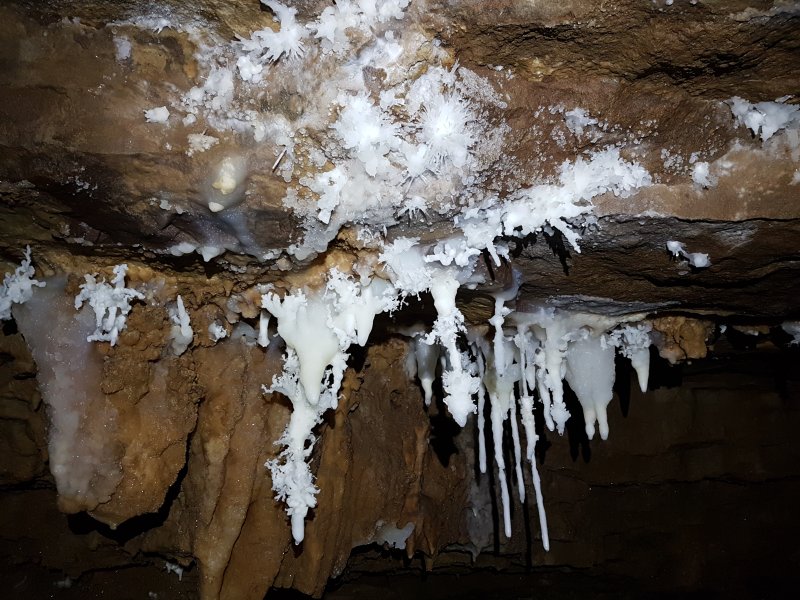 The middle group's main helictites and anthodites.
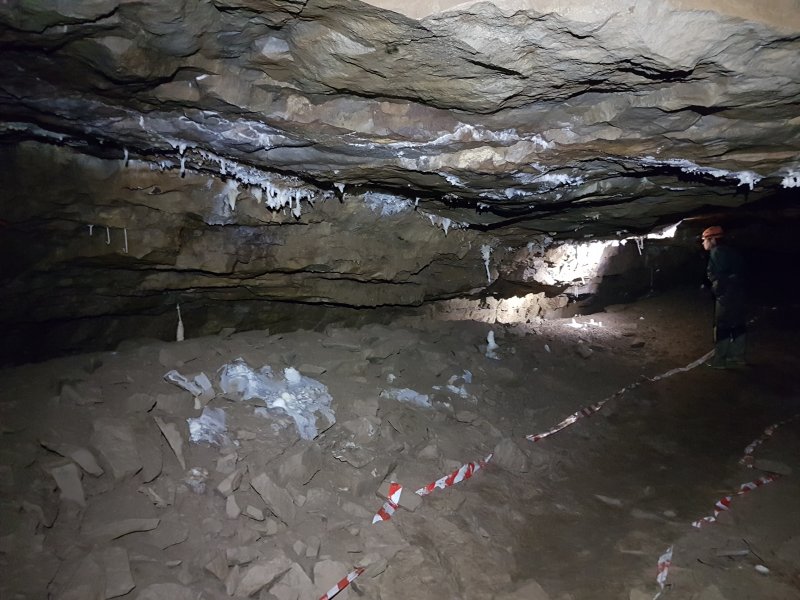 The right group.
Modelling by Helen, lighting by Tarquin and Helen
The right group.
Modelling by Helen, lighting by Tarquin and Helen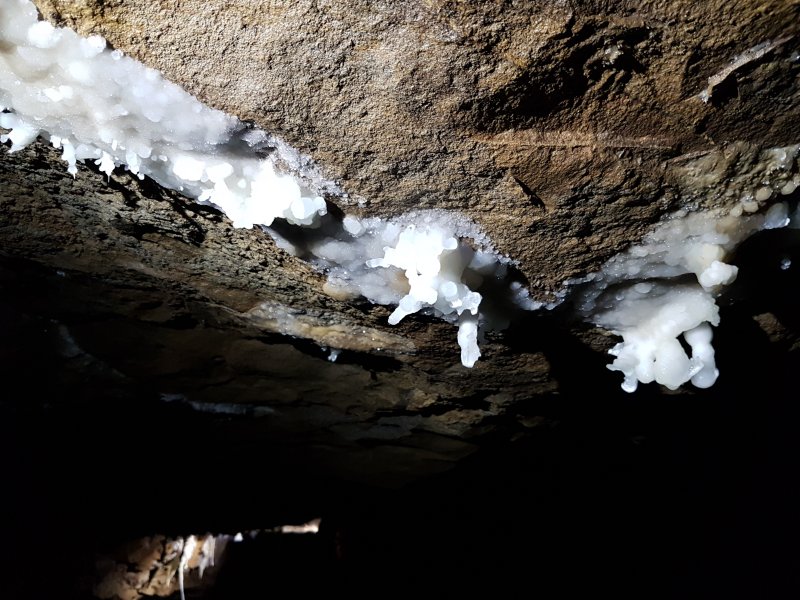 Helictites on a ceiling fracture.
Lighting by Tarquin and Helen
Helictites on a ceiling fracture.
Lighting by Tarquin and Helen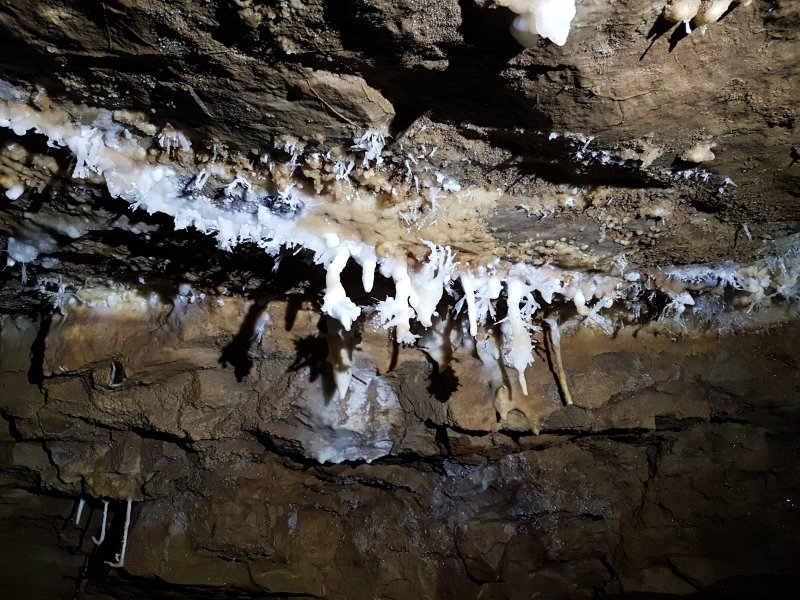 First part of the right set.
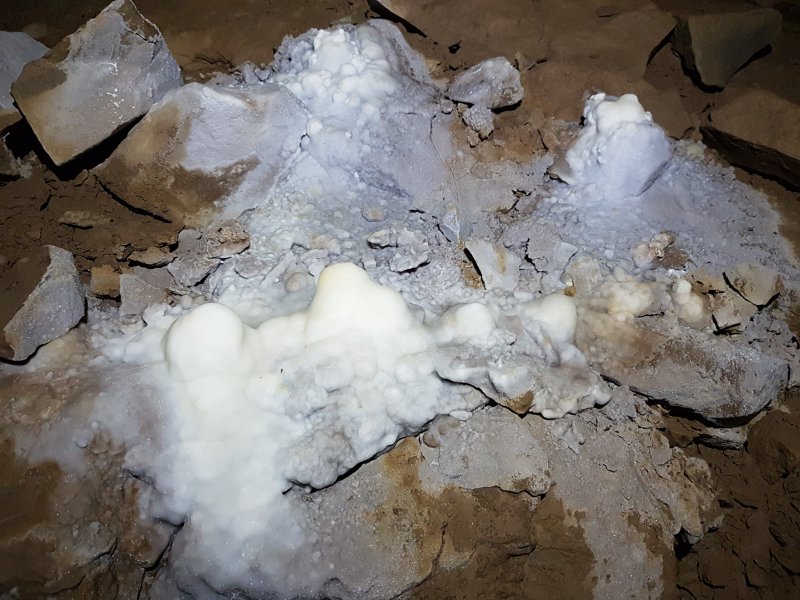 Stalagmites at the right set.
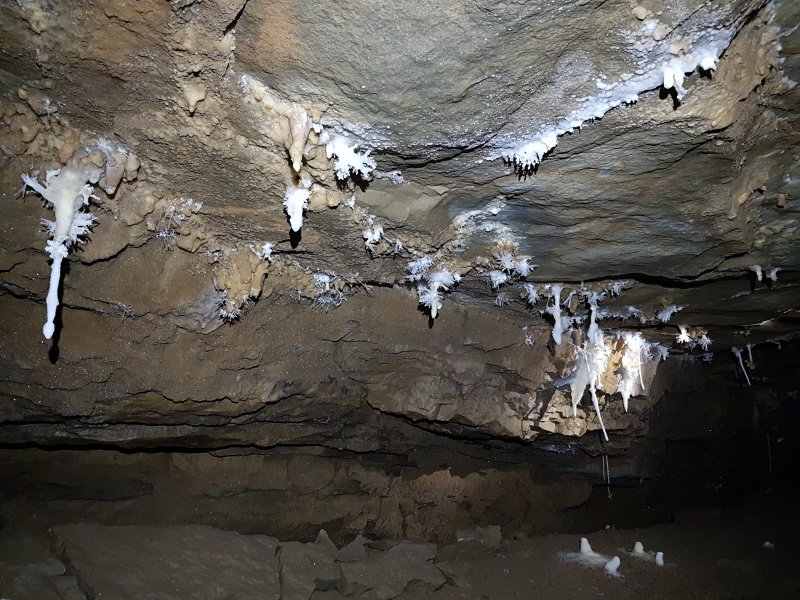 Main part of the right set.
Lighting by Tarquin and Helen
Main part of the right set.
Lighting by Tarquin and Helen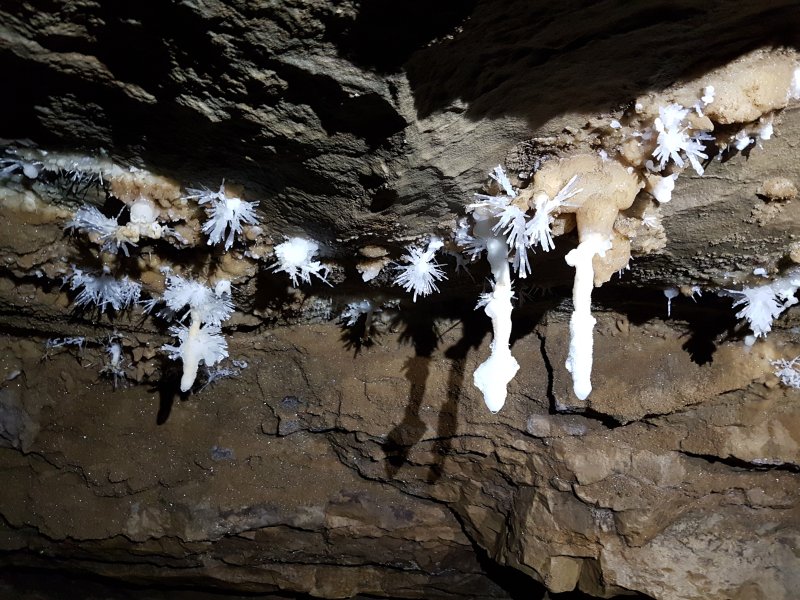 Anthodites.
Lighting by Tarquin and Helen
Anthodites.
Lighting by Tarquin and Helen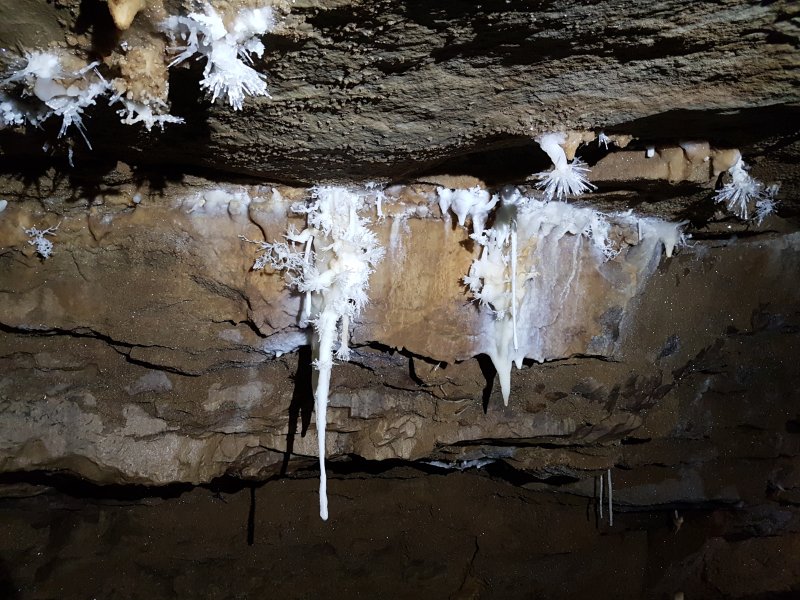 The best helictites in the right set.
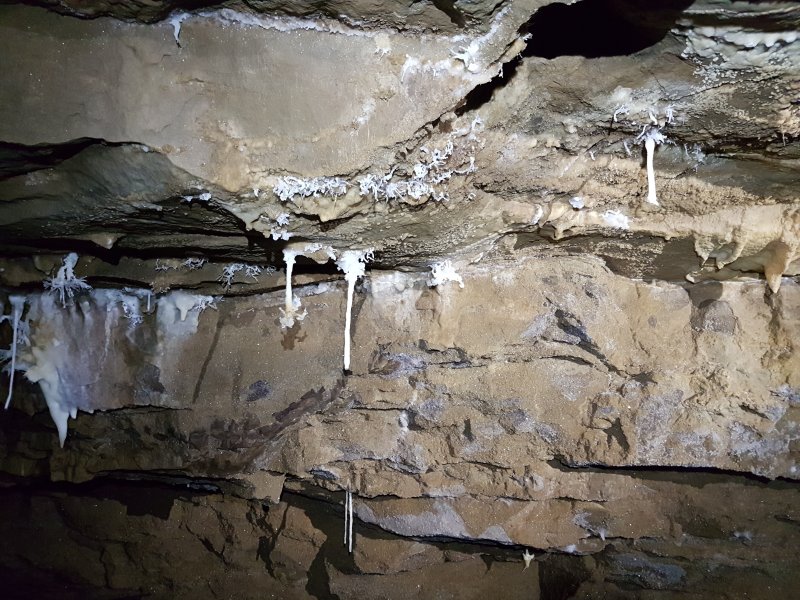 Nearing the end.
Lighting by Tarquin and Helen
Nearing the end.
Lighting by Tarquin and Helen Superb anthodites, the last of The White Company.
 Epocalypse Way then reverts to breakdown.
Modelling by Paul, Phill, Helen and Huw, lighting by Tarquin, Paul, Phill, Helen and Huw
Epocalypse Way then reverts to breakdown.
Modelling by Paul, Phill, Helen and Huw, lighting by Tarquin, Paul, Phill, Helen and Huw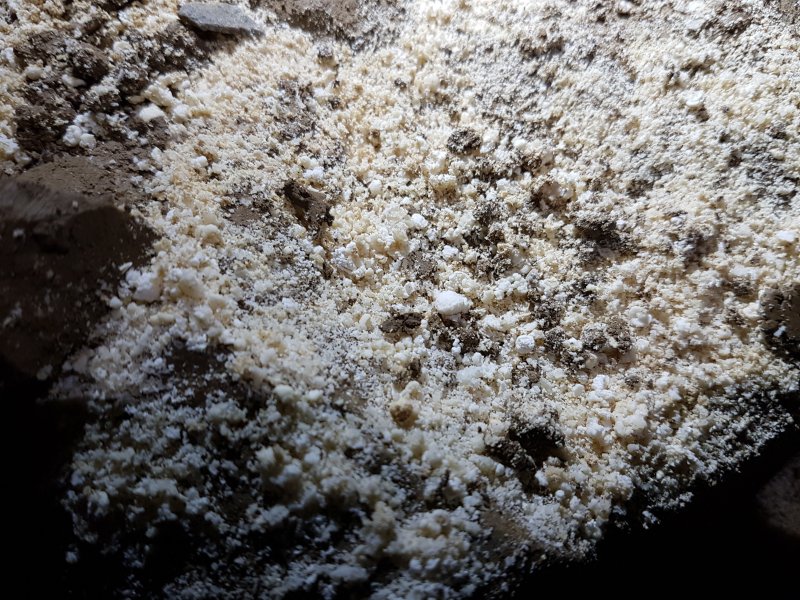 Cryostal on the boulders.
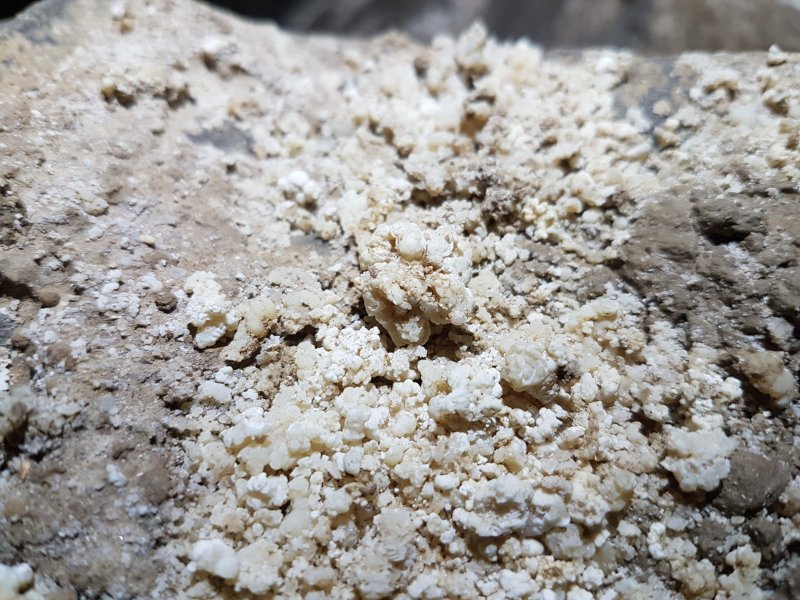 Another patch of cryostal.
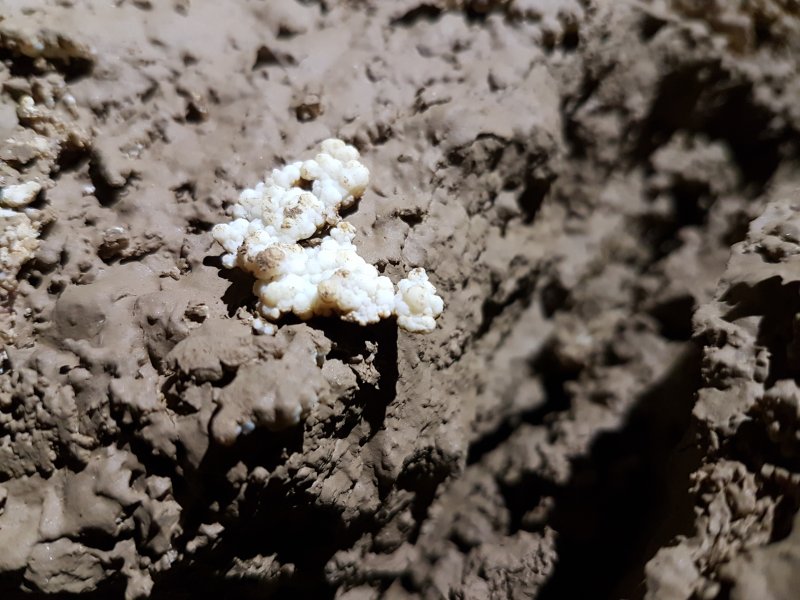 Another patch of cryostal, at the entrance to Urchin Oxbow.
 Anthodites on the high ceiling at the start of Urchin Oxbow.
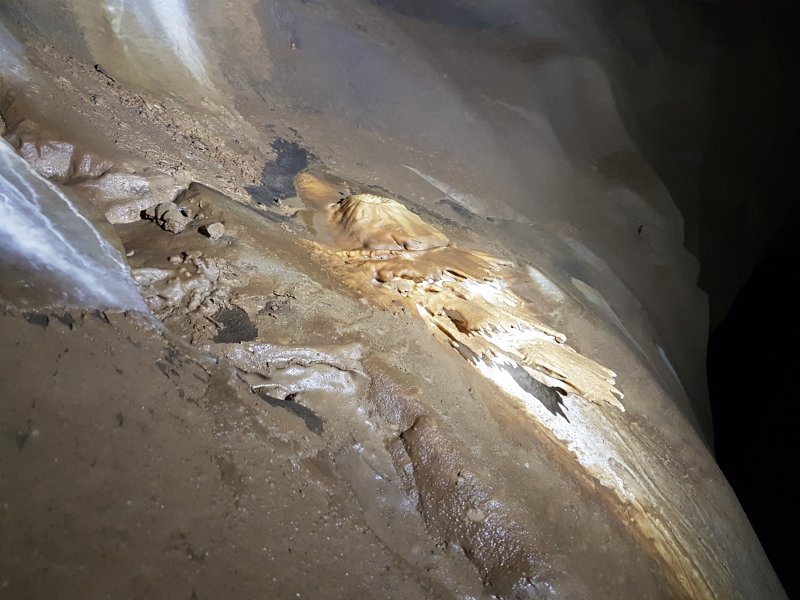 Splash layers on a stalagmite at the entrance to Urchin Oxbow.
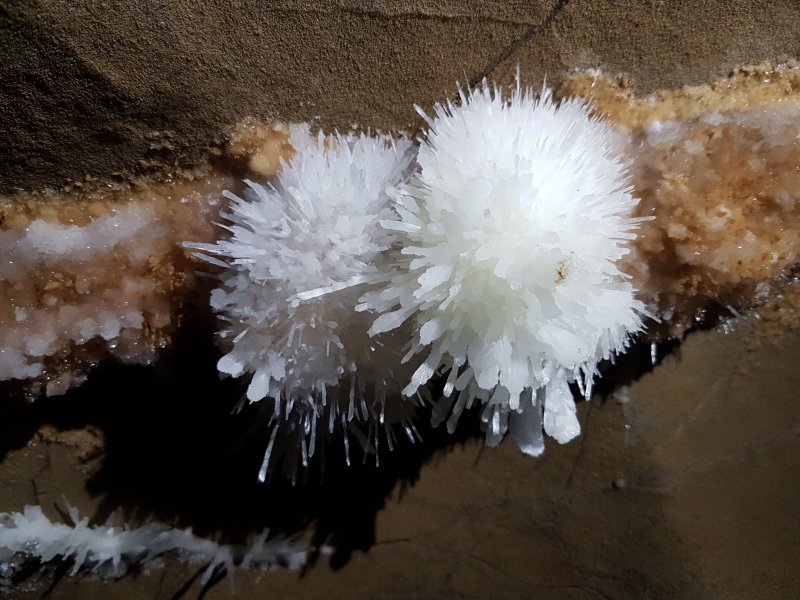 The seams of the passage are literally bursting with anthodites - The Urchins.
 Urchins.
 Urchins.
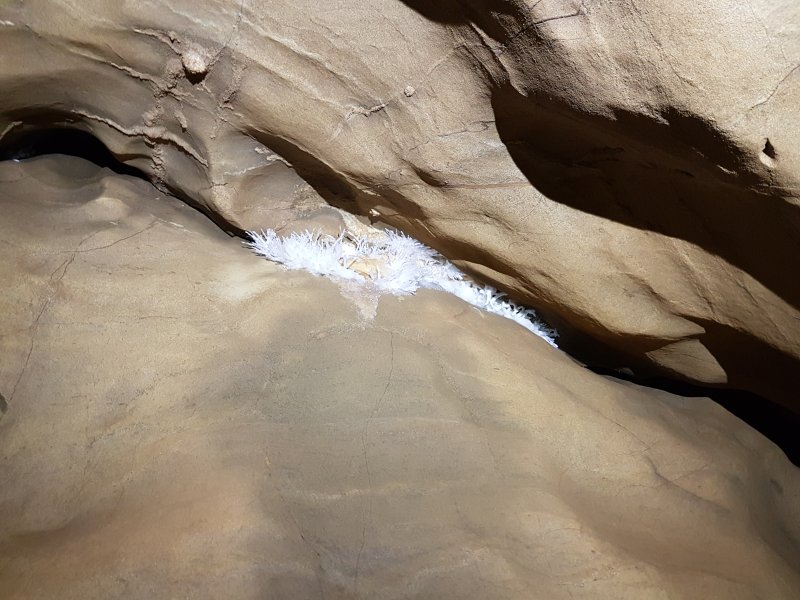 Urchins in the roof.
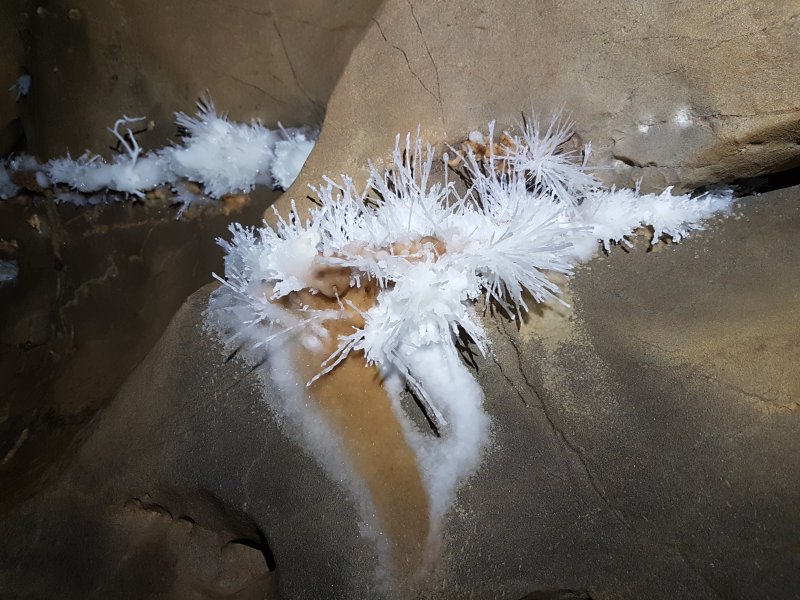 Urchins.
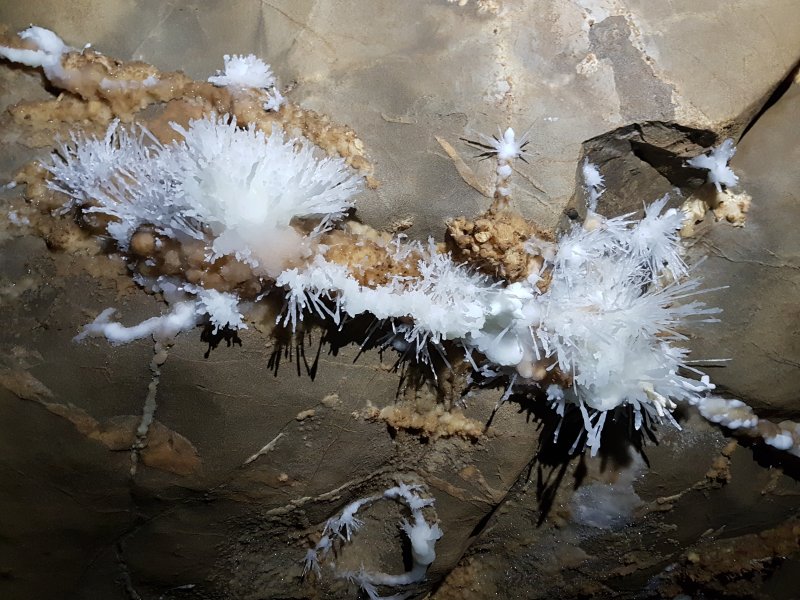 Urchins.
 Urchins.
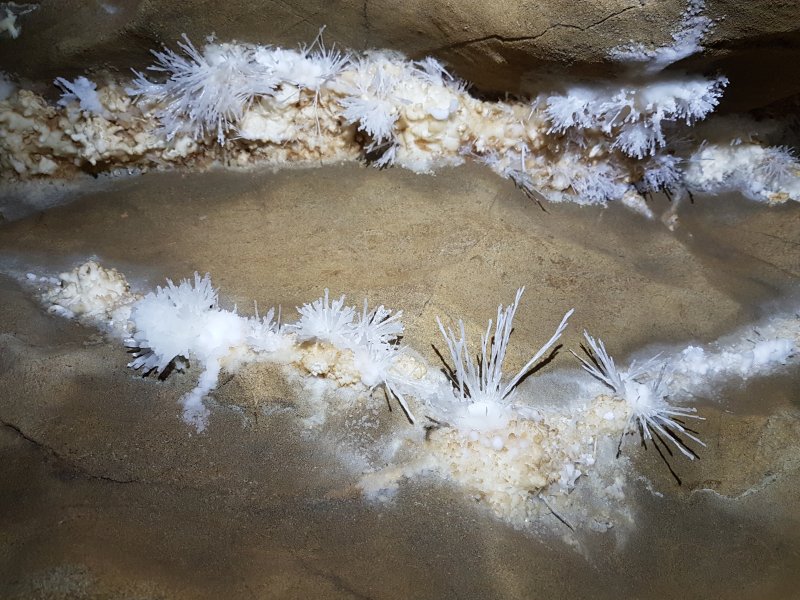 Long-spined urchins.
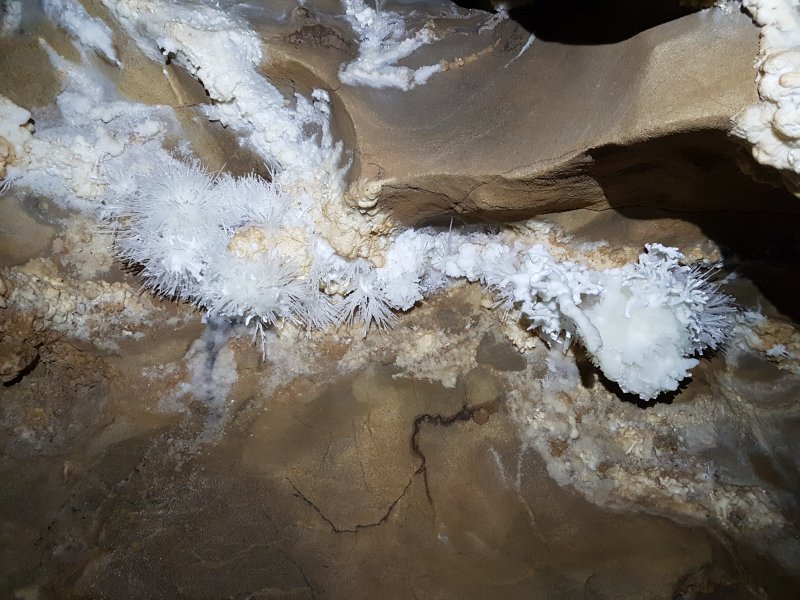 Urchins and helictites.
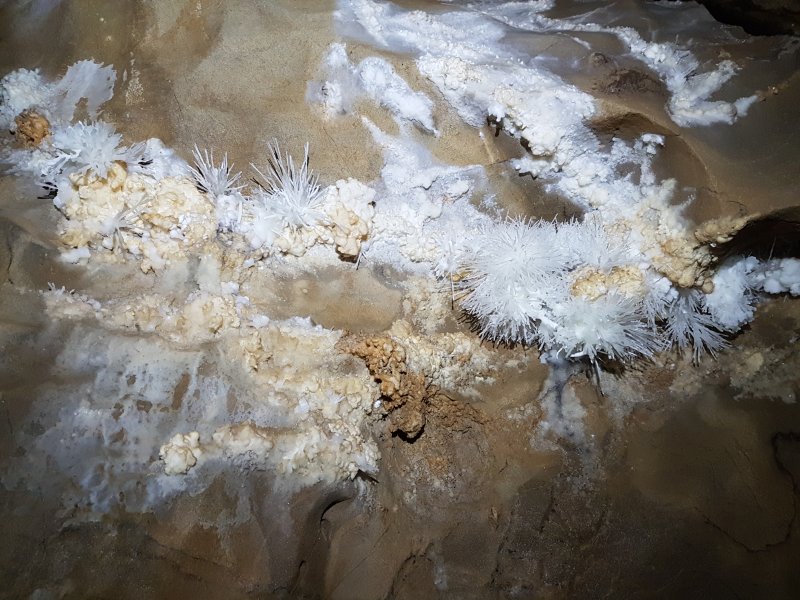 Urchins.
 Helictites.
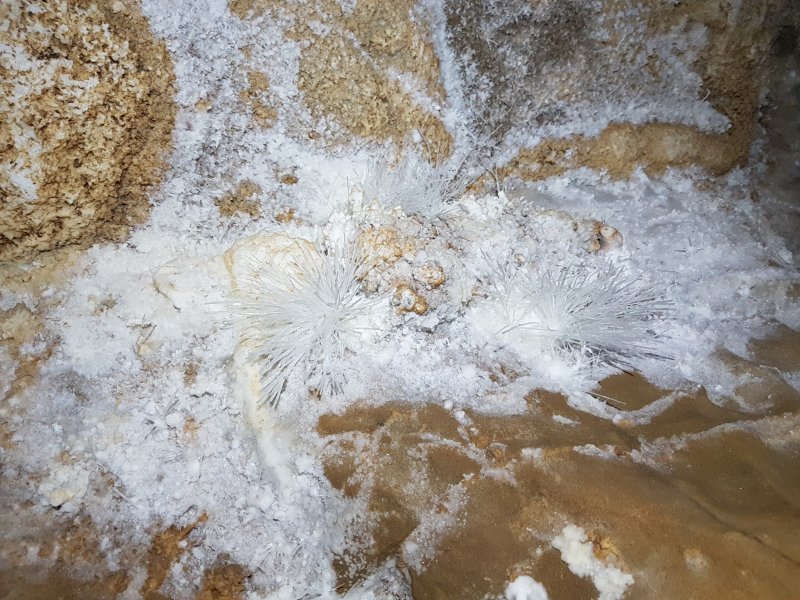 The last urchins.
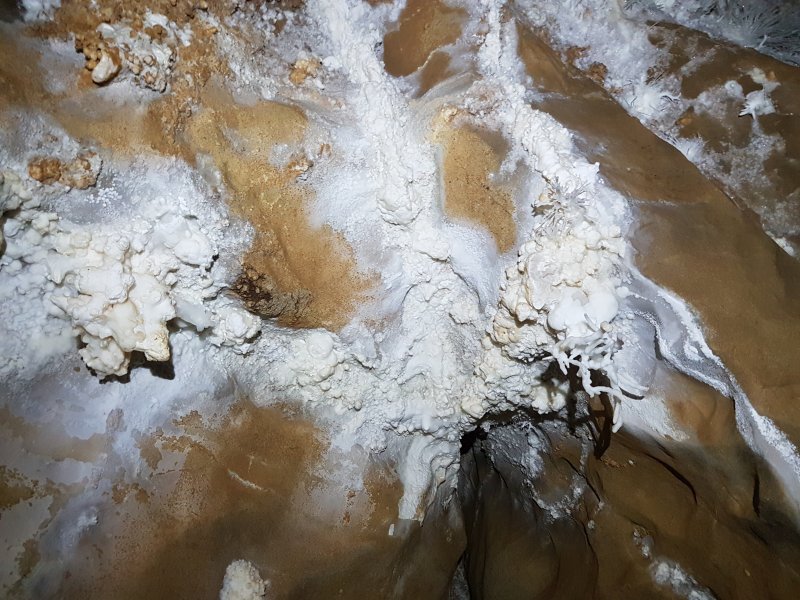 Old stal and helictites.
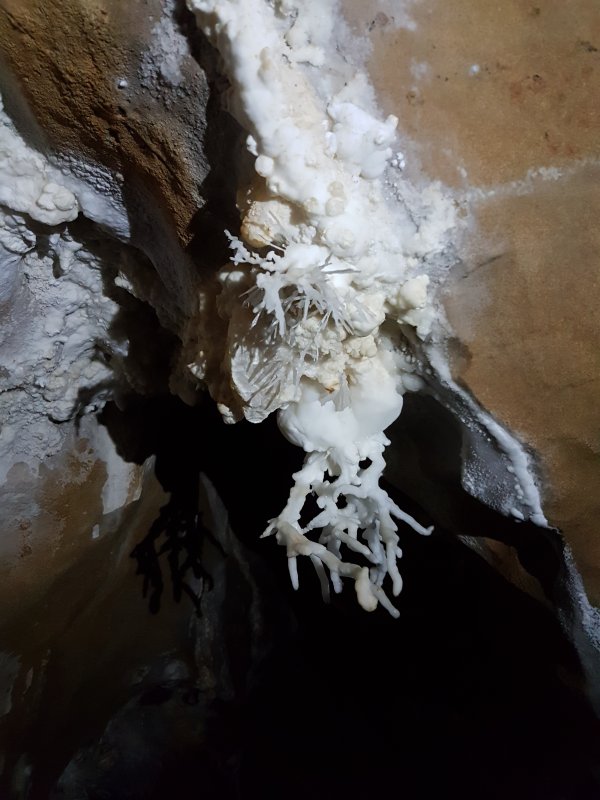 The helictites.
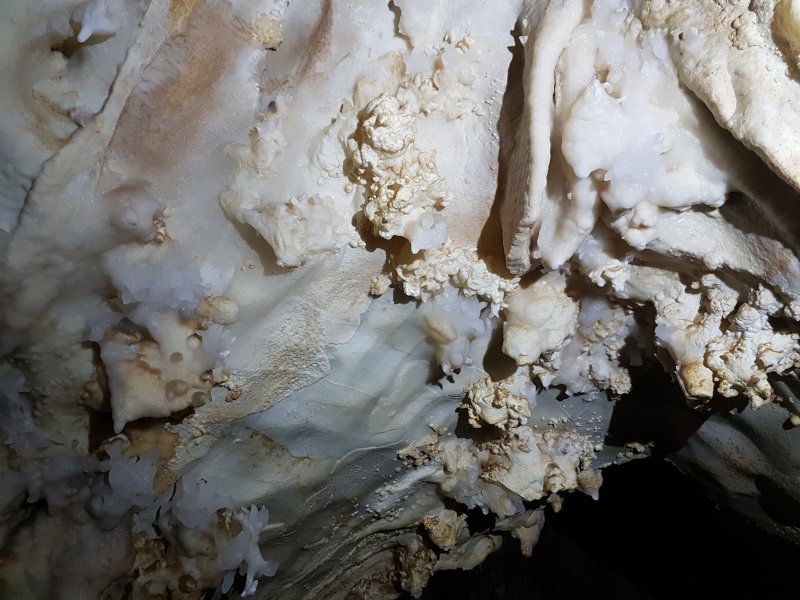 Old stal.
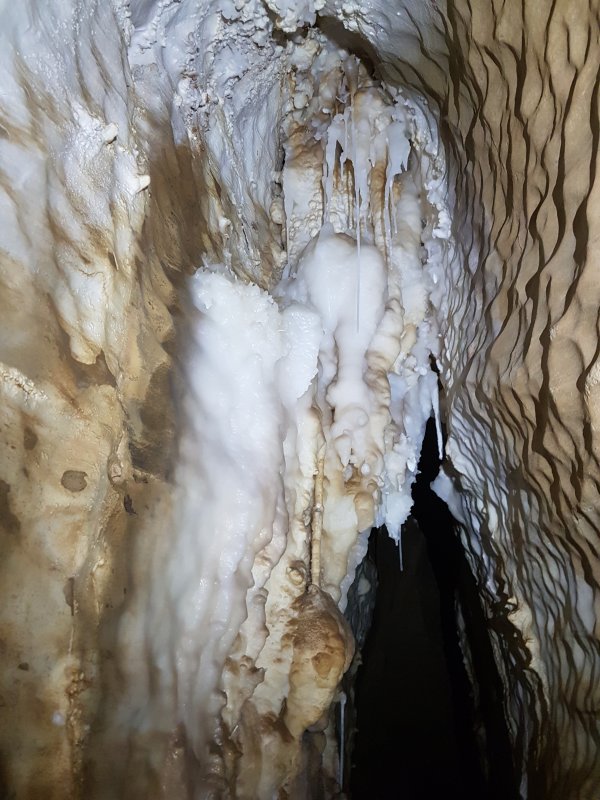 Old stal and straws. These partly block the passage, and to avoid damage, the continuing passage is taped off. It can be more easily reached from Antler Passage instead.
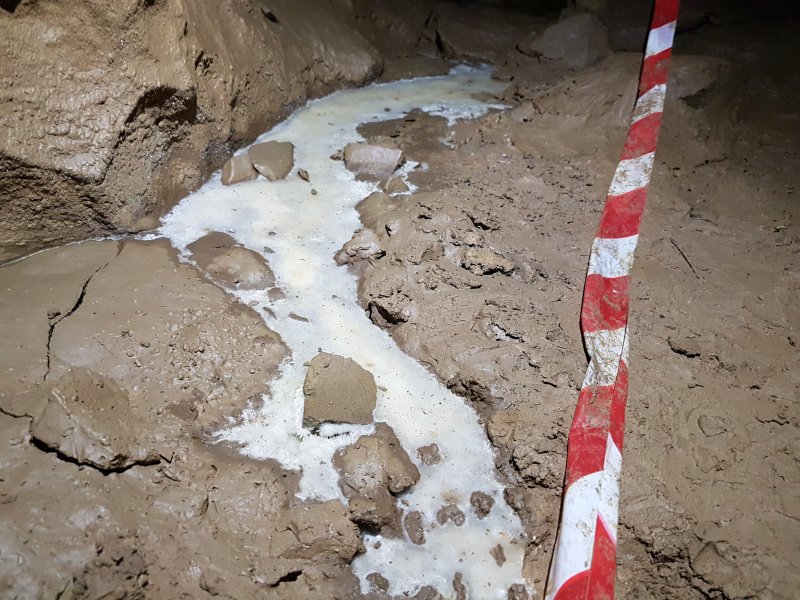 Stal flow in the continuation of Urchin Oxbow.
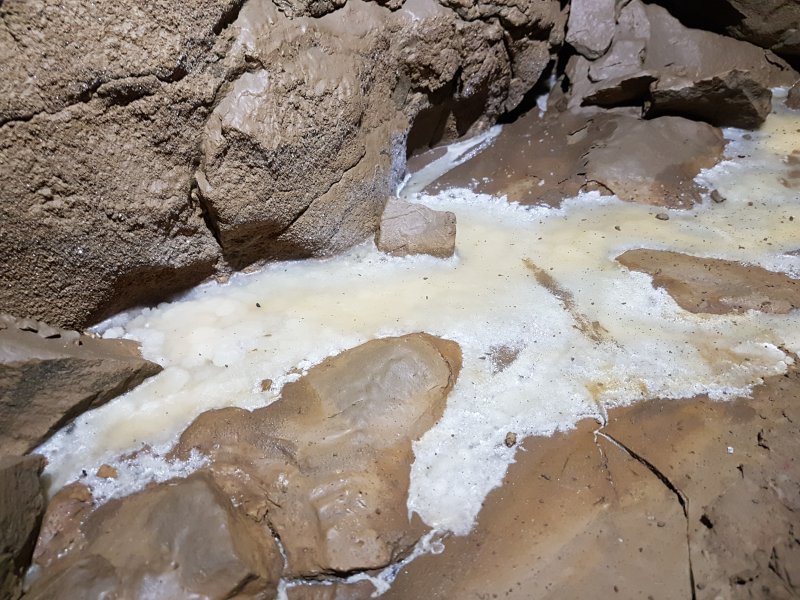 Stal flow, the last of the Urchin Oxbow decorations.
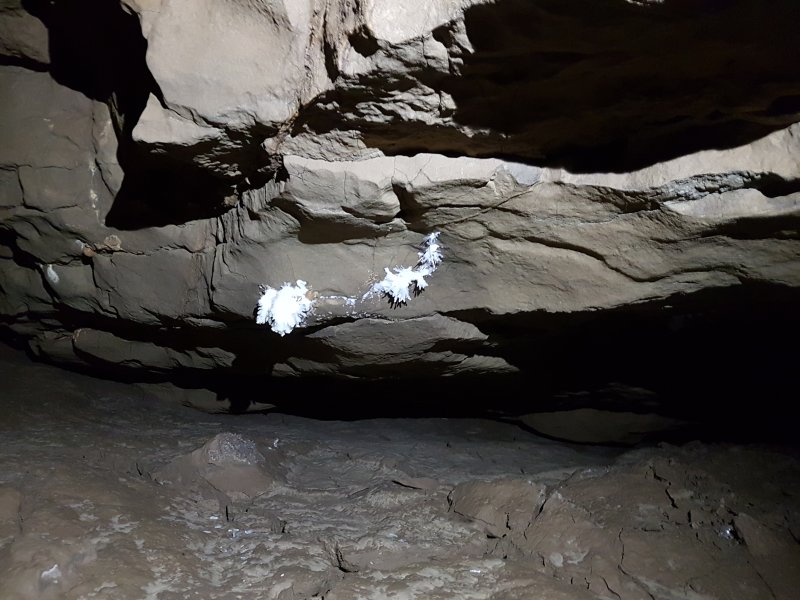 Back in Epocalypse Way, these anthodites are tucked into an undercut.
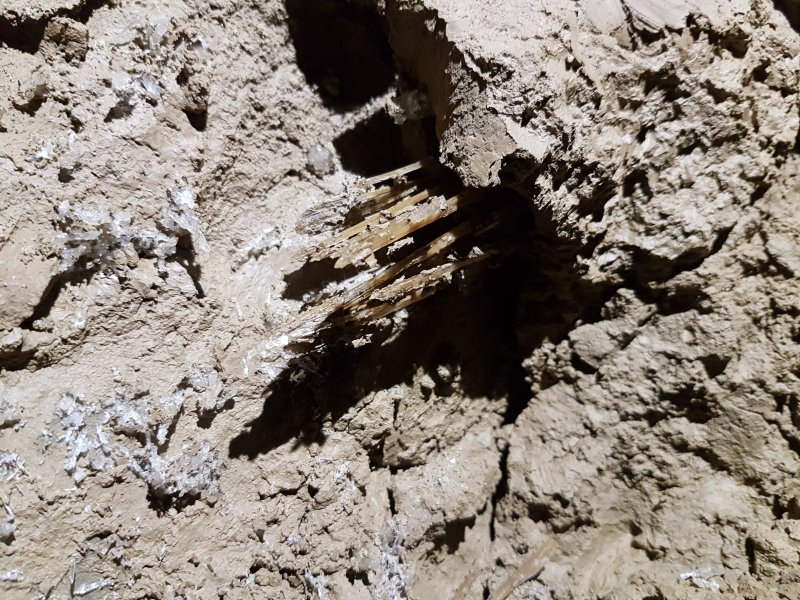 Epocalypse Way then switches to very impressive selenite crystals growing from the mud. These are as big as any in Agen Allwedd or Draenen, but absolutely everywhere.
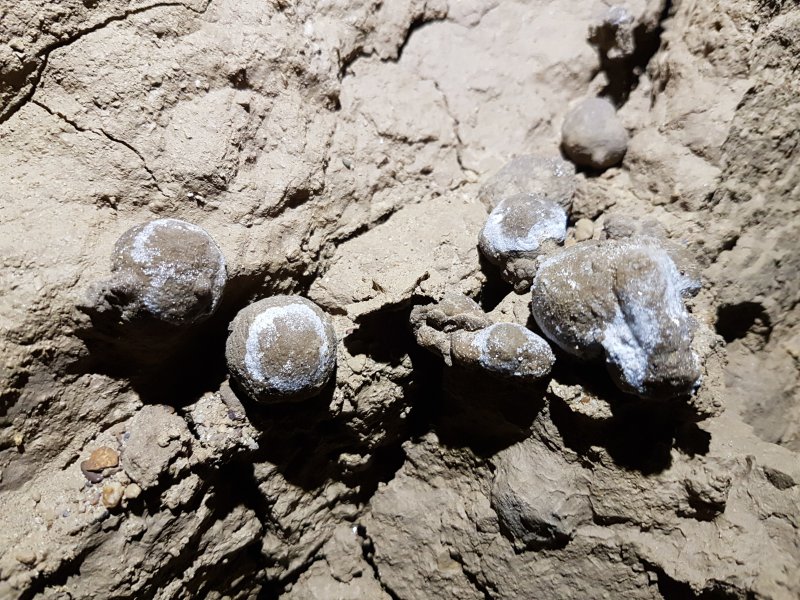 And then a set of very unusual spherical formations (balls to you), with a selenite frosting, looking like little chocolate truffles. Each sphere is about 2-3 cm in diameter. Perhaps they are just coated river pebbles, but they sit on top of the silt mud, surrounded by selenite crystals. The original explorers thought they looked like rusty ball bearings.
 Selenite crystals.
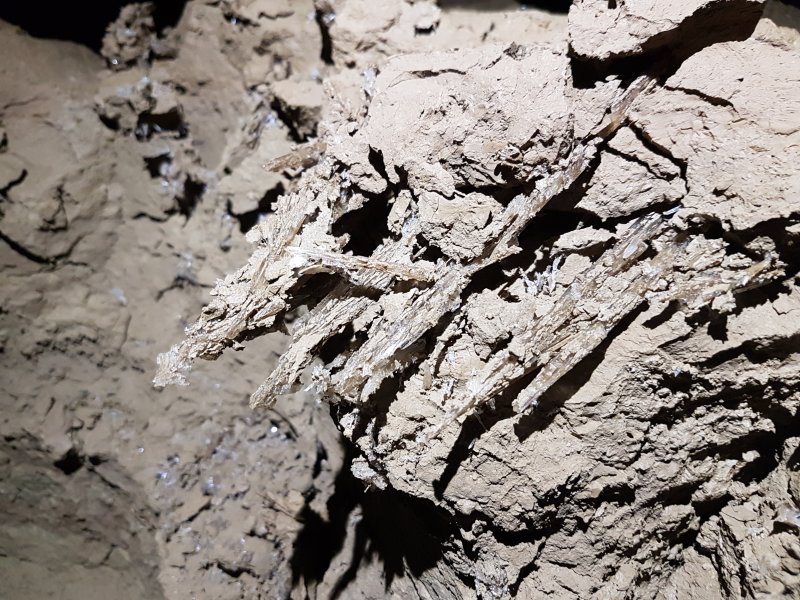 Selenite crystals.
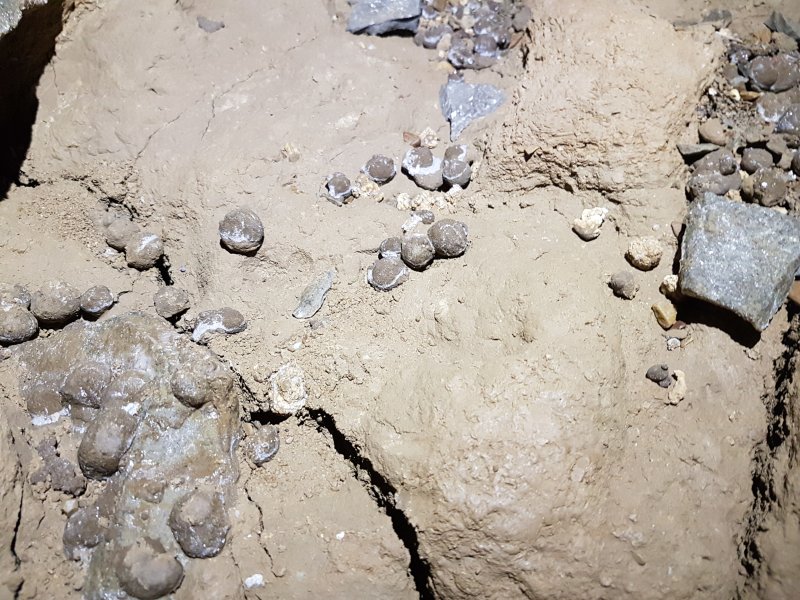 More truffles. This time with some yellow lumps that appear to be cryostal. Is that what the truffles are too?
 Selenite crystals.
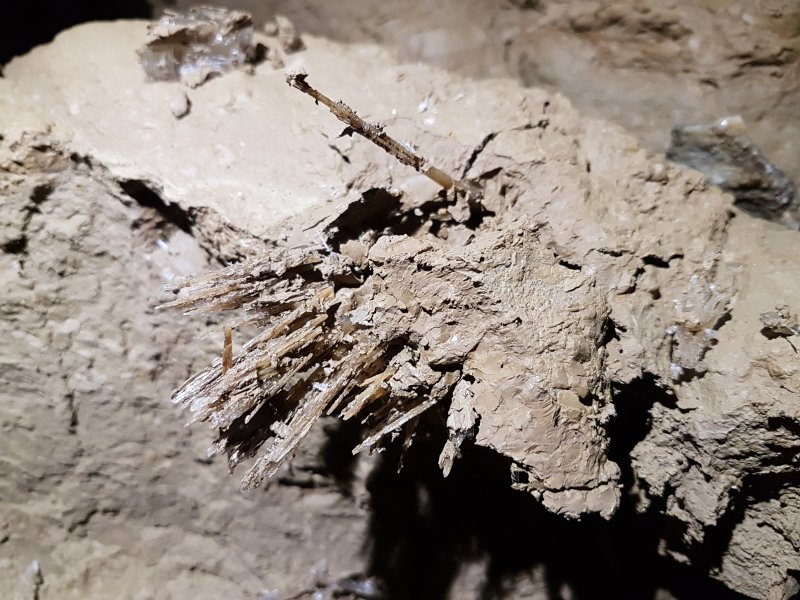 Selenite crystals. Most are about 10 cm (4 inches) long.
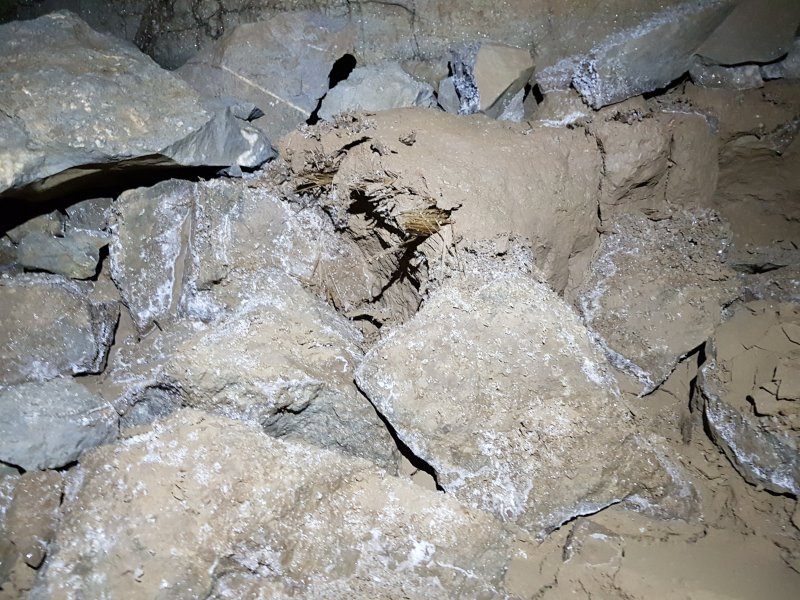 They only form on the mud, while smaller gypsum crystals form on the rocks.
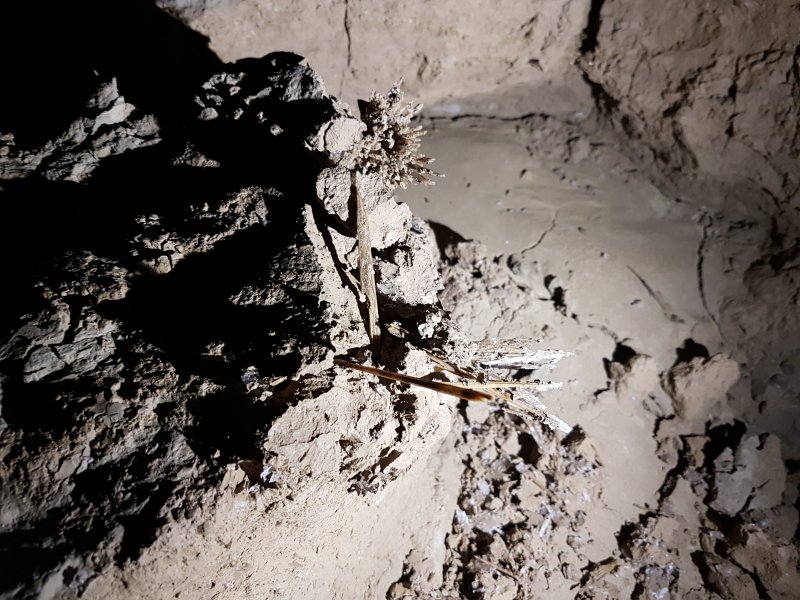 Selenite crystals.
 You're surrounded! How many people does it take to take a picture?
Modelling by Phill, Paul, Helen and Huw, lighting by Tarquin, Phill, Paul, Helen and Huw
You're surrounded! How many people does it take to take a picture?
Modelling by Phill, Paul, Helen and Huw, lighting by Tarquin, Phill, Paul, Helen and Huw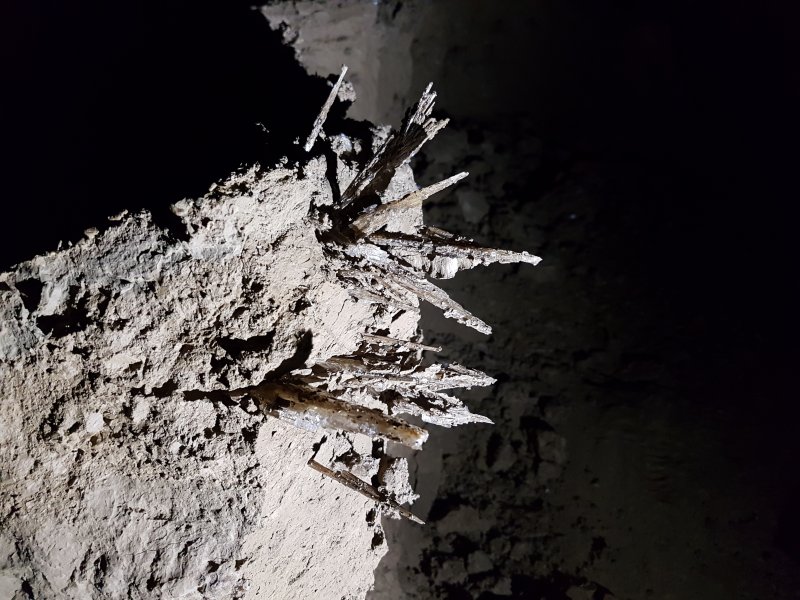 The victims.
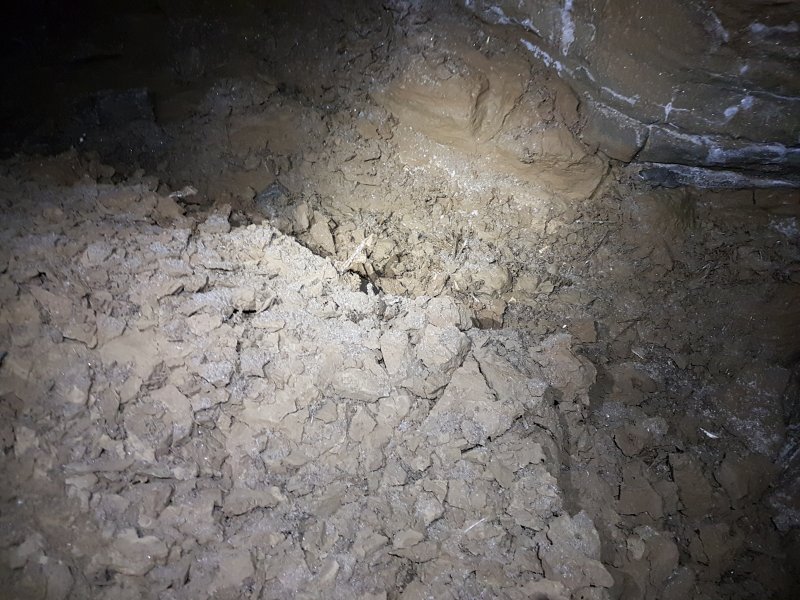 Longer crystals further away in a trench. These are about 15 cm long in most cases.
Lighting by Tarquin and Paul
Longer crystals further away in a trench. These are about 15 cm long in most cases.
Lighting by Tarquin and Paul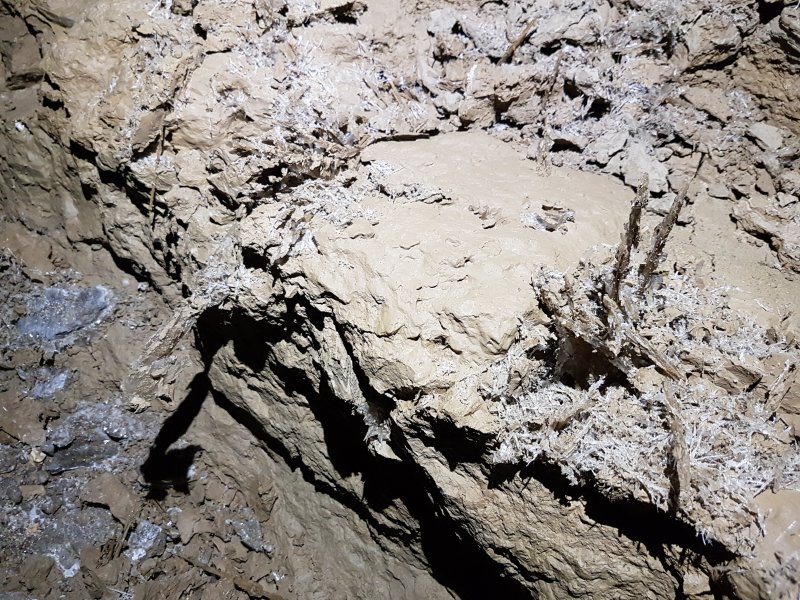 Some of the longer selenite crystals.
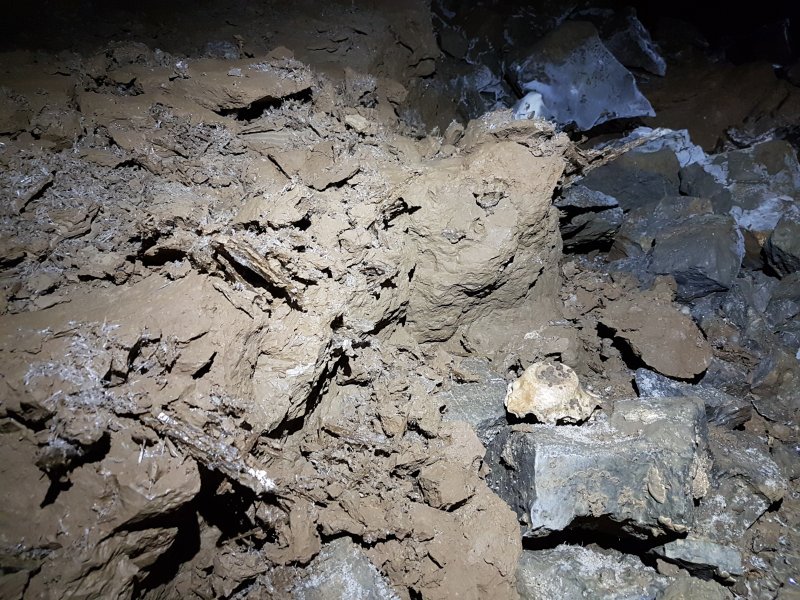 Whether these are formed by growing from the mud, or by evaporation (wicking) of water saturated with selenite within the mud, remains unknown. If the latter, the water in the mud must have been highly saturated when it was happening, and not something you would want to drink. It is also notable that these crystals tend to be found in places where cryogenic processes have also left visible effects, so maybe they have cryogenic origins as well.
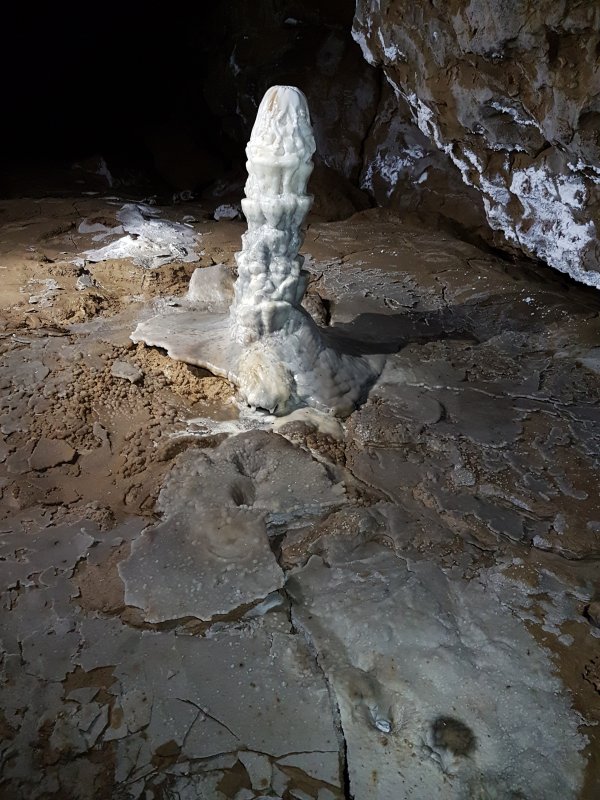 The next formation is an unusual stalagmite, with distinctive ledges, reminiscent of The Pagoda in Craig a Ffynnon (though the ledges are not of the same quality). This stalagmite is therefore also called The Pagoda, and is about 60 cm (2 feet) tall. (The stalagmite nearly caused Epocalypse Way to be called Penis Passage.) The surrounding wall has more evaporation formations.
Lighting by Tarquin, Paul, Helen and Huw
The next formation is an unusual stalagmite, with distinctive ledges, reminiscent of The Pagoda in Craig a Ffynnon (though the ledges are not of the same quality). This stalagmite is therefore also called The Pagoda, and is about 60 cm (2 feet) tall. (The stalagmite nearly caused Epocalypse Way to be called Penis Passage.) The surrounding wall has more evaporation formations.
Lighting by Tarquin, Paul, Helen and Huw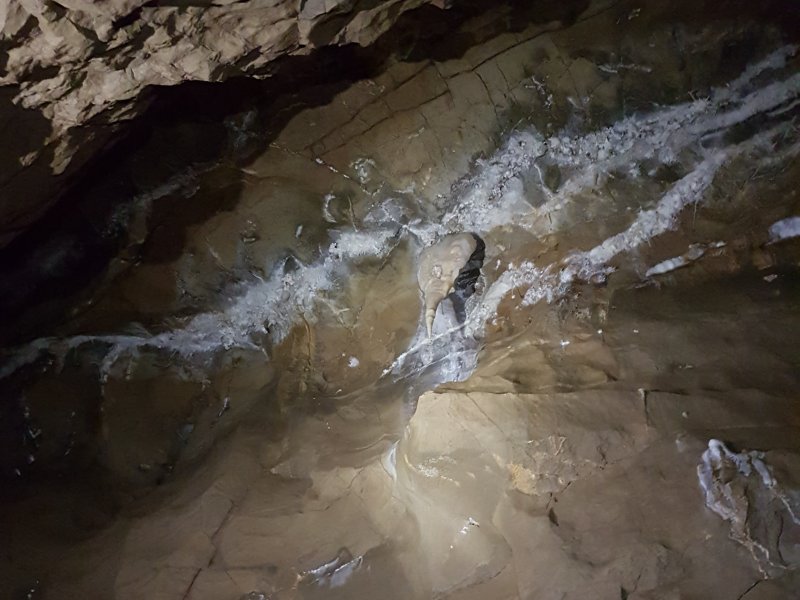 The stalactite above, which is also very ... distinctive. No, I did not say "ugly". Why, do you think I should? It looks like a bee's stinger and venom gland.
Lighting by Tarquin, Paul, Helen and Huw
The stalactite above, which is also very ... distinctive. No, I did not say "ugly". Why, do you think I should? It looks like a bee's stinger and venom gland.
Lighting by Tarquin, Paul, Helen and Huw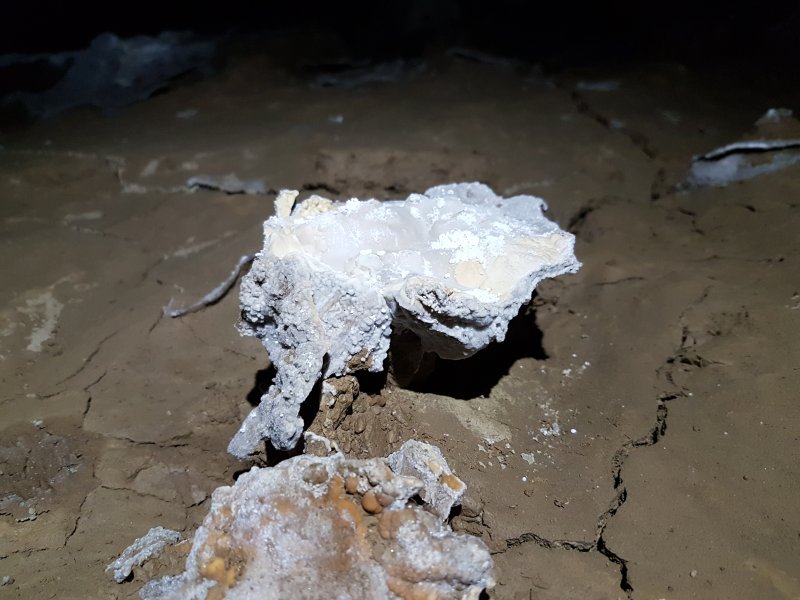 False floor, like Dan-yr-Ogof's Mushroom.
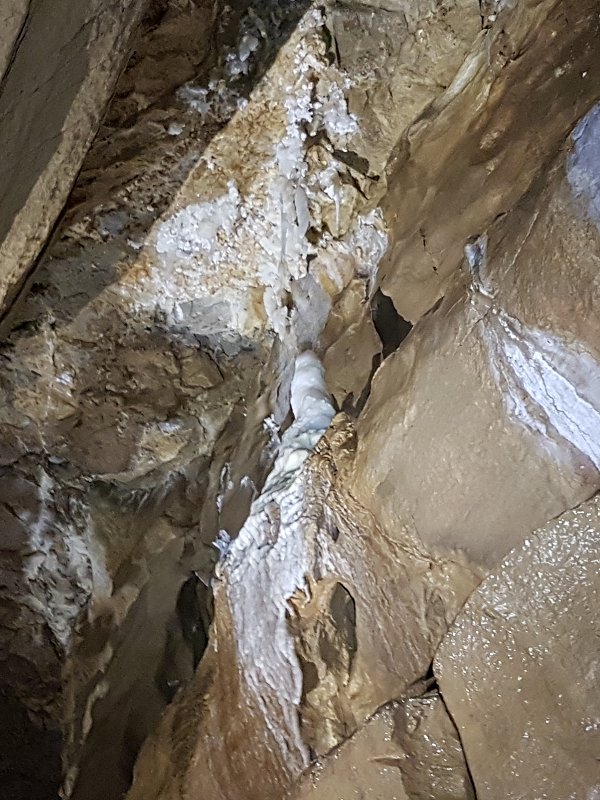 Formations in the roof.
Lighting by Tarquin and Paul
Formations in the roof.
Lighting by Tarquin and Paul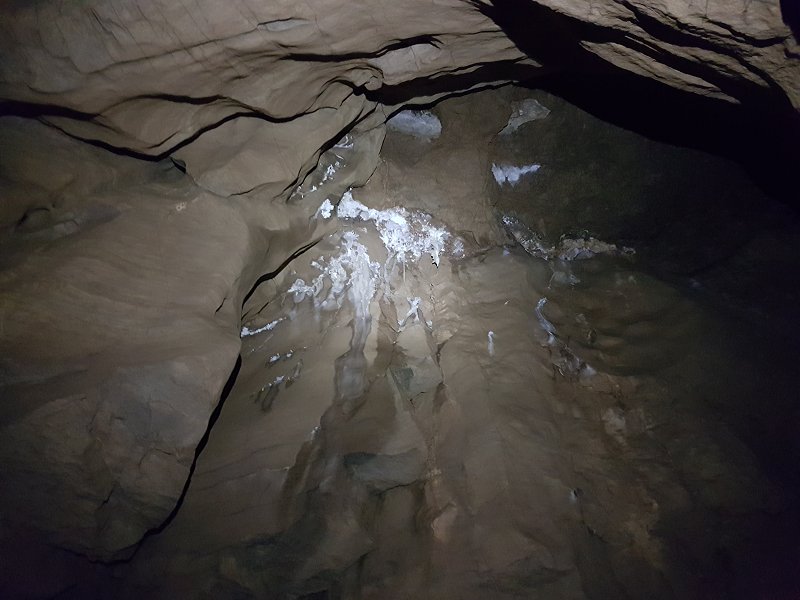 Formations in the roof, as we approach The Kitchen.
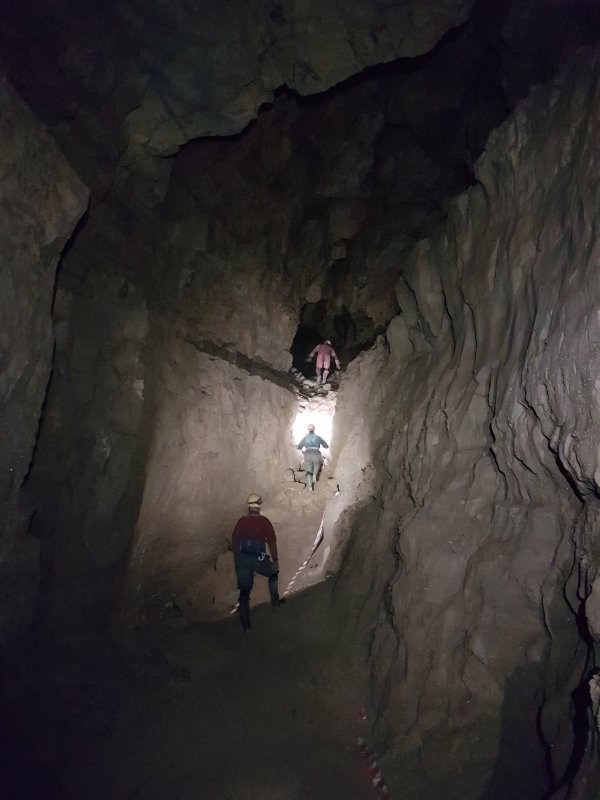 A relatively small tube then gains the large Antler Passage, the most significant side passage in this part of the cave. In the shadow on the left is the other end of Urchin Oxbow.
Modelling by Paul, Helen and Phill, lighting by Tarquin, Huw, Paul, Helen and Phill
A relatively small tube then gains the large Antler Passage, the most significant side passage in this part of the cave. In the shadow on the left is the other end of Urchin Oxbow.
Modelling by Paul, Helen and Phill, lighting by Tarquin, Huw, Paul, Helen and Phill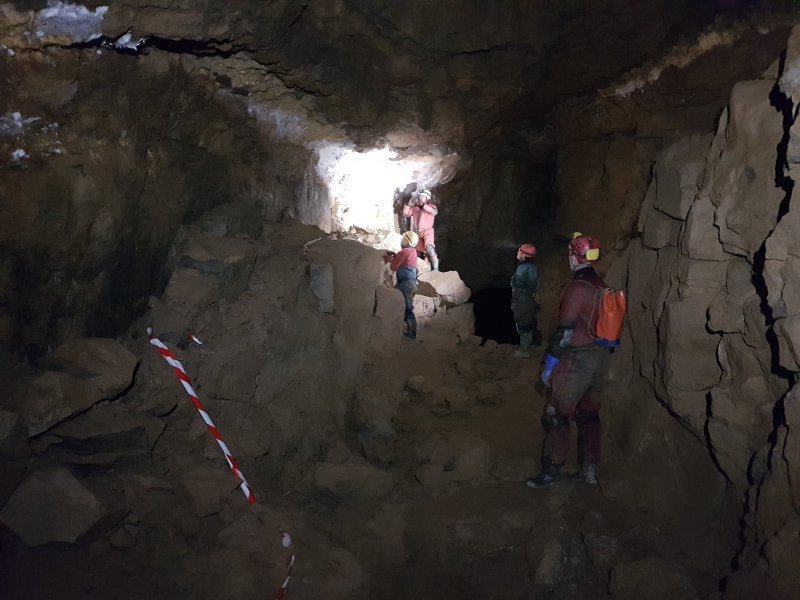 The left wall then becomes decorated with another set of impressive helictite formations, The Antlers. This was a common destination before the through trip was established.
Modelling by Huw, Helen, Paul and Phill, lighting by Tarquin, Huw, Helen, Paul and Phill
The left wall then becomes decorated with another set of impressive helictite formations, The Antlers. This was a common destination before the through trip was established.
Modelling by Huw, Helen, Paul and Phill, lighting by Tarquin, Huw, Helen, Paul and Phill A lonely antler. The large helictites are likely to be aragonite rather than calcite.
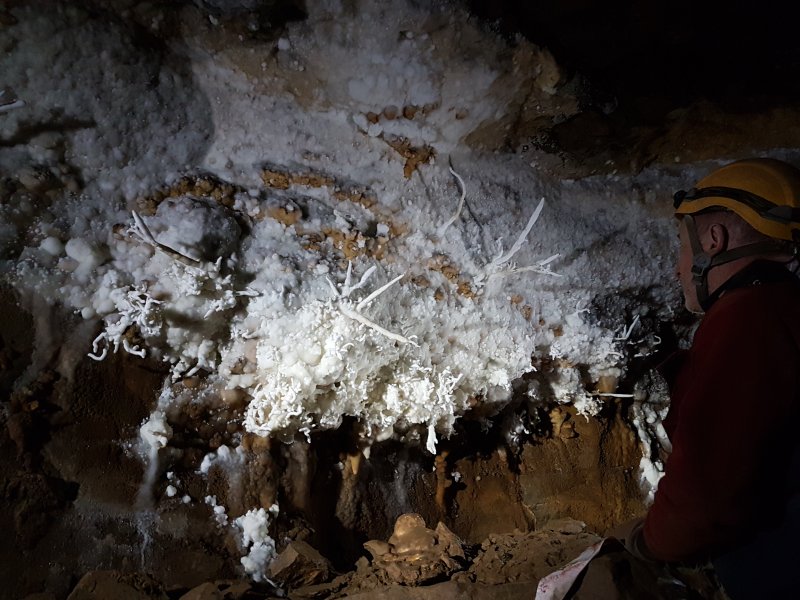 The Antlers.
Modelling by Paul, lighting by Huw
The Antlers.
Modelling by Paul, lighting by Huw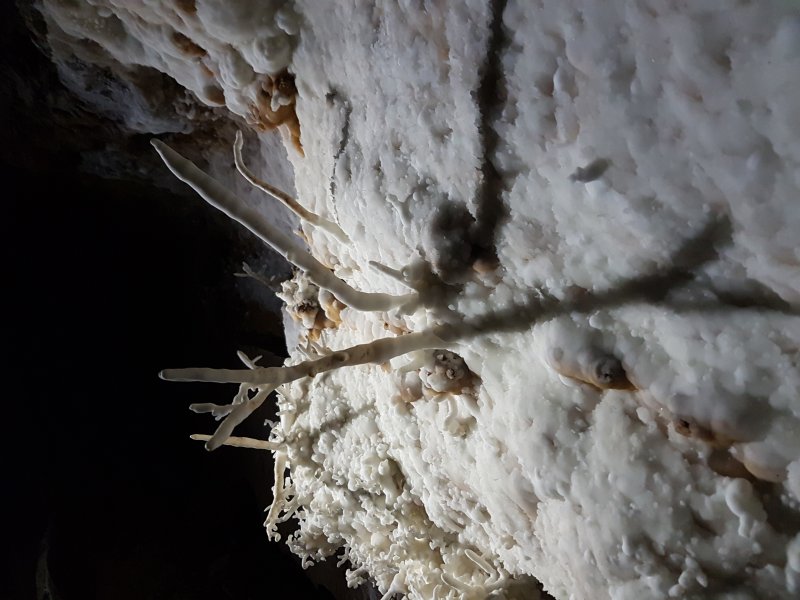 The Antlers. The muddy marks are thought to be caused by bats hanging from the formations, leaving tiny amounts of mud from their feet. Miniature vandals.
Lighting by Huw
The Antlers. The muddy marks are thought to be caused by bats hanging from the formations, leaving tiny amounts of mud from their feet. Miniature vandals.
Lighting by Huw Helictites on the left.
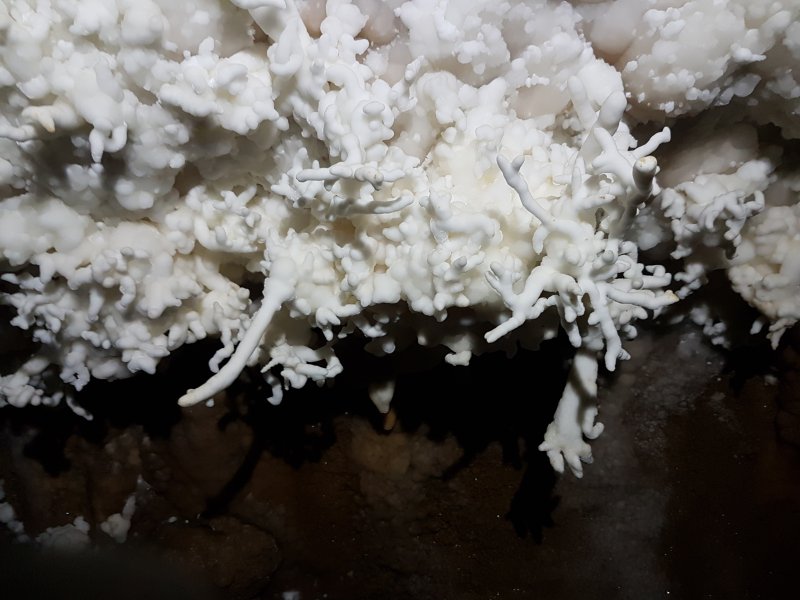 Intricate helictites below The Antlers.
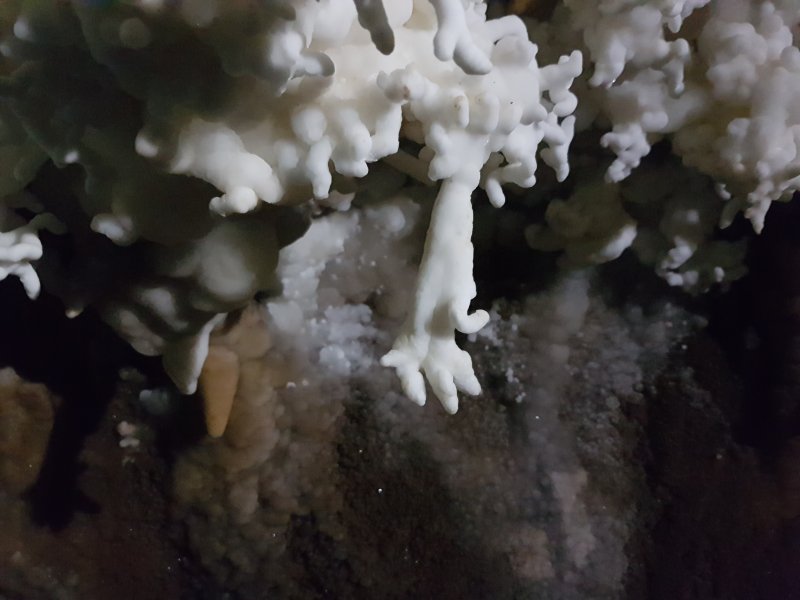 The hand-shaped helictite below The Antlers.
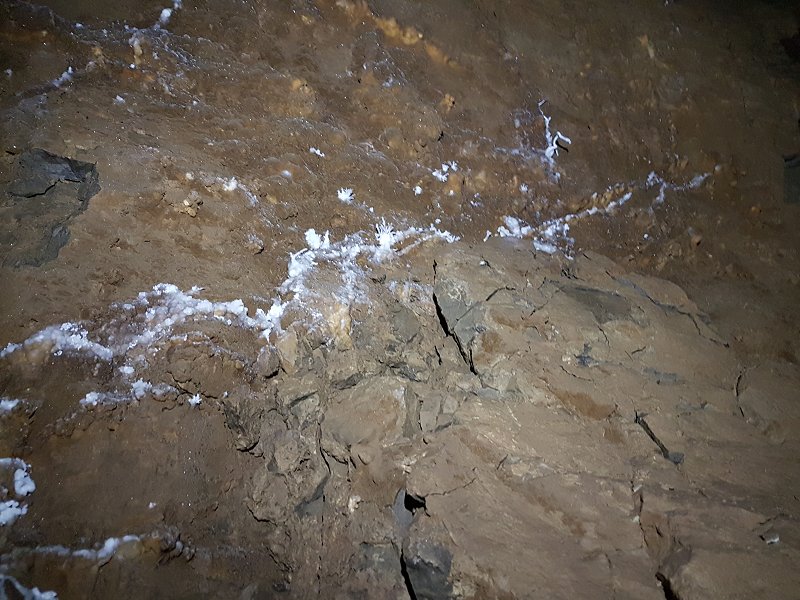 Helictites on a wall seam beyond The Antlers.
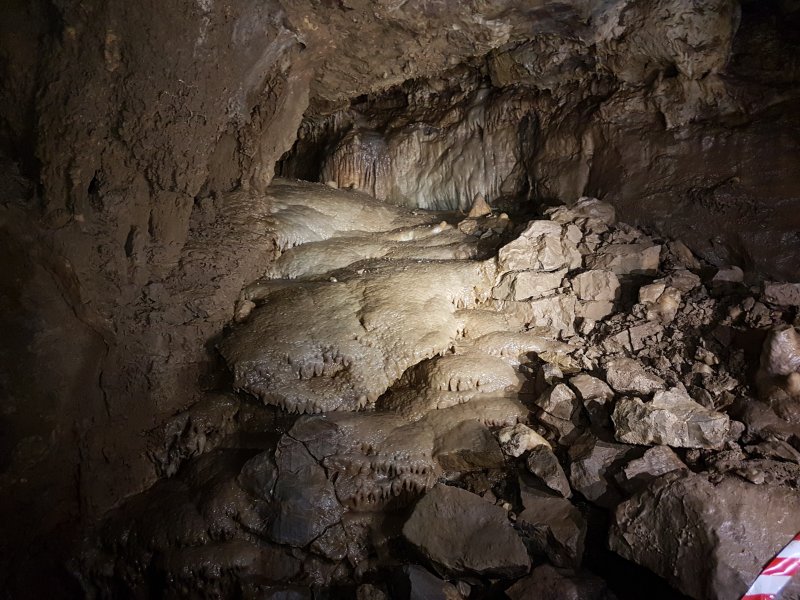 Antler Passage then turns its only significant corner, where this beautiful flowstone formation fills a choked side passage. This is the closest point to Ogof Craig a Ffynnon's Promised Land, and is almost certainly related to it. However, digging through here would destroy the formations, so it has been left untouched. In theory it might be possible to dig beneath it, shoring up the rubble above, but that would be a major operation in such a remote location.
Lighting by Tarquin, Paul, Phill, Helen and Huw
Antler Passage then turns its only significant corner, where this beautiful flowstone formation fills a choked side passage. This is the closest point to Ogof Craig a Ffynnon's Promised Land, and is almost certainly related to it. However, digging through here would destroy the formations, so it has been left untouched. In theory it might be possible to dig beneath it, shoring up the rubble above, but that would be a major operation in such a remote location.
Lighting by Tarquin, Paul, Phill, Helen and Huw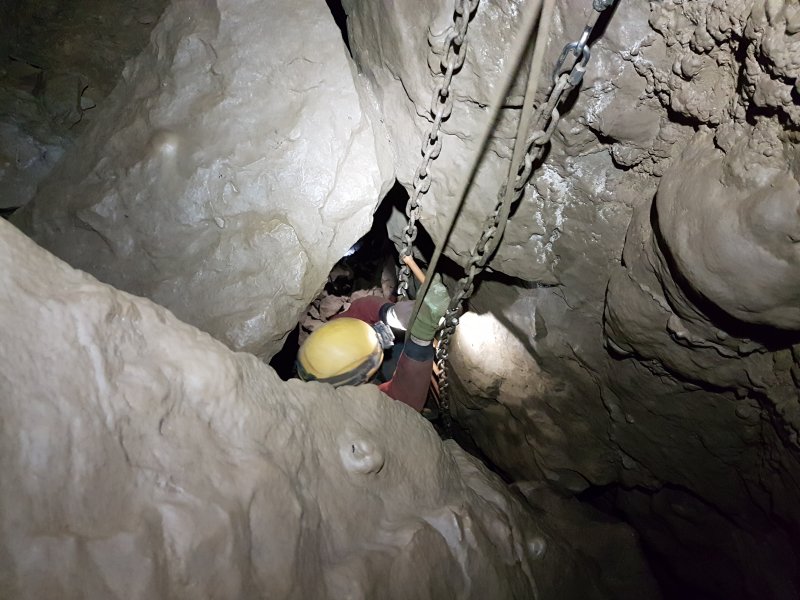 Antler Passage may be fairly large, but it has numerous obstacles and boulder collapses that need scrambles and ladders to get along it. Two ladders up, one down, a rope climb down, a chain traverse and a choke before the final chamber.
Modelling by Paul and Phill's arm, lighting by Tarquin, Paul, Phill and Helen
Antler Passage may be fairly large, but it has numerous obstacles and boulder collapses that need scrambles and ladders to get along it. Two ladders up, one down, a rope climb down, a chain traverse and a choke before the final chamber.
Modelling by Paul and Phill's arm, lighting by Tarquin, Paul, Phill and Helen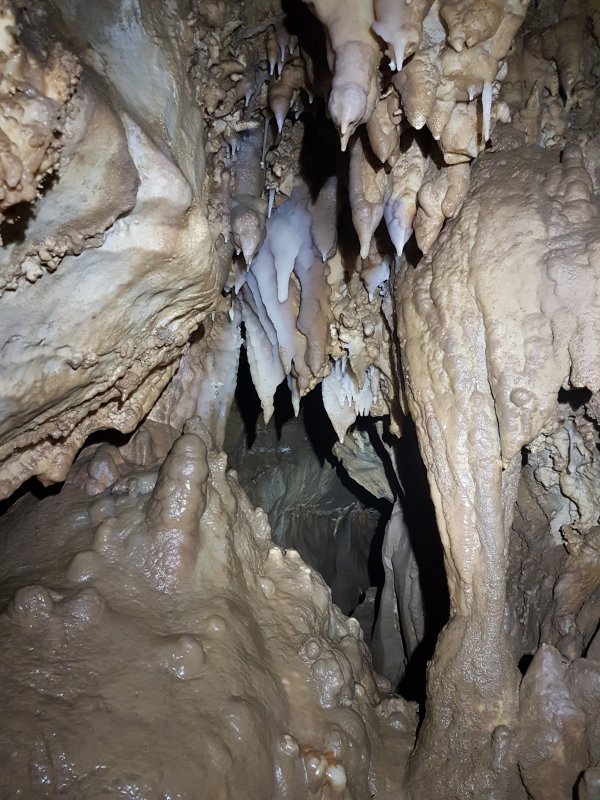 A stal obstruction, which needs care to avoid smearing mud on the stal, while passing through a crawling-sized gap. There is an alternative slot below it, needing a traverse in a slippery rift.
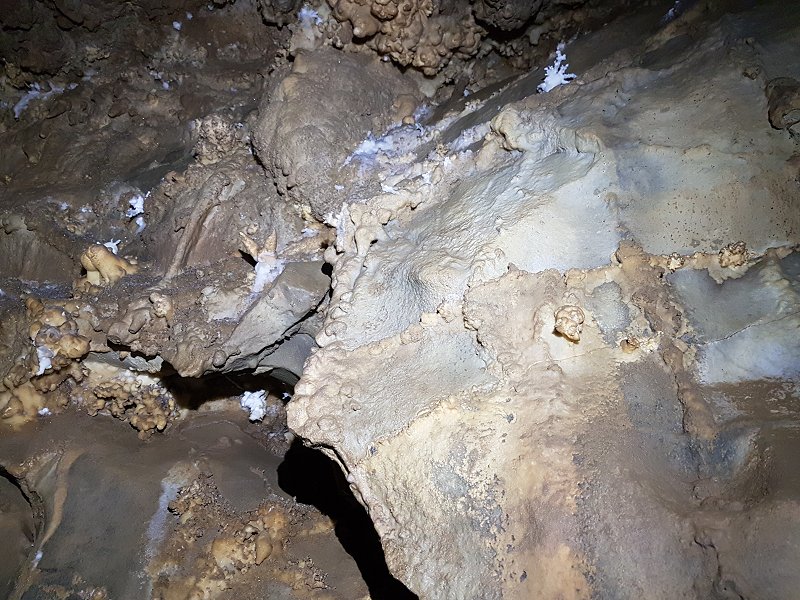 Old stal and helictites on the wall.
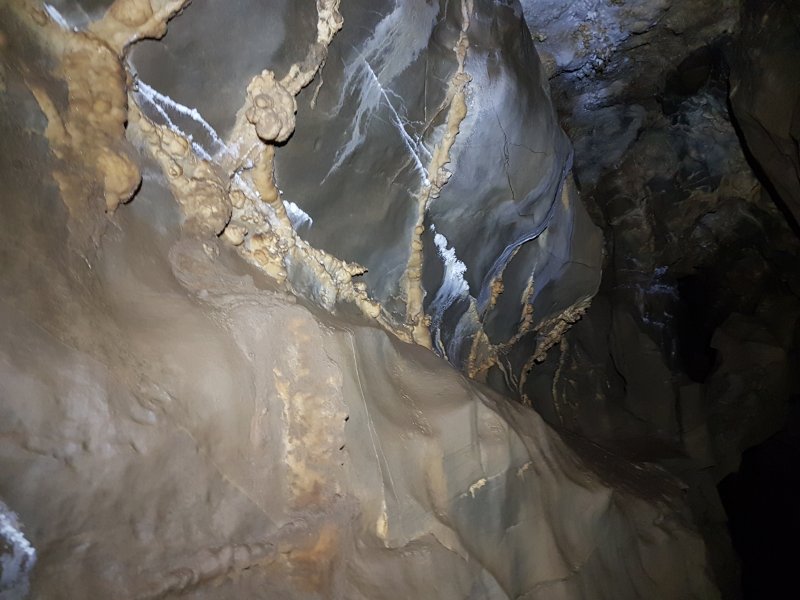 More old stal and helictites on wall fractures.
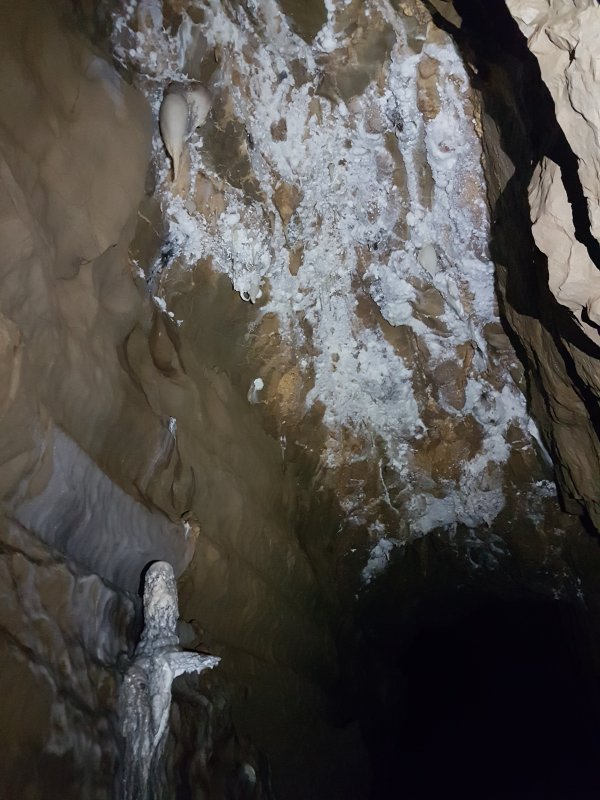 Calcited ceiling, with some helictites and a distinctive stalagmite.
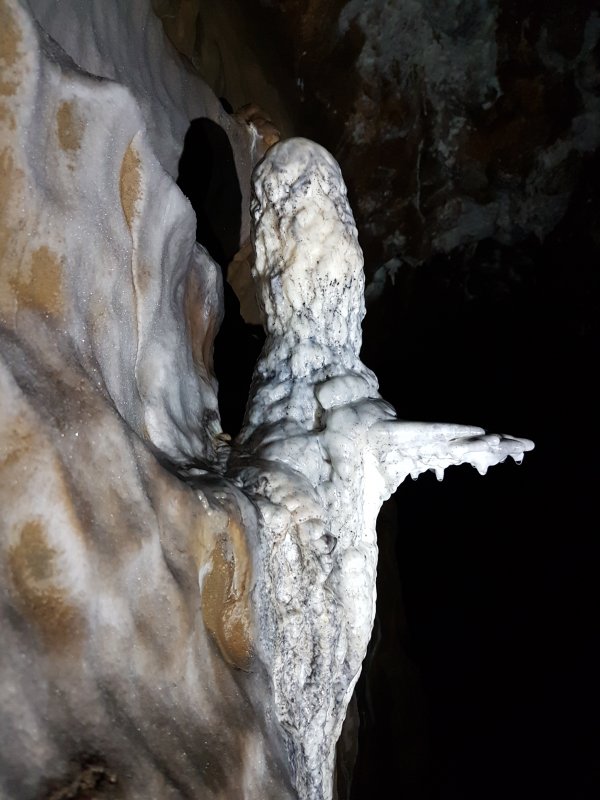 Stalagmite with its own diving board. Either that or a southern cassowary's head.
 Elaborate calcite icing on the wall.
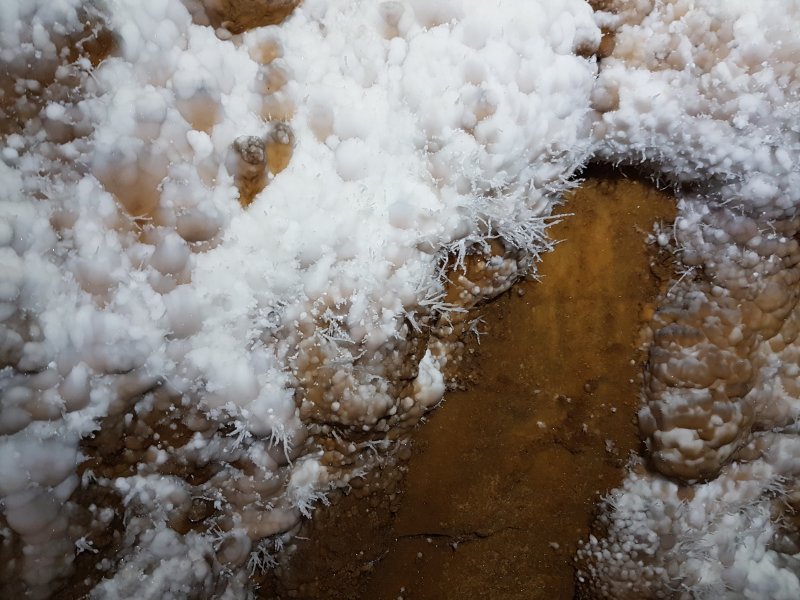 Aragonite needle fringe on the icing.
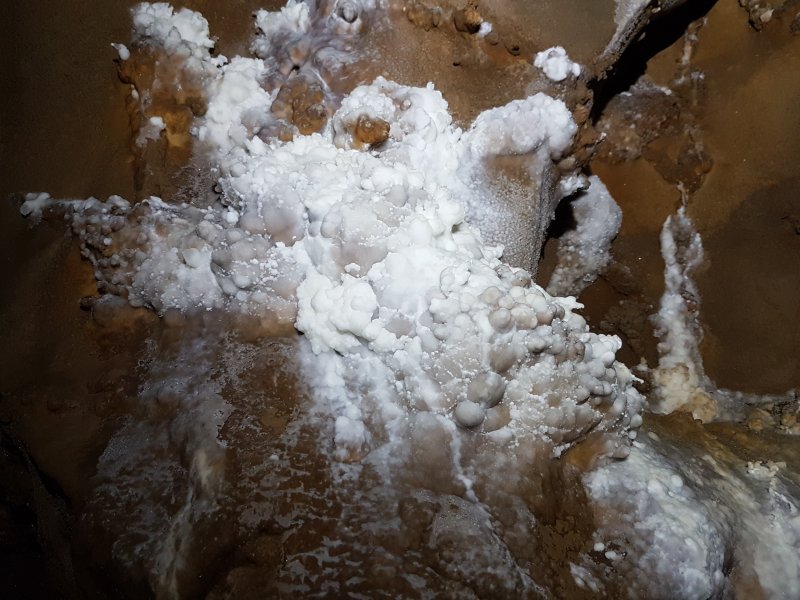 Calcite icing.
 A little over half way along Antler Passage, showing the typical shape and style. Somewhere under the rocks is a small stream.
Modelling by Phill and Helen, lighting by Tarquin, Phill and Helen
A little over half way along Antler Passage, showing the typical shape and style. Somewhere under the rocks is a small stream.
Modelling by Phill and Helen, lighting by Tarquin, Phill and Helen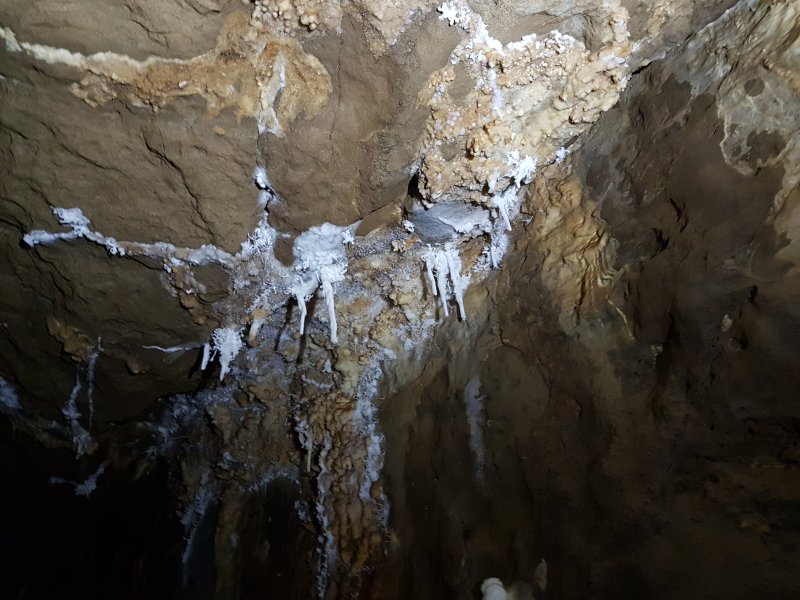 Helictites on the ceiling.
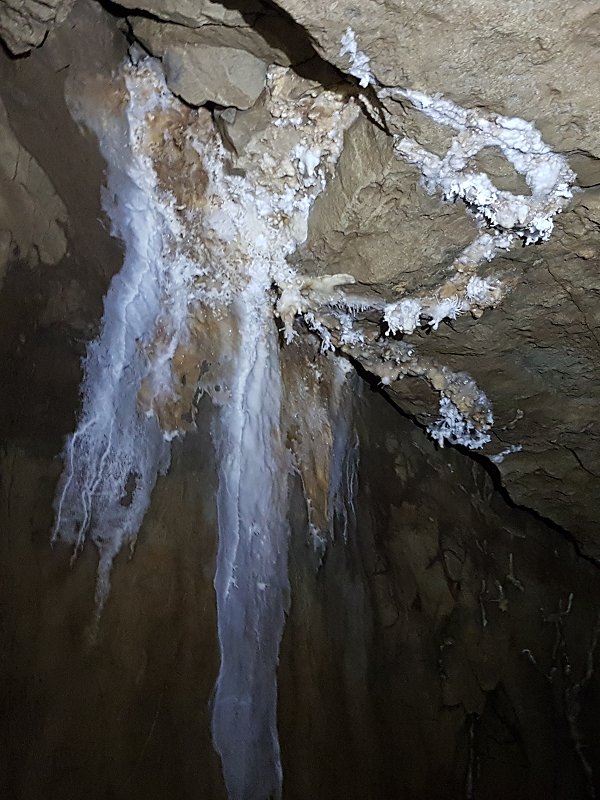 Helictites on the ceiling.
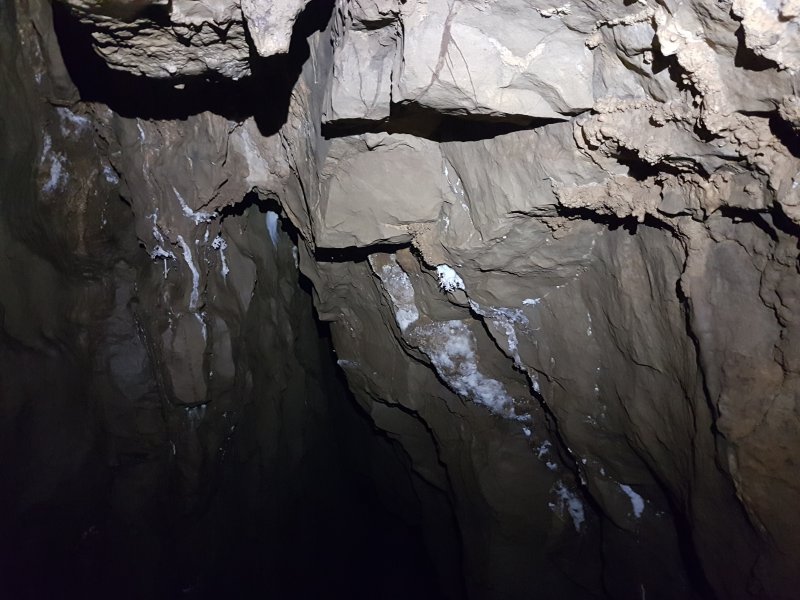 Helictites on the ceiling.
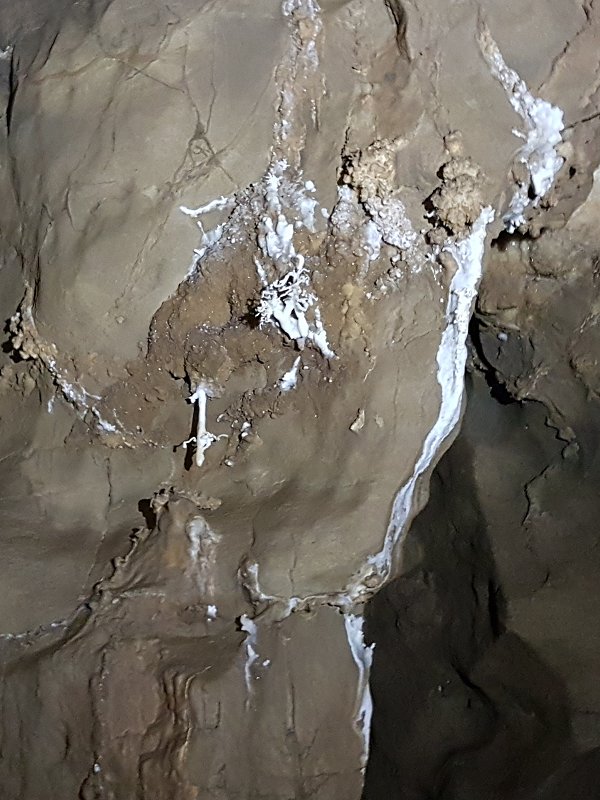 Helictites on the ceiling.
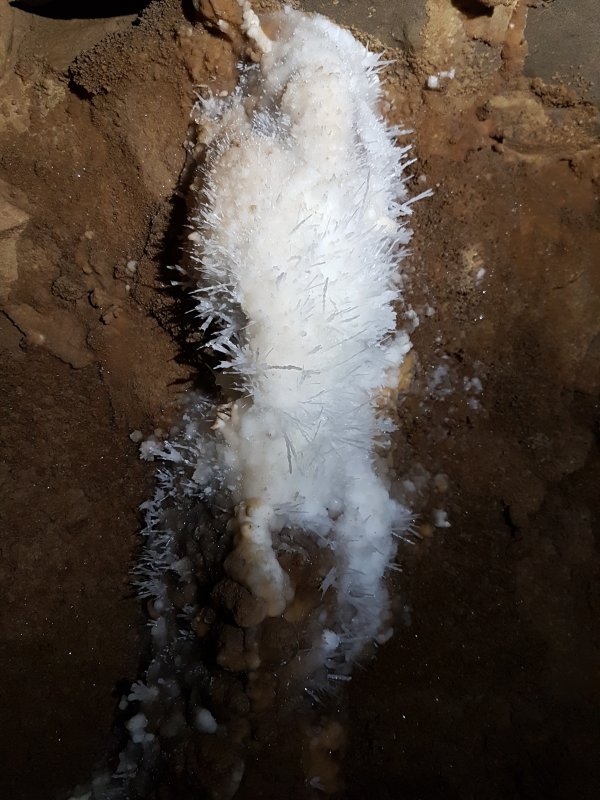 Thick bunch of aragonite needles.
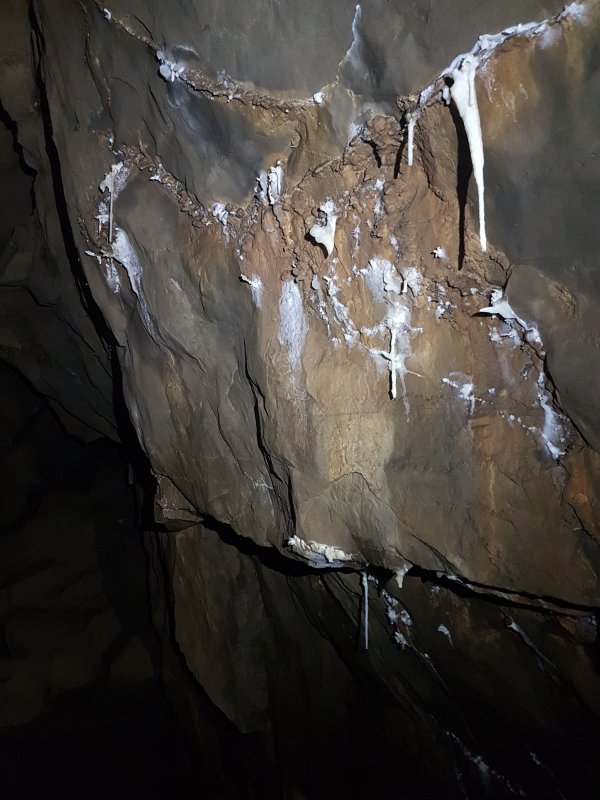 Small selection of stal on the wall.
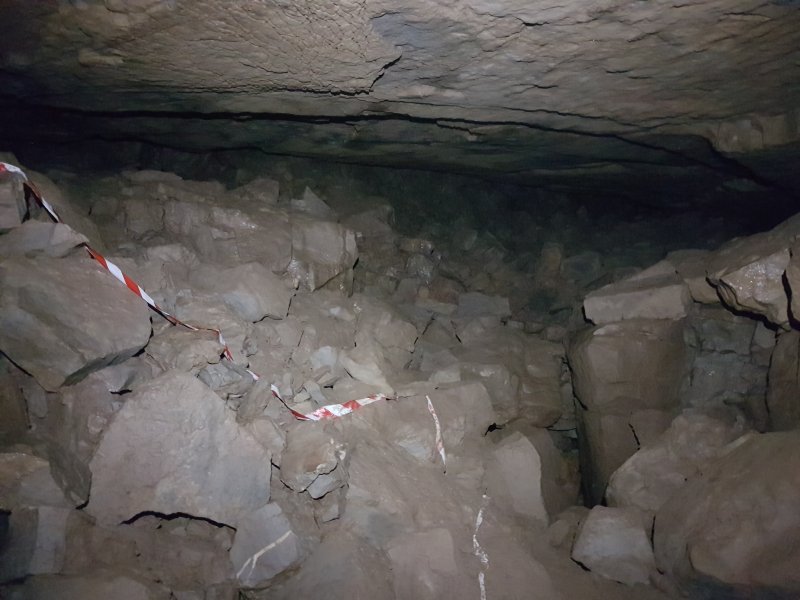 This chamber was the end of Antler Passage in 1984. The way on was found to the right of the inlet choke in 1985, into a short extension. The water comes from Ogof Pen Eryr, which has so far not been connected.
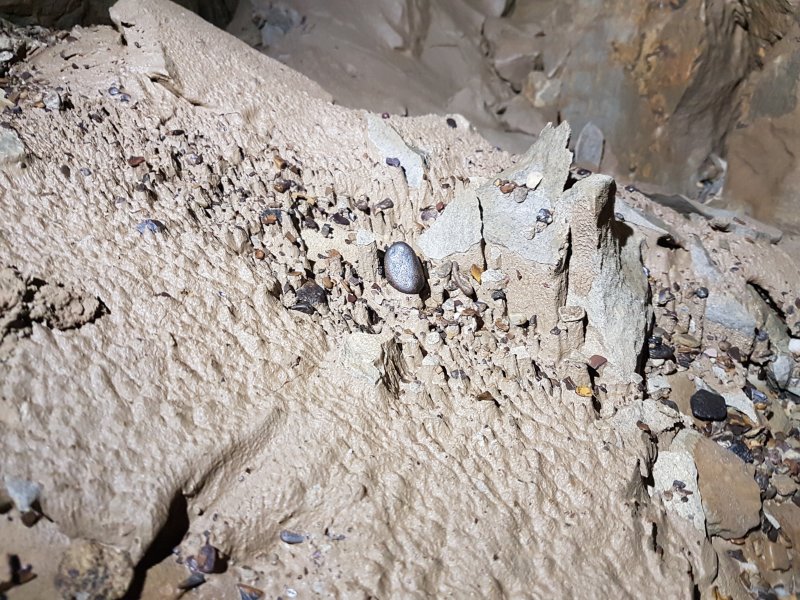 Hoodoos in the 1984 terminal chamber. Pebbles protect the mud from falling drips, leaving a tower where the mud has not been washed away, topped with the pebble. The brightly coloured pebbles are clearly not limestone.
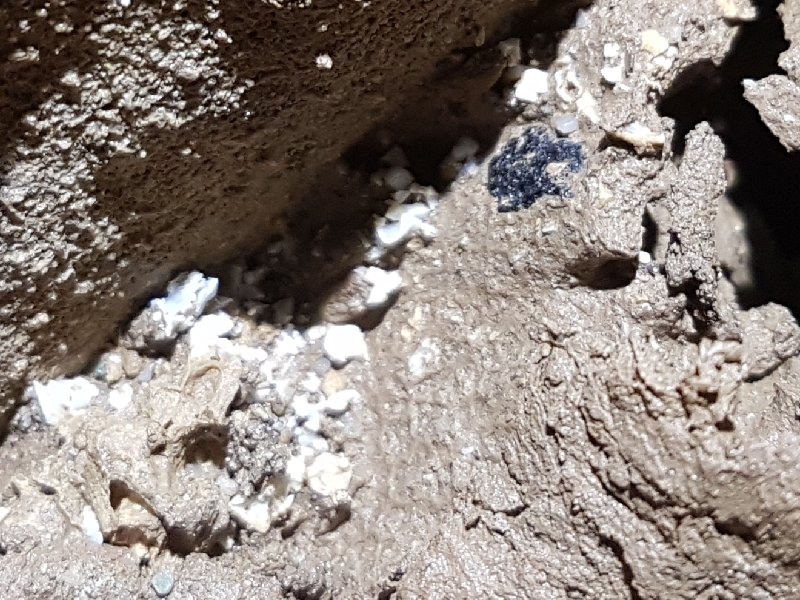 Cryostal in the 1984 terminal chamber, being mashed into the floor under the feet of passing cavers.
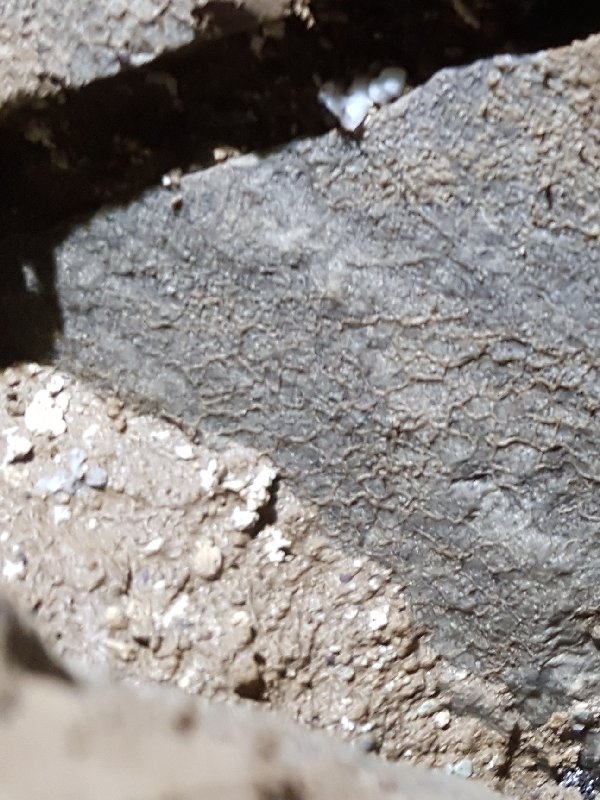 Cryostal in the 1984 terminal chamber.
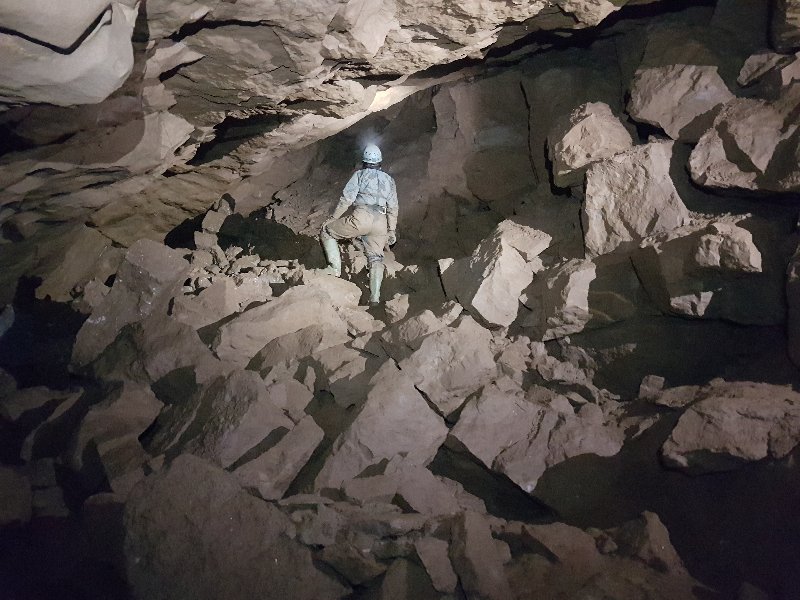 The 1985 extension, which was the end of the cave for almost a decade.
Modelling by Celestine, lighting by Tarquin and Helen
The 1985 extension, which was the end of the cave for almost a decade.
Modelling by Celestine, lighting by Tarquin and Helen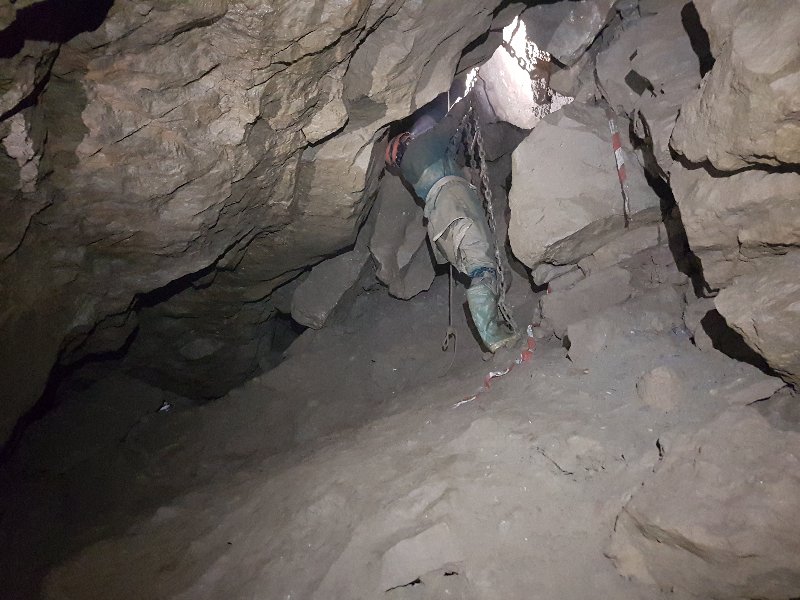 The ladder climb up through the choke.
Modelling by Helen, lighting by Tarquin and Celestine
The ladder climb up through the choke.
Modelling by Helen, lighting by Tarquin and Celestine The awkward pitch head requires a scramble behind the ladder chains, which seems very silly.
Modelling by Celestine
The awkward pitch head requires a scramble behind the ladder chains, which seems very silly.
Modelling by Celestine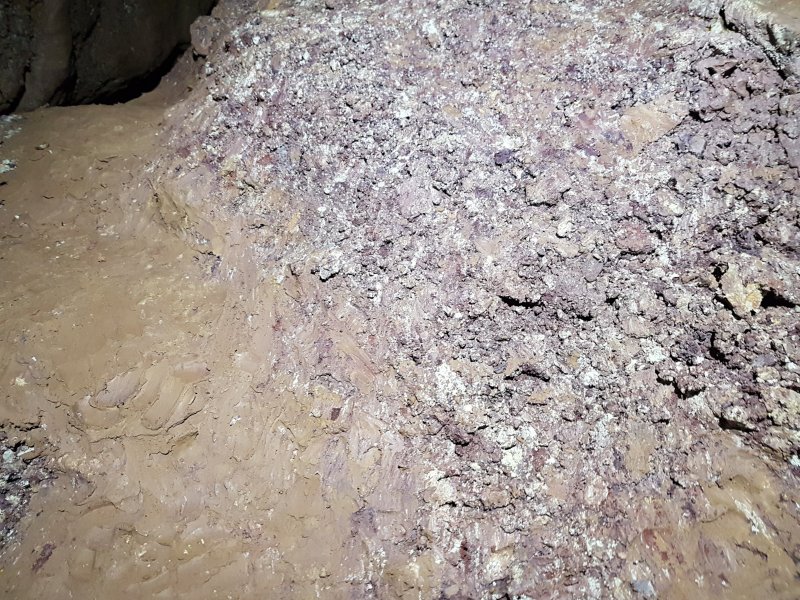 A short crawl through the top of the choke reaches the 1993 Busman's Holiday extensions. The first part has some purple mud, suggesting that the cave is immediately below the Llanelly Shales.
 An enormous jammed boulder, which seems to be held up by only a few small rocks and a crumbling pillar.
Modelling by Helen, lighting by Tarquin, Paul and Helen
An enormous jammed boulder, which seems to be held up by only a few small rocks and a crumbling pillar.
Modelling by Helen, lighting by Tarquin, Paul and Helen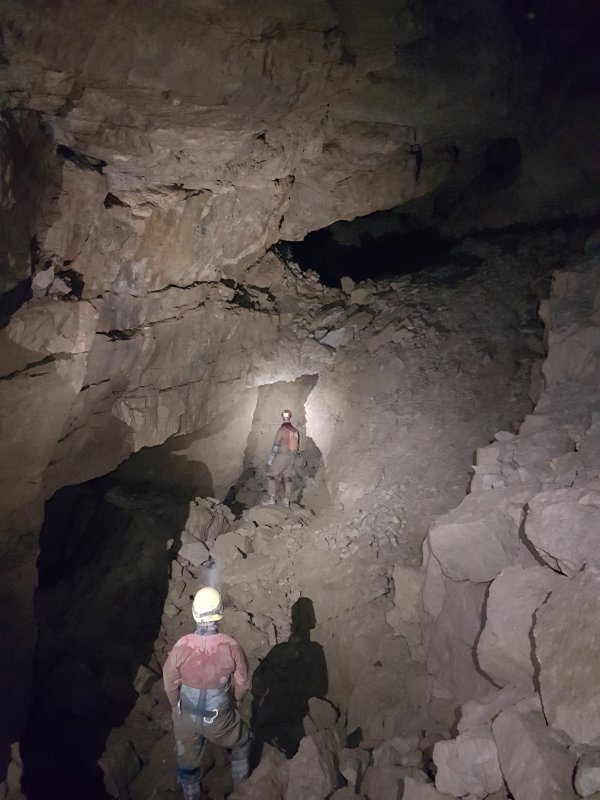 Bridge Cavern, the first part of Busman's Holiday.
Modelling by Paul and Huw, lighting by Tarquin, Helen, Paul and Huw
Bridge Cavern, the first part of Busman's Holiday.
Modelling by Paul and Huw, lighting by Tarquin, Helen, Paul and Huw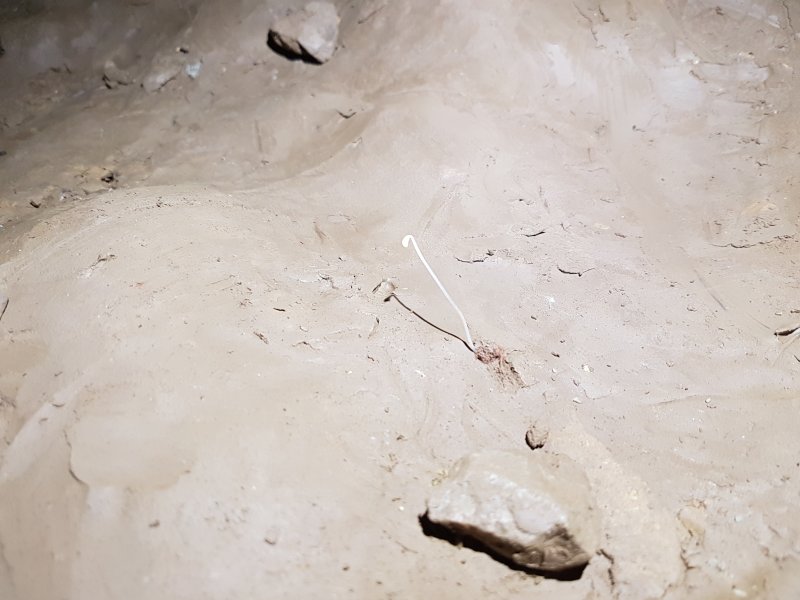 A plant, making a valiant but futile attempt to grow in a crawl. Presumably from someone's granola bar.
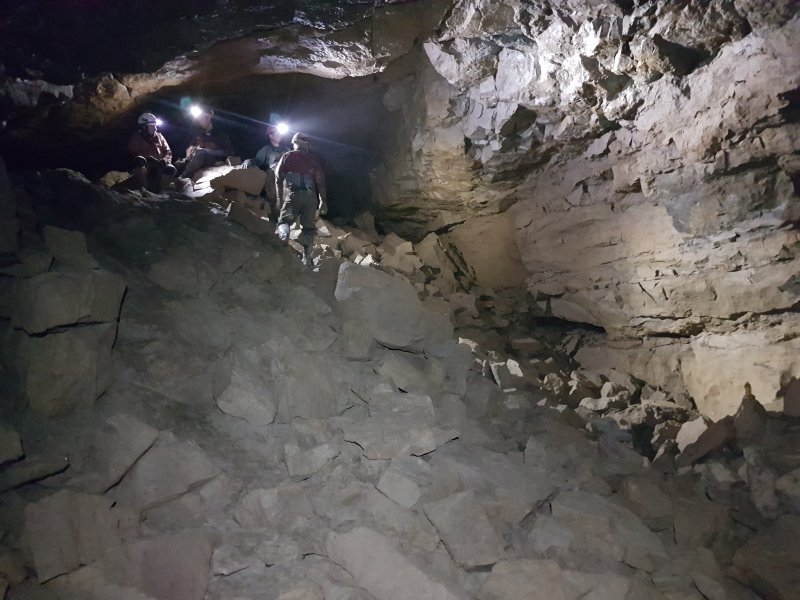 The crawl ends, and the passage becomes abruptly bigger.
Modelling by Phill, Huw, Helen and Paul, lighting by Tarquin, Phill, Huw, Helen and Paul
The crawl ends, and the passage becomes abruptly bigger.
Modelling by Phill, Huw, Helen and Paul, lighting by Tarquin, Phill, Huw, Helen and Paul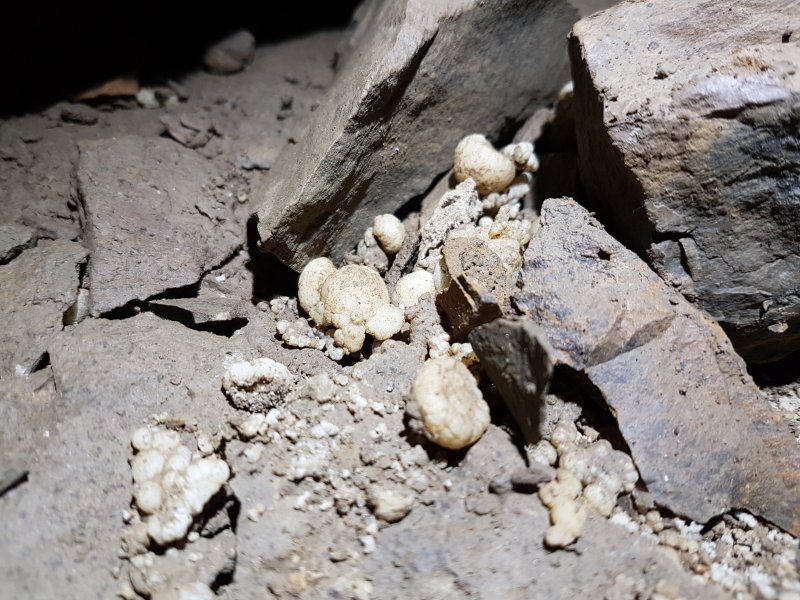 Large pieces of cryostal at the start of the big section. The big beads are about 2 cm (nearly an inch) in diameter)
 Big cryostal, with the distinctive flat side of the beads.
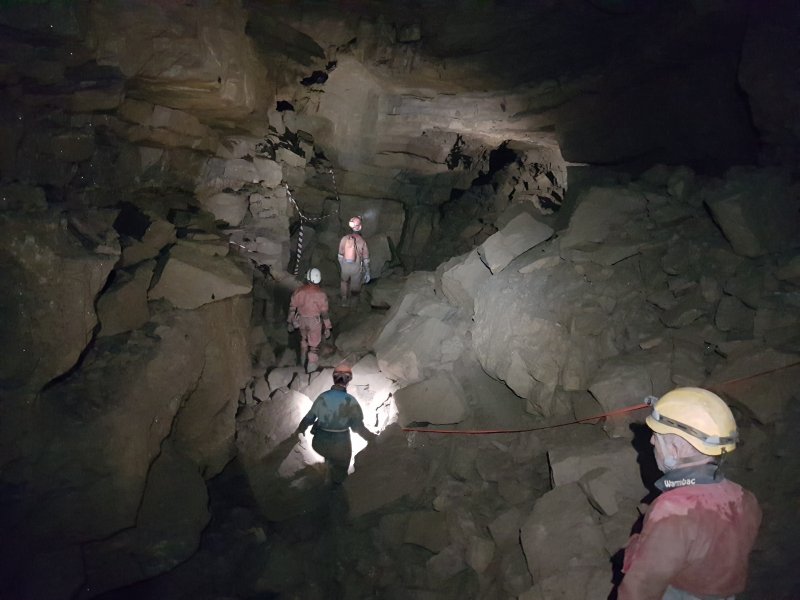 Busman's Holiday.
Modelling by Paul, Helen, Phill and Huw, lighting by Tarquin, Paul, Helen, Phill and Huw
Busman's Holiday.
Modelling by Paul, Helen, Phill and Huw, lighting by Tarquin, Paul, Helen, Phill and Huw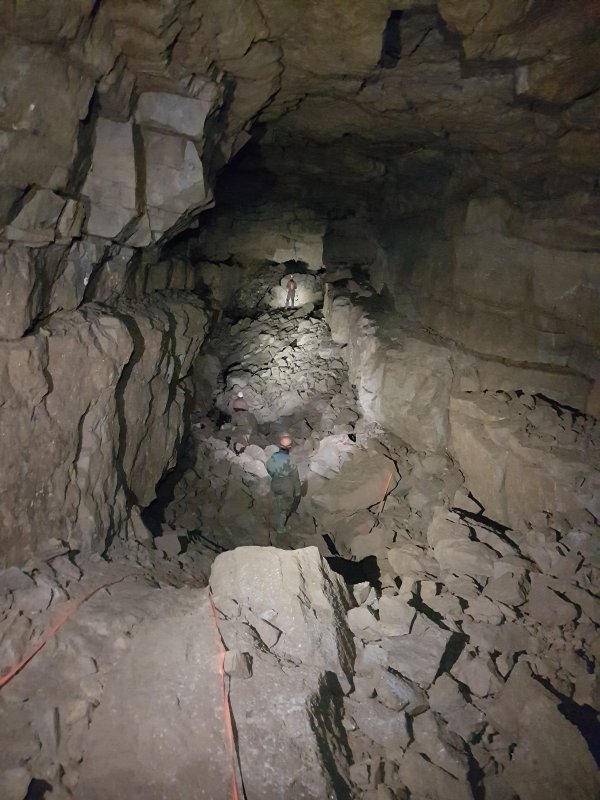 The longest and most impressive part of Busman's Holiday.
Modelling by Helen, Phill and Huw, lighting by Paul, Helen, Phill and Huw
The longest and most impressive part of Busman's Holiday.
Modelling by Helen, Phill and Huw, lighting by Paul, Helen, Phill and Huw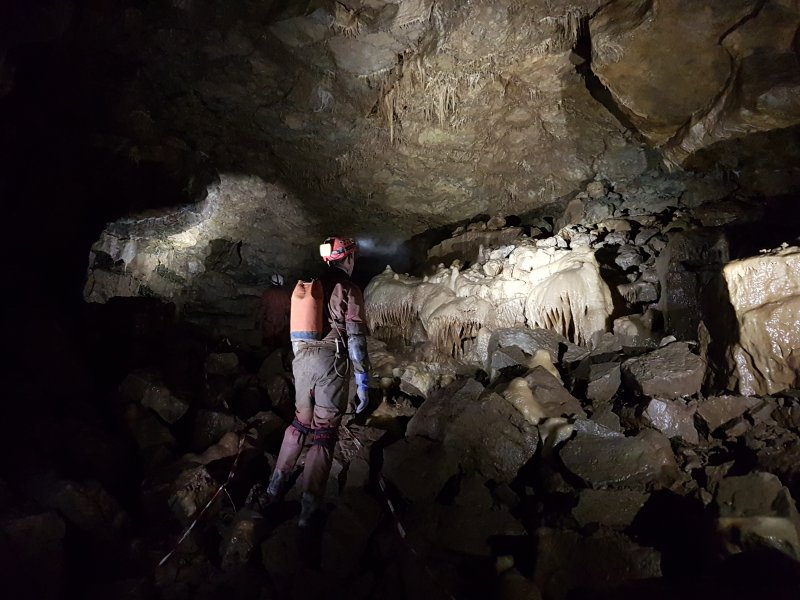 A beautifully decorated chamber. A hole on the right enters Orange Blossom Way, a short streamway.
Modelling by Huw and Phill, lighting by Tarquin, Helen, Paul, Huw and Phill
A beautifully decorated chamber. A hole on the right enters Orange Blossom Way, a short streamway.
Modelling by Huw and Phill, lighting by Tarquin, Helen, Paul, Huw and Phill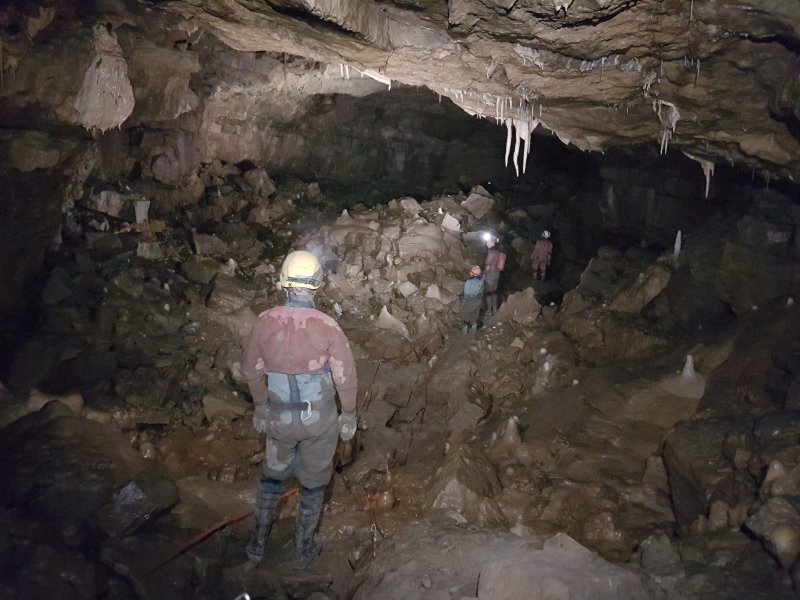 A well decorated chamber, Price's Prophecy, the largest part of Busman's Holiday. The name is a reference to a 1950 prediction by Brian Price that this big cave would be here, which seemed unlikely when digging in the tiny passages of Prices (Old) Dig. The dig was officially renamed to Ogof Cnwc after the connection was made (Brian had always referred to it with that name, but others had not). The way out is on the left at the end of the chamber.
Modelling by Paul, Helen, Huw and Phill, lighting by Tarquin, Paul, Helen, Huw and Phill
A well decorated chamber, Price's Prophecy, the largest part of Busman's Holiday. The name is a reference to a 1950 prediction by Brian Price that this big cave would be here, which seemed unlikely when digging in the tiny passages of Prices (Old) Dig. The dig was officially renamed to Ogof Cnwc after the connection was made (Brian had always referred to it with that name, but others had not). The way out is on the left at the end of the chamber.
Modelling by Paul, Helen, Huw and Phill, lighting by Tarquin, Paul, Helen, Huw and Phill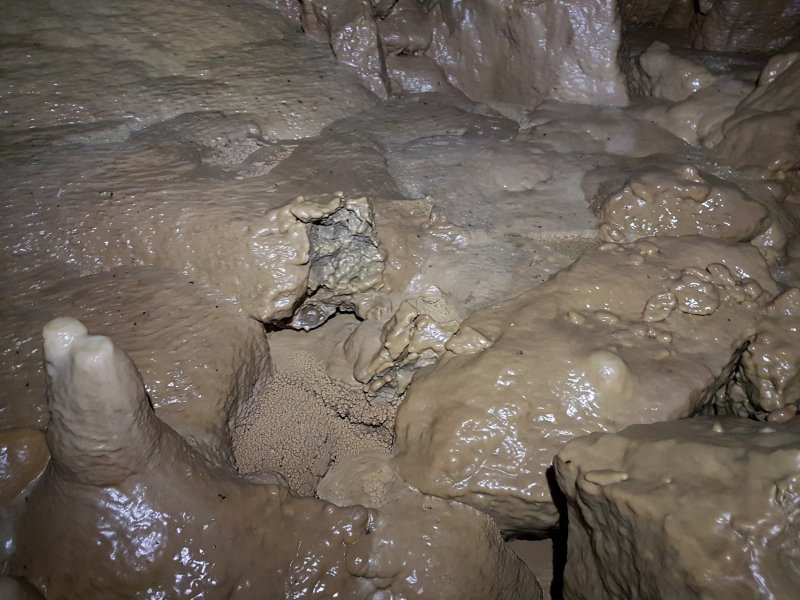 Flowstone and crystal pools in Price's Prophecy.
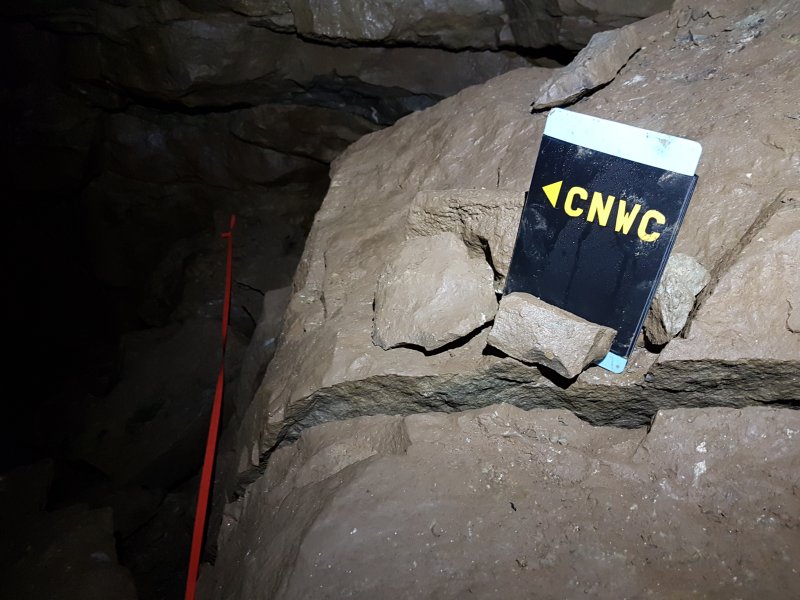 OK, this is stupid, and not a good idea. Yes, people occasionally fail to find the way on. Sure, but that's the whole point of cave navigation. It doesn't matter if a couple of them have to turn back - they will learn the routes slowly, like we all do. It takes the challenge and skill away if you leave signposts. And where does it end? Should there be one at every major junction? This is not a show cave. We are cavers, not tourists.
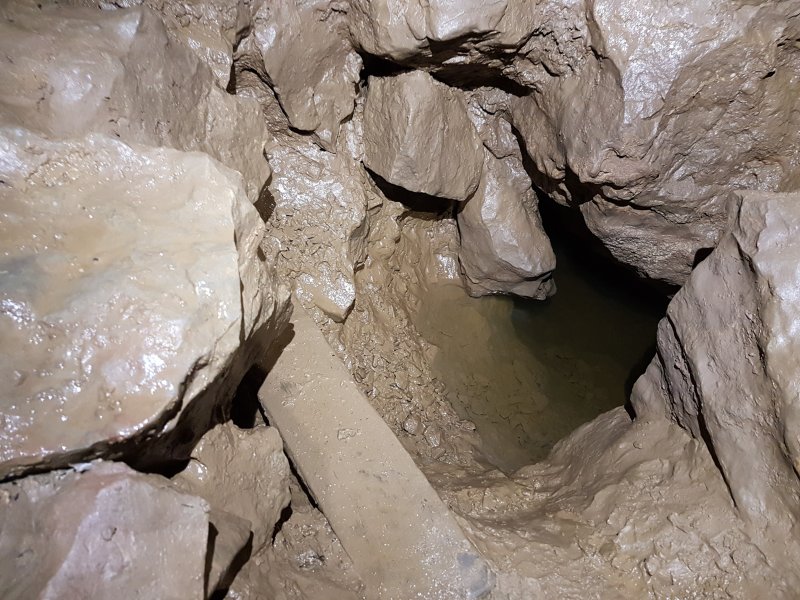 Sump in Ogof Cnwc. The original connection was made through this sump in 2002, and orginal through trips went through it! It would usually be attempted only when it had partially drained after a drought.
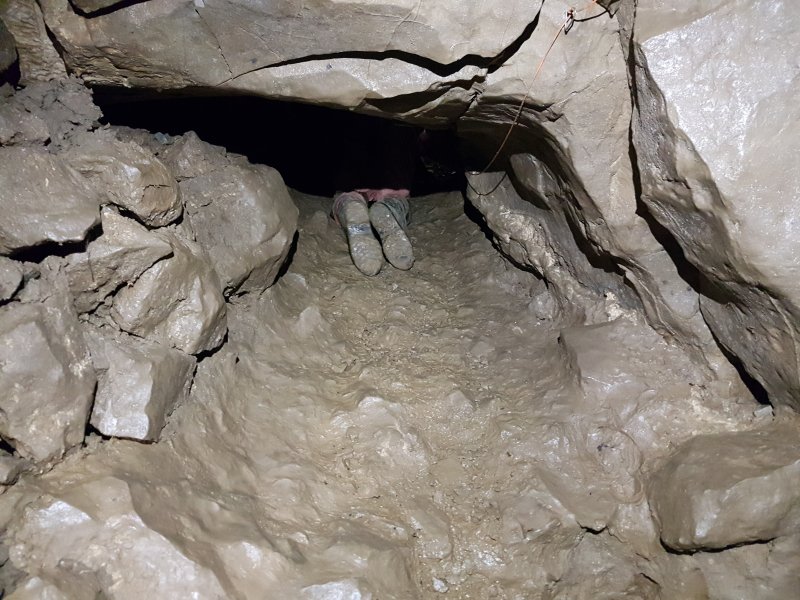 Bypass to the sump, the connection between the two caves that was dug open in 2008.
Modelling by Phill
Bypass to the sump, the connection between the two caves that was dug open in 2008.
Modelling by Phill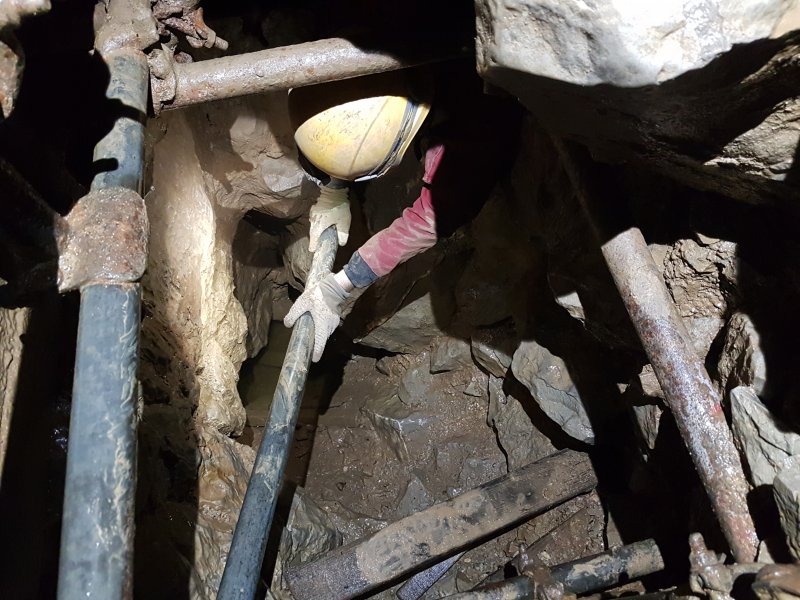 The bypass ends at the other end of the sump, at a scaffolded shaft.
Modelling by Paul, lighting by Tarquin and Paul
The bypass ends at the other end of the sump, at a scaffolded shaft.
Modelling by Paul, lighting by Tarquin and Paul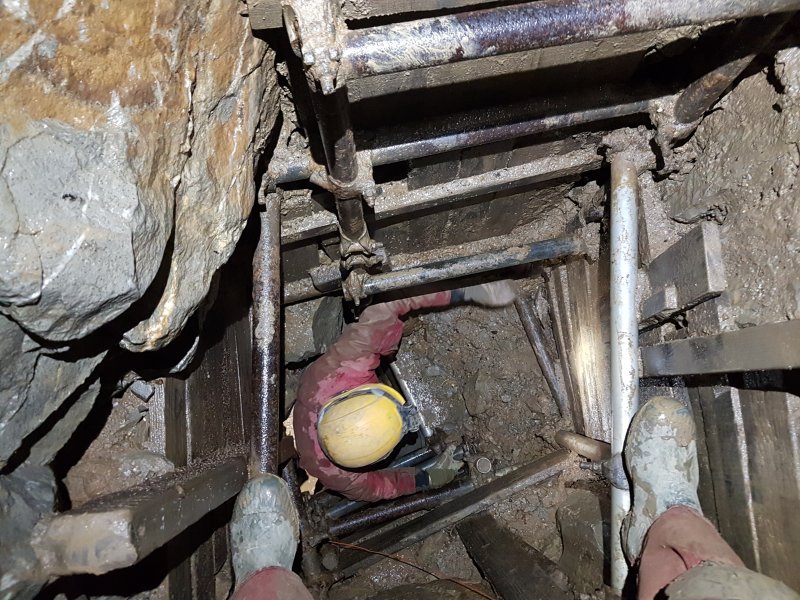 Scaffolded shaft. This was once the end of Price's (Old) Dig.
Modelling and lighting by Tarquin and Paul
Scaffolded shaft. This was once the end of Price's (Old) Dig.
Modelling and lighting by Tarquin and Paul Sliding down a plank into the continuing crawl.
Modelling by Phill
Sliding down a plank into the continuing crawl.
Modelling by Phill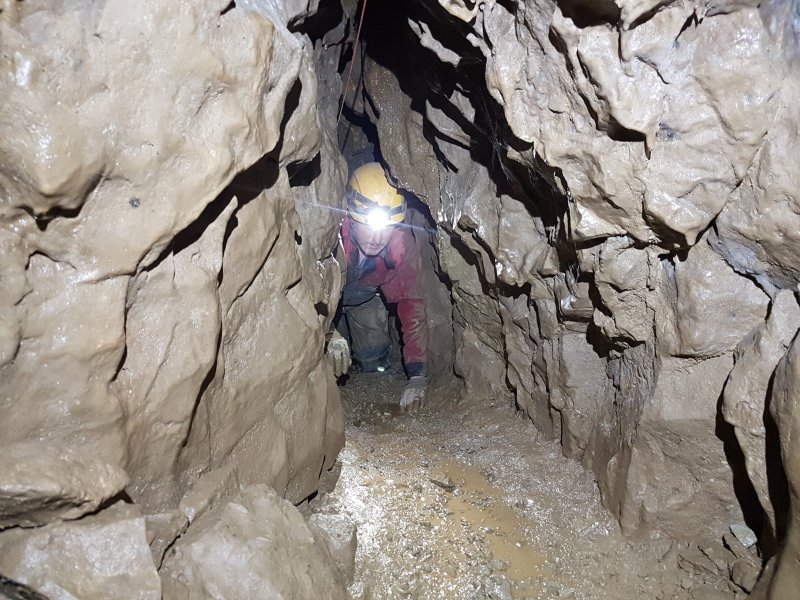 The crawl appears to have been "chemically enlarged", since there used to be a duck here.
Modelling by Paul, lighting by Tarquin and Paul
The crawl appears to have been "chemically enlarged", since there used to be a duck here.
Modelling by Paul, lighting by Tarquin and Paul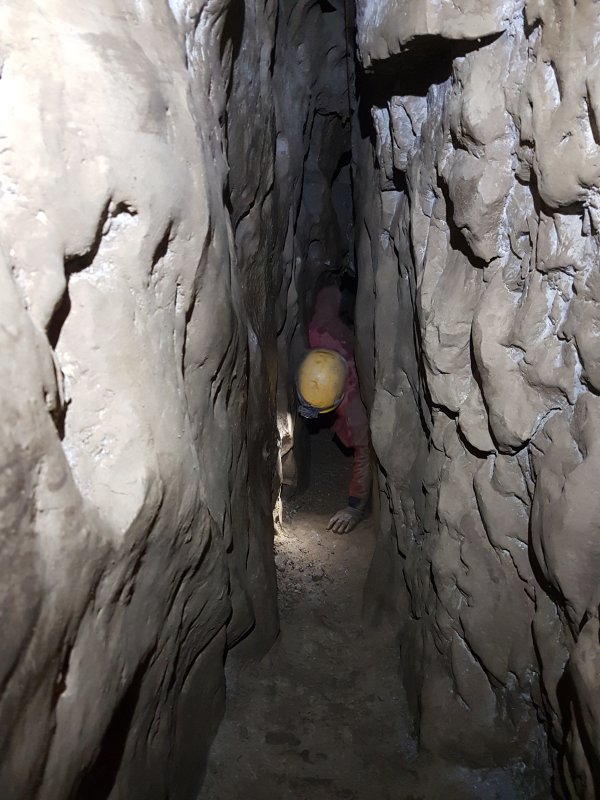 Narrow rift in Ogof Cnwc.
Modelling by Paul, lighting by Tarquin and Paul
Narrow rift in Ogof Cnwc.
Modelling by Paul, lighting by Tarquin and Paul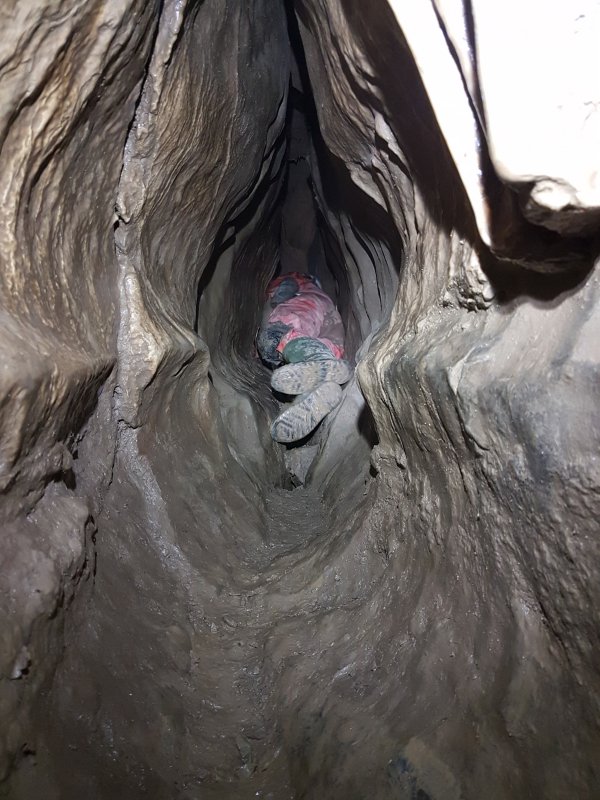 A muddy tube, reminiscent of the Daren Cilau entrance passage, without the water to keep it clean. Thankfully it is also much shorter, with only about 45 metres of crawling in total needed through all of these small crawling sections.
Modelling by Phill
A muddy tube, reminiscent of the Daren Cilau entrance passage, without the water to keep it clean. Thankfully it is also much shorter, with only about 45 metres of crawling in total needed through all of these small crawling sections.
Modelling by Phill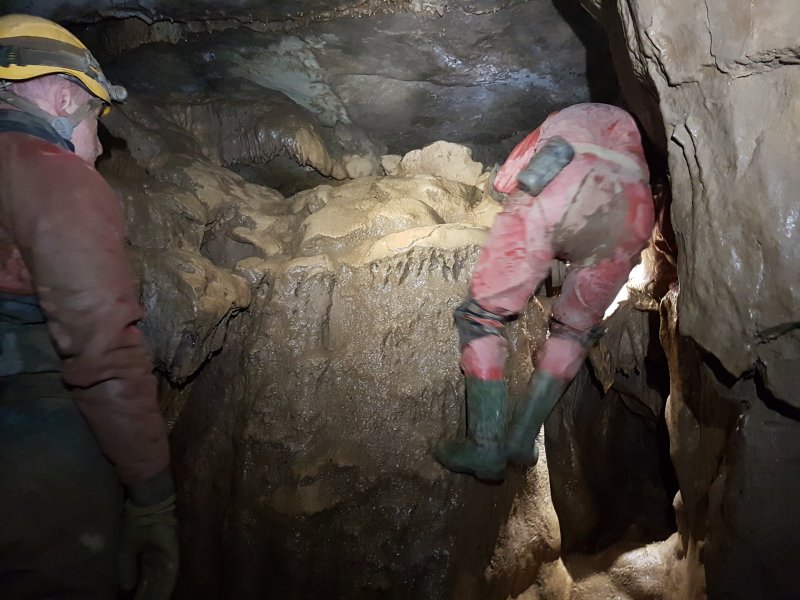 Calcite Chamber, the highlight of the original Price's (Old) Dig.
Modelling by Paul and Phill, lighting by Tarquin, Paul and Phill
Calcite Chamber, the highlight of the original Price's (Old) Dig.
Modelling by Paul and Phill, lighting by Tarquin, Paul and Phill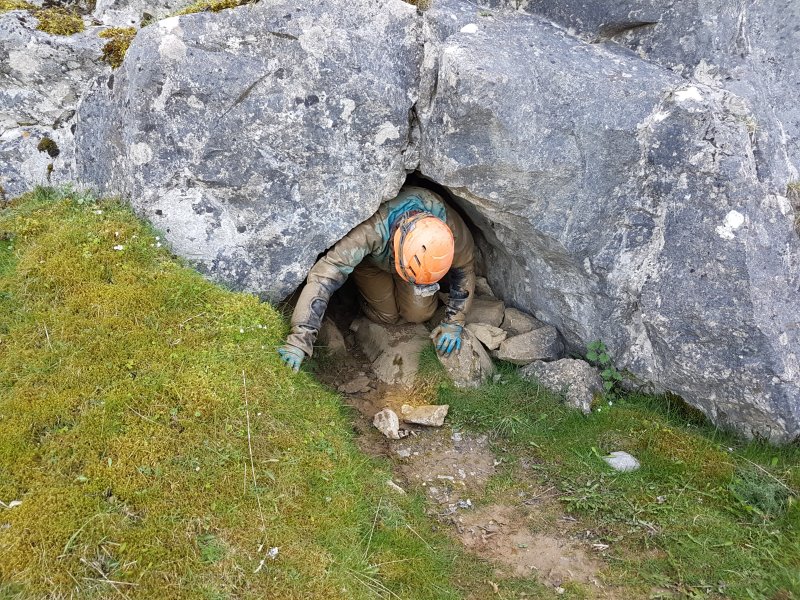 Ogof Cnwc entrance. In 1950, this was completely filled with silt, and was entirely excavated.
Modelling by Helen, lighting by Sol and Helen
Ogof Cnwc entrance. In 1950, this was completely filled with silt, and was entirely excavated.
Modelling by Helen, lighting by Sol and Helen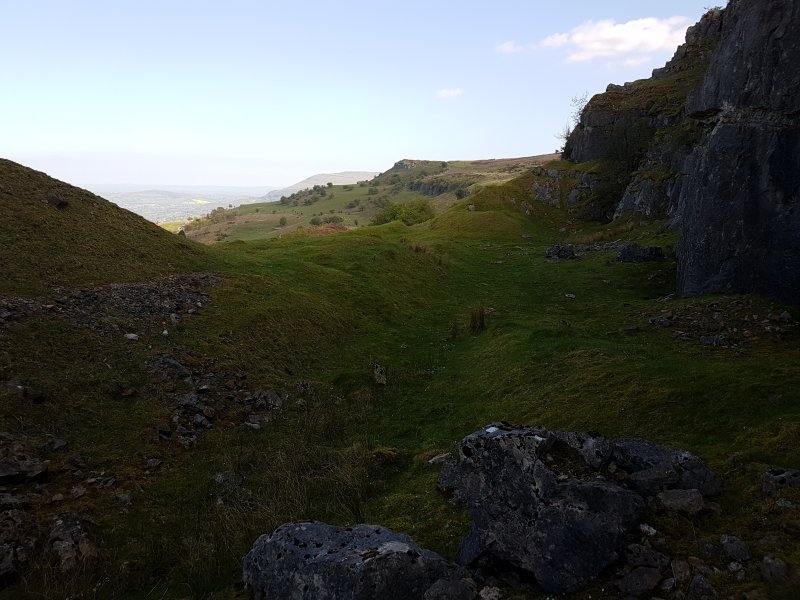 View from the entrance, with the Darren Disgwylfa crags of Mynydd Llangatwg (529 and 530 metres), Ysgyryd Fach (270 metres) and The Blorenge (561 metres).