Ogof Daren Cilau central loops trips 13/10/2019 and 01/12/2019
Unless otherwise stated, camera, setups, lighting, edits and gallery effects by Tarquin. Modelling and lighting at various points will be Gareth Farrow, Claire Vivian, Sanita Lustika, Antonia Freem and Paul Evans.
This was a visit to learn the Crystal Inlet area, and the Flyovers-Half Mile area of the cave. These are not shown correctly on the 1991 survey, and appear to be described incorrectly in the Chelsea Spelæological Society's "An Exploration Journal Of Llangattwg Mountain" - one of the only publications to include a description of the area. Part of the mistakes appear to be due to early exploration notes referring to Crystal Oxbow as a "climb up to a high level passage" and then other notes confusing Crystal Oxbow as a branch of Crystal Inlet, and claiming that it ends in a choke, which it doesn't. A subsequent trip then picked up the remaining passages around Beyond Time
Unless we missed something (which is possible), Crystal Inlet leads upstream for 50 metres, to where the water comes from a narrow passage on the right, which is the way on along Crystal Inlet (this is the point mentioned as a branch or Y-junction). The obvious passage ahead, which does not need you to climb up to reach it, is Crystal Oxbow. Crystal Inlet is narrow and sometimes awkward, ending at a very tight section after 200 metres. After just over 100 metres, there is a climb up into a short side passage on the right. Crystal Oxbow contains many fine crystal pools, gypsum crystals, and intricate helictite formations, reaching a chamber after 150 metres. The chamber has two avens which both enter Nameless Canyon and Half Mile Passage - the aven ahead can be climbed with the assistance of a handline. In the chamber, right closes down, ahead-left is a drop down behind rocks into Crystal Corridor, while left is the continuation of Crystal Oxbow, soon reaching a taped-off drop back into Bonsai Streamway. Crystal Corridor is a narrow, scalloped rift passage, starting as a crawl, soon becomming walking size, then returning to crawling sized, passing a short side passage on the left. After 100 metres, it reaches a drop down into Bonsai Streamway. The first part can be free climbed down to a passage on the right which quickly reaches Beyond Time. The second part of the drop down reaches Bonsai Streamway, and can be free climbed with difficulty too, but equipment may be desired.
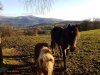 Horses at the fields near the Whitewalls caving hut.
Modelling by a pair of equines, lighting by Sol
Horses at the fields near the Whitewalls caving hut.
Modelling by a pair of equines, lighting by Sol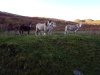 Wild mountain ponies.
Modelling by The Herd, lighting by Sol
Wild mountain ponies.
Modelling by The Herd, lighting by Sol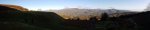 Superb view over the Black Mountains range from the limekilns at the Daren Cilau quarry. Mynydd Llangorse (515 metres), Mynydd Troed (609 metres), Pen Allt-mawr (719 metres), Pen Cerrig-calch (701 metres), Pen Twyn Mawr (658 metres), Crug Mawr (550 metres), Hatterall Hill (531 metres), the Sugar Loaf (596 metres) and The Skirrid (486 metres).
 A tricky climb into an oxbow after the entrance crawl, which bypasses a mud-filled section. This often proves tricky for shorter cavers.
Modelling by Paul's arm, Claire and Sanita, lighting by Tarquin, Paul, Claire and Sanita
A tricky climb into an oxbow after the entrance crawl, which bypasses a mud-filled section. This often proves tricky for shorter cavers.
Modelling by Paul's arm, Claire and Sanita, lighting by Tarquin, Paul, Claire and Sanita Big Chamber Nowhere Near The Entrance (named as a humorous reference to Big Chamber Near The Entrance in Ogof Ffynnon Ddu). The archway on the left is Jigsaw Passage (the way in), while Gareth's light is shining into Epocalypse Way (the way towards the Ogof Cnwc through trip). Up the boulder slope on the right is the rest of Big Chamber, and the way on to the downstream cave. Behind the camera is a blind alcove. The logbook sits on the boulders between Epocalypse Way and the slope up.
Modelling by Gareth, lighting by Tarquin and Gareth
Big Chamber Nowhere Near The Entrance (named as a humorous reference to Big Chamber Near The Entrance in Ogof Ffynnon Ddu). The archway on the left is Jigsaw Passage (the way in), while Gareth's light is shining into Epocalypse Way (the way towards the Ogof Cnwc through trip). Up the boulder slope on the right is the rest of Big Chamber, and the way on to the downstream cave. Behind the camera is a blind alcove. The logbook sits on the boulders between Epocalypse Way and the slope up.
Modelling by Gareth, lighting by Tarquin and Gareth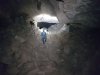 Big Chamber Nowhere Near The Entrance continues at the top of the boulder slope.
Modelling by Gareth, lighting by Tarquin and Gareth
Big Chamber Nowhere Near The Entrance continues at the top of the boulder slope.
Modelling by Gareth, lighting by Tarquin and Gareth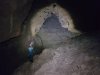 The largest part of Big Chamber Nowhere Near The Entrance, looking into Loop Route, a choked pair of passages, which are not the way on. The way on is up the scree slope on the right, and into the left passage at the top.
Modelling by Gareth, lighting by Tarquin and Gareth
The largest part of Big Chamber Nowhere Near The Entrance, looking into Loop Route, a choked pair of passages, which are not the way on. The way on is up the scree slope on the right, and into the left passage at the top.
Modelling by Gareth, lighting by Tarquin and Gareth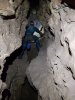 You know you have found Eglwys Passage when you see this traverse. Then follow it through some crawls, ignoring side passages.
Modelling by Gareth, lighting by Tarquin and Gareth
You know you have found Eglwys Passage when you see this traverse. Then follow it through some crawls, ignoring side passages.
Modelling by Gareth, lighting by Tarquin and Gareth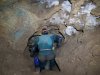 Evaporation formations in Eglwys Passage. These are formed by the airflow wicking water saturated with calcite away from the rocks, causing the water to evaporate all over the surface.
Modelling by Gareth, lighting by Tarquin and Gareth
Evaporation formations in Eglwys Passage. These are formed by the airflow wicking water saturated with calcite away from the rocks, causing the water to evaporate all over the surface.
Modelling by Gareth, lighting by Tarquin and Gareth Formations in Eglwys Passage.
 Formations in Eglwys Passage.
 Formations in Eglwys Passage.
 Looking back out of Fiveways Chamber in Eglwys Passage, where the way on is into an eyehole on the right (seen on the left here, with the chamber's entrance being ahead-right). This is a key junction for the route into the downstream cave.
Modelling by Gareth, lighting by Tarquin and Gareth
Looking back out of Fiveways Chamber in Eglwys Passage, where the way on is into an eyehole on the right (seen on the left here, with the chamber's entrance being ahead-right). This is a key junction for the route into the downstream cave.
Modelling by Gareth, lighting by Tarquin and Gareth The eyehole is almost comically small, requiring a hands-first dive through the hole. Though not a squeeze, this is the size limitation for equipment being taken into the cave, as it only just allows the 15 litre Daren drums to be taken in for food storage at the camps. Even though The Vice is narrower, it is much taller, so it allows wide equipment to be taken through vertically; this hole does not.
Modelling by Gareth, lighting by Tarquin and Gareth
The eyehole is almost comically small, requiring a hands-first dive through the hole. Though not a squeeze, this is the size limitation for equipment being taken into the cave, as it only just allows the 15 litre Daren drums to be taken in for food storage at the camps. Even though The Vice is narrower, it is much taller, so it allows wide equipment to be taken through vertically; this hole does not.
Modelling by Gareth, lighting by Tarquin and Gareth A short crawl - the 1985 breakthrough point - then emerges in St. Valentines Chamber. Loop Route's choke lies under the floor to the left, while the way on is down through the choke in the floor at the lowest point.
Modelling by Gareth, lighting by Tarquin and Gareth
A short crawl - the 1985 breakthrough point - then emerges in St. Valentines Chamber. Loop Route's choke lies under the floor to the left, while the way on is down through the choke in the floor at the lowest point.
Modelling by Gareth, lighting by Tarquin and Gareth The way on is down through a choke, with a squeeze that is another size limitation for equipment.
Modelling by Paul, lighting by Tarquin and Paul
The way on is down through a choke, with a squeeze that is another size limitation for equipment.
Modelling by Paul, lighting by Tarquin and Paul Emerging from the choke into Preliminary Passage, a very impressive sight.
Modelling by Gareth, lighting by Tarquin and Gareth
Emerging from the choke into Preliminary Passage, a very impressive sight.
Modelling by Gareth, lighting by Tarquin and Gareth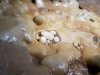 Cave pearls in Preliminary Passage.
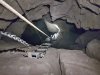 Climbing up The 60, a 20 metre pitch into Higher Things. The 60 has a flexible ladder, rigged with the rungs upside down so that they pinch your feet, wrapped around the rocks on a diagonal slant at the ledge. It almost always invokes bemused laughter from visitors who have not seen it before.
Modelling by Gareth, lighting by Tarquin and Gareth
Climbing up The 60, a 20 metre pitch into Higher Things. The 60 has a flexible ladder, rigged with the rungs upside down so that they pinch your feet, wrapped around the rocks on a diagonal slant at the ledge. It almost always invokes bemused laughter from visitors who have not seen it before.
Modelling by Gareth, lighting by Tarquin and Gareth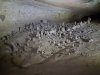 Crazy collection of mud sculptures made by bored cavers waiting for their turn at the top. A caving hut, mushroom farm, animals of all kinds (the cobra is particularly nice), the obligatory penises, gnomes, beer mugs, caving helmets, and countless other trinkets.
Lighting by Tarquin and Gareth
Crazy collection of mud sculptures made by bored cavers waiting for their turn at the top. A caving hut, mushroom farm, animals of all kinds (the cobra is particularly nice), the obligatory penises, gnomes, beer mugs, caving helmets, and countless other trinkets.
Lighting by Tarquin and Gareth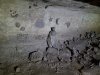 Several club initials are represented too, as well as a BEC bat mascot.
 Higher Things is a rather nice phreatic passage, with a 22 metre pitch - The 70 - into White Passage.
Modelling by Gareth, lighting by Tarquin and Gareth
Higher Things is a rather nice phreatic passage, with a 22 metre pitch - The 70 - into White Passage.
Modelling by Gareth, lighting by Tarquin and Gareth Traversing around the pitch rather than descending it.
Modelling by Gareth, lighting by Tarquin and Gareth
Traversing around the pitch rather than descending it.
Modelling by Gareth, lighting by Tarquin and Gareth Ceiling of Higher Things.
Lighting by Tarquin and Paul
Ceiling of Higher Things.
Lighting by Tarquin and Paul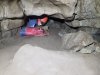 A flat out crawl along a side passage (with a bad smell on the first trip) is the way on.
Modelling by Paul, lighting by Tarquin and Paul
A flat out crawl along a side passage (with a bad smell on the first trip) is the way on.
Modelling by Paul, lighting by Tarquin and Paul The crawl then reaches this larger rift. That little line of rocks on the floor is a warning - don't go this way, there is a very deep hole down into the large passage far below.
 In the other direction, a climb down a rope reaches another oxbow level, with yet more holes dropping down.
Modelling by Gareth, lighting by Tarquin and Gareth
In the other direction, a climb down a rope reaches another oxbow level, with yet more holes dropping down.
Modelling by Gareth, lighting by Tarquin and Gareth In the safer direction, the passage rapidly grows, and drops into the side of White Passage, via a couple of roped climbs.
Modelling by Gareth, lighting by Tarquin and Gareth
In the safer direction, the passage rapidly grows, and drops into the side of White Passage, via a couple of roped climbs.
Modelling by Gareth, lighting by Tarquin and Gareth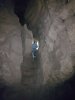 The ropes might not be needed on this climb, but they definitely make it much easier.
Modelling by Gareth, lighting by Tarquin and Gareth
The ropes might not be needed on this climb, but they definitely make it much easier.
Modelling by Gareth, lighting by Tarquin and Gareth White Passage is impressively large and tall. The Higher Things oxbow windows drop in from the blackness in the ceiling.
Modelling by Gareth, lighting by Tarquin and Gareth
White Passage is impressively large and tall. The Higher Things oxbow windows drop in from the blackness in the ceiling.
Modelling by Gareth, lighting by Tarquin and Gareth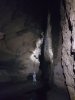 Tall and thin, shortly before the Time Machine.
Modelling by Gareth, lighting by Tarquin and Gareth
Tall and thin, shortly before the Time Machine.
Modelling by Gareth, lighting by Tarquin and Gareth The Time Machine is currently the largest known passage in the UK, though some parts of Draenen are very close to this size as well. While impressive, it does not feel as big as it might seem, since it is much lower than similarly sized passages in Draenen. Later on, however, the passage does become taller, but becomes narrower instead.
Modelling by Paul, Sanita, Antonia and Claire, lighting by Tarquin, Paul, Sanita, Antonia and Claire
The Time Machine is currently the largest known passage in the UK, though some parts of Draenen are very close to this size as well. While impressive, it does not feel as big as it might seem, since it is much lower than similarly sized passages in Draenen. Later on, however, the passage does become taller, but becomes narrower instead.
Modelling by Paul, Sanita, Antonia and Claire, lighting by Tarquin, Paul, Sanita, Antonia and Claire Rock sculptures on the wall of Bonsai Streamway.
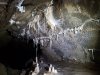 Helictite formations tucked into a roof level of Bonsai Streamway.
Lighting by Tarquin and Gareth
Helictite formations tucked into a roof level of Bonsai Streamway.
Lighting by Tarquin and Gareth Phreatic sculpting in Bonsai Streamway. Crystal Oxbow rejoins from the left at the corner ahead.
Modelling by Gareth, lighting by Tarquin and Gareth
Phreatic sculpting in Bonsai Streamway. Crystal Oxbow rejoins from the left at the corner ahead.
Modelling by Gareth, lighting by Tarquin and Gareth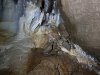 Helictites on the corner, with Crystal Oxbow rejoining above them.
 Helictites on the corner.
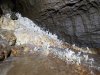 Helictites on the corner.
 Helictites in Bonsai Streamway.
 The Bonsai Tree, the helictite that gives Bonsai Streamway its name.
 We now begin our first excursion, heading into Crystal Inlet. The initial passage is quite large and inviting, but the stream soon cascades out of a small side passage instead.
Modelling by Gareth, lighting by Tarquin and Gareth
We now begin our first excursion, heading into Crystal Inlet. The initial passage is quite large and inviting, but the stream soon cascades out of a small side passage instead.
Modelling by Gareth, lighting by Tarquin and Gareth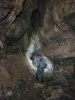 When the water emerges from the smaller passage, the large passage continues ahead as Crystal Oxbow.
Modelling by Gareth, lighting by Tarquin and Gareth
When the water emerges from the smaller passage, the large passage continues ahead as Crystal Oxbow.
Modelling by Gareth, lighting by Tarquin and Gareth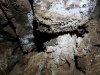 Thick gypsum deposits on the wall of Crystal Oxbow.
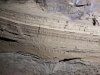 Sediment layers in Crystal Oxbow.
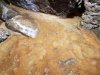 Crystal Oxbow is superbly decorated, beginning with a set of crystal pools.
 Crystal pool.
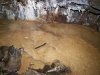 Crystal pool.
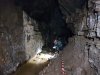 Photographing the crystal pools. The flowstone and gypsum covered walls are quite characteristic.
Modelling by Gareth, lighting by Tarquin and Gareth
Photographing the crystal pools. The flowstone and gypsum covered walls are quite characteristic.
Modelling by Gareth, lighting by Tarquin and Gareth Impressive gypsum crystals on the wall.
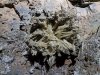 Large gypsum crystals.
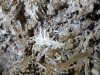 Gypsum crystals.
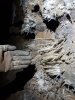 Size of the gypsum crystals.
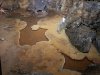 A lilly pad pool, the last of the pools to still contain water.
 The lilly pad pool.
 Photographing the lilly pad pool.
Modelling by Gareth, lighting by Tarquin and Gareth
Photographing the lilly pad pool.
Modelling by Gareth, lighting by Tarquin and Gareth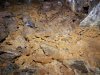 First of the dry crystal pools.
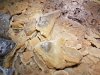 First of the dry crystal pools.
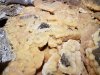 First of the dry crystal pools.
 Photographing the first of the dry crystal pools.
Modelling by Gareth, lighting by Tarquin and Gareth
Photographing the first of the dry crystal pools.
Modelling by Gareth, lighting by Tarquin and Gareth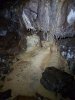 Source of the first dry crystal pool. The mud splatter is mostly natural, rather than produced by cavers, as can be seen clearly on later formations.
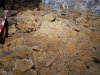 Second dry crystal pool.
 Second dry crystal pool. The little ledges of calcite are the successive water levels as the pool slowly drained.
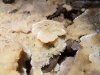 Lilly pad in the second dry crystal pool.
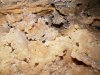 Second dry crystal pool.
 Crystal Oxbow, with a diamond-shaped cross section formed on a bedding plane.
Modelling by Gareth, lighting by Tarquin and Gareth
Crystal Oxbow, with a diamond-shaped cross section formed on a bedding plane.
Modelling by Gareth, lighting by Tarquin and Gareth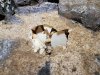 Hole in a calcite false floor.
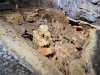 Third dry crystal pool. Reminiscent of desert hoodoos and canyons, like Bryce Canyon.
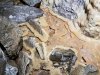 Pool showing two elevated water levels.
 White-tipped helictites.
 Helictites.
 Helictites.
 Most of the smaller helictites are in thick clusters at floor level.
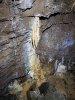 Stalactite with helictites.
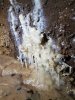 The helictites.
 The helictites.
 About half way along Crystal Oxbow.
Modelling and lighting by Gareth
About half way along Crystal Oxbow.
Modelling and lighting by Gareth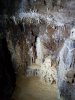 Formations at the half way point.
Lighting by Gareth
Formations at the half way point.
Lighting by Gareth Helictites at the half way point.
Lighting by Gareth
Helictites at the half way point.
Lighting by Gareth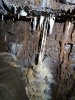 Helictite columns at the half way point.
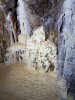 Helictites at floor level.
Lighting by Gareth
Helictites at floor level.
Lighting by Gareth Dried crystal pool between the rocks.
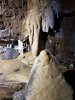 Stal with helictites at floor level.
 The small column has a tutu made of helictites.
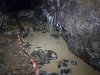 Flowstone river.
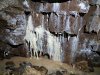 Stal above the flowstone.
 Gypsum covered wall.
 Thick shards of layered calcite that were naturally broken and cemented back in by new calcite flow.
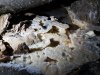 Lilly pads and mesas, some of the best in the passage.
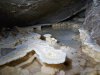 Hidden underneath a boulder, a pool has some large calcite rafts, still partially floating.
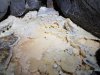 Miniature lilly pads on the far side of the boulder, again some very fine examples.
 Fractured stal. This appears to be a possible example of ice-age ice fracturing, as each old stalactite was broken off at the same height.
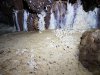 The newer flowstone on the floor has superb helictites. The mud splatters here can be clearly seen to affect only the flowstone, but not the helictites. This makes it very clear that the mud splatter is historical, predating the growth of the helictites. It looks like human influence, but it is natural. Interestingly though, the flowstone has not grown since whatever event created the mud splatter, with the exception of the helictites.
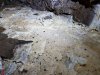 Crystal pool with mud splatter.
 Ceiling helictites. Do you get the impression that this might be a pretty passage? Maybe?
 Floor helictite bunches.
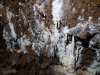 Then a final, superb set of helictites and anthodites.
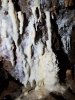 Right side.
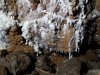 Central portion.
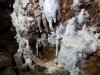 Left side with the best anthodites. Saving the best for last.
 Now near the end of Crystal Oxbow. The ramp in the distance is the floor of the chamber with the avens. The passage has changed shape to a smooth arch with a triangular cleft in the ceiling.
Modelling by Gareth, lighting by Tarquin and Gareth
Now near the end of Crystal Oxbow. The ramp in the distance is the floor of the chamber with the avens. The passage has changed shape to a smooth arch with a triangular cleft in the ceiling.
Modelling by Gareth, lighting by Tarquin and Gareth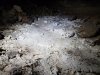 Not to be outdone, the passage puts on a final display, with this incredible formation of stacked calcite rafts in a dried crystal pool. This is almost (but not quite) as good as the Snow Gardens in Slaughter Stream Cave - it is just missing the central pool.
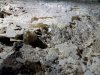 Stacked rafts.
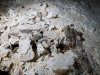 Stacked rafts.
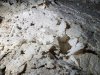 The finest gratin dauphinois you have ever eaten.
 Just after the chamber, the floor has an attractive evaporation coating. Just up ahead is the taped-off connection with Bonsai Streamway, and an awkward climb into a blind roof level.
Modelling by Gareth, lighting by Tarquin and Gareth
Just after the chamber, the floor has an attractive evaporation coating. Just up ahead is the taped-off connection with Bonsai Streamway, and an awkward climb into a blind roof level.
Modelling by Gareth, lighting by Tarquin and Gareth Rippled sand and evaporation formation.
Lighting by Tarquin and Gareth
Rippled sand and evaporation formation.
Lighting by Tarquin and Gareth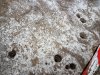 Evaporation coating and drip pockets.
 An early part of Crystal Corridor, where you can walk.
Modelling by Gareth, lighting by Tarquin and Gareth
An early part of Crystal Corridor, where you can walk.
Modelling by Gareth, lighting by Tarquin and Gareth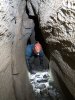 Unfortunately, it soon becomes crawling sized, and we decided not to continue to the junction with Beyond Time.
Modelling by Gareth, lighting by Tarquin and Gareth
Unfortunately, it soon becomes crawling sized, and we decided not to continue to the junction with Beyond Time.
Modelling by Gareth, lighting by Tarquin and Gareth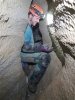 When trying to turn around to retreat back to more interesting passages, it quickly became apparent that some methods work better than others. Gareth tried trapping himself into Buddha pose, but it proved not to be a comfortable technique for turning. Who knew?
Modelling by Gareth, lighting by Tarquin and Gareth
When trying to turn around to retreat back to more interesting passages, it quickly became apparent that some methods work better than others. Gareth tried trapping himself into Buddha pose, but it proved not to be a comfortable technique for turning. Who knew?
Modelling by Gareth, lighting by Tarquin and Gareth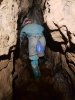 From the junction with Crystal Oxbow, Crystal Inlet is much smaller, and much more slippery. Several little cascades add to the fun, but the passage has no other attractions.
Modelling by Gareth, lighting by Tarquin and Gareth
From the junction with Crystal Oxbow, Crystal Inlet is much smaller, and much more slippery. Several little cascades add to the fun, but the passage has no other attractions.
Modelling by Gareth, lighting by Tarquin and Gareth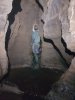 The widest part of the passage is this plunge pool. Some of the other pools require traversing to avoid swimming.
Modelling by Gareth, lighting by Tarquin and Gareth
The widest part of the passage is this plunge pool. Some of the other pools require traversing to avoid swimming.
Modelling by Gareth, lighting by Tarquin and Gareth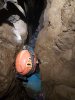 After a traverse over a tight rift, the inlet then becomes very narrow, and only a very determined caver would want to continue. Gareth tried descending to stream level to force a way up the passage.
Modelling by Gareth, lighting by Tarquin and Gareth
After a traverse over a tight rift, the inlet then becomes very narrow, and only a very determined caver would want to continue. Gareth tried descending to stream level to force a way up the passage.
Modelling by Gareth, lighting by Tarquin and Gareth The passage has in fact been forced at floor level for 35 metres, to reach a flake which blocks progress. Gareth gave it a good effort, but reversing through a 35 metre squeeze doesn't sound as much fun as visiting the Flyovers, so he was encouraged to return early.
Modelling by Gareth, lighting by Tarquin and Gareth
The passage has in fact been forced at floor level for 35 metres, to reach a flake which blocks progress. Gareth gave it a good effort, but reversing through a 35 metre squeeze doesn't sound as much fun as visiting the Flyovers, so he was encouraged to return early.
Modelling by Gareth, lighting by Tarquin and Gareth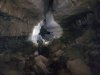 Bonsai Streamway, downstream of Crystal Inlet, takes on some impressive dimensions.
Modelling by Gareth, lighting by Tarquin and Gareth
Bonsai Streamway, downstream of Crystal Inlet, takes on some impressive dimensions.
Modelling by Gareth, lighting by Tarquin and Gareth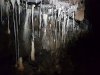 Formations in Bonsai Streamway.
 Formations.
 Helictites.
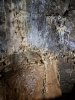 Helictites on a seam in flowstone.
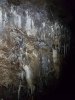 Helictites below the Flyovers.
 Helictit fringed column.
 Helictites.
 Roped climb into Western Flyover. This was originally free climbed.
Modelling by Gareth, lighting by Tarquin and Gareth
Roped climb into Western Flyover. This was originally free climbed.
Modelling by Gareth, lighting by Tarquin and Gareth Western Flyover is an old continuation of the Time Machine, and even though it does not have the same dimensions, it is still a very impressive old phreatic tube.
Modelling by Gareth, lighting by Tarquin and Gareth
Western Flyover is an old continuation of the Time Machine, and even though it does not have the same dimensions, it is still a very impressive old phreatic tube.
Modelling by Gareth, lighting by Tarquin and Gareth A very large section of Western Flyover.
Modelling by Gareth, lighting by Tarquin and Gareth
A very large section of Western Flyover.
Modelling by Gareth, lighting by Tarquin and Gareth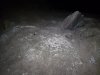 The floor here is absolutely covered in cryostal.
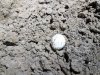 A type of cryostal I had not seen before. These look like egg shells or puffball mushrooms.
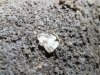 Just like an egg shell, they are hollow.
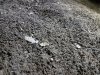 Hollow egg shells.
 The more normal bead aggregations.
 Bead aggregations.
 Then a very impressive spread, strewn in patches across the floor. Most of it sits on sand, not fluffy/bobbly mud or breakdown, and the passage is a clean phreas, so it seems like the wrong place to find it. But here it is anyway.
Modelling by Gareth, lighting by Tarquin and Gareth
Then a very impressive spread, strewn in patches across the floor. Most of it sits on sand, not fluffy/bobbly mud or breakdown, and the passage is a clean phreas, so it seems like the wrong place to find it. But here it is anyway.
Modelling by Gareth, lighting by Tarquin and Gareth Most of the cryostal is bead aggregations. They can be seen to form bands of more and less dense clusters of beads.
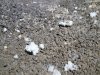 Cryostal clusters.
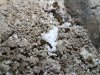 Bead aggregations.
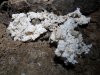 Then a very large group of giant cryostal clusters are seen on a pile of rocks. It is possible that they were moved here to keep them away from feet.
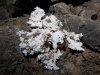 These are some of the largest pieces in the cave, and some of the best looking pieces in any British cave, competing with those in Draenen. This is the largest cluster of giant pieces that I know of, around 20 cm long and wide, with the largest pieces being about the size of a karabiner.
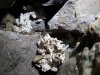 After that is a series of pieces of cryostal which seem to be mixed with sand, probably after meltwater washed it over them.
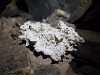 This piece is the single largest cluster I have seen in any cave, around 14 cm long in its longer direction.
 Seen here with a hand for scale, it is almost ridiculous.
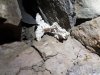 Tucked between the rocks.
 Ladder into the Labyrinth, a crawling sized passage leading into Half Mile Passage. Even without the ladder, it could probably be climbed using just a handline, but the ladder certainly makes it a lot easier.
Lighting by Tarquin and Gareth
Ladder into the Labyrinth, a crawling sized passage leading into Half Mile Passage. Even without the ladder, it could probably be climbed using just a handline, but the ladder certainly makes it a lot easier.
Lighting by Tarquin and Gareth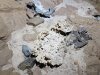 More sand-covered cryostal. This is a particularly large piece. The flat part looks like a possible footprint, or maybe a rock print.
 A final piece of cryostal - this is the last significant piece in Western Flyover.
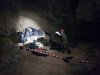 Western Flyover has been the site of a camp. Though I fail to see why, since Hard Rock is very close, and much more comfortable, even with its own flushing toilet. This camp has no toilet. But sleeping on sand is comfortable, even if it does get everywhere. Gareth is demonstrating with a camp (or at least limp wristed) sand dance.
Modelling by Gareth, lighting by Tarquin and Gareth
Western Flyover has been the site of a camp. Though I fail to see why, since Hard Rock is very close, and much more comfortable, even with its own flushing toilet. This camp has no toilet. But sleeping on sand is comfortable, even if it does get everywhere. Gareth is demonstrating with a camp (or at least limp wristed) sand dance.
Modelling by Gareth, lighting by Tarquin and Gareth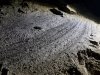 Banded sand deposits.
Lighting by Gareth
Banded sand deposits.
Lighting by Gareth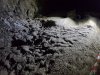 Rippled sand, showing water flow.
Lighting by Gareth
Rippled sand, showing water flow.
Lighting by Gareth The middle portion of Western Flyover.
Modelling and lighting by Gareth
The middle portion of Western Flyover.
Modelling and lighting by Gareth Backlit, it looks like a different place.
Modelling by Gareth
Backlit, it looks like a different place.
Modelling by Gareth Cryostal flakes. Nothing like as grand as the stuff before it.
 A large section of passage then reaches an abrupt end.
Modelling by Gareth, lighting by Tarquin and Gareth
A large section of passage then reaches an abrupt end.
Modelling by Gareth, lighting by Tarquin and Gareth Lumpy mud on the wall of the passage. This looks like the fluffy/bobbly mud, but the lumps are much larger, and appear to have been wet.
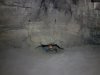 Originally, the roof tubes were used to reach the final part of the passage, but a sand swim under the wall reaches the same place more easily. This is a tight squeeze, but don't worry; you can always enlarge it if it is too small for you.
Modelling by Gareth
Originally, the roof tubes were used to reach the final part of the passage, but a sand swim under the wall reaches the same place more easily. This is a tight squeeze, but don't worry; you can always enlarge it if it is too small for you.
Modelling by Gareth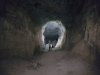 A final very impressive section of passage. They missed a trick here; it really should have been called West End.
Modelling by Gareth, lighting by Tarquin and Gareth
A final very impressive section of passage. They missed a trick here; it really should have been called West End.
Modelling by Gareth, lighting by Tarquin and Gareth The terminal choke of Western Flyover. This is clearly a big choke, and will be quite long. On the other side of it is Beyond Time, so there is no point in digging here.
Modelling by Gareth, lighting by Tarquin and Gareth
The terminal choke of Western Flyover. This is clearly a big choke, and will be quite long. On the other side of it is Beyond Time, so there is no point in digging here.
Modelling by Gareth, lighting by Tarquin and Gareth 5 metre ladder pitch up to Eastern Flyover from Bonsai Streamway
Modelling by Gareth, lighting by Tarquin and Gareth
5 metre ladder pitch up to Eastern Flyover from Bonsai Streamway
Modelling by Gareth, lighting by Tarquin and Gareth The main passage of Eastern Flyover.
Modelling by Gareth, lighting by Tarquin and Gareth
The main passage of Eastern Flyover.
Modelling by Gareth, lighting by Tarquin and Gareth 6 metre ladder up to the balcony level above. We will continue ahead first instead.
Modelling by Gareth, lighting by Tarquin and Gareth
6 metre ladder up to the balcony level above. We will continue ahead first instead.
Modelling by Gareth, lighting by Tarquin and Gareth Selenite crystals on a beautiful cracked mud floor.
Lighting by Gareth
Selenite crystals on a beautiful cracked mud floor.
Lighting by Gareth Eastern Flyover reaches another massive choke. This is one of the most significant leads in the cave, but has never been a successful digging site. It sits directly below parts of Half Mile Passage.
Modelling by Gareth, lighting by Tarquin and Gareth
Eastern Flyover reaches another massive choke. This is one of the most significant leads in the cave, but has never been a successful digging site. It sits directly below parts of Half Mile Passage.
Modelling by Gareth, lighting by Tarquin and Gareth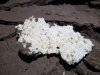 A very large piece of cryostal at the choke. This is about 10 cm across. It looks like it has been moved into position to avoid being trampled.
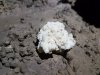 Another large piece, about half the size of the previous one.
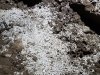 It covers the boulders over most of the lower part of the choke.
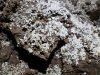 Beads in the mud.
 Beaded flake
 Bead aggregations.
 Very pretty stuff.
 At the top of the balcony ladder is another large passage that quickly shrinks.
Modelling by Gareth, lighting by Tarquin and Gareth
At the top of the balcony ladder is another large passage that quickly shrinks.
Modelling by Gareth, lighting by Tarquin and Gareth Rather poor cryostal in the mud.
 The balcony ends in a dig, with a rather unusual grotto. The dig points away from Eastern Flyover's
Modelling by Gareth, lighting by Tarquin and Gareth
The balcony ends in a dig, with a rather unusual grotto. The dig points away from Eastern Flyover's
Modelling by Gareth, lighting by Tarquin and Gareth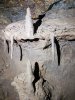 The grotto's stal is not exactly natural, being moulded out of mud by bored cavers. I guess it helps to liven up a dig.
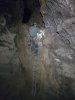 From the balcony, a 4 metre ladder leads to an upper passage. This could be free climbed, but the ladder certainly makes it easier.
Modelling by Gareth, lighting by Tarquin and Gareth
From the balcony, a 4 metre ladder leads to an upper passage. This could be free climbed, but the ladder certainly makes it easier.
Modelling by Gareth, lighting by Tarquin and Gareth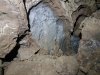 Coloured limestone layers in the passage at the top. Only one of the layers likes to form significant scallops, while the rest gets odd etchings instead.
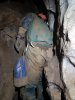 The passage at the top starts off quite narrow.
Modelling by Gareth, lighting by Tarquin and Gareth
The passage at the top starts off quite narrow.
Modelling by Gareth, lighting by Tarquin and Gareth Followed by a ridiculous squeeze that looks impossible.
Modelling by Gareth
Followed by a ridiculous squeeze that looks impossible.
Modelling by Gareth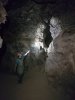 It then becomes a crawling sized tube that pops out into the side of the sand floored Half Mile Passage.
Modelling by Gareth, lighting by Tarquin and Gareth
It then becomes a crawling sized tube that pops out into the side of the sand floored Half Mile Passage.
Modelling by Gareth, lighting by Tarquin and Gareth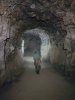 We started off heading south along Half Mile Passage, away from the loop. This is such a comfortable passage, easily possible to run along.
Modelling by Gareth, lighting by Tarquin and Gareth
We started off heading south along Half Mile Passage, away from the loop. This is such a comfortable passage, easily possible to run along.
Modelling by Gareth, lighting by Tarquin and Gareth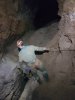 The southerly traverse. This has a rope to assist, but the rope ends at the most tricky point, and doesn't really serve the purpose very well. The hole is 6 metres deep, with only a dig below.
Modelling by Gareth, lighting by Tarquin and Gareth
The southerly traverse. This has a rope to assist, but the rope ends at the most tricky point, and doesn't really serve the purpose very well. The hole is 6 metres deep, with only a dig below.
Modelling by Gareth, lighting by Tarquin and Gareth The side passage immediately afterwards ends at a boulder choke. At first, this equipment seems bizarrely out of place. It is used to tie the cable around boulders, and then pull them out of the choke from a safe distance. This choke sits directly beside the top of the choke in Eastern Flyover, and could possibly be a place to bypass it. Half Mile Passage loses its grandure at this point, and appears to become a series of soakaways, which suggests that the water is simply trying to drop into the Eastern Flyover old main drain.
 Half Mile Passage, now reduced to a mere shadow of its former self.
Modelling by Gareth, lighting by Tarquin and Gareth
Half Mile Passage, now reduced to a mere shadow of its former self.
Modelling by Gareth, lighting by Tarquin and Gareth Digging spoil from one of the little side digs. This is one of the most impressive dry stone walls you can find in a Welsh cave, holding back a monumental quantity of spoil.
Modelling by Gareth, lighting by Tarquin and Gareth
Digging spoil from one of the little side digs. This is one of the most impressive dry stone walls you can find in a Welsh cave, holding back a monumental quantity of spoil.
Modelling by Gareth, lighting by Tarquin and Gareth Half Mile Passage used to end at this ascending passage to a choke. Amazingly, there were bats in this section (it was not yet hibernation season), despite being 2 km in from the surface.
Modelling by Gareth, lighting by Tarquin and Gareth
Half Mile Passage used to end at this ascending passage to a choke. Amazingly, there were bats in this section (it was not yet hibernation season), despite being 2 km in from the surface.
Modelling by Gareth, lighting by Tarquin and Gareth Passing the choke.
Modelling by Gareth, lighting by Tarquin and Gareth
Passing the choke.
Modelling by Gareth, lighting by Tarquin and Gareth Beyond the choke, the passages are much smaller, just a final series of little soakaways that degenerate into chaos. There is nothing good here.
Modelling by Gareth, lighting by Tarquin and Gareth
Beyond the choke, the passages are much smaller, just a final series of little soakaways that degenerate into chaos. There is nothing good here.
Modelling by Gareth, lighting by Tarquin and Gareth We returned to the junction where we entered Half Mile Passage, and continued North.
Modelling by Gareth, lighting by Tarquin and Gareth
We returned to the junction where we entered Half Mile Passage, and continued North.
Modelling by Gareth, lighting by Tarquin and Gareth Beautifully rippled sand floor.
Modelling by Gareth, lighting by Tarquin and Gareth
Beautifully rippled sand floor.
Modelling by Gareth, lighting by Tarquin and Gareth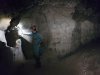 Passing one of the entrances to The Labyrinth, which connects to Western Flyover.
Modelling by Gareth, lighting by Tarquin and Gareth
Passing one of the entrances to The Labyrinth, which connects to Western Flyover.
Modelling by Gareth, lighting by Tarquin and Gareth Half Mile Passage becomes a taller canyon.
Modelling by Gareth, lighting by Tarquin and Gareth
Half Mile Passage becomes a taller canyon.
Modelling by Gareth, lighting by Tarquin and Gareth Rather poor cryostal in Half Mile Passage.
 Sediment bank.
Lighting by Tarquin and Gareth
Sediment bank.
Lighting by Tarquin and Gareth Sediment bank with coloured layers.
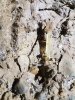 Selenite needle.
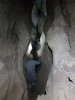 The passage then changes style, and becomes a phreatic canyon.
Modelling by Gareth, lighting by Tarquin and Gareth
The passage then changes style, and becomes a phreatic canyon.
Modelling by Gareth, lighting by Tarquin and Gareth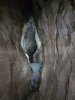 Keyhole section.
Modelling by Gareth, lighting by Tarquin and Gareth
Keyhole section.
Modelling by Gareth, lighting by Tarquin and Gareth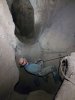 Finally, there is this traverse over a deep hole, dropping about 10 metres into Crystal Oxbow. This is one of the two avens in the chamber in Crystal Oxbow - the one that cannot be free climbed. The passage on the other side is Nameless Canyon - even though it is really the continuation of Half Mile Passage - which has another hole down to the left almost immediately, which is the second aven. That hole can be climbed with the rope that was in place.
Modelling by Gareth, lighting by Tarquin and Gareth
Finally, there is this traverse over a deep hole, dropping about 10 metres into Crystal Oxbow. This is one of the two avens in the chamber in Crystal Oxbow - the one that cannot be free climbed. The passage on the other side is Nameless Canyon - even though it is really the continuation of Half Mile Passage - which has another hole down to the left almost immediately, which is the second aven. That hole can be climbed with the rope that was in place.
Modelling by Gareth, lighting by Tarquin and Gareth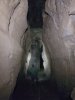 Nameless Canyon (which is also called No-Name Canyon, so it has 2 names...) then pops into the side of a larger, sandy passage, which is also called Nameless Canyon (just accept it, OK). Left closes down, but right continues like this.
Modelling by Gareth, lighting by Tarquin and Gareth
Nameless Canyon (which is also called No-Name Canyon, so it has 2 names...) then pops into the side of a larger, sandy passage, which is also called Nameless Canyon (just accept it, OK). Left closes down, but right continues like this.
Modelling by Gareth, lighting by Tarquin and Gareth Cracked sand and gravel deposits in Nameless Canyon. There was evidently a pool here that dried out very slowly, leaving gravel on top of the cracked mud below.
Lighting by Tarquin and Gareth
Cracked sand and gravel deposits in Nameless Canyon. There was evidently a pool here that dried out very slowly, leaving gravel on top of the cracked mud below.
Lighting by Tarquin and Gareth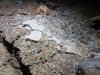 Calcite rafts stuck to the lip of the old cracked gravel pools. It is very strange seeing calcite rafts on a pool that has no other crystal deposits - all the pebbles are clean.
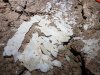 Calcite rafts.
 Calcite rafts.
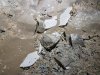 Calcite rafts.
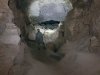 Nameless Canyon then earns a substantial side passage heading steeply upwards. This is the way to Aggy Passage.
Modelling by Gareth, lighting by Tarquin and Gareth
Nameless Canyon then earns a substantial side passage heading steeply upwards. This is the way to Aggy Passage.
Modelling by Gareth, lighting by Tarquin and Gareth Very cool, layered rock in the ceiling at the junction of Kingston Sands (left) and Aggy Passage (right). The coloured layers are shale bands.
Modelling by Gareth, lighting by Tarquin and Gareth
Very cool, layered rock in the ceiling at the junction of Kingston Sands (left) and Aggy Passage (right). The coloured layers are shale bands.
Modelling by Gareth, lighting by Tarquin and Gareth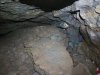 Kingston Sands starts huge but immediately becomes a low crawl.
Modelling by Gareth, lighting by Tarquin and Gareth
Kingston Sands starts huge but immediately becomes a low crawl.
Modelling by Gareth, lighting by Tarquin and Gareth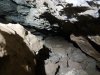 The crawl seemed to go on a very long way, so since we were running low on time, we decided to leave it for another day. The survey makes it look like it might enter a short section of larger passage before it ends. It does not point in a useful direction, and probably is just an oxbow.
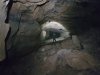 Aggy Passage is much more substantial, and a very promising lead.
Modelling by Gareth, lighting by Tarquin and Gareth
Aggy Passage is much more substantial, and a very promising lead.
Modelling by Gareth, lighting by Tarquin and Gareth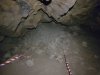 Side choke in Aggy Passage.
 A lower phreatic arch before the end.
Modelling by Gareth, lighting by Tarquin and Gareth
A lower phreatic arch before the end.
Modelling by Gareth, lighting by Tarquin and Gareth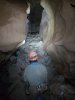 The terminal choke of Aggy Passage, and the most likely place to find an extension.
Modelling by Gareth, lighting by Tarquin and Gareth
The terminal choke of Aggy Passage, and the most likely place to find an extension.
Modelling by Gareth, lighting by Tarquin and Gareth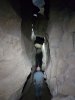 Continuing along Nameless Canyon seems almost anti-climactic after such an impressive side passage, but it is quite impressively tall in in its own right.
Modelling by Gareth, lighting by Tarquin and Gareth
Continuing along Nameless Canyon seems almost anti-climactic after such an impressive side passage, but it is quite impressively tall in in its own right.
Modelling by Gareth, lighting by Tarquin and Gareth Gypsum in Nameless Canyon.
 Nearing the end of Nameless Canyon.
Modelling by Gareth, lighting by Tarquin and Gareth
Nearing the end of Nameless Canyon.
Modelling by Gareth, lighting by Tarquin and Gareth The Meeting Room. Nameless Canyon is behind the camera. To the left is a short stub passage half way up the wall, then the obvious entrance to Beyond Time, but we were appropriately out of time to visit on the first trip; this was visited on the second trip instead. Ahead is a large entrance into the side of a passage, where left drops into the Time Machine, and right is the usual way to the Time Machine. To the right are two short passages, the left of which pinches out just before connecting with the other passage.
Modelling by Gareth, lighting by Tarquin and Gareth
The Meeting Room. Nameless Canyon is behind the camera. To the left is a short stub passage half way up the wall, then the obvious entrance to Beyond Time, but we were appropriately out of time to visit on the first trip; this was visited on the second trip instead. Ahead is a large entrance into the side of a passage, where left drops into the Time Machine, and right is the usual way to the Time Machine. To the right are two short passages, the left of which pinches out just before connecting with the other passage.
Modelling by Gareth, lighting by Tarquin and Gareth The passage to the right ends abruptly at a dig. This is probably related to Kingston Sands.
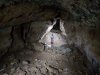 Beyond Time starts as a beautifully triangular passage.
Modelling by Paul, lighting by Tarquin, Claire, Sanita and Antonia
Beyond Time starts as a beautifully triangular passage.
Modelling by Paul, lighting by Tarquin, Claire, Sanita and Antonia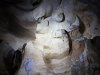 Phreatic sculpted ceiling in Beyond Time.
Lighting by Claire and Antonia
Phreatic sculpted ceiling in Beyond Time.
Lighting by Claire and Antonia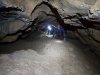 Beyond Time abruptly becomes a smaller crawl, but at least it is comfortably sized.
Modelling by Paul, Antonia and Claire, lighting by Tarquin, Paul, Antonia and Claire
Beyond Time abruptly becomes a smaller crawl, but at least it is comfortably sized.
Modelling by Paul, Antonia and Claire, lighting by Tarquin, Paul, Antonia and Claire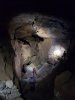 Boulder Chamber, the largest part of Beyond Time. In the floor to the right at the start, before the big part, are holes down through the boulders into the end of The Time Machine, and clearly this passage is its continuation. In the floor pit down to the left is the way into Crystal Corridor.
Modelling by Paul, Sanita, Antonia and Claire, lighting by Tarquin, Paul, Sanita, Antonia and Claire
Boulder Chamber, the largest part of Beyond Time. In the floor to the right at the start, before the big part, are holes down through the boulders into the end of The Time Machine, and clearly this passage is its continuation. In the floor pit down to the left is the way into Crystal Corridor.
Modelling by Paul, Sanita, Antonia and Claire, lighting by Tarquin, Paul, Sanita, Antonia and Claire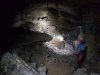 Beyond Time stops being large at this junction. To the right are phreatic tubes, while ahead is low.
Modelling by Paul, Sanita and Antonia, lighting by Tarquin, Paul, Sanita, Antonia and Claire
Beyond Time stops being large at this junction. To the right are phreatic tubes, while ahead is low.
Modelling by Paul, Sanita and Antonia, lighting by Tarquin, Paul, Sanita, Antonia and Claire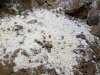 In the floor at the junction is a large pile of cryostal.
 It seems a little out of place with so much gypsum around it, but the beads show that this is definitely cryostal.
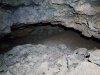 The low passage ahead ends at a washout chamber and digs. On the other side of this infill is Western Flyover, so clearly the cryostal deposits are related.
Modelling by , lighting by Tarquin,
The low passage ahead ends at a washout chamber and digs. On the other side of this infill is Western Flyover, so clearly the cryostal deposits are related.
Modelling by , lighting by Tarquin,  A final cryostal dusting on the rocks.
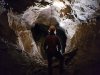 The phreatic tubes are rather attractive, with white gypsum coatings and obvious scallops. They end rather abruptly at mud infill, with a tapping connection to Painkiller Passage. This connection has intentionally been left closed, since it helps to preserve the formations in that passage.
Modelling by Antonia, lighting by Claire and Sanita
The phreatic tubes are rather attractive, with white gypsum coatings and obvious scallops. They end rather abruptly at mud infill, with a tapping connection to Painkiller Passage. This connection has intentionally been left closed, since it helps to preserve the formations in that passage.
Modelling by Antonia, lighting by Claire and Sanita In the floor pit of Boulder Chamber, an alcove on the side offers the other way on, decorated with iron-stained rocks.
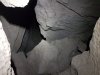 In the floor is a hole down to Bonsai Streamway. It is possible to free climb below the camera (on the near side of the wedged boulders), using some ledges, but it looks quite tricky, and equipment may be preferred.
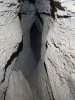 Above the hole down, a climb to the left gains a small tube, which drops into the end of Crystal Corridor. It is just as small and uninspiring at this end.
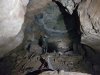 Returning to The Meeting Room, the left-hand way to the Time Machine starts promising.
Modelling by Claire, lighting by Tarquin and Claire
Returning to The Meeting Room, the left-hand way to the Time Machine starts promising.
Modelling by Claire, lighting by Tarquin and Claire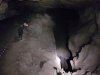 However, it ends at a choke, just after passing over this deep hole into the Time Machine. It looks about 25-30 metres down, and is not free climbable.
Modelling by Claire, lighting by Tarquin and Claire
However, it ends at a choke, just after passing over this deep hole into the Time Machine. It looks about 25-30 metres down, and is not free climbable.
Modelling by Claire, lighting by Tarquin and Claire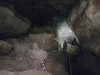 The usual way to The Time Machine.
Modelling by Gareth, lighting by Tarquin and Gareth
The usual way to The Time Machine.
Modelling by Gareth, lighting by Tarquin and Gareth This quickly becomes a very large passage in its own right, but does not even earn a name.
Modelling by Gareth, lighting by Tarquin and Gareth
This quickly becomes a very large passage in its own right, but does not even earn a name.
Modelling by Gareth, lighting by Tarquin and Gareth Looking out into the southern end of the Time Machine, with the floor level reached via a short climb. Amazingly, the enormous passage we are in is almost invisible from below the climb, and can be easily missed when walking past, even when looking for it. From below, it just appears to be an alcove in the roof. With the final loop now completed, we headed out.
Modelling by Gareth, lighting by Tarquin and Gareth
Looking out into the southern end of the Time Machine, with the floor level reached via a short climb. Amazingly, the enormous passage we are in is almost invisible from below the climb, and can be easily missed when walking past, even when looking for it. From below, it just appears to be an alcove in the roof. With the final loop now completed, we headed out.
Modelling by Gareth, lighting by Tarquin and Gareth
 Horses at the fields near the Whitewalls caving hut.
Modelling by a pair of equines, lighting by Sol
Horses at the fields near the Whitewalls caving hut.
Modelling by a pair of equines, lighting by Sol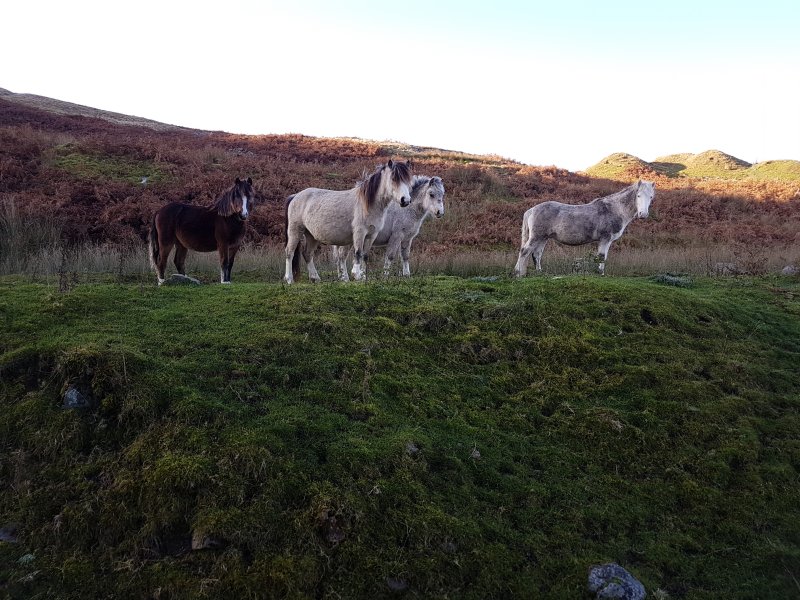 Wild mountain ponies.
Modelling by The Herd, lighting by Sol
Wild mountain ponies.
Modelling by The Herd, lighting by Sol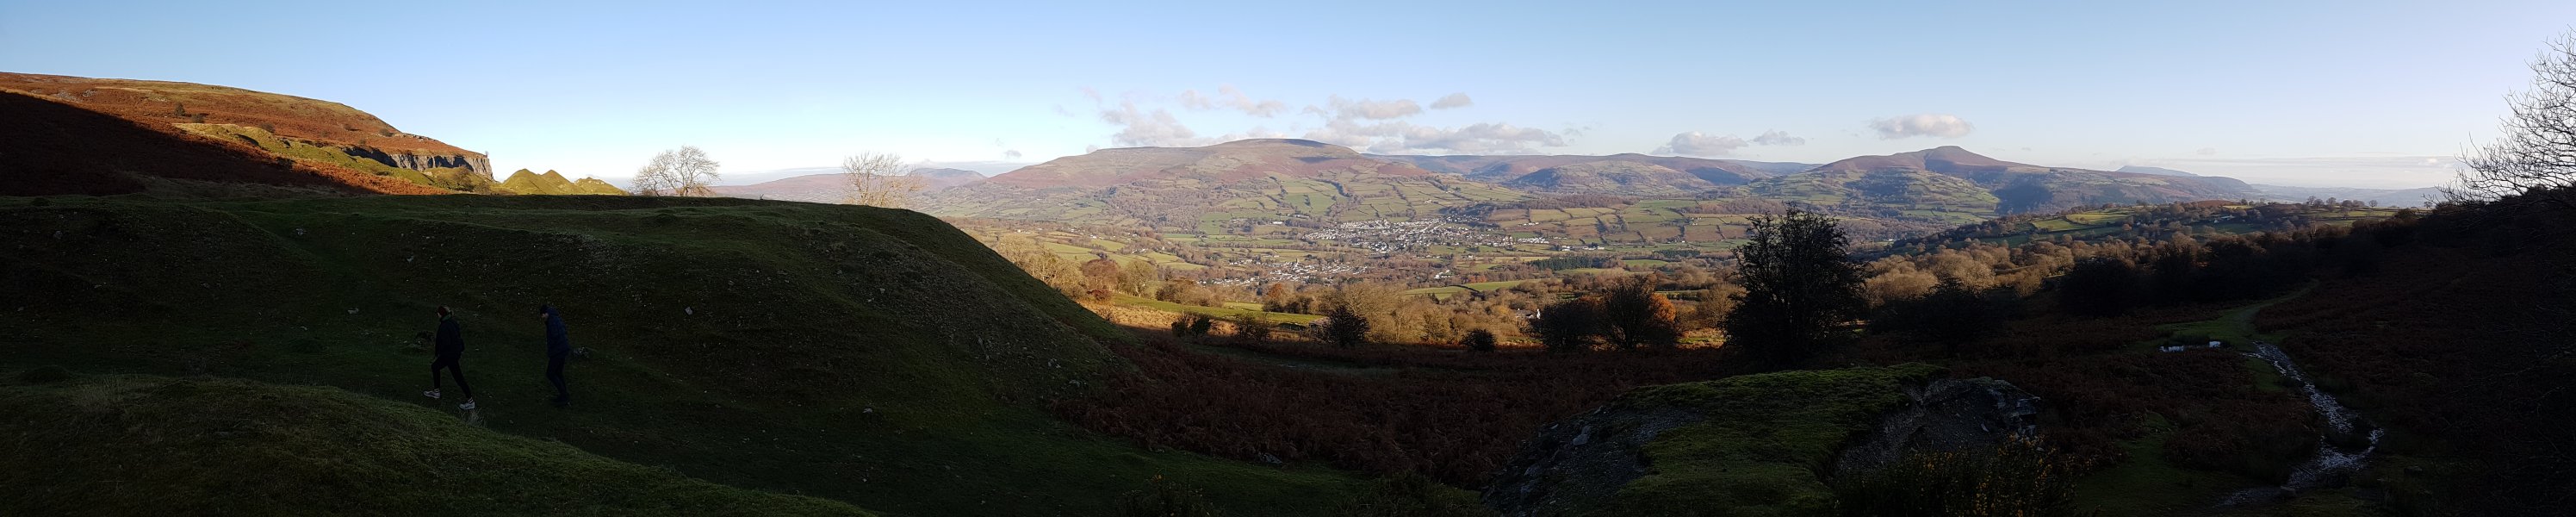 Superb view over the Black Mountains range from the limekilns at the Daren Cilau quarry. Mynydd Llangorse (515 metres), Mynydd Troed (609 metres), Pen Allt-mawr (719 metres), Pen Cerrig-calch (701 metres), Pen Twyn Mawr (658 metres), Crug Mawr (550 metres), Hatterall Hill (531 metres), the Sugar Loaf (596 metres) and The Skirrid (486 metres).
 A tricky climb into an oxbow after the entrance crawl, which bypasses a mud-filled section. This often proves tricky for shorter cavers.
Modelling by Paul's arm, Claire and Sanita, lighting by Tarquin, Paul, Claire and Sanita
A tricky climb into an oxbow after the entrance crawl, which bypasses a mud-filled section. This often proves tricky for shorter cavers.
Modelling by Paul's arm, Claire and Sanita, lighting by Tarquin, Paul, Claire and Sanita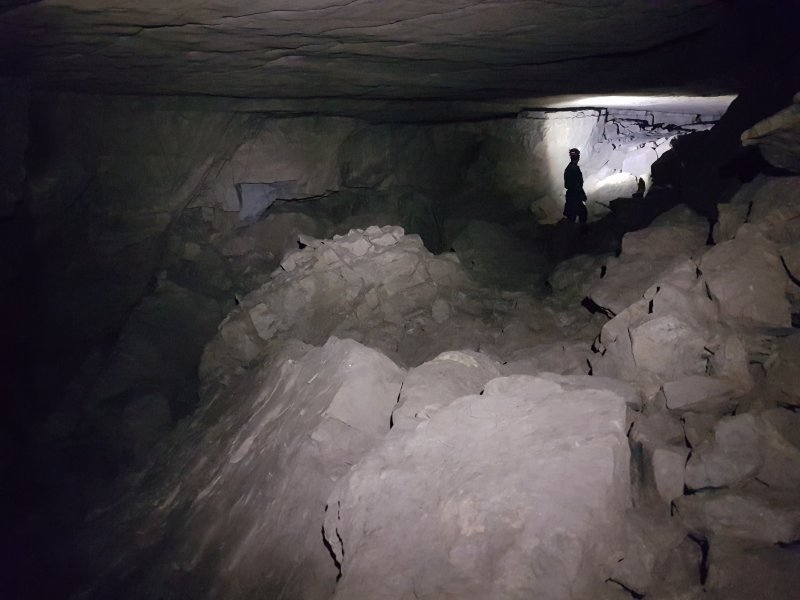 Big Chamber Nowhere Near The Entrance (named as a humorous reference to Big Chamber Near The Entrance in Ogof Ffynnon Ddu). The archway on the left is Jigsaw Passage (the way in), while Gareth's light is shining into Epocalypse Way (the way towards the Ogof Cnwc through trip). Up the boulder slope on the right is the rest of Big Chamber, and the way on to the downstream cave. Behind the camera is a blind alcove. The logbook sits on the boulders between Epocalypse Way and the slope up.
Modelling by Gareth, lighting by Tarquin and Gareth
Big Chamber Nowhere Near The Entrance (named as a humorous reference to Big Chamber Near The Entrance in Ogof Ffynnon Ddu). The archway on the left is Jigsaw Passage (the way in), while Gareth's light is shining into Epocalypse Way (the way towards the Ogof Cnwc through trip). Up the boulder slope on the right is the rest of Big Chamber, and the way on to the downstream cave. Behind the camera is a blind alcove. The logbook sits on the boulders between Epocalypse Way and the slope up.
Modelling by Gareth, lighting by Tarquin and Gareth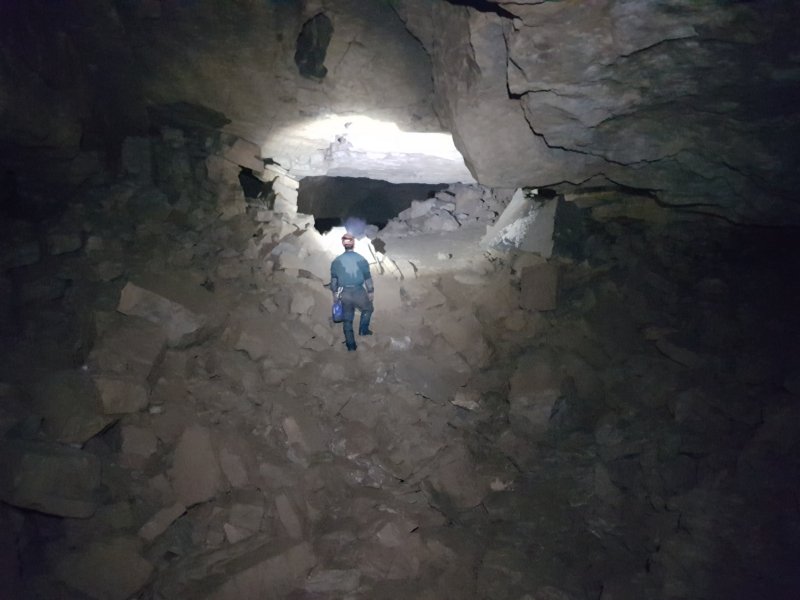 Big Chamber Nowhere Near The Entrance continues at the top of the boulder slope.
Modelling by Gareth, lighting by Tarquin and Gareth
Big Chamber Nowhere Near The Entrance continues at the top of the boulder slope.
Modelling by Gareth, lighting by Tarquin and Gareth The largest part of Big Chamber Nowhere Near The Entrance, looking into Loop Route, a choked pair of passages, which are not the way on. The way on is up the scree slope on the right, and into the left passage at the top.
Modelling by Gareth, lighting by Tarquin and Gareth
The largest part of Big Chamber Nowhere Near The Entrance, looking into Loop Route, a choked pair of passages, which are not the way on. The way on is up the scree slope on the right, and into the left passage at the top.
Modelling by Gareth, lighting by Tarquin and Gareth You know you have found Eglwys Passage when you see this traverse. Then follow it through some crawls, ignoring side passages.
Modelling by Gareth, lighting by Tarquin and Gareth
You know you have found Eglwys Passage when you see this traverse. Then follow it through some crawls, ignoring side passages.
Modelling by Gareth, lighting by Tarquin and Gareth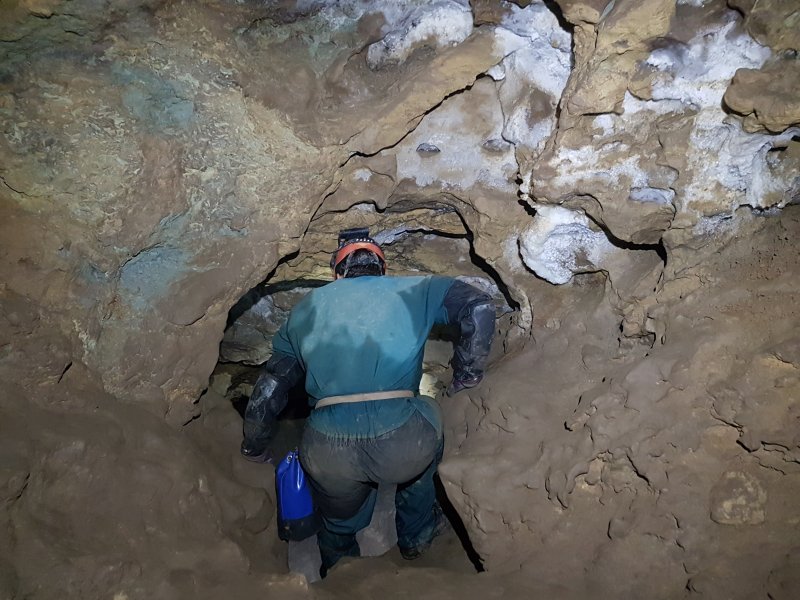 Evaporation formations in Eglwys Passage. These are formed by the airflow wicking water saturated with calcite away from the rocks, causing the water to evaporate all over the surface.
Modelling by Gareth, lighting by Tarquin and Gareth
Evaporation formations in Eglwys Passage. These are formed by the airflow wicking water saturated with calcite away from the rocks, causing the water to evaporate all over the surface.
Modelling by Gareth, lighting by Tarquin and Gareth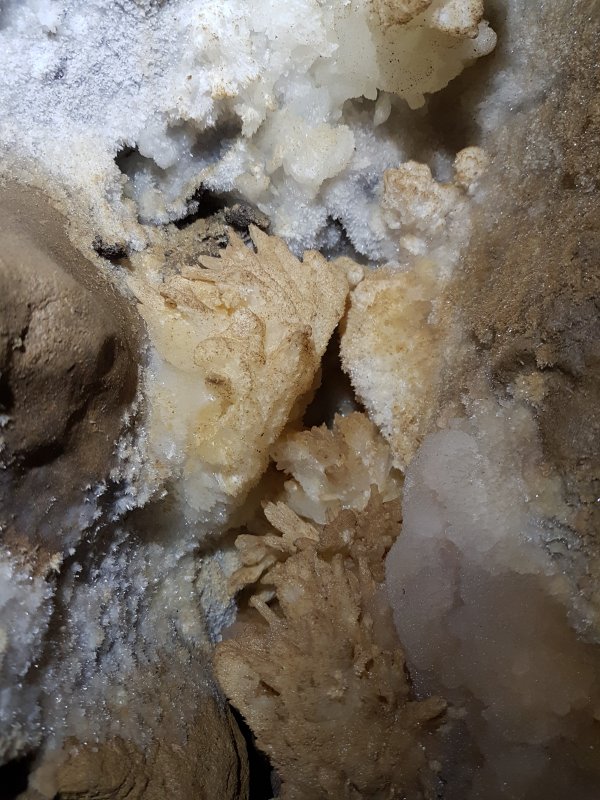 Formations in Eglwys Passage.
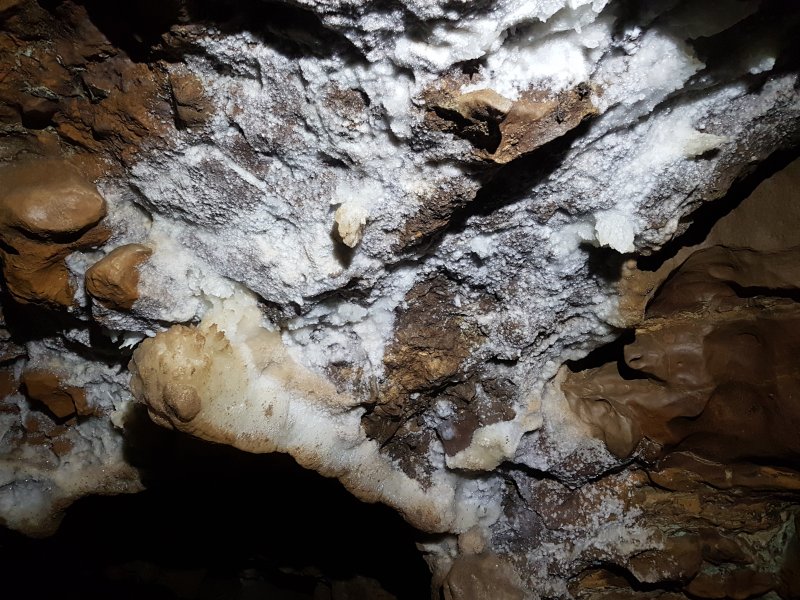 Formations in Eglwys Passage.
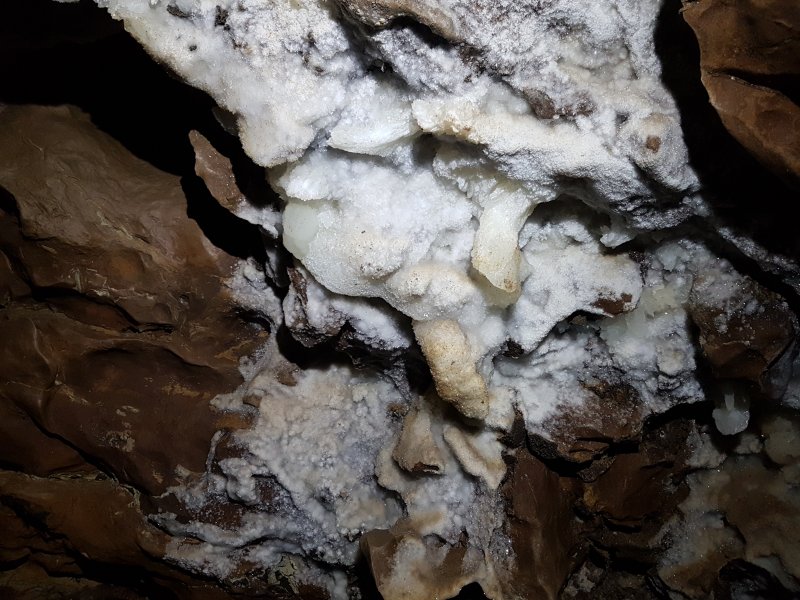 Formations in Eglwys Passage.
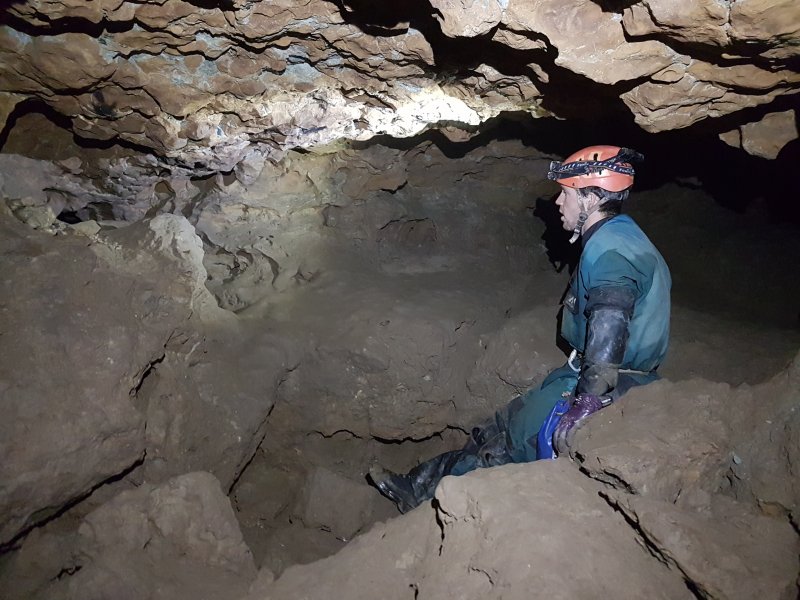 Looking back out of Fiveways Chamber in Eglwys Passage, where the way on is into an eyehole on the right (seen on the left here, with the chamber's entrance being ahead-right). This is a key junction for the route into the downstream cave.
Modelling by Gareth, lighting by Tarquin and Gareth
Looking back out of Fiveways Chamber in Eglwys Passage, where the way on is into an eyehole on the right (seen on the left here, with the chamber's entrance being ahead-right). This is a key junction for the route into the downstream cave.
Modelling by Gareth, lighting by Tarquin and Gareth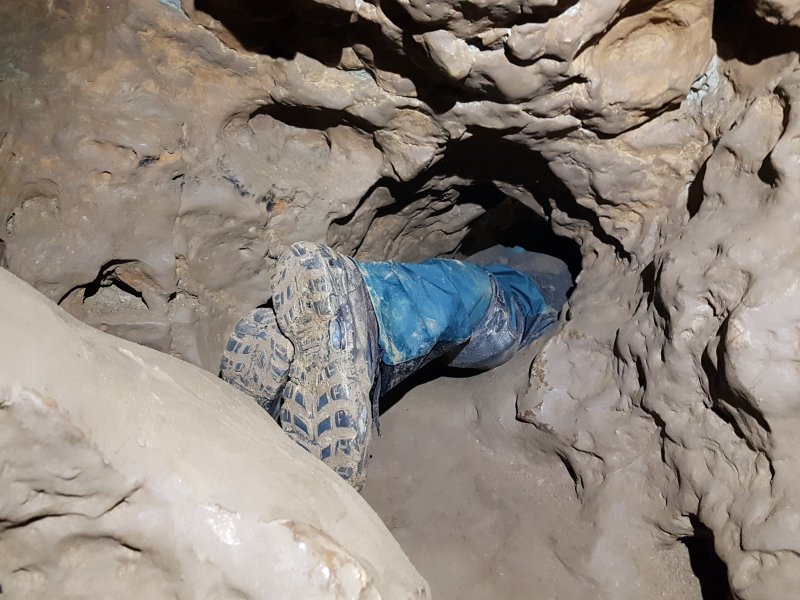 The eyehole is almost comically small, requiring a hands-first dive through the hole. Though not a squeeze, this is the size limitation for equipment being taken into the cave, as it only just allows the 15 litre Daren drums to be taken in for food storage at the camps. Even though The Vice is narrower, it is much taller, so it allows wide equipment to be taken through vertically; this hole does not.
Modelling by Gareth, lighting by Tarquin and Gareth
The eyehole is almost comically small, requiring a hands-first dive through the hole. Though not a squeeze, this is the size limitation for equipment being taken into the cave, as it only just allows the 15 litre Daren drums to be taken in for food storage at the camps. Even though The Vice is narrower, it is much taller, so it allows wide equipment to be taken through vertically; this hole does not.
Modelling by Gareth, lighting by Tarquin and Gareth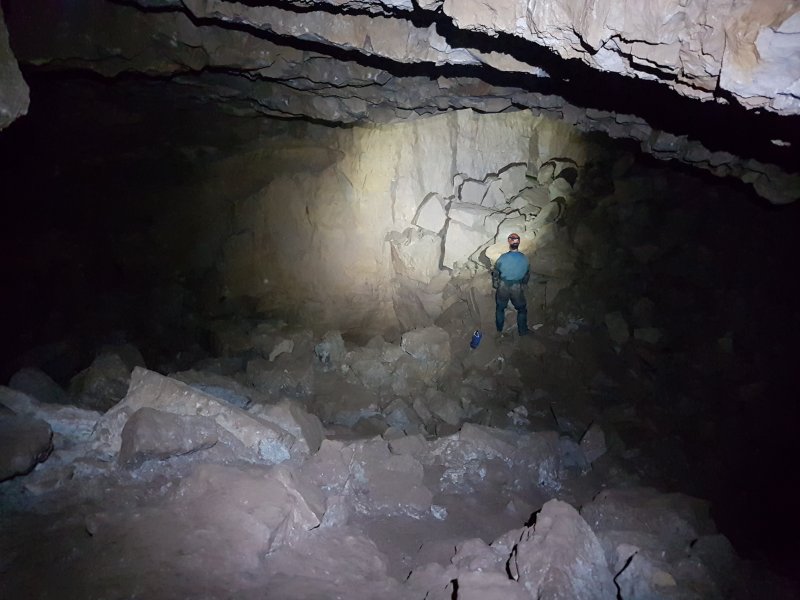 A short crawl - the 1985 breakthrough point - then emerges in St. Valentines Chamber. Loop Route's choke lies under the floor to the left, while the way on is down through the choke in the floor at the lowest point.
Modelling by Gareth, lighting by Tarquin and Gareth
A short crawl - the 1985 breakthrough point - then emerges in St. Valentines Chamber. Loop Route's choke lies under the floor to the left, while the way on is down through the choke in the floor at the lowest point.
Modelling by Gareth, lighting by Tarquin and Gareth The way on is down through a choke, with a squeeze that is another size limitation for equipment.
Modelling by Paul, lighting by Tarquin and Paul
The way on is down through a choke, with a squeeze that is another size limitation for equipment.
Modelling by Paul, lighting by Tarquin and Paul Emerging from the choke into Preliminary Passage, a very impressive sight.
Modelling by Gareth, lighting by Tarquin and Gareth
Emerging from the choke into Preliminary Passage, a very impressive sight.
Modelling by Gareth, lighting by Tarquin and Gareth Cave pearls in Preliminary Passage.
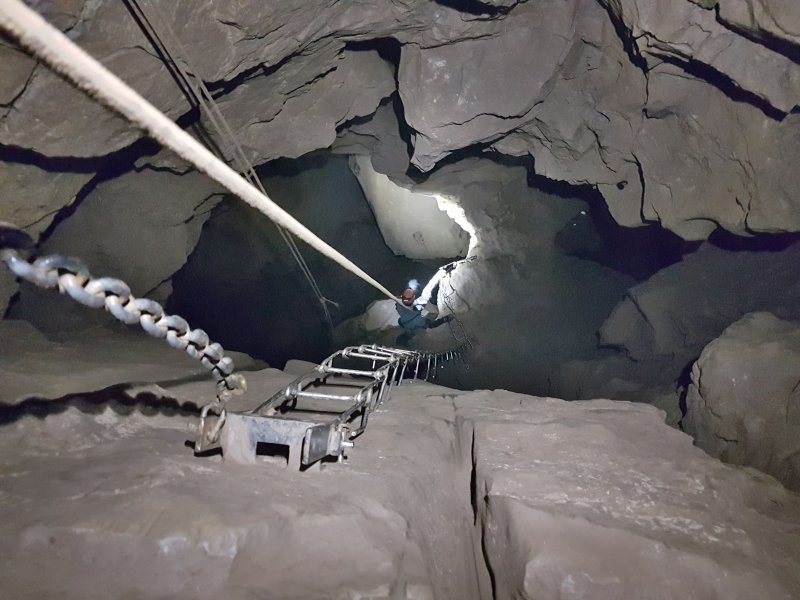 Climbing up The 60, a 20 metre pitch into Higher Things. The 60 has a flexible ladder, rigged with the rungs upside down so that they pinch your feet, wrapped around the rocks on a diagonal slant at the ledge. It almost always invokes bemused laughter from visitors who have not seen it before.
Modelling by Gareth, lighting by Tarquin and Gareth
Climbing up The 60, a 20 metre pitch into Higher Things. The 60 has a flexible ladder, rigged with the rungs upside down so that they pinch your feet, wrapped around the rocks on a diagonal slant at the ledge. It almost always invokes bemused laughter from visitors who have not seen it before.
Modelling by Gareth, lighting by Tarquin and Gareth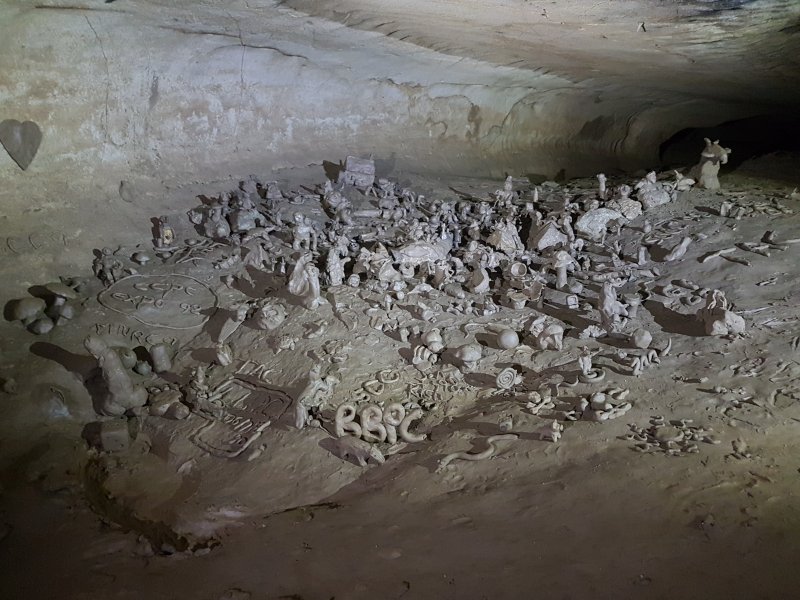 Crazy collection of mud sculptures made by bored cavers waiting for their turn at the top. A caving hut, mushroom farm, animals of all kinds (the cobra is particularly nice), the obligatory penises, gnomes, beer mugs, caving helmets, and countless other trinkets.
Lighting by Tarquin and Gareth
Crazy collection of mud sculptures made by bored cavers waiting for their turn at the top. A caving hut, mushroom farm, animals of all kinds (the cobra is particularly nice), the obligatory penises, gnomes, beer mugs, caving helmets, and countless other trinkets.
Lighting by Tarquin and Gareth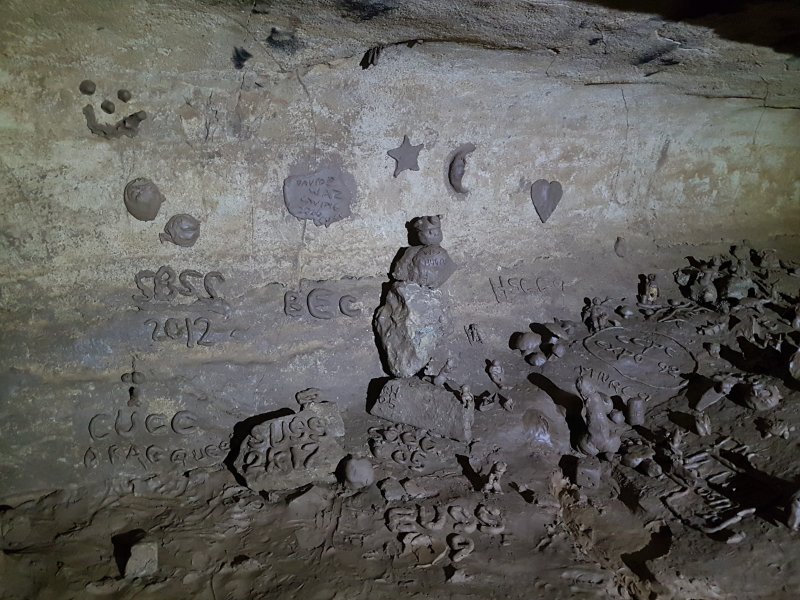 Several club initials are represented too, as well as a BEC bat mascot.
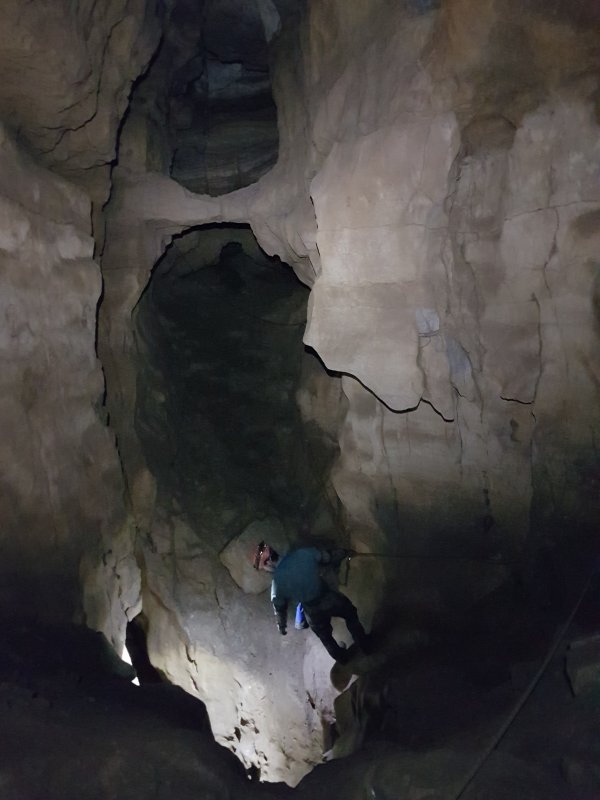 Higher Things is a rather nice phreatic passage, with a 22 metre pitch - The 70 - into White Passage.
Modelling by Gareth, lighting by Tarquin and Gareth
Higher Things is a rather nice phreatic passage, with a 22 metre pitch - The 70 - into White Passage.
Modelling by Gareth, lighting by Tarquin and Gareth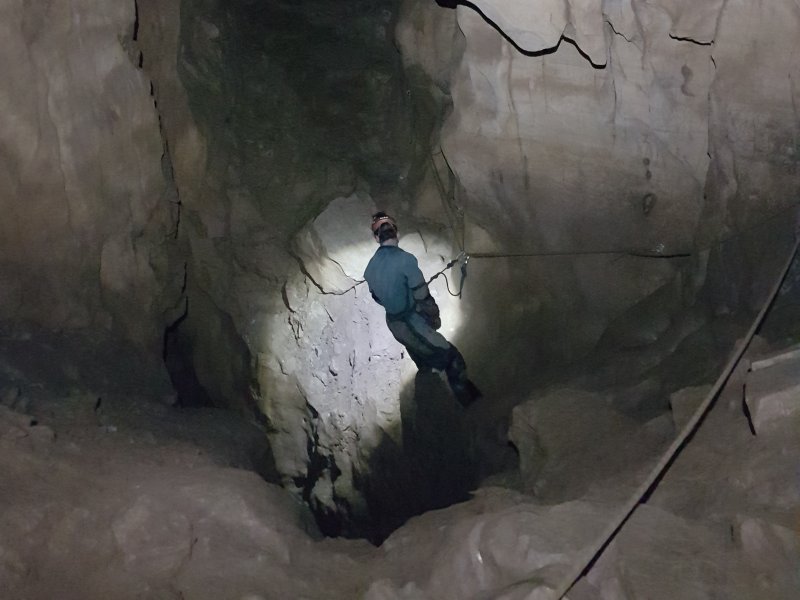 Traversing around the pitch rather than descending it.
Modelling by Gareth, lighting by Tarquin and Gareth
Traversing around the pitch rather than descending it.
Modelling by Gareth, lighting by Tarquin and Gareth Ceiling of Higher Things.
Lighting by Tarquin and Paul
Ceiling of Higher Things.
Lighting by Tarquin and Paul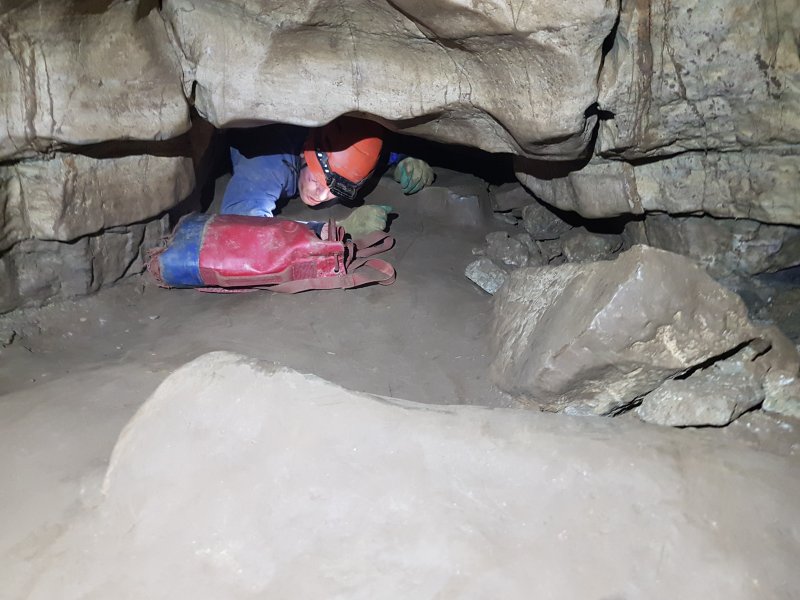 A flat out crawl along a side passage (with a bad smell on the first trip) is the way on.
Modelling by Paul, lighting by Tarquin and Paul
A flat out crawl along a side passage (with a bad smell on the first trip) is the way on.
Modelling by Paul, lighting by Tarquin and Paul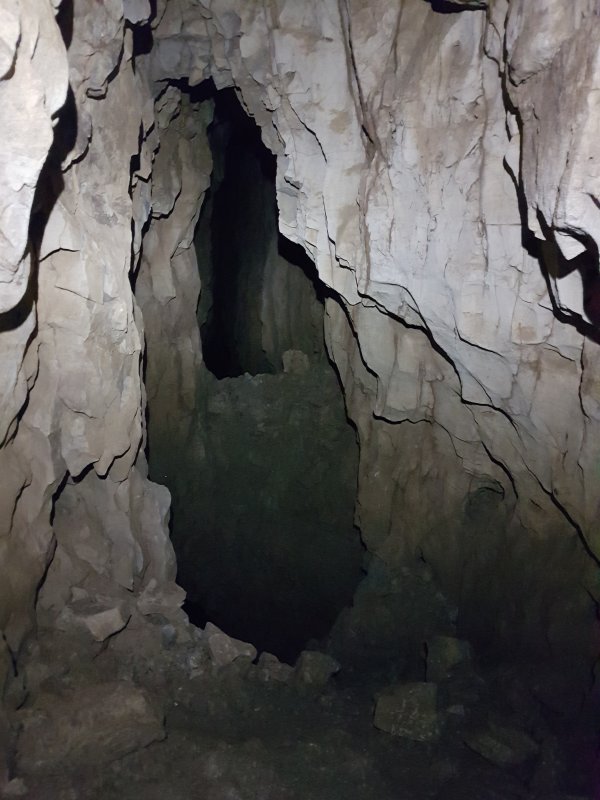 The crawl then reaches this larger rift. That little line of rocks on the floor is a warning - don't go this way, there is a very deep hole down into the large passage far below.
 In the other direction, a climb down a rope reaches another oxbow level, with yet more holes dropping down.
Modelling by Gareth, lighting by Tarquin and Gareth
In the other direction, a climb down a rope reaches another oxbow level, with yet more holes dropping down.
Modelling by Gareth, lighting by Tarquin and Gareth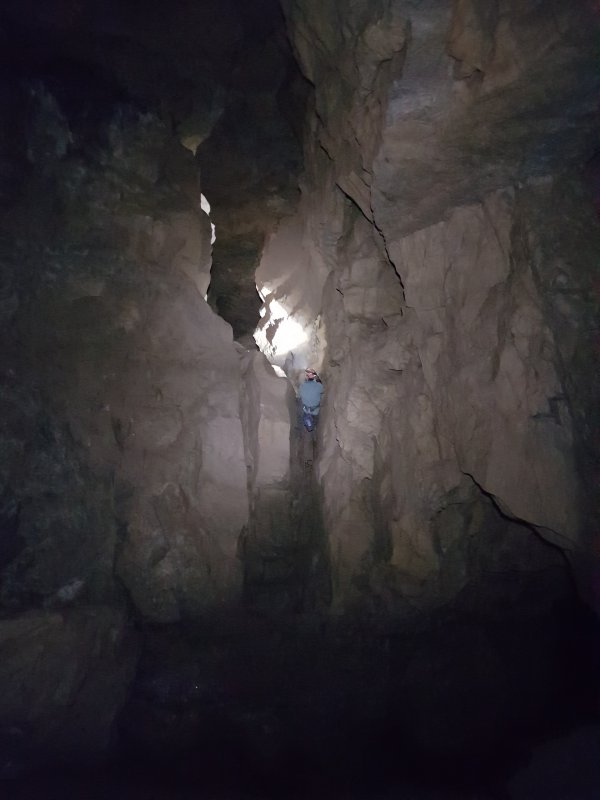 In the safer direction, the passage rapidly grows, and drops into the side of White Passage, via a couple of roped climbs.
Modelling by Gareth, lighting by Tarquin and Gareth
In the safer direction, the passage rapidly grows, and drops into the side of White Passage, via a couple of roped climbs.
Modelling by Gareth, lighting by Tarquin and Gareth The ropes might not be needed on this climb, but they definitely make it much easier.
Modelling by Gareth, lighting by Tarquin and Gareth
The ropes might not be needed on this climb, but they definitely make it much easier.
Modelling by Gareth, lighting by Tarquin and Gareth White Passage is impressively large and tall. The Higher Things oxbow windows drop in from the blackness in the ceiling.
Modelling by Gareth, lighting by Tarquin and Gareth
White Passage is impressively large and tall. The Higher Things oxbow windows drop in from the blackness in the ceiling.
Modelling by Gareth, lighting by Tarquin and Gareth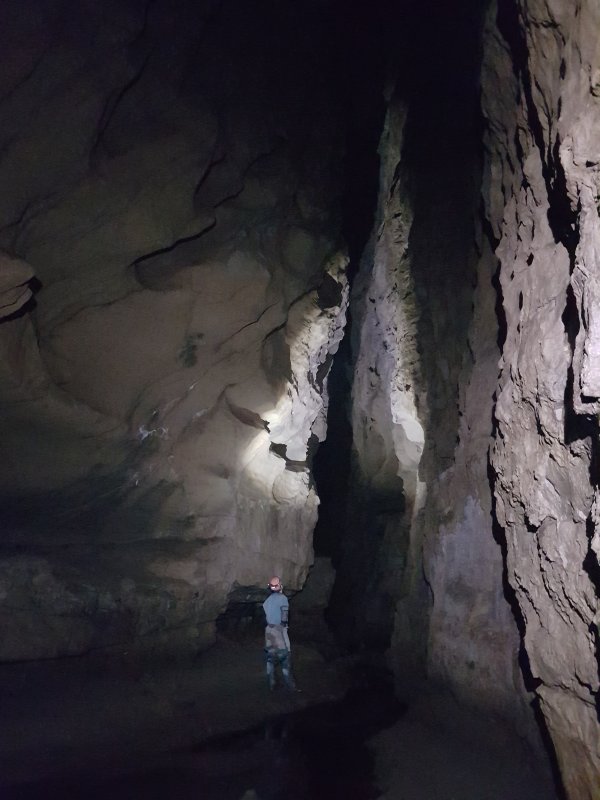 Tall and thin, shortly before the Time Machine.
Modelling by Gareth, lighting by Tarquin and Gareth
Tall and thin, shortly before the Time Machine.
Modelling by Gareth, lighting by Tarquin and Gareth The Time Machine is currently the largest known passage in the UK, though some parts of Draenen are very close to this size as well. While impressive, it does not feel as big as it might seem, since it is much lower than similarly sized passages in Draenen. Later on, however, the passage does become taller, but becomes narrower instead.
Modelling by Paul, Sanita, Antonia and Claire, lighting by Tarquin, Paul, Sanita, Antonia and Claire
The Time Machine is currently the largest known passage in the UK, though some parts of Draenen are very close to this size as well. While impressive, it does not feel as big as it might seem, since it is much lower than similarly sized passages in Draenen. Later on, however, the passage does become taller, but becomes narrower instead.
Modelling by Paul, Sanita, Antonia and Claire, lighting by Tarquin, Paul, Sanita, Antonia and Claire Rock sculptures on the wall of Bonsai Streamway.
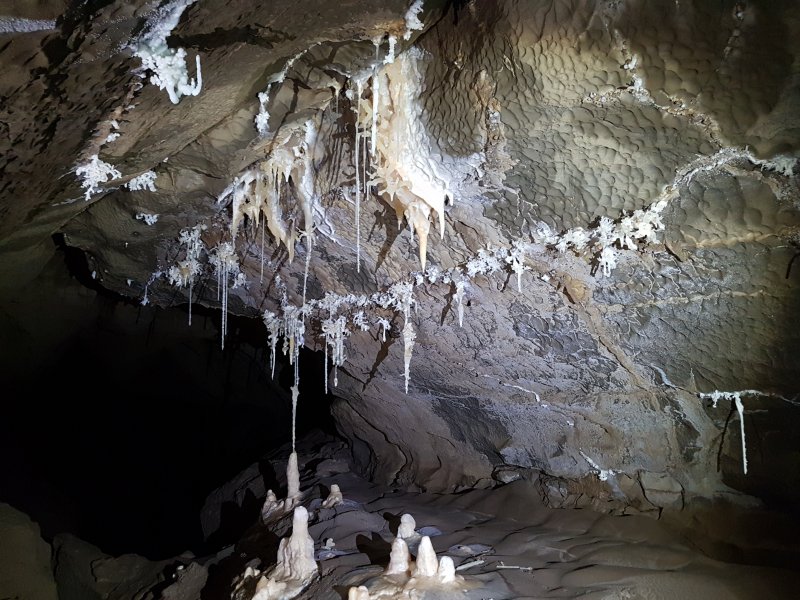 Helictite formations tucked into a roof level of Bonsai Streamway.
Lighting by Tarquin and Gareth
Helictite formations tucked into a roof level of Bonsai Streamway.
Lighting by Tarquin and Gareth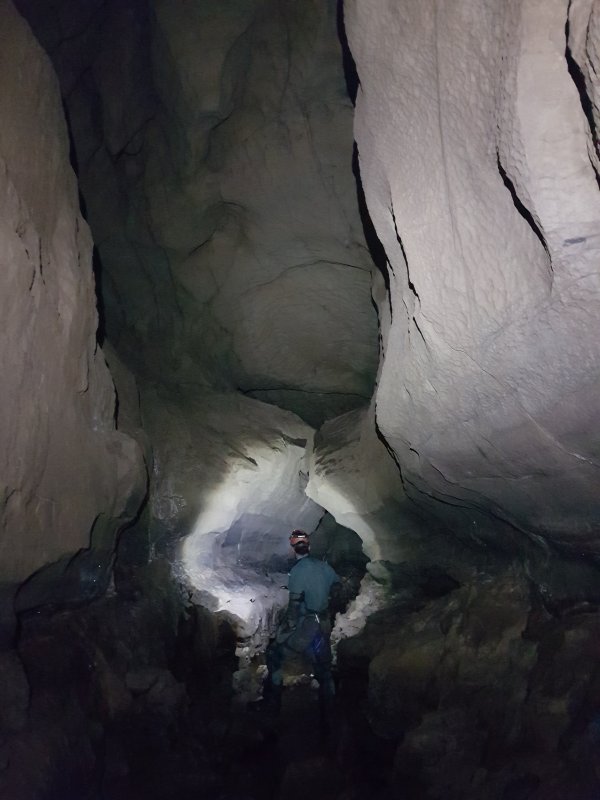 Phreatic sculpting in Bonsai Streamway. Crystal Oxbow rejoins from the left at the corner ahead.
Modelling by Gareth, lighting by Tarquin and Gareth
Phreatic sculpting in Bonsai Streamway. Crystal Oxbow rejoins from the left at the corner ahead.
Modelling by Gareth, lighting by Tarquin and Gareth Helictites on the corner, with Crystal Oxbow rejoining above them.
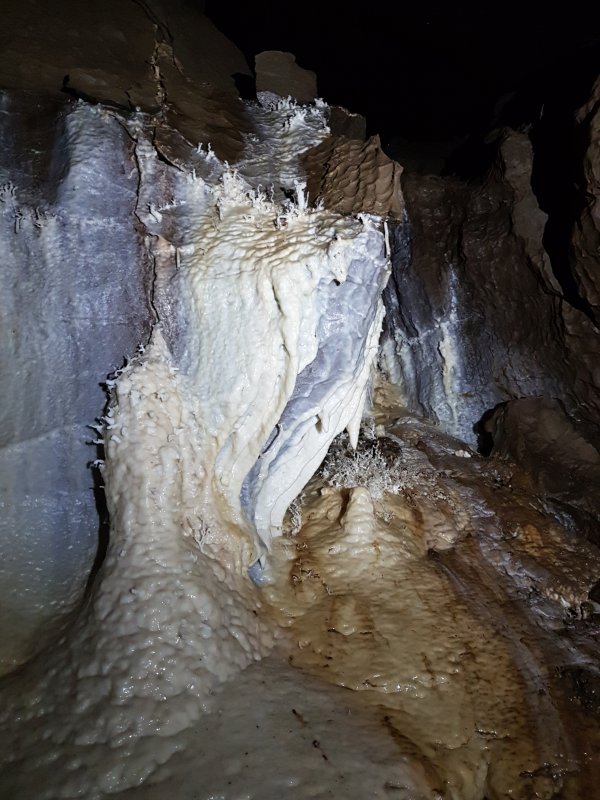 Helictites on the corner.
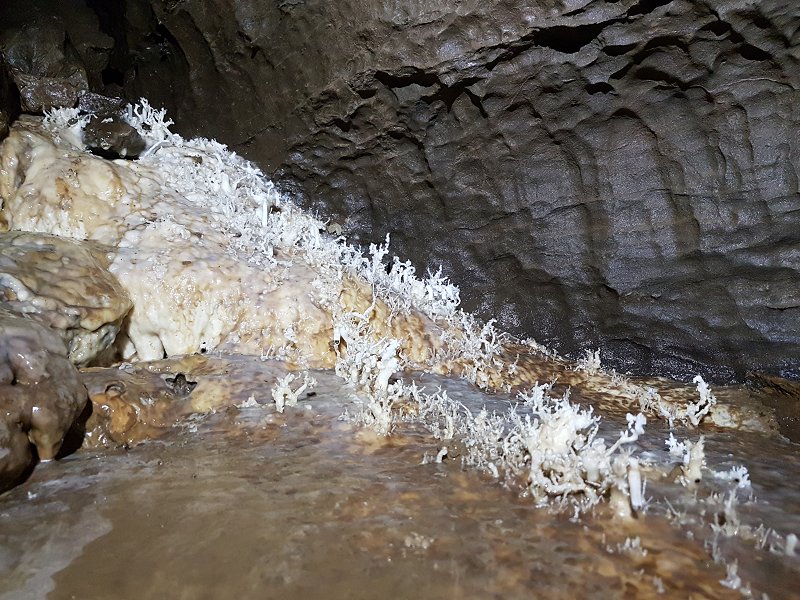 Helictites on the corner.
 Helictites in Bonsai Streamway.
 The Bonsai Tree, the helictite that gives Bonsai Streamway its name.
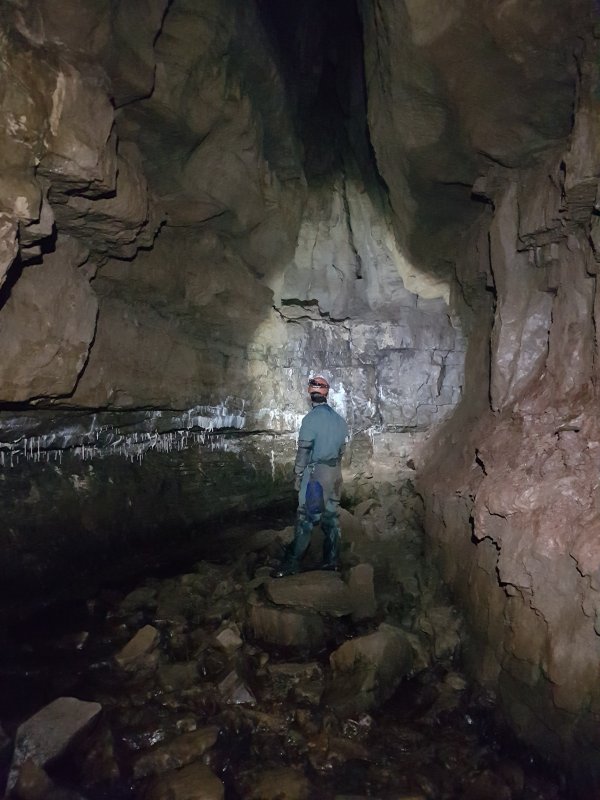 We now begin our first excursion, heading into Crystal Inlet. The initial passage is quite large and inviting, but the stream soon cascades out of a small side passage instead.
Modelling by Gareth, lighting by Tarquin and Gareth
We now begin our first excursion, heading into Crystal Inlet. The initial passage is quite large and inviting, but the stream soon cascades out of a small side passage instead.
Modelling by Gareth, lighting by Tarquin and Gareth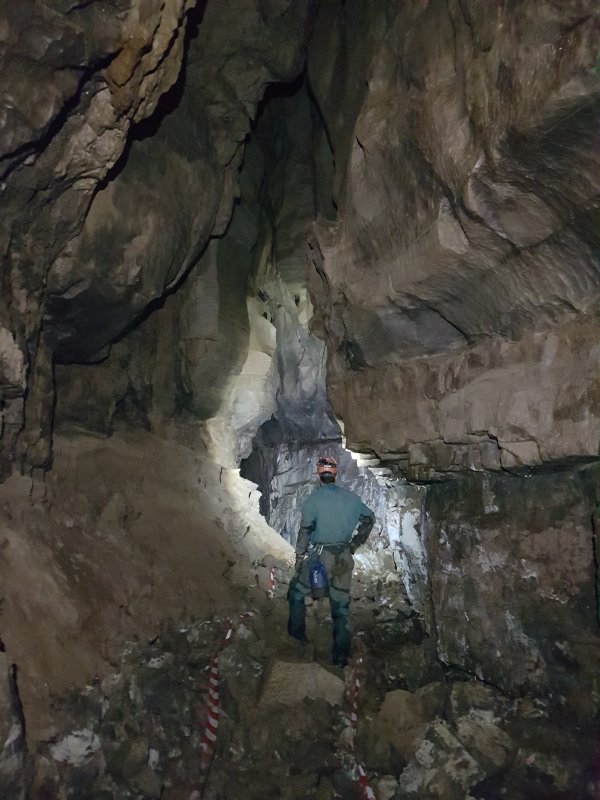 When the water emerges from the smaller passage, the large passage continues ahead as Crystal Oxbow.
Modelling by Gareth, lighting by Tarquin and Gareth
When the water emerges from the smaller passage, the large passage continues ahead as Crystal Oxbow.
Modelling by Gareth, lighting by Tarquin and Gareth Thick gypsum deposits on the wall of Crystal Oxbow.
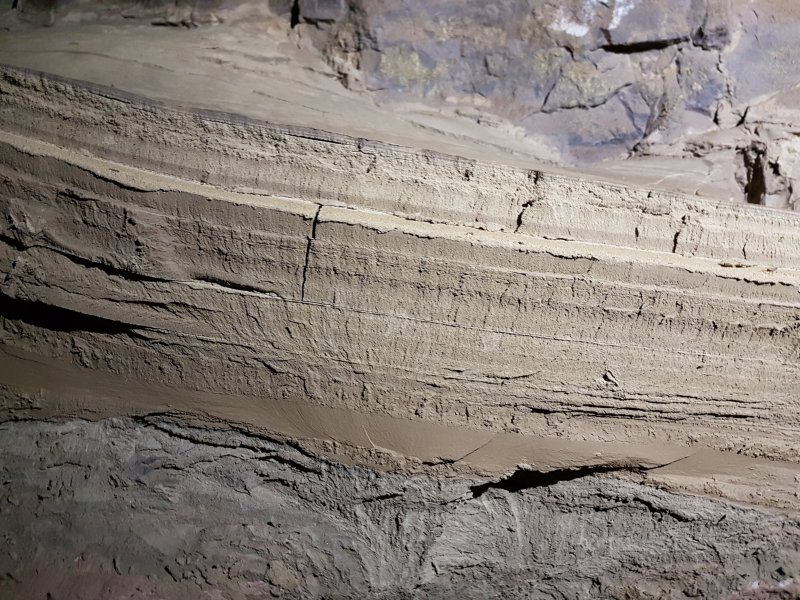 Sediment layers in Crystal Oxbow.
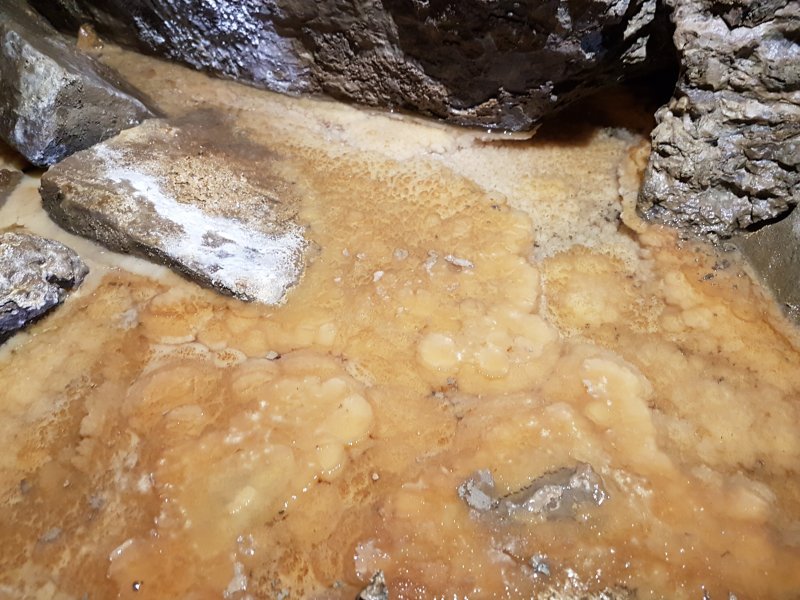 Crystal Oxbow is superbly decorated, beginning with a set of crystal pools.
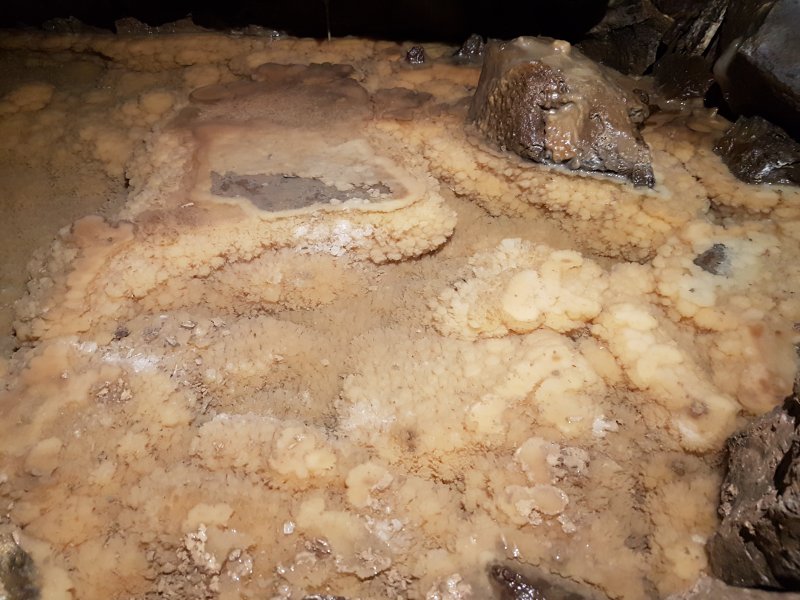 Crystal pool.
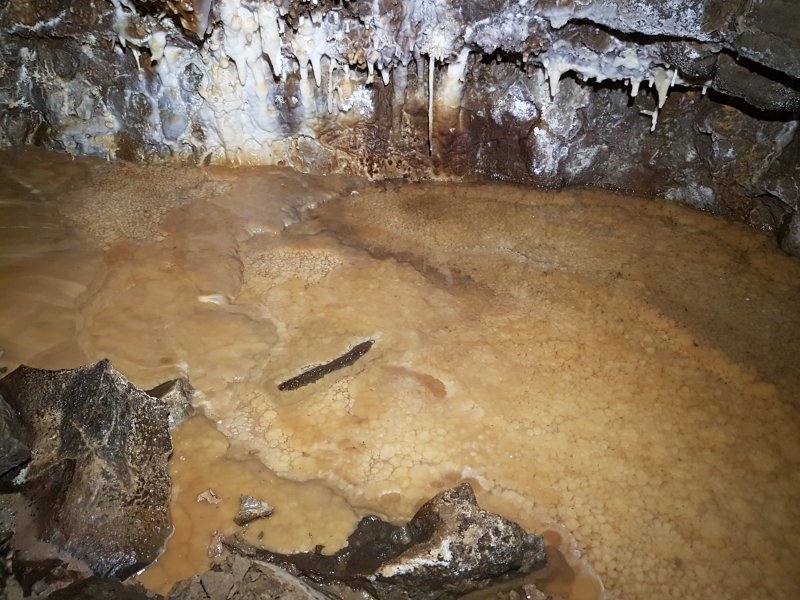 Crystal pool.
 Photographing the crystal pools. The flowstone and gypsum covered walls are quite characteristic.
Modelling by Gareth, lighting by Tarquin and Gareth
Photographing the crystal pools. The flowstone and gypsum covered walls are quite characteristic.
Modelling by Gareth, lighting by Tarquin and Gareth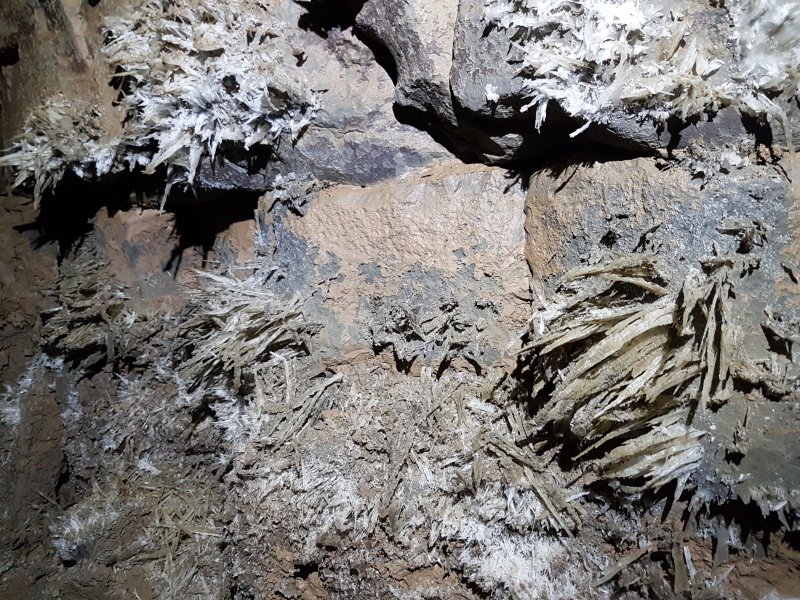 Impressive gypsum crystals on the wall.
 Large gypsum crystals.
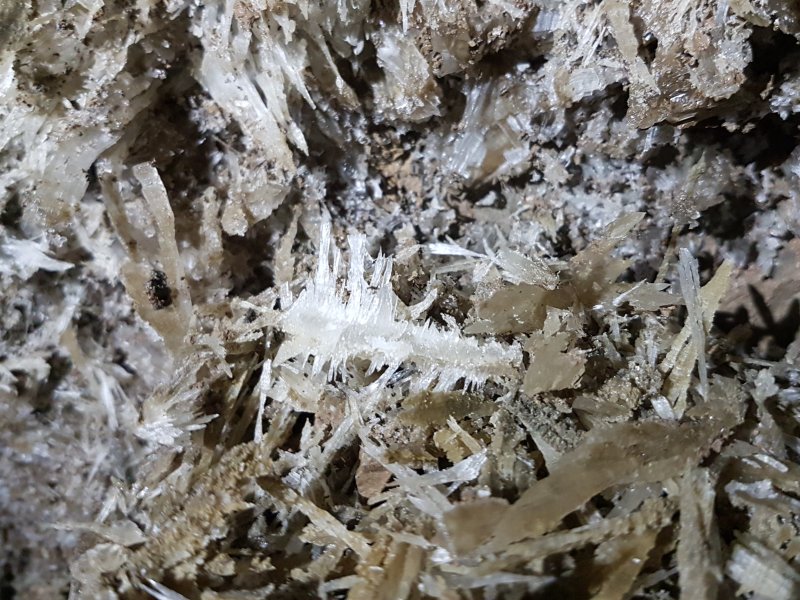 Gypsum crystals.
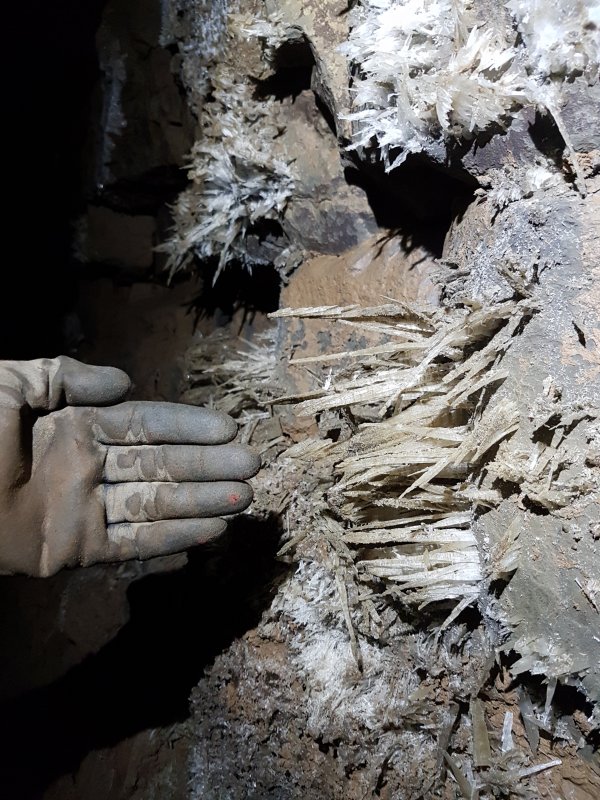 Size of the gypsum crystals.
 A lilly pad pool, the last of the pools to still contain water.
 The lilly pad pool.
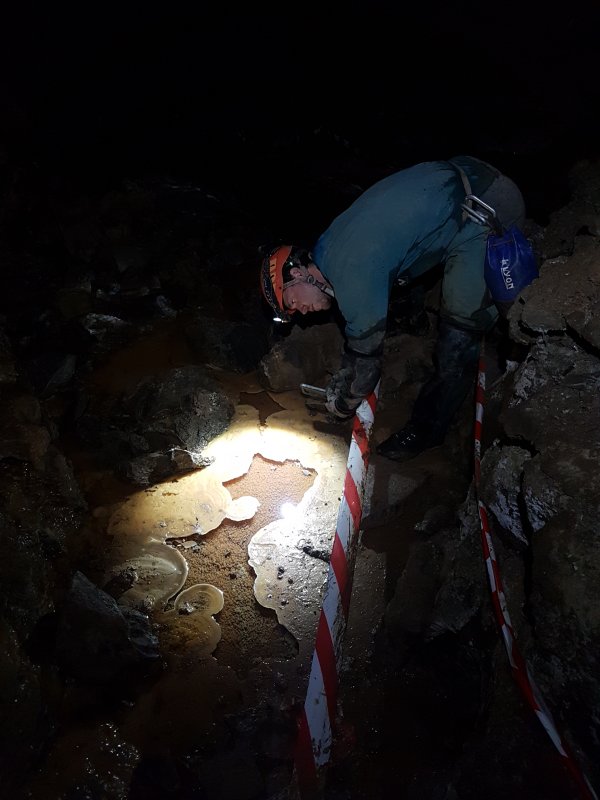 Photographing the lilly pad pool.
Modelling by Gareth, lighting by Tarquin and Gareth
Photographing the lilly pad pool.
Modelling by Gareth, lighting by Tarquin and Gareth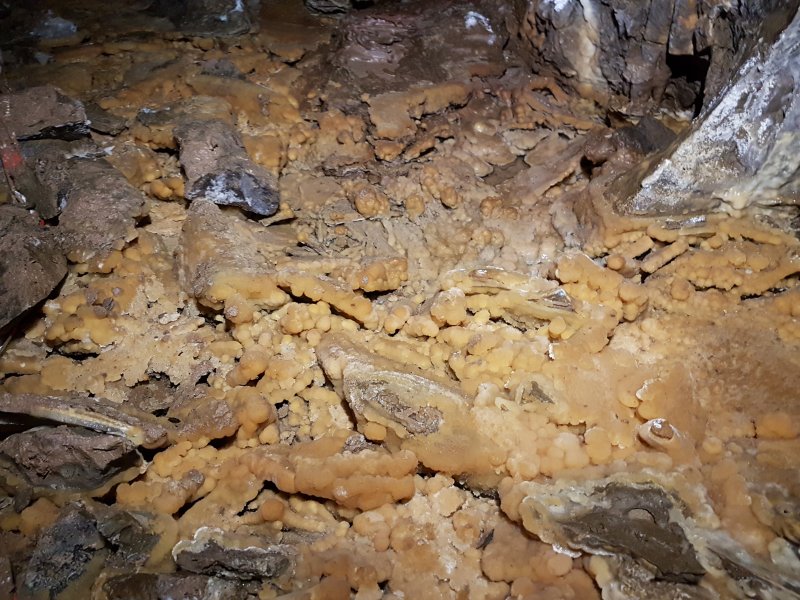 First of the dry crystal pools.
 First of the dry crystal pools.
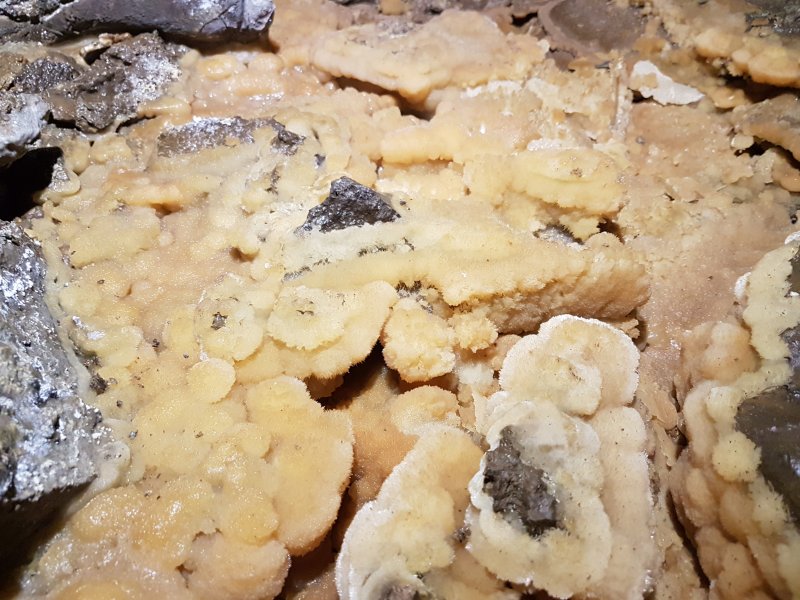 First of the dry crystal pools.
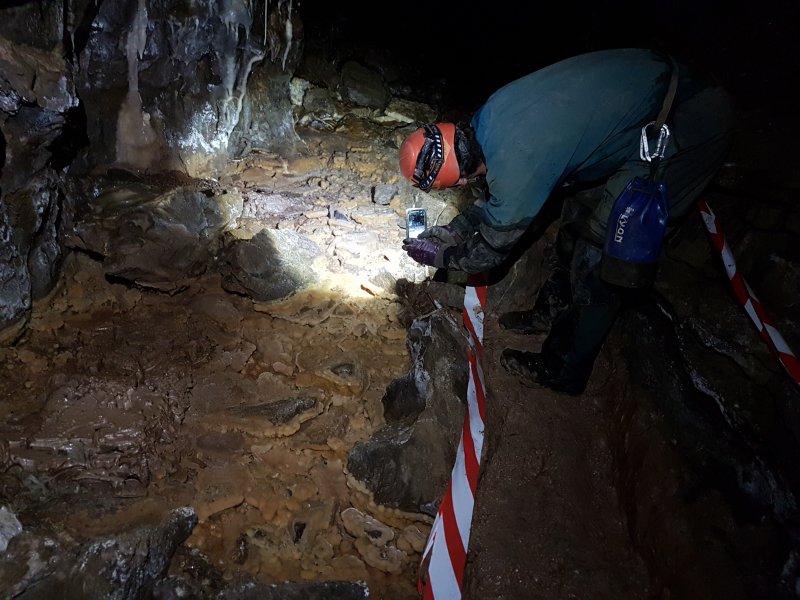 Photographing the first of the dry crystal pools.
Modelling by Gareth, lighting by Tarquin and Gareth
Photographing the first of the dry crystal pools.
Modelling by Gareth, lighting by Tarquin and Gareth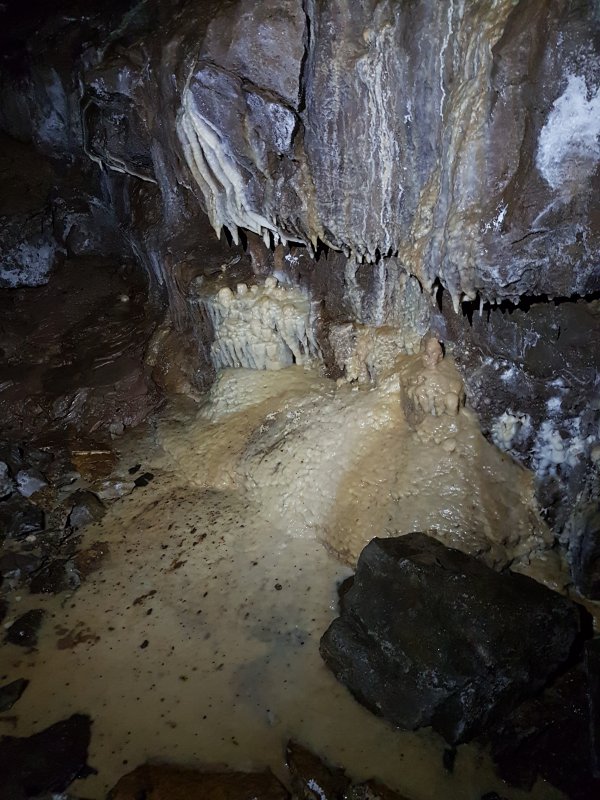 Source of the first dry crystal pool. The mud splatter is mostly natural, rather than produced by cavers, as can be seen clearly on later formations.
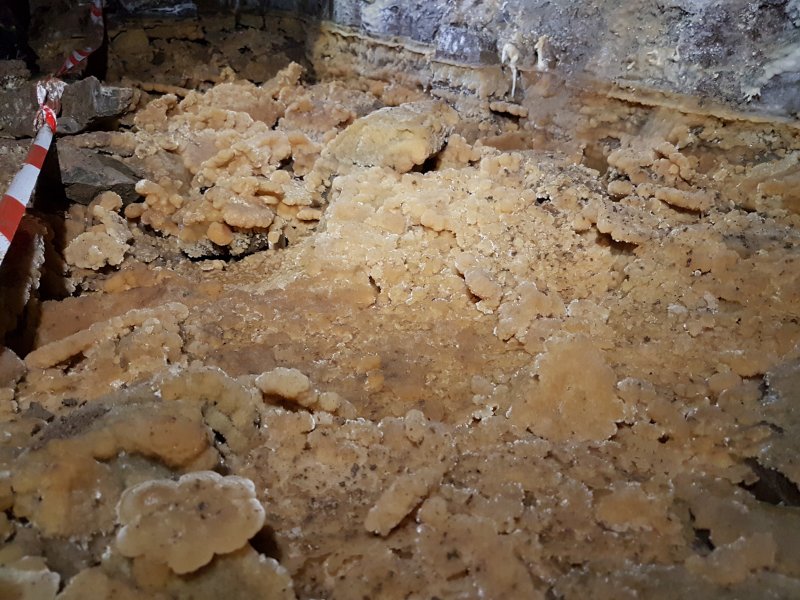 Second dry crystal pool.
 Second dry crystal pool. The little ledges of calcite are the successive water levels as the pool slowly drained.
 Lilly pad in the second dry crystal pool.
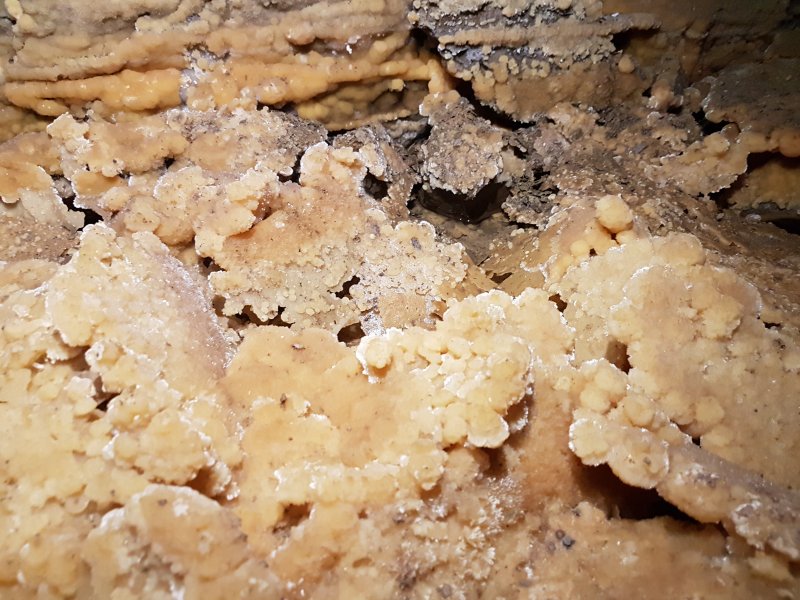 Second dry crystal pool.
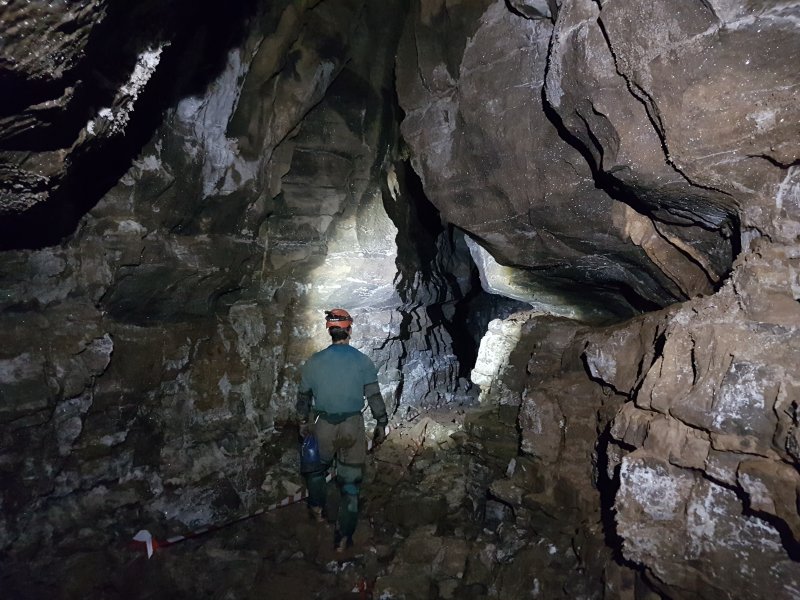 Crystal Oxbow, with a diamond-shaped cross section formed on a bedding plane.
Modelling by Gareth, lighting by Tarquin and Gareth
Crystal Oxbow, with a diamond-shaped cross section formed on a bedding plane.
Modelling by Gareth, lighting by Tarquin and Gareth Hole in a calcite false floor.
 Third dry crystal pool. Reminiscent of desert hoodoos and canyons, like Bryce Canyon.
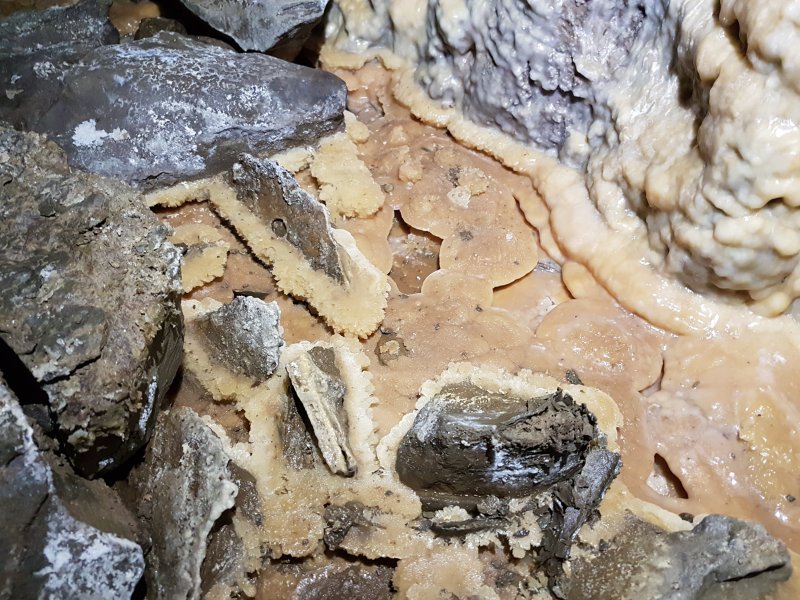 Pool showing two elevated water levels.
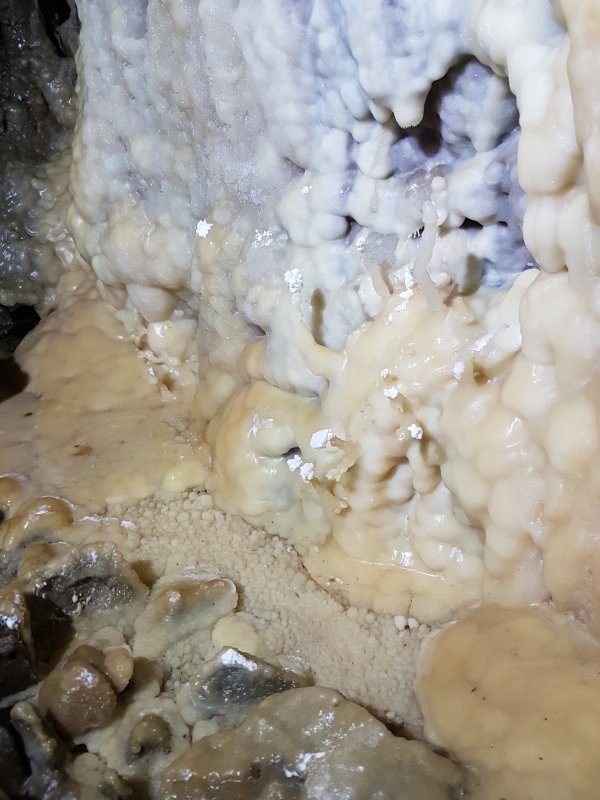 White-tipped helictites.
 Helictites.
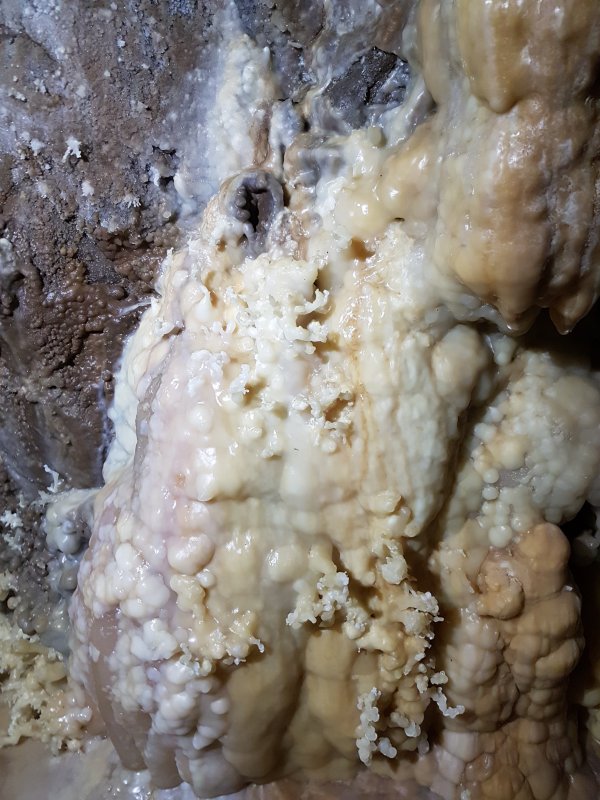 Helictites.
 Most of the smaller helictites are in thick clusters at floor level.
 Stalactite with helictites.
 The helictites.
 The helictites.
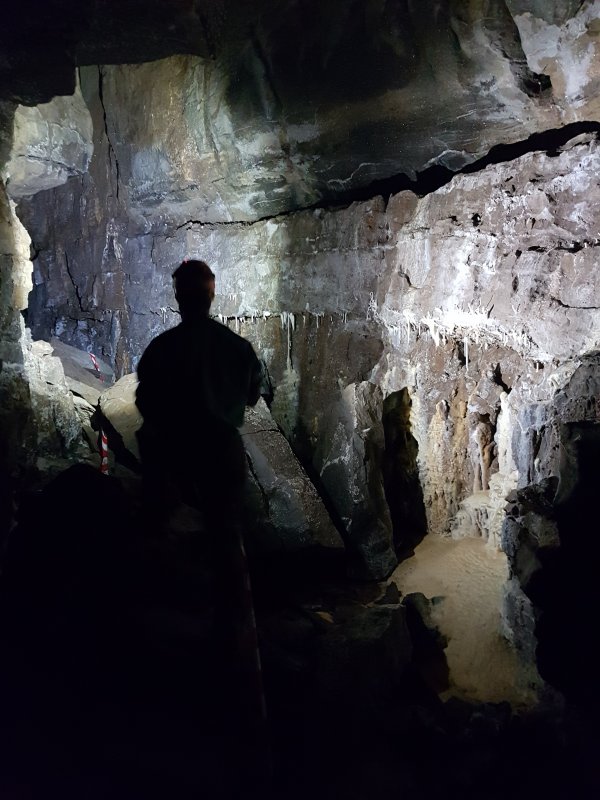 About half way along Crystal Oxbow.
Modelling and lighting by Gareth
About half way along Crystal Oxbow.
Modelling and lighting by Gareth Formations at the half way point.
Lighting by Gareth
Formations at the half way point.
Lighting by Gareth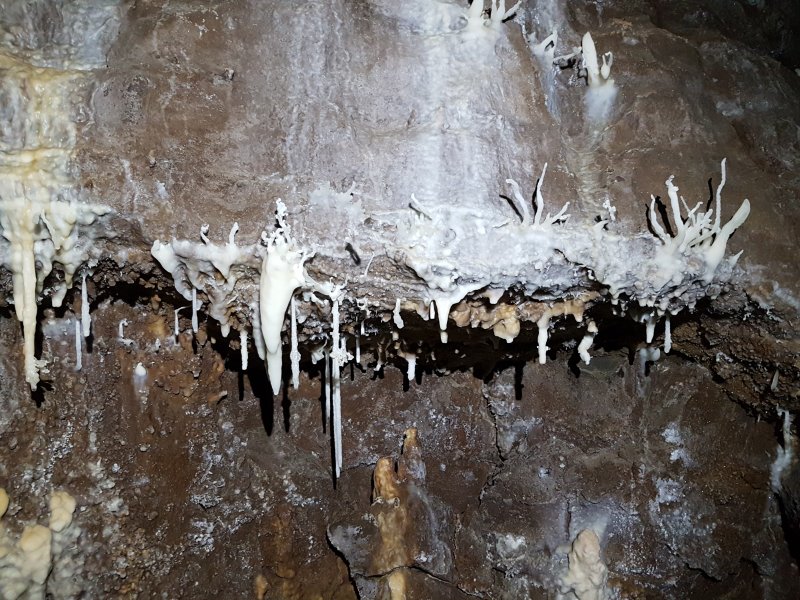 Helictites at the half way point.
Lighting by Gareth
Helictites at the half way point.
Lighting by Gareth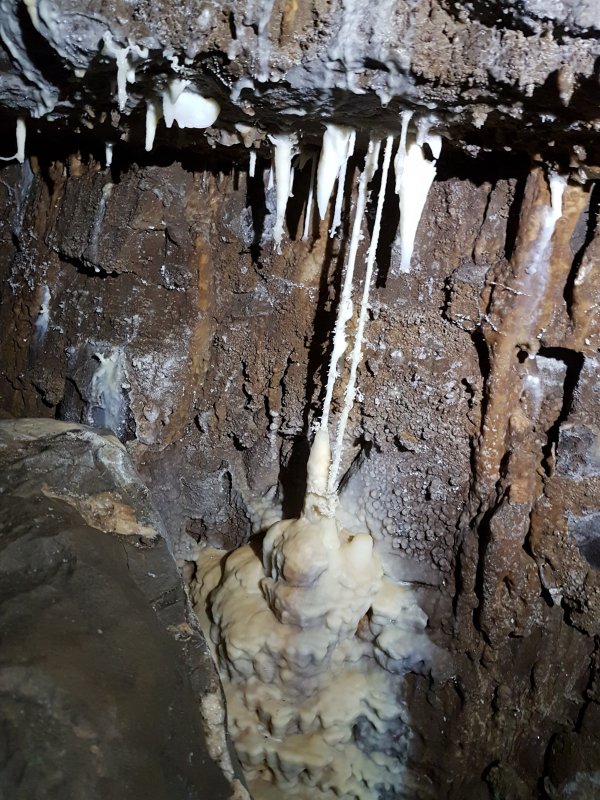 Helictite columns at the half way point.
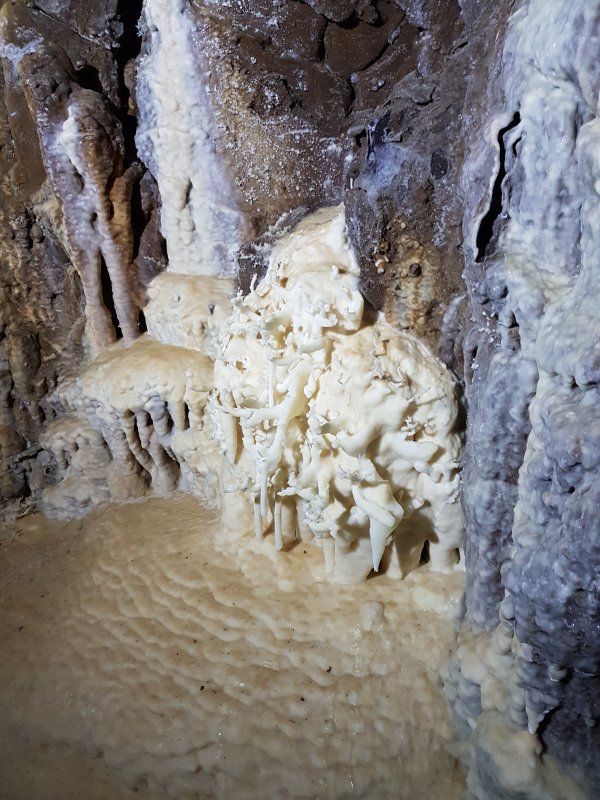 Helictites at floor level.
Lighting by Gareth
Helictites at floor level.
Lighting by Gareth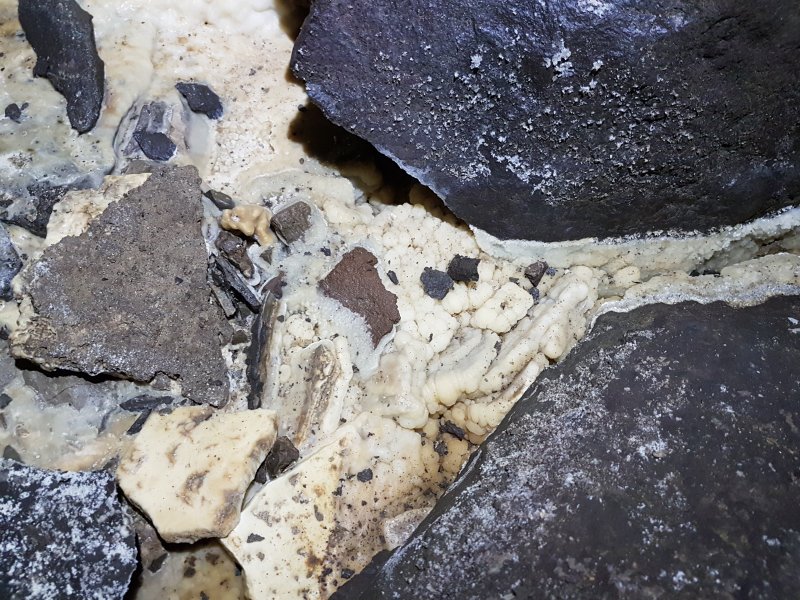 Dried crystal pool between the rocks.
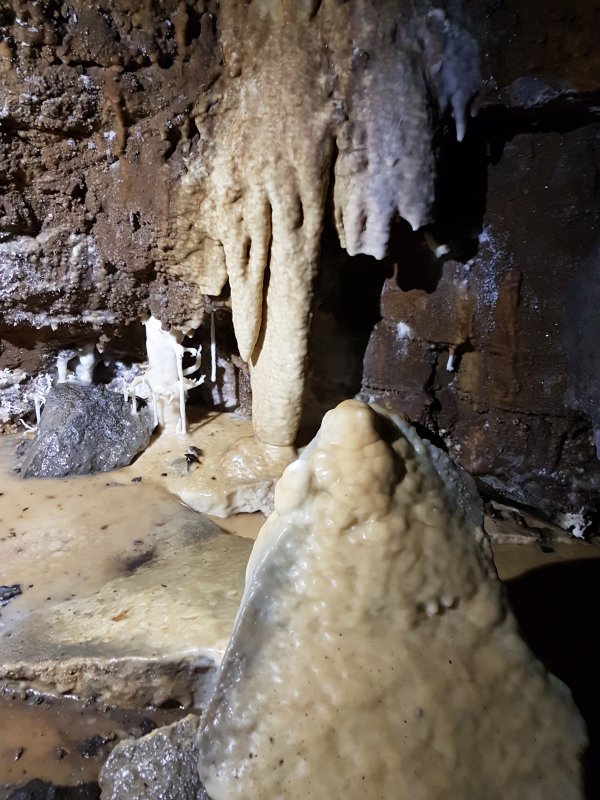 Stal with helictites at floor level.
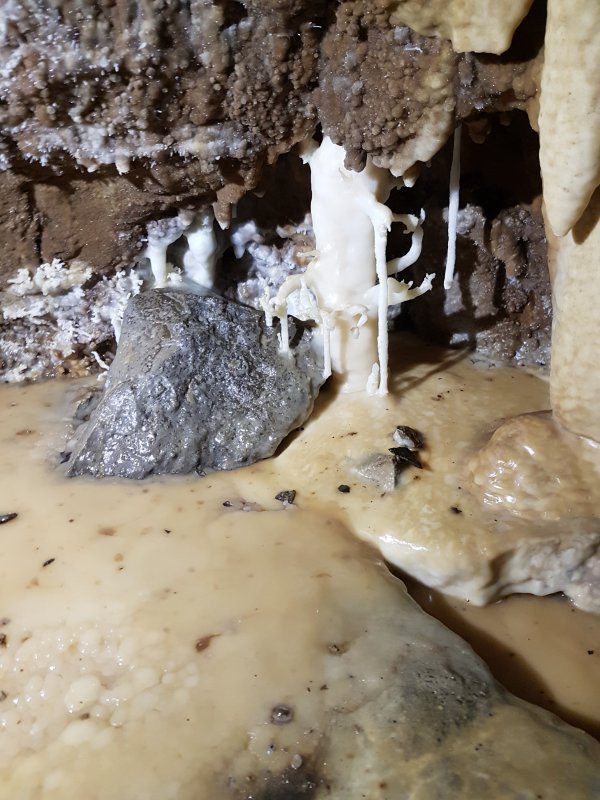 The small column has a tutu made of helictites.
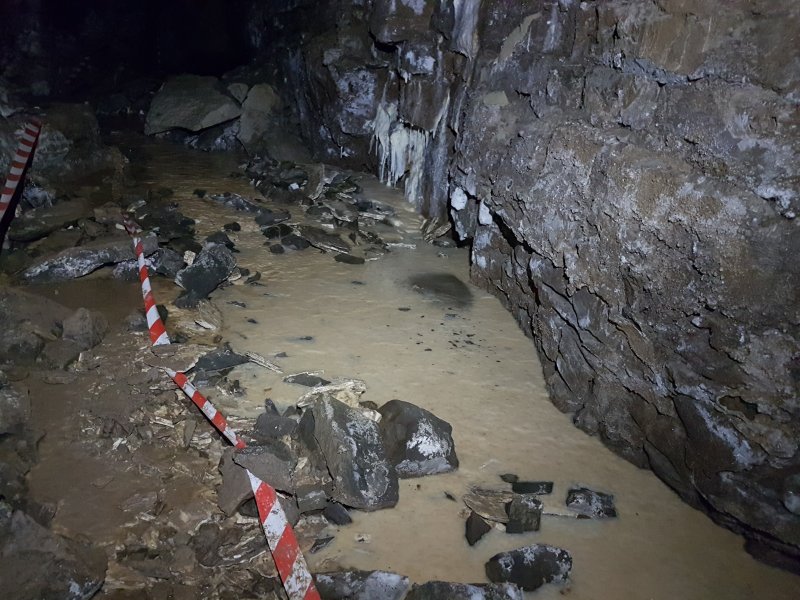 Flowstone river.
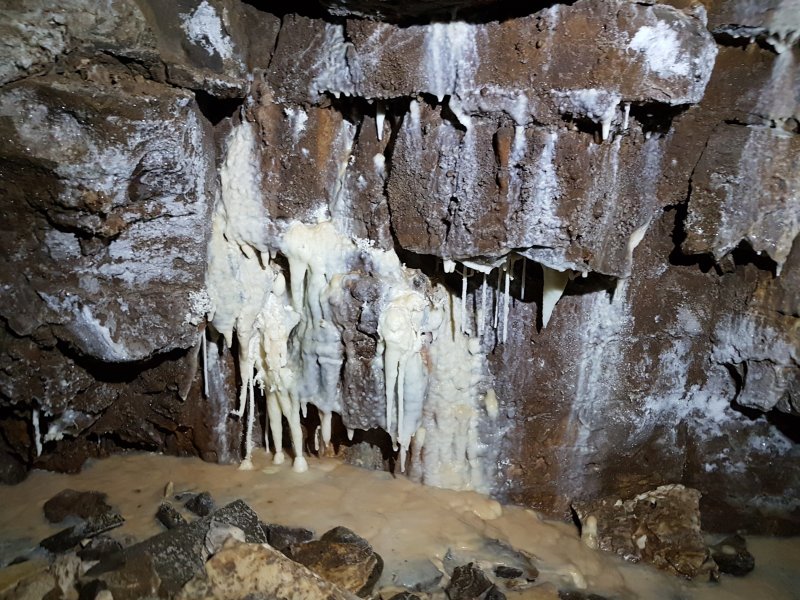 Stal above the flowstone.
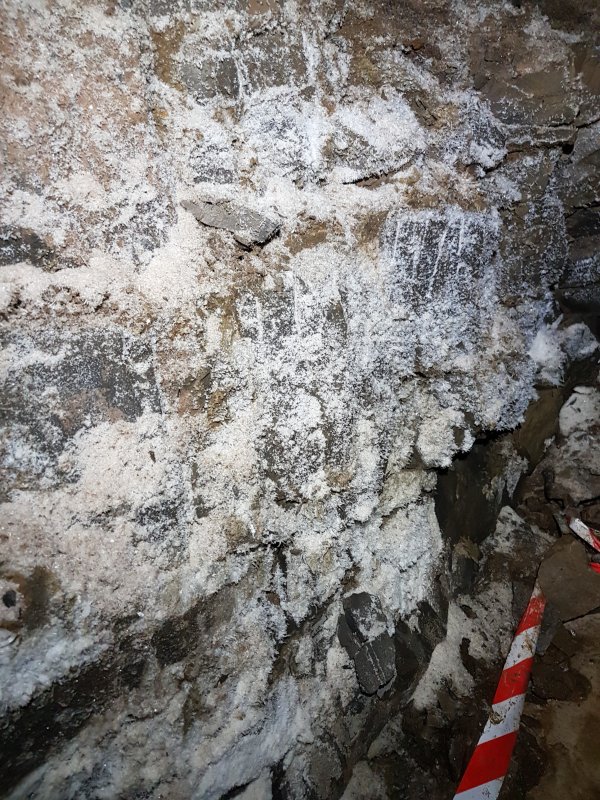 Gypsum covered wall.
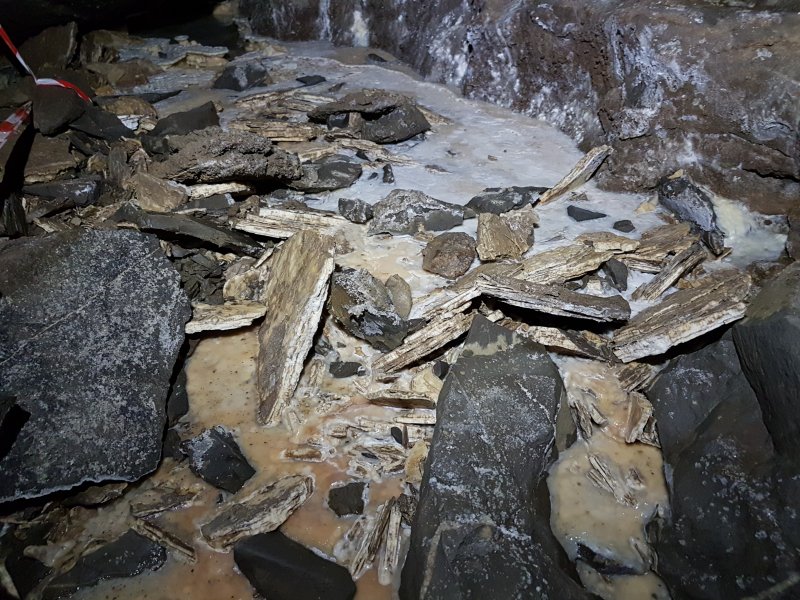 Thick shards of layered calcite that were naturally broken and cemented back in by new calcite flow.
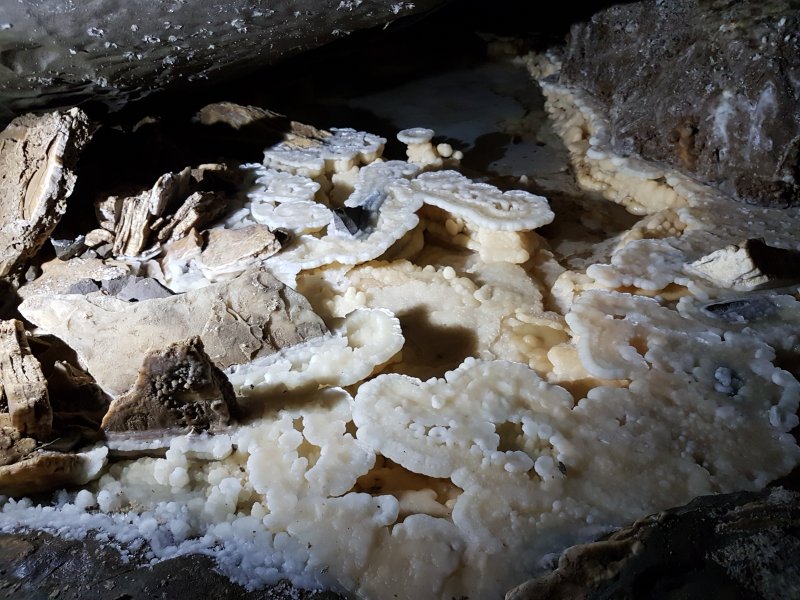 Lilly pads and mesas, some of the best in the passage.
 Hidden underneath a boulder, a pool has some large calcite rafts, still partially floating.
 Miniature lilly pads on the far side of the boulder, again some very fine examples.
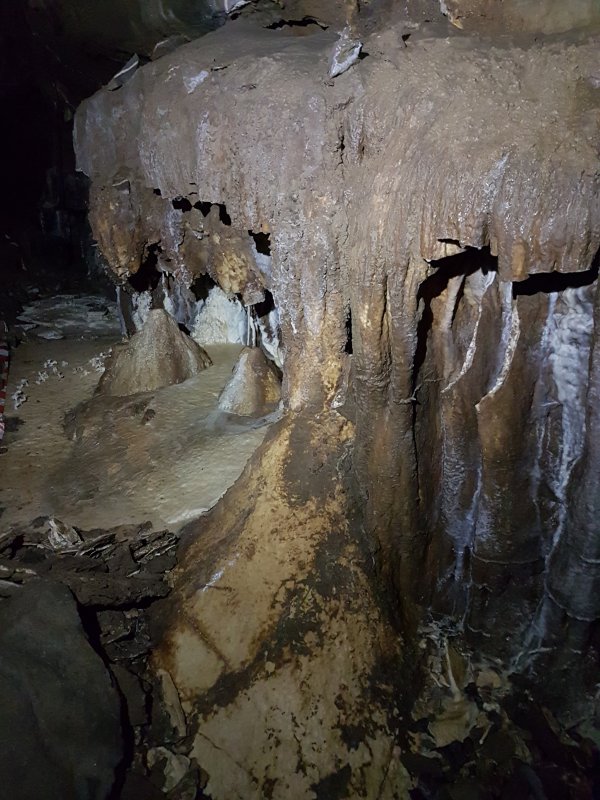 Fractured stal. This appears to be a possible example of ice-age ice fracturing, as each old stalactite was broken off at the same height.
 The newer flowstone on the floor has superb helictites. The mud splatters here can be clearly seen to affect only the flowstone, but not the helictites. This makes it very clear that the mud splatter is historical, predating the growth of the helictites. It looks like human influence, but it is natural. Interestingly though, the flowstone has not grown since whatever event created the mud splatter, with the exception of the helictites.
 Crystal pool with mud splatter.
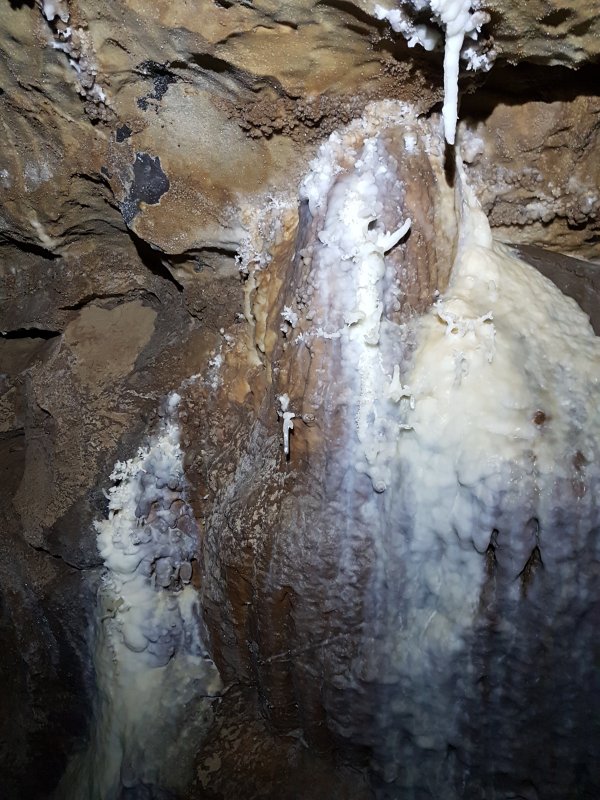 Ceiling helictites. Do you get the impression that this might be a pretty passage? Maybe?
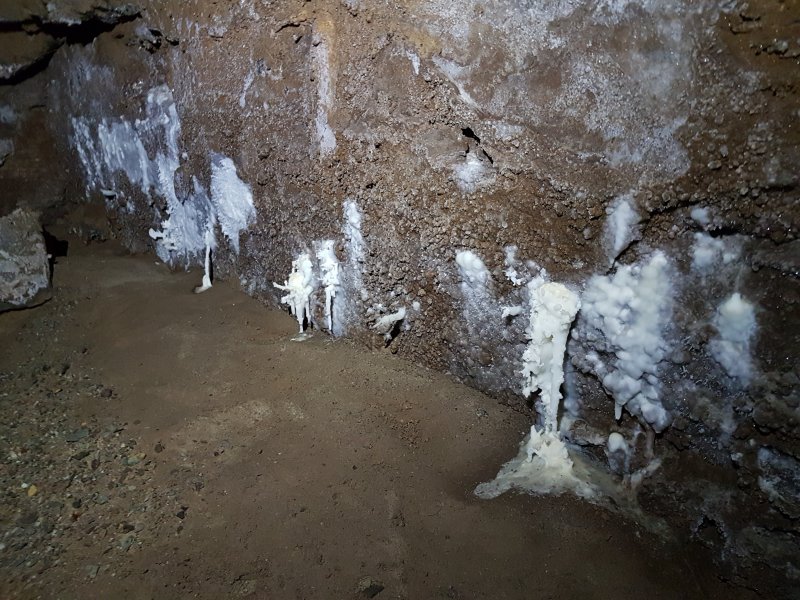 Floor helictite bunches.
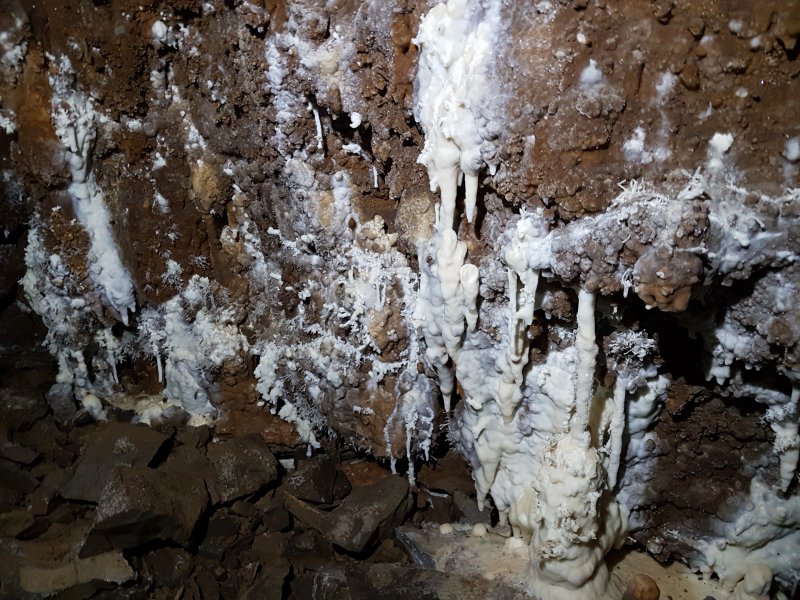 Then a final, superb set of helictites and anthodites.
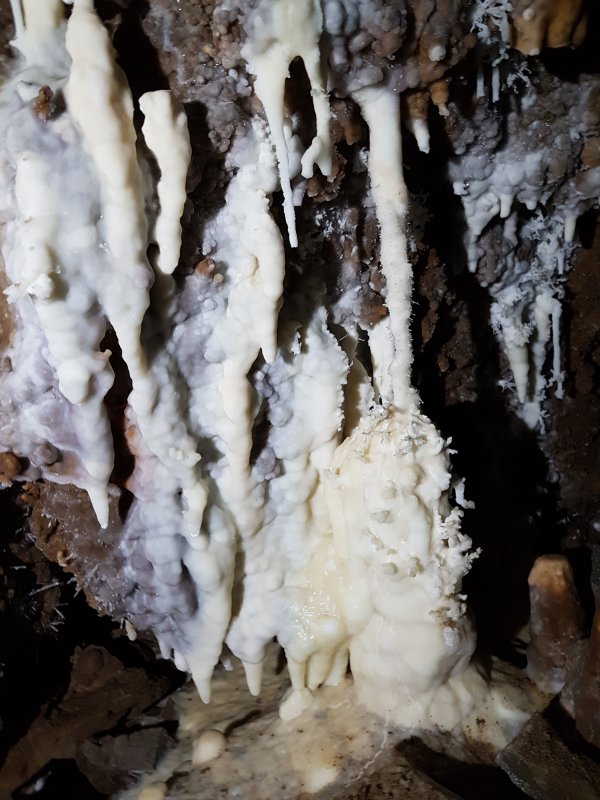 Right side.
 Central portion.
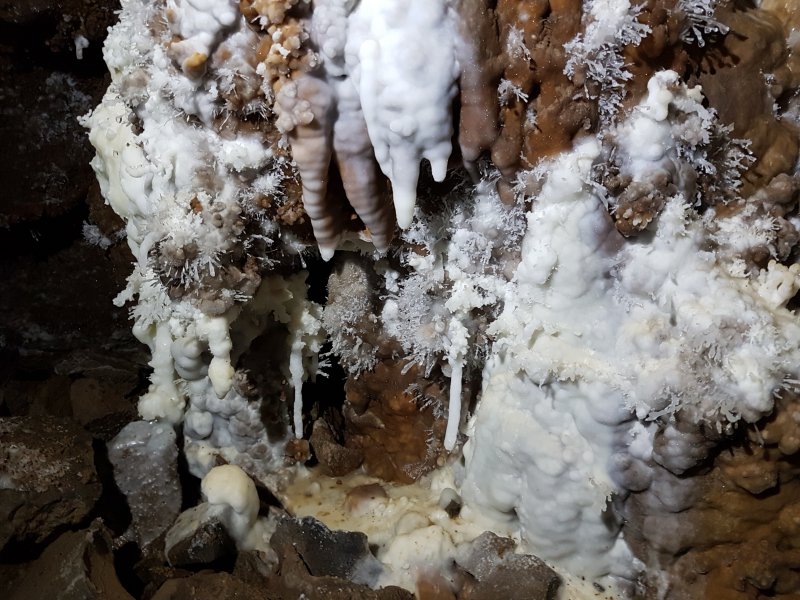 Left side with the best anthodites. Saving the best for last.
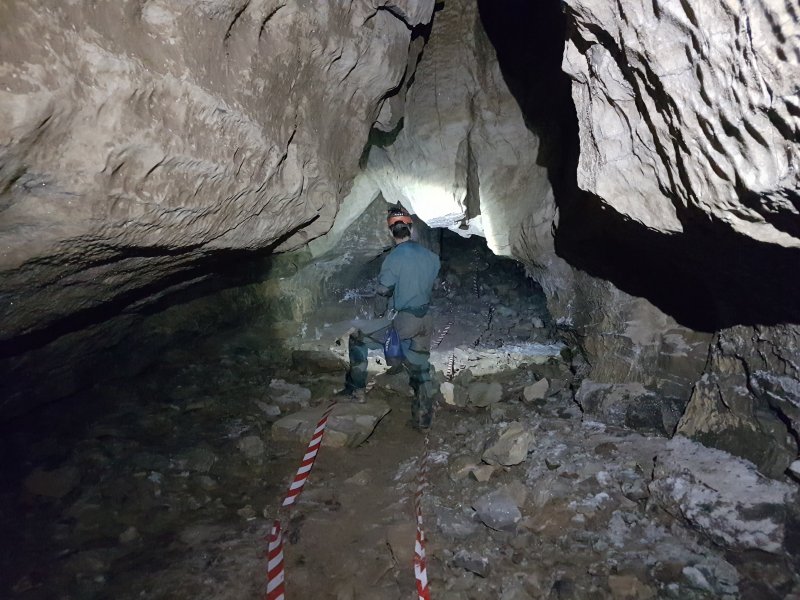 Now near the end of Crystal Oxbow. The ramp in the distance is the floor of the chamber with the avens. The passage has changed shape to a smooth arch with a triangular cleft in the ceiling.
Modelling by Gareth, lighting by Tarquin and Gareth
Now near the end of Crystal Oxbow. The ramp in the distance is the floor of the chamber with the avens. The passage has changed shape to a smooth arch with a triangular cleft in the ceiling.
Modelling by Gareth, lighting by Tarquin and Gareth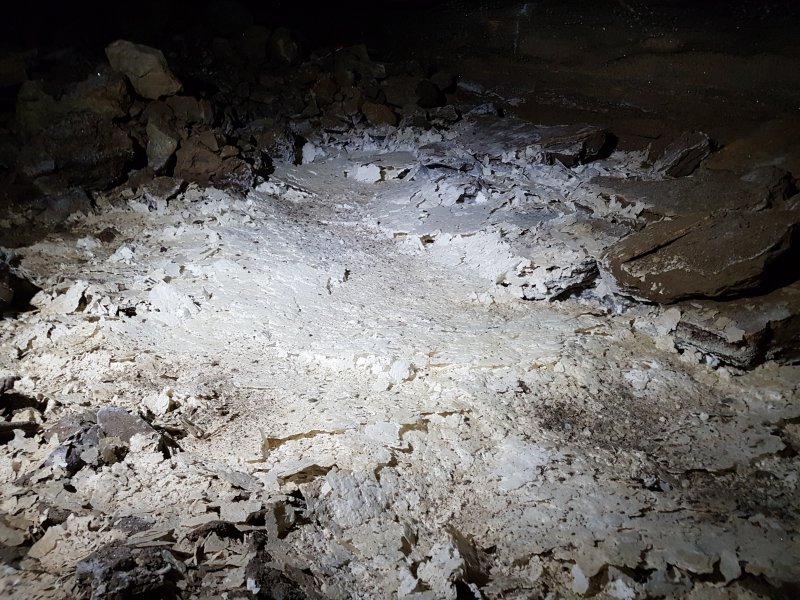 Not to be outdone, the passage puts on a final display, with this incredible formation of stacked calcite rafts in a dried crystal pool. This is almost (but not quite) as good as the Snow Gardens in Slaughter Stream Cave - it is just missing the central pool.
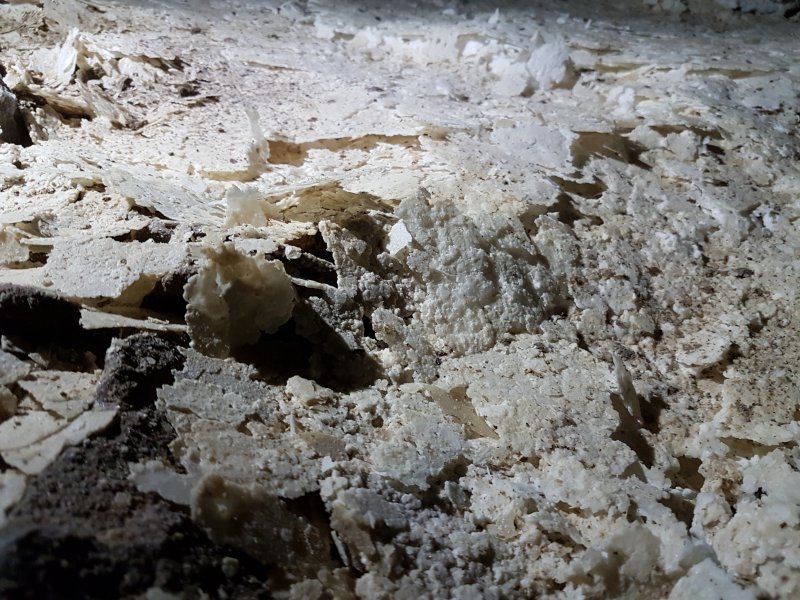 Stacked rafts.
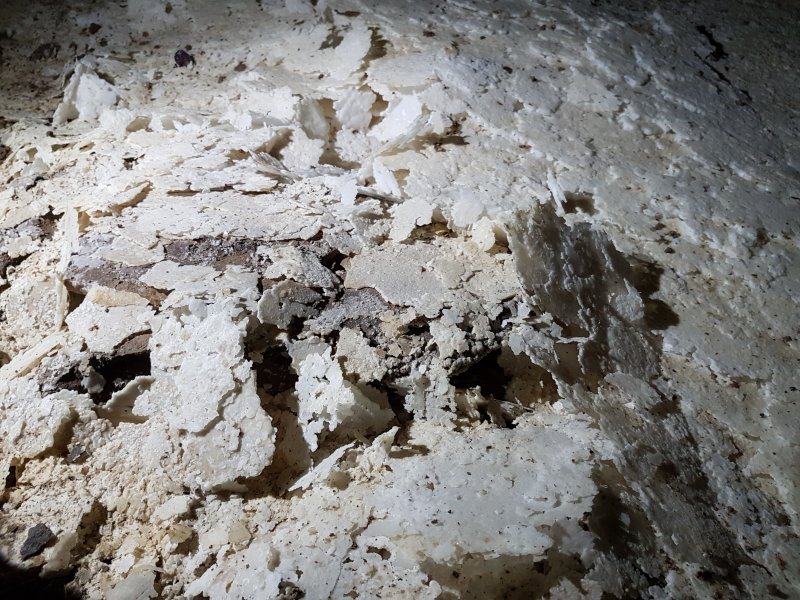 Stacked rafts.
 The finest gratin dauphinois you have ever eaten.
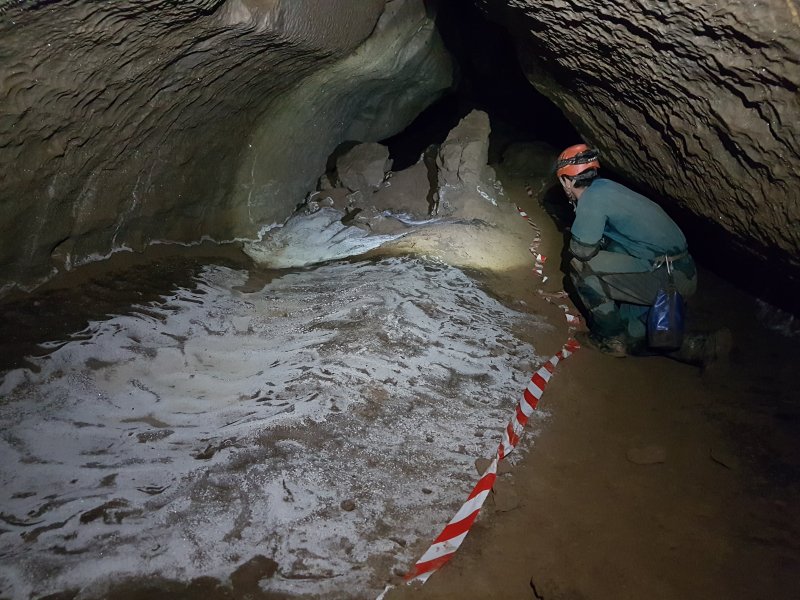 Just after the chamber, the floor has an attractive evaporation coating. Just up ahead is the taped-off connection with Bonsai Streamway, and an awkward climb into a blind roof level.
Modelling by Gareth, lighting by Tarquin and Gareth
Just after the chamber, the floor has an attractive evaporation coating. Just up ahead is the taped-off connection with Bonsai Streamway, and an awkward climb into a blind roof level.
Modelling by Gareth, lighting by Tarquin and Gareth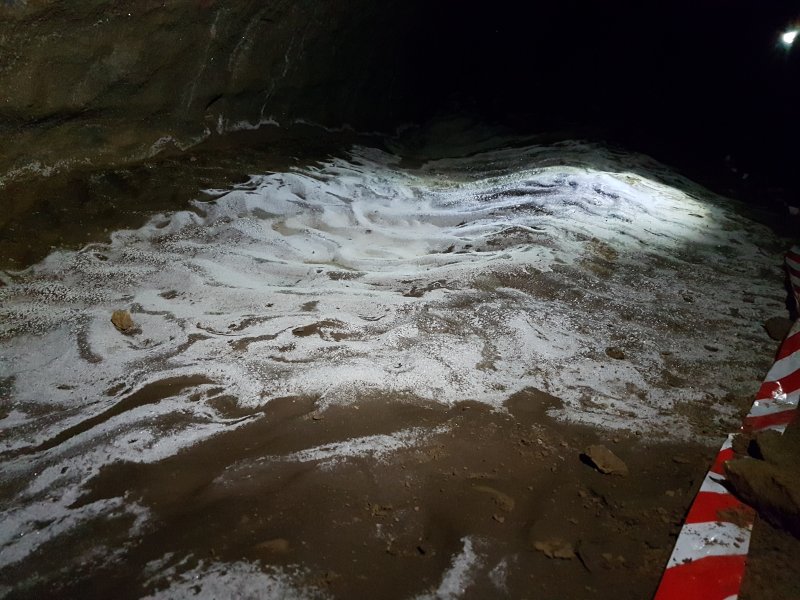 Rippled sand and evaporation formation.
Lighting by Tarquin and Gareth
Rippled sand and evaporation formation.
Lighting by Tarquin and Gareth Evaporation coating and drip pockets.
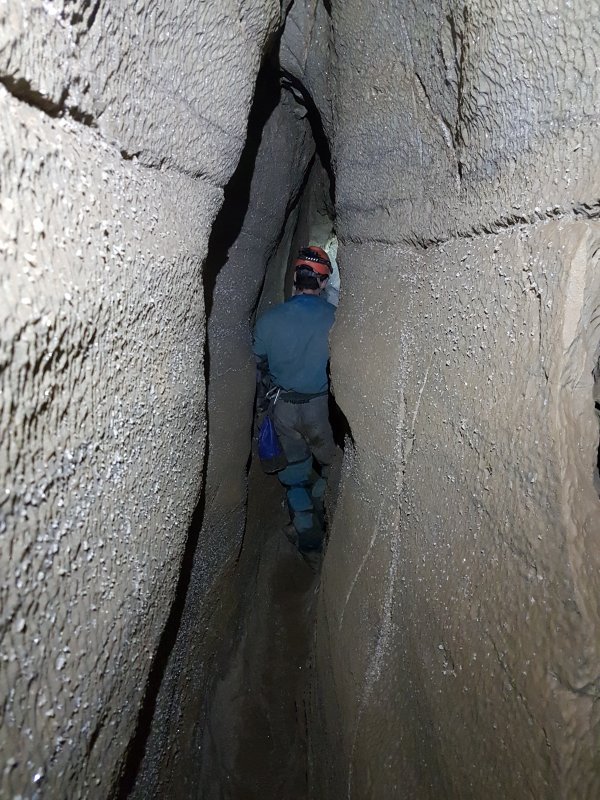 An early part of Crystal Corridor, where you can walk.
Modelling by Gareth, lighting by Tarquin and Gareth
An early part of Crystal Corridor, where you can walk.
Modelling by Gareth, lighting by Tarquin and Gareth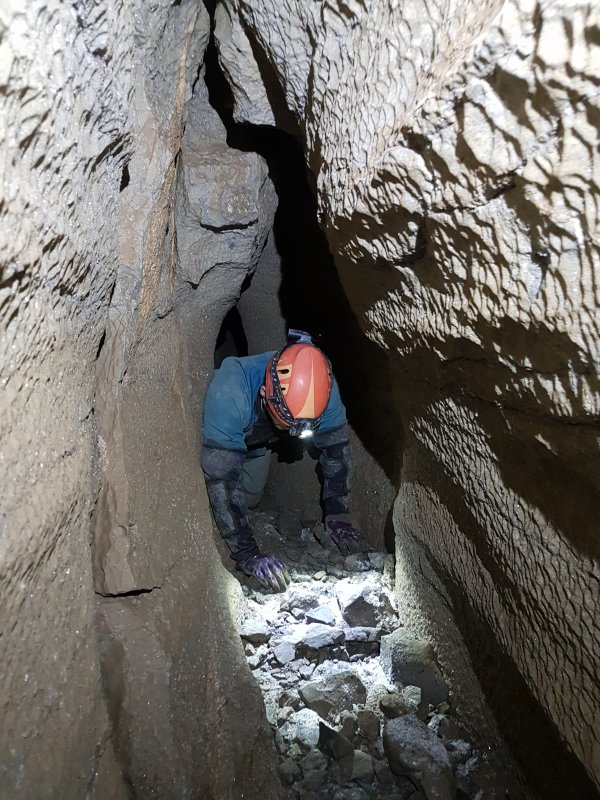 Unfortunately, it soon becomes crawling sized, and we decided not to continue to the junction with Beyond Time.
Modelling by Gareth, lighting by Tarquin and Gareth
Unfortunately, it soon becomes crawling sized, and we decided not to continue to the junction with Beyond Time.
Modelling by Gareth, lighting by Tarquin and Gareth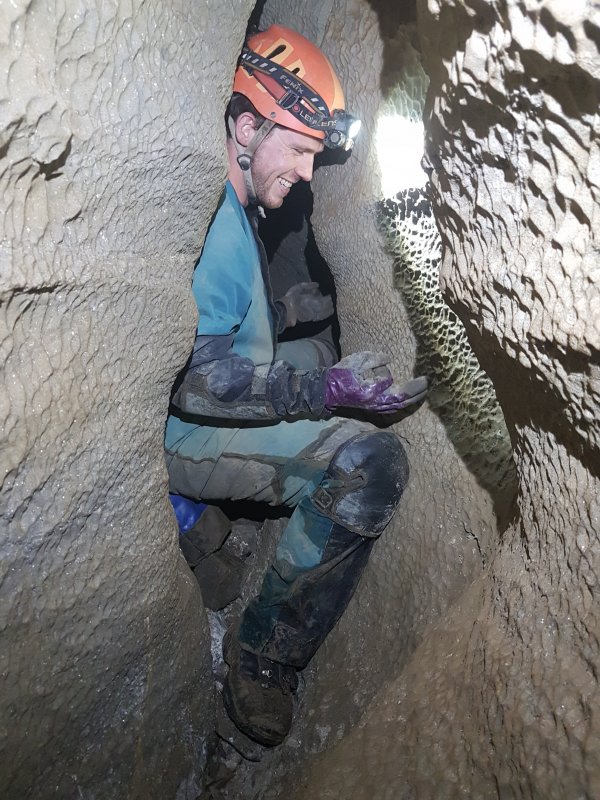 When trying to turn around to retreat back to more interesting passages, it quickly became apparent that some methods work better than others. Gareth tried trapping himself into Buddha pose, but it proved not to be a comfortable technique for turning. Who knew?
Modelling by Gareth, lighting by Tarquin and Gareth
When trying to turn around to retreat back to more interesting passages, it quickly became apparent that some methods work better than others. Gareth tried trapping himself into Buddha pose, but it proved not to be a comfortable technique for turning. Who knew?
Modelling by Gareth, lighting by Tarquin and Gareth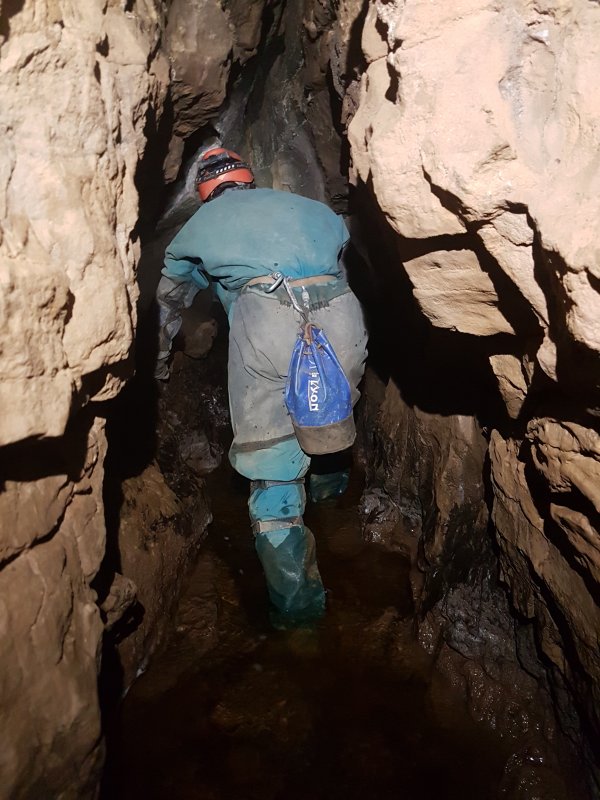 From the junction with Crystal Oxbow, Crystal Inlet is much smaller, and much more slippery. Several little cascades add to the fun, but the passage has no other attractions.
Modelling by Gareth, lighting by Tarquin and Gareth
From the junction with Crystal Oxbow, Crystal Inlet is much smaller, and much more slippery. Several little cascades add to the fun, but the passage has no other attractions.
Modelling by Gareth, lighting by Tarquin and Gareth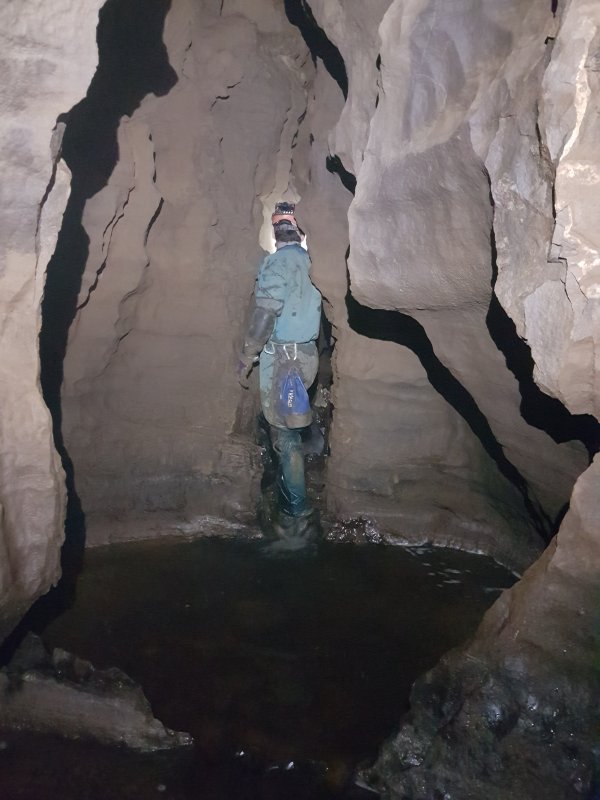 The widest part of the passage is this plunge pool. Some of the other pools require traversing to avoid swimming.
Modelling by Gareth, lighting by Tarquin and Gareth
The widest part of the passage is this plunge pool. Some of the other pools require traversing to avoid swimming.
Modelling by Gareth, lighting by Tarquin and Gareth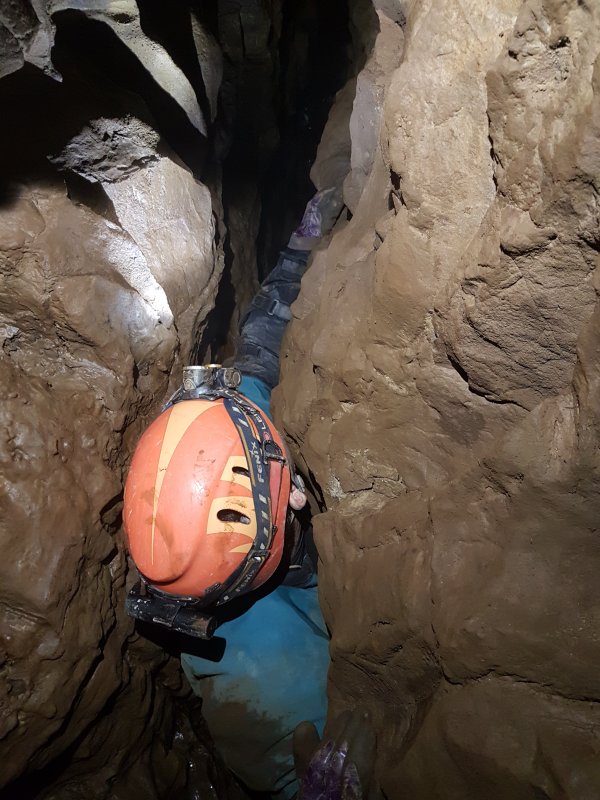 After a traverse over a tight rift, the inlet then becomes very narrow, and only a very determined caver would want to continue. Gareth tried descending to stream level to force a way up the passage.
Modelling by Gareth, lighting by Tarquin and Gareth
After a traverse over a tight rift, the inlet then becomes very narrow, and only a very determined caver would want to continue. Gareth tried descending to stream level to force a way up the passage.
Modelling by Gareth, lighting by Tarquin and Gareth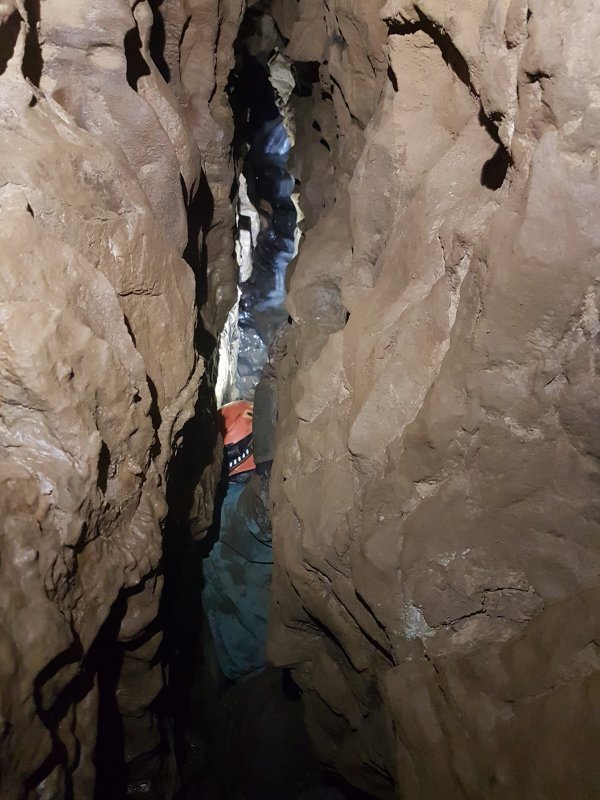 The passage has in fact been forced at floor level for 35 metres, to reach a flake which blocks progress. Gareth gave it a good effort, but reversing through a 35 metre squeeze doesn't sound as much fun as visiting the Flyovers, so he was encouraged to return early.
Modelling by Gareth, lighting by Tarquin and Gareth
The passage has in fact been forced at floor level for 35 metres, to reach a flake which blocks progress. Gareth gave it a good effort, but reversing through a 35 metre squeeze doesn't sound as much fun as visiting the Flyovers, so he was encouraged to return early.
Modelling by Gareth, lighting by Tarquin and Gareth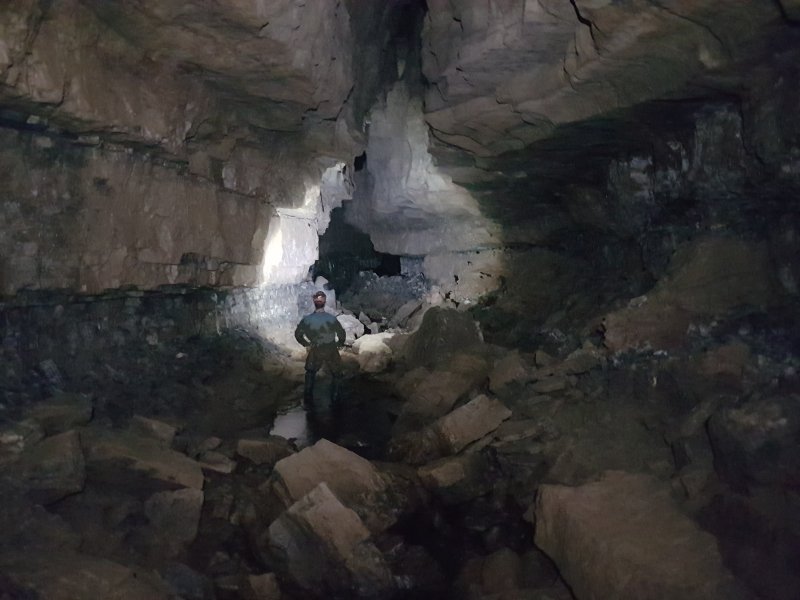 Bonsai Streamway, downstream of Crystal Inlet, takes on some impressive dimensions.
Modelling by Gareth, lighting by Tarquin and Gareth
Bonsai Streamway, downstream of Crystal Inlet, takes on some impressive dimensions.
Modelling by Gareth, lighting by Tarquin and Gareth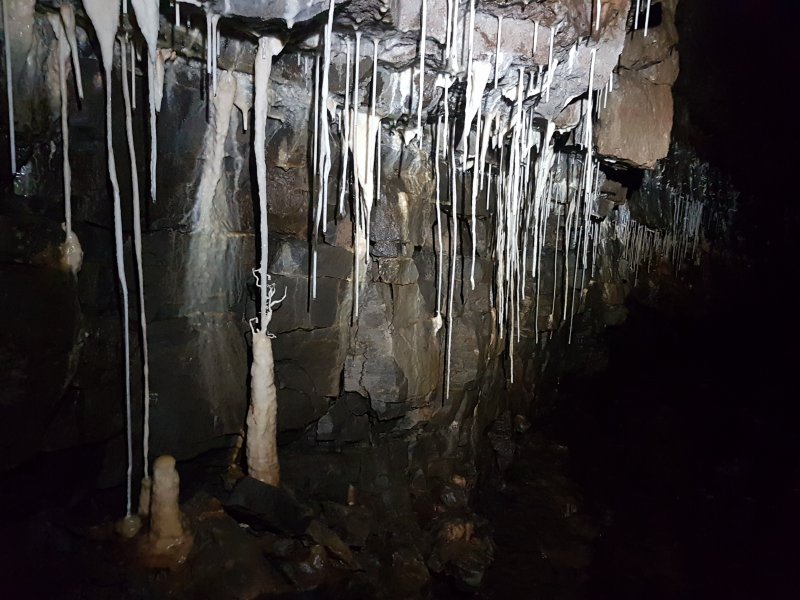 Formations in Bonsai Streamway.
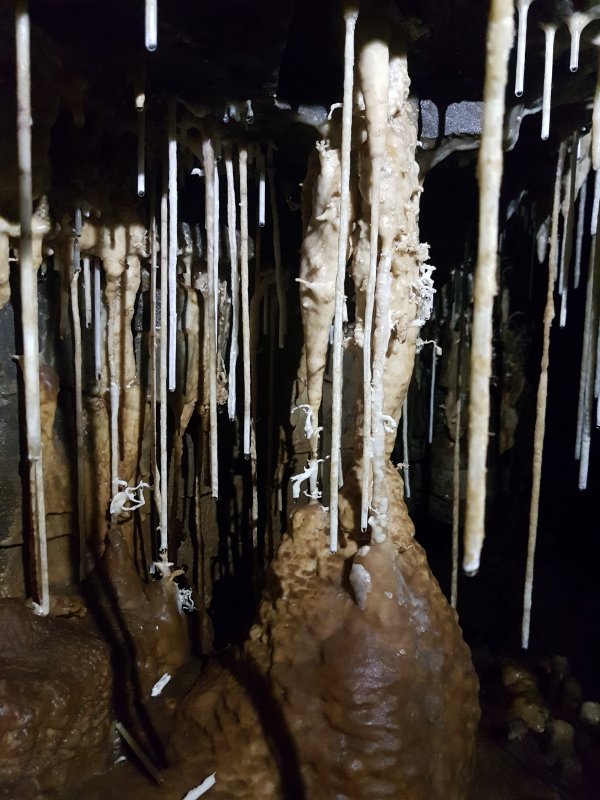 Formations.
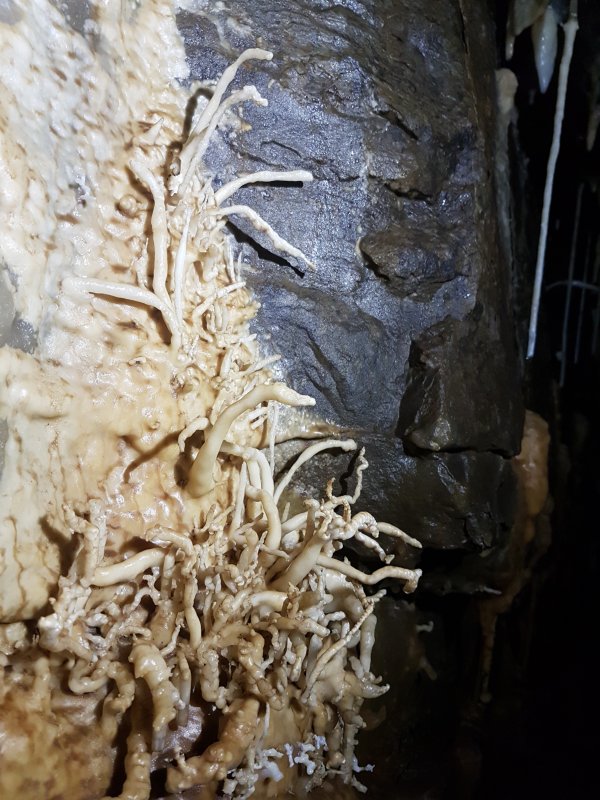 Helictites.
 Helictites on a seam in flowstone.
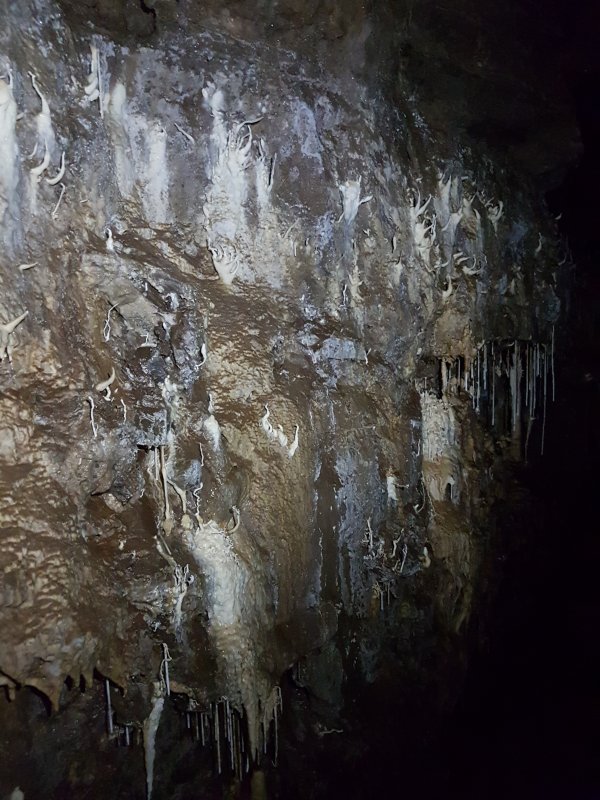 Helictites below the Flyovers.
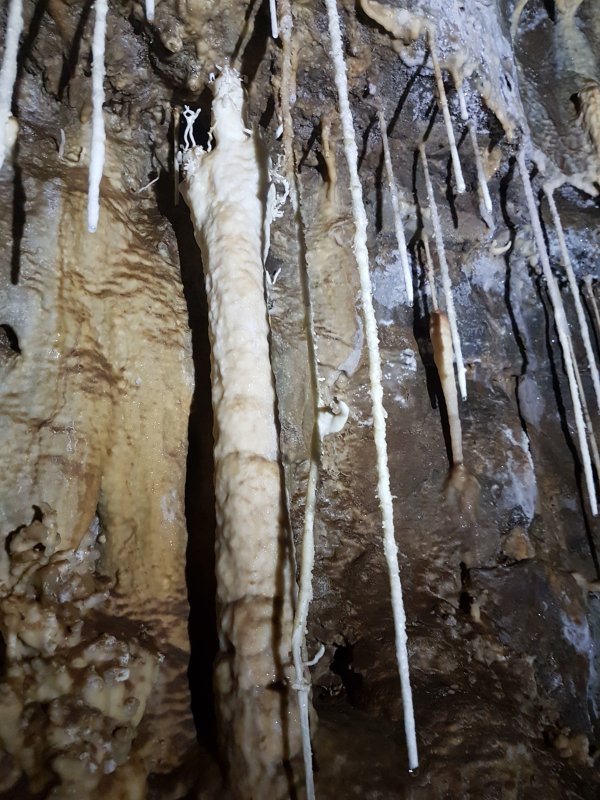 Helictit fringed column.
 Helictites.
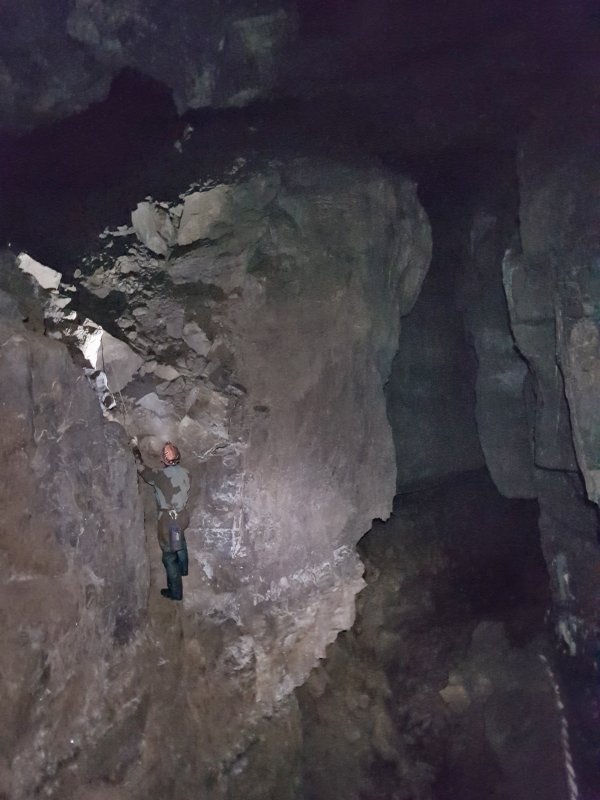 Roped climb into Western Flyover. This was originally free climbed.
Modelling by Gareth, lighting by Tarquin and Gareth
Roped climb into Western Flyover. This was originally free climbed.
Modelling by Gareth, lighting by Tarquin and Gareth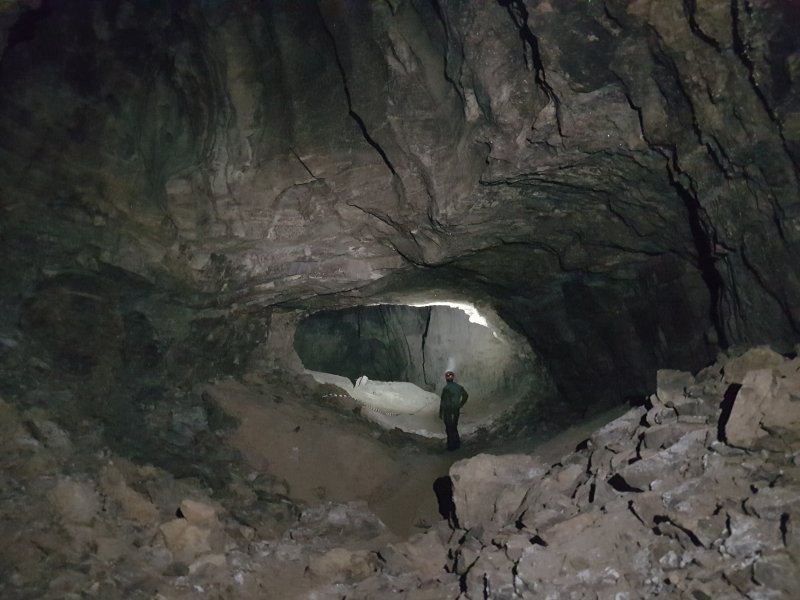 Western Flyover is an old continuation of the Time Machine, and even though it does not have the same dimensions, it is still a very impressive old phreatic tube.
Modelling by Gareth, lighting by Tarquin and Gareth
Western Flyover is an old continuation of the Time Machine, and even though it does not have the same dimensions, it is still a very impressive old phreatic tube.
Modelling by Gareth, lighting by Tarquin and Gareth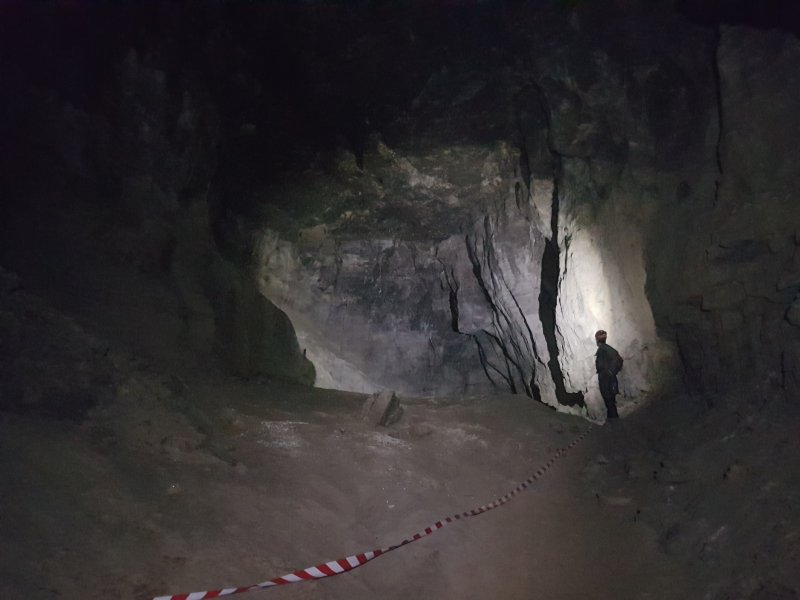 A very large section of Western Flyover.
Modelling by Gareth, lighting by Tarquin and Gareth
A very large section of Western Flyover.
Modelling by Gareth, lighting by Tarquin and Gareth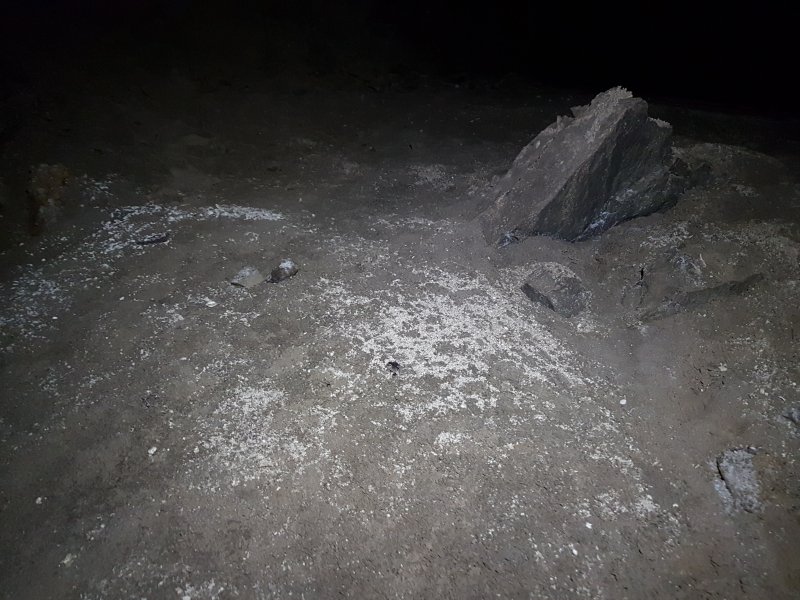 The floor here is absolutely covered in cryostal.
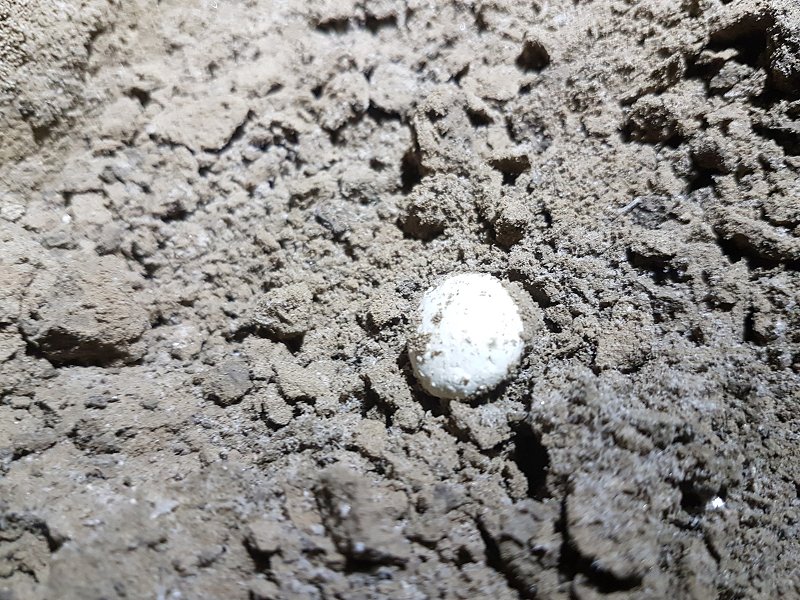 A type of cryostal I had not seen before. These look like egg shells or puffball mushrooms.
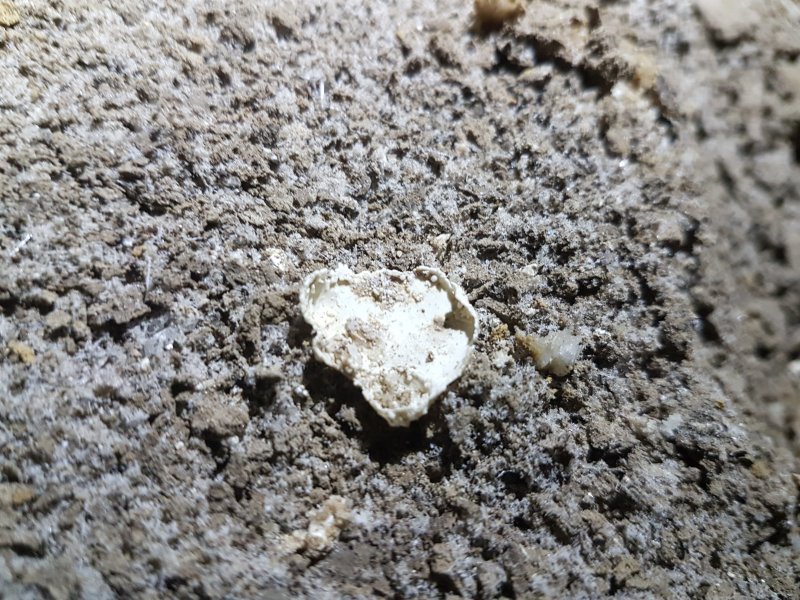 Just like an egg shell, they are hollow.
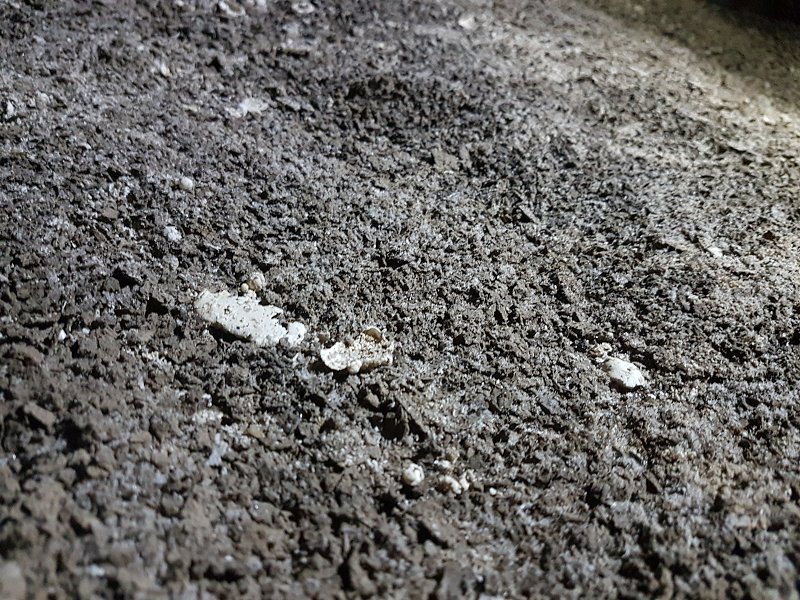 Hollow egg shells.
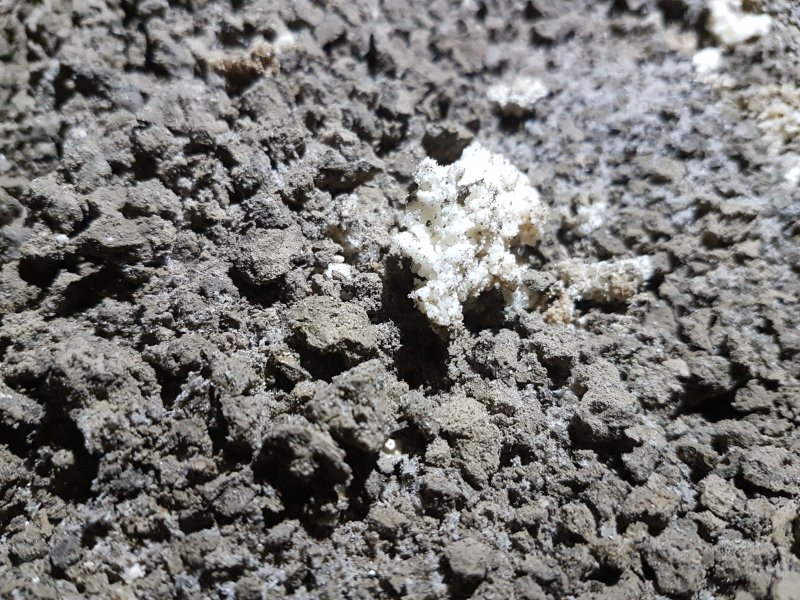 The more normal bead aggregations.
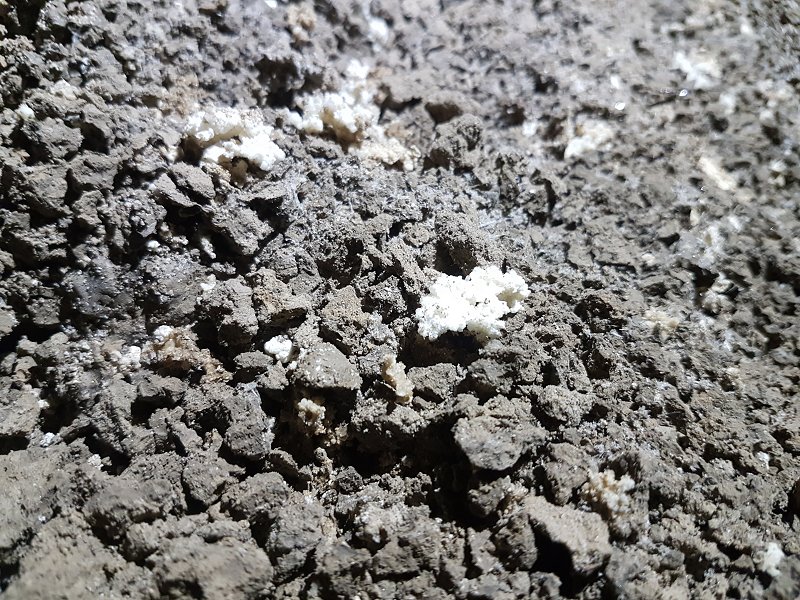 Bead aggregations.
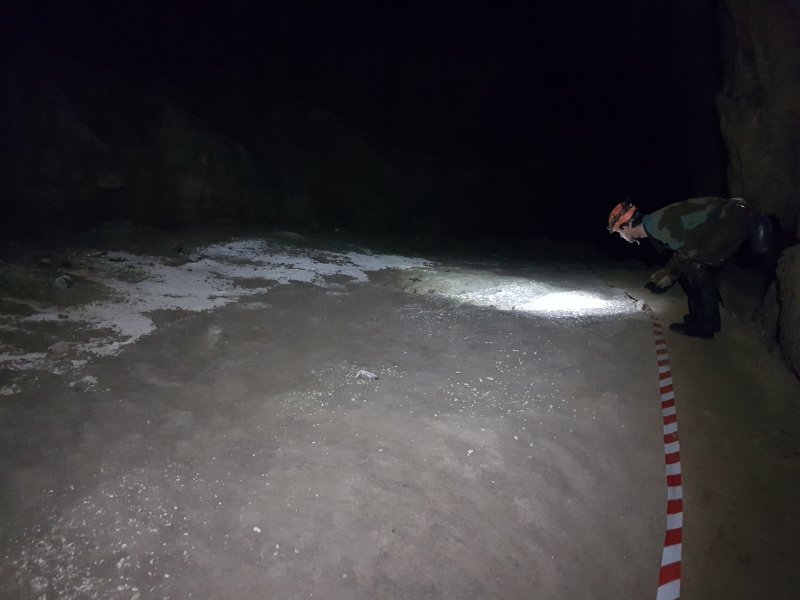 Then a very impressive spread, strewn in patches across the floor. Most of it sits on sand, not fluffy/bobbly mud or breakdown, and the passage is a clean phreas, so it seems like the wrong place to find it. But here it is anyway.
Modelling by Gareth, lighting by Tarquin and Gareth
Then a very impressive spread, strewn in patches across the floor. Most of it sits on sand, not fluffy/bobbly mud or breakdown, and the passage is a clean phreas, so it seems like the wrong place to find it. But here it is anyway.
Modelling by Gareth, lighting by Tarquin and Gareth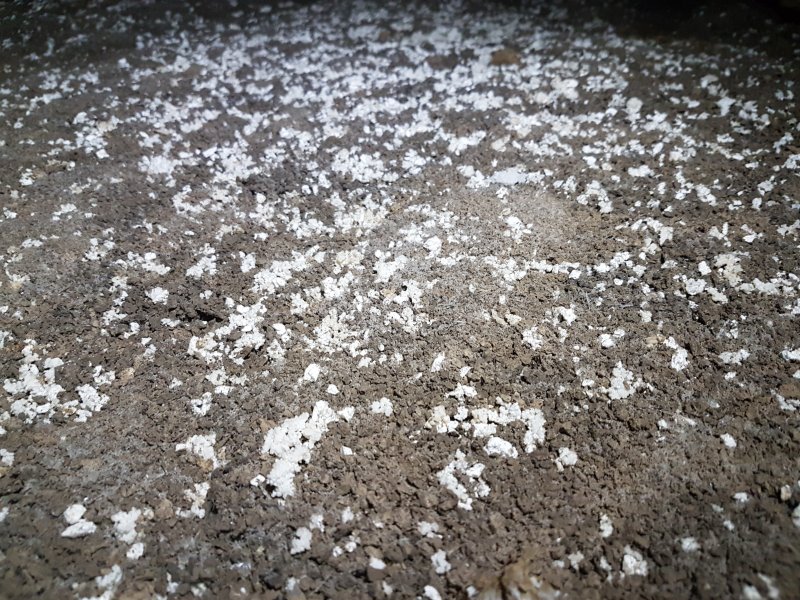 Most of the cryostal is bead aggregations. They can be seen to form bands of more and less dense clusters of beads.
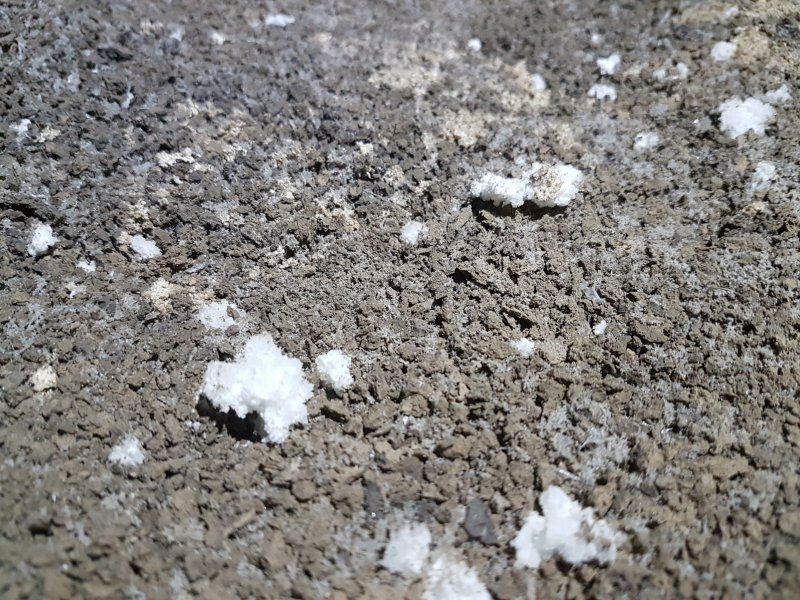 Cryostal clusters.
 Bead aggregations.
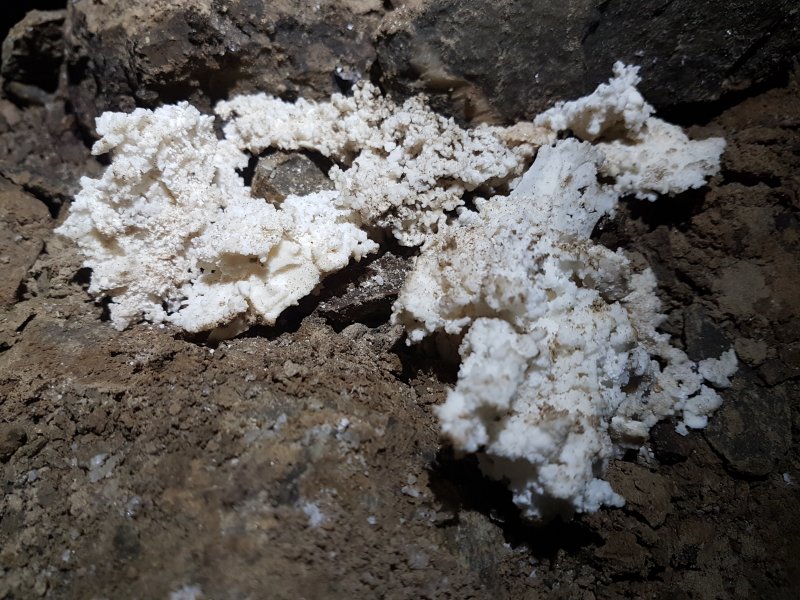 Then a very large group of giant cryostal clusters are seen on a pile of rocks. It is possible that they were moved here to keep them away from feet.
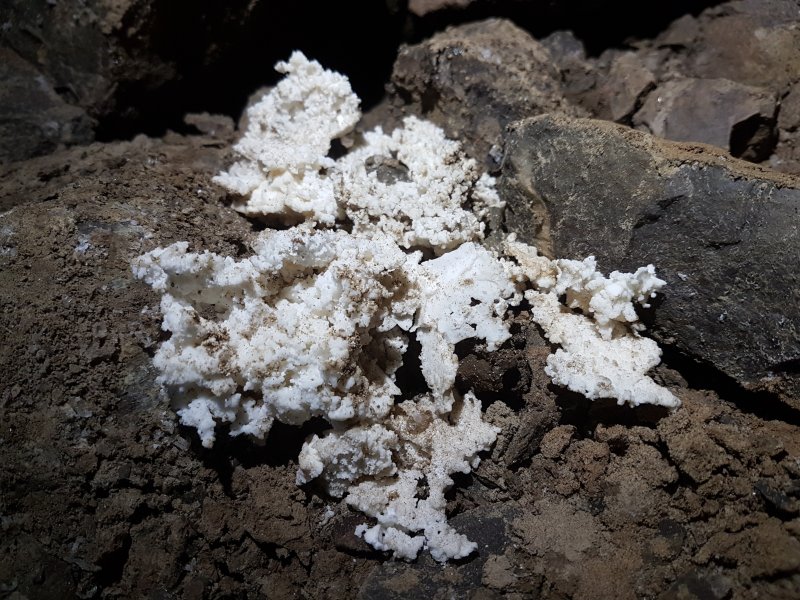 These are some of the largest pieces in the cave, and some of the best looking pieces in any British cave, competing with those in Draenen. This is the largest cluster of giant pieces that I know of, around 20 cm long and wide, with the largest pieces being about the size of a karabiner.
 After that is a series of pieces of cryostal which seem to be mixed with sand, probably after meltwater washed it over them.
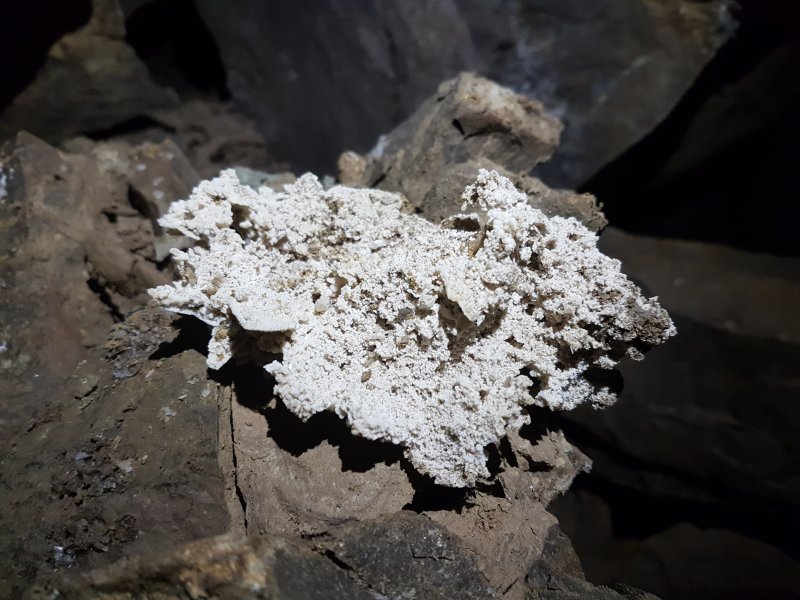 This piece is the single largest cluster I have seen in any cave, around 14 cm long in its longer direction.
 Seen here with a hand for scale, it is almost ridiculous.
 Tucked between the rocks.
 Ladder into the Labyrinth, a crawling sized passage leading into Half Mile Passage. Even without the ladder, it could probably be climbed using just a handline, but the ladder certainly makes it a lot easier.
Lighting by Tarquin and Gareth
Ladder into the Labyrinth, a crawling sized passage leading into Half Mile Passage. Even without the ladder, it could probably be climbed using just a handline, but the ladder certainly makes it a lot easier.
Lighting by Tarquin and Gareth More sand-covered cryostal. This is a particularly large piece. The flat part looks like a possible footprint, or maybe a rock print.
 A final piece of cryostal - this is the last significant piece in Western Flyover.
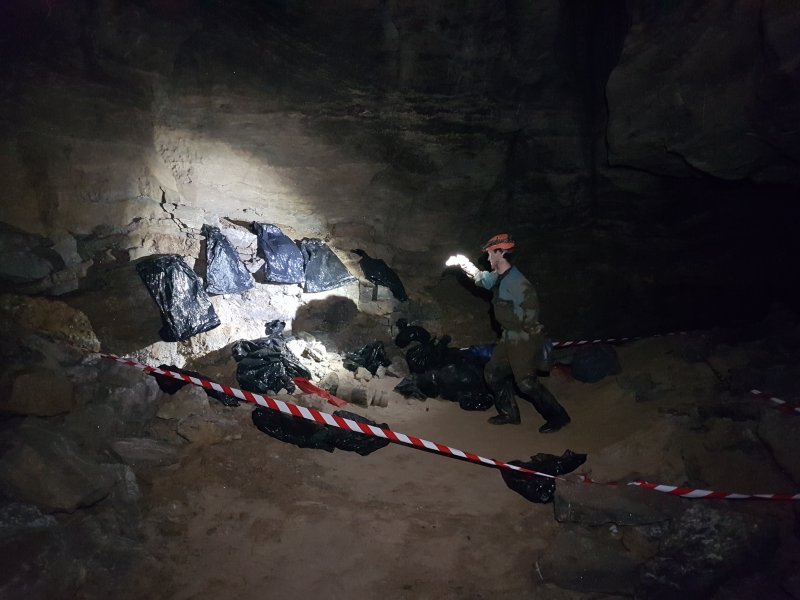 Western Flyover has been the site of a camp. Though I fail to see why, since Hard Rock is very close, and much more comfortable, even with its own flushing toilet. This camp has no toilet. But sleeping on sand is comfortable, even if it does get everywhere. Gareth is demonstrating with a camp (or at least limp wristed) sand dance.
Modelling by Gareth, lighting by Tarquin and Gareth
Western Flyover has been the site of a camp. Though I fail to see why, since Hard Rock is very close, and much more comfortable, even with its own flushing toilet. This camp has no toilet. But sleeping on sand is comfortable, even if it does get everywhere. Gareth is demonstrating with a camp (or at least limp wristed) sand dance.
Modelling by Gareth, lighting by Tarquin and Gareth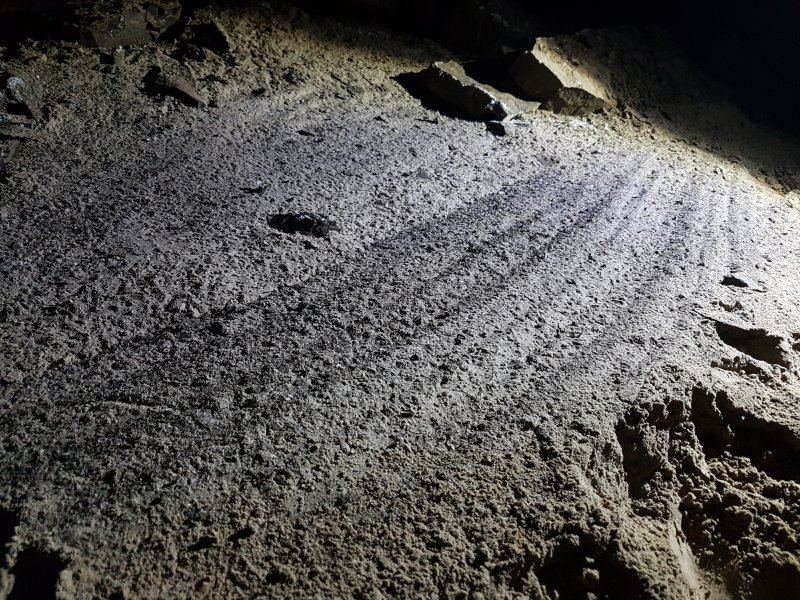 Banded sand deposits.
Lighting by Gareth
Banded sand deposits.
Lighting by Gareth Rippled sand, showing water flow.
Lighting by Gareth
Rippled sand, showing water flow.
Lighting by Gareth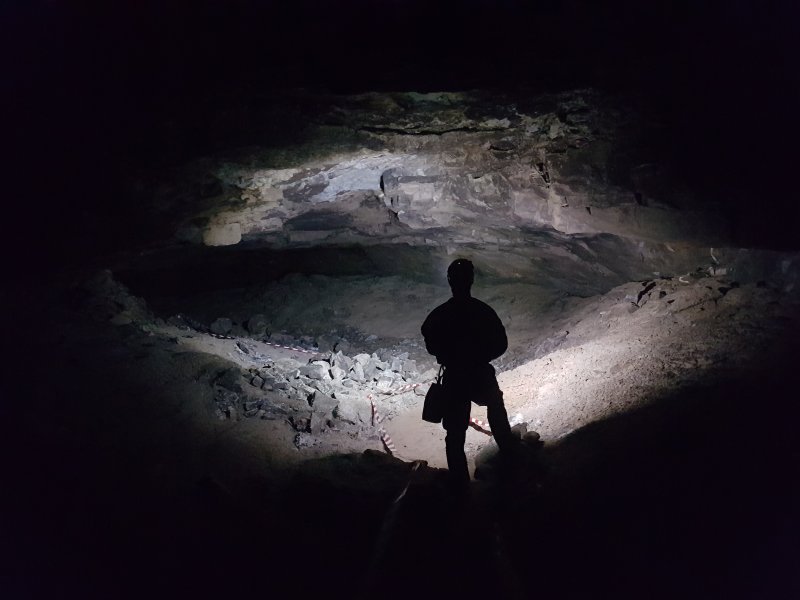 The middle portion of Western Flyover.
Modelling and lighting by Gareth
The middle portion of Western Flyover.
Modelling and lighting by Gareth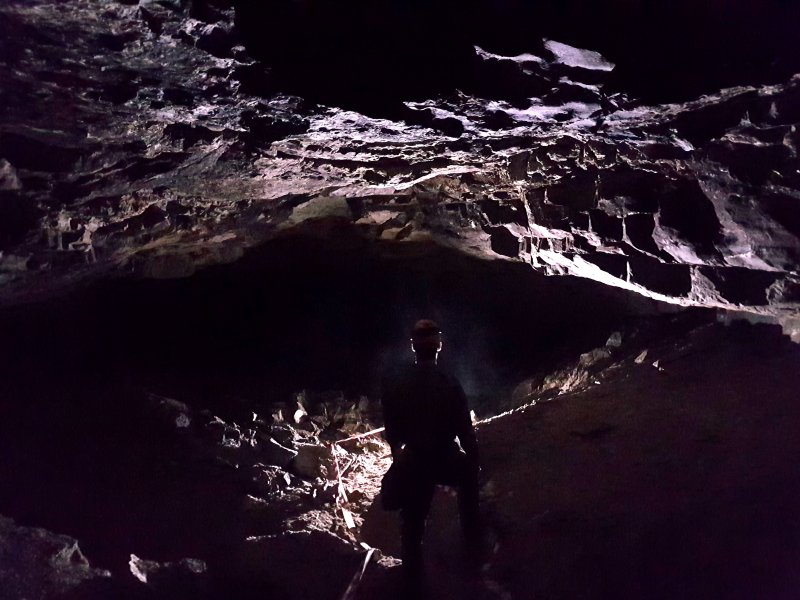 Backlit, it looks like a different place.
Modelling by Gareth
Backlit, it looks like a different place.
Modelling by Gareth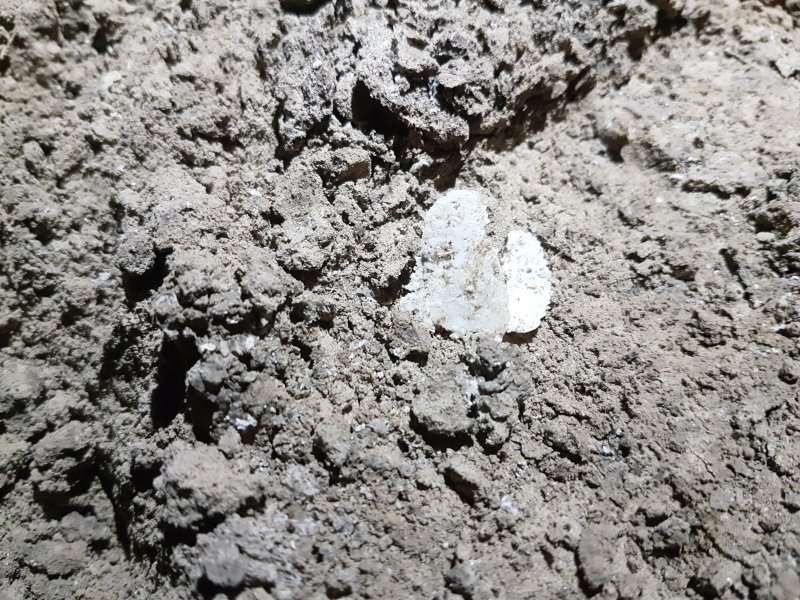 Cryostal flakes. Nothing like as grand as the stuff before it.
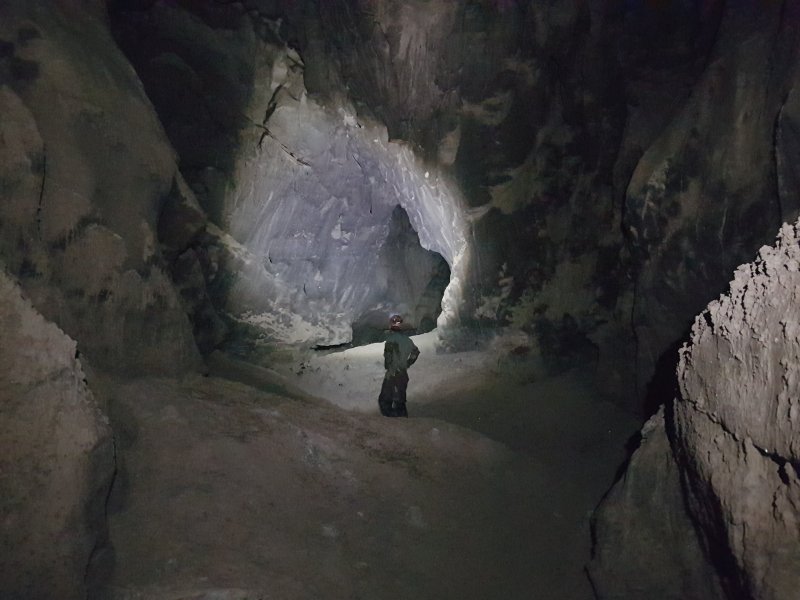 A large section of passage then reaches an abrupt end.
Modelling by Gareth, lighting by Tarquin and Gareth
A large section of passage then reaches an abrupt end.
Modelling by Gareth, lighting by Tarquin and Gareth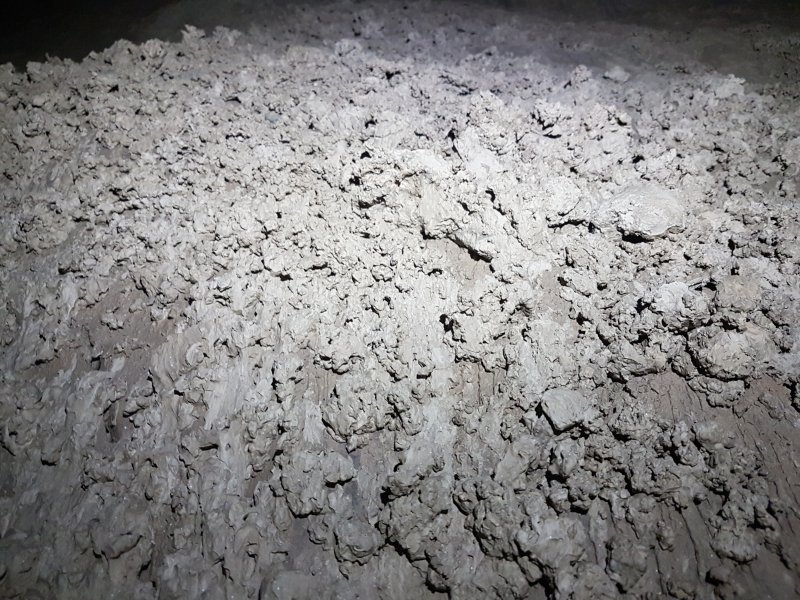 Lumpy mud on the wall of the passage. This looks like the fluffy/bobbly mud, but the lumps are much larger, and appear to have been wet.
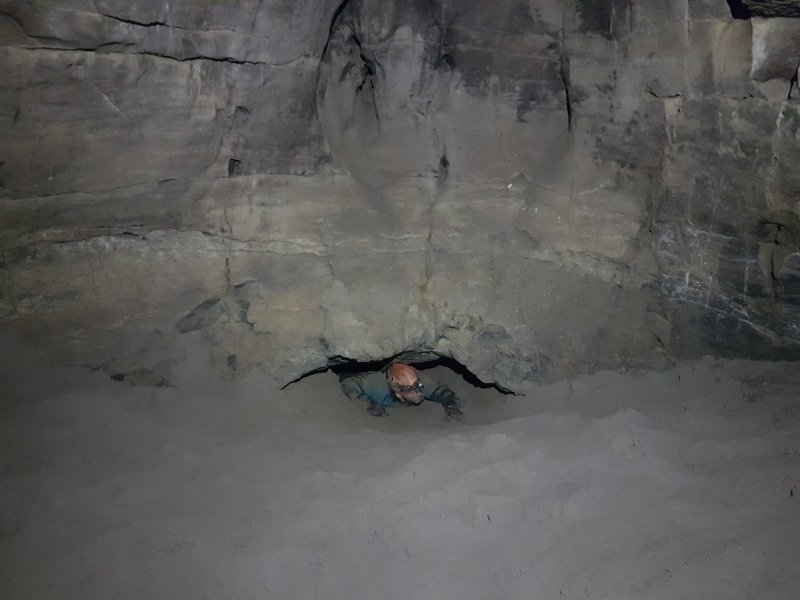 Originally, the roof tubes were used to reach the final part of the passage, but a sand swim under the wall reaches the same place more easily. This is a tight squeeze, but don't worry; you can always enlarge it if it is too small for you.
Modelling by Gareth
Originally, the roof tubes were used to reach the final part of the passage, but a sand swim under the wall reaches the same place more easily. This is a tight squeeze, but don't worry; you can always enlarge it if it is too small for you.
Modelling by Gareth A final very impressive section of passage. They missed a trick here; it really should have been called West End.
Modelling by Gareth, lighting by Tarquin and Gareth
A final very impressive section of passage. They missed a trick here; it really should have been called West End.
Modelling by Gareth, lighting by Tarquin and Gareth The terminal choke of Western Flyover. This is clearly a big choke, and will be quite long. On the other side of it is Beyond Time, so there is no point in digging here.
Modelling by Gareth, lighting by Tarquin and Gareth
The terminal choke of Western Flyover. This is clearly a big choke, and will be quite long. On the other side of it is Beyond Time, so there is no point in digging here.
Modelling by Gareth, lighting by Tarquin and Gareth 5 metre ladder pitch up to Eastern Flyover from Bonsai Streamway
Modelling by Gareth, lighting by Tarquin and Gareth
5 metre ladder pitch up to Eastern Flyover from Bonsai Streamway
Modelling by Gareth, lighting by Tarquin and Gareth The main passage of Eastern Flyover.
Modelling by Gareth, lighting by Tarquin and Gareth
The main passage of Eastern Flyover.
Modelling by Gareth, lighting by Tarquin and Gareth 6 metre ladder up to the balcony level above. We will continue ahead first instead.
Modelling by Gareth, lighting by Tarquin and Gareth
6 metre ladder up to the balcony level above. We will continue ahead first instead.
Modelling by Gareth, lighting by Tarquin and Gareth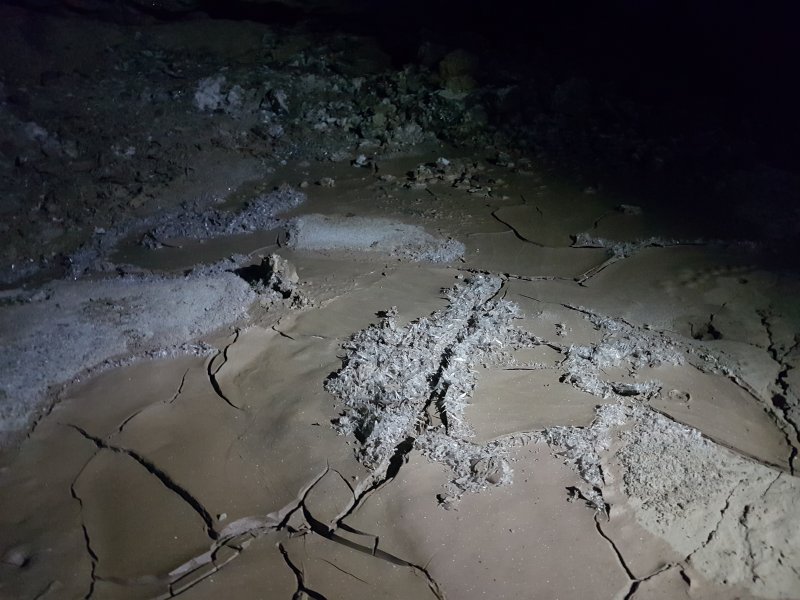 Selenite crystals on a beautiful cracked mud floor.
Lighting by Gareth
Selenite crystals on a beautiful cracked mud floor.
Lighting by Gareth Eastern Flyover reaches another massive choke. This is one of the most significant leads in the cave, but has never been a successful digging site. It sits directly below parts of Half Mile Passage.
Modelling by Gareth, lighting by Tarquin and Gareth
Eastern Flyover reaches another massive choke. This is one of the most significant leads in the cave, but has never been a successful digging site. It sits directly below parts of Half Mile Passage.
Modelling by Gareth, lighting by Tarquin and Gareth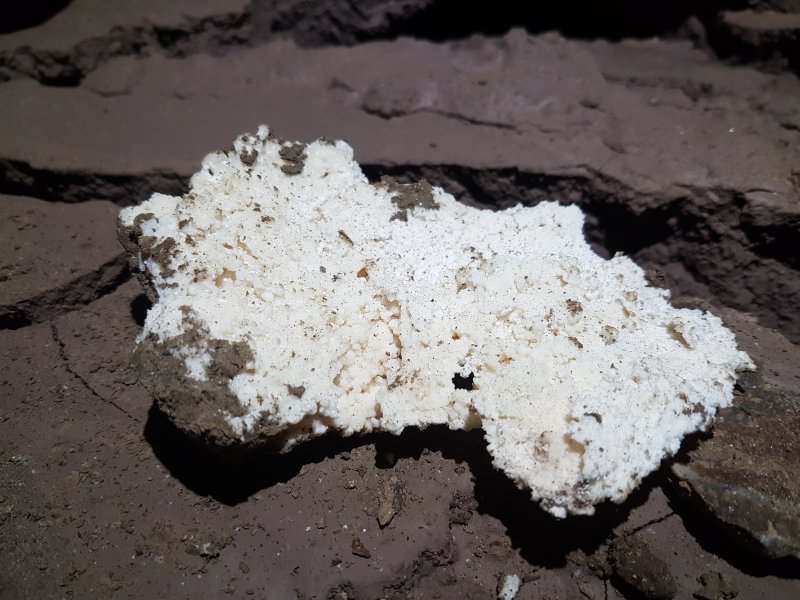 A very large piece of cryostal at the choke. This is about 10 cm across. It looks like it has been moved into position to avoid being trampled.
 Another large piece, about half the size of the previous one.
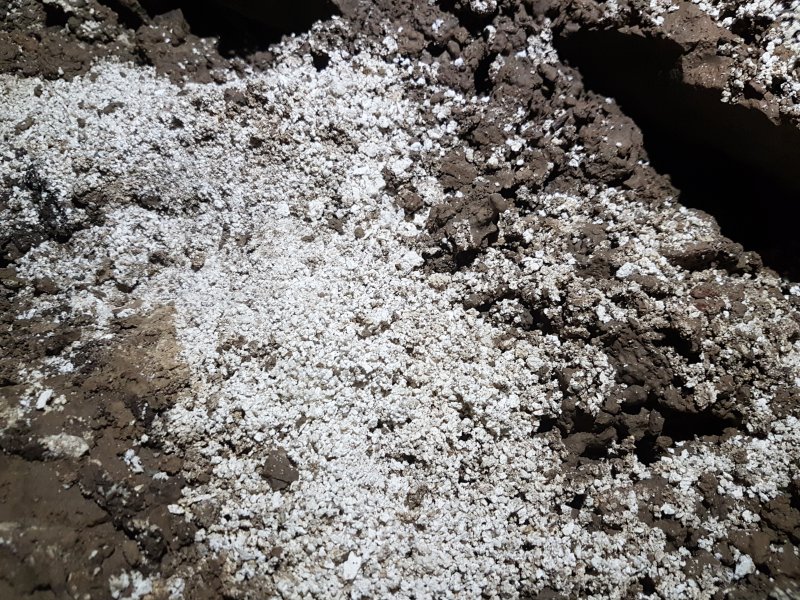 It covers the boulders over most of the lower part of the choke.
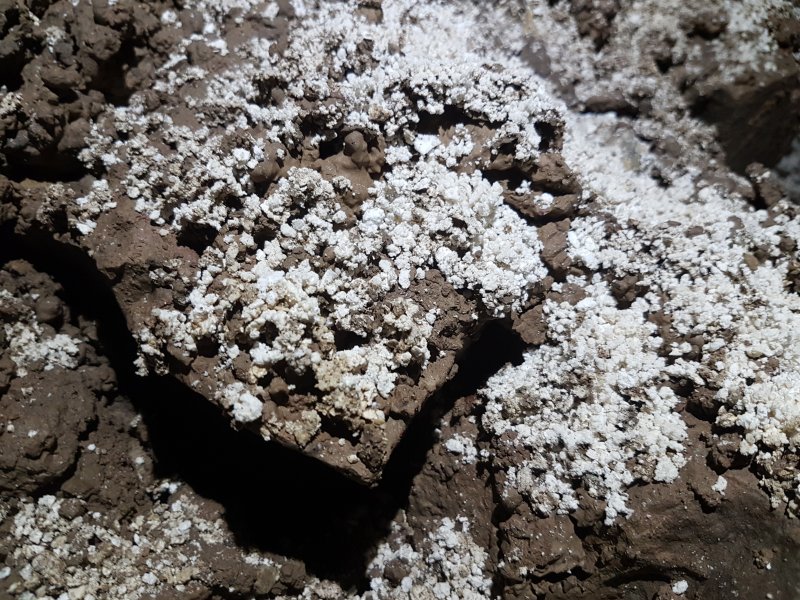 Beads in the mud.
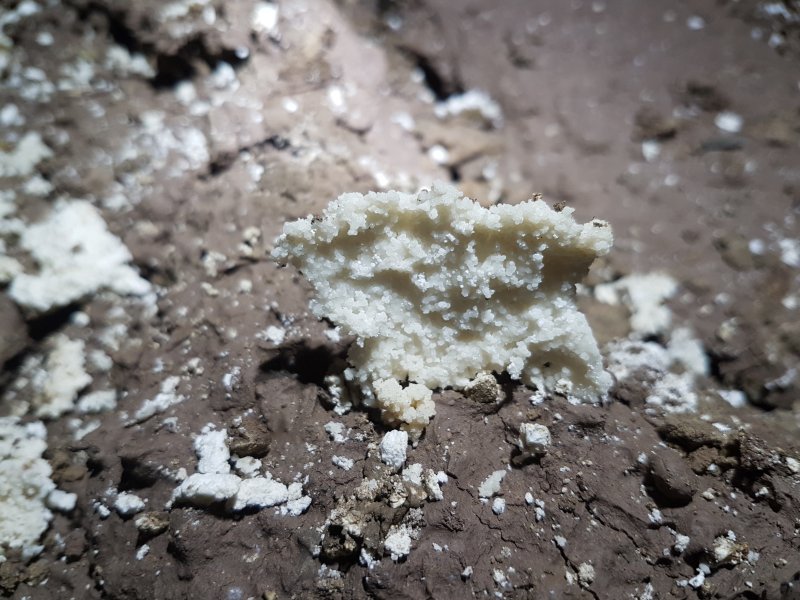 Beaded flake
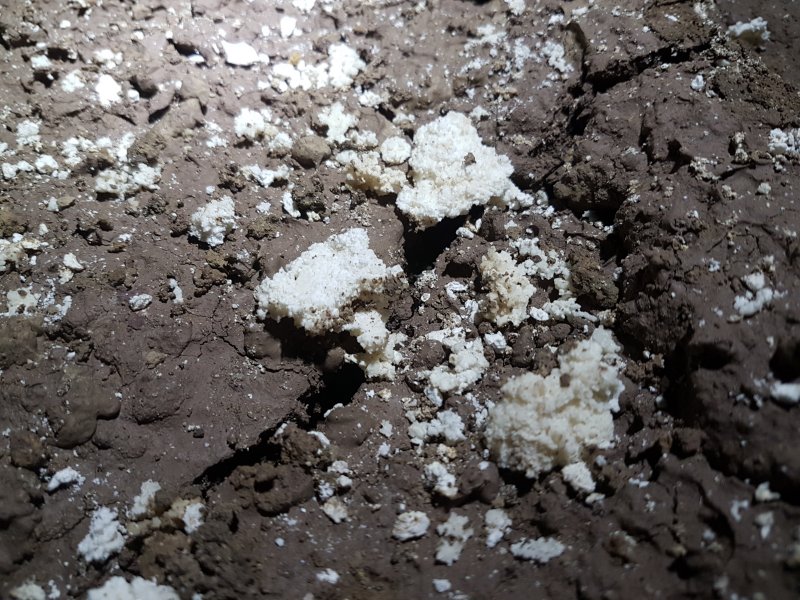 Bead aggregations.
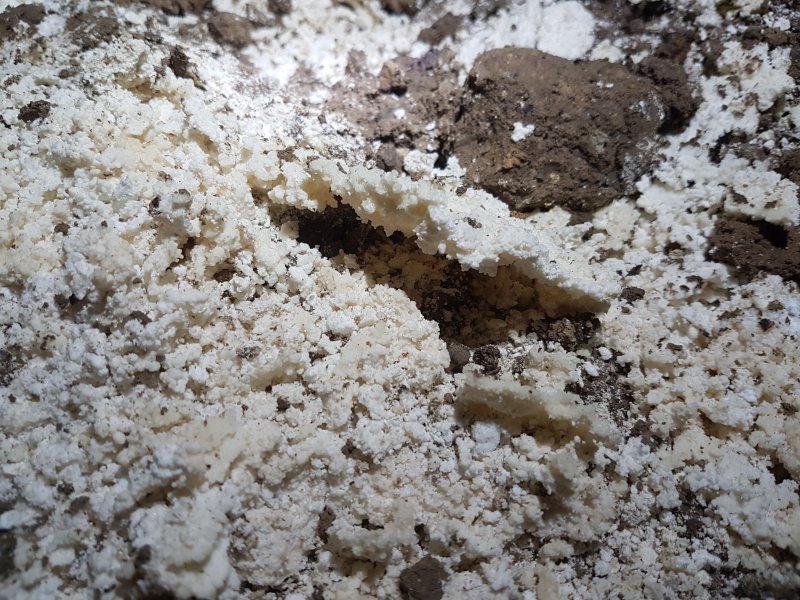 Very pretty stuff.
 At the top of the balcony ladder is another large passage that quickly shrinks.
Modelling by Gareth, lighting by Tarquin and Gareth
At the top of the balcony ladder is another large passage that quickly shrinks.
Modelling by Gareth, lighting by Tarquin and Gareth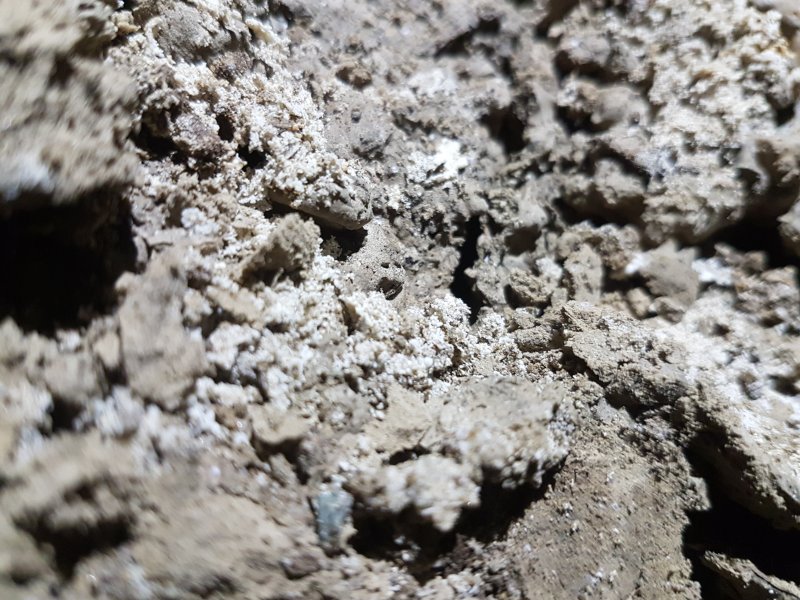 Rather poor cryostal in the mud.
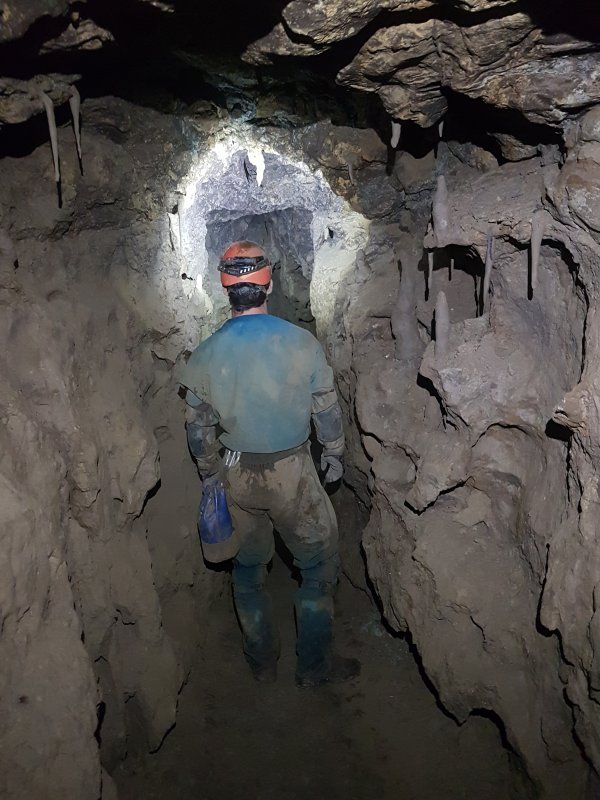 The balcony ends in a dig, with a rather unusual grotto. The dig points away from Eastern Flyover's
Modelling by Gareth, lighting by Tarquin and Gareth
The balcony ends in a dig, with a rather unusual grotto. The dig points away from Eastern Flyover's
Modelling by Gareth, lighting by Tarquin and Gareth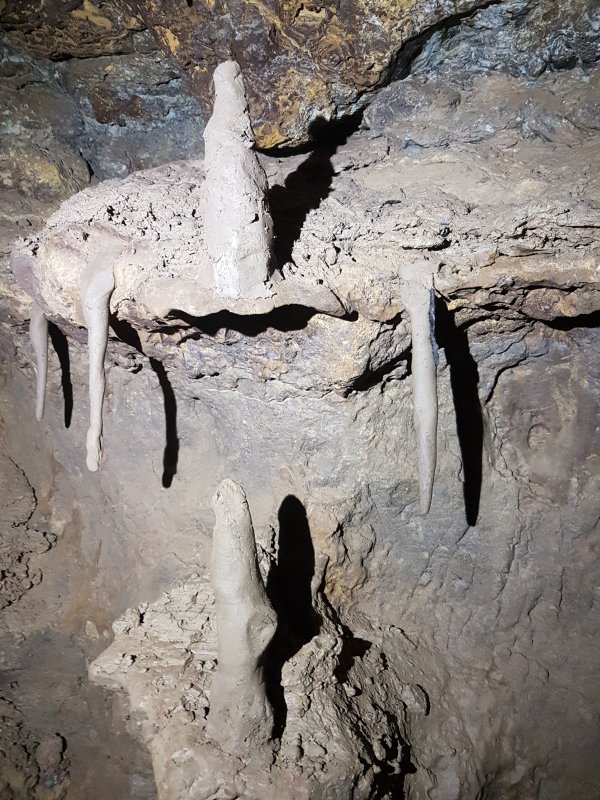 The grotto's stal is not exactly natural, being moulded out of mud by bored cavers. I guess it helps to liven up a dig.
 From the balcony, a 4 metre ladder leads to an upper passage. This could be free climbed, but the ladder certainly makes it easier.
Modelling by Gareth, lighting by Tarquin and Gareth
From the balcony, a 4 metre ladder leads to an upper passage. This could be free climbed, but the ladder certainly makes it easier.
Modelling by Gareth, lighting by Tarquin and Gareth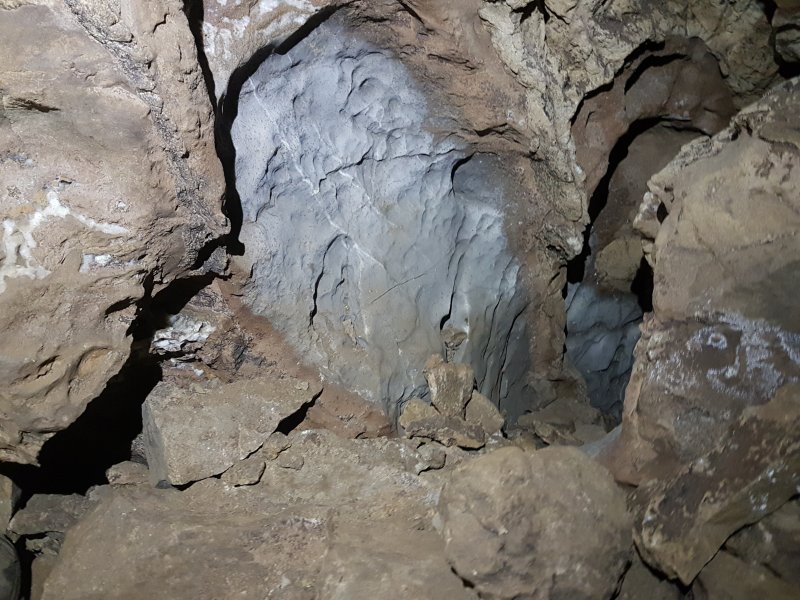 Coloured limestone layers in the passage at the top. Only one of the layers likes to form significant scallops, while the rest gets odd etchings instead.
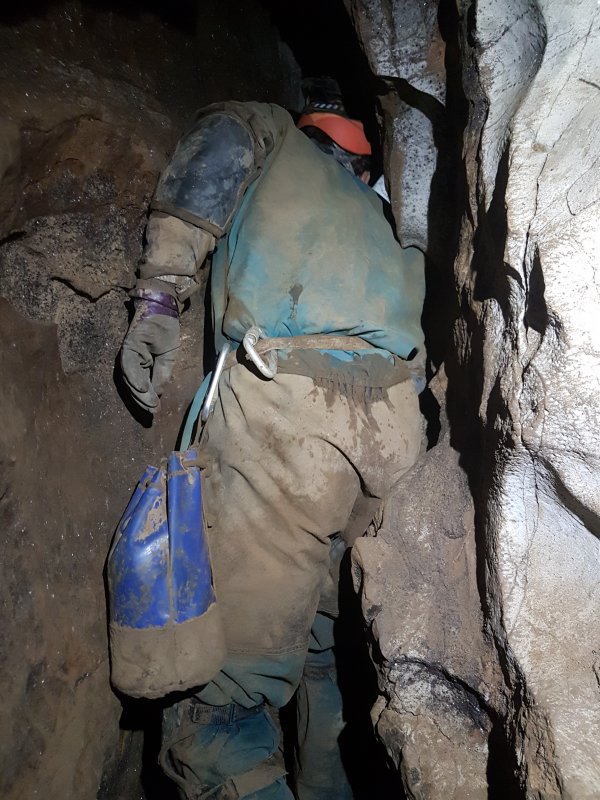 The passage at the top starts off quite narrow.
Modelling by Gareth, lighting by Tarquin and Gareth
The passage at the top starts off quite narrow.
Modelling by Gareth, lighting by Tarquin and Gareth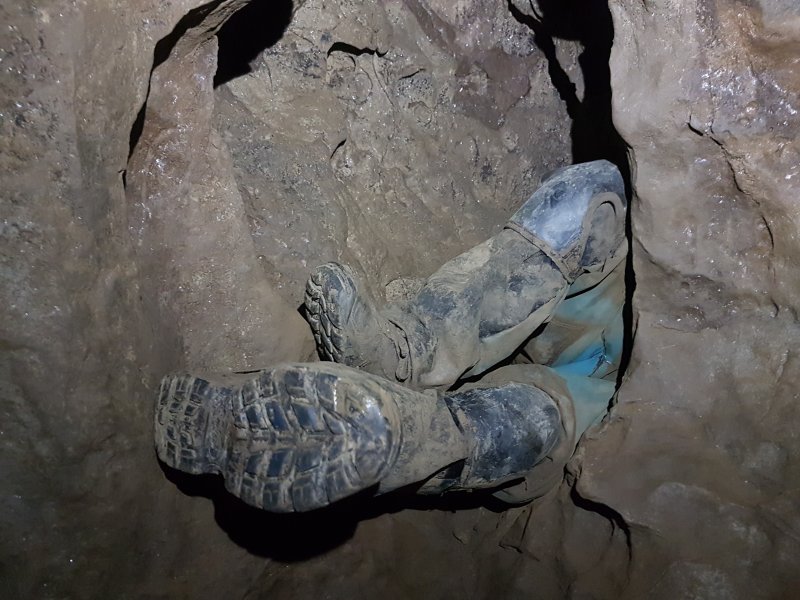 Followed by a ridiculous squeeze that looks impossible.
Modelling by Gareth
Followed by a ridiculous squeeze that looks impossible.
Modelling by Gareth It then becomes a crawling sized tube that pops out into the side of the sand floored Half Mile Passage.
Modelling by Gareth, lighting by Tarquin and Gareth
It then becomes a crawling sized tube that pops out into the side of the sand floored Half Mile Passage.
Modelling by Gareth, lighting by Tarquin and Gareth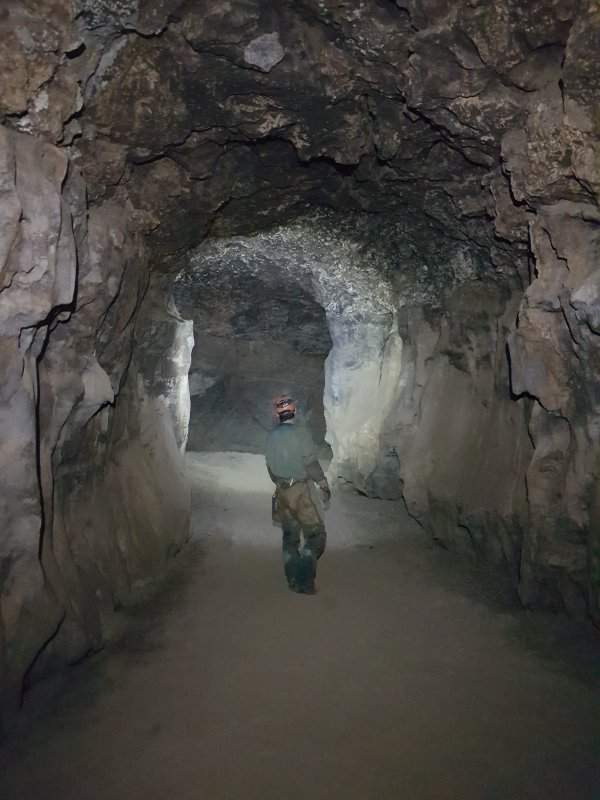 We started off heading south along Half Mile Passage, away from the loop. This is such a comfortable passage, easily possible to run along.
Modelling by Gareth, lighting by Tarquin and Gareth
We started off heading south along Half Mile Passage, away from the loop. This is such a comfortable passage, easily possible to run along.
Modelling by Gareth, lighting by Tarquin and Gareth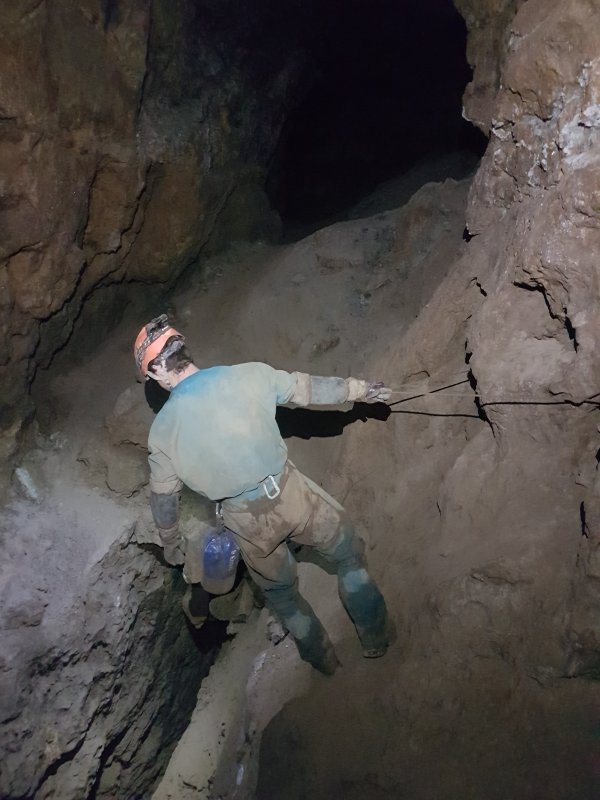 The southerly traverse. This has a rope to assist, but the rope ends at the most tricky point, and doesn't really serve the purpose very well. The hole is 6 metres deep, with only a dig below.
Modelling by Gareth, lighting by Tarquin and Gareth
The southerly traverse. This has a rope to assist, but the rope ends at the most tricky point, and doesn't really serve the purpose very well. The hole is 6 metres deep, with only a dig below.
Modelling by Gareth, lighting by Tarquin and Gareth The side passage immediately afterwards ends at a boulder choke. At first, this equipment seems bizarrely out of place. It is used to tie the cable around boulders, and then pull them out of the choke from a safe distance. This choke sits directly beside the top of the choke in Eastern Flyover, and could possibly be a place to bypass it. Half Mile Passage loses its grandure at this point, and appears to become a series of soakaways, which suggests that the water is simply trying to drop into the Eastern Flyover old main drain.
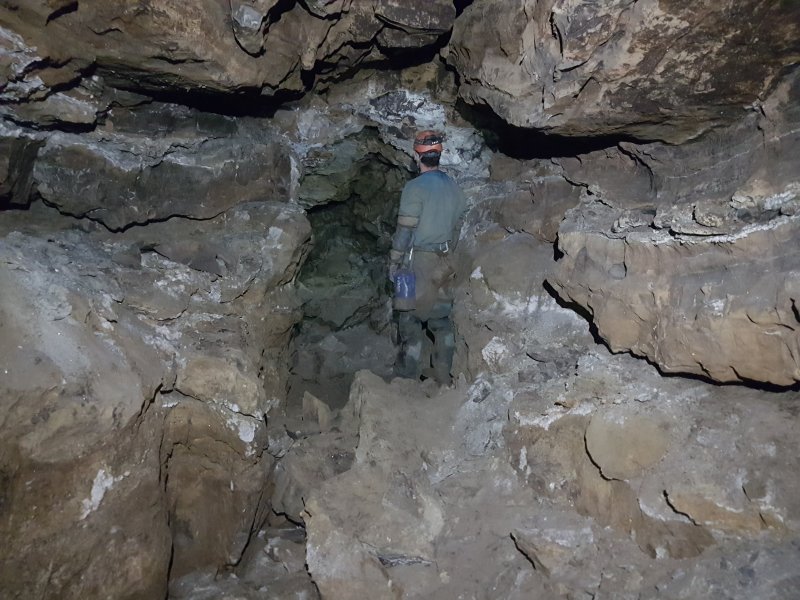 Half Mile Passage, now reduced to a mere shadow of its former self.
Modelling by Gareth, lighting by Tarquin and Gareth
Half Mile Passage, now reduced to a mere shadow of its former self.
Modelling by Gareth, lighting by Tarquin and Gareth Digging spoil from one of the little side digs. This is one of the most impressive dry stone walls you can find in a Welsh cave, holding back a monumental quantity of spoil.
Modelling by Gareth, lighting by Tarquin and Gareth
Digging spoil from one of the little side digs. This is one of the most impressive dry stone walls you can find in a Welsh cave, holding back a monumental quantity of spoil.
Modelling by Gareth, lighting by Tarquin and Gareth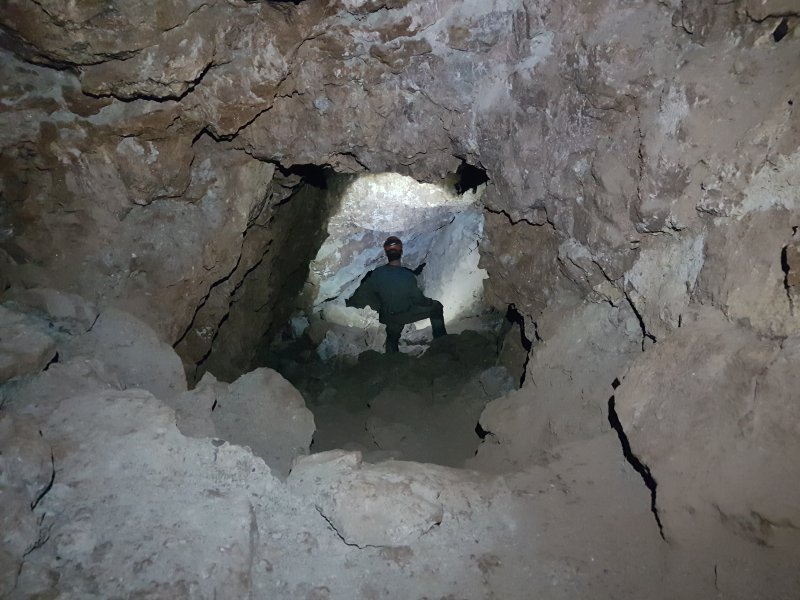 Half Mile Passage used to end at this ascending passage to a choke. Amazingly, there were bats in this section (it was not yet hibernation season), despite being 2 km in from the surface.
Modelling by Gareth, lighting by Tarquin and Gareth
Half Mile Passage used to end at this ascending passage to a choke. Amazingly, there were bats in this section (it was not yet hibernation season), despite being 2 km in from the surface.
Modelling by Gareth, lighting by Tarquin and Gareth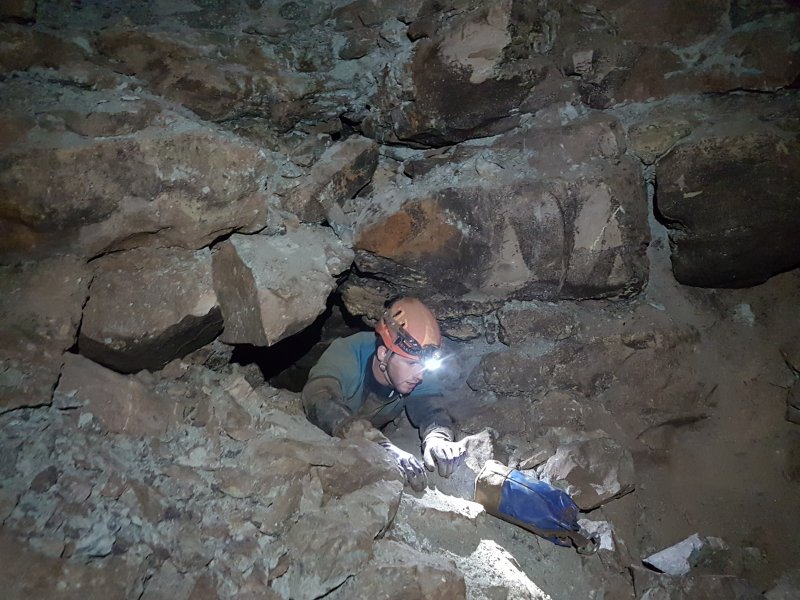 Passing the choke.
Modelling by Gareth, lighting by Tarquin and Gareth
Passing the choke.
Modelling by Gareth, lighting by Tarquin and Gareth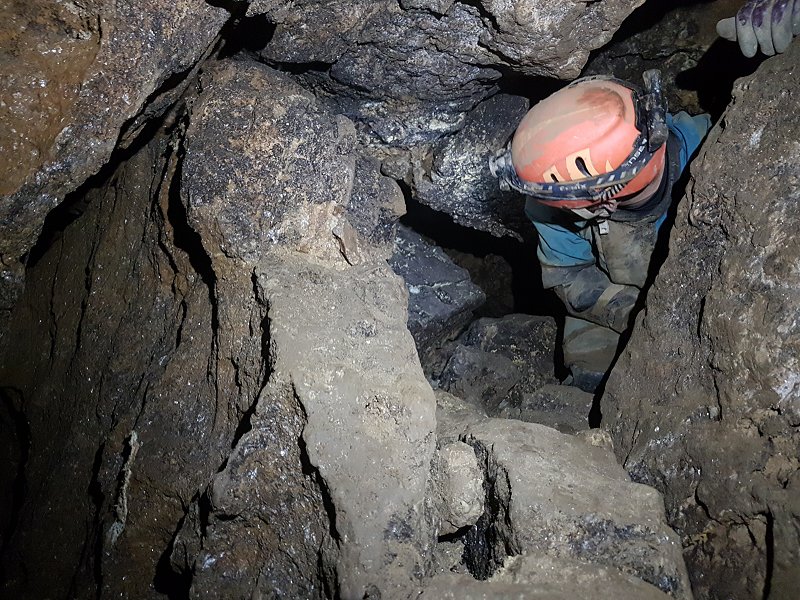 Beyond the choke, the passages are much smaller, just a final series of little soakaways that degenerate into chaos. There is nothing good here.
Modelling by Gareth, lighting by Tarquin and Gareth
Beyond the choke, the passages are much smaller, just a final series of little soakaways that degenerate into chaos. There is nothing good here.
Modelling by Gareth, lighting by Tarquin and Gareth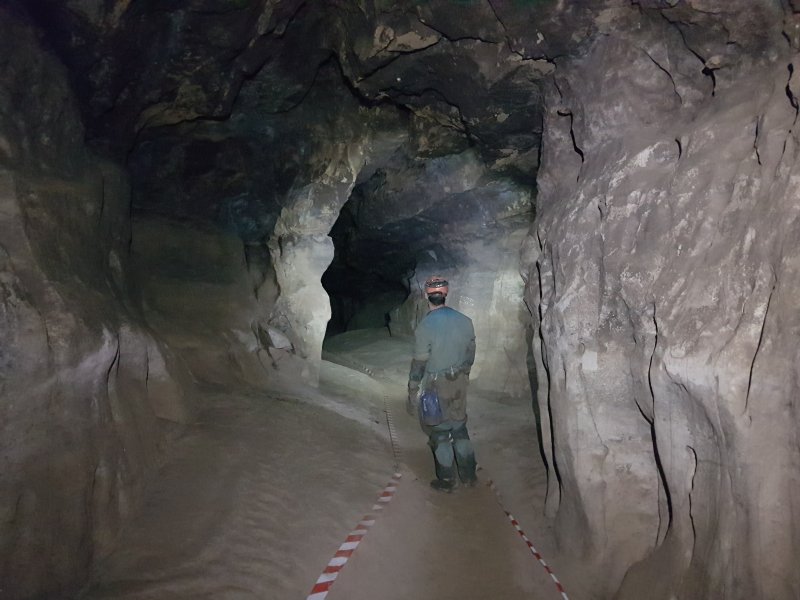 We returned to the junction where we entered Half Mile Passage, and continued North.
Modelling by Gareth, lighting by Tarquin and Gareth
We returned to the junction where we entered Half Mile Passage, and continued North.
Modelling by Gareth, lighting by Tarquin and Gareth Beautifully rippled sand floor.
Modelling by Gareth, lighting by Tarquin and Gareth
Beautifully rippled sand floor.
Modelling by Gareth, lighting by Tarquin and Gareth Passing one of the entrances to The Labyrinth, which connects to Western Flyover.
Modelling by Gareth, lighting by Tarquin and Gareth
Passing one of the entrances to The Labyrinth, which connects to Western Flyover.
Modelling by Gareth, lighting by Tarquin and Gareth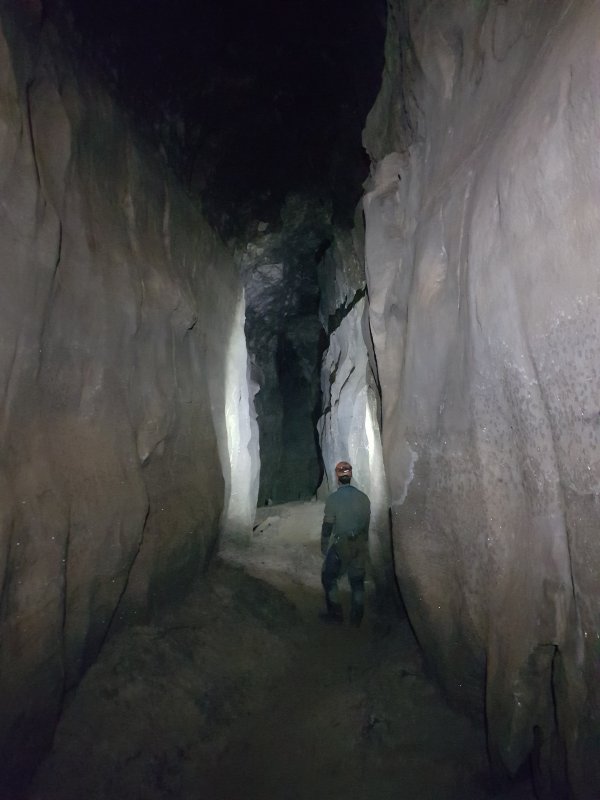 Half Mile Passage becomes a taller canyon.
Modelling by Gareth, lighting by Tarquin and Gareth
Half Mile Passage becomes a taller canyon.
Modelling by Gareth, lighting by Tarquin and Gareth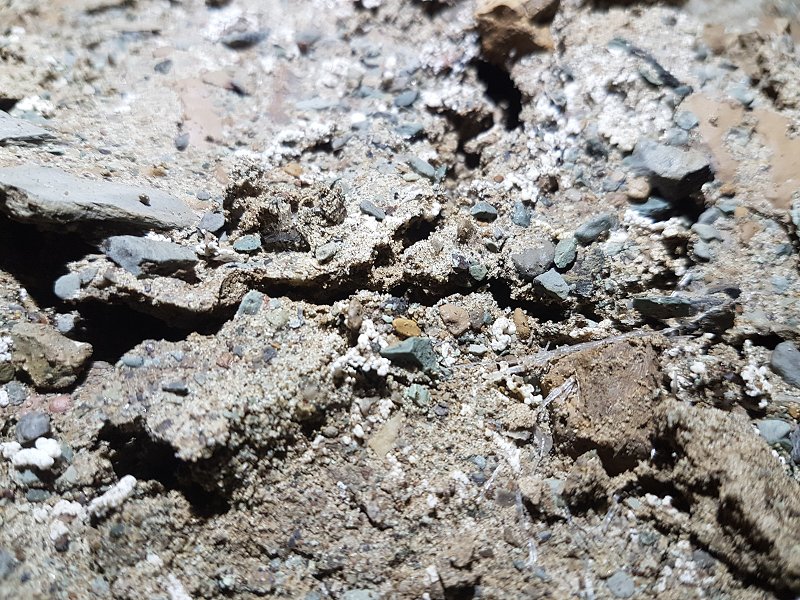 Rather poor cryostal in Half Mile Passage.
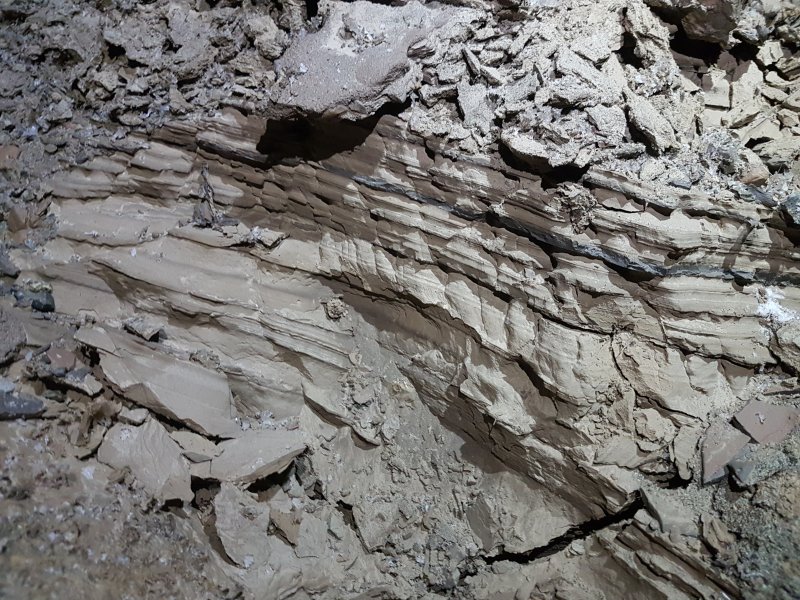 Sediment bank.
Lighting by Tarquin and Gareth
Sediment bank.
Lighting by Tarquin and Gareth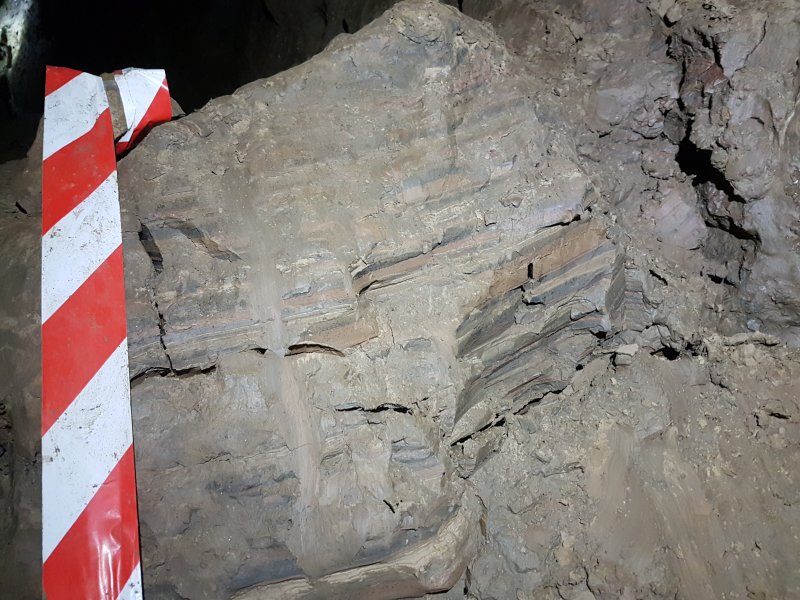 Sediment bank with coloured layers.
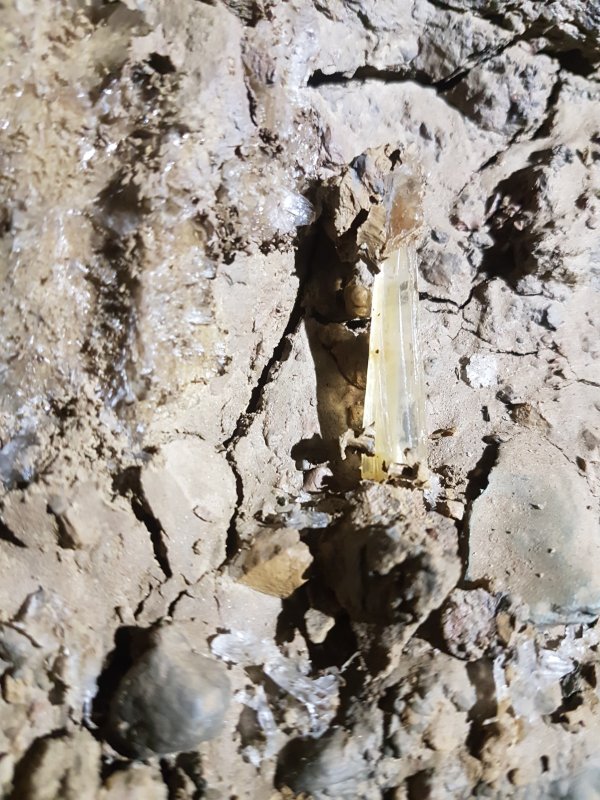 Selenite needle.
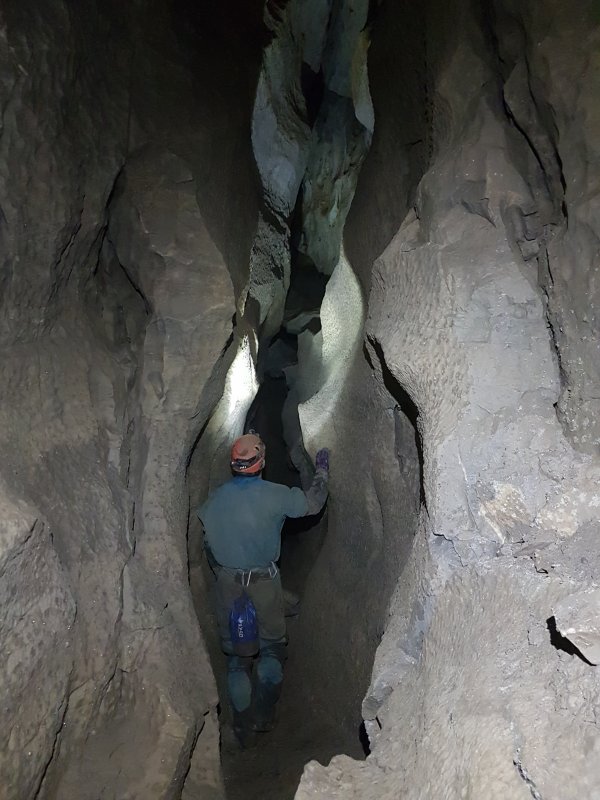 The passage then changes style, and becomes a phreatic canyon.
Modelling by Gareth, lighting by Tarquin and Gareth
The passage then changes style, and becomes a phreatic canyon.
Modelling by Gareth, lighting by Tarquin and Gareth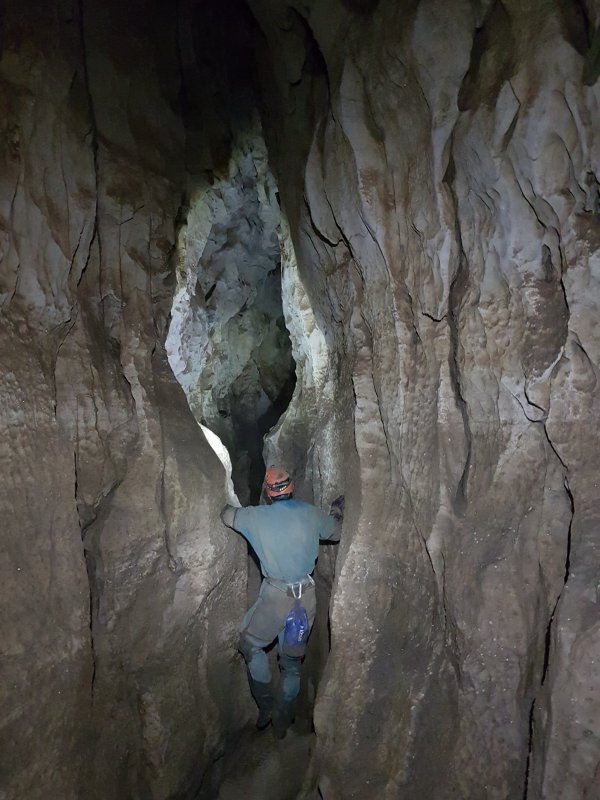 Keyhole section.
Modelling by Gareth, lighting by Tarquin and Gareth
Keyhole section.
Modelling by Gareth, lighting by Tarquin and Gareth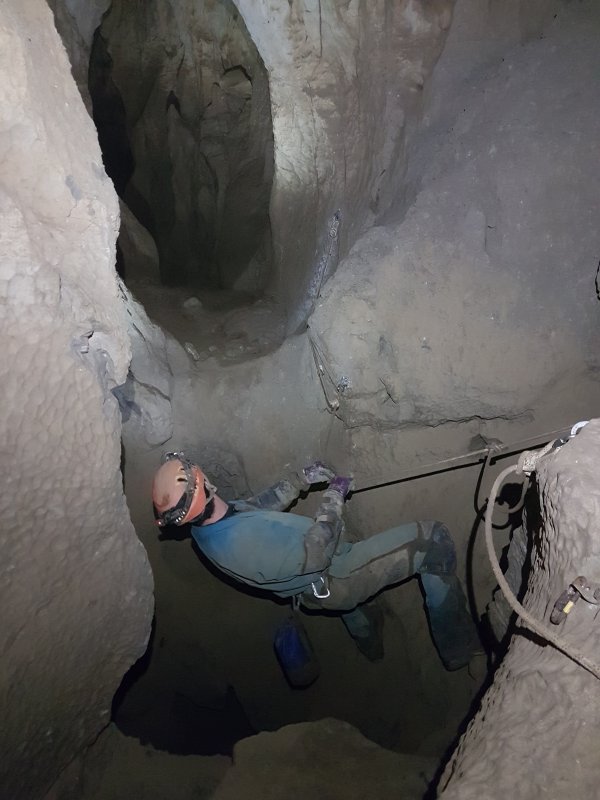 Finally, there is this traverse over a deep hole, dropping about 10 metres into Crystal Oxbow. This is one of the two avens in the chamber in Crystal Oxbow - the one that cannot be free climbed. The passage on the other side is Nameless Canyon - even though it is really the continuation of Half Mile Passage - which has another hole down to the left almost immediately, which is the second aven. That hole can be climbed with the rope that was in place.
Modelling by Gareth, lighting by Tarquin and Gareth
Finally, there is this traverse over a deep hole, dropping about 10 metres into Crystal Oxbow. This is one of the two avens in the chamber in Crystal Oxbow - the one that cannot be free climbed. The passage on the other side is Nameless Canyon - even though it is really the continuation of Half Mile Passage - which has another hole down to the left almost immediately, which is the second aven. That hole can be climbed with the rope that was in place.
Modelling by Gareth, lighting by Tarquin and Gareth Nameless Canyon (which is also called No-Name Canyon, so it has 2 names...) then pops into the side of a larger, sandy passage, which is also called Nameless Canyon (just accept it, OK). Left closes down, but right continues like this.
Modelling by Gareth, lighting by Tarquin and Gareth
Nameless Canyon (which is also called No-Name Canyon, so it has 2 names...) then pops into the side of a larger, sandy passage, which is also called Nameless Canyon (just accept it, OK). Left closes down, but right continues like this.
Modelling by Gareth, lighting by Tarquin and Gareth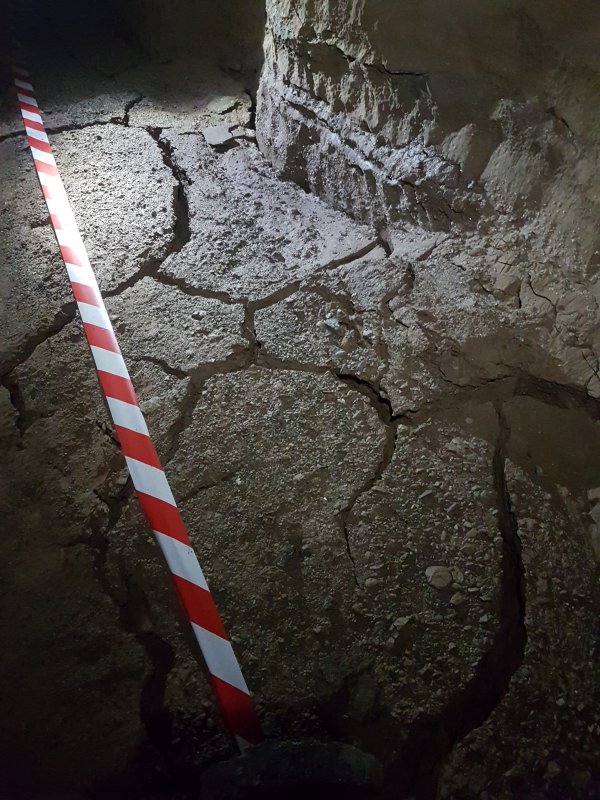 Cracked sand and gravel deposits in Nameless Canyon. There was evidently a pool here that dried out very slowly, leaving gravel on top of the cracked mud below.
Lighting by Tarquin and Gareth
Cracked sand and gravel deposits in Nameless Canyon. There was evidently a pool here that dried out very slowly, leaving gravel on top of the cracked mud below.
Lighting by Tarquin and Gareth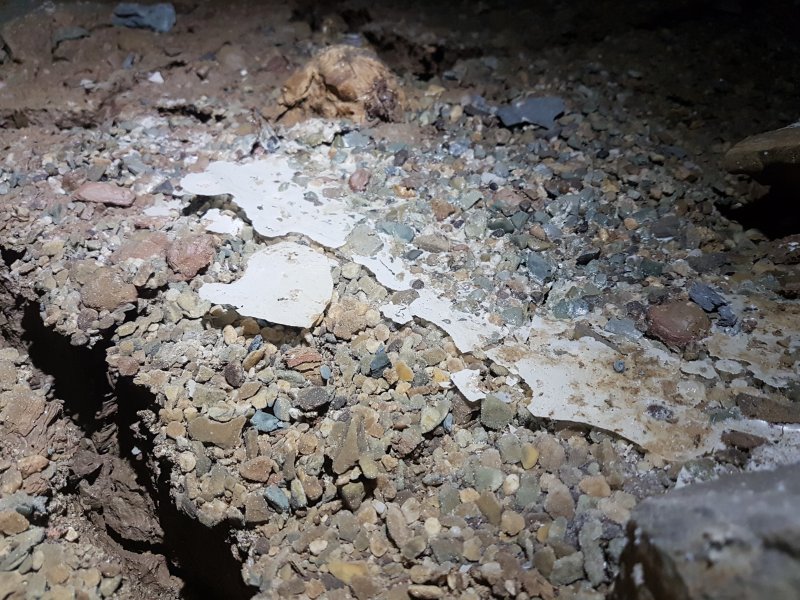 Calcite rafts stuck to the lip of the old cracked gravel pools. It is very strange seeing calcite rafts on a pool that has no other crystal deposits - all the pebbles are clean.
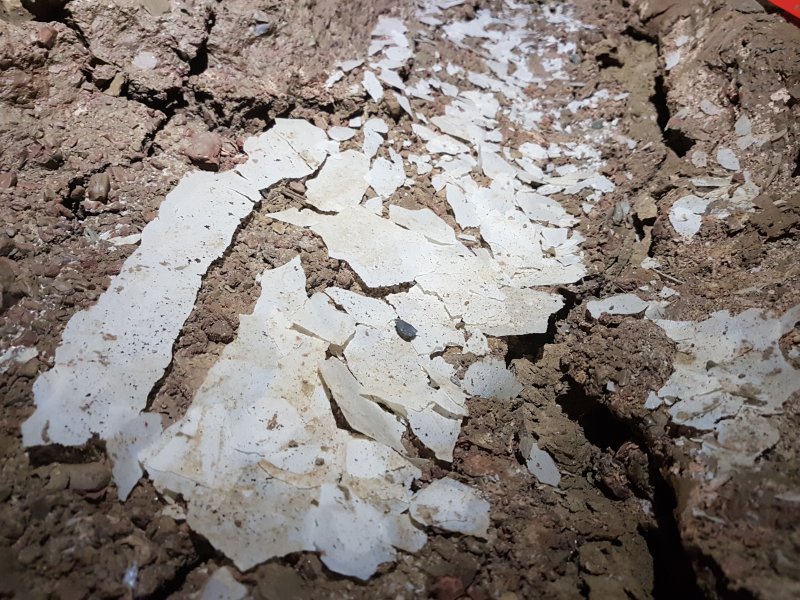 Calcite rafts.
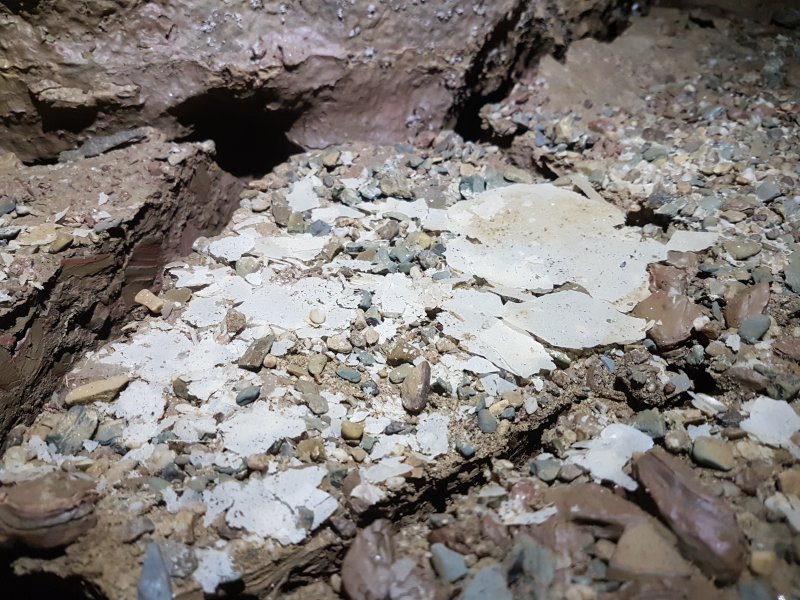 Calcite rafts.
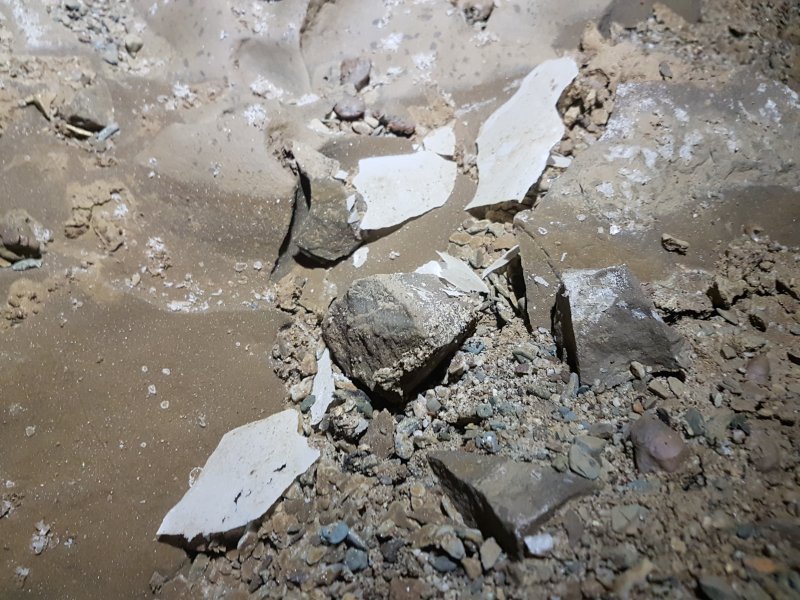 Calcite rafts.
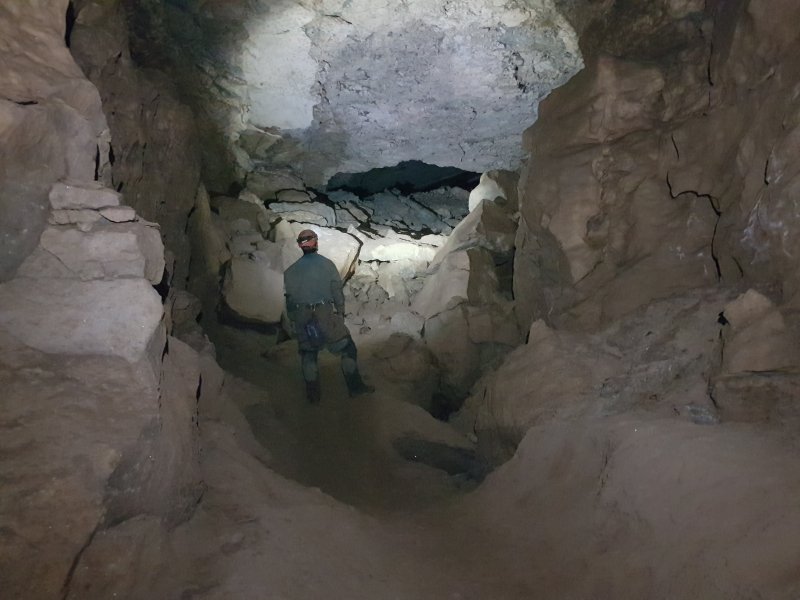 Nameless Canyon then earns a substantial side passage heading steeply upwards. This is the way to Aggy Passage.
Modelling by Gareth, lighting by Tarquin and Gareth
Nameless Canyon then earns a substantial side passage heading steeply upwards. This is the way to Aggy Passage.
Modelling by Gareth, lighting by Tarquin and Gareth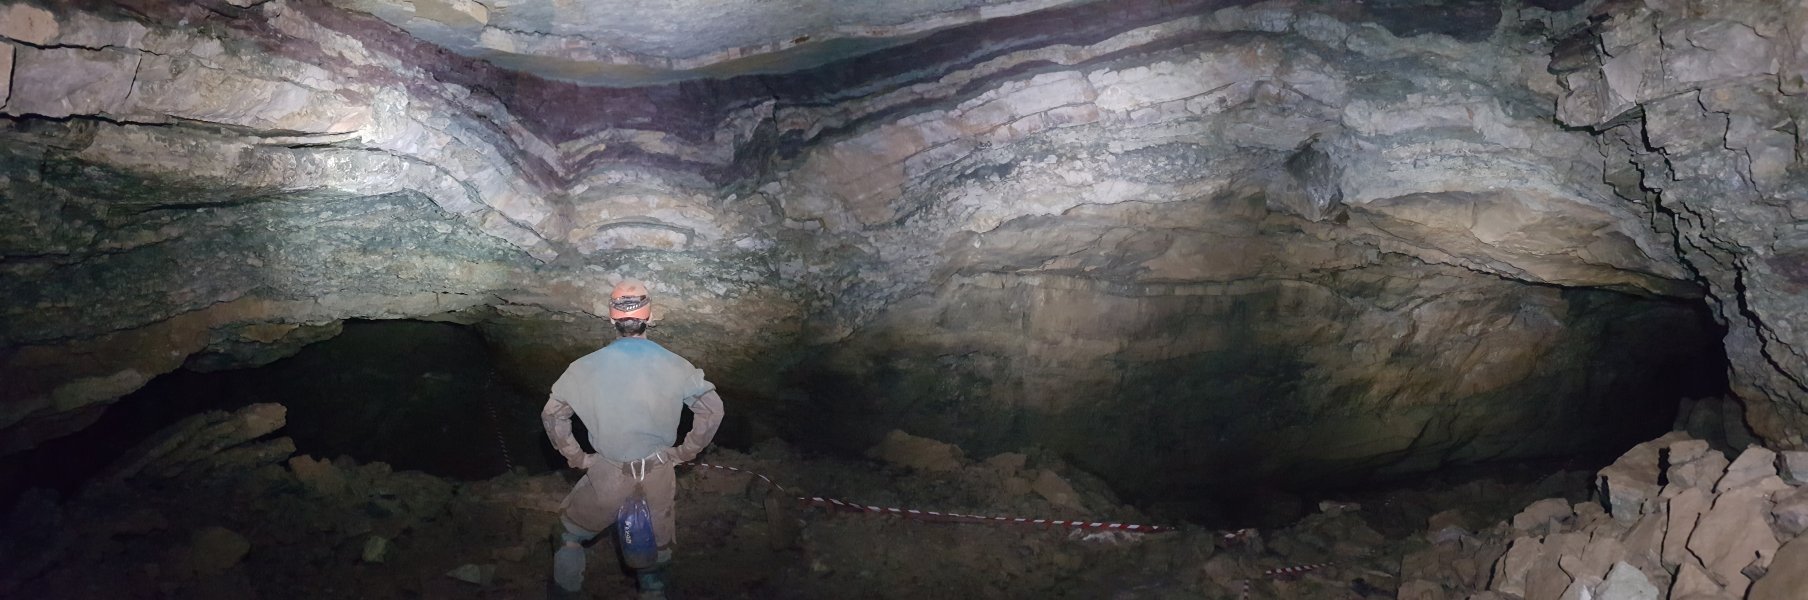 Very cool, layered rock in the ceiling at the junction of Kingston Sands (left) and Aggy Passage (right). The coloured layers are shale bands.
Modelling by Gareth, lighting by Tarquin and Gareth
Very cool, layered rock in the ceiling at the junction of Kingston Sands (left) and Aggy Passage (right). The coloured layers are shale bands.
Modelling by Gareth, lighting by Tarquin and Gareth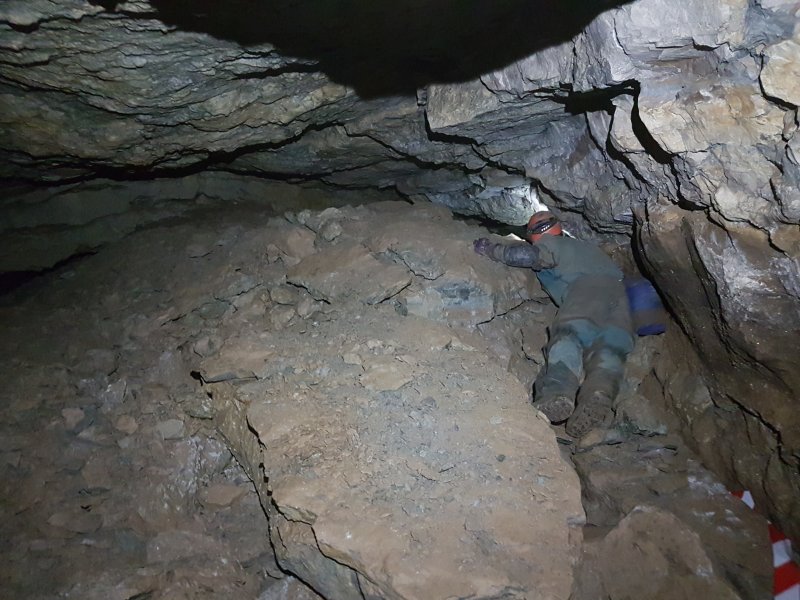 Kingston Sands starts huge but immediately becomes a low crawl.
Modelling by Gareth, lighting by Tarquin and Gareth
Kingston Sands starts huge but immediately becomes a low crawl.
Modelling by Gareth, lighting by Tarquin and Gareth The crawl seemed to go on a very long way, so since we were running low on time, we decided to leave it for another day. The survey makes it look like it might enter a short section of larger passage before it ends. It does not point in a useful direction, and probably is just an oxbow.
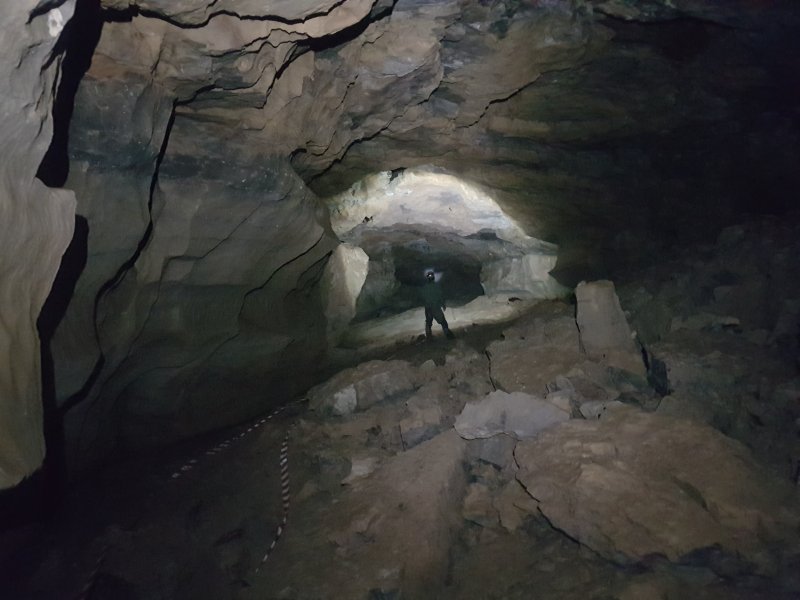 Aggy Passage is much more substantial, and a very promising lead.
Modelling by Gareth, lighting by Tarquin and Gareth
Aggy Passage is much more substantial, and a very promising lead.
Modelling by Gareth, lighting by Tarquin and Gareth Side choke in Aggy Passage.
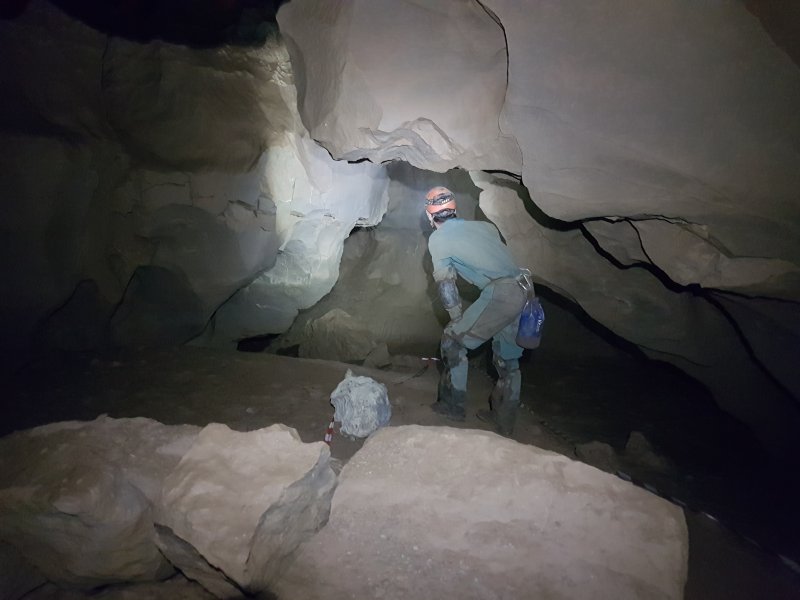 A lower phreatic arch before the end.
Modelling by Gareth, lighting by Tarquin and Gareth
A lower phreatic arch before the end.
Modelling by Gareth, lighting by Tarquin and Gareth The terminal choke of Aggy Passage, and the most likely place to find an extension.
Modelling by Gareth, lighting by Tarquin and Gareth
The terminal choke of Aggy Passage, and the most likely place to find an extension.
Modelling by Gareth, lighting by Tarquin and Gareth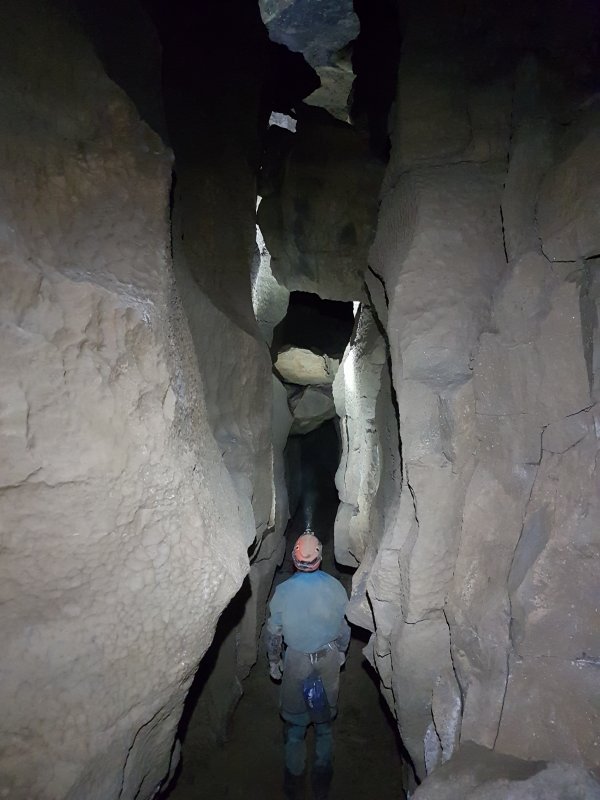 Continuing along Nameless Canyon seems almost anti-climactic after such an impressive side passage, but it is quite impressively tall in in its own right.
Modelling by Gareth, lighting by Tarquin and Gareth
Continuing along Nameless Canyon seems almost anti-climactic after such an impressive side passage, but it is quite impressively tall in in its own right.
Modelling by Gareth, lighting by Tarquin and Gareth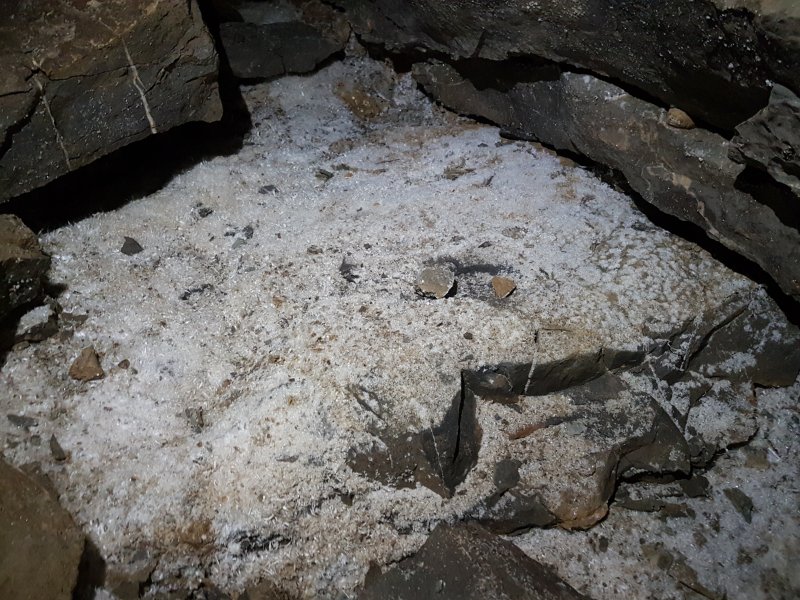 Gypsum in Nameless Canyon.
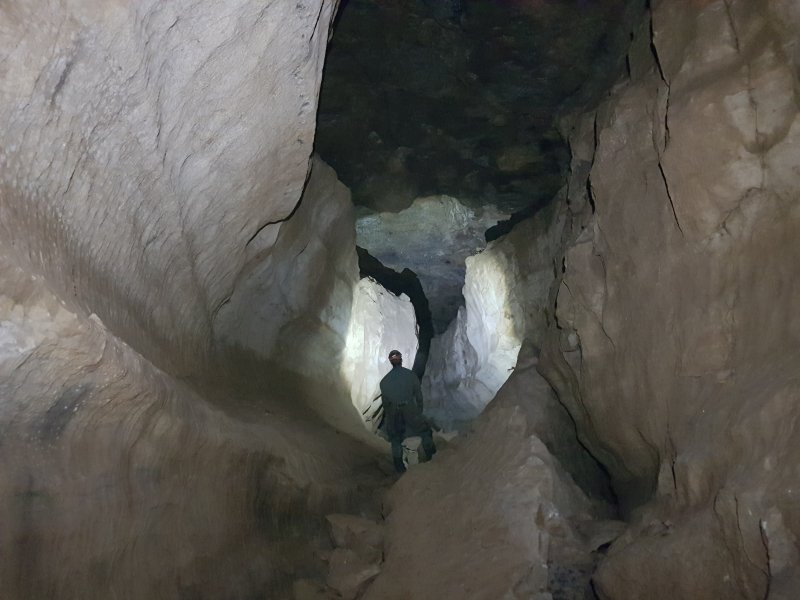 Nearing the end of Nameless Canyon.
Modelling by Gareth, lighting by Tarquin and Gareth
Nearing the end of Nameless Canyon.
Modelling by Gareth, lighting by Tarquin and Gareth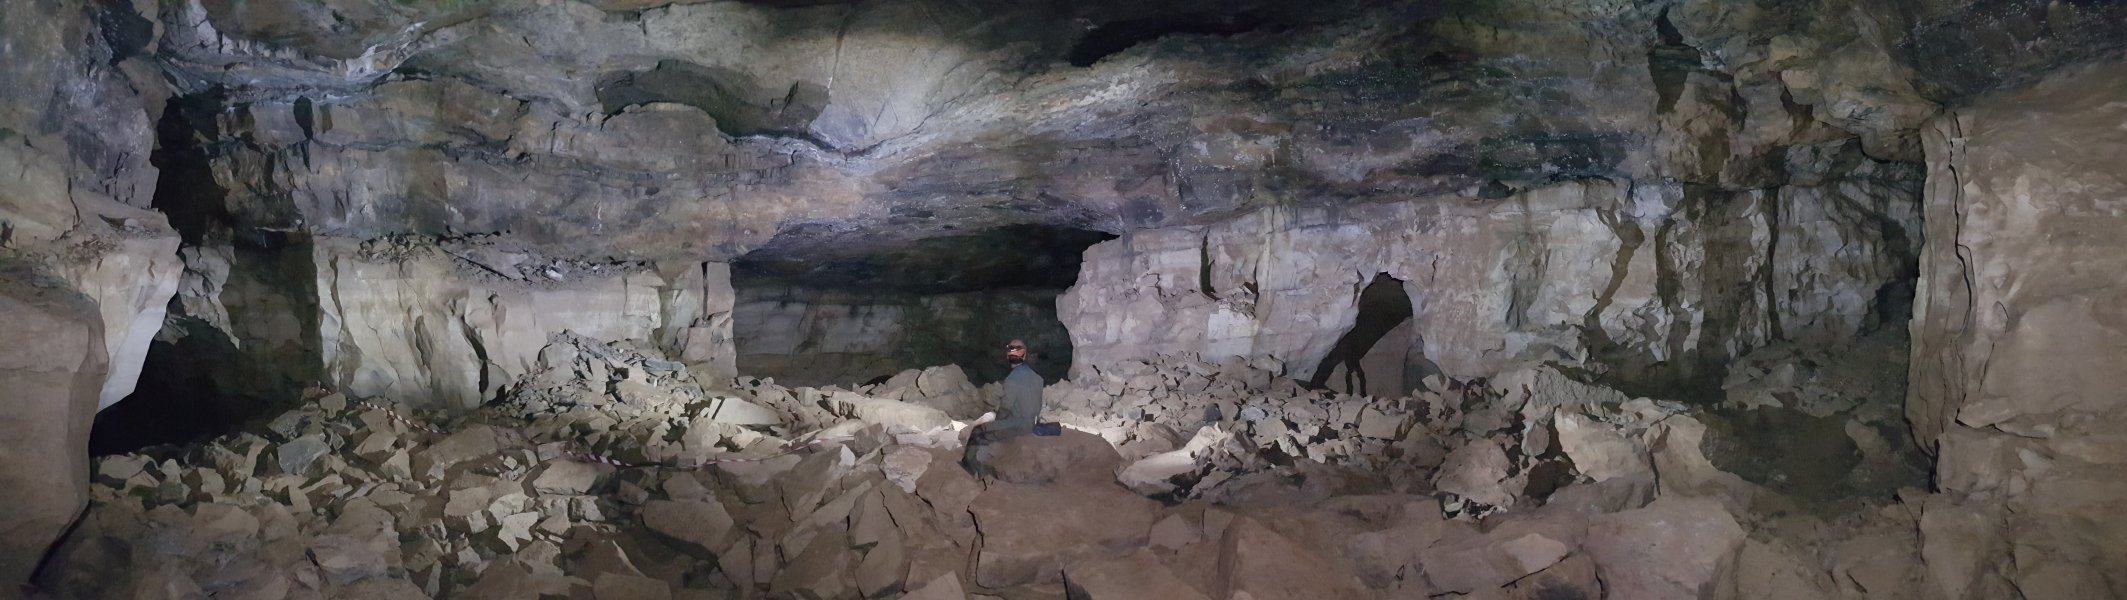 The Meeting Room. Nameless Canyon is behind the camera. To the left is a short stub passage half way up the wall, then the obvious entrance to Beyond Time, but we were appropriately out of time to visit on the first trip; this was visited on the second trip instead. Ahead is a large entrance into the side of a passage, where left drops into the Time Machine, and right is the usual way to the Time Machine. To the right are two short passages, the left of which pinches out just before connecting with the other passage.
Modelling by Gareth, lighting by Tarquin and Gareth
The Meeting Room. Nameless Canyon is behind the camera. To the left is a short stub passage half way up the wall, then the obvious entrance to Beyond Time, but we were appropriately out of time to visit on the first trip; this was visited on the second trip instead. Ahead is a large entrance into the side of a passage, where left drops into the Time Machine, and right is the usual way to the Time Machine. To the right are two short passages, the left of which pinches out just before connecting with the other passage.
Modelling by Gareth, lighting by Tarquin and Gareth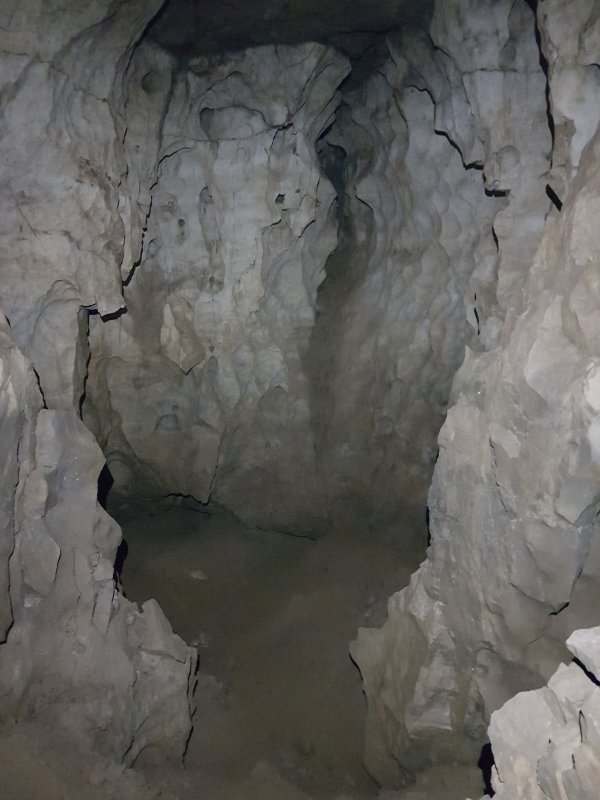 The passage to the right ends abruptly at a dig. This is probably related to Kingston Sands.
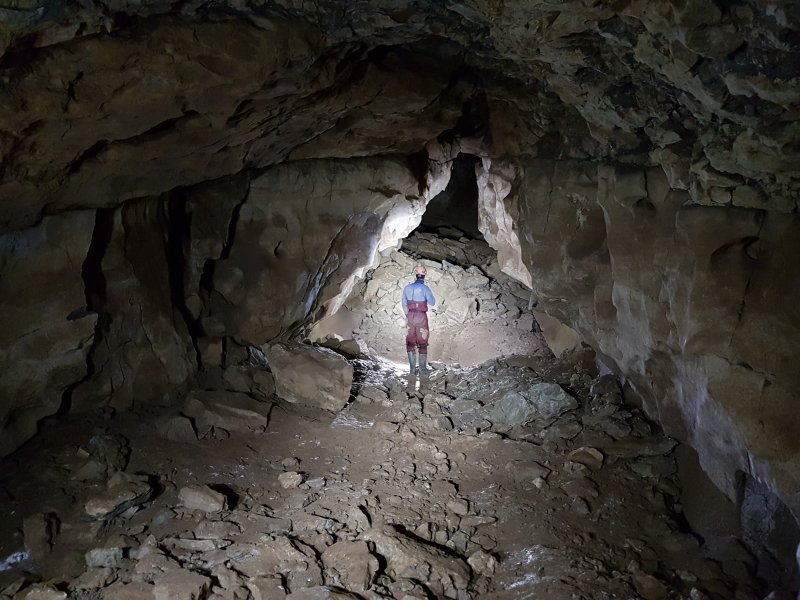 Beyond Time starts as a beautifully triangular passage.
Modelling by Paul, lighting by Tarquin, Claire, Sanita and Antonia
Beyond Time starts as a beautifully triangular passage.
Modelling by Paul, lighting by Tarquin, Claire, Sanita and Antonia Phreatic sculpted ceiling in Beyond Time.
Lighting by Claire and Antonia
Phreatic sculpted ceiling in Beyond Time.
Lighting by Claire and Antonia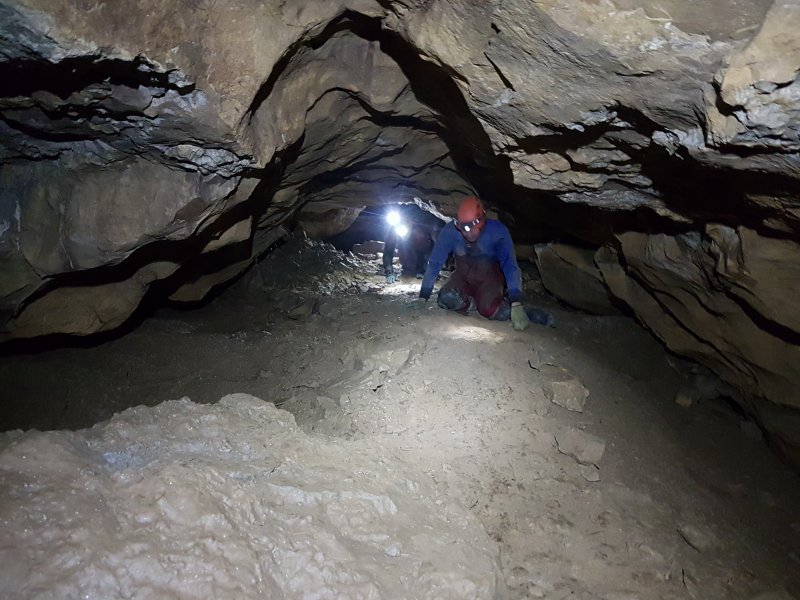 Beyond Time abruptly becomes a smaller crawl, but at least it is comfortably sized.
Modelling by Paul, Antonia and Claire, lighting by Tarquin, Paul, Antonia and Claire
Beyond Time abruptly becomes a smaller crawl, but at least it is comfortably sized.
Modelling by Paul, Antonia and Claire, lighting by Tarquin, Paul, Antonia and Claire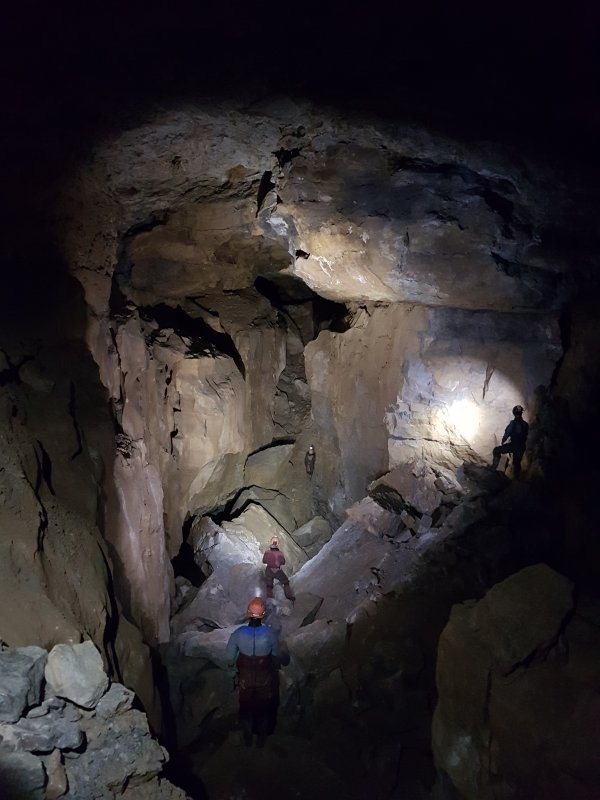 Boulder Chamber, the largest part of Beyond Time. In the floor to the right at the start, before the big part, are holes down through the boulders into the end of The Time Machine, and clearly this passage is its continuation. In the floor pit down to the left is the way into Crystal Corridor.
Modelling by Paul, Sanita, Antonia and Claire, lighting by Tarquin, Paul, Sanita, Antonia and Claire
Boulder Chamber, the largest part of Beyond Time. In the floor to the right at the start, before the big part, are holes down through the boulders into the end of The Time Machine, and clearly this passage is its continuation. In the floor pit down to the left is the way into Crystal Corridor.
Modelling by Paul, Sanita, Antonia and Claire, lighting by Tarquin, Paul, Sanita, Antonia and Claire Beyond Time stops being large at this junction. To the right are phreatic tubes, while ahead is low.
Modelling by Paul, Sanita and Antonia, lighting by Tarquin, Paul, Sanita, Antonia and Claire
Beyond Time stops being large at this junction. To the right are phreatic tubes, while ahead is low.
Modelling by Paul, Sanita and Antonia, lighting by Tarquin, Paul, Sanita, Antonia and Claire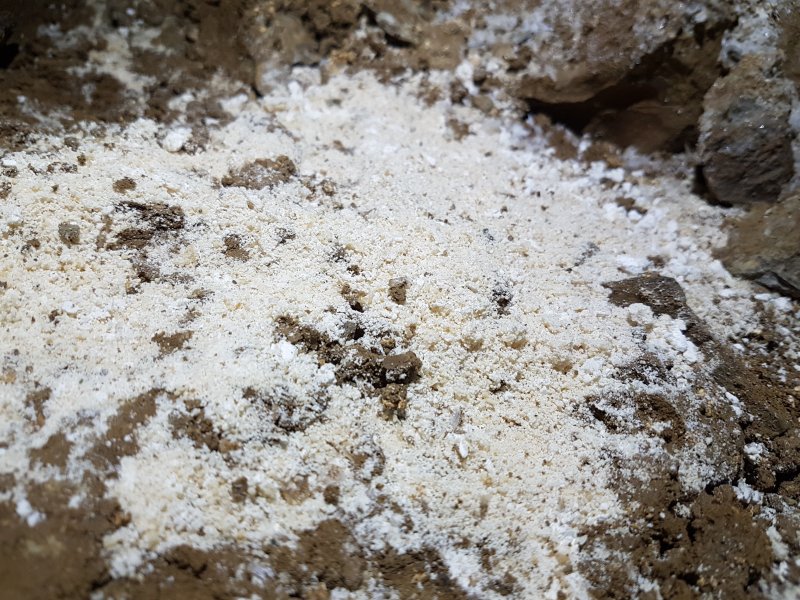 In the floor at the junction is a large pile of cryostal.
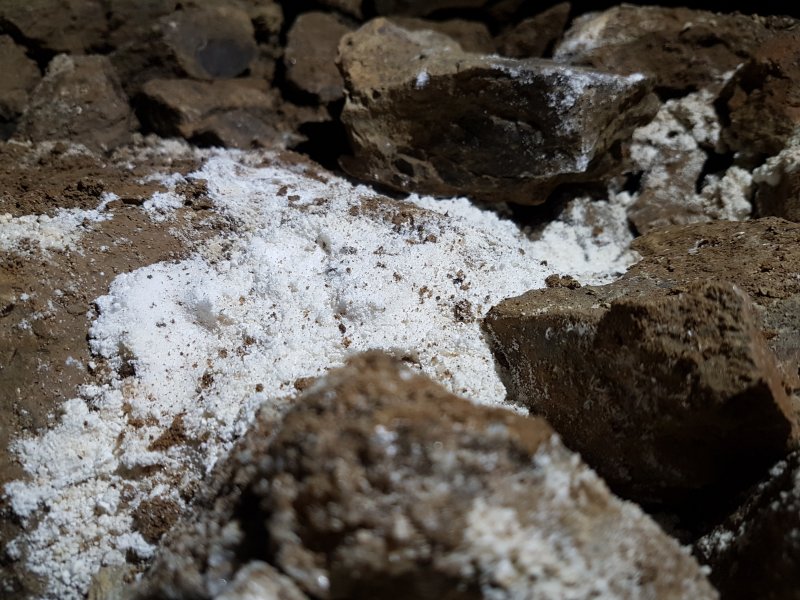 It seems a little out of place with so much gypsum around it, but the beads show that this is definitely cryostal.
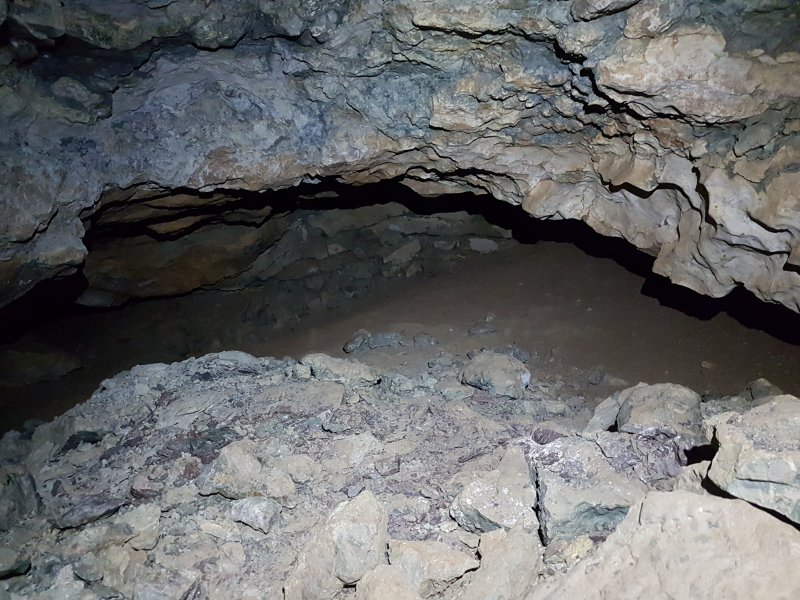 The low passage ahead ends at a washout chamber and digs. On the other side of this infill is Western Flyover, so clearly the cryostal deposits are related.
Modelling by , lighting by Tarquin,
The low passage ahead ends at a washout chamber and digs. On the other side of this infill is Western Flyover, so clearly the cryostal deposits are related.
Modelling by , lighting by Tarquin,  A final cryostal dusting on the rocks.
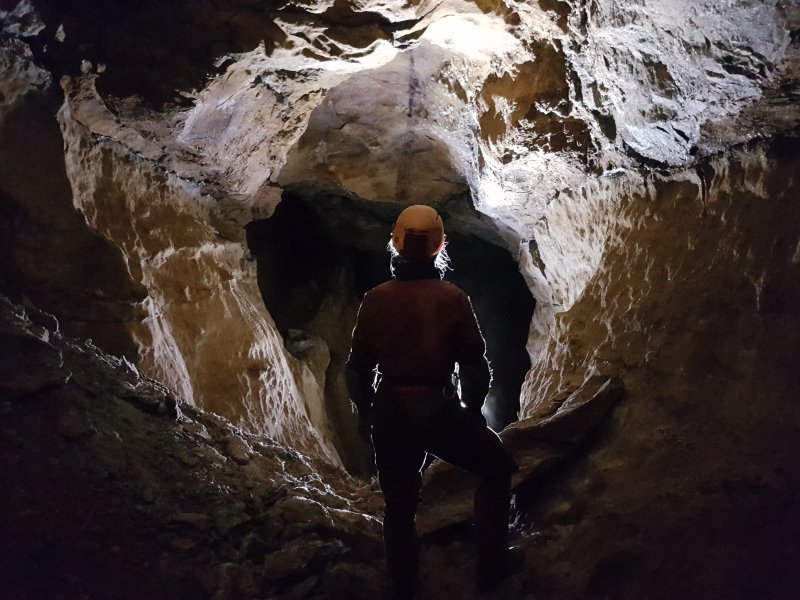 The phreatic tubes are rather attractive, with white gypsum coatings and obvious scallops. They end rather abruptly at mud infill, with a tapping connection to Painkiller Passage. This connection has intentionally been left closed, since it helps to preserve the formations in that passage.
Modelling by Antonia, lighting by Claire and Sanita
The phreatic tubes are rather attractive, with white gypsum coatings and obvious scallops. They end rather abruptly at mud infill, with a tapping connection to Painkiller Passage. This connection has intentionally been left closed, since it helps to preserve the formations in that passage.
Modelling by Antonia, lighting by Claire and Sanita In the floor pit of Boulder Chamber, an alcove on the side offers the other way on, decorated with iron-stained rocks.
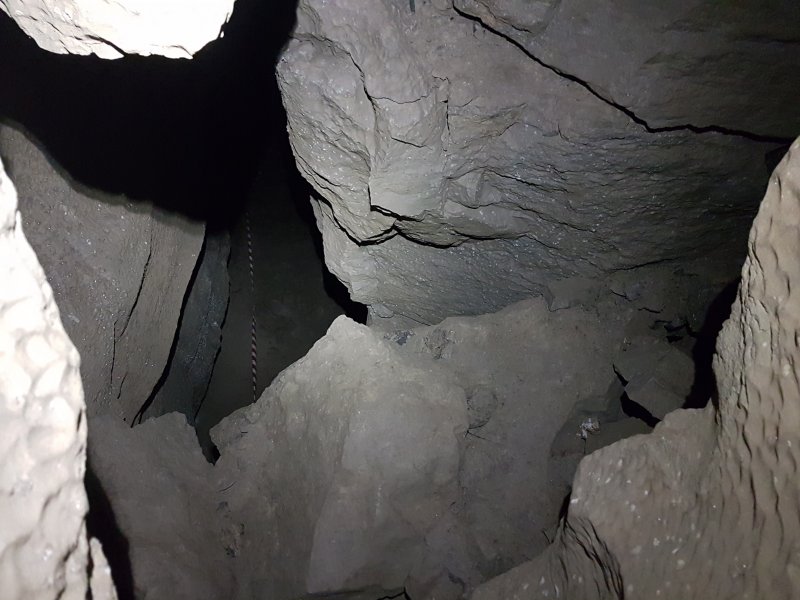 In the floor is a hole down to Bonsai Streamway. It is possible to free climb below the camera (on the near side of the wedged boulders), using some ledges, but it looks quite tricky, and equipment may be preferred.
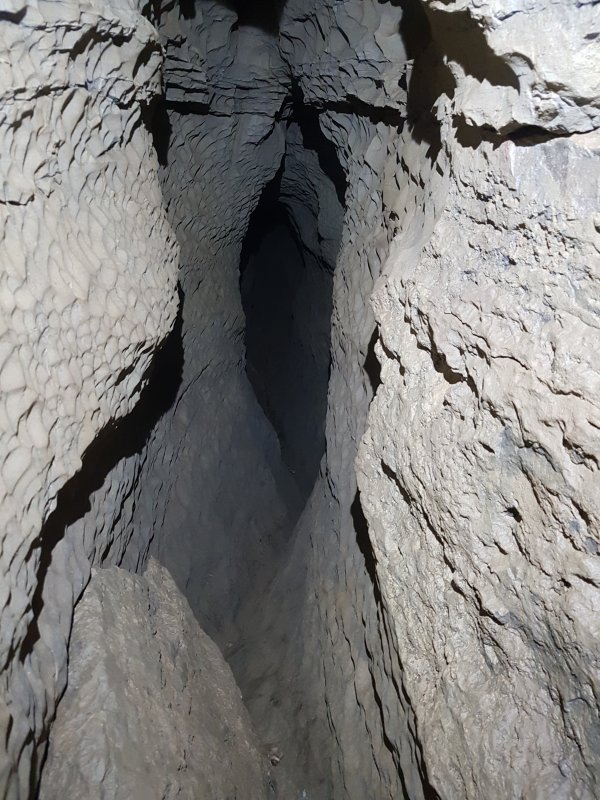 Above the hole down, a climb to the left gains a small tube, which drops into the end of Crystal Corridor. It is just as small and uninspiring at this end.
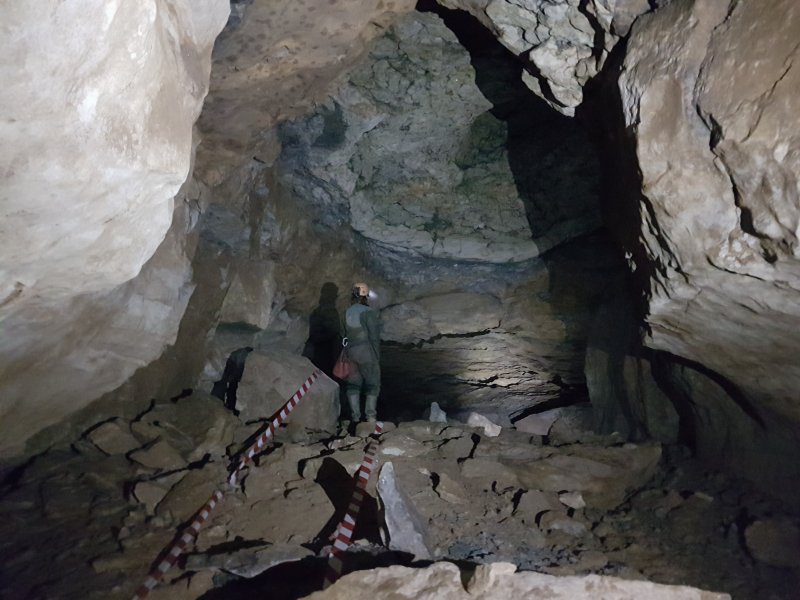 Returning to The Meeting Room, the left-hand way to the Time Machine starts promising.
Modelling by Claire, lighting by Tarquin and Claire
Returning to The Meeting Room, the left-hand way to the Time Machine starts promising.
Modelling by Claire, lighting by Tarquin and Claire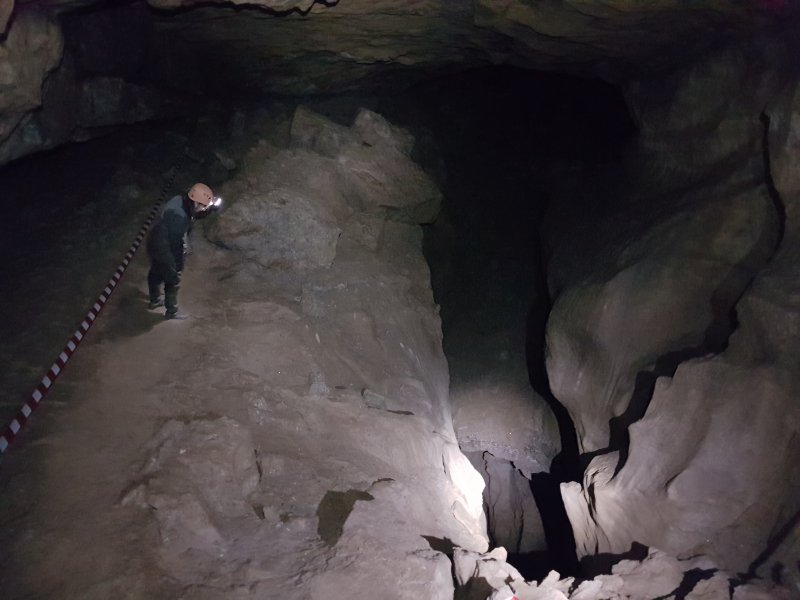 However, it ends at a choke, just after passing over this deep hole into the Time Machine. It looks about 25-30 metres down, and is not free climbable.
Modelling by Claire, lighting by Tarquin and Claire
However, it ends at a choke, just after passing over this deep hole into the Time Machine. It looks about 25-30 metres down, and is not free climbable.
Modelling by Claire, lighting by Tarquin and Claire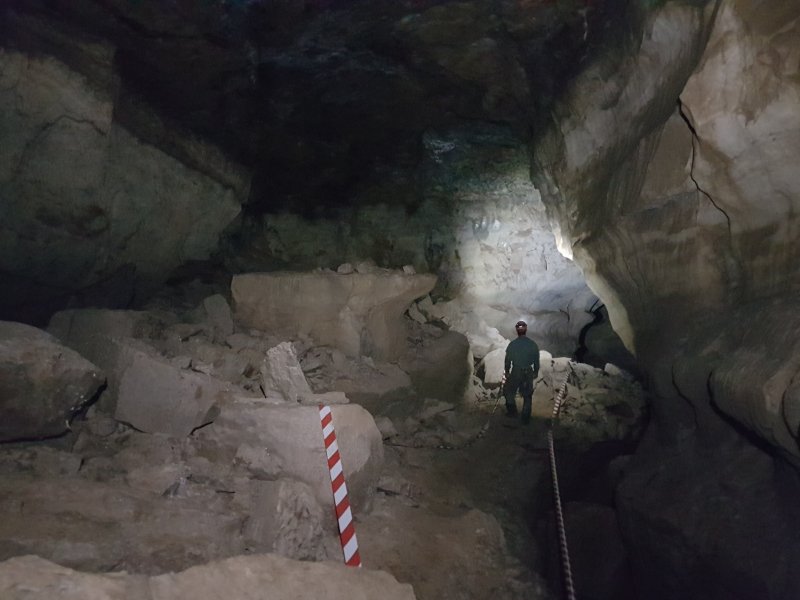 The usual way to The Time Machine.
Modelling by Gareth, lighting by Tarquin and Gareth
The usual way to The Time Machine.
Modelling by Gareth, lighting by Tarquin and Gareth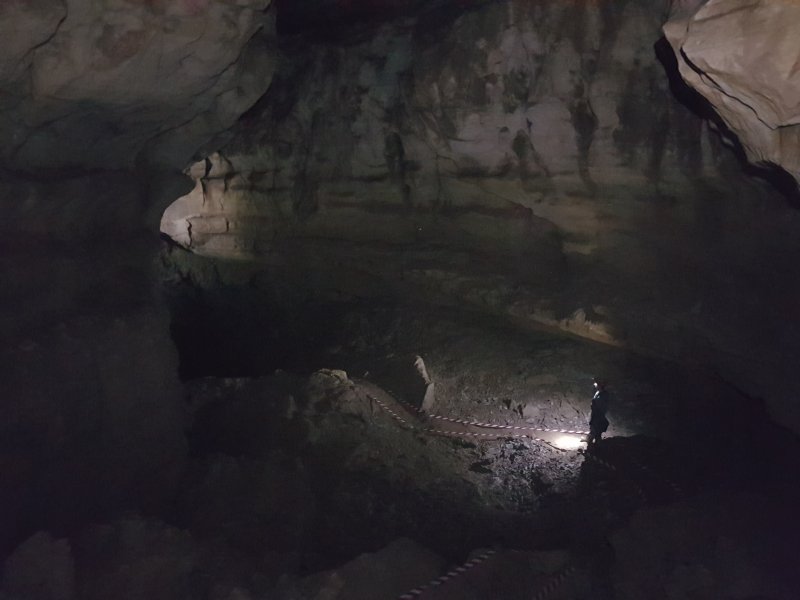 This quickly becomes a very large passage in its own right, but does not even earn a name.
Modelling by Gareth, lighting by Tarquin and Gareth
This quickly becomes a very large passage in its own right, but does not even earn a name.
Modelling by Gareth, lighting by Tarquin and Gareth Looking out into the southern end of the Time Machine, with the floor level reached via a short climb. Amazingly, the enormous passage we are in is almost invisible from below the climb, and can be easily missed when walking past, even when looking for it. From below, it just appears to be an alcove in the roof. With the final loop now completed, we headed out.
Modelling by Gareth, lighting by Tarquin and Gareth
Looking out into the southern end of the Time Machine, with the floor level reached via a short climb. Amazingly, the enormous passage we are in is almost invisible from below the climb, and can be easily missed when walking past, even when looking for it. From below, it just appears to be an alcove in the roof. With the final loop now completed, we headed out.
Modelling by Gareth, lighting by Tarquin and Gareth