Dolaucothi Gold Mines trip 28/04/2018
Unless otherwise stated, camera and setups by Tarquin, modelling by SMWCRT members and Beth and other guides from National Trust, lighting by everyone, edits and gallery effects by Tarquin.
This was a cave rescue team practice, intended to demonstrate how a person might be extracted from a lower level of a show mine, and removed from an upper level, if they were physically disabled, and unable to progress up the shafts themselves. While extremely unlikely to ever occur, this is an example of a bad case that can be planned for, should the need ever arise. Our simulated casualty was a volunteer from the National Trust, who operate the site. She was extracted from the lower level of the mine via a technically complicated stretcher haul up a series of pitches and inclines. The techniques and equipment are real, and would be used during an actual rescue, if needed. (Note that this refers to cave rescue, not working coal mines rescue, which is handled by different organisations.)
While the first shaft was being painstakingly prepared with the crazy rigging it would need, those of us not involved in the rigging were given the chance to visit the rest of the site, including several of the mines not open to the general public. Cave rescue is a voluntary service, and we are all cavers or mine explorers ourselves. The rescue practice pictures are taken while I was also taking part in the rescue practice, during the few seconds in between activities. They are not staged for the purpose of photography, and the people in the pictures are doing their parts in the rescue, rather than posing for a picture. There was not much time to take the pictures, so I hope the quality of the pictures does not suffer too much.
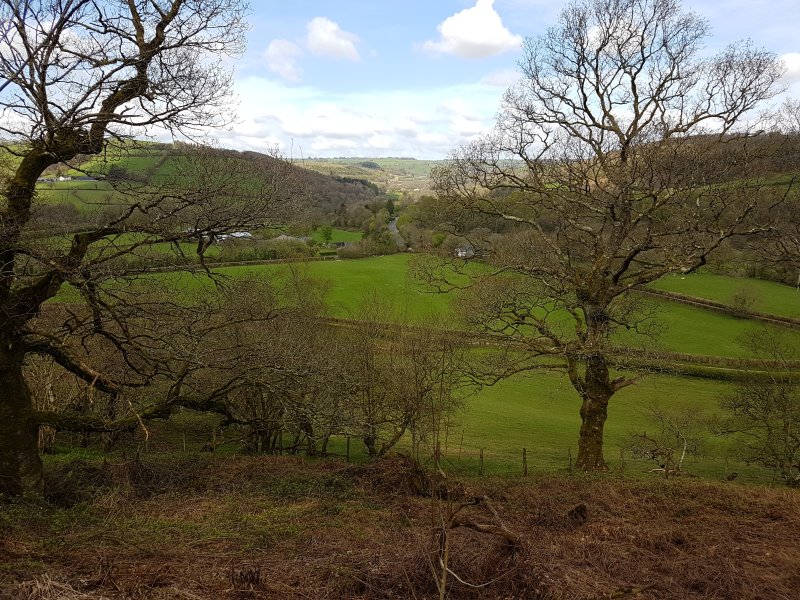
 Looking over Pumsaint. The depression in the field below is the site of an old Roman bathhouse, for the workers and soldiers based here. The cluster of trees to the left of the road was the site of a large Roman fort, which protected the resources here. The locals were hired to mine the gold from beneath the hills.
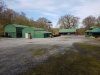 The mine buildings. The pit head (the big wheels on the tower) is at the top of the main 140 m deep shaft for the largest mine on the site, Ogofau Gold Mine. Sadly this was not available for us to visit - we were told that much of it is flooded.
Modelling by Kevin Diffey
The mine buildings. The pit head (the big wheels on the tower) is at the top of the main 140 m deep shaft for the largest mine on the site, Ogofau Gold Mine. Sadly this was not available for us to visit - we were told that much of it is flooded.
Modelling by Kevin Diffey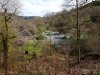 The mine buildings sit in a large opencast quarry, in operation since Roman times. Beneath the buildings is an enormous Roman mine, with a chamber some 30 metres by 30 metres in size. It was accidentally discovered by later miners, who had no idea that there were underground workings in the area. It's a real shame that we can't see it.
 The Romans had built a series of leats (drainage channels) around the Mynydd Mallaen hills, from as far away as 7 km at Pwll Uffern-Gothi, bringing water to flush the mines, and wash the gold from the ore in the washing beds below. This valley had a wooden aquaduct bringing the water from those leats over to this otherwise dry hill.
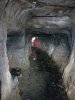 Lower Roman Adit, whose shape suggests that it is most likely to be a water drainage adit.
Modelling by Kevin Diffey
Lower Roman Adit, whose shape suggests that it is most likely to be a water drainage adit.
Modelling by Kevin Diffey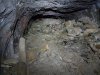 The passage chokes, but used to connect to the final chamber of the Upper Roman Adit.
Lighting by Tarquin
The passage chokes, but used to connect to the final chamber of the Upper Roman Adit.
Lighting by Tarquin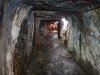 Upper Roman Adit, whose shape suggests it was used for trucks, transporting the ore to the washing areas.
Lighting by Tarquin
Upper Roman Adit, whose shape suggests it was used for trucks, transporting the ore to the washing areas.
Lighting by Tarquin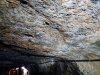 Pick marks in the roof, showing how the adit was mined by hand, probably by Roman soldiers.
Lighting by Dave Linton
Pick marks in the roof, showing how the adit was mined by hand, probably by Roman soldiers.
Lighting by Dave Linton Mineral stains on the walls of the Roman Adit room.
Lighting by Tarquin
Mineral stains on the walls of the Roman Adit room.
Lighting by Tarquin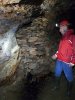 A room-and-pillar support pillar (on the left). The dry stone wall is simply waste shale. Up to the right is a chimney, a small shaft leading to the surface, used when setting fires to break the rock.
Modelling by Peter Dennis, lighting by Tarquin, Peter and the National Trust guide
A room-and-pillar support pillar (on the left). The dry stone wall is simply waste shale. Up to the right is a chimney, a small shaft leading to the surface, used when setting fires to break the rock.
Modelling by Peter Dennis, lighting by Tarquin, Peter and the National Trust guide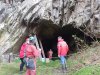 The entrance to Ogof Fawr, a short mine.
Modelling by our National Trust guide, Lisa Boore, Peter, Phil Knight, and Dave
The entrance to Ogof Fawr, a short mine.
Modelling by our National Trust guide, Lisa Boore, Peter, Phil Knight, and Dave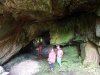 The main chamber of the mine, which has another entrance and 3 ways on, none of which go very far.
Modelling by Dave, our National Trust guide and Peter, lighting by Dave
The main chamber of the mine, which has another entrance and 3 ways on, none of which go very far.
Modelling by Dave, our National Trust guide and Peter, lighting by Dave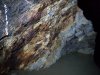 Minerals at the main drift face.
Lighting by Tarquin
Minerals at the main drift face.
Lighting by Tarquin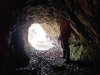 Smokers' Adit looks very inviting from the main site, but it is only a short stump of an adit, used for what you might expect from its name.
Modelling by Phil
Smokers' Adit looks very inviting from the main site, but it is only a short stump of an adit, used for what you might expect from its name.
Modelling by Phil Entrance to Mitchel Adit, which is visited by tourists, and where we were lucky enough to see a couple of greater horseshoe bats.
Modelling by Peter, Kevin Munn and Lisa
Entrance to Mitchel Adit, which is visited by tourists, and where we were lucky enough to see a couple of greater horseshoe bats.
Modelling by Peter, Kevin Munn and Lisa The main passage of Mitchel Adit.
Modelling by Lisa, Kevin Munn, Dave, and our guide, lighting by Tarquin and the rest
The main passage of Mitchel Adit.
Modelling by Lisa, Kevin Munn, Dave, and our guide, lighting by Tarquin and the rest A seam of gold-bearing quartz. Why was this not removed by the Victorian miners? They appear to have ignored anything that was not substantial enough.
Lighting by Tarquin
A seam of gold-bearing quartz. Why was this not removed by the Victorian miners? They appear to have ignored anything that was not substantial enough.
Lighting by Tarquin Water-filled passage at Five Ways junction. It appears to be only a short sump, surfacing again in the distance.
Lighting by Tarquin
Water-filled passage at Five Ways junction. It appears to be only a short sump, surfacing again in the distance.
Lighting by Tarquin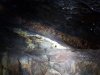 Much more substantial gold-bearing quartz seam at Mitchel Stope. This is about 50 cm wide. The seam itself was hoped to be the payoff for the mine owner.
Lighting by Tarquin and others
Much more substantial gold-bearing quartz seam at Mitchel Stope. This is about 50 cm wide. The seam itself was hoped to be the payoff for the mine owner.
Lighting by Tarquin and others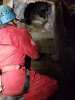 Hole towards the upper entrance. Regular tourists are taken up through here, and so would our stretcher later.
Modelling by Dave, lighting by Tarquin, Phil and Dave
Hole towards the upper entrance. Regular tourists are taken up through here, and so would our stretcher later.
Modelling by Dave, lighting by Tarquin, Phil and Dave Mitchel's team drilled the ceiling (with hand drills), put in their dynamite, set it off, and came back to see how much they had discovered. Instead of gold, they found a gaping hole left by the Romans, who had already discovered the seam, and mined it to within just a few cm of where the Victorians had reached. There would be no payoff. Mitchel immediately packed and left for Africa (where he hoped the Romans would not have been before him). The steps were cut by the Romans, and the wooden barriers are put there by the National Trust. Our stretcher haul would ascend them.
Lighting by Tarquin and others
Mitchel's team drilled the ceiling (with hand drills), put in their dynamite, set it off, and came back to see how much they had discovered. Instead of gold, they found a gaping hole left by the Romans, who had already discovered the seam, and mined it to within just a few cm of where the Victorians had reached. There would be no payoff. Mitchel immediately packed and left for Africa (where he hoped the Romans would not have been before him). The steps were cut by the Romans, and the wooden barriers are put there by the National Trust. Our stretcher haul would ascend them.
Lighting by Tarquin and others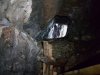 One of the two Roman entrances which had somehow gone unnoticed by the Mitchel team. Presumably, they had been covered by debris over the previous 2000 years.
Lighting by Tarquin
One of the two Roman entrances which had somehow gone unnoticed by the Mitchel team. Presumably, they had been covered by debris over the previous 2000 years.
Lighting by Tarquin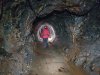 Rescue team members and the volunteer casualty Beth.
 Placing the casualty in the stretcher. Blankets add padding and help keep a motionless casualty warm. The stretcher is made of flexible plastic, with loads of straps to keep the casualty in place. There are metal brackets for hauling, handles for carrying, a spinal splint for bracing, and the casualty wears a harness (if possible) which is used as a safety backup during a stretcher haul. A medically trained rescuer accompanies the casualty, reassuring them and making sure they know what is happening. At the same time, they may dictate how much the stretcher can be hauled, and when it is ready to move.
Modelling (actually working) by Lisa, Kevin Munn, Phil, Gary Evans, Dave and casualty Beth
Placing the casualty in the stretcher. Blankets add padding and help keep a motionless casualty warm. The stretcher is made of flexible plastic, with loads of straps to keep the casualty in place. There are metal brackets for hauling, handles for carrying, a spinal splint for bracing, and the casualty wears a harness (if possible) which is used as a safety backup during a stretcher haul. A medically trained rescuer accompanies the casualty, reassuring them and making sure they know what is happening. At the same time, they may dictate how much the stretcher can be hauled, and when it is ready to move.
Modelling (actually working) by Lisa, Kevin Munn, Phil, Gary Evans, Dave and casualty Beth The main haul took place in this shaft. Normally, we would haul up a cave pitch, but this is very different, with ladders and platforms. These make it much harder to haul, as they get in the way, and force all sorts of adjustments to be made, instead of a single haul up a pitch. There is a rope for hauling, a rope for recuers to clip into between drops, a rope for rescuers to ascend with, and a backup rope for the casualty. The stretcher has to get past these without tangling.
Lighting by Tarquin
The main haul took place in this shaft. Normally, we would haul up a cave pitch, but this is very different, with ladders and platforms. These make it much harder to haul, as they get in the way, and force all sorts of adjustments to be made, instead of a single haul up a pitch. There is a rope for hauling, a rope for recuers to clip into between drops, a rope for rescuers to ascend with, and a backup rope for the casualty. The stretcher has to get past these without tangling.
Lighting by Tarquin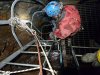 Stretcher guidance team inspecting the rigging, to work out how they will guide the stretcher through the area.
Modelling by Lisa, lighting by Tarquin and Lisa
Stretcher guidance team inspecting the rigging, to work out how they will guide the stretcher through the area.
Modelling by Lisa, lighting by Tarquin and Lisa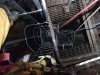 The ropes were able to pass through the floors of some of the platforms, reducing the number of times it needed to be pulled sideways into the next ladder. Nonetheless, it is still a lot of metalwork and obstructions to bypass, and the rigging must have been quite a logistical challenge. The benefit is that the ropes can be safely tied away from each other, to reduce the chance of tangles.
Lighting by Tarquin and Lisa
The ropes were able to pass through the floors of some of the platforms, reducing the number of times it needed to be pulled sideways into the next ladder. Nonetheless, it is still a lot of metalwork and obstructions to bypass, and the rigging must have been quite a logistical challenge. The benefit is that the ropes can be safely tied away from each other, to reduce the chance of tangles.
Lighting by Tarquin and Lisa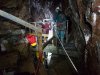 Stretcher (the white cucoon) approaching the pitch head, having been slowly raised by the hauling team. The stretcher guidance team can be seen manoevering the stretcher up to the awkward position where it needs to be lifted above the highest ropes before it can be rotated and pulled horizontally. In this mine, the rock is not strong enough for higher bolts to be added for this purpose, and it required a lot of careful manoeuvring and manual effort, while swapping from rope to rope.
Modelling (working) by Gary, Kevin Munn, John Roe, Ali Garmin, Lisa and Beth, additional lighting by Tarquin and Peter
Stretcher (the white cucoon) approaching the pitch head, having been slowly raised by the hauling team. The stretcher guidance team can be seen manoevering the stretcher up to the awkward position where it needs to be lifted above the highest ropes before it can be rotated and pulled horizontally. In this mine, the rock is not strong enough for higher bolts to be added for this purpose, and it required a lot of careful manoeuvring and manual effort, while swapping from rope to rope.
Modelling (working) by Gary, Kevin Munn, John Roe, Ali Garmin, Lisa and Beth, additional lighting by Tarquin and Peter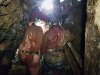 Manual hauling up the Roman Stope steps. A fuzzy picture, but hopefully it will show the cramped conditions, where manual effort of about 10 people is required to steer and haul the stretcher up the passage. Almost everyone (all except me and the underground communications controller) of the underground team can be seen in this picture.
Modelling (working) by everyone except me, Kevin Diffey and our original guide, but including Dan Thorne and Rich Hill ... somewhere
Manual hauling up the Roman Stope steps. A fuzzy picture, but hopefully it will show the cramped conditions, where manual effort of about 10 people is required to steer and haul the stretcher up the passage. Almost everyone (all except me and the underground communications controller) of the underground team can be seen in this picture.
Modelling (working) by everyone except me, Kevin Diffey and our original guide, but including Dan Thorne and Rich Hill ... somewhere
 Looking over Pumsaint. The depression in the field below is the site of an old Roman bathhouse, for the workers and soldiers based here. The cluster of trees to the left of the road was the site of a large Roman fort, which protected the resources here. The locals were hired to mine the gold from beneath the hills.
 The mine buildings. The pit head (the big wheels on the tower) is at the top of the main 140 m deep shaft for the largest mine on the site, Ogofau Gold Mine. Sadly this was not available for us to visit - we were told that much of it is flooded.
Modelling by Kevin Diffey
The mine buildings. The pit head (the big wheels on the tower) is at the top of the main 140 m deep shaft for the largest mine on the site, Ogofau Gold Mine. Sadly this was not available for us to visit - we were told that much of it is flooded.
Modelling by Kevin Diffey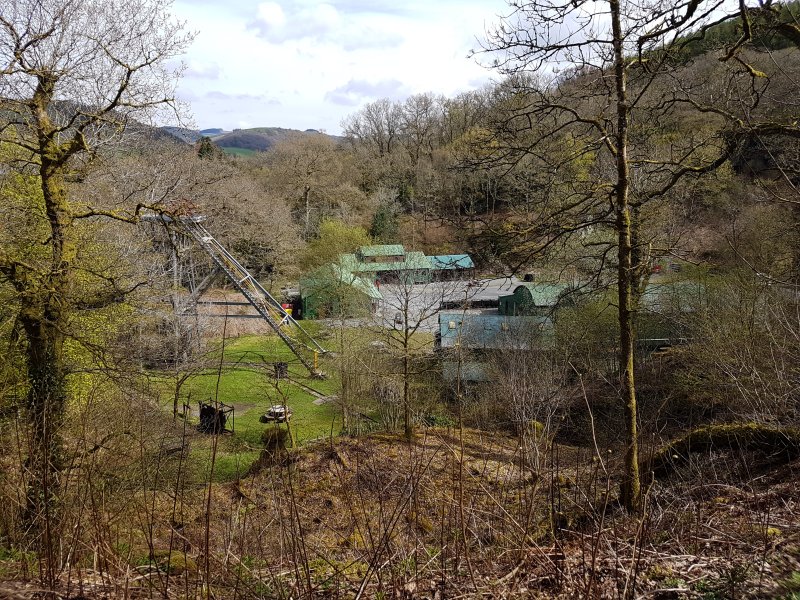 The mine buildings sit in a large opencast quarry, in operation since Roman times. Beneath the buildings is an enormous Roman mine, with a chamber some 30 metres by 30 metres in size. It was accidentally discovered by later miners, who had no idea that there were underground workings in the area. It's a real shame that we can't see it.
 The Romans had built a series of leats (drainage channels) around the Mynydd Mallaen hills, from as far away as 7 km at Pwll Uffern-Gothi, bringing water to flush the mines, and wash the gold from the ore in the washing beds below. This valley had a wooden aquaduct bringing the water from those leats over to this otherwise dry hill.
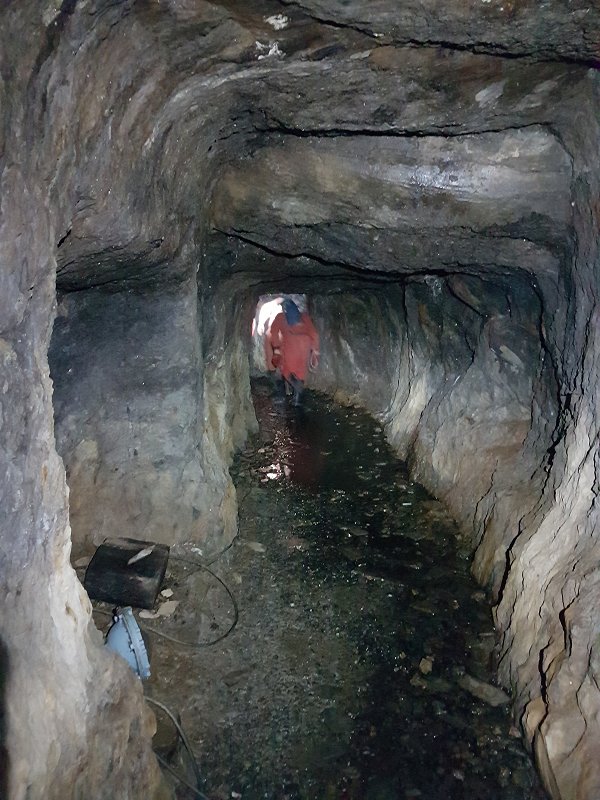 Lower Roman Adit, whose shape suggests that it is most likely to be a water drainage adit.
Modelling by Kevin Diffey
Lower Roman Adit, whose shape suggests that it is most likely to be a water drainage adit.
Modelling by Kevin Diffey The passage chokes, but used to connect to the final chamber of the Upper Roman Adit.
Lighting by Tarquin
The passage chokes, but used to connect to the final chamber of the Upper Roman Adit.
Lighting by Tarquin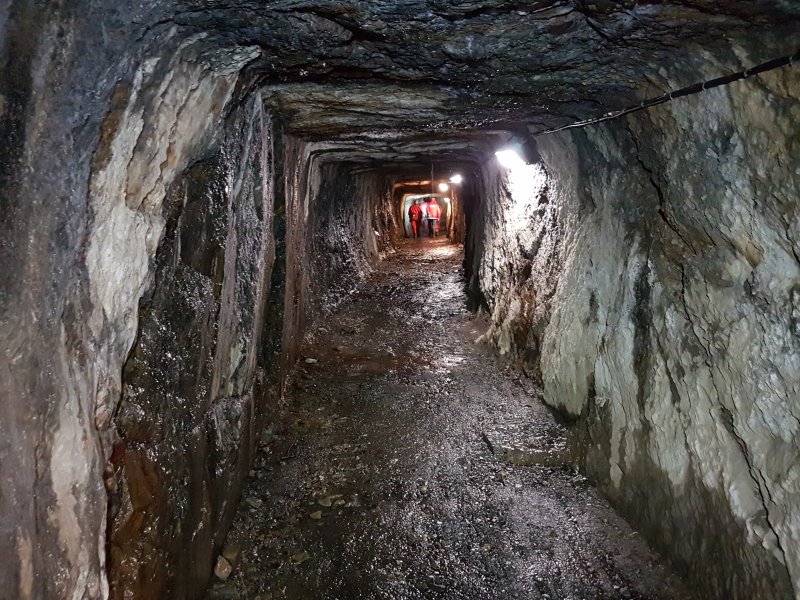 Upper Roman Adit, whose shape suggests it was used for trucks, transporting the ore to the washing areas.
Lighting by Tarquin
Upper Roman Adit, whose shape suggests it was used for trucks, transporting the ore to the washing areas.
Lighting by Tarquin Pick marks in the roof, showing how the adit was mined by hand, probably by Roman soldiers.
Lighting by Dave Linton
Pick marks in the roof, showing how the adit was mined by hand, probably by Roman soldiers.
Lighting by Dave Linton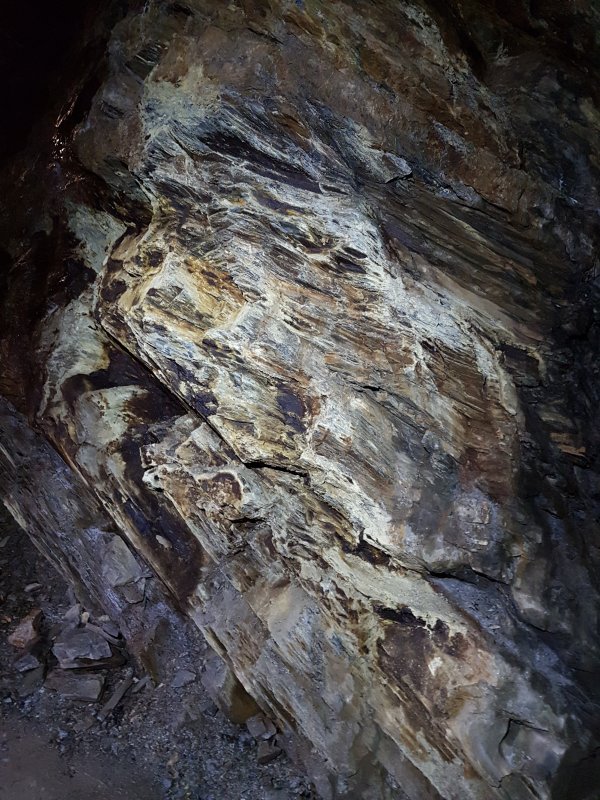 Mineral stains on the walls of the Roman Adit room.
Lighting by Tarquin
Mineral stains on the walls of the Roman Adit room.
Lighting by Tarquin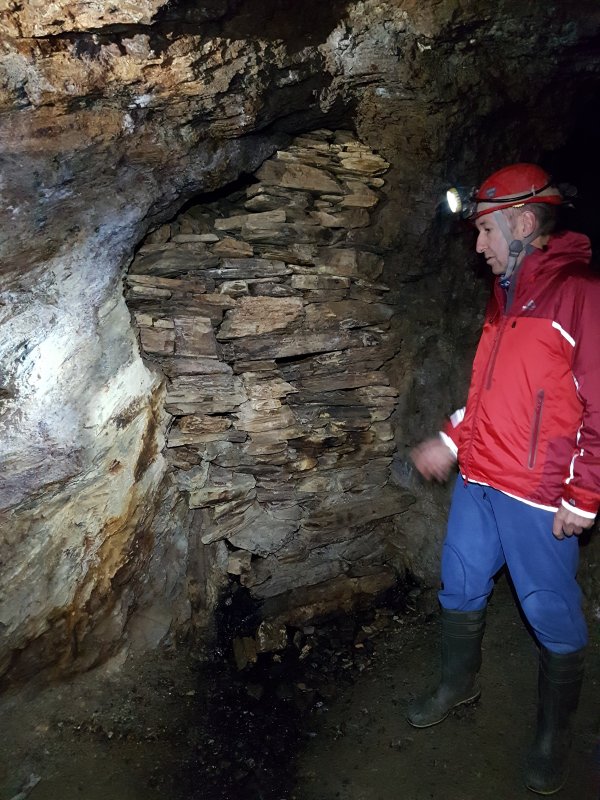 A room-and-pillar support pillar (on the left). The dry stone wall is simply waste shale. Up to the right is a chimney, a small shaft leading to the surface, used when setting fires to break the rock.
Modelling by Peter Dennis, lighting by Tarquin, Peter and the National Trust guide
A room-and-pillar support pillar (on the left). The dry stone wall is simply waste shale. Up to the right is a chimney, a small shaft leading to the surface, used when setting fires to break the rock.
Modelling by Peter Dennis, lighting by Tarquin, Peter and the National Trust guide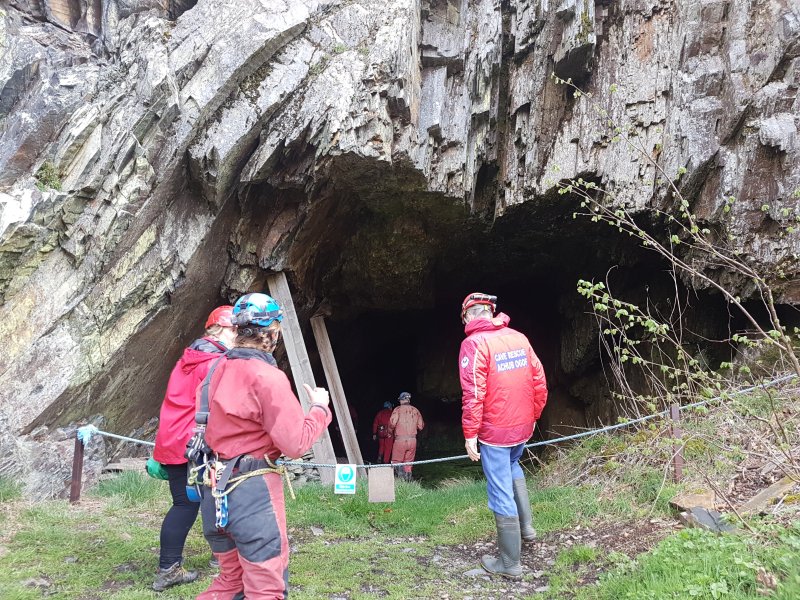 The entrance to Ogof Fawr, a short mine.
Modelling by our National Trust guide, Lisa Boore, Peter, Phil Knight, and Dave
The entrance to Ogof Fawr, a short mine.
Modelling by our National Trust guide, Lisa Boore, Peter, Phil Knight, and Dave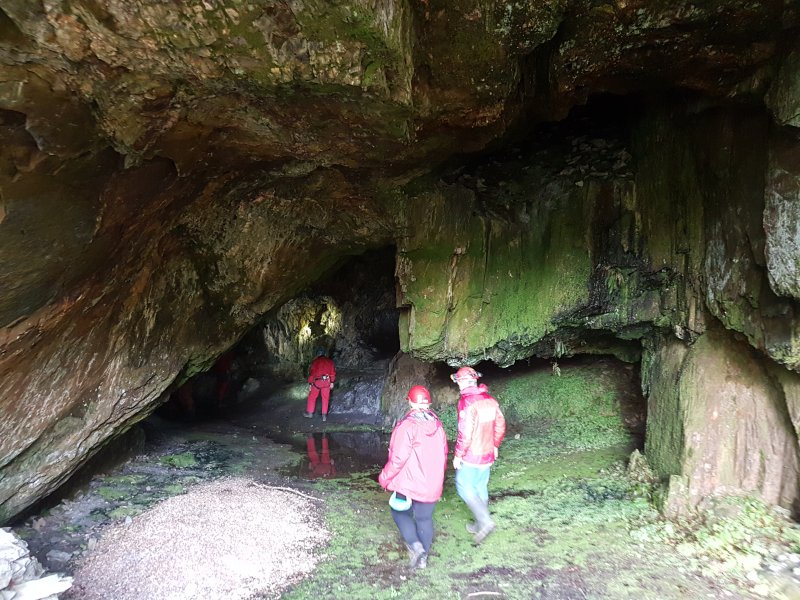 The main chamber of the mine, which has another entrance and 3 ways on, none of which go very far.
Modelling by Dave, our National Trust guide and Peter, lighting by Dave
The main chamber of the mine, which has another entrance and 3 ways on, none of which go very far.
Modelling by Dave, our National Trust guide and Peter, lighting by Dave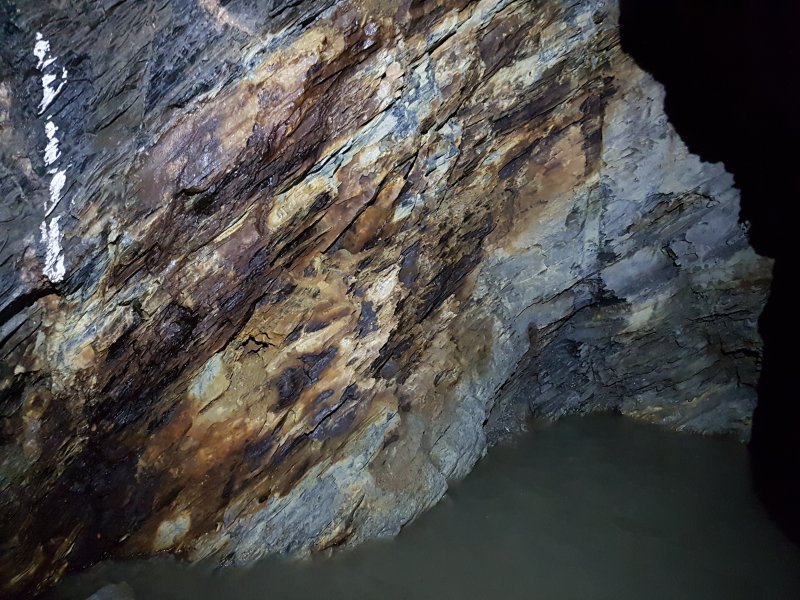 Minerals at the main drift face.
Lighting by Tarquin
Minerals at the main drift face.
Lighting by Tarquin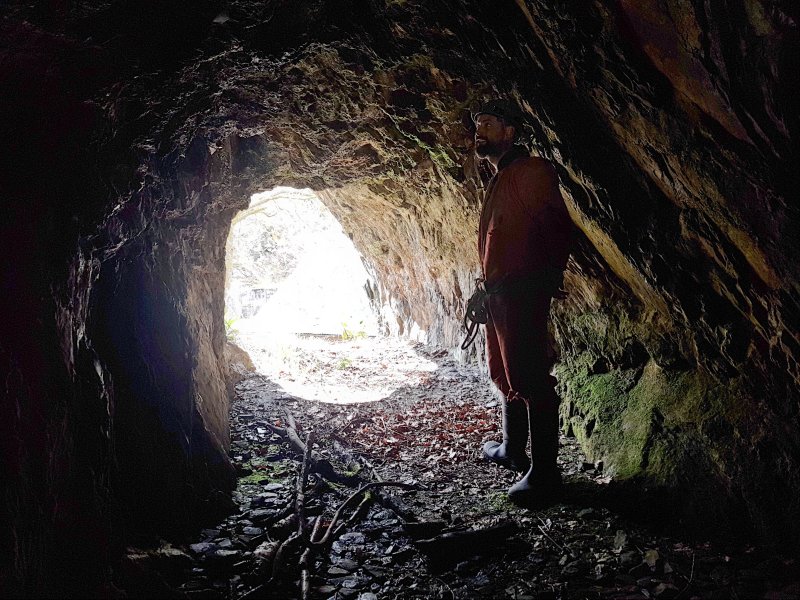 Smokers' Adit looks very inviting from the main site, but it is only a short stump of an adit, used for what you might expect from its name.
Modelling by Phil
Smokers' Adit looks very inviting from the main site, but it is only a short stump of an adit, used for what you might expect from its name.
Modelling by Phil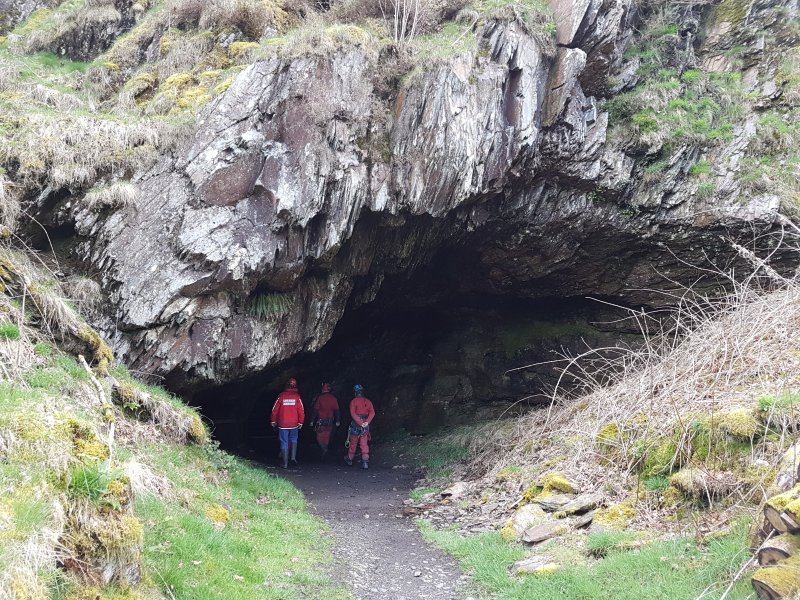 Entrance to Mitchel Adit, which is visited by tourists, and where we were lucky enough to see a couple of greater horseshoe bats.
Modelling by Peter, Kevin Munn and Lisa
Entrance to Mitchel Adit, which is visited by tourists, and where we were lucky enough to see a couple of greater horseshoe bats.
Modelling by Peter, Kevin Munn and Lisa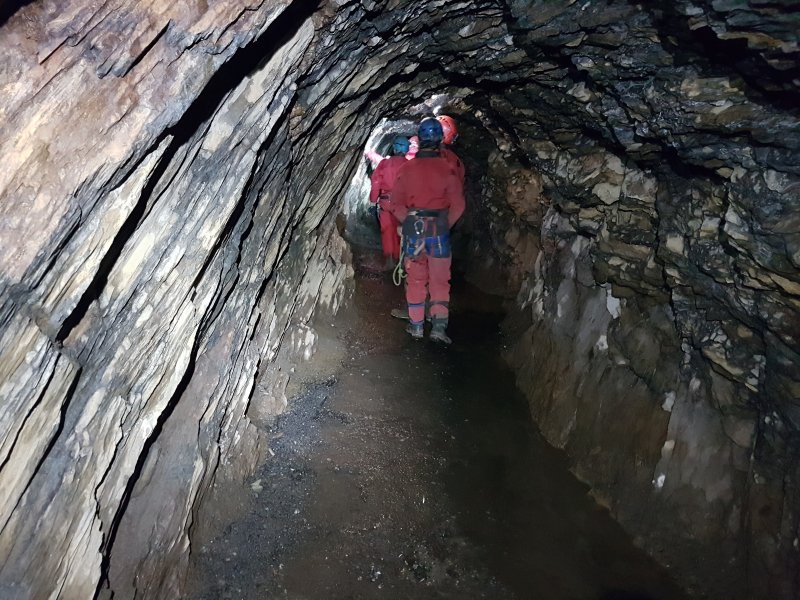 The main passage of Mitchel Adit.
Modelling by Lisa, Kevin Munn, Dave, and our guide, lighting by Tarquin and the rest
The main passage of Mitchel Adit.
Modelling by Lisa, Kevin Munn, Dave, and our guide, lighting by Tarquin and the rest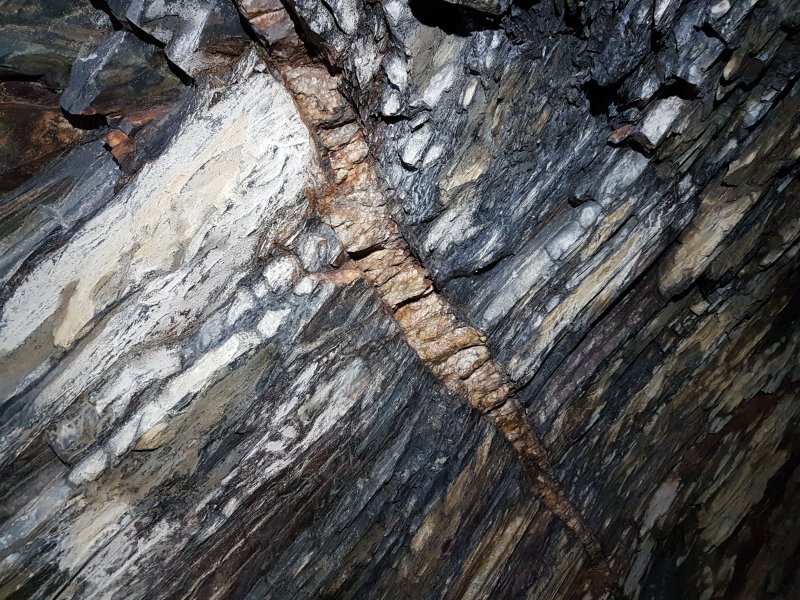 A seam of gold-bearing quartz. Why was this not removed by the Victorian miners? They appear to have ignored anything that was not substantial enough.
Lighting by Tarquin
A seam of gold-bearing quartz. Why was this not removed by the Victorian miners? They appear to have ignored anything that was not substantial enough.
Lighting by Tarquin Water-filled passage at Five Ways junction. It appears to be only a short sump, surfacing again in the distance.
Lighting by Tarquin
Water-filled passage at Five Ways junction. It appears to be only a short sump, surfacing again in the distance.
Lighting by Tarquin Much more substantial gold-bearing quartz seam at Mitchel Stope. This is about 50 cm wide. The seam itself was hoped to be the payoff for the mine owner.
Lighting by Tarquin and others
Much more substantial gold-bearing quartz seam at Mitchel Stope. This is about 50 cm wide. The seam itself was hoped to be the payoff for the mine owner.
Lighting by Tarquin and others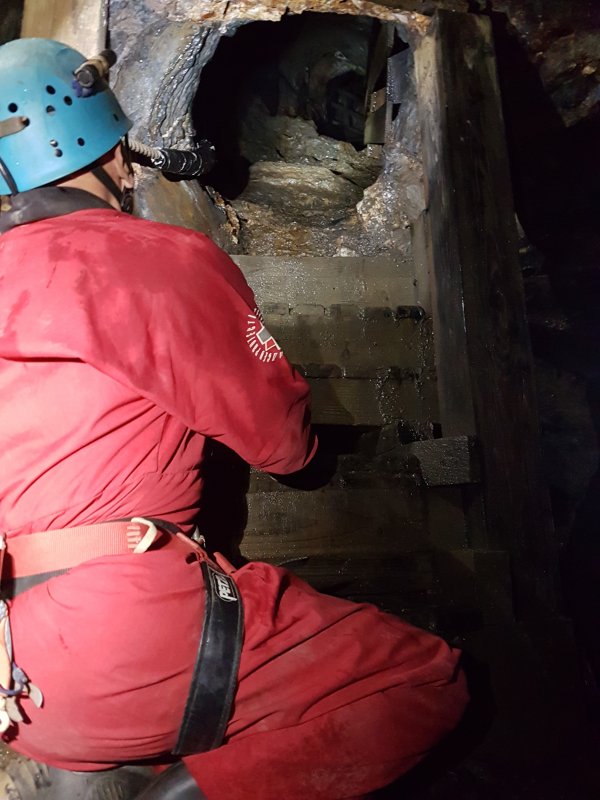 Hole towards the upper entrance. Regular tourists are taken up through here, and so would our stretcher later.
Modelling by Dave, lighting by Tarquin, Phil and Dave
Hole towards the upper entrance. Regular tourists are taken up through here, and so would our stretcher later.
Modelling by Dave, lighting by Tarquin, Phil and Dave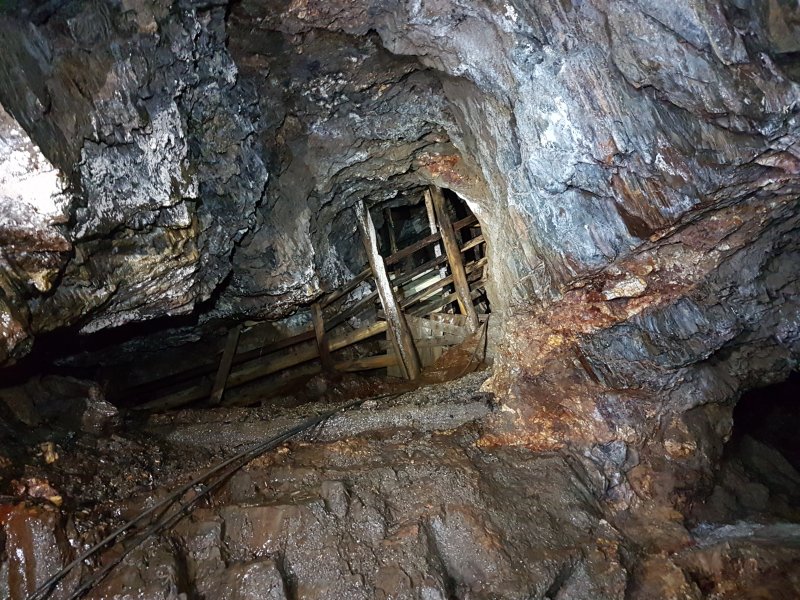 Mitchel's team drilled the ceiling (with hand drills), put in their dynamite, set it off, and came back to see how much they had discovered. Instead of gold, they found a gaping hole left by the Romans, who had already discovered the seam, and mined it to within just a few cm of where the Victorians had reached. There would be no payoff. Mitchel immediately packed and left for Africa (where he hoped the Romans would not have been before him). The steps were cut by the Romans, and the wooden barriers are put there by the National Trust. Our stretcher haul would ascend them.
Lighting by Tarquin and others
Mitchel's team drilled the ceiling (with hand drills), put in their dynamite, set it off, and came back to see how much they had discovered. Instead of gold, they found a gaping hole left by the Romans, who had already discovered the seam, and mined it to within just a few cm of where the Victorians had reached. There would be no payoff. Mitchel immediately packed and left for Africa (where he hoped the Romans would not have been before him). The steps were cut by the Romans, and the wooden barriers are put there by the National Trust. Our stretcher haul would ascend them.
Lighting by Tarquin and others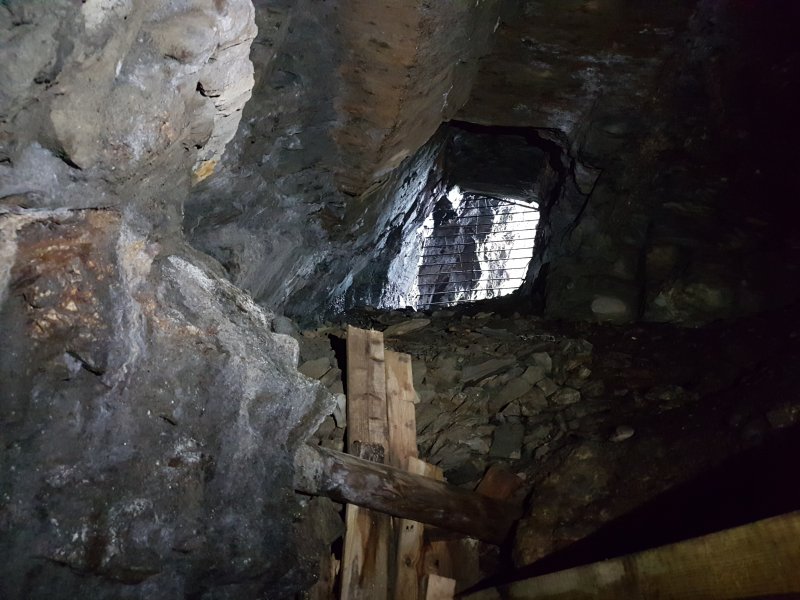 One of the two Roman entrances which had somehow gone unnoticed by the Mitchel team. Presumably, they had been covered by debris over the previous 2000 years.
Lighting by Tarquin
One of the two Roman entrances which had somehow gone unnoticed by the Mitchel team. Presumably, they had been covered by debris over the previous 2000 years.
Lighting by Tarquin Rescue team members and the volunteer casualty Beth.
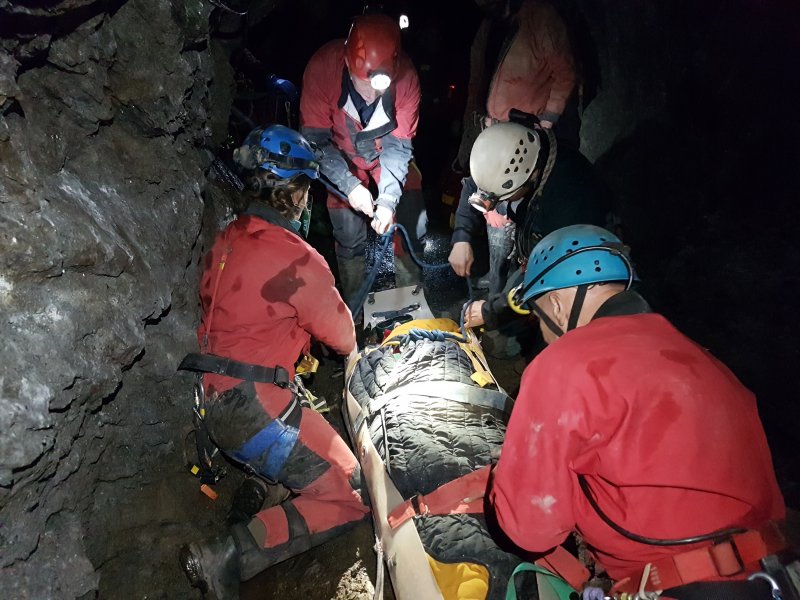 Placing the casualty in the stretcher. Blankets add padding and help keep a motionless casualty warm. The stretcher is made of flexible plastic, with loads of straps to keep the casualty in place. There are metal brackets for hauling, handles for carrying, a spinal splint for bracing, and the casualty wears a harness (if possible) which is used as a safety backup during a stretcher haul. A medically trained rescuer accompanies the casualty, reassuring them and making sure they know what is happening. At the same time, they may dictate how much the stretcher can be hauled, and when it is ready to move.
Modelling (actually working) by Lisa, Kevin Munn, Phil, Gary Evans, Dave and casualty Beth
Placing the casualty in the stretcher. Blankets add padding and help keep a motionless casualty warm. The stretcher is made of flexible plastic, with loads of straps to keep the casualty in place. There are metal brackets for hauling, handles for carrying, a spinal splint for bracing, and the casualty wears a harness (if possible) which is used as a safety backup during a stretcher haul. A medically trained rescuer accompanies the casualty, reassuring them and making sure they know what is happening. At the same time, they may dictate how much the stretcher can be hauled, and when it is ready to move.
Modelling (actually working) by Lisa, Kevin Munn, Phil, Gary Evans, Dave and casualty Beth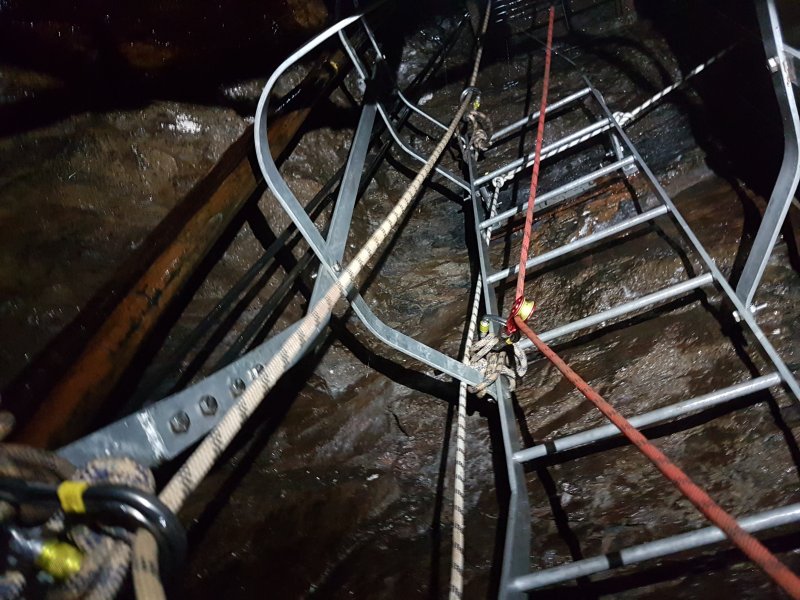 The main haul took place in this shaft. Normally, we would haul up a cave pitch, but this is very different, with ladders and platforms. These make it much harder to haul, as they get in the way, and force all sorts of adjustments to be made, instead of a single haul up a pitch. There is a rope for hauling, a rope for recuers to clip into between drops, a rope for rescuers to ascend with, and a backup rope for the casualty. The stretcher has to get past these without tangling.
Lighting by Tarquin
The main haul took place in this shaft. Normally, we would haul up a cave pitch, but this is very different, with ladders and platforms. These make it much harder to haul, as they get in the way, and force all sorts of adjustments to be made, instead of a single haul up a pitch. There is a rope for hauling, a rope for recuers to clip into between drops, a rope for rescuers to ascend with, and a backup rope for the casualty. The stretcher has to get past these without tangling.
Lighting by Tarquin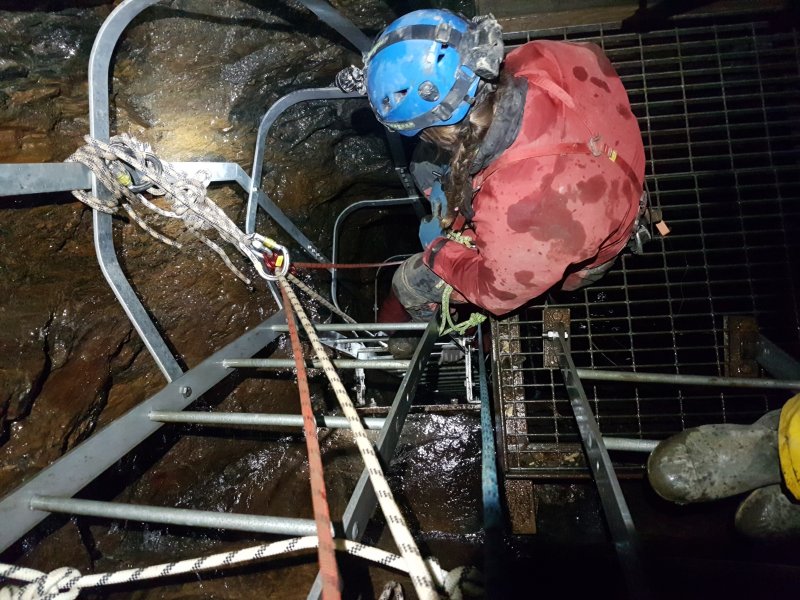 Stretcher guidance team inspecting the rigging, to work out how they will guide the stretcher through the area.
Modelling by Lisa, lighting by Tarquin and Lisa
Stretcher guidance team inspecting the rigging, to work out how they will guide the stretcher through the area.
Modelling by Lisa, lighting by Tarquin and Lisa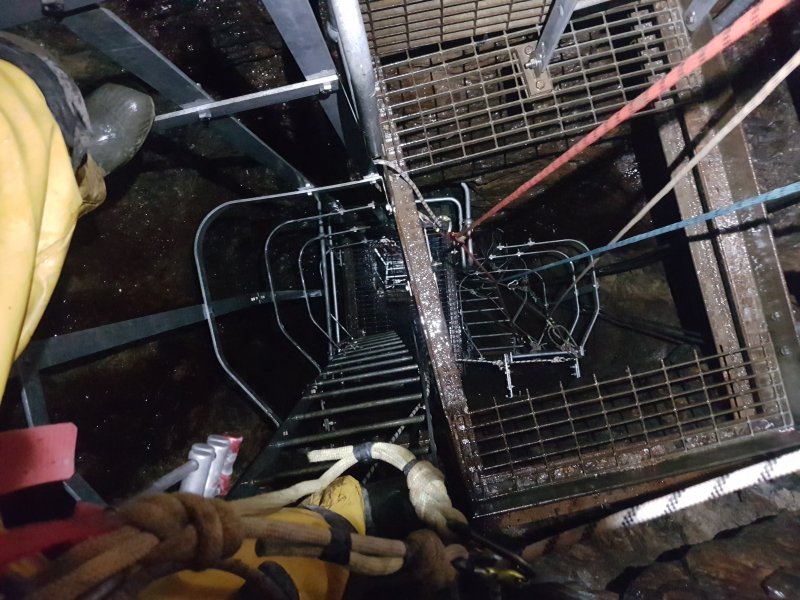 The ropes were able to pass through the floors of some of the platforms, reducing the number of times it needed to be pulled sideways into the next ladder. Nonetheless, it is still a lot of metalwork and obstructions to bypass, and the rigging must have been quite a logistical challenge. The benefit is that the ropes can be safely tied away from each other, to reduce the chance of tangles.
Lighting by Tarquin and Lisa
The ropes were able to pass through the floors of some of the platforms, reducing the number of times it needed to be pulled sideways into the next ladder. Nonetheless, it is still a lot of metalwork and obstructions to bypass, and the rigging must have been quite a logistical challenge. The benefit is that the ropes can be safely tied away from each other, to reduce the chance of tangles.
Lighting by Tarquin and Lisa Stretcher (the white cucoon) approaching the pitch head, having been slowly raised by the hauling team. The stretcher guidance team can be seen manoevering the stretcher up to the awkward position where it needs to be lifted above the highest ropes before it can be rotated and pulled horizontally. In this mine, the rock is not strong enough for higher bolts to be added for this purpose, and it required a lot of careful manoeuvring and manual effort, while swapping from rope to rope.
Modelling (working) by Gary, Kevin Munn, John Roe, Ali Garmin, Lisa and Beth, additional lighting by Tarquin and Peter
Stretcher (the white cucoon) approaching the pitch head, having been slowly raised by the hauling team. The stretcher guidance team can be seen manoevering the stretcher up to the awkward position where it needs to be lifted above the highest ropes before it can be rotated and pulled horizontally. In this mine, the rock is not strong enough for higher bolts to be added for this purpose, and it required a lot of careful manoeuvring and manual effort, while swapping from rope to rope.
Modelling (working) by Gary, Kevin Munn, John Roe, Ali Garmin, Lisa and Beth, additional lighting by Tarquin and Peter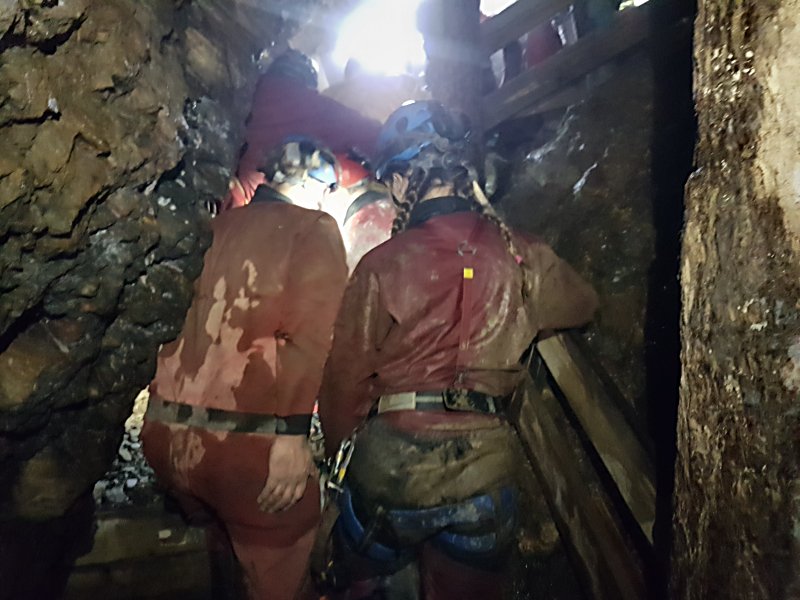 Manual hauling up the Roman Stope steps. A fuzzy picture, but hopefully it will show the cramped conditions, where manual effort of about 10 people is required to steer and haul the stretcher up the passage. Almost everyone (all except me and the underground communications controller) of the underground team can be seen in this picture.
Modelling (working) by everyone except me, Kevin Diffey and our original guide, but including Dan Thorne and Rich Hill ... somewhere
Manual hauling up the Roman Stope steps. A fuzzy picture, but hopefully it will show the cramped conditions, where manual effort of about 10 people is required to steer and haul the stretcher up the passage. Almost everyone (all except me and the underground communications controller) of the underground team can be seen in this picture.
Modelling (working) by everyone except me, Kevin Diffey and our original guide, but including Dan Thorne and Rich Hill ... somewhere