Ogof Draenen Waterfall Series trip 03/10/2021
Unless otherwise stated, camera, setups, lighting, edits and gallery effects by Tarquin. Modelling and lighting at various points will be Josh Henry.
This series extends under the entire eastern side of Gilwern Hill. It should be noted that while Waterfall Series itself is a great destination for the superb passage and formations, Bolder Land is particularly unstable, and not a recommended destination. The passage was stabilised a little during its discovery, but was still left with many of the hazards in situ. The reason for visiting the area is to witness the instability and crazy gravity defying boulders. So no, it would not be a good idea to remove them. Potential visitors should observe the place for the insanity that it is, just like the original explorers did. If you are looking for a stable or semi-stable passage, it is best to stop at the end of Yes Passage or Padlock Passage.
This is a very extensive gallery, because the intention was to photograph this relatively unvisited area so that cavers could safely see what lies beyond, without us needing to make any further trips for photography. I am extremely grateful to Josh for actually finishing the passage so that the pictures could be taken in one go.
 We decided to go in via Darling Rifts, which are normally bypassed via Spare Rib. There are plenty of little ledges for traversing, but the occasional bold step is required. This passage can prove quite demanding at the end of a long trip. The passage is named after a visiting couple who were becoming quite frustrated, but always insisted on ending their sentences with "darling" when snapping at each other.
Modelling by Josh, lighting by Tarquin and Josh
We decided to go in via Darling Rifts, which are normally bypassed via Spare Rib. There are plenty of little ledges for traversing, but the occasional bold step is required. This passage can prove quite demanding at the end of a long trip. The passage is named after a visiting couple who were becoming quite frustrated, but always insisted on ending their sentences with "darling" when snapping at each other.
Modelling by Josh, lighting by Tarquin and Josh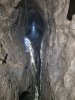 Some narrow sections have a rope for assistance. It was somewhere like this that Kevin Munn (one of the original explorers) slipped down the rift when passing a 1990s giant television camera to someone else, breaking his rib - the event that gave Spare Rib its name.
Modelling by Josh, lighting by Tarquin and Josh
Some narrow sections have a rope for assistance. It was somewhere like this that Kevin Munn (one of the original explorers) slipped down the rift when passing a 1990s giant television camera to someone else, breaking his rib - the event that gave Spare Rib its name.
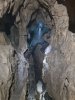
Modelling by Josh, lighting by Tarquin and Josh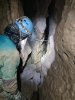 The passage ends with a choice. Down to the left is this handline, which leads down a climb to a chamber at the head of Big Bang Pitch, the original way into the cave. To the right is the start of Pitch Bypass, which rejoins the Spare Rib route.
Modelling by Josh, lighting by Tarquin and Josh
The passage ends with a choice. Down to the left is this handline, which leads down a climb to a chamber at the head of Big Bang Pitch, the original way into the cave. To the right is the start of Pitch Bypass, which rejoins the Spare Rib route.
Modelling by Josh, lighting by Tarquin and Josh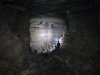 Upstream Passage, where it starts at Cairn Junction. Strictly speaking, it was called Beyond A Choke at this point originally, since it only used to be upstream from Big Bang Pitch. But since Pitch Bypass has now become the main route, it has become Upstream Passage from this point instead. At its start, a noisy inlet on the left is the water from the Entrance Series, entering from an impossibly tight cleft.
Modelling by Josh, lighting by Tarquin and Josh
Upstream Passage, where it starts at Cairn Junction. Strictly speaking, it was called Beyond A Choke at this point originally, since it only used to be upstream from Big Bang Pitch. But since Pitch Bypass has now become the main route, it has become Upstream Passage from this point instead. At its start, a noisy inlet on the left is the water from the Entrance Series, entering from an impossibly tight cleft.
Modelling by Josh, lighting by Tarquin and Josh The passage climbs up a slope into a section with a superb cracked mud floor. The white powder is likely to be a microbial deposit, which has been washed away by drips.
Modelling by Josh, lighting by Tarquin and Josh
The passage climbs up a slope into a section with a superb cracked mud floor. The white powder is likely to be a microbial deposit, which has been washed away by drips.
Modelling by Josh, lighting by Tarquin and Josh Collapsed section of the mud floor, showing the sand and silt layers.
Lighting by Tarquin and Josh
Collapsed section of the mud floor, showing the sand and silt layers.
Lighting by Tarquin and Josh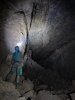 Big Bang Pitch emerging from the roof of the passage. This is how the cave was originally discovered, and the big bang referred to the feeling of popping out in such a grand passage, and knowing that the breakthrough had gone big. The first person to descend the ladder from above - Tim Long - was forced to climb back up when it did not reach the floor, and did not have the energy left to try again, so missed out on the exploration that day. There was a separate incident here when Malcolm Stewart looked into a tackle bag containing a leaky spent carbide pig (car inner tube), igniting the acetylene gas with his own carbide lamp, and exploding his eyebrows off. An oversuit which had been lying on a sandbank got blown down the shaft, so the cavers below only heard a big bang then saw an oversuit slowly fall. This incident was not involved in the naming of the pitch, it was just a happy coincidence.
Modelling by Josh, lighting by Tarquin and Josh
Big Bang Pitch emerging from the roof of the passage. This is how the cave was originally discovered, and the big bang referred to the feeling of popping out in such a grand passage, and knowing that the breakthrough had gone big. The first person to descend the ladder from above - Tim Long - was forced to climb back up when it did not reach the floor, and did not have the energy left to try again, so missed out on the exploration that day. There was a separate incident here when Malcolm Stewart looked into a tackle bag containing a leaky spent carbide pig (car inner tube), igniting the acetylene gas with his own carbide lamp, and exploding his eyebrows off. An oversuit which had been lying on a sandbank got blown down the shaft, so the cavers below only heard a big bang then saw an oversuit slowly fall. This incident was not involved in the naming of the pitch, it was just a happy coincidence.
Modelling by Josh, lighting by Tarquin and Josh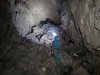 The passage then ramps up a slope to a ruckle formed by the floor of the chamber above Big Bang Pitch. During my first trip into this cave shortly after the breakthrough, before the main routes had been stabilised by passing cavers, I had accidentally sent one of the black boulders on the right down from the top of this slope towards my father. He had leapt up onto the right wall and clung on while the boulder passed below him. I guess that boulder has been stabilised now.
Modelling by Josh, lighting by Tarquin and Josh
The passage then ramps up a slope to a ruckle formed by the floor of the chamber above Big Bang Pitch. During my first trip into this cave shortly after the breakthrough, before the main routes had been stabilised by passing cavers, I had accidentally sent one of the black boulders on the right down from the top of this slope towards my father. He had leapt up onto the right wall and clung on while the boulder passed below him. I guess that boulder has been stabilised now.
Modelling by Josh, lighting by Tarquin and Josh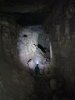 Upstream passage beyond the ruckle. This is the part that would have originally been called Upstream Passage. There is a waterfall on one side which I have used for drinking, but it should be noted that most other streams in upstream passage are fed directly from the stream that flows past the entrance, and are not safe for drinking.
Modelling by Josh, lighting by Tarquin and Josh
Upstream passage beyond the ruckle. This is the part that would have originally been called Upstream Passage. There is a waterfall on one side which I have used for drinking, but it should be noted that most other streams in upstream passage are fed directly from the stream that flows past the entrance, and are not safe for drinking.
Modelling by Josh, lighting by Tarquin and Josh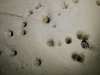 Drip pockets in a mud bank. The line is from the conservation tape, which had been rearranged by flooding. That line will disappear next time there is a flood. Incredibly, the drip pockets survive the flooding.
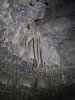 Curtains in a grotto at the end of the large passage. They appear quite dull in colour, so that is not an effect of poor lighting (though the lighting is difficult here).
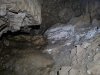 The large passage ends at this sediment bank and calcite flow. There is no prospect for extension, as the hillside has been carved away by a glacier.
 Instead, the way on is to continue upstream along a narrower passage. The waterfalls in this section must not be used for drinking.
Modelling by Josh, lighting by Tarquin and Josh
Instead, the way on is to continue upstream along a narrower passage. The waterfalls in this section must not be used for drinking.
Modelling by Josh, lighting by Tarquin and Josh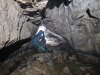 After a few corners, the passage lowers to a crawl. This section can experience a substantial flow of water during flood, and the water rises over a very short amount of time. However, it should not be possible for it to sump, as the passage gradient is fairly steep. This area has been seen in flood conditions by the original explorers, and was safely passed.
Modelling by Josh, lighting by Tarquin and Josh
After a few corners, the passage lowers to a crawl. This section can experience a substantial flow of water during flood, and the water rises over a very short amount of time. However, it should not be possible for it to sump, as the passage gradient is fairly steep. This area has been seen in flood conditions by the original explorers, and was safely passed.
Modelling by Josh, lighting by Tarquin and Josh The water then appears from under a wall, while the passage ahead has about 500 metres of branches which all end at chokes against the mountainside. To regain the stream, the route climbs through a series of tight rifts above it. Waterfall Series does not really have a start point, since the passage was always open. Officially, the discovery of the series started further on, but the name Waterfall Series gets used from this point onwards anyway.
Modelling by Josh, lighting by Tarquin and Josh
The water then appears from under a wall, while the passage ahead has about 500 metres of branches which all end at chokes against the mountainside. To regain the stream, the route climbs through a series of tight rifts above it. Waterfall Series does not really have a start point, since the passage was always open. Officially, the discovery of the series started further on, but the name Waterfall Series gets used from this point onwards anyway.
Modelling by Josh, lighting by Tarquin and Josh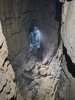 The series of dry waterfalls above the stream, used to bypass a too-narrow slot.
Modelling by Josh, lighting by Tarquin and Josh
The series of dry waterfalls above the stream, used to bypass a too-narrow slot.
Modelling by Josh, lighting by Tarquin and Josh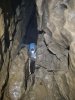 The climbs do not really need a rope, but someone has rigged one here anyway. This is not an official handline.
Modelling by Josh, lighting by Tarquin and Josh
The climbs do not really need a rope, but someone has rigged one here anyway. This is not an official handline.
Modelling by Josh, lighting by Tarquin and Josh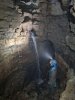 The waterfall which gives the series its name. It is possible to free climb this (I have done it a few times), but it is particularly difficult. There was previously a knotted handline here, but someone has recently replaced this with an electron ladder and belay line. There is another ladder stashed further into the series, presumably to replace this one when it rusts. The route heads upstream, then passes through an eyehole on the left into an inlet.
Modelling by Josh, lighting by Tarquin and Josh
The waterfall which gives the series its name. It is possible to free climb this (I have done it a few times), but it is particularly difficult. There was previously a knotted handline here, but someone has recently replaced this with an electron ladder and belay line. There is another ladder stashed further into the series, presumably to replace this one when it rusts. The route heads upstream, then passes through an eyehole on the left into an inlet.
Modelling by Josh, lighting by Tarquin and Josh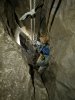 Climbing out of the inlet into a higher level passage. This is the official start of Waterfall Series, as this high level passage, and the upstream passage below it, had been left open during the earlier exploration.
Modelling by Josh, lighting by Tarquin and Josh
Climbing out of the inlet into a higher level passage. This is the official start of Waterfall Series, as this high level passage, and the upstream passage below it, had been left open during the earlier exploration.
Modelling by Josh, lighting by Tarquin and Josh The dry passage at the top has no name, but was surveyed by Outcast Caving Club. The club left the word "Outcast" on their survey markers, which were mistaken for the name of the passage, so it got labelled as "Outcast Passage" on some surveys. This is the southern direction, which ends in a small loop, a mud filled tube, and an extremely tight rift.
Modelling by Josh, lighting by Tarquin and Josh
The dry passage at the top has no name, but was surveyed by Outcast Caving Club. The club left the word "Outcast" on their survey markers, which were mistaken for the name of the passage, so it got labelled as "Outcast Passage" on some surveys. This is the southern direction, which ends in a small loop, a mud filled tube, and an extremely tight rift.
Modelling by Josh, lighting by Tarquin and Josh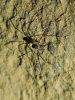 Harvestman in (not) Outcast Passage, in the northwards direction. This appears to be a Nelima gothica, a fairly small species, and is probably male. There were a couple of them seen along the passage.
Modelling by Opil
Harvestman in (not) Outcast Passage, in the northwards direction. This appears to be a Nelima gothica, a fairly small species, and is probably male. There were a couple of them seen along the passage.
Modelling by Opil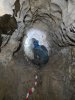 The northern direction is the way into Waterfall Series, and starts out as a walking or stooping passage.
Modelling by Josh, lighting by Tarquin and Josh
The northern direction is the way into Waterfall Series, and starts out as a walking or stooping passage.
Modelling by Josh, lighting by Tarquin and Josh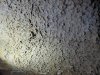 Karren weathering instead of scallops.
Lighting by Tarquin and Josh
Karren weathering instead of scallops.
Lighting by Tarquin and Josh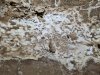 Gypsum crust on the wall of the passage.
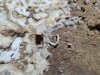 A finger of gypsum.
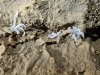 Gypsum flowers, some of the largest in the cave.
Lighting by Tarquin and Josh
Gypsum flowers, some of the largest in the cave.
Lighting by Tarquin and Josh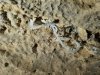 Gypsum flower.
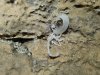 Gypsum flower.
 Gypsum flowers.
Lighting by Josh
Gypsum flowers.
Lighting by Josh Gypsum boxwork.
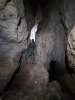 On a hairpin bend to the right, the obvious way on (seen on the left here) rapidly pinches out and becomes an impassable rabbit hole. The way on is to climb into an inobvious upper level above it.
Modelling by Josh, lighting by Tarquin and Josh
On a hairpin bend to the right, the obvious way on (seen on the left here) rapidly pinches out and becomes an impassable rabbit hole. The way on is to climb into an inobvious upper level above it.
Modelling by Josh, lighting by Tarquin and Josh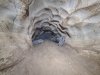 The passage swings left and lowers to a 70 metre crawl.
Modelling by Josh, lighting by Tarquin and Josh
The passage swings left and lowers to a 70 metre crawl.
Modelling by Josh, lighting by Tarquin and Josh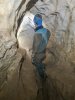 Walking size? No, just a brief rest before crawling again.
Modelling by Josh, lighting by Tarquin and Josh
Walking size? No, just a brief rest before crawling again.
Modelling by Josh, lighting by Tarquin and Josh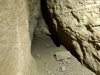 Impossibly small side rift which has a visual connection with the lower passage. Someone has actually managed to wriggle down this part.
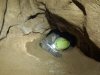 The crawl ends first squeeze, up a slope into a brief section of walking passage, with a dead-end side stub.
Modelling by Tarquin, camera and setup by Josh, lighting by Tarquin and Josh
The crawl ends first squeeze, up a slope into a brief section of walking passage, with a dead-end side stub.
Modelling by Tarquin, camera and setup by Josh, lighting by Tarquin and Josh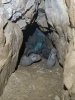 There is a choice between upper and lower passages. The upper one looks inviting, but is small and ends with some visual connections into the lower one. The lower passage is the way on, and is the start of the second crawl.
Modelling by Josh
There is a choice between upper and lower passages. The upper one looks inviting, but is small and ends with some visual connections into the lower one. The lower passage is the way on, and is the start of the second crawl.
Modelling by Josh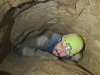 The second squeeze, which is fairly easy, like the first. The crawl is about 40 metres long, with the squeeze about half way along it.
Modelling by Tarquin, camera, setup and lighting by Josh
The second squeeze, which is fairly easy, like the first. The crawl is about 40 metres long, with the squeeze about half way along it.
Modelling by Tarquin, camera, setup and lighting by Josh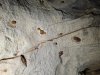 Nodules of what appears to be iron oxide embedded in the rock.
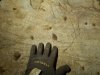 Iron oxide nodules.
Modelling by Tarquin's glove
Iron oxide nodules.
Modelling by Tarquin's glove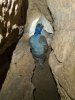 After the crawls, the passage is smaller than before.
Modelling by Josh, lighting by Tarquin and Josh
After the crawls, the passage is smaller than before.
Modelling by Josh, lighting by Tarquin and Josh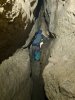 The passage passes through a small complex, with the main way remaining the most obvious one. The longest side passage is only a few metres long, at the top of an aven. At one point is a lower level oxbow, but this not at all obvious. Later on is a short traverse over a muddy crawl with a tiny stream, which is the far end of the oxbow.
Modelling by Josh, lighting by Tarquin and Josh
The passage passes through a small complex, with the main way remaining the most obvious one. The longest side passage is only a few metres long, at the top of an aven. At one point is a lower level oxbow, but this not at all obvious. Later on is a short traverse over a muddy crawl with a tiny stream, which is the far end of the oxbow.
Modelling by Josh, lighting by Tarquin and Josh Immature helictites in the ceiling.
Lighting by Tarquin and Josh
Immature helictites in the ceiling.
Lighting by Tarquin and Josh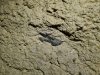 Fossil ctenacanthus (proto-shark) dorsal spine at floor level in the passage above the traverse.
Modelling by Josh, lighting by Tarquin and Josh
Fossil ctenacanthus (proto-shark) dorsal spine at floor level in the passage above the traverse.
Modelling by Josh, lighting by Tarquin and Josh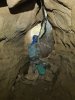 The passage then pops out in the floor of a larger passage, which quickly ends in both directions. The old passage continues as a trench in the floor.
Modelling by Josh, lighting by Tarquin and Josh
The passage then pops out in the floor of a larger passage, which quickly ends in both directions. The old passage continues as a trench in the floor.
Modelling by Josh, lighting by Tarquin and Josh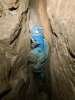 When the passage chokes, the trench in the floor breaks out again on the other side of the passage, and is the only way on. The drop down into the trench is tight, and can be a little challenging on the return. It is most easily passed on the return by trying to stay up near ceiling level rather than dropping to the floor.
Modelling by Josh, lighting by Tarquin and Josh
When the passage chokes, the trench in the floor breaks out again on the other side of the passage, and is the only way on. The drop down into the trench is tight, and can be a little challenging on the return. It is most easily passed on the return by trying to stay up near ceiling level rather than dropping to the floor.
Modelling by Josh, lighting by Tarquin and Josh The rift then emerges from the floor of Knees Up Mother Brown. This has to be one of the most beautifully sculpted passages in the entire cave, and is worth all the effort to reach it. The way on to the left is the more comfortable, and is the more popular destination.
Modelling by Josh, lighting by Tarquin and Josh
The rift then emerges from the floor of Knees Up Mother Brown. This has to be one of the most beautifully sculpted passages in the entire cave, and is worth all the effort to reach it. The way on to the left is the more comfortable, and is the more popular destination.
Modelling by Josh, lighting by Tarquin and Josh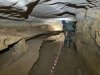 Beautifully sculpted passage, with deep scallops on the corners. The white ceiling is very reminiscent of Canyon Passage and Indiana Highway (before the heavy traffic caused the walls to be muddied).
Modelling by Josh, lighting by Tarquin and Josh
Beautifully sculpted passage, with deep scallops on the corners. The white ceiling is very reminiscent of Canyon Passage and Indiana Highway (before the heavy traffic caused the walls to be muddied).
Modelling by Josh, lighting by Tarquin and Josh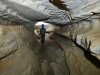 Ribbed passage. The ceiling soon lifts, and it becomes possible to run for over 200 metres, something especially rare in Draenen. This fact is the reason for the name Knees Up Mother Brown. The sand floor is only occasionally interrupted by rocks.
Modelling by Josh, lighting by Tarquin and Josh
Ribbed passage. The ceiling soon lifts, and it becomes possible to run for over 200 metres, something especially rare in Draenen. This fact is the reason for the name Knees Up Mother Brown. The sand floor is only occasionally interrupted by rocks.
Modelling by Josh, lighting by Tarquin and Josh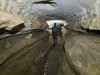 Knees Up Mother Brown.
Modelling by Josh, lighting by Tarquin and Josh
Knees Up Mother Brown.
Modelling by Josh, lighting by Tarquin and Josh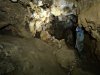 Knees Up Mother Brown ends at a junction with Lost River Passage, where the cave enters a dolomite area. Lost River is a series of domed chambers leading to the right, with numerous fine formations.
Modelling by Josh, lighting by Tarquin and Josh
Knees Up Mother Brown ends at a junction with Lost River Passage, where the cave enters a dolomite area. Lost River is a series of domed chambers leading to the right, with numerous fine formations.
Modelling by Josh, lighting by Tarquin and Josh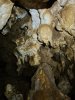 Many of the formations are bulbous, and look like they might have formed underwater.
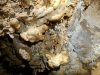 Anthodites in Lost River. These are aragonite needles splaying from a calcite base, like the Urchins in Daren Cilau. Aragonite is the same chemical as calcite, but with a different crystal structure, which decomposes to calcite over around 100 million years.
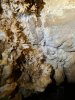 Anthodites in Lost River.
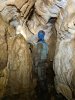 Formations covering the walls in Lost River.
Modelling by Josh, lighting by Tarquin and Josh
Formations covering the walls in Lost River.
Modelling by Josh, lighting by Tarquin and Josh Formations covering the ceiling. Again these have that underwater appearance.
Modelling by Josh, lighting by Tarquin and Josh
Formations covering the ceiling. Again these have that underwater appearance.
Modelling by Josh, lighting by Tarquin and Josh A brief piece of actual passage (rather than chambers) in Lost River Passage.
Modelling by Josh, lighting by Tarquin and Josh
A brief piece of actual passage (rather than chambers) in Lost River Passage.
Modelling by Josh, lighting by Tarquin and Josh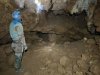 The first big chamber in Lost River Passage. There are several digs and holes down into a choked lower level. One of the digs regains the way on, but it becomes too narrow after 50 metres.
Modelling by Josh, lighting by Tarquin and Josh
The first big chamber in Lost River Passage. There are several digs and holes down into a choked lower level. One of the digs regains the way on, but it becomes too narrow after 50 metres.
Modelling by Josh, lighting by Tarquin and Josh White arch in the ceiling of the chamber.
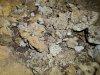 Chunks of gypsum crystals, yellow ochre and darker haematite on the floor of the chamber.
 The chamber also has a rather meagre pile of cryostal.
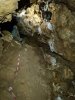 To the left at Lost River Passage is a slipe up into the main destination of the series; 6th Heaven Chamber, containing the best formations in the series.
Modelling by Josh, lighting by Tarquin and Josh
To the left at Lost River Passage is a slipe up into the main destination of the series; 6th Heaven Chamber, containing the best formations in the series.
Modelling by Josh, lighting by Tarquin and Josh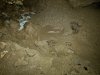 Mud formations at the base of the slope.
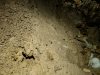 Rather poor hoodoos on the slope.
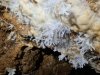 6th Heaven Chamber is known for its fine collection of anthodites, an uncommon formation in the northern part of the cave.
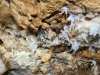 Anthodites.
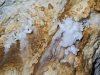 Anthodites.
 Anthodites.
 Anthodites.
 Anthodites.
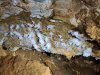 Anthodites.
Lighting by Tarquin and Josh
Anthodites.
Lighting by Tarquin and Josh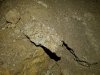 This area has a choke formed from quartz conglomerate; part of the millstone grit caprock. The odd thing here is that this hill is formed from two distinct bands of limestone, with limestone shales in between. The cave is formed in the lower beds of limestone, and the caprock should sit over the upper beds. There should therefore be at least two other beds of rock separating the cave from the caprock: the Llanelly shales beds, then the upper Dowlais limestone beds. Evidently there is a deep sedimentary depression localised inside the eastern side of Gilwern Hill (just south of the radio mast), where the shales and upper limestones got hollowed out after forming, and re-filled with the caprock material when it formed.
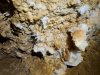 A clamber through an eyehole gains a second chamber that initially looks bare. However, it has these fine anthodites hiding in an alcove at the end.
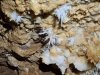 Anthodites in the second chamber.
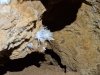 Anthodites in the second chamber.
 Anthodites in the second chamber.
 Anthodites in the second chamber.
 Anthodites in a blind passage leading off from the second chamber.
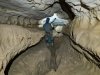 Returning to the junction of (not) Outcast Passage and Knees Up Mother Brown, we headed in the other direction (to the right when seen from the way in), along Yes Passage. This starts out walking sized, but soon lowers to a hands-and-knees crawl for most of its 200 metre length. Note that this name is used for both branches on some surveys, but that is due to a misunderstanding of the survey markers. The original discoverers confirmed that Yes Passage was to the right, and Knees Up Mother Brown was to the left, even though they are both really the same passage. The name comes from the obvious exclamation upon seeing the passage for the first time.
Modelling by Josh, lighting by Tarquin and Josh
Returning to the junction of (not) Outcast Passage and Knees Up Mother Brown, we headed in the other direction (to the right when seen from the way in), along Yes Passage. This starts out walking sized, but soon lowers to a hands-and-knees crawl for most of its 200 metre length. Note that this name is used for both branches on some surveys, but that is due to a misunderstanding of the survey markers. The original discoverers confirmed that Yes Passage was to the right, and Knees Up Mother Brown was to the left, even though they are both really the same passage. The name comes from the obvious exclamation upon seeing the passage for the first time.
Modelling by Josh, lighting by Tarquin and Josh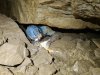 Yes Passage ends at a choke, where a crawl through a bedding floored with really sticky mud, reaches a route up through the choke.
Modelling by Josh, lighting by Tarquin and Josh
Yes Passage ends at a choke, where a crawl through a bedding floored with really sticky mud, reaches a route up through the choke.
Modelling by Josh, lighting by Tarquin and Josh The route up through the choke emerges at the side of the very wide Padlock Passage. This is the northern continuation of Megadrive, separated from it by the glacial removal of the mountainside. Its name refers to how on the trip where it was found, Rich Blake reached into his bag for a drink as the others crawled through the choke, and found that he had accidentally brought the padlock for the entrance gate with him into the cave, in his bag. Also, the fact that it was the key that unlocked the mystery of how Megadrive formed. The choke seen here is an immense surface collapse. A stream flows somewhere under here, but is unreachable; a common feature for the area.
Modelling by Josh, lighting by Tarquin and Josh
The route up through the choke emerges at the side of the very wide Padlock Passage. This is the northern continuation of Megadrive, separated from it by the glacial removal of the mountainside. Its name refers to how on the trip where it was found, Rich Blake reached into his bag for a drink as the others crawled through the choke, and found that he had accidentally brought the padlock for the entrance gate with him into the cave, in his bag. Also, the fact that it was the key that unlocked the mystery of how Megadrive formed. The choke seen here is an immense surface collapse. A stream flows somewhere under here, but is unreachable; a common feature for the area.
Modelling by Josh, lighting by Tarquin and Josh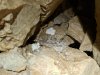 Cryostal rafts in Padlock Passage. These are the only pieces seen in this passage, and are where you want to put your feet. They have survived only because of the low traffic, and from being down gaps between the rocks.
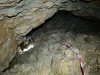 The early part of Padlock Passage is massive collapse, and is still quite unstable. As this picture was taken, a rock moved and sliced through Josh's glove. This area needs a very delicate touch.
Modelling by Josh, lighting by Tarquin and Josh
The early part of Padlock Passage is massive collapse, and is still quite unstable. As this picture was taken, a rock moved and sliced through Josh's glove. This area needs a very delicate touch.
Modelling by Josh, lighting by Tarquin and Josh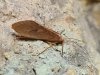 Caddisfly in Padlock Passage.
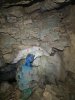 The passage soon drops down to a more stable zone, but the ceiling above the slope is layers of fractured rocks.
Modelling by Josh, lighting by Tarquin and Josh
The passage soon drops down to a more stable zone, but the ceiling above the slope is layers of fractured rocks.
Modelling by Josh, lighting by Tarquin and Josh The more stable part of Padlock Passage, which immediately looks like Megadrive.
Modelling by Josh, lighting by Tarquin and Josh
The more stable part of Padlock Passage, which immediately looks like Megadrive.
Modelling by Josh, lighting by Tarquin and Josh The passage then reaches its largest size. In the floor on the left is a 9 metre deep pit, where water can be heard. Again, there is no streamway accessible.
Modelling by Josh, lighting by Tarquin and Josh
The passage then reaches its largest size. In the floor on the left is a 9 metre deep pit, where water can be heard. Again, there is no streamway accessible.
Modelling by Josh, lighting by Tarquin and Josh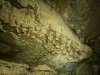 Anastomosis (very immature passage development channels) and phreatic pendants (etched by water making channels above a mud floor) at the end of Padlock Passage.
Lighting by Tarquin and Josh
Anastomosis (very immature passage development channels) and phreatic pendants (etched by water making channels above a mud floor) at the end of Padlock Passage.
Lighting by Tarquin and Josh Padlock Passage ends in massive breakdown. Shortly before the end, the way on is in the most unlikely of places, sandwiched between two massive boulders in the floor. The route from here continues immediately below the floor, between those boulders. This is the start of Bolder Land (note the spelling).
Modelling by Josh
Padlock Passage ends in massive breakdown. Shortly before the end, the way on is in the most unlikely of places, sandwiched between two massive boulders in the floor. The route from here continues immediately below the floor, between those boulders. This is the start of Bolder Land (note the spelling).
Modelling by Josh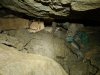 There is an alternative route into Bolder Land, tucked into an undercut on the right. This is much tighter.
Modelling by Josh, lighting by Tarquin and Josh
There is an alternative route into Bolder Land, tucked into an undercut on the right. This is much tighter.
Modelling by Josh, lighting by Tarquin and Josh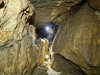 The route seems almost unreal, in a stal coated passage, with what appears to be a solutional ceiling and one solid wall. However, it is all made up from a passage that used to be at ceiling height in Padlock Passage, and has fallen several metres to the floor.
Modelling by Josh, lighting by Tarquin and Josh
The route seems almost unreal, in a stal coated passage, with what appears to be a solutional ceiling and one solid wall. However, it is all made up from a passage that used to be at ceiling height in Padlock Passage, and has fallen several metres to the floor.
Modelling by Josh, lighting by Tarquin and Josh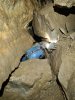 After passing through a standing section just beyond Padlock Passage's terminal choke, the route switches to the left side of the former passage, and passes through a squeeze before climbing up into a ceiling cleft.
Modelling by Josh, lighting by Tarquin and Josh
After passing through a standing section just beyond Padlock Passage's terminal choke, the route switches to the left side of the former passage, and passes through a squeeze before climbing up into a ceiling cleft.
Modelling by Josh, lighting by Tarquin and Josh It then breaks out into large passage. A sense of accomplishment; the choke has been passed, right?
Modelling by Josh, lighting by Tarquin and Josh
It then breaks out into large passage. A sense of accomplishment; the choke has been passed, right?
Modelling by Josh, lighting by Tarquin and Josh The large passage is dominated by an enormous crater in the floor. This is the largest of the pits, 10-13 metres deep depending on where you measure it, with overhanging death on all sides. Keep well clear. There are two ways on here, the first being the rift opposite the point of entry which is horrifyingly loose, and the second being the much more comforting slot between boulders to the left of it into an undercut. Use the undercut. The rift soon joins it.
Modelling by Josh, lighting by Tarquin and Josh
The large passage is dominated by an enormous crater in the floor. This is the largest of the pits, 10-13 metres deep depending on where you measure it, with overhanging death on all sides. Keep well clear. There are two ways on here, the first being the rift opposite the point of entry which is horrifyingly loose, and the second being the much more comforting slot between boulders to the left of it into an undercut. Use the undercut. The rift soon joins it.
Modelling by Josh, lighting by Tarquin and Josh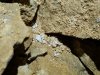 The bedding beyond the pit has a large cryostal deposit, mostly small pieces and miniature bead clusters.
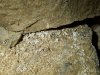 Cryostal.
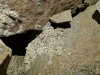 Cryostal.
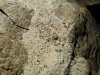 Cryostal.
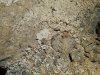 Cryostal including a raft.
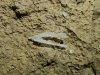 Gypsum crystal.
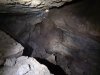 The next pit is 6 metres deep, with the way on being a crawl around the ledge of fallen slabs. At the end of the overhanging slab is a boulder that has fallen and been wedged between the slab and a shattered wall, and somehow managed to remain in place. The wall does not appear to have any reason for staying in one piece, and the boulder really has no right to be stuck in mid air like it is. To get past here, you have to lean out over that boulder, and use the shattered wall for support while you climb into the heavily shattered passage beyond. This obstacle is the reason for the passage's name, with Pete Bolt being the first person bold enough to risk passing it.
Modelling by Josh, lighting by Tarquin and Josh
The next pit is 6 metres deep, with the way on being a crawl around the ledge of fallen slabs. At the end of the overhanging slab is a boulder that has fallen and been wedged between the slab and a shattered wall, and somehow managed to remain in place. The wall does not appear to have any reason for staying in one piece, and the boulder really has no right to be stuck in mid air like it is. To get past here, you have to lean out over that boulder, and use the shattered wall for support while you climb into the heavily shattered passage beyond. This obstacle is the reason for the passage's name, with Pete Bolt being the first person bold enough to risk passing it.
Modelling by Josh, lighting by Tarquin and Josh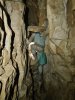 The passage beyond contains another little climb beneath a mousetrap rock, being very careful not to brush against it. This is how the passage looked after the original explorers had removed the most dangerous features. This is immediately followed by a 4 metre climb down, where the perfect handholds turned out to be a shattered pillar that moved. Guess it's best not to use that one then.
Modelling by Josh, lighting by Tarquin and Josh
The passage beyond contains another little climb beneath a mousetrap rock, being very careful not to brush against it. This is how the passage looked after the original explorers had removed the most dangerous features. This is immediately followed by a 4 metre climb down, where the perfect handholds turned out to be a shattered pillar that moved. Guess it's best not to use that one then.
Modelling by Josh, lighting by Tarquin and Josh The passage below the climb has two perfectly placed bridges of toppled rocks. It is important here to acknowledge the work of the photographic model, who has to wait below each of these crazy things while the photographer stands in relative safety with the camera.
Modelling by Josh, lighting by Tarquin and Josh
The passage below the climb has two perfectly placed bridges of toppled rocks. It is important here to acknowledge the work of the photographic model, who has to wait below each of these crazy things while the photographer stands in relative safety with the camera.
Modelling by Josh, lighting by Tarquin and Josh The shattered wall of the passage, which again has no reason to remain in place. It could be pulled apart with almost no effort.
Modelling by Josh, lighting by Tarquin and Josh
The shattered wall of the passage, which again has no reason to remain in place. It could be pulled apart with almost no effort.
Modelling by Josh, lighting by Tarquin and Josh "Could you go and put yourself under that pointy rock that doesn't seem to have any reason to stay where it is?"
Modelling by Josh, lighting by Tarquin and Josh
"Could you go and put yourself under that pointy rock that doesn't seem to have any reason to stay where it is?"
Modelling by Josh, lighting by Tarquin and Josh In many places, there are undercuts which loop around and sometimes join each other. This one has a small inlet with water actually visible. The amount of water is too much for what is seen in (not) Outcast Passage, and too little for what is seen in Upstream Passage. It is not known where it rejoins the rest of the cave's water, or whether it joins the north-flowing or south-flowing streamways under this hill.
Modelling by Josh, lighting by Tarquin and Josh
In many places, there are undercuts which loop around and sometimes join each other. This one has a small inlet with water actually visible. The amount of water is too much for what is seen in (not) Outcast Passage, and too little for what is seen in Upstream Passage. It is not known where it rejoins the rest of the cave's water, or whether it joins the north-flowing or south-flowing streamways under this hill.
Modelling by Josh, lighting by Tarquin and Josh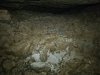 The undercut has an extremely large deposit of cryostal, with a pile of powdered cryostal in the middle.
 A few reasonably sized beads.
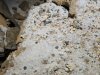 Some larger beads.
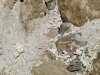 Large pieces, the biggest of which are a couple of centimetres across.
 Large lattices of cryostal, a few centimetres across.
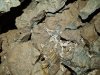 More lattices, with a finger for scale. There were many more large pieces here.
 A large slab with a fracture through the middle of it.
Modelling by Josh, lighting by Tarquin and Josh
A large slab with a fracture through the middle of it.
Modelling by Josh, lighting by Tarquin and Josh A peeling section of wall just waiting to fall if you breathe on it.
Modelling by Josh, lighting by Tarquin and Josh
A peeling section of wall just waiting to fall if you breathe on it.
Modelling by Josh, lighting by Tarquin and Josh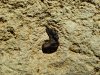 Fossil ctenacanthus (assumed) dorsal spine.
 Where the next undercut joins (which connects back to the previous one), there is another superb deposit of cryostal. The most impressive pieces are tucked behind a large boulder to one side of the passage, and not immediately obvious.
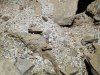 Close-up of the cryostal.
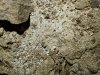 Cryostal.
 With some large beads.
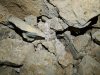 Cryostal.
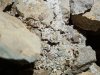 Close-up.
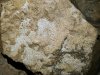 On the rocks.
 Close-up.
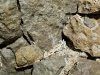 Large aggregations between the rocks.
 Wedged in the gaps.
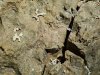 Twiglets.
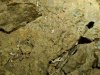 Cryostal.
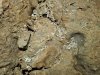 Twiglets and lattices.
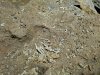 Twiglets.
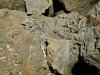 Twiglets
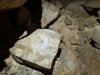 Powder and large beads under the rocks.
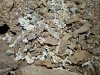 Large lattices.
 The largest and most elaborate of the cryostal lattices, at about 11 cm x 4 cm.
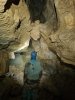 Another crazy pair of jammed rocks.
Modelling by Josh, lighting by Tarquin and Josh
Another crazy pair of jammed rocks.
Modelling by Josh, lighting by Tarquin and Josh The most insane of the suspended rocks, a gravity defying arch, which really doesn't look like it should work. This passage seems to have the most ludicrous interpretation of the laws of physics.
Modelling by Josh
The most insane of the suspended rocks, a gravity defying arch, which really doesn't look like it should work. This passage seems to have the most ludicrous interpretation of the laws of physics.
Modelling by Josh Leaning pillar.
Modelling by Josh, lighting by Tarquin and Josh
Leaning pillar.
Modelling by Josh, lighting by Tarquin and Josh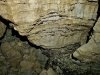 Beds of what appears to be goethite, a very dark ochre.
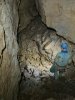 A semi-stable section of passage.
Modelling by Josh, lighting by Tarquin and Josh
A semi-stable section of passage.
Modelling by Josh, lighting by Tarquin and Josh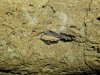 A flattened ctenacanthus dorsal spine.
 This part is particularly impressive, in that it is the first time the walls have looked stable since the start of Bolder Land. A welcome break from watching everything you touch. The passage is not large enough to be the only source of Padlock Passage's size, so presumably there was something larger hidden under the floor somewhere. The scallops indicate a southwards flow.
Modelling by Josh, lighting by Tarquin and Josh
This part is particularly impressive, in that it is the first time the walls have looked stable since the start of Bolder Land. A welcome break from watching everything you touch. The passage is not large enough to be the only source of Padlock Passage's size, so presumably there was something larger hidden under the floor somewhere. The scallops indicate a southwards flow.
Modelling by Josh, lighting by Tarquin and Josh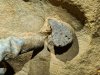 The most impressive of the ctenacanthus spines, with well defined blood vessel holes.
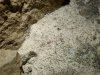 Powdered cryostal.
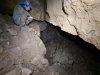 A climb down (with loose rocks at the top, of course) lands at the head of this blind pit, which is several metres deep. This is quite a crater, without a safe way to descend it, so we remain on the rubble bank above, and bypass it. The missing large passage may well be buried in a series of these collapse pits and undercuts. At this point there is less than 150 metres of passage left, but the right turn is just the passage returning to its normal northwest alignment.
Modelling by Josh, lighting by Tarquin and Josh
A climb down (with loose rocks at the top, of course) lands at the head of this blind pit, which is several metres deep. This is quite a crater, without a safe way to descend it, so we remain on the rubble bank above, and bypass it. The missing large passage may well be buried in a series of these collapse pits and undercuts. At this point there is less than 150 metres of passage left, but the right turn is just the passage returning to its normal northwest alignment.
Modelling by Josh, lighting by Tarquin and Josh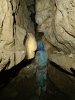 It can be stable now, right?
Modelling by Josh, lighting by Tarquin and Josh
It can be stable now, right?
Modelling by Josh, lighting by Tarquin and Josh Ah of course, more suspended rocks.
Modelling by Josh, lighting by Tarquin and Josh
Ah of course, more suspended rocks.
Modelling by Josh, lighting by Tarquin and Josh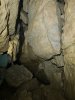 And an unstable wall. Because why not.
Modelling by Josh, lighting by Tarquin and Josh
And an unstable wall. Because why not.
Modelling by Josh, lighting by Tarquin and Josh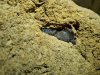 Another fossil bone, likely to be a ctenacanthus, but a very different cross section. Perhaps it is a jaw bone or shoulder plate.
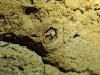 Fossil nautiloid shell.
 Beautifully arched former phreas, with a wide vadose trench.
Modelling by Josh, lighting by Tarquin and Josh
Beautifully arched former phreas, with a wide vadose trench.
Modelling by Josh, lighting by Tarquin and Josh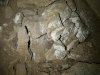 Powdered cryostal.
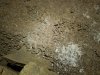 Cryostal.
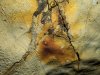 Richly stained ceiling, probably various ochres.
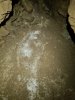 Powdered and more elaborate cryostal deposits.
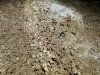 Cryostal twiglets.
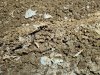 Cryostal lattices and rafts.
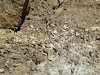 Lattices and rafts.
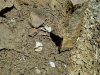 Rafts.
 Rafts.
 A very wide bedding, with the shattered remains of formations on the ceiling. This is where the passage finally turns to trend northeast.
Modelling by Josh, lighting by Tarquin and Josh
A very wide bedding, with the shattered remains of formations on the ceiling. This is where the passage finally turns to trend northeast.
Modelling by Josh, lighting by Tarquin and Josh The bedding has yet another very large cryostal deposit.
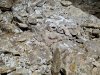 Cryostal.
 Cryostal.
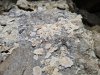 Very fine cryostal rafts, a type very rarely seen, with edges covered in fine crystals.
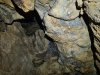 A blind aven with the first signs of quartz conglomerate, in the form of white quartz pebbles embedded in the rock. Once again, the cave has intersected the caprock, while being two rock beds too low to encounter it. This is probably the same sedimentary depression seen in 6th Heaven Chamber.
 Laminated calcite chunk. The black layers are probaby manganese.
 A coloured band of quartz conglomerate.
 Calcite and manganese stalactite.
 Admiring the conglomerate ceiling. The route now twists a little, passing short dead ends.
Modelling by Josh
Admiring the conglomerate ceiling. The route now twists a little, passing short dead ends.
Modelling by Josh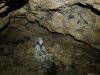 The passage now fully breaks into the quartz conglomerate caprock, where the quartz pebbles are clearly visible. The rock is impervious to water unless it is fractured, and cannot be dissolved by acid, so it does not normally form caves, except in places where it collapses into a cavity beneath it. Caves do form by etching away the limestone at the contact between limestone and caprock, but that is almost exclusively in the upper limestone beds which cover most of the national park's caving area. This area is unusual, as at this edge of the hillside, the upper limestone beds are missing completely, and the Llanelly shales are also missing in a few patches, allowing the caprock to rest on the lower beds. (The situation is different at the Blorenge mountain, since the shales and upper limestone beds are both absent there, and some of the lower beds also go missing at the northwestern edge of the mountain. But under most of Gilwern Hill there should be shales and upper limestone beds, which can be seen at Ogof Ddwy Sir.)
Modelling by Josh
The passage now fully breaks into the quartz conglomerate caprock, where the quartz pebbles are clearly visible. The rock is impervious to water unless it is fractured, and cannot be dissolved by acid, so it does not normally form caves, except in places where it collapses into a cavity beneath it. Caves do form by etching away the limestone at the contact between limestone and caprock, but that is almost exclusively in the upper limestone beds which cover most of the national park's caving area. This area is unusual, as at this edge of the hillside, the upper limestone beds are missing completely, and the Llanelly shales are also missing in a few patches, allowing the caprock to rest on the lower beds. (The situation is different at the Blorenge mountain, since the shales and upper limestone beds are both absent there, and some of the lower beds also go missing at the northwestern edge of the mountain. But under most of Gilwern Hill there should be shales and upper limestone beds, which can be seen at Ogof Ddwy Sir.)
Modelling by Josh Calcite and manganese flowstone.
 A crawl under the wall then reaches the final chamber, another within the conglomerate. At the top end is a rift which is heavily choked with conglomerate. 150 metres beyond the end wall here is the Queen Of Hearts extension to Ogof Ddwy Sir, which is the obvious continuation of this passage. It also ends in quartz conglomerate like this, which suggests that there is at least another 150 metres of these insane domed chambers, made from this rock.
 Quartz conglomerate is not particularly strong, and cannot cope with wide spans, so it collapses relatively easily, compared with limestone. Not the best building material for the cave to have chosen. But instead of another 150 metres of it, it is time to turn around, and face the rest of Bolder Land again.
 We decided to go in via Darling Rifts, which are normally bypassed via Spare Rib. There are plenty of little ledges for traversing, but the occasional bold step is required. This passage can prove quite demanding at the end of a long trip. The passage is named after a visiting couple who were becoming quite frustrated, but always insisted on ending their sentences with "darling" when snapping at each other.
Modelling by Josh, lighting by Tarquin and Josh
We decided to go in via Darling Rifts, which are normally bypassed via Spare Rib. There are plenty of little ledges for traversing, but the occasional bold step is required. This passage can prove quite demanding at the end of a long trip. The passage is named after a visiting couple who were becoming quite frustrated, but always insisted on ending their sentences with "darling" when snapping at each other.
Modelling by Josh, lighting by Tarquin and Josh Some narrow sections have a rope for assistance. It was somewhere like this that Kevin Munn (one of the original explorers) slipped down the rift when passing a 1990s giant television camera to someone else, breaking his rib - the event that gave Spare Rib its name.
Modelling by Josh, lighting by Tarquin and Josh
Some narrow sections have a rope for assistance. It was somewhere like this that Kevin Munn (one of the original explorers) slipped down the rift when passing a 1990s giant television camera to someone else, breaking his rib - the event that gave Spare Rib its name.
Modelling by Josh, lighting by Tarquin and Josh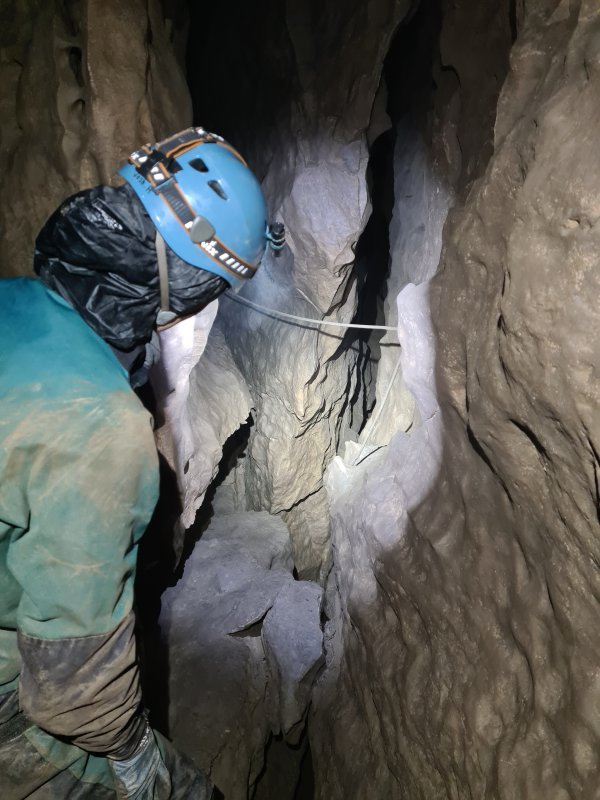 The passage ends with a choice. Down to the left is this handline, which leads down a climb to a chamber at the head of Big Bang Pitch, the original way into the cave. To the right is the start of Pitch Bypass, which rejoins the Spare Rib route.
Modelling by Josh, lighting by Tarquin and Josh
The passage ends with a choice. Down to the left is this handline, which leads down a climb to a chamber at the head of Big Bang Pitch, the original way into the cave. To the right is the start of Pitch Bypass, which rejoins the Spare Rib route.
Modelling by Josh, lighting by Tarquin and Josh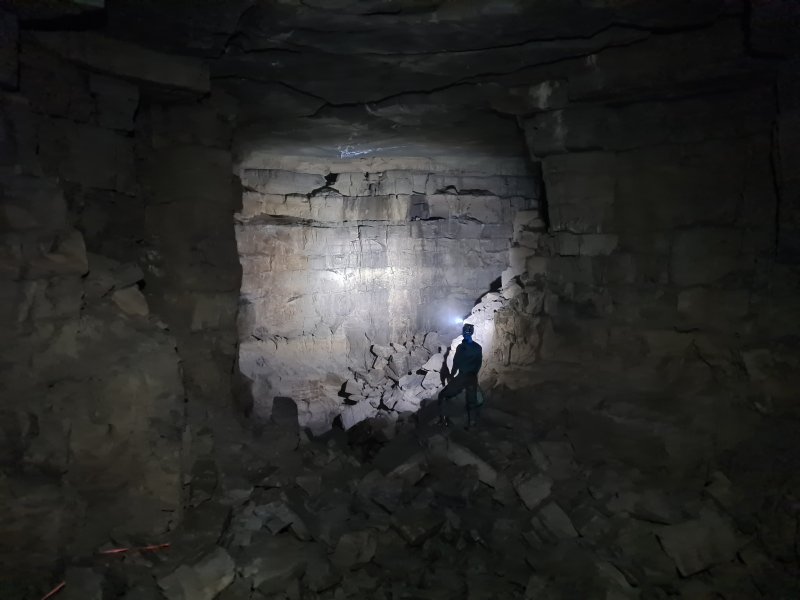 Upstream Passage, where it starts at Cairn Junction. Strictly speaking, it was called Beyond A Choke at this point originally, since it only used to be upstream from Big Bang Pitch. But since Pitch Bypass has now become the main route, it has become Upstream Passage from this point instead. At its start, a noisy inlet on the left is the water from the Entrance Series, entering from an impossibly tight cleft.
Modelling by Josh, lighting by Tarquin and Josh
Upstream Passage, where it starts at Cairn Junction. Strictly speaking, it was called Beyond A Choke at this point originally, since it only used to be upstream from Big Bang Pitch. But since Pitch Bypass has now become the main route, it has become Upstream Passage from this point instead. At its start, a noisy inlet on the left is the water from the Entrance Series, entering from an impossibly tight cleft.
Modelling by Josh, lighting by Tarquin and Josh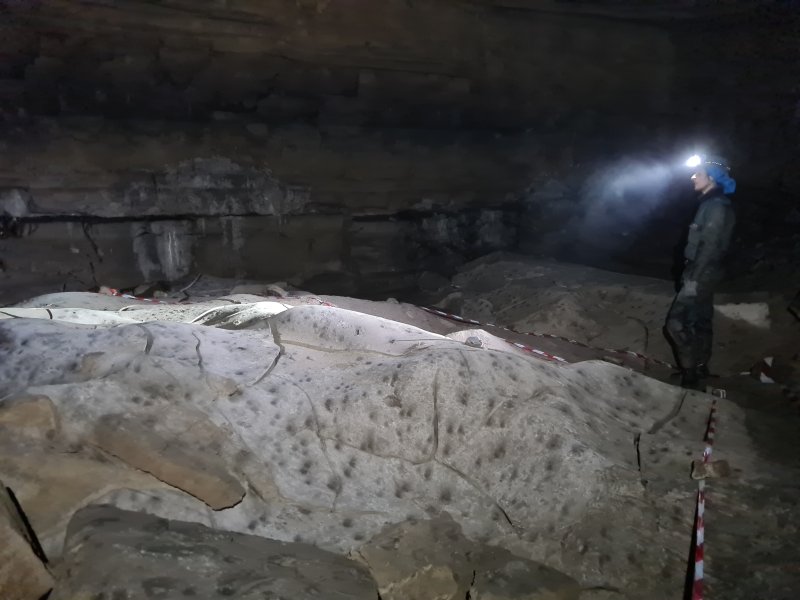 The passage climbs up a slope into a section with a superb cracked mud floor. The white powder is likely to be a microbial deposit, which has been washed away by drips.
Modelling by Josh, lighting by Tarquin and Josh
The passage climbs up a slope into a section with a superb cracked mud floor. The white powder is likely to be a microbial deposit, which has been washed away by drips.
Modelling by Josh, lighting by Tarquin and Josh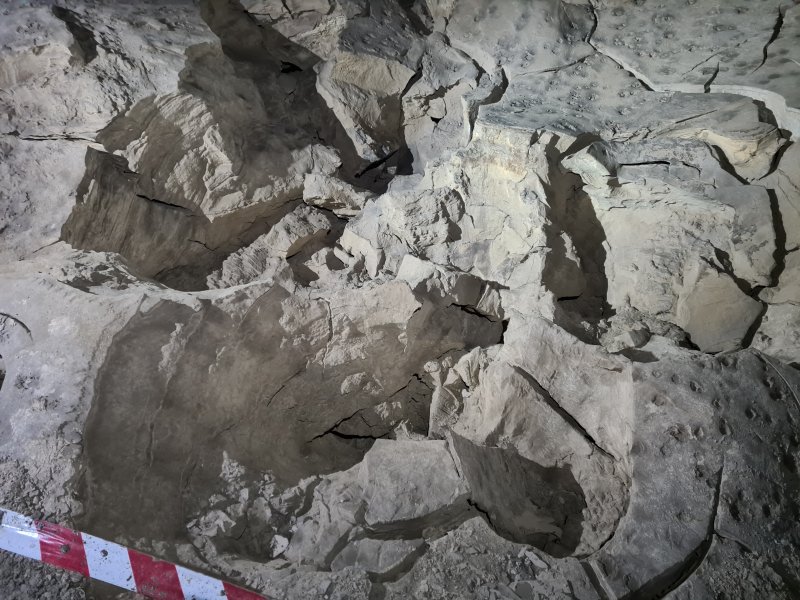 Collapsed section of the mud floor, showing the sand and silt layers.
Lighting by Tarquin and Josh
Collapsed section of the mud floor, showing the sand and silt layers.
Lighting by Tarquin and Josh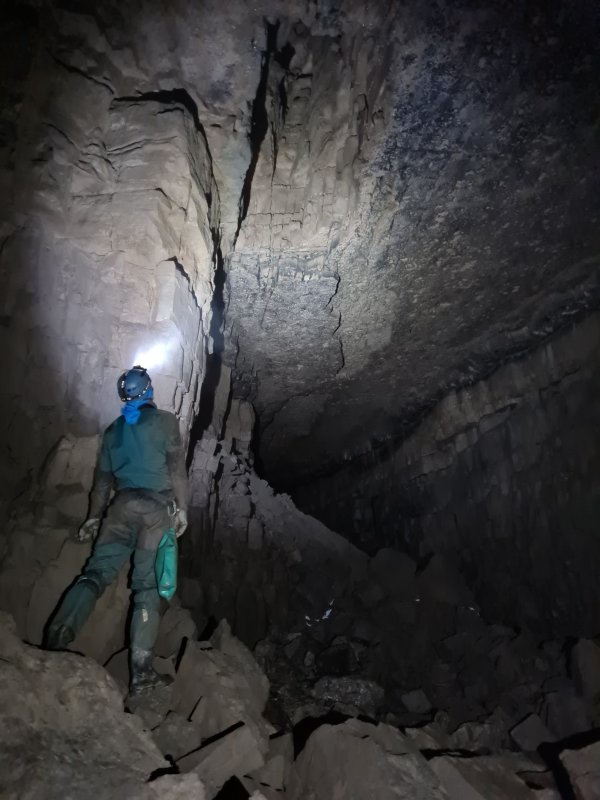 Big Bang Pitch emerging from the roof of the passage. This is how the cave was originally discovered, and the big bang referred to the feeling of popping out in such a grand passage, and knowing that the breakthrough had gone big. The first person to descend the ladder from above - Tim Long - was forced to climb back up when it did not reach the floor, and did not have the energy left to try again, so missed out on the exploration that day. There was a separate incident here when Malcolm Stewart looked into a tackle bag containing a leaky spent carbide pig (car inner tube), igniting the acetylene gas with his own carbide lamp, and exploding his eyebrows off. An oversuit which had been lying on a sandbank got blown down the shaft, so the cavers below only heard a big bang then saw an oversuit slowly fall. This incident was not involved in the naming of the pitch, it was just a happy coincidence.
Modelling by Josh, lighting by Tarquin and Josh
Big Bang Pitch emerging from the roof of the passage. This is how the cave was originally discovered, and the big bang referred to the feeling of popping out in such a grand passage, and knowing that the breakthrough had gone big. The first person to descend the ladder from above - Tim Long - was forced to climb back up when it did not reach the floor, and did not have the energy left to try again, so missed out on the exploration that day. There was a separate incident here when Malcolm Stewart looked into a tackle bag containing a leaky spent carbide pig (car inner tube), igniting the acetylene gas with his own carbide lamp, and exploding his eyebrows off. An oversuit which had been lying on a sandbank got blown down the shaft, so the cavers below only heard a big bang then saw an oversuit slowly fall. This incident was not involved in the naming of the pitch, it was just a happy coincidence.
Modelling by Josh, lighting by Tarquin and Josh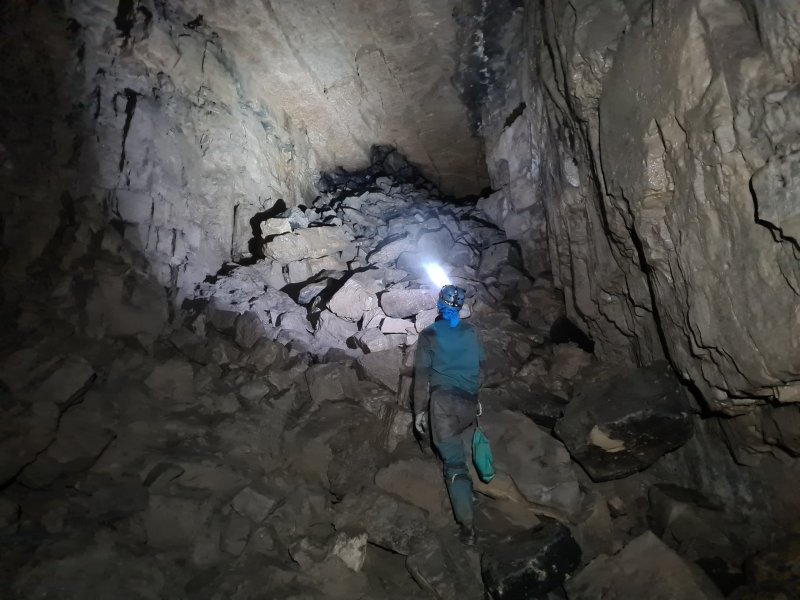 The passage then ramps up a slope to a ruckle formed by the floor of the chamber above Big Bang Pitch. During my first trip into this cave shortly after the breakthrough, before the main routes had been stabilised by passing cavers, I had accidentally sent one of the black boulders on the right down from the top of this slope towards my father. He had leapt up onto the right wall and clung on while the boulder passed below him. I guess that boulder has been stabilised now.
Modelling by Josh, lighting by Tarquin and Josh
The passage then ramps up a slope to a ruckle formed by the floor of the chamber above Big Bang Pitch. During my first trip into this cave shortly after the breakthrough, before the main routes had been stabilised by passing cavers, I had accidentally sent one of the black boulders on the right down from the top of this slope towards my father. He had leapt up onto the right wall and clung on while the boulder passed below him. I guess that boulder has been stabilised now.
Modelling by Josh, lighting by Tarquin and Josh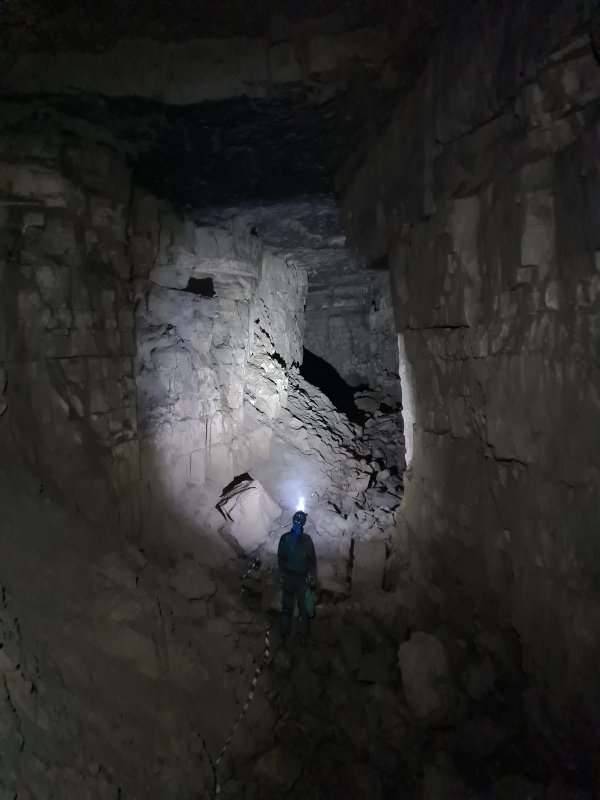 Upstream passage beyond the ruckle. This is the part that would have originally been called Upstream Passage. There is a waterfall on one side which I have used for drinking, but it should be noted that most other streams in upstream passage are fed directly from the stream that flows past the entrance, and are not safe for drinking.
Modelling by Josh, lighting by Tarquin and Josh
Upstream passage beyond the ruckle. This is the part that would have originally been called Upstream Passage. There is a waterfall on one side which I have used for drinking, but it should be noted that most other streams in upstream passage are fed directly from the stream that flows past the entrance, and are not safe for drinking.
Modelling by Josh, lighting by Tarquin and Josh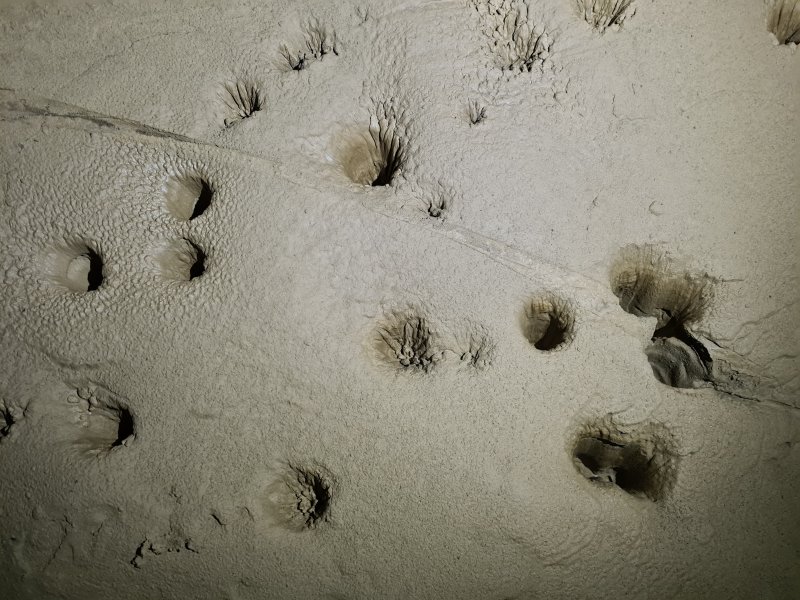 Drip pockets in a mud bank. The line is from the conservation tape, which had been rearranged by flooding. That line will disappear next time there is a flood. Incredibly, the drip pockets survive the flooding.
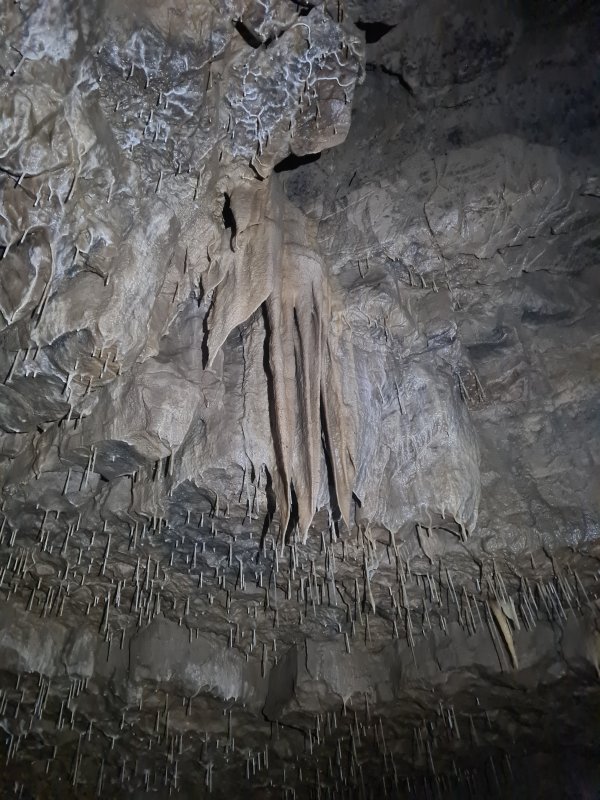 Curtains in a grotto at the end of the large passage. They appear quite dull in colour, so that is not an effect of poor lighting (though the lighting is difficult here).
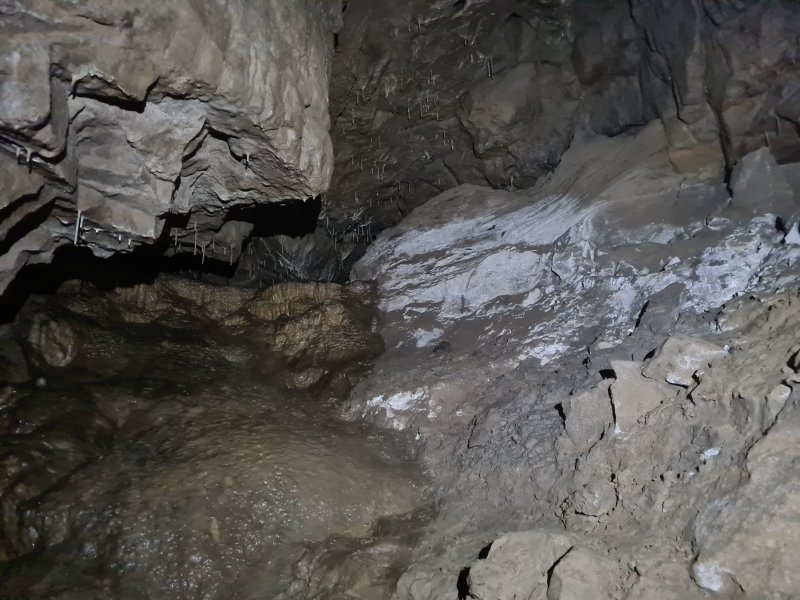 The large passage ends at this sediment bank and calcite flow. There is no prospect for extension, as the hillside has been carved away by a glacier.
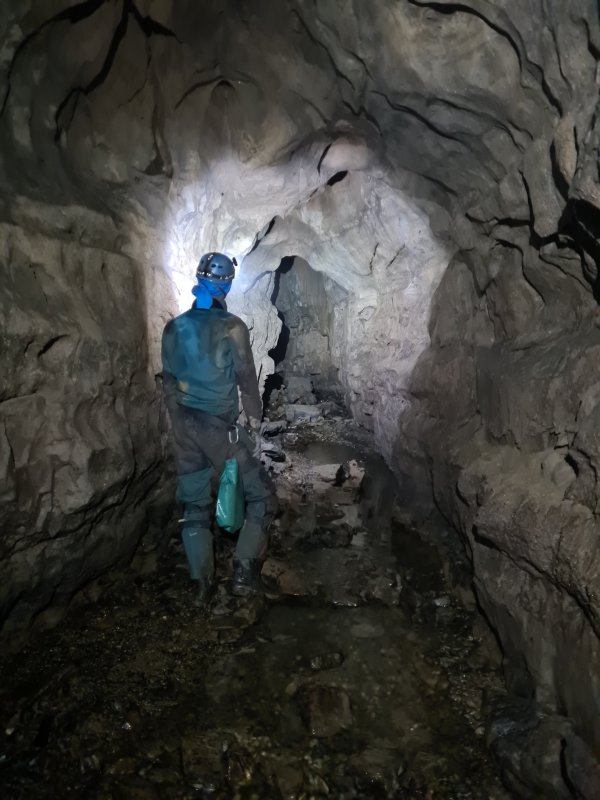 Instead, the way on is to continue upstream along a narrower passage. The waterfalls in this section must not be used for drinking.
Modelling by Josh, lighting by Tarquin and Josh
Instead, the way on is to continue upstream along a narrower passage. The waterfalls in this section must not be used for drinking.
Modelling by Josh, lighting by Tarquin and Josh After a few corners, the passage lowers to a crawl. This section can experience a substantial flow of water during flood, and the water rises over a very short amount of time. However, it should not be possible for it to sump, as the passage gradient is fairly steep. This area has been seen in flood conditions by the original explorers, and was safely passed.
Modelling by Josh, lighting by Tarquin and Josh
After a few corners, the passage lowers to a crawl. This section can experience a substantial flow of water during flood, and the water rises over a very short amount of time. However, it should not be possible for it to sump, as the passage gradient is fairly steep. This area has been seen in flood conditions by the original explorers, and was safely passed.
Modelling by Josh, lighting by Tarquin and Josh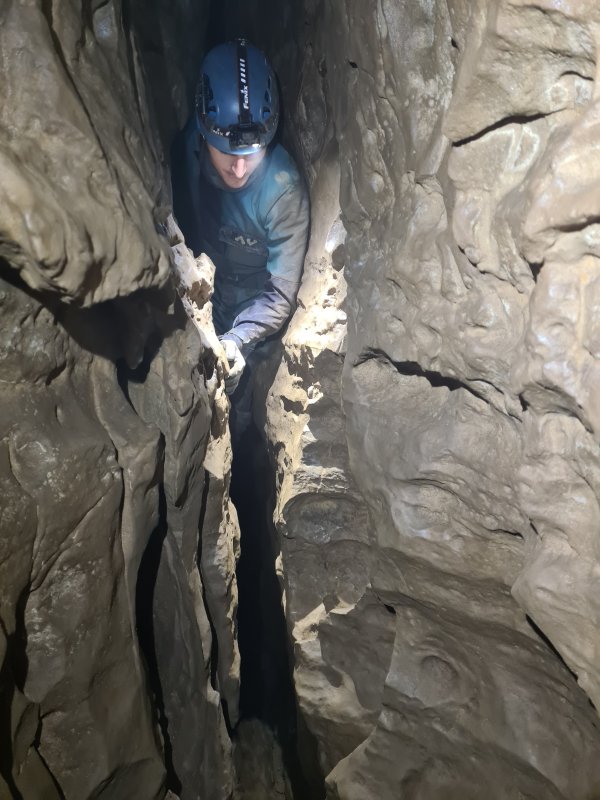 The water then appears from under a wall, while the passage ahead has about 500 metres of branches which all end at chokes against the mountainside. To regain the stream, the route climbs through a series of tight rifts above it. Waterfall Series does not really have a start point, since the passage was always open. Officially, the discovery of the series started further on, but the name Waterfall Series gets used from this point onwards anyway.
Modelling by Josh, lighting by Tarquin and Josh
The water then appears from under a wall, while the passage ahead has about 500 metres of branches which all end at chokes against the mountainside. To regain the stream, the route climbs through a series of tight rifts above it. Waterfall Series does not really have a start point, since the passage was always open. Officially, the discovery of the series started further on, but the name Waterfall Series gets used from this point onwards anyway.
Modelling by Josh, lighting by Tarquin and Josh The series of dry waterfalls above the stream, used to bypass a too-narrow slot.
Modelling by Josh, lighting by Tarquin and Josh
The series of dry waterfalls above the stream, used to bypass a too-narrow slot.
Modelling by Josh, lighting by Tarquin and Josh The climbs do not really need a rope, but someone has rigged one here anyway. This is not an official handline.
Modelling by Josh, lighting by Tarquin and Josh
The climbs do not really need a rope, but someone has rigged one here anyway. This is not an official handline.
Modelling by Josh, lighting by Tarquin and Josh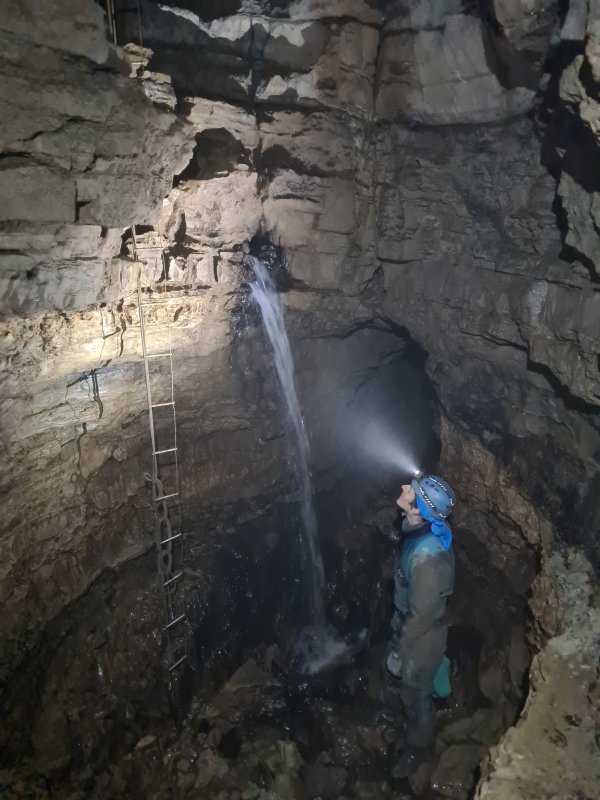 The waterfall which gives the series its name. It is possible to free climb this (I have done it a few times), but it is particularly difficult. There was previously a knotted handline here, but someone has recently replaced this with an electron ladder and belay line. There is another ladder stashed further into the series, presumably to replace this one when it rusts. The route heads upstream, then passes through an eyehole on the left into an inlet.
Modelling by Josh, lighting by Tarquin and Josh
The waterfall which gives the series its name. It is possible to free climb this (I have done it a few times), but it is particularly difficult. There was previously a knotted handline here, but someone has recently replaced this with an electron ladder and belay line. There is another ladder stashed further into the series, presumably to replace this one when it rusts. The route heads upstream, then passes through an eyehole on the left into an inlet.
Modelling by Josh, lighting by Tarquin and Josh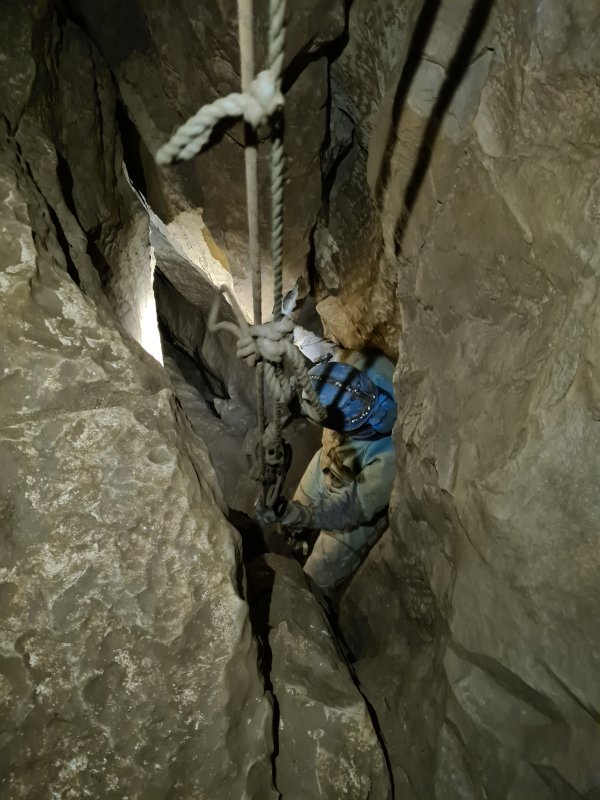 Climbing out of the inlet into a higher level passage. This is the official start of Waterfall Series, as this high level passage, and the upstream passage below it, had been left open during the earlier exploration.
Modelling by Josh, lighting by Tarquin and Josh
Climbing out of the inlet into a higher level passage. This is the official start of Waterfall Series, as this high level passage, and the upstream passage below it, had been left open during the earlier exploration.
Modelling by Josh, lighting by Tarquin and Josh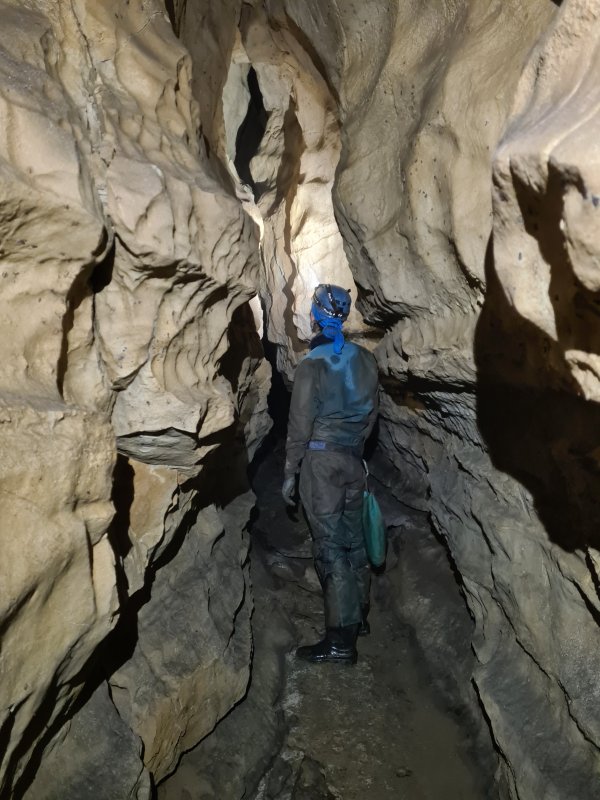 The dry passage at the top has no name, but was surveyed by Outcast Caving Club. The club left the word "Outcast" on their survey markers, which were mistaken for the name of the passage, so it got labelled as "Outcast Passage" on some surveys. This is the southern direction, which ends in a small loop, a mud filled tube, and an extremely tight rift.
Modelling by Josh, lighting by Tarquin and Josh
The dry passage at the top has no name, but was surveyed by Outcast Caving Club. The club left the word "Outcast" on their survey markers, which were mistaken for the name of the passage, so it got labelled as "Outcast Passage" on some surveys. This is the southern direction, which ends in a small loop, a mud filled tube, and an extremely tight rift.
Modelling by Josh, lighting by Tarquin and Josh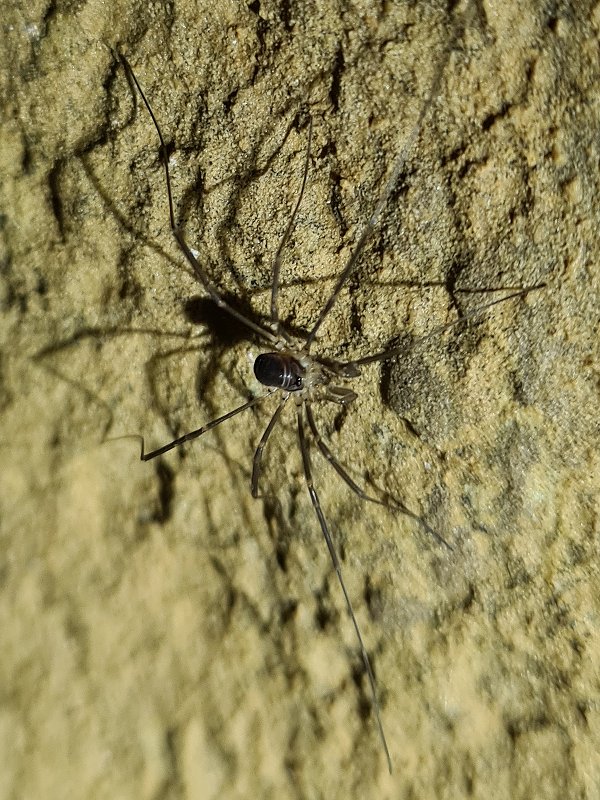 Harvestman in (not) Outcast Passage, in the northwards direction. This appears to be a Nelima gothica, a fairly small species, and is probably male. There were a couple of them seen along the passage.
Modelling by Opil
Harvestman in (not) Outcast Passage, in the northwards direction. This appears to be a Nelima gothica, a fairly small species, and is probably male. There were a couple of them seen along the passage.
Modelling by Opil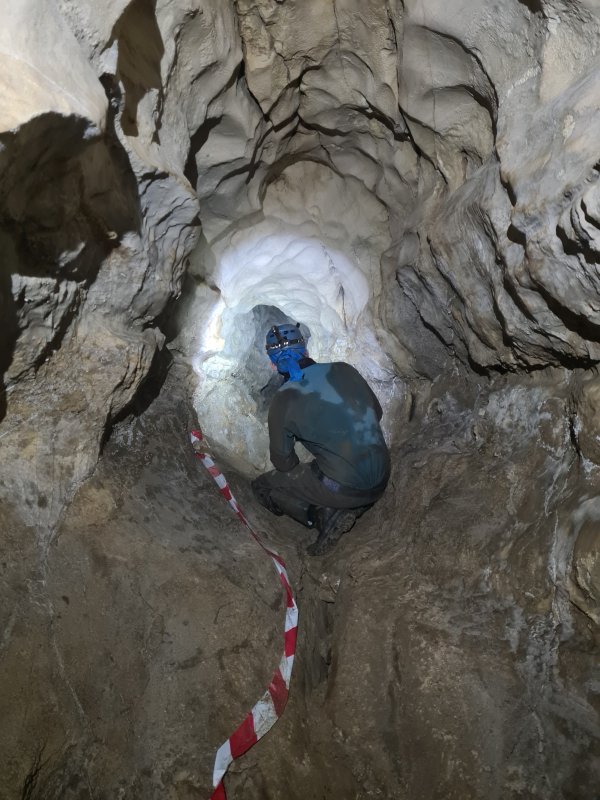 The northern direction is the way into Waterfall Series, and starts out as a walking or stooping passage.
Modelling by Josh, lighting by Tarquin and Josh
The northern direction is the way into Waterfall Series, and starts out as a walking or stooping passage.
Modelling by Josh, lighting by Tarquin and Josh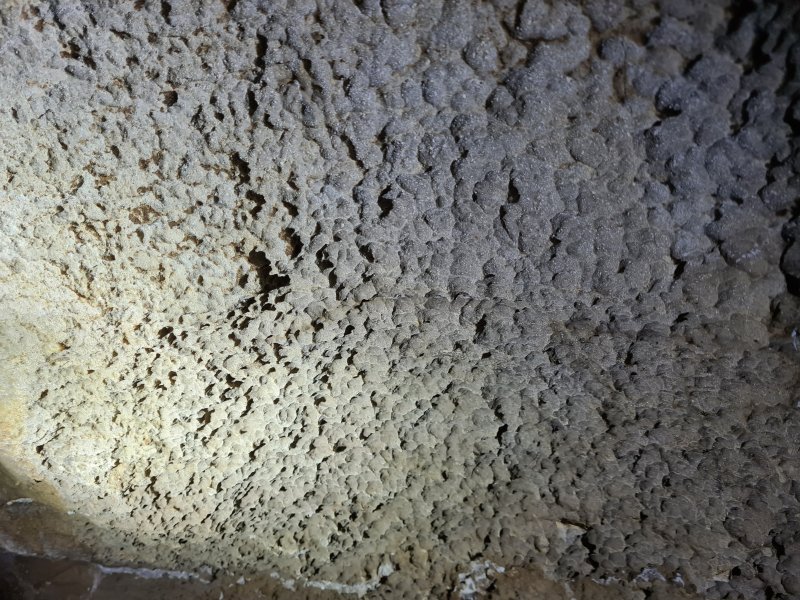 Karren weathering instead of scallops.
Lighting by Tarquin and Josh
Karren weathering instead of scallops.
Lighting by Tarquin and Josh Gypsum crust on the wall of the passage.
 A finger of gypsum.
 Gypsum flowers, some of the largest in the cave.
Lighting by Tarquin and Josh
Gypsum flowers, some of the largest in the cave.
Lighting by Tarquin and Josh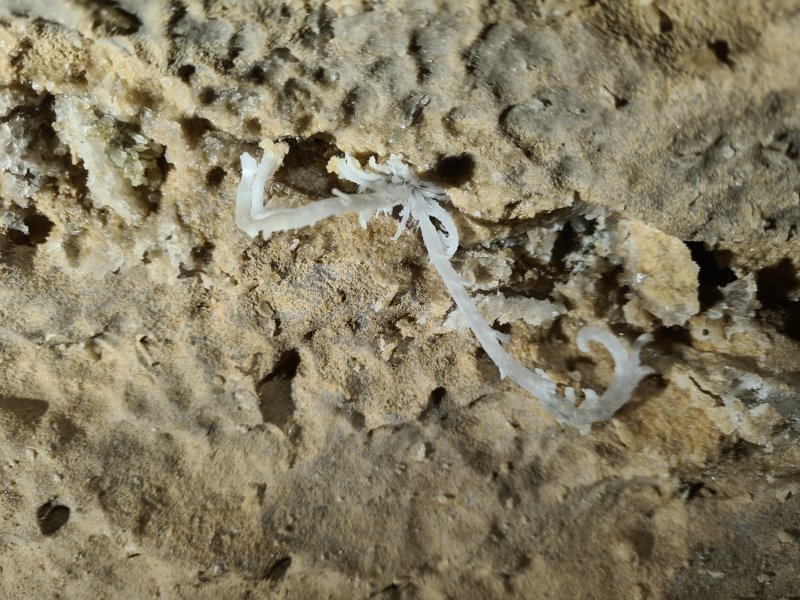 Gypsum flower.
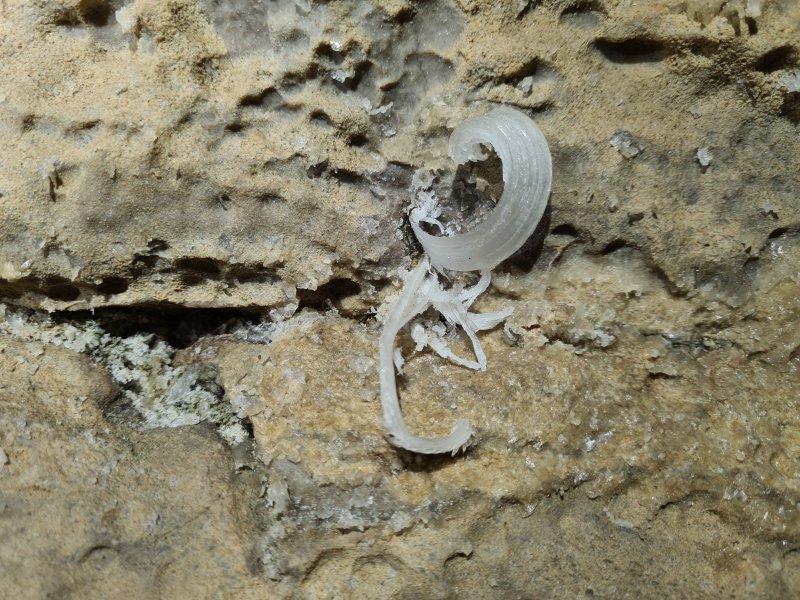 Gypsum flower.
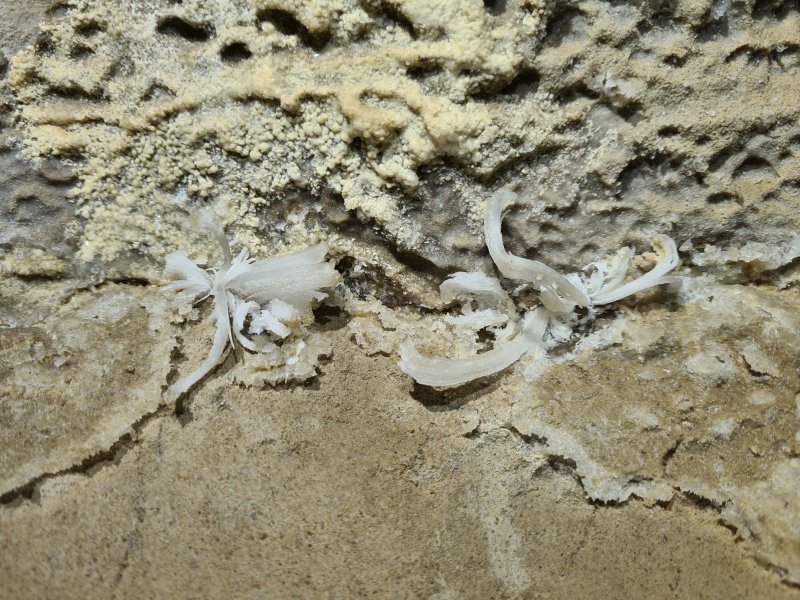 Gypsum flowers.
Lighting by Josh
Gypsum flowers.
Lighting by Josh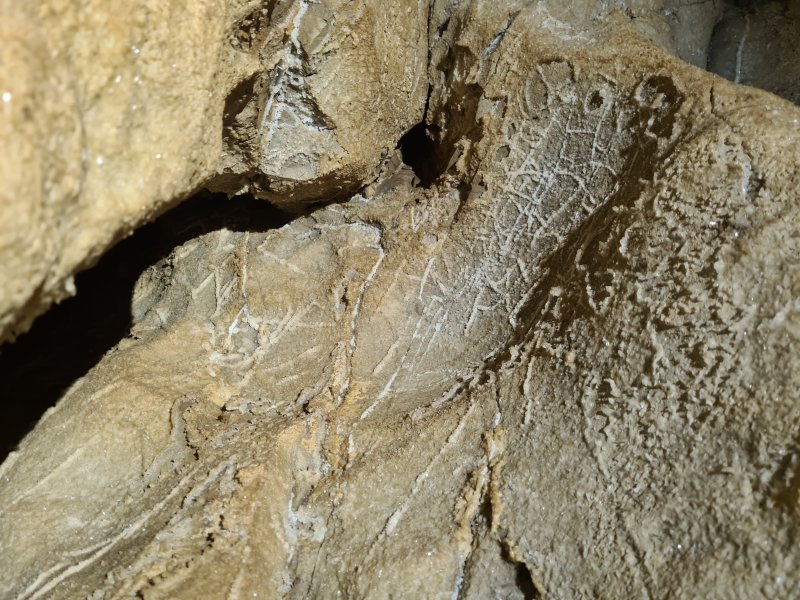 Gypsum boxwork.
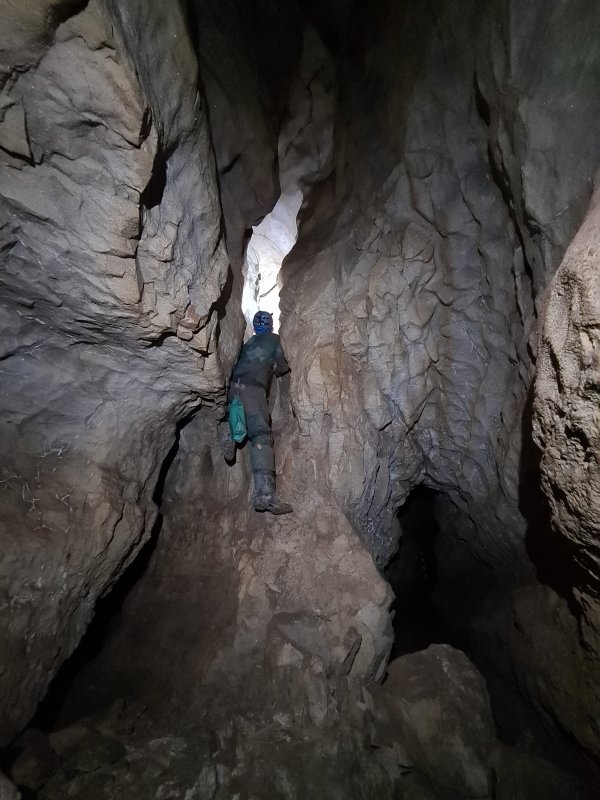 On a hairpin bend to the right, the obvious way on (seen on the left here) rapidly pinches out and becomes an impassable rabbit hole. The way on is to climb into an inobvious upper level above it.
Modelling by Josh, lighting by Tarquin and Josh
On a hairpin bend to the right, the obvious way on (seen on the left here) rapidly pinches out and becomes an impassable rabbit hole. The way on is to climb into an inobvious upper level above it.
Modelling by Josh, lighting by Tarquin and Josh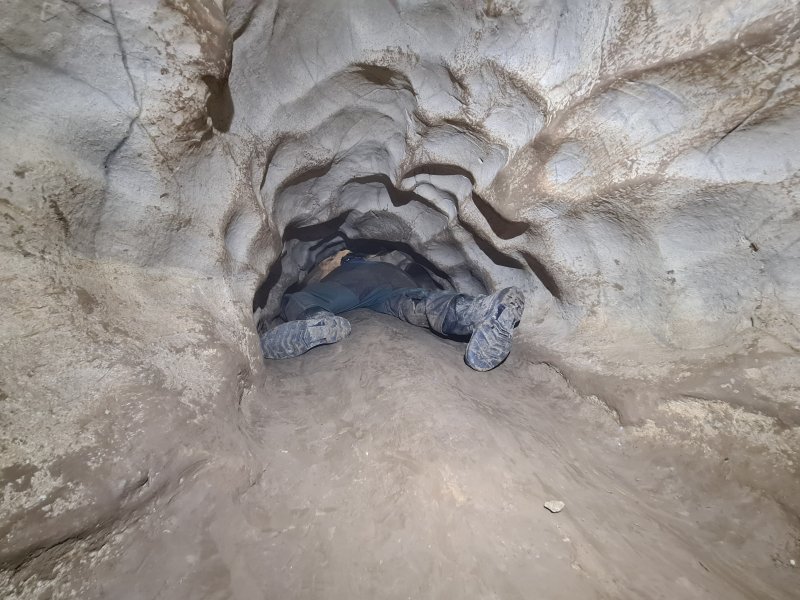 The passage swings left and lowers to a 70 metre crawl.
Modelling by Josh, lighting by Tarquin and Josh
The passage swings left and lowers to a 70 metre crawl.
Modelling by Josh, lighting by Tarquin and Josh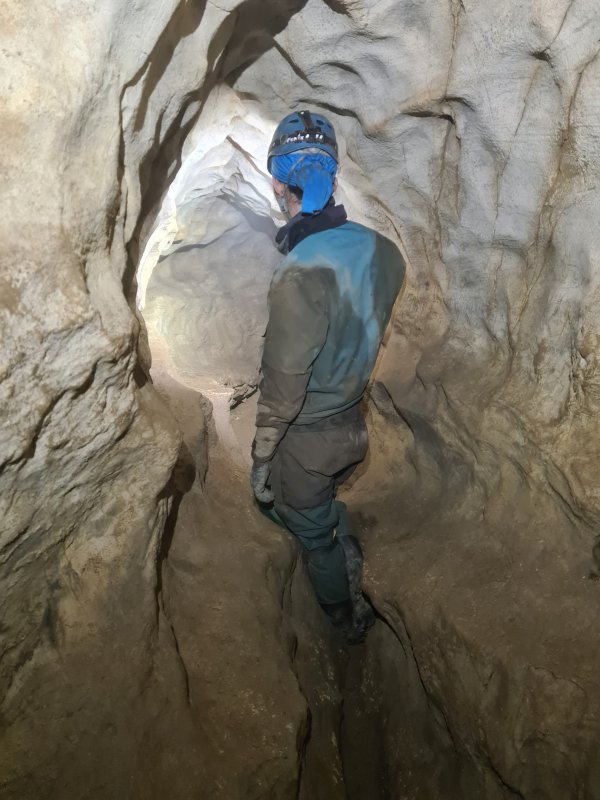 Walking size? No, just a brief rest before crawling again.
Modelling by Josh, lighting by Tarquin and Josh
Walking size? No, just a brief rest before crawling again.
Modelling by Josh, lighting by Tarquin and Josh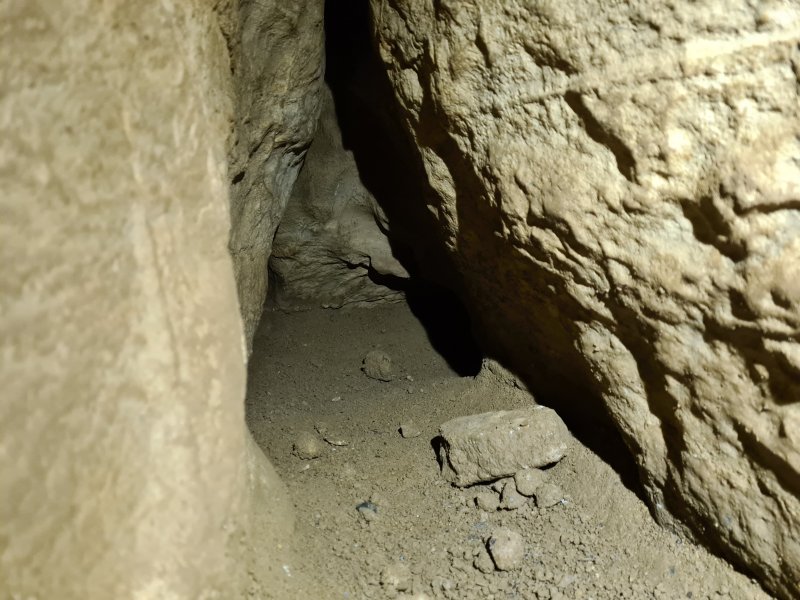 Impossibly small side rift which has a visual connection with the lower passage. Someone has actually managed to wriggle down this part.
 The crawl ends first squeeze, up a slope into a brief section of walking passage, with a dead-end side stub.
Modelling by Tarquin, camera and setup by Josh, lighting by Tarquin and Josh
The crawl ends first squeeze, up a slope into a brief section of walking passage, with a dead-end side stub.
Modelling by Tarquin, camera and setup by Josh, lighting by Tarquin and Josh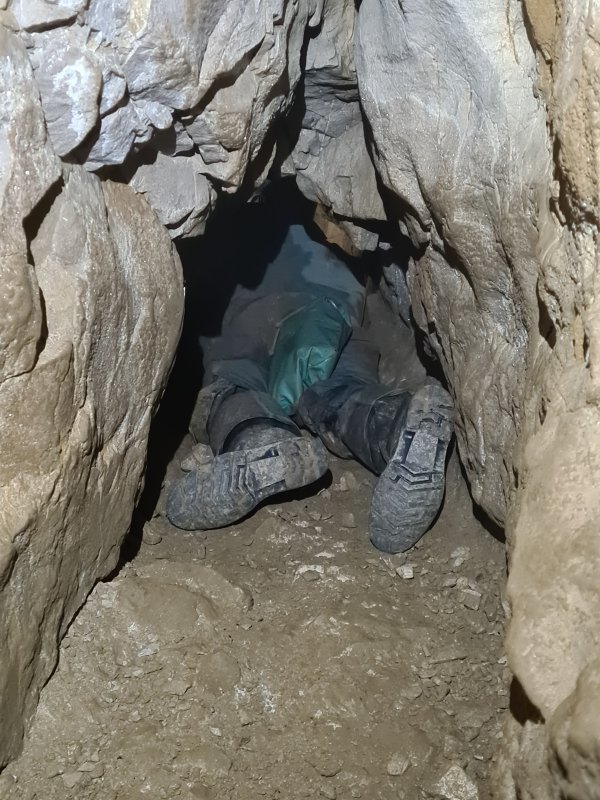 There is a choice between upper and lower passages. The upper one looks inviting, but is small and ends with some visual connections into the lower one. The lower passage is the way on, and is the start of the second crawl.
Modelling by Josh
There is a choice between upper and lower passages. The upper one looks inviting, but is small and ends with some visual connections into the lower one. The lower passage is the way on, and is the start of the second crawl.
Modelling by Josh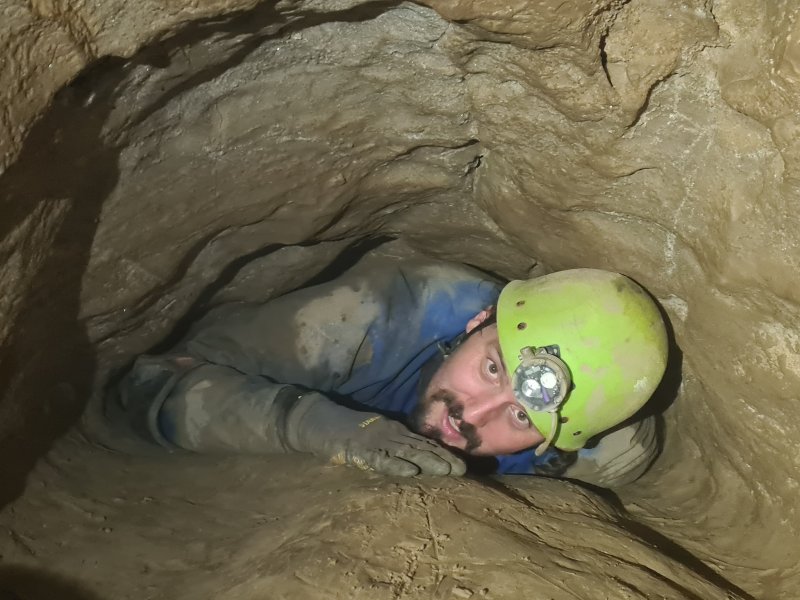 The second squeeze, which is fairly easy, like the first. The crawl is about 40 metres long, with the squeeze about half way along it.
Modelling by Tarquin, camera, setup and lighting by Josh
The second squeeze, which is fairly easy, like the first. The crawl is about 40 metres long, with the squeeze about half way along it.
Modelling by Tarquin, camera, setup and lighting by Josh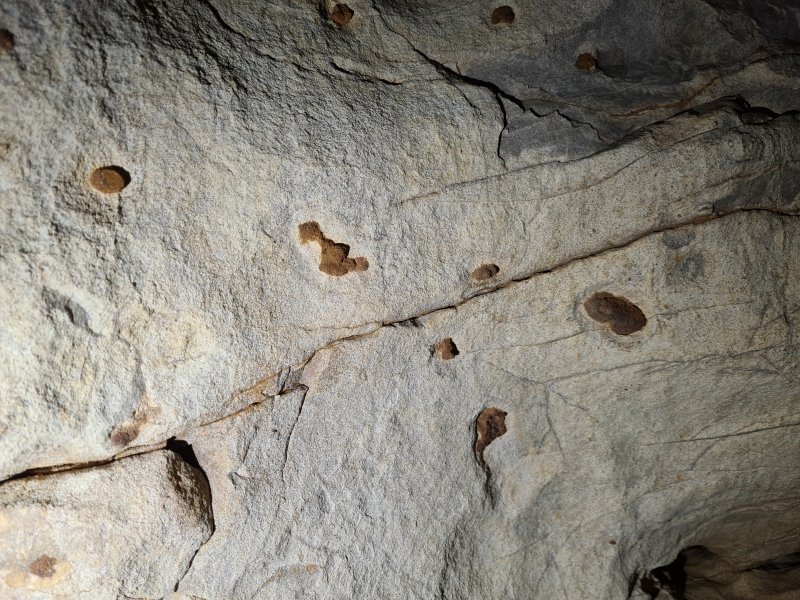 Nodules of what appears to be iron oxide embedded in the rock.
 Iron oxide nodules.
Modelling by Tarquin's glove
Iron oxide nodules.
Modelling by Tarquin's glove After the crawls, the passage is smaller than before.
Modelling by Josh, lighting by Tarquin and Josh
After the crawls, the passage is smaller than before.
Modelling by Josh, lighting by Tarquin and Josh The passage passes through a small complex, with the main way remaining the most obvious one. The longest side passage is only a few metres long, at the top of an aven. At one point is a lower level oxbow, but this not at all obvious. Later on is a short traverse over a muddy crawl with a tiny stream, which is the far end of the oxbow.
Modelling by Josh, lighting by Tarquin and Josh
The passage passes through a small complex, with the main way remaining the most obvious one. The longest side passage is only a few metres long, at the top of an aven. At one point is a lower level oxbow, but this not at all obvious. Later on is a short traverse over a muddy crawl with a tiny stream, which is the far end of the oxbow.
Modelling by Josh, lighting by Tarquin and Josh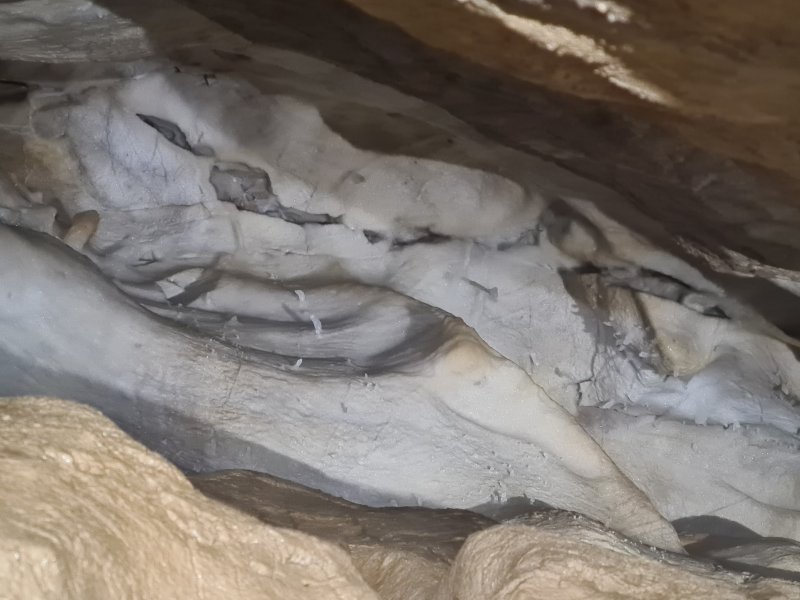 Immature helictites in the ceiling.
Lighting by Tarquin and Josh
Immature helictites in the ceiling.
Lighting by Tarquin and Josh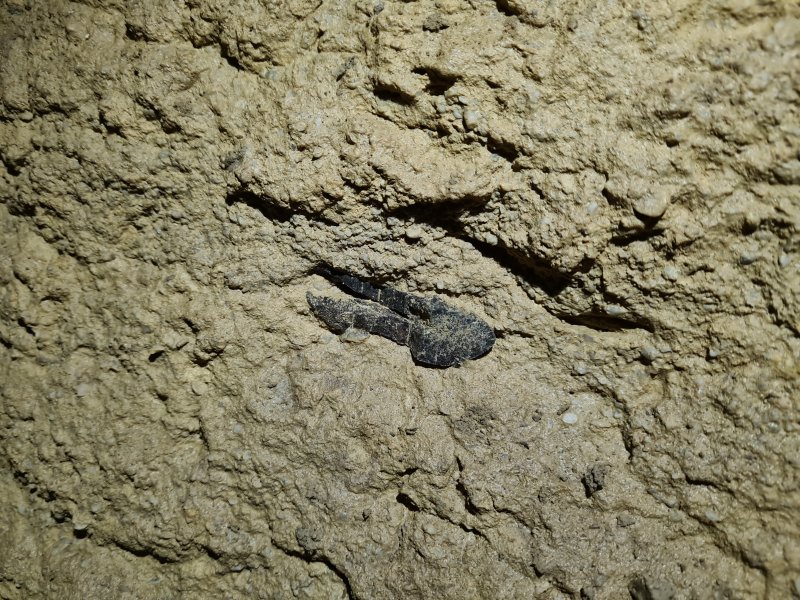 Fossil ctenacanthus (proto-shark) dorsal spine at floor level in the passage above the traverse.
Modelling by Josh, lighting by Tarquin and Josh
Fossil ctenacanthus (proto-shark) dorsal spine at floor level in the passage above the traverse.
Modelling by Josh, lighting by Tarquin and Josh The passage then pops out in the floor of a larger passage, which quickly ends in both directions. The old passage continues as a trench in the floor.
Modelling by Josh, lighting by Tarquin and Josh
The passage then pops out in the floor of a larger passage, which quickly ends in both directions. The old passage continues as a trench in the floor.
Modelling by Josh, lighting by Tarquin and Josh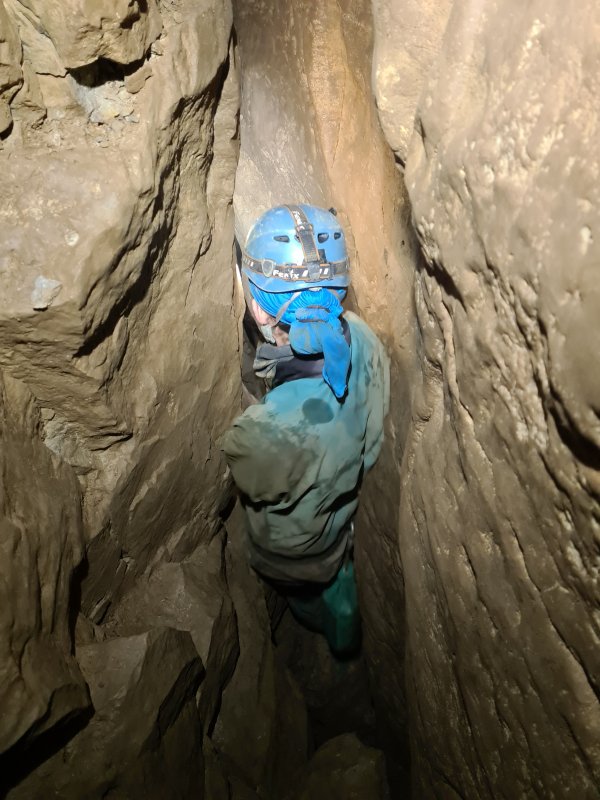 When the passage chokes, the trench in the floor breaks out again on the other side of the passage, and is the only way on. The drop down into the trench is tight, and can be a little challenging on the return. It is most easily passed on the return by trying to stay up near ceiling level rather than dropping to the floor.
Modelling by Josh, lighting by Tarquin and Josh
When the passage chokes, the trench in the floor breaks out again on the other side of the passage, and is the only way on. The drop down into the trench is tight, and can be a little challenging on the return. It is most easily passed on the return by trying to stay up near ceiling level rather than dropping to the floor.
Modelling by Josh, lighting by Tarquin and Josh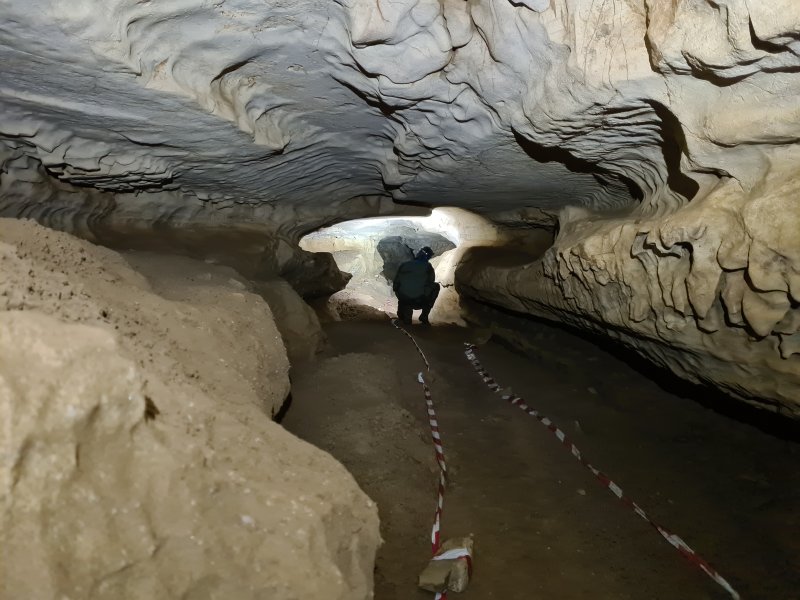 The rift then emerges from the floor of Knees Up Mother Brown. This has to be one of the most beautifully sculpted passages in the entire cave, and is worth all the effort to reach it. The way on to the left is the more comfortable, and is the more popular destination.
Modelling by Josh, lighting by Tarquin and Josh
The rift then emerges from the floor of Knees Up Mother Brown. This has to be one of the most beautifully sculpted passages in the entire cave, and is worth all the effort to reach it. The way on to the left is the more comfortable, and is the more popular destination.
Modelling by Josh, lighting by Tarquin and Josh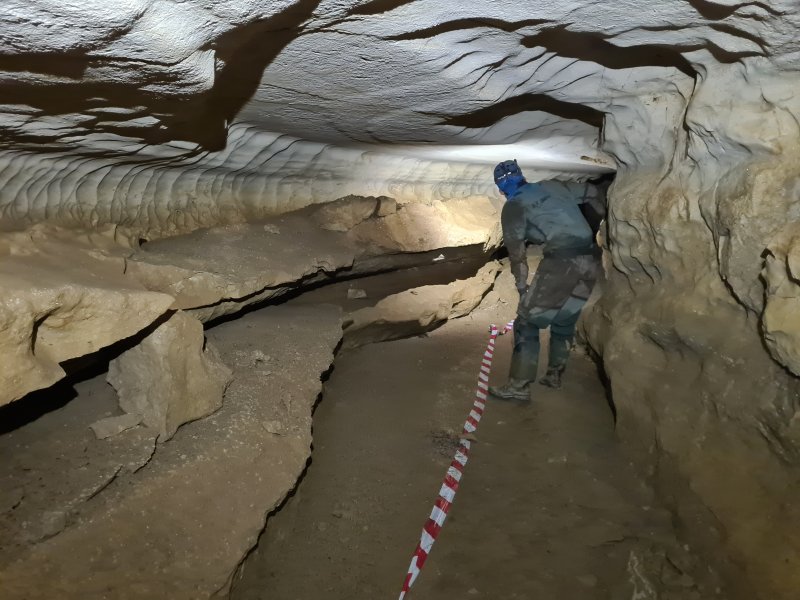 Beautifully sculpted passage, with deep scallops on the corners. The white ceiling is very reminiscent of Canyon Passage and Indiana Highway (before the heavy traffic caused the walls to be muddied).
Modelling by Josh, lighting by Tarquin and Josh
Beautifully sculpted passage, with deep scallops on the corners. The white ceiling is very reminiscent of Canyon Passage and Indiana Highway (before the heavy traffic caused the walls to be muddied).
Modelling by Josh, lighting by Tarquin and Josh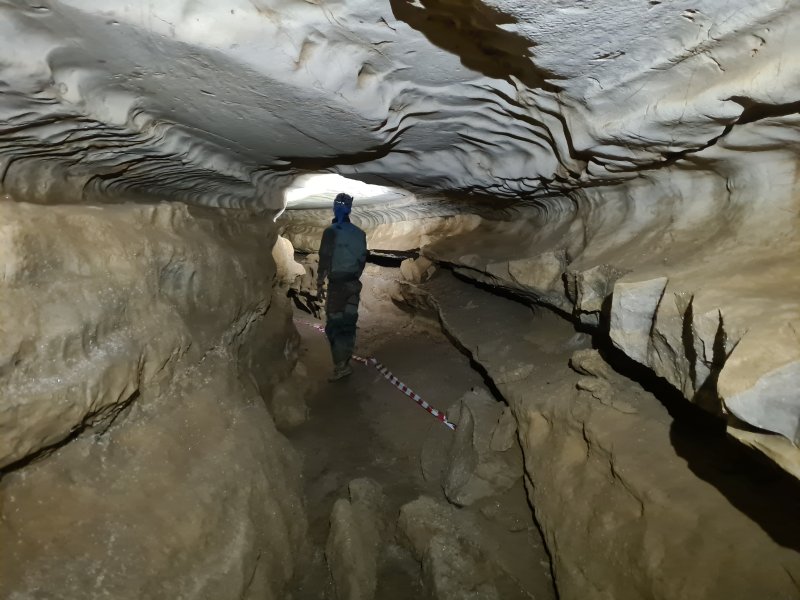 Ribbed passage. The ceiling soon lifts, and it becomes possible to run for over 200 metres, something especially rare in Draenen. This fact is the reason for the name Knees Up Mother Brown. The sand floor is only occasionally interrupted by rocks.
Modelling by Josh, lighting by Tarquin and Josh
Ribbed passage. The ceiling soon lifts, and it becomes possible to run for over 200 metres, something especially rare in Draenen. This fact is the reason for the name Knees Up Mother Brown. The sand floor is only occasionally interrupted by rocks.
Modelling by Josh, lighting by Tarquin and Josh Knees Up Mother Brown.
Modelling by Josh, lighting by Tarquin and Josh
Knees Up Mother Brown.
Modelling by Josh, lighting by Tarquin and Josh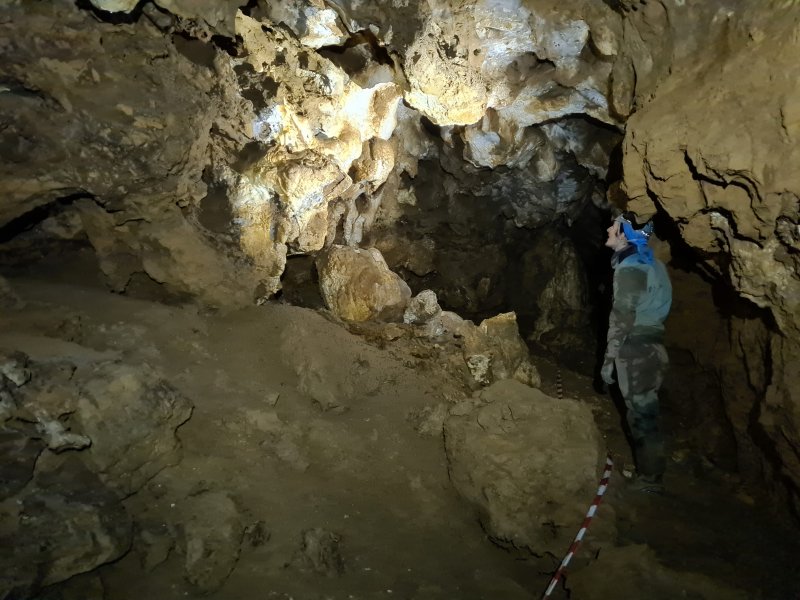 Knees Up Mother Brown ends at a junction with Lost River Passage, where the cave enters a dolomite area. Lost River is a series of domed chambers leading to the right, with numerous fine formations.
Modelling by Josh, lighting by Tarquin and Josh
Knees Up Mother Brown ends at a junction with Lost River Passage, where the cave enters a dolomite area. Lost River is a series of domed chambers leading to the right, with numerous fine formations.
Modelling by Josh, lighting by Tarquin and Josh Many of the formations are bulbous, and look like they might have formed underwater.
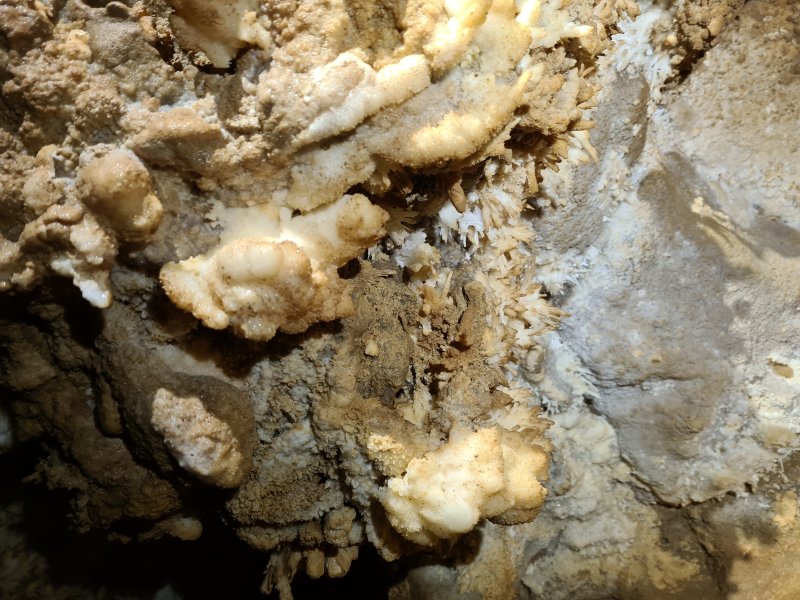 Anthodites in Lost River. These are aragonite needles splaying from a calcite base, like the Urchins in Daren Cilau. Aragonite is the same chemical as calcite, but with a different crystal structure, which decomposes to calcite over around 100 million years.
 Anthodites in Lost River.
 Formations covering the walls in Lost River.
Modelling by Josh, lighting by Tarquin and Josh
Formations covering the walls in Lost River.
Modelling by Josh, lighting by Tarquin and Josh Formations covering the ceiling. Again these have that underwater appearance.
Modelling by Josh, lighting by Tarquin and Josh
Formations covering the ceiling. Again these have that underwater appearance.
Modelling by Josh, lighting by Tarquin and Josh A brief piece of actual passage (rather than chambers) in Lost River Passage.
Modelling by Josh, lighting by Tarquin and Josh
A brief piece of actual passage (rather than chambers) in Lost River Passage.
Modelling by Josh, lighting by Tarquin and Josh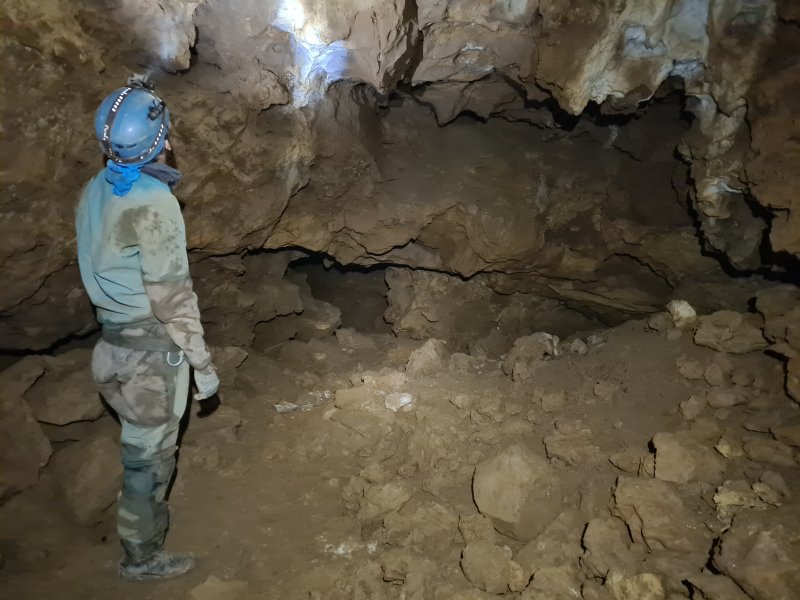 The first big chamber in Lost River Passage. There are several digs and holes down into a choked lower level. One of the digs regains the way on, but it becomes too narrow after 50 metres.
Modelling by Josh, lighting by Tarquin and Josh
The first big chamber in Lost River Passage. There are several digs and holes down into a choked lower level. One of the digs regains the way on, but it becomes too narrow after 50 metres.
Modelling by Josh, lighting by Tarquin and Josh White arch in the ceiling of the chamber.
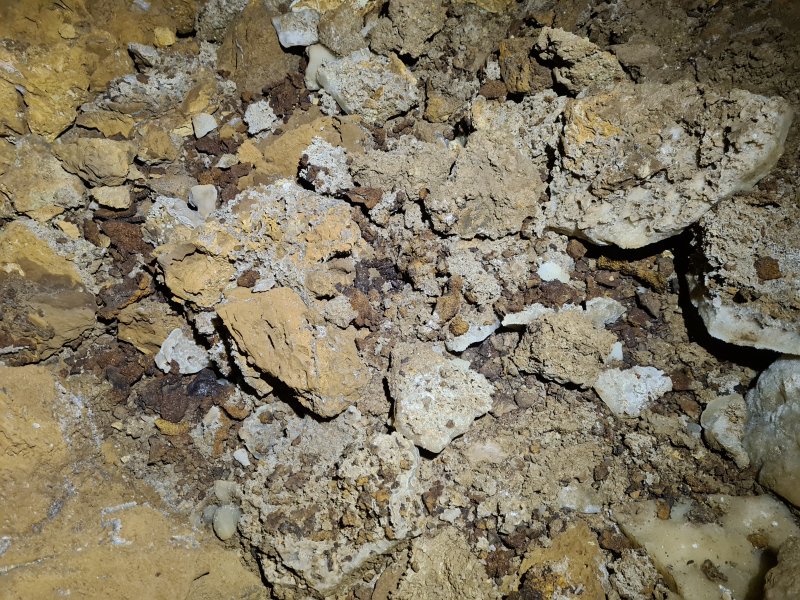 Chunks of gypsum crystals, yellow ochre and darker haematite on the floor of the chamber.
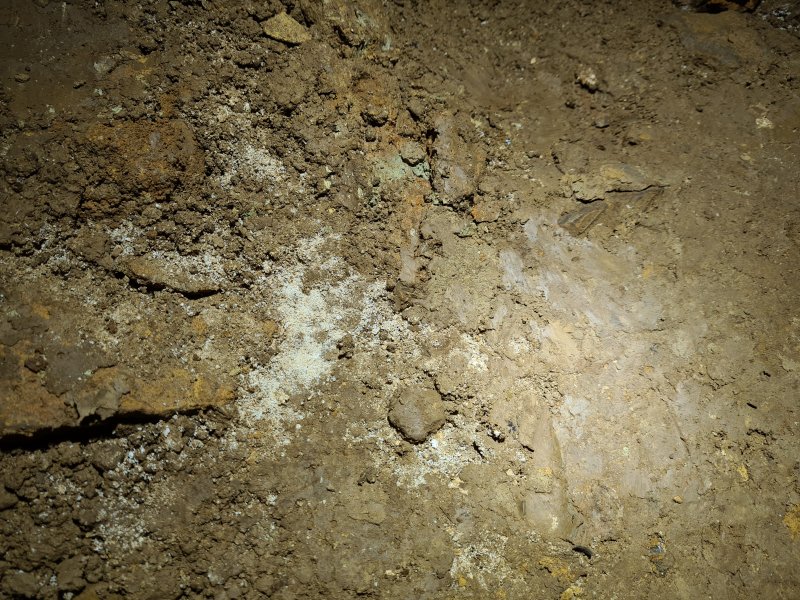 The chamber also has a rather meagre pile of cryostal.
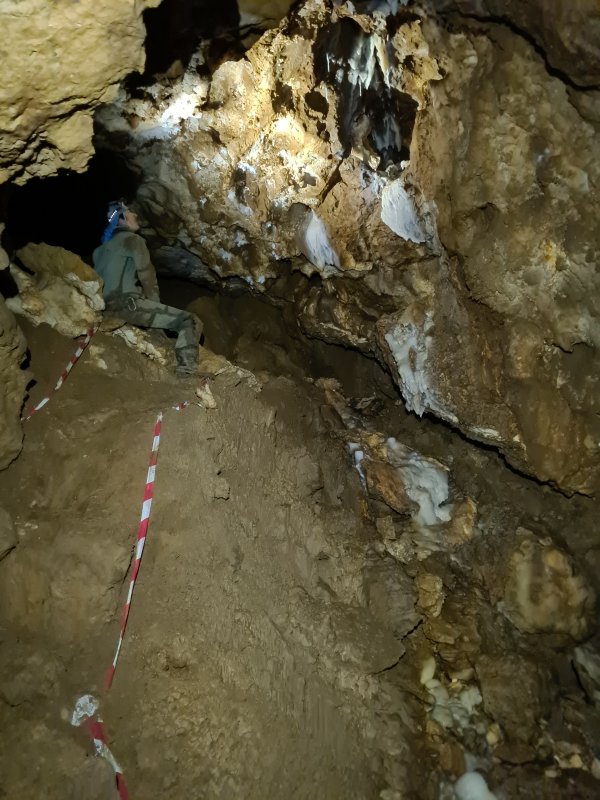 To the left at Lost River Passage is a slipe up into the main destination of the series; 6th Heaven Chamber, containing the best formations in the series.
Modelling by Josh, lighting by Tarquin and Josh
To the left at Lost River Passage is a slipe up into the main destination of the series; 6th Heaven Chamber, containing the best formations in the series.
Modelling by Josh, lighting by Tarquin and Josh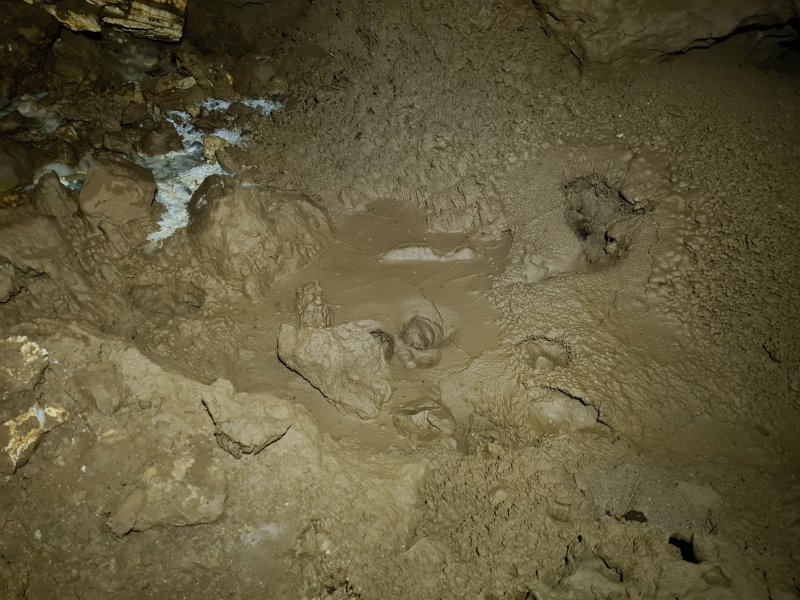 Mud formations at the base of the slope.
 Rather poor hoodoos on the slope.
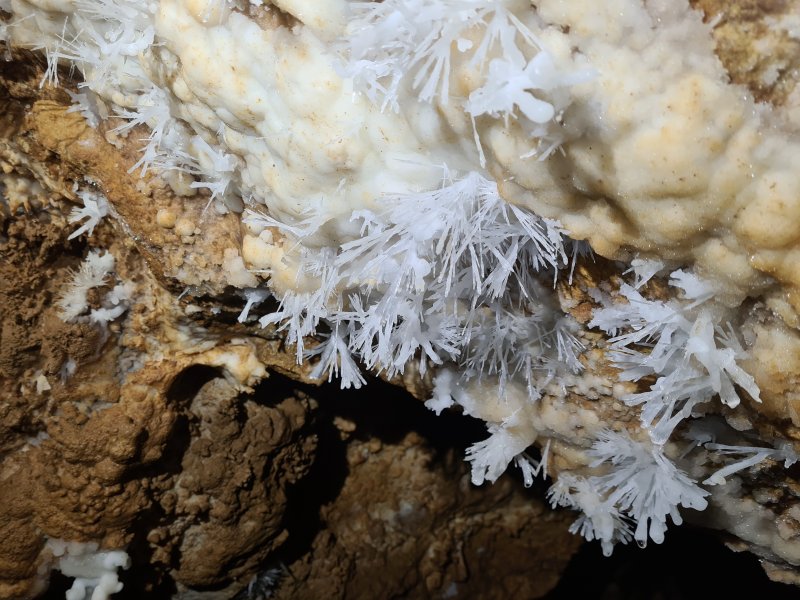 6th Heaven Chamber is known for its fine collection of anthodites, an uncommon formation in the northern part of the cave.
 Anthodites.
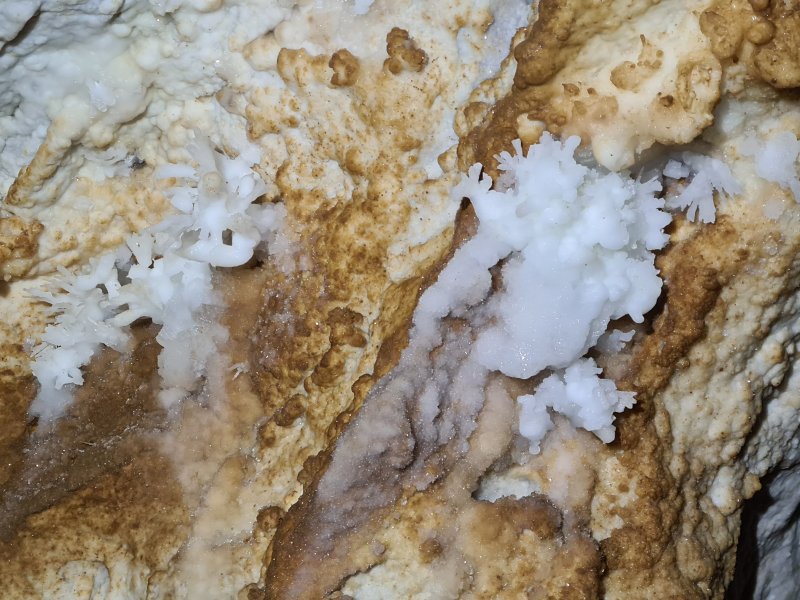 Anthodites.
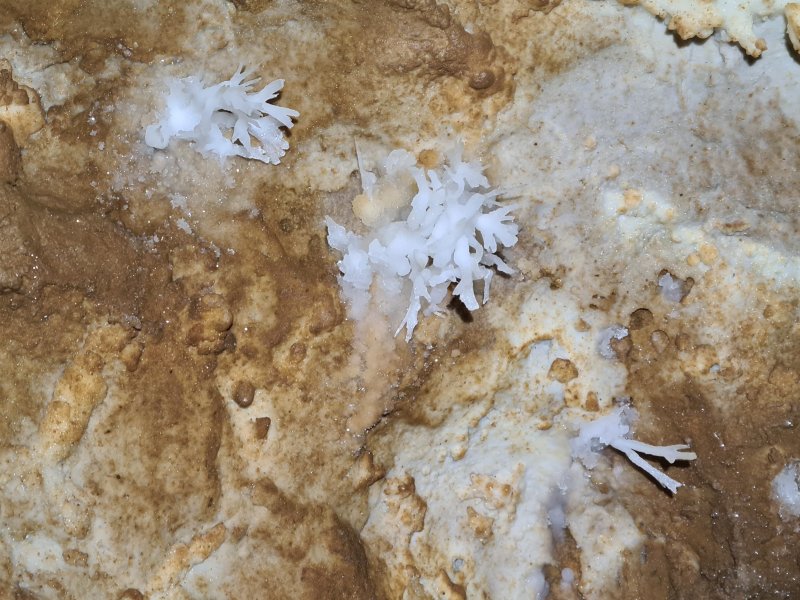 Anthodites.
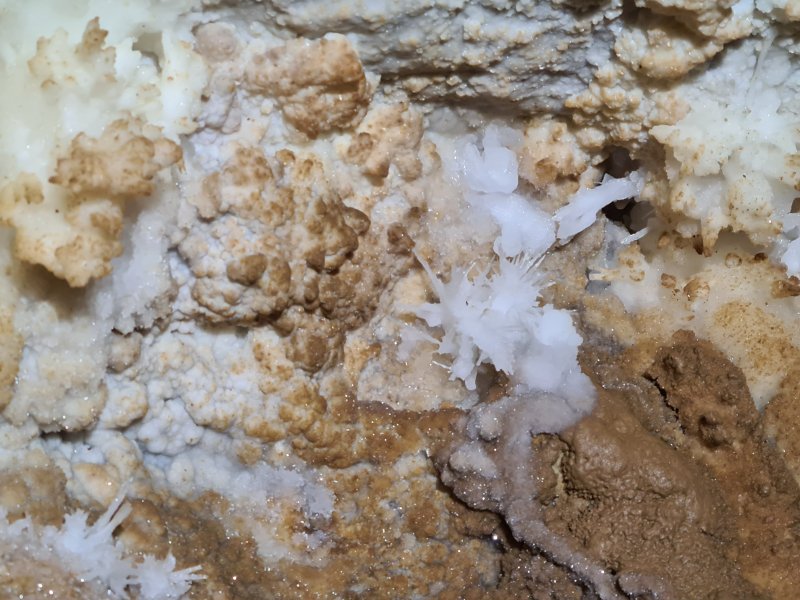 Anthodites.
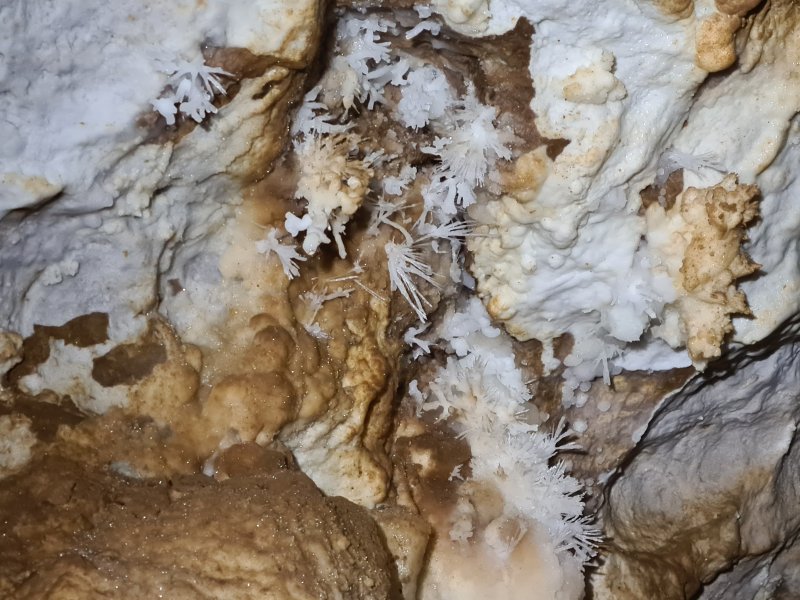 Anthodites.
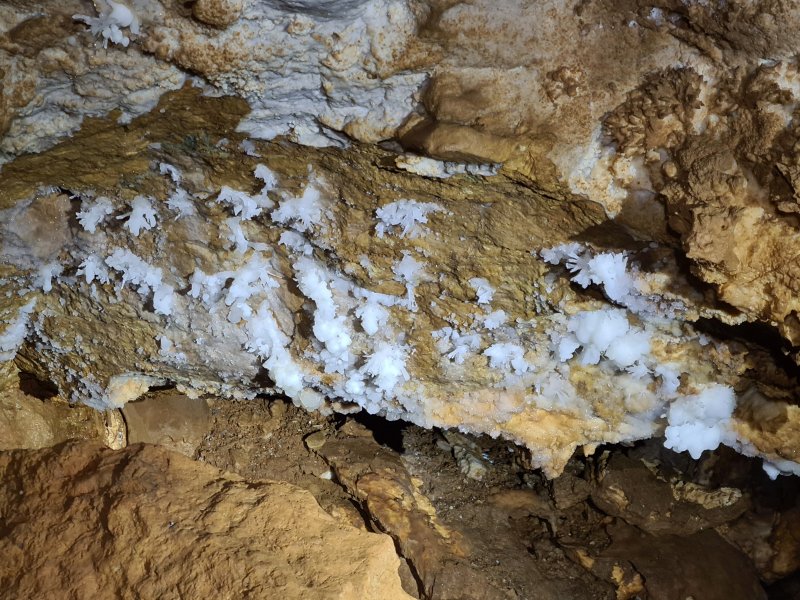 Anthodites.
Lighting by Tarquin and Josh
Anthodites.
Lighting by Tarquin and Josh This area has a choke formed from quartz conglomerate; part of the millstone grit caprock. The odd thing here is that this hill is formed from two distinct bands of limestone, with limestone shales in between. The cave is formed in the lower beds of limestone, and the caprock should sit over the upper beds. There should therefore be at least two other beds of rock separating the cave from the caprock: the Llanelly shales beds, then the upper Dowlais limestone beds. Evidently there is a deep sedimentary depression localised inside the eastern side of Gilwern Hill (just south of the radio mast), where the shales and upper limestones got hollowed out after forming, and re-filled with the caprock material when it formed.
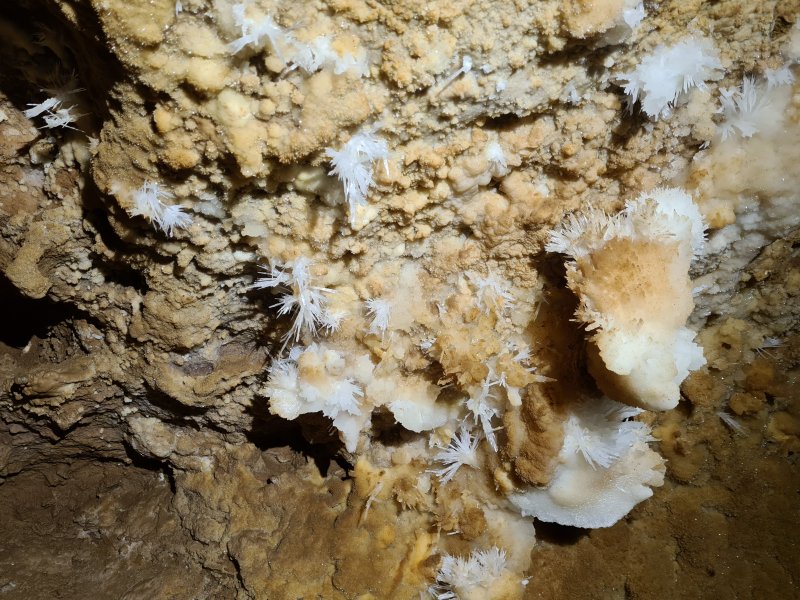 A clamber through an eyehole gains a second chamber that initially looks bare. However, it has these fine anthodites hiding in an alcove at the end.
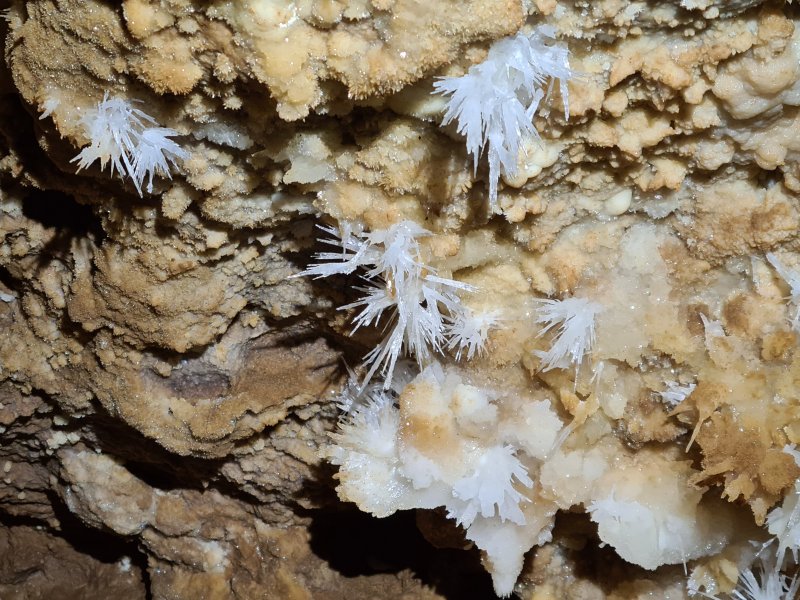 Anthodites in the second chamber.
 Anthodites in the second chamber.
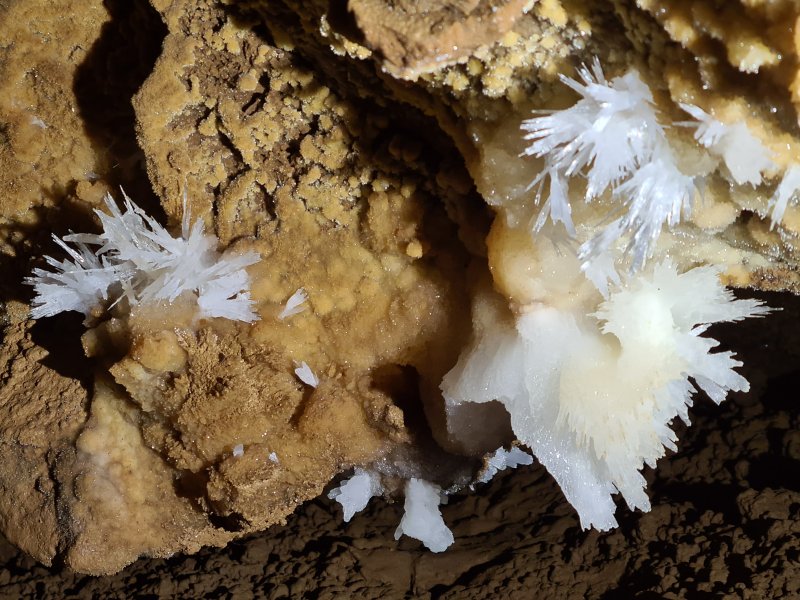 Anthodites in the second chamber.
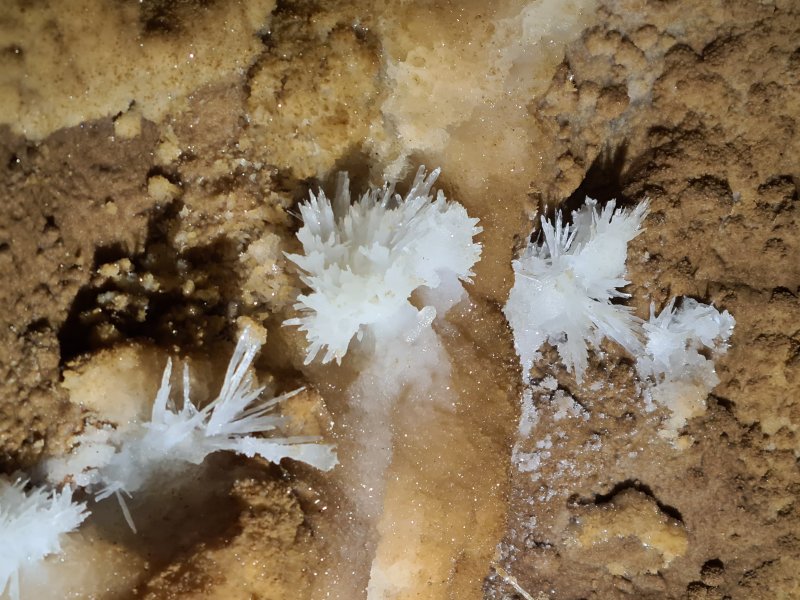 Anthodites in the second chamber.
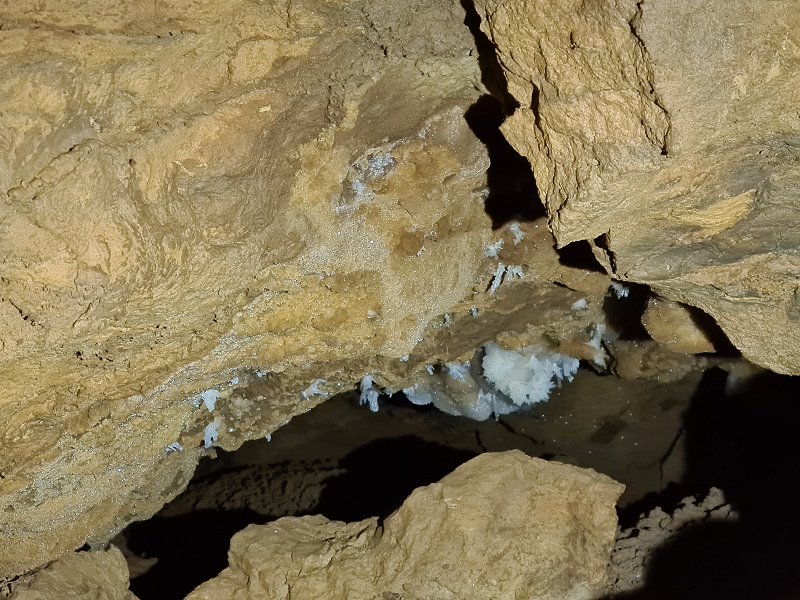 Anthodites in a blind passage leading off from the second chamber.
 Returning to the junction of (not) Outcast Passage and Knees Up Mother Brown, we headed in the other direction (to the right when seen from the way in), along Yes Passage. This starts out walking sized, but soon lowers to a hands-and-knees crawl for most of its 200 metre length. Note that this name is used for both branches on some surveys, but that is due to a misunderstanding of the survey markers. The original discoverers confirmed that Yes Passage was to the right, and Knees Up Mother Brown was to the left, even though they are both really the same passage. The name comes from the obvious exclamation upon seeing the passage for the first time.
Modelling by Josh, lighting by Tarquin and Josh
Returning to the junction of (not) Outcast Passage and Knees Up Mother Brown, we headed in the other direction (to the right when seen from the way in), along Yes Passage. This starts out walking sized, but soon lowers to a hands-and-knees crawl for most of its 200 metre length. Note that this name is used for both branches on some surveys, but that is due to a misunderstanding of the survey markers. The original discoverers confirmed that Yes Passage was to the right, and Knees Up Mother Brown was to the left, even though they are both really the same passage. The name comes from the obvious exclamation upon seeing the passage for the first time.
Modelling by Josh, lighting by Tarquin and Josh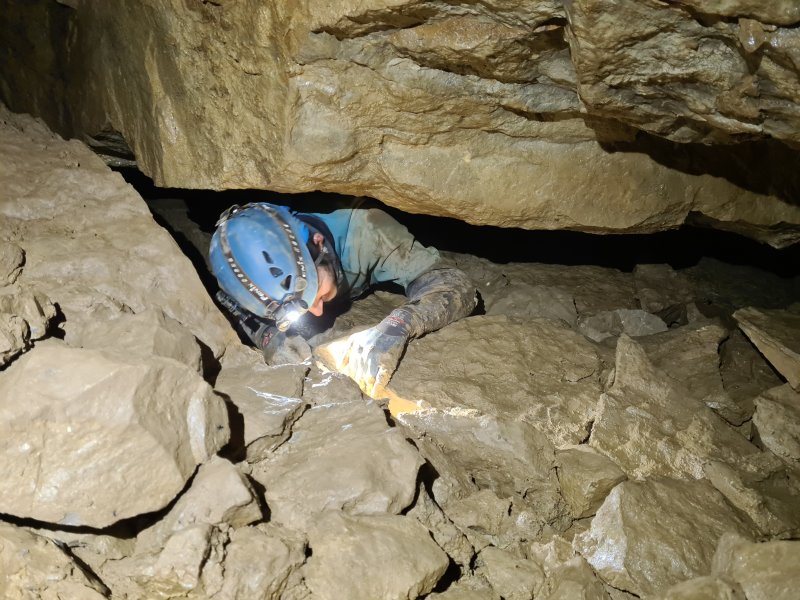 Yes Passage ends at a choke, where a crawl through a bedding floored with really sticky mud, reaches a route up through the choke.
Modelling by Josh, lighting by Tarquin and Josh
Yes Passage ends at a choke, where a crawl through a bedding floored with really sticky mud, reaches a route up through the choke.
Modelling by Josh, lighting by Tarquin and Josh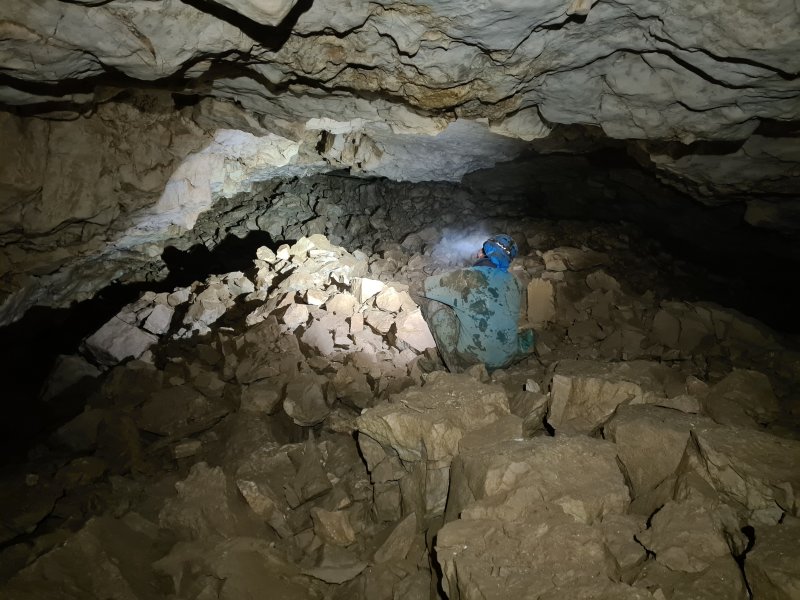 The route up through the choke emerges at the side of the very wide Padlock Passage. This is the northern continuation of Megadrive, separated from it by the glacial removal of the mountainside. Its name refers to how on the trip where it was found, Rich Blake reached into his bag for a drink as the others crawled through the choke, and found that he had accidentally brought the padlock for the entrance gate with him into the cave, in his bag. Also, the fact that it was the key that unlocked the mystery of how Megadrive formed. The choke seen here is an immense surface collapse. A stream flows somewhere under here, but is unreachable; a common feature for the area.
Modelling by Josh, lighting by Tarquin and Josh
The route up through the choke emerges at the side of the very wide Padlock Passage. This is the northern continuation of Megadrive, separated from it by the glacial removal of the mountainside. Its name refers to how on the trip where it was found, Rich Blake reached into his bag for a drink as the others crawled through the choke, and found that he had accidentally brought the padlock for the entrance gate with him into the cave, in his bag. Also, the fact that it was the key that unlocked the mystery of how Megadrive formed. The choke seen here is an immense surface collapse. A stream flows somewhere under here, but is unreachable; a common feature for the area.
Modelling by Josh, lighting by Tarquin and Josh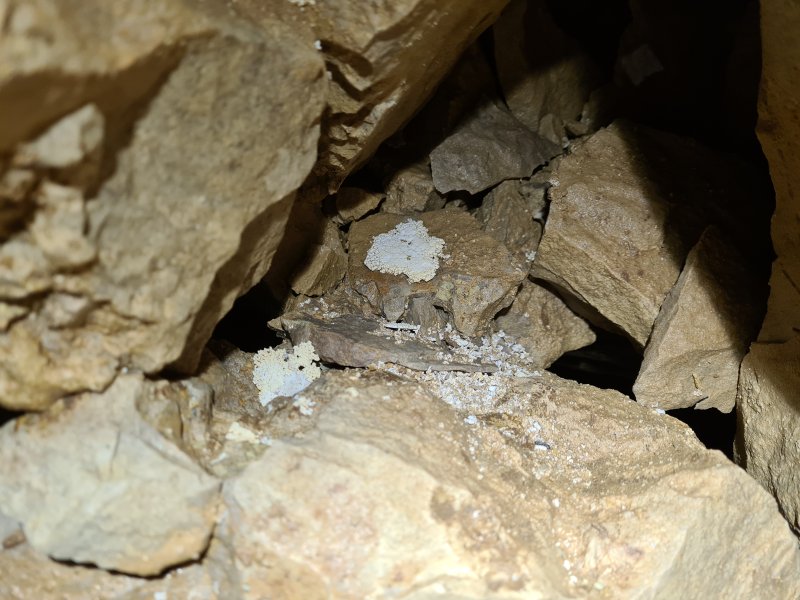 Cryostal rafts in Padlock Passage. These are the only pieces seen in this passage, and are where you want to put your feet. They have survived only because of the low traffic, and from being down gaps between the rocks.
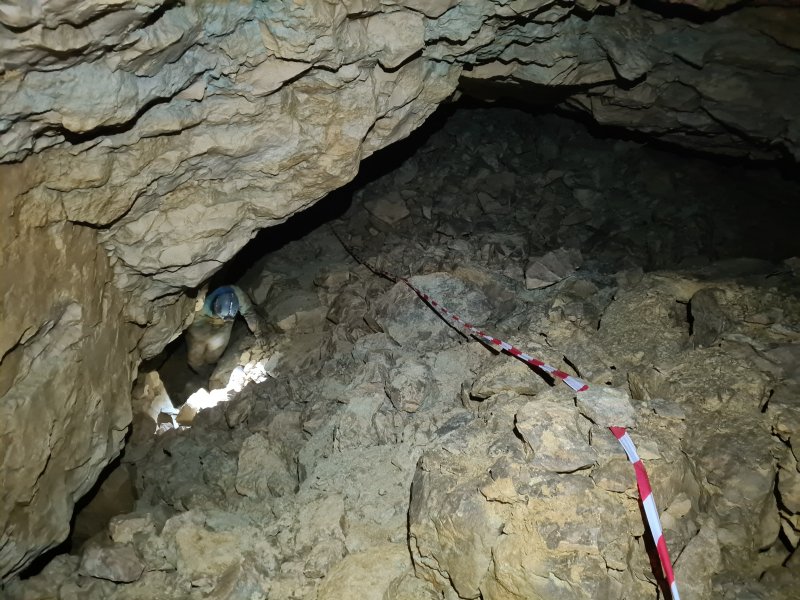 The early part of Padlock Passage is massive collapse, and is still quite unstable. As this picture was taken, a rock moved and sliced through Josh's glove. This area needs a very delicate touch.
Modelling by Josh, lighting by Tarquin and Josh
The early part of Padlock Passage is massive collapse, and is still quite unstable. As this picture was taken, a rock moved and sliced through Josh's glove. This area needs a very delicate touch.
Modelling by Josh, lighting by Tarquin and Josh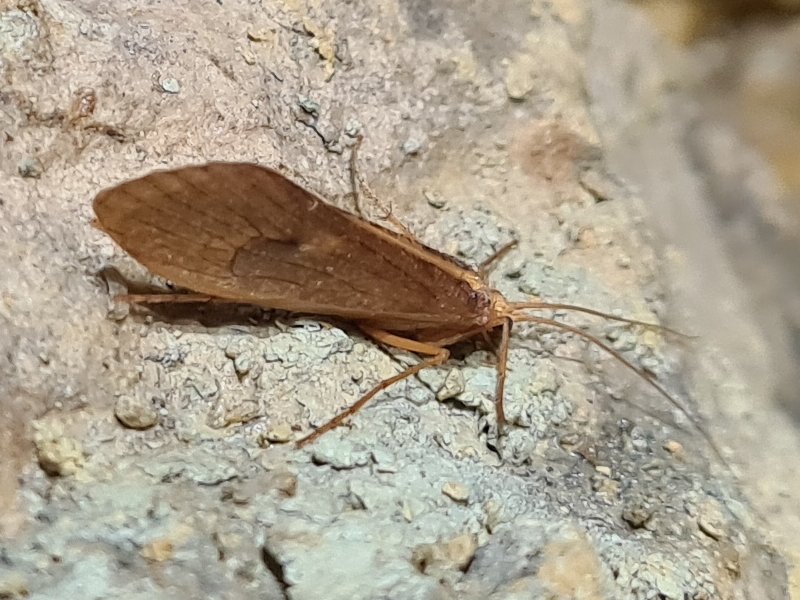 Caddisfly in Padlock Passage.
 The passage soon drops down to a more stable zone, but the ceiling above the slope is layers of fractured rocks.
Modelling by Josh, lighting by Tarquin and Josh
The passage soon drops down to a more stable zone, but the ceiling above the slope is layers of fractured rocks.
Modelling by Josh, lighting by Tarquin and Josh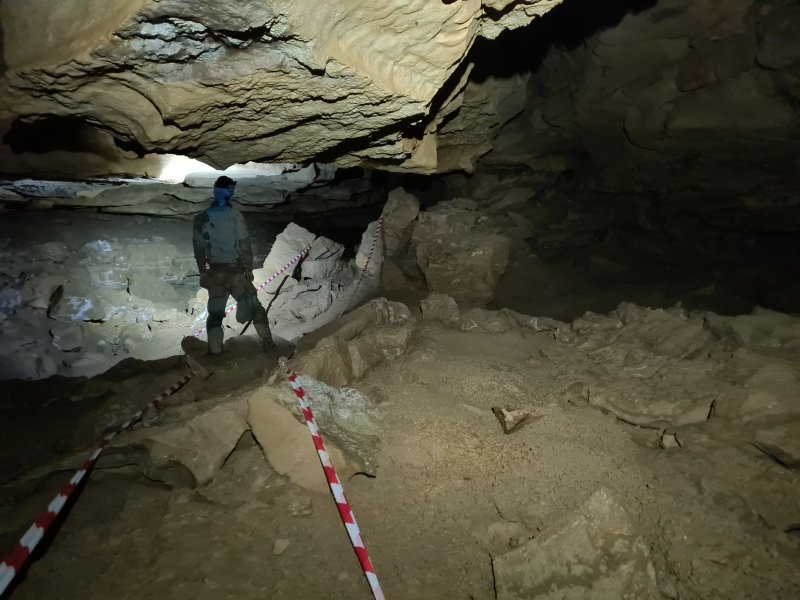 The more stable part of Padlock Passage, which immediately looks like Megadrive.
Modelling by Josh, lighting by Tarquin and Josh
The more stable part of Padlock Passage, which immediately looks like Megadrive.
Modelling by Josh, lighting by Tarquin and Josh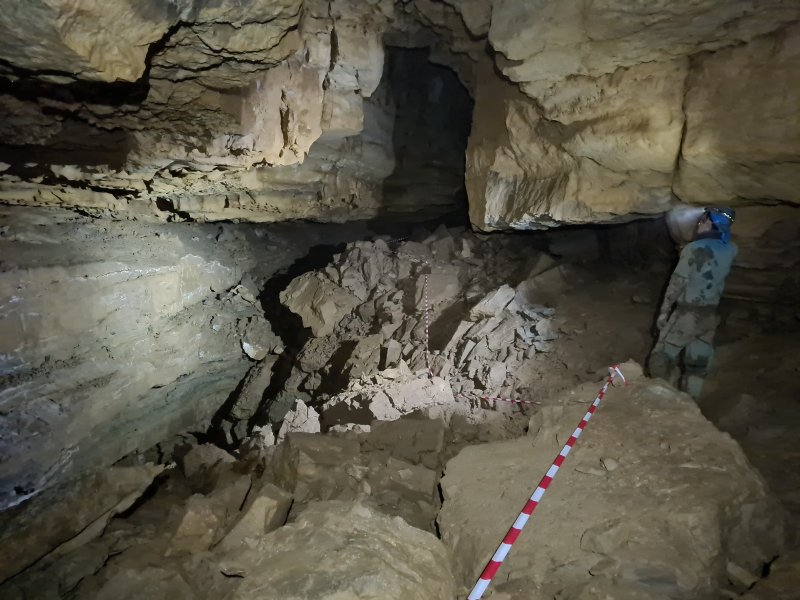 The passage then reaches its largest size. In the floor on the left is a 9 metre deep pit, where water can be heard. Again, there is no streamway accessible.
Modelling by Josh, lighting by Tarquin and Josh
The passage then reaches its largest size. In the floor on the left is a 9 metre deep pit, where water can be heard. Again, there is no streamway accessible.
Modelling by Josh, lighting by Tarquin and Josh Anastomosis (very immature passage development channels) and phreatic pendants (etched by water making channels above a mud floor) at the end of Padlock Passage.
Lighting by Tarquin and Josh
Anastomosis (very immature passage development channels) and phreatic pendants (etched by water making channels above a mud floor) at the end of Padlock Passage.
Lighting by Tarquin and Josh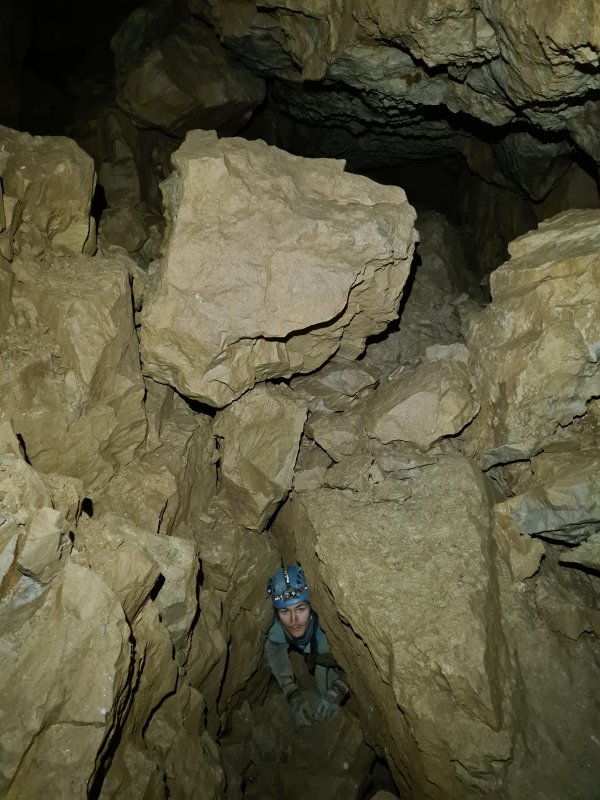 Padlock Passage ends in massive breakdown. Shortly before the end, the way on is in the most unlikely of places, sandwiched between two massive boulders in the floor. The route from here continues immediately below the floor, between those boulders. This is the start of Bolder Land (note the spelling).
Modelling by Josh
Padlock Passage ends in massive breakdown. Shortly before the end, the way on is in the most unlikely of places, sandwiched between two massive boulders in the floor. The route from here continues immediately below the floor, between those boulders. This is the start of Bolder Land (note the spelling).
Modelling by Josh There is an alternative route into Bolder Land, tucked into an undercut on the right. This is much tighter.
Modelling by Josh, lighting by Tarquin and Josh
There is an alternative route into Bolder Land, tucked into an undercut on the right. This is much tighter.
Modelling by Josh, lighting by Tarquin and Josh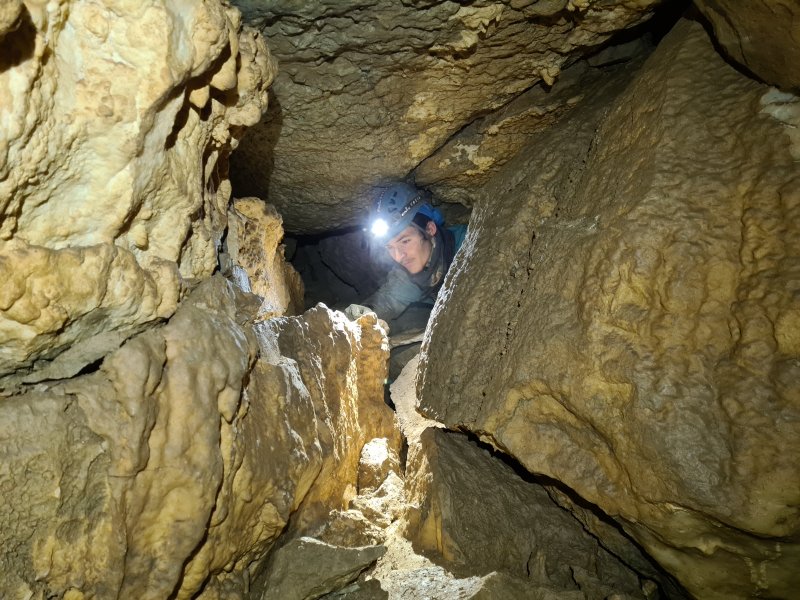 The route seems almost unreal, in a stal coated passage, with what appears to be a solutional ceiling and one solid wall. However, it is all made up from a passage that used to be at ceiling height in Padlock Passage, and has fallen several metres to the floor.
Modelling by Josh, lighting by Tarquin and Josh
The route seems almost unreal, in a stal coated passage, with what appears to be a solutional ceiling and one solid wall. However, it is all made up from a passage that used to be at ceiling height in Padlock Passage, and has fallen several metres to the floor.
Modelling by Josh, lighting by Tarquin and Josh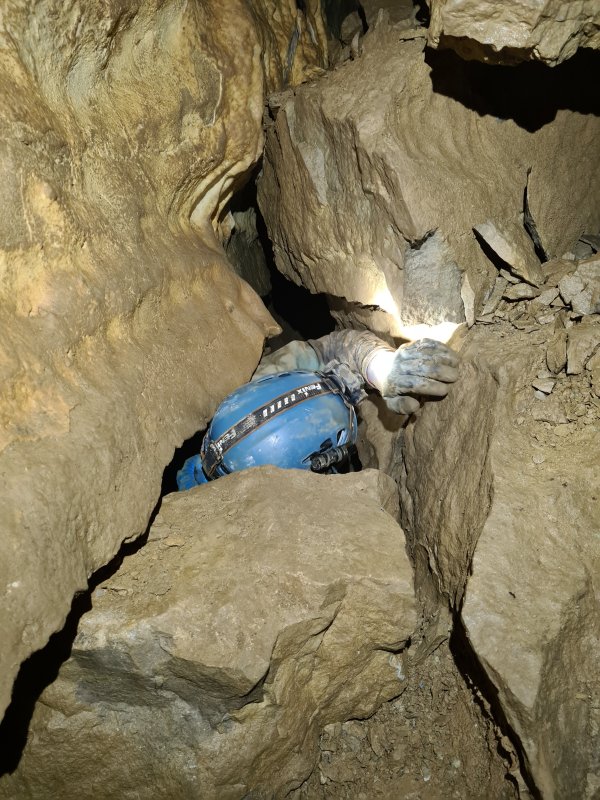 After passing through a standing section just beyond Padlock Passage's terminal choke, the route switches to the left side of the former passage, and passes through a squeeze before climbing up into a ceiling cleft.
Modelling by Josh, lighting by Tarquin and Josh
After passing through a standing section just beyond Padlock Passage's terminal choke, the route switches to the left side of the former passage, and passes through a squeeze before climbing up into a ceiling cleft.
Modelling by Josh, lighting by Tarquin and Josh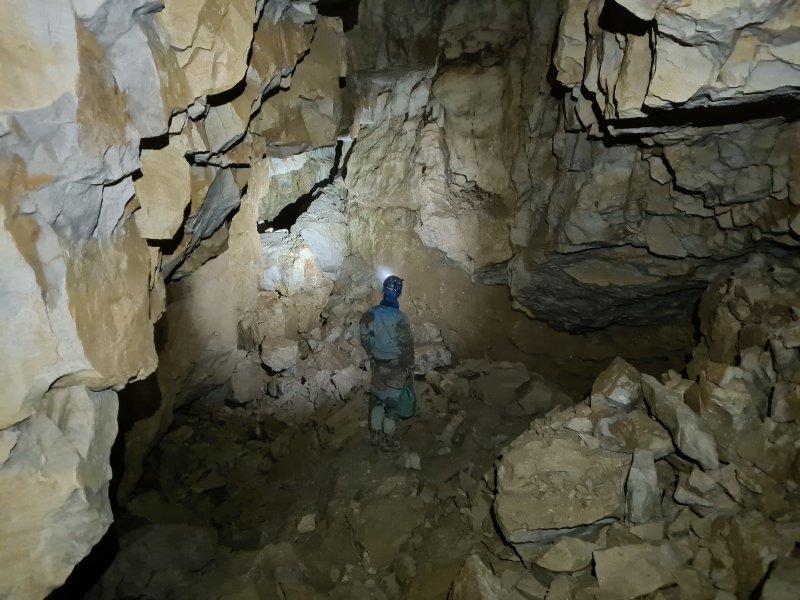 It then breaks out into large passage. A sense of accomplishment; the choke has been passed, right?
Modelling by Josh, lighting by Tarquin and Josh
It then breaks out into large passage. A sense of accomplishment; the choke has been passed, right?
Modelling by Josh, lighting by Tarquin and Josh The large passage is dominated by an enormous crater in the floor. This is the largest of the pits, 10-13 metres deep depending on where you measure it, with overhanging death on all sides. Keep well clear. There are two ways on here, the first being the rift opposite the point of entry which is horrifyingly loose, and the second being the much more comforting slot between boulders to the left of it into an undercut. Use the undercut. The rift soon joins it.
Modelling by Josh, lighting by Tarquin and Josh
The large passage is dominated by an enormous crater in the floor. This is the largest of the pits, 10-13 metres deep depending on where you measure it, with overhanging death on all sides. Keep well clear. There are two ways on here, the first being the rift opposite the point of entry which is horrifyingly loose, and the second being the much more comforting slot between boulders to the left of it into an undercut. Use the undercut. The rift soon joins it.
Modelling by Josh, lighting by Tarquin and Josh The bedding beyond the pit has a large cryostal deposit, mostly small pieces and miniature bead clusters.
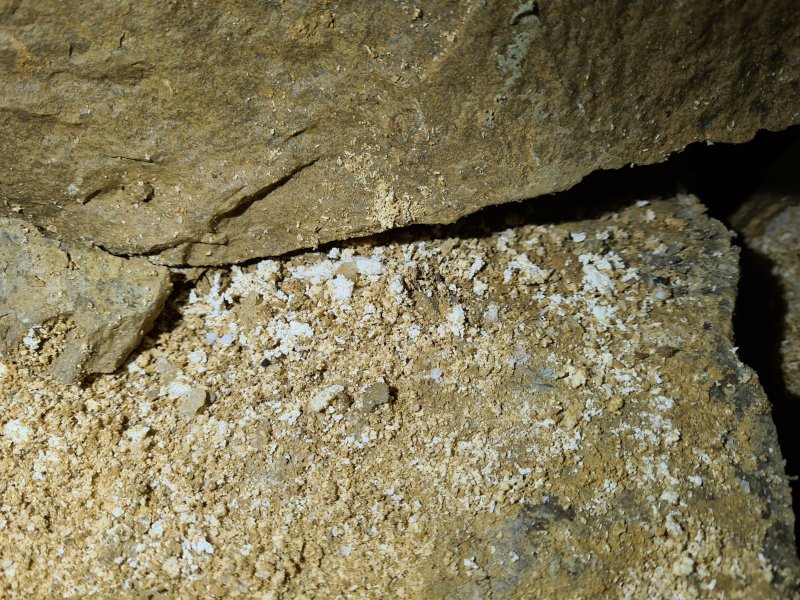 Cryostal.
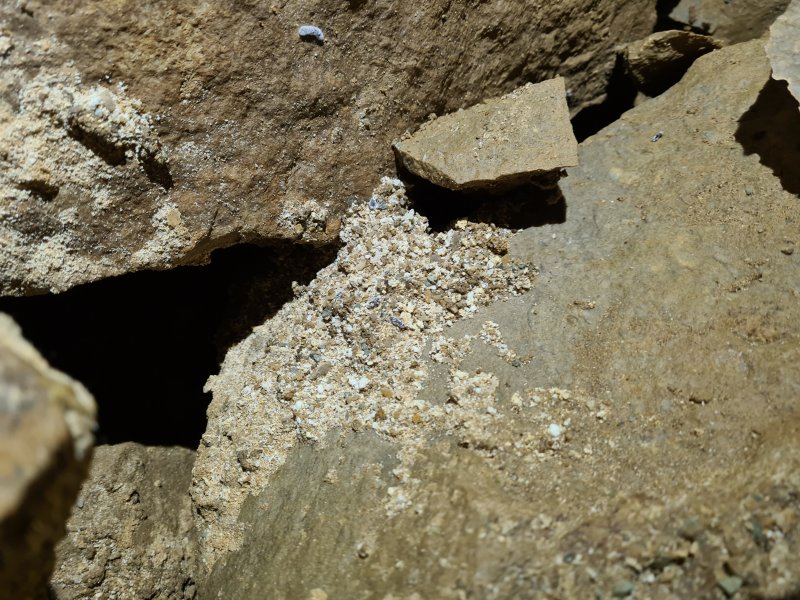 Cryostal.
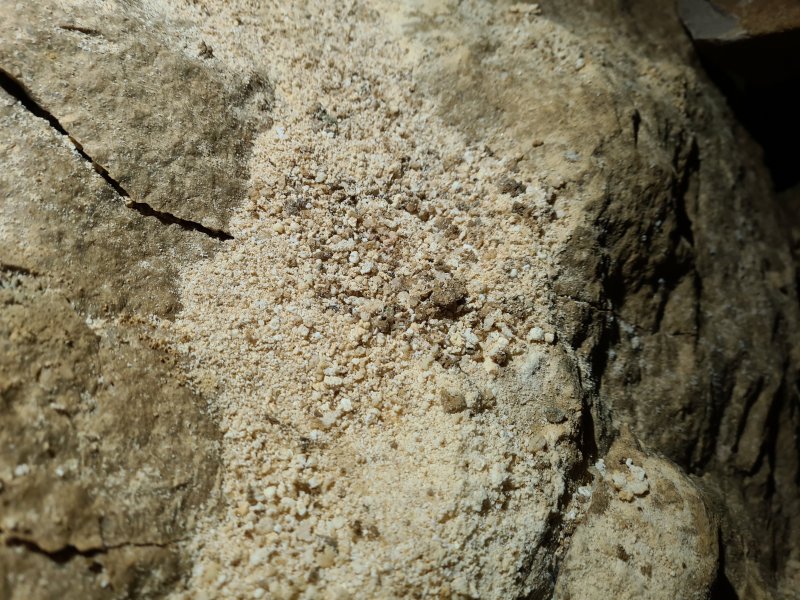 Cryostal.
 Cryostal including a raft.
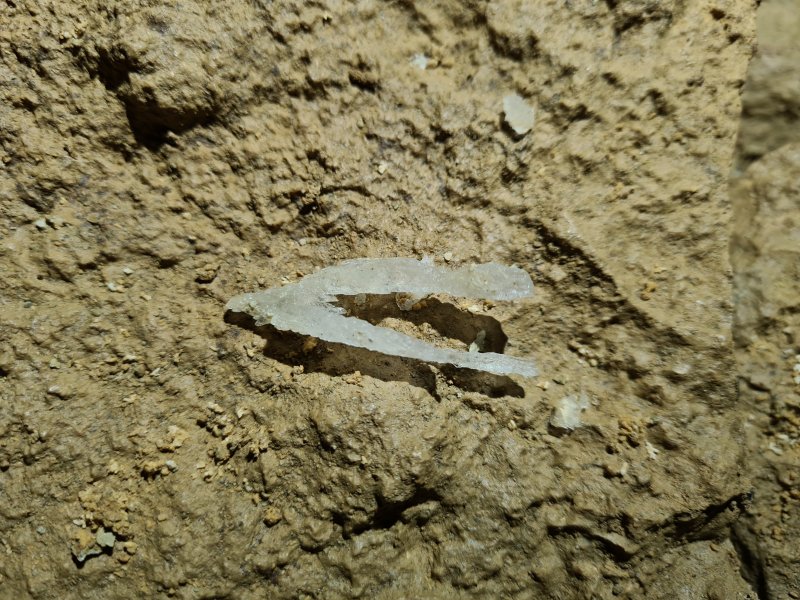 Gypsum crystal.
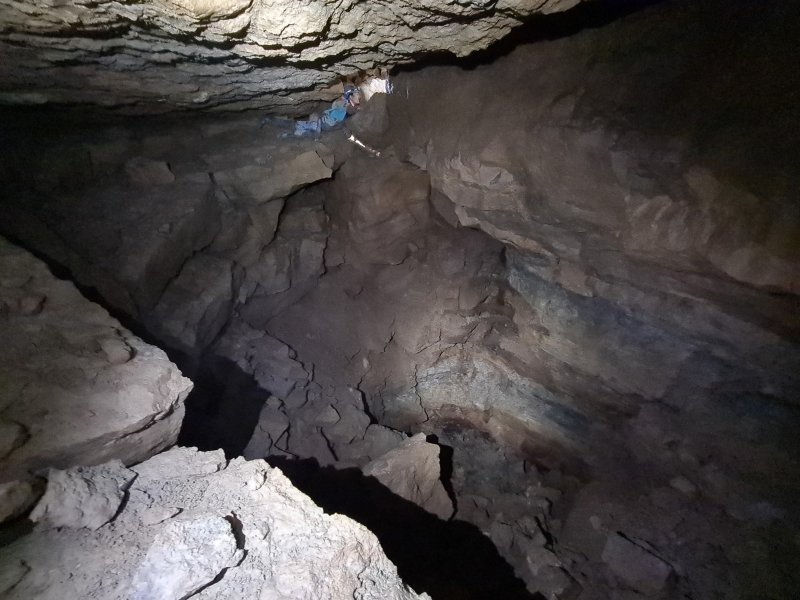 The next pit is 6 metres deep, with the way on being a crawl around the ledge of fallen slabs. At the end of the overhanging slab is a boulder that has fallen and been wedged between the slab and a shattered wall, and somehow managed to remain in place. The wall does not appear to have any reason for staying in one piece, and the boulder really has no right to be stuck in mid air like it is. To get past here, you have to lean out over that boulder, and use the shattered wall for support while you climb into the heavily shattered passage beyond. This obstacle is the reason for the passage's name, with Pete Bolt being the first person bold enough to risk passing it.
Modelling by Josh, lighting by Tarquin and Josh
The next pit is 6 metres deep, with the way on being a crawl around the ledge of fallen slabs. At the end of the overhanging slab is a boulder that has fallen and been wedged between the slab and a shattered wall, and somehow managed to remain in place. The wall does not appear to have any reason for staying in one piece, and the boulder really has no right to be stuck in mid air like it is. To get past here, you have to lean out over that boulder, and use the shattered wall for support while you climb into the heavily shattered passage beyond. This obstacle is the reason for the passage's name, with Pete Bolt being the first person bold enough to risk passing it.
Modelling by Josh, lighting by Tarquin and Josh The passage beyond contains another little climb beneath a mousetrap rock, being very careful not to brush against it. This is how the passage looked after the original explorers had removed the most dangerous features. This is immediately followed by a 4 metre climb down, where the perfect handholds turned out to be a shattered pillar that moved. Guess it's best not to use that one then.
Modelling by Josh, lighting by Tarquin and Josh
The passage beyond contains another little climb beneath a mousetrap rock, being very careful not to brush against it. This is how the passage looked after the original explorers had removed the most dangerous features. This is immediately followed by a 4 metre climb down, where the perfect handholds turned out to be a shattered pillar that moved. Guess it's best not to use that one then.
Modelling by Josh, lighting by Tarquin and Josh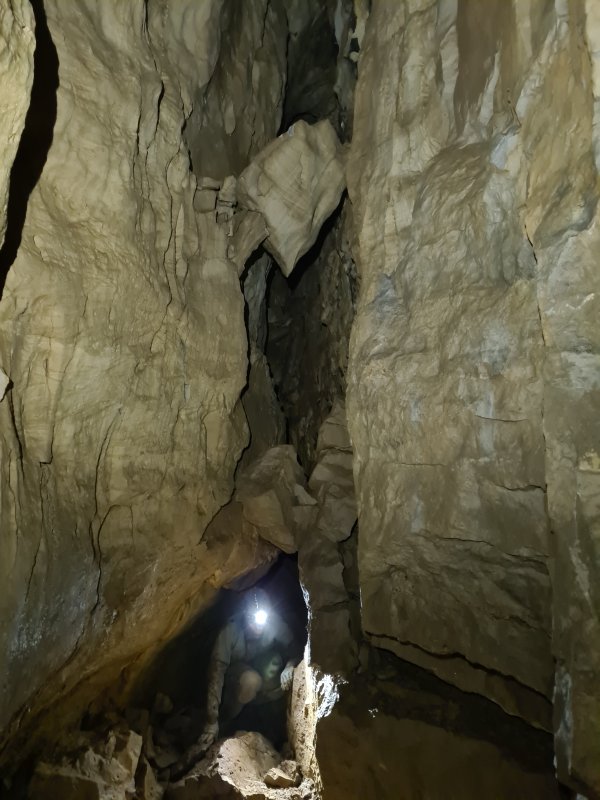 The passage below the climb has two perfectly placed bridges of toppled rocks. It is important here to acknowledge the work of the photographic model, who has to wait below each of these crazy things while the photographer stands in relative safety with the camera.
Modelling by Josh, lighting by Tarquin and Josh
The passage below the climb has two perfectly placed bridges of toppled rocks. It is important here to acknowledge the work of the photographic model, who has to wait below each of these crazy things while the photographer stands in relative safety with the camera.
Modelling by Josh, lighting by Tarquin and Josh The shattered wall of the passage, which again has no reason to remain in place. It could be pulled apart with almost no effort.
Modelling by Josh, lighting by Tarquin and Josh
The shattered wall of the passage, which again has no reason to remain in place. It could be pulled apart with almost no effort.
Modelling by Josh, lighting by Tarquin and Josh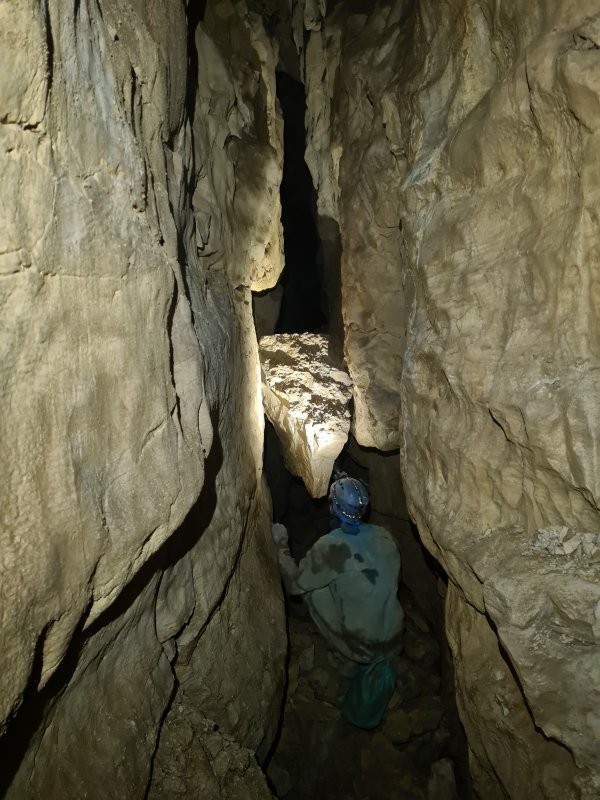 "Could you go and put yourself under that pointy rock that doesn't seem to have any reason to stay where it is?"
Modelling by Josh, lighting by Tarquin and Josh
"Could you go and put yourself under that pointy rock that doesn't seem to have any reason to stay where it is?"
Modelling by Josh, lighting by Tarquin and Josh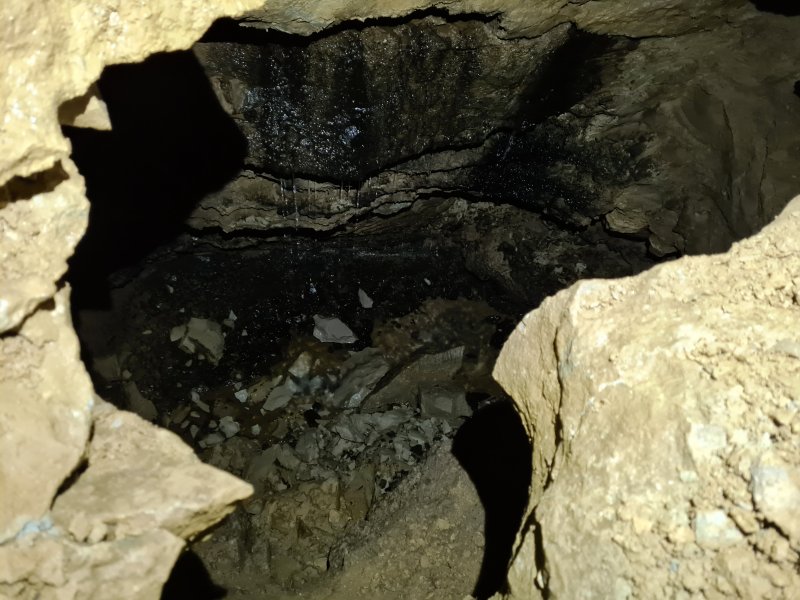 In many places, there are undercuts which loop around and sometimes join each other. This one has a small inlet with water actually visible. The amount of water is too much for what is seen in (not) Outcast Passage, and too little for what is seen in Upstream Passage. It is not known where it rejoins the rest of the cave's water, or whether it joins the north-flowing or south-flowing streamways under this hill.
Modelling by Josh, lighting by Tarquin and Josh
In many places, there are undercuts which loop around and sometimes join each other. This one has a small inlet with water actually visible. The amount of water is too much for what is seen in (not) Outcast Passage, and too little for what is seen in Upstream Passage. It is not known where it rejoins the rest of the cave's water, or whether it joins the north-flowing or south-flowing streamways under this hill.
Modelling by Josh, lighting by Tarquin and Josh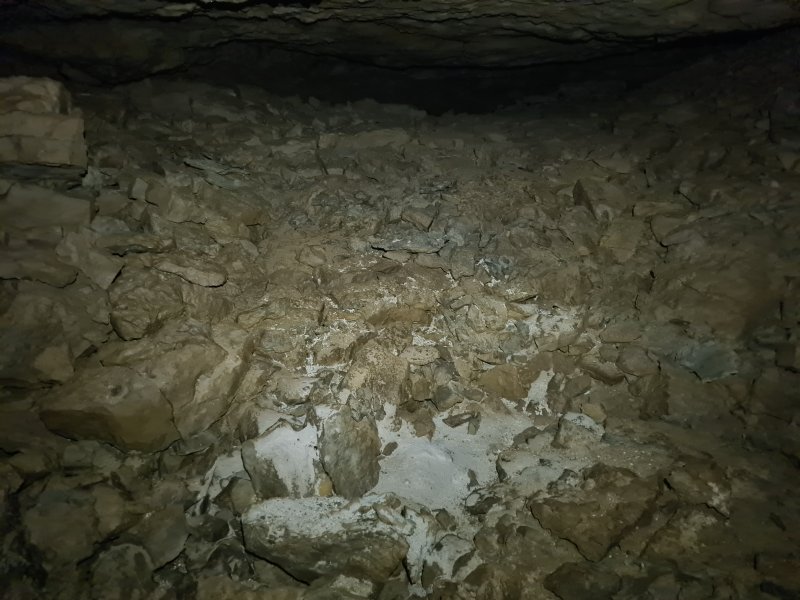 The undercut has an extremely large deposit of cryostal, with a pile of powdered cryostal in the middle.
 A few reasonably sized beads.
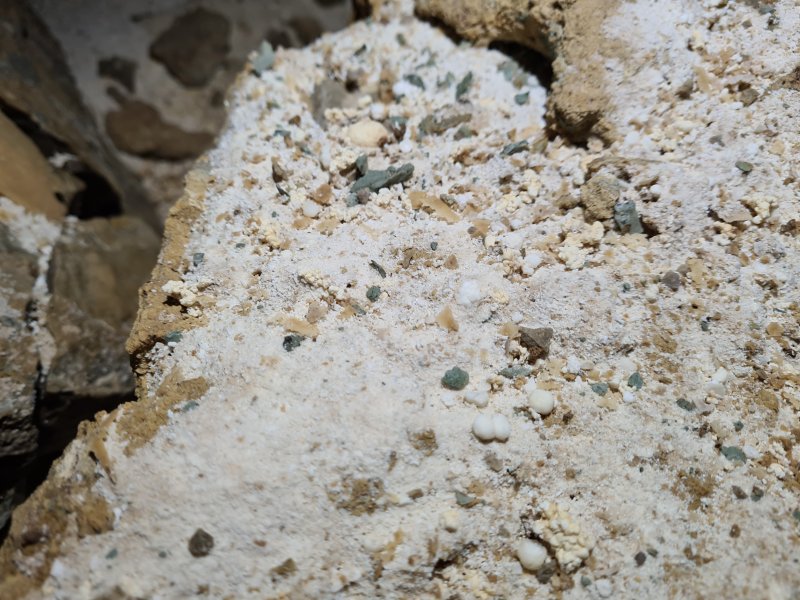 Some larger beads.
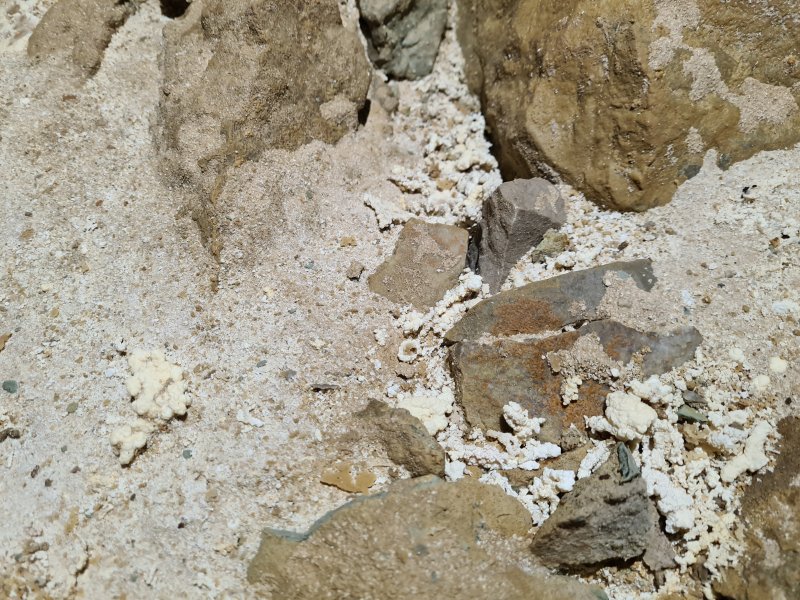 Large pieces, the biggest of which are a couple of centimetres across.
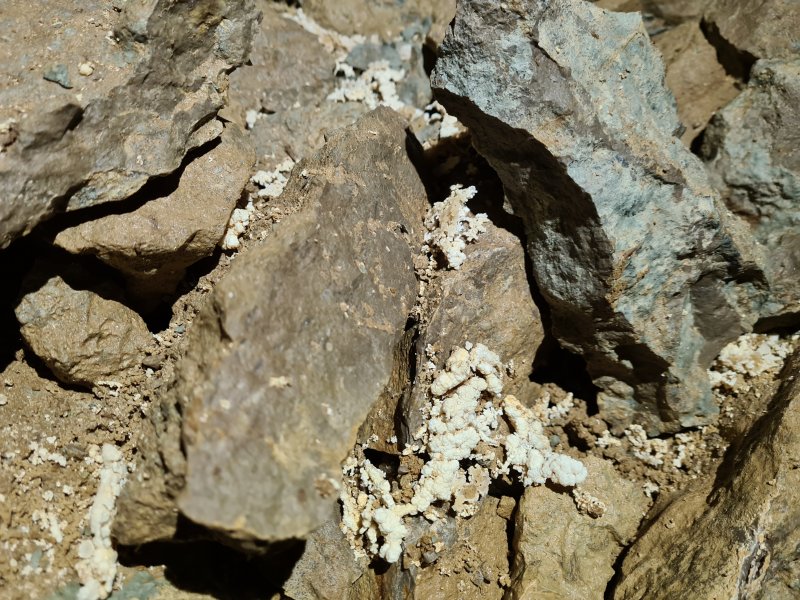 Large lattices of cryostal, a few centimetres across.
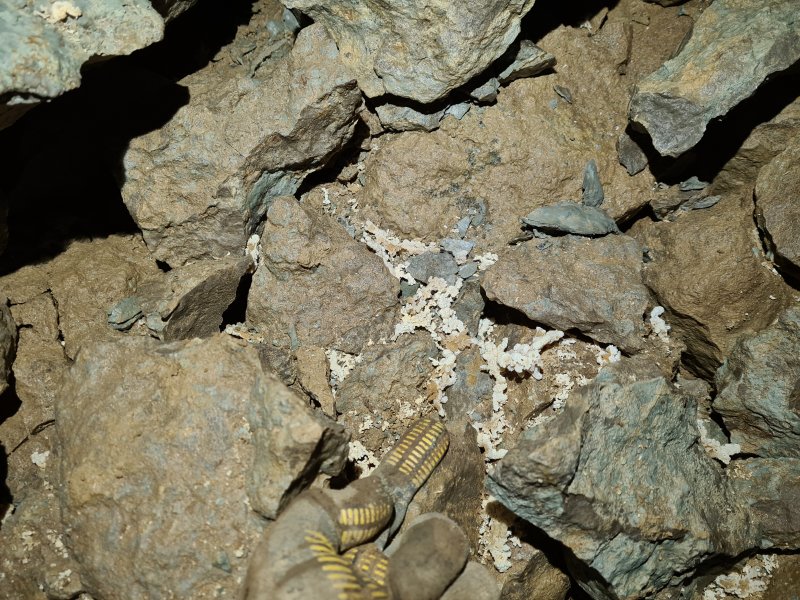 More lattices, with a finger for scale. There were many more large pieces here.
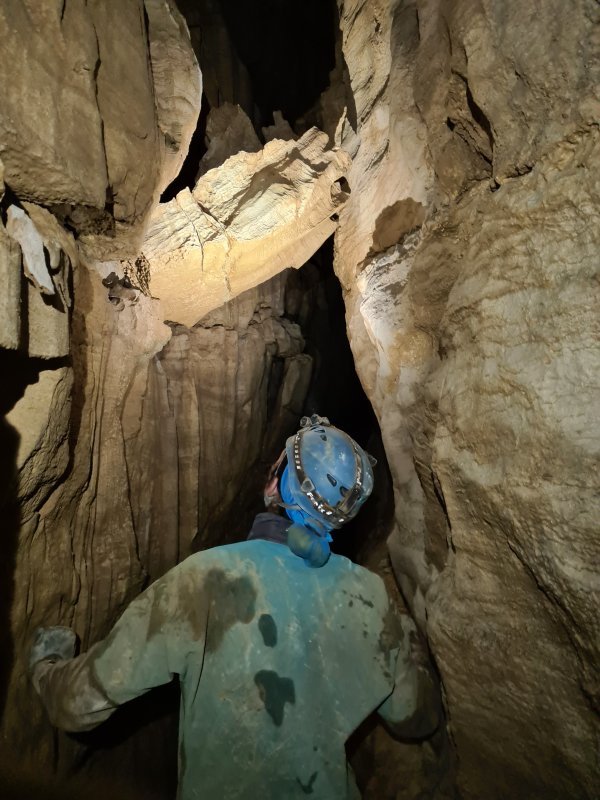 A large slab with a fracture through the middle of it.
Modelling by Josh, lighting by Tarquin and Josh
A large slab with a fracture through the middle of it.
Modelling by Josh, lighting by Tarquin and Josh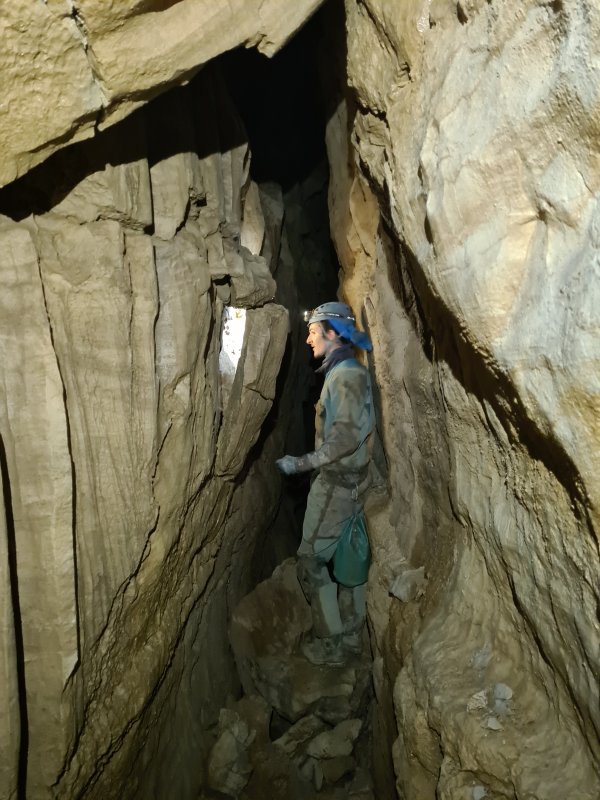 A peeling section of wall just waiting to fall if you breathe on it.
Modelling by Josh, lighting by Tarquin and Josh
A peeling section of wall just waiting to fall if you breathe on it.
Modelling by Josh, lighting by Tarquin and Josh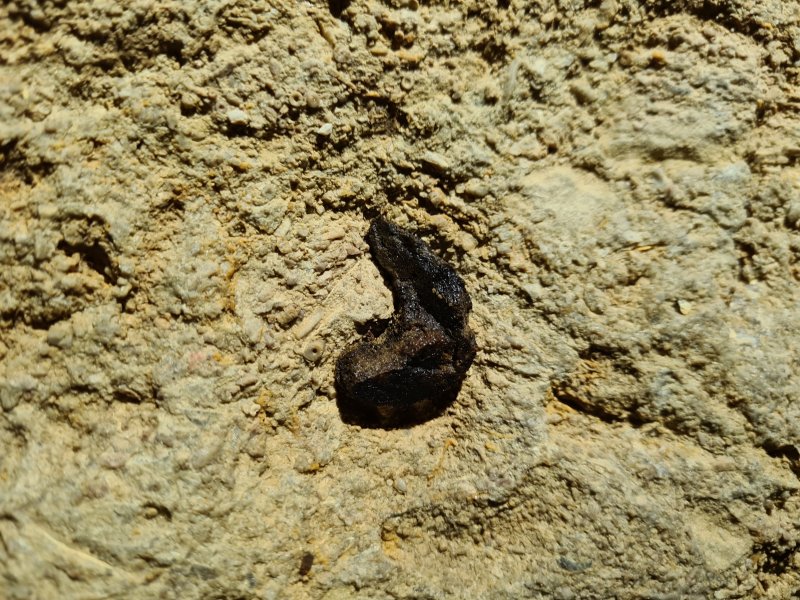 Fossil ctenacanthus (assumed) dorsal spine.
 Where the next undercut joins (which connects back to the previous one), there is another superb deposit of cryostal. The most impressive pieces are tucked behind a large boulder to one side of the passage, and not immediately obvious.
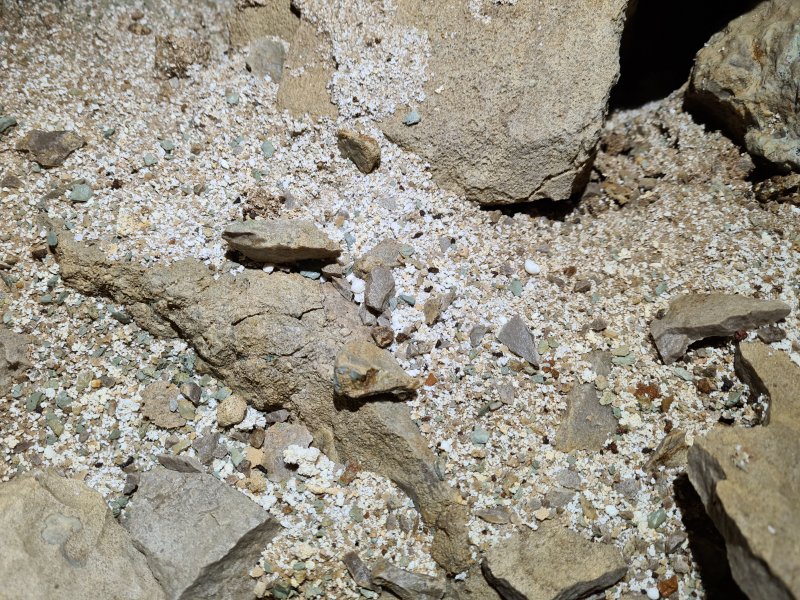 Close-up of the cryostal.
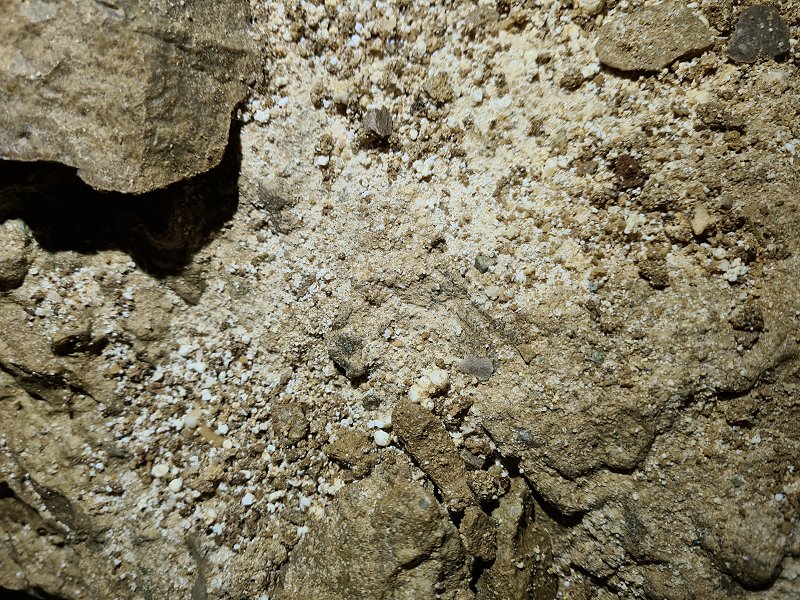 Cryostal.
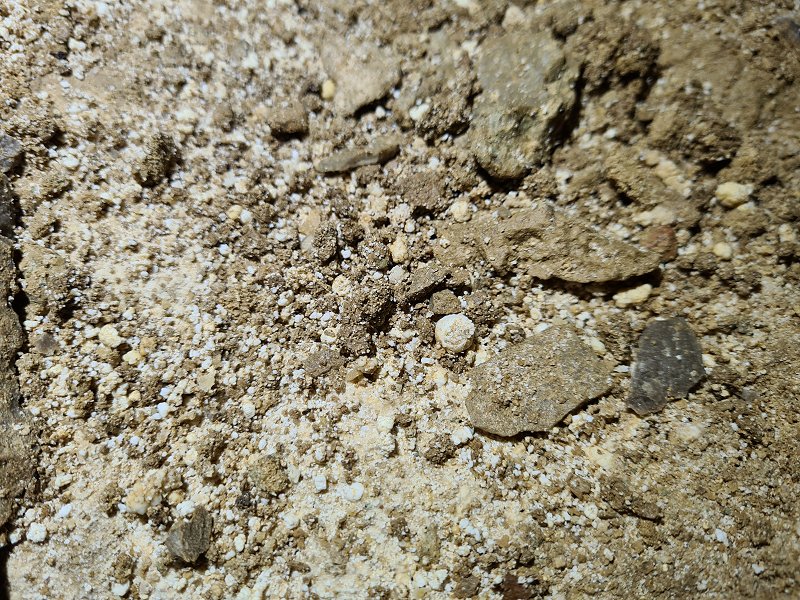 With some large beads.
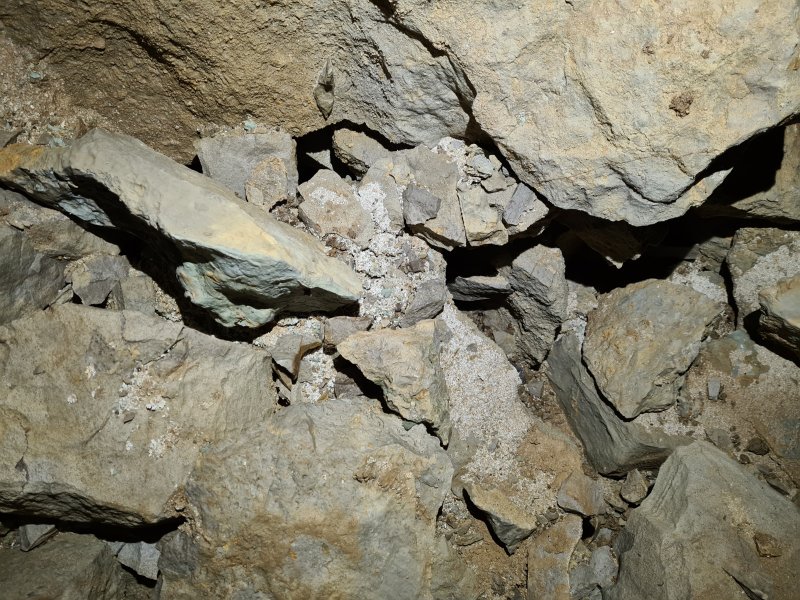 Cryostal.
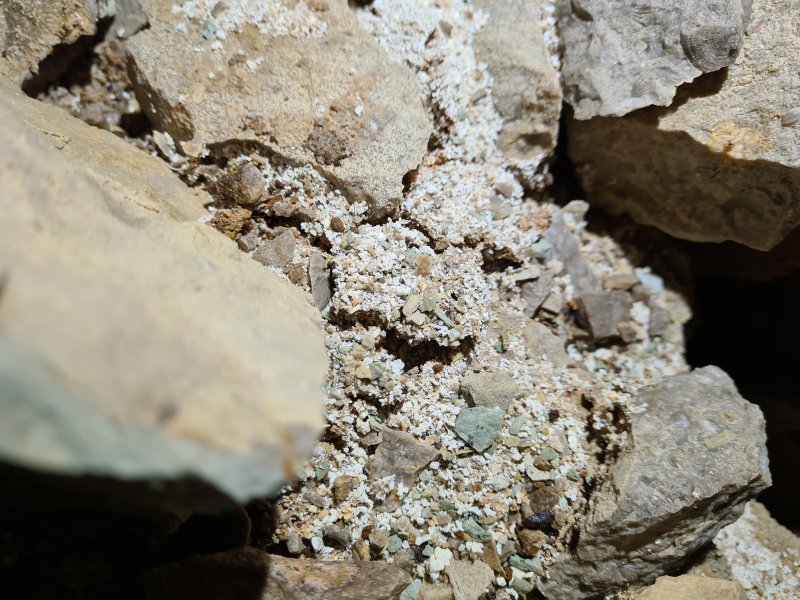 Close-up.
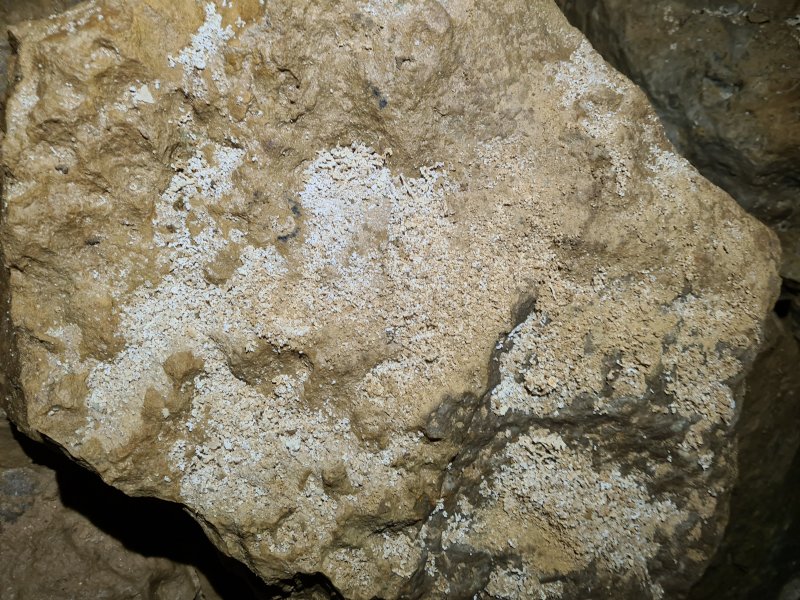 On the rocks.
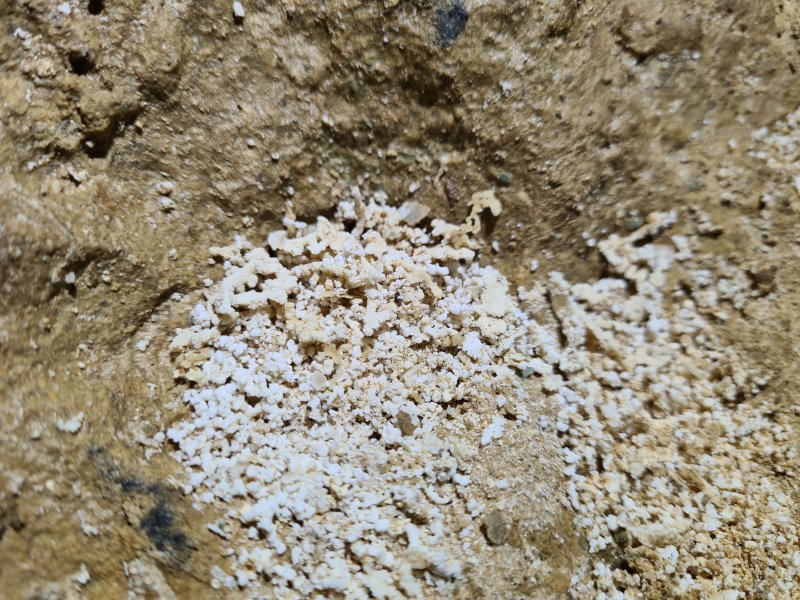 Close-up.
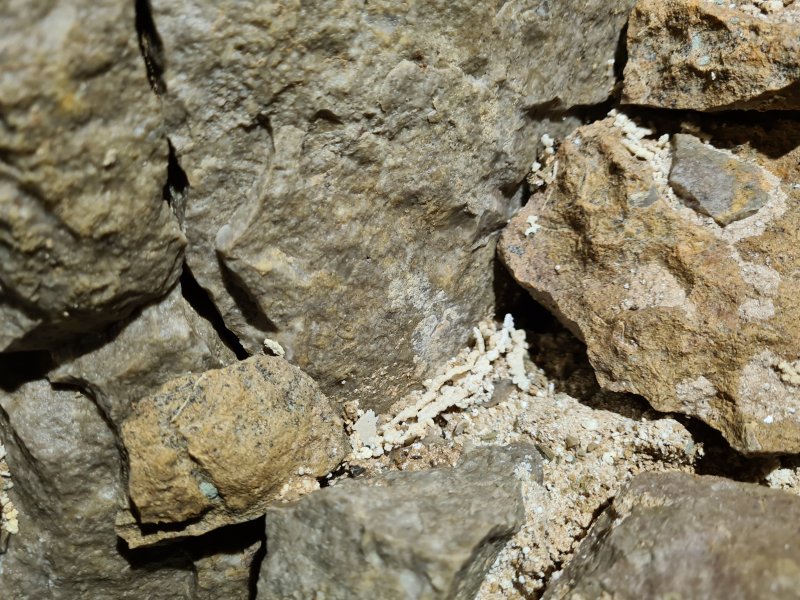 Large aggregations between the rocks.
 Wedged in the gaps.
 Twiglets.
 Cryostal.
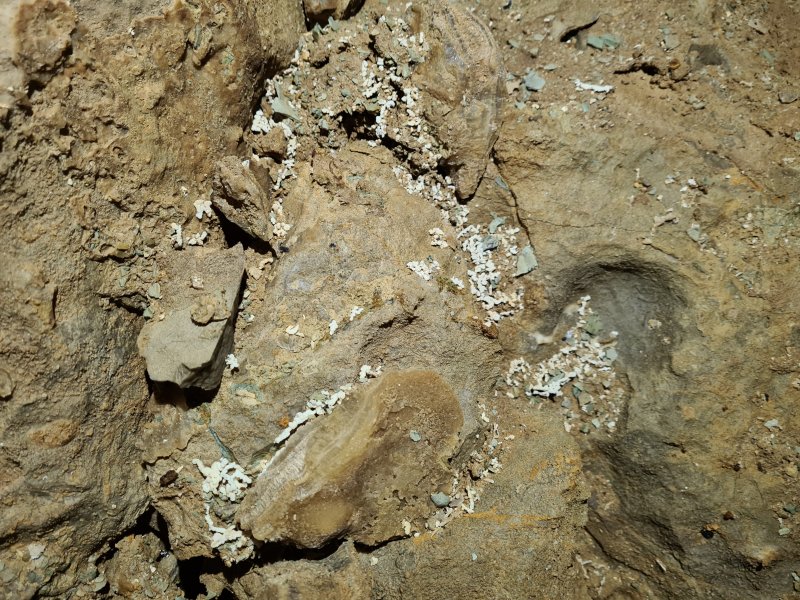 Twiglets and lattices.
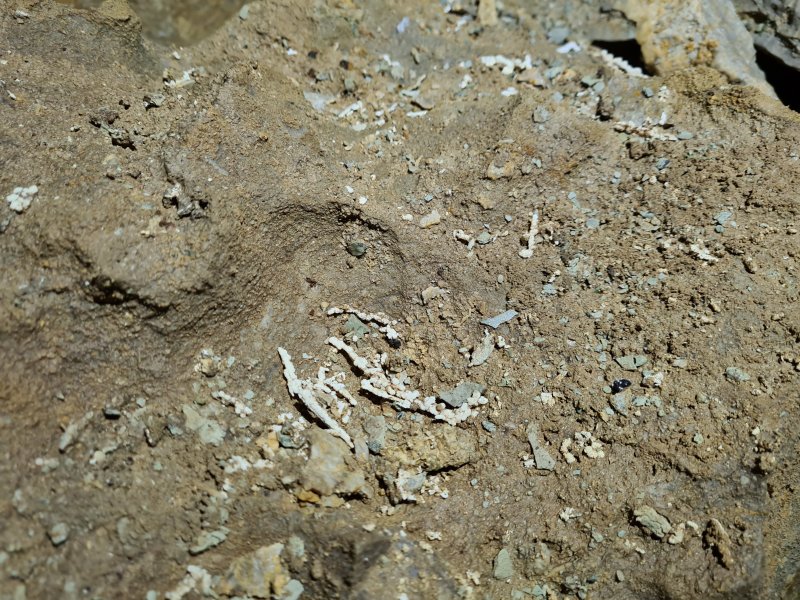 Twiglets.
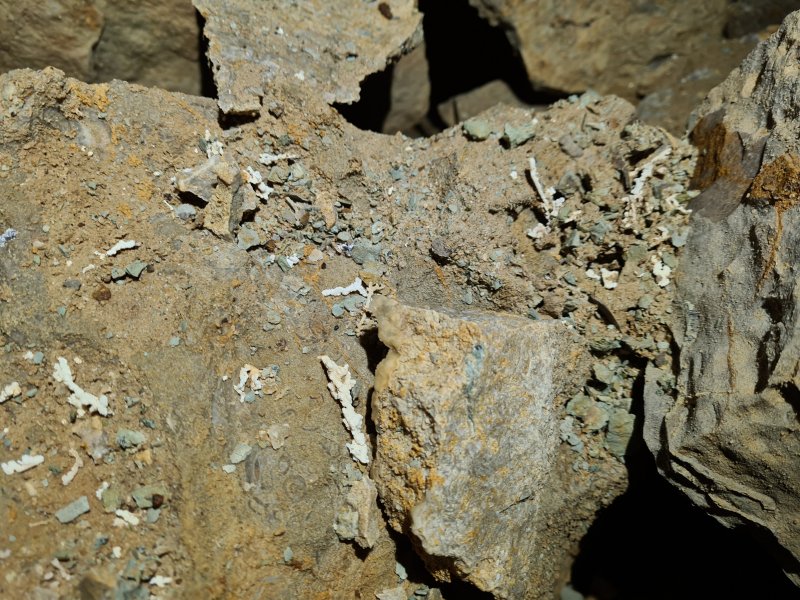 Twiglets
 Powder and large beads under the rocks.
 Large lattices.
 The largest and most elaborate of the cryostal lattices, at about 11 cm x 4 cm.
 Another crazy pair of jammed rocks.
Modelling by Josh, lighting by Tarquin and Josh
Another crazy pair of jammed rocks.
Modelling by Josh, lighting by Tarquin and Josh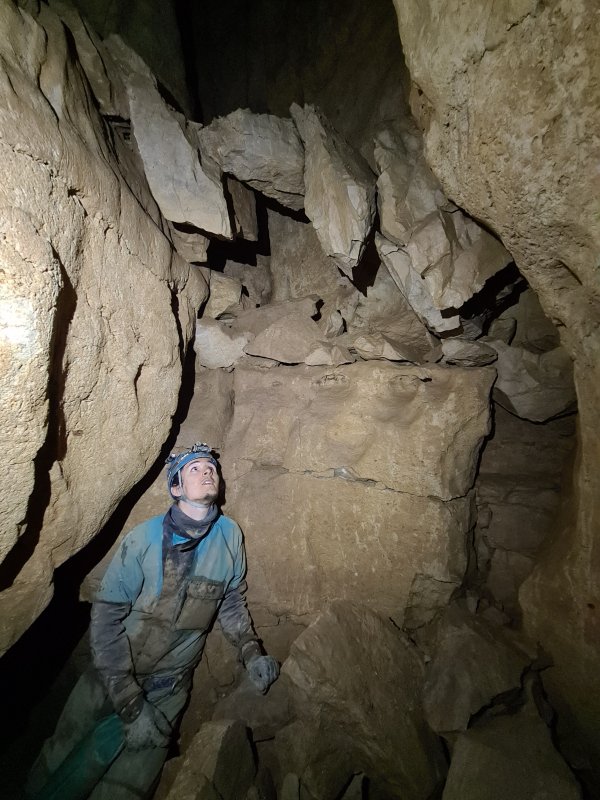 The most insane of the suspended rocks, a gravity defying arch, which really doesn't look like it should work. This passage seems to have the most ludicrous interpretation of the laws of physics.
Modelling by Josh
The most insane of the suspended rocks, a gravity defying arch, which really doesn't look like it should work. This passage seems to have the most ludicrous interpretation of the laws of physics.
Modelling by Josh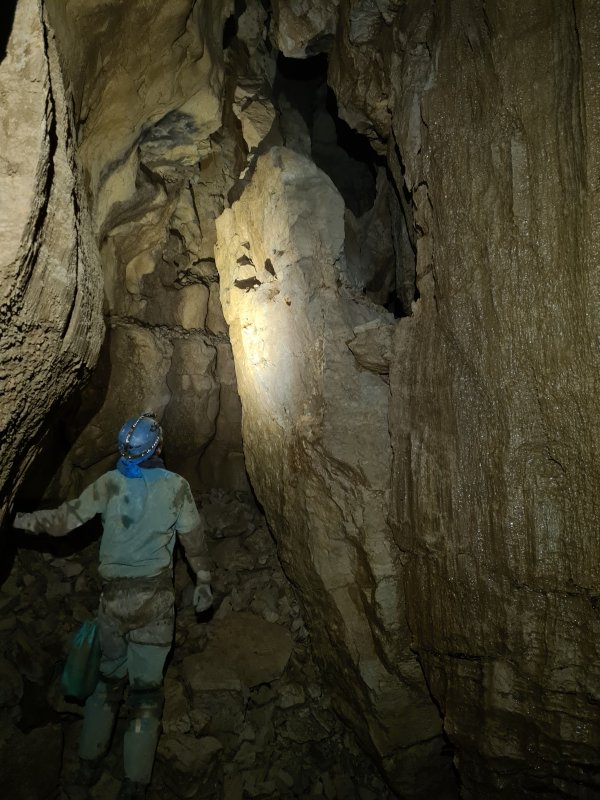 Leaning pillar.
Modelling by Josh, lighting by Tarquin and Josh
Leaning pillar.
Modelling by Josh, lighting by Tarquin and Josh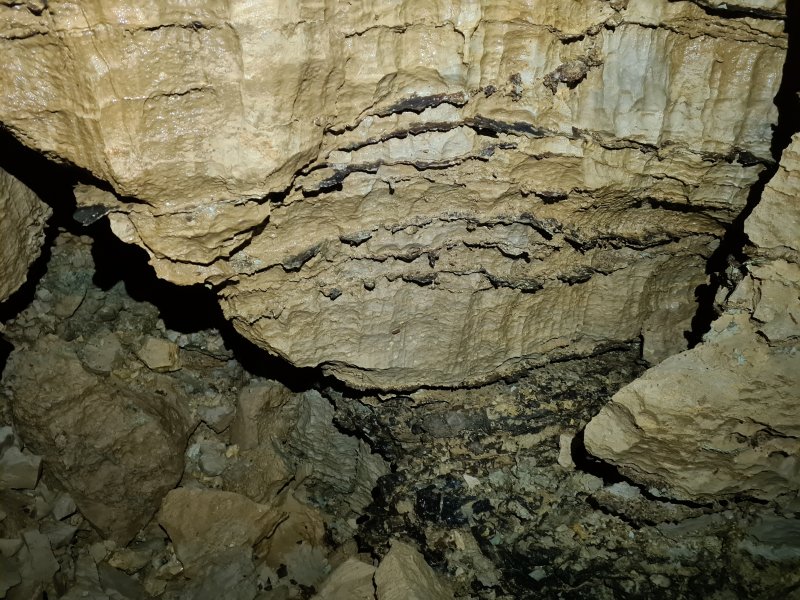 Beds of what appears to be goethite, a very dark ochre.
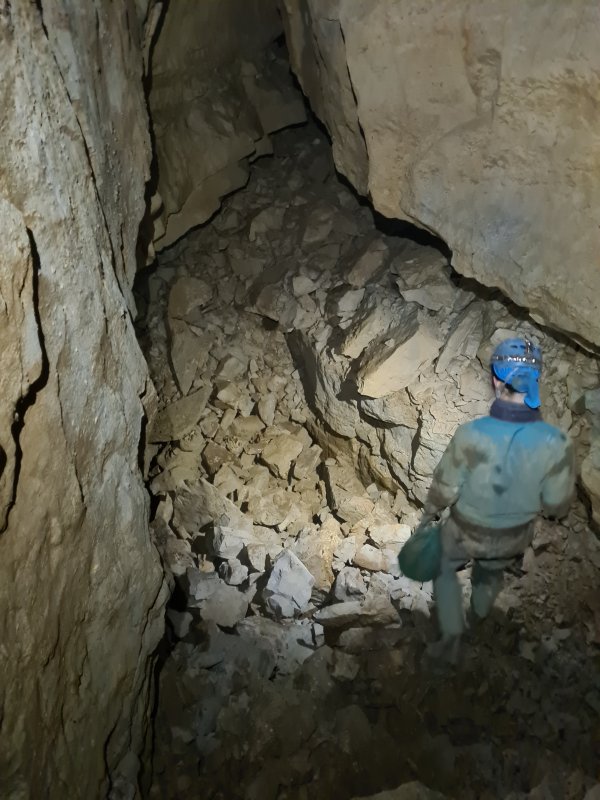 A semi-stable section of passage.
Modelling by Josh, lighting by Tarquin and Josh
A semi-stable section of passage.
Modelling by Josh, lighting by Tarquin and Josh A flattened ctenacanthus dorsal spine.
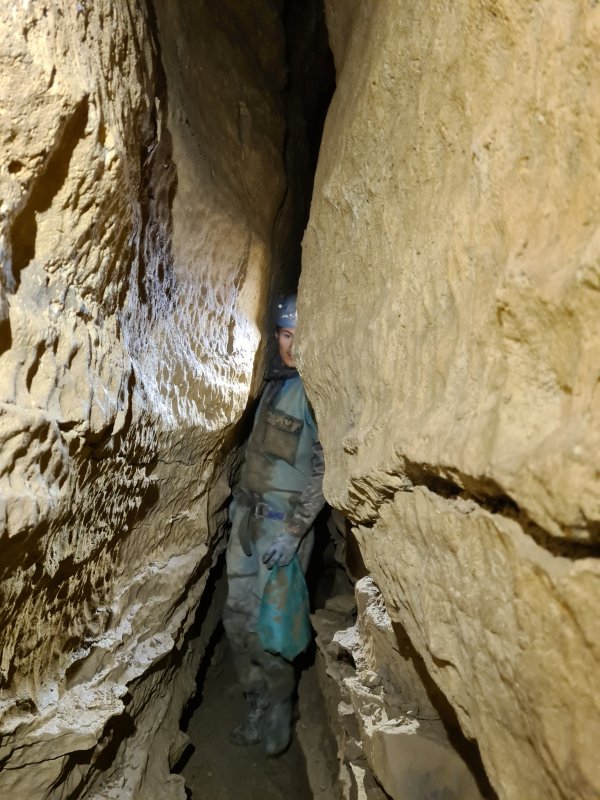 This part is particularly impressive, in that it is the first time the walls have looked stable since the start of Bolder Land. A welcome break from watching everything you touch. The passage is not large enough to be the only source of Padlock Passage's size, so presumably there was something larger hidden under the floor somewhere. The scallops indicate a southwards flow.
Modelling by Josh, lighting by Tarquin and Josh
This part is particularly impressive, in that it is the first time the walls have looked stable since the start of Bolder Land. A welcome break from watching everything you touch. The passage is not large enough to be the only source of Padlock Passage's size, so presumably there was something larger hidden under the floor somewhere. The scallops indicate a southwards flow.
Modelling by Josh, lighting by Tarquin and Josh The most impressive of the ctenacanthus spines, with well defined blood vessel holes.
 Powdered cryostal.
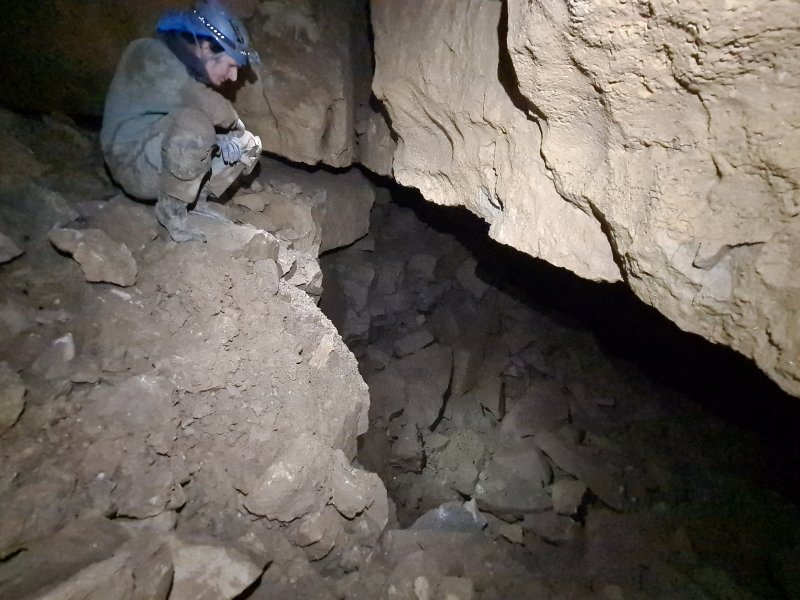 A climb down (with loose rocks at the top, of course) lands at the head of this blind pit, which is several metres deep. This is quite a crater, without a safe way to descend it, so we remain on the rubble bank above, and bypass it. The missing large passage may well be buried in a series of these collapse pits and undercuts. At this point there is less than 150 metres of passage left, but the right turn is just the passage returning to its normal northwest alignment.
Modelling by Josh, lighting by Tarquin and Josh
A climb down (with loose rocks at the top, of course) lands at the head of this blind pit, which is several metres deep. This is quite a crater, without a safe way to descend it, so we remain on the rubble bank above, and bypass it. The missing large passage may well be buried in a series of these collapse pits and undercuts. At this point there is less than 150 metres of passage left, but the right turn is just the passage returning to its normal northwest alignment.
Modelling by Josh, lighting by Tarquin and Josh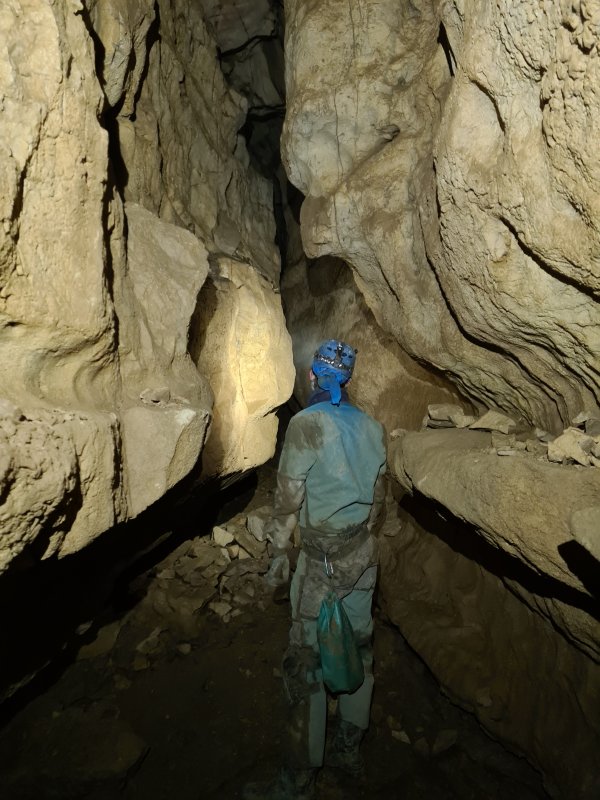 It can be stable now, right?
Modelling by Josh, lighting by Tarquin and Josh
It can be stable now, right?
Modelling by Josh, lighting by Tarquin and Josh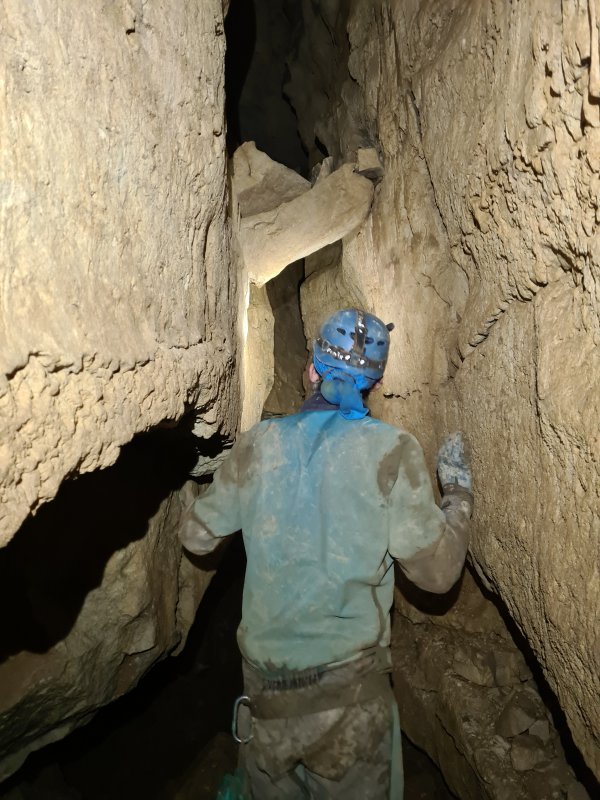 Ah of course, more suspended rocks.
Modelling by Josh, lighting by Tarquin and Josh
Ah of course, more suspended rocks.
Modelling by Josh, lighting by Tarquin and Josh And an unstable wall. Because why not.
Modelling by Josh, lighting by Tarquin and Josh
And an unstable wall. Because why not.
Modelling by Josh, lighting by Tarquin and Josh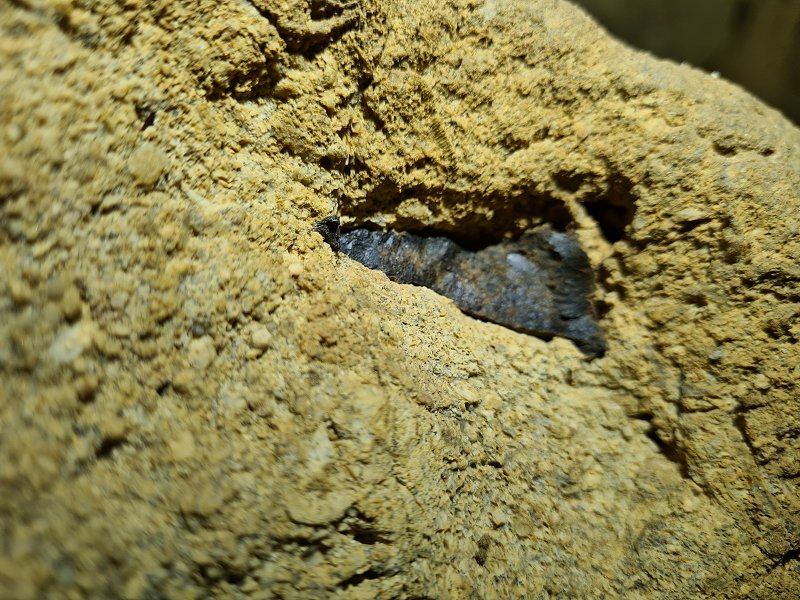 Another fossil bone, likely to be a ctenacanthus, but a very different cross section. Perhaps it is a jaw bone or shoulder plate.
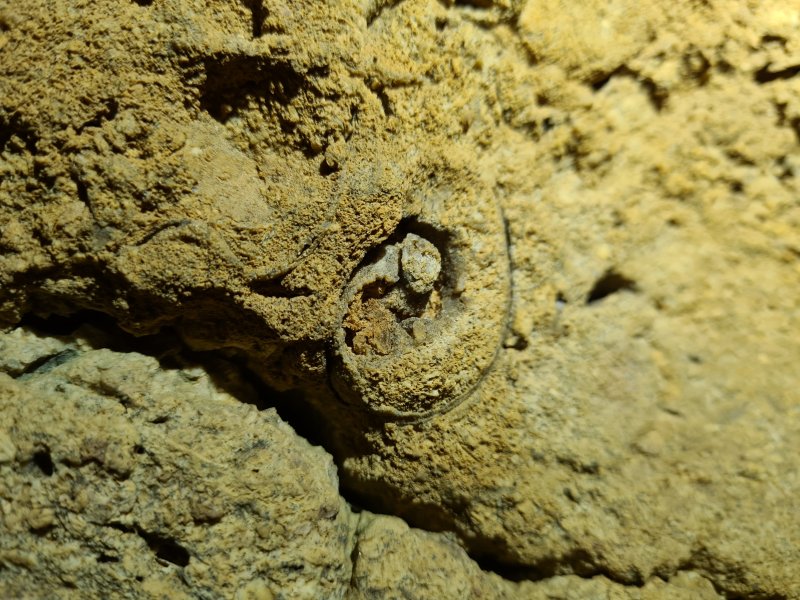 Fossil nautiloid shell.
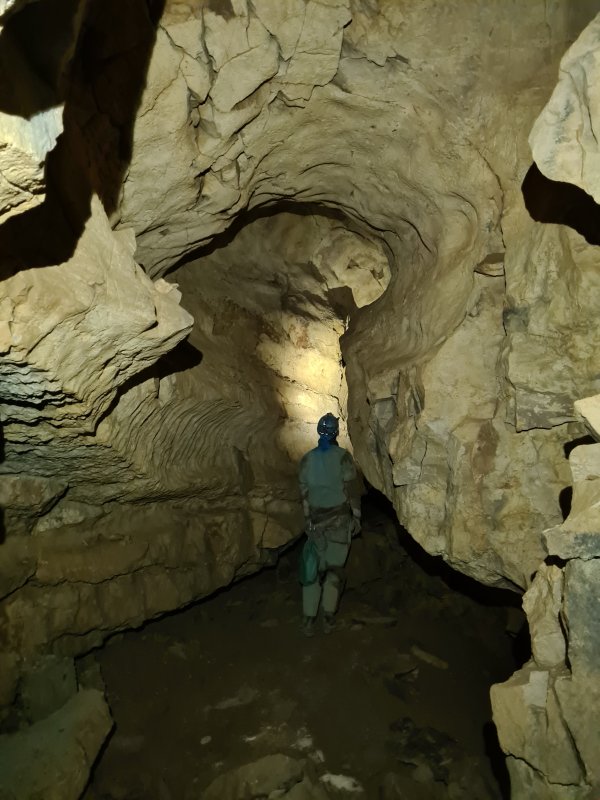 Beautifully arched former phreas, with a wide vadose trench.
Modelling by Josh, lighting by Tarquin and Josh
Beautifully arched former phreas, with a wide vadose trench.
Modelling by Josh, lighting by Tarquin and Josh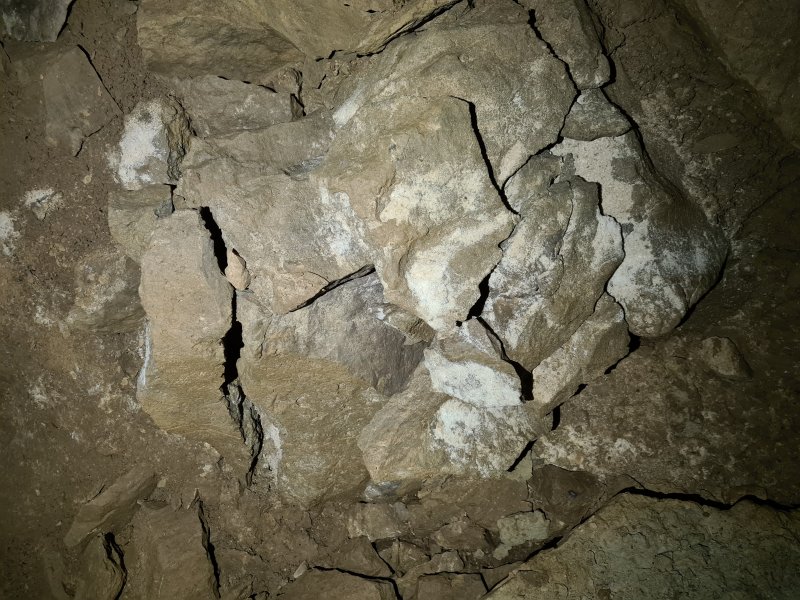 Powdered cryostal.
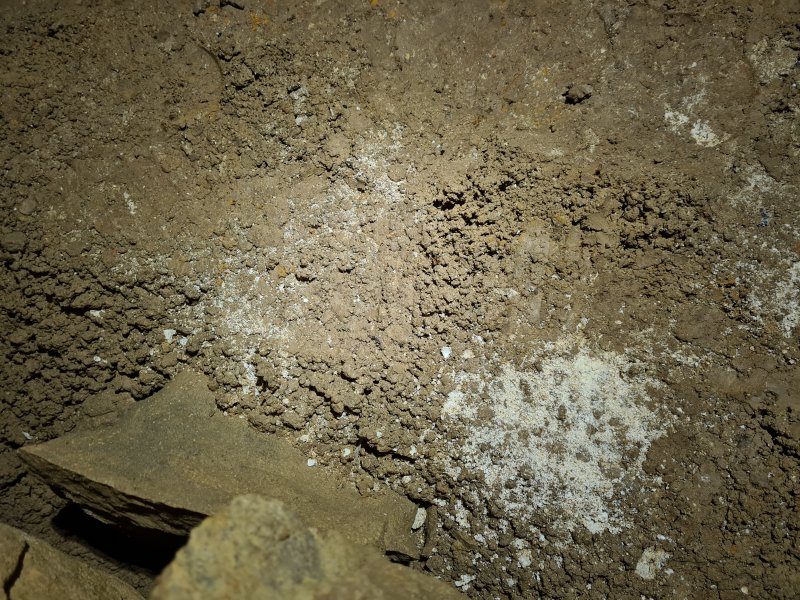 Cryostal.
 Richly stained ceiling, probably various ochres.
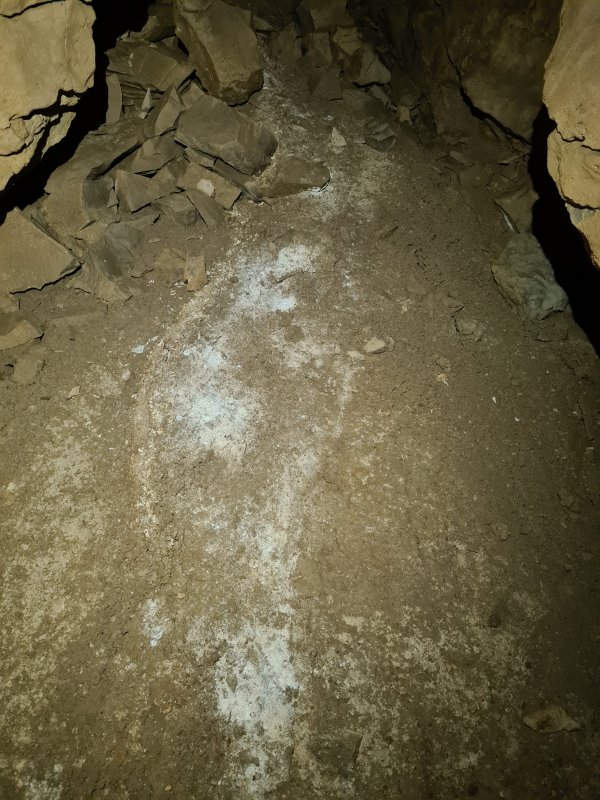 Powdered and more elaborate cryostal deposits.
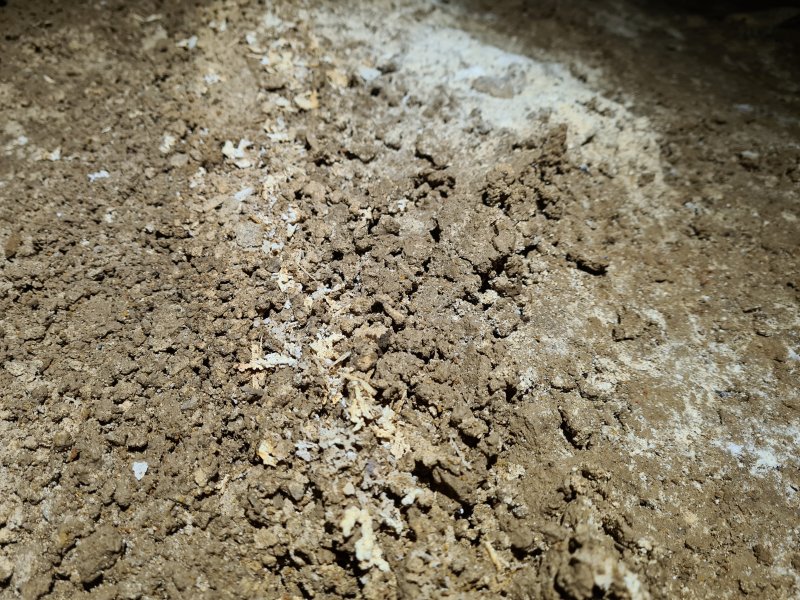 Cryostal twiglets.
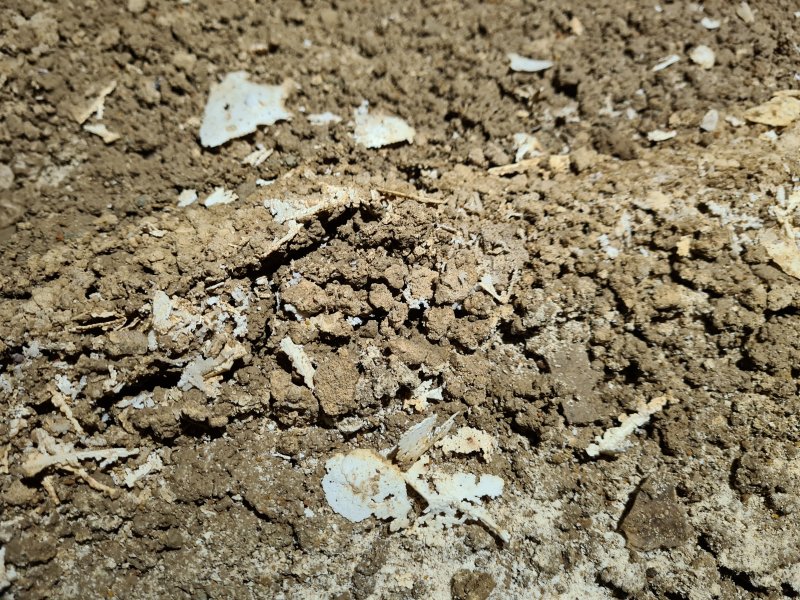 Cryostal lattices and rafts.
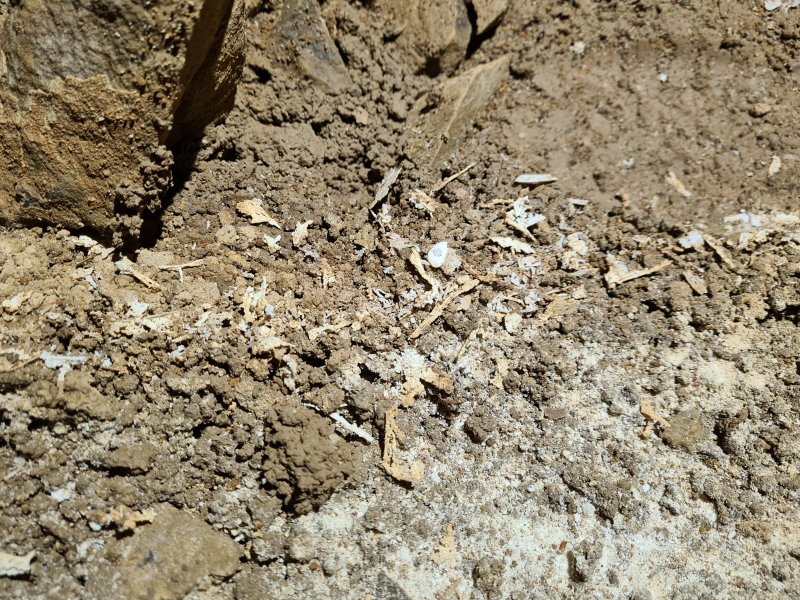 Lattices and rafts.
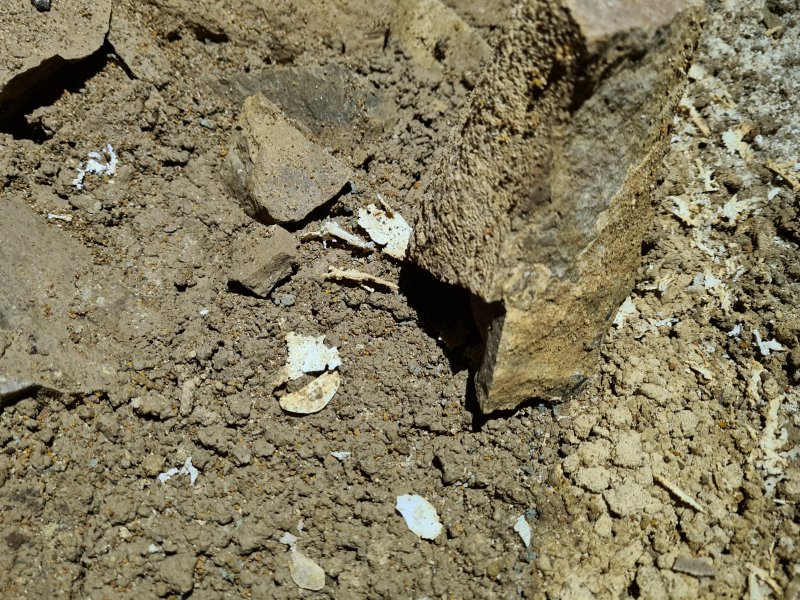 Rafts.
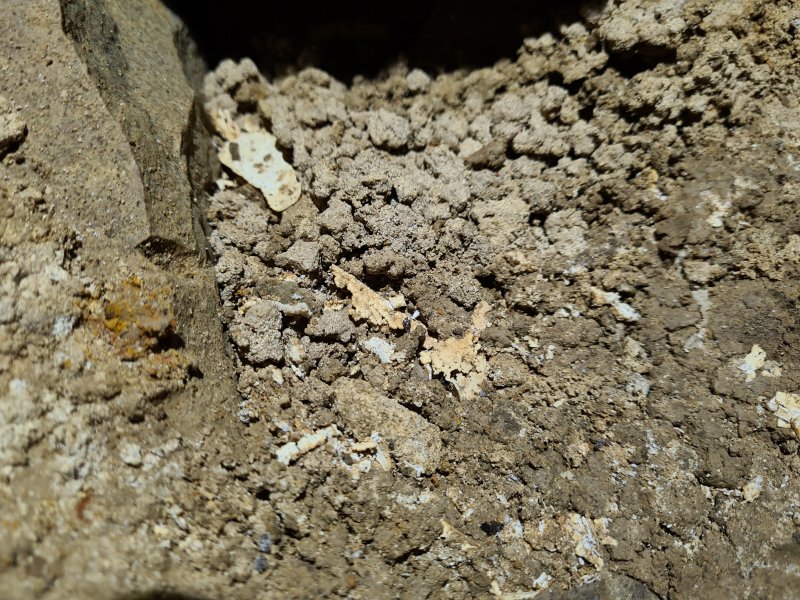 Rafts.
 A very wide bedding, with the shattered remains of formations on the ceiling. This is where the passage finally turns to trend northeast.
Modelling by Josh, lighting by Tarquin and Josh
A very wide bedding, with the shattered remains of formations on the ceiling. This is where the passage finally turns to trend northeast.
Modelling by Josh, lighting by Tarquin and Josh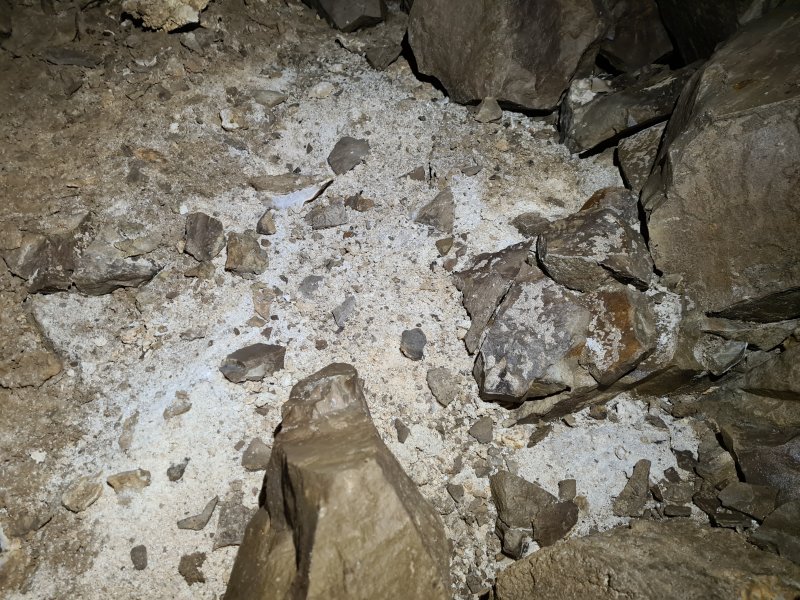 The bedding has yet another very large cryostal deposit.
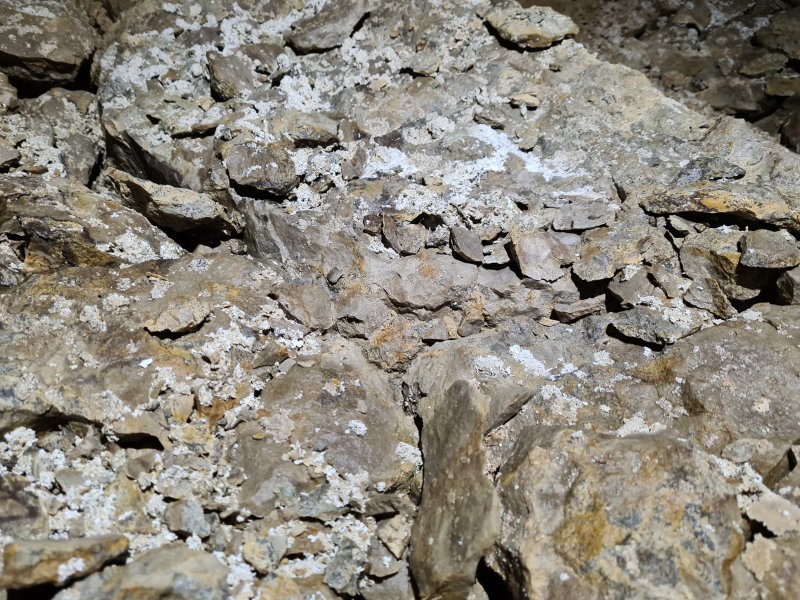 Cryostal.
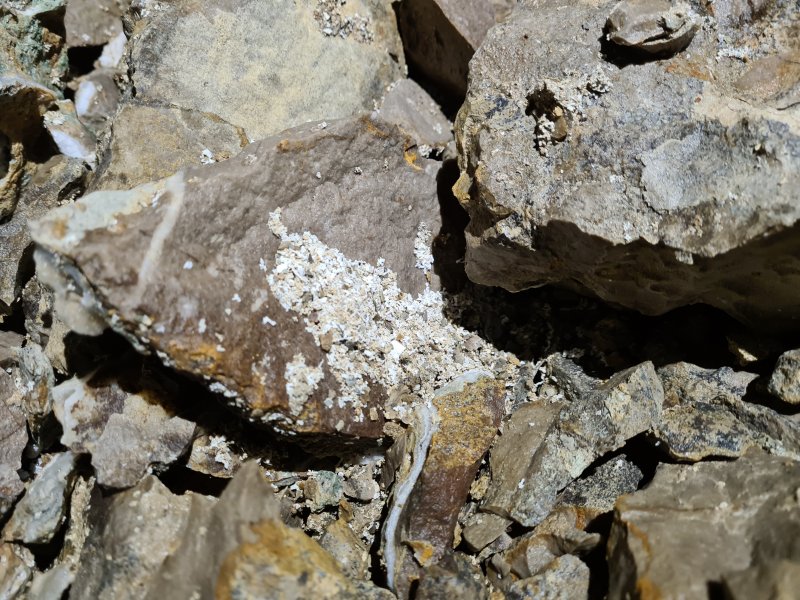 Cryostal.
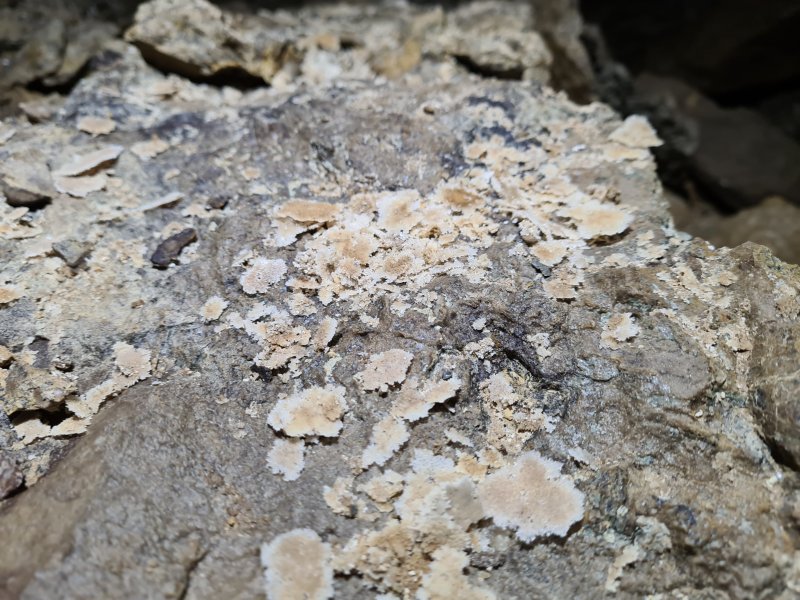 Very fine cryostal rafts, a type very rarely seen, with edges covered in fine crystals.
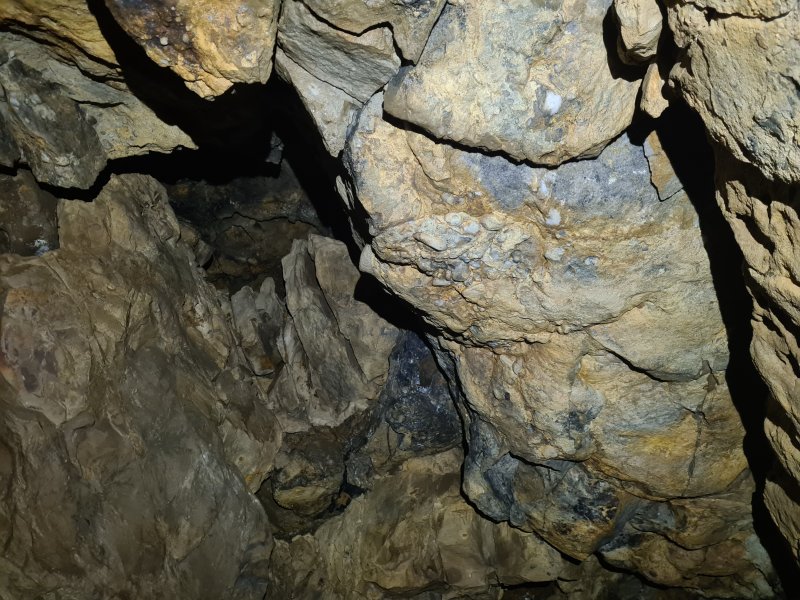 A blind aven with the first signs of quartz conglomerate, in the form of white quartz pebbles embedded in the rock. Once again, the cave has intersected the caprock, while being two rock beds too low to encounter it. This is probably the same sedimentary depression seen in 6th Heaven Chamber.
 Laminated calcite chunk. The black layers are probaby manganese.
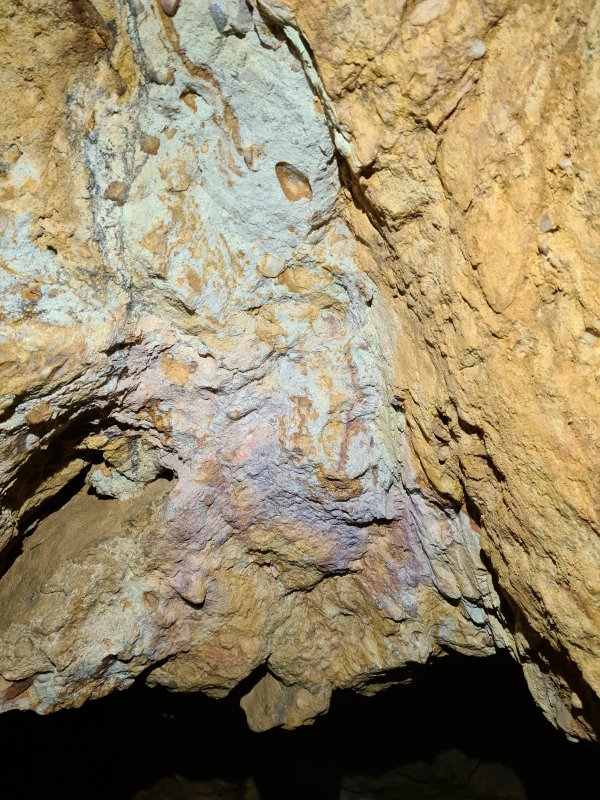 A coloured band of quartz conglomerate.
 Calcite and manganese stalactite.
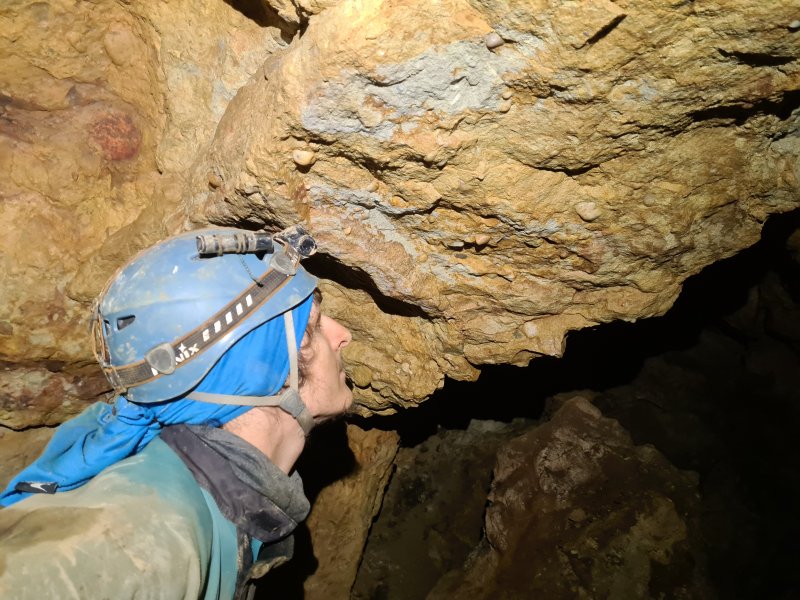 Admiring the conglomerate ceiling. The route now twists a little, passing short dead ends.
Modelling by Josh
Admiring the conglomerate ceiling. The route now twists a little, passing short dead ends.
Modelling by Josh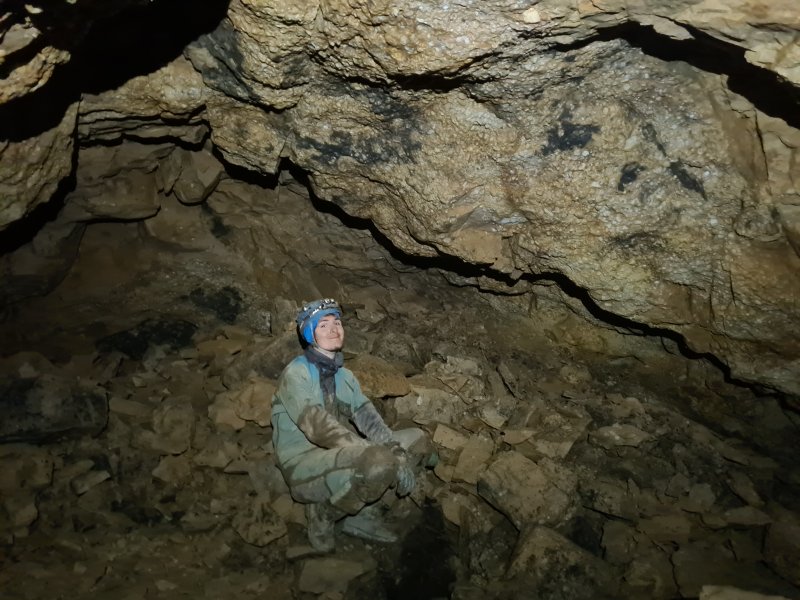 The passage now fully breaks into the quartz conglomerate caprock, where the quartz pebbles are clearly visible. The rock is impervious to water unless it is fractured, and cannot be dissolved by acid, so it does not normally form caves, except in places where it collapses into a cavity beneath it. Caves do form by etching away the limestone at the contact between limestone and caprock, but that is almost exclusively in the upper limestone beds which cover most of the national park's caving area. This area is unusual, as at this edge of the hillside, the upper limestone beds are missing completely, and the Llanelly shales are also missing in a few patches, allowing the caprock to rest on the lower beds. (The situation is different at the Blorenge mountain, since the shales and upper limestone beds are both absent there, and some of the lower beds also go missing at the northwestern edge of the mountain. But under most of Gilwern Hill there should be shales and upper limestone beds, which can be seen at Ogof Ddwy Sir.)
Modelling by Josh
The passage now fully breaks into the quartz conglomerate caprock, where the quartz pebbles are clearly visible. The rock is impervious to water unless it is fractured, and cannot be dissolved by acid, so it does not normally form caves, except in places where it collapses into a cavity beneath it. Caves do form by etching away the limestone at the contact between limestone and caprock, but that is almost exclusively in the upper limestone beds which cover most of the national park's caving area. This area is unusual, as at this edge of the hillside, the upper limestone beds are missing completely, and the Llanelly shales are also missing in a few patches, allowing the caprock to rest on the lower beds. (The situation is different at the Blorenge mountain, since the shales and upper limestone beds are both absent there, and some of the lower beds also go missing at the northwestern edge of the mountain. But under most of Gilwern Hill there should be shales and upper limestone beds, which can be seen at Ogof Ddwy Sir.)
Modelling by Josh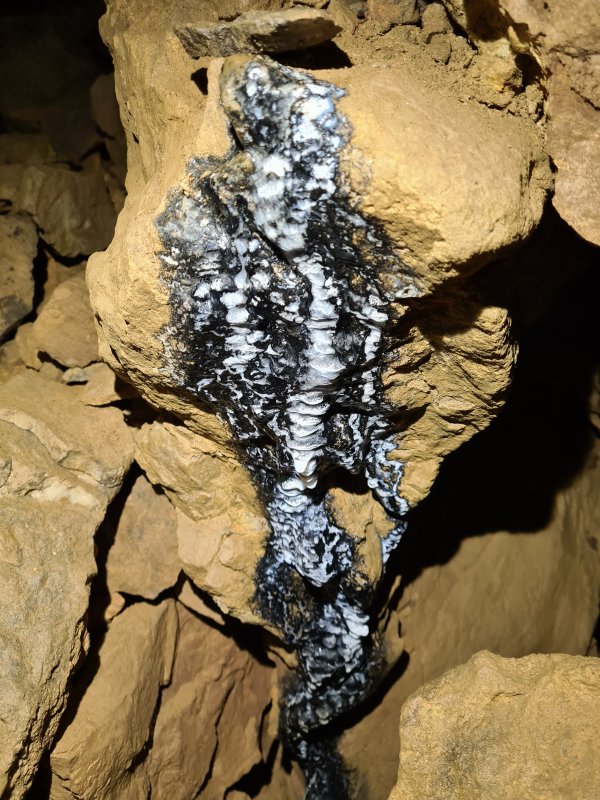 Calcite and manganese flowstone.
 A crawl under the wall then reaches the final chamber, another within the conglomerate. At the top end is a rift which is heavily choked with conglomerate. 150 metres beyond the end wall here is the Queen Of Hearts extension to Ogof Ddwy Sir, which is the obvious continuation of this passage. It also ends in quartz conglomerate like this, which suggests that there is at least another 150 metres of these insane domed chambers, made from this rock.
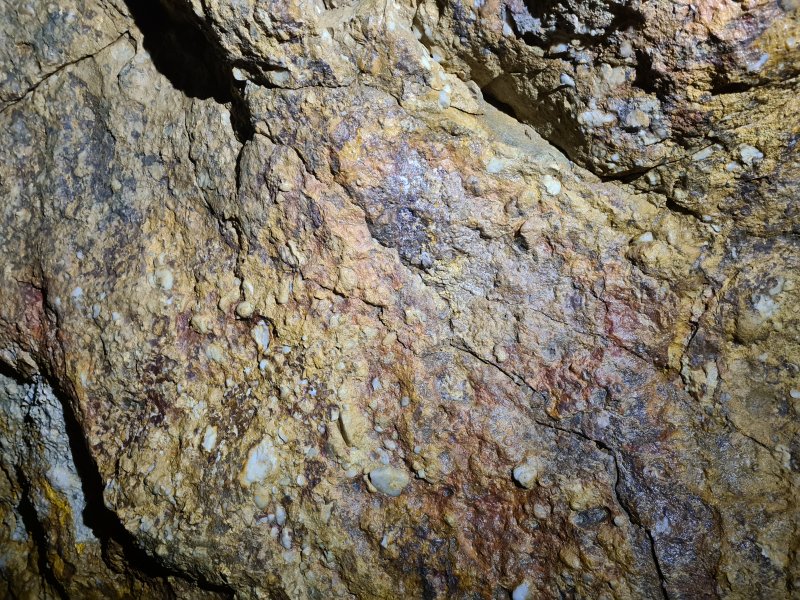 Quartz conglomerate is not particularly strong, and cannot cope with wide spans, so it collapses relatively easily, compared with limestone. Not the best building material for the cave to have chosen. But instead of another 150 metres of it, it is time to turn around, and face the rest of Bolder Land again.