Ogof Draenen Canyon trip 04/01/2020
Unless otherwise stated, camera, setups, lighting, edits and gallery effects by Tarquin. Modelling and lighting at various points will be Pete Bolt.
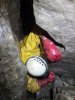 The slot at the start of the corkscrew into Spare Rib, the usual way through the Entrance Series.
Modelling by Pete, lighting by Tarquin and Pete
The slot at the start of the corkscrew into Spare Rib, the usual way through the Entrance Series.
Modelling by Pete, lighting by Tarquin and Pete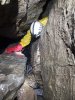 Exiting the corkscrew via an awkward bedding.
Modelling by Pete, lighting by Tarquin and Pete
Exiting the corkscrew via an awkward bedding.
Modelling by Pete, lighting by Tarquin and Pete Lost Crusade, the 20 metre pitch in the floor of Indiana Highway, which bells out into an enormous shaft. The rope handline on the traverse over it is not really needed, and if this hole were not here, there would be no traverse line at all. But this hole is enough to make you grateful for a handline.
Lighting by Tarquin and Pete
Lost Crusade, the 20 metre pitch in the floor of Indiana Highway, which bells out into an enormous shaft. The rope handline on the traverse over it is not really needed, and if this hole were not here, there would be no traverse line at all. But this hole is enough to make you grateful for a handline.
Lighting by Tarquin and Pete Looking out from the start of Canyon West. Ahead-left is the loop into Megadrive North. Ahead-right is the way out to Indiana Highway. Behind the tape on the right is the upper level opening into Canyon East. Canyon West is behind the camera.
Modelling by Pete, lighting by Tarquin and Pete
Looking out from the start of Canyon West. Ahead-left is the loop into Megadrive North. Ahead-right is the way out to Indiana Highway. Behind the tape on the right is the upper level opening into Canyon East. Canyon West is behind the camera.
Modelling by Pete, lighting by Tarquin and Pete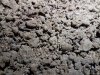 Bat bones among the bobbly mud in Canyon West. The mud shows that this passage has been fossil since at least before the last ice age. The bat bones are presumably newer, probably a few thousand years old at most.
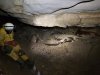 Guano piles in the undercuts of Canyon West.
Modelling by Pete, lighting by Tarquin and Pete
Guano piles in the undercuts of Canyon West.
Modelling by Pete, lighting by Tarquin and Pete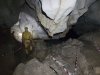 The start of Canyon West is a series of oxbows and loops, with gorgeous, sculpted white rock ceiling. The easiest way through is to take a right at each junction, until the big guano pile.
Modelling by Pete, lighting by Tarquin and Pete
The start of Canyon West is a series of oxbows and loops, with gorgeous, sculpted white rock ceiling. The easiest way through is to take a right at each junction, until the big guano pile.
Modelling by Pete, lighting by Tarquin and Pete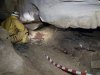 More guano piles. These are much smaller than those in Raiders Passage, but still represent hundreds or thousands of years worth of bat droppings, using the same spot to hibernate over and over again.
Modelling by Pete, lighting by Tarquin and Pete
More guano piles. These are much smaller than those in Raiders Passage, but still represent hundreds or thousands of years worth of bat droppings, using the same spot to hibernate over and over again.
Modelling by Pete, lighting by Tarquin and Pete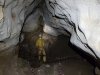 Junction of the oxbows, with loops ahead, left and right.
Modelling by Pete, lighting by Tarquin and Pete
Junction of the oxbows, with loops ahead, left and right.
Modelling by Pete, lighting by Tarquin and Pete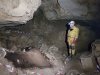 Huge pile of guano in Canyon West, the largest guano pile in the UK. It is about 3 metres (10 feet) long in the longer direction, and 2 metres (6 feet) in the shorter direction. Pete is well over 6 foot tall, and is not a good choice of model for scale. The rift behind Pete has a vocal connection with the Raiders side passage. The way on here is to pass the guano pile, then take the passage on the left
Modelling by Pete, lighting by Tarquin and Pete
Huge pile of guano in Canyon West, the largest guano pile in the UK. It is about 3 metres (10 feet) long in the longer direction, and 2 metres (6 feet) in the shorter direction. Pete is well over 6 foot tall, and is not a good choice of model for scale. The rift behind Pete has a vocal connection with the Raiders side passage. The way on here is to pass the guano pile, then take the passage on the left
Modelling by Pete, lighting by Tarquin and Pete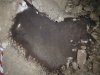 A heart-shaped sea of guano. This represents several thousand years of bat droppings. It sits on top of the bobbly mud, which means that the guano is more recent than the last ice age, under 10'000 years. It probably represents some of the first bat colonies to settle in Britain after the ice age. Judging from the clustering behaviour (the guano is only in discrete piles), these were likely to be greater horseshoe bats, which are now only rarely found at this end of the national park. We saw 2 on this trip, which are the first that I have ever seen in this cave.
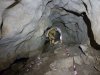 After the guano pile, the passage loses some of its grandure.
Modelling by Pete, lighting by Tarquin and Pete
After the guano pile, the passage loses some of its grandure.
Modelling by Pete, lighting by Tarquin and Pete Textured mud in Canyon West. This is fluffy/bobbly mud in ripples, created by ice, but probably moved into ripples by the water as the ice melted.
Lighting by Tarquin and Pete
Textured mud in Canyon West. This is fluffy/bobbly mud in ripples, created by ice, but probably moved into ripples by the water as the ice melted.
Lighting by Tarquin and Pete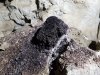 A raised hagg (like a raised part of a peat bog) of guano.
 A very different pile of grey guano. Perhaps this is a different species of bat, or perhaps it is much older guano. Or maybe it has been changed by chemical processes.
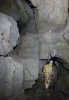 Start of Canyon East. The lower level is the usual way in, while the upper level is the connection with the start of Canyon West.
Modelling by Pete, lighting by Tarquin and Pete
Start of Canyon East. The lower level is the usual way in, while the upper level is the connection with the start of Canyon West.
Modelling by Pete, lighting by Tarquin and Pete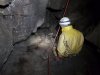 Guano at the start of Canyon East.
Modelling by Pete, lighting by Tarquin and Pete
Guano at the start of Canyon East.
Modelling by Pete, lighting by Tarquin and Pete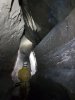 Canyon East is the more canyon-shaped passage.
Modelling by Pete, lighting by Tarquin and Pete
Canyon East is the more canyon-shaped passage.
Modelling by Pete, lighting by Tarquin and Pete Ctenacanthus dorsal spine in Canyon East. This is the bone that once held up the dorsal fin of a ctenacanthus proto-shark. It is far surpassed by those in Raiders Passage, but is still impressive.
 The lower section is normally narrow, and that is usually where you walk. This is the widest part.
Modelling by Pete, lighting by Tarquin and Pete
The lower section is normally narrow, and that is usually where you walk. This is the widest part.
Modelling by Pete, lighting by Tarquin and Pete A much better dorsal spine, with gypsum crystals. The dorsal fin sat in the U-shaped cup on the right, with the front of the shark being on the left.
 Wicking formations on the wall, created by the draught evaporating water that it wicked out of the rock.
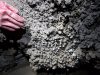 Textured formation, that looks like it might have formed underwater.
Modelling by Pete's hand, lighting by Tarquin and Pete
Textured formation, that looks like it might have formed underwater.
Modelling by Pete's hand, lighting by Tarquin and Pete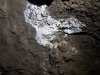 Wicking/evaporation formation.
 A more normal part of Canyon East.
Modelling by Pete, lighting by Tarquin and Pete
A more normal part of Canyon East.
Modelling by Pete, lighting by Tarquin and Pete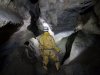 Up above, there are some very wide sections, especially on the corners, but the upper ledges cannot be followed for long.
Modelling by Pete, lighting by Tarquin and Pete
Up above, there are some very wide sections, especially on the corners, but the upper ledges cannot be followed for long.
Modelling by Pete, lighting by Tarquin and Pete More grey guano on the ledges.
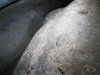 Grey guano.
 End of Canyon East.
Modelling by Pete, lighting by Tarquin and Pete
End of Canyon East.
Modelling by Pete, lighting by Tarquin and Pete The junction of Canyon East and Canyon West, where the passage takes on the combined size. For a while, it is possible to follow the upper ledges, but eventually, the canyon floor is the only way to make progress, occasionally climbing over fallen boulders. This is an unusual passage for Draenen, which has largely survived the ice shattering, and retained its original walls and ceiling, so progress is quite fast and relatively comfortable.
Modelling by Pete, lighting by Tarquin and Pete
The junction of Canyon East and Canyon West, where the passage takes on the combined size. For a while, it is possible to follow the upper ledges, but eventually, the canyon floor is the only way to make progress, occasionally climbing over fallen boulders. This is an unusual passage for Draenen, which has largely survived the ice shattering, and retained its original walls and ceiling, so progress is quite fast and relatively comfortable.
Modelling by Pete, lighting by Tarquin and Pete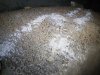 Grey guano near the junction.
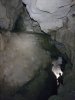 The junction with Big Mole Passage, which takes some of the size away from the main Canyon. The junction is invisible from below, but can be clearly seen from the ledges. It is accessed via a slope from the bottom of the canyon.
Modelling by Pete, lighting by Tarquin and Pete
The junction with Big Mole Passage, which takes some of the size away from the main Canyon. The junction is invisible from below, but can be clearly seen from the ledges. It is accessed via a slope from the bottom of the canyon.
Modelling by Pete, lighting by Tarquin and Pete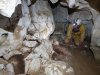 Guano at the start of Big Mole Passage.
Modelling by Pete, lighting by Tarquin and Pete
Guano at the start of Big Mole Passage.
Modelling by Pete, lighting by Tarquin and Pete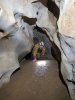 Big Mole is crawling sized for its whole length.
Modelling by Pete, lighting by Tarquin and Pete
Big Mole is crawling sized for its whole length.
Modelling by Pete, lighting by Tarquin and Pete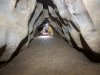 Getting lower. The passage then becomes low enough that it could be considered a squeeze, and I continued alone.
Modelling by Pete, lighting by Tarquin and Pete
Getting lower. The passage then becomes low enough that it could be considered a squeeze, and I continued alone.
Modelling by Pete, lighting by Tarquin and Pete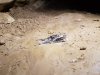 Remains of a very dead bat in Big Mole Passage. This most likely died several years earlier.
Modelling by Vlad
Remains of a very dead bat in Big Mole Passage. This most likely died several years earlier.
Modelling by Vlad The passage then shrinks and loses its charm, becoming narrow and muddy.
 Remains of a dig at the end. This drag tray sits in a very awkward squeeze, on a 130° bend. There is not enough space for a normal sized person to turn around beyond it, so it has to be reversed feet first, into a narrow passage requiring a contortion manoeuvre to turn the corner. It took me three attempts to get back out, trying and failing to turn around in the tiny space beyond it each time. Whoever was digging this (Hades CC) must have been a very determined, small caver.
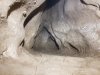 The dig, at the point where it is too small to turn around.
 The dig continues as a flat out squeeze, rising up and heading into the unknown. I suspect that this may connect back up along Big Mole Passage since it points back along the passage, but if it is a way on, it probably would end up connecting to Going Square, rather than breaking new ground. It was too tight for me to contemplate squeezing onwards on my own to find out how far they had pushed it.
 After the junction with Big Mole, the wide upper section of Canyon disappears, and the passage becomes a narrow canyon.
Modelling by Pete, lighting by Tarquin and Pete
After the junction with Big Mole, the wide upper section of Canyon disappears, and the passage becomes a narrow canyon.
Modelling by Pete, lighting by Tarquin and Pete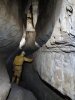 The meandering section of Canyon.
Modelling by Pete, lighting by Tarquin and Pete
The meandering section of Canyon.
Modelling by Pete, lighting by Tarquin and Pete The meandering section of Canyon.
Modelling by Pete, lighting by Tarquin and Pete
The meandering section of Canyon.
Modelling by Pete, lighting by Tarquin and Pete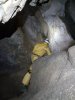 A climb up gains a very small side passage. Like most side passages here, it goes nowhere, and is probably just an incomplete oxbow.
Modelling by Pete, lighting by Tarquin and Pete
A climb up gains a very small side passage. Like most side passages here, it goes nowhere, and is probably just an incomplete oxbow.
Modelling by Pete, lighting by Tarquin and Pete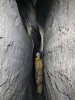 The Canyon.
Modelling by Pete, lighting by Tarquin and Pete
The Canyon.
Modelling by Pete, lighting by Tarquin and Pete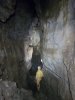 Half way along, the passage turns a corner and enlarges. The draught, which had been blowing strongly along the passage, disappeared here. Roof tubes turned out to be only oxbows. The draught most likely sinks through the floor into Wooden Spoon Passage, which passes 25 metres below at this point. There is no known physical connection between the passages.
Modelling by Pete, lighting by Tarquin and Pete
Half way along, the passage turns a corner and enlarges. The draught, which had been blowing strongly along the passage, disappeared here. Roof tubes turned out to be only oxbows. The draught most likely sinks through the floor into Wooden Spoon Passage, which passes 25 metres below at this point. There is no known physical connection between the passages.
Modelling by Pete, lighting by Tarquin and Pete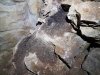 Guano at a corner.
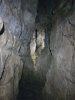 The passage remains quite large for a little while, with a rocky floor, but quickly loses its grandure after this point.
Modelling by Pete, lighting by Tarquin and Pete
The passage remains quite large for a little while, with a rocky floor, but quickly loses its grandure after this point.
Modelling by Pete, lighting by Tarquin and Pete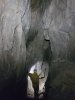 The passage style finally changes completely at this junction. From here on, there are at least three routes, and it becomes very confusing. The main way to the end of the Canyon passage is through a narrow slot in the left wall just beyond Pete, then descending into the lower rift. The passage up to the left is difficult to reach and can be largely ignored. The low passage ahead is the way into the upper maze, and the usual route to Tractor Tracks.
Modelling by Pete, lighting by Tarquin and Pete
The passage style finally changes completely at this junction. From here on, there are at least three routes, and it becomes very confusing. The main way to the end of the Canyon passage is through a narrow slot in the left wall just beyond Pete, then descending into the lower rift. The passage up to the left is difficult to reach and can be largely ignored. The low passage ahead is the way into the upper maze, and the usual route to Tractor Tracks.
Modelling by Pete, lighting by Tarquin and Pete The lower rift, which is quite narrow. It has a couple of roof holes up into various parts of the upper maze.
Modelling by Pete, lighting by Tarquin and Pete
The lower rift, which is quite narrow. It has a couple of roof holes up into various parts of the upper maze.
Modelling by Pete, lighting by Tarquin and Pete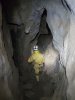 The junction where the different routes recombine, looking from the upper maze's final slope. The lower rift comes in from the left, continues ahead, then doubles back to the right.
Modelling by Pete, lighting by Tarquin and Pete
The junction where the different routes recombine, looking from the upper maze's final slope. The lower rift comes in from the left, continues ahead, then doubles back to the right.
Modelling by Pete, lighting by Tarquin and Pete The way on passes an upper level oxbow, then splits into a multitude of little digs, with the furthest passage (seen here) never having been pushed. The passage here is 25 metres above the level of Crystal Mole and The Score (which would once have been connected), but without any obvious destination. It is not known whether there is potential here, but the passages must have drained somewhere.
Modelling by Pete, lighting by Tarquin and Pete
The way on passes an upper level oxbow, then splits into a multitude of little digs, with the furthest passage (seen here) never having been pushed. The passage here is 25 metres above the level of Crystal Mole and The Score (which would once have been connected), but without any obvious destination. It is not known whether there is potential here, but the passages must have drained somewhere.
Modelling by Pete, lighting by Tarquin and Pete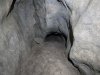 The passage to the upper maze starts as a crawl which quickly ascends to a higher level.
Modelling by Pete, lighting by Tarquin and Pete
The passage to the upper maze starts as a crawl which quickly ascends to a higher level.
Modelling by Pete, lighting by Tarquin and Pete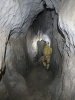 The higher level. This soon passes over a hole into the lower rift, but confusingly, to return to the junction via that route, you would continue ahead in the lower rift, as it has doubled back before passing below.
Modelling by Pete, lighting by Tarquin and Pete
The higher level. This soon passes over a hole into the lower rift, but confusingly, to return to the junction via that route, you would continue ahead in the lower rift, as it has doubled back before passing below.
Modelling by Pete, lighting by Tarquin and Pete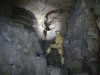 The main junction in the maze, with the way in being behind the camera to the left. On the left, a passage doubles back to become the upper passage at the junction before the maze. Up the unofficial rope is Tractor Tracks Passage. To the right is the way on through the maze. The ropes in this area are completely unnecessary, and not really strong enough to use for support. They get in the way, and should not be trusted.
Modelling by Pete, lighting by Tarquin and Pete
The main junction in the maze, with the way in being behind the camera to the left. On the left, a passage doubles back to become the upper passage at the junction before the maze. Up the unofficial rope is Tractor Tracks Passage. To the right is the way on through the maze. The ropes in this area are completely unnecessary, and not really strong enough to use for support. They get in the way, and should not be trusted.
Modelling by Pete, lighting by Tarquin and Pete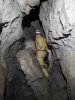 The way on through the maze. This passes over a climb down into the lower rift before splitting into tight rifts. The one on the right reaches the end junction with the lower rift.
Modelling by Pete, lighting by Tarquin and Pete
The way on through the maze. This passes over a climb down into the lower rift before splitting into tight rifts. The one on the right reaches the end junction with the lower rift.
Modelling by Pete, lighting by Tarquin and Pete The passage to the left at the main junction in the maze.
Modelling by Pete, lighting by Tarquin and Pete
The passage to the left at the main junction in the maze.
Modelling by Pete, lighting by Tarquin and Pete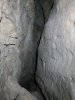 The rift ends abruptly at the junction before the maze, with a pitch down, or a very tricky climb down into the start of the lower rift. It is very easy to accidentally fall down it when trying to climb, so it is best avoided.
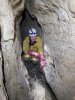 The start of Tractor Tracks, which is small and uninspiring.
Modelling by Pete, lighting by Tarquin and Pete
The start of Tractor Tracks, which is small and uninspiring.
Modelling by Pete, lighting by Tarquin and Pete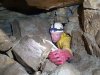 Tractor Tracks then passes through an awkward squeeze, and looks even less inspiring. Turning around in a tiny space to take this picture, it was looking like it might be another solo trip.
Modelling by Pete, lighting by Tarquin and Pete
Tractor Tracks then passes through an awkward squeeze, and looks even less inspiring. Turning around in a tiny space to take this picture, it was looking like it might be another solo trip.
Modelling by Pete, lighting by Tarquin and Pete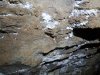 Calcite formations in Tractor Tracks.
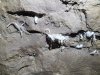 The passage then gains some very beautiful gypsum flower formations.
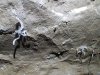 Gypsum flowers.
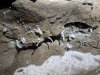 Gypsum flowers.
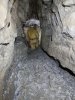 Thankfully, the passage enlarges to a more comfortable size.
Modelling by Pete, lighting by Tarquin and Pete
Thankfully, the passage enlarges to a more comfortable size.
Modelling by Pete, lighting by Tarquin and Pete In fact, for most of its length, Tractor Tracks is walking sized, and very comfortable.
Modelling by Pete, lighting by Tarquin and Pete
In fact, for most of its length, Tractor Tracks is walking sized, and very comfortable.
Modelling by Pete, lighting by Tarquin and Pete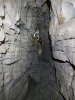 Thinly bedded rock.
Modelling by Pete, lighting by Tarquin and Pete
Thinly bedded rock.
Modelling by Pete, lighting by Tarquin and Pete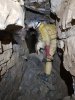 Shrinking back to stooping size. At this point, it passes over Far Agent Blorence, having completely crossed over the middle of the Round Trip.
Modelling by Pete, lighting by Tarquin and Pete
Shrinking back to stooping size. At this point, it passes over Far Agent Blorence, having completely crossed over the middle of the Round Trip.
Modelling by Pete, lighting by Tarquin and Pete The gypsum ends, and the passage becomes crawling sized. Sadly, it does not improve from here onwards.
Modelling by Pete, lighting by Tarquin and Pete
The gypsum ends, and the passage becomes crawling sized. Sadly, it does not improve from here onwards.
Modelling by Pete, lighting by Tarquin and Pete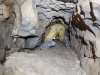 Initially, the crawl is fairly comfortable, with scalloping suggesting that we are heading downstream.
Modelling by Pete, lighting by Tarquin and Pete
Initially, the crawl is fairly comfortable, with scalloping suggesting that we are heading downstream.
Modelling by Pete, lighting by Tarquin and Pete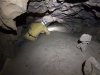 Wider bedding section, where the only significant side passage is an oxbow.
Modelling by Pete, lighting by Tarquin and Pete
Wider bedding section, where the only significant side passage is an oxbow.
Modelling by Pete, lighting by Tarquin and Pete A very low crawl then shows where the name Tractor Tracks comes from, with the central ridge and trenches either side looking like the ruts dug by tractor wheels.
Modelling by Pete, lighting by Tarquin and Pete
A very low crawl then shows where the name Tractor Tracks comes from, with the central ridge and trenches either side looking like the ruts dug by tractor wheels.
Modelling by Pete, lighting by Tarquin and Pete The passage briefly enlarges to standing size, the only significantly sized passage before the end. Perhaps there is another passage hiding under the floor here, because there is nothing good beyond here.
Modelling by Pete, lighting by Tarquin and Pete
The passage briefly enlarges to standing size, the only significantly sized passage before the end. Perhaps there is another passage hiding under the floor here, because there is nothing good beyond here.
Modelling by Pete, lighting by Tarquin and Pete A couple of dug out sections then reach the final tube.
 The final tube seems to be in a different rock, without the sculpting. This appears to have been a lengthy dig, beyond the surveyed end of the passage. The dry stone walling and long drag rope shows that someone put in a considerable effort here.
Modelling by Tarquin's welly
The final tube seems to be in a different rock, without the sculpting. This appears to have been a lengthy dig, beyond the surveyed end of the passage. The dry stone walling and long drag rope shows that someone put in a considerable effort here.
Modelling by Tarquin's welly The passage ends very abruptly indeed at a very definite, solidly packed wall. It looks more like a quarry than a dig, and does not appear to be an actual passage. There is not an obvious place to dig, even though it is the end of a reasonably sized tube. Quite disappointing. The passage has now reached Chocolate Blorenge (the downtream end of Far Agent Blorenge), but 35 metres higher. It is at the same height as Life On Mars, and was probably originally connected to that series, which would explain why both sets of passages are here.
 The slot at the start of the corkscrew into Spare Rib, the usual way through the Entrance Series.
Modelling by Pete, lighting by Tarquin and Pete
The slot at the start of the corkscrew into Spare Rib, the usual way through the Entrance Series.
Modelling by Pete, lighting by Tarquin and Pete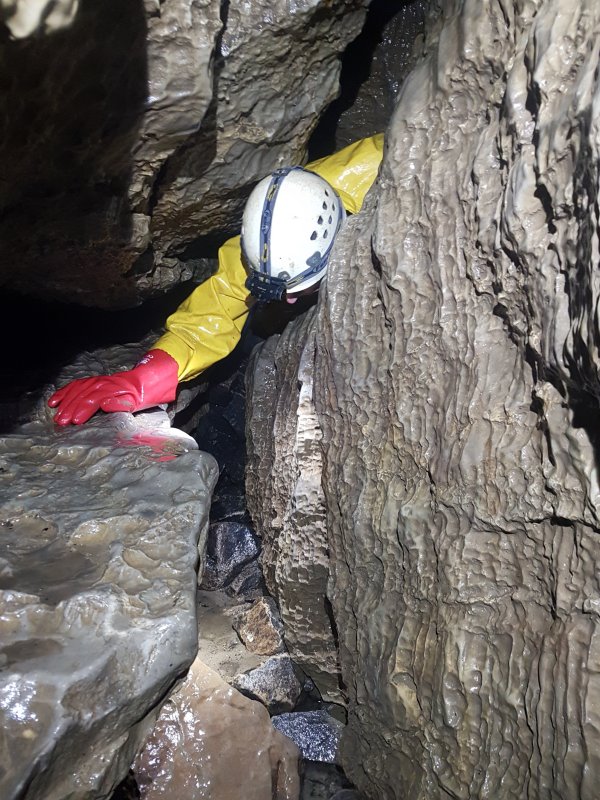 Exiting the corkscrew via an awkward bedding.
Modelling by Pete, lighting by Tarquin and Pete
Exiting the corkscrew via an awkward bedding.
Modelling by Pete, lighting by Tarquin and Pete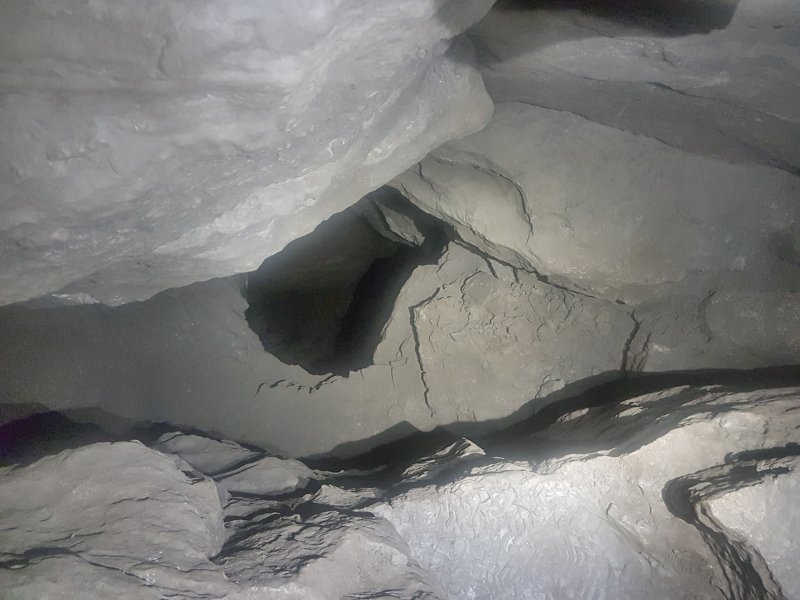 Lost Crusade, the 20 metre pitch in the floor of Indiana Highway, which bells out into an enormous shaft. The rope handline on the traverse over it is not really needed, and if this hole were not here, there would be no traverse line at all. But this hole is enough to make you grateful for a handline.
Lighting by Tarquin and Pete
Lost Crusade, the 20 metre pitch in the floor of Indiana Highway, which bells out into an enormous shaft. The rope handline on the traverse over it is not really needed, and if this hole were not here, there would be no traverse line at all. But this hole is enough to make you grateful for a handline.
Lighting by Tarquin and Pete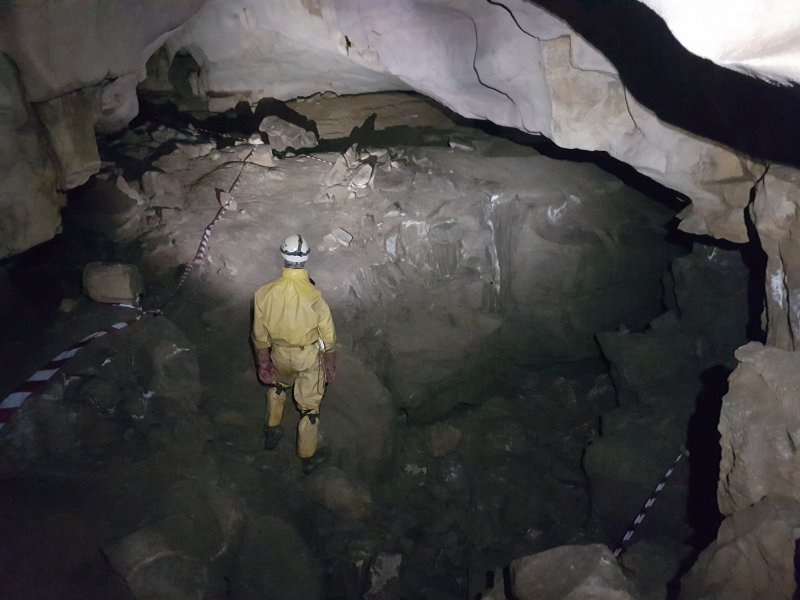 Looking out from the start of Canyon West. Ahead-left is the loop into Megadrive North. Ahead-right is the way out to Indiana Highway. Behind the tape on the right is the upper level opening into Canyon East. Canyon West is behind the camera.
Modelling by Pete, lighting by Tarquin and Pete
Looking out from the start of Canyon West. Ahead-left is the loop into Megadrive North. Ahead-right is the way out to Indiana Highway. Behind the tape on the right is the upper level opening into Canyon East. Canyon West is behind the camera.
Modelling by Pete, lighting by Tarquin and Pete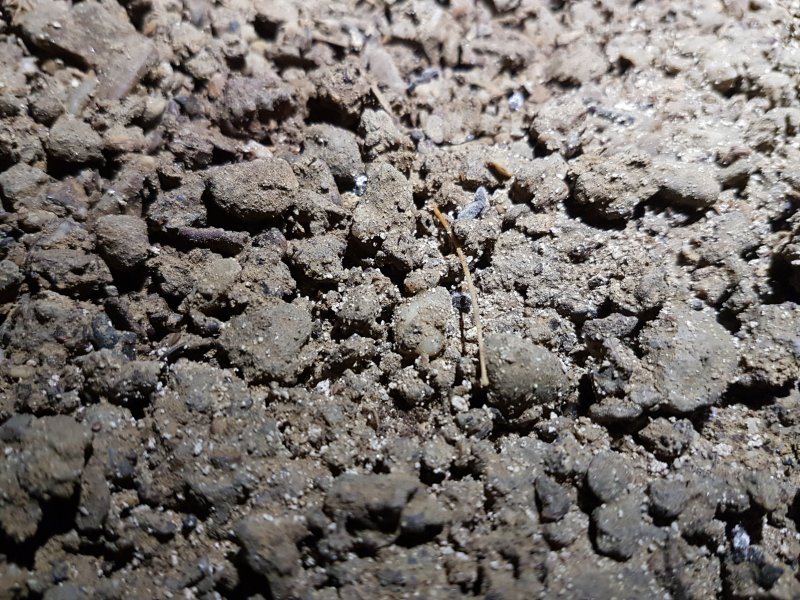 Bat bones among the bobbly mud in Canyon West. The mud shows that this passage has been fossil since at least before the last ice age. The bat bones are presumably newer, probably a few thousand years old at most.
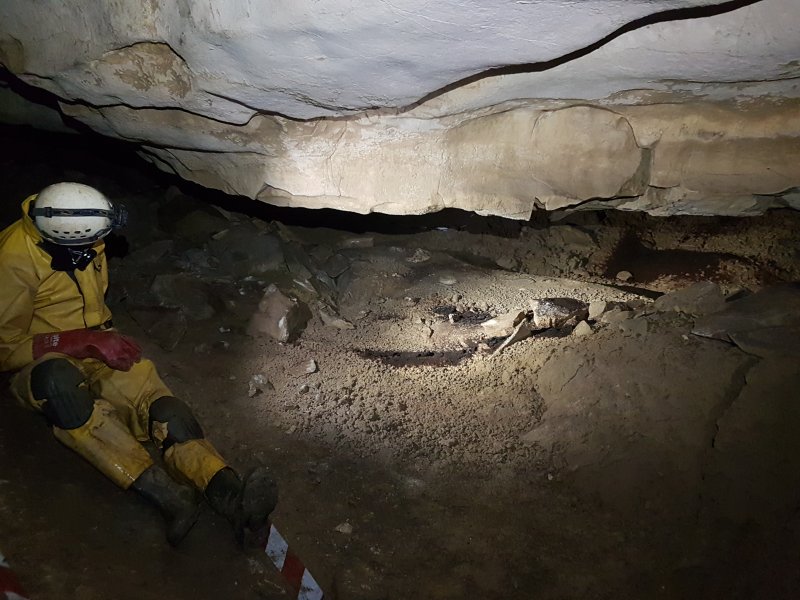 Guano piles in the undercuts of Canyon West.
Modelling by Pete, lighting by Tarquin and Pete
Guano piles in the undercuts of Canyon West.
Modelling by Pete, lighting by Tarquin and Pete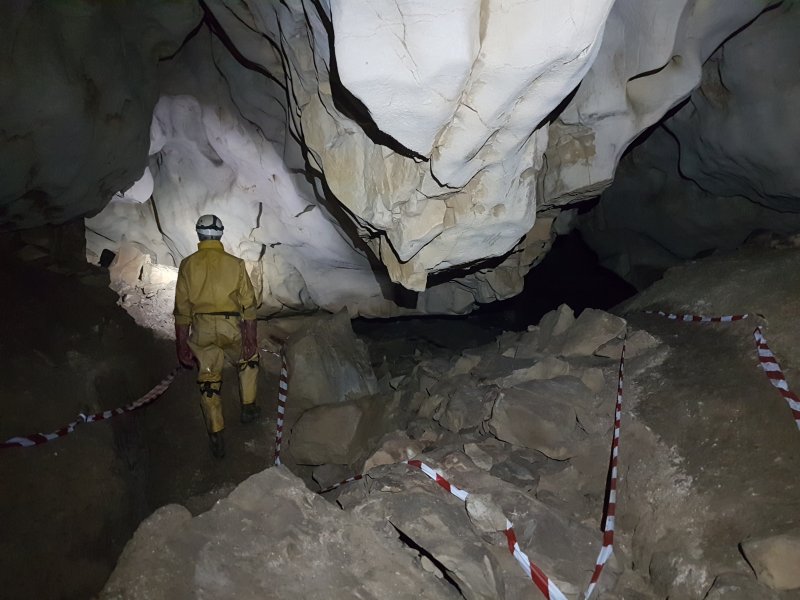 The start of Canyon West is a series of oxbows and loops, with gorgeous, sculpted white rock ceiling. The easiest way through is to take a right at each junction, until the big guano pile.
Modelling by Pete, lighting by Tarquin and Pete
The start of Canyon West is a series of oxbows and loops, with gorgeous, sculpted white rock ceiling. The easiest way through is to take a right at each junction, until the big guano pile.
Modelling by Pete, lighting by Tarquin and Pete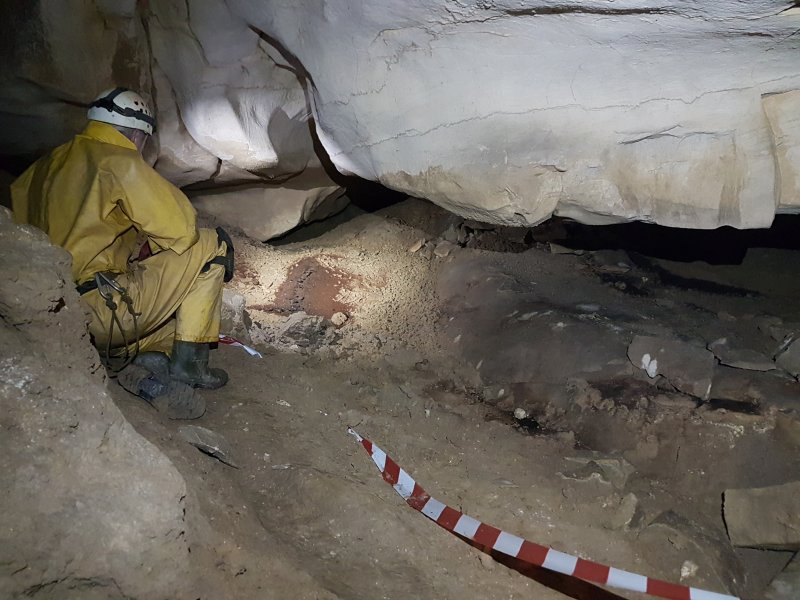 More guano piles. These are much smaller than those in Raiders Passage, but still represent hundreds or thousands of years worth of bat droppings, using the same spot to hibernate over and over again.
Modelling by Pete, lighting by Tarquin and Pete
More guano piles. These are much smaller than those in Raiders Passage, but still represent hundreds or thousands of years worth of bat droppings, using the same spot to hibernate over and over again.
Modelling by Pete, lighting by Tarquin and Pete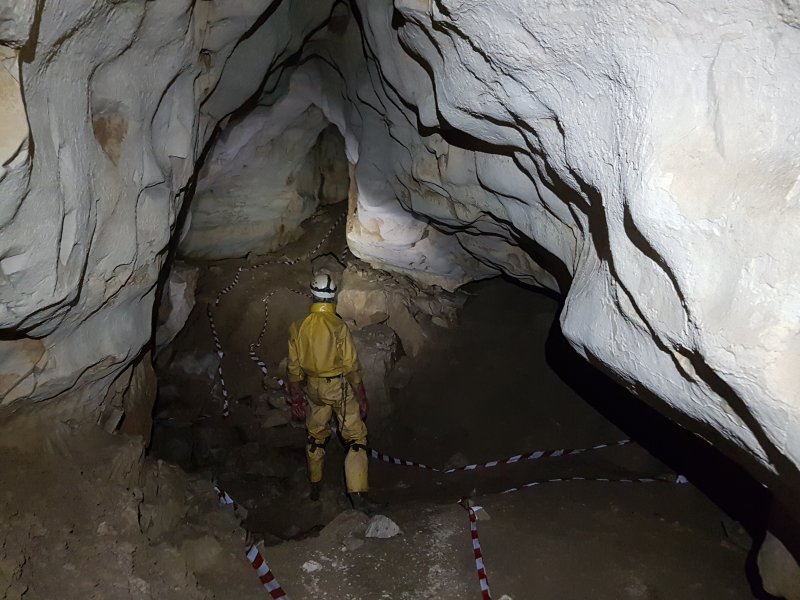 Junction of the oxbows, with loops ahead, left and right.
Modelling by Pete, lighting by Tarquin and Pete
Junction of the oxbows, with loops ahead, left and right.
Modelling by Pete, lighting by Tarquin and Pete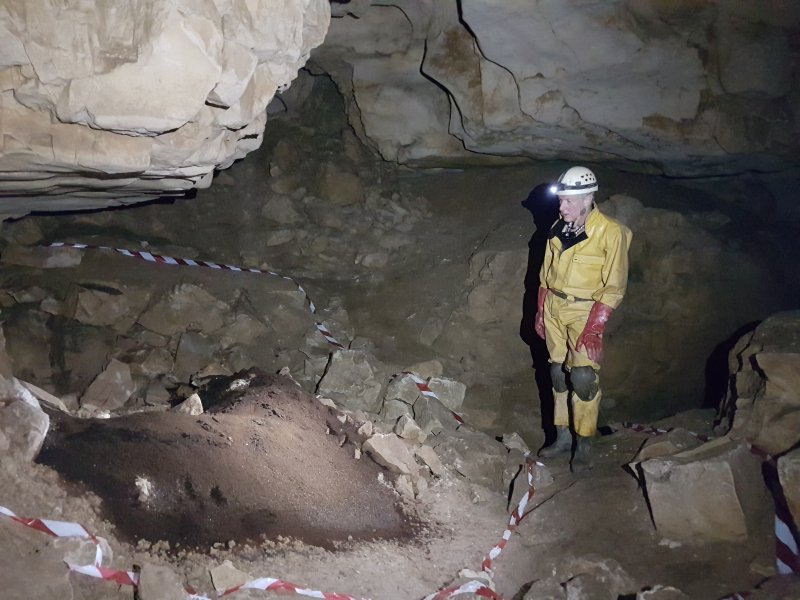 Huge pile of guano in Canyon West, the largest guano pile in the UK. It is about 3 metres (10 feet) long in the longer direction, and 2 metres (6 feet) in the shorter direction. Pete is well over 6 foot tall, and is not a good choice of model for scale. The rift behind Pete has a vocal connection with the Raiders side passage. The way on here is to pass the guano pile, then take the passage on the left
Modelling by Pete, lighting by Tarquin and Pete
Huge pile of guano in Canyon West, the largest guano pile in the UK. It is about 3 metres (10 feet) long in the longer direction, and 2 metres (6 feet) in the shorter direction. Pete is well over 6 foot tall, and is not a good choice of model for scale. The rift behind Pete has a vocal connection with the Raiders side passage. The way on here is to pass the guano pile, then take the passage on the left
Modelling by Pete, lighting by Tarquin and Pete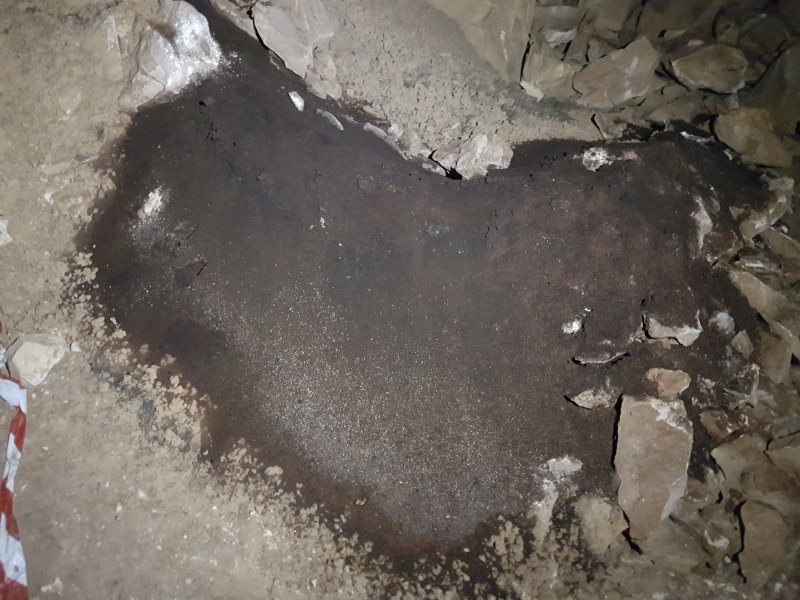 A heart-shaped sea of guano. This represents several thousand years of bat droppings. It sits on top of the bobbly mud, which means that the guano is more recent than the last ice age, under 10'000 years. It probably represents some of the first bat colonies to settle in Britain after the ice age. Judging from the clustering behaviour (the guano is only in discrete piles), these were likely to be greater horseshoe bats, which are now only rarely found at this end of the national park. We saw 2 on this trip, which are the first that I have ever seen in this cave.
 After the guano pile, the passage loses some of its grandure.
Modelling by Pete, lighting by Tarquin and Pete
After the guano pile, the passage loses some of its grandure.
Modelling by Pete, lighting by Tarquin and Pete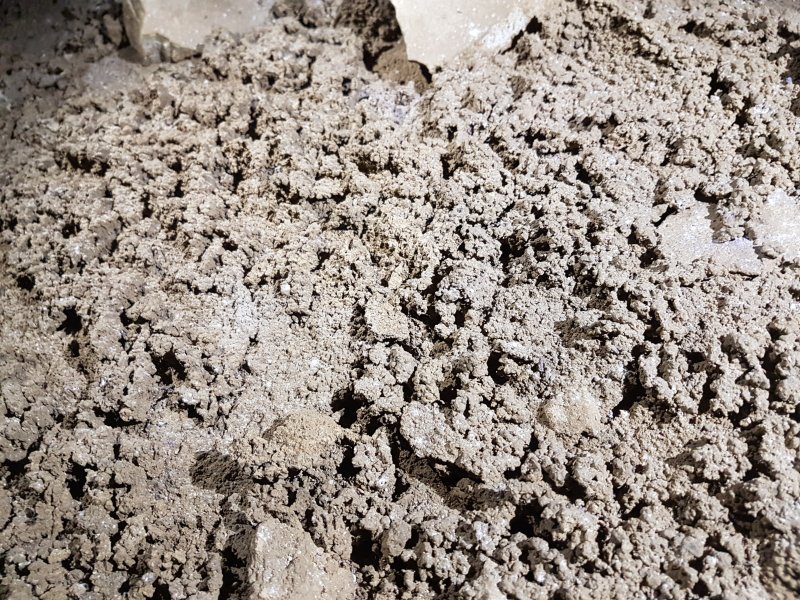 Textured mud in Canyon West. This is fluffy/bobbly mud in ripples, created by ice, but probably moved into ripples by the water as the ice melted.
Lighting by Tarquin and Pete
Textured mud in Canyon West. This is fluffy/bobbly mud in ripples, created by ice, but probably moved into ripples by the water as the ice melted.
Lighting by Tarquin and Pete A raised hagg (like a raised part of a peat bog) of guano.
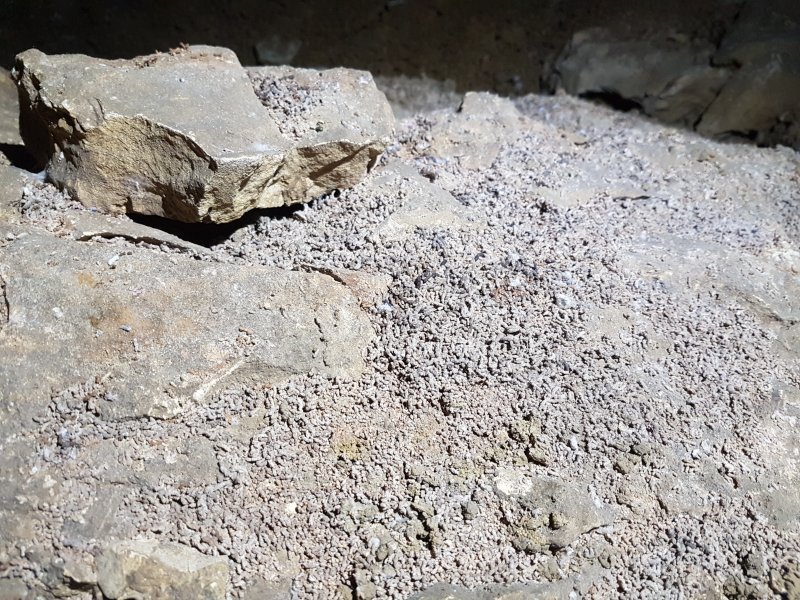 A very different pile of grey guano. Perhaps this is a different species of bat, or perhaps it is much older guano. Or maybe it has been changed by chemical processes.
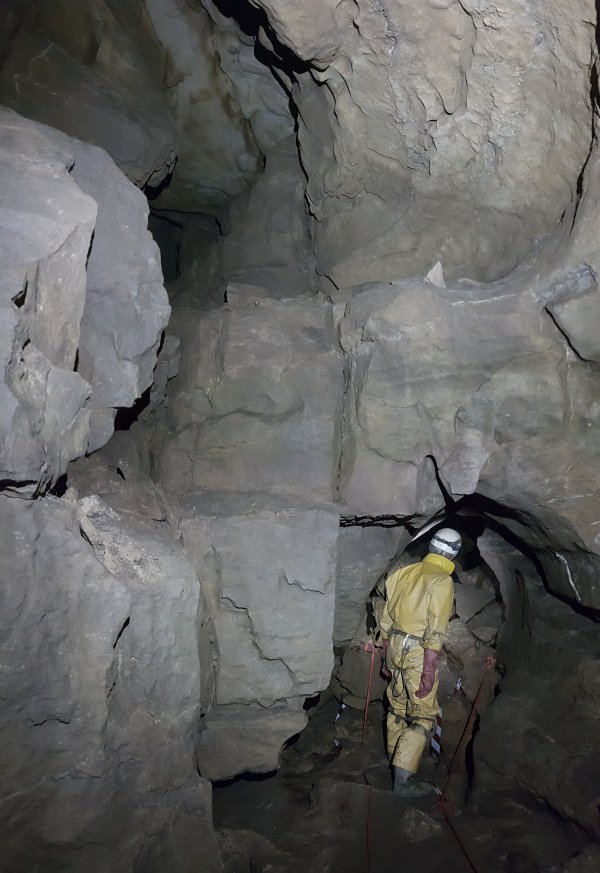 Start of Canyon East. The lower level is the usual way in, while the upper level is the connection with the start of Canyon West.
Modelling by Pete, lighting by Tarquin and Pete
Start of Canyon East. The lower level is the usual way in, while the upper level is the connection with the start of Canyon West.
Modelling by Pete, lighting by Tarquin and Pete Guano at the start of Canyon East.
Modelling by Pete, lighting by Tarquin and Pete
Guano at the start of Canyon East.
Modelling by Pete, lighting by Tarquin and Pete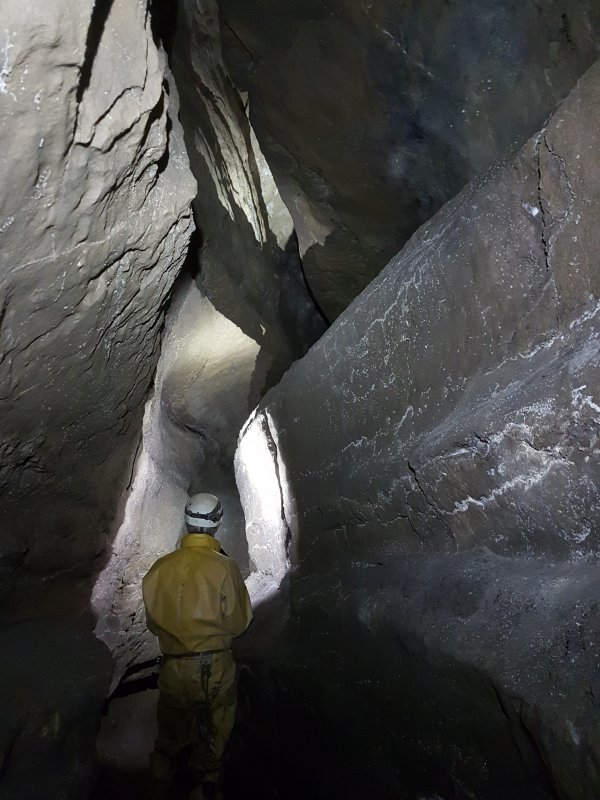 Canyon East is the more canyon-shaped passage.
Modelling by Pete, lighting by Tarquin and Pete
Canyon East is the more canyon-shaped passage.
Modelling by Pete, lighting by Tarquin and Pete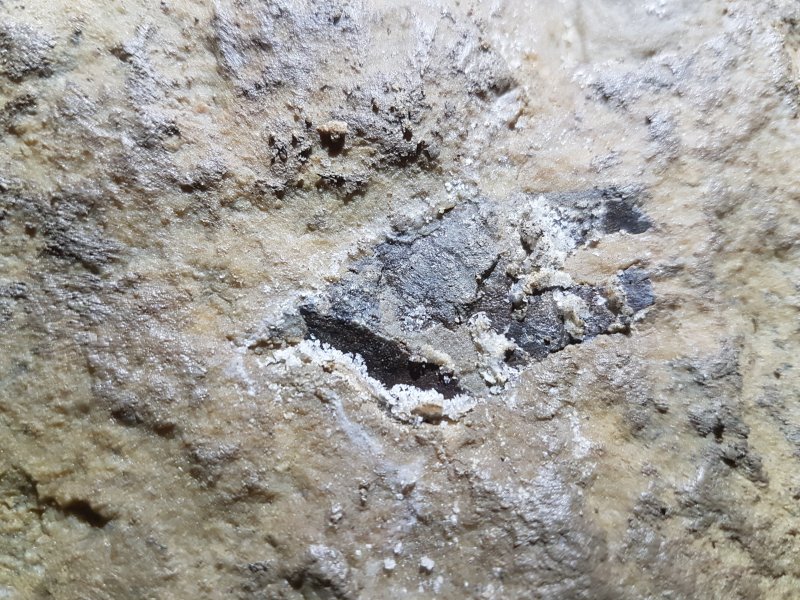 Ctenacanthus dorsal spine in Canyon East. This is the bone that once held up the dorsal fin of a ctenacanthus proto-shark. It is far surpassed by those in Raiders Passage, but is still impressive.
 The lower section is normally narrow, and that is usually where you walk. This is the widest part.
Modelling by Pete, lighting by Tarquin and Pete
The lower section is normally narrow, and that is usually where you walk. This is the widest part.
Modelling by Pete, lighting by Tarquin and Pete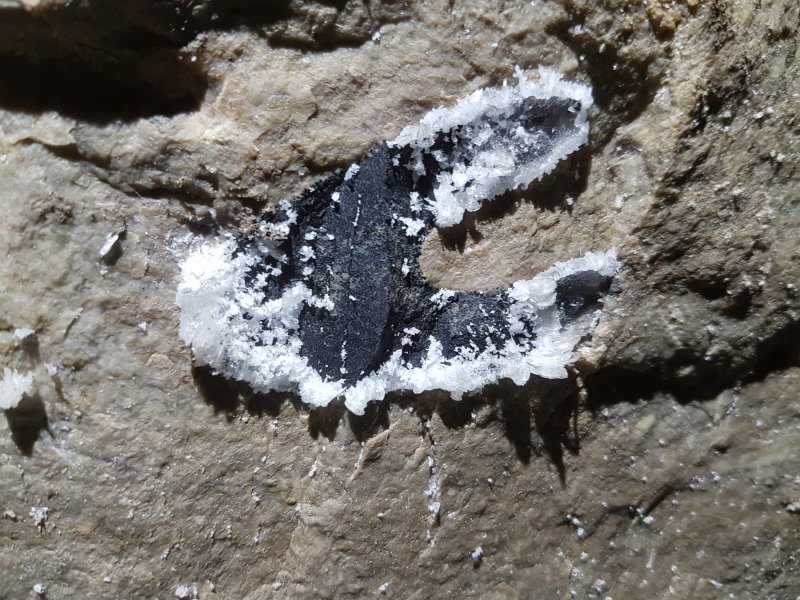 A much better dorsal spine, with gypsum crystals. The dorsal fin sat in the U-shaped cup on the right, with the front of the shark being on the left.
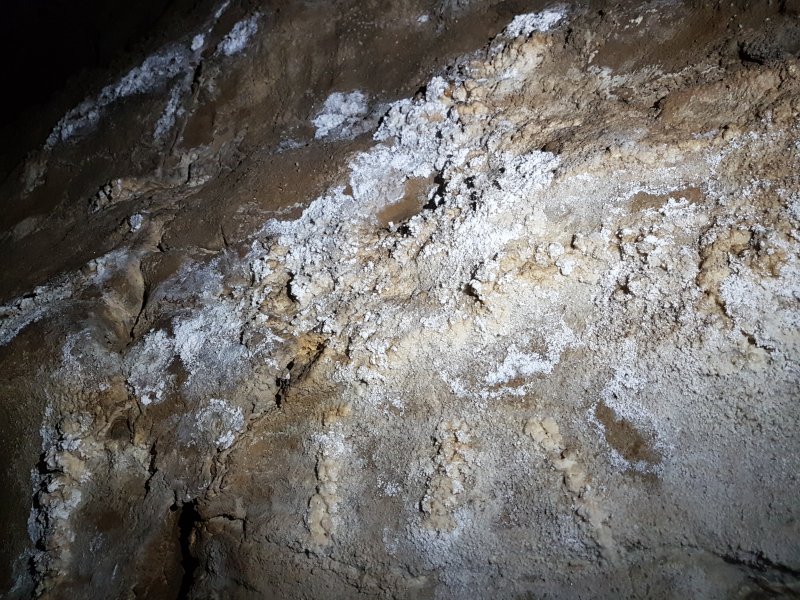 Wicking formations on the wall, created by the draught evaporating water that it wicked out of the rock.
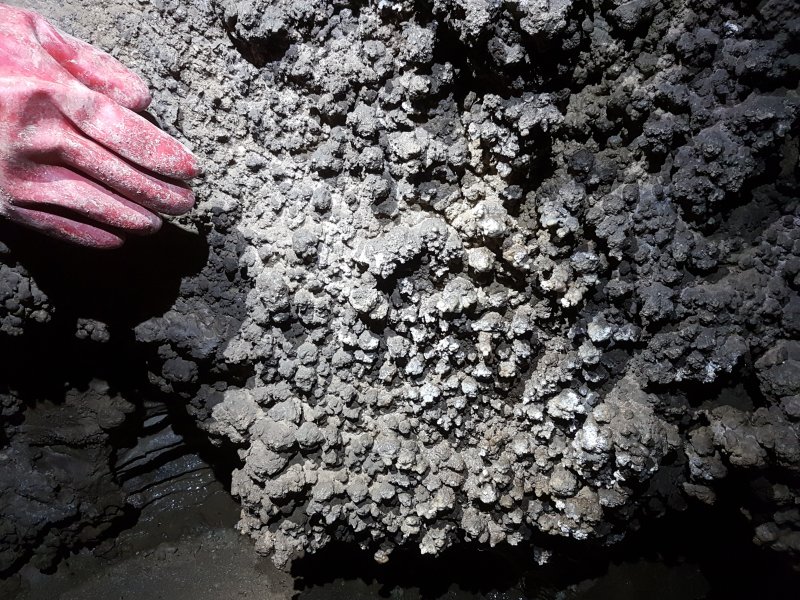 Textured formation, that looks like it might have formed underwater.
Modelling by Pete's hand, lighting by Tarquin and Pete
Textured formation, that looks like it might have formed underwater.
Modelling by Pete's hand, lighting by Tarquin and Pete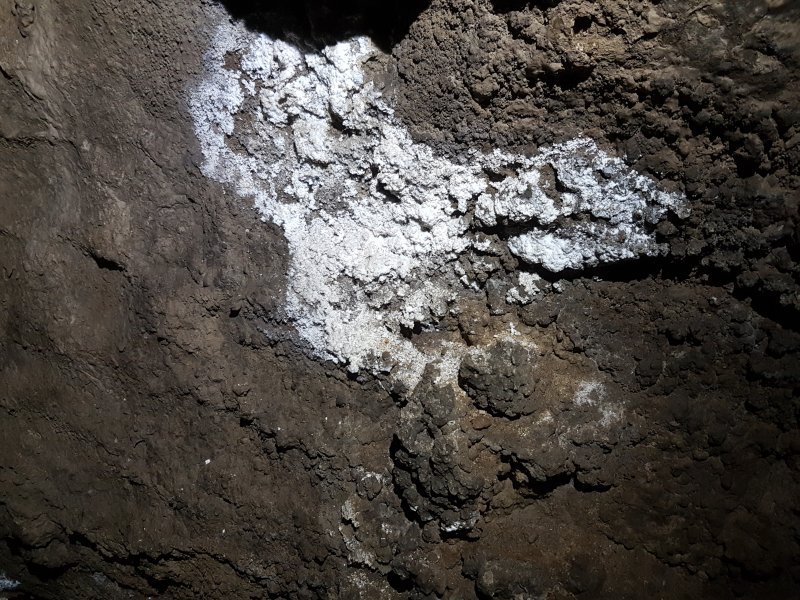 Wicking/evaporation formation.
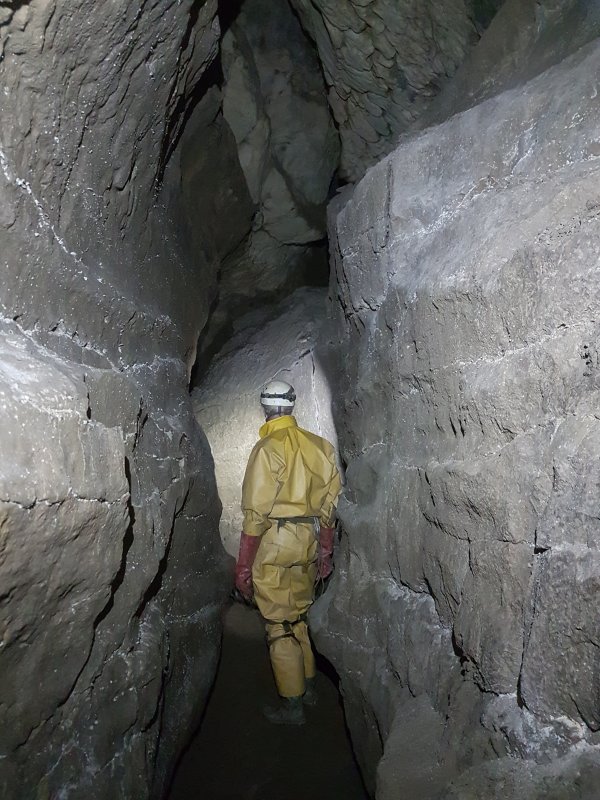 A more normal part of Canyon East.
Modelling by Pete, lighting by Tarquin and Pete
A more normal part of Canyon East.
Modelling by Pete, lighting by Tarquin and Pete Up above, there are some very wide sections, especially on the corners, but the upper ledges cannot be followed for long.
Modelling by Pete, lighting by Tarquin and Pete
Up above, there are some very wide sections, especially on the corners, but the upper ledges cannot be followed for long.
Modelling by Pete, lighting by Tarquin and Pete More grey guano on the ledges.
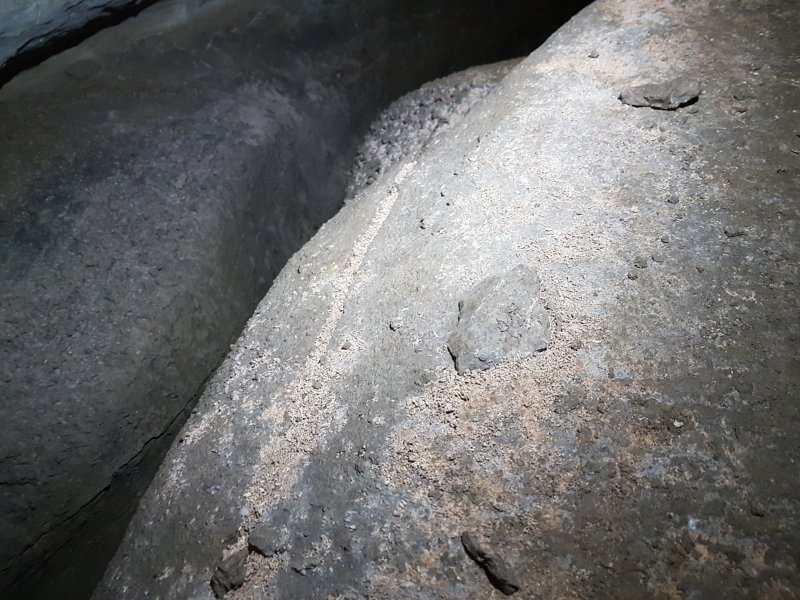 Grey guano.
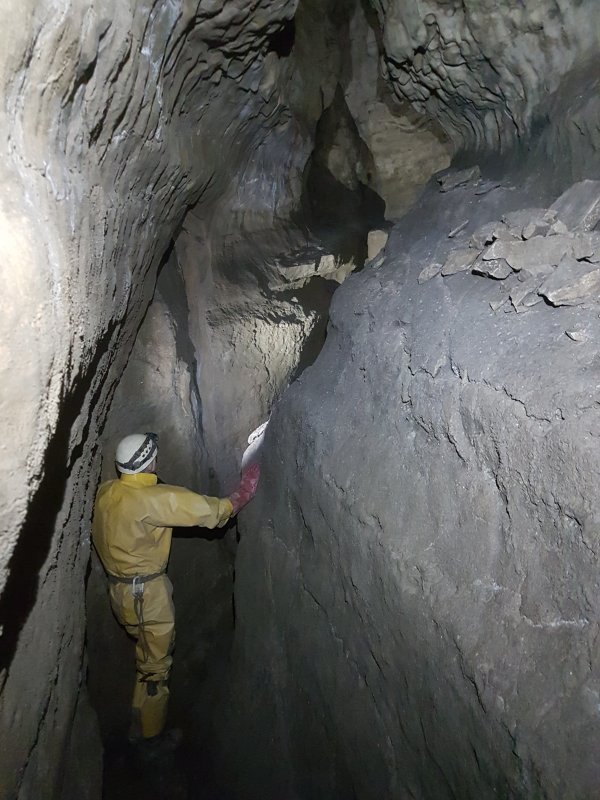 End of Canyon East.
Modelling by Pete, lighting by Tarquin and Pete
End of Canyon East.
Modelling by Pete, lighting by Tarquin and Pete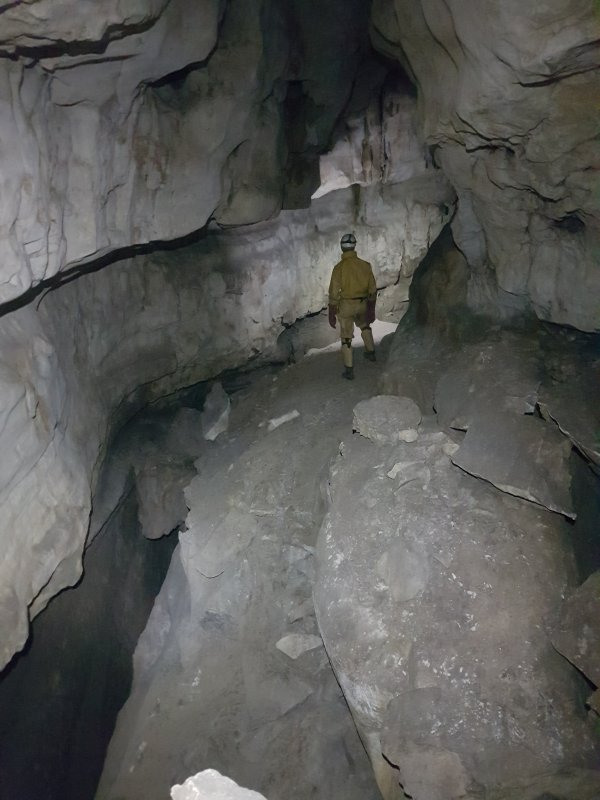 The junction of Canyon East and Canyon West, where the passage takes on the combined size. For a while, it is possible to follow the upper ledges, but eventually, the canyon floor is the only way to make progress, occasionally climbing over fallen boulders. This is an unusual passage for Draenen, which has largely survived the ice shattering, and retained its original walls and ceiling, so progress is quite fast and relatively comfortable.
Modelling by Pete, lighting by Tarquin and Pete
The junction of Canyon East and Canyon West, where the passage takes on the combined size. For a while, it is possible to follow the upper ledges, but eventually, the canyon floor is the only way to make progress, occasionally climbing over fallen boulders. This is an unusual passage for Draenen, which has largely survived the ice shattering, and retained its original walls and ceiling, so progress is quite fast and relatively comfortable.
Modelling by Pete, lighting by Tarquin and Pete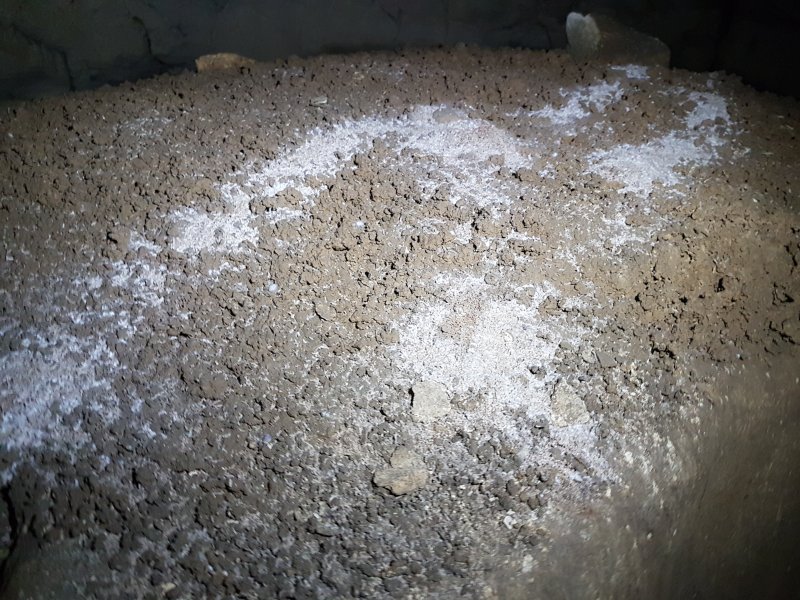 Grey guano near the junction.
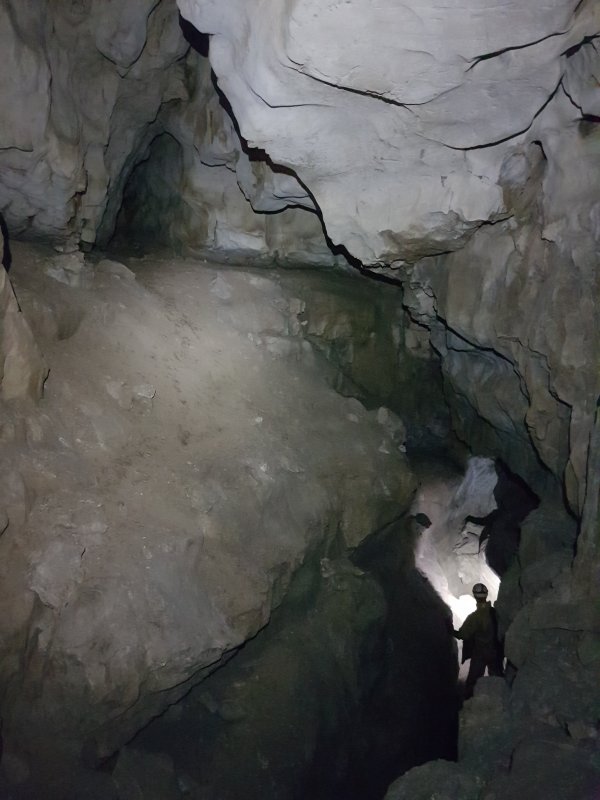 The junction with Big Mole Passage, which takes some of the size away from the main Canyon. The junction is invisible from below, but can be clearly seen from the ledges. It is accessed via a slope from the bottom of the canyon.
Modelling by Pete, lighting by Tarquin and Pete
The junction with Big Mole Passage, which takes some of the size away from the main Canyon. The junction is invisible from below, but can be clearly seen from the ledges. It is accessed via a slope from the bottom of the canyon.
Modelling by Pete, lighting by Tarquin and Pete Guano at the start of Big Mole Passage.
Modelling by Pete, lighting by Tarquin and Pete
Guano at the start of Big Mole Passage.
Modelling by Pete, lighting by Tarquin and Pete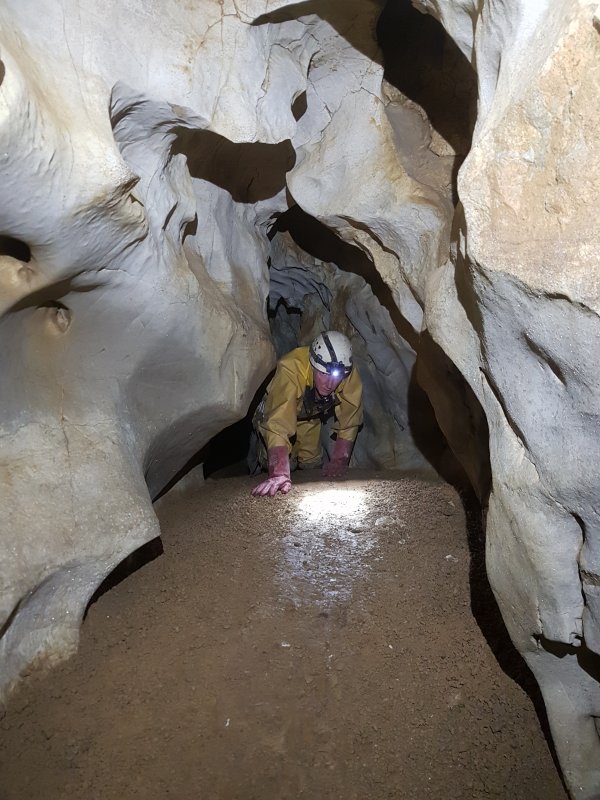 Big Mole is crawling sized for its whole length.
Modelling by Pete, lighting by Tarquin and Pete
Big Mole is crawling sized for its whole length.
Modelling by Pete, lighting by Tarquin and Pete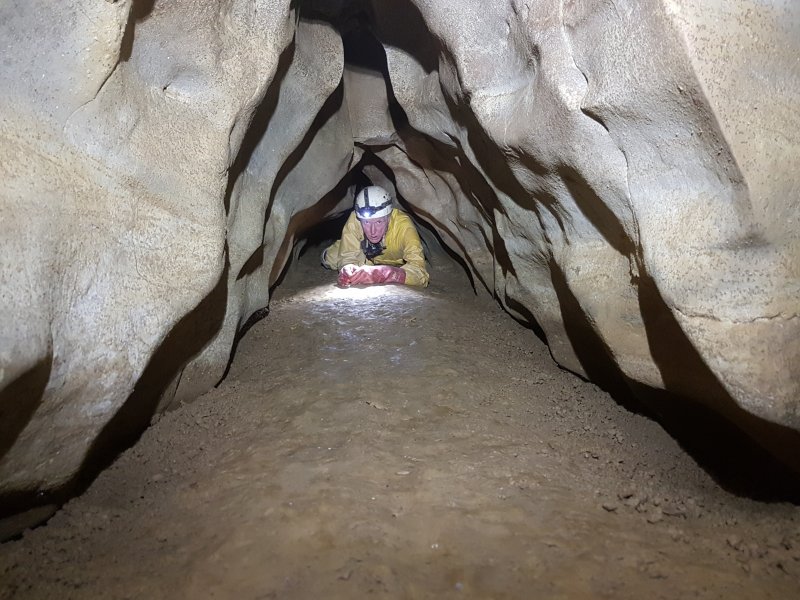 Getting lower. The passage then becomes low enough that it could be considered a squeeze, and I continued alone.
Modelling by Pete, lighting by Tarquin and Pete
Getting lower. The passage then becomes low enough that it could be considered a squeeze, and I continued alone.
Modelling by Pete, lighting by Tarquin and Pete Remains of a very dead bat in Big Mole Passage. This most likely died several years earlier.
Modelling by Vlad
Remains of a very dead bat in Big Mole Passage. This most likely died several years earlier.
Modelling by Vlad The passage then shrinks and loses its charm, becoming narrow and muddy.
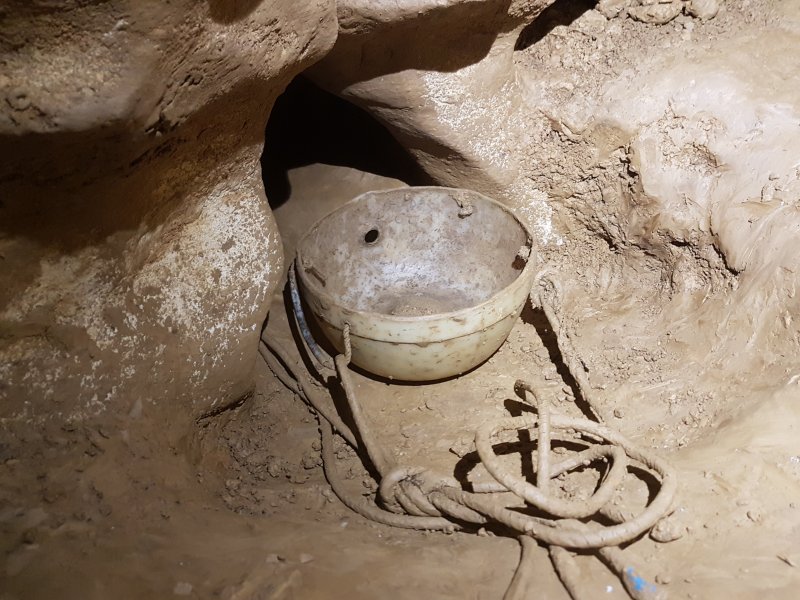 Remains of a dig at the end. This drag tray sits in a very awkward squeeze, on a 130° bend. There is not enough space for a normal sized person to turn around beyond it, so it has to be reversed feet first, into a narrow passage requiring a contortion manoeuvre to turn the corner. It took me three attempts to get back out, trying and failing to turn around in the tiny space beyond it each time. Whoever was digging this (Hades CC) must have been a very determined, small caver.
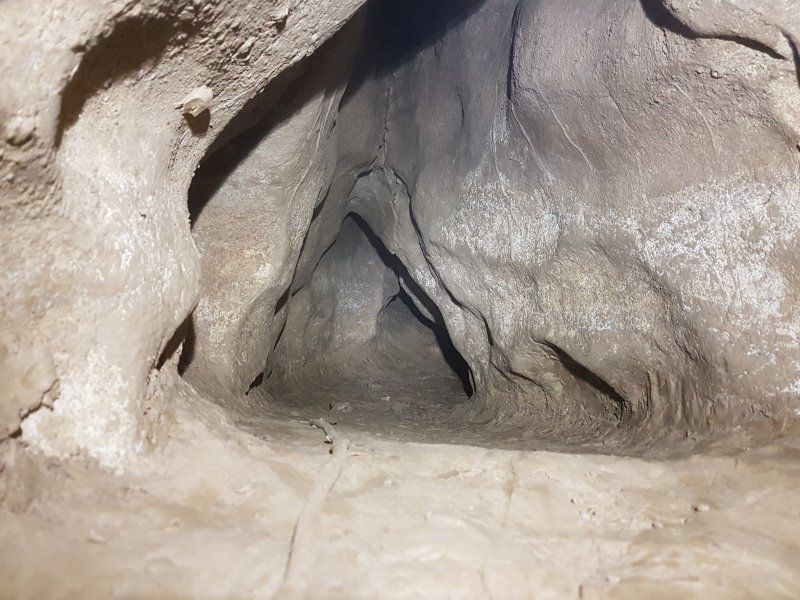 The dig, at the point where it is too small to turn around.
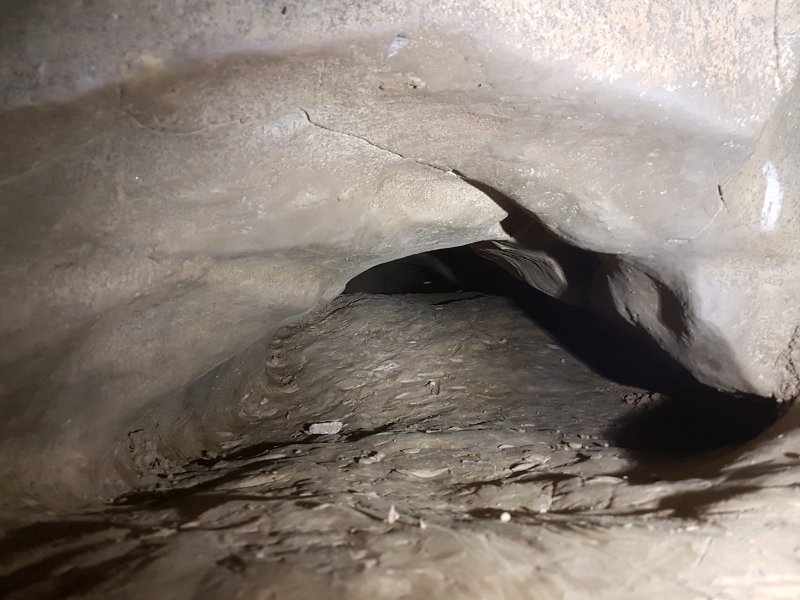 The dig continues as a flat out squeeze, rising up and heading into the unknown. I suspect that this may connect back up along Big Mole Passage since it points back along the passage, but if it is a way on, it probably would end up connecting to Going Square, rather than breaking new ground. It was too tight for me to contemplate squeezing onwards on my own to find out how far they had pushed it.
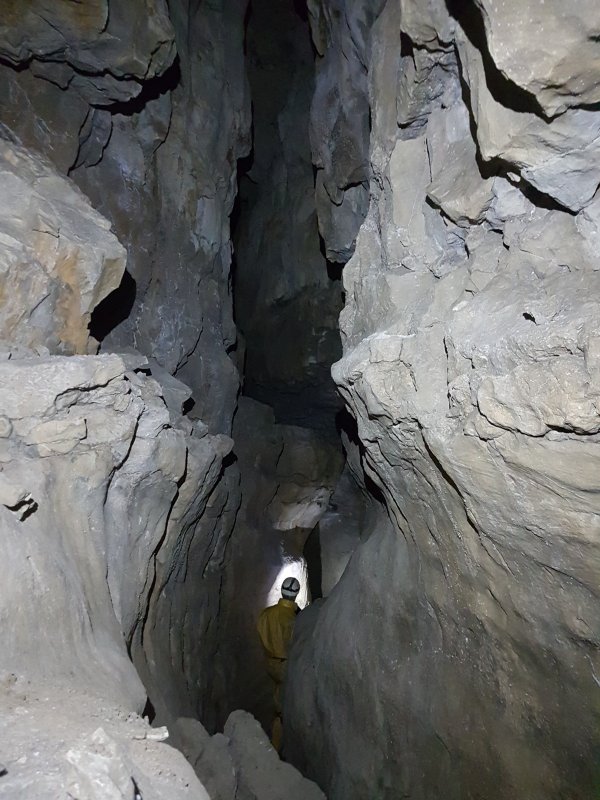 After the junction with Big Mole, the wide upper section of Canyon disappears, and the passage becomes a narrow canyon.
Modelling by Pete, lighting by Tarquin and Pete
After the junction with Big Mole, the wide upper section of Canyon disappears, and the passage becomes a narrow canyon.
Modelling by Pete, lighting by Tarquin and Pete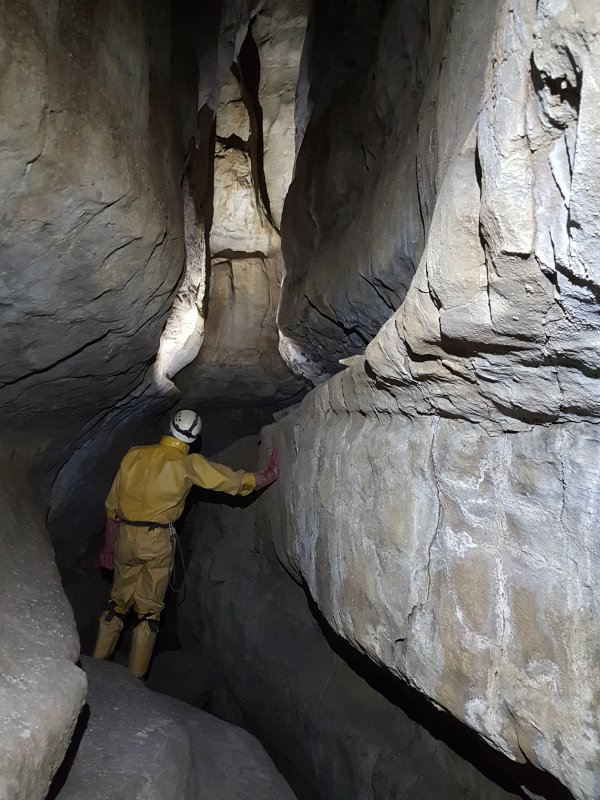 The meandering section of Canyon.
Modelling by Pete, lighting by Tarquin and Pete
The meandering section of Canyon.
Modelling by Pete, lighting by Tarquin and Pete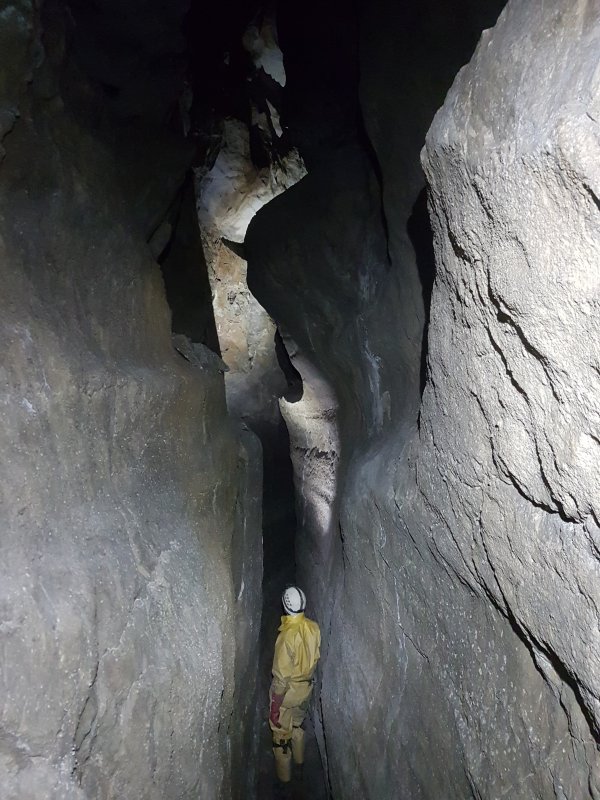 The meandering section of Canyon.
Modelling by Pete, lighting by Tarquin and Pete
The meandering section of Canyon.
Modelling by Pete, lighting by Tarquin and Pete A climb up gains a very small side passage. Like most side passages here, it goes nowhere, and is probably just an incomplete oxbow.
Modelling by Pete, lighting by Tarquin and Pete
A climb up gains a very small side passage. Like most side passages here, it goes nowhere, and is probably just an incomplete oxbow.
Modelling by Pete, lighting by Tarquin and Pete The Canyon.
Modelling by Pete, lighting by Tarquin and Pete
The Canyon.
Modelling by Pete, lighting by Tarquin and Pete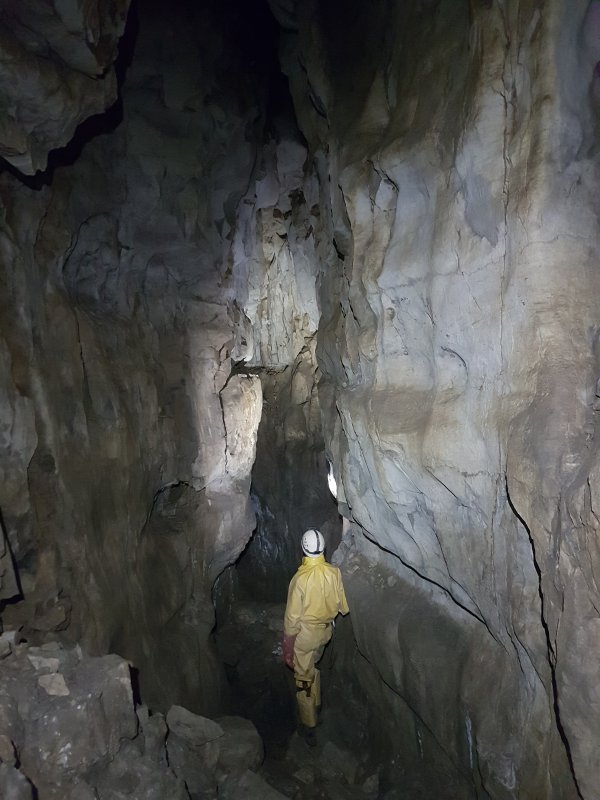 Half way along, the passage turns a corner and enlarges. The draught, which had been blowing strongly along the passage, disappeared here. Roof tubes turned out to be only oxbows. The draught most likely sinks through the floor into Wooden Spoon Passage, which passes 25 metres below at this point. There is no known physical connection between the passages.
Modelling by Pete, lighting by Tarquin and Pete
Half way along, the passage turns a corner and enlarges. The draught, which had been blowing strongly along the passage, disappeared here. Roof tubes turned out to be only oxbows. The draught most likely sinks through the floor into Wooden Spoon Passage, which passes 25 metres below at this point. There is no known physical connection between the passages.
Modelling by Pete, lighting by Tarquin and Pete Guano at a corner.
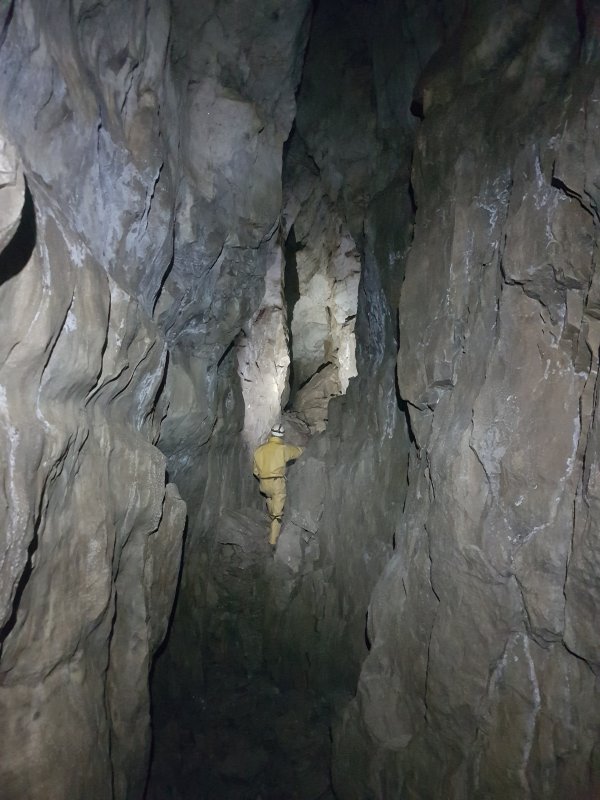 The passage remains quite large for a little while, with a rocky floor, but quickly loses its grandure after this point.
Modelling by Pete, lighting by Tarquin and Pete
The passage remains quite large for a little while, with a rocky floor, but quickly loses its grandure after this point.
Modelling by Pete, lighting by Tarquin and Pete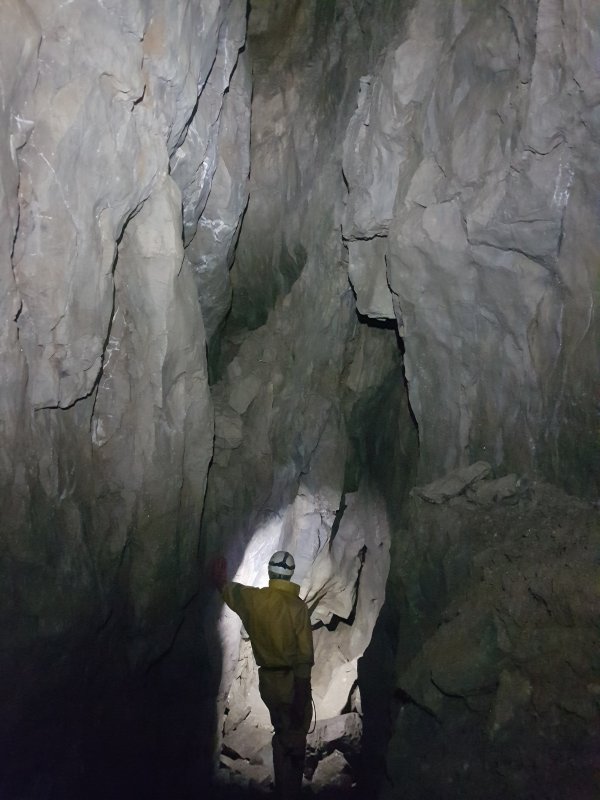 The passage style finally changes completely at this junction. From here on, there are at least three routes, and it becomes very confusing. The main way to the end of the Canyon passage is through a narrow slot in the left wall just beyond Pete, then descending into the lower rift. The passage up to the left is difficult to reach and can be largely ignored. The low passage ahead is the way into the upper maze, and the usual route to Tractor Tracks.
Modelling by Pete, lighting by Tarquin and Pete
The passage style finally changes completely at this junction. From here on, there are at least three routes, and it becomes very confusing. The main way to the end of the Canyon passage is through a narrow slot in the left wall just beyond Pete, then descending into the lower rift. The passage up to the left is difficult to reach and can be largely ignored. The low passage ahead is the way into the upper maze, and the usual route to Tractor Tracks.
Modelling by Pete, lighting by Tarquin and Pete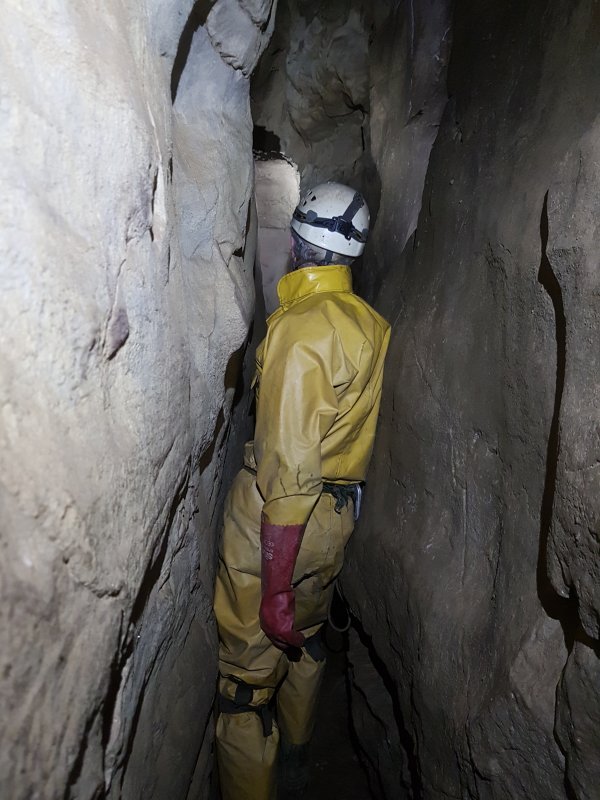 The lower rift, which is quite narrow. It has a couple of roof holes up into various parts of the upper maze.
Modelling by Pete, lighting by Tarquin and Pete
The lower rift, which is quite narrow. It has a couple of roof holes up into various parts of the upper maze.
Modelling by Pete, lighting by Tarquin and Pete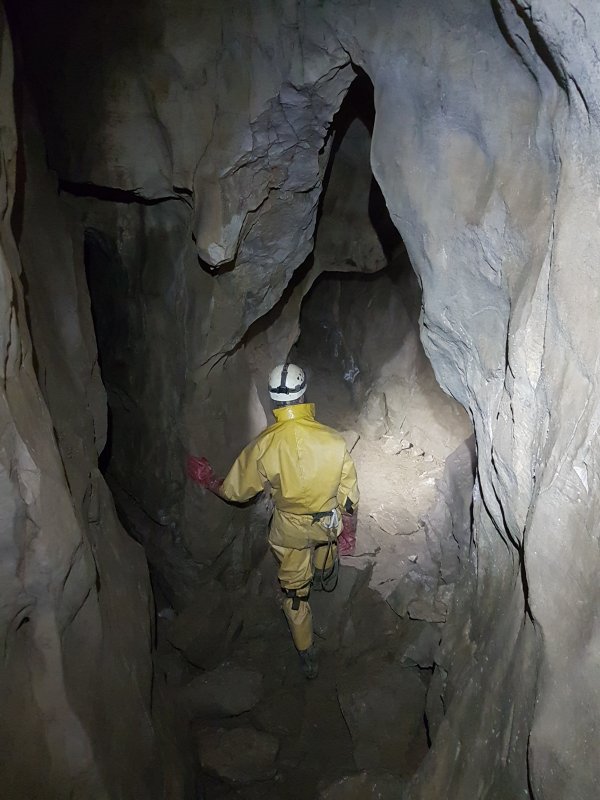 The junction where the different routes recombine, looking from the upper maze's final slope. The lower rift comes in from the left, continues ahead, then doubles back to the right.
Modelling by Pete, lighting by Tarquin and Pete
The junction where the different routes recombine, looking from the upper maze's final slope. The lower rift comes in from the left, continues ahead, then doubles back to the right.
Modelling by Pete, lighting by Tarquin and Pete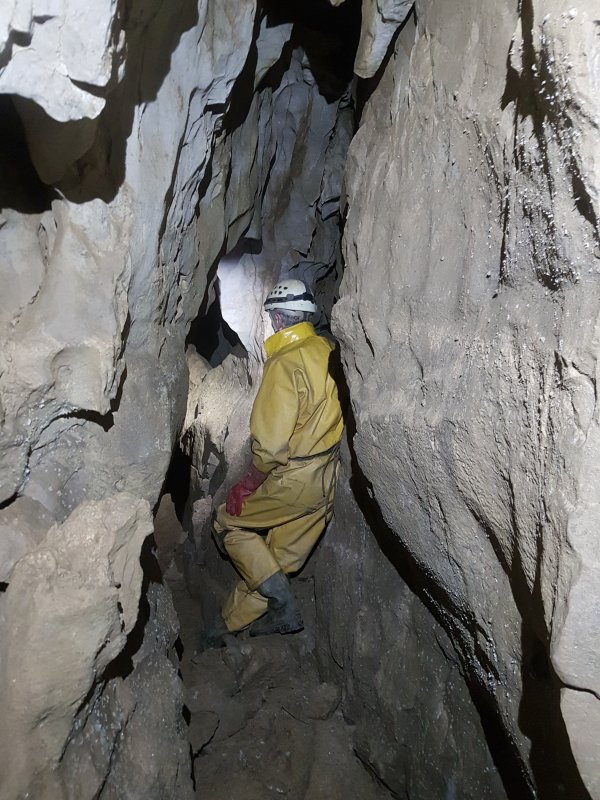 The way on passes an upper level oxbow, then splits into a multitude of little digs, with the furthest passage (seen here) never having been pushed. The passage here is 25 metres above the level of Crystal Mole and The Score (which would once have been connected), but without any obvious destination. It is not known whether there is potential here, but the passages must have drained somewhere.
Modelling by Pete, lighting by Tarquin and Pete
The way on passes an upper level oxbow, then splits into a multitude of little digs, with the furthest passage (seen here) never having been pushed. The passage here is 25 metres above the level of Crystal Mole and The Score (which would once have been connected), but without any obvious destination. It is not known whether there is potential here, but the passages must have drained somewhere.
Modelling by Pete, lighting by Tarquin and Pete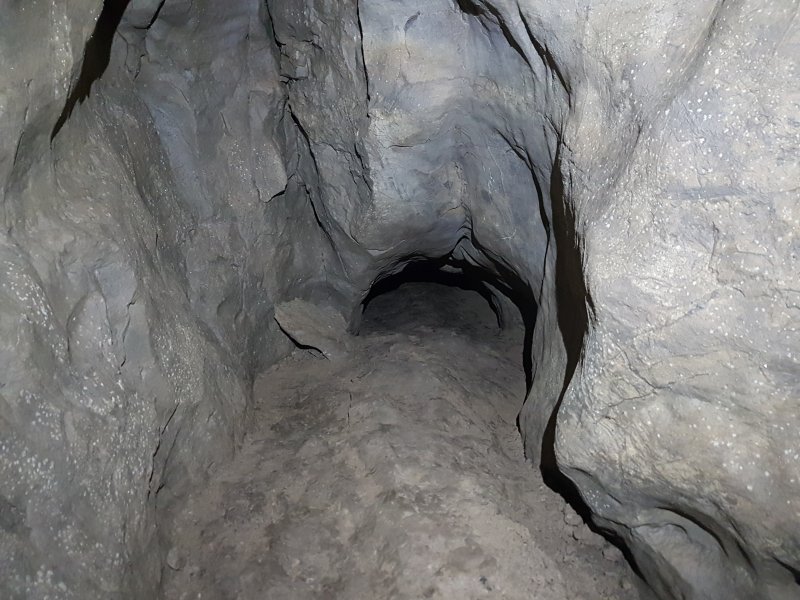 The passage to the upper maze starts as a crawl which quickly ascends to a higher level.
Modelling by Pete, lighting by Tarquin and Pete
The passage to the upper maze starts as a crawl which quickly ascends to a higher level.
Modelling by Pete, lighting by Tarquin and Pete The higher level. This soon passes over a hole into the lower rift, but confusingly, to return to the junction via that route, you would continue ahead in the lower rift, as it has doubled back before passing below.
Modelling by Pete, lighting by Tarquin and Pete
The higher level. This soon passes over a hole into the lower rift, but confusingly, to return to the junction via that route, you would continue ahead in the lower rift, as it has doubled back before passing below.
Modelling by Pete, lighting by Tarquin and Pete The main junction in the maze, with the way in being behind the camera to the left. On the left, a passage doubles back to become the upper passage at the junction before the maze. Up the unofficial rope is Tractor Tracks Passage. To the right is the way on through the maze. The ropes in this area are completely unnecessary, and not really strong enough to use for support. They get in the way, and should not be trusted.
Modelling by Pete, lighting by Tarquin and Pete
The main junction in the maze, with the way in being behind the camera to the left. On the left, a passage doubles back to become the upper passage at the junction before the maze. Up the unofficial rope is Tractor Tracks Passage. To the right is the way on through the maze. The ropes in this area are completely unnecessary, and not really strong enough to use for support. They get in the way, and should not be trusted.
Modelling by Pete, lighting by Tarquin and Pete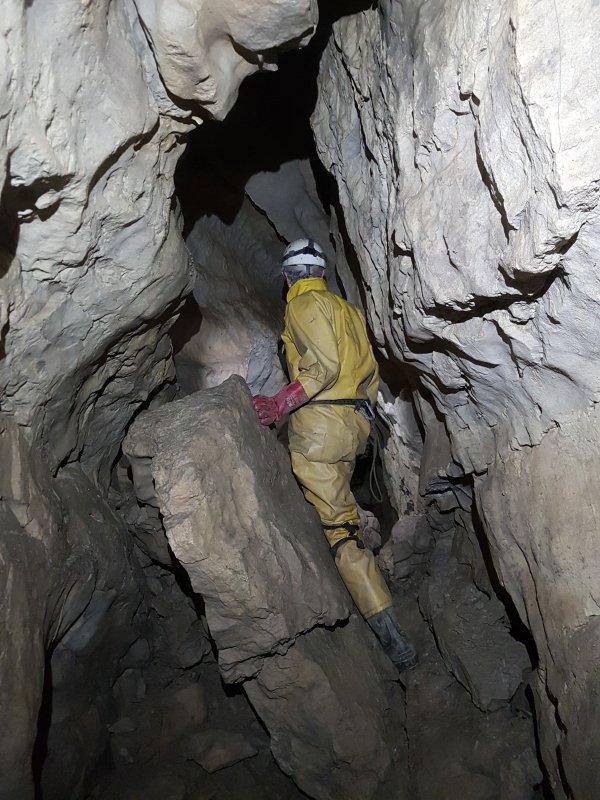 The way on through the maze. This passes over a climb down into the lower rift before splitting into tight rifts. The one on the right reaches the end junction with the lower rift.
Modelling by Pete, lighting by Tarquin and Pete
The way on through the maze. This passes over a climb down into the lower rift before splitting into tight rifts. The one on the right reaches the end junction with the lower rift.
Modelling by Pete, lighting by Tarquin and Pete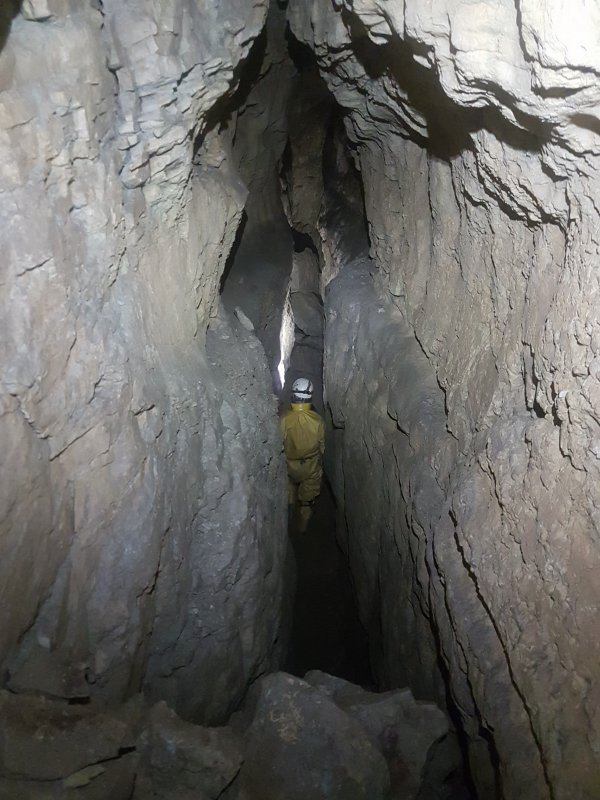 The passage to the left at the main junction in the maze.
Modelling by Pete, lighting by Tarquin and Pete
The passage to the left at the main junction in the maze.
Modelling by Pete, lighting by Tarquin and Pete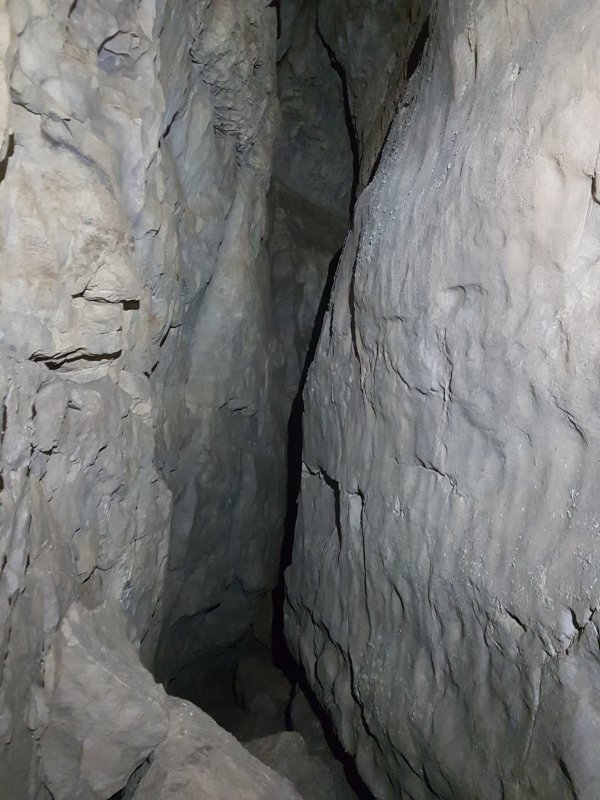 The rift ends abruptly at the junction before the maze, with a pitch down, or a very tricky climb down into the start of the lower rift. It is very easy to accidentally fall down it when trying to climb, so it is best avoided.
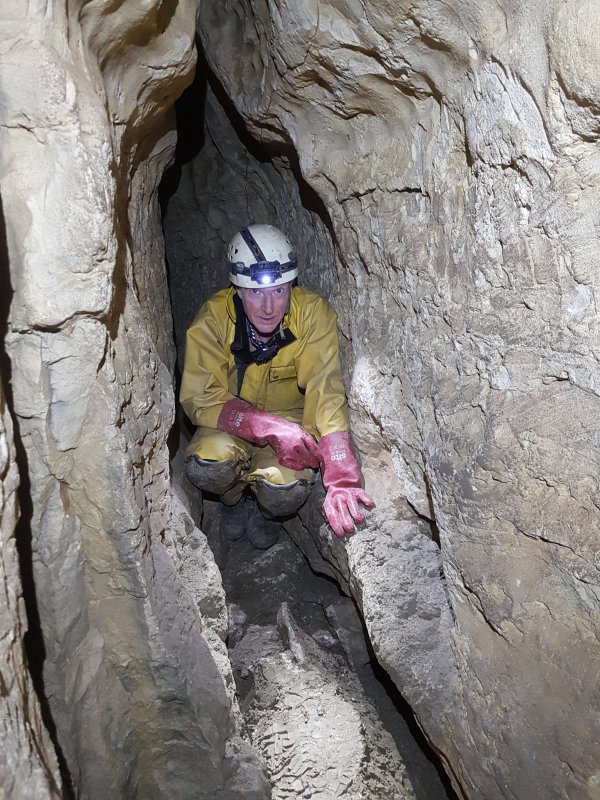 The start of Tractor Tracks, which is small and uninspiring.
Modelling by Pete, lighting by Tarquin and Pete
The start of Tractor Tracks, which is small and uninspiring.
Modelling by Pete, lighting by Tarquin and Pete Tractor Tracks then passes through an awkward squeeze, and looks even less inspiring. Turning around in a tiny space to take this picture, it was looking like it might be another solo trip.
Modelling by Pete, lighting by Tarquin and Pete
Tractor Tracks then passes through an awkward squeeze, and looks even less inspiring. Turning around in a tiny space to take this picture, it was looking like it might be another solo trip.
Modelling by Pete, lighting by Tarquin and Pete Calcite formations in Tractor Tracks.
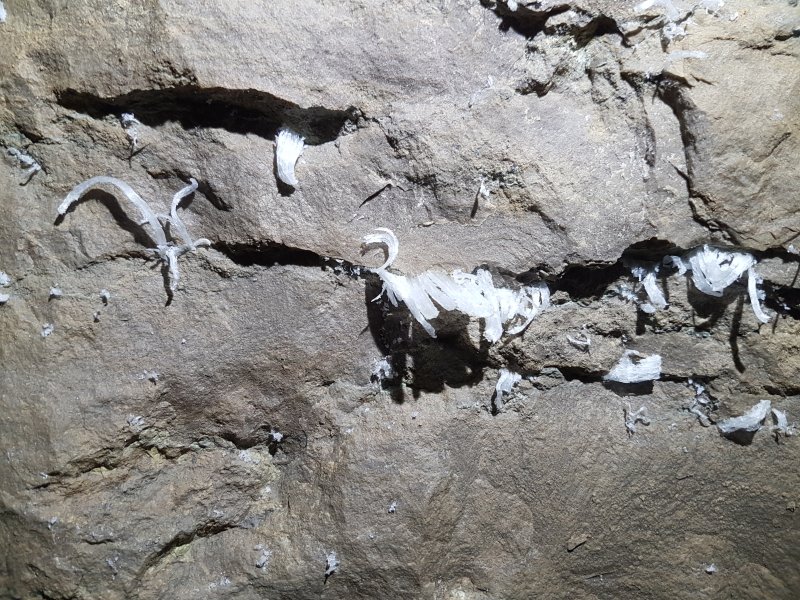 The passage then gains some very beautiful gypsum flower formations.
 Gypsum flowers.
 Gypsum flowers.
 Thankfully, the passage enlarges to a more comfortable size.
Modelling by Pete, lighting by Tarquin and Pete
Thankfully, the passage enlarges to a more comfortable size.
Modelling by Pete, lighting by Tarquin and Pete In fact, for most of its length, Tractor Tracks is walking sized, and very comfortable.
Modelling by Pete, lighting by Tarquin and Pete
In fact, for most of its length, Tractor Tracks is walking sized, and very comfortable.
Modelling by Pete, lighting by Tarquin and Pete Thinly bedded rock.
Modelling by Pete, lighting by Tarquin and Pete
Thinly bedded rock.
Modelling by Pete, lighting by Tarquin and Pete Shrinking back to stooping size. At this point, it passes over Far Agent Blorence, having completely crossed over the middle of the Round Trip.
Modelling by Pete, lighting by Tarquin and Pete
Shrinking back to stooping size. At this point, it passes over Far Agent Blorence, having completely crossed over the middle of the Round Trip.
Modelling by Pete, lighting by Tarquin and Pete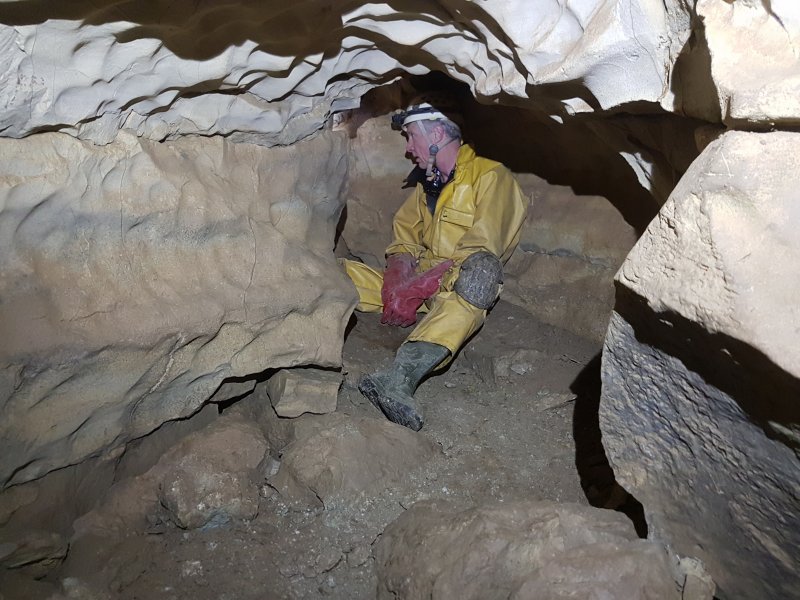 The gypsum ends, and the passage becomes crawling sized. Sadly, it does not improve from here onwards.
Modelling by Pete, lighting by Tarquin and Pete
The gypsum ends, and the passage becomes crawling sized. Sadly, it does not improve from here onwards.
Modelling by Pete, lighting by Tarquin and Pete Initially, the crawl is fairly comfortable, with scalloping suggesting that we are heading downstream.
Modelling by Pete, lighting by Tarquin and Pete
Initially, the crawl is fairly comfortable, with scalloping suggesting that we are heading downstream.
Modelling by Pete, lighting by Tarquin and Pete Wider bedding section, where the only significant side passage is an oxbow.
Modelling by Pete, lighting by Tarquin and Pete
Wider bedding section, where the only significant side passage is an oxbow.
Modelling by Pete, lighting by Tarquin and Pete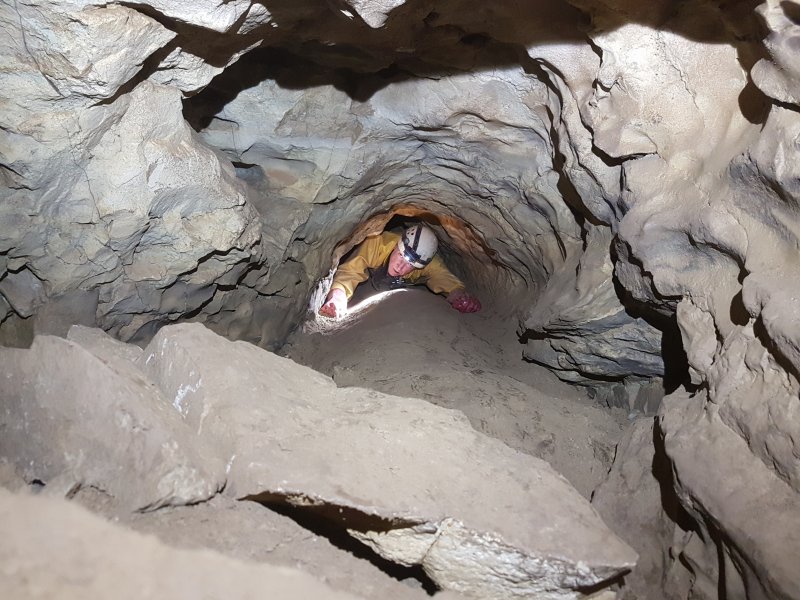 A very low crawl then shows where the name Tractor Tracks comes from, with the central ridge and trenches either side looking like the ruts dug by tractor wheels.
Modelling by Pete, lighting by Tarquin and Pete
A very low crawl then shows where the name Tractor Tracks comes from, with the central ridge and trenches either side looking like the ruts dug by tractor wheels.
Modelling by Pete, lighting by Tarquin and Pete The passage briefly enlarges to standing size, the only significantly sized passage before the end. Perhaps there is another passage hiding under the floor here, because there is nothing good beyond here.
Modelling by Pete, lighting by Tarquin and Pete
The passage briefly enlarges to standing size, the only significantly sized passage before the end. Perhaps there is another passage hiding under the floor here, because there is nothing good beyond here.
Modelling by Pete, lighting by Tarquin and Pete A couple of dug out sections then reach the final tube.
 The final tube seems to be in a different rock, without the sculpting. This appears to have been a lengthy dig, beyond the surveyed end of the passage. The dry stone walling and long drag rope shows that someone put in a considerable effort here.
Modelling by Tarquin's welly
The final tube seems to be in a different rock, without the sculpting. This appears to have been a lengthy dig, beyond the surveyed end of the passage. The dry stone walling and long drag rope shows that someone put in a considerable effort here.
Modelling by Tarquin's welly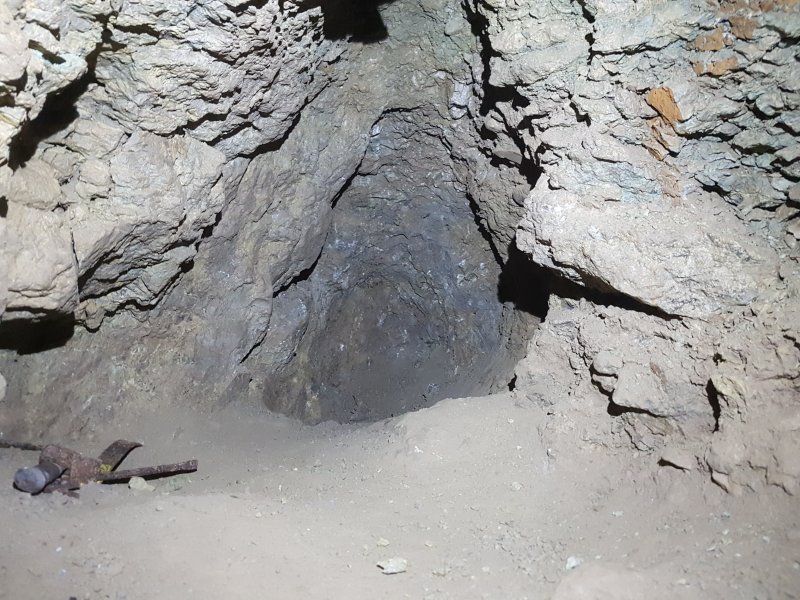 The passage ends very abruptly indeed at a very definite, solidly packed wall. It looks more like a quarry than a dig, and does not appear to be an actual passage. There is not an obvious place to dig, even though it is the end of a reasonably sized tube. Quite disappointing. The passage has now reached Chocolate Blorenge (the downtream end of Far Agent Blorenge), but 35 metres higher. It is at the same height as Life On Mars, and was probably originally connected to that series, which would explain why both sets of passages are here.