Ogof Draenen Dollimore Series trip 06/01/2018
Unless otherwise stated, camera and setups by Tarquin, modelling by Claire Vivan, lighting by Tarquin, edits and gallery effects by Tarquin.
The pictures in this gallery are presented in logical order, rather than the order they were taken, as the various sections were actually visited in reverse order. The main purpose of this trip was to show Claire around the most superbly decorated parts of the series, with the exception of Dogleg Complex, which she had already visited. Dogleg is therefore not included in this gallery, despite having equally stunning formations. The pictures here (apart from Hall Of The One) are taken with a phone camera, which is not designed for these conditions, and cannot use optical zoom - the intention was not to take pictures, but it's hard to resist.
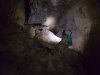 Approaching Sugar Cube Chamber in Perseverance I, on the way to Dollimore Series. The tackle bag on the floor marks the location of some rather unremarkable cryostal deposits.
Lighting by Tarquin and Claire
Approaching Sugar Cube Chamber in Perseverance I, on the way to Dollimore Series. The tackle bag on the floor marks the location of some rather unremarkable cryostal deposits.
Lighting by Tarquin and Claire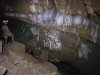 Flowstone on the wall of upstream MSAD, the first major passage of Dollimore Series.
Lighting by Tarquin and Claire
Flowstone on the wall of upstream MSAD, the first major passage of Dollimore Series.
Lighting by Tarquin and Claire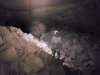 Looking back along one of the larger parts of upstream MSAD. Not as large as the downstream direction.
Lighting by Tarquin and Claire
Looking back along one of the larger parts of upstream MSAD. Not as large as the downstream direction.
Lighting by Tarquin and Claire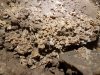 Cryostal on the boulders.
 Cryostal.
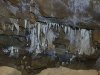 Grotto on the wall of upstream MSAD.
Lighting by Tarquin and Claire
Grotto on the wall of upstream MSAD.
Lighting by Tarquin and Claire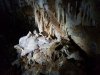 A much more impressive part of the grotto.
Lighting by Claire
A much more impressive part of the grotto.
Lighting by Claire Immediately before the terminal choke is the Snowy Christmas Tree stalagite formation.
Lighting by Claire
Immediately before the terminal choke is the Snowy Christmas Tree stalagite formation.
Lighting by Claire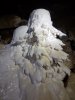 Snowy Christmas Tree.
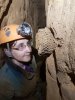 Honeycomb fossil in Pisspot Passage. The fossil is likely to be a favosites - a type of coral - and similar fossils can be seen in other parts of the cave, such as Bee Keeper's Passage in Hexamine Highways.
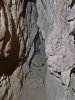 Looking back through the crazy squeeze in Pisspot Passage. It is relatively easy to pass, but looks impossible because of the way it swings from side to side.
Camera, setup and lighting by Claire, modelling by Tarquin
Looking back through the crazy squeeze in Pisspot Passage. It is relatively easy to pass, but looks impossible because of the way it swings from side to side.
Camera, setup and lighting by Claire, modelling by Tarquin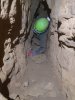 Passing the squeeze.
Camera, setup and lighting by Claire, modelling by Tarquin
Passing the squeeze.
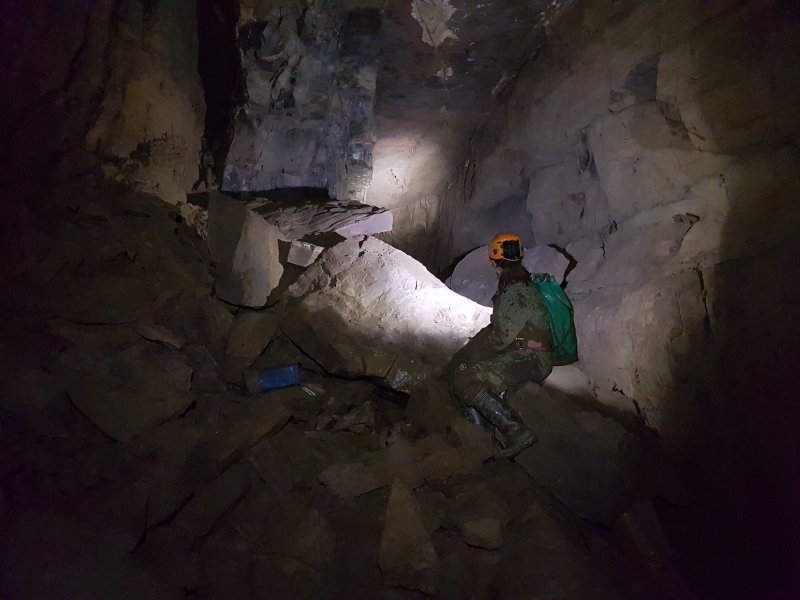
Camera, setup and lighting by Claire, modelling by Tarquin Hall Of The One, the second largest chamber in the cave, seen from Nicola's Grotto Landing, over the top of The One rock pinnacle. Beyond the arch, the continuing passage of MSAD is almost as big as the chamber. Behind the camera, the landing is nearly as wide as the chamber. At roof level on the left is the pitch of Pisspot Passage and Screaming Like A Stuck Pig. At roof level on the right is Luck Of The Draw. In the floor on the right is a rope climb down into Into The Black, which begins with a double chamber with a combined size as large as Hall Of The One. This is an enormous empty space under the mountain. Without flashguns and a minimal team of just two people, this picture was taken using a whopping 45 second exposure during which I had to remain completely still, while Claire used light painting to light up the rest of the chamber. A very impressive result given the conditions.
Camera by Claire, setup and lighting by Claire and Tarquin, modelling by Tarquin, edits by Peter Wilton-Jones and Tarquin
Hall Of The One, the second largest chamber in the cave, seen from Nicola's Grotto Landing, over the top of The One rock pinnacle. Beyond the arch, the continuing passage of MSAD is almost as big as the chamber. Behind the camera, the landing is nearly as wide as the chamber. At roof level on the left is the pitch of Pisspot Passage and Screaming Like A Stuck Pig. At roof level on the right is Luck Of The Draw. In the floor on the right is a rope climb down into Into The Black, which begins with a double chamber with a combined size as large as Hall Of The One. This is an enormous empty space under the mountain. Without flashguns and a minimal team of just two people, this picture was taken using a whopping 45 second exposure during which I had to remain completely still, while Claire used light painting to light up the rest of the chamber. A very impressive result given the conditions.
Camera by Claire, setup and lighting by Claire and Tarquin, modelling by Tarquin, edits by Peter Wilton-Jones and Tarquin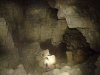 Lower part of Hall Of The One, with MSAD continuing to the right. Up at roof level is the pitch from Pisspot Passage and Screaming Like A Stuck Pig. This is another light painting picture, with a significantly shorter exposure, but still around 30 seconds.
Camera and setup by Claire, lighting by Tarquin and Claire, modelling by Tarquin
Lower part of Hall Of The One, with MSAD continuing to the right. Up at roof level is the pitch from Pisspot Passage and Screaming Like A Stuck Pig. This is another light painting picture, with a significantly shorter exposure, but still around 30 seconds.
Camera and setup by Claire, lighting by Tarquin and Claire, modelling by Tarquin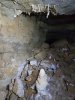 Small formations in Grotto Passage.
 The most iconic view of the first part of Nicola's Grotto, with the fairy castle of fallen stalactites.
Lighting by Claire
The most iconic view of the first part of Nicola's Grotto, with the fairy castle of fallen stalactites.
Lighting by Claire The helictites in this small part of the grotto are already as good as anything else in the country, and yet here are just one tiny part of the grotto.
Lighting by Tarquin and Claire
The helictites in this small part of the grotto are already as good as anything else in the country, and yet here are just one tiny part of the grotto.
Lighting by Tarquin and Claire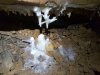 Formations in the grotto.
 Bat skeleton, with its wings still folded.
Lighting by Claire
Bat skeleton, with its wings still folded.
Lighting by Claire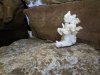 The continuing passage ends at an abrupt wall, with this formation presumably placed on a shelf on the right. It looks like a teddy bear with an elf's head, pointed ear and all.
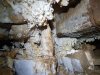 Crawling under the wall beside the remains of several more old formations.
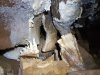 Decorated alcove.
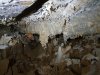 The crawl ends at a squeeze into another section of grotto, filled with very old stal. The squeeze is not tight at all, but requires a great deal of care to avoid damaging the formations, and it can help to have cavers guide each other's clothing away from them.
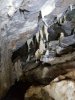 Stal hidden in a rift above the grotto.
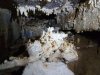 Fallen stal below the rift.
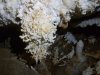 The largest and most impressive helictite cluster in this part of the passage.
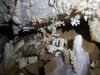 Old stal, including the conjoined fallen stal, and several clumps of fallen helictites.
 Fallen helictites.
 Old stal in an alcove.
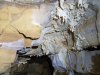 Ceiling of the ongoing passage.
 Large fallen wafers in the ongoing passage
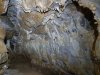 Passage leading to the final section of the grotto.
 The final grotto is one of the best in the cave, but often overlooked on the way to better known grottos.
Lighting by Tarquin and Claire
The final grotto is one of the best in the cave, but often overlooked on the way to better known grottos.
Lighting by Tarquin and Claire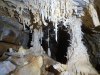 The helictite covered columns, the most dramatic part of the grotto.
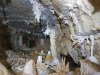 The far end of the grotto has been checked without damaging the stal, presumably using polythene sheets to protect it, and closes down almost immediately. It ends very close to a similar grotto in Dogleg Complex. The grotto floor has more fallen fairy castles, with many clusters of impressive helictites in the ceiling, and numerous columns.
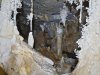 Distant helictites.
 Side of the grotto.
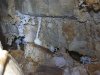 Helictites tucked into the undercut.
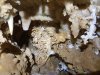 Helictites in the undercut, some of which appear to have formed underwater when this was a crystal pool.
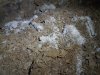 Our route now heads into the lengthy Luck Of The Draw, a major passage with mud, gypsum and spectacular helictite formations. The largest gypsum crystals in this picture are about 10 cm (4 inches) long.
Lighting by Tarquin and Claire
Our route now heads into the lengthy Luck Of The Draw, a major passage with mud, gypsum and spectacular helictite formations. The largest gypsum crystals in this picture are about 10 cm (4 inches) long.
Lighting by Tarquin and Claire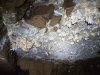 Old helictites in the ceiling.
Lighting by Tarquin and Claire
Old helictites in the ceiling.
Lighting by Tarquin and Claire Detail of the best set, which are still actively growing.
Lighting by Tarquin and Claire
Detail of the best set, which are still actively growing.
Lighting by Tarquin and Claire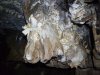 Old helictites.
Lighting by Tarquin and Claire
Old helictites.
Lighting by Tarquin and Claire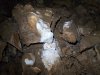 Most of the stal on the floor is so old it has been covered in a layer of mud, with new growth trying to wash it off. There is even a fallen helictite cluster to the right of the stalagmites, thickly coated in mud.
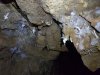 Some much better, active helictites. Anywhere else, these would be a main attraction for a passage, but they will soon be completely overshadowed.
Lighting by Tarquin and Claire
Some much better, active helictites. Anywhere else, these would be a main attraction for a passage, but they will soon be completely overshadowed.
Lighting by Tarquin and Claire Detail of the helictites.
Lighting by Tarquin and Claire
Detail of the helictites.
Lighting by Tarquin and Claire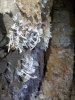 Gypsum formations, including one looking like a bow-and-arrow.
Lighting by Tarquin and Claire
Gypsum formations, including one looking like a bow-and-arrow.
Lighting by Tarquin and Claire The Pineapple Patch, some old helictites and stalagmites guarding the way into The Gobbler.
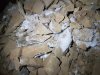 Gypsum thickly coating a random set of rocks. Exactly why it forms this way is still not known, but cryogenic aspects are possible. Perhaps it forms when a bubble of water within ice covers this area, with the crystals growing much like calcite crystals in a crystal pool. But this is just conjecture.
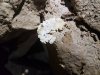 Cryostal rafts on the floor of the passage. Their significance has only recently been recognised, and they are not always protected by taping - this one sits immediately beside a footprint.
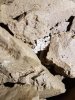 These were almost certainly formed by cryogenic process during an ice age, from calcite supersaturated in a bubble of water within permafrost ice. They would then be gently placed into unusual positions as the ice melted.
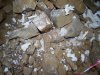 Nearby piles of gypsum have the same general appearance, formed in odd clumps and balanced on rocks. The angular rocks are the result of freeze-thaw fracturing the passage walls, and the bobbly mud is the result of ice crystals fluffing it up. Ice has played a very significant role in so much of this cave.
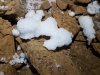 Cryogenic gypsum.
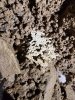 Another location, and this time some very elaborate lattices of cryostal.
 One of the most beautiful sets of cryostal lattices, layered around the gypsum. This shows that they are very likely to have formed as part of the same process.
Lighting by Claire
One of the most beautiful sets of cryostal lattices, layered around the gypsum. This shows that they are very likely to have formed as part of the same process.
Lighting by Claire Still unknown is why they would form in such a flat pattern - like they were resting on a flat surface - while free to form in a bubble of water. Perhaps these formed on a melting surface of ice.
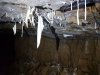 Stal, notable because it is actually rather ordinary, which makes it seem quite out of place in this passage.
Lighting by Tarquin and Claire
Stal, notable because it is actually rather ordinary, which makes it seem quite out of place in this passage.
Lighting by Tarquin and Claire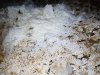 Extremely elaborate stalagmite formation, with a distinctive bobbly texture.
Lighting by Tarquin and Claire
Extremely elaborate stalagmite formation, with a distinctive bobbly texture.
Lighting by Tarquin and Claire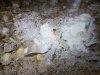 Bobbly stalagmites.
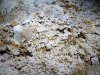 The detailed bobbles seem to be a thin layer of stal coating the bobbly mud and gypsum crystals.
 Calcite bobbles.
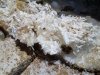 Calcite on gypsum crystals.
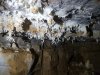 The helictites then begin, getting better every few metres. This is the beginning of Medusa's Children, one of the finest helictite grottos in Britain.
 Early Medusa's Children.
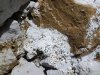 Several parts of the passage are coated in a natural calcite whitewash, the origin of which is unknown. Here, it even covers the gypsum crystals.
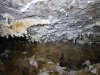 Early Medusa's Children.
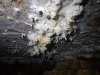 Early Medusa's Children.
 Stunning helictites, and whitewashed boulders. Between the stalagmites are fallen clusters of old helictites, also coated in whitewash.
 Stalagmites and fallen helictite clusters.
Lighting by Tarquin and Claire
Stalagmites and fallen helictite clusters.
Lighting by Tarquin and Claire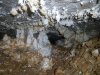 The most iconic view of Medusa's Children. The way on is ahead, crawling through the gap in the formations, taking great care when passing them. The whole of this section of passage demands great care anyway, since the helictites require cavers to stoop beneath them without brushing against them.
Lighting by Tarquin and Claire
The most iconic view of Medusa's Children. The way on is ahead, crawling through the gap in the formations, taking great care when passing them. The whole of this section of passage demands great care anyway, since the helictites require cavers to stoop beneath them without brushing against them.
Lighting by Tarquin and Claire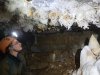 Overwhelmed by helictites.
Lighting by Tarquin and Claire
Overwhelmed by helictites.
Lighting by Tarquin and Claire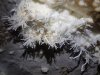 Medusa's Children.
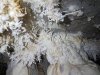 The tops of the columns.
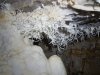 The longest of the helictites.
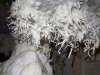 The longest of the helictites.
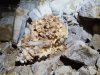 If one of Medusa's snakes looks at another of Medusa's snakes, it turns to stone and falls off. True story.
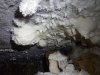 The grotto ends, but there are still many clusters of helictites in the passage immediately beyond.
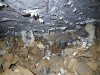 Cauliflower.
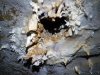 Helictites around an aven.
 In the aven
 Continuing helictites.
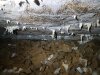 Continuing helictites.
 Continuing helictites.
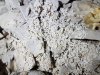 Whitewash coated gypsum.
 Whitewash patches radomly coating the rocks and ceiling. The tapes hang from the roof as a reminder to keep down and avoid touching the ceiling.
 Even Claire, being quite petite, has to stoop here. The taping seems to have worked though, as the ceiling's whitewash remains pristine.
Lighting by Tarquin and Claire
Even Claire, being quite petite, has to stoop here. The taping seems to have worked though, as the ceiling's whitewash remains pristine.
Lighting by Tarquin and Claire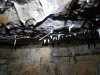 Pointing helictite.
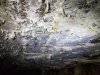 The helictites begin again, approaching Lightbulb Chamber.
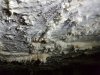 Anthodites.
 Approaching Lightbulb Chamber.
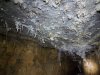 Lightbulb Chamber, adorned with many fine helictite formations.
Lighting by Tarquin and Claire
Lightbulb Chamber, adorned with many fine helictite formations.
Lighting by Tarquin and Claire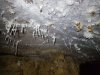 Lightbulb Chamber. Much taller, making it hard to get good pitures with my phone camera.
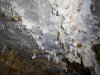 Lightbulb Chamber. The Lightbulb can barely be seen here, but it is the nearly round ball of calcite hanging from a brown helictite, to the right of the centre of the picture. Also distinctive is the helictite cluster near the back wall that looks like a donkey hanging from its neck. But lightbulb Chamber sounds much nicer than Dead Donkey Chamber.
Lighting by Tarquin and Claire
Lightbulb Chamber. The Lightbulb can barely be seen here, but it is the nearly round ball of calcite hanging from a brown helictite, to the right of the centre of the picture. Also distinctive is the helictite cluster near the back wall that looks like a donkey hanging from its neck. But lightbulb Chamber sounds much nicer than Dead Donkey Chamber.
Lighting by Tarquin and Claire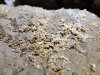 If you know what to look for, there is some more cryostal just after Lightbulb Chamber, looking like gold dust.
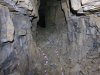 The formations then abruptly end, and the brief walking section is short lived. The passage soon becomes one of the longest crawls in the country, without a significant reward at the far end. Instead, we will take a detour near the start of the crawl, into Cantankerous Surveyors' Passage.
 The spectactular Geryon helictite formation, by far one of the best in the UK, and much larger than it appears in photographs.
Lighting by Claire
The spectactular Geryon helictite formation, by far one of the best in the UK, and much larger than it appears in photographs.
Lighting by Claire The aragonite helictites are about 30 cm (1 foot) long, formed around three calcite stalactites, which I think of as a father, baby and mother. The baby and mother are joined by a thick umbilical cord. Most helictites are single, long fingers, but some branch into distinctive hands.
Lighting by Claire
The aragonite helictites are about 30 cm (1 foot) long, formed around three calcite stalactites, which I think of as a father, baby and mother. The baby and mother are joined by a thick umbilical cord. Most helictites are single, long fingers, but some branch into distinctive hands.
Lighting by Claire Helictites in Geryon's Lair, including a distinctive Catherine wheel on the right.
Lighting by Claire
Helictites in Geryon's Lair, including a distinctive Catherine wheel on the right.
Lighting by Claire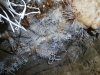 Large anthodites behind The Geryon.
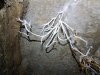 Helictites in Geryon's Lair.
 A very large collection of anthodites in Geryon's Lair.
Lighting by Claire
A very large collection of anthodites in Geryon's Lair.
Lighting by Claire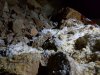 Just beyond Geryon's Lair, in Needle Passage, a pile of gypsum contains The Needles, some extremely long selenite needles growing randomly from the gypsum.
Lighting by Claire
Just beyond Geryon's Lair, in Needle Passage, a pile of gypsum contains The Needles, some extremely long selenite needles growing randomly from the gypsum.
Lighting by Claire The longest needle is around 23 cm (9 inches) long, about 50% longer than any others known in the cave.
Lighting by Claire
The longest needle is around 23 cm (9 inches) long, about 50% longer than any others known in the cave.
Lighting by Claire Some of the smaller needles are still longer than any other known selenite needles in the cave.
Lighting by Claire
Some of the smaller needles are still longer than any other known selenite needles in the cave.
Lighting by Claire
 Approaching Sugar Cube Chamber in Perseverance I, on the way to Dollimore Series. The tackle bag on the floor marks the location of some rather unremarkable cryostal deposits.
Lighting by Tarquin and Claire
Approaching Sugar Cube Chamber in Perseverance I, on the way to Dollimore Series. The tackle bag on the floor marks the location of some rather unremarkable cryostal deposits.
Lighting by Tarquin and Claire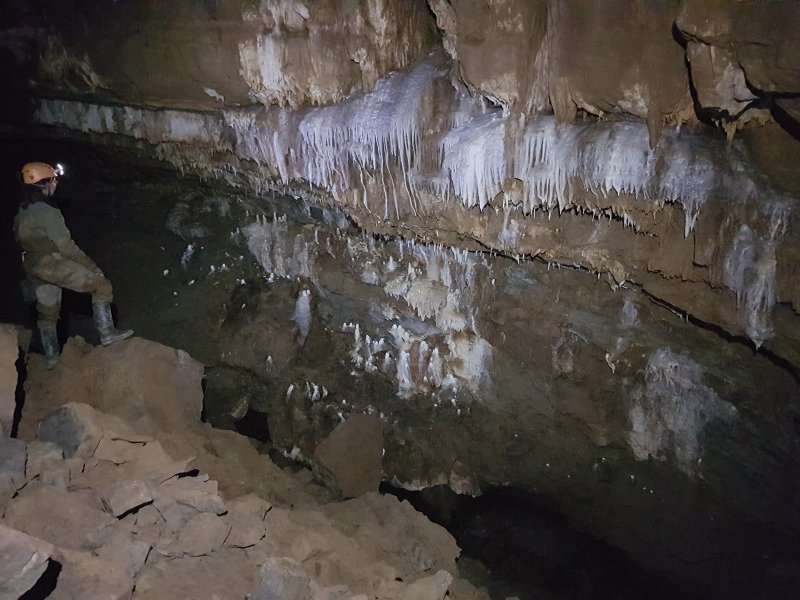 Flowstone on the wall of upstream MSAD, the first major passage of Dollimore Series.
Lighting by Tarquin and Claire
Flowstone on the wall of upstream MSAD, the first major passage of Dollimore Series.
Lighting by Tarquin and Claire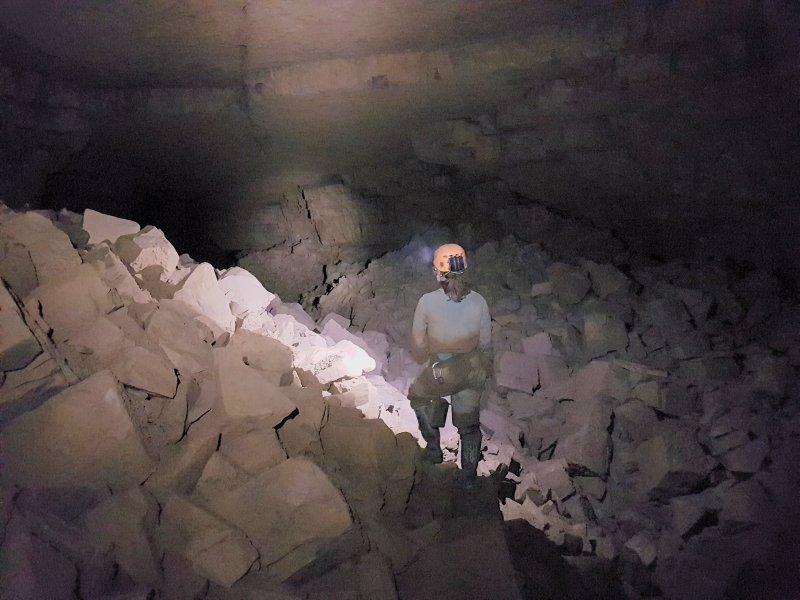 Looking back along one of the larger parts of upstream MSAD. Not as large as the downstream direction.
Lighting by Tarquin and Claire
Looking back along one of the larger parts of upstream MSAD. Not as large as the downstream direction.
Lighting by Tarquin and Claire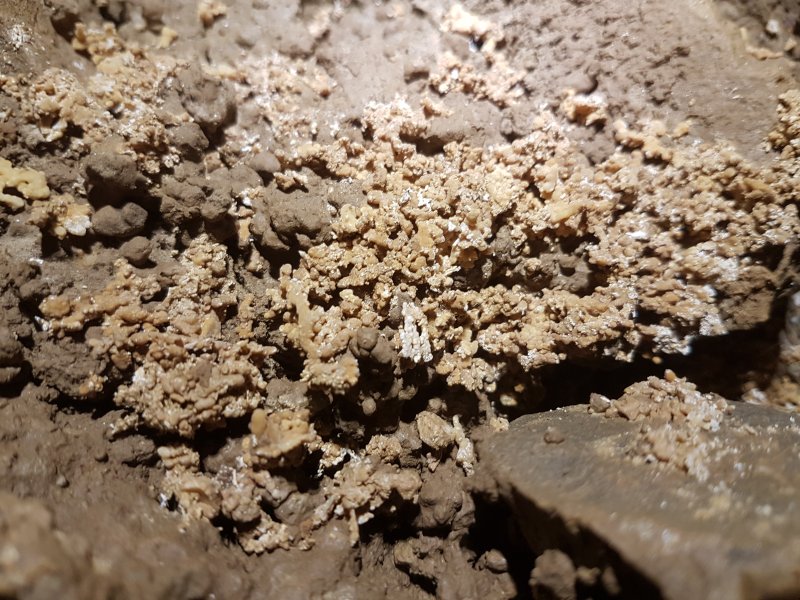 Cryostal on the boulders.
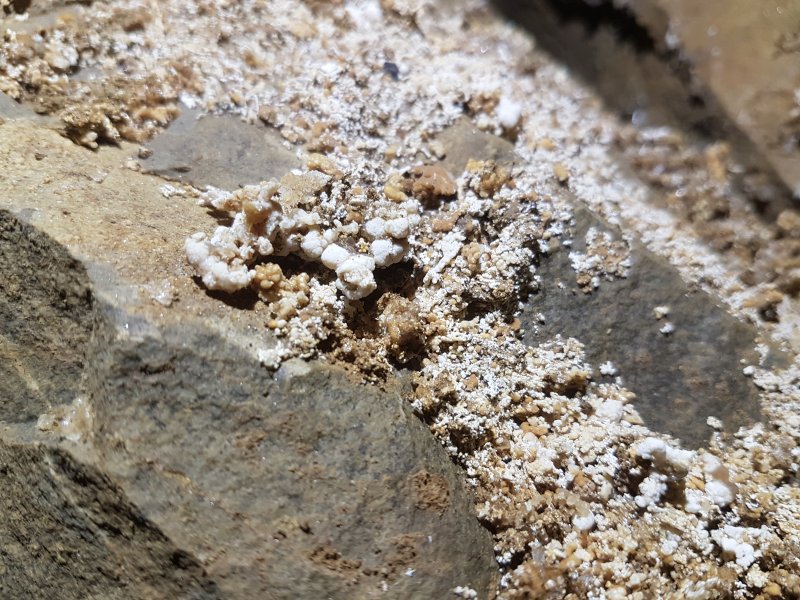 Cryostal.
 Grotto on the wall of upstream MSAD.
Lighting by Tarquin and Claire
Grotto on the wall of upstream MSAD.
Lighting by Tarquin and Claire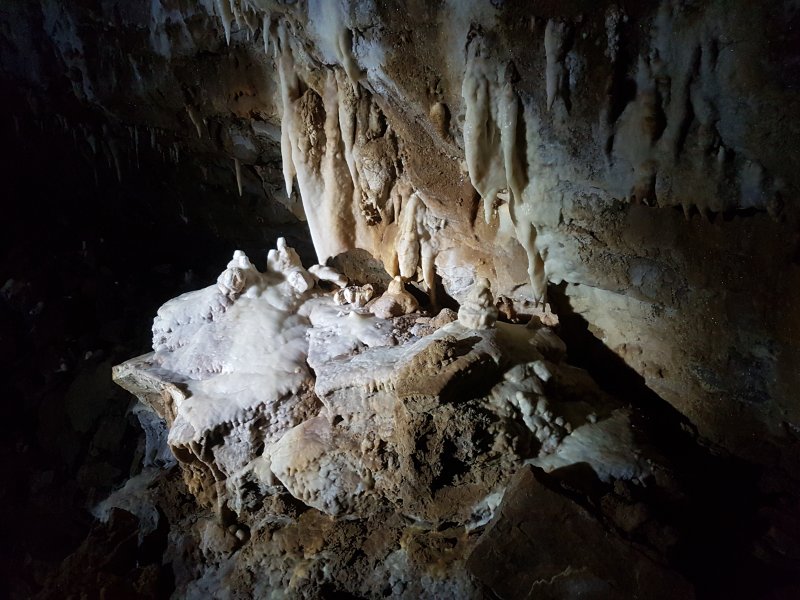 A much more impressive part of the grotto.
Lighting by Claire
A much more impressive part of the grotto.
Lighting by Claire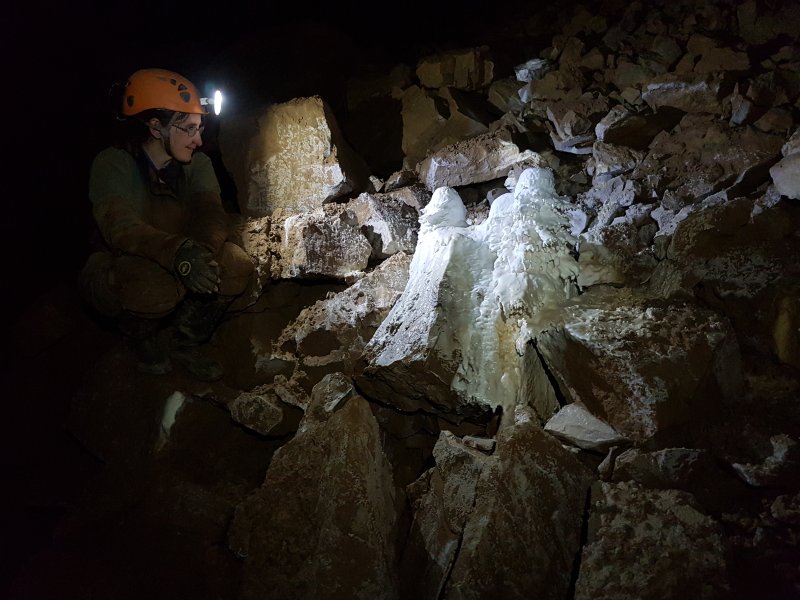 Immediately before the terminal choke is the Snowy Christmas Tree stalagite formation.
Lighting by Claire
Immediately before the terminal choke is the Snowy Christmas Tree stalagite formation.
Lighting by Claire Snowy Christmas Tree.
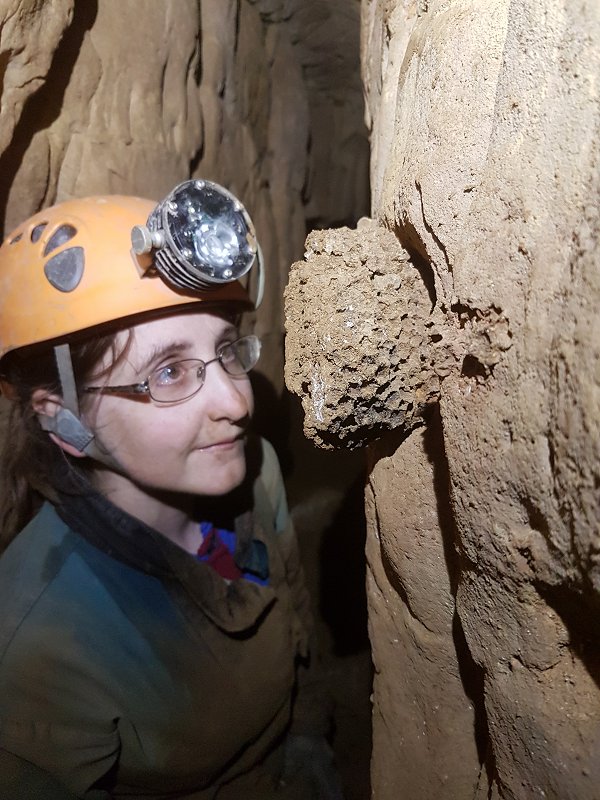 Honeycomb fossil in Pisspot Passage. The fossil is likely to be a favosites - a type of coral - and similar fossils can be seen in other parts of the cave, such as Bee Keeper's Passage in Hexamine Highways.
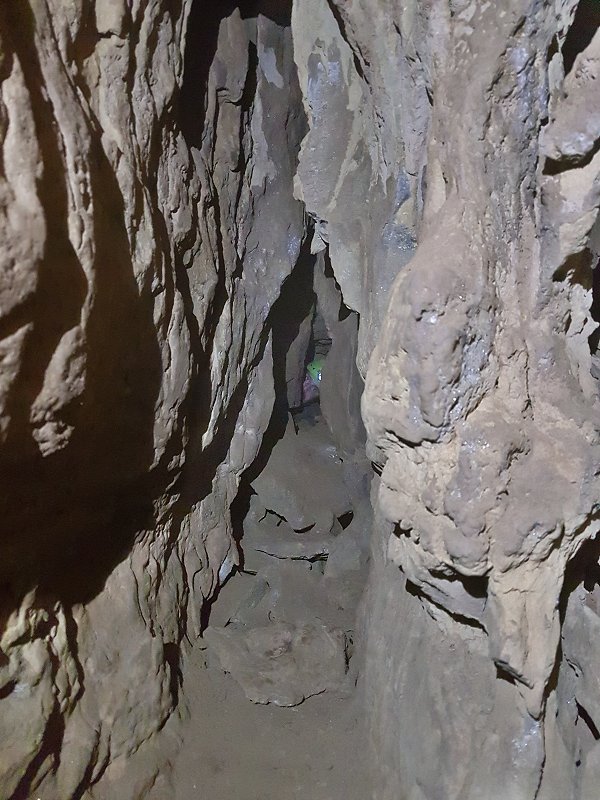 Looking back through the crazy squeeze in Pisspot Passage. It is relatively easy to pass, but looks impossible because of the way it swings from side to side.
Camera, setup and lighting by Claire, modelling by Tarquin
Looking back through the crazy squeeze in Pisspot Passage. It is relatively easy to pass, but looks impossible because of the way it swings from side to side.
Camera, setup and lighting by Claire, modelling by Tarquin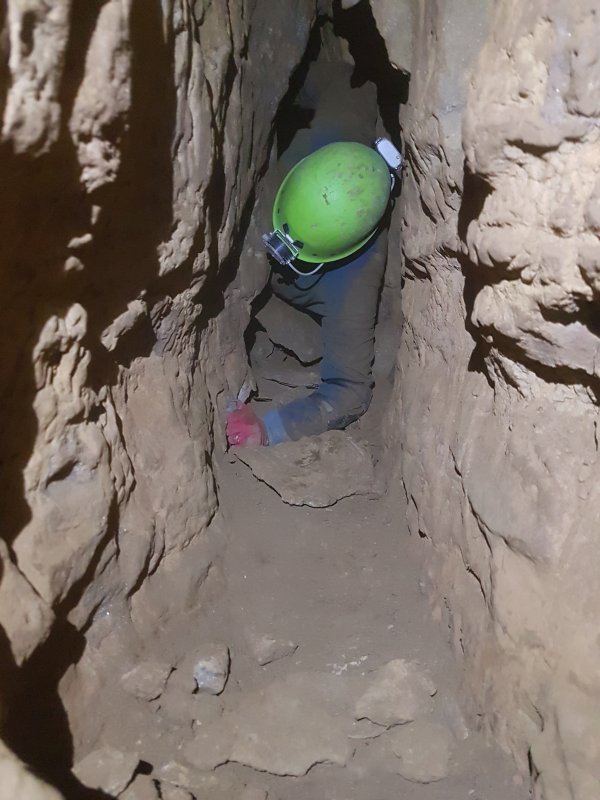 Passing the squeeze.
Camera, setup and lighting by Claire, modelling by Tarquin
Passing the squeeze.
Camera, setup and lighting by Claire, modelling by Tarquin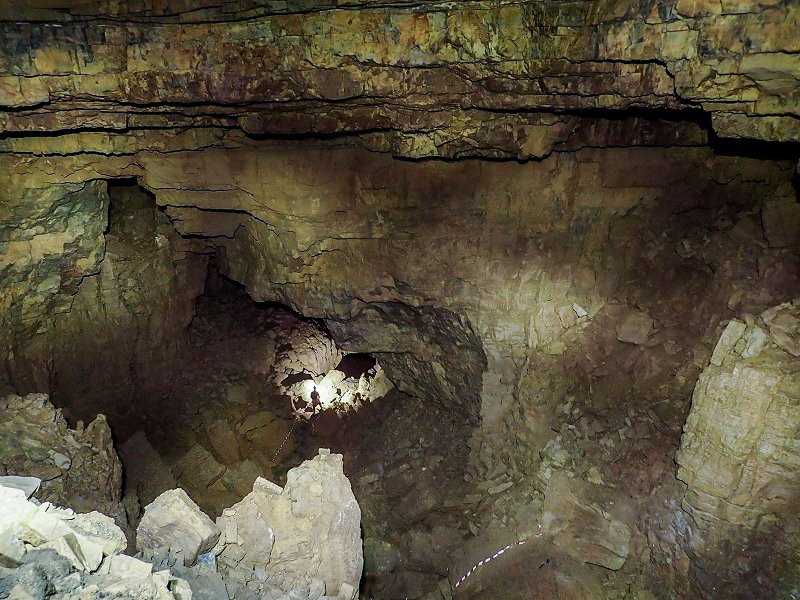 Hall Of The One, the second largest chamber in the cave, seen from Nicola's Grotto Landing, over the top of The One rock pinnacle. Beyond the arch, the continuing passage of MSAD is almost as big as the chamber. Behind the camera, the landing is nearly as wide as the chamber. At roof level on the left is the pitch of Pisspot Passage and Screaming Like A Stuck Pig. At roof level on the right is Luck Of The Draw. In the floor on the right is a rope climb down into Into The Black, which begins with a double chamber with a combined size as large as Hall Of The One. This is an enormous empty space under the mountain. Without flashguns and a minimal team of just two people, this picture was taken using a whopping 45 second exposure during which I had to remain completely still, while Claire used light painting to light up the rest of the chamber. A very impressive result given the conditions.
Camera by Claire, setup and lighting by Claire and Tarquin, modelling by Tarquin, edits by Peter Wilton-Jones and Tarquin
Hall Of The One, the second largest chamber in the cave, seen from Nicola's Grotto Landing, over the top of The One rock pinnacle. Beyond the arch, the continuing passage of MSAD is almost as big as the chamber. Behind the camera, the landing is nearly as wide as the chamber. At roof level on the left is the pitch of Pisspot Passage and Screaming Like A Stuck Pig. At roof level on the right is Luck Of The Draw. In the floor on the right is a rope climb down into Into The Black, which begins with a double chamber with a combined size as large as Hall Of The One. This is an enormous empty space under the mountain. Without flashguns and a minimal team of just two people, this picture was taken using a whopping 45 second exposure during which I had to remain completely still, while Claire used light painting to light up the rest of the chamber. A very impressive result given the conditions.
Camera by Claire, setup and lighting by Claire and Tarquin, modelling by Tarquin, edits by Peter Wilton-Jones and Tarquin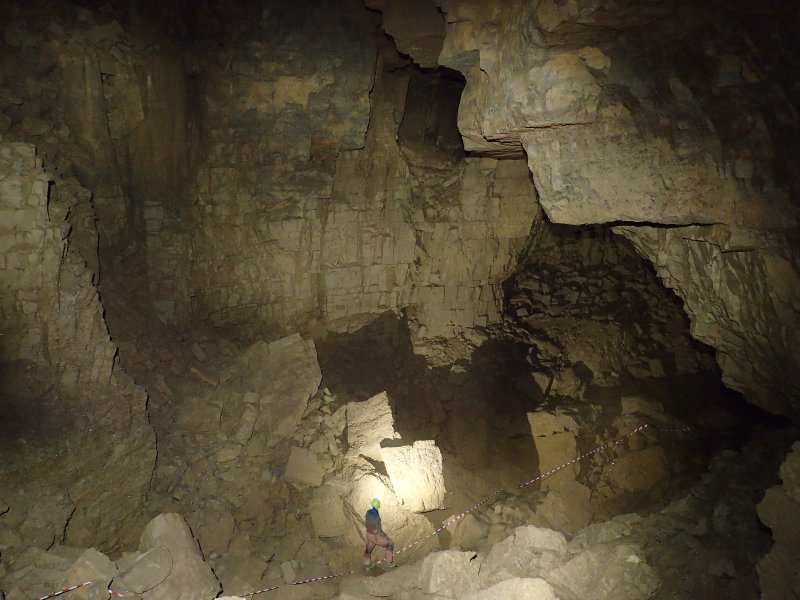 Lower part of Hall Of The One, with MSAD continuing to the right. Up at roof level is the pitch from Pisspot Passage and Screaming Like A Stuck Pig. This is another light painting picture, with a significantly shorter exposure, but still around 30 seconds.
Camera and setup by Claire, lighting by Tarquin and Claire, modelling by Tarquin
Lower part of Hall Of The One, with MSAD continuing to the right. Up at roof level is the pitch from Pisspot Passage and Screaming Like A Stuck Pig. This is another light painting picture, with a significantly shorter exposure, but still around 30 seconds.
Camera and setup by Claire, lighting by Tarquin and Claire, modelling by Tarquin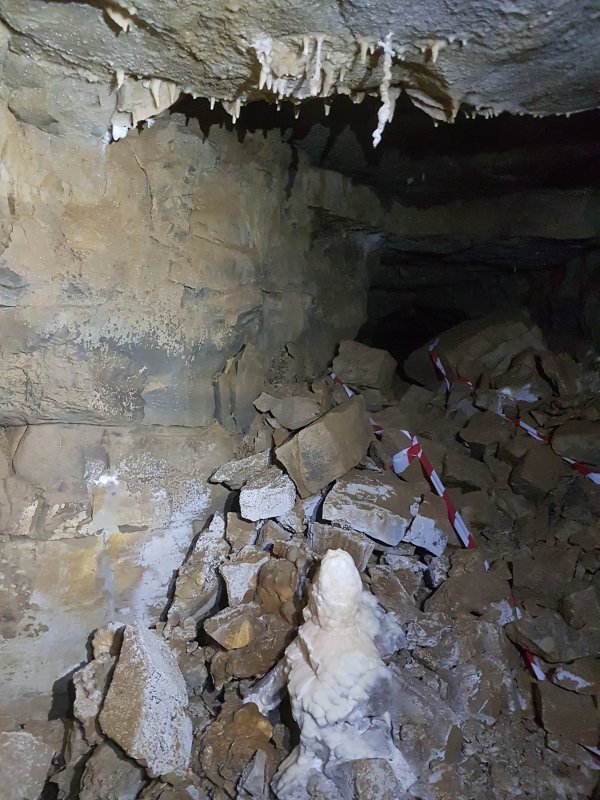 Small formations in Grotto Passage.
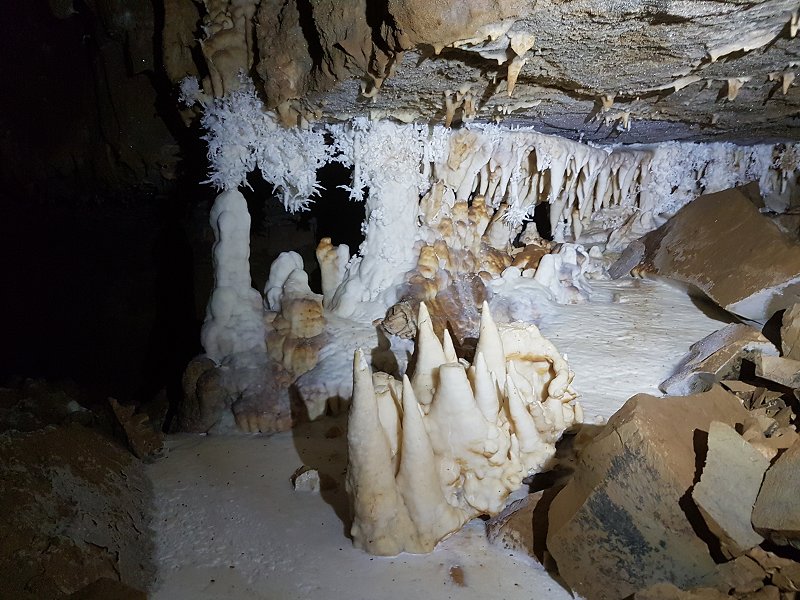 The most iconic view of the first part of Nicola's Grotto, with the fairy castle of fallen stalactites.
Lighting by Claire
The most iconic view of the first part of Nicola's Grotto, with the fairy castle of fallen stalactites.
Lighting by Claire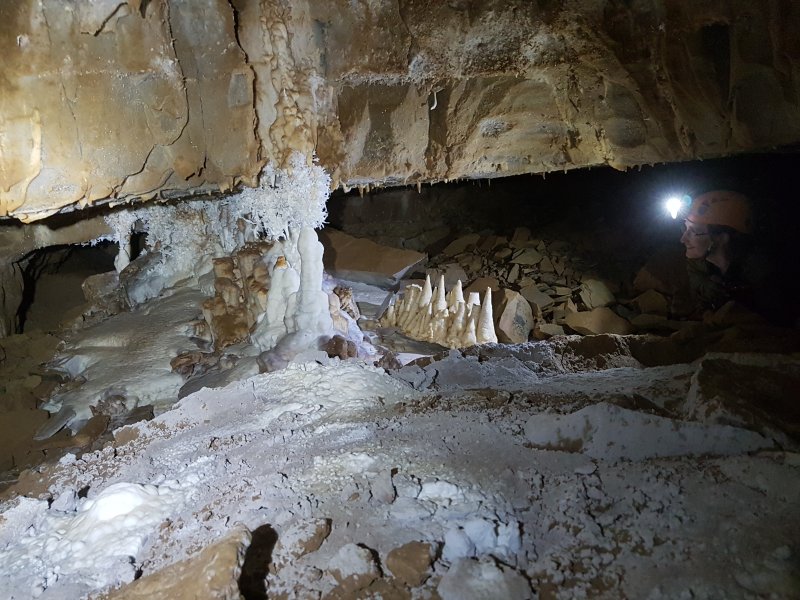 The helictites in this small part of the grotto are already as good as anything else in the country, and yet here are just one tiny part of the grotto.
Lighting by Tarquin and Claire
The helictites in this small part of the grotto are already as good as anything else in the country, and yet here are just one tiny part of the grotto.
Lighting by Tarquin and Claire Formations in the grotto.
 Bat skeleton, with its wings still folded.
Lighting by Claire
Bat skeleton, with its wings still folded.
Lighting by Claire The continuing passage ends at an abrupt wall, with this formation presumably placed on a shelf on the right. It looks like a teddy bear with an elf's head, pointed ear and all.
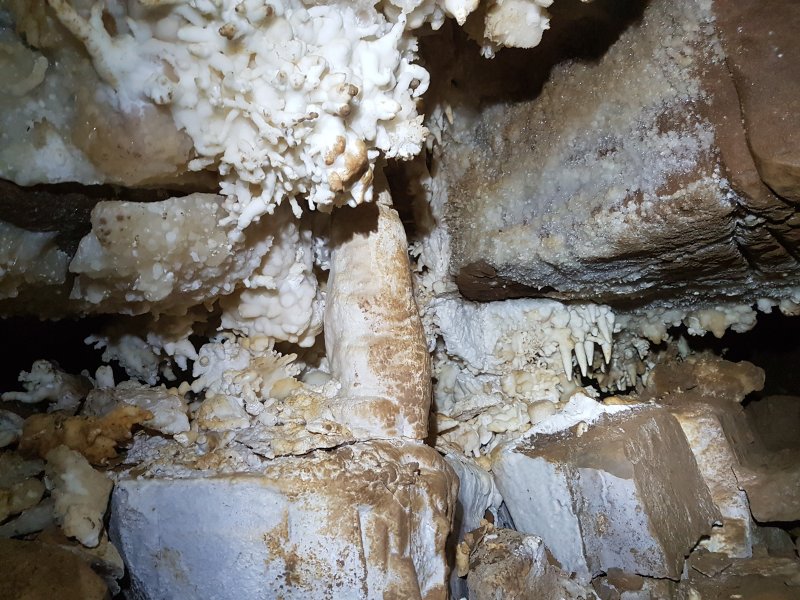 Crawling under the wall beside the remains of several more old formations.
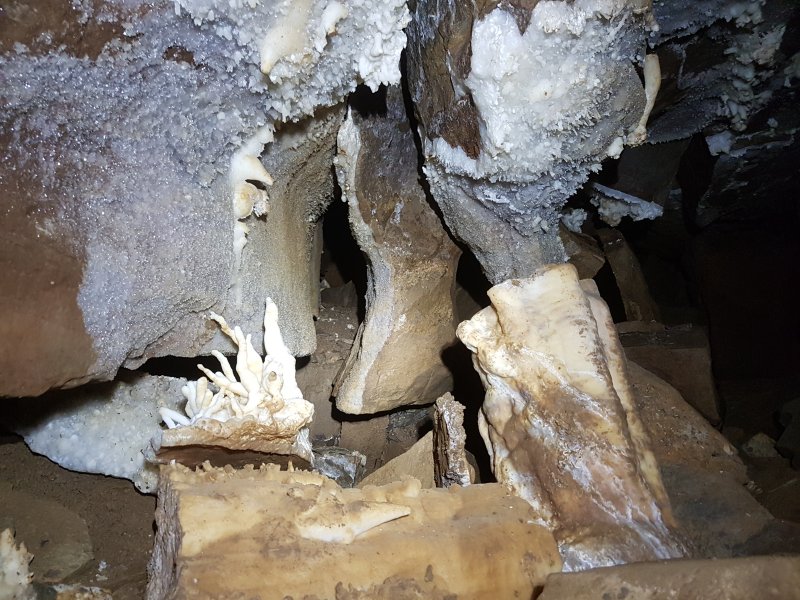 Decorated alcove.
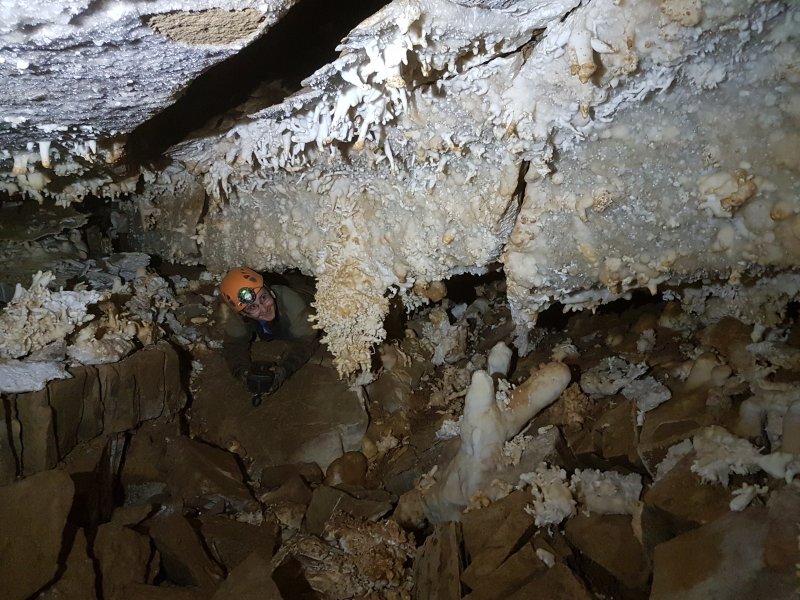 The crawl ends at a squeeze into another section of grotto, filled with very old stal. The squeeze is not tight at all, but requires a great deal of care to avoid damaging the formations, and it can help to have cavers guide each other's clothing away from them.
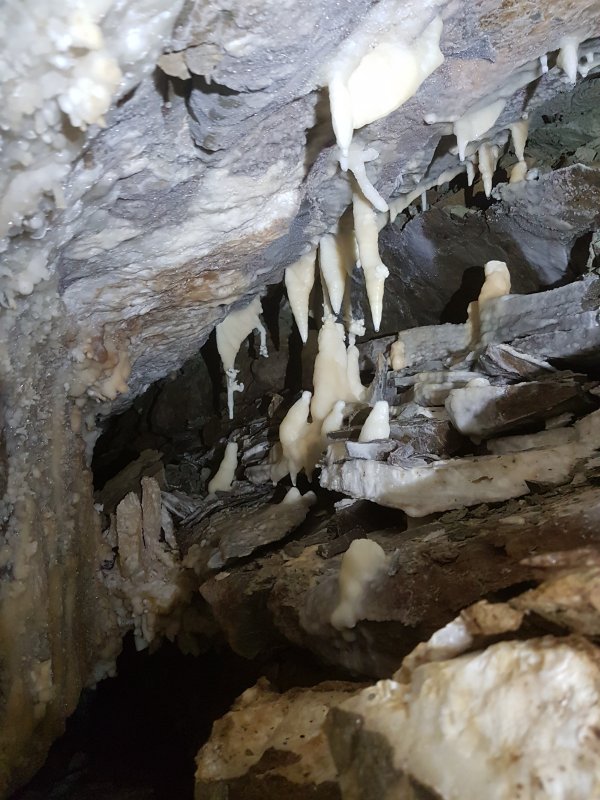 Stal hidden in a rift above the grotto.
 Fallen stal below the rift.
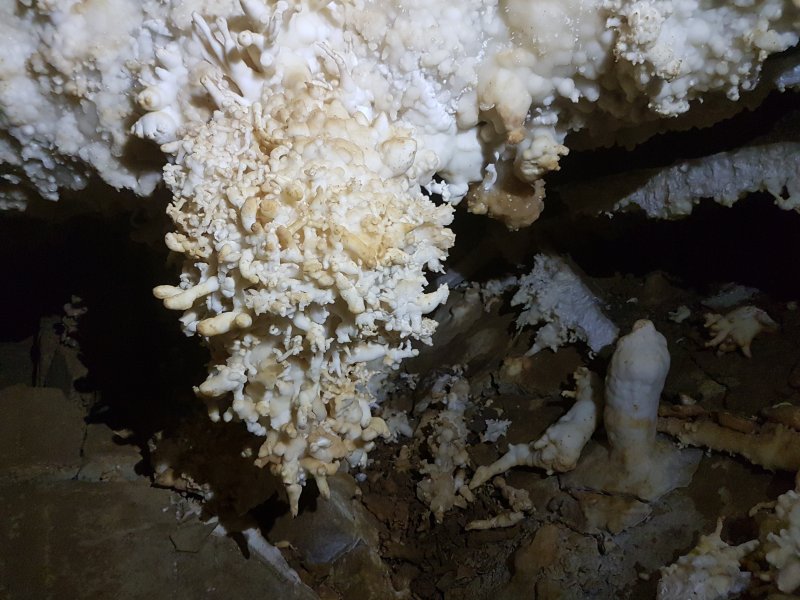 The largest and most impressive helictite cluster in this part of the passage.
 Old stal, including the conjoined fallen stal, and several clumps of fallen helictites.
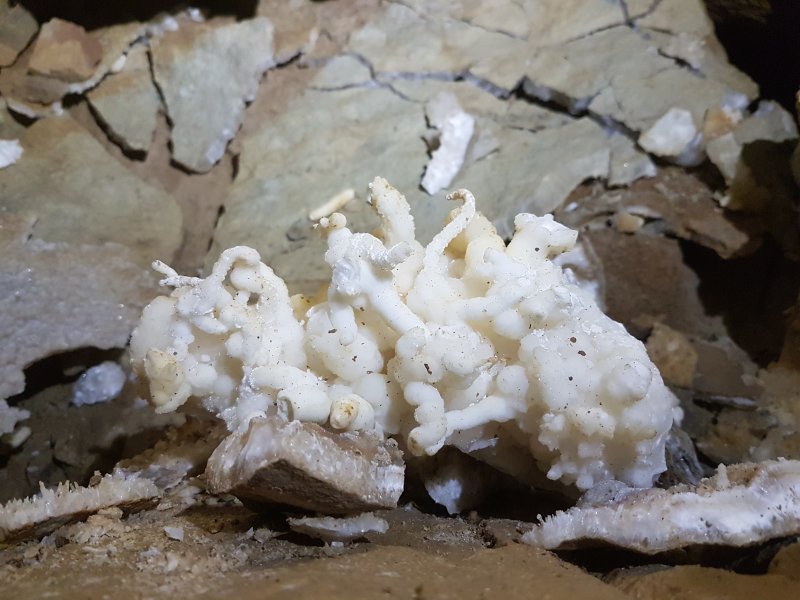 Fallen helictites.
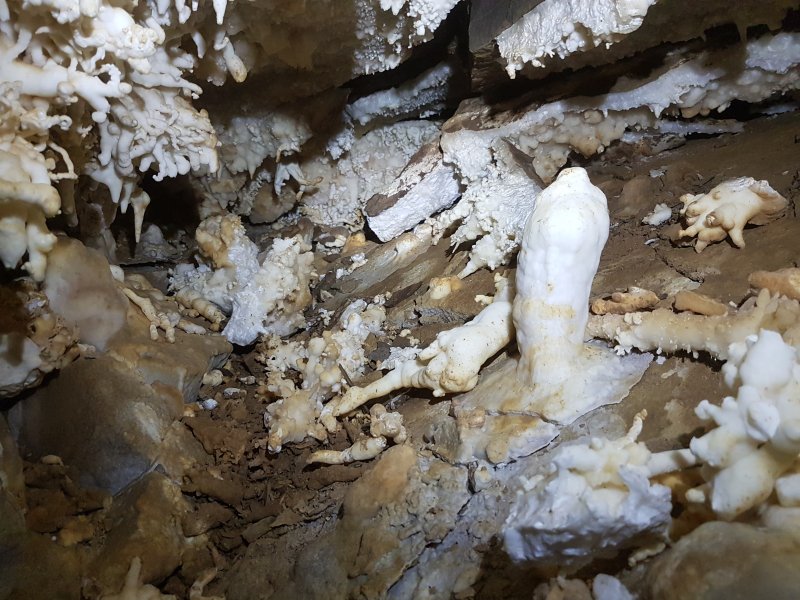 Old stal in an alcove.
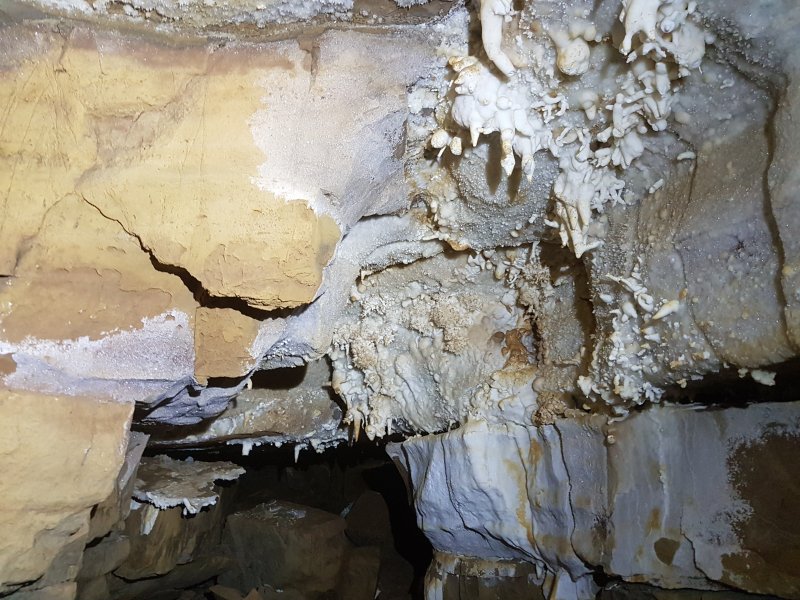 Ceiling of the ongoing passage.
 Large fallen wafers in the ongoing passage
 Passage leading to the final section of the grotto.
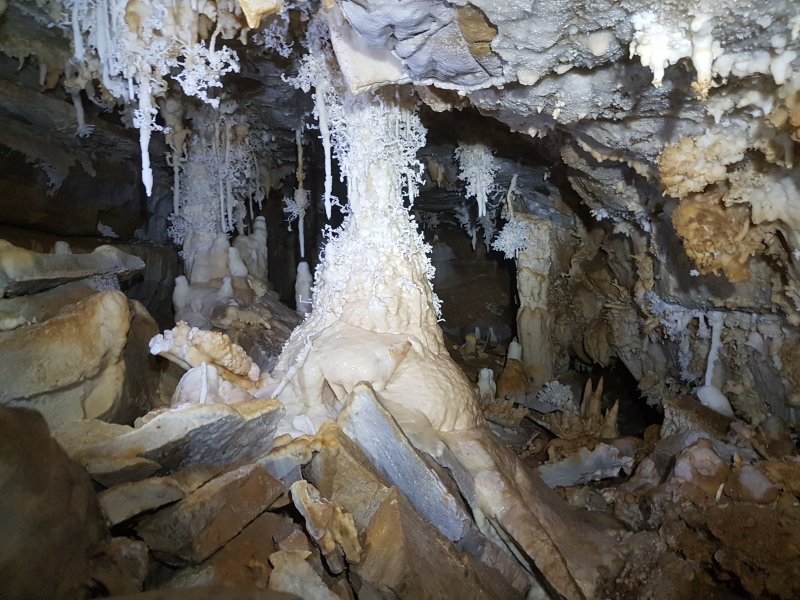 The final grotto is one of the best in the cave, but often overlooked on the way to better known grottos.
Lighting by Tarquin and Claire
The final grotto is one of the best in the cave, but often overlooked on the way to better known grottos.
Lighting by Tarquin and Claire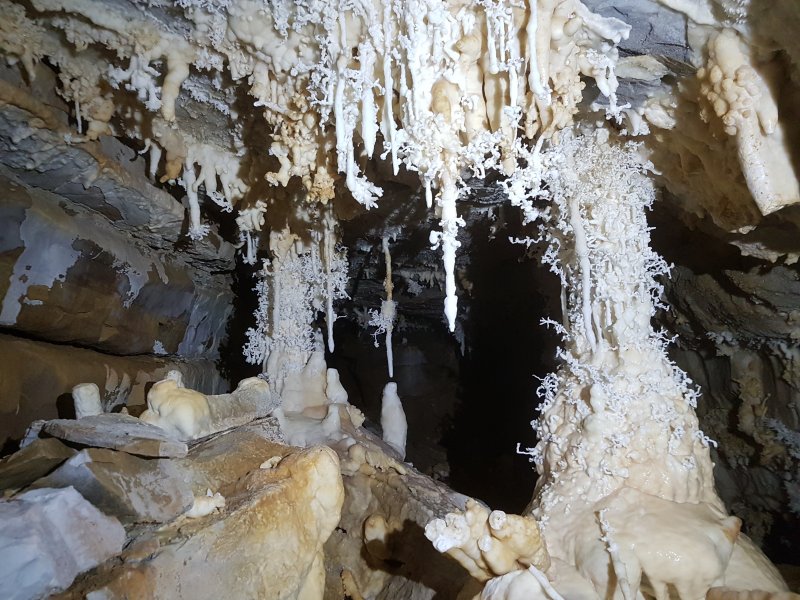 The helictite covered columns, the most dramatic part of the grotto.
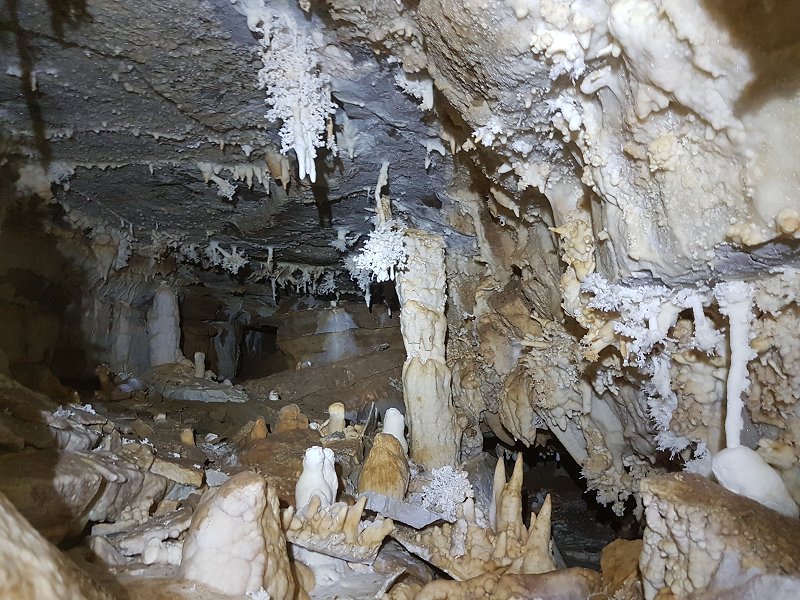 The far end of the grotto has been checked without damaging the stal, presumably using polythene sheets to protect it, and closes down almost immediately. It ends very close to a similar grotto in Dogleg Complex. The grotto floor has more fallen fairy castles, with many clusters of impressive helictites in the ceiling, and numerous columns.
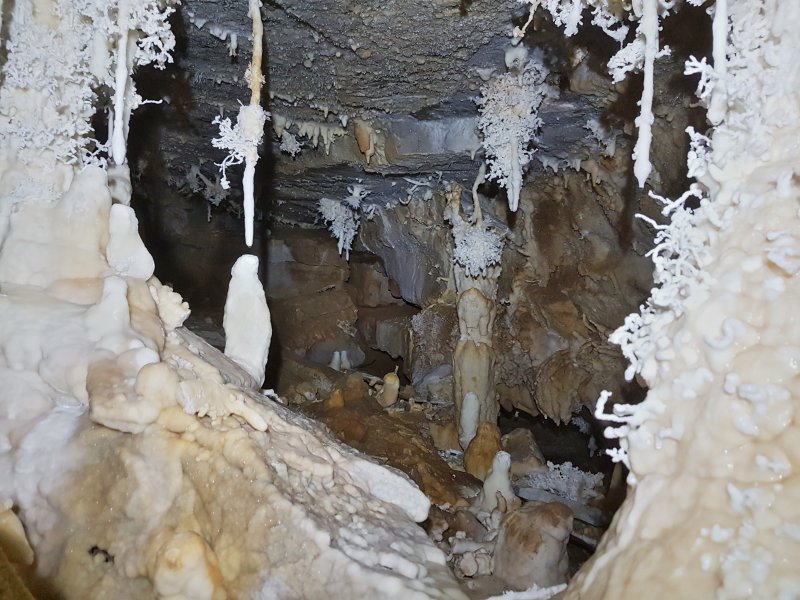 Distant helictites.
 Side of the grotto.
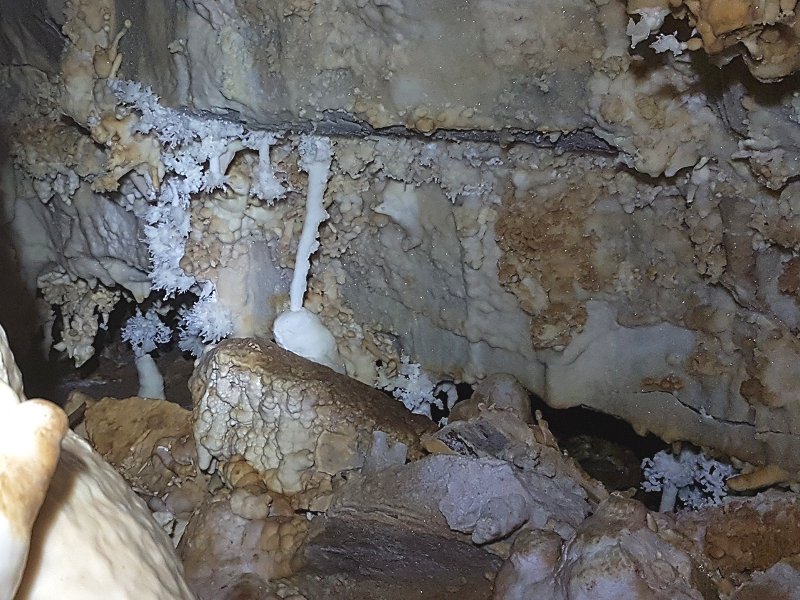 Helictites tucked into the undercut.
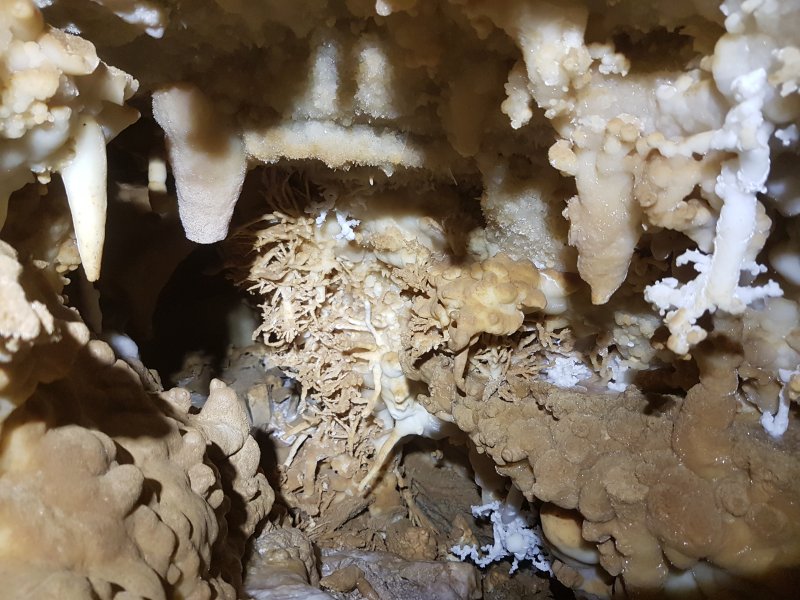 Helictites in the undercut, some of which appear to have formed underwater when this was a crystal pool.
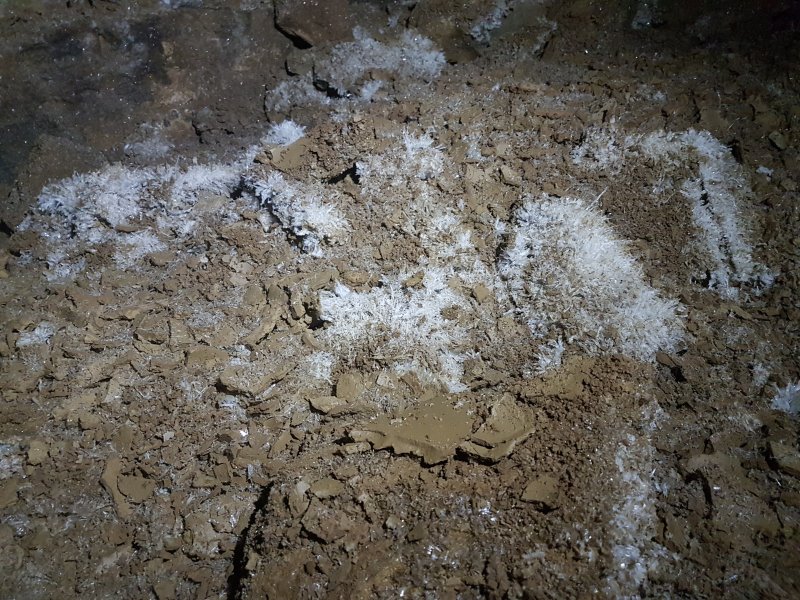 Our route now heads into the lengthy Luck Of The Draw, a major passage with mud, gypsum and spectacular helictite formations. The largest gypsum crystals in this picture are about 10 cm (4 inches) long.
Lighting by Tarquin and Claire
Our route now heads into the lengthy Luck Of The Draw, a major passage with mud, gypsum and spectacular helictite formations. The largest gypsum crystals in this picture are about 10 cm (4 inches) long.
Lighting by Tarquin and Claire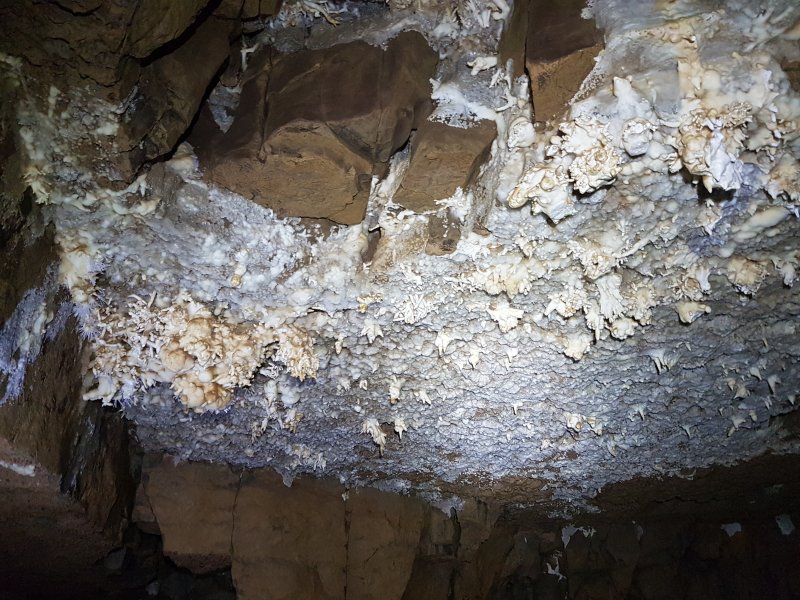 Old helictites in the ceiling.
Lighting by Tarquin and Claire
Old helictites in the ceiling.
Lighting by Tarquin and Claire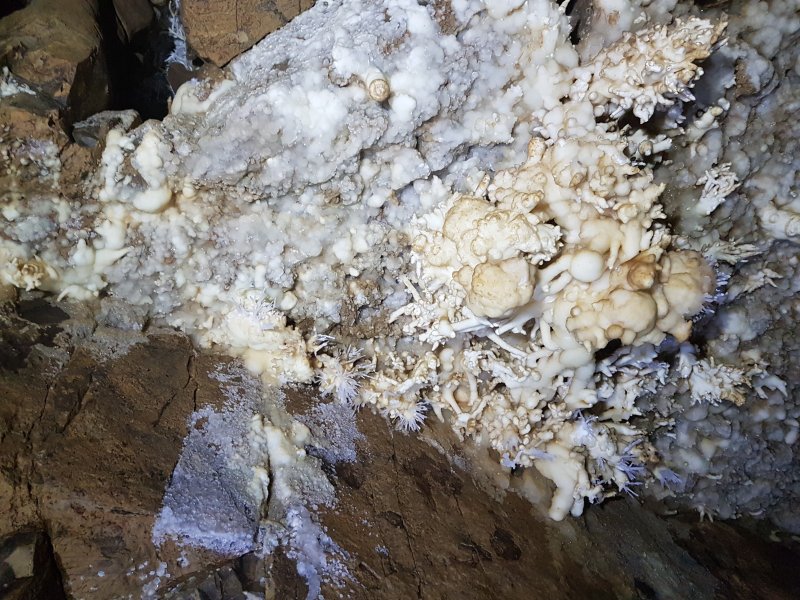 Detail of the best set, which are still actively growing.
Lighting by Tarquin and Claire
Detail of the best set, which are still actively growing.
Lighting by Tarquin and Claire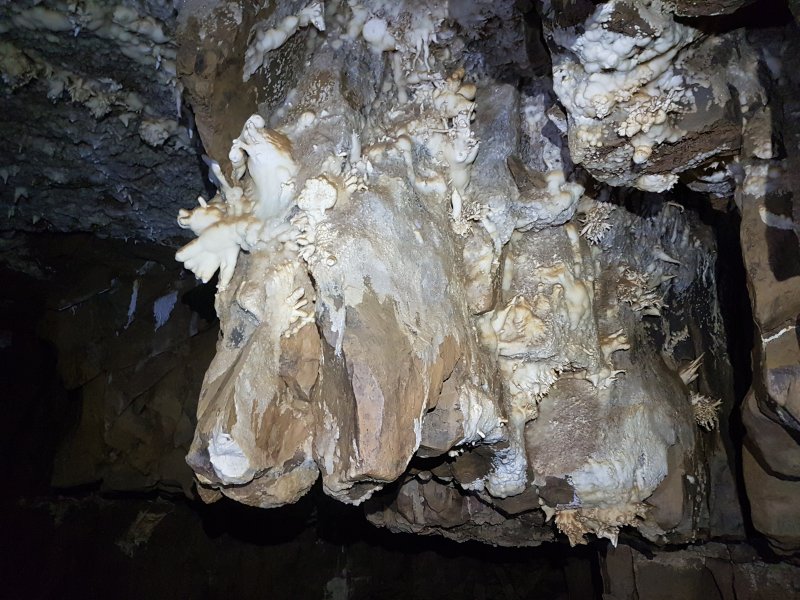 Old helictites.
Lighting by Tarquin and Claire
Old helictites.
Lighting by Tarquin and Claire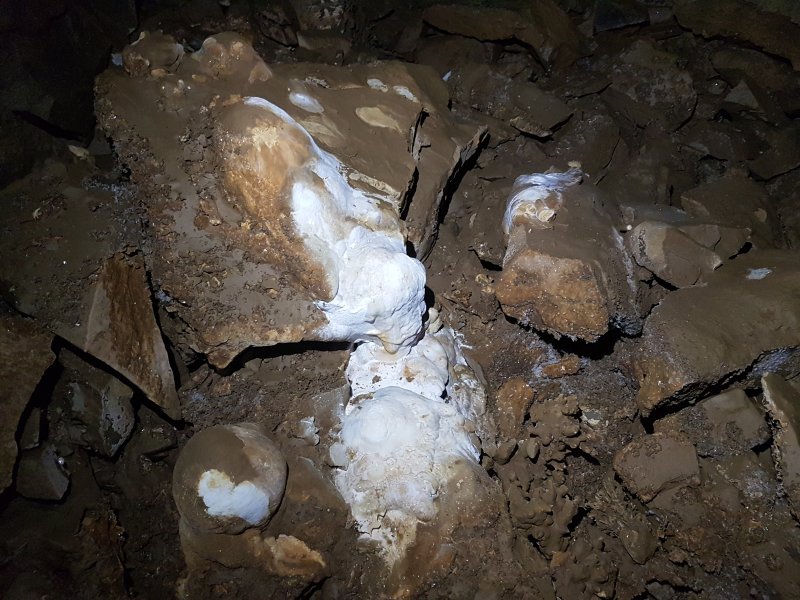 Most of the stal on the floor is so old it has been covered in a layer of mud, with new growth trying to wash it off. There is even a fallen helictite cluster to the right of the stalagmites, thickly coated in mud.
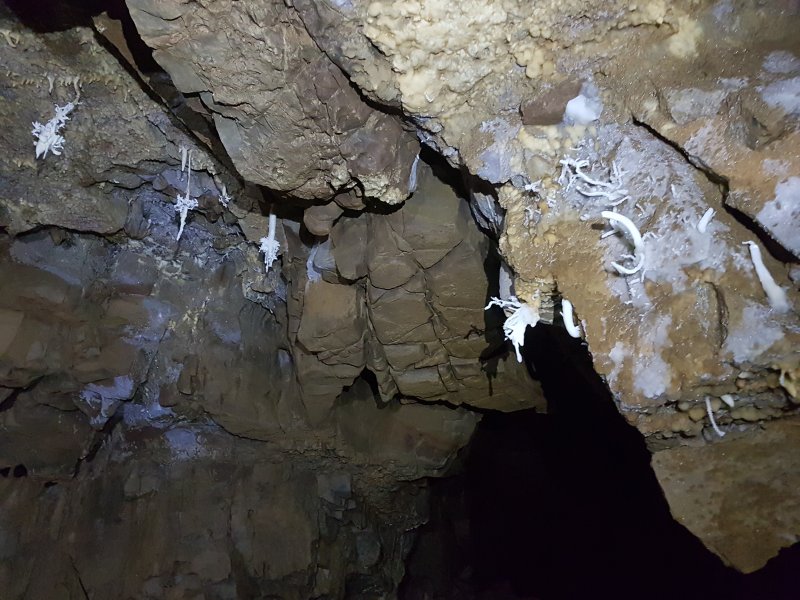 Some much better, active helictites. Anywhere else, these would be a main attraction for a passage, but they will soon be completely overshadowed.
Lighting by Tarquin and Claire
Some much better, active helictites. Anywhere else, these would be a main attraction for a passage, but they will soon be completely overshadowed.
Lighting by Tarquin and Claire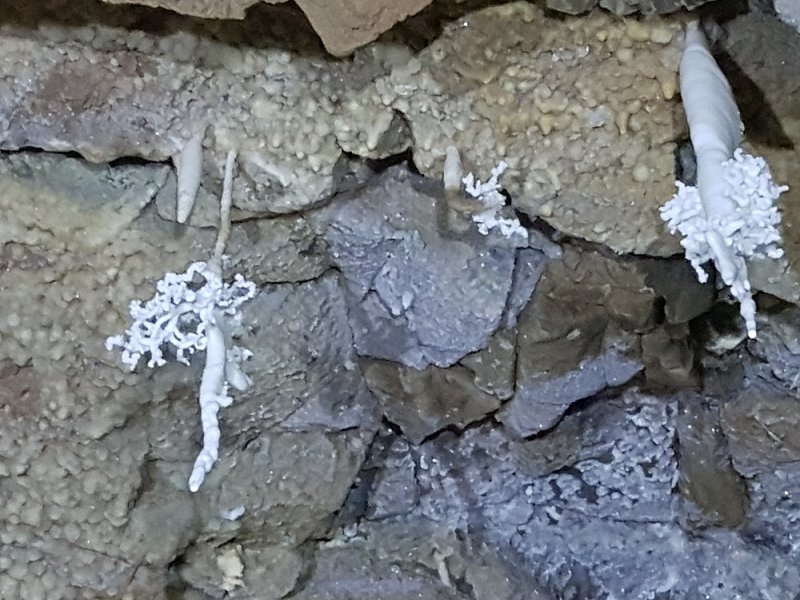 Detail of the helictites.
Lighting by Tarquin and Claire
Detail of the helictites.
Lighting by Tarquin and Claire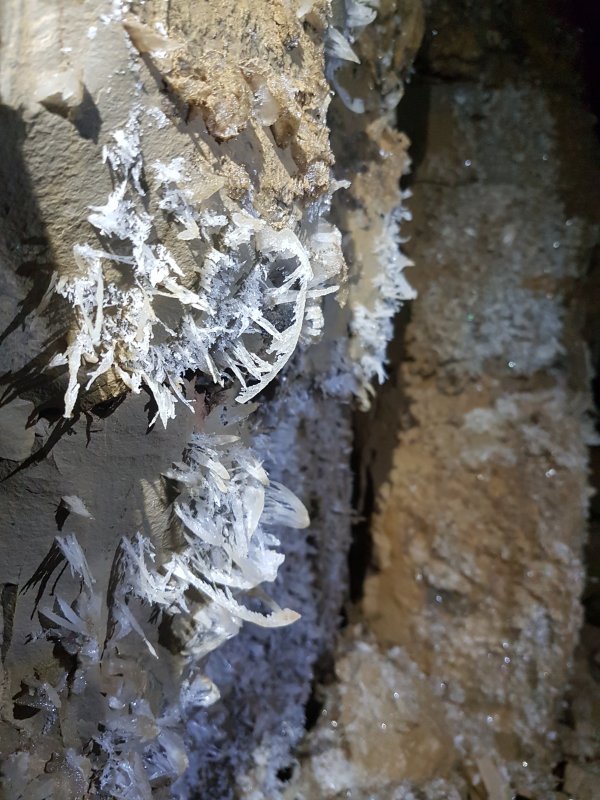 Gypsum formations, including one looking like a bow-and-arrow.
Lighting by Tarquin and Claire
Gypsum formations, including one looking like a bow-and-arrow.
Lighting by Tarquin and Claire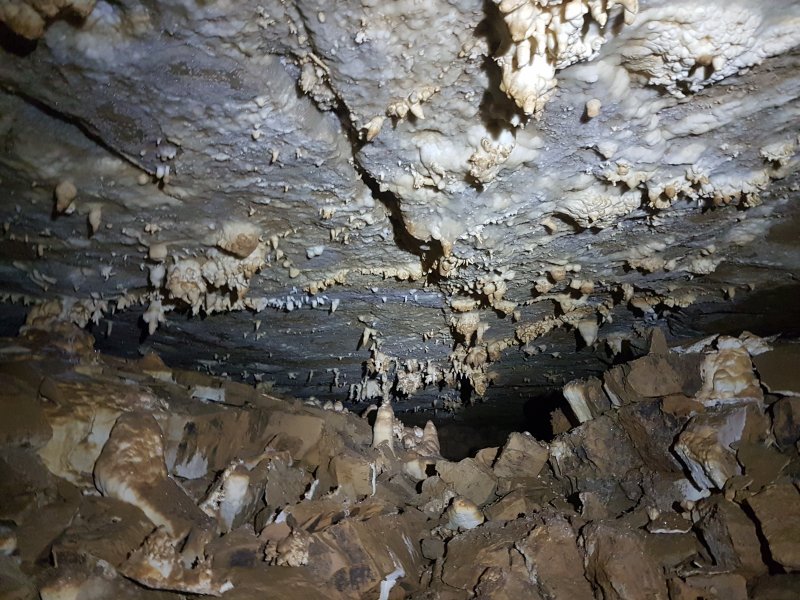 The Pineapple Patch, some old helictites and stalagmites guarding the way into The Gobbler.
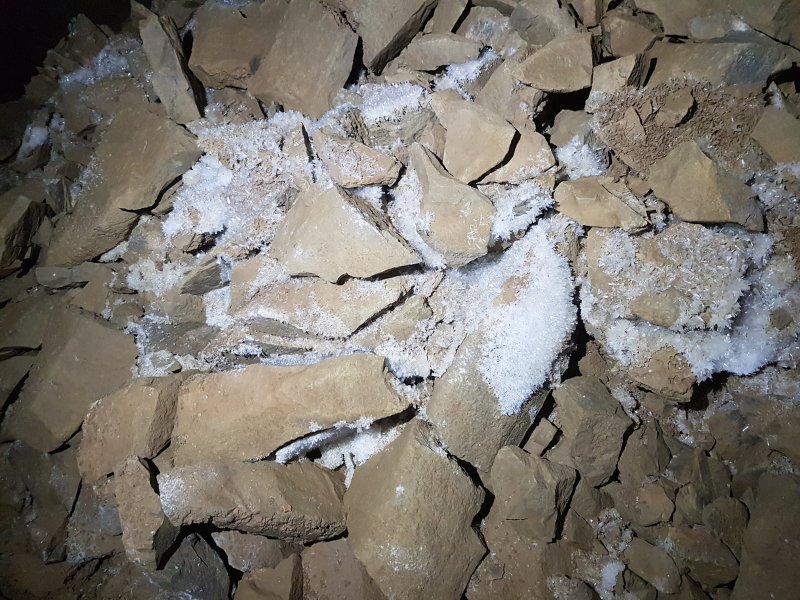 Gypsum thickly coating a random set of rocks. Exactly why it forms this way is still not known, but cryogenic aspects are possible. Perhaps it forms when a bubble of water within ice covers this area, with the crystals growing much like calcite crystals in a crystal pool. But this is just conjecture.
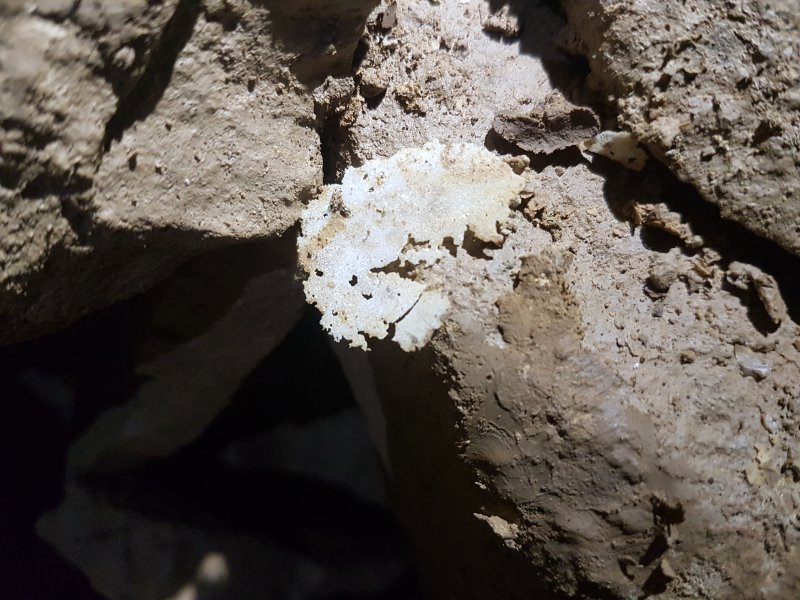 Cryostal rafts on the floor of the passage. Their significance has only recently been recognised, and they are not always protected by taping - this one sits immediately beside a footprint.
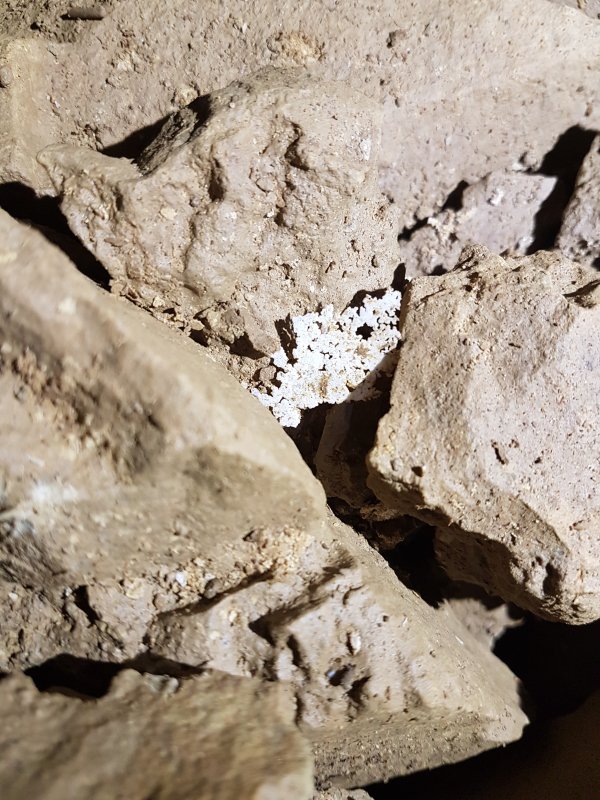 These were almost certainly formed by cryogenic process during an ice age, from calcite supersaturated in a bubble of water within permafrost ice. They would then be gently placed into unusual positions as the ice melted.
 Nearby piles of gypsum have the same general appearance, formed in odd clumps and balanced on rocks. The angular rocks are the result of freeze-thaw fracturing the passage walls, and the bobbly mud is the result of ice crystals fluffing it up. Ice has played a very significant role in so much of this cave.
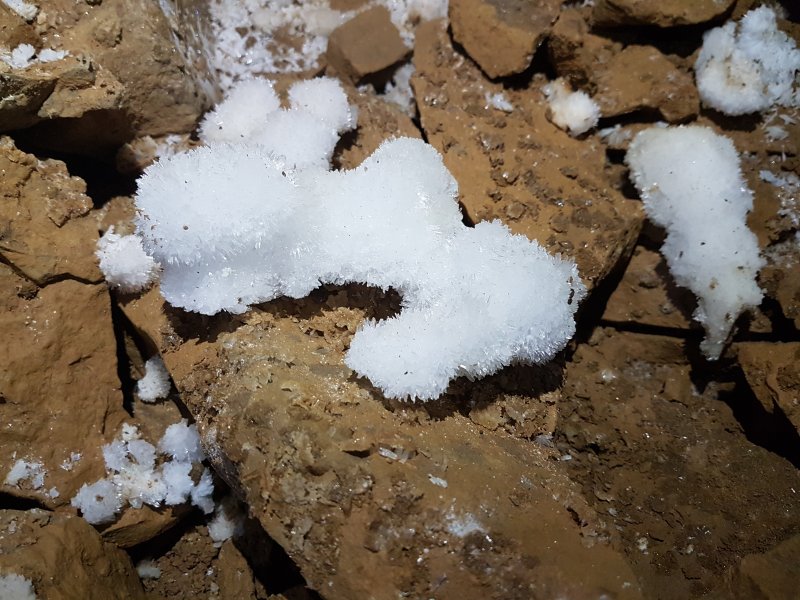 Cryogenic gypsum.
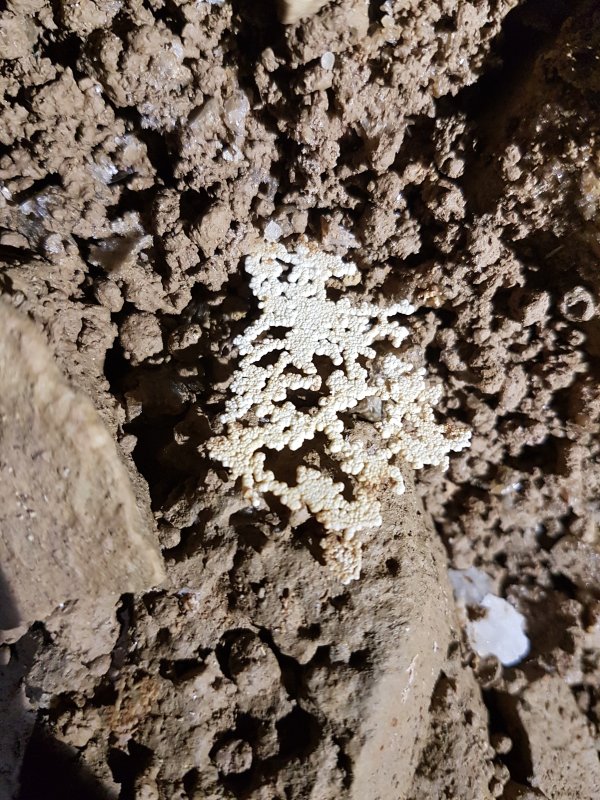 Another location, and this time some very elaborate lattices of cryostal.
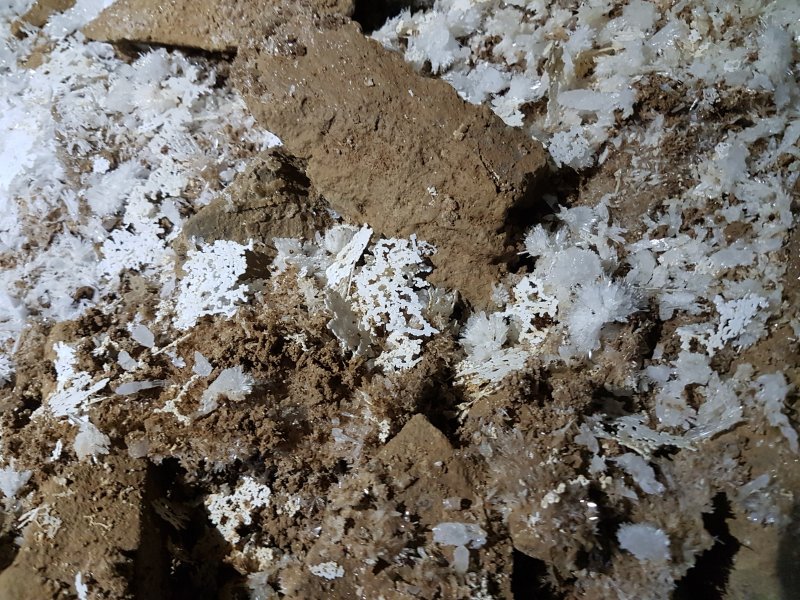 One of the most beautiful sets of cryostal lattices, layered around the gypsum. This shows that they are very likely to have formed as part of the same process.
Lighting by Claire
One of the most beautiful sets of cryostal lattices, layered around the gypsum. This shows that they are very likely to have formed as part of the same process.
Lighting by Claire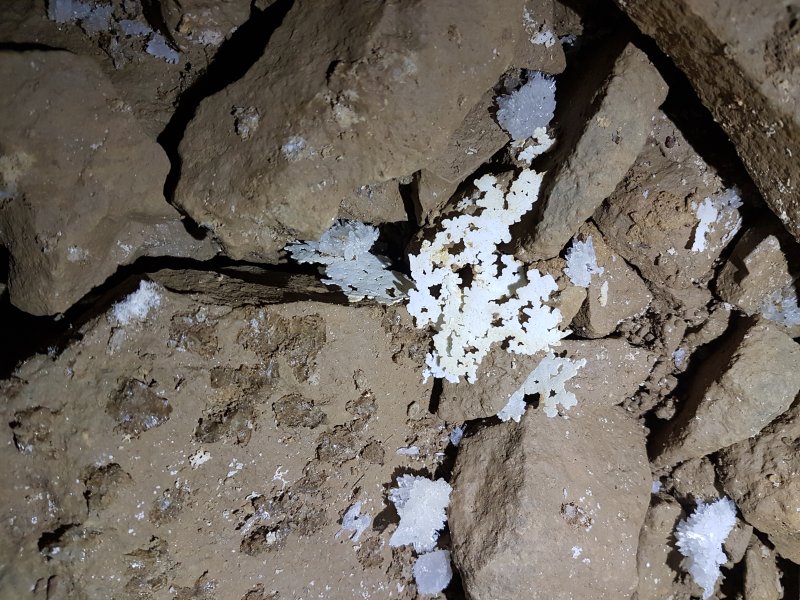 Still unknown is why they would form in such a flat pattern - like they were resting on a flat surface - while free to form in a bubble of water. Perhaps these formed on a melting surface of ice.
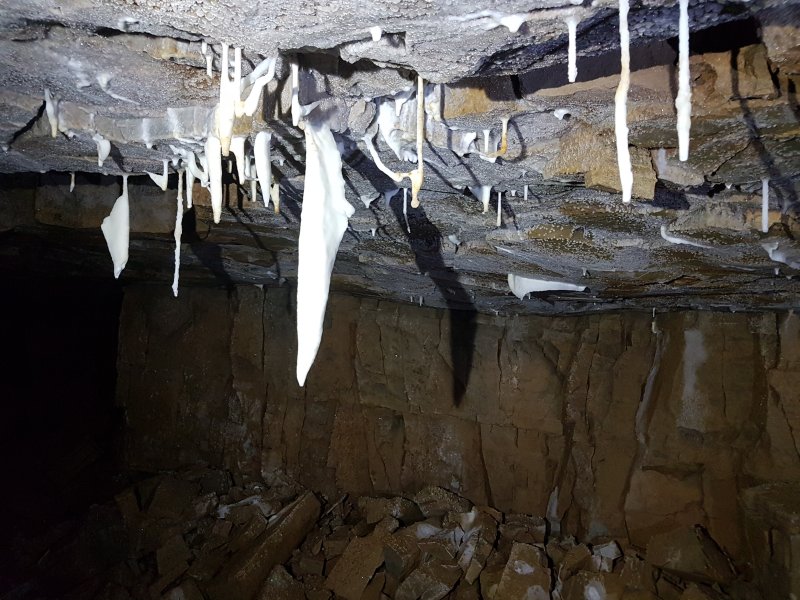 Stal, notable because it is actually rather ordinary, which makes it seem quite out of place in this passage.
Lighting by Tarquin and Claire
Stal, notable because it is actually rather ordinary, which makes it seem quite out of place in this passage.
Lighting by Tarquin and Claire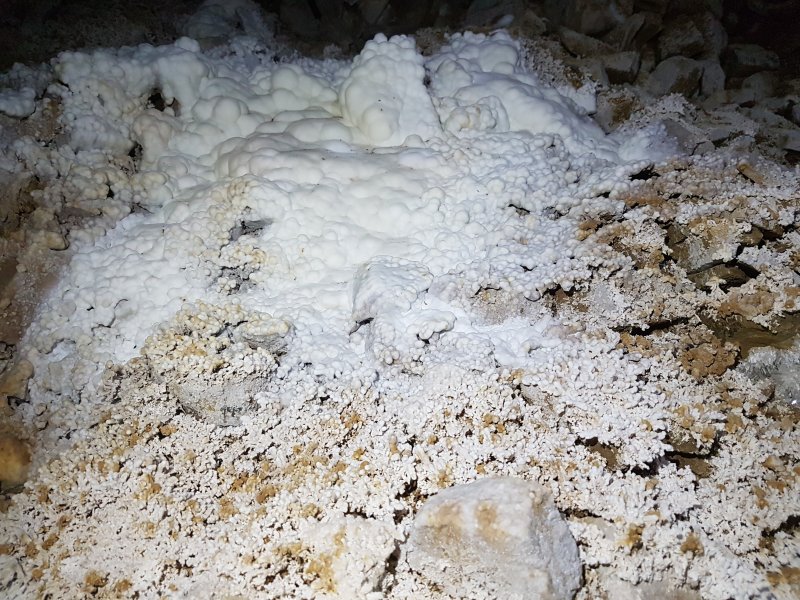 Extremely elaborate stalagmite formation, with a distinctive bobbly texture.
Lighting by Tarquin and Claire
Extremely elaborate stalagmite formation, with a distinctive bobbly texture.
Lighting by Tarquin and Claire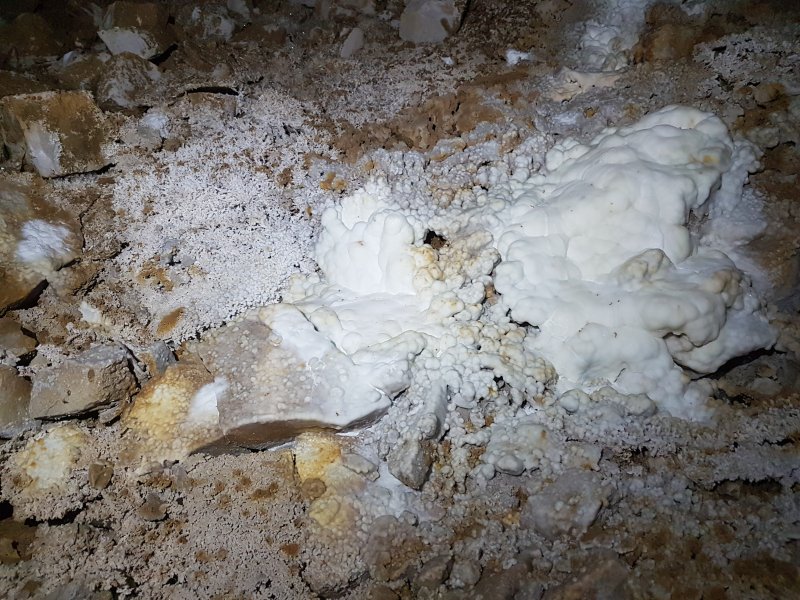 Bobbly stalagmites.
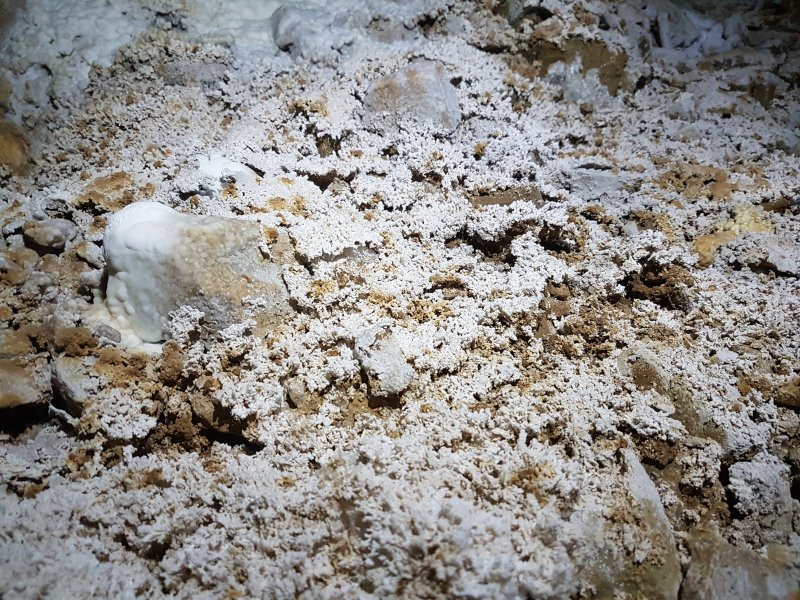 The detailed bobbles seem to be a thin layer of stal coating the bobbly mud and gypsum crystals.
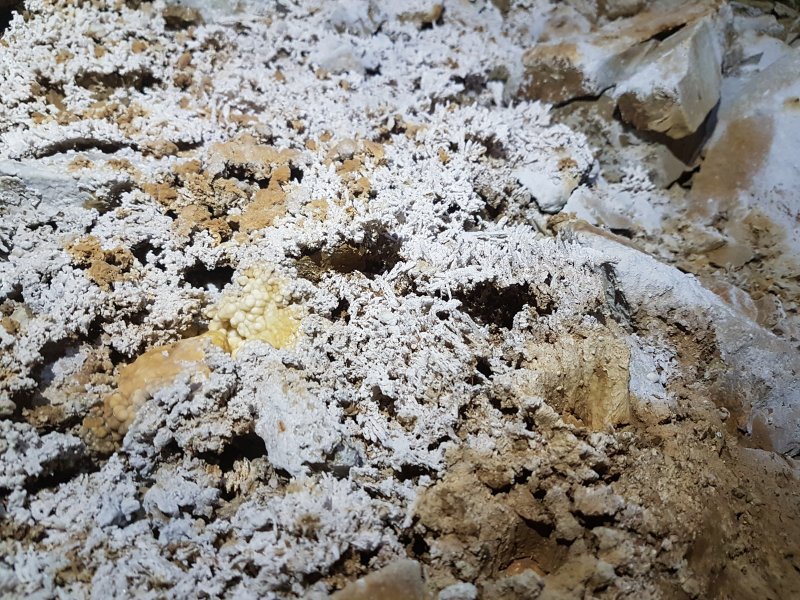 Calcite bobbles.
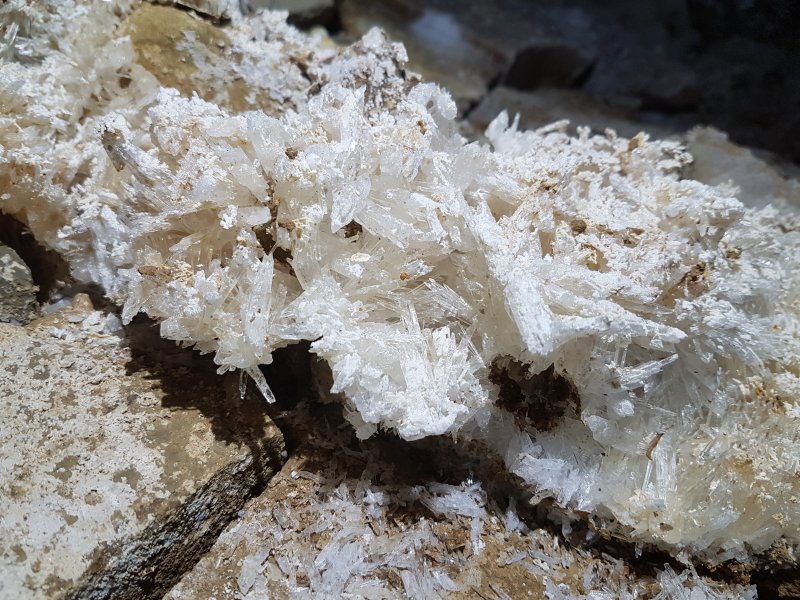 Calcite on gypsum crystals.
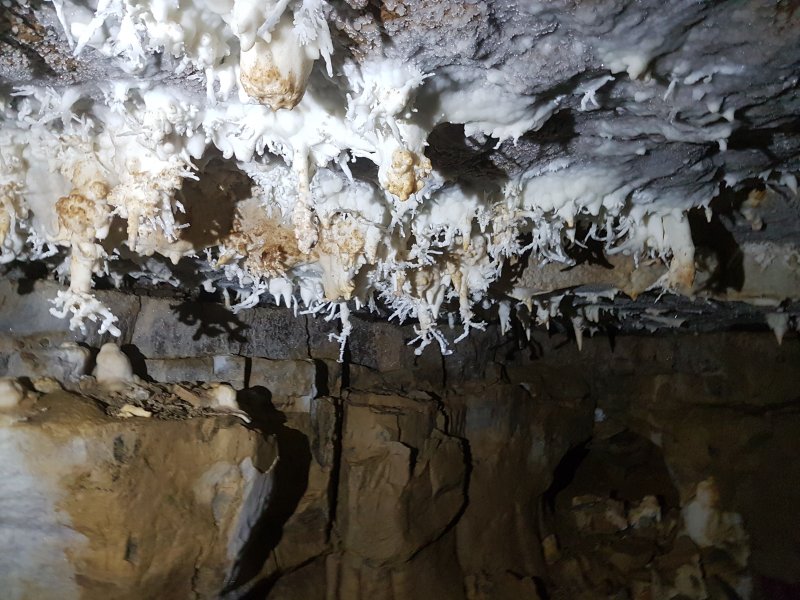 The helictites then begin, getting better every few metres. This is the beginning of Medusa's Children, one of the finest helictite grottos in Britain.
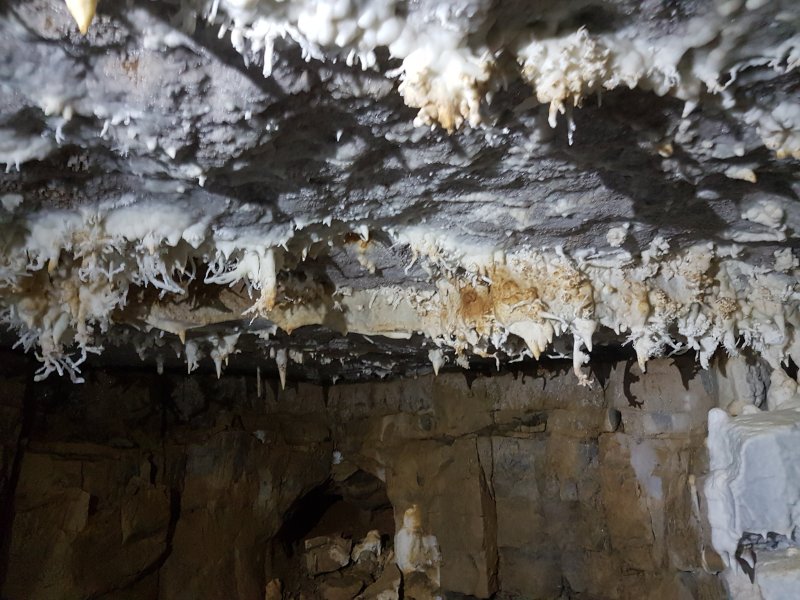 Early Medusa's Children.
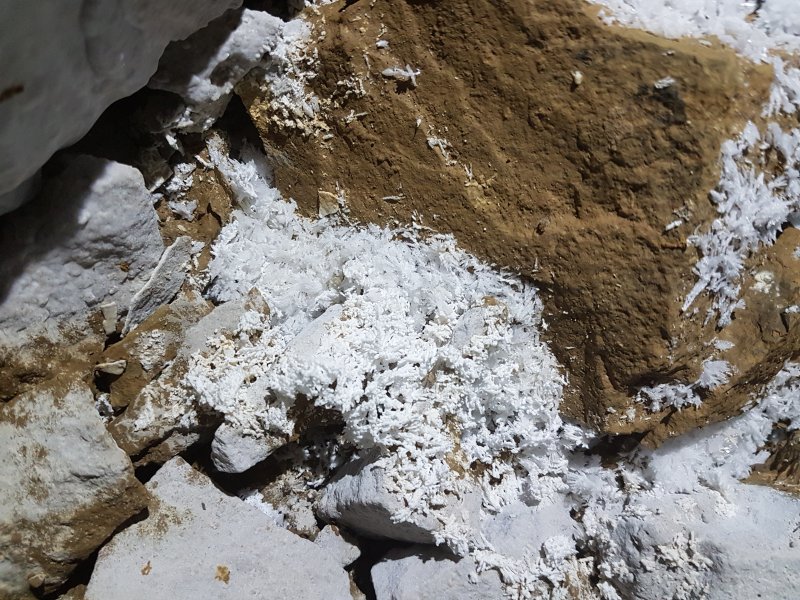 Several parts of the passage are coated in a natural calcite whitewash, the origin of which is unknown. Here, it even covers the gypsum crystals.
 Early Medusa's Children.
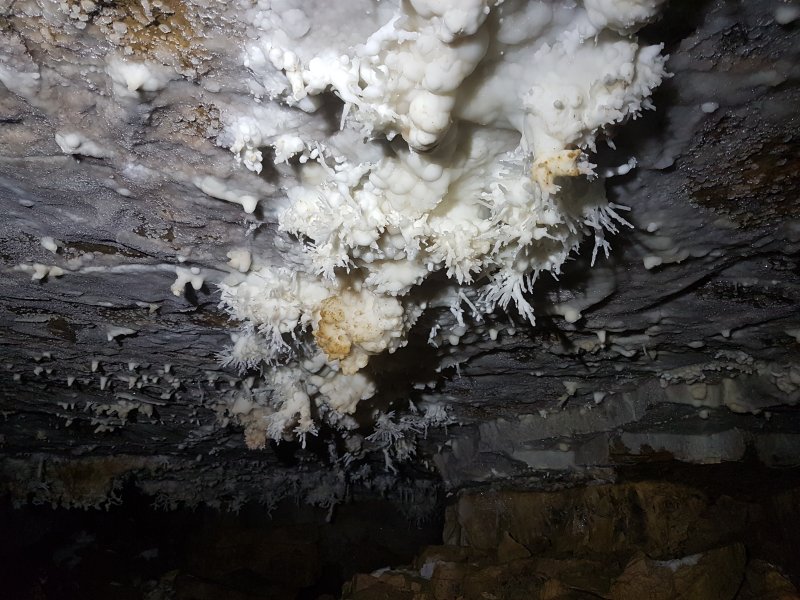 Early Medusa's Children.
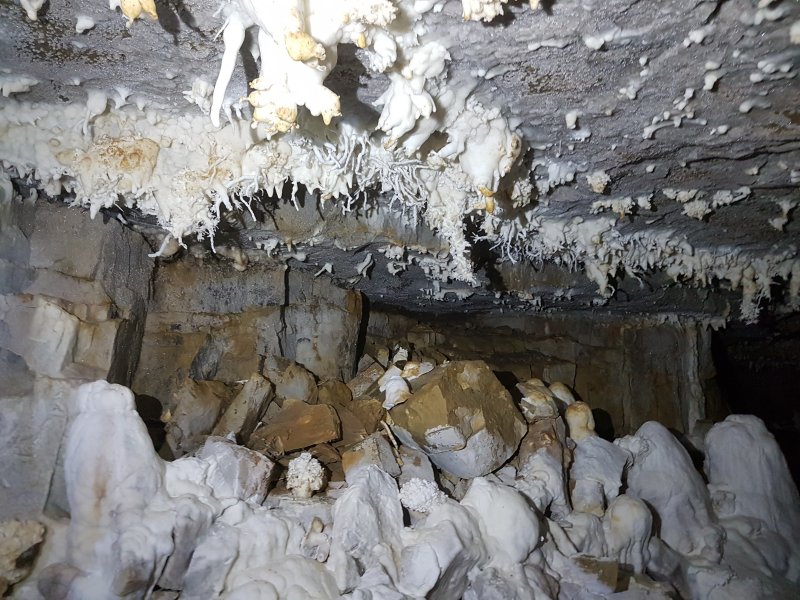 Stunning helictites, and whitewashed boulders. Between the stalagmites are fallen clusters of old helictites, also coated in whitewash.
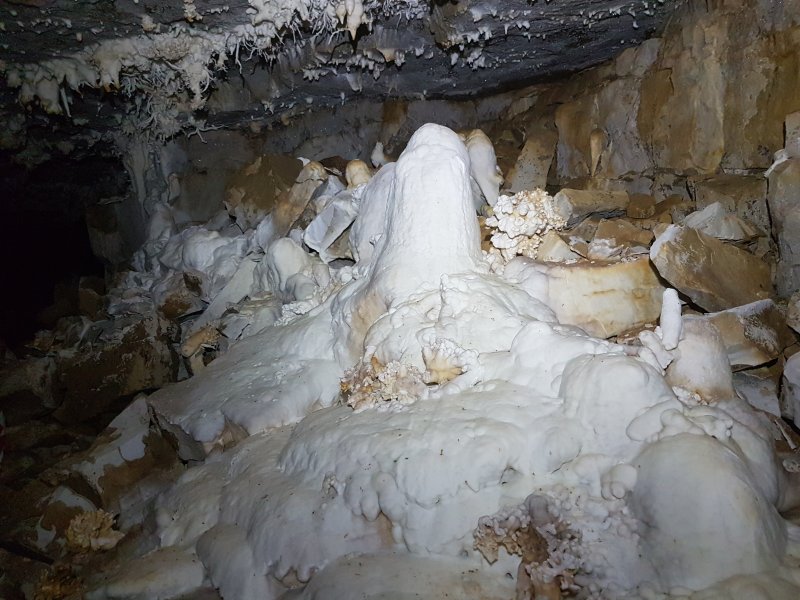 Stalagmites and fallen helictite clusters.
Lighting by Tarquin and Claire
Stalagmites and fallen helictite clusters.
Lighting by Tarquin and Claire The most iconic view of Medusa's Children. The way on is ahead, crawling through the gap in the formations, taking great care when passing them. The whole of this section of passage demands great care anyway, since the helictites require cavers to stoop beneath them without brushing against them.
Lighting by Tarquin and Claire
The most iconic view of Medusa's Children. The way on is ahead, crawling through the gap in the formations, taking great care when passing them. The whole of this section of passage demands great care anyway, since the helictites require cavers to stoop beneath them without brushing against them.
Lighting by Tarquin and Claire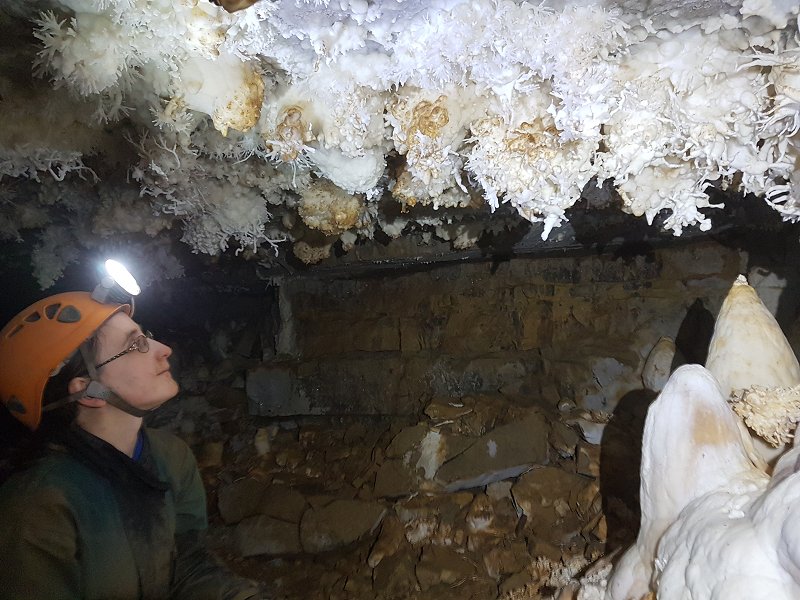 Overwhelmed by helictites.
Lighting by Tarquin and Claire
Overwhelmed by helictites.
Lighting by Tarquin and Claire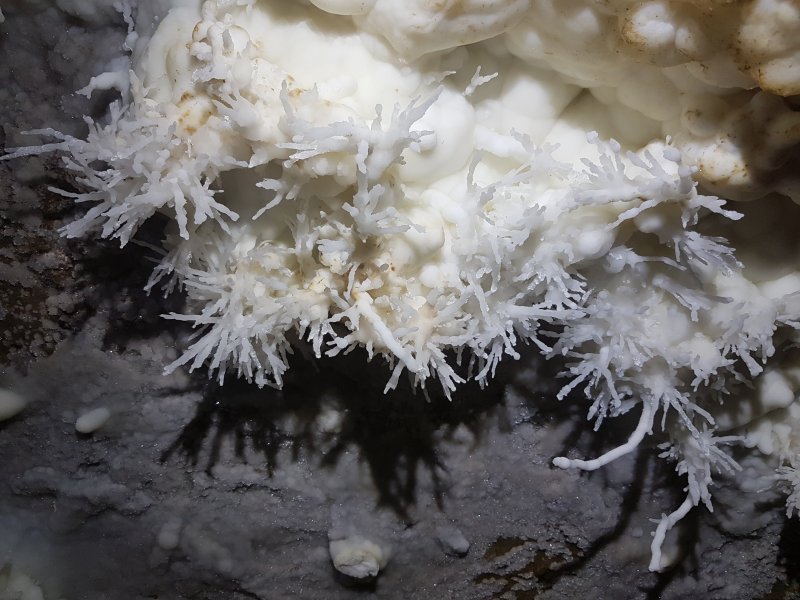 Medusa's Children.
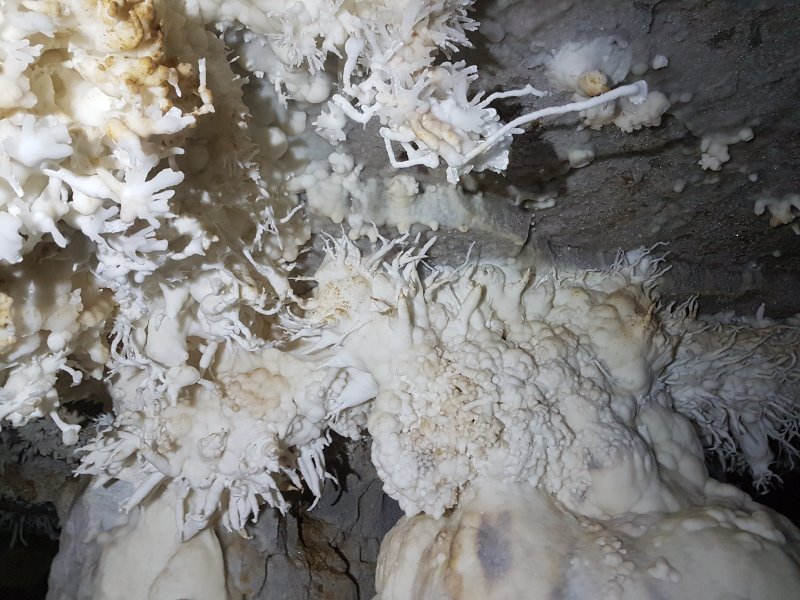 The tops of the columns.
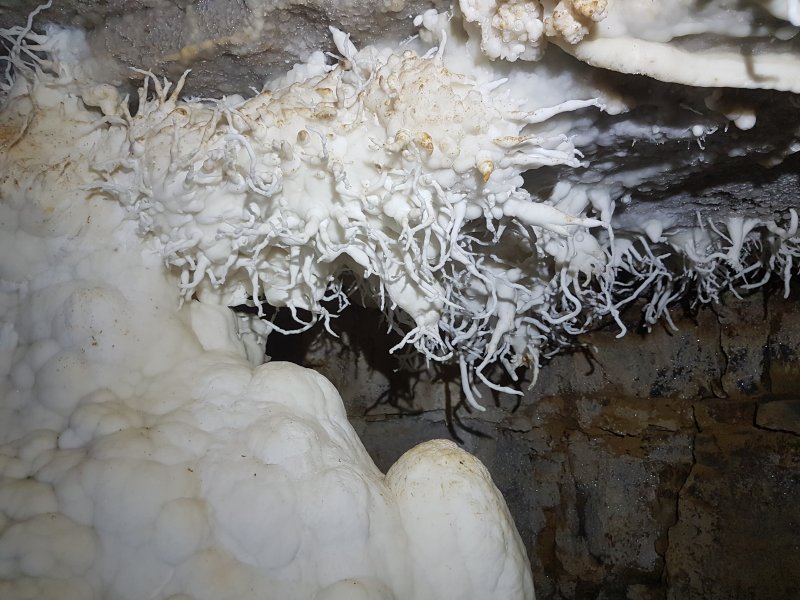 The longest of the helictites.
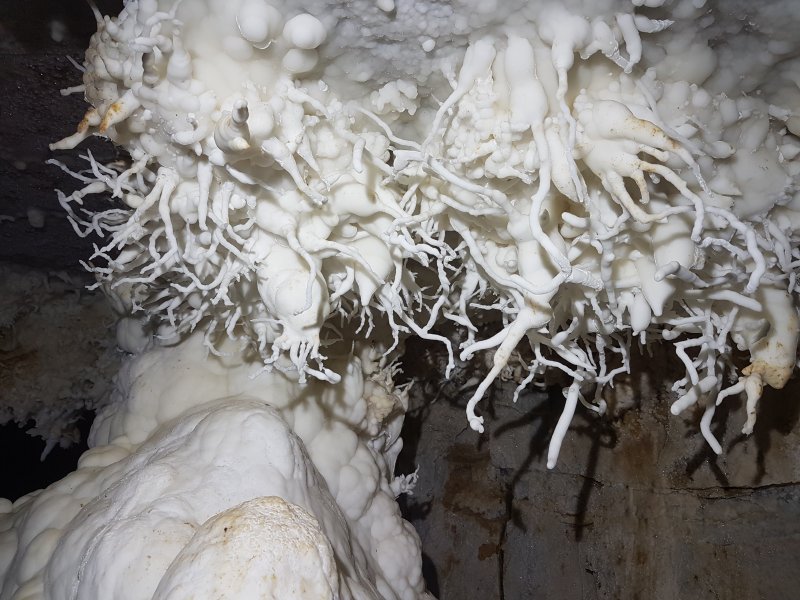 The longest of the helictites.
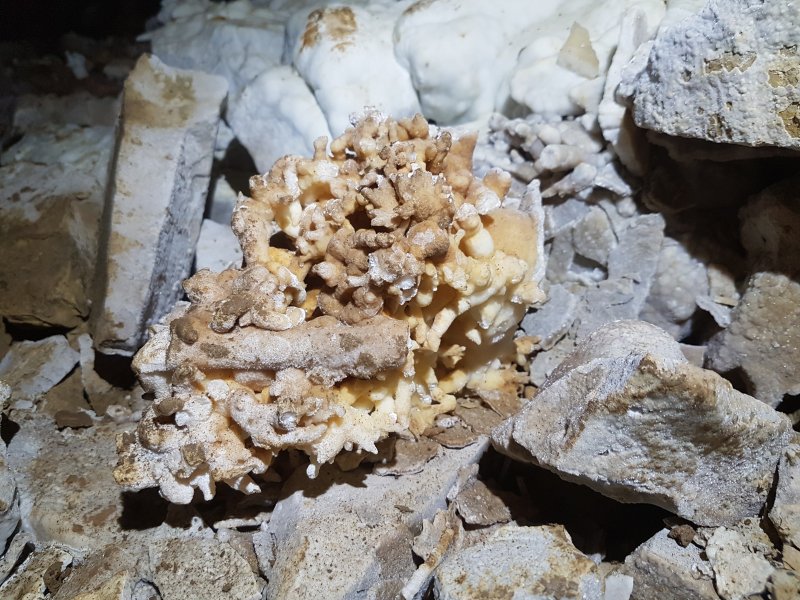 If one of Medusa's snakes looks at another of Medusa's snakes, it turns to stone and falls off. True story.
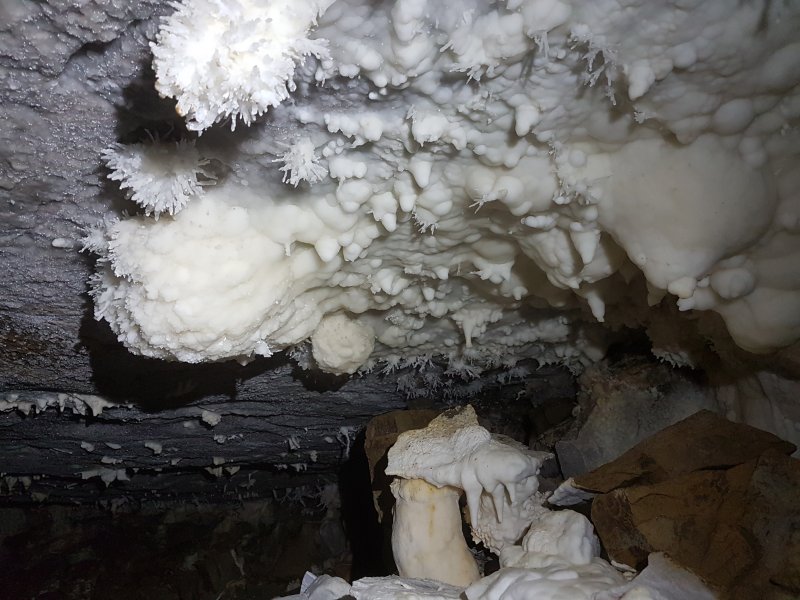 The grotto ends, but there are still many clusters of helictites in the passage immediately beyond.
 Cauliflower.
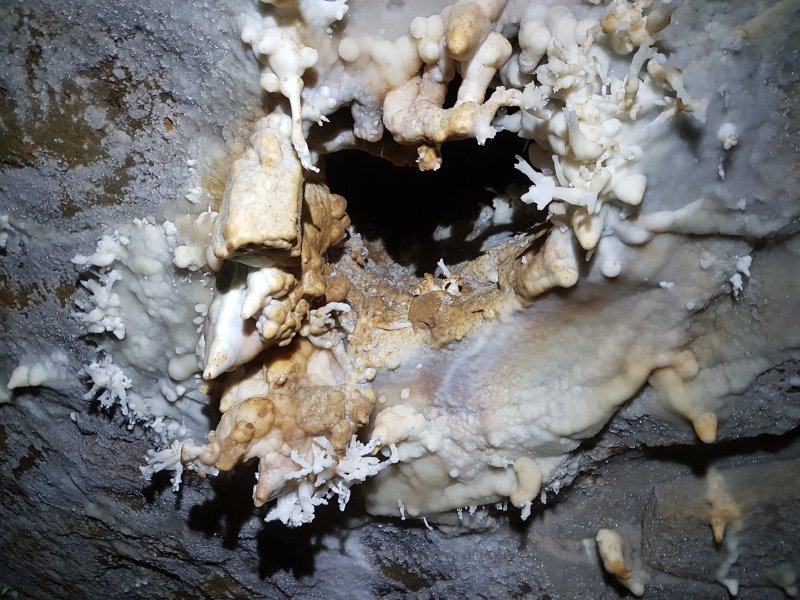 Helictites around an aven.
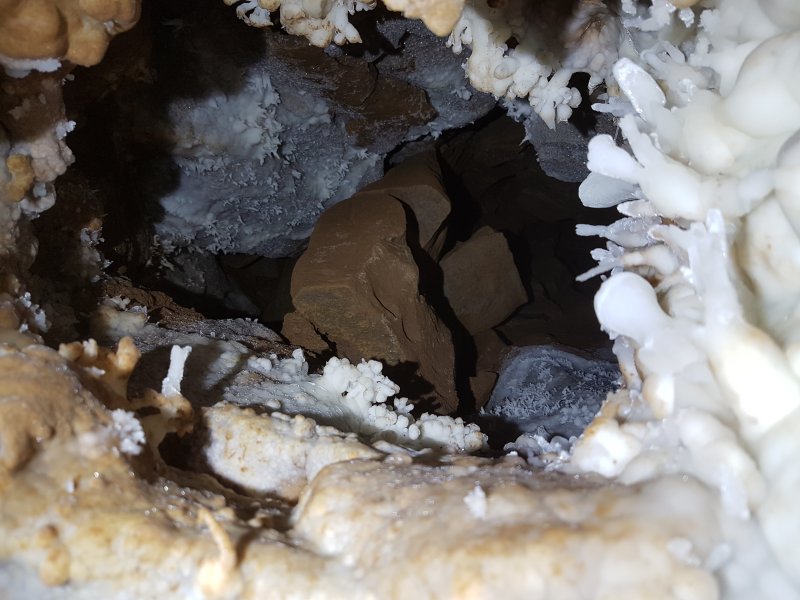 In the aven
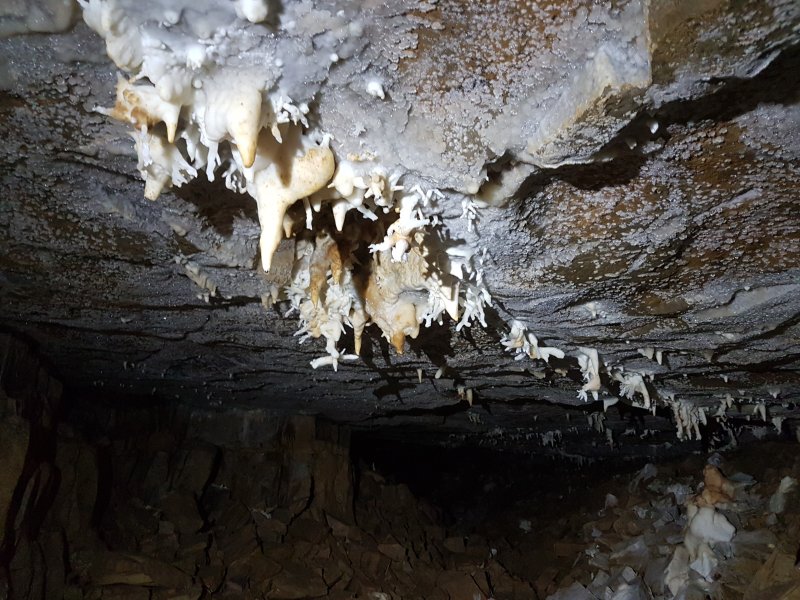 Continuing helictites.
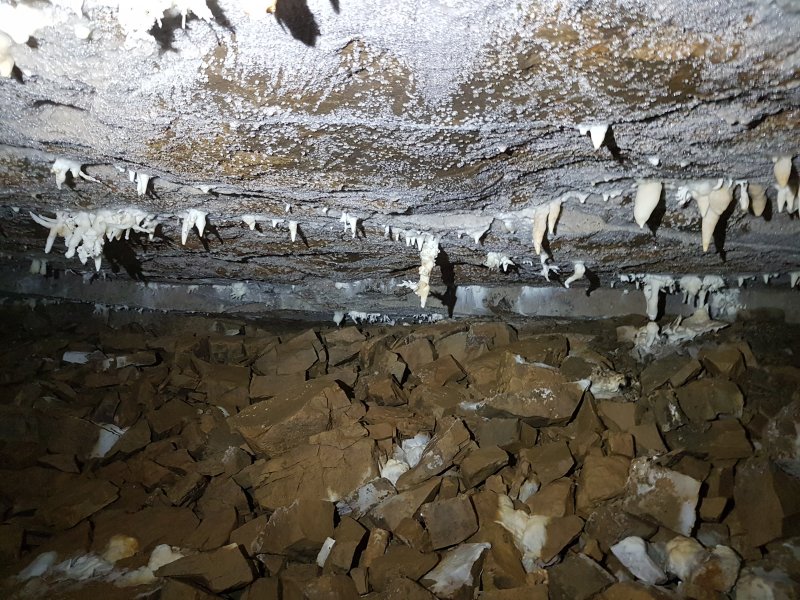 Continuing helictites.
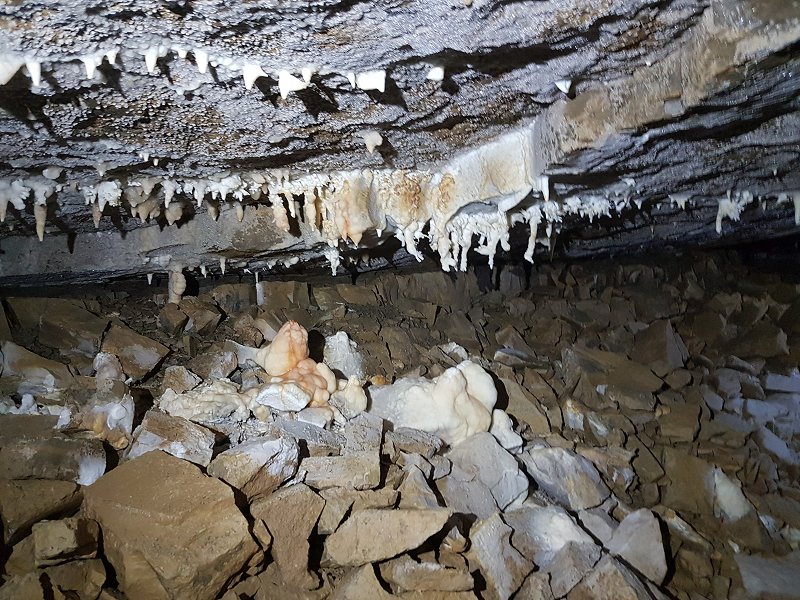 Continuing helictites.
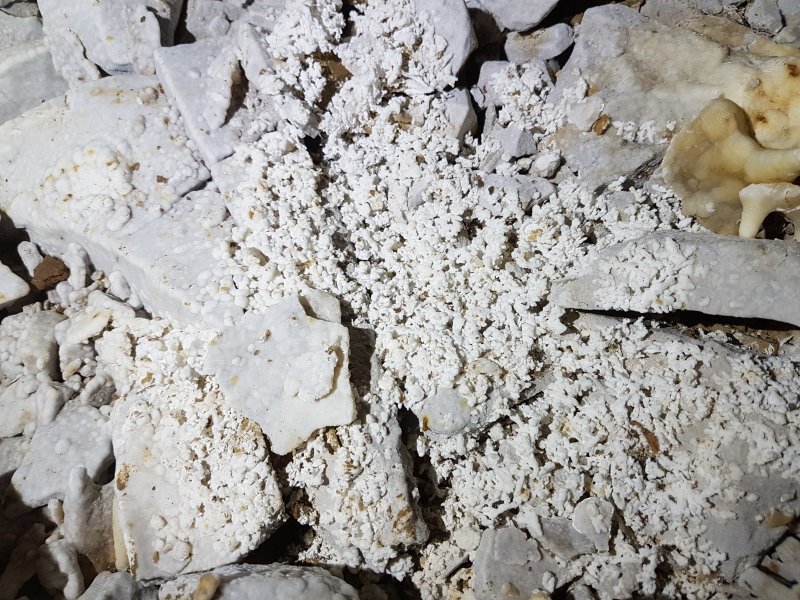 Whitewash coated gypsum.
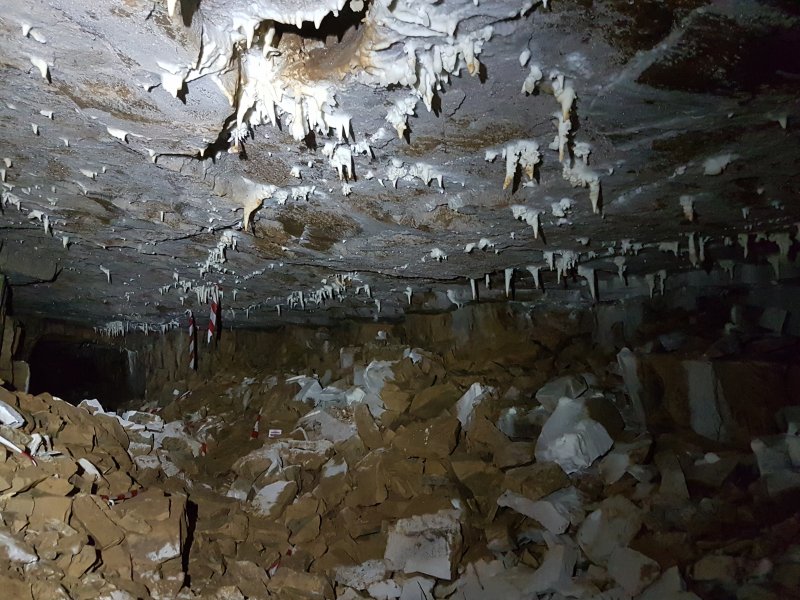 Whitewash patches radomly coating the rocks and ceiling. The tapes hang from the roof as a reminder to keep down and avoid touching the ceiling.
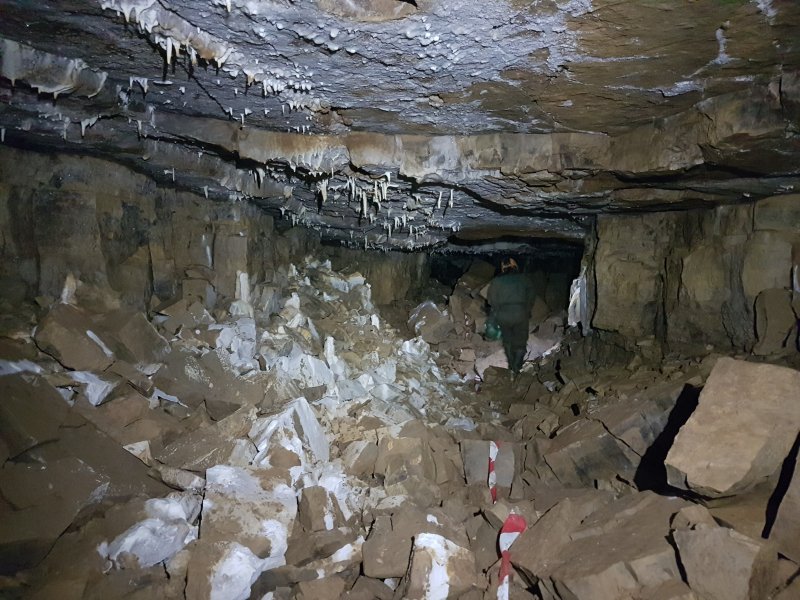 Even Claire, being quite petite, has to stoop here. The taping seems to have worked though, as the ceiling's whitewash remains pristine.
Lighting by Tarquin and Claire
Even Claire, being quite petite, has to stoop here. The taping seems to have worked though, as the ceiling's whitewash remains pristine.
Lighting by Tarquin and Claire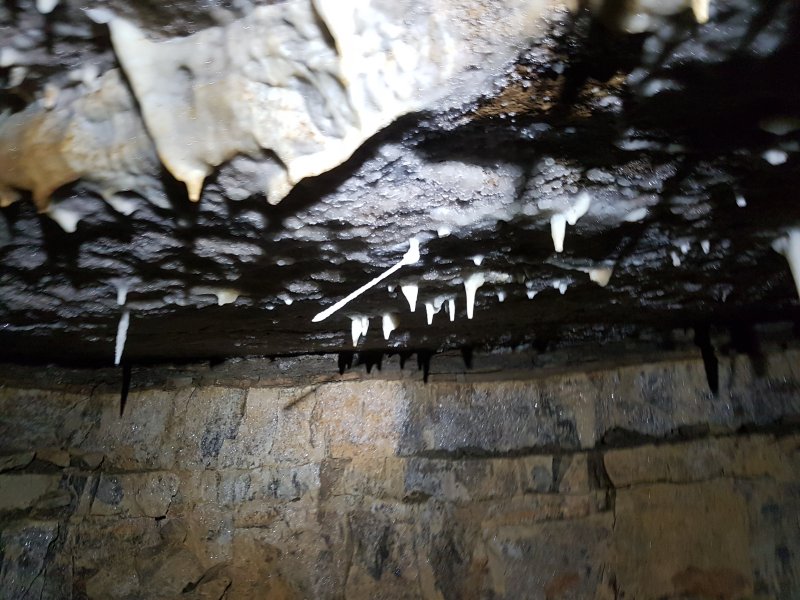 Pointing helictite.
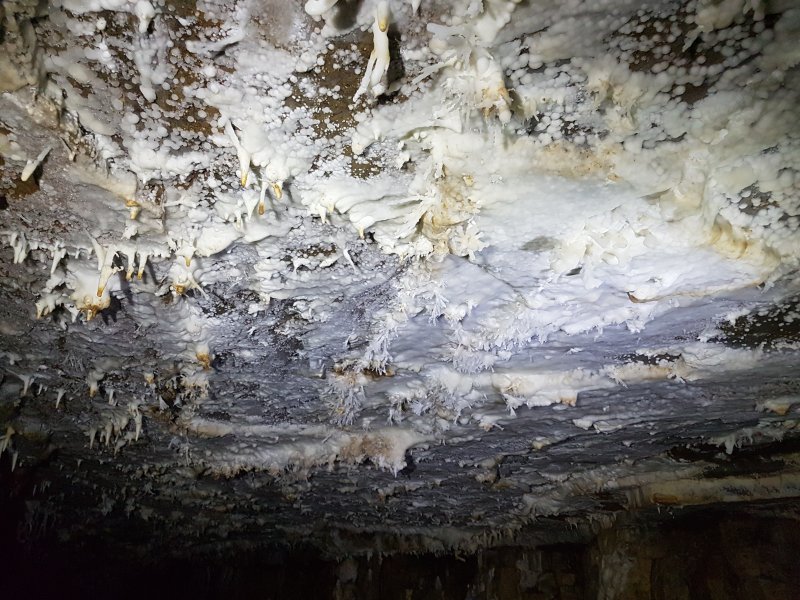 The helictites begin again, approaching Lightbulb Chamber.
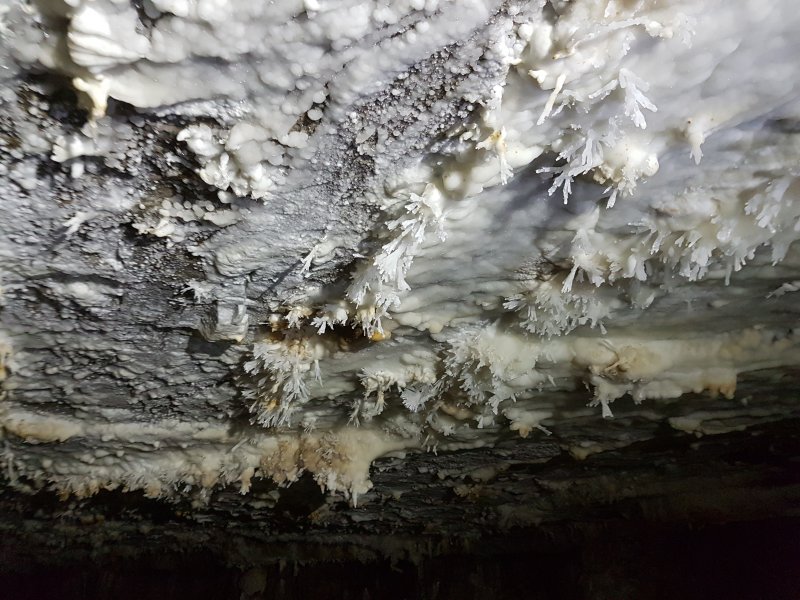 Anthodites.
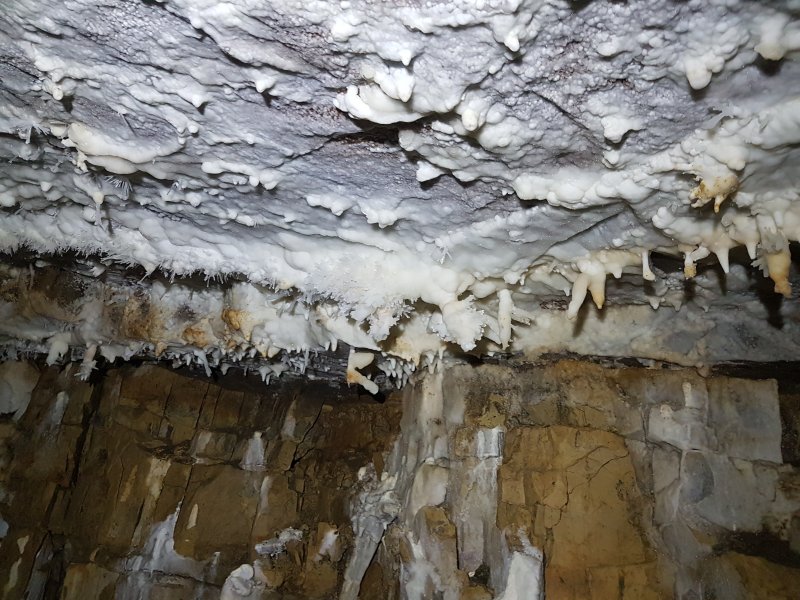 Approaching Lightbulb Chamber.
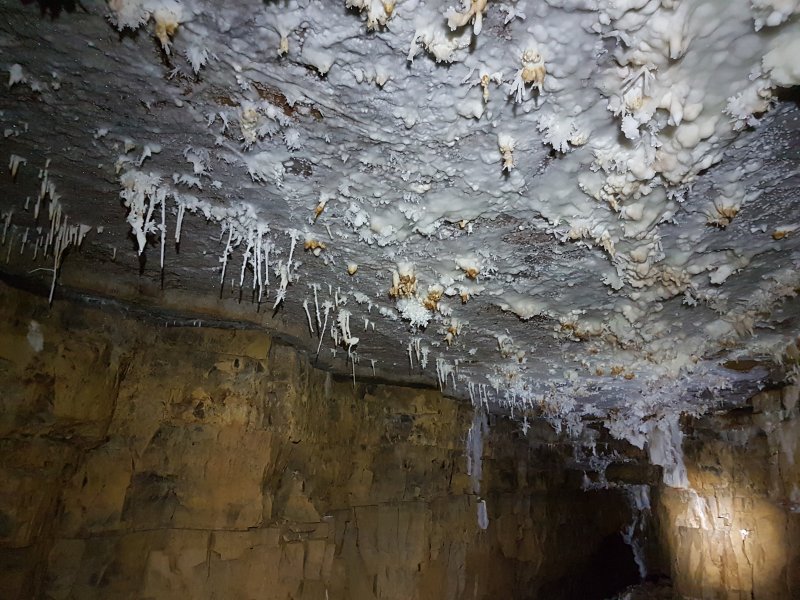 Lightbulb Chamber, adorned with many fine helictite formations.
Lighting by Tarquin and Claire
Lightbulb Chamber, adorned with many fine helictite formations.
Lighting by Tarquin and Claire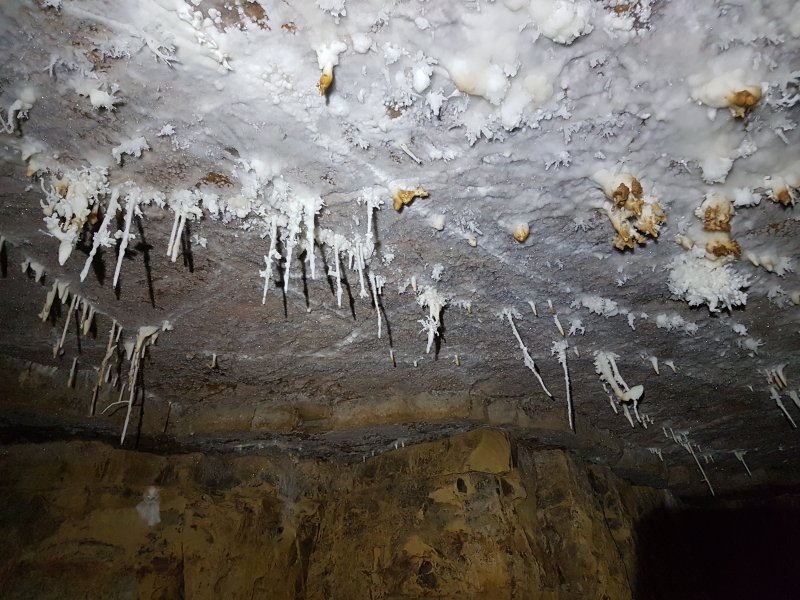 Lightbulb Chamber. Much taller, making it hard to get good pitures with my phone camera.
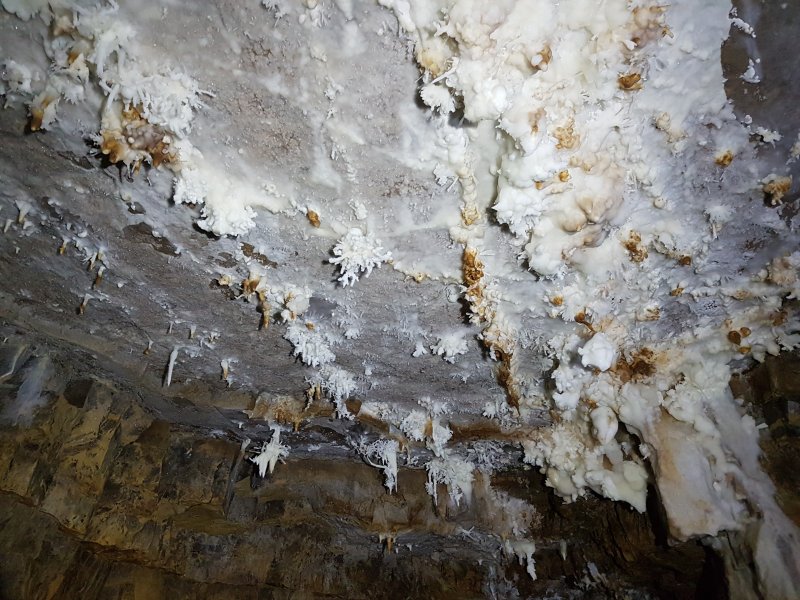 Lightbulb Chamber. The Lightbulb can barely be seen here, but it is the nearly round ball of calcite hanging from a brown helictite, to the right of the centre of the picture. Also distinctive is the helictite cluster near the back wall that looks like a donkey hanging from its neck. But lightbulb Chamber sounds much nicer than Dead Donkey Chamber.
Lighting by Tarquin and Claire
Lightbulb Chamber. The Lightbulb can barely be seen here, but it is the nearly round ball of calcite hanging from a brown helictite, to the right of the centre of the picture. Also distinctive is the helictite cluster near the back wall that looks like a donkey hanging from its neck. But lightbulb Chamber sounds much nicer than Dead Donkey Chamber.
Lighting by Tarquin and Claire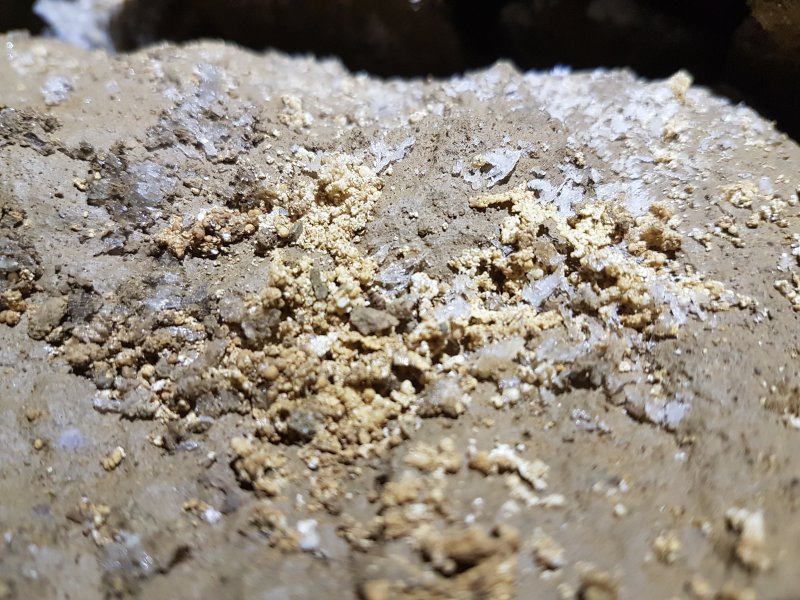 If you know what to look for, there is some more cryostal just after Lightbulb Chamber, looking like gold dust.
 The formations then abruptly end, and the brief walking section is short lived. The passage soon becomes one of the longest crawls in the country, without a significant reward at the far end. Instead, we will take a detour near the start of the crawl, into Cantankerous Surveyors' Passage.
 The spectactular Geryon helictite formation, by far one of the best in the UK, and much larger than it appears in photographs.
Lighting by Claire
The spectactular Geryon helictite formation, by far one of the best in the UK, and much larger than it appears in photographs.
Lighting by Claire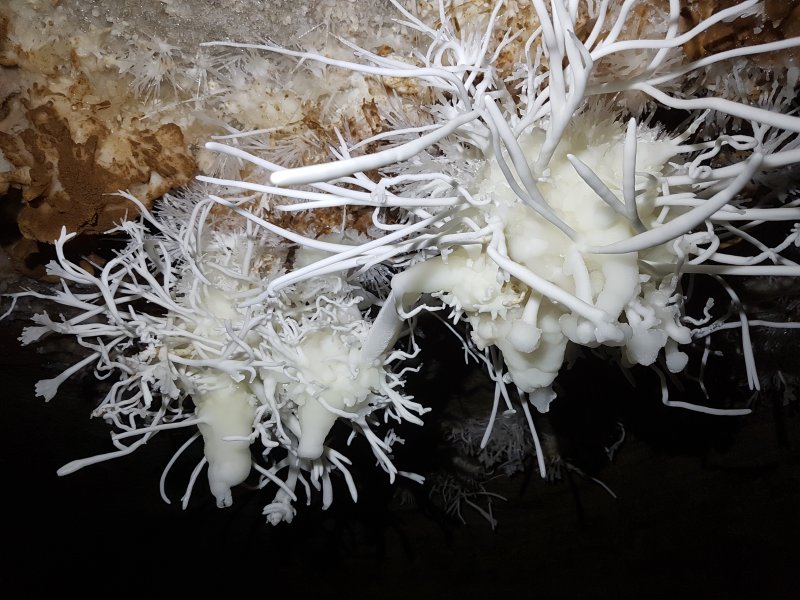 The aragonite helictites are about 30 cm (1 foot) long, formed around three calcite stalactites, which I think of as a father, baby and mother. The baby and mother are joined by a thick umbilical cord. Most helictites are single, long fingers, but some branch into distinctive hands.
Lighting by Claire
The aragonite helictites are about 30 cm (1 foot) long, formed around three calcite stalactites, which I think of as a father, baby and mother. The baby and mother are joined by a thick umbilical cord. Most helictites are single, long fingers, but some branch into distinctive hands.
Lighting by Claire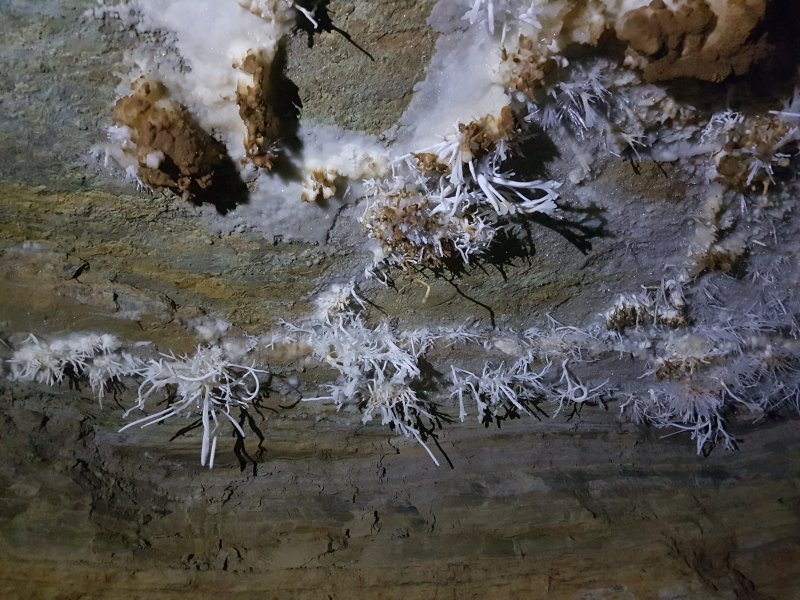 Helictites in Geryon's Lair, including a distinctive Catherine wheel on the right.
Lighting by Claire
Helictites in Geryon's Lair, including a distinctive Catherine wheel on the right.
Lighting by Claire Large anthodites behind The Geryon.
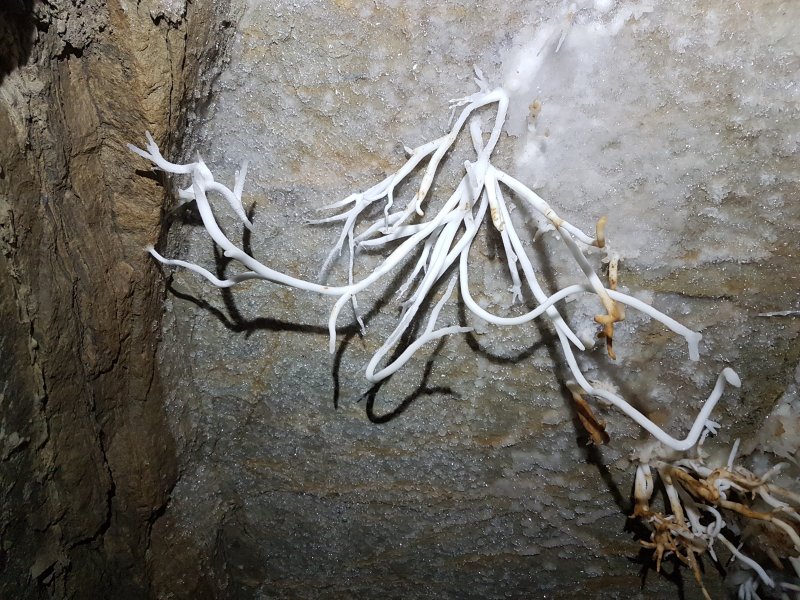 Helictites in Geryon's Lair.
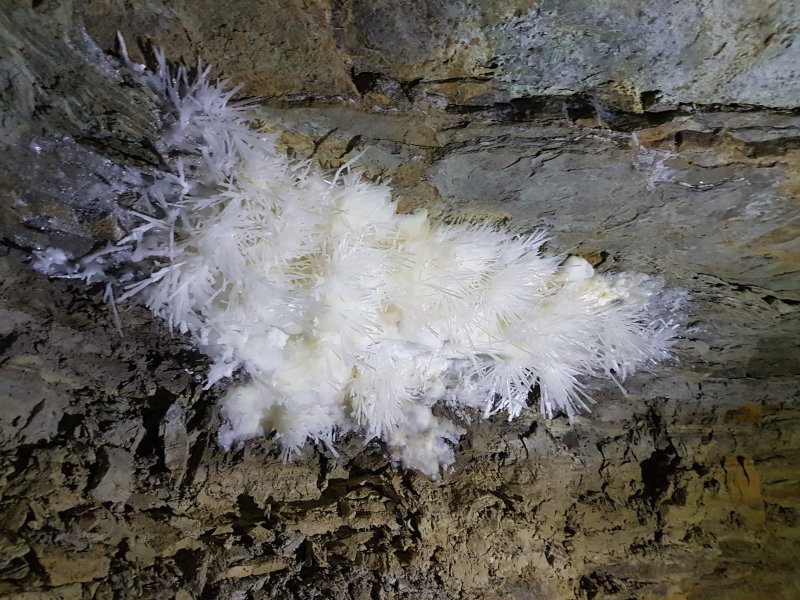 A very large collection of anthodites in Geryon's Lair.
Lighting by Claire
A very large collection of anthodites in Geryon's Lair.
Lighting by Claire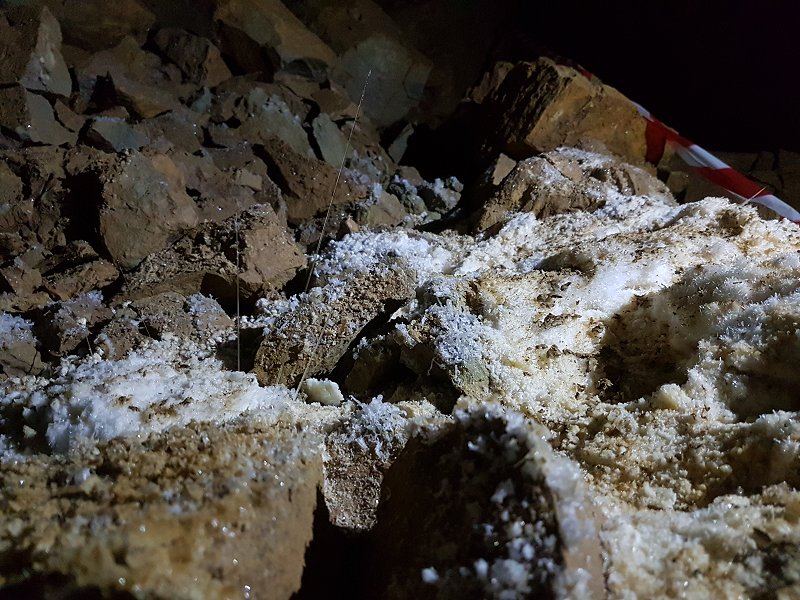 Just beyond Geryon's Lair, in Needle Passage, a pile of gypsum contains The Needles, some extremely long selenite needles growing randomly from the gypsum.
Lighting by Claire
Just beyond Geryon's Lair, in Needle Passage, a pile of gypsum contains The Needles, some extremely long selenite needles growing randomly from the gypsum.
Lighting by Claire The longest needle is around 23 cm (9 inches) long, about 50% longer than any others known in the cave.
Lighting by Claire
The longest needle is around 23 cm (9 inches) long, about 50% longer than any others known in the cave.
Lighting by Claire Some of the smaller needles are still longer than any other known selenite needles in the cave.
Lighting by Claire
Some of the smaller needles are still longer than any other known selenite needles in the cave.
Lighting by Claire