Ogof Draenen Round Trip 12/08/2018
Unless otherwise stated, camera, setups, lighting, edits and gallery effects by Tarquin. Modelling and lighting at various points will be Robert "Rob" Middleton, Helen Fairclough, Hannah Risser, Craig Hamar, Will Burn and Jolene Anne.
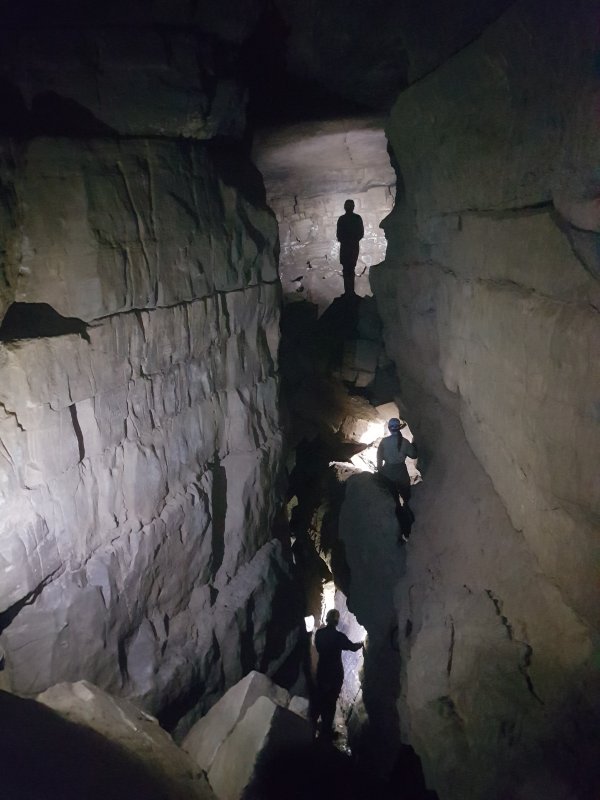
 Climbs in Beyond A Choke Streamway, which are bypassed by Wonderbra Bypass.
Modelling by Helen, Hannah and Craig, lighting by Will, Helen, Hannah and Craig
Climbs in Beyond A Choke Streamway, which are bypassed by Wonderbra Bypass.
Modelling by Helen, Hannah and Craig, lighting by Will, Helen, Hannah and Craig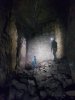 An early part of White Arch Passage, showing its typical size.
Modelling by Helen and Hannah, lighting by Will, Helen and Hannah
An early part of White Arch Passage, showing its typical size.
Modelling by Helen and Hannah, lighting by Will, Helen and Hannah A taller part of White Arch Passage.
Modelling by Jolene, Helen and Hannah, lighting by Will, Craig, Jolene, Helen and Hannah
A taller part of White Arch Passage.
Modelling by Jolene, Helen and Hannah, lighting by Will, Craig, Jolene, Helen and Hannah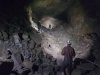 The largest part of White Arch Passage, below the pub.
Modelling by Craig, Helen and Hannah, lighting by Will, Jolene, Craig, Helen and Hannah
The largest part of White Arch Passage, below the pub.
Modelling by Craig, Helen and Hannah, lighting by Will, Jolene, Craig, Helen and Hannah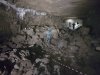 The Players' Tunnel, the large passage connecting the Arms Park and Saint David's Hall chambers.
Modelling by Hannah, Will and Helen, lighting by Tarquin, Craig, Hannah, Will and Helen
The Players' Tunnel, the large passage connecting the Arms Park and Saint David's Hall chambers.
Modelling by Hannah, Will and Helen, lighting by Tarquin, Craig, Hannah, Will and Helen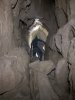 Top of a climb in Squirrel Rifts.
Modelling by Helen, lighting by Tarquin, Helen, Will and Craig
Top of a climb in Squirrel Rifts.
Modelling by Helen, lighting by Tarquin, Helen, Will and Craig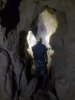 Near the traverses in Squirrel Rifts.
Modelling by Helen, lighting by Tarquin and Helen
Near the traverses in Squirrel Rifts.
Modelling by Helen, lighting by Tarquin and Helen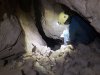 Entrance to Sparrow Series.
Modelling by Helen, lighting by Tarquin, Will and Helen
Entrance to Sparrow Series.
Modelling by Helen, lighting by Tarquin, Will and Helen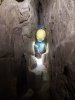 The Connection, the tightest part of the Round Trip, but more awkward than tight.
Modelling by Helen, lighting by Tarquin and Helen
The Connection, the tightest part of the Round Trip, but more awkward than tight.
Modelling by Helen, lighting by Tarquin and Helen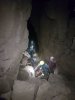 Haggis Basher Number One, on the way to Far Agent Blorenge.
Modelling by Helen, Craig, Jolene, Hannah, Will and Rob, lighting by Tarquin, Helen, Craig, Jolene, Hannah, Will and Rob
Haggis Basher Number One, on the way to Far Agent Blorenge.
Modelling by Helen, Craig, Jolene, Hannah, Will and Rob, lighting by Tarquin, Helen, Craig, Jolene, Hannah, Will and Rob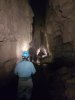 Sump Inlet heading upstream towards the sump, from the junction with Far Agent Blorenge.
Modelling by Hannah, Helen and Craig, lighting by Tarquin, Hannah, Helen and Craig
Sump Inlet heading upstream towards the sump, from the junction with Far Agent Blorenge.
Modelling by Hannah, Helen and Craig, lighting by Tarquin, Hannah, Helen and Craig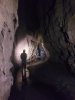 Far Agent Blorenge, a superb stream passage that actually has a comfortable gravel floor, quite unusual for Draenen.
Modelling by Craig, Hannah and Helen, lighting by Will, Craig, Hannah and Helen
Far Agent Blorenge, a superb stream passage that actually has a comfortable gravel floor, quite unusual for Draenen.
Modelling by Craig, Hannah and Helen, lighting by Will, Craig, Hannah and Helen Far Agent Blorenge.
Modelling by Hannah and Craig, lighting by Tarquin, Hannah and Craig
Far Agent Blorenge.
Modelling by Hannah and Craig, lighting by Tarquin, Hannah and Craig Far Agent Blorenge.
Modelling and lighting by Will, Craig, Helen and Hannah
Far Agent Blorenge.
Modelling and lighting by Will, Craig, Helen and Hannah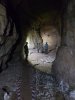 Crystal Mole, a large, fossil, side passage, that was once a major stream flowing north into The Score. It now ends in a sand swim dig.
Modelling by Helen and Hannah, lighting by Will, Helen and Hannah
Crystal Mole, a large, fossil, side passage, that was once a major stream flowing north into The Score. It now ends in a sand swim dig.
Modelling by Helen and Hannah, lighting by Will, Helen and Hannah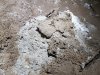 A gypsum crystal molehill.
 Far Agent Blorenge, downstream of Crystal Mole Passage, where it gains some deep, white mud.
Modelling by Will and Helen, lighting by Jolene, Will and Helen
Far Agent Blorenge, downstream of Crystal Mole Passage, where it gains some deep, white mud.
Modelling by Will and Helen, lighting by Jolene, Will and Helen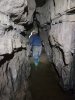 Agent Blorenge then takes over, as a much more sporting, active streamway.
Modelling by Will, lighting by Tarquin and Will
Agent Blorenge then takes over, as a much more sporting, active streamway.
Modelling by Will, lighting by Tarquin and Will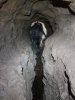 Agent Blorenge traverse on the way to the junction with Chocolate Blorenge.
Modelling by Will, lighting by Tarquin and Will
Agent Blorenge traverse on the way to the junction with Chocolate Blorenge.
Modelling by Will, lighting by Tarquin and Will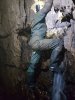 Cascade at the junction of Agent Blorenge and Chocolate Blorenge.
Modelling by Helen, lighting by Tarquin, Will and Helen
Cascade at the junction of Agent Blorenge and Chocolate Blorenge.
Modelling by Helen, lighting by Tarquin, Will and Helen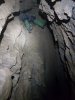 Climbing through an eyehole in Agent Blorenge.
Modelling by Will
Climbing through an eyehole in Agent Blorenge.
Modelling by Will The Sewer.
Modelling by Helen, lighting by Tarquin and Helen
The Sewer.
Modelling by Helen, lighting by Tarquin and Helen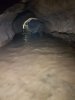 The Sewer.
Modelling by Helen, lighting by Tarquin and Helen
The Sewer.
Modelling by Helen, lighting by Tarquin and Helen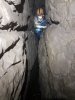 Tight traverse in Agent Blorenge.
Modelling by Rob, lighting by Tarquin and Rob
Tight traverse in Agent Blorenge.
Modelling by Rob, lighting by Tarquin and Rob Rope climb in Agent Blorenge. The rope is not official, but without it, it is very hard to do this climb without falling, as the walls bell out without any holds.
Modelling by Rob, lighting by Tarquin and Rob
Rope climb in Agent Blorenge. The rope is not official, but without it, it is very hard to do this climb without falling, as the walls bell out without any holds.
Modelling by Rob, lighting by Tarquin and Rob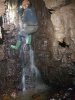 Cascade in Agent Blorenge.
Modelling by Will, lighting by Tarquin and Will
Cascade in Agent Blorenge.
Modelling by Will, lighting by Tarquin and Will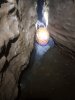 The Duck, which can normally be passed with a dry face, or bypassed via a tight climb above. Bravo to Will for sitting in it for the picture!
Modelling by Will, lighting by Tarquin and Will
The Duck, which can normally be passed with a dry face, or bypassed via a tight climb above. Bravo to Will for sitting in it for the picture!
Modelling by Will, lighting by Tarquin and Will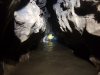 Immediately afterwards is this low section with no official name, but which is often called the Second Sewer. "Could you just stay still for a moment. Sorry. Point your light away. Thanks. Sorry. Sorry."
Modelling by Helen, lighting by Tarquin and Helen
Immediately afterwards is this low section with no official name, but which is often called the Second Sewer. "Could you just stay still for a moment. Sorry. Point your light away. Thanks. Sorry. Sorry."
Modelling by Helen, lighting by Tarquin and Helen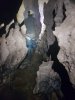 Lower portion of Agent Blorenge.
Modelling by Helen, lighting by Tarquin and Helen
Lower portion of Agent Blorenge.
Modelling by Helen, lighting by Tarquin and Helen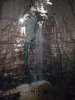 One of the larger cascades.
Modelling by Helen, lighting by Tarquin, Helen, Rob and Jolene
One of the larger cascades.
Modelling by Helen, lighting by Tarquin, Helen, Rob and Jolene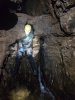 Cascade with a bridge. Nearly done.
Modelling by Helen, lighting by Tarquin, Helen and Rob
Cascade with a bridge. Nearly done.
Modelling by Helen, lighting by Tarquin, Helen and Rob Beyond A Choke Streamway, upstream of The Confluence. It is very tall, extending far above the apparent height here.
Modelling by Helen, lighting by Tarquin and Helen
Beyond A Choke Streamway, upstream of The Confluence. It is very tall, extending far above the apparent height here.
Modelling by Helen, lighting by Tarquin and Helen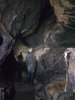 Decorated section of Beyond a Choke Streamway, upstream of The Sentinel.
Modelling by Helen and Rob, lighting by Will, Helen and Rob
Decorated section of Beyond a Choke Streamway, upstream of The Sentinel.
Modelling by Helen and Rob, lighting by Will, Helen and Rob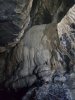 Stal bank in Beyond A Choke.
Lighting by Tarquin and Will
Stal bank in Beyond A Choke.
Lighting by Tarquin and Will Cascade in Beyond A Choke Streamway.
Modelling by Helen, lighting by Tarquin, Will and Helen
Cascade in Beyond A Choke Streamway.
Modelling by Helen, lighting by Tarquin, Will and Helen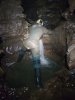 Cascade in Beyond A Choke Streamway.
Modelling by Helen, lighting by Tarquin and Helen
Cascade in Beyond A Choke Streamway.
Modelling by Helen, lighting by Tarquin and Helen Cascade in Beyond A Choke Streamway.
Modelling by Helen, lighting by Tarquin and Helen
Cascade in Beyond A Choke Streamway.
Modelling by Helen, lighting by Tarquin and Helen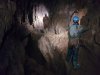 Traverse in Beyond A Choke Streamway, shortly after leaving the sporting river section.
Modelling by Hannah and Craig, lighting by Tarquin, Hannah and Craig
Traverse in Beyond A Choke Streamway, shortly after leaving the sporting river section.
Modelling by Hannah and Craig, lighting by Tarquin, Hannah and Craig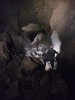 Beyond A Choke Streamway, just below its junction with Gilwern Passage.
Modelling by Will, Helen and Rob, lighting by Jolene, Will, Helen and Rob
Beyond A Choke Streamway, just below its junction with Gilwern Passage.
Modelling by Will, Helen and Rob, lighting by Jolene, Will, Helen and Rob
 Climbs in Beyond A Choke Streamway, which are bypassed by Wonderbra Bypass.
Modelling by Helen, Hannah and Craig, lighting by Will, Helen, Hannah and Craig
Climbs in Beyond A Choke Streamway, which are bypassed by Wonderbra Bypass.
Modelling by Helen, Hannah and Craig, lighting by Will, Helen, Hannah and Craig An early part of White Arch Passage, showing its typical size.
Modelling by Helen and Hannah, lighting by Will, Helen and Hannah
An early part of White Arch Passage, showing its typical size.
Modelling by Helen and Hannah, lighting by Will, Helen and Hannah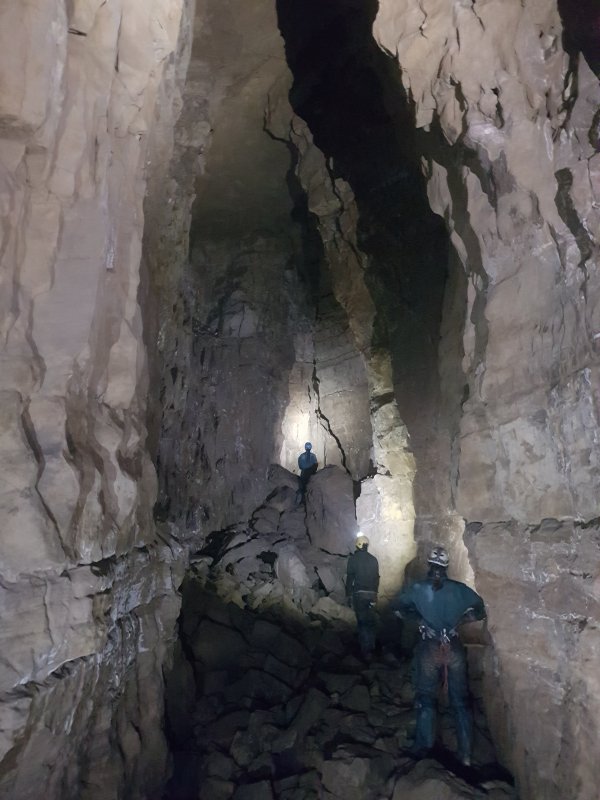 A taller part of White Arch Passage.
Modelling by Jolene, Helen and Hannah, lighting by Will, Craig, Jolene, Helen and Hannah
A taller part of White Arch Passage.
Modelling by Jolene, Helen and Hannah, lighting by Will, Craig, Jolene, Helen and Hannah The largest part of White Arch Passage, below the pub.
Modelling by Craig, Helen and Hannah, lighting by Will, Jolene, Craig, Helen and Hannah
The largest part of White Arch Passage, below the pub.
Modelling by Craig, Helen and Hannah, lighting by Will, Jolene, Craig, Helen and Hannah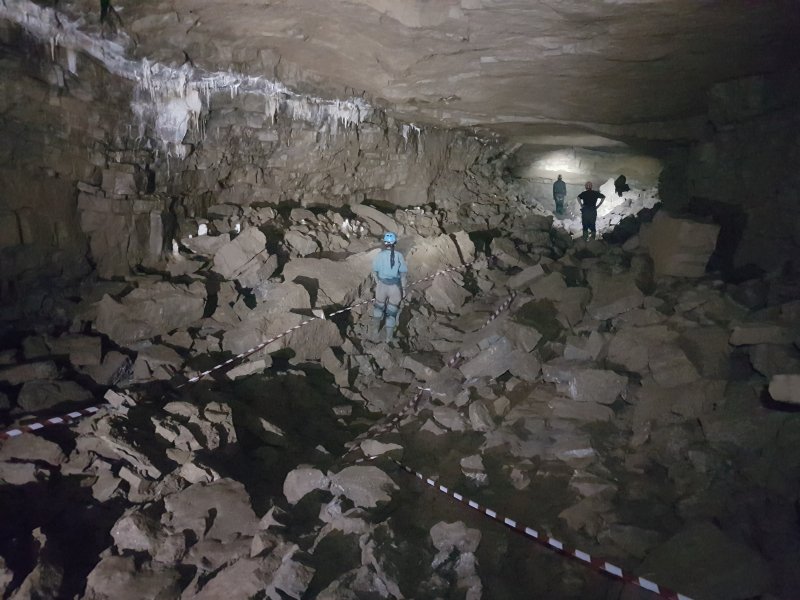 The Players' Tunnel, the large passage connecting the Arms Park and Saint David's Hall chambers.
Modelling by Hannah, Will and Helen, lighting by Tarquin, Craig, Hannah, Will and Helen
The Players' Tunnel, the large passage connecting the Arms Park and Saint David's Hall chambers.
Modelling by Hannah, Will and Helen, lighting by Tarquin, Craig, Hannah, Will and Helen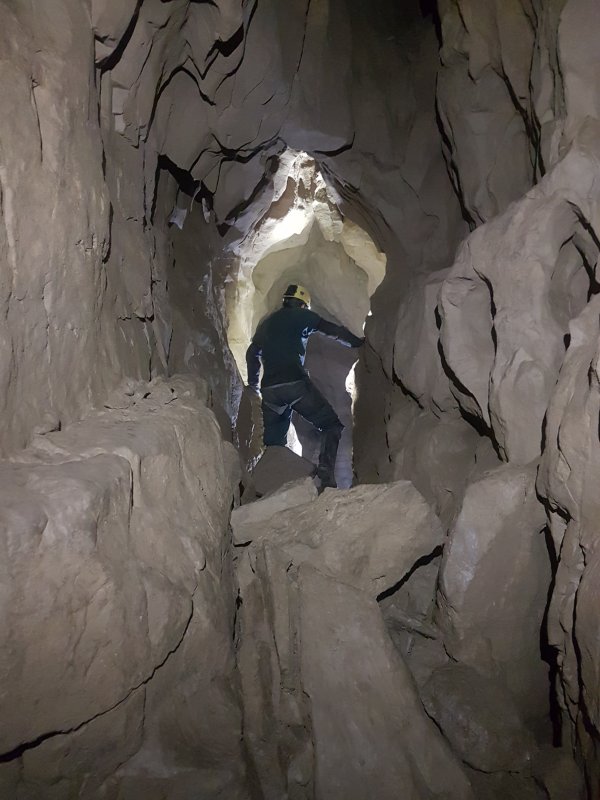 Top of a climb in Squirrel Rifts.
Modelling by Helen, lighting by Tarquin, Helen, Will and Craig
Top of a climb in Squirrel Rifts.
Modelling by Helen, lighting by Tarquin, Helen, Will and Craig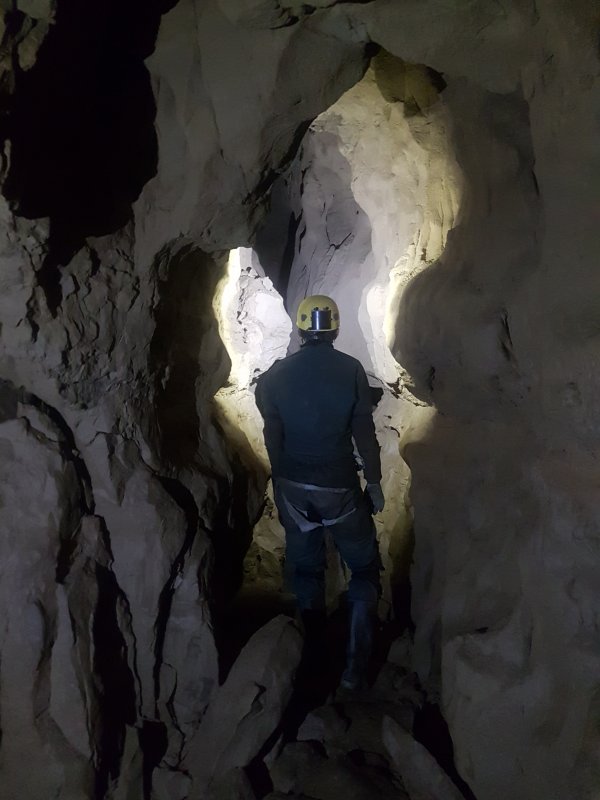 Near the traverses in Squirrel Rifts.
Modelling by Helen, lighting by Tarquin and Helen
Near the traverses in Squirrel Rifts.
Modelling by Helen, lighting by Tarquin and Helen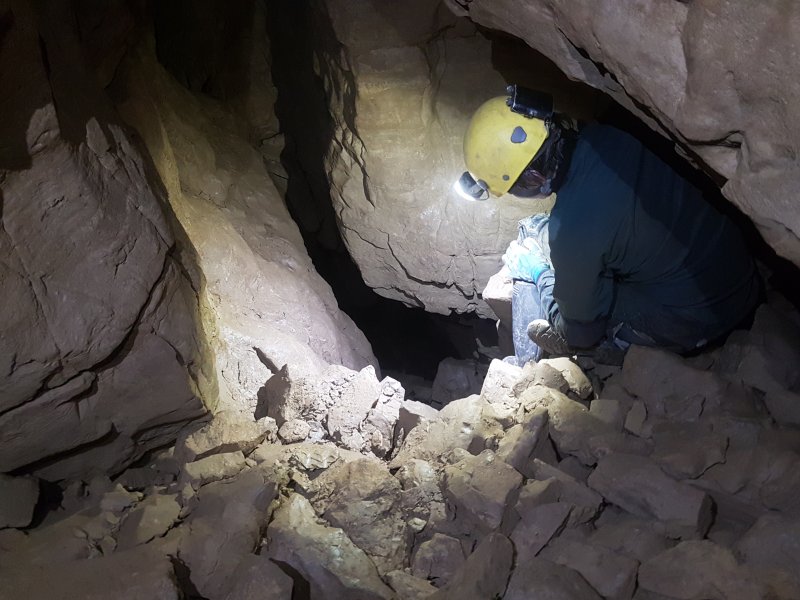 Entrance to Sparrow Series.
Modelling by Helen, lighting by Tarquin, Will and Helen
Entrance to Sparrow Series.
Modelling by Helen, lighting by Tarquin, Will and Helen The Connection, the tightest part of the Round Trip, but more awkward than tight.
Modelling by Helen, lighting by Tarquin and Helen
The Connection, the tightest part of the Round Trip, but more awkward than tight.
Modelling by Helen, lighting by Tarquin and Helen Haggis Basher Number One, on the way to Far Agent Blorenge.
Modelling by Helen, Craig, Jolene, Hannah, Will and Rob, lighting by Tarquin, Helen, Craig, Jolene, Hannah, Will and Rob
Haggis Basher Number One, on the way to Far Agent Blorenge.
Modelling by Helen, Craig, Jolene, Hannah, Will and Rob, lighting by Tarquin, Helen, Craig, Jolene, Hannah, Will and Rob Sump Inlet heading upstream towards the sump, from the junction with Far Agent Blorenge.
Modelling by Hannah, Helen and Craig, lighting by Tarquin, Hannah, Helen and Craig
Sump Inlet heading upstream towards the sump, from the junction with Far Agent Blorenge.
Modelling by Hannah, Helen and Craig, lighting by Tarquin, Hannah, Helen and Craig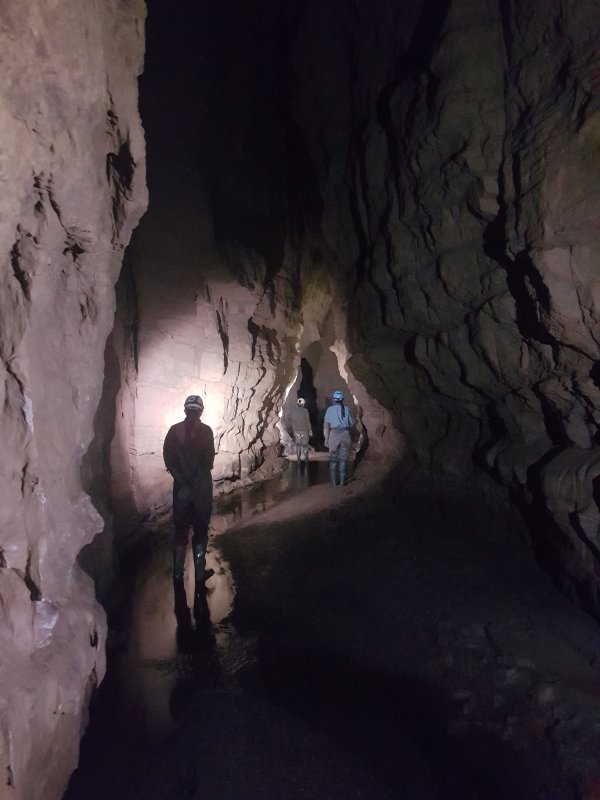 Far Agent Blorenge, a superb stream passage that actually has a comfortable gravel floor, quite unusual for Draenen.
Modelling by Craig, Hannah and Helen, lighting by Will, Craig, Hannah and Helen
Far Agent Blorenge, a superb stream passage that actually has a comfortable gravel floor, quite unusual for Draenen.
Modelling by Craig, Hannah and Helen, lighting by Will, Craig, Hannah and Helen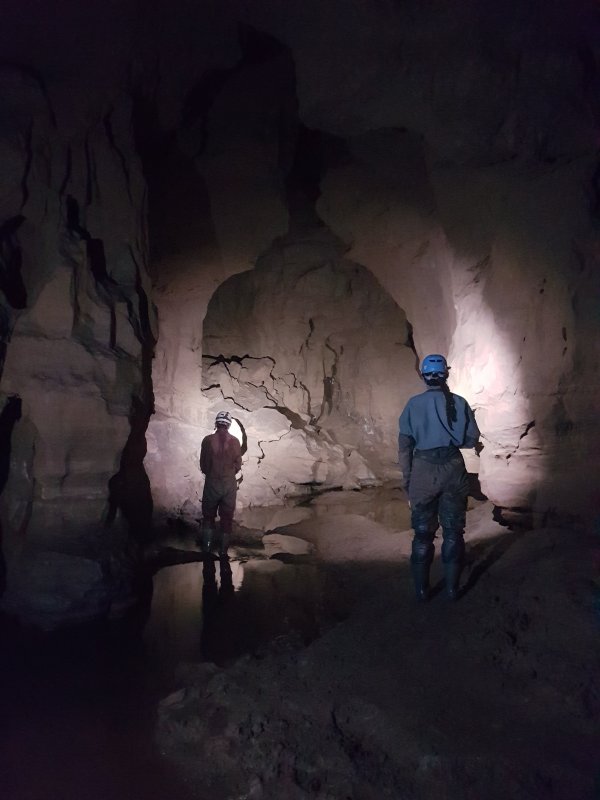 Far Agent Blorenge.
Modelling by Hannah and Craig, lighting by Tarquin, Hannah and Craig
Far Agent Blorenge.
Modelling by Hannah and Craig, lighting by Tarquin, Hannah and Craig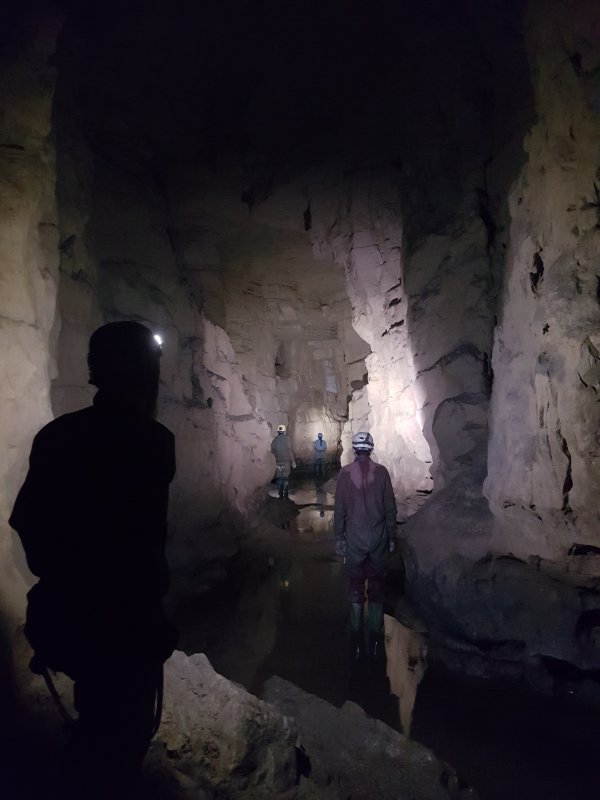 Far Agent Blorenge.
Modelling and lighting by Will, Craig, Helen and Hannah
Far Agent Blorenge.
Modelling and lighting by Will, Craig, Helen and Hannah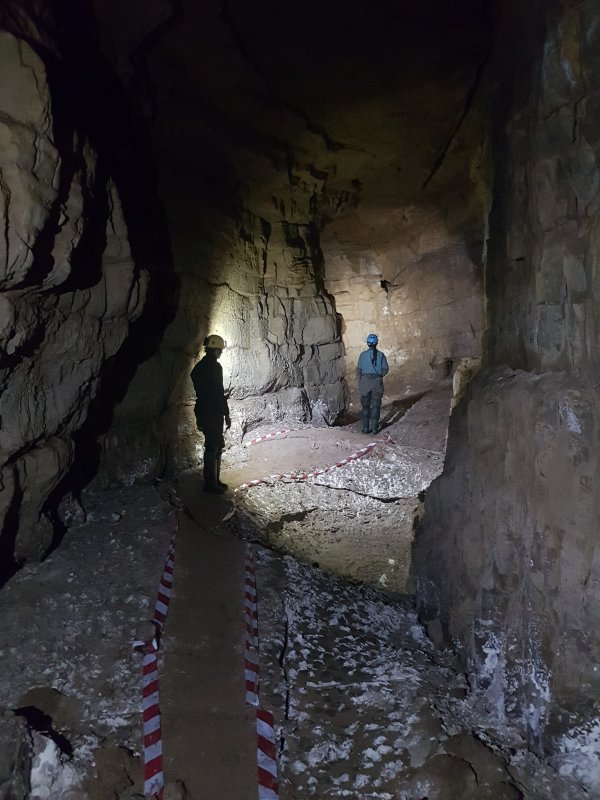 Crystal Mole, a large, fossil, side passage, that was once a major stream flowing north into The Score. It now ends in a sand swim dig.
Modelling by Helen and Hannah, lighting by Will, Helen and Hannah
Crystal Mole, a large, fossil, side passage, that was once a major stream flowing north into The Score. It now ends in a sand swim dig.
Modelling by Helen and Hannah, lighting by Will, Helen and Hannah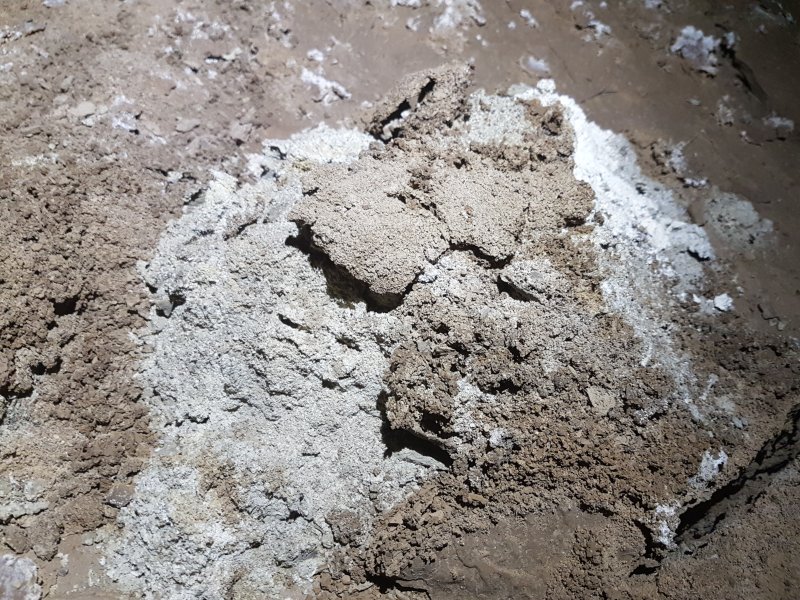 A gypsum crystal molehill.
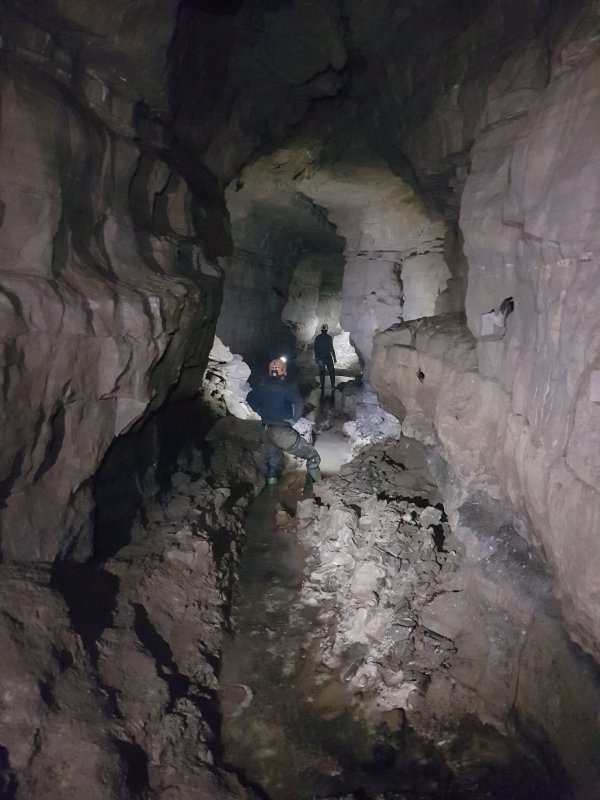 Far Agent Blorenge, downstream of Crystal Mole Passage, where it gains some deep, white mud.
Modelling by Will and Helen, lighting by Jolene, Will and Helen
Far Agent Blorenge, downstream of Crystal Mole Passage, where it gains some deep, white mud.
Modelling by Will and Helen, lighting by Jolene, Will and Helen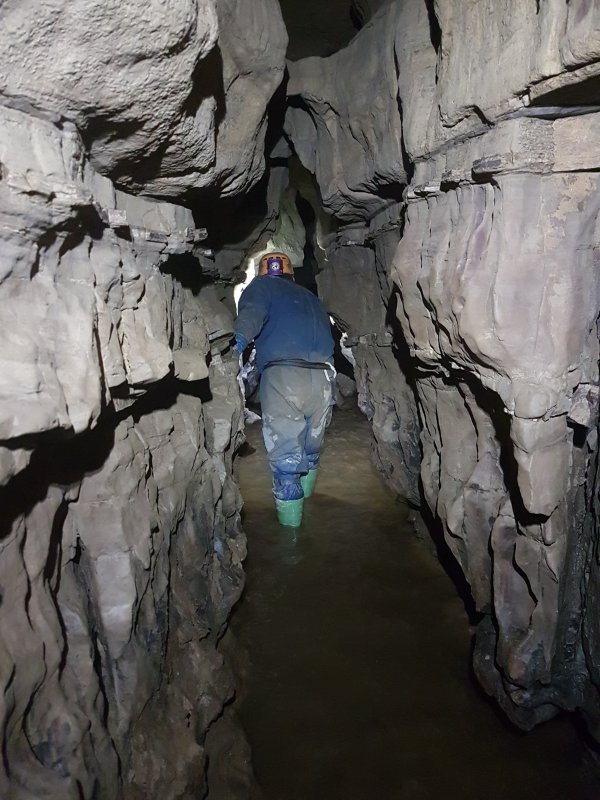 Agent Blorenge then takes over, as a much more sporting, active streamway.
Modelling by Will, lighting by Tarquin and Will
Agent Blorenge then takes over, as a much more sporting, active streamway.
Modelling by Will, lighting by Tarquin and Will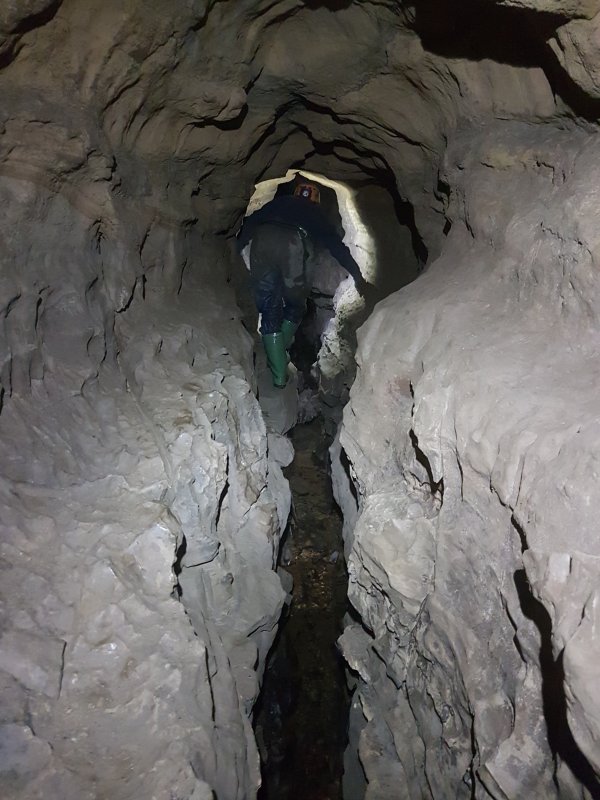 Agent Blorenge traverse on the way to the junction with Chocolate Blorenge.
Modelling by Will, lighting by Tarquin and Will
Agent Blorenge traverse on the way to the junction with Chocolate Blorenge.
Modelling by Will, lighting by Tarquin and Will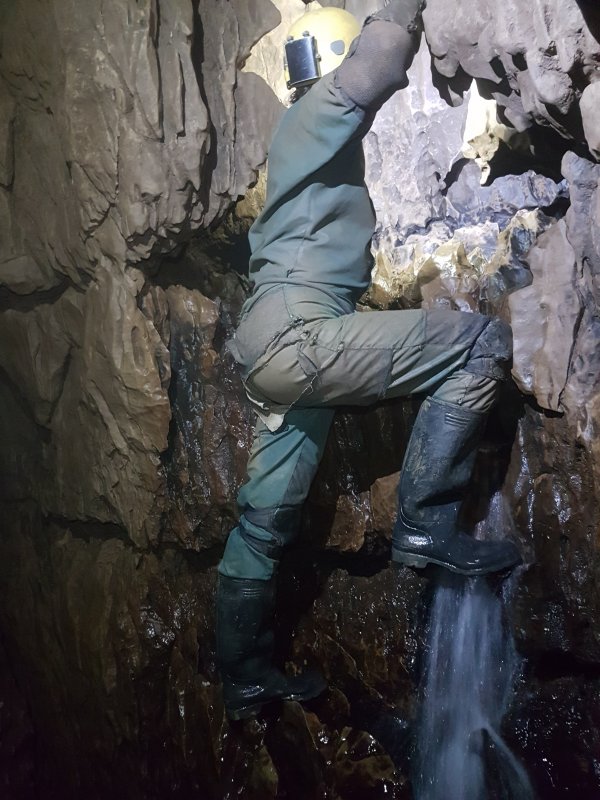 Cascade at the junction of Agent Blorenge and Chocolate Blorenge.
Modelling by Helen, lighting by Tarquin, Will and Helen
Cascade at the junction of Agent Blorenge and Chocolate Blorenge.
Modelling by Helen, lighting by Tarquin, Will and Helen Climbing through an eyehole in Agent Blorenge.
Modelling by Will
Climbing through an eyehole in Agent Blorenge.
Modelling by Will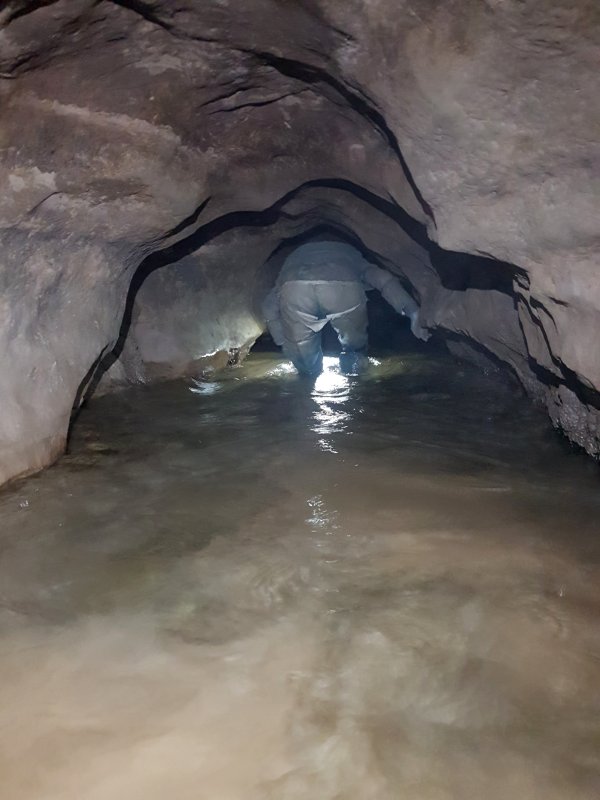 The Sewer.
Modelling by Helen, lighting by Tarquin and Helen
The Sewer.
Modelling by Helen, lighting by Tarquin and Helen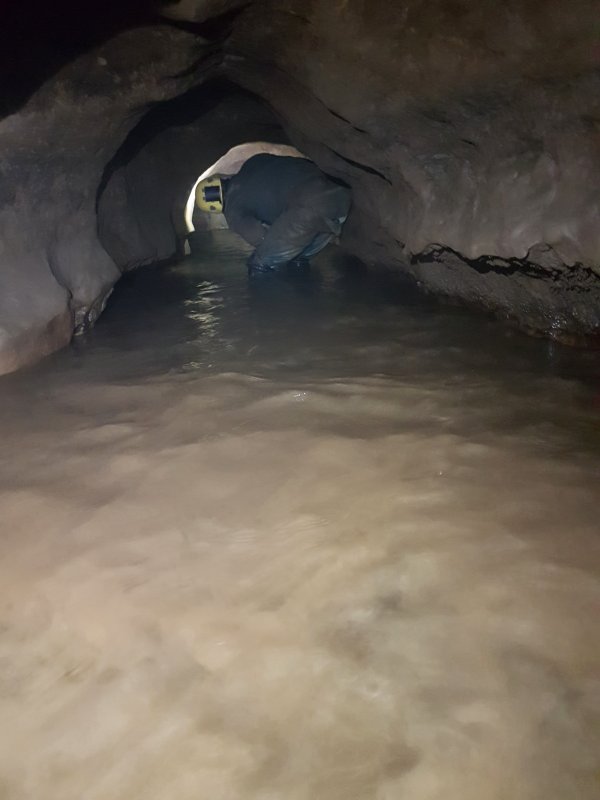 The Sewer.
Modelling by Helen, lighting by Tarquin and Helen
The Sewer.
Modelling by Helen, lighting by Tarquin and Helen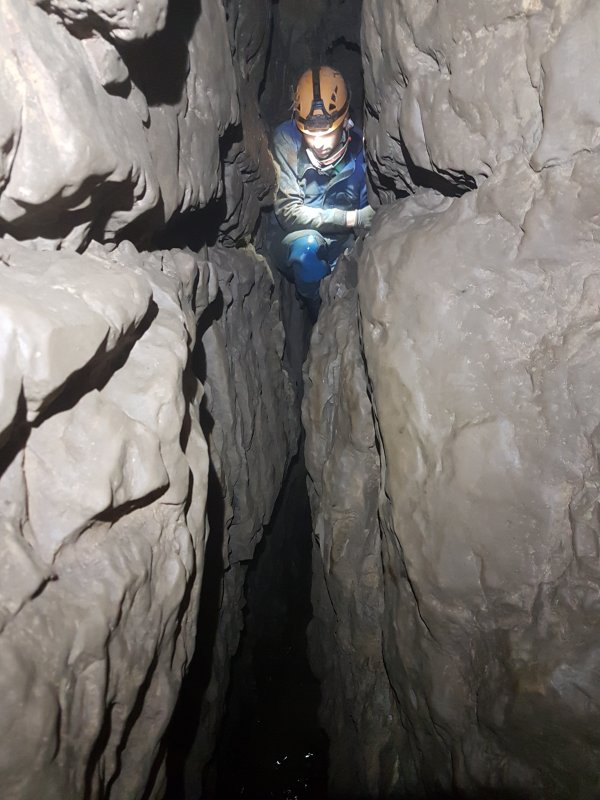 Tight traverse in Agent Blorenge.
Modelling by Rob, lighting by Tarquin and Rob
Tight traverse in Agent Blorenge.
Modelling by Rob, lighting by Tarquin and Rob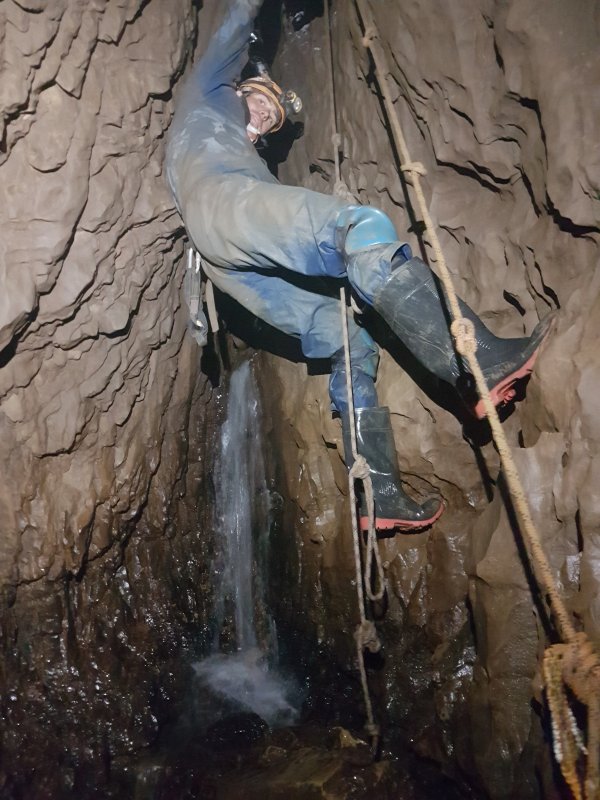 Rope climb in Agent Blorenge. The rope is not official, but without it, it is very hard to do this climb without falling, as the walls bell out without any holds.
Modelling by Rob, lighting by Tarquin and Rob
Rope climb in Agent Blorenge. The rope is not official, but without it, it is very hard to do this climb without falling, as the walls bell out without any holds.
Modelling by Rob, lighting by Tarquin and Rob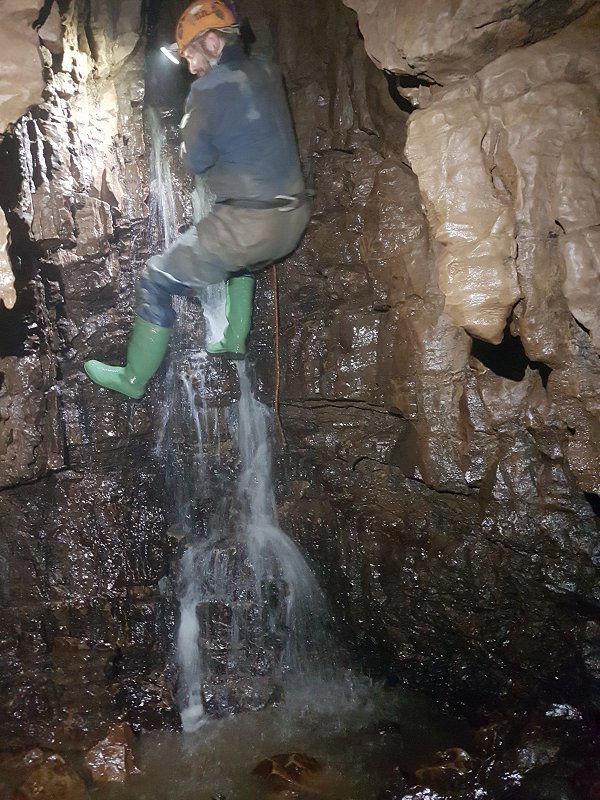 Cascade in Agent Blorenge.
Modelling by Will, lighting by Tarquin and Will
Cascade in Agent Blorenge.
Modelling by Will, lighting by Tarquin and Will The Duck, which can normally be passed with a dry face, or bypassed via a tight climb above. Bravo to Will for sitting in it for the picture!
Modelling by Will, lighting by Tarquin and Will
The Duck, which can normally be passed with a dry face, or bypassed via a tight climb above. Bravo to Will for sitting in it for the picture!
Modelling by Will, lighting by Tarquin and Will Immediately afterwards is this low section with no official name, but which is often called the Second Sewer. "Could you just stay still for a moment. Sorry. Point your light away. Thanks. Sorry. Sorry."
Modelling by Helen, lighting by Tarquin and Helen
Immediately afterwards is this low section with no official name, but which is often called the Second Sewer. "Could you just stay still for a moment. Sorry. Point your light away. Thanks. Sorry. Sorry."
Modelling by Helen, lighting by Tarquin and Helen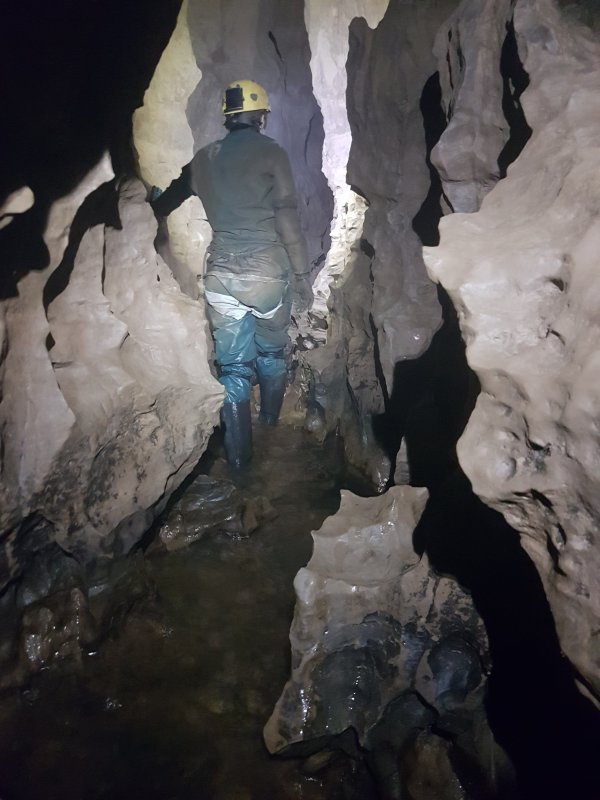 Lower portion of Agent Blorenge.
Modelling by Helen, lighting by Tarquin and Helen
Lower portion of Agent Blorenge.
Modelling by Helen, lighting by Tarquin and Helen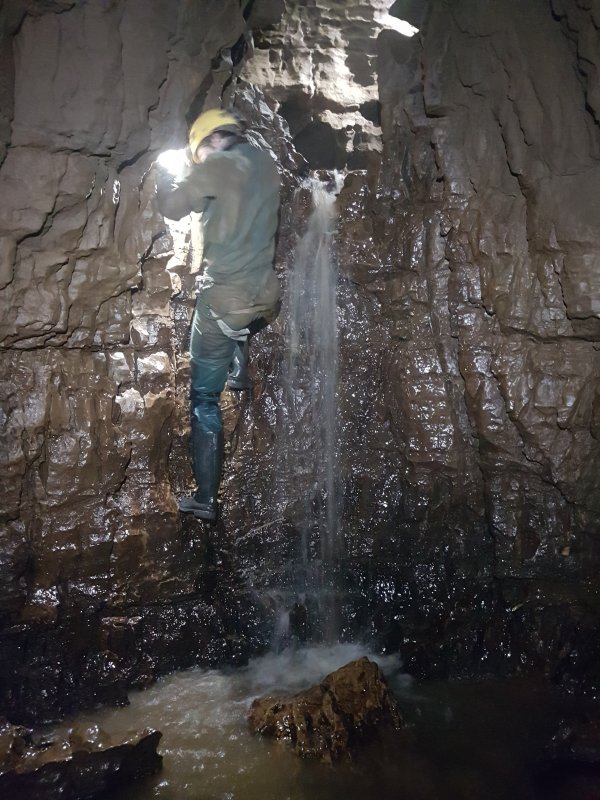 One of the larger cascades.
Modelling by Helen, lighting by Tarquin, Helen, Rob and Jolene
One of the larger cascades.
Modelling by Helen, lighting by Tarquin, Helen, Rob and Jolene Cascade with a bridge. Nearly done.
Modelling by Helen, lighting by Tarquin, Helen and Rob
Cascade with a bridge. Nearly done.
Modelling by Helen, lighting by Tarquin, Helen and Rob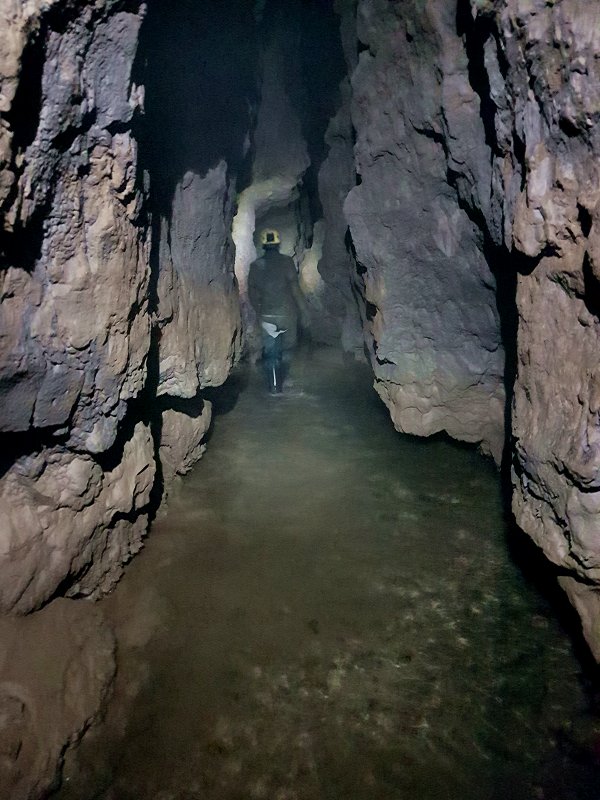 Beyond A Choke Streamway, upstream of The Confluence. It is very tall, extending far above the apparent height here.
Modelling by Helen, lighting by Tarquin and Helen
Beyond A Choke Streamway, upstream of The Confluence. It is very tall, extending far above the apparent height here.
Modelling by Helen, lighting by Tarquin and Helen Decorated section of Beyond a Choke Streamway, upstream of The Sentinel.
Modelling by Helen and Rob, lighting by Will, Helen and Rob
Decorated section of Beyond a Choke Streamway, upstream of The Sentinel.
Modelling by Helen and Rob, lighting by Will, Helen and Rob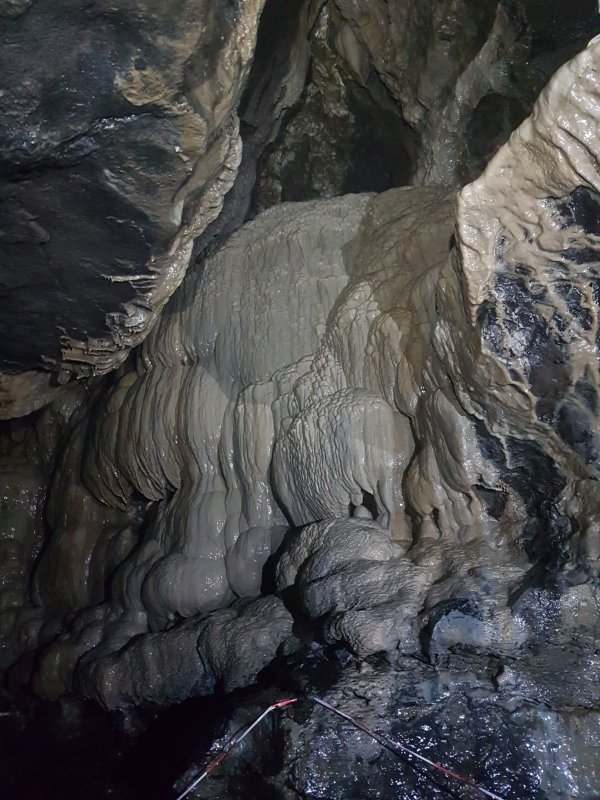 Stal bank in Beyond A Choke.
Lighting by Tarquin and Will
Stal bank in Beyond A Choke.
Lighting by Tarquin and Will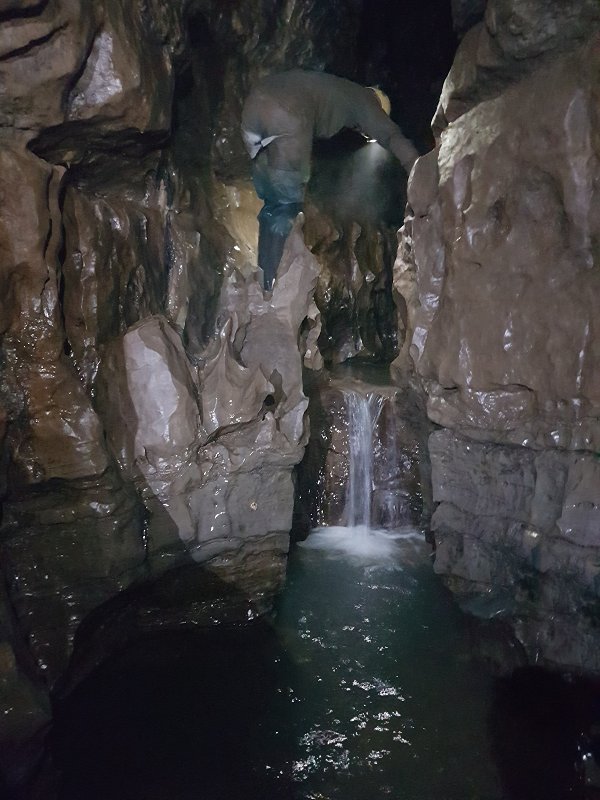 Cascade in Beyond A Choke Streamway.
Modelling by Helen, lighting by Tarquin, Will and Helen
Cascade in Beyond A Choke Streamway.
Modelling by Helen, lighting by Tarquin, Will and Helen Cascade in Beyond A Choke Streamway.
Modelling by Helen, lighting by Tarquin and Helen
Cascade in Beyond A Choke Streamway.
Modelling by Helen, lighting by Tarquin and Helen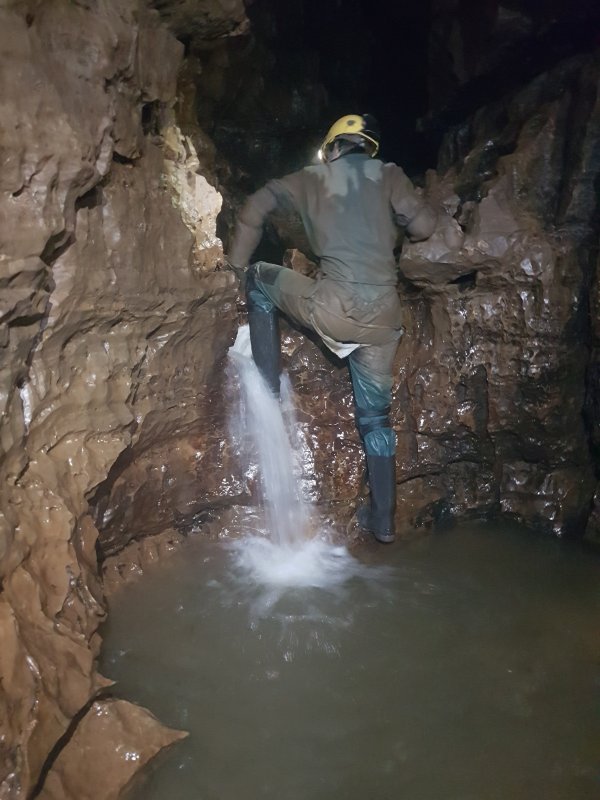 Cascade in Beyond A Choke Streamway.
Modelling by Helen, lighting by Tarquin and Helen
Cascade in Beyond A Choke Streamway.
Modelling by Helen, lighting by Tarquin and Helen Traverse in Beyond A Choke Streamway, shortly after leaving the sporting river section.
Modelling by Hannah and Craig, lighting by Tarquin, Hannah and Craig
Traverse in Beyond A Choke Streamway, shortly after leaving the sporting river section.
Modelling by Hannah and Craig, lighting by Tarquin, Hannah and Craig Beyond A Choke Streamway, just below its junction with Gilwern Passage.
Modelling by Will, Helen and Rob, lighting by Jolene, Will, Helen and Rob
Beyond A Choke Streamway, just below its junction with Gilwern Passage.
Modelling by Will, Helen and Rob, lighting by Jolene, Will, Helen and Rob