Ogof Draenen War of the Worlds trip 20/05/2018
This area of the cave has been visited before and photographed extensively, so this gallery is only a small addition, covering a few of the places which had not been photographed previously.
Unless otherwise stated, camera, setups, lighting, edits and gallery effects by Tarquin. Modelling and lighting at various points will be Pete Bolt.
 Snowball Passage near its end, where the two ends of the loop join. The way on is the lower passage, with the loop rejoining above. The entrance to Exodus - the way on to Dollimore Series - is on the right side just under the rock bridge. The way on to War of the Worlds is to continue ahead, then turn left into a choke.
Modelling by Pete, lighting by Tarquin and Pete
Snowball Passage near its end, where the two ends of the loop join. The way on is the lower passage, with the loop rejoining above. The entrance to Exodus - the way on to Dollimore Series - is on the right side just under the rock bridge. The way on to War of the Worlds is to continue ahead, then turn left into a choke.
Modelling by Pete, lighting by Tarquin and Pete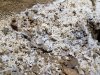 Cryostal on the floor at the junction.
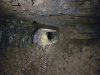 The Black Run, the normal way into Sleepcrawler Series.
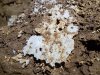 Very large cryostal raft in Lost In Space. Some of these are between 20 and 30 cm (8 and 12 inches) across.
 Cryostal rafts.
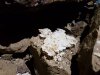 Cryostal rafts.
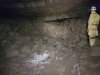 Lost In Space, just after the tight crawl.
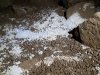 Cryostal rafts, cryostal aggregations and gypsum in Lost In Space.
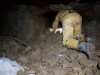 Killer Tomato Crawl, an arduous side passage off Lost In Space. This is one of the largest sections of the passage. In general, this passage should be avoided, as the crystal deposits are extremely hard to avoid, and the passage does not have enough redeeming features to justify damaging the crystal formations. These pictures form a record of the best of the formations in the passage, and cavers are requested to view these pictures instead of visiting the passage themselves.
Modelling by Pete, lighting by Tarquin and Pete
Killer Tomato Crawl, an arduous side passage off Lost In Space. This is one of the largest sections of the passage. In general, this passage should be avoided, as the crystal deposits are extremely hard to avoid, and the passage does not have enough redeeming features to justify damaging the crystal formations. These pictures form a record of the best of the formations in the passage, and cavers are requested to view these pictures instead of visiting the passage themselves.
Modelling by Pete, lighting by Tarquin and Pete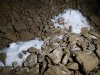 Piles of gypsum in Killer Tomato Crawl. Each pile is deceptively small; only about 30 cm (1 foot) across. These piles must be very carefully crawled over to continue down the passage.
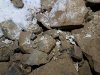 Small cryostal rafts beside the gypsum.
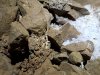 More cryostal formations, this time the twiglet variety.
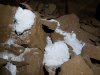 Gypsum formations.
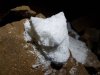 Gypsum formation, appearing more like hoar frost with its fine hairs.
 Gypsum drift, which needs to be even more carefully avoided, in the floor of a flat out crawl, bridging over the gypsum and lifting clothing over it.
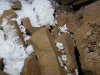 More small cryostal rafts.
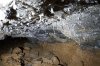 The passage then lowers to a tight crawl, with 10 cm (4 inch) selenite needles in the ceiling. The passage gets progressively lower until, just up ahead from this photograph, it becomes squeeze sized, with a fallen block restricting the passage to half its normal width. The squeeze is 20 cm (8 inches) high at the highest point of the arch, and can be quite challenging because of the restricted width forcing a lower part of the arch to be used. My companion did not wish to continue even into the start of this low section, even before seeing the squeeze.
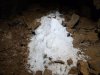 Gupsum drift beyond the squeeze.
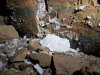 Large crystal flaking off the wall. At this point, the passage becomes very narrow, to the point that it is almost a squeeze.
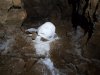 As the passage enlarges, the most impressive formation appears; The Killer Tomato. This is a very large ball of gypsum, almost identical in shape to The Snowball, but about 45 cm (1.5 feet) in diameter.
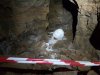 The passage is taped off at this point, and the floor remains almost untouched. Beyond here, the passage remains small before choking just before it would have reconnected back to Lost In Space. There is a sign at the start of the passage asking cavers to avoid it, as the floor is extremely vulnerable. Please enjoy these pictures instead, and avoid visiting the passage.
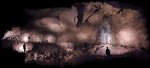 The main way on from Lost In Space abruptly enters the end of the largest chamber in the cave, The Reactor, with its blue and green tinted stal flow on the fault-controlled right wall. The chamber is 50 m (164 feet) long to the far end, 32 m (105 feet) wide, and up to 20 m (66 feet) high. The way on into Destiny Inlet is down a boulder slope on the left, while the upstream end of MSAD in Dollimore Series lies below the large choke on the right side, and the far end is blind. With only two of us on the trip, no extra lights, and a chamber with a view nearly 180° wide, it was impossible to photograph this as a single image. Instead, this 2-dimensional panoramic view is constructed from 18 separate pictures in 25 layers, each lighting a different portion of the chamber. Each picture needed to be manually stitched, including skew, resizing and lens correction to account for barrel distortion of the images (automatic correction does not understand caves), as automatic stitching software cannot cope with the changes in lighting.
Modelling and lighting by Pete, Pete, Pete, Pete, Slenderman and Pete
The main way on from Lost In Space abruptly enters the end of the largest chamber in the cave, The Reactor, with its blue and green tinted stal flow on the fault-controlled right wall. The chamber is 50 m (164 feet) long to the far end, 32 m (105 feet) wide, and up to 20 m (66 feet) high. The way on into Destiny Inlet is down a boulder slope on the left, while the upstream end of MSAD in Dollimore Series lies below the large choke on the right side, and the far end is blind. With only two of us on the trip, no extra lights, and a chamber with a view nearly 180° wide, it was impossible to photograph this as a single image. Instead, this 2-dimensional panoramic view is constructed from 18 separate pictures in 25 layers, each lighting a different portion of the chamber. Each picture needed to be manually stitched, including skew, resizing and lens correction to account for barrel distortion of the images (automatic correction does not understand caves), as automatic stitching software cannot cope with the changes in lighting.
Modelling and lighting by Pete, Pete, Pete, Pete, Slenderman and Pete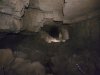 War of the Worlds North, the smaller of two major passages in the series, looking back towards the junction. The stream comes from a tiny inlet passage, to the left of the camera.
Modelling by Pete, lighting by Tarquin and Pete
War of the Worlds North, the smaller of two major passages in the series, looking back towards the junction. The stream comes from a tiny inlet passage, to the left of the camera.
Modelling by Pete, lighting by Tarquin and Pete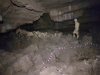 Near the end of War of the Worlds North.
Modelling by Pete, lighting by Tarquin and Pete
Near the end of War of the Worlds North.
Modelling by Pete, lighting by Tarquin and Pete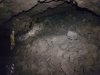 The choke at the end of War of the Worlds North is the largest and most promising choke heading into The Blorenge. Unfortunately, it could be a major task to open a route through it.
Modelling by Pete, lighting by Tarquin and Pete
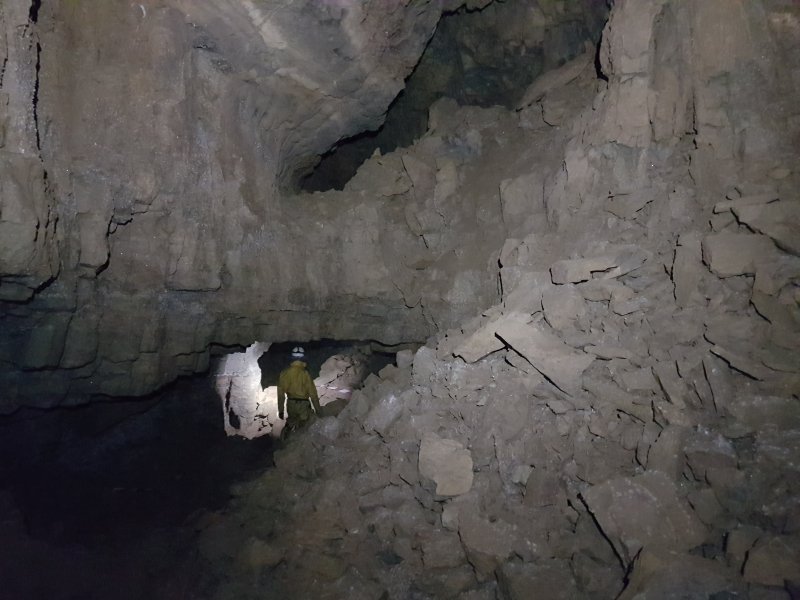
The choke at the end of War of the Worlds North is the largest and most promising choke heading into The Blorenge. Unfortunately, it could be a major task to open a route through it.
Modelling by Pete, lighting by Tarquin and Pete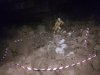 The passage features an enormous pile of cryostal just before the choke.
Modelling by Pete, lighting by Tarquin and Pete
The passage features an enormous pile of cryostal just before the choke.
Modelling by Pete, lighting by Tarquin and Pete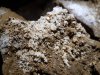 The cryostal appears to just be white powder like decomposing gypsum, but closer inspection reveals the beads and structures of cryostal.
 The small and beautifully decorated Sendero Luminoso is a highlight of trips to this area.
Modelling by Pete, lighting by Tarquin and Pete
The small and beautifully decorated Sendero Luminoso is a highlight of trips to this area.
Modelling by Pete, lighting by Tarquin and Pete Anthodites.
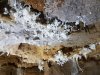 Helictites.
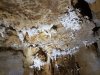 Helictites.
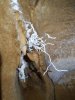 Distinctive split helictite.
 Stalagmites and heligmites below it.
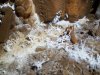 Heligmites is definitely a misnomer since they are just helictites. But here they are anyway; heligmites.
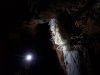 The most impressive formation in Sendero Luminoso.
Modelling by Pete, lighting by Tarquin and Pete
The most impressive formation in Sendero Luminoso.
Modelling by Pete, lighting by Tarquin and Pete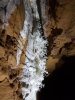 The impressive formation from the other side.
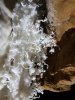 Detail of the formation.
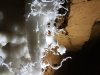 Helictite and stalactite detail.
 Helictite detail.
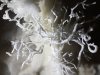 Detail of its most elaborate part.
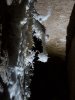 Anthodite at the end of the passage's formations.
Lighting by Tarquin and Pete
Anthodite at the end of the passage's formations.
Lighting by Tarquin and Pete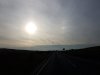 Sun dog (the white glint in the clouds to the right) over Brynmawr on the way back.
 Snowball Passage near its end, where the two ends of the loop join. The way on is the lower passage, with the loop rejoining above. The entrance to Exodus - the way on to Dollimore Series - is on the right side just under the rock bridge. The way on to War of the Worlds is to continue ahead, then turn left into a choke.
Modelling by Pete, lighting by Tarquin and Pete
Snowball Passage near its end, where the two ends of the loop join. The way on is the lower passage, with the loop rejoining above. The entrance to Exodus - the way on to Dollimore Series - is on the right side just under the rock bridge. The way on to War of the Worlds is to continue ahead, then turn left into a choke.
Modelling by Pete, lighting by Tarquin and Pete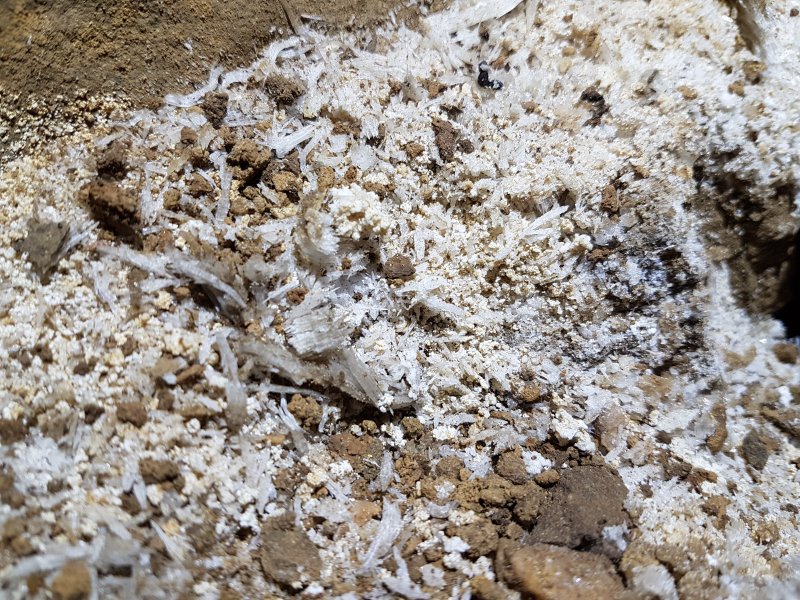 Cryostal on the floor at the junction.
 The Black Run, the normal way into Sleepcrawler Series.
 Very large cryostal raft in Lost In Space. Some of these are between 20 and 30 cm (8 and 12 inches) across.
 Cryostal rafts.
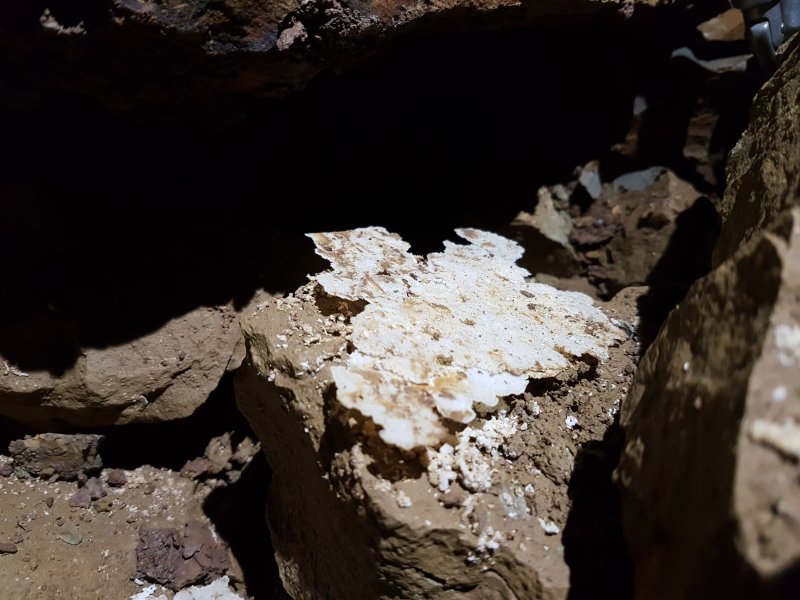 Cryostal rafts.
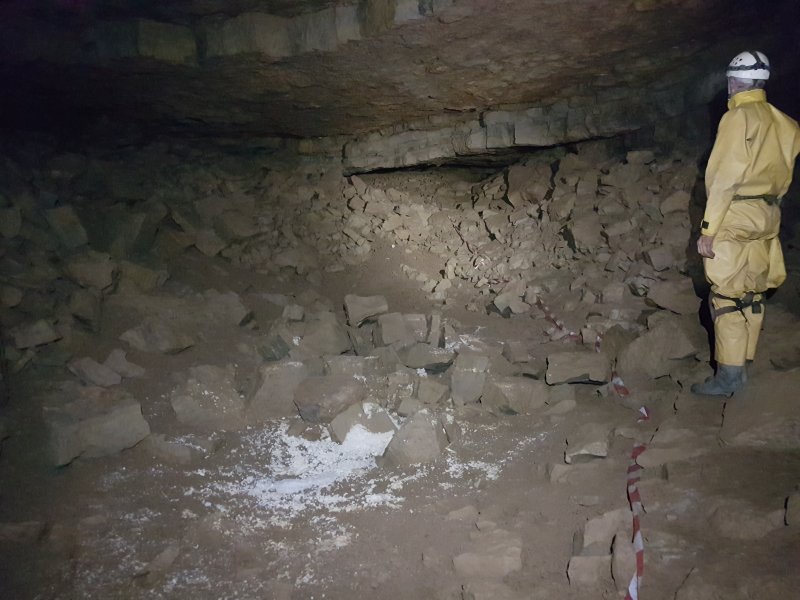 Lost In Space, just after the tight crawl.
 Cryostal rafts, cryostal aggregations and gypsum in Lost In Space.
 Killer Tomato Crawl, an arduous side passage off Lost In Space. This is one of the largest sections of the passage. In general, this passage should be avoided, as the crystal deposits are extremely hard to avoid, and the passage does not have enough redeeming features to justify damaging the crystal formations. These pictures form a record of the best of the formations in the passage, and cavers are requested to view these pictures instead of visiting the passage themselves.
Modelling by Pete, lighting by Tarquin and Pete
Killer Tomato Crawl, an arduous side passage off Lost In Space. This is one of the largest sections of the passage. In general, this passage should be avoided, as the crystal deposits are extremely hard to avoid, and the passage does not have enough redeeming features to justify damaging the crystal formations. These pictures form a record of the best of the formations in the passage, and cavers are requested to view these pictures instead of visiting the passage themselves.
Modelling by Pete, lighting by Tarquin and Pete Piles of gypsum in Killer Tomato Crawl. Each pile is deceptively small; only about 30 cm (1 foot) across. These piles must be very carefully crawled over to continue down the passage.
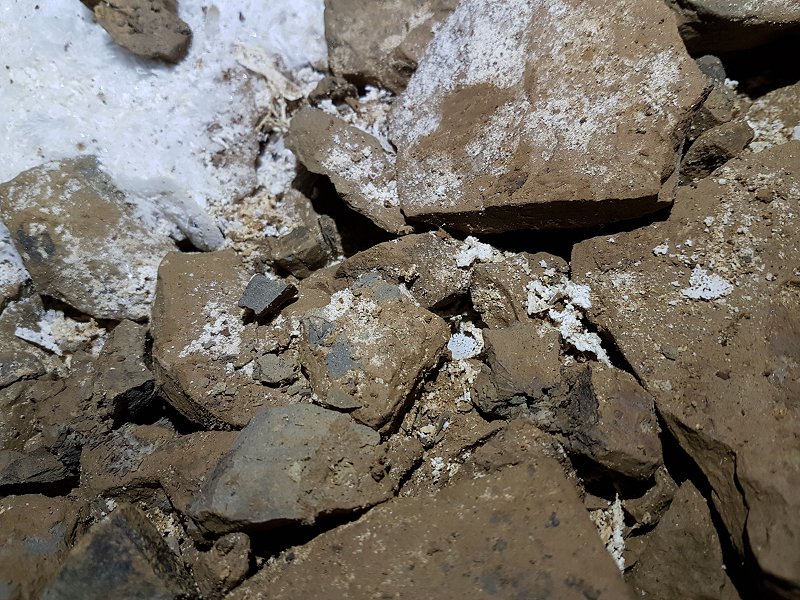 Small cryostal rafts beside the gypsum.
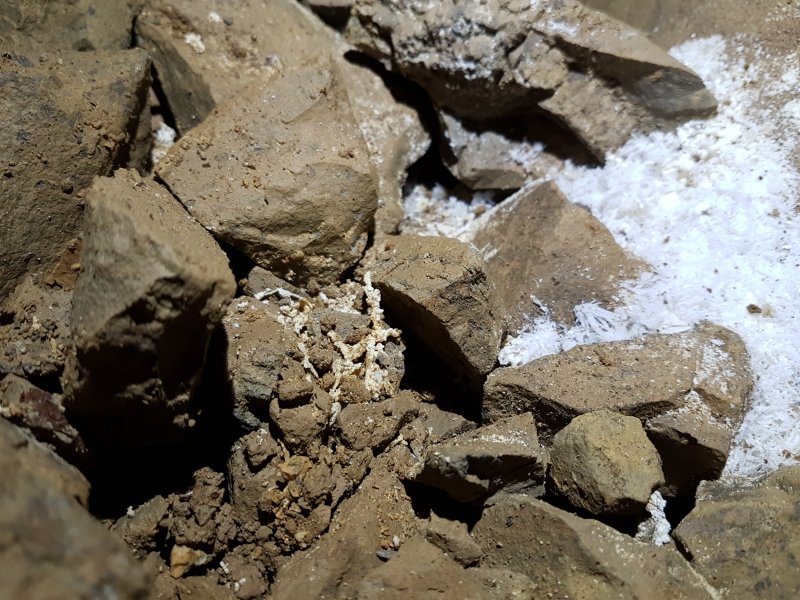 More cryostal formations, this time the twiglet variety.
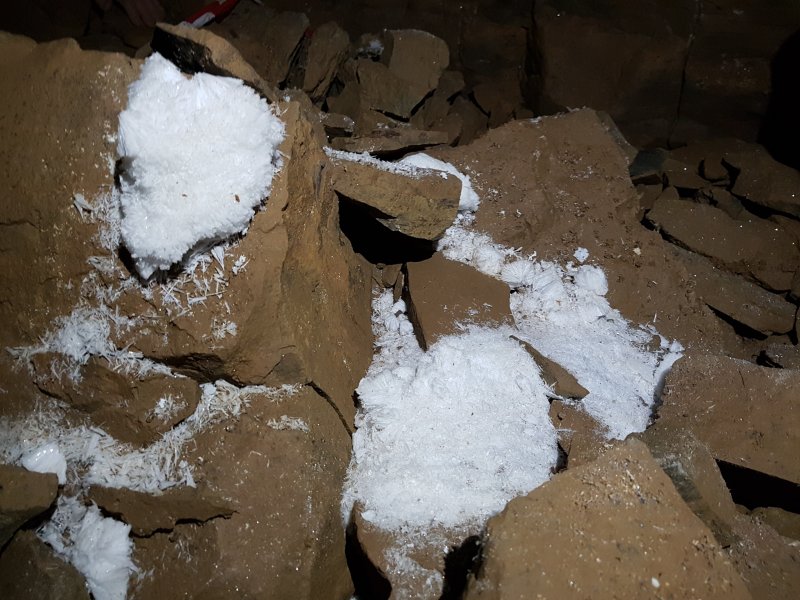 Gypsum formations.
 Gypsum formation, appearing more like hoar frost with its fine hairs.
 Gypsum drift, which needs to be even more carefully avoided, in the floor of a flat out crawl, bridging over the gypsum and lifting clothing over it.
 More small cryostal rafts.
 The passage then lowers to a tight crawl, with 10 cm (4 inch) selenite needles in the ceiling. The passage gets progressively lower until, just up ahead from this photograph, it becomes squeeze sized, with a fallen block restricting the passage to half its normal width. The squeeze is 20 cm (8 inches) high at the highest point of the arch, and can be quite challenging because of the restricted width forcing a lower part of the arch to be used. My companion did not wish to continue even into the start of this low section, even before seeing the squeeze.
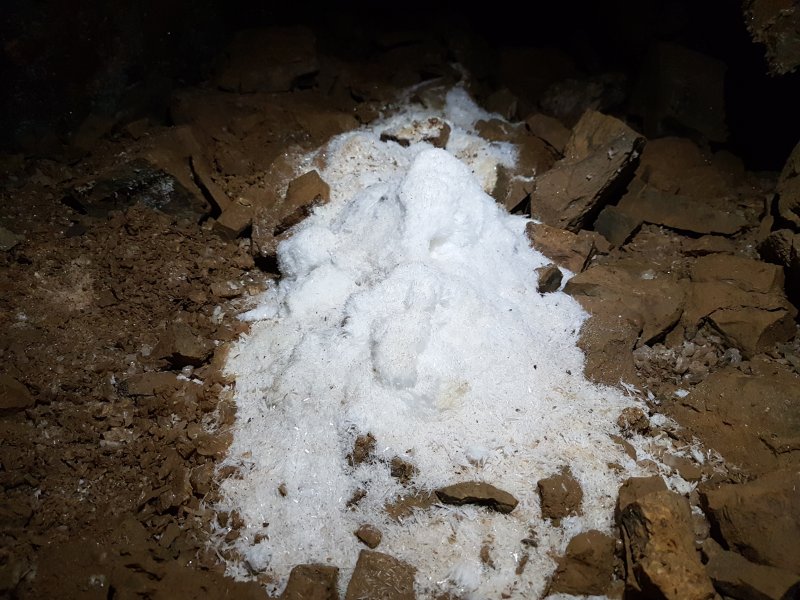 Gupsum drift beyond the squeeze.
 Large crystal flaking off the wall. At this point, the passage becomes very narrow, to the point that it is almost a squeeze.
 As the passage enlarges, the most impressive formation appears; The Killer Tomato. This is a very large ball of gypsum, almost identical in shape to The Snowball, but about 45 cm (1.5 feet) in diameter.
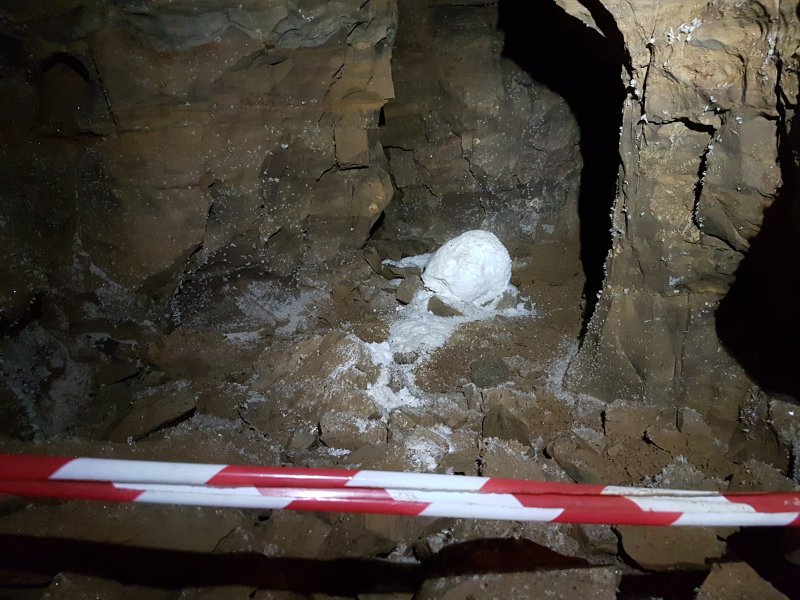 The passage is taped off at this point, and the floor remains almost untouched. Beyond here, the passage remains small before choking just before it would have reconnected back to Lost In Space. There is a sign at the start of the passage asking cavers to avoid it, as the floor is extremely vulnerable. Please enjoy these pictures instead, and avoid visiting the passage.
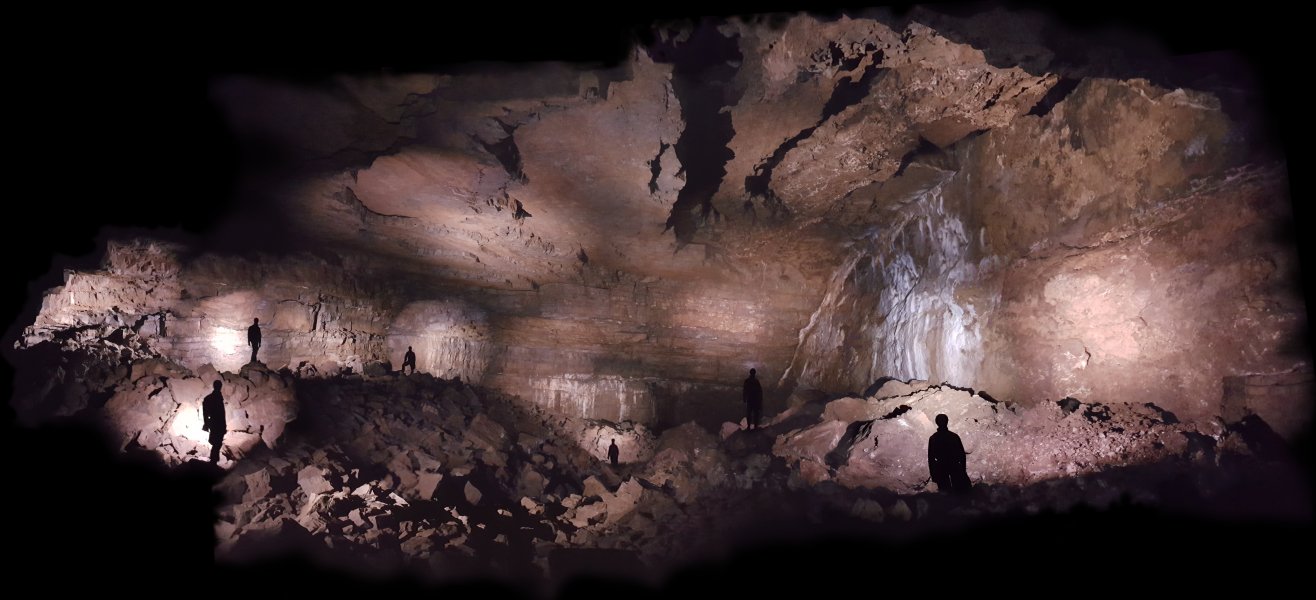 The main way on from Lost In Space abruptly enters the end of the largest chamber in the cave, The Reactor, with its blue and green tinted stal flow on the fault-controlled right wall. The chamber is 50 m (164 feet) long to the far end, 32 m (105 feet) wide, and up to 20 m (66 feet) high. The way on into Destiny Inlet is down a boulder slope on the left, while the upstream end of MSAD in Dollimore Series lies below the large choke on the right side, and the far end is blind. With only two of us on the trip, no extra lights, and a chamber with a view nearly 180° wide, it was impossible to photograph this as a single image. Instead, this 2-dimensional panoramic view is constructed from 18 separate pictures in 25 layers, each lighting a different portion of the chamber. Each picture needed to be manually stitched, including skew, resizing and lens correction to account for barrel distortion of the images (automatic correction does not understand caves), as automatic stitching software cannot cope with the changes in lighting.
Modelling and lighting by Pete, Pete, Pete, Pete, Slenderman and Pete
The main way on from Lost In Space abruptly enters the end of the largest chamber in the cave, The Reactor, with its blue and green tinted stal flow on the fault-controlled right wall. The chamber is 50 m (164 feet) long to the far end, 32 m (105 feet) wide, and up to 20 m (66 feet) high. The way on into Destiny Inlet is down a boulder slope on the left, while the upstream end of MSAD in Dollimore Series lies below the large choke on the right side, and the far end is blind. With only two of us on the trip, no extra lights, and a chamber with a view nearly 180° wide, it was impossible to photograph this as a single image. Instead, this 2-dimensional panoramic view is constructed from 18 separate pictures in 25 layers, each lighting a different portion of the chamber. Each picture needed to be manually stitched, including skew, resizing and lens correction to account for barrel distortion of the images (automatic correction does not understand caves), as automatic stitching software cannot cope with the changes in lighting.
Modelling and lighting by Pete, Pete, Pete, Pete, Slenderman and Pete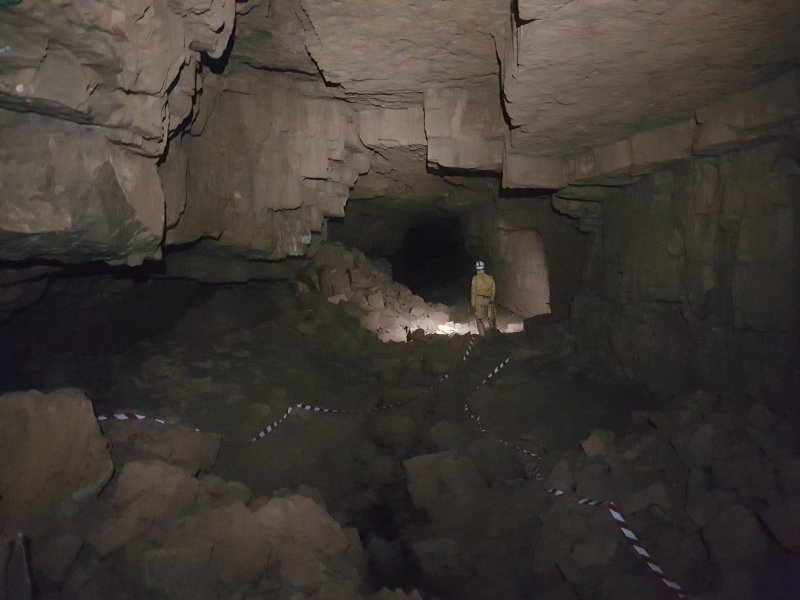 War of the Worlds North, the smaller of two major passages in the series, looking back towards the junction. The stream comes from a tiny inlet passage, to the left of the camera.
Modelling by Pete, lighting by Tarquin and Pete
War of the Worlds North, the smaller of two major passages in the series, looking back towards the junction. The stream comes from a tiny inlet passage, to the left of the camera.
Modelling by Pete, lighting by Tarquin and Pete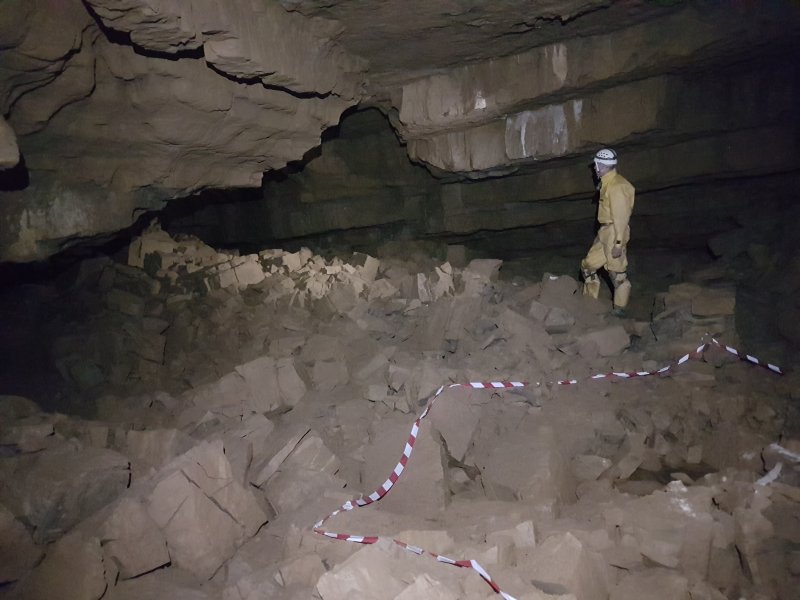 Near the end of War of the Worlds North.
Modelling by Pete, lighting by Tarquin and Pete
Near the end of War of the Worlds North.
Modelling by Pete, lighting by Tarquin and Pete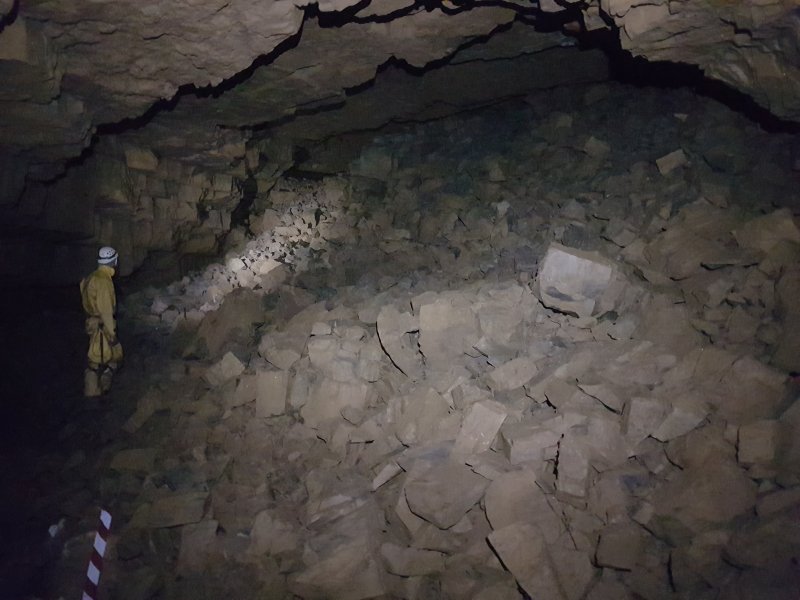 The choke at the end of War of the Worlds North is the largest and most promising choke heading into The Blorenge. Unfortunately, it could be a major task to open a route through it.
Modelling by Pete, lighting by Tarquin and Pete
The choke at the end of War of the Worlds North is the largest and most promising choke heading into The Blorenge. Unfortunately, it could be a major task to open a route through it.
Modelling by Pete, lighting by Tarquin and Pete The passage features an enormous pile of cryostal just before the choke.
Modelling by Pete, lighting by Tarquin and Pete
The passage features an enormous pile of cryostal just before the choke.
Modelling by Pete, lighting by Tarquin and Pete The cryostal appears to just be white powder like decomposing gypsum, but closer inspection reveals the beads and structures of cryostal.
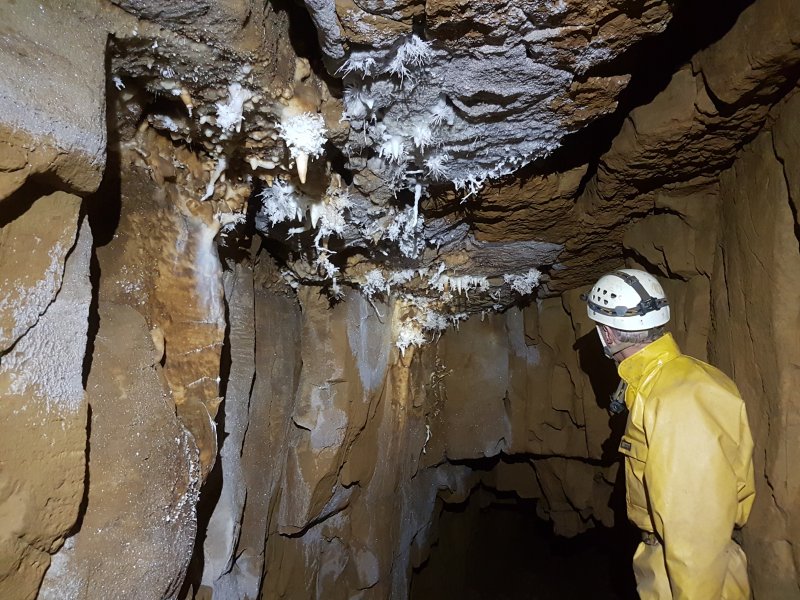 The small and beautifully decorated Sendero Luminoso is a highlight of trips to this area.
Modelling by Pete, lighting by Tarquin and Pete
The small and beautifully decorated Sendero Luminoso is a highlight of trips to this area.
Modelling by Pete, lighting by Tarquin and Pete Anthodites.
 Helictites.
 Helictites.
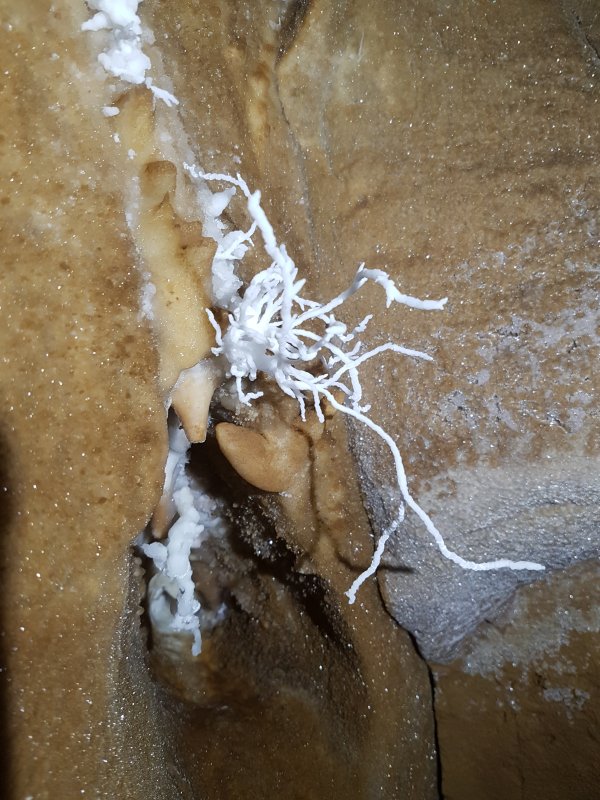 Distinctive split helictite.
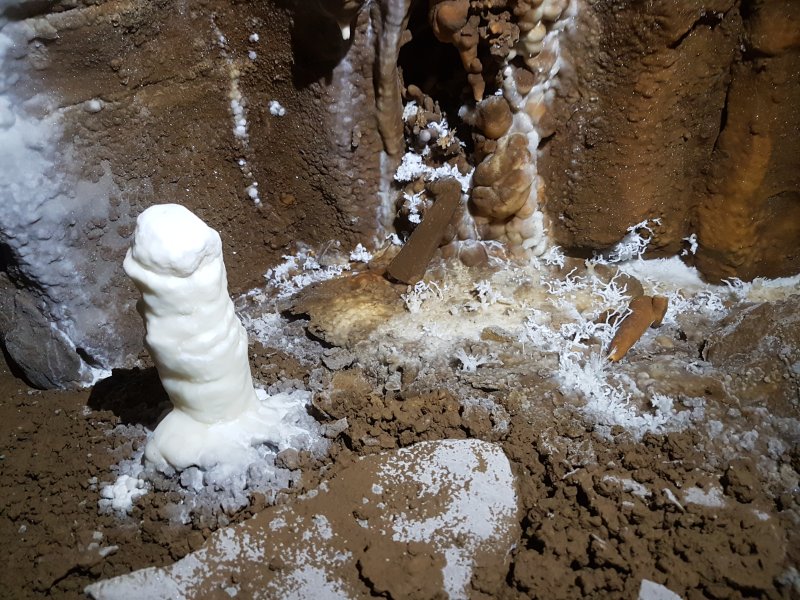 Stalagmites and heligmites below it.
 Heligmites is definitely a misnomer since they are just helictites. But here they are anyway; heligmites.
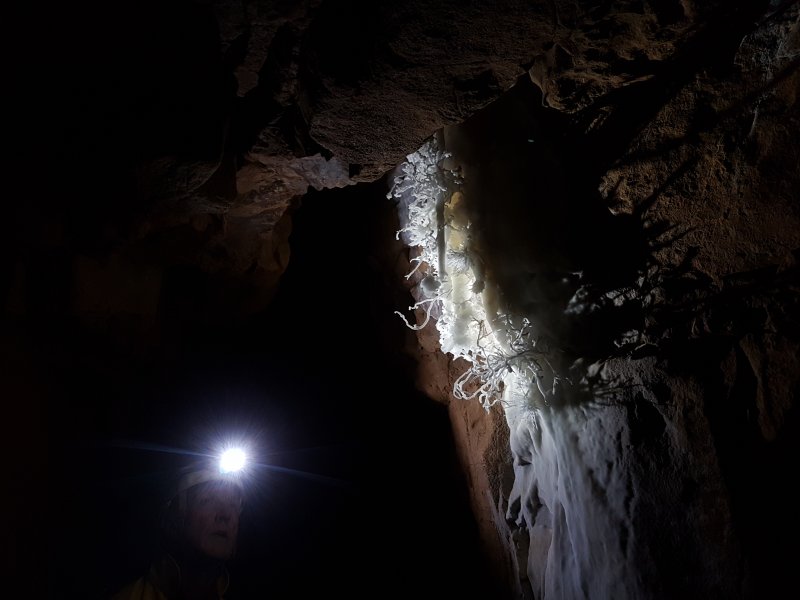 The most impressive formation in Sendero Luminoso.
Modelling by Pete, lighting by Tarquin and Pete
The most impressive formation in Sendero Luminoso.
Modelling by Pete, lighting by Tarquin and Pete The impressive formation from the other side.
 Detail of the formation.
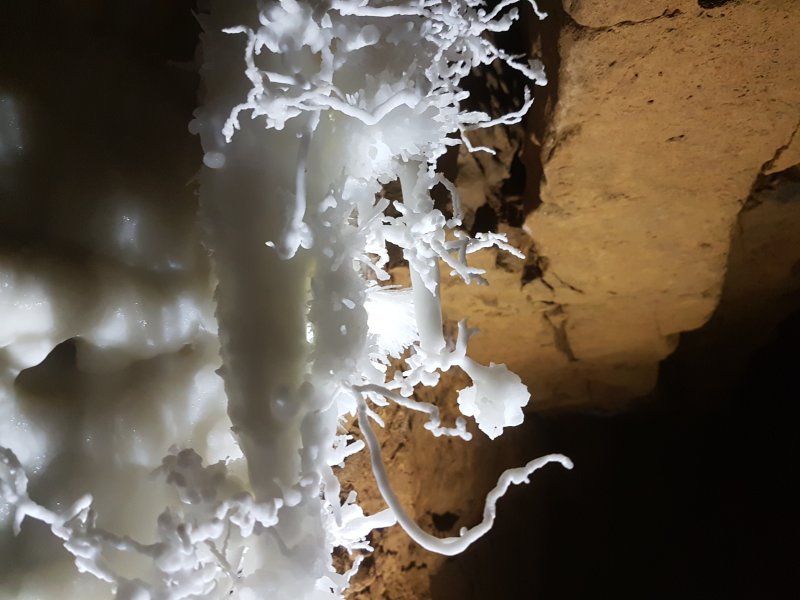 Helictite and stalactite detail.
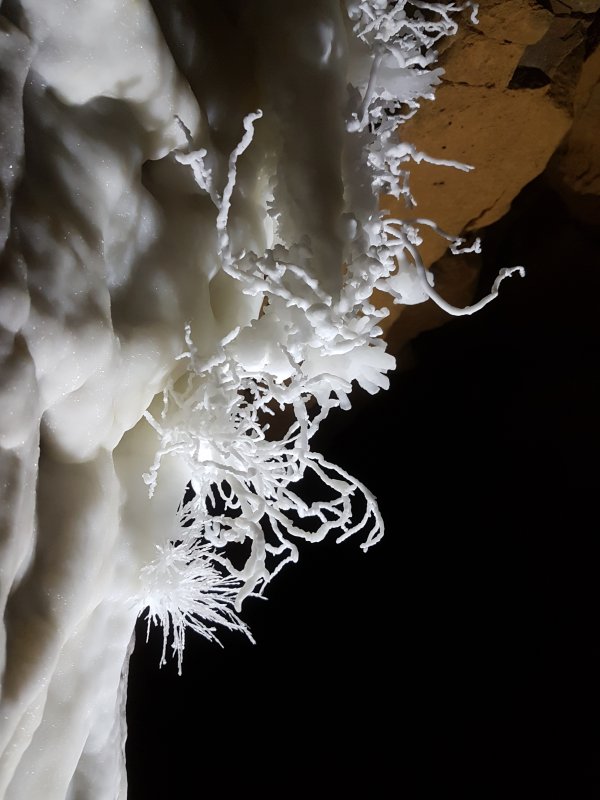 Helictite detail.
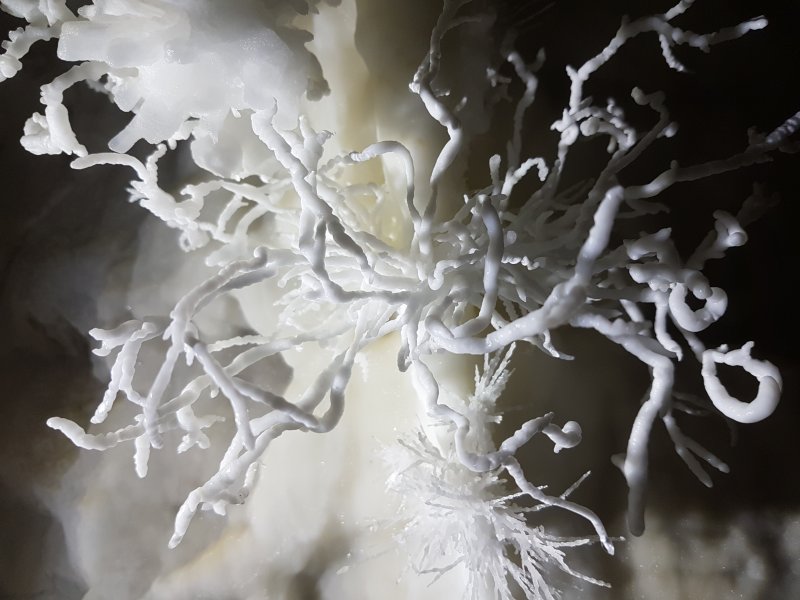 Detail of its most elaborate part.
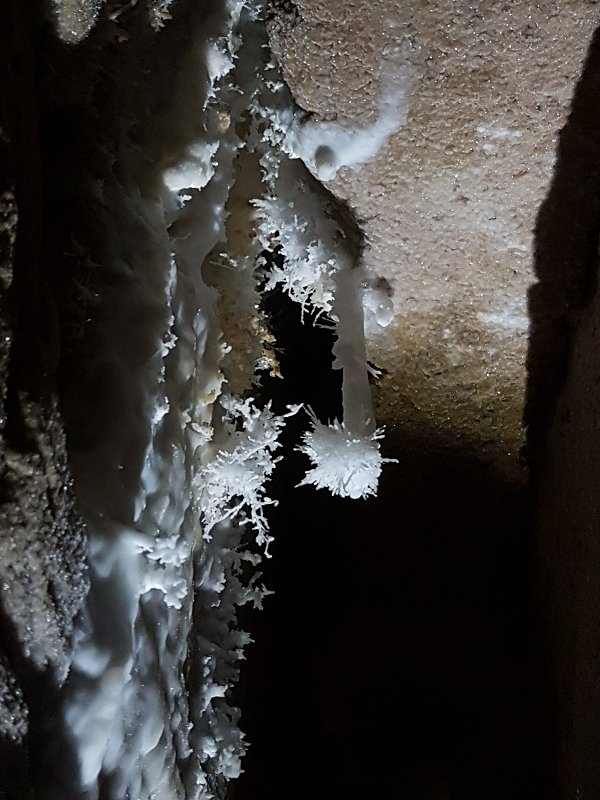 Anthodite at the end of the passage's formations.
Lighting by Tarquin and Pete
Anthodite at the end of the passage's formations.
Lighting by Tarquin and Pete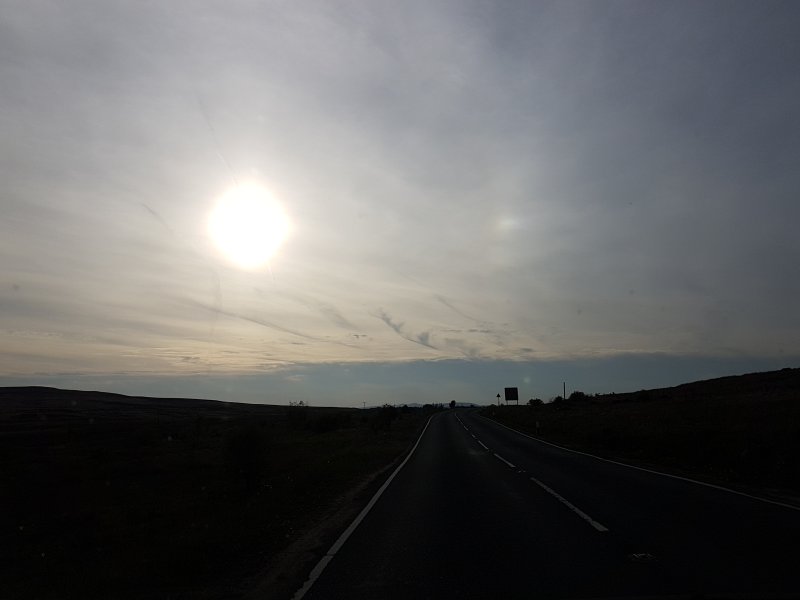 Sun dog (the white glint in the clouds to the right) over Brynmawr on the way back.