Ogof Draenen Destiny trip 24/07/2022
Unless otherwise stated, camera, setups, lighting, edits and gallery effects by Tarquin. Modelling and lighting at various points will be Pete Bolt.
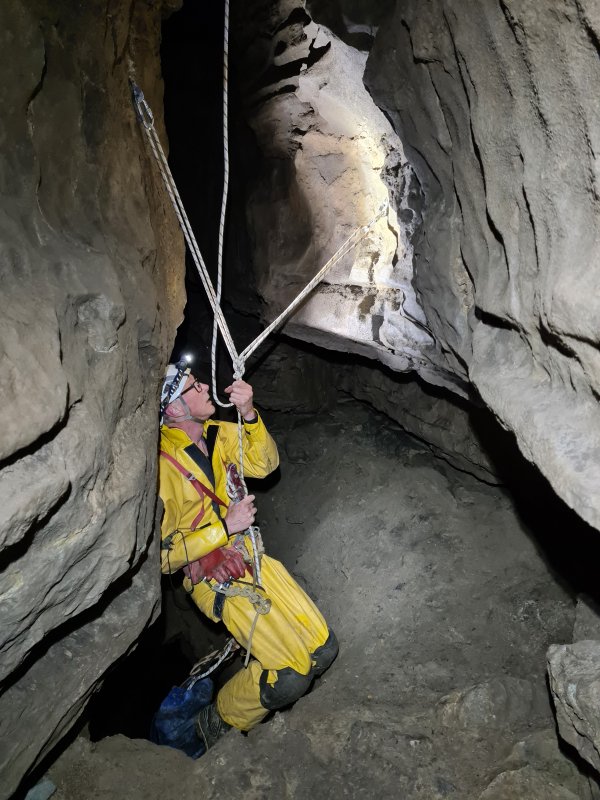
 The head of the Lost Crusade pitch, in the floor of Indiana Highway; the pitch that everyone traverses over. There are two ways to rig this; the first is directly from one of the P-hangers of the traverse line above (they are too far apart to rig a Y hang from two of them). The other is to use a P-hanger as a backup, then rig from two spits in the rift below, which is what we did. There is a significant rope rub at the lip of the pitch, for which we used a rope rub protector. There is also another spit just around the corner to the left, but it is badly positioned for use as a Y-hang, being lower than the other two, and the rock is poor quality there. It can be used for a deviation, and could also be used that way if rigging directly from a P-hanger.
Modelling by Pete, lighting by Tarquin and Pete
The head of the Lost Crusade pitch, in the floor of Indiana Highway; the pitch that everyone traverses over. There are two ways to rig this; the first is directly from one of the P-hangers of the traverse line above (they are too far apart to rig a Y hang from two of them). The other is to use a P-hanger as a backup, then rig from two spits in the rift below, which is what we did. There is a significant rope rub at the lip of the pitch, for which we used a rope rub protector. There is also another spit just around the corner to the left, but it is badly positioned for use as a Y-hang, being lower than the other two, and the rock is poor quality there. It can be used for a deviation, and could also be used that way if rigging directly from a P-hanger.
Modelling by Pete, lighting by Tarquin and Pete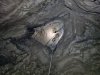 Lost Crusade opens out immediately into a very large shaft, quite a dramatic surprise considering the passages above and below. Where the ceiling bells out, a ledge to one side has a ramp of rubble leading back up into the floor of Indiana Highway, near the junction with Canyon. A choked inlet here runs in flood conditions, spilling water down the wall of the shaft. The source of the water is not proven, but it is likely to be the Black Beetle streamway.
Modelling by Pete, lighting by Tarquin and Pete
Lost Crusade opens out immediately into a very large shaft, quite a dramatic surprise considering the passages above and below. Where the ceiling bells out, a ledge to one side has a ramp of rubble leading back up into the floor of Indiana Highway, near the junction with Canyon. A choked inlet here runs in flood conditions, spilling water down the wall of the shaft. The source of the water is not proven, but it is likely to be the Black Beetle streamway.
Modelling by Pete, lighting by Tarquin and Pete The base of Lost Crusade. Beneath the camera is a narrow slot ending in a rift which chokes in both directions, while in the distance is the climb up into Destiny.
Modelling by Pete, lighting by Tarquin and Pete
The base of Lost Crusade. Beneath the camera is a narrow slot ending in a rift which chokes in both directions, while in the distance is the climb up into Destiny.
Modelling by Pete, lighting by Tarquin and Pete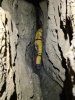 The passage leading off from the climb was explored during the original exploration in 1994, and is awkwardly narrow. After a mistake which caused a tackle bag to fall down Lost Crusade in 1995, Ali Garman and Kevin Munn went to retrieve it, claiming it was Destiny. While doing so, they re-explored this passage.
Modelling by Pete, lighting by Tarquin and Pete
The passage leading off from the climb was explored during the original exploration in 1994, and is awkwardly narrow. After a mistake which caused a tackle bag to fall down Lost Crusade in 1995, Ali Garman and Kevin Munn went to retrieve it, claiming it was Destiny. While doing so, they re-explored this passage.
Modelling by Pete, lighting by Tarquin and Pete The passage - seen on the right here - ended in this small chamber. During the 1995 trip, the shattered wall on one side was found to be draughting, and was broken open to reveal the way on, seen on the left here. Some spits have been installed on the left side of the passage, in this chamber.
Modelling by Pete, lighting by Tarquin and Pete
The passage - seen on the right here - ended in this small chamber. During the 1995 trip, the shattered wall on one side was found to be draughting, and was broken open to reveal the way on, seen on the left here. Some spits have been installed on the left side of the passage, in this chamber.
Modelling by Pete, lighting by Tarquin and Pete The passage ended at a very tight squeeze onto a pitch head, which proved impassable to everyone who attempted to visit afterwards. This has subsquently been significantly enlarged by a digging team some time around 2005 (without actually getting any further). Pete and I then enlarged it further, so that it is no longer a squeeze. It does still need you to go through feet first, a small distance above the floor.
Modelling by Pete, lighting by Tarquin and Pete
The passage ended at a very tight squeeze onto a pitch head, which proved impassable to everyone who attempted to visit afterwards. This has subsquently been significantly enlarged by a digging team some time around 2005 (without actually getting any further). Pete and I then enlarged it further, so that it is no longer a squeeze. It does still need you to go through feet first, a small distance above the floor.
Modelling by Pete, lighting by Tarquin and Pete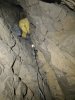 The pitch starts off very narrow, and getting back out requires a rotation while hovering in space. SRT would be almost impossible. Although this pitch was originally done on rope by Ali and Huw Jones in 1995, the jammed rocks used to rig from are no longer there, and the floor that could be used to stand on, has collapsed away. As a result, the best approach is a ladder starting at the lip of the pitch, connected via a long tether to the spits in the previous chamber.
Modelling by Pete, lighting by Tarquin and Pete
The pitch starts off very narrow, and getting back out requires a rotation while hovering in space. SRT would be almost impossible. Although this pitch was originally done on rope by Ali and Huw Jones in 1995, the jammed rocks used to rig from are no longer there, and the floor that could be used to stand on, has collapsed away. As a result, the best approach is a ladder starting at the lip of the pitch, connected via a long tether to the spits in the previous chamber.
Modelling by Pete, lighting by Tarquin and Pete A ladder of 5-6 metres is enough to reach a rocky ledge, where a clamber down then reaches the proper floor.
Modelling by Pete, lighting by Tarquin and Pete
A ladder of 5-6 metres is enough to reach a rocky ledge, where a clamber down then reaches the proper floor.
Modelling by Pete, lighting by Tarquin and Pete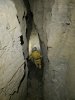 Destiny temporarily becomes a more impressive rift. There was a survey marker on the wall made in the style of the Chelsea Spelaeological Society survey markers, but this part of the passage is not shown on any of their surveys. As a result, we suspect that the survey marker was made by Ali and Huw during the original exploration, when they roughly surveyed it. It is quite possible that our visit here was only the second ever trip into this part of the passage.
Modelling by Pete, lighting by Tarquin and Pete
Destiny temporarily becomes a more impressive rift. There was a survey marker on the wall made in the style of the Chelsea Spelaeological Society survey markers, but this part of the passage is not shown on any of their surveys. As a result, we suspect that the survey marker was made by Ali and Huw during the original exploration, when they roughly surveyed it. It is quite possible that our visit here was only the second ever trip into this part of the passage.
Modelling by Pete, lighting by Tarquin and Pete However, it soon becomes a crawl past boulders.
Modelling by Pete, lighting by Tarquin and Pete
However, it soon becomes a crawl past boulders.
Modelling by Pete, lighting by Tarquin and Pete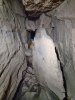 The walls become uncomfortably unstable, with large rocks peeling off the wall, supported by shattered rubble. Crawling underneath these requires some careful self-control. It would probably have been better to just dismantle the wall. During the original exploration, Huw was temporarily caught on the other side of this, when Ali collapsed the parts that had been suspended from the ceiling.
Modelling by Pete, lighting by Tarquin and Pete
The walls become uncomfortably unstable, with large rocks peeling off the wall, supported by shattered rubble. Crawling underneath these requires some careful self-control. It would probably have been better to just dismantle the wall. During the original exploration, Huw was temporarily caught on the other side of this, when Ali collapsed the parts that had been suspended from the ceiling.
Modelling by Pete, lighting by Tarquin and Pete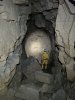 Destiny abruptly ends in this chamber, Temple Of Doom, where there is no obvious place to dig.
Modelling by Pete, lighting by Tarquin and Pete
Destiny abruptly ends in this chamber, Temple Of Doom, where there is no obvious place to dig.
Modelling by Pete, lighting by Tarquin and Pete There is a small hole between rocks at the start of the chamber, but video footage showed that there is no way on in there, just the bottom of the rift of the passage leading into the chamber.
Modelling by Pete, lighting by Tarquin and Pete
There is a small hole between rocks at the start of the chamber, but video footage showed that there is no way on in there, just the bottom of the rift of the passage leading into the chamber.
Modelling by Pete, lighting by Tarquin and Pete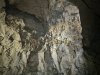 Straws in the chamber.
Lighting by Tarquin and Pete
Straws in the chamber.
Lighting by Tarquin and Pete Straws in the chamber.
Lighting by Tarquin and Pete
Straws in the chamber.
Lighting by Tarquin and Pete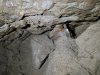 The floor of the chamber has a depression on one side, which appears to be exposing the wall of the chamber, not a way on. The sand makes it very unlikely that any good way on will exist, as water evidently backs up here.
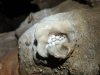 Beautiful cave pearls, nestled in a rose-like basket, in the depression.
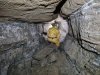 We then headed into an oxbow, hidden behind a boulder squeeze in the trench between Canyon and Megadrive.
Modelling by Pete, lighting by Tarquin and Pete
We then headed into an oxbow, hidden behind a boulder squeeze in the trench between Canyon and Megadrive.
Modelling by Pete, lighting by Tarquin and Pete Laminates/layers of sediments in the oxbow. These are periglacial rhythmites; layers of alternating fine silt and coarse gravel deposited by the meltwater from glaciers. The summer layers, when there is more meltwater, are the larger grains. The process has started, been truncated, then restarted a couple of times, creating the layering changes.
Modelling by Pete, lighting by Tarquin and Pete
Laminates/layers of sediments in the oxbow. These are periglacial rhythmites; layers of alternating fine silt and coarse gravel deposited by the meltwater from glaciers. The summer layers, when there is more meltwater, are the larger grains. The process has started, been truncated, then restarted a couple of times, creating the layering changes.
Modelling by Pete, lighting by Tarquin and Pete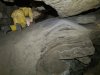 Periglacial rhythmites.
Modelling by Pete, lighting by Tarquin and Pete
Periglacial rhythmites.
Modelling by Pete, lighting by Tarquin and Pete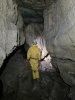 The oxbow grows to a large size.
Modelling by Pete, lighting by Tarquin and Pete
The oxbow grows to a large size.
Modelling by Pete, lighting by Tarquin and Pete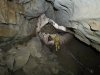 Near the start of Megadrive North, where the trench oxbow rejoins. The right side of the passage here is a series of very wide beddings with their own trenches. In the distance is the inlet aven, with the patterned mud ceiling, at the junction with Northern Loop.
Modelling by Pete, lighting by Tarquin and Pete
Near the start of Megadrive North, where the trench oxbow rejoins. The right side of the passage here is a series of very wide beddings with their own trenches. In the distance is the inlet aven, with the patterned mud ceiling, at the junction with Northern Loop.
Modelling by Pete, lighting by Tarquin and Pete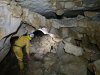 Unstable ceiling in Megadrive North.
Modelling by Pete, lighting by Tarquin and Pete
Unstable ceiling in Megadrive North.
Modelling by Pete, lighting by Tarquin and Pete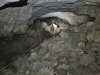 Choke at the end of Megadrive North. To the right of the camera is a way into Anastomosis Passage. To the left is a drop into the trench, which is the way into Underworld Passage. We left that for another day.
Modelling by Pete, lighting by Tarquin and Pete
Choke at the end of Megadrive North. To the right of the camera is a way into Anastomosis Passage. To the left is a drop into the trench, which is the way into Underworld Passage. We left that for another day.
Modelling by Pete, lighting by Tarquin and Pete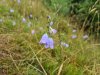 Welcomed back to surface by the harebells.
 The head of the Lost Crusade pitch, in the floor of Indiana Highway; the pitch that everyone traverses over. There are two ways to rig this; the first is directly from one of the P-hangers of the traverse line above (they are too far apart to rig a Y hang from two of them). The other is to use a P-hanger as a backup, then rig from two spits in the rift below, which is what we did. There is a significant rope rub at the lip of the pitch, for which we used a rope rub protector. There is also another spit just around the corner to the left, but it is badly positioned for use as a Y-hang, being lower than the other two, and the rock is poor quality there. It can be used for a deviation, and could also be used that way if rigging directly from a P-hanger.
Modelling by Pete, lighting by Tarquin and Pete
The head of the Lost Crusade pitch, in the floor of Indiana Highway; the pitch that everyone traverses over. There are two ways to rig this; the first is directly from one of the P-hangers of the traverse line above (they are too far apart to rig a Y hang from two of them). The other is to use a P-hanger as a backup, then rig from two spits in the rift below, which is what we did. There is a significant rope rub at the lip of the pitch, for which we used a rope rub protector. There is also another spit just around the corner to the left, but it is badly positioned for use as a Y-hang, being lower than the other two, and the rock is poor quality there. It can be used for a deviation, and could also be used that way if rigging directly from a P-hanger.
Modelling by Pete, lighting by Tarquin and Pete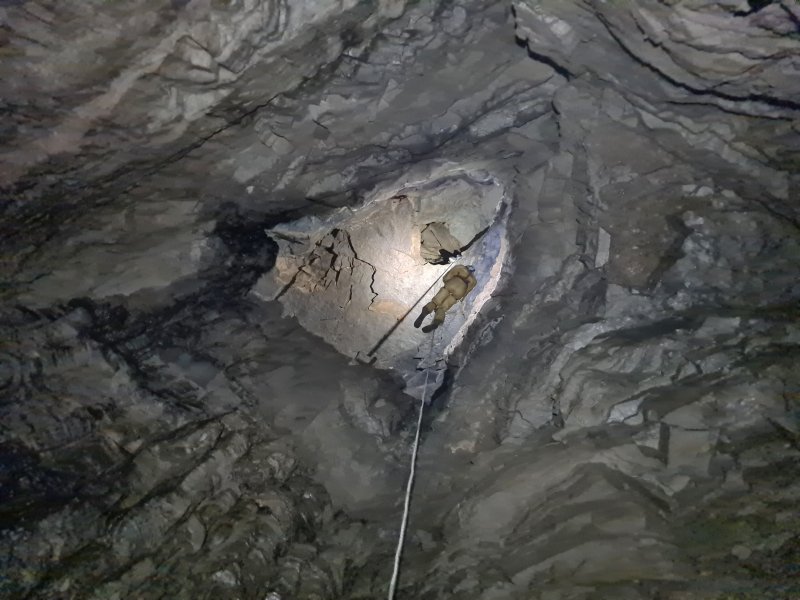 Lost Crusade opens out immediately into a very large shaft, quite a dramatic surprise considering the passages above and below. Where the ceiling bells out, a ledge to one side has a ramp of rubble leading back up into the floor of Indiana Highway, near the junction with Canyon. A choked inlet here runs in flood conditions, spilling water down the wall of the shaft. The source of the water is not proven, but it is likely to be the Black Beetle streamway.
Modelling by Pete, lighting by Tarquin and Pete
Lost Crusade opens out immediately into a very large shaft, quite a dramatic surprise considering the passages above and below. Where the ceiling bells out, a ledge to one side has a ramp of rubble leading back up into the floor of Indiana Highway, near the junction with Canyon. A choked inlet here runs in flood conditions, spilling water down the wall of the shaft. The source of the water is not proven, but it is likely to be the Black Beetle streamway.
Modelling by Pete, lighting by Tarquin and Pete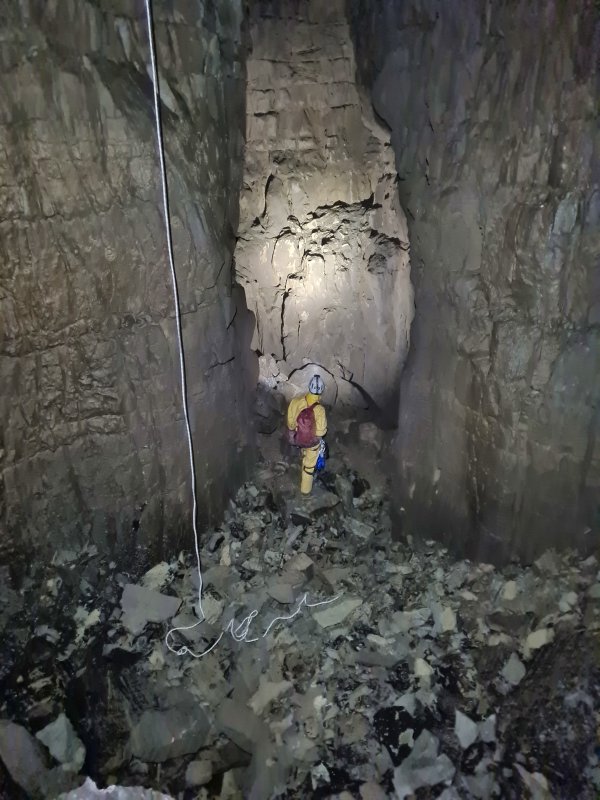 The base of Lost Crusade. Beneath the camera is a narrow slot ending in a rift which chokes in both directions, while in the distance is the climb up into Destiny.
Modelling by Pete, lighting by Tarquin and Pete
The base of Lost Crusade. Beneath the camera is a narrow slot ending in a rift which chokes in both directions, while in the distance is the climb up into Destiny.
Modelling by Pete, lighting by Tarquin and Pete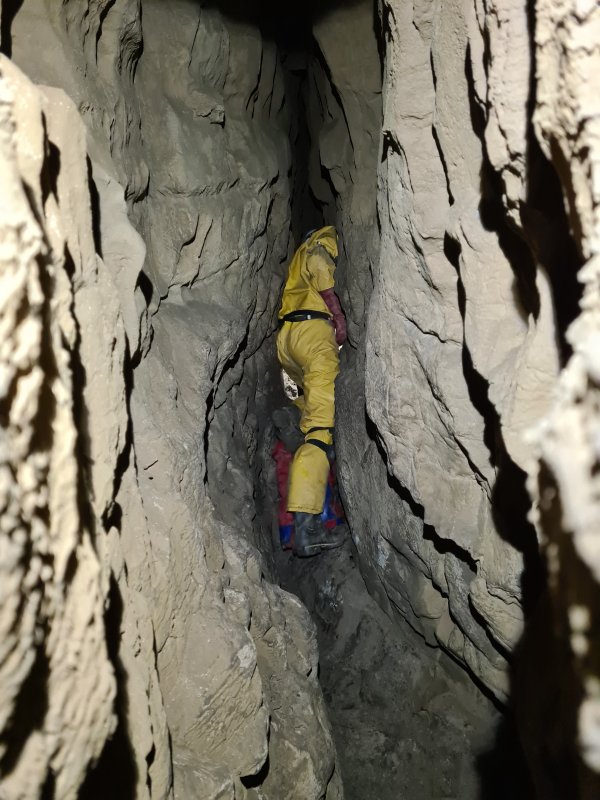 The passage leading off from the climb was explored during the original exploration in 1994, and is awkwardly narrow. After a mistake which caused a tackle bag to fall down Lost Crusade in 1995, Ali Garman and Kevin Munn went to retrieve it, claiming it was Destiny. While doing so, they re-explored this passage.
Modelling by Pete, lighting by Tarquin and Pete
The passage leading off from the climb was explored during the original exploration in 1994, and is awkwardly narrow. After a mistake which caused a tackle bag to fall down Lost Crusade in 1995, Ali Garman and Kevin Munn went to retrieve it, claiming it was Destiny. While doing so, they re-explored this passage.
Modelling by Pete, lighting by Tarquin and Pete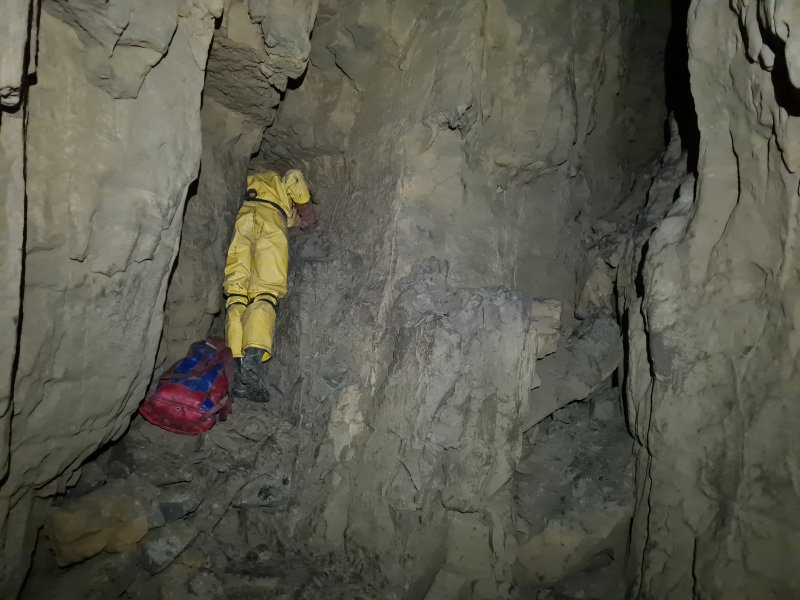 The passage - seen on the right here - ended in this small chamber. During the 1995 trip, the shattered wall on one side was found to be draughting, and was broken open to reveal the way on, seen on the left here. Some spits have been installed on the left side of the passage, in this chamber.
Modelling by Pete, lighting by Tarquin and Pete
The passage - seen on the right here - ended in this small chamber. During the 1995 trip, the shattered wall on one side was found to be draughting, and was broken open to reveal the way on, seen on the left here. Some spits have been installed on the left side of the passage, in this chamber.
Modelling by Pete, lighting by Tarquin and Pete The passage ended at a very tight squeeze onto a pitch head, which proved impassable to everyone who attempted to visit afterwards. This has subsquently been significantly enlarged by a digging team some time around 2005 (without actually getting any further). Pete and I then enlarged it further, so that it is no longer a squeeze. It does still need you to go through feet first, a small distance above the floor.
Modelling by Pete, lighting by Tarquin and Pete
The passage ended at a very tight squeeze onto a pitch head, which proved impassable to everyone who attempted to visit afterwards. This has subsquently been significantly enlarged by a digging team some time around 2005 (without actually getting any further). Pete and I then enlarged it further, so that it is no longer a squeeze. It does still need you to go through feet first, a small distance above the floor.
Modelling by Pete, lighting by Tarquin and Pete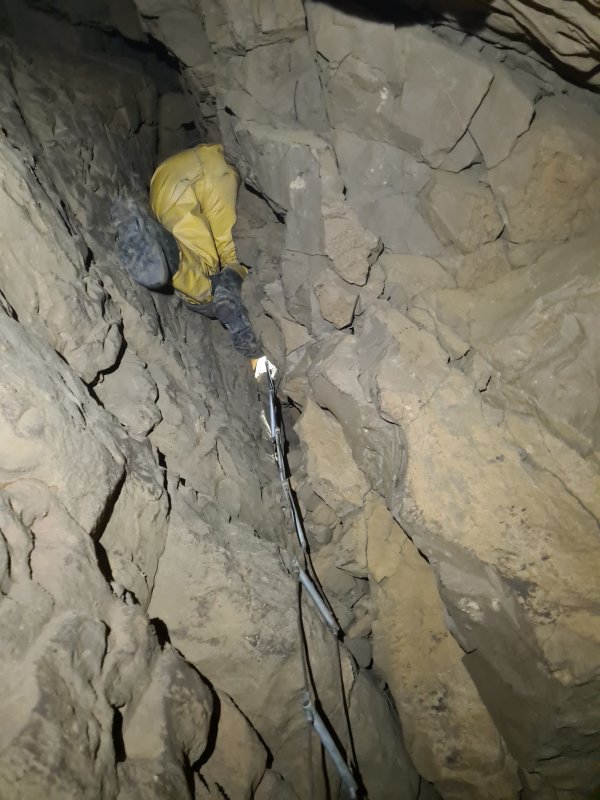 The pitch starts off very narrow, and getting back out requires a rotation while hovering in space. SRT would be almost impossible. Although this pitch was originally done on rope by Ali and Huw Jones in 1995, the jammed rocks used to rig from are no longer there, and the floor that could be used to stand on, has collapsed away. As a result, the best approach is a ladder starting at the lip of the pitch, connected via a long tether to the spits in the previous chamber.
Modelling by Pete, lighting by Tarquin and Pete
The pitch starts off very narrow, and getting back out requires a rotation while hovering in space. SRT would be almost impossible. Although this pitch was originally done on rope by Ali and Huw Jones in 1995, the jammed rocks used to rig from are no longer there, and the floor that could be used to stand on, has collapsed away. As a result, the best approach is a ladder starting at the lip of the pitch, connected via a long tether to the spits in the previous chamber.
Modelling by Pete, lighting by Tarquin and Pete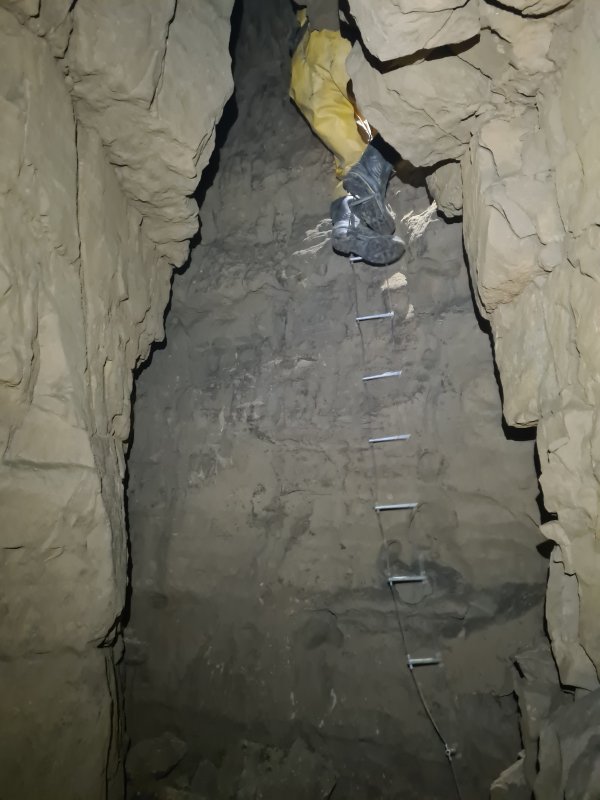 A ladder of 5-6 metres is enough to reach a rocky ledge, where a clamber down then reaches the proper floor.
Modelling by Pete, lighting by Tarquin and Pete
A ladder of 5-6 metres is enough to reach a rocky ledge, where a clamber down then reaches the proper floor.
Modelling by Pete, lighting by Tarquin and Pete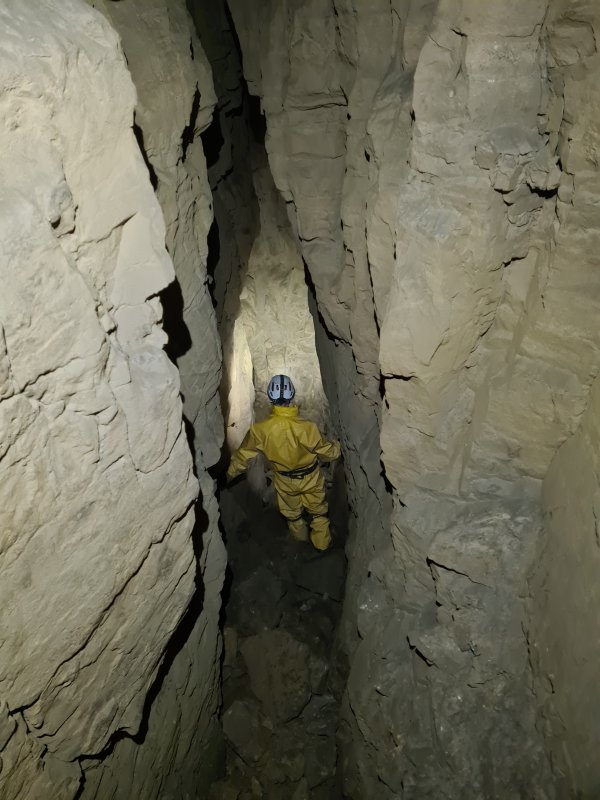 Destiny temporarily becomes a more impressive rift. There was a survey marker on the wall made in the style of the Chelsea Spelaeological Society survey markers, but this part of the passage is not shown on any of their surveys. As a result, we suspect that the survey marker was made by Ali and Huw during the original exploration, when they roughly surveyed it. It is quite possible that our visit here was only the second ever trip into this part of the passage.
Modelling by Pete, lighting by Tarquin and Pete
Destiny temporarily becomes a more impressive rift. There was a survey marker on the wall made in the style of the Chelsea Spelaeological Society survey markers, but this part of the passage is not shown on any of their surveys. As a result, we suspect that the survey marker was made by Ali and Huw during the original exploration, when they roughly surveyed it. It is quite possible that our visit here was only the second ever trip into this part of the passage.
Modelling by Pete, lighting by Tarquin and Pete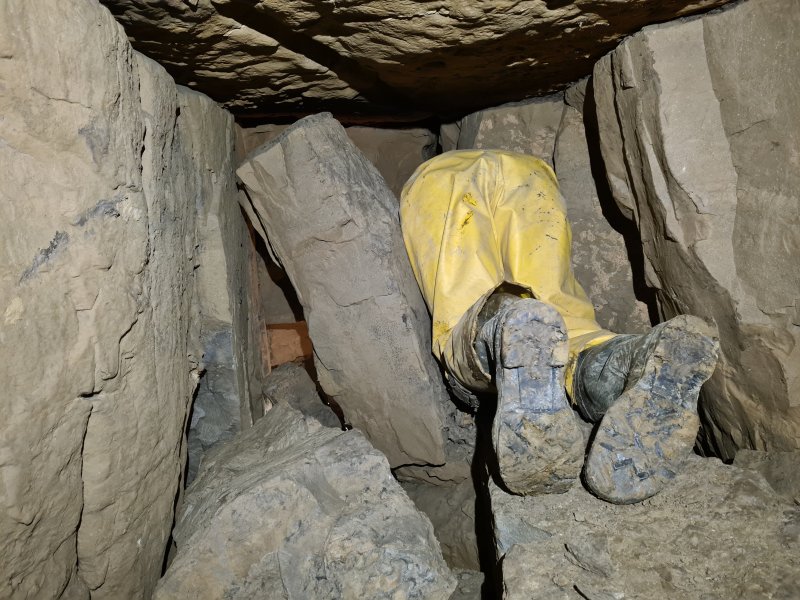 However, it soon becomes a crawl past boulders.
Modelling by Pete, lighting by Tarquin and Pete
However, it soon becomes a crawl past boulders.
Modelling by Pete, lighting by Tarquin and Pete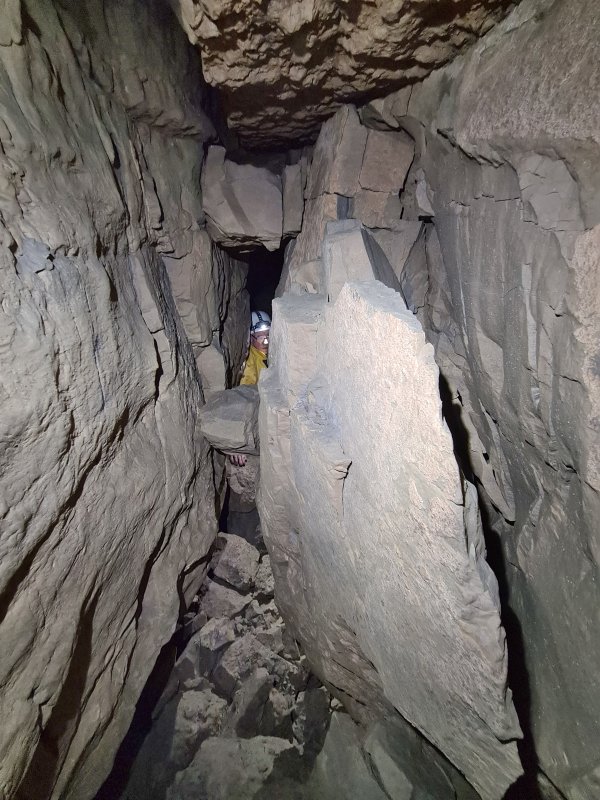 The walls become uncomfortably unstable, with large rocks peeling off the wall, supported by shattered rubble. Crawling underneath these requires some careful self-control. It would probably have been better to just dismantle the wall. During the original exploration, Huw was temporarily caught on the other side of this, when Ali collapsed the parts that had been suspended from the ceiling.
Modelling by Pete, lighting by Tarquin and Pete
The walls become uncomfortably unstable, with large rocks peeling off the wall, supported by shattered rubble. Crawling underneath these requires some careful self-control. It would probably have been better to just dismantle the wall. During the original exploration, Huw was temporarily caught on the other side of this, when Ali collapsed the parts that had been suspended from the ceiling.
Modelling by Pete, lighting by Tarquin and Pete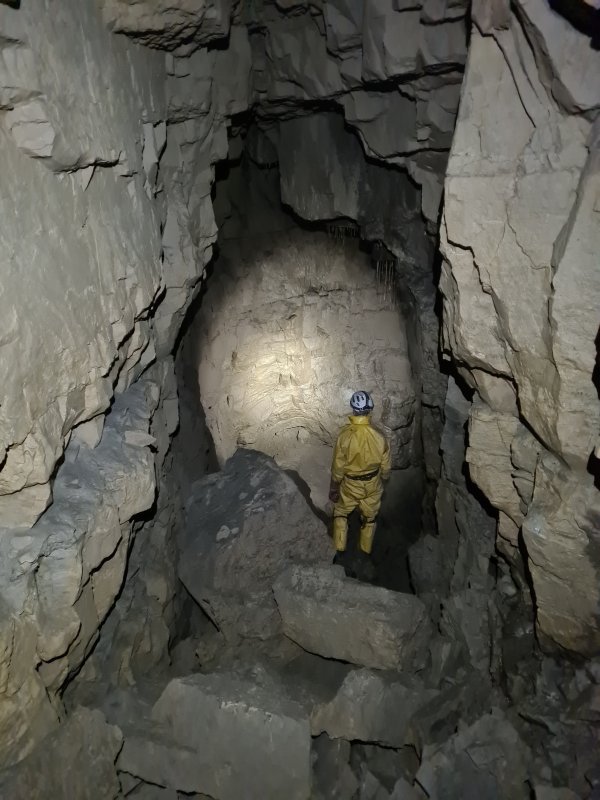 Destiny abruptly ends in this chamber, Temple Of Doom, where there is no obvious place to dig.
Modelling by Pete, lighting by Tarquin and Pete
Destiny abruptly ends in this chamber, Temple Of Doom, where there is no obvious place to dig.
Modelling by Pete, lighting by Tarquin and Pete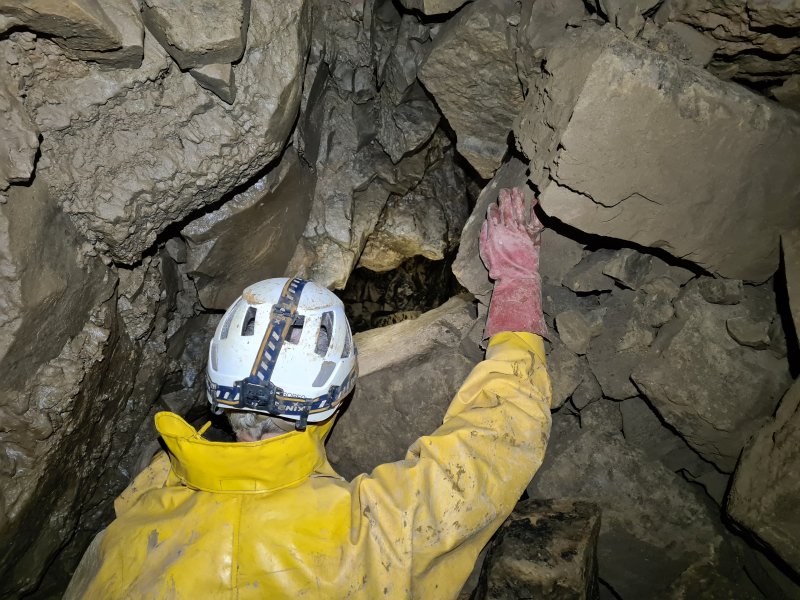 There is a small hole between rocks at the start of the chamber, but video footage showed that there is no way on in there, just the bottom of the rift of the passage leading into the chamber.
Modelling by Pete, lighting by Tarquin and Pete
There is a small hole between rocks at the start of the chamber, but video footage showed that there is no way on in there, just the bottom of the rift of the passage leading into the chamber.
Modelling by Pete, lighting by Tarquin and Pete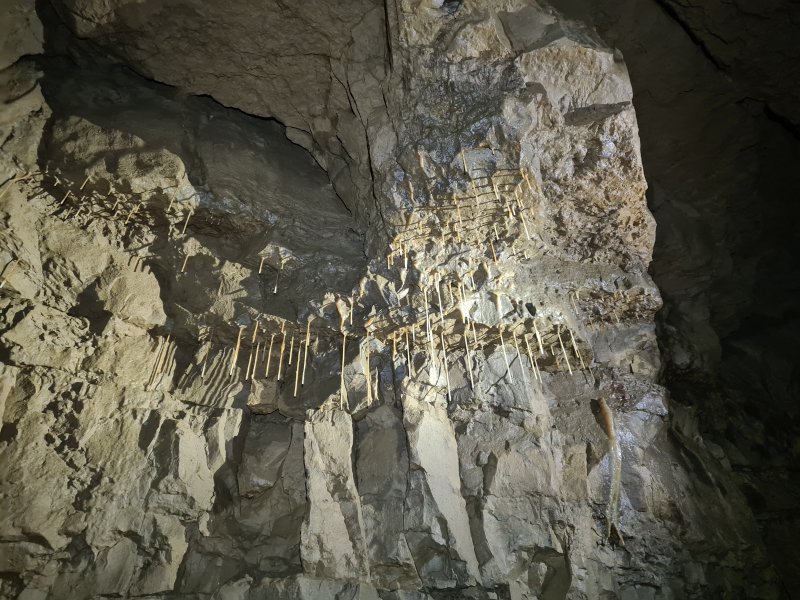 Straws in the chamber.
Lighting by Tarquin and Pete
Straws in the chamber.
Lighting by Tarquin and Pete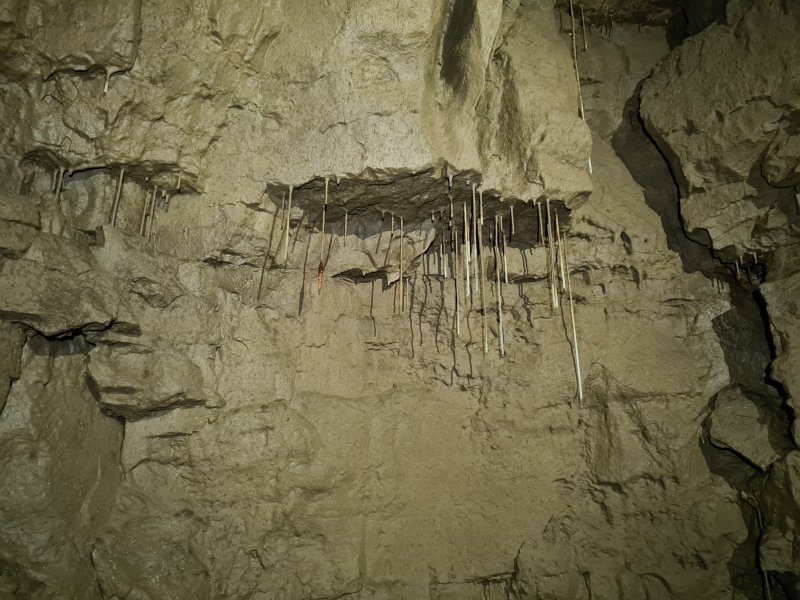 Straws in the chamber.
Lighting by Tarquin and Pete
Straws in the chamber.
Lighting by Tarquin and Pete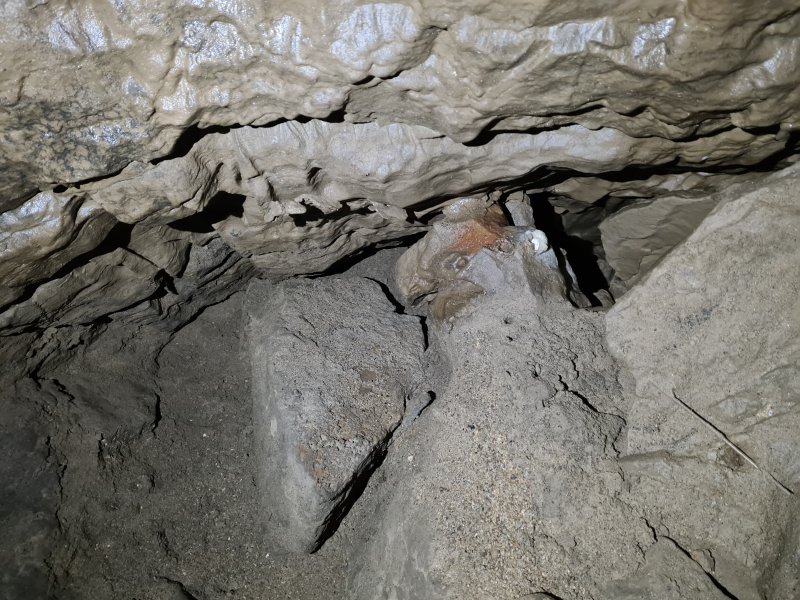 The floor of the chamber has a depression on one side, which appears to be exposing the wall of the chamber, not a way on. The sand makes it very unlikely that any good way on will exist, as water evidently backs up here.
 Beautiful cave pearls, nestled in a rose-like basket, in the depression.
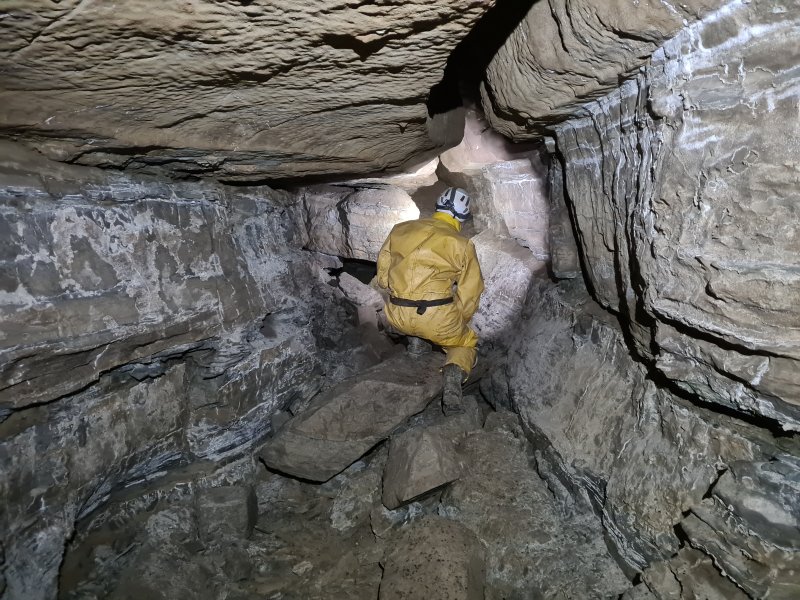 We then headed into an oxbow, hidden behind a boulder squeeze in the trench between Canyon and Megadrive.
Modelling by Pete, lighting by Tarquin and Pete
We then headed into an oxbow, hidden behind a boulder squeeze in the trench between Canyon and Megadrive.
Modelling by Pete, lighting by Tarquin and Pete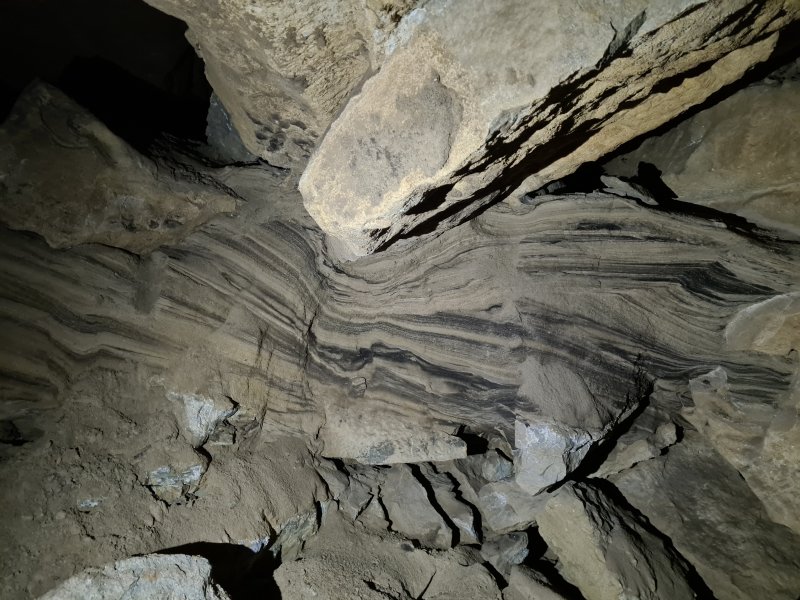 Laminates/layers of sediments in the oxbow. These are periglacial rhythmites; layers of alternating fine silt and coarse gravel deposited by the meltwater from glaciers. The summer layers, when there is more meltwater, are the larger grains. The process has started, been truncated, then restarted a couple of times, creating the layering changes.
Modelling by Pete, lighting by Tarquin and Pete
Laminates/layers of sediments in the oxbow. These are periglacial rhythmites; layers of alternating fine silt and coarse gravel deposited by the meltwater from glaciers. The summer layers, when there is more meltwater, are the larger grains. The process has started, been truncated, then restarted a couple of times, creating the layering changes.
Modelling by Pete, lighting by Tarquin and Pete Periglacial rhythmites.
Modelling by Pete, lighting by Tarquin and Pete
Periglacial rhythmites.
Modelling by Pete, lighting by Tarquin and Pete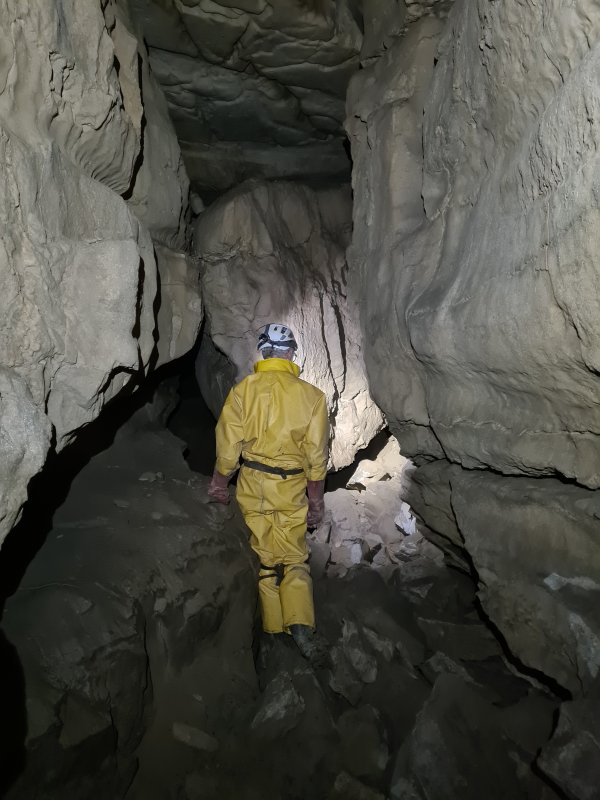 The oxbow grows to a large size.
Modelling by Pete, lighting by Tarquin and Pete
The oxbow grows to a large size.
Modelling by Pete, lighting by Tarquin and Pete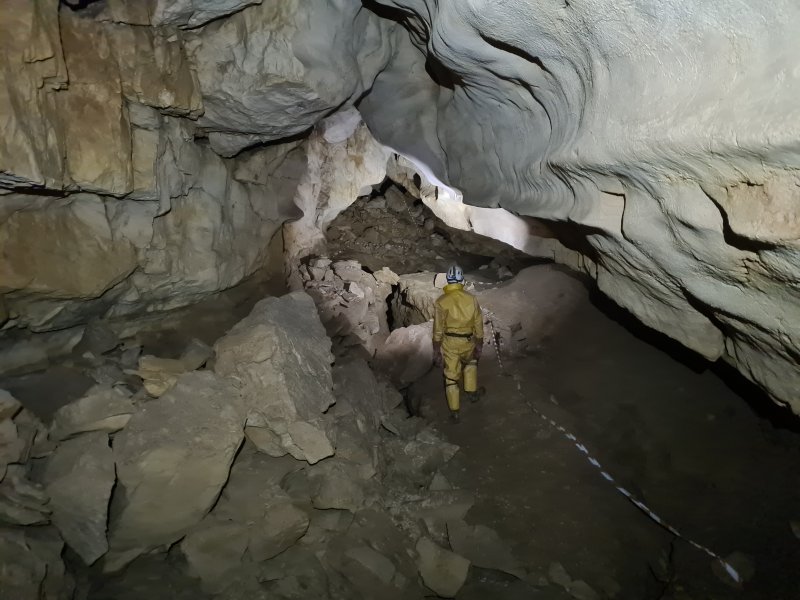 Near the start of Megadrive North, where the trench oxbow rejoins. The right side of the passage here is a series of very wide beddings with their own trenches. In the distance is the inlet aven, with the patterned mud ceiling, at the junction with Northern Loop.
Modelling by Pete, lighting by Tarquin and Pete
Near the start of Megadrive North, where the trench oxbow rejoins. The right side of the passage here is a series of very wide beddings with their own trenches. In the distance is the inlet aven, with the patterned mud ceiling, at the junction with Northern Loop.
Modelling by Pete, lighting by Tarquin and Pete Unstable ceiling in Megadrive North.
Modelling by Pete, lighting by Tarquin and Pete
Unstable ceiling in Megadrive North.
Modelling by Pete, lighting by Tarquin and Pete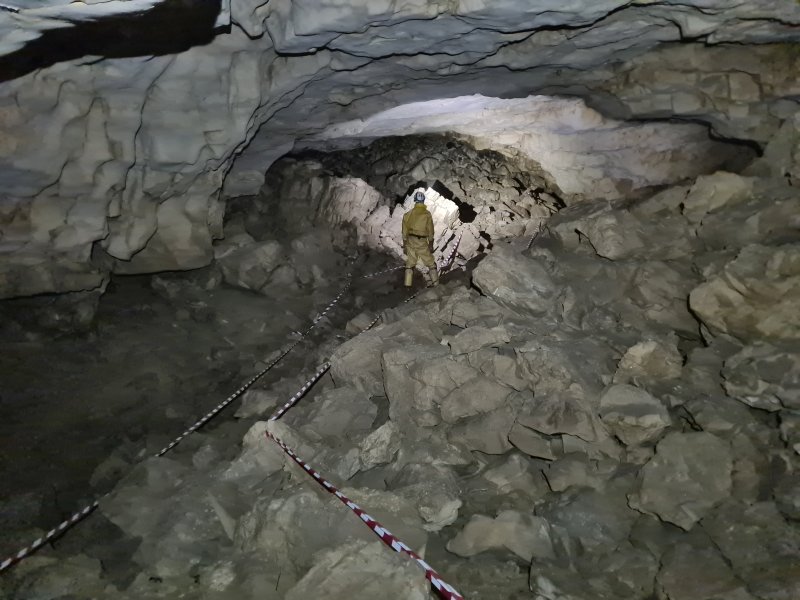 Choke at the end of Megadrive North. To the right of the camera is a way into Anastomosis Passage. To the left is a drop into the trench, which is the way into Underworld Passage. We left that for another day.
Modelling by Pete, lighting by Tarquin and Pete
Choke at the end of Megadrive North. To the right of the camera is a way into Anastomosis Passage. To the left is a drop into the trench, which is the way into Underworld Passage. We left that for another day.
Modelling by Pete, lighting by Tarquin and Pete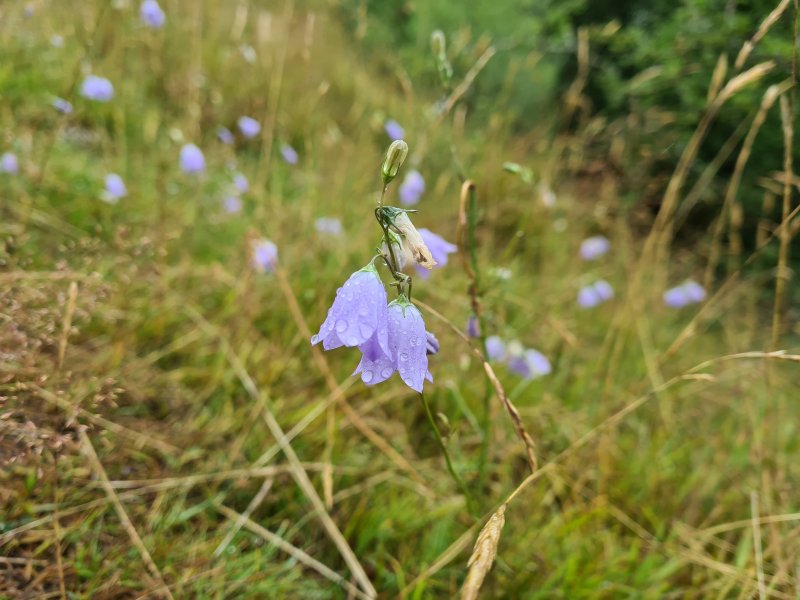 Welcomed back to surface by the harebells.