Ogof Draenen Wyvern Extensions trip 28/05/2022
Unless otherwise stated, camera, setups, lighting, edits and gallery effects by Tarquin. Modelling and lighting at various points will be Monica Bollani, Mike Kushy and Pete Bolt.
This was actually a Long Round Trip, but since the rest of the route has been photographed extensively, this gallery concentrates entirely on the Wyvern Extensions, most of which I previously had no photographs for.
The Wyvern Extensions are also known as Wessex Series, found by members of Wessex Cave Club in 1995, initially by Mark Helmore, Richard Hathway and Dominic Sealy. Several others were then involved, whose names can be found in the Wessex Cave Club Journal, volume 24, number 253, from February 1997. Further extensions were then made by Oxford University Caving Club (Chris Densham, Hilary Greaves, Tim Guilford, Lou Maurice, Pauline Rigby), Brynmawr Caving Club (Ian Wilton-Jones, Peter Wilton-Jones, Tarquin Wilton-Jones - yes, that's me, Malcolm Reid), the Chelsea Spelaeological Society surveyors, and a few others (Andy Manthorpe of Shepton Mallet Caving Club, Tim Barter of Westminster Speleological Group, Steve Whitlock of Combined Services Caving Association, Ben Lovett of Morgannwg Caving Club). In total, there is around 5 km of passage in the series.
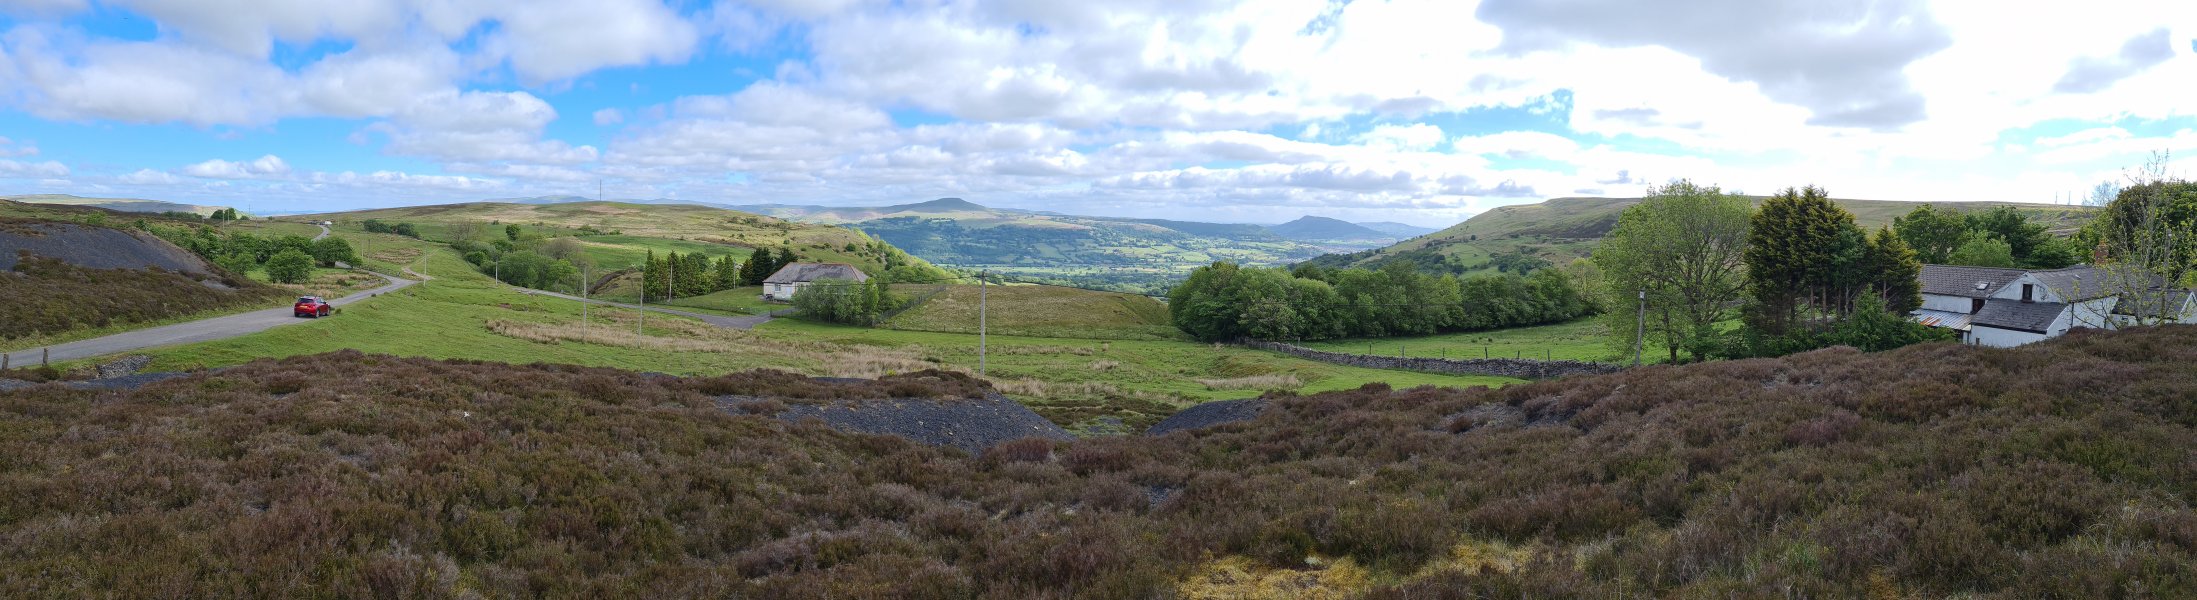
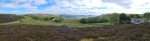 View from Pwll Du. The two buildings are the Pwll Du Adventure Centre, and the former Lamb And Fox pub. The entrance lies on the slope on the far side of the Pwll Du Adventure Centre. The mountains are Mynydd Llangatwg/Llangattock (530 and 529 metres), Pen Allt-mawr (719 metres), Pen Cerrig-calch (701 metres), Gilwern Hill (441 metres), Waun Fach (810 metres), Pen y Gadair Fawr (800 metres), Pen Twyn Mawr (658 metres), Pen Gwyllt Meirch (580 metres), Chwarel y Fan (679 metres), Disgwylfa (540 metres), Crug Mawr (550 metres), Sugar Loaf (596 metres), Hatterall Hill (531 metres), The Skirrid/Ysgyryd Fawr (486 metres), Edmund's Tump (423 metres) and the Blorenge (561 metres). The northern end of the cave extends far beyond the radio mast on Gilwen Hill, while War Of The Worlds lies beneath the television masts on the Blorenge. The camera sits over the top of Tea Junction, and the pub sits over the junction of White Arch Passage and Back Passage. The adventure centre sits over the roped climb in the Entrance Series. Today's trip would take us to the start of the Blorenge.
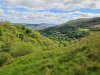 View down into Cwm Llanwenarth, towards The Skirrid, Edmund's Tump and the Blorenge.
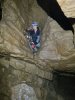 The climb down from Elliptic Passage into Dead Bat Passage, at the start of the Wyvern Extensions.
Modelling by Monica, lighting by Tarquin and Mike
The climb down from Elliptic Passage into Dead Bat Passage, at the start of the Wyvern Extensions.
Modelling by Monica, lighting by Tarquin and Mike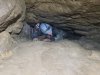 Dead Bat Passage.
Modelling by Monica, lighting by Tarquin and Mike
Dead Bat Passage.
Modelling by Monica, lighting by Tarquin and Mike The choked chamber leading towards Ogof Drws Cefn. There is a bat skeleton in the chamber, which gave the name to the previous passage.
 Meagre stal flow in the chamber.
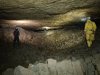 Dragon's Lair, the first part of Wyvern Hall, looking towards the blind end. This is a collapse chamber above the former major passage that once formed a principal drainage route leading through Wyvern Hall, Fault Chambers, Rift Chamber and Agent Blorenge III to Saint David's Hall. These are now split up by collapses and chokes. The choke at the end of Dragon's Lair is probably caused by the cutting back of Cwm Llanwenarth, but still has some distance to go before it would break surface. On the right is another way into the passages leading to Drws Cefn, and behind the camera is another passage leading back to Dead Bat Passage, and the main way on down into Wyvern Hall.
Modelling by Mike, Monica and Pete, lighting by Tarquin, Mike, Monica and Pete
Dragon's Lair, the first part of Wyvern Hall, looking towards the blind end. This is a collapse chamber above the former major passage that once formed a principal drainage route leading through Wyvern Hall, Fault Chambers, Rift Chamber and Agent Blorenge III to Saint David's Hall. These are now split up by collapses and chokes. The choke at the end of Dragon's Lair is probably caused by the cutting back of Cwm Llanwenarth, but still has some distance to go before it would break surface. On the right is another way into the passages leading to Drws Cefn, and behind the camera is another passage leading back to Dead Bat Passage, and the main way on down into Wyvern Hall.
Modelling by Mike, Monica and Pete, lighting by Tarquin, Mike, Monica and Pete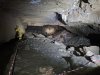 The main part of Wyvern Hall, with its thick mud formations. The taped route on the right merely gains a short section of stream between the boulders.
Modelling by Pete, Monica and Mike, lighting by Tarquin, Pete, Monica and Mike
The main part of Wyvern Hall, with its thick mud formations. The taped route on the right merely gains a short section of stream between the boulders.
Modelling by Pete, Monica and Mike, lighting by Tarquin, Pete, Monica and Mike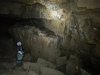 Straws beside the inlet.
Modelling by Monica, lighting by Tarquin and Monica
Straws beside the inlet.
Modelling by Monica, lighting by Tarquin and Monica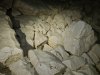 Thick mud with surge marks covering the boulders.
Lighting by Tarquin and Pete
Thick mud with surge marks covering the boulders.
Lighting by Tarquin and Pete Drip pockets in the mud. The damage is likely to be footprints from the original exploration, before the taped route had been developed.
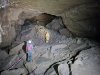 The far end of Wyvern Hall, where it chokes solidly. This choke is around 30 metres thick, formed from the floor of Fault Chambers.
Modelling by Mike, Pete and Monica, lighting by Tarquin, Mike, Pete and Monica
The far end of Wyvern Hall, where it chokes solidly. This choke is around 30 metres thick, formed from the floor of Fault Chambers.
Modelling by Mike, Pete and Monica, lighting by Tarquin, Mike, Pete and Monica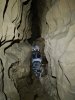 The inlet, the only way on from Wyvern Hall.
Modelling by Monica, lighting by Tarquin, Monica and Mike
The inlet, the only way on from Wyvern Hall.
Modelling by Monica, lighting by Tarquin, Monica and Mike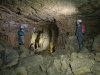 Soup Dragon's Kitchen, a large chamber in the inlet. The inlet closes down immediately afterwards.
Modelling by Monica, Pete and Mike, lighting by Tarquin, Monica, Pete and Mike
Soup Dragon's Kitchen, a large chamber in the inlet. The inlet closes down immediately afterwards.
Modelling by Monica, Pete and Mike, lighting by Tarquin, Monica, Pete and Mike The Trowel.
Modelling by Mike
The Trowel.
Modelling by Mike Gypsum formations.
 Gypsum formations.
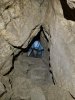 Early climb.
Modelling by Monica, lighting by Tarquin and Monica
Early climb.
Modelling by Monica, lighting by Tarquin and Monica Narrow rift above the climb.
Modelling by Mike, lighting by Tarquin and Mike
Narrow rift above the climb.
Modelling by Mike, lighting by Tarquin and Mike The tight drop above The Garden.
Modelling by Mike, lighting by Tarquin and Mike
The tight drop above The Garden.
Modelling by Mike, lighting by Tarquin and Mike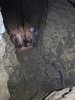 Looking down from the Main Route into The Garden. The hole in the floor drops into Gore Blimey in Republican Plot. A tight rift to the right enters Awe Chasm in Republican Plot. Republican Plot was originally found from The Land Down Under in 2000 by Ian Wilton-Jones, Tim Barter and Pauline Rigby. Its 1.5 km length was pushed by them, Peter Wilton-Jones, Andy Manthorpe, Malcolm Reid, Neil Wooldridge (Wessex) and Steve Whitlock, over the subsequent year. Quite a mix of clubs.
Modelling by Mike, lighting by Tarquin and Mike
Looking down from the Main Route into The Garden. The hole in the floor drops into Gore Blimey in Republican Plot. A tight rift to the right enters Awe Chasm in Republican Plot. Republican Plot was originally found from The Land Down Under in 2000 by Ian Wilton-Jones, Tim Barter and Pauline Rigby. Its 1.5 km length was pushed by them, Peter Wilton-Jones, Andy Manthorpe, Malcolm Reid, Neil Wooldridge (Wessex) and Steve Whitlock, over the subsequent year. Quite a mix of clubs.
Modelling by Mike, lighting by Tarquin and Mike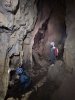 Isotonic Weirdways, a complex junction where the way in is to the right, and the way on is to the left. Or any of the other passages, since they are mostly oxbows. In the ceiling are holes into Pasta Best in Republican Plot.
Modelling by Monica and Mike, lighting by Tarquin, Monica, Mike and Pete
Isotonic Weirdways, a complex junction where the way in is to the right, and the way on is to the left. Or any of the other passages, since they are mostly oxbows. In the ceiling are holes into Pasta Best in Republican Plot.
Modelling by Monica and Mike, lighting by Tarquin, Monica, Mike and Pete The top of the Didgeredon't climb, the way into The Land Down Under from Isotonic Weirdways.
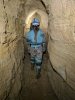 The Main Route just before Psychology Rock.
Modelling by Monica, lighting by Tarquin and Monica
The Main Route just before Psychology Rock.
Modelling by Monica, lighting by Tarquin and Monica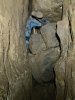 Psychology Rock. Well, actually, Psychology Rock was a tiny rock inserted into the gap between the giant boulders, in the pretence that it could support the big boulder in the ceiling if it fell.
Modelling by Monica, lighting by Tarquin and Monica
Psychology Rock. Well, actually, Psychology Rock was a tiny rock inserted into the gap between the giant boulders, in the pretence that it could support the big boulder in the ceiling if it fell.
Modelling by Monica, lighting by Tarquin and Monica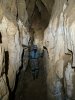 The Main Route beyond Timney's Turn.
Modelling by Monica, lighting by Tarquin and Monica
The Main Route beyond Timney's Turn.
Modelling by Monica, lighting by Tarquin and Monica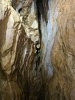 A calcited rift that has been taped off to protect the stal flow, and the false floor of the passage.
Lighting by Tarquin, Monica and Mike
A calcited rift that has been taped off to protect the stal flow, and the false floor of the passage.
Lighting by Tarquin, Monica and Mike Bypassing the taped-off rift via an oxbow.
Modelling by Monica, lighting by Tarquin, Monica and Mike
Bypassing the taped-off rift via an oxbow.
Modelling by Monica, lighting by Tarquin, Monica and Mike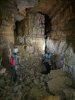 A large chamber with oxbows to the left. The way on is over the traverse ahead.
Modelling by Mike and Monica, lighting by Tarquin, Pete, Mike and Monica
A large chamber with oxbows to the left. The way on is over the traverse ahead.
Modelling by Mike and Monica, lighting by Tarquin, Pete, Mike and Monica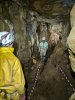 A large section of passage shortly before Ponderosa. Rifts to the left connect to the previous oxbows, or oxbow forwards towards Ponderosa. The way on ahead then lowers to a crawl.
Modelling by Pete, Monica and Mike, lighting by Tarquin, Pete, Monica and Mike
A large section of passage shortly before Ponderosa. Rifts to the left connect to the previous oxbows, or oxbow forwards towards Ponderosa. The way on ahead then lowers to a crawl.
Modelling by Pete, Monica and Mike, lighting by Tarquin, Pete, Monica and Mike Cryostal in the large section of passage.
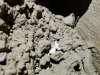 Cryostal in the large section of passage.
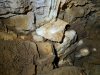 Stal flow in the large section of passage.
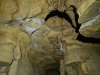 Banded patterns in the rock beyond the crawl.
 Rock patterns, simiar to those seen in Lucky 13 Series.
 Ponderosa, a chamber that forms an important junction. Two passages on the left are the way into Dragon's Teeth, with a connection to an earlier oxbow. Three passages on the right are Come Back You Bastard, and two ways into Mike's Garage. Come Back You Bastard also connects to Mike's Garage. Passages ahead form a tight connection to Pond Passage, but that is more easily reached via Come Back You Bastard. The "pond" names here relate to this part of the passage being nearly underneath the Keeper's Pond. However, none of this level of the cave actually passes under the Keeper's Pond (but both ends of Interesting Times do).
Modelling by Monica, Mike and Pete, lighting by Tarquin, Monica, Mike and Pete
Ponderosa, a chamber that forms an important junction. Two passages on the left are the way into Dragon's Teeth, with a connection to an earlier oxbow. Three passages on the right are Come Back You Bastard, and two ways into Mike's Garage. Come Back You Bastard also connects to Mike's Garage. Passages ahead form a tight connection to Pond Passage, but that is more easily reached via Come Back You Bastard. The "pond" names here relate to this part of the passage being nearly underneath the Keeper's Pond. However, none of this level of the cave actually passes under the Keeper's Pond (but both ends of Interesting Times do).
Modelling by Monica, Mike and Pete, lighting by Tarquin, Monica, Mike and Pete Cryostal in Ponderosa.
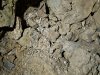 Cryostal in Ponderosa.
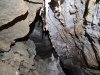 Come Back You Bastard ends at a junction with Pool Passage to the left, and Pond Life ahead. Pond Life is absolutely loaded with formations, starting with this small set.
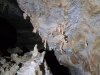 Pond Life.
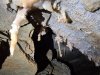 Pond Life.
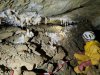 Another set of Pond Life formations.
Modelling by Pete, lighting by Tarquin, Monica and Pete
Another set of Pond Life formations.
Modelling by Pete, lighting by Tarquin, Monica and Pete Pond Life.
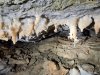 Pond Life.
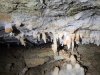 Pond Life.
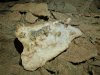 A fallen crust of calcite in Pond Life.
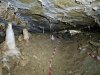 The main Pond Life grotto then starts, as the passage lowers to a crawl. The exploration originally stopped at this point, but the passage was subsequently pushed to its impressive conclusion by Wessex members.
Modelling by Monica, lighting by Tarquin and Monica
The main Pond Life grotto then starts, as the passage lowers to a crawl. The exploration originally stopped at this point, but the passage was subsequently pushed to its impressive conclusion by Wessex members.
Modelling by Monica, lighting by Tarquin and Monica Fallen and rejoined stalagmites.
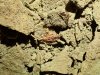 Bat skeleton in Pond Life.
Modelling by Aquaticus
Bat skeleton in Pond Life.
Modelling by Aquaticus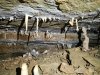 Pond Life.
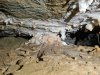 Pond Life.
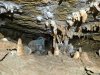 The finest set of columns in Pond Life, which must be passed extremely carefully.
Modelling by Monica, lighting by Tarquin and Monica
The finest set of columns in Pond Life, which must be passed extremely carefully.
Modelling by Monica, lighting by Tarquin and Monica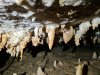 Beside the columns. One of those helictites looks decidedly like a sheep's horn.
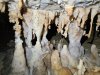 The Pond Life columns.
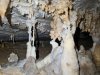 Hiding behind the columns.
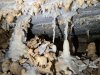 More superb columns.
 Passing through the next section involves sliding through this gap, trying not to touch anything that has not already been muddied.
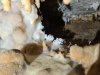 In the low passage beyond. This is still technically part of Pond Life.
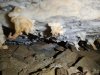 Pond Life.
 Pond Life.
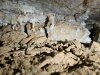 The last of Pond Life, now in an extremely low section.
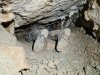 The passage now passes through a low squeeze - seen here on the way out. Great care is needed to avoid breaking or muddying formations. The squeeze is tight, but the main problem is that the ceiling is very snatchy, and grabs on to your clothing, making the squeeze feel tighter than it is.
Modelling by Monica, lighting by Tarquin and Monica
The passage now passes through a low squeeze - seen here on the way out. Great care is needed to avoid breaking or muddying formations. The squeeze is tight, but the main problem is that the ceiling is very snatchy, and grabs on to your clothing, making the squeeze feel tighter than it is.
Modelling by Monica, lighting by Tarquin and Monica Beyond the squeeze, the passage resumes its formations.
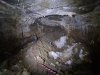 The squeeze emerges in The Whitehouse, also known as Anthodite Chamber. This is one of the most spectacularly decorated places in the Wyvern Extensions.
Modelling by Monica and Mike, lighting by Tarquin, Monica and Mike
The squeeze emerges in The Whitehouse, also known as Anthodite Chamber. This is one of the most spectacularly decorated places in the Wyvern Extensions.
Modelling by Monica and Mike, lighting by Tarquin, Monica and Mike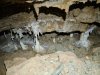 The last of the Pond Life style columns.
 Fallen anthodites.
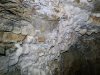 The Whitehouse has one of the most impressive displays of anthodites (aragonite needles growing from a calcite base) in the cave, with crystals 10-15 cm (4-6 inches) long covering several patches of the wall and most of the ceiling.
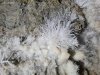 Detail of the anthodites.
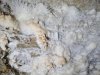 Detail of the anthodites.
 Anthodite display.
 Anthodite display.
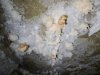 Anthodites on an early part of the ceiling.
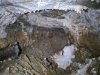 The main part of The Whitehouse.
Modelling by Monica and Mike, lighting by Tarquin, Monica and Mike
The main part of The Whitehouse.
Modelling by Monica and Mike, lighting by Tarquin, Monica and Mike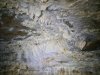 The northern edge of the circular ceiling.
 Detail of the anthodites.
 The eastern edge of the circular ceiling, with green and orange tinted anthodites.
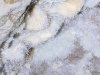 Detail of the anthodites.
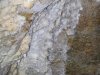 Detail of the anthodites.
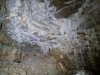 The southern edge of the circular ceiling, which includes some unusually shaped stalactites, covered in helictites and anthodites.
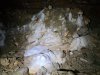 The northern cluster of stalagmites.
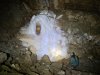 Enormous stalagmite boss, with what appears to be the Eye of Sauron.
Modelling by Monica, lighting by Tarquin and Monica
Enormous stalagmite boss, with what appears to be the Eye of Sauron.
Modelling by Monica, lighting by Tarquin and Monica Helictites towards the end of the chamber.
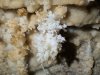 Helictites towards the end of the chamber.
 Pond Passage, which soon lowers to a crawl. I confused myself here by forgetting that the passage turns abruptly left to drop through a brief crawl part way along, and nearly missed the way to Yanto's Grotto as a result. The passage skirts the tip of Keeper's Pond.
Modelling by Monica, lighting by Tarquin and Monica
Pond Passage, which soon lowers to a crawl. I confused myself here by forgetting that the passage turns abruptly left to drop through a brief crawl part way along, and nearly missed the way to Yanto's Grotto as a result. The passage skirts the tip of Keeper's Pond.
Modelling by Monica, lighting by Tarquin and Monica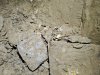 A large deposit of cryostal rafts starts at the end of Pond Passage, where it degenerates into a series of small passages. If you see this cryostal, you have just passed the way to Yanto's Grotto.
 Cryostal rafts that have been crushed by passing cavers. We taped off this deposit before leaving.
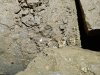 Cryostal.
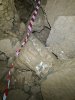 Cryostal.
 Cryostal rafts.
 Cryostal twiglets.
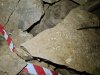 Cryostal.
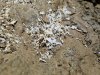 Cryostal.
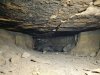 The main crawl to Yanto's Grotto (there is a much tighter rift route as well). The chamber was originally discovered by Chris Densham, Hilary Greaves, Tim Guilford, Lou Maurice and Ben Lovett in 1998, though they actually first got into it via the alternative rift route. This bypass was connected by John Cooper in 1999.
Modelling by Mike, lighting by Tarquin and Mike
The main crawl to Yanto's Grotto (there is a much tighter rift route as well). The chamber was originally discovered by Chris Densham, Hilary Greaves, Tim Guilford, Lou Maurice and Ben Lovett in 1998, though they actually first got into it via the alternative rift route. This bypass was connected by John Cooper in 1999.
Modelling by Mike, lighting by Tarquin and Mike Carefully passing under a badly shattered ceiling.
Modelling by Pete, lighting by Tarquin and Pete
Carefully passing under a badly shattered ceiling.
Modelling by Pete, lighting by Tarquin and Pete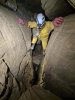 The final traverse before Yanto's Grotto. The slot is very deep indeed, and can prove quite intimidating, despite the traverse only being short.
Modelling by Pete and hints of Monica, lighting by Tarquin, Pete and Monica
The final traverse before Yanto's Grotto. The slot is very deep indeed, and can prove quite intimidating, despite the traverse only being short.
Modelling by Pete and hints of Monica, lighting by Tarquin, Pete and Monica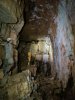 Yanto's Grotto, which was originally codenamed Blue Room. Yanto's Grotto is named after someone's cat (whose name was originally spelled in some other way, possibly Ianto as it would be in Welsh). However, because the codename can be seen on the original survey tags, the chamber often gets called The Blue Room. The chamber sits on a barytes vein, which contains some blue tinted minerals (possibly copper sulphate, since sulphuric acid from the overlying coal measures was involved in the cave's development, or another copper compound), staining much of the stal on one wall. The way in to the chamber is ahead-left. The way to Coldfinger is either above the boulders at ceiling level ahead (very loose, not recommended!) or below them at floor level. The archway on the right edge of the picture goes nowhere, and neither does the obvious rift behind the camera. This chamber sits almost directly below the Keeper's Pond parking area.
Modelling by Mike, Pete and Monica, lighting by Tarquin, Mike, Pete and Monica
Yanto's Grotto, which was originally codenamed Blue Room. Yanto's Grotto is named after someone's cat (whose name was originally spelled in some other way, possibly Ianto as it would be in Welsh). However, because the codename can be seen on the original survey tags, the chamber often gets called The Blue Room. The chamber sits on a barytes vein, which contains some blue tinted minerals (possibly copper sulphate, since sulphuric acid from the overlying coal measures was involved in the cave's development, or another copper compound), staining much of the stal on one wall. The way in to the chamber is ahead-left. The way to Coldfinger is either above the boulders at ceiling level ahead (very loose, not recommended!) or below them at floor level. The archway on the right edge of the picture goes nowhere, and neither does the obvious rift behind the camera. This chamber sits almost directly below the Keeper's Pond parking area.
Modelling by Mike, Pete and Monica, lighting by Tarquin, Mike, Pete and Monica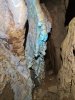 Blue tinted stal in the blind rift.
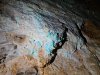 Blue stalactites and helictites.
 Blue and green tinted spread of stalactites and helictites.
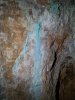 Blue tinted helictites and flow.
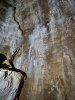 Blue tinted helictites.
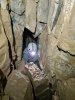 Climbing through a hole between the boulders, on the way to Coldfinger. This area is very loose, and must be treated with serious respect. The passage used to end shortly afterwards.
Modelling by Mike, lighting by Tarquin and Mike
Climbing through a hole between the boulders, on the way to Coldfinger. This area is very loose, and must be treated with serious respect. The passage used to end shortly afterwards.
Modelling by Mike, lighting by Tarquin and Mike In July 1999, my father Ian and I visited this passage, and spotted this unentered narrow calcited hole, looking into a passage filled with small anthodites. My father incredibly carefully climbed through the hole, with me holding his clothing away from the calcite. The fact there is almost no trace of his having been through here - even the mud seems almost untouched - is testament to how carefully this was done.
 After he explored the passage beyond, I heard him talking through a tiny hole in the wall. I pushed the wall, causing it to collapse, giving access to the virgin passage containing these anthodites.
 Anthodites and calcite blobs.
 Anthodites.
 Stalagmite flow, now muddied by passing cavers. This sits in an inconvenient position, at the foot of a slope where you have to wriggle up into the continuation of the passage. It is hard to avoid.
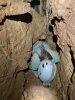 Wriggling into the continuation of the passage.
Modelling by Monica and vague hints of Pete, lighting by Tarquin, Monica and Pete
Wriggling into the continuation of the passage.
Modelling by Monica and vague hints of Pete, lighting by Tarquin, Monica and Pete The anthodite-filled alcove above the wriggle, which my father had passed through during the original exploration. The anthodites survived!
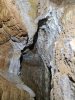 Ceiling of the alcove.
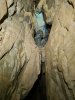 Climbing up to a higher level.
Modelling by Monica, lighting by Tarquin, Pete and Monica
Climbing up to a higher level.
Modelling by Monica, lighting by Tarquin, Pete and Monica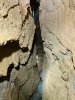 During the first exploration, my father had glanced into the rift on the right (shown here), seen nothing but the end of the passage, climbed up higher and dropped into the rift on the left, finding another dead end. He then returned to get me. I climbed up the rift, and asked why he had not mentioned the stalactite. He had replied "what stalactite?", having not noticed the bright blue formations peeking around the corner. As a result, I was the first person to get in to the rift (squeezing at floor level), and the first to ever see Coldfinger.
Modelling by Monica, lighting by Tarquin and Monica
During the first exploration, my father had glanced into the rift on the right (shown here), seen nothing but the end of the passage, climbed up higher and dropped into the rift on the left, finding another dead end. He then returned to get me. I climbed up the rift, and asked why he had not mentioned the stalactite. He had replied "what stalactite?", having not noticed the bright blue formations peeking around the corner. As a result, I was the first person to get in to the rift (squeezing at floor level), and the first to ever see Coldfinger.
Modelling by Monica, lighting by Tarquin and Monica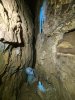 Coldfinger, in all its glory. The triple stalactite and blue stalagmite are the longest I have ever seen, with the stalactite measuring about 50 cm. Given the confined space, this picture requires the wide angle lens, which distorts colours more than the regular lens. The camera made it more blue than it really is, so I have tried to manually correct it back to where it should have been.
Modelling by Monica
Coldfinger, in all its glory. The triple stalactite and blue stalagmite are the longest I have ever seen, with the stalactite measuring about 50 cm. Given the confined space, this picture requires the wide angle lens, which distorts colours more than the regular lens. The camera made it more blue than it really is, so I have tried to manually correct it back to where it should have been.
Modelling by Monica Coldfinger, closer to its natural colour. The muddy staining is natural. The white mark near the tip, however, is a ding from a rock that fell while trying to shimmy overhead many years ago. For this reason, squeezing at floor level is the only safe way to get here.
 Coldfinger's stalagmite, looking suspiciously phallic. The slight mud staining may be natural, but may also be due to cavers trying to squeeze past. It cannot be seen in earlier photographs, but the detail is not so visible in those. Either way, the stain is permanently ingrained.
Modelling by Tarquin's welly
Coldfinger's stalagmite, looking suspiciously phallic. The slight mud staining may be natural, but may also be due to cavers trying to squeeze past. It cannot be seen in earlier photographs, but the detail is not so visible in those. Either way, the stain is permanently ingrained.
Modelling by Tarquin's welly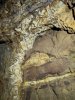 Barytes vein at Coldfinger.
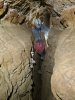 Traversing along Dragon's Teeth, a passage named after the jagged ledges, which appear to be chert.
Modelling by Mike, lighting by Tarquin and Monica
Traversing along Dragon's Teeth, a passage named after the jagged ledges, which appear to be chert.
Modelling by Mike, lighting by Tarquin and Monica Top of the Didgeredoo pitch. This is the way to Interesting Times, and the Long Round Trip. It is worth noting that this is a pitch, not a climb, but because of how narrow it is, it can be descended by jamming between the walls, and using the rope as a handline. However, a descender would be better. Ascending it requires equipment, but this is difficult in such a narrow space, so visits are almost always done in a downhill direction.
Modelling by Monica, Mike and Pete's toes, lighting by Tarquin, Monica and Mike
Top of the Didgeredoo pitch. This is the way to Interesting Times, and the Long Round Trip. It is worth noting that this is a pitch, not a climb, but because of how narrow it is, it can be descended by jamming between the walls, and using the rope as a handline. However, a descender would be better. Ascending it requires equipment, but this is difficult in such a narrow space, so visits are almost always done in a downhill direction.
Modelling by Monica, Mike and Pete's toes, lighting by Tarquin, Monica and Mike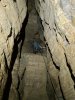 The Didgeredoo's top section is vertical for about 10 metres, then requires this climb down, causing a severe rope rub.
Modelling by Monica, lighting by Tarquin and Monica
The Didgeredoo's top section is vertical for about 10 metres, then requires this climb down, causing a severe rope rub.
Modelling by Monica, lighting by Tarquin and Monica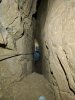 The second half of The Didgeredoo is also about 10 metres, and is tight, once again.
Modelling by Monica, lighting by Tarquin and Monica
The second half of The Didgeredoo is also about 10 metres, and is tight, once again.
Modelling by Monica, lighting by Tarquin and Monica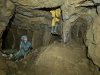 The pitch lands in Interesting Times, a part of the series found by the Wessex Cave Club, but extended significantly by the Chelsea Spelaeological Society surveyors during surveying. The way out along the Long Round Trip is behind the camera.
Modelling by Monica and Pete's legs, lighting by Tarquin and Mike
The pitch lands in Interesting Times, a part of the series found by the Wessex Cave Club, but extended significantly by the Chelsea Spelaeological Society surveyors during surveying. The way out along the Long Round Trip is behind the camera.
Modelling by Monica and Pete's legs, lighting by Tarquin and Mike Bat skeleton in Interesting Times.
Modelling by Nearly Headless Nick
Bat skeleton in Interesting Times.
Modelling by Nearly Headless Nick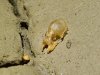 The bat's skull, a short distance from the rest of the skeleton.
Modelling by Nearly Headless Nick
The bat's skull, a short distance from the rest of the skeleton.
Modelling by Nearly Headless Nick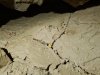 Another bat skeleton.
Modelling by Terry
Another bat skeleton.
Modelling by Terry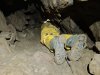 The sump below the Haggis Basher Number 2 choke, which had dried out in drought conditions. Someone has dug here in the past, but it undermines the choke and looks horrifying.
Modelling by Pete, lighting by Tarquin and Pete
The sump below the Haggis Basher Number 2 choke, which had dried out in drought conditions. Someone has dug here in the past, but it undermines the choke and looks horrifying.
Modelling by Pete, lighting by Tarquin and Pete Exiting to the view of Cwm Llanwenarth. The whole Long Round Trip took about 8 hours and 30 minutes, including all of the photography. 2 hours 10 minutes of that was a detour to see The Whitehouse, Yanto's Grotto and Coldfinger.
Modelling by Pete
Exiting to the view of Cwm Llanwenarth. The whole Long Round Trip took about 8 hours and 30 minutes, including all of the photography. 2 hours 10 minutes of that was a detour to see The Whitehouse, Yanto's Grotto and Coldfinger.
Modelling by Pete Wild vole, which we rescued from the jaws of a cat.
Camera and setup by Pete, modelling by Van Graven, Tarquin's extremities and Pete's toes
Wild vole, which we rescued from the jaws of a cat.
Camera and setup by Pete, modelling by Van Graven, Tarquin's extremities and Pete's toes
 View from Pwll Du. The two buildings are the Pwll Du Adventure Centre, and the former Lamb And Fox pub. The entrance lies on the slope on the far side of the Pwll Du Adventure Centre. The mountains are Mynydd Llangatwg/Llangattock (530 and 529 metres), Pen Allt-mawr (719 metres), Pen Cerrig-calch (701 metres), Gilwern Hill (441 metres), Waun Fach (810 metres), Pen y Gadair Fawr (800 metres), Pen Twyn Mawr (658 metres), Pen Gwyllt Meirch (580 metres), Chwarel y Fan (679 metres), Disgwylfa (540 metres), Crug Mawr (550 metres), Sugar Loaf (596 metres), Hatterall Hill (531 metres), The Skirrid/Ysgyryd Fawr (486 metres), Edmund's Tump (423 metres) and the Blorenge (561 metres). The northern end of the cave extends far beyond the radio mast on Gilwen Hill, while War Of The Worlds lies beneath the television masts on the Blorenge. The camera sits over the top of Tea Junction, and the pub sits over the junction of White Arch Passage and Back Passage. The adventure centre sits over the roped climb in the Entrance Series. Today's trip would take us to the start of the Blorenge.
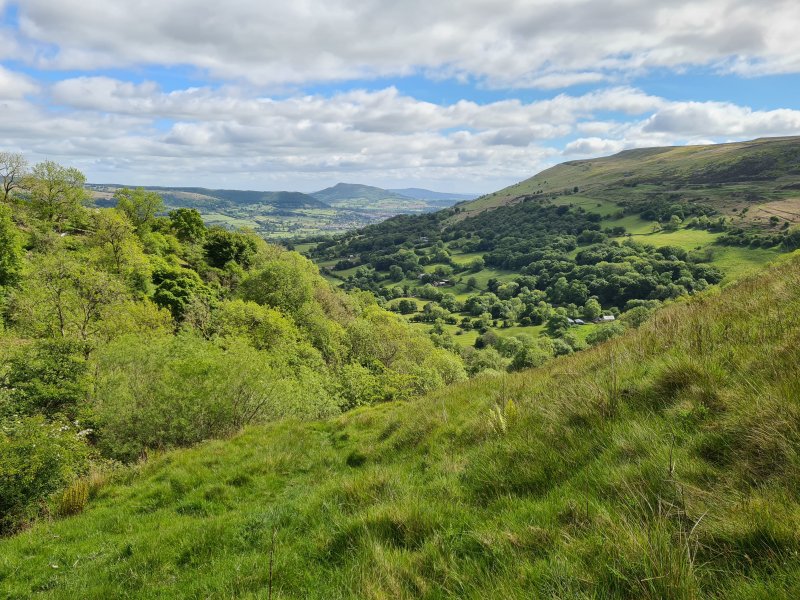 View down into Cwm Llanwenarth, towards The Skirrid, Edmund's Tump and the Blorenge.
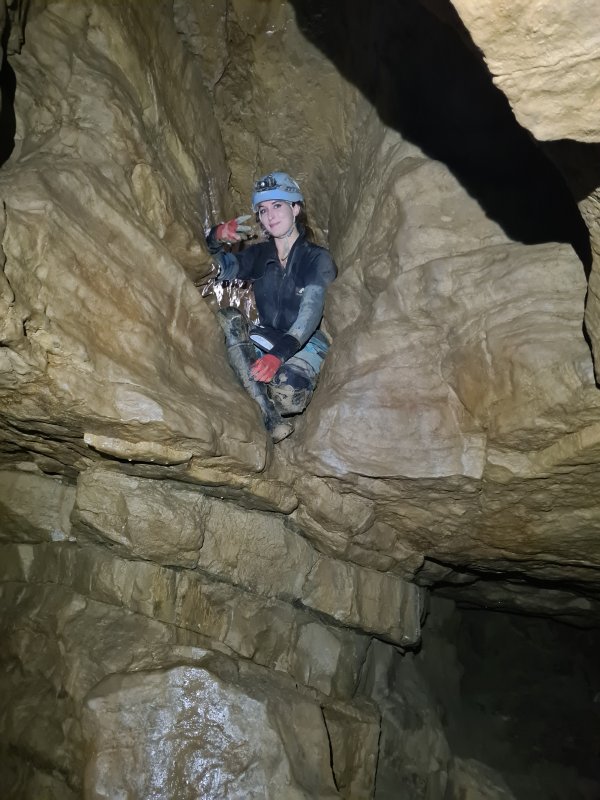 The climb down from Elliptic Passage into Dead Bat Passage, at the start of the Wyvern Extensions.
Modelling by Monica, lighting by Tarquin and Mike
The climb down from Elliptic Passage into Dead Bat Passage, at the start of the Wyvern Extensions.
Modelling by Monica, lighting by Tarquin and Mike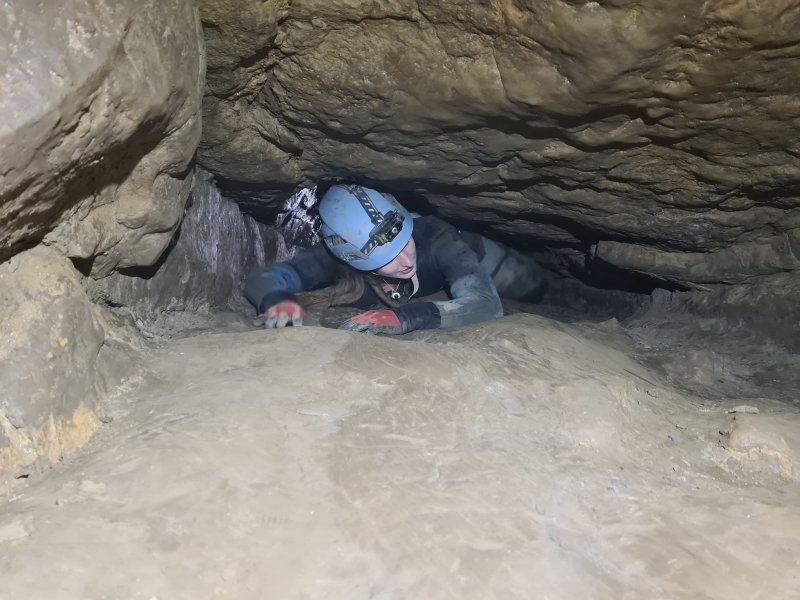 Dead Bat Passage.
Modelling by Monica, lighting by Tarquin and Mike
Dead Bat Passage.
Modelling by Monica, lighting by Tarquin and Mike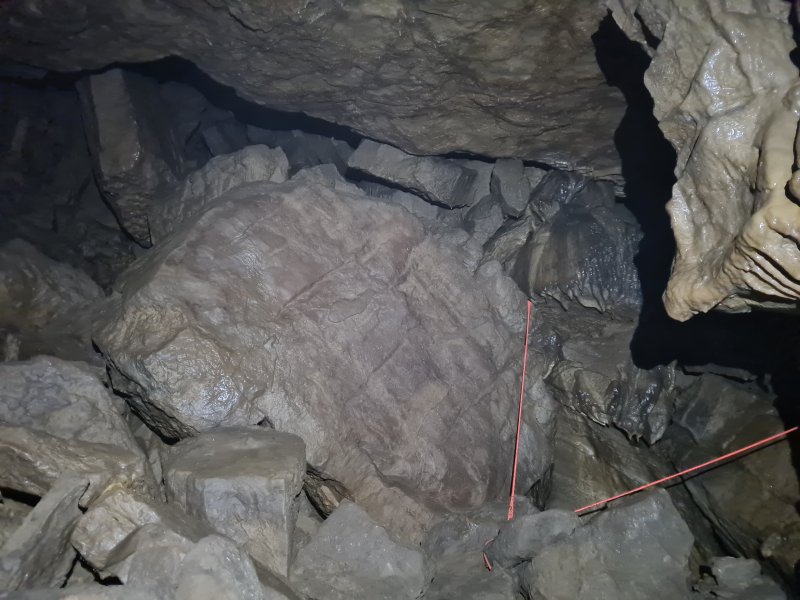 The choked chamber leading towards Ogof Drws Cefn. There is a bat skeleton in the chamber, which gave the name to the previous passage.
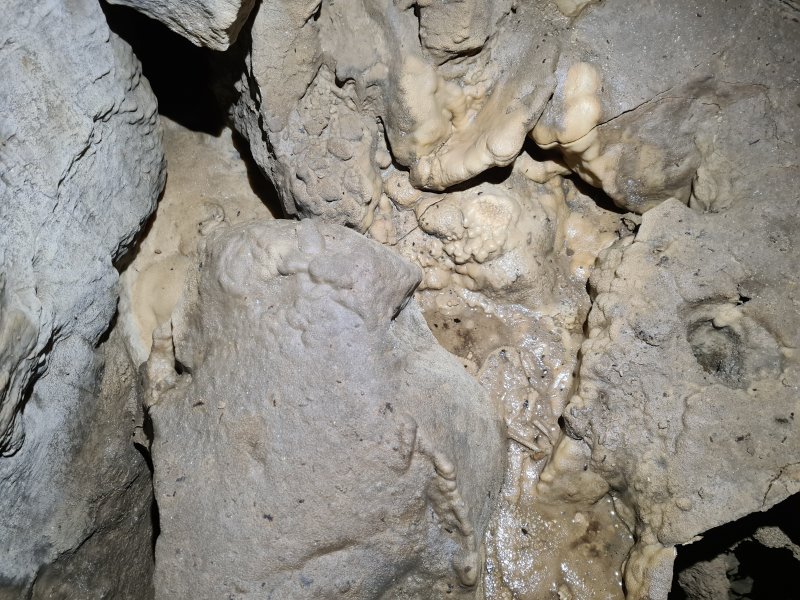 Meagre stal flow in the chamber.
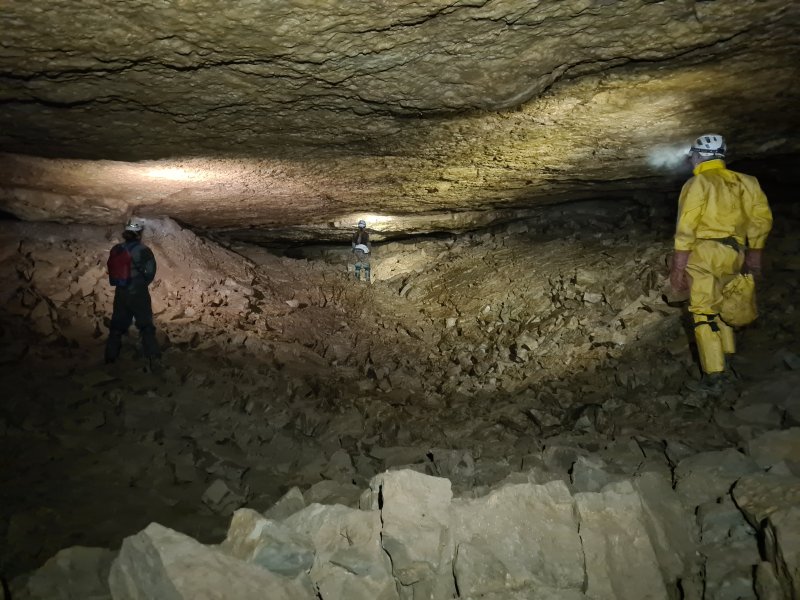 Dragon's Lair, the first part of Wyvern Hall, looking towards the blind end. This is a collapse chamber above the former major passage that once formed a principal drainage route leading through Wyvern Hall, Fault Chambers, Rift Chamber and Agent Blorenge III to Saint David's Hall. These are now split up by collapses and chokes. The choke at the end of Dragon's Lair is probably caused by the cutting back of Cwm Llanwenarth, but still has some distance to go before it would break surface. On the right is another way into the passages leading to Drws Cefn, and behind the camera is another passage leading back to Dead Bat Passage, and the main way on down into Wyvern Hall.
Modelling by Mike, Monica and Pete, lighting by Tarquin, Mike, Monica and Pete
Dragon's Lair, the first part of Wyvern Hall, looking towards the blind end. This is a collapse chamber above the former major passage that once formed a principal drainage route leading through Wyvern Hall, Fault Chambers, Rift Chamber and Agent Blorenge III to Saint David's Hall. These are now split up by collapses and chokes. The choke at the end of Dragon's Lair is probably caused by the cutting back of Cwm Llanwenarth, but still has some distance to go before it would break surface. On the right is another way into the passages leading to Drws Cefn, and behind the camera is another passage leading back to Dead Bat Passage, and the main way on down into Wyvern Hall.
Modelling by Mike, Monica and Pete, lighting by Tarquin, Mike, Monica and Pete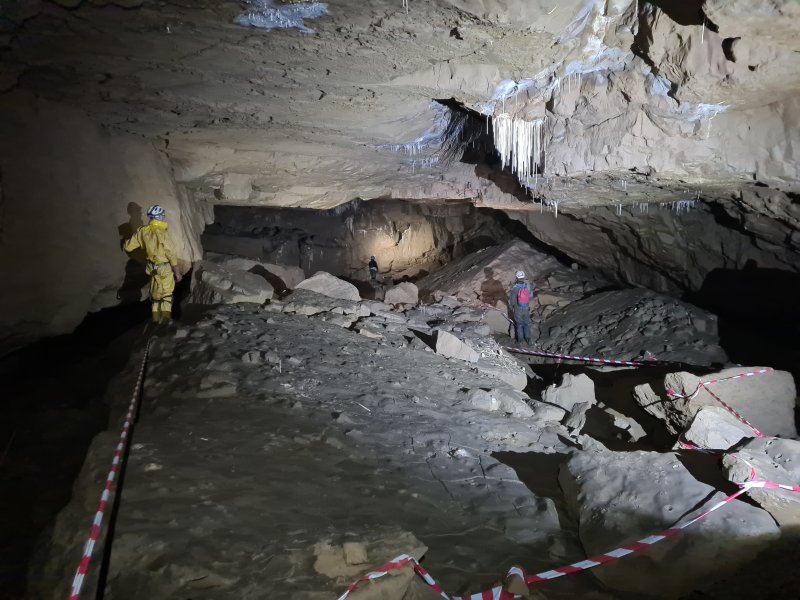 The main part of Wyvern Hall, with its thick mud formations. The taped route on the right merely gains a short section of stream between the boulders.
Modelling by Pete, Monica and Mike, lighting by Tarquin, Pete, Monica and Mike
The main part of Wyvern Hall, with its thick mud formations. The taped route on the right merely gains a short section of stream between the boulders.
Modelling by Pete, Monica and Mike, lighting by Tarquin, Pete, Monica and Mike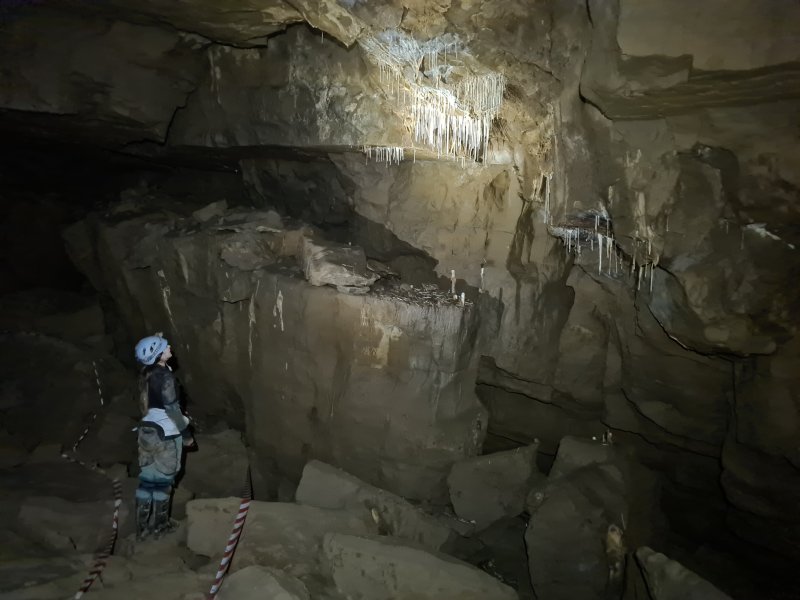 Straws beside the inlet.
Modelling by Monica, lighting by Tarquin and Monica
Straws beside the inlet.
Modelling by Monica, lighting by Tarquin and Monica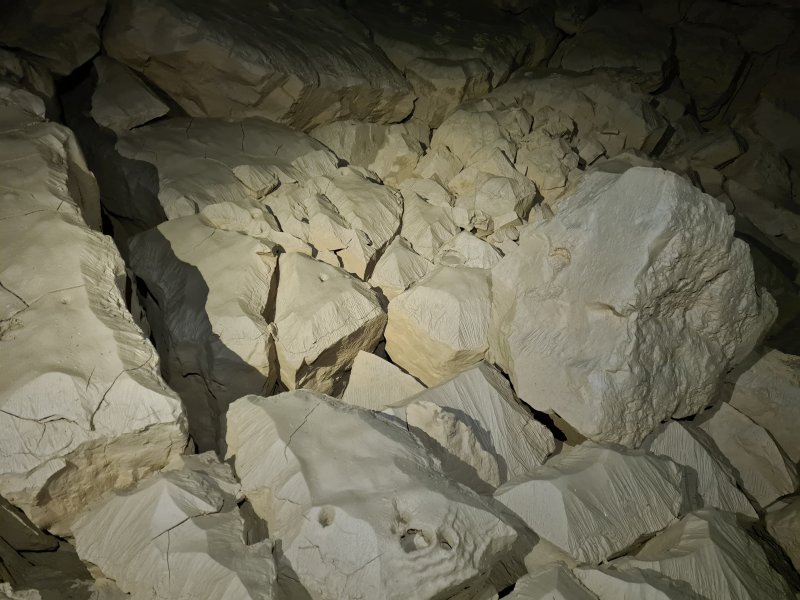 Thick mud with surge marks covering the boulders.
Lighting by Tarquin and Pete
Thick mud with surge marks covering the boulders.
Lighting by Tarquin and Pete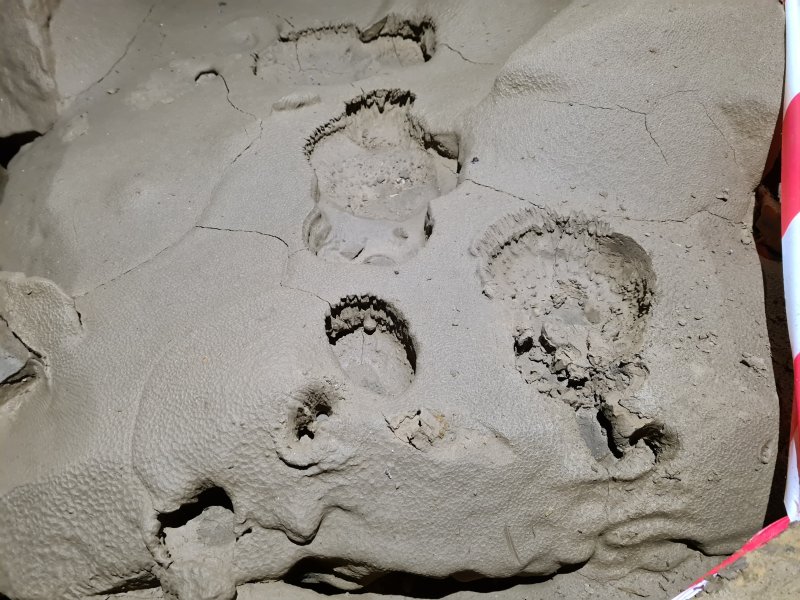 Drip pockets in the mud. The damage is likely to be footprints from the original exploration, before the taped route had been developed.
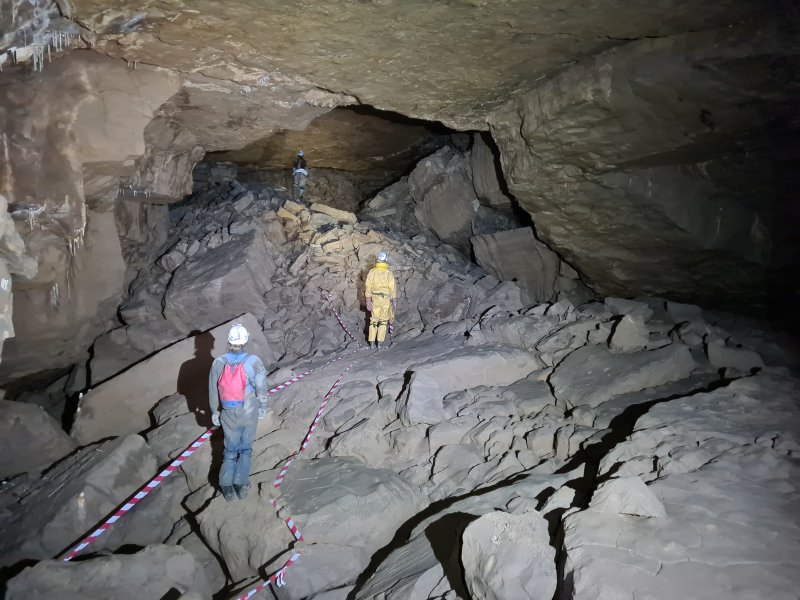 The far end of Wyvern Hall, where it chokes solidly. This choke is around 30 metres thick, formed from the floor of Fault Chambers.
Modelling by Mike, Pete and Monica, lighting by Tarquin, Mike, Pete and Monica
The far end of Wyvern Hall, where it chokes solidly. This choke is around 30 metres thick, formed from the floor of Fault Chambers.
Modelling by Mike, Pete and Monica, lighting by Tarquin, Mike, Pete and Monica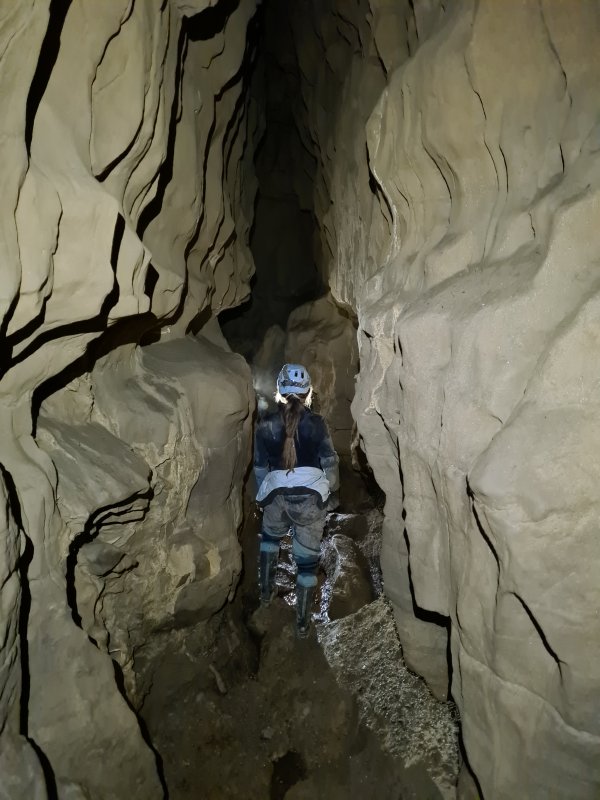 The inlet, the only way on from Wyvern Hall.
Modelling by Monica, lighting by Tarquin, Monica and Mike
The inlet, the only way on from Wyvern Hall.
Modelling by Monica, lighting by Tarquin, Monica and Mike Soup Dragon's Kitchen, a large chamber in the inlet. The inlet closes down immediately afterwards.
Modelling by Monica, Pete and Mike, lighting by Tarquin, Monica, Pete and Mike
Soup Dragon's Kitchen, a large chamber in the inlet. The inlet closes down immediately afterwards.
Modelling by Monica, Pete and Mike, lighting by Tarquin, Monica, Pete and Mike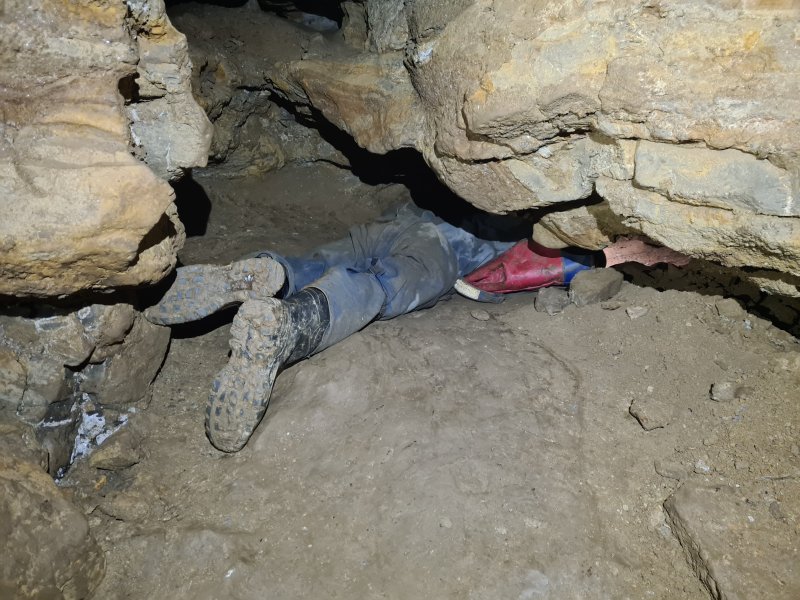 The Trowel.
Modelling by Mike
The Trowel.
Modelling by Mike Gypsum formations.
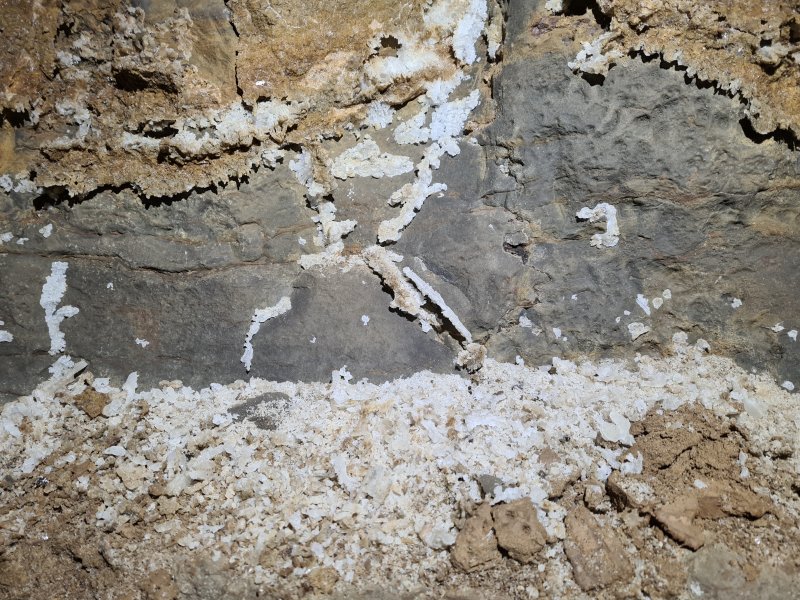 Gypsum formations.
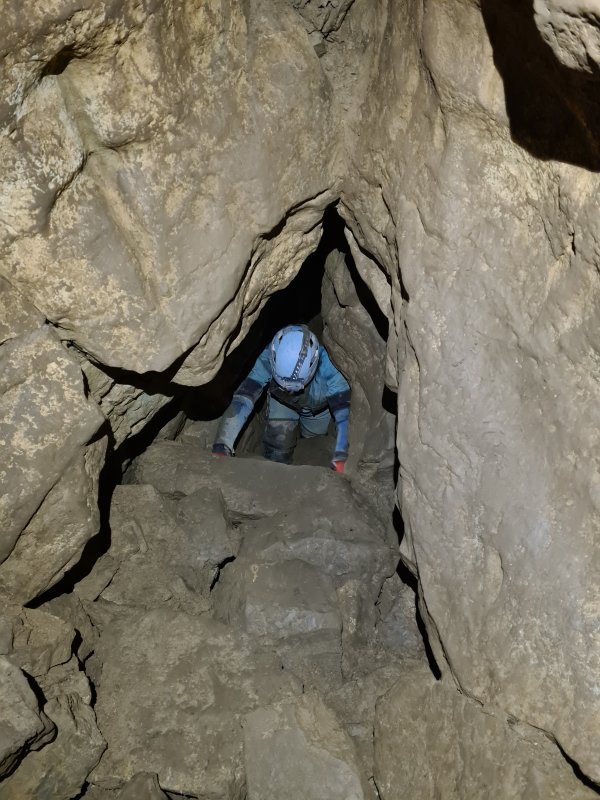 Early climb.
Modelling by Monica, lighting by Tarquin and Monica
Early climb.
Modelling by Monica, lighting by Tarquin and Monica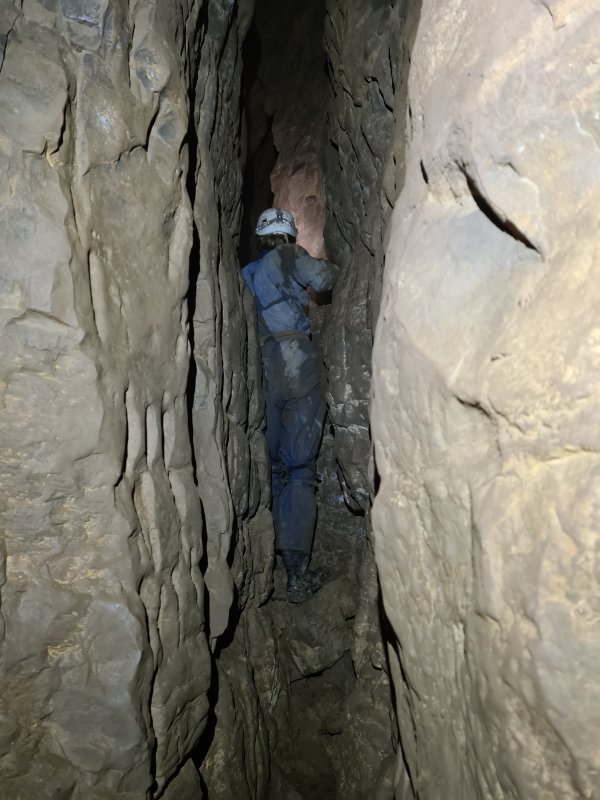 Narrow rift above the climb.
Modelling by Mike, lighting by Tarquin and Mike
Narrow rift above the climb.
Modelling by Mike, lighting by Tarquin and Mike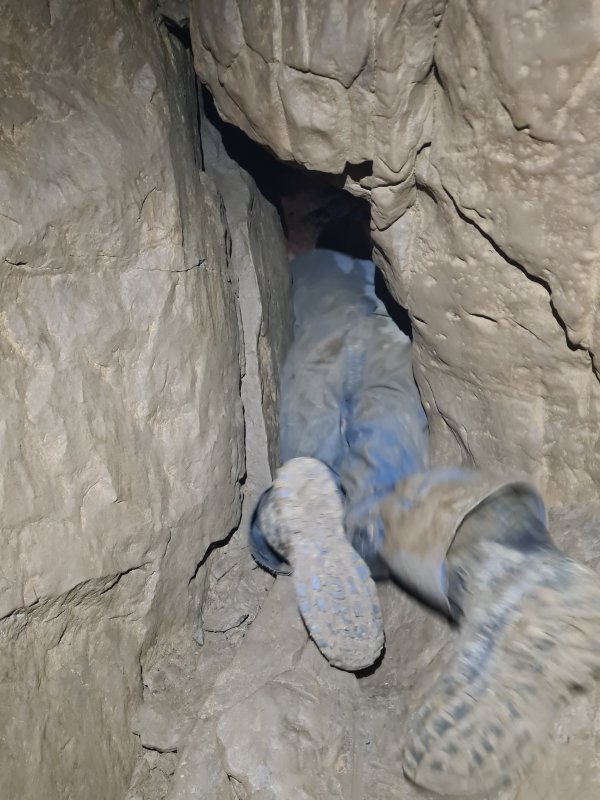 The tight drop above The Garden.
Modelling by Mike, lighting by Tarquin and Mike
The tight drop above The Garden.
Modelling by Mike, lighting by Tarquin and Mike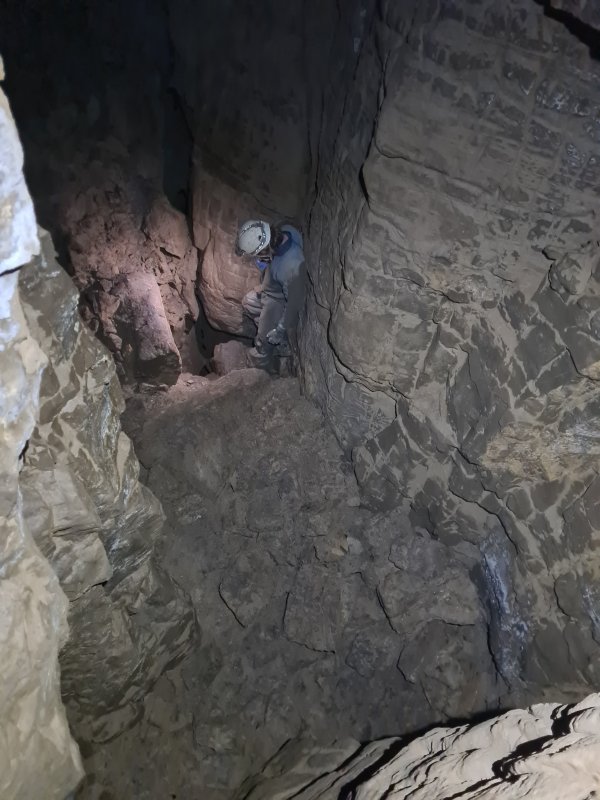 Looking down from the Main Route into The Garden. The hole in the floor drops into Gore Blimey in Republican Plot. A tight rift to the right enters Awe Chasm in Republican Plot. Republican Plot was originally found from The Land Down Under in 2000 by Ian Wilton-Jones, Tim Barter and Pauline Rigby. Its 1.5 km length was pushed by them, Peter Wilton-Jones, Andy Manthorpe, Malcolm Reid, Neil Wooldridge (Wessex) and Steve Whitlock, over the subsequent year. Quite a mix of clubs.
Modelling by Mike, lighting by Tarquin and Mike
Looking down from the Main Route into The Garden. The hole in the floor drops into Gore Blimey in Republican Plot. A tight rift to the right enters Awe Chasm in Republican Plot. Republican Plot was originally found from The Land Down Under in 2000 by Ian Wilton-Jones, Tim Barter and Pauline Rigby. Its 1.5 km length was pushed by them, Peter Wilton-Jones, Andy Manthorpe, Malcolm Reid, Neil Wooldridge (Wessex) and Steve Whitlock, over the subsequent year. Quite a mix of clubs.
Modelling by Mike, lighting by Tarquin and Mike Isotonic Weirdways, a complex junction where the way in is to the right, and the way on is to the left. Or any of the other passages, since they are mostly oxbows. In the ceiling are holes into Pasta Best in Republican Plot.
Modelling by Monica and Mike, lighting by Tarquin, Monica, Mike and Pete
Isotonic Weirdways, a complex junction where the way in is to the right, and the way on is to the left. Or any of the other passages, since they are mostly oxbows. In the ceiling are holes into Pasta Best in Republican Plot.
Modelling by Monica and Mike, lighting by Tarquin, Monica, Mike and Pete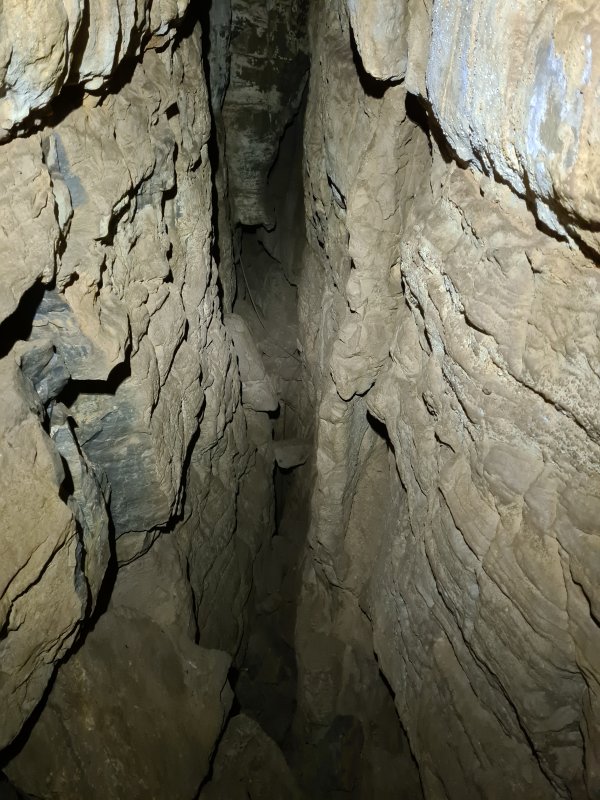 The top of the Didgeredon't climb, the way into The Land Down Under from Isotonic Weirdways.
 The Main Route just before Psychology Rock.
Modelling by Monica, lighting by Tarquin and Monica
The Main Route just before Psychology Rock.
Modelling by Monica, lighting by Tarquin and Monica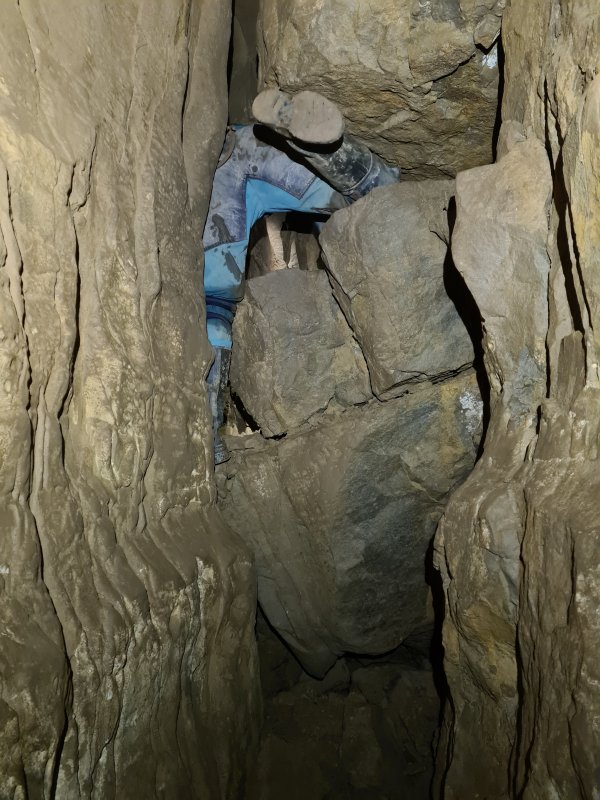 Psychology Rock. Well, actually, Psychology Rock was a tiny rock inserted into the gap between the giant boulders, in the pretence that it could support the big boulder in the ceiling if it fell.
Modelling by Monica, lighting by Tarquin and Monica
Psychology Rock. Well, actually, Psychology Rock was a tiny rock inserted into the gap between the giant boulders, in the pretence that it could support the big boulder in the ceiling if it fell.
Modelling by Monica, lighting by Tarquin and Monica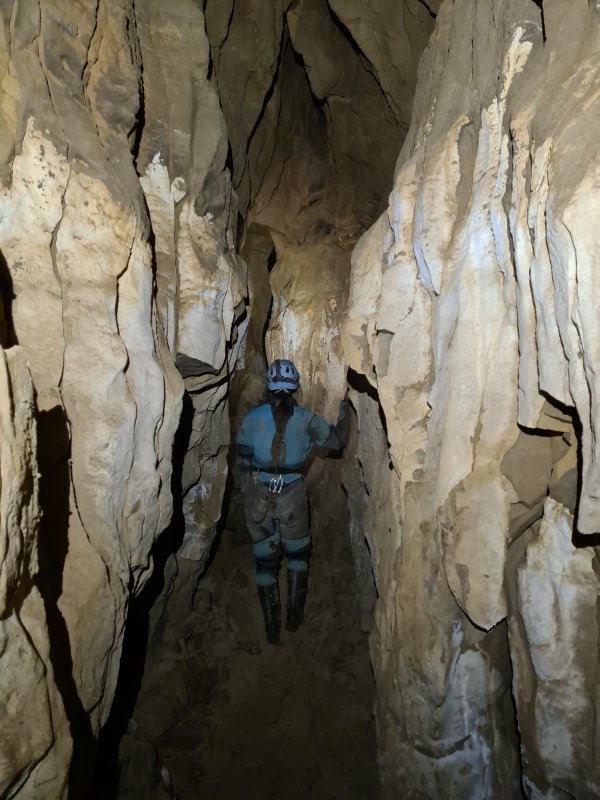 The Main Route beyond Timney's Turn.
Modelling by Monica, lighting by Tarquin and Monica
The Main Route beyond Timney's Turn.
Modelling by Monica, lighting by Tarquin and Monica A calcited rift that has been taped off to protect the stal flow, and the false floor of the passage.
Lighting by Tarquin, Monica and Mike
A calcited rift that has been taped off to protect the stal flow, and the false floor of the passage.
Lighting by Tarquin, Monica and Mike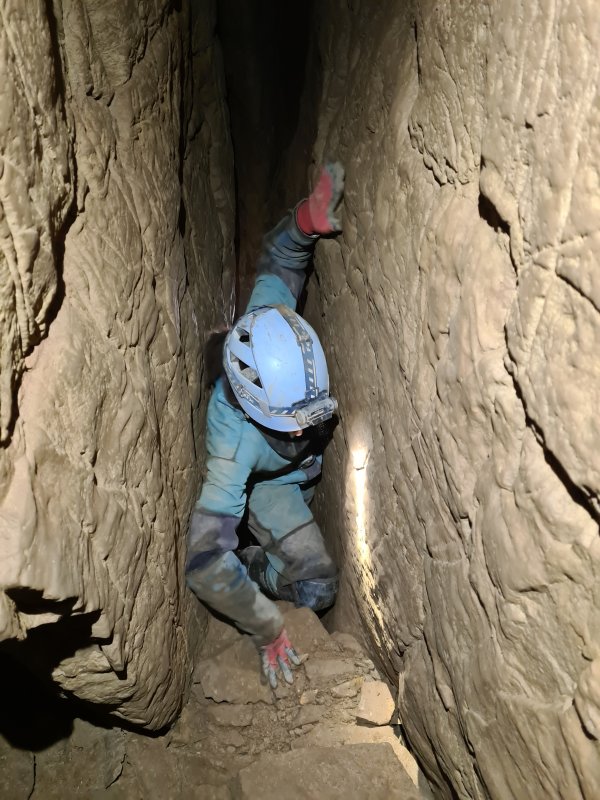 Bypassing the taped-off rift via an oxbow.
Modelling by Monica, lighting by Tarquin, Monica and Mike
Bypassing the taped-off rift via an oxbow.
Modelling by Monica, lighting by Tarquin, Monica and Mike A large chamber with oxbows to the left. The way on is over the traverse ahead.
Modelling by Mike and Monica, lighting by Tarquin, Pete, Mike and Monica
A large chamber with oxbows to the left. The way on is over the traverse ahead.
Modelling by Mike and Monica, lighting by Tarquin, Pete, Mike and Monica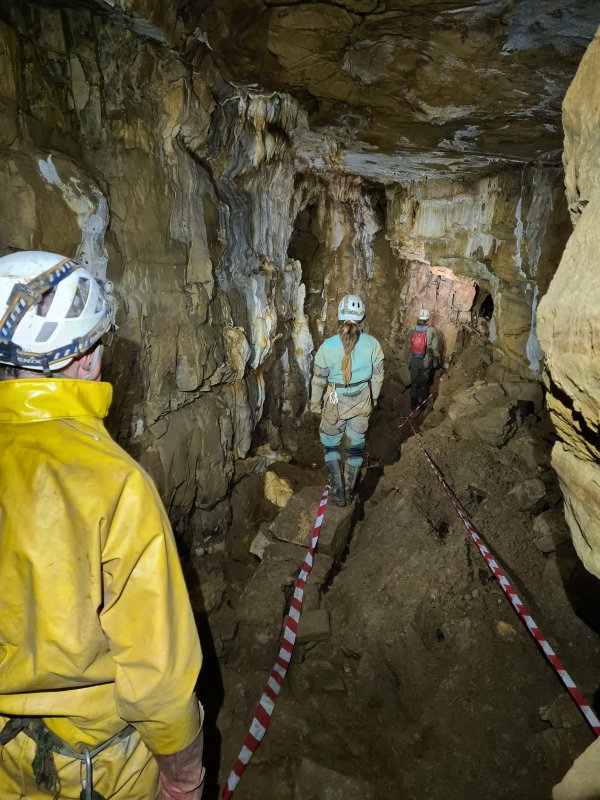 A large section of passage shortly before Ponderosa. Rifts to the left connect to the previous oxbows, or oxbow forwards towards Ponderosa. The way on ahead then lowers to a crawl.
Modelling by Pete, Monica and Mike, lighting by Tarquin, Pete, Monica and Mike
A large section of passage shortly before Ponderosa. Rifts to the left connect to the previous oxbows, or oxbow forwards towards Ponderosa. The way on ahead then lowers to a crawl.
Modelling by Pete, Monica and Mike, lighting by Tarquin, Pete, Monica and Mike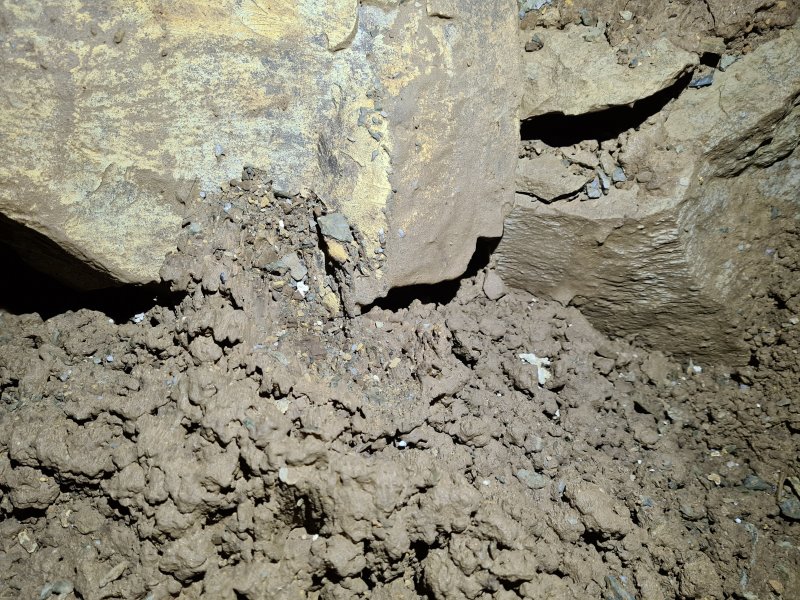 Cryostal in the large section of passage.
 Cryostal in the large section of passage.
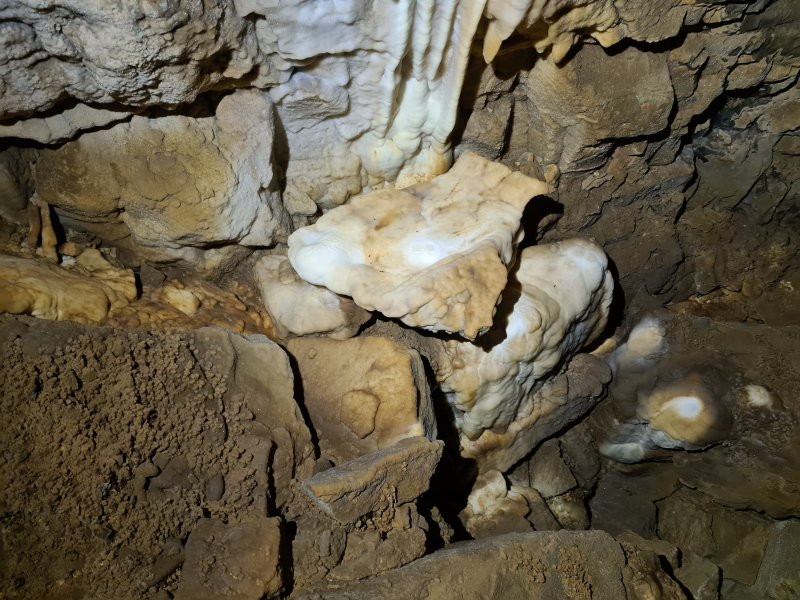 Stal flow in the large section of passage.
 Banded patterns in the rock beyond the crawl.
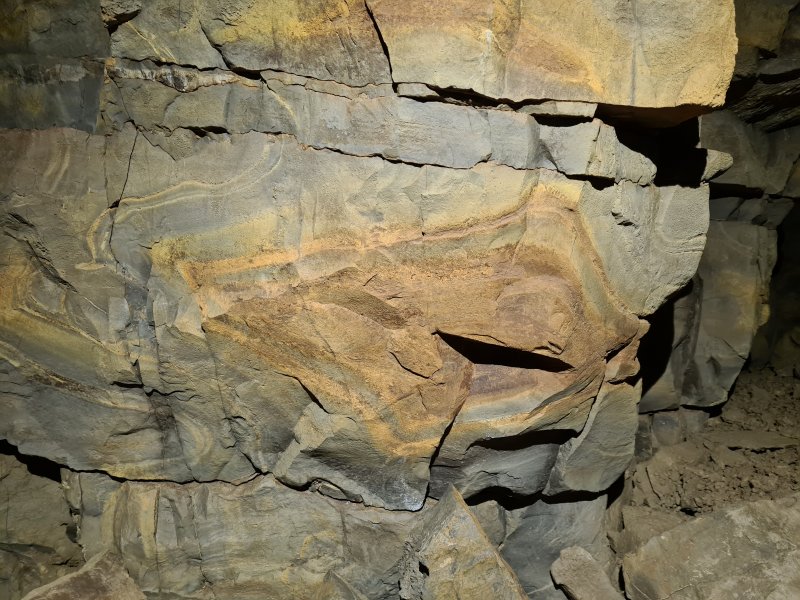 Rock patterns, simiar to those seen in Lucky 13 Series.
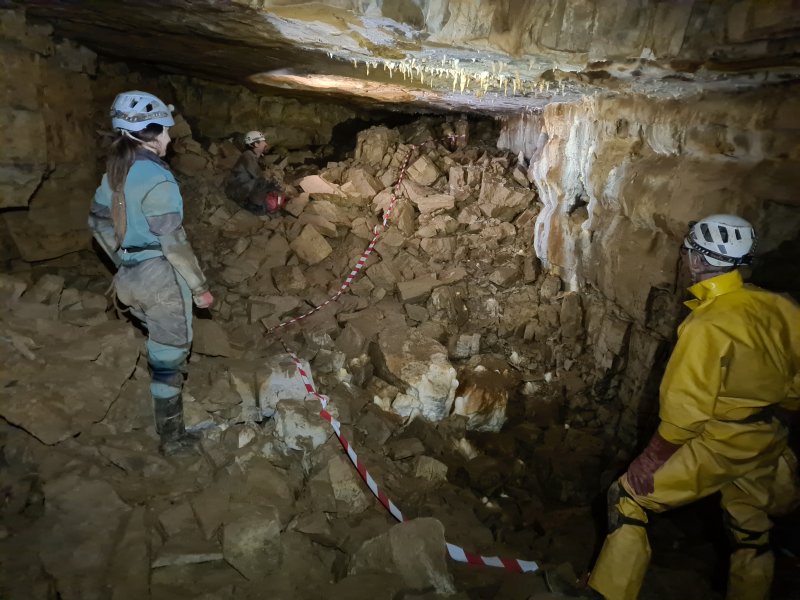 Ponderosa, a chamber that forms an important junction. Two passages on the left are the way into Dragon's Teeth, with a connection to an earlier oxbow. Three passages on the right are Come Back You Bastard, and two ways into Mike's Garage. Come Back You Bastard also connects to Mike's Garage. Passages ahead form a tight connection to Pond Passage, but that is more easily reached via Come Back You Bastard. The "pond" names here relate to this part of the passage being nearly underneath the Keeper's Pond. However, none of this level of the cave actually passes under the Keeper's Pond (but both ends of Interesting Times do).
Modelling by Monica, Mike and Pete, lighting by Tarquin, Monica, Mike and Pete
Ponderosa, a chamber that forms an important junction. Two passages on the left are the way into Dragon's Teeth, with a connection to an earlier oxbow. Three passages on the right are Come Back You Bastard, and two ways into Mike's Garage. Come Back You Bastard also connects to Mike's Garage. Passages ahead form a tight connection to Pond Passage, but that is more easily reached via Come Back You Bastard. The "pond" names here relate to this part of the passage being nearly underneath the Keeper's Pond. However, none of this level of the cave actually passes under the Keeper's Pond (but both ends of Interesting Times do).
Modelling by Monica, Mike and Pete, lighting by Tarquin, Monica, Mike and Pete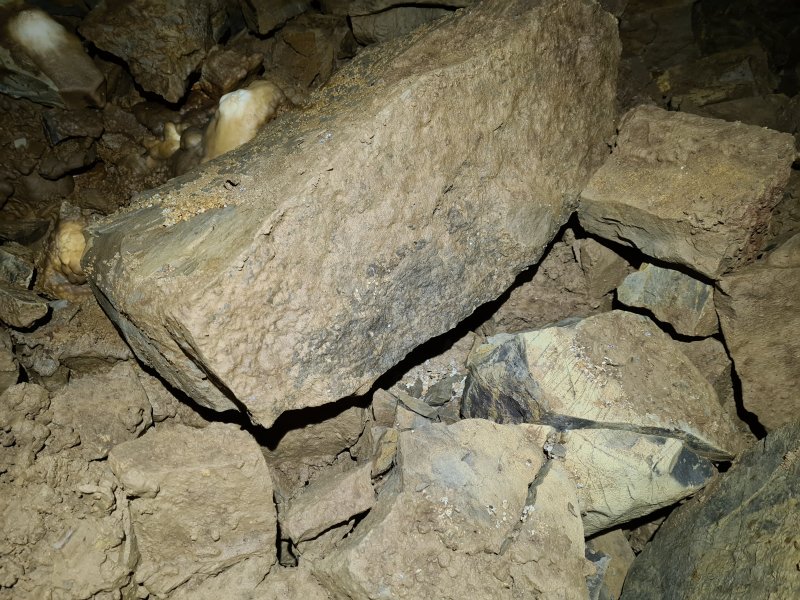 Cryostal in Ponderosa.
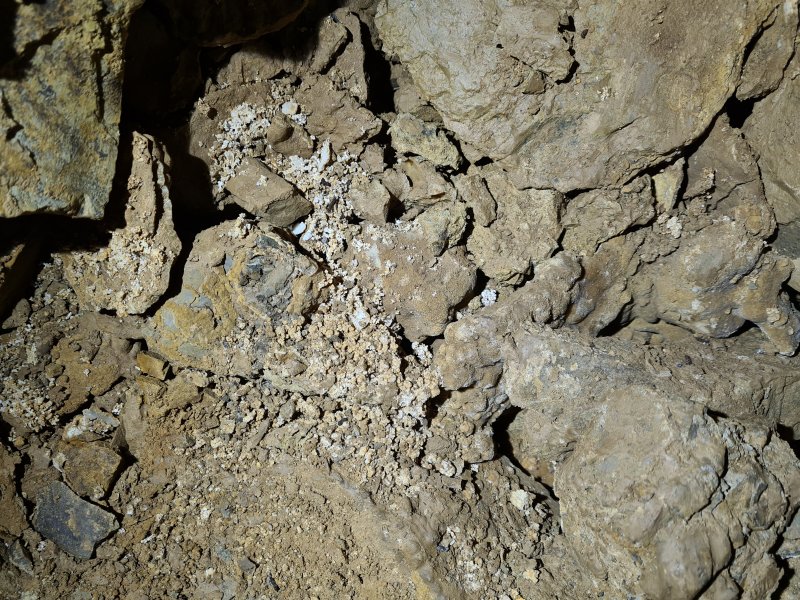 Cryostal in Ponderosa.
 Come Back You Bastard ends at a junction with Pool Passage to the left, and Pond Life ahead. Pond Life is absolutely loaded with formations, starting with this small set.
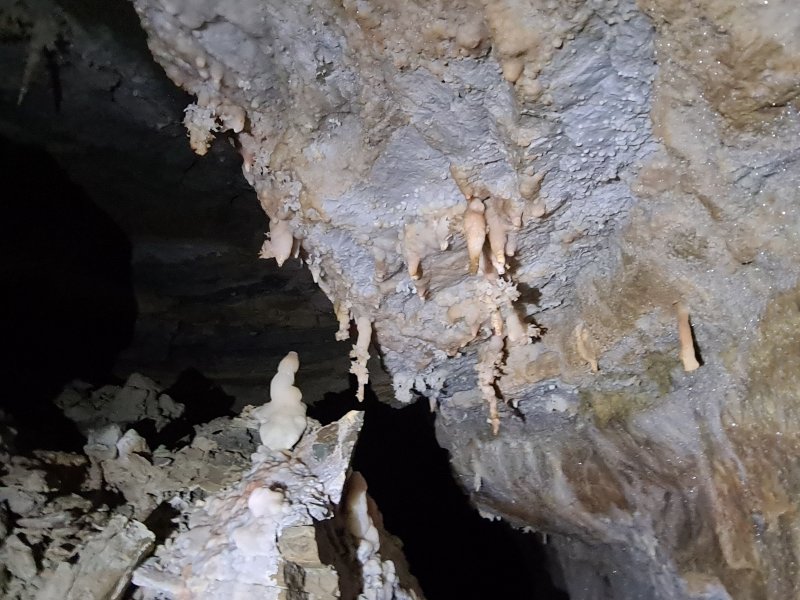 Pond Life.
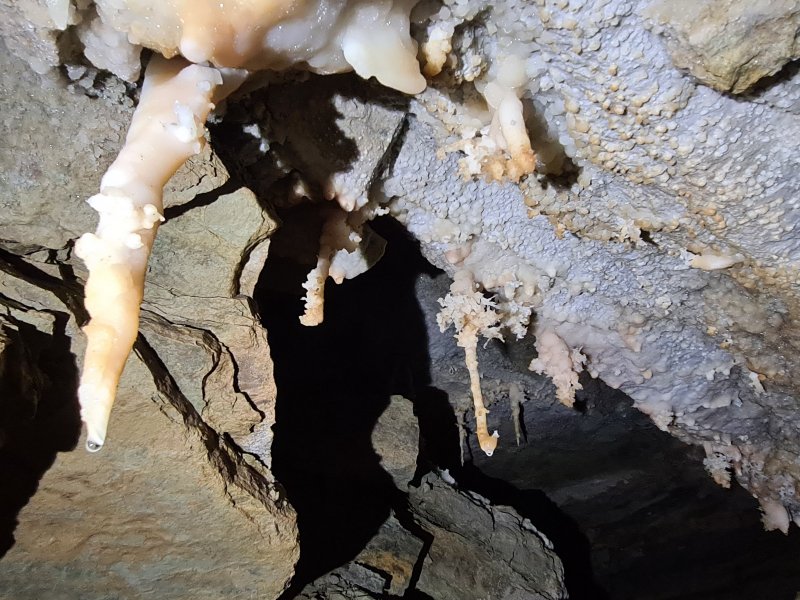 Pond Life.
 Another set of Pond Life formations.
Modelling by Pete, lighting by Tarquin, Monica and Pete
Another set of Pond Life formations.
Modelling by Pete, lighting by Tarquin, Monica and Pete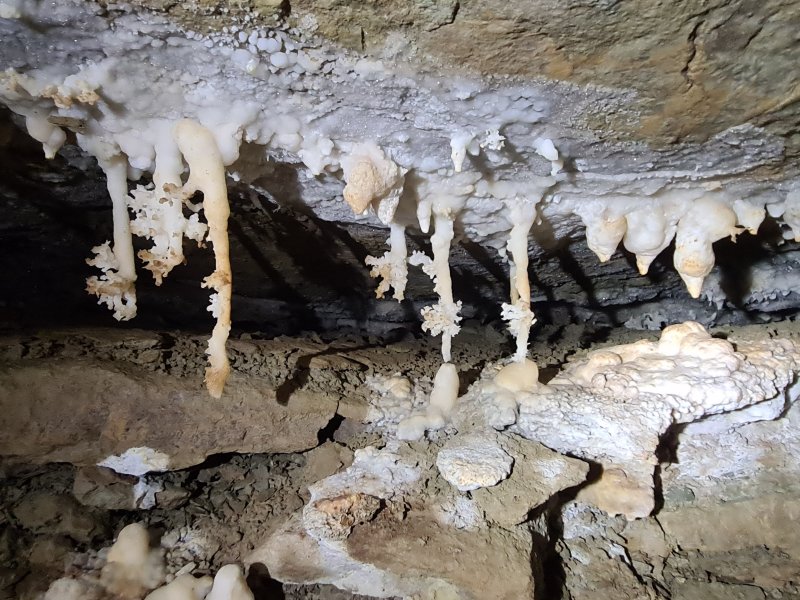 Pond Life.
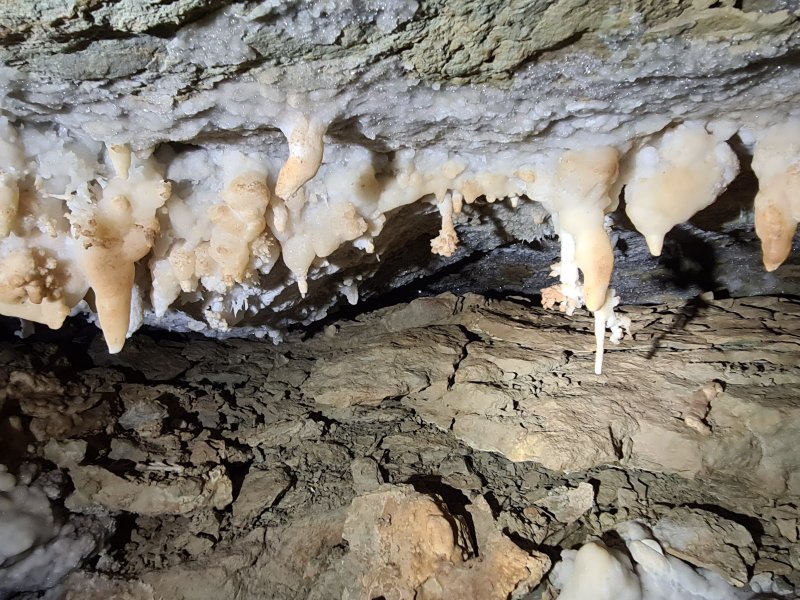 Pond Life.
 Pond Life.
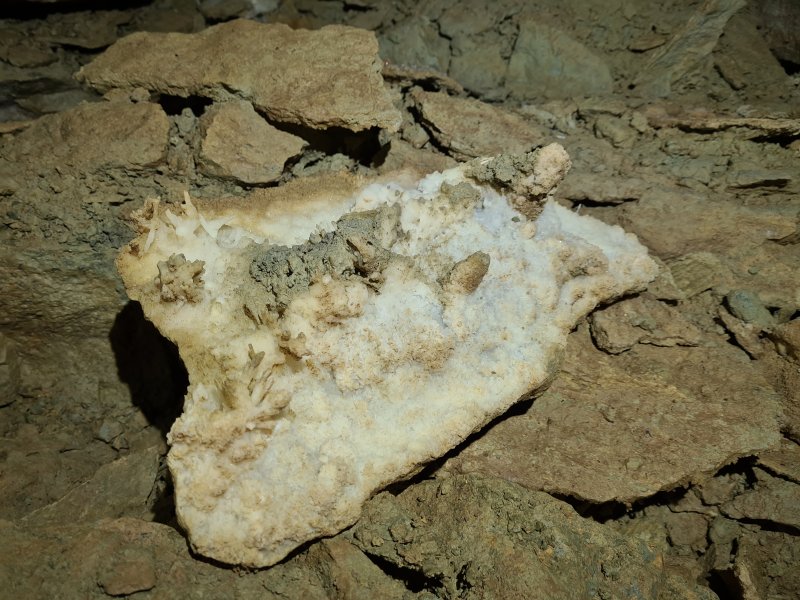 A fallen crust of calcite in Pond Life.
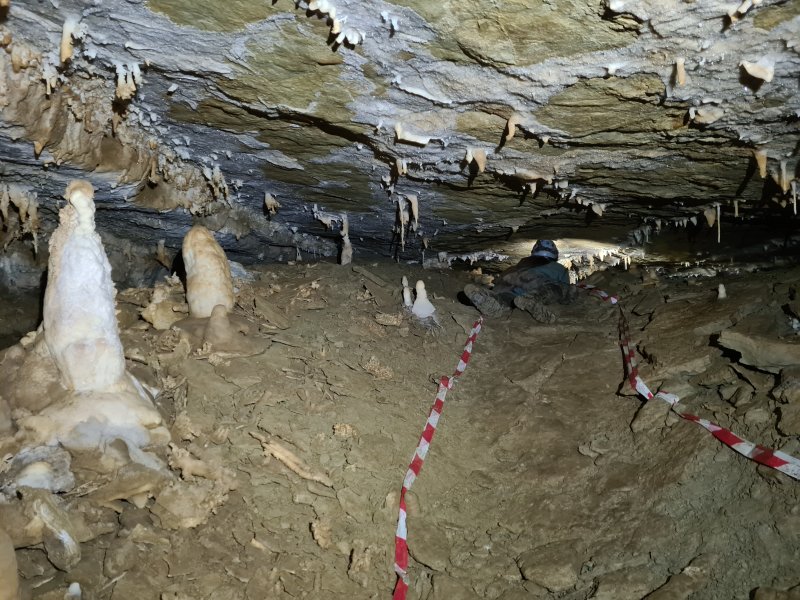 The main Pond Life grotto then starts, as the passage lowers to a crawl. The exploration originally stopped at this point, but the passage was subsequently pushed to its impressive conclusion by Wessex members.
Modelling by Monica, lighting by Tarquin and Monica
The main Pond Life grotto then starts, as the passage lowers to a crawl. The exploration originally stopped at this point, but the passage was subsequently pushed to its impressive conclusion by Wessex members.
Modelling by Monica, lighting by Tarquin and Monica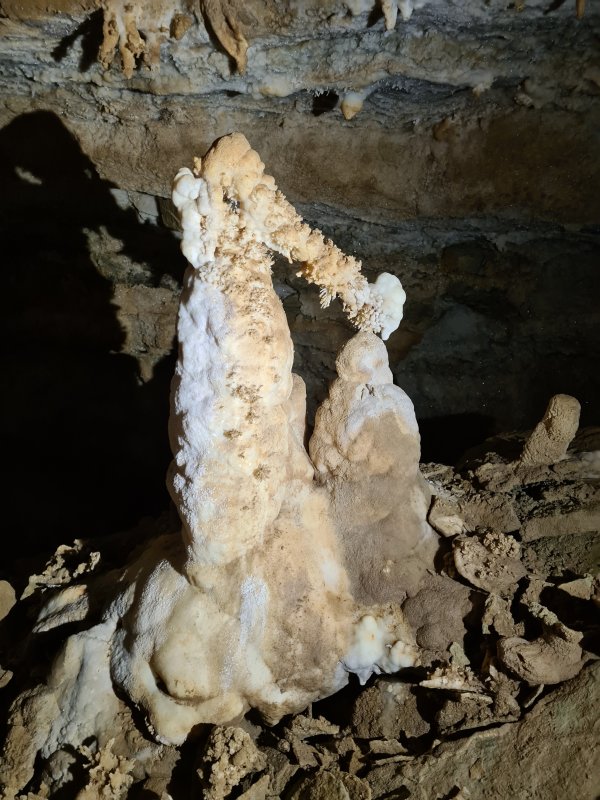 Fallen and rejoined stalagmites.
 Bat skeleton in Pond Life.
Modelling by Aquaticus
Bat skeleton in Pond Life.
Modelling by Aquaticus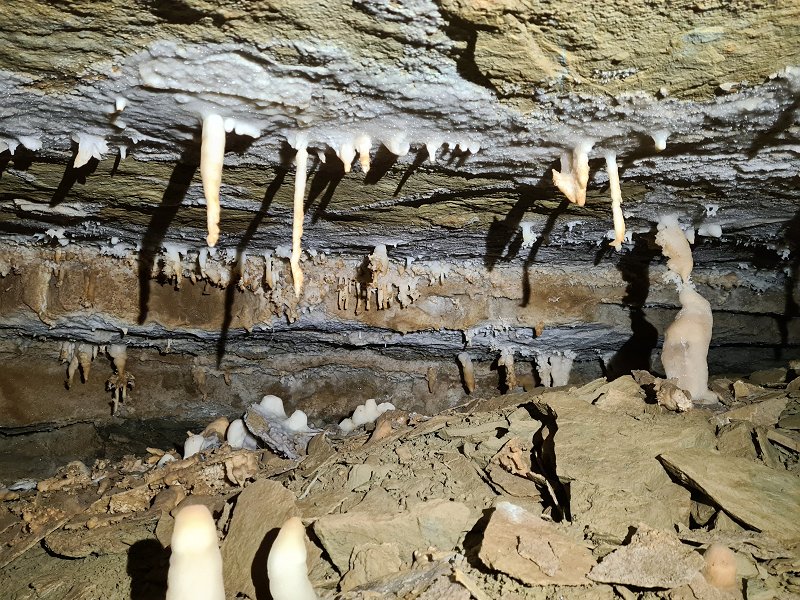 Pond Life.
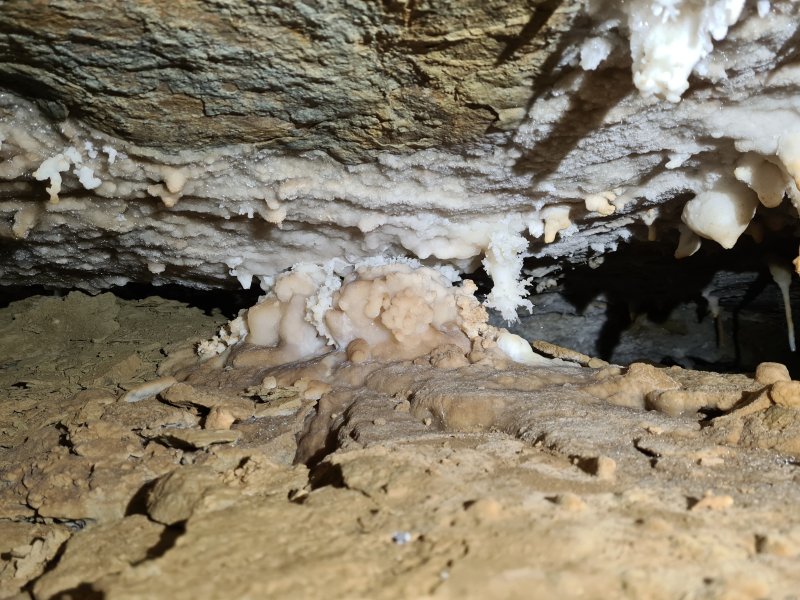 Pond Life.
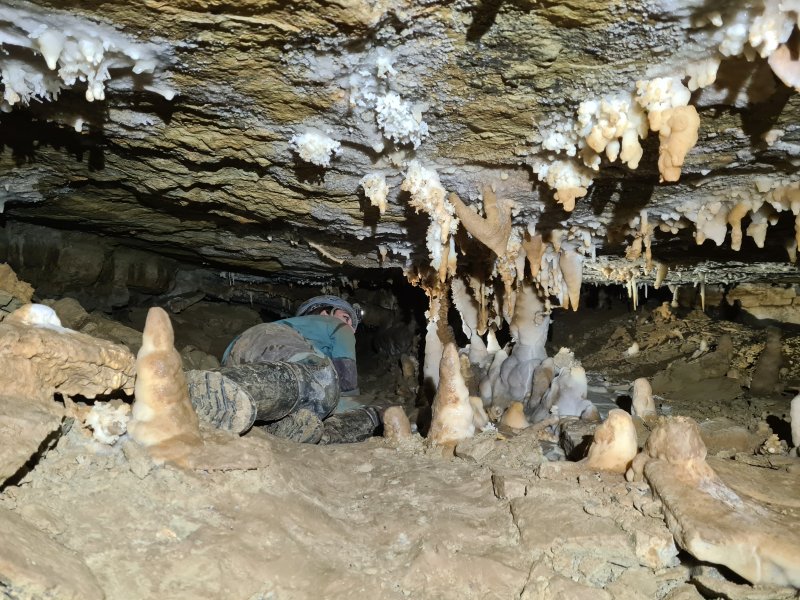 The finest set of columns in Pond Life, which must be passed extremely carefully.
Modelling by Monica, lighting by Tarquin and Monica
The finest set of columns in Pond Life, which must be passed extremely carefully.
Modelling by Monica, lighting by Tarquin and Monica Beside the columns. One of those helictites looks decidedly like a sheep's horn.
 The Pond Life columns.
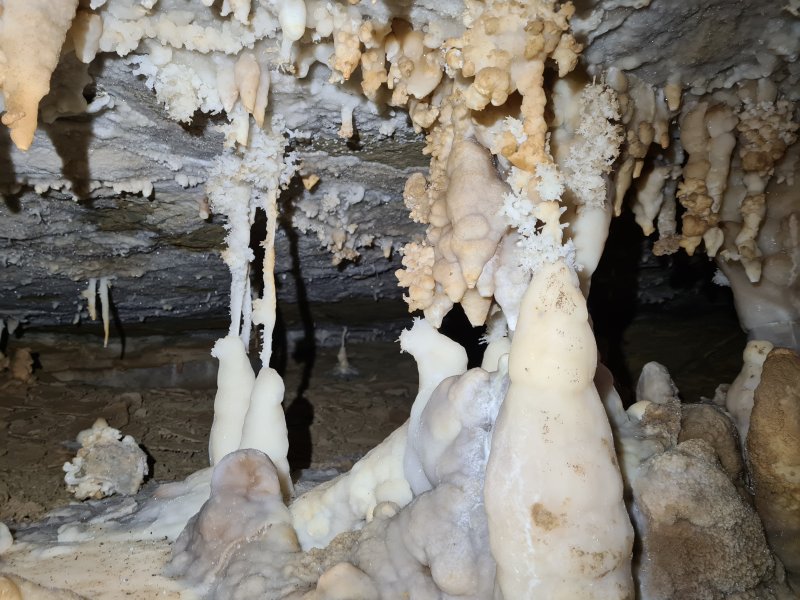 Hiding behind the columns.
 More superb columns.
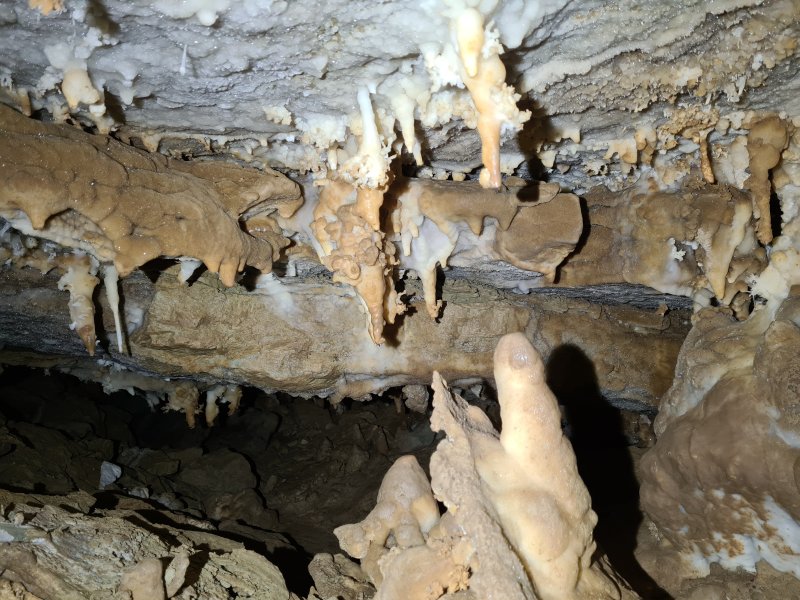 Passing through the next section involves sliding through this gap, trying not to touch anything that has not already been muddied.
 In the low passage beyond. This is still technically part of Pond Life.
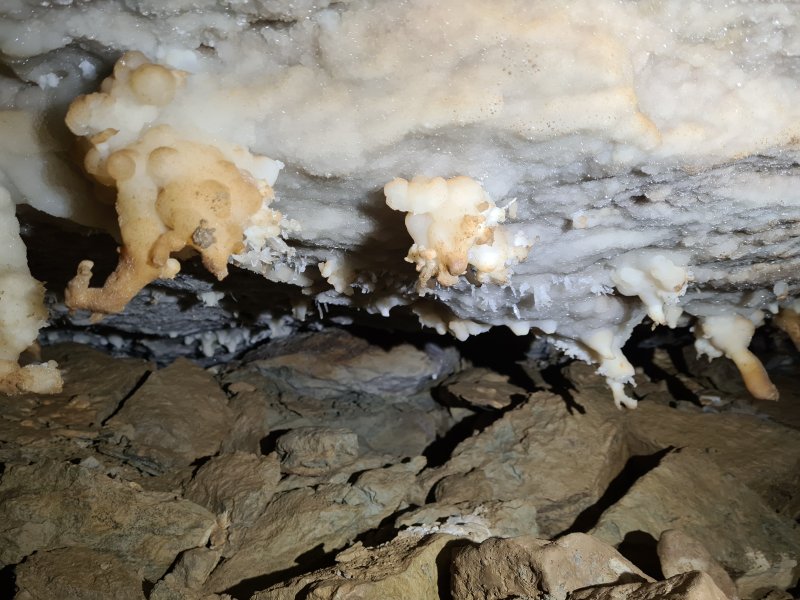 Pond Life.
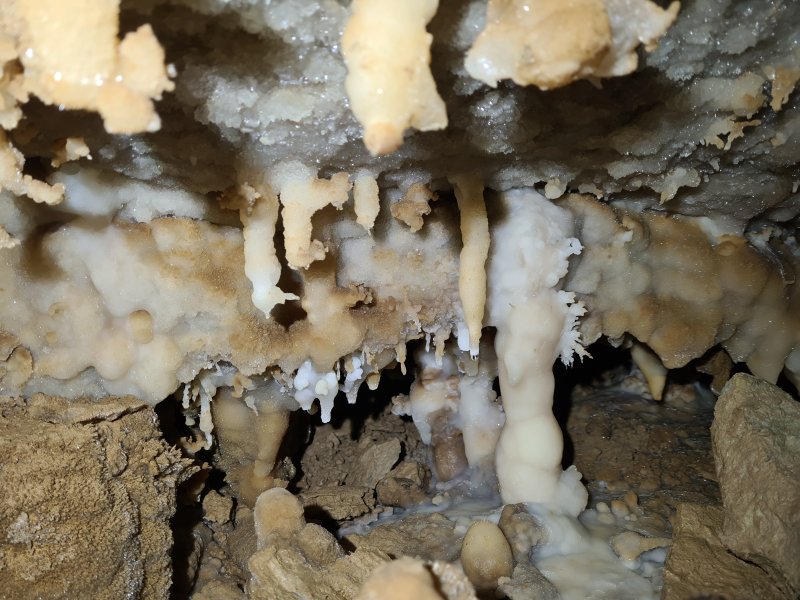 Pond Life.
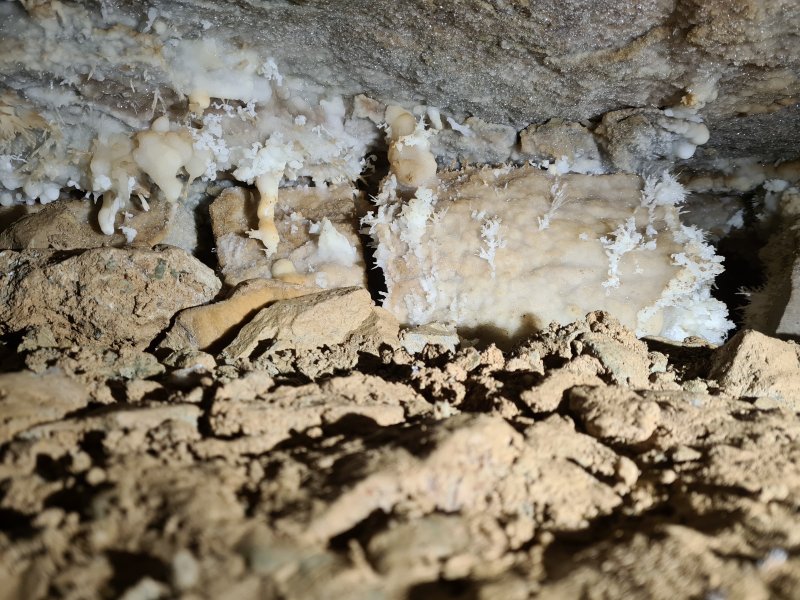 The last of Pond Life, now in an extremely low section.
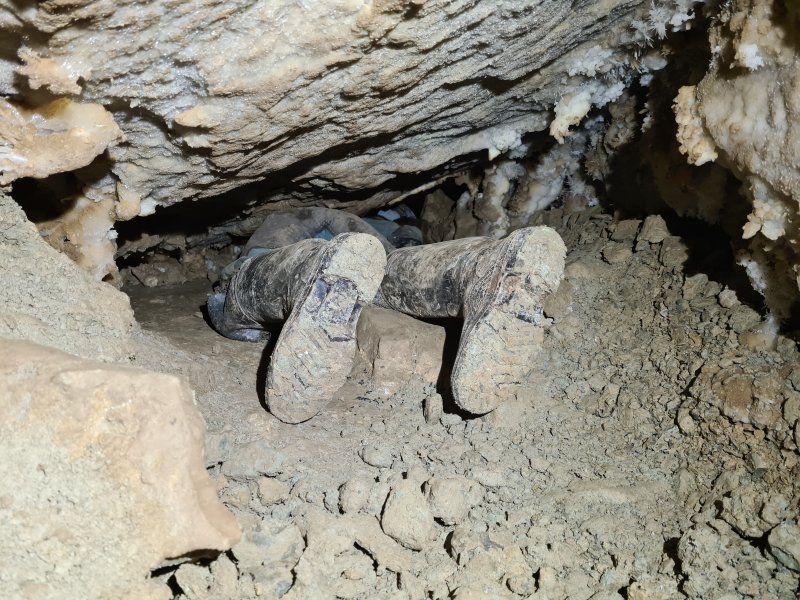 The passage now passes through a low squeeze - seen here on the way out. Great care is needed to avoid breaking or muddying formations. The squeeze is tight, but the main problem is that the ceiling is very snatchy, and grabs on to your clothing, making the squeeze feel tighter than it is.
Modelling by Monica, lighting by Tarquin and Monica
The passage now passes through a low squeeze - seen here on the way out. Great care is needed to avoid breaking or muddying formations. The squeeze is tight, but the main problem is that the ceiling is very snatchy, and grabs on to your clothing, making the squeeze feel tighter than it is.
Modelling by Monica, lighting by Tarquin and Monica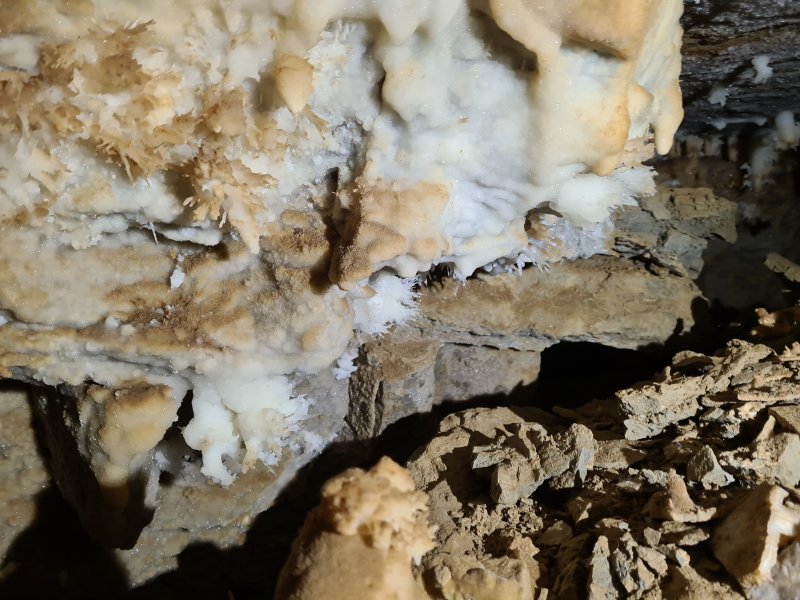 Beyond the squeeze, the passage resumes its formations.
 The squeeze emerges in The Whitehouse, also known as Anthodite Chamber. This is one of the most spectacularly decorated places in the Wyvern Extensions.
Modelling by Monica and Mike, lighting by Tarquin, Monica and Mike
The squeeze emerges in The Whitehouse, also known as Anthodite Chamber. This is one of the most spectacularly decorated places in the Wyvern Extensions.
Modelling by Monica and Mike, lighting by Tarquin, Monica and Mike The last of the Pond Life style columns.
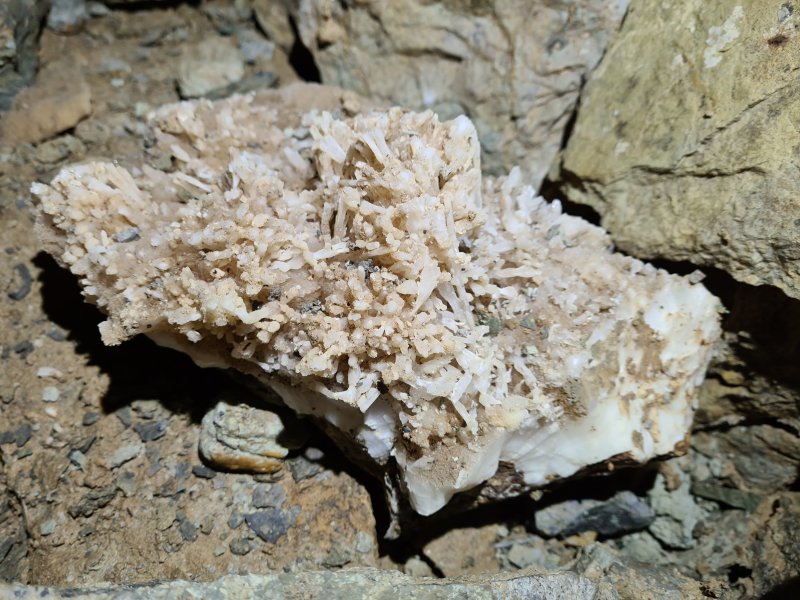 Fallen anthodites.
 The Whitehouse has one of the most impressive displays of anthodites (aragonite needles growing from a calcite base) in the cave, with crystals 10-15 cm (4-6 inches) long covering several patches of the wall and most of the ceiling.
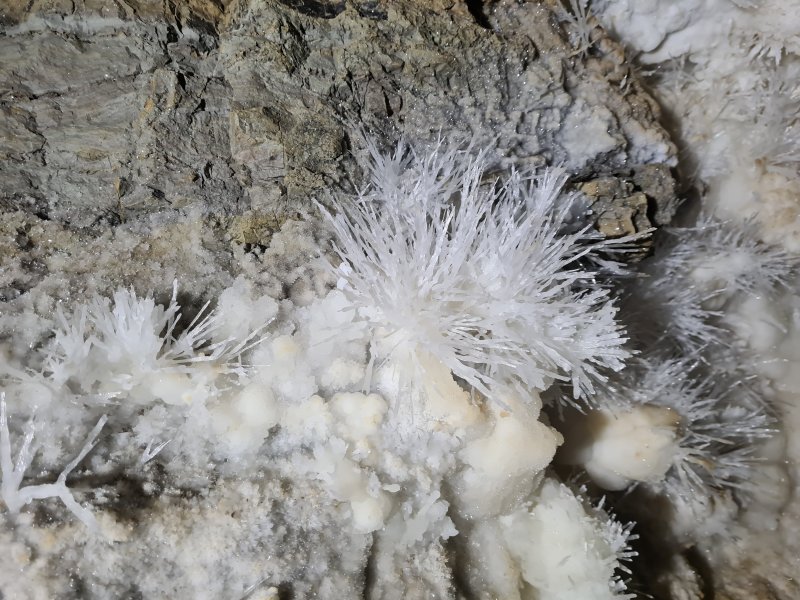 Detail of the anthodites.
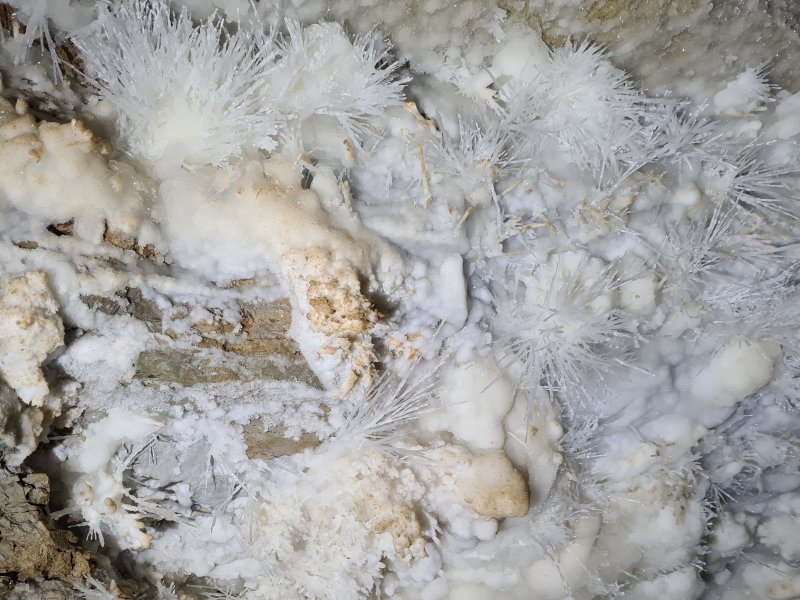 Detail of the anthodites.
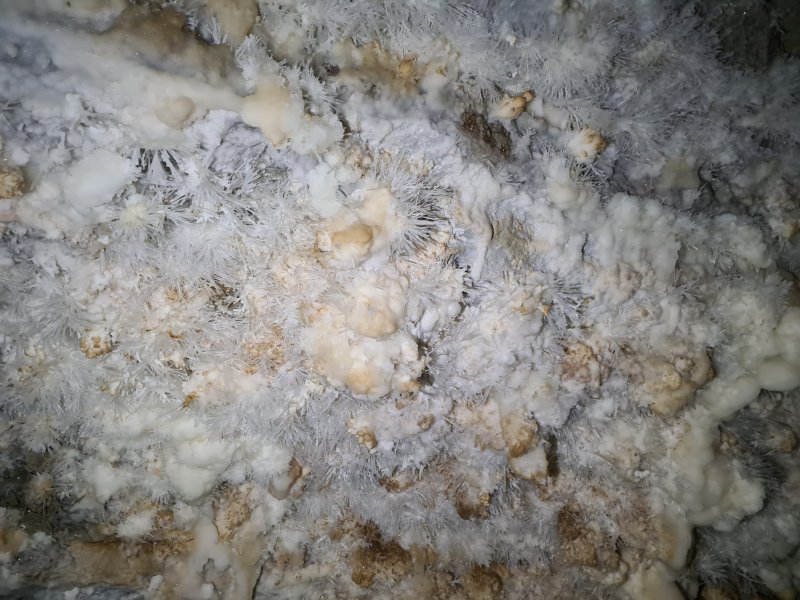 Anthodite display.
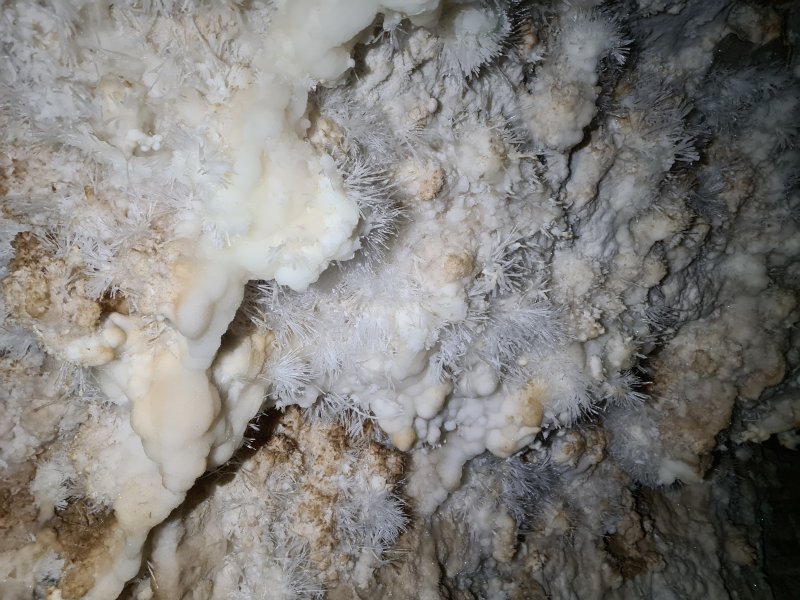 Anthodite display.
 Anthodites on an early part of the ceiling.
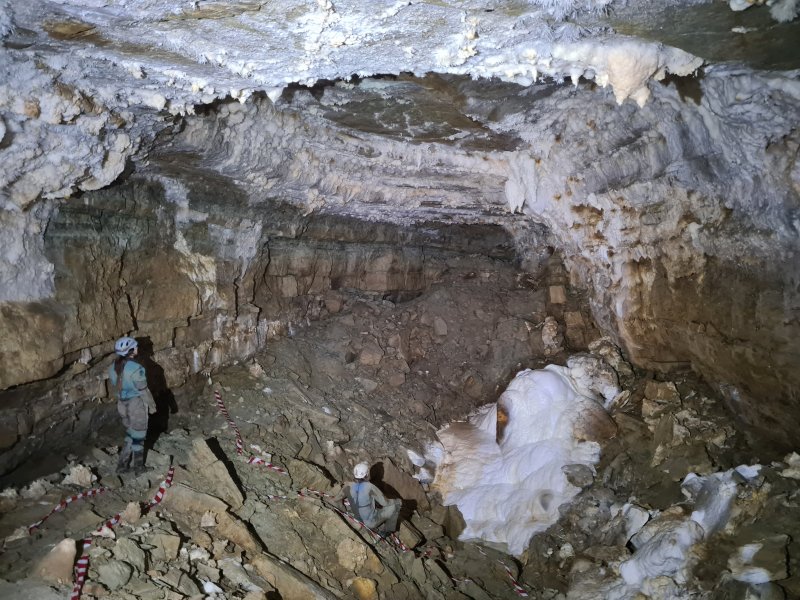 The main part of The Whitehouse.
Modelling by Monica and Mike, lighting by Tarquin, Monica and Mike
The main part of The Whitehouse.
Modelling by Monica and Mike, lighting by Tarquin, Monica and Mike The northern edge of the circular ceiling.
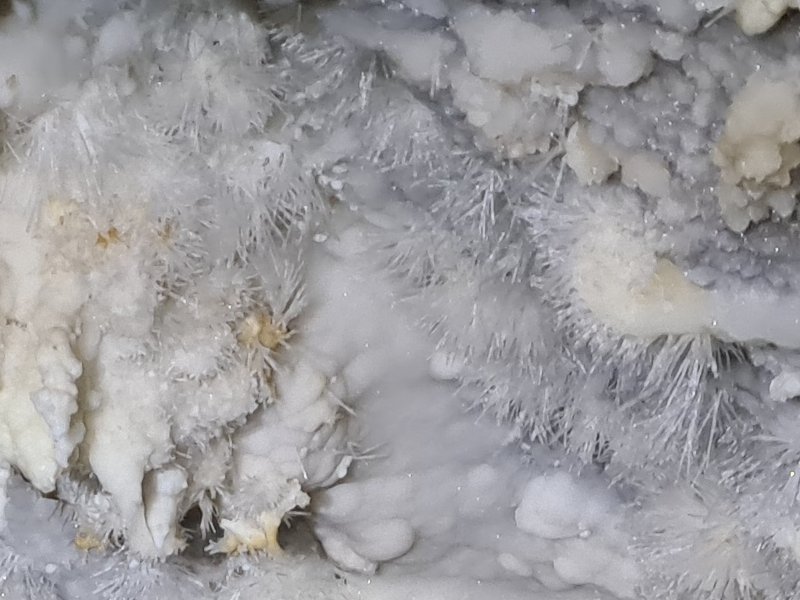 Detail of the anthodites.
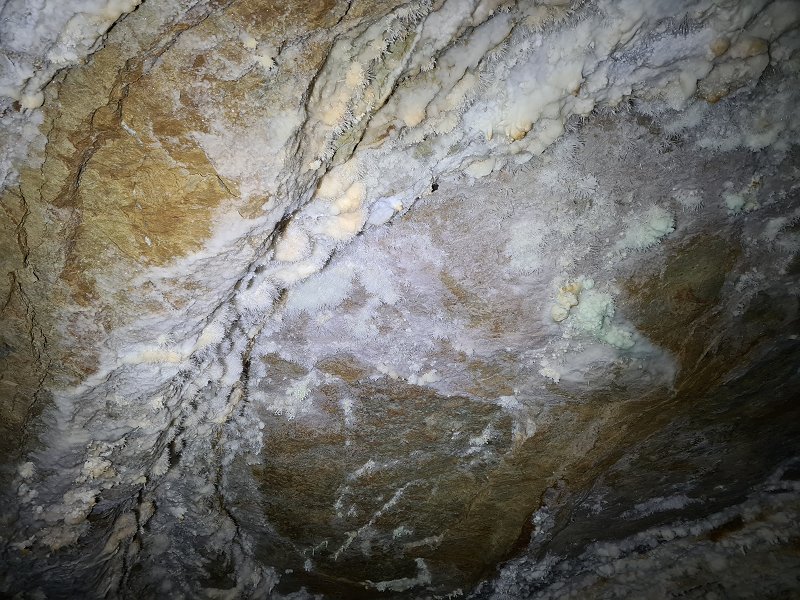 The eastern edge of the circular ceiling, with green and orange tinted anthodites.
 Detail of the anthodites.
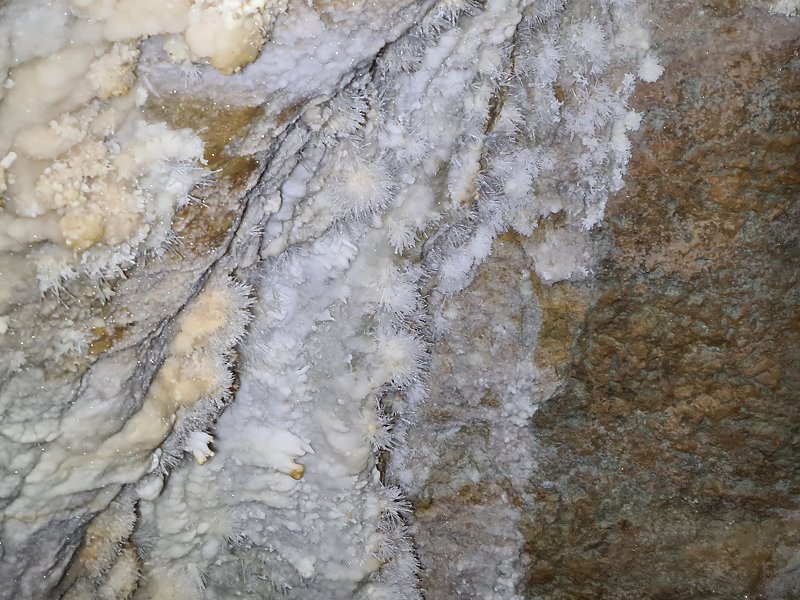 Detail of the anthodites.
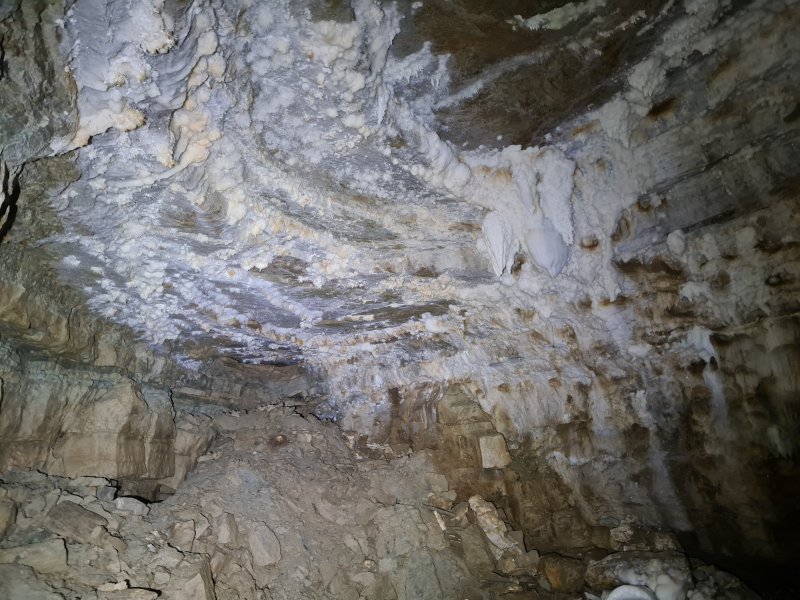 The southern edge of the circular ceiling, which includes some unusually shaped stalactites, covered in helictites and anthodites.
 The northern cluster of stalagmites.
 Enormous stalagmite boss, with what appears to be the Eye of Sauron.
Modelling by Monica, lighting by Tarquin and Monica
Enormous stalagmite boss, with what appears to be the Eye of Sauron.
Modelling by Monica, lighting by Tarquin and Monica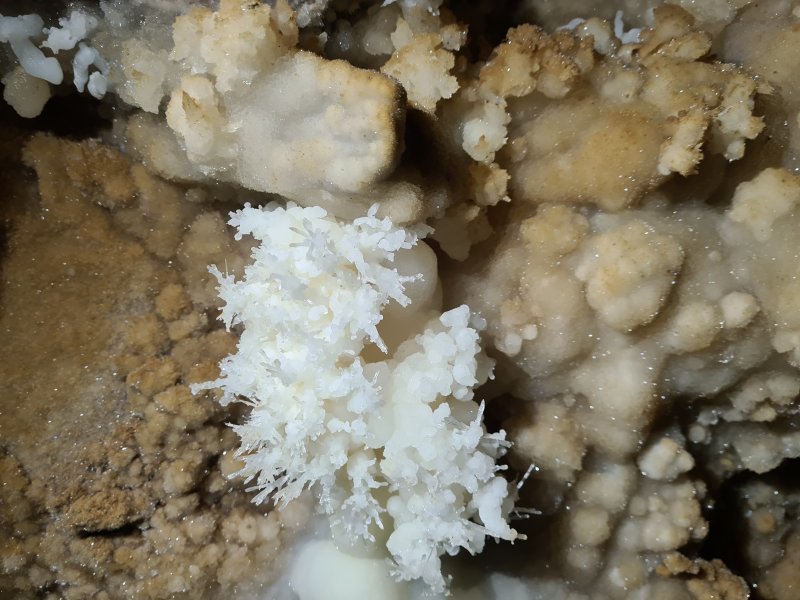 Helictites towards the end of the chamber.
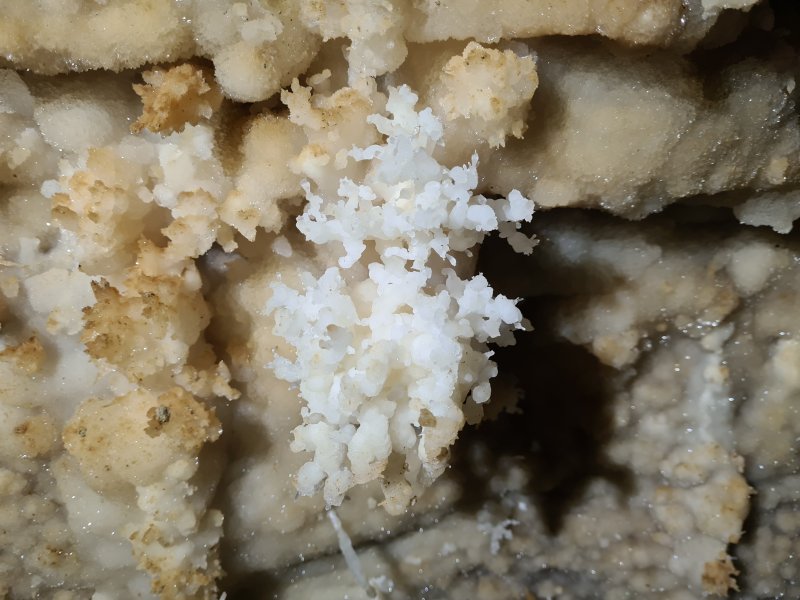 Helictites towards the end of the chamber.
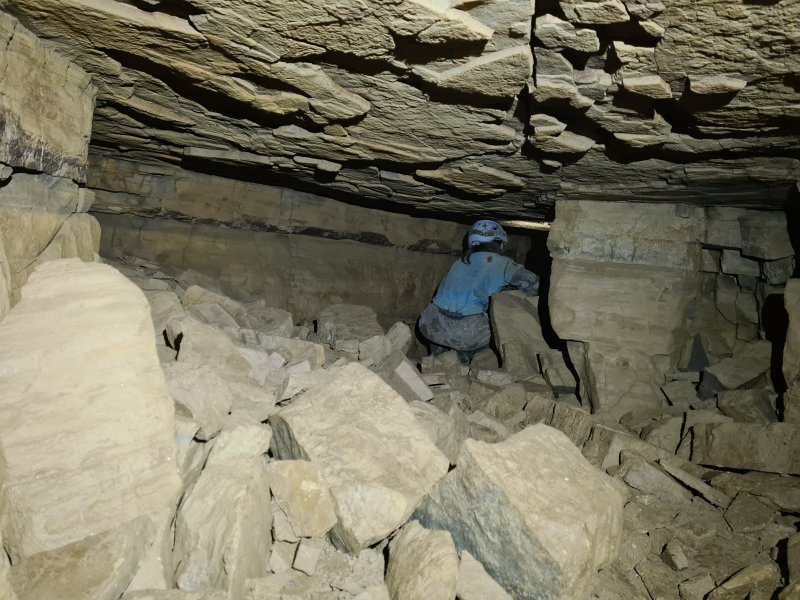 Pond Passage, which soon lowers to a crawl. I confused myself here by forgetting that the passage turns abruptly left to drop through a brief crawl part way along, and nearly missed the way to Yanto's Grotto as a result. The passage skirts the tip of Keeper's Pond.
Modelling by Monica, lighting by Tarquin and Monica
Pond Passage, which soon lowers to a crawl. I confused myself here by forgetting that the passage turns abruptly left to drop through a brief crawl part way along, and nearly missed the way to Yanto's Grotto as a result. The passage skirts the tip of Keeper's Pond.
Modelling by Monica, lighting by Tarquin and Monica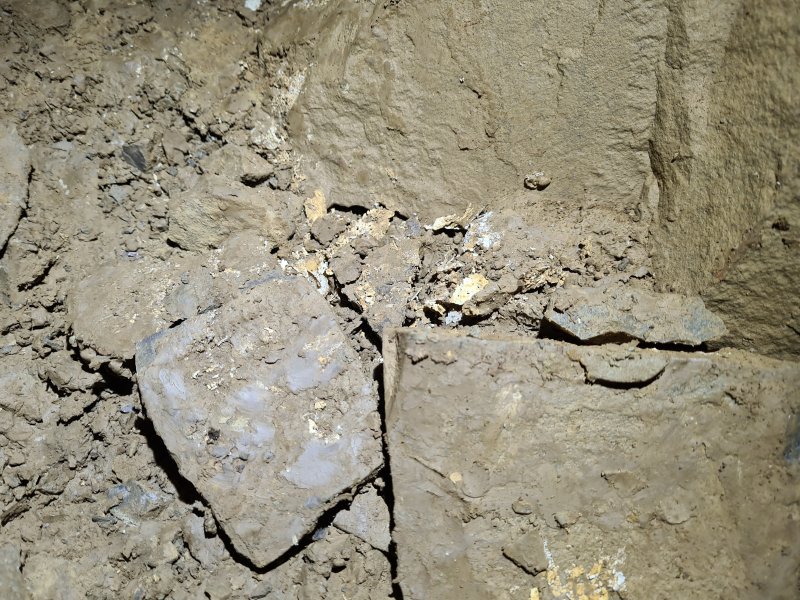 A large deposit of cryostal rafts starts at the end of Pond Passage, where it degenerates into a series of small passages. If you see this cryostal, you have just passed the way to Yanto's Grotto.
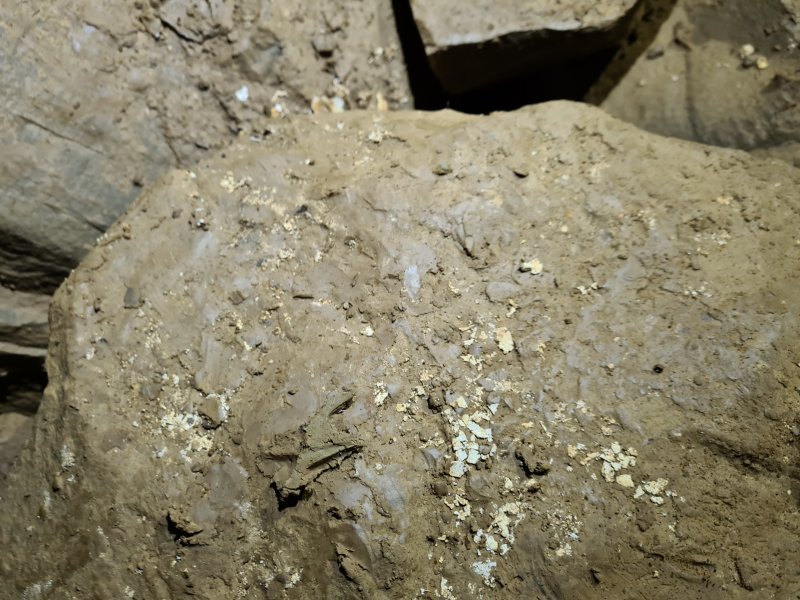 Cryostal rafts that have been crushed by passing cavers. We taped off this deposit before leaving.
 Cryostal.
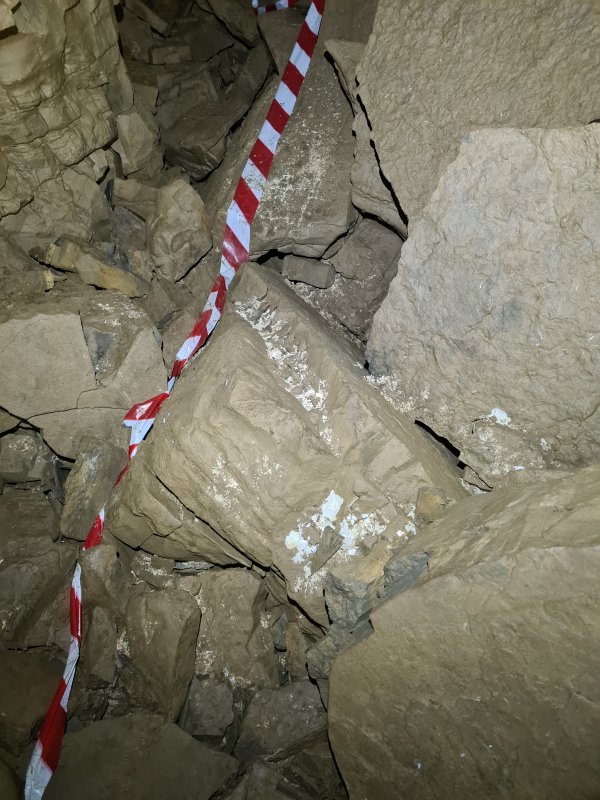 Cryostal.
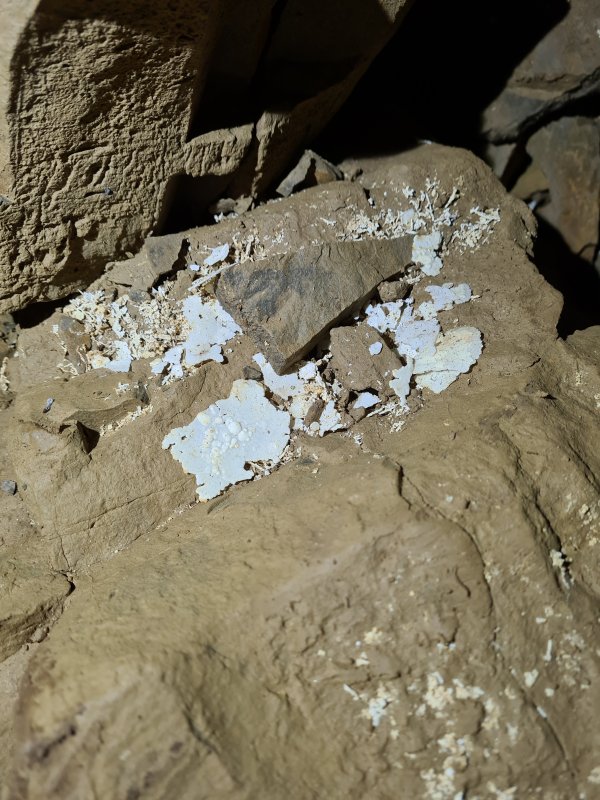 Cryostal rafts.
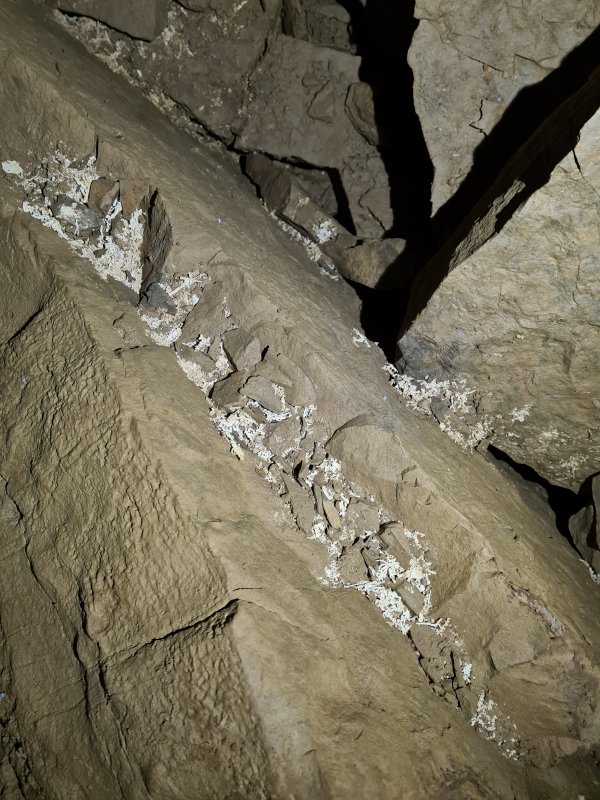 Cryostal twiglets.
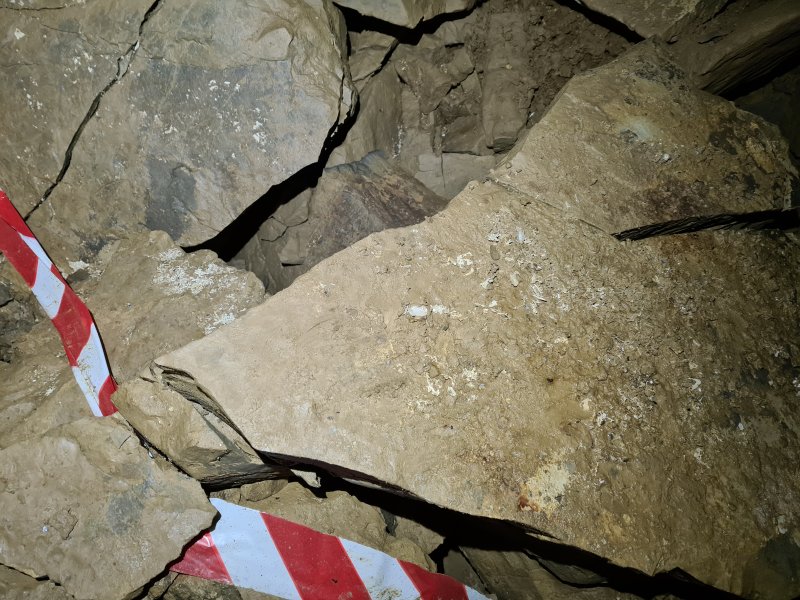 Cryostal.
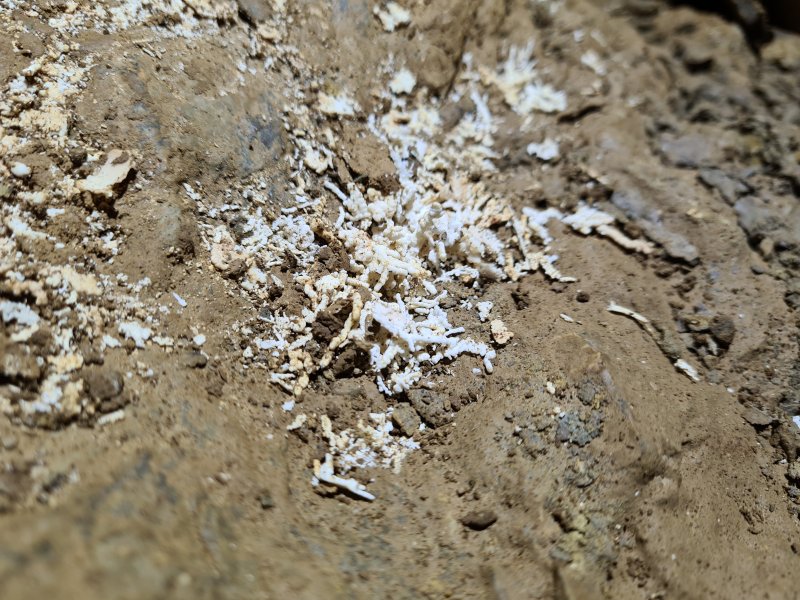 Cryostal.
 The main crawl to Yanto's Grotto (there is a much tighter rift route as well). The chamber was originally discovered by Chris Densham, Hilary Greaves, Tim Guilford, Lou Maurice and Ben Lovett in 1998, though they actually first got into it via the alternative rift route. This bypass was connected by John Cooper in 1999.
Modelling by Mike, lighting by Tarquin and Mike
The main crawl to Yanto's Grotto (there is a much tighter rift route as well). The chamber was originally discovered by Chris Densham, Hilary Greaves, Tim Guilford, Lou Maurice and Ben Lovett in 1998, though they actually first got into it via the alternative rift route. This bypass was connected by John Cooper in 1999.
Modelling by Mike, lighting by Tarquin and Mike Carefully passing under a badly shattered ceiling.
Modelling by Pete, lighting by Tarquin and Pete
Carefully passing under a badly shattered ceiling.
Modelling by Pete, lighting by Tarquin and Pete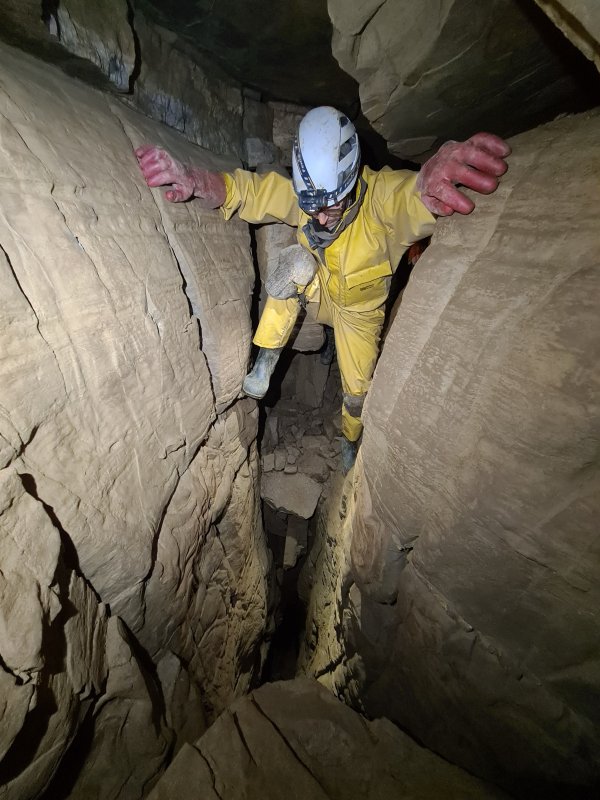 The final traverse before Yanto's Grotto. The slot is very deep indeed, and can prove quite intimidating, despite the traverse only being short.
Modelling by Pete and hints of Monica, lighting by Tarquin, Pete and Monica
The final traverse before Yanto's Grotto. The slot is very deep indeed, and can prove quite intimidating, despite the traverse only being short.
Modelling by Pete and hints of Monica, lighting by Tarquin, Pete and Monica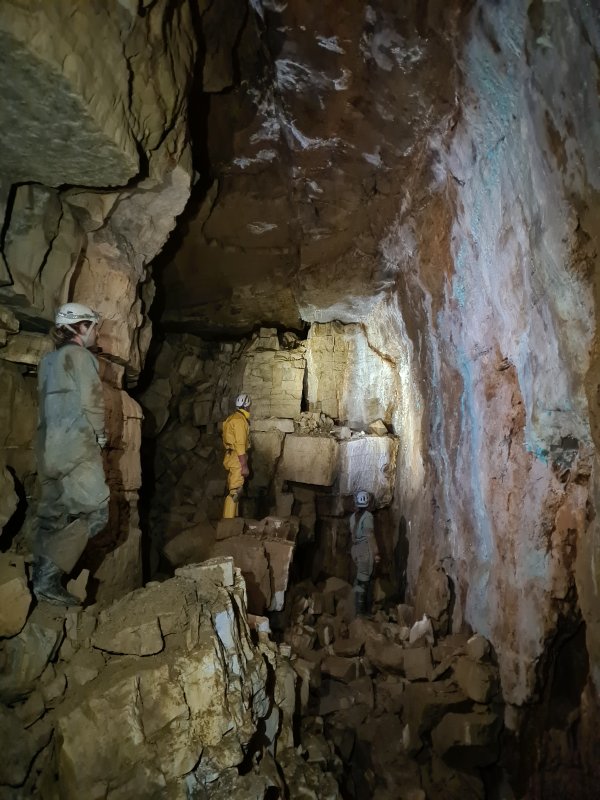 Yanto's Grotto, which was originally codenamed Blue Room. Yanto's Grotto is named after someone's cat (whose name was originally spelled in some other way, possibly Ianto as it would be in Welsh). However, because the codename can be seen on the original survey tags, the chamber often gets called The Blue Room. The chamber sits on a barytes vein, which contains some blue tinted minerals (possibly copper sulphate, since sulphuric acid from the overlying coal measures was involved in the cave's development, or another copper compound), staining much of the stal on one wall. The way in to the chamber is ahead-left. The way to Coldfinger is either above the boulders at ceiling level ahead (very loose, not recommended!) or below them at floor level. The archway on the right edge of the picture goes nowhere, and neither does the obvious rift behind the camera. This chamber sits almost directly below the Keeper's Pond parking area.
Modelling by Mike, Pete and Monica, lighting by Tarquin, Mike, Pete and Monica
Yanto's Grotto, which was originally codenamed Blue Room. Yanto's Grotto is named after someone's cat (whose name was originally spelled in some other way, possibly Ianto as it would be in Welsh). However, because the codename can be seen on the original survey tags, the chamber often gets called The Blue Room. The chamber sits on a barytes vein, which contains some blue tinted minerals (possibly copper sulphate, since sulphuric acid from the overlying coal measures was involved in the cave's development, or another copper compound), staining much of the stal on one wall. The way in to the chamber is ahead-left. The way to Coldfinger is either above the boulders at ceiling level ahead (very loose, not recommended!) or below them at floor level. The archway on the right edge of the picture goes nowhere, and neither does the obvious rift behind the camera. This chamber sits almost directly below the Keeper's Pond parking area.
Modelling by Mike, Pete and Monica, lighting by Tarquin, Mike, Pete and Monica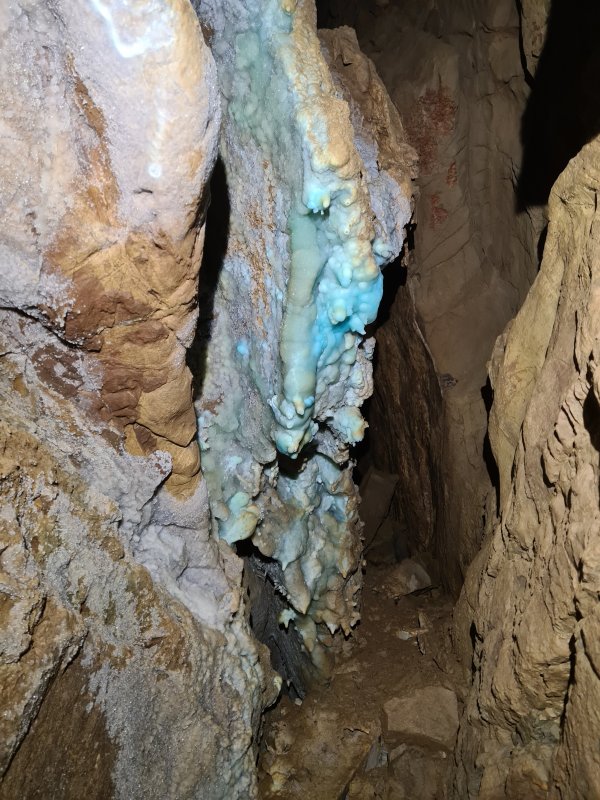 Blue tinted stal in the blind rift.
 Blue stalactites and helictites.
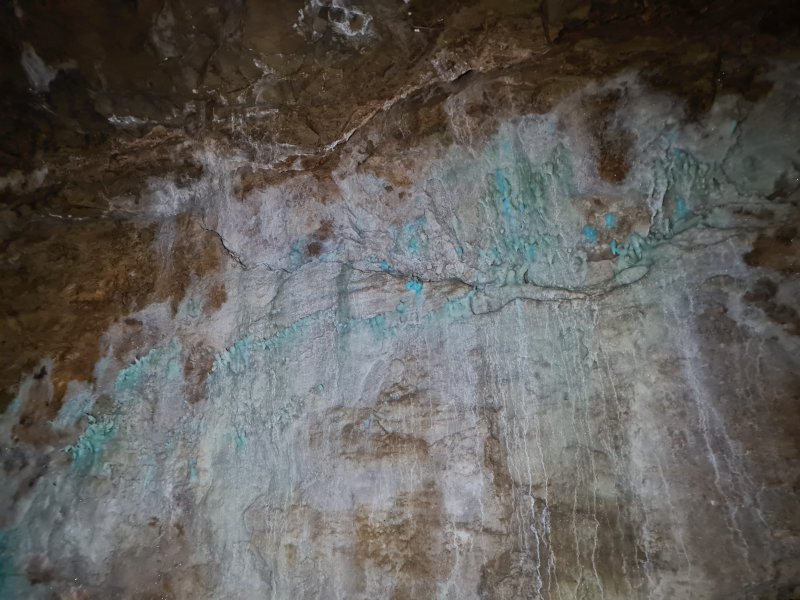 Blue and green tinted spread of stalactites and helictites.
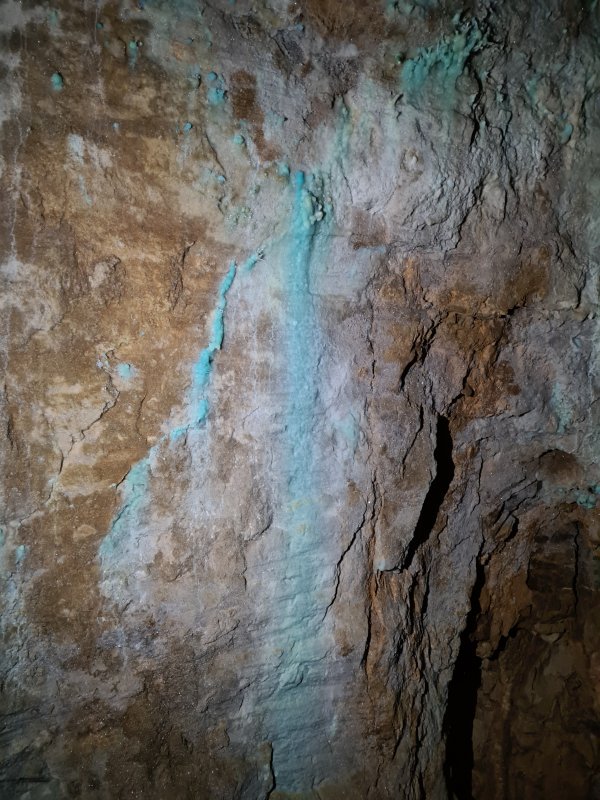 Blue tinted helictites and flow.
 Blue tinted helictites.
 Climbing through a hole between the boulders, on the way to Coldfinger. This area is very loose, and must be treated with serious respect. The passage used to end shortly afterwards.
Modelling by Mike, lighting by Tarquin and Mike
Climbing through a hole between the boulders, on the way to Coldfinger. This area is very loose, and must be treated with serious respect. The passage used to end shortly afterwards.
Modelling by Mike, lighting by Tarquin and Mike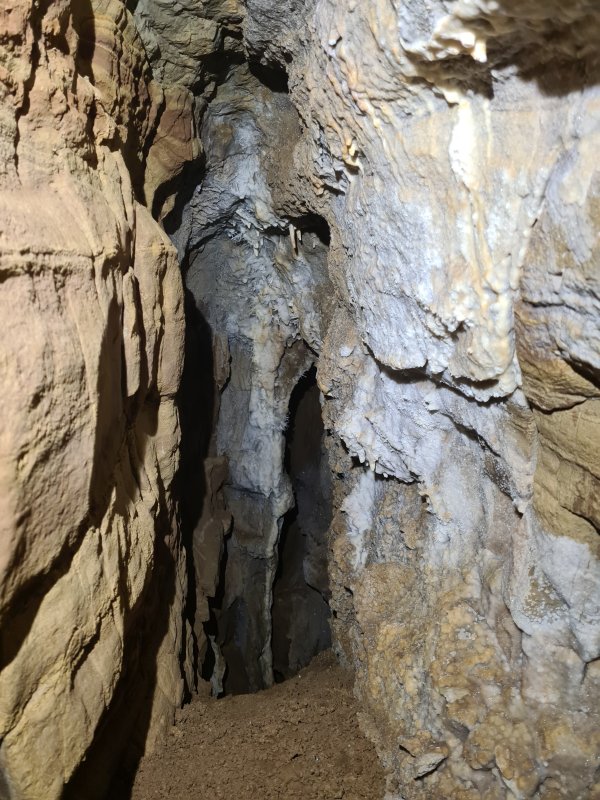 In July 1999, my father Ian and I visited this passage, and spotted this unentered narrow calcited hole, looking into a passage filled with small anthodites. My father incredibly carefully climbed through the hole, with me holding his clothing away from the calcite. The fact there is almost no trace of his having been through here - even the mud seems almost untouched - is testament to how carefully this was done.
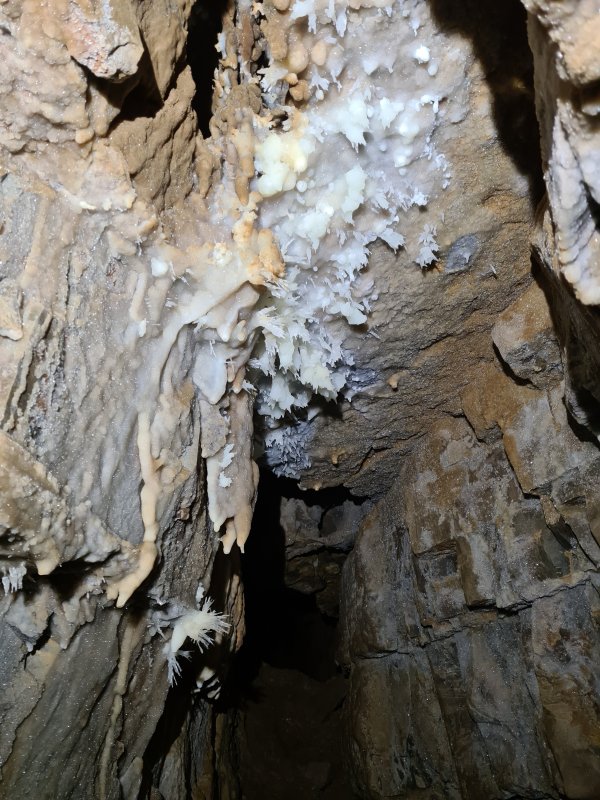 After he explored the passage beyond, I heard him talking through a tiny hole in the wall. I pushed the wall, causing it to collapse, giving access to the virgin passage containing these anthodites.
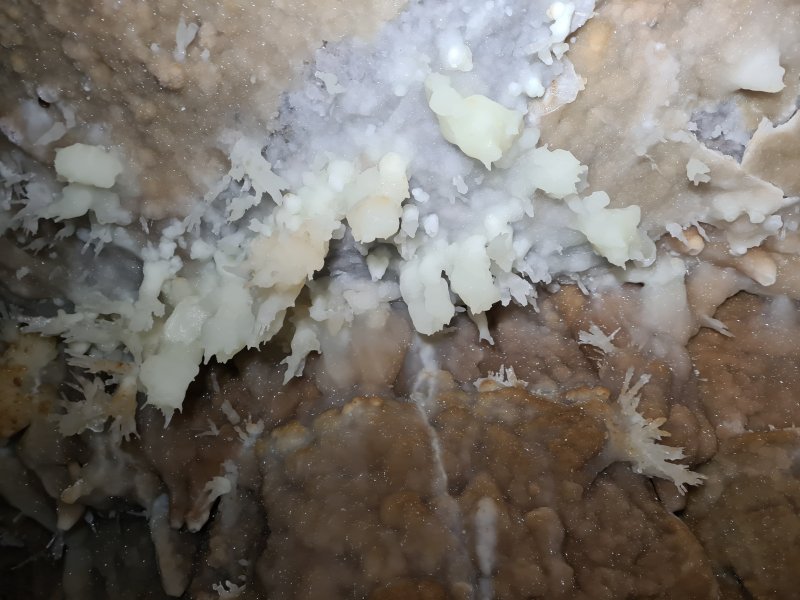 Anthodites and calcite blobs.
 Anthodites.
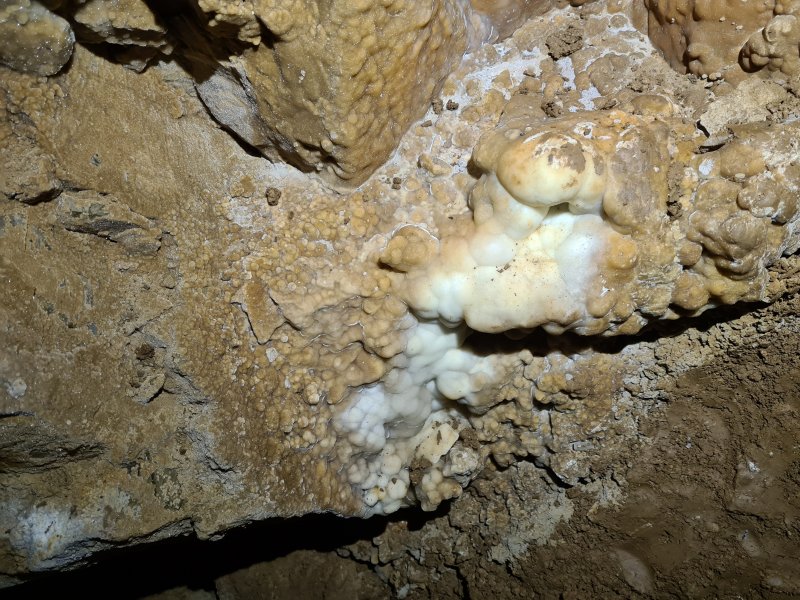 Stalagmite flow, now muddied by passing cavers. This sits in an inconvenient position, at the foot of a slope where you have to wriggle up into the continuation of the passage. It is hard to avoid.
 Wriggling into the continuation of the passage.
Modelling by Monica and vague hints of Pete, lighting by Tarquin, Monica and Pete
Wriggling into the continuation of the passage.
Modelling by Monica and vague hints of Pete, lighting by Tarquin, Monica and Pete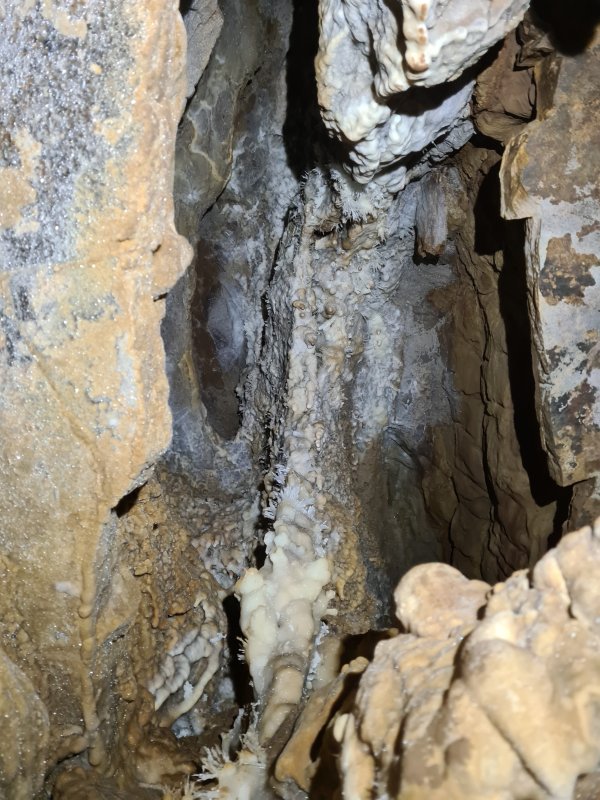 The anthodite-filled alcove above the wriggle, which my father had passed through during the original exploration. The anthodites survived!
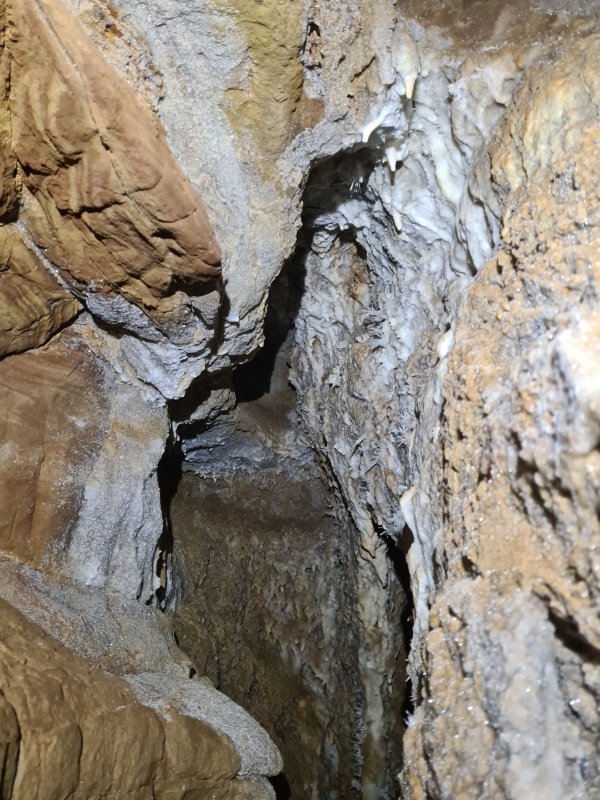 Ceiling of the alcove.
 Climbing up to a higher level.
Modelling by Monica, lighting by Tarquin, Pete and Monica
Climbing up to a higher level.
Modelling by Monica, lighting by Tarquin, Pete and Monica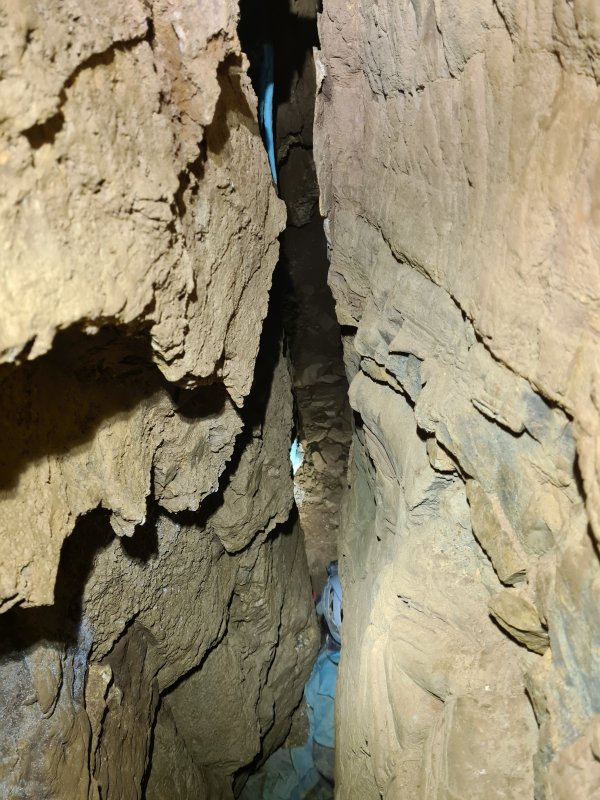 During the first exploration, my father had glanced into the rift on the right (shown here), seen nothing but the end of the passage, climbed up higher and dropped into the rift on the left, finding another dead end. He then returned to get me. I climbed up the rift, and asked why he had not mentioned the stalactite. He had replied "what stalactite?", having not noticed the bright blue formations peeking around the corner. As a result, I was the first person to get in to the rift (squeezing at floor level), and the first to ever see Coldfinger.
Modelling by Monica, lighting by Tarquin and Monica
During the first exploration, my father had glanced into the rift on the right (shown here), seen nothing but the end of the passage, climbed up higher and dropped into the rift on the left, finding another dead end. He then returned to get me. I climbed up the rift, and asked why he had not mentioned the stalactite. He had replied "what stalactite?", having not noticed the bright blue formations peeking around the corner. As a result, I was the first person to get in to the rift (squeezing at floor level), and the first to ever see Coldfinger.
Modelling by Monica, lighting by Tarquin and Monica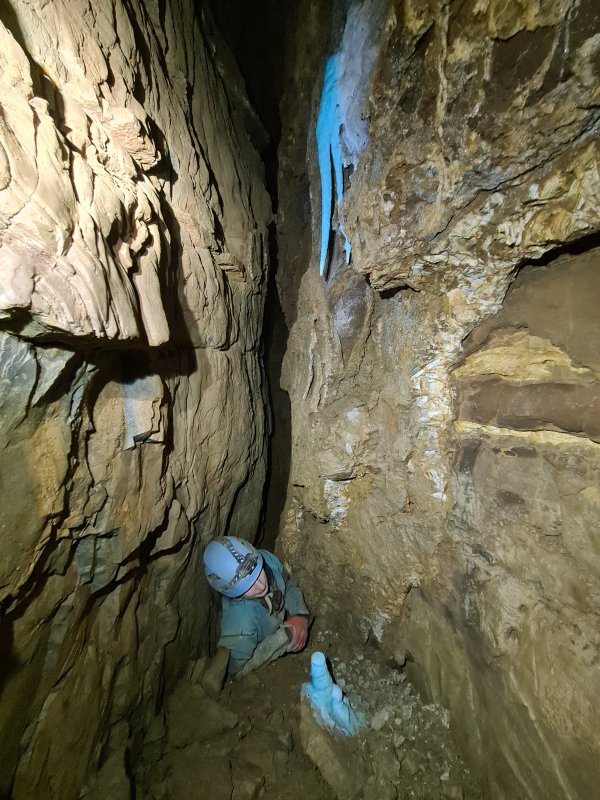 Coldfinger, in all its glory. The triple stalactite and blue stalagmite are the longest I have ever seen, with the stalactite measuring about 50 cm. Given the confined space, this picture requires the wide angle lens, which distorts colours more than the regular lens. The camera made it more blue than it really is, so I have tried to manually correct it back to where it should have been.
Modelling by Monica
Coldfinger, in all its glory. The triple stalactite and blue stalagmite are the longest I have ever seen, with the stalactite measuring about 50 cm. Given the confined space, this picture requires the wide angle lens, which distorts colours more than the regular lens. The camera made it more blue than it really is, so I have tried to manually correct it back to where it should have been.
Modelling by Monica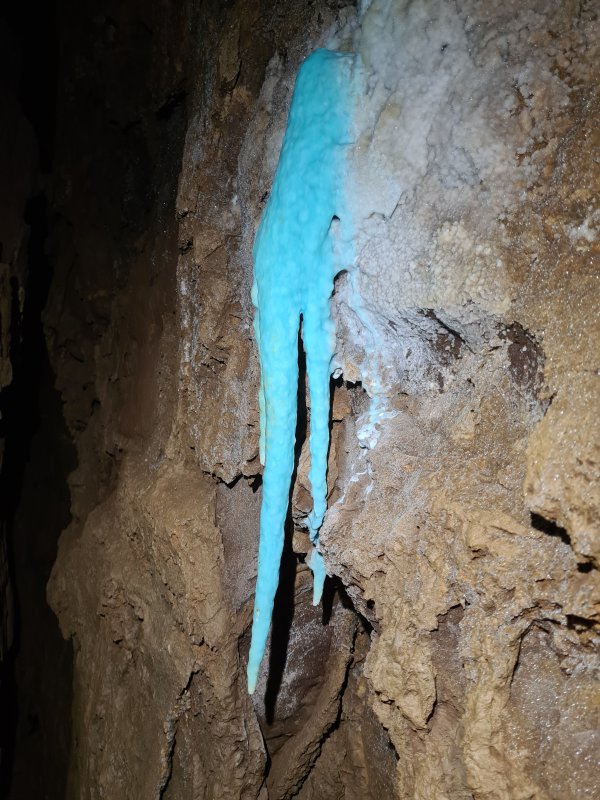 Coldfinger, closer to its natural colour. The muddy staining is natural. The white mark near the tip, however, is a ding from a rock that fell while trying to shimmy overhead many years ago. For this reason, squeezing at floor level is the only safe way to get here.
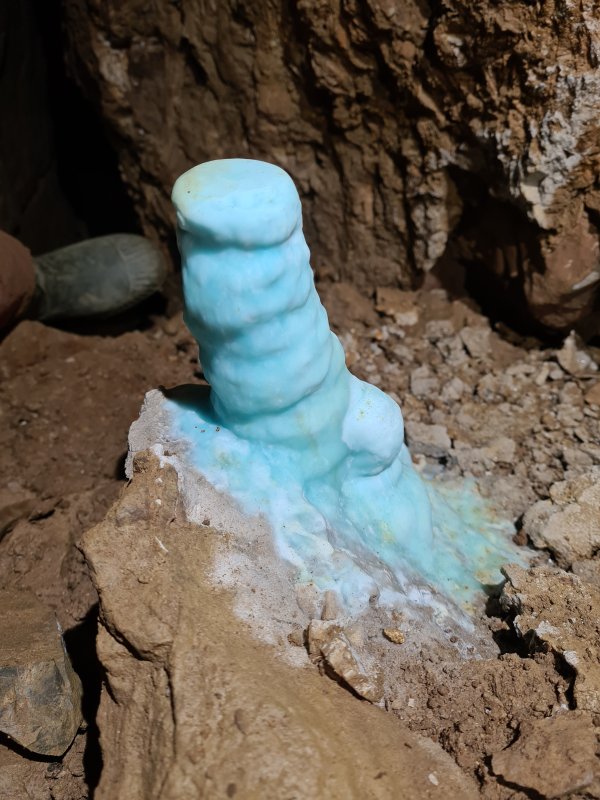 Coldfinger's stalagmite, looking suspiciously phallic. The slight mud staining may be natural, but may also be due to cavers trying to squeeze past. It cannot be seen in earlier photographs, but the detail is not so visible in those. Either way, the stain is permanently ingrained.
Modelling by Tarquin's welly
Coldfinger's stalagmite, looking suspiciously phallic. The slight mud staining may be natural, but may also be due to cavers trying to squeeze past. It cannot be seen in earlier photographs, but the detail is not so visible in those. Either way, the stain is permanently ingrained.
Modelling by Tarquin's welly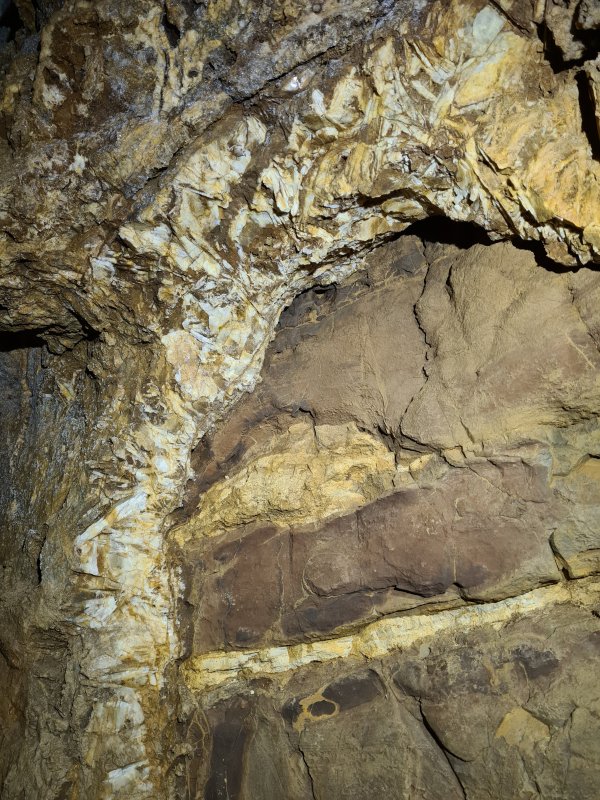 Barytes vein at Coldfinger.
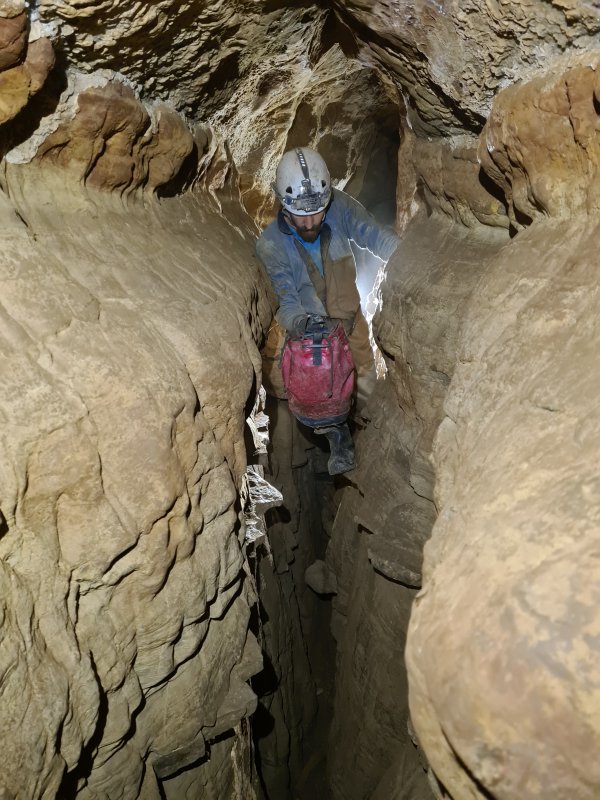 Traversing along Dragon's Teeth, a passage named after the jagged ledges, which appear to be chert.
Modelling by Mike, lighting by Tarquin and Monica
Traversing along Dragon's Teeth, a passage named after the jagged ledges, which appear to be chert.
Modelling by Mike, lighting by Tarquin and Monica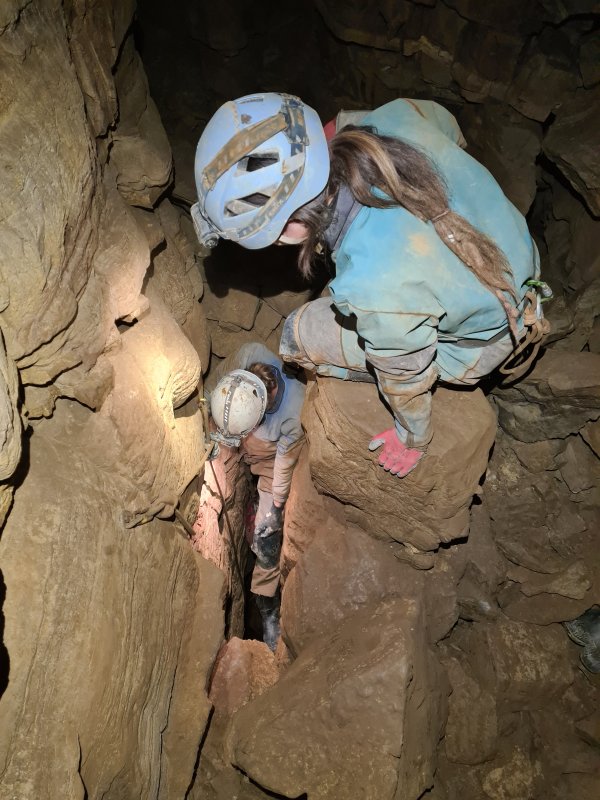 Top of the Didgeredoo pitch. This is the way to Interesting Times, and the Long Round Trip. It is worth noting that this is a pitch, not a climb, but because of how narrow it is, it can be descended by jamming between the walls, and using the rope as a handline. However, a descender would be better. Ascending it requires equipment, but this is difficult in such a narrow space, so visits are almost always done in a downhill direction.
Modelling by Monica, Mike and Pete's toes, lighting by Tarquin, Monica and Mike
Top of the Didgeredoo pitch. This is the way to Interesting Times, and the Long Round Trip. It is worth noting that this is a pitch, not a climb, but because of how narrow it is, it can be descended by jamming between the walls, and using the rope as a handline. However, a descender would be better. Ascending it requires equipment, but this is difficult in such a narrow space, so visits are almost always done in a downhill direction.
Modelling by Monica, Mike and Pete's toes, lighting by Tarquin, Monica and Mike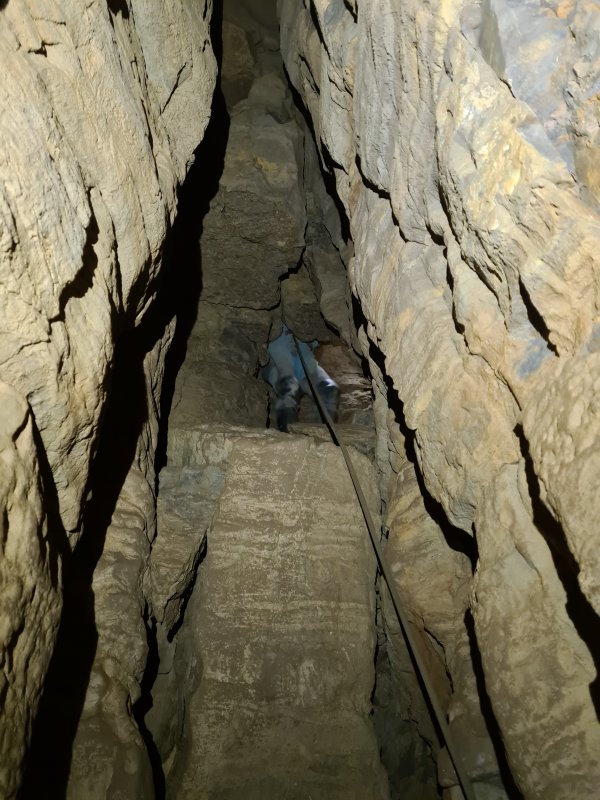 The Didgeredoo's top section is vertical for about 10 metres, then requires this climb down, causing a severe rope rub.
Modelling by Monica, lighting by Tarquin and Monica
The Didgeredoo's top section is vertical for about 10 metres, then requires this climb down, causing a severe rope rub.
Modelling by Monica, lighting by Tarquin and Monica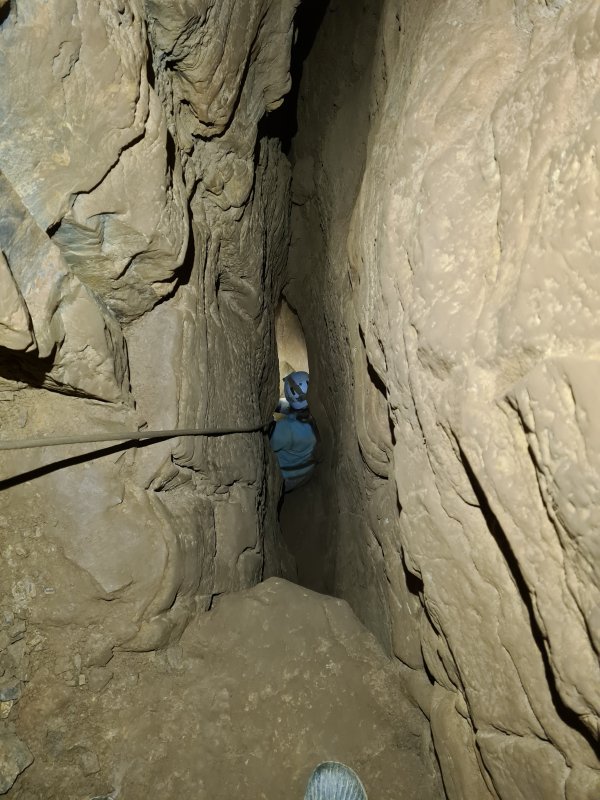 The second half of The Didgeredoo is also about 10 metres, and is tight, once again.
Modelling by Monica, lighting by Tarquin and Monica
The second half of The Didgeredoo is also about 10 metres, and is tight, once again.
Modelling by Monica, lighting by Tarquin and Monica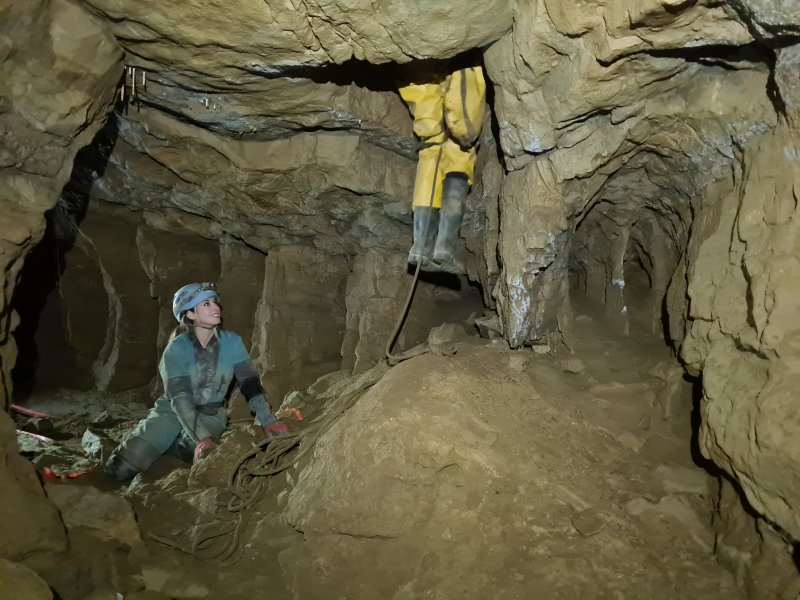 The pitch lands in Interesting Times, a part of the series found by the Wessex Cave Club, but extended significantly by the Chelsea Spelaeological Society surveyors during surveying. The way out along the Long Round Trip is behind the camera.
Modelling by Monica and Pete's legs, lighting by Tarquin and Mike
The pitch lands in Interesting Times, a part of the series found by the Wessex Cave Club, but extended significantly by the Chelsea Spelaeological Society surveyors during surveying. The way out along the Long Round Trip is behind the camera.
Modelling by Monica and Pete's legs, lighting by Tarquin and Mike Bat skeleton in Interesting Times.
Modelling by Nearly Headless Nick
Bat skeleton in Interesting Times.
Modelling by Nearly Headless Nick The bat's skull, a short distance from the rest of the skeleton.
Modelling by Nearly Headless Nick
The bat's skull, a short distance from the rest of the skeleton.
Modelling by Nearly Headless Nick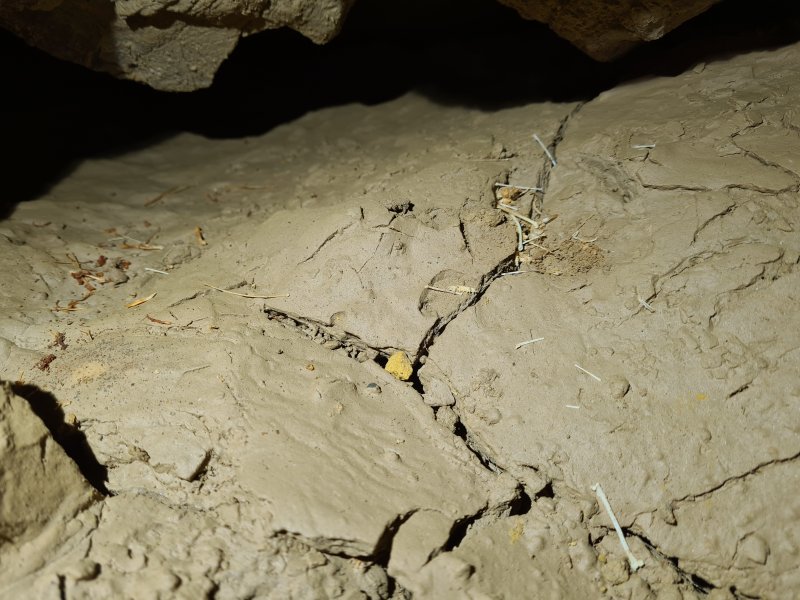 Another bat skeleton.
Modelling by Terry
Another bat skeleton.
Modelling by Terry The sump below the Haggis Basher Number 2 choke, which had dried out in drought conditions. Someone has dug here in the past, but it undermines the choke and looks horrifying.
Modelling by Pete, lighting by Tarquin and Pete
The sump below the Haggis Basher Number 2 choke, which had dried out in drought conditions. Someone has dug here in the past, but it undermines the choke and looks horrifying.
Modelling by Pete, lighting by Tarquin and Pete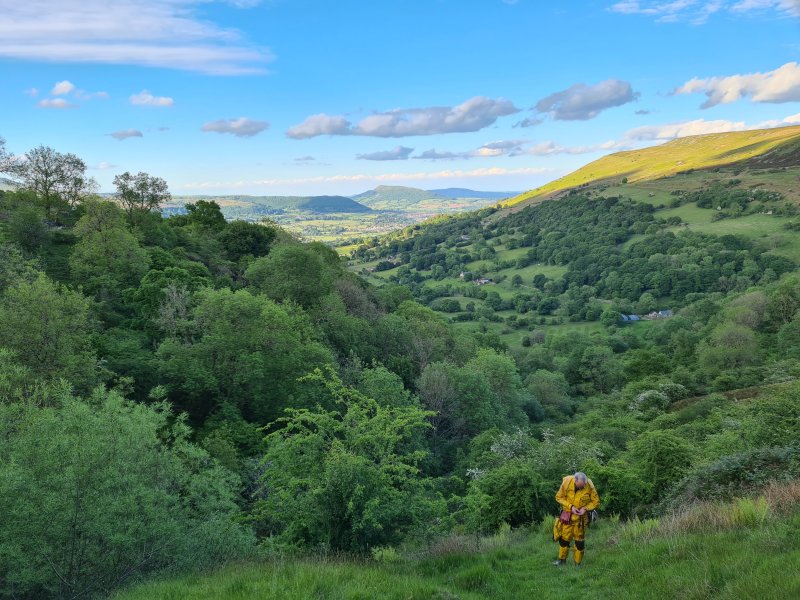 Exiting to the view of Cwm Llanwenarth. The whole Long Round Trip took about 8 hours and 30 minutes, including all of the photography. 2 hours 10 minutes of that was a detour to see The Whitehouse, Yanto's Grotto and Coldfinger.
Modelling by Pete
Exiting to the view of Cwm Llanwenarth. The whole Long Round Trip took about 8 hours and 30 minutes, including all of the photography. 2 hours 10 minutes of that was a detour to see The Whitehouse, Yanto's Grotto and Coldfinger.
Modelling by Pete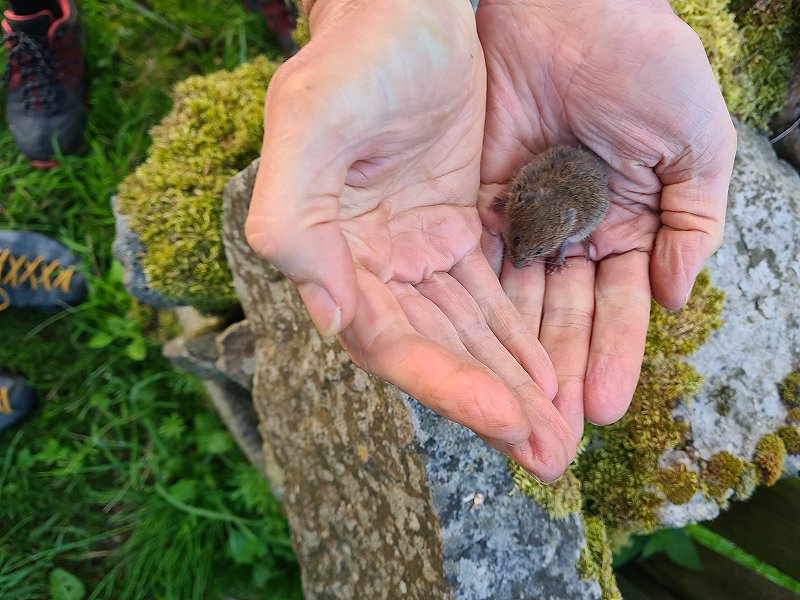 Wild vole, which we rescued from the jaws of a cat.
Camera and setup by Pete, modelling by Van Graven, Tarquin's extremities and Pete's toes
Wild vole, which we rescued from the jaws of a cat.
Camera and setup by Pete, modelling by Van Graven, Tarquin's extremities and Pete's toes