Dan y Lleuad Wen trip 28/08/2020
Unless otherwise stated, camera, setups, lighting, edits and gallery effects by Tarquin. Modelling and lighting at various points will be Phil Knight, Gareth Davies and Jules Carter.
This cave has a lengthy history of dig poaching and secret extensions. Originally found by Mark Withers of ISCA in 1991, it was then extended in about 1994-1995 by Amman Valley CC, by a group including Liam Kealy. Before they could finish pushing their extension, the extension was intentionally poached and pushed to its conclusion by Nig Rogers. Around that same time, Nig and other members of Grwp Ogofeydd Garimpeiros had made their own discovery in the cave that had more than doubled its length, but this was kept secret. For 15 years, only a small number of cavers, almost all from the same club, were told about it. Presumably Nig didn't want anyone to poach his dig. After Nig's death, details of the discovery were finally made public in 2019.
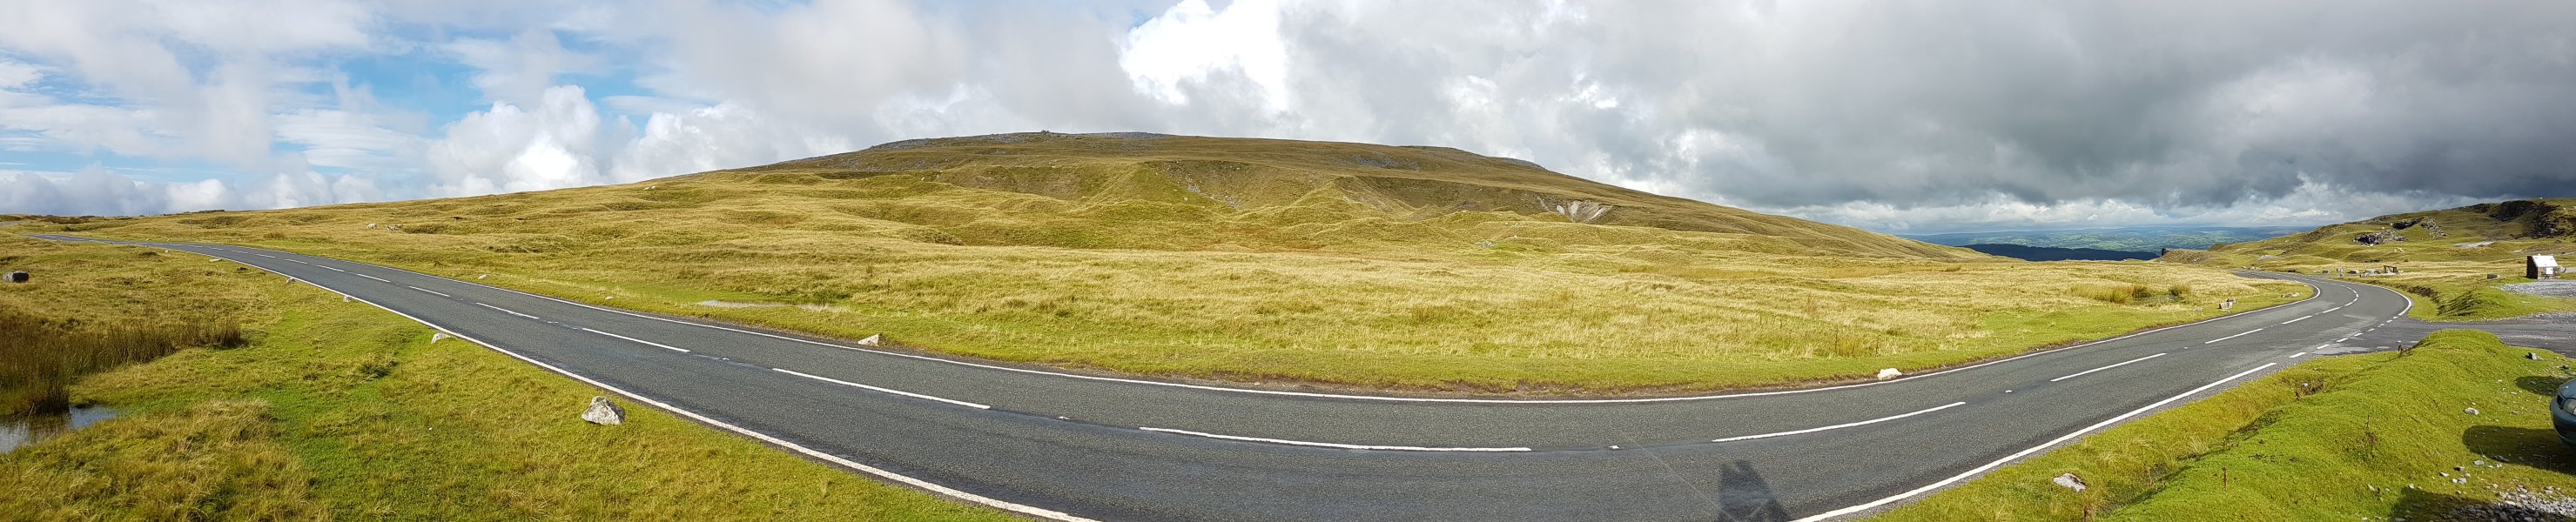
 Carn Pen-rhiw-ddu (532 metres), seen from the parking area on the A4069. Ogof Gwynt yr Eira, a 460 metre cave, lies on the left side of the picture.
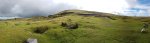 Garreg Lwyd (616 metres), the tallest of the mountains at this end of The Black Mountain. Despite being a giant heap of limestone, it has very few substantial caves.
 View over Pantyffynnon, an area with a lot of marshy springs. To the right of the Mid Wales lowlands is Cefn y Cylchau (556 metres). On the right is the Foel Fawr ridge of Garreg Lwyd, which has been heavily quarried. Foel Fawr contains the Ogof Foel Fawr cave on its right shoulder, which together with Ogof Pasg, forms the longest cave under Garreg Lwyd at 834 metres. The cave is not hydrologically connected to the nearby springs, and instead has been traced to Llygad Llwchwr at the western end of the mountain range.
Modelling by Phil, Gareth and Jules
View over Pantyffynnon, an area with a lot of marshy springs. To the right of the Mid Wales lowlands is Cefn y Cylchau (556 metres). On the right is the Foel Fawr ridge of Garreg Lwyd, which has been heavily quarried. Foel Fawr contains the Ogof Foel Fawr cave on its right shoulder, which together with Ogof Pasg, forms the longest cave under Garreg Lwyd at 834 metres. The cave is not hydrologically connected to the nearby springs, and instead has been traced to Llygad Llwchwr at the western end of the mountain range.
Modelling by Phil, Gareth and Jules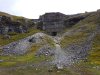 Looks like a fortress, but it is actually a limekiln.
 Remains of the old quarry buildings for Herbert's Quarry.
 A second limekiln fortress.
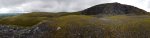 Cefn y Cylchau, Foel Fraith (602 metres) and Herbert's Quarry. Dan y Lleuad Wen sits in the left side of Foel Fraith. In the middle of Herbert's Quarry, half way up the face, is the entrance to Ogof Pasg, offering a through trip to Ogof Foel Fawr, via a tight squeeze.
Modelling by Gareth, Jules and Phil
Cefn y Cylchau, Foel Fraith (602 metres) and Herbert's Quarry. Dan y Lleuad Wen sits in the left side of Foel Fraith. In the middle of Herbert's Quarry, half way up the face, is the entrance to Ogof Pasg, offering a through trip to Ogof Foel Fawr, via a tight squeeze.
Modelling by Gareth, Jules and Phil View from the slopes of Garreg Lwyd over Blaenclydach. Garreg Lwyd, Cefn y Cylchau, Garreg Las (635 metres) and Foel Fraith.
Modelling by Phil, Jules and Gareth
View from the slopes of Garreg Lwyd over Blaenclydach. Garreg Lwyd, Cefn y Cylchau, Garreg Las (635 metres) and Foel Fraith.
Modelling by Phil, Jules and Gareth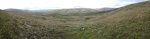 View from the pass between Garreg Lwyd and Foel Fraith over a sea of shakeholes. Garreg Lwyd, Cefn y Cylchau, Carreg yr Ogof (585 metres), Garreg Las and Foel Fraith.
Modelling by Phil, Gareth and Jules
View from the pass between Garreg Lwyd and Foel Fraith over a sea of shakeholes. Garreg Lwyd, Cefn y Cylchau, Carreg yr Ogof (585 metres), Garreg Las and Foel Fraith.
Modelling by Phil, Gareth and Jules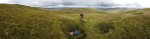 Entrance to Dan y Lleuad Wen, with plenty of shoring through the initial shakehole. In the distant cloud on the right are Picws Du (749 metres), Fan Hir (761 metres) and Fan Gyhirych (725 metres). Dan y Lleuad Wen is, at 1144 metres long and 57 metres deep, the second longest and deepest cave on the mountain, after Ogof Pwll Swnd's 1410 metre length and 76 metre depth. The other major caves here are Dolphin's Hole at 122 metres long, Ogof Tepod at 100 metres long and Arthur's Pot at 37 metres long. Those other caves lie around 400 metres away on the right of this picture, and are still far enough away from any passages in Dan y Lleuad Wen that there would need to be about another kilometre of passage network between them.
Modelling by Gareth
Entrance to Dan y Lleuad Wen, with plenty of shoring through the initial shakehole. In the distant cloud on the right are Picws Du (749 metres), Fan Hir (761 metres) and Fan Gyhirych (725 metres). Dan y Lleuad Wen is, at 1144 metres long and 57 metres deep, the second longest and deepest cave on the mountain, after Ogof Pwll Swnd's 1410 metre length and 76 metre depth. The other major caves here are Dolphin's Hole at 122 metres long, Ogof Tepod at 100 metres long and Arthur's Pot at 37 metres long. Those other caves lie around 400 metres away on the right of this picture, and are still far enough away from any passages in Dan y Lleuad Wen that there would need to be about another kilometre of passage network between them.
Modelling by Gareth The entrance passage, below the shoring.
Modelling by Phil, lighting by Tarquin and Phil
The entrance passage, below the shoring.
Modelling by Phil, lighting by Tarquin and Phil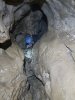 Awkward little passage.
Modelling by Phil, lighting by Tarquin and Phil
Awkward little passage.
Modelling by Phil, lighting by Tarquin and Phil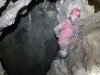 Head of the first pitch. This seems completely out of place, since the passage below does not seem to be related to the entrance passage. It's like they just accidentally met each other. We used a ladder here, but SRT would have been a lot better.
Modelling by Jules, lighting by Tarquin and Phil
Head of the first pitch. This seems completely out of place, since the passage below does not seem to be related to the entrance passage. It's like they just accidentally met each other. We used a ladder here, but SRT would have been a lot better.
Modelling by Jules, lighting by Tarquin and Phil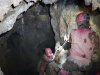 The ladder does not hang cleanly, but is OK as a ladder pitch. However, SRT is required further through the cave, so it would make sense to use it everywhere.
Modelling by Gareth and Jules, lighting by Tarquin, Phil, Gareth and Jules
The ladder does not hang cleanly, but is OK as a ladder pitch. However, SRT is required further through the cave, so it would make sense to use it everywhere.
Modelling by Gareth and Jules, lighting by Tarquin, Phil, Gareth and Jules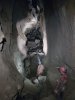 The pitch lands in Debbie's Dread, a huge, inspiring passage, which abruptly ends in one direction. Hidden below the boulder floor is a climb down into Lon Drury, the passages found by Amman Valley CC and subsequently poached by Nig Rogers.
Modelling by Jules and Phil, lighting by Tarquin, Jules and Phil
The pitch lands in Debbie's Dread, a huge, inspiring passage, which abruptly ends in one direction. Hidden below the boulder floor is a climb down into Lon Drury, the passages found by Amman Valley CC and subsequently poached by Nig Rogers.
Modelling by Jules and Phil, lighting by Tarquin, Jules and Phil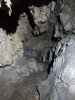 Mark's Grotto, a dead end grotto off Debbie's Dread.
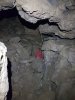 The way on is in the opposite direction, around the corner via a rope climb.
Modelling by Jules, lighting by Tarquin and Jules
The way on is in the opposite direction, around the corner via a rope climb.
Modelling by Jules, lighting by Tarquin and Jules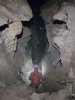 Into a comfortable, walking sized passage. At the end of the first straight is a junction, where a narrower oxbow starts on the right. That oxbow has a side passage dropping down a series of climbs into the Lower Series, which we did not have time for on this trip.
Modelling by Jules and Phil, lighting by Tarquin, Jules and Phil
Into a comfortable, walking sized passage. At the end of the first straight is a junction, where a narrower oxbow starts on the right. That oxbow has a side passage dropping down a series of climbs into the Lower Series, which we did not have time for on this trip.
Modelling by Jules and Phil, lighting by Tarquin, Jules and Phil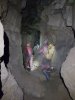 After the junction, following the larger passage. Several side passages here end quickly.
Modelling by Gareth, Jules and Phil, lighting by Tarquin, Gareth, Jules and Phil
After the junction, following the larger passage. Several side passages here end quickly.
Modelling by Gareth, Jules and Phil, lighting by Tarquin, Gareth, Jules and Phil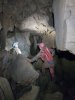 Before the oxbow rejoins.
Modelling by Jules and Phil, lighting by Tarquin, Jules and Phil
Before the oxbow rejoins.
Modelling by Jules and Phil, lighting by Tarquin, Jules and Phil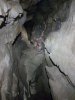 After the oxbow rejoins.
Modelling by Phil, lighting by Tarquin and Phil
After the oxbow rejoins.
Modelling by Phil, lighting by Tarquin and Phil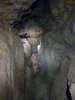 The passage then grows to a more impressive size.
Modelling by Phil, lighting by Tarquin and Phil
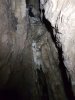
The passage then grows to a more impressive size.
Modelling by Phil, lighting by Tarquin and Phil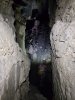 The big passage ends at a ramp up.
Modelling by Gareth and Phil, lighting by Tarquin, Gareth and Phil
The big passage ends at a ramp up.
Modelling by Gareth and Phil, lighting by Tarquin, Gareth and Phil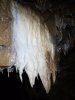 Formations at the top of the ramp.
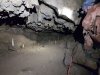 Formations in an undersut at the top of the ramp.
Modelling by Phil, lighting by Tarquin and Phil
Formations in an undersut at the top of the ramp.
Modelling by Phil, lighting by Tarquin and Phil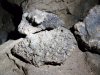 Crystal covered rocks.
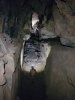 The Canyon, the most impressive passage in the old cave, with a large rock bridge at its end. Below the bridge, the Garimpeiros discoveries are down a hole to the right, via a route that was originally pushed during the original explorations.
Modelling by Gareth and Phil, lighting by Tarquin, Gareth and Phil
The Canyon, the most impressive passage in the old cave, with a large rock bridge at its end. Below the bridge, the Garimpeiros discoveries are down a hole to the right, via a route that was originally pushed during the original explorations.
Modelling by Gareth and Phil, lighting by Tarquin, Gareth and Phil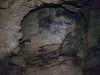 Chimney failure dome at the end of The Canyon.
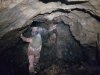 Under the bridge.
Modelling by Phil, lighting by Tarquin and Phil
Under the bridge.
Modelling by Phil, lighting by Tarquin and Phil Down through the boulders on the right, the passage funnels down and the shoring starts.
Modelling and lighting by Tarquin and Gareth
Down through the boulders on the right, the passage funnels down and the shoring starts.
Modelling and lighting by Tarquin and Gareth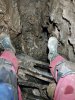 The shoring at the breakthrough is a rather confused mix of scaffolding, wood and polystyrene. But if it works, it works.
Modelling by Tarquin
The shoring at the breakthrough is a rather confused mix of scaffolding, wood and polystyrene. But if it works, it works.
Modelling by Tarquin After the breakthrough is a junction. To the right is Omaha Rift, a tall rift with fissures dropping far down into the floor.
Modelling by Gareth, lighting by Tarquin and Gareth
After the breakthrough is a junction. To the right is Omaha Rift, a tall rift with fissures dropping far down into the floor.
Modelling by Gareth, lighting by Tarquin and Gareth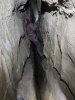 Progress along Omaha Rift is by traversing using a fixed rope which has been here for a very long time.
Modelling by Jules, lighting by Tarquin, Gareth and Jules
Progress along Omaha Rift is by traversing using a fixed rope which has been here for a very long time.
Modelling by Jules, lighting by Tarquin, Gareth and Jules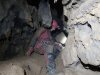 The Omaha Rift traverse ends, and the passage turns right and fizzles out, with a too-tight rift down to the right. This is so close to the Lower Series that it could have been the main way into here, with just a little persuasion.
Modelling by Jules, lighting by Tarquin and Jules
The Omaha Rift traverse ends, and the passage turns right and fizzles out, with a too-tight rift down to the right. This is so close to the Lower Series that it could have been the main way into here, with just a little persuasion.
Modelling by Jules, lighting by Tarquin and Jules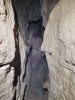 The way on is to the left at the junction.
Modelling by Jules, lighting by Tarquin and Jules
The way on is to the left at the junction.
Modelling by Jules, lighting by Tarquin and Jules A dead end side passage.
Modelling by Jules, lighting by Tarquin and Jules
A dead end side passage.
Modelling by Jules, lighting by Tarquin and Jules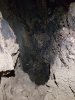 The pit is blind, like almost every other hole down. The lower passages always seem to end too tight.
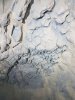 Anastomosis in the passage. Around this point is a side passage to the left, which ends in a series of small tubes, with a lower level oxbow linking back to the main passage. Another side passage up to the left is very tight, but links back in later.
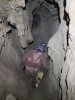 The way on shrinks, and looks like it might end.
Modelling by Phil, lighting by Tarquin and Phil
The way on shrinks, and looks like it might end.
Modelling by Phil, lighting by Tarquin and Phil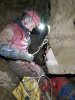 The passage abruptly reaches a pitch head. There are ropes here which we used for belaying, but if we had brought SRT gear, we would have used them as SRT ropes. Of course, their heritage is unknown, so...
Modelling by Gareth, lighting by Tarquin and Gareth
The passage abruptly reaches a pitch head. There are ropes here which we used for belaying, but if we had brought SRT gear, we would have used them as SRT ropes. Of course, their heritage is unknown, so...
Modelling by Gareth, lighting by Tarquin and Gareth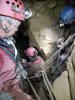 At the head of the pitch is a junction, with a side passage on the right.
Modelling by Gareth, Phil and Jules, lighting by Tarquin, Gareth, Phil and Jules
At the head of the pitch is a junction, with a side passage on the right.
Modelling by Gareth, Phil and Jules, lighting by Tarquin, Gareth, Phil and Jules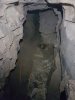 The side passage reaches a balcony overlooking the impressive side passage of Absent Friends.
Lighting by Tarquin and Gareth
The side passage reaches a balcony overlooking the impressive side passage of Absent Friends.
Lighting by Tarquin and Gareth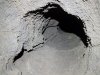 Karren weathering in an aven above the balcony.
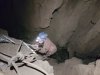 The pitch lands in the Absent Friends passage, a very large passageway. To the left is a climb up the most unstable looking boulders. At the top is the end of the tight passage mentioned earlier, and a series of other tight passages leading into a choke. This area looks horrifyingly unstable, so we did not explore those passages.
Modelling by Phil, lighting by Tarquin and Phil
The pitch lands in the Absent Friends passage, a very large passageway. To the left is a climb up the most unstable looking boulders. At the top is the end of the tight passage mentioned earlier, and a series of other tight passages leading into a choke. This area looks horrifyingly unstable, so we did not explore those passages.
Modelling by Phil, lighting by Tarquin and Phil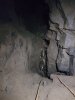 A climb up a gravity defying rubble wall below a wedged rock leads into the Absent Friends side passage. Half of the team did not like the look of the climb, and remained in the main route.
Modelling by Phil, lighting by Tarquin and Phil
A climb up a gravity defying rubble wall below a wedged rock leads into the Absent Friends side passage. Half of the team did not like the look of the climb, and remained in the main route.
Modelling by Phil, lighting by Tarquin and Phil Some rather excellent hoodoos in the side passage.
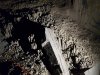 Hoodoos.
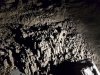 Hoodoos.
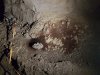 A large pile of guano.
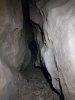 The side passage then pinches out, with a tiny side tube at floor level.
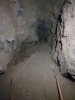 A side passage off the side passage ends rapidly in crumbly mud fill.
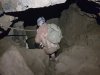 A roped climb down lands in Peaceful Easy Feeling, the main way on. Part way down is a rope traverse into the bypass, but it really needs cowstails, which we didn't have, but some of the team successfully used it on the way out anyway.
Modelling by Phil, lighting by Tarquin and Phil
A roped climb down lands in Peaceful Easy Feeling, the main way on. Part way down is a rope traverse into the bypass, but it really needs cowstails, which we didn't have, but some of the team successfully used it on the way out anyway.
Modelling by Phil, lighting by Tarquin and Phil A second rope climb down.
Modelling by Gareth, lighting by Tarquin and Gareth
A second rope climb down.
Modelling by Gareth, lighting by Tarquin and Gareth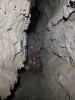 The main passage of Peaceful Easy Feeling. There are loads of side passages here, including a funnel to a blind pitch, a level underneath that chokes almost immediately, a small crawl and a slot into an aven. None of them go far, and most are not on the survey.
Modelling by Phil, lighting by Tarquin and Phil
The main passage of Peaceful Easy Feeling. There are loads of side passages here, including a funnel to a blind pitch, a level underneath that chokes almost immediately, a small crawl and a slot into an aven. None of them go far, and most are not on the survey.
Modelling by Phil, lighting by Tarquin and Phil Stal tucked into a tiny alcove.
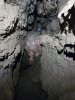 Peaceful Easy Feeling then narrows, and comes to a muddy end.
Modelling by Phil, lighting by Tarquin and Phil
Peaceful Easy Feeling then narrows, and comes to a muddy end.
Modelling by Phil, lighting by Tarquin and Phil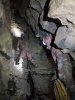 A pitch overhead gave access to the bypass. This was not what we had expected, and we did not have any SRT gear. So this was ascended by free climbing, using the only jammer we had brought as a backup, with the pretence that this was safe. Tip; bring SRT gear. We rigged the remaining ladder on it, so everyone else could get up. Some rather concerned grunts from above warned everyone to stay clear of the base.
Modelling by Gareth and Phil, lighting by Tarquin, Gareth and Phil
A pitch overhead gave access to the bypass. This was not what we had expected, and we did not have any SRT gear. So this was ascended by free climbing, using the only jammer we had brought as a backup, with the pretence that this was safe. Tip; bring SRT gear. We rigged the remaining ladder on it, so everyone else could get up. Some rather concerned grunts from above warned everyone to stay clear of the base.
Modelling by Gareth and Phil, lighting by Tarquin, Gareth and Phil The bypass route from the earlier traverse rejoins as a crawl at the top.
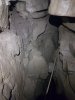 Jammed rocks at the top, held in place by wishful thinking, which needed to be carefuly traversed over without touching them. Guess those grunts really meant it.
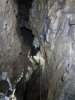 If we had SRT gear, there is a second rope that avoids traversing over the boulders, but this one could not be free climbed.
Lighting by Tarquin and Gareth
If we had SRT gear, there is a second rope that avoids traversing over the boulders, but this one could not be free climbed.
Lighting by Tarquin and Gareth Stal in the bypass.
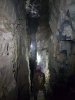 After Spannner Dig, the passage suddenly increases in size again, briefly sloping down to become extremely large, then sloping back up. At the end of this large section is a blind passage on the right, that we would return to later (Spectacle Thief).
Modelling by Gareth, Jules and Phil, lighting by Tarquin, Gareth, Jules and Phil
After Spannner Dig, the passage suddenly increases in size again, briefly sloping down to become extremely large, then sloping back up. At the end of this large section is a blind passage on the right, that we would return to later (Spectacle Thief).
Modelling by Gareth, Jules and Phil, lighting by Tarquin, Gareth, Jules and Phil After the floor rises back up, the decorated section begins.
Modelling by Jules and Phil, lighting by Tarquin, Jules and Phil
After the floor rises back up, the decorated section begins.
Modelling by Jules and Phil, lighting by Tarquin, Jules and Phil Decorated section stal flow.
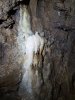 Decorated section stalagmites.
 Dried crystal pool.
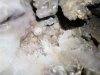 Dried crystal pool.
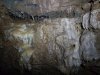 Flowstone.
 Flowstone.
 Stal from an eyehole.
-
In the decorated section.
Modelling by Phil, lighting by Tarquin and Phil
 Stal pouring from an aven. It looked like a good prospect, and we could see signs that someone had tried pushing it.
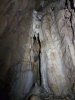 Stal below the aven.
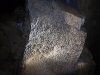 Heavily weathered rock in the ceiling.
Lighting by Tarquin and Phil
Heavily weathered rock in the ceiling.
Lighting by Tarquin and Phil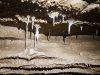 Some tiny straws
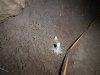 Stalagmites on fluffy/bobbly mud. Despite having a few signs of permafrost like this, no cryostal was found within the cave.
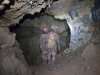 The decorated section ends at a major junction of phreatic passages. To the right is the longest side passage, and ahead is the main way on.
Modelling by Gareth and Jules, lighting by Tarquin, Gareth and Jules
The decorated section ends at a major junction of phreatic passages. To the right is the longest side passage, and ahead is the main way on.
Modelling by Gareth and Jules, lighting by Tarquin, Gareth and Jules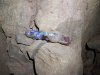 Supplies presumably left at the junction to allow longer term digs or camps.
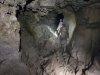 The main passage is very comfortable, and maintains a nice size.
Modelling by Gareth and Jules, lighting by Tarquin, Gareth and Jules
The main passage is very comfortable, and maintains a nice size.
Modelling by Gareth and Jules, lighting by Tarquin, Gareth and Jules More bobbly mud, and still no cryostal.
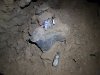 Another stash. This is a little weird, since the cave is not really all that long, and having two separate stashes does seem like overkill.
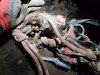 At this point, I should mention Phil's SRT kit. The rest of us have cows tails, and separate top jammers. Phil has a top jammer with a carabiner on it, and that is his only cowstail. Never mind that it is made from ropes rescued from a skip, or at least a rope that looks like it was.
Modelling by Tarquin
At this point, I should mention Phil's SRT kit. The rest of us have cows tails, and separate top jammers. Phil has a top jammer with a carabiner on it, and that is his only cowstail. Never mind that it is made from ropes rescued from a skip, or at least a rope that looks like it was.
Modelling by Tarquin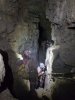 The passage then crosses a dramatic traverse. Phil's single cowstail proved that to cross a traverse, you need a second one, as he was unable to pass the knot in the middle. Jules fetched a spare crab, and sent it down the traverse line so that Phil could clip it to a second scrap in order to continue. It's always fun caving with Phil.
Modelling by Gareth, Phil and Jules, lighting by Tarquin, Gareth, Phil and Jules
The passage then crosses a dramatic traverse. Phil's single cowstail proved that to cross a traverse, you need a second one, as he was unable to pass the knot in the middle. Jules fetched a spare crab, and sent it down the traverse line so that Phil could clip it to a second scrap in order to continue. It's always fun caving with Phil.
Modelling by Gareth, Phil and Jules, lighting by Tarquin, Gareth, Phil and Jules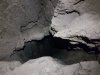 The traverse is over this deep hole, which looks somewhere around 15 metres deep. Certainly not somewhere you would want to be fiddling around with a single cowstail.
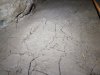 Cracked mud.
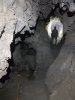 Junction with a taped off oxbow on the left, which contains Arthur's Seat.
Modelling by Gareth, lighting by Tarquin and Gareth
Junction with a taped off oxbow on the left, which contains Arthur's Seat.
Modelling by Gareth, lighting by Tarquin and Gareth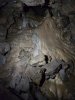 Arthur's Seat can be seen through a perfectly placed viewing window, and is one of the best formations in the cave.
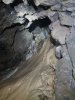 Another passage gives access to the side of it, where more formations can be seen. The passages at the top have apparently been very carefully pushed, presumably with a clean pair of boots.
Lighting by Tarquin and Gareth
Another passage gives access to the side of it, where more formations can be seen. The passages at the top have apparently been very carefully pushed, presumably with a clean pair of boots.
Lighting by Tarquin and Gareth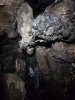 The passage beyond Arthur's Seat then passes through a wet choke, which brings in a large stream. This does not seem particularly stable, and some of the rocks require a delicate touch.
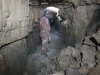 This reaches the end junction. The passage ahead changes character, and is clearly an inlet, with a sandy floor.
Modelling by Phil, lighting by Tarquin and Phil
This reaches the end junction. The passage ahead changes character, and is clearly an inlet, with a sandy floor.
Modelling by Phil, lighting by Tarquin and Phil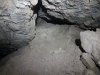 An aven to one side, which proved to be a choked rock and mud dig.
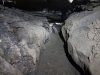 The passage then becomes a flat out dig, pinching out.
Modelling by Gareth, lighting by Tarquin and Gareth
The passage then becomes a flat out dig, pinching out.
Modelling by Gareth, lighting by Tarquin and Gareth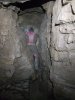 To the left at the junction immediately reaches another junction, where ahead is this awkward rift.
Modelling by Gareth, lighting by Tarquin and Gareth
To the left at the junction immediately reaches another junction, where ahead is this awkward rift.
Modelling by Gareth, lighting by Tarquin and Gareth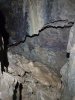 The awkward rift is blind, but contains this formation.
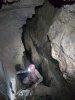 At the second junction, the obvious way on is to double back around to the left, into a bigger rift. This is now heading back up along the way in.
Modelling by Jules, lighting by Tarquin, Phil and Jules
At the second junction, the obvious way on is to double back around to the left, into a bigger rift. This is now heading back up along the way in.
Modelling by Jules, lighting by Tarquin, Phil and Jules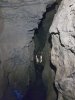 This is the final rift of the cave.
Modelling by Phil, lighting by Tarquin and Phil
This is the final rift of the cave.
Modelling by Phil, lighting by Tarquin and Phil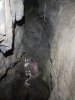 It ends at a somewhat unstable climb up to a balcony which gives the side view of Arthur's Seat. At the bottom of the climb is a hole down.
Modelling by Gareth, lighting by Tarquin and Gareth
It ends at a somewhat unstable climb up to a balcony which gives the side view of Arthur's Seat. At the bottom of the climb is a hole down.
Modelling by Gareth, lighting by Tarquin and Gareth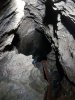 The hole is the head of a 20 metre pitch, which swallows the stream from the choke, with some plumbing installed to try to keep the spray down. The rope is here, but we didn't have SRT gear. The bottom of the pitch, like so many of the descending routes in the cave, is blind, but is certainly the most promising place to dig.
Lighting by Tarquin and Gareth
The hole is the head of a 20 metre pitch, which swallows the stream from the choke, with some plumbing installed to try to keep the spray down. The rope is here, but we didn't have SRT gear. The bottom of the pitch, like so many of the descending routes in the cave, is blind, but is certainly the most promising place to dig.
Lighting by Tarquin and Gareth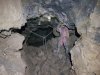 Back at the main junction, the main side passage starts fairly big, immediately reaching a junction of its own. The rope loops through a tight roof tube which contains a little grotto.
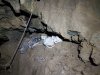 Yet another stash, this time some digging equipment, and some more drink.
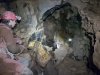 To the right looks promising.
Modelling by Jules and Gareth, lighting by Tarquin, Jules and Gareth
To the right looks promising.
Modelling by Jules and Gareth, lighting by Tarquin, Jules and Gareth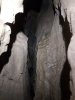 But it immediately shrinks to a much smaller size, with a squeeze and awkward climb before becoming too tight.
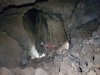 The main side passage almost immediately enters a large chamber.
Modelling by Jules and Phil, lighting by Tarquin, Jules and Phil
The main side passage almost immediately enters a large chamber.
Modelling by Jules and Phil, lighting by Tarquin, Jules and Phil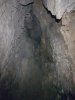 High in the ceiling there appears to be a roof tube.
 To the right is a steeply dropping rift, and like all deep rifts, it is blind.
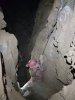 A rope climb ahead gains the way on.
Modelling by Jules and Gareth, lighting by Tarquin, Jules and Gareth
A rope climb ahead gains the way on.
Modelling by Jules and Gareth, lighting by Tarquin, Jules and Gareth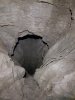 The route passes over another deep hole. Again, it's probably blind, and it's not on the survey.
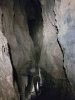 The traverse ends in a huge rift, traversing to a junction. Hidden in the left wall is a small tube. Hidden up above it is an invisible balcony that can be accessed later. Hidden high up on the right wall is a balcony with a possibly unsurveyed side passage. Ahead, the lower level reaches an abrupt end where a passage high up to the left was not visited, and the way on is a slippery climb up to the right.
Modelling by Jules, lighting by Tarquin and Jules
The traverse ends in a huge rift, traversing to a junction. Hidden in the left wall is a small tube. Hidden up above it is an invisible balcony that can be accessed later. Hidden high up on the right wall is a balcony with a possibly unsurveyed side passage. Ahead, the lower level reaches an abrupt end where a passage high up to the left was not visited, and the way on is a slippery climb up to the right.
Modelling by Jules, lighting by Tarquin and Jules The impressive vaulted ceiling of the passage.
 Looking down into the rift from the upper passage.
Modelling by Gareth and Jules, lighting by Tarquin, Gareth and Jules
Looking down into the rift from the upper passage.
Modelling by Gareth and Jules, lighting by Tarquin, Gareth and Jules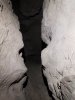 The upper passage ends, and a side passage to its left is guarded by an awkward slot that turns it into a very tricky climb.
 The passage splits in two. To the left is a steeply descending hole. Over the hole, a passage to the left reaches the left balcony.
 The hole keeps dropping, connecting through a squeeze to the small tube on the left mentioned earlier. Over the hole to the right is one of the ways on.
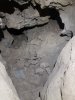 The way on turns a corner where some holes connect to a later pitch. Everything connects to everything else here.
 Above the corner, the way on requires a climb up, to post yourself into an upper passage. Here the two routes join.
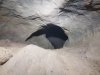 The right route is a low crawl over tacky mud.
 In an alcove on one side are the bones of a badger.
Modelling by Tarquin and Stripes
In an alcove on one side are the bones of a badger.
Modelling by Tarquin and Stripes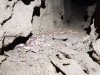 The skull is still fairly well intact, with enough features to identify it. What makes this skeleton impressive is that this part of the cave is about 50 metres below the surface. There are some shakeholes above, but no known aven where they join. Surviving a 50 metre descent (assuming a single shaft) or following a 50 metre deep passageway, and crawling into this passage, is an incredible feat for a badger.
Modelling by Stripes
The skull is still fairly well intact, with enough features to identify it. What makes this skeleton impressive is that this part of the cave is about 50 metres below the surface. There are some shakeholes above, but no known aven where they join. Surviving a 50 metre descent (assuming a single shaft) or following a 50 metre deep passageway, and crawling into this passage, is an incredible feat for a badger.
Modelling by Stripes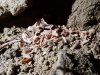 Deepest badger sett in Wales.
Modelling by Stripes
Deepest badger sett in Wales.
Modelling by Stripes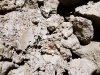 Small bones, unrelated to the badger.
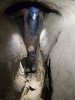 The conjoined passages become a reasonably sized keyhole.
Modelling by Phil, lighting by Tarquin and Phil
The conjoined passages become a reasonably sized keyhole.
Modelling by Phil, lighting by Tarquin and Phil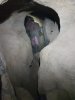 The way on splits, and the right side then splits into a series of smaller tubes, all of which become too tight.
Modelling by Gareth, lighting by Tarquin and Gareth
The way on splits, and the right side then splits into a series of smaller tubes, all of which become too tight.
Modelling by Gareth, lighting by Tarquin and Gareth The left branch is a little more promising.
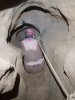 Another rope, which again suggests that we might need SRT gear.
Modelling by Jules, lighting by Tarquin and Jules
Another rope, which again suggests that we might need SRT gear.
Modelling by Jules, lighting by Tarquin and Jules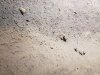 Fossil crinoids in the passage.
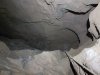 The pitch head.
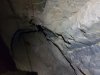 The base of the pitch appears to have no way on, even if that alcove does look promising.
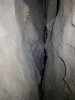 An obvious rift on one side is far too narrow to fit through.
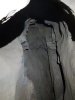 The ceiling looked like it had a separate aven, but a partial descent revealed that it is blind too.
 We returned to the tall rift after Spanner Dig, and at the end of the dip, looked into an unsurveyed rift. Clearly, nobody had tried to push it, since it only points towards an impossibly tight rift from the main side passage.
Modelling by Gareth, lighting by Tarquin and Gareth
We returned to the tall rift after Spanner Dig, and at the end of the dip, looked into an unsurveyed rift. Clearly, nobody had tried to push it, since it only points towards an impossibly tight rift from the main side passage.
Modelling by Gareth, lighting by Tarquin and Gareth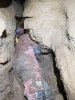 Gareth and Jules put in some effort to remove a blockage of rocks. The passage got its revenge by stealing Jules' glasses, and secreting them deep into the rift in the floor. Some very determined effort, and ingenious use of a crowbar, allowed them to finally be retrived. The rift was named Spectacle Thief in their honour.
Modelling by Gareth, lighting by Tarquin and Gareth
Gareth and Jules put in some effort to remove a blockage of rocks. The passage got its revenge by stealing Jules' glasses, and secreting them deep into the rift in the floor. Some very determined effort, and ingenious use of a crowbar, allowed them to finally be retrived. The rift was named Spectacle Thief in their honour.
Modelling by Gareth, lighting by Tarquin and Gareth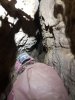 The passage currently has a too tight squeeze in it. Ahead, we can see a short section of wider passage ending at a dip down into a too tight section. The squeeze might be passable with great difficulty, but turning around afterwards might be impossible, so we left it. The passage won.
Modelling by Gareth, lighting by Tarquin and Gareth
The passage currently has a too tight squeeze in it. Ahead, we can see a short section of wider passage ending at a dip down into a too tight section. The squeeze might be passable with great difficulty, but turning around afterwards might be impossible, so we left it. The passage won.
Modelling by Gareth, lighting by Tarquin and Gareth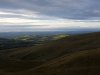 Sunset over the fields on Carn Powell (340 metres), Carreglwyd (353 metres) and Trichrug/Pen y Bicws (415 metres), with Llandeilo behind them. A fitting end to the day.
 Carn Pen-rhiw-ddu (532 metres), seen from the parking area on the A4069. Ogof Gwynt yr Eira, a 460 metre cave, lies on the left side of the picture.
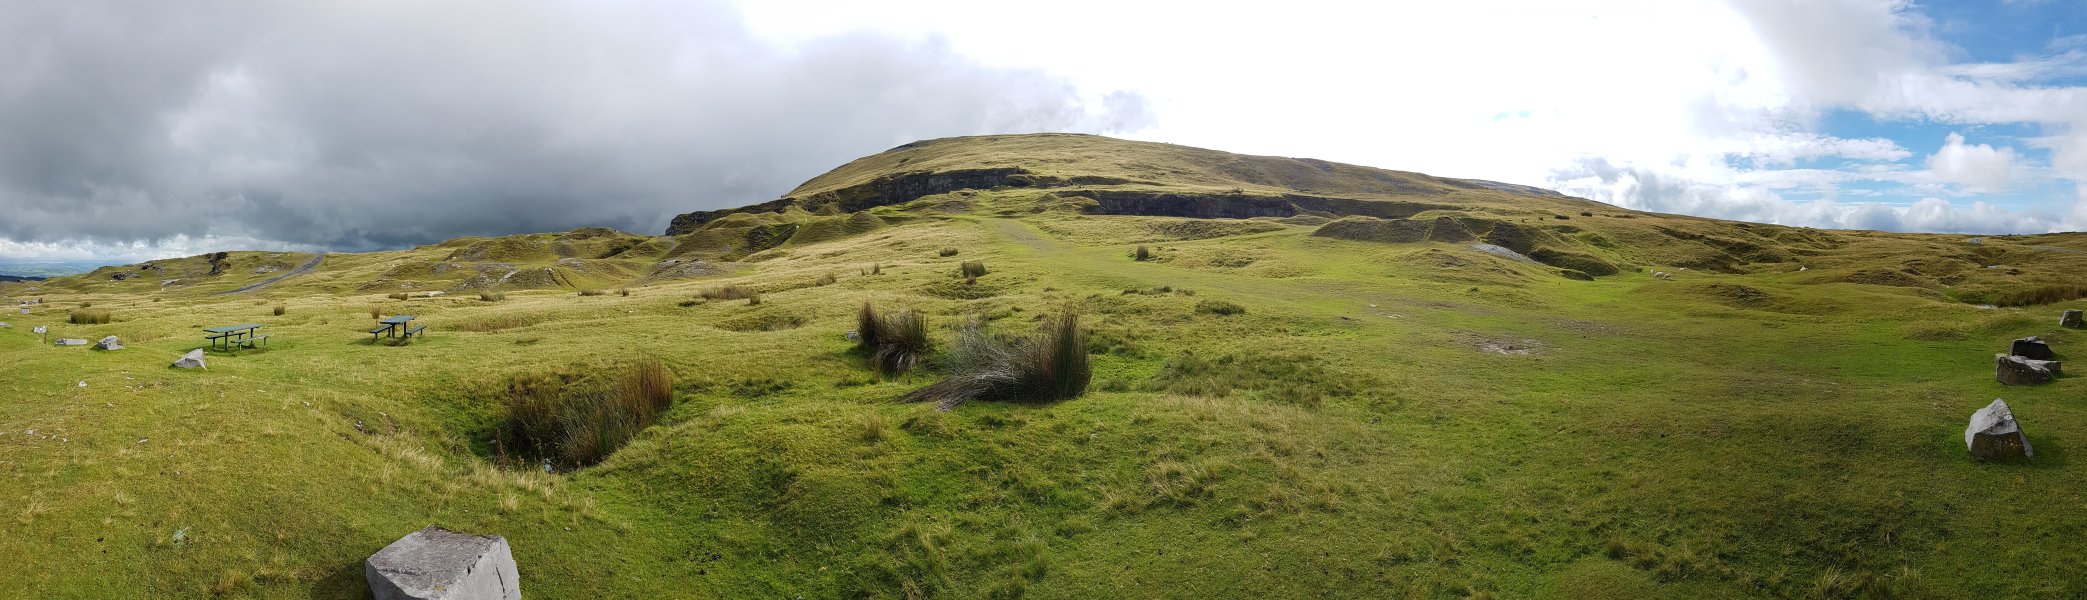 Garreg Lwyd (616 metres), the tallest of the mountains at this end of The Black Mountain. Despite being a giant heap of limestone, it has very few substantial caves.
 View over Pantyffynnon, an area with a lot of marshy springs. To the right of the Mid Wales lowlands is Cefn y Cylchau (556 metres). On the right is the Foel Fawr ridge of Garreg Lwyd, which has been heavily quarried. Foel Fawr contains the Ogof Foel Fawr cave on its right shoulder, which together with Ogof Pasg, forms the longest cave under Garreg Lwyd at 834 metres. The cave is not hydrologically connected to the nearby springs, and instead has been traced to Llygad Llwchwr at the western end of the mountain range.
Modelling by Phil, Gareth and Jules
View over Pantyffynnon, an area with a lot of marshy springs. To the right of the Mid Wales lowlands is Cefn y Cylchau (556 metres). On the right is the Foel Fawr ridge of Garreg Lwyd, which has been heavily quarried. Foel Fawr contains the Ogof Foel Fawr cave on its right shoulder, which together with Ogof Pasg, forms the longest cave under Garreg Lwyd at 834 metres. The cave is not hydrologically connected to the nearby springs, and instead has been traced to Llygad Llwchwr at the western end of the mountain range.
Modelling by Phil, Gareth and Jules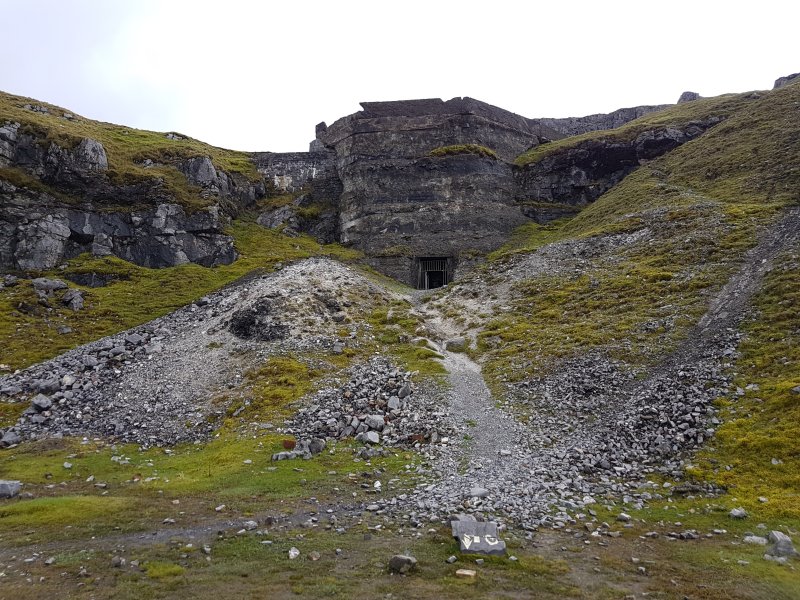 Looks like a fortress, but it is actually a limekiln.
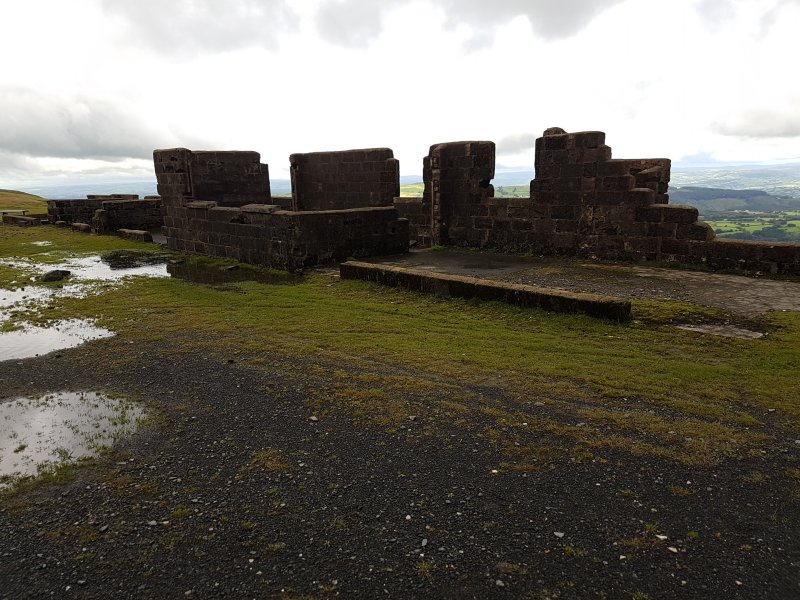 Remains of the old quarry buildings for Herbert's Quarry.
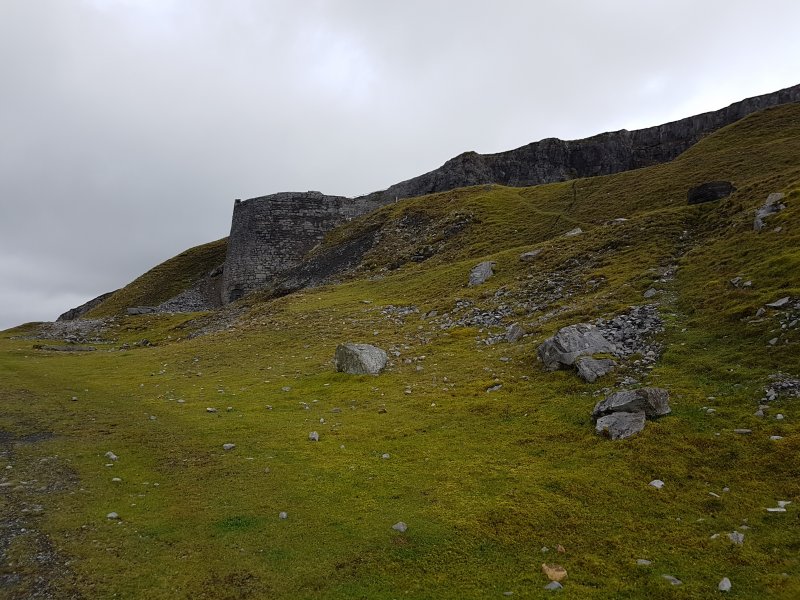 A second limekiln fortress.
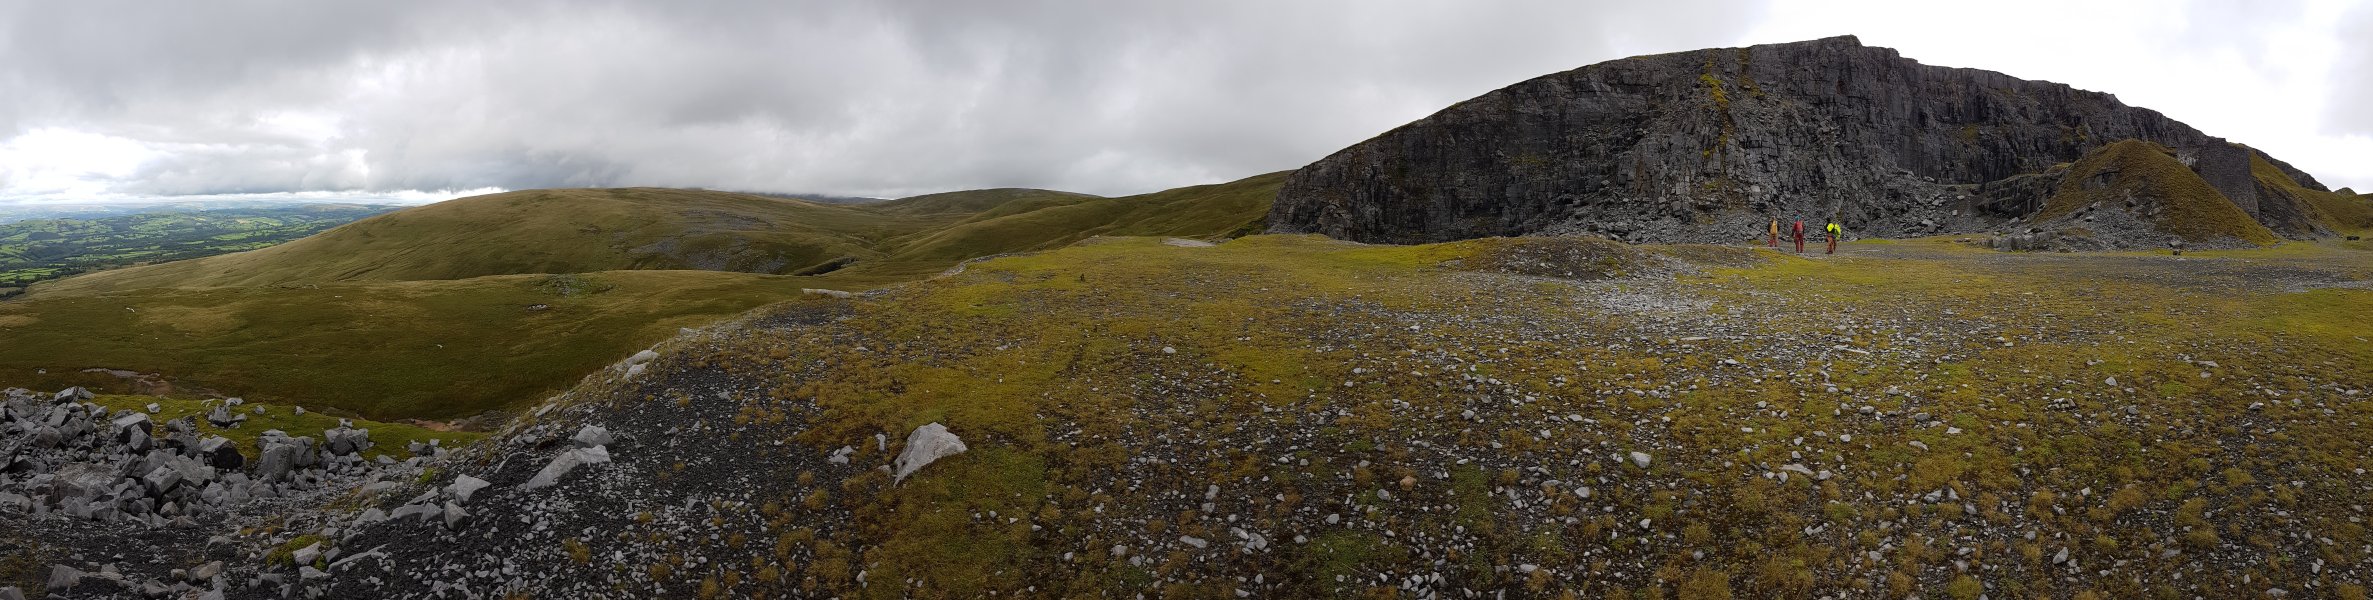 Cefn y Cylchau, Foel Fraith (602 metres) and Herbert's Quarry. Dan y Lleuad Wen sits in the left side of Foel Fraith. In the middle of Herbert's Quarry, half way up the face, is the entrance to Ogof Pasg, offering a through trip to Ogof Foel Fawr, via a tight squeeze.
Modelling by Gareth, Jules and Phil
Cefn y Cylchau, Foel Fraith (602 metres) and Herbert's Quarry. Dan y Lleuad Wen sits in the left side of Foel Fraith. In the middle of Herbert's Quarry, half way up the face, is the entrance to Ogof Pasg, offering a through trip to Ogof Foel Fawr, via a tight squeeze.
Modelling by Gareth, Jules and Phil View from the slopes of Garreg Lwyd over Blaenclydach. Garreg Lwyd, Cefn y Cylchau, Garreg Las (635 metres) and Foel Fraith.
Modelling by Phil, Jules and Gareth
View from the slopes of Garreg Lwyd over Blaenclydach. Garreg Lwyd, Cefn y Cylchau, Garreg Las (635 metres) and Foel Fraith.
Modelling by Phil, Jules and Gareth View from the pass between Garreg Lwyd and Foel Fraith over a sea of shakeholes. Garreg Lwyd, Cefn y Cylchau, Carreg yr Ogof (585 metres), Garreg Las and Foel Fraith.
Modelling by Phil, Gareth and Jules
View from the pass between Garreg Lwyd and Foel Fraith over a sea of shakeholes. Garreg Lwyd, Cefn y Cylchau, Carreg yr Ogof (585 metres), Garreg Las and Foel Fraith.
Modelling by Phil, Gareth and Jules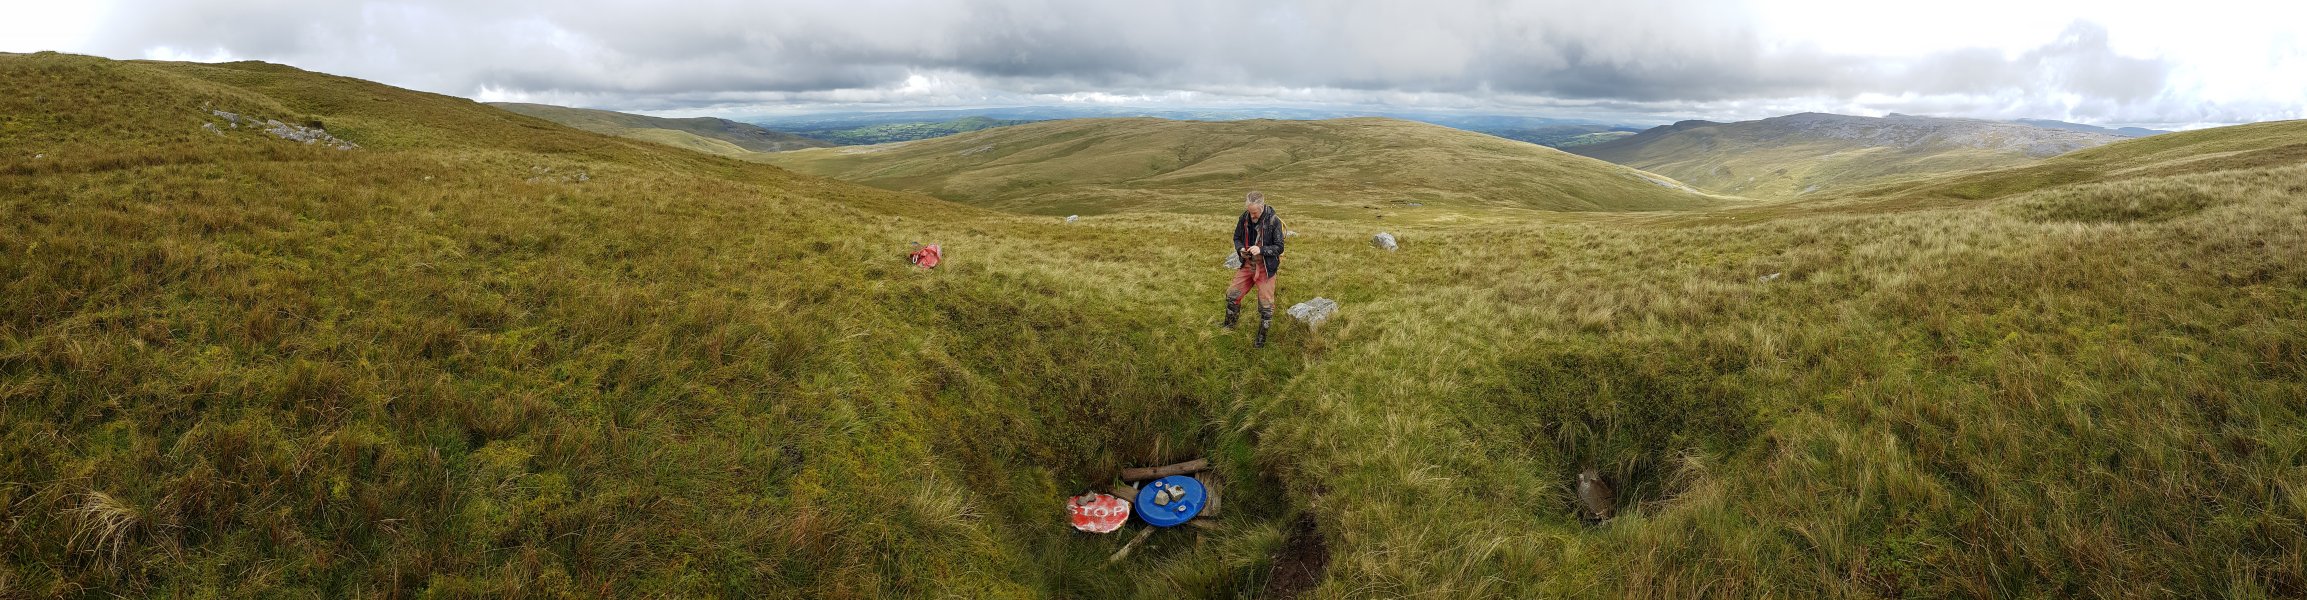 Entrance to Dan y Lleuad Wen, with plenty of shoring through the initial shakehole. In the distant cloud on the right are Picws Du (749 metres), Fan Hir (761 metres) and Fan Gyhirych (725 metres). Dan y Lleuad Wen is, at 1144 metres long and 57 metres deep, the second longest and deepest cave on the mountain, after Ogof Pwll Swnd's 1410 metre length and 76 metre depth. The other major caves here are Dolphin's Hole at 122 metres long, Ogof Tepod at 100 metres long and Arthur's Pot at 37 metres long. Those other caves lie around 400 metres away on the right of this picture, and are still far enough away from any passages in Dan y Lleuad Wen that there would need to be about another kilometre of passage network between them.
Modelling by Gareth
Entrance to Dan y Lleuad Wen, with plenty of shoring through the initial shakehole. In the distant cloud on the right are Picws Du (749 metres), Fan Hir (761 metres) and Fan Gyhirych (725 metres). Dan y Lleuad Wen is, at 1144 metres long and 57 metres deep, the second longest and deepest cave on the mountain, after Ogof Pwll Swnd's 1410 metre length and 76 metre depth. The other major caves here are Dolphin's Hole at 122 metres long, Ogof Tepod at 100 metres long and Arthur's Pot at 37 metres long. Those other caves lie around 400 metres away on the right of this picture, and are still far enough away from any passages in Dan y Lleuad Wen that there would need to be about another kilometre of passage network between them.
Modelling by Gareth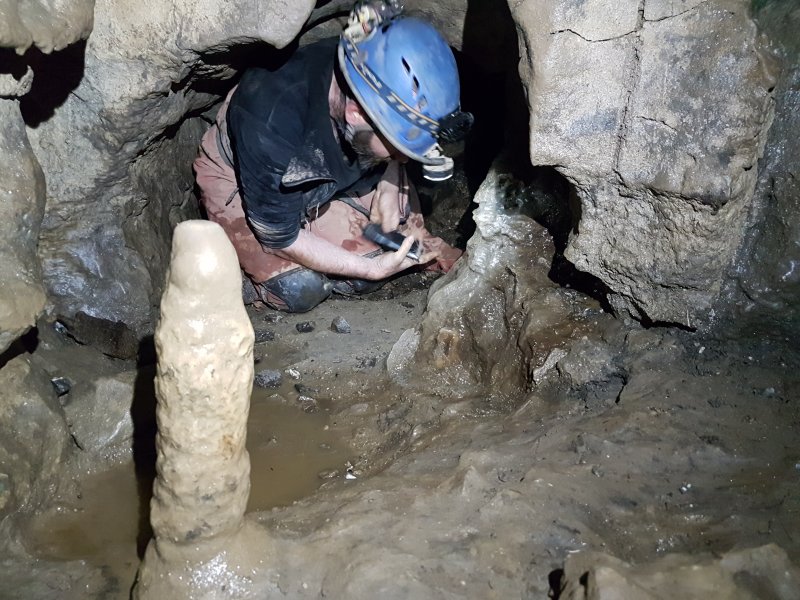 The entrance passage, below the shoring.
Modelling by Phil, lighting by Tarquin and Phil
The entrance passage, below the shoring.
Modelling by Phil, lighting by Tarquin and Phil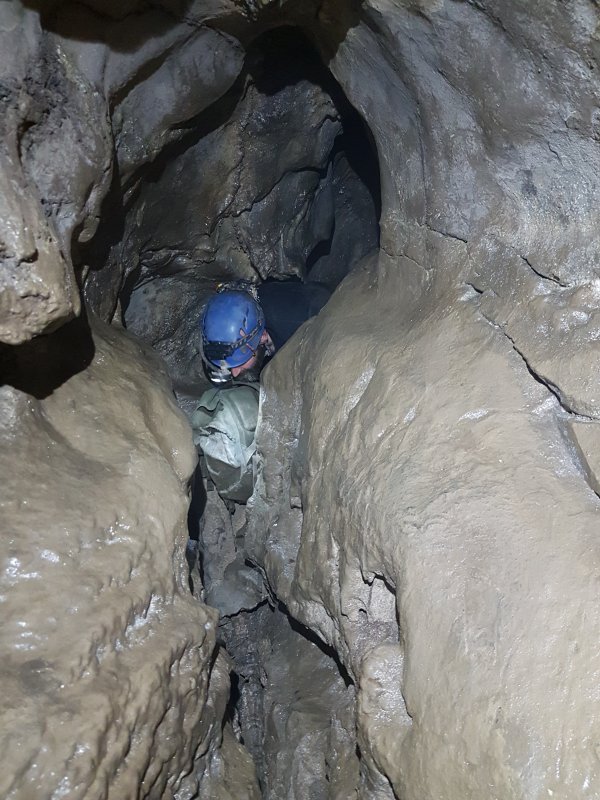 Awkward little passage.
Modelling by Phil, lighting by Tarquin and Phil
Awkward little passage.
Modelling by Phil, lighting by Tarquin and Phil Head of the first pitch. This seems completely out of place, since the passage below does not seem to be related to the entrance passage. It's like they just accidentally met each other. We used a ladder here, but SRT would have been a lot better.
Modelling by Jules, lighting by Tarquin and Phil
Head of the first pitch. This seems completely out of place, since the passage below does not seem to be related to the entrance passage. It's like they just accidentally met each other. We used a ladder here, but SRT would have been a lot better.
Modelling by Jules, lighting by Tarquin and Phil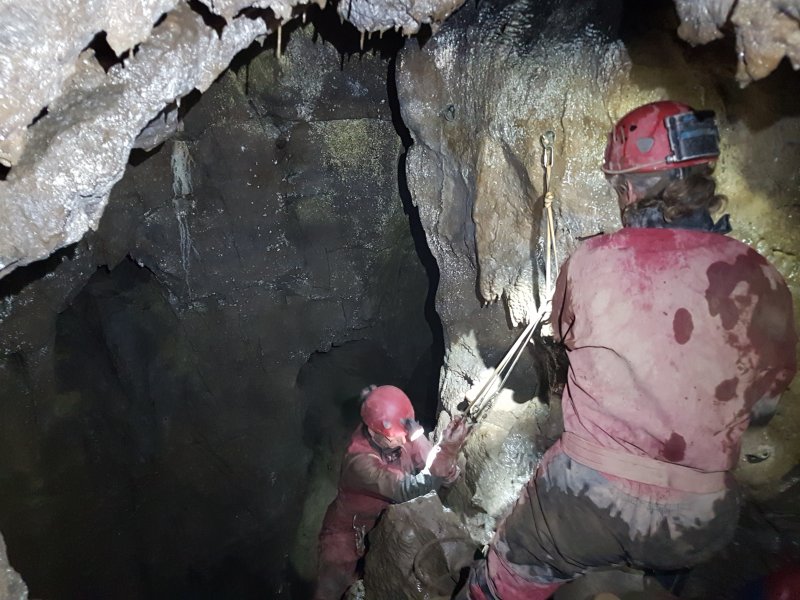 The ladder does not hang cleanly, but is OK as a ladder pitch. However, SRT is required further through the cave, so it would make sense to use it everywhere.
Modelling by Gareth and Jules, lighting by Tarquin, Phil, Gareth and Jules
The ladder does not hang cleanly, but is OK as a ladder pitch. However, SRT is required further through the cave, so it would make sense to use it everywhere.
Modelling by Gareth and Jules, lighting by Tarquin, Phil, Gareth and Jules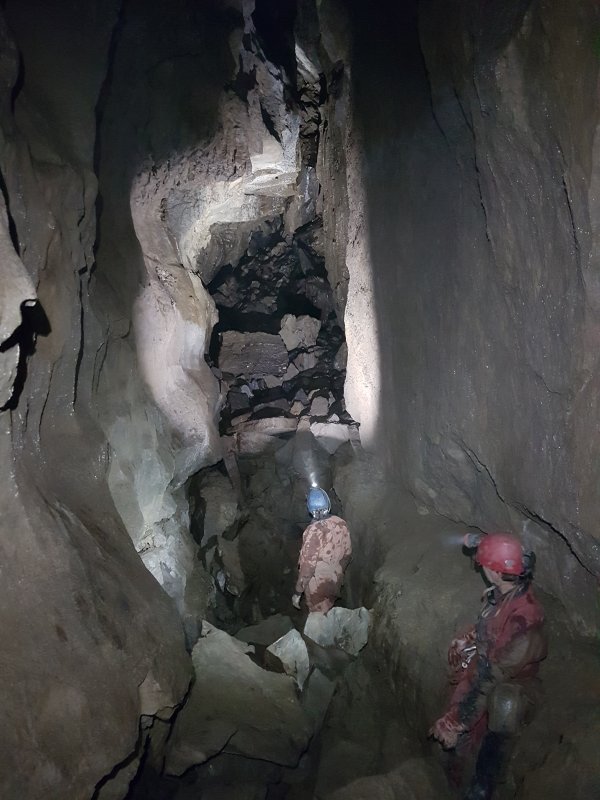 The pitch lands in Debbie's Dread, a huge, inspiring passage, which abruptly ends in one direction. Hidden below the boulder floor is a climb down into Lon Drury, the passages found by Amman Valley CC and subsequently poached by Nig Rogers.
Modelling by Jules and Phil, lighting by Tarquin, Jules and Phil
The pitch lands in Debbie's Dread, a huge, inspiring passage, which abruptly ends in one direction. Hidden below the boulder floor is a climb down into Lon Drury, the passages found by Amman Valley CC and subsequently poached by Nig Rogers.
Modelling by Jules and Phil, lighting by Tarquin, Jules and Phil Mark's Grotto, a dead end grotto off Debbie's Dread.
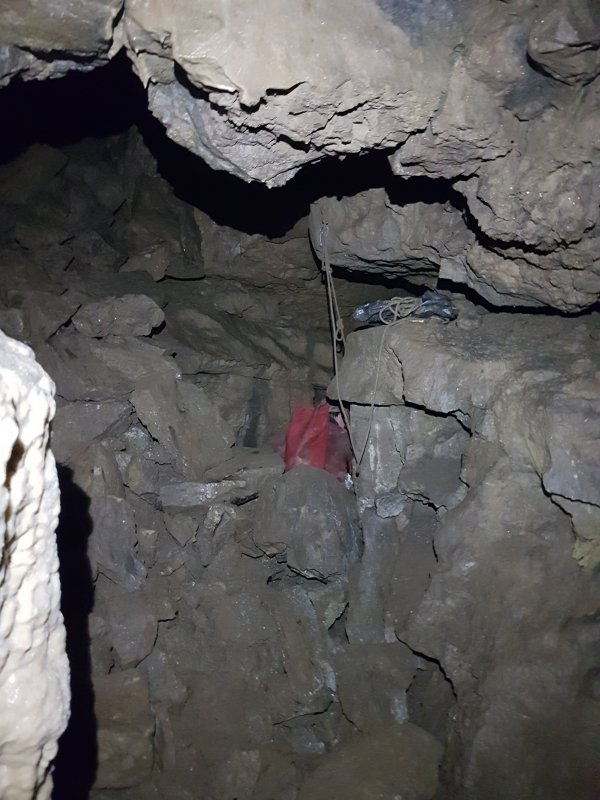 The way on is in the opposite direction, around the corner via a rope climb.
Modelling by Jules, lighting by Tarquin and Jules
The way on is in the opposite direction, around the corner via a rope climb.
Modelling by Jules, lighting by Tarquin and Jules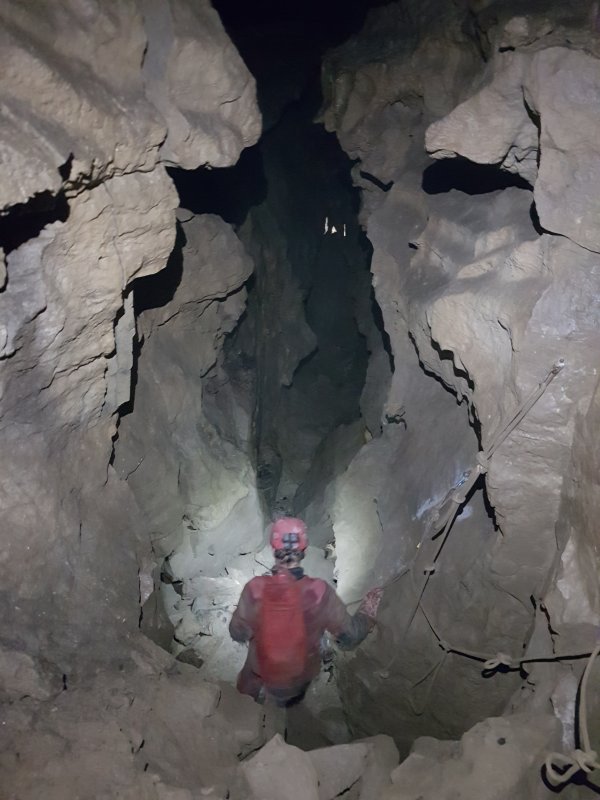 Into a comfortable, walking sized passage. At the end of the first straight is a junction, where a narrower oxbow starts on the right. That oxbow has a side passage dropping down a series of climbs into the Lower Series, which we did not have time for on this trip.
Modelling by Jules and Phil, lighting by Tarquin, Jules and Phil
Into a comfortable, walking sized passage. At the end of the first straight is a junction, where a narrower oxbow starts on the right. That oxbow has a side passage dropping down a series of climbs into the Lower Series, which we did not have time for on this trip.
Modelling by Jules and Phil, lighting by Tarquin, Jules and Phil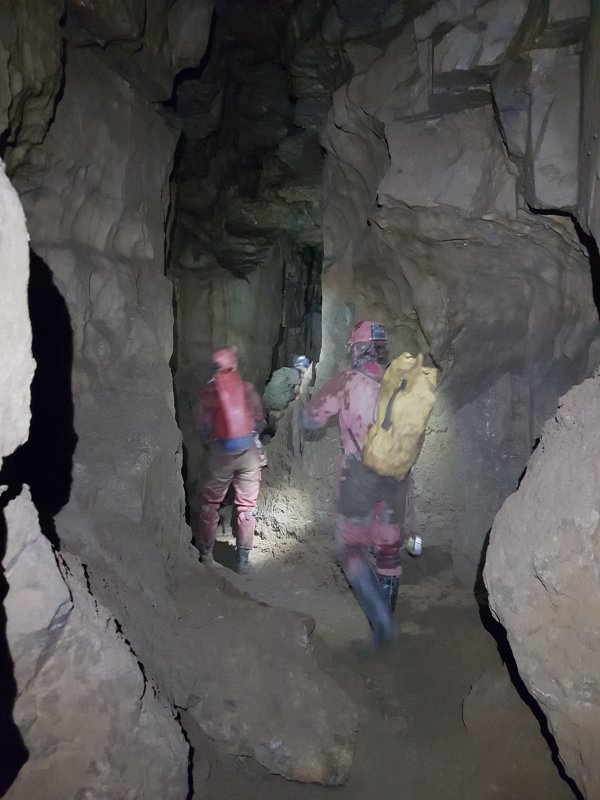 After the junction, following the larger passage. Several side passages here end quickly.
Modelling by Gareth, Jules and Phil, lighting by Tarquin, Gareth, Jules and Phil
After the junction, following the larger passage. Several side passages here end quickly.
Modelling by Gareth, Jules and Phil, lighting by Tarquin, Gareth, Jules and Phil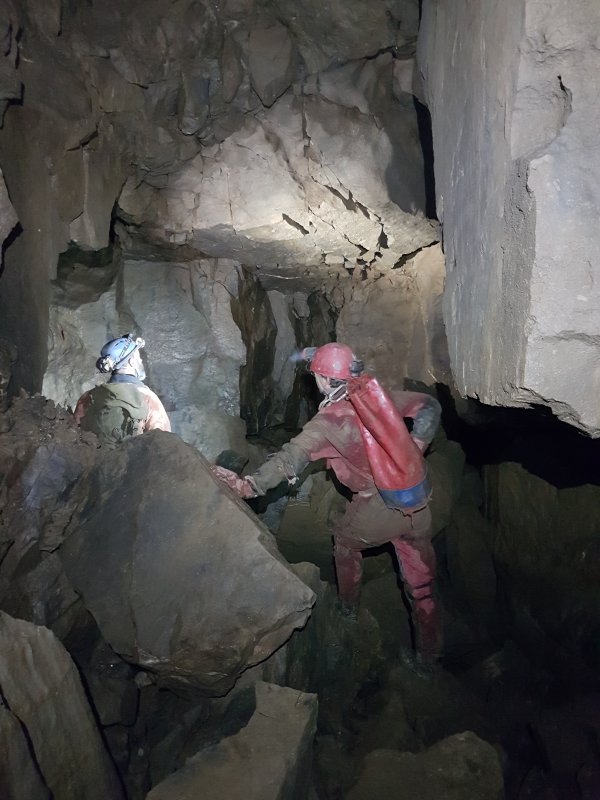 Before the oxbow rejoins.
Modelling by Jules and Phil, lighting by Tarquin, Jules and Phil
Before the oxbow rejoins.
Modelling by Jules and Phil, lighting by Tarquin, Jules and Phil After the oxbow rejoins.
Modelling by Phil, lighting by Tarquin and Phil
After the oxbow rejoins.
Modelling by Phil, lighting by Tarquin and Phil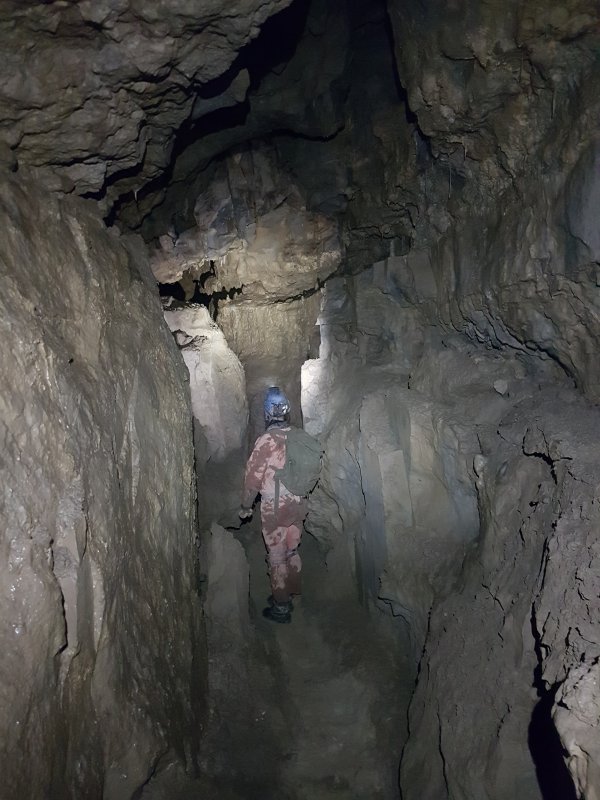 The passage then grows to a more impressive size.
Modelling by Phil, lighting by Tarquin and Phil
The passage then grows to a more impressive size.
Modelling by Phil, lighting by Tarquin and Phil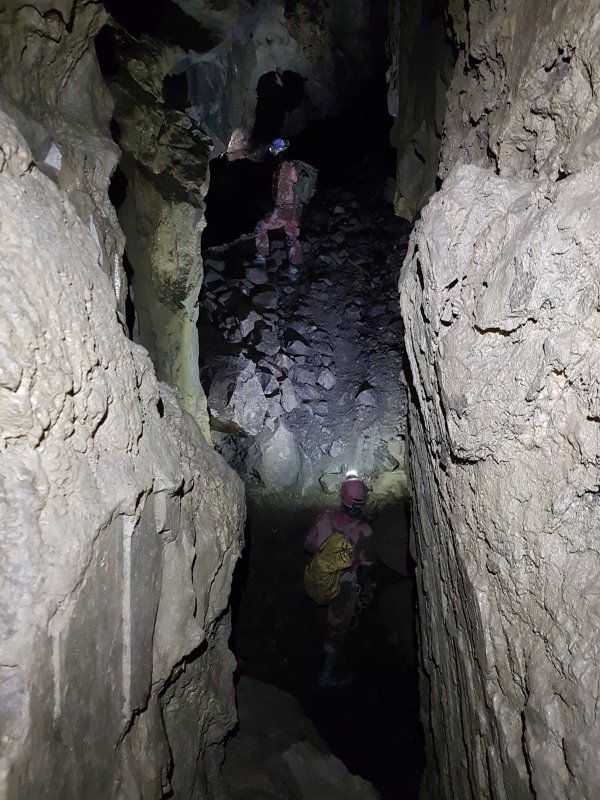 The big passage ends at a ramp up.
Modelling by Gareth and Phil, lighting by Tarquin, Gareth and Phil
The big passage ends at a ramp up.
Modelling by Gareth and Phil, lighting by Tarquin, Gareth and Phil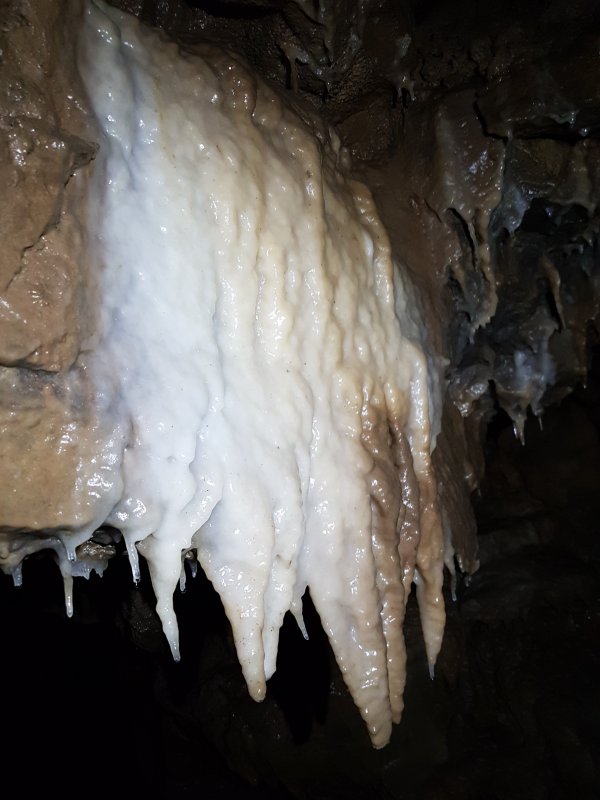 Formations at the top of the ramp.
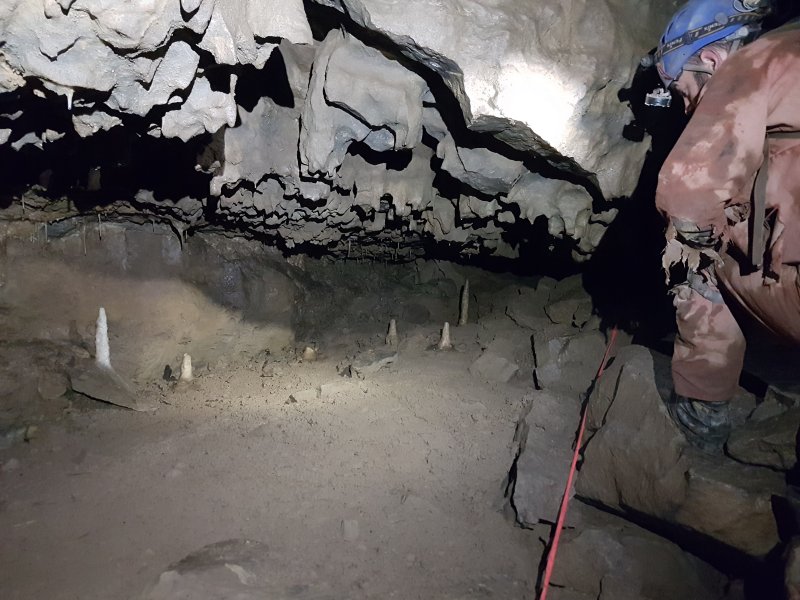 Formations in an undersut at the top of the ramp.
Modelling by Phil, lighting by Tarquin and Phil
Formations in an undersut at the top of the ramp.
Modelling by Phil, lighting by Tarquin and Phil Crystal covered rocks.
 The Canyon, the most impressive passage in the old cave, with a large rock bridge at its end. Below the bridge, the Garimpeiros discoveries are down a hole to the right, via a route that was originally pushed during the original explorations.
Modelling by Gareth and Phil, lighting by Tarquin, Gareth and Phil
The Canyon, the most impressive passage in the old cave, with a large rock bridge at its end. Below the bridge, the Garimpeiros discoveries are down a hole to the right, via a route that was originally pushed during the original explorations.
Modelling by Gareth and Phil, lighting by Tarquin, Gareth and Phil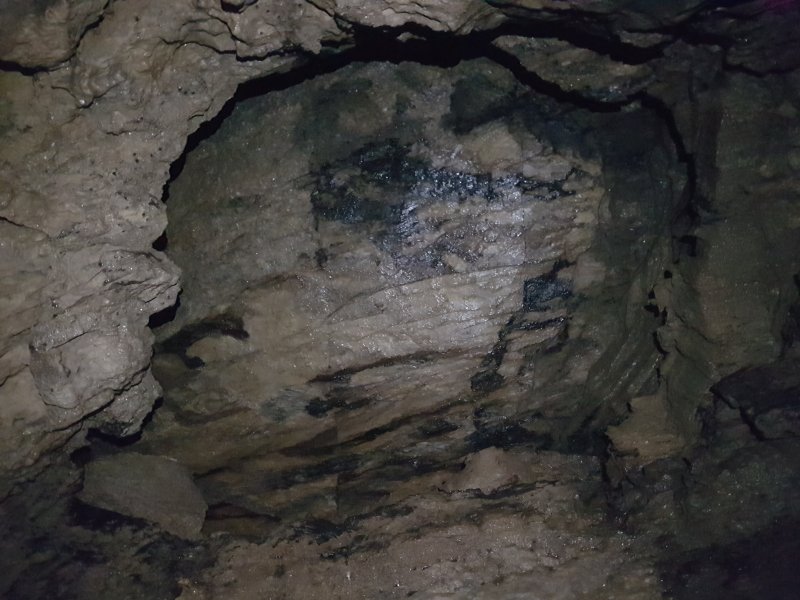 Chimney failure dome at the end of The Canyon.
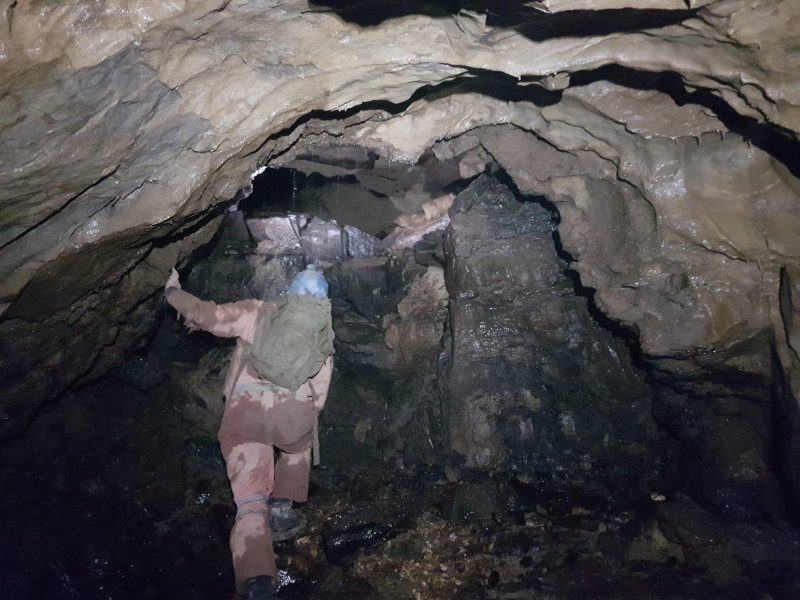 Under the bridge.
Modelling by Phil, lighting by Tarquin and Phil
Under the bridge.
Modelling by Phil, lighting by Tarquin and Phil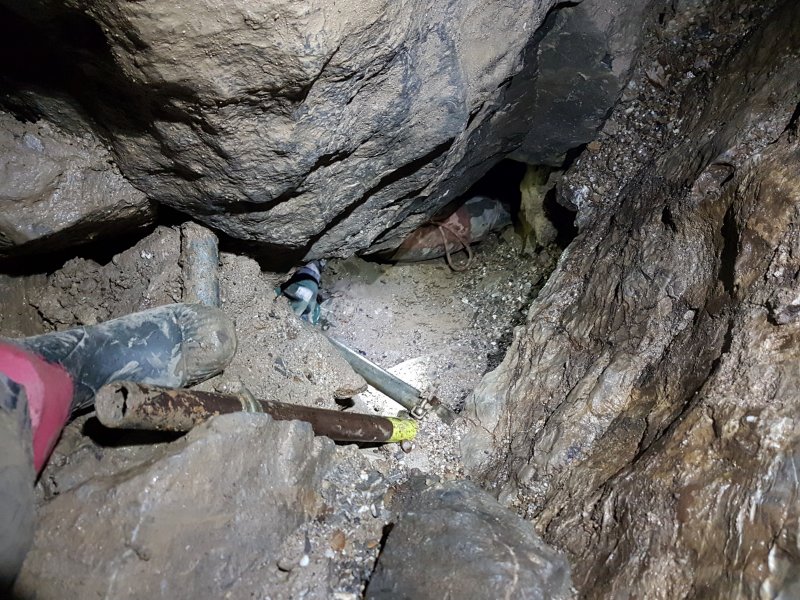 Down through the boulders on the right, the passage funnels down and the shoring starts.
Modelling and lighting by Tarquin and Gareth
Down through the boulders on the right, the passage funnels down and the shoring starts.
Modelling and lighting by Tarquin and Gareth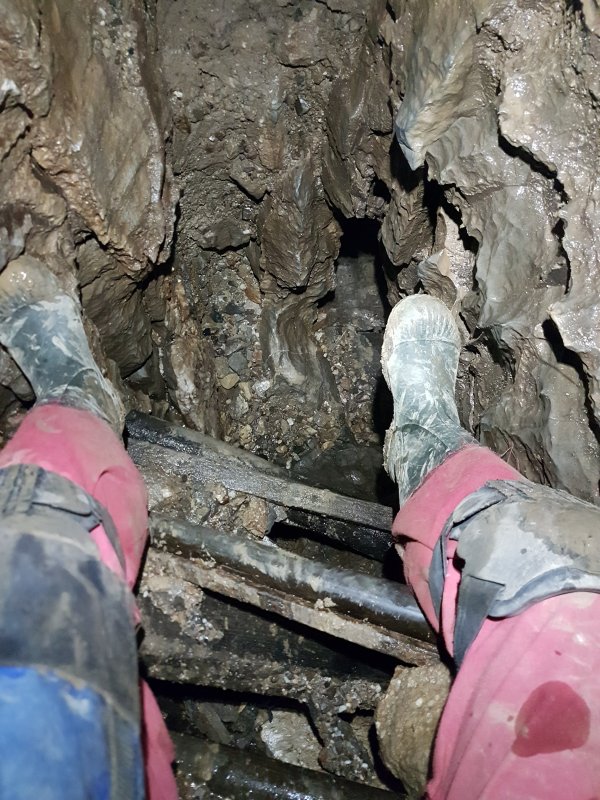 The shoring at the breakthrough is a rather confused mix of scaffolding, wood and polystyrene. But if it works, it works.
Modelling by Tarquin
The shoring at the breakthrough is a rather confused mix of scaffolding, wood and polystyrene. But if it works, it works.
Modelling by Tarquin After the breakthrough is a junction. To the right is Omaha Rift, a tall rift with fissures dropping far down into the floor.
Modelling by Gareth, lighting by Tarquin and Gareth
After the breakthrough is a junction. To the right is Omaha Rift, a tall rift with fissures dropping far down into the floor.
Modelling by Gareth, lighting by Tarquin and Gareth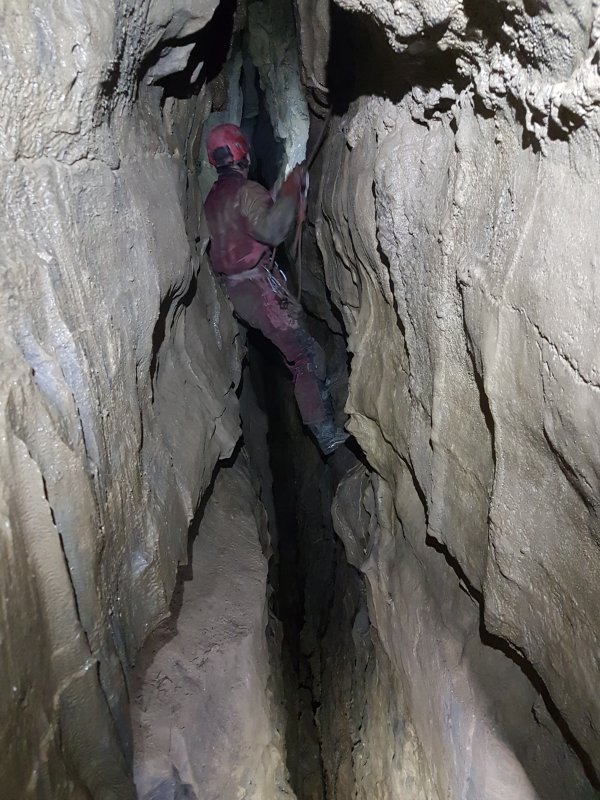 Progress along Omaha Rift is by traversing using a fixed rope which has been here for a very long time.
Modelling by Jules, lighting by Tarquin, Gareth and Jules
Progress along Omaha Rift is by traversing using a fixed rope which has been here for a very long time.
Modelling by Jules, lighting by Tarquin, Gareth and Jules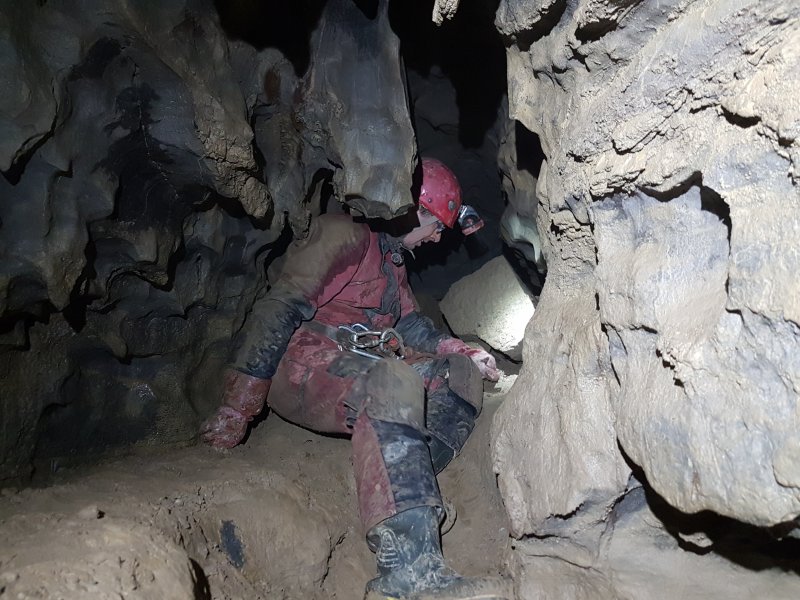 The Omaha Rift traverse ends, and the passage turns right and fizzles out, with a too-tight rift down to the right. This is so close to the Lower Series that it could have been the main way into here, with just a little persuasion.
Modelling by Jules, lighting by Tarquin and Jules
The Omaha Rift traverse ends, and the passage turns right and fizzles out, with a too-tight rift down to the right. This is so close to the Lower Series that it could have been the main way into here, with just a little persuasion.
Modelling by Jules, lighting by Tarquin and Jules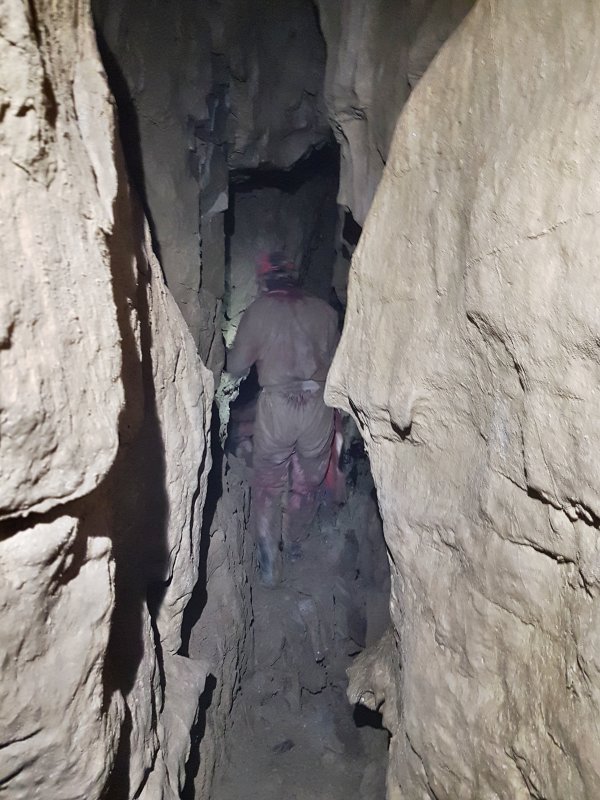 The way on is to the left at the junction.
Modelling by Jules, lighting by Tarquin and Jules
The way on is to the left at the junction.
Modelling by Jules, lighting by Tarquin and Jules A dead end side passage.
Modelling by Jules, lighting by Tarquin and Jules
A dead end side passage.
Modelling by Jules, lighting by Tarquin and Jules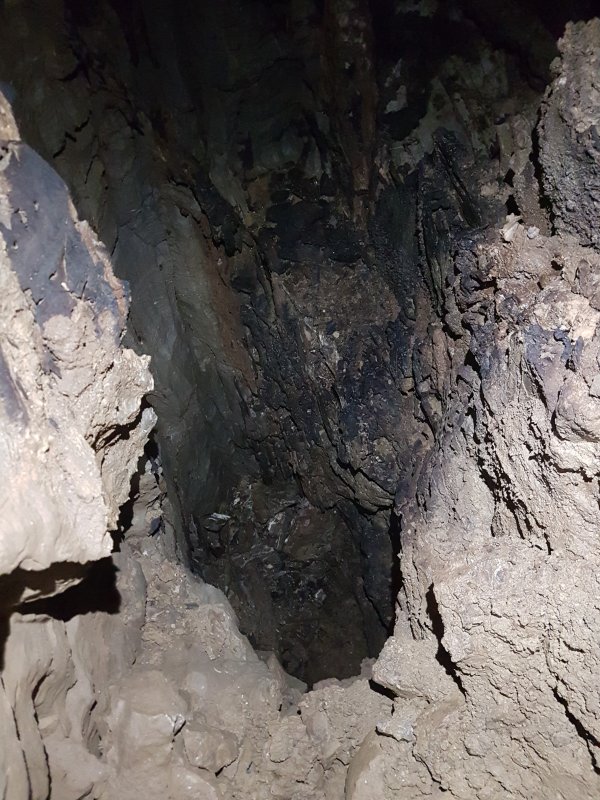 The pit is blind, like almost every other hole down. The lower passages always seem to end too tight.
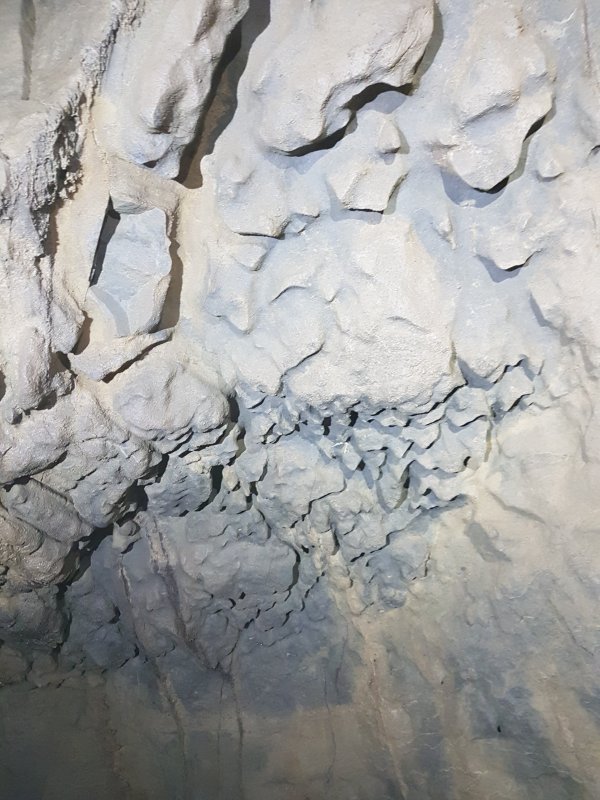 Anastomosis in the passage. Around this point is a side passage to the left, which ends in a series of small tubes, with a lower level oxbow linking back to the main passage. Another side passage up to the left is very tight, but links back in later.
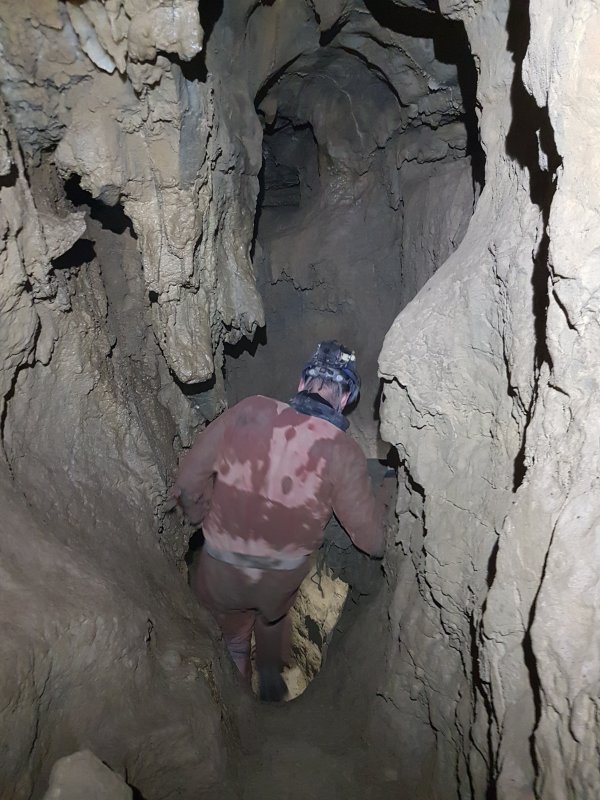 The way on shrinks, and looks like it might end.
Modelling by Phil, lighting by Tarquin and Phil
The way on shrinks, and looks like it might end.
Modelling by Phil, lighting by Tarquin and Phil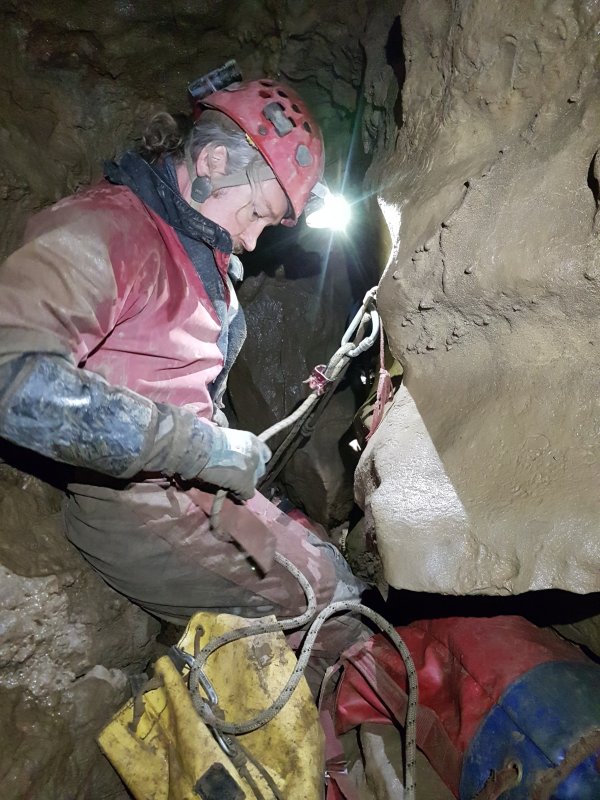 The passage abruptly reaches a pitch head. There are ropes here which we used for belaying, but if we had brought SRT gear, we would have used them as SRT ropes. Of course, their heritage is unknown, so...
Modelling by Gareth, lighting by Tarquin and Gareth
The passage abruptly reaches a pitch head. There are ropes here which we used for belaying, but if we had brought SRT gear, we would have used them as SRT ropes. Of course, their heritage is unknown, so...
Modelling by Gareth, lighting by Tarquin and Gareth At the head of the pitch is a junction, with a side passage on the right.
Modelling by Gareth, Phil and Jules, lighting by Tarquin, Gareth, Phil and Jules
At the head of the pitch is a junction, with a side passage on the right.
Modelling by Gareth, Phil and Jules, lighting by Tarquin, Gareth, Phil and Jules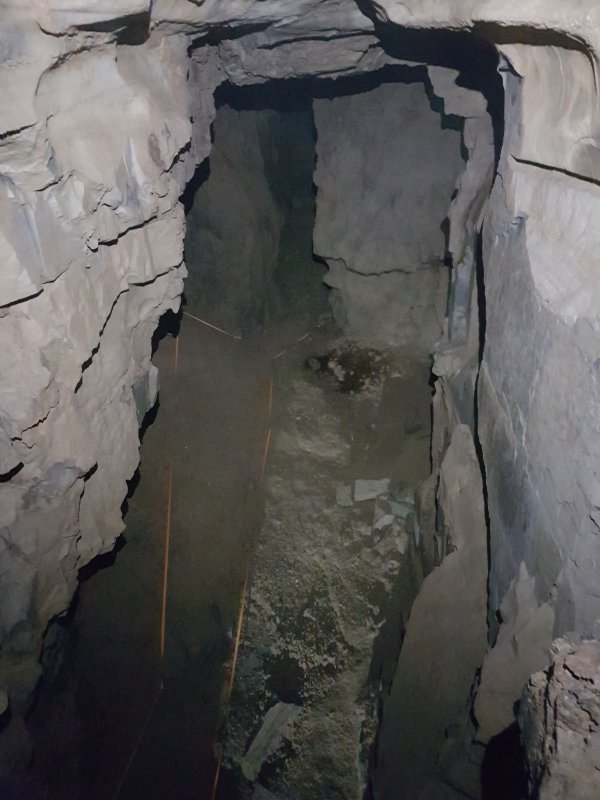 The side passage reaches a balcony overlooking the impressive side passage of Absent Friends.
Lighting by Tarquin and Gareth
The side passage reaches a balcony overlooking the impressive side passage of Absent Friends.
Lighting by Tarquin and Gareth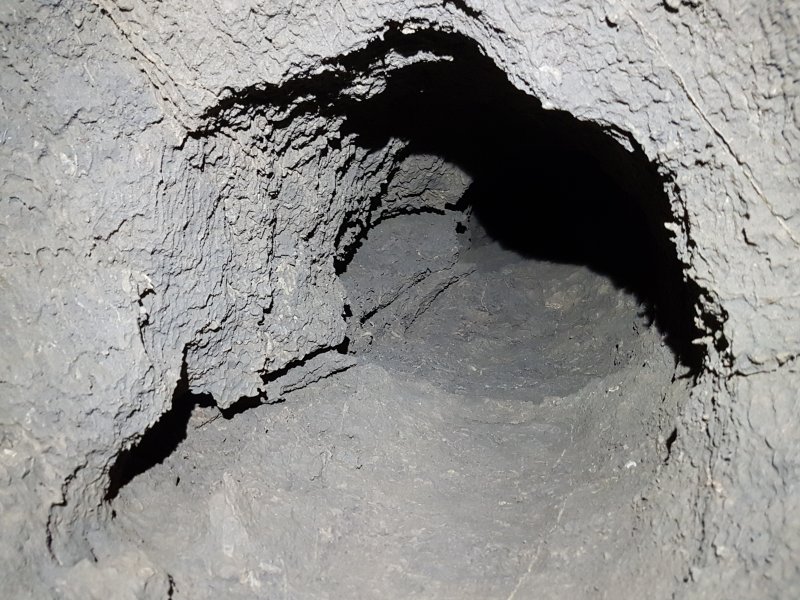 Karren weathering in an aven above the balcony.
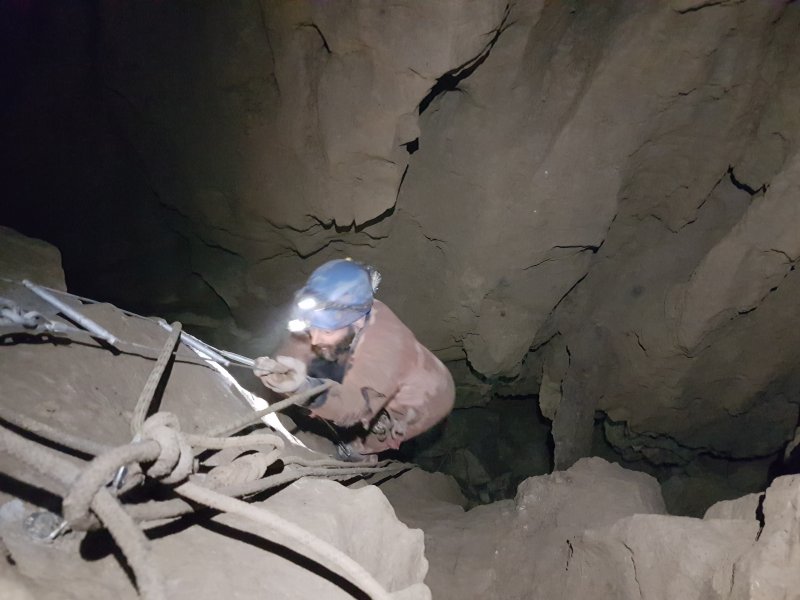 The pitch lands in the Absent Friends passage, a very large passageway. To the left is a climb up the most unstable looking boulders. At the top is the end of the tight passage mentioned earlier, and a series of other tight passages leading into a choke. This area looks horrifyingly unstable, so we did not explore those passages.
Modelling by Phil, lighting by Tarquin and Phil
The pitch lands in the Absent Friends passage, a very large passageway. To the left is a climb up the most unstable looking boulders. At the top is the end of the tight passage mentioned earlier, and a series of other tight passages leading into a choke. This area looks horrifyingly unstable, so we did not explore those passages.
Modelling by Phil, lighting by Tarquin and Phil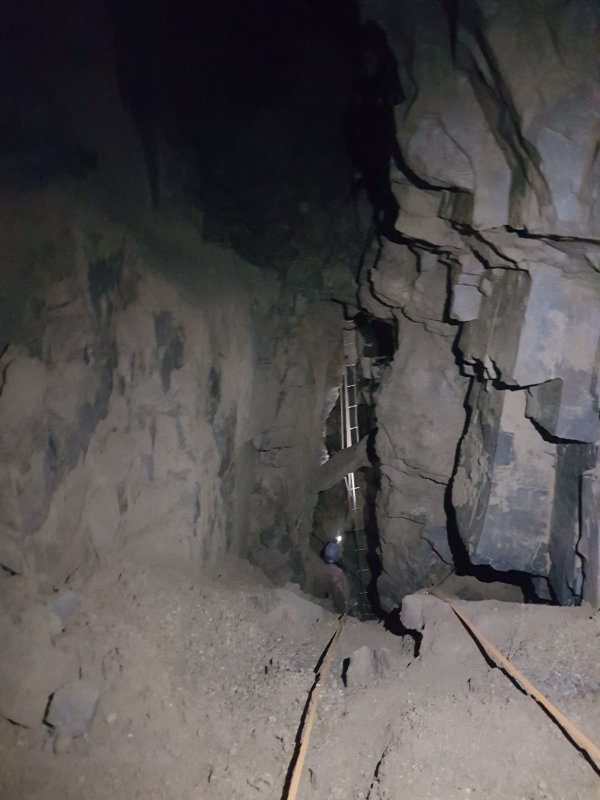 A climb up a gravity defying rubble wall below a wedged rock leads into the Absent Friends side passage. Half of the team did not like the look of the climb, and remained in the main route.
Modelling by Phil, lighting by Tarquin and Phil
A climb up a gravity defying rubble wall below a wedged rock leads into the Absent Friends side passage. Half of the team did not like the look of the climb, and remained in the main route.
Modelling by Phil, lighting by Tarquin and Phil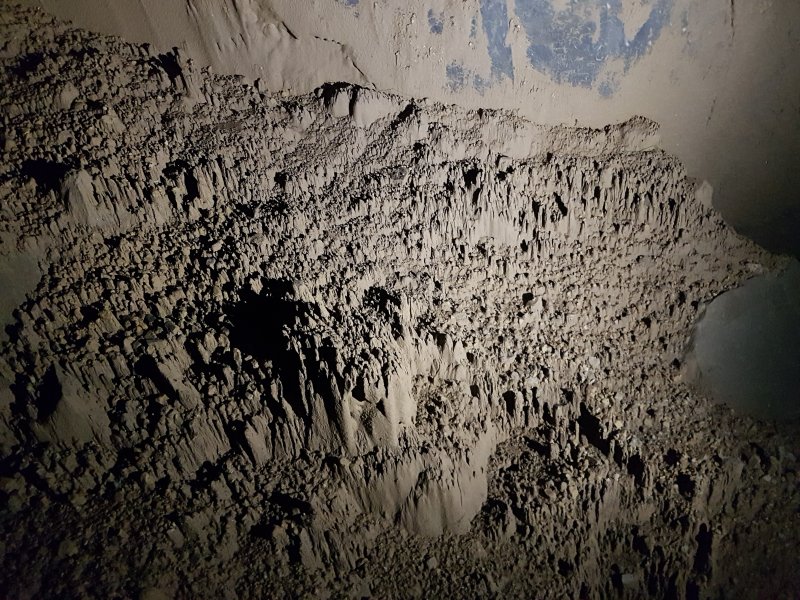 Some rather excellent hoodoos in the side passage.
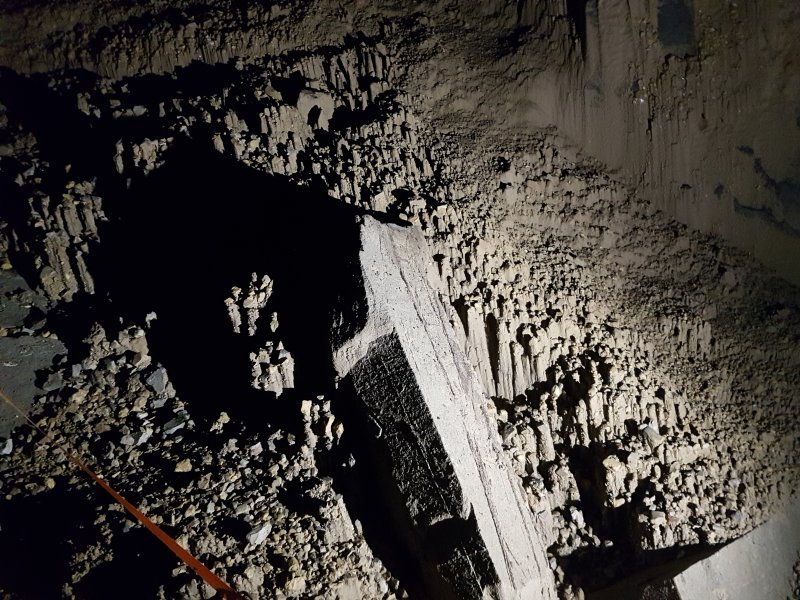 Hoodoos.
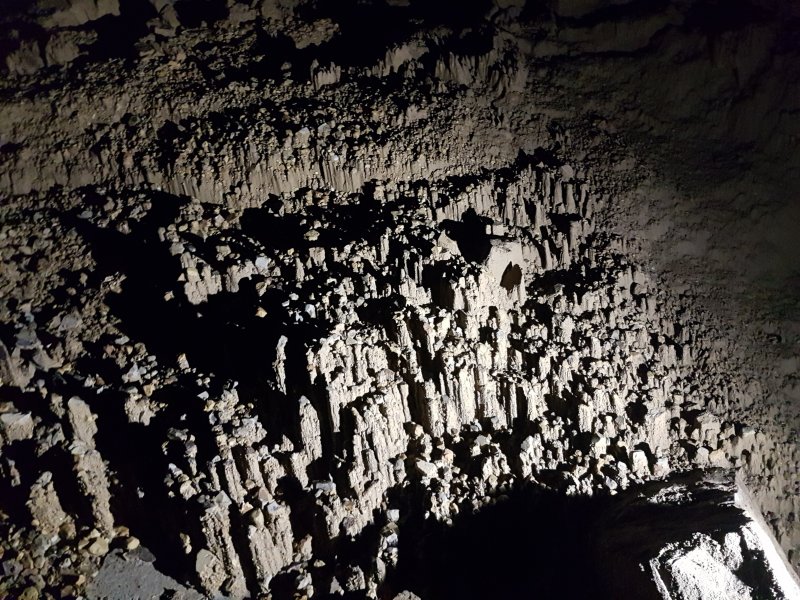 Hoodoos.
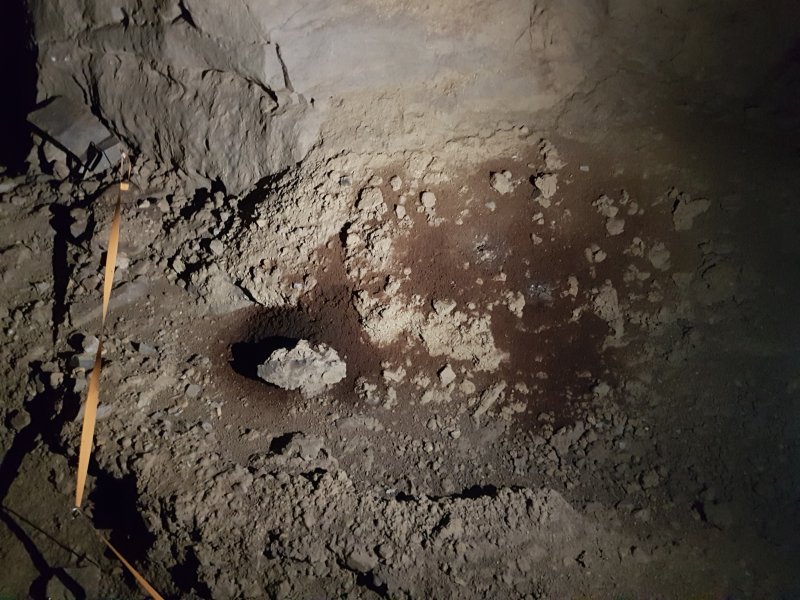 A large pile of guano.
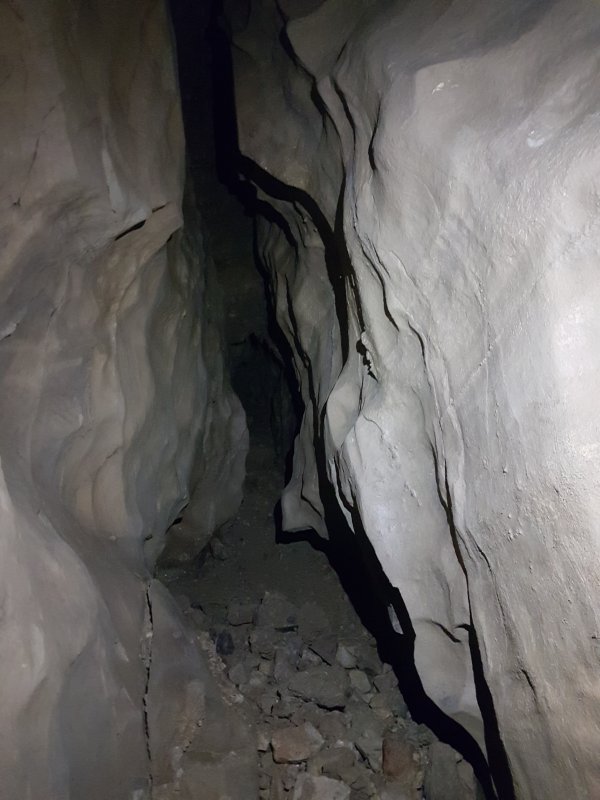 The side passage then pinches out, with a tiny side tube at floor level.
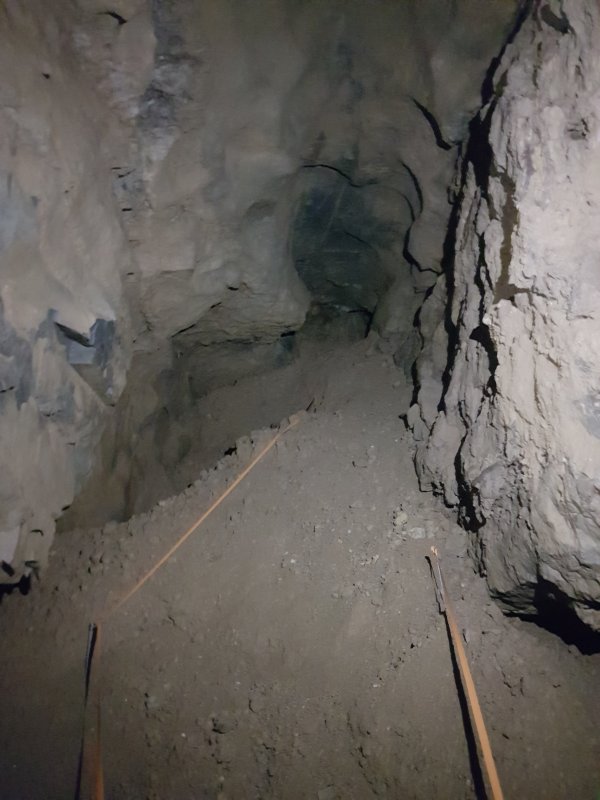 A side passage off the side passage ends rapidly in crumbly mud fill.
 A roped climb down lands in Peaceful Easy Feeling, the main way on. Part way down is a rope traverse into the bypass, but it really needs cowstails, which we didn't have, but some of the team successfully used it on the way out anyway.
Modelling by Phil, lighting by Tarquin and Phil
A roped climb down lands in Peaceful Easy Feeling, the main way on. Part way down is a rope traverse into the bypass, but it really needs cowstails, which we didn't have, but some of the team successfully used it on the way out anyway.
Modelling by Phil, lighting by Tarquin and Phil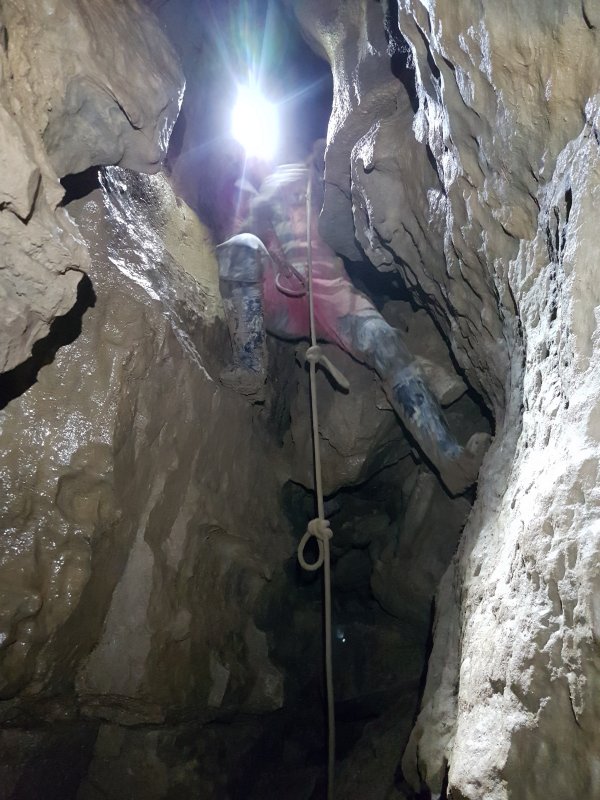 A second rope climb down.
Modelling by Gareth, lighting by Tarquin and Gareth
A second rope climb down.
Modelling by Gareth, lighting by Tarquin and Gareth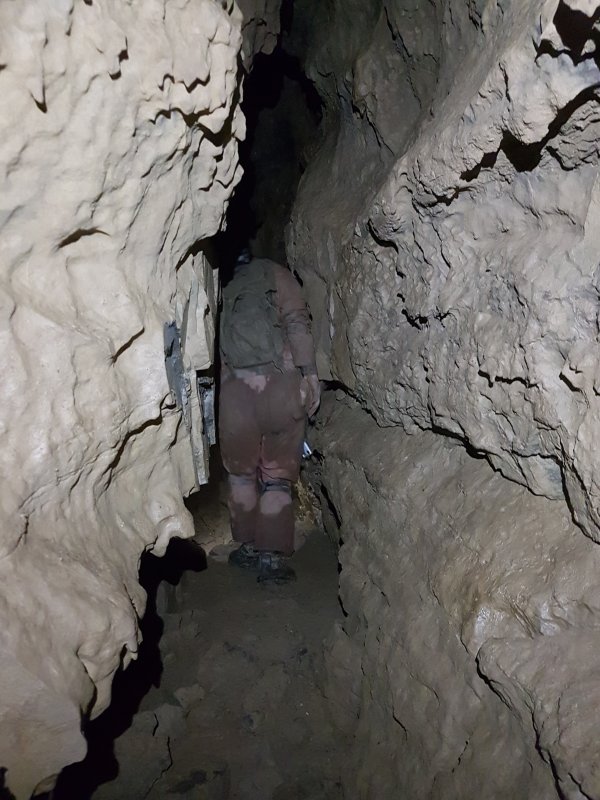 The main passage of Peaceful Easy Feeling. There are loads of side passages here, including a funnel to a blind pitch, a level underneath that chokes almost immediately, a small crawl and a slot into an aven. None of them go far, and most are not on the survey.
Modelling by Phil, lighting by Tarquin and Phil
The main passage of Peaceful Easy Feeling. There are loads of side passages here, including a funnel to a blind pitch, a level underneath that chokes almost immediately, a small crawl and a slot into an aven. None of them go far, and most are not on the survey.
Modelling by Phil, lighting by Tarquin and Phil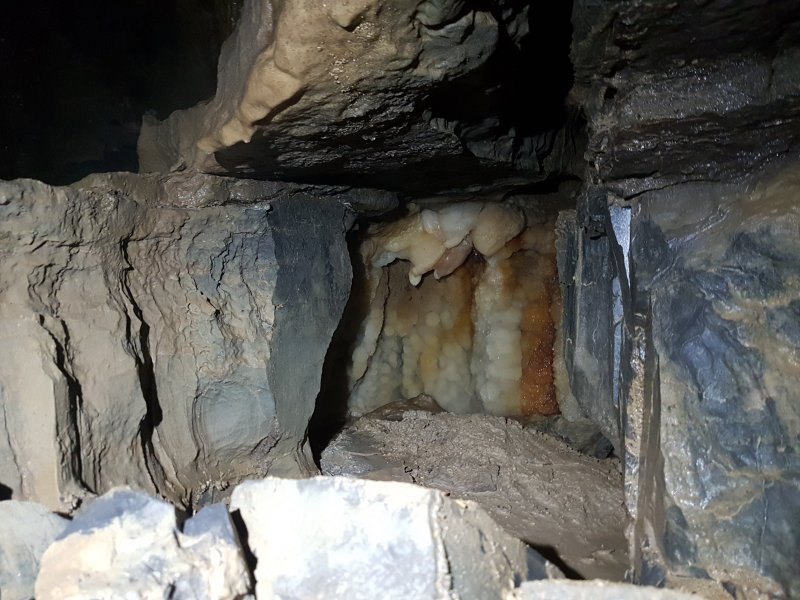 Stal tucked into a tiny alcove.
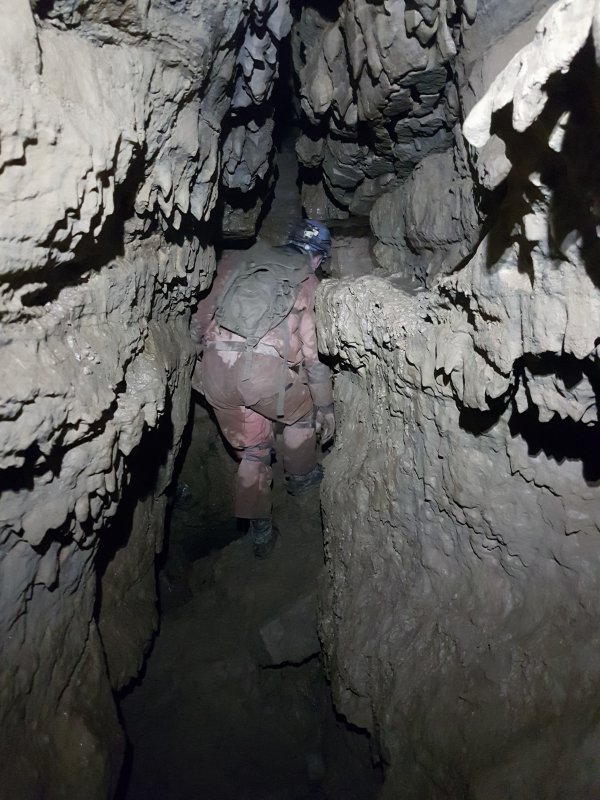 Peaceful Easy Feeling then narrows, and comes to a muddy end.
Modelling by Phil, lighting by Tarquin and Phil
Peaceful Easy Feeling then narrows, and comes to a muddy end.
Modelling by Phil, lighting by Tarquin and Phil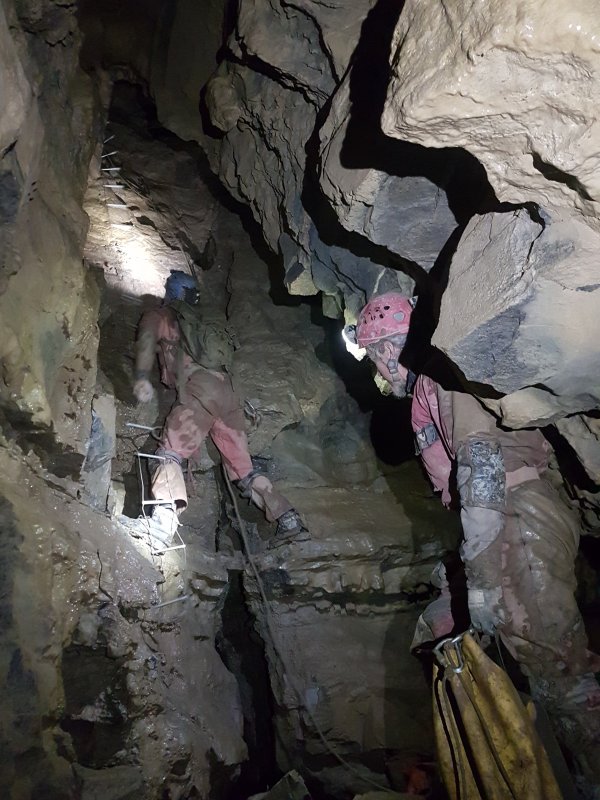 A pitch overhead gave access to the bypass. This was not what we had expected, and we did not have any SRT gear. So this was ascended by free climbing, using the only jammer we had brought as a backup, with the pretence that this was safe. Tip; bring SRT gear. We rigged the remaining ladder on it, so everyone else could get up. Some rather concerned grunts from above warned everyone to stay clear of the base.
Modelling by Gareth and Phil, lighting by Tarquin, Gareth and Phil
A pitch overhead gave access to the bypass. This was not what we had expected, and we did not have any SRT gear. So this was ascended by free climbing, using the only jammer we had brought as a backup, with the pretence that this was safe. Tip; bring SRT gear. We rigged the remaining ladder on it, so everyone else could get up. Some rather concerned grunts from above warned everyone to stay clear of the base.
Modelling by Gareth and Phil, lighting by Tarquin, Gareth and Phil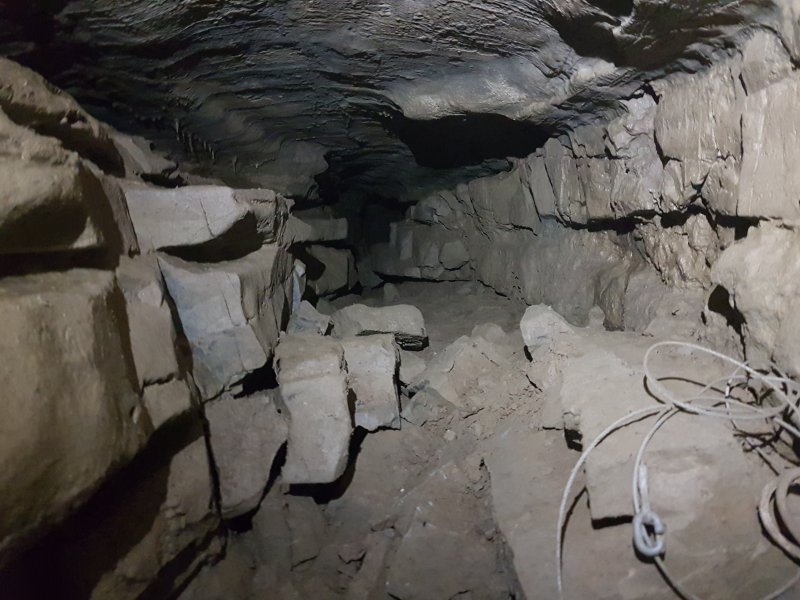 The bypass route from the earlier traverse rejoins as a crawl at the top.
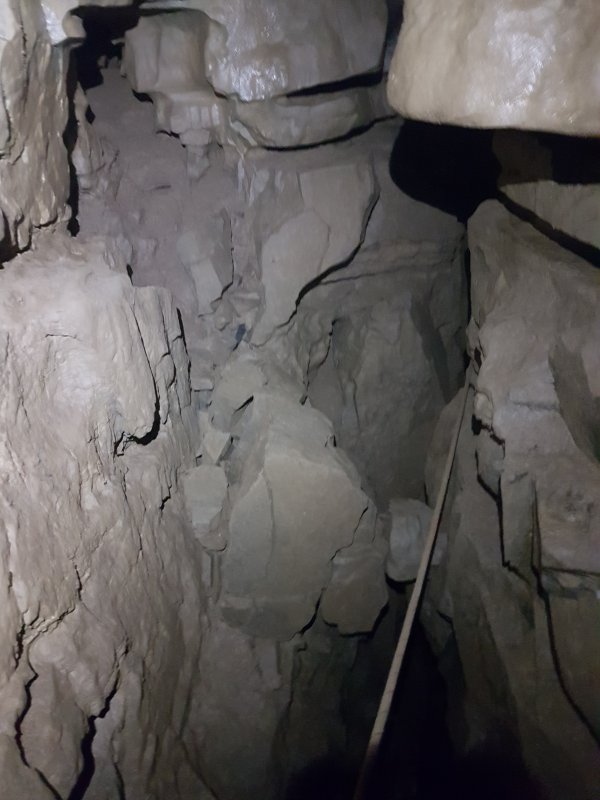 Jammed rocks at the top, held in place by wishful thinking, which needed to be carefuly traversed over without touching them. Guess those grunts really meant it.
 If we had SRT gear, there is a second rope that avoids traversing over the boulders, but this one could not be free climbed.
Lighting by Tarquin and Gareth
If we had SRT gear, there is a second rope that avoids traversing over the boulders, but this one could not be free climbed.
Lighting by Tarquin and Gareth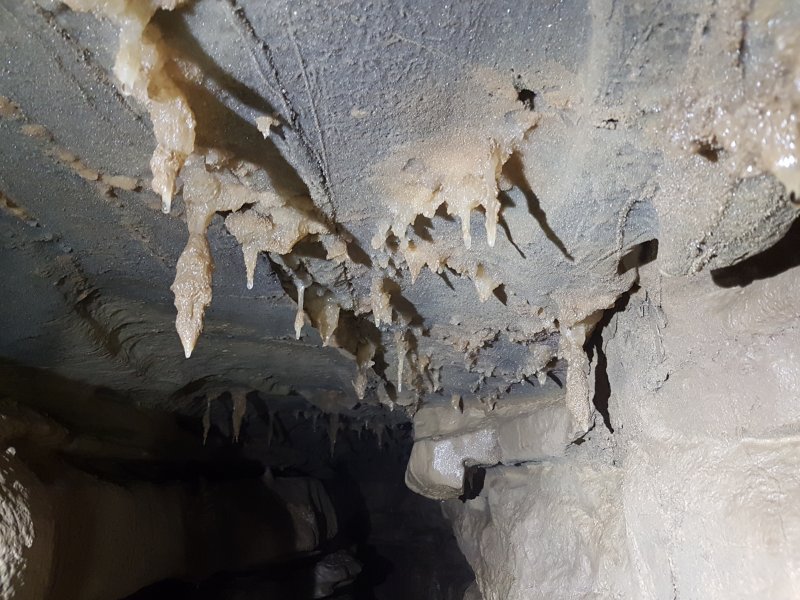 Stal in the bypass.
 After Spannner Dig, the passage suddenly increases in size again, briefly sloping down to become extremely large, then sloping back up. At the end of this large section is a blind passage on the right, that we would return to later (Spectacle Thief).
Modelling by Gareth, Jules and Phil, lighting by Tarquin, Gareth, Jules and Phil
After Spannner Dig, the passage suddenly increases in size again, briefly sloping down to become extremely large, then sloping back up. At the end of this large section is a blind passage on the right, that we would return to later (Spectacle Thief).
Modelling by Gareth, Jules and Phil, lighting by Tarquin, Gareth, Jules and Phil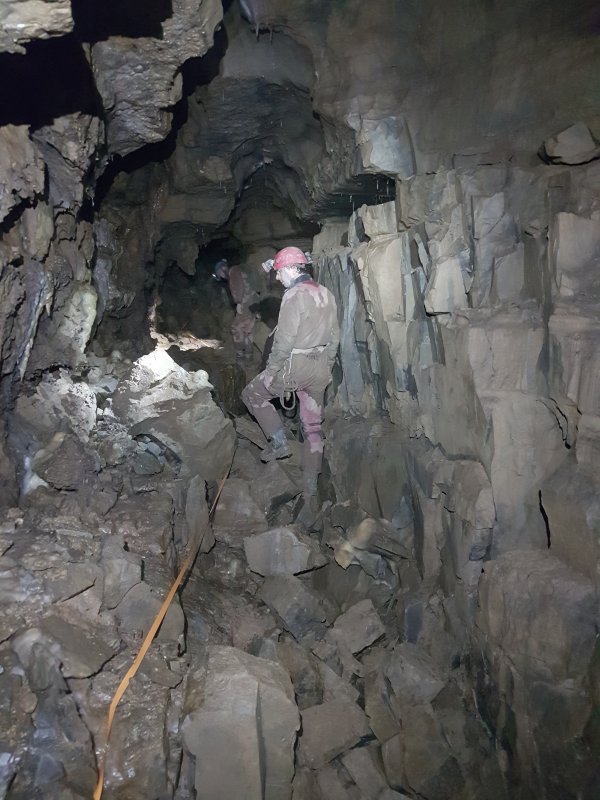 After the floor rises back up, the decorated section begins.
Modelling by Jules and Phil, lighting by Tarquin, Jules and Phil
After the floor rises back up, the decorated section begins.
Modelling by Jules and Phil, lighting by Tarquin, Jules and Phil Decorated section stal flow.
 Decorated section stalagmites.
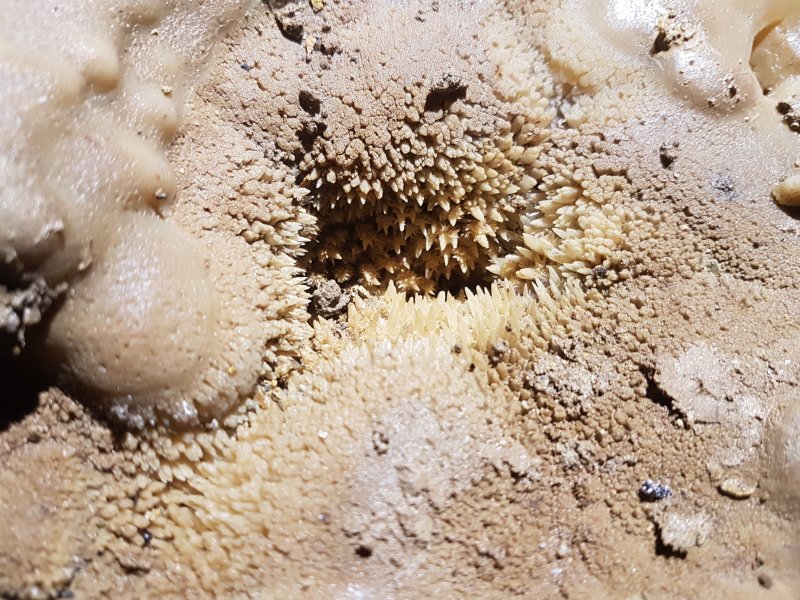 Dried crystal pool.
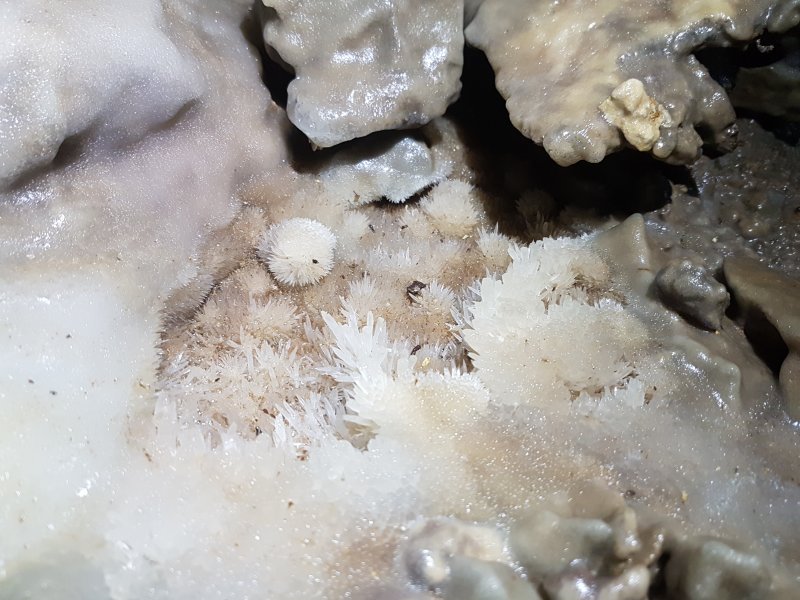 Dried crystal pool.
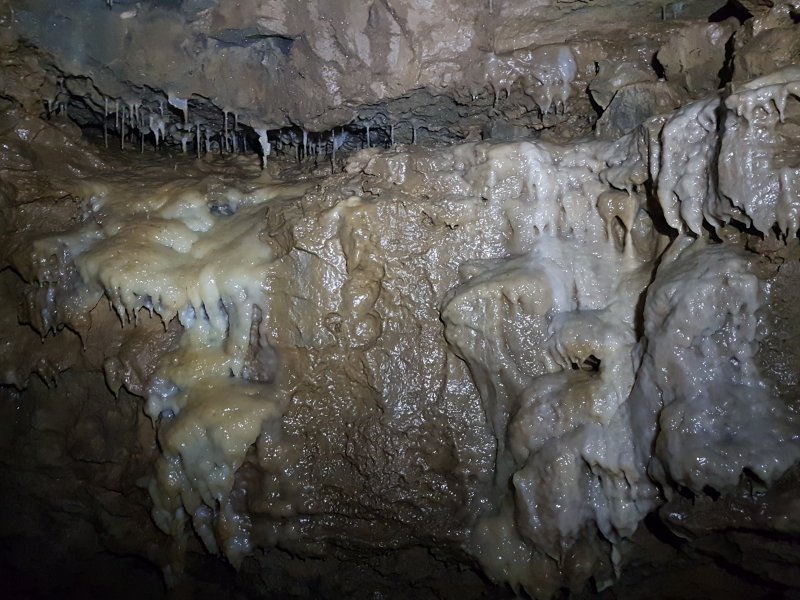 Flowstone.
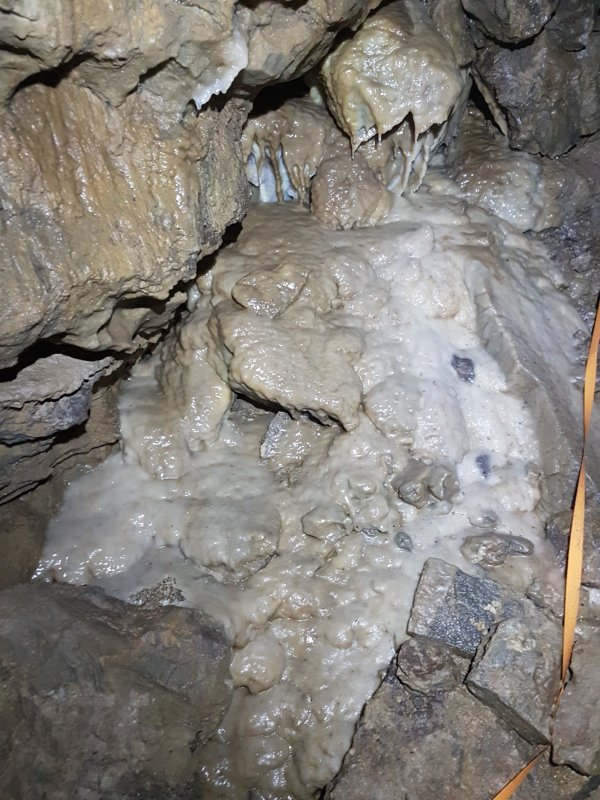 Flowstone.
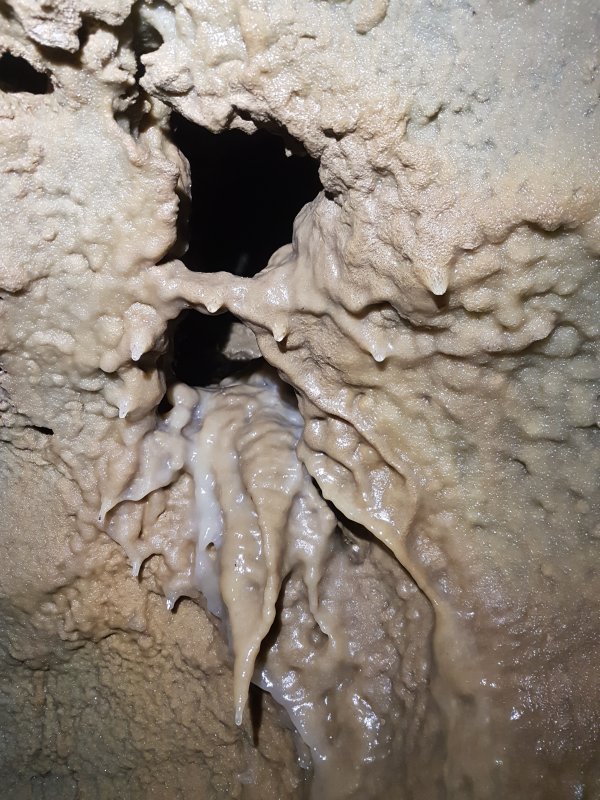 Stal from an eyehole.
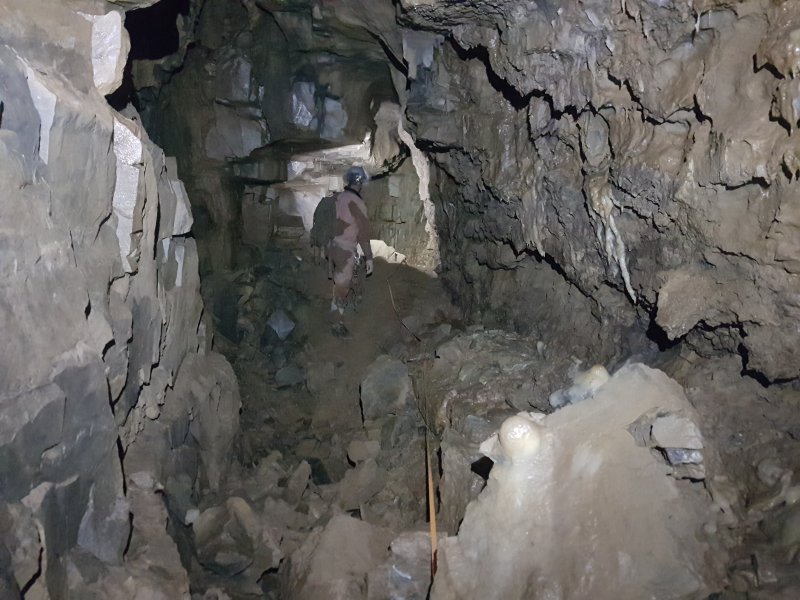 In the decorated section.
Modelling by Phil, lighting by Tarquin and Phil
In the decorated section.
Modelling by Phil, lighting by Tarquin and Phil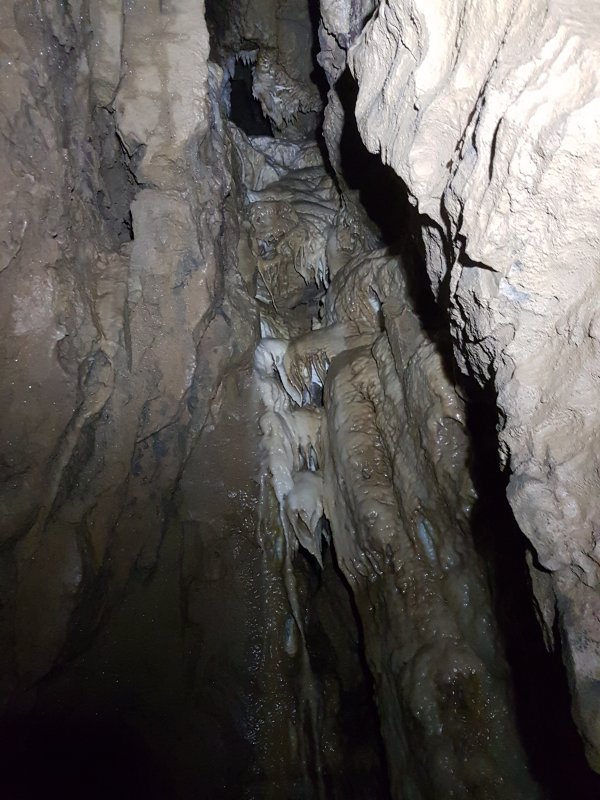 Stal pouring from an aven. It looked like a good prospect, and we could see signs that someone had tried pushing it.
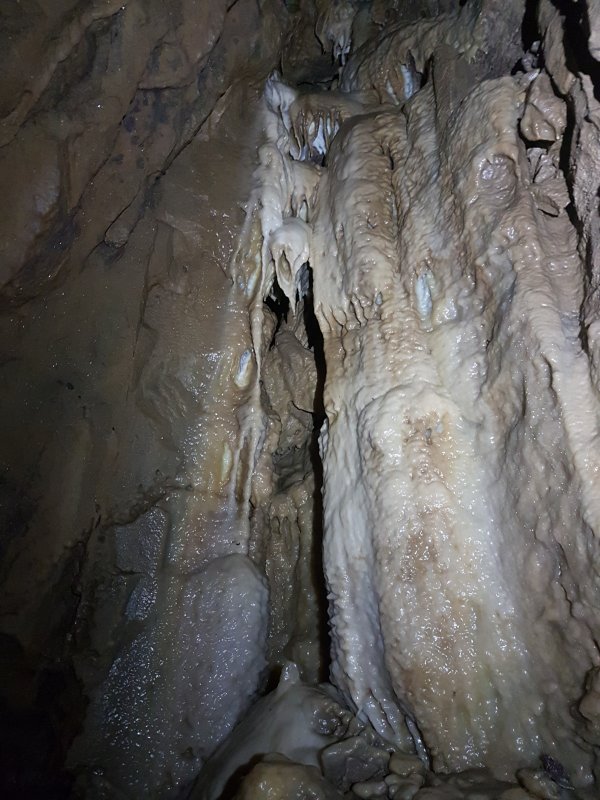 Stal below the aven.
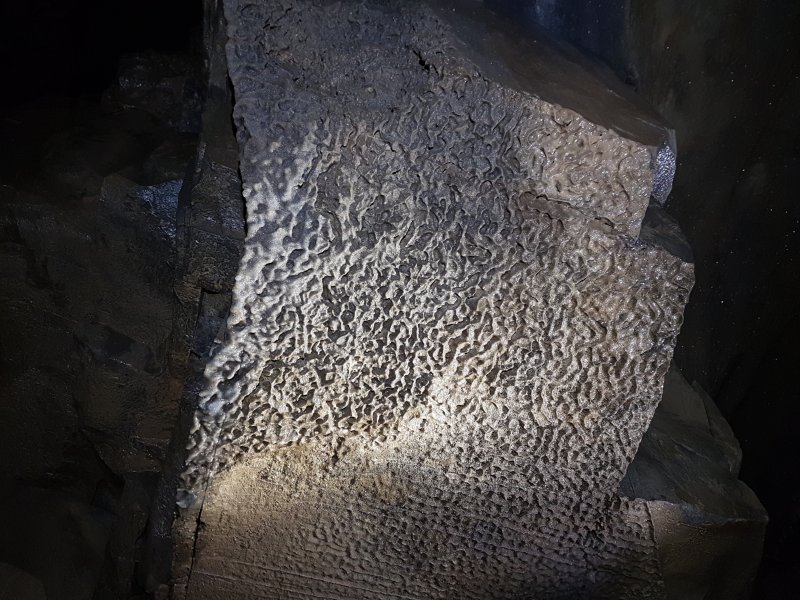 Heavily weathered rock in the ceiling.
Lighting by Tarquin and Phil
Heavily weathered rock in the ceiling.
Lighting by Tarquin and Phil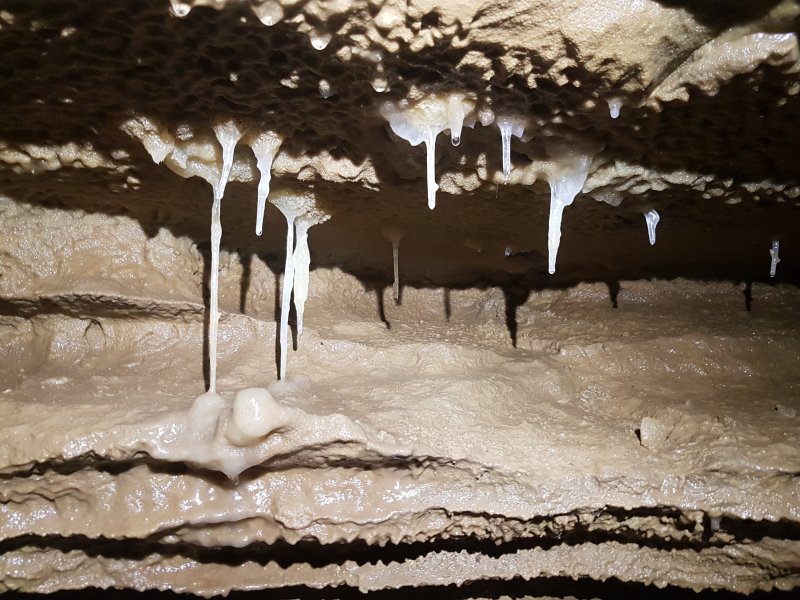 Some tiny straws
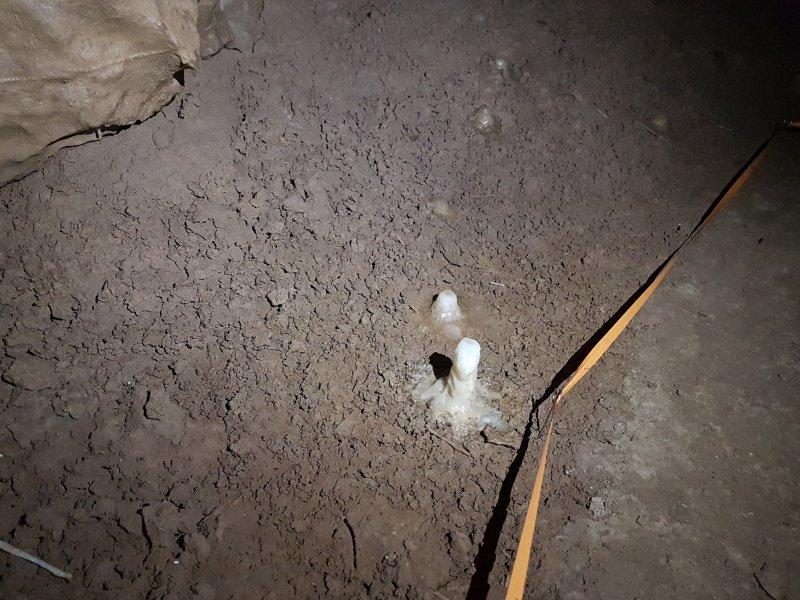 Stalagmites on fluffy/bobbly mud. Despite having a few signs of permafrost like this, no cryostal was found within the cave.
 The decorated section ends at a major junction of phreatic passages. To the right is the longest side passage, and ahead is the main way on.
Modelling by Gareth and Jules, lighting by Tarquin, Gareth and Jules
The decorated section ends at a major junction of phreatic passages. To the right is the longest side passage, and ahead is the main way on.
Modelling by Gareth and Jules, lighting by Tarquin, Gareth and Jules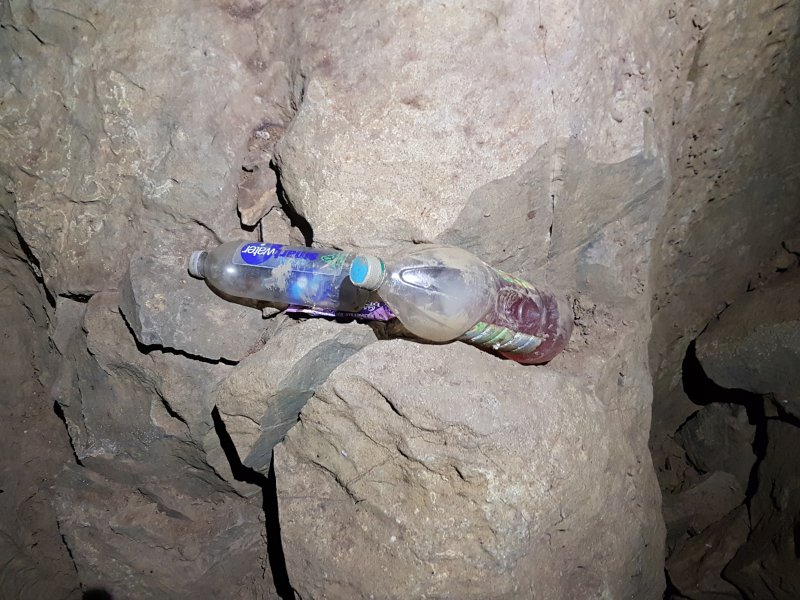 Supplies presumably left at the junction to allow longer term digs or camps.
 The main passage is very comfortable, and maintains a nice size.
Modelling by Gareth and Jules, lighting by Tarquin, Gareth and Jules
The main passage is very comfortable, and maintains a nice size.
Modelling by Gareth and Jules, lighting by Tarquin, Gareth and Jules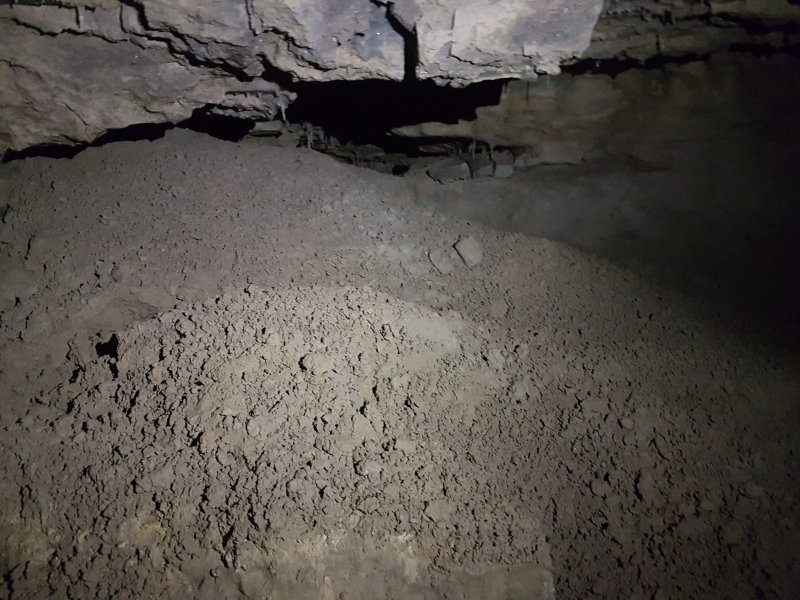 More bobbly mud, and still no cryostal.
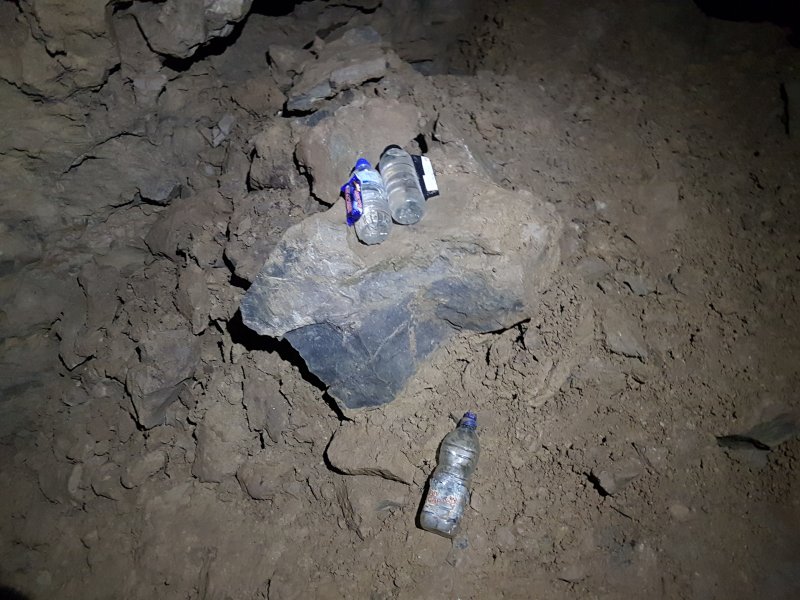 Another stash. This is a little weird, since the cave is not really all that long, and having two separate stashes does seem like overkill.
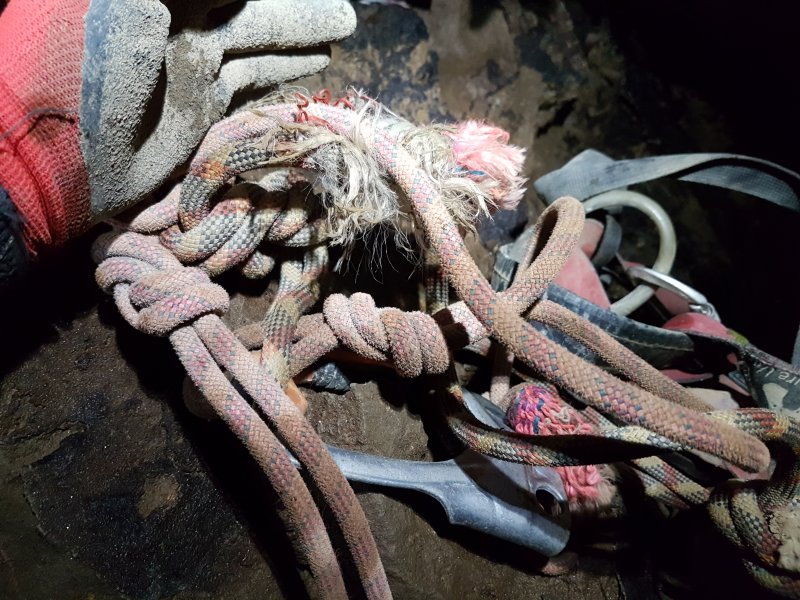 At this point, I should mention Phil's SRT kit. The rest of us have cows tails, and separate top jammers. Phil has a top jammer with a carabiner on it, and that is his only cowstail. Never mind that it is made from ropes rescued from a skip, or at least a rope that looks like it was.
Modelling by Tarquin
At this point, I should mention Phil's SRT kit. The rest of us have cows tails, and separate top jammers. Phil has a top jammer with a carabiner on it, and that is his only cowstail. Never mind that it is made from ropes rescued from a skip, or at least a rope that looks like it was.
Modelling by Tarquin The passage then crosses a dramatic traverse. Phil's single cowstail proved that to cross a traverse, you need a second one, as he was unable to pass the knot in the middle. Jules fetched a spare crab, and sent it down the traverse line so that Phil could clip it to a second scrap in order to continue. It's always fun caving with Phil.
Modelling by Gareth, Phil and Jules, lighting by Tarquin, Gareth, Phil and Jules
The passage then crosses a dramatic traverse. Phil's single cowstail proved that to cross a traverse, you need a second one, as he was unable to pass the knot in the middle. Jules fetched a spare crab, and sent it down the traverse line so that Phil could clip it to a second scrap in order to continue. It's always fun caving with Phil.
Modelling by Gareth, Phil and Jules, lighting by Tarquin, Gareth, Phil and Jules The traverse is over this deep hole, which looks somewhere around 15 metres deep. Certainly not somewhere you would want to be fiddling around with a single cowstail.
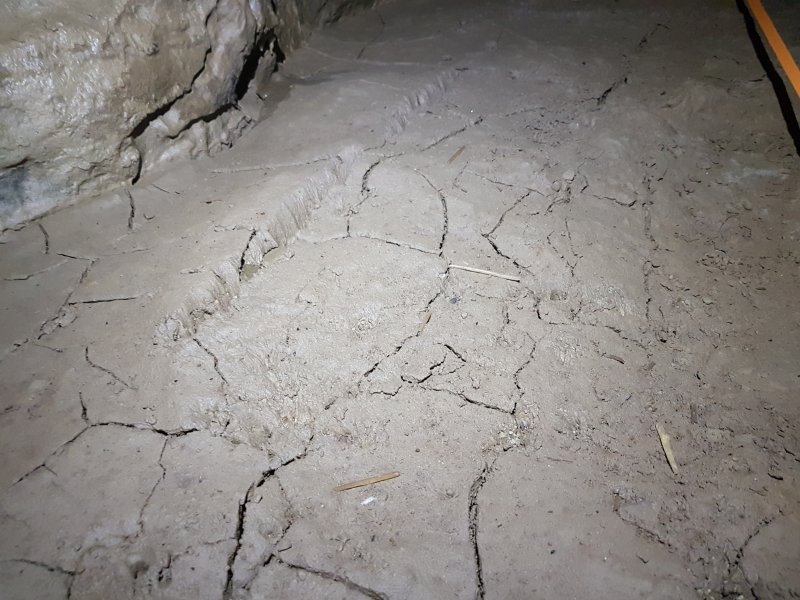 Cracked mud.
 Junction with a taped off oxbow on the left, which contains Arthur's Seat.
Modelling by Gareth, lighting by Tarquin and Gareth
Junction with a taped off oxbow on the left, which contains Arthur's Seat.
Modelling by Gareth, lighting by Tarquin and Gareth Arthur's Seat can be seen through a perfectly placed viewing window, and is one of the best formations in the cave.
 Another passage gives access to the side of it, where more formations can be seen. The passages at the top have apparently been very carefully pushed, presumably with a clean pair of boots.
Lighting by Tarquin and Gareth
Another passage gives access to the side of it, where more formations can be seen. The passages at the top have apparently been very carefully pushed, presumably with a clean pair of boots.
Lighting by Tarquin and Gareth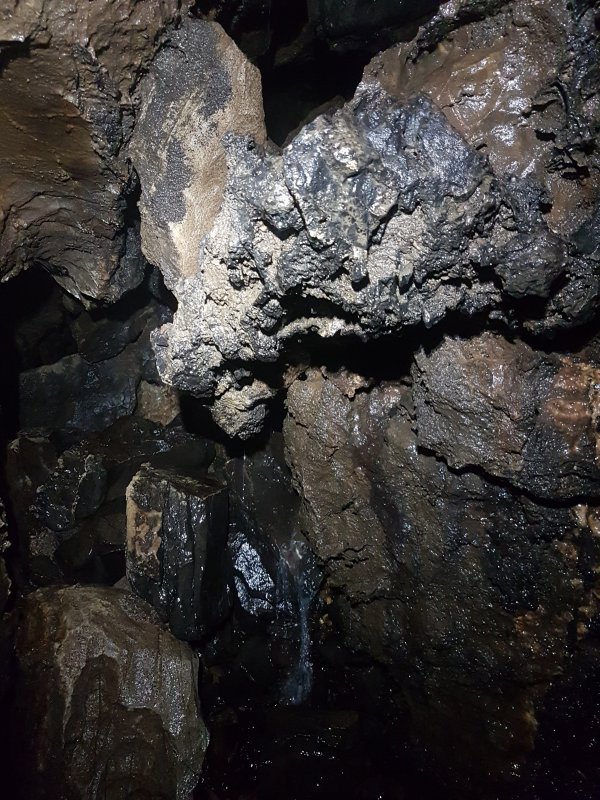 The passage beyond Arthur's Seat then passes through a wet choke, which brings in a large stream. This does not seem particularly stable, and some of the rocks require a delicate touch.
 This reaches the end junction. The passage ahead changes character, and is clearly an inlet, with a sandy floor.
Modelling by Phil, lighting by Tarquin and Phil
This reaches the end junction. The passage ahead changes character, and is clearly an inlet, with a sandy floor.
Modelling by Phil, lighting by Tarquin and Phil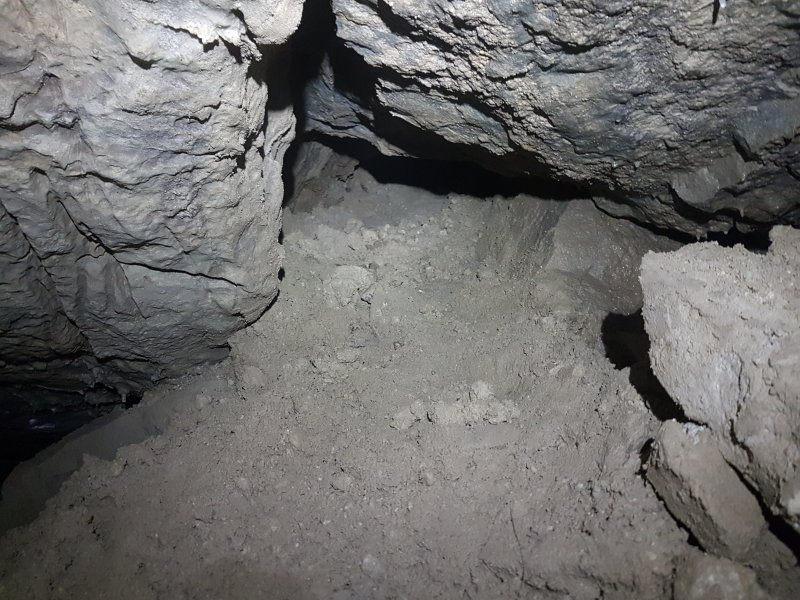 An aven to one side, which proved to be a choked rock and mud dig.
 The passage then becomes a flat out dig, pinching out.
Modelling by Gareth, lighting by Tarquin and Gareth
The passage then becomes a flat out dig, pinching out.
Modelling by Gareth, lighting by Tarquin and Gareth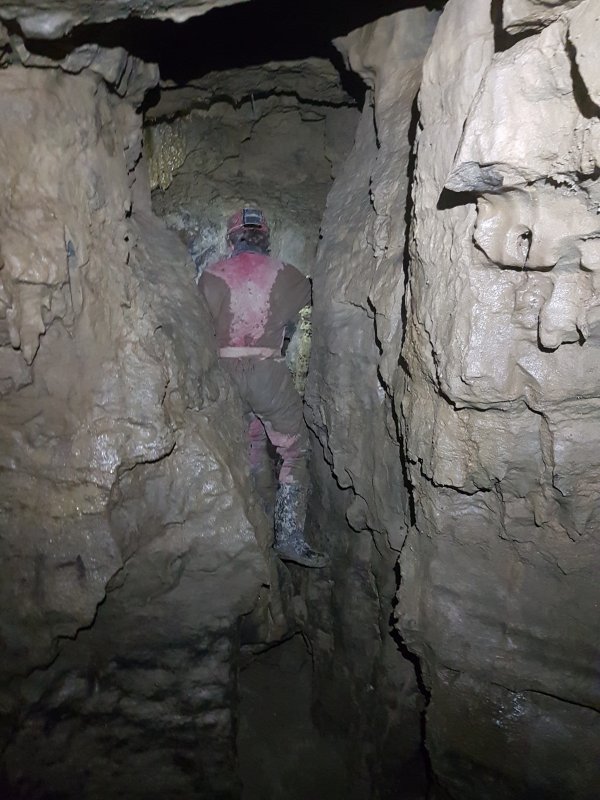 To the left at the junction immediately reaches another junction, where ahead is this awkward rift.
Modelling by Gareth, lighting by Tarquin and Gareth
To the left at the junction immediately reaches another junction, where ahead is this awkward rift.
Modelling by Gareth, lighting by Tarquin and Gareth The awkward rift is blind, but contains this formation.
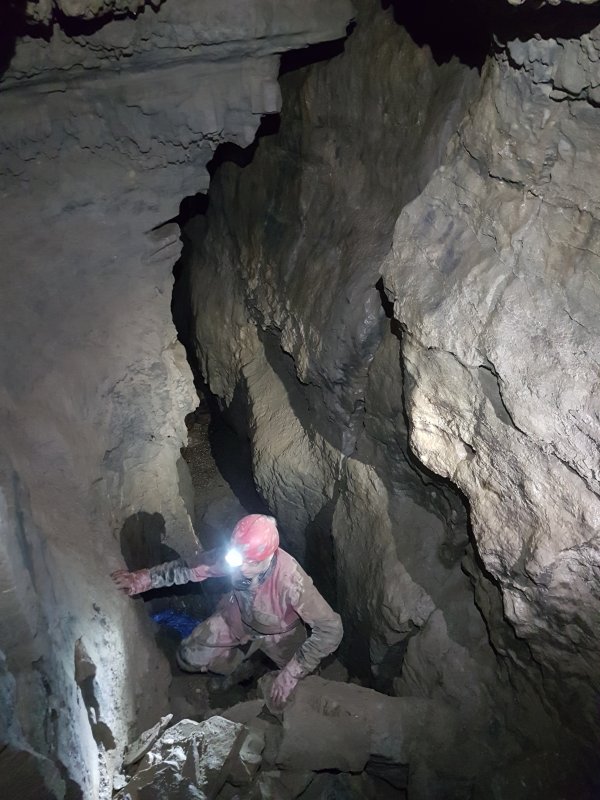 At the second junction, the obvious way on is to double back around to the left, into a bigger rift. This is now heading back up along the way in.
Modelling by Jules, lighting by Tarquin, Phil and Jules
At the second junction, the obvious way on is to double back around to the left, into a bigger rift. This is now heading back up along the way in.
Modelling by Jules, lighting by Tarquin, Phil and Jules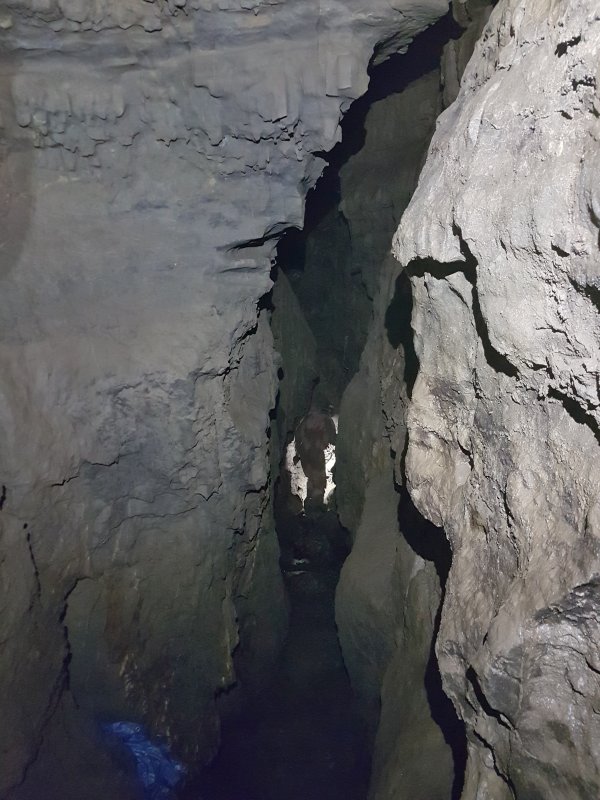 This is the final rift of the cave.
Modelling by Phil, lighting by Tarquin and Phil
This is the final rift of the cave.
Modelling by Phil, lighting by Tarquin and Phil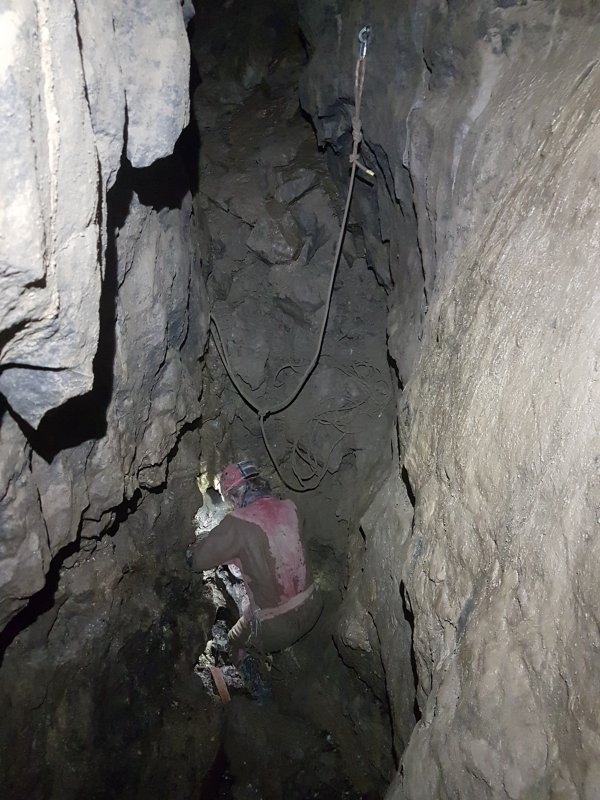 It ends at a somewhat unstable climb up to a balcony which gives the side view of Arthur's Seat. At the bottom of the climb is a hole down.
Modelling by Gareth, lighting by Tarquin and Gareth
It ends at a somewhat unstable climb up to a balcony which gives the side view of Arthur's Seat. At the bottom of the climb is a hole down.
Modelling by Gareth, lighting by Tarquin and Gareth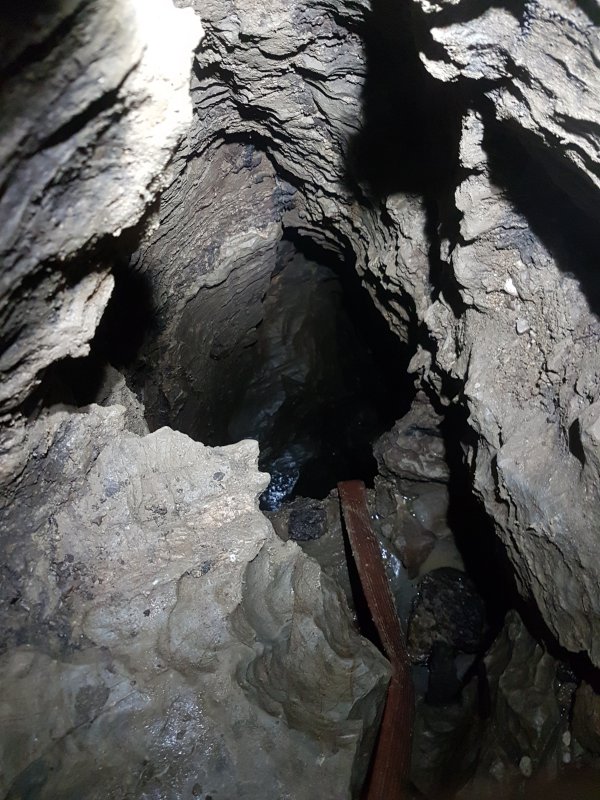 The hole is the head of a 20 metre pitch, which swallows the stream from the choke, with some plumbing installed to try to keep the spray down. The rope is here, but we didn't have SRT gear. The bottom of the pitch, like so many of the descending routes in the cave, is blind, but is certainly the most promising place to dig.
Lighting by Tarquin and Gareth
The hole is the head of a 20 metre pitch, which swallows the stream from the choke, with some plumbing installed to try to keep the spray down. The rope is here, but we didn't have SRT gear. The bottom of the pitch, like so many of the descending routes in the cave, is blind, but is certainly the most promising place to dig.
Lighting by Tarquin and Gareth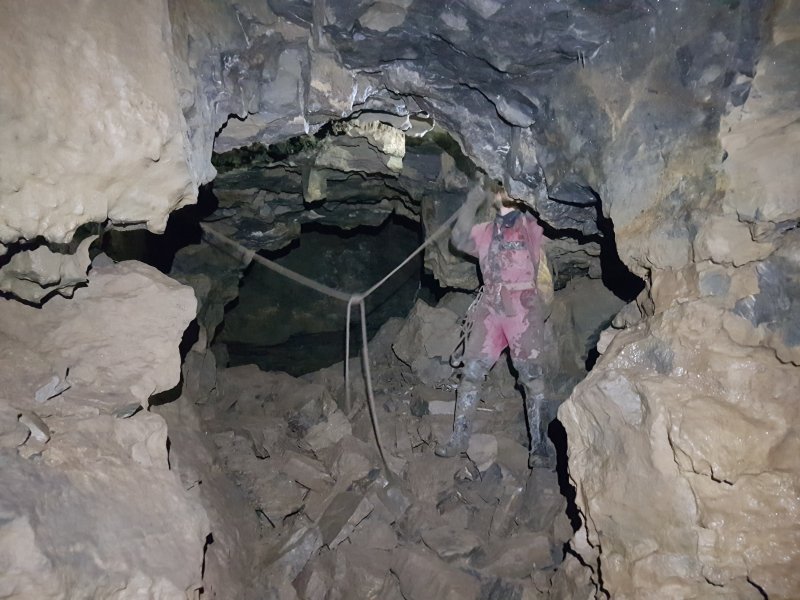 Back at the main junction, the main side passage starts fairly big, immediately reaching a junction of its own. The rope loops through a tight roof tube which contains a little grotto.
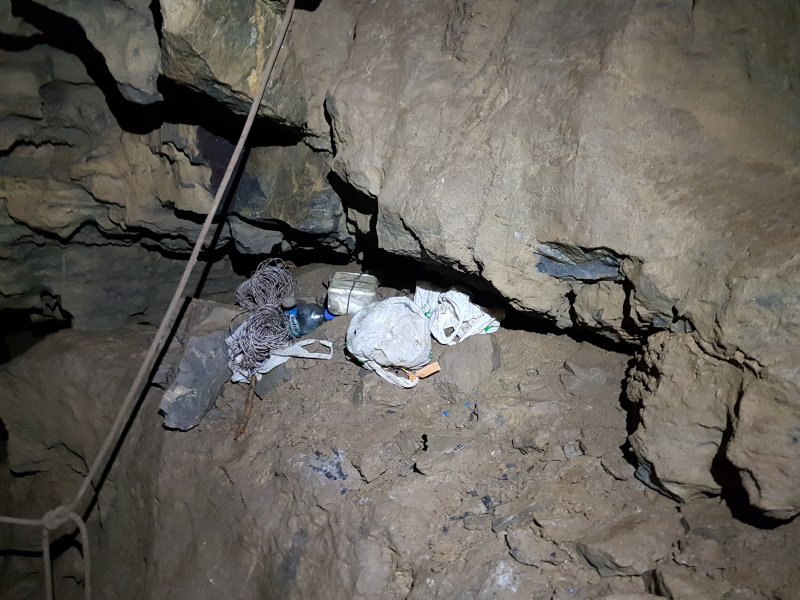 Yet another stash, this time some digging equipment, and some more drink.
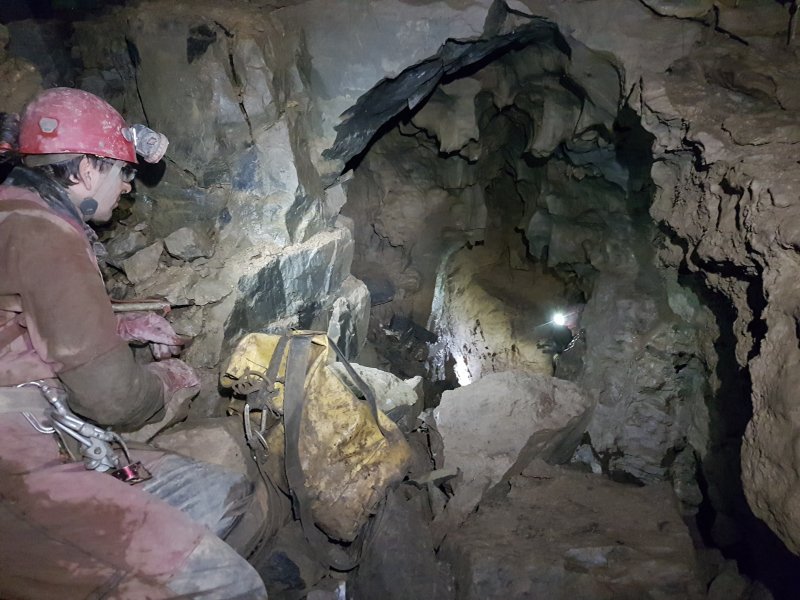 To the right looks promising.
Modelling by Jules and Gareth, lighting by Tarquin, Jules and Gareth
To the right looks promising.
Modelling by Jules and Gareth, lighting by Tarquin, Jules and Gareth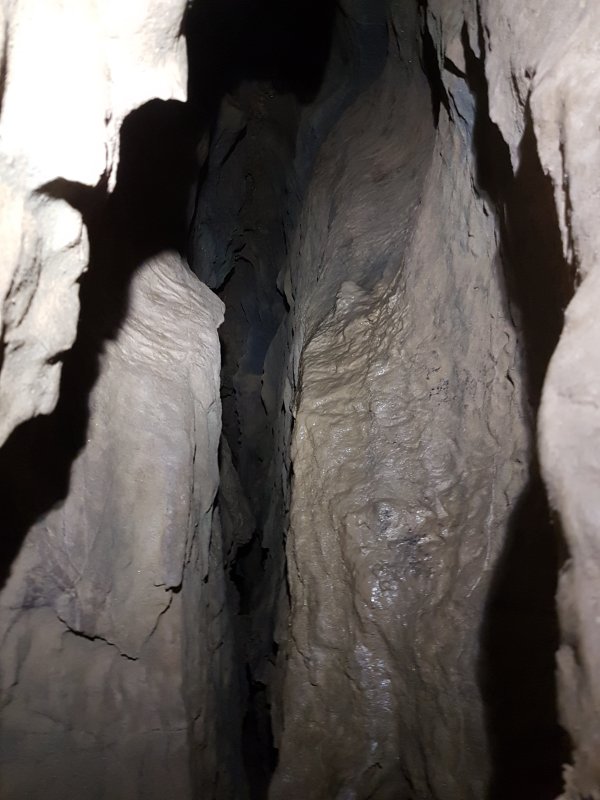 But it immediately shrinks to a much smaller size, with a squeeze and awkward climb before becoming too tight.
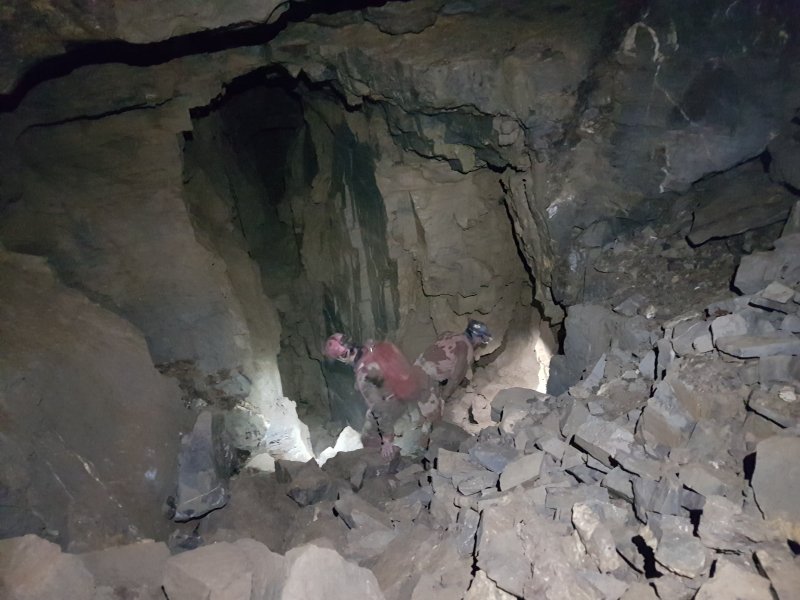 The main side passage almost immediately enters a large chamber.
Modelling by Jules and Phil, lighting by Tarquin, Jules and Phil
The main side passage almost immediately enters a large chamber.
Modelling by Jules and Phil, lighting by Tarquin, Jules and Phil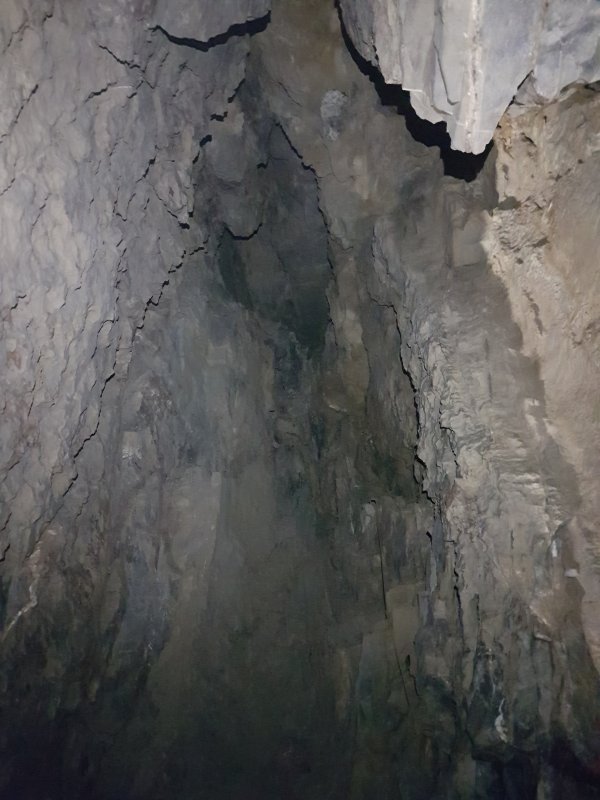 High in the ceiling there appears to be a roof tube.
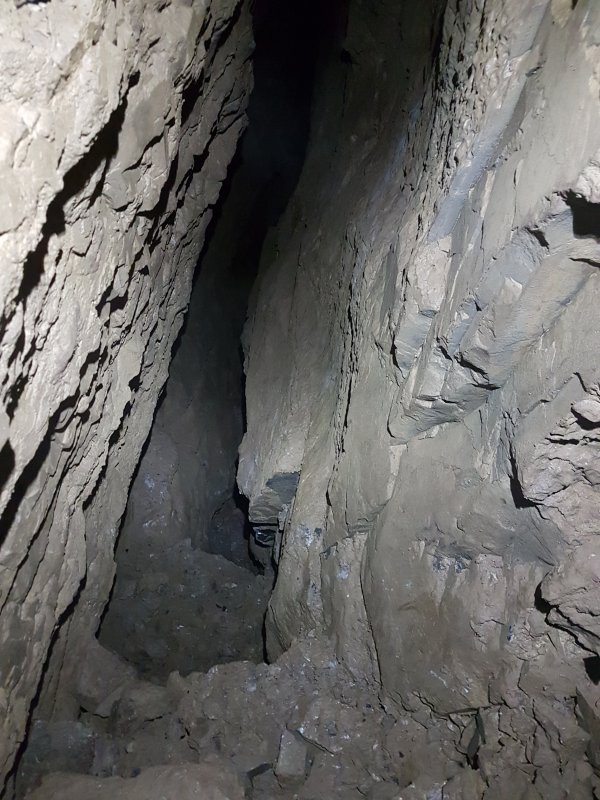 To the right is a steeply dropping rift, and like all deep rifts, it is blind.
 A rope climb ahead gains the way on.
Modelling by Jules and Gareth, lighting by Tarquin, Jules and Gareth
A rope climb ahead gains the way on.
Modelling by Jules and Gareth, lighting by Tarquin, Jules and Gareth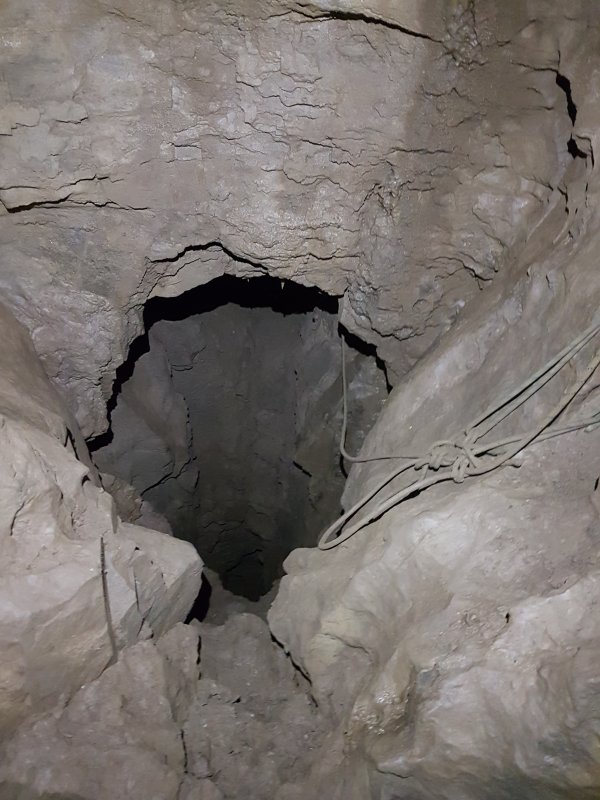 The route passes over another deep hole. Again, it's probably blind, and it's not on the survey.
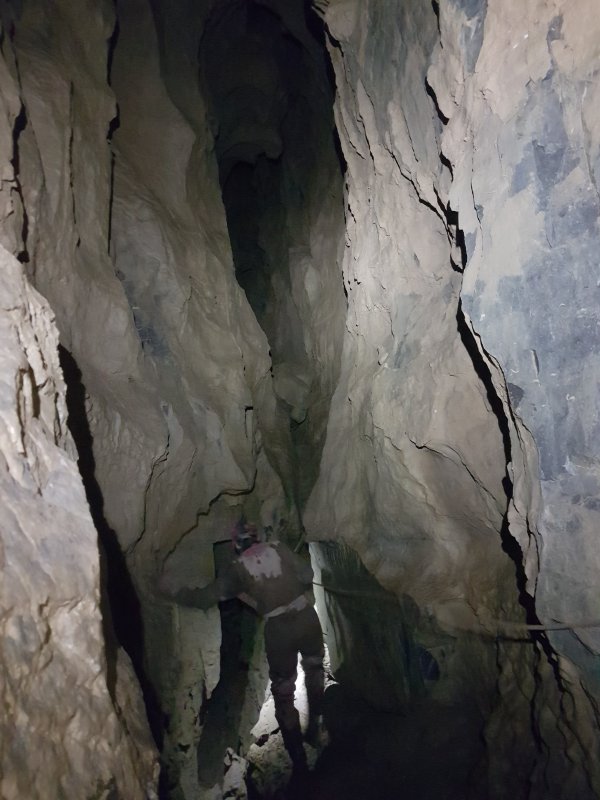 The traverse ends in a huge rift, traversing to a junction. Hidden in the left wall is a small tube. Hidden up above it is an invisible balcony that can be accessed later. Hidden high up on the right wall is a balcony with a possibly unsurveyed side passage. Ahead, the lower level reaches an abrupt end where a passage high up to the left was not visited, and the way on is a slippery climb up to the right.
Modelling by Jules, lighting by Tarquin and Jules
The traverse ends in a huge rift, traversing to a junction. Hidden in the left wall is a small tube. Hidden up above it is an invisible balcony that can be accessed later. Hidden high up on the right wall is a balcony with a possibly unsurveyed side passage. Ahead, the lower level reaches an abrupt end where a passage high up to the left was not visited, and the way on is a slippery climb up to the right.
Modelling by Jules, lighting by Tarquin and Jules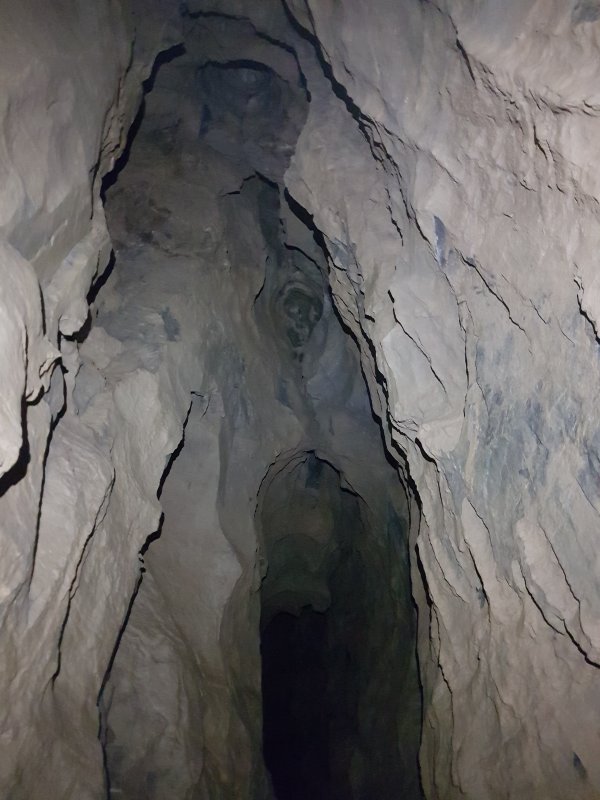 The impressive vaulted ceiling of the passage.
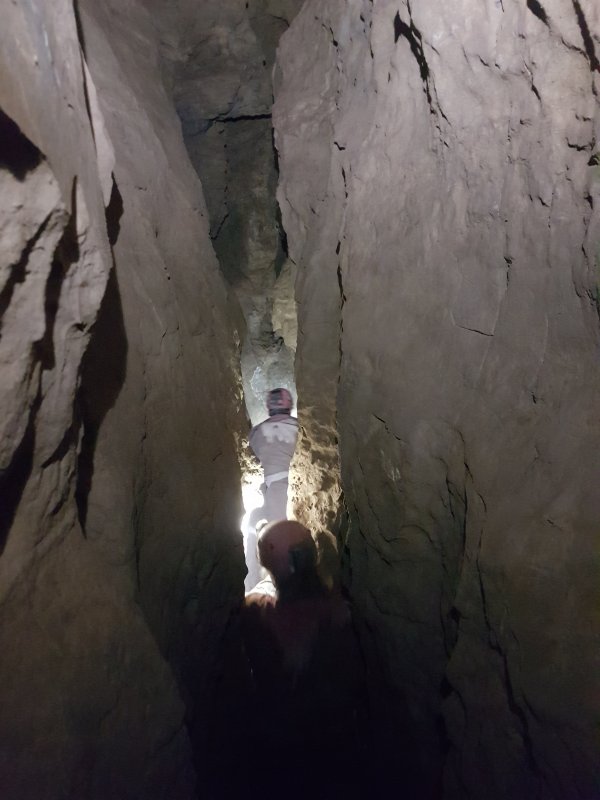 Looking down into the rift from the upper passage.
Modelling by Gareth and Jules, lighting by Tarquin, Gareth and Jules
Looking down into the rift from the upper passage.
Modelling by Gareth and Jules, lighting by Tarquin, Gareth and Jules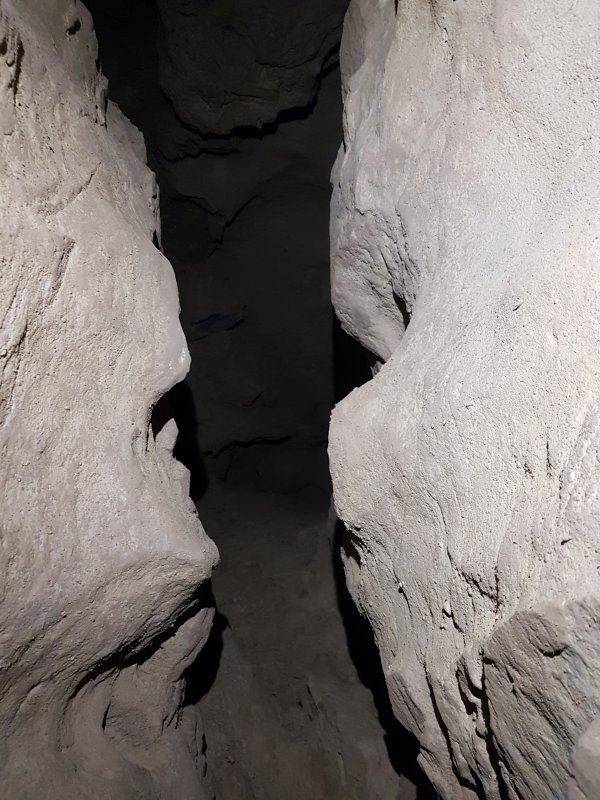 The upper passage ends, and a side passage to its left is guarded by an awkward slot that turns it into a very tricky climb.
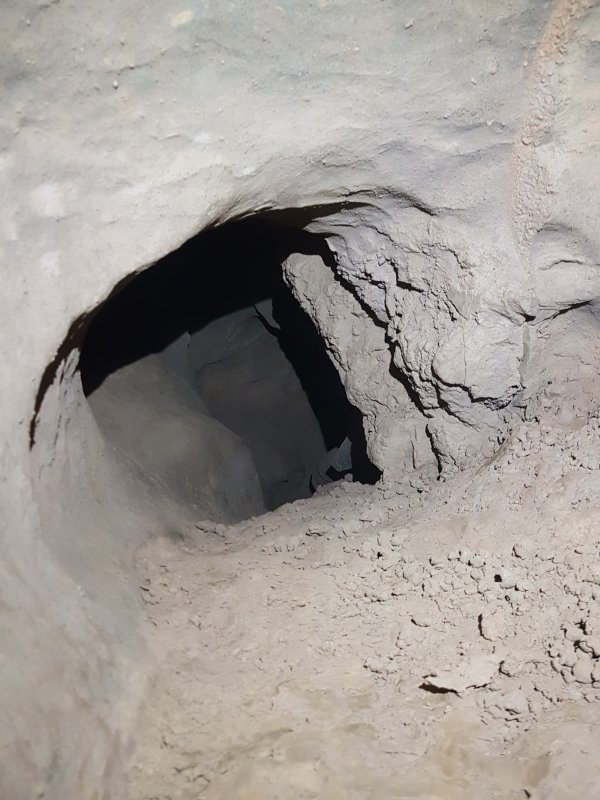 The passage splits in two. To the left is a steeply descending hole. Over the hole, a passage to the left reaches the left balcony.
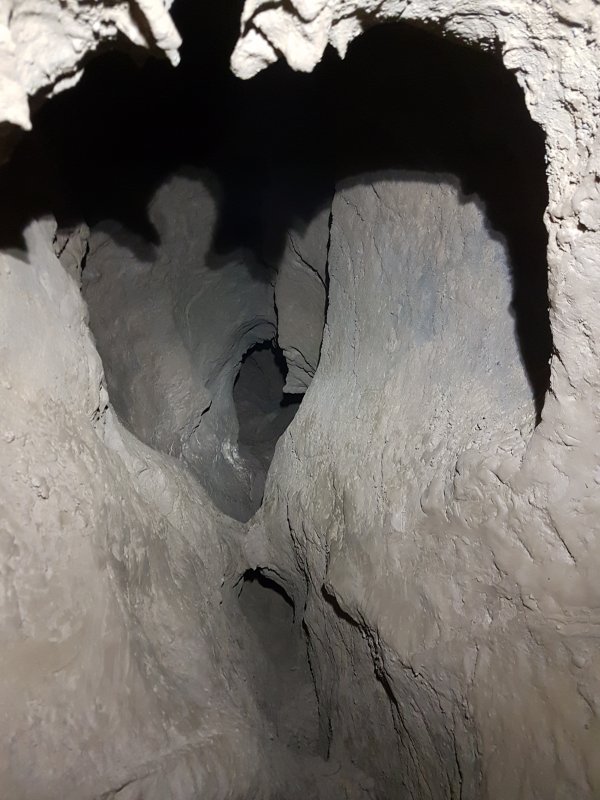 The hole keeps dropping, connecting through a squeeze to the small tube on the left mentioned earlier. Over the hole to the right is one of the ways on.
 The way on turns a corner where some holes connect to a later pitch. Everything connects to everything else here.
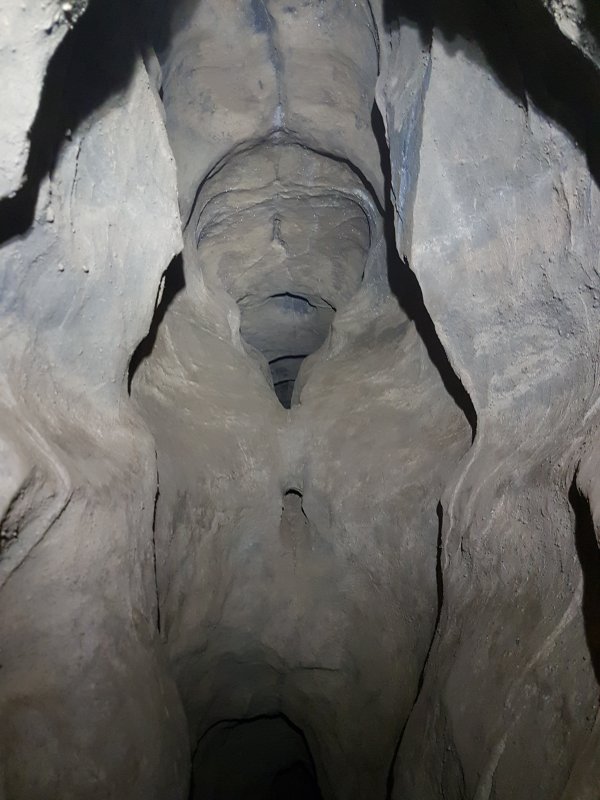 Above the corner, the way on requires a climb up, to post yourself into an upper passage. Here the two routes join.
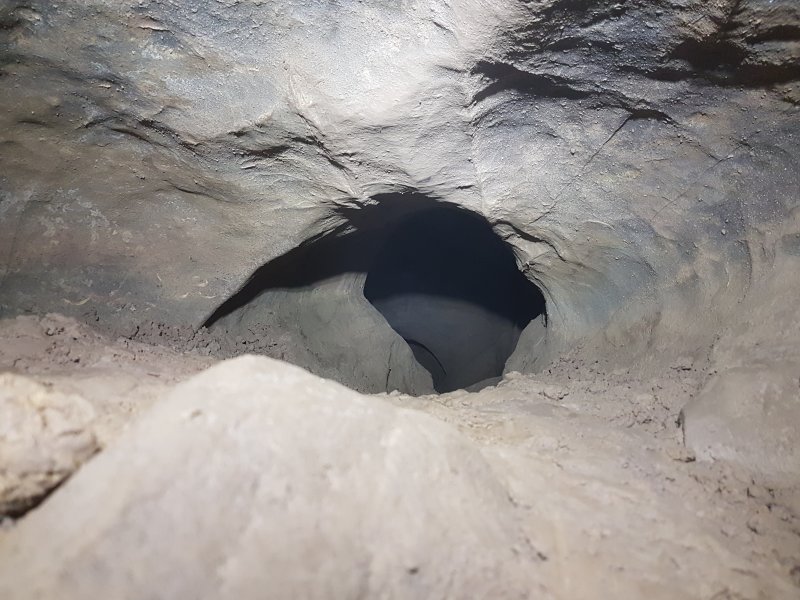 The right route is a low crawl over tacky mud.
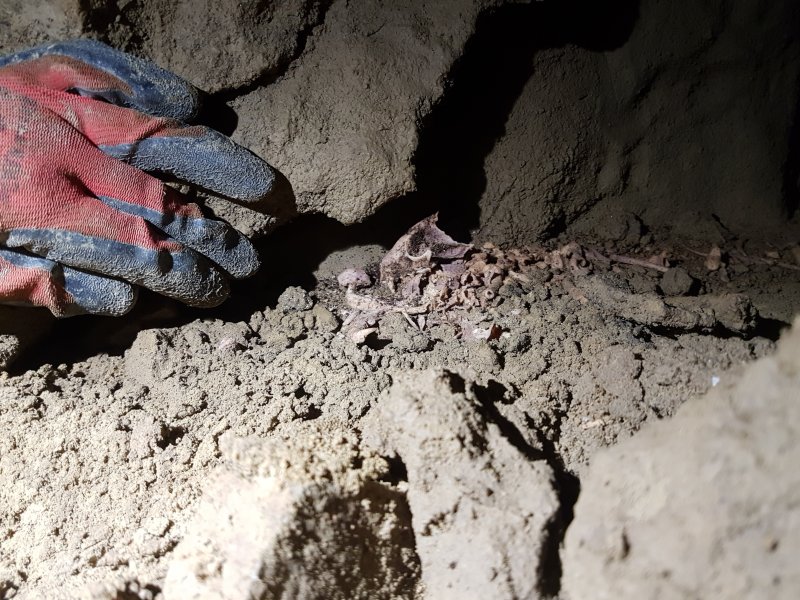 In an alcove on one side are the bones of a badger.
Modelling by Tarquin and Stripes
In an alcove on one side are the bones of a badger.
Modelling by Tarquin and Stripes The skull is still fairly well intact, with enough features to identify it. What makes this skeleton impressive is that this part of the cave is about 50 metres below the surface. There are some shakeholes above, but no known aven where they join. Surviving a 50 metre descent (assuming a single shaft) or following a 50 metre deep passageway, and crawling into this passage, is an incredible feat for a badger.
Modelling by Stripes
The skull is still fairly well intact, with enough features to identify it. What makes this skeleton impressive is that this part of the cave is about 50 metres below the surface. There are some shakeholes above, but no known aven where they join. Surviving a 50 metre descent (assuming a single shaft) or following a 50 metre deep passageway, and crawling into this passage, is an incredible feat for a badger.
Modelling by Stripes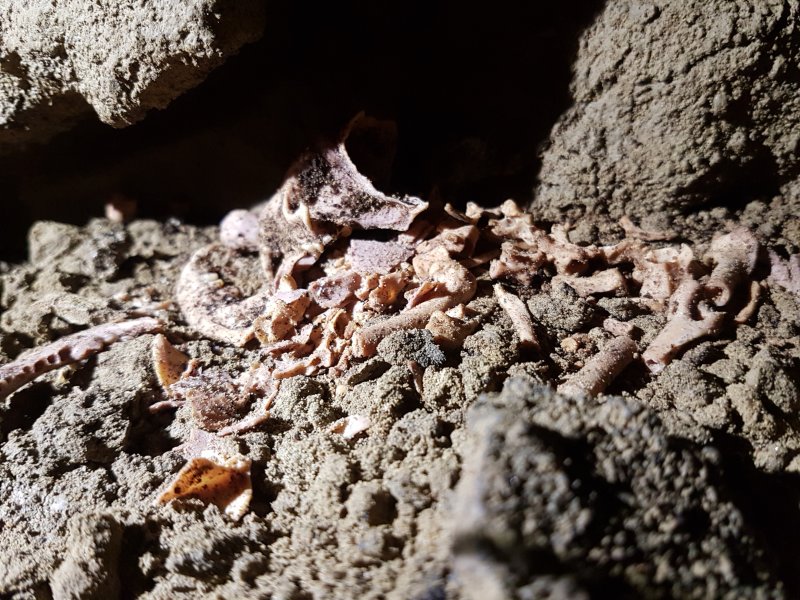 Deepest badger sett in Wales.
Modelling by Stripes
Deepest badger sett in Wales.
Modelling by Stripes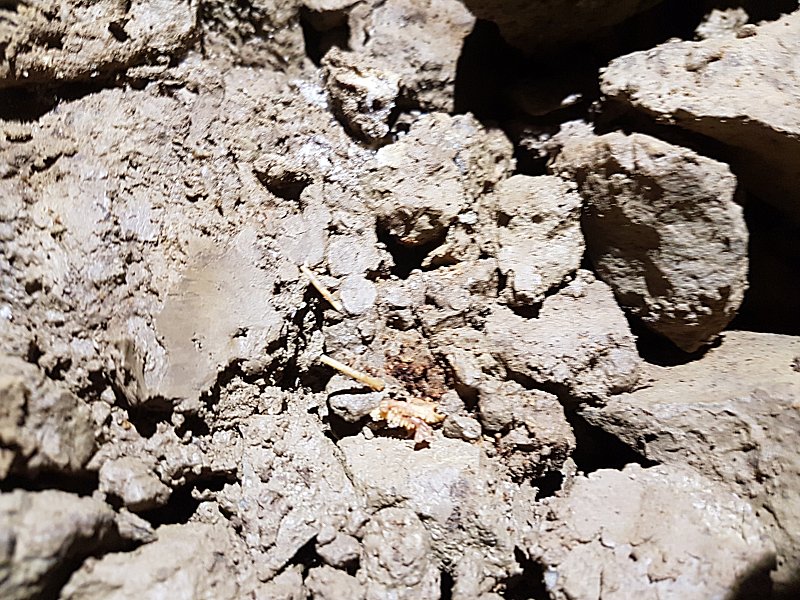 Small bones, unrelated to the badger.
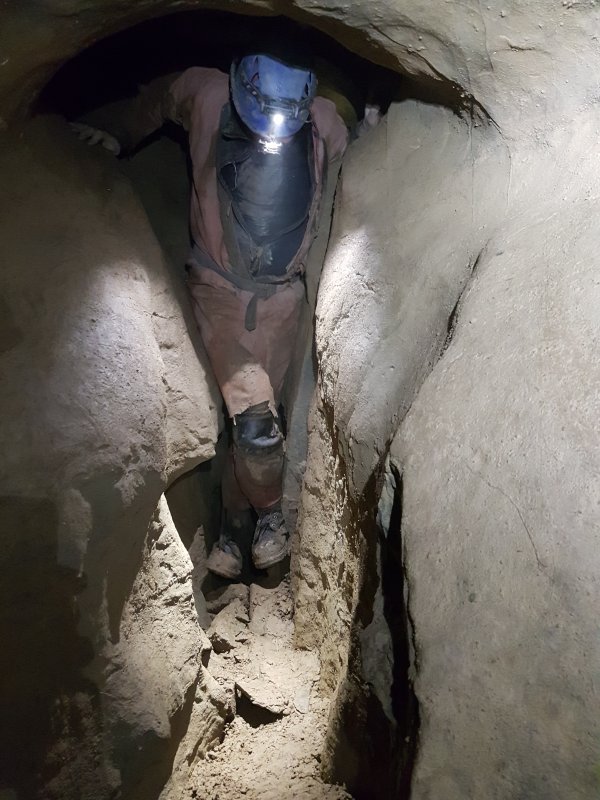 The conjoined passages become a reasonably sized keyhole.
Modelling by Phil, lighting by Tarquin and Phil
The conjoined passages become a reasonably sized keyhole.
Modelling by Phil, lighting by Tarquin and Phil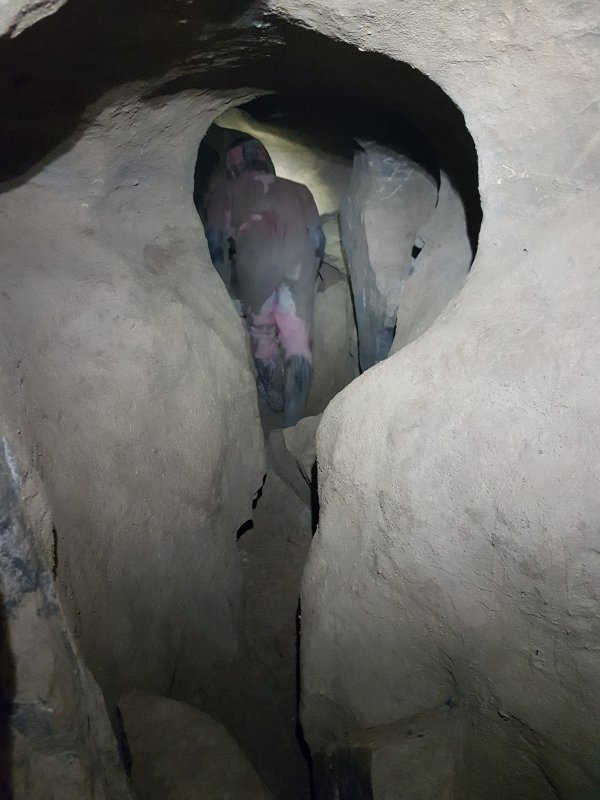 The way on splits, and the right side then splits into a series of smaller tubes, all of which become too tight.
Modelling by Gareth, lighting by Tarquin and Gareth
The way on splits, and the right side then splits into a series of smaller tubes, all of which become too tight.
Modelling by Gareth, lighting by Tarquin and Gareth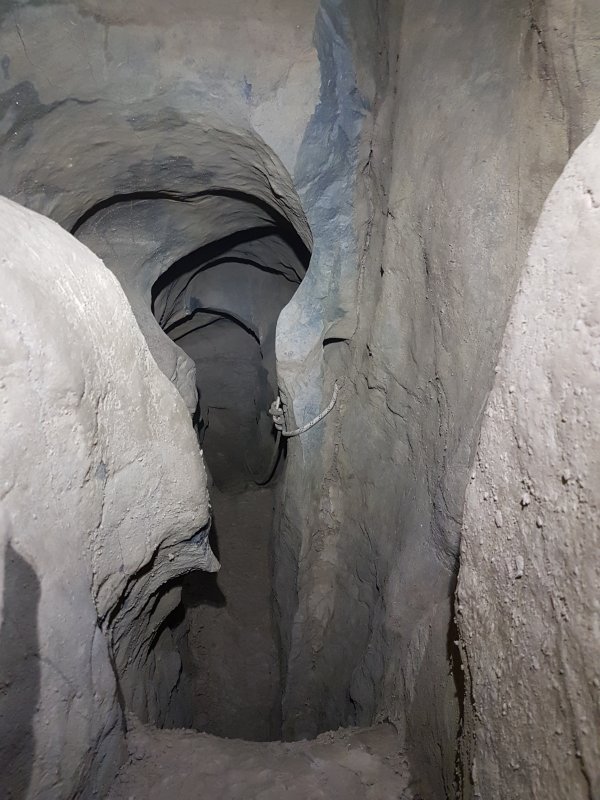 The left branch is a little more promising.
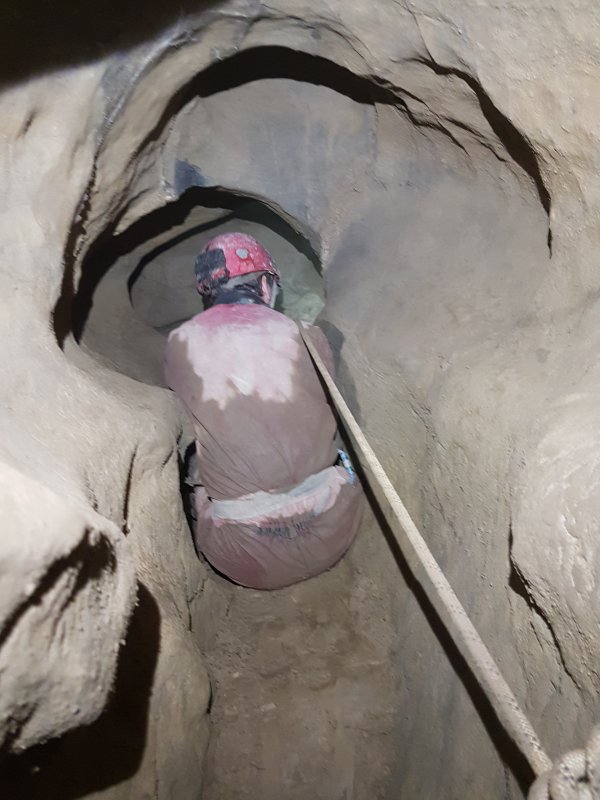 Another rope, which again suggests that we might need SRT gear.
Modelling by Jules, lighting by Tarquin and Jules
Another rope, which again suggests that we might need SRT gear.
Modelling by Jules, lighting by Tarquin and Jules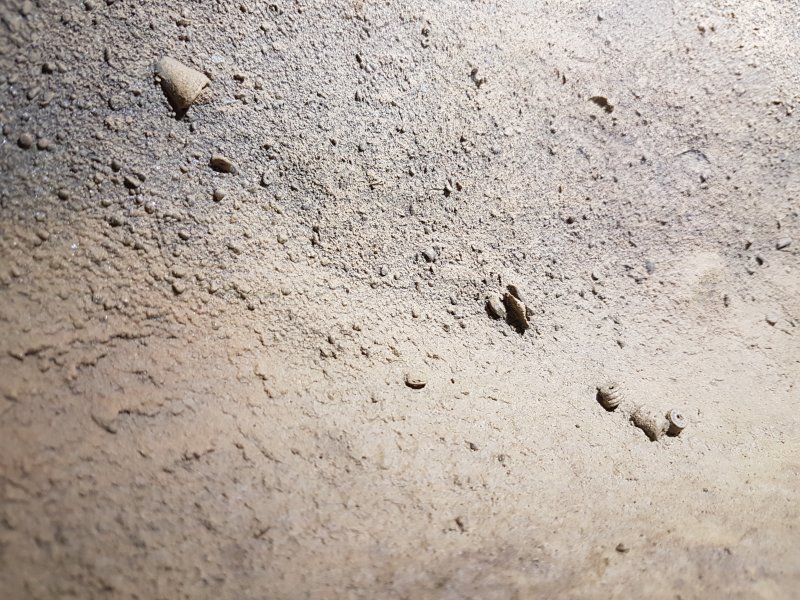 Fossil crinoids in the passage.
 The pitch head.
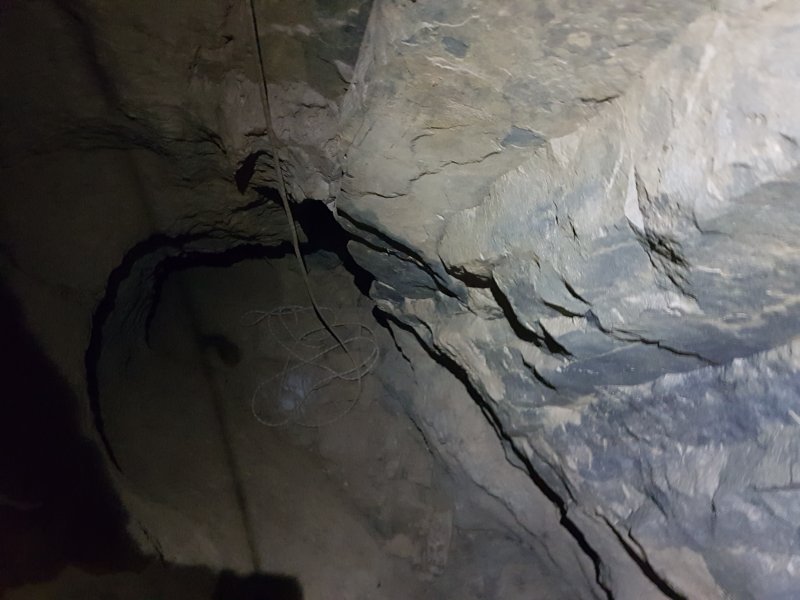 The base of the pitch appears to have no way on, even if that alcove does look promising.
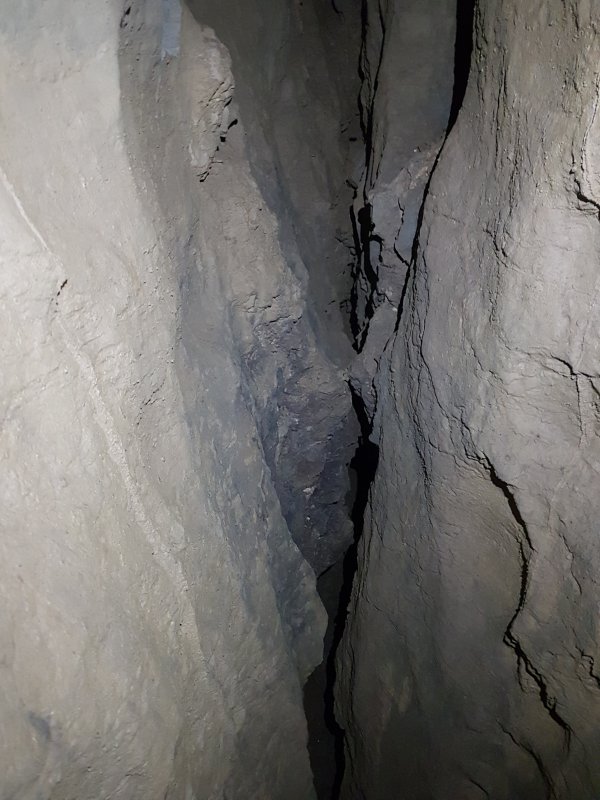 An obvious rift on one side is far too narrow to fit through.
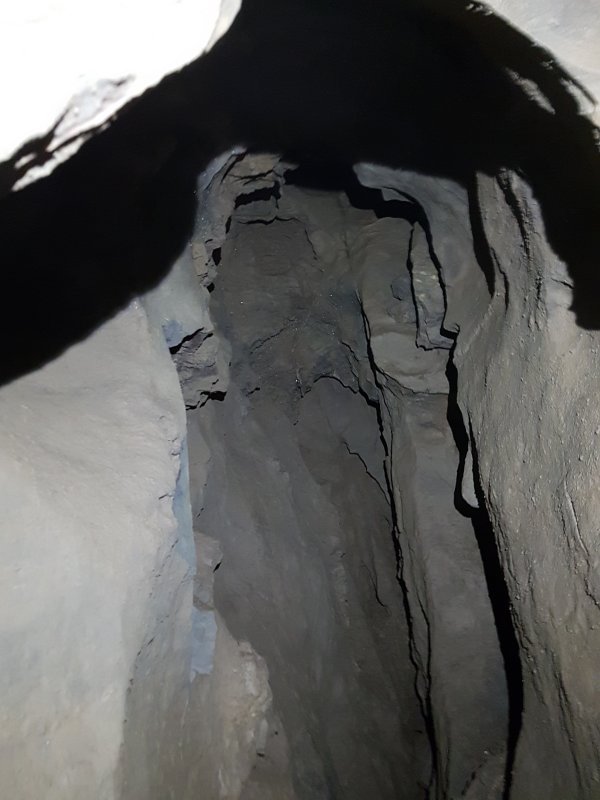 The ceiling looked like it had a separate aven, but a partial descent revealed that it is blind too.
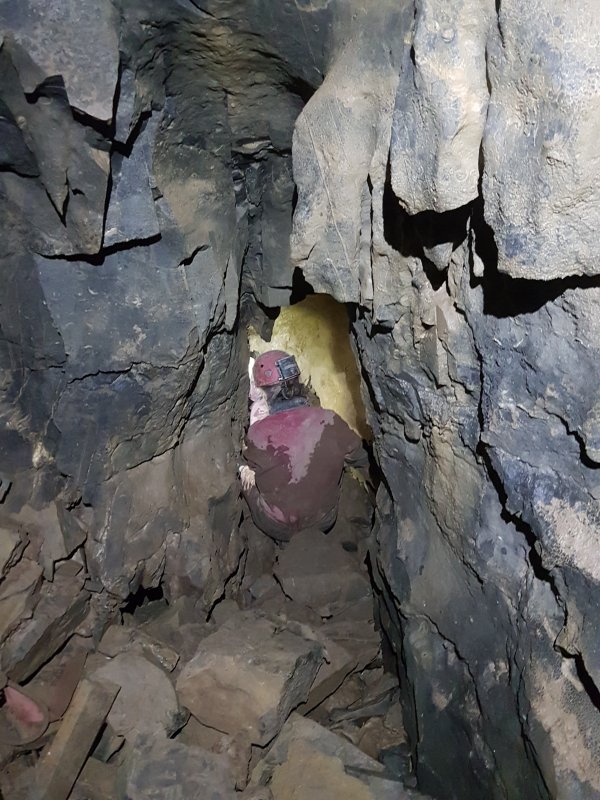 We returned to the tall rift after Spanner Dig, and at the end of the dip, looked into an unsurveyed rift. Clearly, nobody had tried to push it, since it only points towards an impossibly tight rift from the main side passage.
Modelling by Gareth, lighting by Tarquin and Gareth
We returned to the tall rift after Spanner Dig, and at the end of the dip, looked into an unsurveyed rift. Clearly, nobody had tried to push it, since it only points towards an impossibly tight rift from the main side passage.
Modelling by Gareth, lighting by Tarquin and Gareth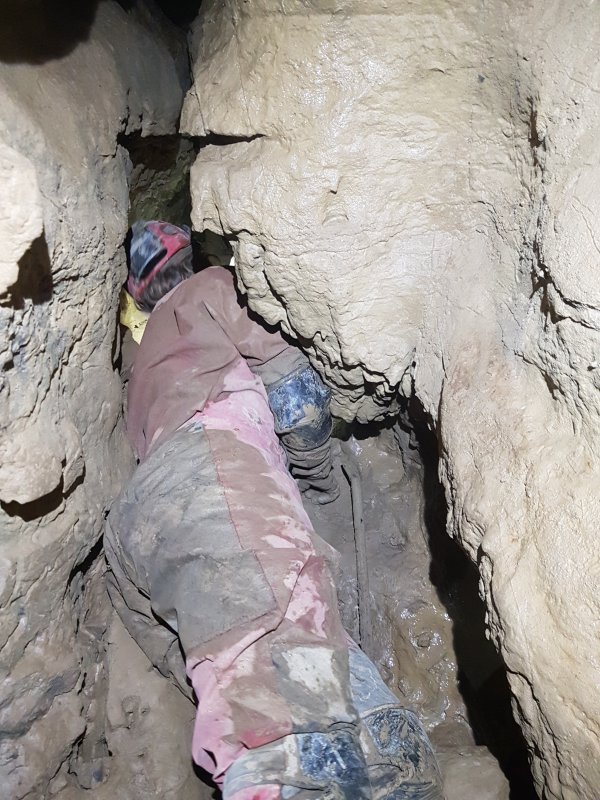 Gareth and Jules put in some effort to remove a blockage of rocks. The passage got its revenge by stealing Jules' glasses, and secreting them deep into the rift in the floor. Some very determined effort, and ingenious use of a crowbar, allowed them to finally be retrived. The rift was named Spectacle Thief in their honour.
Modelling by Gareth, lighting by Tarquin and Gareth
Gareth and Jules put in some effort to remove a blockage of rocks. The passage got its revenge by stealing Jules' glasses, and secreting them deep into the rift in the floor. Some very determined effort, and ingenious use of a crowbar, allowed them to finally be retrived. The rift was named Spectacle Thief in their honour.
Modelling by Gareth, lighting by Tarquin and Gareth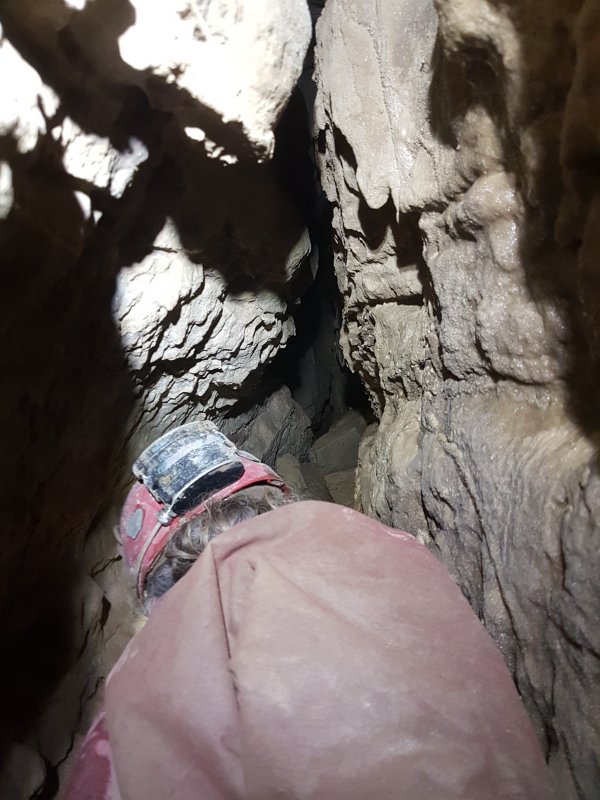 The passage currently has a too tight squeeze in it. Ahead, we can see a short section of wider passage ending at a dip down into a too tight section. The squeeze might be passable with great difficulty, but turning around afterwards might be impossible, so we left it. The passage won.
Modelling by Gareth, lighting by Tarquin and Gareth
The passage currently has a too tight squeeze in it. Ahead, we can see a short section of wider passage ending at a dip down into a too tight section. The squeeze might be passable with great difficulty, but turning around afterwards might be impossible, so we left it. The passage won.
Modelling by Gareth, lighting by Tarquin and Gareth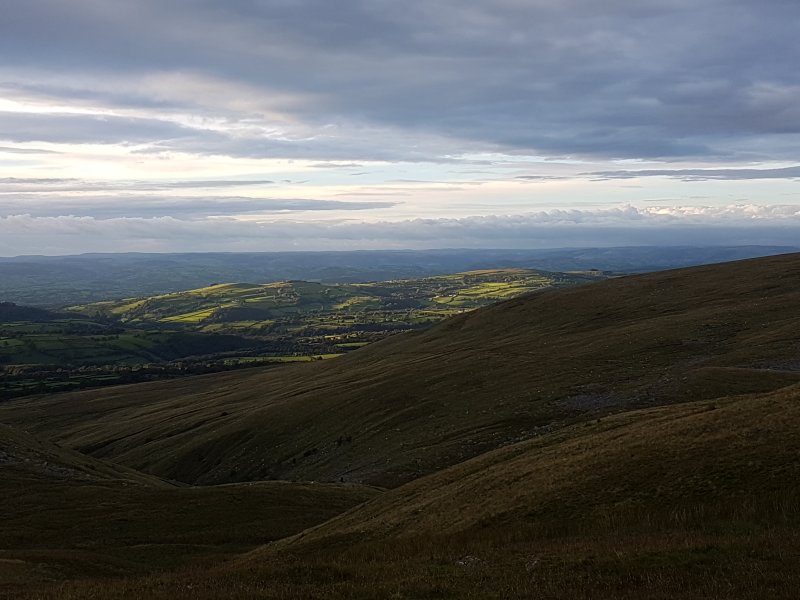 Sunset over the fields on Carn Powell (340 metres), Carreglwyd (353 metres) and Trichrug/Pen y Bicws (415 metres), with Llandeilo behind them. A fitting end to the day.