Dan yr Ogof Longer Crawl trip 19/09/2020
Unless otherwise stated, camera, setups, lighting, edits and gallery effects by Tarquin. Modelling and lighting at various points will be David Eason, Phil Knight and Dickon Morris.
The Longer Crawl is an infamous alternative to the standard Long Crawl between Dan yr Ogof I and II. It is far longer, and although most of it is relatively large, the tight parts are far tighter. But it is also very well decorated. Too well decorated, in fact, and the formations are very close to any passing cavers. There is nothing particularly special; the helictites are not as good as those in Grand Canyon, and the straws are easily surpassed by Cloud Chamber and Hangar Passage. But there is a lot of it compared with the other route through this area. As a result, it is never used for standard trips through the cave. It serves as the conduit for the emergency communication line that is laid through the cave. With so few trips using the passage, the cable is well protected from casual traffic, but it means that the few trips that do go through here have to be done carefully in what is already an extremely awkward passage.
This particular trip was for maintenance purposes, checking on the state of the emergency communication equipment, communication lines, and the unofficial tackle along the route.
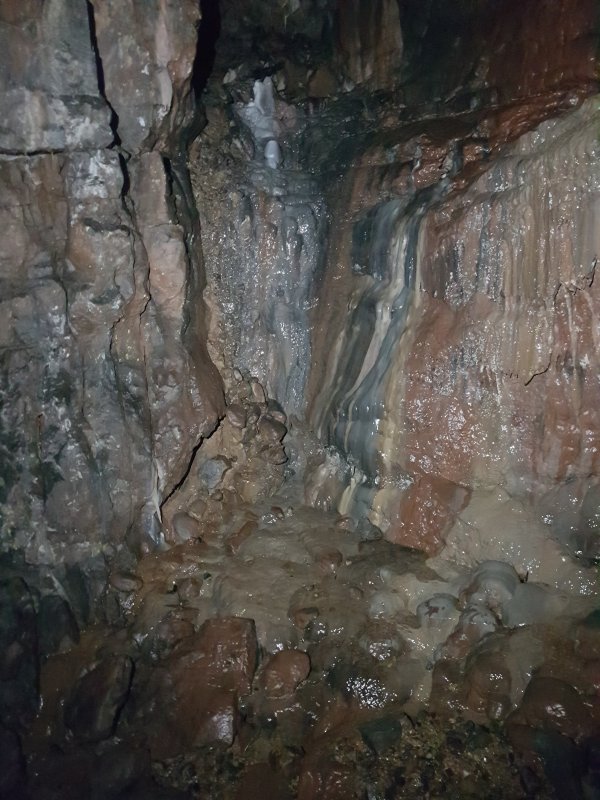
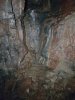 Flowstone in Boulder Chamber
 Traversing from Boulder Chamber into Wigmore Hall. The traverse is easy enough, but can be bypassed with a crawl up to the left. The hole can be free climbed up from the lower passages.
Modelling by David, lighting by Tarquin and David
Traversing from Boulder Chamber into Wigmore Hall. The traverse is easy enough, but can be bypassed with a crawl up to the left. The hole can be free climbed up from the lower passages.
Modelling by David, lighting by Tarquin and David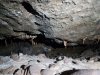 Stal in an undercut in Wigmore Hall.
 The rescue dump that used to be in Boulder Chamber now lives in Wigmore Hall. This has to be the best stocked rescue dump of any cave in the UK. There are tents, sleeping bags, food, cooking facilities and medical supplies. There is even the famous kettle. On the other side of the passage is the phone and electricity box. After all, if those lakes flood while someone is in the cave, it could be a while before the water drops enough to allow an exit.
Modelling by David, lighting by Tarquin and David
The rescue dump that used to be in Boulder Chamber now lives in Wigmore Hall. This has to be the best stocked rescue dump of any cave in the UK. There are tents, sleeping bags, food, cooking facilities and medical supplies. There is even the famous kettle. On the other side of the passage is the phone and electricity box. After all, if those lakes flood while someone is in the cave, it could be a while before the water drops enough to allow an exit.
Modelling by David, lighting by Tarquin and David This really is a phone box. It connects to a similar box hidden in Cauldron Chamber (which is also where the alarm will go off when you open this one), to allow communication between trapped cavers and rescuers in the showcave. There is a light for the box and a separate light for lighting the campsite. There are power sockets to supply power for cooking or lighting. The power and communication cables can be seen leading through the lakes and Pot Sump, then through the 1937 Series and up via a small tube into Wigmore Hall.
Modelling by David, lighting by Tarquin and David
This really is a phone box. It connects to a similar box hidden in Cauldron Chamber (which is also where the alarm will go off when you open this one), to allow communication between trapped cavers and rescuers in the showcave. There is a light for the box and a separate light for lighting the campsite. There are power sockets to supply power for cooking or lighting. The power and communication cables can be seen leading through the lakes and Pot Sump, then through the 1937 Series and up via a small tube into Wigmore Hall.
Modelling by David, lighting by Tarquin and David Formations in the early part of Wigmore Hall.
 Formations in the early part of Wigmore Hall.
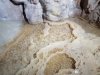 Crystal pools.
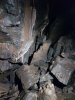 Shattered rocks and formations where the passage is crossed by a fault.
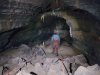 An early part of Wigmore Hall. This is a large, fossil phreas, heading away from all the known cave, with no known origin.
Modelling by David, lighting by Tarquin and David
An early part of Wigmore Hall. This is a large, fossil phreas, heading away from all the known cave, with no known origin.
Modelling by David, lighting by Tarquin and David Stalagmites in Wigore Hall.
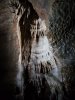 Flowstone and curtain in an aven.
Lighting by David
Flowstone and curtain in an aven.
Lighting by David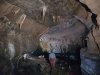 The middle part of Wigmore Hall, with more decorations.
Modelling by David, lighting by Tarquin
The middle part of Wigmore Hall, with more decorations.
Modelling by David, lighting by Tarquin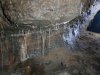 Straws.
Lighting by Tarquin and David
Straws.
Lighting by Tarquin and David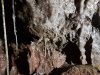 Helictites.
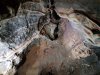 Another decorated aven.
Lighting by David
Another decorated aven.
Lighting by David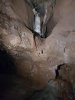 Decorated side rift.
 End of Wigmore Hall.
Modelling by David, lighting by Tarquin and David
End of Wigmore Hall.
Modelling by David, lighting by Tarquin and David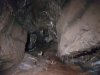 The final end is a calcited mud slope, with a lot of stal. This is begging for a bypass.
 A beautifully decorated little alcove just before the end. Up to its left is a dig through a choke, while down in the floor is a network of passages.
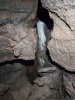 Formations in the passage network under Wigmore Hall. The passages under Wigmore Hall connect all the way back out to the bottom of the traverse.
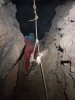 On the side of Boulder Chamber is a loose rubble slope, aided by a rope.
Modelling by Dickon, lighting by Tarquin and Dickon
On the side of Boulder Chamber is a loose rubble slope, aided by a rope.
Modelling by Dickon, lighting by Tarquin and Dickon The rope reaches a large chamber, with a series of side passages and balconies.
Modelling by Phil and David, lighting by Tarquin, Phil and David
The rope reaches a large chamber, with a series of side passages and balconies.
Modelling by Phil and David, lighting by Tarquin, Phil and David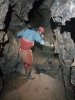 The obvious passage at the first landing is the start of August Series, which very quickly arrives at this deep rift.
Modelling by David, lighting by Tarquin and David
The obvious passage at the first landing is the start of August Series, which very quickly arrives at this deep rift.
Modelling by David, lighting by Tarquin and David The rift is deep enough to play on those "falling down a well" fears, the kind of hole that reminds you to pay a little bit more attention to where you are putting your feet.
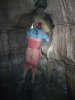 It starts off conveniently enough, but the passages soon get small and crawly. A right branch ends, while the left branch ascends a climb to reach about 100 m of passage. We had other places to be, so left it all for another day. An aven above the landing also has another side passage that weaves its way around August Series via a tall climb, without ever intercepting it.
Modelling by David, lighting by Tarquin and David
It starts off conveniently enough, but the passages soon get small and crawly. A right branch ends, while the left branch ascends a climb to reach about 100 m of passage. We had other places to be, so left it all for another day. An aven above the landing also has another side passage that weaves its way around August Series via a tall climb, without ever intercepting it.
Modelling by David, lighting by Tarquin and David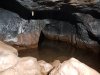 Part way up the climb from the first landing to the upper balcony, a stream running in a natural trough elevated high above the climbs, gets delivered into this pool in a crawling sized passage. The water level is currently low but an obvious, wet tide mark sits a few inches higher, and strange gurgling sounds can be heard. This would appear to be the water reservoir for the nearby Lavatory Dan periodic siphon.
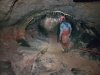 The large passage heading off from the upper balcony.
Modelling by David, lighting by Tarquin and David
The large passage heading off from the upper balcony.
Modelling by David, lighting by Tarquin and David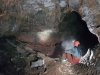 Formations at the end of the passage.
Modelling by David, lighting by Tarquin, Dickon, David and Phil
Formations at the end of the passage.
Modelling by David, lighting by Tarquin, Dickon, David and Phil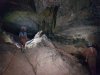 The passage ends in the impressive Mud Hall, with its profusion of mud and straws.
Modelling by David and Phil, lighting by Tarquin, Dickon, David and Phil
The passage ends in the impressive Mud Hall, with its profusion of mud and straws.
Modelling by David and Phil, lighting by Tarquin, Dickon, David and Phil Straws at the back of Mud Hall. There is a short loop of crawls back there.
Modelling by David, lighting by Tarquin and David
Straws at the back of Mud Hall. There is a short loop of crawls back there.
Modelling by David, lighting by Tarquin and David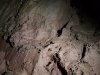 Mud formation in the middle of the chamber.
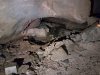 The small stream in Mud Hall flows out through a low crawl, which enters the passageway in, via a climb. The water then joins the Lavatory Dan water.
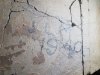 Signature of Jeff L. Morgan, one of the brothers who discovered the cave. This one is near the Straw Chamber, or as they called it; Ashwell Morgan's Palace.
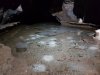 Calcite rafts on the crystal pool in Corbell's Chamber.
 Straws in the stooping passages after Straw Chamber.
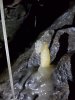 This tiny little stalagmite looks like a native American chief's headdress.
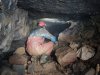 Beside this, a rocky undercut is the way into Ashford Price's Hall.
Modelling by David, lighting by Tarquin and David
Beside this, a rocky undercut is the way into Ashford Price's Hall.
Modelling by David, lighting by Tarquin and David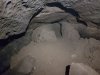 To the left - back towards Straw Chamber - ends in gravel fill.
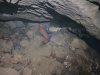 To the right slopes up into the chamber.
Modelling by David, lighting by Tarquin, Phil and David
To the right slopes up into the chamber.
Modelling by David, lighting by Tarquin, Phil and David The lower part of Ashford Price's Hall, named after the father of the current showcave owner. The pole accesses a short side passage.
Modelling by Phil, David and Dickon's legs, lighting by Tarquin, Phil, David and Dickon
The lower part of Ashford Price's Hall, named after the father of the current showcave owner. The pole accesses a short side passage.
Modelling by Phil, David and Dickon's legs, lighting by Tarquin, Phil, David and Dickon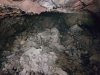 The top of Ashford Price's Hall is a monstrously big choke. This choke is the reason that the Long Crawl is used. The other side of it would be Gerard Platten Hall, but a colossal shakehole on the surface shows that a way through will never be found. Fortunately, there are two bypasses to it.
Lighting by Tarquin, Dickon, Phil and David
The top of Ashford Price's Hall is a monstrously big choke. This choke is the reason that the Long Crawl is used. The other side of it would be Gerard Platten Hall, but a colossal shakehole on the surface shows that a way through will never be found. Fortunately, there are two bypasses to it.
Lighting by Tarquin, Dickon, Phil and David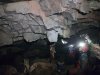 The ceiling is a chimney failure zone, with large amounts of rock peeling off. Best not touched.
Modelling by David, Phil and Dickon, lighting by Tarquin, David, Phil and Dickon
The ceiling is a chimney failure zone, with large amounts of rock peeling off. Best not touched.
Modelling by David, Phil and Dickon, lighting by Tarquin, David, Phil and Dickon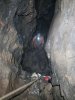 Just after the Showerbath aven is a climb up into the Longer Crawl. This must not be mistaken for the earlier climb in the Showerbath aven itself, which only leads to a dig.
Modelling by David and Phil, lighting by Tarquin, David and Phil
Just after the Showerbath aven is a climb up into the Longer Crawl. This must not be mistaken for the earlier climb in the Showerbath aven itself, which only leads to a dig.
Modelling by David and Phil, lighting by Tarquin, David and Phil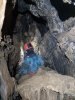 The Longer Crawl starts with a further little climb and double back over a rocky patch. This immediately causes it to point in the wrong direction, away from its destination. This is what makes the Longer Crawl so long.
Modelling by David, lighting by Tarquin and David
The Longer Crawl starts with a further little climb and double back over a rocky patch. This immediately causes it to point in the wrong direction, away from its destination. This is what makes the Longer Crawl so long.
Modelling by David, lighting by Tarquin and David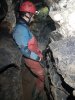 To start with, the passage is walking size. If only it stayed that way.
Modelling by David, lighting by Tarquin and David
To start with, the passage is walking size. If only it stayed that way.
Modelling by David, lighting by Tarquin and David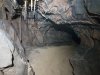 At a junction, the way on is to the right, but this crawl is straight ahead.
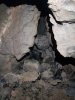 The crawl ends in a tiny aven, with a pinched out rift ahead.
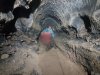 The way on to the right from the junction is stooping/crawling size. Avoid that cable.
Modelling by David, lighting by Tarquin and David
The way on to the right from the junction is stooping/crawling size. Avoid that cable.
Modelling by David, lighting by Tarquin and David The passage reaches a tiny enlargement with some stal, where you are really hoping that the way on will be a lower passage that you hadn't noticed, but it pinches out.
Modelling by David, lighting by Tarquin and David
The passage reaches a tiny enlargement with some stal, where you are really hoping that the way on will be a lower passage that you hadn't noticed, but it pinches out.
Modelling by David, lighting by Tarquin and David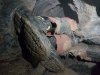 But no, the way on is through the most ridiculous squeeze at ceiling height. This is small and stupid, and by far the most claustrophobic part, but it is not the tightest.
Modelling by Phil
But no, the way on is through the most ridiculous squeeze at ceiling height. This is small and stupid, and by far the most claustrophobic part, but it is not the tightest.
Modelling by Phil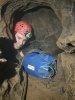 Exiting the squeeze, where it turns a corner. Fortunately, there is enough space to roll around, because turning a corner in that tiny space would not be fun at all.
Modelling by David
Exiting the squeeze, where it turns a corner. Fortunately, there is enough space to roll around, because turning a corner in that tiny space would not be fun at all.
Modelling by David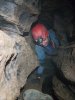 The passage stays uncomfortably small, and you need to carefully avoid dropping things down the rift, such as your pride, balls, bags and camera.
Modelling by Tarquin's boot and David
The passage stays uncomfortably small, and you need to carefully avoid dropping things down the rift, such as your pride, balls, bags and camera.
Modelling by Tarquin's boot and David Getting smaller.
Modelling by David, lighting by Tarquin and David
Getting smaller.
Modelling by David, lighting by Tarquin and David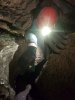 OK, this part is tighter. But it feels more comfortable because you can see the end, if you can manage to lift your head, that is.
Modelling by David, lighting by Tarquin and David
OK, this part is tighter. But it feels more comfortable because you can see the end, if you can manage to lift your head, that is.
Modelling by David, lighting by Tarquin and David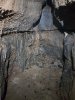 The passage enlarges and descends to a hole down. The way on remains high around a corner to the left, but down in the floor is Initials Chamber. This requires a climb down via a rock bridge.
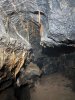 Underneath the way in is a passage which I did not follow. It looks like a lower level of the same rift, but maybe it goes elsewhere too.
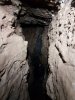 In the opposite direction is a rift with an inlet. This probably ends quickly but would be an obvious place to dig, as it points away from the known cave.
 The way on above starts around a corner to the left, only slightly lower than the way in. The formations start immediately.
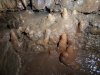 Stalagmites below.
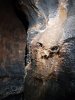 The helictites are the real highlight of this passage. Progress is slow, keeping low enough to avoid touching them.
 Taking photographs while lying on the floor, aiming a light and camera. Making sure to keep far away from the formations. These will not be my best photographs.
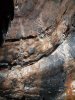 Glass-like, non-branching helictites, typical for the caves in this area.
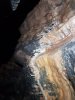 Helictites.
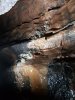 Helictites.
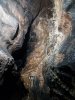 The best patch of helictites.
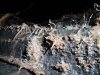 Helictites.
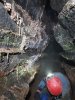 Slithering along under the helictites.
Modelling by David, lighting by Tarquin and David.
Slithering along under the helictites.
Modelling by David, lighting by Tarquin and David.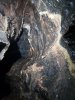 Helictites.
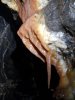 Curtain-finger.
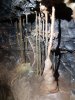 Grill of straw columns.
 Squeezing past the formations. Baggy oversuits pulled tight.
Modelling by David, lighting by Tarquin and David.
Squeezing past the formations. Baggy oversuits pulled tight.
Modelling by David, lighting by Tarquin and David.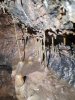 A second grill with evidence of a previous failure.
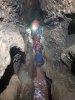 Time to get wet feet.
Modelling by David, lighting by Tarquin and David.
Time to get wet feet.
Modelling by David, lighting by Tarquin and David.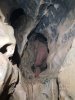 Climb up where the lower level pinches out.
Modelling by Phil.
Climb up where the lower level pinches out.
Modelling by Phil. Levitate over the water.
Modelling by David, lighting by Tarquin and David.
Levitate over the water.
Modelling by David, lighting by Tarquin and David.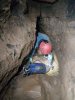 A short crawl.
Modelling by David, lighting by Tarquin and David.
A short crawl.
Modelling by David, lighting by Tarquin and David.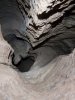 The cables go down a pitch in the floor but the way on continues over it.
 The way on reached the head of a small pitch. The ladder and rope not official, but without them this would be impossible. There is a short blind passage in the opposite wall which we did not explore.
Modelling by Phil, lighting by Tarquin and Phil
The way on reached the head of a small pitch. The ladder and rope not official, but without them this would be impossible. There is a short blind passage in the opposite wall which we did not explore.
Modelling by Phil, lighting by Tarquin and Phil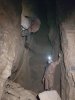 Free climbing this would not be possible. At the bottom, a hole down descends to a junction.
Modelling by David and Phil, lighting by Tarquin, David and Phil
Free climbing this would not be possible. At the bottom, a hole down descends to a junction.
Modelling by David and Phil, lighting by Tarquin, David and Phil To the right (none of which is on the survey) reaches another junction where up to the right reaches the bottom of an aven where the cables come in from the passage above.
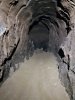 To the left at the second junction is a sandy crawl.
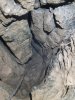 A tight hole on the left drops down a short climb.
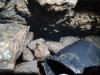 This reaches a dry stone wall, where there is also a bundle of spare cable - this is a tap into the communications cable for use during rescues.
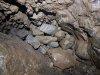 The other side of the same wall is in the regular Long Crawl.
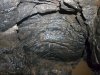 Just above this hole between the Long Crawl and Cattle Trough.
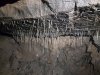 Continuing along the sandy crawl reaches a small grotto where there is a short side passage ascending through a dig to the right.
 To the left is another passage that appears to end at a tight rift, but to the right, a very low arch is a way on. This looked like it might be too low for me, so I didn't try it.
 Extremely small cavers might be able to follow it through this body sized tube.
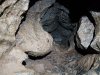 That then appears here, just above the start of the Cattle Trough. We have done all of that caving, and we are just a few metres from where we started into the Longer Crawl. The survey is completely wrong in this area, since the passages have to weave around and cross each other in a couple of places. The passage was resurveyed, but the resurvey couldn't be linked in to the old survey of the Long Crawl because the old one made no sense.
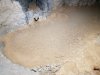 At the first junction below the pitch, continuing ahead reaches the start of the gours.
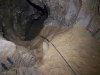 Climbing down the gours.
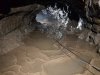 The passage of gours.
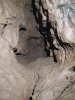 At the end of the gours is another side passage ahead, while the way on drops down to the left.
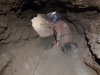 After the gours.
Modelling by Phil, lighting by Tarquin and Phil
After the gours.
Modelling by Phil, lighting by Tarquin and Phil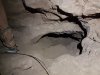 The passage then reaches a small chamber with a selection of ways off. This one is down in the floor, which is where the wire goes.
Modelling by Phil's clodhopper, lighting by Tarquin
The passage then reaches a small chamber with a selection of ways off. This one is down in the floor, which is where the wire goes.
Modelling by Phil's clodhopper, lighting by Tarquin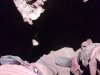 It's body sized, and repeatedly passes through tight bits as it descends to an inevitable final drop out of the ceiling of Gerard Platten Hall. This is a stupid place to be.
Modelling by Tarquin
It's body sized, and repeatedly passes through tight bits as it descends to an inevitable final drop out of the ceiling of Gerard Platten Hall. This is a stupid place to be.
Modelling by Tarquin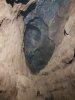 At the end of the chamber, a drop down in the floor reaches a steeply descending tube, popping out at the top of this climb. This is shown on the survey, but not correctly.
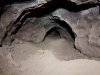 This rather miserably low crawl continues.
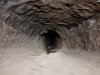 Looks stupidly small, but it is actually not as bad as it looks.
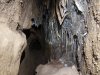 This reaches a tiny grotto.
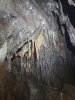 The tiny grotto.
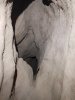 The grotto has a hole in the floor, and a passage over the top of it reaching another hole down. The holes are really steep and pretty difficult to navigate, and should be avoided since any dirt that falls from here lands in the crystal pool below, and could sink the rafts. Falling out of here yourself would not be funny.
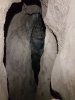 The holes reach a shaft dropping directly into the Crystal Pool - the one with all the calcite rafts at the start of Flabbergasm Oxbow.
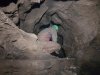 A climb up in the last chamber reaches the normal way on.
Modelling by Dickon, lighting by Tarquin and Dickon
A climb up in the last chamber reaches the normal way on.
Modelling by Dickon, lighting by Tarquin and Dickon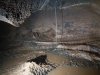 This passage is crawling sized, and the straw formations start immediately.
 Straws.
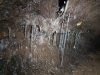 Straws.
 Straws.
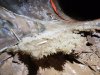 Dried crystal pool, with the muddied remains of rafts.
 Straws.
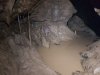 Straws and a muddy pool.
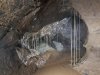 The best straw columns.
Lighting by Tarquin and David (I think)
The best straw columns.
Lighting by Tarquin and David (I think)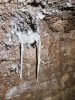 Straws.
 Straws.
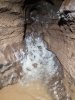 Calcite flow.
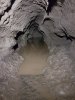 The passage then gains a canal, which gets progressively deeper. As none of us were wearing wetsuits, my companions all made the decision not to continue, so I was spared the need to crawl through the squalor. By now we were parallel with the end of Flabbergasm Oxbow, and the crawl should become sandy, and then end at the start of Monk Hall. Still a long way off. It will have to wait for another day. We made our way out via the Long Crawl, not wanting to face those squeezes again.
 Flowstone in Boulder Chamber
 Traversing from Boulder Chamber into Wigmore Hall. The traverse is easy enough, but can be bypassed with a crawl up to the left. The hole can be free climbed up from the lower passages.
Modelling by David, lighting by Tarquin and David
Traversing from Boulder Chamber into Wigmore Hall. The traverse is easy enough, but can be bypassed with a crawl up to the left. The hole can be free climbed up from the lower passages.
Modelling by David, lighting by Tarquin and David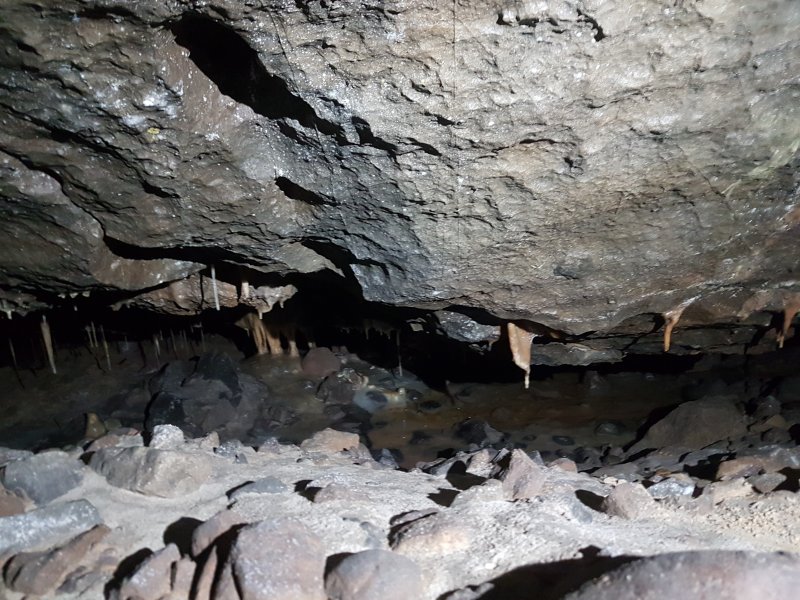 Stal in an undercut in Wigmore Hall.
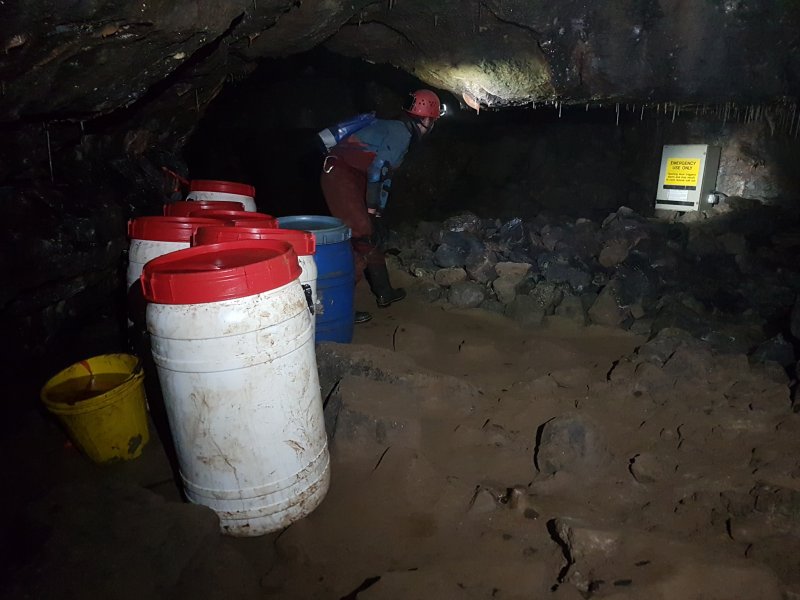 The rescue dump that used to be in Boulder Chamber now lives in Wigmore Hall. This has to be the best stocked rescue dump of any cave in the UK. There are tents, sleeping bags, food, cooking facilities and medical supplies. There is even the famous kettle. On the other side of the passage is the phone and electricity box. After all, if those lakes flood while someone is in the cave, it could be a while before the water drops enough to allow an exit.
Modelling by David, lighting by Tarquin and David
The rescue dump that used to be in Boulder Chamber now lives in Wigmore Hall. This has to be the best stocked rescue dump of any cave in the UK. There are tents, sleeping bags, food, cooking facilities and medical supplies. There is even the famous kettle. On the other side of the passage is the phone and electricity box. After all, if those lakes flood while someone is in the cave, it could be a while before the water drops enough to allow an exit.
Modelling by David, lighting by Tarquin and David This really is a phone box. It connects to a similar box hidden in Cauldron Chamber (which is also where the alarm will go off when you open this one), to allow communication between trapped cavers and rescuers in the showcave. There is a light for the box and a separate light for lighting the campsite. There are power sockets to supply power for cooking or lighting. The power and communication cables can be seen leading through the lakes and Pot Sump, then through the 1937 Series and up via a small tube into Wigmore Hall.
Modelling by David, lighting by Tarquin and David
This really is a phone box. It connects to a similar box hidden in Cauldron Chamber (which is also where the alarm will go off when you open this one), to allow communication between trapped cavers and rescuers in the showcave. There is a light for the box and a separate light for lighting the campsite. There are power sockets to supply power for cooking or lighting. The power and communication cables can be seen leading through the lakes and Pot Sump, then through the 1937 Series and up via a small tube into Wigmore Hall.
Modelling by David, lighting by Tarquin and David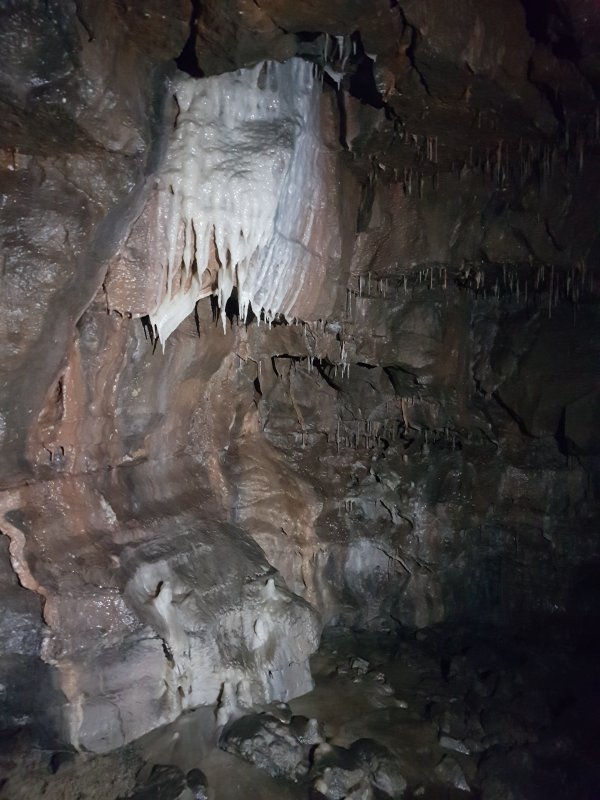 Formations in the early part of Wigmore Hall.
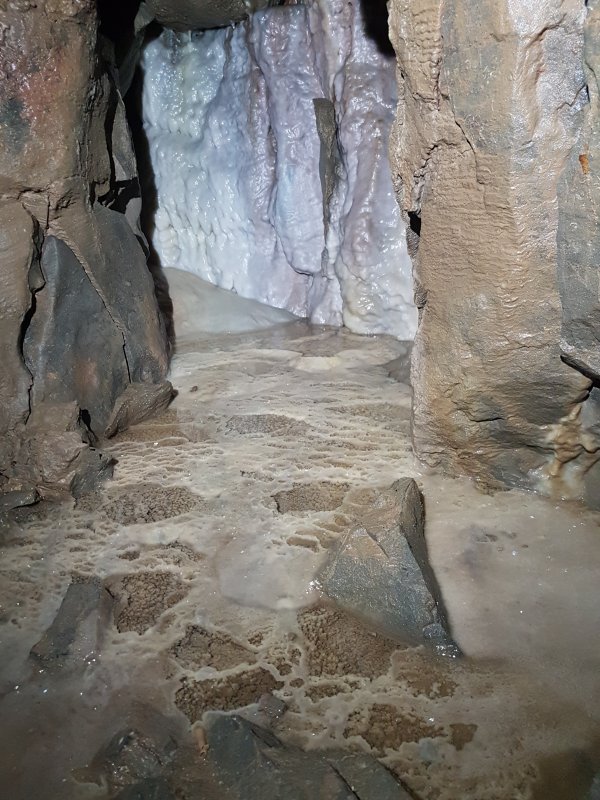 Formations in the early part of Wigmore Hall.
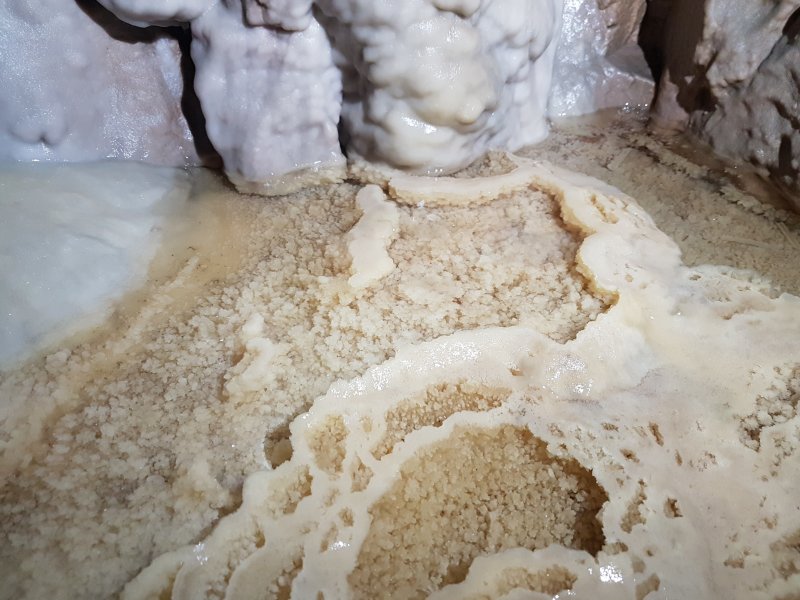 Crystal pools.
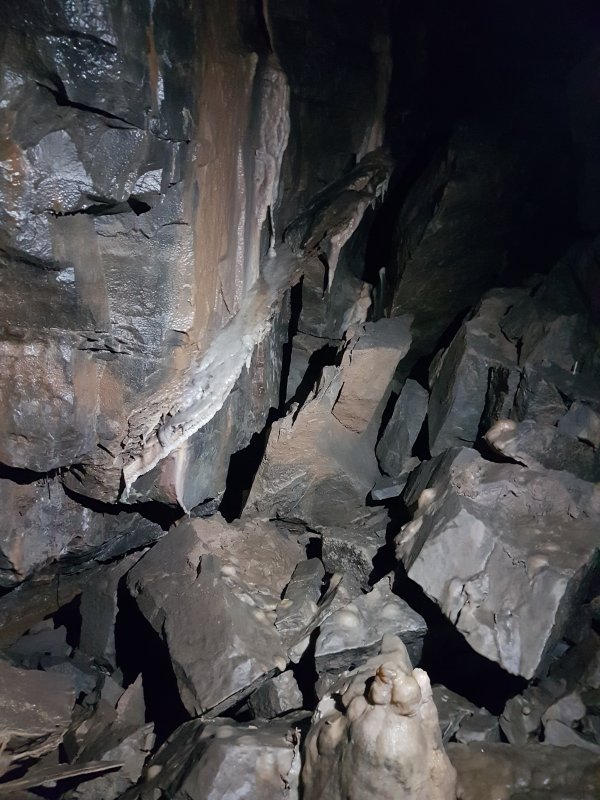 Shattered rocks and formations where the passage is crossed by a fault.
 An early part of Wigmore Hall. This is a large, fossil phreas, heading away from all the known cave, with no known origin.
Modelling by David, lighting by Tarquin and David
An early part of Wigmore Hall. This is a large, fossil phreas, heading away from all the known cave, with no known origin.
Modelling by David, lighting by Tarquin and David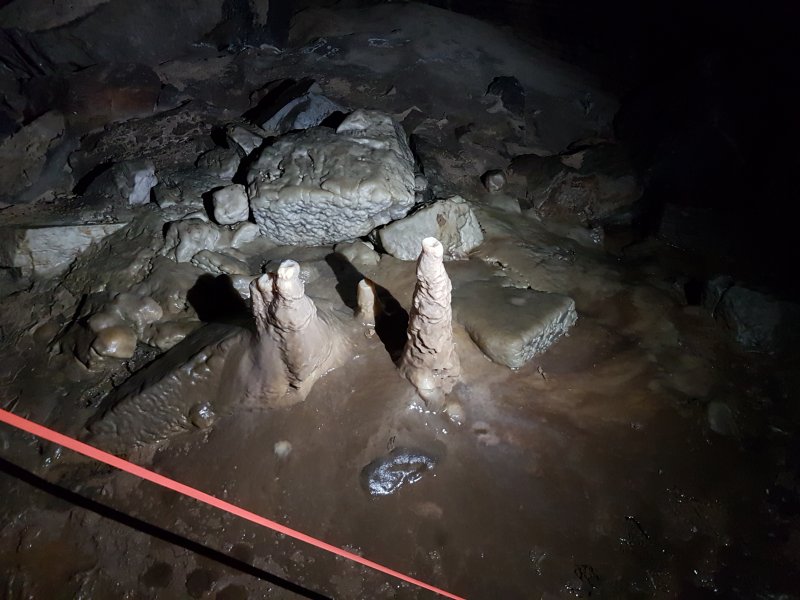 Stalagmites in Wigore Hall.
 Flowstone and curtain in an aven.
Lighting by David
Flowstone and curtain in an aven.
Lighting by David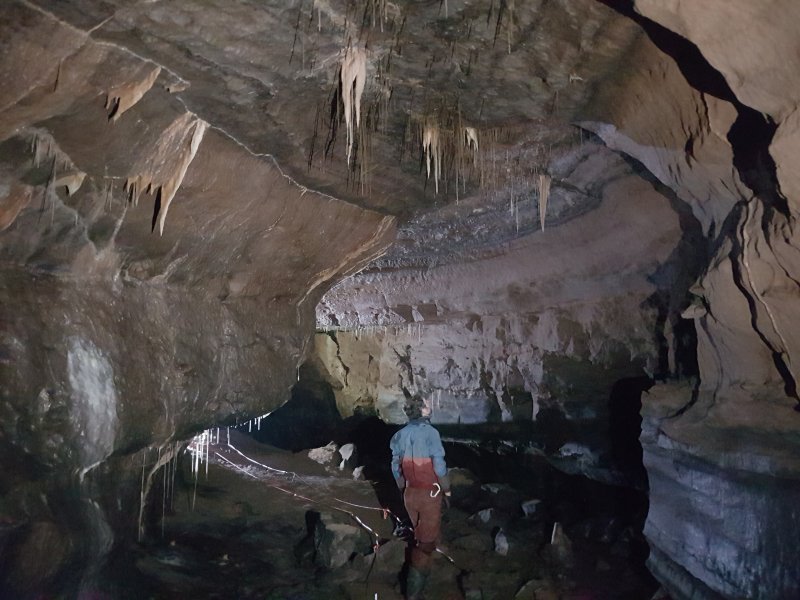 The middle part of Wigmore Hall, with more decorations.
Modelling by David, lighting by Tarquin
The middle part of Wigmore Hall, with more decorations.
Modelling by David, lighting by Tarquin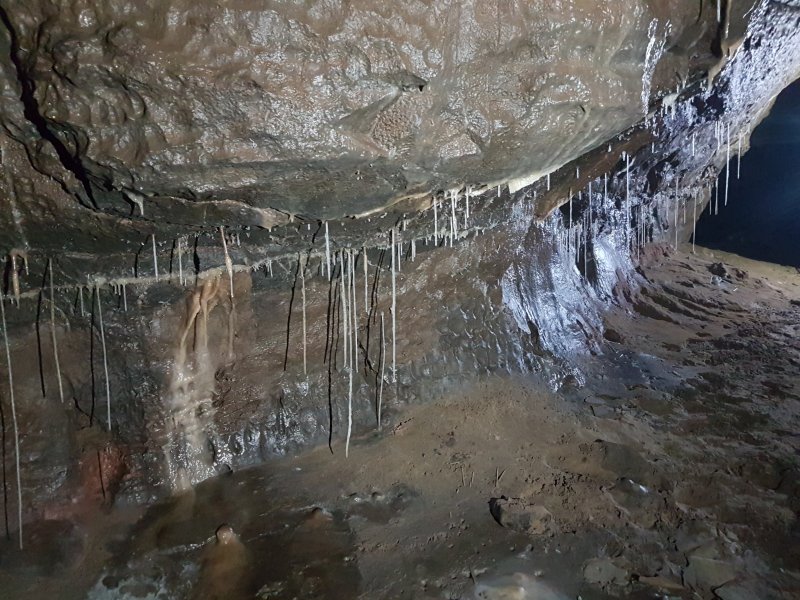 Straws.
Lighting by Tarquin and David
Straws.
Lighting by Tarquin and David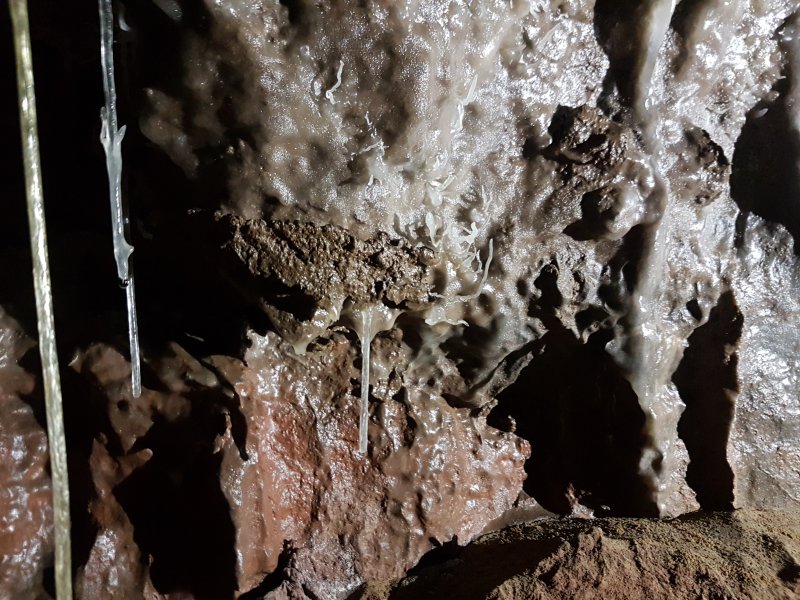 Helictites.
 Another decorated aven.
Lighting by David
Another decorated aven.
Lighting by David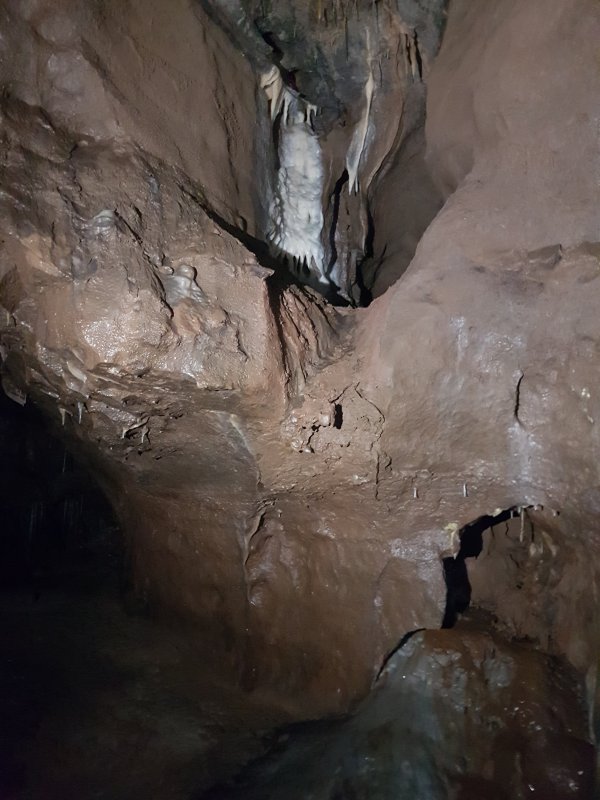 Decorated side rift.
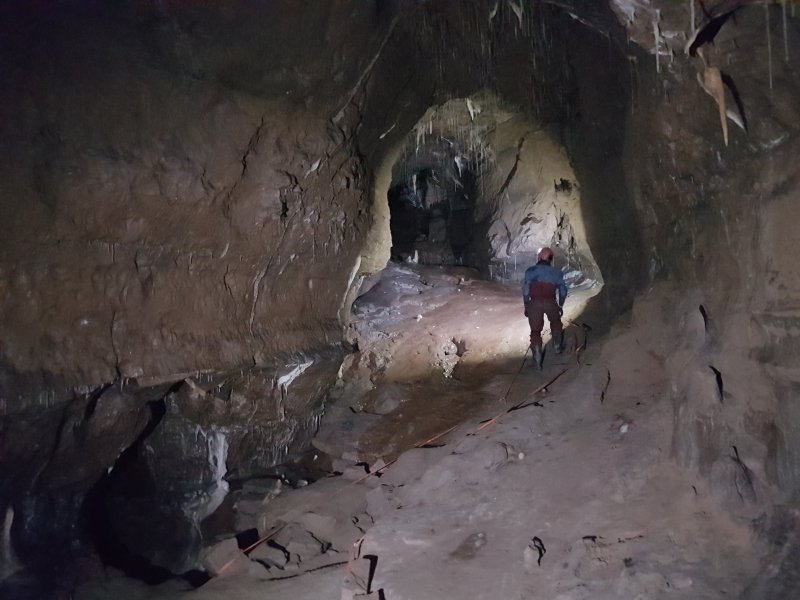 End of Wigmore Hall.
Modelling by David, lighting by Tarquin and David
End of Wigmore Hall.
Modelling by David, lighting by Tarquin and David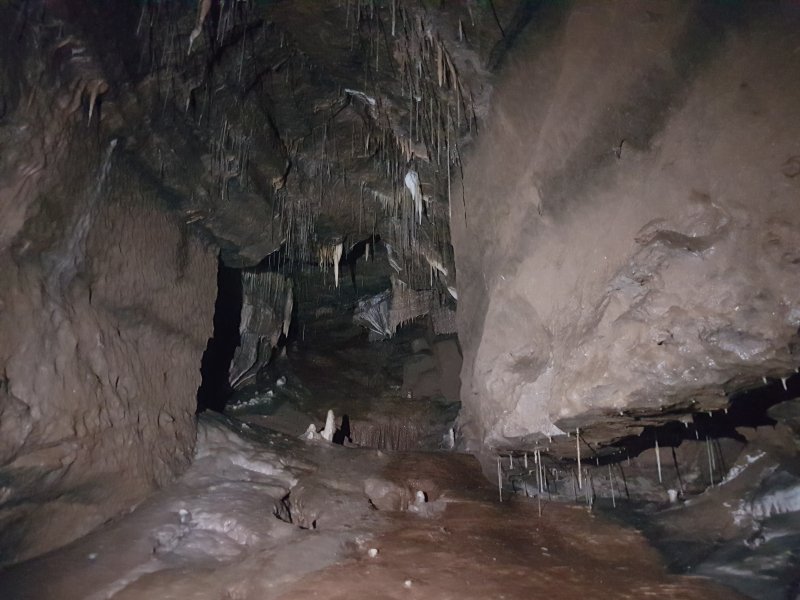 The final end is a calcited mud slope, with a lot of stal. This is begging for a bypass.
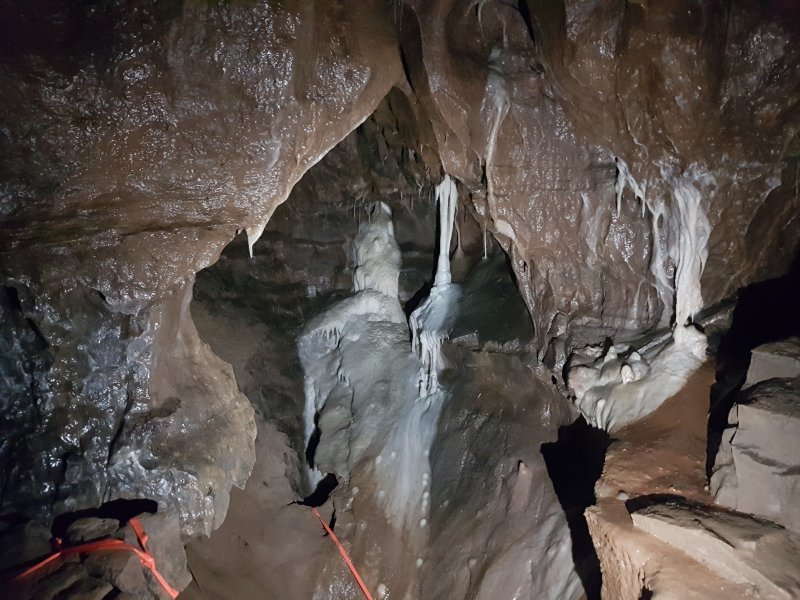 A beautifully decorated little alcove just before the end. Up to its left is a dig through a choke, while down in the floor is a network of passages.
 Formations in the passage network under Wigmore Hall. The passages under Wigmore Hall connect all the way back out to the bottom of the traverse.
 On the side of Boulder Chamber is a loose rubble slope, aided by a rope.
Modelling by Dickon, lighting by Tarquin and Dickon
On the side of Boulder Chamber is a loose rubble slope, aided by a rope.
Modelling by Dickon, lighting by Tarquin and Dickon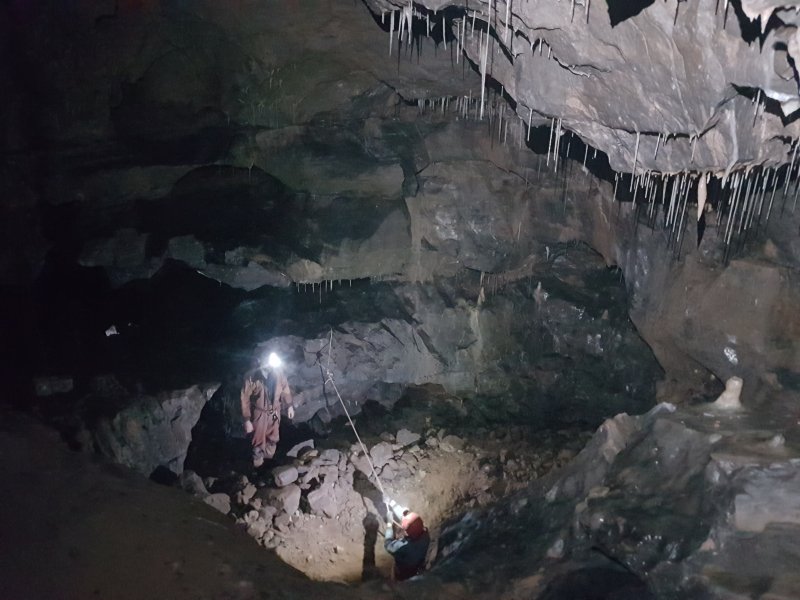 The rope reaches a large chamber, with a series of side passages and balconies.
Modelling by Phil and David, lighting by Tarquin, Phil and David
The rope reaches a large chamber, with a series of side passages and balconies.
Modelling by Phil and David, lighting by Tarquin, Phil and David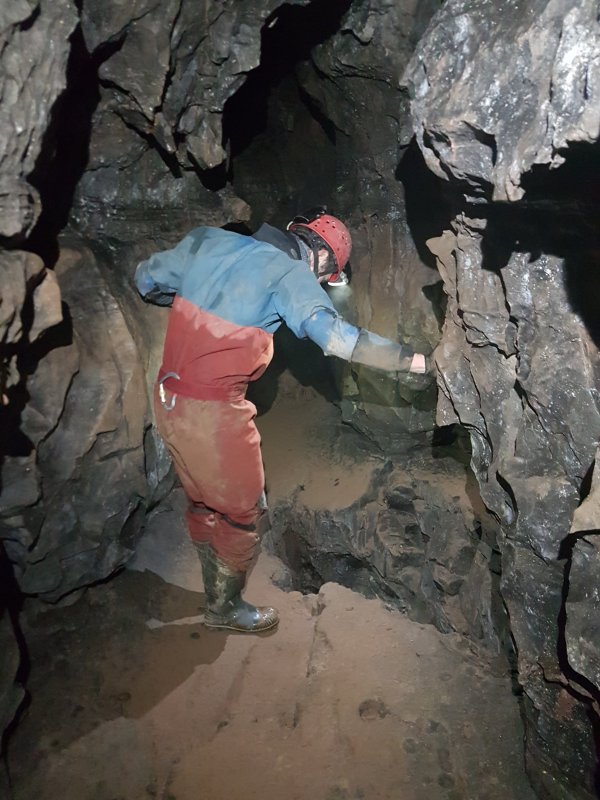 The obvious passage at the first landing is the start of August Series, which very quickly arrives at this deep rift.
Modelling by David, lighting by Tarquin and David
The obvious passage at the first landing is the start of August Series, which very quickly arrives at this deep rift.
Modelling by David, lighting by Tarquin and David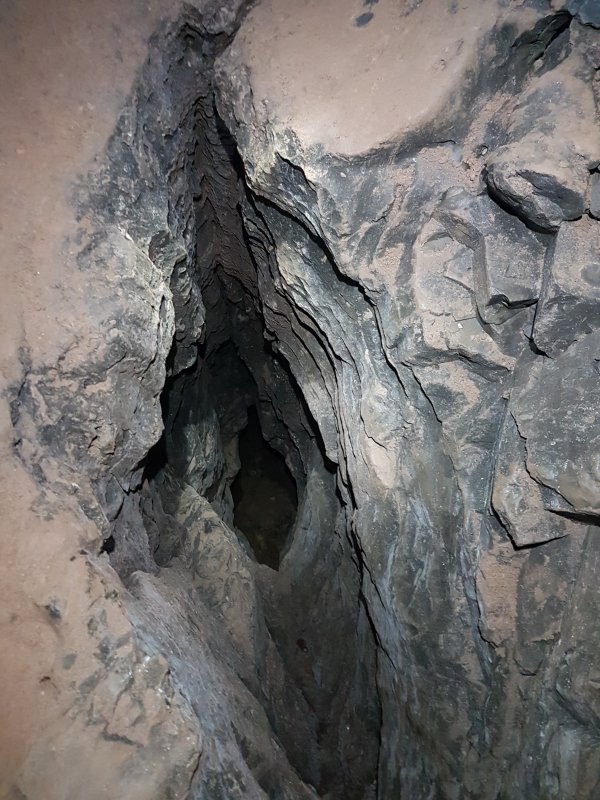 The rift is deep enough to play on those "falling down a well" fears, the kind of hole that reminds you to pay a little bit more attention to where you are putting your feet.
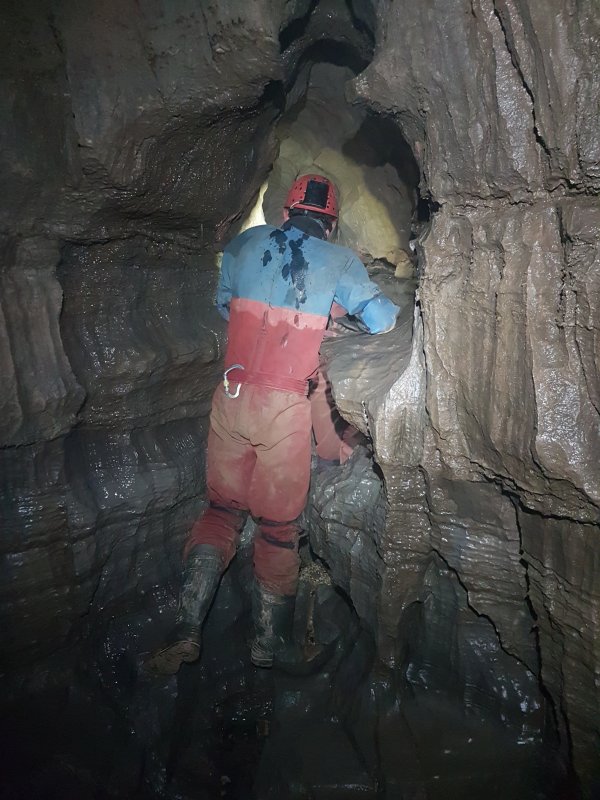 It starts off conveniently enough, but the passages soon get small and crawly. A right branch ends, while the left branch ascends a climb to reach about 100 m of passage. We had other places to be, so left it all for another day. An aven above the landing also has another side passage that weaves its way around August Series via a tall climb, without ever intercepting it.
Modelling by David, lighting by Tarquin and David
It starts off conveniently enough, but the passages soon get small and crawly. A right branch ends, while the left branch ascends a climb to reach about 100 m of passage. We had other places to be, so left it all for another day. An aven above the landing also has another side passage that weaves its way around August Series via a tall climb, without ever intercepting it.
Modelling by David, lighting by Tarquin and David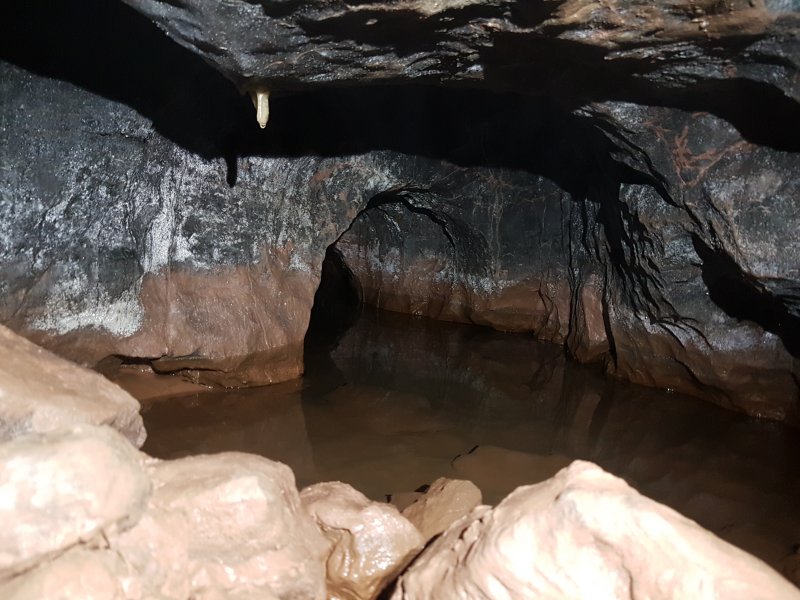 Part way up the climb from the first landing to the upper balcony, a stream running in a natural trough elevated high above the climbs, gets delivered into this pool in a crawling sized passage. The water level is currently low but an obvious, wet tide mark sits a few inches higher, and strange gurgling sounds can be heard. This would appear to be the water reservoir for the nearby Lavatory Dan periodic siphon.
 The large passage heading off from the upper balcony.
Modelling by David, lighting by Tarquin and David
The large passage heading off from the upper balcony.
Modelling by David, lighting by Tarquin and David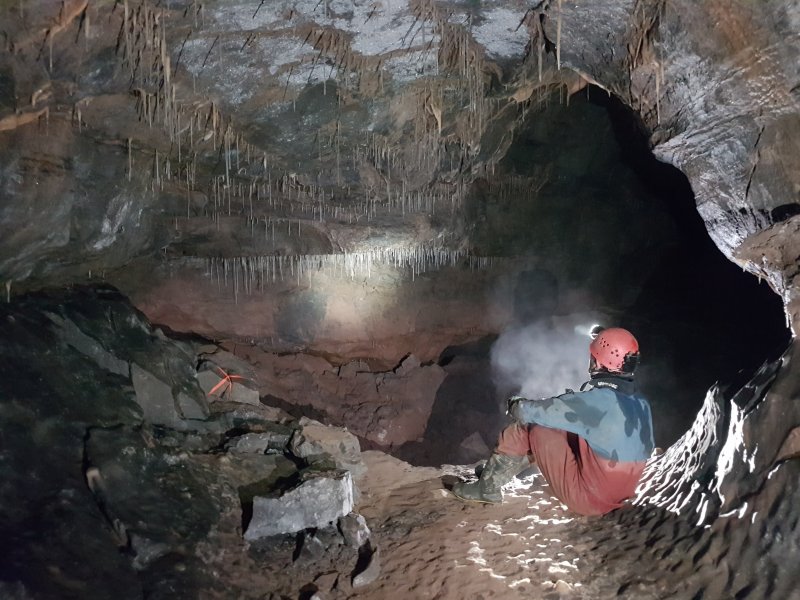 Formations at the end of the passage.
Modelling by David, lighting by Tarquin, Dickon, David and Phil
Formations at the end of the passage.
Modelling by David, lighting by Tarquin, Dickon, David and Phil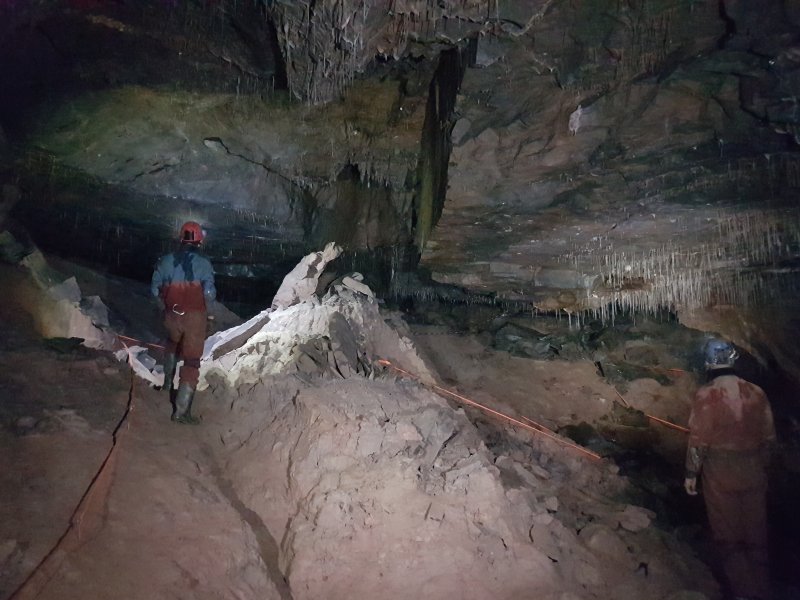 The passage ends in the impressive Mud Hall, with its profusion of mud and straws.
Modelling by David and Phil, lighting by Tarquin, Dickon, David and Phil
The passage ends in the impressive Mud Hall, with its profusion of mud and straws.
Modelling by David and Phil, lighting by Tarquin, Dickon, David and Phil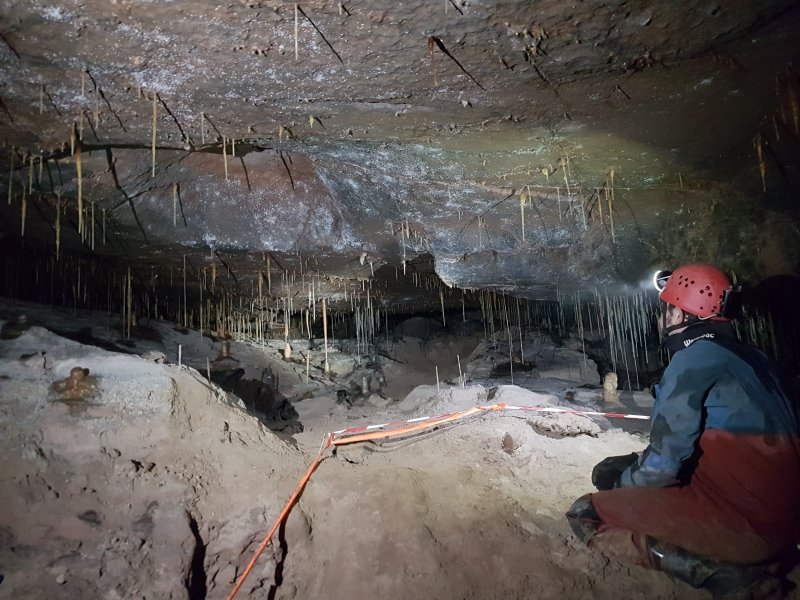 Straws at the back of Mud Hall. There is a short loop of crawls back there.
Modelling by David, lighting by Tarquin and David
Straws at the back of Mud Hall. There is a short loop of crawls back there.
Modelling by David, lighting by Tarquin and David Mud formation in the middle of the chamber.
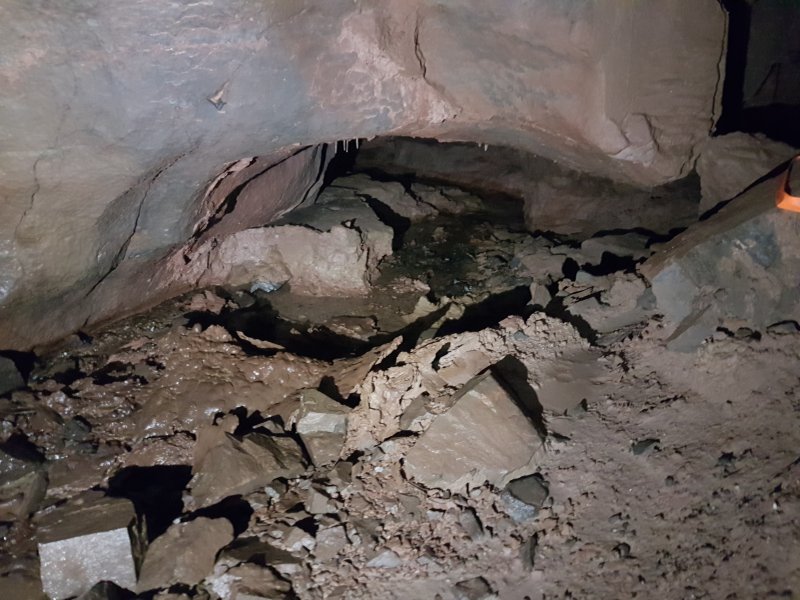 The small stream in Mud Hall flows out through a low crawl, which enters the passageway in, via a climb. The water then joins the Lavatory Dan water.
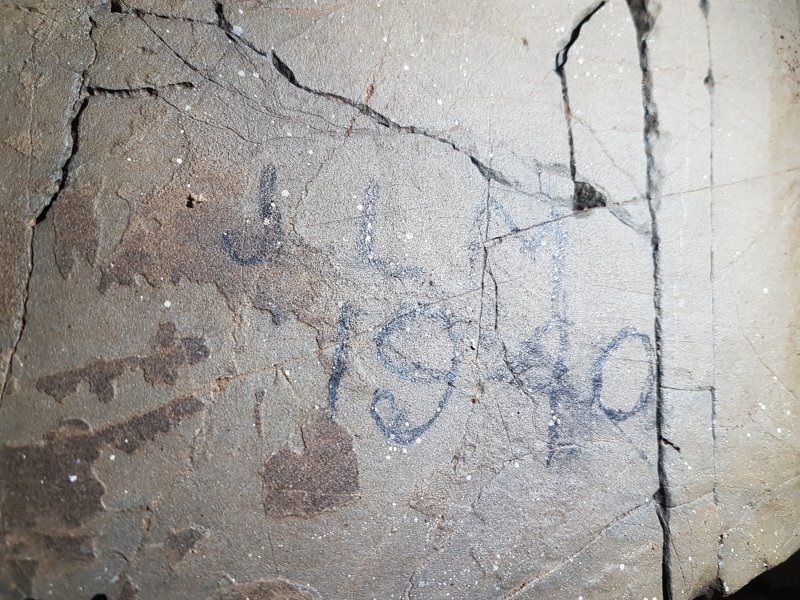 Signature of Jeff L. Morgan, one of the brothers who discovered the cave. This one is near the Straw Chamber, or as they called it; Ashwell Morgan's Palace.
 Calcite rafts on the crystal pool in Corbell's Chamber.
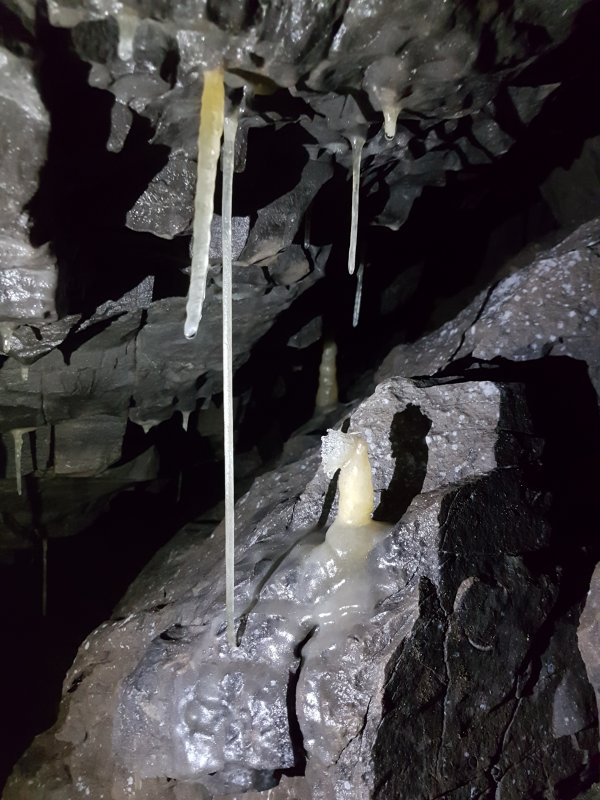 Straws in the stooping passages after Straw Chamber.
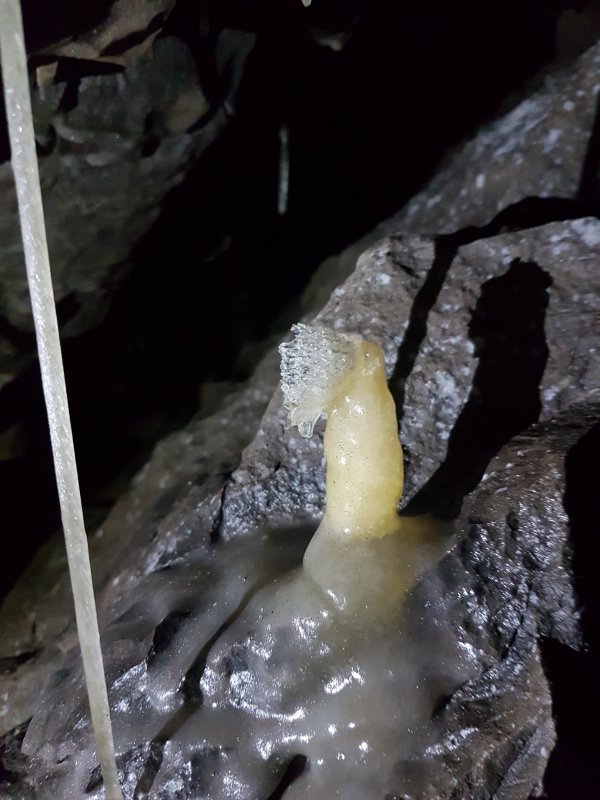 This tiny little stalagmite looks like a native American chief's headdress.
 Beside this, a rocky undercut is the way into Ashford Price's Hall.
Modelling by David, lighting by Tarquin and David
Beside this, a rocky undercut is the way into Ashford Price's Hall.
Modelling by David, lighting by Tarquin and David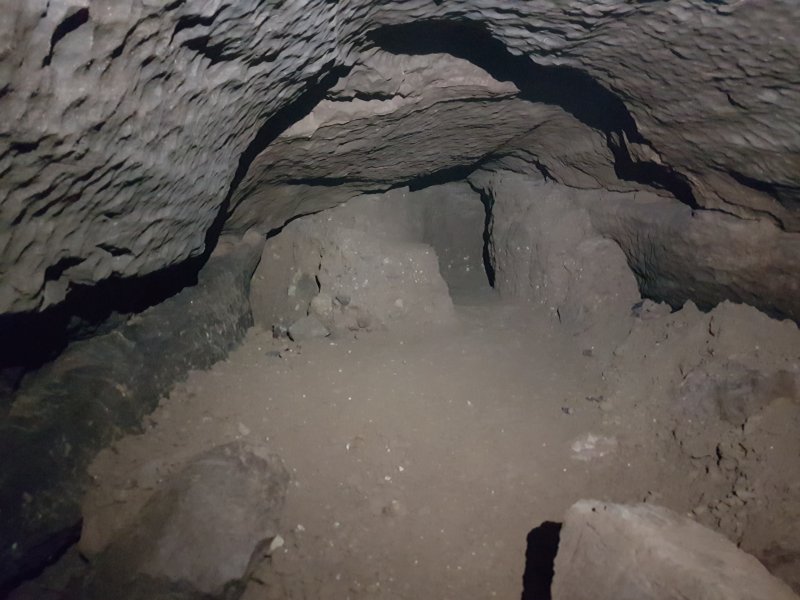 To the left - back towards Straw Chamber - ends in gravel fill.
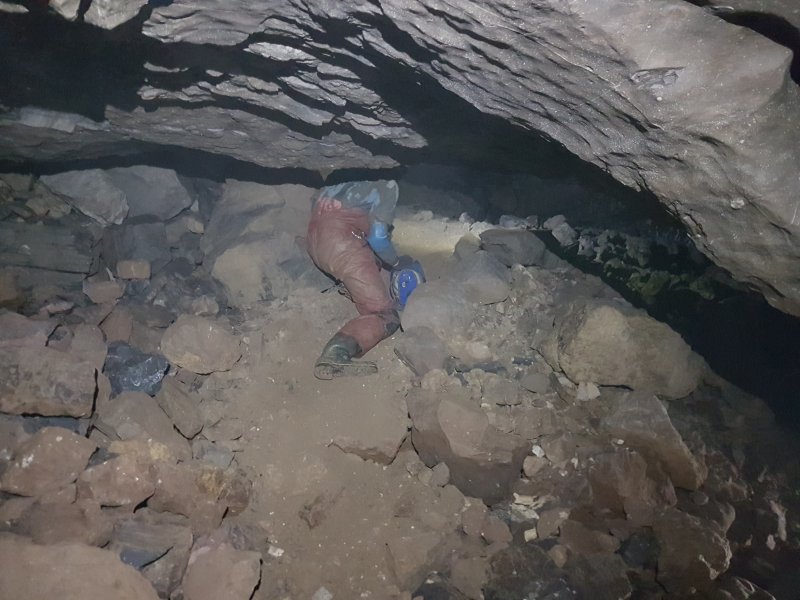 To the right slopes up into the chamber.
Modelling by David, lighting by Tarquin, Phil and David
To the right slopes up into the chamber.
Modelling by David, lighting by Tarquin, Phil and David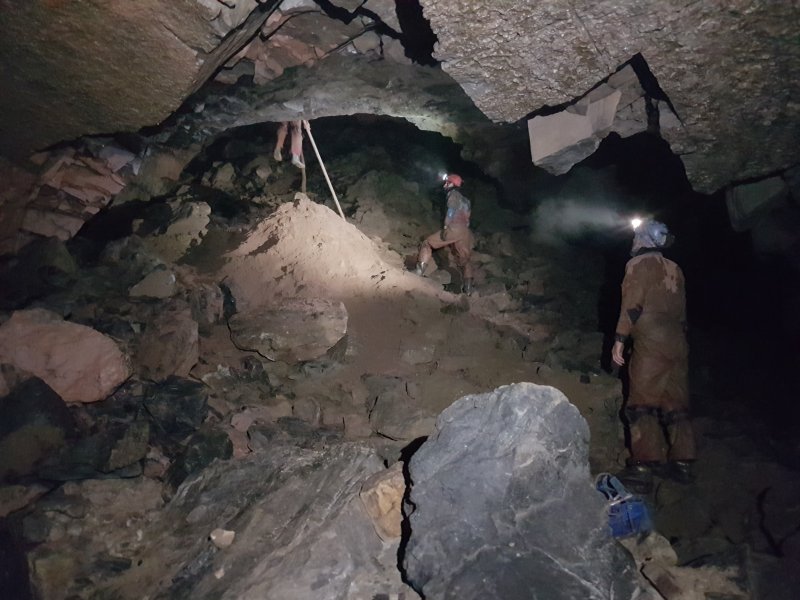 The lower part of Ashford Price's Hall, named after the father of the current showcave owner. The pole accesses a short side passage.
Modelling by Phil, David and Dickon's legs, lighting by Tarquin, Phil, David and Dickon
The lower part of Ashford Price's Hall, named after the father of the current showcave owner. The pole accesses a short side passage.
Modelling by Phil, David and Dickon's legs, lighting by Tarquin, Phil, David and Dickon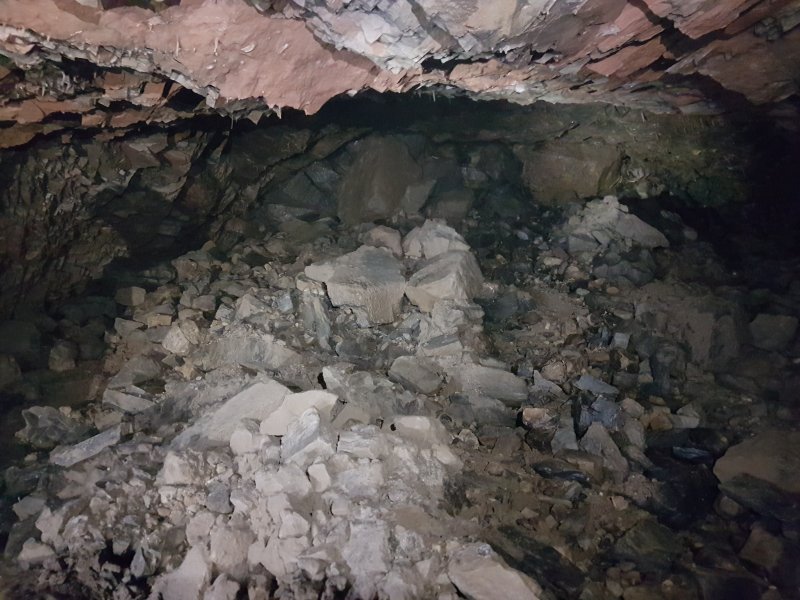 The top of Ashford Price's Hall is a monstrously big choke. This choke is the reason that the Long Crawl is used. The other side of it would be Gerard Platten Hall, but a colossal shakehole on the surface shows that a way through will never be found. Fortunately, there are two bypasses to it.
Lighting by Tarquin, Dickon, Phil and David
The top of Ashford Price's Hall is a monstrously big choke. This choke is the reason that the Long Crawl is used. The other side of it would be Gerard Platten Hall, but a colossal shakehole on the surface shows that a way through will never be found. Fortunately, there are two bypasses to it.
Lighting by Tarquin, Dickon, Phil and David The ceiling is a chimney failure zone, with large amounts of rock peeling off. Best not touched.
Modelling by David, Phil and Dickon, lighting by Tarquin, David, Phil and Dickon
The ceiling is a chimney failure zone, with large amounts of rock peeling off. Best not touched.
Modelling by David, Phil and Dickon, lighting by Tarquin, David, Phil and Dickon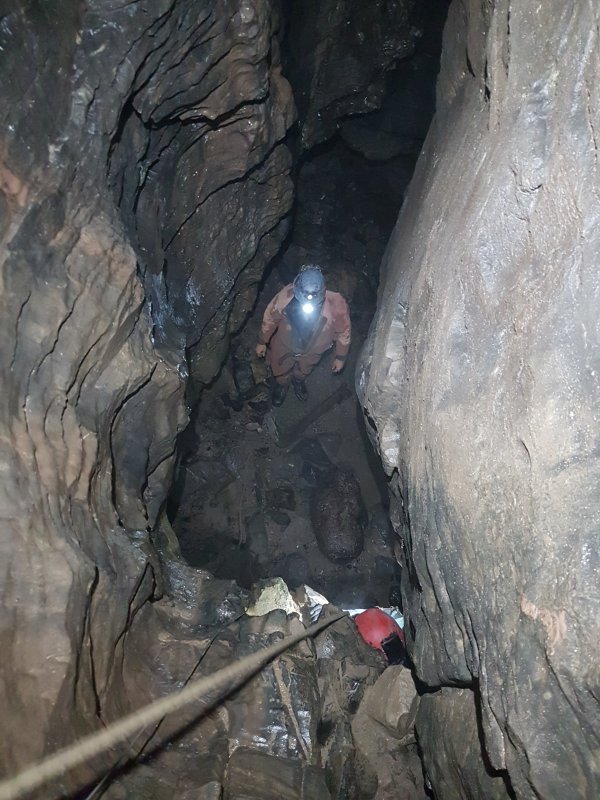 Just after the Showerbath aven is a climb up into the Longer Crawl. This must not be mistaken for the earlier climb in the Showerbath aven itself, which only leads to a dig.
Modelling by David and Phil, lighting by Tarquin, David and Phil
Just after the Showerbath aven is a climb up into the Longer Crawl. This must not be mistaken for the earlier climb in the Showerbath aven itself, which only leads to a dig.
Modelling by David and Phil, lighting by Tarquin, David and Phil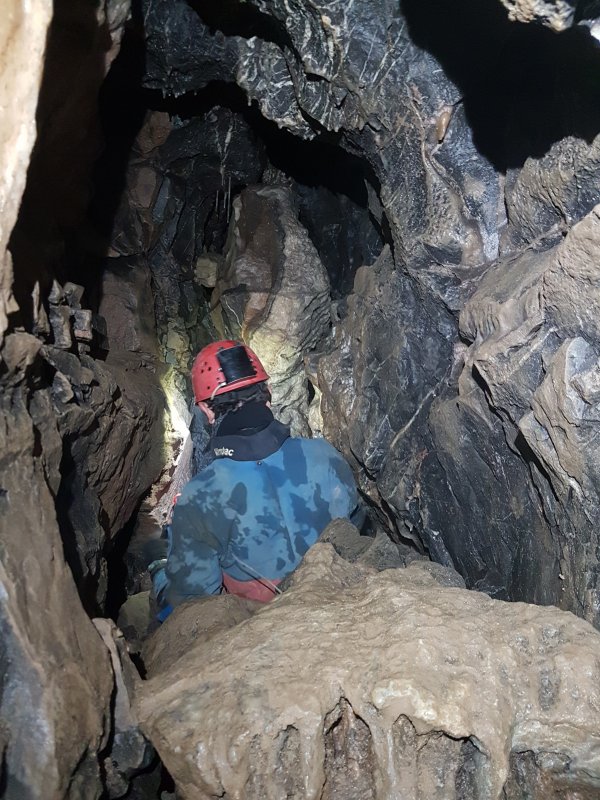 The Longer Crawl starts with a further little climb and double back over a rocky patch. This immediately causes it to point in the wrong direction, away from its destination. This is what makes the Longer Crawl so long.
Modelling by David, lighting by Tarquin and David
The Longer Crawl starts with a further little climb and double back over a rocky patch. This immediately causes it to point in the wrong direction, away from its destination. This is what makes the Longer Crawl so long.
Modelling by David, lighting by Tarquin and David To start with, the passage is walking size. If only it stayed that way.
Modelling by David, lighting by Tarquin and David
To start with, the passage is walking size. If only it stayed that way.
Modelling by David, lighting by Tarquin and David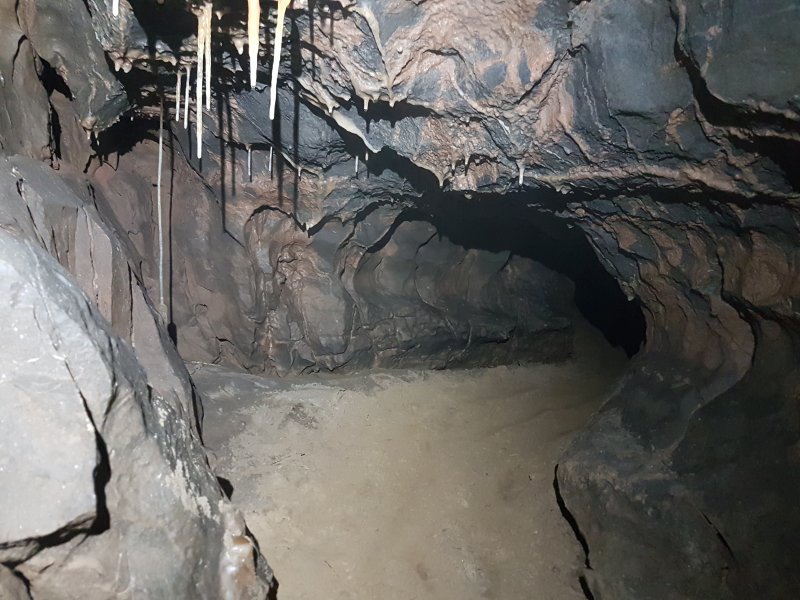 At a junction, the way on is to the right, but this crawl is straight ahead.
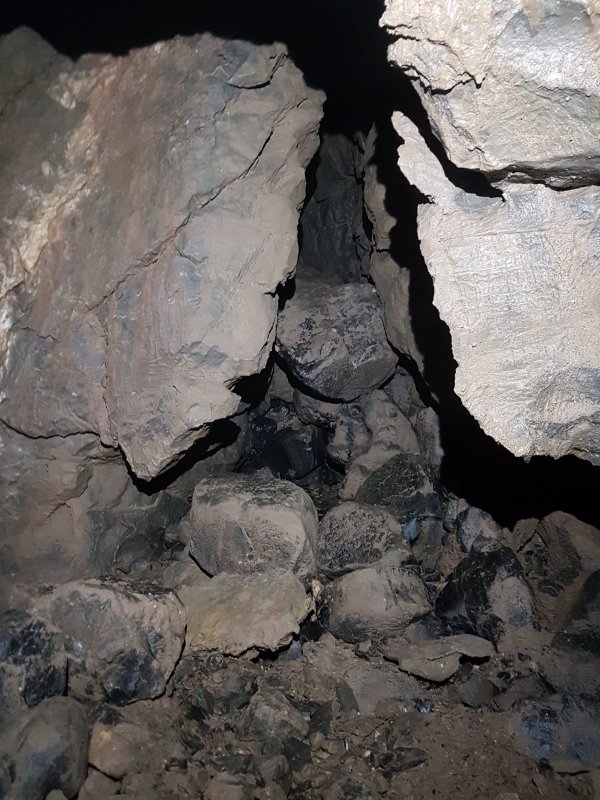 The crawl ends in a tiny aven, with a pinched out rift ahead.
 The way on to the right from the junction is stooping/crawling size. Avoid that cable.
Modelling by David, lighting by Tarquin and David
The way on to the right from the junction is stooping/crawling size. Avoid that cable.
Modelling by David, lighting by Tarquin and David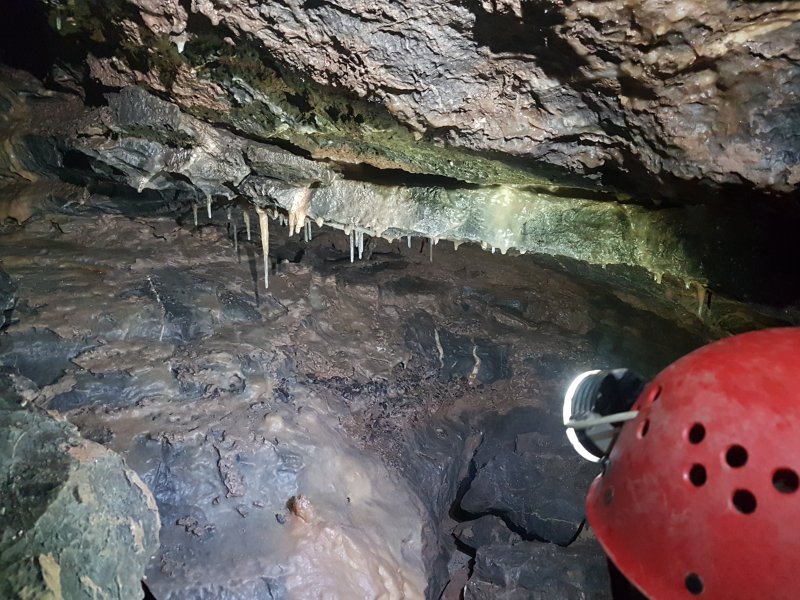 The passage reaches a tiny enlargement with some stal, where you are really hoping that the way on will be a lower passage that you hadn't noticed, but it pinches out.
Modelling by David, lighting by Tarquin and David
The passage reaches a tiny enlargement with some stal, where you are really hoping that the way on will be a lower passage that you hadn't noticed, but it pinches out.
Modelling by David, lighting by Tarquin and David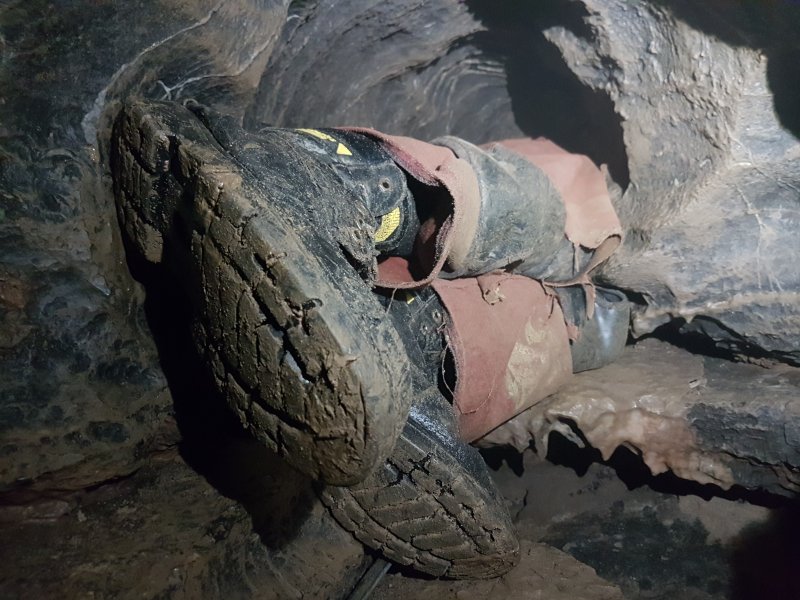 But no, the way on is through the most ridiculous squeeze at ceiling height. This is small and stupid, and by far the most claustrophobic part, but it is not the tightest.
Modelling by Phil
But no, the way on is through the most ridiculous squeeze at ceiling height. This is small and stupid, and by far the most claustrophobic part, but it is not the tightest.
Modelling by Phil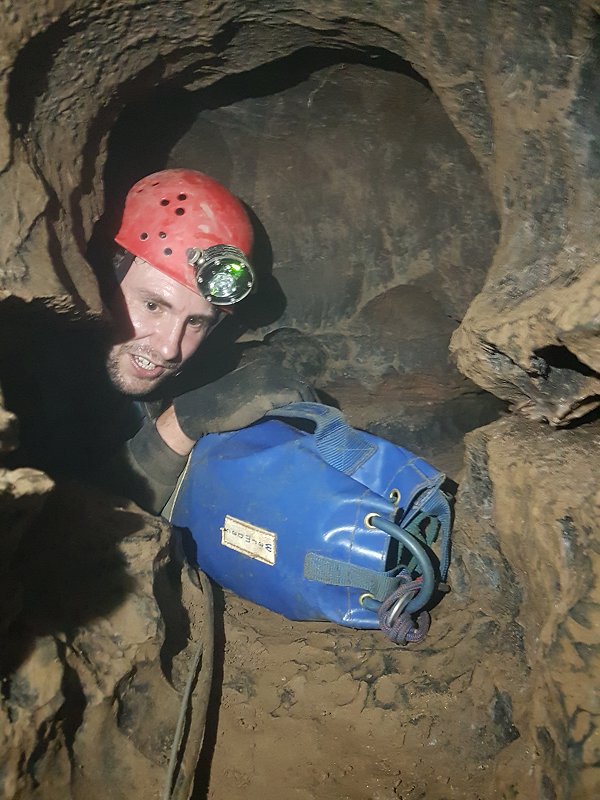 Exiting the squeeze, where it turns a corner. Fortunately, there is enough space to roll around, because turning a corner in that tiny space would not be fun at all.
Modelling by David
Exiting the squeeze, where it turns a corner. Fortunately, there is enough space to roll around, because turning a corner in that tiny space would not be fun at all.
Modelling by David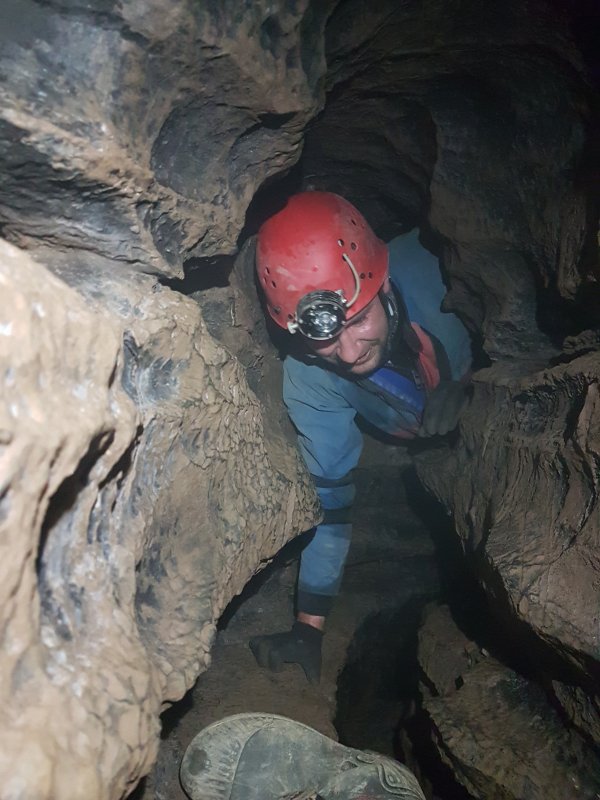 The passage stays uncomfortably small, and you need to carefully avoid dropping things down the rift, such as your pride, balls, bags and camera.
Modelling by Tarquin's boot and David
The passage stays uncomfortably small, and you need to carefully avoid dropping things down the rift, such as your pride, balls, bags and camera.
Modelling by Tarquin's boot and David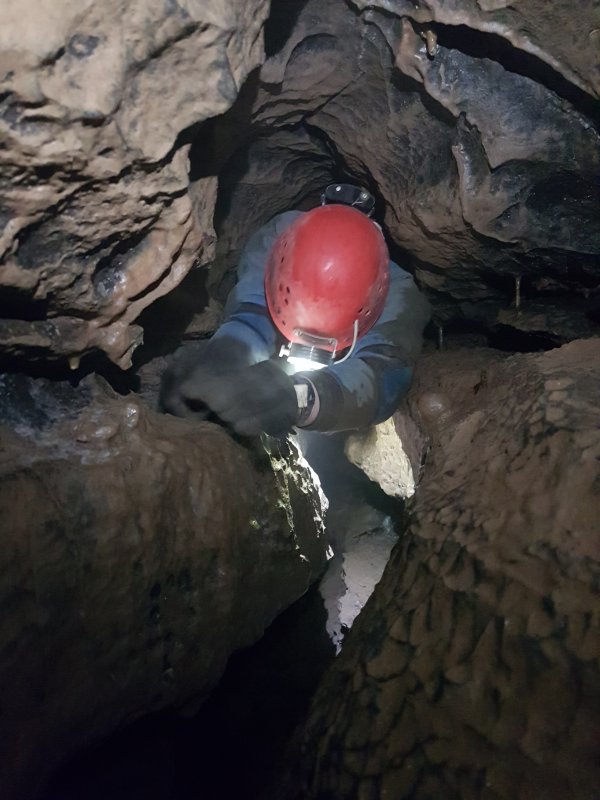 Getting smaller.
Modelling by David, lighting by Tarquin and David
Getting smaller.
Modelling by David, lighting by Tarquin and David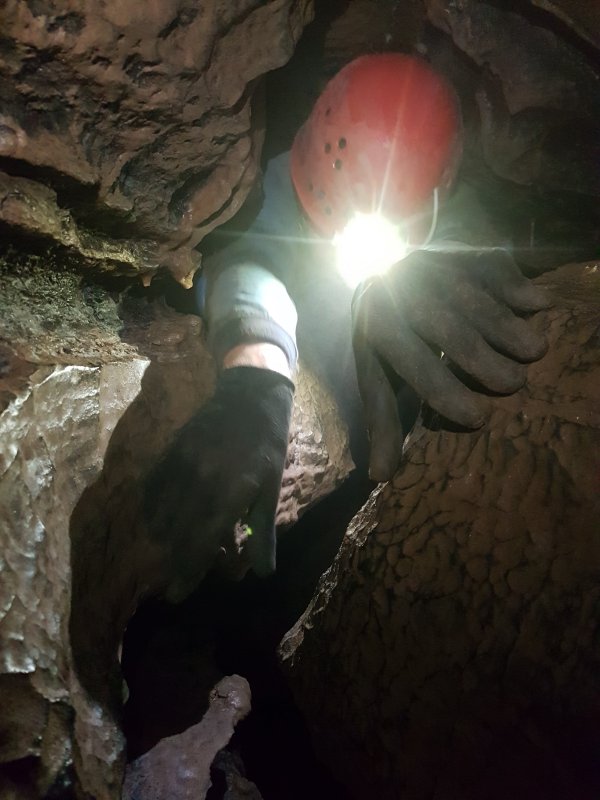 OK, this part is tighter. But it feels more comfortable because you can see the end, if you can manage to lift your head, that is.
Modelling by David, lighting by Tarquin and David
OK, this part is tighter. But it feels more comfortable because you can see the end, if you can manage to lift your head, that is.
Modelling by David, lighting by Tarquin and David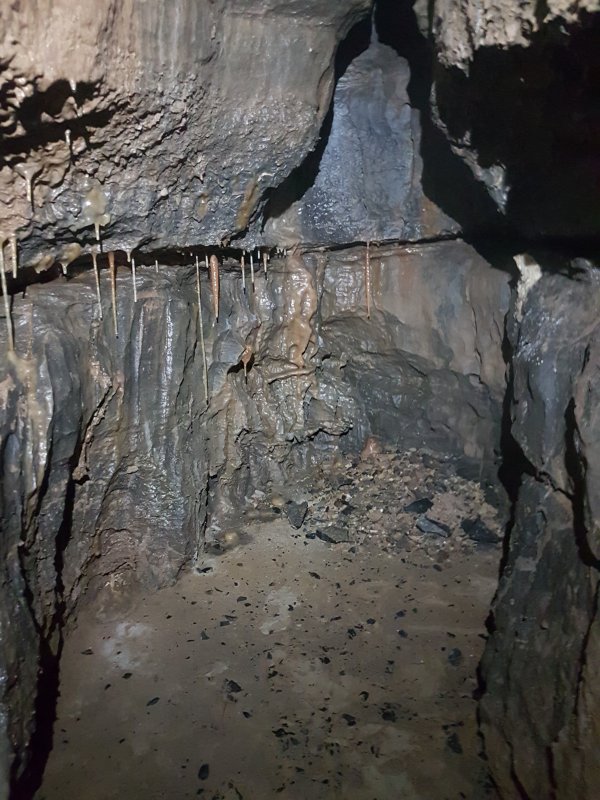 The passage enlarges and descends to a hole down. The way on remains high around a corner to the left, but down in the floor is Initials Chamber. This requires a climb down via a rock bridge.
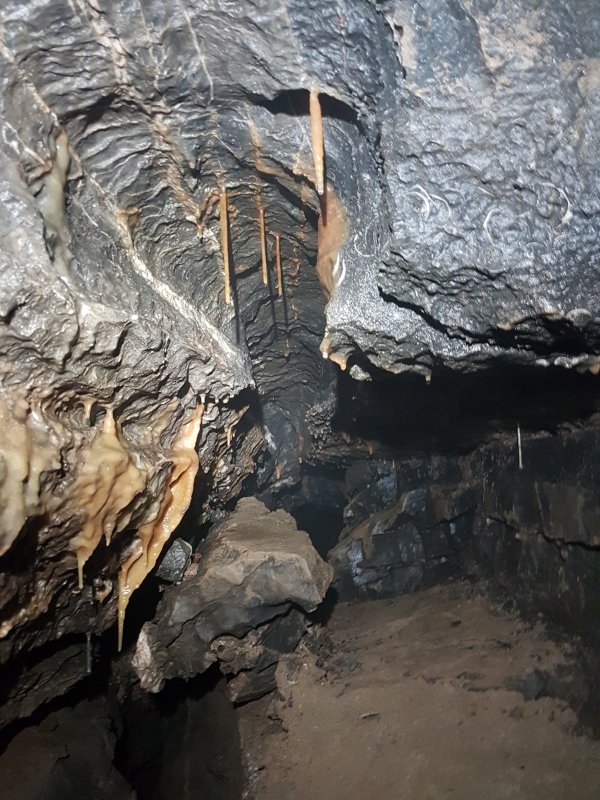 Underneath the way in is a passage which I did not follow. It looks like a lower level of the same rift, but maybe it goes elsewhere too.
 In the opposite direction is a rift with an inlet. This probably ends quickly but would be an obvious place to dig, as it points away from the known cave.
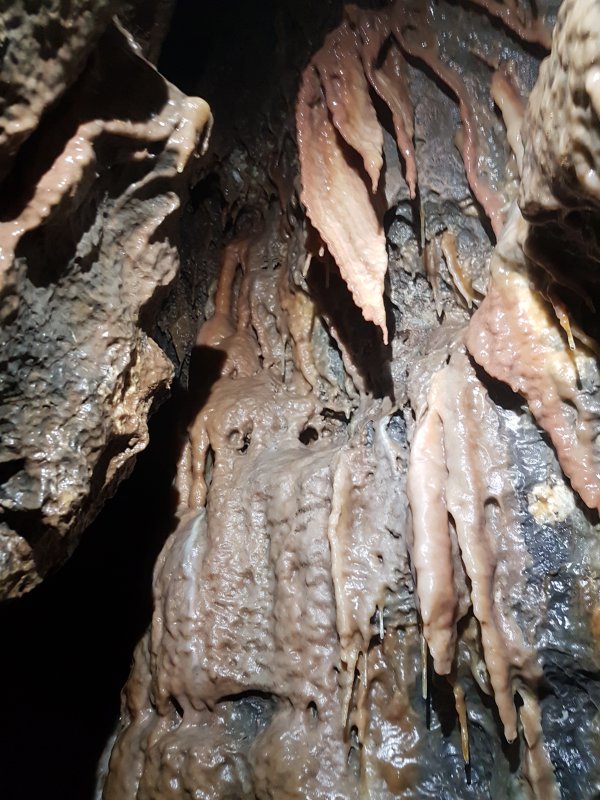 The way on above starts around a corner to the left, only slightly lower than the way in. The formations start immediately.
 Stalagmites below.
 The helictites are the real highlight of this passage. Progress is slow, keeping low enough to avoid touching them.
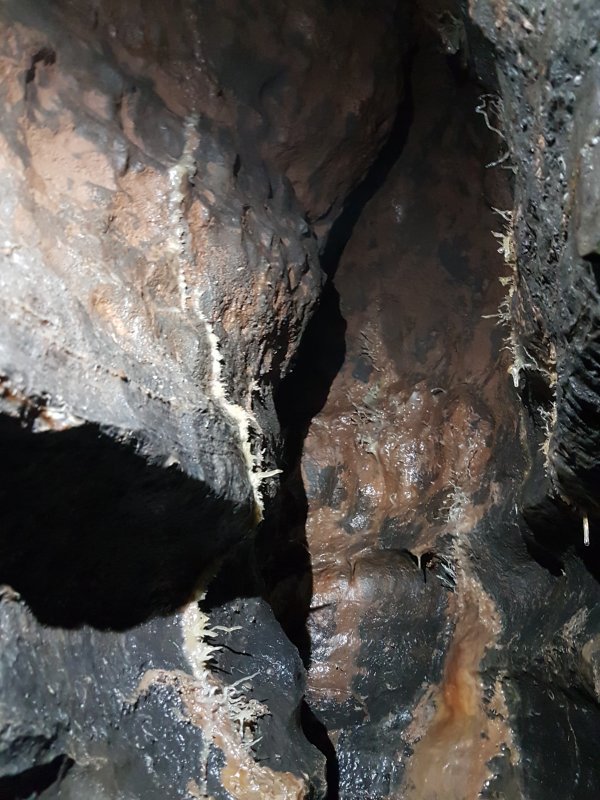 Taking photographs while lying on the floor, aiming a light and camera. Making sure to keep far away from the formations. These will not be my best photographs.
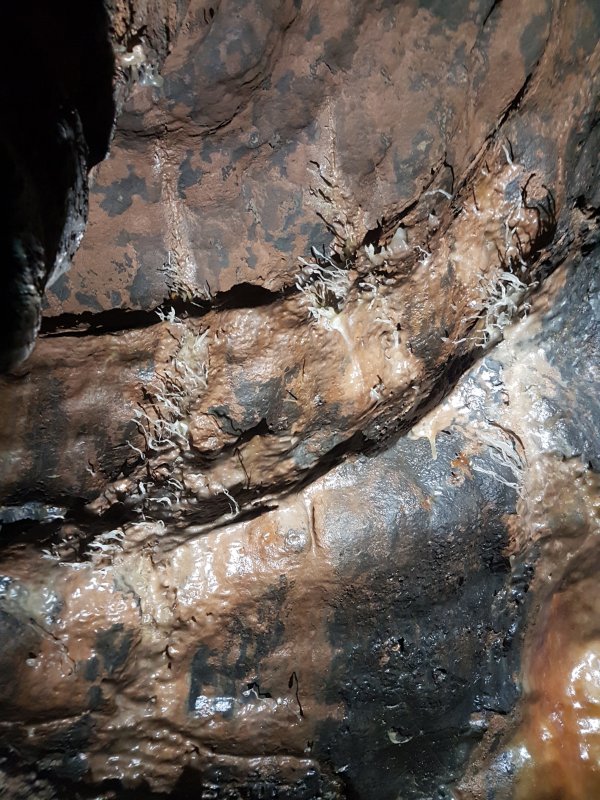 Glass-like, non-branching helictites, typical for the caves in this area.
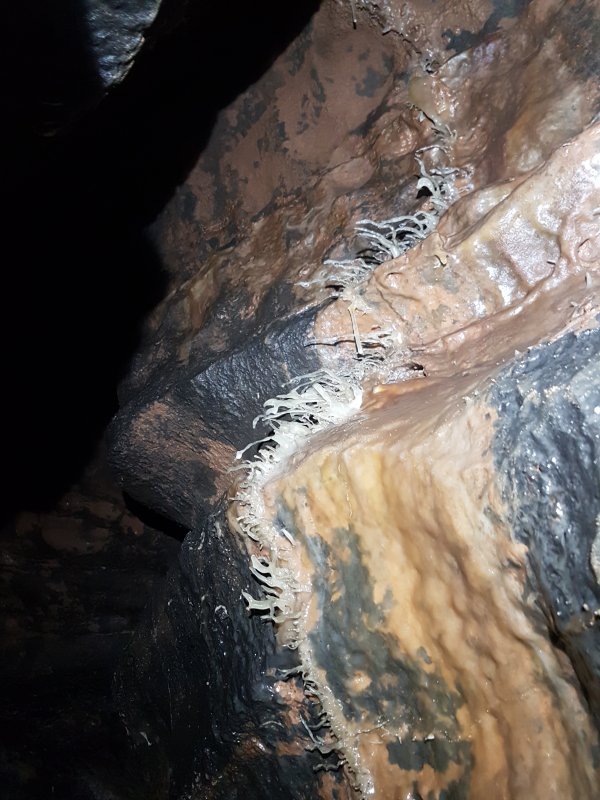 Helictites.
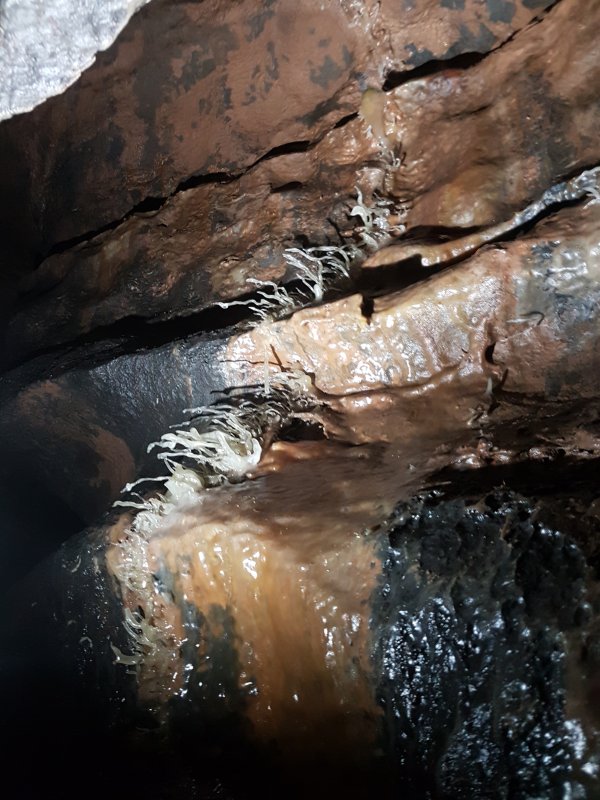 Helictites.
 The best patch of helictites.
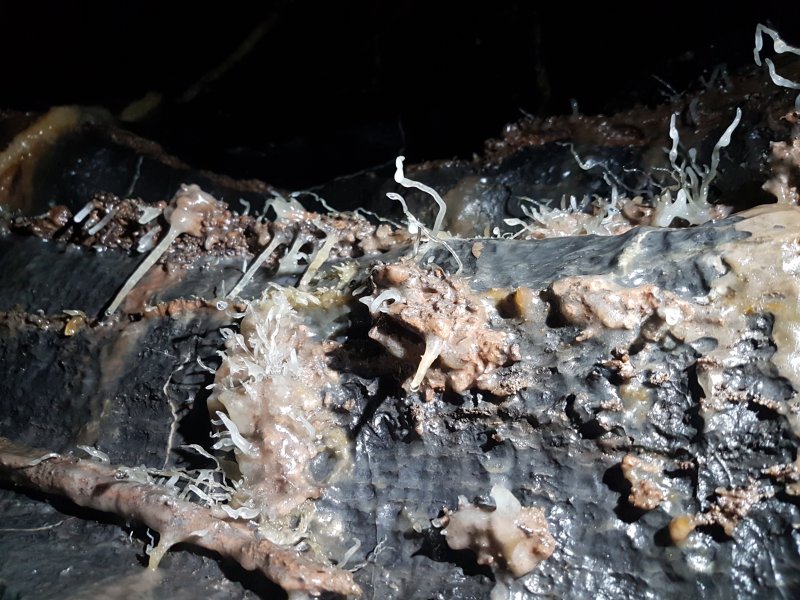 Helictites.
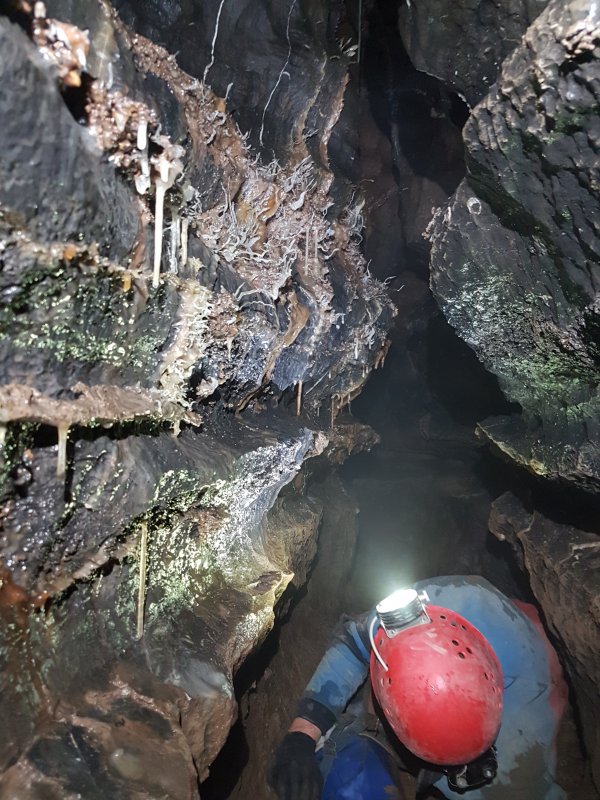 Slithering along under the helictites.
Modelling by David, lighting by Tarquin and David.
Slithering along under the helictites.
Modelling by David, lighting by Tarquin and David.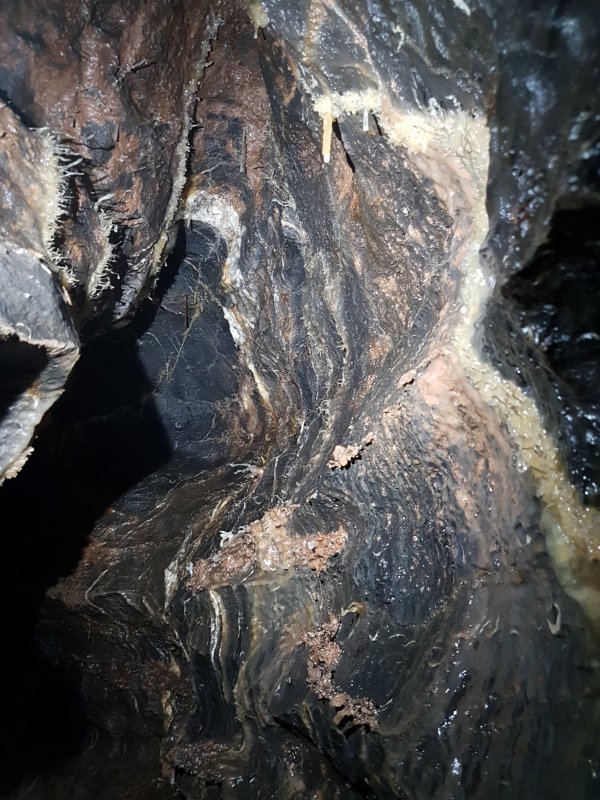 Helictites.
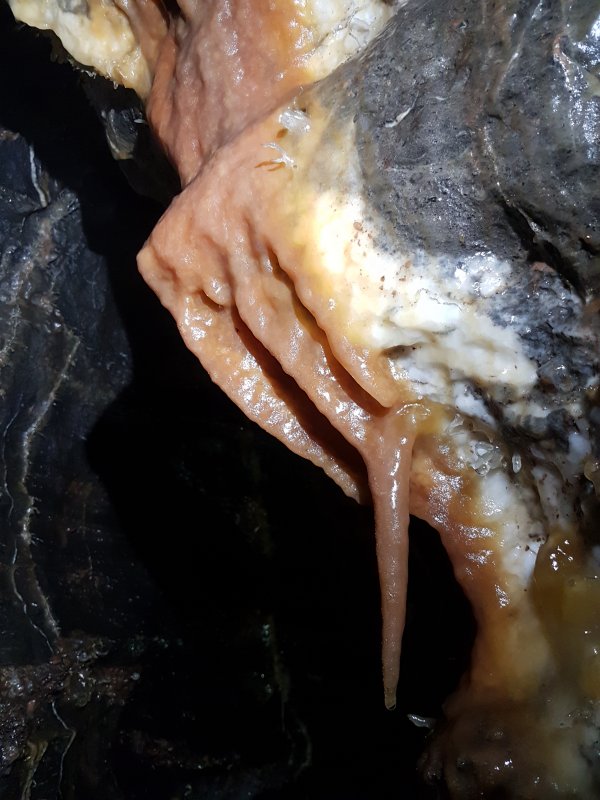 Curtain-finger.
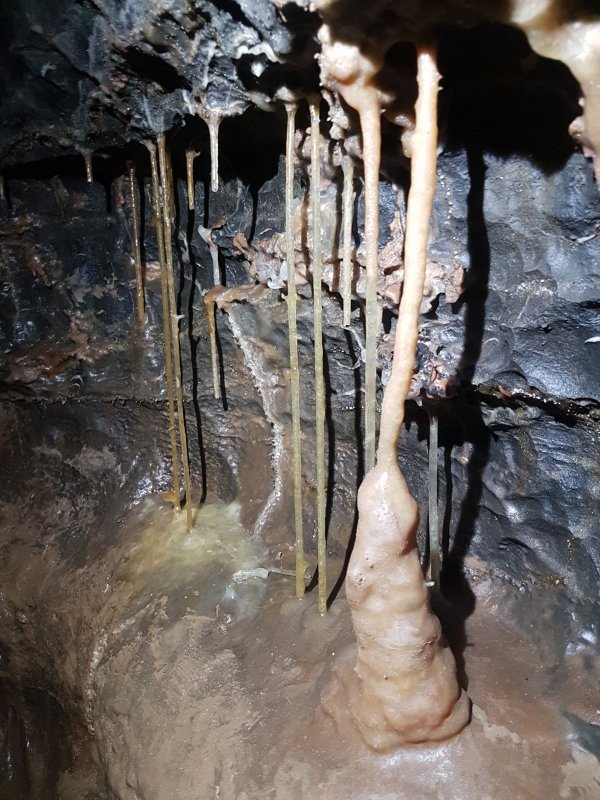 Grill of straw columns.
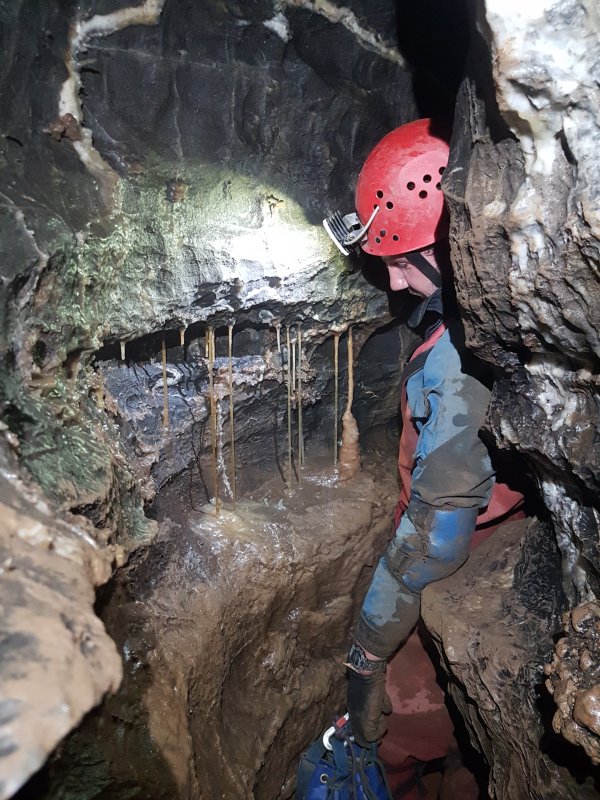 Squeezing past the formations. Baggy oversuits pulled tight.
Modelling by David, lighting by Tarquin and David.
Squeezing past the formations. Baggy oversuits pulled tight.
Modelling by David, lighting by Tarquin and David.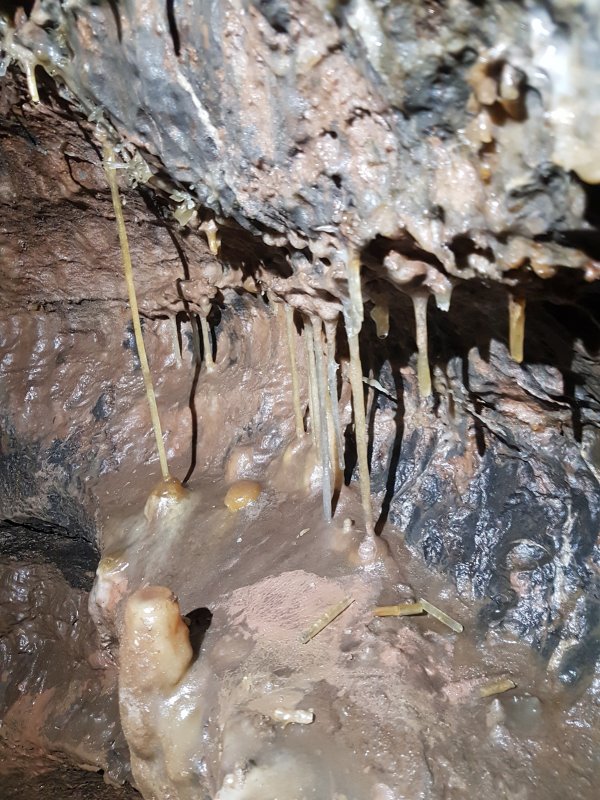 A second grill with evidence of a previous failure.
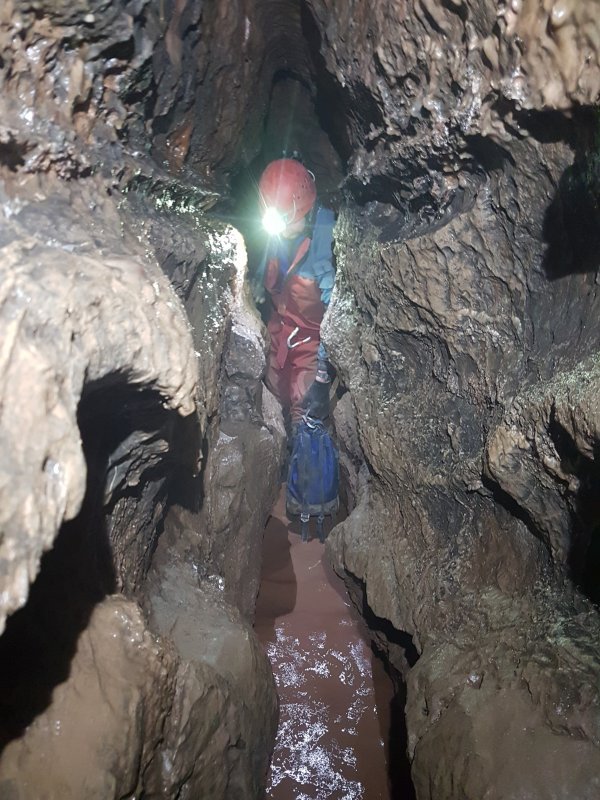 Time to get wet feet.
Modelling by David, lighting by Tarquin and David.
Time to get wet feet.
Modelling by David, lighting by Tarquin and David.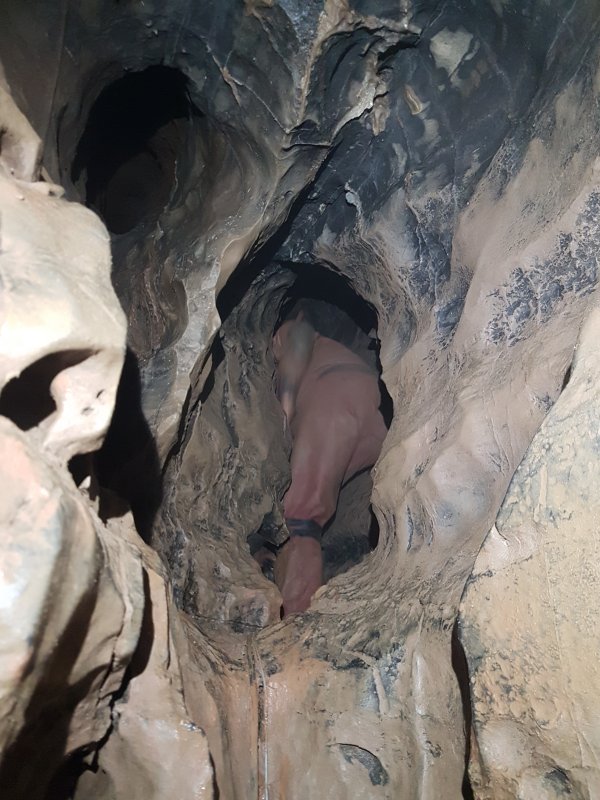 Climb up where the lower level pinches out.
Modelling by Phil.
Climb up where the lower level pinches out.
Modelling by Phil. Levitate over the water.
Modelling by David, lighting by Tarquin and David.
Levitate over the water.
Modelling by David, lighting by Tarquin and David. A short crawl.
Modelling by David, lighting by Tarquin and David.
A short crawl.
Modelling by David, lighting by Tarquin and David.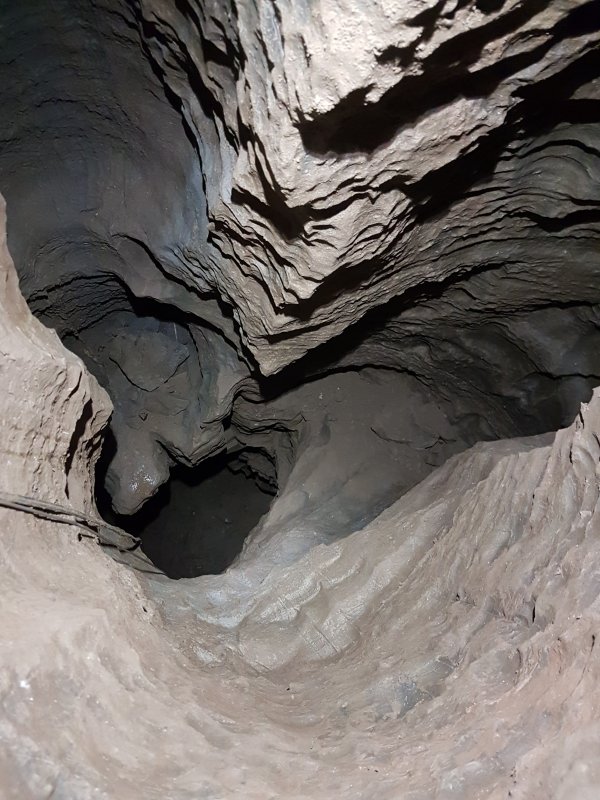 The cables go down a pitch in the floor but the way on continues over it.
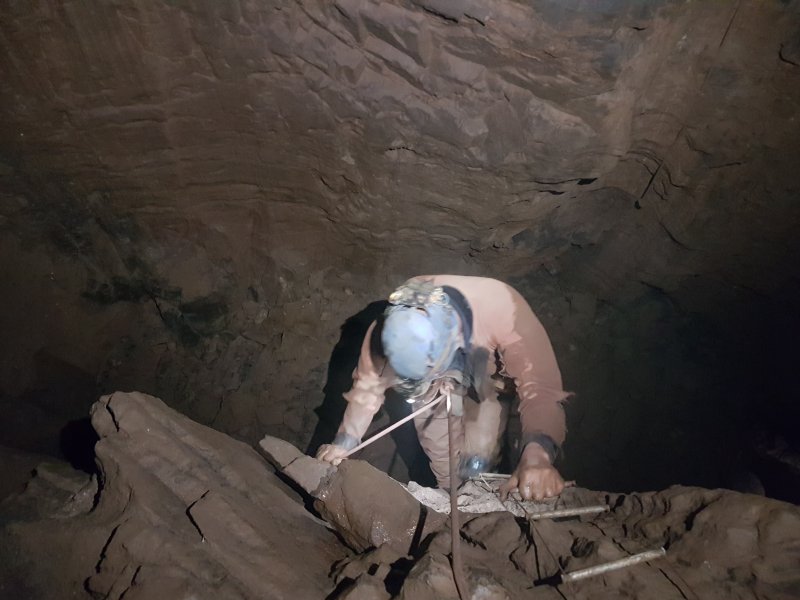 The way on reached the head of a small pitch. The ladder and rope not official, but without them this would be impossible. There is a short blind passage in the opposite wall which we did not explore.
Modelling by Phil, lighting by Tarquin and Phil
The way on reached the head of a small pitch. The ladder and rope not official, but without them this would be impossible. There is a short blind passage in the opposite wall which we did not explore.
Modelling by Phil, lighting by Tarquin and Phil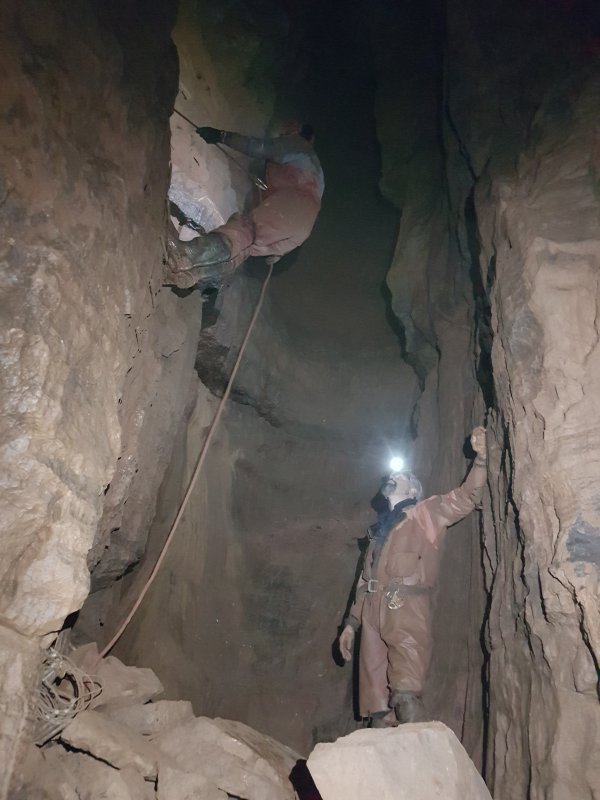 Free climbing this would not be possible. At the bottom, a hole down descends to a junction.
Modelling by David and Phil, lighting by Tarquin, David and Phil
Free climbing this would not be possible. At the bottom, a hole down descends to a junction.
Modelling by David and Phil, lighting by Tarquin, David and Phil To the right (none of which is on the survey) reaches another junction where up to the right reaches the bottom of an aven where the cables come in from the passage above.
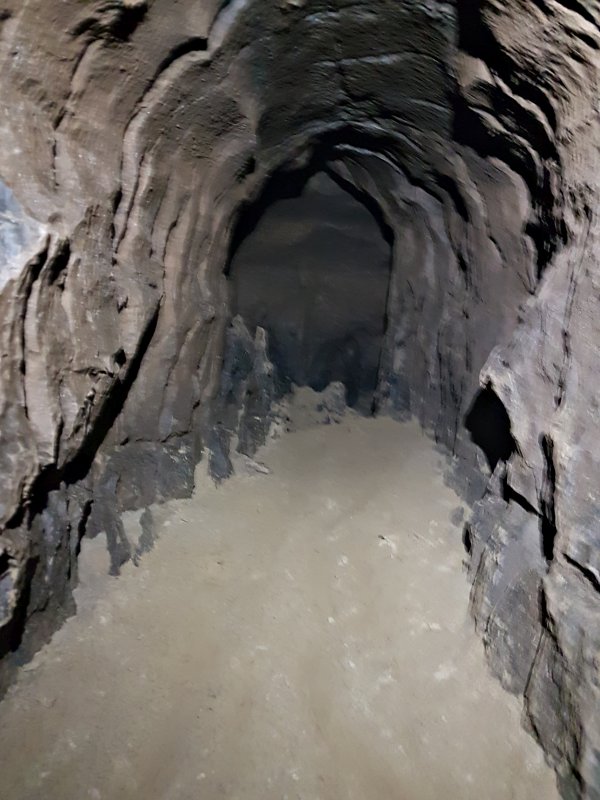 To the left at the second junction is a sandy crawl.
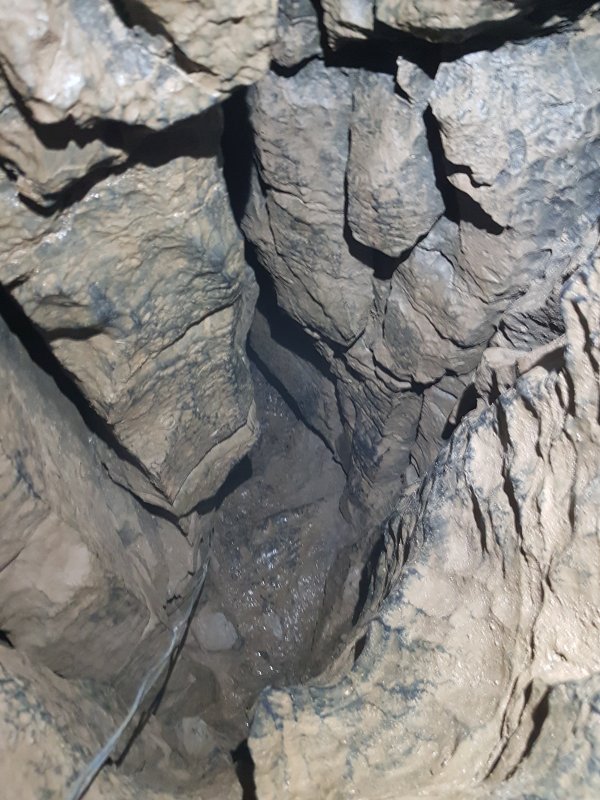 A tight hole on the left drops down a short climb.
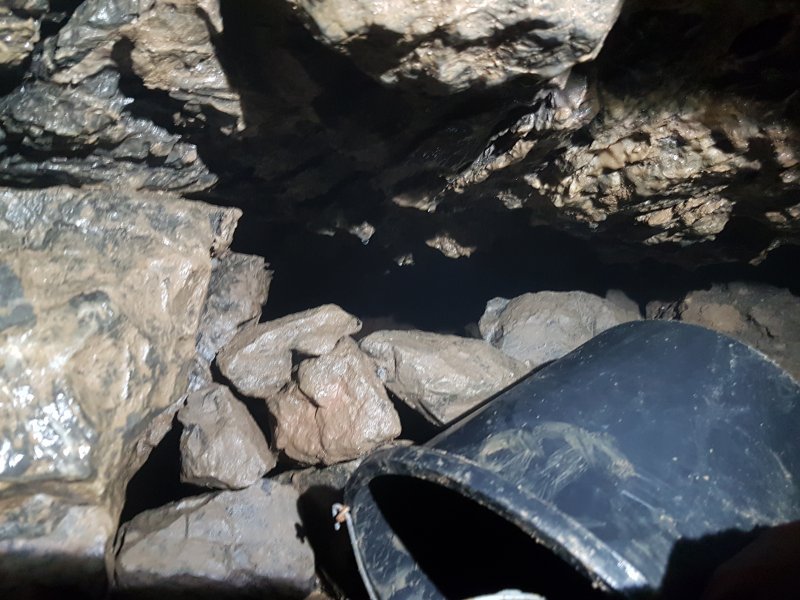 This reaches a dry stone wall, where there is also a bundle of spare cable - this is a tap into the communications cable for use during rescues.
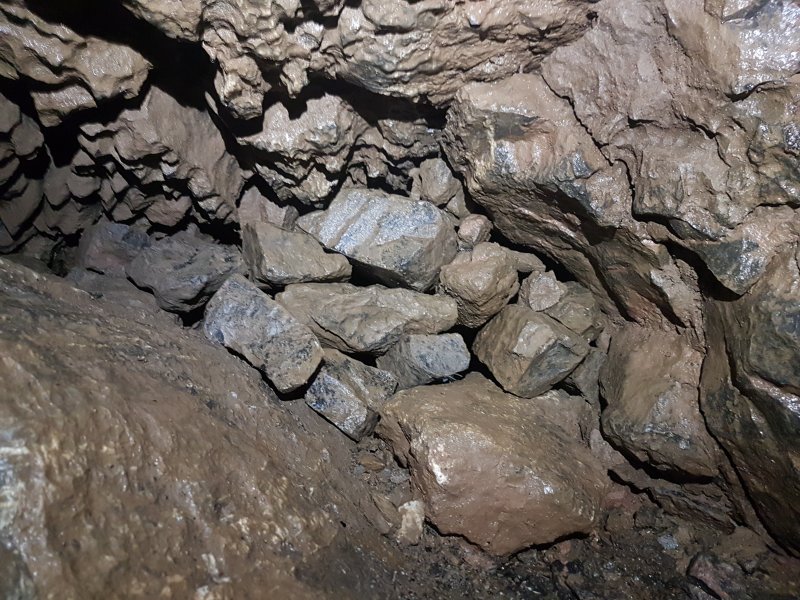 The other side of the same wall is in the regular Long Crawl.
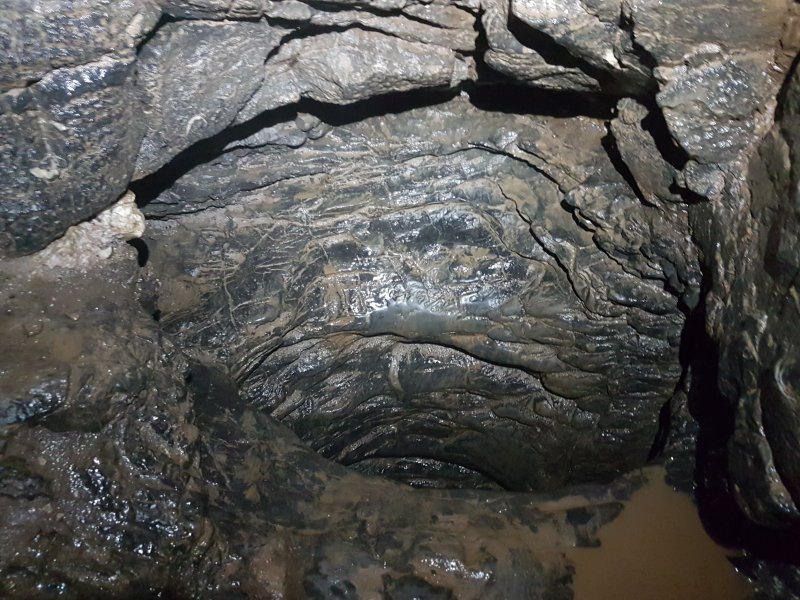 Just above this hole between the Long Crawl and Cattle Trough.
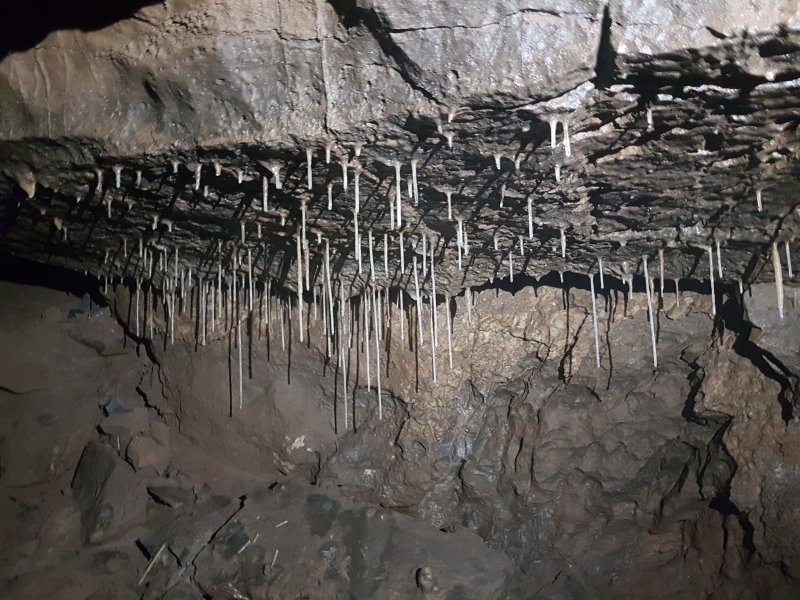 Continuing along the sandy crawl reaches a small grotto where there is a short side passage ascending through a dig to the right.
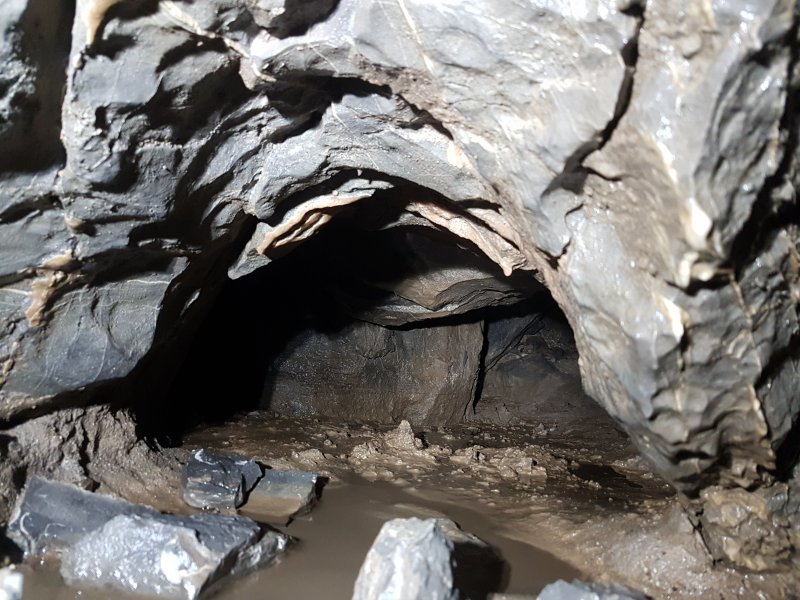 To the left is another passage that appears to end at a tight rift, but to the right, a very low arch is a way on. This looked like it might be too low for me, so I didn't try it.
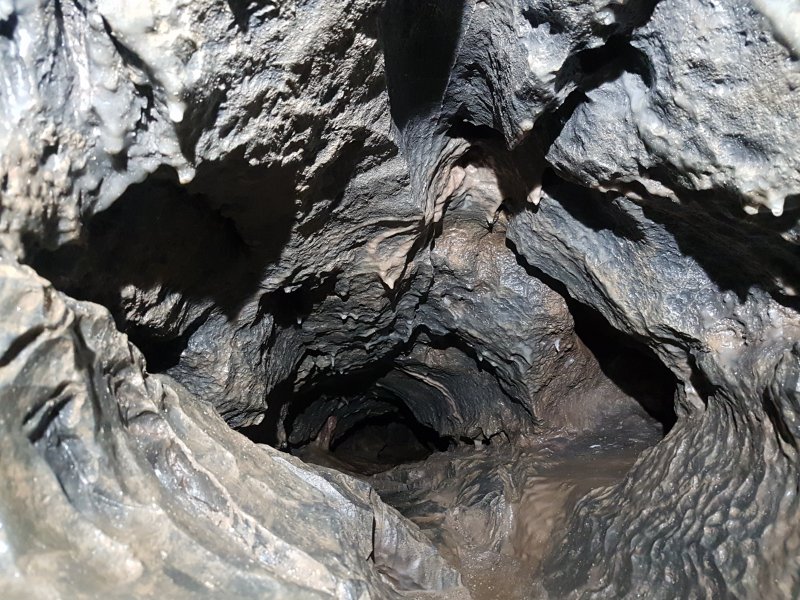 Extremely small cavers might be able to follow it through this body sized tube.
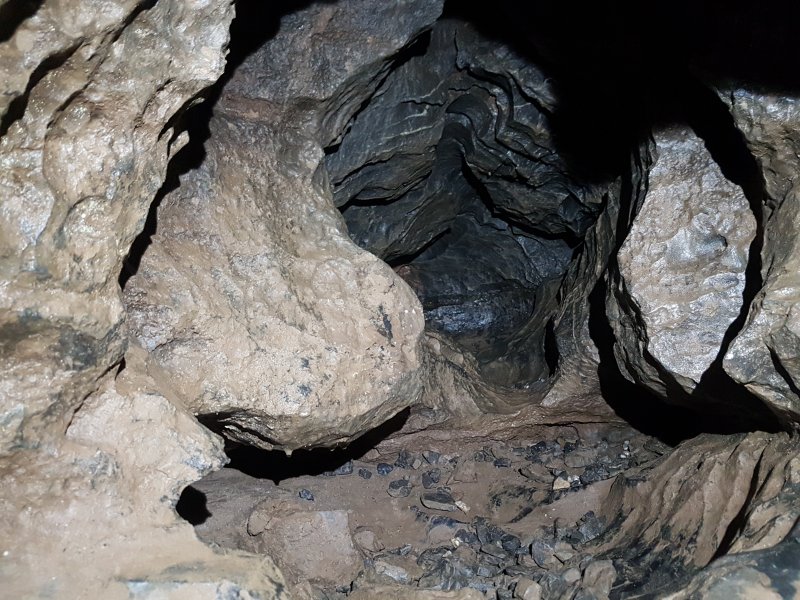 That then appears here, just above the start of the Cattle Trough. We have done all of that caving, and we are just a few metres from where we started into the Longer Crawl. The survey is completely wrong in this area, since the passages have to weave around and cross each other in a couple of places. The passage was resurveyed, but the resurvey couldn't be linked in to the old survey of the Long Crawl because the old one made no sense.
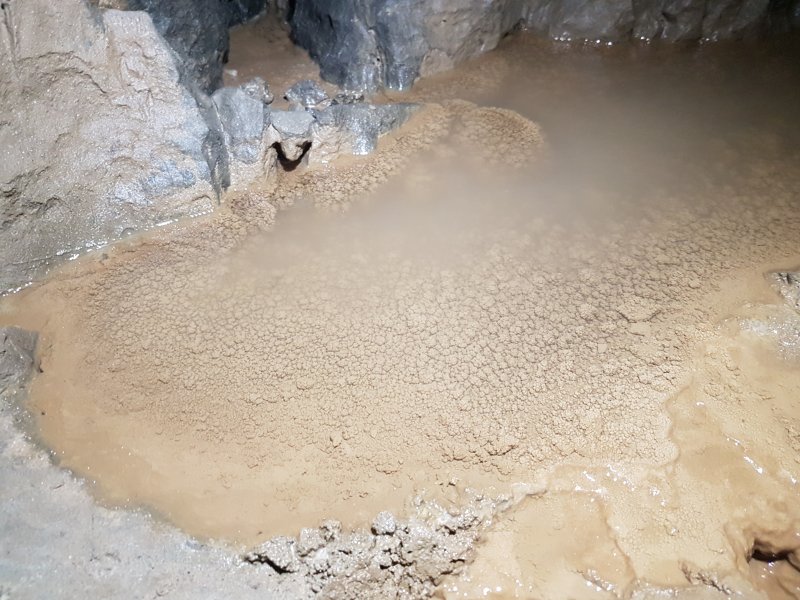 At the first junction below the pitch, continuing ahead reaches the start of the gours.
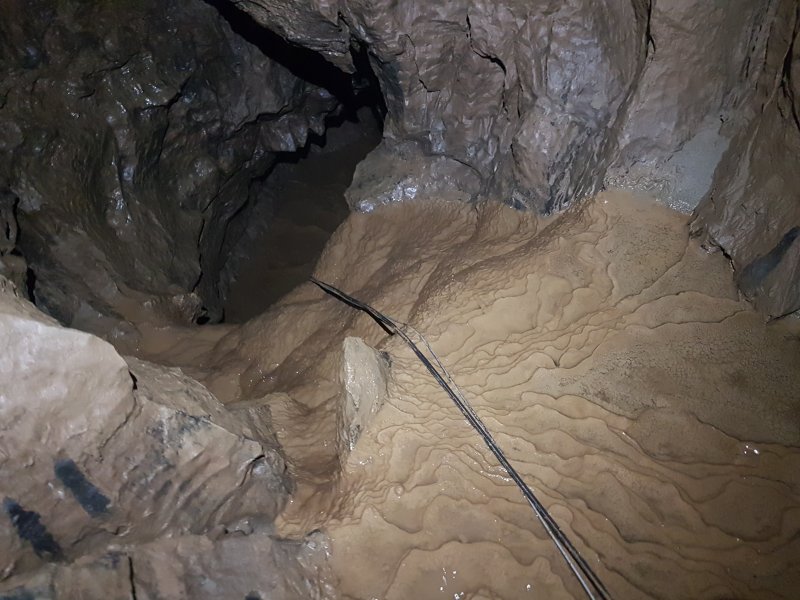 Climbing down the gours.
 The passage of gours.
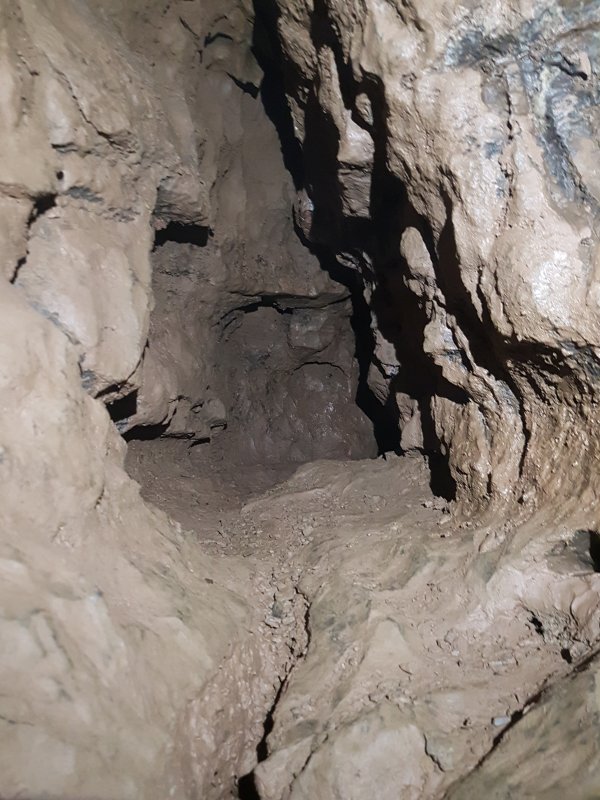 At the end of the gours is another side passage ahead, while the way on drops down to the left.
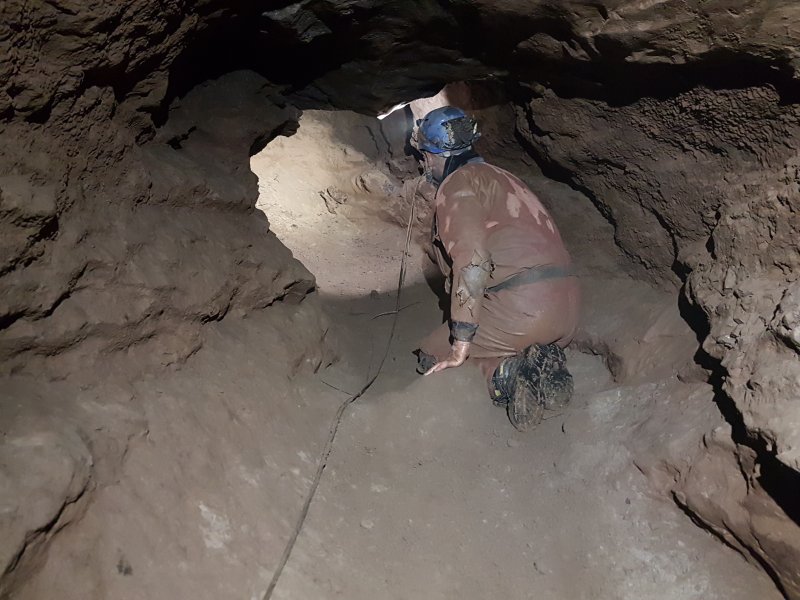 After the gours.
Modelling by Phil, lighting by Tarquin and Phil
After the gours.
Modelling by Phil, lighting by Tarquin and Phil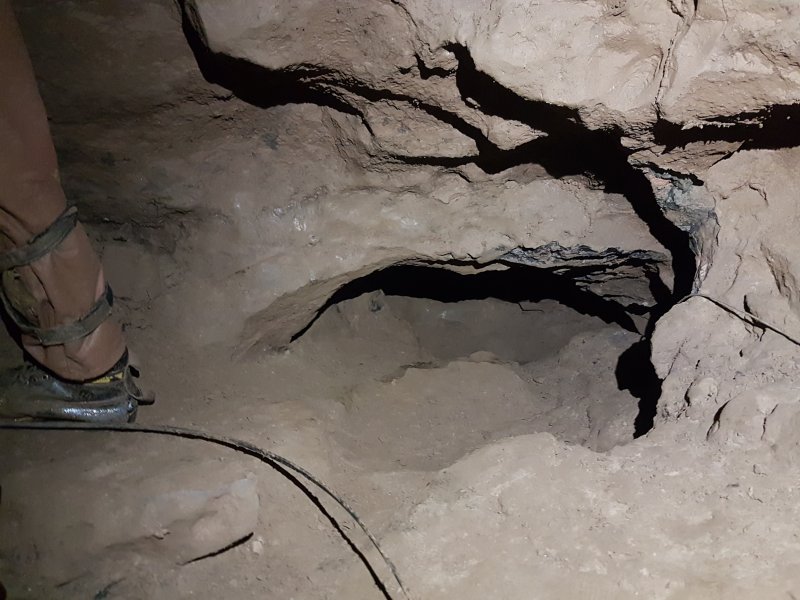 The passage then reaches a small chamber with a selection of ways off. This one is down in the floor, which is where the wire goes.
Modelling by Phil's clodhopper, lighting by Tarquin
The passage then reaches a small chamber with a selection of ways off. This one is down in the floor, which is where the wire goes.
Modelling by Phil's clodhopper, lighting by Tarquin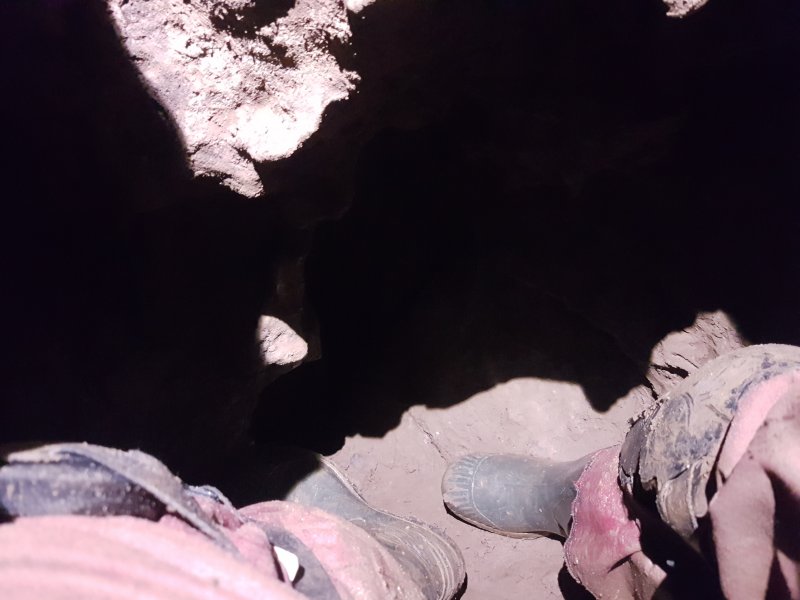 It's body sized, and repeatedly passes through tight bits as it descends to an inevitable final drop out of the ceiling of Gerard Platten Hall. This is a stupid place to be.
Modelling by Tarquin
It's body sized, and repeatedly passes through tight bits as it descends to an inevitable final drop out of the ceiling of Gerard Platten Hall. This is a stupid place to be.
Modelling by Tarquin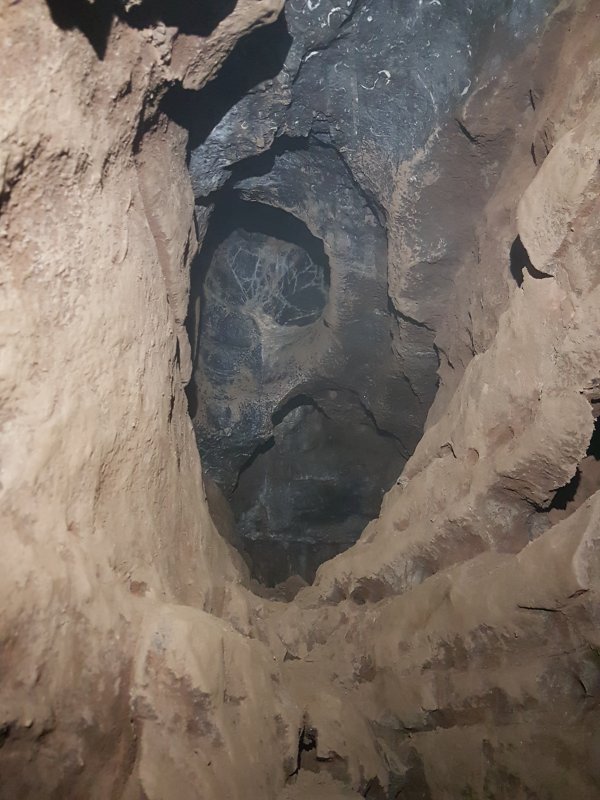 At the end of the chamber, a drop down in the floor reaches a steeply descending tube, popping out at the top of this climb. This is shown on the survey, but not correctly.
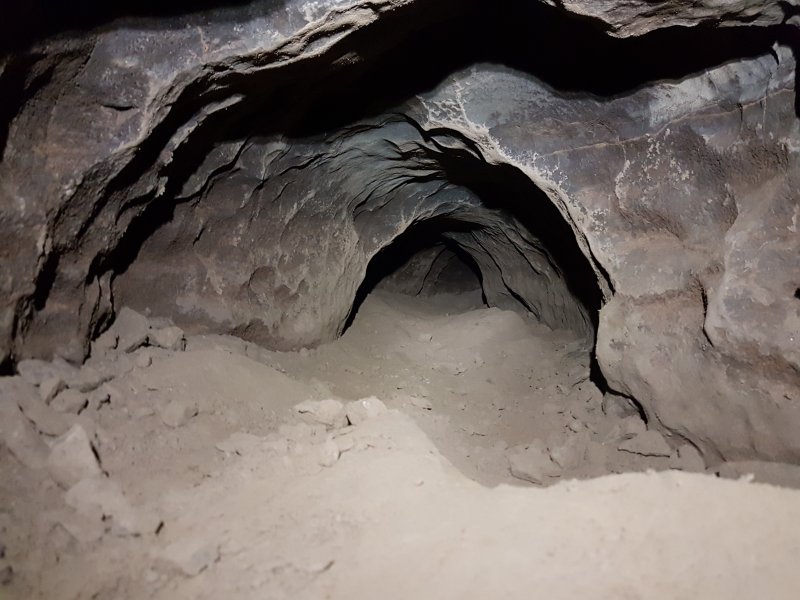 This rather miserably low crawl continues.
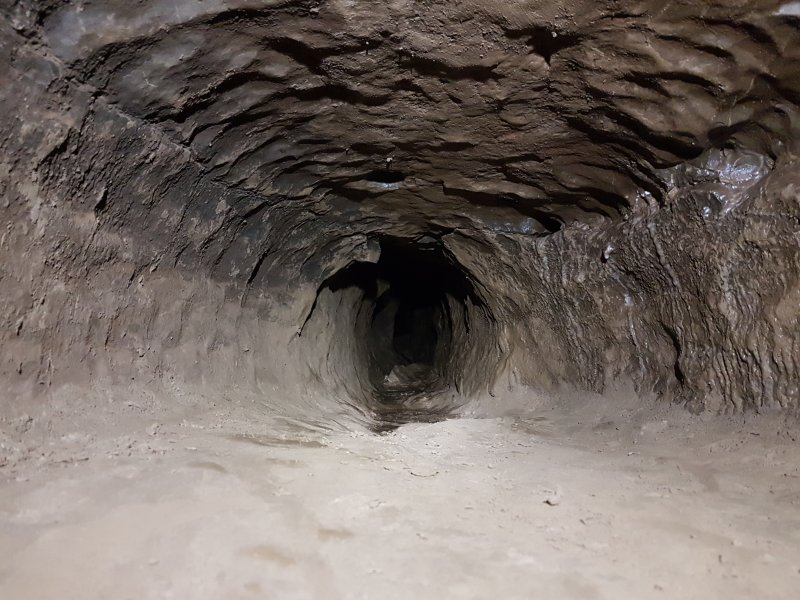 Looks stupidly small, but it is actually not as bad as it looks.
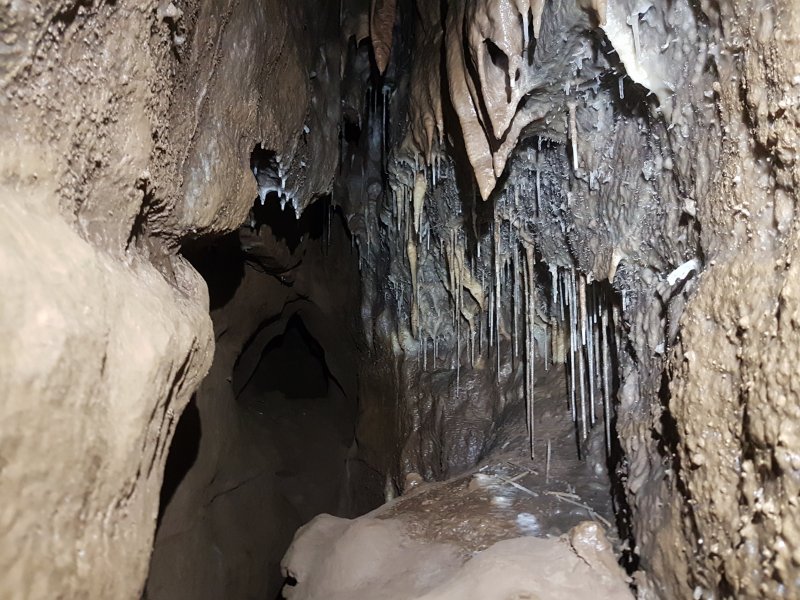 This reaches a tiny grotto.
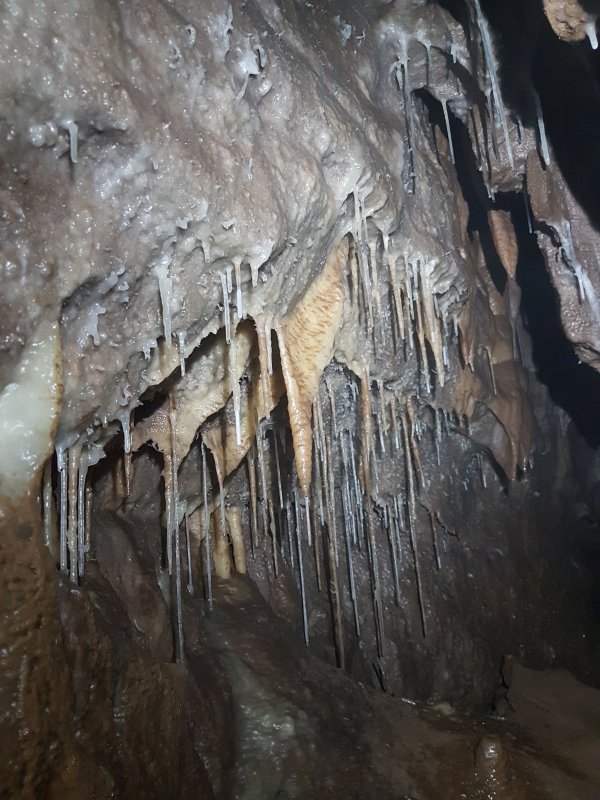 The tiny grotto.
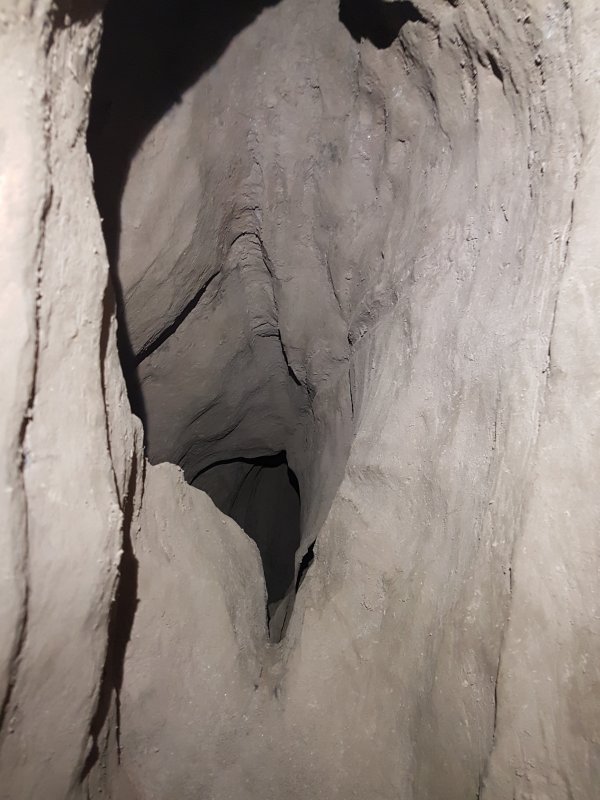 The grotto has a hole in the floor, and a passage over the top of it reaching another hole down. The holes are really steep and pretty difficult to navigate, and should be avoided since any dirt that falls from here lands in the crystal pool below, and could sink the rafts. Falling out of here yourself would not be funny.
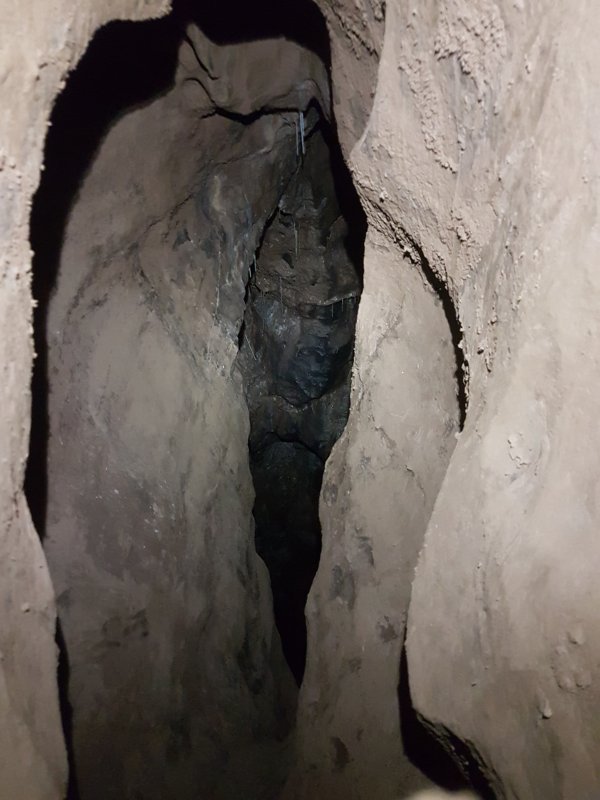 The holes reach a shaft dropping directly into the Crystal Pool - the one with all the calcite rafts at the start of Flabbergasm Oxbow.
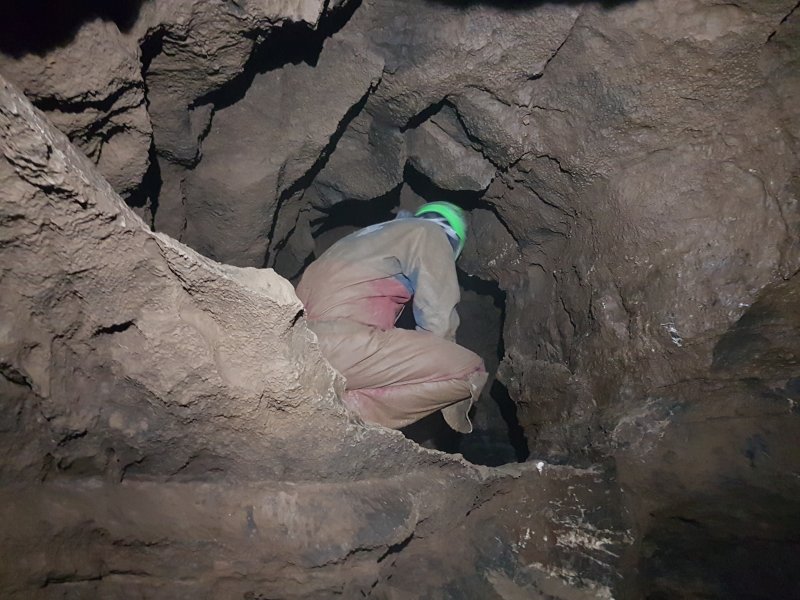 A climb up in the last chamber reaches the normal way on.
Modelling by Dickon, lighting by Tarquin and Dickon
A climb up in the last chamber reaches the normal way on.
Modelling by Dickon, lighting by Tarquin and Dickon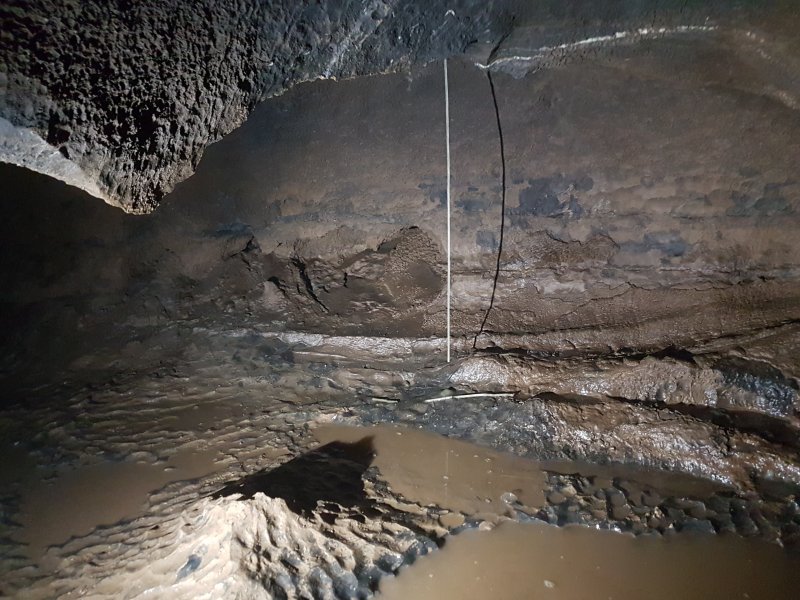 This passage is crawling sized, and the straw formations start immediately.
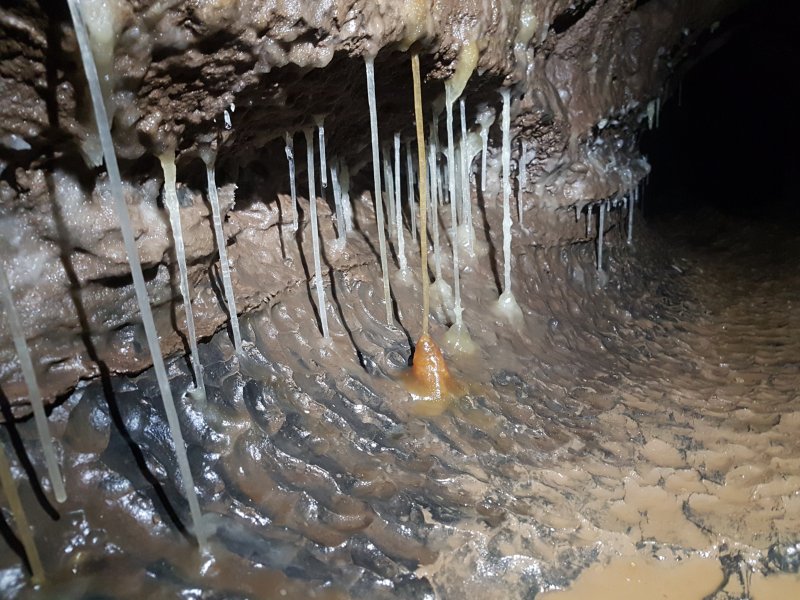 Straws.
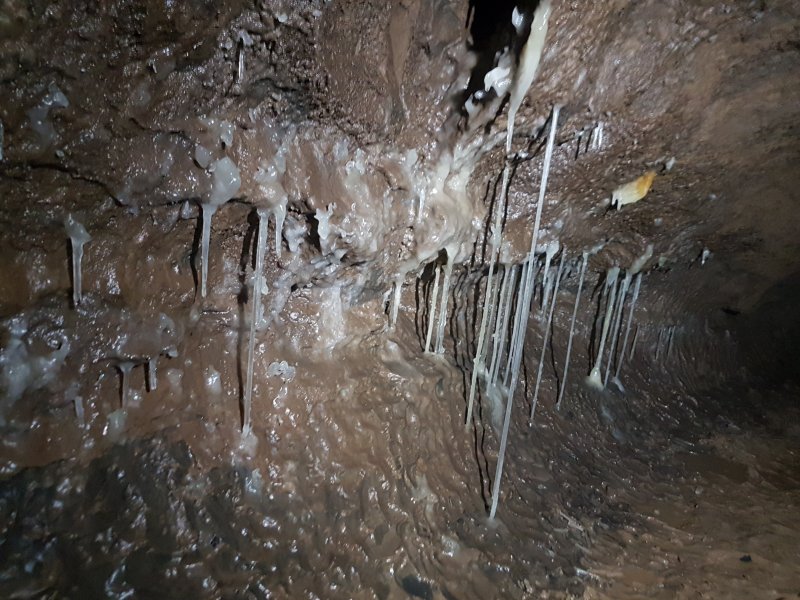 Straws.
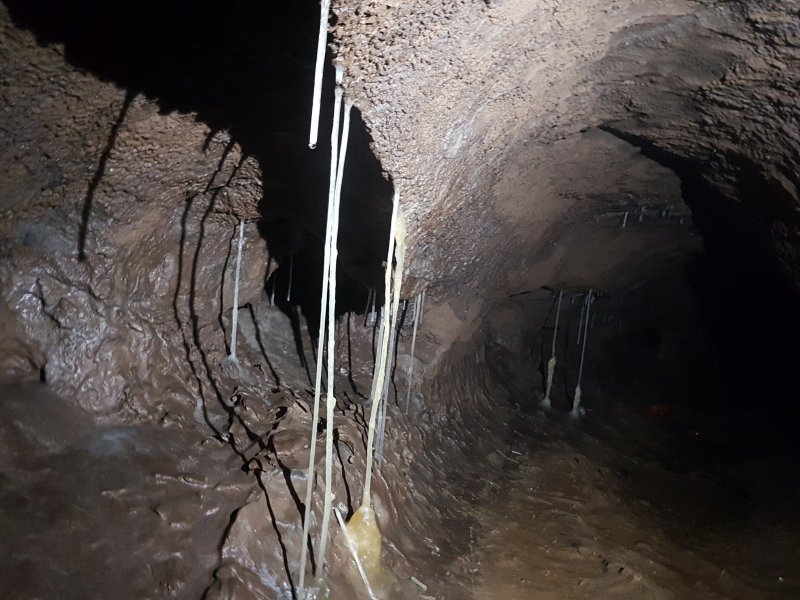 Straws.
 Dried crystal pool, with the muddied remains of rafts.
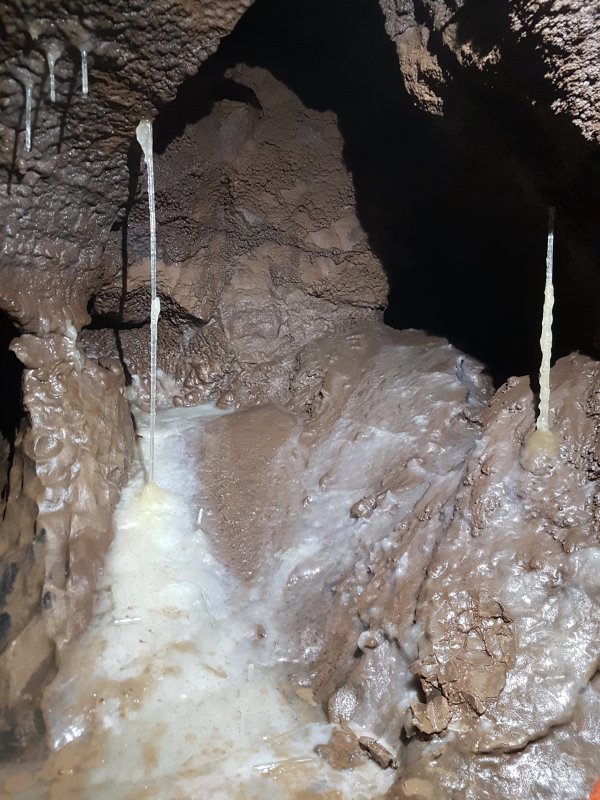 Straws.
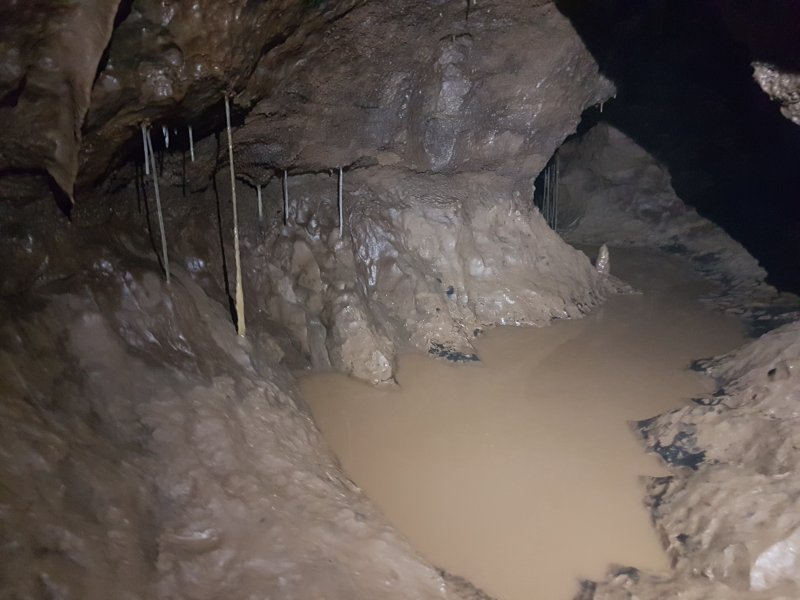 Straws and a muddy pool.
 The best straw columns.
Lighting by Tarquin and David (I think)
The best straw columns.
Lighting by Tarquin and David (I think)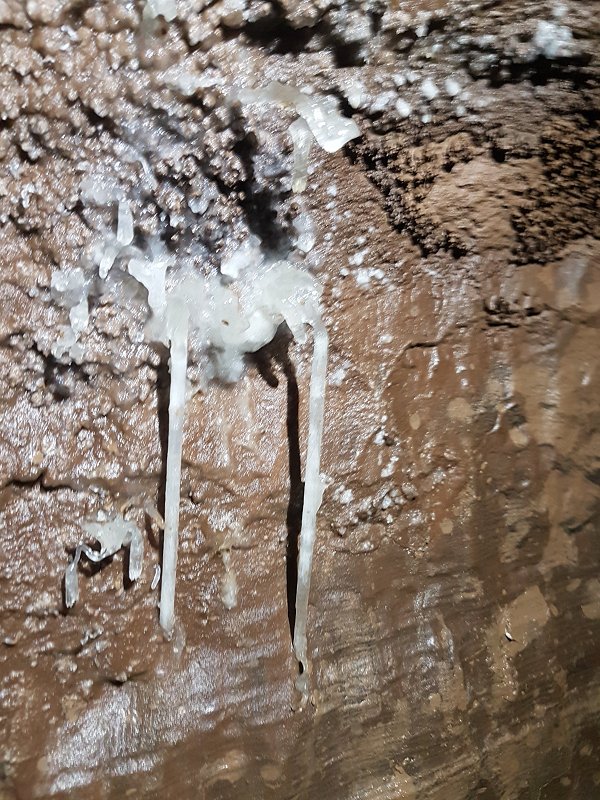 Straws.
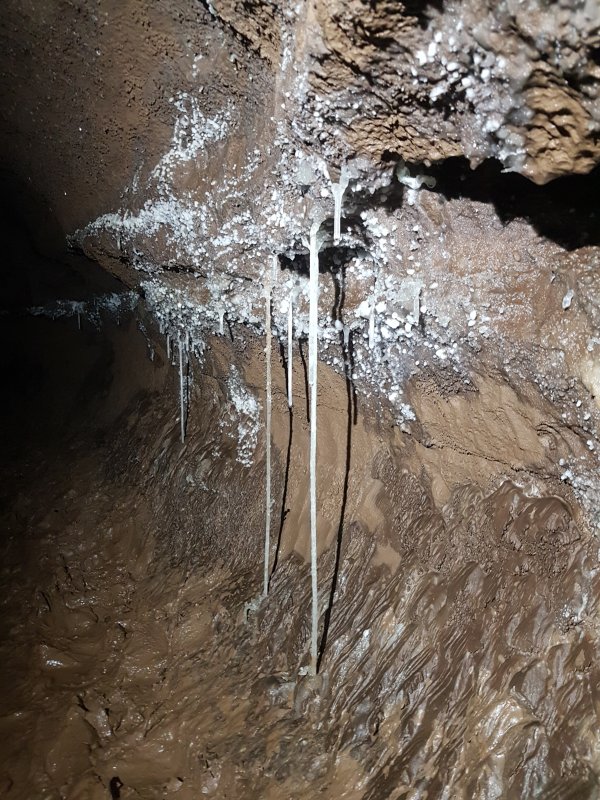 Straws.
 Calcite flow.
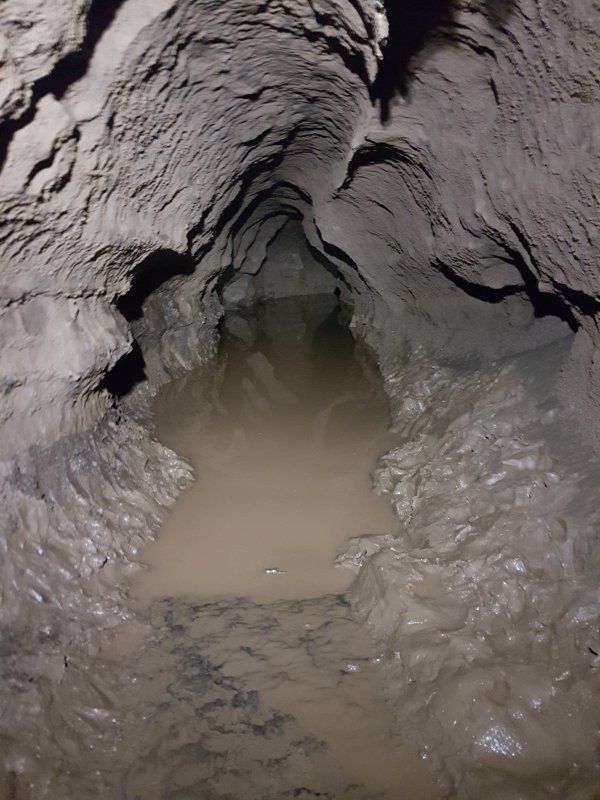 The passage then gains a canal, which gets progressively deeper. As none of us were wearing wetsuits, my companions all made the decision not to continue, so I was spared the need to crawl through the squalor. By now we were parallel with the end of Flabbergasm Oxbow, and the crawl should become sandy, and then end at the start of Monk Hall. Still a long way off. It will have to wait for another day. We made our way out via the Long Crawl, not wanting to face those squeezes again.