Dan yr Ogof Hangar Passage trip 21/09/2019
Unless otherwise stated, camera, setups, lighting, edits and gallery effects by Tarquin. Modelling and lighting at various points will be Mark Tringham and Gareth Farrow.
This trip also included a visit to Mazeways, which was surprisingly open, in spite of recent flooding. The water was about 30 cm deeper than it had been in the summer, and the air space was enough to keep head and shoulders dry. The flood scum on the ceiling, however, was 2 metres above the current water level.
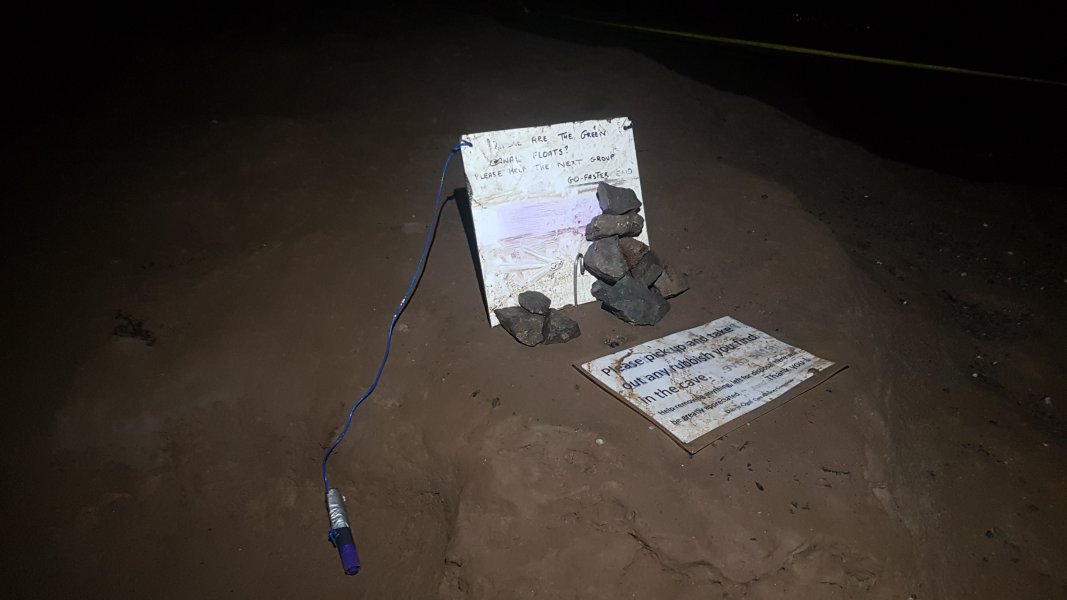
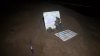 The simple but effective way of telling the next team how many floats are at each end of the Green Canal, since the pen stopped working due to the damp.
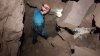 The choke at the end of Hangar Passage has two ways in. This is the upper route, about 10 metres up on the left.
Modelling by Gareth, lighting by Tarquin and Gareth
The choke at the end of Hangar Passage has two ways in. This is the upper route, about 10 metres up on the left.
Modelling by Gareth, lighting by Tarquin and Gareth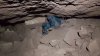 From there, the route drops down through the choke into an undercut. It is deceptive though, since it feels like you are now facing into the choke, when you are actually facing back out of it.
Modelling by Gareth, lighting by Tarquin and Gareth
From there, the route drops down through the choke into an undercut. It is deceptive though, since it feels like you are now facing into the choke, when you are actually facing back out of it.
Modelling by Gareth, lighting by Tarquin and Gareth The lower route passes through this squeeze to reach the same point, and it is easily possible (we proved it) to end up going in via the upper route, and emerging out of the lower one, thinking you have now passed the choke when in fact you are back where you started.
Modelling by Gareth, lighting by Tarquin and Gareth
The lower route passes through this squeeze to reach the same point, and it is easily possible (we proved it) to end up going in via the upper route, and emerging out of the lower one, thinking you have now passed the choke when in fact you are back where you started.
Modelling by Gareth, lighting by Tarquin and Gareth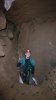 The route is ahead in the undercut when using the lower route, or back under yourself in the undercut when using the upper route. It emerges at this flat wall at the far end of the choke.
Modelling by Gareth, lighting by Tarquin and Mark
The route is ahead in the undercut when using the lower route, or back under yourself in the undercut when using the upper route. It emerges at this flat wall at the far end of the choke.
Modelling by Gareth, lighting by Tarquin and Mark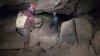 Beyond the choke, in the continuation of Hangar Passage.
Modelling by Mark and Gareth, lighting by Tarquin, Mark and Gareth
Beyond the choke, in the continuation of Hangar Passage.
Modelling by Mark and Gareth, lighting by Tarquin, Mark and Gareth Despite looking enormous on the survey, the junction of Hangar North and Hangar South is not at all obvious. Hangar North is the low crawl under the right wall, and Hangar South is the obvious passage ahead-left.
Modelling by Mark and Gareth, lighting by Tarquin, Mark and Gareth
Despite looking enormous on the survey, the junction of Hangar North and Hangar South is not at all obvious. Hangar North is the low crawl under the right wall, and Hangar South is the obvious passage ahead-left.
Modelling by Mark and Gareth, lighting by Tarquin, Mark and Gareth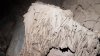 Mud formations at a junction in Hangar South.
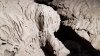 Mud formations in Hangar South.
 The main Hangar South continues right at the junction by the mud formations, becoming its largest size, with rock breakdown. This is the older branch of Hangar Passage, thought to be some 2 million years old.
Modelling by Mark and Gareth, lighting by Tarquin, Mark and Gareth
The main Hangar South continues right at the junction by the mud formations, becoming its largest size, with rock breakdown. This is the older branch of Hangar Passage, thought to be some 2 million years old.
Modelling by Mark and Gareth, lighting by Tarquin, Mark and Gareth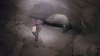 A beautiful arched section with a sand floor. This, sadly, is short lived.
Modelling by Mark and Gareth, lighting by Tarquin, Mark and Gareth
A beautiful arched section with a sand floor. This, sadly, is short lived.
Modelling by Mark and Gareth, lighting by Tarquin, Mark and Gareth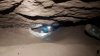 The passage lowers to a very tight crawl over mud, squeeze sized at one point.
Modelling by Gareth and Tarquin's welly, lighting by Tarquin and Gareth
The passage lowers to a very tight crawl over mud, squeeze sized at one point.
Modelling by Gareth and Tarquin's welly, lighting by Tarquin and Gareth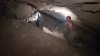 The squeeze emerges in a brief large section of passage.
Modelling by Mark and Gareth, lighting by Tarquin, Mark and Gareth
The squeeze emerges in a brief large section of passage.
Modelling by Mark and Gareth, lighting by Tarquin, Mark and Gareth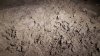 Mud formations near the end.
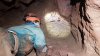 Hangar South is the most promising major lead in the cave, pointing towards blank mountain. The dig face is currently just sediment.
Modelling by Gareth, lighting by Tarquin and Gareth
Hangar South is the most promising major lead in the cave, pointing towards blank mountain. The dig face is currently just sediment.
Modelling by Gareth, lighting by Tarquin and Gareth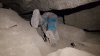 Back at the junction just after the start of Hangar South, a low passage to the left appears to end. However, tucked under its right wall is the way into an extension.
Modelling by Gareth
Back at the junction just after the start of Hangar South, a low passage to the left appears to end. However, tucked under its right wall is the way into an extension.
Modelling by Gareth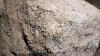 Selenite on the walls of the extension.
 This is the start of a couple of rocky clambers up a narrow rift.
Modelling by Gareth, lighting by Tarquin and Gareth
This is the start of a couple of rocky clambers up a narrow rift.
Modelling by Gareth, lighting by Tarquin and Gareth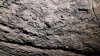 Selenite on the walls of the clambers.
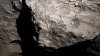 Selenite on the walls of the clambers.
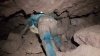 The clambers emerge in a small chamber, with a rocky slope up into a narrow sloping bedding, which is quite awkward, especially given the loose rocks above, where you want to put your hands.
Modelling by Gareth, lighting by Tarquin and Gareth
The clambers emerge in a small chamber, with a rocky slope up into a narrow sloping bedding, which is quite awkward, especially given the loose rocks above, where you want to put your hands.
Modelling by Gareth, lighting by Tarquin and Gareth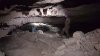 The bedding emerges into the side of a wide chamber. This is at a substantially higher level than the main Hangar South, and could be an older development. However, it is probably a collapse chamber above the original level of Hangar South. Even so, it has definitely seen significant amounts of water flow, so perhaps it is a separate drainage level.
Modelling by Mark and Gareth, lighting by Tarquin, Mark and Gareth
The bedding emerges into the side of a wide chamber. This is at a substantially higher level than the main Hangar South, and could be an older development. However, it is probably a collapse chamber above the original level of Hangar South. Even so, it has definitely seen significant amounts of water flow, so perhaps it is a separate drainage level.
Modelling by Mark and Gareth, lighting by Tarquin, Mark and Gareth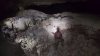 The major feature of the chamber is a superb sediment cliff, and part of this visit was to lay tape at the top, to guide cavers away from the edge. The collapse pit below the cliff seems to be where the water soaked away back into the original level of Hangar South's eastern continuation.
Modelling by Mark, lighting by Tarquin, Gareth and Mark
The major feature of the chamber is a superb sediment cliff, and part of this visit was to lay tape at the top, to guide cavers away from the edge. The collapse pit below the cliff seems to be where the water soaked away back into the original level of Hangar South's eastern continuation.
Modelling by Mark, lighting by Tarquin, Gareth and Mark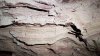 The cliff is made from finely layered periglacial rhythmites; laminates of mud with two different grain sizes. Each laminate shows a seasonal change from slow flowing water in winter (fine silt), to faster flowing meltwater in summer (coarser sand). The silt comes from the sandstones to the north, with ice age meltwater being the most likely source of the water carrying it into the cave.
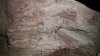 The side of the cliff also has some great rhythmites.
 The continuing dig follows a bedding that becomes filled with silt. This seems rather unpromising, as the way on is more likely to be buried beneath the depression in the floor. The chamber and dig point in the wrong direction for major extensions though, as they represent an outflow, towards the entrance. If further passage is found here, it will probably just rejoin the main passages at Cloud Chamber, or perhaps be parallel to that.
Modelling by Gareth's flailing wellies
The continuing dig follows a bedding that becomes filled with silt. This seems rather unpromising, as the way on is more likely to be buried beneath the depression in the floor. The chamber and dig point in the wrong direction for major extensions though, as they represent an outflow, towards the entrance. If further passage is found here, it will probably just rejoin the main passages at Cloud Chamber, or perhaps be parallel to that.
Modelling by Gareth's flailing wellies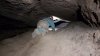 Crawling into Hangar North.
Modelling by Gareth, lighting by Tarquin and Gareth
Crawling into Hangar North.
Modelling by Gareth, lighting by Tarquin and Gareth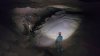 Hangar North soon opens out to an impressive size, with a stream.
Modelling by Gareth and Mark, lighting by Tarquin, Gareth and Mark
Hangar North soon opens out to an impressive size, with a stream.
Modelling by Gareth and Mark, lighting by Tarquin, Gareth and Mark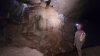 Flowstone formation in Hangar North.
Modelling by Mark, lighting by Tarquin and Mark
Flowstone formation in Hangar North.
Modelling by Mark, lighting by Tarquin and Mark Junction of routes in Hangar North, its largest point.
Modelling by Gareth and Mark, lighting by Tarquin, Gareth and Mark
Junction of routes in Hangar North, its largest point.
Modelling by Gareth and Mark, lighting by Tarquin, Gareth and Mark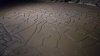 Mud formations in the Hangar North main branch.
Lighting by Tarquin and Mark
Mud formations in the Hangar North main branch.
Lighting by Tarquin and Mark The main branch ends at a large choke. Gareth headed up into this one, reporting back that as we had heard, there are some very loose rocks in there, and it felt like something had moved relatively recently. Although he could see into the open passage beyond, the slope above looked ready to trap visitors. We decided not to continue into the impressive chamber above, at least until someone who knows the choke says whether it is supposed to be like that.
Modelling by Gareth, lighting by Tarquin, Mark and Gareth
The main branch ends at a large choke. Gareth headed up into this one, reporting back that as we had heard, there are some very loose rocks in there, and it felt like something had moved relatively recently. Although he could see into the open passage beyond, the slope above looked ready to trap visitors. We decided not to continue into the impressive chamber above, at least until someone who knows the choke says whether it is supposed to be like that.
Modelling by Gareth, lighting by Tarquin, Mark and Gareth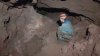 Taking the side passage to the left at the junction, another low crawl reaches this small enlargement, with mud formations.
Modelling by Gareth, lighting by Tarquin and Gareth
Taking the side passage to the left at the junction, another low crawl reaches this small enlargement, with mud formations.
Modelling by Gareth, lighting by Tarquin and Gareth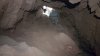 The passage ends in a slope up, with an unsupported, vertical choke at its top. This was also not very inviting, and has never been passed.
Modelling by Gareth, lighting by Tarquin and Gareth
The passage ends in a slope up, with an unsupported, vertical choke at its top. This was also not very inviting, and has never been passed.
Modelling by Gareth, lighting by Tarquin and Gareth Green Canal had almost no floats left, so Gareth shuttled several back to the start, allowing Mark to join us. On the shuttle run, he was wearing 3 life jackets and one ring, pushing 4 more rings, leaving him about as mobile as a walrus.
Modelling by Gareth
Green Canal had almost no floats left, so Gareth shuttled several back to the start, allowing Mark to join us. On the shuttle run, he was wearing 3 life jackets and one ring, pushing 4 more rings, leaving him about as mobile as a walrus.
Modelling by Gareth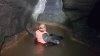 Looks like fun.
Modelling by Gareth, lighting by Tarquin and Gareth
Looks like fun.
Modelling by Gareth, lighting by Tarquin and Gareth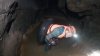 It's even more fun when you can't get out of the ring afterwards.
Modelling by Gareth, lighting by Tarquin and Gareth
It's even more fun when you can't get out of the ring afterwards.
Modelling by Gareth, lighting by Tarquin and Gareth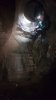 Down the Abyss.
Modelling by Gareth, lighting by Tarquin, Gareth and Mark
Down the Abyss.
Modelling by Gareth, lighting by Tarquin, Gareth and Mark Climbing up The Camel.
Modelling by Gareth, lighting by Tarquin, Gareth and Mark
Climbing up The Camel.
Modelling by Gareth, lighting by Tarquin, Gareth and Mark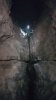 Using the slide technique to get down The Camel. This method is much more fun, and actually a lot easier, than trying to sit on one wall and push off the other wall, which is the usual method people use.
Modelling by Gareth and Mark, lighting by Tarquin and Gareth
Using the slide technique to get down The Camel. This method is much more fun, and actually a lot easier, than trying to sit on one wall and push off the other wall, which is the usual method people use.
Modelling by Gareth and Mark, lighting by Tarquin and Gareth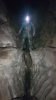 When sliding, you do have to make sure you land correctly on this ledge, before sliding the final part.
Modelling by Gareth, lighting by Tarquin and Gareth
When sliding, you do have to make sure you land correctly on this ledge, before sliding the final part.
Modelling by Gareth, lighting by Tarquin and Gareth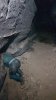 On our way out, we decided to learn Elliptic Passage, which can be used to bypass the Virgin Passage canals, and the Green Canal, to reach the Lower Series with ease. It starts in the left wall of the Grand Canyon (on the way in), just before the corner where Flabbergasm rejoins from above.
Modelling by Gareth
On our way out, we decided to learn Elliptic Passage, which can be used to bypass the Virgin Passage canals, and the Green Canal, to reach the Lower Series with ease. It starts in the left wall of the Grand Canyon (on the way in), just before the corner where Flabbergasm rejoins from above.
Modelling by Gareth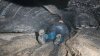 Most of the passage is an easy crawl.
Modelling by Gareth, lighting by Tarquin and Gareth
Most of the passage is an easy crawl.
Modelling by Gareth, lighting by Tarquin and Gareth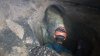 This ends at a chimney down.
Modelling by Gareth, lighting by Tarquin and Gareth
This ends at a chimney down.
Modelling by Gareth, lighting by Tarquin and Gareth The chimney is about 6 metres, and looks like it has no footholds from the top. However, there are some in the crack on the left, and exactly where you need them on the right. We both chimneyed back up with ease, but it is possible that some may find it more difficult.
Modelling by Gareth, lighting by Tarquin and Gareth
The chimney is about 6 metres, and looks like it has no footholds from the top. However, there are some in the crack on the left, and exactly where you need them on the right. We both chimneyed back up with ease, but it is possible that some may find it more difficult.
Modelling by Gareth, lighting by Tarquin and Gareth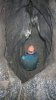 In the wrong direction at the bottom is a short side passage, but the way on is to continue in the same direction as before. Immediately, there is a 2 metre climb, easier than the chimney.
Modelling by Gareth, lighting by Tarquin and Gareth
In the wrong direction at the bottom is a short side passage, but the way on is to continue in the same direction as before. Immediately, there is a 2 metre climb, easier than the chimney.
Modelling by Gareth, lighting by Tarquin and Gareth At the bottom is a flat out crawl over gravel.
Modelling by Gareth, lighting by Tarquin and Gareth
At the bottom is a flat out crawl over gravel.
Modelling by Gareth, lighting by Tarquin and Gareth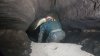 The exit of Elliptic Passage.
Modelling by Gareth, lighting by Tarquin and Gareth
The exit of Elliptic Passage.
Modelling by Gareth, lighting by Tarquin and Gareth Bakerloo, at its best cross section, just before where it turns into a keyhole shape, and enters its phreatic maze. On the left is the exit from Elliptic Passage.
Modelling by Gareth, lighting by Gareth and Mark
Bakerloo, at its best cross section, just before where it turns into a keyhole shape, and enters its phreatic maze. On the left is the exit from Elliptic Passage.
Modelling by Gareth, lighting by Gareth and Mark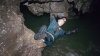 At The Washing Machine, Gareth wanted to take a picture of the water chute, and felt that this was best achieved by hanging upside down, one-handed, over the deep pool, with a camera in the other hand. It worked.
Modelling by Gareth
At The Washing Machine, Gareth wanted to take a picture of the water chute, and felt that this was best achieved by hanging upside down, one-handed, over the deep pool, with a camera in the other hand. It worked.
Modelling by Gareth
 The simple but effective way of telling the next team how many floats are at each end of the Green Canal, since the pen stopped working due to the damp.
 The choke at the end of Hangar Passage has two ways in. This is the upper route, about 10 metres up on the left.
Modelling by Gareth, lighting by Tarquin and Gareth
The choke at the end of Hangar Passage has two ways in. This is the upper route, about 10 metres up on the left.
Modelling by Gareth, lighting by Tarquin and Gareth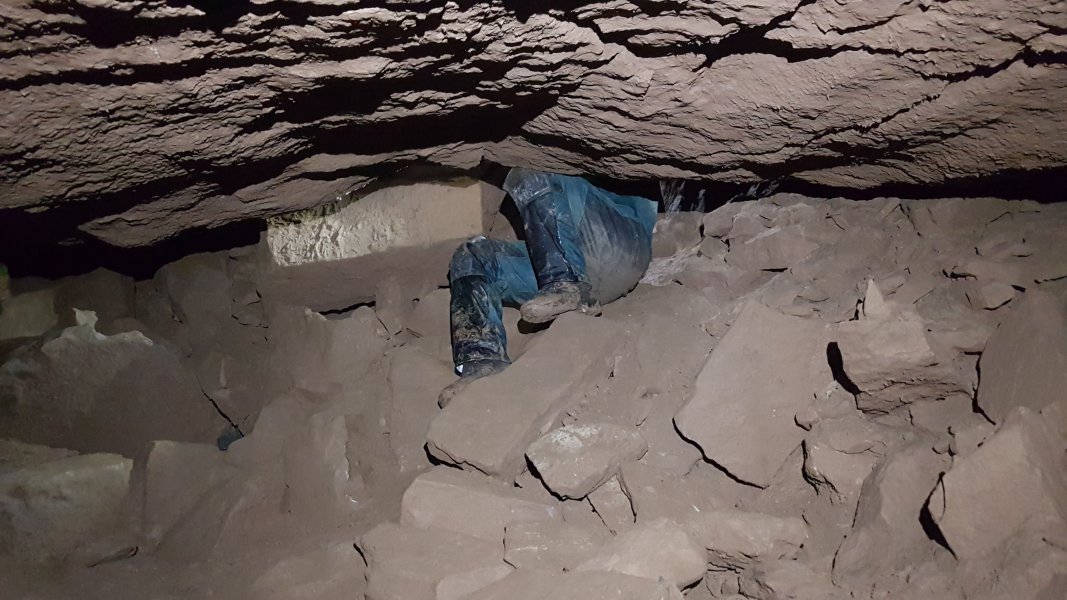 From there, the route drops down through the choke into an undercut. It is deceptive though, since it feels like you are now facing into the choke, when you are actually facing back out of it.
Modelling by Gareth, lighting by Tarquin and Gareth
From there, the route drops down through the choke into an undercut. It is deceptive though, since it feels like you are now facing into the choke, when you are actually facing back out of it.
Modelling by Gareth, lighting by Tarquin and Gareth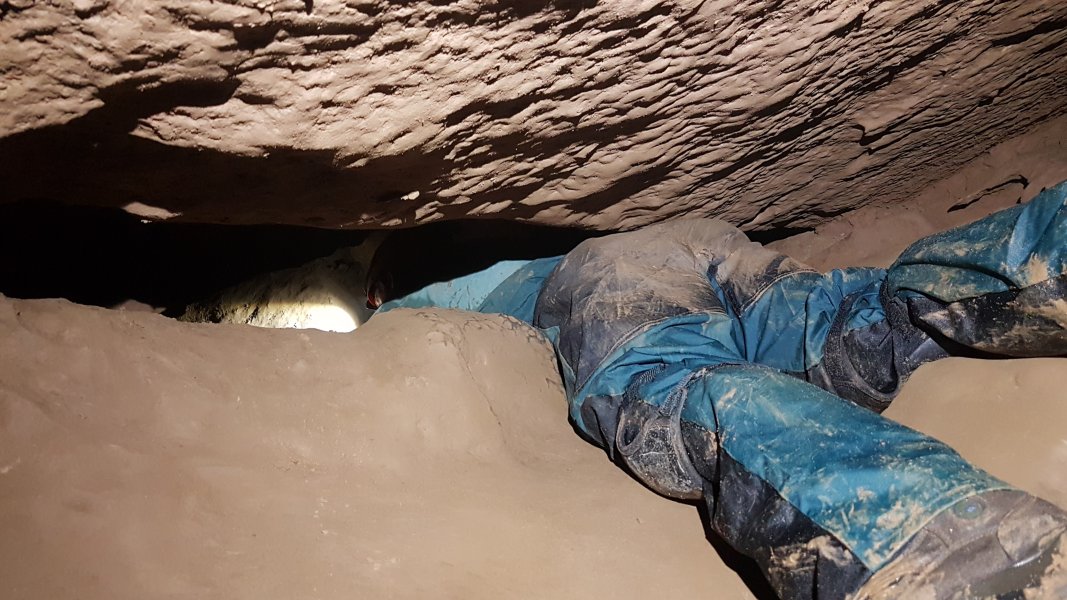 The lower route passes through this squeeze to reach the same point, and it is easily possible (we proved it) to end up going in via the upper route, and emerging out of the lower one, thinking you have now passed the choke when in fact you are back where you started.
Modelling by Gareth, lighting by Tarquin and Gareth
The lower route passes through this squeeze to reach the same point, and it is easily possible (we proved it) to end up going in via the upper route, and emerging out of the lower one, thinking you have now passed the choke when in fact you are back where you started.
Modelling by Gareth, lighting by Tarquin and Gareth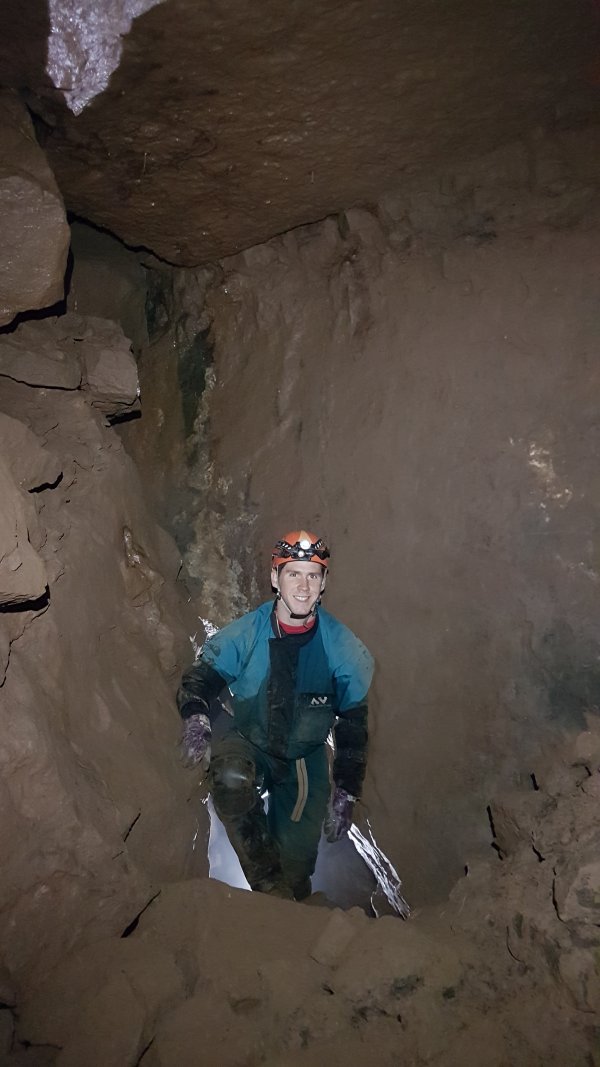 The route is ahead in the undercut when using the lower route, or back under yourself in the undercut when using the upper route. It emerges at this flat wall at the far end of the choke.
Modelling by Gareth, lighting by Tarquin and Mark
The route is ahead in the undercut when using the lower route, or back under yourself in the undercut when using the upper route. It emerges at this flat wall at the far end of the choke.
Modelling by Gareth, lighting by Tarquin and Mark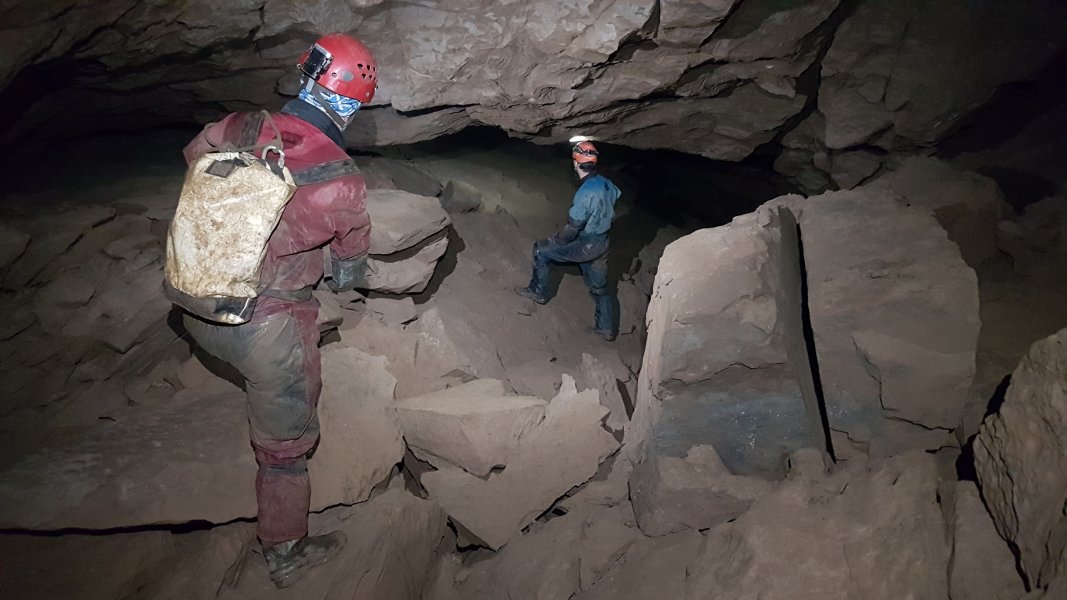 Beyond the choke, in the continuation of Hangar Passage.
Modelling by Mark and Gareth, lighting by Tarquin, Mark and Gareth
Beyond the choke, in the continuation of Hangar Passage.
Modelling by Mark and Gareth, lighting by Tarquin, Mark and Gareth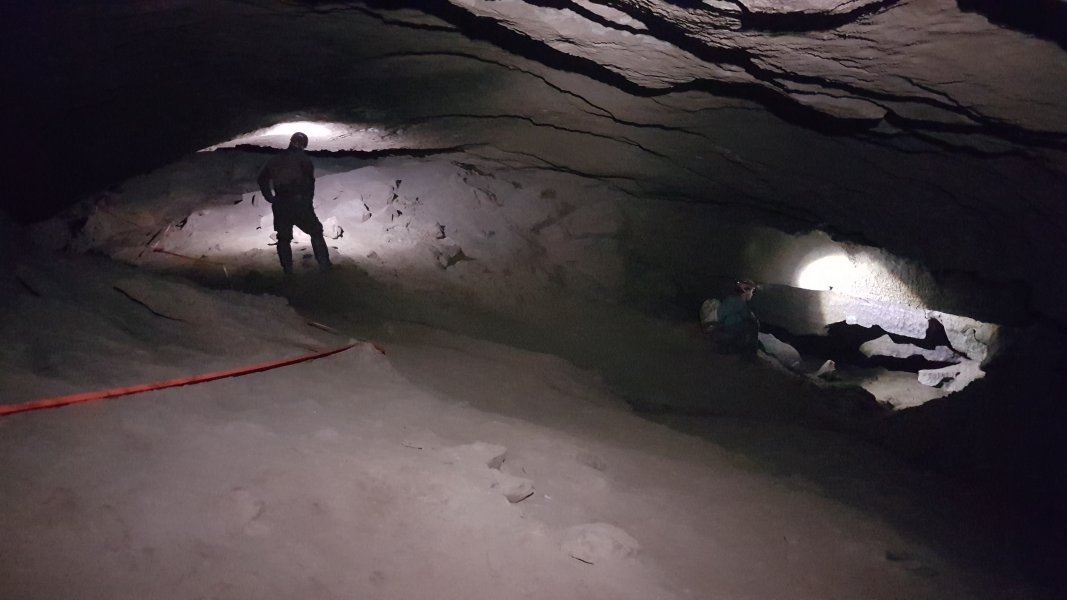 Despite looking enormous on the survey, the junction of Hangar North and Hangar South is not at all obvious. Hangar North is the low crawl under the right wall, and Hangar South is the obvious passage ahead-left.
Modelling by Mark and Gareth, lighting by Tarquin, Mark and Gareth
Despite looking enormous on the survey, the junction of Hangar North and Hangar South is not at all obvious. Hangar North is the low crawl under the right wall, and Hangar South is the obvious passage ahead-left.
Modelling by Mark and Gareth, lighting by Tarquin, Mark and Gareth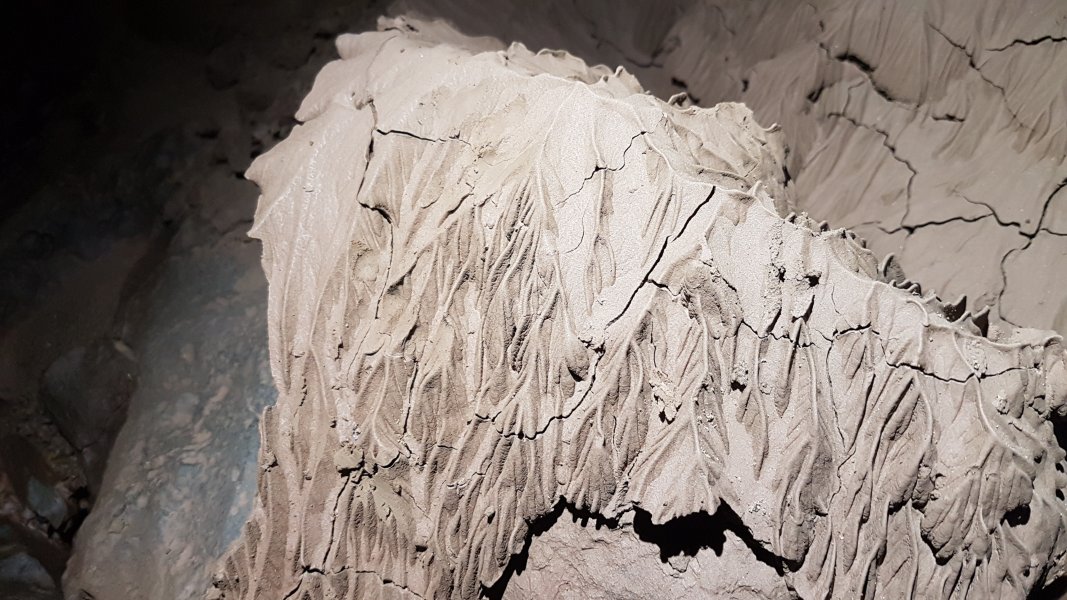 Mud formations at a junction in Hangar South.
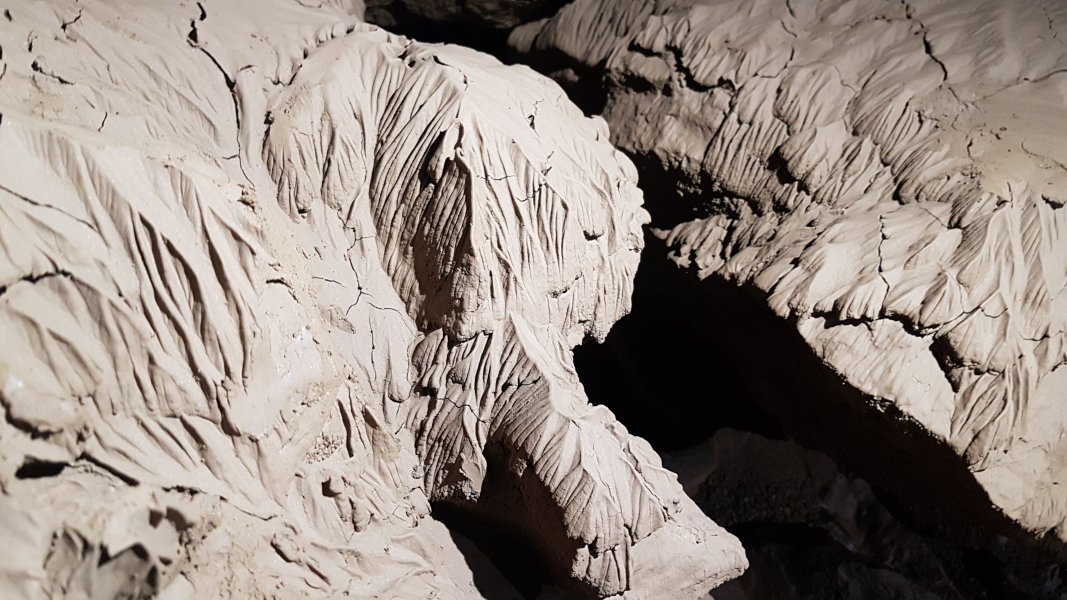 Mud formations in Hangar South.
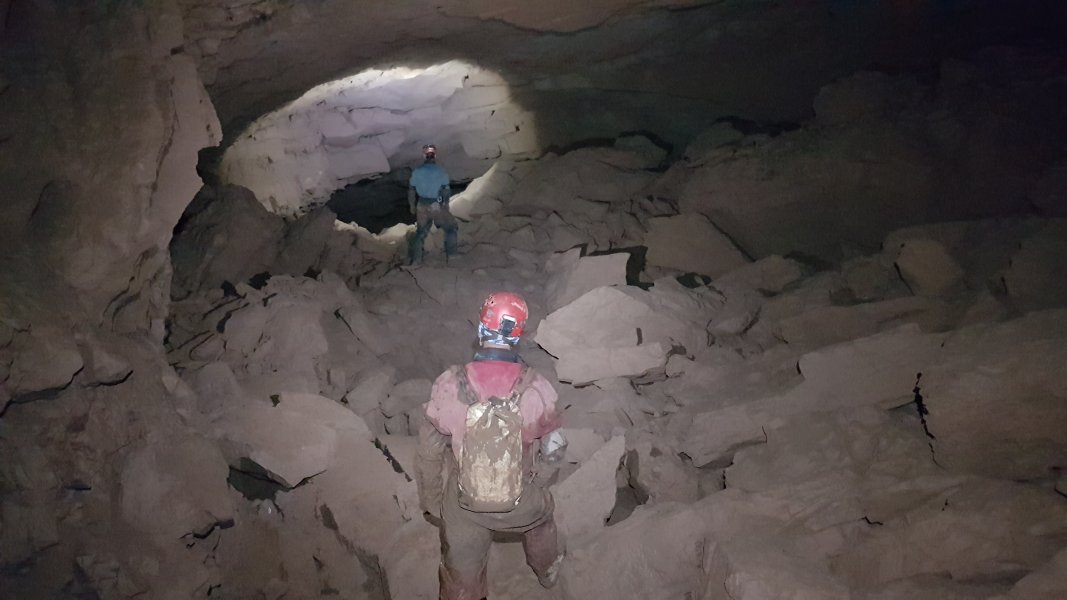 The main Hangar South continues right at the junction by the mud formations, becoming its largest size, with rock breakdown. This is the older branch of Hangar Passage, thought to be some 2 million years old.
Modelling by Mark and Gareth, lighting by Tarquin, Mark and Gareth
The main Hangar South continues right at the junction by the mud formations, becoming its largest size, with rock breakdown. This is the older branch of Hangar Passage, thought to be some 2 million years old.
Modelling by Mark and Gareth, lighting by Tarquin, Mark and Gareth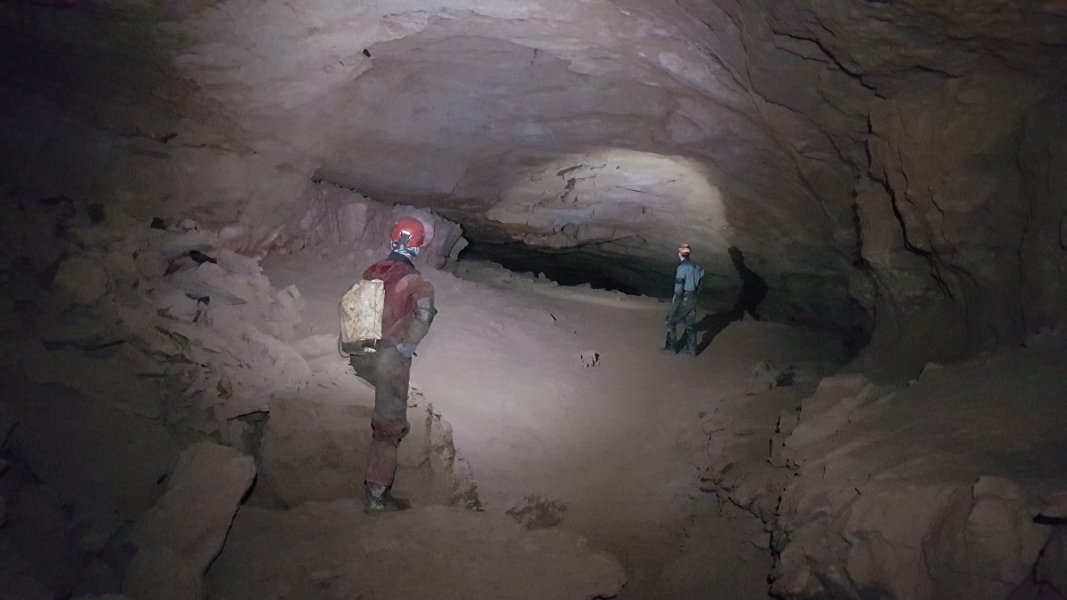 A beautiful arched section with a sand floor. This, sadly, is short lived.
Modelling by Mark and Gareth, lighting by Tarquin, Mark and Gareth
A beautiful arched section with a sand floor. This, sadly, is short lived.
Modelling by Mark and Gareth, lighting by Tarquin, Mark and Gareth The passage lowers to a very tight crawl over mud, squeeze sized at one point.
Modelling by Gareth and Tarquin's welly, lighting by Tarquin and Gareth
The passage lowers to a very tight crawl over mud, squeeze sized at one point.
Modelling by Gareth and Tarquin's welly, lighting by Tarquin and Gareth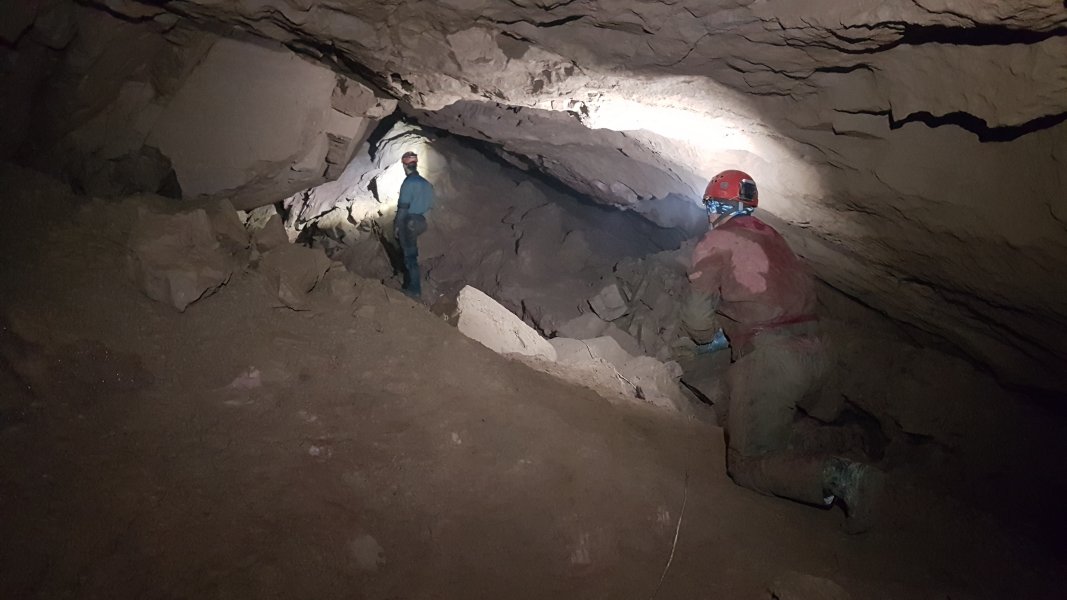 The squeeze emerges in a brief large section of passage.
Modelling by Mark and Gareth, lighting by Tarquin, Mark and Gareth
The squeeze emerges in a brief large section of passage.
Modelling by Mark and Gareth, lighting by Tarquin, Mark and Gareth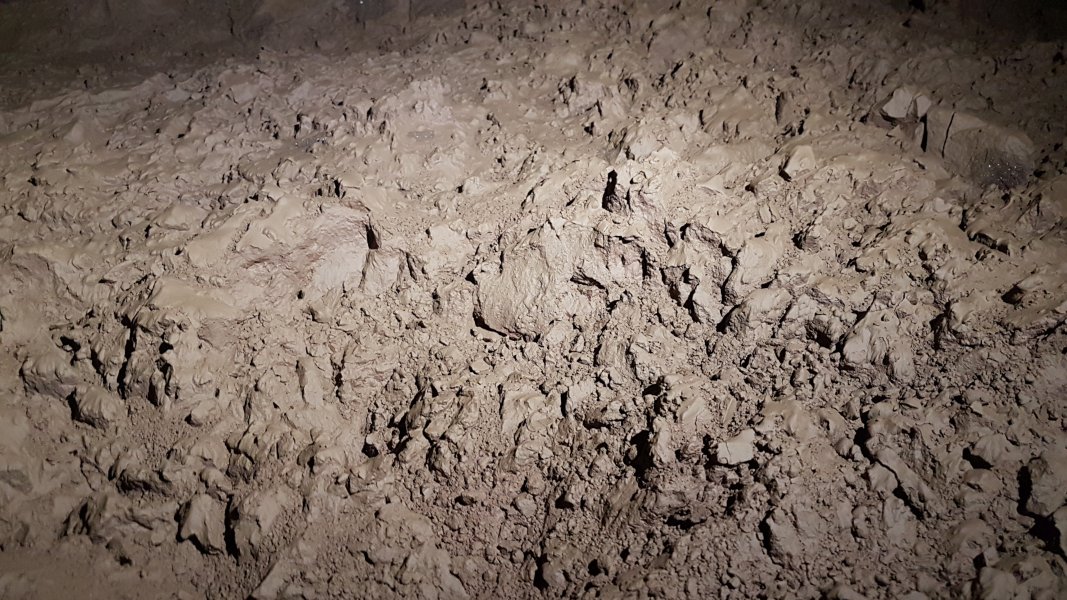 Mud formations near the end.
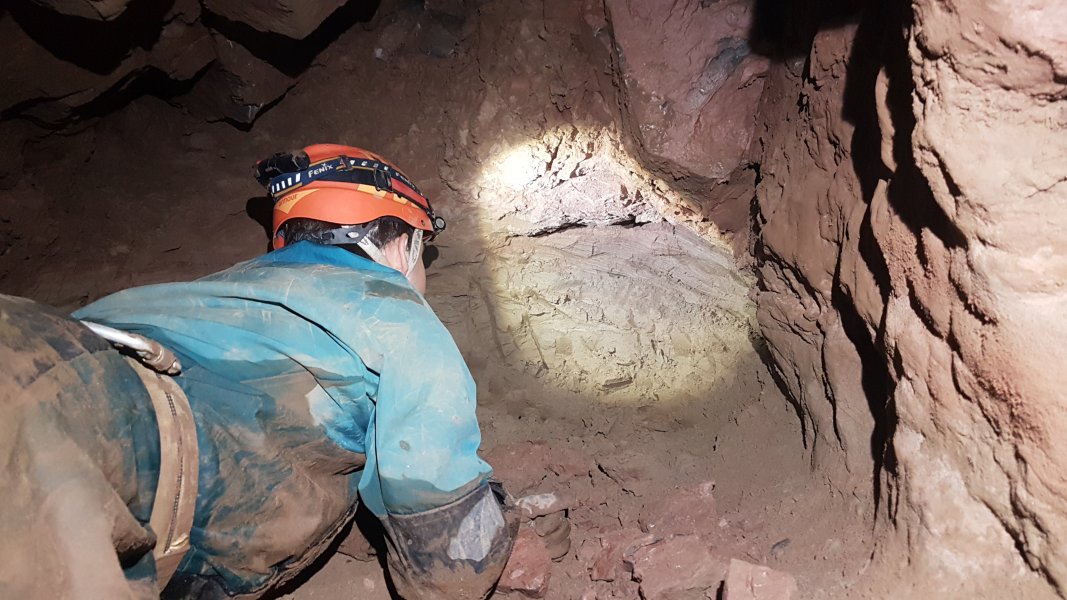 Hangar South is the most promising major lead in the cave, pointing towards blank mountain. The dig face is currently just sediment.
Modelling by Gareth, lighting by Tarquin and Gareth
Hangar South is the most promising major lead in the cave, pointing towards blank mountain. The dig face is currently just sediment.
Modelling by Gareth, lighting by Tarquin and Gareth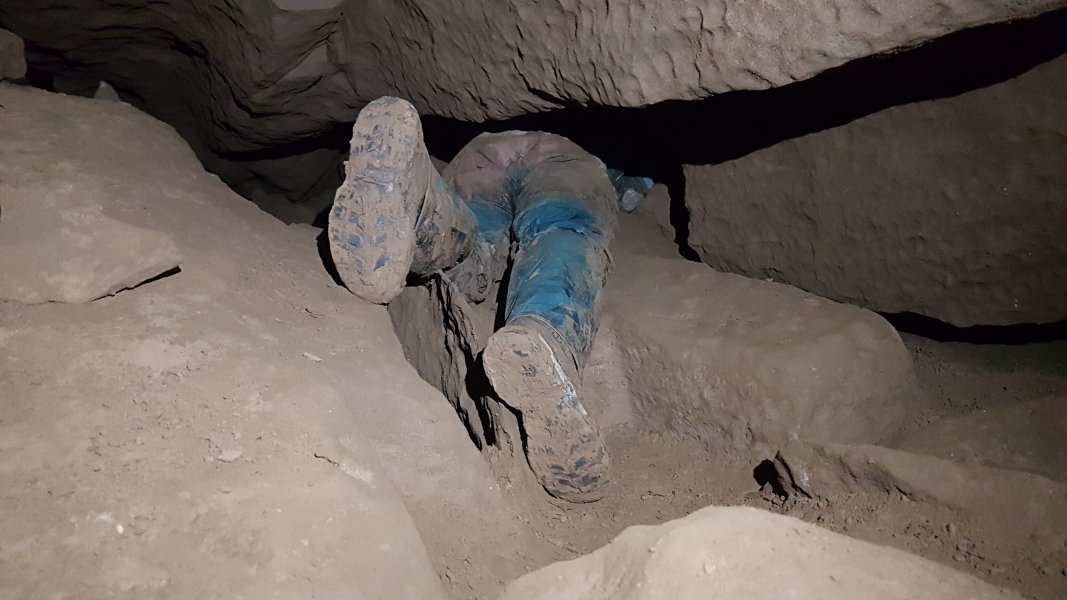 Back at the junction just after the start of Hangar South, a low passage to the left appears to end. However, tucked under its right wall is the way into an extension.
Modelling by Gareth
Back at the junction just after the start of Hangar South, a low passage to the left appears to end. However, tucked under its right wall is the way into an extension.
Modelling by Gareth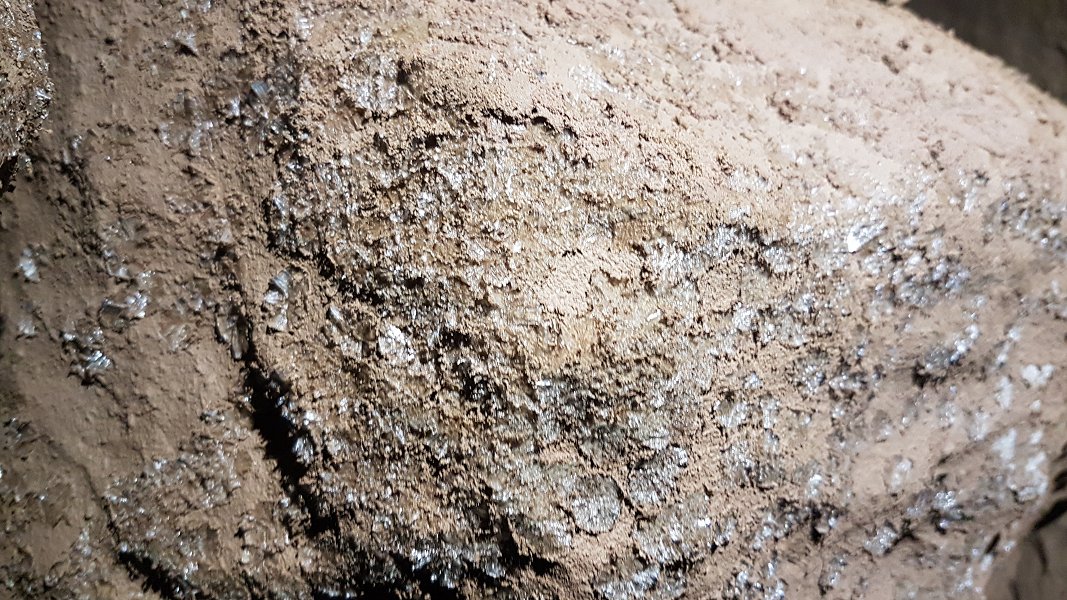 Selenite on the walls of the extension.
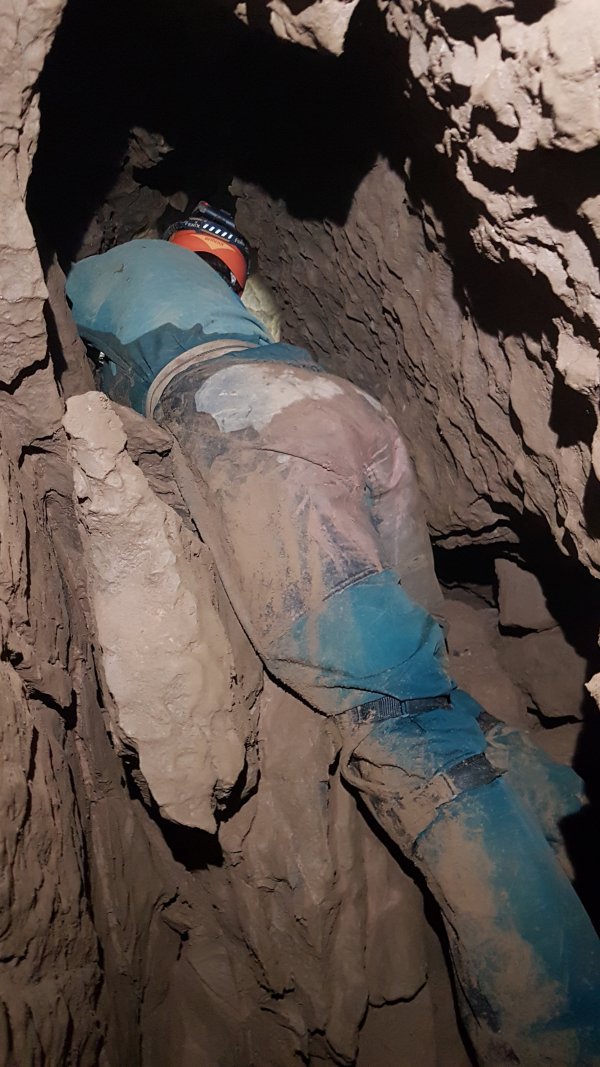 This is the start of a couple of rocky clambers up a narrow rift.
Modelling by Gareth, lighting by Tarquin and Gareth
This is the start of a couple of rocky clambers up a narrow rift.
Modelling by Gareth, lighting by Tarquin and Gareth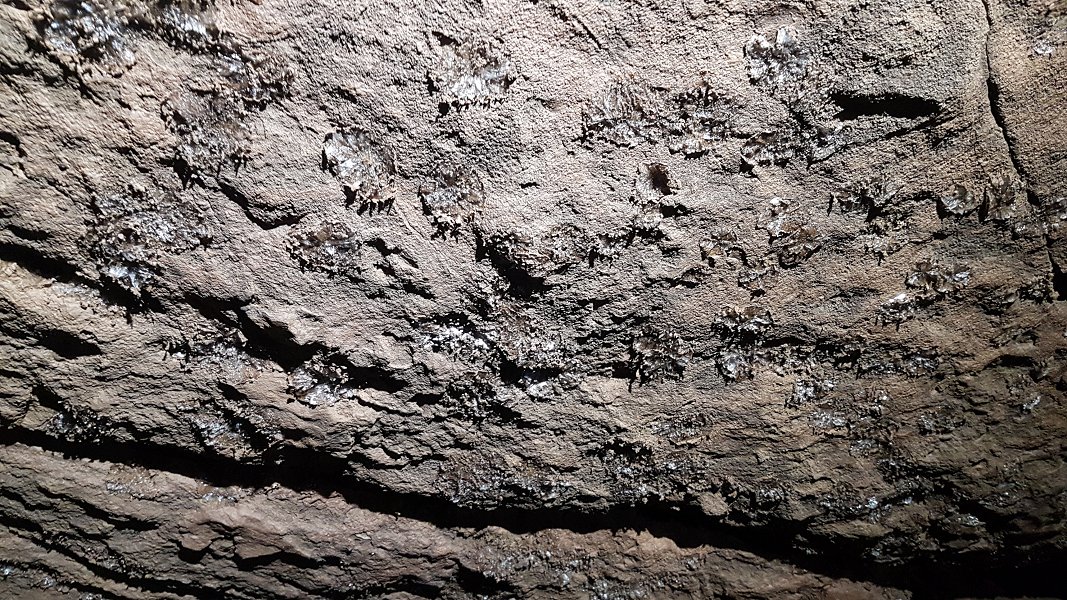 Selenite on the walls of the clambers.
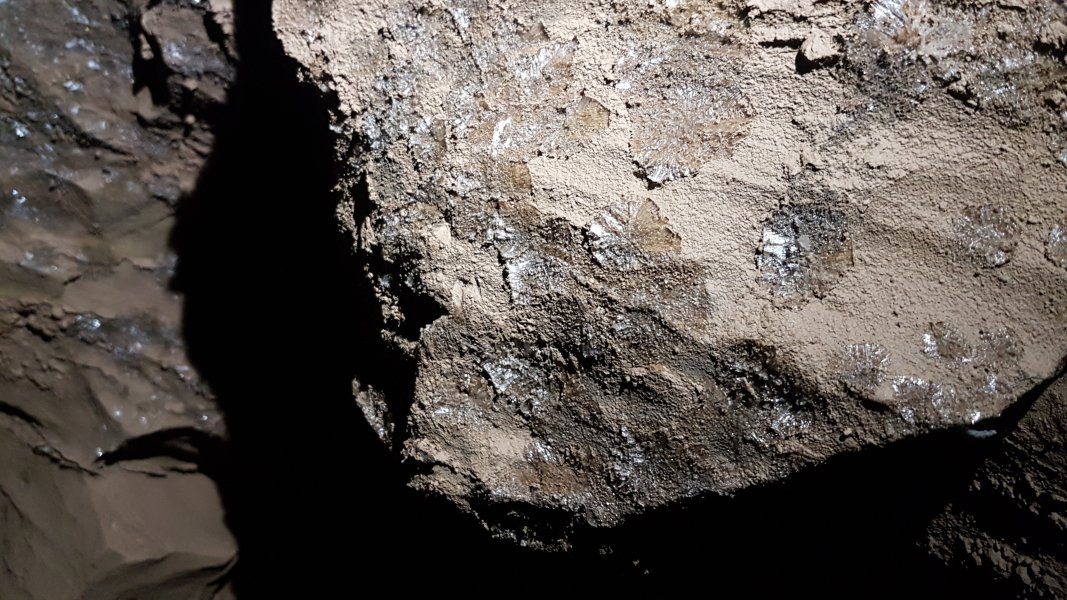 Selenite on the walls of the clambers.
 The clambers emerge in a small chamber, with a rocky slope up into a narrow sloping bedding, which is quite awkward, especially given the loose rocks above, where you want to put your hands.
Modelling by Gareth, lighting by Tarquin and Gareth
The clambers emerge in a small chamber, with a rocky slope up into a narrow sloping bedding, which is quite awkward, especially given the loose rocks above, where you want to put your hands.
Modelling by Gareth, lighting by Tarquin and Gareth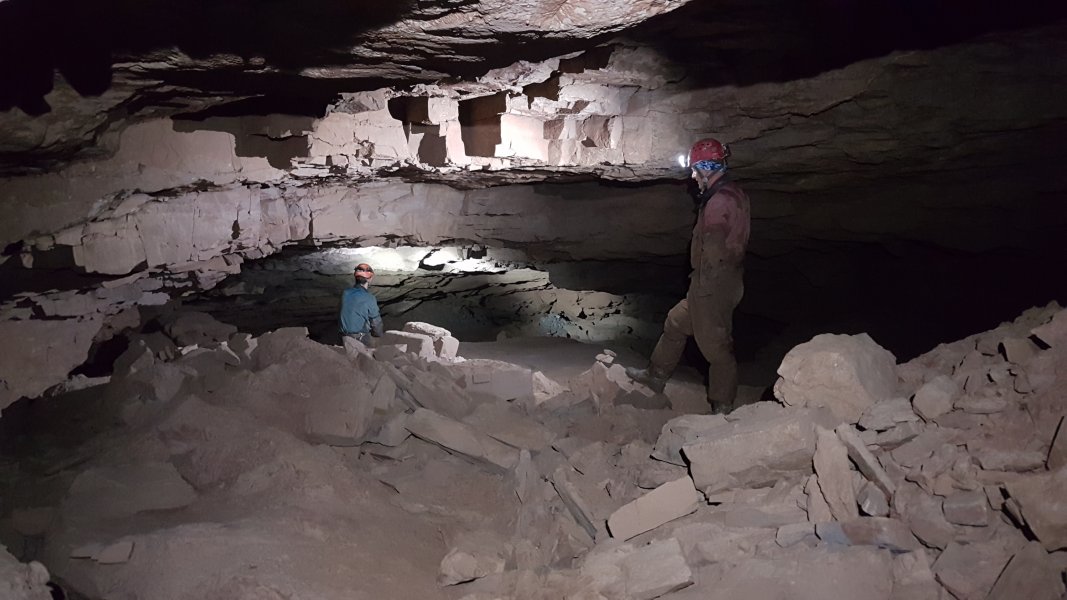 The bedding emerges into the side of a wide chamber. This is at a substantially higher level than the main Hangar South, and could be an older development. However, it is probably a collapse chamber above the original level of Hangar South. Even so, it has definitely seen significant amounts of water flow, so perhaps it is a separate drainage level.
Modelling by Mark and Gareth, lighting by Tarquin, Mark and Gareth
The bedding emerges into the side of a wide chamber. This is at a substantially higher level than the main Hangar South, and could be an older development. However, it is probably a collapse chamber above the original level of Hangar South. Even so, it has definitely seen significant amounts of water flow, so perhaps it is a separate drainage level.
Modelling by Mark and Gareth, lighting by Tarquin, Mark and Gareth The major feature of the chamber is a superb sediment cliff, and part of this visit was to lay tape at the top, to guide cavers away from the edge. The collapse pit below the cliff seems to be where the water soaked away back into the original level of Hangar South's eastern continuation.
Modelling by Mark, lighting by Tarquin, Gareth and Mark
The major feature of the chamber is a superb sediment cliff, and part of this visit was to lay tape at the top, to guide cavers away from the edge. The collapse pit below the cliff seems to be where the water soaked away back into the original level of Hangar South's eastern continuation.
Modelling by Mark, lighting by Tarquin, Gareth and Mark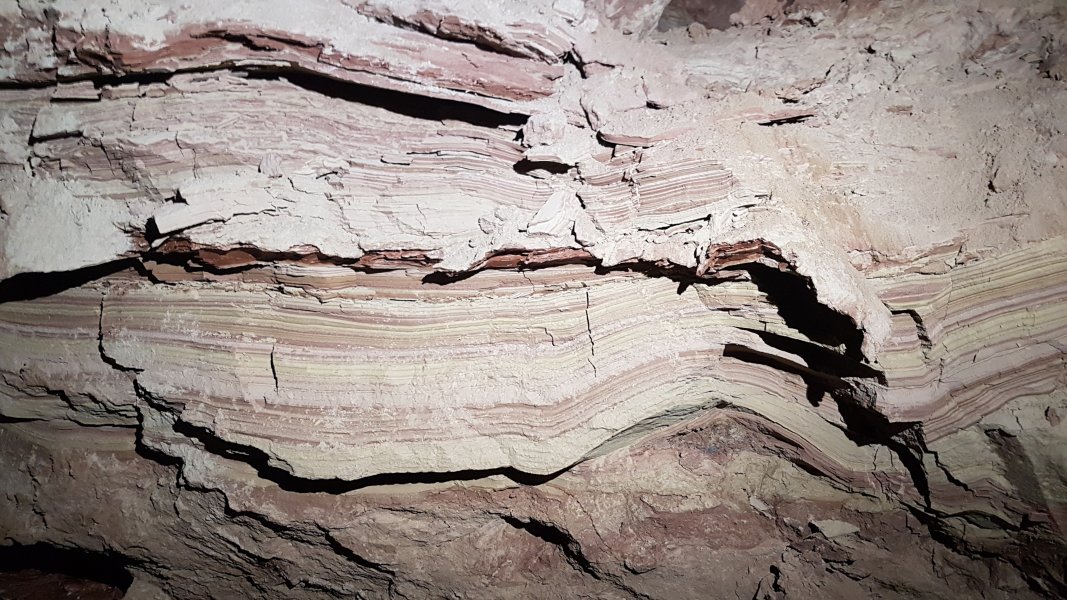 The cliff is made from finely layered periglacial rhythmites; laminates of mud with two different grain sizes. Each laminate shows a seasonal change from slow flowing water in winter (fine silt), to faster flowing meltwater in summer (coarser sand). The silt comes from the sandstones to the north, with ice age meltwater being the most likely source of the water carrying it into the cave.
 The side of the cliff also has some great rhythmites.
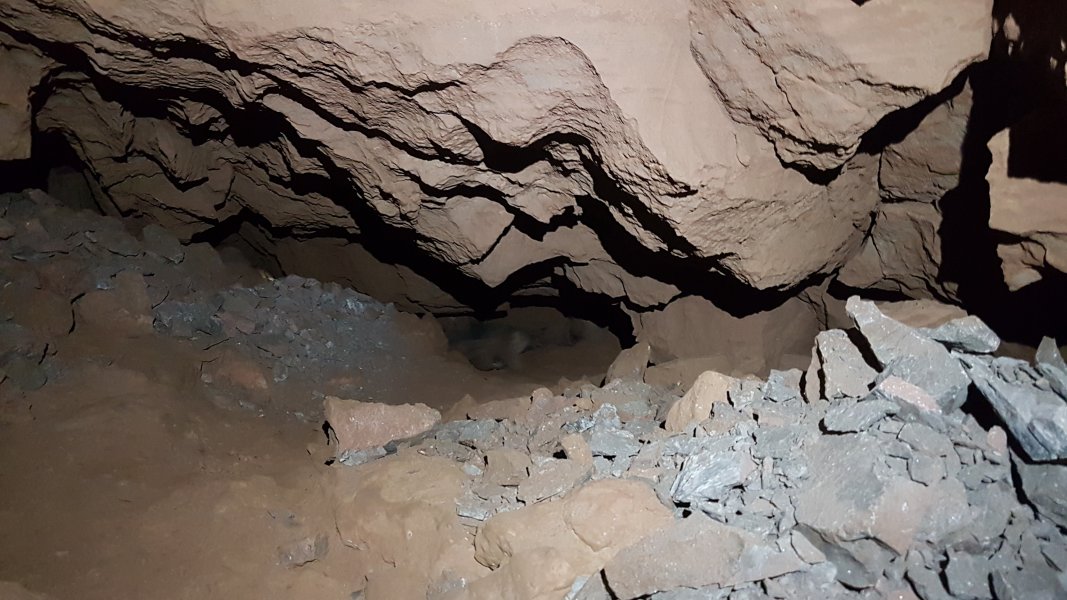 The continuing dig follows a bedding that becomes filled with silt. This seems rather unpromising, as the way on is more likely to be buried beneath the depression in the floor. The chamber and dig point in the wrong direction for major extensions though, as they represent an outflow, towards the entrance. If further passage is found here, it will probably just rejoin the main passages at Cloud Chamber, or perhaps be parallel to that.
Modelling by Gareth's flailing wellies
The continuing dig follows a bedding that becomes filled with silt. This seems rather unpromising, as the way on is more likely to be buried beneath the depression in the floor. The chamber and dig point in the wrong direction for major extensions though, as they represent an outflow, towards the entrance. If further passage is found here, it will probably just rejoin the main passages at Cloud Chamber, or perhaps be parallel to that.
Modelling by Gareth's flailing wellies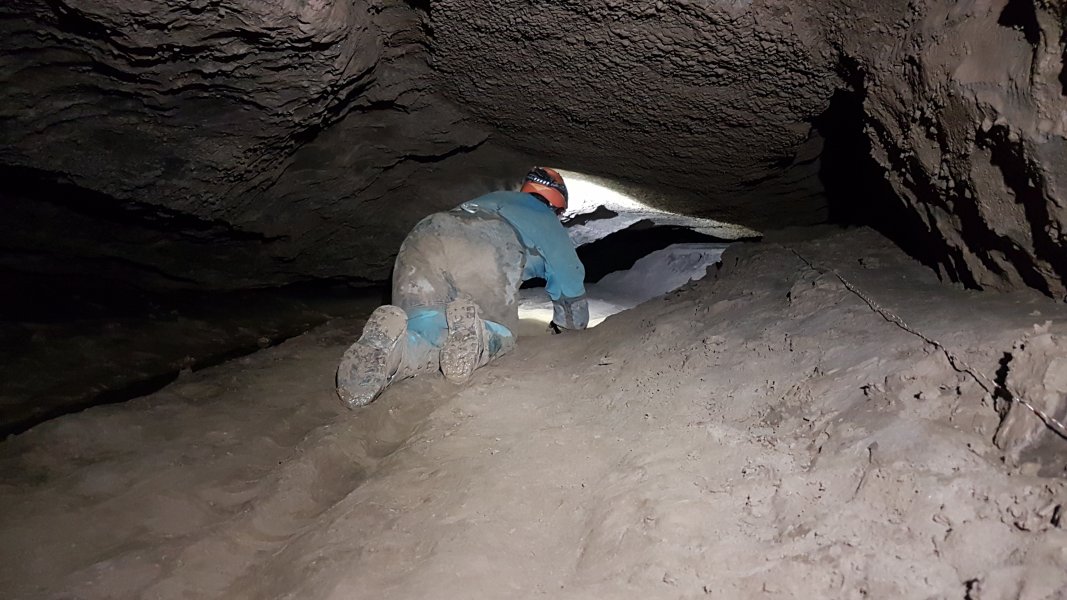 Crawling into Hangar North.
Modelling by Gareth, lighting by Tarquin and Gareth
Crawling into Hangar North.
Modelling by Gareth, lighting by Tarquin and Gareth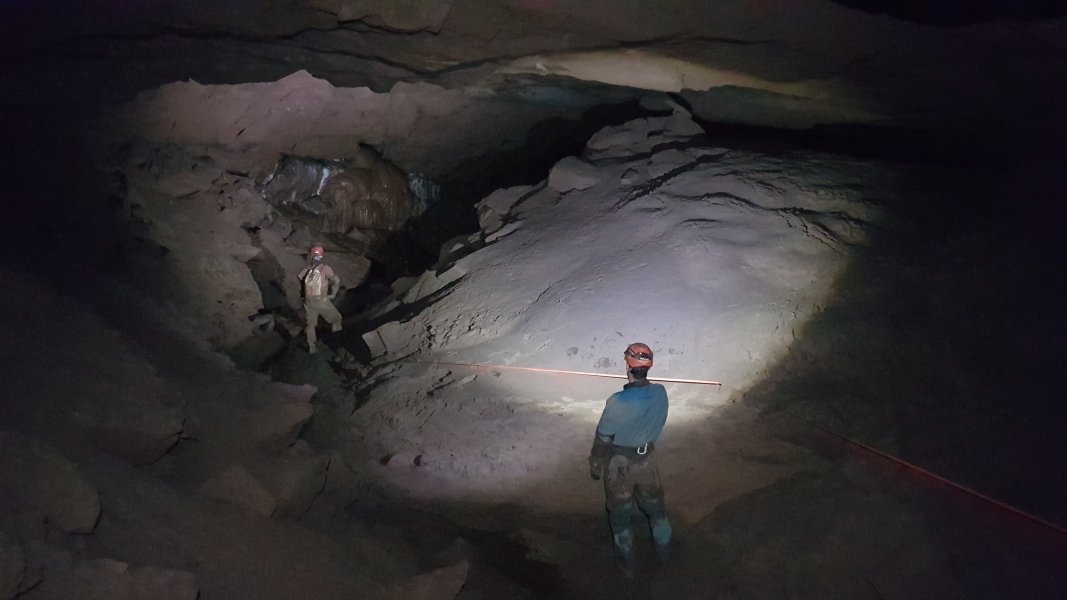 Hangar North soon opens out to an impressive size, with a stream.
Modelling by Gareth and Mark, lighting by Tarquin, Gareth and Mark
Hangar North soon opens out to an impressive size, with a stream.
Modelling by Gareth and Mark, lighting by Tarquin, Gareth and Mark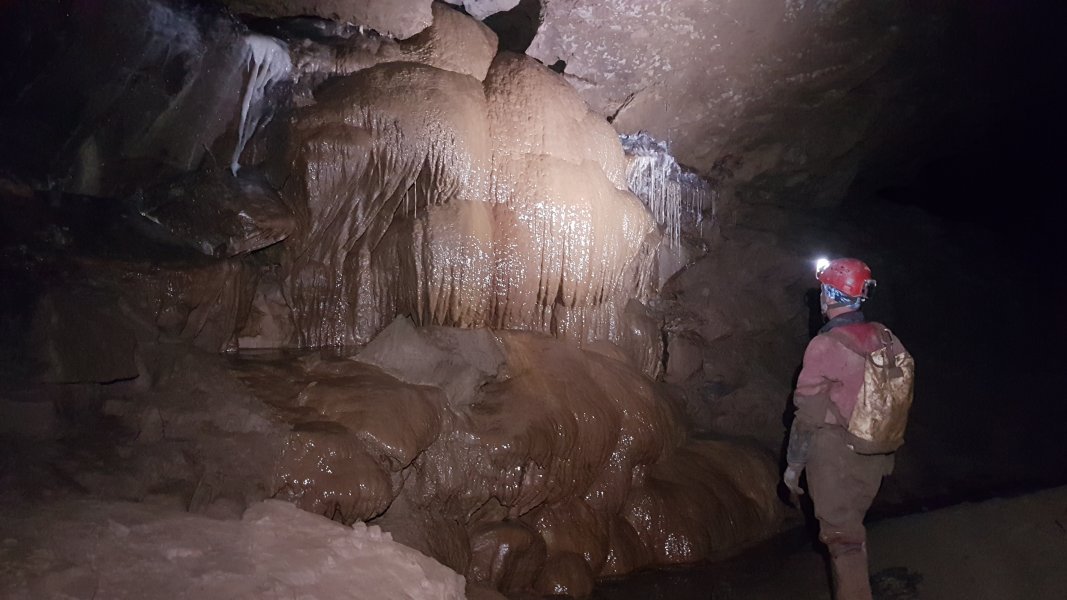 Flowstone formation in Hangar North.
Modelling by Mark, lighting by Tarquin and Mark
Flowstone formation in Hangar North.
Modelling by Mark, lighting by Tarquin and Mark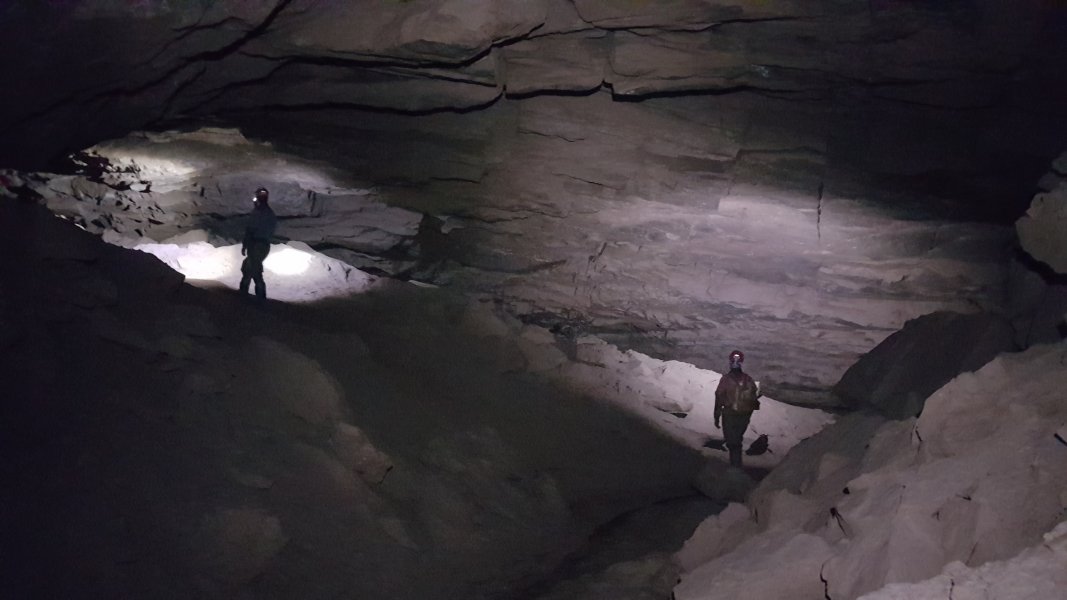 Junction of routes in Hangar North, its largest point.
Modelling by Gareth and Mark, lighting by Tarquin, Gareth and Mark
Junction of routes in Hangar North, its largest point.
Modelling by Gareth and Mark, lighting by Tarquin, Gareth and Mark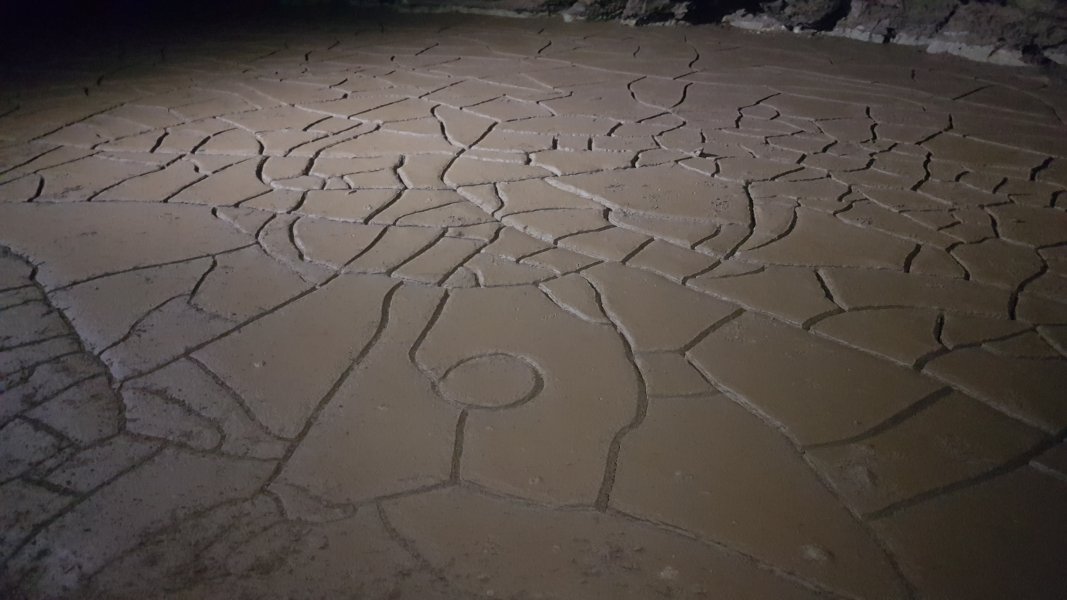 Mud formations in the Hangar North main branch.
Lighting by Tarquin and Mark
Mud formations in the Hangar North main branch.
Lighting by Tarquin and Mark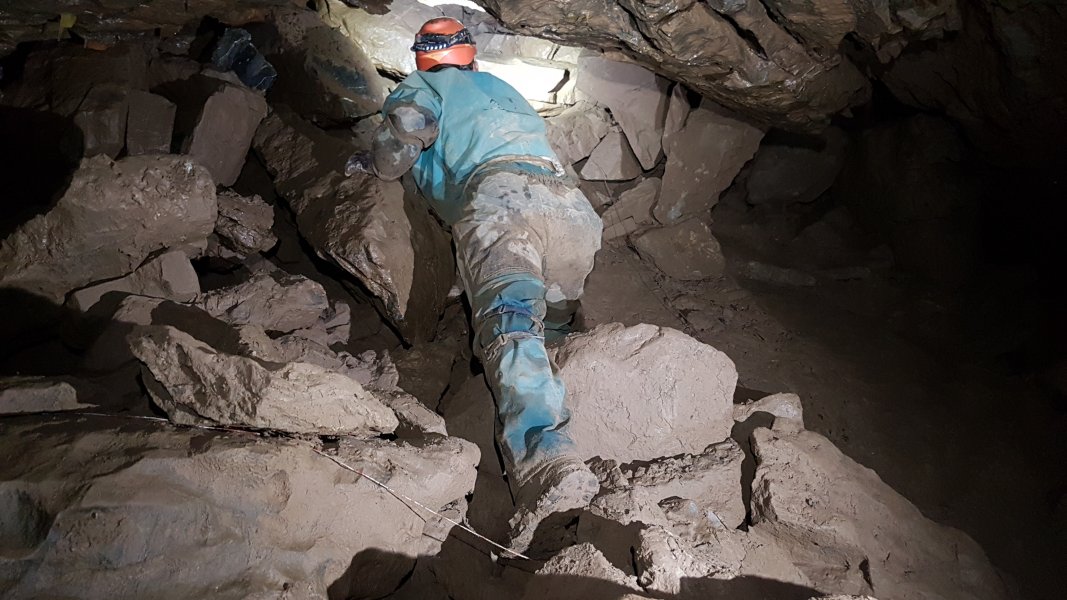 The main branch ends at a large choke. Gareth headed up into this one, reporting back that as we had heard, there are some very loose rocks in there, and it felt like something had moved relatively recently. Although he could see into the open passage beyond, the slope above looked ready to trap visitors. We decided not to continue into the impressive chamber above, at least until someone who knows the choke says whether it is supposed to be like that.
Modelling by Gareth, lighting by Tarquin, Mark and Gareth
The main branch ends at a large choke. Gareth headed up into this one, reporting back that as we had heard, there are some very loose rocks in there, and it felt like something had moved relatively recently. Although he could see into the open passage beyond, the slope above looked ready to trap visitors. We decided not to continue into the impressive chamber above, at least until someone who knows the choke says whether it is supposed to be like that.
Modelling by Gareth, lighting by Tarquin, Mark and Gareth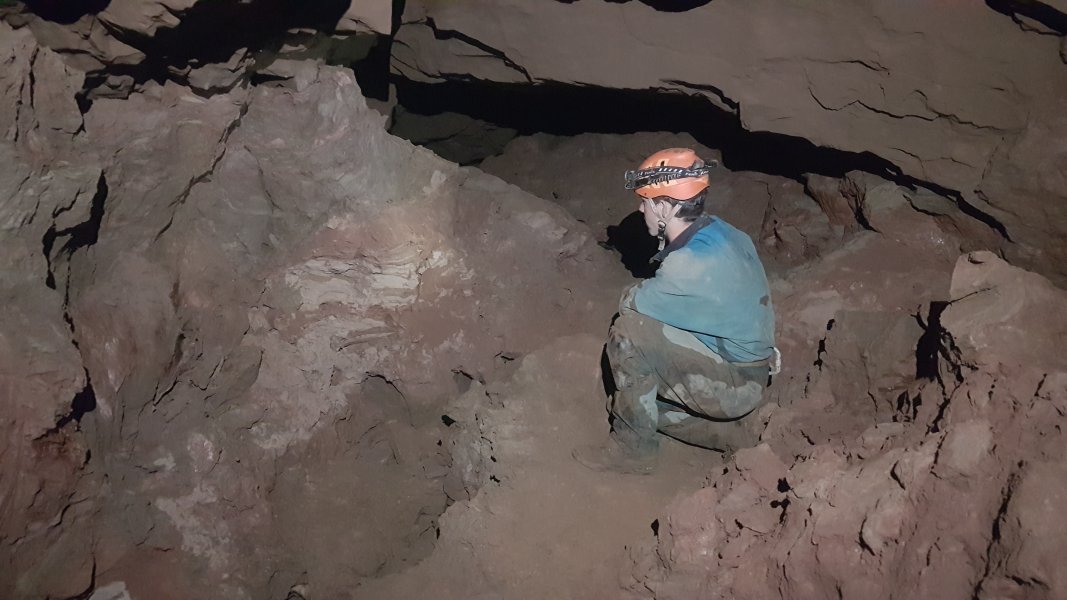 Taking the side passage to the left at the junction, another low crawl reaches this small enlargement, with mud formations.
Modelling by Gareth, lighting by Tarquin and Gareth
Taking the side passage to the left at the junction, another low crawl reaches this small enlargement, with mud formations.
Modelling by Gareth, lighting by Tarquin and Gareth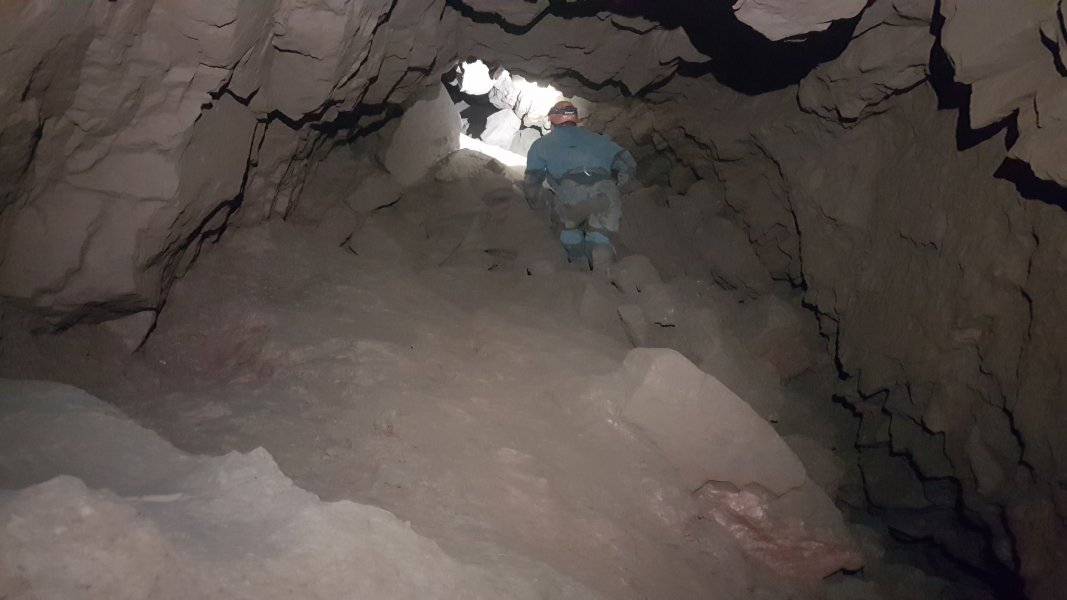 The passage ends in a slope up, with an unsupported, vertical choke at its top. This was also not very inviting, and has never been passed.
Modelling by Gareth, lighting by Tarquin and Gareth
The passage ends in a slope up, with an unsupported, vertical choke at its top. This was also not very inviting, and has never been passed.
Modelling by Gareth, lighting by Tarquin and Gareth Green Canal had almost no floats left, so Gareth shuttled several back to the start, allowing Mark to join us. On the shuttle run, he was wearing 3 life jackets and one ring, pushing 4 more rings, leaving him about as mobile as a walrus.
Modelling by Gareth
Green Canal had almost no floats left, so Gareth shuttled several back to the start, allowing Mark to join us. On the shuttle run, he was wearing 3 life jackets and one ring, pushing 4 more rings, leaving him about as mobile as a walrus.
Modelling by Gareth Looks like fun.
Modelling by Gareth, lighting by Tarquin and Gareth
Looks like fun.
Modelling by Gareth, lighting by Tarquin and Gareth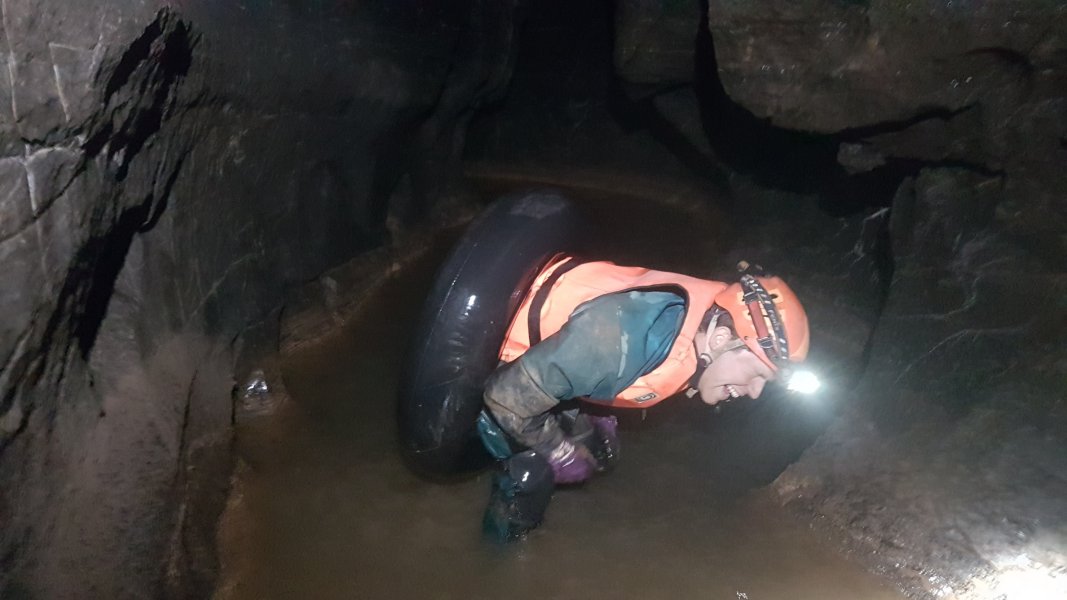 It's even more fun when you can't get out of the ring afterwards.
Modelling by Gareth, lighting by Tarquin and Gareth
It's even more fun when you can't get out of the ring afterwards.
Modelling by Gareth, lighting by Tarquin and Gareth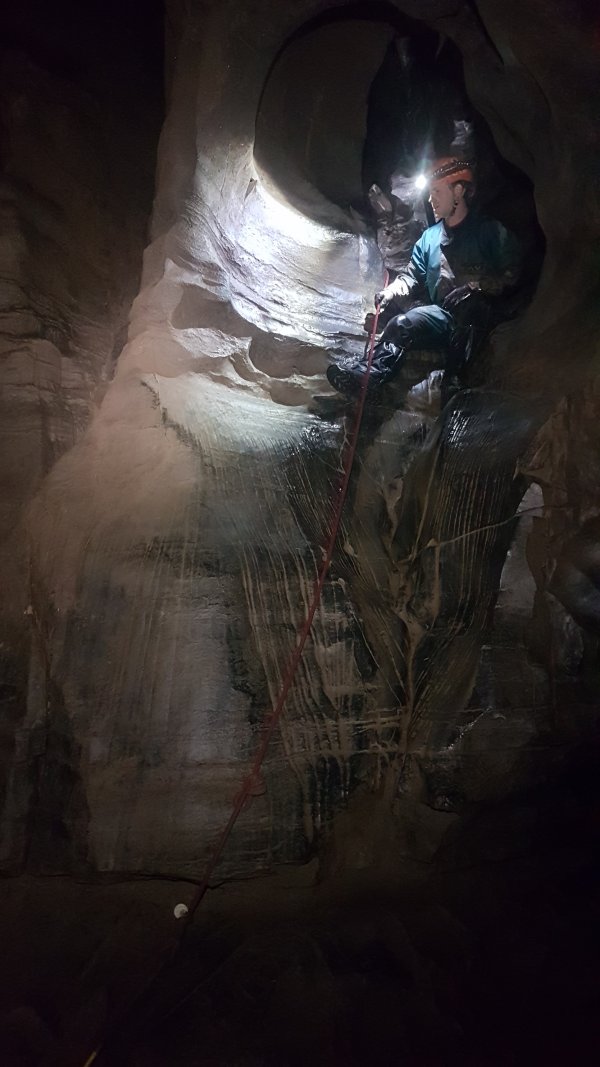 Down the Abyss.
Modelling by Gareth, lighting by Tarquin, Gareth and Mark
Down the Abyss.
Modelling by Gareth, lighting by Tarquin, Gareth and Mark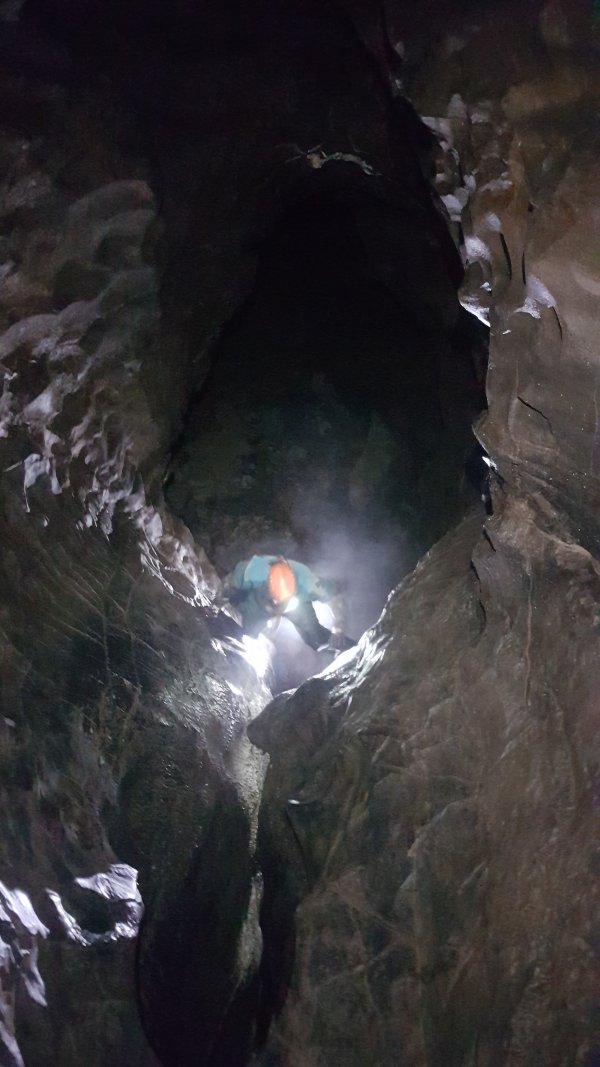 Climbing up The Camel.
Modelling by Gareth, lighting by Tarquin, Gareth and Mark
Climbing up The Camel.
Modelling by Gareth, lighting by Tarquin, Gareth and Mark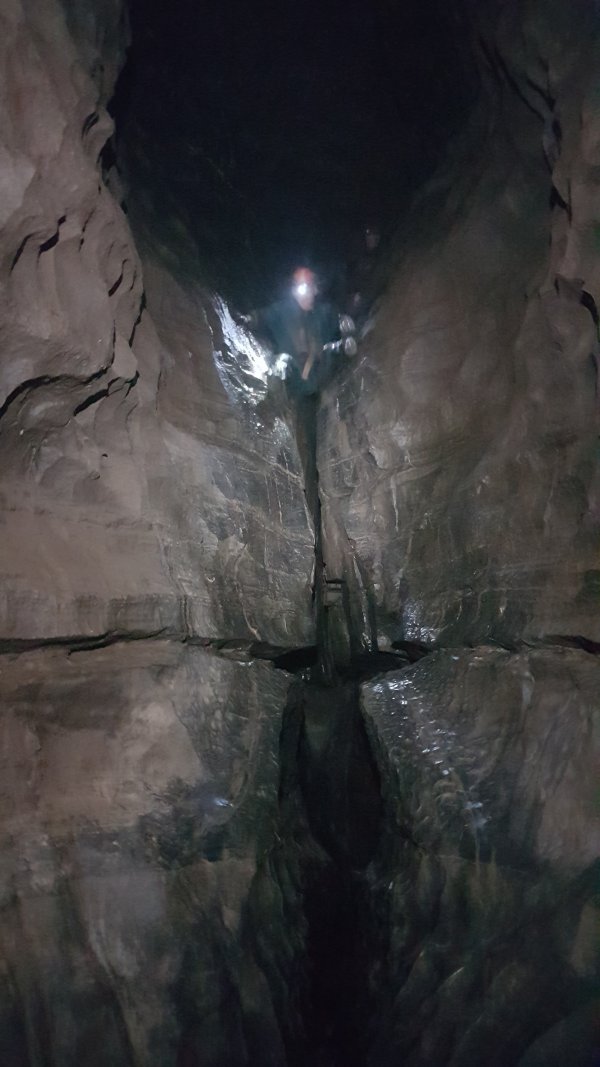 Using the slide technique to get down The Camel. This method is much more fun, and actually a lot easier, than trying to sit on one wall and push off the other wall, which is the usual method people use.
Modelling by Gareth and Mark, lighting by Tarquin and Gareth
Using the slide technique to get down The Camel. This method is much more fun, and actually a lot easier, than trying to sit on one wall and push off the other wall, which is the usual method people use.
Modelling by Gareth and Mark, lighting by Tarquin and Gareth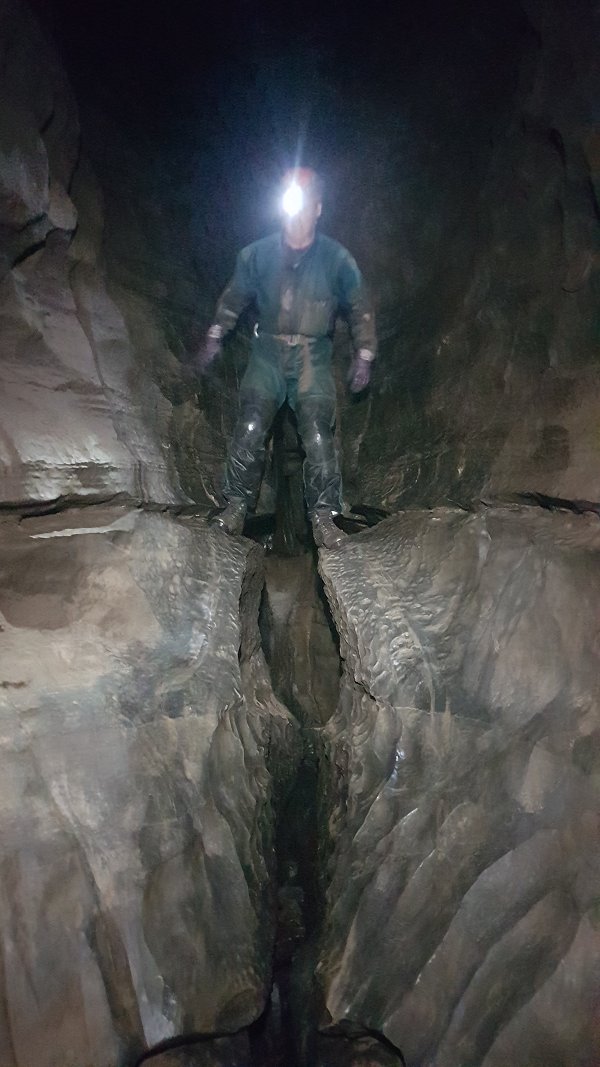 When sliding, you do have to make sure you land correctly on this ledge, before sliding the final part.
Modelling by Gareth, lighting by Tarquin and Gareth
When sliding, you do have to make sure you land correctly on this ledge, before sliding the final part.
Modelling by Gareth, lighting by Tarquin and Gareth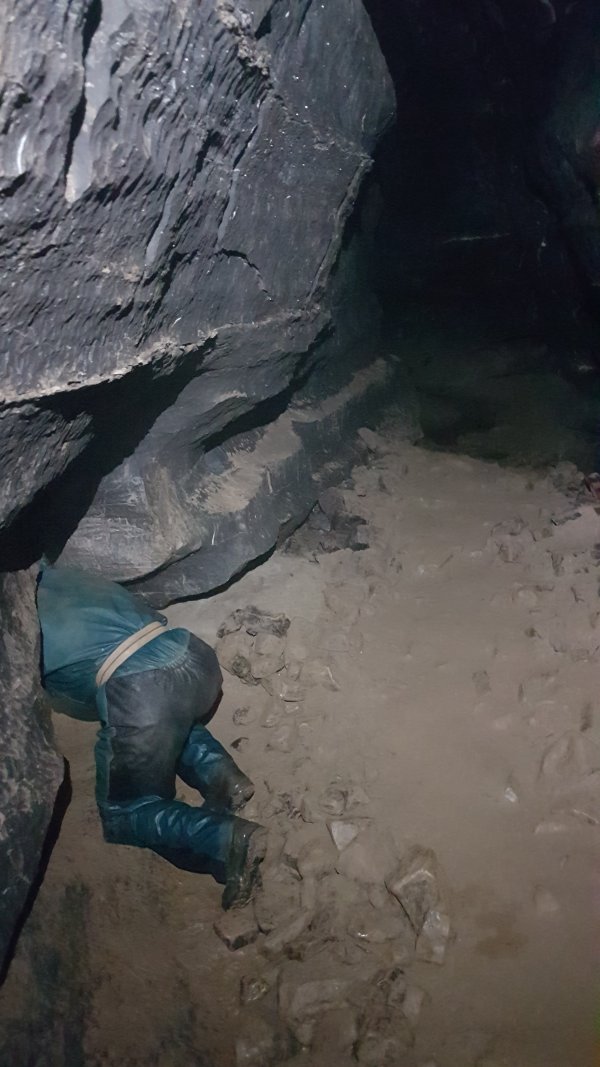 On our way out, we decided to learn Elliptic Passage, which can be used to bypass the Virgin Passage canals, and the Green Canal, to reach the Lower Series with ease. It starts in the left wall of the Grand Canyon (on the way in), just before the corner where Flabbergasm rejoins from above.
Modelling by Gareth
On our way out, we decided to learn Elliptic Passage, which can be used to bypass the Virgin Passage canals, and the Green Canal, to reach the Lower Series with ease. It starts in the left wall of the Grand Canyon (on the way in), just before the corner where Flabbergasm rejoins from above.
Modelling by Gareth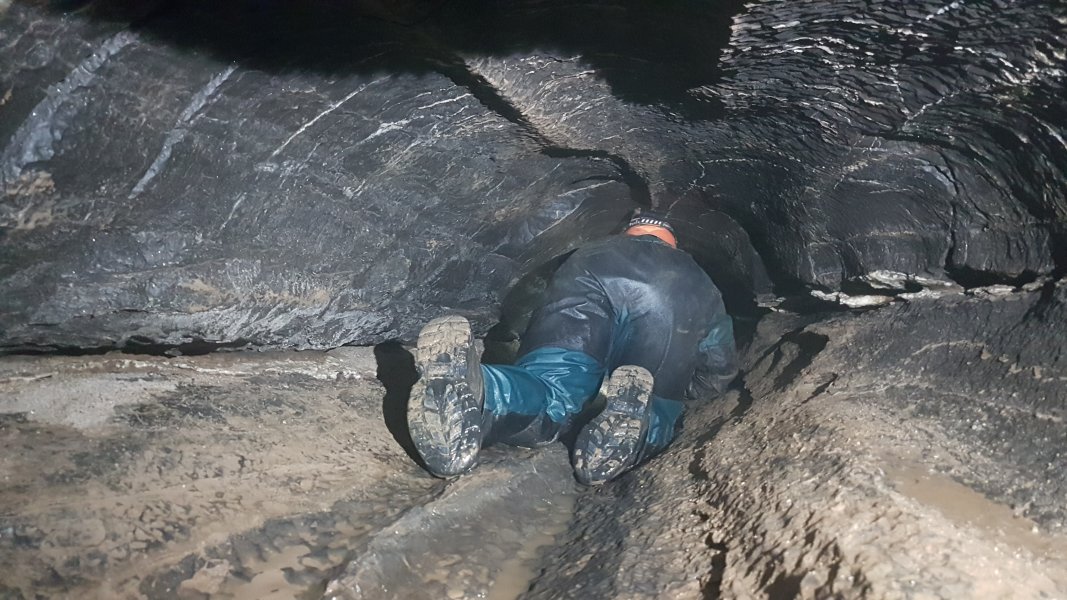 Most of the passage is an easy crawl.
Modelling by Gareth, lighting by Tarquin and Gareth
Most of the passage is an easy crawl.
Modelling by Gareth, lighting by Tarquin and Gareth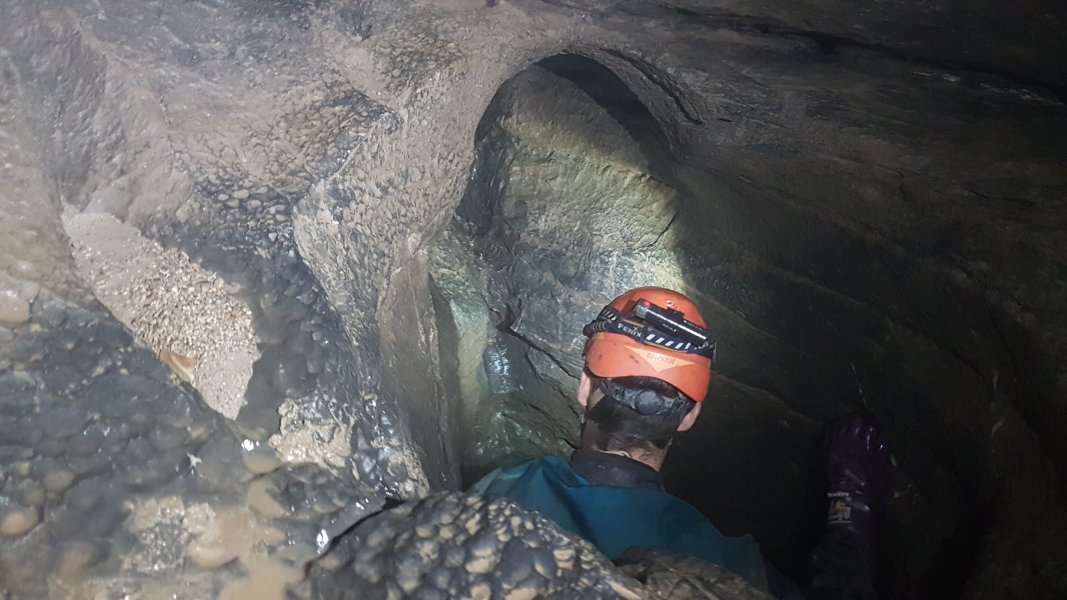 This ends at a chimney down.
Modelling by Gareth, lighting by Tarquin and Gareth
This ends at a chimney down.
Modelling by Gareth, lighting by Tarquin and Gareth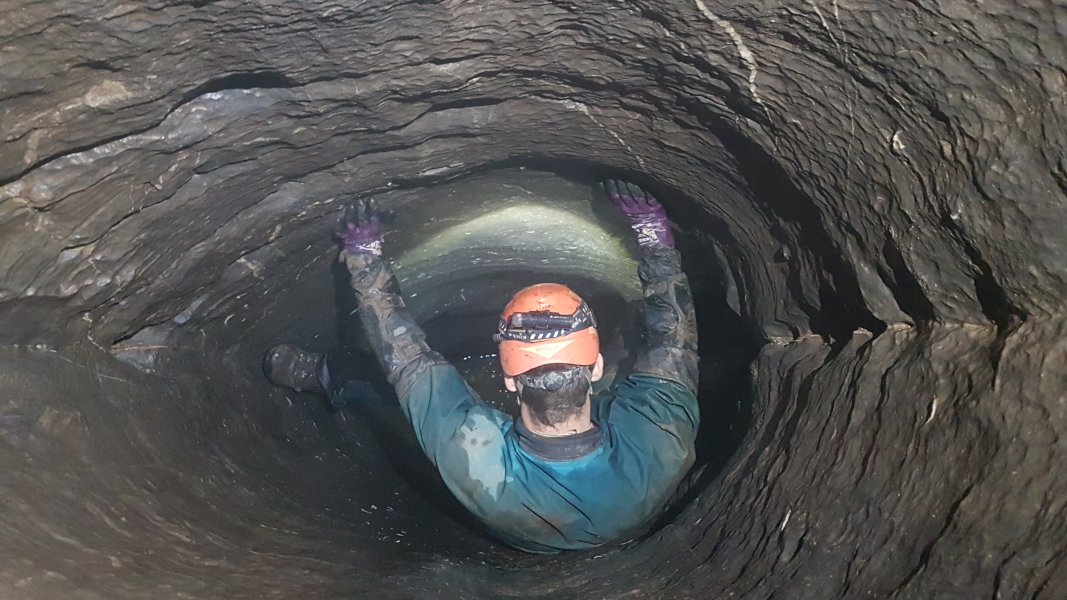 The chimney is about 6 metres, and looks like it has no footholds from the top. However, there are some in the crack on the left, and exactly where you need them on the right. We both chimneyed back up with ease, but it is possible that some may find it more difficult.
Modelling by Gareth, lighting by Tarquin and Gareth
The chimney is about 6 metres, and looks like it has no footholds from the top. However, there are some in the crack on the left, and exactly where you need them on the right. We both chimneyed back up with ease, but it is possible that some may find it more difficult.
Modelling by Gareth, lighting by Tarquin and Gareth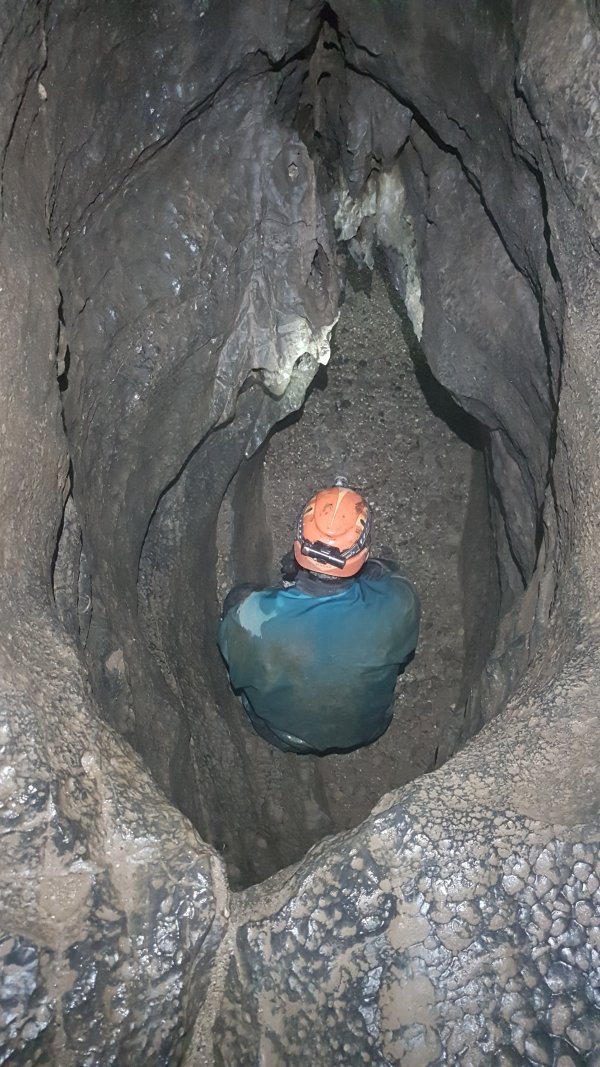 In the wrong direction at the bottom is a short side passage, but the way on is to continue in the same direction as before. Immediately, there is a 2 metre climb, easier than the chimney.
Modelling by Gareth, lighting by Tarquin and Gareth
In the wrong direction at the bottom is a short side passage, but the way on is to continue in the same direction as before. Immediately, there is a 2 metre climb, easier than the chimney.
Modelling by Gareth, lighting by Tarquin and Gareth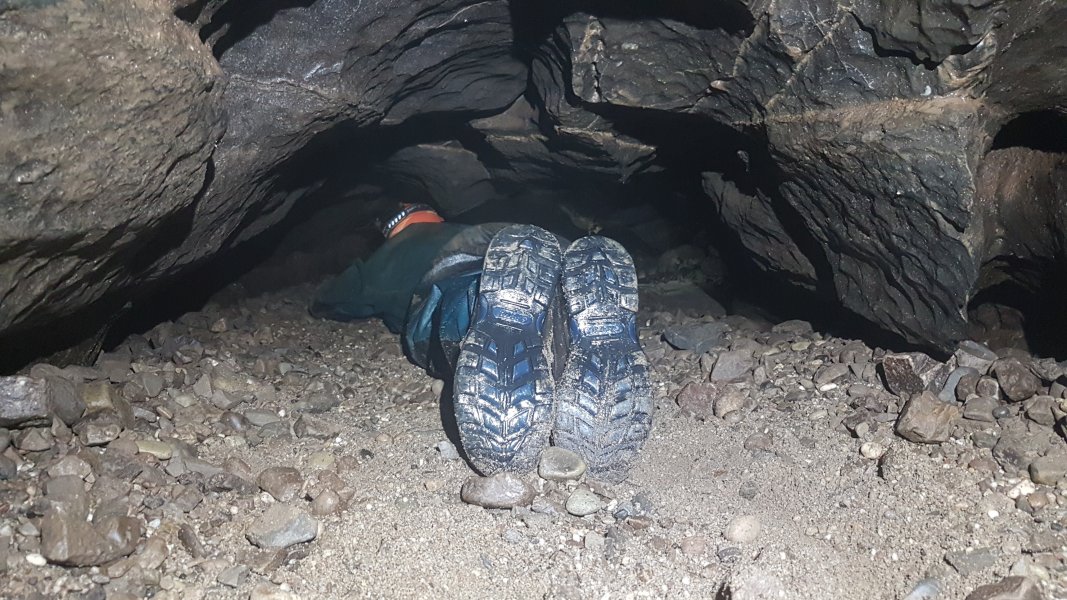 At the bottom is a flat out crawl over gravel.
Modelling by Gareth, lighting by Tarquin and Gareth
At the bottom is a flat out crawl over gravel.
Modelling by Gareth, lighting by Tarquin and Gareth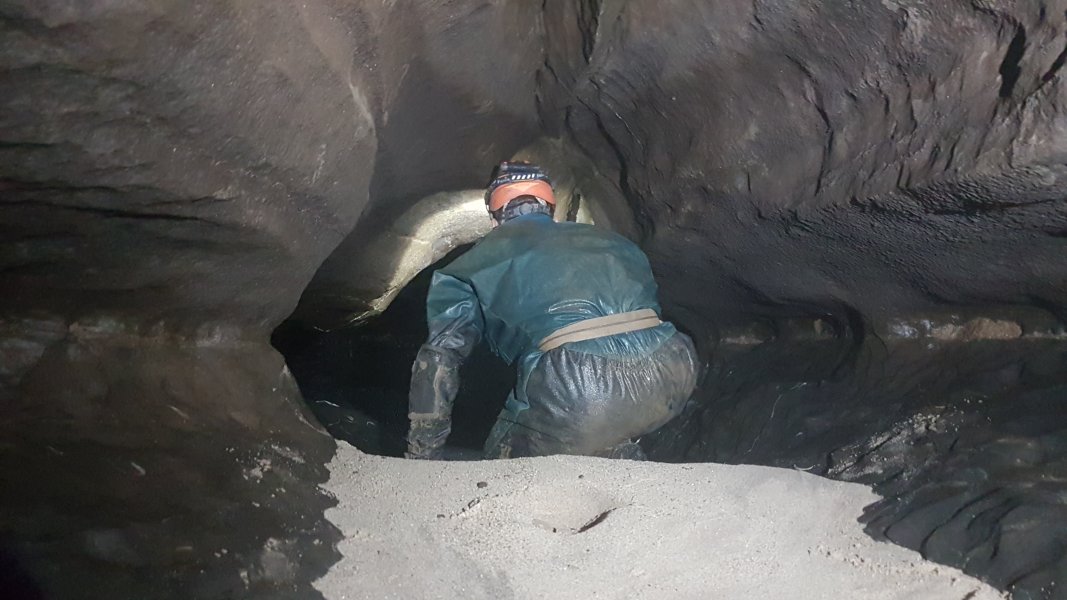 The exit of Elliptic Passage.
Modelling by Gareth, lighting by Tarquin and Gareth
The exit of Elliptic Passage.
Modelling by Gareth, lighting by Tarquin and Gareth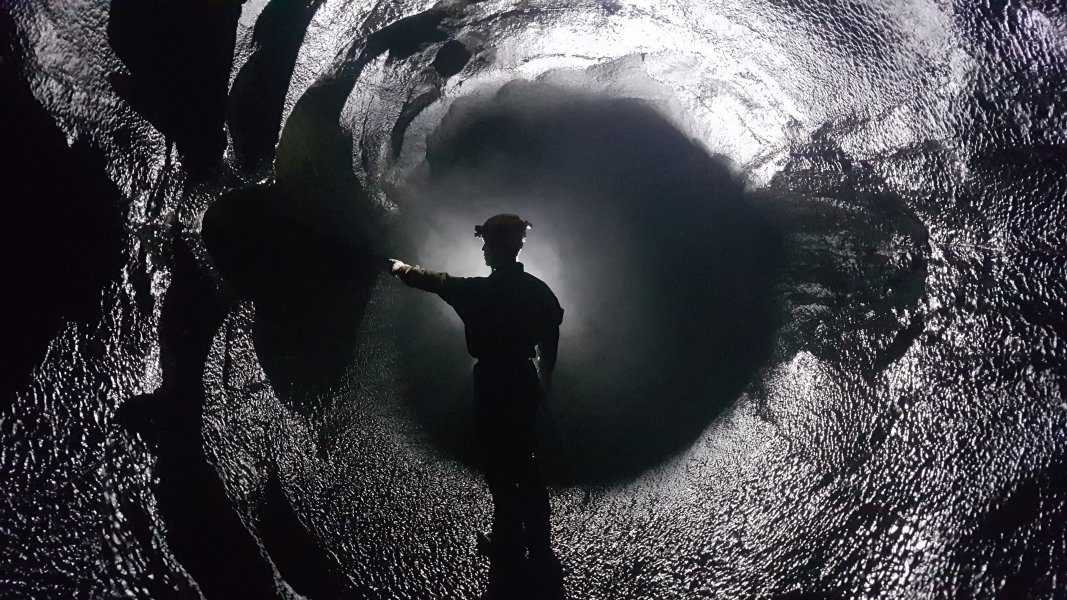 Bakerloo, at its best cross section, just before where it turns into a keyhole shape, and enters its phreatic maze. On the left is the exit from Elliptic Passage.
Modelling by Gareth, lighting by Gareth and Mark
Bakerloo, at its best cross section, just before where it turns into a keyhole shape, and enters its phreatic maze. On the left is the exit from Elliptic Passage.
Modelling by Gareth, lighting by Gareth and Mark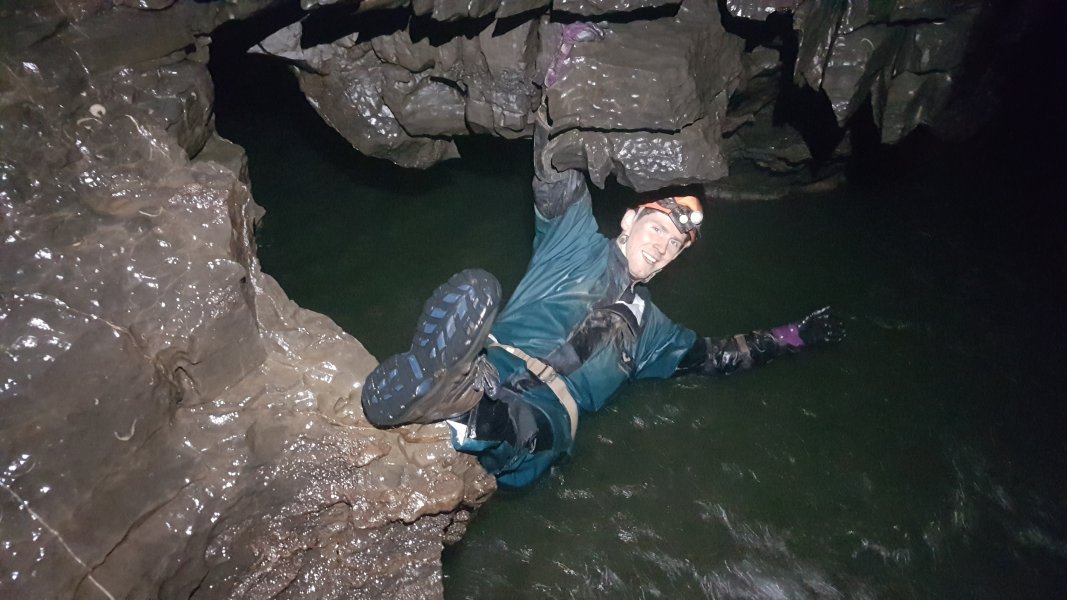 At The Washing Machine, Gareth wanted to take a picture of the water chute, and felt that this was best achieved by hanging upside down, one-handed, over the deep pool, with a camera in the other hand. It worked.
Modelling by Gareth
At The Washing Machine, Gareth wanted to take a picture of the water chute, and felt that this was best achieved by hanging upside down, one-handed, over the deep pool, with a camera in the other hand. It worked.
Modelling by Gareth