Dan-yr-Ogof Round Trip 29/04/2018 and Pinnacle Series trips 01/05/2018 and 31/05/2019
Unless otherwise stated, camera, setups, lighting, edits and gallery effects by Tarquin.
This is a complement to my previous gallery, which covered the lower series and route to the Far North. This gallery instead concentrates on the more usual formations in the Upper Series and 1937 Series, which were not photographed on the last trip. It then ends with a separtate trip to Pinnacle Series. These pictures were taken using a phone camera and caplamps rather than a proper camera and flashes, so please enjoy what they are, and don't expect miracles.
The Round Trip and The Rising was actually two separate teams, with a lot of diving gear being carried into the cave in preparation for another trip, but the gallery is presented as if it were a single team. Pictures were taken on the way out, so the direction of travel will be reversed. For those who are interested, the entire trip took just over 6.5 hours, and the pace was very gentle indeed. The Pinnacle Series trip was a much faster pace, with just a two-man team, taking a mere 7 hrs 40 minutes, including a great deal of exploration.
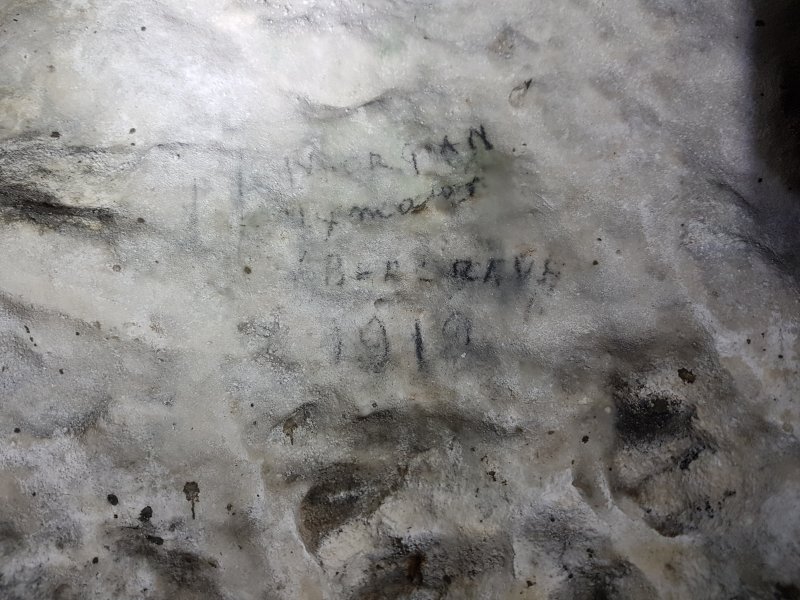
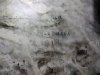 Graffiti signatures of the cave's original discoverers, Tommy and Jeff Morgan, above the Alabaster Pillar formation in the showcave. This looks like it says 1919, but they originally explored the cave in 1912.
 Cauldron Chamber, with one of the largest curtains in the cave.
Modelling by Jasen Finch, lighting by Tarquin, Jasen, Melissa O'Reilly and Chelsey Morris
Cauldron Chamber, with one of the largest curtains in the cave.
Modelling by Jasen Finch, lighting by Tarquin, Jasen, Melissa O'Reilly and Chelsey Morris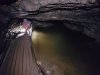 Lake 1, which was originally part of the showcave. In summer conditions as seen here on the Pinnacle Series trip, the water runs below the walkway.
Modelling by Gareth, lighting by Tarquin and Gareth
Lake 1, which was originally part of the showcave. In summer conditions as seen here on the Pinnacle Series trip, the water runs below the walkway.
Modelling by Gareth, lighting by Tarquin and Gareth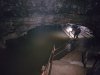 If the water in Lake 1 reaches the first rungs of the handrail, then Lake 3 will have very limited airspace. If the water reaches the top of the handrail, then Lake 3 will definitely be sumped. Seen here on the Round Trip just 2 days earlier, the water is part way above the walkway. Lake 3 was about 45 cm deeper.
Modelling by Jasen, lighting by Tarquin and Jasen
If the water in Lake 1 reaches the first rungs of the handrail, then Lake 3 will have very limited airspace. If the water reaches the top of the handrail, then Lake 3 will definitely be sumped. Seen here on the Round Trip just 2 days earlier, the water is part way above the walkway. Lake 3 was about 45 cm deeper.
Modelling by Jasen, lighting by Tarquin and Jasen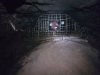 Barrier between the lakes, constructed with a warning; as long as there is only the showcave entrance, cavers can use it. If there is another entrance dug anywhere, that will become the only entrance that cavers can use, and this barrier will have to be closed, removing one of the country's classic trips.
Modelling by Jasen, lighting by Tarquin and Jasen
Barrier between the lakes, constructed with a warning; as long as there is only the showcave entrance, cavers can use it. If there is another entrance dug anywhere, that will become the only entrance that cavers can use, and this barrier will have to be closed, removing one of the country's classic trips.
Modelling by Jasen, lighting by Tarquin and Jasen Lake 2, merely a static pool which can normally be waded without reaching anything uncomfortable.
Modelling by Chelsey and Melissa, lighting by Tarquin, Jasen, Chelsey and Melissa
Lake 2, merely a static pool which can normally be waded without reaching anything uncomfortable.
Modelling by Chelsey and Melissa, lighting by Tarquin, Jasen, Chelsey and Melissa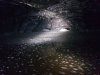 Downstream sump taking the water out of Lake 3, one of the most intimidating places for poor swimmers.
Lighting by Jasen, Tarquin and Chelsey
Downstream sump taking the water out of Lake 3, one of the most intimidating places for poor swimmers.
Lighting by Jasen, Tarquin and Chelsey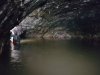 The wide part of Lake 3. The downstream sump is to the right of the camera. In the deep-water alcove on the right side of the picture is the static sump connecting with Pot Sump. The arched passage in the distance is the way on upstream. The left wall is used as a handrail when treading water, or feeling for the rocks on the bottom, depending on water levels.
Modelling by Gareth, lighting by Tarquin and Gareth
The wide part of Lake 3. The downstream sump is to the right of the camera. In the deep-water alcove on the right side of the picture is the static sump connecting with Pot Sump. The arched passage in the distance is the way on upstream. The left wall is used as a handrail when treading water, or feeling for the rocks on the bottom, depending on water levels.
Modelling by Gareth, lighting by Tarquin and Gareth Arched passage just beyond the wide part of Lake 3, looking back towards the wide part. This passage fills completely to the roof in flood. One side of the passage is normally shallow enough to walk (except in high water conditions), and at the passage's mouth, a line of rocks allow taller cavers to cross to the right wall (the handrail wall).
Modelling by Chelsey, lighting by Tarquin and Chelsey
Arched passage just beyond the wide part of Lake 3, looking back towards the wide part. This passage fills completely to the roof in flood. One side of the passage is normally shallow enough to walk (except in high water conditions), and at the passage's mouth, a line of rocks allow taller cavers to cross to the right wall (the handrail wall).
Modelling by Chelsey, lighting by Tarquin and Chelsey Upstream end of the lake, with a very clear flood scum mark high above the river, showing that it has recently flooded quite severely.
Modelling by Chelsey, lighting by Tarquin and Chelsey
Upstream end of the lake, with a very clear flood scum mark high above the river, showing that it has recently flooded quite severely.
Modelling by Chelsey, lighting by Tarquin and Chelsey To the right of the camera in the last picture (to the left when heading upstream) is a slot in the floor, about 2.5 metres deep, destined to catch out the unwary caver. In low water the river flows through the slot (so at least it doesn't suck you in...), but in higher water, the slot cannot be seen at all.
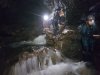 The Cataracts, a series of cascades and plunge pools between the lakes, the finest piece of river passage in the cave.
Modelling by Chelsey, Melissa and Jasen, lighting by Tarquin, Chelsey, Melissa and Jasen
The Cataracts, a series of cascades and plunge pools between the lakes, the finest piece of river passage in the cave.
Modelling by Chelsey, Melissa and Jasen, lighting by Tarquin, Chelsey, Melissa and Jasen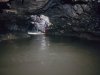 The Cataracts. The entrances to Syphon Series and Razor Passage are tucked into alcoves on the left.
Modelling by Gareth, lighting by Tarquin and Gareth
The Cataracts. The entrances to Syphon Series and Razor Passage are tucked into alcoves on the left.
Modelling by Gareth, lighting by Tarquin and Gareth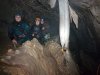 Stal column at the climb out of Lake 4 into the 1937 Series.
Modelling by Chelsey, Melissa and Jasen
Stal column at the climb out of Lake 4 into the 1937 Series.
Modelling by Chelsey, Melissa and Jasen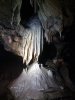 The beautiful cluster formation. The tapes and notices around it appear to have been laid as part of a never-realised plan to use this as a deep tour caving experience. The formation itself seems to have been used previously in brochures for the cave.
Lighting by Melissa, Phil Knight, Jasen, Gareth Davies and Deri Williams
The beautiful cluster formation. The tapes and notices around it appear to have been laid as part of a never-realised plan to use this as a deep tour caving experience. The formation itself seems to have been used previously in brochures for the cave.
Lighting by Melissa, Phil Knight, Jasen, Gareth Davies and Deri Williams The static Pot Sump, which connects with Lake 3. The cables bring power and communications in to the rescue dump - the best equiped rescue dump that I know of in any British cave - which has a heater, kettle (for that all-important cup of tea), and phone, which automatically notifies the cave management if you try to use it. Wardens are very careful with the flooding conditions of the cave, but just in case...
Lighting by Tarquin and Jasen
The static Pot Sump, which connects with Lake 3. The cables bring power and communications in to the rescue dump - the best equiped rescue dump that I know of in any British cave - which has a heater, kettle (for that all-important cup of tea), and phone, which automatically notifies the cave management if you try to use it. Wardens are very careful with the flooding conditions of the cave, but just in case...
Lighting by Tarquin and Jasen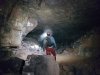 Boulder Chamber, a small remnant of the ancient cave passages, as old as any other parts of the cave. The rescue dump lies in a side passage here, and the natural self-emptying periodic syphon called Lavatory Dan is just beyond the arch ahead (though it was not running so there is no picture).
Modelling by Gareth, lighting by Tarquin and Gareth
Boulder Chamber, a small remnant of the ancient cave passages, as old as any other parts of the cave. The rescue dump lies in a side passage here, and the natural self-emptying periodic syphon called Lavatory Dan is just beyond the arch ahead (though it was not running so there is no picture).
Modelling by Gareth, lighting by Tarquin and Gareth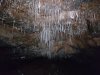 Entrance to Straw Chamber, one of the highlights of the 1937 Series, which is usually ignored on longer trips, even though it sits right beside the main route, whose tapes can be seen in this picture.
 Straw Chamber.
Modelling by Melissa and Chelsey, lighting by Tarquin, Melissa and Chelsey
Straw Chamber.
Modelling by Melissa and Chelsey, lighting by Tarquin, Melissa and Chelsey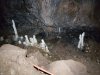 Stalagmites in Straw Chamber. The two on the right look like they need the toilet.
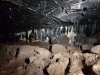 Stal in the crawl to Corbels Chamber
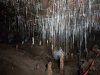 Enlargement in the crawl to Corbels Chamber.
Lighting by Tarquin and Melissa
Enlargement in the crawl to Corbels Chamber.
Lighting by Tarquin and Melissa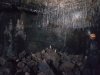 Corbels Chamber.
Modelling by Melissa, lighting by Tarquin, Melissa and Jasen
Corbels Chamber.
Modelling by Melissa, lighting by Tarquin, Melissa and Jasen Crystal pool in Corbels Chamber.
 Crystals.
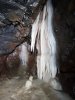 Stal in a side passage.
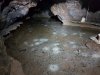 One of the largest calcite rafts in the country, in the side passage. This was surveyed at one point, destroying any rafts. This has reformed since then. The white piles are where drips have fallen into the pool from straws, sinking any rafts which had formed beneath them. Thousands of the sunken rafts form each pile.
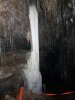 Column in another side passage, about as tall as a human.
Lighting by Tarquin and Jasen
Column in another side passage, about as tall as a human.
Lighting by Tarquin and Jasen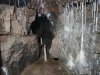 Blue blotch, presumably copper sulphate, on a stalactite.
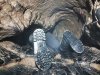 Heading into the first squeeze at the start of The Long Crawl.
Modelling by Melissa
Heading into the first squeeze at the start of The Long Crawl.
Modelling by Melissa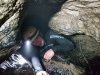 Exiting the squeeze, which is neither particularly tight, nor particularly difficult.
Modelling by Deri, lighting by Tarquin and Deri
Exiting the squeeze, which is neither particularly tight, nor particularly difficult.
Modelling by Deri, lighting by Tarquin and Deri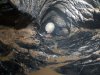 Second squeeze, near the end of The Long Crawl.
Modelling by Deri, lighting by Tarquin and Deri
Second squeeze, near the end of The Long Crawl.
Modelling by Deri, lighting by Tarquin and Deri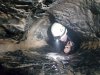 Exiting The Long Crawl. From here, climbs and a pitch regain the large passages.
Modelling by Deri, lighting by Tarquin and Deri
Exiting The Long Crawl. From here, climbs and a pitch regain the large passages.
Modelling by Deri, lighting by Tarquin and Deri A series of climbs and a ladder then land in Gerard Platten Hall, back to the big stuff, and the start of Dan-yr-Ogof II.
Modelling by Gareth, lighting by Tarquin and Gareth
A series of climbs and a ladder then land in Gerard Platten Hall, back to the big stuff, and the start of Dan-yr-Ogof II.
Modelling by Gareth, lighting by Tarquin and Gareth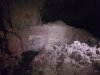 Layered sediment bank in Gerard Platten Hall. The pink is Old Red Sandstone, whose beds sit below the limestone, but which are lifted higher by the dip at the mountain summits.
Lighting by Tarquin and Gareth
Layered sediment bank in Gerard Platten Hall. The pink is Old Red Sandstone, whose beds sit below the limestone, but which are lifted higher by the dip at the mountain summits.
Lighting by Tarquin and Gareth The Crystal Pool, seen from the start of The Grand Canyon (a point where it is known as Elliptic Passage), an iconic scene.
Modelling by Deri and Phil, lighting by Tarquin, Chelsey, Deri, Phil and Gareth
The Crystal Pool, seen from the start of The Grand Canyon (a point where it is known as Elliptic Passage), an iconic scene.
Modelling by Deri and Phil, lighting by Tarquin, Chelsey, Deri, Phil and Gareth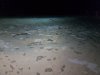 Calcite rafts on The Crystal Pool. Once again, the white piles are rafts sunken by drips over hundreds of years.
Lighting by Tarquin and Phil
Calcite rafts on The Crystal Pool. Once again, the white piles are rafts sunken by drips over hundreds of years.
Lighting by Tarquin and Phil Traverse over The Crystal Pool, using rope loops for feet and hands, to reach Flabbergasm Oxbow. In the past, someone fell in, and sunk all of the calcite rafts, but these have regrown over the decades.
Modelling by Melissa and Gareth, lighting by Tarquin, Deri, Phil and Gareth
Traverse over The Crystal Pool, using rope loops for feet and hands, to reach Flabbergasm Oxbow. In the past, someone fell in, and sunk all of the calcite rafts, but these have regrown over the decades.
Modelling by Melissa and Gareth, lighting by Tarquin, Deri, Phil and Gareth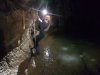 The difficulty is trying to get feet from one loop to the other, without touching the water.
Modelling by Melissa and Gareth, lighting by Tarquin, Deri, Phil and Gareth
The difficulty is trying to get feet from one loop to the other, without touching the water.
Modelling by Melissa and Gareth, lighting by Tarquin, Deri, Phil and Gareth Flabbergasm Oxbow (or Flabbergasm Chasm), with its superb straws and helictites.
Modelling and lighting by Deri and Jasen
Flabbergasm Oxbow (or Flabbergasm Chasm), with its superb straws and helictites.
Modelling and lighting by Deri and Jasen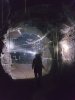 Long straws.
Modelling by Deri and Jasen, lighting by Deri, Jasen and Gareth
Long straws.
Modelling by Deri and Jasen, lighting by Deri, Jasen and Gareth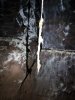 The straws can be seen to swing whenever they are caught by the draught.
 Phreatic tube at the end of Flabbergasm Oxbow.
Modelling and lighting by Phil, Melissa, Jasen, Gareth and Deri
Phreatic tube at the end of Flabbergasm Oxbow.
Modelling and lighting by Phil, Melissa, Jasen, Gareth and Deri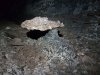 The Mushroom, a piece of false floor attached to a small rock spike. Calcite has concreted this small patch of gravel, with the surrounding gravel washed away by the river, leaving this little platform.
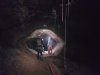 Straw column at the end of Flabbergasm Oxbow. Immediately afterwards is the pitch down into The Grand Canyon.
Modelling by Melissa, Jasen, Gareth and Deri, lighting by Tarquin, Melissa, Jasen, Gareth and Deri
Straw column at the end of Flabbergasm Oxbow. Immediately afterwards is the pitch down into The Grand Canyon.
Modelling by Melissa, Jasen, Gareth and Deri, lighting by Tarquin, Melissa, Jasen, Gareth and Deri The Grand Canyon.
Modelling by Melissa, lighting by Tarquin and Melissa
The Grand Canyon.
Modelling by Melissa, lighting by Tarquin and Melissa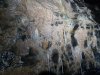 Wall of helictites in The Grand Canyon.
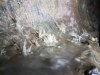 Helictite shelf.
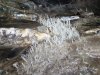 Short back and sides.
Lighting by Tarquin and Chelsey
Short back and sides.
Lighting by Tarquin and Chelsey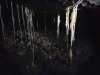 The Candlewax Formations, iconic translucent stal columns. These are extremely hard to photograph, and would be better with flashguns lighting the ceiling and floor, and only a weak light lighting the bright stal.
Lighting by Deri and Melissa
The Candlewax Formations, iconic translucent stal columns. These are extremely hard to photograph, and would be better with flashguns lighting the ceiling and floor, and only a weak light lighting the bright stal.
Lighting by Deri and Melissa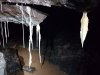 The Candlewax Formations.
Lighting by Deri and Melissa
The Candlewax Formations.
Lighting by Deri and Melissa The Monk, a bowing stalagmite.
 Monk Hall, an enormous phreatic tube, the largest in the cave. Lighting this part is nearly impossible without plenty of flashes and time to set them up. This picture does it no justice, and needed to be constructed from multiple images.
Modelling by Melissa, Deri, Chelsey, Gareth and Phil, lighting by Tarquin, Melissa, Deri, Chelsey, Gareth and Phil
Monk Hall, an enormous phreatic tube, the largest in the cave. Lighting this part is nearly impossible without plenty of flashes and time to set them up. This picture does it no justice, and needed to be constructed from multiple images.
Modelling by Melissa, Deri, Chelsey, Gareth and Phil, lighting by Tarquin, Melissa, Deri, Chelsey, Gareth and Phil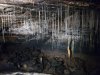 Straws on the side of Monk Hall.
Lighting by Chelsey, Melissa and Deri
Straws on the side of Monk Hall.
Lighting by Chelsey, Melissa and Deri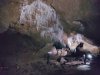 Cloud Chamber, the other end of Monk Hall, with its superb clusters of straws.
Modelling by Deri, Melissa and Jasen, lighting by Chelsey, Deri, Melissa and Jasen
Cloud Chamber, the other end of Monk Hall, with its superb clusters of straws.
Modelling by Deri, Melissa and Jasen, lighting by Chelsey, Deri, Melissa and Jasen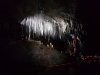 Stunning arch and straws at the end of Cloud Chamber.
Modelling by Jasen, lighting by Chelsey, Jasen and Deri
Stunning arch and straws at the end of Cloud Chamber.
Modelling by Jasen, lighting by Chelsey, Jasen and Deri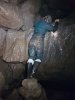 Climb up beside Cascade Aven, leading to the Green Canal. Only a thin blade of rock separates the stream in the floor from the Green Canal, and if it is ever punctured by erosion, it would drain the Green Canal.
Modelling by Chelsey, lighting by Tarquin and Chelsey
Climb up beside Cascade Aven, leading to the Green Canal. Only a thin blade of rock separates the stream in the floor from the Green Canal, and if it is ever punctured by erosion, it would drain the Green Canal.
Modelling by Chelsey, lighting by Tarquin and Chelsey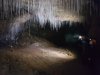 Hangar Passage, a beautifully decorated side passage, and one of the most ancient pieces of the cave, at around 2 million years old.
Modelling by Melissa and Gareth, lighting by Tarquin, Melissa and Gareth
Hangar Passage, a beautifully decorated side passage, and one of the most ancient pieces of the cave, at around 2 million years old.
Modelling by Melissa and Gareth, lighting by Tarquin, Melissa and Gareth Hangar Passage.
Modelling by Jasen, Deri and Chelsey, lighting by Tarquin, Gareth, Jasen, Deri and Chelsey
Hangar Passage.
Modelling by Jasen, Deri and Chelsey, lighting by Tarquin, Gareth, Jasen, Deri and Chelsey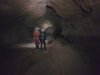 Looking towards the Hangar Passage choke. Beyond here, it splits into two branches. These are undoubtedly some of the most important leads in the cave.
Modelling by Phil and Melissa, lighting by Tarquin, Phil and Melissa
Looking towards the Hangar Passage choke. Beyond here, it splits into two branches. These are undoubtedly some of the most important leads in the cave.
Modelling by Phil and Melissa, lighting by Tarquin, Phil and Melissa Start of The Green Canal, at the point where the floor first drops away. Despite seeming deep, it is only 3 metres at its deepest point. The floor is littered with fallen wellies and a deteriorating rope, but a recent cleanup removed a different rope, two sets of SRT gear, a lump hammer, a crowbar, a tripod mount, a pulley and a krab. Someone's wedding ring is also down there somewhere.
Modelling by Chelsey, lighting by Tarquin and Deri
Start of The Green Canal, at the point where the floor first drops away. Despite seeming deep, it is only 3 metres at its deepest point. The floor is littered with fallen wellies and a deteriorating rope, but a recent cleanup removed a different rope, two sets of SRT gear, a lump hammer, a crowbar, a tripod mount, a pulley and a krab. Someone's wedding ring is also down there somewhere.
Modelling by Chelsey, lighting by Tarquin and Deri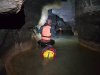 After a 50 metre swim, the floor becomes shallow enough to allow walking, and slowly gets shallower. The wetsuited swimmers had some fun with taking pictures, while those without wetsuits hoped for some movement to get the blood flowing.
Modelling by Gareth and Melissa, lighting by Tarquin, Gareth and Chelsey
After a 50 metre swim, the floor becomes shallow enough to allow walking, and slowly gets shallower. The wetsuited swimmers had some fun with taking pictures, while those without wetsuits hoped for some movement to get the blood flowing.
Modelling by Gareth and Melissa, lighting by Tarquin, Gareth and Chelsey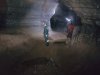 Go Faster, the large passage heading North.
Modelling by Chelsey and Jasen, lighting by Tarquin, Chelsey and Jasen
Go Faster, the large passage heading North.
Modelling by Chelsey and Jasen, lighting by Tarquin, Chelsey and Jasen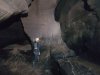 The end of Go Faster. To the left passes through crawls into Surprise Chamber, but Go Slower, on the right, is the way on.
Modelling by Melissa, lighting by Tarquin, Phil and Melissa
The end of Go Faster. To the left passes through crawls into Surprise Chamber, but Go Slower, on the right, is the way on.
Modelling by Melissa, lighting by Tarquin, Phil and Melissa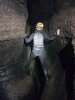 Go Slower, a narrow passage with traverses, that occasionally intersects fragments of the larger passage.
Modelling by Melissa, lighting by Tarquin and Melissa
Go Slower, a narrow passage with traverses, that occasionally intersects fragments of the larger passage.
Modelling by Melissa, lighting by Tarquin and Melissa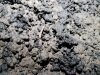 Earthworm in Go Slower. These colonies are in several places, including Thixotropic Passage in the Lower Series.
 Rottenstone Aven, a very tall aven with unusually shaped, snatchy rock.
Modelling by Gareth and Melissa, lighting by Tarquin, Gareth and Melissa
Rottenstone Aven, a very tall aven with unusually shaped, snatchy rock.
Modelling by Gareth and Melissa, lighting by Tarquin, Gareth and Melissa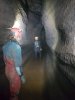 Go Slower
Modelling by Gareth and Melissa, lighting by Tarquin, Gareth and Melissa
Go Slower
Modelling by Gareth and Melissa, lighting by Tarquin, Gareth and Melissa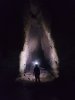 A demon in High Way near The Rising. This was not a set-up, and the horns and tail were purely by accident.
Modelling and lighting by Gareth
A demon in High Way near The Rising. This was not a set-up, and the horns and tail were purely by accident.
Modelling and lighting by Gareth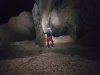 The Battleship, a rib of rock forming an oxbow just before The Rising.
Modelling by Gareth, lighting by Tarquin and Gareth
The Battleship, a rib of rock forming an oxbow just before The Rising.
Modelling by Gareth, lighting by Tarquin and Gareth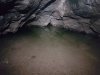 The Rising, the end of Dan-yr-Ogof II. This is where our Round Trip ended. Strictly speaking, it is not part of the Round Trip, but it is a popular detour.
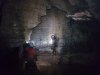 Above the sump, the ladder and ropes lead up into Windy Way, which bypasses the sump.
Modelling by Jasen, Melissa, Chelsey, Gareth and Deri, lighting by Tarquin, Jasen, Melissa, Chelsey, Gareth and Deri
Above the sump, the ladder and ropes lead up into Windy Way, which bypasses the sump.
Modelling by Jasen, Melissa, Chelsey, Gareth and Deri, lighting by Tarquin, Jasen, Melissa, Chelsey, Gareth and Deri Climbing above the ladder. The climb does not need the rope, but the rope is there for safety. Particularly welcome at the exposed pitch head.
Modelling by Gareth, lighting by Tarquin and Gareth
Climbing above the ladder. The climb does not need the rope, but the rope is there for safety. Particularly welcome at the exposed pitch head.
Modelling by Gareth, lighting by Tarquin and Gareth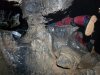 Windy Way, a series of oxbowing crawls with a very strong draught.
Modelling by Gareth, lighting by Tarquin and Gareth
Windy Way, a series of oxbowing crawls with a very strong draught.
Modelling by Gareth, lighting by Tarquin and Gareth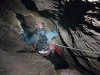 Traverse over the double pitch at the end of Windy Way.
Modelling by Gareth, lighting by Tarquin and Gareth
Traverse over the double pitch at the end of Windy Way.
Modelling by Gareth, lighting by Tarquin and Gareth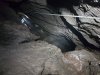 Double pitch down to Birthday Passage.
Modelling by Gareth, lighting by Tarquin and Gareth
Double pitch down to Birthday Passage.
Modelling by Gareth, lighting by Tarquin and Gareth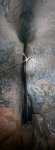 Tight pitch head down to the Great North Road, where the rope somehow manages to avoid touching the walls. Getting on and off the rope is done at the bottom of the trench instead of the pitch head. (The odd lighting is because this is a panorama stitched from 4 photographs.)
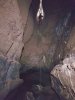 Dropping into the Great North Road.
Modelling by Gareth, lighting by Tarquin and Gareth
Dropping into the Great North Road.
Modelling by Gareth, lighting by Tarquin and Gareth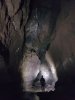 The Great North Road, where the roof soars to the limit of our lights. At this point, it is a mere 20 metres tall, but later it reaches over 40 metres. For the first part, there are some holes in the roof, connecting with an oxbow from Birthday Passage.
Modelling by Gareth, lighting by Tarquin and Gareth
The Great North Road, where the roof soars to the limit of our lights. At this point, it is a mere 20 metres tall, but later it reaches over 40 metres. For the first part, there are some holes in the roof, connecting with an oxbow from Birthday Passage.
Modelling by Gareth, lighting by Tarquin and Gareth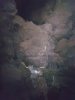 An enormous boulder jammed across the passage, which is easily mistaken for a solid ceiling until you look more closely. Multiple avens from this point onwards connect with the various parts of Pinnacle Series.
Modelling by Gareth, lighting by Tarquin and Gareth
An enormous boulder jammed across the passage, which is easily mistaken for a solid ceiling until you look more closely. Multiple avens from this point onwards connect with the various parts of Pinnacle Series.
Modelling by Gareth, lighting by Tarquin and Gareth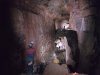 Pinnacle Chamber, the largest part of the Great North Road. This return trip gave me a chance to take additional pictures of the distant parts of this chamber, from the same place as I had photographed it on a previous trip. The two Gareths and their lights are then pasted into the older picture, which finally gives a good sense of scale to this enormous space. The lower Gareth is at the entrance down to the Meanders, and the climb to the North Bypass. The upper Gareth is in the North Bypass.
Modelling by peter Wilton-Jones, Pete Bolt and Gareth (twice), lighting by Tarquin, Peter, Pete and Gareth
Pinnacle Chamber, the largest part of the Great North Road. This return trip gave me a chance to take additional pictures of the distant parts of this chamber, from the same place as I had photographed it on a previous trip. The two Gareths and their lights are then pasted into the older picture, which finally gives a good sense of scale to this enormous space. The lower Gareth is at the entrance down to the Meanders, and the climb to the North Bypass. The upper Gareth is in the North Bypass.
Modelling by peter Wilton-Jones, Pete Bolt and Gareth (twice), lighting by Tarquin, Peter, Pete and Gareth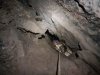 Pitch up to Pinnacle Series.
Modelling by Gareth, lighting by Tarquin and Gareth
Pitch up to Pinnacle Series.
Modelling by Gareth, lighting by Tarquin and Gareth At the top of the pitch is a balcony overlooking an enormous hole down to Pinnacle Chamber. Just around the corner is another giant balcony with waterfalls.
Modelling by Gareth, lighting by Tarquin and Gareth
At the top of the pitch is a balcony overlooking an enormous hole down to Pinnacle Chamber. Just around the corner is another giant balcony with waterfalls.
Modelling by Gareth, lighting by Tarquin and Gareth The lower level of Pinnacle Series, which feels a lot like Ogof Ffynnon Ddu's Great Oxbow, ending at a couple of parallel 25 metre pitches into the Great North Road.
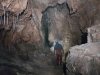 Up a slope is the middle level of Pinnacle Series, which ends at a traverse over the lower level.
Modelling by Gareth, lighting by Tarquin and Gareth
Up a slope is the middle level of Pinnacle Series, which ends at a traverse over the lower level.
Modelling by Gareth, lighting by Tarquin and Gareth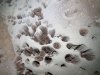 Drip pockets in the middle level.
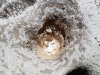 Cave pearls (or just calcited pebbles) in the bottom of a drip pocket.
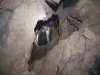 Pitch to the upper level. Though extremely slippery, this must have been free climbed originally.
Modelling by Gareth, lighting by Tarquin and Gareth
Pitch to the upper level. Though extremely slippery, this must have been free climbed originally.
Modelling by Gareth, lighting by Tarquin and Gareth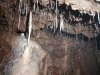 Stal in the right side of the upper level.
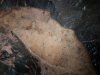 Large, dried crystal pool in the passage.
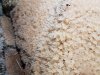 Crystals in the pool.
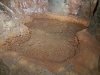 Smaller crystal pool.
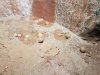 Cave pearls, as much as 2 cm in diameter.
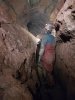 The passage then continues to two branches, each of which reaches a pitch back to the Great North Road. The first of these is about 40 metres high, the second a mere 35 metres, with a rope heading into an aven on the other side...
Modelling by Gareth, lighting by Tarquin and Gareth
The passage then continues to two branches, each of which reaches a pitch back to the Great North Road. The first of these is about 40 metres high, the second a mere 35 metres, with a rope heading into an aven on the other side...
Modelling by Gareth, lighting by Tarquin and Gareth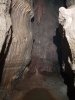 Stal in the left branch of the upper level.
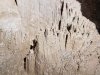 Mud hoodoos.
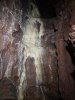 Stal flow in an alcove.
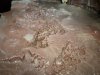 Crazy calcite floor below. This seems to have been formed by calcite flowing over mud hoodoos.
 Bryce Canyon in miniature.
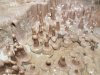 Frozen splashing chocolate drips. Or a pool full of Monty Python nipples. You decide.
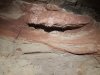 Layered sediment. The old red sandstone even managed to infiltrate all the way up here.
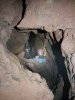 Climb down to bypass a pitch in a side passage.
Modelling by Gareth, lighting by Tarquin and Gareth
Climb down to bypass a pitch in a side passage.
Modelling by Gareth, lighting by Tarquin and Gareth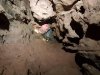 Awkward squeeze leading to the head of yet another massive drop into North Bypass.
Modelling by Gareth, lighting by Tarquin and Gareth
Awkward squeeze leading to the head of yet another massive drop into North Bypass.
Modelling by Gareth, lighting by Tarquin and Gareth An aven in the side passage splits, with the right passage ending at an ugly, loose choke. Everything we touched wanted to move, including the floor, but Gareth managed to check out the route which failed to pass through the choke. Beneath this horrible, unsupported boulder.
Modelling by Gareth
An aven in the side passage splits, with the right passage ending at an ugly, loose choke. Everything we touched wanted to move, including the floor, but Gareth managed to check out the route which failed to pass through the choke. Beneath this horrible, unsupported boulder.
Modelling by Gareth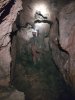 Last chamber of the side passage, which chokes.
Modelling by Gareth, lighting by Tarquin and Gareth
Last chamber of the side passage, which chokes.
Modelling by Gareth, lighting by Tarquin and Gareth Pitches in the side passage off the side passage, which leads to the current end of the Pinnacle Series extensions.
Lighting by Tarquin and Gareth
Pitches in the side passage off the side passage, which leads to the current end of the Pinnacle Series extensions.
Lighting by Tarquin and Gareth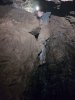 At the bottom of the pitches, a fragment of stream quickly gets too tight downstream, but can be followed upstream via a climb.
Modelling by Gareth, lighting by Tarquin and Gareth
At the bottom of the pitches, a fragment of stream quickly gets too tight downstream, but can be followed upstream via a climb.
Modelling by Gareth, lighting by Tarquin and Gareth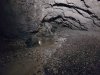 Arched streamway upstream of the climb.
Modelling by Gareth, lighting by Tarquin and Gareth
Arched streamway upstream of the climb.
Modelling by Gareth, lighting by Tarquin and Gareth Formations in an alcove.
 Straws in another alcove.
 Continuing upsteam required a very tricky climb. Though it is possible to free climb, there are not enough holds where you want them, and both of us would have welcomed a rope or some other safety equipment. And that's why there is no model in the picture, because I was too busy being the safety equipment.
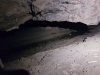 The low streamway above the climb, which does not seem promising.
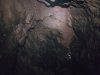 Suddenly it enters a large terminal aven, where the water pours in from a small slot above.
 Stal in The Playground, a surprisingly large side passage with a long sand slide.
 Face down in the sand squeeze bypassing an exposed climb in The Playground.
Modelling by Gareth
Face down in the sand squeeze bypassing an exposed climb in The Playground.
Modelling by Gareth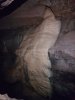 The Playground ends at an all-too-common ledge overlooking North Bypass, 8 metres above the floor. At least this time there was some stal to look at, which allowed us to recognise where we were.
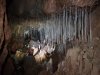 Painted Chamber, the main destination within Pinnacle Series.
Modelling by Gareth, lighting by Tarquin and Gareth
Painted Chamber, the main destination within Pinnacle Series.
Modelling by Gareth, lighting by Tarquin and Gareth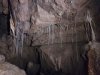 Less-decorated side of the chamber.
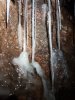 Glass-like straws on the wall.
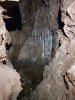 Decorated alcove, with white stal and black manganese-stained stal.
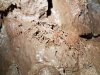 Cracked calcite.
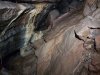 Stal in the undercuts beneath the chamber.
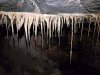 Stal on a lip, with a helictite fringe.
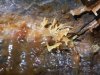 Yellow helictites.
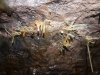 More yellow helictites.
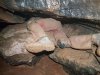 I pushed through a tight and awkward squeeze under the chamber into another tiny grotto.
Modelling by Gareth
I pushed through a tight and awkward squeeze under the chamber into another tiny grotto.
Modelling by Gareth Gareth then pushed through the next one, but there was no way on.
Modelling by Gareth
Gareth then pushed through the next one, but there was no way on.
Modelling by Gareth That left only the most obvious passage, which ended at a couple of grottos with ominous echos.
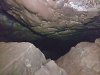 The floor of the grottos had gone missing, and in their place were pitches dropping all the way to North Bypass, nearly 30 metres below. Not the place to go climbing up avens, so we decided to call it an evening, and head back out.
 A toadlet that had been washed in from the Not Far Now sump - incredible to have survived such a long journey underground. We carried it out in a lunchbox, and released it somewhere more sensible.
Modelling by Tobias
A toadlet that had been washed in from the Not Far Now sump - incredible to have survived such a long journey underground. We carried it out in a lunchbox, and released it somewhere more sensible.
Modelling by Tobias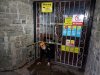 Exiting through the Cavers' Door, at the end of a successful trip.
Modelling by Melissa
Exiting through the Cavers' Door, at the end of a successful trip.
Modelling by Melissa
 Graffiti signatures of the cave's original discoverers, Tommy and Jeff Morgan, above the Alabaster Pillar formation in the showcave. This looks like it says 1919, but they originally explored the cave in 1912.
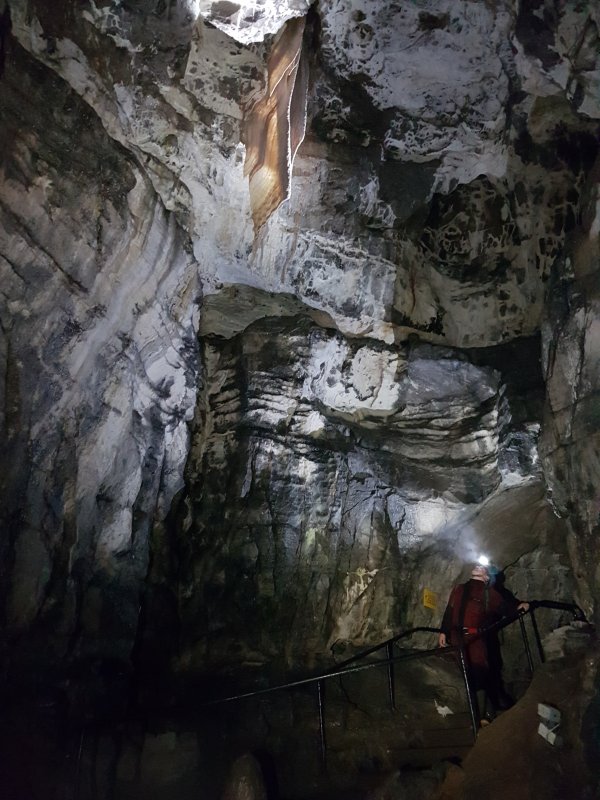 Cauldron Chamber, with one of the largest curtains in the cave.
Modelling by Jasen Finch, lighting by Tarquin, Jasen, Melissa O'Reilly and Chelsey Morris
Cauldron Chamber, with one of the largest curtains in the cave.
Modelling by Jasen Finch, lighting by Tarquin, Jasen, Melissa O'Reilly and Chelsey Morris Lake 1, which was originally part of the showcave. In summer conditions as seen here on the Pinnacle Series trip, the water runs below the walkway.
Modelling by Gareth, lighting by Tarquin and Gareth
Lake 1, which was originally part of the showcave. In summer conditions as seen here on the Pinnacle Series trip, the water runs below the walkway.
Modelling by Gareth, lighting by Tarquin and Gareth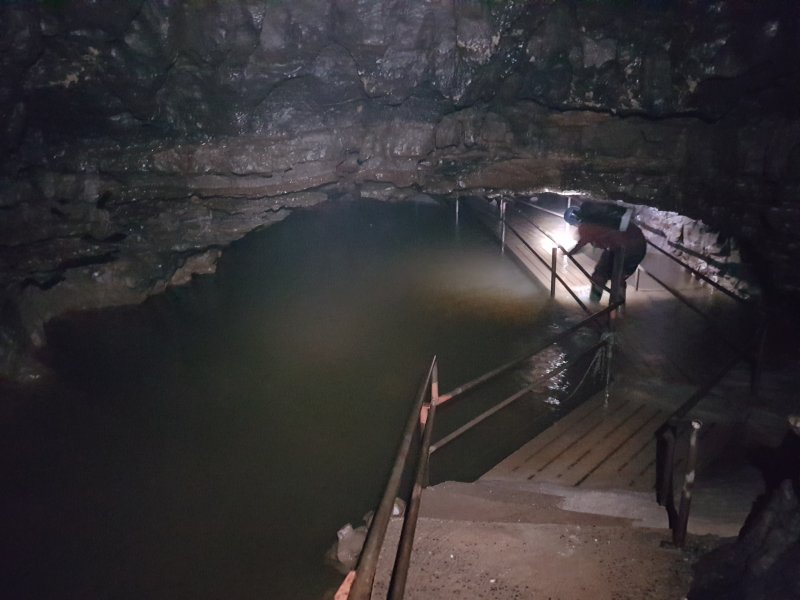 If the water in Lake 1 reaches the first rungs of the handrail, then Lake 3 will have very limited airspace. If the water reaches the top of the handrail, then Lake 3 will definitely be sumped. Seen here on the Round Trip just 2 days earlier, the water is part way above the walkway. Lake 3 was about 45 cm deeper.
Modelling by Jasen, lighting by Tarquin and Jasen
If the water in Lake 1 reaches the first rungs of the handrail, then Lake 3 will have very limited airspace. If the water reaches the top of the handrail, then Lake 3 will definitely be sumped. Seen here on the Round Trip just 2 days earlier, the water is part way above the walkway. Lake 3 was about 45 cm deeper.
Modelling by Jasen, lighting by Tarquin and Jasen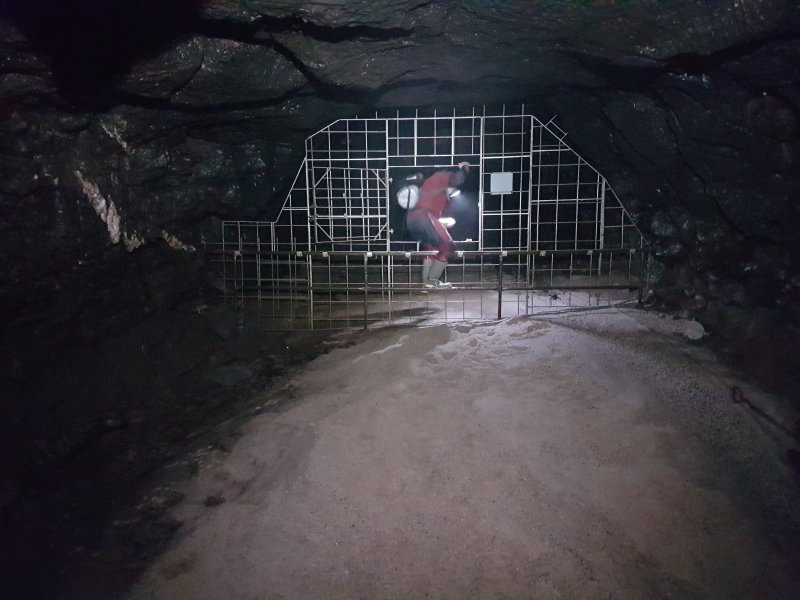 Barrier between the lakes, constructed with a warning; as long as there is only the showcave entrance, cavers can use it. If there is another entrance dug anywhere, that will become the only entrance that cavers can use, and this barrier will have to be closed, removing one of the country's classic trips.
Modelling by Jasen, lighting by Tarquin and Jasen
Barrier between the lakes, constructed with a warning; as long as there is only the showcave entrance, cavers can use it. If there is another entrance dug anywhere, that will become the only entrance that cavers can use, and this barrier will have to be closed, removing one of the country's classic trips.
Modelling by Jasen, lighting by Tarquin and Jasen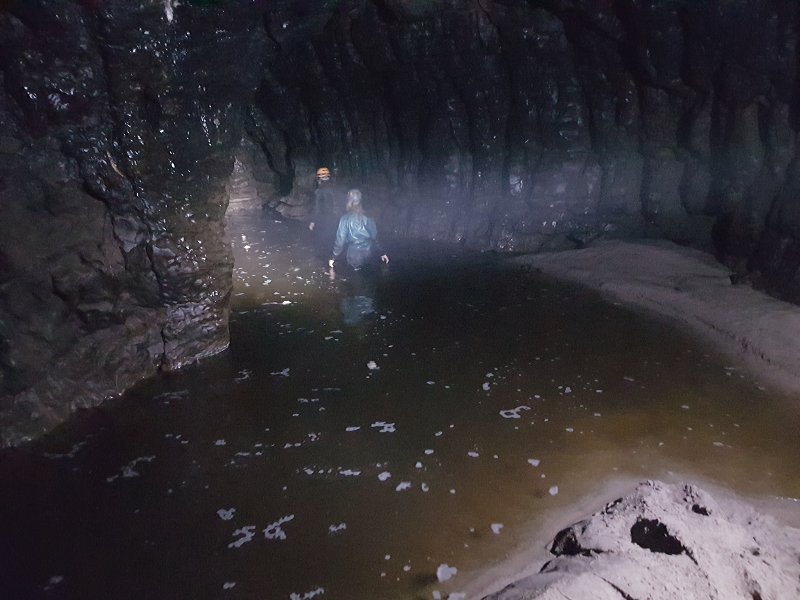 Lake 2, merely a static pool which can normally be waded without reaching anything uncomfortable.
Modelling by Chelsey and Melissa, lighting by Tarquin, Jasen, Chelsey and Melissa
Lake 2, merely a static pool which can normally be waded without reaching anything uncomfortable.
Modelling by Chelsey and Melissa, lighting by Tarquin, Jasen, Chelsey and Melissa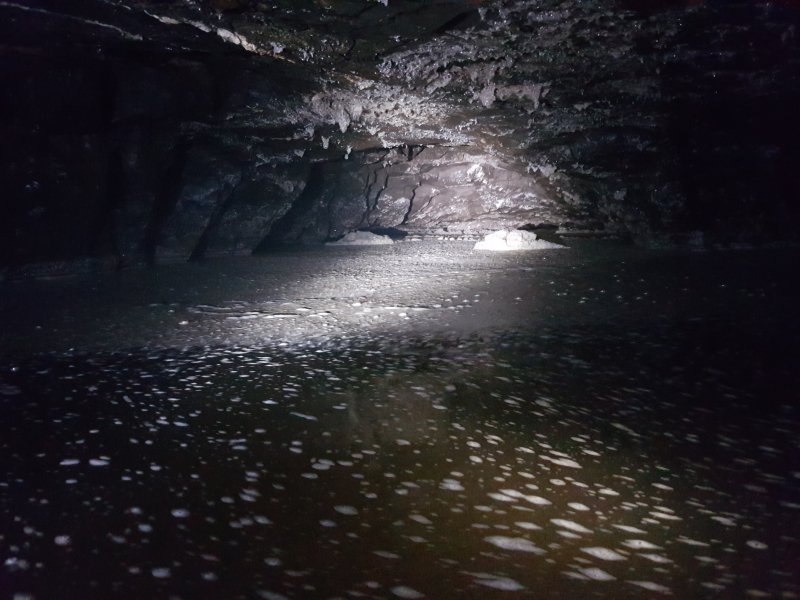 Downstream sump taking the water out of Lake 3, one of the most intimidating places for poor swimmers.
Lighting by Jasen, Tarquin and Chelsey
Downstream sump taking the water out of Lake 3, one of the most intimidating places for poor swimmers.
Lighting by Jasen, Tarquin and Chelsey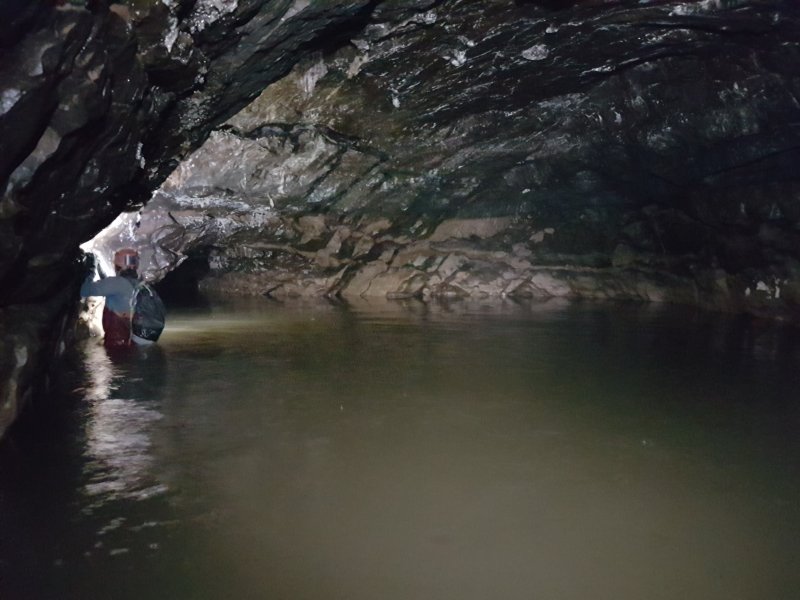 The wide part of Lake 3. The downstream sump is to the right of the camera. In the deep-water alcove on the right side of the picture is the static sump connecting with Pot Sump. The arched passage in the distance is the way on upstream. The left wall is used as a handrail when treading water, or feeling for the rocks on the bottom, depending on water levels.
Modelling by Gareth, lighting by Tarquin and Gareth
The wide part of Lake 3. The downstream sump is to the right of the camera. In the deep-water alcove on the right side of the picture is the static sump connecting with Pot Sump. The arched passage in the distance is the way on upstream. The left wall is used as a handrail when treading water, or feeling for the rocks on the bottom, depending on water levels.
Modelling by Gareth, lighting by Tarquin and Gareth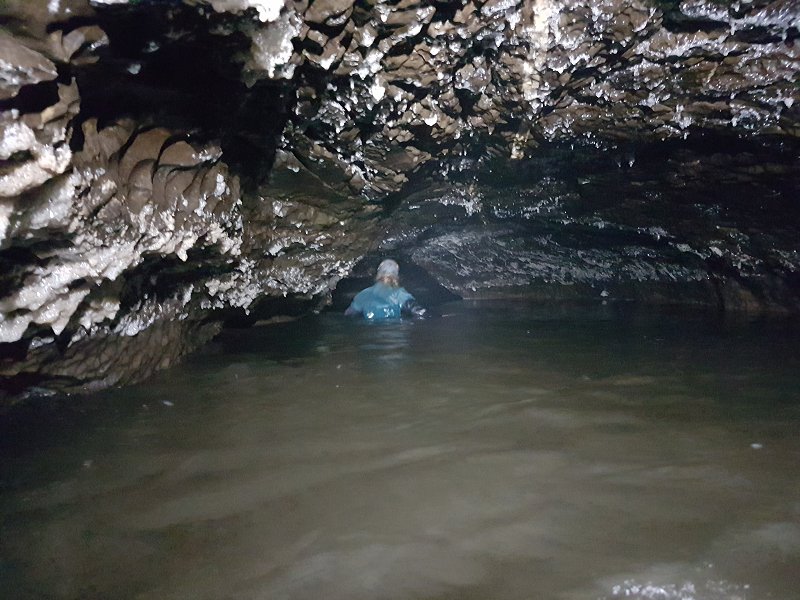 Arched passage just beyond the wide part of Lake 3, looking back towards the wide part. This passage fills completely to the roof in flood. One side of the passage is normally shallow enough to walk (except in high water conditions), and at the passage's mouth, a line of rocks allow taller cavers to cross to the right wall (the handrail wall).
Modelling by Chelsey, lighting by Tarquin and Chelsey
Arched passage just beyond the wide part of Lake 3, looking back towards the wide part. This passage fills completely to the roof in flood. One side of the passage is normally shallow enough to walk (except in high water conditions), and at the passage's mouth, a line of rocks allow taller cavers to cross to the right wall (the handrail wall).
Modelling by Chelsey, lighting by Tarquin and Chelsey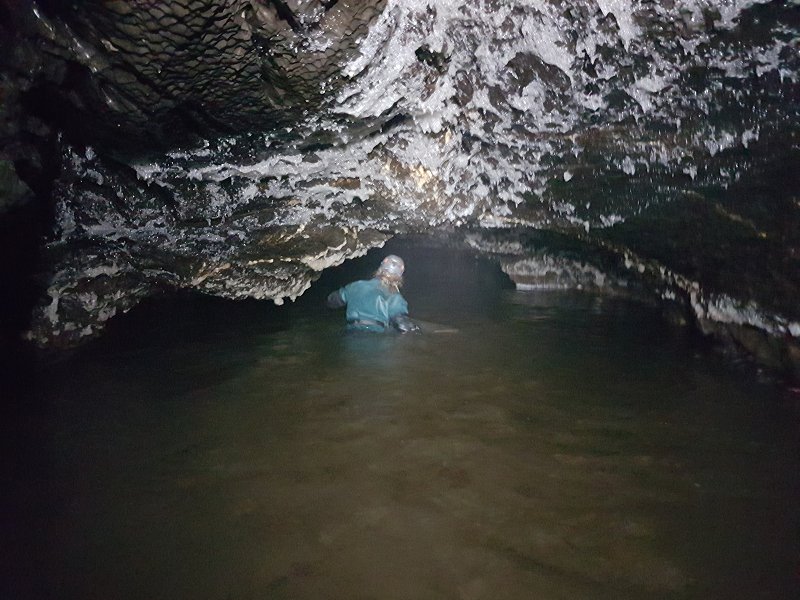 Upstream end of the lake, with a very clear flood scum mark high above the river, showing that it has recently flooded quite severely.
Modelling by Chelsey, lighting by Tarquin and Chelsey
Upstream end of the lake, with a very clear flood scum mark high above the river, showing that it has recently flooded quite severely.
Modelling by Chelsey, lighting by Tarquin and Chelsey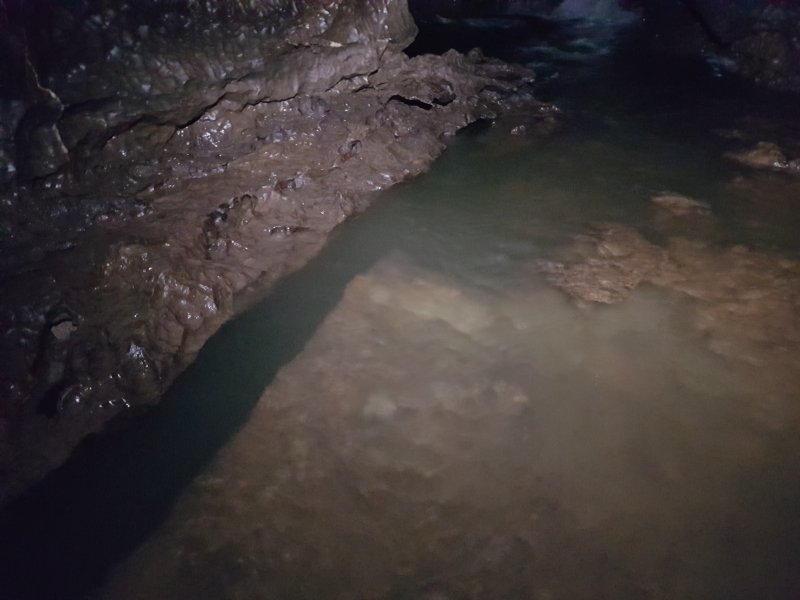 To the right of the camera in the last picture (to the left when heading upstream) is a slot in the floor, about 2.5 metres deep, destined to catch out the unwary caver. In low water the river flows through the slot (so at least it doesn't suck you in...), but in higher water, the slot cannot be seen at all.
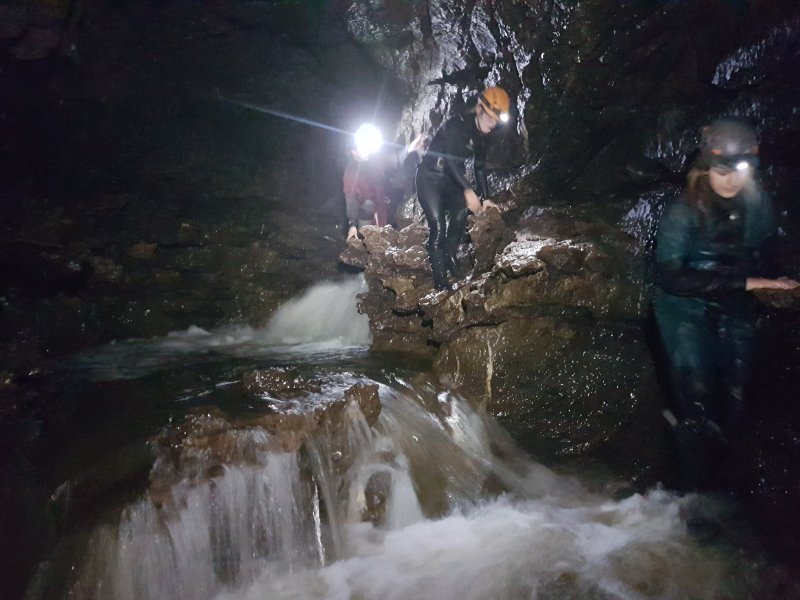 The Cataracts, a series of cascades and plunge pools between the lakes, the finest piece of river passage in the cave.
Modelling by Chelsey, Melissa and Jasen, lighting by Tarquin, Chelsey, Melissa and Jasen
The Cataracts, a series of cascades and plunge pools between the lakes, the finest piece of river passage in the cave.
Modelling by Chelsey, Melissa and Jasen, lighting by Tarquin, Chelsey, Melissa and Jasen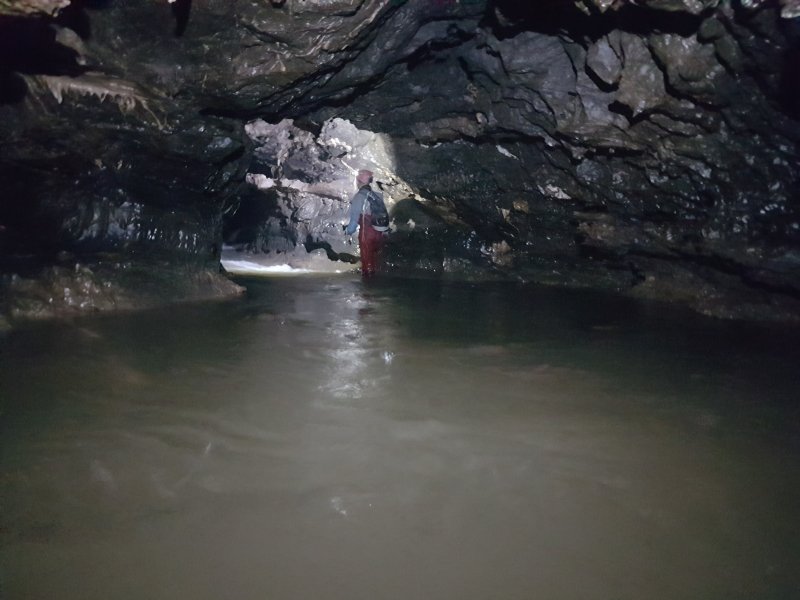 The Cataracts. The entrances to Syphon Series and Razor Passage are tucked into alcoves on the left.
Modelling by Gareth, lighting by Tarquin and Gareth
The Cataracts. The entrances to Syphon Series and Razor Passage are tucked into alcoves on the left.
Modelling by Gareth, lighting by Tarquin and Gareth Stal column at the climb out of Lake 4 into the 1937 Series.
Modelling by Chelsey, Melissa and Jasen
Stal column at the climb out of Lake 4 into the 1937 Series.
Modelling by Chelsey, Melissa and Jasen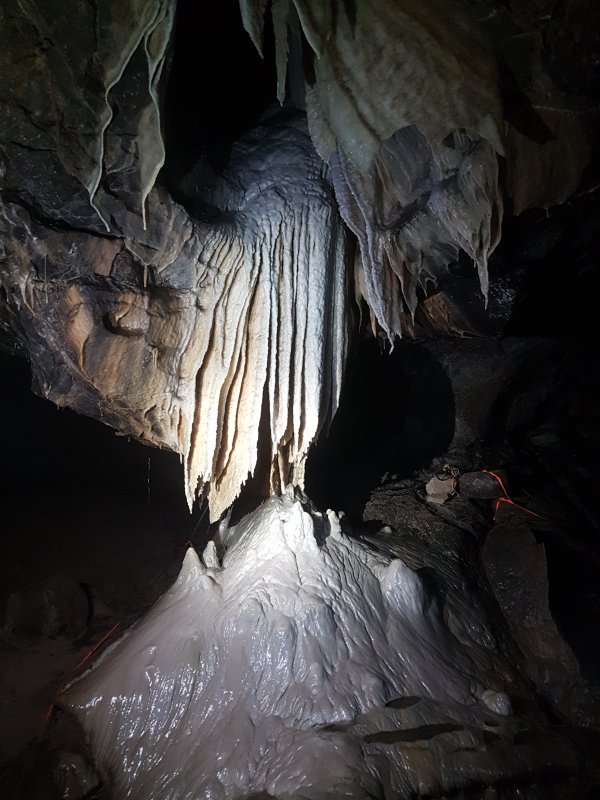 The beautiful cluster formation. The tapes and notices around it appear to have been laid as part of a never-realised plan to use this as a deep tour caving experience. The formation itself seems to have been used previously in brochures for the cave.
Lighting by Melissa, Phil Knight, Jasen, Gareth Davies and Deri Williams
The beautiful cluster formation. The tapes and notices around it appear to have been laid as part of a never-realised plan to use this as a deep tour caving experience. The formation itself seems to have been used previously in brochures for the cave.
Lighting by Melissa, Phil Knight, Jasen, Gareth Davies and Deri Williams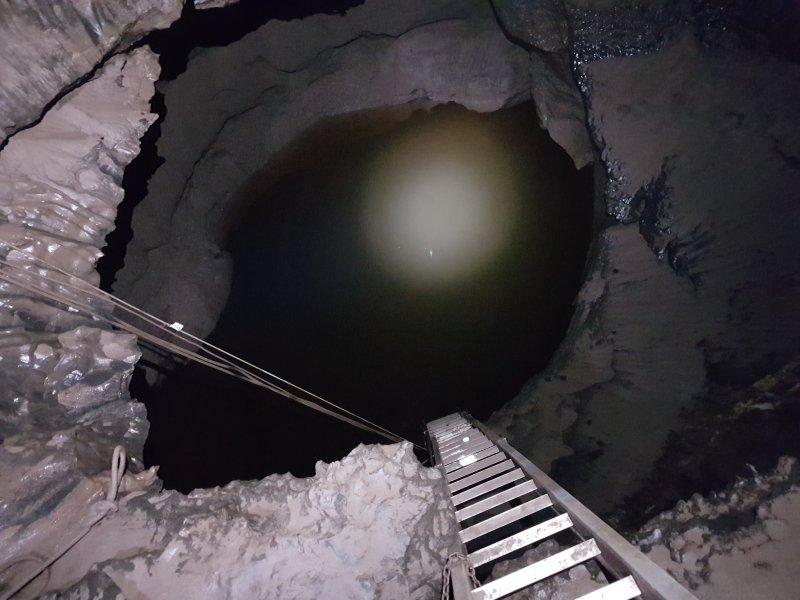 The static Pot Sump, which connects with Lake 3. The cables bring power and communications in to the rescue dump - the best equiped rescue dump that I know of in any British cave - which has a heater, kettle (for that all-important cup of tea), and phone, which automatically notifies the cave management if you try to use it. Wardens are very careful with the flooding conditions of the cave, but just in case...
Lighting by Tarquin and Jasen
The static Pot Sump, which connects with Lake 3. The cables bring power and communications in to the rescue dump - the best equiped rescue dump that I know of in any British cave - which has a heater, kettle (for that all-important cup of tea), and phone, which automatically notifies the cave management if you try to use it. Wardens are very careful with the flooding conditions of the cave, but just in case...
Lighting by Tarquin and Jasen Boulder Chamber, a small remnant of the ancient cave passages, as old as any other parts of the cave. The rescue dump lies in a side passage here, and the natural self-emptying periodic syphon called Lavatory Dan is just beyond the arch ahead (though it was not running so there is no picture).
Modelling by Gareth, lighting by Tarquin and Gareth
Boulder Chamber, a small remnant of the ancient cave passages, as old as any other parts of the cave. The rescue dump lies in a side passage here, and the natural self-emptying periodic syphon called Lavatory Dan is just beyond the arch ahead (though it was not running so there is no picture).
Modelling by Gareth, lighting by Tarquin and Gareth Entrance to Straw Chamber, one of the highlights of the 1937 Series, which is usually ignored on longer trips, even though it sits right beside the main route, whose tapes can be seen in this picture.
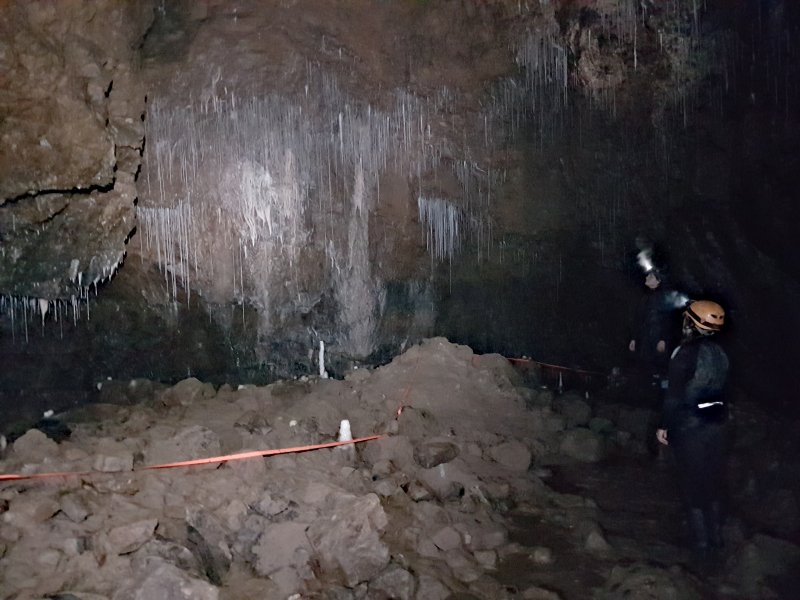 Straw Chamber.
Modelling by Melissa and Chelsey, lighting by Tarquin, Melissa and Chelsey
Straw Chamber.
Modelling by Melissa and Chelsey, lighting by Tarquin, Melissa and Chelsey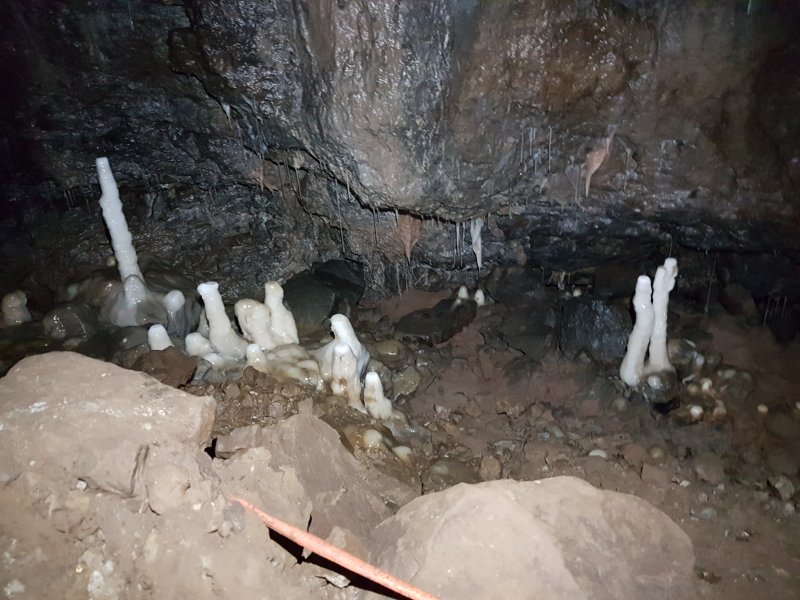 Stalagmites in Straw Chamber. The two on the right look like they need the toilet.
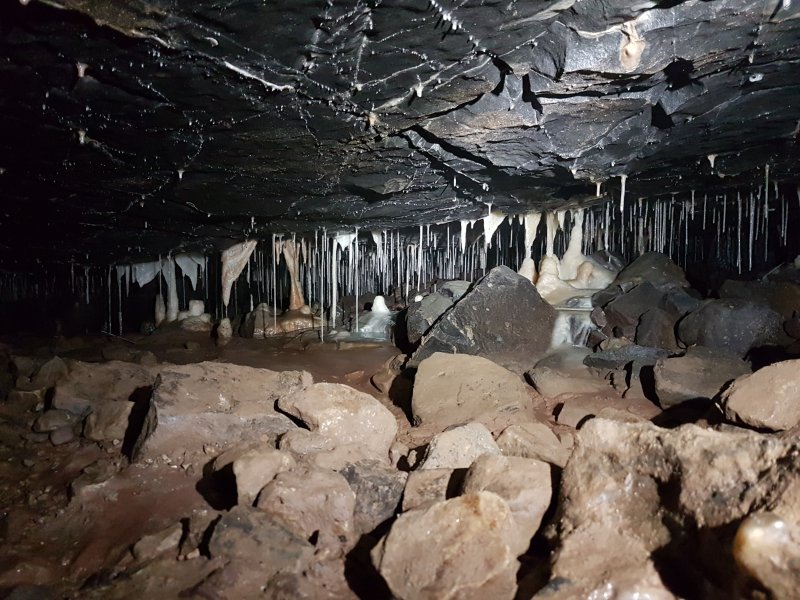 Stal in the crawl to Corbels Chamber
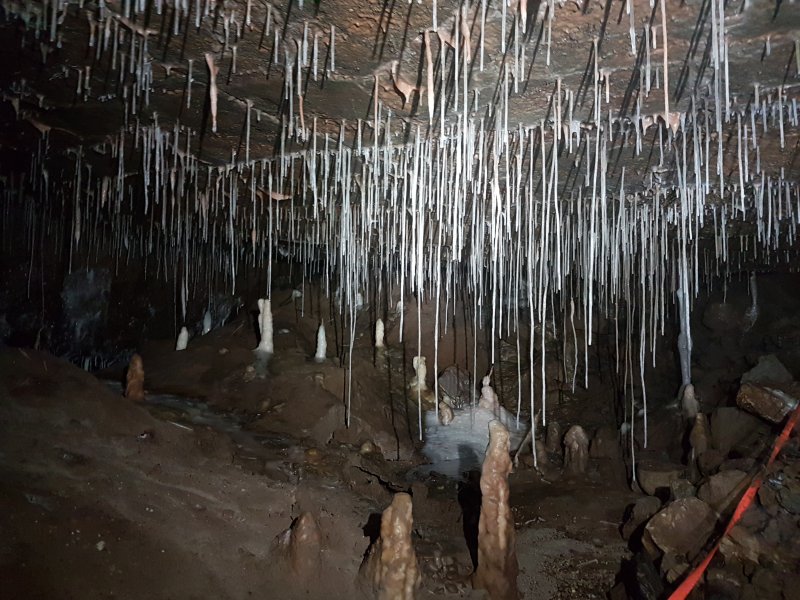 Enlargement in the crawl to Corbels Chamber.
Lighting by Tarquin and Melissa
Enlargement in the crawl to Corbels Chamber.
Lighting by Tarquin and Melissa Corbels Chamber.
Modelling by Melissa, lighting by Tarquin, Melissa and Jasen
Corbels Chamber.
Modelling by Melissa, lighting by Tarquin, Melissa and Jasen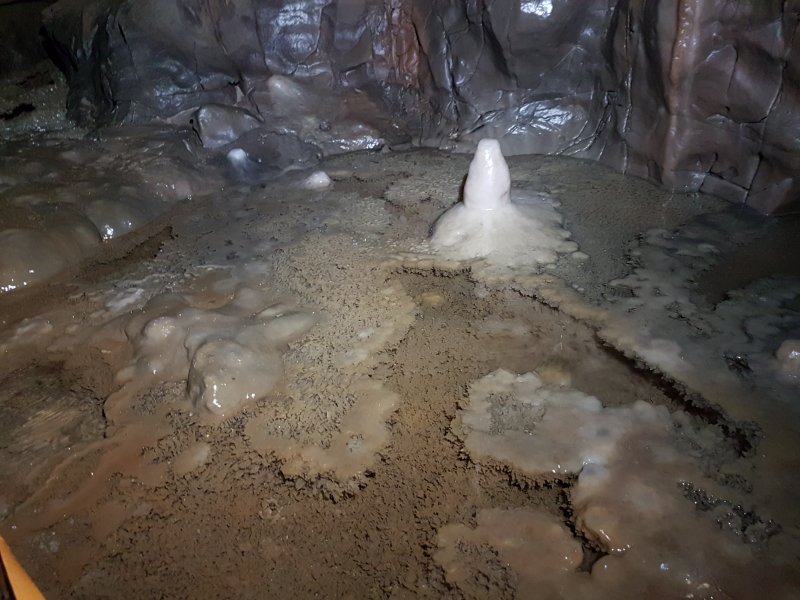 Crystal pool in Corbels Chamber.
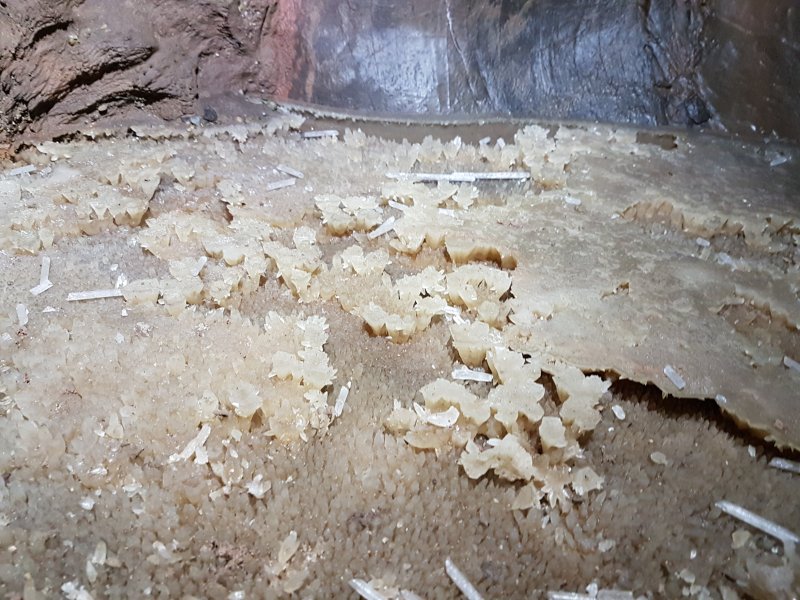 Crystals.
 Stal in a side passage.
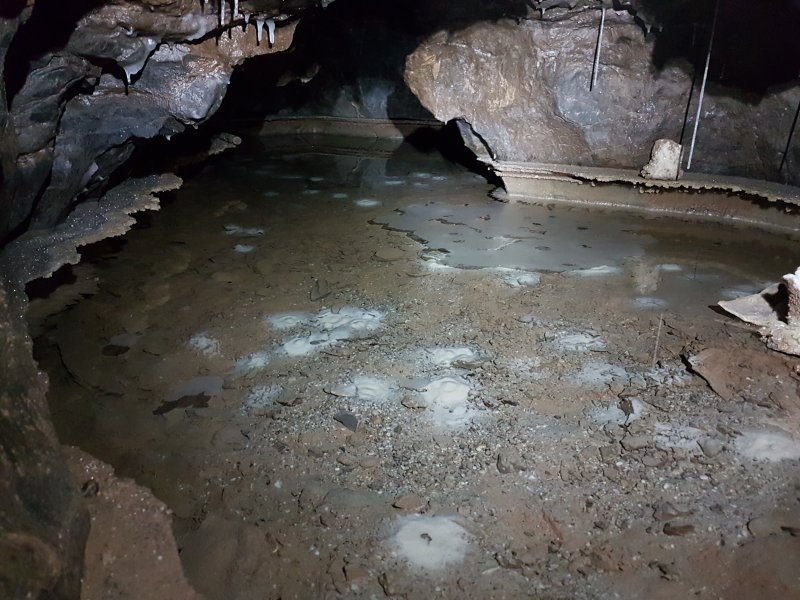 One of the largest calcite rafts in the country, in the side passage. This was surveyed at one point, destroying any rafts. This has reformed since then. The white piles are where drips have fallen into the pool from straws, sinking any rafts which had formed beneath them. Thousands of the sunken rafts form each pile.
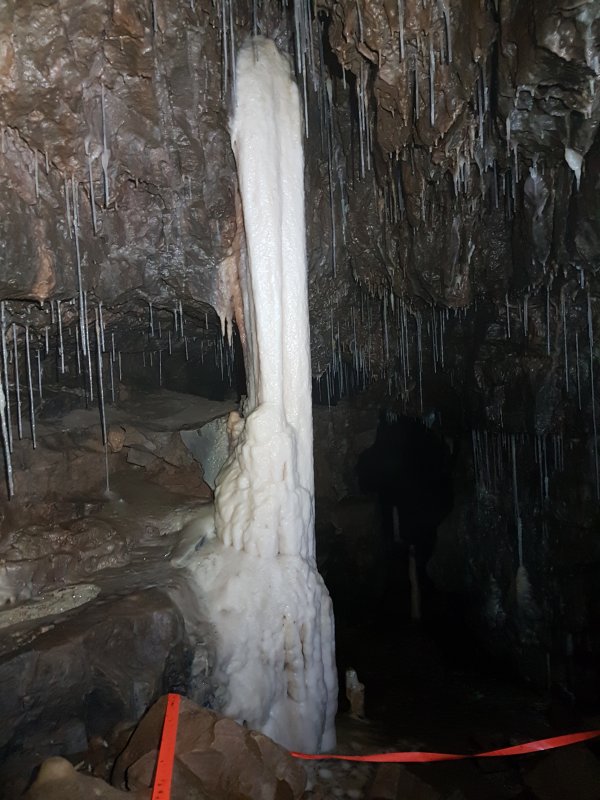 Column in another side passage, about as tall as a human.
Lighting by Tarquin and Jasen
Column in another side passage, about as tall as a human.
Lighting by Tarquin and Jasen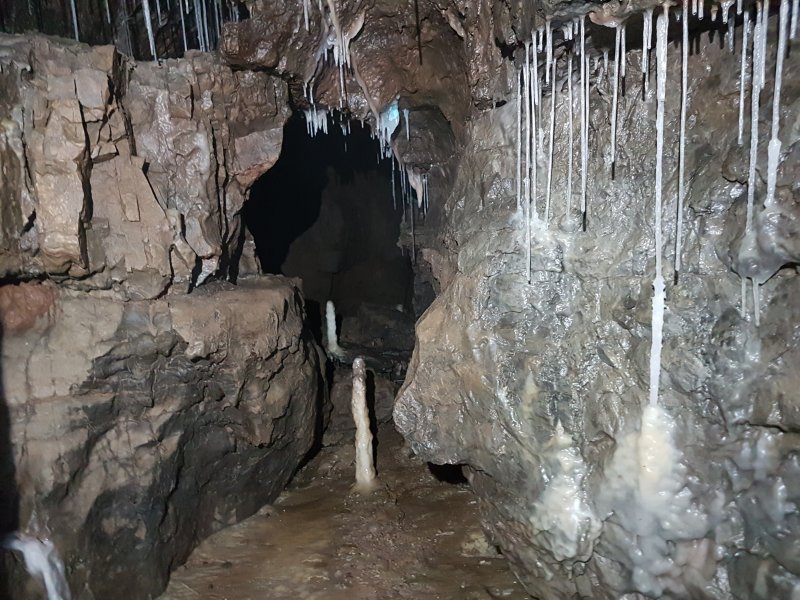 Blue blotch, presumably copper sulphate, on a stalactite.
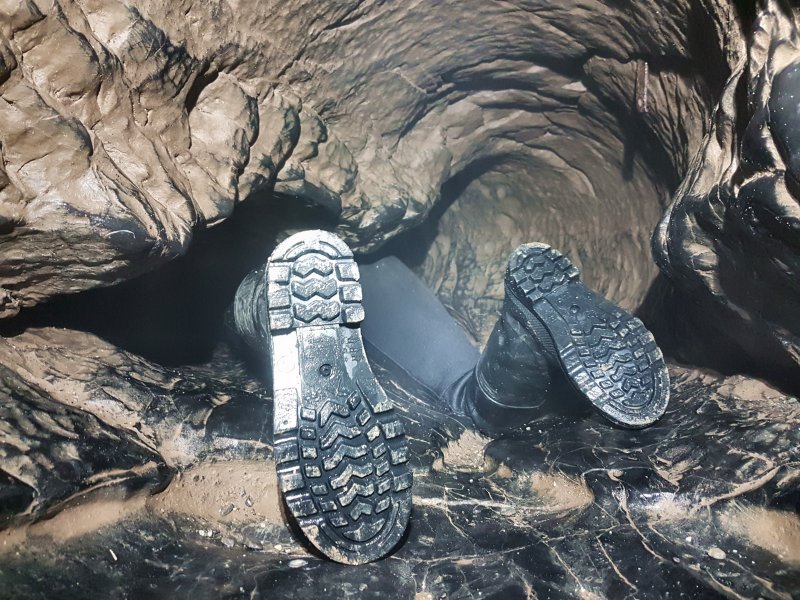 Heading into the first squeeze at the start of The Long Crawl.
Modelling by Melissa
Heading into the first squeeze at the start of The Long Crawl.
Modelling by Melissa Exiting the squeeze, which is neither particularly tight, nor particularly difficult.
Modelling by Deri, lighting by Tarquin and Deri
Exiting the squeeze, which is neither particularly tight, nor particularly difficult.
Modelling by Deri, lighting by Tarquin and Deri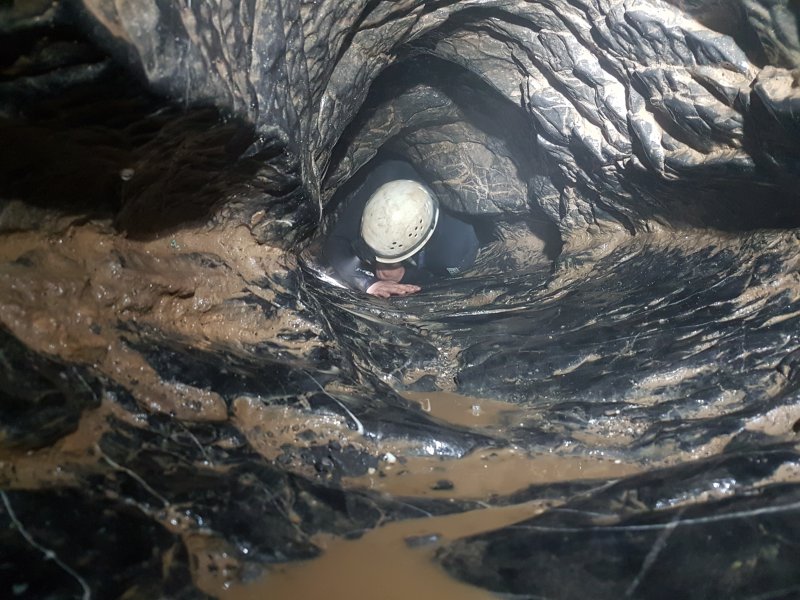 Second squeeze, near the end of The Long Crawl.
Modelling by Deri, lighting by Tarquin and Deri
Second squeeze, near the end of The Long Crawl.
Modelling by Deri, lighting by Tarquin and Deri Exiting The Long Crawl. From here, climbs and a pitch regain the large passages.
Modelling by Deri, lighting by Tarquin and Deri
Exiting The Long Crawl. From here, climbs and a pitch regain the large passages.
Modelling by Deri, lighting by Tarquin and Deri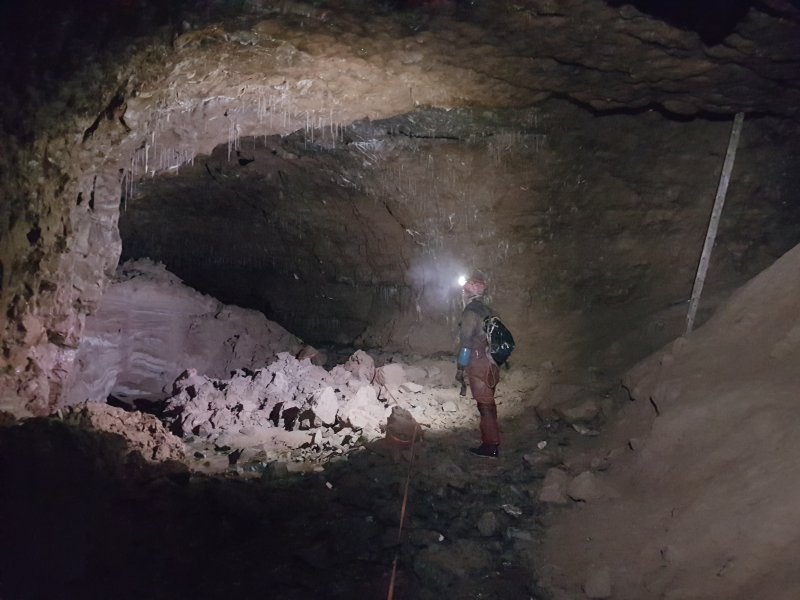 A series of climbs and a ladder then land in Gerard Platten Hall, back to the big stuff, and the start of Dan-yr-Ogof II.
Modelling by Gareth, lighting by Tarquin and Gareth
A series of climbs and a ladder then land in Gerard Platten Hall, back to the big stuff, and the start of Dan-yr-Ogof II.
Modelling by Gareth, lighting by Tarquin and Gareth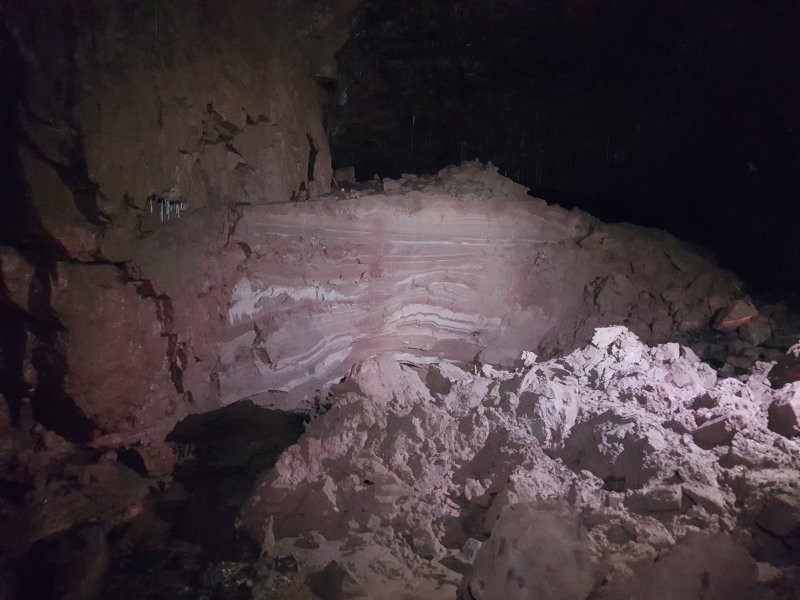 Layered sediment bank in Gerard Platten Hall. The pink is Old Red Sandstone, whose beds sit below the limestone, but which are lifted higher by the dip at the mountain summits.
Lighting by Tarquin and Gareth
Layered sediment bank in Gerard Platten Hall. The pink is Old Red Sandstone, whose beds sit below the limestone, but which are lifted higher by the dip at the mountain summits.
Lighting by Tarquin and Gareth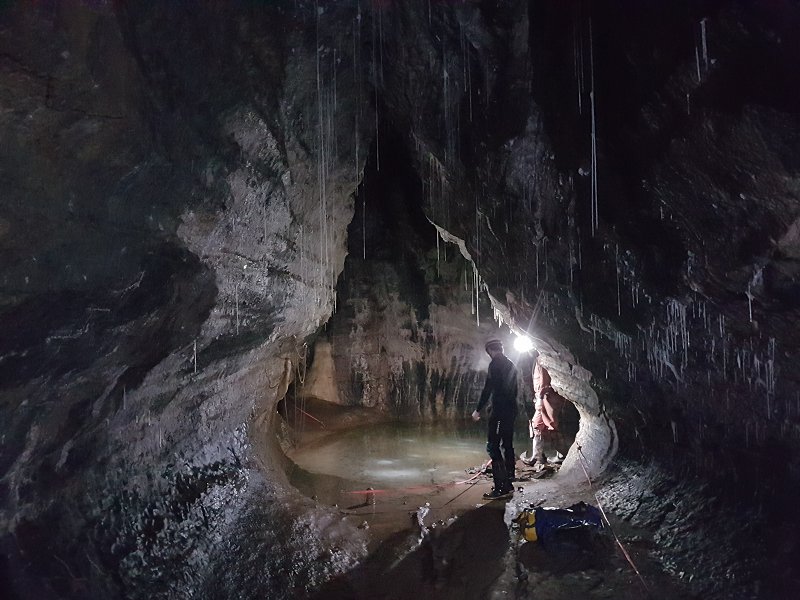 The Crystal Pool, seen from the start of The Grand Canyon (a point where it is known as Elliptic Passage), an iconic scene.
Modelling by Deri and Phil, lighting by Tarquin, Chelsey, Deri, Phil and Gareth
The Crystal Pool, seen from the start of The Grand Canyon (a point where it is known as Elliptic Passage), an iconic scene.
Modelling by Deri and Phil, lighting by Tarquin, Chelsey, Deri, Phil and Gareth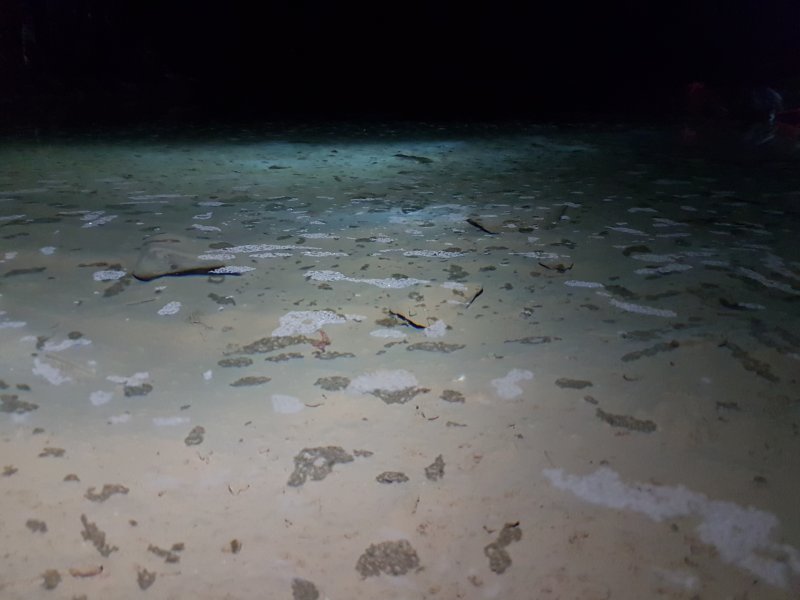 Calcite rafts on The Crystal Pool. Once again, the white piles are rafts sunken by drips over hundreds of years.
Lighting by Tarquin and Phil
Calcite rafts on The Crystal Pool. Once again, the white piles are rafts sunken by drips over hundreds of years.
Lighting by Tarquin and Phil Traverse over The Crystal Pool, using rope loops for feet and hands, to reach Flabbergasm Oxbow. In the past, someone fell in, and sunk all of the calcite rafts, but these have regrown over the decades.
Modelling by Melissa and Gareth, lighting by Tarquin, Deri, Phil and Gareth
Traverse over The Crystal Pool, using rope loops for feet and hands, to reach Flabbergasm Oxbow. In the past, someone fell in, and sunk all of the calcite rafts, but these have regrown over the decades.
Modelling by Melissa and Gareth, lighting by Tarquin, Deri, Phil and Gareth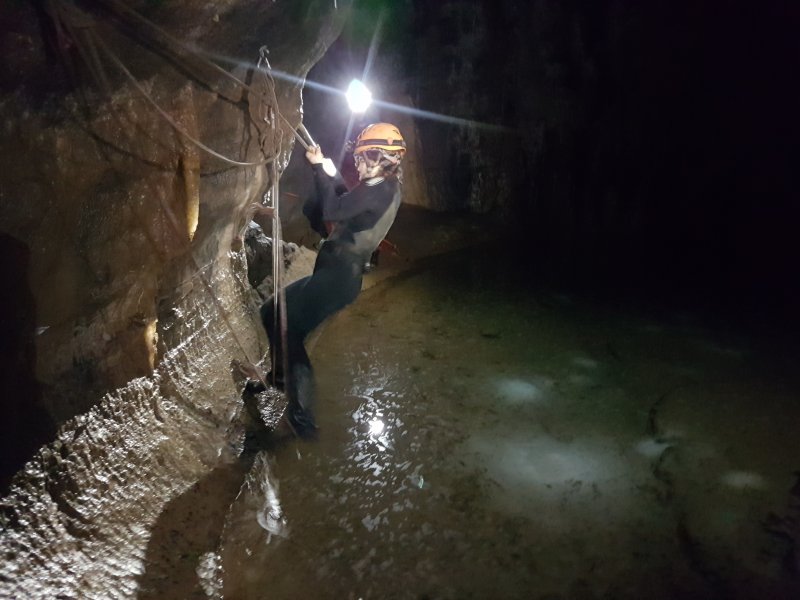 The difficulty is trying to get feet from one loop to the other, without touching the water.
Modelling by Melissa and Gareth, lighting by Tarquin, Deri, Phil and Gareth
The difficulty is trying to get feet from one loop to the other, without touching the water.
Modelling by Melissa and Gareth, lighting by Tarquin, Deri, Phil and Gareth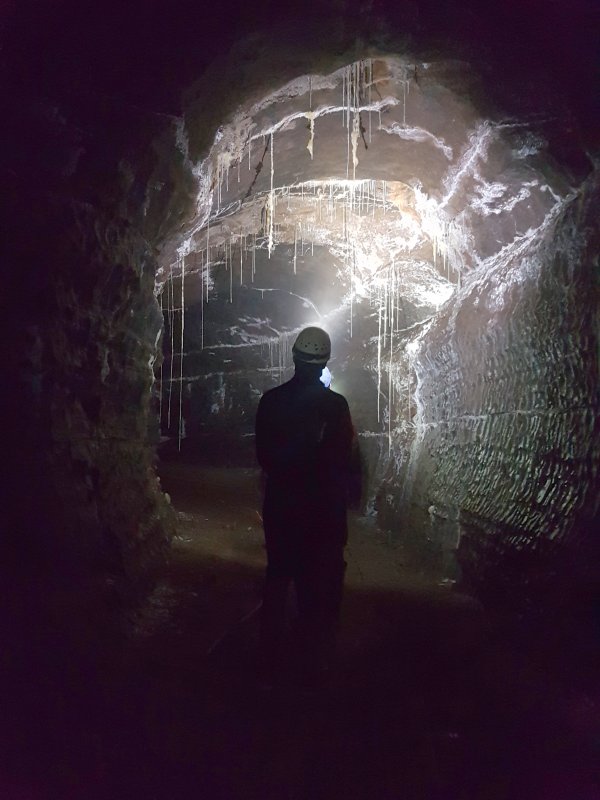 Flabbergasm Oxbow (or Flabbergasm Chasm), with its superb straws and helictites.
Modelling and lighting by Deri and Jasen
Flabbergasm Oxbow (or Flabbergasm Chasm), with its superb straws and helictites.
Modelling and lighting by Deri and Jasen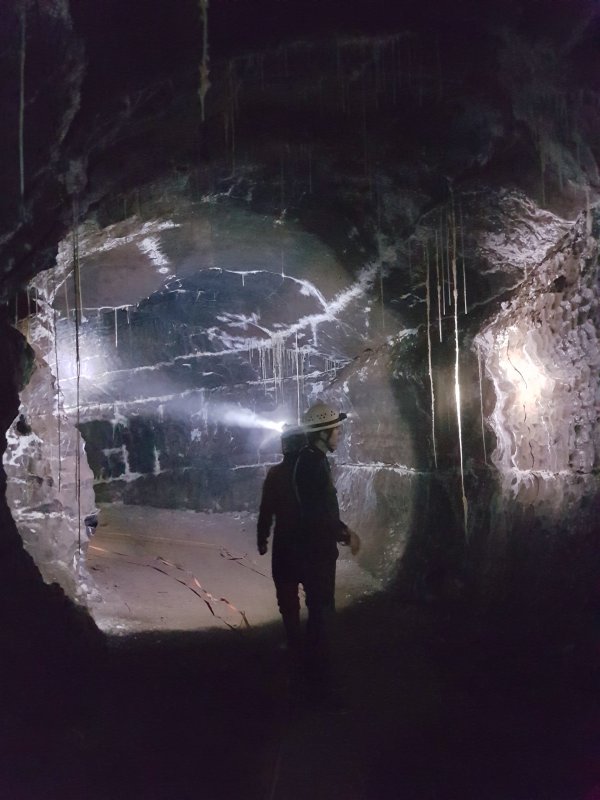 Long straws.
Modelling by Deri and Jasen, lighting by Deri, Jasen and Gareth
Long straws.
Modelling by Deri and Jasen, lighting by Deri, Jasen and Gareth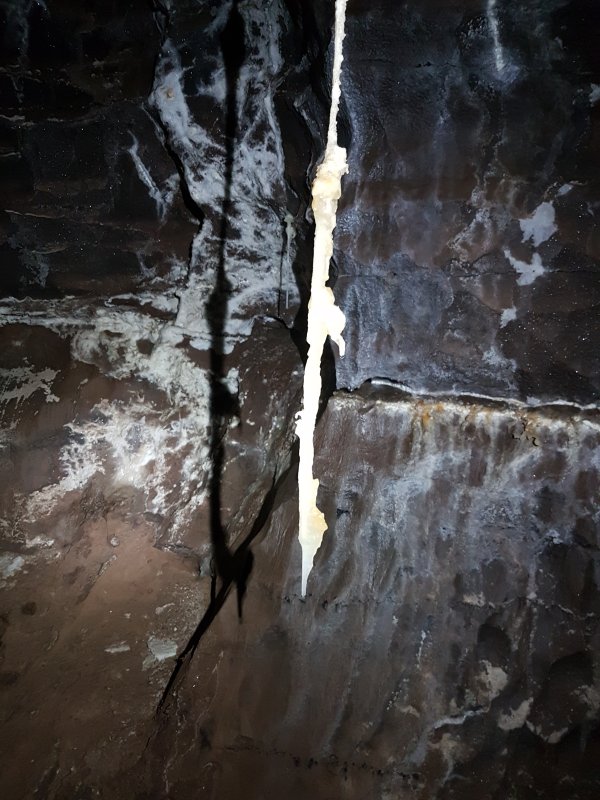 The straws can be seen to swing whenever they are caught by the draught.
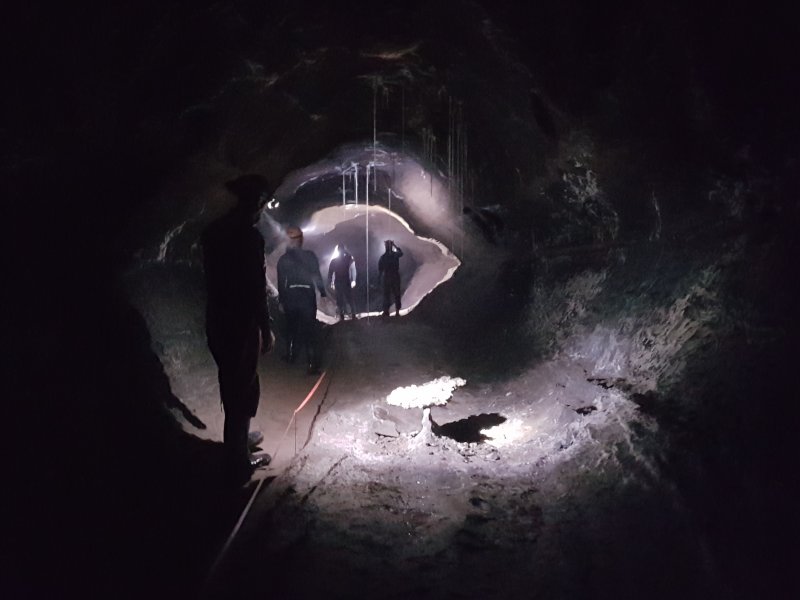 Phreatic tube at the end of Flabbergasm Oxbow.
Modelling and lighting by Phil, Melissa, Jasen, Gareth and Deri
Phreatic tube at the end of Flabbergasm Oxbow.
Modelling and lighting by Phil, Melissa, Jasen, Gareth and Deri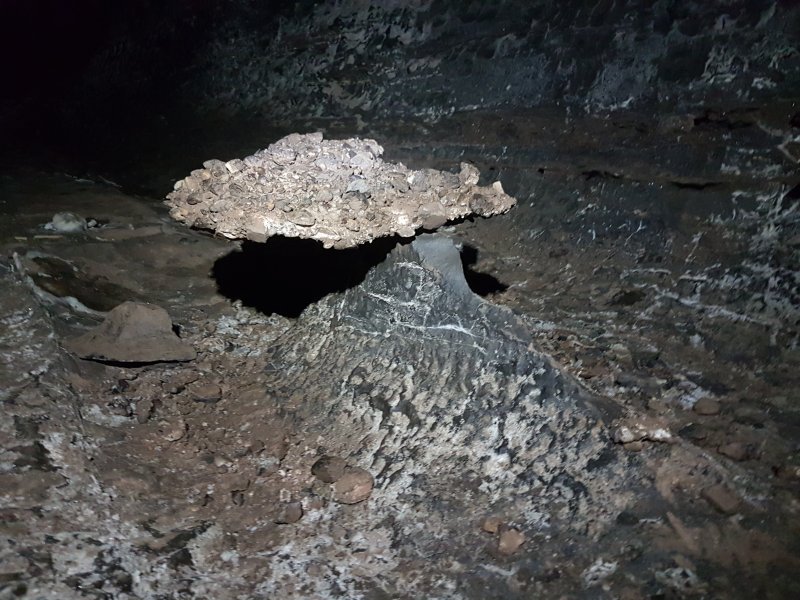 The Mushroom, a piece of false floor attached to a small rock spike. Calcite has concreted this small patch of gravel, with the surrounding gravel washed away by the river, leaving this little platform.
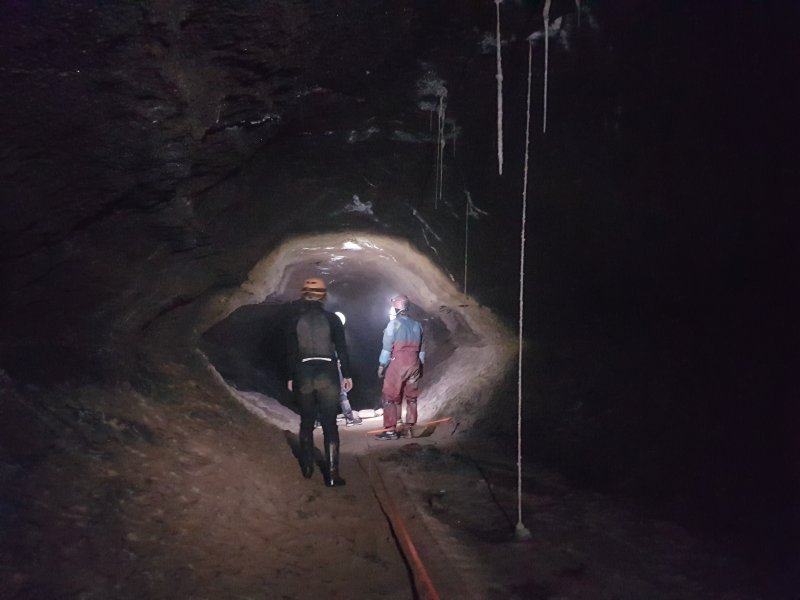 Straw column at the end of Flabbergasm Oxbow. Immediately afterwards is the pitch down into The Grand Canyon.
Modelling by Melissa, Jasen, Gareth and Deri, lighting by Tarquin, Melissa, Jasen, Gareth and Deri
Straw column at the end of Flabbergasm Oxbow. Immediately afterwards is the pitch down into The Grand Canyon.
Modelling by Melissa, Jasen, Gareth and Deri, lighting by Tarquin, Melissa, Jasen, Gareth and Deri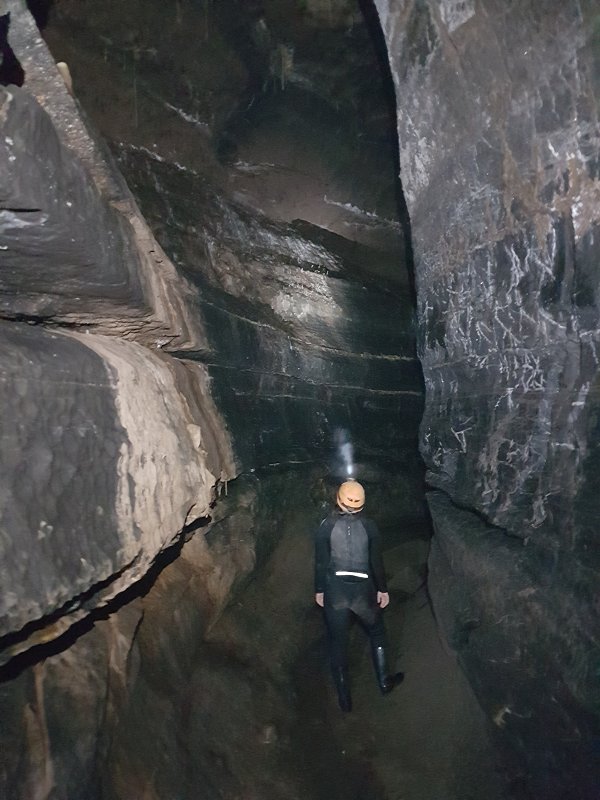 The Grand Canyon.
Modelling by Melissa, lighting by Tarquin and Melissa
The Grand Canyon.
Modelling by Melissa, lighting by Tarquin and Melissa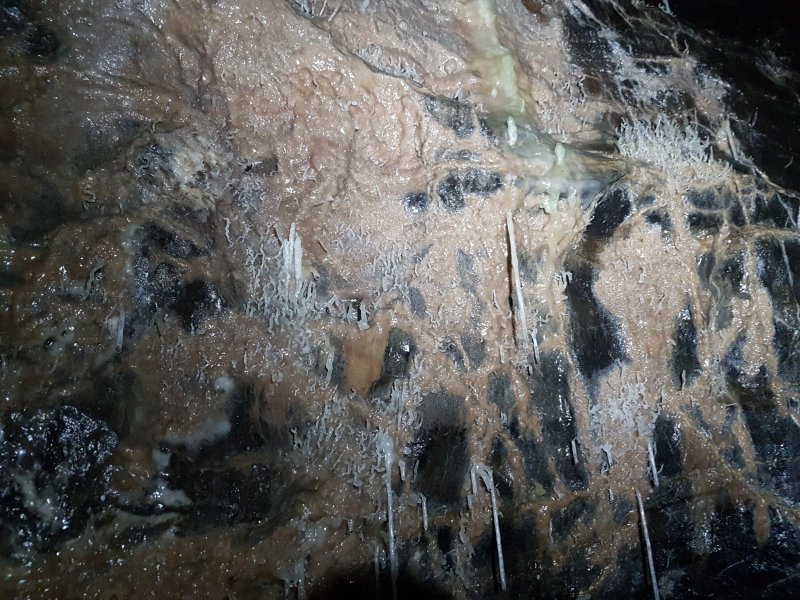 Wall of helictites in The Grand Canyon.
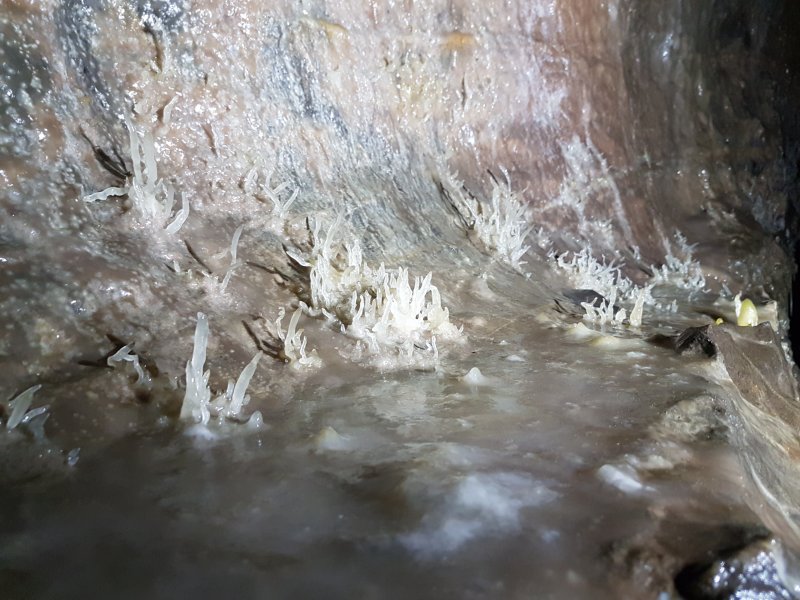 Helictite shelf.
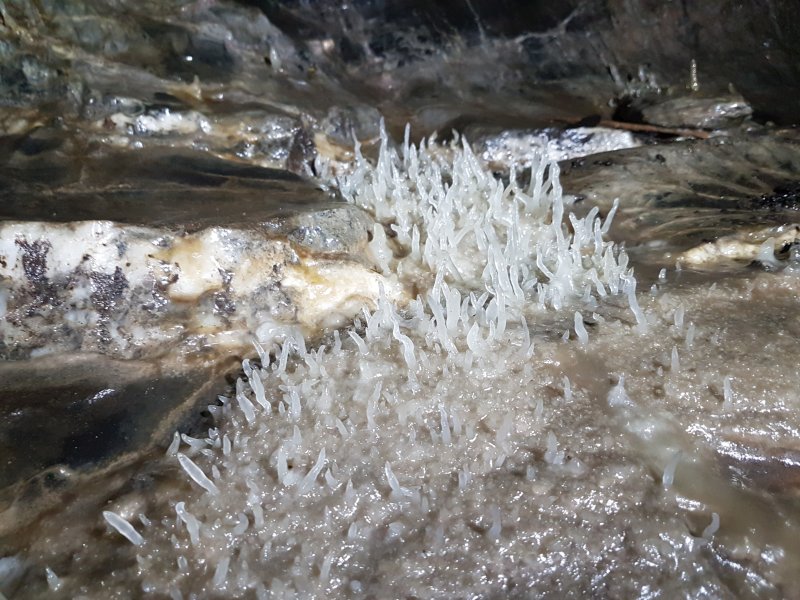 Short back and sides.
Lighting by Tarquin and Chelsey
Short back and sides.
Lighting by Tarquin and Chelsey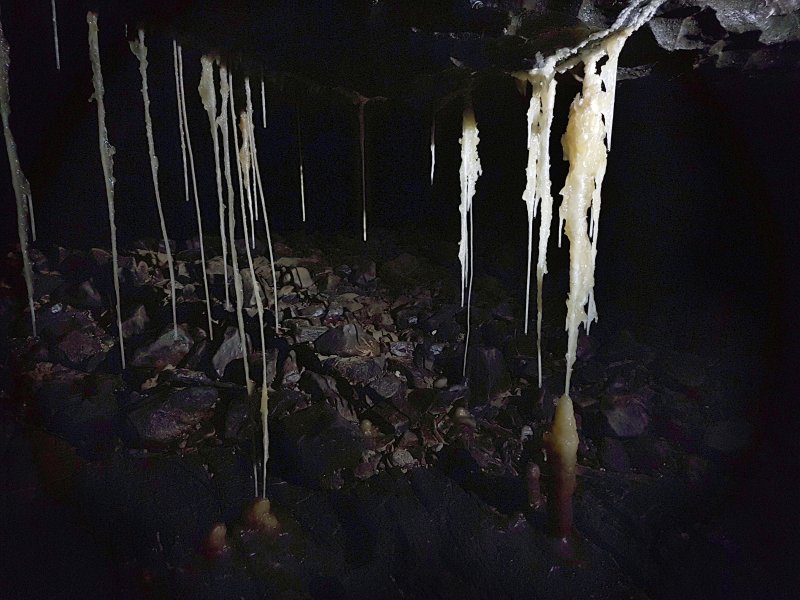 The Candlewax Formations, iconic translucent stal columns. These are extremely hard to photograph, and would be better with flashguns lighting the ceiling and floor, and only a weak light lighting the bright stal.
Lighting by Deri and Melissa
The Candlewax Formations, iconic translucent stal columns. These are extremely hard to photograph, and would be better with flashguns lighting the ceiling and floor, and only a weak light lighting the bright stal.
Lighting by Deri and Melissa The Candlewax Formations.
Lighting by Deri and Melissa
The Candlewax Formations.
Lighting by Deri and Melissa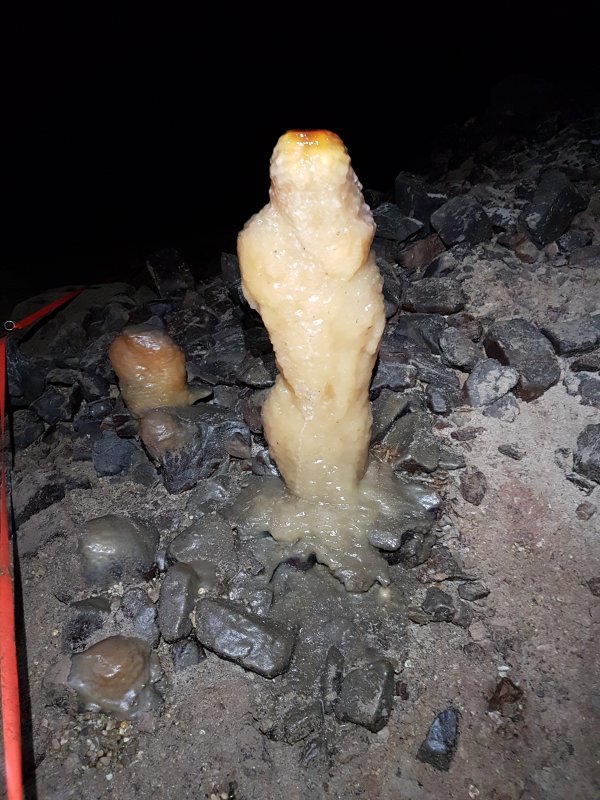 The Monk, a bowing stalagmite.
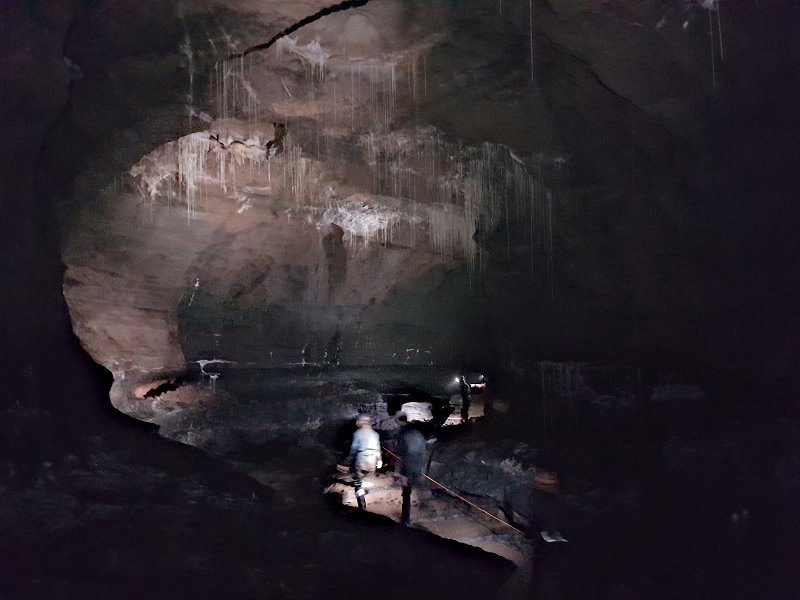 Monk Hall, an enormous phreatic tube, the largest in the cave. Lighting this part is nearly impossible without plenty of flashes and time to set them up. This picture does it no justice, and needed to be constructed from multiple images.
Modelling by Melissa, Deri, Chelsey, Gareth and Phil, lighting by Tarquin, Melissa, Deri, Chelsey, Gareth and Phil
Monk Hall, an enormous phreatic tube, the largest in the cave. Lighting this part is nearly impossible without plenty of flashes and time to set them up. This picture does it no justice, and needed to be constructed from multiple images.
Modelling by Melissa, Deri, Chelsey, Gareth and Phil, lighting by Tarquin, Melissa, Deri, Chelsey, Gareth and Phil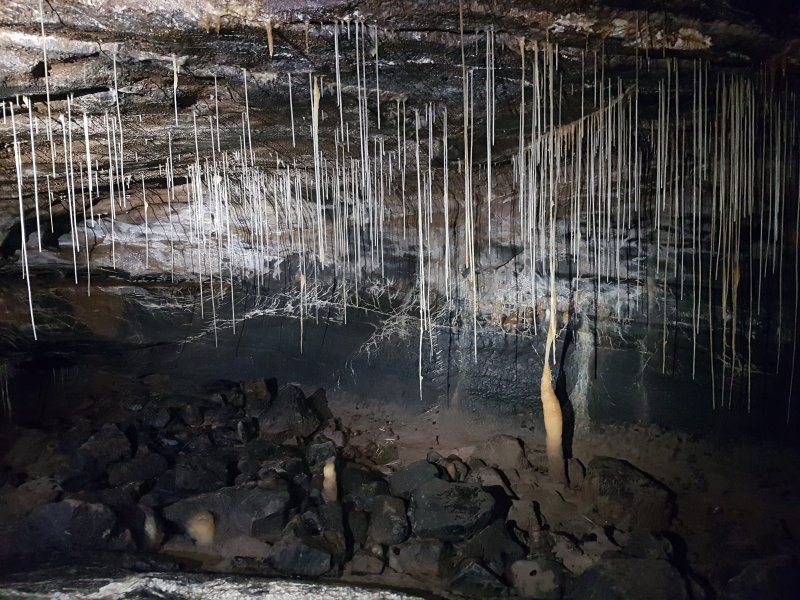 Straws on the side of Monk Hall.
Lighting by Chelsey, Melissa and Deri
Straws on the side of Monk Hall.
Lighting by Chelsey, Melissa and Deri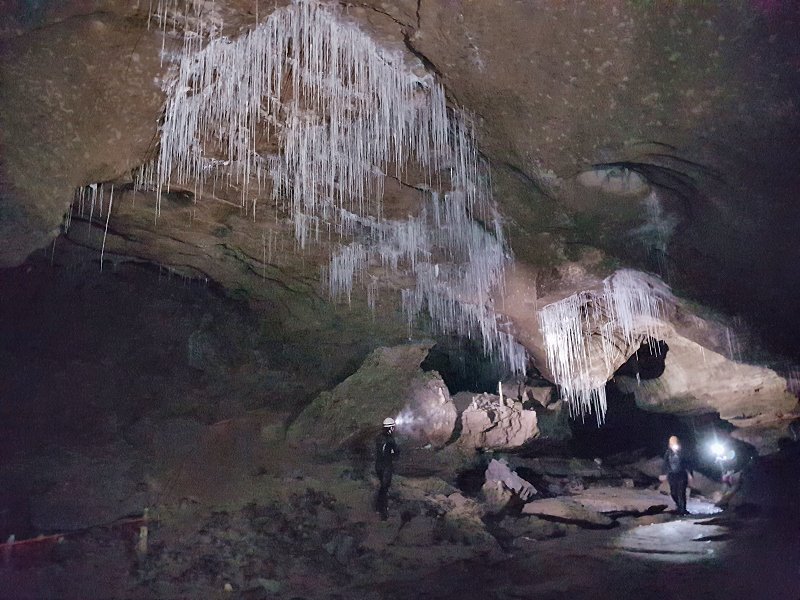 Cloud Chamber, the other end of Monk Hall, with its superb clusters of straws.
Modelling by Deri, Melissa and Jasen, lighting by Chelsey, Deri, Melissa and Jasen
Cloud Chamber, the other end of Monk Hall, with its superb clusters of straws.
Modelling by Deri, Melissa and Jasen, lighting by Chelsey, Deri, Melissa and Jasen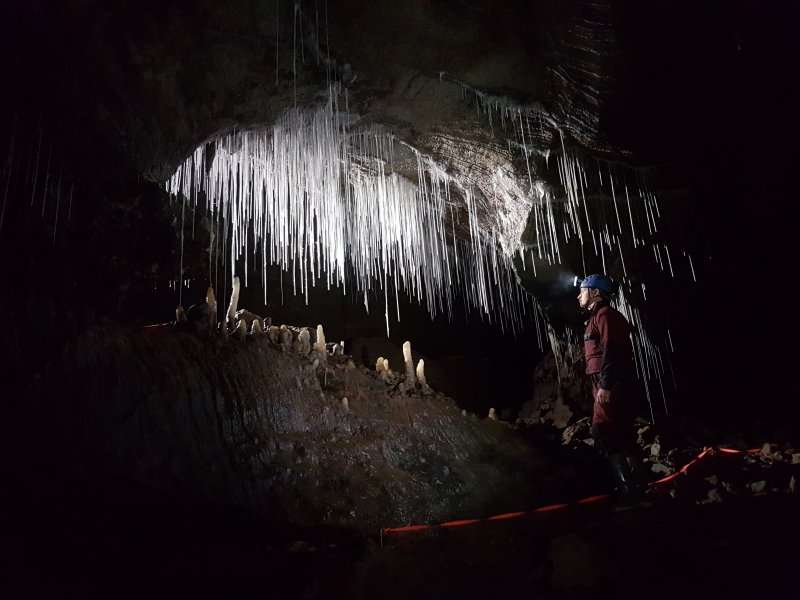 Stunning arch and straws at the end of Cloud Chamber.
Modelling by Jasen, lighting by Chelsey, Jasen and Deri
Stunning arch and straws at the end of Cloud Chamber.
Modelling by Jasen, lighting by Chelsey, Jasen and Deri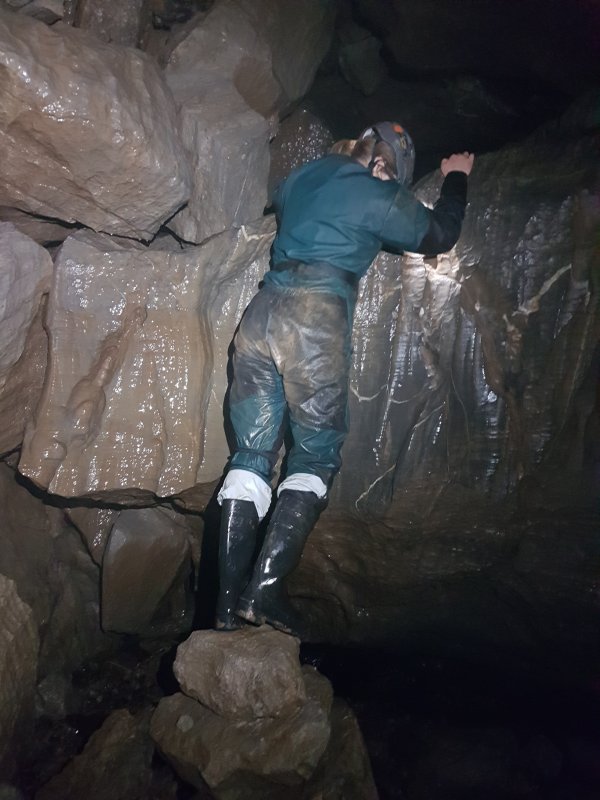 Climb up beside Cascade Aven, leading to the Green Canal. Only a thin blade of rock separates the stream in the floor from the Green Canal, and if it is ever punctured by erosion, it would drain the Green Canal.
Modelling by Chelsey, lighting by Tarquin and Chelsey
Climb up beside Cascade Aven, leading to the Green Canal. Only a thin blade of rock separates the stream in the floor from the Green Canal, and if it is ever punctured by erosion, it would drain the Green Canal.
Modelling by Chelsey, lighting by Tarquin and Chelsey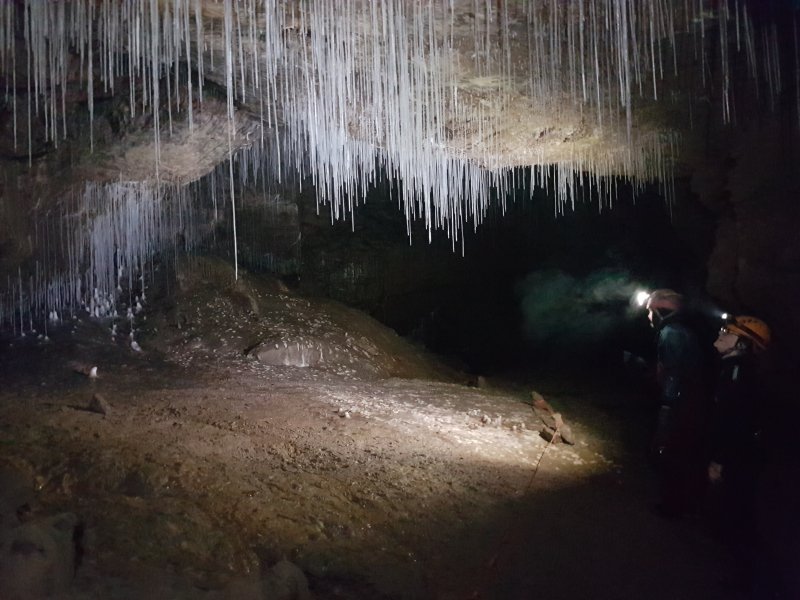 Hangar Passage, a beautifully decorated side passage, and one of the most ancient pieces of the cave, at around 2 million years old.
Modelling by Melissa and Gareth, lighting by Tarquin, Melissa and Gareth
Hangar Passage, a beautifully decorated side passage, and one of the most ancient pieces of the cave, at around 2 million years old.
Modelling by Melissa and Gareth, lighting by Tarquin, Melissa and Gareth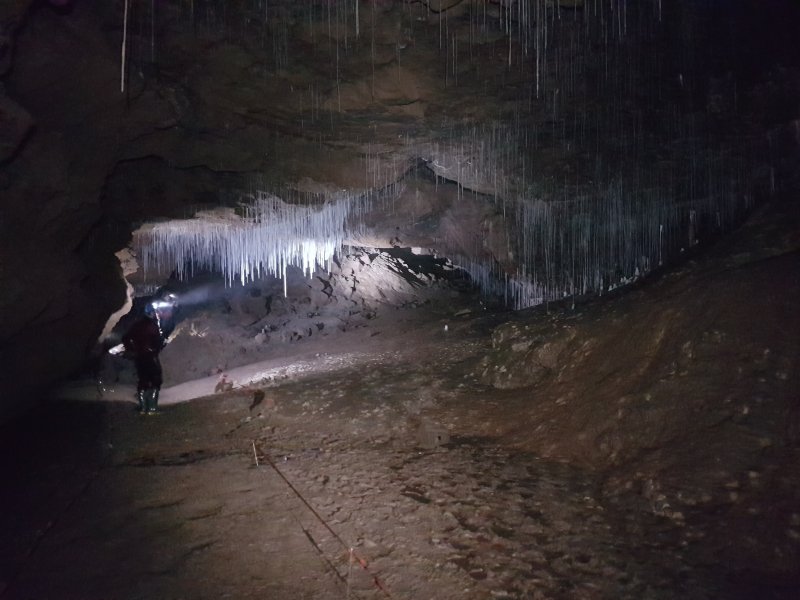 Hangar Passage.
Modelling by Jasen, Deri and Chelsey, lighting by Tarquin, Gareth, Jasen, Deri and Chelsey
Hangar Passage.
Modelling by Jasen, Deri and Chelsey, lighting by Tarquin, Gareth, Jasen, Deri and Chelsey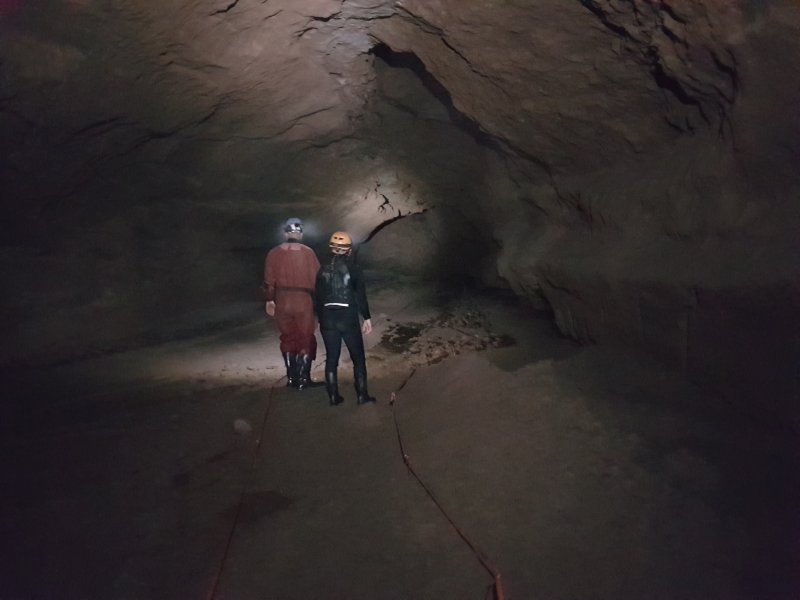 Looking towards the Hangar Passage choke. Beyond here, it splits into two branches. These are undoubtedly some of the most important leads in the cave.
Modelling by Phil and Melissa, lighting by Tarquin, Phil and Melissa
Looking towards the Hangar Passage choke. Beyond here, it splits into two branches. These are undoubtedly some of the most important leads in the cave.
Modelling by Phil and Melissa, lighting by Tarquin, Phil and Melissa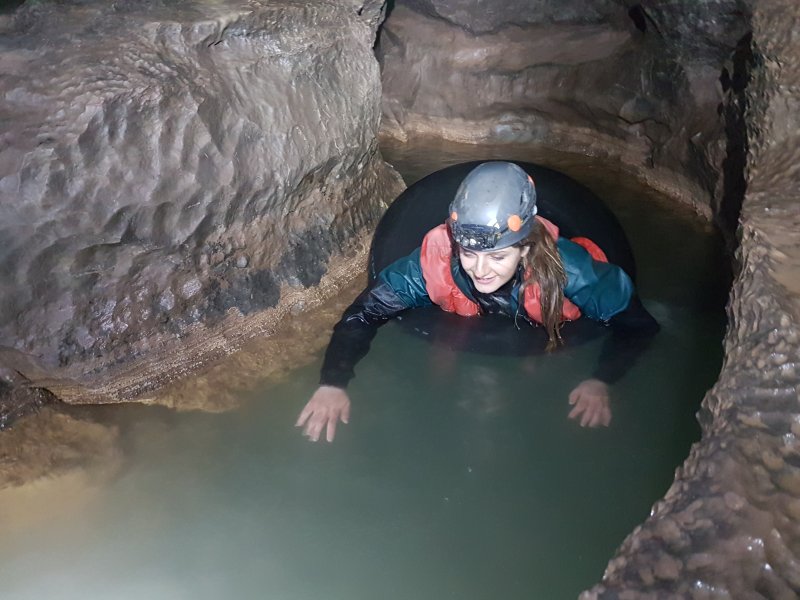 Start of The Green Canal, at the point where the floor first drops away. Despite seeming deep, it is only 3 metres at its deepest point. The floor is littered with fallen wellies and a deteriorating rope, but a recent cleanup removed a different rope, two sets of SRT gear, a lump hammer, a crowbar, a tripod mount, a pulley and a krab. Someone's wedding ring is also down there somewhere.
Modelling by Chelsey, lighting by Tarquin and Deri
Start of The Green Canal, at the point where the floor first drops away. Despite seeming deep, it is only 3 metres at its deepest point. The floor is littered with fallen wellies and a deteriorating rope, but a recent cleanup removed a different rope, two sets of SRT gear, a lump hammer, a crowbar, a tripod mount, a pulley and a krab. Someone's wedding ring is also down there somewhere.
Modelling by Chelsey, lighting by Tarquin and Deri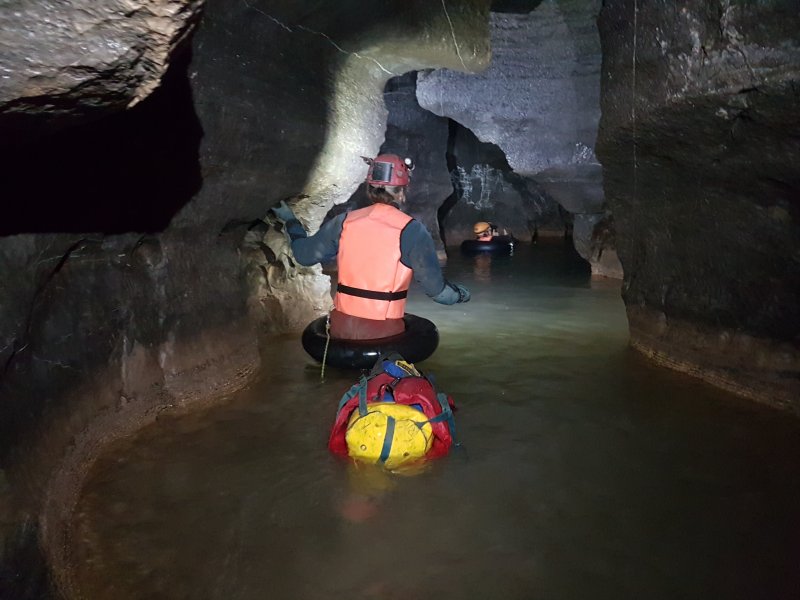 After a 50 metre swim, the floor becomes shallow enough to allow walking, and slowly gets shallower. The wetsuited swimmers had some fun with taking pictures, while those without wetsuits hoped for some movement to get the blood flowing.
Modelling by Gareth and Melissa, lighting by Tarquin, Gareth and Chelsey
After a 50 metre swim, the floor becomes shallow enough to allow walking, and slowly gets shallower. The wetsuited swimmers had some fun with taking pictures, while those without wetsuits hoped for some movement to get the blood flowing.
Modelling by Gareth and Melissa, lighting by Tarquin, Gareth and Chelsey Go Faster, the large passage heading North.
Modelling by Chelsey and Jasen, lighting by Tarquin, Chelsey and Jasen
Go Faster, the large passage heading North.
Modelling by Chelsey and Jasen, lighting by Tarquin, Chelsey and Jasen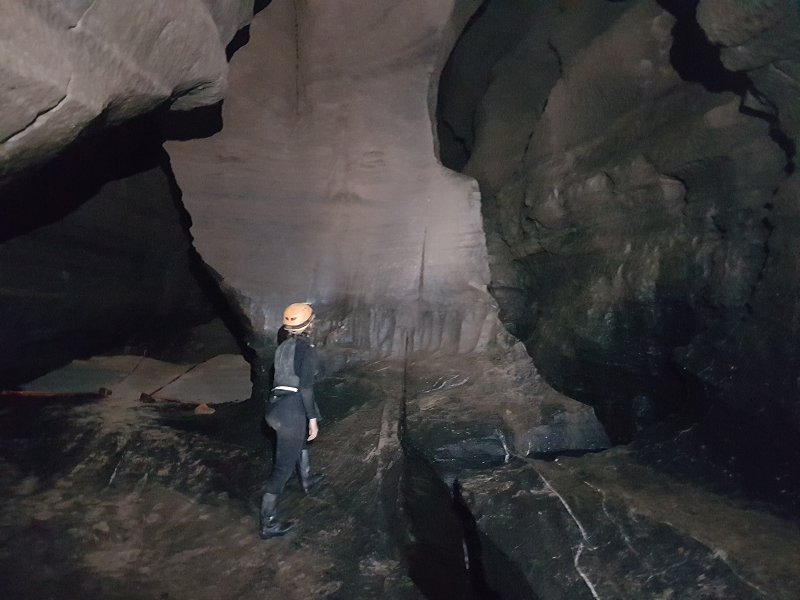 The end of Go Faster. To the left passes through crawls into Surprise Chamber, but Go Slower, on the right, is the way on.
Modelling by Melissa, lighting by Tarquin, Phil and Melissa
The end of Go Faster. To the left passes through crawls into Surprise Chamber, but Go Slower, on the right, is the way on.
Modelling by Melissa, lighting by Tarquin, Phil and Melissa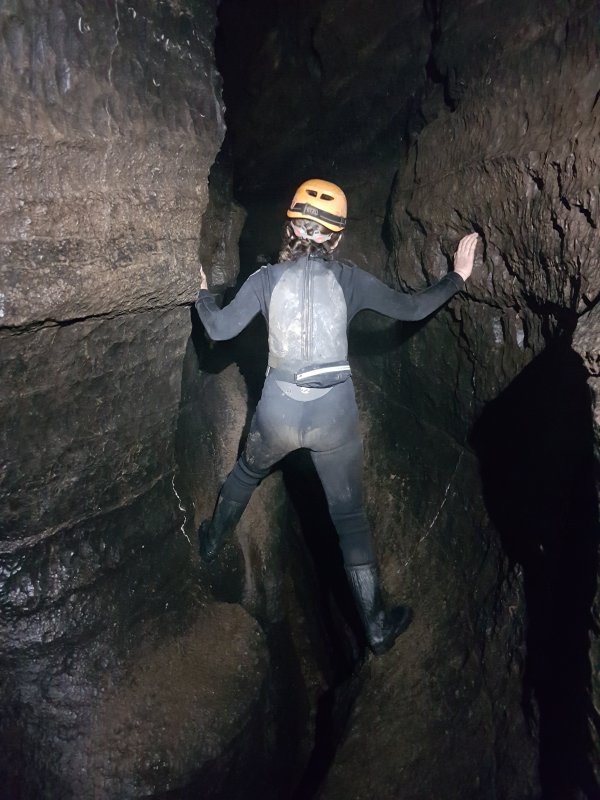 Go Slower, a narrow passage with traverses, that occasionally intersects fragments of the larger passage.
Modelling by Melissa, lighting by Tarquin and Melissa
Go Slower, a narrow passage with traverses, that occasionally intersects fragments of the larger passage.
Modelling by Melissa, lighting by Tarquin and Melissa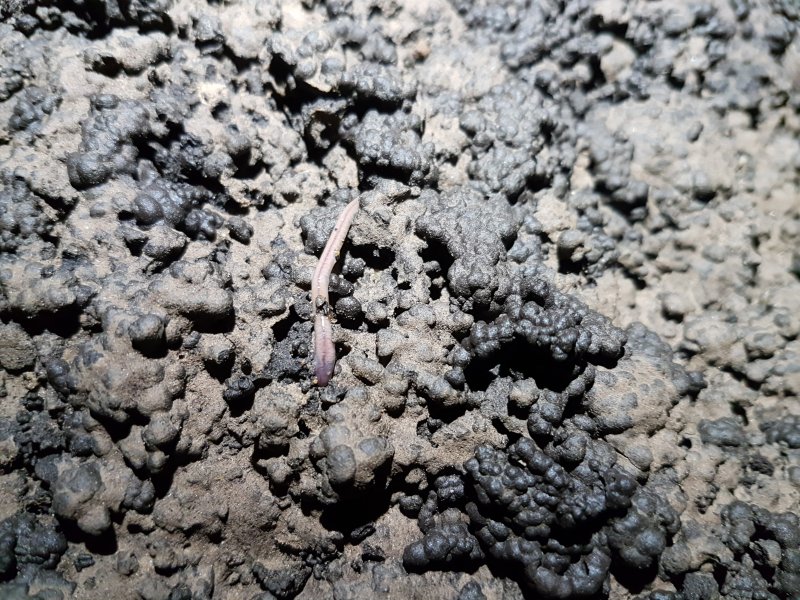 Earthworm in Go Slower. These colonies are in several places, including Thixotropic Passage in the Lower Series.
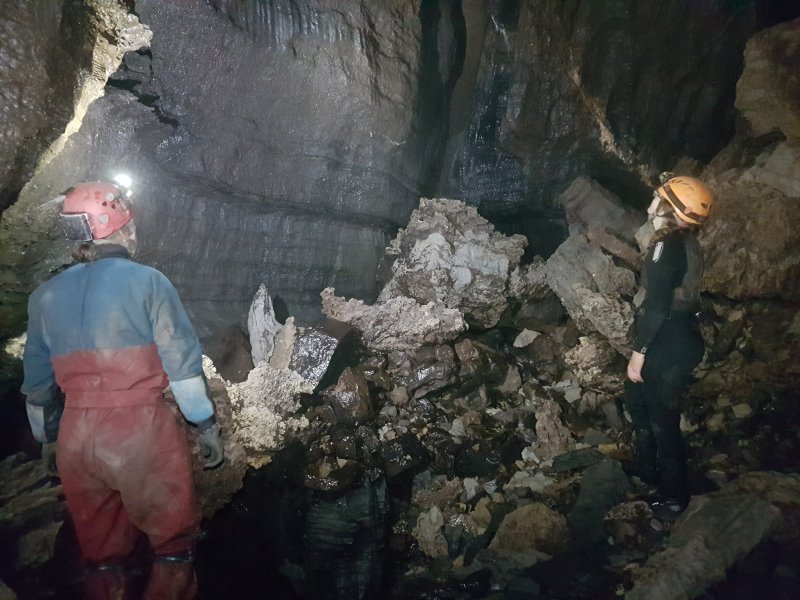 Rottenstone Aven, a very tall aven with unusually shaped, snatchy rock.
Modelling by Gareth and Melissa, lighting by Tarquin, Gareth and Melissa
Rottenstone Aven, a very tall aven with unusually shaped, snatchy rock.
Modelling by Gareth and Melissa, lighting by Tarquin, Gareth and Melissa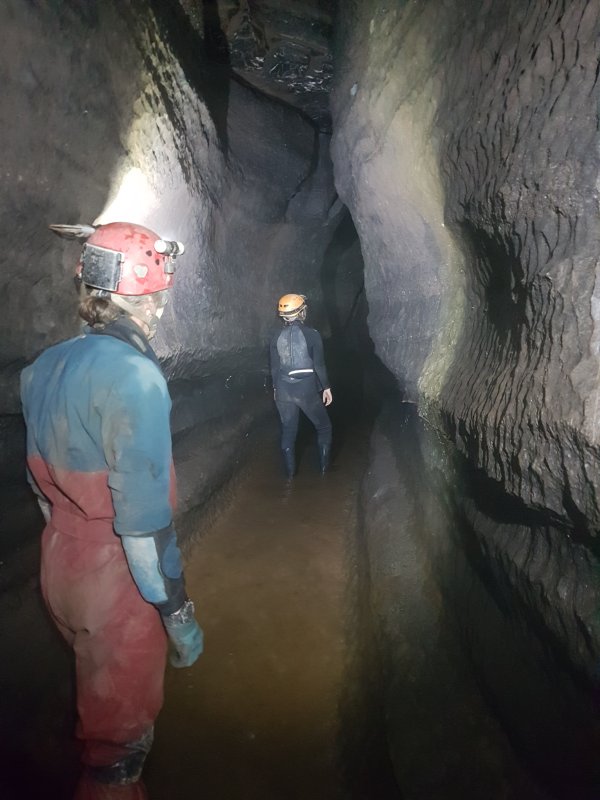 Go Slower
Modelling by Gareth and Melissa, lighting by Tarquin, Gareth and Melissa
Go Slower
Modelling by Gareth and Melissa, lighting by Tarquin, Gareth and Melissa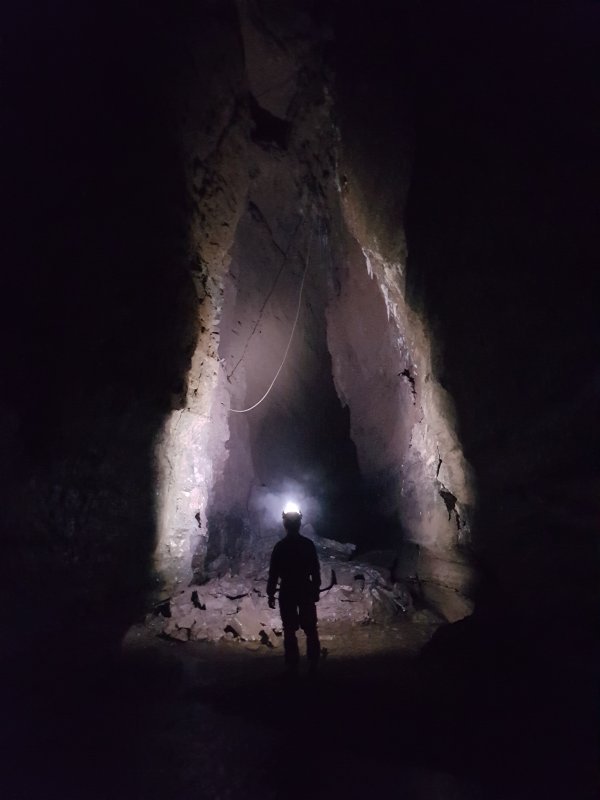 A demon in High Way near The Rising. This was not a set-up, and the horns and tail were purely by accident.
Modelling and lighting by Gareth
A demon in High Way near The Rising. This was not a set-up, and the horns and tail were purely by accident.
Modelling and lighting by Gareth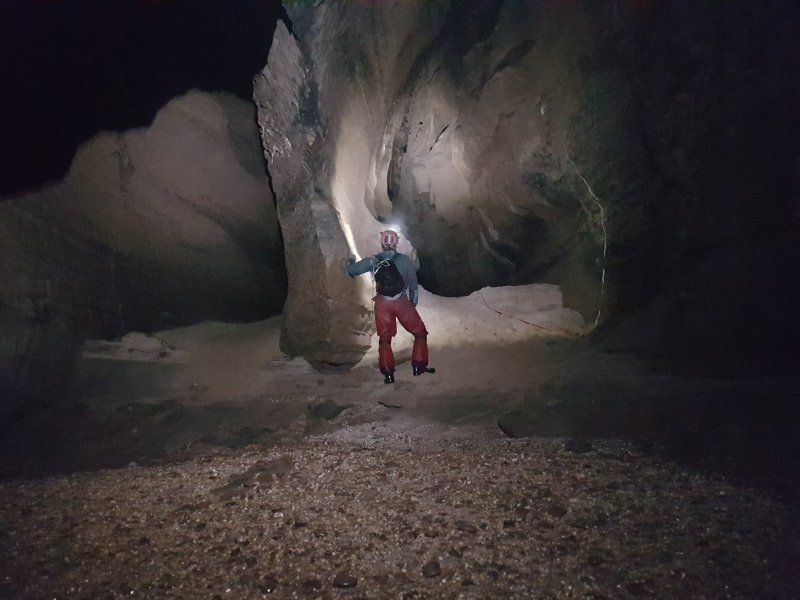 The Battleship, a rib of rock forming an oxbow just before The Rising.
Modelling by Gareth, lighting by Tarquin and Gareth
The Battleship, a rib of rock forming an oxbow just before The Rising.
Modelling by Gareth, lighting by Tarquin and Gareth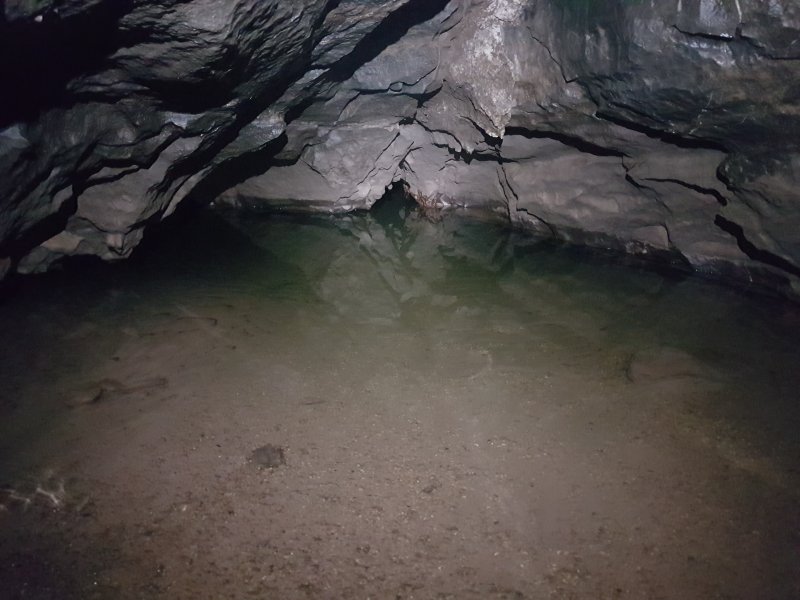 The Rising, the end of Dan-yr-Ogof II. This is where our Round Trip ended. Strictly speaking, it is not part of the Round Trip, but it is a popular detour.
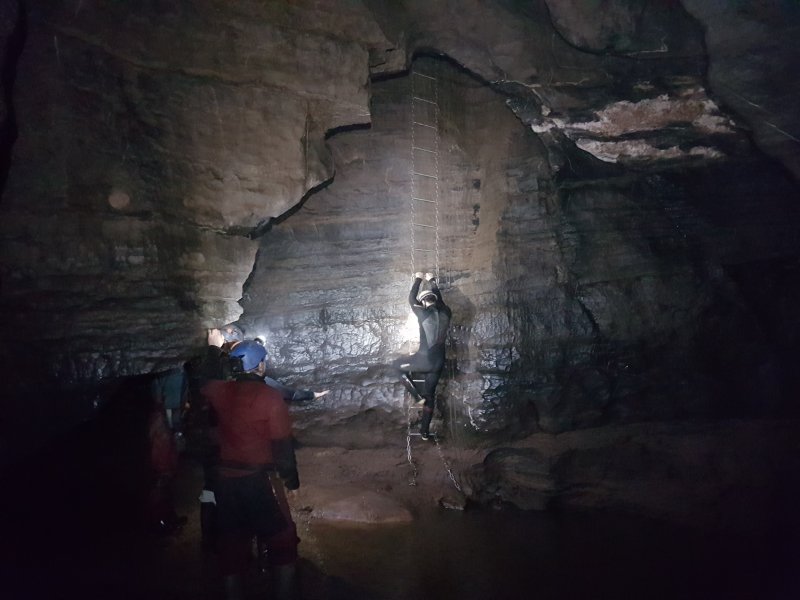 Above the sump, the ladder and ropes lead up into Windy Way, which bypasses the sump.
Modelling by Jasen, Melissa, Chelsey, Gareth and Deri, lighting by Tarquin, Jasen, Melissa, Chelsey, Gareth and Deri
Above the sump, the ladder and ropes lead up into Windy Way, which bypasses the sump.
Modelling by Jasen, Melissa, Chelsey, Gareth and Deri, lighting by Tarquin, Jasen, Melissa, Chelsey, Gareth and Deri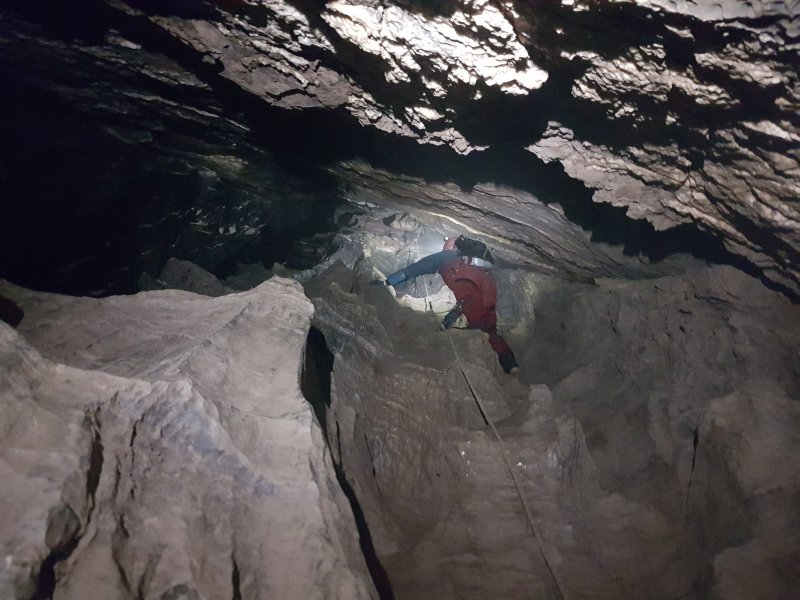 Climbing above the ladder. The climb does not need the rope, but the rope is there for safety. Particularly welcome at the exposed pitch head.
Modelling by Gareth, lighting by Tarquin and Gareth
Climbing above the ladder. The climb does not need the rope, but the rope is there for safety. Particularly welcome at the exposed pitch head.
Modelling by Gareth, lighting by Tarquin and Gareth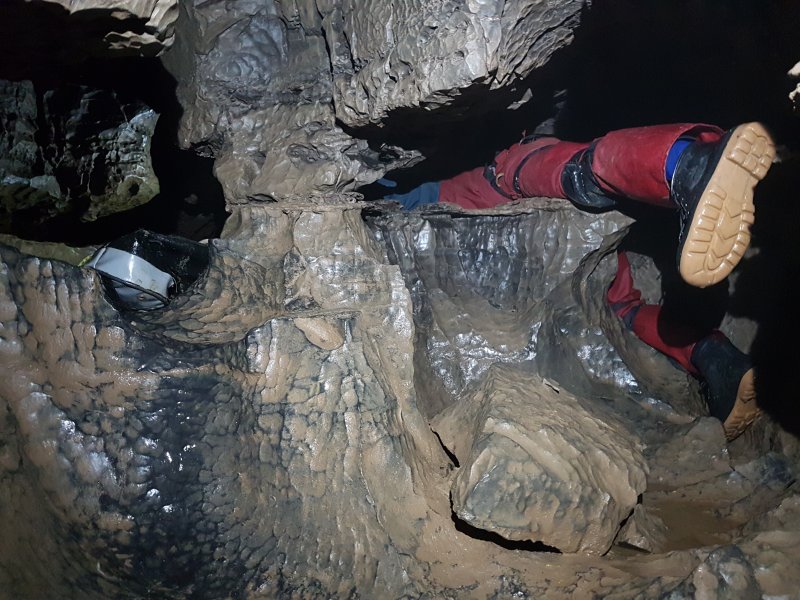 Windy Way, a series of oxbowing crawls with a very strong draught.
Modelling by Gareth, lighting by Tarquin and Gareth
Windy Way, a series of oxbowing crawls with a very strong draught.
Modelling by Gareth, lighting by Tarquin and Gareth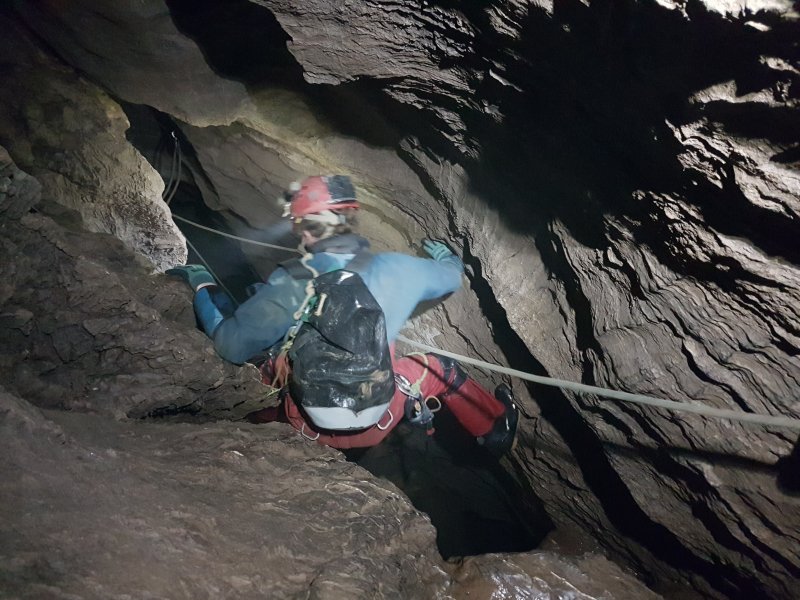 Traverse over the double pitch at the end of Windy Way.
Modelling by Gareth, lighting by Tarquin and Gareth
Traverse over the double pitch at the end of Windy Way.
Modelling by Gareth, lighting by Tarquin and Gareth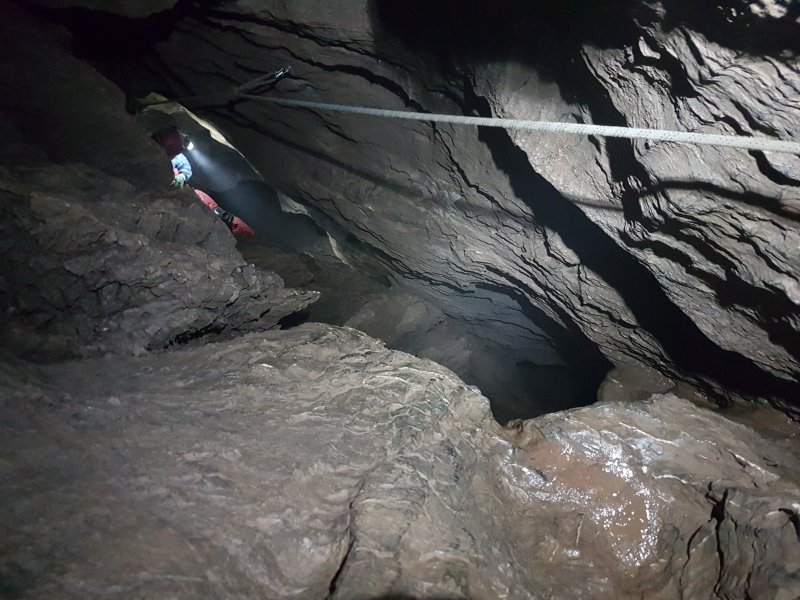 Double pitch down to Birthday Passage.
Modelling by Gareth, lighting by Tarquin and Gareth
Double pitch down to Birthday Passage.
Modelling by Gareth, lighting by Tarquin and Gareth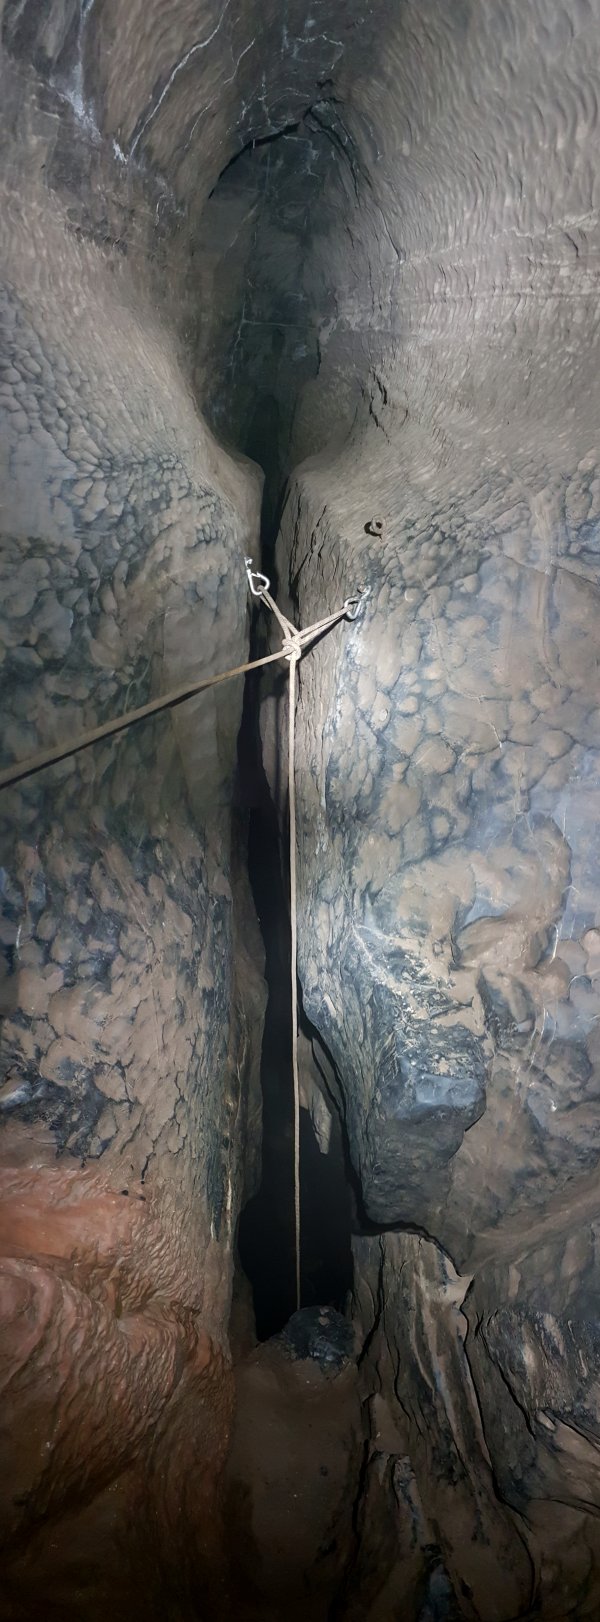 Tight pitch head down to the Great North Road, where the rope somehow manages to avoid touching the walls. Getting on and off the rope is done at the bottom of the trench instead of the pitch head. (The odd lighting is because this is a panorama stitched from 4 photographs.)
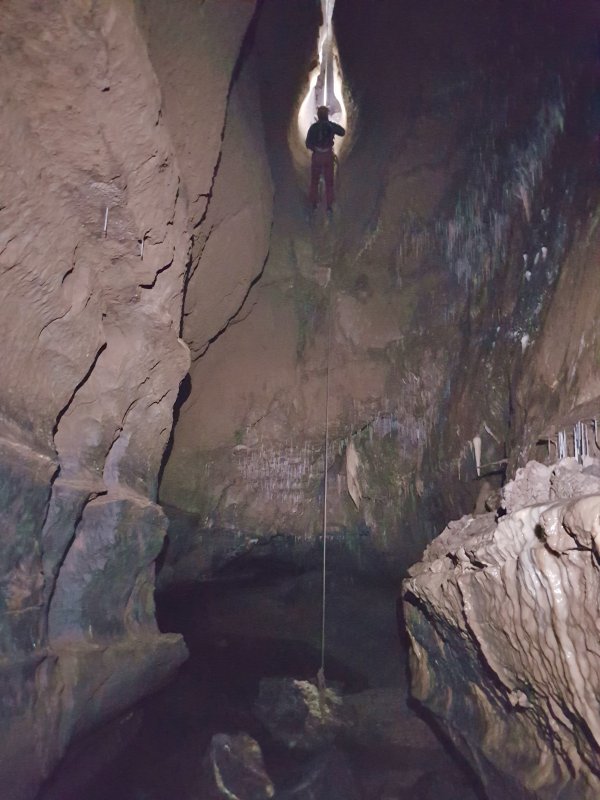 Dropping into the Great North Road.
Modelling by Gareth, lighting by Tarquin and Gareth
Dropping into the Great North Road.
Modelling by Gareth, lighting by Tarquin and Gareth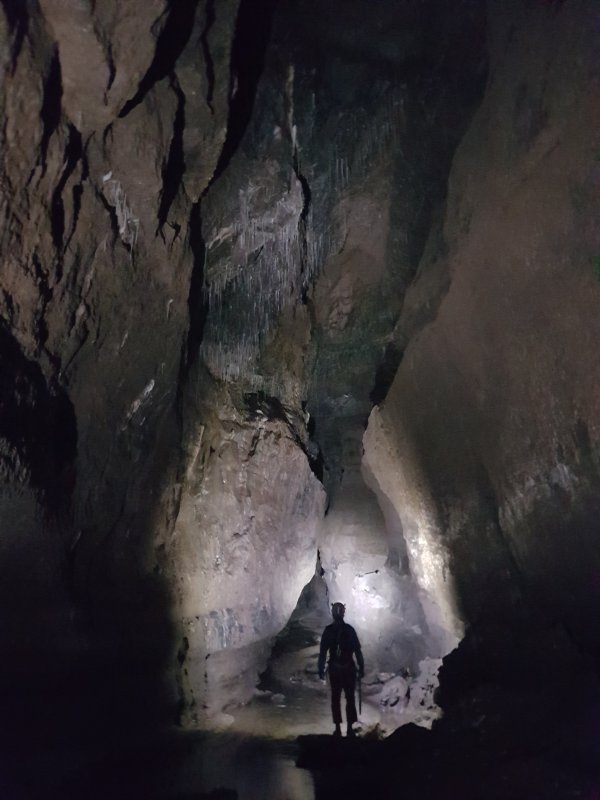 The Great North Road, where the roof soars to the limit of our lights. At this point, it is a mere 20 metres tall, but later it reaches over 40 metres. For the first part, there are some holes in the roof, connecting with an oxbow from Birthday Passage.
Modelling by Gareth, lighting by Tarquin and Gareth
The Great North Road, where the roof soars to the limit of our lights. At this point, it is a mere 20 metres tall, but later it reaches over 40 metres. For the first part, there are some holes in the roof, connecting with an oxbow from Birthday Passage.
Modelling by Gareth, lighting by Tarquin and Gareth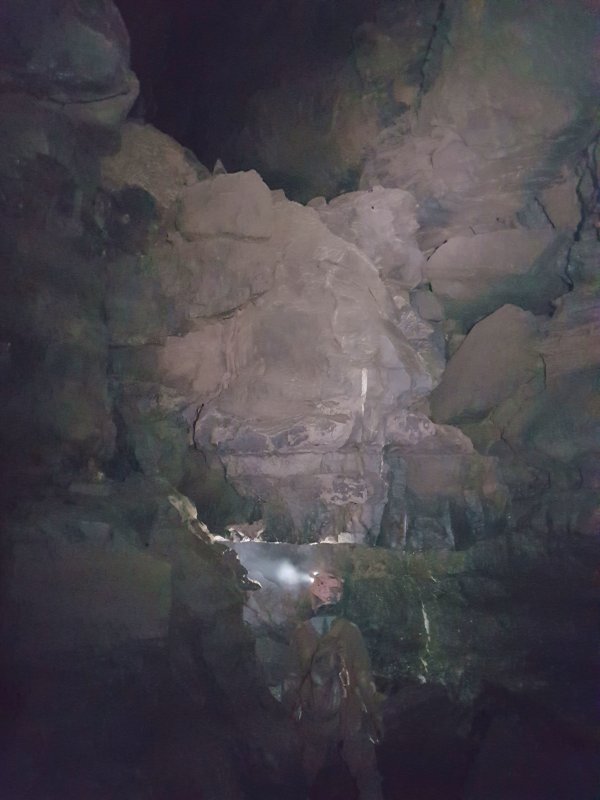 An enormous boulder jammed across the passage, which is easily mistaken for a solid ceiling until you look more closely. Multiple avens from this point onwards connect with the various parts of Pinnacle Series.
Modelling by Gareth, lighting by Tarquin and Gareth
An enormous boulder jammed across the passage, which is easily mistaken for a solid ceiling until you look more closely. Multiple avens from this point onwards connect with the various parts of Pinnacle Series.
Modelling by Gareth, lighting by Tarquin and Gareth Pinnacle Chamber, the largest part of the Great North Road. This return trip gave me a chance to take additional pictures of the distant parts of this chamber, from the same place as I had photographed it on a previous trip. The two Gareths and their lights are then pasted into the older picture, which finally gives a good sense of scale to this enormous space. The lower Gareth is at the entrance down to the Meanders, and the climb to the North Bypass. The upper Gareth is in the North Bypass.
Modelling by peter Wilton-Jones, Pete Bolt and Gareth (twice), lighting by Tarquin, Peter, Pete and Gareth
Pinnacle Chamber, the largest part of the Great North Road. This return trip gave me a chance to take additional pictures of the distant parts of this chamber, from the same place as I had photographed it on a previous trip. The two Gareths and their lights are then pasted into the older picture, which finally gives a good sense of scale to this enormous space. The lower Gareth is at the entrance down to the Meanders, and the climb to the North Bypass. The upper Gareth is in the North Bypass.
Modelling by peter Wilton-Jones, Pete Bolt and Gareth (twice), lighting by Tarquin, Peter, Pete and Gareth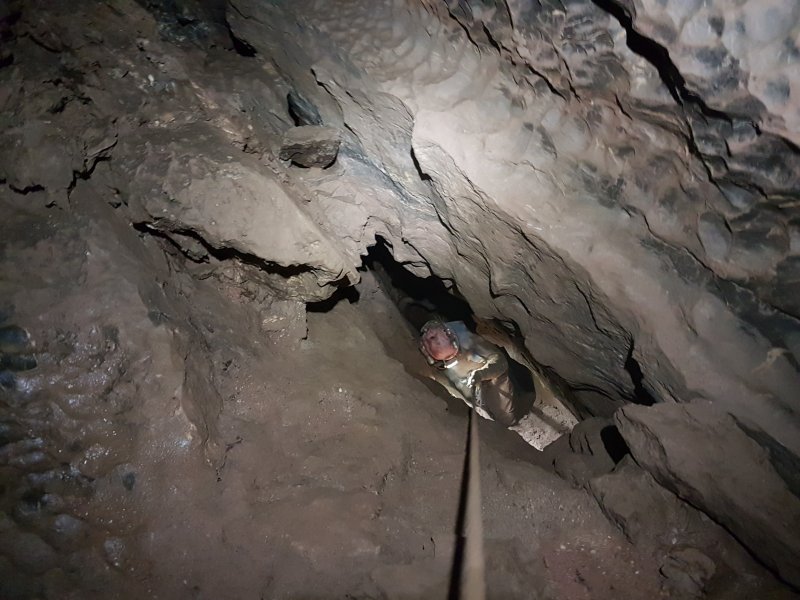 Pitch up to Pinnacle Series.
Modelling by Gareth, lighting by Tarquin and Gareth
Pitch up to Pinnacle Series.
Modelling by Gareth, lighting by Tarquin and Gareth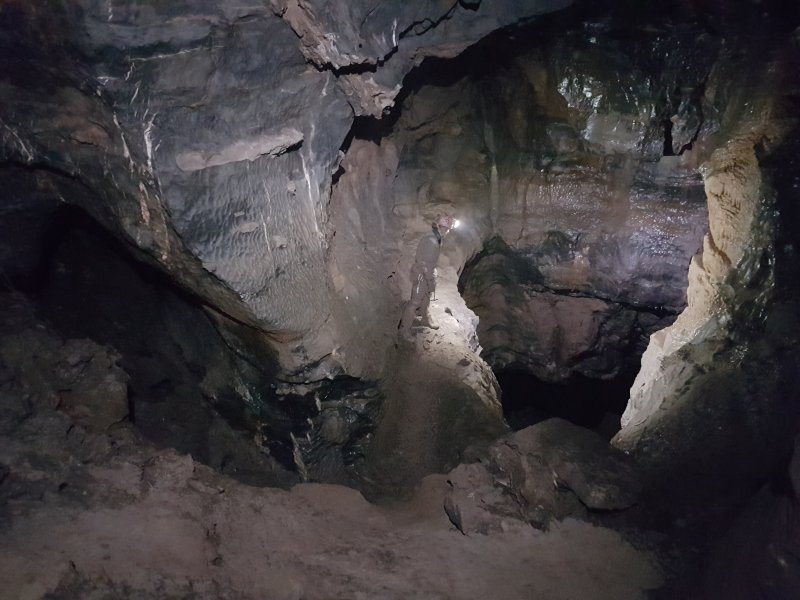 At the top of the pitch is a balcony overlooking an enormous hole down to Pinnacle Chamber. Just around the corner is another giant balcony with waterfalls.
Modelling by Gareth, lighting by Tarquin and Gareth
At the top of the pitch is a balcony overlooking an enormous hole down to Pinnacle Chamber. Just around the corner is another giant balcony with waterfalls.
Modelling by Gareth, lighting by Tarquin and Gareth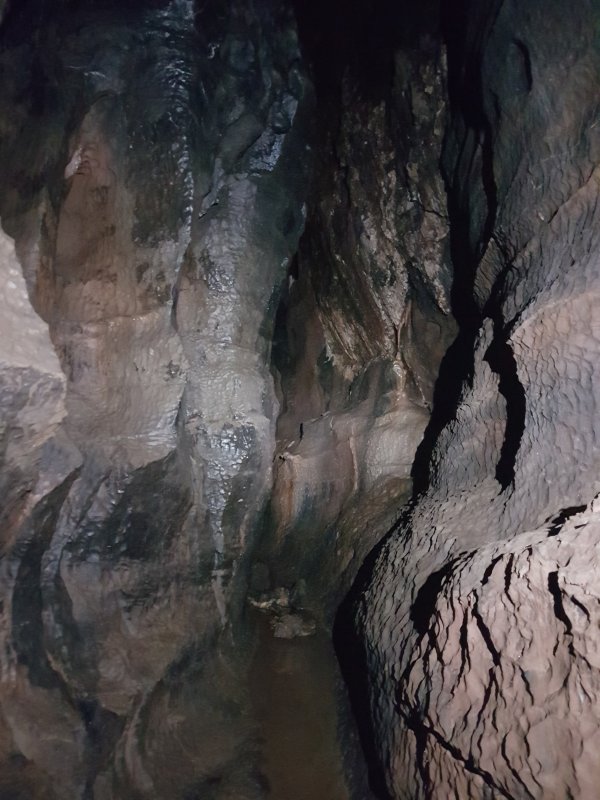 The lower level of Pinnacle Series, which feels a lot like Ogof Ffynnon Ddu's Great Oxbow, ending at a couple of parallel 25 metre pitches into the Great North Road.
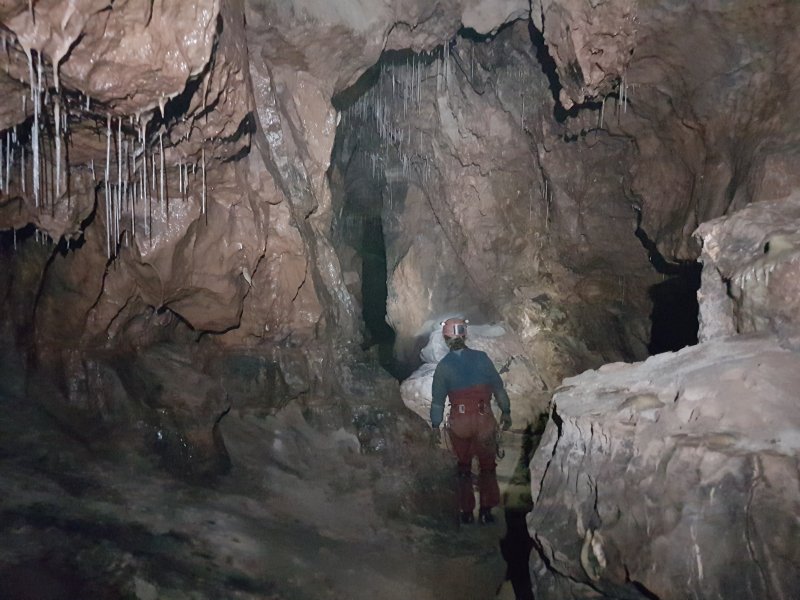 Up a slope is the middle level of Pinnacle Series, which ends at a traverse over the lower level.
Modelling by Gareth, lighting by Tarquin and Gareth
Up a slope is the middle level of Pinnacle Series, which ends at a traverse over the lower level.
Modelling by Gareth, lighting by Tarquin and Gareth Drip pockets in the middle level.
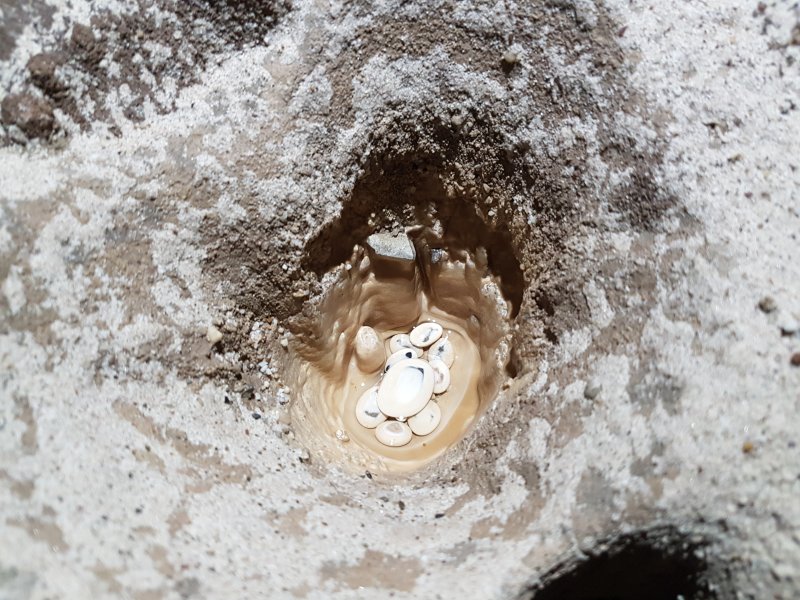 Cave pearls (or just calcited pebbles) in the bottom of a drip pocket.
 Pitch to the upper level. Though extremely slippery, this must have been free climbed originally.
Modelling by Gareth, lighting by Tarquin and Gareth
Pitch to the upper level. Though extremely slippery, this must have been free climbed originally.
Modelling by Gareth, lighting by Tarquin and Gareth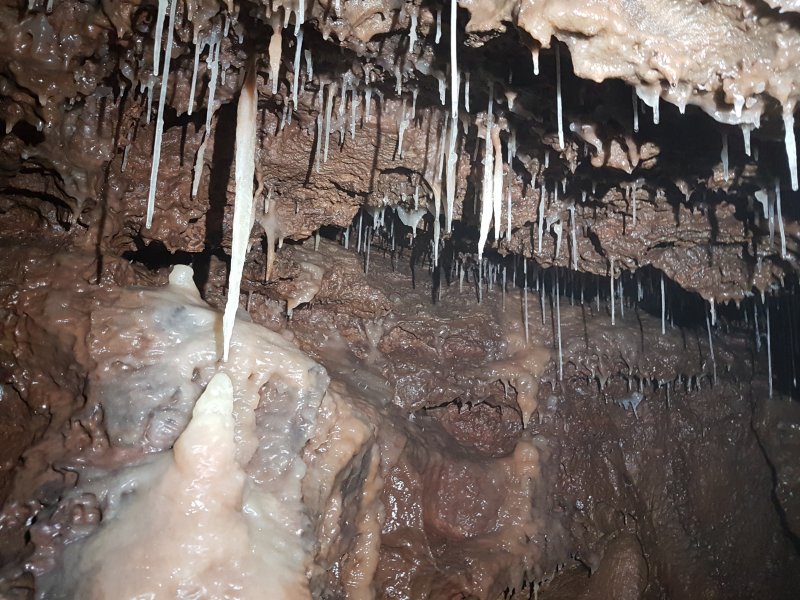 Stal in the right side of the upper level.
 Large, dried crystal pool in the passage.
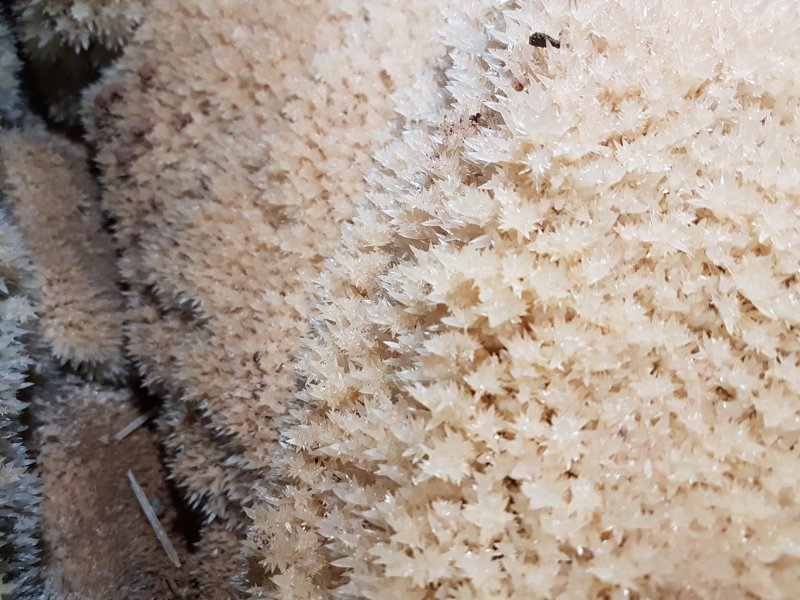 Crystals in the pool.
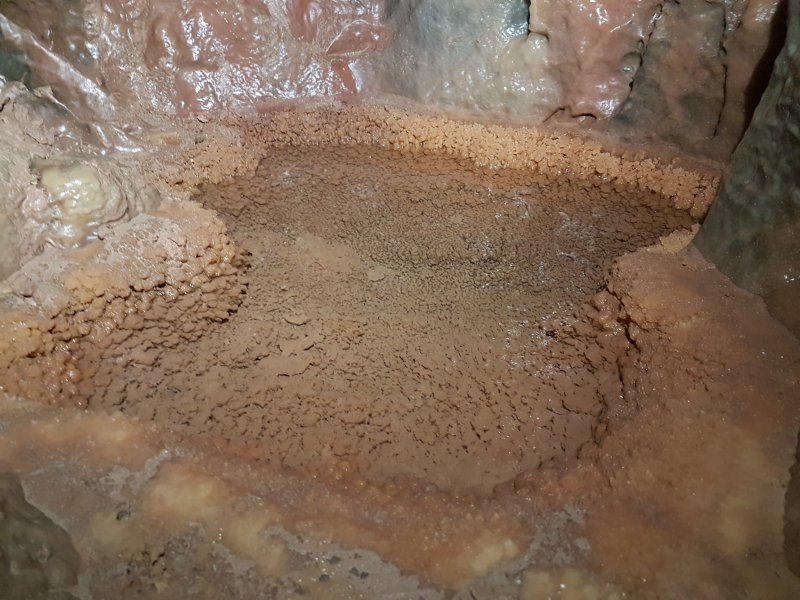 Smaller crystal pool.
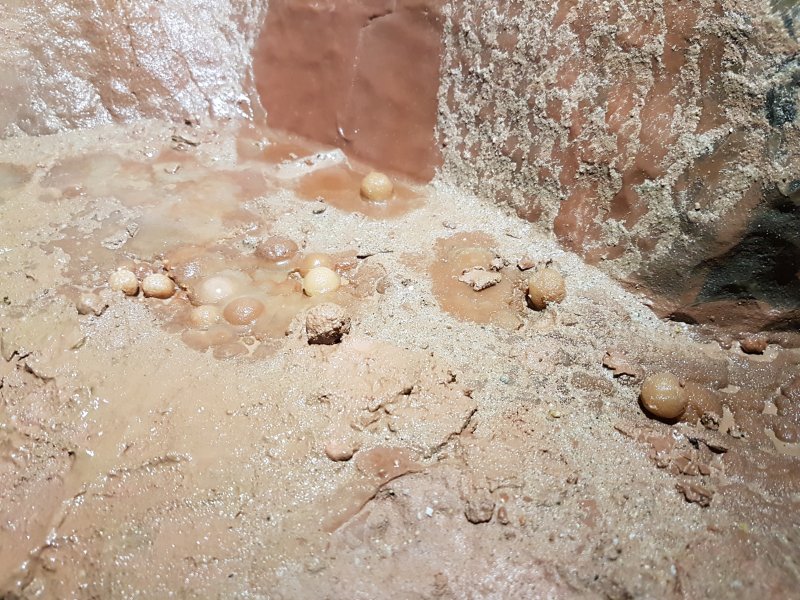 Cave pearls, as much as 2 cm in diameter.
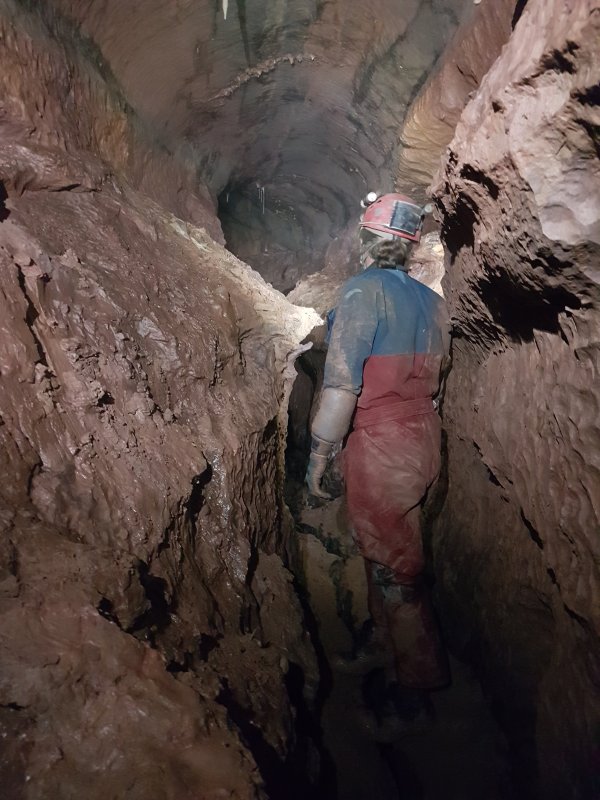 The passage then continues to two branches, each of which reaches a pitch back to the Great North Road. The first of these is about 40 metres high, the second a mere 35 metres, with a rope heading into an aven on the other side...
Modelling by Gareth, lighting by Tarquin and Gareth
The passage then continues to two branches, each of which reaches a pitch back to the Great North Road. The first of these is about 40 metres high, the second a mere 35 metres, with a rope heading into an aven on the other side...
Modelling by Gareth, lighting by Tarquin and Gareth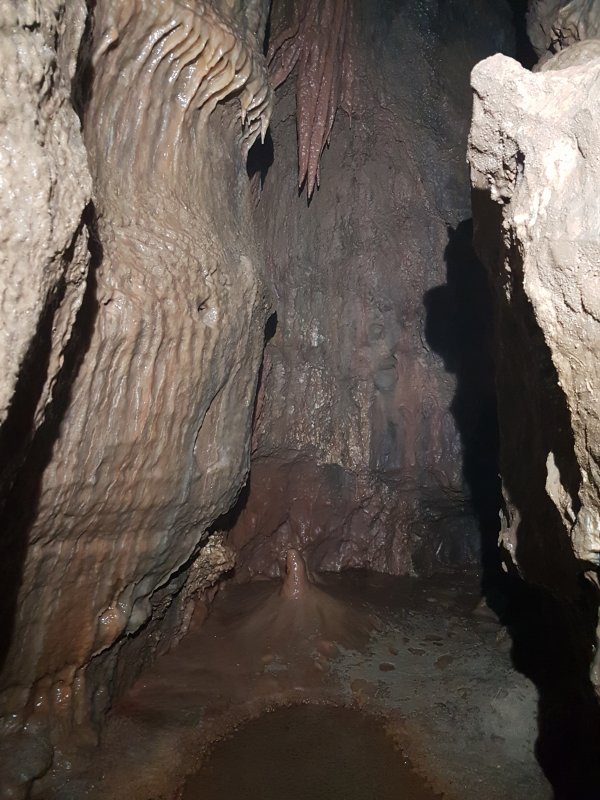 Stal in the left branch of the upper level.
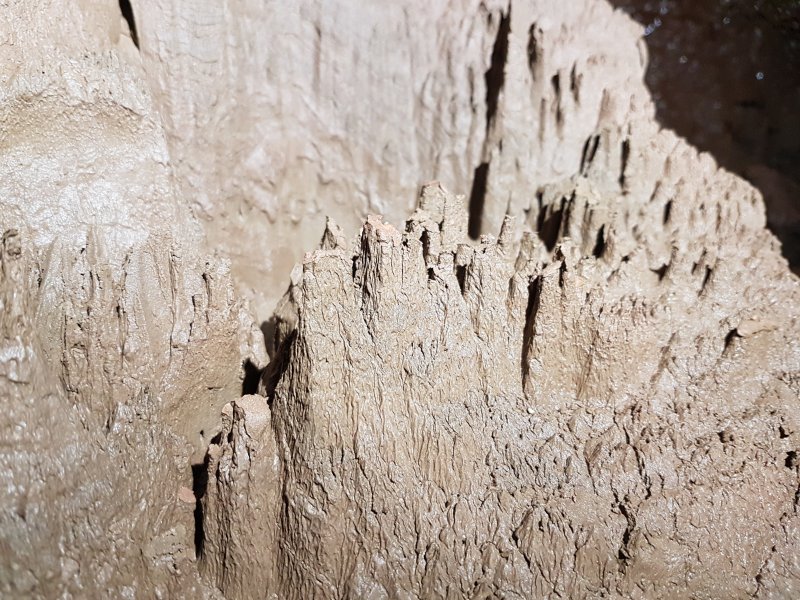 Mud hoodoos.
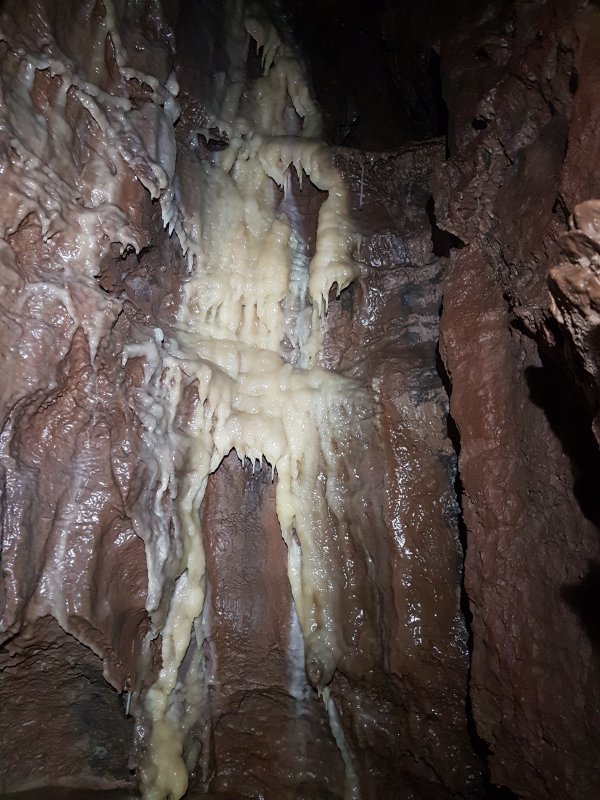 Stal flow in an alcove.
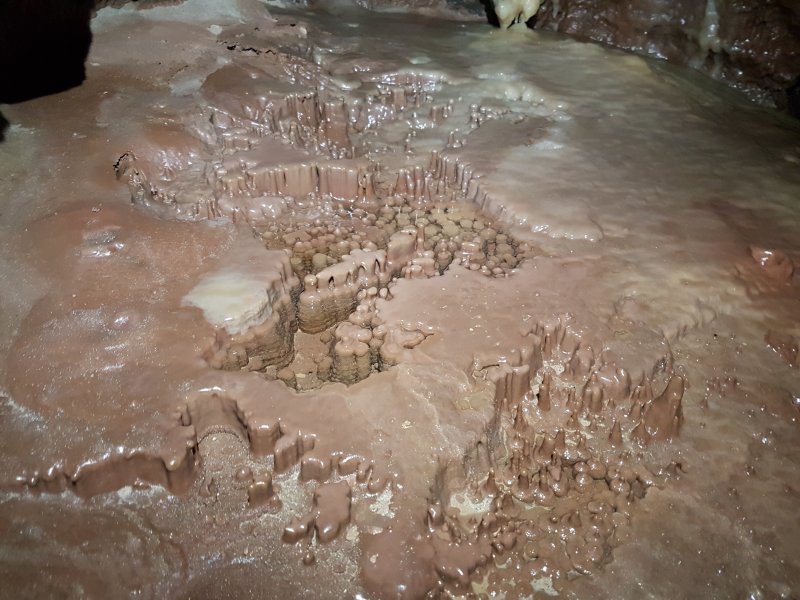 Crazy calcite floor below. This seems to have been formed by calcite flowing over mud hoodoos.
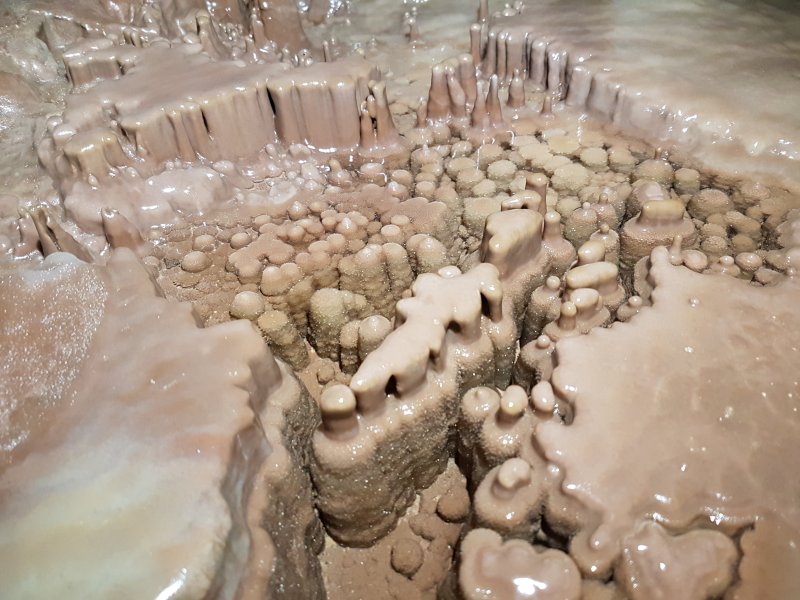 Bryce Canyon in miniature.
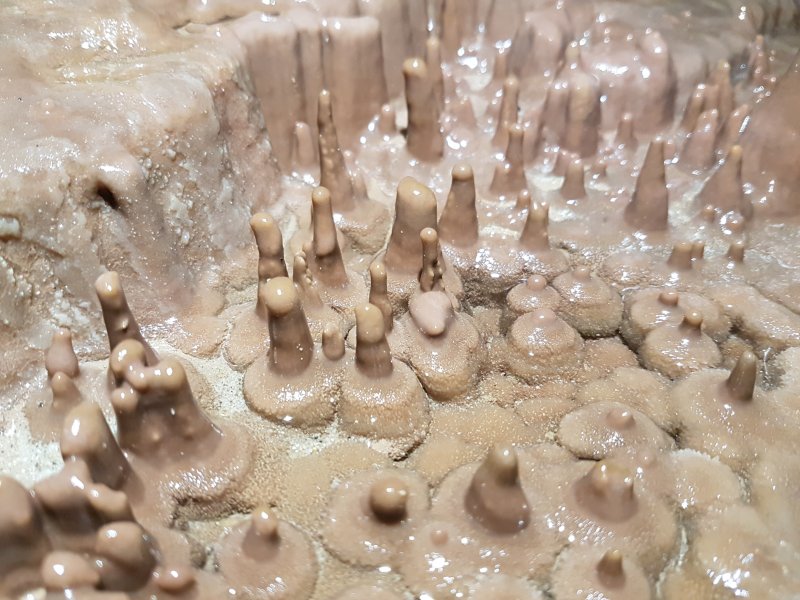 Frozen splashing chocolate drips. Or a pool full of Monty Python nipples. You decide.
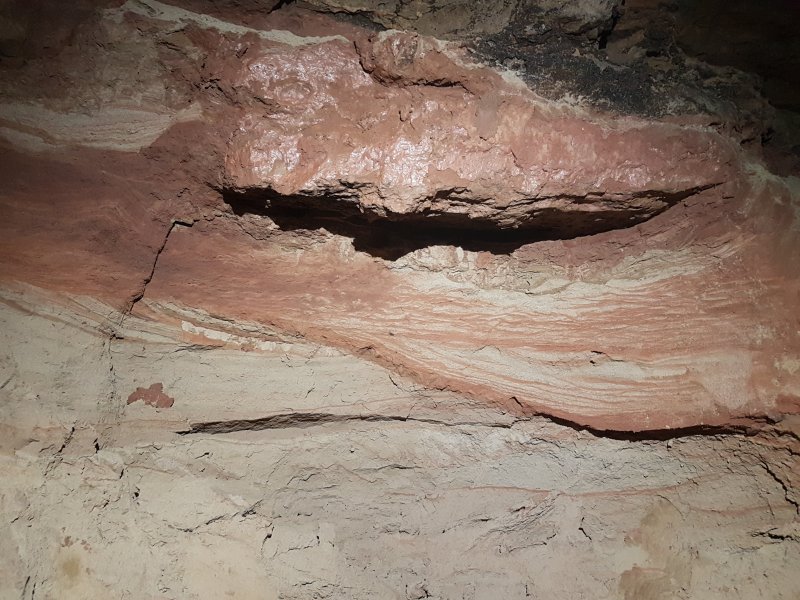 Layered sediment. The old red sandstone even managed to infiltrate all the way up here.
 Climb down to bypass a pitch in a side passage.
Modelling by Gareth, lighting by Tarquin and Gareth
Climb down to bypass a pitch in a side passage.
Modelling by Gareth, lighting by Tarquin and Gareth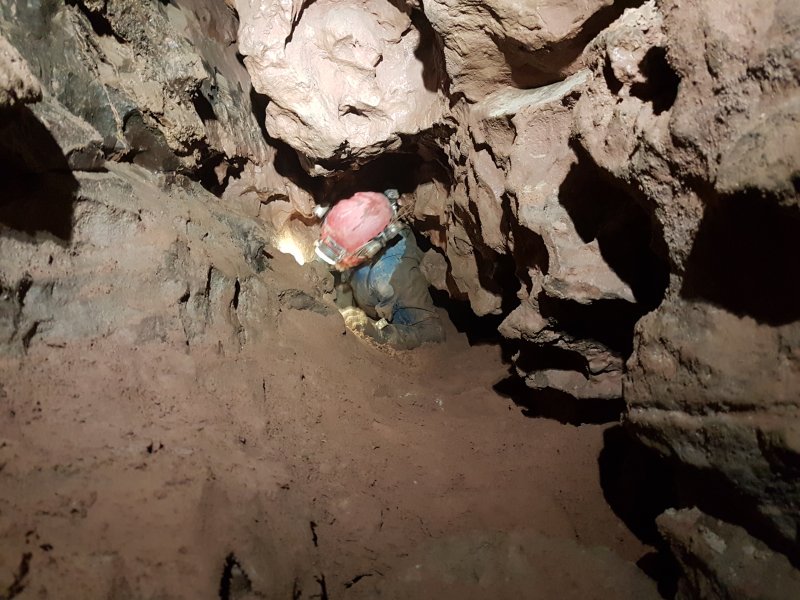 Awkward squeeze leading to the head of yet another massive drop into North Bypass.
Modelling by Gareth, lighting by Tarquin and Gareth
Awkward squeeze leading to the head of yet another massive drop into North Bypass.
Modelling by Gareth, lighting by Tarquin and Gareth An aven in the side passage splits, with the right passage ending at an ugly, loose choke. Everything we touched wanted to move, including the floor, but Gareth managed to check out the route which failed to pass through the choke. Beneath this horrible, unsupported boulder.
Modelling by Gareth
An aven in the side passage splits, with the right passage ending at an ugly, loose choke. Everything we touched wanted to move, including the floor, but Gareth managed to check out the route which failed to pass through the choke. Beneath this horrible, unsupported boulder.
Modelling by Gareth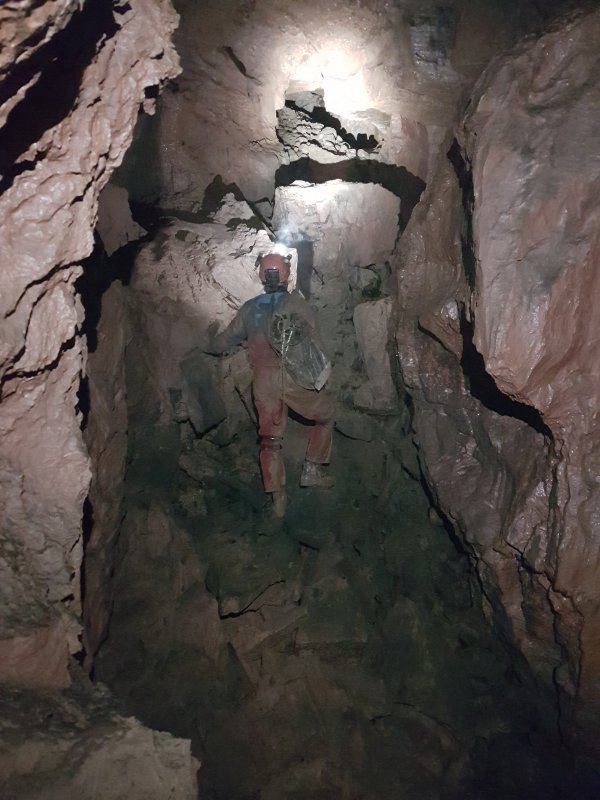 Last chamber of the side passage, which chokes.
Modelling by Gareth, lighting by Tarquin and Gareth
Last chamber of the side passage, which chokes.
Modelling by Gareth, lighting by Tarquin and Gareth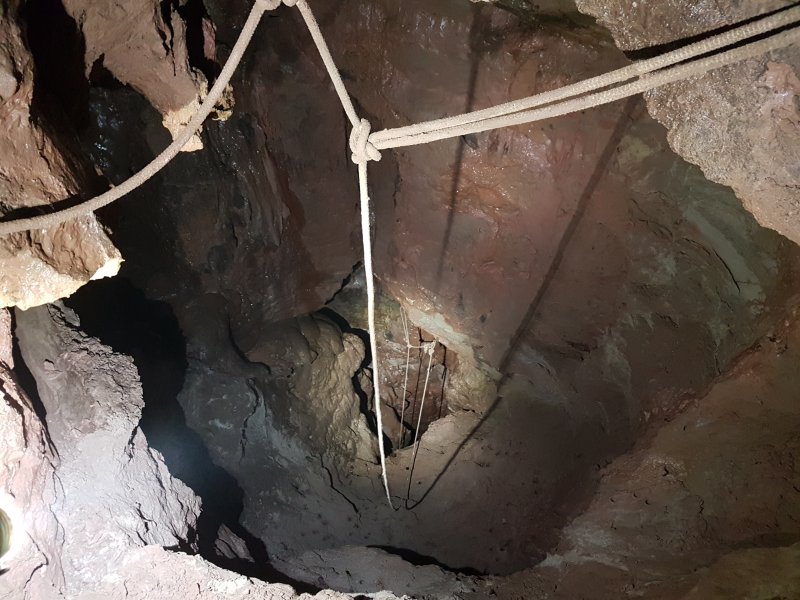 Pitches in the side passage off the side passage, which leads to the current end of the Pinnacle Series extensions.
Lighting by Tarquin and Gareth
Pitches in the side passage off the side passage, which leads to the current end of the Pinnacle Series extensions.
Lighting by Tarquin and Gareth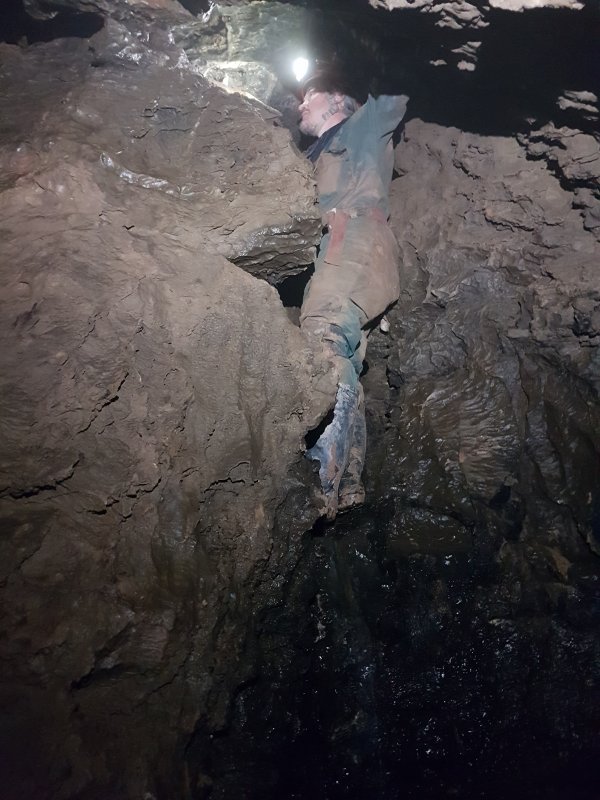 At the bottom of the pitches, a fragment of stream quickly gets too tight downstream, but can be followed upstream via a climb.
Modelling by Gareth, lighting by Tarquin and Gareth
At the bottom of the pitches, a fragment of stream quickly gets too tight downstream, but can be followed upstream via a climb.
Modelling by Gareth, lighting by Tarquin and Gareth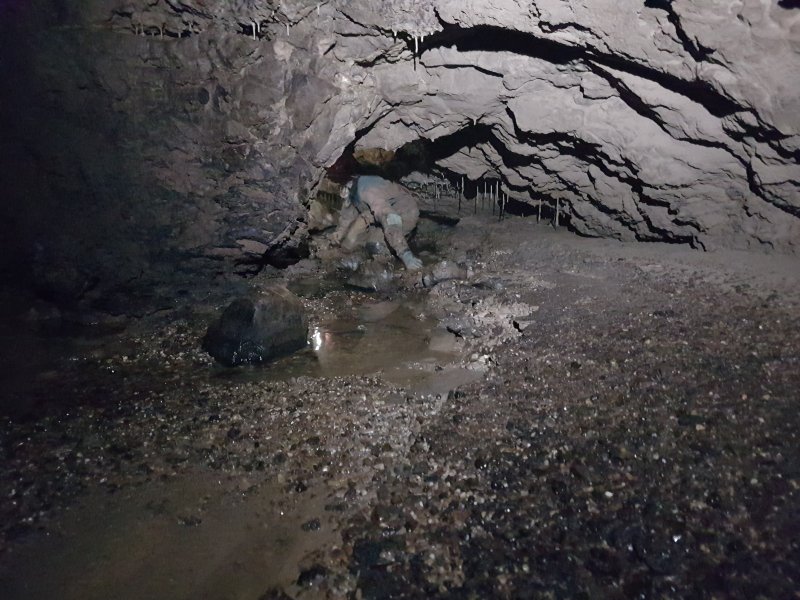 Arched streamway upstream of the climb.
Modelling by Gareth, lighting by Tarquin and Gareth
Arched streamway upstream of the climb.
Modelling by Gareth, lighting by Tarquin and Gareth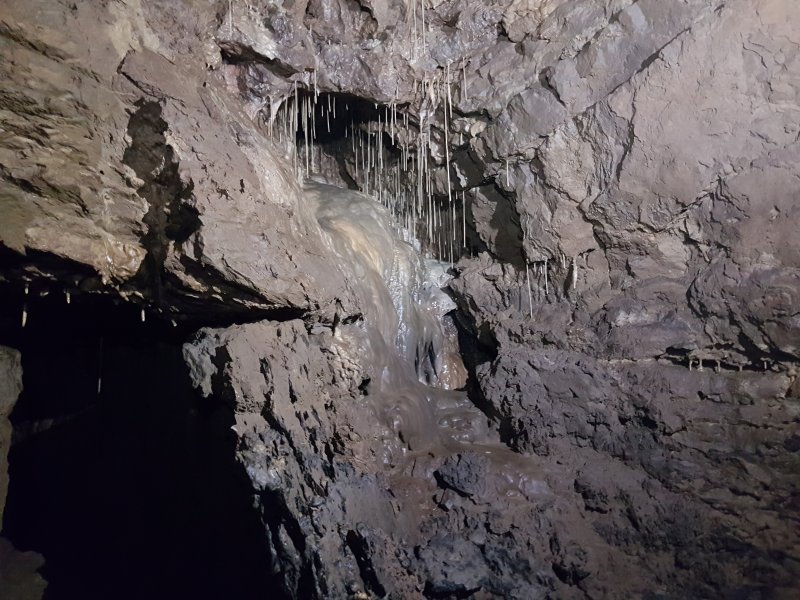 Formations in an alcove.
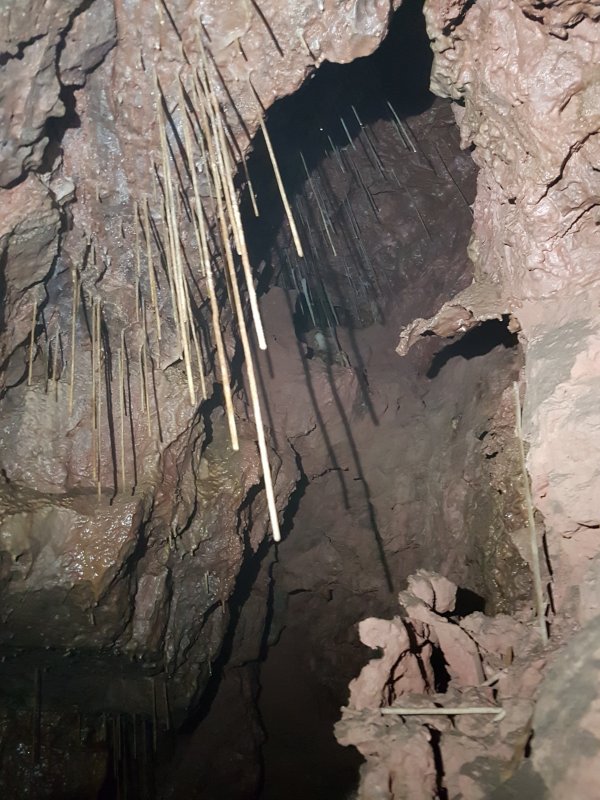 Straws in another alcove.
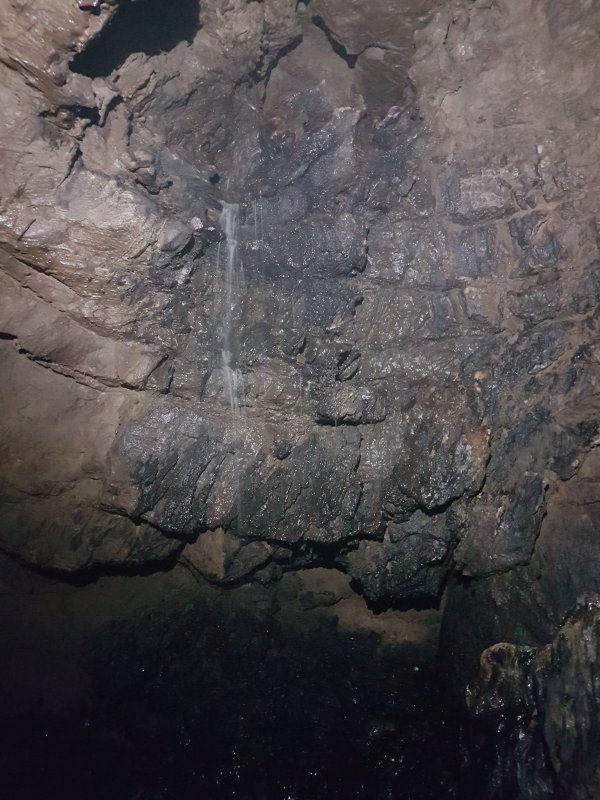 Continuing upsteam required a very tricky climb. Though it is possible to free climb, there are not enough holds where you want them, and both of us would have welcomed a rope or some other safety equipment. And that's why there is no model in the picture, because I was too busy being the safety equipment.
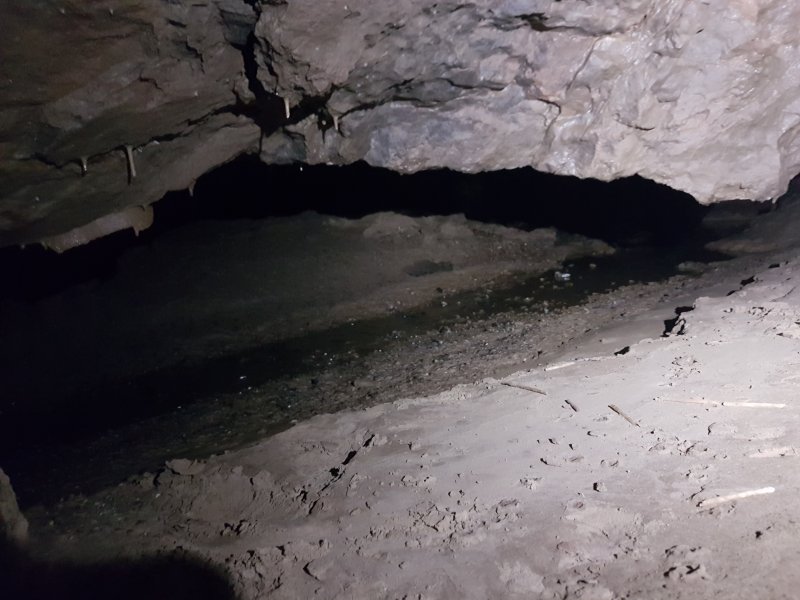 The low streamway above the climb, which does not seem promising.
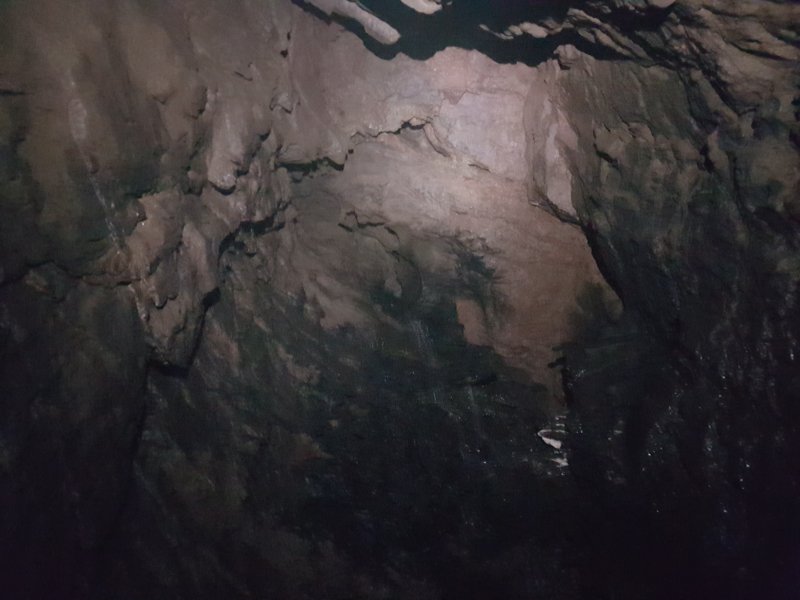 Suddenly it enters a large terminal aven, where the water pours in from a small slot above.
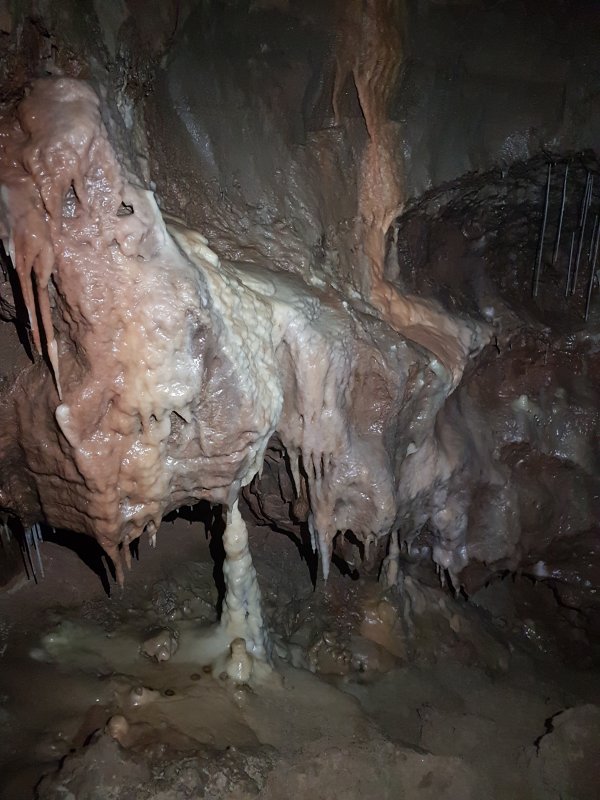 Stal in The Playground, a surprisingly large side passage with a long sand slide.
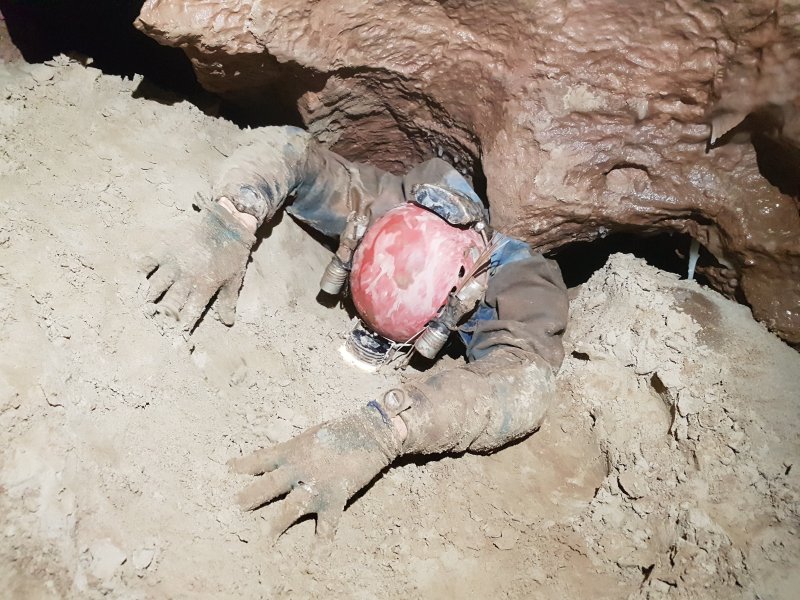 Face down in the sand squeeze bypassing an exposed climb in The Playground.
Modelling by Gareth
Face down in the sand squeeze bypassing an exposed climb in The Playground.
Modelling by Gareth The Playground ends at an all-too-common ledge overlooking North Bypass, 8 metres above the floor. At least this time there was some stal to look at, which allowed us to recognise where we were.
 Painted Chamber, the main destination within Pinnacle Series.
Modelling by Gareth, lighting by Tarquin and Gareth
Painted Chamber, the main destination within Pinnacle Series.
Modelling by Gareth, lighting by Tarquin and Gareth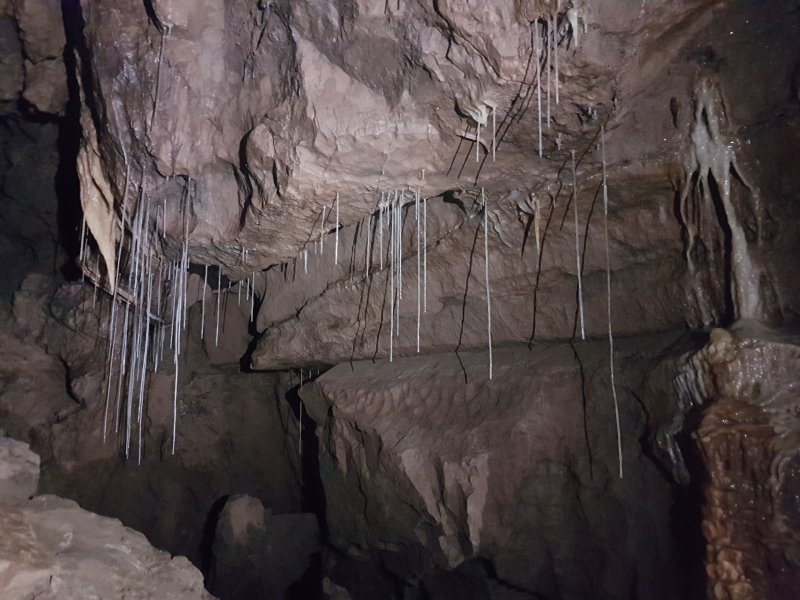 Less-decorated side of the chamber.
 Glass-like straws on the wall.
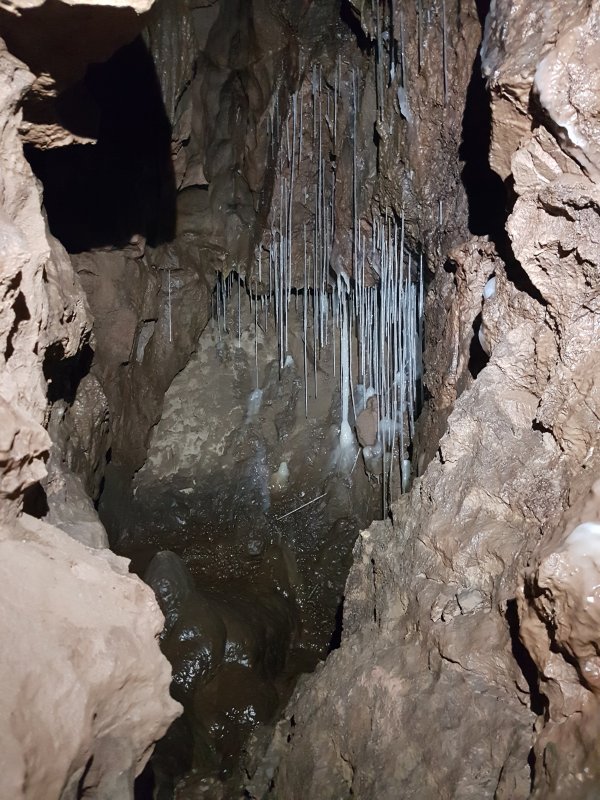 Decorated alcove, with white stal and black manganese-stained stal.
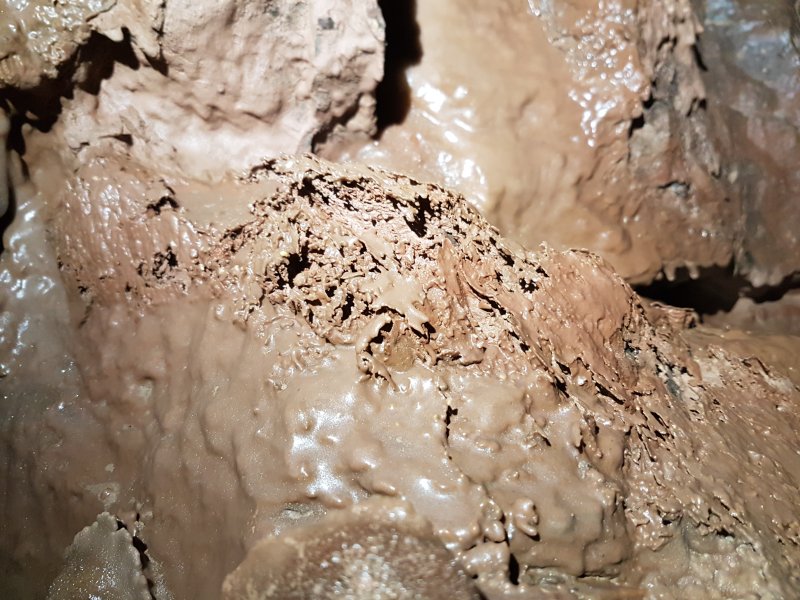 Cracked calcite.
 Stal in the undercuts beneath the chamber.
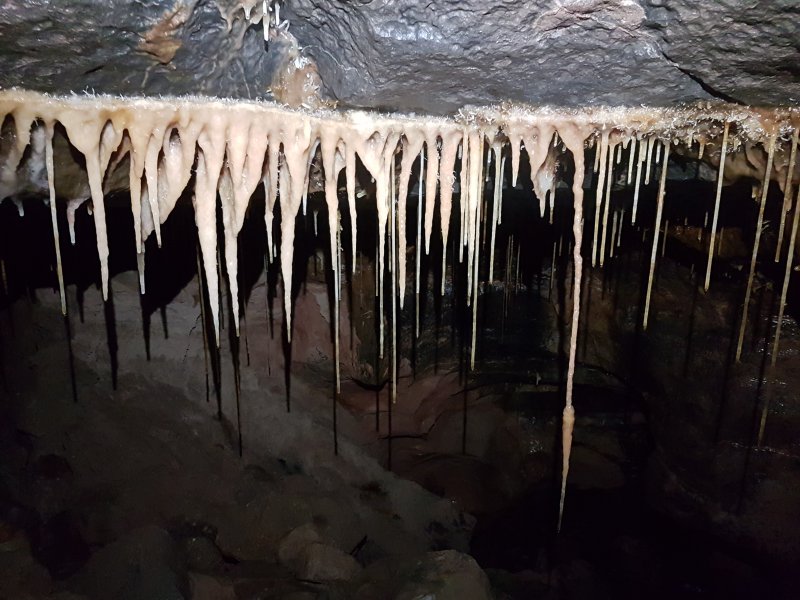 Stal on a lip, with a helictite fringe.
 Yellow helictites.
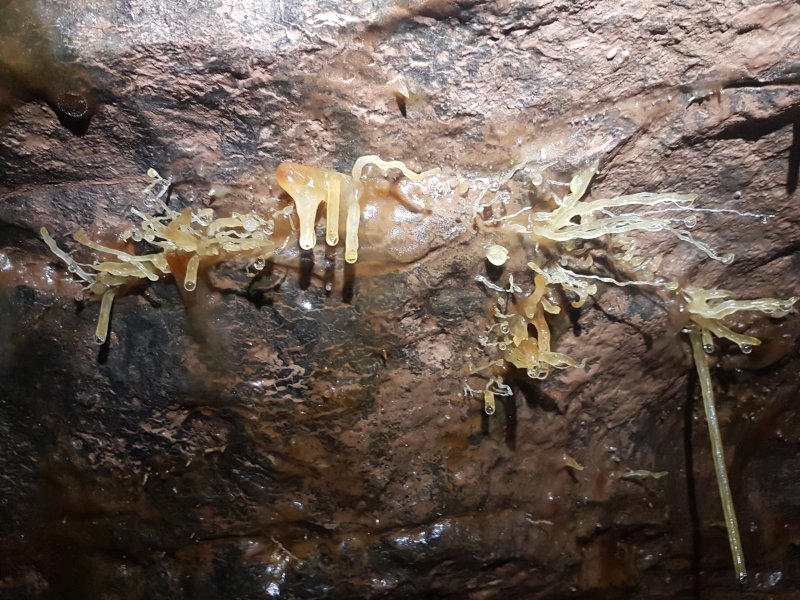 More yellow helictites.
 I pushed through a tight and awkward squeeze under the chamber into another tiny grotto.
Modelling by Gareth
I pushed through a tight and awkward squeeze under the chamber into another tiny grotto.
Modelling by Gareth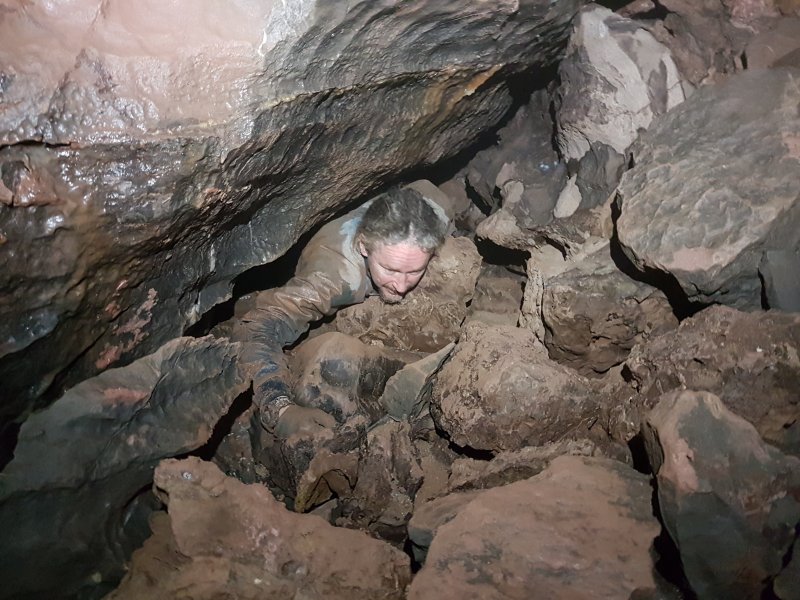 Gareth then pushed through the next one, but there was no way on.
Modelling by Gareth
Gareth then pushed through the next one, but there was no way on.
Modelling by Gareth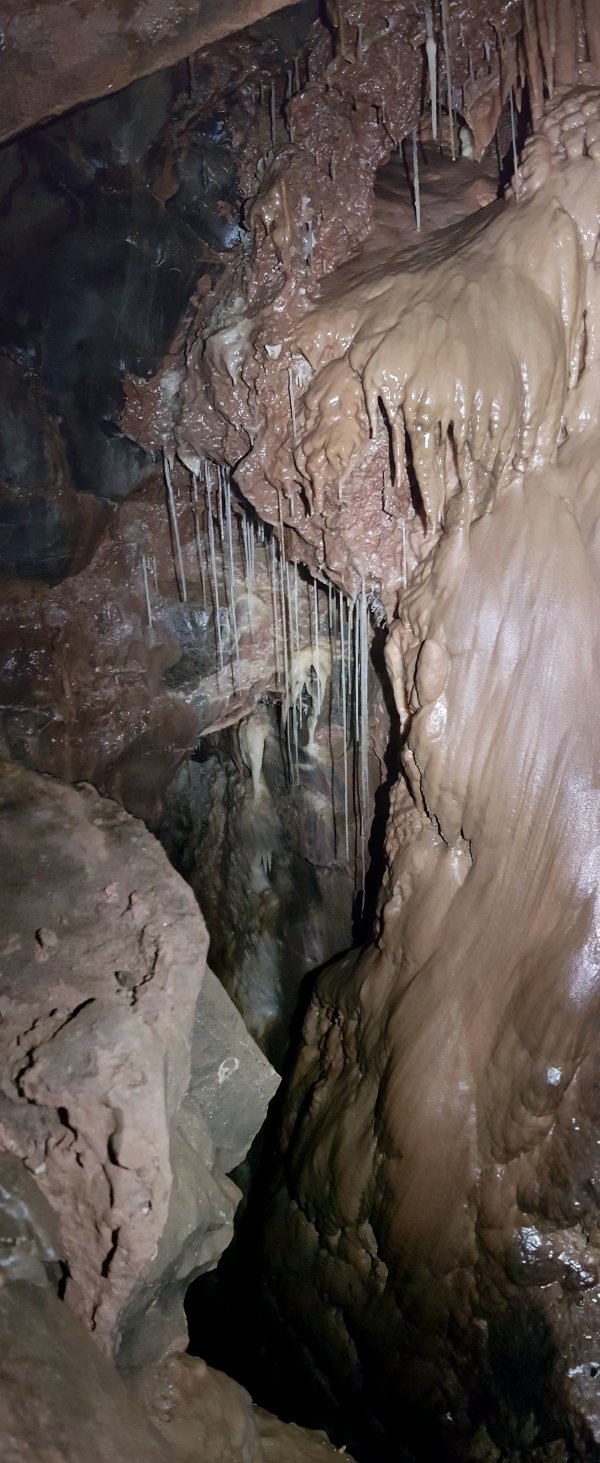 That left only the most obvious passage, which ended at a couple of grottos with ominous echos.
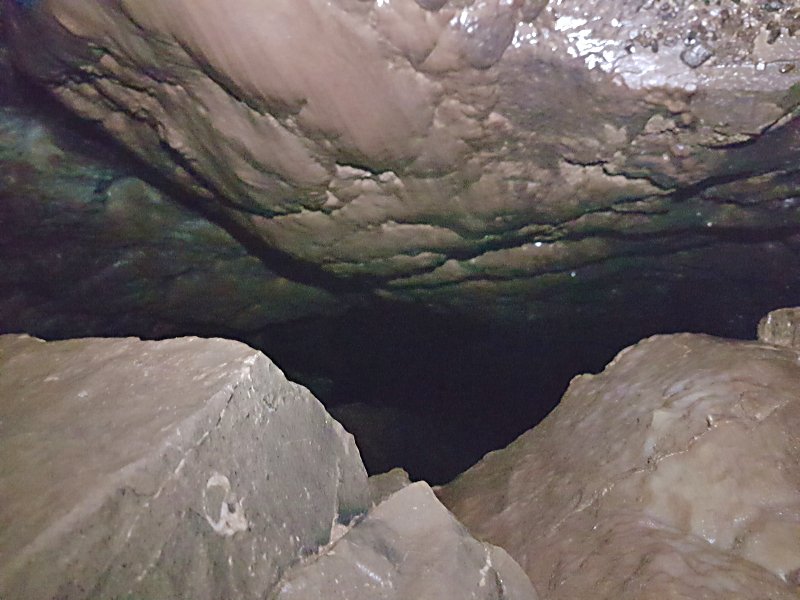 The floor of the grottos had gone missing, and in their place were pitches dropping all the way to North Bypass, nearly 30 metres below. Not the place to go climbing up avens, so we decided to call it an evening, and head back out.
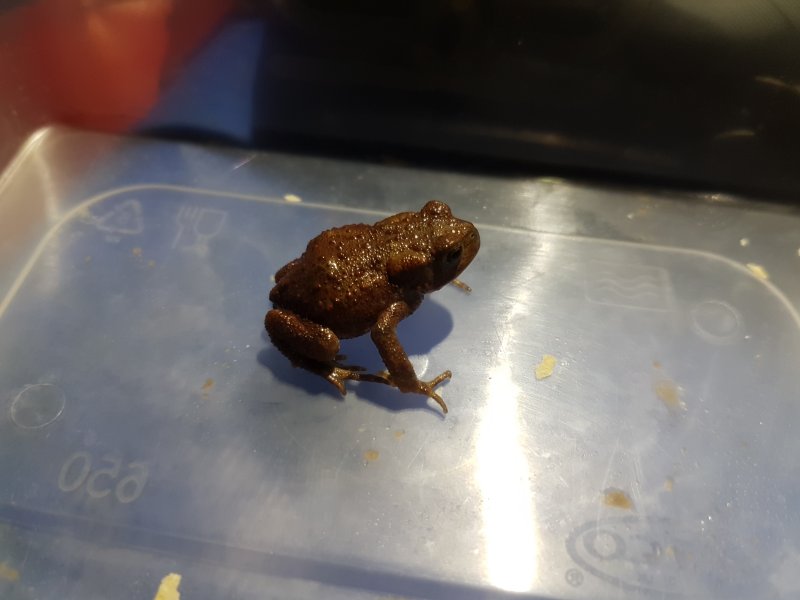 A toadlet that had been washed in from the Not Far Now sump - incredible to have survived such a long journey underground. We carried it out in a lunchbox, and released it somewhere more sensible.
Modelling by Tobias
A toadlet that had been washed in from the Not Far Now sump - incredible to have survived such a long journey underground. We carried it out in a lunchbox, and released it somewhere more sensible.
Modelling by Tobias Exiting through the Cavers' Door, at the end of a successful trip.
Modelling by Melissa
Exiting through the Cavers' Door, at the end of a successful trip.
Modelling by Melissa