Fairy Cave Quarry trip 27/10/2019
Unless otherwise stated, camera, setups, lighting, edits and gallery effects by Tarquin. Modelling and lighting at various points will be Pete Bolt and Mandy Voysey.
This is my second trip to the incredible caves in this quarry, this time taking in Withyhill, W/L Cave, Balch Cave Aven Series and Conning Tower Cave. The first two of these are among the finest decorated caves in Mendip. This will be a long gallery.
 The quarry. The entrance to Withyhill is in the bushes on the right, with Withybrook Slocker in the valley beyond it. Shatter Cave and W/L are in the bushes behind the cavers. The various fragments of Balch Cave are in the cliff behind and to the left of the cavers. Fernhill Cave is in the low hill in the distance, with Fairy Cave on the far side of the hill, and St. Dunstan's Well Cave is beyond that. Hilliers Cave's entrance is at the far end of the cliff on the left, and Hillwithy Cave is on the left, opposite Withyhill Cave. Stoke Lane Slocker lies just over 1km beyond Balch Cave.
Modelling by Pete and Mandy
The quarry. The entrance to Withyhill is in the bushes on the right, with Withybrook Slocker in the valley beyond it. Shatter Cave and W/L are in the bushes behind the cavers. The various fragments of Balch Cave are in the cliff behind and to the left of the cavers. Fernhill Cave is in the low hill in the distance, with Fairy Cave on the far side of the hill, and St. Dunstan's Well Cave is beyond that. Hilliers Cave's entrance is at the far end of the cliff on the left, and Hillwithy Cave is on the left, opposite Withyhill Cave. Stoke Lane Slocker lies just over 1km beyond Balch Cave.
Modelling by Pete and Mandy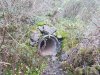 As with most of the caves in the quarry, the entrance to Withyhill is well engineered, with concrete tubes protecting it from quarry rock falls.
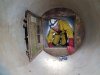 The gates to the caves are quite entertaining to open, with double padlocks, and fiddly keys that are very hard to align without knowing how. The start of a trip usually has several minutes taken up trying to feel the padlock through a hole too small to see through, fumbling around with keys, and then repeating it for the next one.
Modelling by Pete and a partial Mandy, lighting by Tarquin, Pete, Mandy and Sol
The gates to the caves are quite entertaining to open, with double padlocks, and fiddly keys that are very hard to align without knowing how. The start of a trip usually has several minutes taken up trying to feel the padlock through a hole too small to see through, fumbling around with keys, and then repeating it for the next one.
Modelling by Pete and a partial Mandy, lighting by Tarquin, Pete, Mandy and Sol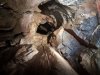 A muddy chute just inside the entrance leads up to West Chamber. We left this until the end, to avoid tracking any mud through the rest of the cave. As it turned out, we managed to remain mostly clean anyway, by being careful. Any remaining mud got washed off between caves.
Lighting by Tarquin and Pete
A muddy chute just inside the entrance leads up to West Chamber. We left this until the end, to avoid tracking any mud through the rest of the cave. As it turned out, we managed to remain mostly clean anyway, by being careful. Any remaining mud got washed off between caves.
Lighting by Tarquin and Pete West Chamber is tall, and surprisingly solid considering it is right next to the quarry face. The aven has a tall flowstone formation.
Modelling by Pete, lighting by Tarquin, Mandy and Pete
West Chamber is tall, and surprisingly solid considering it is right next to the quarry face. The aven has a tall flowstone formation.
Modelling by Pete, lighting by Tarquin, Mandy and Pete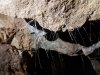 Roots in West Chamber.
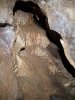 West Chamber's only side passage passes this formation, then becomes a very muddy tube. We did not need to get muddy, so did not visit the tube. The start of this passage shows significant shattering, the only part of the cave to have been badly affected by the quarry.
 Quite different from Shatter Cave's grand passages, Withyhill starts with a muddy rift passage, that partly fills with water in flood. Some rather poor curtains give an uninspiring introduction.
 Still not inspiring. The start of Stal Shuffle.
Modelling by Pete, lighting by Tarquin and Pete
Still not inspiring. The start of Stal Shuffle.
Modelling by Pete, lighting by Tarquin and Pete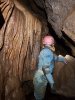 Muddy formations. This part of the passage still floods substantially, pooling up enough to coat the formations with mud.
Modelling by Mandy, lighting by Tarquin and Mandy
Muddy formations. This part of the passage still floods substantially, pooling up enough to coat the formations with mud.
Modelling by Mandy, lighting by Tarquin and Mandy A scramble up rocks then reaches Broken Curtain Chamber.
Modelling by Mandy, lighting by Tarquin and Mandy
A scramble up rocks then reaches Broken Curtain Chamber.
Modelling by Mandy, lighting by Tarquin and Mandy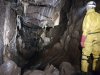 Broken Curtain Chamber, named because of the ... well, it's pretty self explanatory.
Modelling by Pete, lighting by Tarquin, Mandy and Pete
Broken Curtain Chamber, named because of the ... well, it's pretty self explanatory.
Modelling by Pete, lighting by Tarquin, Mandy and Pete Wall of the chamber.
Lighting by Tarquin and Mandy
Wall of the chamber.
Lighting by Tarquin and Mandy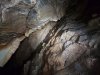 Wall of the chamber.
Lighting by Tarquin and Mandy
Wall of the chamber.
Lighting by Tarquin and Mandy The broken curtain.
Lighting by Pete
The broken curtain.
Lighting by Pete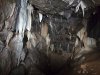 The far end of Broken Curtain Chamber is richly decorated, pretty typical for the rest of the cave.
Lighting by Tarquin and Mandy
The far end of Broken Curtain Chamber is richly decorated, pretty typical for the rest of the cave.
Lighting by Tarquin and Mandy Crystal pools on the false floor of Broken Curtain Chamber.
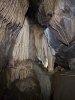 From here, we descend back to the muddy floor level to pass beneath the chamber, and reach a complete curtain blockage.
Modelling by Pete, lighting by Tarquin and Mandy
From here, we descend back to the muddy floor level to pass beneath the chamber, and reach a complete curtain blockage.
Modelling by Pete, lighting by Tarquin and Mandy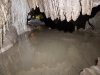 Quite insulting. The rest of the cave allows you to remain completely dry, but to bypass the formations, you have to crawl in a pool. It is possible to remain dry, perhaps with a wet knee pad, but only with some acrobatics. I think this is called The Dam.
Modelling by Pete, lighting by Tarquin and Mandy
Quite insulting. The rest of the cave allows you to remain completely dry, but to bypass the formations, you have to crawl in a pool. It is possible to remain dry, perhaps with a wet knee pad, but only with some acrobatics. I think this is called The Dam.
Modelling by Pete, lighting by Tarquin and Mandy Curtains in the wet crawl.
Modelling by Pete, lighting by Tarquin and Pete
Curtains in the wet crawl.
Modelling by Pete, lighting by Tarquin and Pete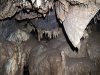 Curtains with mud coating, showing that the flood level is above them.
 Flowstone with mud on top.
 These caves have more than their fair share of curtains. This set has more mud with fresh bat guano, suggesting that it has been a while since it flooded to that level.
 Window through the curtains.
 Below helictite corner.
Lighting by Tarquin, Pete and Mandy
Below helictite corner.
Lighting by Tarquin, Pete and Mandy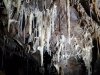 Helictite Corner. The helictites are similar in style to those in Ogof Ffynnon Du, but in white. Very basic, not branching, but tucked neatly between the straws.
 Helictite Corner.
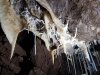 Helictite Corner.
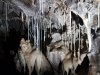 Straws at Helictite Corner.
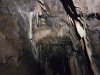 Helictite Corner.
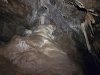 Helictite Corner.
 Flowstone covered wall at Helictite Corner. This cave has an almost unreal amount of stal for Britain, like a painting from imagination.
Lighting by Tarquin, Pete and Mandy
Flowstone covered wall at Helictite Corner. This cave has an almost unreal amount of stal for Britain, like a painting from imagination.
Lighting by Tarquin, Pete and Mandy Beyond Helictite Corner.
Modelling by Pete and Mandy, lighting by Tarquin, Pete and Mandy
Beyond Helictite Corner.
Modelling by Pete and Mandy, lighting by Tarquin, Pete and Mandy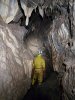 Beyond Helictite Corner.
Modelling by Pete, lighting by Tarquin and Pete
Beyond Helictite Corner.
Modelling by Pete, lighting by Tarquin and Pete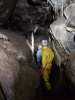 Beyond Helictite Corner.
Modelling by Pete and Mandy, lighting by Tarquin, Pete and Mandy
Beyond Helictite Corner.
Modelling by Pete and Mandy, lighting by Tarquin, Pete and Mandy Stalagmite with miniature gours.
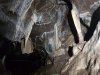 Curtain and column.
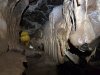 Flowstone.
Modelling by Pete, lighting by Tarquin and Pete
Flowstone.
Modelling by Pete, lighting by Tarquin and Pete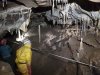 Straw-filled alcove.
Modelling by Pete and Mandy, lighting by Tarquin, Pete and Mandy
Straw-filled alcove.
Modelling by Pete and Mandy, lighting by Tarquin, Pete and Mandy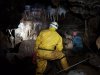 Decorated corner.
Modelling by Pete and Mandy, lighting by Tarquin, Pete and Mandy
Decorated corner.
Modelling by Pete and Mandy, lighting by Tarquin, Pete and Mandy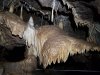 False floor.
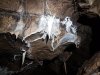 Helictites on a seam.
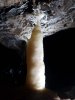 Iconic helictite column.
Lighting by Pete and Mandy
Iconic helictite column.
Lighting by Pete and Mandy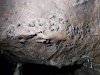 Fossils of what appears to be a colonial rugose coral, specifically Lithostrotion.
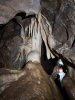 Column almost filling the passage.
Modelling by Pete and Mandy, lighting by Tarquin, Pete and Mandy
Column almost filling the passage.
Modelling by Pete and Mandy, lighting by Tarquin, Pete and Mandy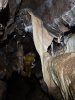 Conjoined curtain.
Modelling by Pete and Mandy, lighting by Tarquin, Pete and Mandy
Conjoined curtain.
Modelling by Pete and Mandy, lighting by Tarquin, Pete and Mandy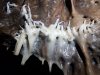 Small helictites.
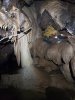 Barabobath's Bath, the crystal pool on the left, which is bypassed via a scrable over flowstone.
Modelling by Pete, lighting by Tarquin and Pete
Barabobath's Bath, the crystal pool on the left, which is bypassed via a scrable over flowstone.
Modelling by Pete, lighting by Tarquin and Pete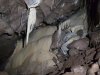 Bypass Grotto.
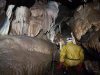 End of the bypass.
Modelling by Pete, lighting by Tarquin and Pete
End of the bypass.
Modelling by Pete, lighting by Tarquin and Pete Approaching an elephant.
Modelling by Pete and Mandy, lighting by Tarquin, Pete and Mandy
Approaching an elephant.
Modelling by Pete and Mandy, lighting by Tarquin, Pete and Mandy Pom poms.
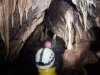 Tail of an elephant.
Modelling by Pete and Mandy, lighting by Tarquin, Pete and Mandy
Tail of an elephant.
Modelling by Pete and Mandy, lighting by Tarquin, Pete and Mandy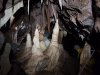 Stunning grotto, which is the back of Elephant Trunk Chamber.
Modelling by Pete, lighting by Tarquin and Mandy
Stunning grotto, which is the back of Elephant Trunk Chamber.
Modelling by Pete, lighting by Tarquin and Mandy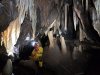 Elephant Trunk Chamber. The name comes from the elephant's trunk shaped stalatite in the middle. This was once a column connected to the calcite floor, but the floor got washed away, snapping the colum to leave the trunk.
Modelling by Pete, lighting by Tarquin, Mandy and Pete
Elephant Trunk Chamber. The name comes from the elephant's trunk shaped stalatite in the middle. This was once a column connected to the calcite floor, but the floor got washed away, snapping the colum to leave the trunk.
Modelling by Pete, lighting by Tarquin, Mandy and Pete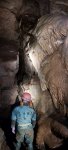 High rift beyond Elephant Trunk Chamber.
Modelling by Mandy, lighting by Tarquin, Pete and Mandy
High rift beyond Elephant Trunk Chamber.
Modelling by Mandy, lighting by Tarquin, Pete and Mandy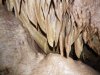 Curtains in the high rift.
Lighting by Tarquin and Pete
Curtains in the high rift.
Lighting by Tarquin and Pete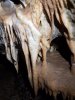 Formations in the high rift.
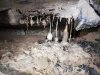 Straw columns and calcited pebbles.
Lighting by Tarquin and Pete
Straw columns and calcited pebbles.
Lighting by Tarquin and Pete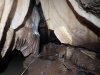 Curtains in East Rift.
Lighting by Tarquin and Mandy
Curtains in East Rift.
Lighting by Tarquin and Mandy Crawling between the curtains. Someone appears to have got this wrong in the past and broken something, but there is no other way through, so care is the only option.
Modelling by Pete, lighting by Tarquin and Pete
Crawling between the curtains. Someone appears to have got this wrong in the past and broken something, but there is no other way through, so care is the only option.
Modelling by Pete, lighting by Tarquin and Pete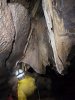 Ducking below curtains.
Modelling by Pete, lighting by Tarquin and Pete
Ducking below curtains.
Modelling by Pete, lighting by Tarquin and Pete Fossil horn coral.
 Fossil horn coral. The exact species is unknown, but it could be a Dibunophyllum.
 With a hand for scale.
Modelling by a partial Tarquin
With a hand for scale.
Modelling by a partial Tarquin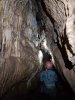 Nearing the junction at the end of East Rift.
Modelling by Mandy, lighting by Tarquin and Mandy
Nearing the junction at the end of East Rift.
Modelling by Mandy, lighting by Tarquin and Mandy Calcite flow at the junction.
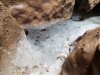 Calcite raft at the junction.
 Curtains at the start of Glistening Pool Series, in Glistening Pool Chamber.
Lighting by Tarquin, Pete and Mandy
Curtains at the start of Glistening Pool Series, in Glistening Pool Chamber.
Lighting by Tarquin, Pete and Mandy Stalagmites and a naturally-broken stalactite in Glistening Pool Chamber.
Modelling by Mandy's knee pad, lighting by Tarquin, Mandy and Pete
Stalagmites and a naturally-broken stalactite in Glistening Pool Chamber.
Modelling by Mandy's knee pad, lighting by Tarquin, Mandy and Pete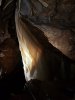 Perfect curtains in Glistening Pool Chamber.
Lighting by Pete
Perfect curtains in Glistening Pool Chamber.
Lighting by Pete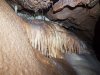 Flowstone in Glistening Pool Chamber.
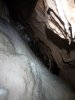 Flowstone in Glistening Pool Chamber, sitting above the other branch of the cave.
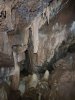 Outlet from Glistening Pool Chamber
Modelling by Pete, lighting by Tarquin and Pete
Outlet from Glistening Pool Chamber
Modelling by Pete, lighting by Tarquin and Pete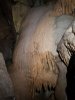 The way on is a clamber down beside this flowstone, and a careful wriggle under it.
 Repairing conservation tape. This is one of the roles of wardens, ensuring that the cave remains well protected and cared for.
Modelling by Mandy and Pete, lighting by Tarquin, Mandy and Pete
Repairing conservation tape. This is one of the roles of wardens, ensuring that the cave remains well protected and cared for.
Modelling by Mandy and Pete, lighting by Tarquin, Mandy and Pete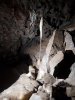 Tiny column.
Lighting by Pete
Tiny column.
Lighting by Pete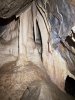 Formations before Fatbelly Rift.
 Calcite raft in the floor of Fatbelly Rift. This sits exactly where you would want to put your knee and your foot in one of the most awkward sections of the rift, but amazingly it has survived the passing cavers. Probably it regrows rapidly, and repairs itself.
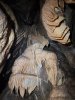 Top of Fatbelly Rift.
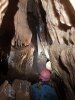 Fatbelly Rift.
Modelling by Mandy, lighting by Tarquin and Mandy
Fatbelly Rift.
Modelling by Mandy, lighting by Tarquin and Mandy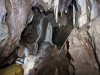 Pearl Chamber. In the right wall here is the way through into Jonathan's Chamber, but that is taped off, so we did not visit.
Modelling by Pete, lighting by Tarquin and Pete
Pearl Chamber. In the right wall here is the way through into Jonathan's Chamber, but that is taped off, so we did not visit.
Modelling by Pete, lighting by Tarquin and Pete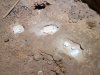 Cave pearls in Pearl Chamber. These are not particularly good pearls; really they are just pebbles with a small amount of calcite. They are protected by a trip hazard wall instead of tape.
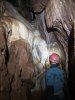 Beyond Pearl Chamber.
Modelling by Mandy, lighting by Tarquin and Mandy
Beyond Pearl Chamber.
Modelling by Mandy, lighting by Tarquin and Mandy Stalagmite.
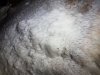 Flowstone.
 Miniature gour pools in the flowstone.
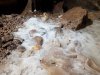 Calcited pebbles.
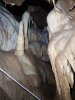 Flowstone covered rift.
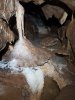 Column.
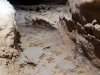 Calcite rafts below the column.
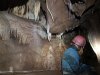 Decorated passage.
Modelling by Mandy, lighting by Tarquin and Mandy
Decorated passage.
Modelling by Mandy, lighting by Tarquin and Mandy Muddy cave pearls in the path. These are self cleaning due to the drips, and will be re-cleaned within a few days.
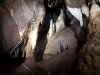 Grotto in a crawl.
Modelling by Pete, lighting by Tarquin and Pete
Grotto in a crawl.
Modelling by Pete, lighting by Tarquin and Pete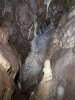 Back of Column Chamber.
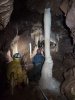 Column Chamber.
Modelling by Pete and Mandy, lighting by Tarquin, Pete and Mandy
Column Chamber.
Modelling by Pete and Mandy, lighting by Tarquin, Pete and Mandy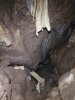 Curtains, current and naturally broken, in Column Chamber.
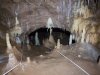 Archway beyond Column Chamber.
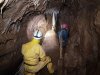 More columns in the passage beyond Column Chamber.
Modelling by Pete and Mandy, lighting by Tarquin, Pete and Mandy
More columns in the passage beyond Column Chamber.
Modelling by Pete and Mandy, lighting by Tarquin, Pete and Mandy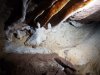 Dry crystal pool.
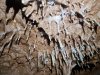 Helictites among the straws.
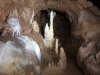 Cavers are asked to stop at this final column. Glistening Pool Series ends in a chamber immediately afterwards.
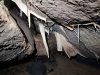 We return to the junction of routes, and head down West Passage, the other major branch of the cave.
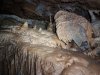 The passage intersects a tall rift, the same rift seen in Glistening Pool Chamber.
Lighting by Tarquin and Pete
The passage intersects a tall rift, the same rift seen in Glistening Pool Chamber.
Lighting by Tarquin and Pete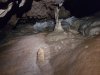 Top of the rift.
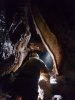 Translucent curtain in West Passage.
Modelling by Pete, lighting by Mandy
Translucent curtain in West Passage.
Modelling by Pete, lighting by Mandy Fossils in West Passage.
 Flowstone formation.
Modelling by Pete, lighting by Tarquin, Pete and Mandy
Flowstone formation.
Modelling by Pete, lighting by Tarquin, Pete and Mandy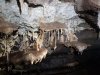 False floors.
Lighting by Tarquin and Pete
False floors.
Lighting by Tarquin and Pete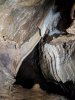 Curtain.
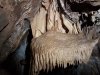 Curtain and false floor formation.
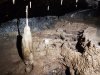 Old gour pools.
 Redissolving curtain.
Lighting by Pete
Redissolving curtain.
Lighting by Pete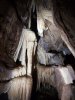 A mixture of curtains and columns.
Lighting by Tarquin and Mandy
A mixture of curtains and columns.
Lighting by Tarquin and Mandy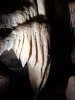 Ribbed curtains.
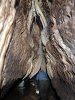 Crawling below curtains.
Modelling by Mandy, lighting by Tarquin and Mandy
Crawling below curtains.
Modelling by Mandy, lighting by Tarquin and Mandy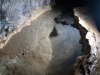 Crystal pool with what appears to be silt dust on it. This will form a binding surface, allowing a calcite raft to easily form here.
Lighting by Pete
Crystal pool with what appears to be silt dust on it. This will form a binding surface, allowing a calcite raft to easily form here.
Lighting by Pete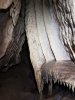 Naturally muddied curtain. This is actually a junction, where there is wa way onwards to Icing Flake Chamber, but we missed it, and only went to the main destination. A return will be needed. Oh, what a shame :)
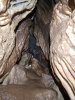 Squeeze up into Green Lake Chamber.
Modelling by Mandy, lighting by Tarquin and Mandy
Squeeze up into Green Lake Chamber.
Modelling by Mandy, lighting by Tarquin and Mandy This squeeze is not particularly tight, though larger cavers do struggle a bit.
Modelling by Pete, lighting by Tarquin, Mandy and Pete
This squeeze is not particularly tight, though larger cavers do struggle a bit.
Modelling by Pete, lighting by Tarquin, Mandy and Pete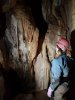 Back of Green Lake Chamber.
Modelling by Mandy, lighting by Tarquin and Mandy
Back of Green Lake Chamber.
Modelling by Mandy, lighting by Tarquin and Mandy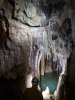 Green Lake Chamber is the prime destination in this cave, and one of the most beautifully decorated grottos on Mendip. It is easily one of the prime focuses of trips within Fairy Cave Quarry, for obvious reasons.
Modelling by Pete, lighting by Mandy and Pete
Green Lake Chamber is the prime destination in this cave, and one of the most beautifully decorated grottos on Mendip. It is easily one of the prime focuses of trips within Fairy Cave Quarry, for obvious reasons.
Modelling by Pete, lighting by Mandy and Pete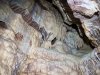 Ceiling of Green Lake Chamber.
Modelling by Pete, lighting by Tarquin and Pete
Ceiling of Green Lake Chamber.
Modelling by Pete, lighting by Tarquin and Pete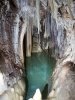 The Green Lake
Lighting by Tarquin and Mandy
The Green Lake
Lighting by Tarquin and Mandy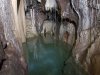 Straw pom pom in the Green Lake.
Lighting by Pete
Straw pom pom in the Green Lake.
Lighting by Pete Calcite growth on the wall of the Green Lake.
Lighting by Pete
Calcite growth on the wall of the Green Lake.
Lighting by Pete Since we were in the area, we also visited W/L cave, one of the entrances to Shatter Cave.
Modelling by Pete, lighting by Sol and Pete
Since we were in the area, we also visited W/L cave, one of the entrances to Shatter Cave.
Modelling by Pete, lighting by Sol and Pete Curtain inside the entrance. Unlike Shatter Cave's destroyed initial chamber, this cave doesn't seem so badly affected by the quarrying.
 The early passage.
Modelling by Pete and Mandy, lighting by Tarquin, Pete and Mandy
The early passage.
Modelling by Pete and Mandy, lighting by Tarquin, Pete and Mandy Crystal pool on the floor.
 The Pineapple, a distinctive formation tucked deep into an undercut. Somehow in the past, this formation was broken off, but has been repaired with glue, holding it back in its natural position. It is easily missed, since it is so far out of the way, and needs you to lie on the floor to see it at all.
Lighting by Pete
The Pineapple, a distinctive formation tucked deep into an undercut. Somehow in the past, this formation was broken off, but has been repaired with glue, holding it back in its natural position. It is easily missed, since it is so far out of the way, and needs you to lie on the floor to see it at all.
Lighting by Pete Helictites.
 Flowstone.
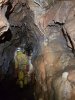 Main passage of W/L Cave.
Modelling by Pete and Mandy, lighting by Tarquin, Pete and Mandy
Main passage of W/L Cave.
Modelling by Pete and Mandy, lighting by Tarquin, Pete and Mandy Occasionally, the formations are in the way, making the passage smaller.
Modelling by Pete, lighting by Tarquin and Pete
Occasionally, the formations are in the way, making the passage smaller.
Modelling by Pete, lighting by Tarquin and Pete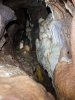 The passage is big enough, but you have to crawl below formations.
Modelling by Pete and Mandy's helmet, lighting by Tarquin, Pete and Mandy
The passage is big enough, but you have to crawl below formations.
Modelling by Pete and Mandy's helmet, lighting by Tarquin, Pete and Mandy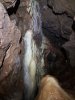 Coloured stalagmites.
 Translucent flowstone.
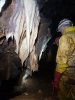 Curtains and stalactites at the Lily Pads.
Modelling by Pete and Mandy, lighting by Tarquin, Pete and Mandy
Curtains and stalactites at the Lily Pads.
Modelling by Pete and Mandy, lighting by Tarquin, Pete and Mandy The Lily Pads.
Lighting by Pete
The Lily Pads.
Lighting by Pete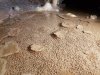 Lily Pads.
Lighting by Pete
Lily Pads.
Lighting by Pete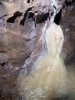 Flowstone at the Lily Pads.
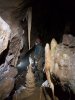 Stalatite and tiered stalagmite.
Modelling by Mandy, lighting by Tarquin and Pete
Stalatite and tiered stalagmite.
Modelling by Mandy, lighting by Tarquin and Pete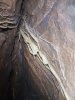 Curtains above the sump rift.
Lighting by Tarquin and Mandy
Curtains above the sump rift.
Lighting by Tarquin and Mandy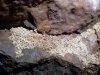 Large pile of cryostal on the boulders at the sump rift junction. This is the best deposit I know of in the Fairy Cave Quarry area.
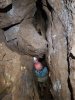 The sump rift starts off with a slippery descent, and is quite awkward to reverse.
Modelling by Mandy, lighting by Tarquin, Pete and Mandy
The sump rift starts off with a slippery descent, and is quite awkward to reverse.
Modelling by Mandy, lighting by Tarquin, Pete and Mandy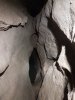 The final drop down to the sump, which is tight, and looks impossible to free climb.
 Stalagmite shaped like a Pickelhaube (Prussian helmet), with a finial spike on top.
 The main passage ends at a scramble into Great Rift Chamber.
Modelling by Pete, lighting by Tarquin and Pete
The main passage ends at a scramble into Great Rift Chamber.
Modelling by Pete, lighting by Tarquin and Pete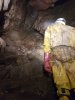 Great Rift Chamber, a tall, sloping chamber. There are ways on at the top-left and bottom-right.
Modelling by Pete, lighting by Tarquin, Mandy and Pete
Great Rift Chamber, a tall, sloping chamber. There are ways on at the top-left and bottom-right.
Modelling by Pete, lighting by Tarquin, Mandy and Pete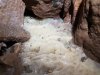 Flowstone in Great Rift Chamber.
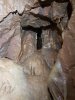 One of the passages on the right ends at a too-tight slot looking back up the main passage.
 The other passage enters Pink Pool Chamber, a well decorated grotto.
Modelling by Mandy, lighting by Tarquin and Mandy
The other passage enters Pink Pool Chamber, a well decorated grotto.
Modelling by Mandy, lighting by Tarquin and Mandy Top of Pink Pool Chamber.
Lighting by Tarquin and Mandy
Top of Pink Pool Chamber.
Lighting by Tarquin and Mandy Middle of Pink Pool Chamber.
Lighting by Tarquin and Mandy
Middle of Pink Pool Chamber.
Lighting by Tarquin and Mandy The Pink Pool. The black specks are bat guano.
Lighting by Tarquin and Mandy
The Pink Pool. The black specks are bat guano.
Lighting by Tarquin and Mandy End of the Pink Pool.
 End rift in Pink Pool Chamber.
Lighting by Tarquin and Mandy
End rift in Pink Pool Chamber.
Lighting by Tarquin and Mandy A rift between the flowstone connects to Shatter Cave, but the connection is off-limits, so we head back to Great Rift Chamber.
Lighting by Tarquin and Mandy
A rift between the flowstone connects to Shatter Cave, but the connection is off-limits, so we head back to Great Rift Chamber.
Lighting by Tarquin and Mandy A scrable up the top-left side of Great Rift Chamber provides another way on, up loose rocks into a choke,
Modelling by Pete and Mandy, lighting by Tarquin, Pete and Mandy
A scrable up the top-left side of Great Rift Chamber provides another way on, up loose rocks into a choke,
Modelling by Pete and Mandy, lighting by Tarquin, Pete and Mandy Top of Hammer Rift.
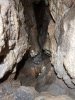 Hammer Rift.
 Hammer Rift has a hole in the floor that looks unclimbable, but it can be done. Taller cavers find this much easier.
Modelling by Mandy, lighting by Tarquin and Mandy
Hammer Rift has a hole in the floor that looks unclimbable, but it can be done. Taller cavers find this much easier.
Modelling by Mandy, lighting by Tarquin and Mandy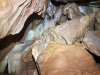 Grotto beneath Hammer Rift, which is one of the ends of the cave. A side passage at the top enters Chisel Rift, but there is nothing really worth the effort in this area.
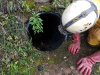 A hole high up in the cliff is the entrance to Balch Cave's Aven Series, one of the surviving fragments of Balch Cave (a large amount was quarried away).
Modelling by Pete
A hole high up in the cliff is the entrance to Balch Cave's Aven Series, one of the surviving fragments of Balch Cave (a large amount was quarried away).
Modelling by Pete Unknown fossils in the roof.
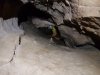 Steep chute into Sixth Chamber.
Modelling by Pete, lighting by Tarquin and Pete
Steep chute into Sixth Chamber.
Modelling by Pete, lighting by Tarquin and Pete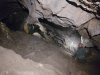 Sixth Chamber, a very steeply sloping rift. There is a pitch (which I free-climbed on the right) down into the chamber, but at the bottom, there is only a tight passage to a pitch ending in a small, terminal chamber.
Modelling by Mandy and Pete, lighting by Tarquin, Mandy and Pete
Sixth Chamber, a very steeply sloping rift. There is a pitch (which I free-climbed on the right) down into the chamber, but at the bottom, there is only a tight passage to a pitch ending in a small, terminal chamber.
Modelling by Mandy and Pete, lighting by Tarquin, Mandy and Pete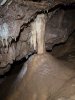 Column at the top of Sixth Chamber.
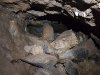 Old entryway to the chamber from Balch's Cave, now blocked by the quarry collapse.
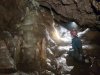 The way on towards Aven Chamber.
Modelling by Mandy and Pete, lighting by Tarquin, Mandy and Pete
The way on towards Aven Chamber.
Modelling by Mandy and Pete, lighting by Tarquin, Mandy and Pete Stalactites.
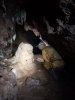 Fat stalagmite in a side passage leading back into Sixth Chamber.
Modelling by Pete, lighting by Tarquin, Mandy and Pete
Fat stalagmite in a side passage leading back into Sixth Chamber.
Modelling by Pete, lighting by Tarquin, Mandy and Pete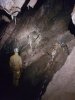 Aven Chamber. There are no good ways on from here, with Aven Annex (seen ahead) being the only one of any significance.
Modelling by Pete and Mandy, lighting by Tarquin, Pete and Mandy
Aven Chamber. There are no good ways on from here, with Aven Annex (seen ahead) being the only one of any significance.
Modelling by Pete and Mandy, lighting by Tarquin, Pete and Mandy Wall covered in superb Lithostrotion fossils.
Modelling by Mandy, lighting by Tarquin and Mandy
Wall covered in superb Lithostrotion fossils.
Modelling by Mandy, lighting by Tarquin and Mandy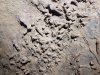 Lithostrotion fossils.
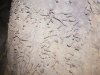 Lithostrotion fossils.
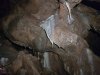 Top of Aven Chamber.
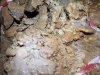 Stalagmite flow, splatter formations and cave pearls in Aven Chamber.
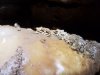 Cryostal hiding amongst the stalagmite flow in Aven Chamber.
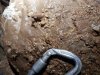 Most of it is calcited into place, but it definitely does appear to be cryostal.
 Finally we visit the muddy hole of Conning Tower Cave, another fragment of Balch Cave.
 Hole into Conning Tower Cave.
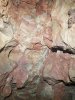 Red rock, an immediately obvious difference from the other caves in the quarry.
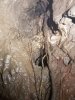 Plant roots in Conning Tower Cave.
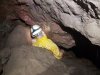 The cave is quite awkward, with no redeeming features.
Modelling by Pete, lighting by Tarquin, Mandy and Pete
The cave is quite awkward, with no redeeming features.
Modelling by Pete, lighting by Tarquin, Mandy and Pete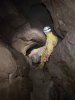 There are no formations at all, unlike the other caves in the quarry. But there is an extremely muddy chamber, with a perilously muddy slope leading down into a sump with a very active stream. The level of the sump changes dramatically, reaching this chamber in extreme flood, or being far down the tube in drought. From here, the water flows to St. Dunstan's Well.
Modelling by Pete, lighting by Tarquin and Pete
There are no formations at all, unlike the other caves in the quarry. But there is an extremely muddy chamber, with a perilously muddy slope leading down into a sump with a very active stream. The level of the sump changes dramatically, reaching this chamber in extreme flood, or being far down the tube in drought. From here, the water flows to St. Dunstan's Well.
Modelling by Pete, lighting by Tarquin and Pete
 The quarry. The entrance to Withyhill is in the bushes on the right, with Withybrook Slocker in the valley beyond it. Shatter Cave and W/L are in the bushes behind the cavers. The various fragments of Balch Cave are in the cliff behind and to the left of the cavers. Fernhill Cave is in the low hill in the distance, with Fairy Cave on the far side of the hill, and St. Dunstan's Well Cave is beyond that. Hilliers Cave's entrance is at the far end of the cliff on the left, and Hillwithy Cave is on the left, opposite Withyhill Cave. Stoke Lane Slocker lies just over 1km beyond Balch Cave.
Modelling by Pete and Mandy
The quarry. The entrance to Withyhill is in the bushes on the right, with Withybrook Slocker in the valley beyond it. Shatter Cave and W/L are in the bushes behind the cavers. The various fragments of Balch Cave are in the cliff behind and to the left of the cavers. Fernhill Cave is in the low hill in the distance, with Fairy Cave on the far side of the hill, and St. Dunstan's Well Cave is beyond that. Hilliers Cave's entrance is at the far end of the cliff on the left, and Hillwithy Cave is on the left, opposite Withyhill Cave. Stoke Lane Slocker lies just over 1km beyond Balch Cave.
Modelling by Pete and Mandy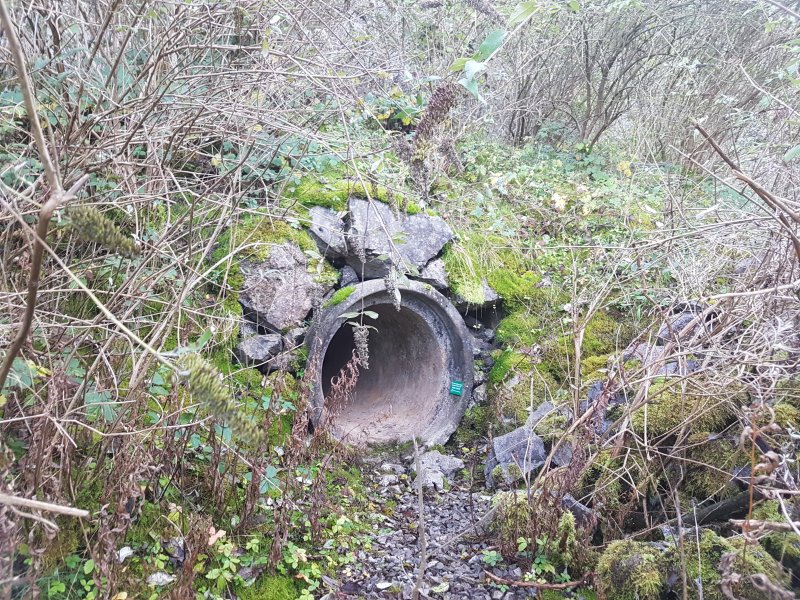 As with most of the caves in the quarry, the entrance to Withyhill is well engineered, with concrete tubes protecting it from quarry rock falls.
 The gates to the caves are quite entertaining to open, with double padlocks, and fiddly keys that are very hard to align without knowing how. The start of a trip usually has several minutes taken up trying to feel the padlock through a hole too small to see through, fumbling around with keys, and then repeating it for the next one.
Modelling by Pete and a partial Mandy, lighting by Tarquin, Pete, Mandy and Sol
The gates to the caves are quite entertaining to open, with double padlocks, and fiddly keys that are very hard to align without knowing how. The start of a trip usually has several minutes taken up trying to feel the padlock through a hole too small to see through, fumbling around with keys, and then repeating it for the next one.
Modelling by Pete and a partial Mandy, lighting by Tarquin, Pete, Mandy and Sol A muddy chute just inside the entrance leads up to West Chamber. We left this until the end, to avoid tracking any mud through the rest of the cave. As it turned out, we managed to remain mostly clean anyway, by being careful. Any remaining mud got washed off between caves.
Lighting by Tarquin and Pete
A muddy chute just inside the entrance leads up to West Chamber. We left this until the end, to avoid tracking any mud through the rest of the cave. As it turned out, we managed to remain mostly clean anyway, by being careful. Any remaining mud got washed off between caves.
Lighting by Tarquin and Pete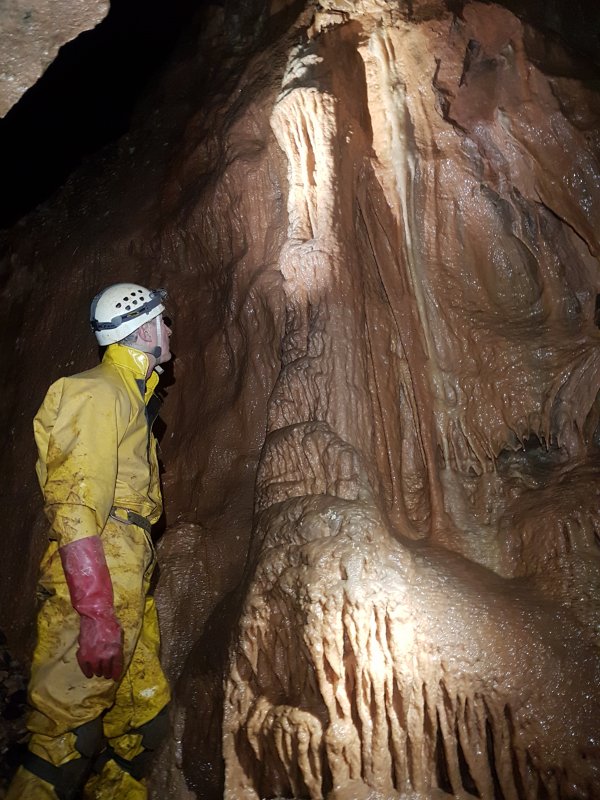 West Chamber is tall, and surprisingly solid considering it is right next to the quarry face. The aven has a tall flowstone formation.
Modelling by Pete, lighting by Tarquin, Mandy and Pete
West Chamber is tall, and surprisingly solid considering it is right next to the quarry face. The aven has a tall flowstone formation.
Modelling by Pete, lighting by Tarquin, Mandy and Pete Roots in West Chamber.
 West Chamber's only side passage passes this formation, then becomes a very muddy tube. We did not need to get muddy, so did not visit the tube. The start of this passage shows significant shattering, the only part of the cave to have been badly affected by the quarry.
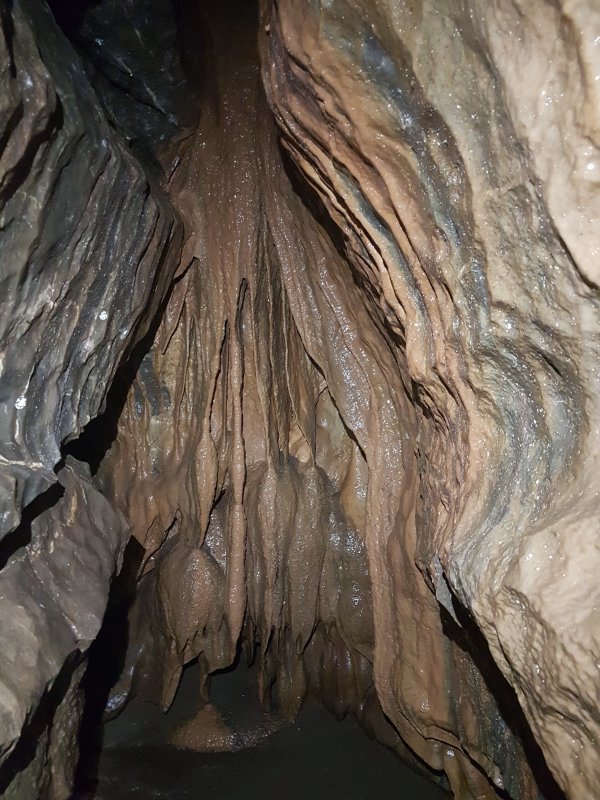 Quite different from Shatter Cave's grand passages, Withyhill starts with a muddy rift passage, that partly fills with water in flood. Some rather poor curtains give an uninspiring introduction.
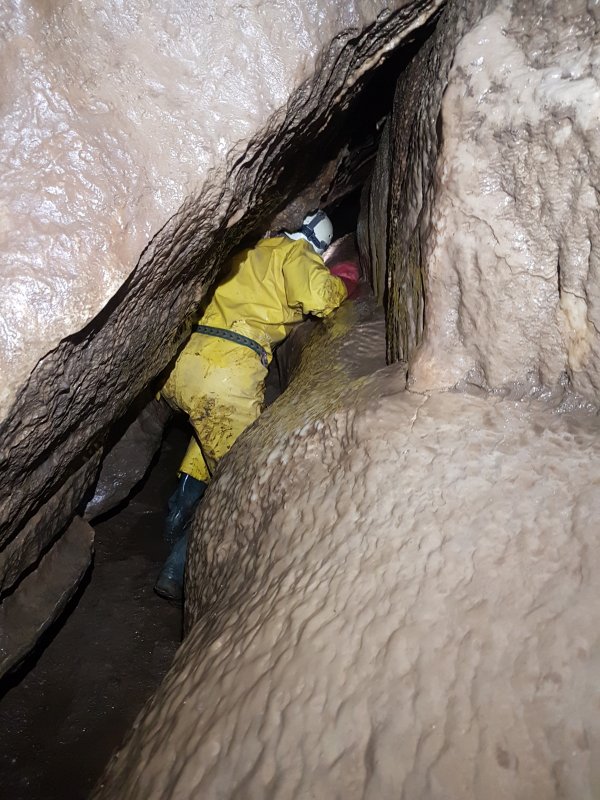 Still not inspiring. The start of Stal Shuffle.
Modelling by Pete, lighting by Tarquin and Pete
Still not inspiring. The start of Stal Shuffle.
Modelling by Pete, lighting by Tarquin and Pete Muddy formations. This part of the passage still floods substantially, pooling up enough to coat the formations with mud.
Modelling by Mandy, lighting by Tarquin and Mandy
Muddy formations. This part of the passage still floods substantially, pooling up enough to coat the formations with mud.
Modelling by Mandy, lighting by Tarquin and Mandy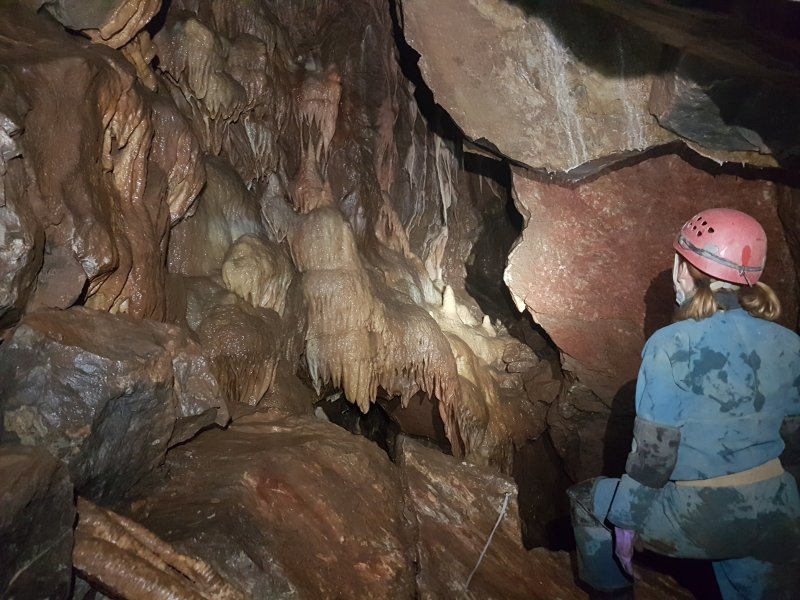 A scramble up rocks then reaches Broken Curtain Chamber.
Modelling by Mandy, lighting by Tarquin and Mandy
A scramble up rocks then reaches Broken Curtain Chamber.
Modelling by Mandy, lighting by Tarquin and Mandy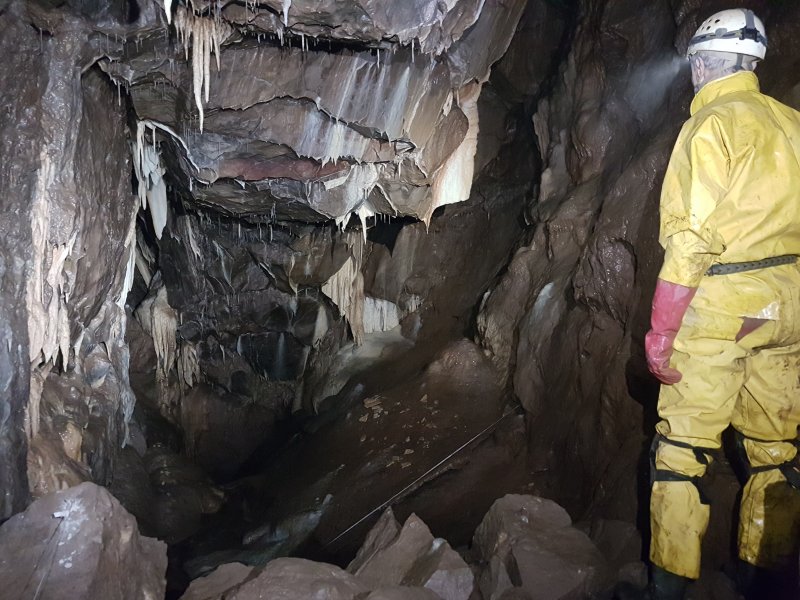 Broken Curtain Chamber, named because of the ... well, it's pretty self explanatory.
Modelling by Pete, lighting by Tarquin, Mandy and Pete
Broken Curtain Chamber, named because of the ... well, it's pretty self explanatory.
Modelling by Pete, lighting by Tarquin, Mandy and Pete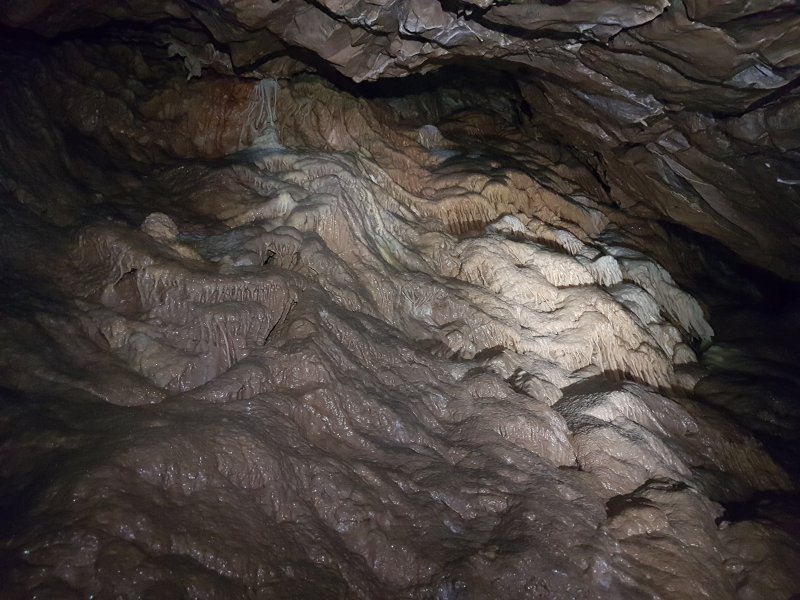 Wall of the chamber.
Lighting by Tarquin and Mandy
Wall of the chamber.
Lighting by Tarquin and Mandy Wall of the chamber.
Lighting by Tarquin and Mandy
Wall of the chamber.
Lighting by Tarquin and Mandy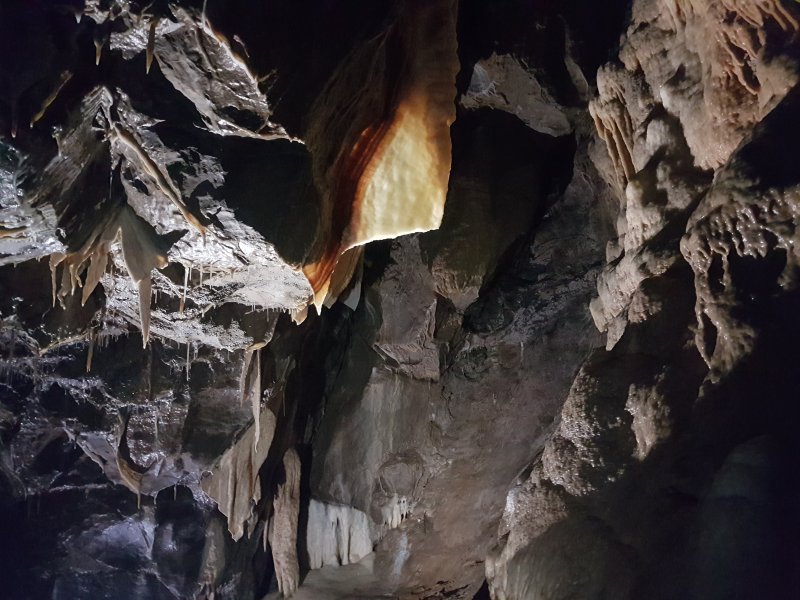 The broken curtain.
Lighting by Pete
The broken curtain.
Lighting by Pete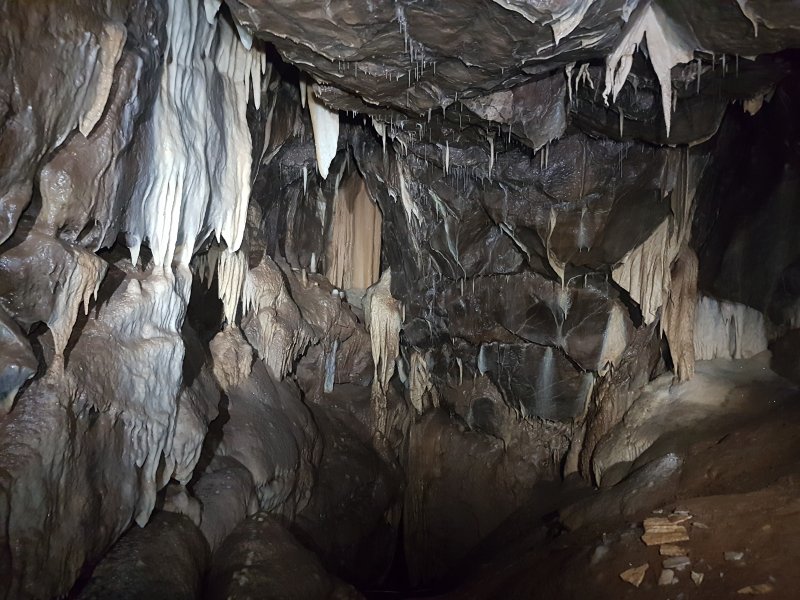 The far end of Broken Curtain Chamber is richly decorated, pretty typical for the rest of the cave.
Lighting by Tarquin and Mandy
The far end of Broken Curtain Chamber is richly decorated, pretty typical for the rest of the cave.
Lighting by Tarquin and Mandy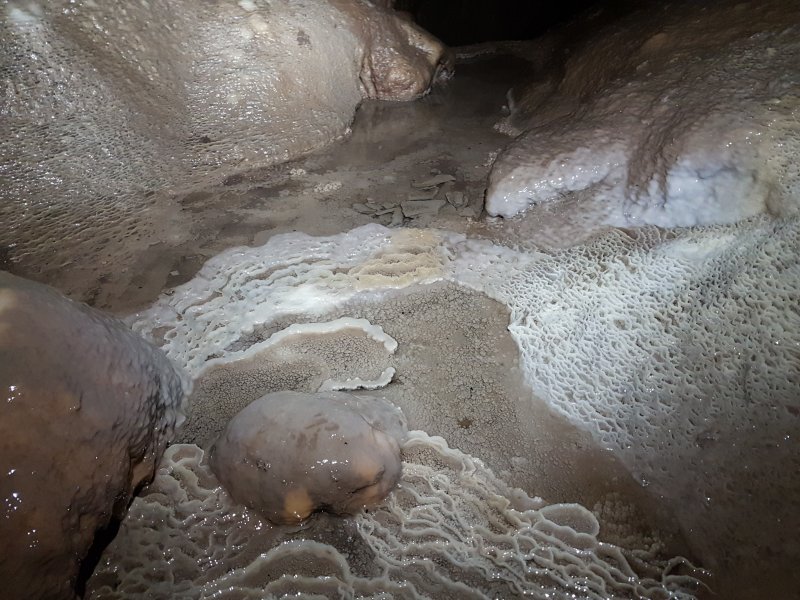 Crystal pools on the false floor of Broken Curtain Chamber.
 From here, we descend back to the muddy floor level to pass beneath the chamber, and reach a complete curtain blockage.
Modelling by Pete, lighting by Tarquin and Mandy
From here, we descend back to the muddy floor level to pass beneath the chamber, and reach a complete curtain blockage.
Modelling by Pete, lighting by Tarquin and Mandy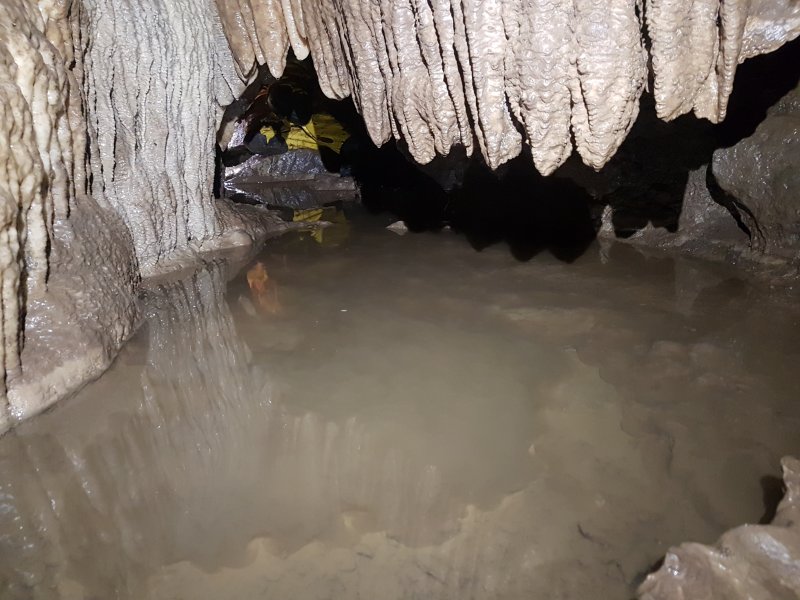 Quite insulting. The rest of the cave allows you to remain completely dry, but to bypass the formations, you have to crawl in a pool. It is possible to remain dry, perhaps with a wet knee pad, but only with some acrobatics. I think this is called The Dam.
Modelling by Pete, lighting by Tarquin and Mandy
Quite insulting. The rest of the cave allows you to remain completely dry, but to bypass the formations, you have to crawl in a pool. It is possible to remain dry, perhaps with a wet knee pad, but only with some acrobatics. I think this is called The Dam.
Modelling by Pete, lighting by Tarquin and Mandy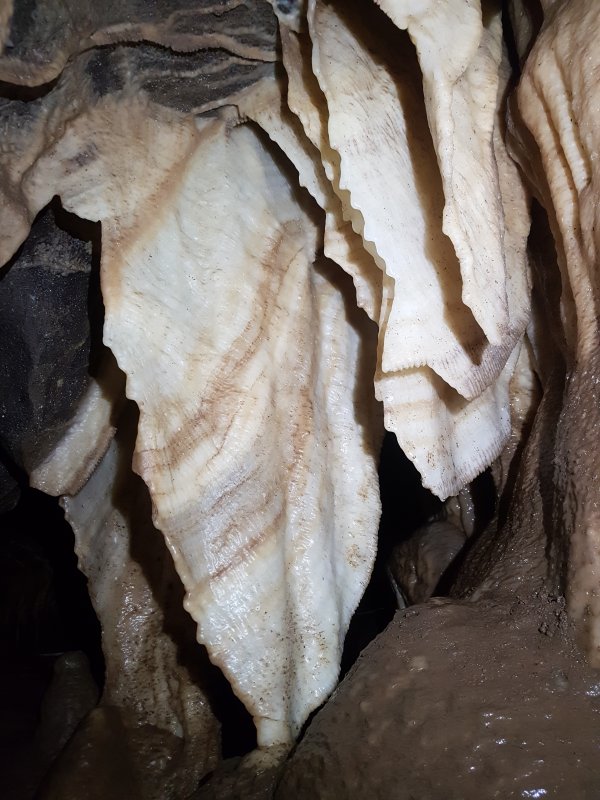 Curtains in the wet crawl.
Modelling by Pete, lighting by Tarquin and Pete
Curtains in the wet crawl.
Modelling by Pete, lighting by Tarquin and Pete Curtains with mud coating, showing that the flood level is above them.
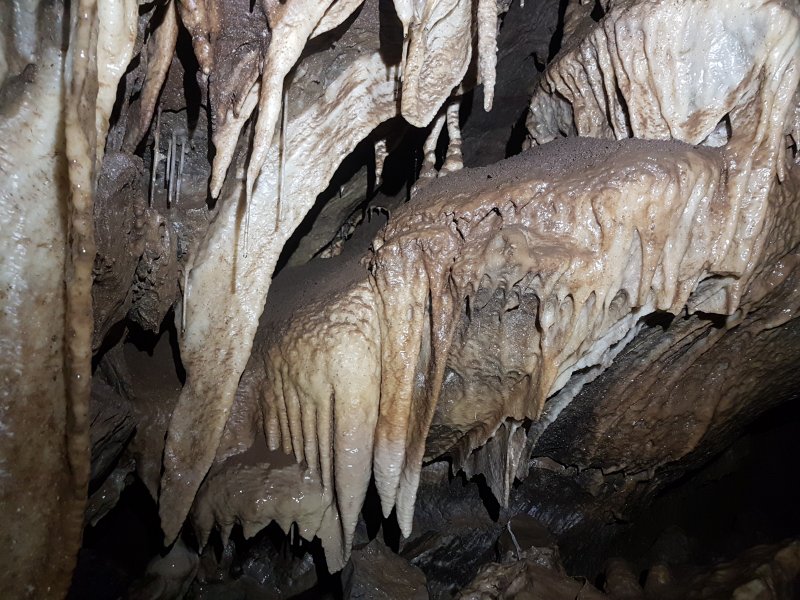 Flowstone with mud on top.
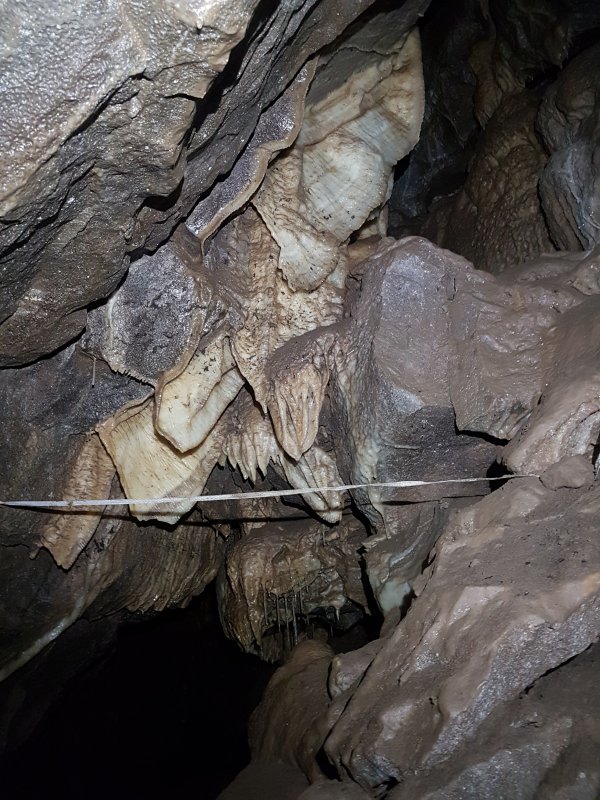 These caves have more than their fair share of curtains. This set has more mud with fresh bat guano, suggesting that it has been a while since it flooded to that level.
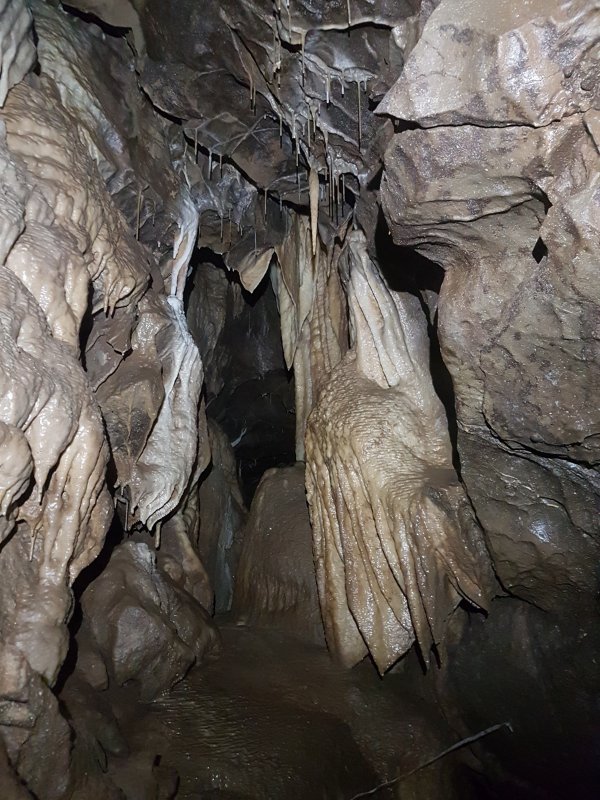 Window through the curtains.
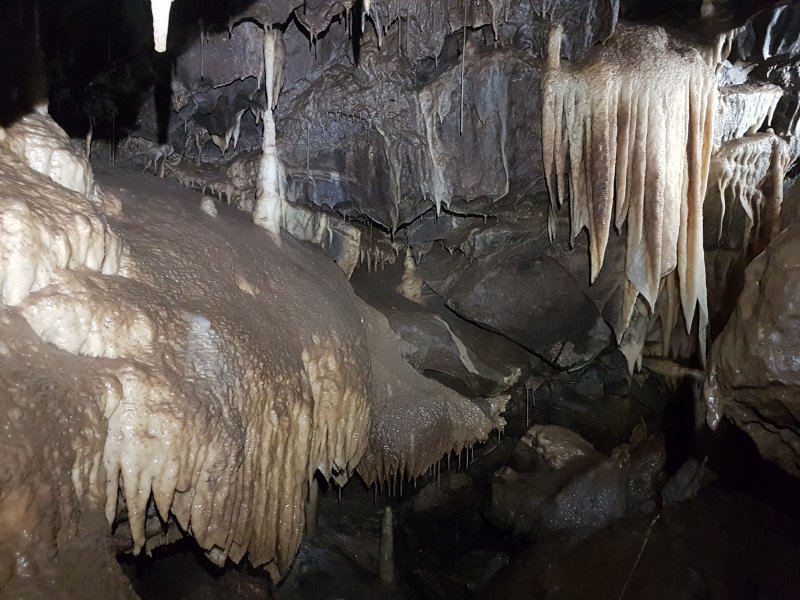 Below helictite corner.
Lighting by Tarquin, Pete and Mandy
Below helictite corner.
Lighting by Tarquin, Pete and Mandy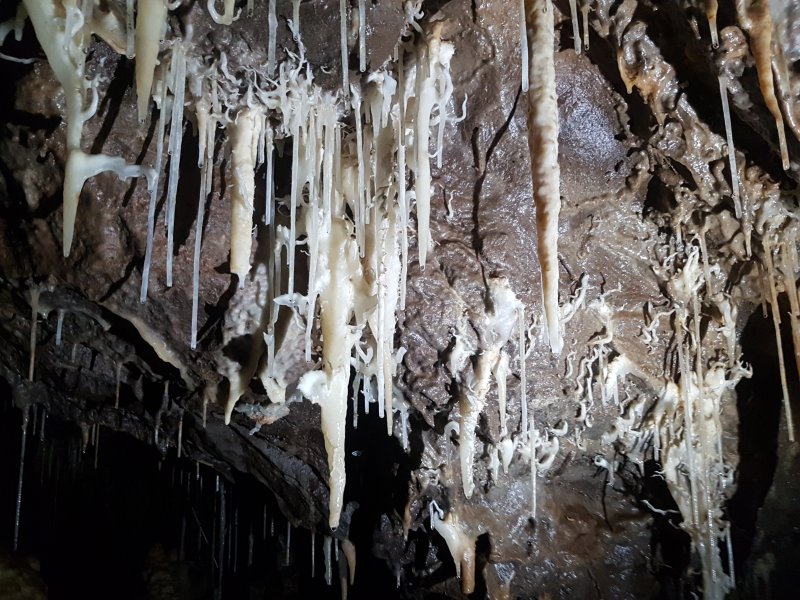 Helictite Corner. The helictites are similar in style to those in Ogof Ffynnon Du, but in white. Very basic, not branching, but tucked neatly between the straws.
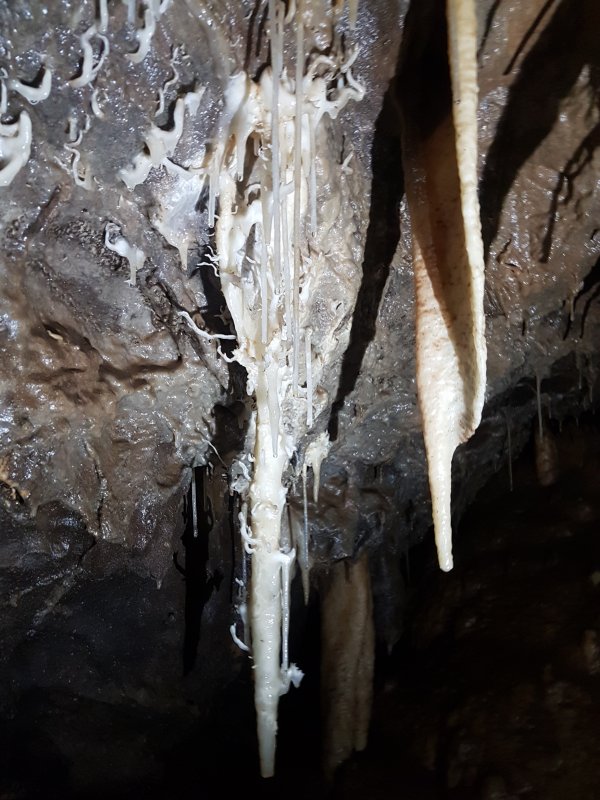 Helictite Corner.
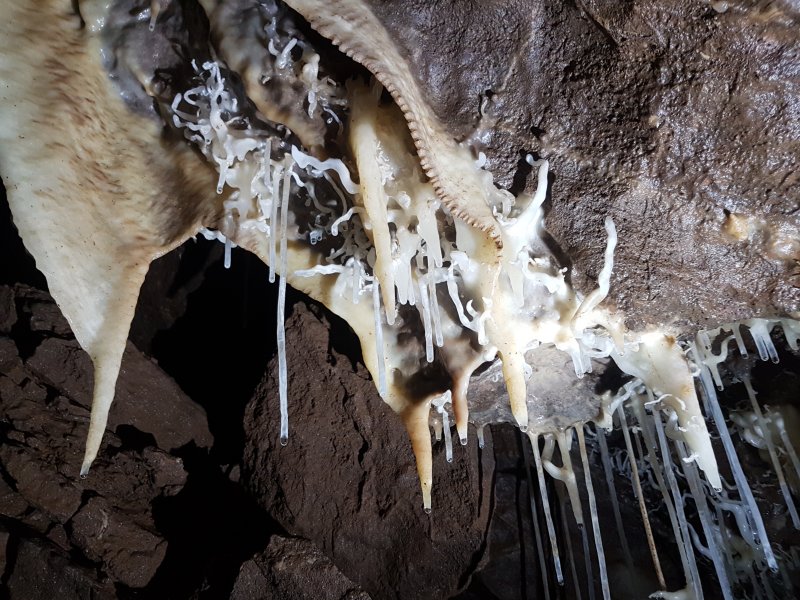 Helictite Corner.
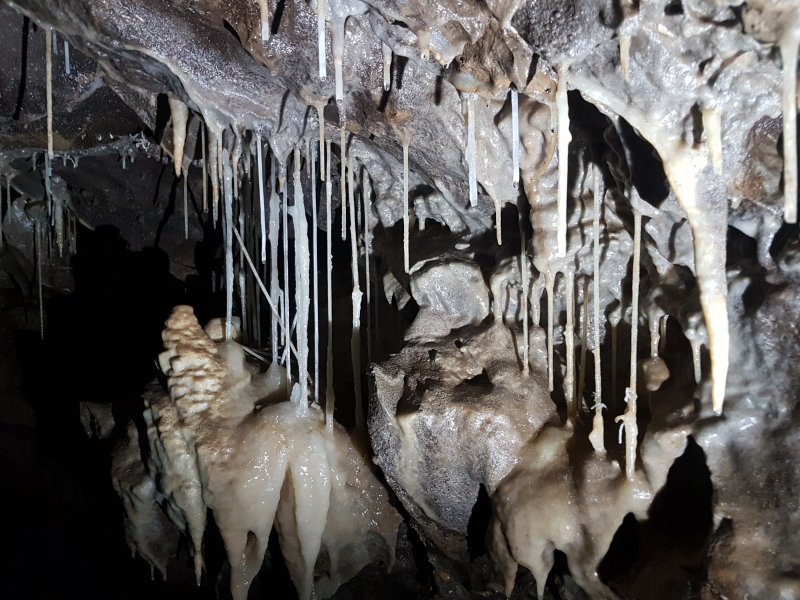 Straws at Helictite Corner.
 Helictite Corner.
 Helictite Corner.
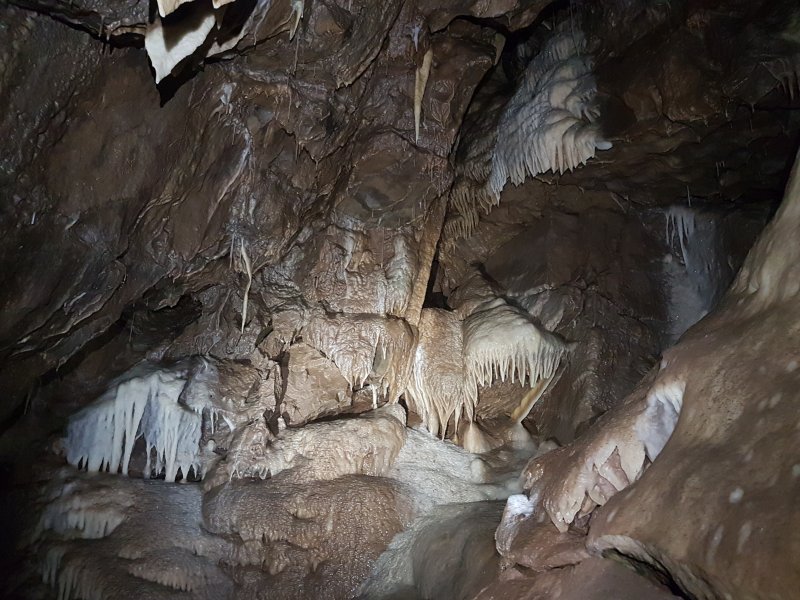 Flowstone covered wall at Helictite Corner. This cave has an almost unreal amount of stal for Britain, like a painting from imagination.
Lighting by Tarquin, Pete and Mandy
Flowstone covered wall at Helictite Corner. This cave has an almost unreal amount of stal for Britain, like a painting from imagination.
Lighting by Tarquin, Pete and Mandy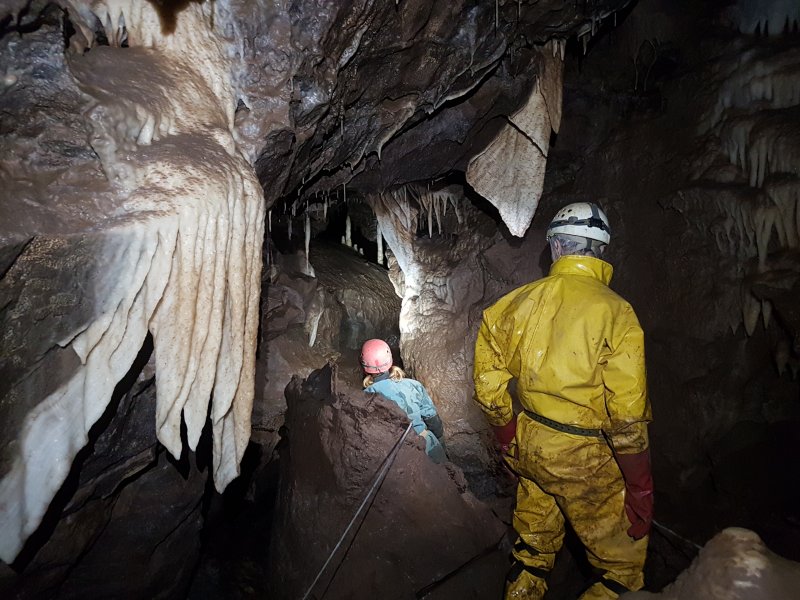 Beyond Helictite Corner.
Modelling by Pete and Mandy, lighting by Tarquin, Pete and Mandy
Beyond Helictite Corner.
Modelling by Pete and Mandy, lighting by Tarquin, Pete and Mandy Beyond Helictite Corner.
Modelling by Pete, lighting by Tarquin and Pete
Beyond Helictite Corner.
Modelling by Pete, lighting by Tarquin and Pete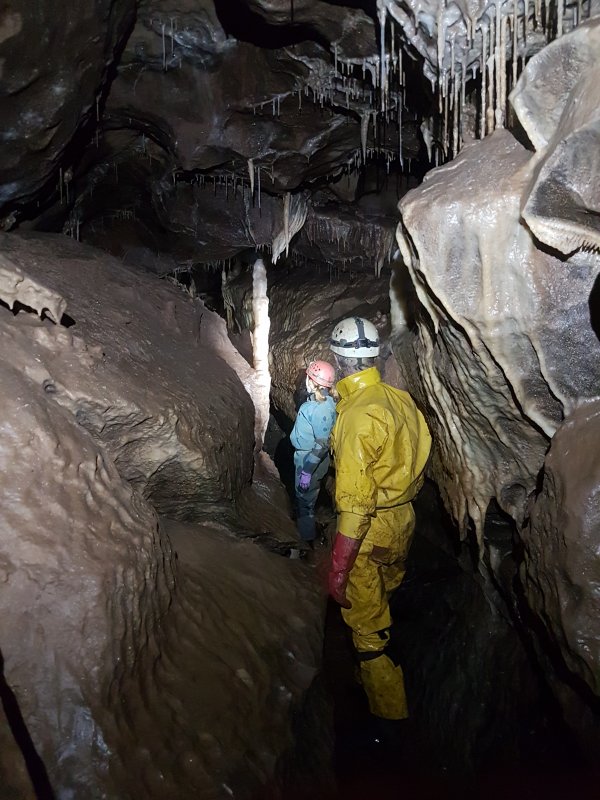 Beyond Helictite Corner.
Modelling by Pete and Mandy, lighting by Tarquin, Pete and Mandy
Beyond Helictite Corner.
Modelling by Pete and Mandy, lighting by Tarquin, Pete and Mandy Stalagmite with miniature gours.
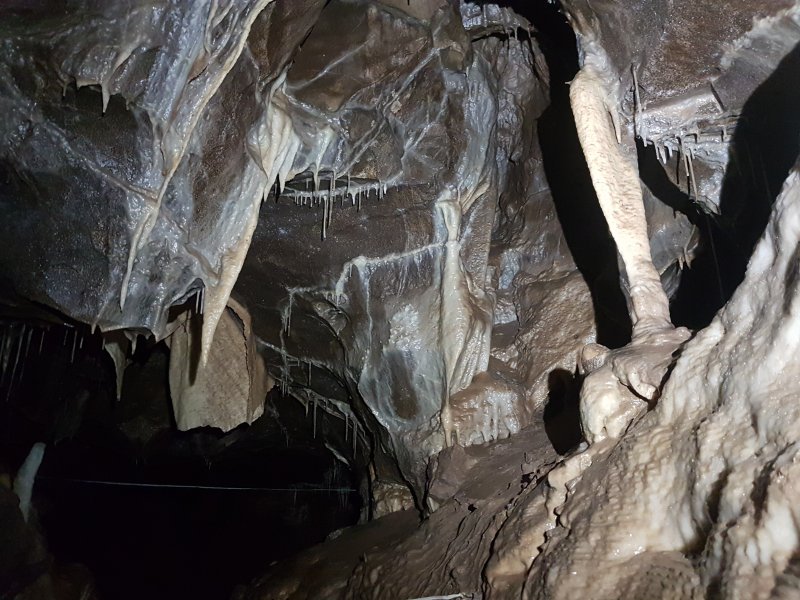 Curtain and column.
 Flowstone.
Modelling by Pete, lighting by Tarquin and Pete
Flowstone.
Modelling by Pete, lighting by Tarquin and Pete Straw-filled alcove.
Modelling by Pete and Mandy, lighting by Tarquin, Pete and Mandy
Straw-filled alcove.
Modelling by Pete and Mandy, lighting by Tarquin, Pete and Mandy Decorated corner.
Modelling by Pete and Mandy, lighting by Tarquin, Pete and Mandy
Decorated corner.
Modelling by Pete and Mandy, lighting by Tarquin, Pete and Mandy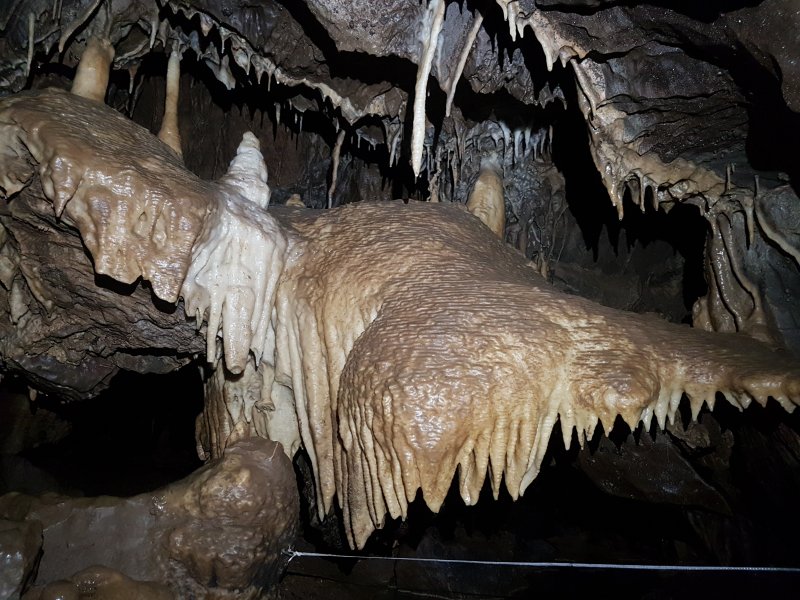 False floor.
 Helictites on a seam.
 Iconic helictite column.
Lighting by Pete and Mandy
Iconic helictite column.
Lighting by Pete and Mandy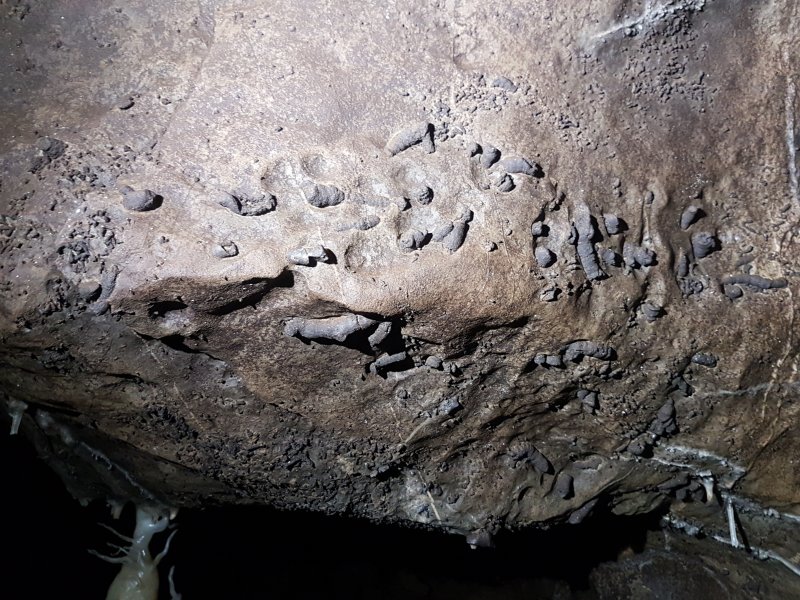 Fossils of what appears to be a colonial rugose coral, specifically Lithostrotion.
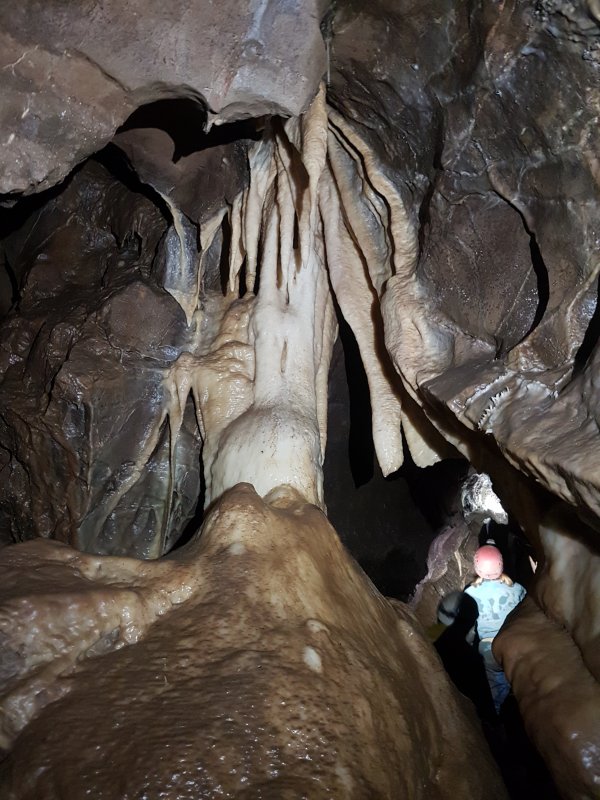 Column almost filling the passage.
Modelling by Pete and Mandy, lighting by Tarquin, Pete and Mandy
Column almost filling the passage.
Modelling by Pete and Mandy, lighting by Tarquin, Pete and Mandy Conjoined curtain.
Modelling by Pete and Mandy, lighting by Tarquin, Pete and Mandy
Conjoined curtain.
Modelling by Pete and Mandy, lighting by Tarquin, Pete and Mandy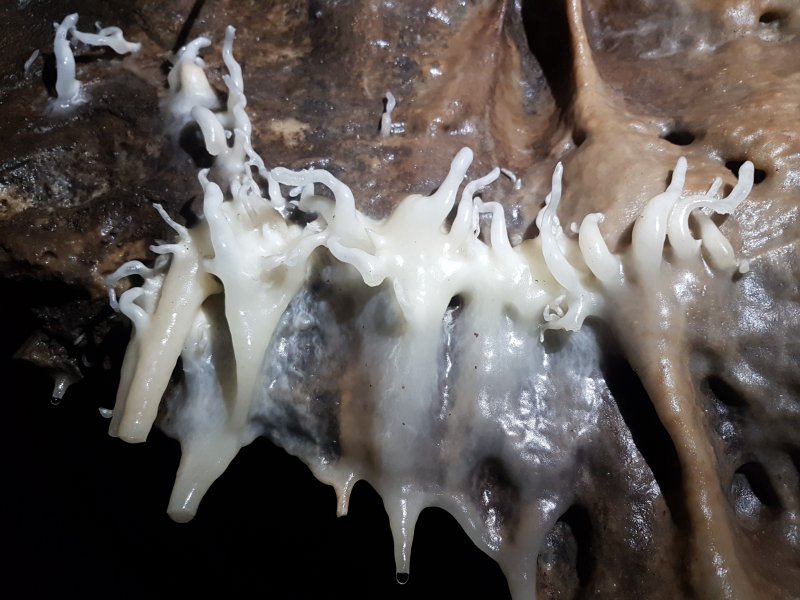 Small helictites.
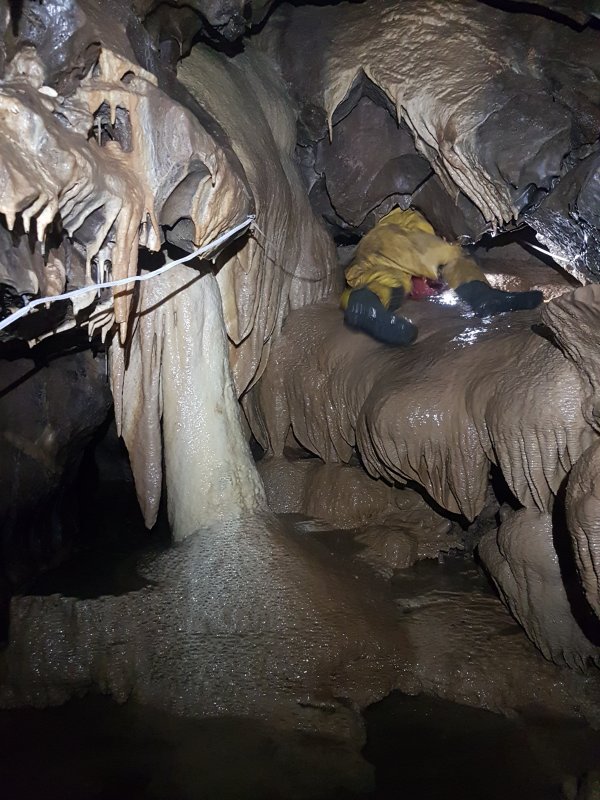 Barabobath's Bath, the crystal pool on the left, which is bypassed via a scrable over flowstone.
Modelling by Pete, lighting by Tarquin and Pete
Barabobath's Bath, the crystal pool on the left, which is bypassed via a scrable over flowstone.
Modelling by Pete, lighting by Tarquin and Pete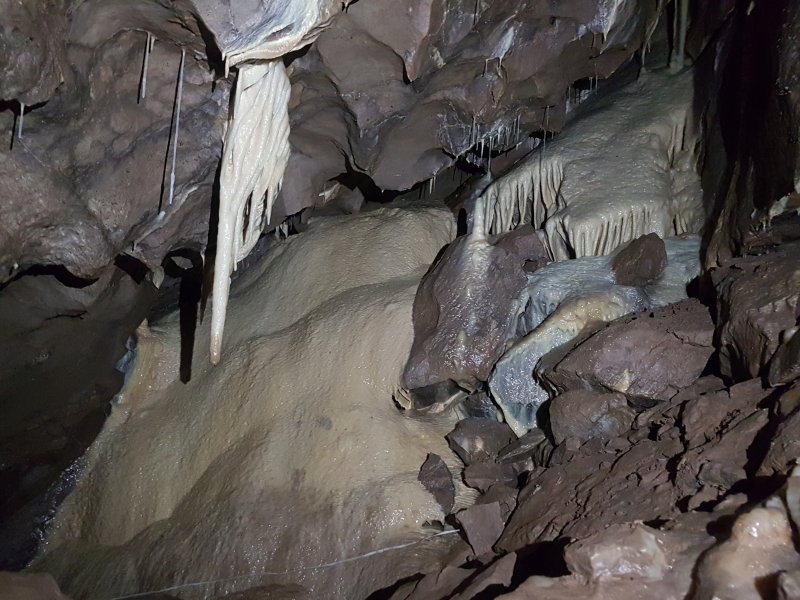 Bypass Grotto.
 End of the bypass.
Modelling by Pete, lighting by Tarquin and Pete
End of the bypass.
Modelling by Pete, lighting by Tarquin and Pete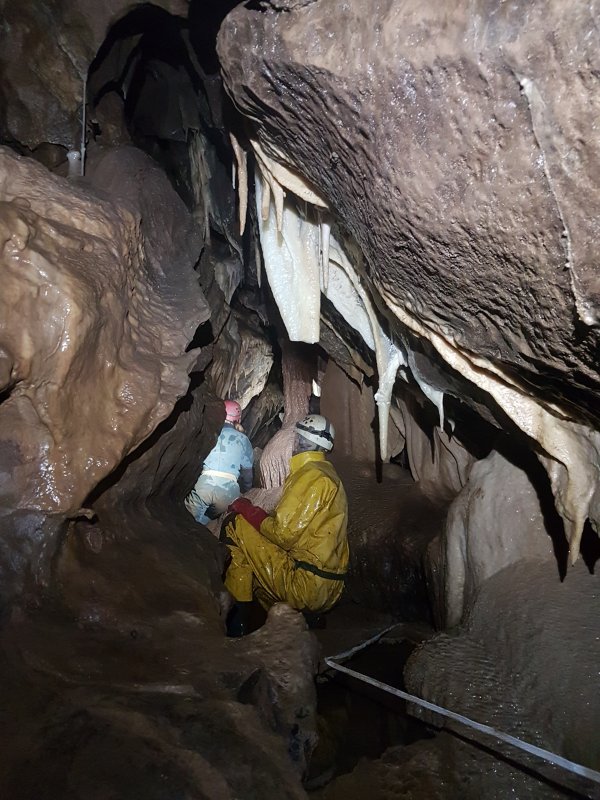 Approaching an elephant.
Modelling by Pete and Mandy, lighting by Tarquin, Pete and Mandy
Approaching an elephant.
Modelling by Pete and Mandy, lighting by Tarquin, Pete and Mandy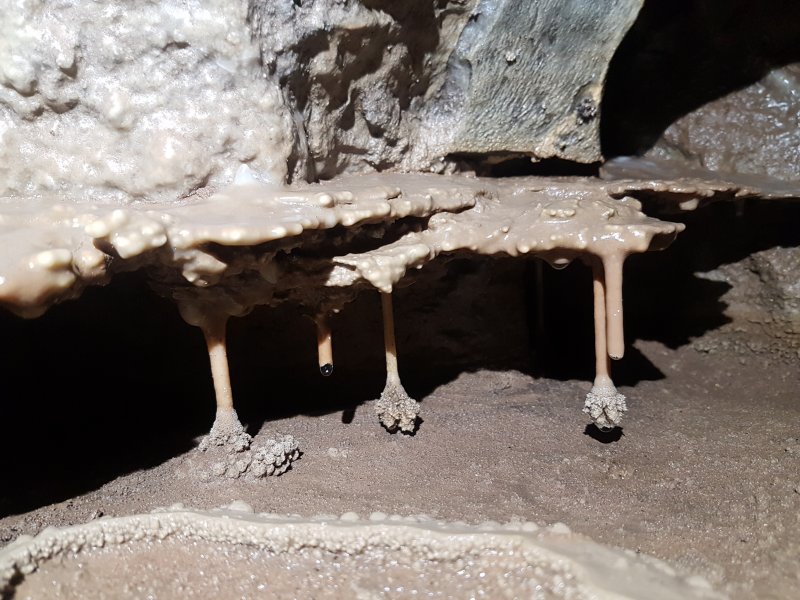 Pom poms.
 Tail of an elephant.
Modelling by Pete and Mandy, lighting by Tarquin, Pete and Mandy
Tail of an elephant.
Modelling by Pete and Mandy, lighting by Tarquin, Pete and Mandy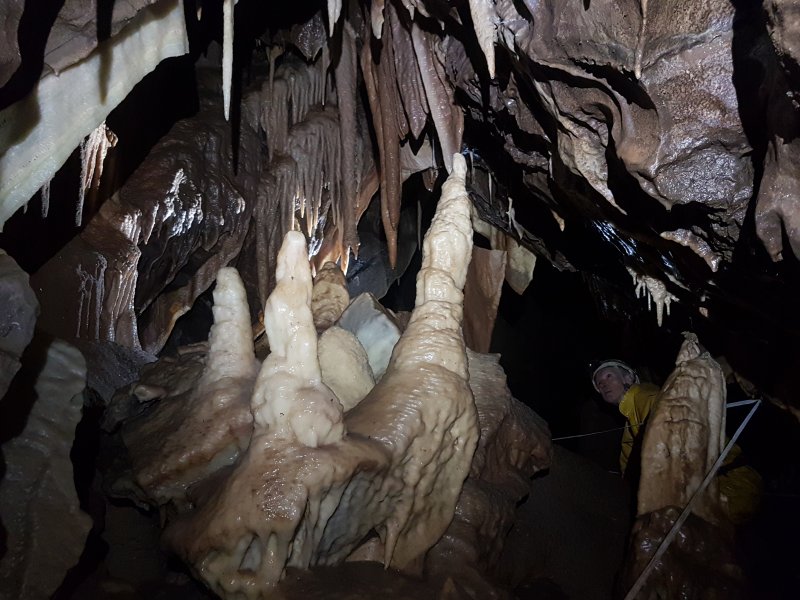 Stunning grotto, which is the back of Elephant Trunk Chamber.
Modelling by Pete, lighting by Tarquin and Mandy
Stunning grotto, which is the back of Elephant Trunk Chamber.
Modelling by Pete, lighting by Tarquin and Mandy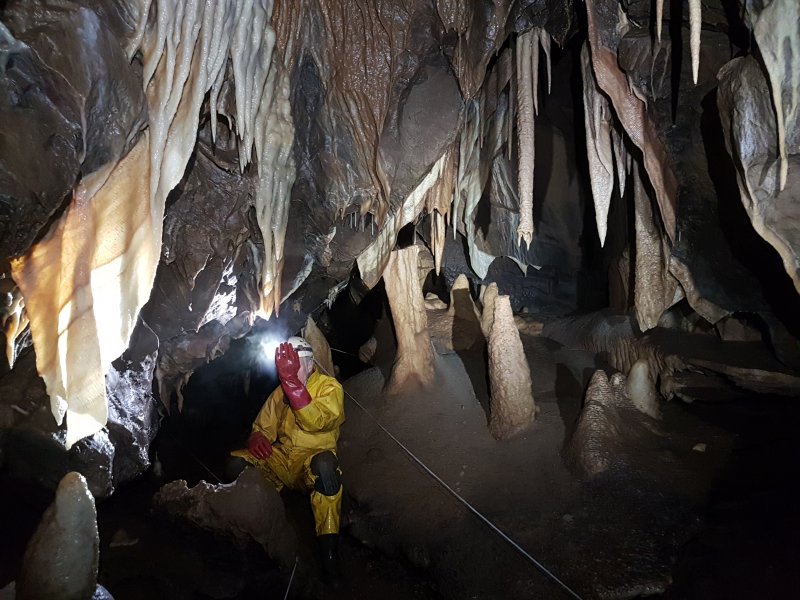 Elephant Trunk Chamber. The name comes from the elephant's trunk shaped stalatite in the middle. This was once a column connected to the calcite floor, but the floor got washed away, snapping the colum to leave the trunk.
Modelling by Pete, lighting by Tarquin, Mandy and Pete
Elephant Trunk Chamber. The name comes from the elephant's trunk shaped stalatite in the middle. This was once a column connected to the calcite floor, but the floor got washed away, snapping the colum to leave the trunk.
Modelling by Pete, lighting by Tarquin, Mandy and Pete High rift beyond Elephant Trunk Chamber.
Modelling by Mandy, lighting by Tarquin, Pete and Mandy
High rift beyond Elephant Trunk Chamber.
Modelling by Mandy, lighting by Tarquin, Pete and Mandy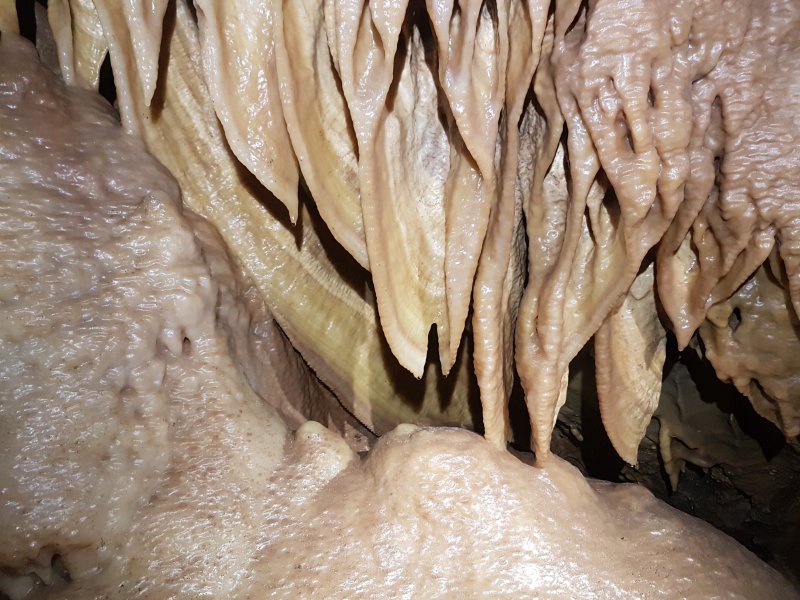 Curtains in the high rift.
Lighting by Tarquin and Pete
Curtains in the high rift.
Lighting by Tarquin and Pete Formations in the high rift.
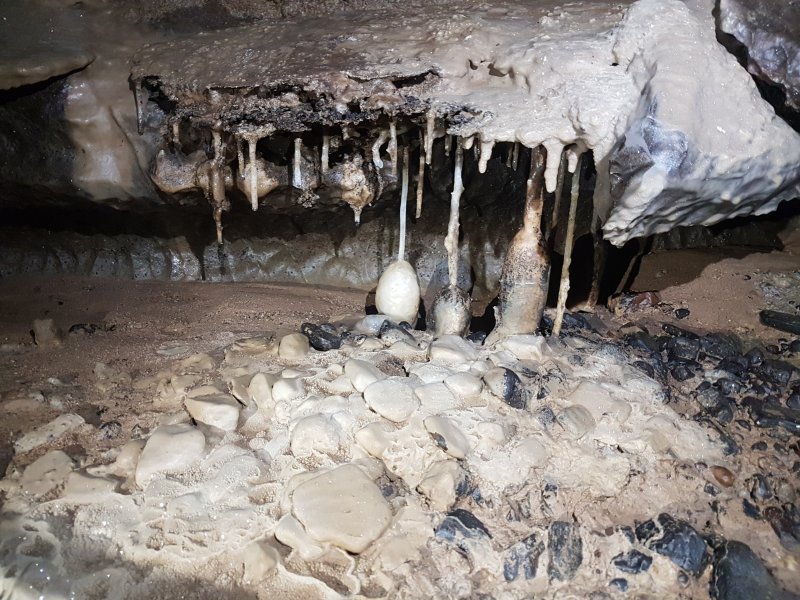 Straw columns and calcited pebbles.
Lighting by Tarquin and Pete
Straw columns and calcited pebbles.
Lighting by Tarquin and Pete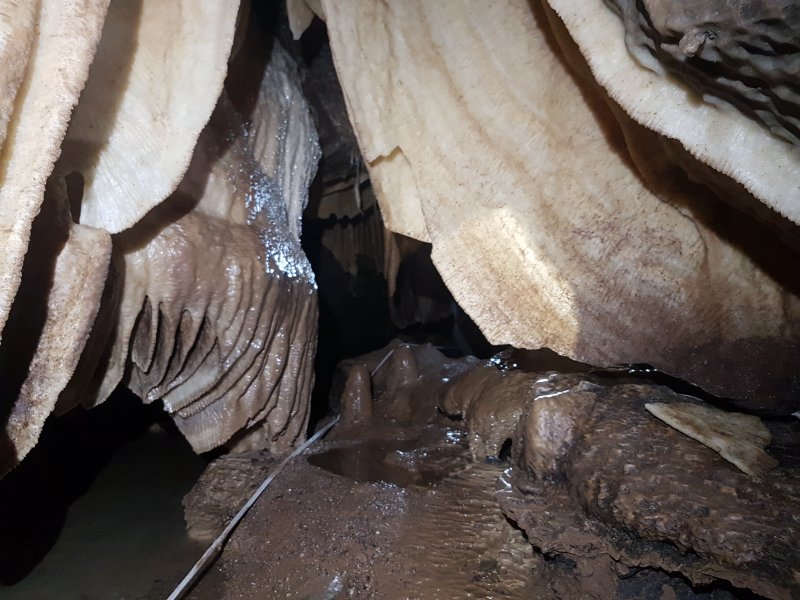 Curtains in East Rift.
Lighting by Tarquin and Mandy
Curtains in East Rift.
Lighting by Tarquin and Mandy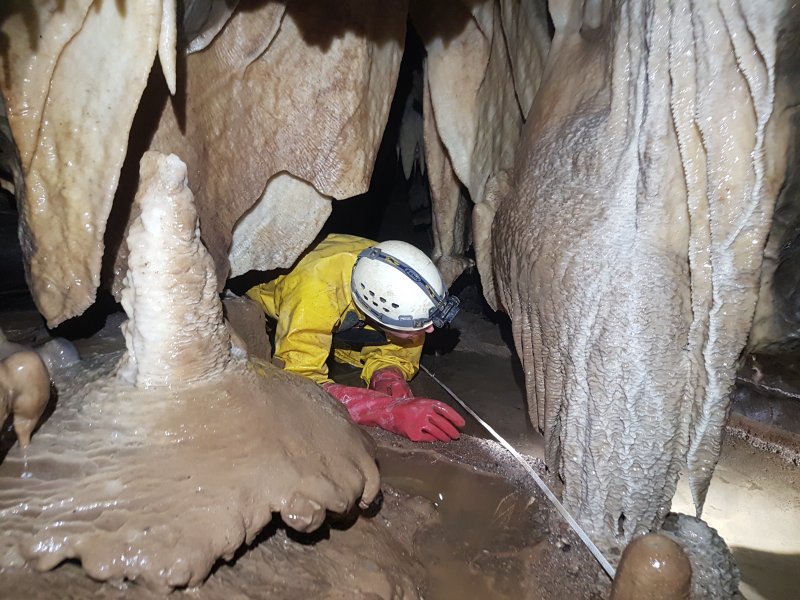 Crawling between the curtains. Someone appears to have got this wrong in the past and broken something, but there is no other way through, so care is the only option.
Modelling by Pete, lighting by Tarquin and Pete
Crawling between the curtains. Someone appears to have got this wrong in the past and broken something, but there is no other way through, so care is the only option.
Modelling by Pete, lighting by Tarquin and Pete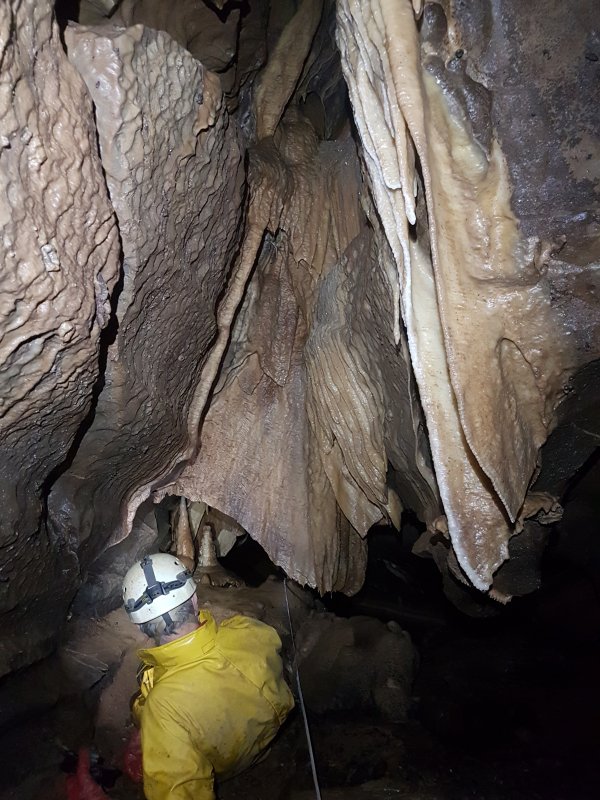 Ducking below curtains.
Modelling by Pete, lighting by Tarquin and Pete
Ducking below curtains.
Modelling by Pete, lighting by Tarquin and Pete Fossil horn coral.
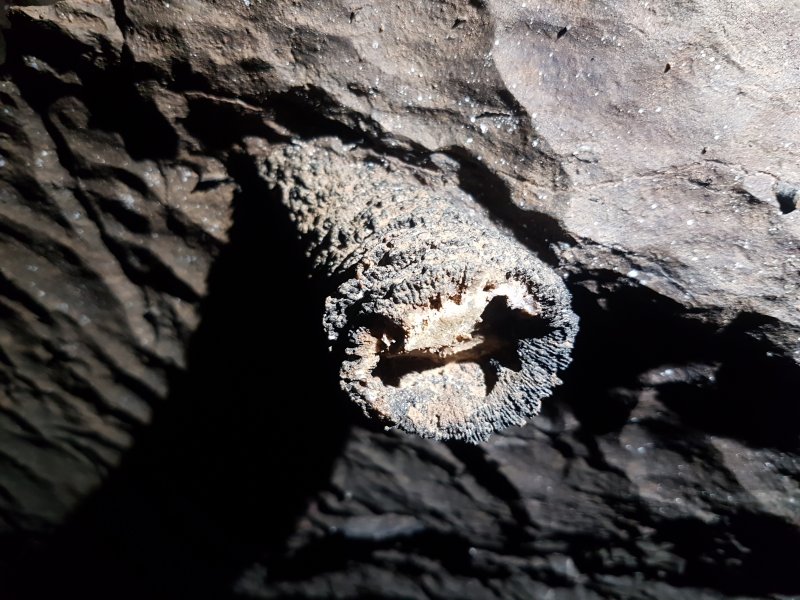 Fossil horn coral. The exact species is unknown, but it could be a Dibunophyllum.
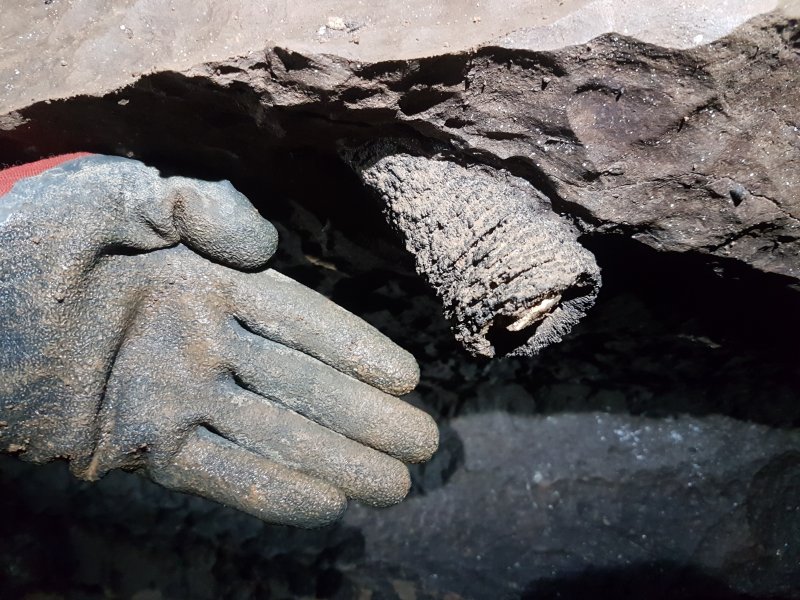 With a hand for scale.
Modelling by a partial Tarquin
With a hand for scale.
Modelling by a partial Tarquin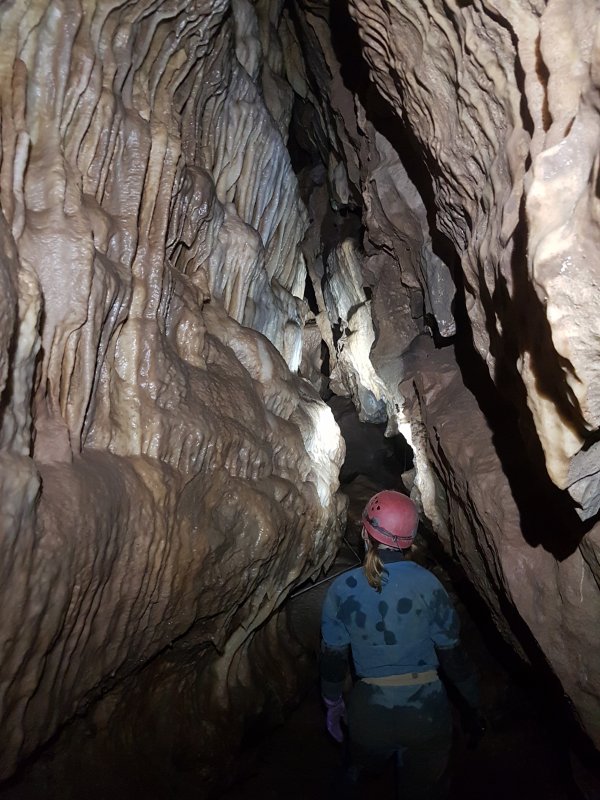 Nearing the junction at the end of East Rift.
Modelling by Mandy, lighting by Tarquin and Mandy
Nearing the junction at the end of East Rift.
Modelling by Mandy, lighting by Tarquin and Mandy Calcite flow at the junction.
 Calcite raft at the junction.
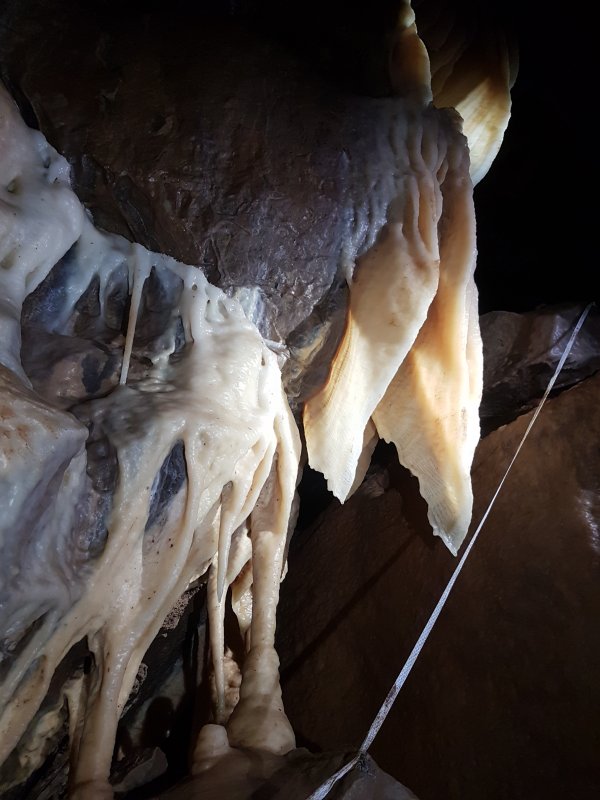 Curtains at the start of Glistening Pool Series, in Glistening Pool Chamber.
Lighting by Tarquin, Pete and Mandy
Curtains at the start of Glistening Pool Series, in Glistening Pool Chamber.
Lighting by Tarquin, Pete and Mandy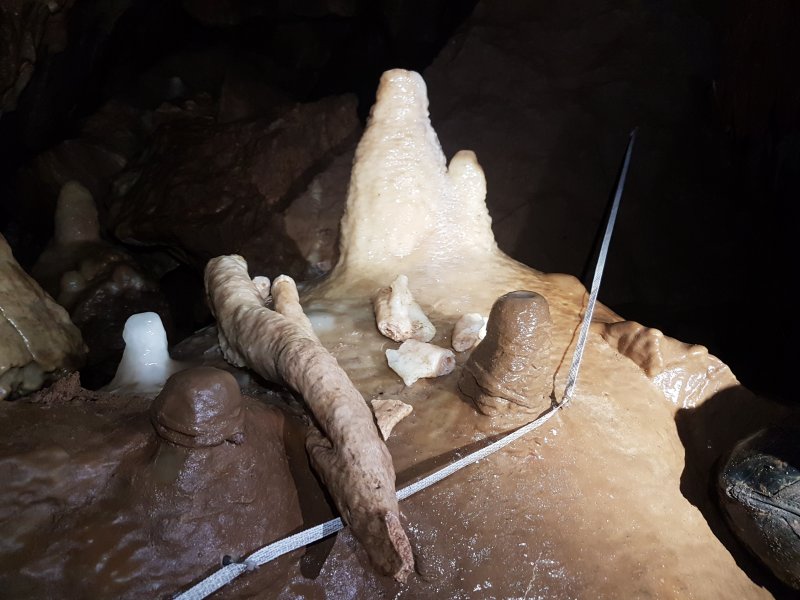 Stalagmites and a naturally-broken stalactite in Glistening Pool Chamber.
Modelling by Mandy's knee pad, lighting by Tarquin, Mandy and Pete
Stalagmites and a naturally-broken stalactite in Glistening Pool Chamber.
Modelling by Mandy's knee pad, lighting by Tarquin, Mandy and Pete Perfect curtains in Glistening Pool Chamber.
Lighting by Pete
Perfect curtains in Glistening Pool Chamber.
Lighting by Pete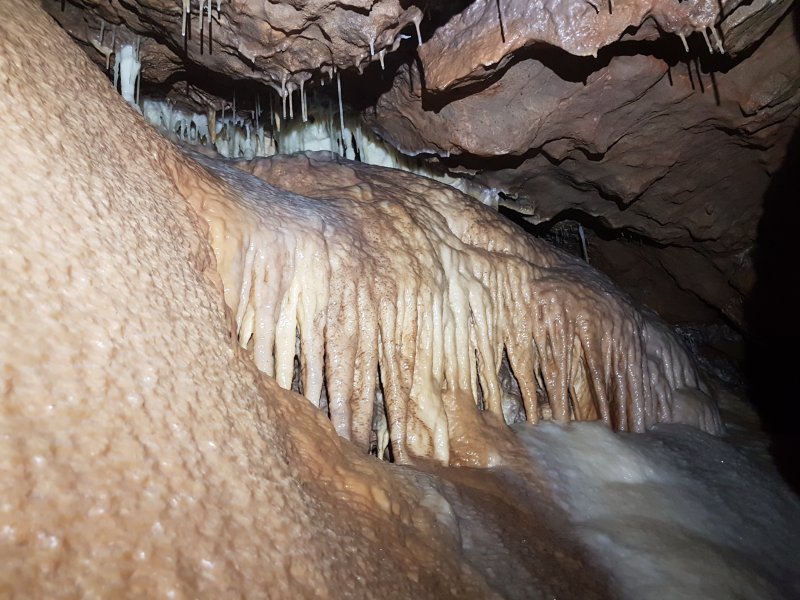 Flowstone in Glistening Pool Chamber.
 Flowstone in Glistening Pool Chamber, sitting above the other branch of the cave.
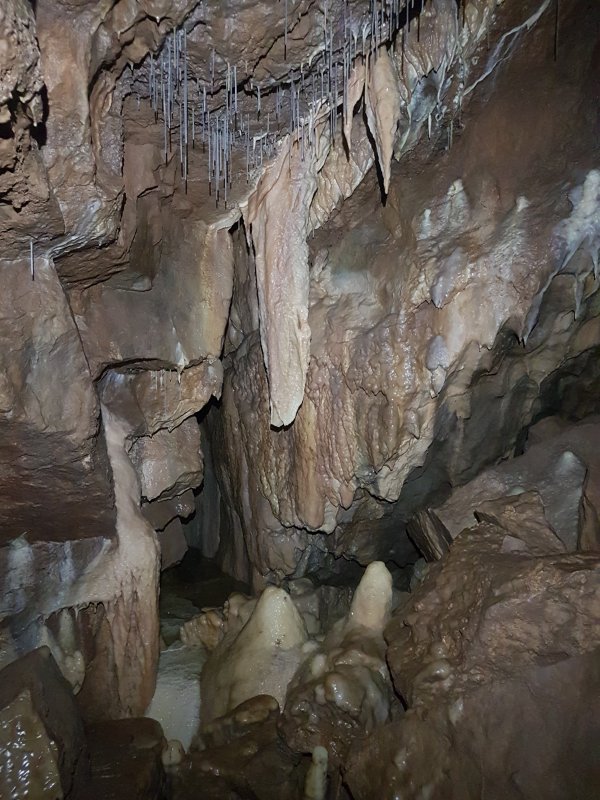 Outlet from Glistening Pool Chamber
Modelling by Pete, lighting by Tarquin and Pete
Outlet from Glistening Pool Chamber
Modelling by Pete, lighting by Tarquin and Pete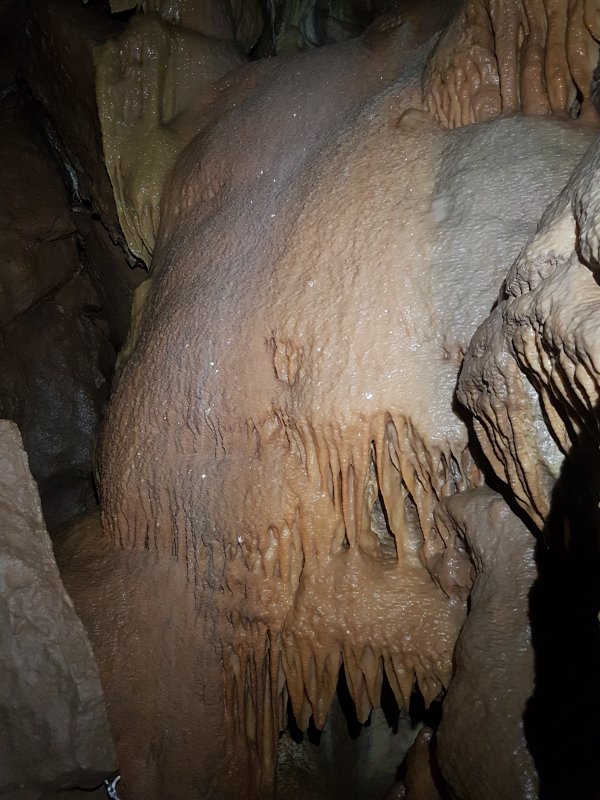 The way on is a clamber down beside this flowstone, and a careful wriggle under it.
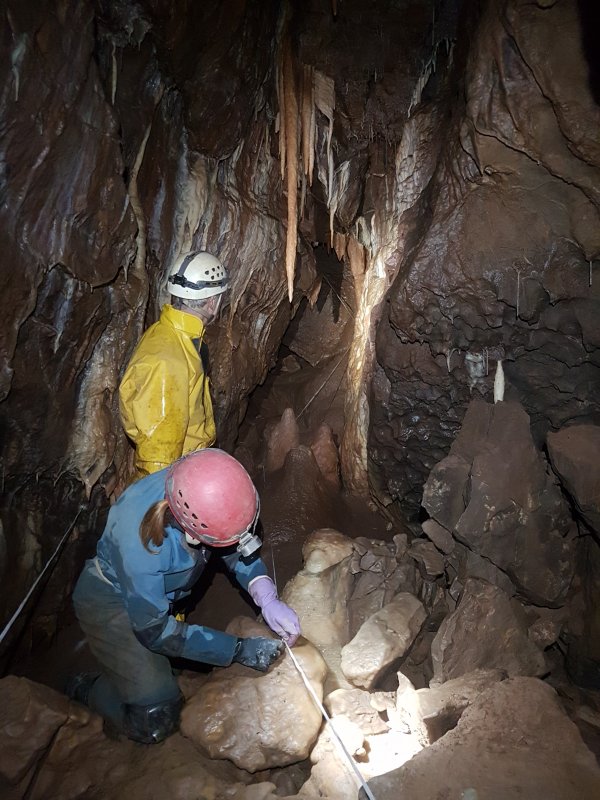 Repairing conservation tape. This is one of the roles of wardens, ensuring that the cave remains well protected and cared for.
Modelling by Mandy and Pete, lighting by Tarquin, Mandy and Pete
Repairing conservation tape. This is one of the roles of wardens, ensuring that the cave remains well protected and cared for.
Modelling by Mandy and Pete, lighting by Tarquin, Mandy and Pete Tiny column.
Lighting by Pete
Tiny column.
Lighting by Pete Formations before Fatbelly Rift.
 Calcite raft in the floor of Fatbelly Rift. This sits exactly where you would want to put your knee and your foot in one of the most awkward sections of the rift, but amazingly it has survived the passing cavers. Probably it regrows rapidly, and repairs itself.
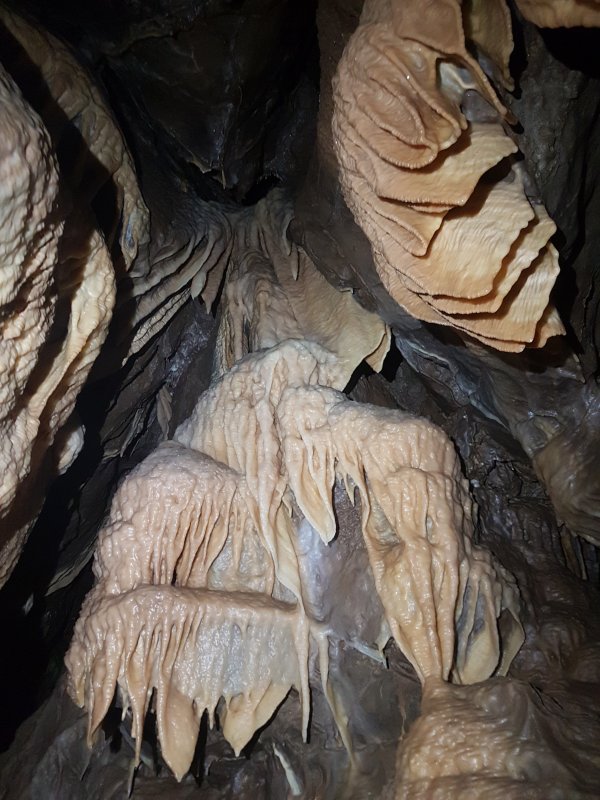 Top of Fatbelly Rift.
 Fatbelly Rift.
Modelling by Mandy, lighting by Tarquin and Mandy
Fatbelly Rift.
Modelling by Mandy, lighting by Tarquin and Mandy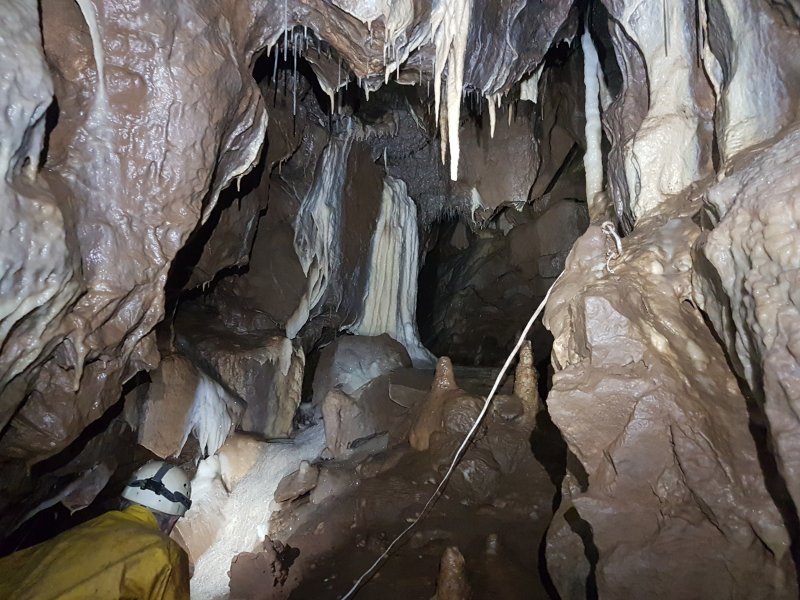 Pearl Chamber. In the right wall here is the way through into Jonathan's Chamber, but that is taped off, so we did not visit.
Modelling by Pete, lighting by Tarquin and Pete
Pearl Chamber. In the right wall here is the way through into Jonathan's Chamber, but that is taped off, so we did not visit.
Modelling by Pete, lighting by Tarquin and Pete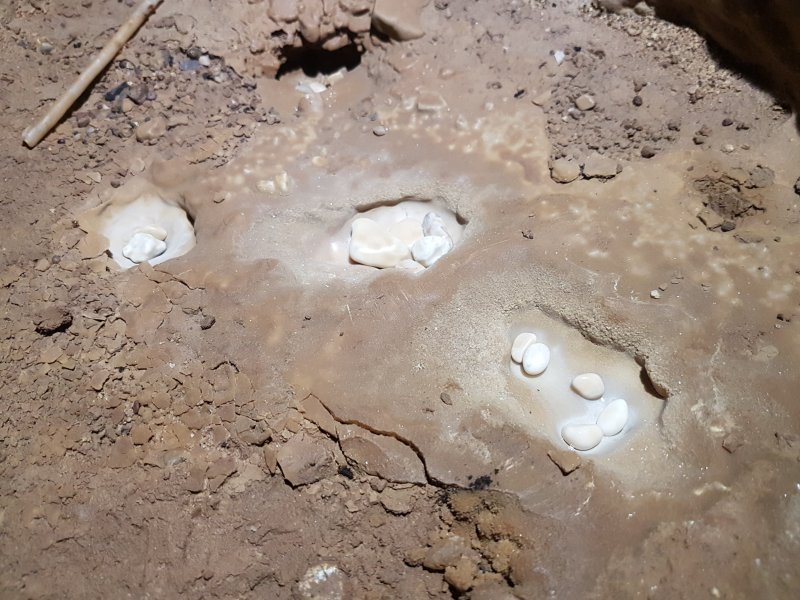 Cave pearls in Pearl Chamber. These are not particularly good pearls; really they are just pebbles with a small amount of calcite. They are protected by a trip hazard wall instead of tape.
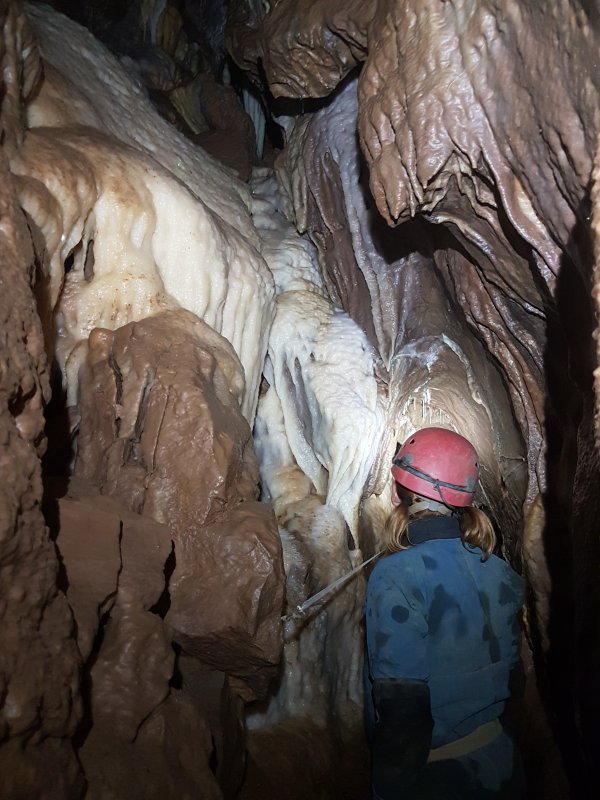 Beyond Pearl Chamber.
Modelling by Mandy, lighting by Tarquin and Mandy
Beyond Pearl Chamber.
Modelling by Mandy, lighting by Tarquin and Mandy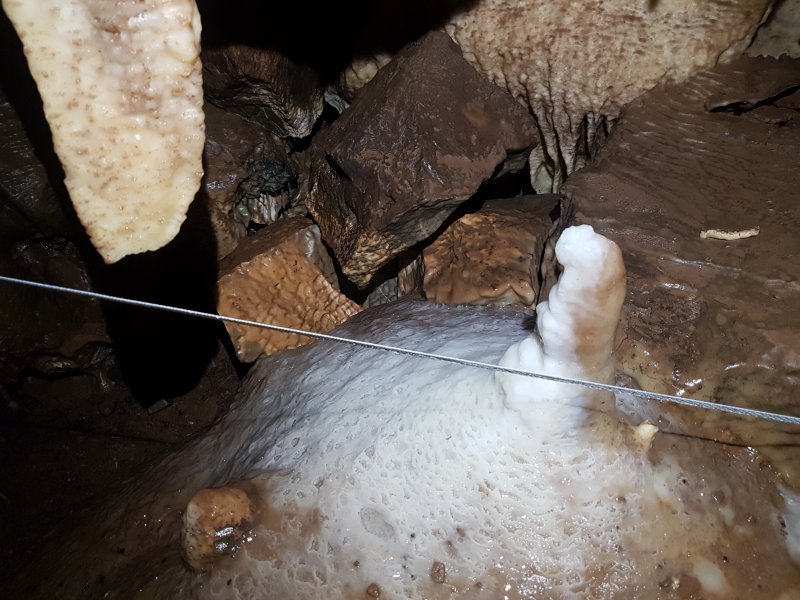 Stalagmite.
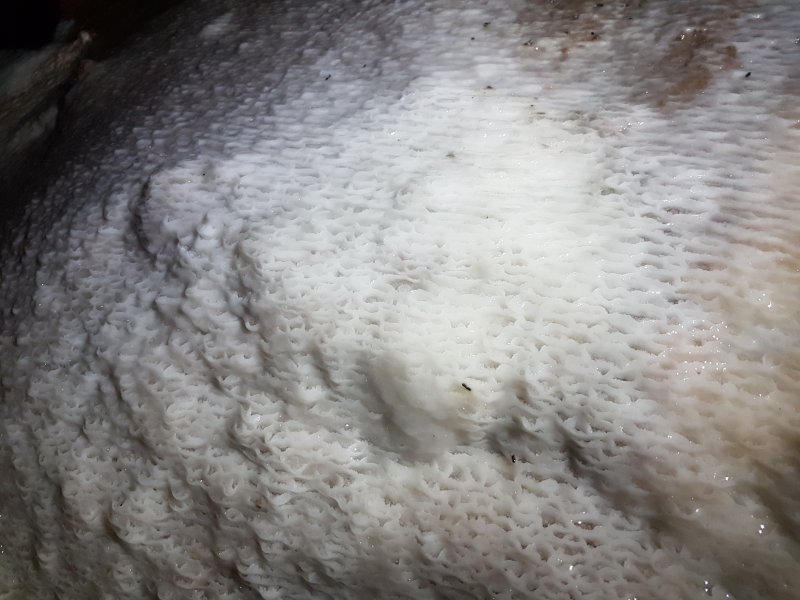 Flowstone.
 Miniature gour pools in the flowstone.
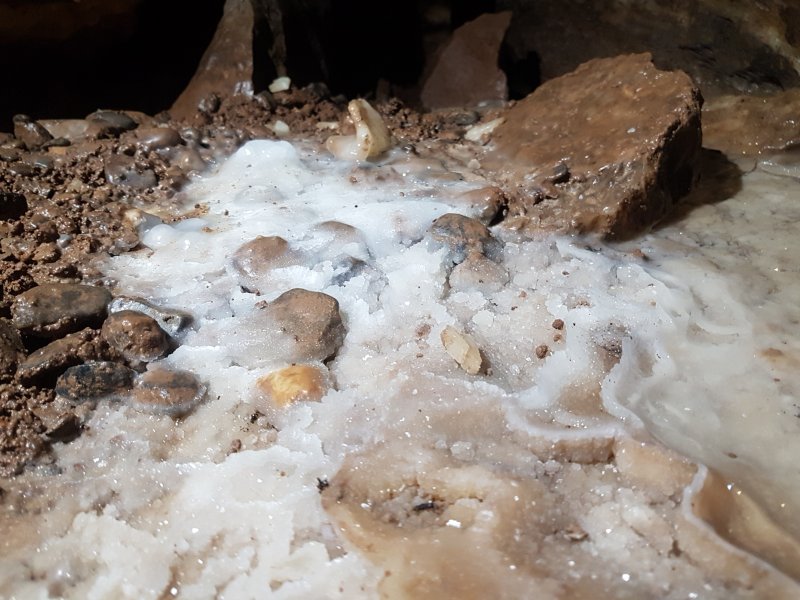 Calcited pebbles.
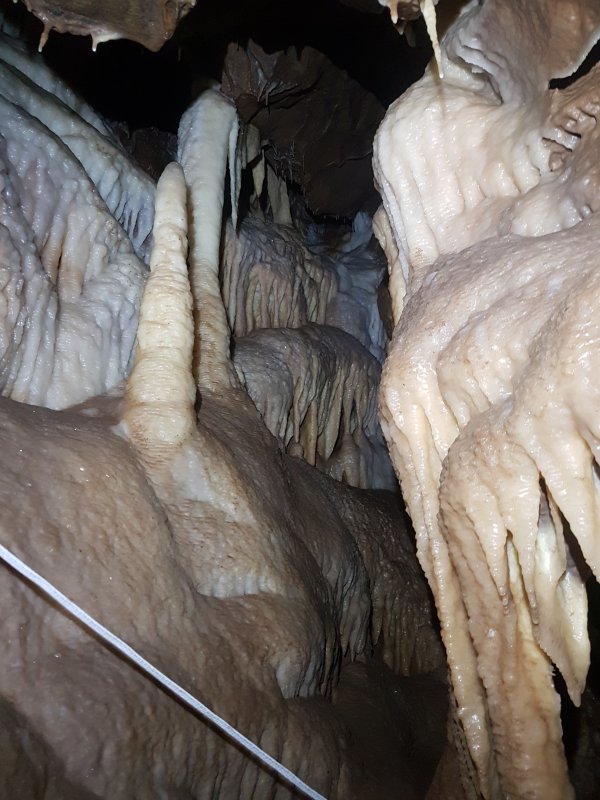 Flowstone covered rift.
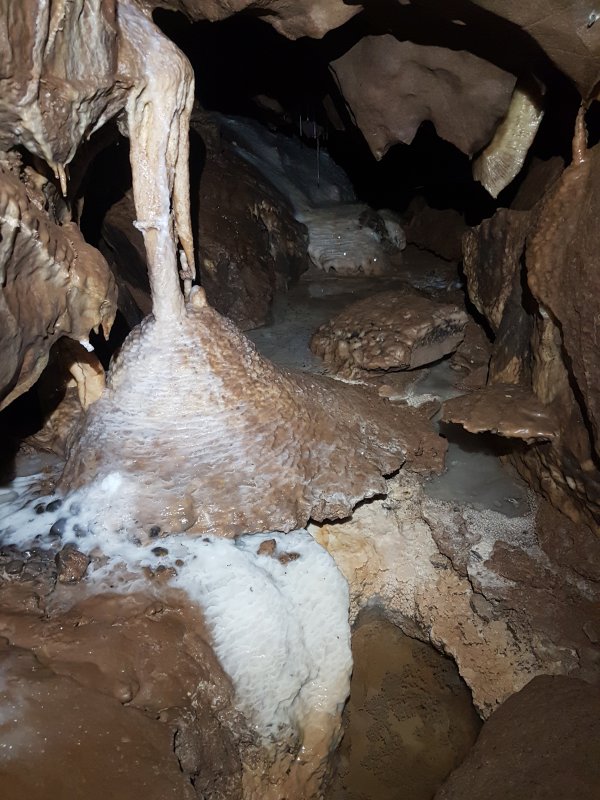 Column.
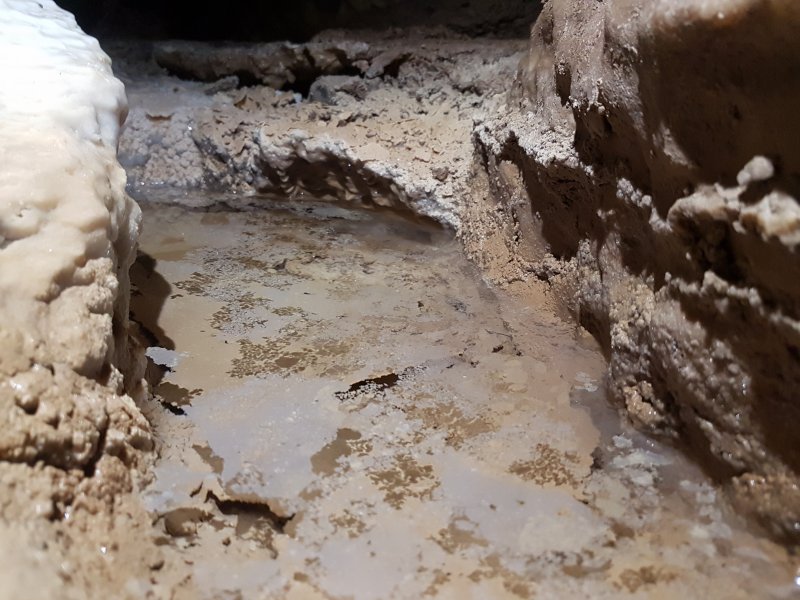 Calcite rafts below the column.
 Decorated passage.
Modelling by Mandy, lighting by Tarquin and Mandy
Decorated passage.
Modelling by Mandy, lighting by Tarquin and Mandy Muddy cave pearls in the path. These are self cleaning due to the drips, and will be re-cleaned within a few days.
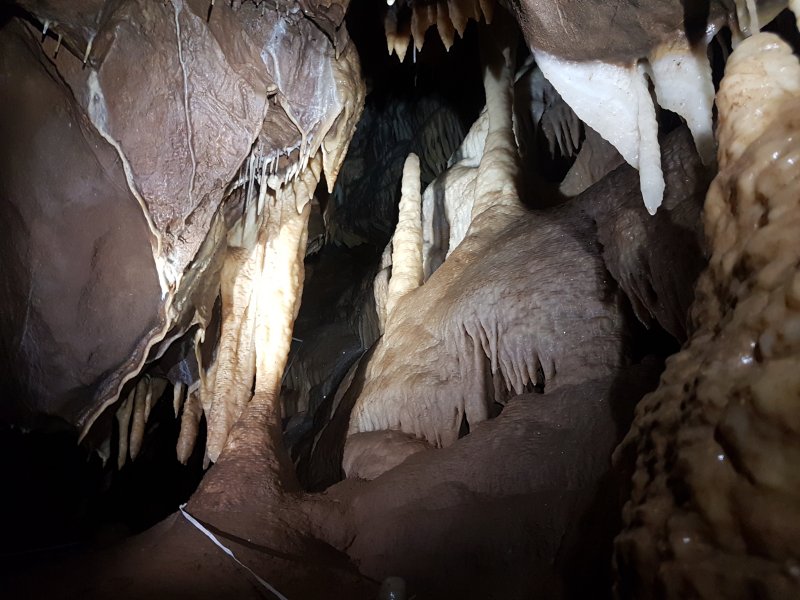 Grotto in a crawl.
Modelling by Pete, lighting by Tarquin and Pete
Grotto in a crawl.
Modelling by Pete, lighting by Tarquin and Pete Back of Column Chamber.
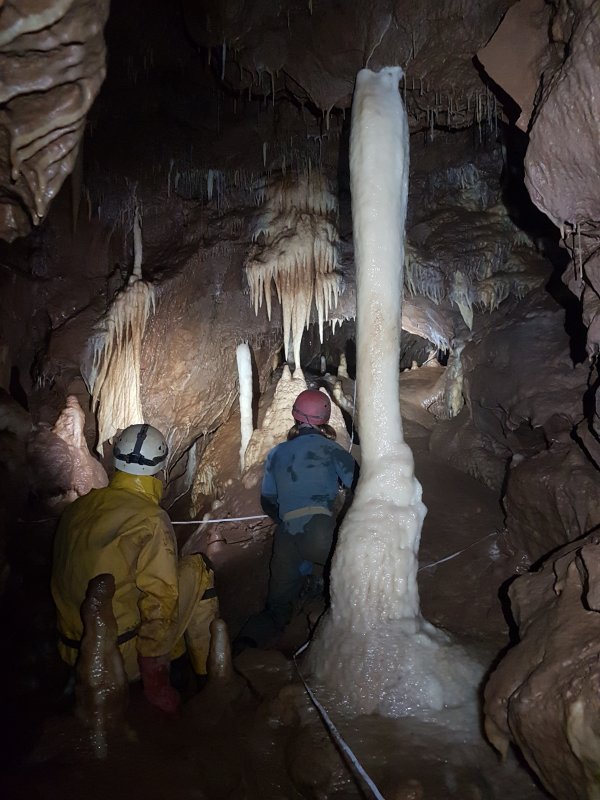 Column Chamber.
Modelling by Pete and Mandy, lighting by Tarquin, Pete and Mandy
Column Chamber.
Modelling by Pete and Mandy, lighting by Tarquin, Pete and Mandy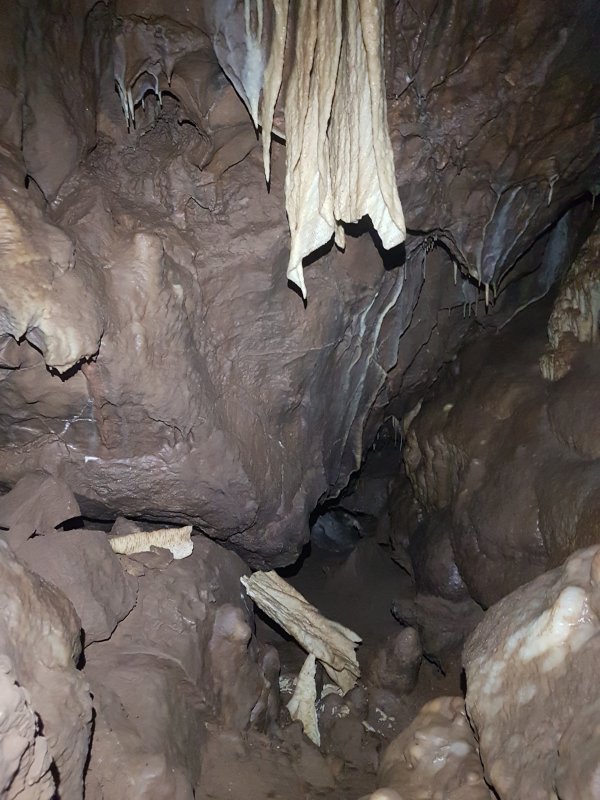 Curtains, current and naturally broken, in Column Chamber.
 Archway beyond Column Chamber.
 More columns in the passage beyond Column Chamber.
Modelling by Pete and Mandy, lighting by Tarquin, Pete and Mandy
More columns in the passage beyond Column Chamber.
Modelling by Pete and Mandy, lighting by Tarquin, Pete and Mandy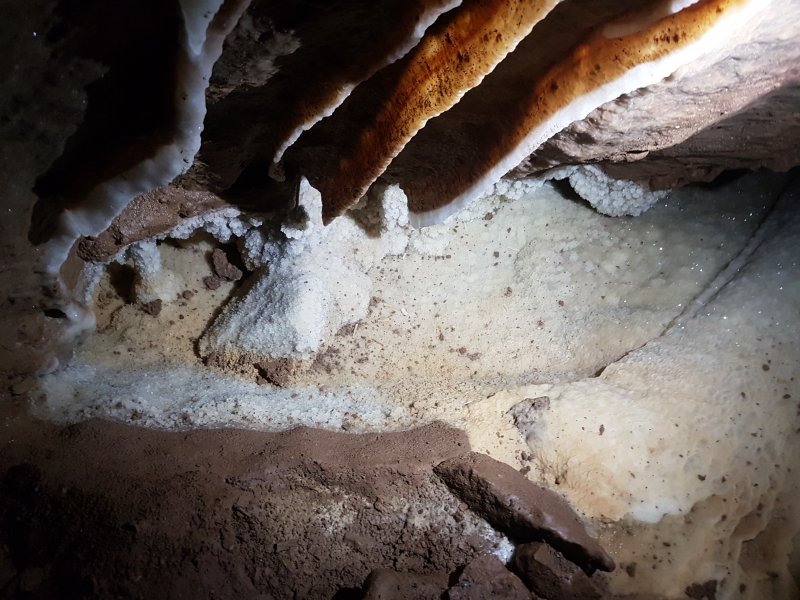 Dry crystal pool.
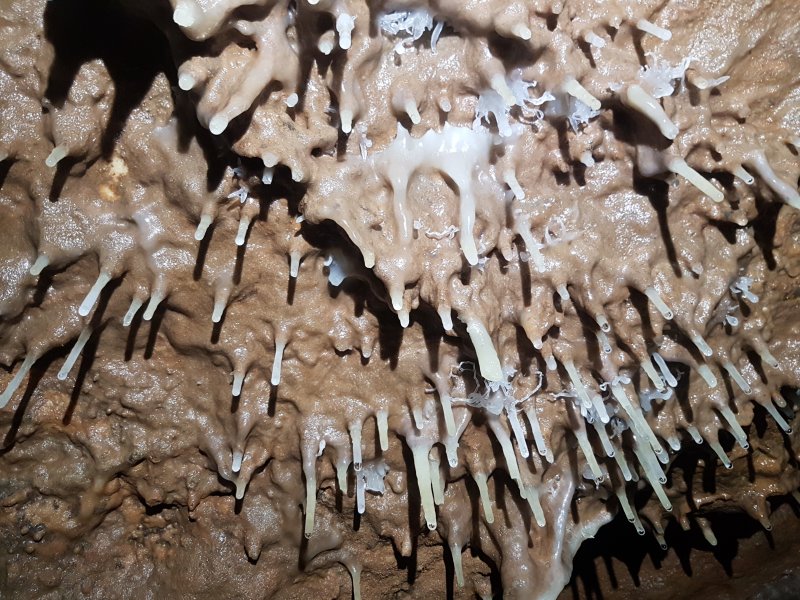 Helictites among the straws.
 Cavers are asked to stop at this final column. Glistening Pool Series ends in a chamber immediately afterwards.
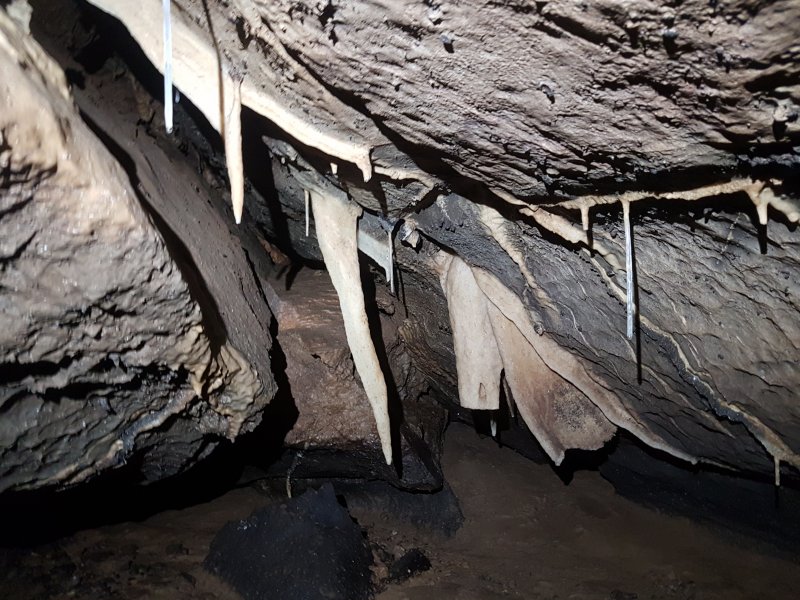 We return to the junction of routes, and head down West Passage, the other major branch of the cave.
 The passage intersects a tall rift, the same rift seen in Glistening Pool Chamber.
Lighting by Tarquin and Pete
The passage intersects a tall rift, the same rift seen in Glistening Pool Chamber.
Lighting by Tarquin and Pete Top of the rift.
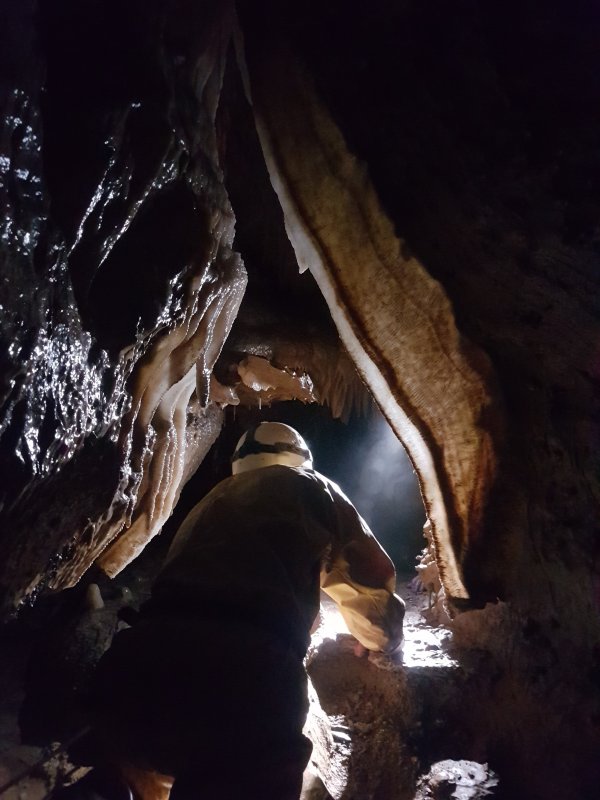 Translucent curtain in West Passage.
Modelling by Pete, lighting by Mandy
Translucent curtain in West Passage.
Modelling by Pete, lighting by Mandy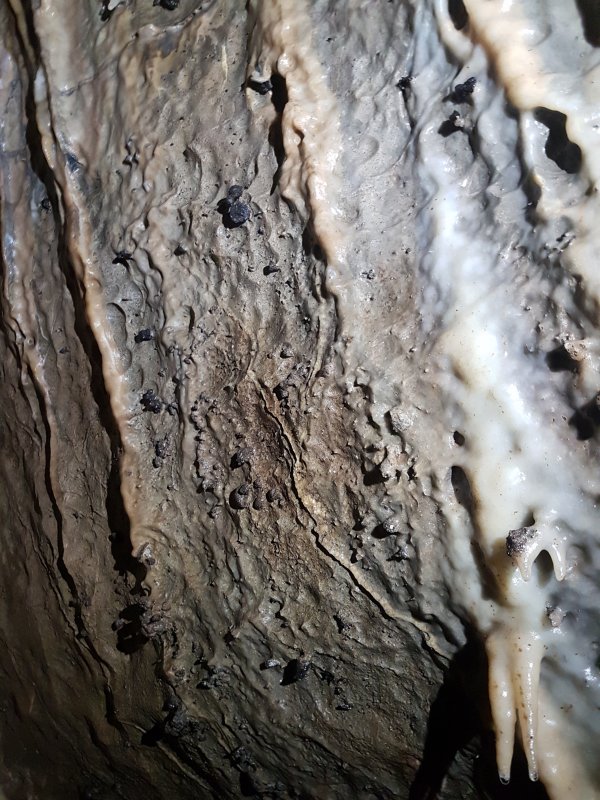 Fossils in West Passage.
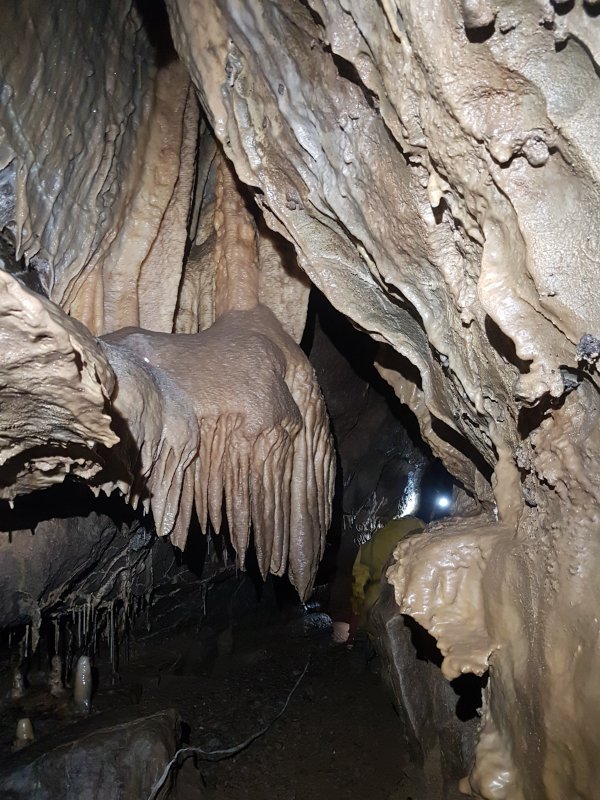 Flowstone formation.
Modelling by Pete, lighting by Tarquin, Pete and Mandy
Flowstone formation.
Modelling by Pete, lighting by Tarquin, Pete and Mandy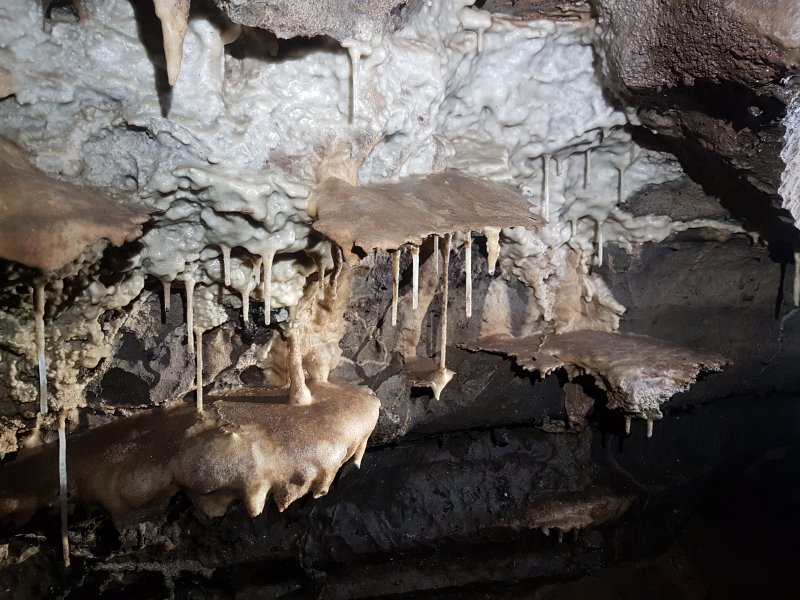 False floors.
Lighting by Tarquin and Pete
False floors.
Lighting by Tarquin and Pete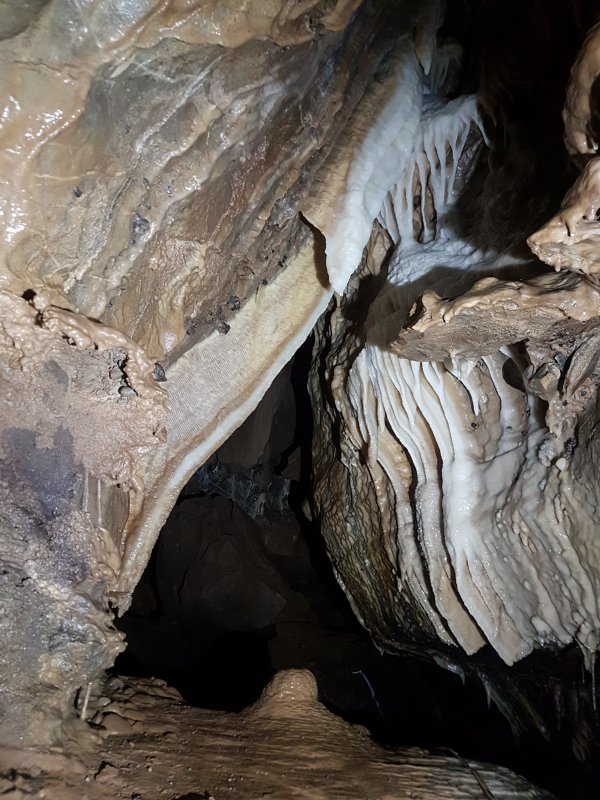 Curtain.
 Curtain and false floor formation.
 Old gour pools.
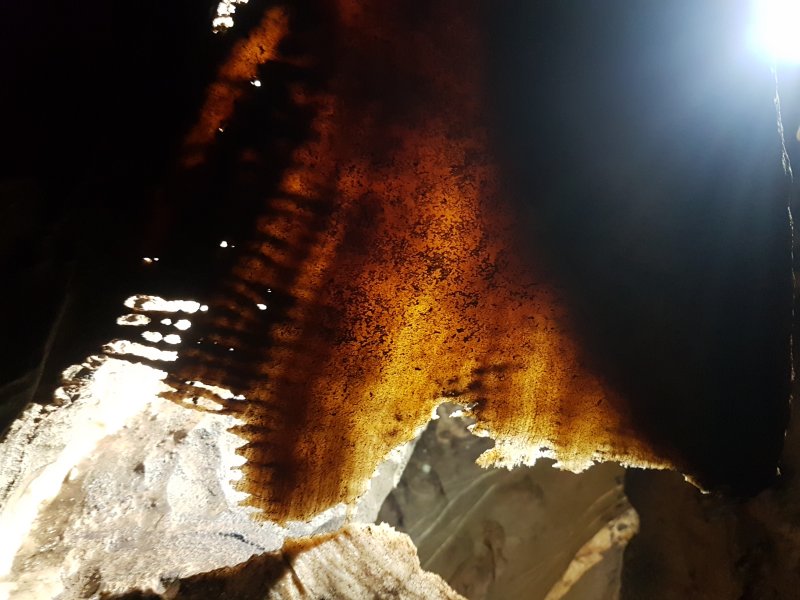 Redissolving curtain.
Lighting by Pete
Redissolving curtain.
Lighting by Pete A mixture of curtains and columns.
Lighting by Tarquin and Mandy
A mixture of curtains and columns.
Lighting by Tarquin and Mandy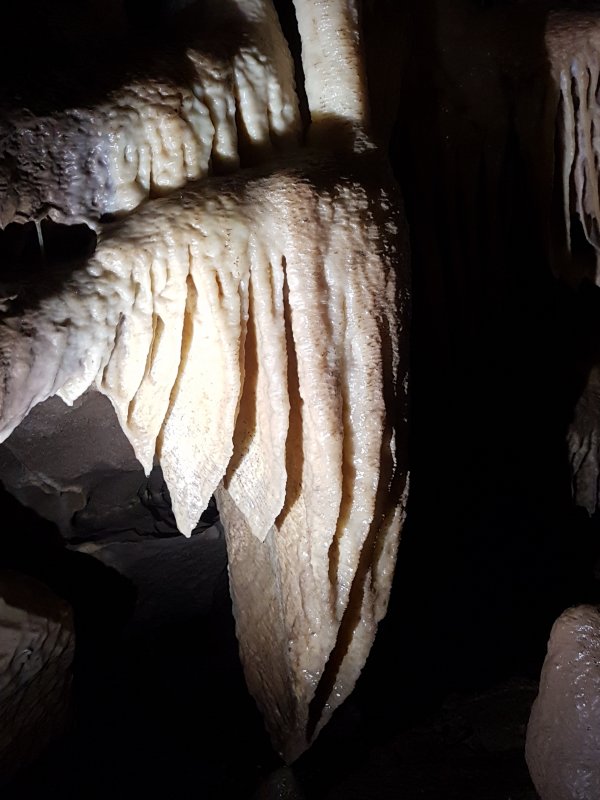 Ribbed curtains.
 Crawling below curtains.
Modelling by Mandy, lighting by Tarquin and Mandy
Crawling below curtains.
Modelling by Mandy, lighting by Tarquin and Mandy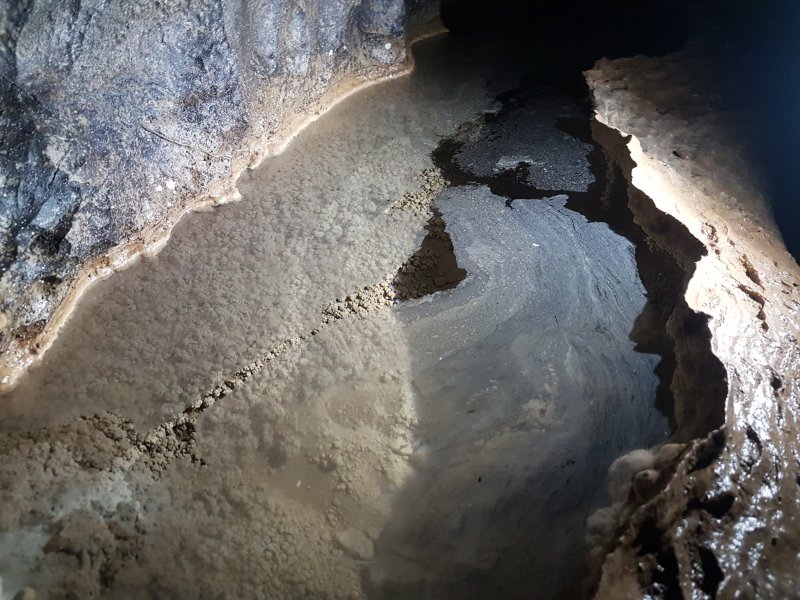 Crystal pool with what appears to be silt dust on it. This will form a binding surface, allowing a calcite raft to easily form here.
Lighting by Pete
Crystal pool with what appears to be silt dust on it. This will form a binding surface, allowing a calcite raft to easily form here.
Lighting by Pete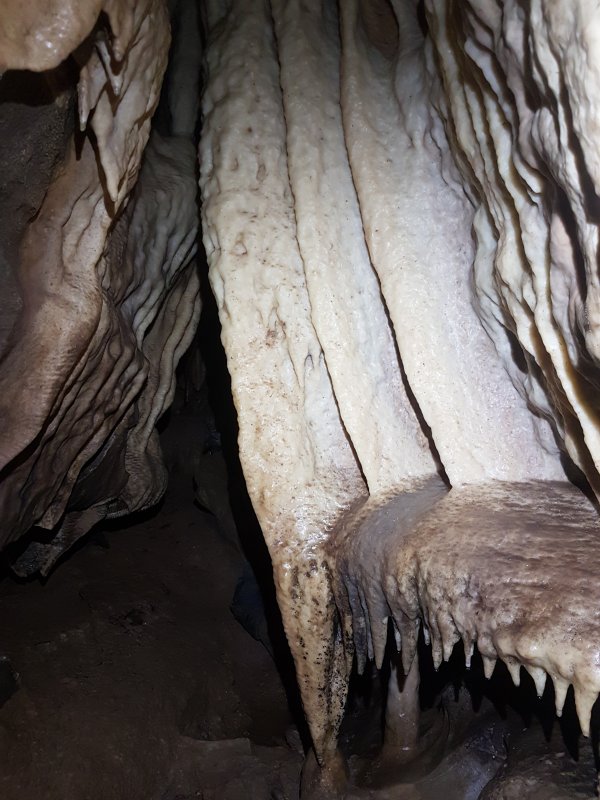 Naturally muddied curtain. This is actually a junction, where there is wa way onwards to Icing Flake Chamber, but we missed it, and only went to the main destination. A return will be needed. Oh, what a shame :)
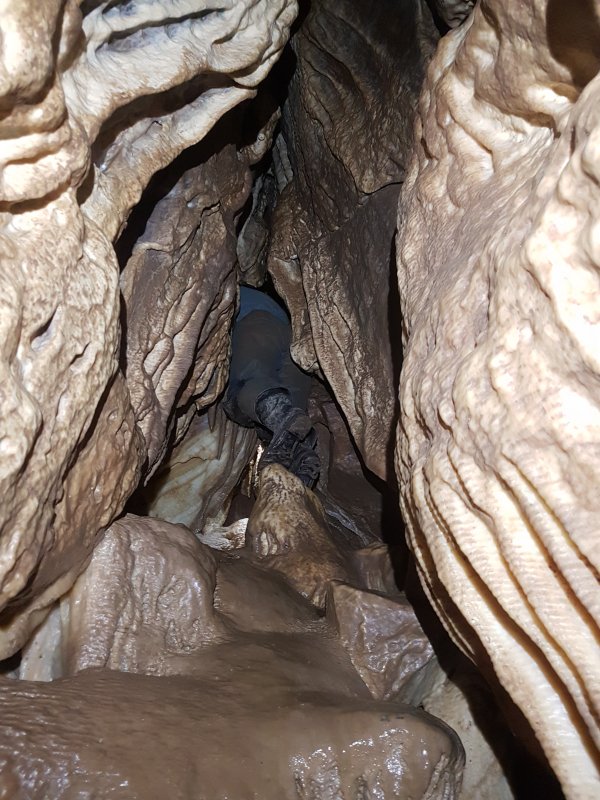 Squeeze up into Green Lake Chamber.
Modelling by Mandy, lighting by Tarquin and Mandy
Squeeze up into Green Lake Chamber.
Modelling by Mandy, lighting by Tarquin and Mandy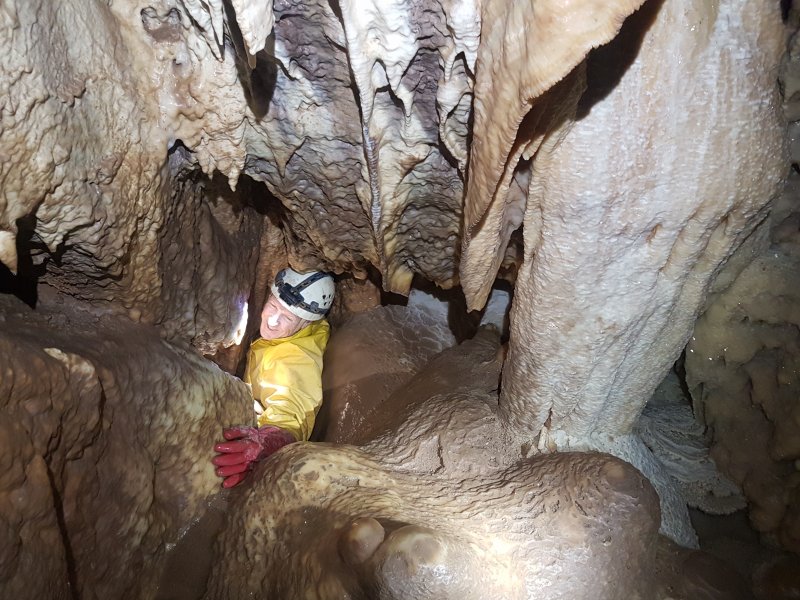 This squeeze is not particularly tight, though larger cavers do struggle a bit.
Modelling by Pete, lighting by Tarquin, Mandy and Pete
This squeeze is not particularly tight, though larger cavers do struggle a bit.
Modelling by Pete, lighting by Tarquin, Mandy and Pete Back of Green Lake Chamber.
Modelling by Mandy, lighting by Tarquin and Mandy
Back of Green Lake Chamber.
Modelling by Mandy, lighting by Tarquin and Mandy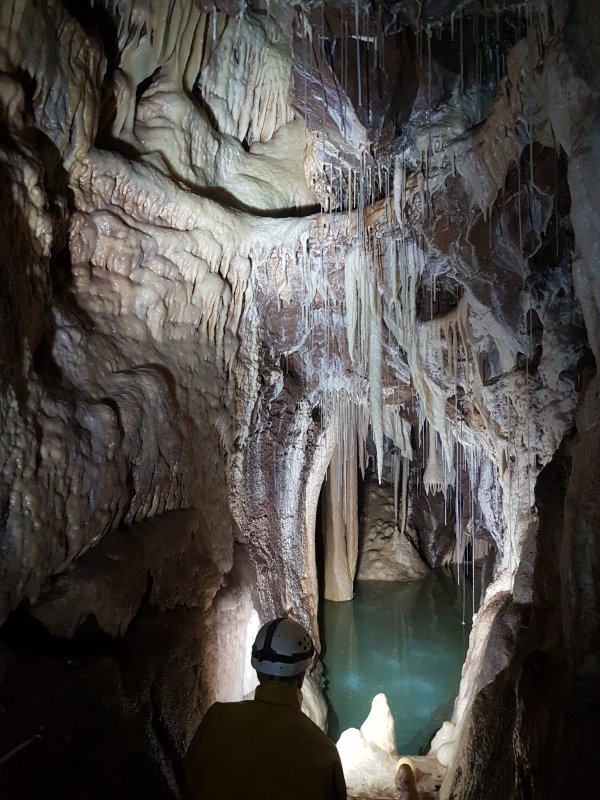 Green Lake Chamber is the prime destination in this cave, and one of the most beautifully decorated grottos on Mendip. It is easily one of the prime focuses of trips within Fairy Cave Quarry, for obvious reasons.
Modelling by Pete, lighting by Mandy and Pete
Green Lake Chamber is the prime destination in this cave, and one of the most beautifully decorated grottos on Mendip. It is easily one of the prime focuses of trips within Fairy Cave Quarry, for obvious reasons.
Modelling by Pete, lighting by Mandy and Pete Ceiling of Green Lake Chamber.
Modelling by Pete, lighting by Tarquin and Pete
Ceiling of Green Lake Chamber.
Modelling by Pete, lighting by Tarquin and Pete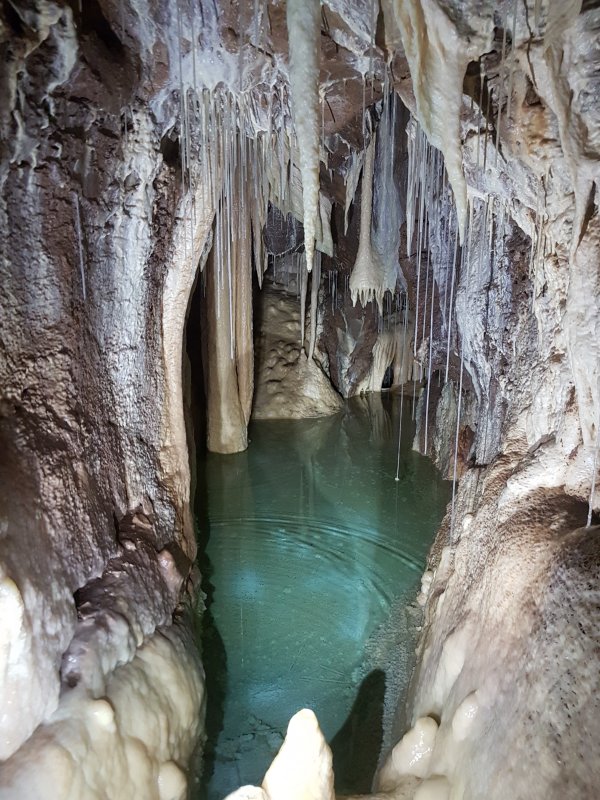 The Green Lake
Lighting by Tarquin and Mandy
The Green Lake
Lighting by Tarquin and Mandy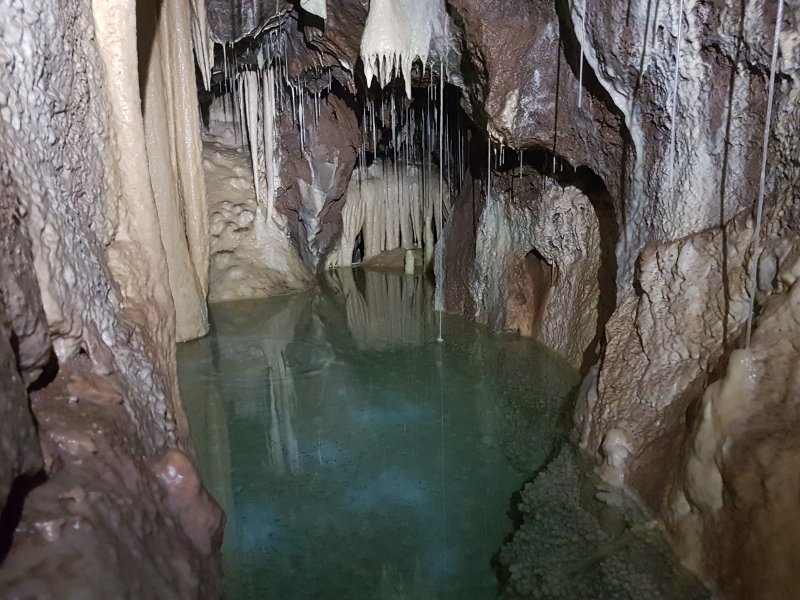 Straw pom pom in the Green Lake.
Lighting by Pete
Straw pom pom in the Green Lake.
Lighting by Pete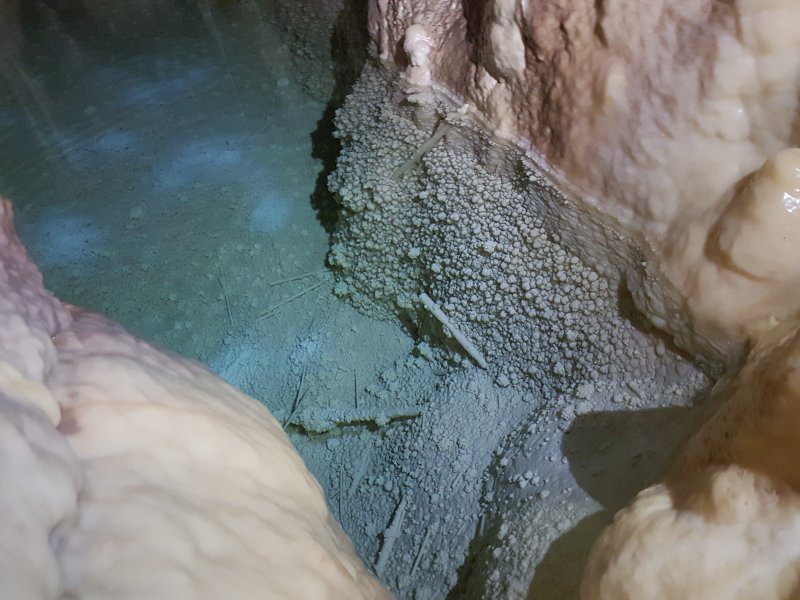 Calcite growth on the wall of the Green Lake.
Lighting by Pete
Calcite growth on the wall of the Green Lake.
Lighting by Pete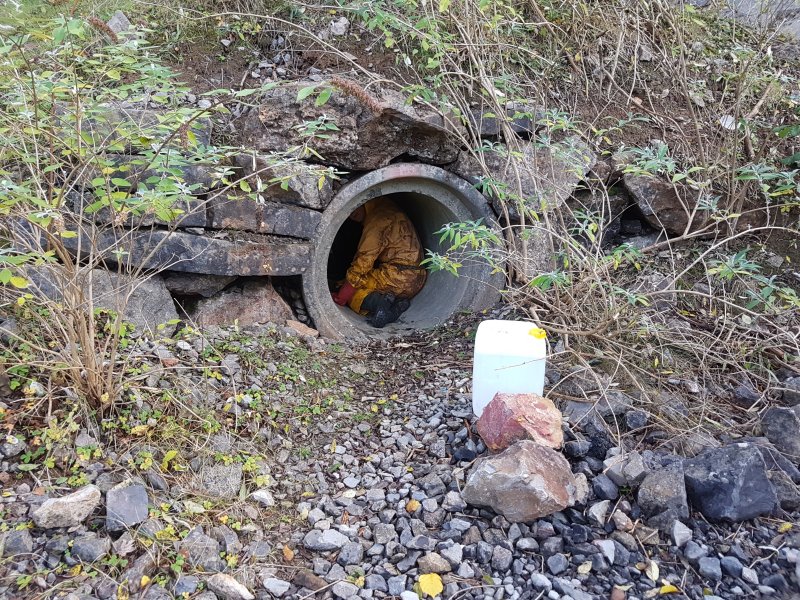 Since we were in the area, we also visited W/L cave, one of the entrances to Shatter Cave.
Modelling by Pete, lighting by Sol and Pete
Since we were in the area, we also visited W/L cave, one of the entrances to Shatter Cave.
Modelling by Pete, lighting by Sol and Pete Curtain inside the entrance. Unlike Shatter Cave's destroyed initial chamber, this cave doesn't seem so badly affected by the quarrying.
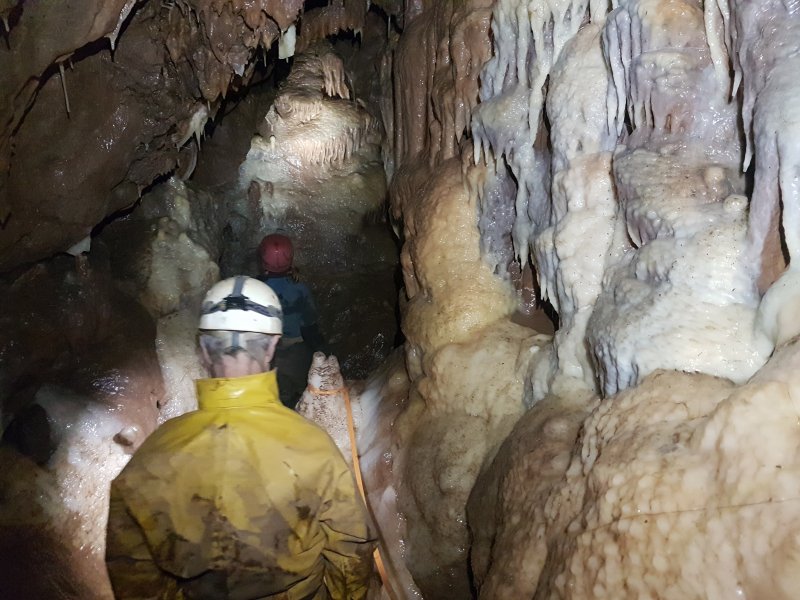 The early passage.
Modelling by Pete and Mandy, lighting by Tarquin, Pete and Mandy
The early passage.
Modelling by Pete and Mandy, lighting by Tarquin, Pete and Mandy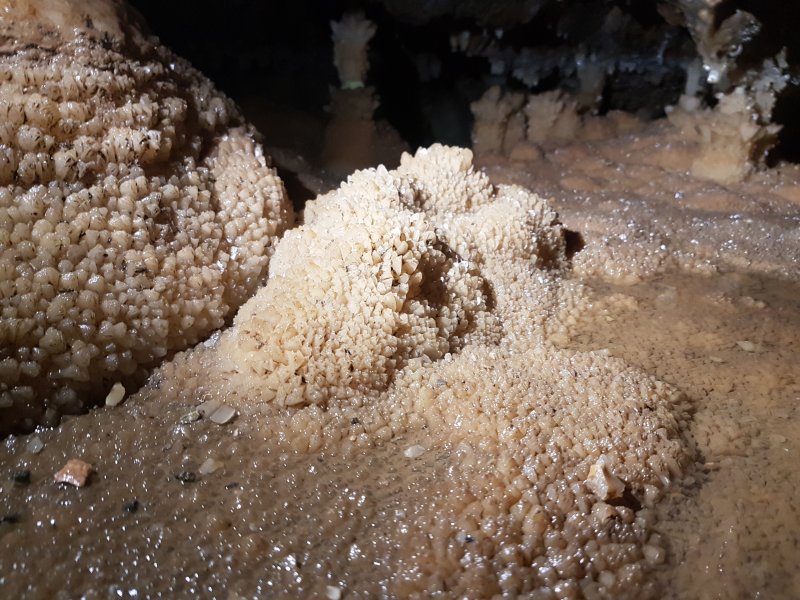 Crystal pool on the floor.
 The Pineapple, a distinctive formation tucked deep into an undercut. Somehow in the past, this formation was broken off, but has been repaired with glue, holding it back in its natural position. It is easily missed, since it is so far out of the way, and needs you to lie on the floor to see it at all.
Lighting by Pete
The Pineapple, a distinctive formation tucked deep into an undercut. Somehow in the past, this formation was broken off, but has been repaired with glue, holding it back in its natural position. It is easily missed, since it is so far out of the way, and needs you to lie on the floor to see it at all.
Lighting by Pete Helictites.
 Flowstone.
 Main passage of W/L Cave.
Modelling by Pete and Mandy, lighting by Tarquin, Pete and Mandy
Main passage of W/L Cave.
Modelling by Pete and Mandy, lighting by Tarquin, Pete and Mandy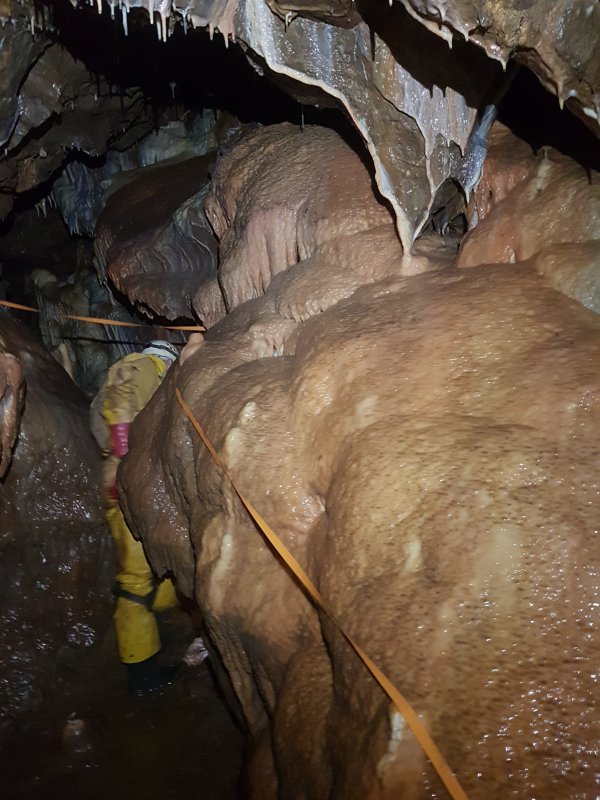 Occasionally, the formations are in the way, making the passage smaller.
Modelling by Pete, lighting by Tarquin and Pete
Occasionally, the formations are in the way, making the passage smaller.
Modelling by Pete, lighting by Tarquin and Pete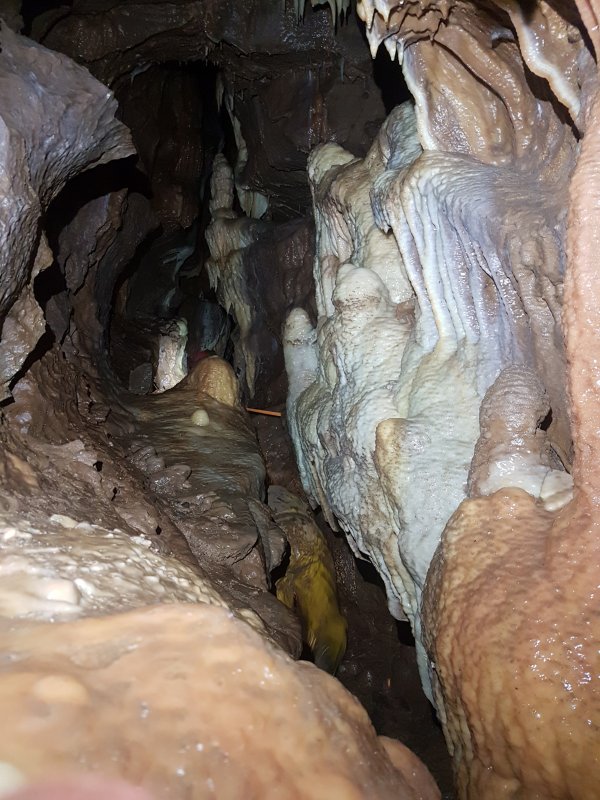 The passage is big enough, but you have to crawl below formations.
Modelling by Pete and Mandy's helmet, lighting by Tarquin, Pete and Mandy
The passage is big enough, but you have to crawl below formations.
Modelling by Pete and Mandy's helmet, lighting by Tarquin, Pete and Mandy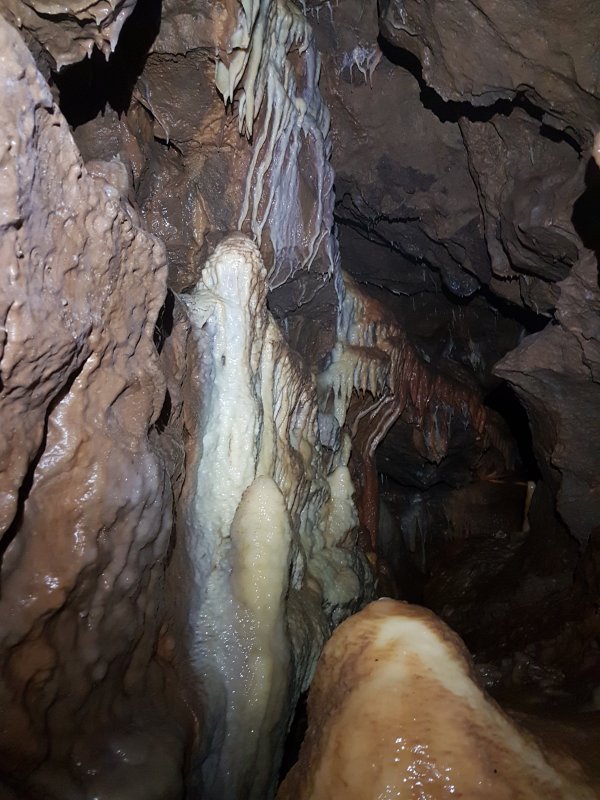 Coloured stalagmites.
 Curtains and stalactites at the Lily Pads.
Modelling by Pete and Mandy, lighting by Tarquin, Pete and Mandy
Curtains and stalactites at the Lily Pads.
Modelling by Pete and Mandy, lighting by Tarquin, Pete and Mandy The Lily Pads.
Lighting by Pete
The Lily Pads.
Lighting by Pete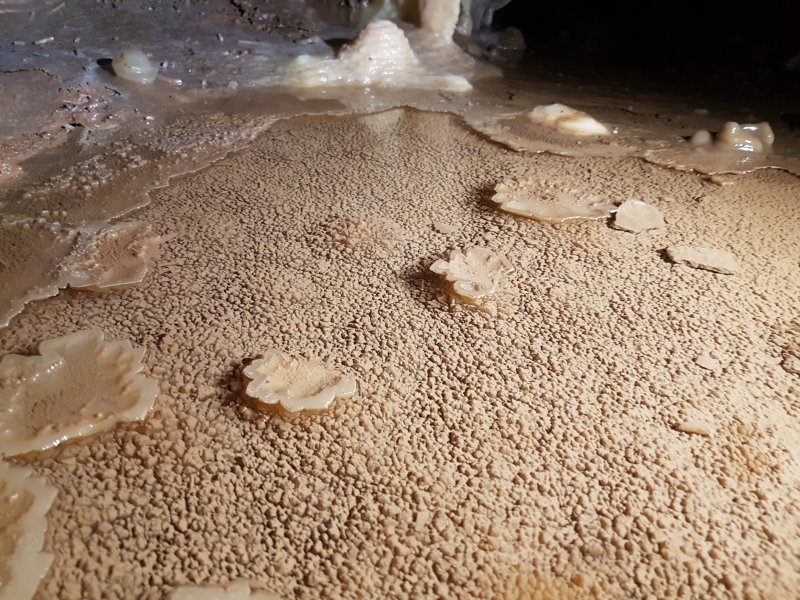 Lily Pads.
Lighting by Pete
Lily Pads.
Lighting by Pete Flowstone at the Lily Pads.
 Stalatite and tiered stalagmite.
Modelling by Mandy, lighting by Tarquin and Pete
Stalatite and tiered stalagmite.
Modelling by Mandy, lighting by Tarquin and Pete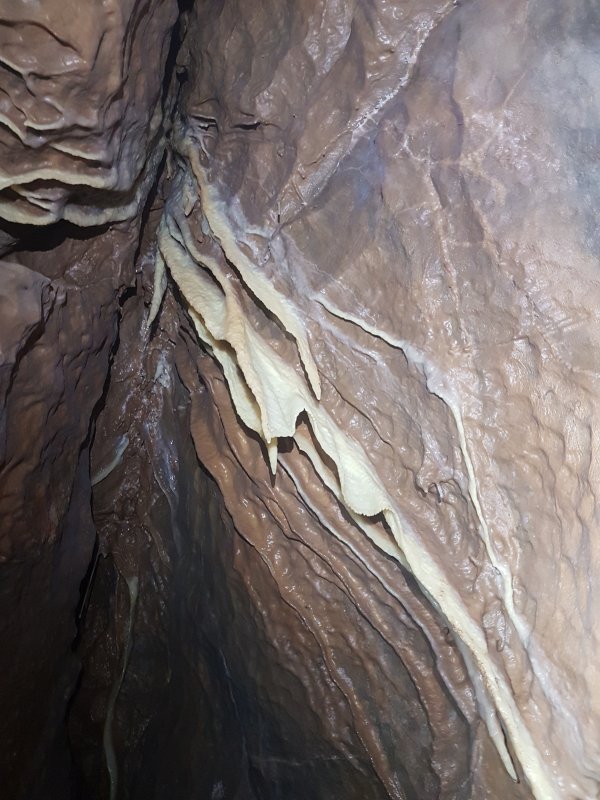 Curtains above the sump rift.
Lighting by Tarquin and Mandy
Curtains above the sump rift.
Lighting by Tarquin and Mandy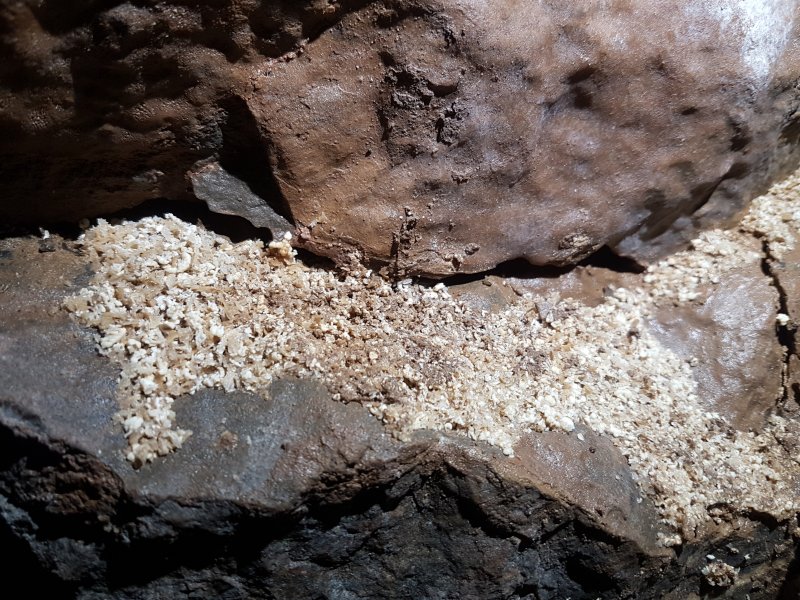 Large pile of cryostal on the boulders at the sump rift junction. This is the best deposit I know of in the Fairy Cave Quarry area.
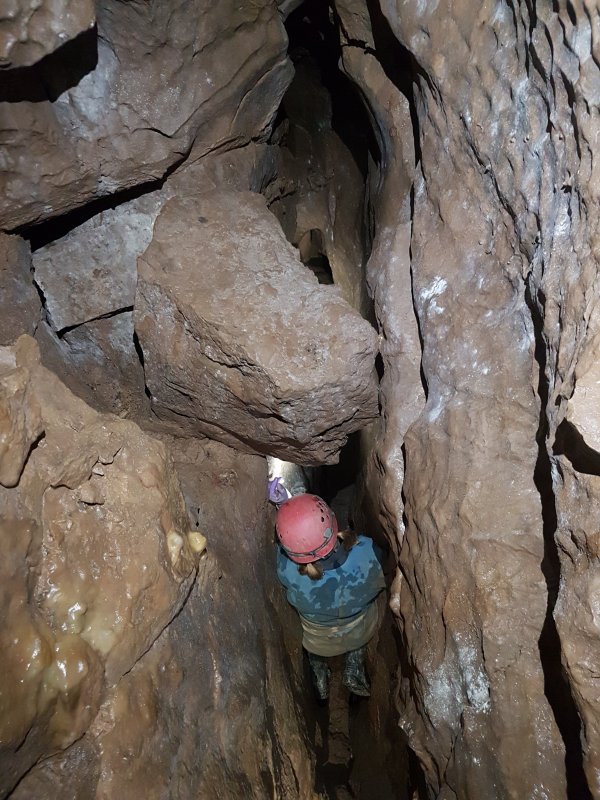 The sump rift starts off with a slippery descent, and is quite awkward to reverse.
Modelling by Mandy, lighting by Tarquin, Pete and Mandy
The sump rift starts off with a slippery descent, and is quite awkward to reverse.
Modelling by Mandy, lighting by Tarquin, Pete and Mandy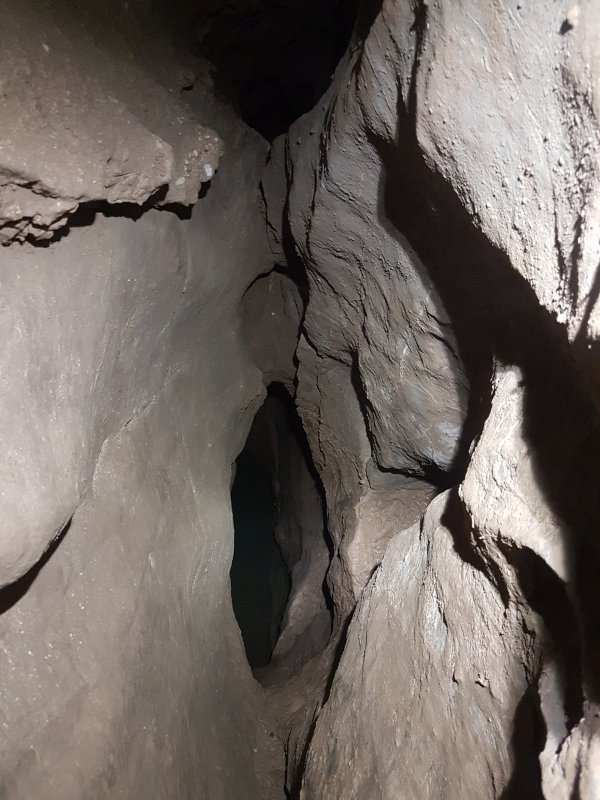 The final drop down to the sump, which is tight, and looks impossible to free climb.
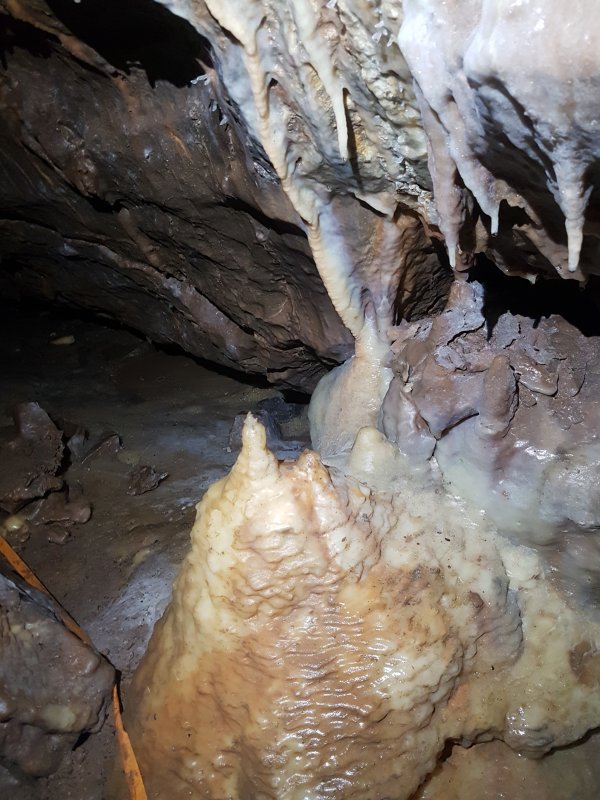 Stalagmite shaped like a Pickelhaube (Prussian helmet), with a finial spike on top.
 The main passage ends at a scramble into Great Rift Chamber.
Modelling by Pete, lighting by Tarquin and Pete
The main passage ends at a scramble into Great Rift Chamber.
Modelling by Pete, lighting by Tarquin and Pete Great Rift Chamber, a tall, sloping chamber. There are ways on at the top-left and bottom-right.
Modelling by Pete, lighting by Tarquin, Mandy and Pete
Great Rift Chamber, a tall, sloping chamber. There are ways on at the top-left and bottom-right.
Modelling by Pete, lighting by Tarquin, Mandy and Pete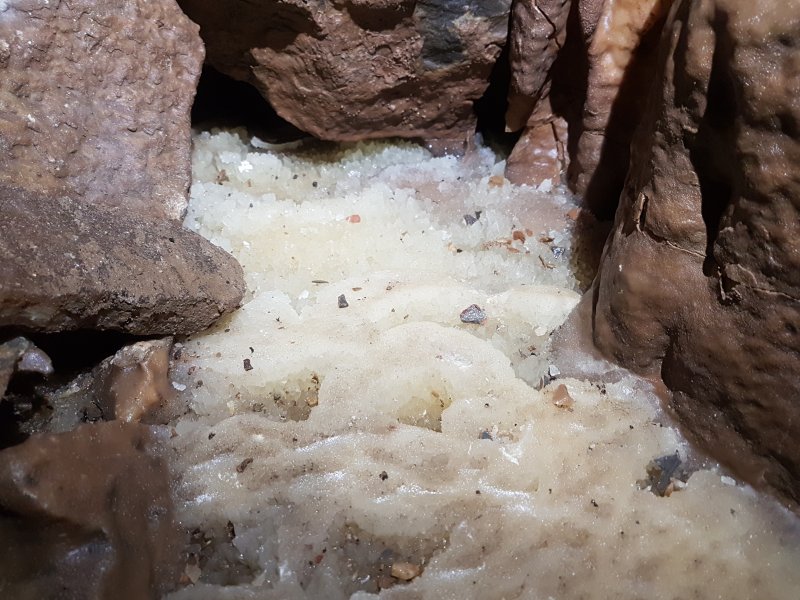 Flowstone in Great Rift Chamber.
 One of the passages on the right ends at a too-tight slot looking back up the main passage.
 The other passage enters Pink Pool Chamber, a well decorated grotto.
Modelling by Mandy, lighting by Tarquin and Mandy
The other passage enters Pink Pool Chamber, a well decorated grotto.
Modelling by Mandy, lighting by Tarquin and Mandy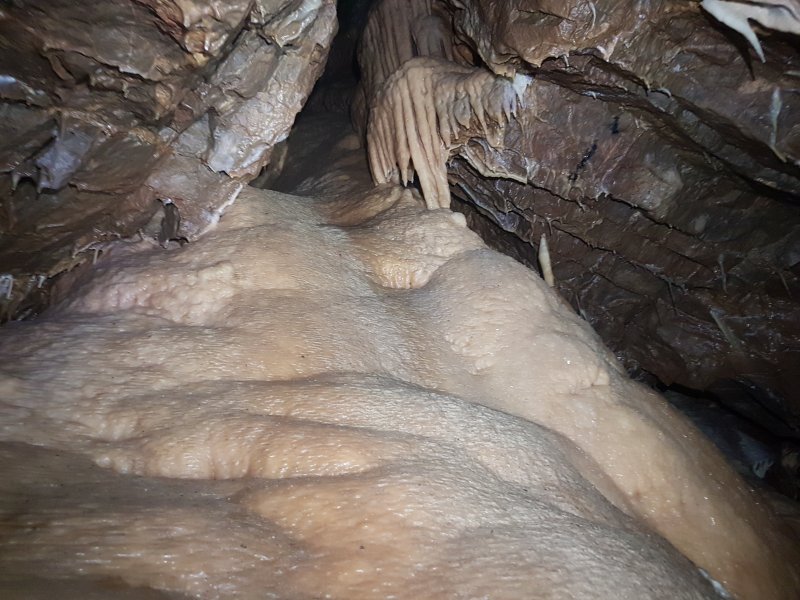 Top of Pink Pool Chamber.
Lighting by Tarquin and Mandy
Top of Pink Pool Chamber.
Lighting by Tarquin and Mandy Middle of Pink Pool Chamber.
Lighting by Tarquin and Mandy
Middle of Pink Pool Chamber.
Lighting by Tarquin and Mandy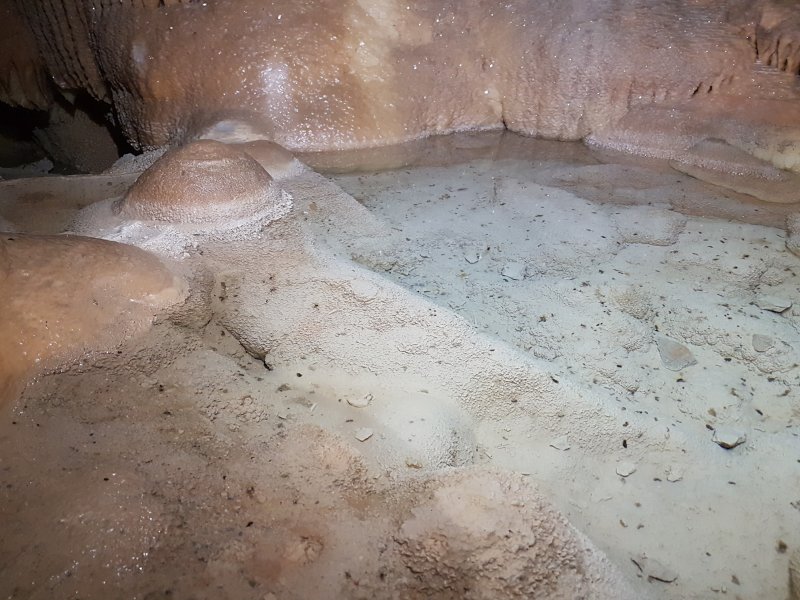 The Pink Pool. The black specks are bat guano.
Lighting by Tarquin and Mandy
The Pink Pool. The black specks are bat guano.
Lighting by Tarquin and Mandy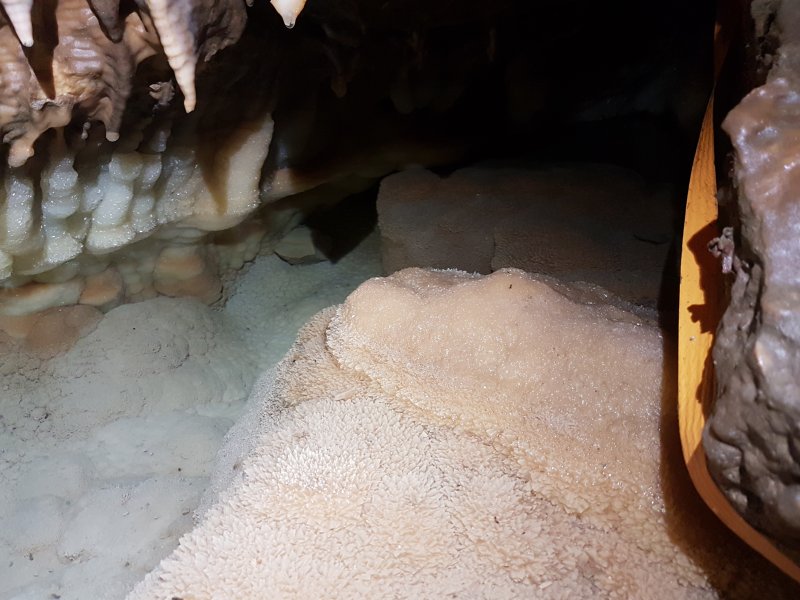 End of the Pink Pool.
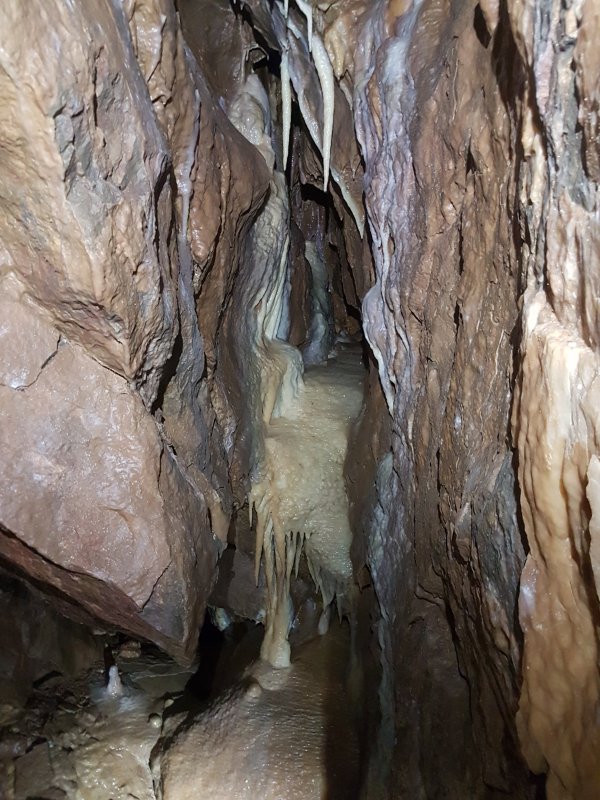 End rift in Pink Pool Chamber.
Lighting by Tarquin and Mandy
End rift in Pink Pool Chamber.
Lighting by Tarquin and Mandy A rift between the flowstone connects to Shatter Cave, but the connection is off-limits, so we head back to Great Rift Chamber.
Lighting by Tarquin and Mandy
A rift between the flowstone connects to Shatter Cave, but the connection is off-limits, so we head back to Great Rift Chamber.
Lighting by Tarquin and Mandy A scrable up the top-left side of Great Rift Chamber provides another way on, up loose rocks into a choke,
Modelling by Pete and Mandy, lighting by Tarquin, Pete and Mandy
A scrable up the top-left side of Great Rift Chamber provides another way on, up loose rocks into a choke,
Modelling by Pete and Mandy, lighting by Tarquin, Pete and Mandy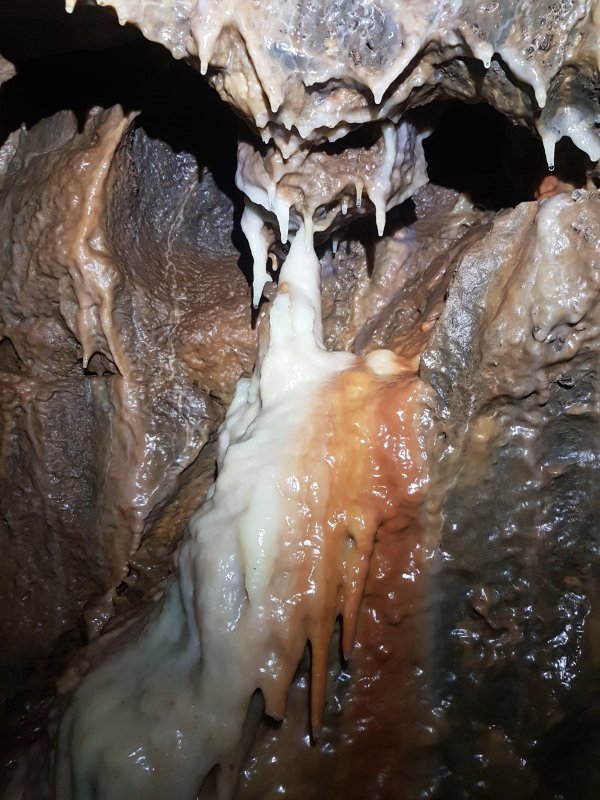 Top of Hammer Rift.
 Hammer Rift.
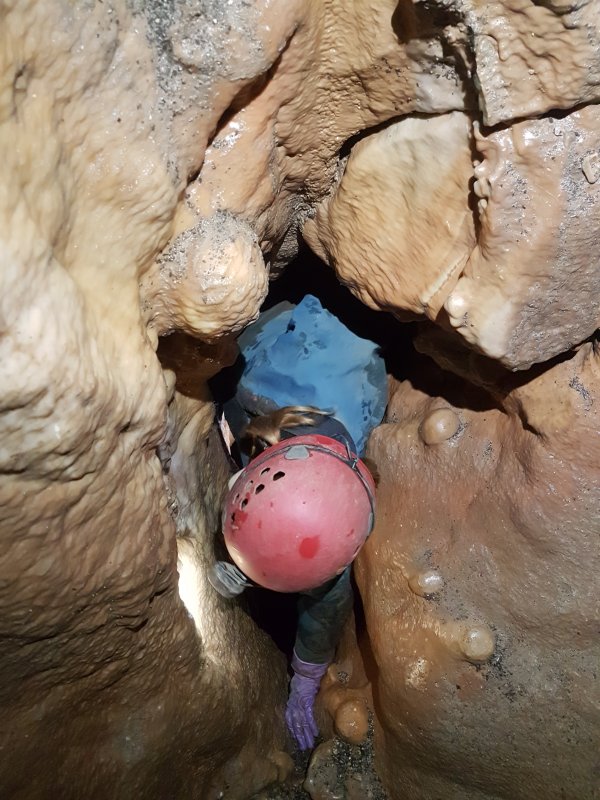 Hammer Rift has a hole in the floor that looks unclimbable, but it can be done. Taller cavers find this much easier.
Modelling by Mandy, lighting by Tarquin and Mandy
Hammer Rift has a hole in the floor that looks unclimbable, but it can be done. Taller cavers find this much easier.
Modelling by Mandy, lighting by Tarquin and Mandy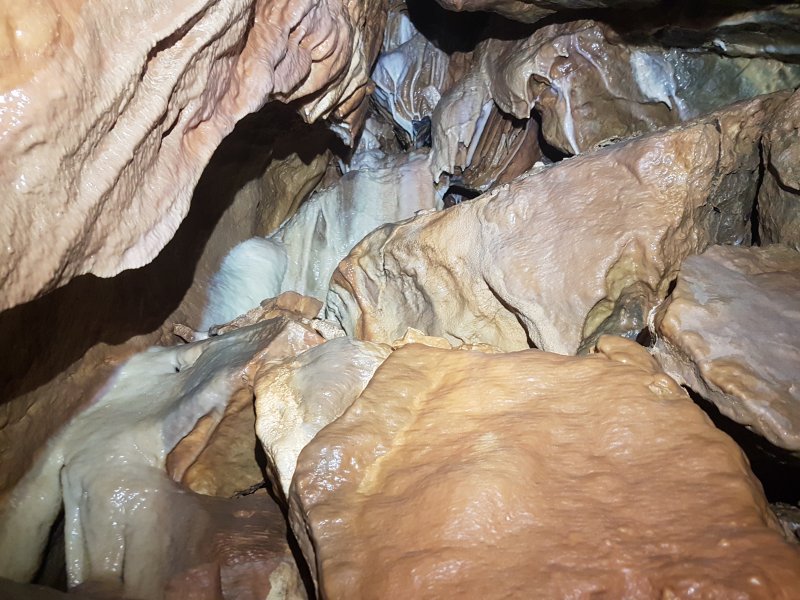 Grotto beneath Hammer Rift, which is one of the ends of the cave. A side passage at the top enters Chisel Rift, but there is nothing really worth the effort in this area.
 A hole high up in the cliff is the entrance to Balch Cave's Aven Series, one of the surviving fragments of Balch Cave (a large amount was quarried away).
Modelling by Pete
A hole high up in the cliff is the entrance to Balch Cave's Aven Series, one of the surviving fragments of Balch Cave (a large amount was quarried away).
Modelling by Pete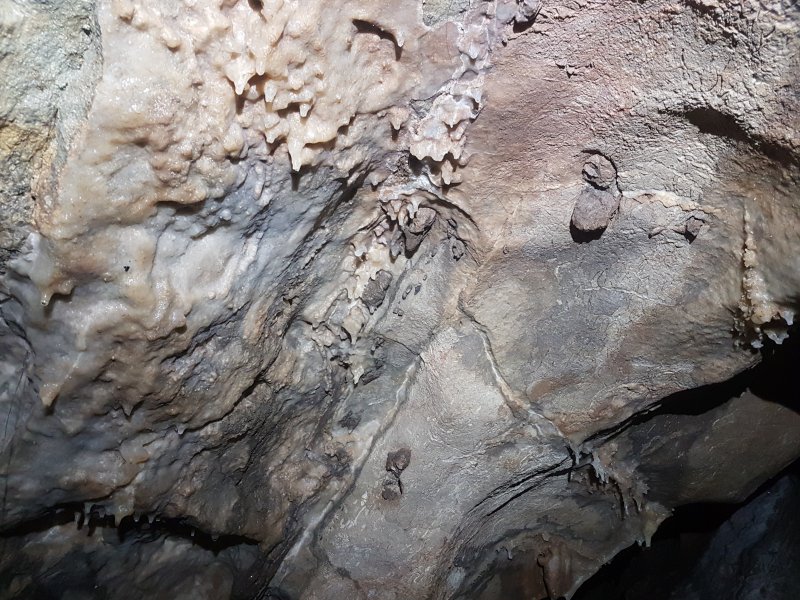 Unknown fossils in the roof.
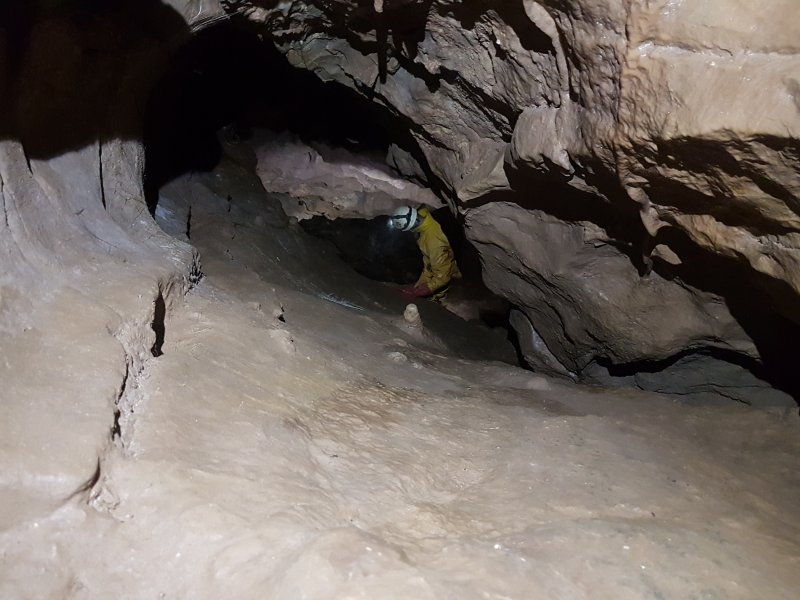 Steep chute into Sixth Chamber.
Modelling by Pete, lighting by Tarquin and Pete
Steep chute into Sixth Chamber.
Modelling by Pete, lighting by Tarquin and Pete Sixth Chamber, a very steeply sloping rift. There is a pitch (which I free-climbed on the right) down into the chamber, but at the bottom, there is only a tight passage to a pitch ending in a small, terminal chamber.
Modelling by Mandy and Pete, lighting by Tarquin, Mandy and Pete
Sixth Chamber, a very steeply sloping rift. There is a pitch (which I free-climbed on the right) down into the chamber, but at the bottom, there is only a tight passage to a pitch ending in a small, terminal chamber.
Modelling by Mandy and Pete, lighting by Tarquin, Mandy and Pete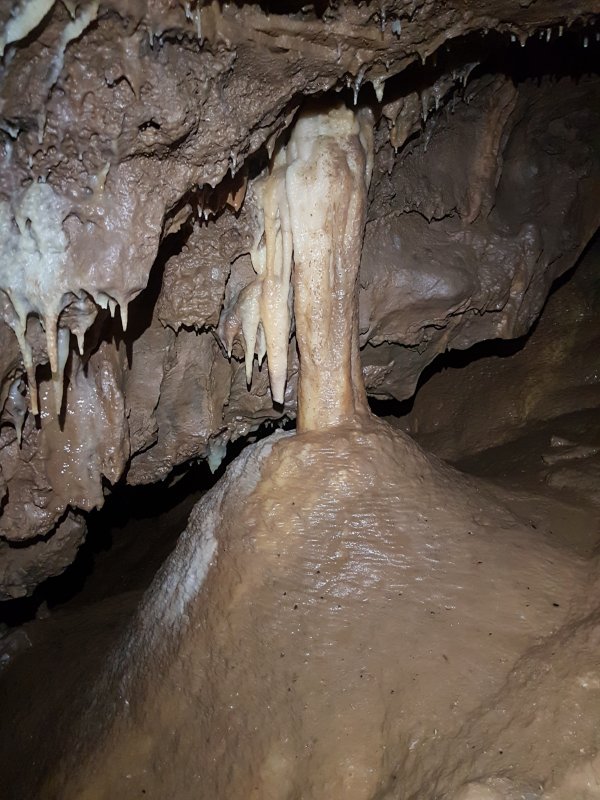 Column at the top of Sixth Chamber.
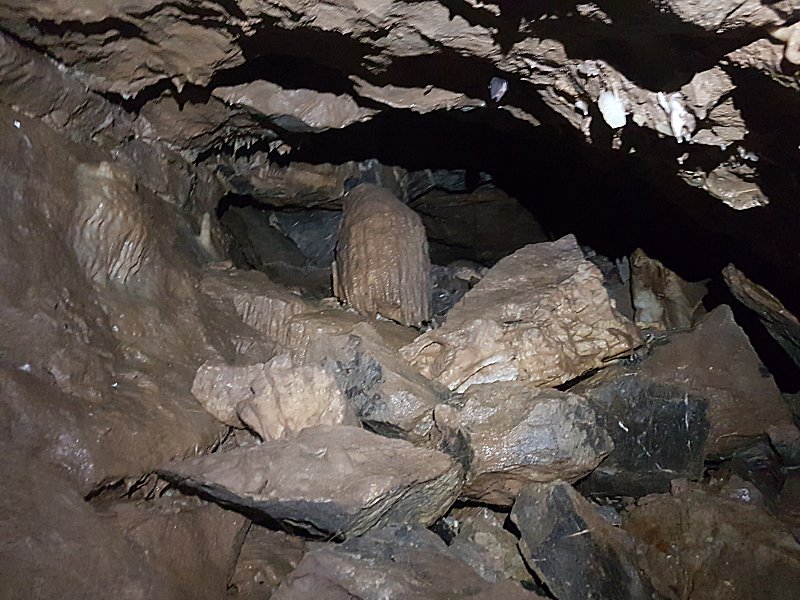 Old entryway to the chamber from Balch's Cave, now blocked by the quarry collapse.
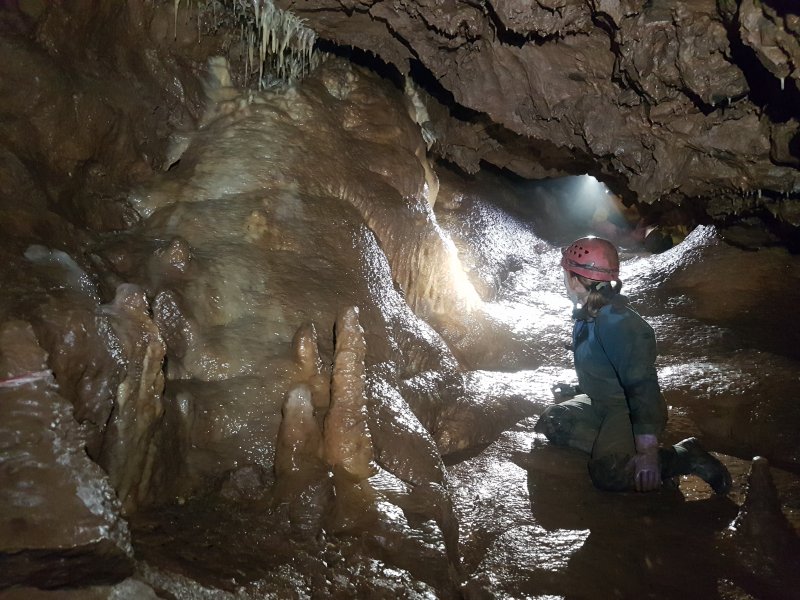 The way on towards Aven Chamber.
Modelling by Mandy and Pete, lighting by Tarquin, Mandy and Pete
The way on towards Aven Chamber.
Modelling by Mandy and Pete, lighting by Tarquin, Mandy and Pete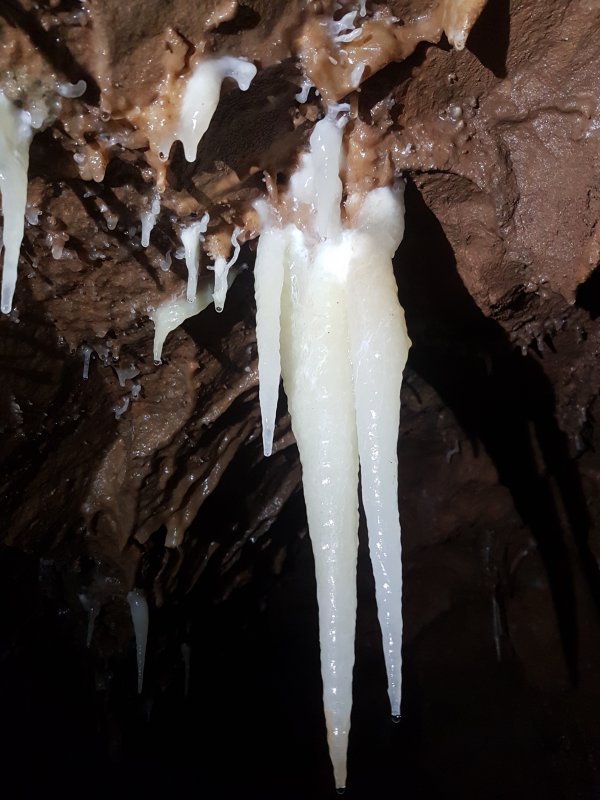 Stalactites.
 Fat stalagmite in a side passage leading back into Sixth Chamber.
Modelling by Pete, lighting by Tarquin, Mandy and Pete
Fat stalagmite in a side passage leading back into Sixth Chamber.
Modelling by Pete, lighting by Tarquin, Mandy and Pete Aven Chamber. There are no good ways on from here, with Aven Annex (seen ahead) being the only one of any significance.
Modelling by Pete and Mandy, lighting by Tarquin, Pete and Mandy
Aven Chamber. There are no good ways on from here, with Aven Annex (seen ahead) being the only one of any significance.
Modelling by Pete and Mandy, lighting by Tarquin, Pete and Mandy Wall covered in superb Lithostrotion fossils.
Modelling by Mandy, lighting by Tarquin and Mandy
Wall covered in superb Lithostrotion fossils.
Modelling by Mandy, lighting by Tarquin and Mandy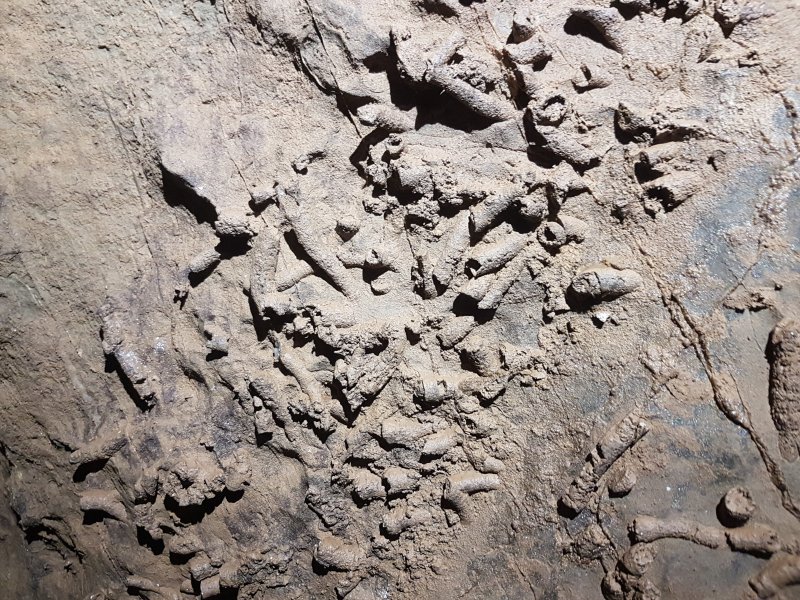 Lithostrotion fossils.
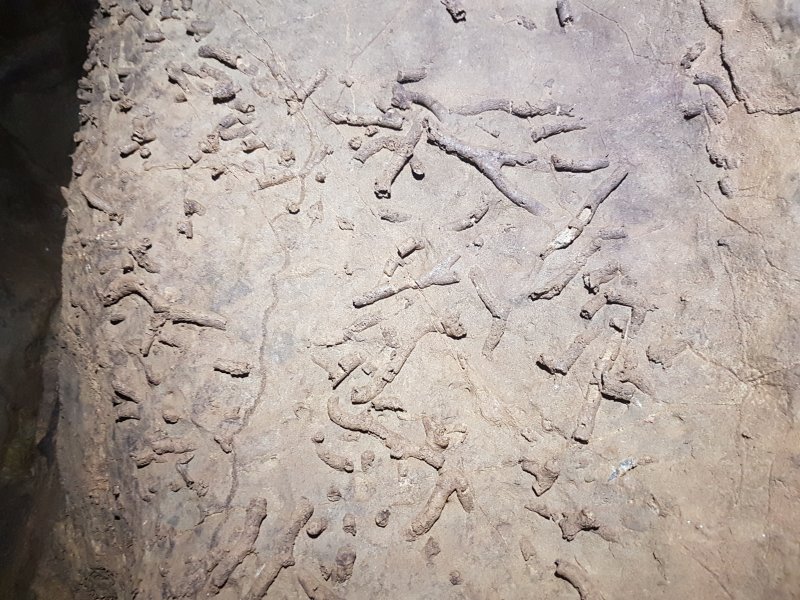 Lithostrotion fossils.
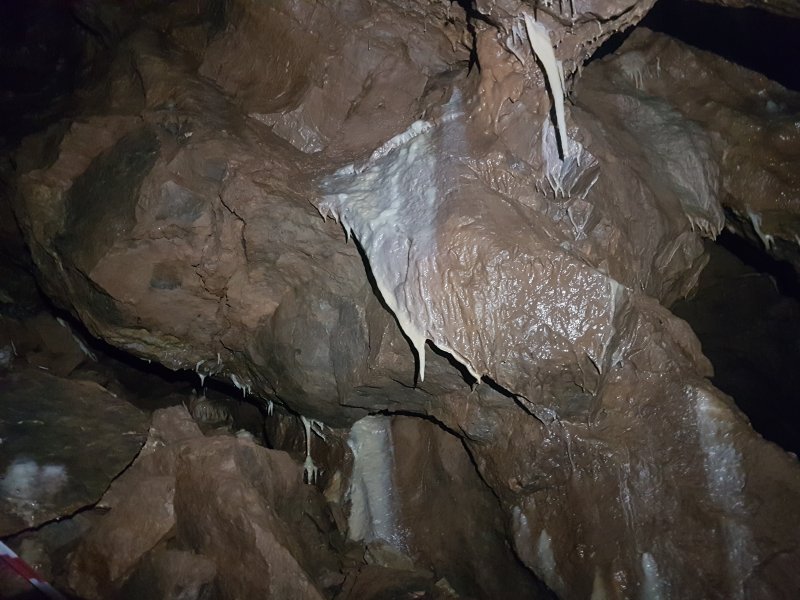 Top of Aven Chamber.
 Stalagmite flow, splatter formations and cave pearls in Aven Chamber.
 Cryostal hiding amongst the stalagmite flow in Aven Chamber.
 Most of it is calcited into place, but it definitely does appear to be cryostal.
 Finally we visit the muddy hole of Conning Tower Cave, another fragment of Balch Cave.
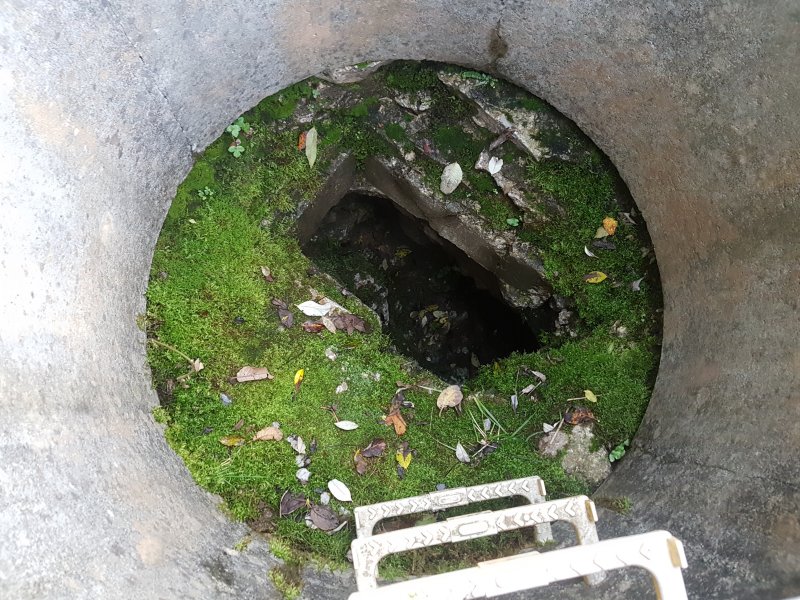 Hole into Conning Tower Cave.
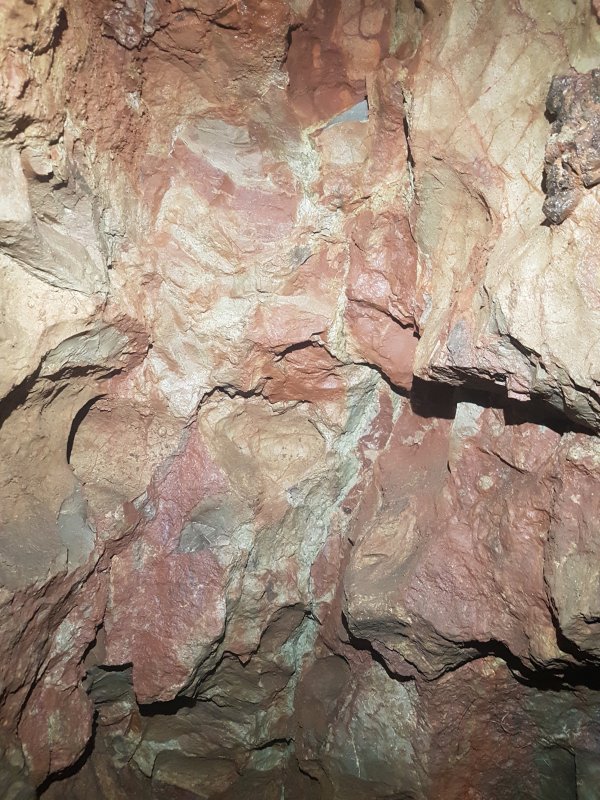 Red rock, an immediately obvious difference from the other caves in the quarry.
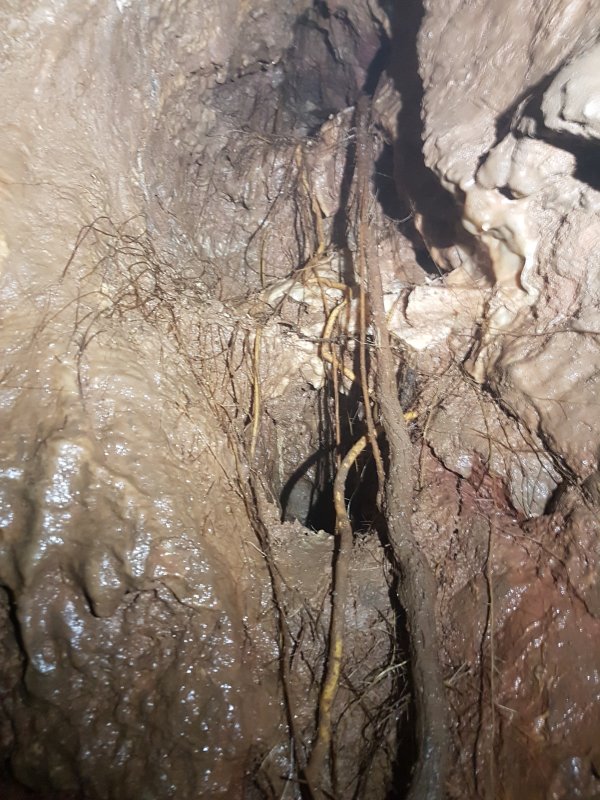 Plant roots in Conning Tower Cave.
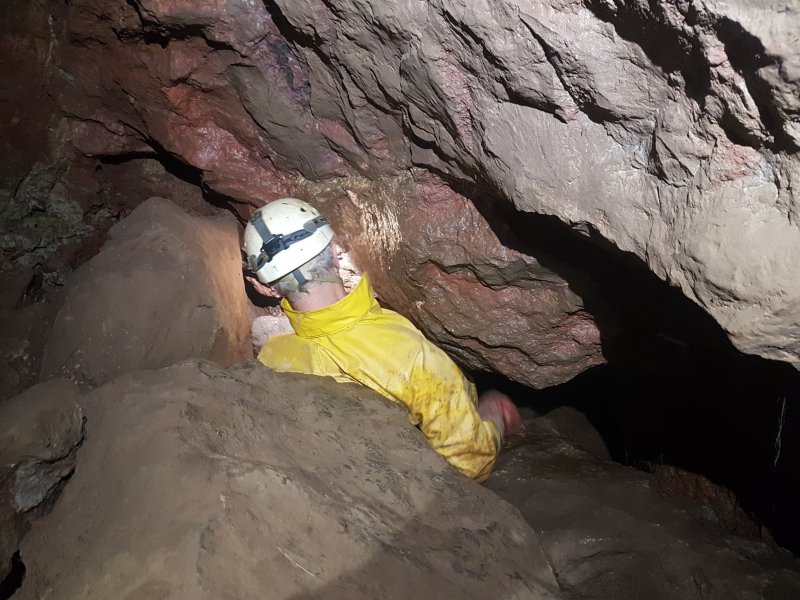 The cave is quite awkward, with no redeeming features.
Modelling by Pete, lighting by Tarquin, Mandy and Pete
The cave is quite awkward, with no redeeming features.
Modelling by Pete, lighting by Tarquin, Mandy and Pete There are no formations at all, unlike the other caves in the quarry. But there is an extremely muddy chamber, with a perilously muddy slope leading down into a sump with a very active stream. The level of the sump changes dramatically, reaching this chamber in extreme flood, or being far down the tube in drought. From here, the water flows to St. Dunstan's Well.
Modelling by Pete, lighting by Tarquin and Pete
There are no formations at all, unlike the other caves in the quarry. But there is an extremely muddy chamber, with a perilously muddy slope leading down into a sump with a very active stream. The level of the sump changes dramatically, reaching this chamber in extreme flood, or being far down the tube in drought. From here, the water flows to St. Dunstan's Well.
Modelling by Pete, lighting by Tarquin and Pete