Ogof Fawr trip 28/04/2021
Unless otherwise stated, camera, setups, lighting, edits and gallery effects by Tarquin. Modelling and lighting at various points will be Helen Stewart and Ali Garman.
This cave was visited during heavy rain after weeks of drought (even though the surface pictures may not look like it is raining). It can flood very severely, but was actively pushed during winter, and was never seen in flood (though the original entrance certainly was). Presumably the worst floods happen during winter storms, when nobody in their right mind would want to approach the cave anyway.
 A set of shakeholes next to a huge cairn in the main feeder valley of the lower Nant Cadlan. Behind it is Cefn Sychbant (419 metres).
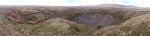 An enormous sink, which sometimes contains a lake. Right now it is empty, after weeks of dry weather, in spite of the heavy rain on this particular day. Behind it is an unnamed 458 metre hill.
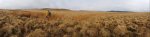 Marshy depression surrounded by the Cefn Sychbant ridge. In the distant rainclouds are the ridge of Gwaun y Pynt (528 metres) and Garn Ddu (462 metres), and a very distant Cefn yr Ystrad (617 metres). More visible are Cefn Cil-Sanws (461 metres) and the tree covered Penmoelallt (over 420 metres). In between the camera and Penmoelallt is the valley of Pant Sychbant, containing the upper Nant Cadlan stream.
Modelling by Ali and Helen
Marshy depression surrounded by the Cefn Sychbant ridge. In the distant rainclouds are the ridge of Gwaun y Pynt (528 metres) and Garn Ddu (462 metres), and a very distant Cefn yr Ystrad (617 metres). More visible are Cefn Cil-Sanws (461 metres) and the tree covered Penmoelallt (over 420 metres). In between the camera and Penmoelallt is the valley of Pant Sychbant, containing the upper Nant Cadlan stream.
Modelling by Ali and Helen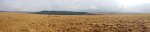 View over Pant Sychbant. Cefn Cil-Sanws, Penmoelallt, Mynydd-y-glog (389 metres) and a distant Hirwaun Common (515 metres) and Craig y Llyn (600 metres).
 Pant Sychbant means "hollow of the dry hollow" (assuming "bant" is a mutated form of "pant" rather than the word "off"). The valley is not dry at this point though, and the name is specifically applied to the point where there is a stream. Ogof Fechan, another cave with a similar length in this catchment, is 1.5 km away to the right of this picture. The resurgence for both caves is nearly 4 km away to the right of the picture, at Llygad Cynon. At that point, the water from both Nant Cadlans finally joins together to create the Afon Cynon.
Modelling by Ali and Helen
Pant Sychbant means "hollow of the dry hollow" (assuming "bant" is a mutated form of "pant" rather than the word "off"). The valley is not dry at this point though, and the name is specifically applied to the point where there is a stream. Ogof Fechan, another cave with a similar length in this catchment, is 1.5 km away to the right of this picture. The resurgence for both caves is nearly 4 km away to the right of the picture, at Llygad Cynon. At that point, the water from both Nant Cadlans finally joins together to create the Afon Cynon.
Modelling by Ali and Helen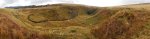 The immense sink of Ogof Fawr. This was named long before there was any known cave here, in reference to the size of the sink, and the potential distance to the resurgence. For a while, Ogof Fawr was the smaller cave in the valley, and Ogof Fechan was the larger cave, but Ogof Fawr now lives up to its name with 1.3 km of cave. The original entrance is at the sink, but the current entrance is in front of the cliff on the right.
Modelling by Ali
The immense sink of Ogof Fawr. This was named long before there was any known cave here, in reference to the size of the sink, and the potential distance to the resurgence. For a while, Ogof Fawr was the smaller cave in the valley, and Ogof Fechan was the larger cave, but Ogof Fawr now lives up to its name with 1.3 km of cave. The original entrance is at the sink, but the current entrance is in front of the cliff on the right.
Modelling by Ali Pump house on the side of the shakehole.
Modelling by Ali
Pump house on the side of the shakehole.
Modelling by Ali Inside the pump house.
 Tiny reservoir outside the pump house.
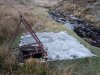 Larger reservoir by the river.
 It doesn't hold water any more, but it does hold an awful lot of rubbish. What a strange place to dump rubbish, but maybe it is just people cleaning up what they found washed into the stream, and putting it here since that's better than it being washed into the cave.
 The original entrances at the sink. There are two openings that join, but the passage leading away from them was full of rocks during our visit. It may randomly be open depending on what flooding does. In severe winter floods, the water can pond up here to completely cover the entrances, and the cave is not safe in those conditions. The first constructed entrance was up to the left, through a shored route into the entrance passage. However, this also gets modified too much by the river, and is no longer used. The passage led into a chamber where it sank, then a side passage led into the rest of the known cave.
Modelling by Ali.
The original entrances at the sink. There are two openings that join, but the passage leading away from them was full of rocks during our visit. It may randomly be open depending on what flooding does. In severe winter floods, the water can pond up here to completely cover the entrances, and the cave is not safe in those conditions. The first constructed entrance was up to the left, through a shored route into the entrance passage. However, this also gets modified too much by the river, and is no longer used. The passage led into a chamber where it sank, then a side passage led into the rest of the known cave.
Modelling by Ali. The current entrance, down to the right. This is liberally adorned with sheep droppings, and a sheep carcas can be seen on the left. There are a lot of sheep bones in this sink, especially below the cliffs.
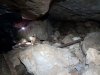 A couple of sheep skulls in the entrance passage. There were loads of bones scattered all the way down the passage.
Modelling by Helen, lighting by Tarquin and Helen
A couple of sheep skulls in the entrance passage. There were loads of bones scattered all the way down the passage.
Modelling by Helen, lighting by Tarquin and Helen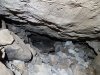 The entrance passage slopes very steeply down a slope of debris. The left wall is choss from the sink, and feels like it will slide if you breathe on it. Everything that gets kicked down crashes onwards on top of anyone further down.
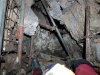 Scaffolded shaft dropping down into a steeply sloping bedding. You are very definitely in the firing line here, and rocks shoot past as others move around above.
Modelling by Tarquin
Scaffolded shaft dropping down into a steeply sloping bedding. You are very definitely in the firing line here, and rocks shoot past as others move around above.
Modelling by Tarquin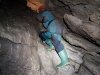 The bedding spits you out onto a climb, which was opened up from below in order to make a more reliable entrance.
Modelling by Helen, lighting by Tarquin and Helen
The bedding spits you out onto a climb, which was opened up from below in order to make a more reliable entrance.
Modelling by Helen, lighting by Tarquin and Helen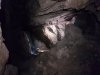 The climb drops into the top end of Clive Jones's Locker, an enormous chamber that slopes very steeply down into a boulder pile.
Modelling by Helen and Ali, lighting by Tarquin, Helen and Ali
The climb drops into the top end of Clive Jones's Locker, an enormous chamber that slopes very steeply down into a boulder pile.
Modelling by Helen and Ali, lighting by Tarquin, Helen and Ali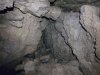 The original route into this chamber enters from up a pitch to the left. From the sink, this reached a scaffolded shaft (the top of which was also accessed via the first constructed entrance), then into a series of chambers, a couple of which gain then lose the stream. That first chamber was first seen then lost in the 1980s, then regained in 2007. Beyond those is a climb up into a passage ending up at this pitch. The 2007 Croydon Caving Club survey showed only those chambers, not the passage that eventually reached Clive Jones's Locker. Their 2009 survey shows these chambers as a small loop near E1, while the modern entrance is E2.
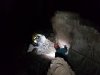 A handline leads down a loose climb to a lower bench of Clive Jones's Locker. A side passage at the top seems to drop in to a later aven. Standing under this climb is risky, as dislodged rocks end up flying down it. Instead, it is better to shelter in the way on; under the wall at the bottom of the climb. This area is known as Hung Drawn And Slaughtered, as is the pitch above it.
Modelling by Helen and Ali, lighting by Tarquin, Helen and Ali
A handline leads down a loose climb to a lower bench of Clive Jones's Locker. A side passage at the top seems to drop in to a later aven. Standing under this climb is risky, as dislodged rocks end up flying down it. Instead, it is better to shelter in the way on; under the wall at the bottom of the climb. This area is known as Hung Drawn And Slaughtered, as is the pitch above it.
Modelling by Helen and Ali, lighting by Tarquin, Helen and Ali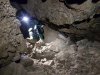 The way on is made from heavily shattered rock, steeply descending a scree slope.
Modelling by Helen, lighting by Tarquin and Helen
The way on is made from heavily shattered rock, steeply descending a scree slope.
Modelling by Helen, lighting by Tarquin and Helen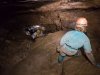 The route enters the Second Chamber, half way down. This could easily be mistaken for a Mendip cave, with very steeply sloping beds, and giant rock slabs.
Modelling by Helen and Ali, lighting by Tarquin, Helen and Ali
The route enters the Second Chamber, half way down. This could easily be mistaken for a Mendip cave, with very steeply sloping beds, and giant rock slabs.
Modelling by Helen and Ali, lighting by Tarquin, Helen and Ali Looking up the slope into the top of Second Chamber. Don't worry, I'm sure that ceiling is perfectly safe.
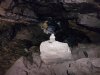 The passage below the Second Chamber remains very steep. This cairn seems completely pointless, since there is no junction here, and nowhere to be confused. Perhaps it is there to remind you to watch your footing on the sloping rocks. Or maybe it marks the highest water level the cave can experience.
Modelling by Ali, lighting by Tarquin, Helen and Ali
The passage below the Second Chamber remains very steep. This cairn seems completely pointless, since there is no junction here, and nowhere to be confused. Perhaps it is there to remind you to watch your footing on the sloping rocks. Or maybe it marks the highest water level the cave can experience.
Modelling by Ali, lighting by Tarquin, Helen and Ali The stream finally decides to put in an appearance, after not having been seen since the first chamber in the old entrance. In spite of the heavy rain, it is not a problem today, but in severe flood the cave can flood to a depth of the bottom of this slope.
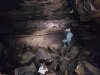 A junction at the bottom, marked by a boulder with flood-washed sand on top, offers a choice of routes. A clamber down to the left with the stream reaches the large Sump Chamber, where the stream sinks. This is also labelled as Flood Chamber on some surveys, and Mamma Goo's Realm in a description. The original name it was given by the explorers is Sump Chamber, because it fills to the ceiling in severe floods. In the boulders at the bottom is a pitch down to a lower chamber, the last place that the stream is seen. From there, the water must follow a similar route to the main passage, but probably repeatedly sumping as it aims down dip rather than along the strike.
Modelling by Helen, lighting by Tarquin, Ali and Helen
A junction at the bottom, marked by a boulder with flood-washed sand on top, offers a choice of routes. A clamber down to the left with the stream reaches the large Sump Chamber, where the stream sinks. This is also labelled as Flood Chamber on some surveys, and Mamma Goo's Realm in a description. The original name it was given by the explorers is Sump Chamber, because it fills to the ceiling in severe floods. In the boulders at the bottom is a pitch down to a lower chamber, the last place that the stream is seen. From there, the water must follow a similar route to the main passage, but probably repeatedly sumping as it aims down dip rather than along the strike.
Modelling by Helen, lighting by Tarquin, Ali and Helen From the junction, the way on is to the right, ascending into the cave's main passage; Penderyn Passage. This trundles off for about 1 km, forming the majority of the cave's length.
Modelling by Helen and Ali, lighting by Tarquin, Helen and Ali
From the junction, the way on is to the right, ascending into the cave's main passage; Penderyn Passage. This trundles off for about 1 km, forming the majority of the cave's length.
Modelling by Helen and Ali, lighting by Tarquin, Helen and Ali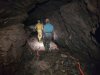 Penderyn Passage
Modelling by Helen and Ali, lighting by Tarquin, Helen and Ali
Penderyn Passage
Modelling by Helen and Ali, lighting by Tarquin, Helen and Ali Clapper Bridge, where there are short passages at both ends.
Modelling by Helen, lighting by Tarquin, Helen and Ali
Clapper Bridge, where there are short passages at both ends.
Modelling by Helen, lighting by Tarquin, Helen and Ali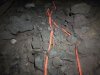 The tapes along this passage may make no sense, since they regularly get rearranged by flooding. Even though the cave may be safe right now in a summer rainstorm, winter flooding can definitely have an effect here.
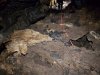 Decomposed gour pools at the start of a section called The Orange Blossom Trail (these names seem to be quite randomly applied, and are not mentioned in the original exploration, but are written in the description - it's almost like two different people invented different sets of names, and each wrote about them separately).
Modelling by Ali and Helen, lighting by Tarquin, Ali and Helen
Decomposed gour pools at the start of a section called The Orange Blossom Trail (these names seem to be quite randomly applied, and are not mentioned in the original exploration, but are written in the description - it's almost like two different people invented different sets of names, and each wrote about them separately).
Modelling by Ali and Helen, lighting by Tarquin, Ali and Helen Formations in The Orange Blossom Trail.
 Formations in The Orange Blossom Trail.
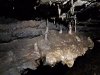 Formations in The Orange Blossom Trail.
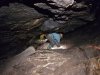 The Orange Blossom Trail.
Modelling by Helen and Ali, lighting by Tarquin, Helen and Ali
The Orange Blossom Trail.
Modelling by Helen and Ali, lighting by Tarquin, Helen and Ali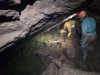 Stooping through a pool, trying to keep your feet dry.
Modelling by Helen and Ali, lighting by Tarquin, Helen and Ali
Stooping through a pool, trying to keep your feet dry.
Modelling by Helen and Ali, lighting by Tarquin, Helen and Ali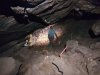 Approaching Formation Junction.
Modelling by Helen and Ali, lighting by Tarquin, Helen and Ali
Approaching Formation Junction.
Modelling by Helen and Ali, lighting by Tarquin, Helen and Ali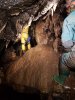 Traversing over the formations. Fortunately, your boots are clean.
Modelling by Helen and Ali, lighting by Tarquin, Helen and Ali
Traversing over the formations. Fortunately, your boots are clean.
Modelling by Helen and Ali, lighting by Tarquin, Helen and Ali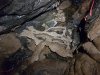 More decomposed gour pools.
 At Formation Junction just after the traverse, Hell's Delight is a tight and loose side passage. It is not long enough to be interesting.
 Impressive phreas.
Modelling by Helen and Ali, lighting by Tarquin, Helen and Ali
Impressive phreas.
Modelling by Helen and Ali, lighting by Tarquin, Helen and Ali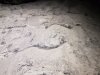 Sand ripples. The tapes here are covered in fresh sand, so presumably these get refreshed by flooding.
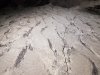 Sand ripples.
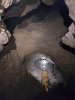 The Penang Bridge, a very large rock arch.
Modelling by Ali, lighting by Tarquin, Helen and Ali
The Penang Bridge, a very large rock arch.
Modelling by Ali, lighting by Tarquin, Helen and Ali The top of The Penang Bridge supports a huge amount of rocks and sand.
Modelling by Helen, lighting by Tarquin, Ali and Helen
The top of The Penang Bridge supports a huge amount of rocks and sand.
Modelling by Helen, lighting by Tarquin, Ali and Helen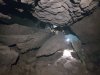 The Trudge, an awkward section of stooping and boulder obstacles.
Modelling by Helen and Ali, lighting by Tarquin, Helen and Ali
The Trudge, an awkward section of stooping and boulder obstacles.
Modelling by Helen and Ali, lighting by Tarquin, Helen and Ali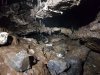 Grotto in The Trudge.
 Dropping into a slot on the right, a common theme in The Trudge.
Modelling by Helen, lighting by Tarquin and Helen
Dropping into a slot on the right, a common theme in The Trudge.
Modelling by Helen, lighting by Tarquin and Helen Honeycomb-like redissolved calcite.
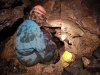 A hole down through the honeycomb. There is a much easier bypass to this part, an eyehole up on the right, that we missed on the way in.
Modelling by Helen and Ali, lighting by Tarquin, Helen and Ali
A hole down through the honeycomb. There is a much easier bypass to this part, an eyehole up on the right, that we missed on the way in.
Modelling by Helen and Ali, lighting by Tarquin, Helen and Ali An even better honeycomb.
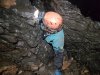 Our route now passed through a tight squeeze dropping onto a climb. This proved very difficult on the return, and the bypass was used instead. The squeeze ends in a chamber.
Modelling by Helen, lighting by Tarquin and Helen
Our route now passed through a tight squeeze dropping onto a climb. This proved very difficult on the return, and the bypass was used instead. The squeeze ends in a chamber.
Modelling by Helen, lighting by Tarquin and Helen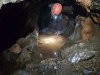 Below the chamber, is a drop down under the wall, which used to be the Trombone Squeeze until it was enlarged. This then passes through a crawl over a puddle.
Modelling by Helen, lighting by Tarquin and Helen
Below the chamber, is a drop down under the wall, which used to be the Trombone Squeeze until it was enlarged. This then passes through a crawl over a puddle.
Modelling by Helen, lighting by Tarquin and Helen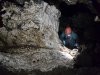 This ends at a very distinctive quartz vein, below a choked aven.
Modelling by Helen, lighting by Tarquin and Helen
This ends at a very distinctive quartz vein, below a choked aven.
Modelling by Helen, lighting by Tarquin and Helen The passage then dramatically enlarges.
Modelling by Ali and Helen, lighting by Tarquin, Ali and Helen
The passage then dramatically enlarges.
Modelling by Ali and Helen, lighting by Tarquin, Ali and Helen The large passage.
Modelling by Ali and Helen, lighting by Tarquin, Ali and Helen
The large passage.
Modelling by Ali and Helen, lighting by Tarquin, Ali and Helen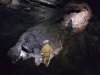 Junction with a side passage on the left. The way on it up the boulder slope on the right.
Modelling by Ali and Helen, lighting by Tarquin, Ali and Helen
Junction with a side passage on the left. The way on it up the boulder slope on the right.
Modelling by Ali and Helen, lighting by Tarquin, Ali and Helen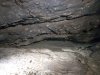 Above the start of some gour pools is a low arch on the right, which accesses the longest side passage in the cave. I visited this on the way out, when the others rather sensibly decided that side passages were irrelevant. This low crawl clearly can sump.
Lighting by Tarquin and Ali
Above the start of some gour pools is a low arch on the right, which accesses the longest side passage in the cave. I visited this on the way out, when the others rather sensibly decided that side passages were irrelevant. This low crawl clearly can sump.
Lighting by Tarquin and Ali The low crawl lifts into a steeply sloping passage, that matches the main passage in size.
 The top end of the side passage ends in boulders, where there is an inlet alcove to the right.
 An arched passage to the right before it provides a way on.
 This is mostly crawling sized.
 The side passage contains a small grotto on a corner, which is one of the best decorated pieces of the whole cave.
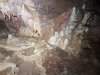 Stal flow.
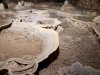 Gour pools.
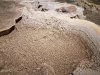 With sunken rafts.
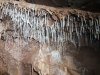 Straws.
 The side passage turns away from the grotto and climbs up to a pitch, where a handline tries to pretend it is a climb rather than a pitch. It lands in a calcited chamber, and from the sound of the description, there may be a lot more chamber below. However, without at least a top ascender or someone else there for help, I wasn't willing to try this.
 Back in the main passage, the gours continue.
 A climb into an oxbow bypasses a lower alternative
Modelling by Helen and Ali, lighting by Tarquin, Helen and Ali
A climb into an oxbow bypasses a lower alternative
Modelling by Helen and Ali, lighting by Tarquin, Helen and Ali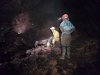 The passage grows again.
Modelling by Helen and Ali, lighting by Tarquin, Helen and Ali
The passage grows again.
Modelling by Helen and Ali, lighting by Tarquin, Helen and Ali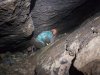 The passage quickly chokes.
Modelling by Helen, lighting by Tarquin and Helen
The passage quickly chokes.
Modelling by Helen, lighting by Tarquin and Helen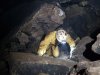 The choke is passed by the Desperate Domino route, under a slab on the right side, and dropping into the way on.
Modelling by Ali, lighting by Tarquin and Ali
The choke is passed by the Desperate Domino route, under a slab on the right side, and dropping into the way on.
Modelling by Ali, lighting by Tarquin and Ali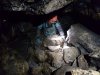 The way on beyond here is not so convenient, and the cave presents a lot more little challenges.
Modelling by Helen, lighting by Tarquin and Helen
The way on beyond here is not so convenient, and the cave presents a lot more little challenges.
Modelling by Helen, lighting by Tarquin and Helen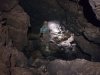 But there are some sections where we could walk again.
Modelling by Helen, lighting by Tarquin and Helen
But there are some sections where we could walk again.
Modelling by Helen, lighting by Tarquin and Helen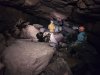 The passage breaks into a wider section. There are actually two routes around here, one upper bouldery passage, and one lower bedding crawl, and they both can be used to reach the end. We didn't actually notice either of them start, but we managed to take the upper one on the way in, and the lower one on the way out. At the end of the loop, the passage descends through a bouldery patch, and by following the obvious way down, we ended up in Passion Pit, without realising we had passed the proper way on.
Modelling by Helen and Ali, lighting by Tarquin, Helen and Ali
The passage breaks into a wider section. There are actually two routes around here, one upper bouldery passage, and one lower bedding crawl, and they both can be used to reach the end. We didn't actually notice either of them start, but we managed to take the upper one on the way in, and the lower one on the way out. At the end of the loop, the passage descends through a bouldery patch, and by following the obvious way down, we ended up in Passion Pit, without realising we had passed the proper way on.
Modelling by Helen and Ali, lighting by Tarquin, Helen and Ali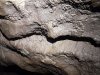 Mud formations.
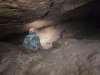 Passion Pit is a low, sandy area, with no way on. It clearly floods substantially, as there were no footprints anywhere.
Modelling by Helen, lighting by Tarquin, Ali and Helen
Passion Pit is a low, sandy area, with no way on. It clearly floods substantially, as there were no footprints anywhere.
Modelling by Helen, lighting by Tarquin, Ali and Helen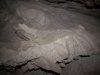 Mud and sand formations in Passion Pit.
 Mud and sand formations in Passion Pit.
 Sand ripples in Passion Pit.
 Returning up the passage, we located the correct way on, up over a rubble bank. This entered a chamber which closed down at the bottom.
Modelling by Helen, lighting by Tarquin, Ali and Helen
Returning up the passage, we located the correct way on, up over a rubble bank. This entered a chamber which closed down at the bottom.
Modelling by Helen, lighting by Tarquin, Ali and Helen To the right is an inlet rift.
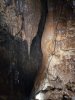 Formations in the inlet rift. The stream enters from an aven and sinks immediately, and there is a wet crawl that pinches out on the far side of the formations.
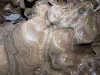 Redissolved stalagmites that look like contours, at the base of the aven.
 Someone has tried pushing the aven, but no way on is known.
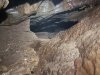 Back in the chamber, a low crawl near the rift provides the only other way on, which I visited alone.
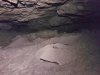 This reaches the final chamber, Oxwich Bay, which slopes upwards into the distance to reach a choke. I left this alone to avoid tracking footprints across this immaculate chamber, but since it floods to the ceiling, footprints cannot leave any lasting damage. This is the last piece of big passage in the cave and is the most likely place to find a way on into the strike oriented semi-fossil passage.
 Sand floor of Oxwich Bay.
 A crawl down at the bottom of the mud funnel is the only way on. In theory, 60 metres of passage is known here, but it will depend entirely on how much mud has been washed into it.
 Mud formations on the ceiling. This place really can flood.
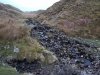 Outside, the stream was still very low, and had not reacted to the rain. In winter floods, this can be an incredible torrent, but certainly the cave does not always flood just because it is raining.
 A set of shakeholes next to a huge cairn in the main feeder valley of the lower Nant Cadlan. Behind it is Cefn Sychbant (419 metres).
 An enormous sink, which sometimes contains a lake. Right now it is empty, after weeks of dry weather, in spite of the heavy rain on this particular day. Behind it is an unnamed 458 metre hill.
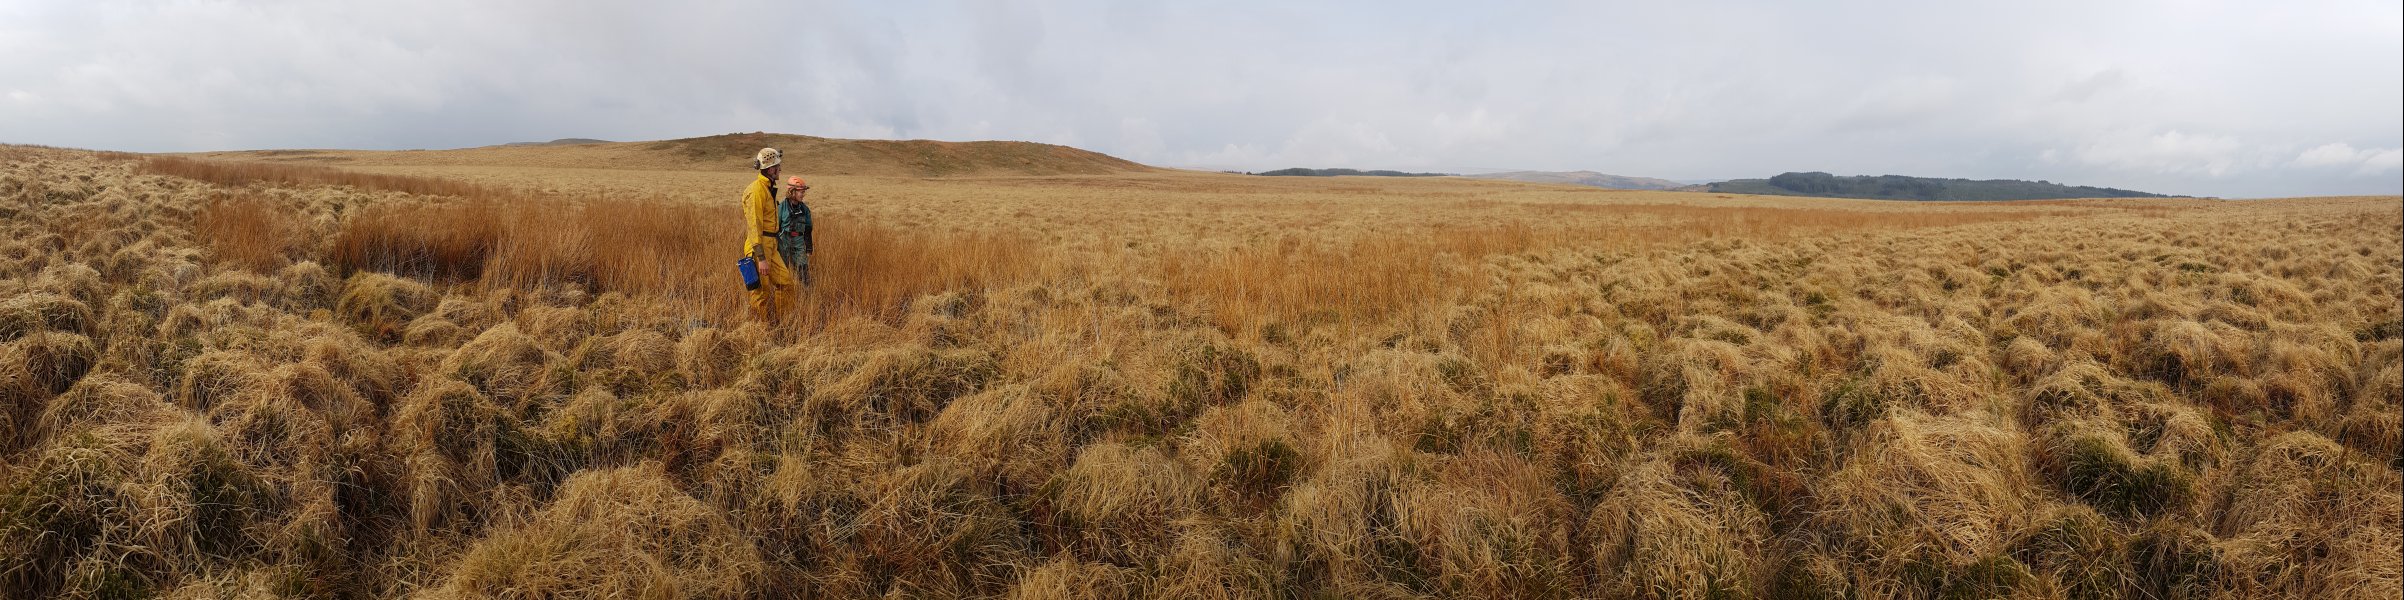 Marshy depression surrounded by the Cefn Sychbant ridge. In the distant rainclouds are the ridge of Gwaun y Pynt (528 metres) and Garn Ddu (462 metres), and a very distant Cefn yr Ystrad (617 metres). More visible are Cefn Cil-Sanws (461 metres) and the tree covered Penmoelallt (over 420 metres). In between the camera and Penmoelallt is the valley of Pant Sychbant, containing the upper Nant Cadlan stream.
Modelling by Ali and Helen
Marshy depression surrounded by the Cefn Sychbant ridge. In the distant rainclouds are the ridge of Gwaun y Pynt (528 metres) and Garn Ddu (462 metres), and a very distant Cefn yr Ystrad (617 metres). More visible are Cefn Cil-Sanws (461 metres) and the tree covered Penmoelallt (over 420 metres). In between the camera and Penmoelallt is the valley of Pant Sychbant, containing the upper Nant Cadlan stream.
Modelling by Ali and Helen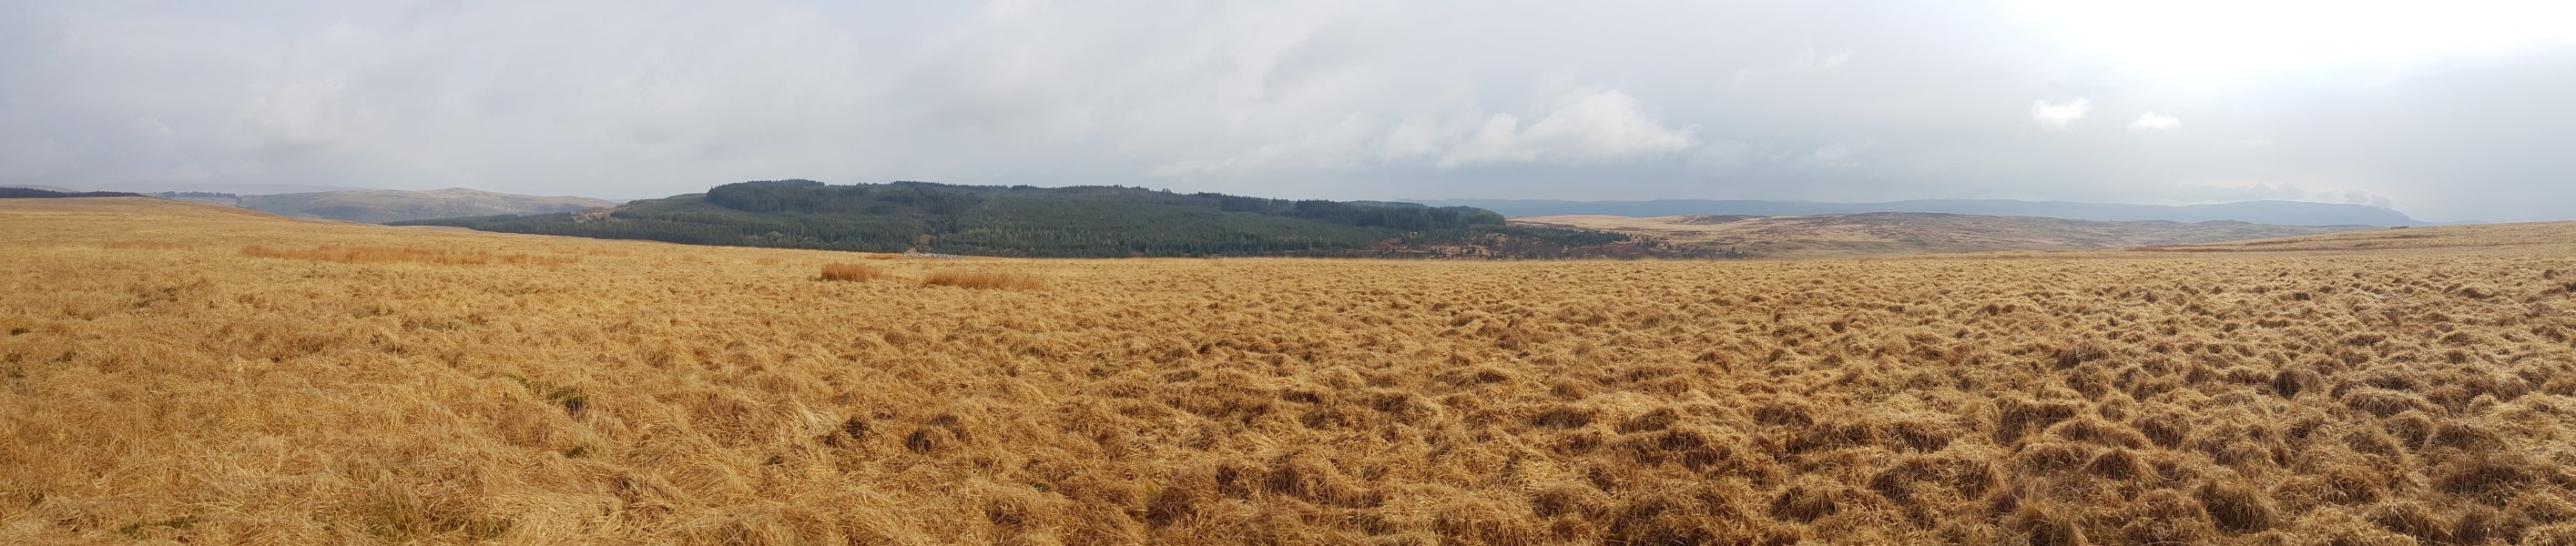 View over Pant Sychbant. Cefn Cil-Sanws, Penmoelallt, Mynydd-y-glog (389 metres) and a distant Hirwaun Common (515 metres) and Craig y Llyn (600 metres).
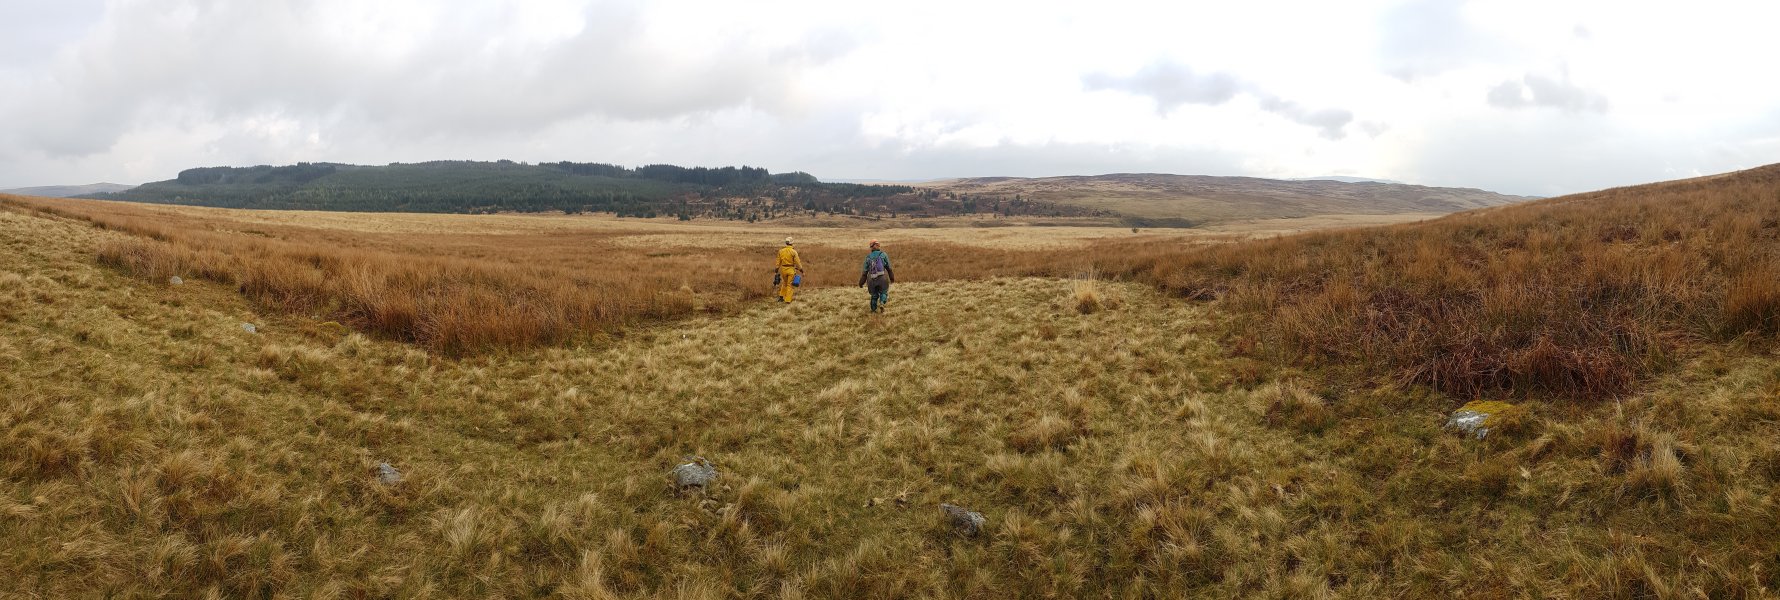 Pant Sychbant means "hollow of the dry hollow" (assuming "bant" is a mutated form of "pant" rather than the word "off"). The valley is not dry at this point though, and the name is specifically applied to the point where there is a stream. Ogof Fechan, another cave with a similar length in this catchment, is 1.5 km away to the right of this picture. The resurgence for both caves is nearly 4 km away to the right of the picture, at Llygad Cynon. At that point, the water from both Nant Cadlans finally joins together to create the Afon Cynon.
Modelling by Ali and Helen
Pant Sychbant means "hollow of the dry hollow" (assuming "bant" is a mutated form of "pant" rather than the word "off"). The valley is not dry at this point though, and the name is specifically applied to the point where there is a stream. Ogof Fechan, another cave with a similar length in this catchment, is 1.5 km away to the right of this picture. The resurgence for both caves is nearly 4 km away to the right of the picture, at Llygad Cynon. At that point, the water from both Nant Cadlans finally joins together to create the Afon Cynon.
Modelling by Ali and Helen The immense sink of Ogof Fawr. This was named long before there was any known cave here, in reference to the size of the sink, and the potential distance to the resurgence. For a while, Ogof Fawr was the smaller cave in the valley, and Ogof Fechan was the larger cave, but Ogof Fawr now lives up to its name with 1.3 km of cave. The original entrance is at the sink, but the current entrance is in front of the cliff on the right.
Modelling by Ali
The immense sink of Ogof Fawr. This was named long before there was any known cave here, in reference to the size of the sink, and the potential distance to the resurgence. For a while, Ogof Fawr was the smaller cave in the valley, and Ogof Fechan was the larger cave, but Ogof Fawr now lives up to its name with 1.3 km of cave. The original entrance is at the sink, but the current entrance is in front of the cliff on the right.
Modelling by Ali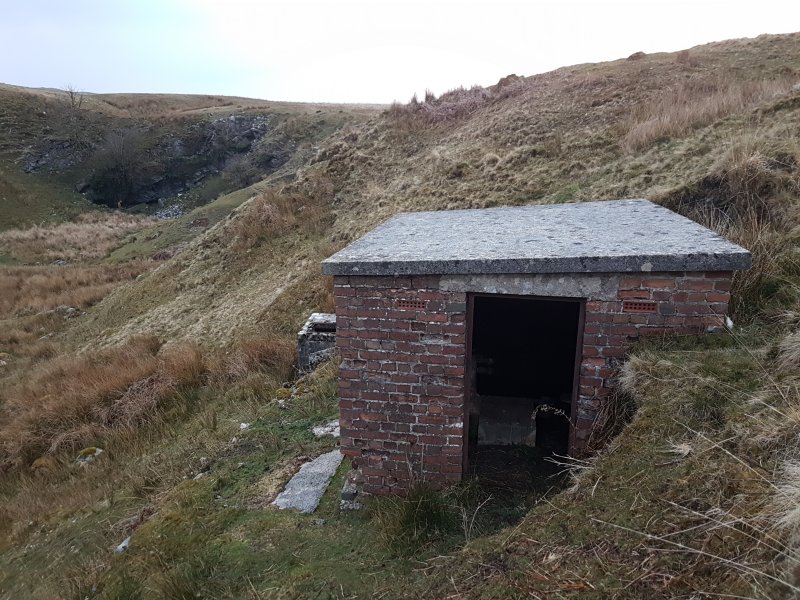 Pump house on the side of the shakehole.
Modelling by Ali
Pump house on the side of the shakehole.
Modelling by Ali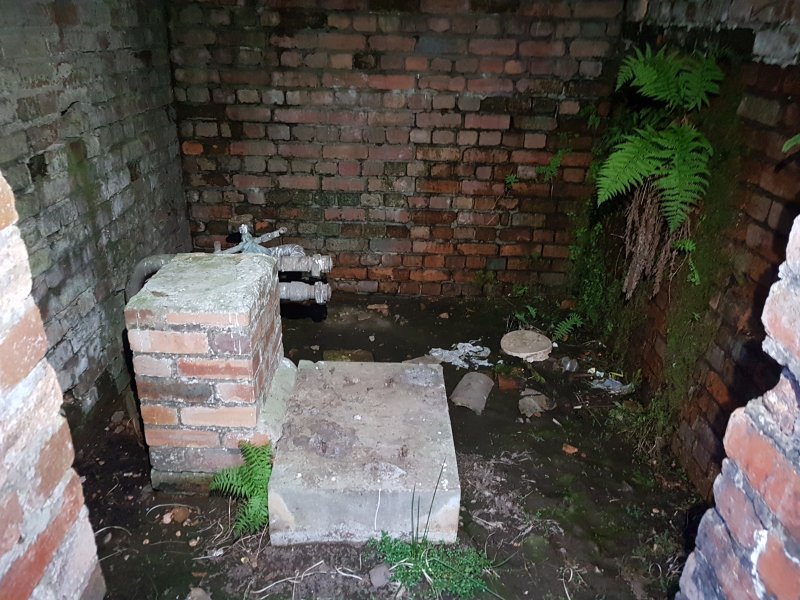 Inside the pump house.
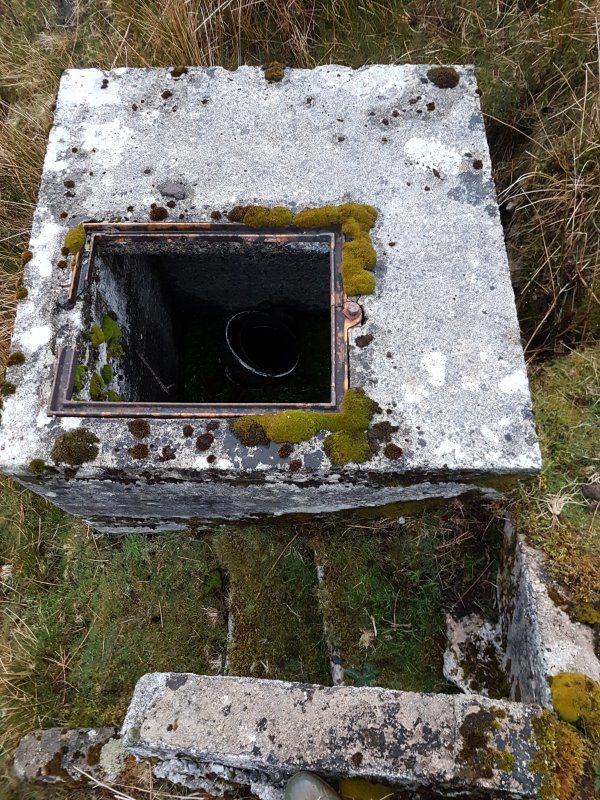 Tiny reservoir outside the pump house.
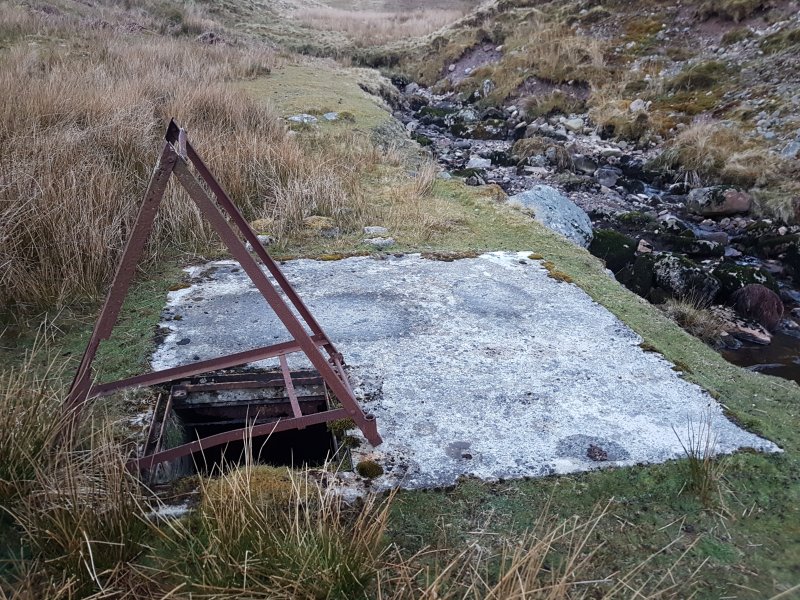 Larger reservoir by the river.
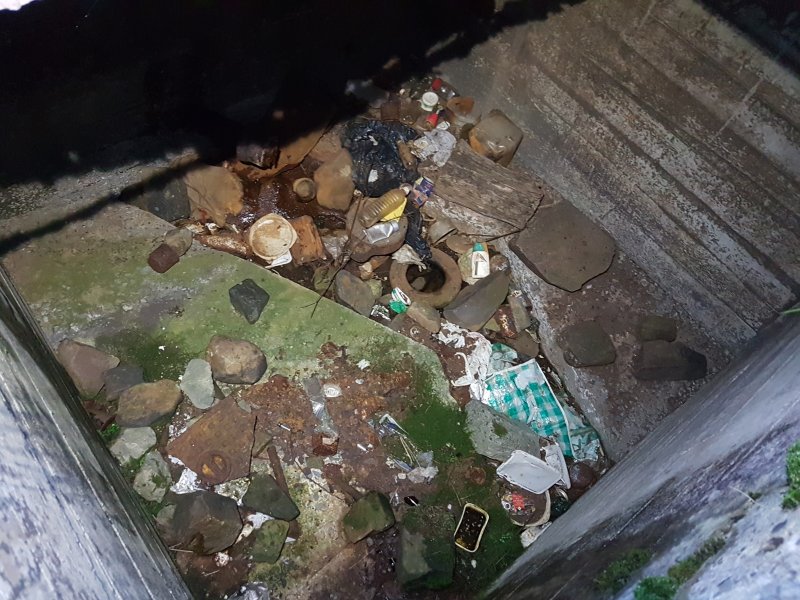 It doesn't hold water any more, but it does hold an awful lot of rubbish. What a strange place to dump rubbish, but maybe it is just people cleaning up what they found washed into the stream, and putting it here since that's better than it being washed into the cave.
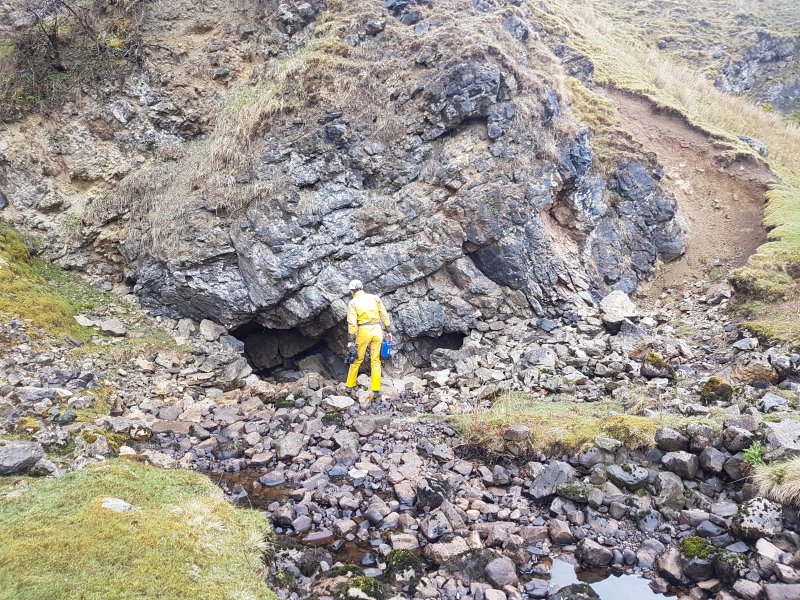 The original entrances at the sink. There are two openings that join, but the passage leading away from them was full of rocks during our visit. It may randomly be open depending on what flooding does. In severe winter floods, the water can pond up here to completely cover the entrances, and the cave is not safe in those conditions. The first constructed entrance was up to the left, through a shored route into the entrance passage. However, this also gets modified too much by the river, and is no longer used. The passage led into a chamber where it sank, then a side passage led into the rest of the known cave.
Modelling by Ali.
The original entrances at the sink. There are two openings that join, but the passage leading away from them was full of rocks during our visit. It may randomly be open depending on what flooding does. In severe winter floods, the water can pond up here to completely cover the entrances, and the cave is not safe in those conditions. The first constructed entrance was up to the left, through a shored route into the entrance passage. However, this also gets modified too much by the river, and is no longer used. The passage led into a chamber where it sank, then a side passage led into the rest of the known cave.
Modelling by Ali.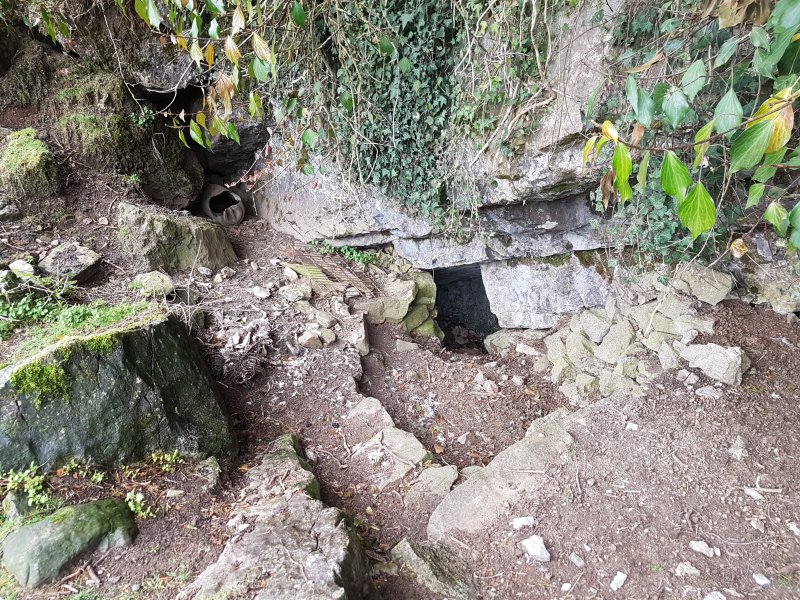 The current entrance, down to the right. This is liberally adorned with sheep droppings, and a sheep carcas can be seen on the left. There are a lot of sheep bones in this sink, especially below the cliffs.
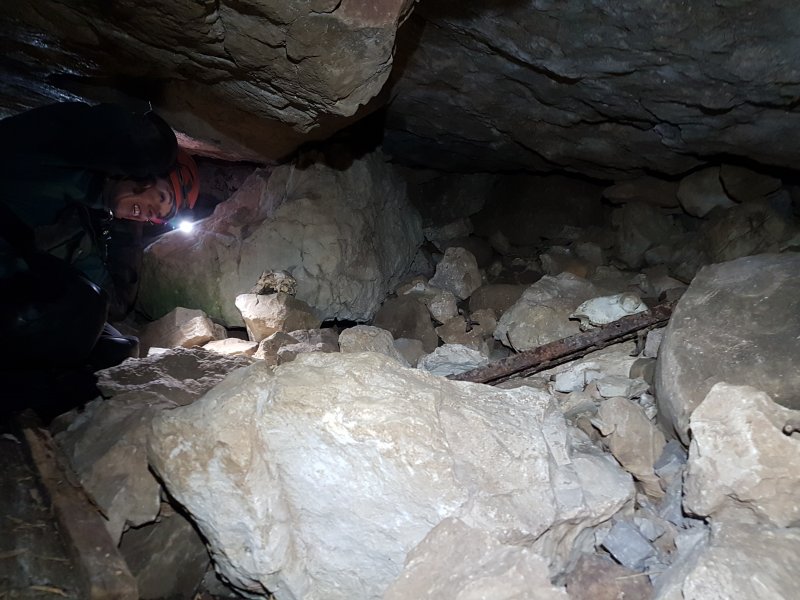 A couple of sheep skulls in the entrance passage. There were loads of bones scattered all the way down the passage.
Modelling by Helen, lighting by Tarquin and Helen
A couple of sheep skulls in the entrance passage. There were loads of bones scattered all the way down the passage.
Modelling by Helen, lighting by Tarquin and Helen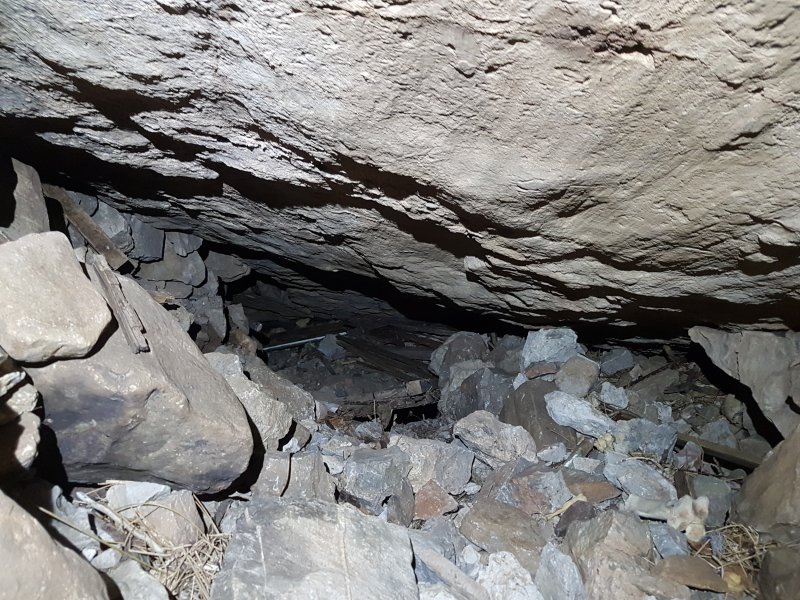 The entrance passage slopes very steeply down a slope of debris. The left wall is choss from the sink, and feels like it will slide if you breathe on it. Everything that gets kicked down crashes onwards on top of anyone further down.
 Scaffolded shaft dropping down into a steeply sloping bedding. You are very definitely in the firing line here, and rocks shoot past as others move around above.
Modelling by Tarquin
Scaffolded shaft dropping down into a steeply sloping bedding. You are very definitely in the firing line here, and rocks shoot past as others move around above.
Modelling by Tarquin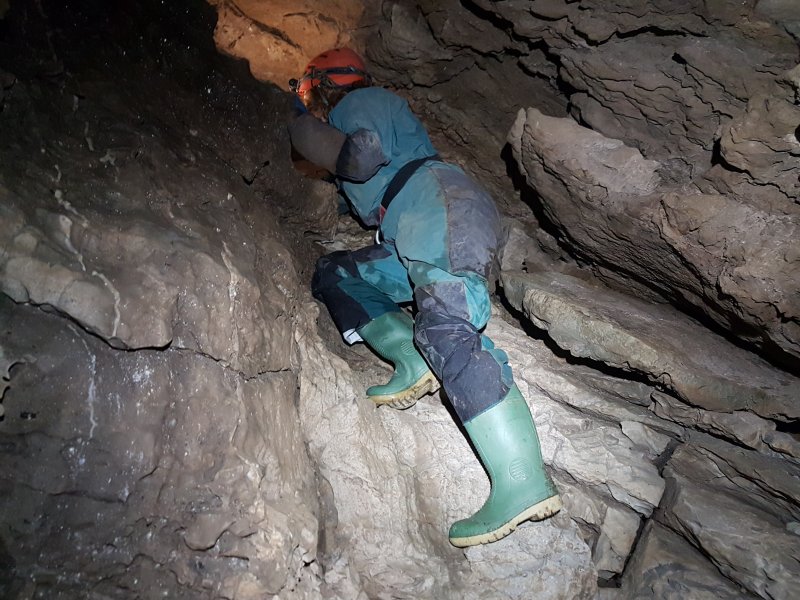 The bedding spits you out onto a climb, which was opened up from below in order to make a more reliable entrance.
Modelling by Helen, lighting by Tarquin and Helen
The bedding spits you out onto a climb, which was opened up from below in order to make a more reliable entrance.
Modelling by Helen, lighting by Tarquin and Helen The climb drops into the top end of Clive Jones's Locker, an enormous chamber that slopes very steeply down into a boulder pile.
Modelling by Helen and Ali, lighting by Tarquin, Helen and Ali
The climb drops into the top end of Clive Jones's Locker, an enormous chamber that slopes very steeply down into a boulder pile.
Modelling by Helen and Ali, lighting by Tarquin, Helen and Ali The original route into this chamber enters from up a pitch to the left. From the sink, this reached a scaffolded shaft (the top of which was also accessed via the first constructed entrance), then into a series of chambers, a couple of which gain then lose the stream. That first chamber was first seen then lost in the 1980s, then regained in 2007. Beyond those is a climb up into a passage ending up at this pitch. The 2007 Croydon Caving Club survey showed only those chambers, not the passage that eventually reached Clive Jones's Locker. Their 2009 survey shows these chambers as a small loop near E1, while the modern entrance is E2.
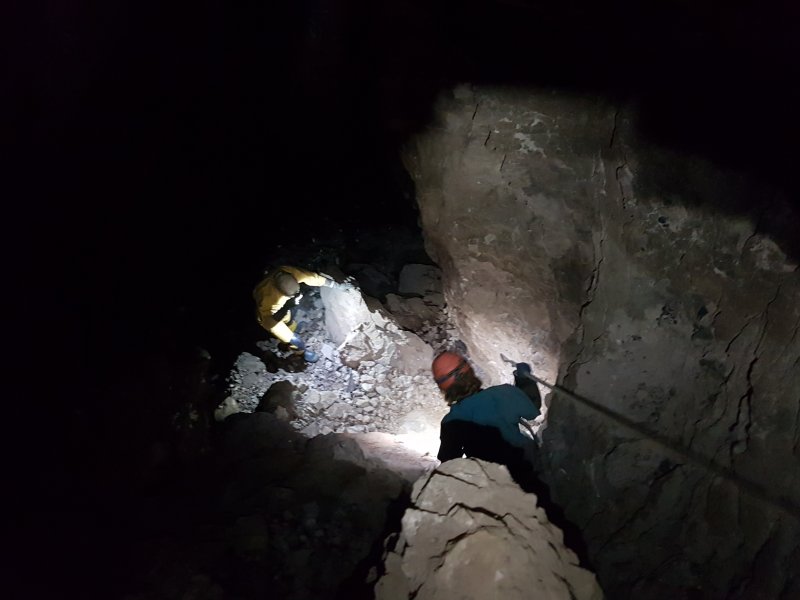 A handline leads down a loose climb to a lower bench of Clive Jones's Locker. A side passage at the top seems to drop in to a later aven. Standing under this climb is risky, as dislodged rocks end up flying down it. Instead, it is better to shelter in the way on; under the wall at the bottom of the climb. This area is known as Hung Drawn And Slaughtered, as is the pitch above it.
Modelling by Helen and Ali, lighting by Tarquin, Helen and Ali
A handline leads down a loose climb to a lower bench of Clive Jones's Locker. A side passage at the top seems to drop in to a later aven. Standing under this climb is risky, as dislodged rocks end up flying down it. Instead, it is better to shelter in the way on; under the wall at the bottom of the climb. This area is known as Hung Drawn And Slaughtered, as is the pitch above it.
Modelling by Helen and Ali, lighting by Tarquin, Helen and Ali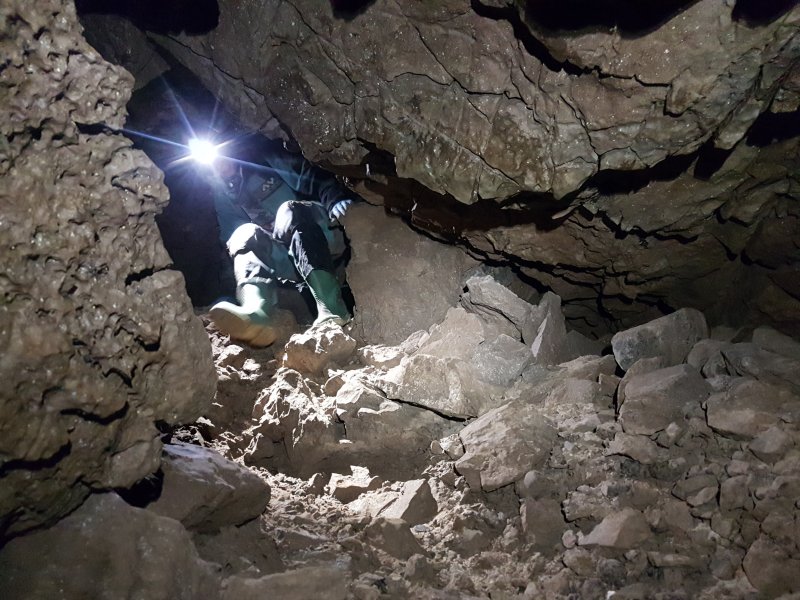 The way on is made from heavily shattered rock, steeply descending a scree slope.
Modelling by Helen, lighting by Tarquin and Helen
The way on is made from heavily shattered rock, steeply descending a scree slope.
Modelling by Helen, lighting by Tarquin and Helen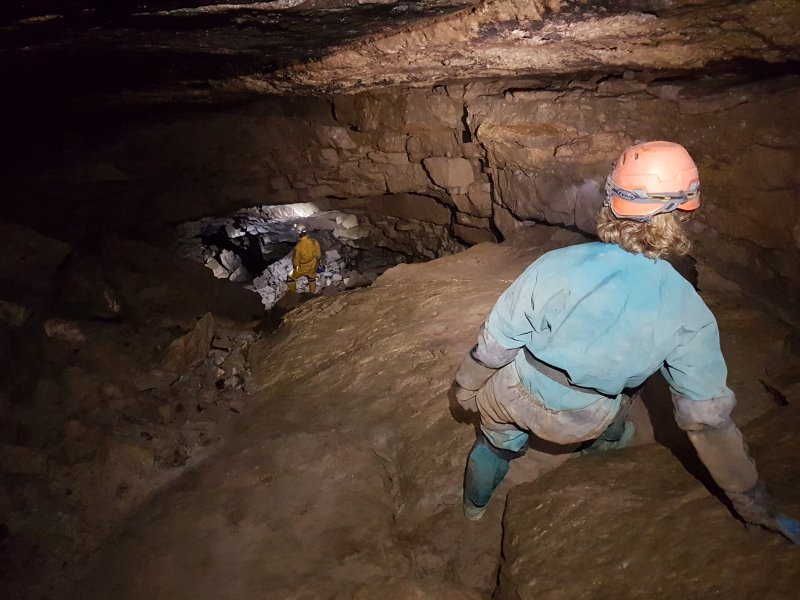 The route enters the Second Chamber, half way down. This could easily be mistaken for a Mendip cave, with very steeply sloping beds, and giant rock slabs.
Modelling by Helen and Ali, lighting by Tarquin, Helen and Ali
The route enters the Second Chamber, half way down. This could easily be mistaken for a Mendip cave, with very steeply sloping beds, and giant rock slabs.
Modelling by Helen and Ali, lighting by Tarquin, Helen and Ali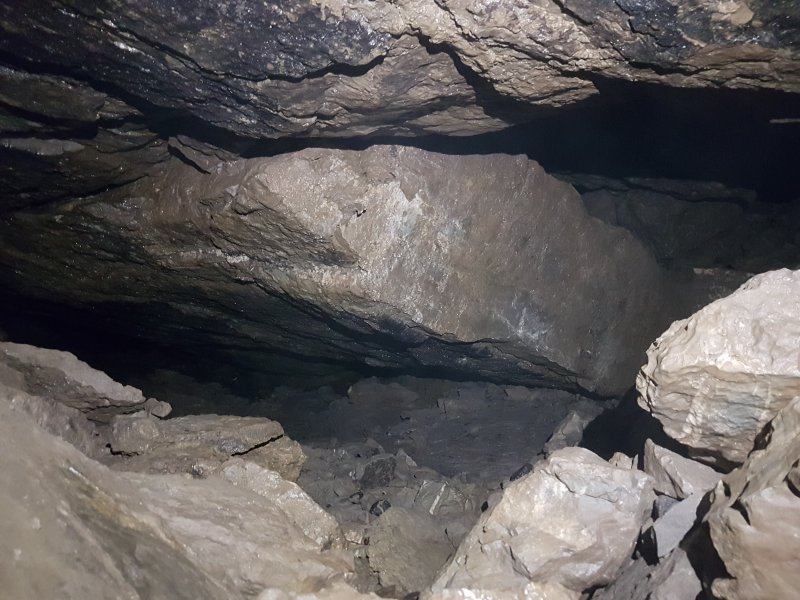 Looking up the slope into the top of Second Chamber. Don't worry, I'm sure that ceiling is perfectly safe.
 The passage below the Second Chamber remains very steep. This cairn seems completely pointless, since there is no junction here, and nowhere to be confused. Perhaps it is there to remind you to watch your footing on the sloping rocks. Or maybe it marks the highest water level the cave can experience.
Modelling by Ali, lighting by Tarquin, Helen and Ali
The passage below the Second Chamber remains very steep. This cairn seems completely pointless, since there is no junction here, and nowhere to be confused. Perhaps it is there to remind you to watch your footing on the sloping rocks. Or maybe it marks the highest water level the cave can experience.
Modelling by Ali, lighting by Tarquin, Helen and Ali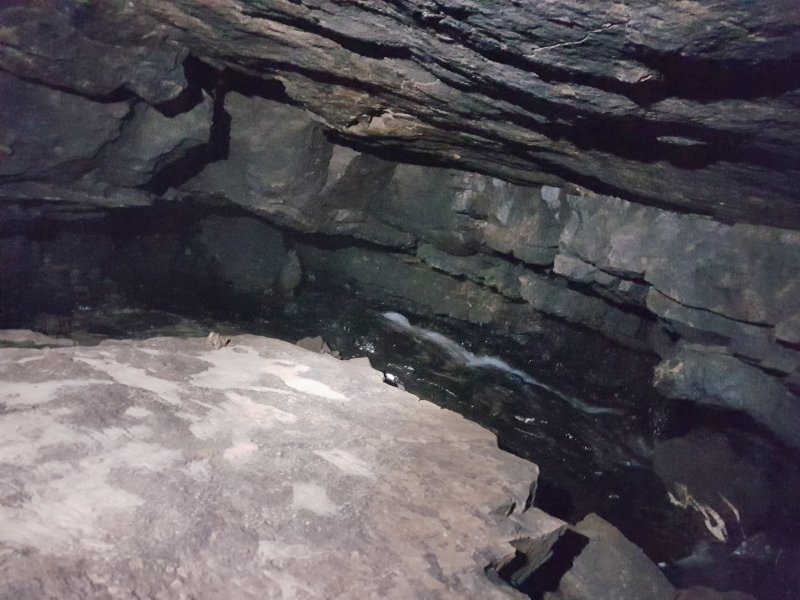 The stream finally decides to put in an appearance, after not having been seen since the first chamber in the old entrance. In spite of the heavy rain, it is not a problem today, but in severe flood the cave can flood to a depth of the bottom of this slope.
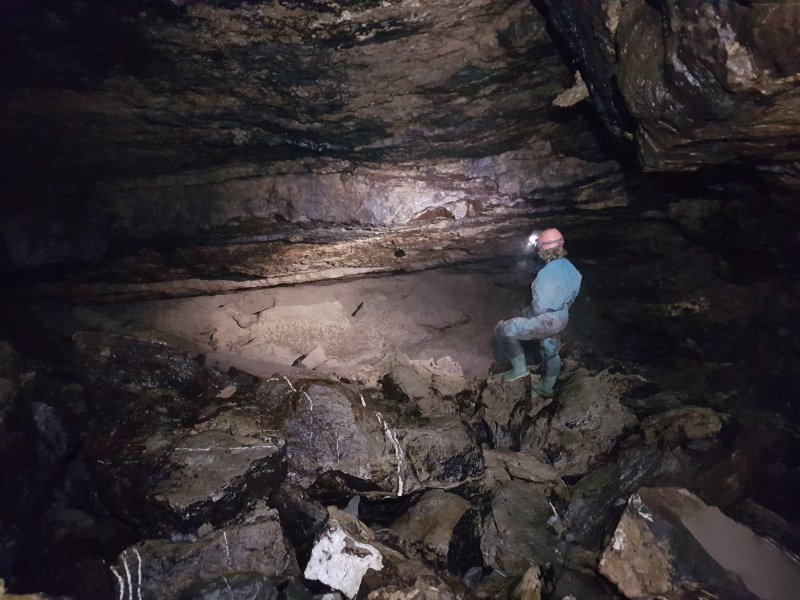 A junction at the bottom, marked by a boulder with flood-washed sand on top, offers a choice of routes. A clamber down to the left with the stream reaches the large Sump Chamber, where the stream sinks. This is also labelled as Flood Chamber on some surveys, and Mamma Goo's Realm in a description. The original name it was given by the explorers is Sump Chamber, because it fills to the ceiling in severe floods. In the boulders at the bottom is a pitch down to a lower chamber, the last place that the stream is seen. From there, the water must follow a similar route to the main passage, but probably repeatedly sumping as it aims down dip rather than along the strike.
Modelling by Helen, lighting by Tarquin, Ali and Helen
A junction at the bottom, marked by a boulder with flood-washed sand on top, offers a choice of routes. A clamber down to the left with the stream reaches the large Sump Chamber, where the stream sinks. This is also labelled as Flood Chamber on some surveys, and Mamma Goo's Realm in a description. The original name it was given by the explorers is Sump Chamber, because it fills to the ceiling in severe floods. In the boulders at the bottom is a pitch down to a lower chamber, the last place that the stream is seen. From there, the water must follow a similar route to the main passage, but probably repeatedly sumping as it aims down dip rather than along the strike.
Modelling by Helen, lighting by Tarquin, Ali and Helen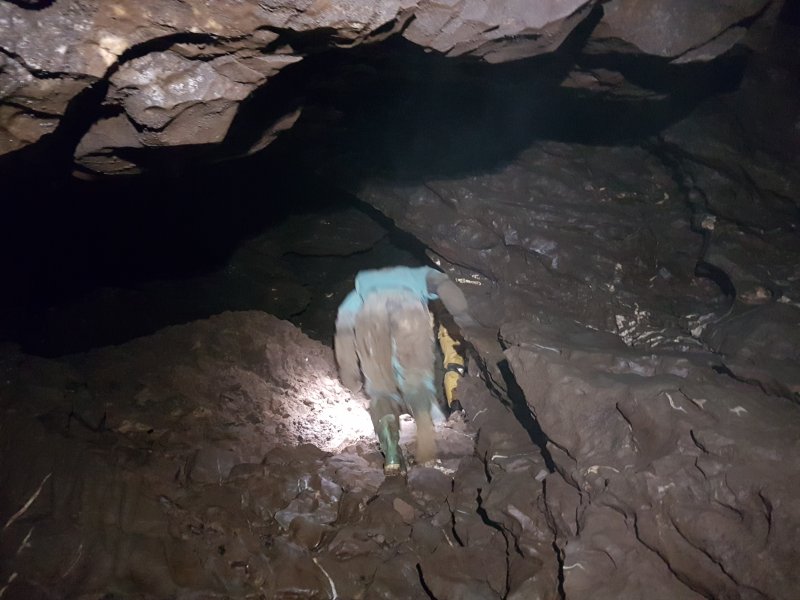 From the junction, the way on is to the right, ascending into the cave's main passage; Penderyn Passage. This trundles off for about 1 km, forming the majority of the cave's length.
Modelling by Helen and Ali, lighting by Tarquin, Helen and Ali
From the junction, the way on is to the right, ascending into the cave's main passage; Penderyn Passage. This trundles off for about 1 km, forming the majority of the cave's length.
Modelling by Helen and Ali, lighting by Tarquin, Helen and Ali Penderyn Passage
Modelling by Helen and Ali, lighting by Tarquin, Helen and Ali
Penderyn Passage
Modelling by Helen and Ali, lighting by Tarquin, Helen and Ali Clapper Bridge, where there are short passages at both ends.
Modelling by Helen, lighting by Tarquin, Helen and Ali
Clapper Bridge, where there are short passages at both ends.
Modelling by Helen, lighting by Tarquin, Helen and Ali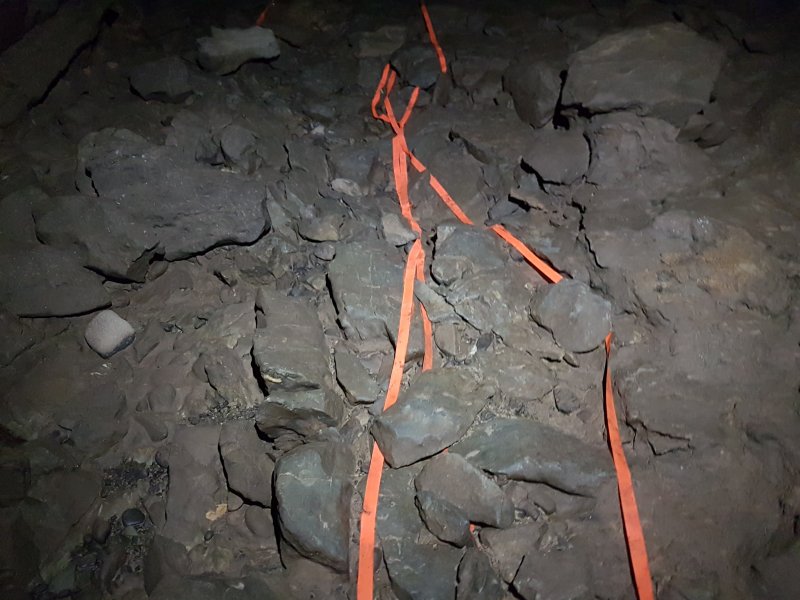 The tapes along this passage may make no sense, since they regularly get rearranged by flooding. Even though the cave may be safe right now in a summer rainstorm, winter flooding can definitely have an effect here.
 Decomposed gour pools at the start of a section called The Orange Blossom Trail (these names seem to be quite randomly applied, and are not mentioned in the original exploration, but are written in the description - it's almost like two different people invented different sets of names, and each wrote about them separately).
Modelling by Ali and Helen, lighting by Tarquin, Ali and Helen
Decomposed gour pools at the start of a section called The Orange Blossom Trail (these names seem to be quite randomly applied, and are not mentioned in the original exploration, but are written in the description - it's almost like two different people invented different sets of names, and each wrote about them separately).
Modelling by Ali and Helen, lighting by Tarquin, Ali and Helen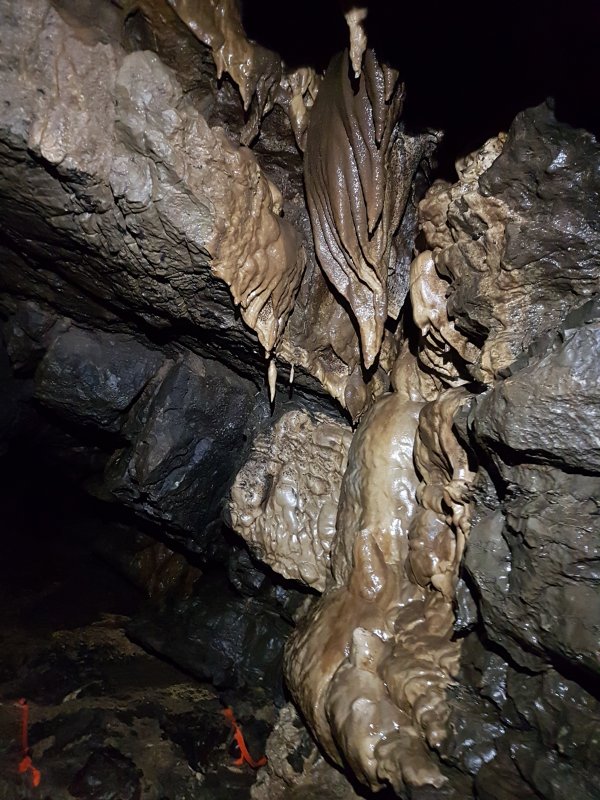 Formations in The Orange Blossom Trail.
 Formations in The Orange Blossom Trail.
 Formations in The Orange Blossom Trail.
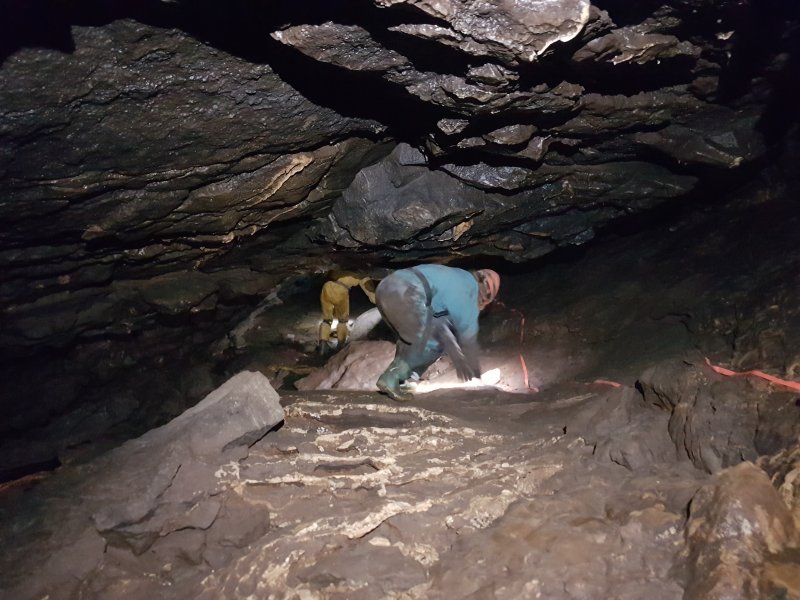 The Orange Blossom Trail.
Modelling by Helen and Ali, lighting by Tarquin, Helen and Ali
The Orange Blossom Trail.
Modelling by Helen and Ali, lighting by Tarquin, Helen and Ali Stooping through a pool, trying to keep your feet dry.
Modelling by Helen and Ali, lighting by Tarquin, Helen and Ali
Stooping through a pool, trying to keep your feet dry.
Modelling by Helen and Ali, lighting by Tarquin, Helen and Ali Approaching Formation Junction.
Modelling by Helen and Ali, lighting by Tarquin, Helen and Ali
Approaching Formation Junction.
Modelling by Helen and Ali, lighting by Tarquin, Helen and Ali Traversing over the formations. Fortunately, your boots are clean.
Modelling by Helen and Ali, lighting by Tarquin, Helen and Ali
Traversing over the formations. Fortunately, your boots are clean.
Modelling by Helen and Ali, lighting by Tarquin, Helen and Ali More decomposed gour pools.
 At Formation Junction just after the traverse, Hell's Delight is a tight and loose side passage. It is not long enough to be interesting.
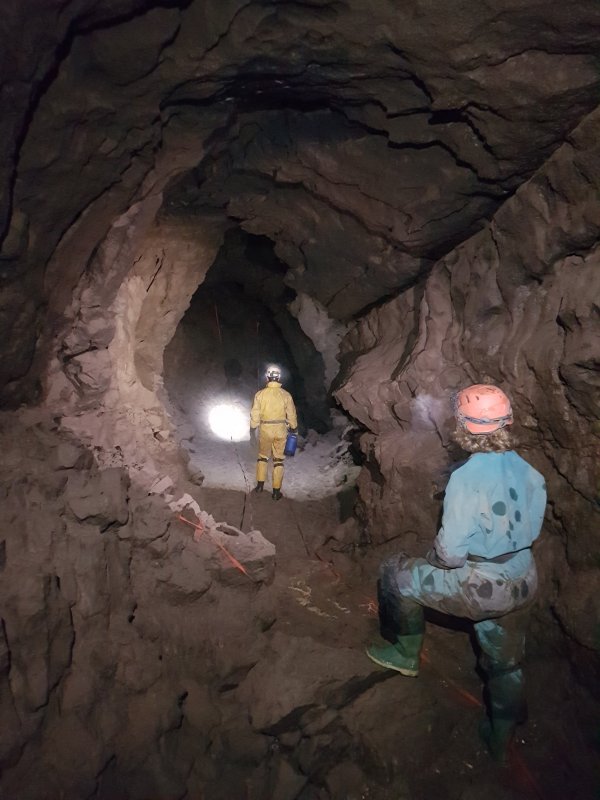 Impressive phreas.
Modelling by Helen and Ali, lighting by Tarquin, Helen and Ali
Impressive phreas.
Modelling by Helen and Ali, lighting by Tarquin, Helen and Ali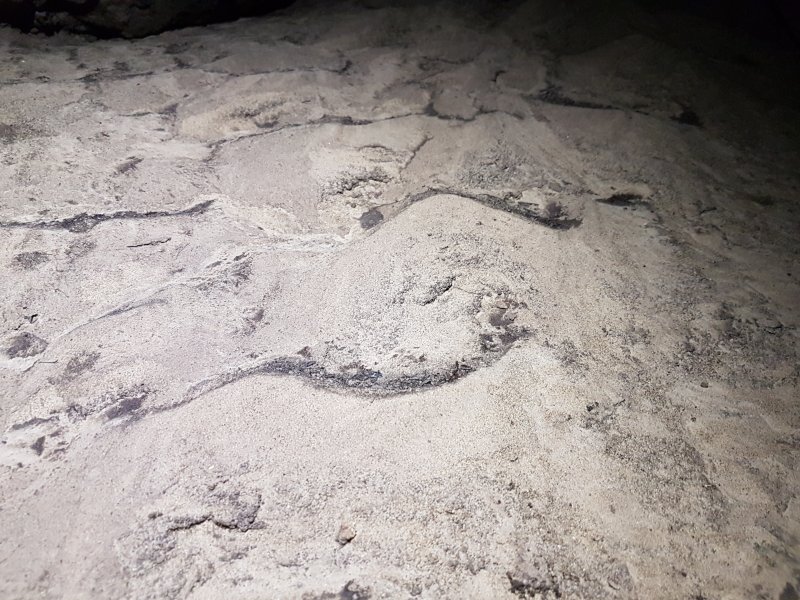 Sand ripples. The tapes here are covered in fresh sand, so presumably these get refreshed by flooding.
 Sand ripples.
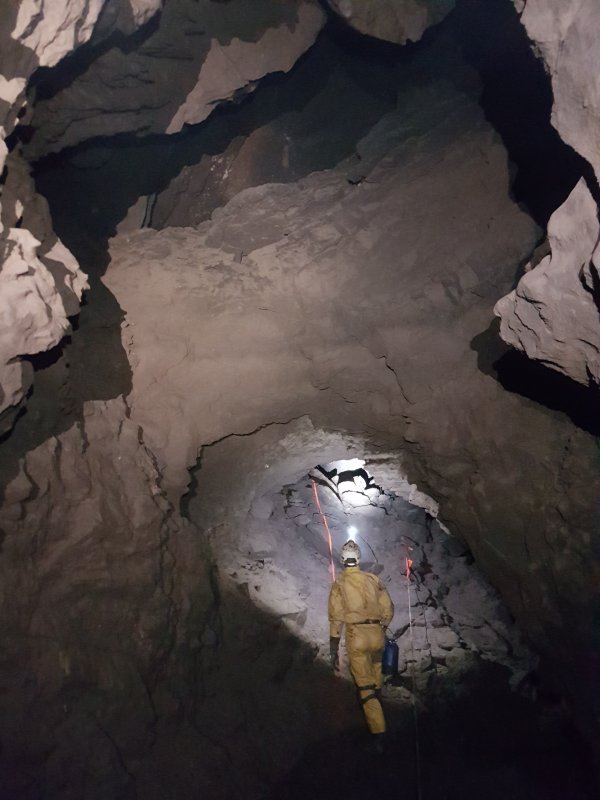 The Penang Bridge, a very large rock arch.
Modelling by Ali, lighting by Tarquin, Helen and Ali
The Penang Bridge, a very large rock arch.
Modelling by Ali, lighting by Tarquin, Helen and Ali The top of The Penang Bridge supports a huge amount of rocks and sand.
Modelling by Helen, lighting by Tarquin, Ali and Helen
The top of The Penang Bridge supports a huge amount of rocks and sand.
Modelling by Helen, lighting by Tarquin, Ali and Helen The Trudge, an awkward section of stooping and boulder obstacles.
Modelling by Helen and Ali, lighting by Tarquin, Helen and Ali
The Trudge, an awkward section of stooping and boulder obstacles.
Modelling by Helen and Ali, lighting by Tarquin, Helen and Ali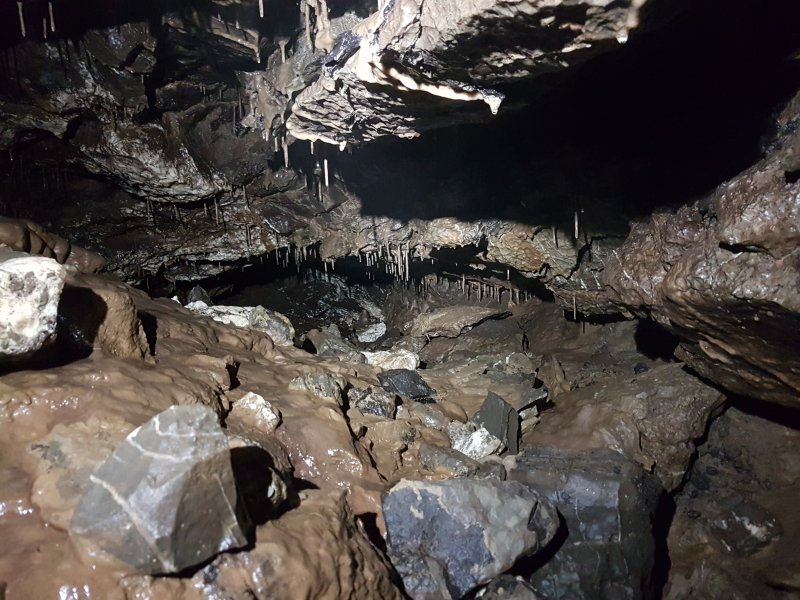 Grotto in The Trudge.
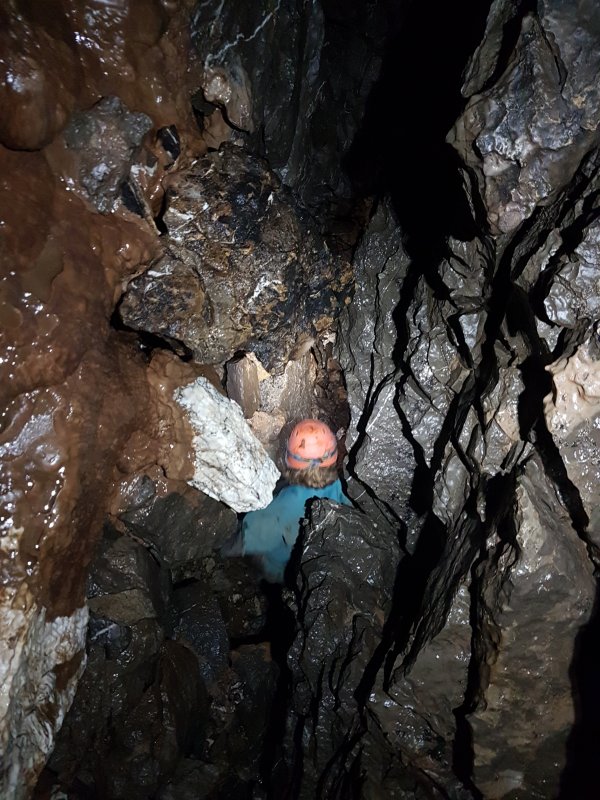 Dropping into a slot on the right, a common theme in The Trudge.
Modelling by Helen, lighting by Tarquin and Helen
Dropping into a slot on the right, a common theme in The Trudge.
Modelling by Helen, lighting by Tarquin and Helen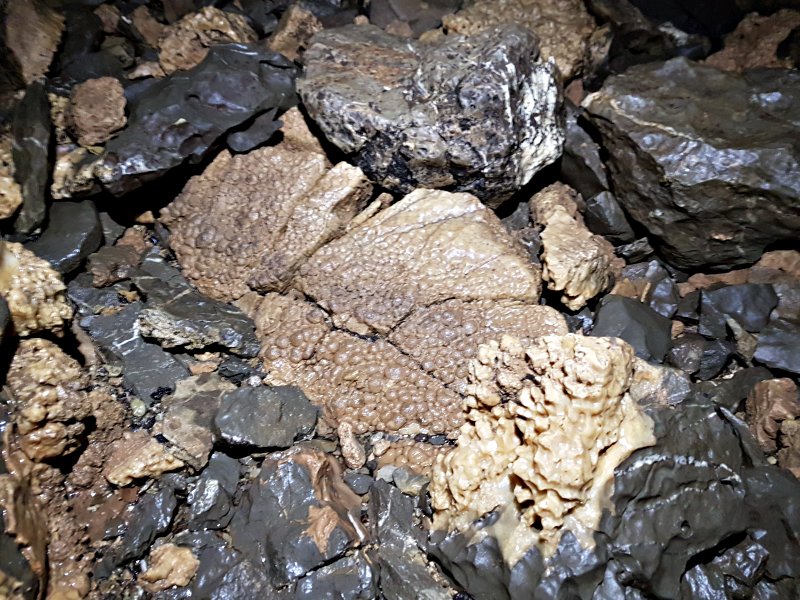 Honeycomb-like redissolved calcite.
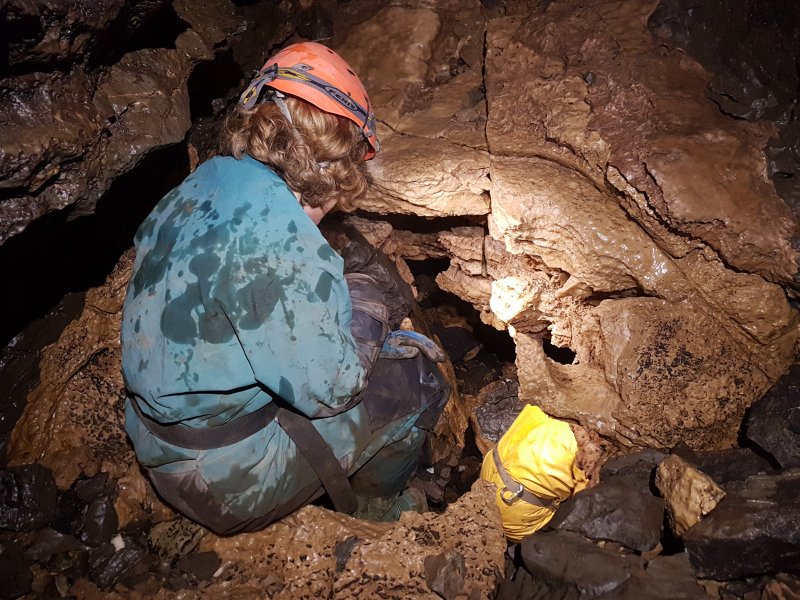 A hole down through the honeycomb. There is a much easier bypass to this part, an eyehole up on the right, that we missed on the way in.
Modelling by Helen and Ali, lighting by Tarquin, Helen and Ali
A hole down through the honeycomb. There is a much easier bypass to this part, an eyehole up on the right, that we missed on the way in.
Modelling by Helen and Ali, lighting by Tarquin, Helen and Ali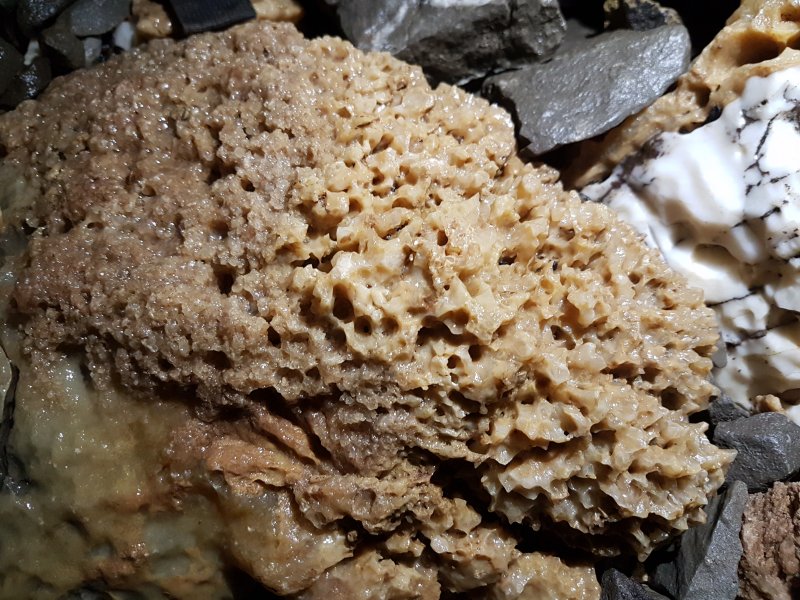 An even better honeycomb.
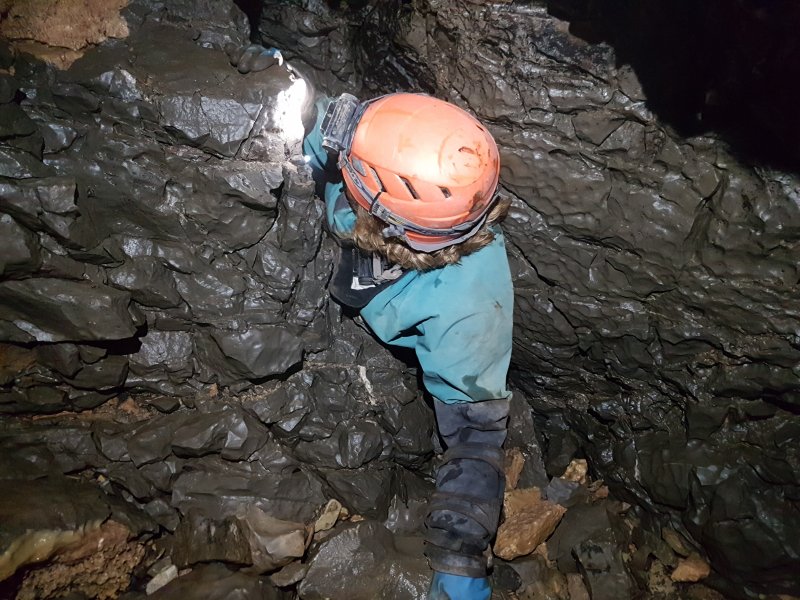 Our route now passed through a tight squeeze dropping onto a climb. This proved very difficult on the return, and the bypass was used instead. The squeeze ends in a chamber.
Modelling by Helen, lighting by Tarquin and Helen
Our route now passed through a tight squeeze dropping onto a climb. This proved very difficult on the return, and the bypass was used instead. The squeeze ends in a chamber.
Modelling by Helen, lighting by Tarquin and Helen Below the chamber, is a drop down under the wall, which used to be the Trombone Squeeze until it was enlarged. This then passes through a crawl over a puddle.
Modelling by Helen, lighting by Tarquin and Helen
Below the chamber, is a drop down under the wall, which used to be the Trombone Squeeze until it was enlarged. This then passes through a crawl over a puddle.
Modelling by Helen, lighting by Tarquin and Helen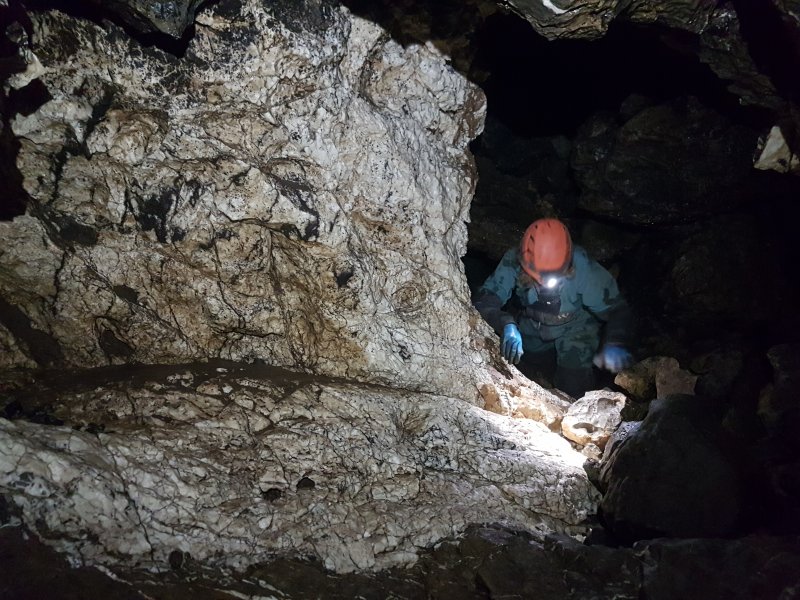 This ends at a very distinctive quartz vein, below a choked aven.
Modelling by Helen, lighting by Tarquin and Helen
This ends at a very distinctive quartz vein, below a choked aven.
Modelling by Helen, lighting by Tarquin and Helen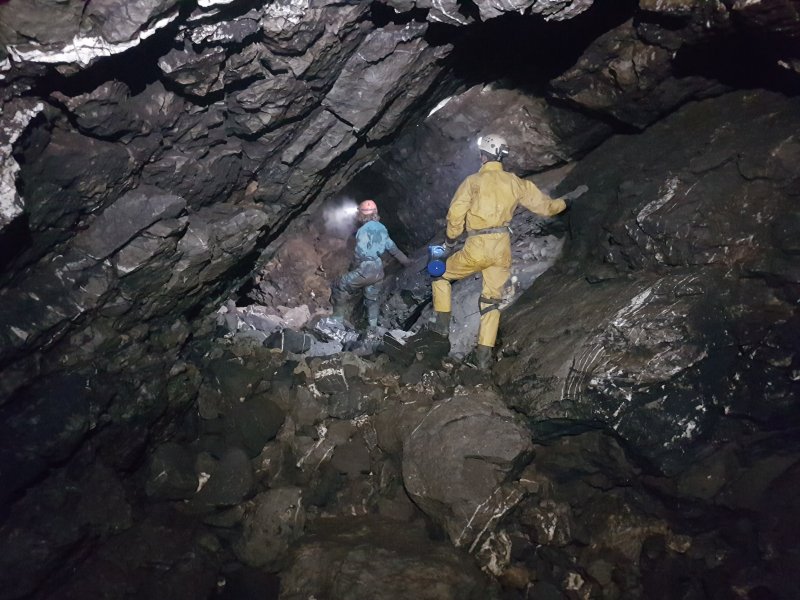 The passage then dramatically enlarges.
Modelling by Ali and Helen, lighting by Tarquin, Ali and Helen
The passage then dramatically enlarges.
Modelling by Ali and Helen, lighting by Tarquin, Ali and Helen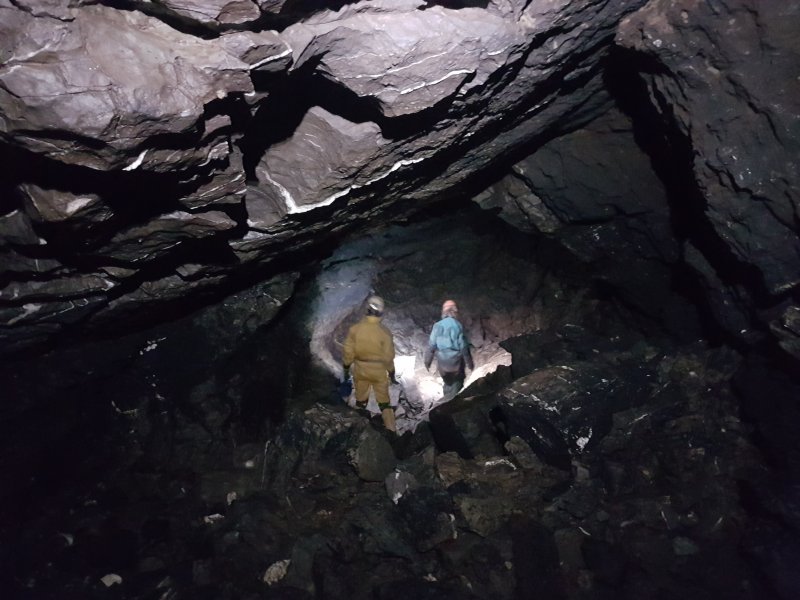 The large passage.
Modelling by Ali and Helen, lighting by Tarquin, Ali and Helen
The large passage.
Modelling by Ali and Helen, lighting by Tarquin, Ali and Helen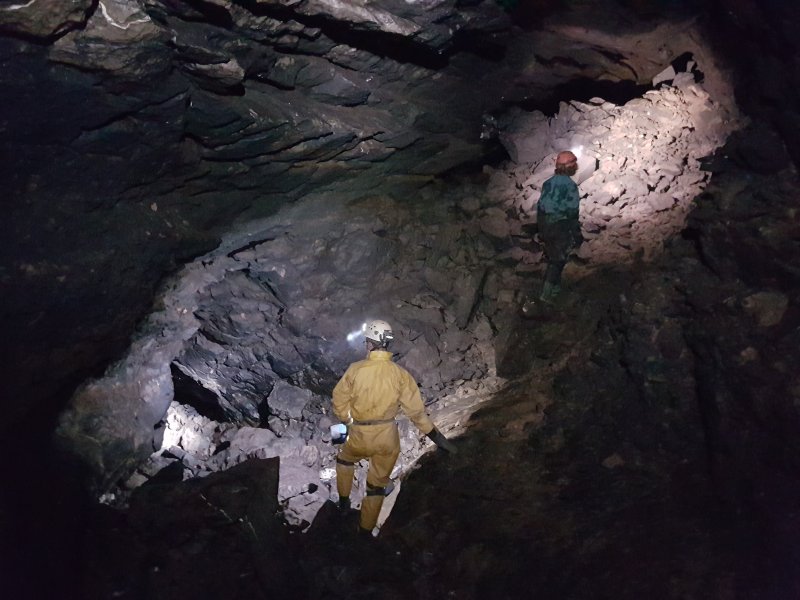 Junction with a side passage on the left. The way on it up the boulder slope on the right.
Modelling by Ali and Helen, lighting by Tarquin, Ali and Helen
Junction with a side passage on the left. The way on it up the boulder slope on the right.
Modelling by Ali and Helen, lighting by Tarquin, Ali and Helen Above the start of some gour pools is a low arch on the right, which accesses the longest side passage in the cave. I visited this on the way out, when the others rather sensibly decided that side passages were irrelevant. This low crawl clearly can sump.
Lighting by Tarquin and Ali
Above the start of some gour pools is a low arch on the right, which accesses the longest side passage in the cave. I visited this on the way out, when the others rather sensibly decided that side passages were irrelevant. This low crawl clearly can sump.
Lighting by Tarquin and Ali The low crawl lifts into a steeply sloping passage, that matches the main passage in size.
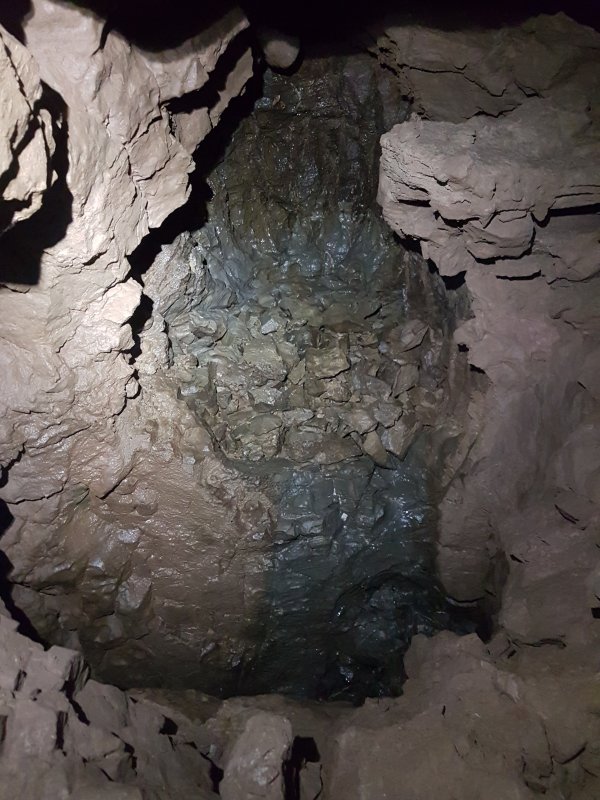 The top end of the side passage ends in boulders, where there is an inlet alcove to the right.
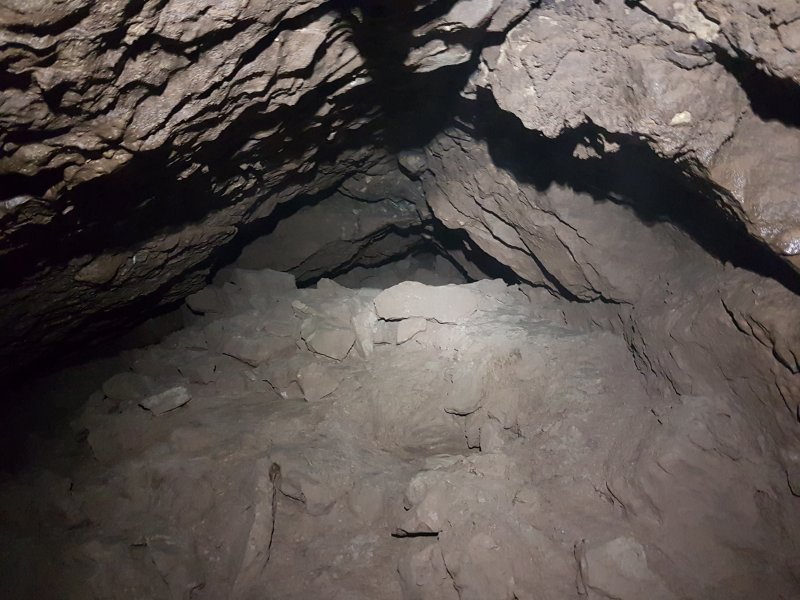 An arched passage to the right before it provides a way on.
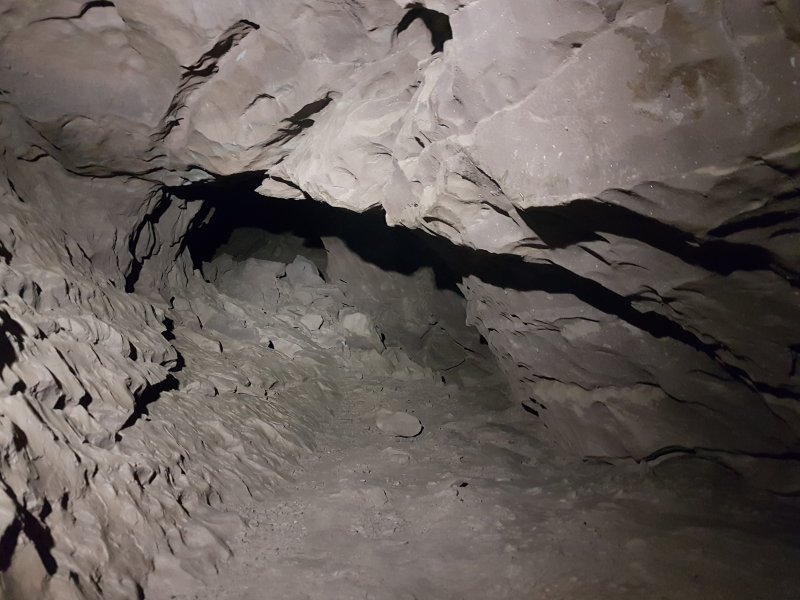 This is mostly crawling sized.
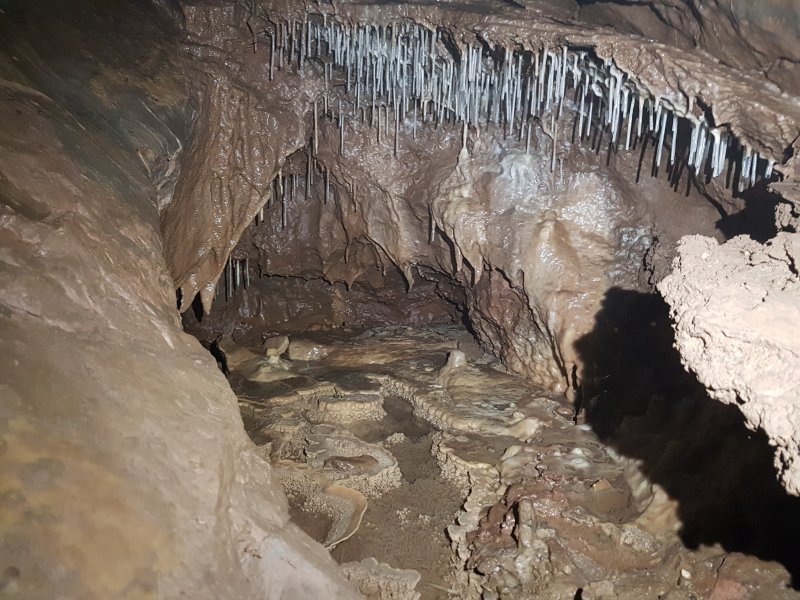 The side passage contains a small grotto on a corner, which is one of the best decorated pieces of the whole cave.
 Stal flow.
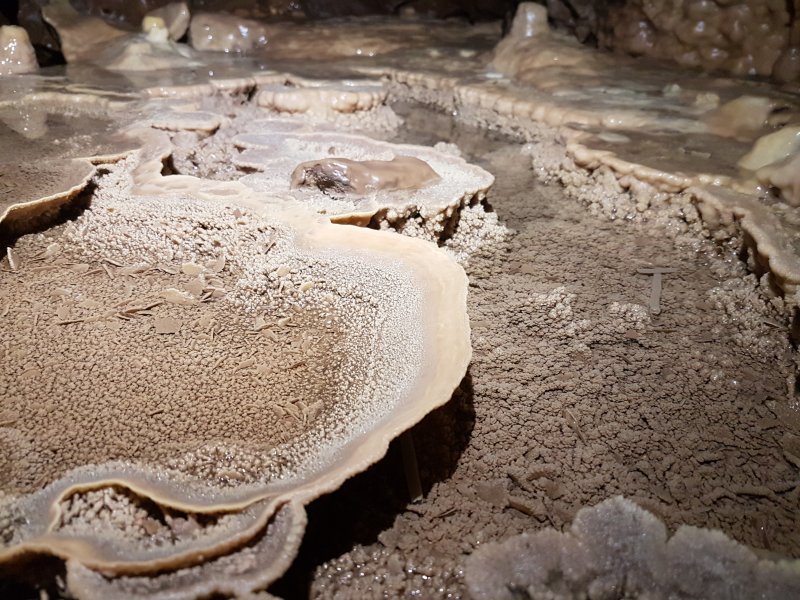 Gour pools.
 With sunken rafts.
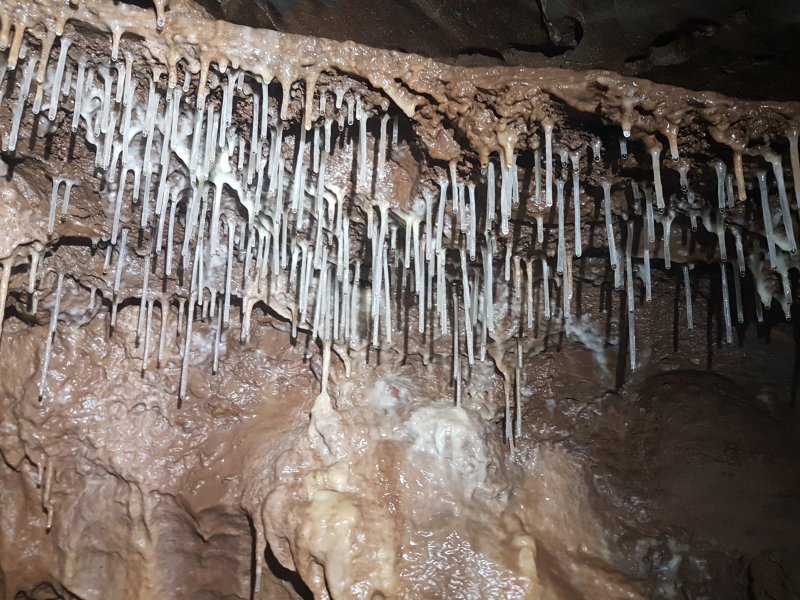 Straws.
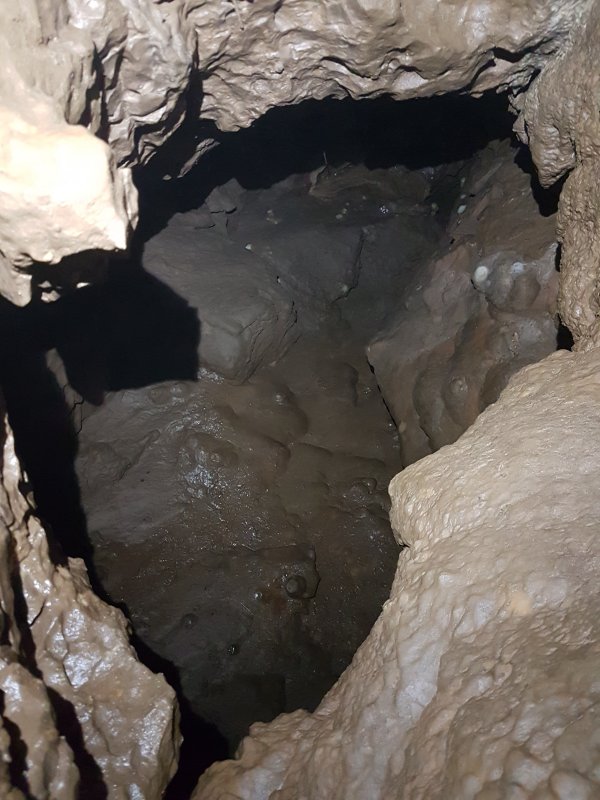 The side passage turns away from the grotto and climbs up to a pitch, where a handline tries to pretend it is a climb rather than a pitch. It lands in a calcited chamber, and from the sound of the description, there may be a lot more chamber below. However, without at least a top ascender or someone else there for help, I wasn't willing to try this.
 Back in the main passage, the gours continue.
 A climb into an oxbow bypasses a lower alternative
Modelling by Helen and Ali, lighting by Tarquin, Helen and Ali
A climb into an oxbow bypasses a lower alternative
Modelling by Helen and Ali, lighting by Tarquin, Helen and Ali The passage grows again.
Modelling by Helen and Ali, lighting by Tarquin, Helen and Ali
The passage grows again.
Modelling by Helen and Ali, lighting by Tarquin, Helen and Ali The passage quickly chokes.
Modelling by Helen, lighting by Tarquin and Helen
The passage quickly chokes.
Modelling by Helen, lighting by Tarquin and Helen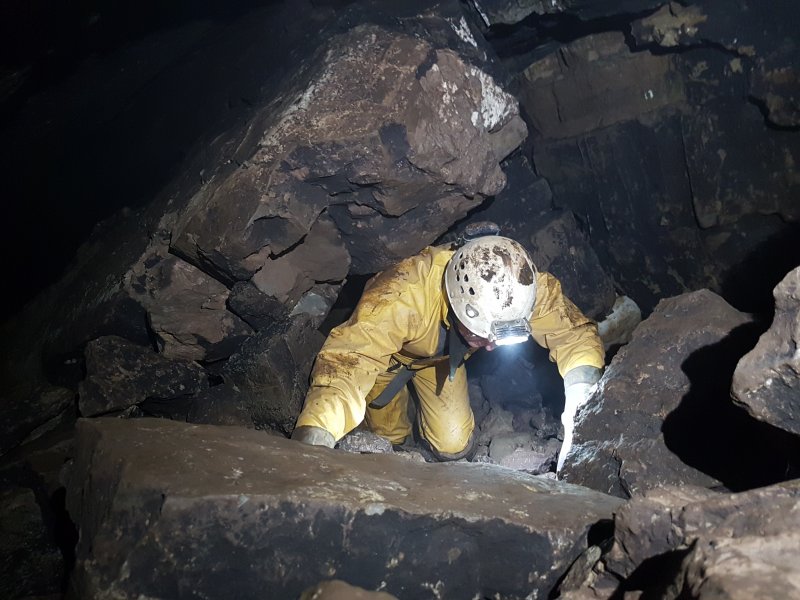 The choke is passed by the Desperate Domino route, under a slab on the right side, and dropping into the way on.
Modelling by Ali, lighting by Tarquin and Ali
The choke is passed by the Desperate Domino route, under a slab on the right side, and dropping into the way on.
Modelling by Ali, lighting by Tarquin and Ali The way on beyond here is not so convenient, and the cave presents a lot more little challenges.
Modelling by Helen, lighting by Tarquin and Helen
The way on beyond here is not so convenient, and the cave presents a lot more little challenges.
Modelling by Helen, lighting by Tarquin and Helen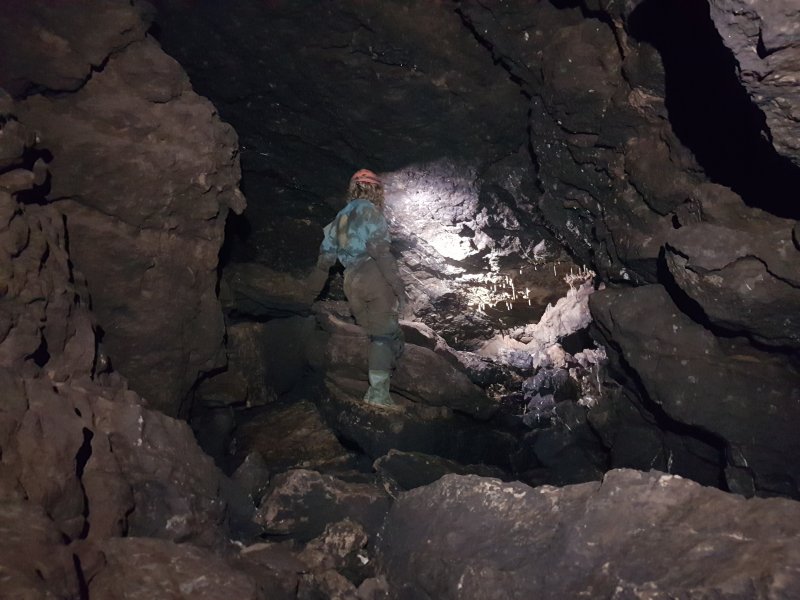 But there are some sections where we could walk again.
Modelling by Helen, lighting by Tarquin and Helen
But there are some sections where we could walk again.
Modelling by Helen, lighting by Tarquin and Helen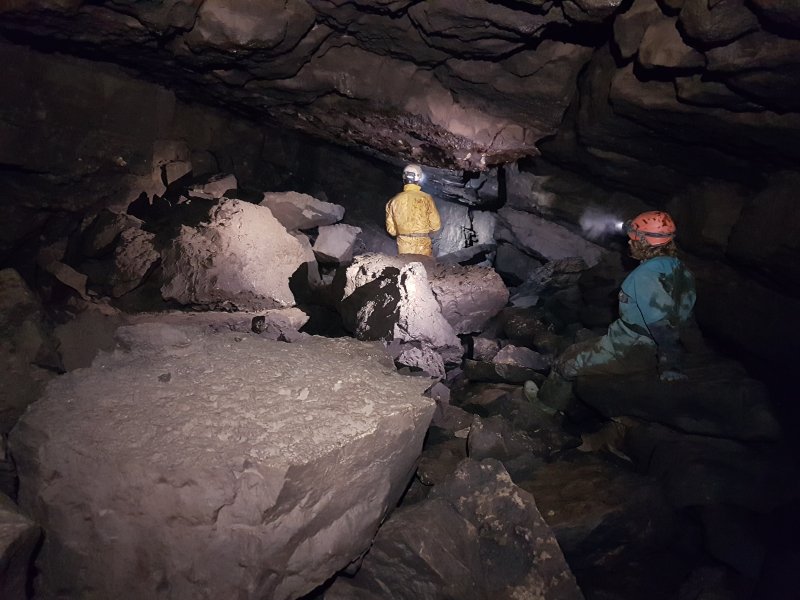 The passage breaks into a wider section. There are actually two routes around here, one upper bouldery passage, and one lower bedding crawl, and they both can be used to reach the end. We didn't actually notice either of them start, but we managed to take the upper one on the way in, and the lower one on the way out. At the end of the loop, the passage descends through a bouldery patch, and by following the obvious way down, we ended up in Passion Pit, without realising we had passed the proper way on.
Modelling by Helen and Ali, lighting by Tarquin, Helen and Ali
The passage breaks into a wider section. There are actually two routes around here, one upper bouldery passage, and one lower bedding crawl, and they both can be used to reach the end. We didn't actually notice either of them start, but we managed to take the upper one on the way in, and the lower one on the way out. At the end of the loop, the passage descends through a bouldery patch, and by following the obvious way down, we ended up in Passion Pit, without realising we had passed the proper way on.
Modelling by Helen and Ali, lighting by Tarquin, Helen and Ali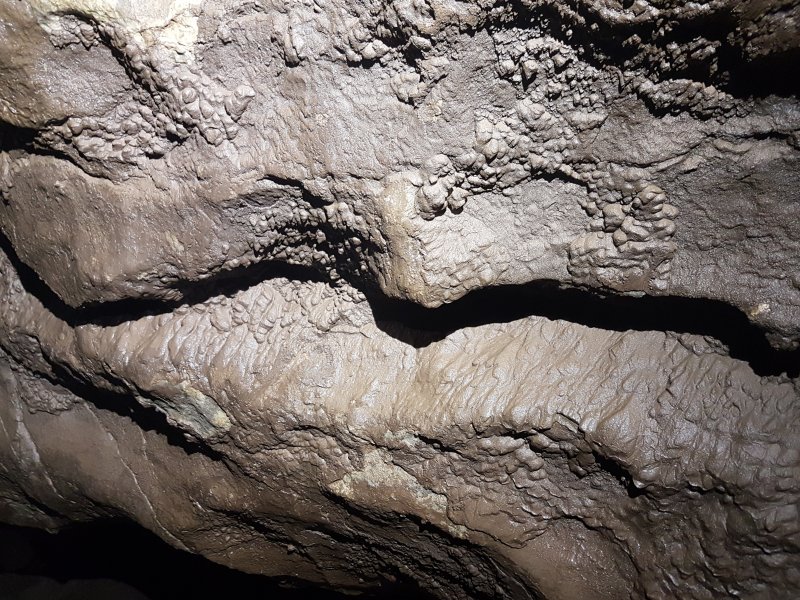 Mud formations.
 Passion Pit is a low, sandy area, with no way on. It clearly floods substantially, as there were no footprints anywhere.
Modelling by Helen, lighting by Tarquin, Ali and Helen
Passion Pit is a low, sandy area, with no way on. It clearly floods substantially, as there were no footprints anywhere.
Modelling by Helen, lighting by Tarquin, Ali and Helen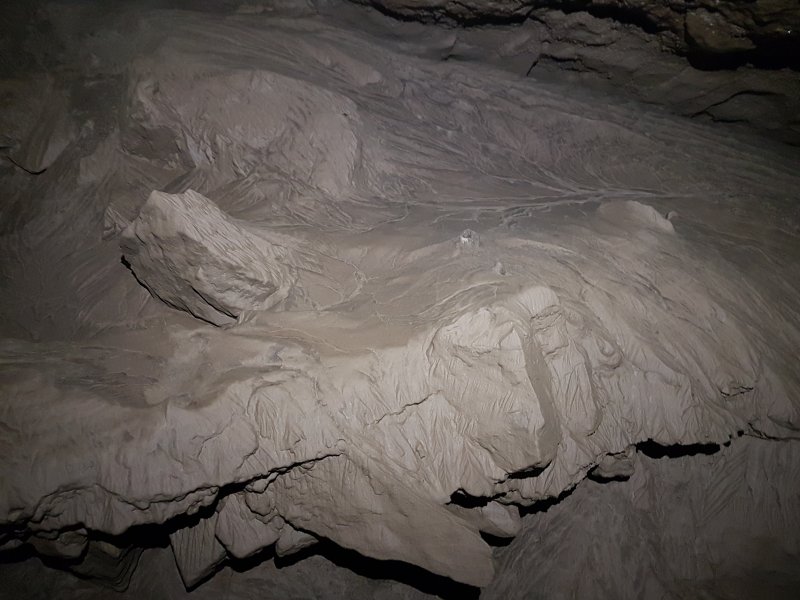 Mud and sand formations in Passion Pit.
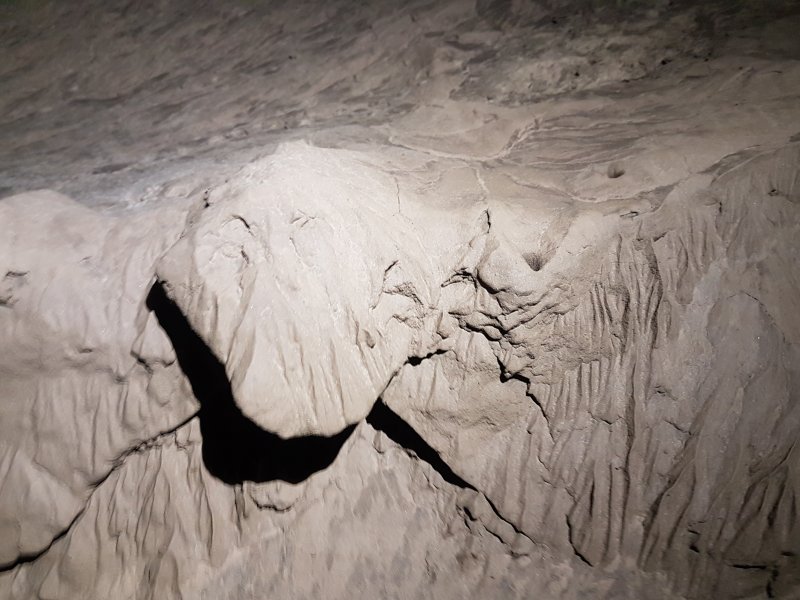 Mud and sand formations in Passion Pit.
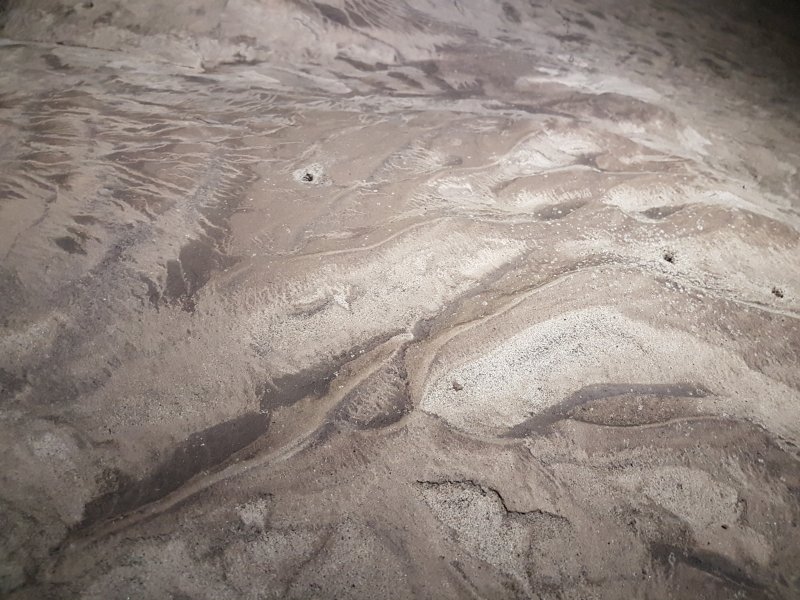 Sand ripples in Passion Pit.
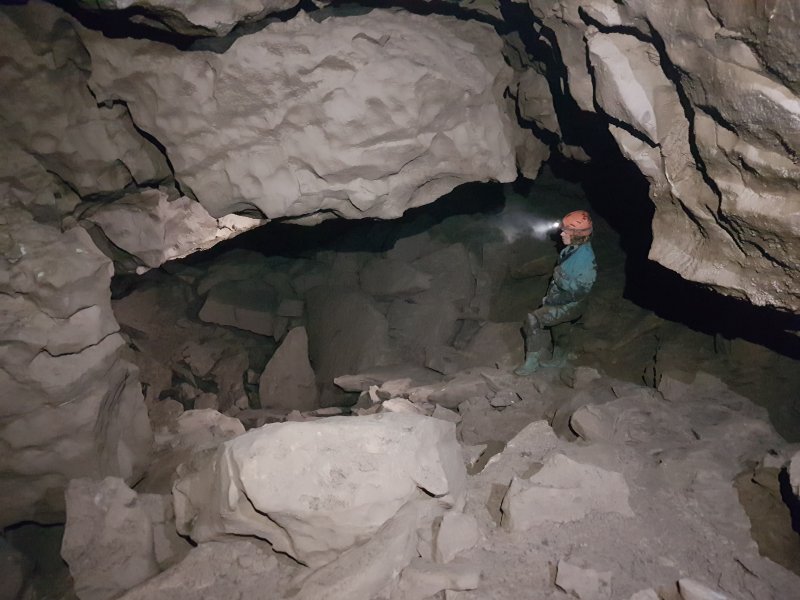 Returning up the passage, we located the correct way on, up over a rubble bank. This entered a chamber which closed down at the bottom.
Modelling by Helen, lighting by Tarquin, Ali and Helen
Returning up the passage, we located the correct way on, up over a rubble bank. This entered a chamber which closed down at the bottom.
Modelling by Helen, lighting by Tarquin, Ali and Helen To the right is an inlet rift.
 Formations in the inlet rift. The stream enters from an aven and sinks immediately, and there is a wet crawl that pinches out on the far side of the formations.
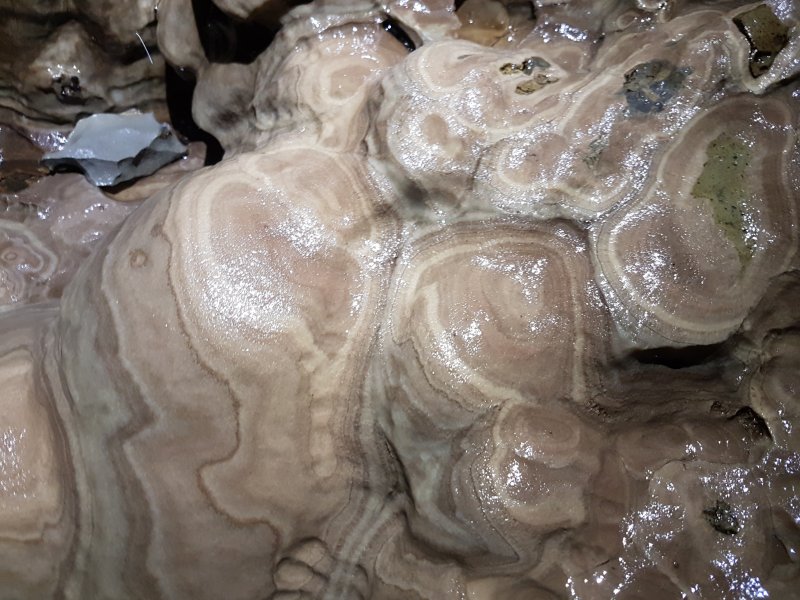 Redissolved stalagmites that look like contours, at the base of the aven.
 Someone has tried pushing the aven, but no way on is known.
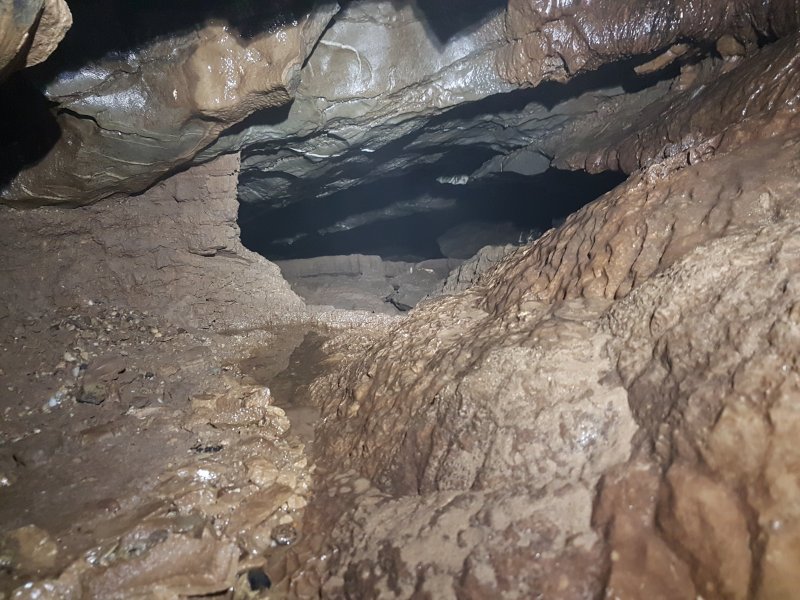 Back in the chamber, a low crawl near the rift provides the only other way on, which I visited alone.
 This reaches the final chamber, Oxwich Bay, which slopes upwards into the distance to reach a choke. I left this alone to avoid tracking footprints across this immaculate chamber, but since it floods to the ceiling, footprints cannot leave any lasting damage. This is the last piece of big passage in the cave and is the most likely place to find a way on into the strike oriented semi-fossil passage.
 Sand floor of Oxwich Bay.
 A crawl down at the bottom of the mud funnel is the only way on. In theory, 60 metres of passage is known here, but it will depend entirely on how much mud has been washed into it.
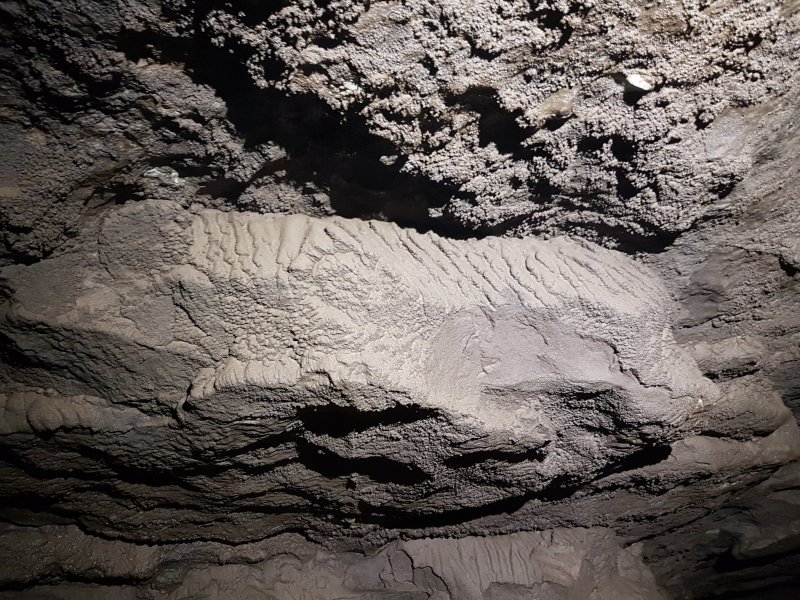 Mud formations on the ceiling. This place really can flood.
 Outside, the stream was still very low, and had not reacted to the rain. In winter floods, this can be an incredible torrent, but certainly the cave does not always flood just because it is raining.