P8 trip 21/05/2022
Unless otherwise stated, camera, setups, lighting, edits and gallery effects by Tarquin. Modelling and lighting at various points will be Gwenllian Tawy and Jack Overhill.
Code named P8, the cave's official name is Jack Pot. However, the code name has stuck, and the cave is always called P8. It had been around 25 years since I last visited this cave, and this is the first time I had done so with a camera. This was an attempt to visit and photograph the majority of the dry cave.
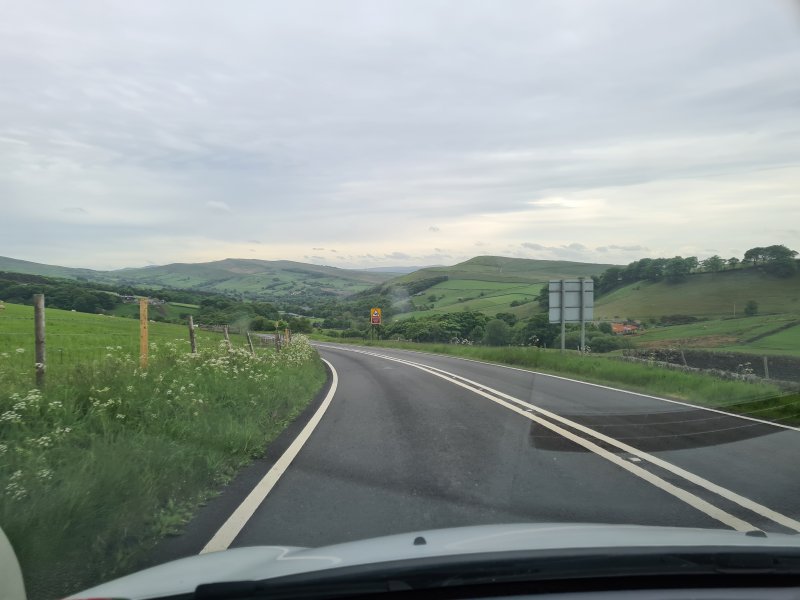
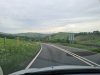 Looking towards Little Hayfield, at the edge of the Peak District. The hills are Chinley Churn (451 metres) and Lantern Pike (373 metres), with Axe Edge Moor (max 551 metres) in the distance.
 The valley at Perryfoot containing all of the P code numbered caves. In the trees on the left is Gautries Hole (P3), then P4 and P5 are the obvious sinks close to the camera. Little Bull Pit (P6) and P7 Swallet are further right, and P8 is in the trees on the distant right. The hills are Gautries Hill (410 metres), Rushup Edge (550 metres), Mam Tor (517 metres), Snells Low (419 metres), Middle Hill (over 420 metres) and an unnamed 477 metre hill. Middle Hill contains Giant's Cave, as well as several others.
Modelling by several white dots
The valley at Perryfoot containing all of the P code numbered caves. In the trees on the left is Gautries Hole (P3), then P4 and P5 are the obvious sinks close to the camera. Little Bull Pit (P6) and P7 Swallet are further right, and P8 is in the trees on the distant right. The hills are Gautries Hill (410 metres), Rushup Edge (550 metres), Mam Tor (517 metres), Snells Low (419 metres), Middle Hill (over 420 metres) and an unnamed 477 metre hill. Middle Hill contains Giant's Cave, as well as several others.
Modelling by several white dots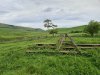 Decaying farm equipment and a lonely tree in front of Mam Tor and Snell's Low. P8 lies in the deep shakehole seen in the distance.
Modelling by more white dots
Decaying farm equipment and a lonely tree in front of Mam Tor and Snell's Low. P8 lies in the deep shakehole seen in the distance.
Modelling by more white dots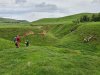 P8's enormous sink. The entrance is below the little crag.
Modelling by Jack and Gwenllian
P8's enormous sink. The entrance is below the little crag.
Modelling by Jack and Gwenllian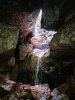 The main entrance to P8.
Lighting by Tarquin and Sol
The main entrance to P8.
Lighting by Tarquin and Sol Idiot's Leap, a drop that usually requires a handline or SRT rope. However, it could be free climbed, with difficulty. It can also be bypassed at high level via a choke and low passage called The Flats.
Modelling by Gwenllian and Jack, lighting by Tarquin, Gwenllian and Jack
Idiot's Leap, a drop that usually requires a handline or SRT rope. However, it could be free climbed, with difficulty. It can also be bypassed at high level via a choke and low passage called The Flats.
Modelling by Gwenllian and Jack, lighting by Tarquin, Gwenllian and Jack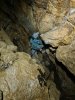 The passage between Idiot's Leap and First Pitch.
Modelling by Gwenllian, lighting by Tarquin and Gwenllian
The passage between Idiot's Leap and First Pitch.
Modelling by Gwenllian, lighting by Tarquin and Gwenllian Stal in the streamway.
 Stal above the stream.
Modelling by Gwenllian, lighting by Tarquin and Gwenllian
Stal above the stream.
Modelling by Gwenllian, lighting by Tarquin and Gwenllian The rift before First Pitch.
Modelling by Gwenllian, lighting by Tarquin and Gwenllian
The rift before First Pitch.
Modelling by Gwenllian, lighting by Tarquin and Gwenllian Detailed fossil bed near the head of First Pitch. These seem to be made up from a large number of crinoids.
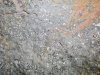 Fossil bed. The ring on the right is a spit anchor.
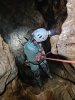 First Pitch, via the main route. There is also a high level route over the top of the pitch, dropping down on the far side of the pitch.
Modelling by Gwenllian, lighting by Tarquin, Gwenllian and Jack
First Pitch, via the main route. There is also a high level route over the top of the pitch, dropping down on the far side of the pitch.
Modelling by Gwenllian, lighting by Tarquin, Gwenllian and Jack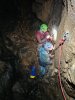 The main route follows an oddly placed set of P-hangers, to land on a traverse ledge where the high level route lands.
Modelling by Gwenllian and Jack, lighting by Tarquin, Gwenllian and Jack
The main route follows an oddly placed set of P-hangers, to land on a traverse ledge where the high level route lands.
Modelling by Gwenllian and Jack, lighting by Tarquin, Gwenllian and Jack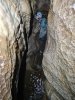 Passage between the pitches.
Modelling by Gwenllian, lighting by Tarquin and Gwenllian
Passage between the pitches.
Modelling by Gwenllian, lighting by Tarquin and Gwenllian Stal bank above Second Pitch. There is another high level route starting above here.
Modelling by Gwenllian, lighting by Tarquin and Gwenllian
Stal bank above Second Pitch. There is another high level route starting above here.
Modelling by Gwenllian, lighting by Tarquin and Gwenllian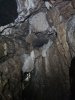 Stalagmite Passage starts from a balcony above the stream, where there is a surplus of stal formations.
Lighting by Tarquin and Gwenllian
Stalagmite Passage starts from a balcony above the stream, where there is a surplus of stal formations.
Lighting by Tarquin and Gwenllian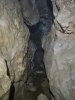 Stalagmite Passage, a much grander passage than the stream.
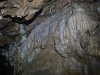 Formations in Stalagmite Passage.
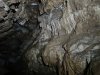 Formations in Stalagmite Passage.
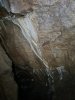 Curtains in Stalagmite Passage.
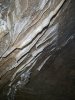 Curtains in Stalagmite Passage.
 Aven in Stalagmite Passage.
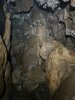 Stalagmite Passage ends where it fills with formations. This almost bypasses the First Pitch, but fails just a couple of metres short.
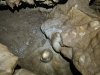 Stalagmites at the end of Stalagmite Passage.
 In the other direction from the balcony is a traverse over the streamway. While not essential at the start, a rope is a very good idea here.
 Formations in the traverse.
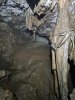 The traverse leads along an exposed ledge high above Second Pitch's chamber, where a rope is essential, ending at this grotto. No pictures of the traverse because I accidentally dropped the camera, and spent a good while trying to find it, thinking it had fallen down an impossibly narrow gap somewhere. By the time it was found, I was not in the mood to take proper pictures.
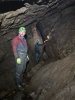 The end of the grotto drops into High Level Route, a large passage that enters the side of Mud Hall. It also has hiddden holes down into Gour Passage and Overflow Passage. Everything links to everything else here.
Modelling by Jack and Gwenllian, lighting by Tarquin and Gwenllian
The end of the grotto drops into High Level Route, a large passage that enters the side of Mud Hall. It also has hiddden holes down into Gour Passage and Overflow Passage. Everything links to everything else here.
Modelling by Jack and Gwenllian, lighting by Tarquin and Gwenllian Back in the streamway route, this is the head of the Second Pitch.
Modelling by Gwenllian and Jack, lighting by Tarquin, Gwenllian and Jack
Back in the streamway route, this is the head of the Second Pitch.
Modelling by Gwenllian and Jack, lighting by Tarquin, Gwenllian and Jack Second Pitch. The downstream passage is too tight, but there are three other ways on. At low level ahead is Overflow Passage.
Modelling by Gwenllian, lighting by Tarquin and Gwenllian
Second Pitch. The downstream passage is too tight, but there are three other ways on. At low level ahead is Overflow Passage.
Modelling by Gwenllian, lighting by Tarquin and Gwenllian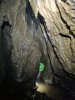 Overflow Passage starts narrow, and passes through a selection of narrow slots.
Modelling by Jack, lighting by Tarquin, Jack and Gwenllian
Overflow Passage starts narrow, and passes through a selection of narrow slots.
Modelling by Jack, lighting by Tarquin, Jack and Gwenllian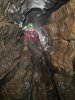 Overflow Passage passes through a low duck, which was completely dry during our visit. This gains a larger passage.
Modelling by Jack, lighting by Tarquin and Gwenllian
Overflow Passage passes through a low duck, which was completely dry during our visit. This gains a larger passage.
Modelling by Jack, lighting by Tarquin and Gwenllian Tricky climb up into Mud Hall, with an oxbow below it.
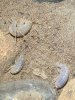 Niphargus shrimps in Overflow Passage.
Modelling by Harry, Ron and Hermione
Niphargus shrimps in Overflow Passage.
Modelling by Harry, Ron and Hermione A very large maggot, nearly the size of your little finger. This is a species of crane fly, likely to be a very big one, such as Tipula maxima.
Modelling by Tippy
A very large maggot, nearly the size of your little finger. This is a species of crane fly, likely to be a very big one, such as Tipula maxima.
Modelling by Tippy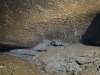 Plants stuck to the ceiling in what would normally be Sump D/I. The connection to Upstream Passage had been passed on the left, and was a very small tube, which did not look fun.
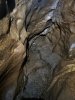 Sump D/I is supposed to be here, but it has dried up completely. The mud is very deep, and I did not risk walking into it, since it already swallowed my welly at the edge. Like many of the sumps in the dry cavers' cave, the sump has both a letter and a Roman numerals number. The numbers go from upstream to downstream, including sumps in side passages, and the letters go from downstream to upstream. Some of the sumps (not this one) also have names, and some of them (including this one) have different numbers/letters at each end. This isn't confusing or anything!
 Second Pitch lands in a chamber with a large stal bank, and the High Level Route crossing in the rift above. The usual way on is up the stal bank into Gour Passage.
Modelling by Gwenllian, lighting by Tarquin and Gwenllian
Second Pitch lands in a chamber with a large stal bank, and the High Level Route crossing in the rift above. The usual way on is up the stal bank into Gour Passage.
Modelling by Gwenllian, lighting by Tarquin and Gwenllian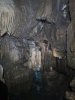 Gour Passage starts as a large passage on a balcony. It has a hole down into Overflow Passage on the right.
Modelling by Gwenllian and Jack, lighting by Tarquin and Gwenllian
Gour Passage starts as a large passage on a balcony. It has a hole down into Overflow Passage on the right.
Modelling by Gwenllian and Jack, lighting by Tarquin and Gwenllian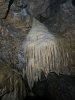 Formations in Gour Passage.
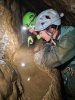 Admiring literally nothing in a completely boring pool, in Gour Passage
Modelling by Gwenllian and Jack, lighting by Tarquin, Gwenllian and Jack
Admiring literally nothing in a completely boring pool, in Gour Passage
Modelling by Gwenllian and Jack, lighting by Tarquin, Gwenllian and Jack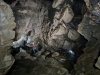 Mud Hall, a large chamber. Gour Passage enters from the right. High Level Route enters ahead-right. The small passage connecting to Overflow Passage is down a small hole ahead. The way downstream is to the left. A passage behind the camera ends in a dig, and so does another one on a balcony further to the left.
Modelling by Jack and Gwenllian, lighting by Tarquin, Jack and Gwenllian
Mud Hall, a large chamber. Gour Passage enters from the right. High Level Route enters ahead-right. The small passage connecting to Overflow Passage is down a small hole ahead. The way downstream is to the left. A passage behind the camera ends in a dig, and so does another one on a balcony further to the left.
Modelling by Jack and Gwenllian, lighting by Tarquin, Jack and Gwenllian Beyond Mud Hall, the way downstream drops down to a junction with the Main Stream Passage, which was not flowing at all during our visit. We headed into the upstream direction along Main Stream Passage (actually we did the downstream direction first, but the pictures make more sense this way).
Modelling by Gwenllian, lighting by Tarquin and Gwenllian
Beyond Mud Hall, the way downstream drops down to a junction with the Main Stream Passage, which was not flowing at all during our visit. We headed into the upstream direction along Main Stream Passage (actually we did the downstream direction first, but the pictures make more sense this way).
Modelling by Gwenllian, lighting by Tarquin and Gwenllian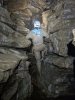 Ledges in the upstream passage, at the junction with Sand Passage.
Modelling by Gwenllian, lighting by Tarquin and Gwenllian
Ledges in the upstream passage, at the junction with Sand Passage.
Modelling by Gwenllian, lighting by Tarquin and Gwenllian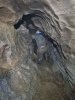 The upstream passage then shrinks. A tight tube in the left wall here also connects to Sand Passage.
Modelling by Gwenllian, lighting by Tarquin and Gwenllian
The upstream passage then shrinks. A tight tube in the left wall here also connects to Sand Passage.
Modelling by Gwenllian, lighting by Tarquin and Gwenllian The upstream passage ends at Top Sump (also known as Sump B/III, because it really needs 3 names), which is normally here. However, it was completely dry during our visit. Around 20 metres of passage may have been accessible, but the initial steep slope needs a rope, and we did not have one. The sump has not been passed, but brings in water from somewhere else, as there is normally more flow here than in the earlier parts of the cave.
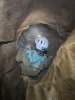 A lower side passage reaches Sump C/II, which is the downstream end of Sump D/I in Overflow Passage. A very narrow tube on the right bypasses the sump, connecting to Overflow Passage.
Modelling by Gwenllian, lighting by Tarquin and Gwenllian
A lower side passage reaches Sump C/II, which is the downstream end of Sump D/I in Overflow Passage. A very narrow tube on the right bypasses the sump, connecting to Overflow Passage.
Modelling by Gwenllian, lighting by Tarquin and Gwenllian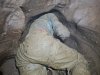 Sump C/II is very small.
Modelling by Gwenllian, lighting by Tarquin and Gwenllian
Sump C/II is very small.
Modelling by Gwenllian, lighting by Tarquin and Gwenllian We could hear water flowing loudly in Sump C/II, and presumably this is the water from the entrance. We could see down into a narrow and extremely slippery slot, but the steep slope threatened to trap us in there if we tried to visit it. We decided that there were better places to be.
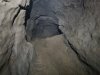 Sand Passage starts out with a sandy floor. What a surprise.
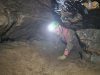 Crawling through Sand Passage. A tiny tube in one wall connects back to the upstream passage.
Modelling by Jack, lighting by Tarquin and Jack
Crawling through Sand Passage. A tiny tube in one wall connects back to the upstream passage.
Modelling by Jack, lighting by Tarquin and Jack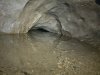 Sand Passage passes through a duck. We had initially assumed it was sumped, but we could hear an echo through the tiny airspace. Siphoning is needed to provide enough airspace for nose snorkeling. The passage looked less than 15 cm (that's 6 inches in old money) high, so probably needs digging out to allow access. Beyond here, there is a short passage leading to the blind Sump E/IV, which is very close to Top Sump.
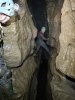 Heading downstream along Main Stream Passage.
Modelling by Gwenllian and Jack, lighting by Tarquin and Gwenllian
Heading downstream along Main Stream Passage.
Modelling by Gwenllian and Jack, lighting by Tarquin and Gwenllian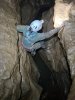 Traversing over static pools in the downstream direction of Main Stream Passage.
Modelling by Gwenllian, lighting by Tarquin and Gwenllian
Traversing over static pools in the downstream direction of Main Stream Passage.
Modelling by Gwenllian, lighting by Tarquin and Gwenllian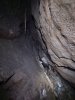 The passage rapidly grows to a very large size, at the junction with Ben's Dig.
Modelling by Gwenllian and Jack, lighting by Tarquin, Gwenllian and Jack
The passage rapidly grows to a very large size, at the junction with Ben's Dig.
Modelling by Gwenllian and Jack, lighting by Tarquin, Gwenllian and Jack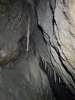 The formations high up in the ceiling are coated in thick mud, and clearly have seen repeated catastrophic flooding. Though it is unlikely that flood water can regularly reach this high now, we did see fairly fresh deposits of grass wedged 9 metres up in the ceiling, which is quite epic.
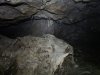 Flowstone in downstream Main Stream Passage.
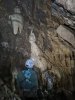 Formations in downstream Main Stream Passage.
Modelling by Gwenllian, lighting by Tarquin, Gwenllian and Jack
Formations in downstream Main Stream Passage.
Modelling by Gwenllian, lighting by Tarquin, Gwenllian and Jack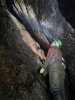 The downstream passage then becomes T'Owd Man's Rift, where the ceiling soars up into the distance like a mine stope. For those not familiar with the terminology, "t'owd man" (the old man) is a name used to refer to the miners from previous centuries, who had found many of the Peak District caves during mining operations, long before cavers. T'owd man has a habit of spoiling the sense of accomplishment when digging into "new" cave, only to find that the miners had already discovered it. This particular passage appears to be completely natural, however.
Modelling by Jack and Gwenllian, lighting by Tarquin, Jack and Gwenllian
The downstream passage then becomes T'Owd Man's Rift, where the ceiling soars up into the distance like a mine stope. For those not familiar with the terminology, "t'owd man" (the old man) is a name used to refer to the miners from previous centuries, who had found many of the Peak District caves during mining operations, long before cavers. T'owd man has a habit of spoiling the sense of accomplishment when digging into "new" cave, only to find that the miners had already discovered it. This particular passage appears to be completely natural, however.
Modelling by Jack and Gwenllian, lighting by Tarquin, Jack and Gwenllian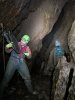 Towards the end of T'Owd Man's Rift, looking back towards the slope up to Stalagmite Grotto.
Modelling by Gwenllian, lighting by Tarquin and Gwenllian
Towards the end of T'Owd Man's Rift, looking back towards the slope up to Stalagmite Grotto.
Modelling by Gwenllian, lighting by Tarquin and Gwenllian Flowstone cascade that is supposed to mark the start of deeper water. However, our feet were still on dry ground.
Modelling by Gwenllian, lighting by Tarquin, Jack and Gwenllian
Flowstone cascade that is supposed to mark the start of deeper water. However, our feet were still on dry ground.
Modelling by Gwenllian, lighting by Tarquin, Jack and Gwenllian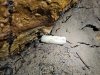 Though it may look bad, this is just a fallen stalactite, being redissolved.
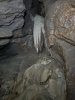 Stal above the downstream sump.
Lighting by Tarquin and Gwenllian
Stal above the downstream sump.
Lighting by Tarquin and Gwenllian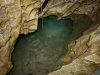 The downstream sump, which appears to be far lower than normal. This is sump A/V, also known as Downstream Sump 1, and in more severe drought can actually dry up completely. There are 10 sumps along the downstream passage, and the subsequent ones are numbered 2-10, without using the letters or Roman numerals system. Downstream Sumps 2 and 3 can also dry up in severe drought.
 The team at the Downstream Sump.
Modelling by Tarquin, Gwenllian and Jack, lighting by Jack
The team at the Downstream Sump.
Modelling by Tarquin, Gwenllian and Jack, lighting by Jack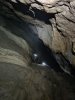 The slippery climb up the slope in T'Owd Man's Rift. This is far worse than it looks, and even though it has a fixed handline, it feels like it is trying to throw you off the edge. Down is worse than up.
Modelling by Gwenllian and Jack, lighting by Tarquin, Gwenllian and Jack
The slippery climb up the slope in T'Owd Man's Rift. This is far worse than it looks, and even though it has a fixed handline, it feels like it is trying to throw you off the edge. Down is worse than up.
Modelling by Gwenllian and Jack, lighting by Tarquin, Gwenllian and Jack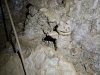 Mud sculpture on the climb. You can decide what it is supposed to be.
Modelling by Carol from Where The Wild Things Are
Mud sculpture on the climb. You can decide what it is supposed to be.
Modelling by Carol from Where The Wild Things Are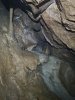 Grotto above the slope.
Lighting by Tarquin and Jack
Grotto above the slope.
Lighting by Tarquin and Jack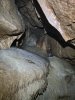 Grotto above the slope.
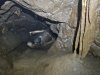 The main target at the top of the slope is Stalagmite Grotto, but it is not even slightly as good as its name suggests; there is very little stal at all, and what is there is plastered in mud. There is a second way on behind Gwenllian, over the mud bank. This is a low crawl to Christmas Aven. Unfortunately, we missed it because it was not on the survey that we had.
Modelling by Gwenllian, lighting by Tarquin, Gwenllian and Jack
The main target at the top of the slope is Stalagmite Grotto, but it is not even slightly as good as its name suggests; there is very little stal at all, and what is there is plastered in mud. There is a second way on behind Gwenllian, over the mud bank. This is a low crawl to Christmas Aven. Unfortunately, we missed it because it was not on the survey that we had.
Modelling by Gwenllian, lighting by Tarquin, Gwenllian and Jack Flowstone in Stalagmite Grotto.
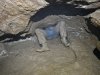 Breech birth, in Stalagmite Grotto. The passage ends too tight here.
Modelling by Jack
Breech birth, in Stalagmite Grotto. The passage ends too tight here.
Modelling by Jack Flowstone formation in Ben's Dig. Amazingly, this has managed to survive the onslaught of passing digging spoil, in one of the most heavily dug passages in the cave.
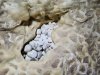 Cave pearls in the flowstone, in Ben's Dig.
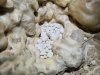 Cave pearls.
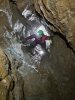 Ben's Dig, mostly a stooping sized passage.
Modelling by Jack, lighting by Tarquin, Jack and Gwenllian
Ben's Dig, mostly a stooping sized passage.
Modelling by Jack, lighting by Tarquin, Jack and Gwenllian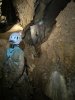 Eldon Room, the large chamber in Ben's Dig, where there are several ways on. Incidentally, the peeing-in-the-pool pose is intentional, as it is my least favourite pose for cave photography, and yet is the typical one that cavers adopt when asked to pose for a picture.
Modelling by Gwenllian and Jack, lighting by Tarquin, Gwenllian and Jack
Eldon Room, the large chamber in Ben's Dig, where there are several ways on. Incidentally, the peeing-in-the-pool pose is intentional, as it is my least favourite pose for cave photography, and yet is the typical one that cavers adopt when asked to pose for a picture.
Modelling by Gwenllian and Jack, lighting by Tarquin, Gwenllian and Jack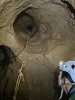 Aven in Eldon Room. Amazingly, this climb has a knotted handline, despite having absolutely no holds whatsoever, and not even any walls to touch for the first 3 metres. The rope and anchors are of unknown vintage.
Modelling by Gwenllian, lighting by Tarquin and Gwenllian
Aven in Eldon Room. Amazingly, this climb has a knotted handline, despite having absolutely no holds whatsoever, and not even any walls to touch for the first 3 metres. The rope and anchors are of unknown vintage.
Modelling by Gwenllian, lighting by Tarquin and Gwenllian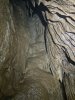 Flowstone in the passage leading to High Noon.
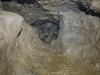 The passage towards High Noon, which leads off up a slope to the side of Eldon Room, soon becomes fairly small, and we assumed it was not a way on. We were wrong, and there are quite a few chambers along its route. However, the passage only heads back towards known cave, though at a higher level.
Modelling by Jack
The passage towards High Noon, which leads off up a slope to the side of Eldon Room, soon becomes fairly small, and we assumed it was not a way on. We were wrong, and there are quite a few chambers along its route. However, the passage only heads back towards known cave, though at a higher level.
Modelling by Jack The major passage leading off from Eldon Room has an incredible amount of digging spoil walled up like deads. This is the most promising dry lead in the cave, as it heads away from all other known cave, and aims towards P7 and the the other P code numbered caves.
Modelling by Gwenllian, lighting by Tarquin and Gwenllian
The major passage leading off from Eldon Room has an incredible amount of digging spoil walled up like deads. This is the most promising dry lead in the cave, as it heads away from all other known cave, and aims towards P7 and the the other P code numbered caves.
Modelling by Gwenllian, lighting by Tarquin and Gwenllian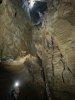 It splits into avens, one of which had a ladder, so up we went.
Modelling by Gwenllian and Jack, lighting by Tarquin, Gwenllian and Jack
It splits into avens, one of which had a ladder, so up we went.
Modelling by Gwenllian and Jack, lighting by Tarquin, Gwenllian and Jack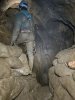 After an alarm call from Jack, it turned out he had mistaken the pile of sand bags for a dead body. An easy mistake to make. The passage beyond offered a choice of pits which had been dug. The whole of this area was full of thick water vapour, and there is clearly very little air flow.
Modelling by Gwenllian, lighting by Tarquin and Gwenllian
After an alarm call from Jack, it turned out he had mistaken the pile of sand bags for a dead body. An easy mistake to make. The passage beyond offered a choice of pits which had been dug. The whole of this area was full of thick water vapour, and there is clearly very little air flow.
Modelling by Gwenllian, lighting by Tarquin and Gwenllian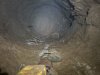 The second pit had a set of rebar stemples, but they were oddly placed, and descending it was not fun. There is no way on at the bottom.
Modelling by Tarquin's left leg
The second pit had a set of rebar stemples, but they were oddly placed, and descending it was not fun. There is no way on at the bottom.
Modelling by Tarquin's left leg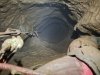 A crawl beside the sand bags entered an aven, with a handline allowing the tricky climb up to be done with the pretence of safety. Without holds, climbing involves wedging between the walls.
Modelling by Tarquin's right leg and a cloud of fog
A crawl beside the sand bags entered an aven, with a handline allowing the tricky climb up to be done with the pretence of safety. Without holds, climbing involves wedging between the walls.
Modelling by Tarquin's right leg and a cloud of fog The aven splits in two, with one side ending abruptly.
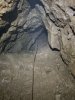 The other branch continues upwards, but now as an SRT rope of unknown vintage. This was best left alone, so I retreated back to safer ground, and left this area for the diggers. They have moved vast amounts of spoil while digging this area, and no doubt there is more cave waiting to be found here.
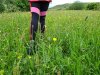 Walking through the meadows at Hobroyd Farm towards Whiteley Nab, at Glossop. A great way to round off a day of caving.
Modelling by Gwenllian
Walking through the meadows at Hobroyd Farm towards Whiteley Nab, at Glossop. A great way to round off a day of caving.
Modelling by Gwenllian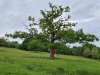 Solitary oak tree near Hobroyd Farm.
Modelling by Gwenllian
Solitary oak tree near Hobroyd Farm.
Modelling by Gwenllian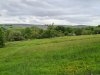 Oak trees in front of Mill Hill (544 metres) and its Chunal Moor ridge.
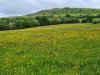 Meadows and Whiteley Nab.
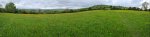 Meadows in front of Bleaklow (633 metres), Mill Hill and Whiteley Nab.
 Horses, looking almost photoshopped.
Modelling by the Sanderson sisters
Horses, looking almost photoshopped.
Modelling by the Sanderson sisters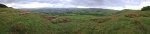 Superb view over Glossop from Whiteley Nab. On the distant left are the West Penine Moors (max 456 metres). Then Wild Bank Hill (399 metres), a long ridge topping out at Black Hill (582 metres), Bleaklow, Mill Hill and Kinder Scout (636 metres) behind it, South Head (494 metres), Mount Famine (473 metres) and an unnamed 384 metre hill. All of the tallest mountains in the Peak District are visible from here, though Kinder Scout's main summit is obscured.
Modelling by Gwenllian and some white dots
Superb view over Glossop from Whiteley Nab. On the distant left are the West Penine Moors (max 456 metres). Then Wild Bank Hill (399 metres), a long ridge topping out at Black Hill (582 metres), Bleaklow, Mill Hill and Kinder Scout (636 metres) behind it, South Head (494 metres), Mount Famine (473 metres) and an unnamed 384 metre hill. All of the tallest mountains in the Peak District are visible from here, though Kinder Scout's main summit is obscured.
Modelling by Gwenllian and some white dots Grouse trying to pretend it is part of the wall. It failed.
Modelling by a funny-shaped rock
Grouse trying to pretend it is part of the wall. It failed.
Modelling by a funny-shaped rock Descending Horse Clough (that's a northern word for a steep-sided valley, gorge or canyon, in case you were wondering), a wonderfully wooded area festooned in flowering rowan trees, birch, heather, whimberries/bilberries and club rushes.
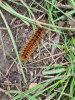 Oak eggar caterpillar, a very impressive caterpillar that turns into a very mundane moth.
Modelling by Muttonchops
Oak eggar caterpillar, a very impressive caterpillar that turns into a very mundane moth.
Modelling by Muttonchops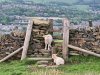 Lambs at the stile.
Modelling by two white dots
Lambs at the stile.
Modelling by two white dots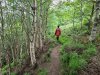 Birch grove in Horse Clough.
Modelling by Gwenllian
Birch grove in Horse Clough.
Modelling by Gwenllian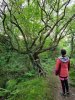 Tree that really looks like a character from a film. It appears to be an ash.
Modelling by Gwenllian
Tree that really looks like a character from a film. It appears to be an ash.
Modelling by Gwenllian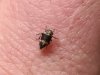 A tiny planthopper nymph, wearing what appears to be a dinner jacket.
Modelling by Martin and Tarquin's finger
A tiny planthopper nymph, wearing what appears to be a dinner jacket.
Modelling by Martin and Tarquin's finger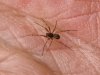 Tiny male money spider, probably a Lepthyphantes tenuis, with just a 12 mm leg span.
Modelling by Bert and Tarquin's hand
Tiny male money spider, probably a Lepthyphantes tenuis, with just a 12 mm leg span.
Modelling by Bert and Tarquin's hand
 Looking towards Little Hayfield, at the edge of the Peak District. The hills are Chinley Churn (451 metres) and Lantern Pike (373 metres), with Axe Edge Moor (max 551 metres) in the distance.
 The valley at Perryfoot containing all of the P code numbered caves. In the trees on the left is Gautries Hole (P3), then P4 and P5 are the obvious sinks close to the camera. Little Bull Pit (P6) and P7 Swallet are further right, and P8 is in the trees on the distant right. The hills are Gautries Hill (410 metres), Rushup Edge (550 metres), Mam Tor (517 metres), Snells Low (419 metres), Middle Hill (over 420 metres) and an unnamed 477 metre hill. Middle Hill contains Giant's Cave, as well as several others.
Modelling by several white dots
The valley at Perryfoot containing all of the P code numbered caves. In the trees on the left is Gautries Hole (P3), then P4 and P5 are the obvious sinks close to the camera. Little Bull Pit (P6) and P7 Swallet are further right, and P8 is in the trees on the distant right. The hills are Gautries Hill (410 metres), Rushup Edge (550 metres), Mam Tor (517 metres), Snells Low (419 metres), Middle Hill (over 420 metres) and an unnamed 477 metre hill. Middle Hill contains Giant's Cave, as well as several others.
Modelling by several white dots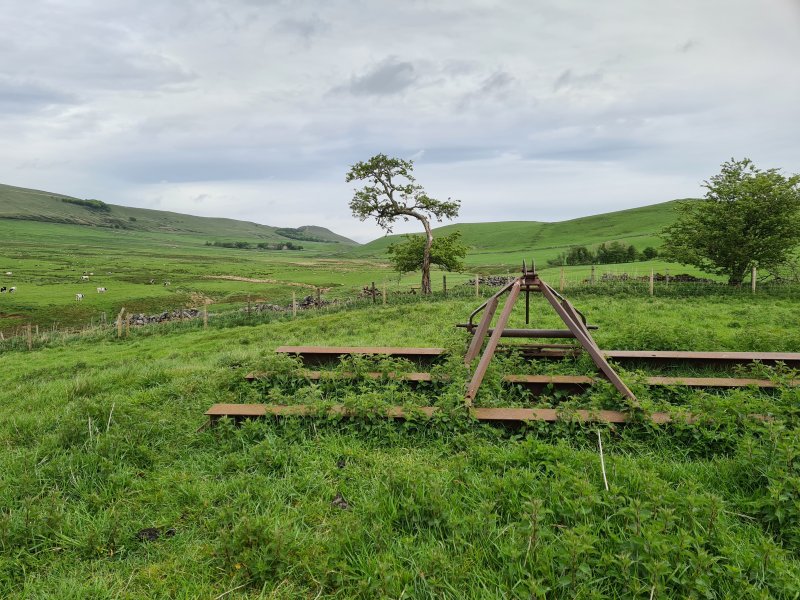 Decaying farm equipment and a lonely tree in front of Mam Tor and Snell's Low. P8 lies in the deep shakehole seen in the distance.
Modelling by more white dots
Decaying farm equipment and a lonely tree in front of Mam Tor and Snell's Low. P8 lies in the deep shakehole seen in the distance.
Modelling by more white dots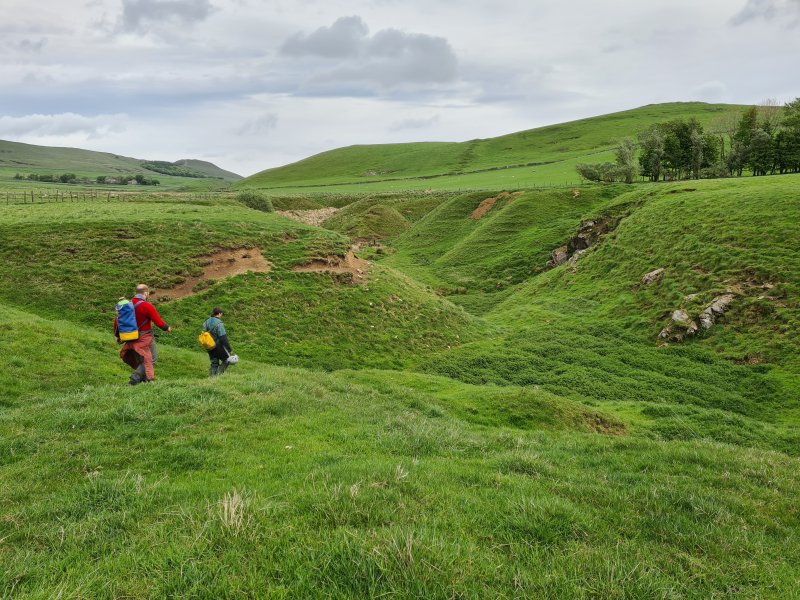 P8's enormous sink. The entrance is below the little crag.
Modelling by Jack and Gwenllian
P8's enormous sink. The entrance is below the little crag.
Modelling by Jack and Gwenllian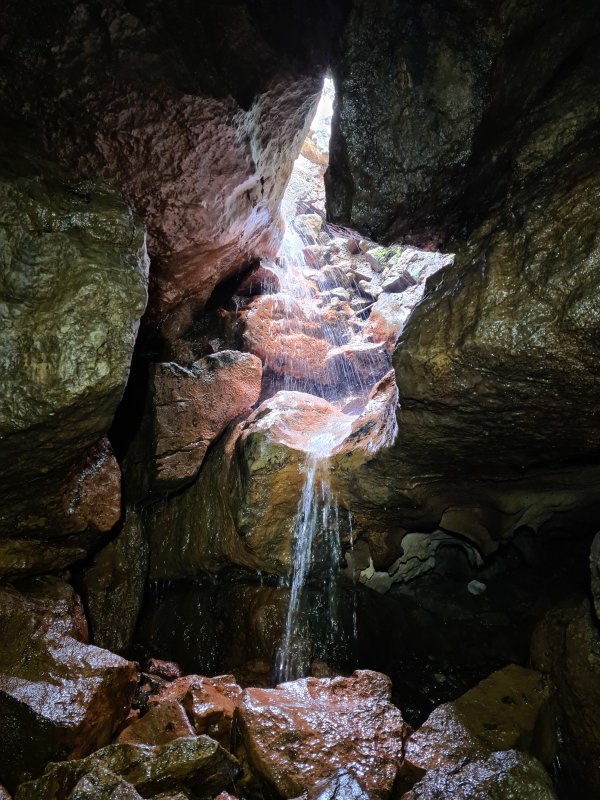 The main entrance to P8.
Lighting by Tarquin and Sol
The main entrance to P8.
Lighting by Tarquin and Sol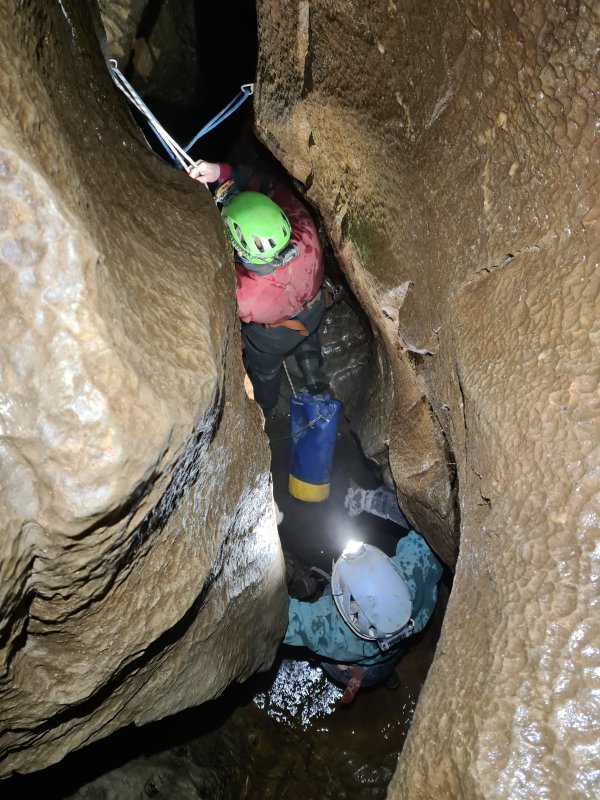 Idiot's Leap, a drop that usually requires a handline or SRT rope. However, it could be free climbed, with difficulty. It can also be bypassed at high level via a choke and low passage called The Flats.
Modelling by Gwenllian and Jack, lighting by Tarquin, Gwenllian and Jack
Idiot's Leap, a drop that usually requires a handline or SRT rope. However, it could be free climbed, with difficulty. It can also be bypassed at high level via a choke and low passage called The Flats.
Modelling by Gwenllian and Jack, lighting by Tarquin, Gwenllian and Jack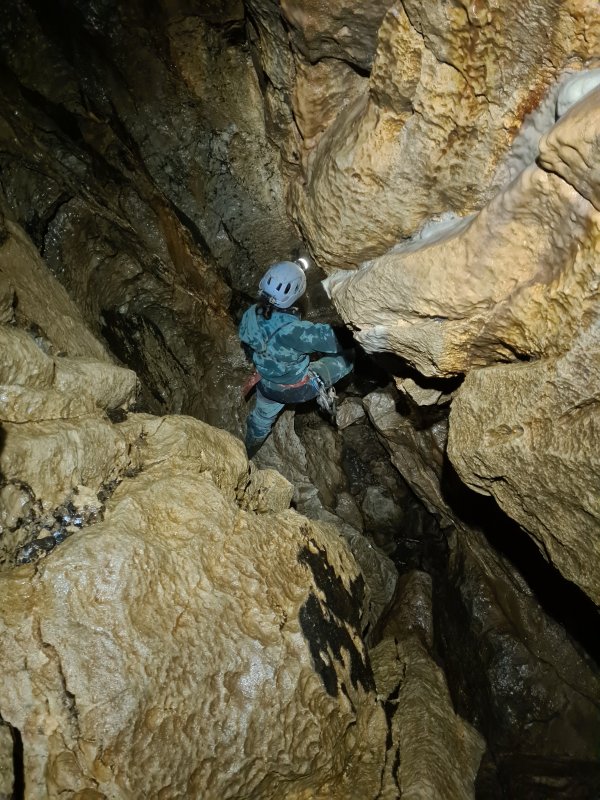 The passage between Idiot's Leap and First Pitch.
Modelling by Gwenllian, lighting by Tarquin and Gwenllian
The passage between Idiot's Leap and First Pitch.
Modelling by Gwenllian, lighting by Tarquin and Gwenllian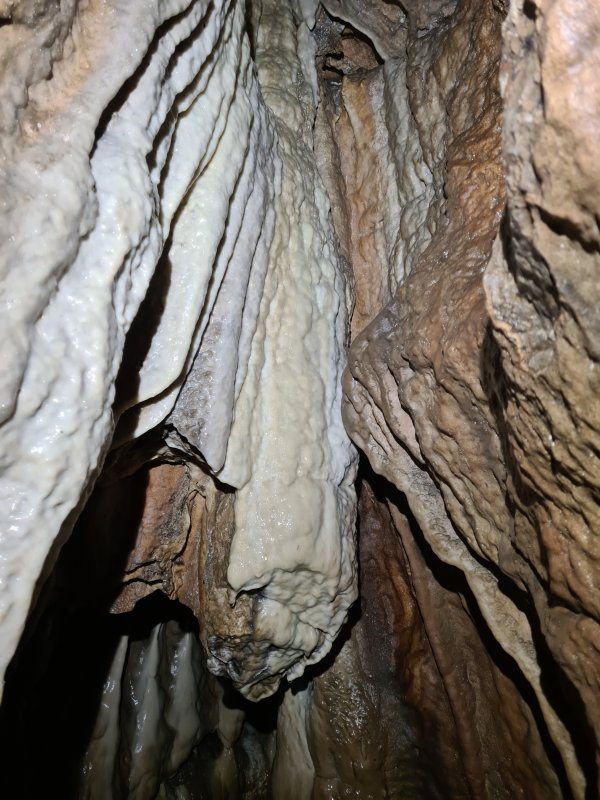 Stal in the streamway.
 Stal above the stream.
Modelling by Gwenllian, lighting by Tarquin and Gwenllian
Stal above the stream.
Modelling by Gwenllian, lighting by Tarquin and Gwenllian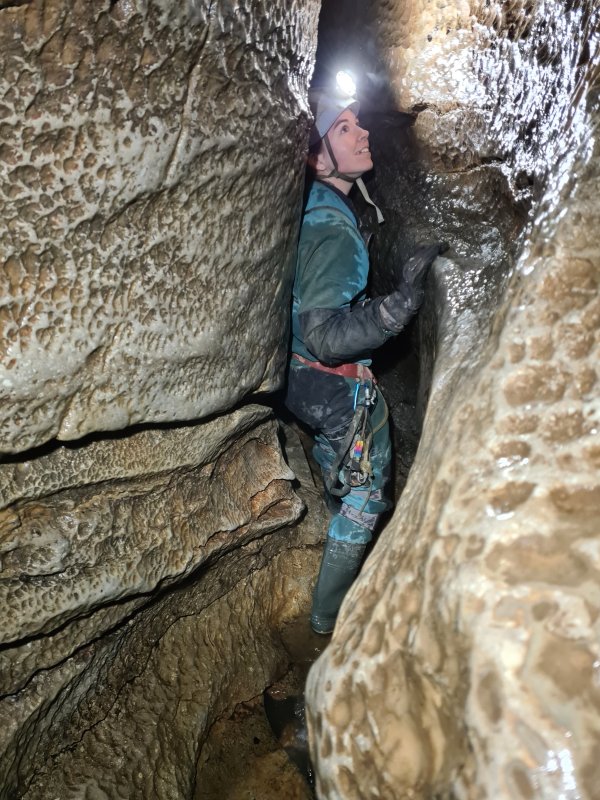 The rift before First Pitch.
Modelling by Gwenllian, lighting by Tarquin and Gwenllian
The rift before First Pitch.
Modelling by Gwenllian, lighting by Tarquin and Gwenllian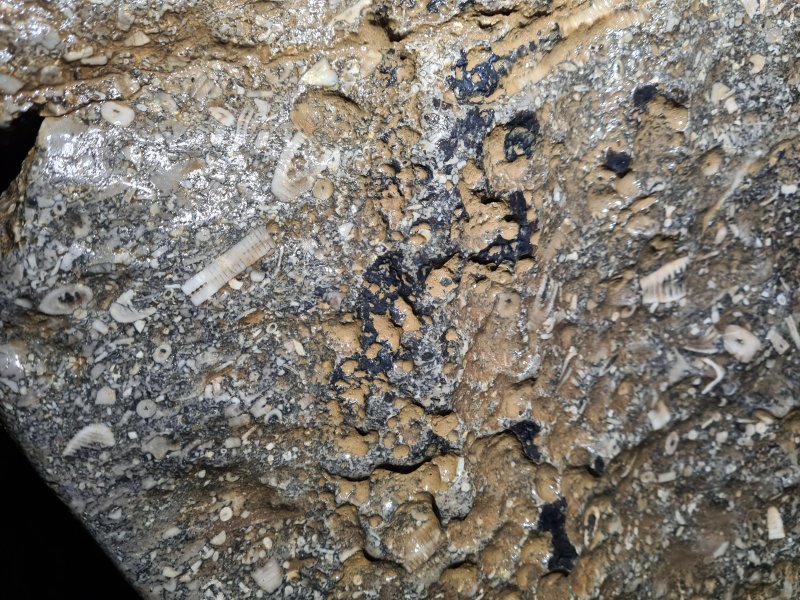 Detailed fossil bed near the head of First Pitch. These seem to be made up from a large number of crinoids.
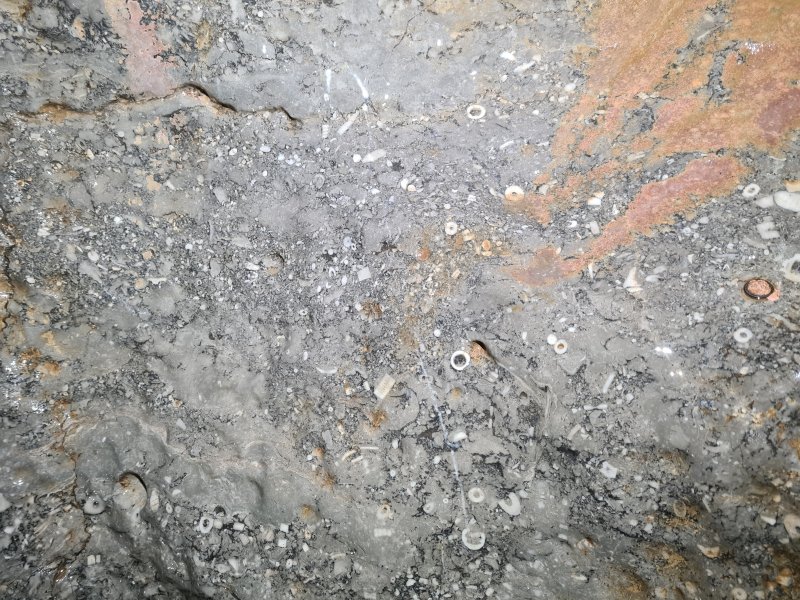 Fossil bed. The ring on the right is a spit anchor.
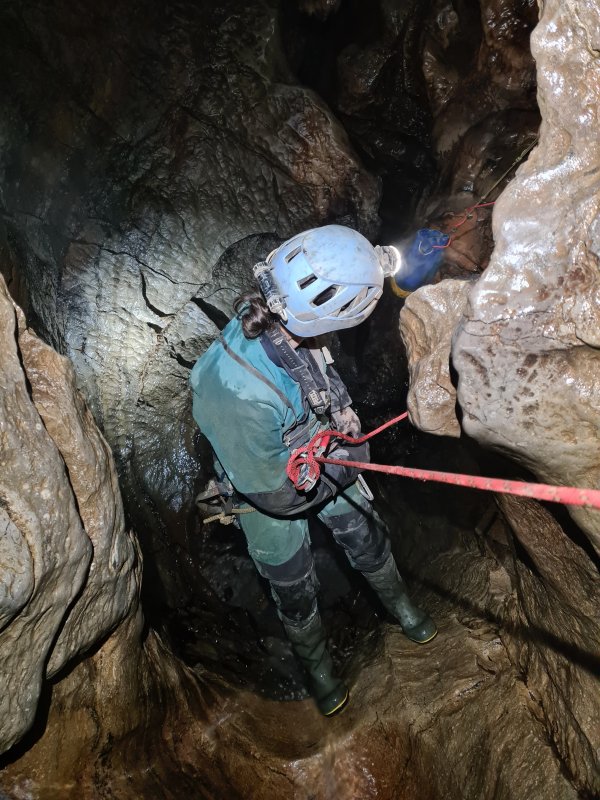 First Pitch, via the main route. There is also a high level route over the top of the pitch, dropping down on the far side of the pitch.
Modelling by Gwenllian, lighting by Tarquin, Gwenllian and Jack
First Pitch, via the main route. There is also a high level route over the top of the pitch, dropping down on the far side of the pitch.
Modelling by Gwenllian, lighting by Tarquin, Gwenllian and Jack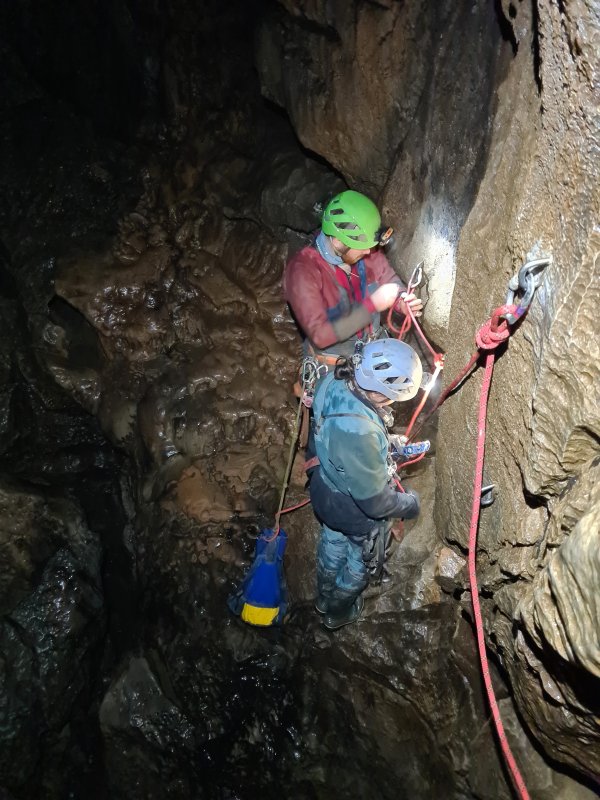 The main route follows an oddly placed set of P-hangers, to land on a traverse ledge where the high level route lands.
Modelling by Gwenllian and Jack, lighting by Tarquin, Gwenllian and Jack
The main route follows an oddly placed set of P-hangers, to land on a traverse ledge where the high level route lands.
Modelling by Gwenllian and Jack, lighting by Tarquin, Gwenllian and Jack Passage between the pitches.
Modelling by Gwenllian, lighting by Tarquin and Gwenllian
Passage between the pitches.
Modelling by Gwenllian, lighting by Tarquin and Gwenllian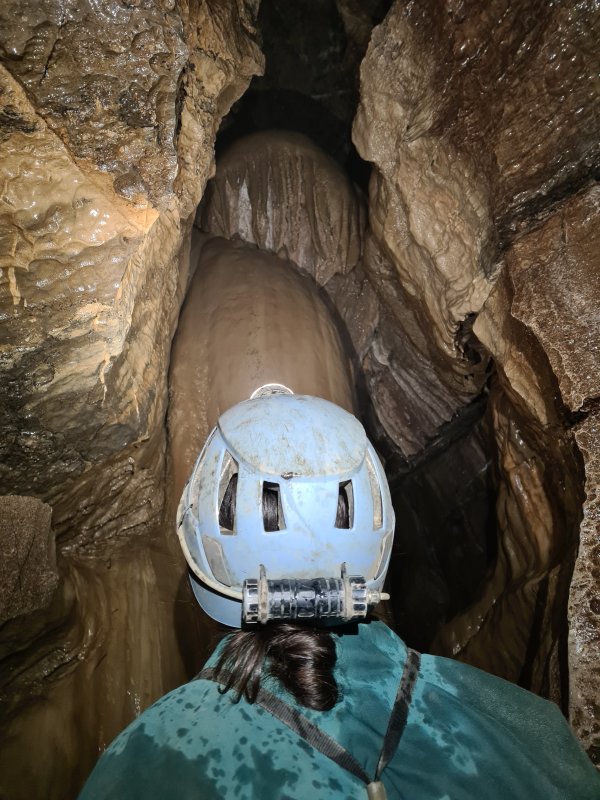 Stal bank above Second Pitch. There is another high level route starting above here.
Modelling by Gwenllian, lighting by Tarquin and Gwenllian
Stal bank above Second Pitch. There is another high level route starting above here.
Modelling by Gwenllian, lighting by Tarquin and Gwenllian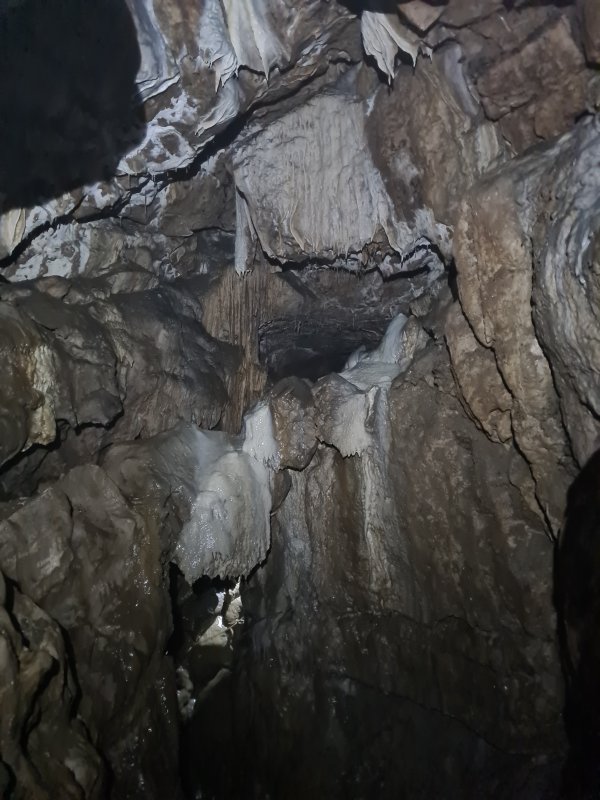 Stalagmite Passage starts from a balcony above the stream, where there is a surplus of stal formations.
Lighting by Tarquin and Gwenllian
Stalagmite Passage starts from a balcony above the stream, where there is a surplus of stal formations.
Lighting by Tarquin and Gwenllian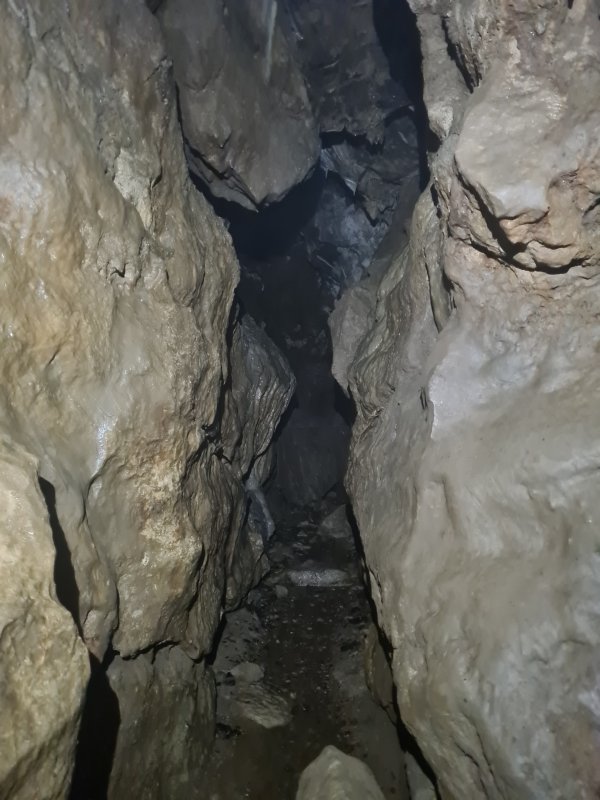 Stalagmite Passage, a much grander passage than the stream.
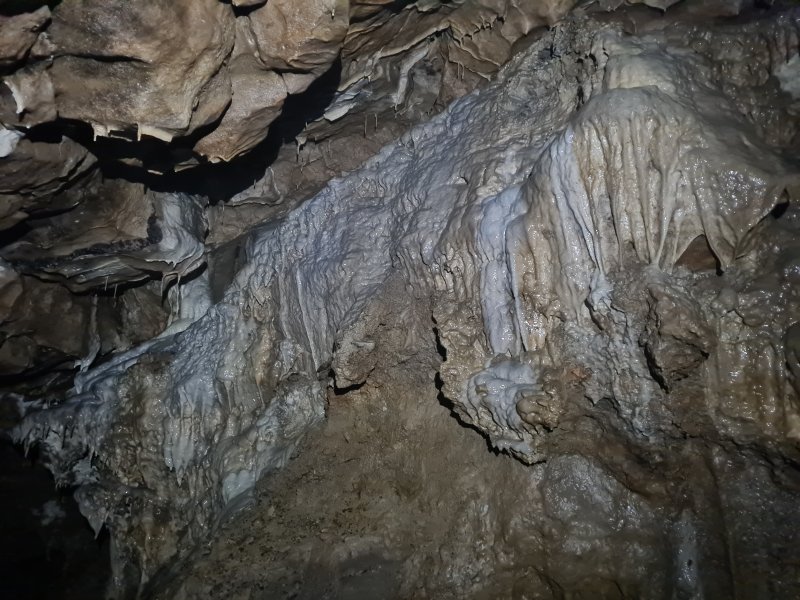 Formations in Stalagmite Passage.
 Formations in Stalagmite Passage.
 Curtains in Stalagmite Passage.
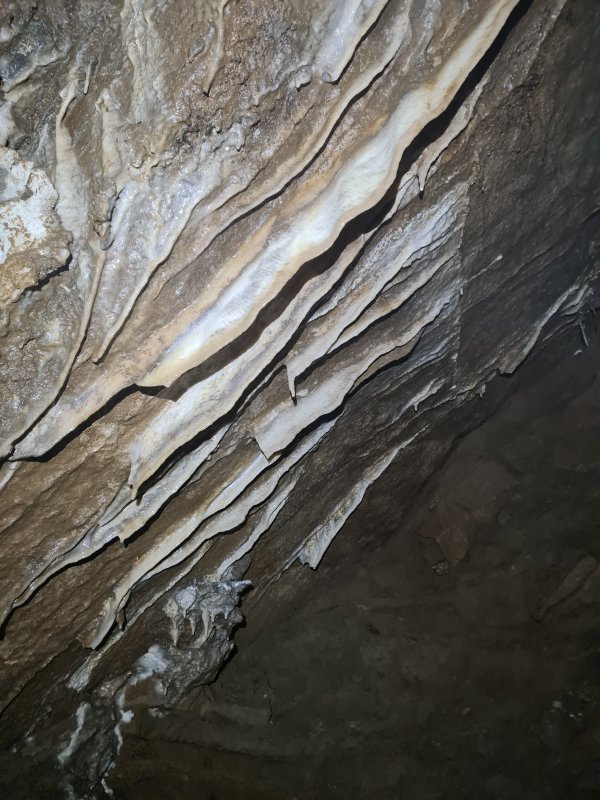 Curtains in Stalagmite Passage.
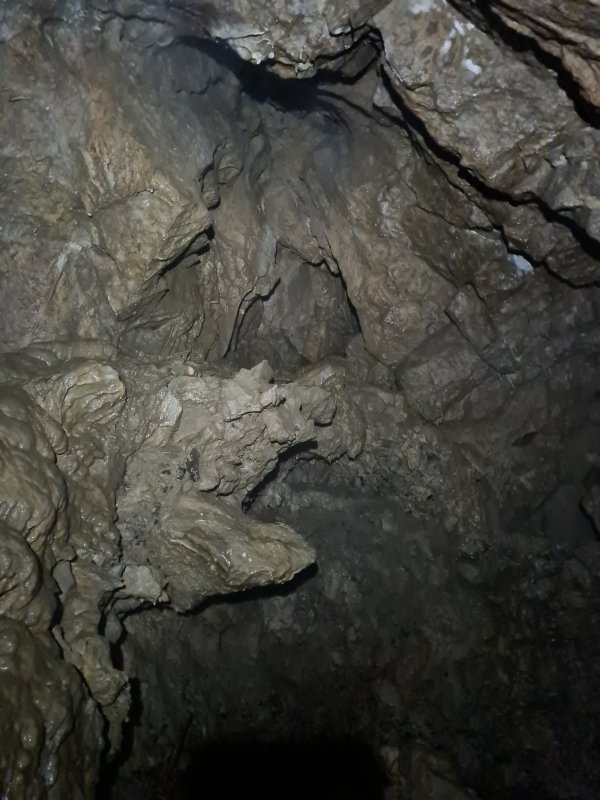 Aven in Stalagmite Passage.
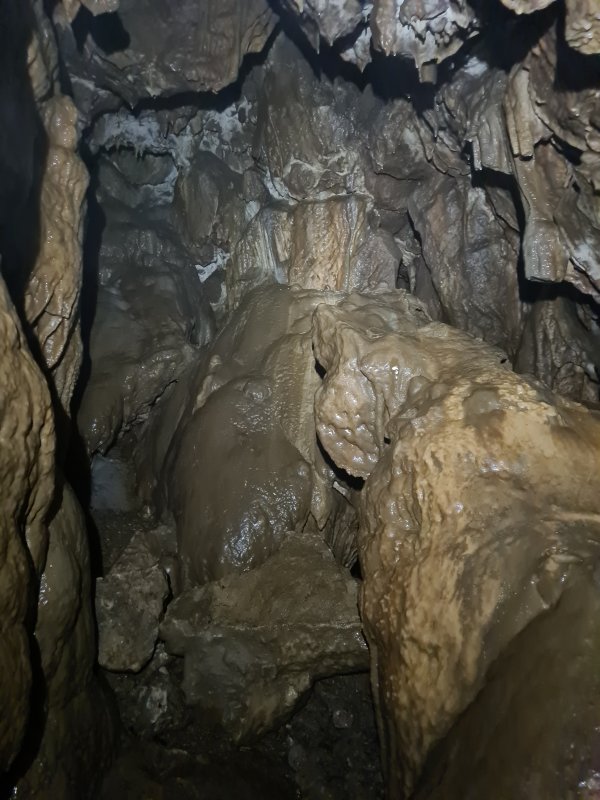 Stalagmite Passage ends where it fills with formations. This almost bypasses the First Pitch, but fails just a couple of metres short.
 Stalagmites at the end of Stalagmite Passage.
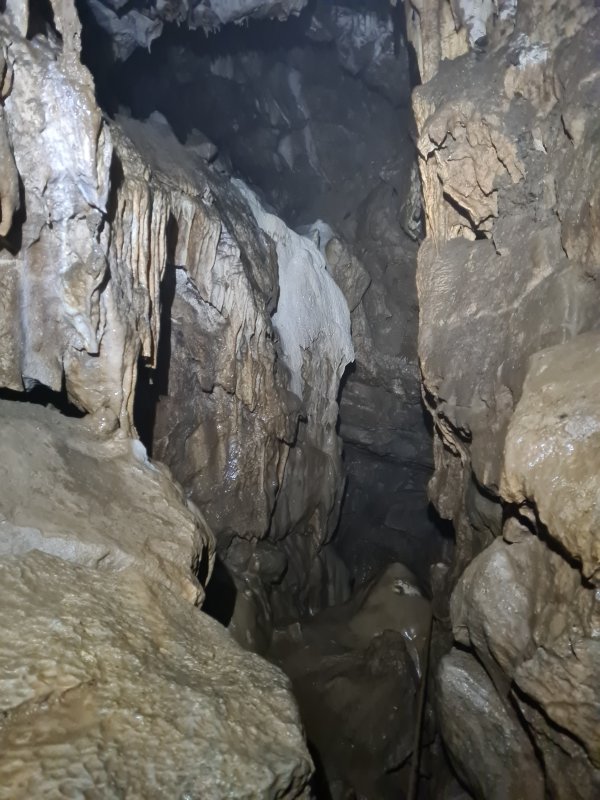 In the other direction from the balcony is a traverse over the streamway. While not essential at the start, a rope is a very good idea here.
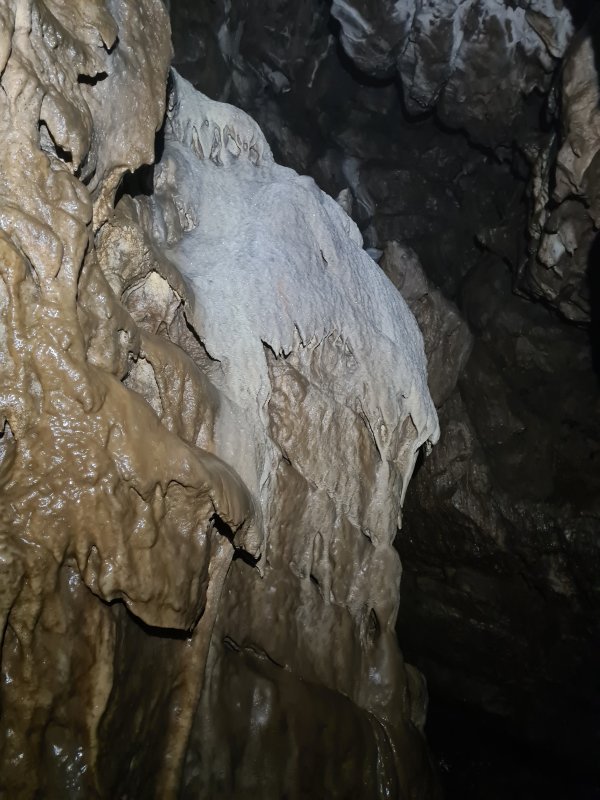 Formations in the traverse.
 The traverse leads along an exposed ledge high above Second Pitch's chamber, where a rope is essential, ending at this grotto. No pictures of the traverse because I accidentally dropped the camera, and spent a good while trying to find it, thinking it had fallen down an impossibly narrow gap somewhere. By the time it was found, I was not in the mood to take proper pictures.
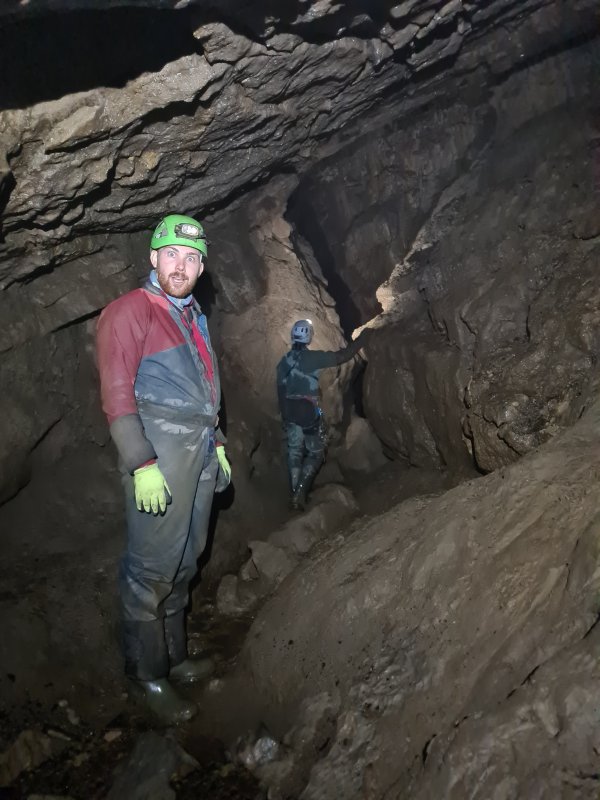 The end of the grotto drops into High Level Route, a large passage that enters the side of Mud Hall. It also has hiddden holes down into Gour Passage and Overflow Passage. Everything links to everything else here.
Modelling by Jack and Gwenllian, lighting by Tarquin and Gwenllian
The end of the grotto drops into High Level Route, a large passage that enters the side of Mud Hall. It also has hiddden holes down into Gour Passage and Overflow Passage. Everything links to everything else here.
Modelling by Jack and Gwenllian, lighting by Tarquin and Gwenllian Back in the streamway route, this is the head of the Second Pitch.
Modelling by Gwenllian and Jack, lighting by Tarquin, Gwenllian and Jack
Back in the streamway route, this is the head of the Second Pitch.
Modelling by Gwenllian and Jack, lighting by Tarquin, Gwenllian and Jack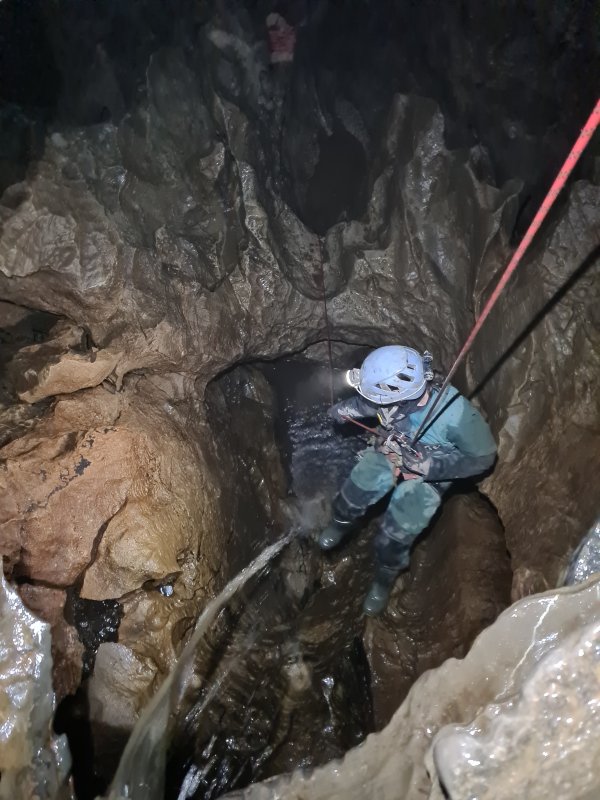 Second Pitch. The downstream passage is too tight, but there are three other ways on. At low level ahead is Overflow Passage.
Modelling by Gwenllian, lighting by Tarquin and Gwenllian
Second Pitch. The downstream passage is too tight, but there are three other ways on. At low level ahead is Overflow Passage.
Modelling by Gwenllian, lighting by Tarquin and Gwenllian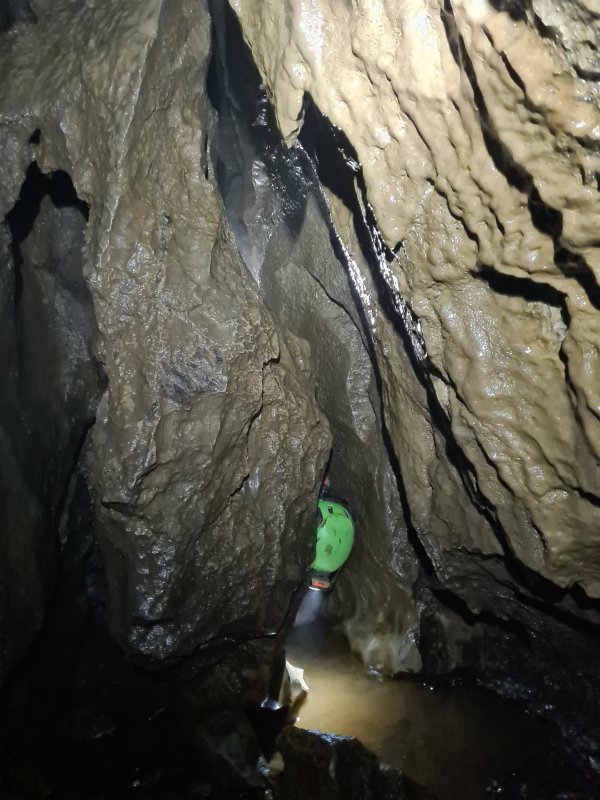 Overflow Passage starts narrow, and passes through a selection of narrow slots.
Modelling by Jack, lighting by Tarquin, Jack and Gwenllian
Overflow Passage starts narrow, and passes through a selection of narrow slots.
Modelling by Jack, lighting by Tarquin, Jack and Gwenllian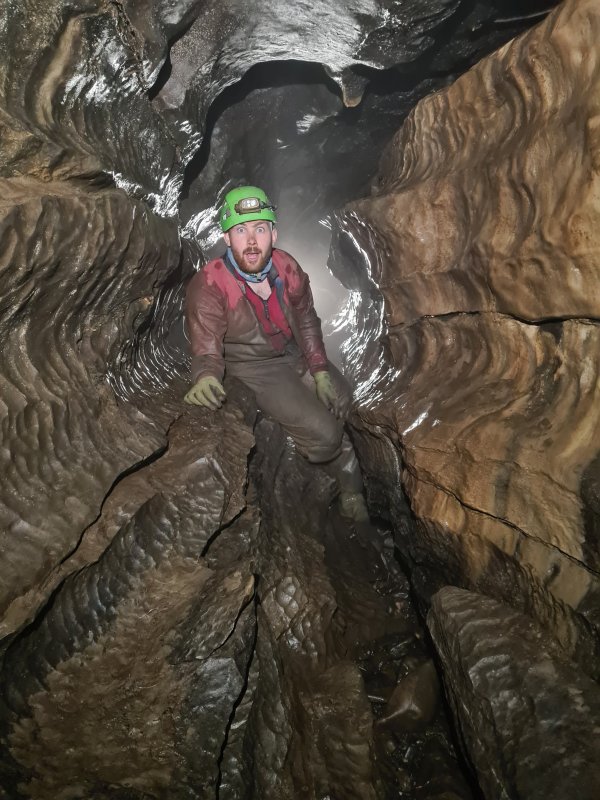 Overflow Passage passes through a low duck, which was completely dry during our visit. This gains a larger passage.
Modelling by Jack, lighting by Tarquin and Gwenllian
Overflow Passage passes through a low duck, which was completely dry during our visit. This gains a larger passage.
Modelling by Jack, lighting by Tarquin and Gwenllian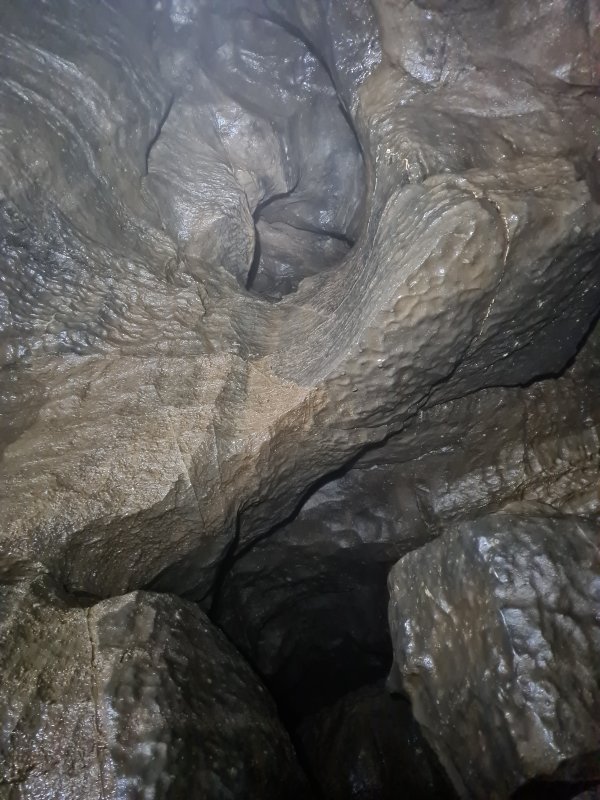 Tricky climb up into Mud Hall, with an oxbow below it.
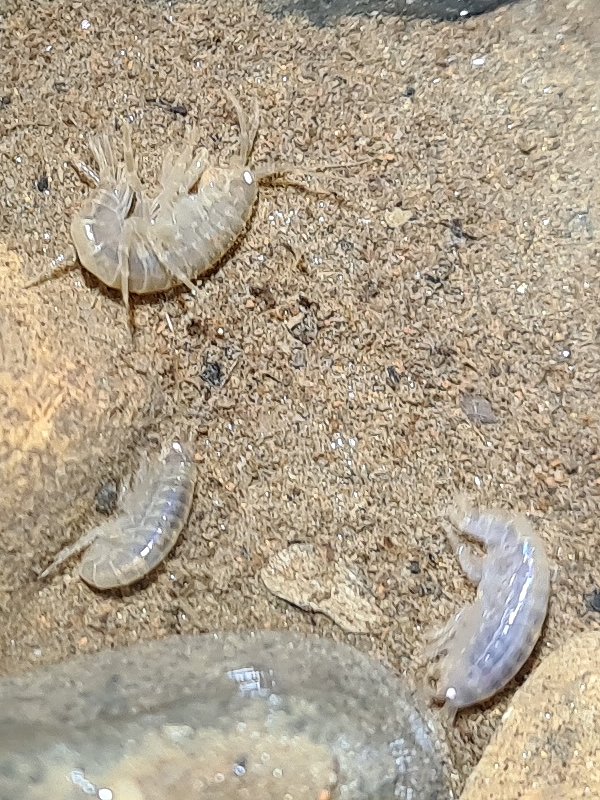 Niphargus shrimps in Overflow Passage.
Modelling by Harry, Ron and Hermione
Niphargus shrimps in Overflow Passage.
Modelling by Harry, Ron and Hermione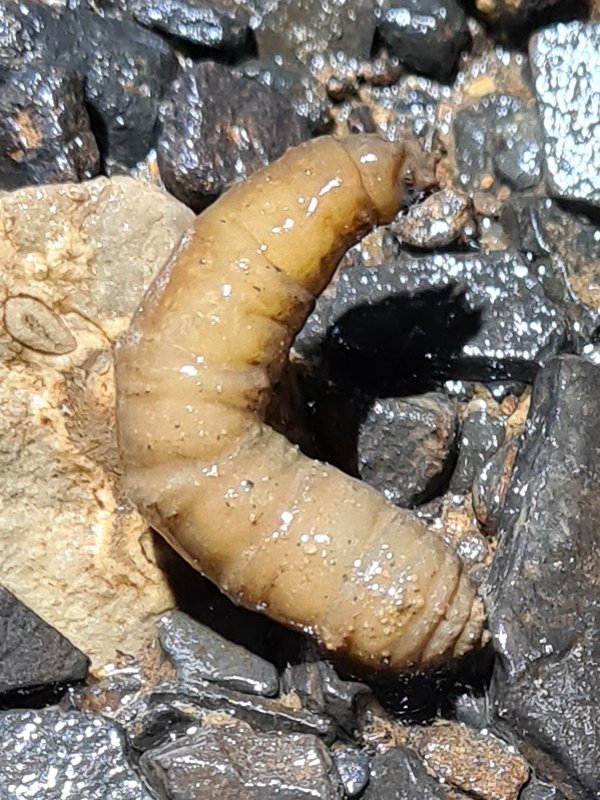 A very large maggot, nearly the size of your little finger. This is a species of crane fly, likely to be a very big one, such as Tipula maxima.
Modelling by Tippy
A very large maggot, nearly the size of your little finger. This is a species of crane fly, likely to be a very big one, such as Tipula maxima.
Modelling by Tippy Plants stuck to the ceiling in what would normally be Sump D/I. The connection to Upstream Passage had been passed on the left, and was a very small tube, which did not look fun.
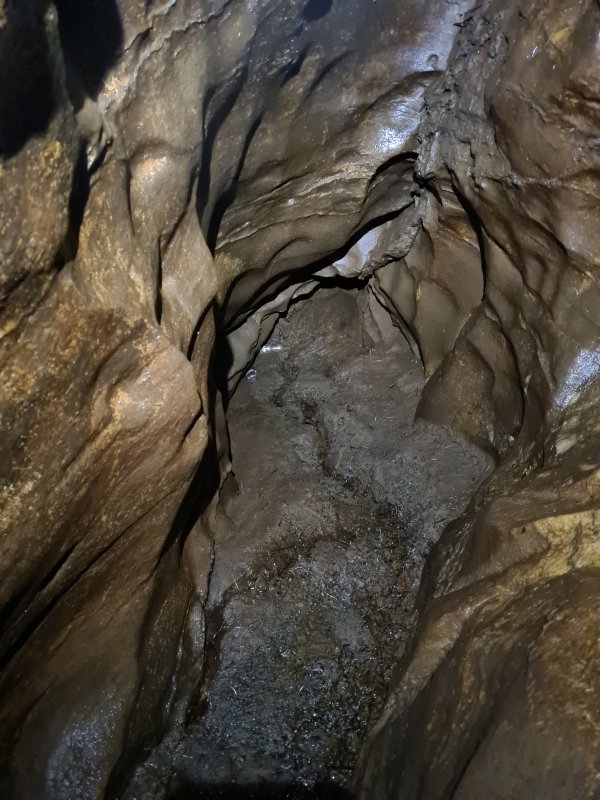 Sump D/I is supposed to be here, but it has dried up completely. The mud is very deep, and I did not risk walking into it, since it already swallowed my welly at the edge. Like many of the sumps in the dry cavers' cave, the sump has both a letter and a Roman numerals number. The numbers go from upstream to downstream, including sumps in side passages, and the letters go from downstream to upstream. Some of the sumps (not this one) also have names, and some of them (including this one) have different numbers/letters at each end. This isn't confusing or anything!
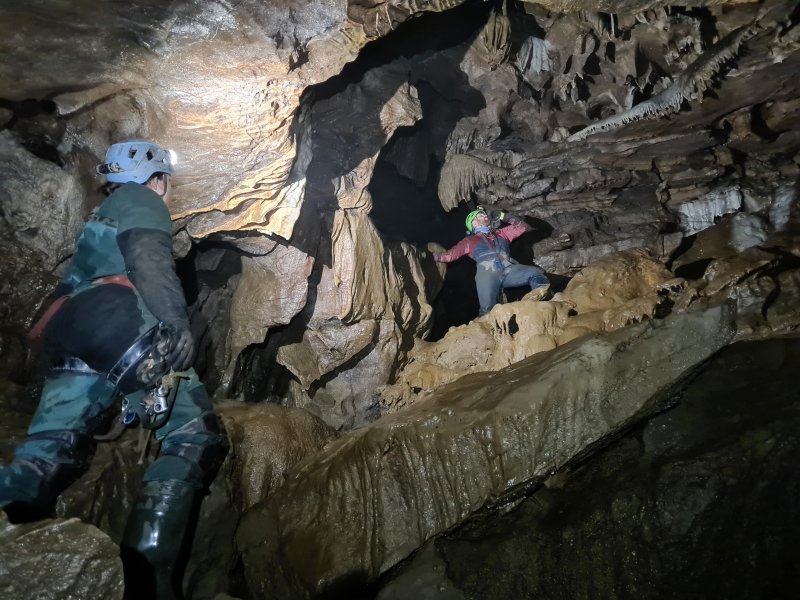 Second Pitch lands in a chamber with a large stal bank, and the High Level Route crossing in the rift above. The usual way on is up the stal bank into Gour Passage.
Modelling by Gwenllian, lighting by Tarquin and Gwenllian
Second Pitch lands in a chamber with a large stal bank, and the High Level Route crossing in the rift above. The usual way on is up the stal bank into Gour Passage.
Modelling by Gwenllian, lighting by Tarquin and Gwenllian Gour Passage starts as a large passage on a balcony. It has a hole down into Overflow Passage on the right.
Modelling by Gwenllian and Jack, lighting by Tarquin and Gwenllian
Gour Passage starts as a large passage on a balcony. It has a hole down into Overflow Passage on the right.
Modelling by Gwenllian and Jack, lighting by Tarquin and Gwenllian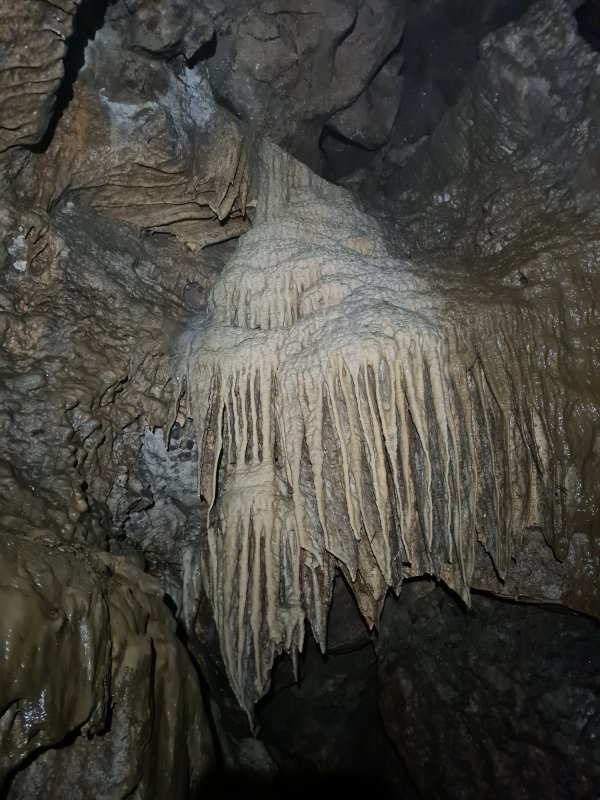 Formations in Gour Passage.
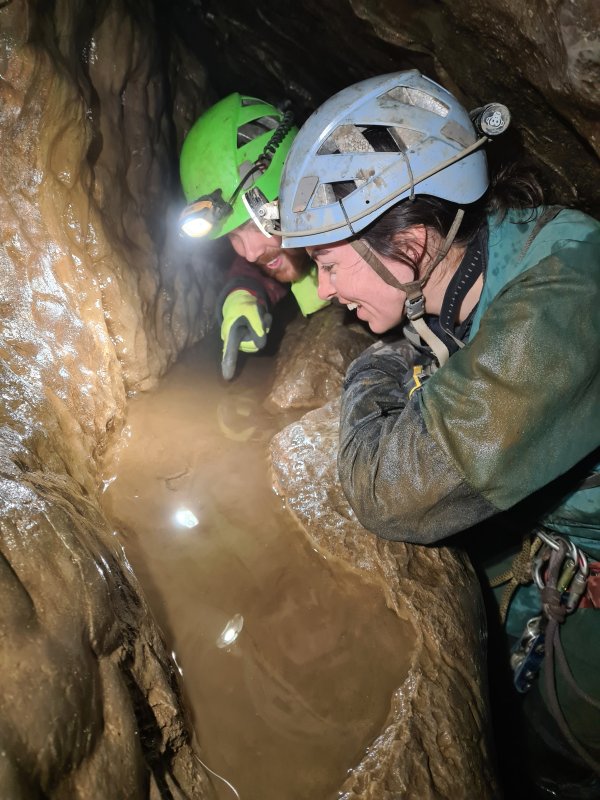 Admiring literally nothing in a completely boring pool, in Gour Passage
Modelling by Gwenllian and Jack, lighting by Tarquin, Gwenllian and Jack
Admiring literally nothing in a completely boring pool, in Gour Passage
Modelling by Gwenllian and Jack, lighting by Tarquin, Gwenllian and Jack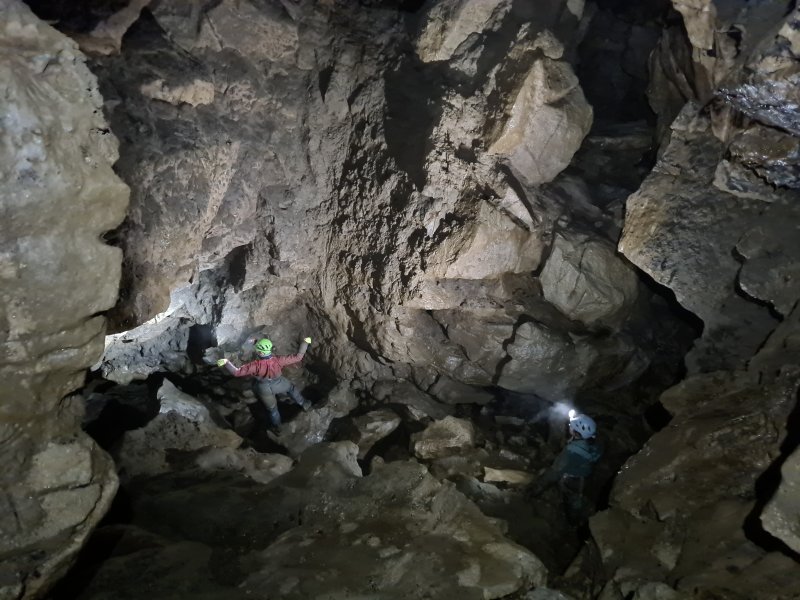 Mud Hall, a large chamber. Gour Passage enters from the right. High Level Route enters ahead-right. The small passage connecting to Overflow Passage is down a small hole ahead. The way downstream is to the left. A passage behind the camera ends in a dig, and so does another one on a balcony further to the left.
Modelling by Jack and Gwenllian, lighting by Tarquin, Jack and Gwenllian
Mud Hall, a large chamber. Gour Passage enters from the right. High Level Route enters ahead-right. The small passage connecting to Overflow Passage is down a small hole ahead. The way downstream is to the left. A passage behind the camera ends in a dig, and so does another one on a balcony further to the left.
Modelling by Jack and Gwenllian, lighting by Tarquin, Jack and Gwenllian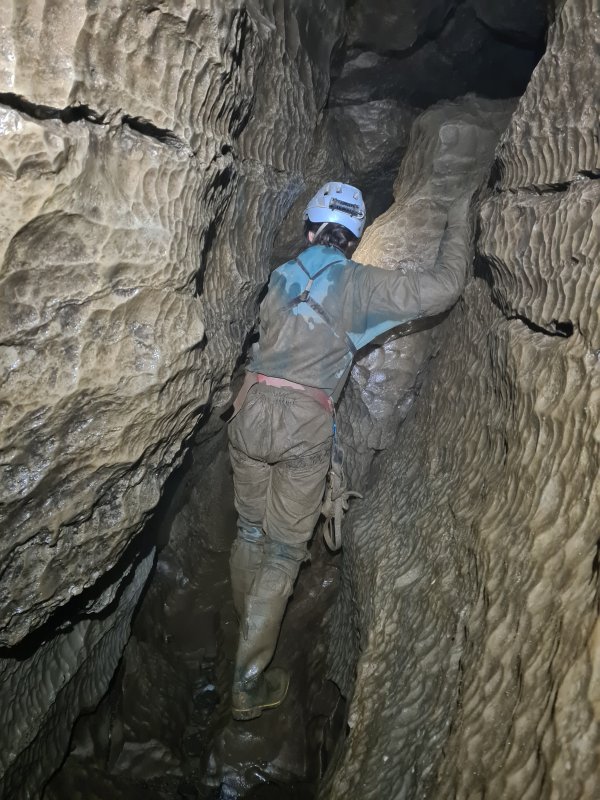 Beyond Mud Hall, the way downstream drops down to a junction with the Main Stream Passage, which was not flowing at all during our visit. We headed into the upstream direction along Main Stream Passage (actually we did the downstream direction first, but the pictures make more sense this way).
Modelling by Gwenllian, lighting by Tarquin and Gwenllian
Beyond Mud Hall, the way downstream drops down to a junction with the Main Stream Passage, which was not flowing at all during our visit. We headed into the upstream direction along Main Stream Passage (actually we did the downstream direction first, but the pictures make more sense this way).
Modelling by Gwenllian, lighting by Tarquin and Gwenllian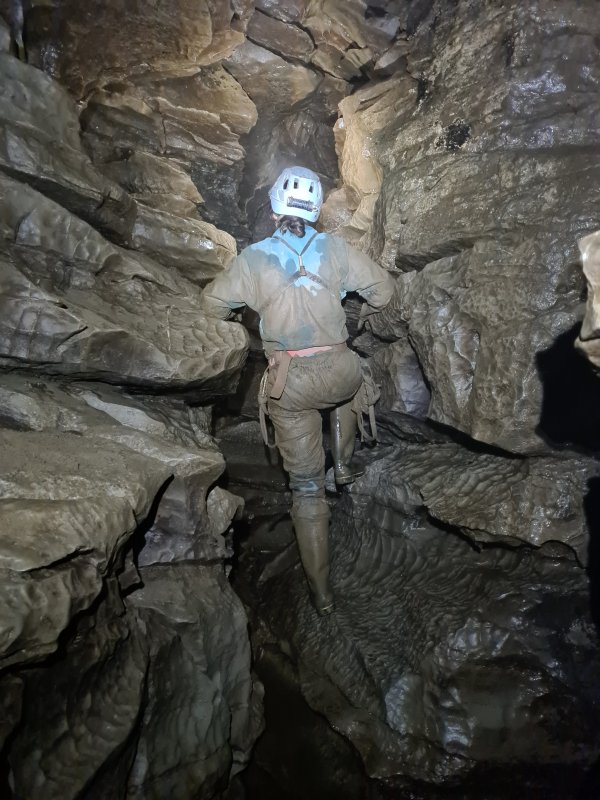 Ledges in the upstream passage, at the junction with Sand Passage.
Modelling by Gwenllian, lighting by Tarquin and Gwenllian
Ledges in the upstream passage, at the junction with Sand Passage.
Modelling by Gwenllian, lighting by Tarquin and Gwenllian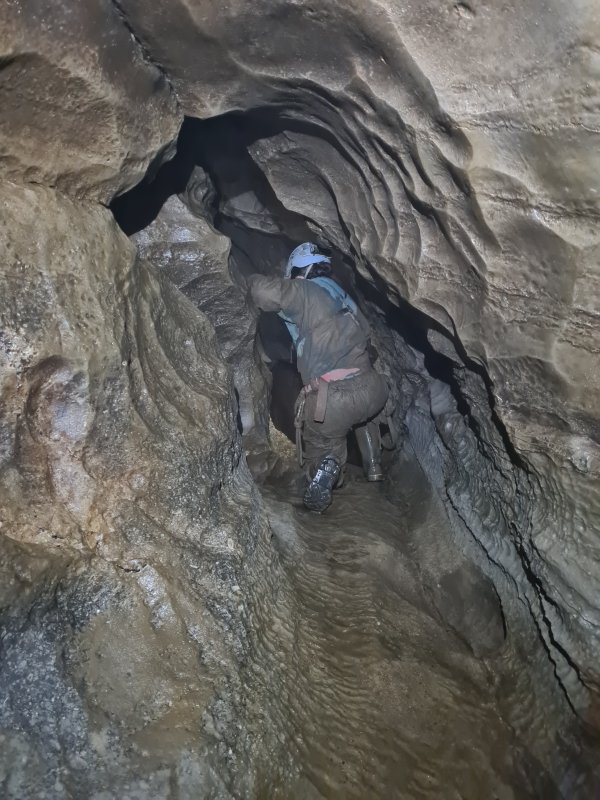 The upstream passage then shrinks. A tight tube in the left wall here also connects to Sand Passage.
Modelling by Gwenllian, lighting by Tarquin and Gwenllian
The upstream passage then shrinks. A tight tube in the left wall here also connects to Sand Passage.
Modelling by Gwenllian, lighting by Tarquin and Gwenllian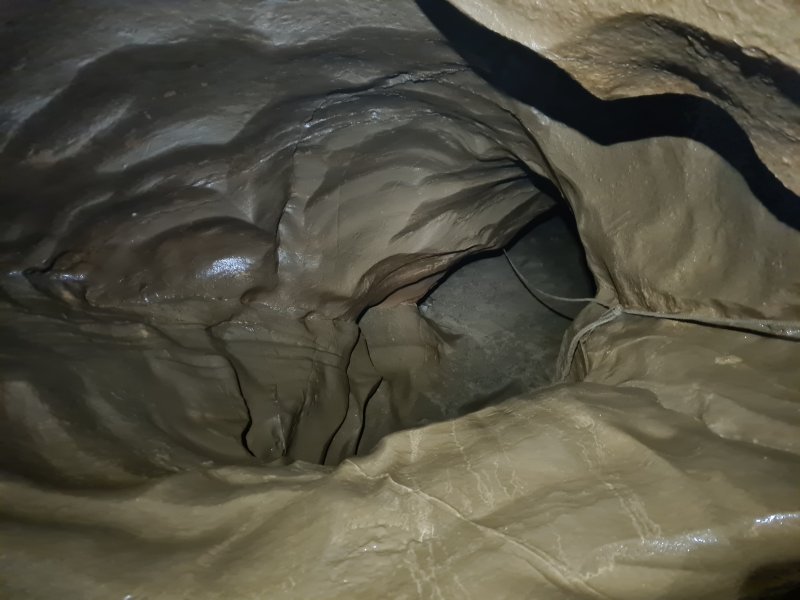 The upstream passage ends at Top Sump (also known as Sump B/III, because it really needs 3 names), which is normally here. However, it was completely dry during our visit. Around 20 metres of passage may have been accessible, but the initial steep slope needs a rope, and we did not have one. The sump has not been passed, but brings in water from somewhere else, as there is normally more flow here than in the earlier parts of the cave.
 A lower side passage reaches Sump C/II, which is the downstream end of Sump D/I in Overflow Passage. A very narrow tube on the right bypasses the sump, connecting to Overflow Passage.
Modelling by Gwenllian, lighting by Tarquin and Gwenllian
A lower side passage reaches Sump C/II, which is the downstream end of Sump D/I in Overflow Passage. A very narrow tube on the right bypasses the sump, connecting to Overflow Passage.
Modelling by Gwenllian, lighting by Tarquin and Gwenllian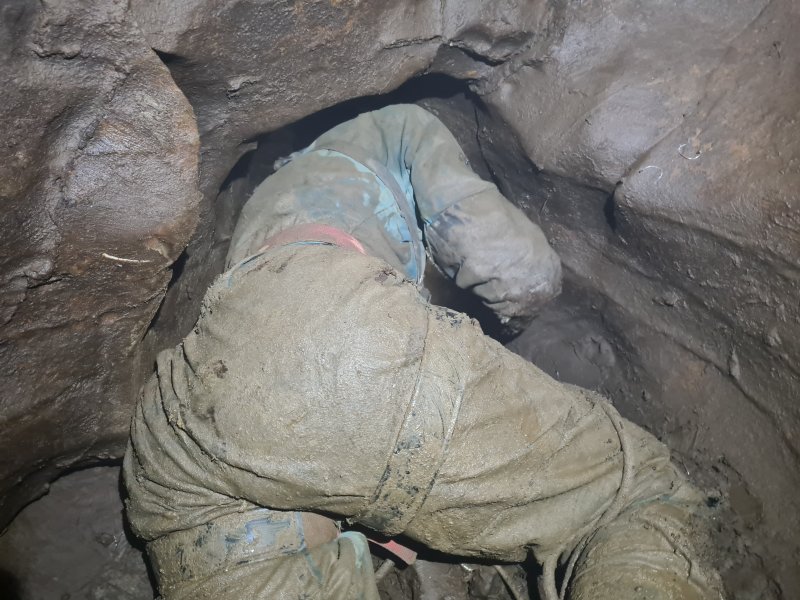 Sump C/II is very small.
Modelling by Gwenllian, lighting by Tarquin and Gwenllian
Sump C/II is very small.
Modelling by Gwenllian, lighting by Tarquin and Gwenllian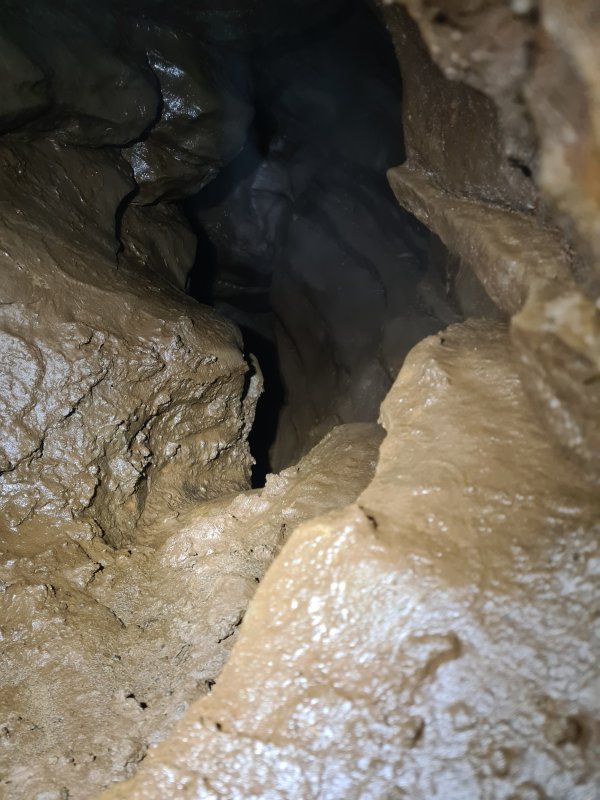 We could hear water flowing loudly in Sump C/II, and presumably this is the water from the entrance. We could see down into a narrow and extremely slippery slot, but the steep slope threatened to trap us in there if we tried to visit it. We decided that there were better places to be.
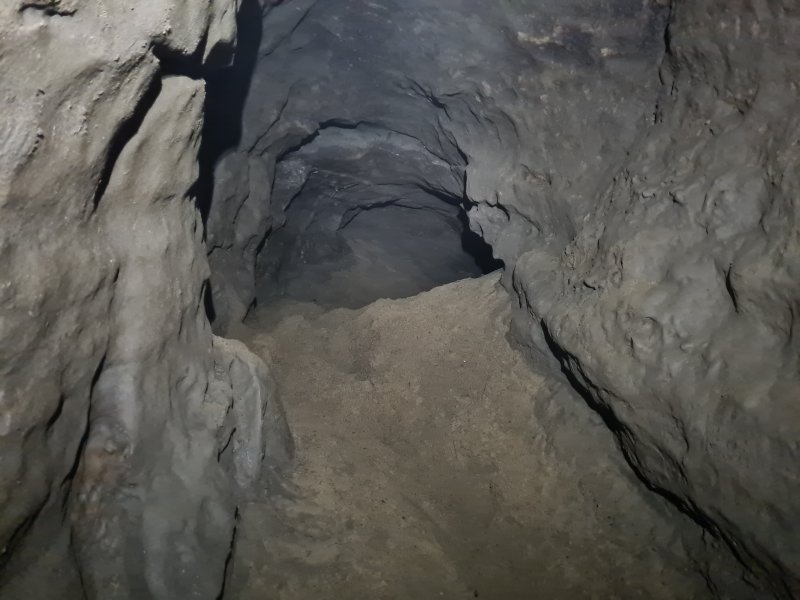 Sand Passage starts out with a sandy floor. What a surprise.
 Crawling through Sand Passage. A tiny tube in one wall connects back to the upstream passage.
Modelling by Jack, lighting by Tarquin and Jack
Crawling through Sand Passage. A tiny tube in one wall connects back to the upstream passage.
Modelling by Jack, lighting by Tarquin and Jack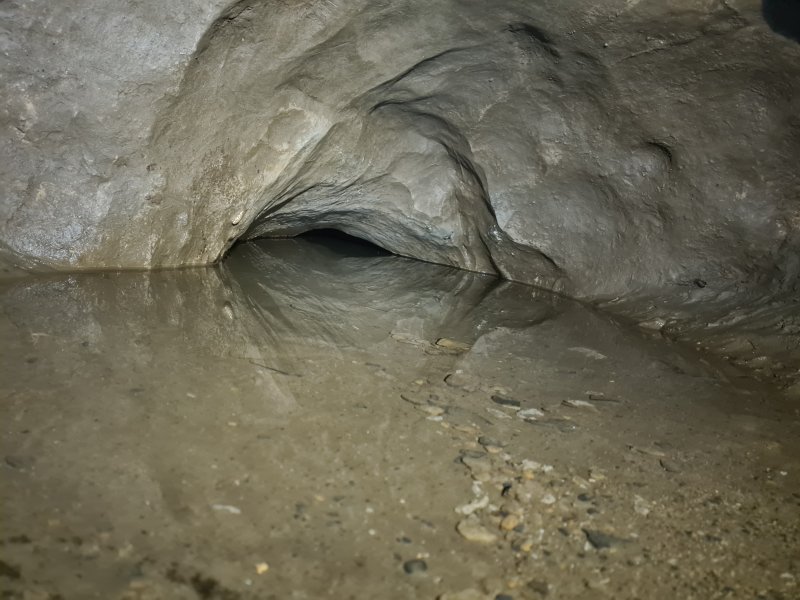 Sand Passage passes through a duck. We had initially assumed it was sumped, but we could hear an echo through the tiny airspace. Siphoning is needed to provide enough airspace for nose snorkeling. The passage looked less than 15 cm (that's 6 inches in old money) high, so probably needs digging out to allow access. Beyond here, there is a short passage leading to the blind Sump E/IV, which is very close to Top Sump.
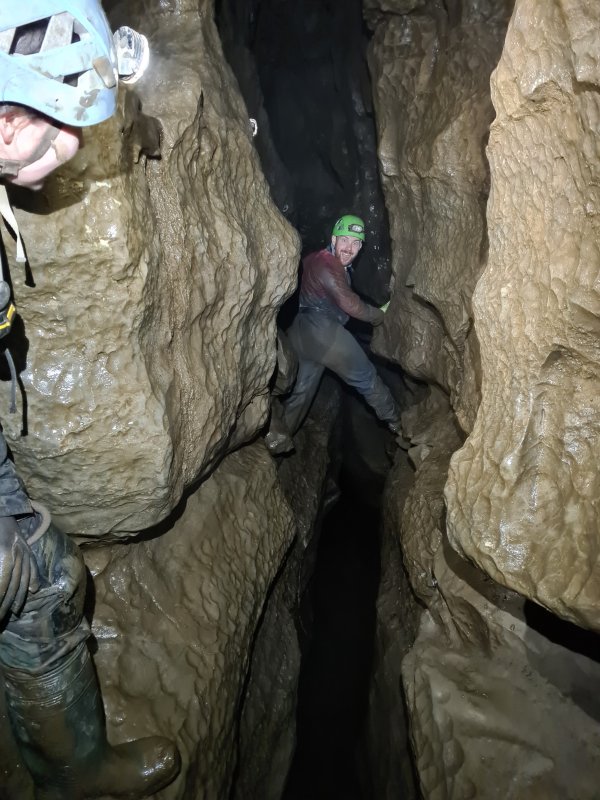 Heading downstream along Main Stream Passage.
Modelling by Gwenllian and Jack, lighting by Tarquin and Gwenllian
Heading downstream along Main Stream Passage.
Modelling by Gwenllian and Jack, lighting by Tarquin and Gwenllian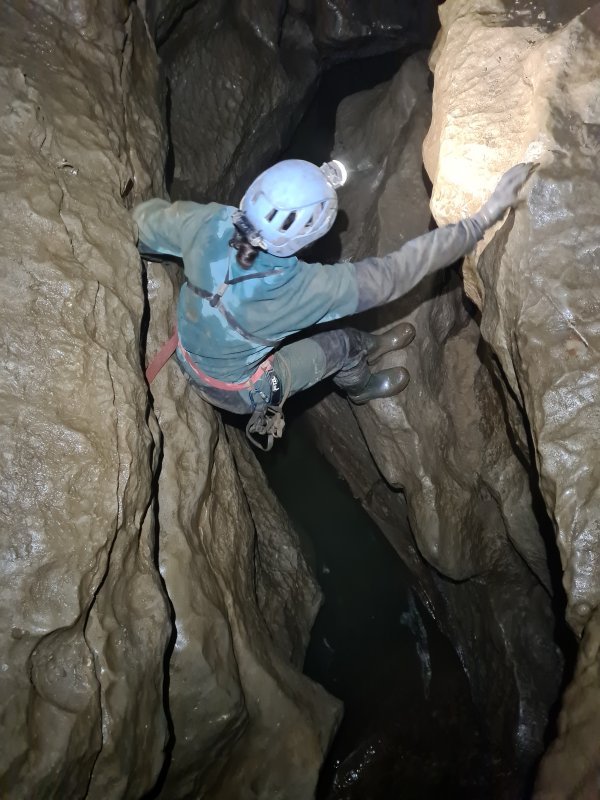 Traversing over static pools in the downstream direction of Main Stream Passage.
Modelling by Gwenllian, lighting by Tarquin and Gwenllian
Traversing over static pools in the downstream direction of Main Stream Passage.
Modelling by Gwenllian, lighting by Tarquin and Gwenllian The passage rapidly grows to a very large size, at the junction with Ben's Dig.
Modelling by Gwenllian and Jack, lighting by Tarquin, Gwenllian and Jack
The passage rapidly grows to a very large size, at the junction with Ben's Dig.
Modelling by Gwenllian and Jack, lighting by Tarquin, Gwenllian and Jack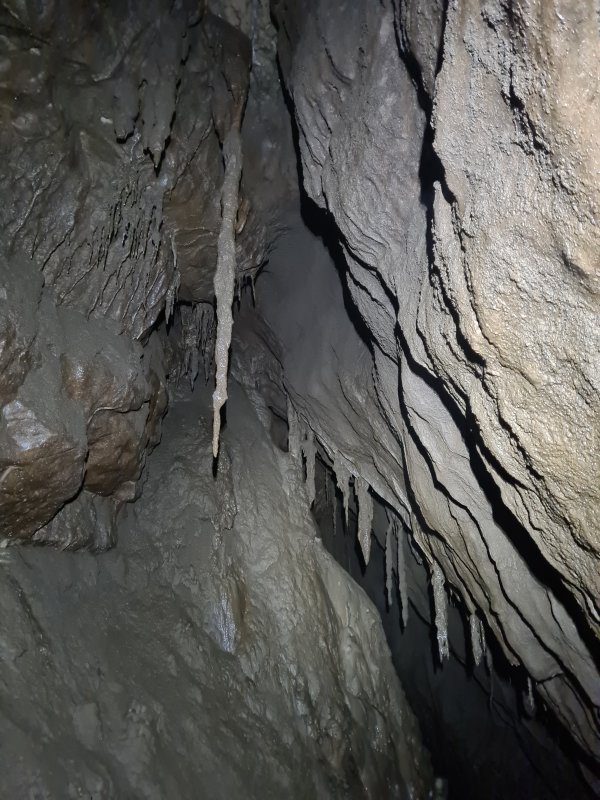 The formations high up in the ceiling are coated in thick mud, and clearly have seen repeated catastrophic flooding. Though it is unlikely that flood water can regularly reach this high now, we did see fairly fresh deposits of grass wedged 9 metres up in the ceiling, which is quite epic.
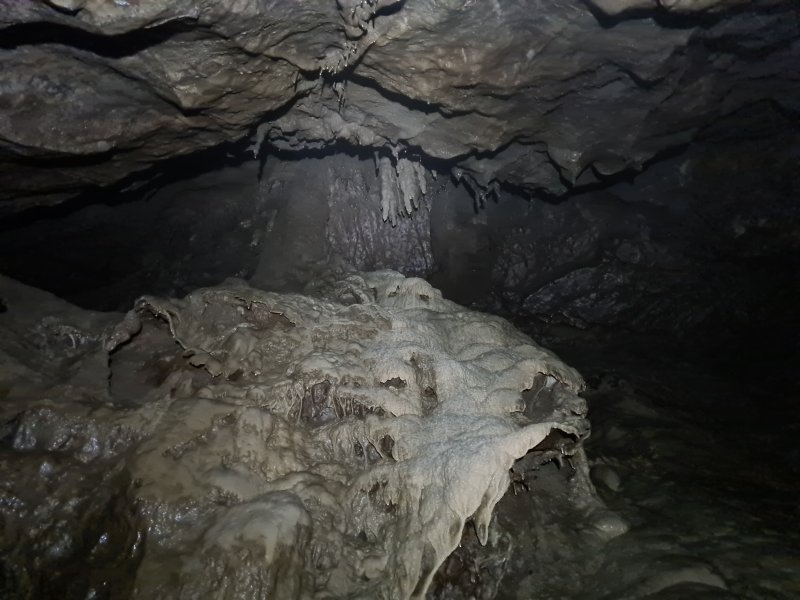 Flowstone in downstream Main Stream Passage.
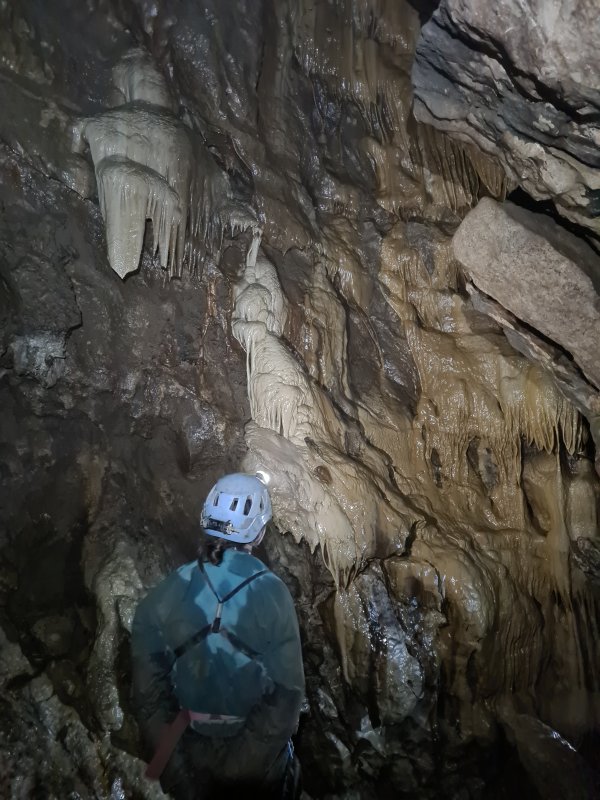 Formations in downstream Main Stream Passage.
Modelling by Gwenllian, lighting by Tarquin, Gwenllian and Jack
Formations in downstream Main Stream Passage.
Modelling by Gwenllian, lighting by Tarquin, Gwenllian and Jack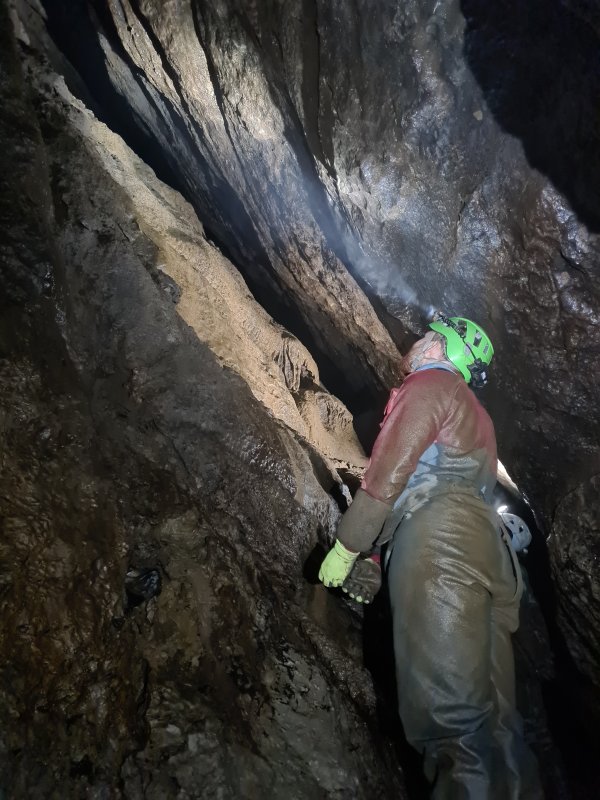 The downstream passage then becomes T'Owd Man's Rift, where the ceiling soars up into the distance like a mine stope. For those not familiar with the terminology, "t'owd man" (the old man) is a name used to refer to the miners from previous centuries, who had found many of the Peak District caves during mining operations, long before cavers. T'owd man has a habit of spoiling the sense of accomplishment when digging into "new" cave, only to find that the miners had already discovered it. This particular passage appears to be completely natural, however.
Modelling by Jack and Gwenllian, lighting by Tarquin, Jack and Gwenllian
The downstream passage then becomes T'Owd Man's Rift, where the ceiling soars up into the distance like a mine stope. For those not familiar with the terminology, "t'owd man" (the old man) is a name used to refer to the miners from previous centuries, who had found many of the Peak District caves during mining operations, long before cavers. T'owd man has a habit of spoiling the sense of accomplishment when digging into "new" cave, only to find that the miners had already discovered it. This particular passage appears to be completely natural, however.
Modelling by Jack and Gwenllian, lighting by Tarquin, Jack and Gwenllian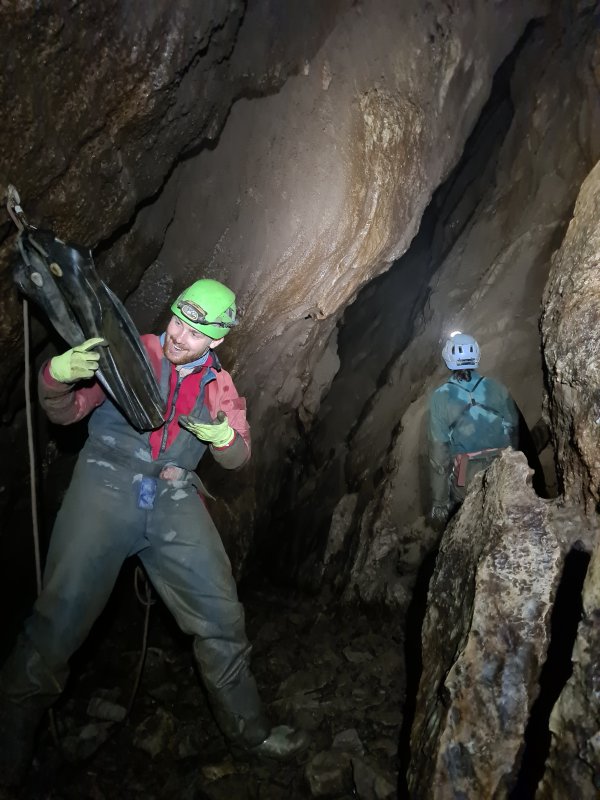 Towards the end of T'Owd Man's Rift, looking back towards the slope up to Stalagmite Grotto.
Modelling by Gwenllian, lighting by Tarquin and Gwenllian
Towards the end of T'Owd Man's Rift, looking back towards the slope up to Stalagmite Grotto.
Modelling by Gwenllian, lighting by Tarquin and Gwenllian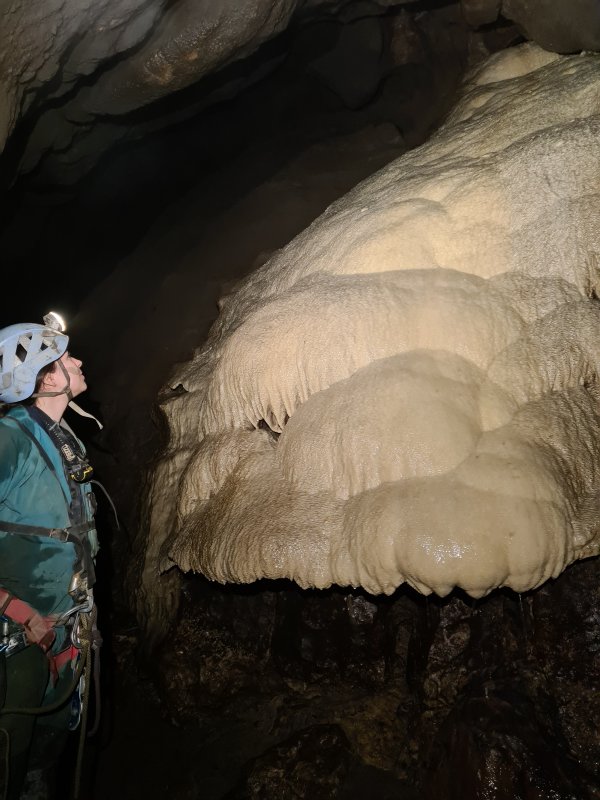 Flowstone cascade that is supposed to mark the start of deeper water. However, our feet were still on dry ground.
Modelling by Gwenllian, lighting by Tarquin, Jack and Gwenllian
Flowstone cascade that is supposed to mark the start of deeper water. However, our feet were still on dry ground.
Modelling by Gwenllian, lighting by Tarquin, Jack and Gwenllian Though it may look bad, this is just a fallen stalactite, being redissolved.
 Stal above the downstream sump.
Lighting by Tarquin and Gwenllian
Stal above the downstream sump.
Lighting by Tarquin and Gwenllian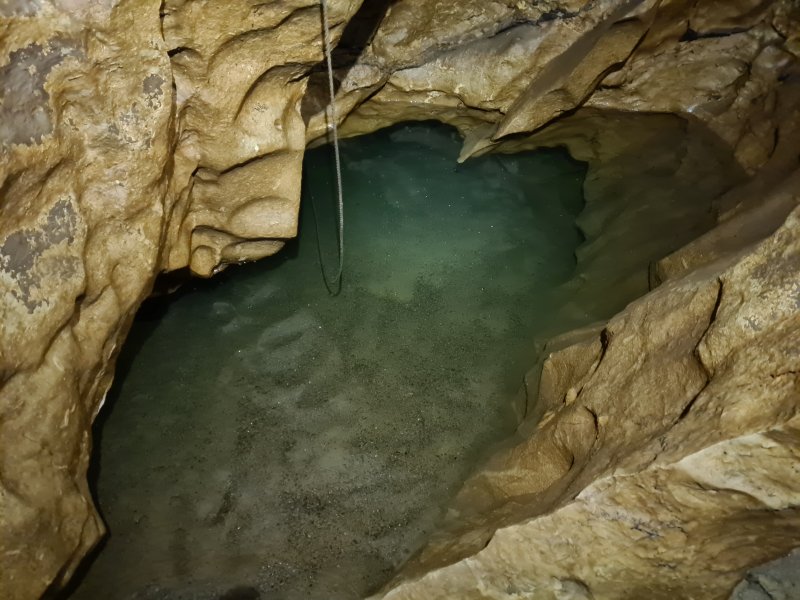 The downstream sump, which appears to be far lower than normal. This is sump A/V, also known as Downstream Sump 1, and in more severe drought can actually dry up completely. There are 10 sumps along the downstream passage, and the subsequent ones are numbered 2-10, without using the letters or Roman numerals system. Downstream Sumps 2 and 3 can also dry up in severe drought.
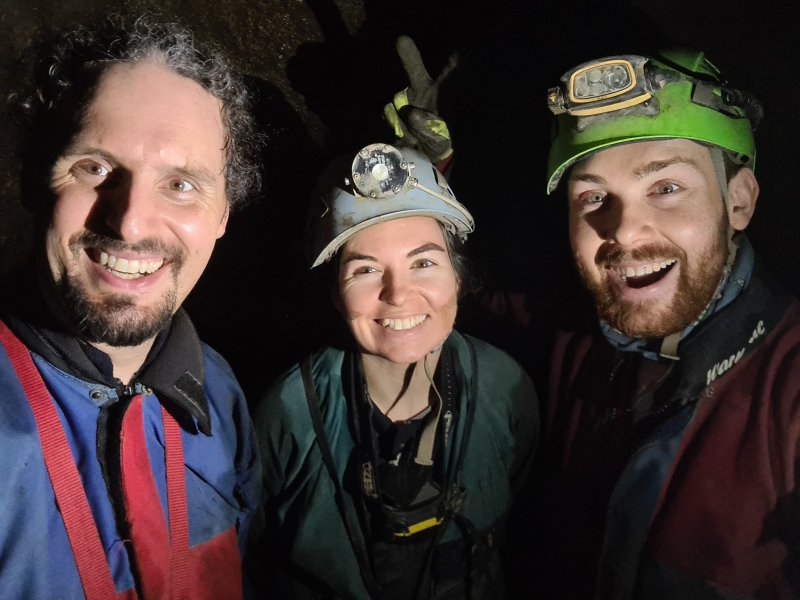 The team at the Downstream Sump.
Modelling by Tarquin, Gwenllian and Jack, lighting by Jack
The team at the Downstream Sump.
Modelling by Tarquin, Gwenllian and Jack, lighting by Jack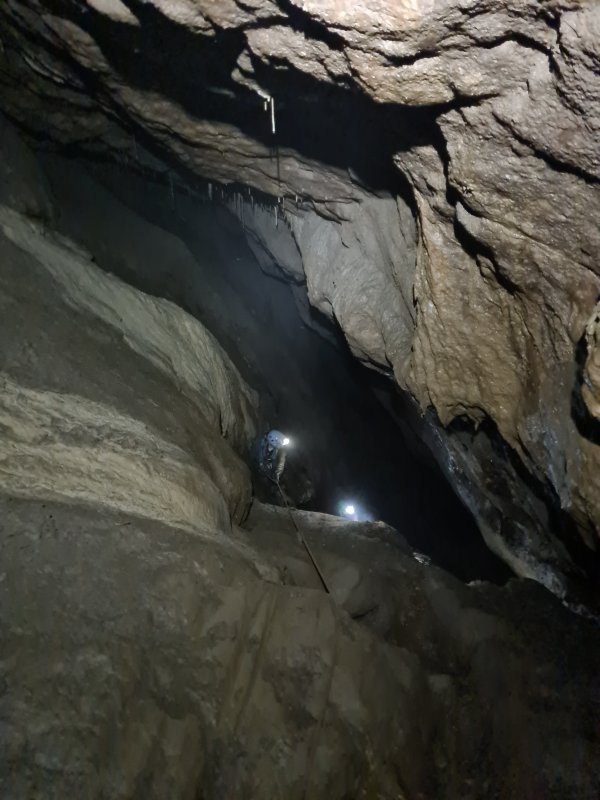 The slippery climb up the slope in T'Owd Man's Rift. This is far worse than it looks, and even though it has a fixed handline, it feels like it is trying to throw you off the edge. Down is worse than up.
Modelling by Gwenllian and Jack, lighting by Tarquin, Gwenllian and Jack
The slippery climb up the slope in T'Owd Man's Rift. This is far worse than it looks, and even though it has a fixed handline, it feels like it is trying to throw you off the edge. Down is worse than up.
Modelling by Gwenllian and Jack, lighting by Tarquin, Gwenllian and Jack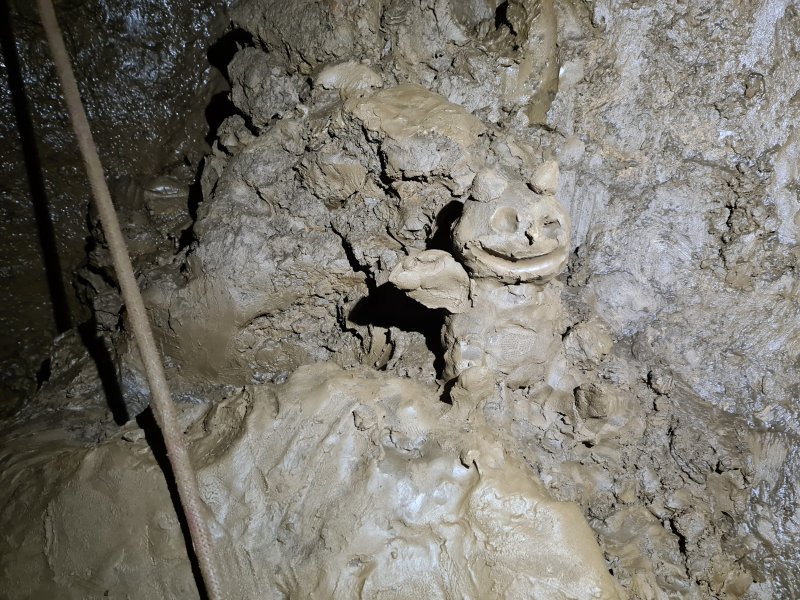 Mud sculpture on the climb. You can decide what it is supposed to be.
Modelling by Carol from Where The Wild Things Are
Mud sculpture on the climb. You can decide what it is supposed to be.
Modelling by Carol from Where The Wild Things Are Grotto above the slope.
Lighting by Tarquin and Jack
Grotto above the slope.
Lighting by Tarquin and Jack Grotto above the slope.
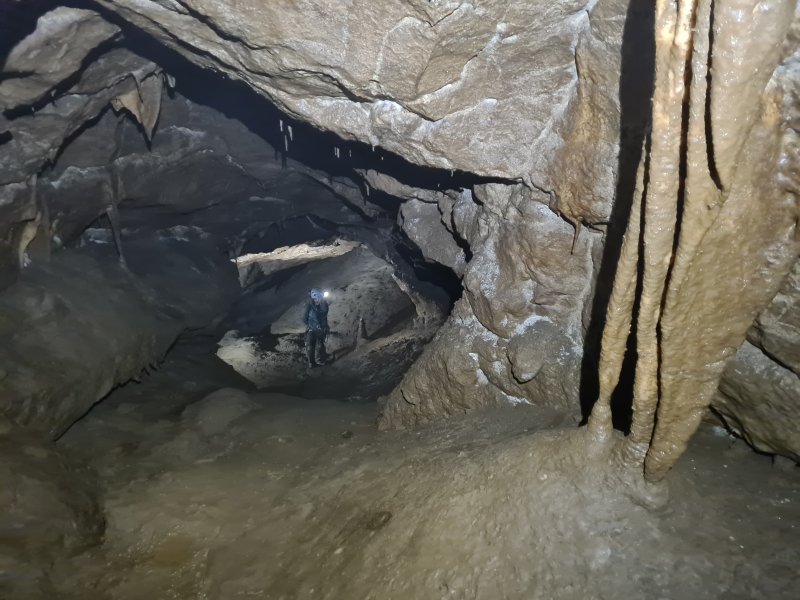 The main target at the top of the slope is Stalagmite Grotto, but it is not even slightly as good as its name suggests; there is very little stal at all, and what is there is plastered in mud. There is a second way on behind Gwenllian, over the mud bank. This is a low crawl to Christmas Aven. Unfortunately, we missed it because it was not on the survey that we had.
Modelling by Gwenllian, lighting by Tarquin, Gwenllian and Jack
The main target at the top of the slope is Stalagmite Grotto, but it is not even slightly as good as its name suggests; there is very little stal at all, and what is there is plastered in mud. There is a second way on behind Gwenllian, over the mud bank. This is a low crawl to Christmas Aven. Unfortunately, we missed it because it was not on the survey that we had.
Modelling by Gwenllian, lighting by Tarquin, Gwenllian and Jack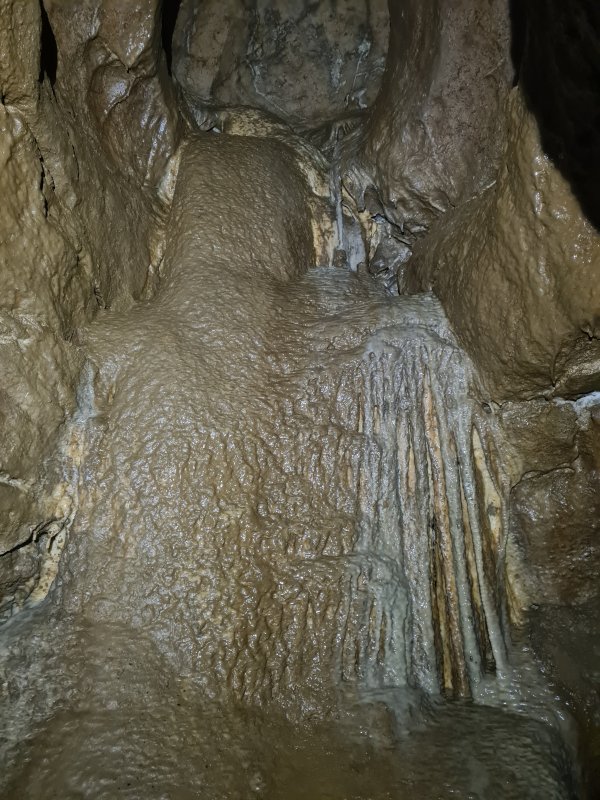 Flowstone in Stalagmite Grotto.
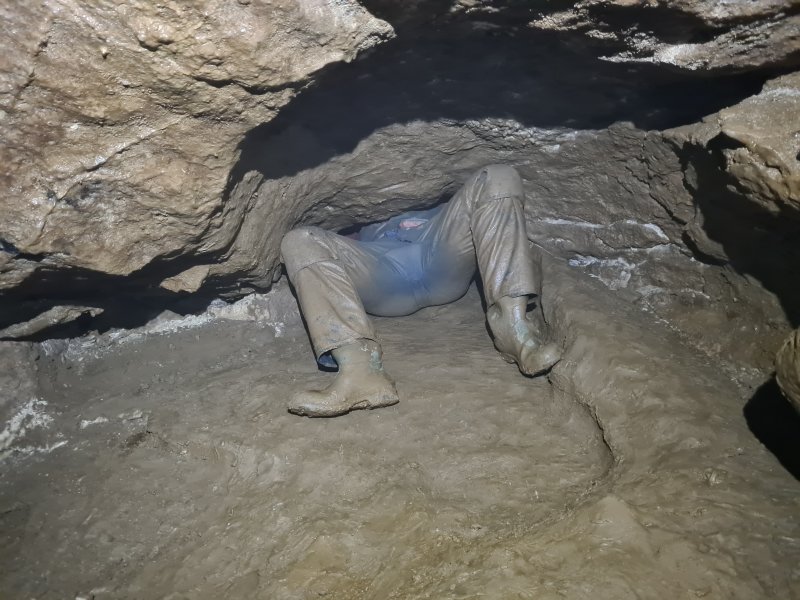 Breech birth, in Stalagmite Grotto. The passage ends too tight here.
Modelling by Jack
Breech birth, in Stalagmite Grotto. The passage ends too tight here.
Modelling by Jack Flowstone formation in Ben's Dig. Amazingly, this has managed to survive the onslaught of passing digging spoil, in one of the most heavily dug passages in the cave.
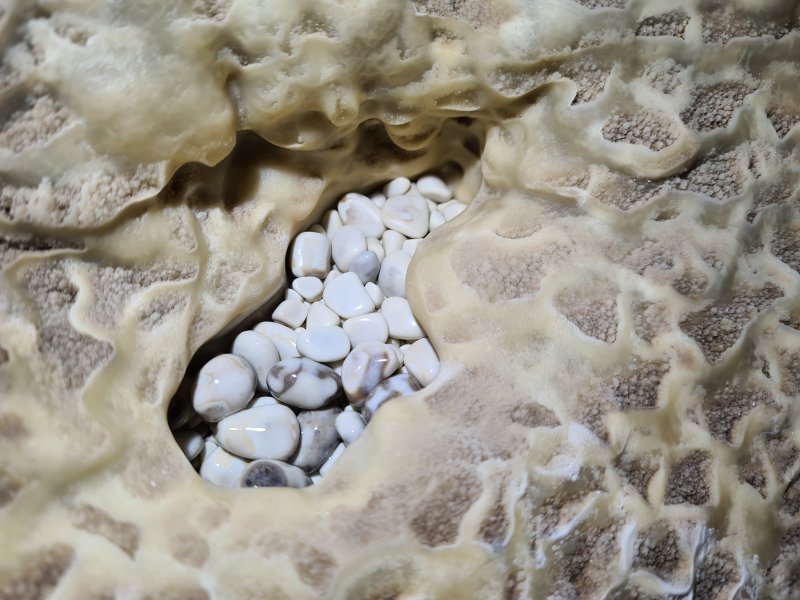 Cave pearls in the flowstone, in Ben's Dig.
 Cave pearls.
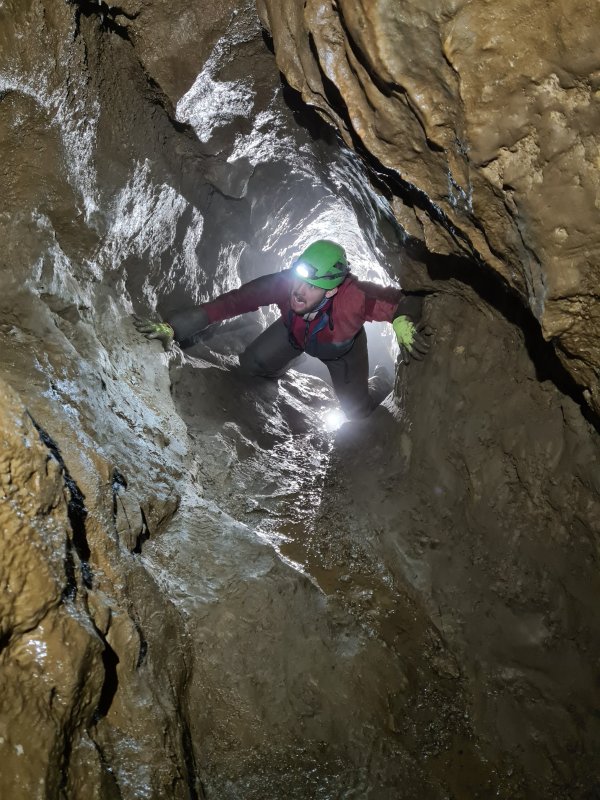 Ben's Dig, mostly a stooping sized passage.
Modelling by Jack, lighting by Tarquin, Jack and Gwenllian
Ben's Dig, mostly a stooping sized passage.
Modelling by Jack, lighting by Tarquin, Jack and Gwenllian Eldon Room, the large chamber in Ben's Dig, where there are several ways on. Incidentally, the peeing-in-the-pool pose is intentional, as it is my least favourite pose for cave photography, and yet is the typical one that cavers adopt when asked to pose for a picture.
Modelling by Gwenllian and Jack, lighting by Tarquin, Gwenllian and Jack
Eldon Room, the large chamber in Ben's Dig, where there are several ways on. Incidentally, the peeing-in-the-pool pose is intentional, as it is my least favourite pose for cave photography, and yet is the typical one that cavers adopt when asked to pose for a picture.
Modelling by Gwenllian and Jack, lighting by Tarquin, Gwenllian and Jack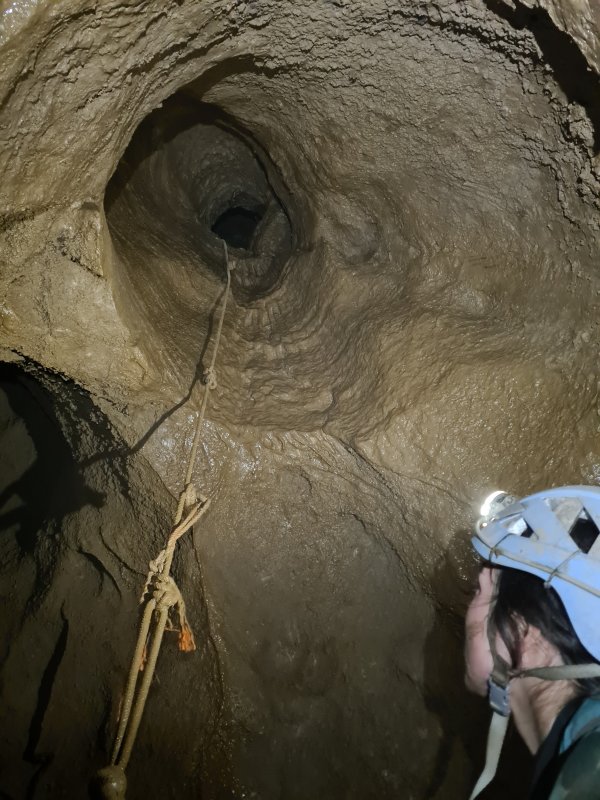 Aven in Eldon Room. Amazingly, this climb has a knotted handline, despite having absolutely no holds whatsoever, and not even any walls to touch for the first 3 metres. The rope and anchors are of unknown vintage.
Modelling by Gwenllian, lighting by Tarquin and Gwenllian
Aven in Eldon Room. Amazingly, this climb has a knotted handline, despite having absolutely no holds whatsoever, and not even any walls to touch for the first 3 metres. The rope and anchors are of unknown vintage.
Modelling by Gwenllian, lighting by Tarquin and Gwenllian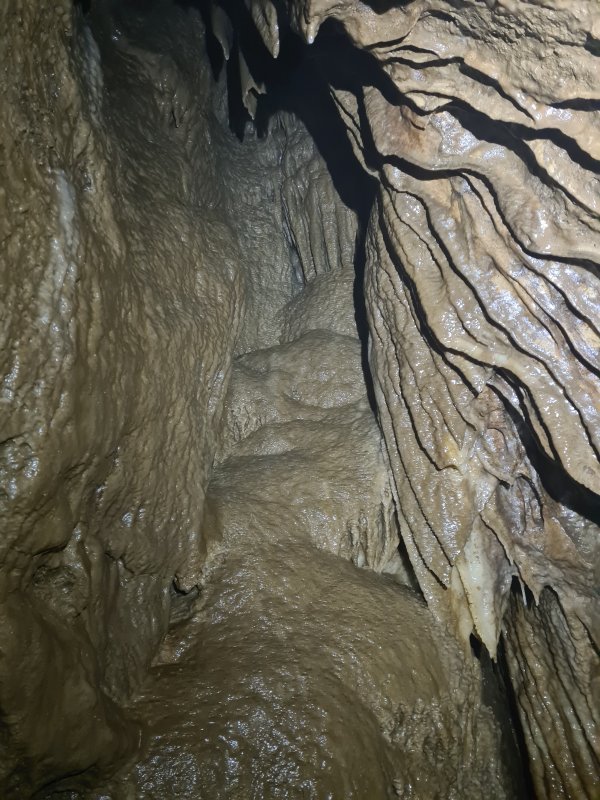 Flowstone in the passage leading to High Noon.
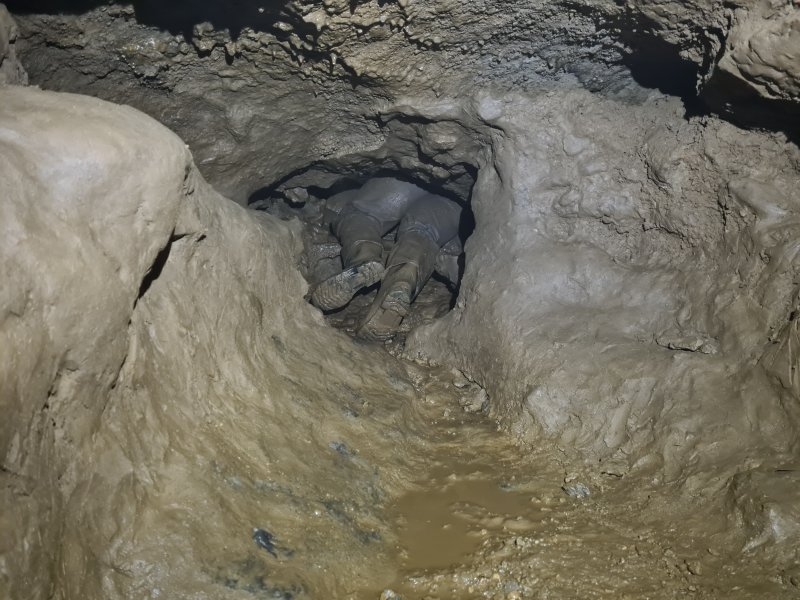 The passage towards High Noon, which leads off up a slope to the side of Eldon Room, soon becomes fairly small, and we assumed it was not a way on. We were wrong, and there are quite a few chambers along its route. However, the passage only heads back towards known cave, though at a higher level.
Modelling by Jack
The passage towards High Noon, which leads off up a slope to the side of Eldon Room, soon becomes fairly small, and we assumed it was not a way on. We were wrong, and there are quite a few chambers along its route. However, the passage only heads back towards known cave, though at a higher level.
Modelling by Jack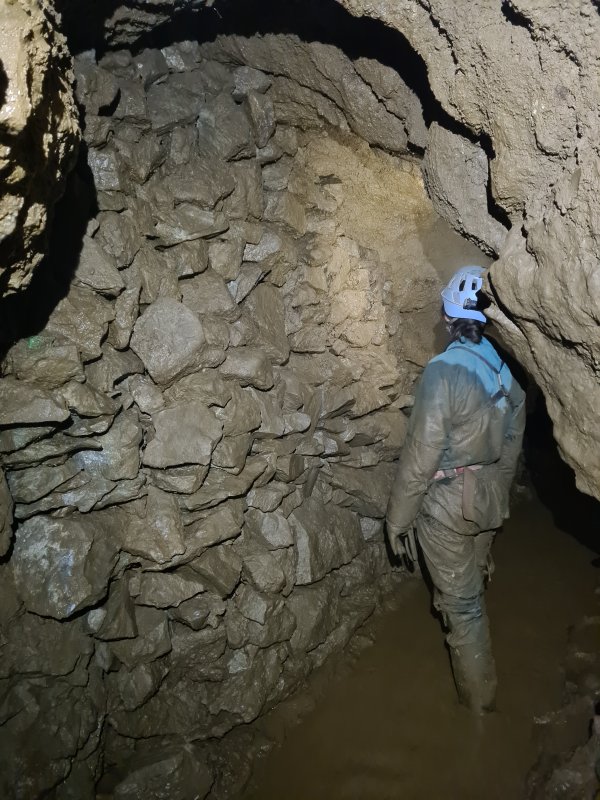 The major passage leading off from Eldon Room has an incredible amount of digging spoil walled up like deads. This is the most promising dry lead in the cave, as it heads away from all other known cave, and aims towards P7 and the the other P code numbered caves.
Modelling by Gwenllian, lighting by Tarquin and Gwenllian
The major passage leading off from Eldon Room has an incredible amount of digging spoil walled up like deads. This is the most promising dry lead in the cave, as it heads away from all other known cave, and aims towards P7 and the the other P code numbered caves.
Modelling by Gwenllian, lighting by Tarquin and Gwenllian It splits into avens, one of which had a ladder, so up we went.
Modelling by Gwenllian and Jack, lighting by Tarquin, Gwenllian and Jack
It splits into avens, one of which had a ladder, so up we went.
Modelling by Gwenllian and Jack, lighting by Tarquin, Gwenllian and Jack After an alarm call from Jack, it turned out he had mistaken the pile of sand bags for a dead body. An easy mistake to make. The passage beyond offered a choice of pits which had been dug. The whole of this area was full of thick water vapour, and there is clearly very little air flow.
Modelling by Gwenllian, lighting by Tarquin and Gwenllian
After an alarm call from Jack, it turned out he had mistaken the pile of sand bags for a dead body. An easy mistake to make. The passage beyond offered a choice of pits which had been dug. The whole of this area was full of thick water vapour, and there is clearly very little air flow.
Modelling by Gwenllian, lighting by Tarquin and Gwenllian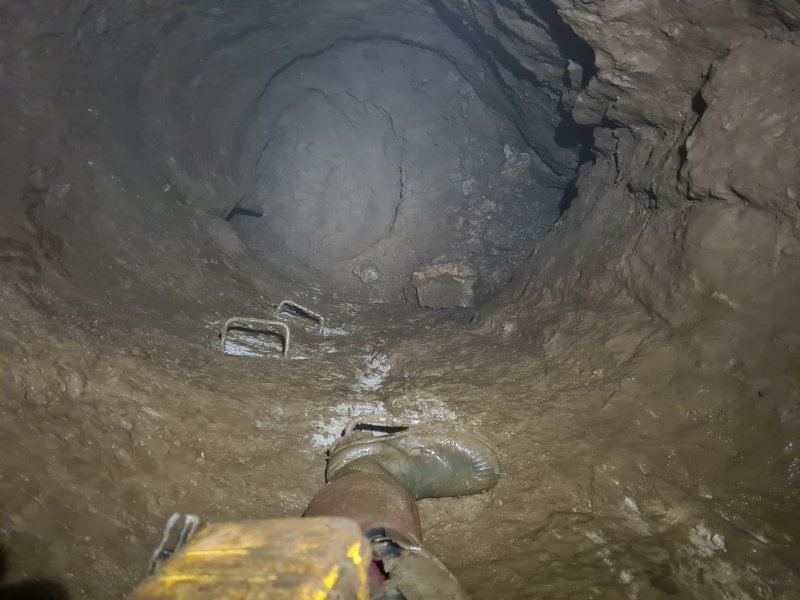 The second pit had a set of rebar stemples, but they were oddly placed, and descending it was not fun. There is no way on at the bottom.
Modelling by Tarquin's left leg
The second pit had a set of rebar stemples, but they were oddly placed, and descending it was not fun. There is no way on at the bottom.
Modelling by Tarquin's left leg A crawl beside the sand bags entered an aven, with a handline allowing the tricky climb up to be done with the pretence of safety. Without holds, climbing involves wedging between the walls.
Modelling by Tarquin's right leg and a cloud of fog
A crawl beside the sand bags entered an aven, with a handline allowing the tricky climb up to be done with the pretence of safety. Without holds, climbing involves wedging between the walls.
Modelling by Tarquin's right leg and a cloud of fog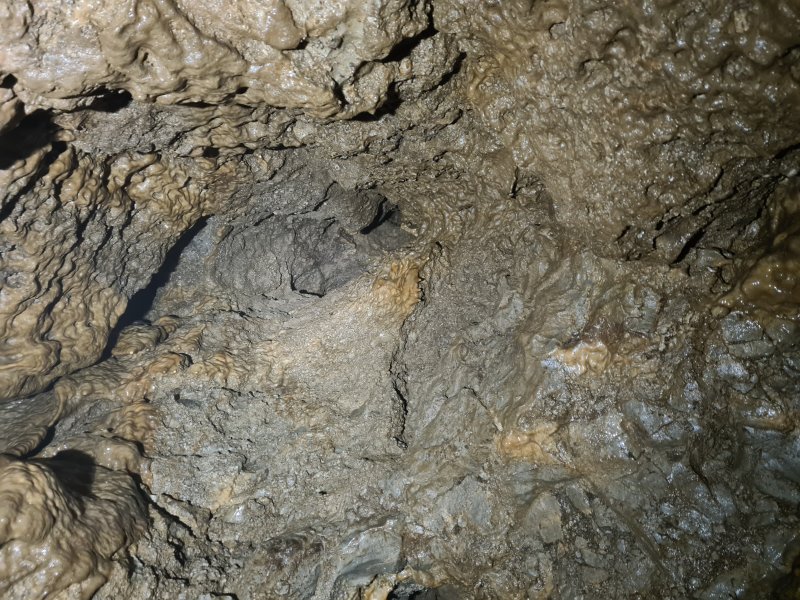 The aven splits in two, with one side ending abruptly.
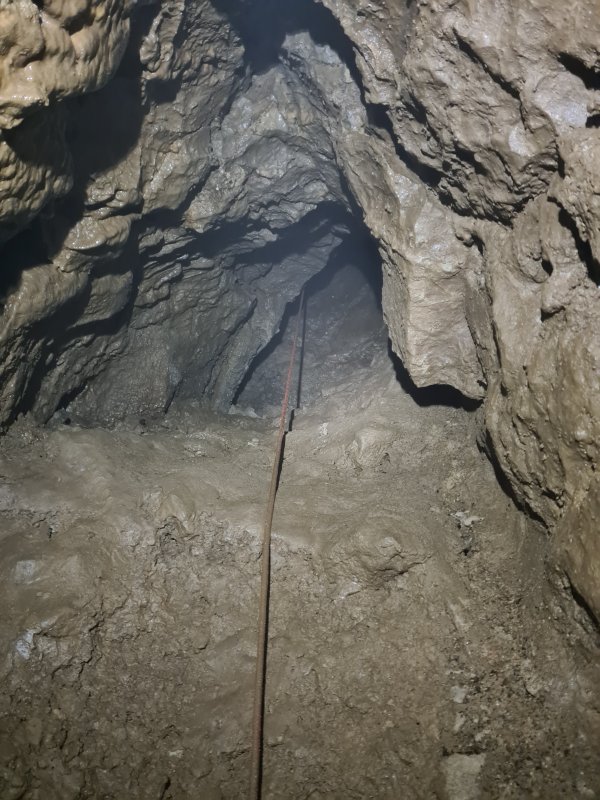 The other branch continues upwards, but now as an SRT rope of unknown vintage. This was best left alone, so I retreated back to safer ground, and left this area for the diggers. They have moved vast amounts of spoil while digging this area, and no doubt there is more cave waiting to be found here.
 Walking through the meadows at Hobroyd Farm towards Whiteley Nab, at Glossop. A great way to round off a day of caving.
Modelling by Gwenllian
Walking through the meadows at Hobroyd Farm towards Whiteley Nab, at Glossop. A great way to round off a day of caving.
Modelling by Gwenllian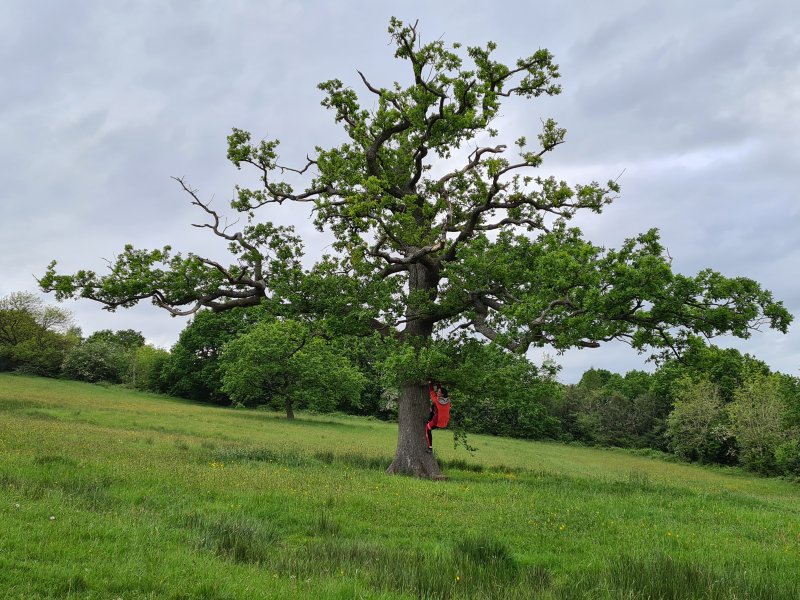 Solitary oak tree near Hobroyd Farm.
Modelling by Gwenllian
Solitary oak tree near Hobroyd Farm.
Modelling by Gwenllian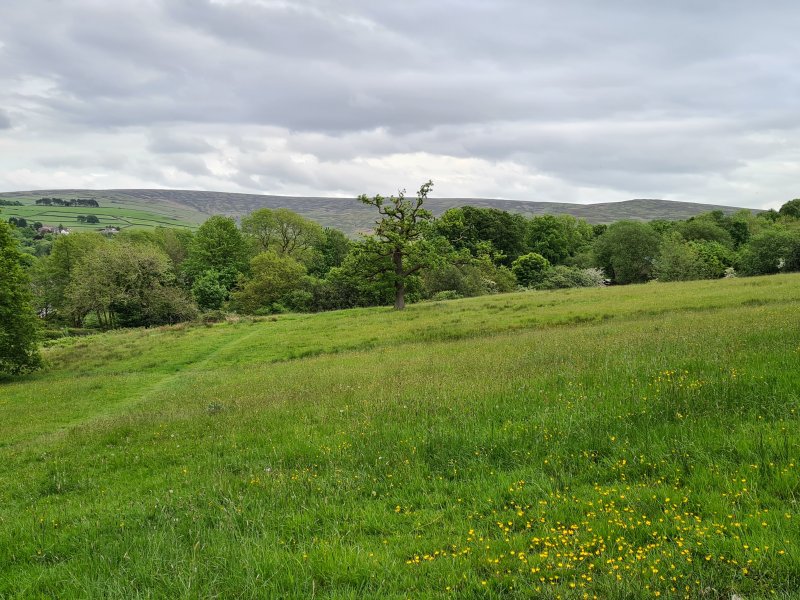 Oak trees in front of Mill Hill (544 metres) and its Chunal Moor ridge.
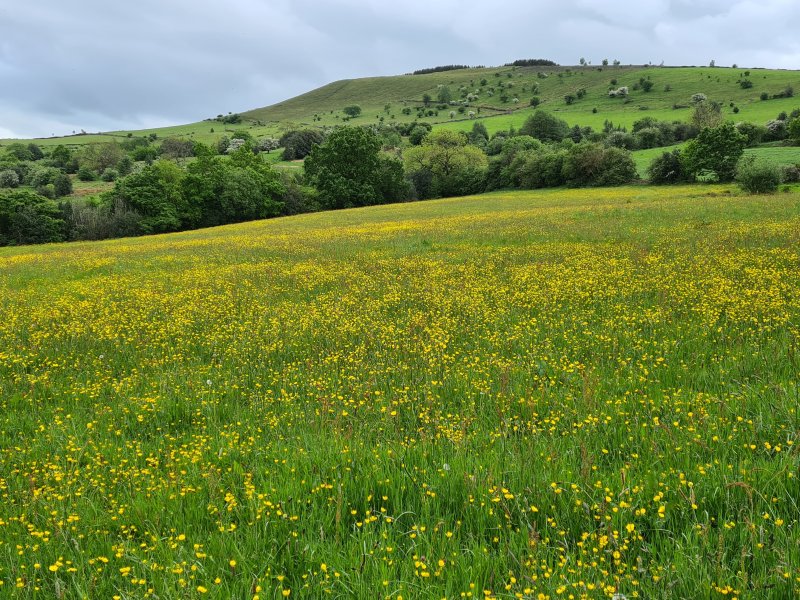 Meadows and Whiteley Nab.
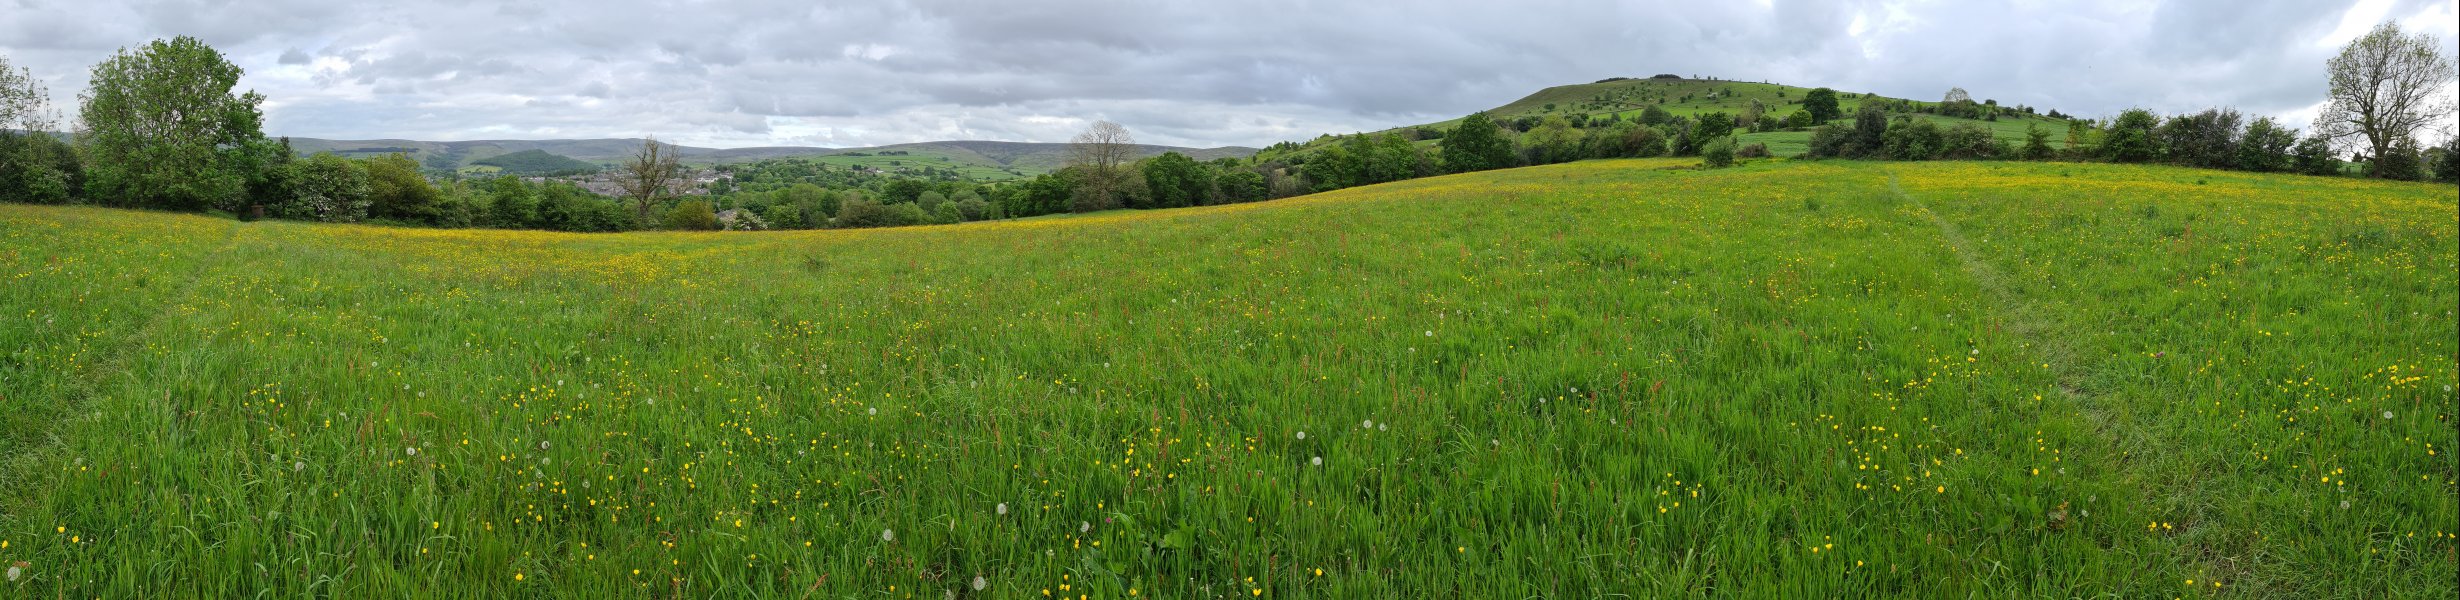 Meadows in front of Bleaklow (633 metres), Mill Hill and Whiteley Nab.
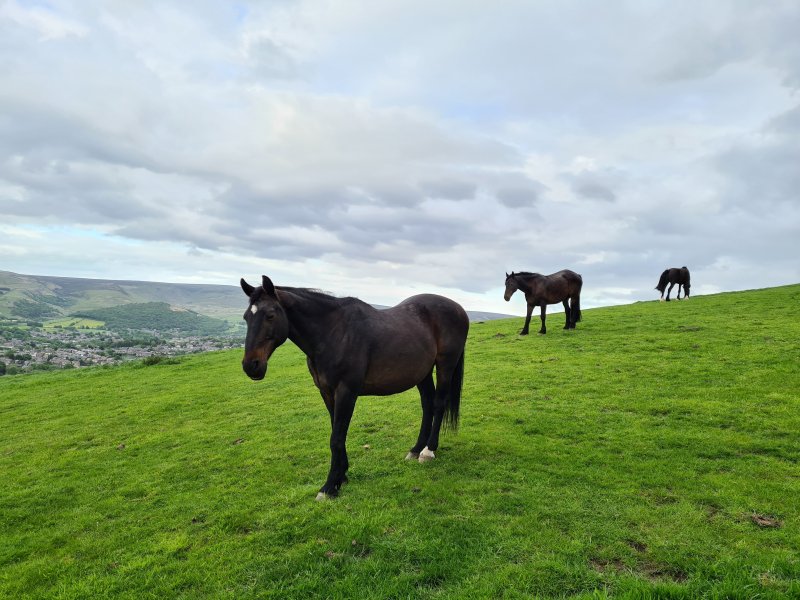 Horses, looking almost photoshopped.
Modelling by the Sanderson sisters
Horses, looking almost photoshopped.
Modelling by the Sanderson sisters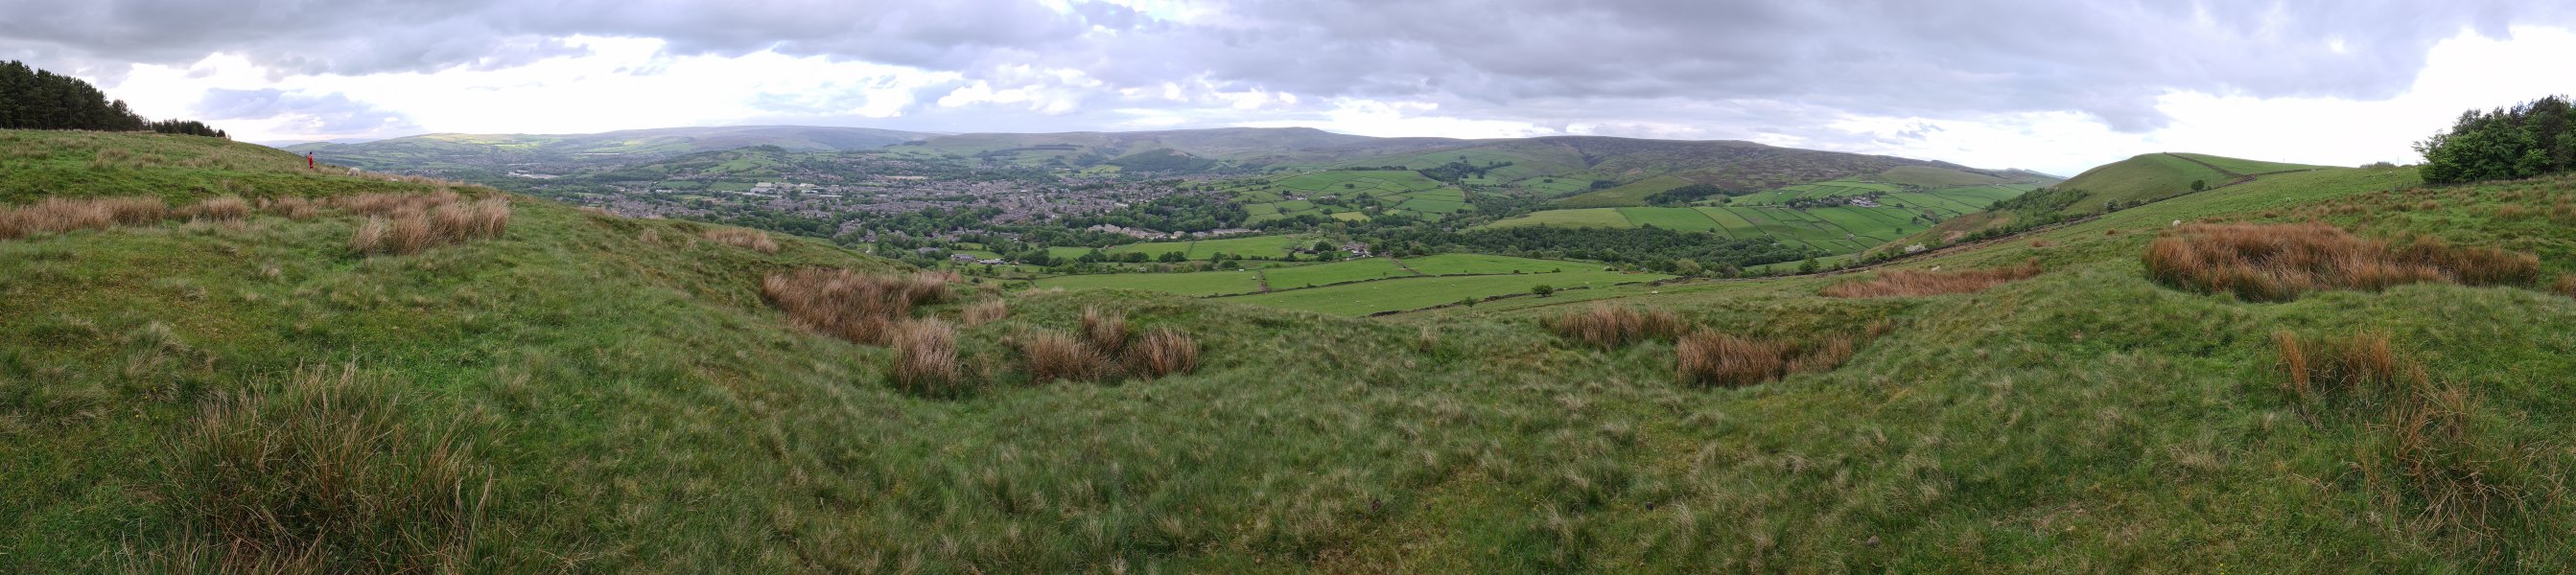 Superb view over Glossop from Whiteley Nab. On the distant left are the West Penine Moors (max 456 metres). Then Wild Bank Hill (399 metres), a long ridge topping out at Black Hill (582 metres), Bleaklow, Mill Hill and Kinder Scout (636 metres) behind it, South Head (494 metres), Mount Famine (473 metres) and an unnamed 384 metre hill. All of the tallest mountains in the Peak District are visible from here, though Kinder Scout's main summit is obscured.
Modelling by Gwenllian and some white dots
Superb view over Glossop from Whiteley Nab. On the distant left are the West Penine Moors (max 456 metres). Then Wild Bank Hill (399 metres), a long ridge topping out at Black Hill (582 metres), Bleaklow, Mill Hill and Kinder Scout (636 metres) behind it, South Head (494 metres), Mount Famine (473 metres) and an unnamed 384 metre hill. All of the tallest mountains in the Peak District are visible from here, though Kinder Scout's main summit is obscured.
Modelling by Gwenllian and some white dots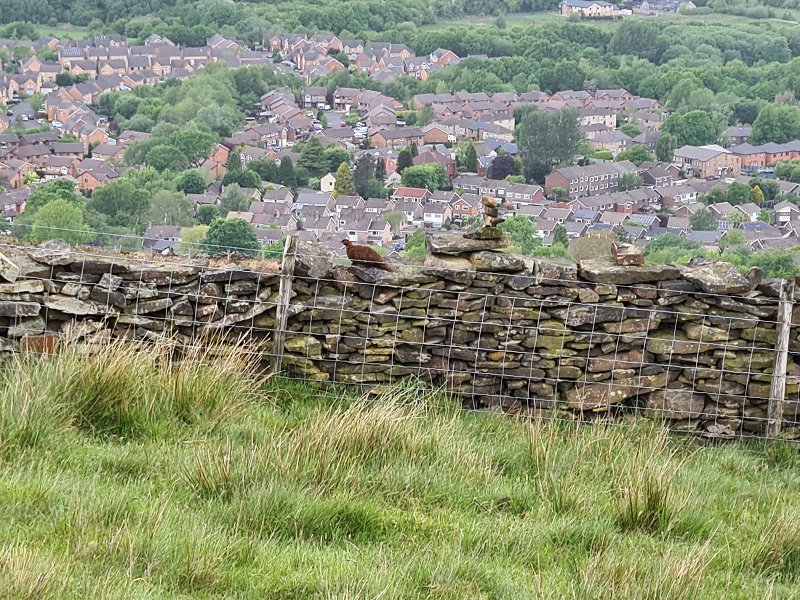 Grouse trying to pretend it is part of the wall. It failed.
Modelling by a funny-shaped rock
Grouse trying to pretend it is part of the wall. It failed.
Modelling by a funny-shaped rock Descending Horse Clough (that's a northern word for a steep-sided valley, gorge or canyon, in case you were wondering), a wonderfully wooded area festooned in flowering rowan trees, birch, heather, whimberries/bilberries and club rushes.
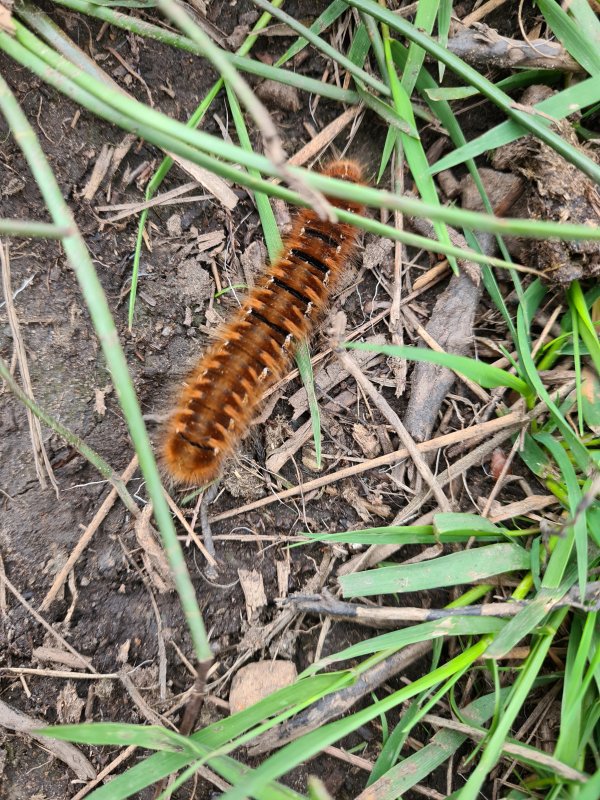 Oak eggar caterpillar, a very impressive caterpillar that turns into a very mundane moth.
Modelling by Muttonchops
Oak eggar caterpillar, a very impressive caterpillar that turns into a very mundane moth.
Modelling by Muttonchops Lambs at the stile.
Modelling by two white dots
Lambs at the stile.
Modelling by two white dots Birch grove in Horse Clough.
Modelling by Gwenllian
Birch grove in Horse Clough.
Modelling by Gwenllian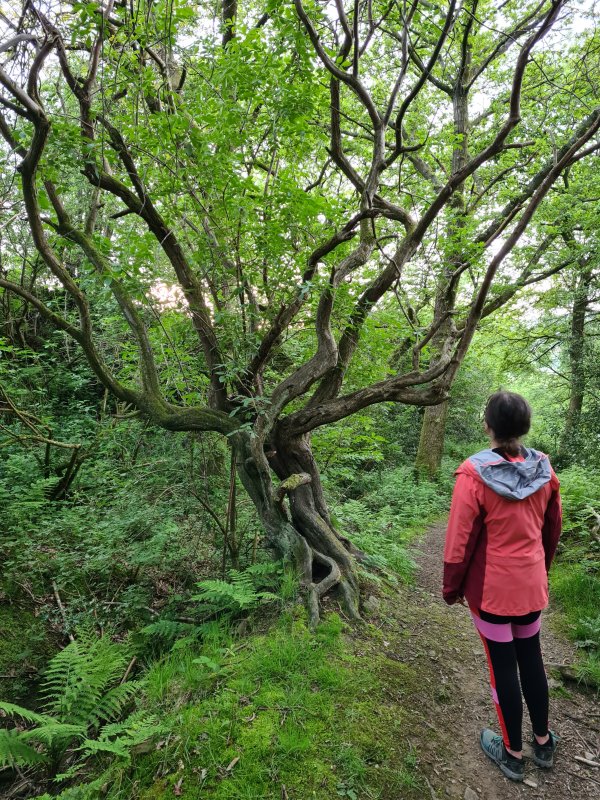 Tree that really looks like a character from a film. It appears to be an ash.
Modelling by Gwenllian
Tree that really looks like a character from a film. It appears to be an ash.
Modelling by Gwenllian A tiny planthopper nymph, wearing what appears to be a dinner jacket.
Modelling by Martin and Tarquin's finger
A tiny planthopper nymph, wearing what appears to be a dinner jacket.
Modelling by Martin and Tarquin's finger Tiny male money spider, probably a Lepthyphantes tenuis, with just a 12 mm leg span.
Modelling by Bert and Tarquin's hand
Tiny male money spider, probably a Lepthyphantes tenuis, with just a 12 mm leg span.
Modelling by Bert and Tarquin's hand