Llywernog Silver-Lead Mine trip 14/05/2021 to 16/05/2021
Unless otherwise stated, camera, setups, lighting, edits and gallery effects by Tarquin. Modelling and lighting at various points will be Gary Mitchell, Kevin Munn and Simon Pickard.
In spite of its name, the mine was really a lead mine, and only a tiny amount of silver was found by accident - the real Silver Mountain was a different area nearby, but silver sells tickets. The entire site is run as a visitor attraction called The Silver Mountain Experience, and despite having only a relatively small amount of actual mine open to the public, the rest of the site has a superb amount of mining heritage on display, and plenty of other entertainment. As well as a very well stocked museum, and plenty of beautifully preserved in-situ industrial machinery, parts of the site are set up with less authentic entertainment; a haunted house, panning for gold, and regularly redesigned escape rooms. An impressively well stocked setup considering the location.
Our visit was just after the end of a lockdown, at a time when the site was gearing up to reopen. We were given nearly full access to the site, both the tourist parts, and behind the scenes. Since the site was not actually open, the electronic parts and staffed parts (escape rooms, haunted house, video rooms) were not running.
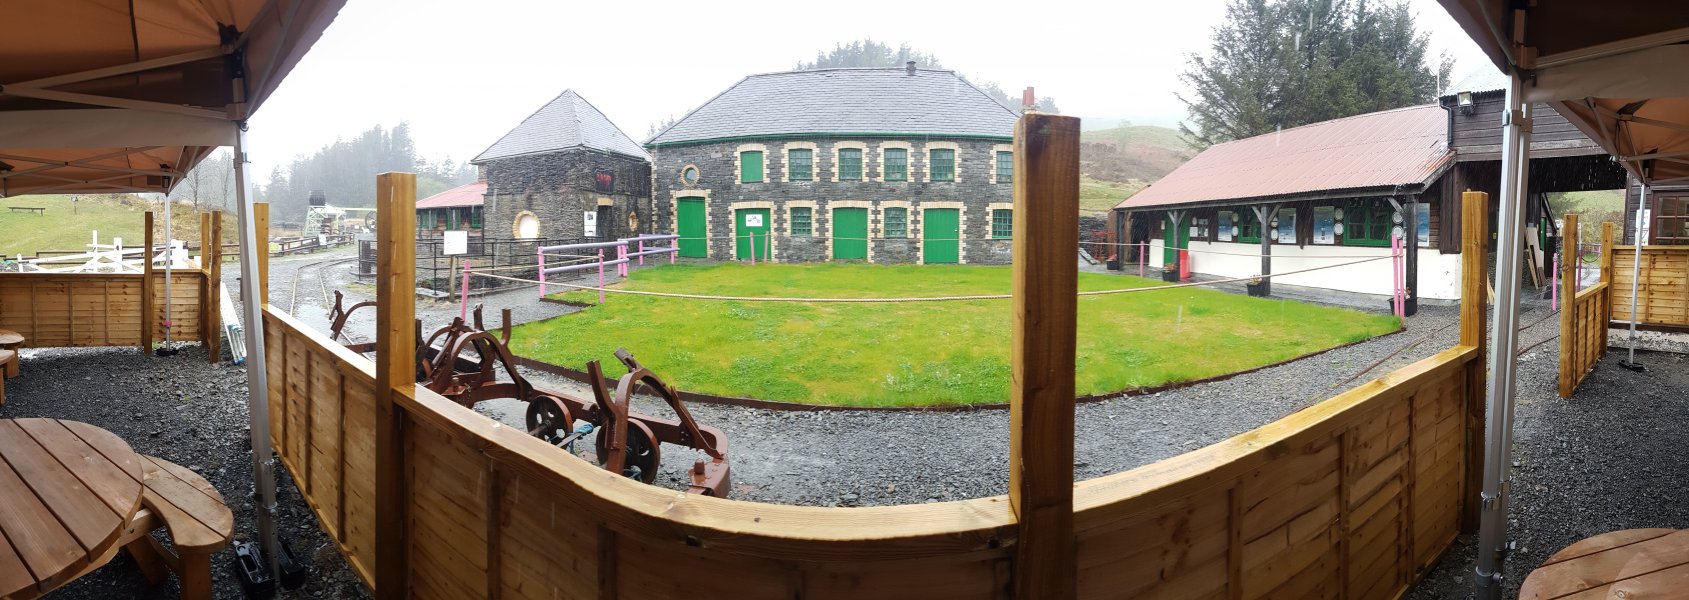
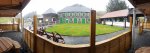 The main buildings of the mine. On the left is the pointy roofed rock crusher building. To the right of that, between the roofed buildings, is the main water wheel pit. The larger roofed building is the smithy and office buildings. To the right of that is a storage shed (now a museum), linked by a bridge to the reception and canteen. The weather, meanwhile, is doing what Mid Wales does well, and raining heavily.
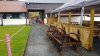 The site has a very cool looking railway, with some points and junctions, and the remains of some mining trucks. This all looks very cool, but is not original. It was put here by the former owner, who had hoped to turn it into an attraction. It is not really good enough to actually use - a shame, because it would be a lot of fun to have a working railway on site.
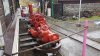 A steam engine? Not really. It is another piece of heritage that might at some point be assembled into a working something, just like the belt pulley in the background.
 Non-functioning turntable leading into the engine shed ahead, or the Old Adit to the right.
 The entire site in one picture. Brace yourself. On the left are the remains of a mining shed that may at some point be reconstructed. On the distant left is the old mine office, with the powder store and reservoir beside it, and Whim Shaft hiding next to it. Next are two water wheels, the lower of which is the buddle wheel. In the foreground are a sand pit and modern water barrel, neither of which are authentic. Behind that is the spoil tip, with a large whater wheel pit in the forest behind it. The building to the right of the forest is the video room, whose old purpose seems to have been the dressing floor. Behind it are Hanson's Shaft and Morris's Shaft. In front of that is the Jigger shed and its water wheel. Next to that are the buildings from the previous picture, with the old adit behind them and a smaller water wheel in front of them. On the right are the escape rooms, which to my knowledge are not an authentic piece of mining heritage. In the background is Mynydd Ponterwyd (391 metres). I will now try to walk through the site in a logical order, to show the progress of the products.
 Let's get that small water wheel out of the way; it is an undershot wheel, and while it looks interesting, it does not appear to be an authentic part of the mining site, as it would have been very much underpowered for the work going on on site. However, it does have a neat little channel and sluce to control it.
 The old office, from the 1700s, the early days of the mine.
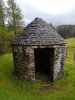 Cornish stule explosives store, dating from the 1820s. The doorway faces away from the rest of the site.
 The roof is also relatively weak, so if there were to be an accidental explosion, the force would be directed upwards and away from the rest of the site.
 The older mine on the site, called Old Adit, is accessed through a tunnel behind the engine shed. Remember that the railway is a modern addition, not authentic.
 The Old Adit is fairly well constructed, and is lit as a show mine. It is dug as a cross cut; perpendicular to the veins, to see whether it might intersect one or more veins.
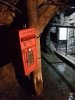 A post box gimmick. Send your postcards from underground, and they will be delivered.
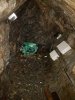 Apparently, we have stumbled on a dragon's lair, which is where the modern railway ends. The eerily animal sounds here turned out to be the cooling fans for some of the lights.
Modelling by Toothless
Apparently, we have stumbled on a dragon's lair, which is where the modern railway ends. The eerily animal sounds here turned out to be the cooling fans for some of the lights.
Modelling by Toothless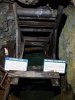 The 1872 "Prospect Winze", a hand dug shaft that was sunk to see if it would be worth digging a full shaft here into the main lode. The hand cranked pulley is for hauling buckets of ore up, and for turning a loop of rags which were used to soak up water and drain the shaft. The other sign mentions "The Knockers", which refers to the cracking sound that can be heard when a timber is about to break before a collapse, supposedly created by fairies tapping on things. Elsewhere, this was called the "whisper of god". Either way, it was a good sign to get out. Now.
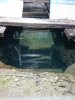 The shaft was not a success, and is very shallow.
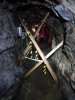 Because of Covid, the final part of the passage is closed off, since there is not enough space for people to pass each other while maintaining a good distance, and there is no ventillation. We were allowed to see the far end.
Modelling by Kevin and Gary
Because of Covid, the final part of the passage is closed off, since there is not enough space for people to pass each other while maintaining a good distance, and there is no ventillation. We were allowed to see the far end.
Modelling by Kevin and Gary A fairly similar passage. But without the show mine lighting, it did at least feel like we were not just tourists.
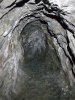 The tourists are really not missing much.
 Beside the postbox is the emergency exit; a ventilation shaft with a ladder.
Modelling by Kevin
Beside the postbox is the emergency exit; a ventilation shaft with a ladder.
Modelling by Kevin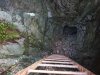 The top of the ladder.
 At the top of the ladder is this decking, which had just been installed.
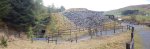 The main show mine tour starts at the larger mine, at the Whim Shaft, behind the tip. Incidentally, that water wheel seems to serve no purpose, and it might be non-authentic. However, water wheels were used all over the site, so perhaps it did serve a purpose.
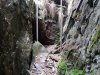 Whim Shaft has been filled, but dropped down one more level.
 The open passage from Whim Shaft was a level, and sits on the smaller lode.
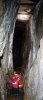 This portion of the level has been modified for the show mine. Originally, it had been stoped all the way out to surface, but the stope has been capped to turn it back into a passage. The plywood boards are a form but the actual cap is the concrete that was poured above them. This was one of the smallest stopes of the mine, at just 12 metres (7 fathoms). Just.
Modelling by Kevin, lighting by Tarquin and Kevin
This portion of the level has been modified for the show mine. Originally, it had been stoped all the way out to surface, but the stope has been capped to turn it back into a passage. The plywood boards are a form but the actual cap is the concrete that was poured above them. This was one of the smallest stopes of the mine, at just 12 metres (7 fathoms). Just.
Modelling by Kevin, lighting by Tarquin and Kevin Female Metellina merianae, the much less common species of cave spider, but apparently fairly common up here, as they were in a few of the mines. They can be distinguished by the wide black stripe and twin pairs of radial lines on the carapace (back), as well as banded legs with black and fairly bright bands. A Meta menardi/bournetti will have a much narrower and less obvious single stripe, without the radial lines, and is normally a darker spider overall, with black and brown/red banded legs. Metellina merianae are a little smaller than Meta menardi/bournetti, but are still an impressively large spider for the UK.
Modelling by Charlotte
Female Metellina merianae, the much less common species of cave spider, but apparently fairly common up here, as they were in a few of the mines. They can be distinguished by the wide black stripe and twin pairs of radial lines on the carapace (back), as well as banded legs with black and fairly bright bands. A Meta menardi/bournetti will have a much narrower and less obvious single stripe, without the radial lines, and is normally a darker spider overall, with black and brown/red banded legs. Metellina merianae are a little smaller than Meta menardi/bournetti, but are still an impressively large spider for the UK.
Modelling by Charlotte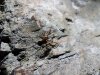 The male (or juvenile) Metellina merianae has similar colours, but the opisthosoma (abdomen) almost looks shrivelled and wrinkly, like a raisin. The palps (reproductive organs on the shorter front pair of legs, that look like boxing gloves) are clearly visible on adult males when they are walking.
Modelling by Greg
The male (or juvenile) Metellina merianae has similar colours, but the opisthosoma (abdomen) almost looks shrivelled and wrinkly, like a raisin. The palps (reproductive organs on the shorter front pair of legs, that look like boxing gloves) are clearly visible on adult males when they are walking.
Modelling by Greg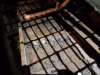 Ore chute below the walkway.
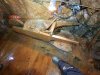 Tiny wheelbarrow. They had a couple of these, and they really look like a child's toy, but apparently they were actually used to transport the heavy ore through awkward passageways. Maybe it was too heavy to carry, but this really seems quite unproductively small.
Modelling by the toes of Tarquin and Simon
Tiny wheelbarrow. They had a couple of these, and they really look like a child's toy, but apparently they were actually used to transport the heavy ore through awkward passageways. Maybe it was too heavy to carry, but this really seems quite unproductively small.
Modelling by the toes of Tarquin and Simon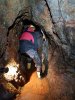 Low ceiling. This is the first time you can see the original passage shape of the level.
Modelling by Gary, lighting by Tarquin and Gary
Low ceiling. This is the first time you can see the original passage shape of the level.
Modelling by Gary, lighting by Tarquin and Gary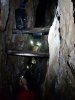 The next part of the stoping sits directly under the tip, and appears to be original, but there is at least part of it that has been capped. Once again, it looks tall from here, but is dwarfed by the stopes elsewhere.
Modelling by Gary, lighting by Tarquin and Gary
The next part of the stoping sits directly under the tip, and appears to be original, but there is at least part of it that has been capped. Once again, it looks tall from here, but is dwarfed by the stopes elsewhere.
Modelling by Gary, lighting by Tarquin and Gary After passing the main cross cut, the stoped level continues, but fenced off from the tourists. This makes it one of the few places that we could go that tourists couldn't. Visible here are a fragment of wood and iron ladder, and an iron drill rod. The drill rod was used like a chisel, dropped into a hole, where its own weight was used instead of a hammer. The hole was then packed with gunpowder for blasting.
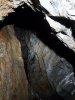 The stope continues, and now without the lights in my face, the top is visible and original.
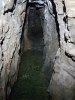 Traversing over a pool to the end of the level. The pool is definitely deeper than wellies.
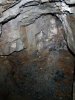 The level ends abruptly, and appears to be heading towards Morris's Shaft, but it does not actually line up with it.
 Nothing else to do but traverse back over the pool.
 The cross cut has a passage continuing into the side of Hanson's Shaft, where the mine operators have built a bridge over the shaft.
Modelling by Simon, Gary and Kevin, lighting by Tarquin, Gary and Kevin
The cross cut has a passage continuing into the side of Hanson's Shaft, where the mine operators have built a bridge over the shaft.
Modelling by Simon, Gary and Kevin, lighting by Tarquin, Gary and Kevin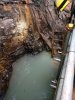 Hanson's Shaft is now flooded to the depth of the crosscut, but the bottom level is another 120 metres (65.5 fathoms) lower, and the shaft continued a little past that. This is some very deep water. Normally it would be clear. The mine operators would like to drain it and show off some of the levels below. There is some incredibly tall stoping further down, with a 61 metre tall stope topping out just below the water level, and 35 metre tall stoping just below that. That would have been an ... interesting ... ladder to climb...
Modelling by Gary, lighting by Tarquin, Gary and Kevin
Hanson's Shaft is now flooded to the depth of the crosscut, but the bottom level is another 120 metres (65.5 fathoms) lower, and the shaft continued a little past that. This is some very deep water. Normally it would be clear. The mine operators would like to drain it and show off some of the levels below. There is some incredibly tall stoping further down, with a 61 metre tall stope topping out just below the water level, and 35 metre tall stoping just below that. That would have been an ... interesting ... ladder to climb...
Modelling by Gary, lighting by Tarquin, Gary and Kevin Back when the mine was operating, this huge pipe was the main rise - the pump pipe that brought the water from the lower levels. The pump was a Cornish style pump, operated using a mechanical rod that pushed a series of plungers down and pulled them back up, pushing water through a series of valves, and lifting it up in stages, to the next pump, so that the pressure in each stage was not too high. One single mechanical rod did all the work for all the stages at once, so there was just a single pump for the whole mine.
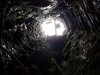 The dry part of Hanson's Shaft is 12 metres (6.5 fathoms), so the full shaft is over 132 metres deep.
 Perfect place to hold a phone out over the edge. It'll be fine.
 The crosscut is called Rothschild's Adit, and carries the mine's water along a channel under the floor. This would have originally carried the pumped water too. The tunnel is uncomfortably short, since it was not used for regular work; it was a drainage adit.
 The adit ends at a junction.
 The water drains into the lowest available water channel; the bottom of the main water wheel's pit.
 Above the junction is another ventilation shaft, which is capped. It seems to sit directly beneath one of the paths, and you do not notice it while walking there.
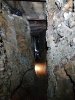 The other branch from the junction emerges beneath the floor of the smithy. What a strange place to have a mine entrance.
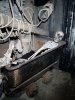 Mining remains in the smithy. Authentic, of course. Well at leat some of it is.
Modelling by Rhodri
Mining remains in the smithy. Authentic, of course. Well at leat some of it is.
Modelling by Rhodri Working through the maze of passageways in the smithy.
Modelling by Iwan
Working through the maze of passageways in the smithy.
Modelling by Iwan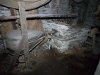 Forge in the smithy, with a load of authentic tools. There would, presumably, have been some mechanical assistance here for the bellows, but these appear to be manual. Perhaps there was originally a power coupling from the water wheel.
 After an accident in the smithy.
Modelling by Dafydd and parts of Geraint
After an accident in the smithy.
Modelling by Dafydd and parts of Geraint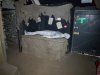 He doesn't look too well.
Modelling by Iolo
He doesn't look too well.
Modelling by Iolo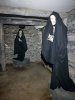 Dementors.
Modelling by Colin and Lord Beergarden
Dementors.
Modelling by Colin and Lord Beergarden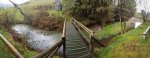 A clay-lined reservoir called a contour leat. This would have supplied most of the water wheels on the site, but another one would have to be higher up for the first wheel.
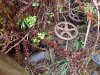 The taps used to control water outflow through the pipes from the reservoir.
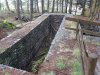 The highest water wheel pit on the site, with a smaller pit beside it, possibly for the gears. This would have been a substantial wheel, and was used to raise ore from the mine.
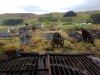 The top of Hanson's Shaft, where the ore would have been raised to. The gears seem to be unrelated, but might have once belonged to part of a water wheel. The rails and tipper trucks might be authentic, but also might not. The flat area to the right is the top of the tip. The nearest building was probably where the dressing floor was. The channel on the left is where the sweep rods for the water pump would have run from the lower water wheel, over a series of support wheels.
 The area at the top of the shafts. Hanson's Shaft is the grating. The capped air shaft is under the simulated scaffolding pit head on the right. The reservoir is on the distant right. On the left is Morris's Shaft. The mountain on the distant left is Pen y Garn (611 metres), the one opposite is Bryn Rhosau (397 metres), and the part with the windmills is Banc Bwa-drain (389 metres).
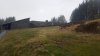 The probable site of the dressing floor; where the women and children would chip the unwanted rock off the ore, so the rest could be processed
 Morris's Shaft. The pit head is a recreation, but the shaft is original.
 Top of Morris's Shaft, with a winze and kibble (bucket for hauling rock).
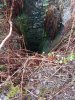 Morris's Shaft has collapsed at the bottom, and does not seem to have any connection to the main mine.
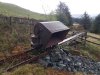 Tipper Truck at Morris's Shaft. This rail setup is not authentic, but the truck is real.
 Looking down into the main wheel pit, with the smithy on the left and the rock crusher on the right. The wheel would have been twice as tall as the pit, easily the tallest on the site, with its axel at the top of the pit. The rock crusher's power came from the same wheel, perhaps with gearing to set the speed. The ventilation shaft in Rothschild's Adit would be directly under the camera here.
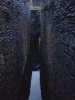 The bottom of the wheel pit, which has some fairly deep water. From here there is a sumped passage taking the water out to the nearby stream. In the water is one of the buckets from the wheel. The lit doorway at the end of the pit is the drain from Rothschild's Adit.
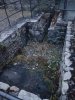 The wheel had a crank that pushed and pulled a rod backwards and forwards, to pump the water. At each end of the rod, there was a balance bob pit, like this one. The pit contained a weight on a lever, which equalled the load of the rods and valves, so that all of the effort of the wheel was used to raise the water, and none was used to raise the rods and valves themselves.
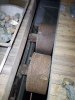 The rock crusher was a pair of wheels spinning very close to each other, with the rocks funnelled into the top. The width between them could be adjusted to set the size of the rock pieces, and the rock could be put back through a few times, with the size reduced each time.
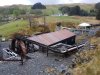 The water that came from upper water wheels was then channelled to this water wheel at the jigger shed.
 The wheel's rotation was then put through a series of gears and pulleys, to convert it into a fast shaking motion.
 The bigger jigger, with the pulleys and mechanics used to shake the trays inside. The crushed ore was put into these troughs, and shaken around in water, to cause the heavier lead to sink, and the waste rock to rise above the lead. The rock (skimpings) was discarded, the lead was extracted for refining, and anything in the middle (raggings) was put through the process again. Whatever ended up at the bottom (bed) of a shaking tray would be refined on a buddle instead.
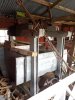 The smaller jigger. These were made in 1907. Before that - most of the mine's operation - this job was done manually by boys shaking the trays.
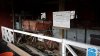 But that ... is not a jigger.
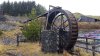 The bottom water wheel, which powered the buddle. The cogwheel which turned the gears of the buddle is clearly visible. The water came directly from the outflow of the wheel above.
 The remains of a buddle, where the lead ore was refined. The powdered ore was put at the top of a gentle slope of planks. Water was dribbled over it, and large rotating brushes made from heather gently brushed the planks. The heavier ore remained still near the top, while the lighter rock dust got washed to the edges. The refining process was now complete.
 Remains of a large shed that got accidentally burned after being brought here from another mine. There are also some gears and pulleys from the water wheels, and some more modern items.
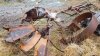 Remains of a windmill. This is not related to the mine.
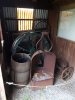 A small overshot water wheel, what appears to be a winch chair, and various other parts.
 A Pelton wheel, a relatively modern type of wheel used in hydroelectric turbines, where water is forced towards the scoops at high speed. This is much more efficient than traditional wheels which used low speed water and gravity over the height of the wheel alone. A Pelton wheel increases power based on how fast the water is moving rather than just how big the wheel is.
 A tiny Pelton wheel.
 Time for some museum pieces, starting with a series of shoes showing the types miners would have worn in these mines, which also shows what produces the different footprints that we see.
 Hobnail boot.
Modelling by Tarquin
Hobnail boot.
Modelling by Tarquin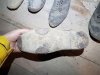 A clog-like sole with plates.
Modelling by Tarquin
A clog-like sole with plates.
Modelling by Tarquin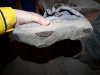 The bottom of these plated shoes was curved, so produces a very odd print.
Modelling by Tarquin
The bottom of these plated shoes was curved, so produces a very odd print.
Modelling by Tarquin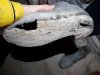 Shoe with a horseshoe heel.
Modelling by Tarquin
Shoe with a horseshoe heel.
Modelling by Tarquin Shoe for a miner who is down on his luck.
Modelling by Tarquin
Shoe for a miner who is down on his luck.
Modelling by Tarquin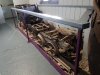 Mining trucks, with an early non-flanged wheel on the tracks to the right.
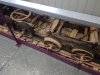 Tram trucks with two different types of wheel. The early trams had no flanges on the wheel at all, so the rails had a flange instead (known as a flangeway). Most trains, trams and trucks have the flange on the inside of the wheel (inboard), like the truck on the right. This aids turning corners because when the centre of balance shifts over the outer wheel of the curve and the slightly conical wheels are at their stability limit, the flange on the outer wheel holds the wheel onto the rail. The truck on the left has outer flanges, so if the inner wheel lifts slightly off the rail when turning corners, the flanges cannot help, and it derails. That is why this design is not used for railways. In addition, the way that a normal train wheel rides up its slight cone on a curve causes the outer wheel to have a larger radius than the inner wheel, which means that the grip is maintained for both wheels over the different lengths of the inner and outer sides of the curve - this is much harder to design with an outer flange. An outer flange requires a reversed design for points, and will derail at standard points.
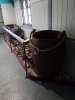 A well preserved kibble.
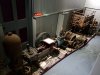 Small engine, winch and truck.
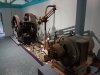 Pulleys and motor.
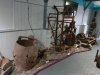 Kibble and mine shaft winch cage.
 Vertical ram pump.
 The main buildings of the mine. On the left is the pointy roofed rock crusher building. To the right of that, between the roofed buildings, is the main water wheel pit. The larger roofed building is the smithy and office buildings. To the right of that is a storage shed (now a museum), linked by a bridge to the reception and canteen. The weather, meanwhile, is doing what Mid Wales does well, and raining heavily.
 The site has a very cool looking railway, with some points and junctions, and the remains of some mining trucks. This all looks very cool, but is not original. It was put here by the former owner, who had hoped to turn it into an attraction. It is not really good enough to actually use - a shame, because it would be a lot of fun to have a working railway on site.
 A steam engine? Not really. It is another piece of heritage that might at some point be assembled into a working something, just like the belt pulley in the background.
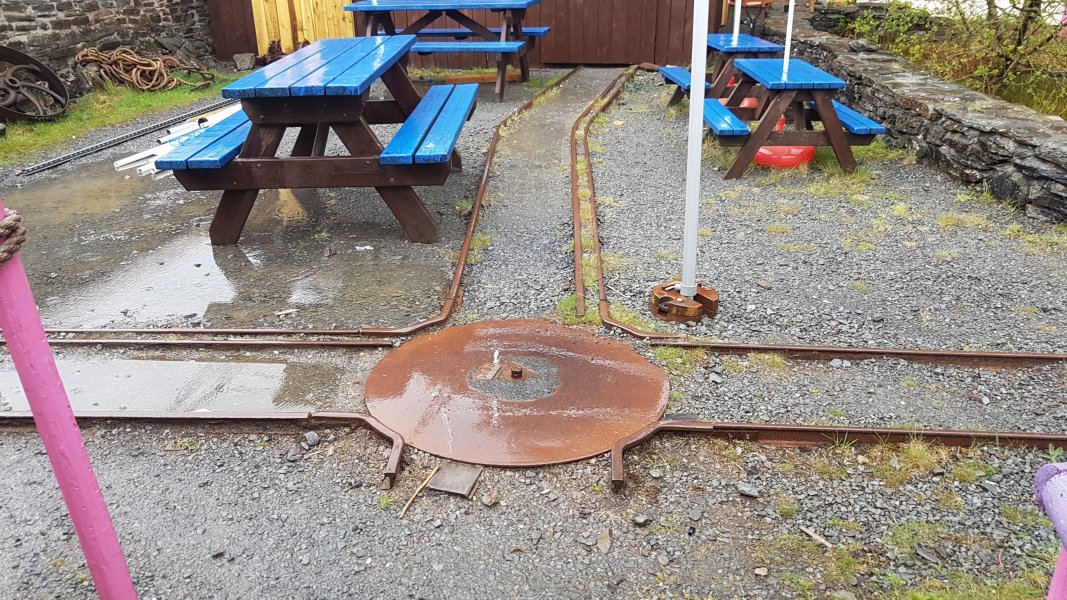 Non-functioning turntable leading into the engine shed ahead, or the Old Adit to the right.
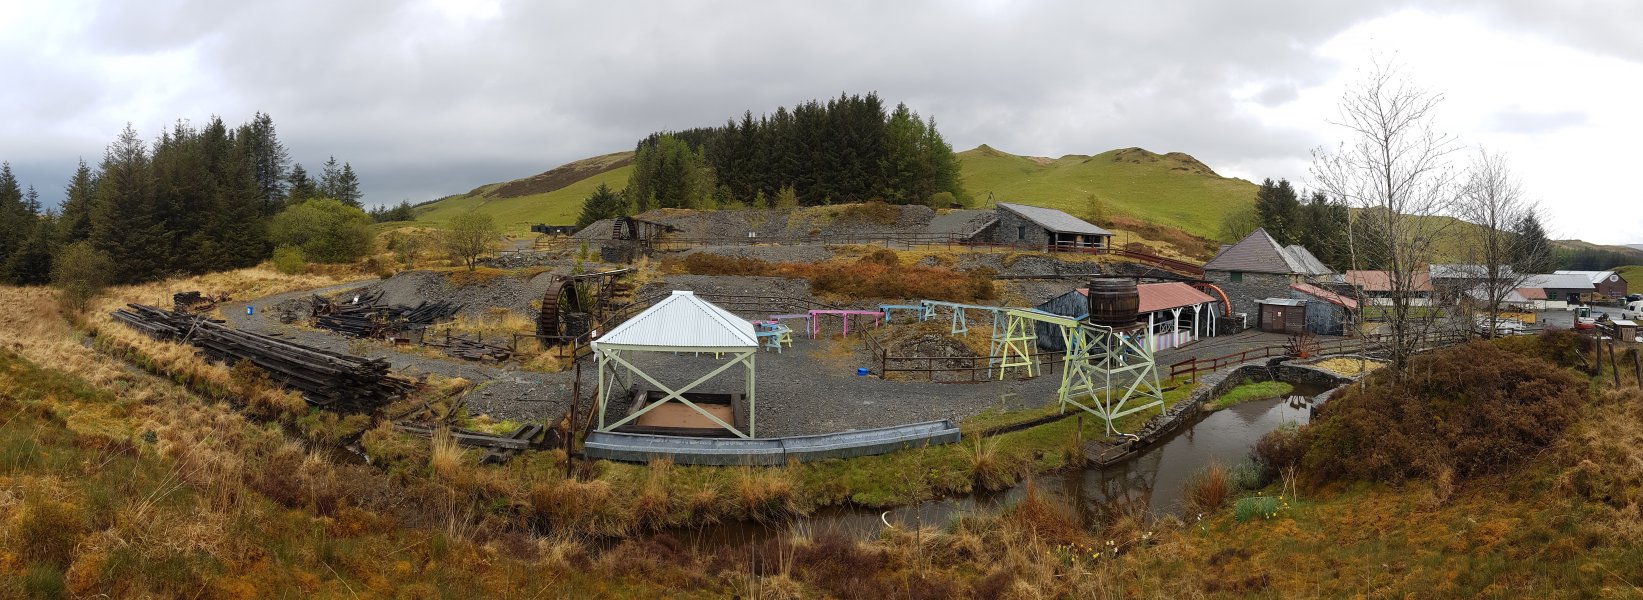 The entire site in one picture. Brace yourself. On the left are the remains of a mining shed that may at some point be reconstructed. On the distant left is the old mine office, with the powder store and reservoir beside it, and Whim Shaft hiding next to it. Next are two water wheels, the lower of which is the buddle wheel. In the foreground are a sand pit and modern water barrel, neither of which are authentic. Behind that is the spoil tip, with a large whater wheel pit in the forest behind it. The building to the right of the forest is the video room, whose old purpose seems to have been the dressing floor. Behind it are Hanson's Shaft and Morris's Shaft. In front of that is the Jigger shed and its water wheel. Next to that are the buildings from the previous picture, with the old adit behind them and a smaller water wheel in front of them. On the right are the escape rooms, which to my knowledge are not an authentic piece of mining heritage. In the background is Mynydd Ponterwyd (391 metres). I will now try to walk through the site in a logical order, to show the progress of the products.
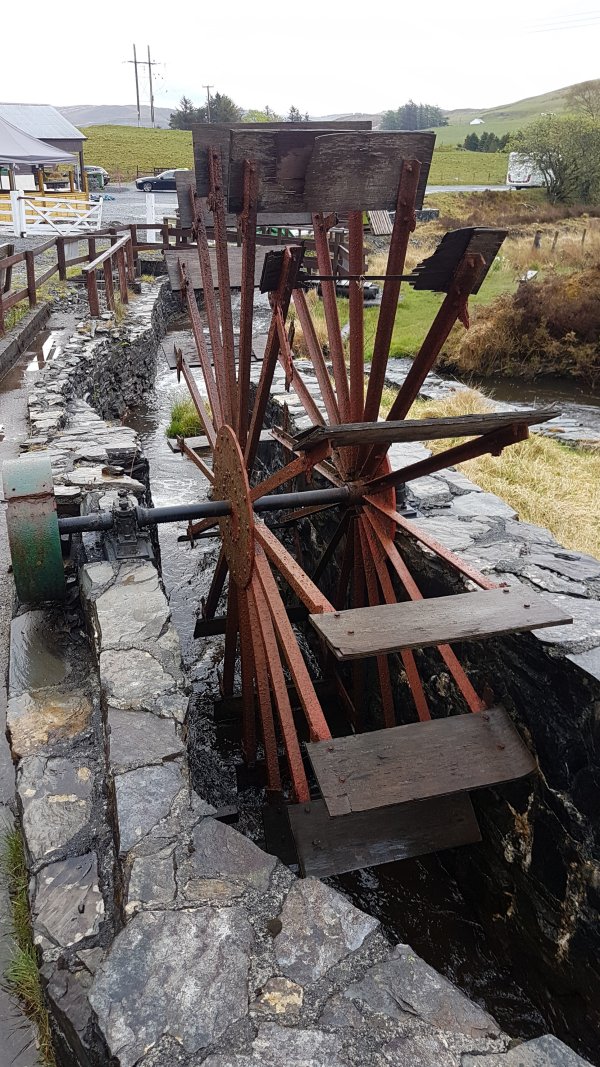 Let's get that small water wheel out of the way; it is an undershot wheel, and while it looks interesting, it does not appear to be an authentic part of the mining site, as it would have been very much underpowered for the work going on on site. However, it does have a neat little channel and sluce to control it.
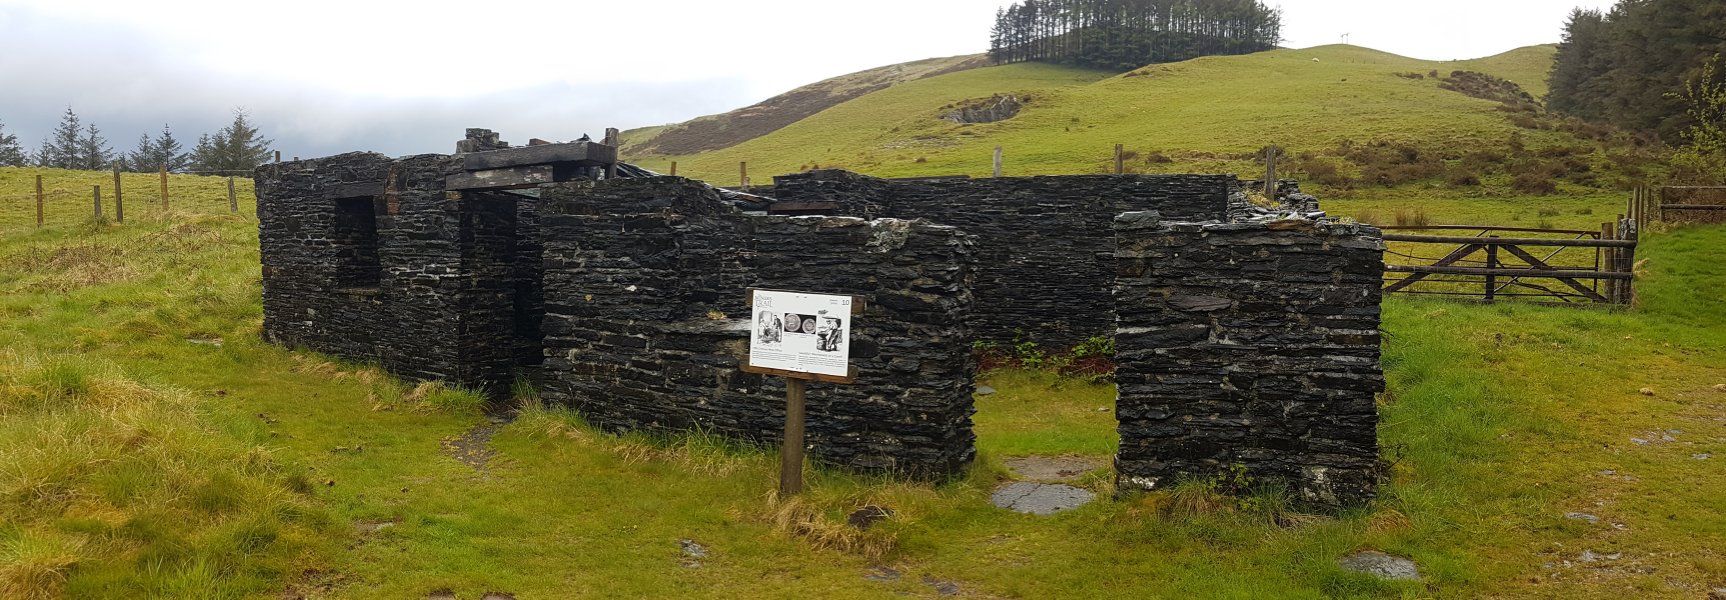 The old office, from the 1700s, the early days of the mine.
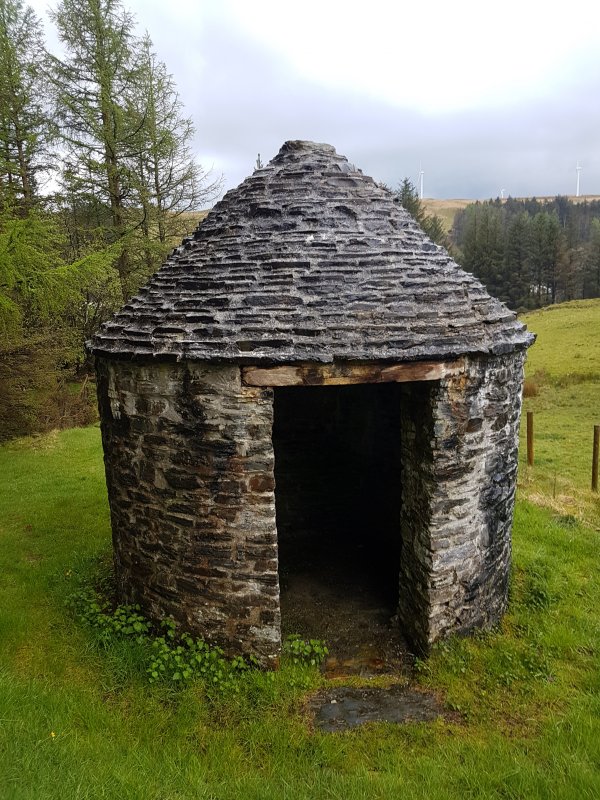 Cornish stule explosives store, dating from the 1820s. The doorway faces away from the rest of the site.
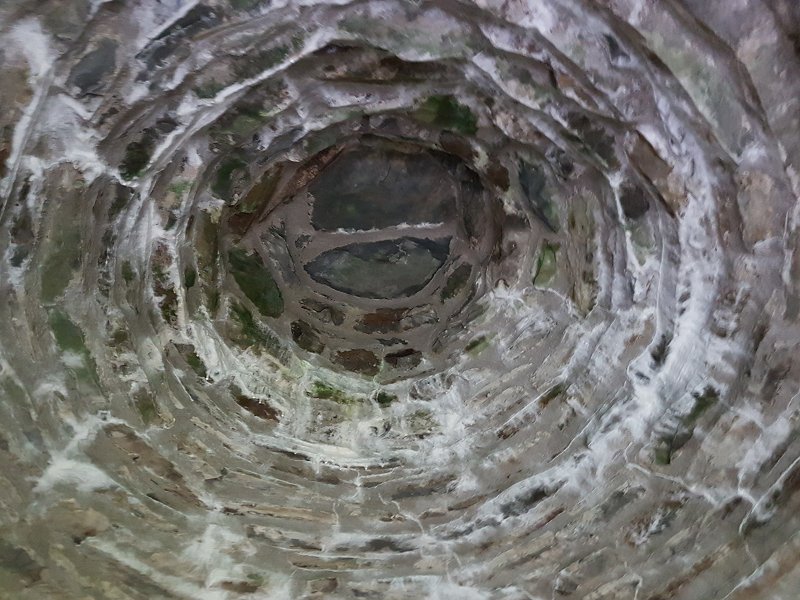 The roof is also relatively weak, so if there were to be an accidental explosion, the force would be directed upwards and away from the rest of the site.
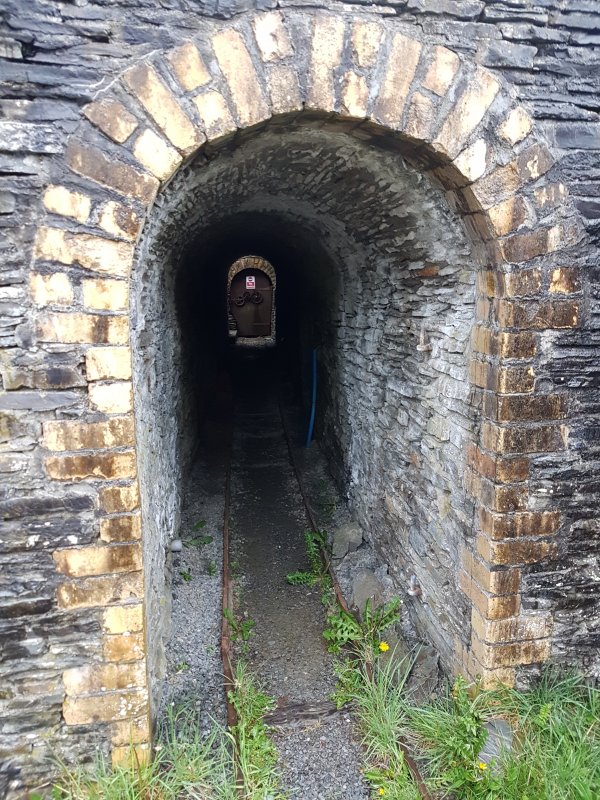 The older mine on the site, called Old Adit, is accessed through a tunnel behind the engine shed. Remember that the railway is a modern addition, not authentic.
 The Old Adit is fairly well constructed, and is lit as a show mine. It is dug as a cross cut; perpendicular to the veins, to see whether it might intersect one or more veins.
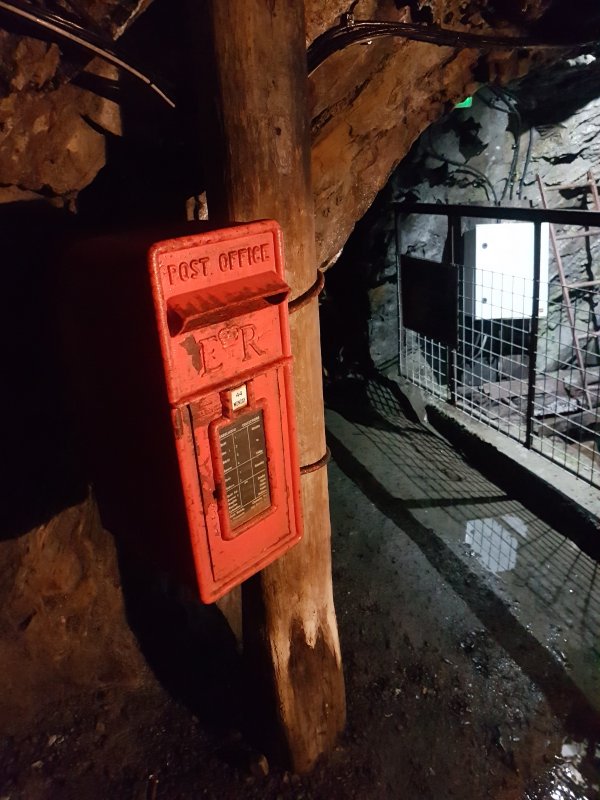 A post box gimmick. Send your postcards from underground, and they will be delivered.
 Apparently, we have stumbled on a dragon's lair, which is where the modern railway ends. The eerily animal sounds here turned out to be the cooling fans for some of the lights.
Modelling by Toothless
Apparently, we have stumbled on a dragon's lair, which is where the modern railway ends. The eerily animal sounds here turned out to be the cooling fans for some of the lights.
Modelling by Toothless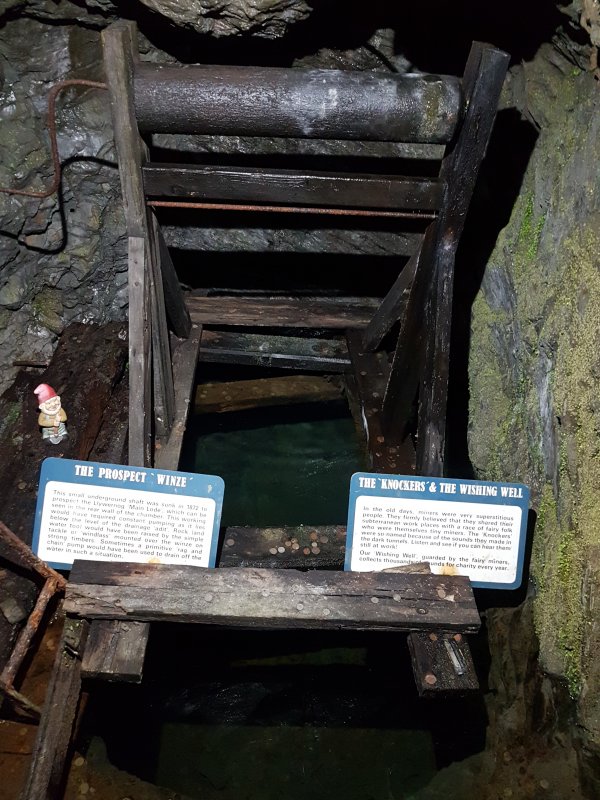 The 1872 "Prospect Winze", a hand dug shaft that was sunk to see if it would be worth digging a full shaft here into the main lode. The hand cranked pulley is for hauling buckets of ore up, and for turning a loop of rags which were used to soak up water and drain the shaft. The other sign mentions "The Knockers", which refers to the cracking sound that can be heard when a timber is about to break before a collapse, supposedly created by fairies tapping on things. Elsewhere, this was called the "whisper of god". Either way, it was a good sign to get out. Now.
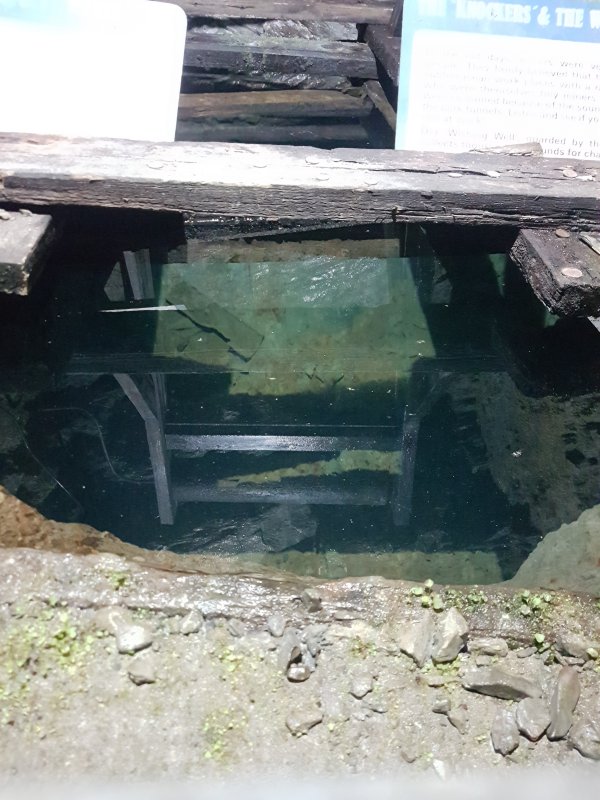 The shaft was not a success, and is very shallow.
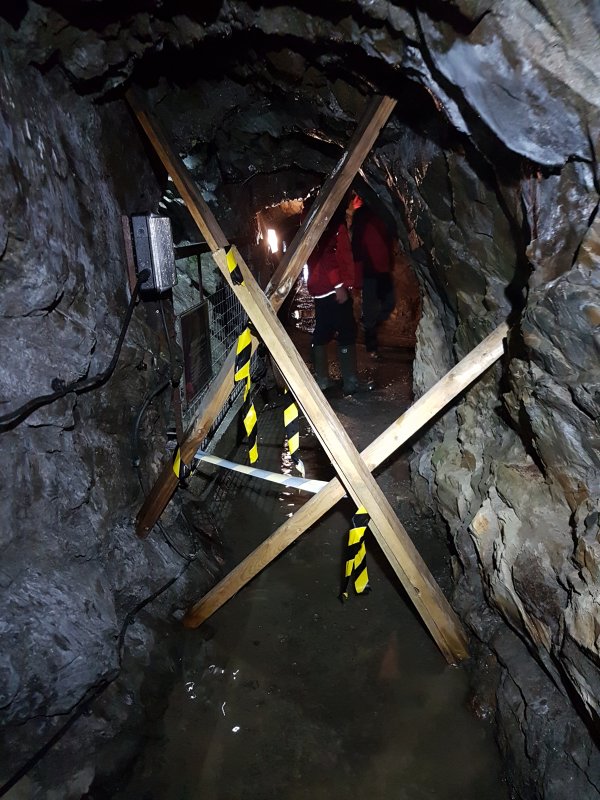 Because of Covid, the final part of the passage is closed off, since there is not enough space for people to pass each other while maintaining a good distance, and there is no ventillation. We were allowed to see the far end.
Modelling by Kevin and Gary
Because of Covid, the final part of the passage is closed off, since there is not enough space for people to pass each other while maintaining a good distance, and there is no ventillation. We were allowed to see the far end.
Modelling by Kevin and Gary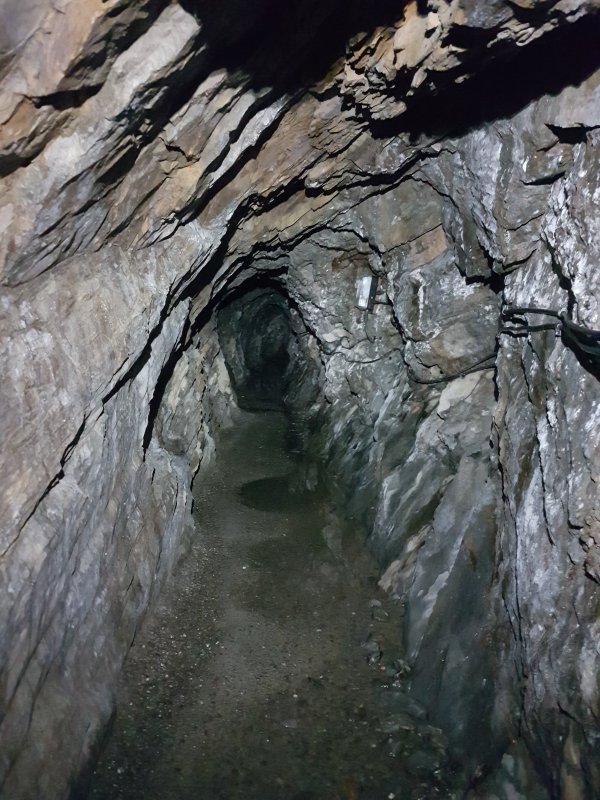 A fairly similar passage. But without the show mine lighting, it did at least feel like we were not just tourists.
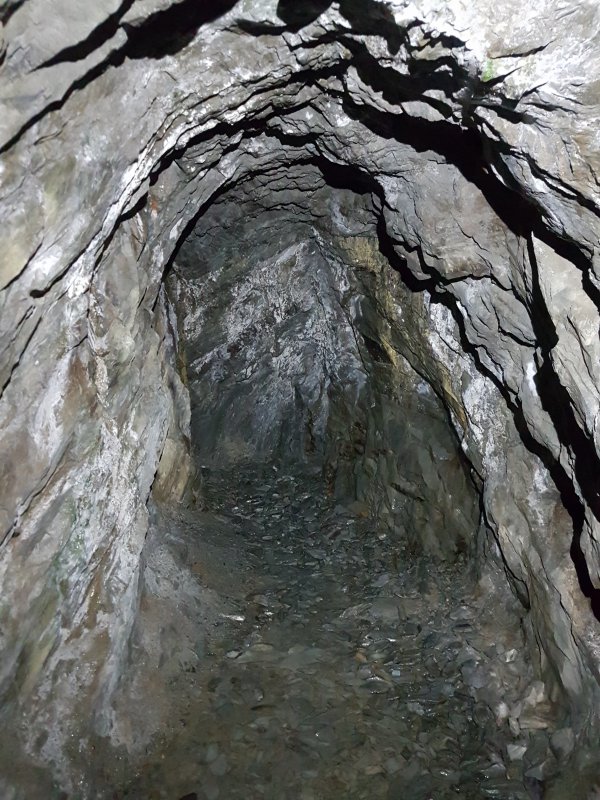 The tourists are really not missing much.
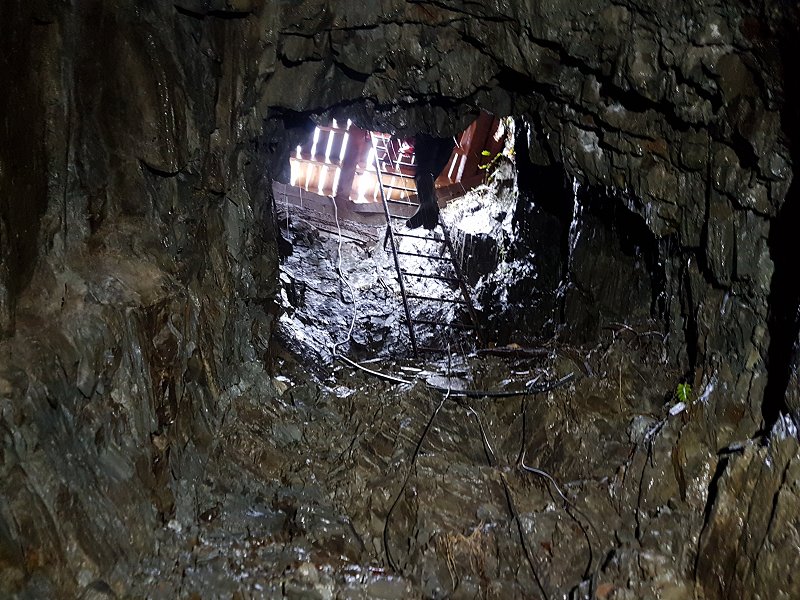 Beside the postbox is the emergency exit; a ventilation shaft with a ladder.
Modelling by Kevin
Beside the postbox is the emergency exit; a ventilation shaft with a ladder.
Modelling by Kevin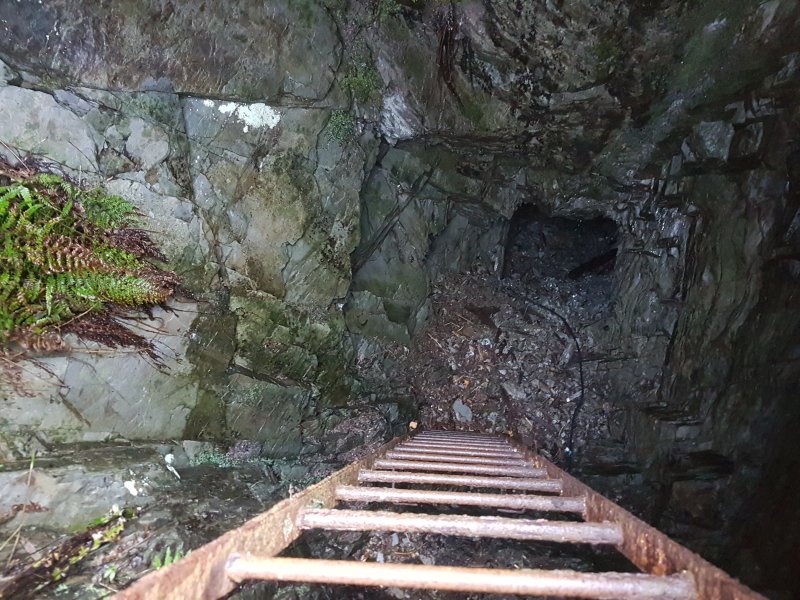 The top of the ladder.
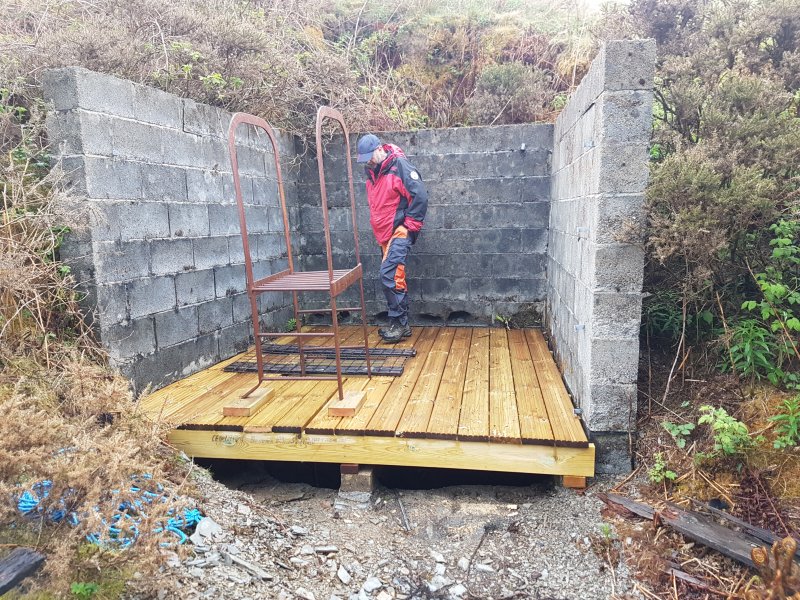 At the top of the ladder is this decking, which had just been installed.
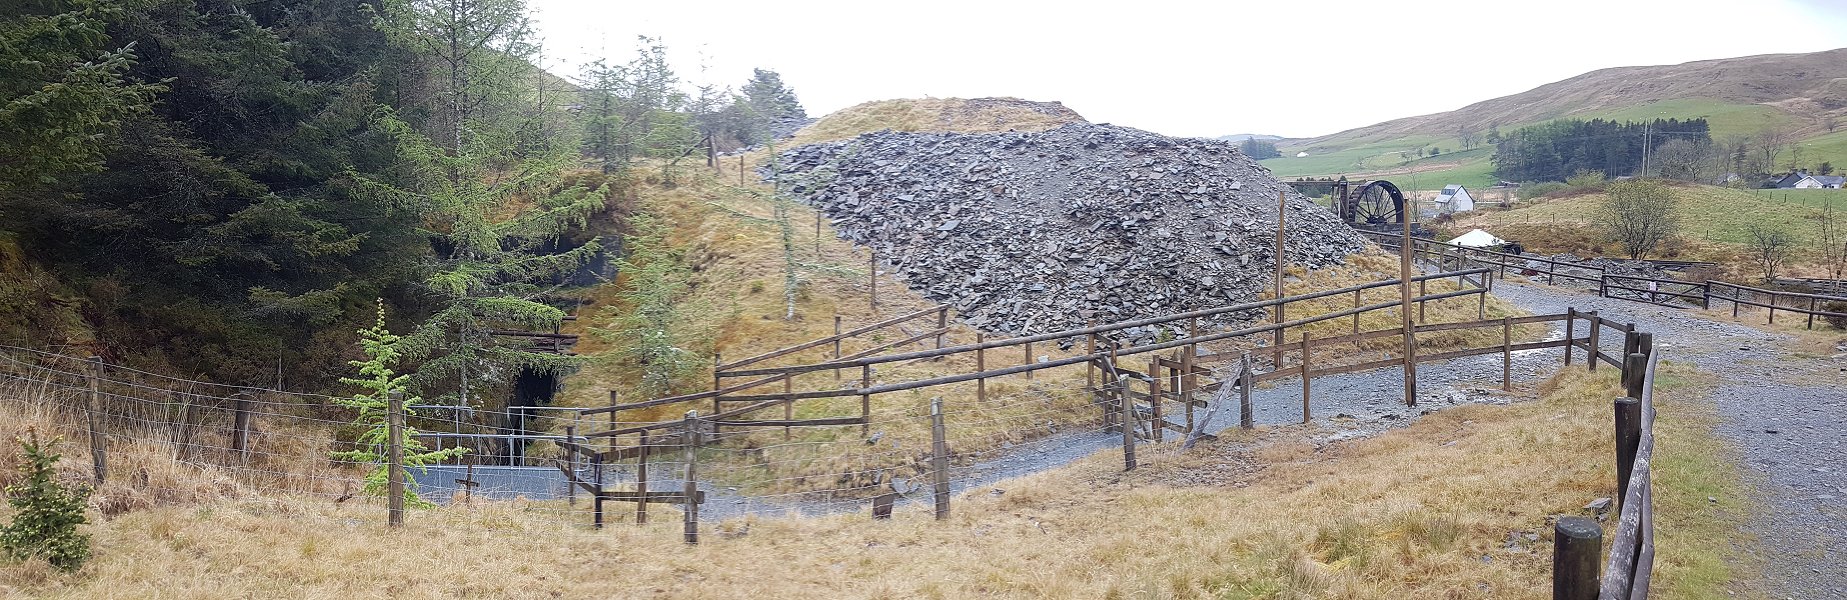 The main show mine tour starts at the larger mine, at the Whim Shaft, behind the tip. Incidentally, that water wheel seems to serve no purpose, and it might be non-authentic. However, water wheels were used all over the site, so perhaps it did serve a purpose.
 Whim Shaft has been filled, but dropped down one more level.
 The open passage from Whim Shaft was a level, and sits on the smaller lode.
 This portion of the level has been modified for the show mine. Originally, it had been stoped all the way out to surface, but the stope has been capped to turn it back into a passage. The plywood boards are a form but the actual cap is the concrete that was poured above them. This was one of the smallest stopes of the mine, at just 12 metres (7 fathoms). Just.
Modelling by Kevin, lighting by Tarquin and Kevin
This portion of the level has been modified for the show mine. Originally, it had been stoped all the way out to surface, but the stope has been capped to turn it back into a passage. The plywood boards are a form but the actual cap is the concrete that was poured above them. This was one of the smallest stopes of the mine, at just 12 metres (7 fathoms). Just.
Modelling by Kevin, lighting by Tarquin and Kevin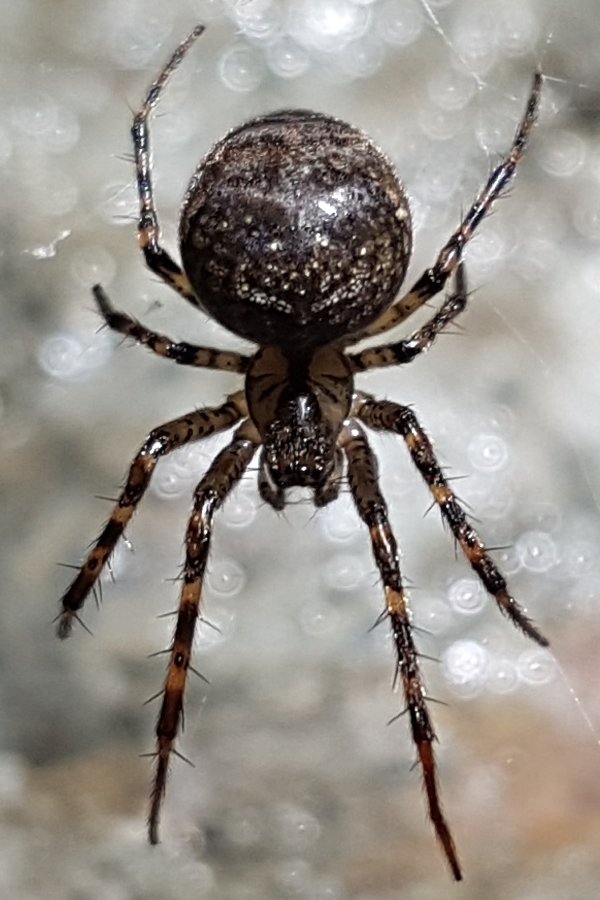 Female Metellina merianae, the much less common species of cave spider, but apparently fairly common up here, as they were in a few of the mines. They can be distinguished by the wide black stripe and twin pairs of radial lines on the carapace (back), as well as banded legs with black and fairly bright bands. A Meta menardi/bournetti will have a much narrower and less obvious single stripe, without the radial lines, and is normally a darker spider overall, with black and brown/red banded legs. Metellina merianae are a little smaller than Meta menardi/bournetti, but are still an impressively large spider for the UK.
Modelling by Charlotte
Female Metellina merianae, the much less common species of cave spider, but apparently fairly common up here, as they were in a few of the mines. They can be distinguished by the wide black stripe and twin pairs of radial lines on the carapace (back), as well as banded legs with black and fairly bright bands. A Meta menardi/bournetti will have a much narrower and less obvious single stripe, without the radial lines, and is normally a darker spider overall, with black and brown/red banded legs. Metellina merianae are a little smaller than Meta menardi/bournetti, but are still an impressively large spider for the UK.
Modelling by Charlotte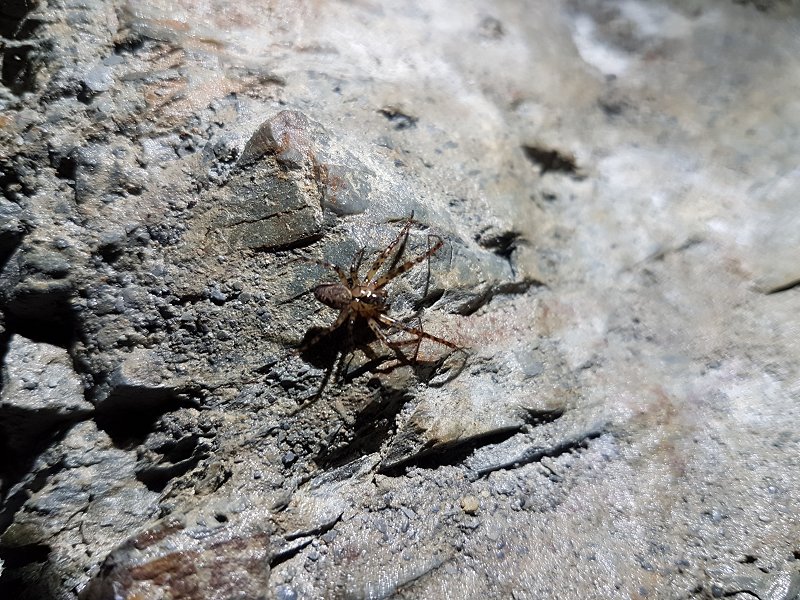 The male (or juvenile) Metellina merianae has similar colours, but the opisthosoma (abdomen) almost looks shrivelled and wrinkly, like a raisin. The palps (reproductive organs on the shorter front pair of legs, that look like boxing gloves) are clearly visible on adult males when they are walking.
Modelling by Greg
The male (or juvenile) Metellina merianae has similar colours, but the opisthosoma (abdomen) almost looks shrivelled and wrinkly, like a raisin. The palps (reproductive organs on the shorter front pair of legs, that look like boxing gloves) are clearly visible on adult males when they are walking.
Modelling by Greg Ore chute below the walkway.
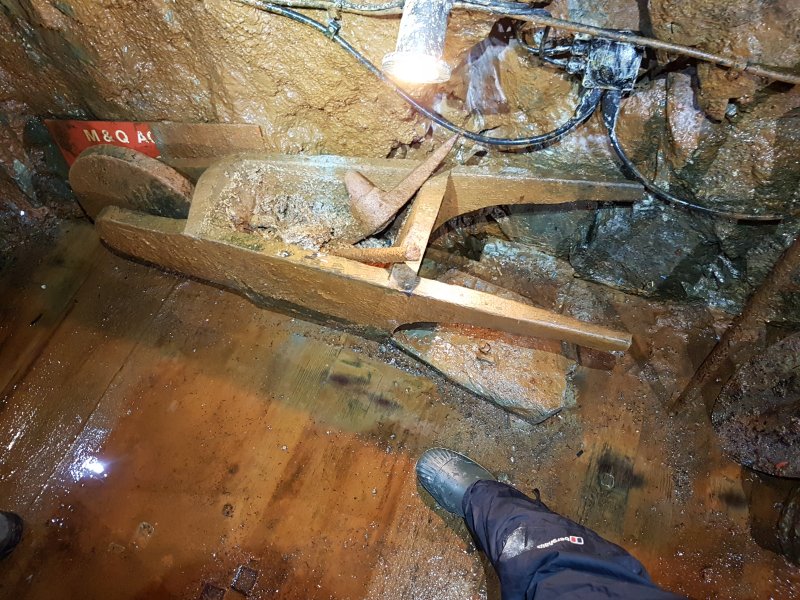 Tiny wheelbarrow. They had a couple of these, and they really look like a child's toy, but apparently they were actually used to transport the heavy ore through awkward passageways. Maybe it was too heavy to carry, but this really seems quite unproductively small.
Modelling by the toes of Tarquin and Simon
Tiny wheelbarrow. They had a couple of these, and they really look like a child's toy, but apparently they were actually used to transport the heavy ore through awkward passageways. Maybe it was too heavy to carry, but this really seems quite unproductively small.
Modelling by the toes of Tarquin and Simon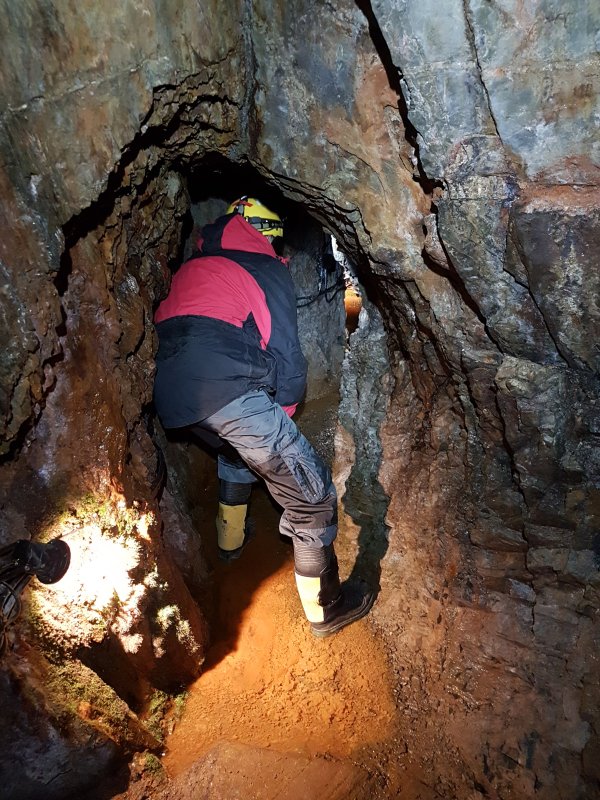 Low ceiling. This is the first time you can see the original passage shape of the level.
Modelling by Gary, lighting by Tarquin and Gary
Low ceiling. This is the first time you can see the original passage shape of the level.
Modelling by Gary, lighting by Tarquin and Gary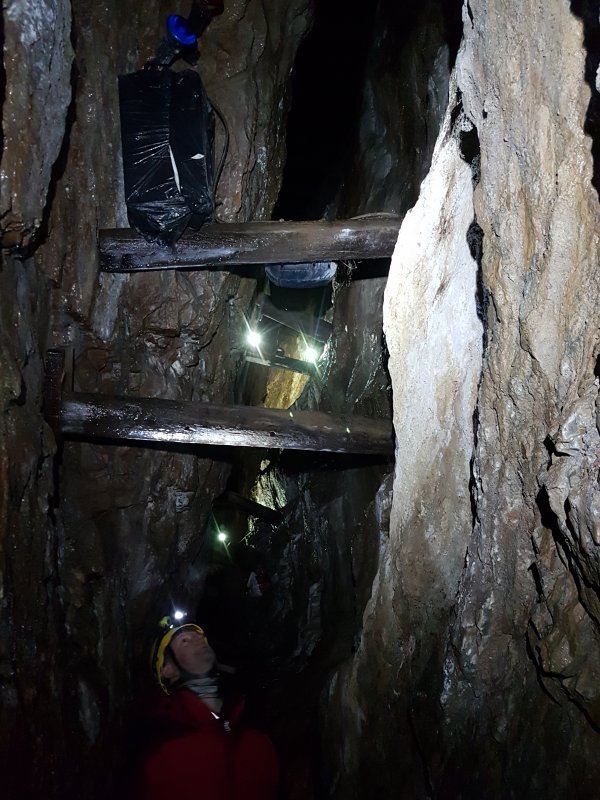 The next part of the stoping sits directly under the tip, and appears to be original, but there is at least part of it that has been capped. Once again, it looks tall from here, but is dwarfed by the stopes elsewhere.
Modelling by Gary, lighting by Tarquin and Gary
The next part of the stoping sits directly under the tip, and appears to be original, but there is at least part of it that has been capped. Once again, it looks tall from here, but is dwarfed by the stopes elsewhere.
Modelling by Gary, lighting by Tarquin and Gary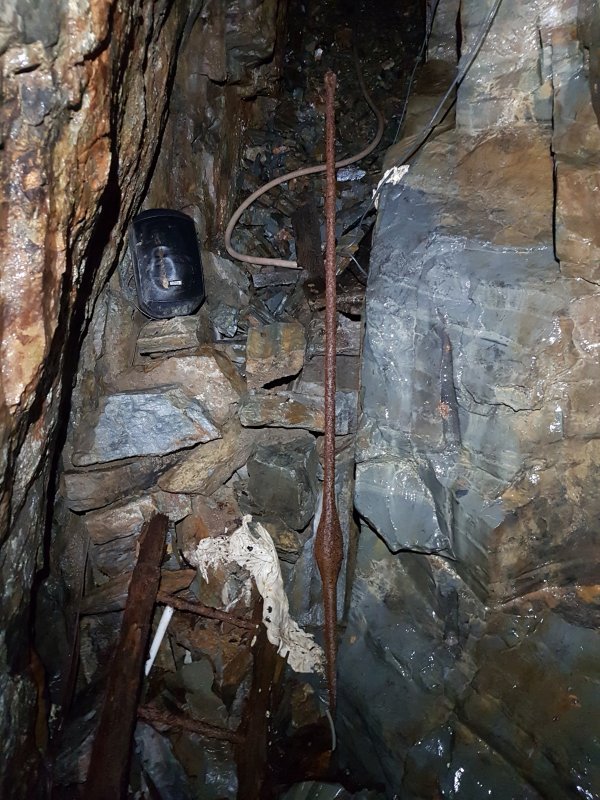 After passing the main cross cut, the stoped level continues, but fenced off from the tourists. This makes it one of the few places that we could go that tourists couldn't. Visible here are a fragment of wood and iron ladder, and an iron drill rod. The drill rod was used like a chisel, dropped into a hole, where its own weight was used instead of a hammer. The hole was then packed with gunpowder for blasting.
 The stope continues, and now without the lights in my face, the top is visible and original.
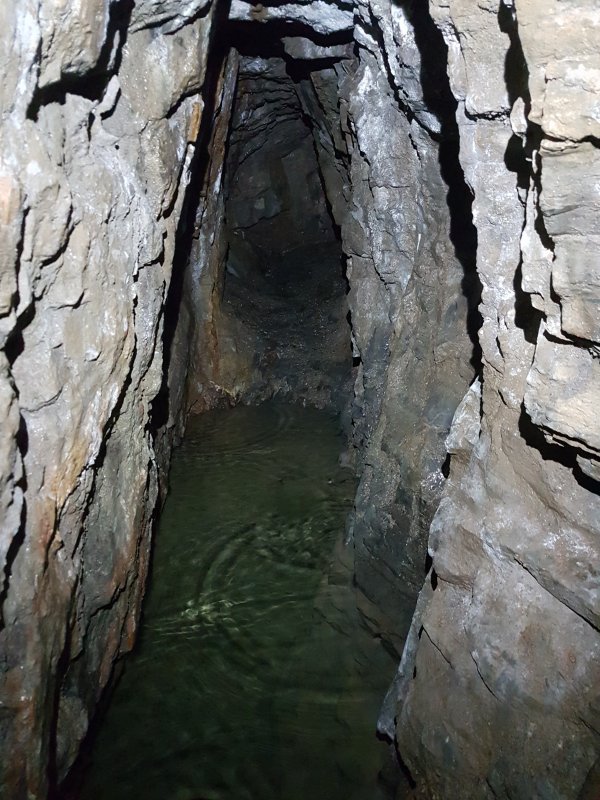 Traversing over a pool to the end of the level. The pool is definitely deeper than wellies.
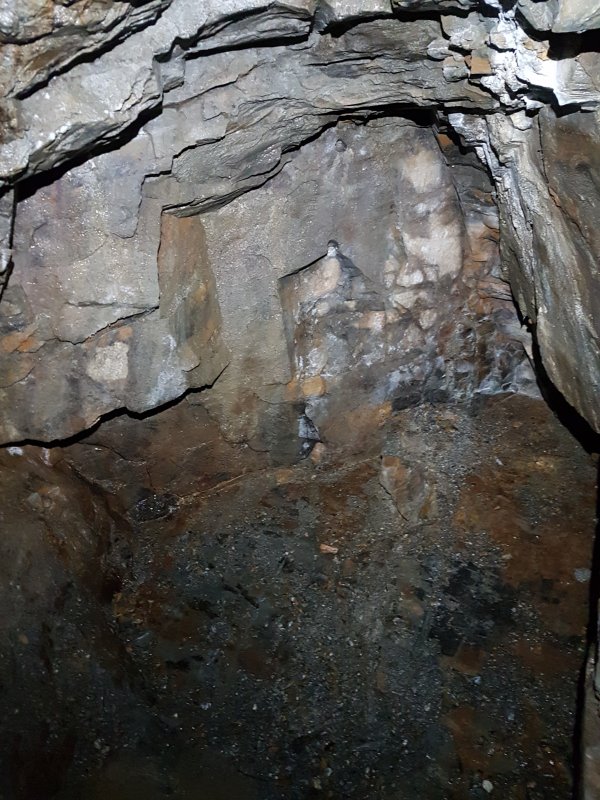 The level ends abruptly, and appears to be heading towards Morris's Shaft, but it does not actually line up with it.
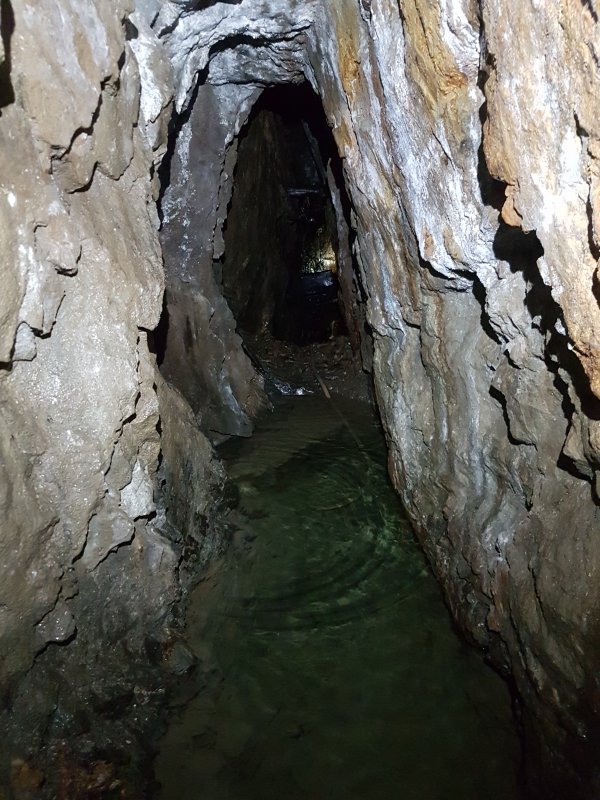 Nothing else to do but traverse back over the pool.
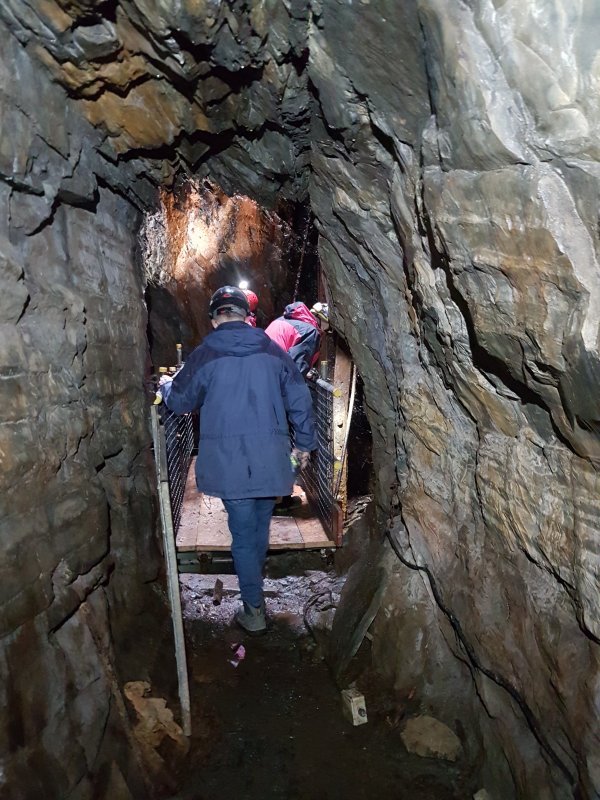 The cross cut has a passage continuing into the side of Hanson's Shaft, where the mine operators have built a bridge over the shaft.
Modelling by Simon, Gary and Kevin, lighting by Tarquin, Gary and Kevin
The cross cut has a passage continuing into the side of Hanson's Shaft, where the mine operators have built a bridge over the shaft.
Modelling by Simon, Gary and Kevin, lighting by Tarquin, Gary and Kevin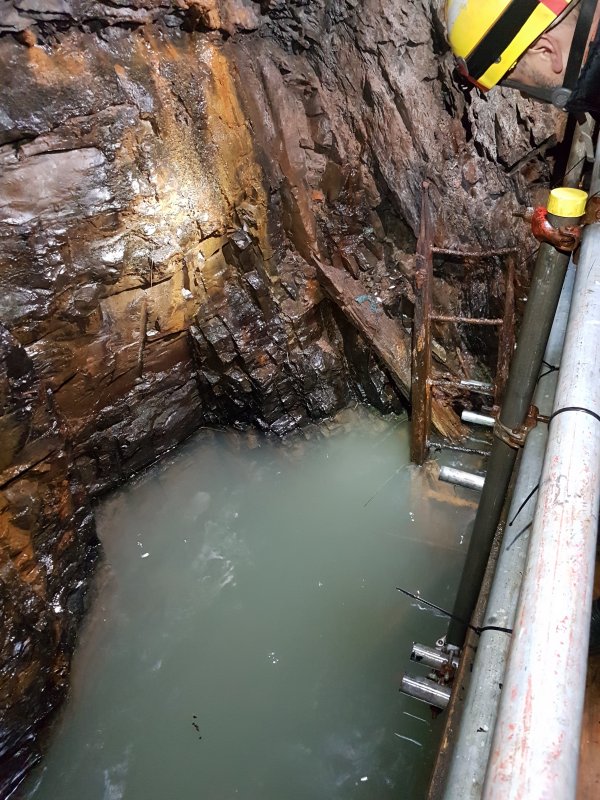 Hanson's Shaft is now flooded to the depth of the crosscut, but the bottom level is another 120 metres (65.5 fathoms) lower, and the shaft continued a little past that. This is some very deep water. Normally it would be clear. The mine operators would like to drain it and show off some of the levels below. There is some incredibly tall stoping further down, with a 61 metre tall stope topping out just below the water level, and 35 metre tall stoping just below that. That would have been an ... interesting ... ladder to climb...
Modelling by Gary, lighting by Tarquin, Gary and Kevin
Hanson's Shaft is now flooded to the depth of the crosscut, but the bottom level is another 120 metres (65.5 fathoms) lower, and the shaft continued a little past that. This is some very deep water. Normally it would be clear. The mine operators would like to drain it and show off some of the levels below. There is some incredibly tall stoping further down, with a 61 metre tall stope topping out just below the water level, and 35 metre tall stoping just below that. That would have been an ... interesting ... ladder to climb...
Modelling by Gary, lighting by Tarquin, Gary and Kevin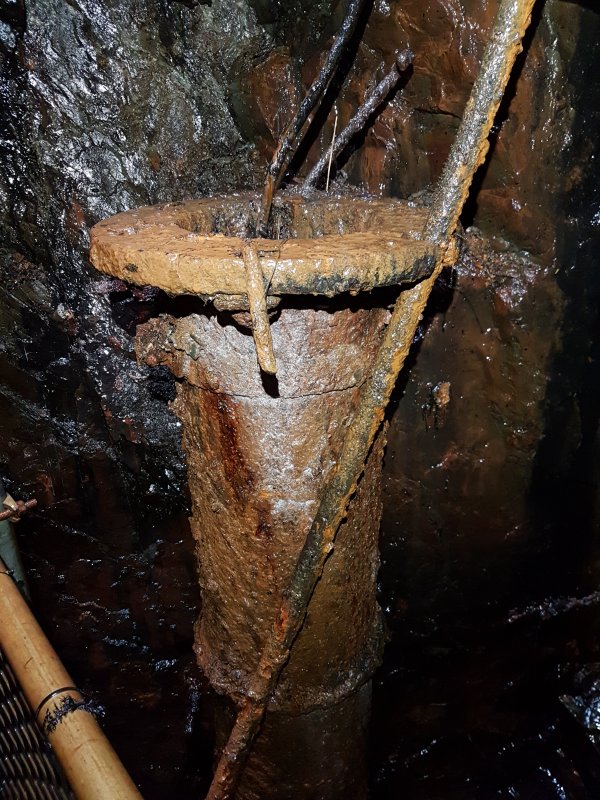 Back when the mine was operating, this huge pipe was the main rise - the pump pipe that brought the water from the lower levels. The pump was a Cornish style pump, operated using a mechanical rod that pushed a series of plungers down and pulled them back up, pushing water through a series of valves, and lifting it up in stages, to the next pump, so that the pressure in each stage was not too high. One single mechanical rod did all the work for all the stages at once, so there was just a single pump for the whole mine.
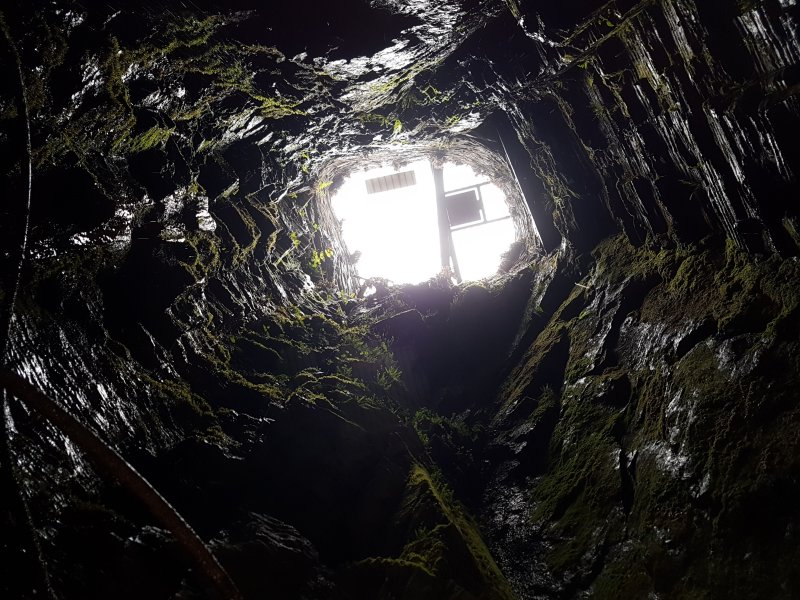 The dry part of Hanson's Shaft is 12 metres (6.5 fathoms), so the full shaft is over 132 metres deep.
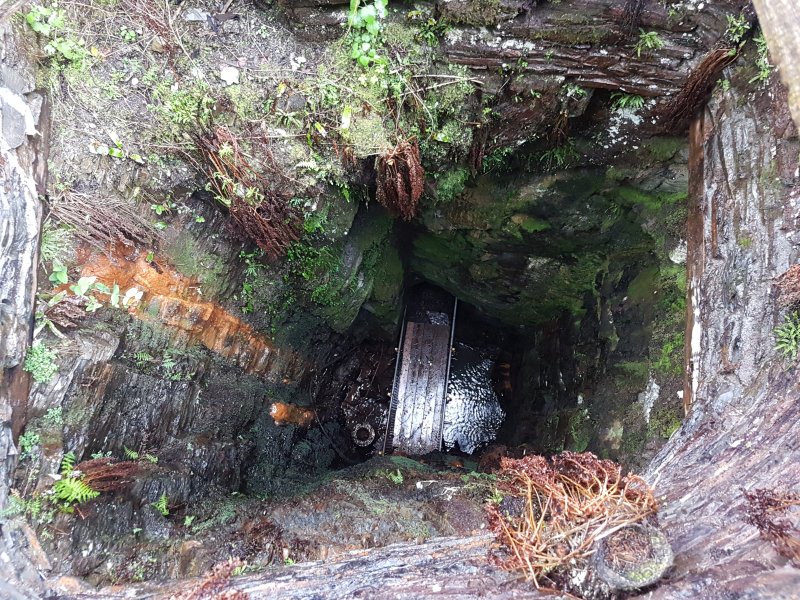 Perfect place to hold a phone out over the edge. It'll be fine.
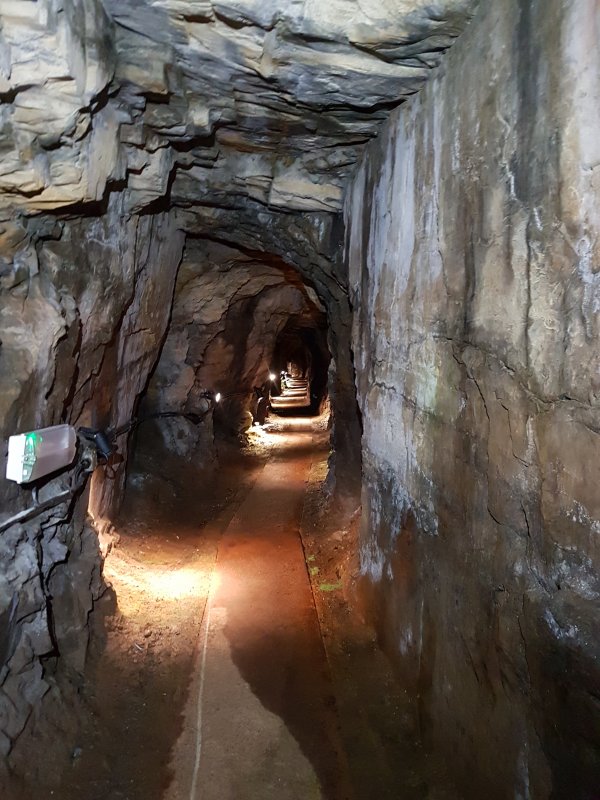 The crosscut is called Rothschild's Adit, and carries the mine's water along a channel under the floor. This would have originally carried the pumped water too. The tunnel is uncomfortably short, since it was not used for regular work; it was a drainage adit.
 The adit ends at a junction.
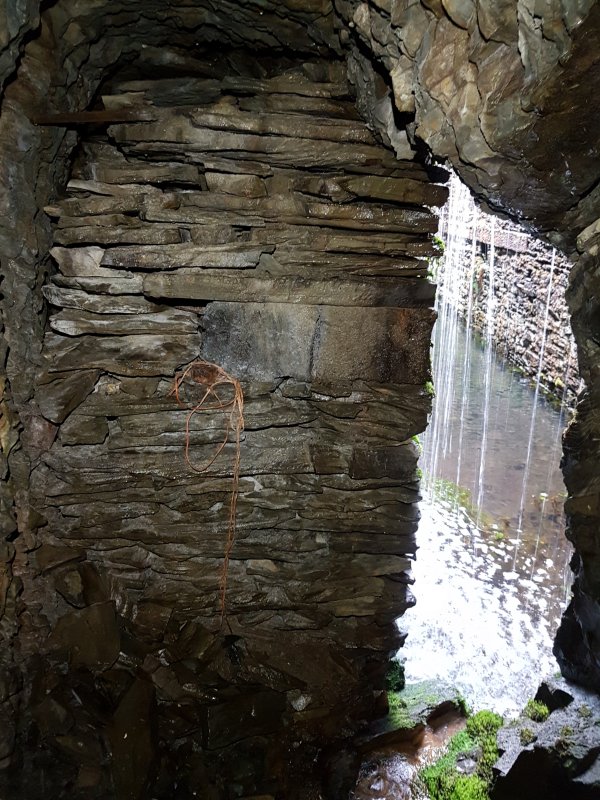 The water drains into the lowest available water channel; the bottom of the main water wheel's pit.
 Above the junction is another ventilation shaft, which is capped. It seems to sit directly beneath one of the paths, and you do not notice it while walking there.
 The other branch from the junction emerges beneath the floor of the smithy. What a strange place to have a mine entrance.
 Mining remains in the smithy. Authentic, of course. Well at leat some of it is.
Modelling by Rhodri
Mining remains in the smithy. Authentic, of course. Well at leat some of it is.
Modelling by Rhodri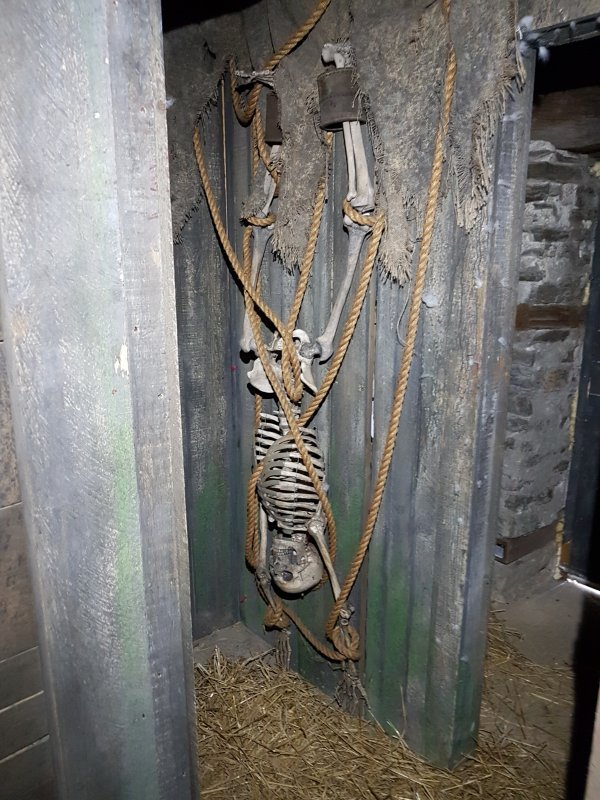 Working through the maze of passageways in the smithy.
Modelling by Iwan
Working through the maze of passageways in the smithy.
Modelling by Iwan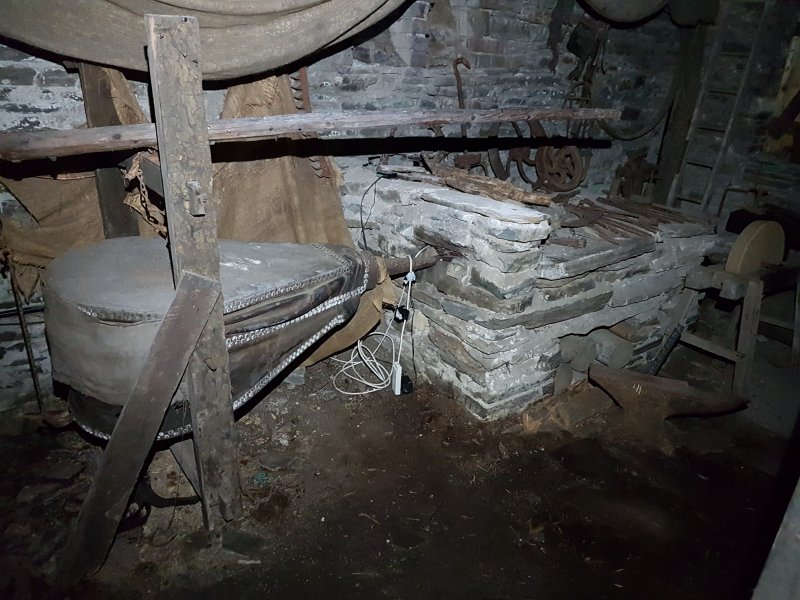 Forge in the smithy, with a load of authentic tools. There would, presumably, have been some mechanical assistance here for the bellows, but these appear to be manual. Perhaps there was originally a power coupling from the water wheel.
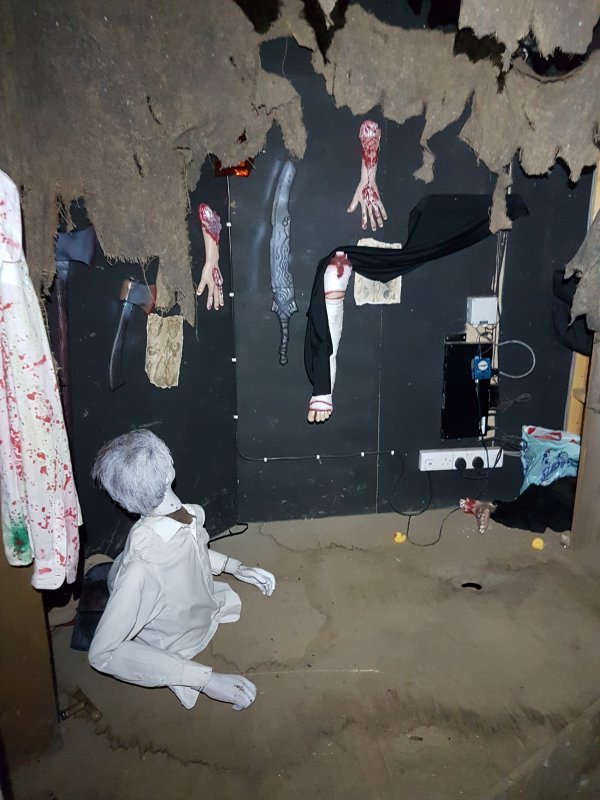 After an accident in the smithy.
Modelling by Dafydd and parts of Geraint
After an accident in the smithy.
Modelling by Dafydd and parts of Geraint He doesn't look too well.
Modelling by Iolo
He doesn't look too well.
Modelling by Iolo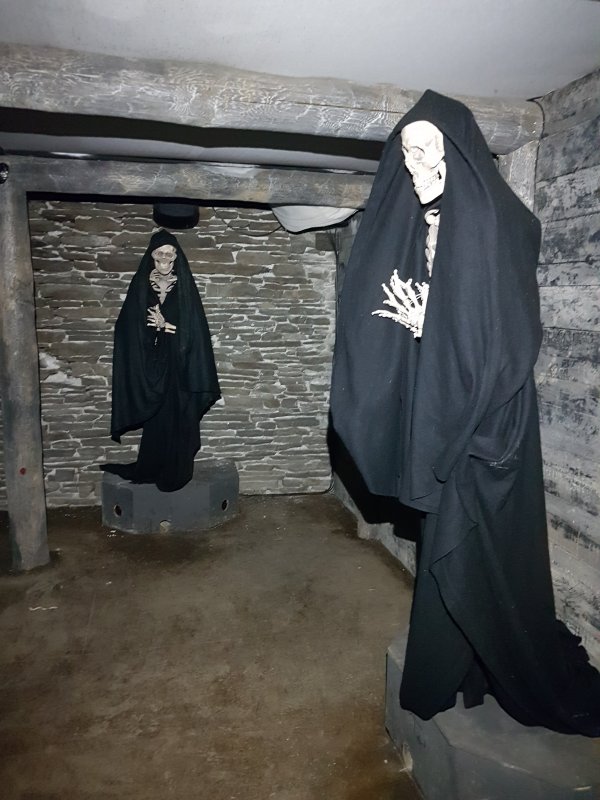 Dementors.
Modelling by Colin and Lord Beergarden
Dementors.
Modelling by Colin and Lord Beergarden A clay-lined reservoir called a contour leat. This would have supplied most of the water wheels on the site, but another one would have to be higher up for the first wheel.
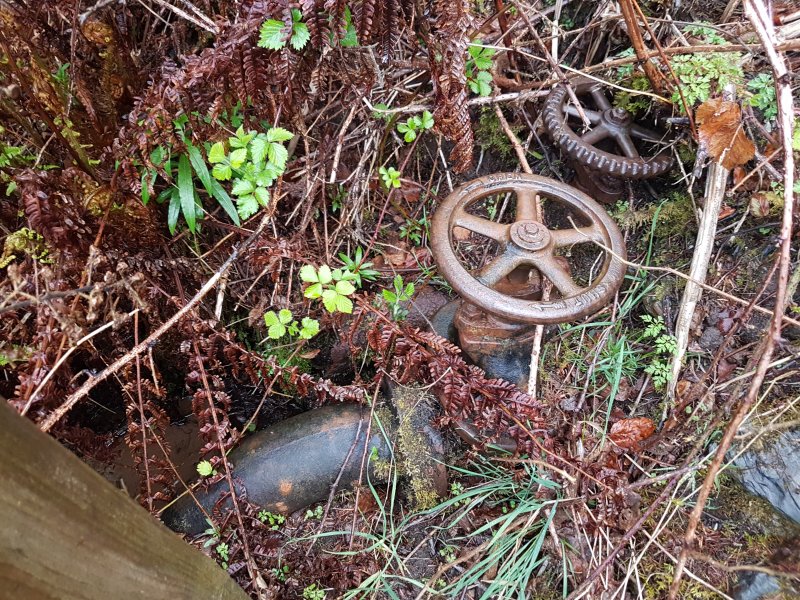 The taps used to control water outflow through the pipes from the reservoir.
 The highest water wheel pit on the site, with a smaller pit beside it, possibly for the gears. This would have been a substantial wheel, and was used to raise ore from the mine.
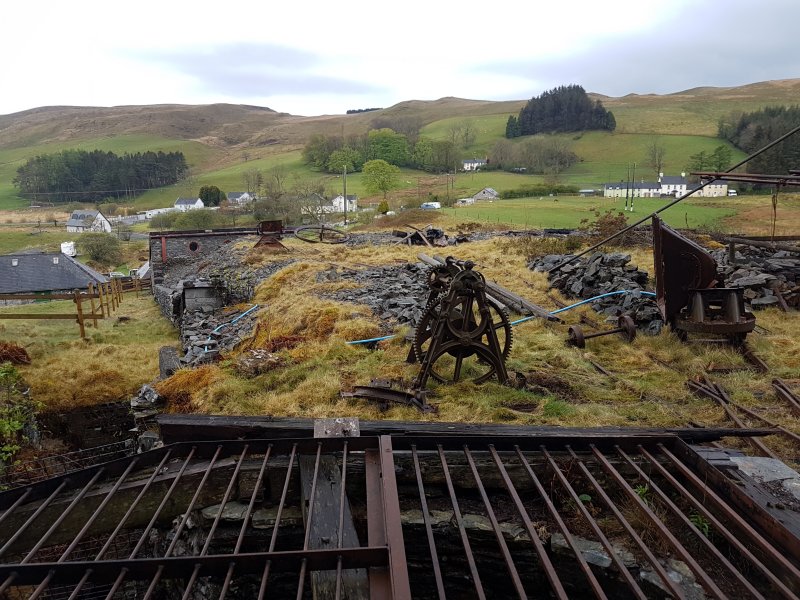 The top of Hanson's Shaft, where the ore would have been raised to. The gears seem to be unrelated, but might have once belonged to part of a water wheel. The rails and tipper trucks might be authentic, but also might not. The flat area to the right is the top of the tip. The nearest building was probably where the dressing floor was. The channel on the left is where the sweep rods for the water pump would have run from the lower water wheel, over a series of support wheels.
 The area at the top of the shafts. Hanson's Shaft is the grating. The capped air shaft is under the simulated scaffolding pit head on the right. The reservoir is on the distant right. On the left is Morris's Shaft. The mountain on the distant left is Pen y Garn (611 metres), the one opposite is Bryn Rhosau (397 metres), and the part with the windmills is Banc Bwa-drain (389 metres).
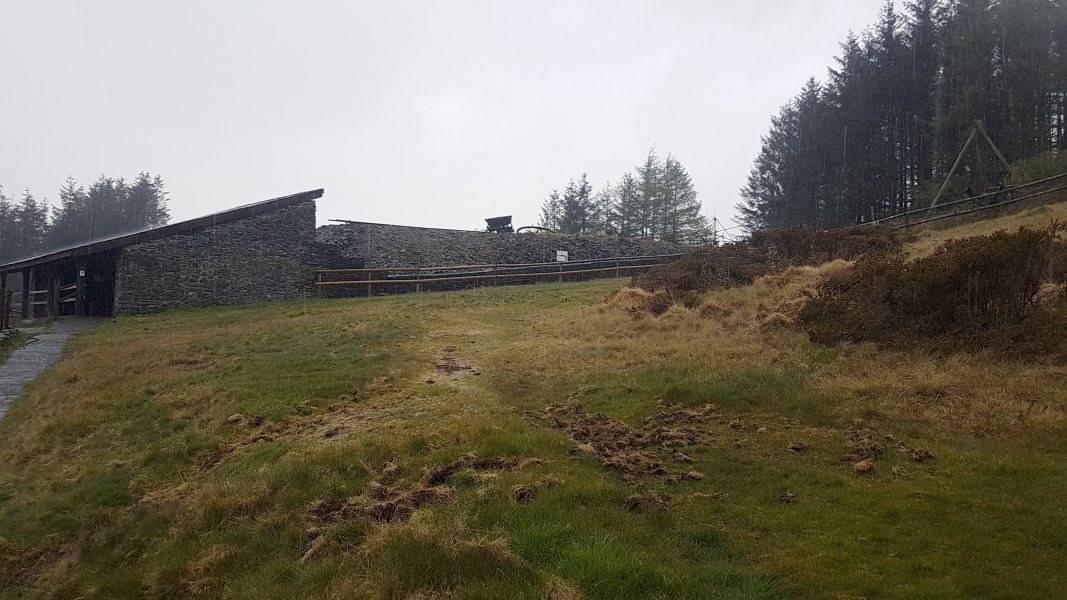 The probable site of the dressing floor; where the women and children would chip the unwanted rock off the ore, so the rest could be processed
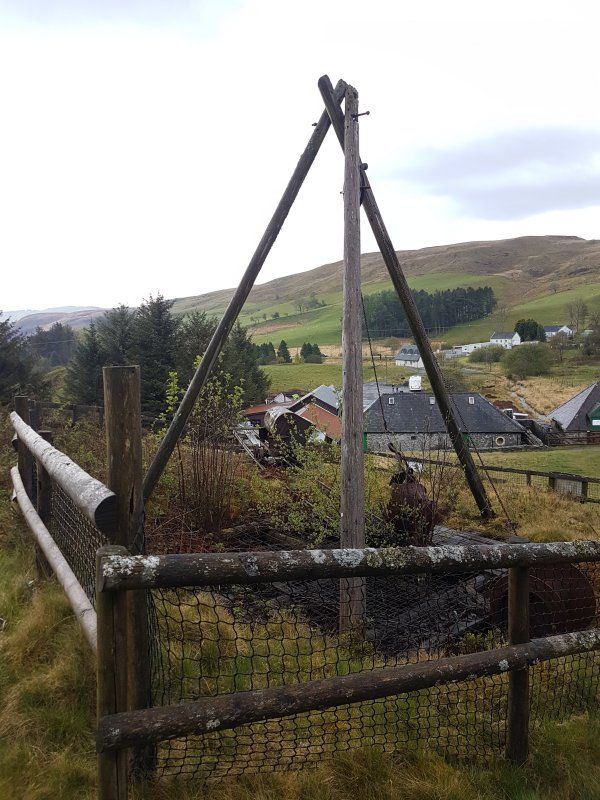 Morris's Shaft. The pit head is a recreation, but the shaft is original.
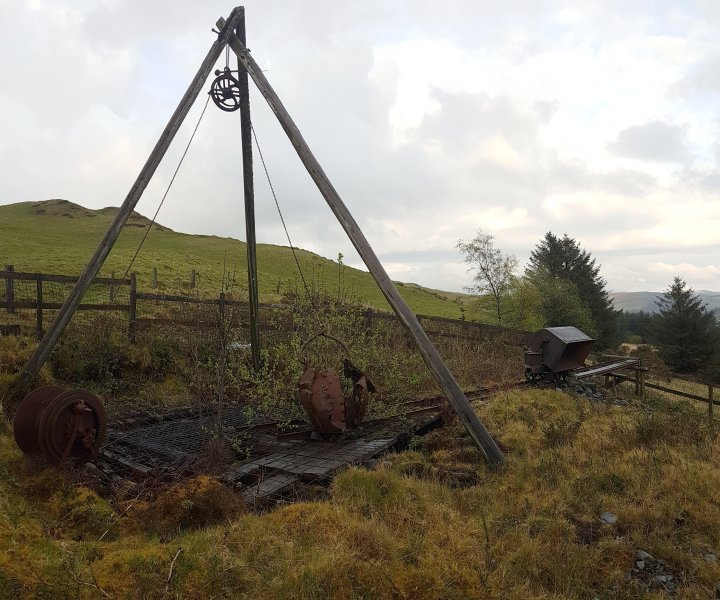 Top of Morris's Shaft, with a winze and kibble (bucket for hauling rock).
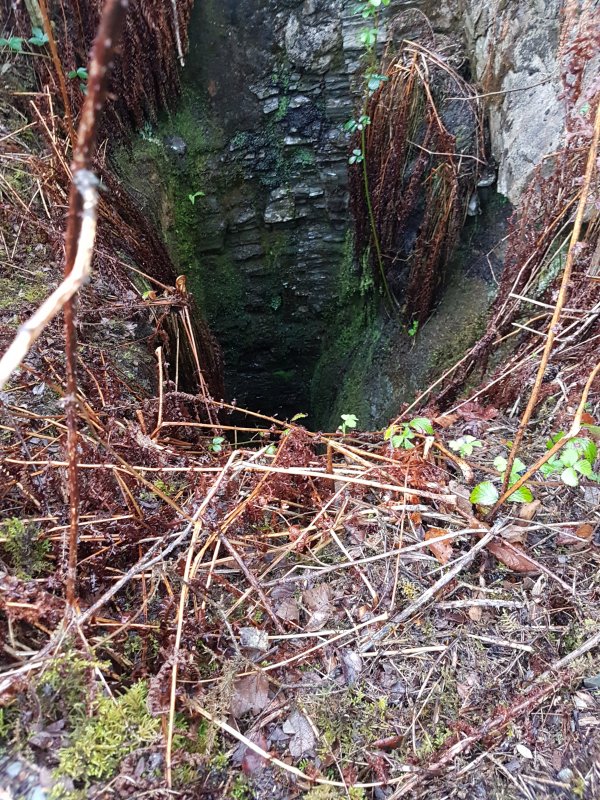 Morris's Shaft has collapsed at the bottom, and does not seem to have any connection to the main mine.
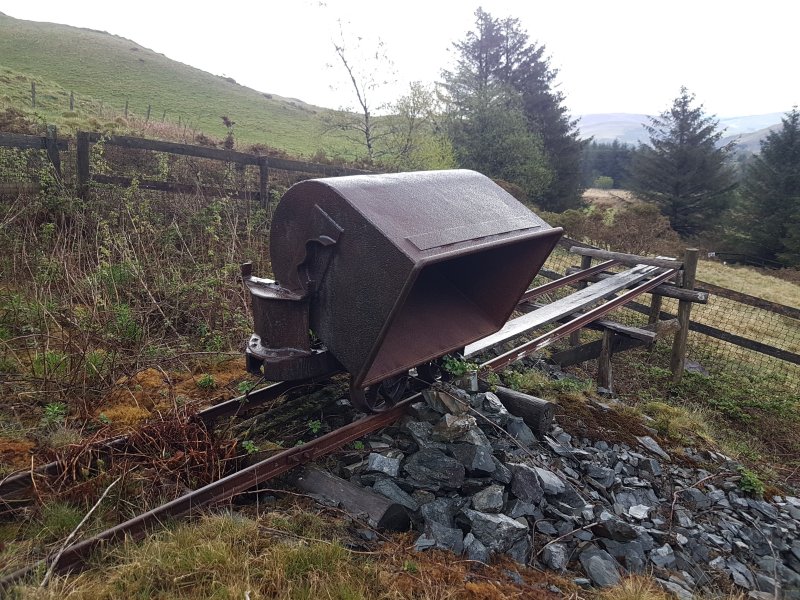 Tipper Truck at Morris's Shaft. This rail setup is not authentic, but the truck is real.
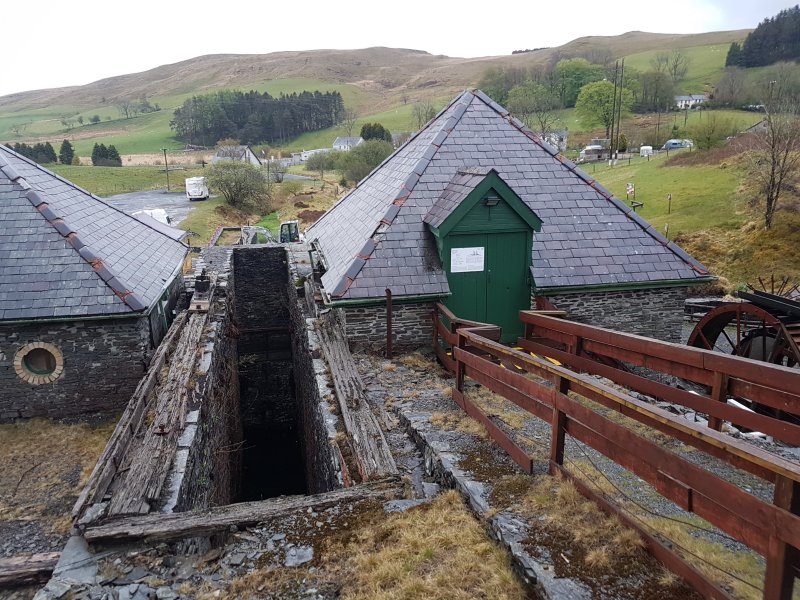 Looking down into the main wheel pit, with the smithy on the left and the rock crusher on the right. The wheel would have been twice as tall as the pit, easily the tallest on the site, with its axel at the top of the pit. The rock crusher's power came from the same wheel, perhaps with gearing to set the speed. The ventilation shaft in Rothschild's Adit would be directly under the camera here.
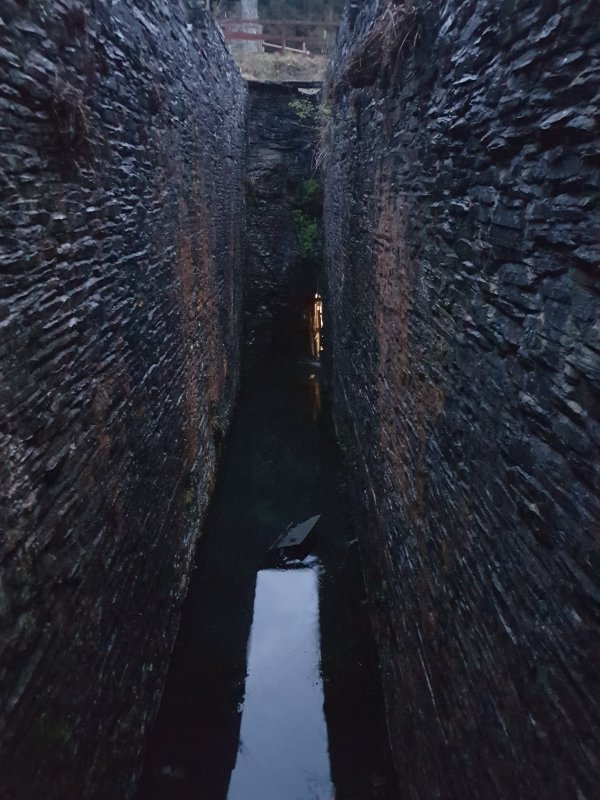 The bottom of the wheel pit, which has some fairly deep water. From here there is a sumped passage taking the water out to the nearby stream. In the water is one of the buckets from the wheel. The lit doorway at the end of the pit is the drain from Rothschild's Adit.
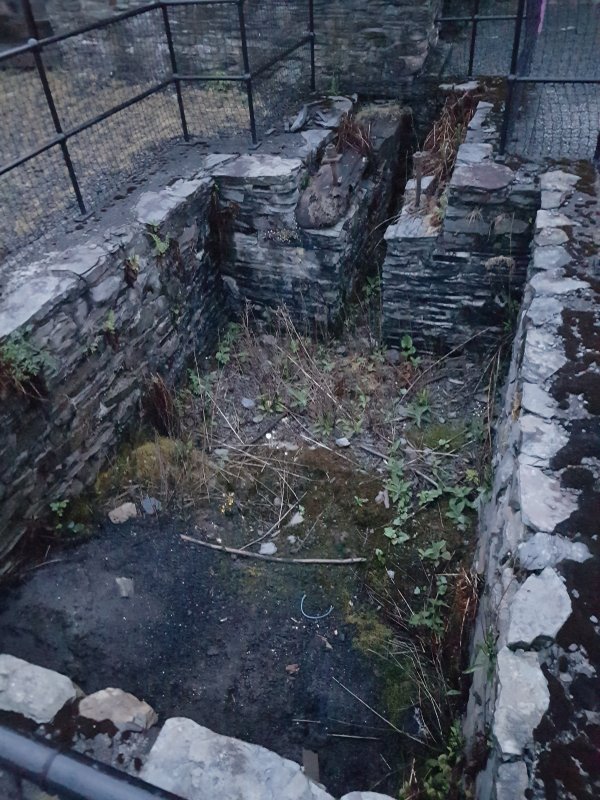 The wheel had a crank that pushed and pulled a rod backwards and forwards, to pump the water. At each end of the rod, there was a balance bob pit, like this one. The pit contained a weight on a lever, which equalled the load of the rods and valves, so that all of the effort of the wheel was used to raise the water, and none was used to raise the rods and valves themselves.
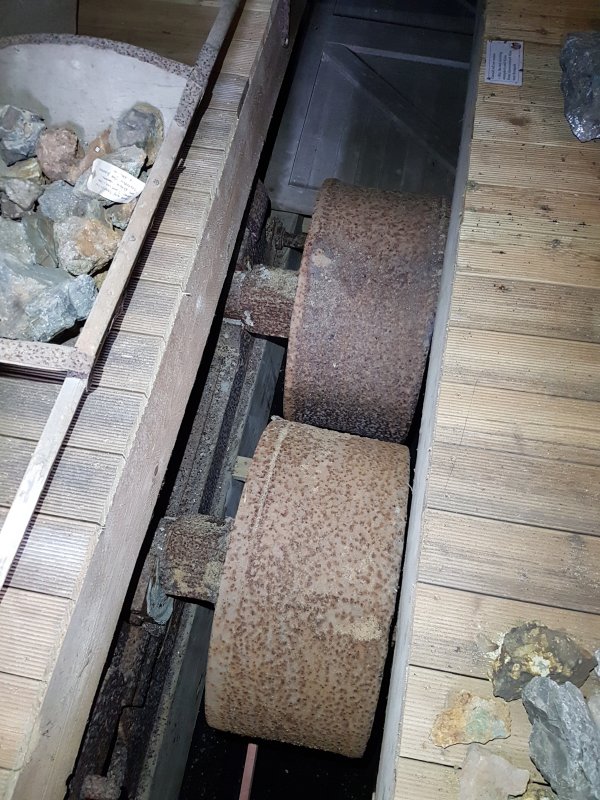 The rock crusher was a pair of wheels spinning very close to each other, with the rocks funnelled into the top. The width between them could be adjusted to set the size of the rock pieces, and the rock could be put back through a few times, with the size reduced each time.
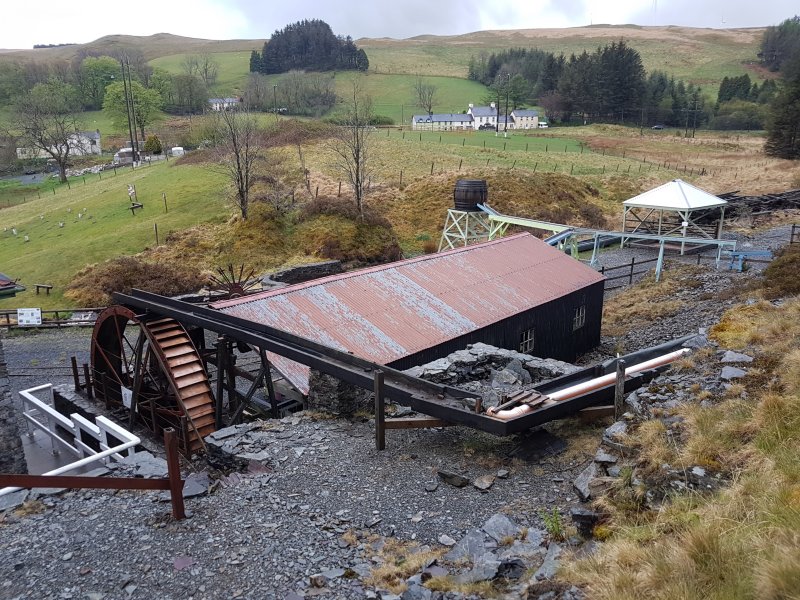 The water that came from upper water wheels was then channelled to this water wheel at the jigger shed.
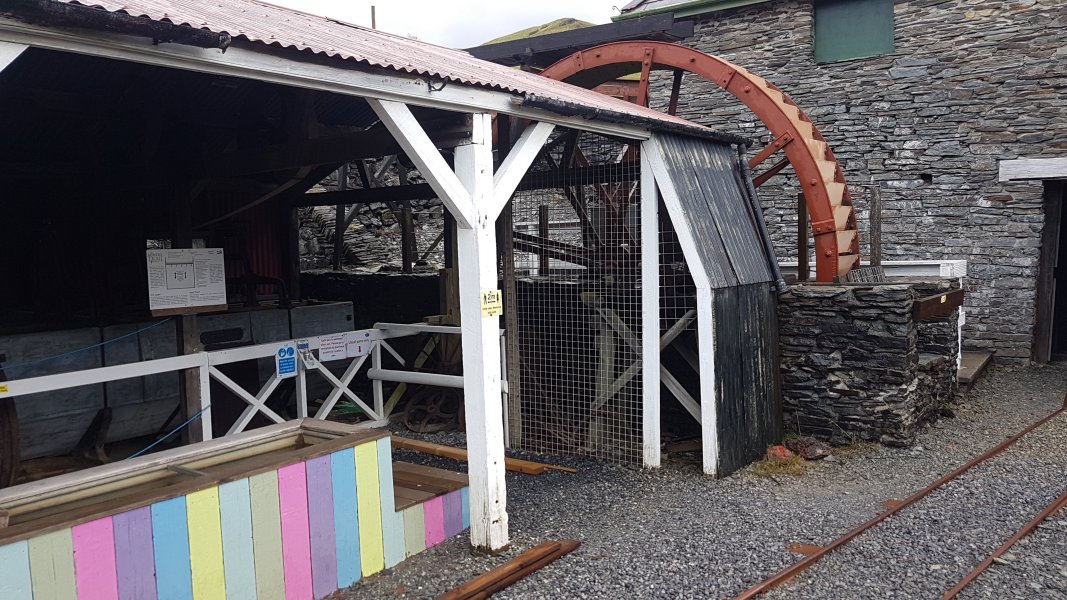 The wheel's rotation was then put through a series of gears and pulleys, to convert it into a fast shaking motion.
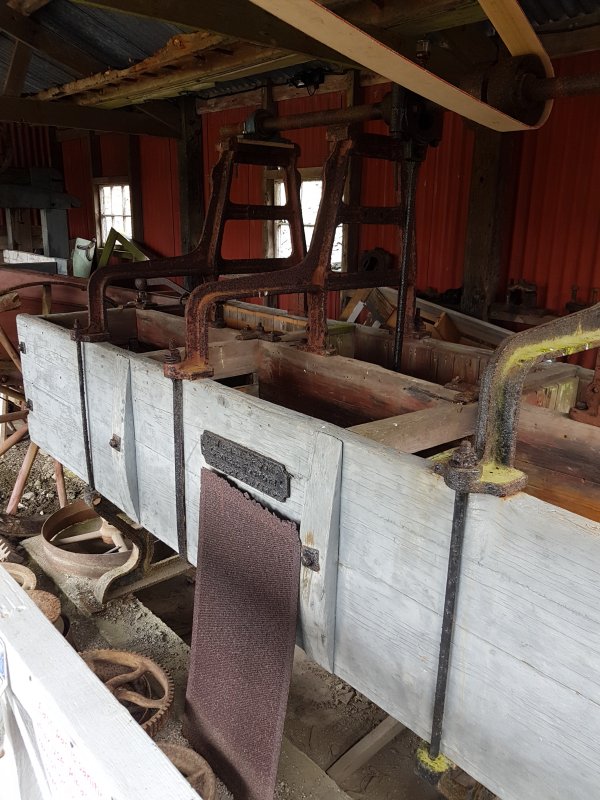 The bigger jigger, with the pulleys and mechanics used to shake the trays inside. The crushed ore was put into these troughs, and shaken around in water, to cause the heavier lead to sink, and the waste rock to rise above the lead. The rock (skimpings) was discarded, the lead was extracted for refining, and anything in the middle (raggings) was put through the process again. Whatever ended up at the bottom (bed) of a shaking tray would be refined on a buddle instead.
 The smaller jigger. These were made in 1907. Before that - most of the mine's operation - this job was done manually by boys shaking the trays.
 But that ... is not a jigger.
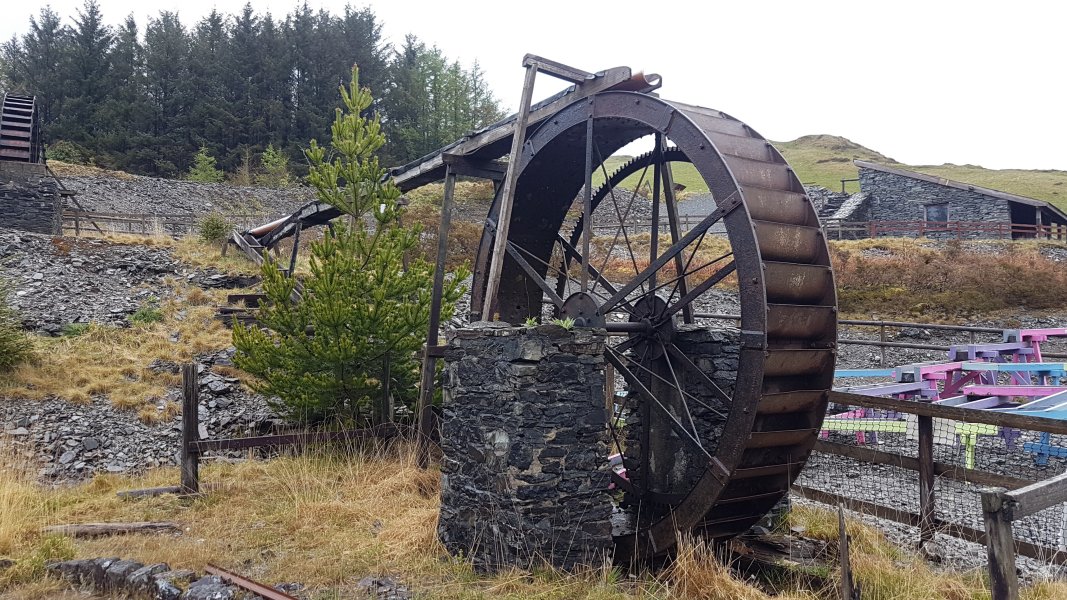 The bottom water wheel, which powered the buddle. The cogwheel which turned the gears of the buddle is clearly visible. The water came directly from the outflow of the wheel above.
 The remains of a buddle, where the lead ore was refined. The powdered ore was put at the top of a gentle slope of planks. Water was dribbled over it, and large rotating brushes made from heather gently brushed the planks. The heavier ore remained still near the top, while the lighter rock dust got washed to the edges. The refining process was now complete.
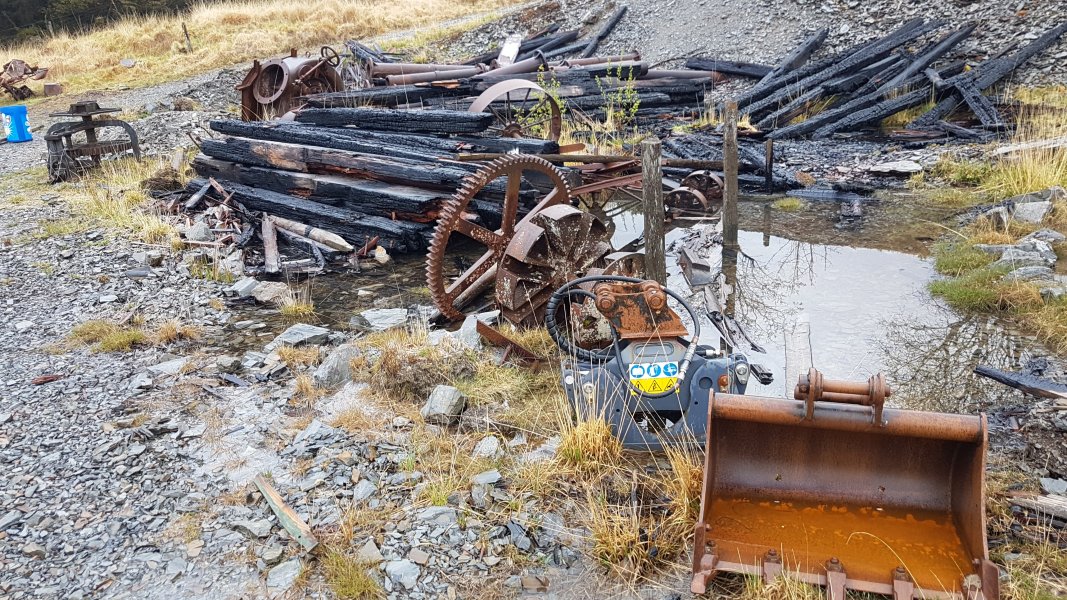 Remains of a large shed that got accidentally burned after being brought here from another mine. There are also some gears and pulleys from the water wheels, and some more modern items.
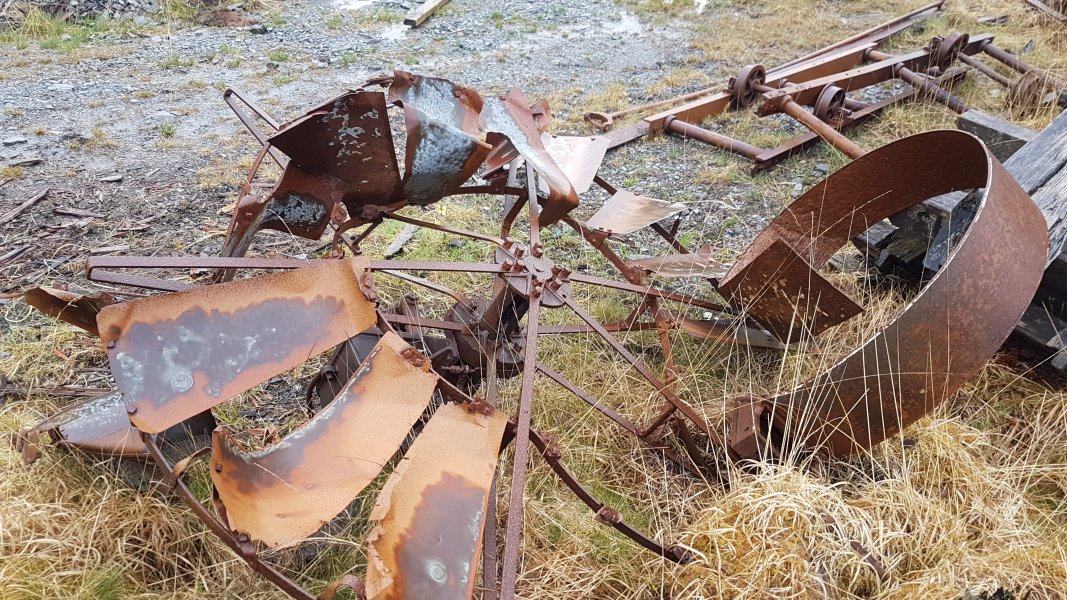 Remains of a windmill. This is not related to the mine.
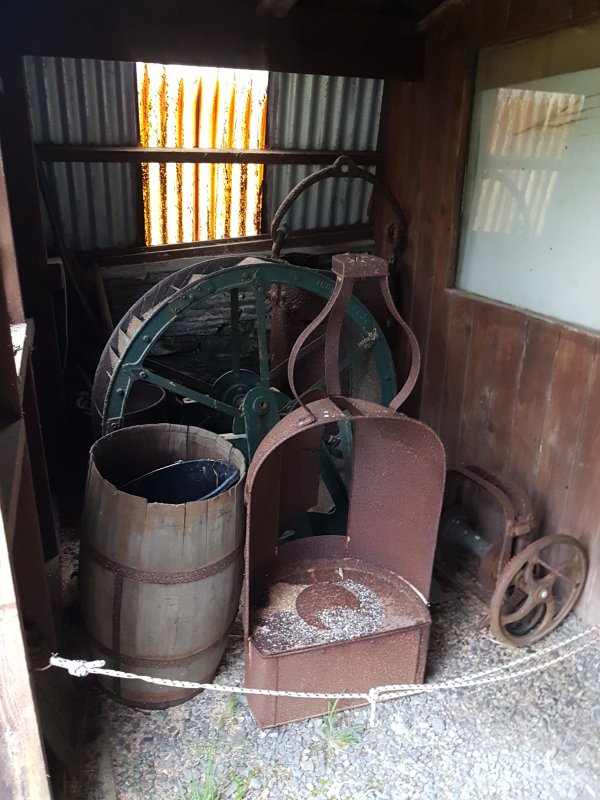 A small overshot water wheel, what appears to be a winch chair, and various other parts.
 A Pelton wheel, a relatively modern type of wheel used in hydroelectric turbines, where water is forced towards the scoops at high speed. This is much more efficient than traditional wheels which used low speed water and gravity over the height of the wheel alone. A Pelton wheel increases power based on how fast the water is moving rather than just how big the wheel is.
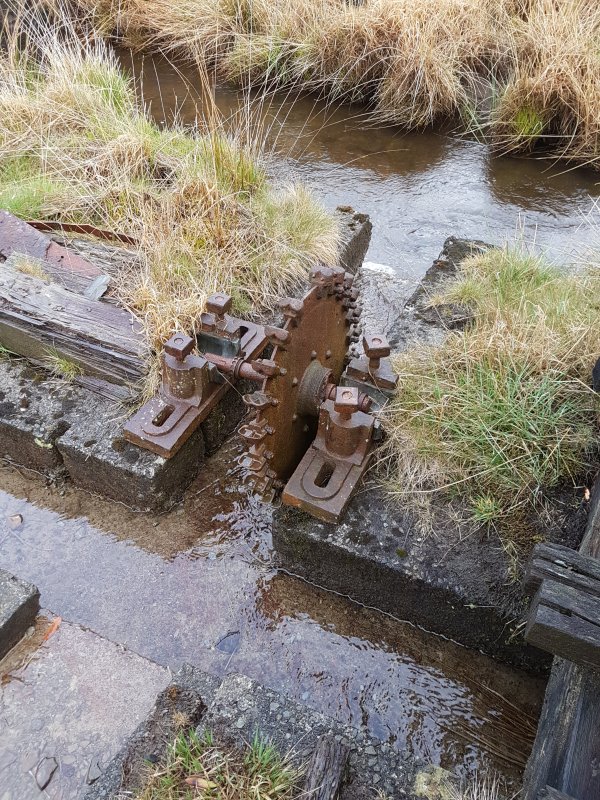 A tiny Pelton wheel.
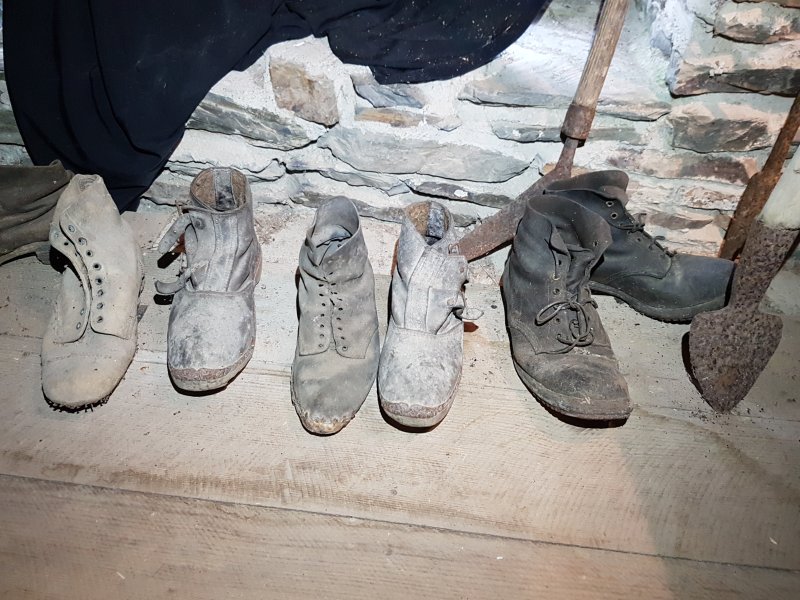 Time for some museum pieces, starting with a series of shoes showing the types miners would have worn in these mines, which also shows what produces the different footprints that we see.
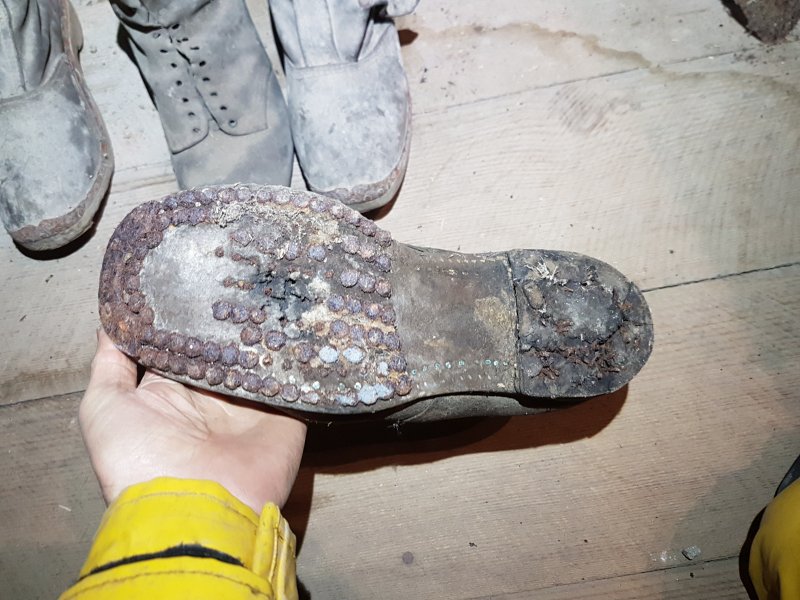 Hobnail boot.
Modelling by Tarquin
Hobnail boot.
Modelling by Tarquin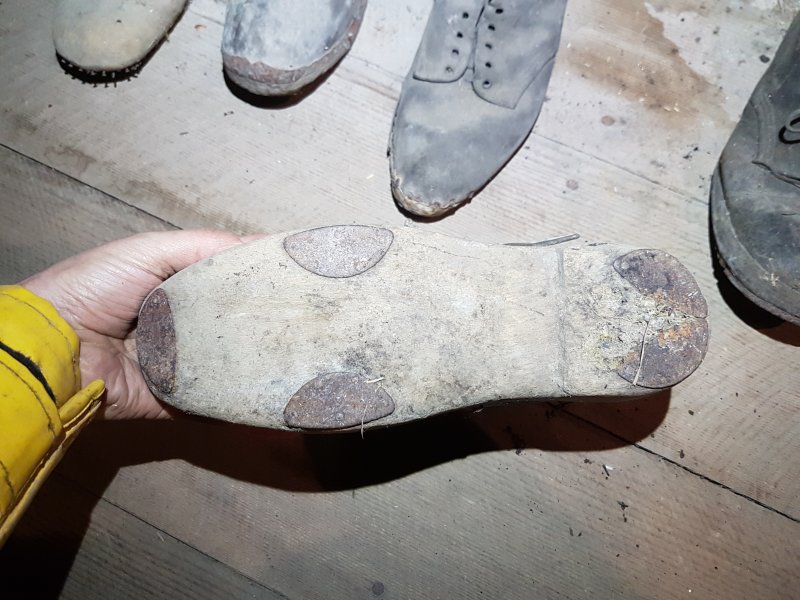 A clog-like sole with plates.
Modelling by Tarquin
A clog-like sole with plates.
Modelling by Tarquin The bottom of these plated shoes was curved, so produces a very odd print.
Modelling by Tarquin
The bottom of these plated shoes was curved, so produces a very odd print.
Modelling by Tarquin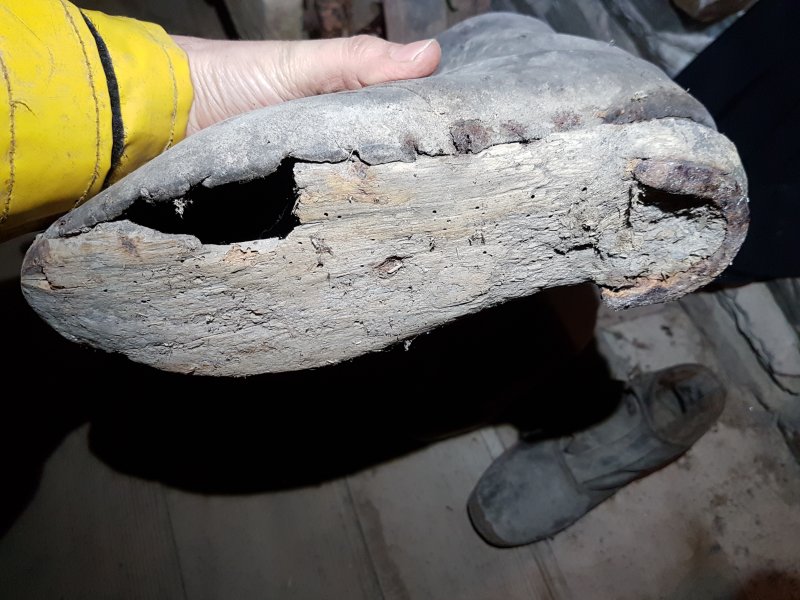 Shoe with a horseshoe heel.
Modelling by Tarquin
Shoe with a horseshoe heel.
Modelling by Tarquin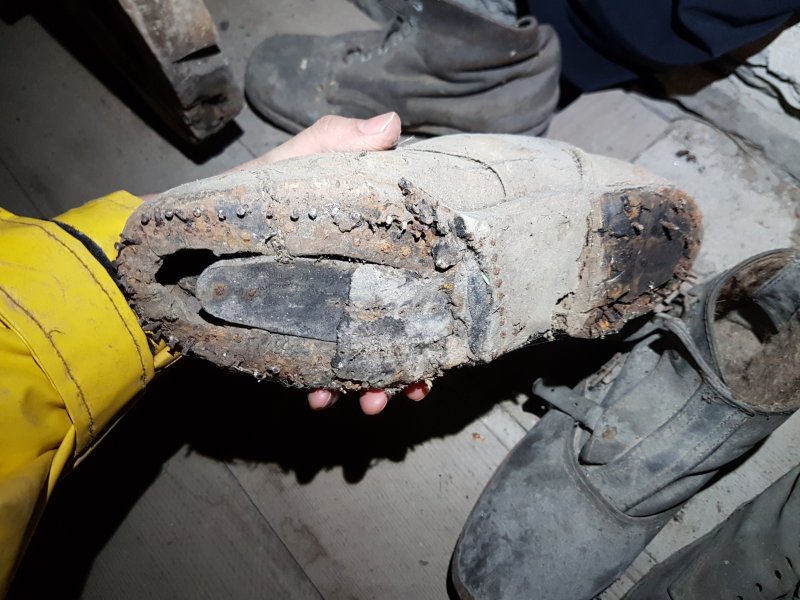 Shoe for a miner who is down on his luck.
Modelling by Tarquin
Shoe for a miner who is down on his luck.
Modelling by Tarquin Mining trucks, with an early non-flanged wheel on the tracks to the right.
 Tram trucks with two different types of wheel. The early trams had no flanges on the wheel at all, so the rails had a flange instead (known as a flangeway). Most trains, trams and trucks have the flange on the inside of the wheel (inboard), like the truck on the right. This aids turning corners because when the centre of balance shifts over the outer wheel of the curve and the slightly conical wheels are at their stability limit, the flange on the outer wheel holds the wheel onto the rail. The truck on the left has outer flanges, so if the inner wheel lifts slightly off the rail when turning corners, the flanges cannot help, and it derails. That is why this design is not used for railways. In addition, the way that a normal train wheel rides up its slight cone on a curve causes the outer wheel to have a larger radius than the inner wheel, which means that the grip is maintained for both wheels over the different lengths of the inner and outer sides of the curve - this is much harder to design with an outer flange. An outer flange requires a reversed design for points, and will derail at standard points.
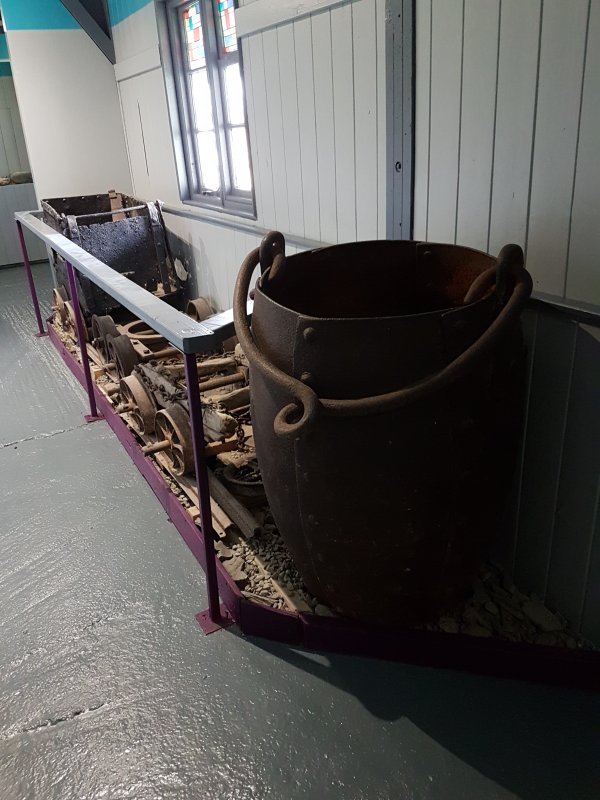 A well preserved kibble.
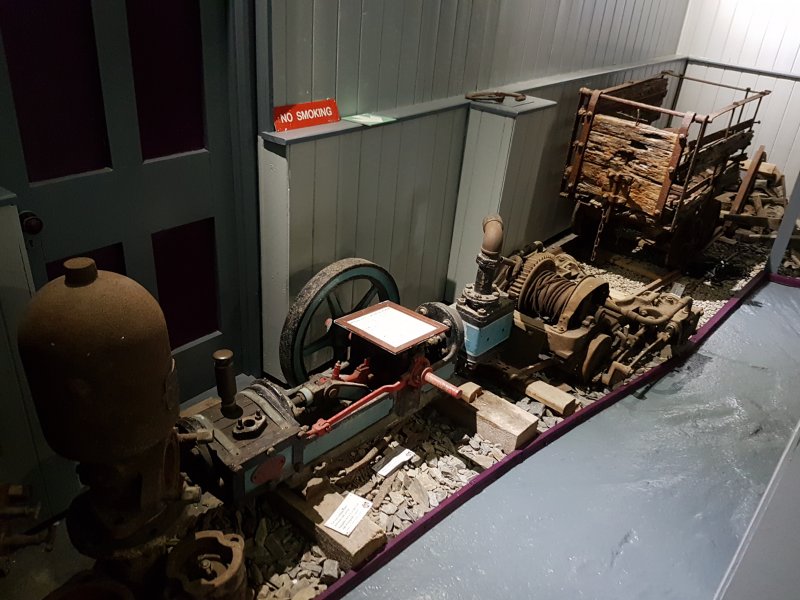 Small engine, winch and truck.
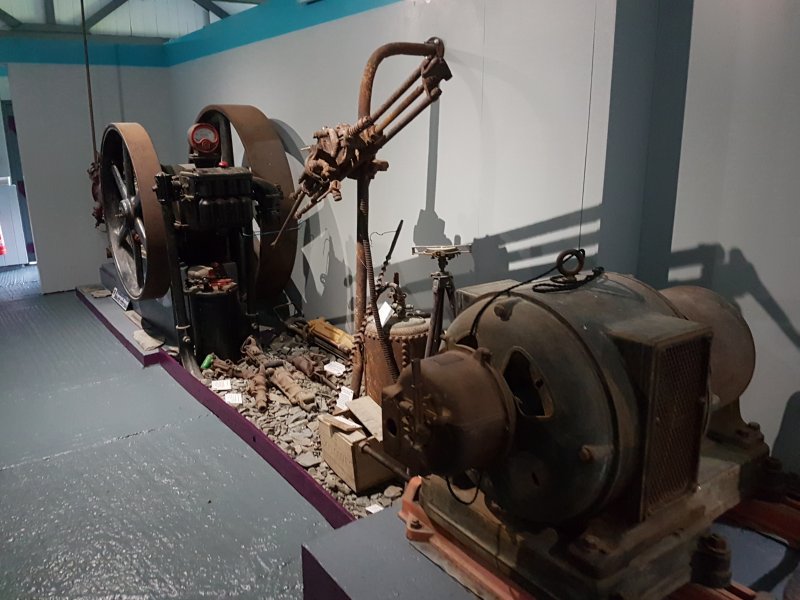 Pulleys and motor.
 Kibble and mine shaft winch cage.
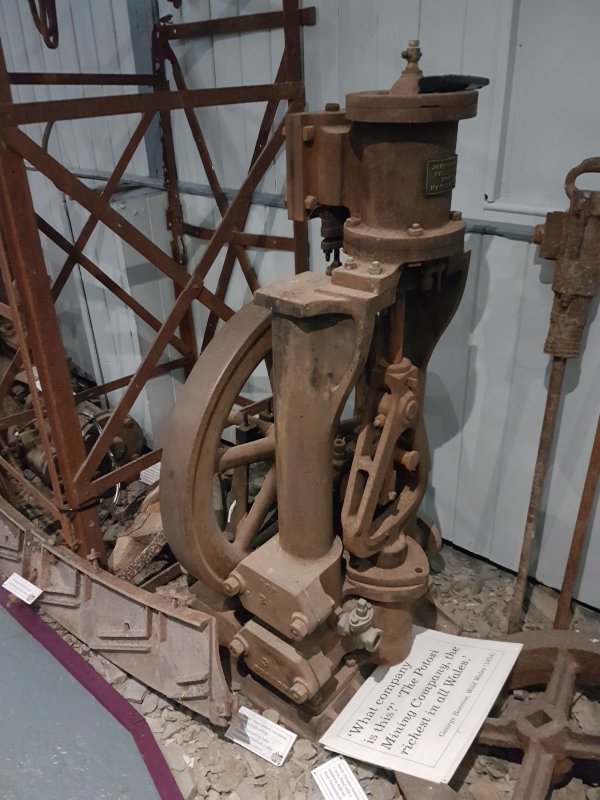 Vertical ram pump.