Little Neath River Cave trips 13/08/2022 and 17/09/2022
Unless otherwise stated, camera, setups, lighting, edits and gallery effects by Tarquin. Modelling and lighting at various points will be Pete Bolt, Lizzy Bolt, Henry Bolt and Steph Andrews.
The longer trip, which included Sump 2, Genesis Gallery, Old Word Series and The Canal and Canal Bypass round trip, took 8 hours, with a relaxed pace and plenty of time for photography. The shorter trip, which did not include Genesis Gallery or Old Word Series, took 4.5 hours, with much more photography.
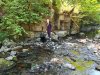 The entrance lies in the bank of the Nedd Fechan (Little Neath) river, and even in these drought conditions, it was still taking a surprising amount of water.
Modelling by Pete
The entrance lies in the bank of the Nedd Fechan (Little Neath) river, and even in these drought conditions, it was still taking a surprising amount of water.
Modelling by Pete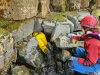 The entrance is notorious for being wet, and in flood conditions can disappear completely under water with very little effort.
Modelling by Lizzy and Pete
The entrance is notorious for being wet, and in flood conditions can disappear completely under water with very little effort.
Modelling by Lizzy and Pete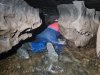 Crawling through the entrance passage. In higher water conditions, the airspace is much smaller, and you control your speed by blocking more of the water flow with your legs. The water had only just left the surface on a baking hot day, and was luxuriously warm.
Modelling by Lizzy, lighting by Tarquin and Lizzy
Crawling through the entrance passage. In higher water conditions, the airspace is much smaller, and you control your speed by blocking more of the water flow with your legs. The water had only just left the surface on a baking hot day, and was luxuriously warm.
Modelling by Lizzy, lighting by Tarquin and Lizzy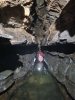 The crawl ends at a duck. It is not even slightly intimidating in these conditions. Smaller cavers can wriggle through the rift above, but we all chose to go through the duck.
Modelling by Lizzy, lighting by Tarquin and Lizzy
The crawl ends at a duck. It is not even slightly intimidating in these conditions. Smaller cavers can wriggle through the rift above, but we all chose to go through the duck.
Modelling by Lizzy, lighting by Tarquin and Lizzy Beyond the duck is Tributary Passage.
Modelling by Henry and Pete, lighting by Tarquin, Lizzy, Henry and Pete
Beyond the duck is Tributary Passage.
Modelling by Henry and Pete, lighting by Tarquin, Lizzy, Henry and Pete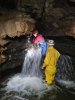 Climbing down a small waterfall in Tributary Passage.
Modelling by Pete and Lizzy, lighting by Tarquin, Henry, Lizzy and Pete
Climbing down a small waterfall in Tributary Passage.
Modelling by Pete and Lizzy, lighting by Tarquin, Henry, Lizzy and Pete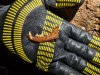 The jawbone of what appears to be a cat, in the choke in Tributary Passage. This had been washed in during a flood.
Modelling by Steph's glove and a partial Tibbles, lighting by Tarquin and Steph
The jawbone of what appears to be a cat, in the choke in Tributary Passage. This had been washed in during a flood.
Modelling by Steph's glove and a partial Tibbles, lighting by Tarquin and Steph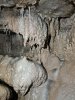 Formations in Tributary Passage.
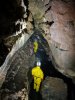 Beyond the junction with Blaen Nedd Isaf Passage, Tributary Passage becomes quite tall.
Modelling by Henry and Pete, lighting by Tarquin, Lizzy, Henry and Pete
Beyond the junction with Blaen Nedd Isaf Passage, Tributary Passage becomes quite tall.
Modelling by Henry and Pete, lighting by Tarquin, Lizzy, Henry and Pete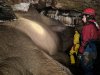 Flowstone bank in Tributary Passage.
Modelling by Lizzy and Henry, lighting by Tarquin, Lizzy, Henry and Pete
Flowstone bank in Tributary Passage.
Modelling by Lizzy and Henry, lighting by Tarquin, Lizzy, Henry and Pete Above the flowstone bank is a small aven coated with calcite.
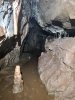 Beside it is a crawling sized passage with some broken stal.
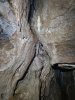 The crawl ends in a small enlargement with some stal which is concealed in a narrow cleft.
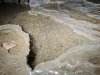 A flat out crawl leads to some small crystal pools.
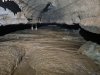 The way on then becomes far too low for most cavers.
 Tributary Passage then splits into upper and lower routes, with the lower route, seen here, carrying the river.
Modelling by Henry, lighting by Tarquin, Henry and Lizzy
Tributary Passage then splits into upper and lower routes, with the lower route, seen here, carrying the river.
Modelling by Henry, lighting by Tarquin, Henry and Lizzy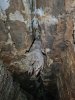 The upper oxbow is better decorated, starting with this formation in the ceiling.
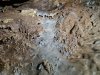 Flowstone with botryoids in the oxbow.
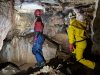 Grotto in the oxbow.
Modelling by Lizzy and Henry, lighting by Tarquin, Lizzy, Henry and Pete
Grotto in the oxbow.
Modelling by Lizzy and Henry, lighting by Tarquin, Lizzy, Henry and Pete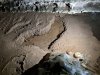 Crystal pools in the grotto.
 Bead-like crystals in the grotto.
 Crystal pools emptying into a channel beside the grotto.
Modelling by Steph, lighting by Tarquin and Steph
Crystal pools emptying into a channel beside the grotto.
Modelling by Steph, lighting by Tarquin and Steph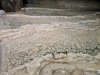 The channel rejoins as a series of crystal pools.
 Remains of a stonefly (larva?) on the gours. There were several of these in the grotto, and all appear to be dead larvae, or adults without wings, not exuviae. The species is hard to identify, but it looks like a Dinocras cephalotes adult, with the wings fallen off (perhaps those is the mouldy remains next to it).
Modelling by Simon Brundle
Remains of a stonefly (larva?) on the gours. There were several of these in the grotto, and all appear to be dead larvae, or adults without wings, not exuviae. The species is hard to identify, but it looks like a Dinocras cephalotes adult, with the wings fallen off (perhaps those is the mouldy remains next to it).
Modelling by Simon Brundle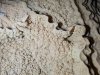 The lip of a gour.
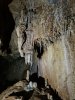 Textured stalactites.
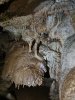 Stal shelf.
 Flowstone and crystal pool.
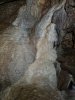 Flowstone on the wall.
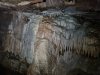 Wall of the grotto.
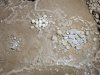 Cave pearls in the grotto. The smooth ones are the best, while the jagged ones have stopped rolling when the water splashes on them, so they have begun to form angular crystals.
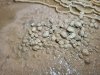 Cave pearls in the grotto.
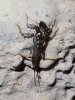 Exuvia (shed skin) of a stonefly. This appears to be a Perla bipunctata, or something similar to that.
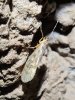 Elaborate caddisfly. This appears to be a Halesus radiatus.
Modelling by Lacey
Elaborate caddisfly. This appears to be a Halesus radiatus.
Modelling by Lacey Window from the grotto back into the stream. The climbs down from the grotto are quite tricky, and it is best to return via the river route.
Modelling by Henry and Pete, lighting by Tarquin, Lizzy, Henry and Pete
Window from the grotto back into the stream. The climbs down from the grotto are quite tricky, and it is best to return via the river route.
Modelling by Henry and Pete, lighting by Tarquin, Lizzy, Henry and Pete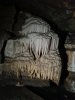 Tiered formation in the wall of Tributary Passage.
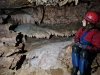 The river then flows through a very small slot, and the way on is via an oxbow, with these formations.
Modelling by Lizzy
The river then flows through a very small slot, and the way on is via an oxbow, with these formations.
Modelling by Lizzy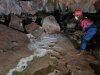 Flowstone on the floor of the oxbow. Sadly, a static picture cannot capture the crazy amount of glittering from this formation. The wall of this oxbow appears to be a silt-filled connection to the end of Mud Hall.
Modelling by Lizzy
Flowstone on the floor of the oxbow. Sadly, a static picture cannot capture the crazy amount of glittering from this formation. The wall of this oxbow appears to be a silt-filled connection to the end of Mud Hall.
Modelling by Lizzy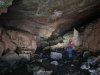 The junction with Canal Bypass, seen at the top of the flowstone on the left. The passage now assumes very large proportions, which it holds for most of the rest of the trip.
Modelling by Lizzy, lighting by Tarquin and Lizzy
The junction with Canal Bypass, seen at the top of the flowstone on the left. The passage now assumes very large proportions, which it holds for most of the rest of the trip.
Modelling by Lizzy, lighting by Tarquin and Lizzy Beautifully arched section before the junction with Mud Hall.
Modelling by Lizzy, lighting by Tarquin and Lizzy
Beautifully arched section before the junction with Mud Hall.
Modelling by Lizzy, lighting by Tarquin and Lizzy At the junction with Mud Hall, where the cave finally shows its true grandure.
Modelling by Lizzy, lighting by Tarquin and Lizzy
At the junction with Mud Hall, where the cave finally shows its true grandure.
Modelling by Lizzy, lighting by Tarquin and Lizzy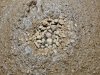 Rather poor cave pearls in Mud Hall.
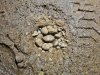 Cave pearls.
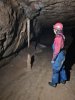 Stereotypical formations in Mud Hall.
Modelling by Lizzy
Stereotypical formations in Mud Hall.
Modelling by Lizzy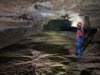 Mud Hall ends with a large flowstone river.
Modelling by Lizzy, lighting by Tarquin and Lizzy
Mud Hall ends with a large flowstone river.
Modelling by Lizzy, lighting by Tarquin and Lizzy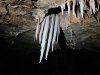 Stalactites in Mud Hall.
 Formations at the upper end of the flowstone river in Mud Hall. The passage chokes immediately afterwards.
Modelling by Steph, lighting by Tarquin and Steph
Formations at the upper end of the flowstone river in Mud Hall. The passage chokes immediately afterwards.
Modelling by Steph, lighting by Tarquin and Steph Cave pearls are normally rare, but Mud Hall has an impressive selection of them.
 Cave pearls in Mud Hall, some of the best in the cave.
 Partially re-cemented cave pearls.
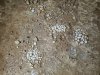 Several sets of cave pearls.
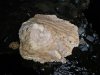 A large, fallen block of calcite in the river below Mud Hall. This is slowly being redissolved by the river.
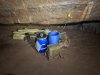 The rescue dump in Sand Chamber. There is a very real prospect of being flooded in here; it has happened in the past (1967, 1970, 5 times in 1985, 1988). As a result, there is a rescue dump with emergency supplies that can be used in emergencies.
Lighting by Tarquin and Lizzy
The rescue dump in Sand Chamber. There is a very real prospect of being flooded in here; it has happened in the past (1967, 1970, 5 times in 1985, 1988). As a result, there is a rescue dump with emergency supplies that can be used in emergencies.
Lighting by Tarquin and Lizzy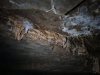 Ceiling of Sand Chamber.
 The main grotto of Sand Chamber, which sits up on a shelf.
Modelling by Lizzy, lighting by Tarquin and Lizzy
The main grotto of Sand Chamber, which sits up on a shelf.
Modelling by Lizzy, lighting by Tarquin and Lizzy Formations in the passage leading to Sump 1.
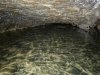 In low and normal water conditions, Sump 1 brings in the rest of the river's water from Bridge Cave. This 20 metre sump is the original way that the cave was found, before the current entrance was opened.
 The combined river flows into one of the cave's most iconic passages; The Canal.
Modelling by Lizzy, lighting by Tarquin and Lizzy
The combined river flows into one of the cave's most iconic passages; The Canal.
Modelling by Lizzy, lighting by Tarquin and Lizzy Far from being uncomfortable, this passage is very easy, and quite magical. You simply lie down and float along, pulling yourself along the floor with your hands. The worst feature are the insects flying around your light.
Modelling by Lizzy, lighting by Tarquin and Lizzy
Far from being uncomfortable, this passage is very easy, and quite magical. You simply lie down and float along, pulling yourself along the floor with your hands. The worst feature are the insects flying around your light.
Modelling by Lizzy, lighting by Tarquin and Lizzy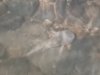 The Canal's best features (assuming you like them) are the fish that swim around your hands and even between your fingers. They seem completely unafraid, and may even pose for photographs. This appears to be a bullhead (Cottus gobio) rather than the more common blanched trout, and swam with us for some time. At nearly 10 cm long, this was a particularly large example. They are well fed by the amount of insects and larvae that are brought in by the river. Since there is absolutely no light in the cave, the fish navigate almost entirely by using their lateral line sensors, with their eyes being essentially vestigial but functional.
Modelling by Aquataurus
The Canal's best features (assuming you like them) are the fish that swim around your hands and even between your fingers. They seem completely unafraid, and may even pose for photographs. This appears to be a bullhead (Cottus gobio) rather than the more common blanched trout, and swam with us for some time. At nearly 10 cm long, this was a particularly large example. They are well fed by the amount of insects and larvae that are brought in by the river. Since there is absolutely no light in the cave, the fish navigate almost entirely by using their lateral line sensors, with their eyes being essentially vestigial but functional.
Modelling by Aquataurus After The Canal, the passage gets named Main Stream, though this is really the same passage as before. The end of Canal Bypass is behind the camera.
Modelling by Pete and Lizzy, lighting by Tarquin, Pete and Lizzy
After The Canal, the passage gets named Main Stream, though this is really the same passage as before. The end of Canal Bypass is behind the camera.
Modelling by Pete and Lizzy, lighting by Tarquin, Pete and Lizzy Blanched trout in Main Stream. These have no pigmentation, but would soon gain pigmentation if taken out into daylight. Their eyes clearly work, as it reacted to our lights by hiding under a rock. (The picture is as blurry as you might expect, since it was taken through 30 cm of fast flowing water, and the fish was moving. Deal with it.)
Modelling by Brithyllgwyn, lighting by Tarquin and Steph
Blanched trout in Main Stream. These have no pigmentation, but would soon gain pigmentation if taken out into daylight. Their eyes clearly work, as it reacted to our lights by hiding under a rock. (The picture is as blurry as you might expect, since it was taken through 30 cm of fast flowing water, and the fish was moving. Deal with it.)
Modelling by Brithyllgwyn, lighting by Tarquin and Steph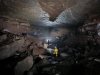 Main Stream soon reaches the widest passage in the cave. The fog here is caused by the warm river and cold cave. In person, it was hard to see this passage due to the fog, so the picture is perhaps the best way to see it.
Modelling by Pete and Lizzy, lighting by Tarquin, Pete and Lizzy
Main Stream soon reaches the widest passage in the cave. The fog here is caused by the warm river and cold cave. In person, it was hard to see this passage due to the fog, so the picture is perhaps the best way to see it.
Modelling by Pete and Lizzy, lighting by Tarquin, Pete and Lizzy Beyond the widest passage.
Modelling by Lizzy and Pete, lighting by Tarquin, Lizzy and Pete
Beyond the widest passage.
Modelling by Lizzy and Pete, lighting by Tarquin, Lizzy and Pete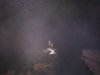 The walls then disappear, and all that remains is fog. This is the start of Bouncing Boulder Hall, and in person, this is all you see. The warmed river flows steeply through a jumble of boulders at the start of the chamber, dramatically increasing the humidity. It completely fills the cold cave air with the fog, so that nothing else is visible. Moving to get away from your evaporation cloud cannot help, because the fog is everywhere.
Modelling by Lizzy and Pete, lighting by Tarquin, Lizzy and Pete
The walls then disappear, and all that remains is fog. This is the start of Bouncing Boulder Hall, and in person, this is all you see. The warmed river flows steeply through a jumble of boulders at the start of the chamber, dramatically increasing the humidity. It completely fills the cold cave air with the fog, so that nothing else is visible. Moving to get away from your evaporation cloud cannot help, because the fog is everywhere.
Modelling by Lizzy and Pete, lighting by Tarquin, Lizzy and Pete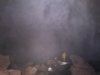 The moment you stand still, the water evaporating from your clothing adds to the effect, and your vision is reduced even further. I want you to remember this as you see the next picture, as all three pictures of this chamber are taken from the same spot, and the only real change is the lighting.
Modelling by Lizzy and Pete, lighting by Tarquin, Lizzy and Pete
The moment you stand still, the water evaporating from your clothing adds to the effect, and your vision is reduced even further. I want you to remember this as you see the next picture, as all three pictures of this chamber are taken from the same spot, and the only real change is the lighting.
Modelling by Lizzy and Pete, lighting by Tarquin, Lizzy and Pete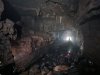 Bouncing Boulder Hall in all its glory. This photograph took a lot of effort. Shouting instructions to models over the roar of the river was nearly impossible, so I ran across the chamber several times to adjust the lighting, and to ask the models to change their poses. I am not entirely happy with the result, mainly because of the glare caused by the foggy conditions, but it helps to give an honest impression of how foggy it really is here. Considering how little you could see in person, this is a result I did not think would be possible at the time.
Modelling by Lizzy and Pete, lighting by Tarquin, Lizzy and Pete
Bouncing Boulder Hall in all its glory. This photograph took a lot of effort. Shouting instructions to models over the roar of the river was nearly impossible, so I ran across the chamber several times to adjust the lighting, and to ask the models to change their poses. I am not entirely happy with the result, mainly because of the glare caused by the foggy conditions, but it helps to give an honest impression of how foggy it really is here. Considering how little you could see in person, this is a result I did not think would be possible at the time.
Modelling by Lizzy and Pete, lighting by Tarquin, Lizzy and Pete The river then returns to smaller dimensions as it approaches the water table.
Modelling by Lizzy and Pete, lighting by Tarquin, Lizzy and Pete
The river then returns to smaller dimensions as it approaches the water table.
Modelling by Lizzy and Pete, lighting by Tarquin, Lizzy and Pete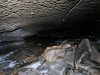 The Main Stream then reduces to a very low duck.
 The normal way downstream is to bypass the duck via a climb overhead. The first step is a little high, and may need a human ladder.
Modelling by Lizzy and Pete, lighting by Tarquin, Lizzy and Pete
The normal way downstream is to bypass the duck via a climb overhead. The first step is a little high, and may need a human ladder.
Modelling by Lizzy and Pete, lighting by Tarquin, Lizzy and Pete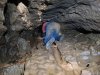 Crawling through the bypass.
Modelling by Lizzy, lighting by Tarquin and Lizzy
Crawling through the bypass.
Modelling by Lizzy, lighting by Tarquin and Lizzy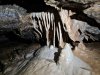 Formations at the end of the bypass.
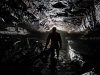 The lower river, beyond the duck.
Modelling by Pete
The lower river, beyond the duck.
Modelling by Pete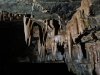 Formations in the lower river.
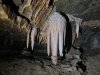 A rather "special" formation in the lower river.
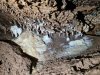 Formations beneath a lip.
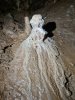 Botryoidal stalagmite in a small aven.
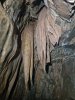 Stalactites in the aven.
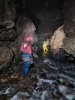 Shortly before the sump.
Modelling by Lizzy and Pete, lighting by Tarquin, Lizzy and Pete
Shortly before the sump.
Modelling by Lizzy and Pete, lighting by Tarquin, Lizzy and Pete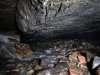 For dry cavers, the cave ends at Sump 2. However, for divers, there is another 2 km of cave beyond this point, ending at Sump 8. The dry section contains a lot of large passage.
 Beside the sump is the climb into Gyrn Fawr Passage. This is made up of cobbles and mud, and does not feel safe at all.
Modelling by Pete, lighting by Tarquin and Pete
Beside the sump is the climb into Gyrn Fawr Passage. This is made up of cobbles and mud, and does not feel safe at all.
Modelling by Pete, lighting by Tarquin and Pete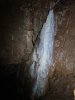 Flowstone in the lower chamber.
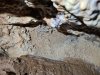 Crystal pool on the climb to the upper chamber.
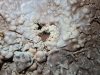 Calcited drip pocket in the upper chamber.
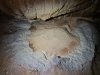 The upper chamber of Gyrn Fawr Passage is dominated by a huge drip splash formation, about 3 metres across. This needs a human for scale, but I was the only one to get here.
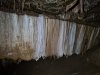 The ceiling would once have been quite beautiful, but too many people have used it for support, and there are a lot of muddy hand prints.
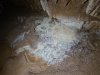 A second drip formation beyond the main one.
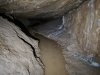 Gyrn Fawr Passage ends at a dig. This heads into the unknown, and would probably bypass the sump, but it is a long way away from any known passage.
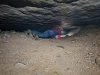 Returning to the widest part of Main Stream, above the sediment bank on the side is a crawl over cobbles into Genesis Gallery.
Modelling by Steph, lighting by Tarquin and Steph
Returning to the widest part of Main Stream, above the sediment bank on the side is a crawl over cobbles into Genesis Gallery.
Modelling by Steph, lighting by Tarquin and Steph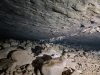 Formations in the crawl.
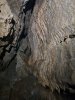 The crawl ends at a rift. The formations here are naturally dull, but glow peach when lit correctly.
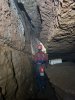 The passage has the remains of a campsite. On the right is an undercut, and the way to 3D maze and Old World Series is in the undercut; the easiest route is at the far end of the undercut. The way along Genesis Gallery is to continue along the rift.
Modelling by Steph, lighting by Tarquin and Steph
The passage has the remains of a campsite. On the right is an undercut, and the way to 3D maze and Old World Series is in the undercut; the easiest route is at the far end of the undercut. The way along Genesis Gallery is to continue along the rift.
Modelling by Steph, lighting by Tarquin and Steph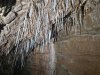 Straws in the rift.
 Flowstone in the rift.
Modelling by Steph, lighting by Tarquin and Steph
Flowstone in the rift.
Modelling by Steph, lighting by Tarquin and Steph Genesis Gallery widens into a bedding.
Modelling by Steph, lighting by Tarquin and Steph
Genesis Gallery widens into a bedding.
Modelling by Steph, lighting by Tarquin and Steph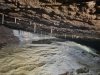 Crystal pools in a flat out part of the bedding.
Lighting by Tarquin and Steph
Crystal pools in a flat out part of the bedding.
Lighting by Tarquin and Steph Genesis Gallery has several grottos, with this one being after the flat out section.
Modelling by Steph, lighting by Tarquin and Steph
Genesis Gallery has several grottos, with this one being after the flat out section.
Modelling by Steph, lighting by Tarquin and Steph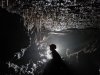 Straw grotto with translucent curtains in Genesis Gallery.
Modelling by Steph
Straw grotto with translucent curtains in Genesis Gallery.
Modelling by Steph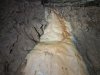 Small calcite flow in Genesis Gallery.
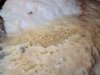 Small crystal pool in the calcite flow.
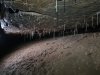 Straw-filled bank in Genesis Gallery. The way on is to the right of these, but there are some avens worth looking at ahead first. The small stream flows down the passage, and really looks like it should be the way on, but beyond the avens, it becomes very low and chokes.
Lighting by Tarquin and Steph
Straw-filled bank in Genesis Gallery. The way on is to the right of these, but there are some avens worth looking at ahead first. The small stream flows down the passage, and really looks like it should be the way on, but beyond the avens, it becomes very low and chokes.
Lighting by Tarquin and Steph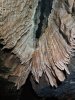 Calcited aven.
Lighting by Tarquin and Steph
Calcited aven.
Lighting by Tarquin and Steph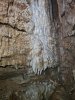 The last aven has more flowstone.
Lighting by Tarquin and Steph
The last aven has more flowstone.
Lighting by Tarquin and Steph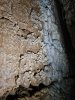 The wall of the aven has hundreds of little calcite projections that look like teeth, so we decided that this should be called Tooth Fairy's Castle.
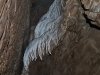 Top of the calcited aven.
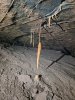 Carrot in the bypass passage behind the straw bank.
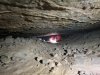 The bypass passage soon lowers to a flat out crawl which looks very low.
Modelling by Steph, lighting by Tarquin and Steph
The bypass passage soon lowers to a flat out crawl which looks very low.
Modelling by Steph, lighting by Tarquin and Steph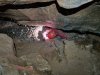 The flat out section regains the main passage of Genesis Gallery.
Modelling by Steph, lighting by Tarquin and Steph
The flat out section regains the main passage of Genesis Gallery.
Modelling by Steph, lighting by Tarquin and Steph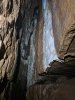 Another calcited aven.
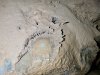 Mud splash formation in the regained passage.
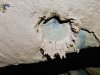 Mud splash formation.
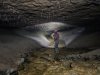 The passage then widens, and lowers again to eventually end. The water is regained in the Main Stream shortly before the sump.
Modelling by Steph, lighting by Tarquin and Steph
The passage then widens, and lowers again to eventually end. The water is regained in the Main Stream shortly before the sump.
Modelling by Steph, lighting by Tarquin and Steph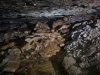 Flowstone emerging from Genesis Inlet.
Lighting by Tarquin and Steph
Flowstone emerging from Genesis Inlet.
Lighting by Tarquin and Steph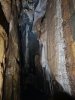 Water pouring from Genesis Inlet. This is a decorated passage with several climbs and avens. The first climb requires a 6 metre maypole, and is too risky to free climb. Sadly the maypole at the climb is no longer usable, so the inlet is inaccessible.
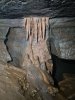 The route into 3D Maze starts with a bedding containing some formations.
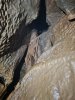 The formations continue in the cleft below. However, if you see these, then you have gone into the cleft too early.
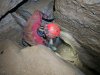 The 3D Maze is a series of slots down next to the wall beside enormous fallen boulders, with gaps leading into undercuts. It can be followed at different levels, but there is actually only one route that actually goes somewhere. The early slots - seen here - are inconvenient. The last gap is the one that actually works relatively easily.
Modelling by Steph, lighting by Tarquin and Steph
The 3D Maze is a series of slots down next to the wall beside enormous fallen boulders, with gaps leading into undercuts. It can be followed at different levels, but there is actually only one route that actually goes somewhere. The early slots - seen here - are inconvenient. The last gap is the one that actually works relatively easily.
Modelling by Steph, lighting by Tarquin and Steph The slot leads down a little climb into the main undercut.
Modelling by Steph
The slot leads down a little climb into the main undercut.
Modelling by Steph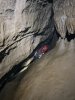 This in turn leads to an awkward thrutch up a narrow slope, trying not to get wedged in the rift below.
Modelling by Steph, lighting by Tarquin and Steph
This in turn leads to an awkward thrutch up a narrow slope, trying not to get wedged in the rift below.
Modelling by Steph, lighting by Tarquin and Steph In the next bedding, a further slot down against the wall is the way on.
Modelling by Steph, lighting by Tarquin and Steph
In the next bedding, a further slot down against the wall is the way on.
Modelling by Steph, lighting by Tarquin and Steph The way down requires an awkward contortion, and although not a particularly tight squeeze, it demands some tactics.
Modelling by Steph, lighting by Tarquin and Steph
The way down requires an awkward contortion, and although not a particularly tight squeeze, it demands some tactics.
Modelling by Steph, lighting by Tarquin and Steph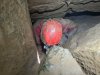 The bottom part is small enough to catch your helmet, but as long as you face in the correct direction, it is passable.
Modelling by Steph, lighting by Tarquin and Steph
The bottom part is small enough to catch your helmet, but as long as you face in the correct direction, it is passable.
Modelling by Steph, lighting by Tarquin and Steph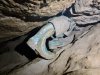 The bottom of the squeeze emerges in a very low undercut, and requires a back bend to slither into it.
Modelling by Steph
The bottom of the squeeze emerges in a very low undercut, and requires a back bend to slither into it.
Modelling by Steph The undercut is the start of Old World Series. A series of steps down boulders arrives at the well decorated section.
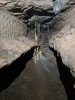 Side grotto in Old World Series.
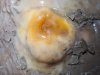 Honey-coloured stalagmite.
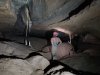 Grotto at the start of Old World Series. Tucked to the right here is a side passage that is very easy to accidentally follow on the way out, either via a little phreas or another undercut, which leads into Crystal River Passage.
Modelling by Steph, lighting by Tarquin and Steph
Grotto at the start of Old World Series. Tucked to the right here is a side passage that is very easy to accidentally follow on the way out, either via a little phreas or another undercut, which leads into Crystal River Passage.
Modelling by Steph, lighting by Tarquin and Steph Parted curtains.
Lighting by Steph
Parted curtains.
Lighting by Steph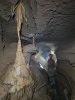 The main passage of Old World Series.
Modelling by Steph, lighting by Tarquin and Steph
The main passage of Old World Series.
Modelling by Steph, lighting by Tarquin and Steph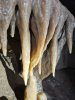 Curtains and stalactites in Old World Series.
Lighting by Tarquin and Steph
Curtains and stalactites in Old World Series.
Lighting by Tarquin and Steph Surge mark mud formations, showing that this part of the cave can flood severely, with water ponding and draining. However, footprints suggest that is has not happened recently.
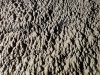 Mud formations.
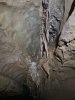 Stalactites above Gooseberry Pot.
 Gooseberry Pot itself is just a drop of several metres at a junction, notable only because it is a potential hazard. It is traversed around, followed by scrambles down and up the ongoing passage.
Modelling by Steph, lighting by Tarquin and Steph
Gooseberry Pot itself is just a drop of several metres at a junction, notable only because it is a potential hazard. It is traversed around, followed by scrambles down and up the ongoing passage.
Modelling by Steph, lighting by Tarquin and Steph The ongoing passage is very muddy, with some heavily mud coated formations.
Modelling by Steph
The ongoing passage is very muddy, with some heavily mud coated formations.
Modelling by Steph Pool on a corner that threatens to soak passing cavers.
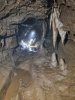 By now, we were liberally coated in mud, and this passage really has no redeeming features.
Modelling by Steph, lighting by Tarquin and Steph
By now, we were liberally coated in mud, and this passage really has no redeeming features.
Modelling by Steph, lighting by Tarquin and Steph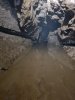 We decided not to push through the next wet crawl to reach the bitter end. We had done enough.
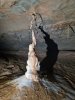 Broken column at the start of Crystal River Passage. It could not make up its mind which direction to grow, so it just went in all directions. The breakage seems to be caused by subsidance from passing cavers, as the route passes over the stalagmite's base.
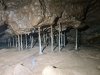 Straw columns in Crystal River Passage.
 An early part of Crystal River Passage.
Modelling by Steph, lighting by Tarquin and Steph
An early part of Crystal River Passage.
Modelling by Steph, lighting by Tarquin and Steph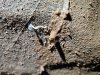 A tiny helictite, barely larger than a drip of water.
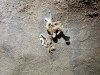 More tiny helictites.
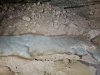 The Crystal River is a small calcite flow, with very clean calcite. At first, it seems rather minimal.
Lighting by Tarquin and Steph
The Crystal River is a small calcite flow, with very clean calcite. At first, it seems rather minimal.
Lighting by Tarquin and Steph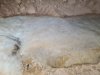 The Crystal River.
 The most impressive feature of the Crystal River is that when you move your head even the tiniest amount, it sparkles with a dazzling array of colours. Each crystal seems to form a prism, causing the light to be split into a full rainbow of colours, with the blues and violets being particularly strong. Each dot of colour is especially tiny, so it almost feels like a faulty pixel. Quite mesmerising.
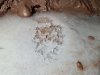 Crystals in the Crystal River.
 Pool with calcite rafts in the Crystal River.
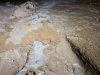 Calcite rafts.
 End of Crystal River Passage.
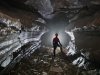 We returned to the Canal Bypass, which starts as a very attractive passage.
Modelling by Lizzy, lighting by Tarquin, Lizzy and Pete
We returned to the Canal Bypass, which starts as a very attractive passage.
Modelling by Lizzy, lighting by Tarquin, Lizzy and Pete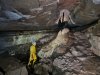 The iconic formation in Canal Bypass.
Modelling by Pete, lighting by Tarquin and Lizzy
The iconic formation in Canal Bypass.
Modelling by Pete, lighting by Tarquin and Lizzy Flowstone.
Lighting by Tarquin and Pete
Flowstone.
Lighting by Tarquin and Pete Curtains and flowstone.
Lighting by Tarquin, Pete and Lizzy
Curtains and flowstone.
Lighting by Tarquin, Pete and Lizzy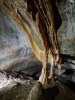 Curtain columns. From here, the way on drops down to a stream, and heads upstream.
Lighting by Tarquin and Lizzy
Curtain columns. From here, the way on drops down to a stream, and heads upstream.
Lighting by Tarquin and Lizzy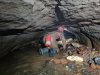 The downstream branch of Canal Bypass, which reaches a climb back up into the passage just before the junction with The Canal.
Modelling by Steph, lighting by Tarquin and Steph
The downstream branch of Canal Bypass, which reaches a climb back up into the passage just before the junction with The Canal.
Modelling by Steph, lighting by Tarquin and Steph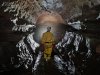 Phreatic tube in Canal Bypass. The stream comes from a side passage called North East Inlet Series.
Modelling by Pete, lighting by Tarquin, Pete and Lizzy
Phreatic tube in Canal Bypass. The stream comes from a side passage called North East Inlet Series.
Modelling by Pete, lighting by Tarquin, Pete and Lizzy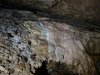 Colourful flowstone.
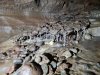 A false floor with stilts.
 Straw columns. These appear to have been formed dry, then submerged and continued forming.
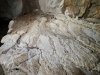 Stal encrusted boulder, with highly detailed texture.
Lighting by Tarquin, Pete and Lizzy
Stal encrusted boulder, with highly detailed texture.
Lighting by Tarquin, Pete and Lizzy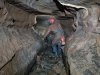 The oxbow leading into North East Inlet Series
Modelling by Steph, lighting by Tarquin and Steph
The oxbow leading into North East Inlet Series
Modelling by Steph, lighting by Tarquin and Steph North East Inlet Series starts with a very impressive set of gour pools.
Modelling by Steph, lighting by Tarquin and Steph
North East Inlet Series starts with a very impressive set of gour pools.
Modelling by Steph, lighting by Tarquin and Steph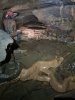 The gours continue upstream, seen here at the junction with its oxbow.
Modelling by Steph, lighting by Tarquin and Steph
The gours continue upstream, seen here at the junction with its oxbow.
Modelling by Steph, lighting by Tarquin and Steph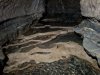 Continuing gours.
 The gours come from a side passage, where they are at their most impressive.
Modelling by Steph, lighting by Tarquin and Steph
The gours come from a side passage, where they are at their most impressive.
Modelling by Steph, lighting by Tarquin and Steph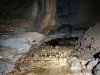 The source of the gours is an extremely low crawl in water. The nearby shovel suggests that this is a dig, so I went no further.
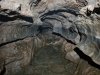 The main passage of North West Inlet Series continues to a pool with a large outflow of water, but no obvious water flowing into it, which was rather confusing.
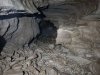 North East Inlet Passage continues for about 400 metres, with a couple of sumps. However, we did not have time to explore further.
 Crawling through the low sections.
Modelling by Lizzy, lighting by Tarquin, Lizzy and Pete
Crawling through the low sections.
Modelling by Lizzy, lighting by Tarquin, Lizzy and Pete False floor on stilts.
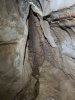 Textured stal alcove.
 The passage ends as a series of gour pools, before dropping down a calcite slope into Tributary Passage. The heat from the river, after the normal cave temperature in Canal Bypass, was quite noticeable, with the air in the passage being several degrees warmer. Time to head upstream through the wet crawl, to return to surface.
Modelling by Lizzy and Pete, lighting by Tarquin, Lizzy and Pete
The passage ends as a series of gour pools, before dropping down a calcite slope into Tributary Passage. The heat from the river, after the normal cave temperature in Canal Bypass, was quite noticeable, with the air in the passage being several degrees warmer. Time to head upstream through the wet crawl, to return to surface.
Modelling by Lizzy and Pete, lighting by Tarquin, Lizzy and Pete
 The entrance lies in the bank of the Nedd Fechan (Little Neath) river, and even in these drought conditions, it was still taking a surprising amount of water.
Modelling by Pete
The entrance lies in the bank of the Nedd Fechan (Little Neath) river, and even in these drought conditions, it was still taking a surprising amount of water.
Modelling by Pete The entrance is notorious for being wet, and in flood conditions can disappear completely under water with very little effort.
Modelling by Lizzy and Pete
The entrance is notorious for being wet, and in flood conditions can disappear completely under water with very little effort.
Modelling by Lizzy and Pete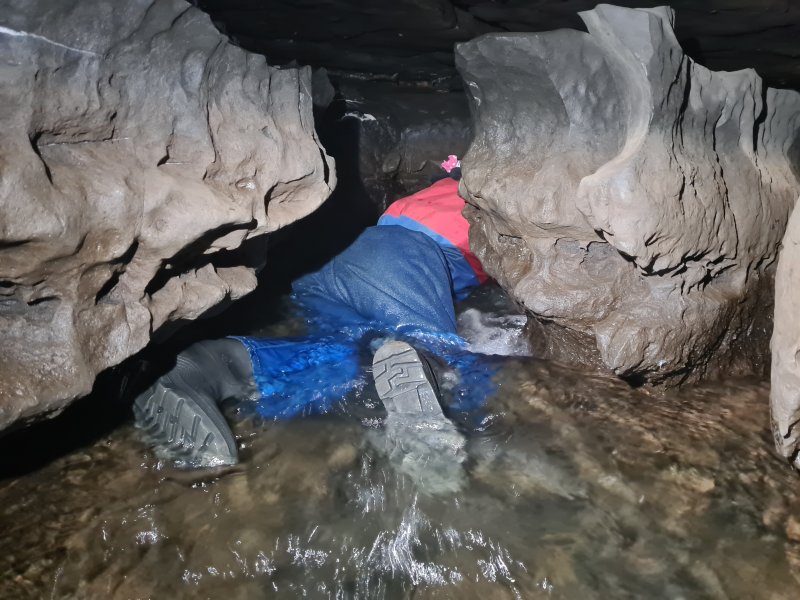 Crawling through the entrance passage. In higher water conditions, the airspace is much smaller, and you control your speed by blocking more of the water flow with your legs. The water had only just left the surface on a baking hot day, and was luxuriously warm.
Modelling by Lizzy, lighting by Tarquin and Lizzy
Crawling through the entrance passage. In higher water conditions, the airspace is much smaller, and you control your speed by blocking more of the water flow with your legs. The water had only just left the surface on a baking hot day, and was luxuriously warm.
Modelling by Lizzy, lighting by Tarquin and Lizzy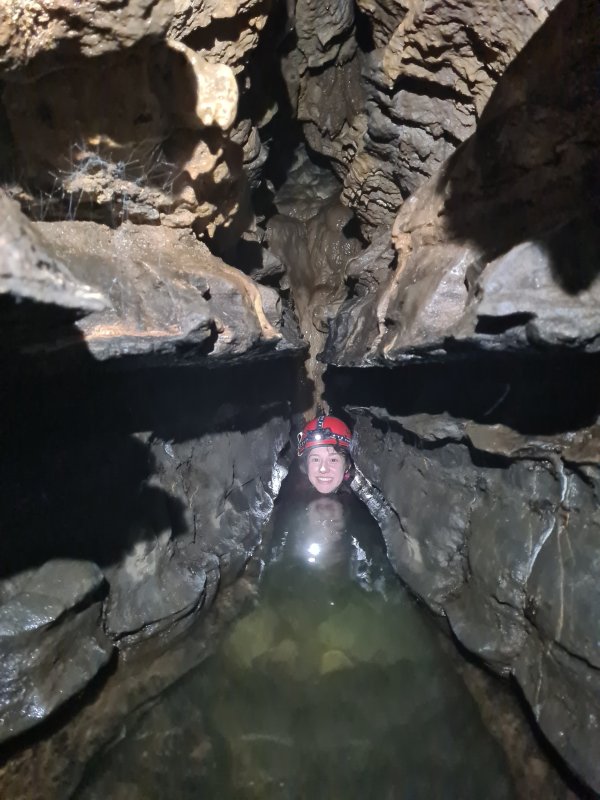 The crawl ends at a duck. It is not even slightly intimidating in these conditions. Smaller cavers can wriggle through the rift above, but we all chose to go through the duck.
Modelling by Lizzy, lighting by Tarquin and Lizzy
The crawl ends at a duck. It is not even slightly intimidating in these conditions. Smaller cavers can wriggle through the rift above, but we all chose to go through the duck.
Modelling by Lizzy, lighting by Tarquin and Lizzy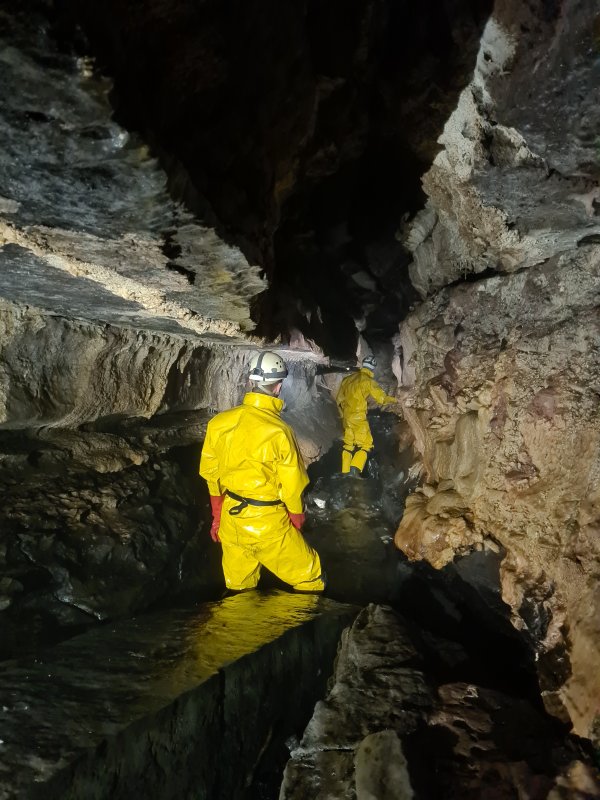 Beyond the duck is Tributary Passage.
Modelling by Henry and Pete, lighting by Tarquin, Lizzy, Henry and Pete
Beyond the duck is Tributary Passage.
Modelling by Henry and Pete, lighting by Tarquin, Lizzy, Henry and Pete Climbing down a small waterfall in Tributary Passage.
Modelling by Pete and Lizzy, lighting by Tarquin, Henry, Lizzy and Pete
Climbing down a small waterfall in Tributary Passage.
Modelling by Pete and Lizzy, lighting by Tarquin, Henry, Lizzy and Pete The jawbone of what appears to be a cat, in the choke in Tributary Passage. This had been washed in during a flood.
Modelling by Steph's glove and a partial Tibbles, lighting by Tarquin and Steph
The jawbone of what appears to be a cat, in the choke in Tributary Passage. This had been washed in during a flood.
Modelling by Steph's glove and a partial Tibbles, lighting by Tarquin and Steph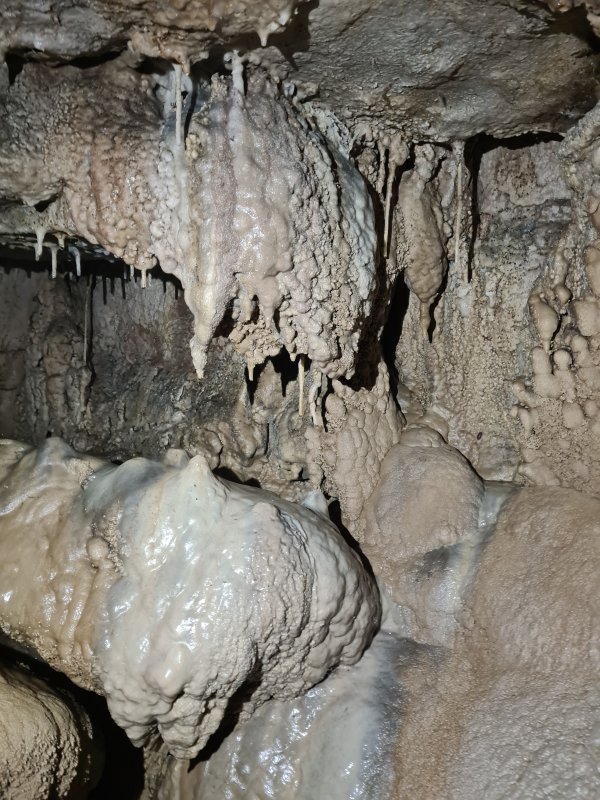 Formations in Tributary Passage.
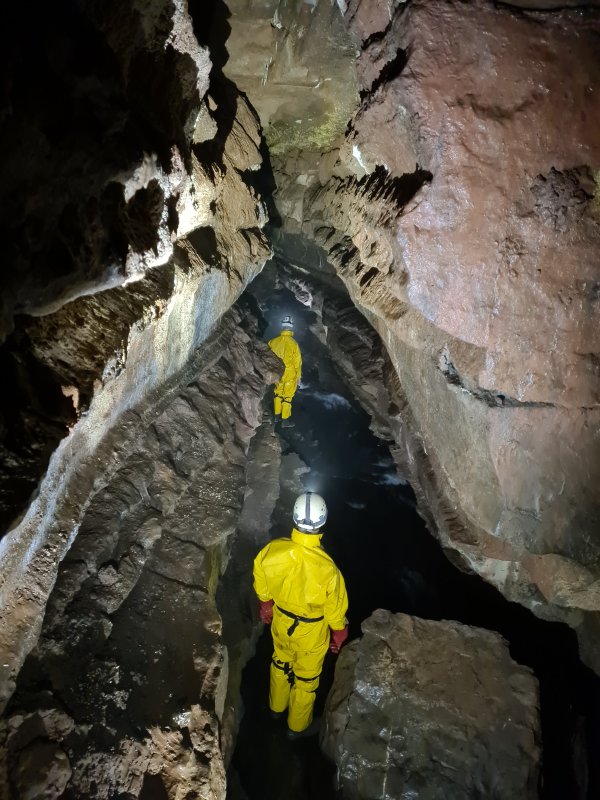 Beyond the junction with Blaen Nedd Isaf Passage, Tributary Passage becomes quite tall.
Modelling by Henry and Pete, lighting by Tarquin, Lizzy, Henry and Pete
Beyond the junction with Blaen Nedd Isaf Passage, Tributary Passage becomes quite tall.
Modelling by Henry and Pete, lighting by Tarquin, Lizzy, Henry and Pete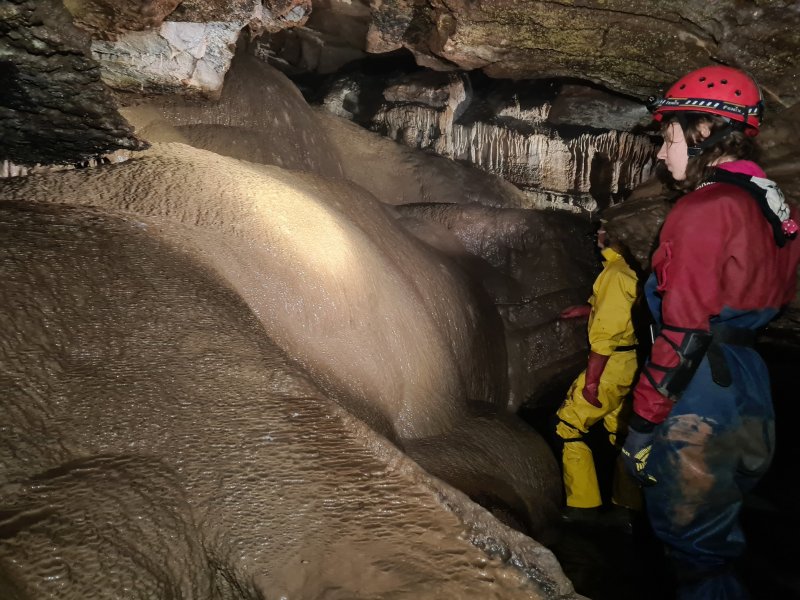 Flowstone bank in Tributary Passage.
Modelling by Lizzy and Henry, lighting by Tarquin, Lizzy, Henry and Pete
Flowstone bank in Tributary Passage.
Modelling by Lizzy and Henry, lighting by Tarquin, Lizzy, Henry and Pete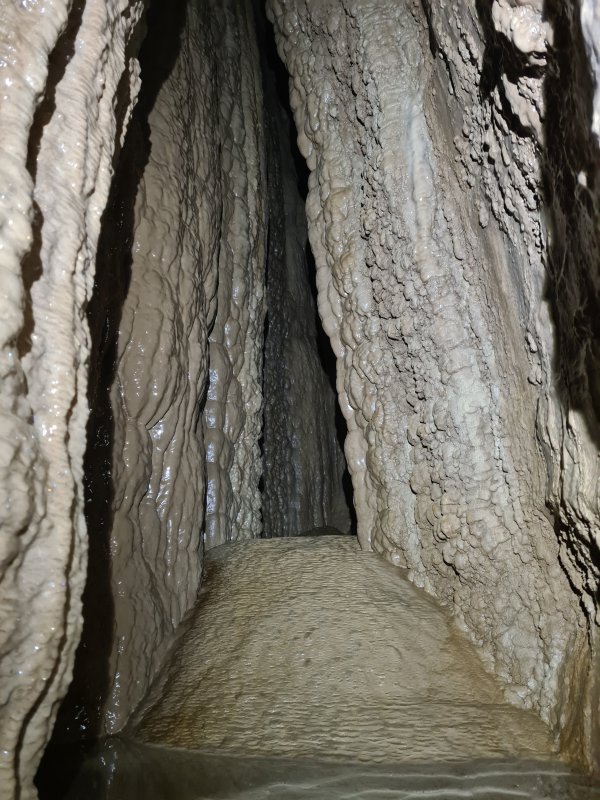 Above the flowstone bank is a small aven coated with calcite.
 Beside it is a crawling sized passage with some broken stal.
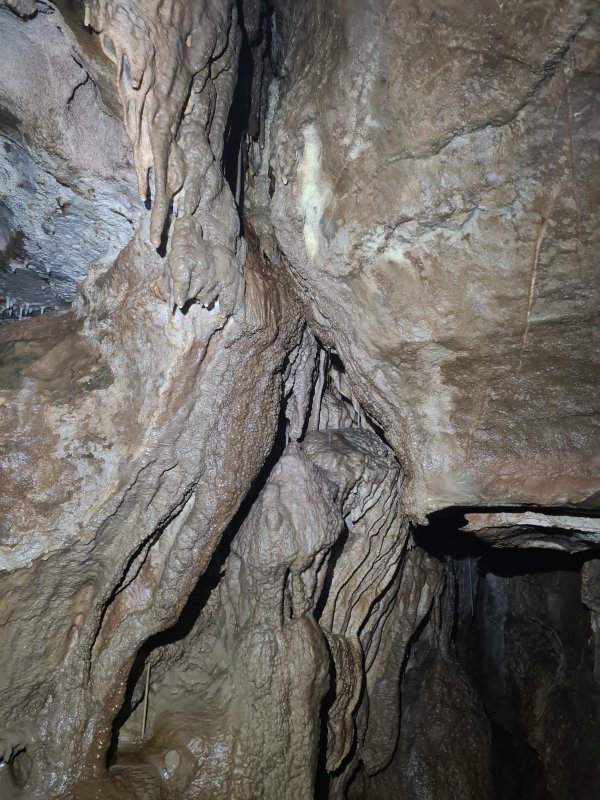 The crawl ends in a small enlargement with some stal which is concealed in a narrow cleft.
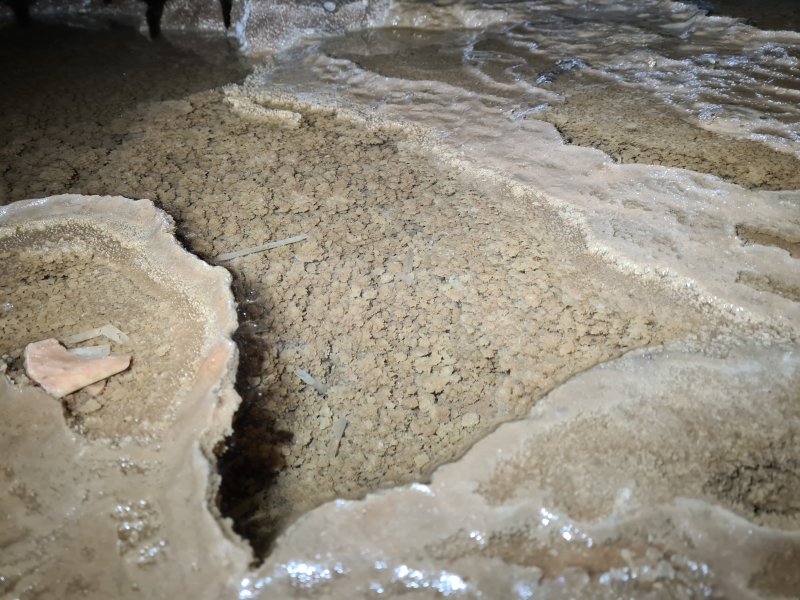 A flat out crawl leads to some small crystal pools.
 The way on then becomes far too low for most cavers.
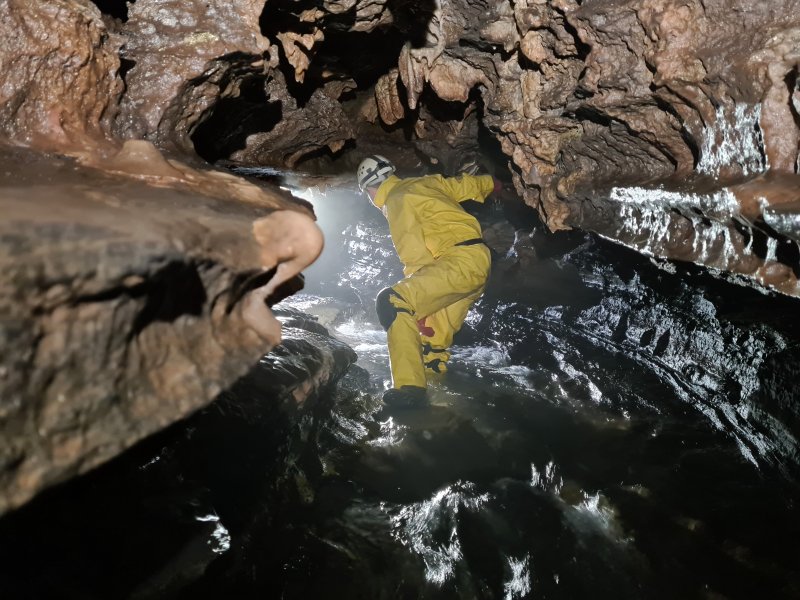 Tributary Passage then splits into upper and lower routes, with the lower route, seen here, carrying the river.
Modelling by Henry, lighting by Tarquin, Henry and Lizzy
Tributary Passage then splits into upper and lower routes, with the lower route, seen here, carrying the river.
Modelling by Henry, lighting by Tarquin, Henry and Lizzy The upper oxbow is better decorated, starting with this formation in the ceiling.
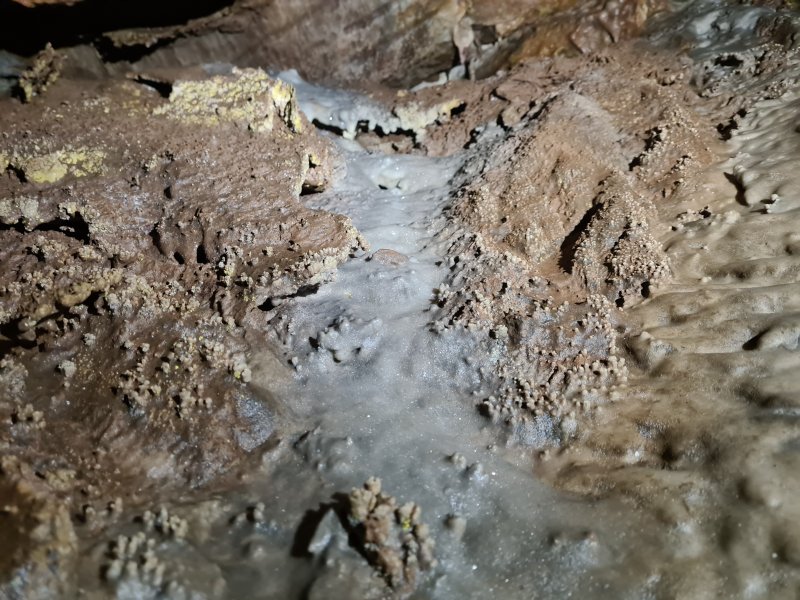 Flowstone with botryoids in the oxbow.
 Grotto in the oxbow.
Modelling by Lizzy and Henry, lighting by Tarquin, Lizzy, Henry and Pete
Grotto in the oxbow.
Modelling by Lizzy and Henry, lighting by Tarquin, Lizzy, Henry and Pete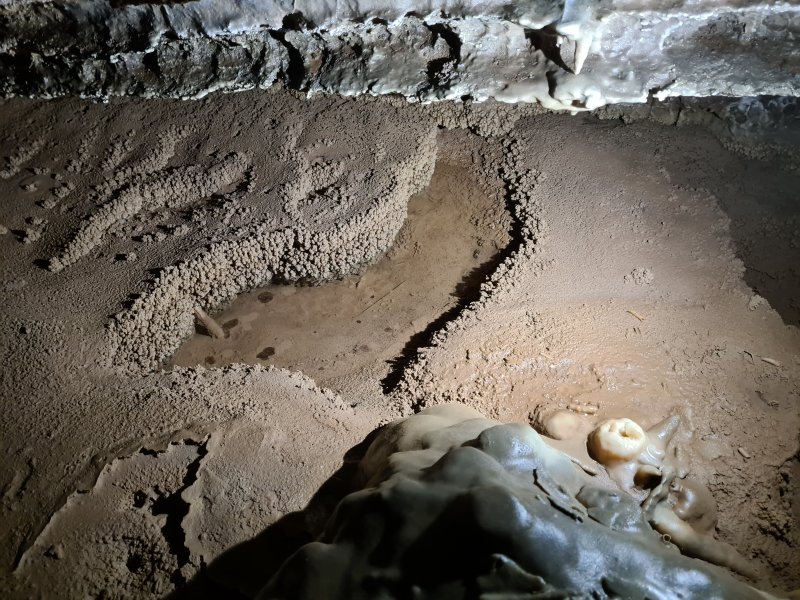 Crystal pools in the grotto.
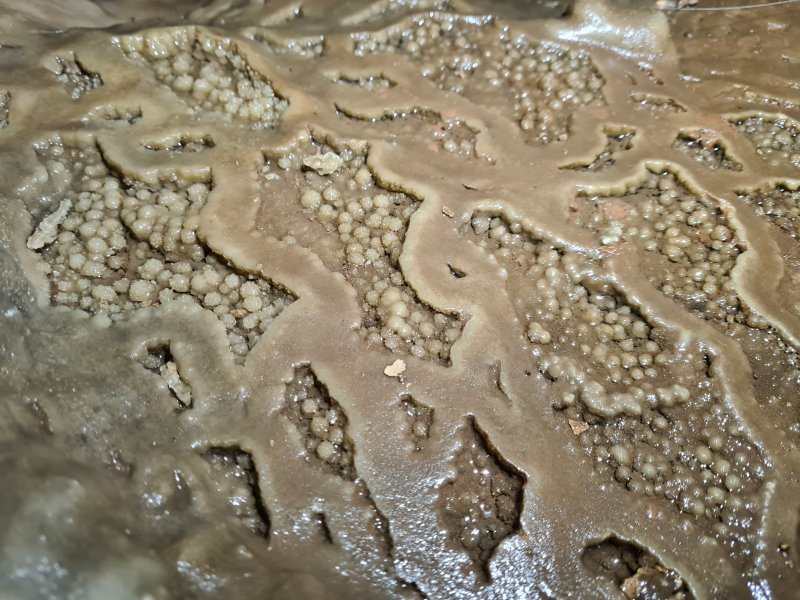 Bead-like crystals in the grotto.
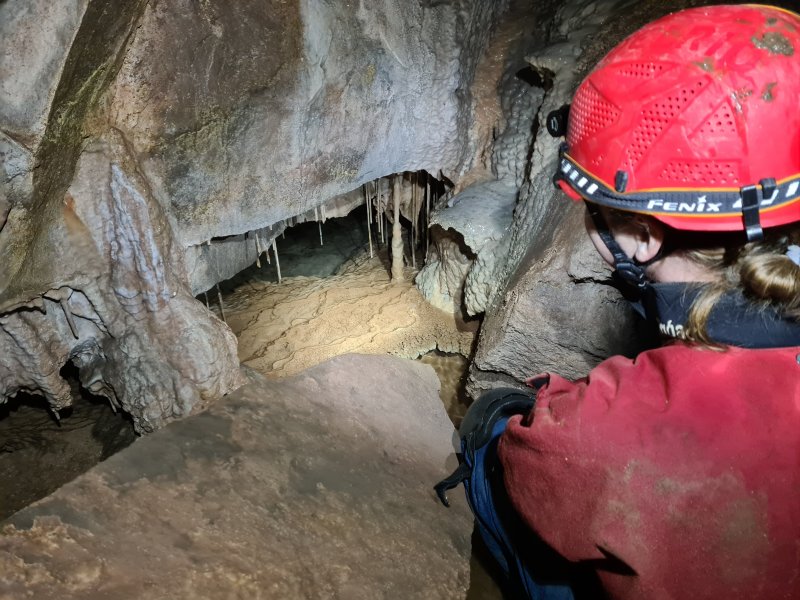 Crystal pools emptying into a channel beside the grotto.
Modelling by Steph, lighting by Tarquin and Steph
Crystal pools emptying into a channel beside the grotto.
Modelling by Steph, lighting by Tarquin and Steph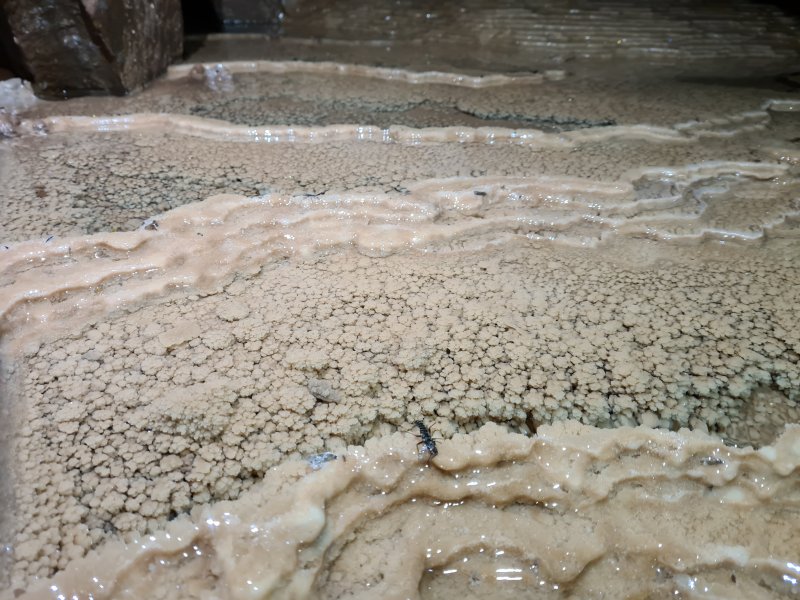 The channel rejoins as a series of crystal pools.
 Remains of a stonefly (larva?) on the gours. There were several of these in the grotto, and all appear to be dead larvae, or adults without wings, not exuviae. The species is hard to identify, but it looks like a Dinocras cephalotes adult, with the wings fallen off (perhaps those is the mouldy remains next to it).
Modelling by Simon Brundle
Remains of a stonefly (larva?) on the gours. There were several of these in the grotto, and all appear to be dead larvae, or adults without wings, not exuviae. The species is hard to identify, but it looks like a Dinocras cephalotes adult, with the wings fallen off (perhaps those is the mouldy remains next to it).
Modelling by Simon Brundle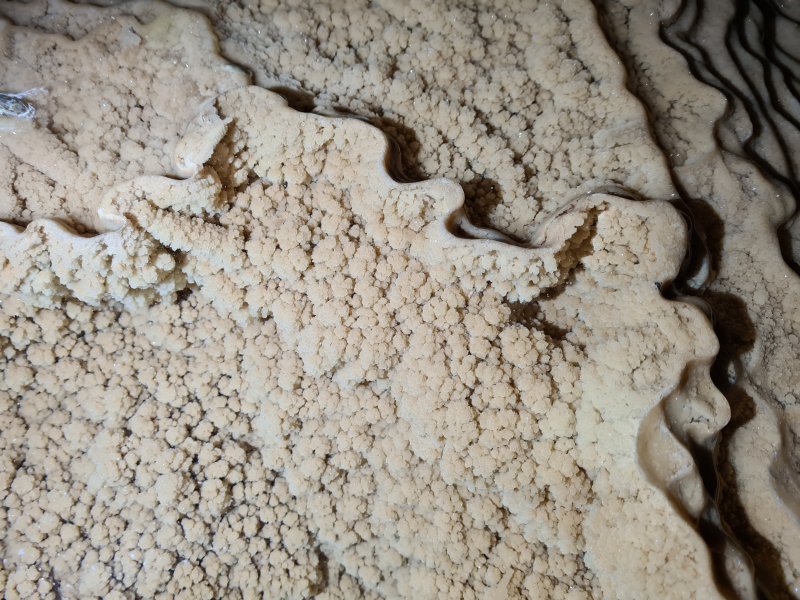 The lip of a gour.
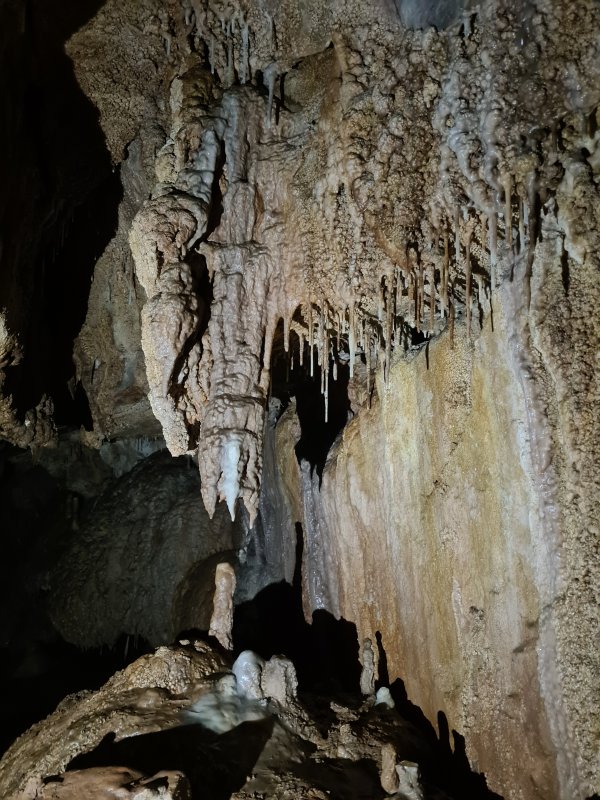 Textured stalactites.
 Stal shelf.
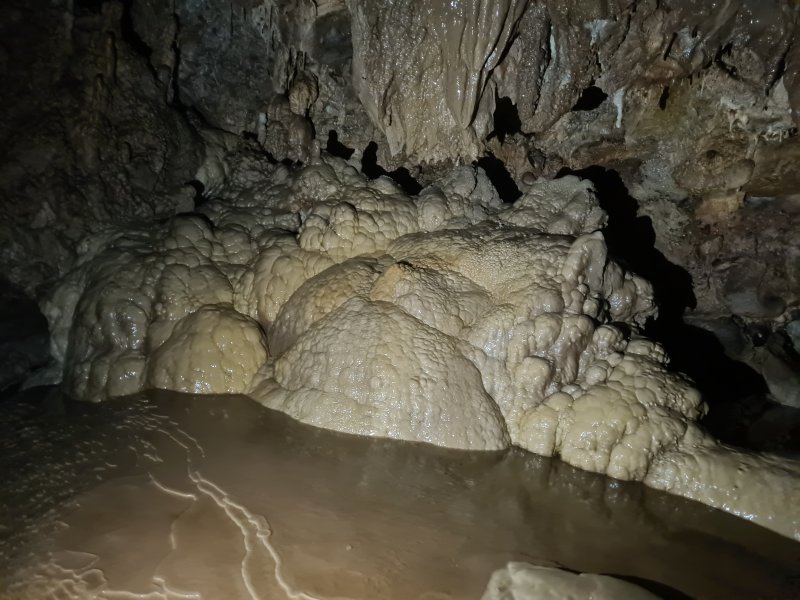 Flowstone and crystal pool.
 Flowstone on the wall.
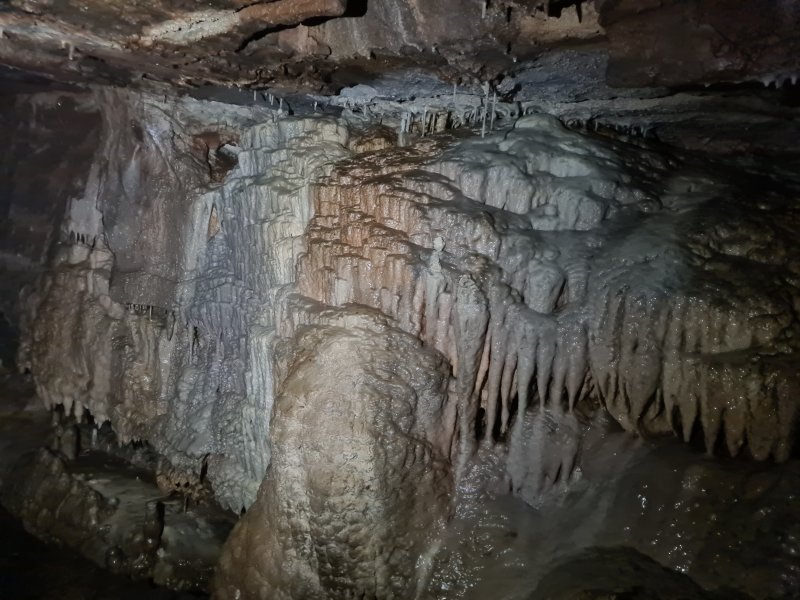 Wall of the grotto.
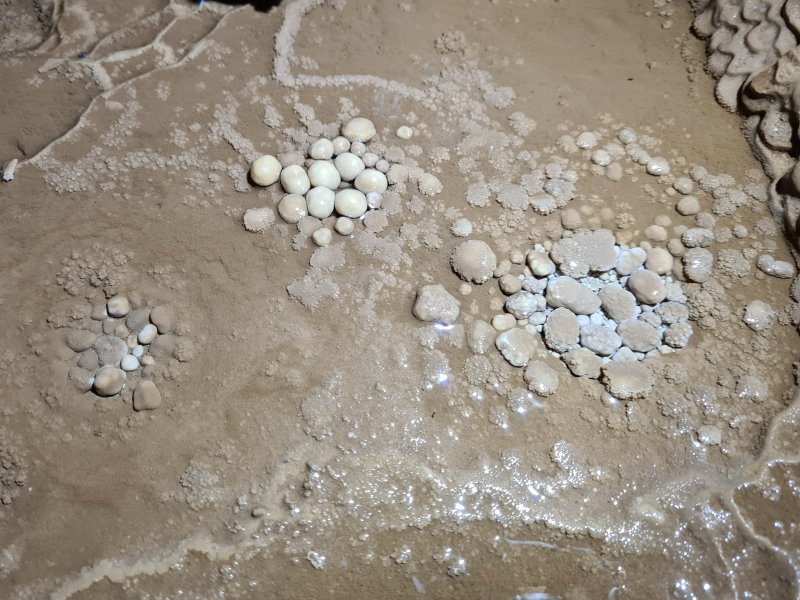 Cave pearls in the grotto. The smooth ones are the best, while the jagged ones have stopped rolling when the water splashes on them, so they have begun to form angular crystals.
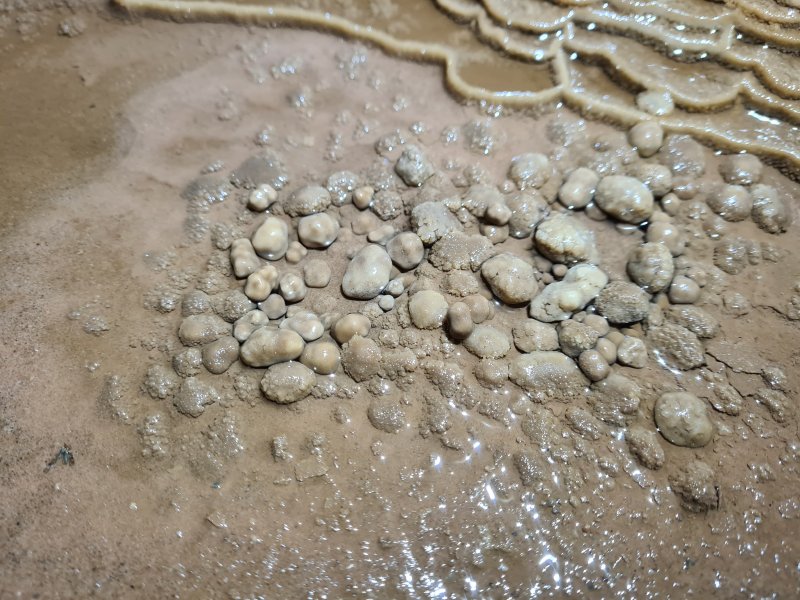 Cave pearls in the grotto.
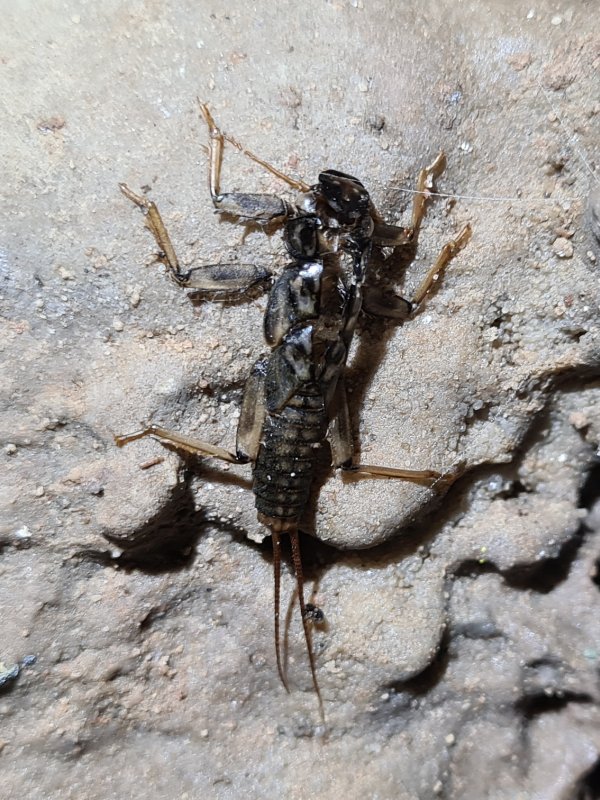 Exuvia (shed skin) of a stonefly. This appears to be a Perla bipunctata, or something similar to that.
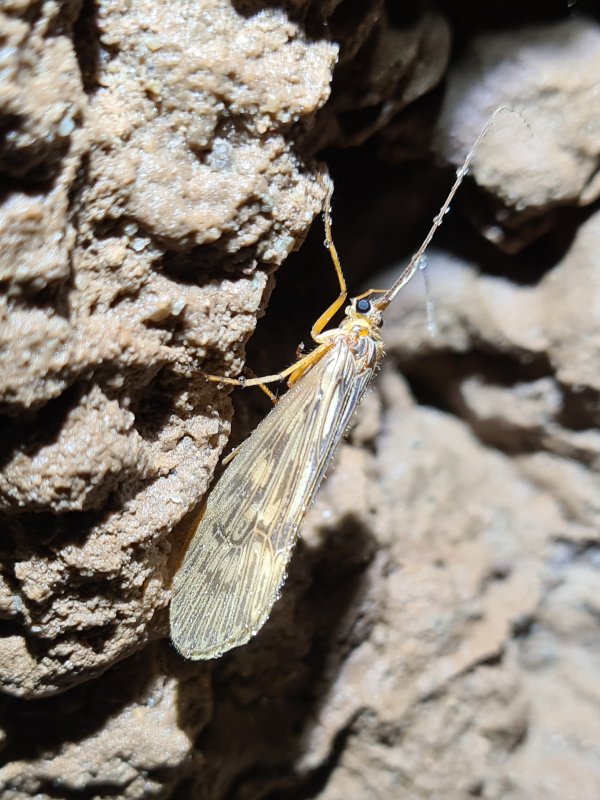 Elaborate caddisfly. This appears to be a Halesus radiatus.
Modelling by Lacey
Elaborate caddisfly. This appears to be a Halesus radiatus.
Modelling by Lacey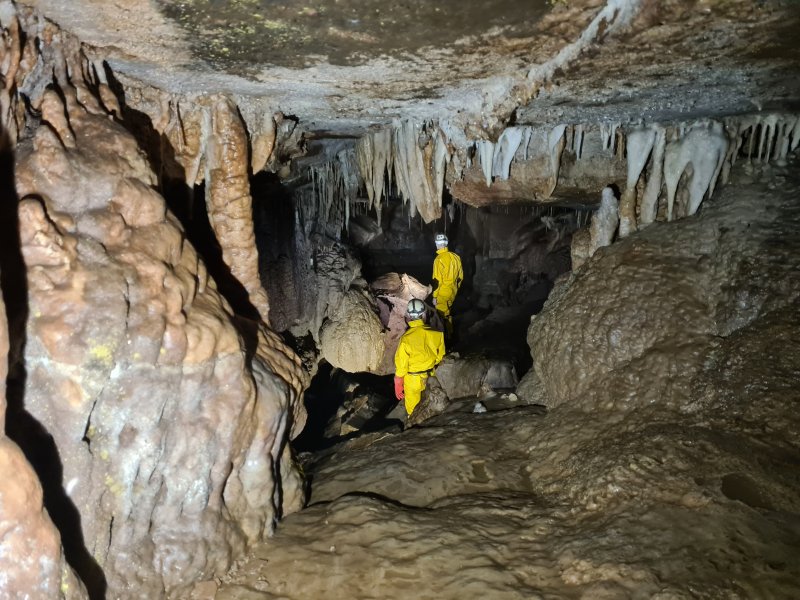 Window from the grotto back into the stream. The climbs down from the grotto are quite tricky, and it is best to return via the river route.
Modelling by Henry and Pete, lighting by Tarquin, Lizzy, Henry and Pete
Window from the grotto back into the stream. The climbs down from the grotto are quite tricky, and it is best to return via the river route.
Modelling by Henry and Pete, lighting by Tarquin, Lizzy, Henry and Pete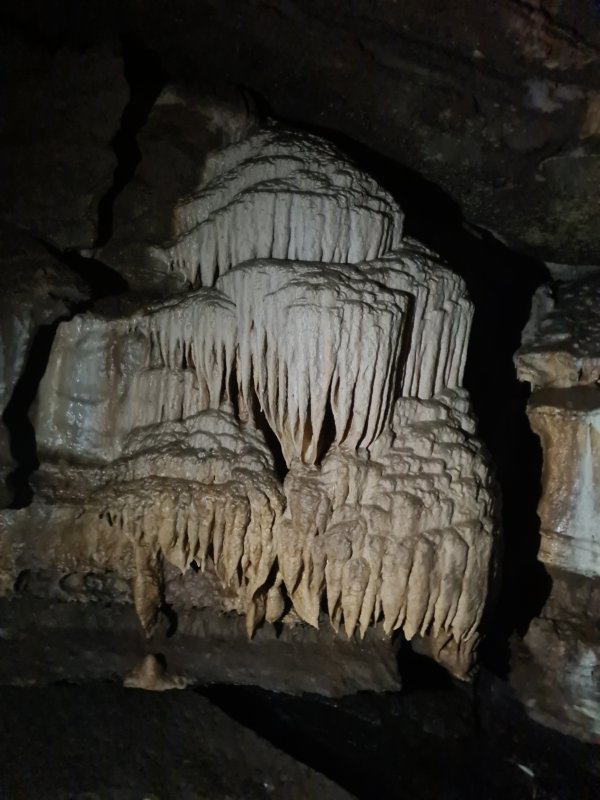 Tiered formation in the wall of Tributary Passage.
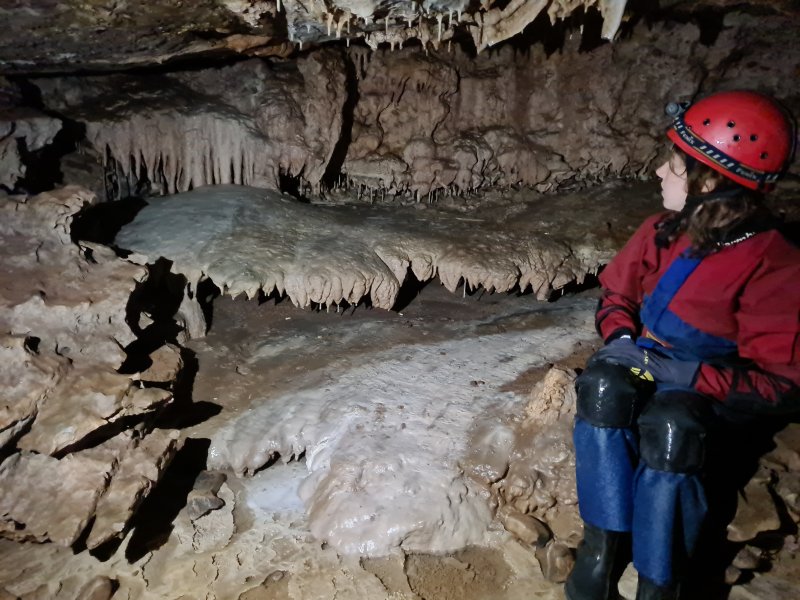 The river then flows through a very small slot, and the way on is via an oxbow, with these formations.
Modelling by Lizzy
The river then flows through a very small slot, and the way on is via an oxbow, with these formations.
Modelling by Lizzy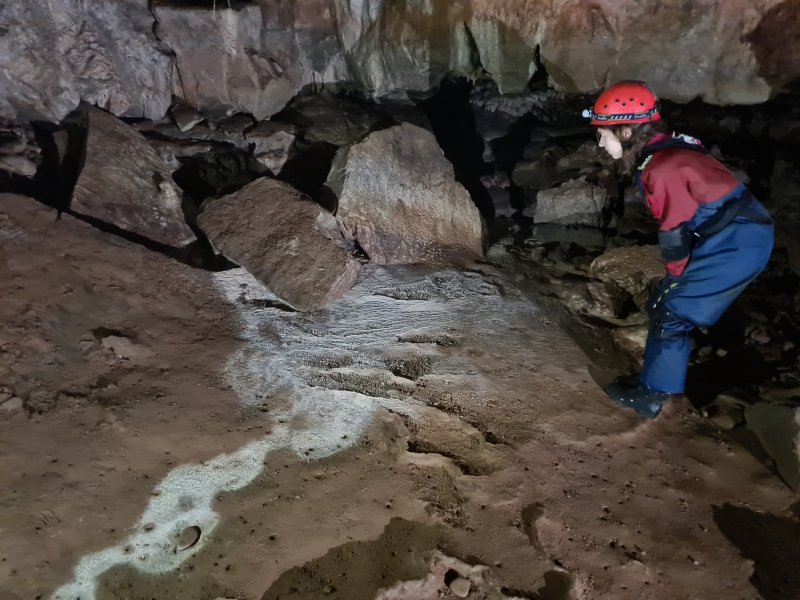 Flowstone on the floor of the oxbow. Sadly, a static picture cannot capture the crazy amount of glittering from this formation. The wall of this oxbow appears to be a silt-filled connection to the end of Mud Hall.
Modelling by Lizzy
Flowstone on the floor of the oxbow. Sadly, a static picture cannot capture the crazy amount of glittering from this formation. The wall of this oxbow appears to be a silt-filled connection to the end of Mud Hall.
Modelling by Lizzy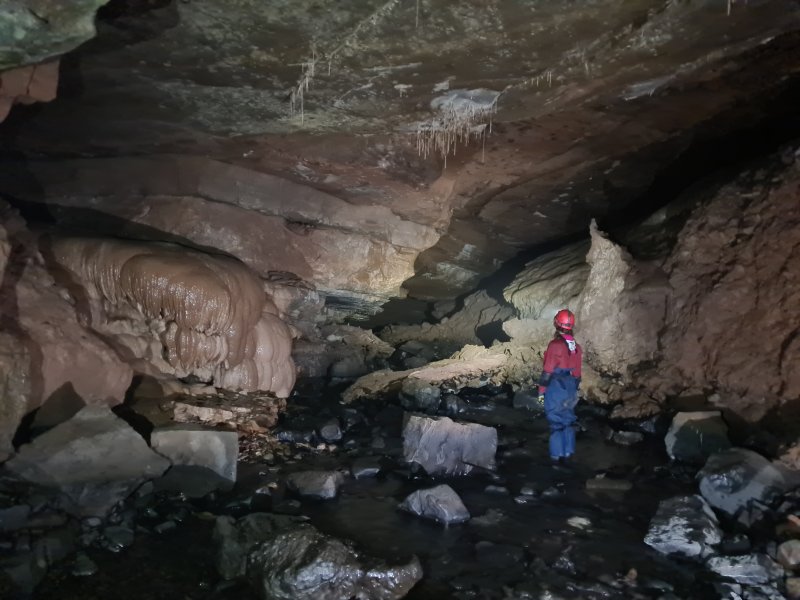 The junction with Canal Bypass, seen at the top of the flowstone on the left. The passage now assumes very large proportions, which it holds for most of the rest of the trip.
Modelling by Lizzy, lighting by Tarquin and Lizzy
The junction with Canal Bypass, seen at the top of the flowstone on the left. The passage now assumes very large proportions, which it holds for most of the rest of the trip.
Modelling by Lizzy, lighting by Tarquin and Lizzy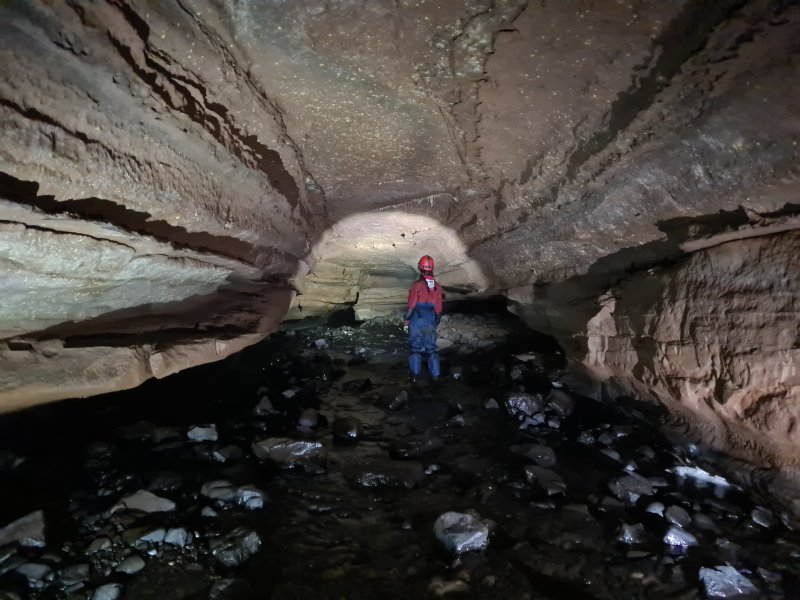 Beautifully arched section before the junction with Mud Hall.
Modelling by Lizzy, lighting by Tarquin and Lizzy
Beautifully arched section before the junction with Mud Hall.
Modelling by Lizzy, lighting by Tarquin and Lizzy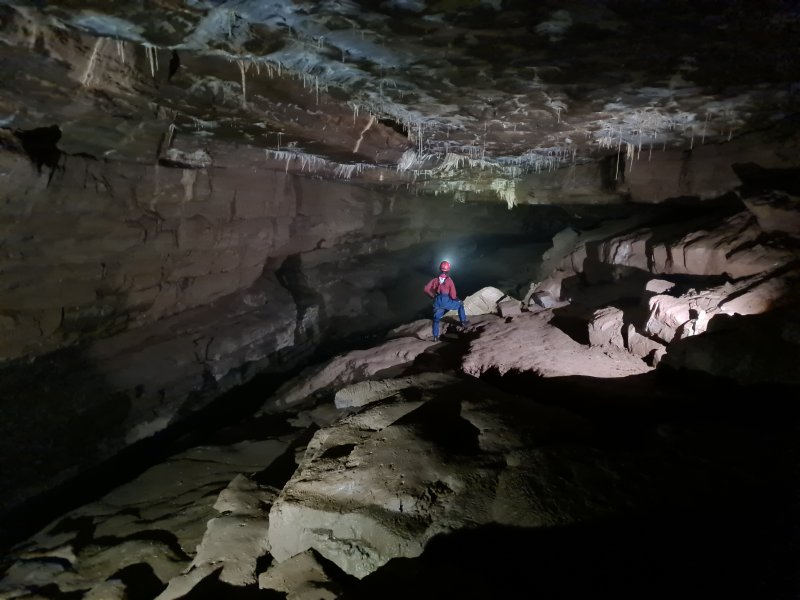 At the junction with Mud Hall, where the cave finally shows its true grandure.
Modelling by Lizzy, lighting by Tarquin and Lizzy
At the junction with Mud Hall, where the cave finally shows its true grandure.
Modelling by Lizzy, lighting by Tarquin and Lizzy Rather poor cave pearls in Mud Hall.
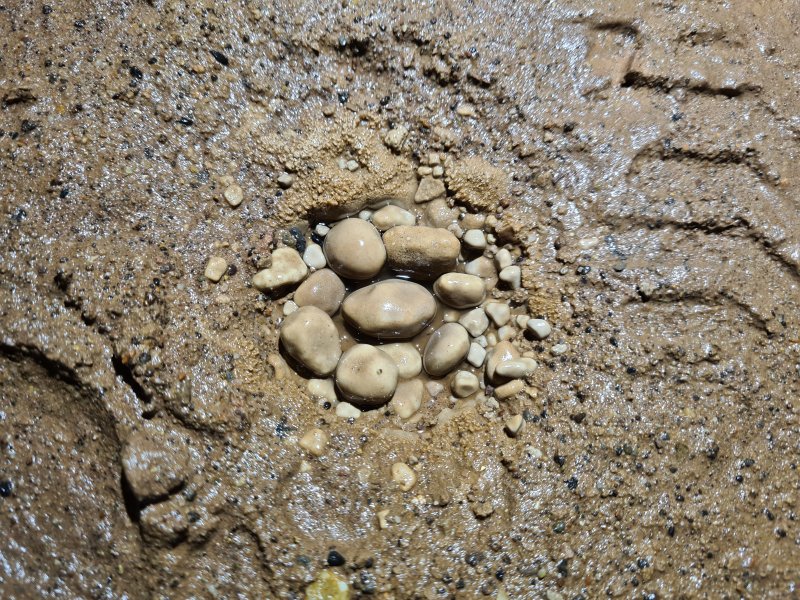 Cave pearls.
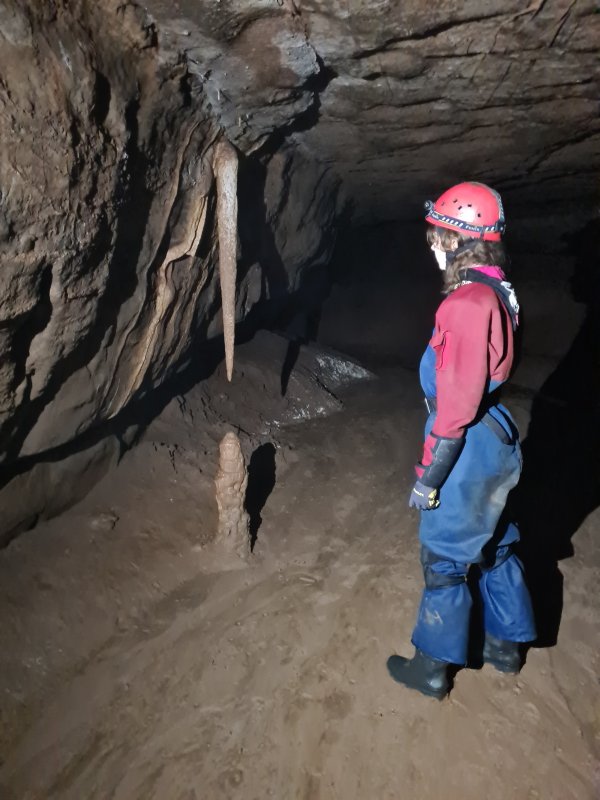 Stereotypical formations in Mud Hall.
Modelling by Lizzy
Stereotypical formations in Mud Hall.
Modelling by Lizzy Mud Hall ends with a large flowstone river.
Modelling by Lizzy, lighting by Tarquin and Lizzy
Mud Hall ends with a large flowstone river.
Modelling by Lizzy, lighting by Tarquin and Lizzy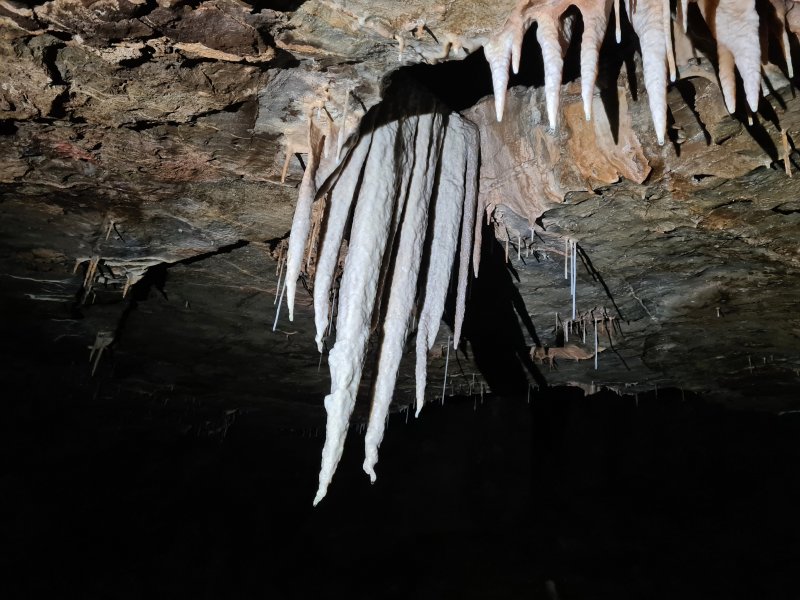 Stalactites in Mud Hall.
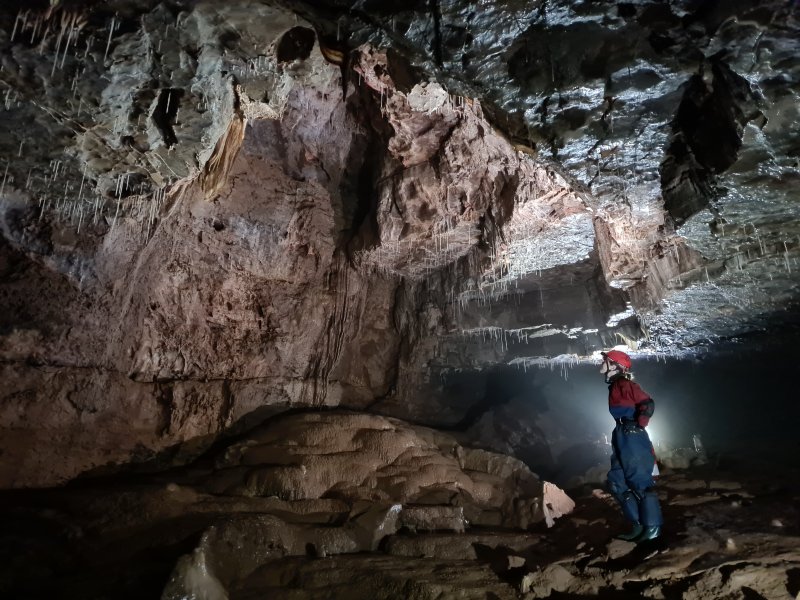 Formations at the upper end of the flowstone river in Mud Hall. The passage chokes immediately afterwards.
Modelling by Steph, lighting by Tarquin and Steph
Formations at the upper end of the flowstone river in Mud Hall. The passage chokes immediately afterwards.
Modelling by Steph, lighting by Tarquin and Steph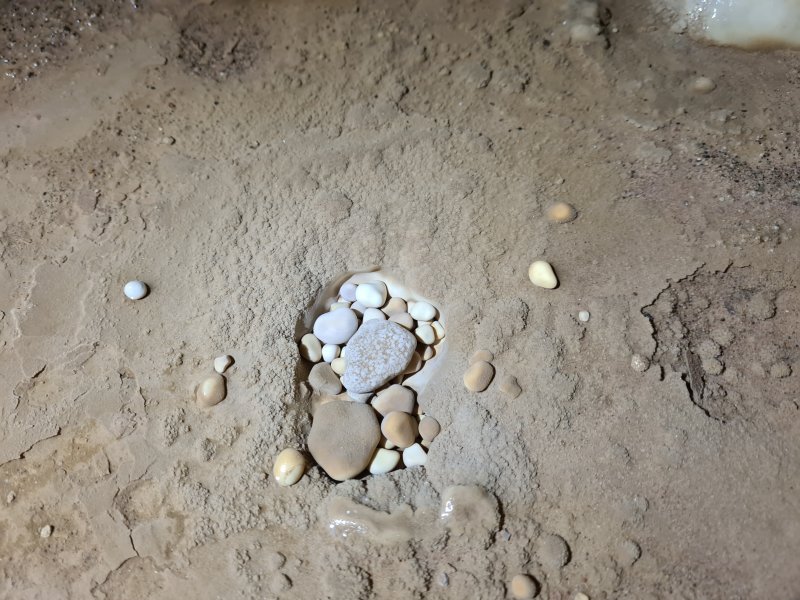 Cave pearls are normally rare, but Mud Hall has an impressive selection of them.
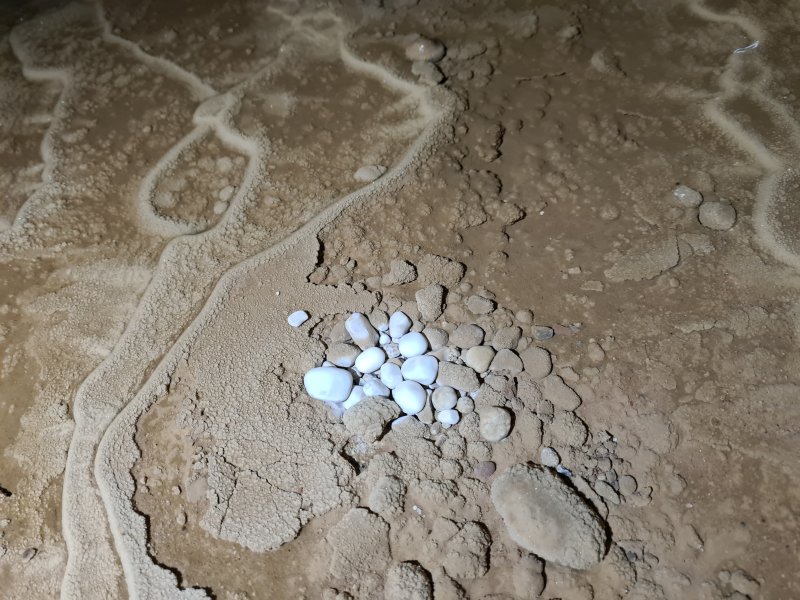 Cave pearls in Mud Hall, some of the best in the cave.
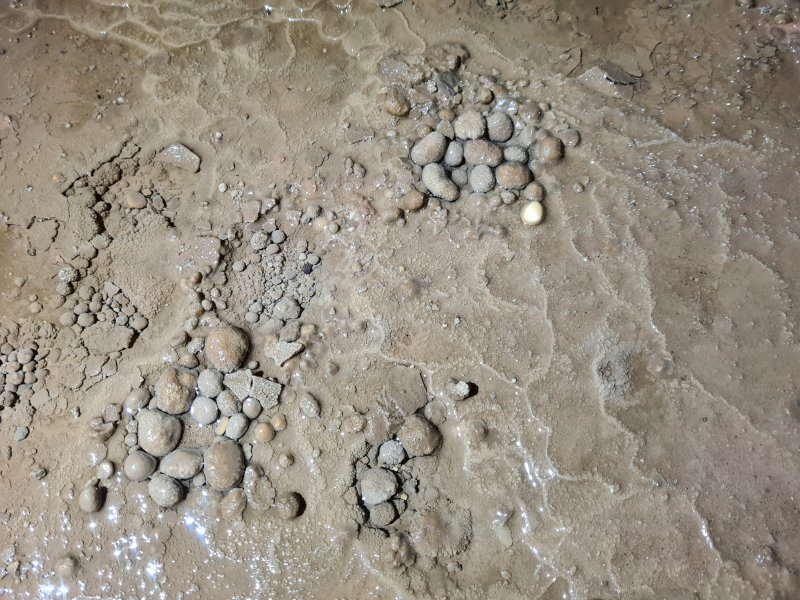 Partially re-cemented cave pearls.
 Several sets of cave pearls.
 A large, fallen block of calcite in the river below Mud Hall. This is slowly being redissolved by the river.
 The rescue dump in Sand Chamber. There is a very real prospect of being flooded in here; it has happened in the past (1967, 1970, 5 times in 1985, 1988). As a result, there is a rescue dump with emergency supplies that can be used in emergencies.
Lighting by Tarquin and Lizzy
The rescue dump in Sand Chamber. There is a very real prospect of being flooded in here; it has happened in the past (1967, 1970, 5 times in 1985, 1988). As a result, there is a rescue dump with emergency supplies that can be used in emergencies.
Lighting by Tarquin and Lizzy Ceiling of Sand Chamber.
 The main grotto of Sand Chamber, which sits up on a shelf.
Modelling by Lizzy, lighting by Tarquin and Lizzy
The main grotto of Sand Chamber, which sits up on a shelf.
Modelling by Lizzy, lighting by Tarquin and Lizzy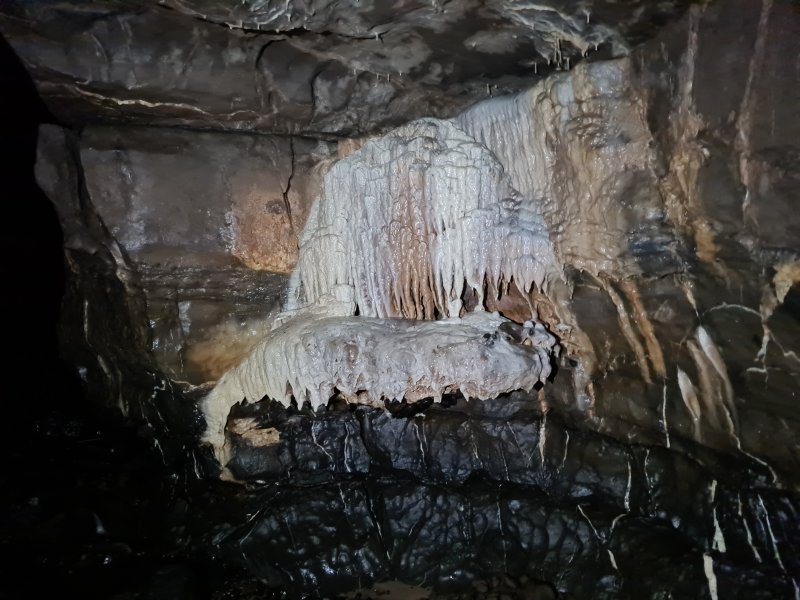 Formations in the passage leading to Sump 1.
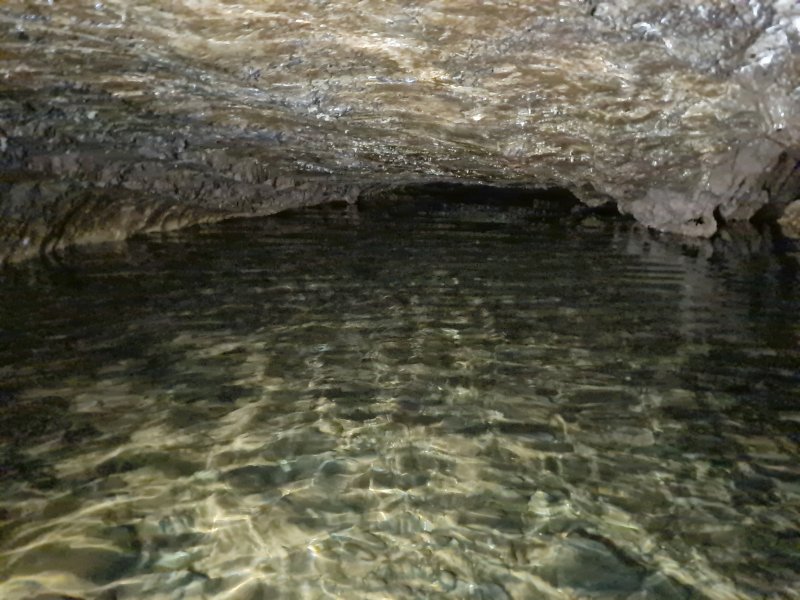 In low and normal water conditions, Sump 1 brings in the rest of the river's water from Bridge Cave. This 20 metre sump is the original way that the cave was found, before the current entrance was opened.
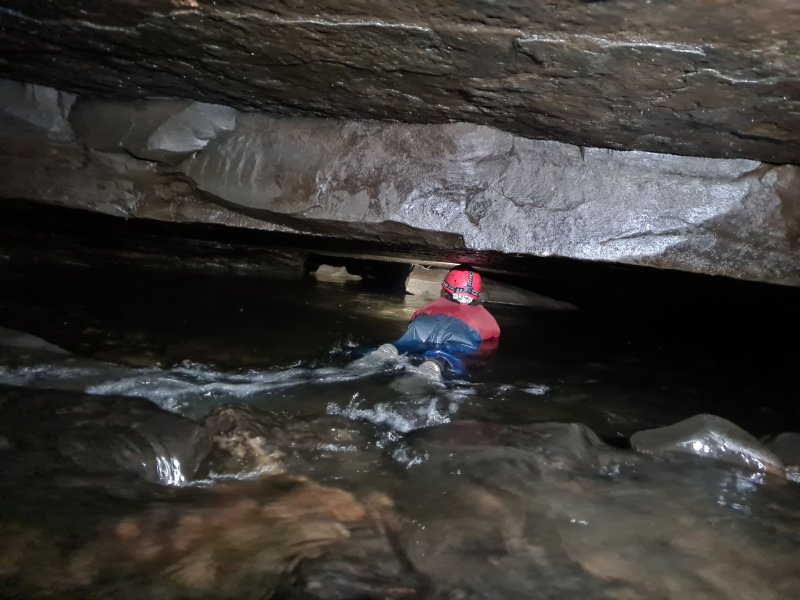 The combined river flows into one of the cave's most iconic passages; The Canal.
Modelling by Lizzy, lighting by Tarquin and Lizzy
The combined river flows into one of the cave's most iconic passages; The Canal.
Modelling by Lizzy, lighting by Tarquin and Lizzy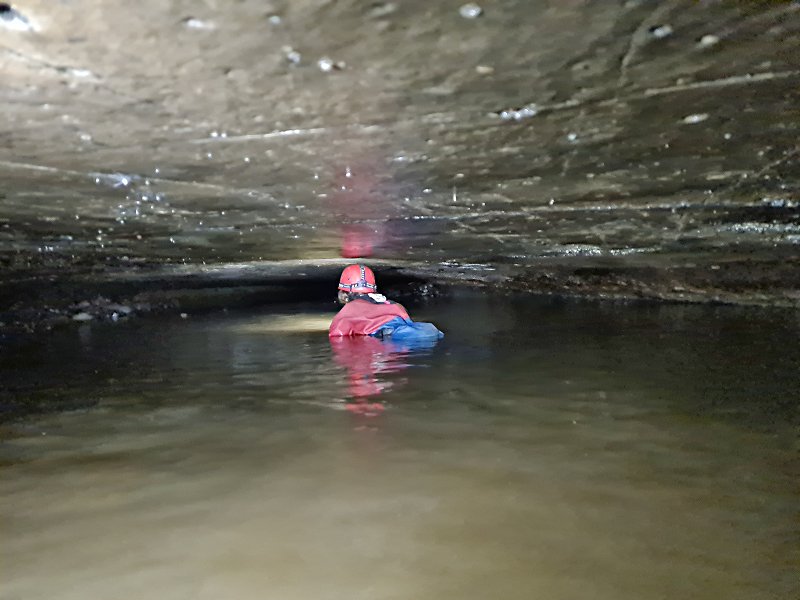 Far from being uncomfortable, this passage is very easy, and quite magical. You simply lie down and float along, pulling yourself along the floor with your hands. The worst feature are the insects flying around your light.
Modelling by Lizzy, lighting by Tarquin and Lizzy
Far from being uncomfortable, this passage is very easy, and quite magical. You simply lie down and float along, pulling yourself along the floor with your hands. The worst feature are the insects flying around your light.
Modelling by Lizzy, lighting by Tarquin and Lizzy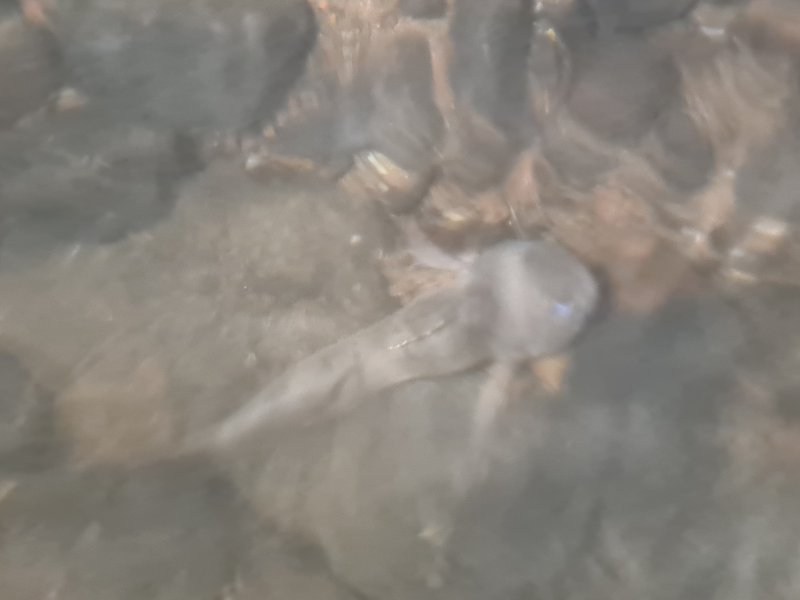 The Canal's best features (assuming you like them) are the fish that swim around your hands and even between your fingers. They seem completely unafraid, and may even pose for photographs. This appears to be a bullhead (Cottus gobio) rather than the more common blanched trout, and swam with us for some time. At nearly 10 cm long, this was a particularly large example. They are well fed by the amount of insects and larvae that are brought in by the river. Since there is absolutely no light in the cave, the fish navigate almost entirely by using their lateral line sensors, with their eyes being essentially vestigial but functional.
Modelling by Aquataurus
The Canal's best features (assuming you like them) are the fish that swim around your hands and even between your fingers. They seem completely unafraid, and may even pose for photographs. This appears to be a bullhead (Cottus gobio) rather than the more common blanched trout, and swam with us for some time. At nearly 10 cm long, this was a particularly large example. They are well fed by the amount of insects and larvae that are brought in by the river. Since there is absolutely no light in the cave, the fish navigate almost entirely by using their lateral line sensors, with their eyes being essentially vestigial but functional.
Modelling by Aquataurus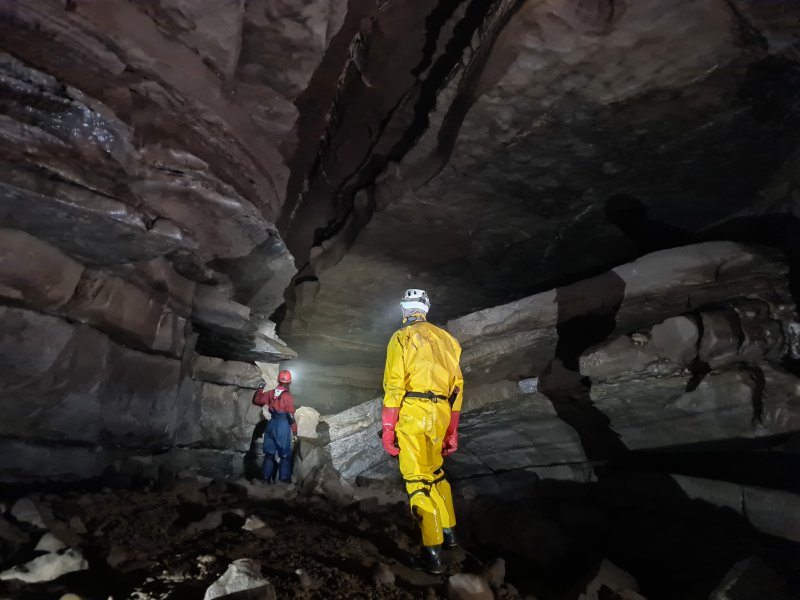 After The Canal, the passage gets named Main Stream, though this is really the same passage as before. The end of Canal Bypass is behind the camera.
Modelling by Pete and Lizzy, lighting by Tarquin, Pete and Lizzy
After The Canal, the passage gets named Main Stream, though this is really the same passage as before. The end of Canal Bypass is behind the camera.
Modelling by Pete and Lizzy, lighting by Tarquin, Pete and Lizzy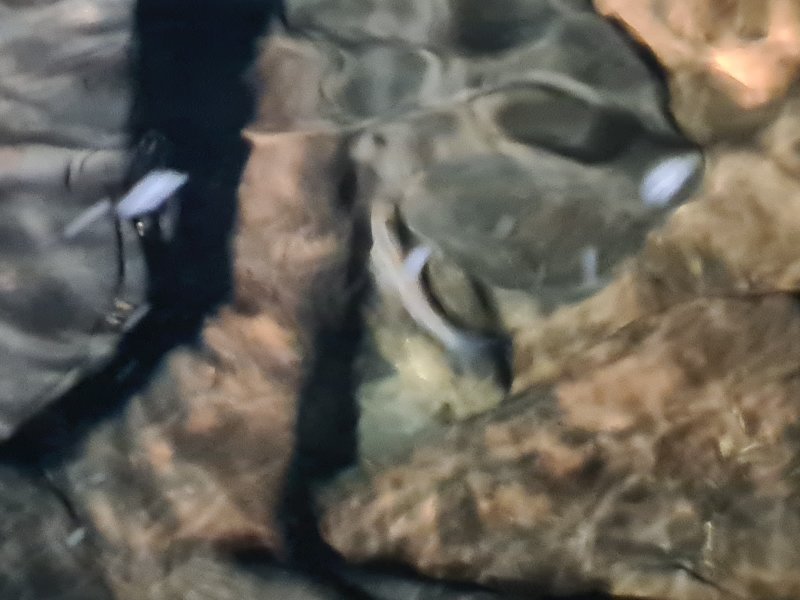 Blanched trout in Main Stream. These have no pigmentation, but would soon gain pigmentation if taken out into daylight. Their eyes clearly work, as it reacted to our lights by hiding under a rock. (The picture is as blurry as you might expect, since it was taken through 30 cm of fast flowing water, and the fish was moving. Deal with it.)
Modelling by Brithyllgwyn, lighting by Tarquin and Steph
Blanched trout in Main Stream. These have no pigmentation, but would soon gain pigmentation if taken out into daylight. Their eyes clearly work, as it reacted to our lights by hiding under a rock. (The picture is as blurry as you might expect, since it was taken through 30 cm of fast flowing water, and the fish was moving. Deal with it.)
Modelling by Brithyllgwyn, lighting by Tarquin and Steph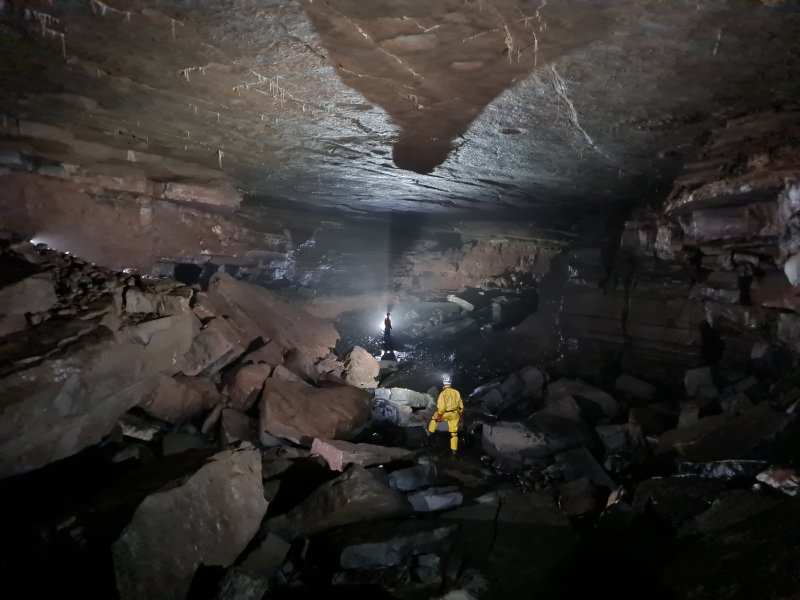 Main Stream soon reaches the widest passage in the cave. The fog here is caused by the warm river and cold cave. In person, it was hard to see this passage due to the fog, so the picture is perhaps the best way to see it.
Modelling by Pete and Lizzy, lighting by Tarquin, Pete and Lizzy
Main Stream soon reaches the widest passage in the cave. The fog here is caused by the warm river and cold cave. In person, it was hard to see this passage due to the fog, so the picture is perhaps the best way to see it.
Modelling by Pete and Lizzy, lighting by Tarquin, Pete and Lizzy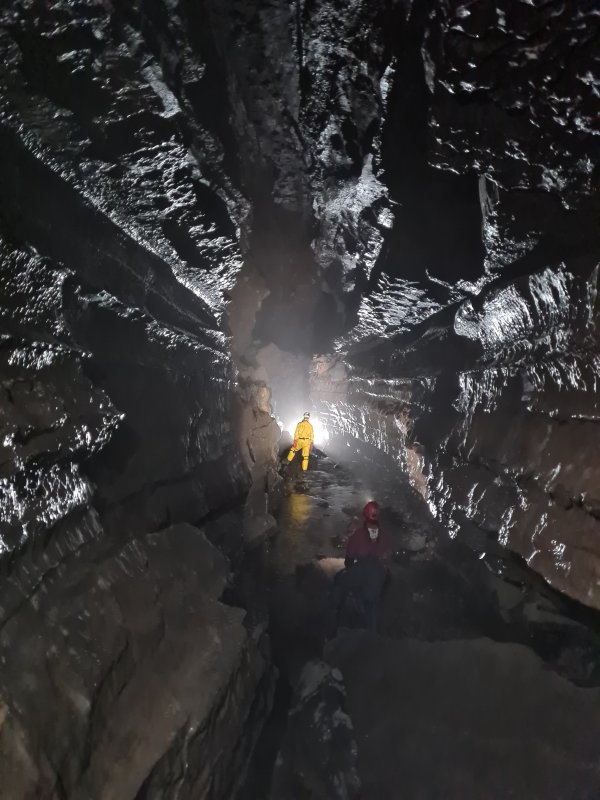 Beyond the widest passage.
Modelling by Lizzy and Pete, lighting by Tarquin, Lizzy and Pete
Beyond the widest passage.
Modelling by Lizzy and Pete, lighting by Tarquin, Lizzy and Pete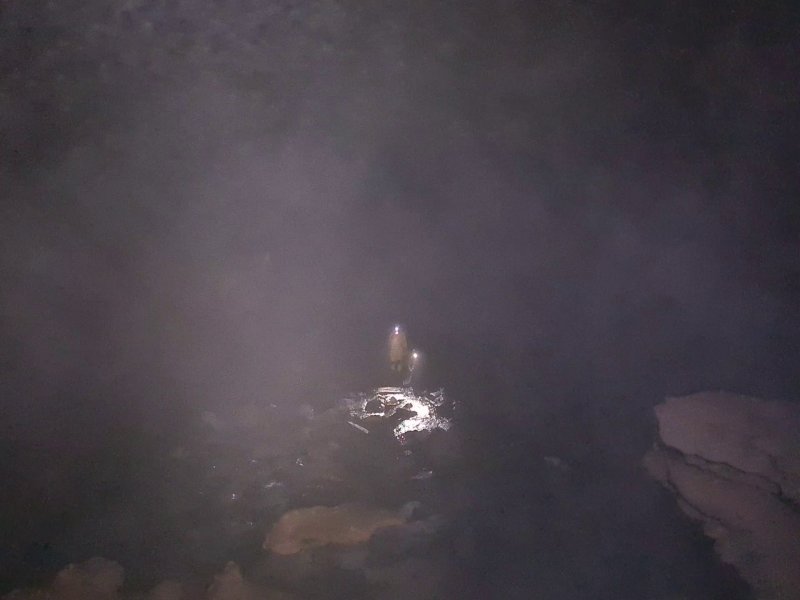 The walls then disappear, and all that remains is fog. This is the start of Bouncing Boulder Hall, and in person, this is all you see. The warmed river flows steeply through a jumble of boulders at the start of the chamber, dramatically increasing the humidity. It completely fills the cold cave air with the fog, so that nothing else is visible. Moving to get away from your evaporation cloud cannot help, because the fog is everywhere.
Modelling by Lizzy and Pete, lighting by Tarquin, Lizzy and Pete
The walls then disappear, and all that remains is fog. This is the start of Bouncing Boulder Hall, and in person, this is all you see. The warmed river flows steeply through a jumble of boulders at the start of the chamber, dramatically increasing the humidity. It completely fills the cold cave air with the fog, so that nothing else is visible. Moving to get away from your evaporation cloud cannot help, because the fog is everywhere.
Modelling by Lizzy and Pete, lighting by Tarquin, Lizzy and Pete The moment you stand still, the water evaporating from your clothing adds to the effect, and your vision is reduced even further. I want you to remember this as you see the next picture, as all three pictures of this chamber are taken from the same spot, and the only real change is the lighting.
Modelling by Lizzy and Pete, lighting by Tarquin, Lizzy and Pete
The moment you stand still, the water evaporating from your clothing adds to the effect, and your vision is reduced even further. I want you to remember this as you see the next picture, as all three pictures of this chamber are taken from the same spot, and the only real change is the lighting.
Modelling by Lizzy and Pete, lighting by Tarquin, Lizzy and Pete Bouncing Boulder Hall in all its glory. This photograph took a lot of effort. Shouting instructions to models over the roar of the river was nearly impossible, so I ran across the chamber several times to adjust the lighting, and to ask the models to change their poses. I am not entirely happy with the result, mainly because of the glare caused by the foggy conditions, but it helps to give an honest impression of how foggy it really is here. Considering how little you could see in person, this is a result I did not think would be possible at the time.
Modelling by Lizzy and Pete, lighting by Tarquin, Lizzy and Pete
Bouncing Boulder Hall in all its glory. This photograph took a lot of effort. Shouting instructions to models over the roar of the river was nearly impossible, so I ran across the chamber several times to adjust the lighting, and to ask the models to change their poses. I am not entirely happy with the result, mainly because of the glare caused by the foggy conditions, but it helps to give an honest impression of how foggy it really is here. Considering how little you could see in person, this is a result I did not think would be possible at the time.
Modelling by Lizzy and Pete, lighting by Tarquin, Lizzy and Pete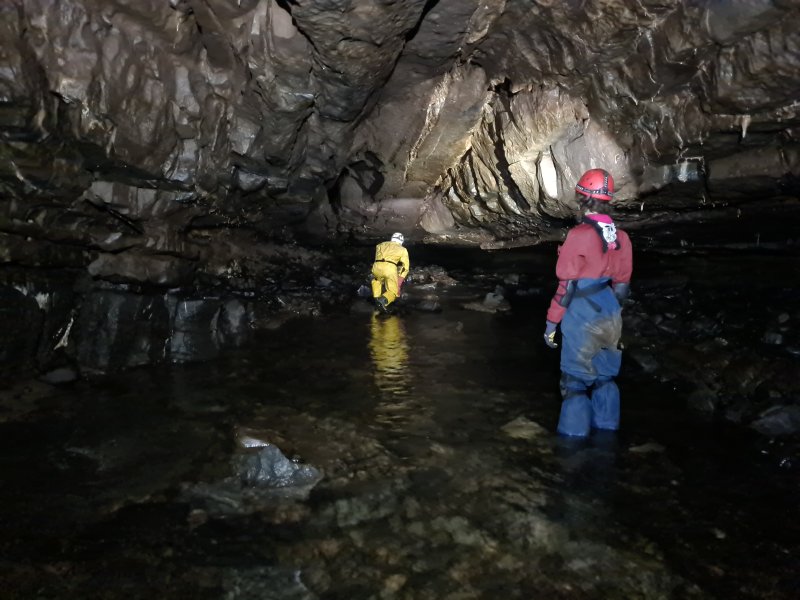 The river then returns to smaller dimensions as it approaches the water table.
Modelling by Lizzy and Pete, lighting by Tarquin, Lizzy and Pete
The river then returns to smaller dimensions as it approaches the water table.
Modelling by Lizzy and Pete, lighting by Tarquin, Lizzy and Pete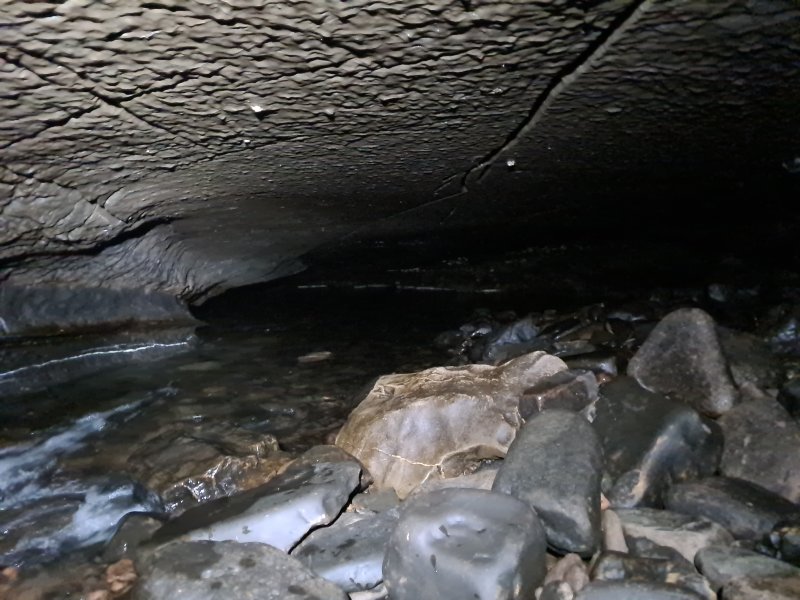 The Main Stream then reduces to a very low duck.
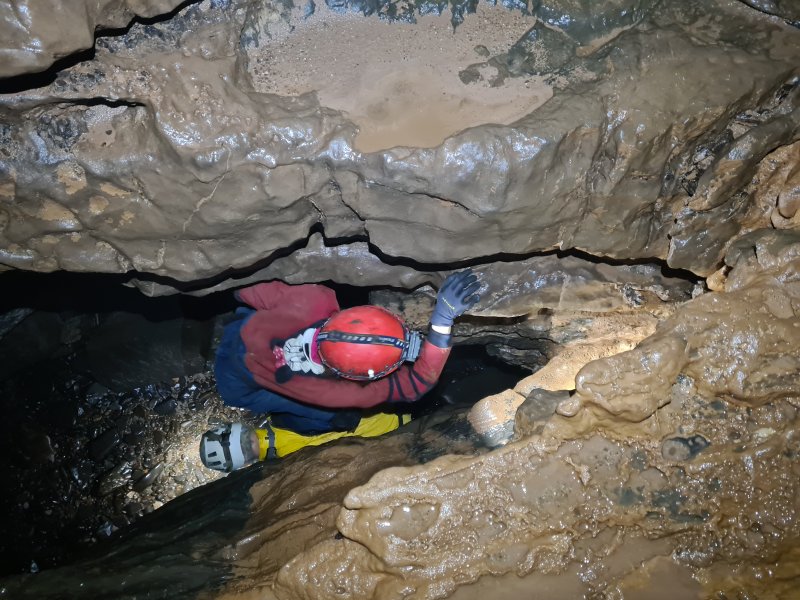 The normal way downstream is to bypass the duck via a climb overhead. The first step is a little high, and may need a human ladder.
Modelling by Lizzy and Pete, lighting by Tarquin, Lizzy and Pete
The normal way downstream is to bypass the duck via a climb overhead. The first step is a little high, and may need a human ladder.
Modelling by Lizzy and Pete, lighting by Tarquin, Lizzy and Pete Crawling through the bypass.
Modelling by Lizzy, lighting by Tarquin and Lizzy
Crawling through the bypass.
Modelling by Lizzy, lighting by Tarquin and Lizzy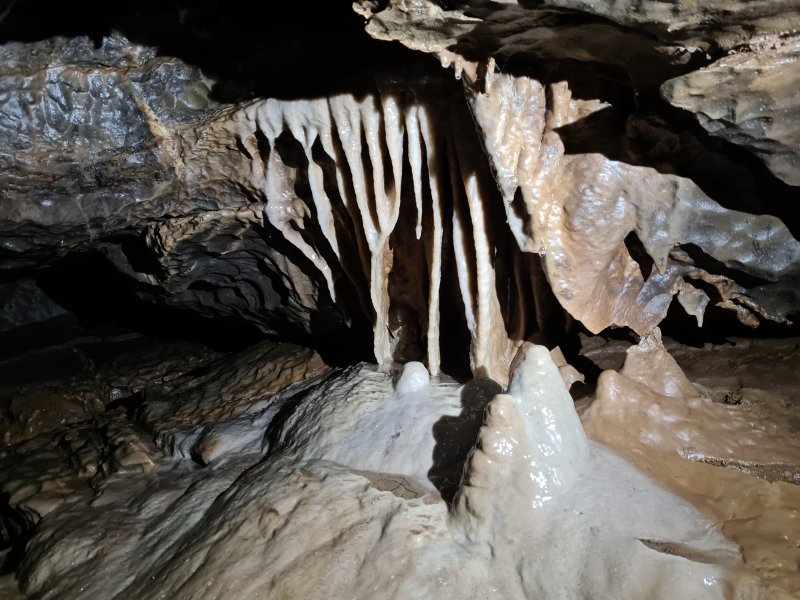 Formations at the end of the bypass.
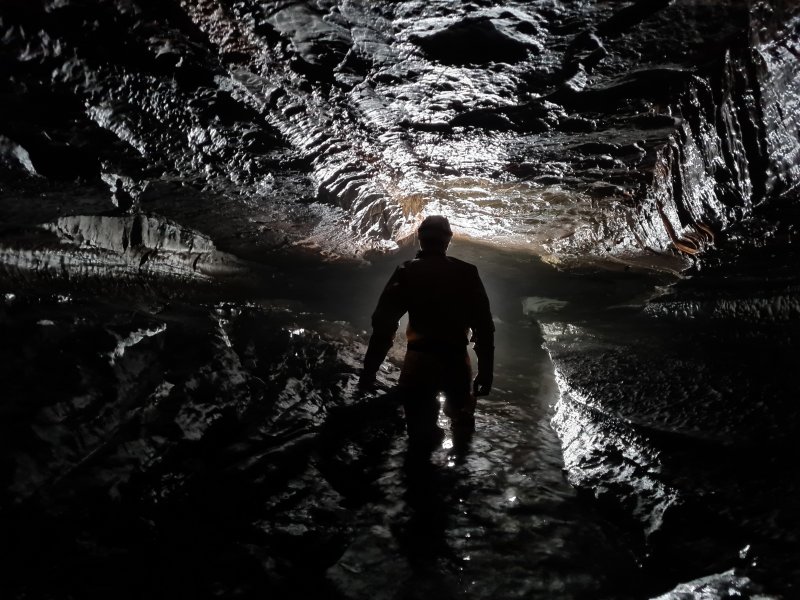 The lower river, beyond the duck.
Modelling by Pete
The lower river, beyond the duck.
Modelling by Pete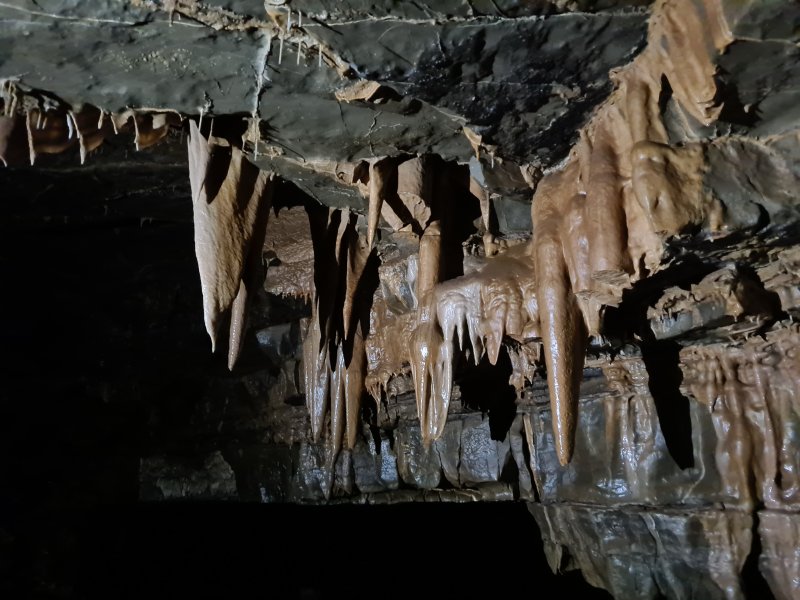 Formations in the lower river.
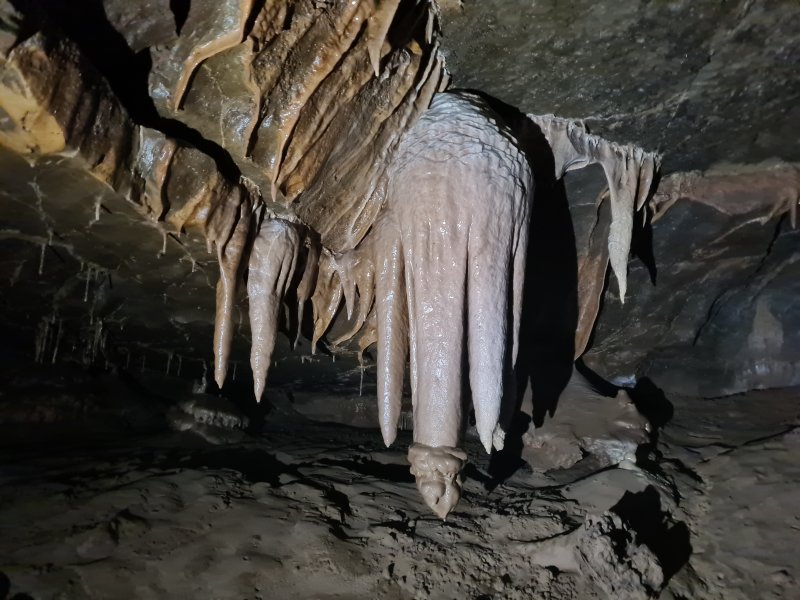 A rather "special" formation in the lower river.
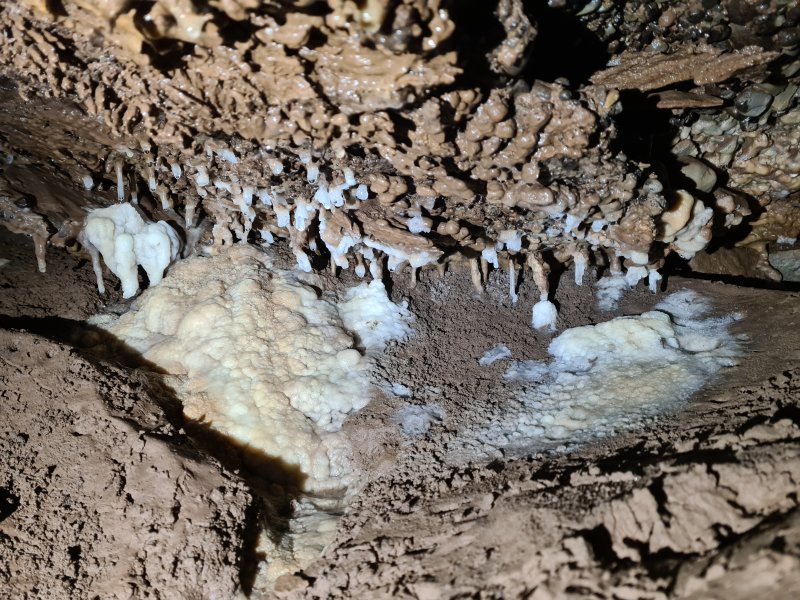 Formations beneath a lip.
 Botryoidal stalagmite in a small aven.
 Stalactites in the aven.
 Shortly before the sump.
Modelling by Lizzy and Pete, lighting by Tarquin, Lizzy and Pete
Shortly before the sump.
Modelling by Lizzy and Pete, lighting by Tarquin, Lizzy and Pete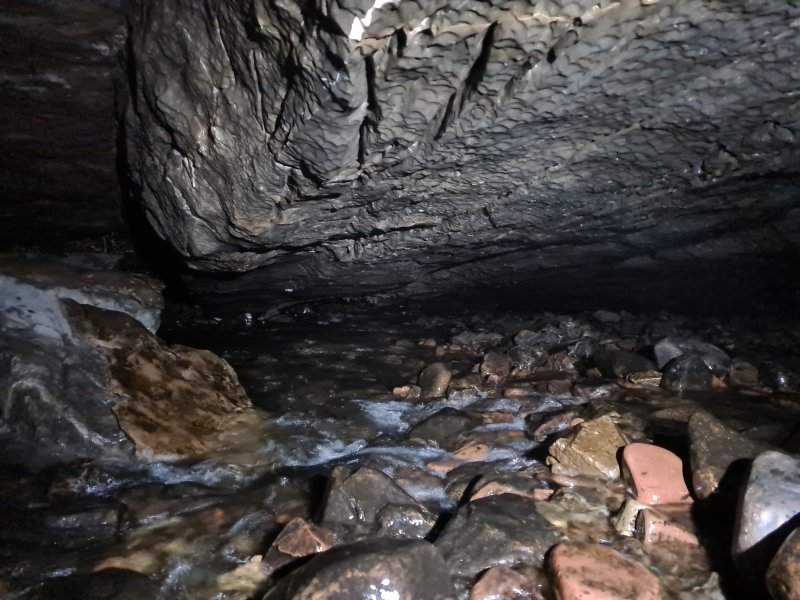 For dry cavers, the cave ends at Sump 2. However, for divers, there is another 2 km of cave beyond this point, ending at Sump 8. The dry section contains a lot of large passage.
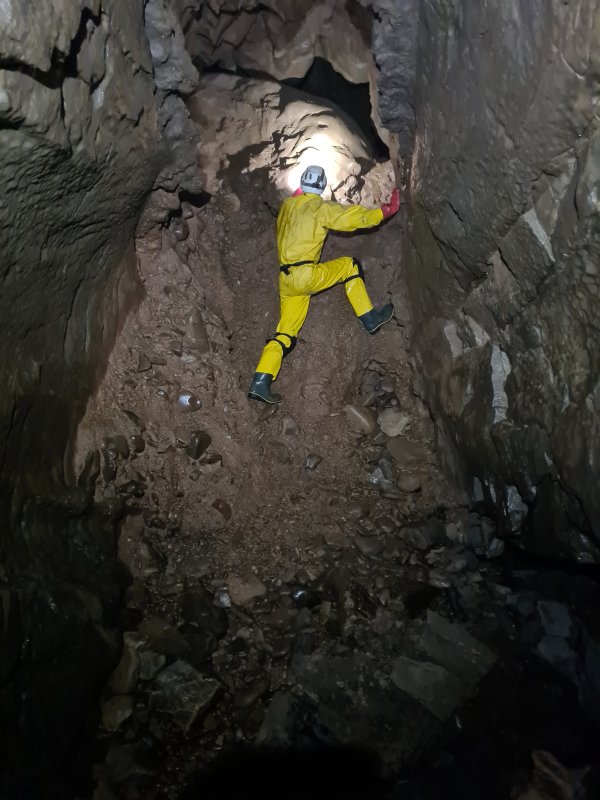 Beside the sump is the climb into Gyrn Fawr Passage. This is made up of cobbles and mud, and does not feel safe at all.
Modelling by Pete, lighting by Tarquin and Pete
Beside the sump is the climb into Gyrn Fawr Passage. This is made up of cobbles and mud, and does not feel safe at all.
Modelling by Pete, lighting by Tarquin and Pete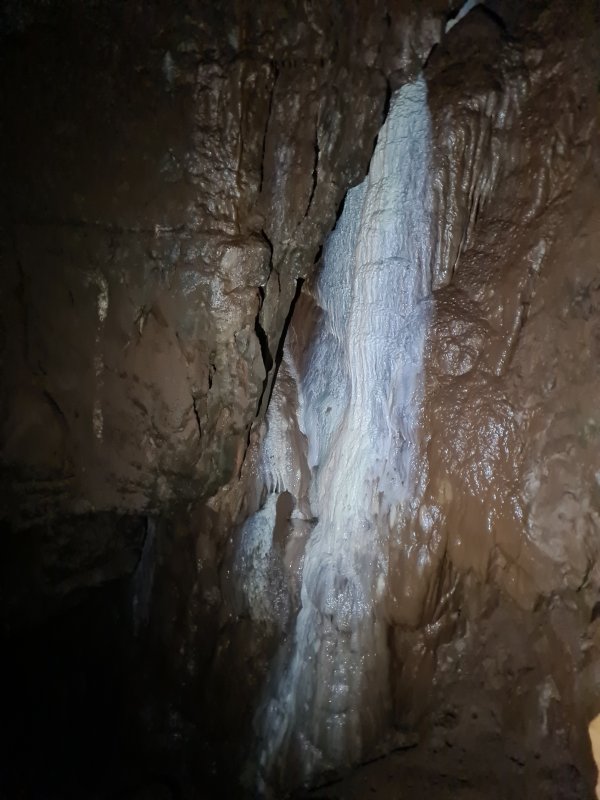 Flowstone in the lower chamber.
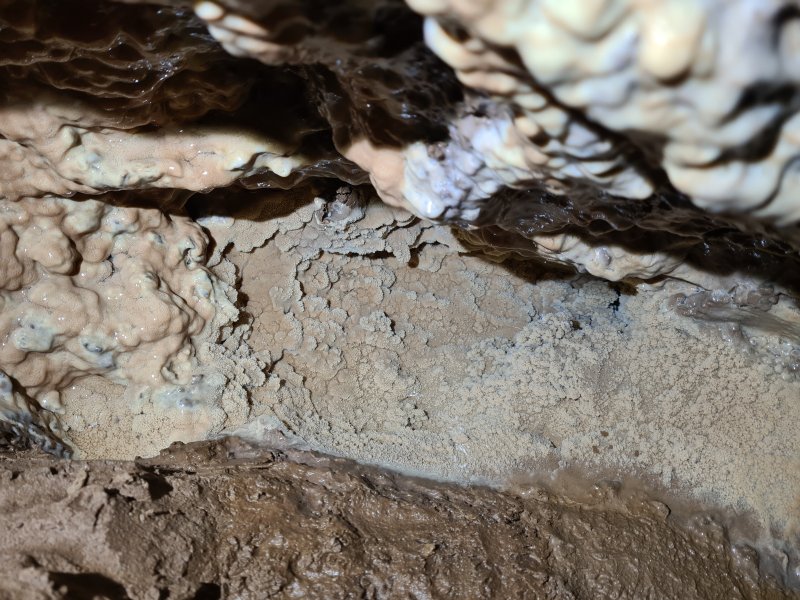 Crystal pool on the climb to the upper chamber.
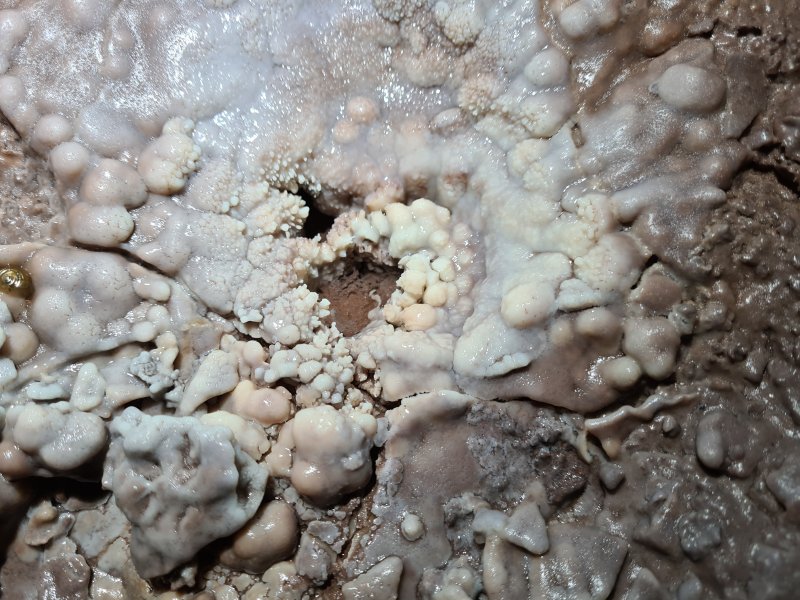 Calcited drip pocket in the upper chamber.
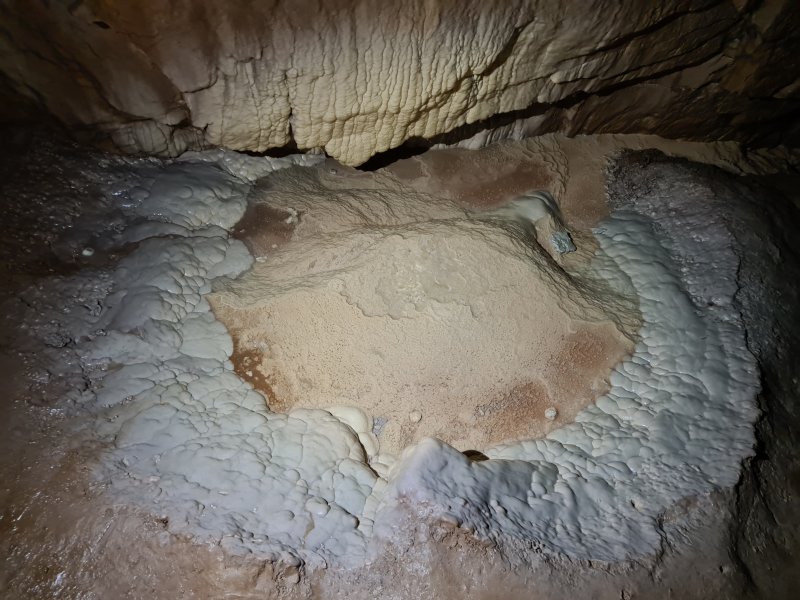 The upper chamber of Gyrn Fawr Passage is dominated by a huge drip splash formation, about 3 metres across. This needs a human for scale, but I was the only one to get here.
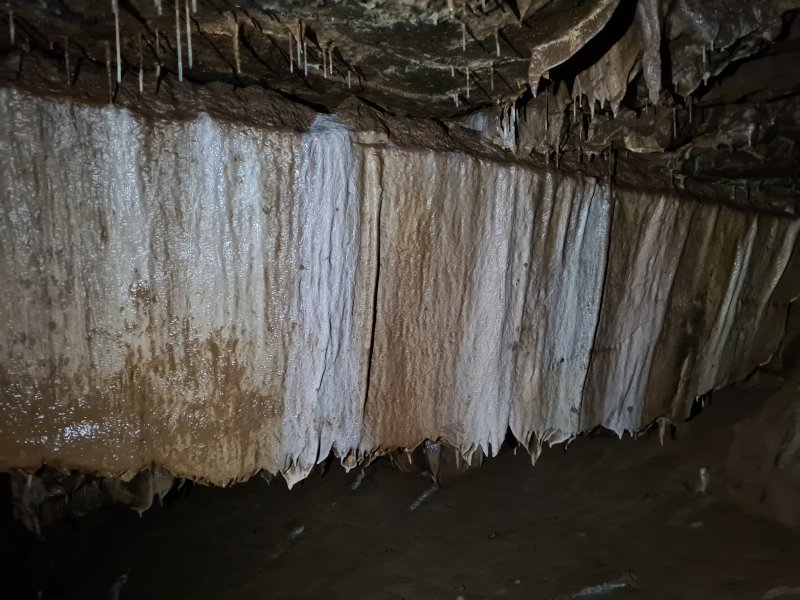 The ceiling would once have been quite beautiful, but too many people have used it for support, and there are a lot of muddy hand prints.
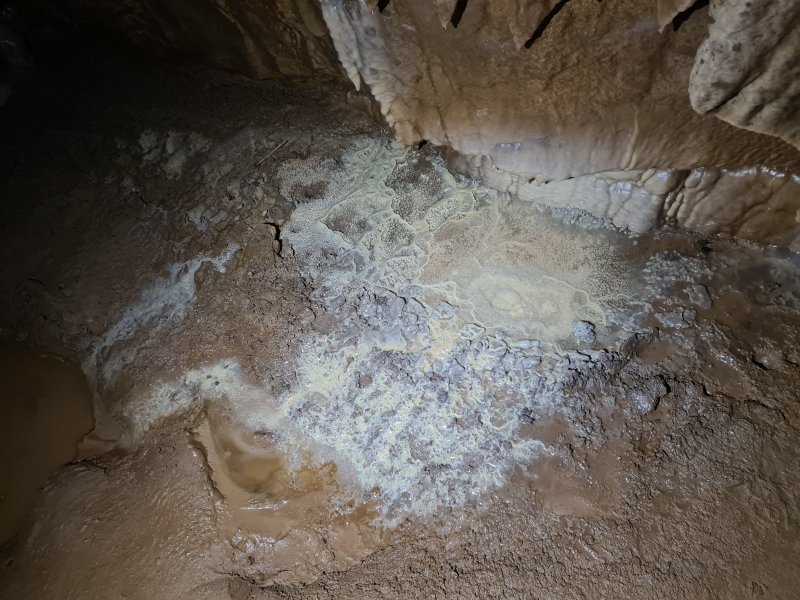 A second drip formation beyond the main one.
 Gyrn Fawr Passage ends at a dig. This heads into the unknown, and would probably bypass the sump, but it is a long way away from any known passage.
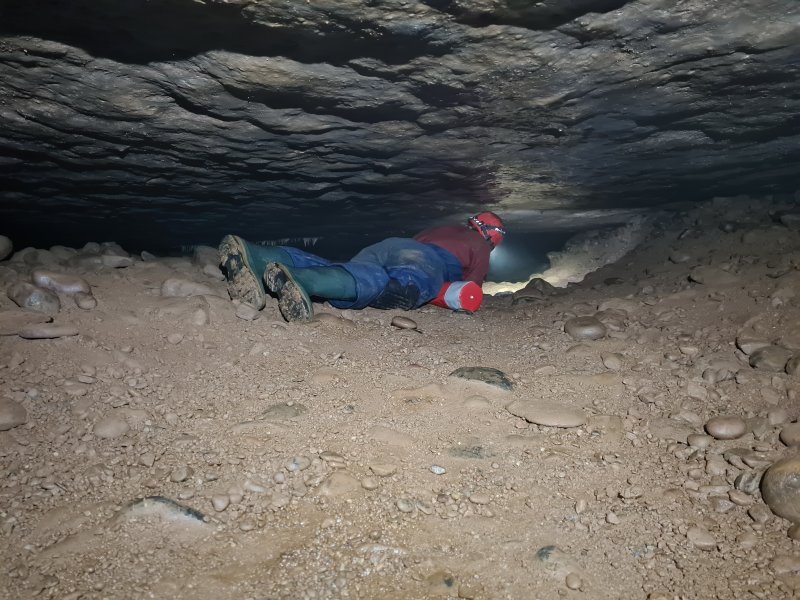 Returning to the widest part of Main Stream, above the sediment bank on the side is a crawl over cobbles into Genesis Gallery.
Modelling by Steph, lighting by Tarquin and Steph
Returning to the widest part of Main Stream, above the sediment bank on the side is a crawl over cobbles into Genesis Gallery.
Modelling by Steph, lighting by Tarquin and Steph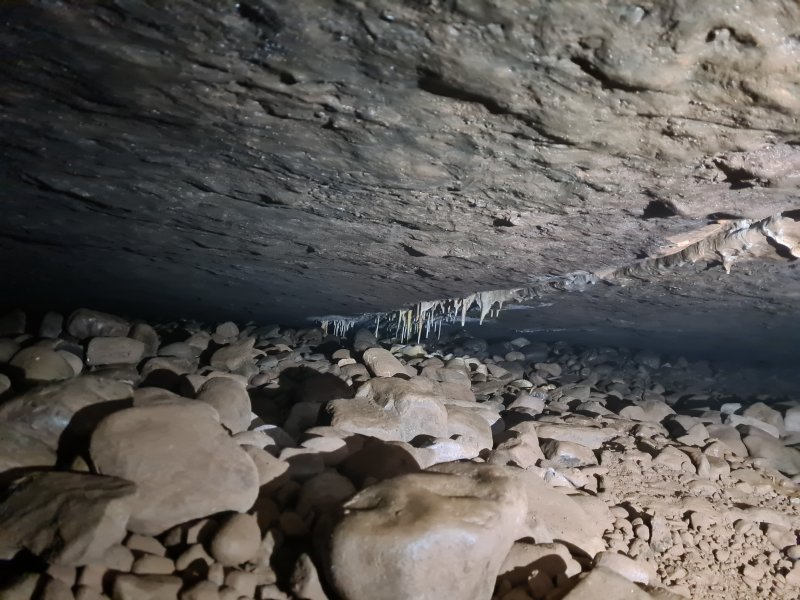 Formations in the crawl.
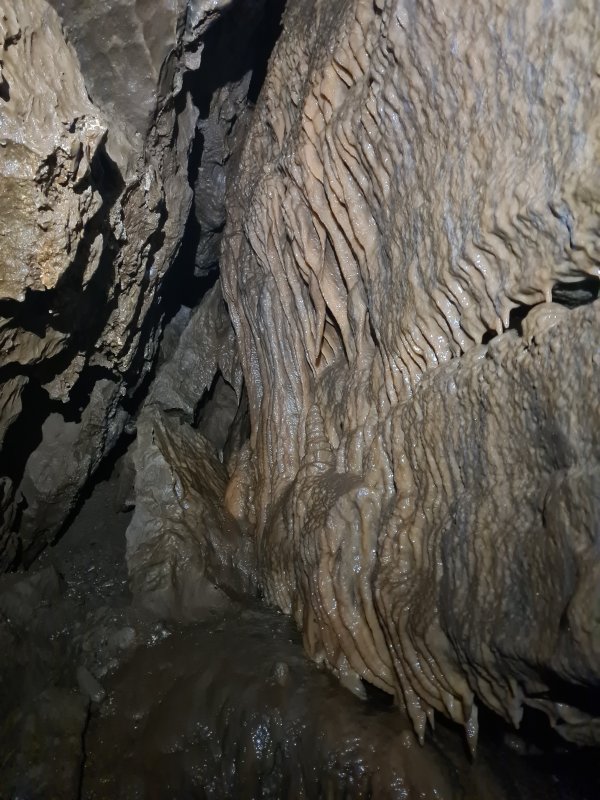 The crawl ends at a rift. The formations here are naturally dull, but glow peach when lit correctly.
 The passage has the remains of a campsite. On the right is an undercut, and the way to 3D maze and Old World Series is in the undercut; the easiest route is at the far end of the undercut. The way along Genesis Gallery is to continue along the rift.
Modelling by Steph, lighting by Tarquin and Steph
The passage has the remains of a campsite. On the right is an undercut, and the way to 3D maze and Old World Series is in the undercut; the easiest route is at the far end of the undercut. The way along Genesis Gallery is to continue along the rift.
Modelling by Steph, lighting by Tarquin and Steph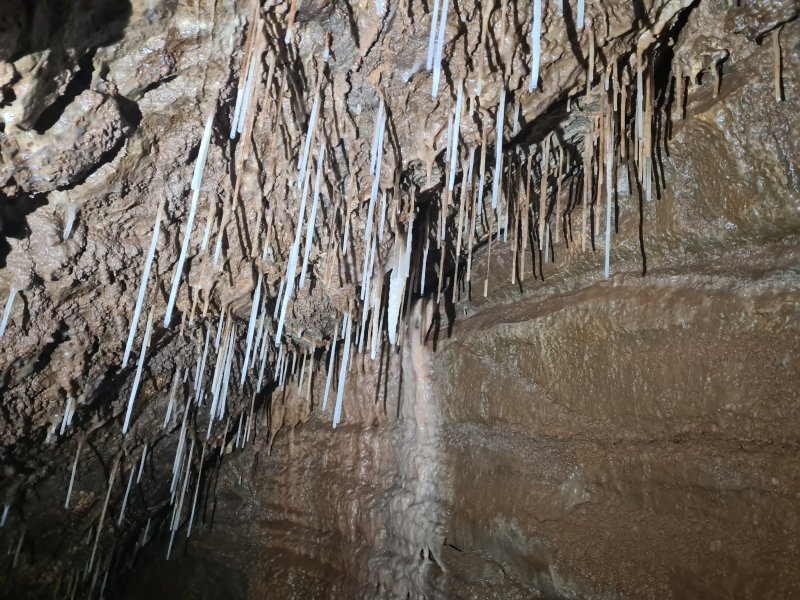 Straws in the rift.
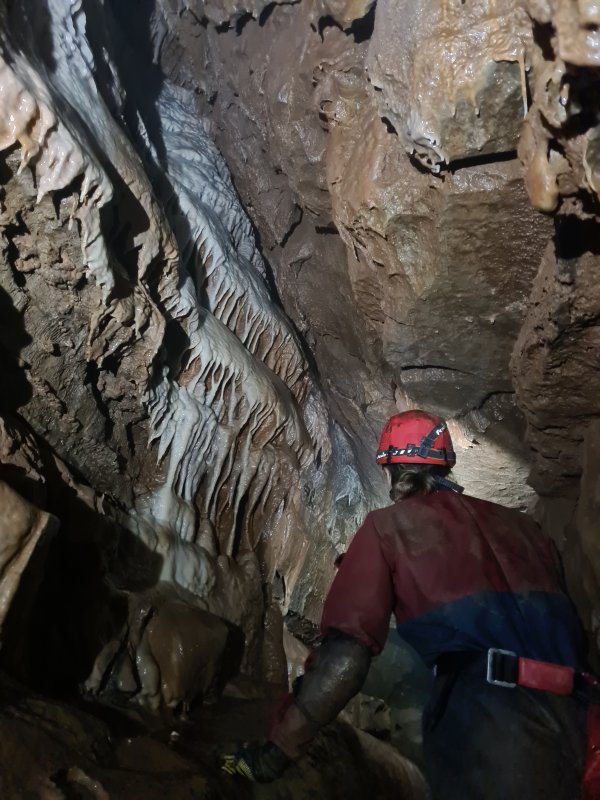 Flowstone in the rift.
Modelling by Steph, lighting by Tarquin and Steph
Flowstone in the rift.
Modelling by Steph, lighting by Tarquin and Steph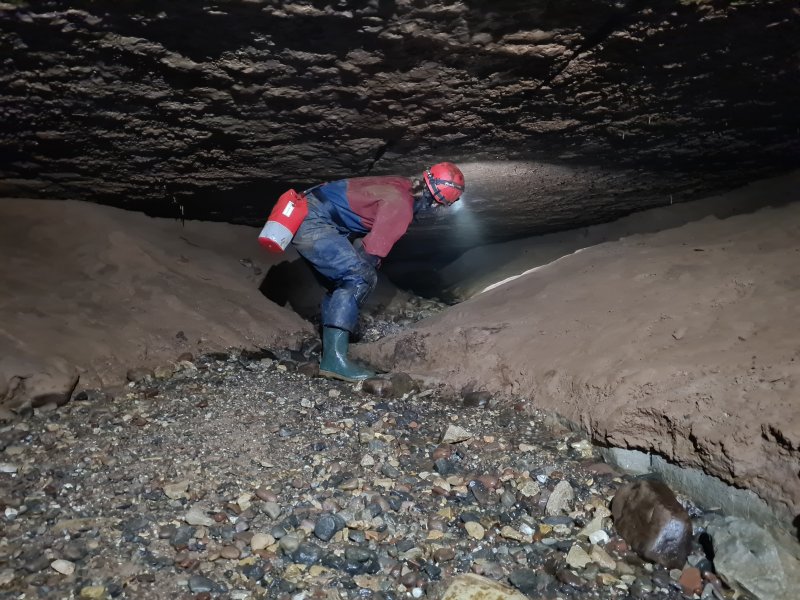 Genesis Gallery widens into a bedding.
Modelling by Steph, lighting by Tarquin and Steph
Genesis Gallery widens into a bedding.
Modelling by Steph, lighting by Tarquin and Steph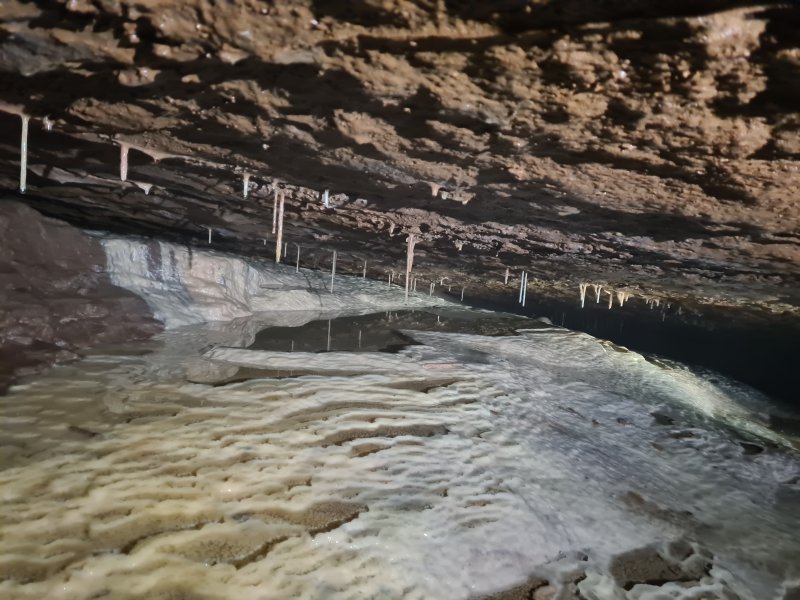 Crystal pools in a flat out part of the bedding.
Lighting by Tarquin and Steph
Crystal pools in a flat out part of the bedding.
Lighting by Tarquin and Steph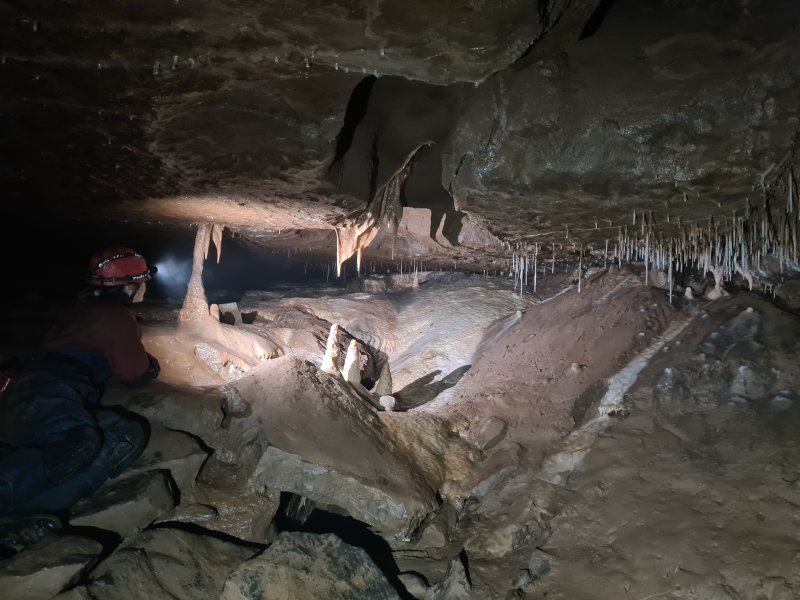 Genesis Gallery has several grottos, with this one being after the flat out section.
Modelling by Steph, lighting by Tarquin and Steph
Genesis Gallery has several grottos, with this one being after the flat out section.
Modelling by Steph, lighting by Tarquin and Steph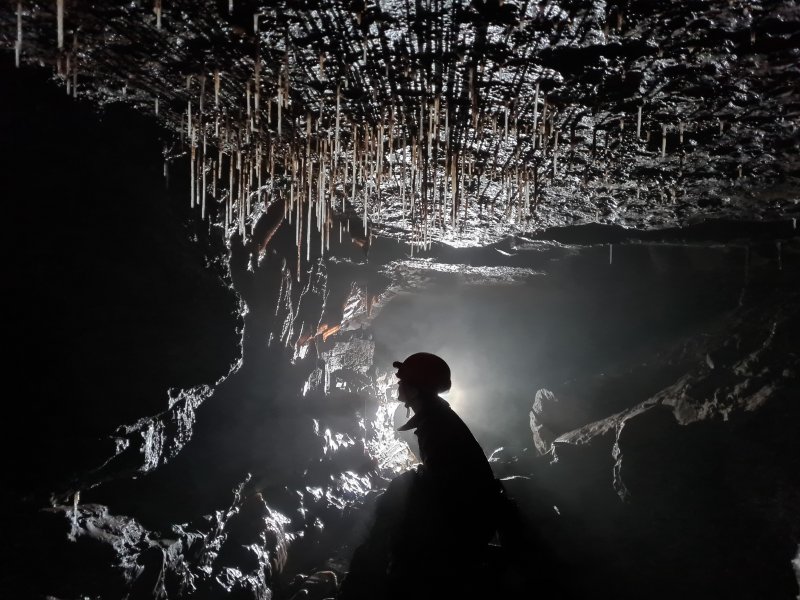 Straw grotto with translucent curtains in Genesis Gallery.
Modelling by Steph
Straw grotto with translucent curtains in Genesis Gallery.
Modelling by Steph Small calcite flow in Genesis Gallery.
 Small crystal pool in the calcite flow.
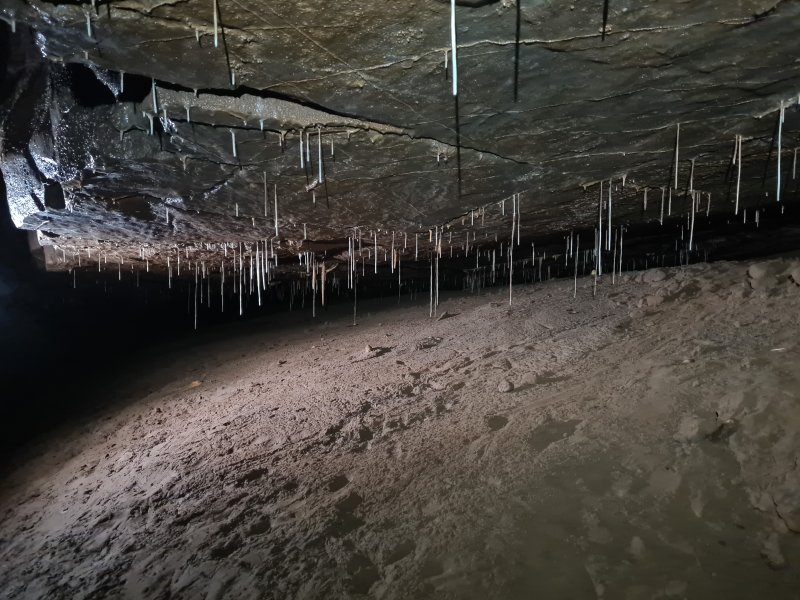 Straw-filled bank in Genesis Gallery. The way on is to the right of these, but there are some avens worth looking at ahead first. The small stream flows down the passage, and really looks like it should be the way on, but beyond the avens, it becomes very low and chokes.
Lighting by Tarquin and Steph
Straw-filled bank in Genesis Gallery. The way on is to the right of these, but there are some avens worth looking at ahead first. The small stream flows down the passage, and really looks like it should be the way on, but beyond the avens, it becomes very low and chokes.
Lighting by Tarquin and Steph Calcited aven.
Lighting by Tarquin and Steph
Calcited aven.
Lighting by Tarquin and Steph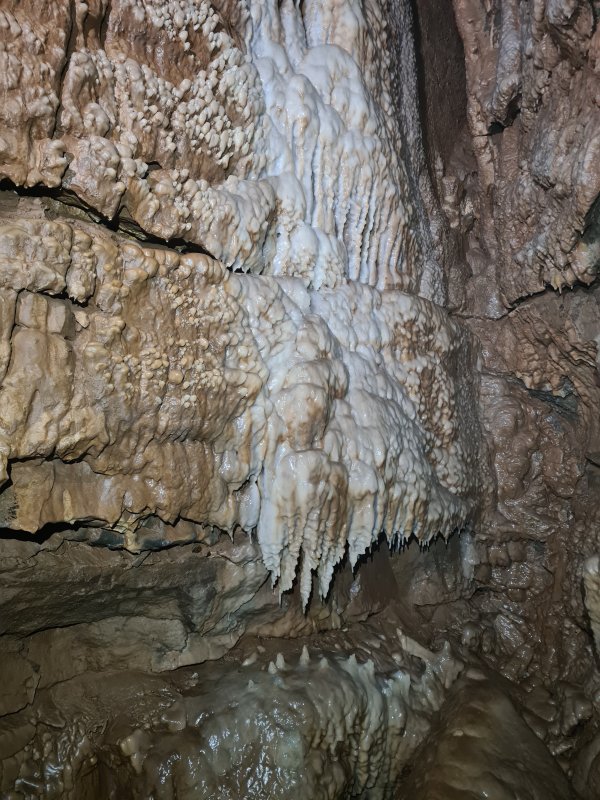 The last aven has more flowstone.
Lighting by Tarquin and Steph
The last aven has more flowstone.
Lighting by Tarquin and Steph The wall of the aven has hundreds of little calcite projections that look like teeth, so we decided that this should be called Tooth Fairy's Castle.
 Top of the calcited aven.
 Carrot in the bypass passage behind the straw bank.
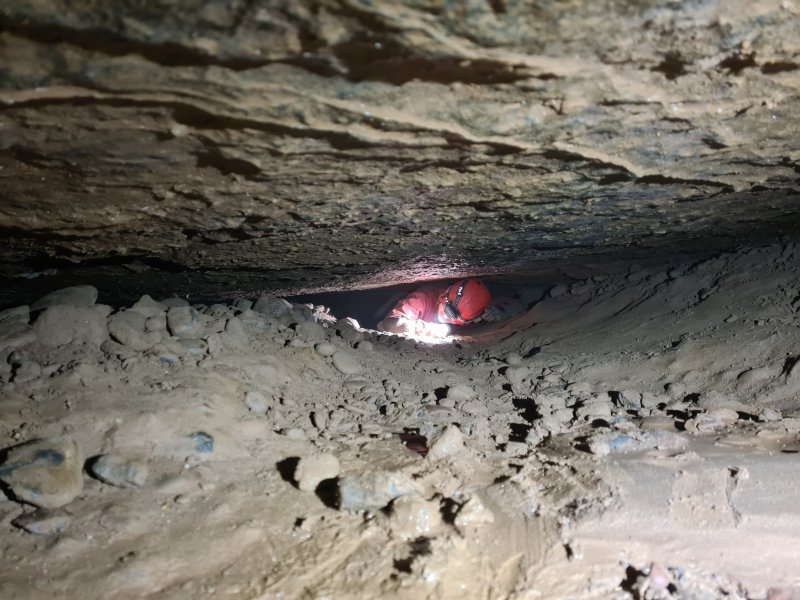 The bypass passage soon lowers to a flat out crawl which looks very low.
Modelling by Steph, lighting by Tarquin and Steph
The bypass passage soon lowers to a flat out crawl which looks very low.
Modelling by Steph, lighting by Tarquin and Steph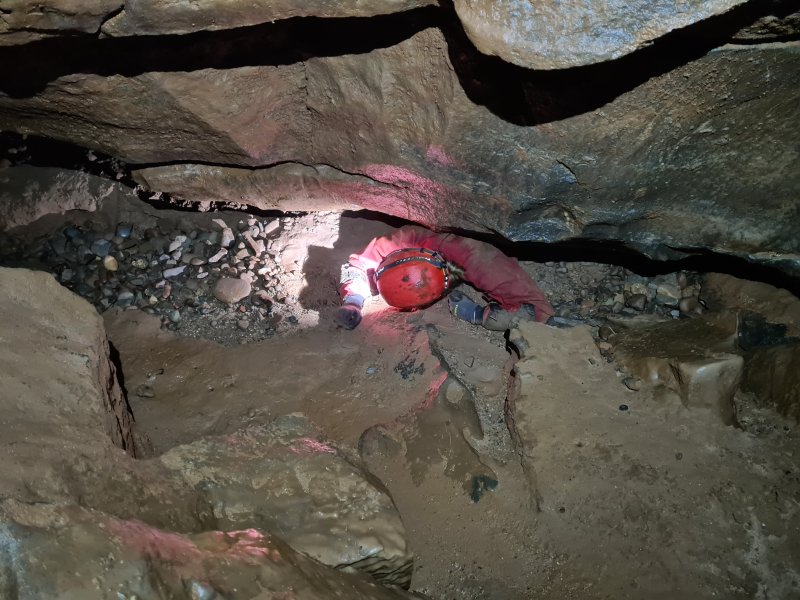 The flat out section regains the main passage of Genesis Gallery.
Modelling by Steph, lighting by Tarquin and Steph
The flat out section regains the main passage of Genesis Gallery.
Modelling by Steph, lighting by Tarquin and Steph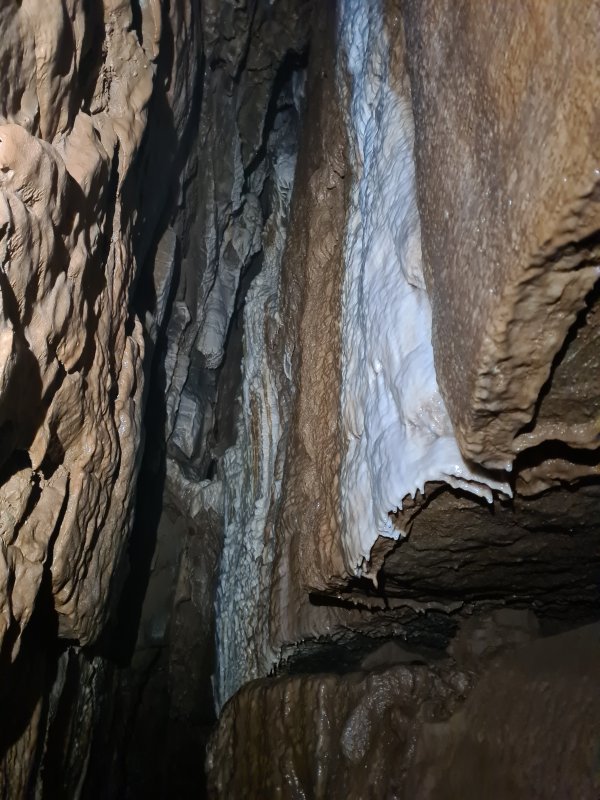 Another calcited aven.
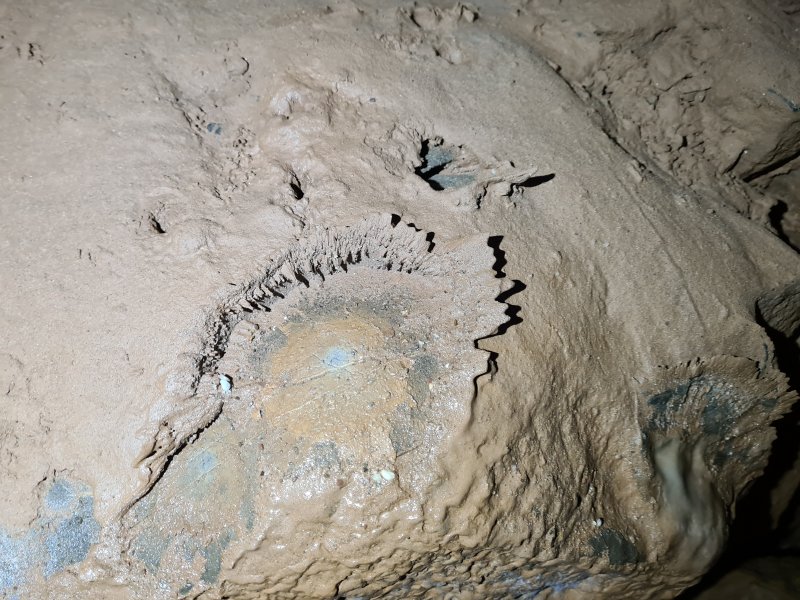 Mud splash formation in the regained passage.
 Mud splash formation.
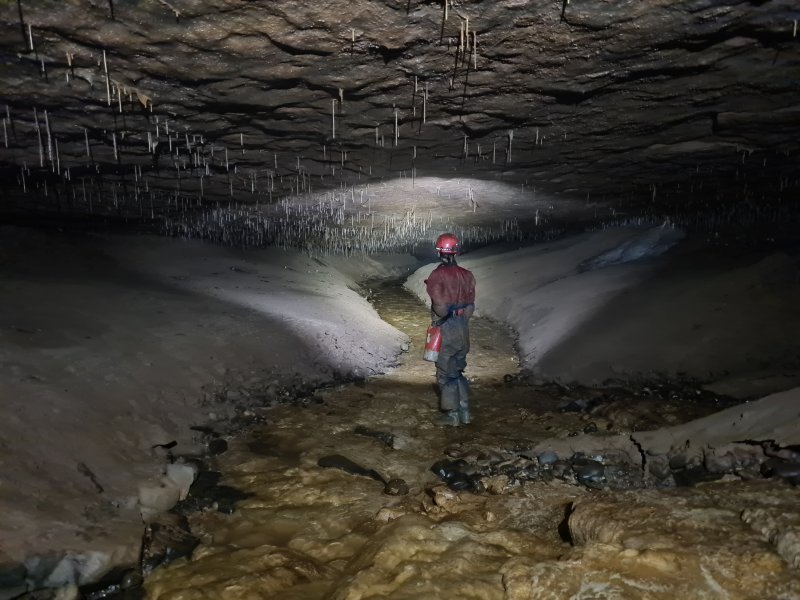 The passage then widens, and lowers again to eventually end. The water is regained in the Main Stream shortly before the sump.
Modelling by Steph, lighting by Tarquin and Steph
The passage then widens, and lowers again to eventually end. The water is regained in the Main Stream shortly before the sump.
Modelling by Steph, lighting by Tarquin and Steph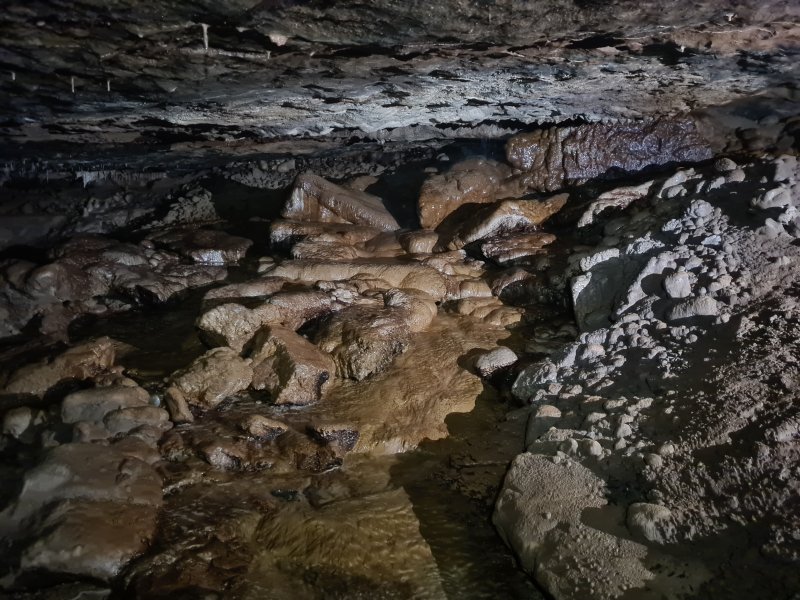 Flowstone emerging from Genesis Inlet.
Lighting by Tarquin and Steph
Flowstone emerging from Genesis Inlet.
Lighting by Tarquin and Steph Water pouring from Genesis Inlet. This is a decorated passage with several climbs and avens. The first climb requires a 6 metre maypole, and is too risky to free climb. Sadly the maypole at the climb is no longer usable, so the inlet is inaccessible.
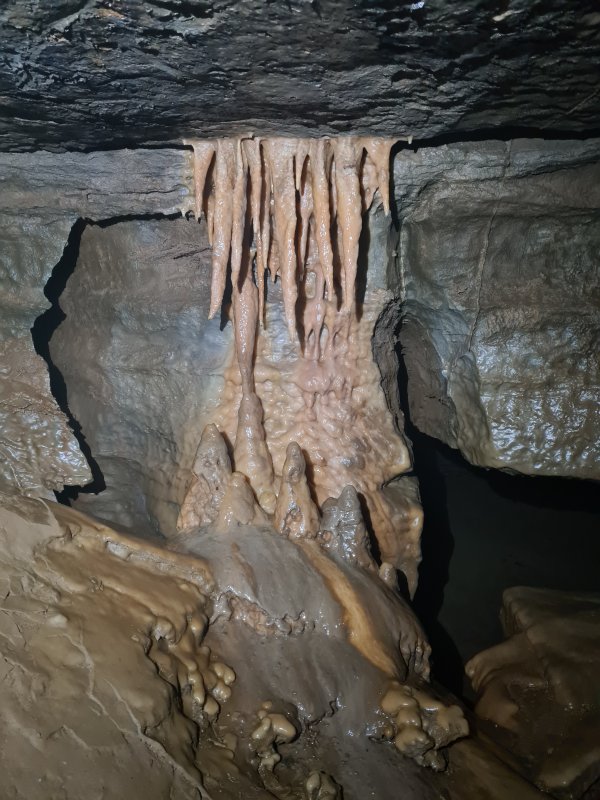 The route into 3D Maze starts with a bedding containing some formations.
 The formations continue in the cleft below. However, if you see these, then you have gone into the cleft too early.
 The 3D Maze is a series of slots down next to the wall beside enormous fallen boulders, with gaps leading into undercuts. It can be followed at different levels, but there is actually only one route that actually goes somewhere. The early slots - seen here - are inconvenient. The last gap is the one that actually works relatively easily.
Modelling by Steph, lighting by Tarquin and Steph
The 3D Maze is a series of slots down next to the wall beside enormous fallen boulders, with gaps leading into undercuts. It can be followed at different levels, but there is actually only one route that actually goes somewhere. The early slots - seen here - are inconvenient. The last gap is the one that actually works relatively easily.
Modelling by Steph, lighting by Tarquin and Steph The slot leads down a little climb into the main undercut.
Modelling by Steph
The slot leads down a little climb into the main undercut.
Modelling by Steph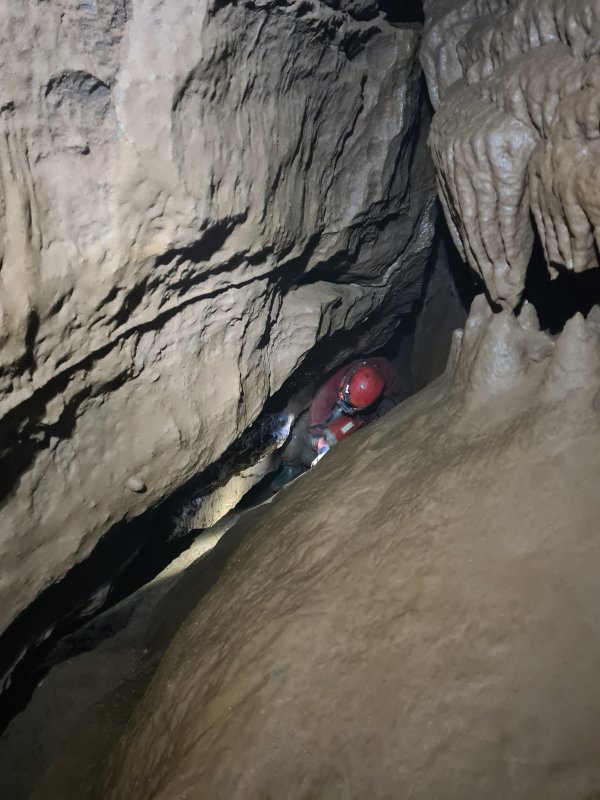 This in turn leads to an awkward thrutch up a narrow slope, trying not to get wedged in the rift below.
Modelling by Steph, lighting by Tarquin and Steph
This in turn leads to an awkward thrutch up a narrow slope, trying not to get wedged in the rift below.
Modelling by Steph, lighting by Tarquin and Steph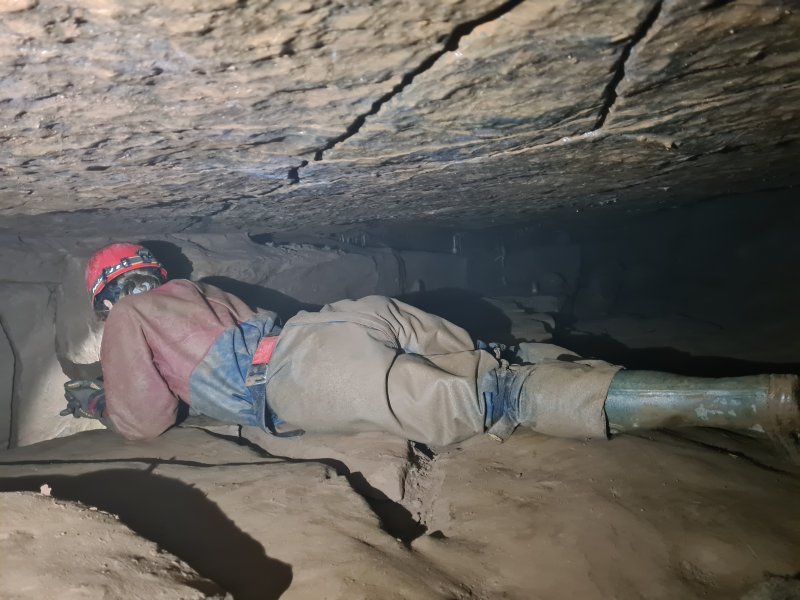 In the next bedding, a further slot down against the wall is the way on.
Modelling by Steph, lighting by Tarquin and Steph
In the next bedding, a further slot down against the wall is the way on.
Modelling by Steph, lighting by Tarquin and Steph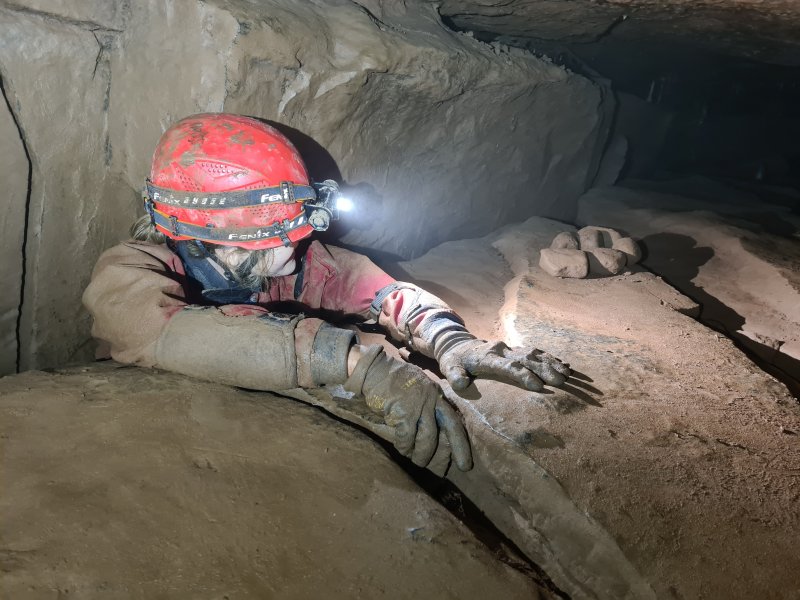 The way down requires an awkward contortion, and although not a particularly tight squeeze, it demands some tactics.
Modelling by Steph, lighting by Tarquin and Steph
The way down requires an awkward contortion, and although not a particularly tight squeeze, it demands some tactics.
Modelling by Steph, lighting by Tarquin and Steph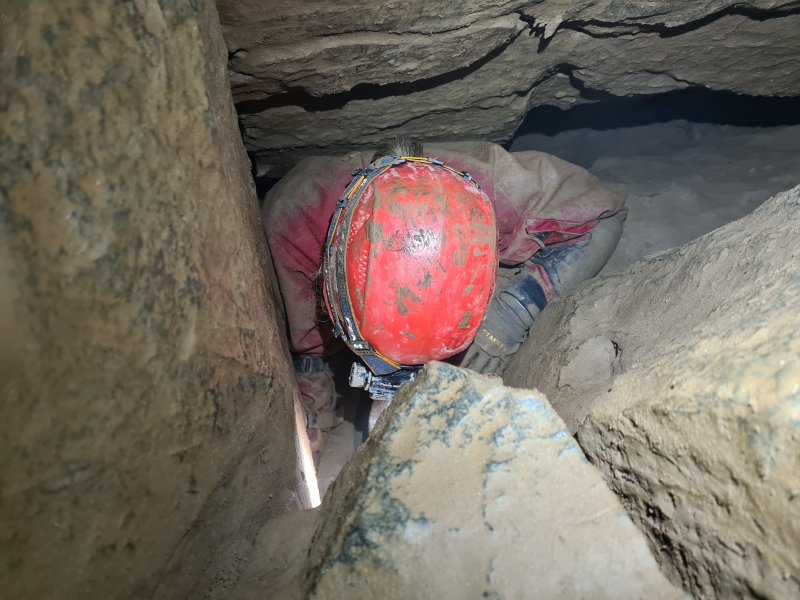 The bottom part is small enough to catch your helmet, but as long as you face in the correct direction, it is passable.
Modelling by Steph, lighting by Tarquin and Steph
The bottom part is small enough to catch your helmet, but as long as you face in the correct direction, it is passable.
Modelling by Steph, lighting by Tarquin and Steph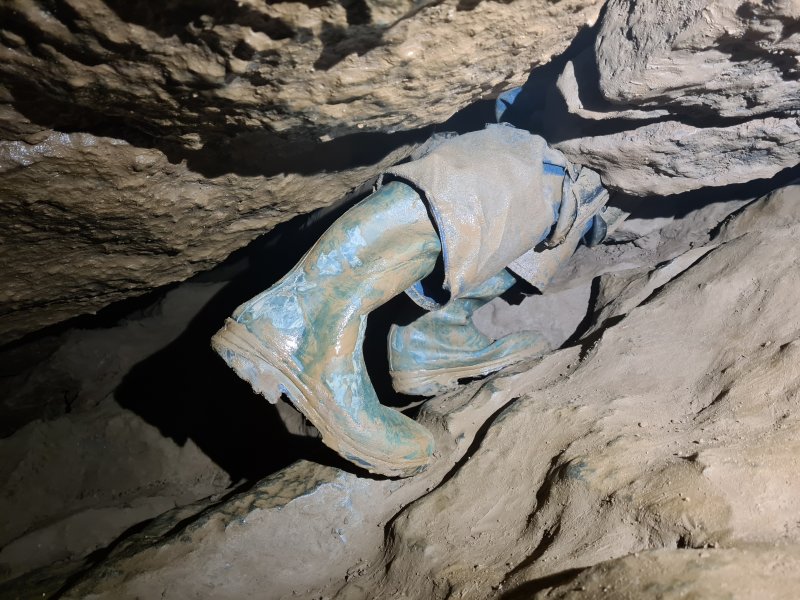 The bottom of the squeeze emerges in a very low undercut, and requires a back bend to slither into it.
Modelling by Steph
The bottom of the squeeze emerges in a very low undercut, and requires a back bend to slither into it.
Modelling by Steph The undercut is the start of Old World Series. A series of steps down boulders arrives at the well decorated section.
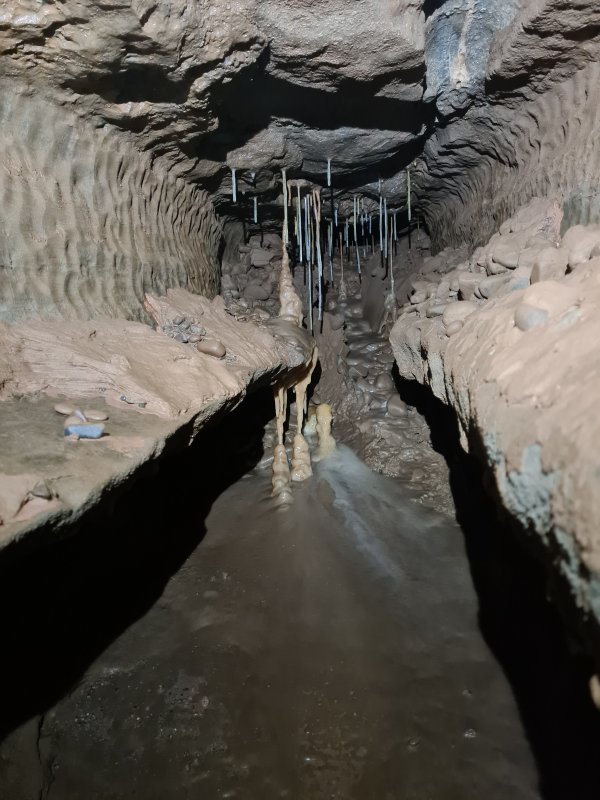 Side grotto in Old World Series.
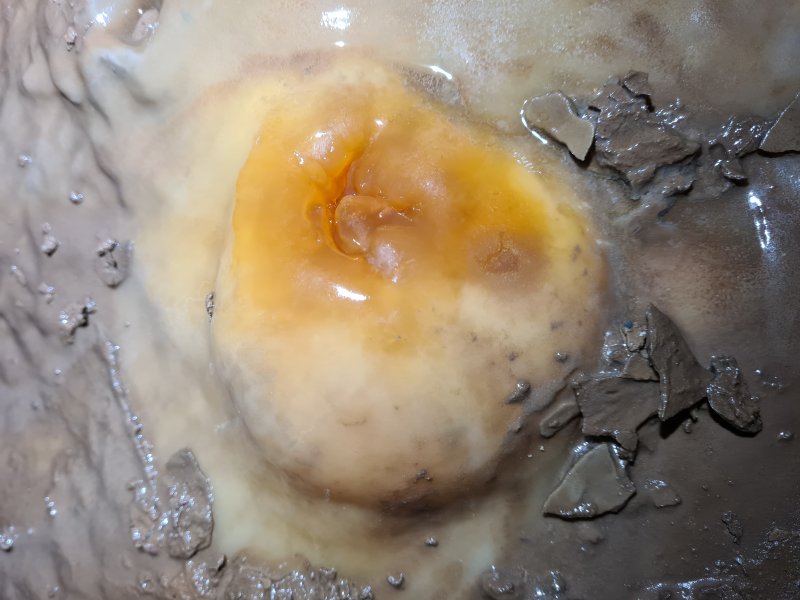 Honey-coloured stalagmite.
 Grotto at the start of Old World Series. Tucked to the right here is a side passage that is very easy to accidentally follow on the way out, either via a little phreas or another undercut, which leads into Crystal River Passage.
Modelling by Steph, lighting by Tarquin and Steph
Grotto at the start of Old World Series. Tucked to the right here is a side passage that is very easy to accidentally follow on the way out, either via a little phreas or another undercut, which leads into Crystal River Passage.
Modelling by Steph, lighting by Tarquin and Steph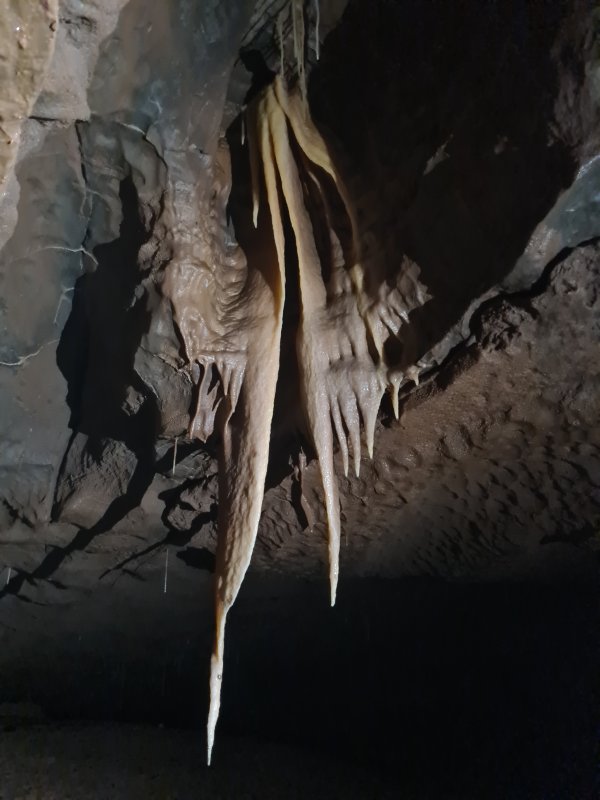 Parted curtains.
Lighting by Steph
Parted curtains.
Lighting by Steph The main passage of Old World Series.
Modelling by Steph, lighting by Tarquin and Steph
The main passage of Old World Series.
Modelling by Steph, lighting by Tarquin and Steph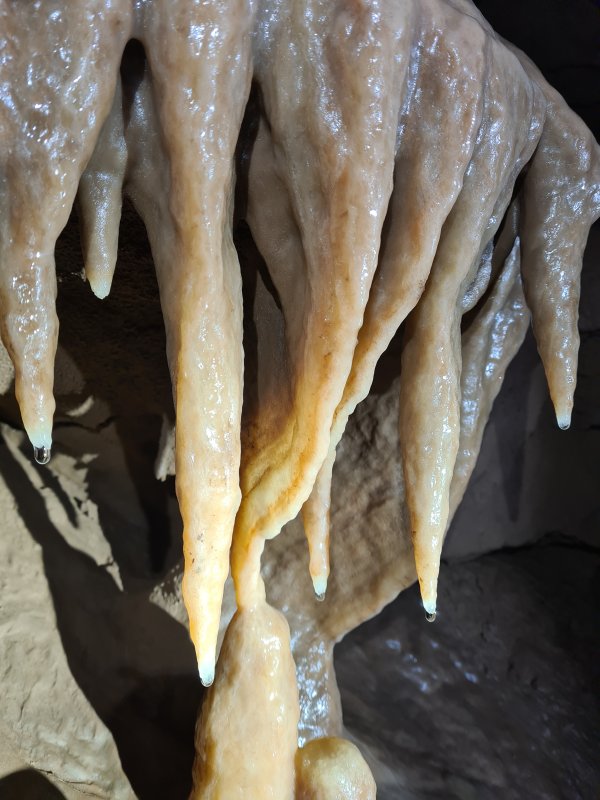 Curtains and stalactites in Old World Series.
Lighting by Tarquin and Steph
Curtains and stalactites in Old World Series.
Lighting by Tarquin and Steph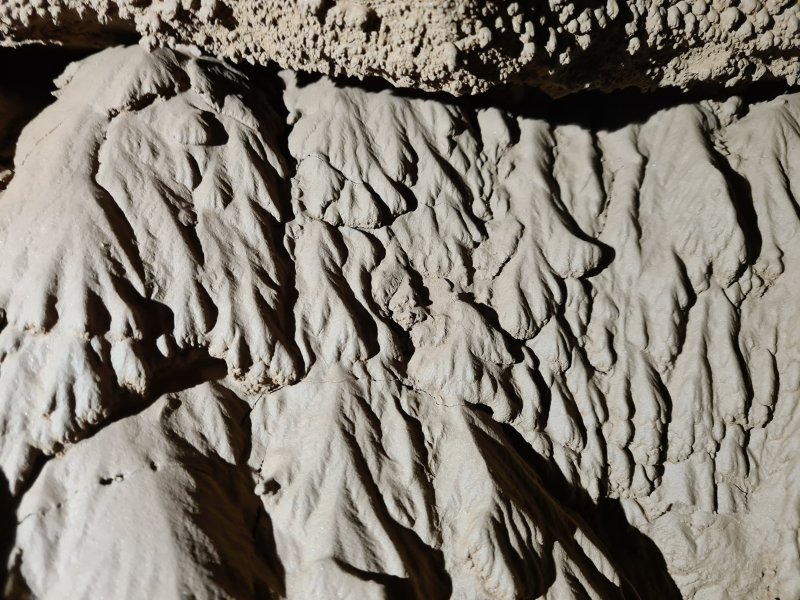 Surge mark mud formations, showing that this part of the cave can flood severely, with water ponding and draining. However, footprints suggest that is has not happened recently.
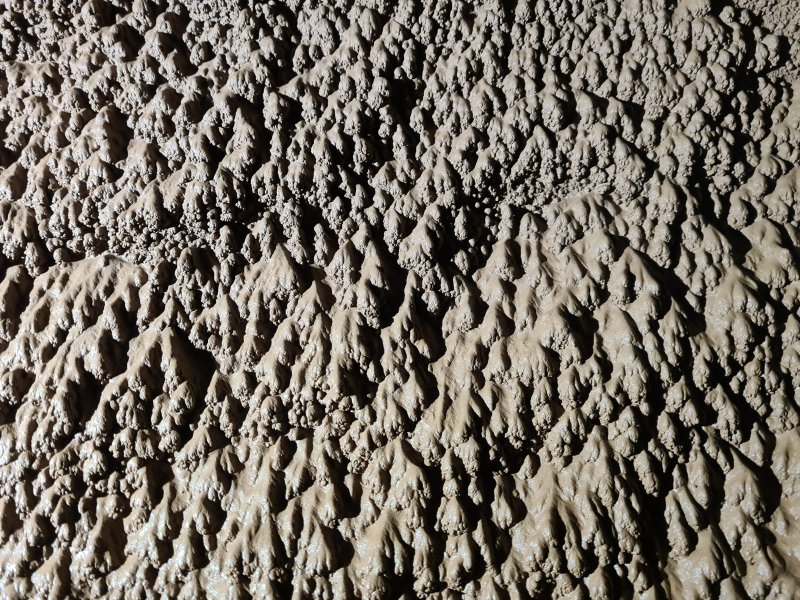 Mud formations.
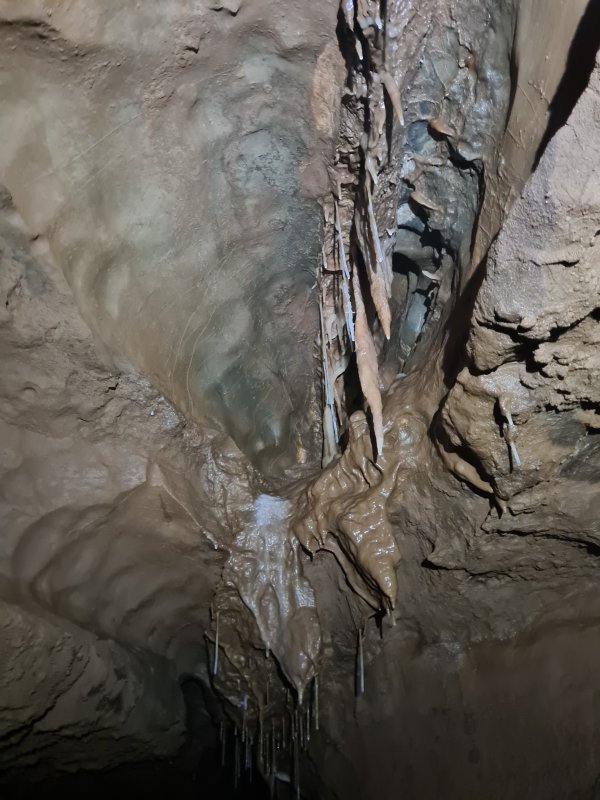 Stalactites above Gooseberry Pot.
 Gooseberry Pot itself is just a drop of several metres at a junction, notable only because it is a potential hazard. It is traversed around, followed by scrambles down and up the ongoing passage.
Modelling by Steph, lighting by Tarquin and Steph
Gooseberry Pot itself is just a drop of several metres at a junction, notable only because it is a potential hazard. It is traversed around, followed by scrambles down and up the ongoing passage.
Modelling by Steph, lighting by Tarquin and Steph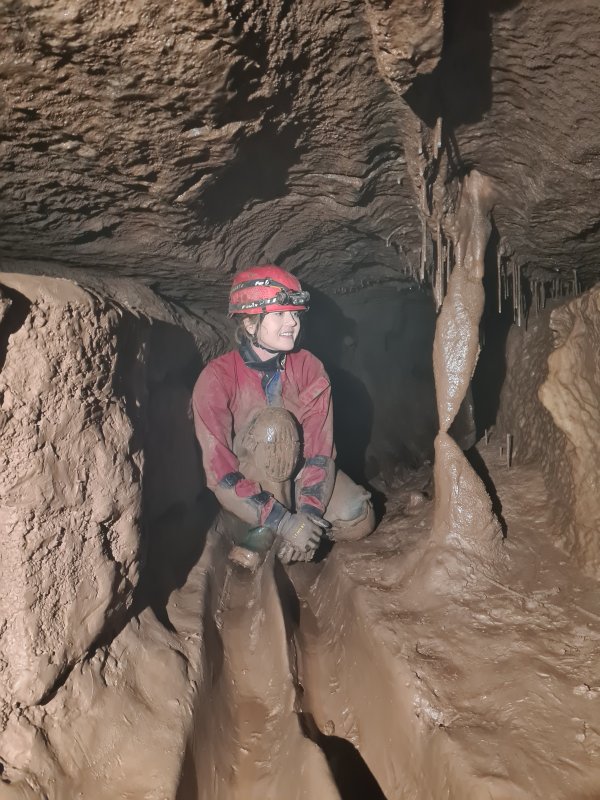 The ongoing passage is very muddy, with some heavily mud coated formations.
Modelling by Steph
The ongoing passage is very muddy, with some heavily mud coated formations.
Modelling by Steph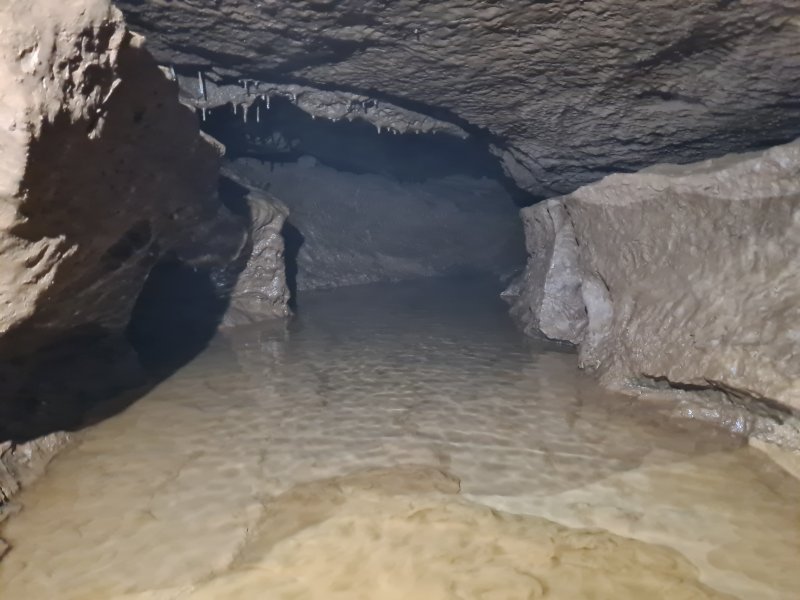 Pool on a corner that threatens to soak passing cavers.
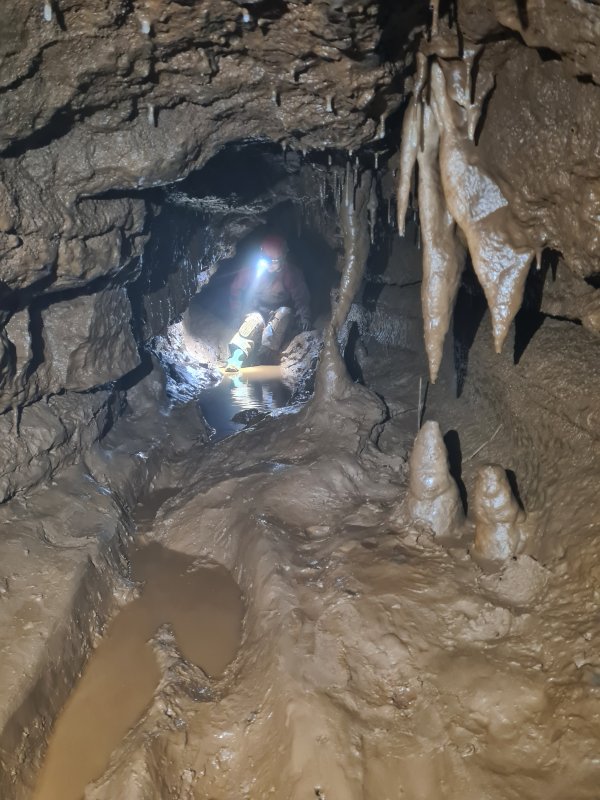 By now, we were liberally coated in mud, and this passage really has no redeeming features.
Modelling by Steph, lighting by Tarquin and Steph
By now, we were liberally coated in mud, and this passage really has no redeeming features.
Modelling by Steph, lighting by Tarquin and Steph We decided not to push through the next wet crawl to reach the bitter end. We had done enough.
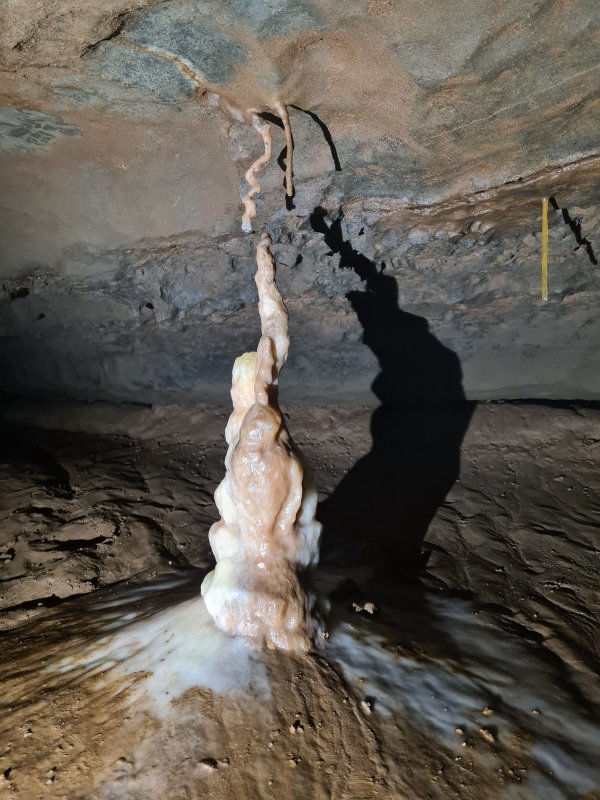 Broken column at the start of Crystal River Passage. It could not make up its mind which direction to grow, so it just went in all directions. The breakage seems to be caused by subsidance from passing cavers, as the route passes over the stalagmite's base.
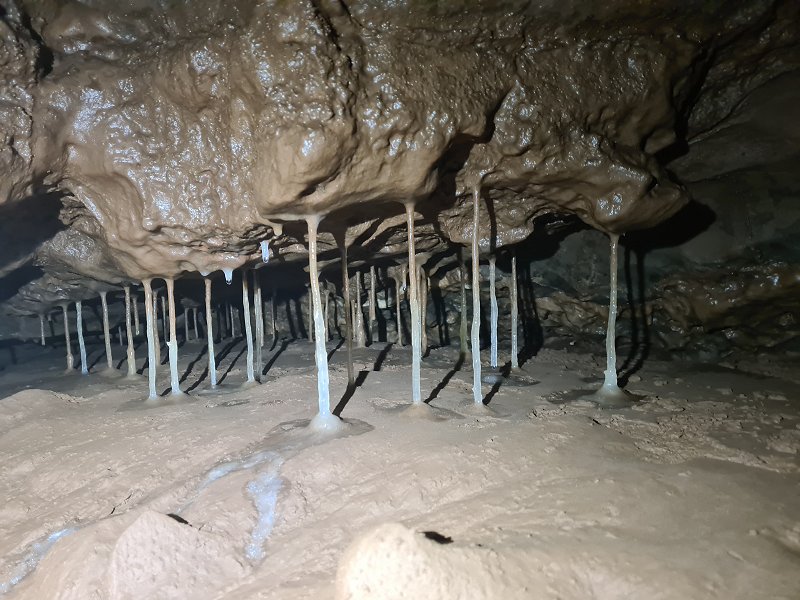 Straw columns in Crystal River Passage.
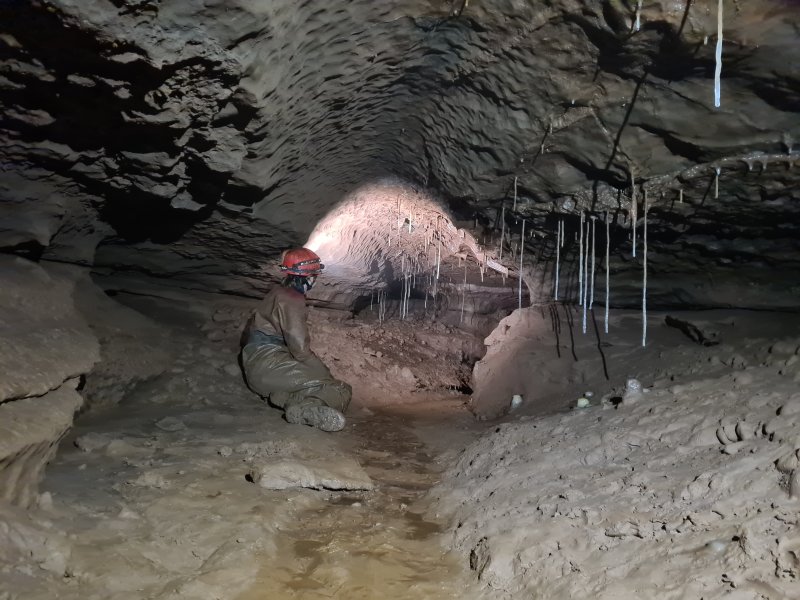 An early part of Crystal River Passage.
Modelling by Steph, lighting by Tarquin and Steph
An early part of Crystal River Passage.
Modelling by Steph, lighting by Tarquin and Steph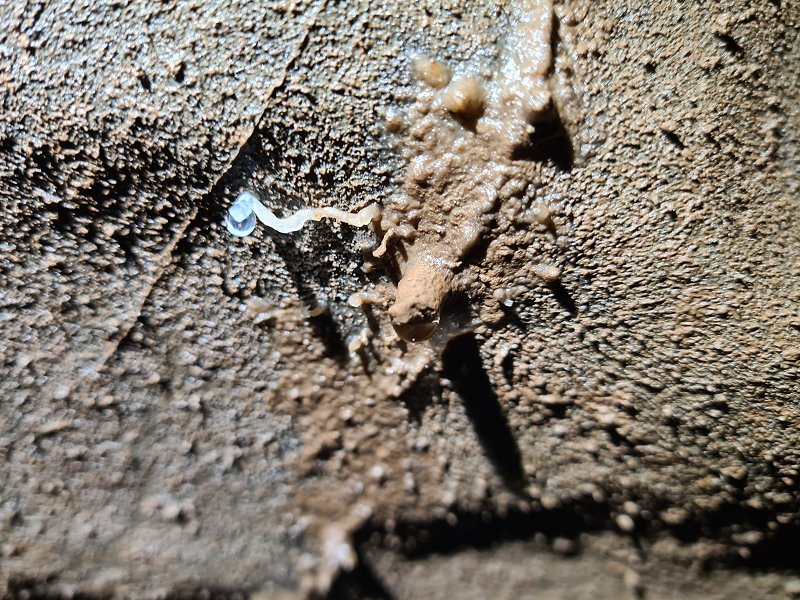 A tiny helictite, barely larger than a drip of water.
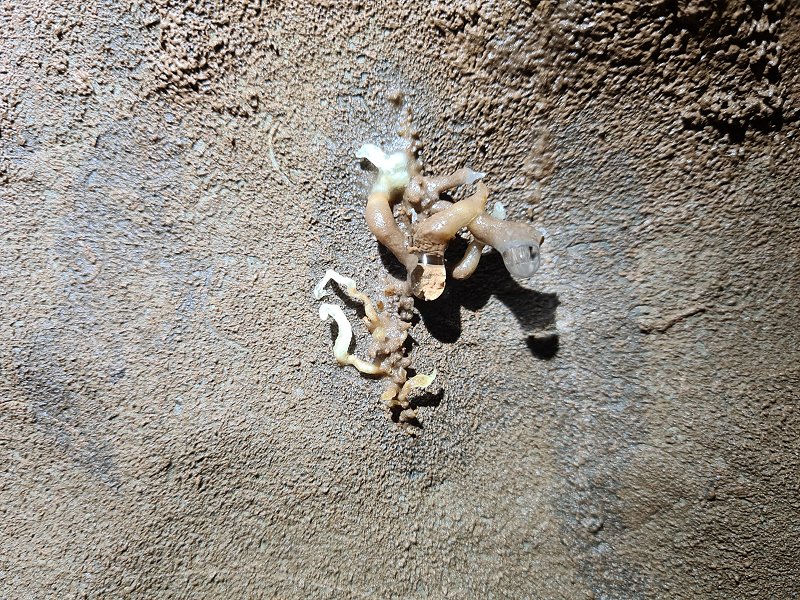 More tiny helictites.
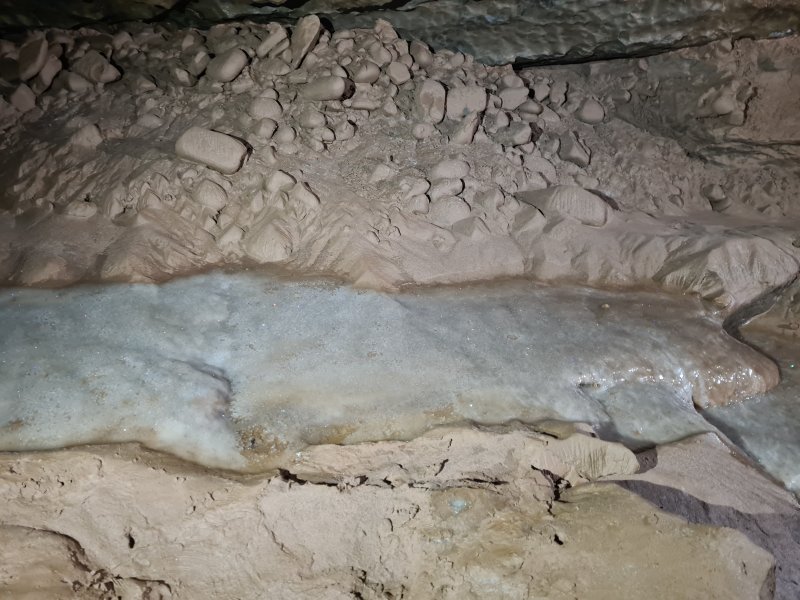 The Crystal River is a small calcite flow, with very clean calcite. At first, it seems rather minimal.
Lighting by Tarquin and Steph
The Crystal River is a small calcite flow, with very clean calcite. At first, it seems rather minimal.
Lighting by Tarquin and Steph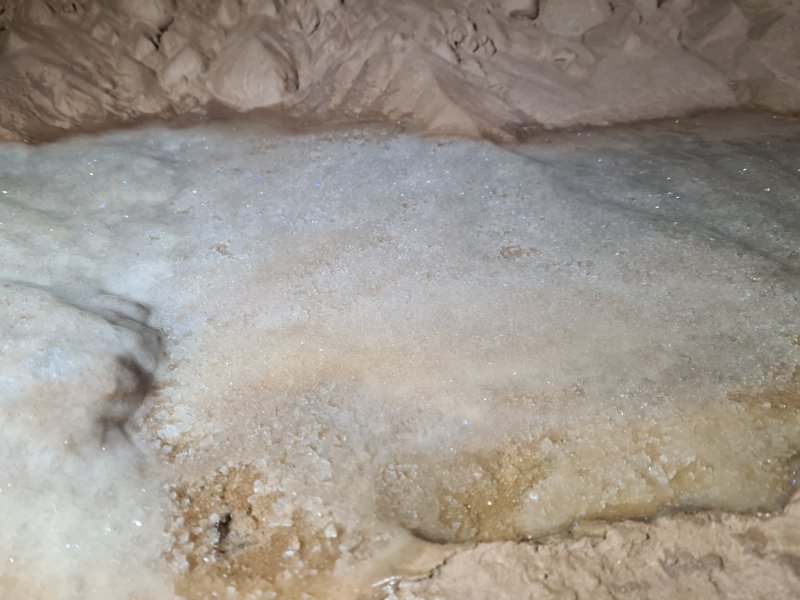 The Crystal River.
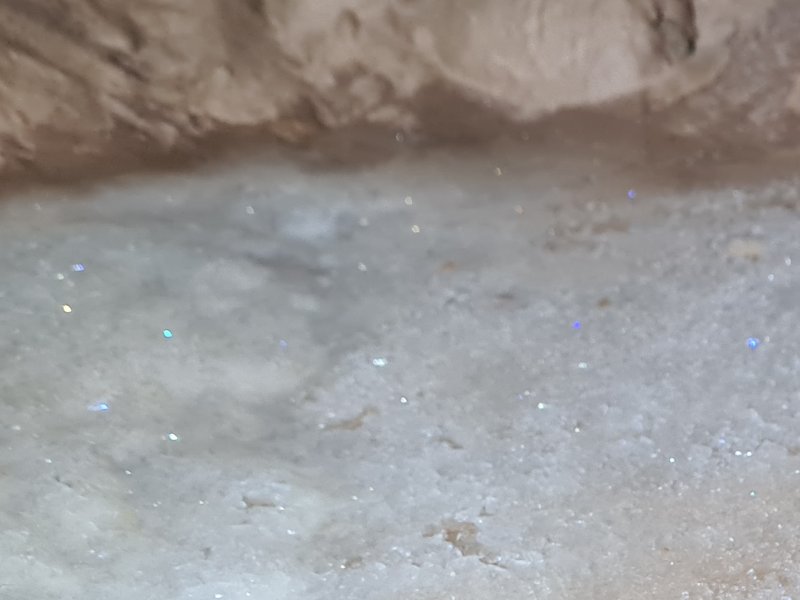 The most impressive feature of the Crystal River is that when you move your head even the tiniest amount, it sparkles with a dazzling array of colours. Each crystal seems to form a prism, causing the light to be split into a full rainbow of colours, with the blues and violets being particularly strong. Each dot of colour is especially tiny, so it almost feels like a faulty pixel. Quite mesmerising.
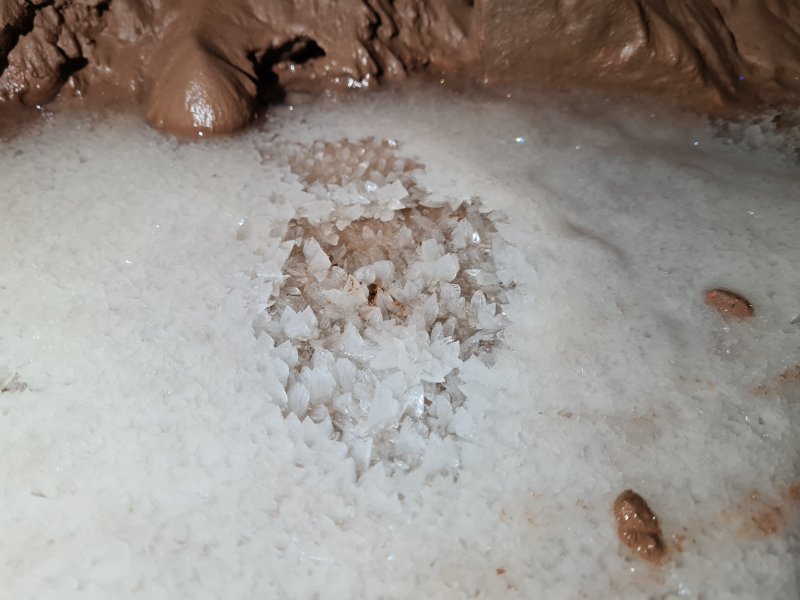 Crystals in the Crystal River.
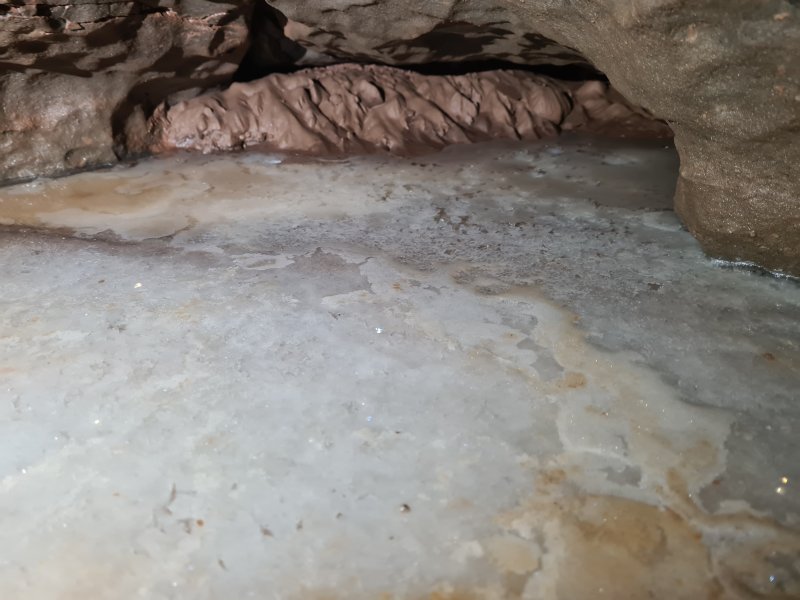 Pool with calcite rafts in the Crystal River.
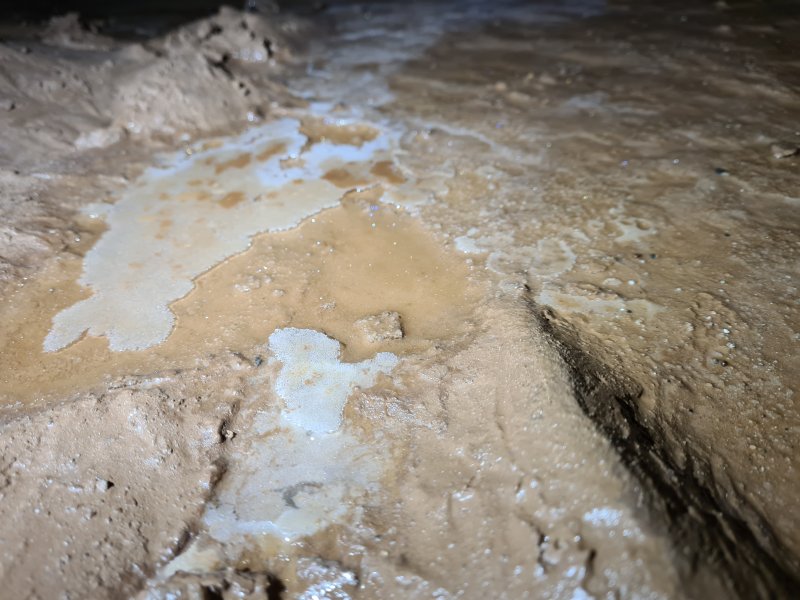 Calcite rafts.
 End of Crystal River Passage.
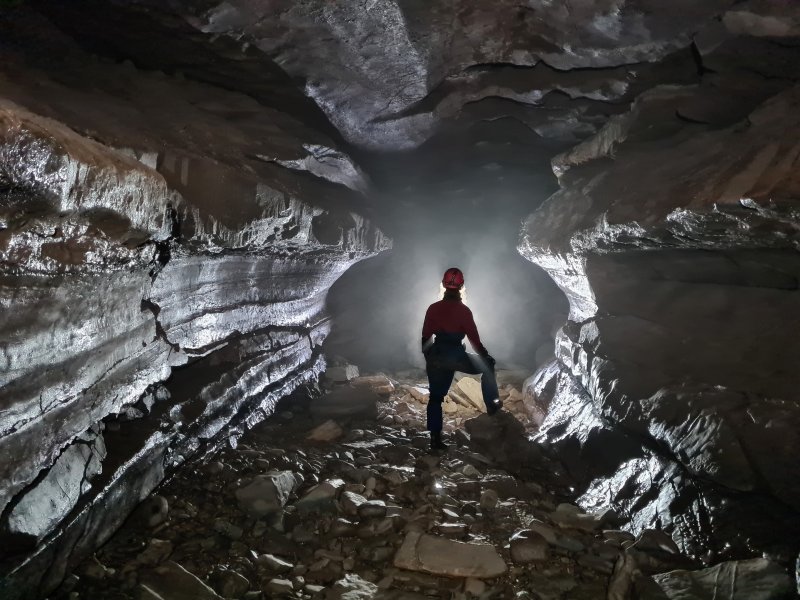 We returned to the Canal Bypass, which starts as a very attractive passage.
Modelling by Lizzy, lighting by Tarquin, Lizzy and Pete
We returned to the Canal Bypass, which starts as a very attractive passage.
Modelling by Lizzy, lighting by Tarquin, Lizzy and Pete The iconic formation in Canal Bypass.
Modelling by Pete, lighting by Tarquin and Lizzy
The iconic formation in Canal Bypass.
Modelling by Pete, lighting by Tarquin and Lizzy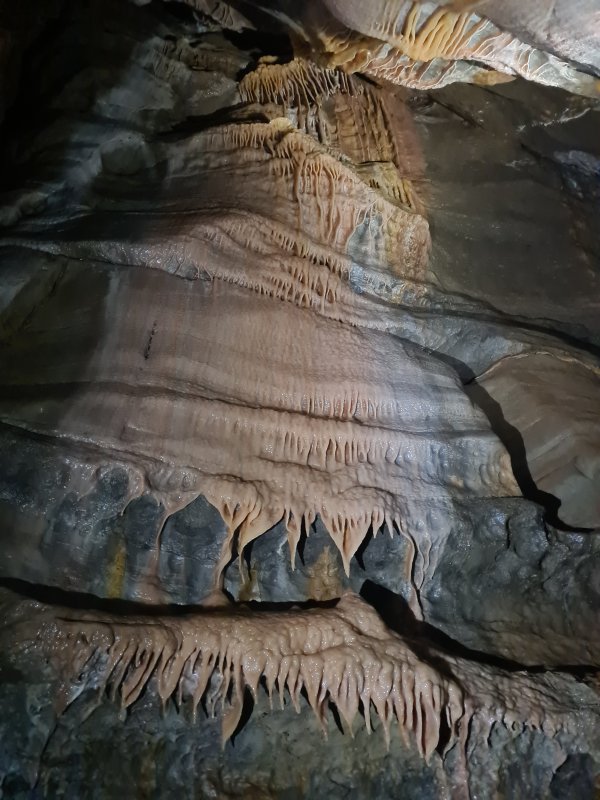 Flowstone.
Lighting by Tarquin and Pete
Flowstone.
Lighting by Tarquin and Pete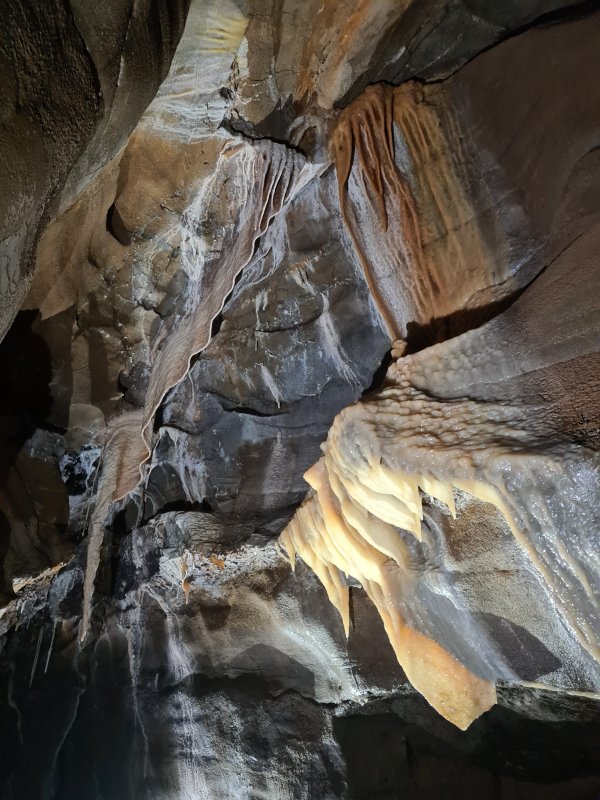 Curtains and flowstone.
Lighting by Tarquin, Pete and Lizzy
Curtains and flowstone.
Lighting by Tarquin, Pete and Lizzy Curtain columns. From here, the way on drops down to a stream, and heads upstream.
Lighting by Tarquin and Lizzy
Curtain columns. From here, the way on drops down to a stream, and heads upstream.
Lighting by Tarquin and Lizzy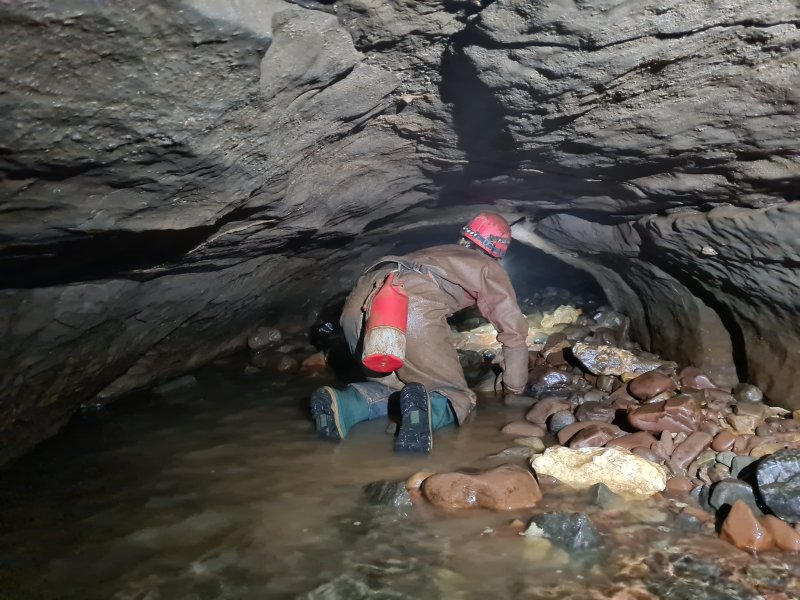 The downstream branch of Canal Bypass, which reaches a climb back up into the passage just before the junction with The Canal.
Modelling by Steph, lighting by Tarquin and Steph
The downstream branch of Canal Bypass, which reaches a climb back up into the passage just before the junction with The Canal.
Modelling by Steph, lighting by Tarquin and Steph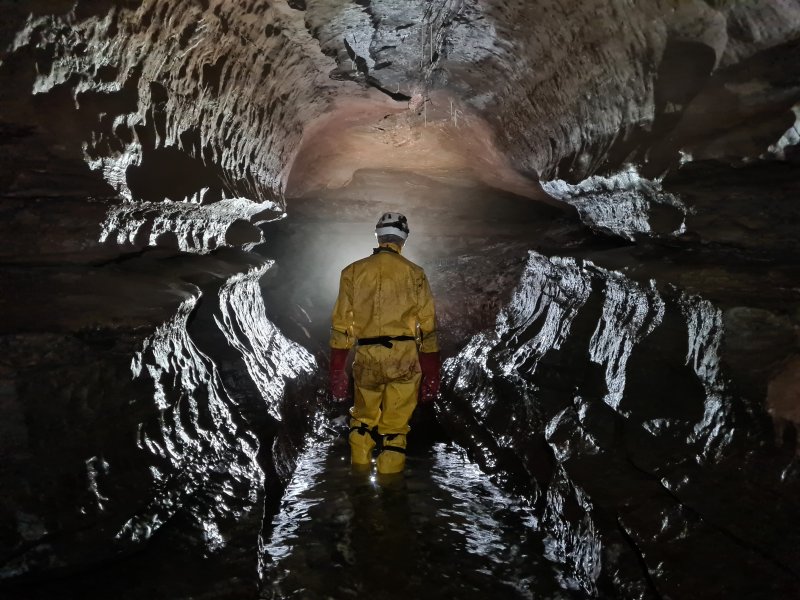 Phreatic tube in Canal Bypass. The stream comes from a side passage called North East Inlet Series.
Modelling by Pete, lighting by Tarquin, Pete and Lizzy
Phreatic tube in Canal Bypass. The stream comes from a side passage called North East Inlet Series.
Modelling by Pete, lighting by Tarquin, Pete and Lizzy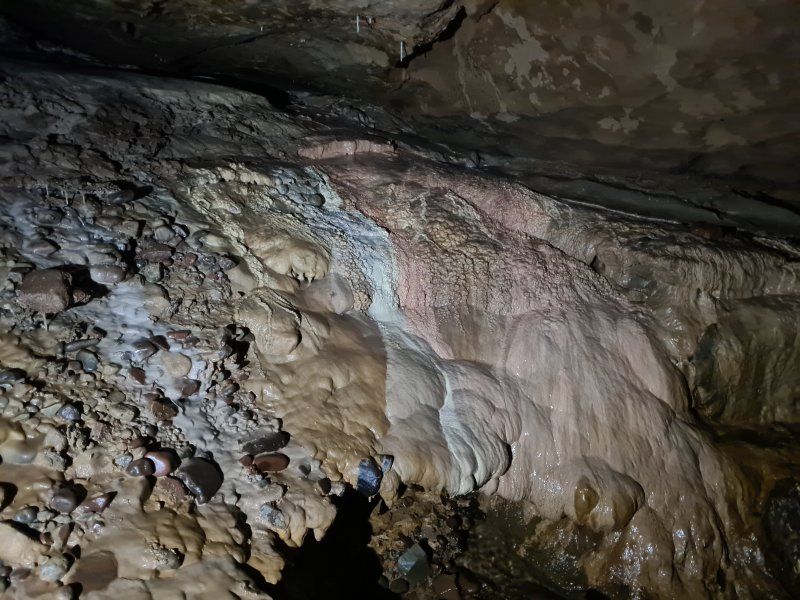 Colourful flowstone.
 A false floor with stilts.
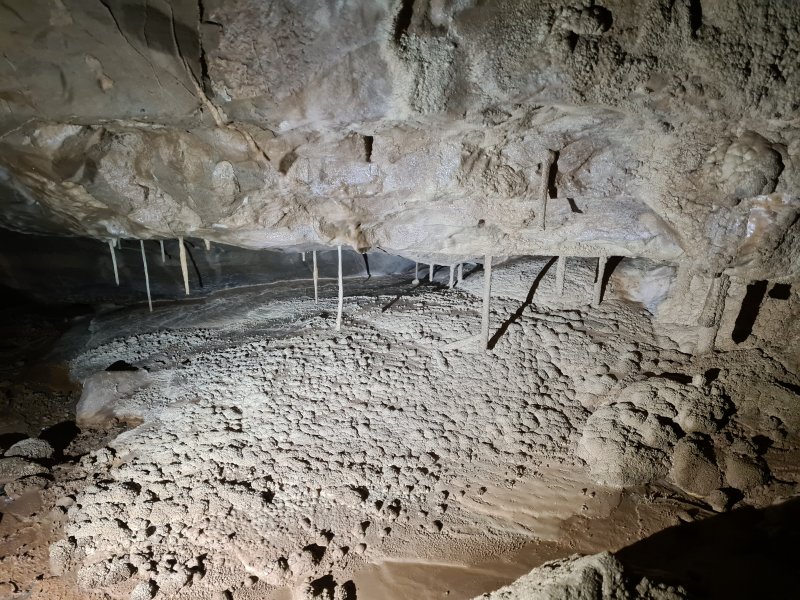 Straw columns. These appear to have been formed dry, then submerged and continued forming.
 Stal encrusted boulder, with highly detailed texture.
Lighting by Tarquin, Pete and Lizzy
Stal encrusted boulder, with highly detailed texture.
Lighting by Tarquin, Pete and Lizzy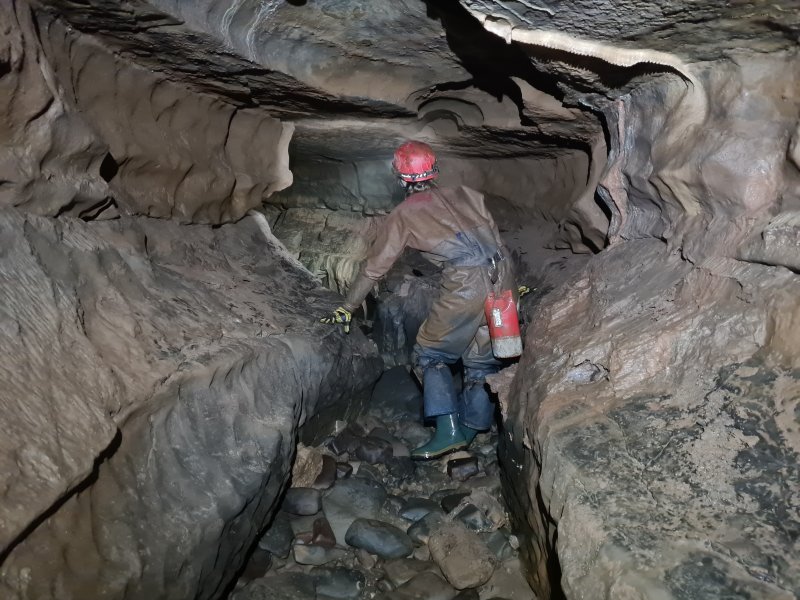 The oxbow leading into North East Inlet Series
Modelling by Steph, lighting by Tarquin and Steph
The oxbow leading into North East Inlet Series
Modelling by Steph, lighting by Tarquin and Steph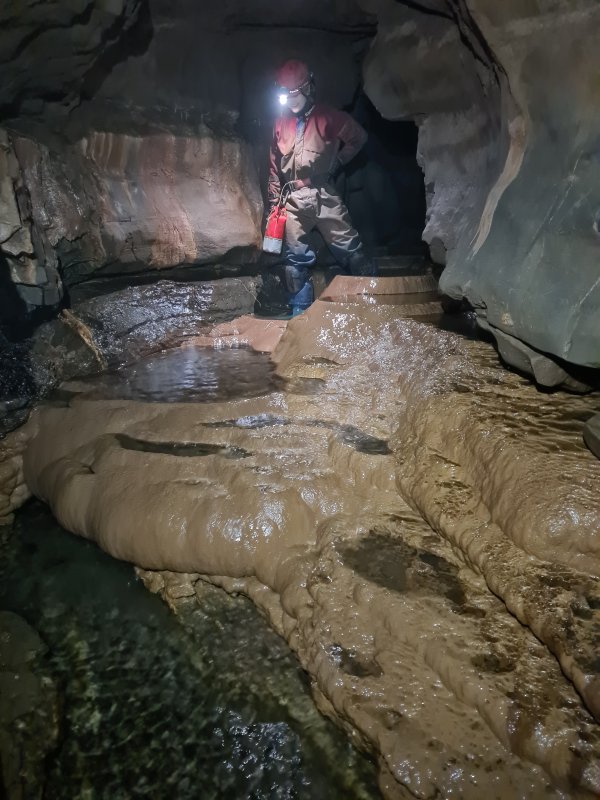 North East Inlet Series starts with a very impressive set of gour pools.
Modelling by Steph, lighting by Tarquin and Steph
North East Inlet Series starts with a very impressive set of gour pools.
Modelling by Steph, lighting by Tarquin and Steph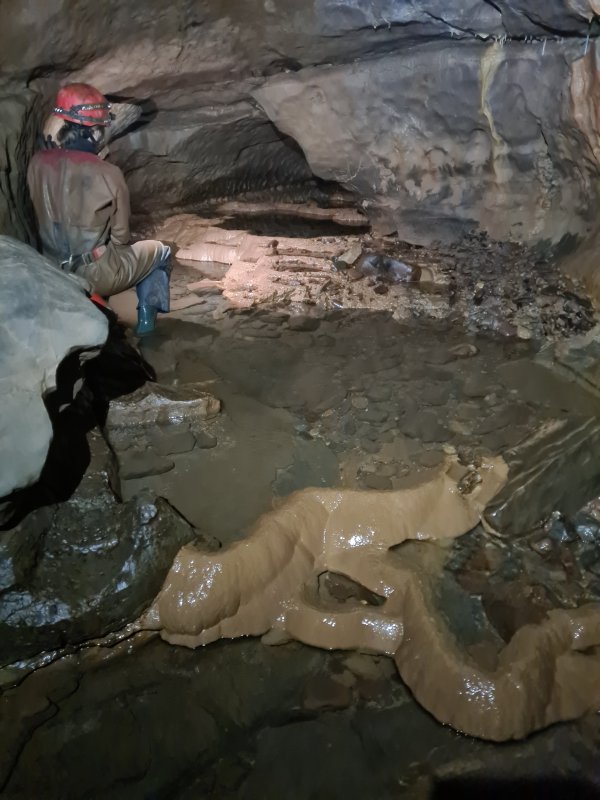 The gours continue upstream, seen here at the junction with its oxbow.
Modelling by Steph, lighting by Tarquin and Steph
The gours continue upstream, seen here at the junction with its oxbow.
Modelling by Steph, lighting by Tarquin and Steph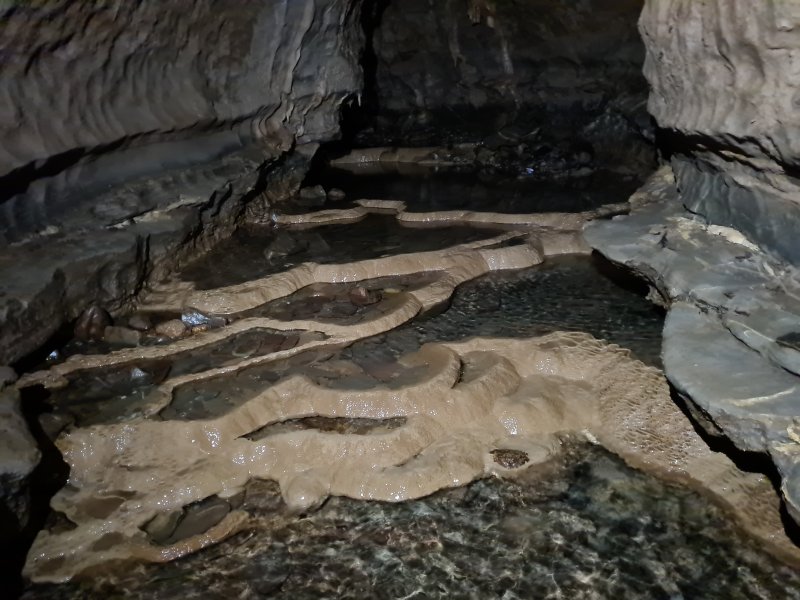 Continuing gours.
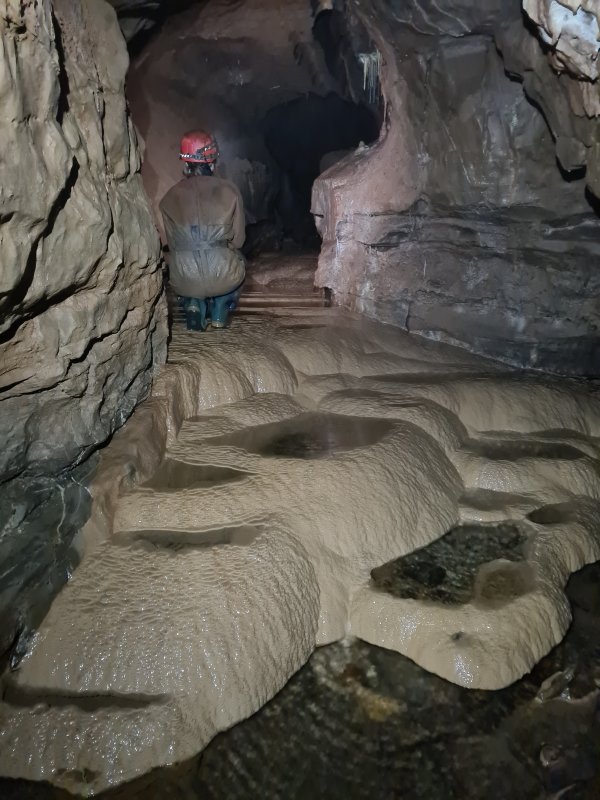 The gours come from a side passage, where they are at their most impressive.
Modelling by Steph, lighting by Tarquin and Steph
The gours come from a side passage, where they are at their most impressive.
Modelling by Steph, lighting by Tarquin and Steph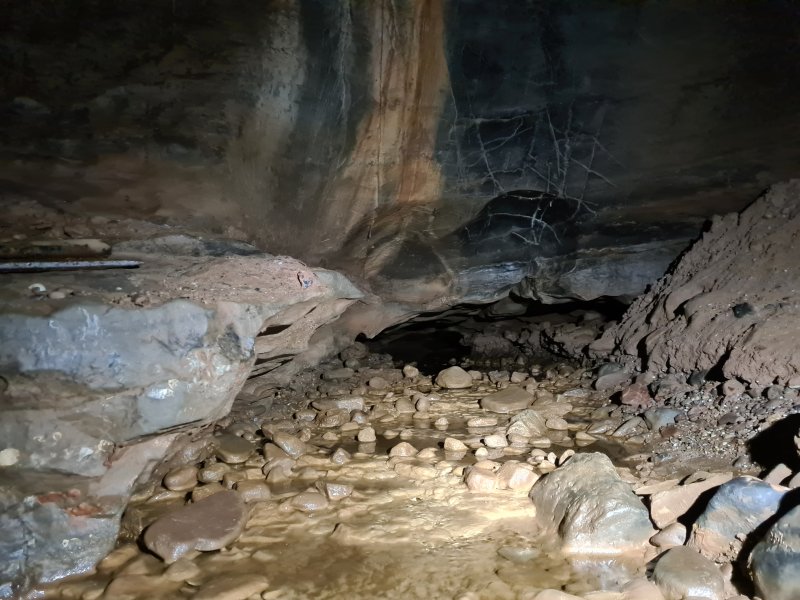 The source of the gours is an extremely low crawl in water. The nearby shovel suggests that this is a dig, so I went no further.
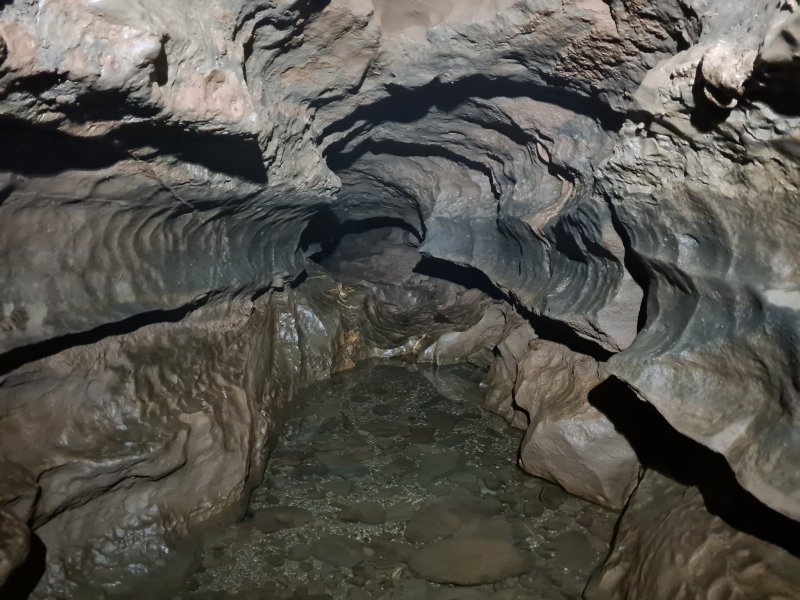 The main passage of North West Inlet Series continues to a pool with a large outflow of water, but no obvious water flowing into it, which was rather confusing.
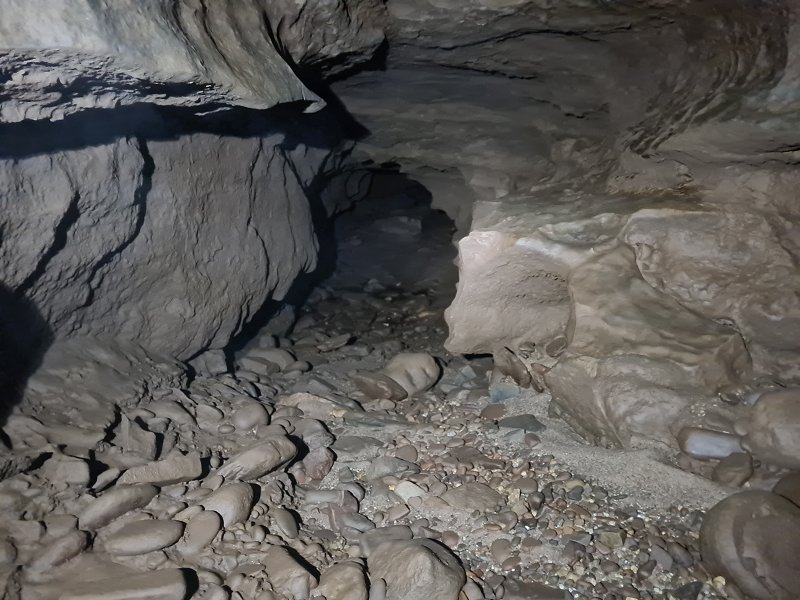 North East Inlet Passage continues for about 400 metres, with a couple of sumps. However, we did not have time to explore further.
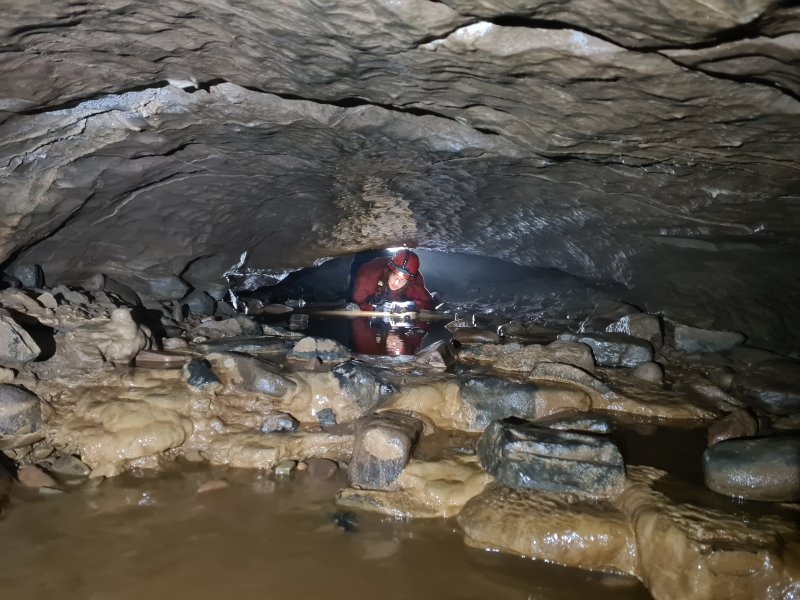 Crawling through the low sections.
Modelling by Lizzy, lighting by Tarquin, Lizzy and Pete
Crawling through the low sections.
Modelling by Lizzy, lighting by Tarquin, Lizzy and Pete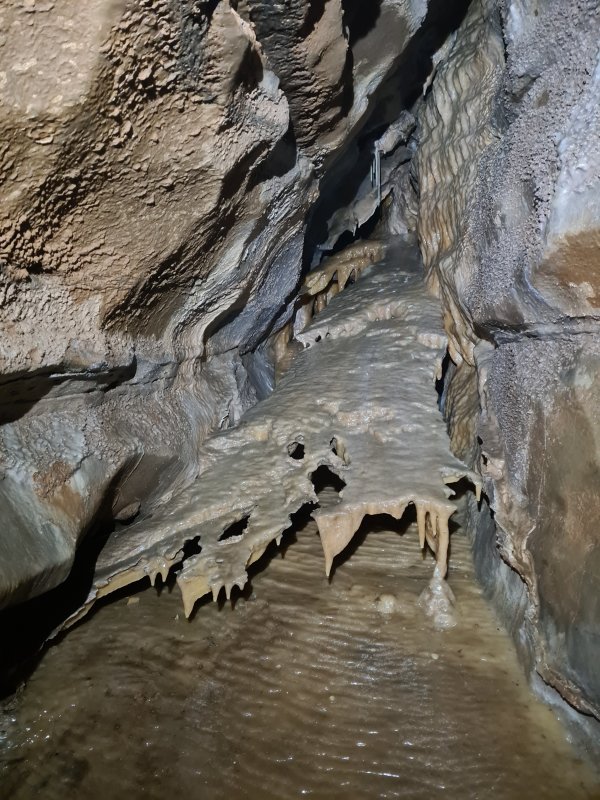 False floor on stilts.
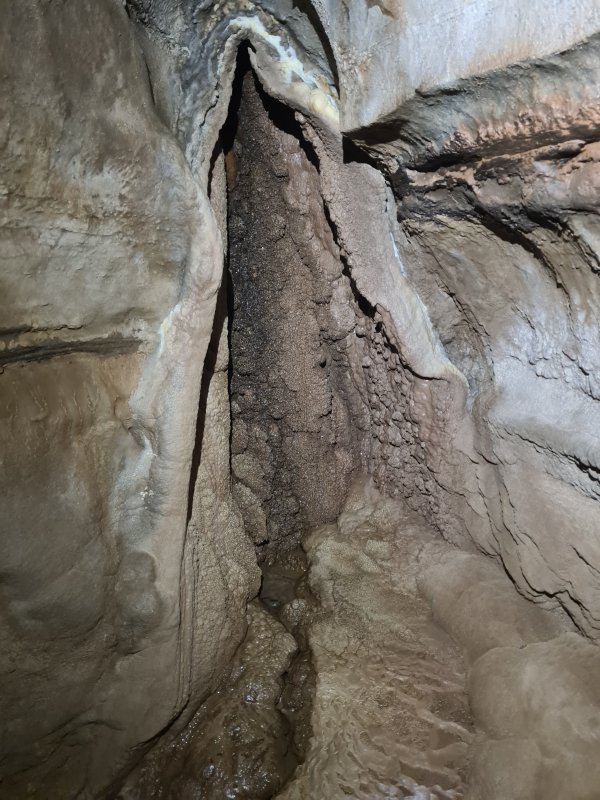 Textured stal alcove.
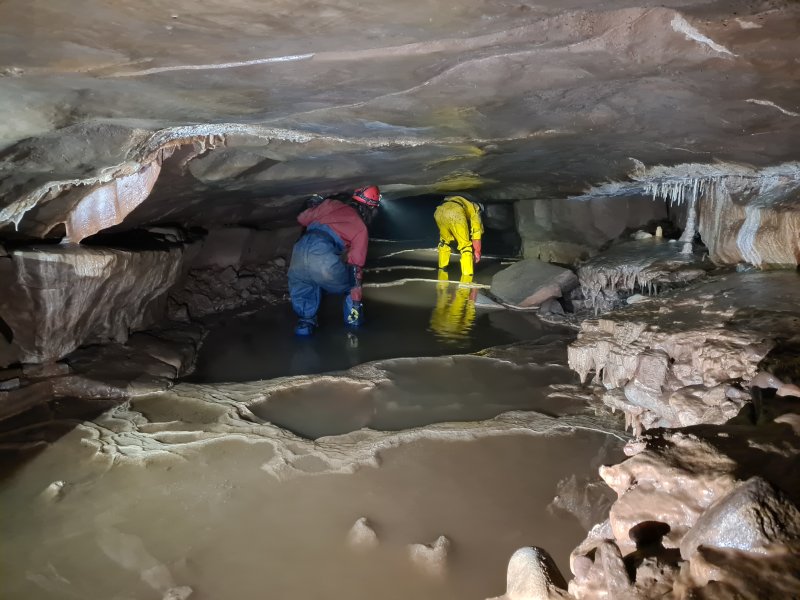 The passage ends as a series of gour pools, before dropping down a calcite slope into Tributary Passage. The heat from the river, after the normal cave temperature in Canal Bypass, was quite noticeable, with the air in the passage being several degrees warmer. Time to head upstream through the wet crawl, to return to surface.
Modelling by Lizzy and Pete, lighting by Tarquin, Lizzy and Pete
The passage ends as a series of gour pools, before dropping down a calcite slope into Tributary Passage. The heat from the river, after the normal cave temperature in Canal Bypass, was quite noticeable, with the air in the passage being several degrees warmer. Time to head upstream through the wet crawl, to return to surface.
Modelling by Lizzy and Pete, lighting by Tarquin, Lizzy and Pete