Miss Graces Lane Cave trips 27/11/2022 and 21/02/2024
Unless otherwise stated, camera, setups, lighting, edits and gallery effects by Tarquin. Modelling and lighting at various points will be Pete Bolt and Steph Andrews.
Miss Graces Lane Cave is located in The Park And Poor's Allotment, a nature reserve close to the Wye Valley in the Forest Of Dean. These were our first trips to this cave, so the gallery will be fairly extensive. The cave is a maze, mostly formed on two distinct levels. The upper level is formed at the contact between the limestone and the richly coloured Cromhall sandstone formation and Llanelly formation. The lower level is formed entirely within the limestone. The characters are distinctively different. The lower level is mostly tall rifts, while the upper level is dominated by complex, interlinked chambers with brightly coloured ceilings and vast amounts of breakdown.
Despite its total length of 4.5 km, and maze-like structure crammed into just 430 metres overland (an unexpectedly normal ratio of just over 1:10), the cave is surprisingly quick and easy to navigate. The first trip took in all three common trip routes; the short round trip, Phreatic Causeway, and Canyon Series to the start of Misery Crawl, pretty much the end of the cave. We probably visited about a quarter of the total cave, with photography, in 4 hours. A trip to the end and back could take under 2 hours.
 Chepstow at high tide.
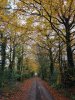 Miss Grace's Lane. Note that the spelling of the road uses an apostrophe, but the name of the cave does not. Don't blame me, it's written that way on the survey. There is a perfectly placed little parking area, with enough space for several cars. The parking area is used by local dog walkers too.
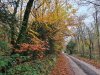 Autumn colours.
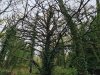 A tree of chaos.
 The entrance is in the bottom of a shakehole, and looks like a well rather than a cave. The bar above is not really strong enough to use as a belay, but can be used to redirect the rope away, as long as a more sturdy belay is used below.
Modelling by Steph
The entrance is in the bottom of a shakehole, and looks like a well rather than a cave. The bar above is not really strong enough to use as a belay, but can be used to redirect the rope away, as long as a more sturdy belay is used below.
Modelling by Steph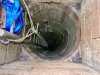 The entrance is a manhole cover over a very impressive concrete-lined shaft. The top section is standard concrete rings for about 6 metres. The ladders can be used all the way to the bottom, changing from one ladder to another part way down. A 65 metre lifeline is needed, which can be belayed to the top of the ladder. On this trip, someone had an SRT rope rigged in the same place, because the did not like the ladder.
Lighting by Tarquin and Sol
The entrance is a manhole cover over a very impressive concrete-lined shaft. The top section is standard concrete rings for about 6 metres. The ladders can be used all the way to the bottom, changing from one ladder to another part way down. A 65 metre lifeline is needed, which can be belayed to the top of the ladder. On this trip, someone had an SRT rope rigged in the same place, because the did not like the ladder.
Lighting by Tarquin and Sol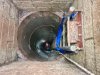 At the changeover point for the ladders. This also shows how we rigged the lifeline, through a maillon on a tape sling connected between the two sides of the ladder. This does mean that everything relies on the ladder and the welds to the ladder's back plate, so there is a single point of failure. But there is no other option, since the lid needs to be closed during the trip, and there are no other anchors inside the shaft.
Modelling by Steph, lighting by Tarquin, Sol and Steph
At the changeover point for the ladders. This also shows how we rigged the lifeline, through a maillon on a tape sling connected between the two sides of the ladder. This does mean that everything relies on the ladder and the welds to the ladder's back plate, so there is a single point of failure. But there is no other option, since the lid needs to be closed during the trip, and there are no other anchors inside the shaft.
Modelling by Steph, lighting by Tarquin, Sol and Steph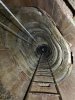 The shaft is 30 metres deep and perfectly vertical. Once past the concrete rings, the entire shaft is lined with concrete, using formers to shape it to match the shaft above. As a result, it looks man made, but was actually dug through the choke below a shakehole.
Modelling by Pete, lighting by Tarquin, Pete and Sol
The shaft is 30 metres deep and perfectly vertical. Once past the concrete rings, the entire shaft is lined with concrete, using formers to shape it to match the shaft above. As a result, it looks man made, but was actually dug through the choke below a shakehole.
Modelling by Pete, lighting by Tarquin, Pete and Sol Female European cave spider (Meta menardi). One of many that live on the walls of the shaft.
Modelling by Layla
Female European cave spider (Meta menardi). One of many that live on the walls of the shaft.
Modelling by Layla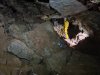 Autumn Frenzy (looking towards the way on), the first major breakthrough at the end of 1997, and the first seasonally named part of the cave. The survey makes this look much bigger than it really is.
Modelling by Pete, lighting by Tarquin and Pete
Autumn Frenzy (looking towards the way on), the first major breakthrough at the end of 1997, and the first seasonally named part of the cave. The survey makes this look much bigger than it really is.
Modelling by Pete, lighting by Tarquin and Pete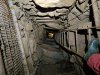 The way on drops down a scaffolded slope and 12 metre scaffolded shaft. A lifeline is not normally used. Below this, another fixed ladder pitch drops down to the 1999 Winter Storm series, but part way down, a side passage leads into Spring Fever.
Modelling by Pete, lighting by Tarquin and Pete
The way on drops down a scaffolded slope and 12 metre scaffolded shaft. A lifeline is not normally used. Below this, another fixed ladder pitch drops down to the 1999 Winter Storm series, but part way down, a side passage leads into Spring Fever.
Modelling by Pete, lighting by Tarquin and Pete Breakthrough Chamber, the start of Spring Fever, and the start of the major cave. This was found in 2003. From here, most of the cave was open, but was found in sections, with links dug to create easier routes. There are several side passages, but the most obvious one - ahead - is the way on. The main consideration is to remember the hole between boulders that was used to access the chamber, to be used on the way out.
Modelling by Pete, lighting by Tarquin and Pete
Breakthrough Chamber, the start of Spring Fever, and the start of the major cave. This was found in 2003. From here, most of the cave was open, but was found in sections, with links dug to create easier routes. There are several side passages, but the most obvious one - ahead - is the way on. The main consideration is to remember the hole between boulders that was used to access the chamber, to be used on the way out.
Modelling by Pete, lighting by Tarquin and Pete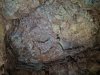 Colourful ceiling of Breakthrough Chamber.
Lighting by Tarquin and Pete
Colourful ceiling of Breakthrough Chamber.
Lighting by Tarquin and Pete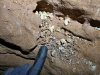 One thing that Miss Graces Lane Cave has in abundance is cryostal, or cryogenic cave calcite (CCCs) to give it its formal name. The characteristic beads and cup shapes are often extremely large, much larger single beads than I have seen in any other cave, though the clustered bead aggregations and cryogenic rafts are much smaller than in Ogof Draenen.
Modelling by Tarquin's digits
One thing that Miss Graces Lane Cave has in abundance is cryostal, or cryogenic cave calcite (CCCs) to give it its formal name. The characteristic beads and cup shapes are often extremely large, much larger single beads than I have seen in any other cave, though the clustered bead aggregations and cryogenic rafts are much smaller than in Ogof Draenen.
Modelling by Tarquin's digits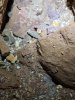 Cryostal.
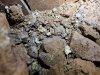 Cryostal.
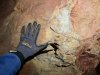 Large calcite crystals on a boulder in Breakthrough Chamber.
Modelling by Tarquin's glove
Large calcite crystals on a boulder in Breakthrough Chamber.
Modelling by Tarquin's glove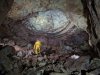 Dome Chamber, the next chamber, showing the glorious colours of the caprock. The way in is to the left. From here, there are two ways on. Behind the camera is the way to Dog Tooth Chamber and the short round trip. To the right is the normal way to Nurden Hall and the rest of the cave.
Modelling by Pete, lighting by Tarquin and Pete
Dome Chamber, the next chamber, showing the glorious colours of the caprock. The way in is to the left. From here, there are two ways on. Behind the camera is the way to Dog Tooth Chamber and the short round trip. To the right is the normal way to Nurden Hall and the rest of the cave.
Modelling by Pete, lighting by Tarquin and Pete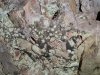 Gorgeous coloured conglomerate in Dome Chamber.
Lighting by Tarquin and Steph
Gorgeous coloured conglomerate in Dome Chamber.
Lighting by Tarquin and Steph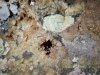 Impressive geode in Dome Chamber.
 Geode in Dome Chamber.
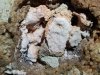 Salmon pink crystals and large calcite crystals in Dome Chamber.
Lighting by Tarquin and Steph
Salmon pink crystals and large calcite crystals in Dome Chamber.
Lighting by Tarquin and Steph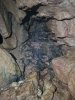 The last major passage to the right before Dog Tooth Chamber has this inlet, water appears then disappears. Flowing water can be seen briefly in the floor of some of the nearby canyons, but there is no properly active stream passage. Getting to this inlet requires navigating some loose rocks and difficult climbs, and I do not recommend it.
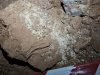 Cryostal in the passage leading to Dog Tooth Chamber.
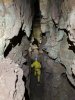 The passage leading to Dog Tooth Chamber.
Modelling by Pete, lighting by Tarquin and Pete
The passage leading to Dog Tooth Chamber.
Modelling by Pete, lighting by Tarquin and Pete Bat skeleton in the passage leading to Dog Tooth Chamber.
Modelling by Bruce
Bat skeleton in the passage leading to Dog Tooth Chamber.
Modelling by Bruce Large calcite crystals in the passage leading to Dog Tooth Chamber.
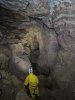 Looking back along the passage shortly before Dog Tooth Chamber. Ahead in the picture is a longer loop of smaller passage that also links to Dog Tooth Chamber.
Modelling by Pete, lighting by Tarquin and Pete
Looking back along the passage shortly before Dog Tooth Chamber. Ahead in the picture is a longer loop of smaller passage that also links to Dog Tooth Chamber.
Modelling by Pete, lighting by Tarquin and Pete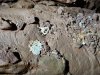 Cryostal on the wall of the last section of passage before Dog Tooth Chamber.
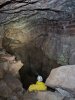 Dog Tooth Chamber is not really much of a chamber; just a slight enlargement of the passage before it. The way out along the short round trip is to the left, connecting back to the passage just after it left Dome Chamber. Under the wall on the right are three passages. One loops back to the earlier part of the passage. The other two form a loop via Dog Passage and La-La Slide, with a side passage invitingly called Tubby Dungeon. A climb down in the loop provides the first route into The Canyon; a series of rifts forming the lower level of the cave, which connects to several other chambers in the upper level.
Modelling by Pete, lighting by Tarquin and Pete
Dog Tooth Chamber is not really much of a chamber; just a slight enlargement of the passage before it. The way out along the short round trip is to the left, connecting back to the passage just after it left Dome Chamber. Under the wall on the right are three passages. One loops back to the earlier part of the passage. The other two form a loop via Dog Passage and La-La Slide, with a side passage invitingly called Tubby Dungeon. A climb down in the loop provides the first route into The Canyon; a series of rifts forming the lower level of the cave, which connects to several other chambers in the upper level.
Modelling by Pete, lighting by Tarquin and Pete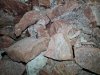 Colourful rocks in Dog Tooth Chamber.
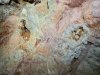 The main feature of Dog Tooth Chamber are these geodes with exceptionally large calcite crystals growing in them called dogtooth spar. These are formed by hydrothermal activity. They are located in an undercut under the right wall of the chamber.
 The best of the geodes.
Modelling by Tarquin's appendage
The best of the geodes.
Modelling by Tarquin's appendage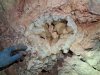 The best of the geodes.
Modelling by Steph's appendage, lighting by Tarquin and Steph
The best of the geodes.
Modelling by Steph's appendage, lighting by Tarquin and Steph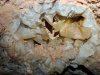 The largest crystals.
 Smaller crystals in another large geode.
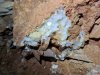 Large crystals.
 Large crystals.
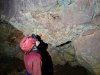 Admiring the geodes in Dog Tooth Chamber.
Modelling by Steph
Admiring the geodes in Dog Tooth Chamber.
Modelling by Steph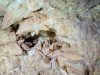 Upper geode on the outer face.
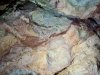 Rock colours in Dog Tooth Chamber.
Lighting by Tarquin and Steph
Rock colours in Dog Tooth Chamber.
Lighting by Tarquin and Steph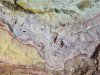 Rock colours in Dog Tooth Chamber.
 The other route on from Dome Chamber quickly reaches Nurden Hall, one of the largest chambers in the cave. The way on from here is down a hole on the left edge of the picture, while the inviting passage ahead is a dead end.
Modelling by Pete, lighting by Tarquin and Pete
The other route on from Dome Chamber quickly reaches Nurden Hall, one of the largest chambers in the cave. The way on from here is down a hole on the left edge of the picture, while the inviting passage ahead is a dead end.
Modelling by Pete, lighting by Tarquin and Pete Nurden Hall has a very large deposit of cryostal.
Lighting by Tarquin and Pete
Nurden Hall has a very large deposit of cryostal.
Lighting by Tarquin and Pete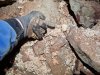 This includes the largest single cryostal bead that I know of, at over 4 cm in diameter. This is twice the diameter of a typical large bead, and 10 times the diameter (1000 times the volume) of a typical small bead.
Modelling by Tarquin's index finger
This includes the largest single cryostal bead that I know of, at over 4 cm in diameter. This is twice the diameter of a typical large bead, and 10 times the diameter (1000 times the volume) of a typical small bead.
Modelling by Tarquin's index finger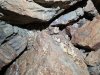 Large cryostal pieces.
Modelling by Tarquin's palm
Large cryostal pieces.
Modelling by Tarquin's palm Cryostal.
Lighting by Tarquin and Pete
Cryostal.
Lighting by Tarquin and Pete Blind passage in Nurden Hall.
Modelling by Pete, lighting by Tarquin and Pete
Blind passage in Nurden Hall.
Modelling by Pete, lighting by Tarquin and Pete Cryostal in the blind passage.
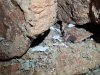 Cryostal rafts in the blind passage.
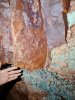 Beautifully coloured rock at the end of the blind passage. The reds and oranges are likely to be various forms of iron oxide. The blue is shale. (These colours had to be tweaked slightly to get them to match reality, since the camera refused to accept how much colour there was, and tried to wash out the photograph.)
Modelling by Tarquin's skin tone
Beautifully coloured rock at the end of the blind passage. The reds and oranges are likely to be various forms of iron oxide. The blue is shale. (These colours had to be tweaked slightly to get them to match reality, since the camera refused to accept how much colour there was, and tried to wash out the photograph.)
Modelling by Tarquin's skin tone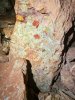 Beautiful conglomerate rock in the way on from Nurden Hall.
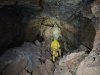 The way on from Nurden Hall soon regains the former size. On the left are the Mallie Rifts, which connect via Taylor Rifts to The Canyon, with two separate ways into Canyon Halls. Since those routes require pitches, they are no longer the main way into that part of the cave.
Modelling by Pete, lighting by Tarquin and Pete
The way on from Nurden Hall soon regains the former size. On the left are the Mallie Rifts, which connect via Taylor Rifts to The Canyon, with two separate ways into Canyon Halls. Since those routes require pitches, they are no longer the main way into that part of the cave.
Modelling by Pete, lighting by Tarquin and Pete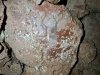 Cryostal in the passage leading to Canyon Halls.
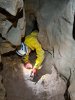 The passage then lowers into Bypass Crawl, a route which was dug to bypass the pitches in The Canyon. This is now the main way into the rest of the cave. Part way through the crawl is a passage leading up through a horrifying choke into Karver Gallery, and a route down into Taylor Rifts.
Modelling by Pete, lighting by Tarquin and Pete
The passage then lowers into Bypass Crawl, a route which was dug to bypass the pitches in The Canyon. This is now the main way into the rest of the cave. Part way through the crawl is a passage leading up through a horrifying choke into Karver Gallery, and a route down into Taylor Rifts.
Modelling by Pete, lighting by Tarquin and Pete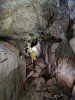 The main part of Canyon Halls, where it is at its largest. The way in is tucked behind a rock behind the camera to the right. Also behind the camera to the right is a pitch down to the end of The Canyon. To the right is the way to Mini Iron Mine. Behind the camera is a blind alcove. On the left is a loop into Phreatic Causeway, with a pitch down to Linking Passage leading into Taylor Rifts. Ahead-right are two routes down through the boulders into Shattered Drop, the normal way to the end of the cave. Ahead in the big passage is the usual way into Phreatic Causeway (two passages ahead-left).
Modelling by Pete, lighting by Tarquin and Pete
The main part of Canyon Halls, where it is at its largest. The way in is tucked behind a rock behind the camera to the right. Also behind the camera to the right is a pitch down to the end of The Canyon. To the right is the way to Mini Iron Mine. Behind the camera is a blind alcove. On the left is a loop into Phreatic Causeway, with a pitch down to Linking Passage leading into Taylor Rifts. Ahead-right are two routes down through the boulders into Shattered Drop, the normal way to the end of the cave. Ahead in the big passage is the usual way into Phreatic Causeway (two passages ahead-left).
Modelling by Pete, lighting by Tarquin and Pete A large deposit of cryostal in Canyon Halls.
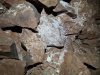 Cryostal.
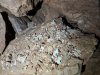 Cryostal.
 The dead-end passage from Canyon Halls (behind the camera in the earlier picture) leads up to a collapse zone with no way on.
 Cryostal in the collapse zone.
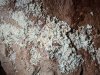 Cryostal detail.
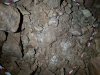 The large passage leading through Canyon Halls also contains more cryostal. Beyond here, the passage degenerates completely, and becomes a series of small passages sitting over Six Way Junction.
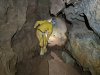 The first route into Phreatic Causeway. This is immediately unusual for the upper level of the cave, in that it has a naturally phreatic shape, and no sign of the beautifully coloured rock. A side passage here leads back into Canyon Halls, and via a pitch into Taylor Rifts.
Modelling by Pete, lighting by Tarquin and Pete
The first route into Phreatic Causeway. This is immediately unusual for the upper level of the cave, in that it has a naturally phreatic shape, and no sign of the beautifully coloured rock. A side passage here leads back into Canyon Halls, and via a pitch into Taylor Rifts.
Modelling by Pete, lighting by Tarquin and Pete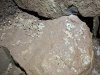 Cryostal in Phreatic Causeway.
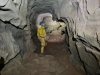 Once the second passage joins, the passage enlarges, and is one of the most comfortable passages in the cave. It is easy to see why this is a destination. Two side passages on the right provide ways into the series of small passages sitting over Six Way Junction.
Modelling by Pete, lighting by Tarquin and Pete
Once the second passage joins, the passage enlarges, and is one of the most comfortable passages in the cave. It is easy to see why this is a destination. Two side passages on the right provide ways into the series of small passages sitting over Six Way Junction.
Modelling by Pete, lighting by Tarquin and Pete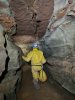 Banded rock in the ceiling of Phreatic Causeway.
Modelling by Pete, lighting by Tarquin and Pete
Banded rock in the ceiling of Phreatic Causeway.
Modelling by Pete, lighting by Tarquin and Pete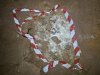 Cryostal.
 After a short crawl, the passage reaches a junction. To the right leads via another small passage into Crystal Pool. This is actually a tide mark of cryostal, rather than a normal crystal pool.
Modelling by Pete
After a short crawl, the passage reaches a junction. To the right leads via another small passage into Crystal Pool. This is actually a tide mark of cryostal, rather than a normal crystal pool.
Modelling by Pete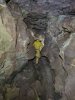 To the left at the junction is much larger.
Modelling by Pete, lighting by Tarquin and Pete
To the left at the junction is much larger.
Modelling by Pete, lighting by Tarquin and Pete The left branch ends in a loop without any significant side passages.
Modelling by Pete, lighting by Tarquin and Pete
The left branch ends in a loop without any significant side passages.
Modelling by Pete, lighting by Tarquin and Pete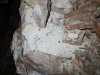 White powder in the loop at the end of Phreatic Causeway. Presumably this is cryostal, but it is a much finer powder than the previous deposits.
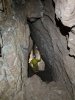 Shattered Drop, a 6 metre climb down into Canyon Series, the way to the end of the cave. This area looks extremely complicated on the survey, but navigation is surprisingly easy. It consists of taking either route to Six Way Junction, going ahead at Six Way Junction, then taking the obvious left branch at every significant junction (ignoring one oxbow), to reach Plummet Junction. Traverse over plummet Junction then turn left to reach the deep rift.
Modelling by Pete, lighting by Tarquin and Pete
Shattered Drop, a 6 metre climb down into Canyon Series, the way to the end of the cave. This area looks extremely complicated on the survey, but navigation is surprisingly easy. It consists of taking either route to Six Way Junction, going ahead at Six Way Junction, then taking the obvious left branch at every significant junction (ignoring one oxbow), to reach Plummet Junction. Traverse over plummet Junction then turn left to reach the deep rift.
Modelling by Pete, lighting by Tarquin and Pete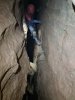 The passage starts as an awkward clambering rift on the right or an awkward clambering crawl on the left, to reach Six Way Junction. This is the clambering rift, which has a tricky traverse with a very small ledge, high off the floor.
Modelling by Steph, lighting by Tarquin and Steph
The passage starts as an awkward clambering rift on the right or an awkward clambering crawl on the left, to reach Six Way Junction. This is the clambering rift, which has a tricky traverse with a very small ledge, high off the floor.
Modelling by Steph, lighting by Tarquin and Steph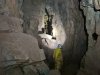 Six Way Junction. To the left reaches a pitch up into the series of small passages sitting over Six Way Junction. To the right chokes. Ahead right is another climb up into the series of small passages sitting over Six Way Junction (but a totally different part of it. Ahead is the way on into The Satanic Traverses.
Modelling by Pete, lighting by Tarquin and Pete
Six Way Junction. To the left reaches a pitch up into the series of small passages sitting over Six Way Junction. To the right chokes. Ahead right is another climb up into the series of small passages sitting over Six Way Junction (but a totally different part of it. Ahead is the way on into The Satanic Traverses.
Modelling by Pete, lighting by Tarquin and Pete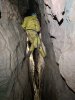 The Satanic Traverses start off very awkward but get easier later. This is the early part, with the hardest part being immediately in front of Pete, which seems completely devoid of footholds, but can be more easily passed by climbing a little higher in the rift and traversing at what had been shoulder height. This section can prove extremely challenging, and there is no way to bypass it.
Modelling by Pete, lighting by Tarquin and Pete
The Satanic Traverses start off very awkward but get easier later. This is the early part, with the hardest part being immediately in front of Pete, which seems completely devoid of footholds, but can be more easily passed by climbing a little higher in the rift and traversing at what had been shoulder height. This section can prove extremely challenging, and there is no way to bypass it.
Modelling by Pete, lighting by Tarquin and Pete The traverses end at Hanging Rock, a ludicrous set of rocks supported by each other, all held up by gravity defying dust. Oxbows here lead forward to Fin Pillar Junction.
Modelling by Pete, lighting by Tarquin and Pete
The traverses end at Hanging Rock, a ludicrous set of rocks supported by each other, all held up by gravity defying dust. Oxbows here lead forward to Fin Pillar Junction.
Modelling by Pete, lighting by Tarquin and Pete Fin Pillar Junction, one of the many junctions where you turn left. The passage behind the pillar is the end of the earlier oxbows. A pitch up here reaches another set of roof tubes, which appear to pass under the series of small passages sitting over Six Way Junction, as well as forward below the New Year Series.
Modelling by Pete, lighting by Tarquin and Pete
Fin Pillar Junction, one of the many junctions where you turn left. The passage behind the pillar is the end of the earlier oxbows. A pitch up here reaches another set of roof tubes, which appear to pass under the series of small passages sitting over Six Way Junction, as well as forward below the New Year Series.
Modelling by Pete, lighting by Tarquin and Pete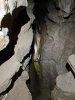 The way on gets renamed to Canyon Continued.
Modelling by Pete, lighting by Tarquin and Pete
The way on gets renamed to Canyon Continued.
Modelling by Pete, lighting by Tarquin and Pete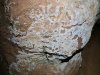 Frosting on the walls of Canyon Continued. This appears to be a type of wicking formation, caused by evaporation due to air flow.
 The effect around small depressions (vesicles) makes it look like a blue ringed octopus.
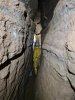 The passage then passes three side rifts on the right, all of which are routes leading into New Year Series, and an oxbow on the left. The navigation is still very obvious, however.
Modelling by Pete, lighting by Tarquin and Pete
The passage then passes three side rifts on the right, all of which are routes leading into New Year Series, and an oxbow on the left. The navigation is still very obvious, however.
Modelling by Pete, lighting by Tarquin and Pete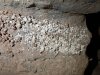 Cryostal at a point on the survey marked as "Large flake".
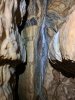 The cave has almost no regular stal formations. This part is unusual enough to be called Calcited Walls.
 Calcited Walls.
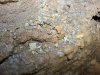 Calcite Flakes.
 Plummet Junction, a traverse over a deep rift. An aven here can be climbed to reach New Year Series.
Modelling by Pete, lighting by Tarquin and Pete
Plummet Junction, a traverse over a deep rift. An aven here can be climbed to reach New Year Series.
Modelling by Pete, lighting by Tarquin and Pete At this point, we made our only navigation mistake, thinking that we needed to take a wet rift on the left before the traverse. This lead nowhere, but earned us wet feet. While streams are briefly seen in many parts of the cave, there should never be enough water to get wet feet.
Modelling by Pete, lighting by Tarquin and Pete
At this point, we made our only navigation mistake, thinking that we needed to take a wet rift on the left before the traverse. This lead nowhere, but earned us wet feet. While streams are briefly seen in many parts of the cave, there should never be enough water to get wet feet.
Modelling by Pete, lighting by Tarquin and Pete After traversing over the rift at Plummet Junction, the correct way on is a crawl to the left.
Modelling by Pete, lighting by Tarquin and Pete
After traversing over the rift at Plummet Junction, the correct way on is a crawl to the left.
Modelling by Pete, lighting by Tarquin and Pete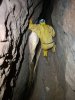 The crawl ends at a small ledge at the edge of a very deep rift, where water falls far into the depths below. The survey shows nothing at the bottom, but just standing here makes you feel a little uneasy, since it looks like the perfect place to get wedged.
Modelling by Pete, lighting by Tarquin and Pete
The crawl ends at a small ledge at the edge of a very deep rift, where water falls far into the depths below. The survey shows nothing at the bottom, but just standing here makes you feel a little uneasy, since it looks like the perfect place to get wedged.
Modelling by Pete, lighting by Tarquin and Pete The way on here is a traverse over the rift, onto a false floor of calcite, and into Misery Crawl. This is a very tight squirming crawl, passing a dead end side passage, to reach an aven and choke. There is no way on. Therefore, most trips stop before the crawl, rather than at the bitter end of the cave. One branch of New Year Series seems to reach a similar distance away.
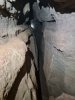 I decided to try getting into New Year Series on my own. I started with what had been the third side passage on the right, a traverse crawl at the top of a rift. It got more awkward and reached a squeeze, so I gave up.
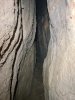 The second side passage was much easier, with the sound of running water. This is perhaps the easiest way into the series, being just a regular rift passage, but I did not complete the route to see what the squeezes up into New Year Series (found in 2004) were like. Another day.
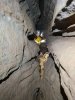 The second and first side passage join through this awkward section, but the first side passage was otherwise fairly easy.
Modelling by Pete, lighting by Tarquin and Pete
The second and first side passage join through this awkward section, but the first side passage was otherwise fairly easy.
Modelling by Pete, lighting by Tarquin and Pete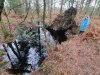 Black water in the forest above Miss Graces Lane Cave.
Modelling by Steph
Black water in the forest above Miss Graces Lane Cave.
Modelling by Steph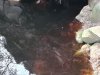 The water is so black that it looks like an oil slick from most angles.
 Sadly it did not turn into a creature from a 1950s science fiction film, so we moved on.
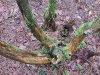 Three-way tree.
 Exmoor ponies, with distinctive facial markings that make them look like donkeys, used to manage undergrowth in The Park And Poor's Allotment which overlies the cave. These are the oldest British pony breed at over 1000 years old, recorded in the Doomsday Book. Their primary use is conservation grazing, as they can eat tough weeds that other horses would leave alone or only partially damage, including gorse.
Modelling by merlod gytnaf, ail, trydydd, pedwerydd and pumed
Exmoor ponies, with distinctive facial markings that make them look like donkeys, used to manage undergrowth in The Park And Poor's Allotment which overlies the cave. These are the oldest British pony breed at over 1000 years old, recorded in the Doomsday Book. Their primary use is conservation grazing, as they can eat tough weeds that other horses would leave alone or only partially damage, including gorse.
Modelling by merlod gytnaf, ail, trydydd, pedwerydd and pumed The signs say to respect them from a distance, so we stood still, and they boldly walked past us with no sign of being upset. As we started to walk away, one of them (the one on the left in the previous picture) came over to say hello, with not even a hint of fear. Presumably hoping for treats.
Modelling by Steph, merlod gytnaf, pedwerydd, ail and trydydd
The signs say to respect them from a distance, so we stood still, and they boldly walked past us with no sign of being upset. As we started to walk away, one of them (the one on the left in the previous picture) came over to say hello, with not even a hint of fear. Presumably hoping for treats.
Modelling by Steph, merlod gytnaf, pedwerydd, ail and trydydd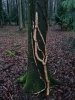 Stripped bark from ivy. This looks more likely to be a deer scraping its antlers, rather than caused by ponies.
 A tree that had bent over, with its roots still firmly planted. It objected to leaning over, and decided to grow numerous vertical trunks instead. You can hear it making the same dad joke every day, telling them how it bends over backwards to support them.
Modelling by Steph
A tree that had bent over, with its roots still firmly planted. It objected to leaning over, and decided to grow numerous vertical trunks instead. You can hear it making the same dad joke every day, telling them how it bends over backwards to support them.
Modelling by Steph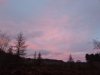 Nearing sunset over the park.
 Orange sky sweeping in.
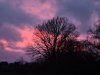 Sunset trees.
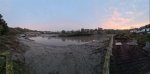 Low tide at Chepstow.
 Sunset over Chepstow Castle.
 Chepstow Castle at night.
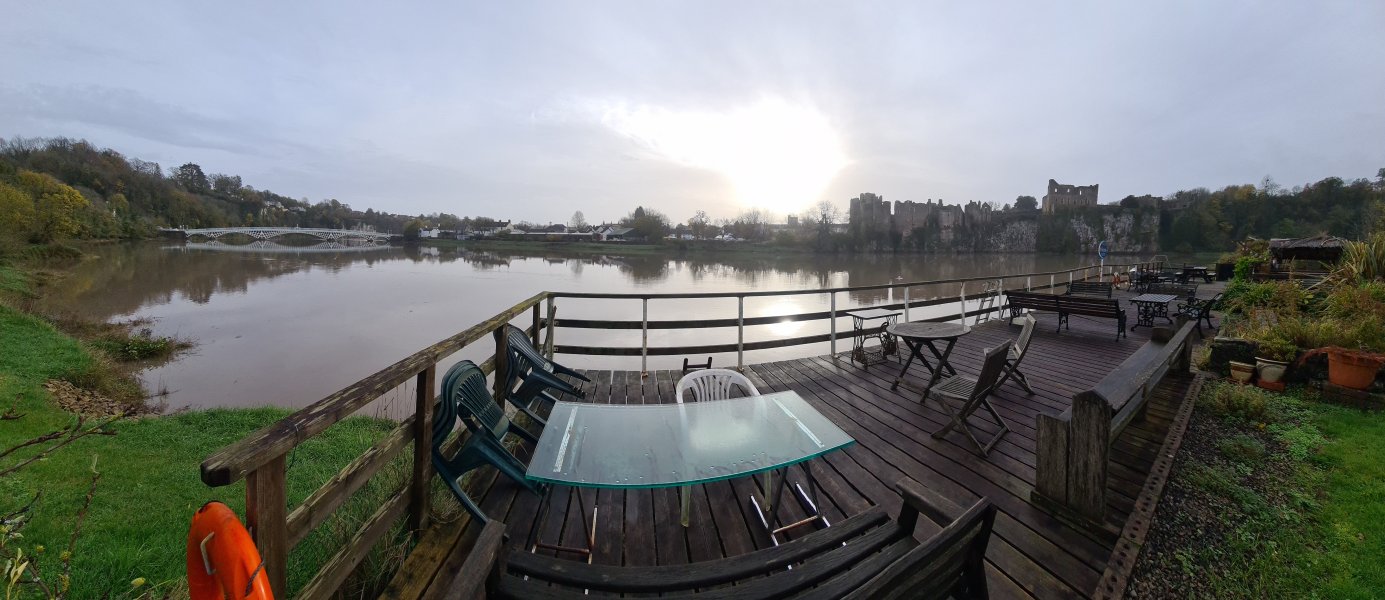 Chepstow at high tide.
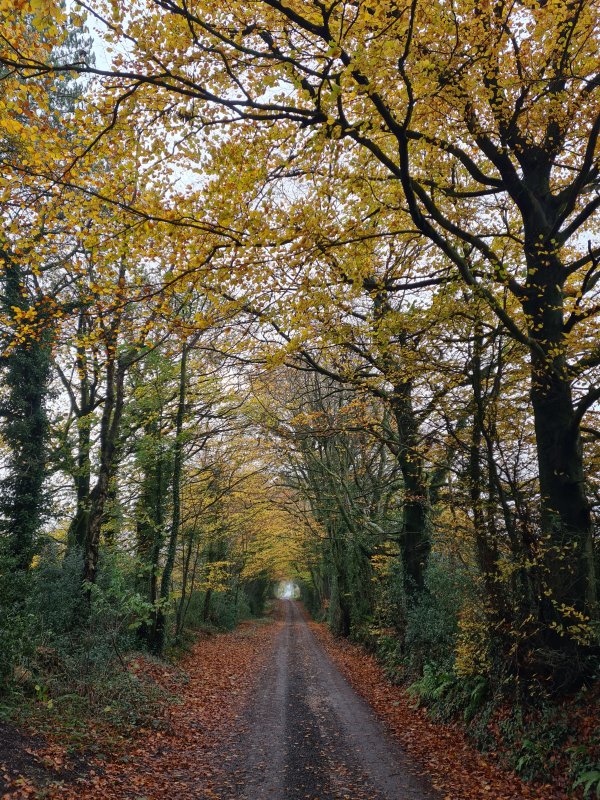 Miss Grace's Lane. Note that the spelling of the road uses an apostrophe, but the name of the cave does not. Don't blame me, it's written that way on the survey. There is a perfectly placed little parking area, with enough space for several cars. The parking area is used by local dog walkers too.
 Autumn colours.
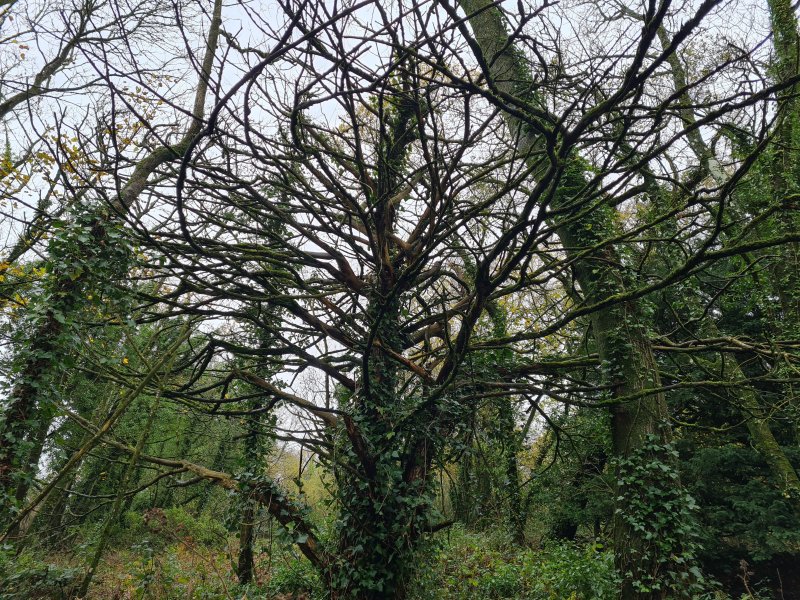 A tree of chaos.
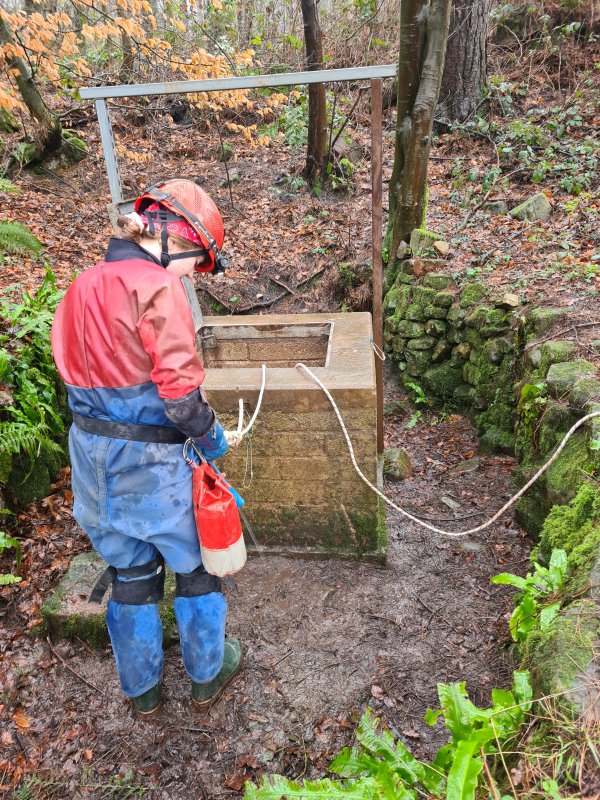 The entrance is in the bottom of a shakehole, and looks like a well rather than a cave. The bar above is not really strong enough to use as a belay, but can be used to redirect the rope away, as long as a more sturdy belay is used below.
Modelling by Steph
The entrance is in the bottom of a shakehole, and looks like a well rather than a cave. The bar above is not really strong enough to use as a belay, but can be used to redirect the rope away, as long as a more sturdy belay is used below.
Modelling by Steph The entrance is a manhole cover over a very impressive concrete-lined shaft. The top section is standard concrete rings for about 6 metres. The ladders can be used all the way to the bottom, changing from one ladder to another part way down. A 65 metre lifeline is needed, which can be belayed to the top of the ladder. On this trip, someone had an SRT rope rigged in the same place, because the did not like the ladder.
Lighting by Tarquin and Sol
The entrance is a manhole cover over a very impressive concrete-lined shaft. The top section is standard concrete rings for about 6 metres. The ladders can be used all the way to the bottom, changing from one ladder to another part way down. A 65 metre lifeline is needed, which can be belayed to the top of the ladder. On this trip, someone had an SRT rope rigged in the same place, because the did not like the ladder.
Lighting by Tarquin and Sol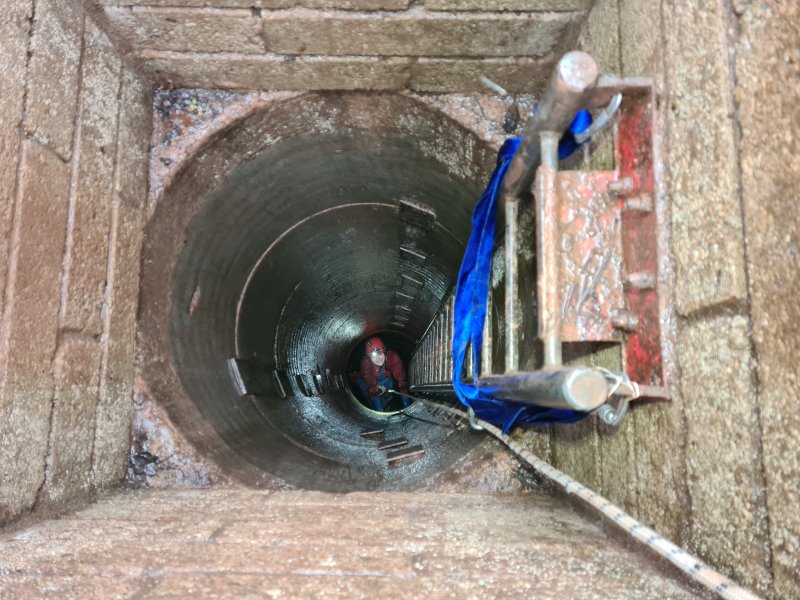 At the changeover point for the ladders. This also shows how we rigged the lifeline, through a maillon on a tape sling connected between the two sides of the ladder. This does mean that everything relies on the ladder and the welds to the ladder's back plate, so there is a single point of failure. But there is no other option, since the lid needs to be closed during the trip, and there are no other anchors inside the shaft.
Modelling by Steph, lighting by Tarquin, Sol and Steph
At the changeover point for the ladders. This also shows how we rigged the lifeline, through a maillon on a tape sling connected between the two sides of the ladder. This does mean that everything relies on the ladder and the welds to the ladder's back plate, so there is a single point of failure. But there is no other option, since the lid needs to be closed during the trip, and there are no other anchors inside the shaft.
Modelling by Steph, lighting by Tarquin, Sol and Steph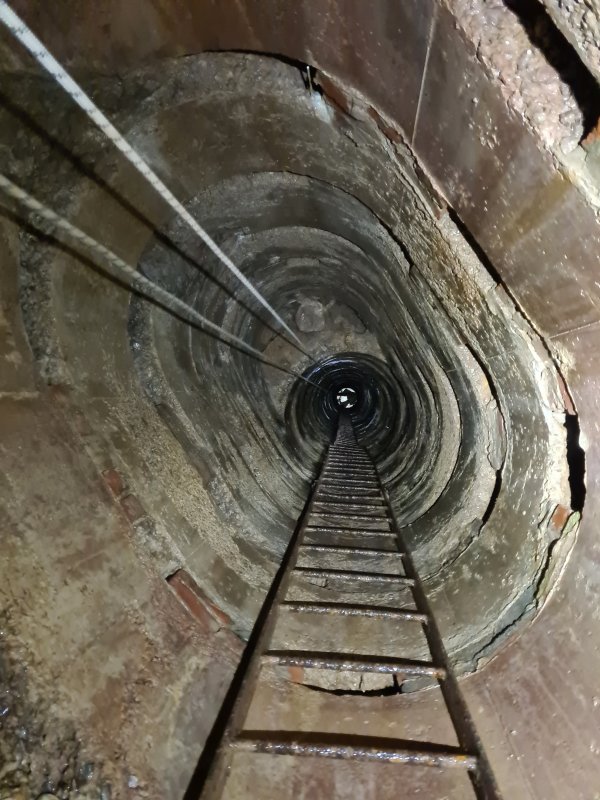 The shaft is 30 metres deep and perfectly vertical. Once past the concrete rings, the entire shaft is lined with concrete, using formers to shape it to match the shaft above. As a result, it looks man made, but was actually dug through the choke below a shakehole.
Modelling by Pete, lighting by Tarquin, Pete and Sol
The shaft is 30 metres deep and perfectly vertical. Once past the concrete rings, the entire shaft is lined with concrete, using formers to shape it to match the shaft above. As a result, it looks man made, but was actually dug through the choke below a shakehole.
Modelling by Pete, lighting by Tarquin, Pete and Sol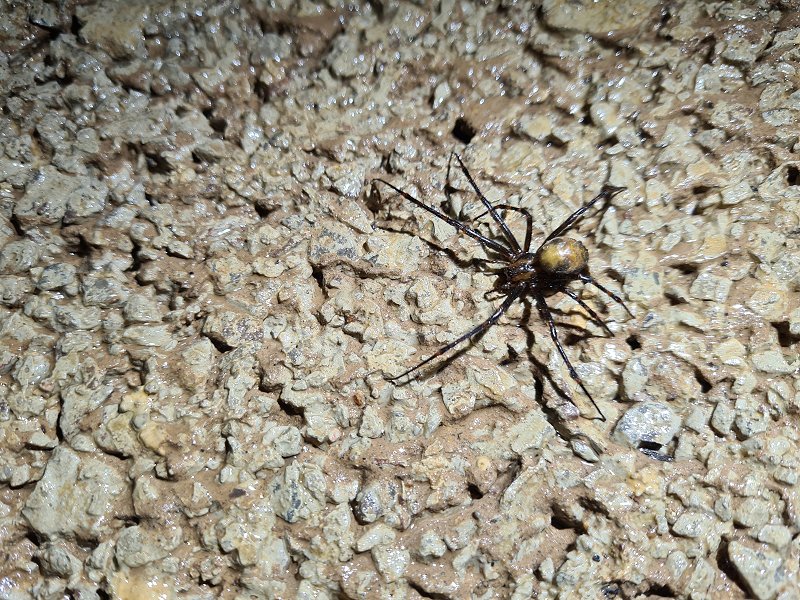 Female European cave spider (Meta menardi). One of many that live on the walls of the shaft.
Modelling by Layla
Female European cave spider (Meta menardi). One of many that live on the walls of the shaft.
Modelling by Layla Autumn Frenzy (looking towards the way on), the first major breakthrough at the end of 1997, and the first seasonally named part of the cave. The survey makes this look much bigger than it really is.
Modelling by Pete, lighting by Tarquin and Pete
Autumn Frenzy (looking towards the way on), the first major breakthrough at the end of 1997, and the first seasonally named part of the cave. The survey makes this look much bigger than it really is.
Modelling by Pete, lighting by Tarquin and Pete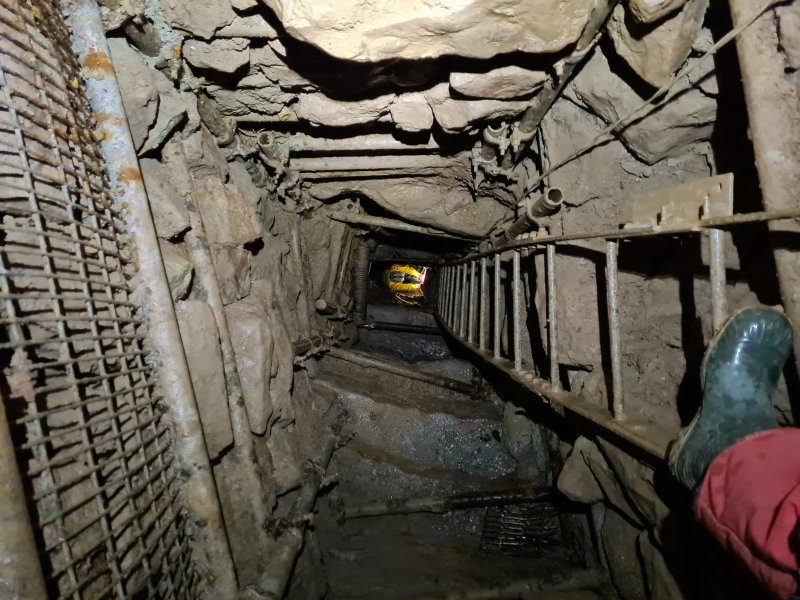 The way on drops down a scaffolded slope and 12 metre scaffolded shaft. A lifeline is not normally used. Below this, another fixed ladder pitch drops down to the 1999 Winter Storm series, but part way down, a side passage leads into Spring Fever.
Modelling by Pete, lighting by Tarquin and Pete
The way on drops down a scaffolded slope and 12 metre scaffolded shaft. A lifeline is not normally used. Below this, another fixed ladder pitch drops down to the 1999 Winter Storm series, but part way down, a side passage leads into Spring Fever.
Modelling by Pete, lighting by Tarquin and Pete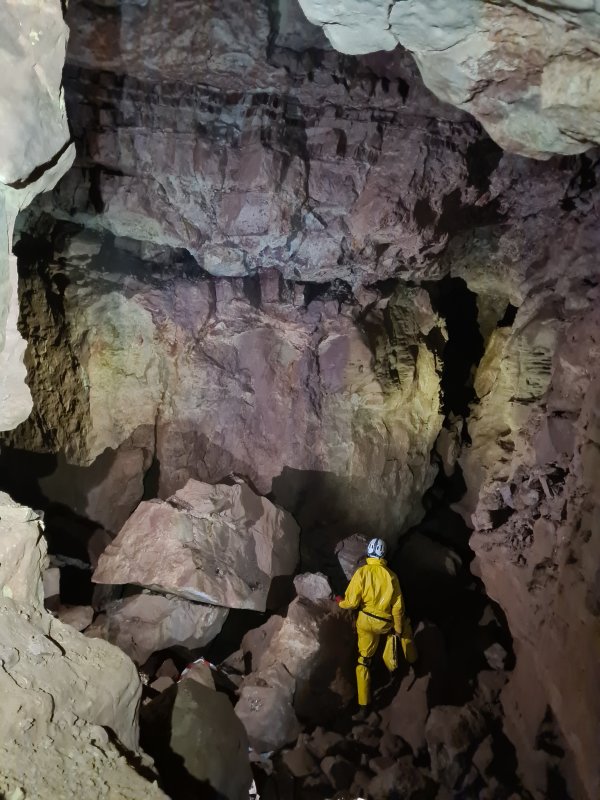 Breakthrough Chamber, the start of Spring Fever, and the start of the major cave. This was found in 2003. From here, most of the cave was open, but was found in sections, with links dug to create easier routes. There are several side passages, but the most obvious one - ahead - is the way on. The main consideration is to remember the hole between boulders that was used to access the chamber, to be used on the way out.
Modelling by Pete, lighting by Tarquin and Pete
Breakthrough Chamber, the start of Spring Fever, and the start of the major cave. This was found in 2003. From here, most of the cave was open, but was found in sections, with links dug to create easier routes. There are several side passages, but the most obvious one - ahead - is the way on. The main consideration is to remember the hole between boulders that was used to access the chamber, to be used on the way out.
Modelling by Pete, lighting by Tarquin and Pete Colourful ceiling of Breakthrough Chamber.
Lighting by Tarquin and Pete
Colourful ceiling of Breakthrough Chamber.
Lighting by Tarquin and Pete One thing that Miss Graces Lane Cave has in abundance is cryostal, or cryogenic cave calcite (CCCs) to give it its formal name. The characteristic beads and cup shapes are often extremely large, much larger single beads than I have seen in any other cave, though the clustered bead aggregations and cryogenic rafts are much smaller than in Ogof Draenen.
Modelling by Tarquin's digits
One thing that Miss Graces Lane Cave has in abundance is cryostal, or cryogenic cave calcite (CCCs) to give it its formal name. The characteristic beads and cup shapes are often extremely large, much larger single beads than I have seen in any other cave, though the clustered bead aggregations and cryogenic rafts are much smaller than in Ogof Draenen.
Modelling by Tarquin's digits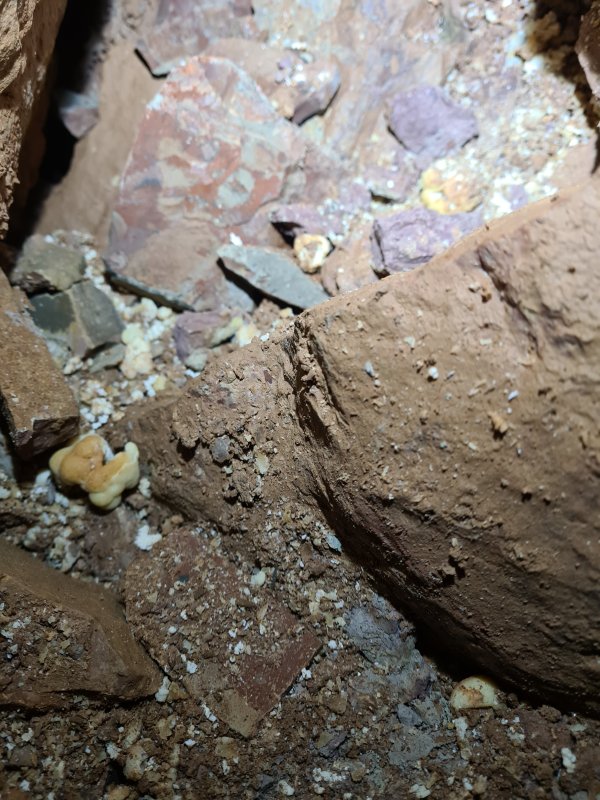 Cryostal.
 Cryostal.
 Large calcite crystals on a boulder in Breakthrough Chamber.
Modelling by Tarquin's glove
Large calcite crystals on a boulder in Breakthrough Chamber.
Modelling by Tarquin's glove Dome Chamber, the next chamber, showing the glorious colours of the caprock. The way in is to the left. From here, there are two ways on. Behind the camera is the way to Dog Tooth Chamber and the short round trip. To the right is the normal way to Nurden Hall and the rest of the cave.
Modelling by Pete, lighting by Tarquin and Pete
Dome Chamber, the next chamber, showing the glorious colours of the caprock. The way in is to the left. From here, there are two ways on. Behind the camera is the way to Dog Tooth Chamber and the short round trip. To the right is the normal way to Nurden Hall and the rest of the cave.
Modelling by Pete, lighting by Tarquin and Pete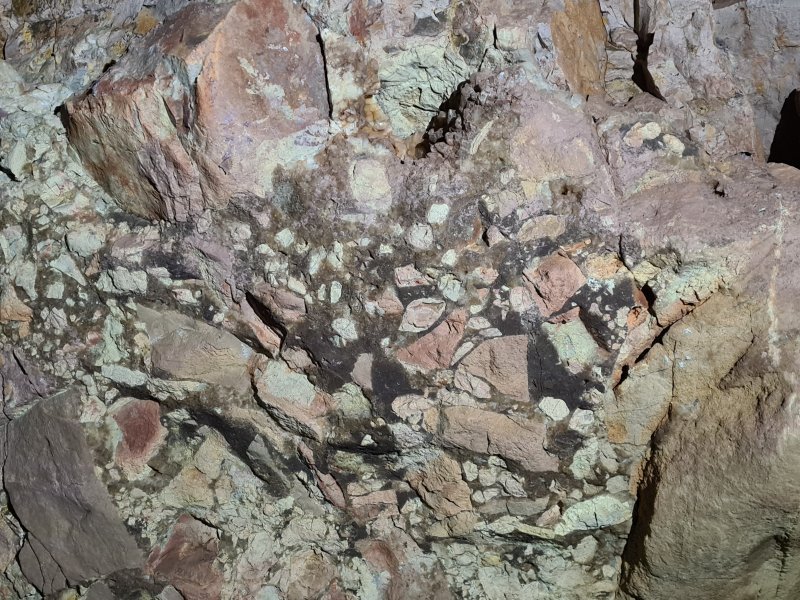 Gorgeous coloured conglomerate in Dome Chamber.
Lighting by Tarquin and Steph
Gorgeous coloured conglomerate in Dome Chamber.
Lighting by Tarquin and Steph Impressive geode in Dome Chamber.
 Geode in Dome Chamber.
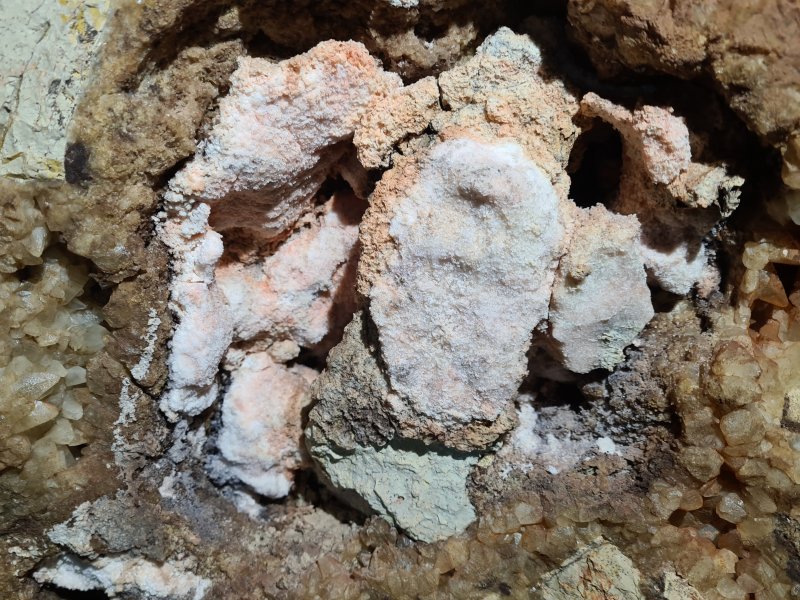 Salmon pink crystals and large calcite crystals in Dome Chamber.
Lighting by Tarquin and Steph
Salmon pink crystals and large calcite crystals in Dome Chamber.
Lighting by Tarquin and Steph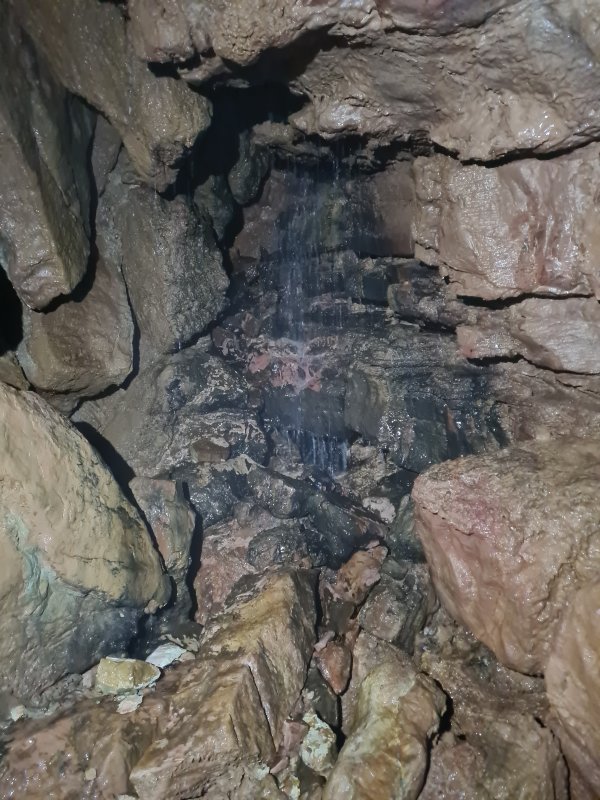 The last major passage to the right before Dog Tooth Chamber has this inlet, water appears then disappears. Flowing water can be seen briefly in the floor of some of the nearby canyons, but there is no properly active stream passage. Getting to this inlet requires navigating some loose rocks and difficult climbs, and I do not recommend it.
 Cryostal in the passage leading to Dog Tooth Chamber.
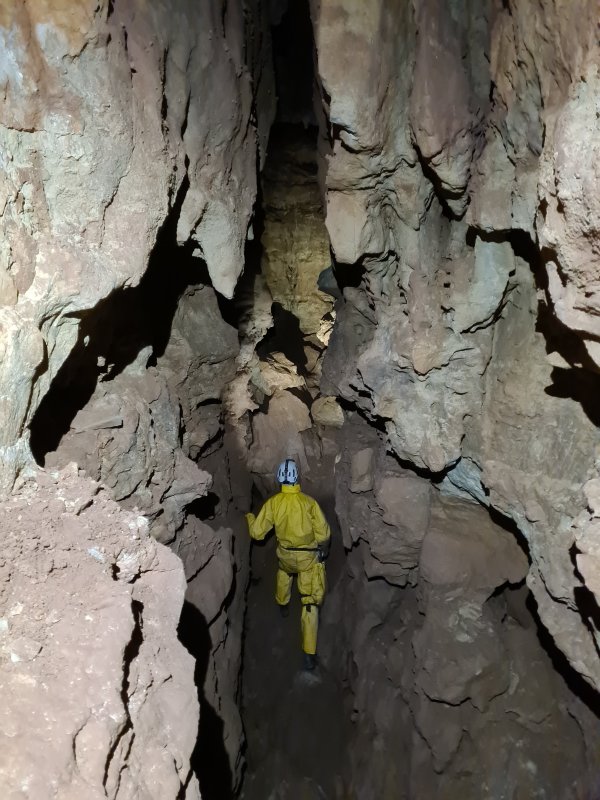 The passage leading to Dog Tooth Chamber.
Modelling by Pete, lighting by Tarquin and Pete
The passage leading to Dog Tooth Chamber.
Modelling by Pete, lighting by Tarquin and Pete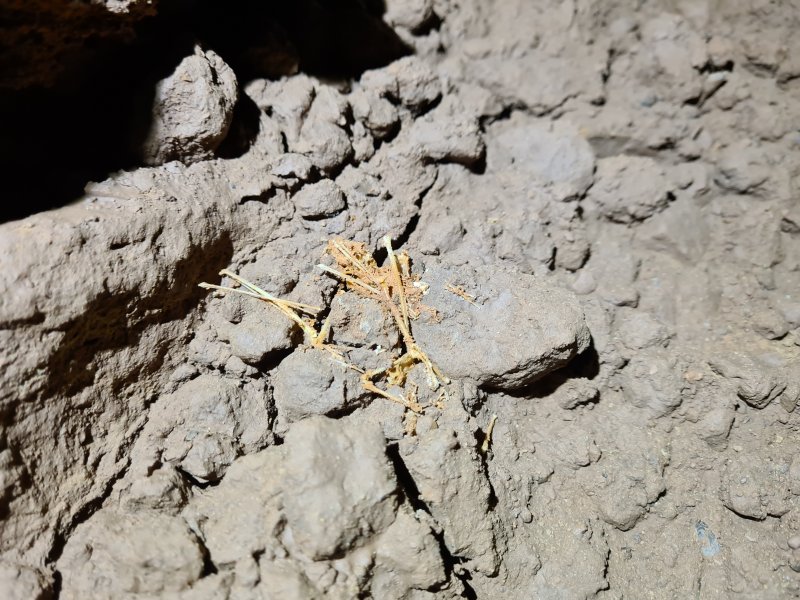 Bat skeleton in the passage leading to Dog Tooth Chamber.
Modelling by Bruce
Bat skeleton in the passage leading to Dog Tooth Chamber.
Modelling by Bruce Large calcite crystals in the passage leading to Dog Tooth Chamber.
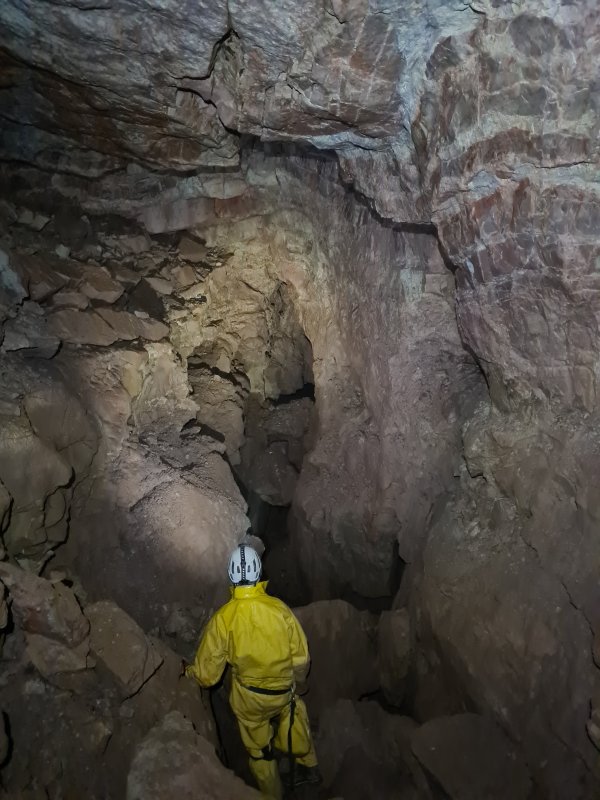 Looking back along the passage shortly before Dog Tooth Chamber. Ahead in the picture is a longer loop of smaller passage that also links to Dog Tooth Chamber.
Modelling by Pete, lighting by Tarquin and Pete
Looking back along the passage shortly before Dog Tooth Chamber. Ahead in the picture is a longer loop of smaller passage that also links to Dog Tooth Chamber.
Modelling by Pete, lighting by Tarquin and Pete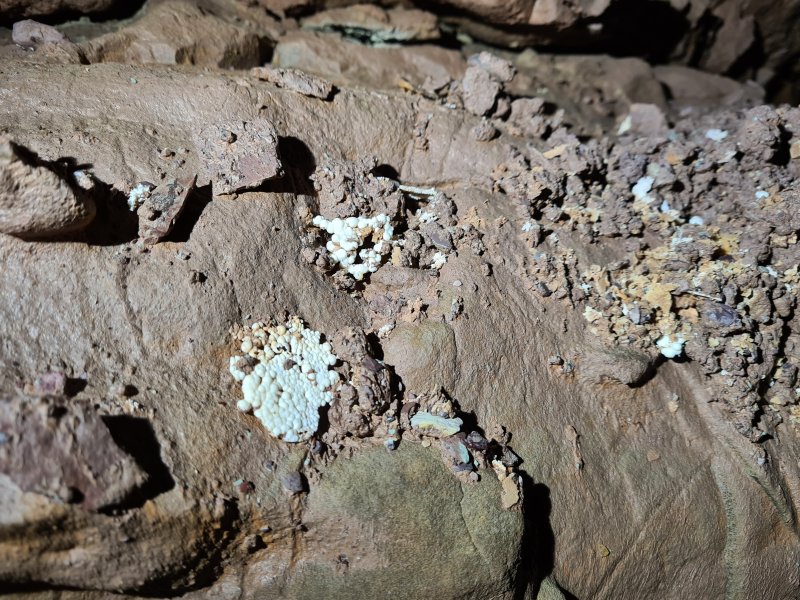 Cryostal on the wall of the last section of passage before Dog Tooth Chamber.
 Dog Tooth Chamber is not really much of a chamber; just a slight enlargement of the passage before it. The way out along the short round trip is to the left, connecting back to the passage just after it left Dome Chamber. Under the wall on the right are three passages. One loops back to the earlier part of the passage. The other two form a loop via Dog Passage and La-La Slide, with a side passage invitingly called Tubby Dungeon. A climb down in the loop provides the first route into The Canyon; a series of rifts forming the lower level of the cave, which connects to several other chambers in the upper level.
Modelling by Pete, lighting by Tarquin and Pete
Dog Tooth Chamber is not really much of a chamber; just a slight enlargement of the passage before it. The way out along the short round trip is to the left, connecting back to the passage just after it left Dome Chamber. Under the wall on the right are three passages. One loops back to the earlier part of the passage. The other two form a loop via Dog Passage and La-La Slide, with a side passage invitingly called Tubby Dungeon. A climb down in the loop provides the first route into The Canyon; a series of rifts forming the lower level of the cave, which connects to several other chambers in the upper level.
Modelling by Pete, lighting by Tarquin and Pete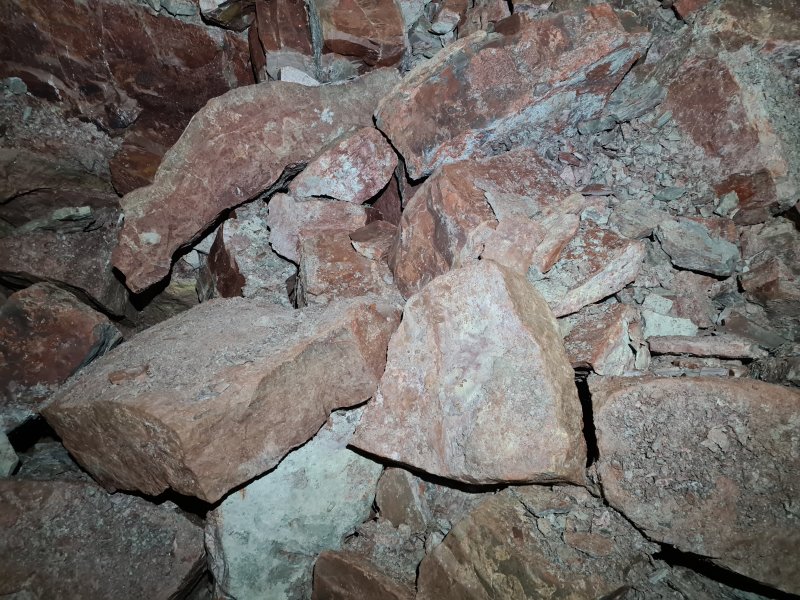 Colourful rocks in Dog Tooth Chamber.
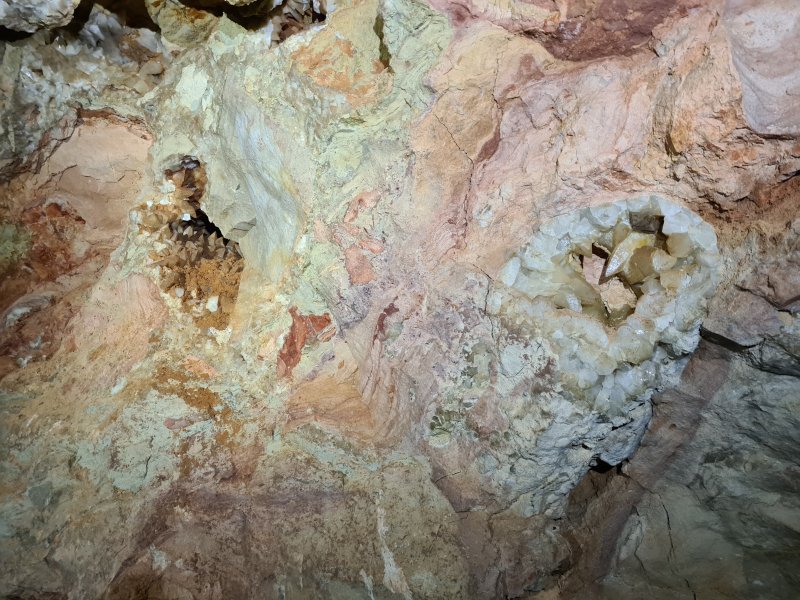 The main feature of Dog Tooth Chamber are these geodes with exceptionally large calcite crystals growing in them called dogtooth spar. These are formed by hydrothermal activity. They are located in an undercut under the right wall of the chamber.
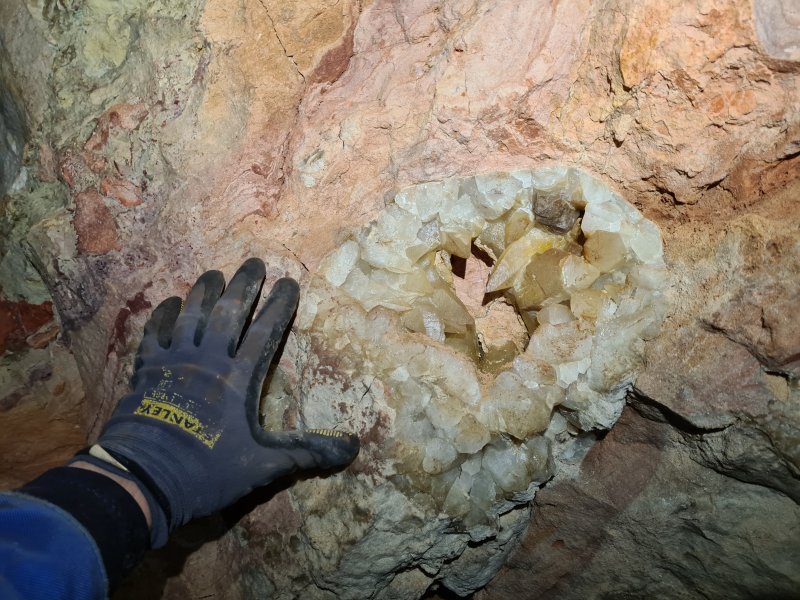 The best of the geodes.
Modelling by Tarquin's appendage
The best of the geodes.
Modelling by Tarquin's appendage The best of the geodes.
Modelling by Steph's appendage, lighting by Tarquin and Steph
The best of the geodes.
Modelling by Steph's appendage, lighting by Tarquin and Steph The largest crystals.
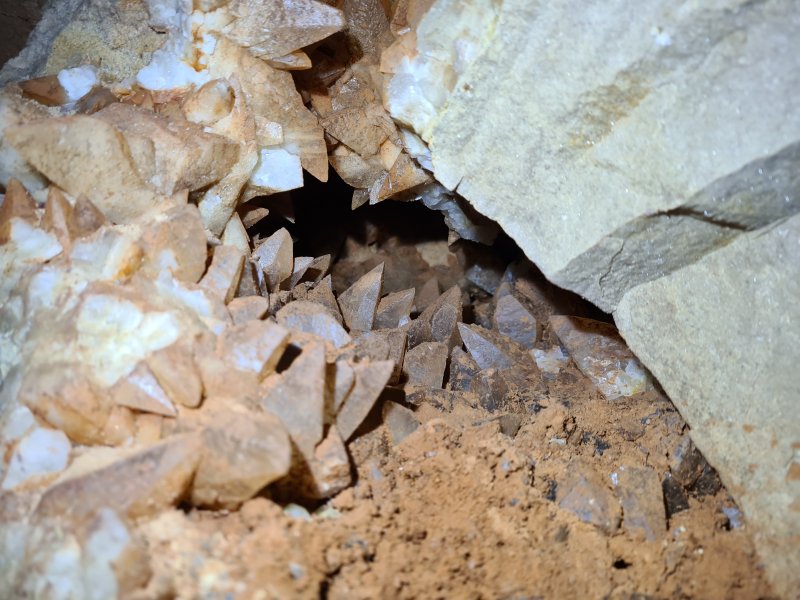 Smaller crystals in another large geode.
 Large crystals.
 Large crystals.
 Admiring the geodes in Dog Tooth Chamber.
Modelling by Steph
Admiring the geodes in Dog Tooth Chamber.
Modelling by Steph Upper geode on the outer face.
 Rock colours in Dog Tooth Chamber.
Lighting by Tarquin and Steph
Rock colours in Dog Tooth Chamber.
Lighting by Tarquin and Steph Rock colours in Dog Tooth Chamber.
 The other route on from Dome Chamber quickly reaches Nurden Hall, one of the largest chambers in the cave. The way on from here is down a hole on the left edge of the picture, while the inviting passage ahead is a dead end.
Modelling by Pete, lighting by Tarquin and Pete
The other route on from Dome Chamber quickly reaches Nurden Hall, one of the largest chambers in the cave. The way on from here is down a hole on the left edge of the picture, while the inviting passage ahead is a dead end.
Modelling by Pete, lighting by Tarquin and Pete Nurden Hall has a very large deposit of cryostal.
Lighting by Tarquin and Pete
Nurden Hall has a very large deposit of cryostal.
Lighting by Tarquin and Pete This includes the largest single cryostal bead that I know of, at over 4 cm in diameter. This is twice the diameter of a typical large bead, and 10 times the diameter (1000 times the volume) of a typical small bead.
Modelling by Tarquin's index finger
This includes the largest single cryostal bead that I know of, at over 4 cm in diameter. This is twice the diameter of a typical large bead, and 10 times the diameter (1000 times the volume) of a typical small bead.
Modelling by Tarquin's index finger Large cryostal pieces.
Modelling by Tarquin's palm
Large cryostal pieces.
Modelling by Tarquin's palm Cryostal.
Lighting by Tarquin and Pete
Cryostal.
Lighting by Tarquin and Pete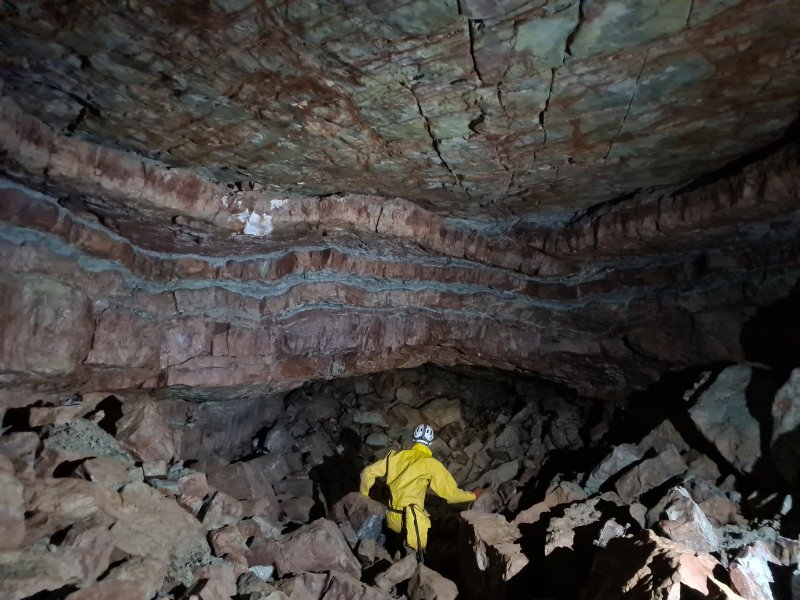 Blind passage in Nurden Hall.
Modelling by Pete, lighting by Tarquin and Pete
Blind passage in Nurden Hall.
Modelling by Pete, lighting by Tarquin and Pete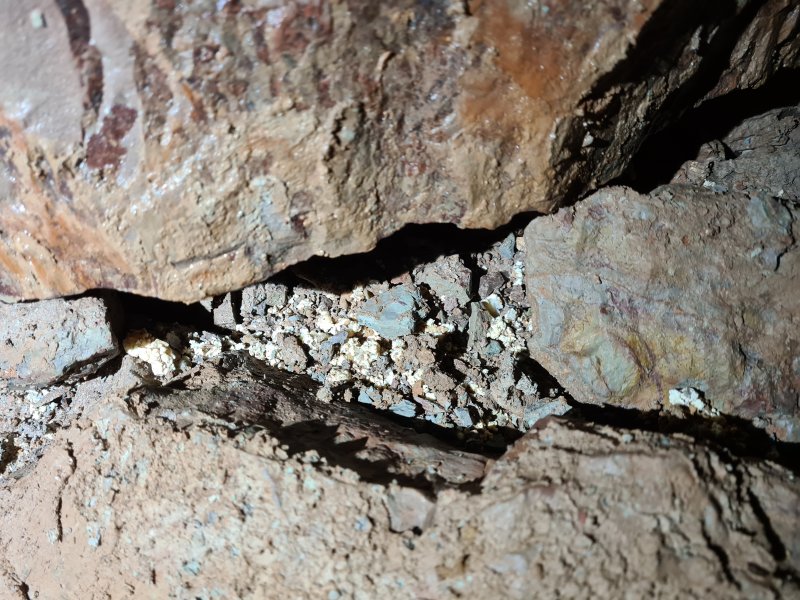 Cryostal in the blind passage.
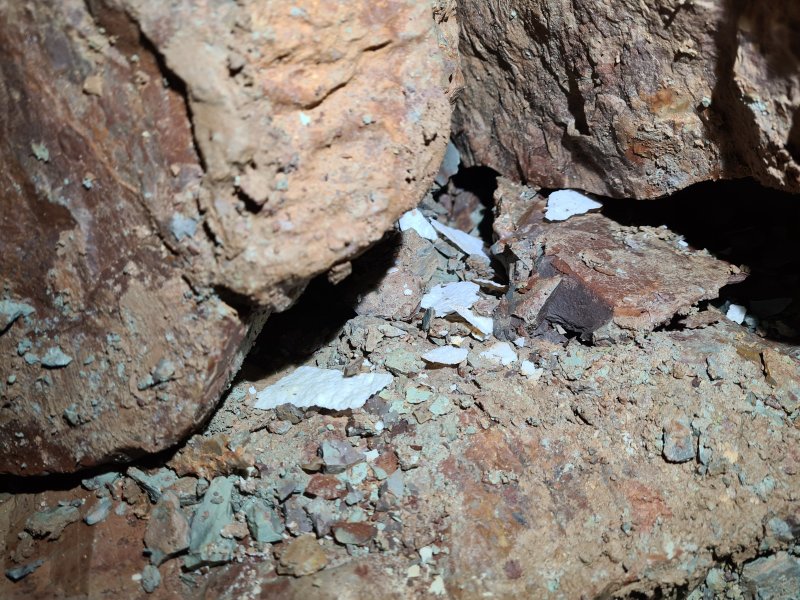 Cryostal rafts in the blind passage.
 Beautifully coloured rock at the end of the blind passage. The reds and oranges are likely to be various forms of iron oxide. The blue is shale. (These colours had to be tweaked slightly to get them to match reality, since the camera refused to accept how much colour there was, and tried to wash out the photograph.)
Modelling by Tarquin's skin tone
Beautifully coloured rock at the end of the blind passage. The reds and oranges are likely to be various forms of iron oxide. The blue is shale. (These colours had to be tweaked slightly to get them to match reality, since the camera refused to accept how much colour there was, and tried to wash out the photograph.)
Modelling by Tarquin's skin tone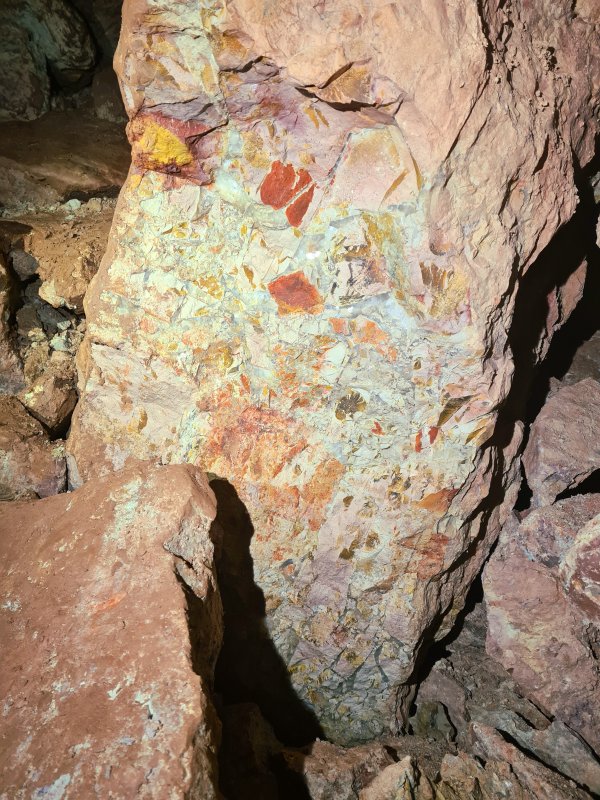 Beautiful conglomerate rock in the way on from Nurden Hall.
 The way on from Nurden Hall soon regains the former size. On the left are the Mallie Rifts, which connect via Taylor Rifts to The Canyon, with two separate ways into Canyon Halls. Since those routes require pitches, they are no longer the main way into that part of the cave.
Modelling by Pete, lighting by Tarquin and Pete
The way on from Nurden Hall soon regains the former size. On the left are the Mallie Rifts, which connect via Taylor Rifts to The Canyon, with two separate ways into Canyon Halls. Since those routes require pitches, they are no longer the main way into that part of the cave.
Modelling by Pete, lighting by Tarquin and Pete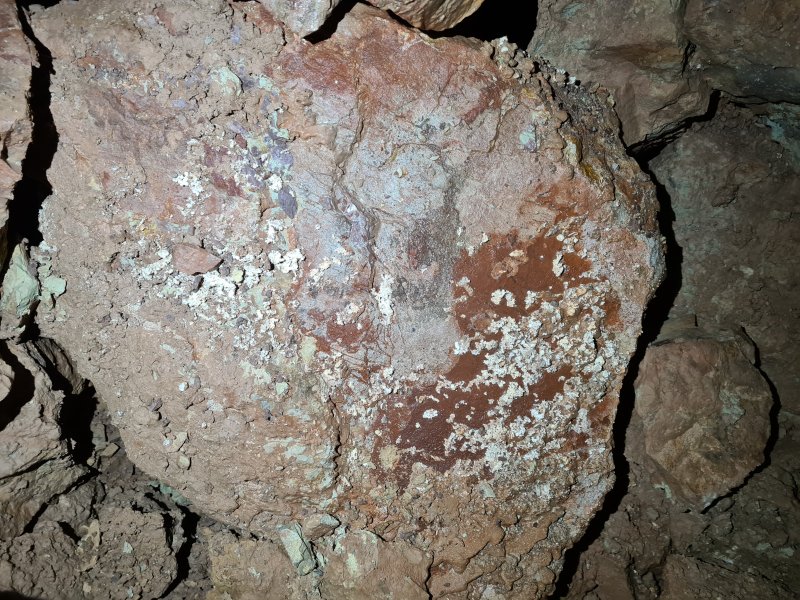 Cryostal in the passage leading to Canyon Halls.
 The passage then lowers into Bypass Crawl, a route which was dug to bypass the pitches in The Canyon. This is now the main way into the rest of the cave. Part way through the crawl is a passage leading up through a horrifying choke into Karver Gallery, and a route down into Taylor Rifts.
Modelling by Pete, lighting by Tarquin and Pete
The passage then lowers into Bypass Crawl, a route which was dug to bypass the pitches in The Canyon. This is now the main way into the rest of the cave. Part way through the crawl is a passage leading up through a horrifying choke into Karver Gallery, and a route down into Taylor Rifts.
Modelling by Pete, lighting by Tarquin and Pete The main part of Canyon Halls, where it is at its largest. The way in is tucked behind a rock behind the camera to the right. Also behind the camera to the right is a pitch down to the end of The Canyon. To the right is the way to Mini Iron Mine. Behind the camera is a blind alcove. On the left is a loop into Phreatic Causeway, with a pitch down to Linking Passage leading into Taylor Rifts. Ahead-right are two routes down through the boulders into Shattered Drop, the normal way to the end of the cave. Ahead in the big passage is the usual way into Phreatic Causeway (two passages ahead-left).
Modelling by Pete, lighting by Tarquin and Pete
The main part of Canyon Halls, where it is at its largest. The way in is tucked behind a rock behind the camera to the right. Also behind the camera to the right is a pitch down to the end of The Canyon. To the right is the way to Mini Iron Mine. Behind the camera is a blind alcove. On the left is a loop into Phreatic Causeway, with a pitch down to Linking Passage leading into Taylor Rifts. Ahead-right are two routes down through the boulders into Shattered Drop, the normal way to the end of the cave. Ahead in the big passage is the usual way into Phreatic Causeway (two passages ahead-left).
Modelling by Pete, lighting by Tarquin and Pete A large deposit of cryostal in Canyon Halls.
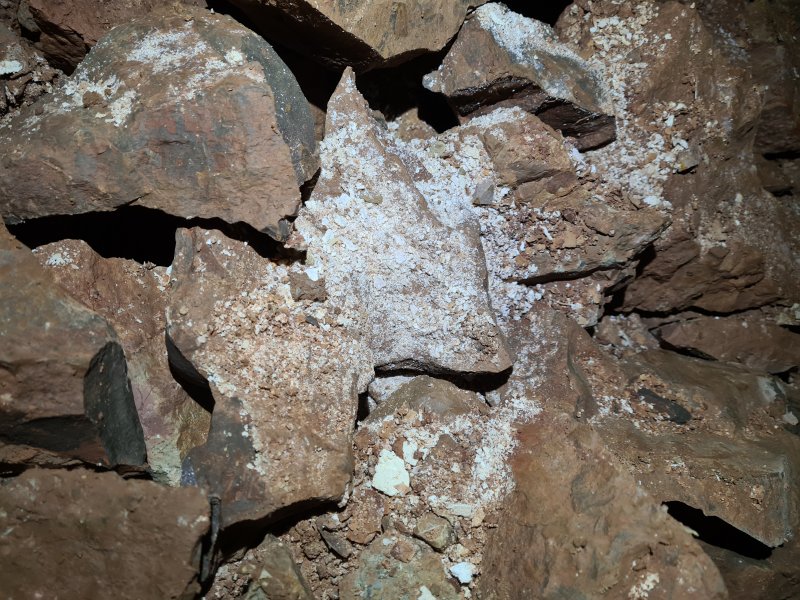 Cryostal.
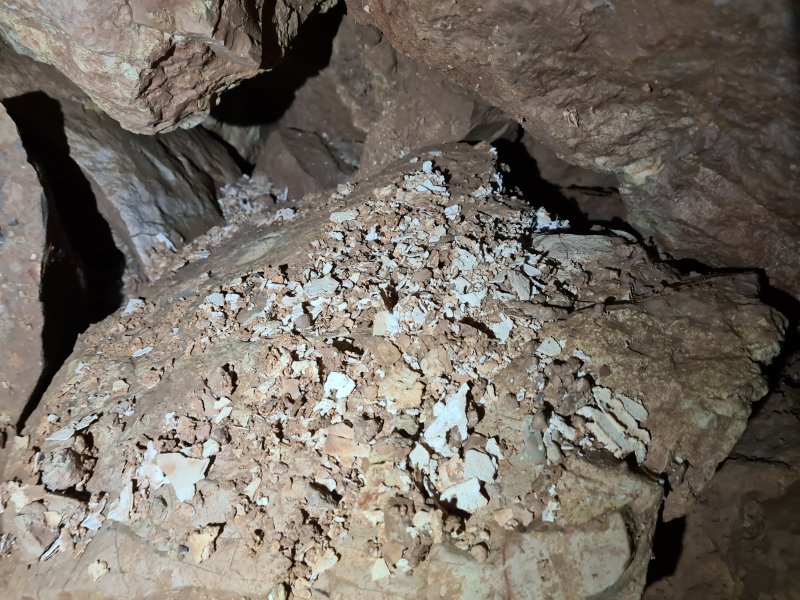 Cryostal.
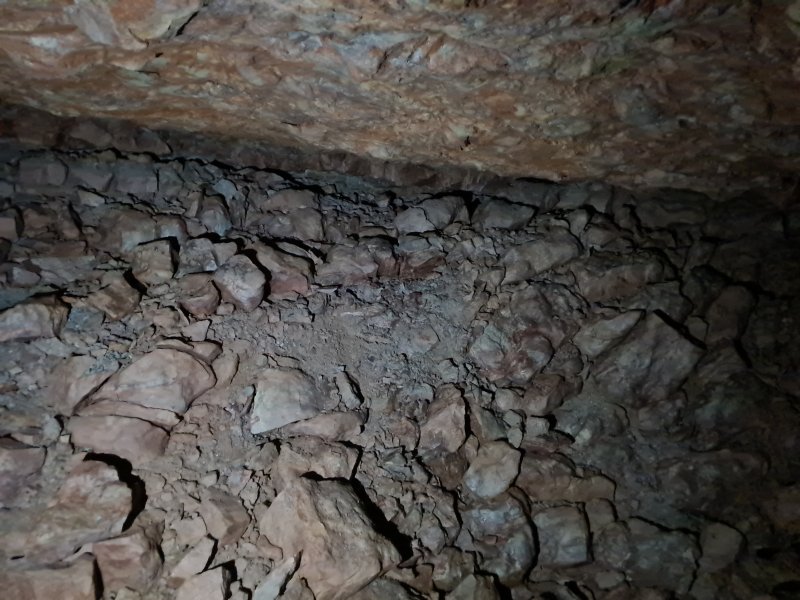 The dead-end passage from Canyon Halls (behind the camera in the earlier picture) leads up to a collapse zone with no way on.
 Cryostal in the collapse zone.
 Cryostal detail.
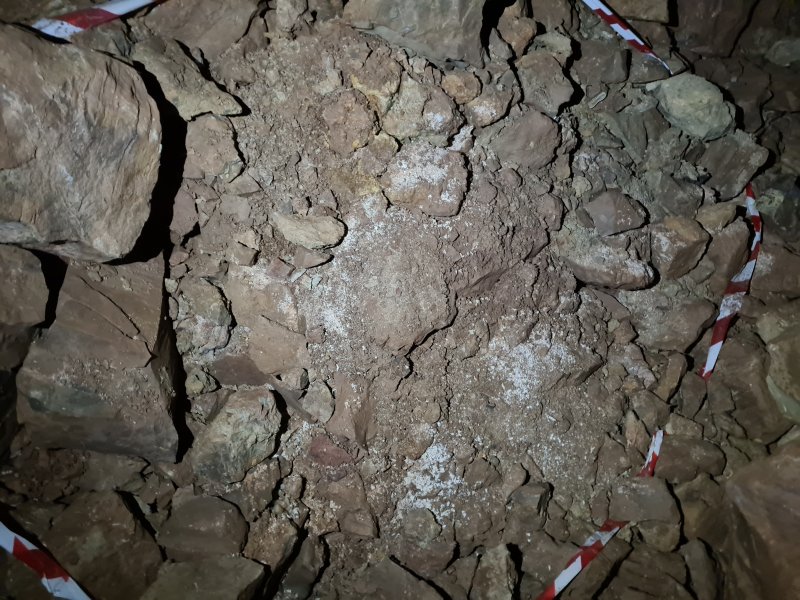 The large passage leading through Canyon Halls also contains more cryostal. Beyond here, the passage degenerates completely, and becomes a series of small passages sitting over Six Way Junction.
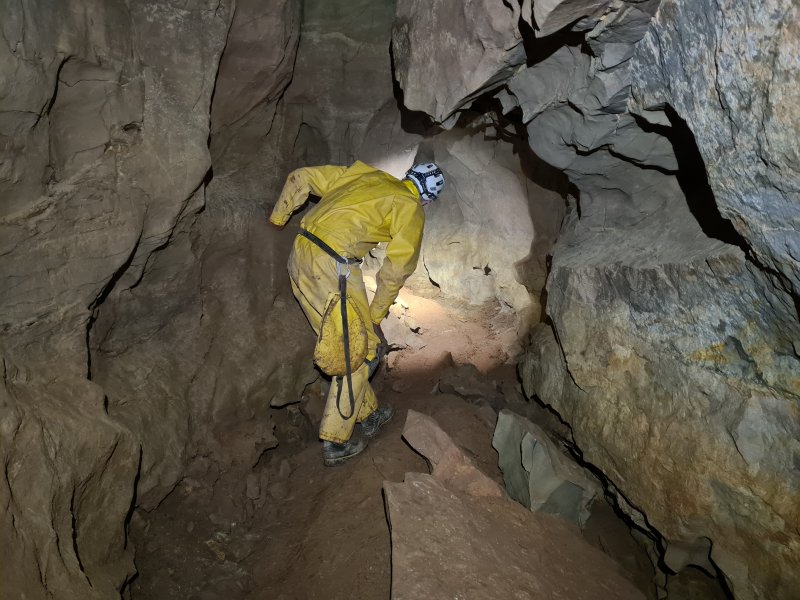 The first route into Phreatic Causeway. This is immediately unusual for the upper level of the cave, in that it has a naturally phreatic shape, and no sign of the beautifully coloured rock. A side passage here leads back into Canyon Halls, and via a pitch into Taylor Rifts.
Modelling by Pete, lighting by Tarquin and Pete
The first route into Phreatic Causeway. This is immediately unusual for the upper level of the cave, in that it has a naturally phreatic shape, and no sign of the beautifully coloured rock. A side passage here leads back into Canyon Halls, and via a pitch into Taylor Rifts.
Modelling by Pete, lighting by Tarquin and Pete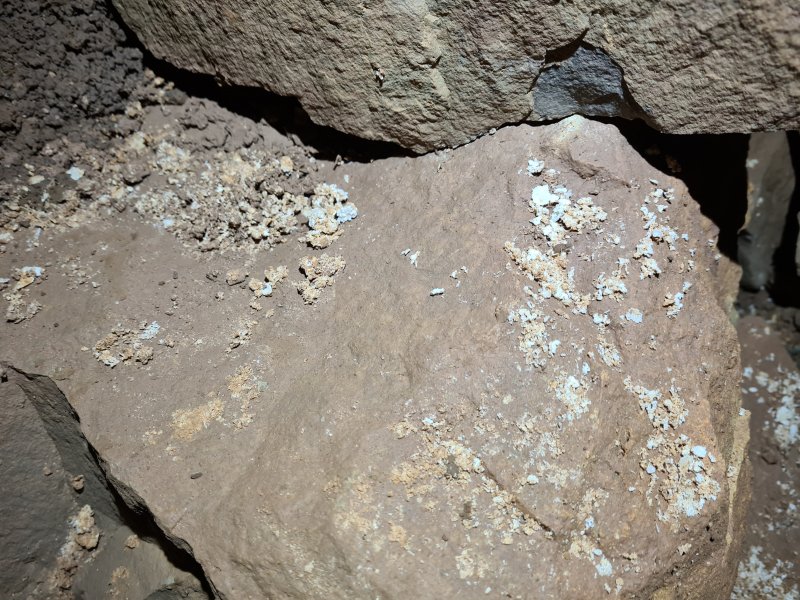 Cryostal in Phreatic Causeway.
 Once the second passage joins, the passage enlarges, and is one of the most comfortable passages in the cave. It is easy to see why this is a destination. Two side passages on the right provide ways into the series of small passages sitting over Six Way Junction.
Modelling by Pete, lighting by Tarquin and Pete
Once the second passage joins, the passage enlarges, and is one of the most comfortable passages in the cave. It is easy to see why this is a destination. Two side passages on the right provide ways into the series of small passages sitting over Six Way Junction.
Modelling by Pete, lighting by Tarquin and Pete Banded rock in the ceiling of Phreatic Causeway.
Modelling by Pete, lighting by Tarquin and Pete
Banded rock in the ceiling of Phreatic Causeway.
Modelling by Pete, lighting by Tarquin and Pete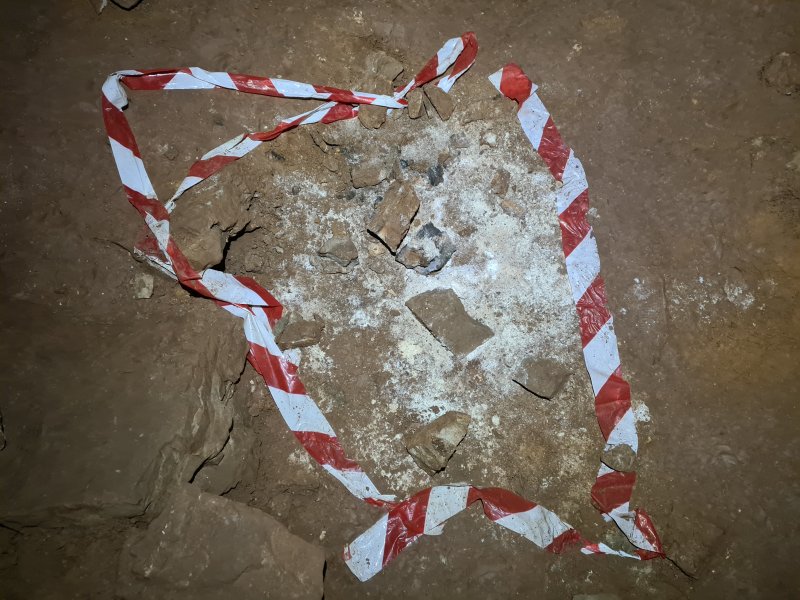 Cryostal.
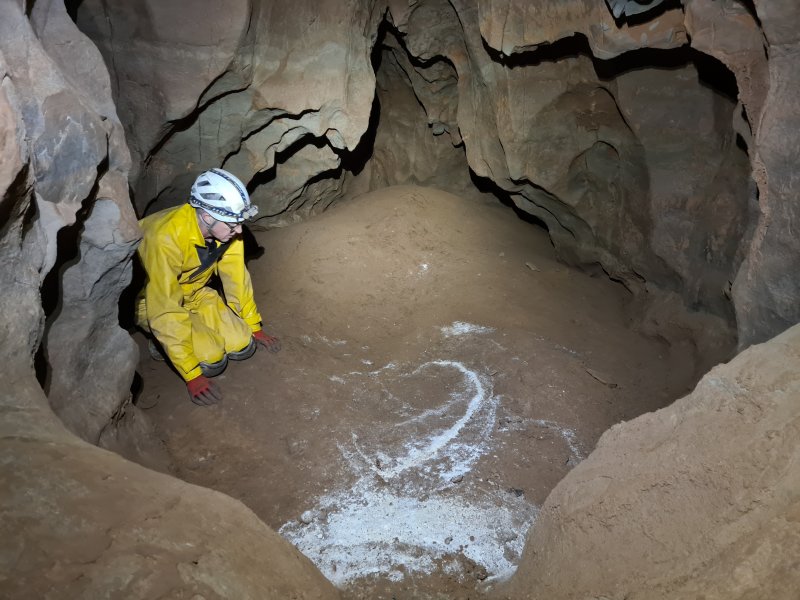 After a short crawl, the passage reaches a junction. To the right leads via another small passage into Crystal Pool. This is actually a tide mark of cryostal, rather than a normal crystal pool.
Modelling by Pete
After a short crawl, the passage reaches a junction. To the right leads via another small passage into Crystal Pool. This is actually a tide mark of cryostal, rather than a normal crystal pool.
Modelling by Pete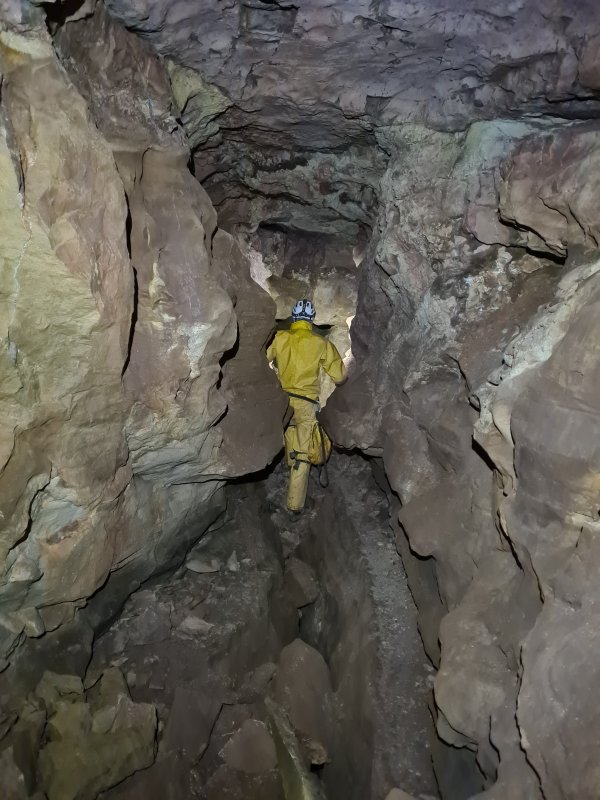 To the left at the junction is much larger.
Modelling by Pete, lighting by Tarquin and Pete
To the left at the junction is much larger.
Modelling by Pete, lighting by Tarquin and Pete The left branch ends in a loop without any significant side passages.
Modelling by Pete, lighting by Tarquin and Pete
The left branch ends in a loop without any significant side passages.
Modelling by Pete, lighting by Tarquin and Pete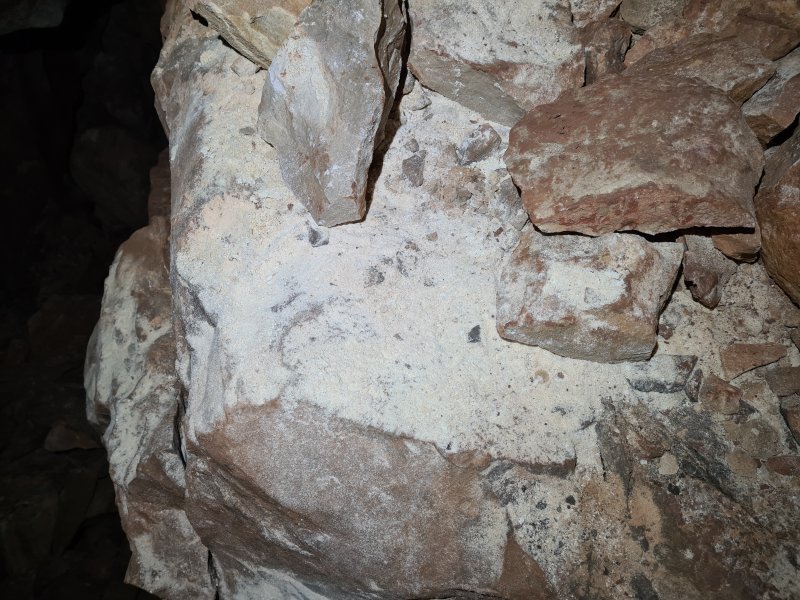 White powder in the loop at the end of Phreatic Causeway. Presumably this is cryostal, but it is a much finer powder than the previous deposits.
 Shattered Drop, a 6 metre climb down into Canyon Series, the way to the end of the cave. This area looks extremely complicated on the survey, but navigation is surprisingly easy. It consists of taking either route to Six Way Junction, going ahead at Six Way Junction, then taking the obvious left branch at every significant junction (ignoring one oxbow), to reach Plummet Junction. Traverse over plummet Junction then turn left to reach the deep rift.
Modelling by Pete, lighting by Tarquin and Pete
Shattered Drop, a 6 metre climb down into Canyon Series, the way to the end of the cave. This area looks extremely complicated on the survey, but navigation is surprisingly easy. It consists of taking either route to Six Way Junction, going ahead at Six Way Junction, then taking the obvious left branch at every significant junction (ignoring one oxbow), to reach Plummet Junction. Traverse over plummet Junction then turn left to reach the deep rift.
Modelling by Pete, lighting by Tarquin and Pete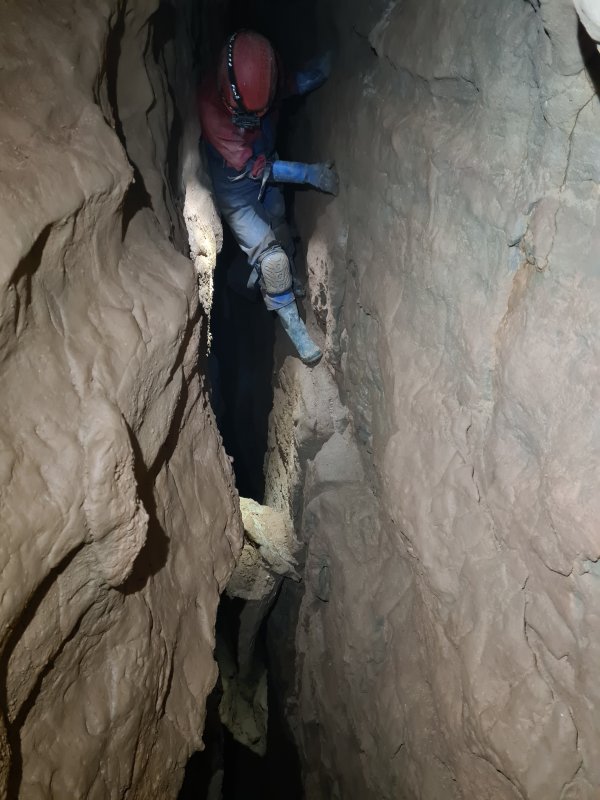 The passage starts as an awkward clambering rift on the right or an awkward clambering crawl on the left, to reach Six Way Junction. This is the clambering rift, which has a tricky traverse with a very small ledge, high off the floor.
Modelling by Steph, lighting by Tarquin and Steph
The passage starts as an awkward clambering rift on the right or an awkward clambering crawl on the left, to reach Six Way Junction. This is the clambering rift, which has a tricky traverse with a very small ledge, high off the floor.
Modelling by Steph, lighting by Tarquin and Steph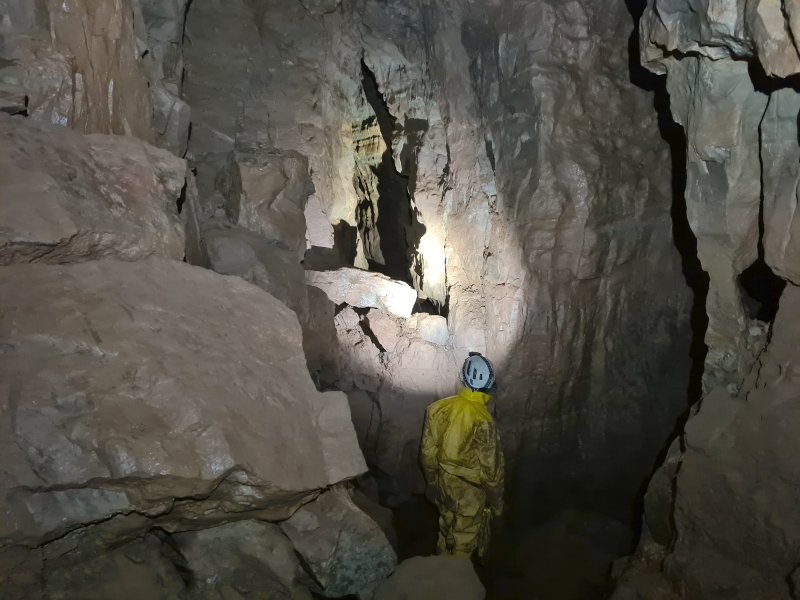 Six Way Junction. To the left reaches a pitch up into the series of small passages sitting over Six Way Junction. To the right chokes. Ahead right is another climb up into the series of small passages sitting over Six Way Junction (but a totally different part of it. Ahead is the way on into The Satanic Traverses.
Modelling by Pete, lighting by Tarquin and Pete
Six Way Junction. To the left reaches a pitch up into the series of small passages sitting over Six Way Junction. To the right chokes. Ahead right is another climb up into the series of small passages sitting over Six Way Junction (but a totally different part of it. Ahead is the way on into The Satanic Traverses.
Modelling by Pete, lighting by Tarquin and Pete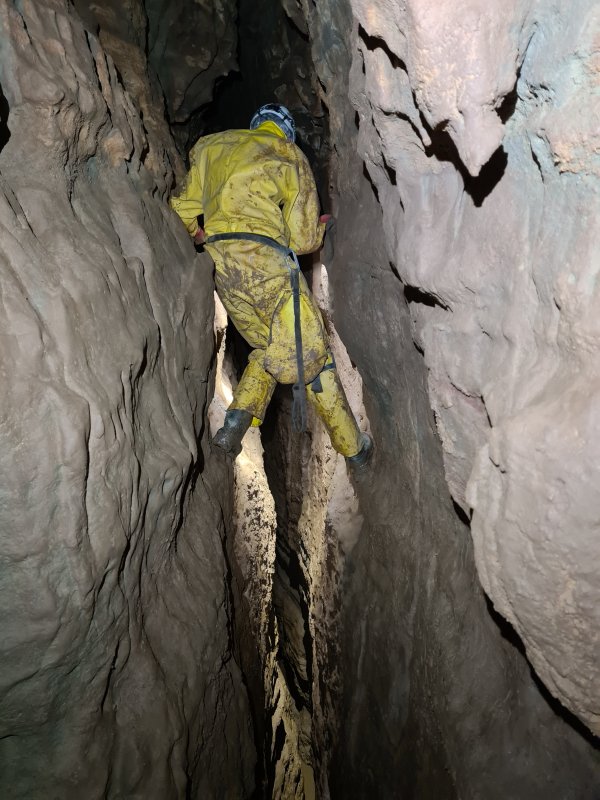 The Satanic Traverses start off very awkward but get easier later. This is the early part, with the hardest part being immediately in front of Pete, which seems completely devoid of footholds, but can be more easily passed by climbing a little higher in the rift and traversing at what had been shoulder height. This section can prove extremely challenging, and there is no way to bypass it.
Modelling by Pete, lighting by Tarquin and Pete
The Satanic Traverses start off very awkward but get easier later. This is the early part, with the hardest part being immediately in front of Pete, which seems completely devoid of footholds, but can be more easily passed by climbing a little higher in the rift and traversing at what had been shoulder height. This section can prove extremely challenging, and there is no way to bypass it.
Modelling by Pete, lighting by Tarquin and Pete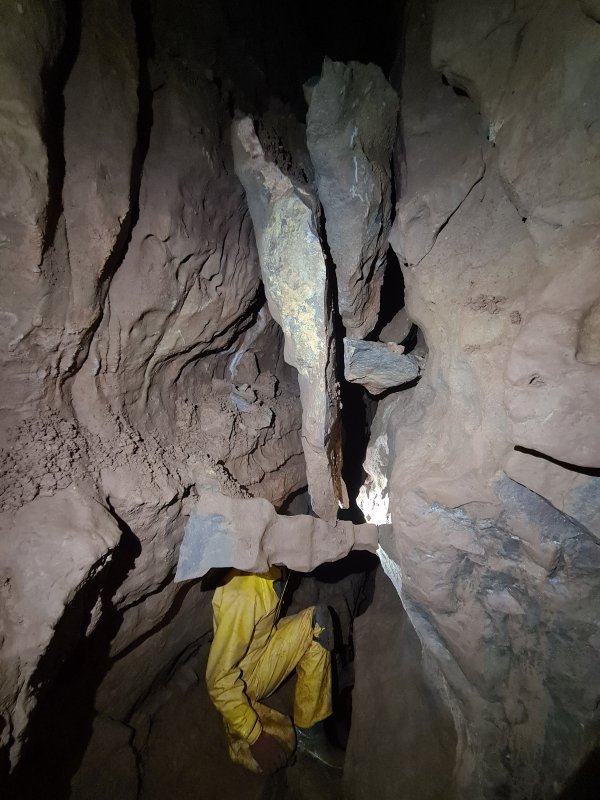 The traverses end at Hanging Rock, a ludicrous set of rocks supported by each other, all held up by gravity defying dust. Oxbows here lead forward to Fin Pillar Junction.
Modelling by Pete, lighting by Tarquin and Pete
The traverses end at Hanging Rock, a ludicrous set of rocks supported by each other, all held up by gravity defying dust. Oxbows here lead forward to Fin Pillar Junction.
Modelling by Pete, lighting by Tarquin and Pete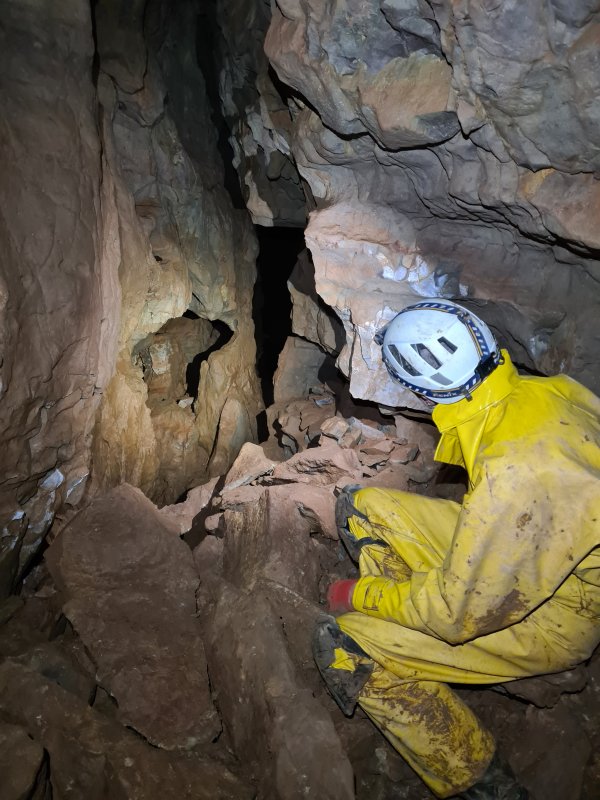 Fin Pillar Junction, one of the many junctions where you turn left. The passage behind the pillar is the end of the earlier oxbows. A pitch up here reaches another set of roof tubes, which appear to pass under the series of small passages sitting over Six Way Junction, as well as forward below the New Year Series.
Modelling by Pete, lighting by Tarquin and Pete
Fin Pillar Junction, one of the many junctions where you turn left. The passage behind the pillar is the end of the earlier oxbows. A pitch up here reaches another set of roof tubes, which appear to pass under the series of small passages sitting over Six Way Junction, as well as forward below the New Year Series.
Modelling by Pete, lighting by Tarquin and Pete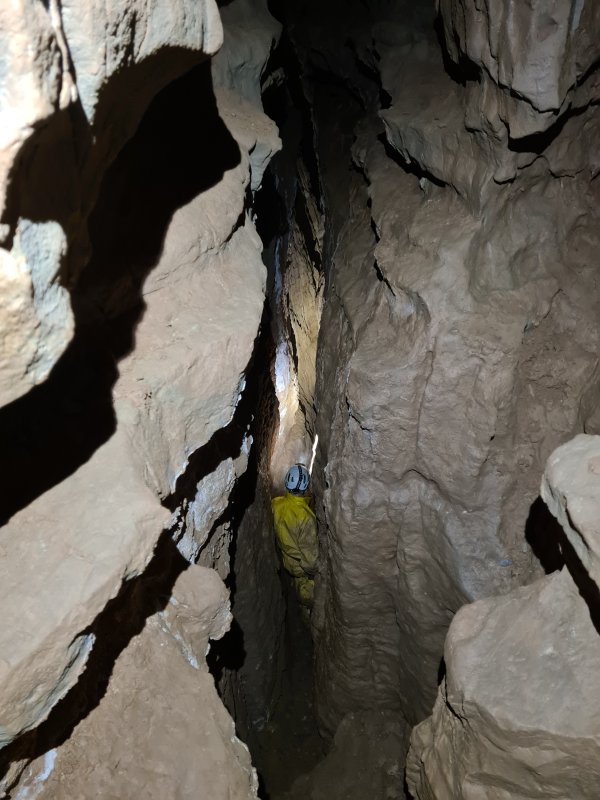 The way on gets renamed to Canyon Continued.
Modelling by Pete, lighting by Tarquin and Pete
The way on gets renamed to Canyon Continued.
Modelling by Pete, lighting by Tarquin and Pete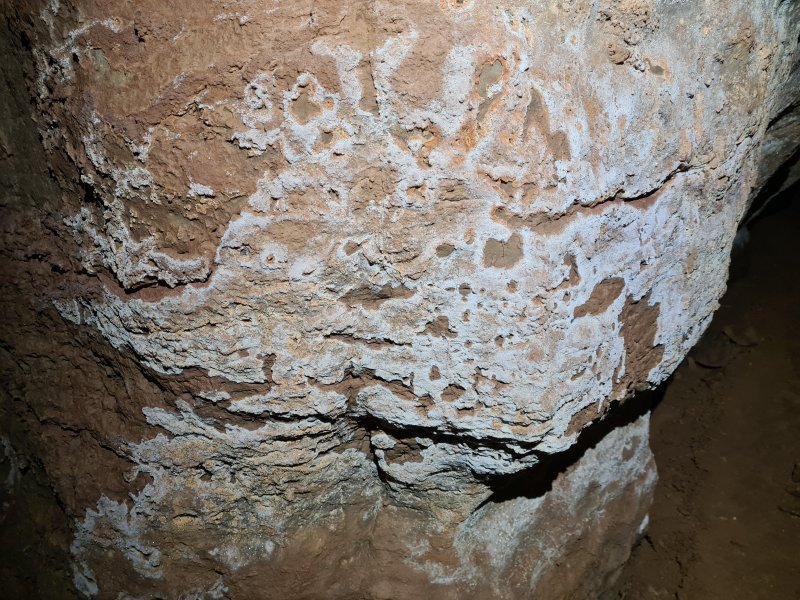 Frosting on the walls of Canyon Continued. This appears to be a type of wicking formation, caused by evaporation due to air flow.
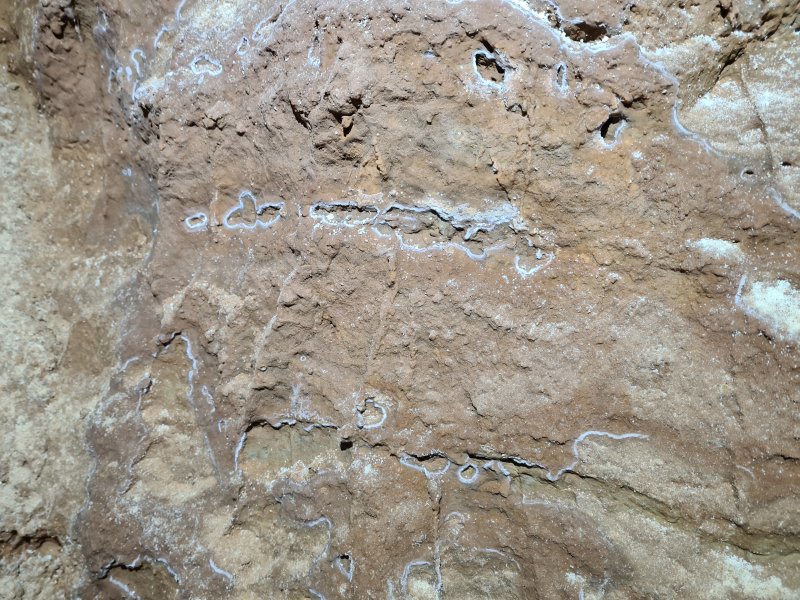 The effect around small depressions (vesicles) makes it look like a blue ringed octopus.
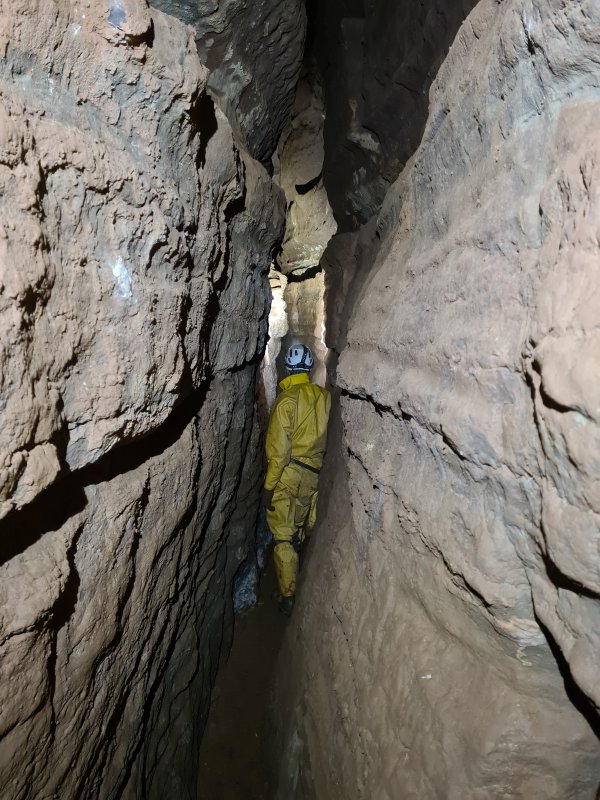 The passage then passes three side rifts on the right, all of which are routes leading into New Year Series, and an oxbow on the left. The navigation is still very obvious, however.
Modelling by Pete, lighting by Tarquin and Pete
The passage then passes three side rifts on the right, all of which are routes leading into New Year Series, and an oxbow on the left. The navigation is still very obvious, however.
Modelling by Pete, lighting by Tarquin and Pete Cryostal at a point on the survey marked as "Large flake".
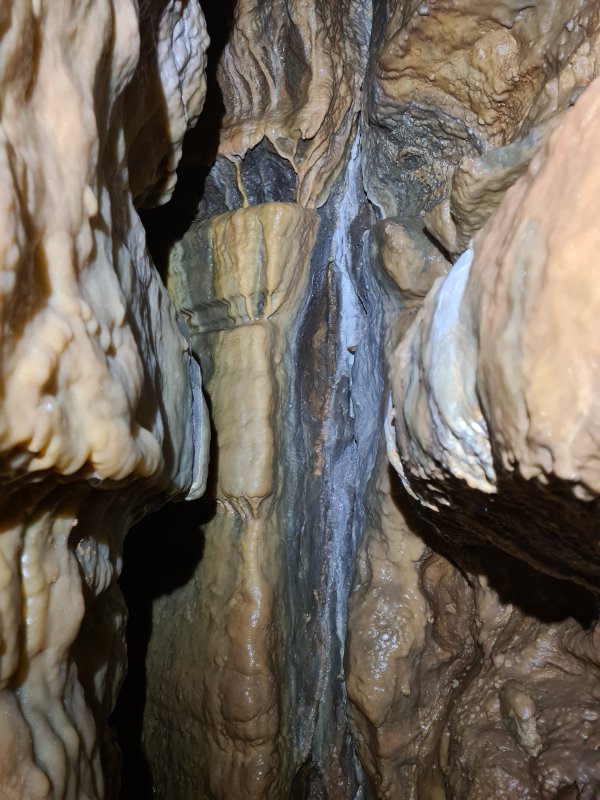 The cave has almost no regular stal formations. This part is unusual enough to be called Calcited Walls.
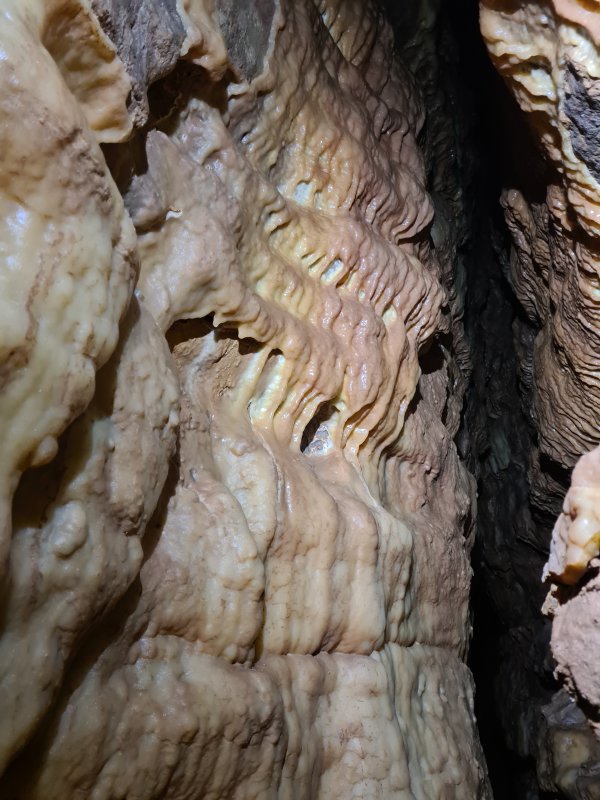 Calcited Walls.
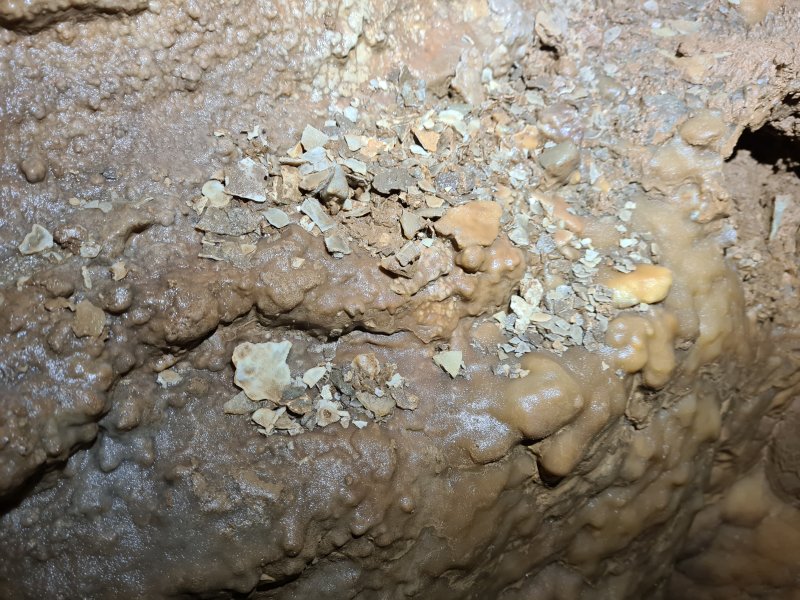 Calcite Flakes.
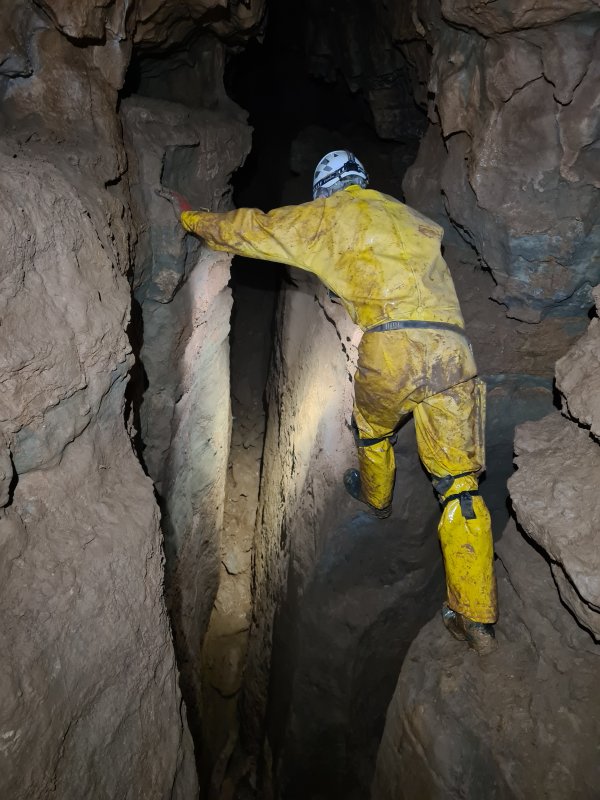 Plummet Junction, a traverse over a deep rift. An aven here can be climbed to reach New Year Series.
Modelling by Pete, lighting by Tarquin and Pete
Plummet Junction, a traverse over a deep rift. An aven here can be climbed to reach New Year Series.
Modelling by Pete, lighting by Tarquin and Pete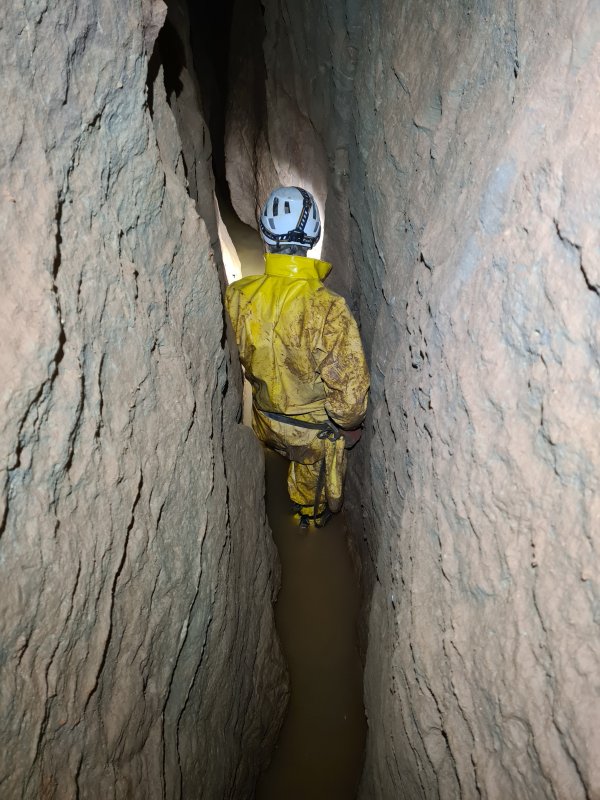 At this point, we made our only navigation mistake, thinking that we needed to take a wet rift on the left before the traverse. This lead nowhere, but earned us wet feet. While streams are briefly seen in many parts of the cave, there should never be enough water to get wet feet.
Modelling by Pete, lighting by Tarquin and Pete
At this point, we made our only navigation mistake, thinking that we needed to take a wet rift on the left before the traverse. This lead nowhere, but earned us wet feet. While streams are briefly seen in many parts of the cave, there should never be enough water to get wet feet.
Modelling by Pete, lighting by Tarquin and Pete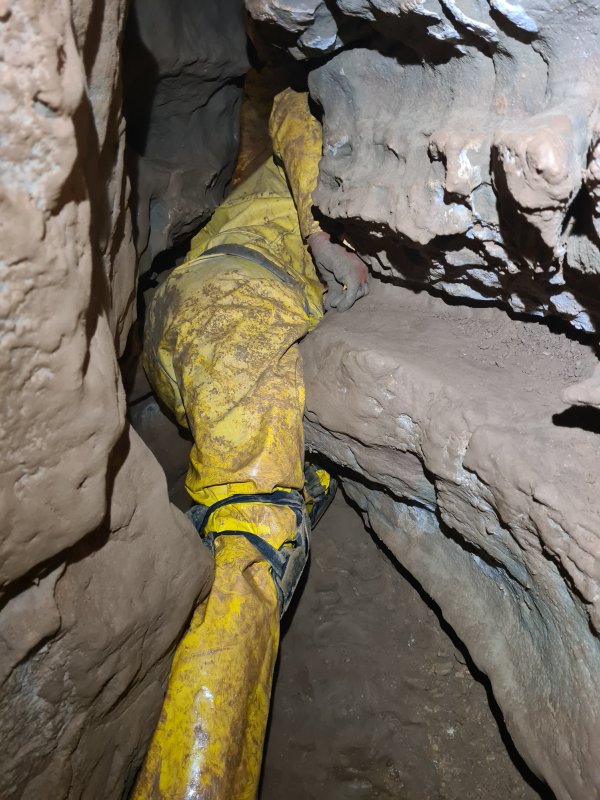 After traversing over the rift at Plummet Junction, the correct way on is a crawl to the left.
Modelling by Pete, lighting by Tarquin and Pete
After traversing over the rift at Plummet Junction, the correct way on is a crawl to the left.
Modelling by Pete, lighting by Tarquin and Pete The crawl ends at a small ledge at the edge of a very deep rift, where water falls far into the depths below. The survey shows nothing at the bottom, but just standing here makes you feel a little uneasy, since it looks like the perfect place to get wedged.
Modelling by Pete, lighting by Tarquin and Pete
The crawl ends at a small ledge at the edge of a very deep rift, where water falls far into the depths below. The survey shows nothing at the bottom, but just standing here makes you feel a little uneasy, since it looks like the perfect place to get wedged.
Modelling by Pete, lighting by Tarquin and Pete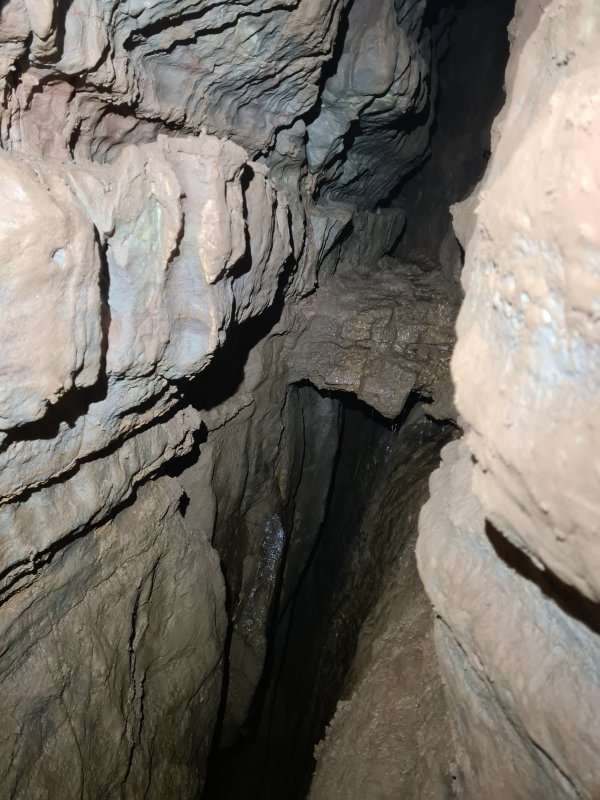 The way on here is a traverse over the rift, onto a false floor of calcite, and into Misery Crawl. This is a very tight squirming crawl, passing a dead end side passage, to reach an aven and choke. There is no way on. Therefore, most trips stop before the crawl, rather than at the bitter end of the cave. One branch of New Year Series seems to reach a similar distance away.
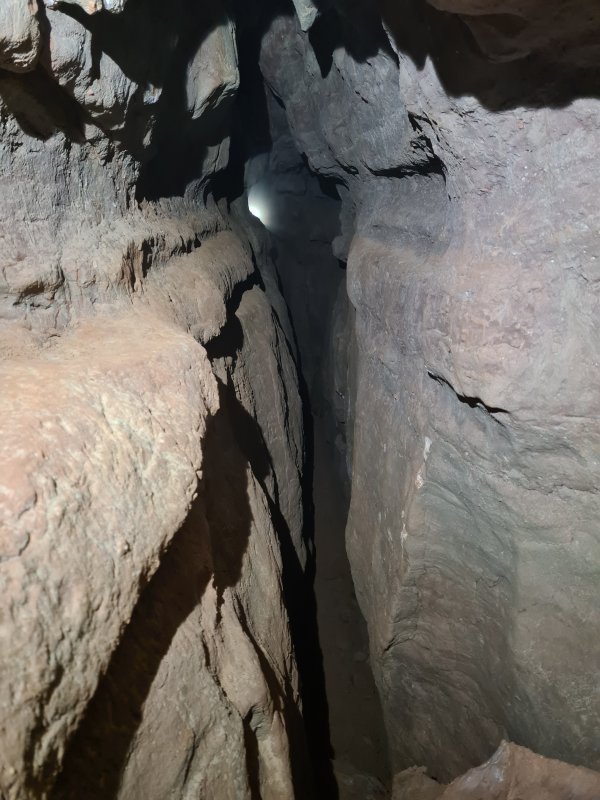 I decided to try getting into New Year Series on my own. I started with what had been the third side passage on the right, a traverse crawl at the top of a rift. It got more awkward and reached a squeeze, so I gave up.
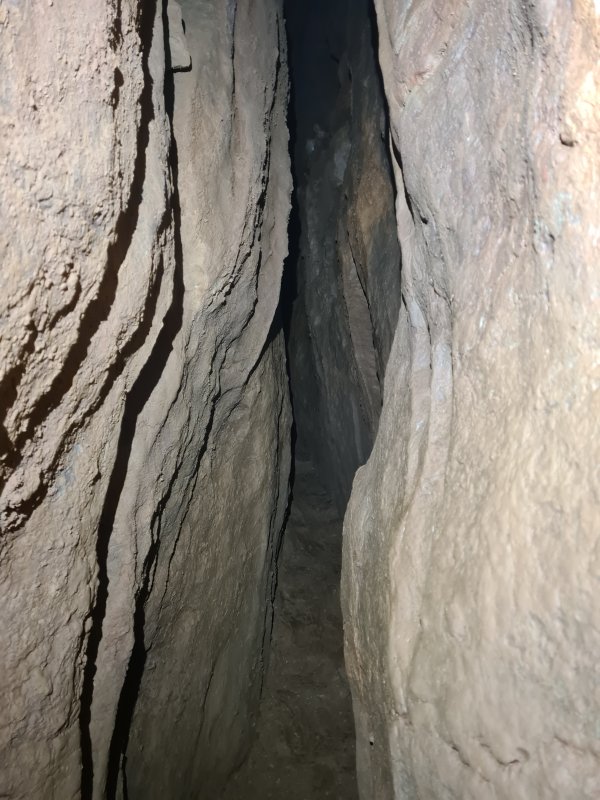 The second side passage was much easier, with the sound of running water. This is perhaps the easiest way into the series, being just a regular rift passage, but I did not complete the route to see what the squeezes up into New Year Series (found in 2004) were like. Another day.
 The second and first side passage join through this awkward section, but the first side passage was otherwise fairly easy.
Modelling by Pete, lighting by Tarquin and Pete
The second and first side passage join through this awkward section, but the first side passage was otherwise fairly easy.
Modelling by Pete, lighting by Tarquin and Pete Black water in the forest above Miss Graces Lane Cave.
Modelling by Steph
Black water in the forest above Miss Graces Lane Cave.
Modelling by Steph The water is so black that it looks like an oil slick from most angles.
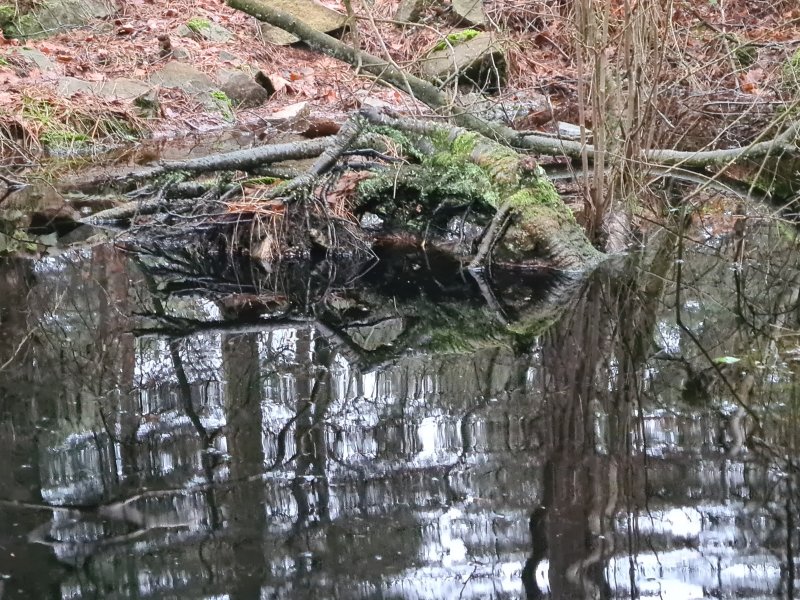 Sadly it did not turn into a creature from a 1950s science fiction film, so we moved on.
 Three-way tree.
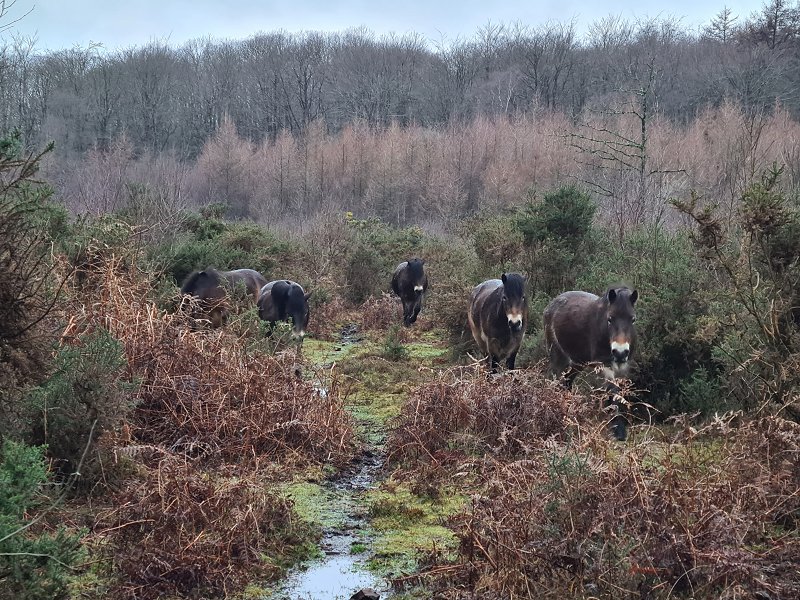 Exmoor ponies, with distinctive facial markings that make them look like donkeys, used to manage undergrowth in The Park And Poor's Allotment which overlies the cave. These are the oldest British pony breed at over 1000 years old, recorded in the Doomsday Book. Their primary use is conservation grazing, as they can eat tough weeds that other horses would leave alone or only partially damage, including gorse.
Modelling by merlod gytnaf, ail, trydydd, pedwerydd and pumed
Exmoor ponies, with distinctive facial markings that make them look like donkeys, used to manage undergrowth in The Park And Poor's Allotment which overlies the cave. These are the oldest British pony breed at over 1000 years old, recorded in the Doomsday Book. Their primary use is conservation grazing, as they can eat tough weeds that other horses would leave alone or only partially damage, including gorse.
Modelling by merlod gytnaf, ail, trydydd, pedwerydd and pumed The signs say to respect them from a distance, so we stood still, and they boldly walked past us with no sign of being upset. As we started to walk away, one of them (the one on the left in the previous picture) came over to say hello, with not even a hint of fear. Presumably hoping for treats.
Modelling by Steph, merlod gytnaf, pedwerydd, ail and trydydd
The signs say to respect them from a distance, so we stood still, and they boldly walked past us with no sign of being upset. As we started to walk away, one of them (the one on the left in the previous picture) came over to say hello, with not even a hint of fear. Presumably hoping for treats.
Modelling by Steph, merlod gytnaf, pedwerydd, ail and trydydd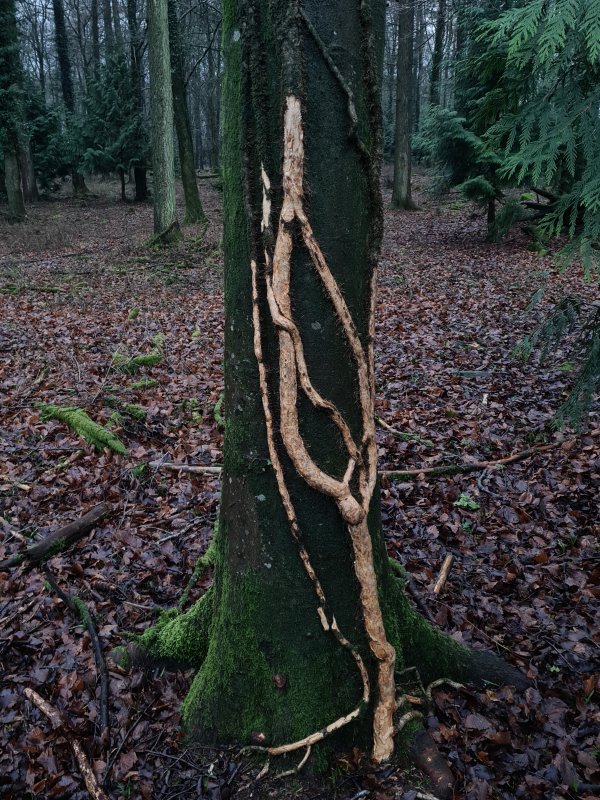 Stripped bark from ivy. This looks more likely to be a deer scraping its antlers, rather than caused by ponies.
 A tree that had bent over, with its roots still firmly planted. It objected to leaning over, and decided to grow numerous vertical trunks instead. You can hear it making the same dad joke every day, telling them how it bends over backwards to support them.
Modelling by Steph
A tree that had bent over, with its roots still firmly planted. It objected to leaning over, and decided to grow numerous vertical trunks instead. You can hear it making the same dad joke every day, telling them how it bends over backwards to support them.
Modelling by Steph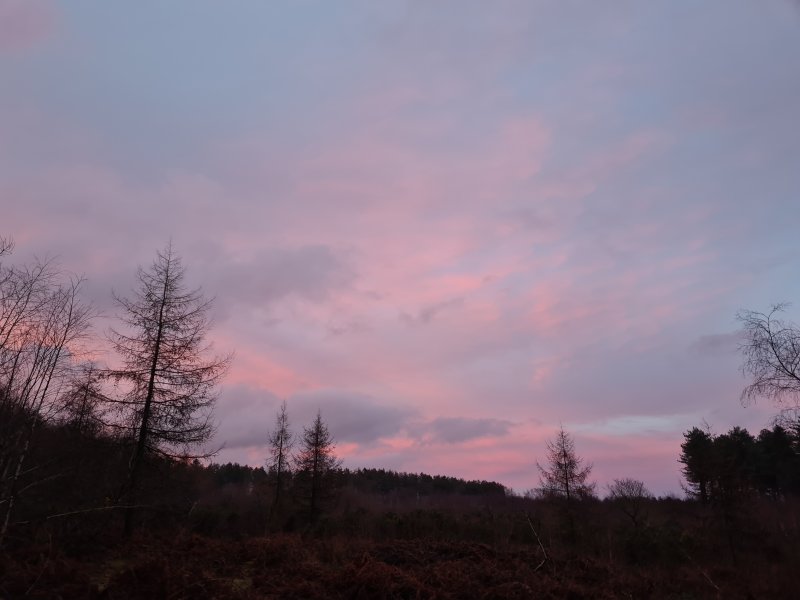 Nearing sunset over the park.
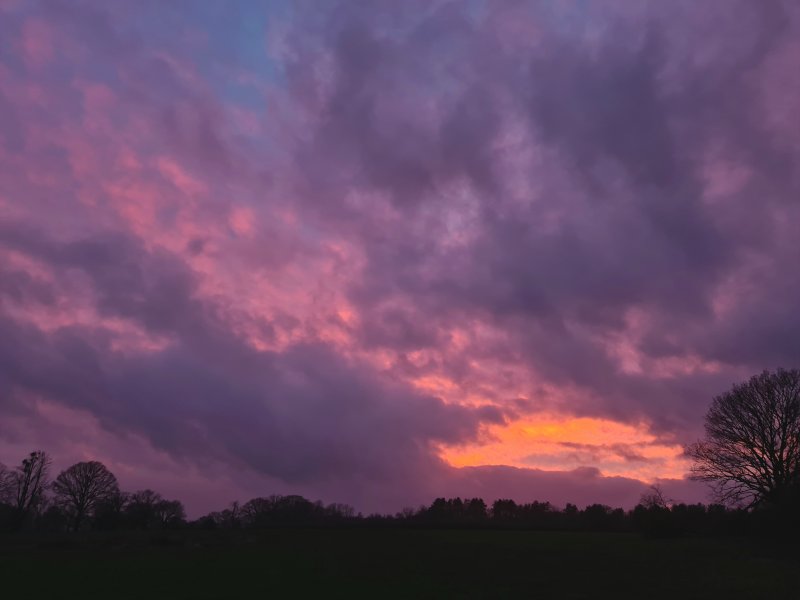 Orange sky sweeping in.
 Sunset trees.
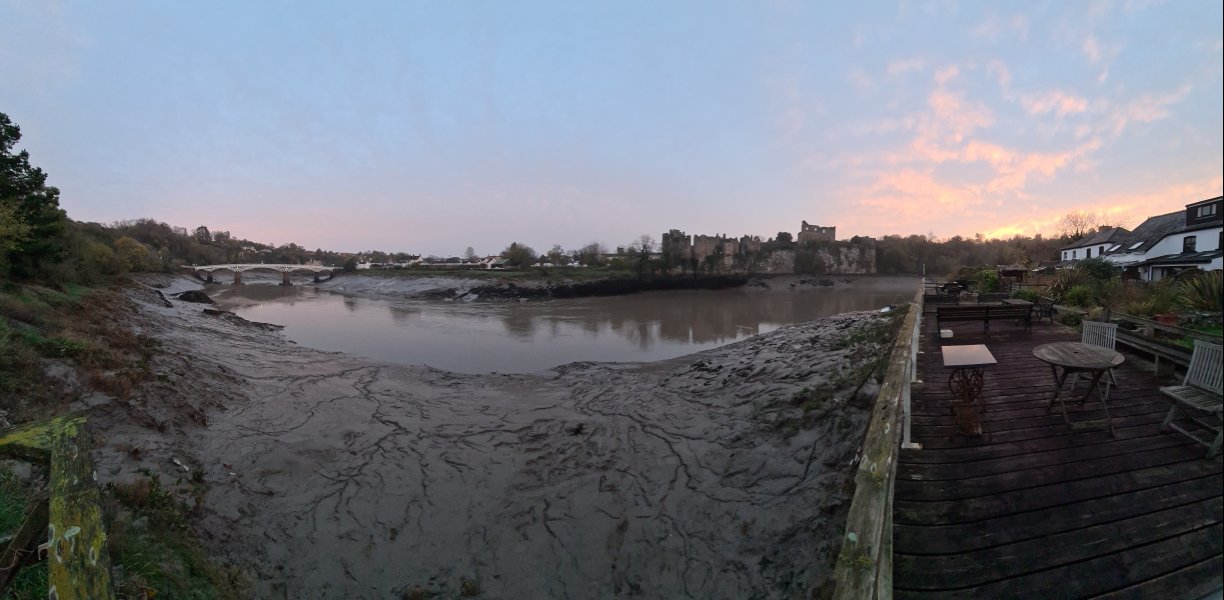 Low tide at Chepstow.
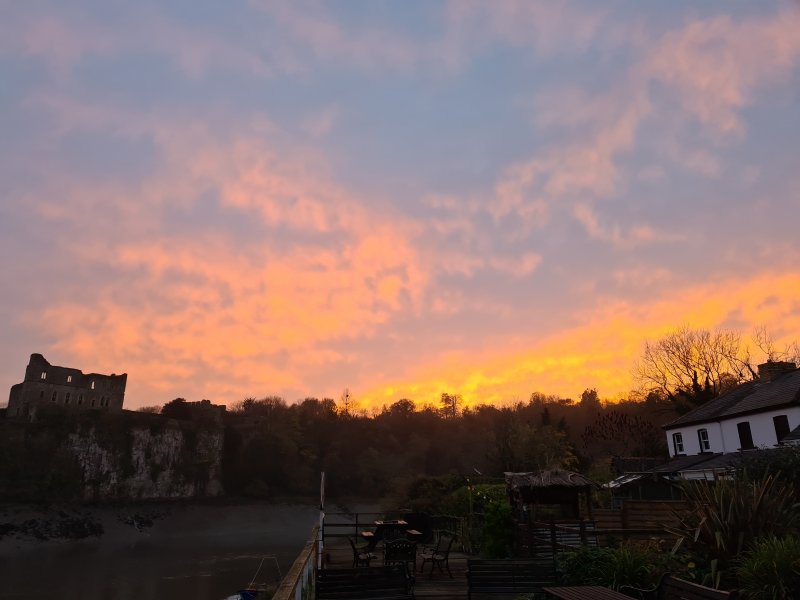 Sunset over Chepstow Castle.
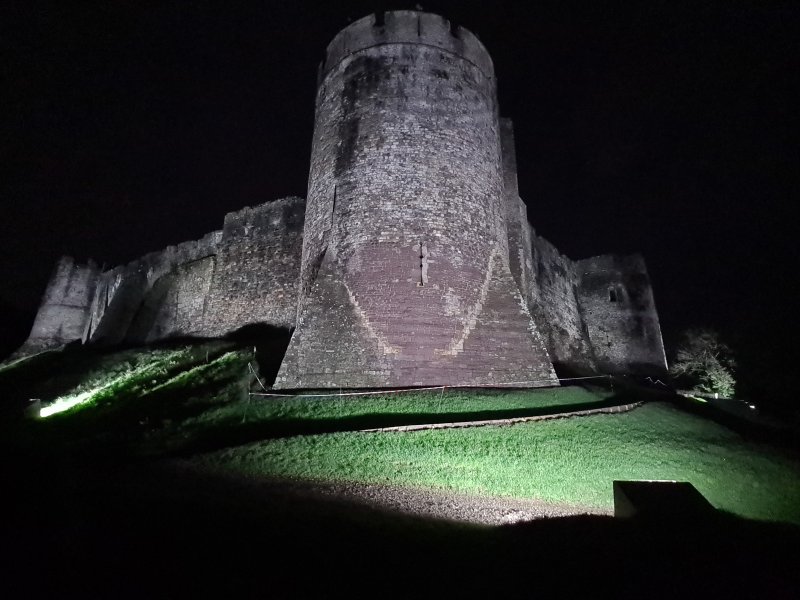 Chepstow Castle at night.