Neath Valley trip 04/08/2018
Unless otherwise stated, camera, setups, lighting, edits and gallery effects by Tarquin. Modelling and lighting at various points will be Josie Wilton-Jones, Gareth Davies and Malcolm Stewart.
The pictures of Ogof Igam Ogam were taken on the way out, so almost all will be taken looking towards the entrance. They are presented here in reverse order. The divers had made their way in with some others who had carried equipment in, and I was there to help carry it out, so had gone in solo to meet up with them at the pre-arranged time.
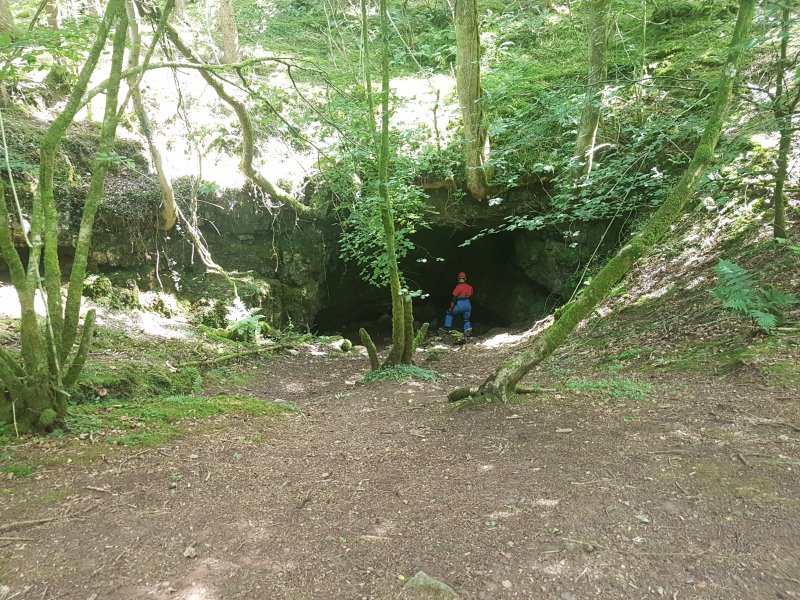
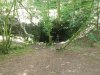 The large and impressive entrance to Bridge Cave. The cave begins as a crawl ahead. Under the left wall is a smaler passage that once connected with the sink at the river bank.
Modelling by Josie
The large and impressive entrance to Bridge Cave. The cave begins as a crawl ahead. Under the left wall is a smaler passage that once connected with the sink at the river bank.
Modelling by Josie Sink above West Passage in Bridge Cave, which takes the river flow in regular flood conditions. When that happens, the path downstream is along the ledge in the cliff. This is also used when attempting to view the waterfall downstream in extreme flood conditions.
Modelling by Josie
Sink above West Passage in Bridge Cave, which takes the river flow in regular flood conditions. When that happens, the path downstream is along the ledge in the cliff. This is also used when attempting to view the waterfall downstream in extreme flood conditions.
Modelling by Josie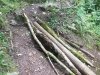 New collapse and dig under the path, just upstream of Pwll-y-Rhyd. There is another entrance into it below the path on the right.
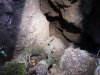 Inside the dig.
Lighting by Josie
Inside the dig.
Lighting by Josie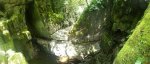 Pwll y Rhyd, which is a very powerful waterfall in severe floods. On the right are some short passages, while the main Cwm Pwll-y-Rhyd cave is downstream to the left, ending at a sump. Downstream connects with White Lady Cave, while upstream is White Lady II. Before the sump is a dry passage which needs to be dug out after floods, connecting with White Lady II.
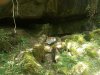 Alcove in the Cwm Pwll-y-Rhyd gorge downstream of the chasm.
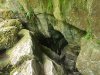 The alcove contains hidden entrances into the Cwm Pwll-y-Rhyd cave.
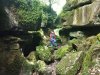 Cwm Pwll-y-Rhyd gorge
Modelling by Josie
Cwm Pwll-y-Rhyd gorge
Modelling by Josie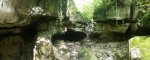 A clamber or absail down then reaches the more dramatic section of gorge. On the left are the smaller and larger entrances to White Lady Cave, while in the undercut on the right is one of the entrances to Town Drain. In severe flood, a powerful river emerges from White Lady Cave, and swamps Town Drain, as well as allowing the river downstream to flow as well.
Modelling by Josie
A clamber or absail down then reaches the more dramatic section of gorge. On the left are the smaller and larger entrances to White Lady Cave, while in the undercut on the right is one of the entrances to Town Drain. In severe flood, a powerful river emerges from White Lady Cave, and swamps Town Drain, as well as allowing the river downstream to flow as well.
Modelling by Josie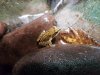 A young common froglet in the gorge.
Modelling by Froglet
A young common froglet in the gorge.
Modelling by Froglet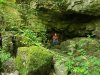 The large alcove which contains the entrances to Town Drain. The entrances are all of the rifts in the wall on the left, while the alcove itself is blind.
Modelling by Josie
The large alcove which contains the entrances to Town Drain. The entrances are all of the rifts in the wall on the left, while the alcove itself is blind.
Modelling by Josie Beautiful green lighting in one of the entrances.
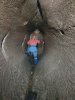 The early passage is beautifully washed and scalloped, like the potholes of Yorkshire.
Modelling by Josie, lighting by Tarquin and Josie
The early passage is beautifully washed and scalloped, like the potholes of Yorkshire.
Modelling by Josie, lighting by Tarquin and Josie From here onwards, the roof becomes much more ominous; the light patch is an air bell, and the dark patch is the flood line. When the cave floods, the enire passage fills to the roof, leaving only this small patch where there is air. The rest of the cave has no obvious air bells. The plant matter is the rotting remains of plants that have been washed in during the last floods, and will presumably be replaced each winter.
Modelling by Josie
From here onwards, the roof becomes much more ominous; the light patch is an air bell, and the dark patch is the flood line. When the cave floods, the enire passage fills to the roof, leaving only this small patch where there is air. The rest of the cave has no obvious air bells. The plant matter is the rotting remains of plants that have been washed in during the last floods, and will presumably be replaced each winter.
Modelling by Josie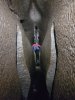 The most beautifully shaped section of passage, where traversing is optional, and a wet boot is almost guaranteed.
Modelling by Josie, lighting by Tarquin and Josie
The most beautifully shaped section of passage, where traversing is optional, and a wet boot is almost guaranteed.
Modelling by Josie, lighting by Tarquin and Josie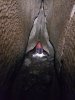 The first crawl, with a ... er ... distinctive passage shape.
Modelling by Josie, lighting by Tarquin and Josie
The first crawl, with a ... er ... distinctive passage shape.
Modelling by Josie, lighting by Tarquin and Josie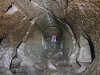 The first crawl.
Modelling by Josie, lighting by Tarquin and Josie
The first crawl.
Modelling by Josie, lighting by Tarquin and Josie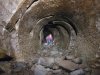 The passage becomes a series of stoops and crawls, with some oxbows.
Modelling by Josie, lighting by Tarquin and Josie
The passage becomes a series of stoops and crawls, with some oxbows.
Modelling by Josie, lighting by Tarquin and Josie Temporarily flat out. There is a bypass, but it is a rift that is just as tight.
Modelling by Josie, lighting by Tarquin and Josie
Temporarily flat out. There is a bypass, but it is a rift that is just as tight.
Modelling by Josie, lighting by Tarquin and Josie Walking again for a short while. The bypass rift rejoins from the side wall seen on the left here.
Modelling by Josie, lighting by Tarquin and Josie
Walking again for a short while. The bypass rift rejoins from the side wall seen on the left here.
Modelling by Josie, lighting by Tarquin and Josie Back to crawling. This is the oxbow option, with a smaller crawl below.
Modelling by Josie, lighting by Tarquin and Josie
Back to crawling. This is the oxbow option, with a smaller crawl below.
Modelling by Josie, lighting by Tarquin and Josie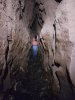 Back to being a proper rift, dimensions which only improve all the way to the end of the cave. The mud on the walls is flood debris, which is renewed by the regular flooding.
Modelling by Josie, lighting by Tarquin and Josie
Back to being a proper rift, dimensions which only improve all the way to the end of the cave. The mud on the walls is flood debris, which is renewed by the regular flooding.
Modelling by Josie, lighting by Tarquin and Josie A lovely but tricky climb into a pool, which would presumably normally have a trickling stream in anything other than these drought conditions. It is possible but awkward to keep dry here, in spite of the deep pool.
Modelling by Josie, lighting by Tarquin and Josie
A lovely but tricky climb into a pool, which would presumably normally have a trickling stream in anything other than these drought conditions. It is possible but awkward to keep dry here, in spite of the deep pool.
Modelling by Josie, lighting by Tarquin and Josie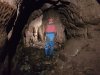 Looking upstream in the largest section of passage, at the junction with the only significant side passage, an inlet which comes in immediately to the right of the caver.
Modelling by Josie, lighting by Tarquin and Josie
Looking upstream in the largest section of passage, at the junction with the only significant side passage, an inlet which comes in immediately to the right of the caver.
Modelling by Josie, lighting by Tarquin and Josie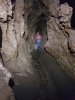 The side passage is extremely muddy, and soon closes down to a too-tight rift.
Modelling by Josie, lighting by Tarquin and Josie
The side passage is extremely muddy, and soon closes down to a too-tight rift.
Modelling by Josie, lighting by Tarquin and Josie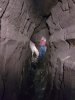 An example of the typical passage, downstream from the inlet. The mud on the walls often contains small worms and beetles, and the mud texture is bobbled with worm casts and insect frass.
Modelling by Josie, lighting by Tarquin and Josie
An example of the typical passage, downstream from the inlet. The mud on the walls often contains small worms and beetles, and the mud texture is bobbled with worm casts and insect frass.
Modelling by Josie, lighting by Tarquin and Josie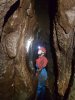 A small inlet which is normally a shower. There is no accessible passage.
Modelling by Josie, lighting by Tarquin and Josie
A small inlet which is normally a shower. There is no accessible passage.
Modelling by Josie, lighting by Tarquin and Josie The passage then gets smaller and closes down to mud fill. Tucked in the right wall are two holes into the final meander.
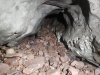 The final arch, where the passage becomes too small and choked. In the roof above is a survey tag stating that this is survey station 1, the end of the cave.
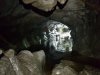 The entrance passage of White Lady Cave, much more impressive than Town Drain. The pool is about waist-to-chest deep, but there is a ledge along one side, where it is only knee deep. It is also possible to traverse the wall with dry feet, but it is not worth trying.
Modelling by Josie, lighting by Tarquin, Josie and Sol
The entrance passage of White Lady Cave, much more impressive than Town Drain. The pool is about waist-to-chest deep, but there is a ledge along one side, where it is only knee deep. It is also possible to traverse the wall with dry feet, but it is not worth trying.
Modelling by Josie, lighting by Tarquin, Josie and Sol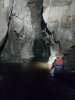 The next section of passage forces wading, with the water at that uncomfortable depth. Because of the dark water, and the dark rocks on the floor, it looks far deeper than it is.
Modelling by Josie, lighting by Tarquin and Josie
The next section of passage forces wading, with the water at that uncomfortable depth. Because of the dark water, and the dark rocks on the floor, it looks far deeper than it is.
Modelling by Josie, lighting by Tarquin and Josie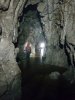 Looking back towards the entrance.
Modelling by Josie, lighting by Tarquin, Josie and Sol
Looking back towards the entrance.
Modelling by Josie, lighting by Tarquin, Josie and Sol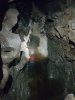 The same view, seen from the upper balcony. The deep section can be seen ahead.
Modelling by Josie, lighting by Tarquin and Josie
The same view, seen from the upper balcony. The deep section can be seen ahead.
Modelling by Josie, lighting by Tarquin and Josie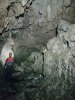 The dry section of passage. The water flows here, but at least there is solid ground to walk on. The upper wall and bank on the right are rather poor flowstone.
Modelling by Josie, lighting by Tarquin and Josie
The dry section of passage. The water flows here, but at least there is solid ground to walk on. The upper wall and bank on the right are rather poor flowstone.
Modelling by Josie, lighting by Tarquin and Josie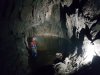 The sump in White Lady Cave, which requires diving equipment. The sump leads to Cwm Pwll-y-Rhyd and White Lady II.
Modelling by Josie, lighting by Tarquin and Josie
The sump in White Lady Cave, which requires diving equipment. The sump leads to Cwm Pwll-y-Rhyd and White Lady II.
Modelling by Josie, lighting by Tarquin and Josie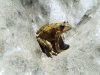 The White Lady, taking on the form of a frog. Don't be fooled, she is no prince.
Modelling by the White Lady
The White Lady, taking on the form of a frog. Don't be fooled, she is no prince.
Modelling by the White Lady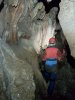 Upper side passage.
Modelling by Josie, lighting by Tarquin and Josie
Upper side passage.
Modelling by Josie, lighting by Tarquin and Josie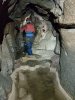 Formations in the side passage.
Modelling by Josie, lighting by Tarquin and Josie
Formations in the side passage.
Modelling by Josie, lighting by Tarquin and Josie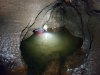 The duck in the side passage, which is chest deep (with a slightly deeper spot if you miss your footing).
Camera and setup by Josie, modelling by Tarquin, lighting by Josie and Tarquin
The duck in the side passage, which is chest deep (with a slightly deeper spot if you miss your footing).
Camera and setup by Josie, modelling by Tarquin, lighting by Josie and Tarquin View from the other side. The arch is quite high, and relatively easy to get through.
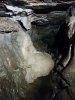 Final flowstone formation.
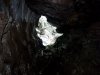 Side entrance, looking back out to the gorge.
Lighting by Sol and Tarquin
Side entrance, looking back out to the gorge.
Lighting by Sol and Tarquin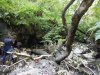 In a section of gorge some distance downstream is the entrance to Ogof Igam Ogam. Another hundred metres downstream is the Dry Way Dig entrance to Ogof Igam Ogam, seen here. This is the usual way into the cave. It is quite difficult to reach down the gorge, so access is usually via a series of paths running above the gorge from Bridge Cave. There would normally be a series of pools in the river here, but this is seen in drought conditions.
Modelling by Gareth and Malcolm, lighting by Sol and Malcolm
In a section of gorge some distance downstream is the entrance to Ogof Igam Ogam. Another hundred metres downstream is the Dry Way Dig entrance to Ogof Igam Ogam, seen here. This is the usual way into the cave. It is quite difficult to reach down the gorge, so access is usually via a series of paths running above the gorge from Bridge Cave. There would normally be a series of pools in the river here, but this is seen in drought conditions.
Modelling by Gareth and Malcolm, lighting by Sol and Malcolm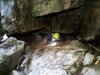 Emerging from the entrance crawl. Just off to the side is a metal mesh which is wedged over the entrance to catch any debris that the river tries to wash in during floods.
Modelling by Malcolm, lighting by Tarquin, Malcolm and Sol
Emerging from the entrance crawl. Just off to the side is a metal mesh which is wedged over the entrance to catch any debris that the river tries to wash in during floods.
Modelling by Malcolm, lighting by Tarquin, Malcolm and Sol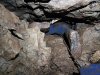 Inside the entrance
Modelling by Gareth, lighting by Tarquin and Gareth
Inside the entrance
Modelling by Gareth, lighting by Tarquin and Gareth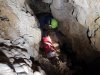 Calcited section of the entrance choke, where a series of scaffolded crawls finally gained some open passage. The right wall is covered in crystals. A stream would normally enter and disappear here, but it is dry today.
Modelling by Malcolm, lighting by Tarquin and Malcolm
Calcited section of the entrance choke, where a series of scaffolded crawls finally gained some open passage. The right wall is covered in crystals. A stream would normally enter and disappear here, but it is dry today.
Modelling by Malcolm, lighting by Tarquin and Malcolm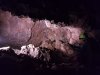 The largest section of the dig, a grotto where it is possible to stand. The grotto is blind, however, and the way on is to crawl through an undercut.
Modelling by Malcolm, lighting by Tarquin and Malcolm
The largest section of the dig, a grotto where it is possible to stand. The grotto is blind, however, and the way on is to crawl through an undercut.
Modelling by Malcolm, lighting by Tarquin and Malcolm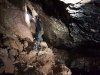 A climb down through the choked floor then reaches the start of Snorer's Annex. This is the breakthrough point, where the Dry Way Dig was connected to Ogof Igam Ogam, allowing non-divers to visit the rest of the cave. The annex itself leads back under the gorge, but is blind in that direction. Normally, the river enters here, but there is no water in these conditions.
Modelling by Gareth, lighting by Tarquin, Malcolm and Gareth
A climb down through the choked floor then reaches the start of Snorer's Annex. This is the breakthrough point, where the Dry Way Dig was connected to Ogof Igam Ogam, allowing non-divers to visit the rest of the cave. The annex itself leads back under the gorge, but is blind in that direction. Normally, the river enters here, but there is no water in these conditions.
Modelling by Gareth, lighting by Tarquin, Malcolm and Gareth Clambering down the friable rift below the annex.
Modelling by Malcolm, lighting by Tarquin and Malcolm
Clambering down the friable rift below the annex.
Modelling by Malcolm, lighting by Tarquin and Malcolm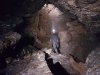 Suzuki Chamber, the largest part of the dry cavers' cave, with its tall aven decorated by layers of false floor. This was the major breakthrough discovered by Malcolm after diving through the three sumps of the original entrance. The sumps emerge from a roof tube perched up in the roof of the chamber, seen in the top-left corner of this photograph; Waters of Lethe.
Modelling by Gareth, lighting by Tarquin and Gareth
Suzuki Chamber, the largest part of the dry cavers' cave, with its tall aven decorated by layers of false floor. This was the major breakthrough discovered by Malcolm after diving through the three sumps of the original entrance. The sumps emerge from a roof tube perched up in the roof of the chamber, seen in the top-left corner of this photograph; Waters of Lethe.
Modelling by Gareth, lighting by Tarquin and Gareth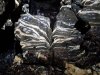 Marbled rocks in the floor of Suzuki Chamber.
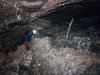 Below Suzuki Chamber, the river would normally be rushing around the slabs into the crawls. The stick wedged into the slab is testament to the force of the flow in flood.
Modelling by Malcolm, lighting by Tarquin and Malcolm
Below Suzuki Chamber, the river would normally be rushing around the slabs into the crawls. The stick wedged into the slab is testament to the force of the flow in flood.
Modelling by Malcolm, lighting by Tarquin and Malcolm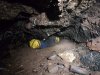 The crawls begin. Last time I was here in low winter water conditions, this was a wet crawl with only a few inches of airspace, and was realy quite intimidating.
Modelling by Gareth, lighting by Tarquin and Gareth
The crawls begin. Last time I was here in low winter water conditions, this was a wet crawl with only a few inches of airspace, and was realy quite intimidating.
Modelling by Gareth, lighting by Tarquin and Gareth A walking-sized section of rift. Finaly, there is some solid, sturdy rock.
Modelling by Gareth, lighting by Tarquin and Gareth
A walking-sized section of rift. Finaly, there is some solid, sturdy rock.
Modelling by Gareth, lighting by Tarquin and Gareth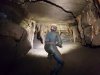 A large side passage shrinks abruptly at a dig and muddy grotto (Flying Pickets). This side passage normally takes the stream, while the way on is into an upstream-looking passage. Behind the grotto, the passage continues for some distance, to end under the gorge again.
Modelling by Gareth, lighting by Tarquin and Gareth
A large side passage shrinks abruptly at a dig and muddy grotto (Flying Pickets). This side passage normally takes the stream, while the way on is into an upstream-looking passage. Behind the grotto, the passage continues for some distance, to end under the gorge again.
Modelling by Gareth, lighting by Tarquin and Gareth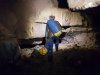 The upstream passage starts nicely sized, but that ends very quickly.
Modelling by Gareth, lighting by Tarquin and Gareth
The upstream passage starts nicely sized, but that ends very quickly.
Modelling by Gareth, lighting by Tarquin and Gareth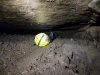 It rapidly becomes a very low passage, descending over gravel. This is surprisingly difficult on the way out, while dragging a bag.
Modelling by Gareth, lighting by Tarquin and Gareth
It rapidly becomes a very low passage, descending over gravel. This is surprisingly difficult on the way out, while dragging a bag.
Modelling by Gareth, lighting by Tarquin and Gareth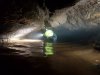 The stream emerges from the side, and the first duck begins. In these low conditions, it was quite spacious, and merely a 30 metre canal, rather than a duck. The mist is partly from us breathing, and partly from an air tank ejecting some of its air after its tap got caught on the gravel floor. Makes for a nicely atmospheric shot.
Modelling by Malcolm, lighting by Tarquin and Malcolm
The stream emerges from the side, and the first duck begins. In these low conditions, it was quite spacious, and merely a 30 metre canal, rather than a duck. The mist is partly from us breathing, and partly from an air tank ejecting some of its air after its tap got caught on the gravel floor. Makes for a nicely atmospheric shot.
Modelling by Malcolm, lighting by Tarquin and Malcolm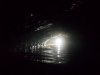 The middle portion of the duck.
Modelling and lighting by Malcolm
The middle portion of the duck.
Modelling and lighting by Malcolm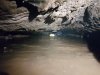 The end of the duck is the lowest, resulting in a wet ear or chin.
Modelling by Gareth, lighting by Tarquin and Gareth
The end of the duck is the lowest, resulting in a wet ear or chin.
Modelling by Gareth, lighting by Tarquin and Gareth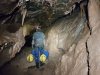 The passage, named So Long And Thanks For All The Fish, improves after the duck, and even gains some formations. You may notice that Gareth is taking two bags of heavy diving equipment, while Malcolm and I carried a single heavy tackle bag (plus my personal emergency equipment and camera). A machine. At least it slowed him down to a comfortable pace where photography was not making us slow.
Modelling by Gareth, lighting by Tarquin and Gareth
The passage, named So Long And Thanks For All The Fish, improves after the duck, and even gains some formations. You may notice that Gareth is taking two bags of heavy diving equipment, while Malcolm and I carried a single heavy tackle bag (plus my personal emergency equipment and camera). A machine. At least it slowed him down to a comfortable pace where photography was not making us slow.
Modelling by Gareth, lighting by Tarquin and Gareth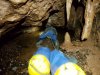 The second duck was little more than a damp crawl.
Modelling by Gareth, lighting by Tarquin and Gareth
The second duck was little more than a damp crawl.
Modelling by Gareth, lighting by Tarquin and Gareth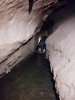 This is followed by a fine section of river rift passage, which sadly ends all too soon.
Modelling by Gareth, lighting by Tarquin and Gareth
This is followed by a fine section of river rift passage, which sadly ends all too soon.
Modelling by Gareth, lighting by Tarquin and Gareth Dekitting at the dive base.
Modelling by Gareth, lighting by Tarquin, Malcolm and Gareth
Dekitting at the dive base.
Modelling by Gareth, lighting by Tarquin, Malcolm and Gareth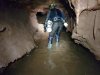 Lowering to stooping before the sump.
Modelling by Malcolm, lighting by Tarquin and Malcolm
Lowering to stooping before the sump.
Modelling by Malcolm, lighting by Tarquin and Malcolm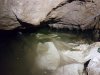 Sump 4, the present limit for dry cavers. The bags are filled with digging spoil from when this sump was being dug open. They make a fairly comfortable platform where I could wait for half an hour for the divers to emerge after their digging trip beyond the sump. Half an hour is quite a while to wait in soaking wet clothing, so I was very happy to have to drag a heavy tackle bag out from here, as it meant rapidly warming back up in spite of the ducks.
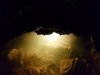 The first diver emerging only a few minutes behind schedule, with relatively good visibility. The cloudy water was partly from me making my way in, and partly because it had not managed to settle since the last divers had emerged a couple of hours earlier. If the stream had been running normally, it might have cleared faster.
Lighting by Gareth
The first diver emerging only a few minutes behind schedule, with relatively good visibility. The cloudy water was partly from me making my way in, and partly because it had not managed to settle since the last divers had emerged a couple of hours earlier. If the stream had been running normally, it might have cleared faster.
Lighting by Gareth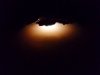 The second diver emerged through the silt kicked up by the first, and could barely see a few inches.
Lighting by Malcolm
The second diver emerged through the silt kicked up by the first, and could barely see a few inches.
Lighting by Malcolm Surfacing from sump 4.
Modelling by Malcolm, lighting by Tarquin and Malcolm
Surfacing from sump 4.
Modelling by Malcolm, lighting by Tarquin and Malcolm
 The large and impressive entrance to Bridge Cave. The cave begins as a crawl ahead. Under the left wall is a smaler passage that once connected with the sink at the river bank.
Modelling by Josie
The large and impressive entrance to Bridge Cave. The cave begins as a crawl ahead. Under the left wall is a smaler passage that once connected with the sink at the river bank.
Modelling by Josie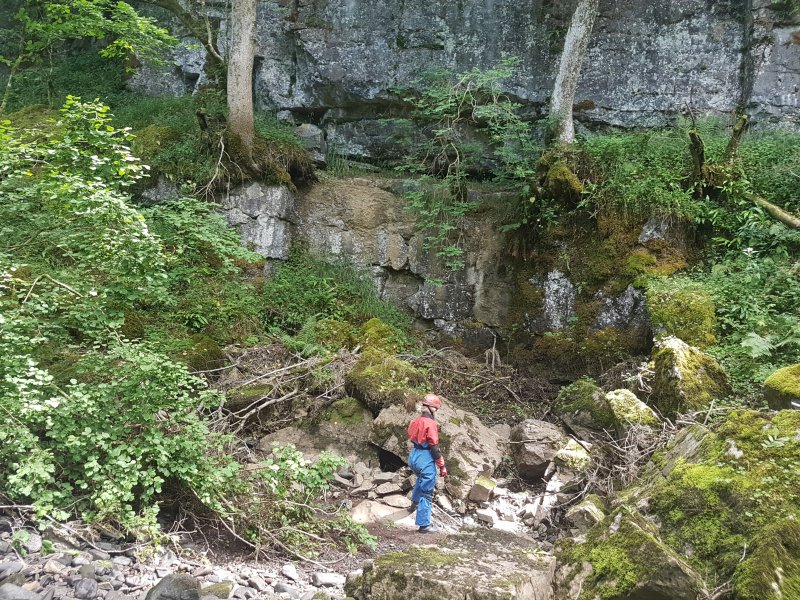 Sink above West Passage in Bridge Cave, which takes the river flow in regular flood conditions. When that happens, the path downstream is along the ledge in the cliff. This is also used when attempting to view the waterfall downstream in extreme flood conditions.
Modelling by Josie
Sink above West Passage in Bridge Cave, which takes the river flow in regular flood conditions. When that happens, the path downstream is along the ledge in the cliff. This is also used when attempting to view the waterfall downstream in extreme flood conditions.
Modelling by Josie New collapse and dig under the path, just upstream of Pwll-y-Rhyd. There is another entrance into it below the path on the right.
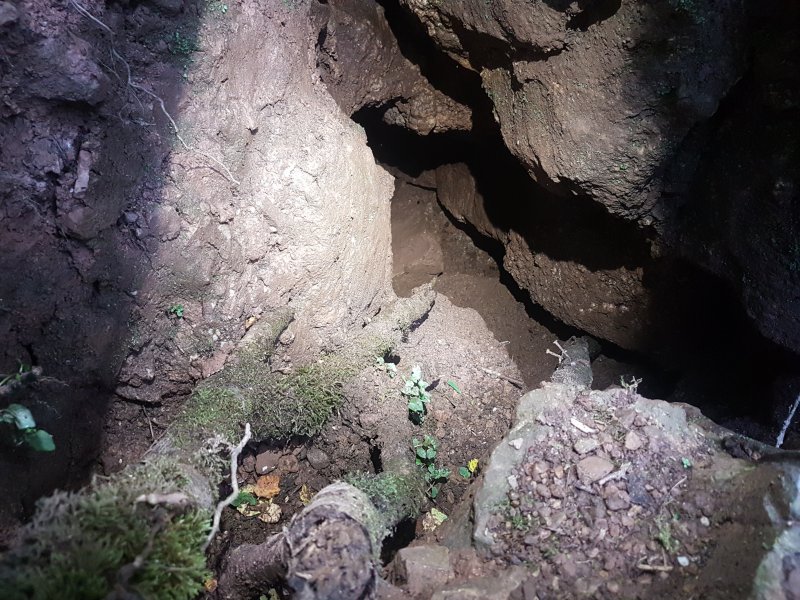 Inside the dig.
Lighting by Josie
Inside the dig.
Lighting by Josie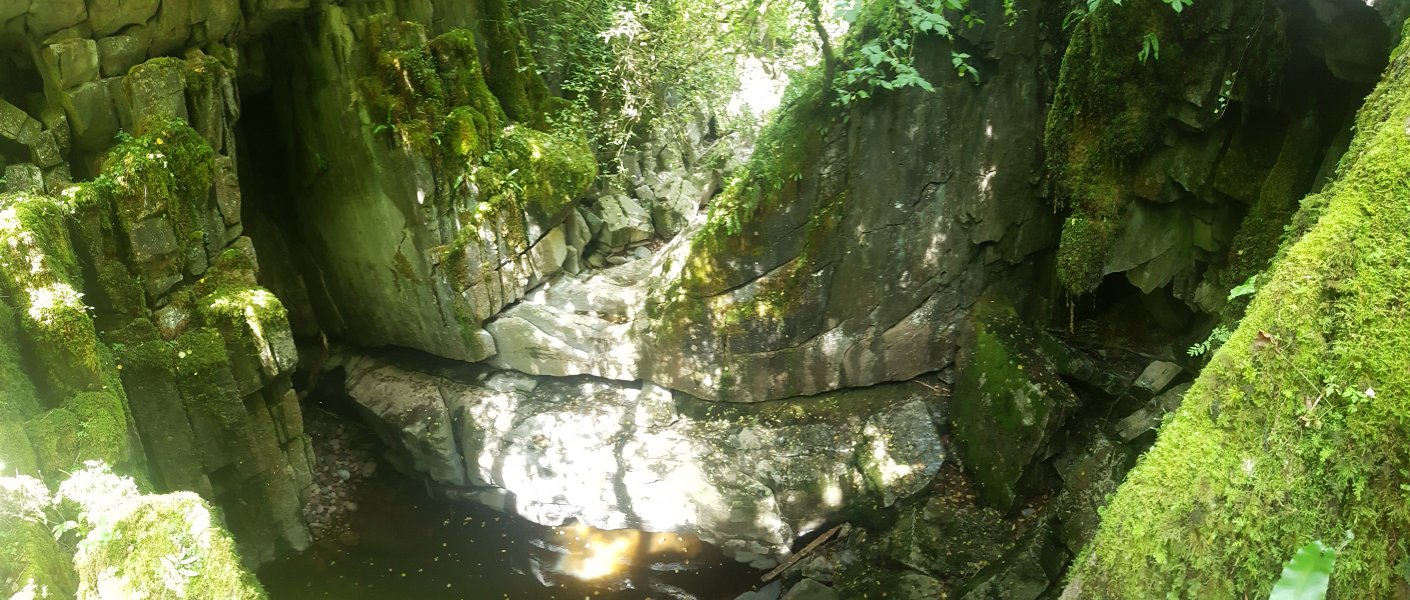 Pwll y Rhyd, which is a very powerful waterfall in severe floods. On the right are some short passages, while the main Cwm Pwll-y-Rhyd cave is downstream to the left, ending at a sump. Downstream connects with White Lady Cave, while upstream is White Lady II. Before the sump is a dry passage which needs to be dug out after floods, connecting with White Lady II.
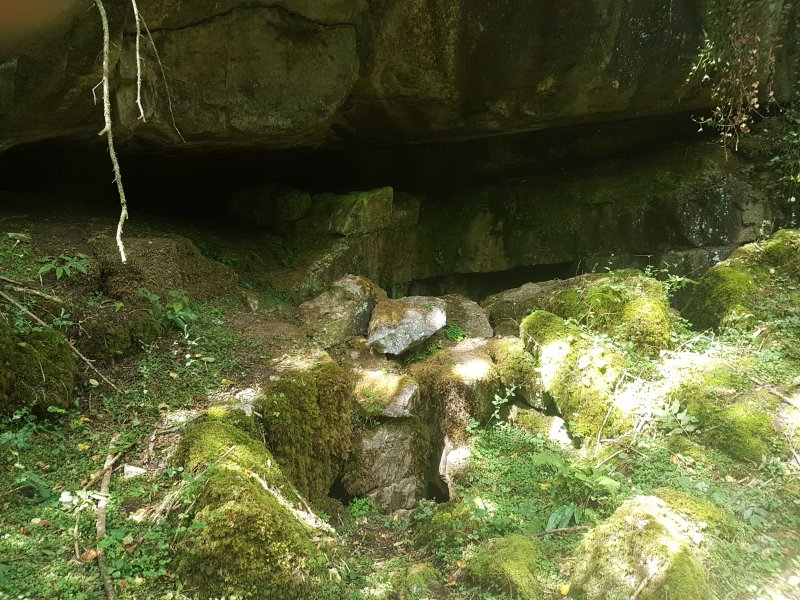 Alcove in the Cwm Pwll-y-Rhyd gorge downstream of the chasm.
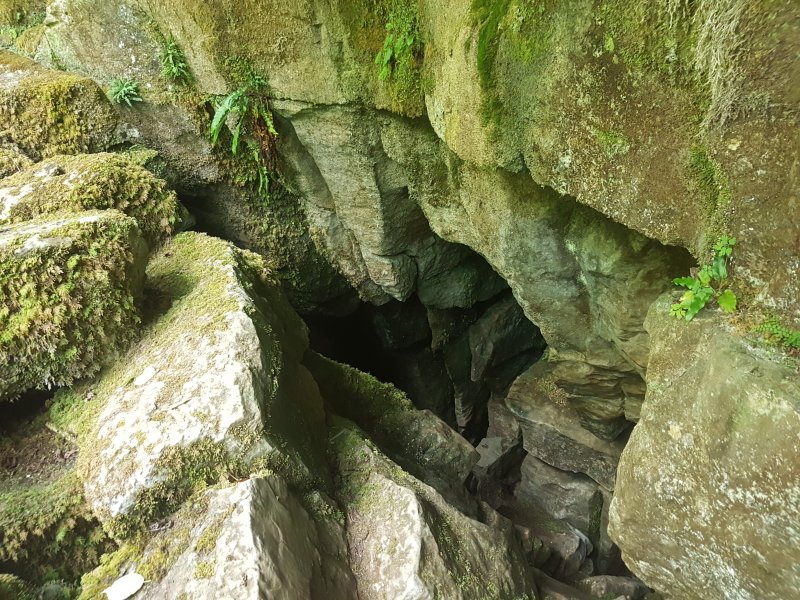 The alcove contains hidden entrances into the Cwm Pwll-y-Rhyd cave.
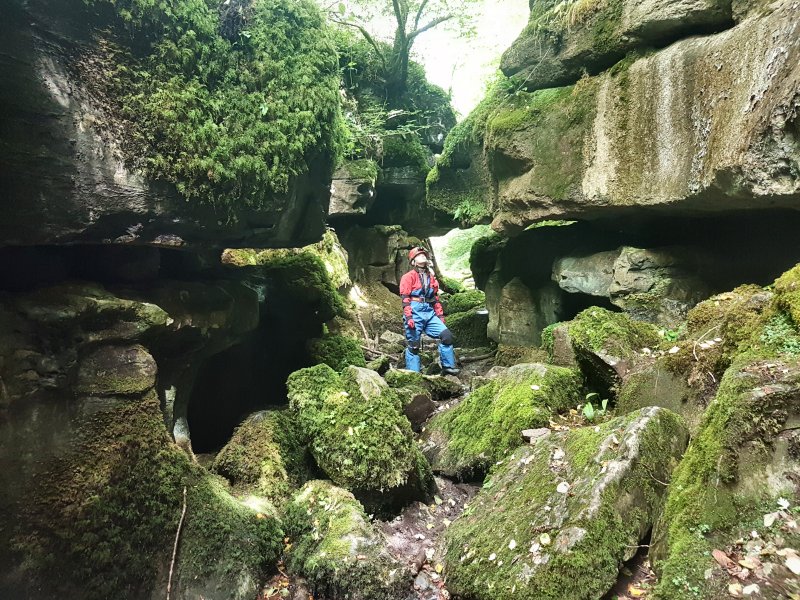 Cwm Pwll-y-Rhyd gorge
Modelling by Josie
Cwm Pwll-y-Rhyd gorge
Modelling by Josie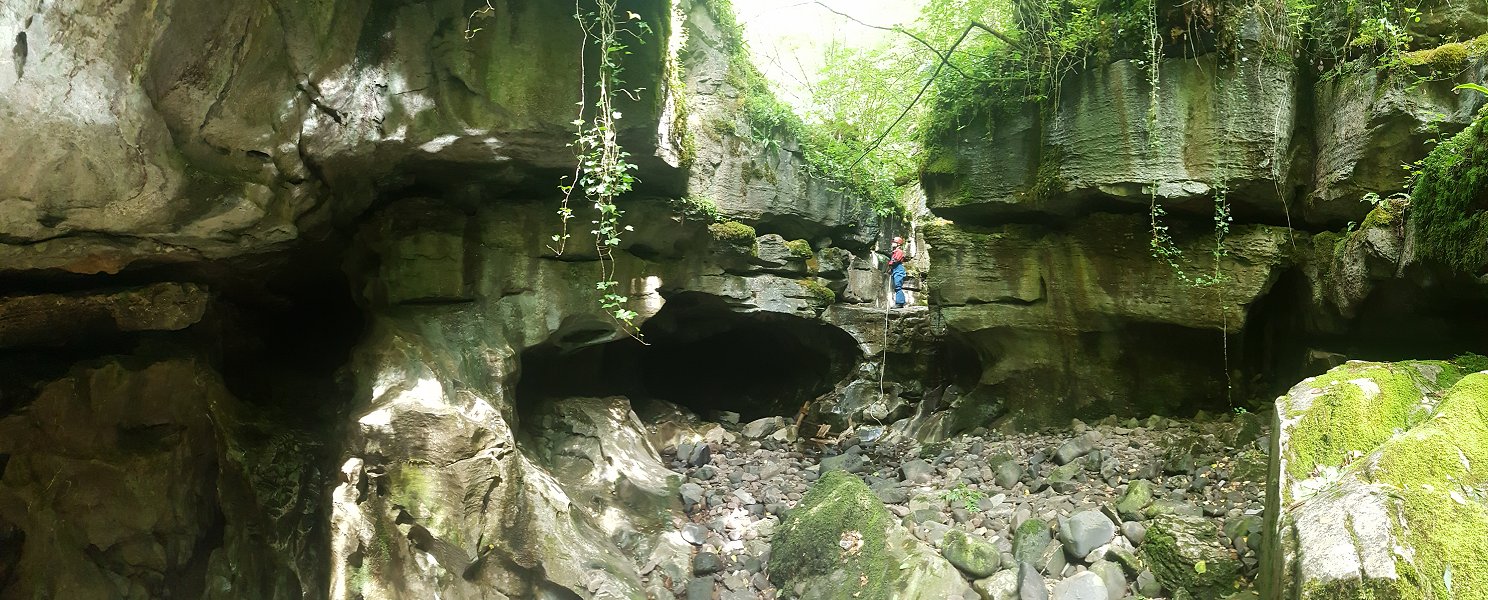 A clamber or absail down then reaches the more dramatic section of gorge. On the left are the smaller and larger entrances to White Lady Cave, while in the undercut on the right is one of the entrances to Town Drain. In severe flood, a powerful river emerges from White Lady Cave, and swamps Town Drain, as well as allowing the river downstream to flow as well.
Modelling by Josie
A clamber or absail down then reaches the more dramatic section of gorge. On the left are the smaller and larger entrances to White Lady Cave, while in the undercut on the right is one of the entrances to Town Drain. In severe flood, a powerful river emerges from White Lady Cave, and swamps Town Drain, as well as allowing the river downstream to flow as well.
Modelling by Josie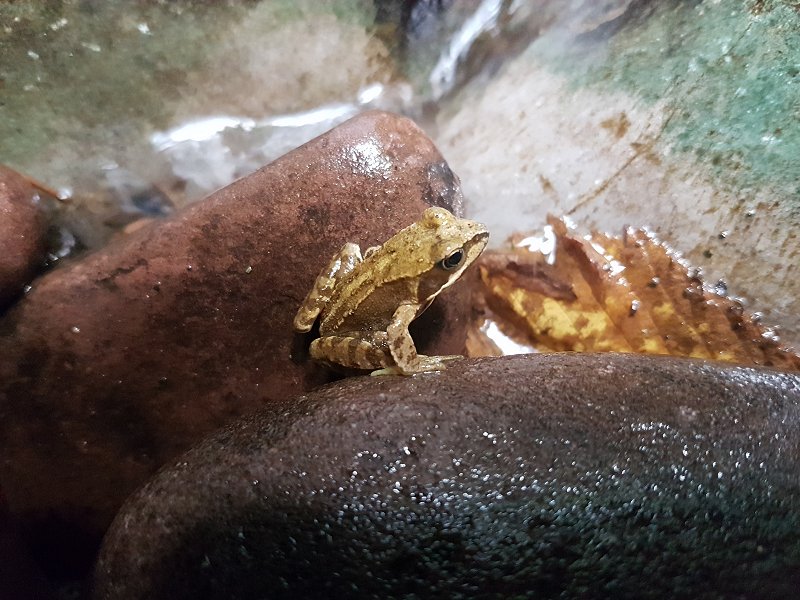 A young common froglet in the gorge.
Modelling by Froglet
A young common froglet in the gorge.
Modelling by Froglet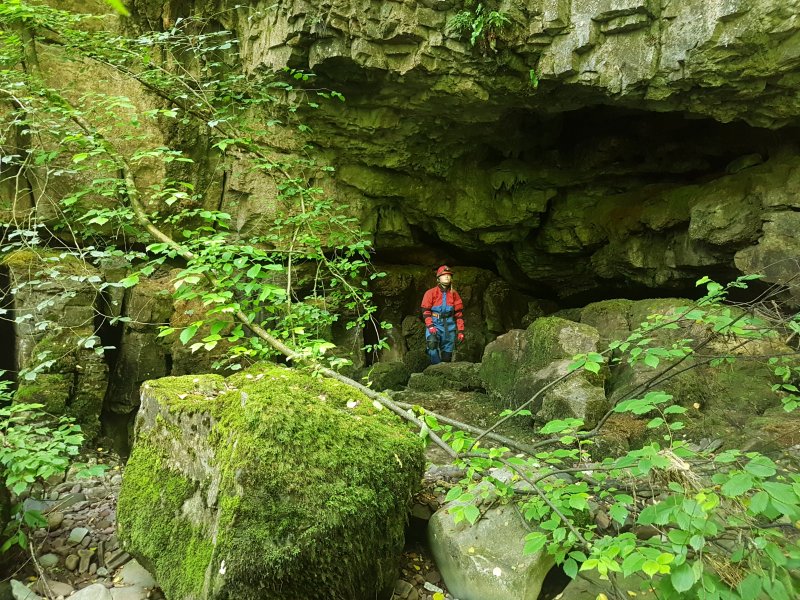 The large alcove which contains the entrances to Town Drain. The entrances are all of the rifts in the wall on the left, while the alcove itself is blind.
Modelling by Josie
The large alcove which contains the entrances to Town Drain. The entrances are all of the rifts in the wall on the left, while the alcove itself is blind.
Modelling by Josie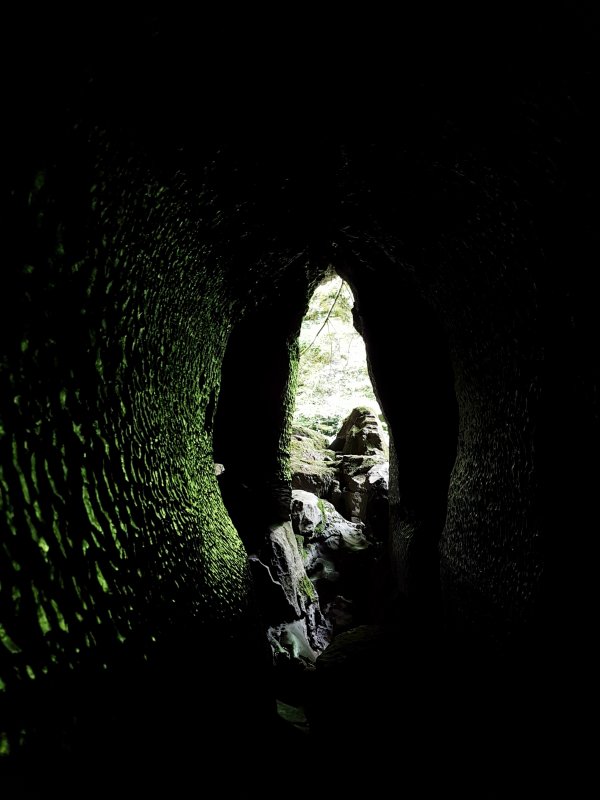 Beautiful green lighting in one of the entrances.
 The early passage is beautifully washed and scalloped, like the potholes of Yorkshire.
Modelling by Josie, lighting by Tarquin and Josie
The early passage is beautifully washed and scalloped, like the potholes of Yorkshire.
Modelling by Josie, lighting by Tarquin and Josie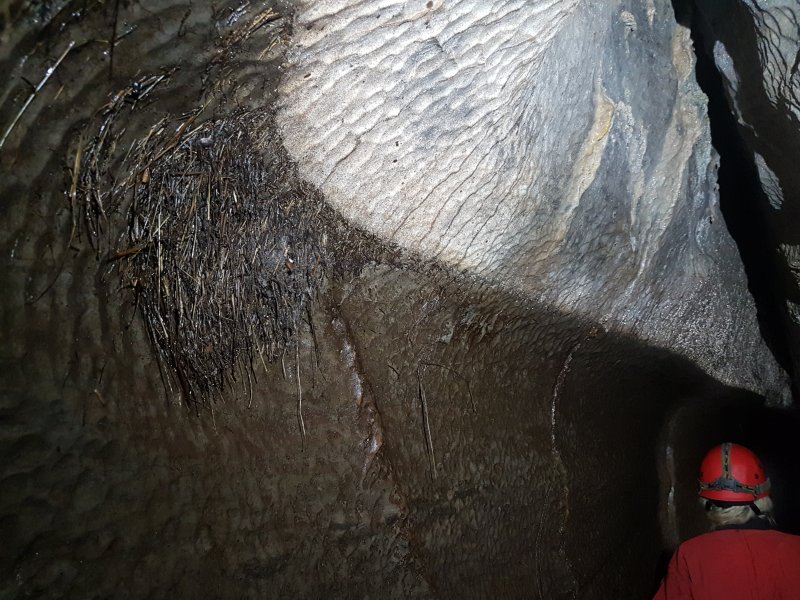 From here onwards, the roof becomes much more ominous; the light patch is an air bell, and the dark patch is the flood line. When the cave floods, the enire passage fills to the roof, leaving only this small patch where there is air. The rest of the cave has no obvious air bells. The plant matter is the rotting remains of plants that have been washed in during the last floods, and will presumably be replaced each winter.
Modelling by Josie
From here onwards, the roof becomes much more ominous; the light patch is an air bell, and the dark patch is the flood line. When the cave floods, the enire passage fills to the roof, leaving only this small patch where there is air. The rest of the cave has no obvious air bells. The plant matter is the rotting remains of plants that have been washed in during the last floods, and will presumably be replaced each winter.
Modelling by Josie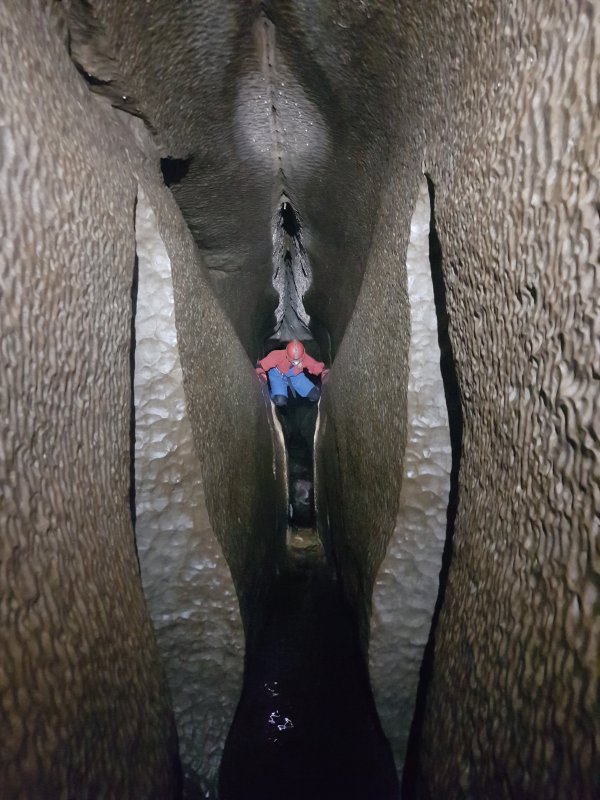 The most beautifully shaped section of passage, where traversing is optional, and a wet boot is almost guaranteed.
Modelling by Josie, lighting by Tarquin and Josie
The most beautifully shaped section of passage, where traversing is optional, and a wet boot is almost guaranteed.
Modelling by Josie, lighting by Tarquin and Josie The first crawl, with a ... er ... distinctive passage shape.
Modelling by Josie, lighting by Tarquin and Josie
The first crawl, with a ... er ... distinctive passage shape.
Modelling by Josie, lighting by Tarquin and Josie The first crawl.
Modelling by Josie, lighting by Tarquin and Josie
The first crawl.
Modelling by Josie, lighting by Tarquin and Josie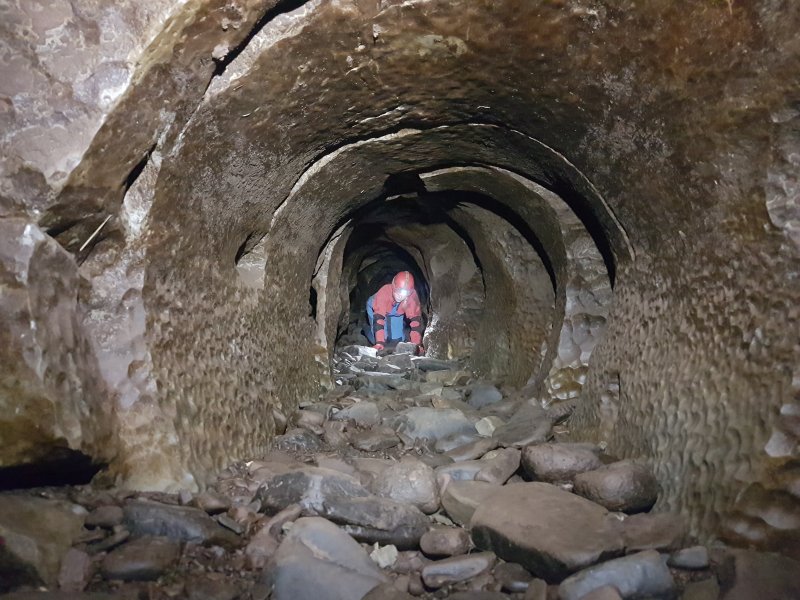 The passage becomes a series of stoops and crawls, with some oxbows.
Modelling by Josie, lighting by Tarquin and Josie
The passage becomes a series of stoops and crawls, with some oxbows.
Modelling by Josie, lighting by Tarquin and Josie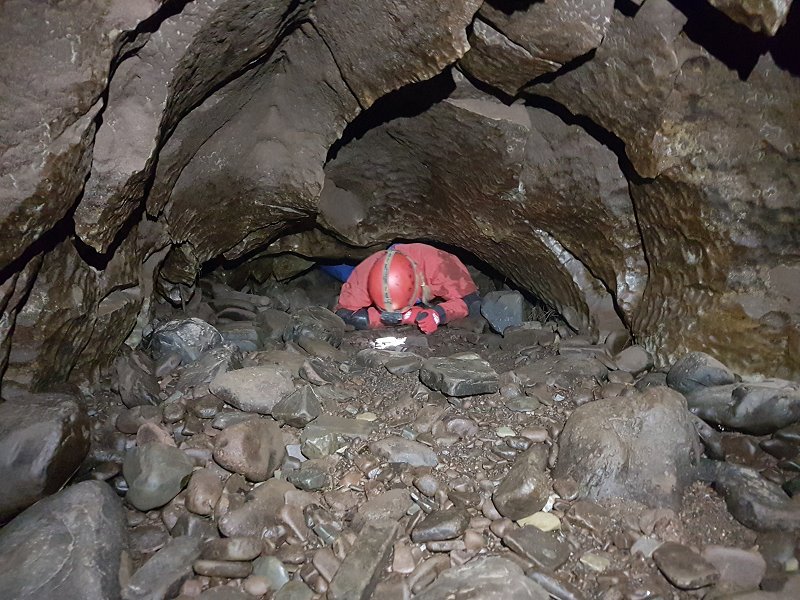 Temporarily flat out. There is a bypass, but it is a rift that is just as tight.
Modelling by Josie, lighting by Tarquin and Josie
Temporarily flat out. There is a bypass, but it is a rift that is just as tight.
Modelling by Josie, lighting by Tarquin and Josie Walking again for a short while. The bypass rift rejoins from the side wall seen on the left here.
Modelling by Josie, lighting by Tarquin and Josie
Walking again for a short while. The bypass rift rejoins from the side wall seen on the left here.
Modelling by Josie, lighting by Tarquin and Josie Back to crawling. This is the oxbow option, with a smaller crawl below.
Modelling by Josie, lighting by Tarquin and Josie
Back to crawling. This is the oxbow option, with a smaller crawl below.
Modelling by Josie, lighting by Tarquin and Josie Back to being a proper rift, dimensions which only improve all the way to the end of the cave. The mud on the walls is flood debris, which is renewed by the regular flooding.
Modelling by Josie, lighting by Tarquin and Josie
Back to being a proper rift, dimensions which only improve all the way to the end of the cave. The mud on the walls is flood debris, which is renewed by the regular flooding.
Modelling by Josie, lighting by Tarquin and Josie A lovely but tricky climb into a pool, which would presumably normally have a trickling stream in anything other than these drought conditions. It is possible but awkward to keep dry here, in spite of the deep pool.
Modelling by Josie, lighting by Tarquin and Josie
A lovely but tricky climb into a pool, which would presumably normally have a trickling stream in anything other than these drought conditions. It is possible but awkward to keep dry here, in spite of the deep pool.
Modelling by Josie, lighting by Tarquin and Josie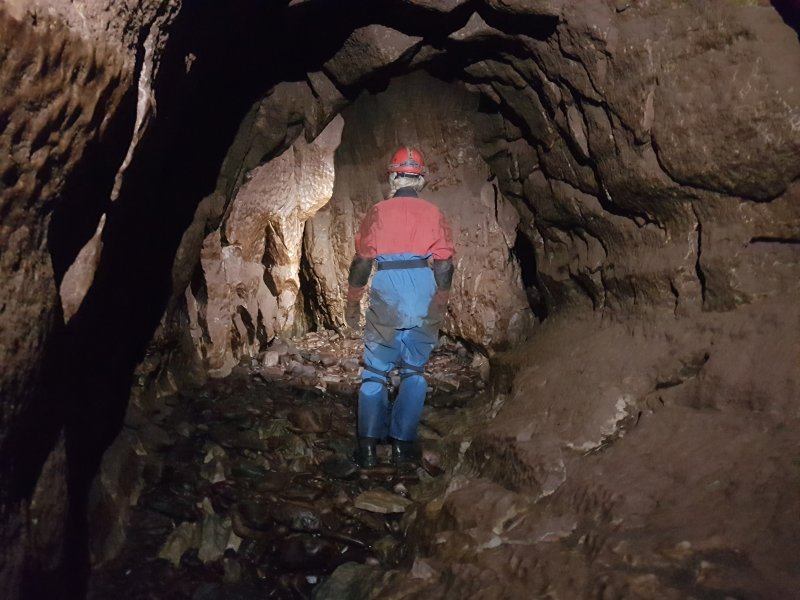 Looking upstream in the largest section of passage, at the junction with the only significant side passage, an inlet which comes in immediately to the right of the caver.
Modelling by Josie, lighting by Tarquin and Josie
Looking upstream in the largest section of passage, at the junction with the only significant side passage, an inlet which comes in immediately to the right of the caver.
Modelling by Josie, lighting by Tarquin and Josie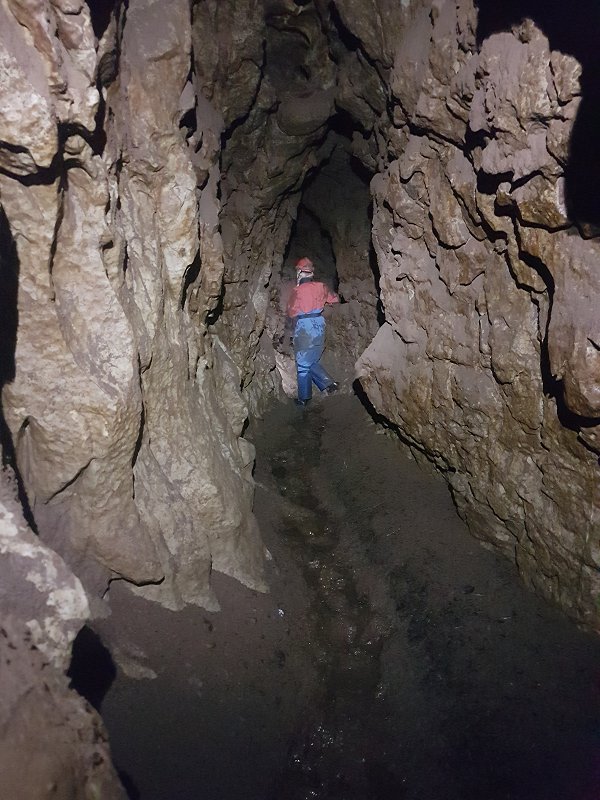 The side passage is extremely muddy, and soon closes down to a too-tight rift.
Modelling by Josie, lighting by Tarquin and Josie
The side passage is extremely muddy, and soon closes down to a too-tight rift.
Modelling by Josie, lighting by Tarquin and Josie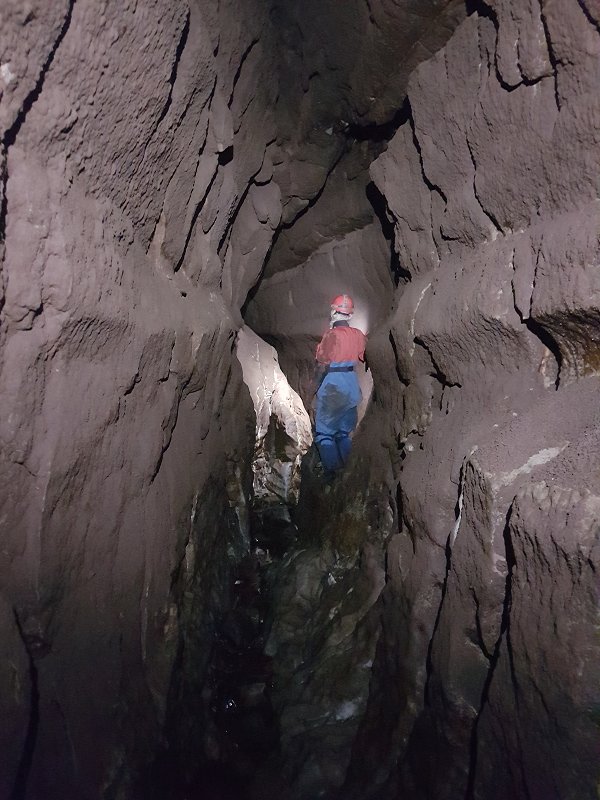 An example of the typical passage, downstream from the inlet. The mud on the walls often contains small worms and beetles, and the mud texture is bobbled with worm casts and insect frass.
Modelling by Josie, lighting by Tarquin and Josie
An example of the typical passage, downstream from the inlet. The mud on the walls often contains small worms and beetles, and the mud texture is bobbled with worm casts and insect frass.
Modelling by Josie, lighting by Tarquin and Josie A small inlet which is normally a shower. There is no accessible passage.
Modelling by Josie, lighting by Tarquin and Josie
A small inlet which is normally a shower. There is no accessible passage.
Modelling by Josie, lighting by Tarquin and Josie The passage then gets smaller and closes down to mud fill. Tucked in the right wall are two holes into the final meander.
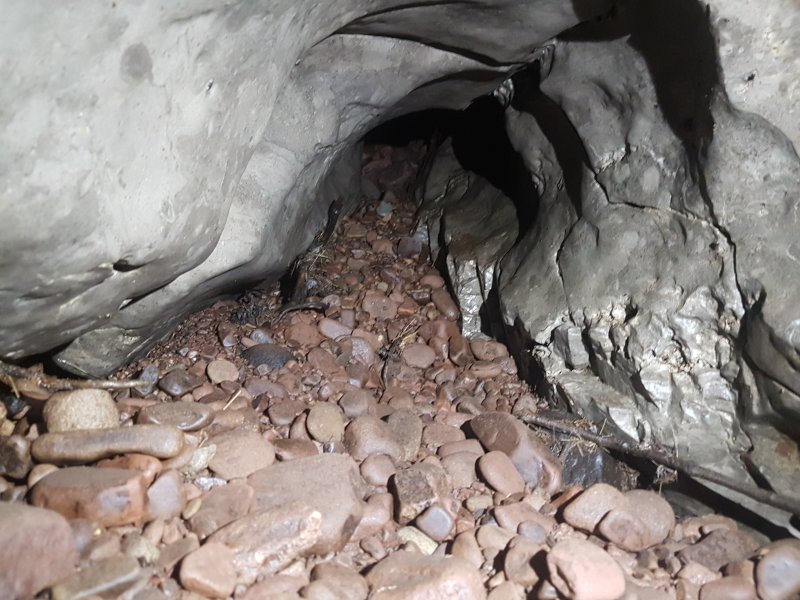 The final arch, where the passage becomes too small and choked. In the roof above is a survey tag stating that this is survey station 1, the end of the cave.
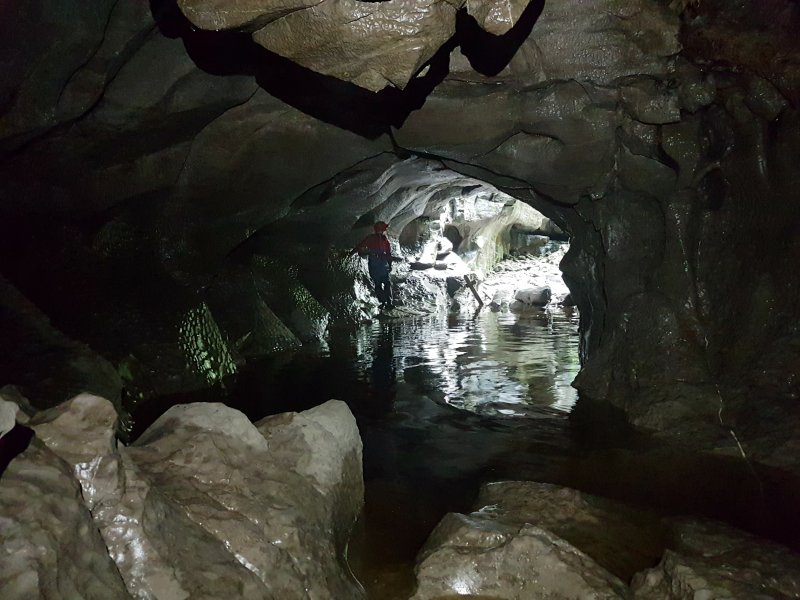 The entrance passage of White Lady Cave, much more impressive than Town Drain. The pool is about waist-to-chest deep, but there is a ledge along one side, where it is only knee deep. It is also possible to traverse the wall with dry feet, but it is not worth trying.
Modelling by Josie, lighting by Tarquin, Josie and Sol
The entrance passage of White Lady Cave, much more impressive than Town Drain. The pool is about waist-to-chest deep, but there is a ledge along one side, where it is only knee deep. It is also possible to traverse the wall with dry feet, but it is not worth trying.
Modelling by Josie, lighting by Tarquin, Josie and Sol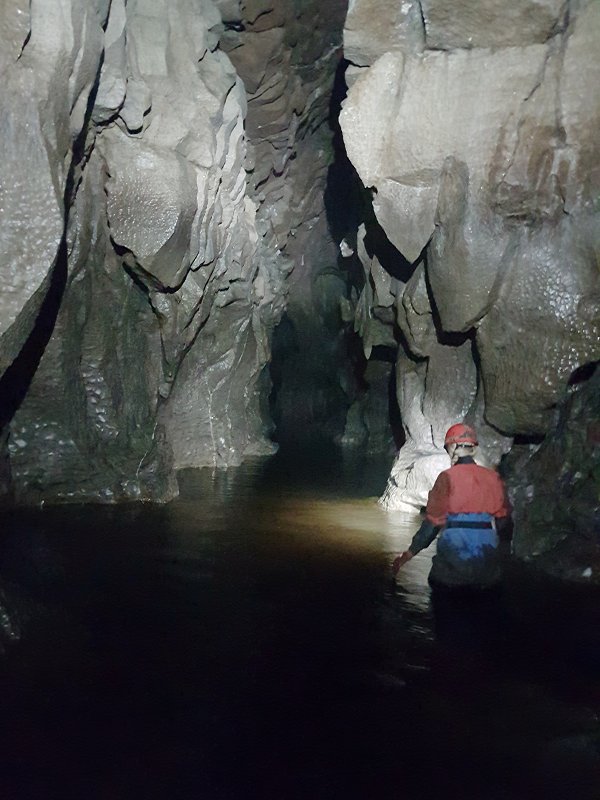 The next section of passage forces wading, with the water at that uncomfortable depth. Because of the dark water, and the dark rocks on the floor, it looks far deeper than it is.
Modelling by Josie, lighting by Tarquin and Josie
The next section of passage forces wading, with the water at that uncomfortable depth. Because of the dark water, and the dark rocks on the floor, it looks far deeper than it is.
Modelling by Josie, lighting by Tarquin and Josie Looking back towards the entrance.
Modelling by Josie, lighting by Tarquin, Josie and Sol
Looking back towards the entrance.
Modelling by Josie, lighting by Tarquin, Josie and Sol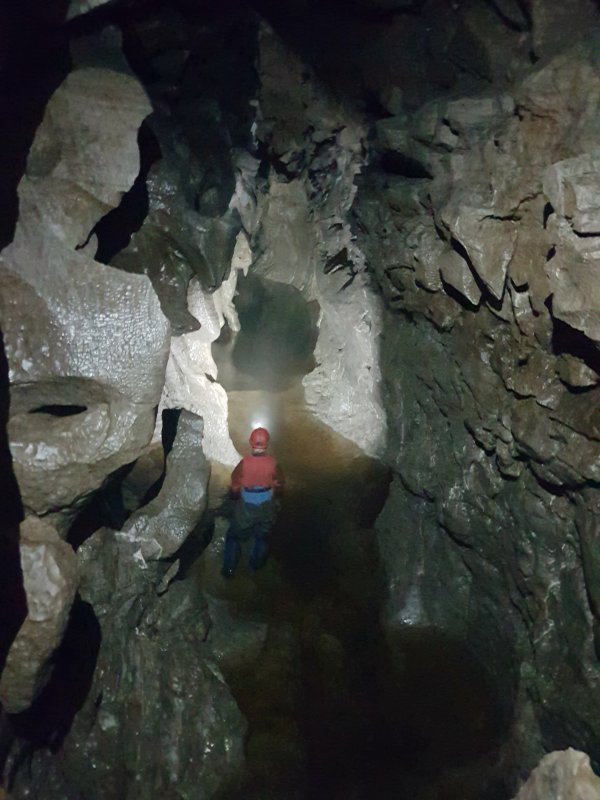 The same view, seen from the upper balcony. The deep section can be seen ahead.
Modelling by Josie, lighting by Tarquin and Josie
The same view, seen from the upper balcony. The deep section can be seen ahead.
Modelling by Josie, lighting by Tarquin and Josie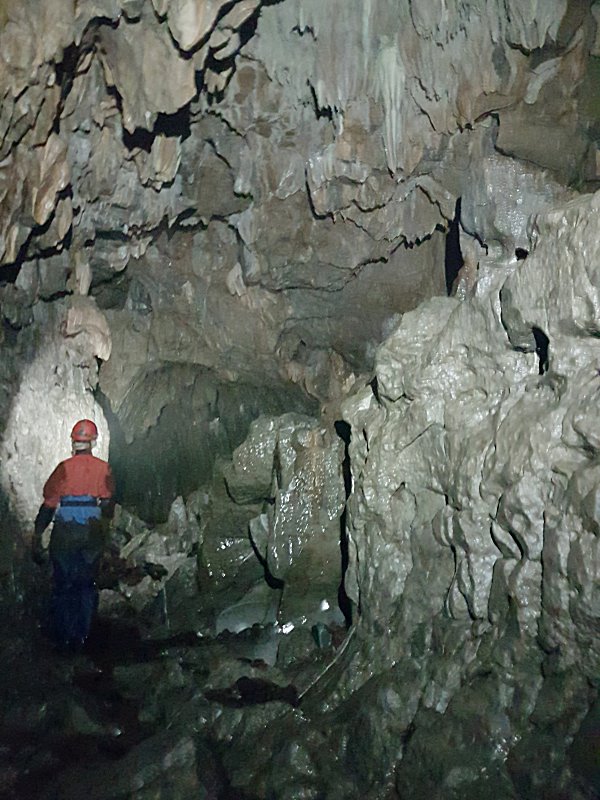 The dry section of passage. The water flows here, but at least there is solid ground to walk on. The upper wall and bank on the right are rather poor flowstone.
Modelling by Josie, lighting by Tarquin and Josie
The dry section of passage. The water flows here, but at least there is solid ground to walk on. The upper wall and bank on the right are rather poor flowstone.
Modelling by Josie, lighting by Tarquin and Josie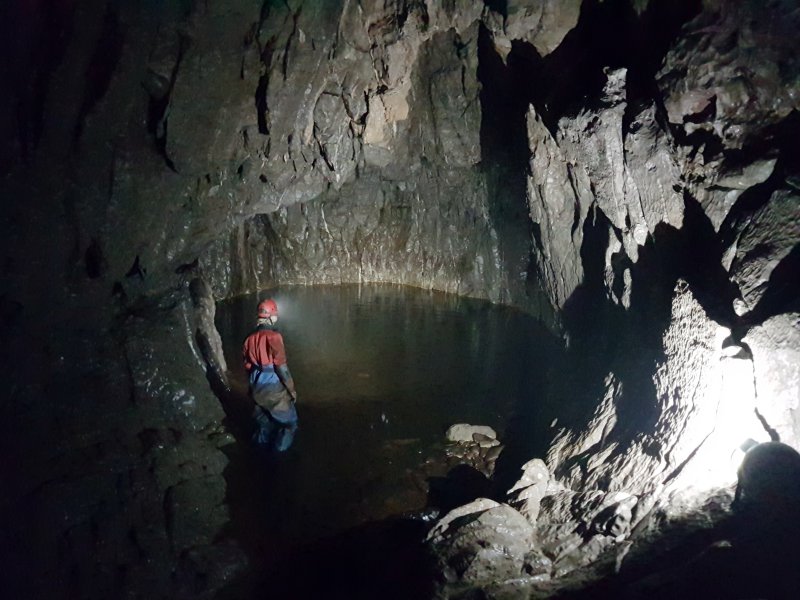 The sump in White Lady Cave, which requires diving equipment. The sump leads to Cwm Pwll-y-Rhyd and White Lady II.
Modelling by Josie, lighting by Tarquin and Josie
The sump in White Lady Cave, which requires diving equipment. The sump leads to Cwm Pwll-y-Rhyd and White Lady II.
Modelling by Josie, lighting by Tarquin and Josie The White Lady, taking on the form of a frog. Don't be fooled, she is no prince.
Modelling by the White Lady
The White Lady, taking on the form of a frog. Don't be fooled, she is no prince.
Modelling by the White Lady Upper side passage.
Modelling by Josie, lighting by Tarquin and Josie
Upper side passage.
Modelling by Josie, lighting by Tarquin and Josie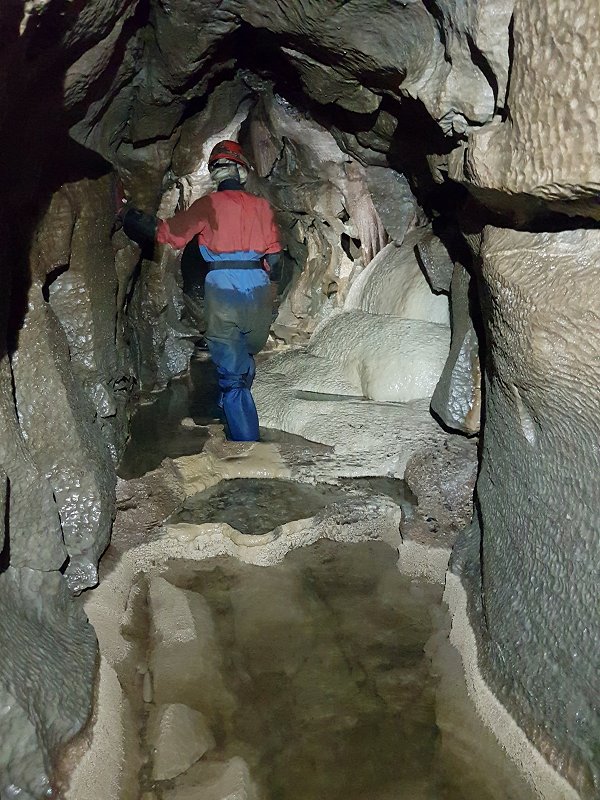 Formations in the side passage.
Modelling by Josie, lighting by Tarquin and Josie
Formations in the side passage.
Modelling by Josie, lighting by Tarquin and Josie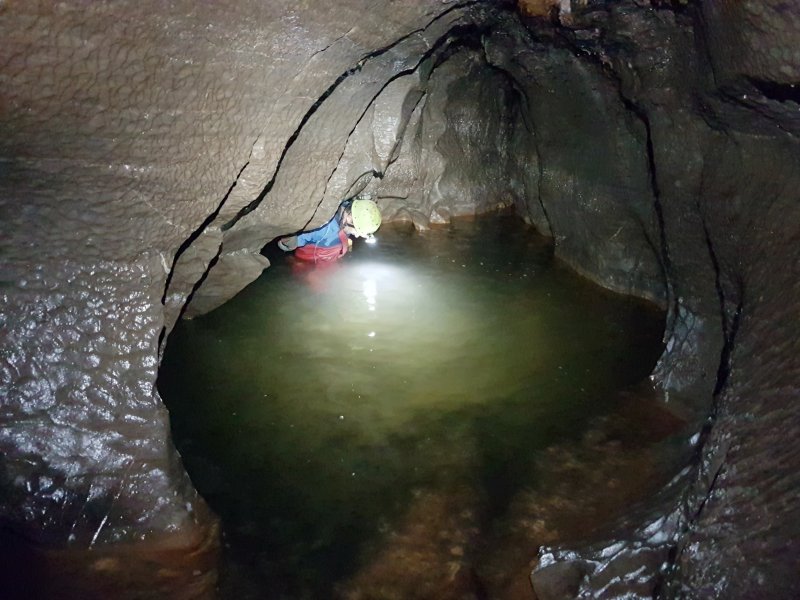 The duck in the side passage, which is chest deep (with a slightly deeper spot if you miss your footing).
Camera and setup by Josie, modelling by Tarquin, lighting by Josie and Tarquin
The duck in the side passage, which is chest deep (with a slightly deeper spot if you miss your footing).
Camera and setup by Josie, modelling by Tarquin, lighting by Josie and Tarquin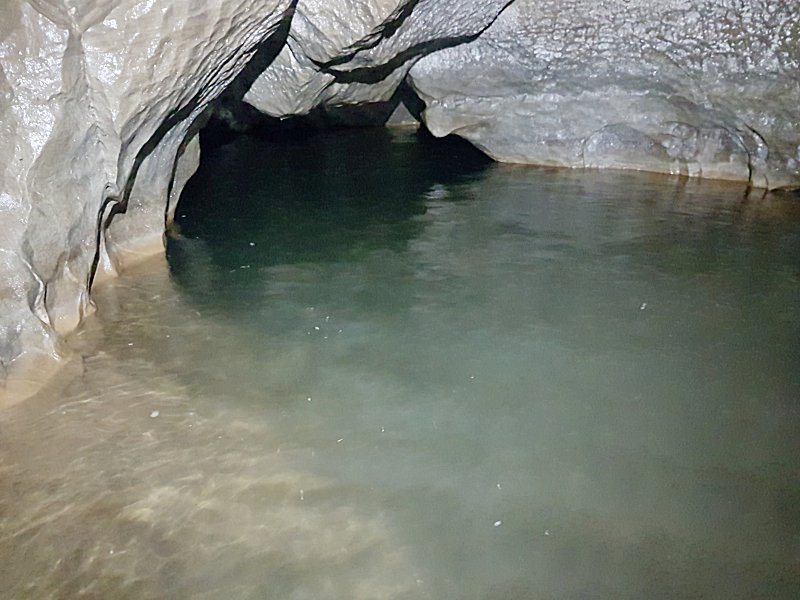 View from the other side. The arch is quite high, and relatively easy to get through.
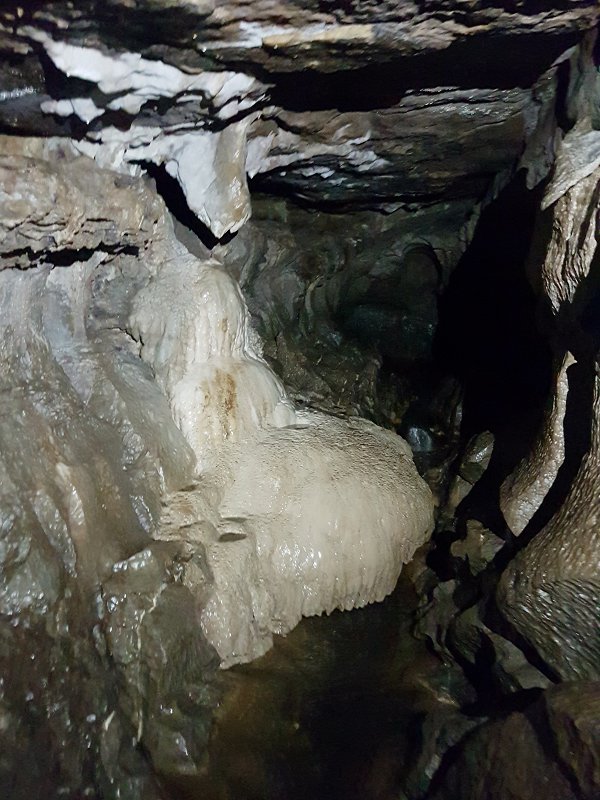 Final flowstone formation.
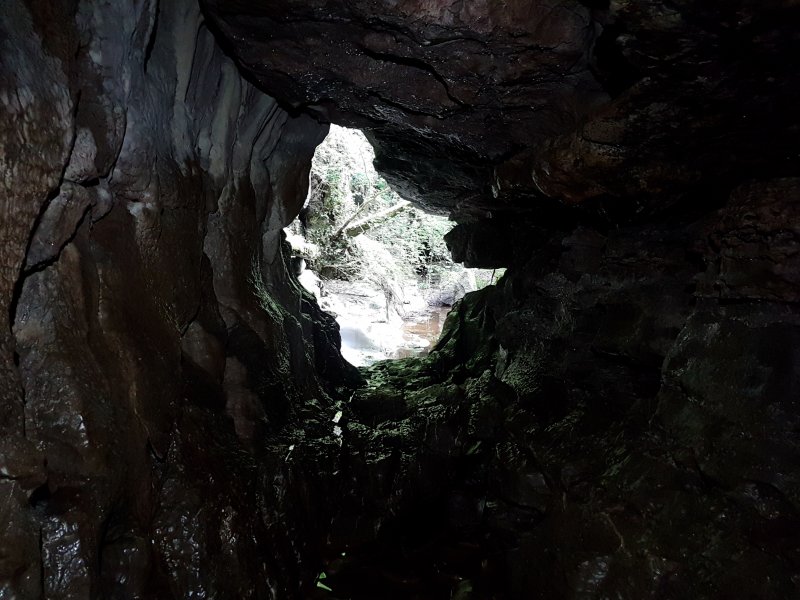 Side entrance, looking back out to the gorge.
Lighting by Sol and Tarquin
Side entrance, looking back out to the gorge.
Lighting by Sol and Tarquin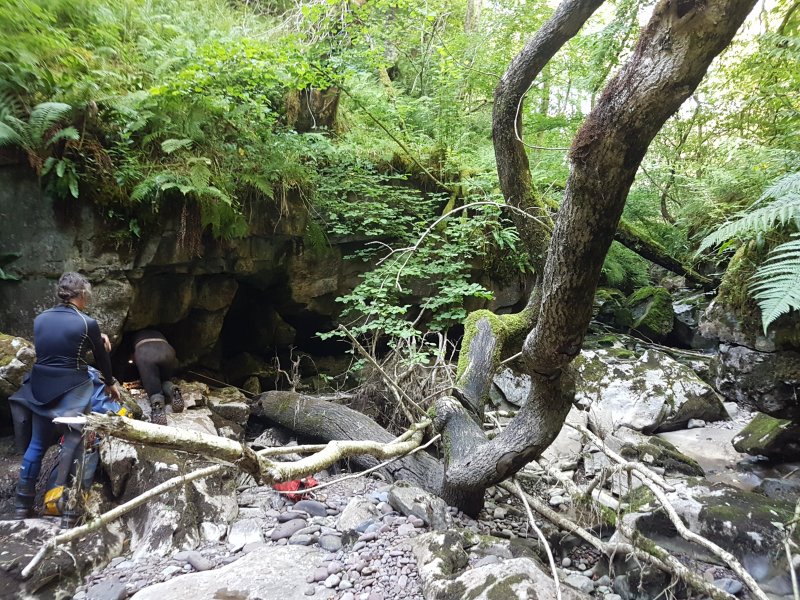 In a section of gorge some distance downstream is the entrance to Ogof Igam Ogam. Another hundred metres downstream is the Dry Way Dig entrance to Ogof Igam Ogam, seen here. This is the usual way into the cave. It is quite difficult to reach down the gorge, so access is usually via a series of paths running above the gorge from Bridge Cave. There would normally be a series of pools in the river here, but this is seen in drought conditions.
Modelling by Gareth and Malcolm, lighting by Sol and Malcolm
In a section of gorge some distance downstream is the entrance to Ogof Igam Ogam. Another hundred metres downstream is the Dry Way Dig entrance to Ogof Igam Ogam, seen here. This is the usual way into the cave. It is quite difficult to reach down the gorge, so access is usually via a series of paths running above the gorge from Bridge Cave. There would normally be a series of pools in the river here, but this is seen in drought conditions.
Modelling by Gareth and Malcolm, lighting by Sol and Malcolm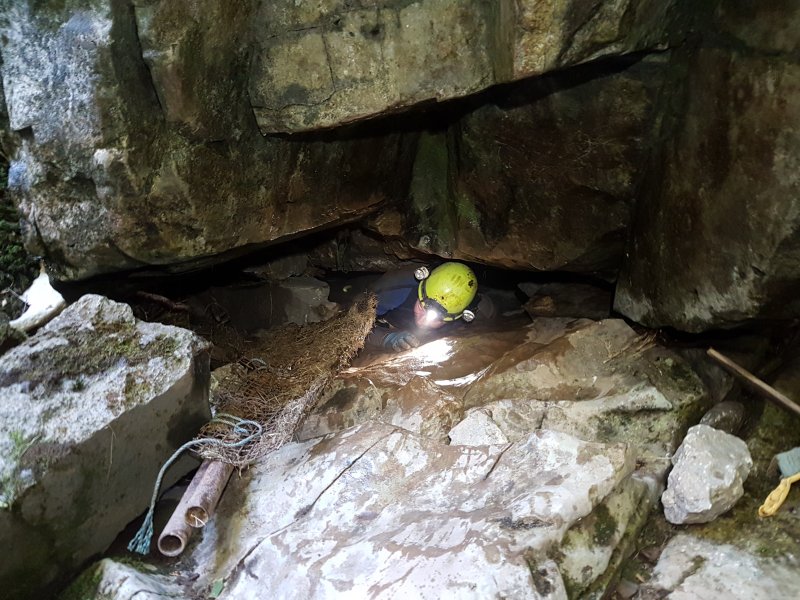 Emerging from the entrance crawl. Just off to the side is a metal mesh which is wedged over the entrance to catch any debris that the river tries to wash in during floods.
Modelling by Malcolm, lighting by Tarquin, Malcolm and Sol
Emerging from the entrance crawl. Just off to the side is a metal mesh which is wedged over the entrance to catch any debris that the river tries to wash in during floods.
Modelling by Malcolm, lighting by Tarquin, Malcolm and Sol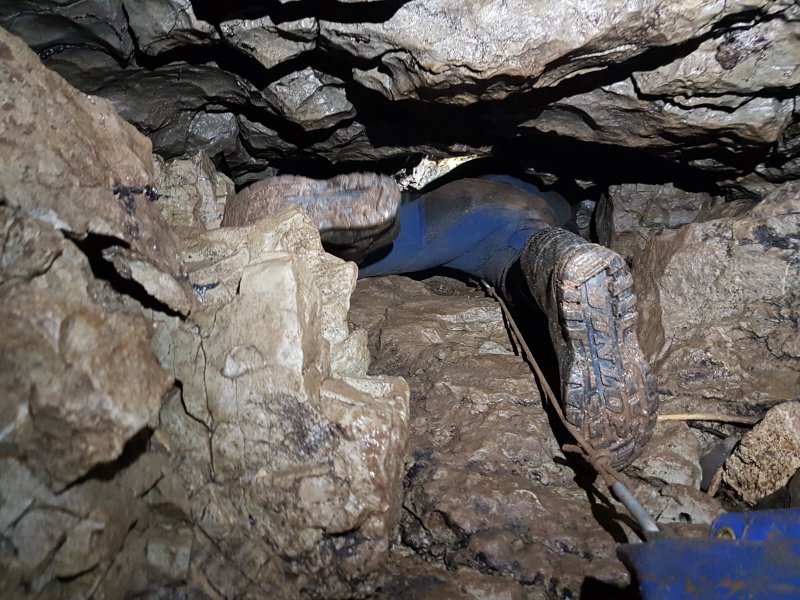 Inside the entrance
Modelling by Gareth, lighting by Tarquin and Gareth
Inside the entrance
Modelling by Gareth, lighting by Tarquin and Gareth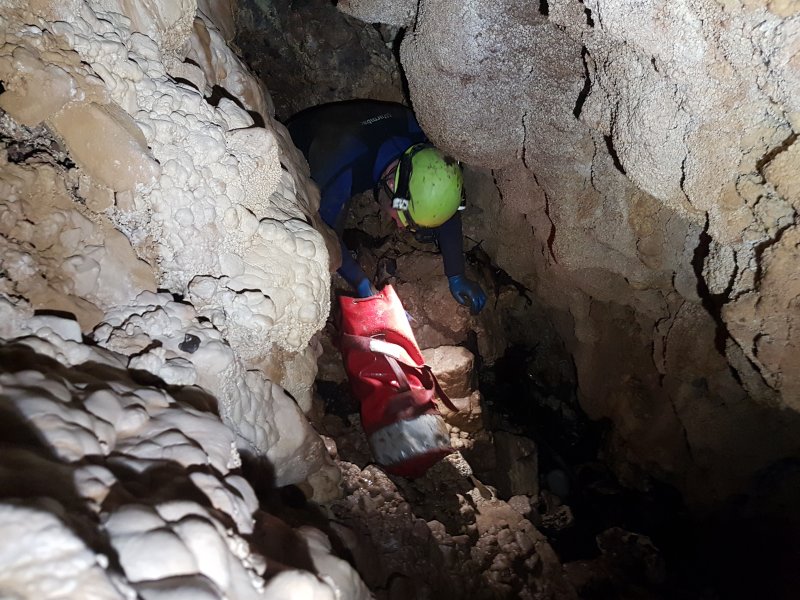 Calcited section of the entrance choke, where a series of scaffolded crawls finally gained some open passage. The right wall is covered in crystals. A stream would normally enter and disappear here, but it is dry today.
Modelling by Malcolm, lighting by Tarquin and Malcolm
Calcited section of the entrance choke, where a series of scaffolded crawls finally gained some open passage. The right wall is covered in crystals. A stream would normally enter and disappear here, but it is dry today.
Modelling by Malcolm, lighting by Tarquin and Malcolm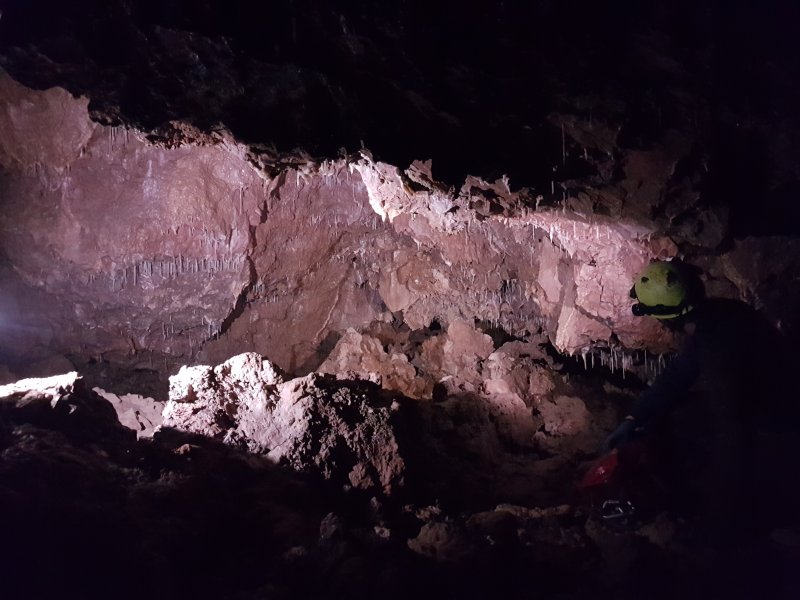 The largest section of the dig, a grotto where it is possible to stand. The grotto is blind, however, and the way on is to crawl through an undercut.
Modelling by Malcolm, lighting by Tarquin and Malcolm
The largest section of the dig, a grotto where it is possible to stand. The grotto is blind, however, and the way on is to crawl through an undercut.
Modelling by Malcolm, lighting by Tarquin and Malcolm A climb down through the choked floor then reaches the start of Snorer's Annex. This is the breakthrough point, where the Dry Way Dig was connected to Ogof Igam Ogam, allowing non-divers to visit the rest of the cave. The annex itself leads back under the gorge, but is blind in that direction. Normally, the river enters here, but there is no water in these conditions.
Modelling by Gareth, lighting by Tarquin, Malcolm and Gareth
A climb down through the choked floor then reaches the start of Snorer's Annex. This is the breakthrough point, where the Dry Way Dig was connected to Ogof Igam Ogam, allowing non-divers to visit the rest of the cave. The annex itself leads back under the gorge, but is blind in that direction. Normally, the river enters here, but there is no water in these conditions.
Modelling by Gareth, lighting by Tarquin, Malcolm and Gareth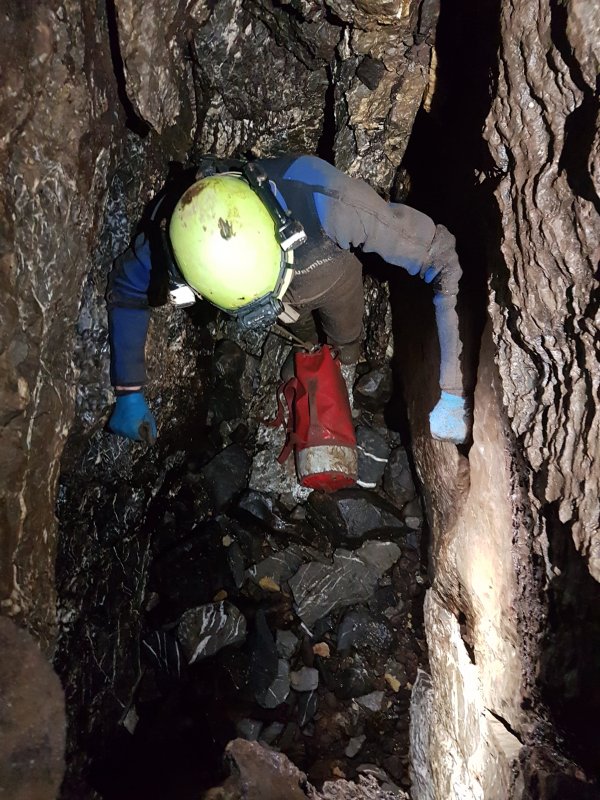 Clambering down the friable rift below the annex.
Modelling by Malcolm, lighting by Tarquin and Malcolm
Clambering down the friable rift below the annex.
Modelling by Malcolm, lighting by Tarquin and Malcolm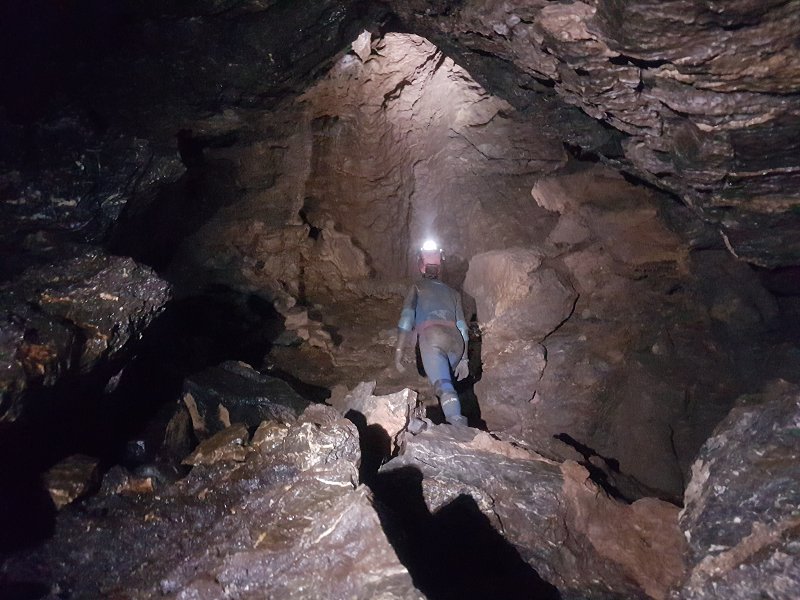 Suzuki Chamber, the largest part of the dry cavers' cave, with its tall aven decorated by layers of false floor. This was the major breakthrough discovered by Malcolm after diving through the three sumps of the original entrance. The sumps emerge from a roof tube perched up in the roof of the chamber, seen in the top-left corner of this photograph; Waters of Lethe.
Modelling by Gareth, lighting by Tarquin and Gareth
Suzuki Chamber, the largest part of the dry cavers' cave, with its tall aven decorated by layers of false floor. This was the major breakthrough discovered by Malcolm after diving through the three sumps of the original entrance. The sumps emerge from a roof tube perched up in the roof of the chamber, seen in the top-left corner of this photograph; Waters of Lethe.
Modelling by Gareth, lighting by Tarquin and Gareth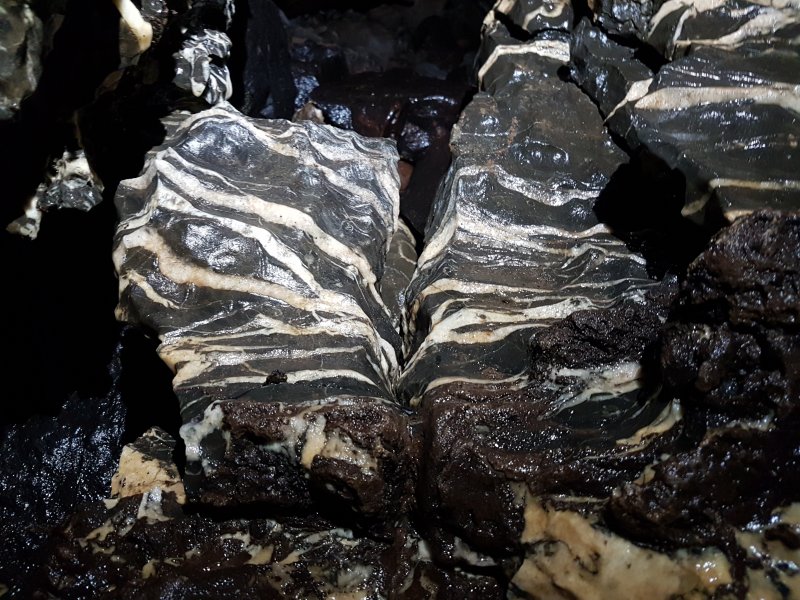 Marbled rocks in the floor of Suzuki Chamber.
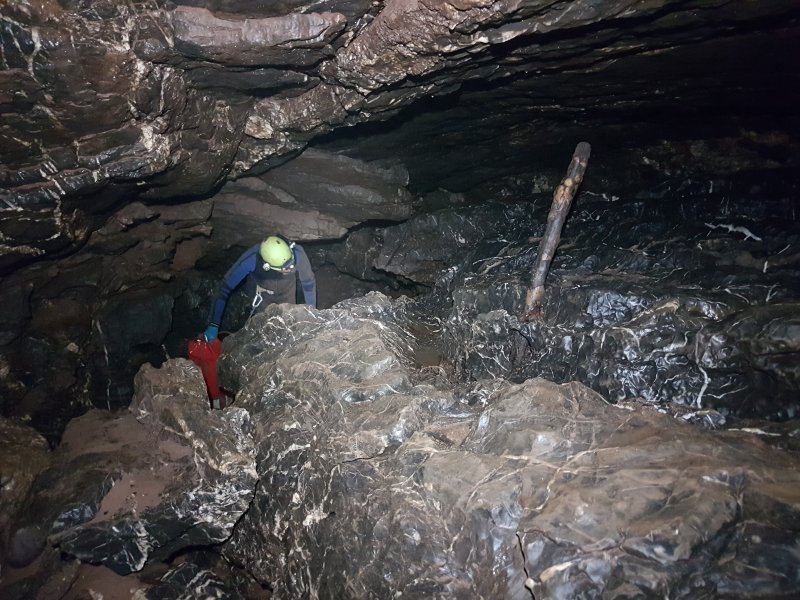 Below Suzuki Chamber, the river would normally be rushing around the slabs into the crawls. The stick wedged into the slab is testament to the force of the flow in flood.
Modelling by Malcolm, lighting by Tarquin and Malcolm
Below Suzuki Chamber, the river would normally be rushing around the slabs into the crawls. The stick wedged into the slab is testament to the force of the flow in flood.
Modelling by Malcolm, lighting by Tarquin and Malcolm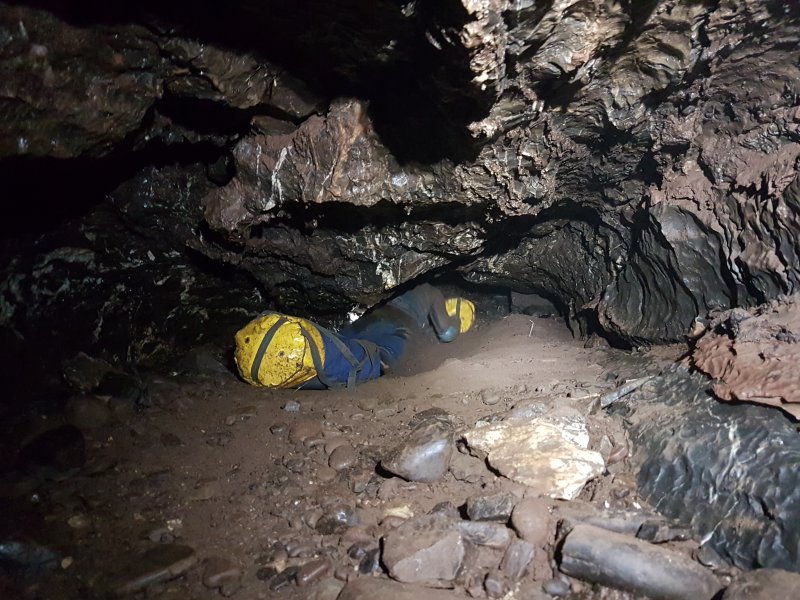 The crawls begin. Last time I was here in low winter water conditions, this was a wet crawl with only a few inches of airspace, and was realy quite intimidating.
Modelling by Gareth, lighting by Tarquin and Gareth
The crawls begin. Last time I was here in low winter water conditions, this was a wet crawl with only a few inches of airspace, and was realy quite intimidating.
Modelling by Gareth, lighting by Tarquin and Gareth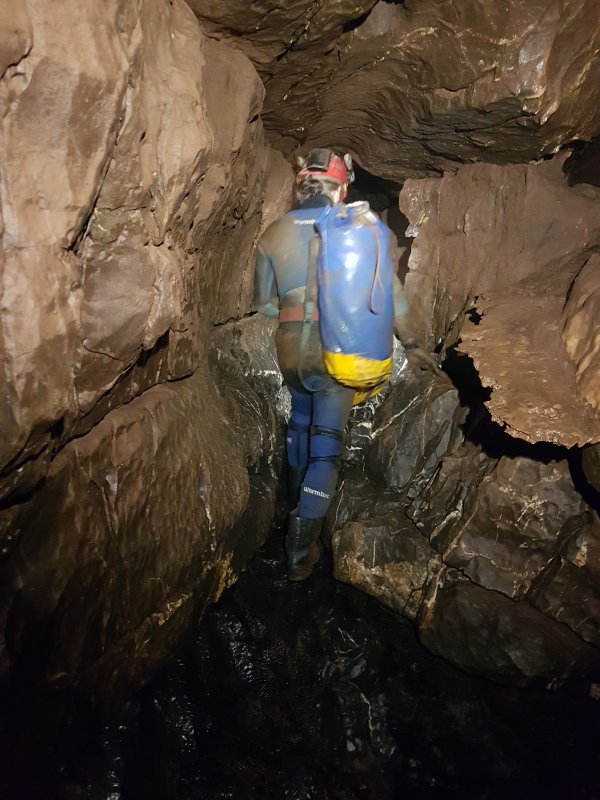 A walking-sized section of rift. Finaly, there is some solid, sturdy rock.
Modelling by Gareth, lighting by Tarquin and Gareth
A walking-sized section of rift. Finaly, there is some solid, sturdy rock.
Modelling by Gareth, lighting by Tarquin and Gareth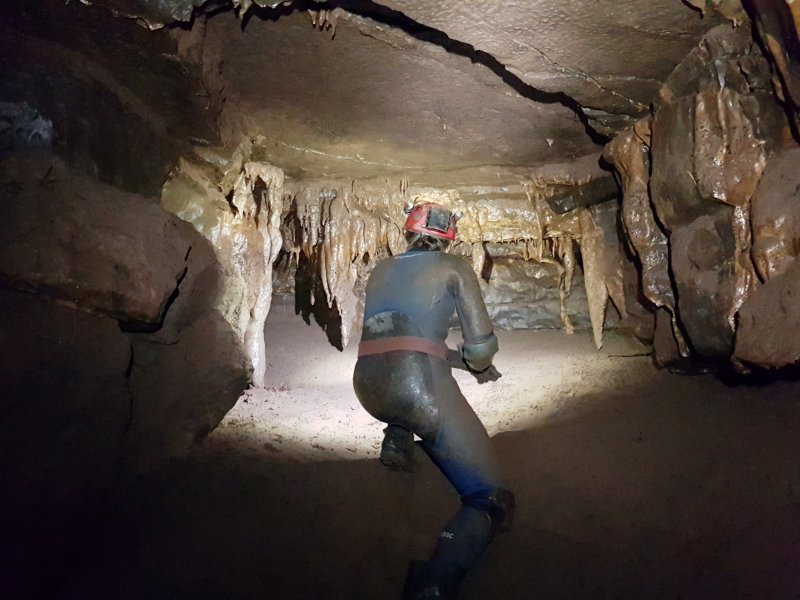 A large side passage shrinks abruptly at a dig and muddy grotto (Flying Pickets). This side passage normally takes the stream, while the way on is into an upstream-looking passage. Behind the grotto, the passage continues for some distance, to end under the gorge again.
Modelling by Gareth, lighting by Tarquin and Gareth
A large side passage shrinks abruptly at a dig and muddy grotto (Flying Pickets). This side passage normally takes the stream, while the way on is into an upstream-looking passage. Behind the grotto, the passage continues for some distance, to end under the gorge again.
Modelling by Gareth, lighting by Tarquin and Gareth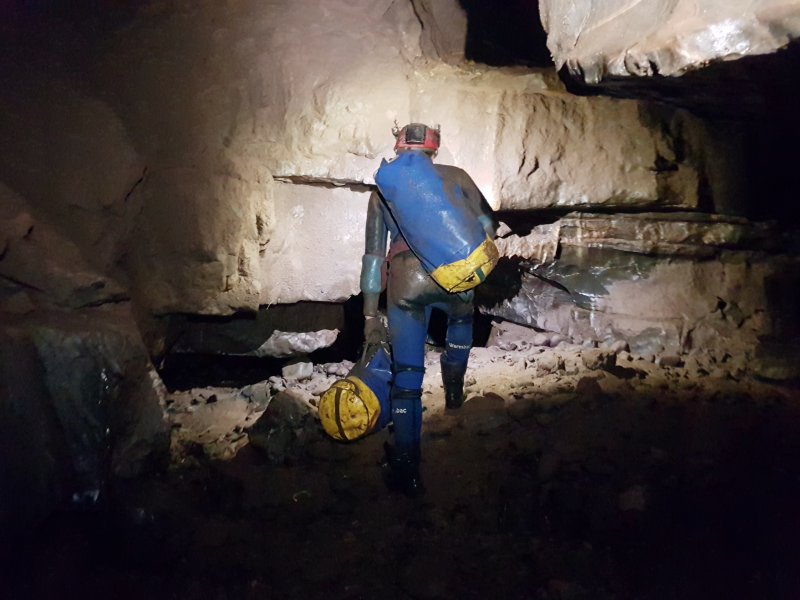 The upstream passage starts nicely sized, but that ends very quickly.
Modelling by Gareth, lighting by Tarquin and Gareth
The upstream passage starts nicely sized, but that ends very quickly.
Modelling by Gareth, lighting by Tarquin and Gareth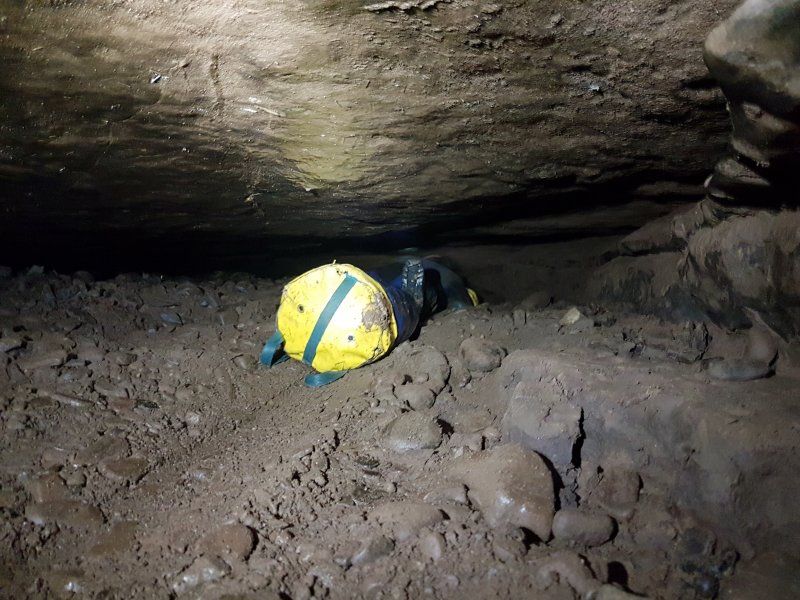 It rapidly becomes a very low passage, descending over gravel. This is surprisingly difficult on the way out, while dragging a bag.
Modelling by Gareth, lighting by Tarquin and Gareth
It rapidly becomes a very low passage, descending over gravel. This is surprisingly difficult on the way out, while dragging a bag.
Modelling by Gareth, lighting by Tarquin and Gareth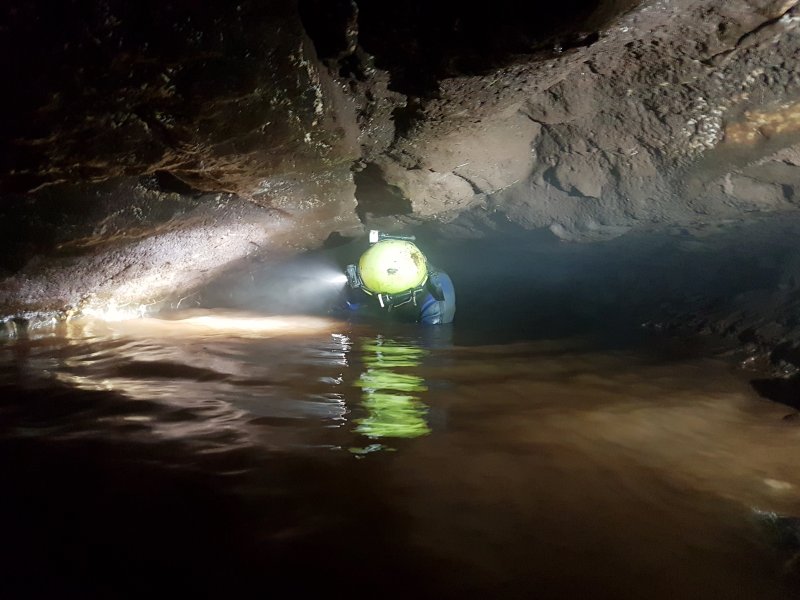 The stream emerges from the side, and the first duck begins. In these low conditions, it was quite spacious, and merely a 30 metre canal, rather than a duck. The mist is partly from us breathing, and partly from an air tank ejecting some of its air after its tap got caught on the gravel floor. Makes for a nicely atmospheric shot.
Modelling by Malcolm, lighting by Tarquin and Malcolm
The stream emerges from the side, and the first duck begins. In these low conditions, it was quite spacious, and merely a 30 metre canal, rather than a duck. The mist is partly from us breathing, and partly from an air tank ejecting some of its air after its tap got caught on the gravel floor. Makes for a nicely atmospheric shot.
Modelling by Malcolm, lighting by Tarquin and Malcolm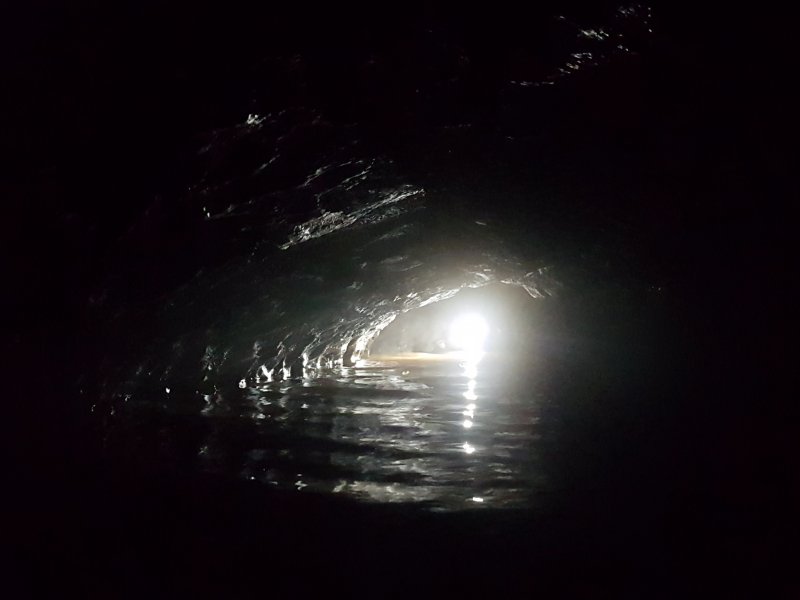 The middle portion of the duck.
Modelling and lighting by Malcolm
The middle portion of the duck.
Modelling and lighting by Malcolm The end of the duck is the lowest, resulting in a wet ear or chin.
Modelling by Gareth, lighting by Tarquin and Gareth
The end of the duck is the lowest, resulting in a wet ear or chin.
Modelling by Gareth, lighting by Tarquin and Gareth The passage, named So Long And Thanks For All The Fish, improves after the duck, and even gains some formations. You may notice that Gareth is taking two bags of heavy diving equipment, while Malcolm and I carried a single heavy tackle bag (plus my personal emergency equipment and camera). A machine. At least it slowed him down to a comfortable pace where photography was not making us slow.
Modelling by Gareth, lighting by Tarquin and Gareth
The passage, named So Long And Thanks For All The Fish, improves after the duck, and even gains some formations. You may notice that Gareth is taking two bags of heavy diving equipment, while Malcolm and I carried a single heavy tackle bag (plus my personal emergency equipment and camera). A machine. At least it slowed him down to a comfortable pace where photography was not making us slow.
Modelling by Gareth, lighting by Tarquin and Gareth The second duck was little more than a damp crawl.
Modelling by Gareth, lighting by Tarquin and Gareth
The second duck was little more than a damp crawl.
Modelling by Gareth, lighting by Tarquin and Gareth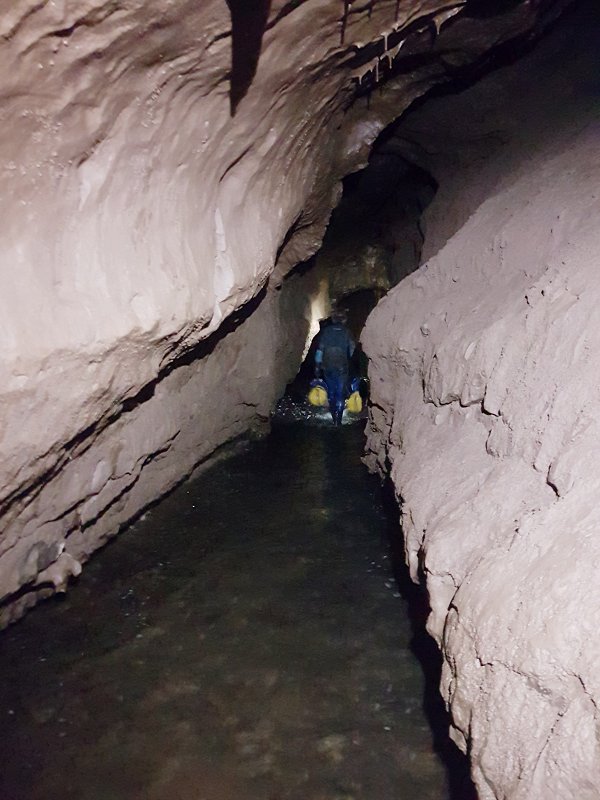 This is followed by a fine section of river rift passage, which sadly ends all too soon.
Modelling by Gareth, lighting by Tarquin and Gareth
This is followed by a fine section of river rift passage, which sadly ends all too soon.
Modelling by Gareth, lighting by Tarquin and Gareth Dekitting at the dive base.
Modelling by Gareth, lighting by Tarquin, Malcolm and Gareth
Dekitting at the dive base.
Modelling by Gareth, lighting by Tarquin, Malcolm and Gareth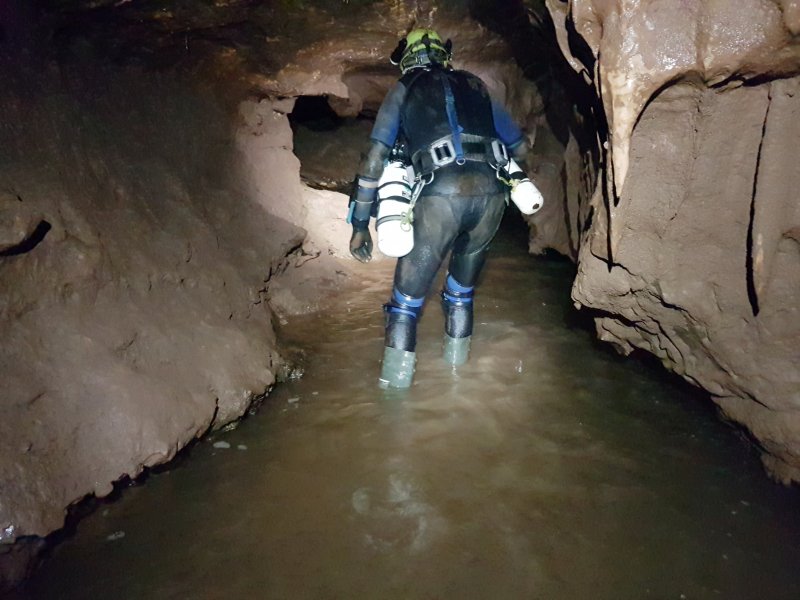 Lowering to stooping before the sump.
Modelling by Malcolm, lighting by Tarquin and Malcolm
Lowering to stooping before the sump.
Modelling by Malcolm, lighting by Tarquin and Malcolm Sump 4, the present limit for dry cavers. The bags are filled with digging spoil from when this sump was being dug open. They make a fairly comfortable platform where I could wait for half an hour for the divers to emerge after their digging trip beyond the sump. Half an hour is quite a while to wait in soaking wet clothing, so I was very happy to have to drag a heavy tackle bag out from here, as it meant rapidly warming back up in spite of the ducks.
 The first diver emerging only a few minutes behind schedule, with relatively good visibility. The cloudy water was partly from me making my way in, and partly because it had not managed to settle since the last divers had emerged a couple of hours earlier. If the stream had been running normally, it might have cleared faster.
Lighting by Gareth
The first diver emerging only a few minutes behind schedule, with relatively good visibility. The cloudy water was partly from me making my way in, and partly because it had not managed to settle since the last divers had emerged a couple of hours earlier. If the stream had been running normally, it might have cleared faster.
Lighting by Gareth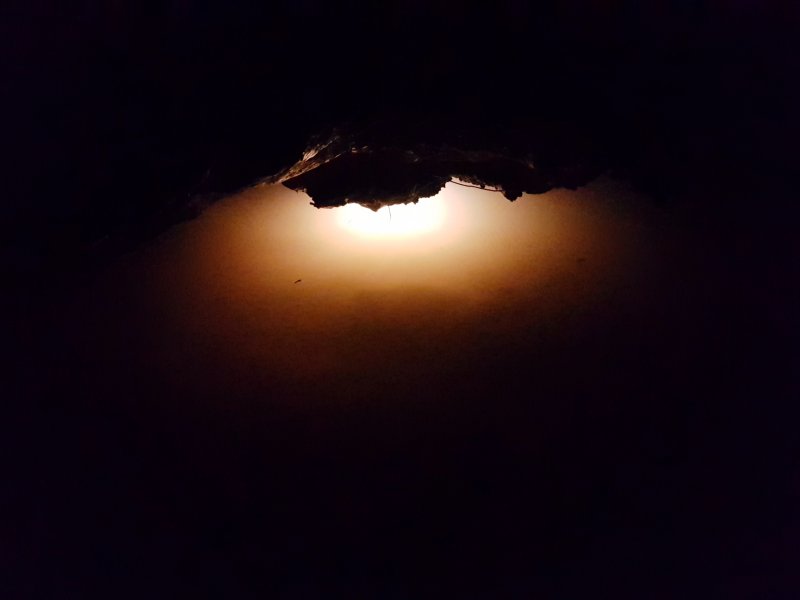 The second diver emerged through the silt kicked up by the first, and could barely see a few inches.
Lighting by Malcolm
The second diver emerged through the silt kicked up by the first, and could barely see a few inches.
Lighting by Malcolm Surfacing from sump 4.
Modelling by Malcolm, lighting by Tarquin and Malcolm
Surfacing from sump 4.
Modelling by Malcolm, lighting by Tarquin and Malcolm