Ogof Craig a Ffynnon Lower Series trip 19/04/2019
Unless otherwise stated, camera, setups, lighting, edits and gallery effects by Tarquin. Modelling and lighting at various points will be Pete Bolt.
I have already covered this cave's major destinations in several galleries. This is the second time I would visit the Blaen Elin Streamway and Lower Series, and the first time I would bring a camera. Much like the rest of the cave, these passages are well decorated, but are ignored because everyone who gets this far into the cave is fixated on Helictite Passage.
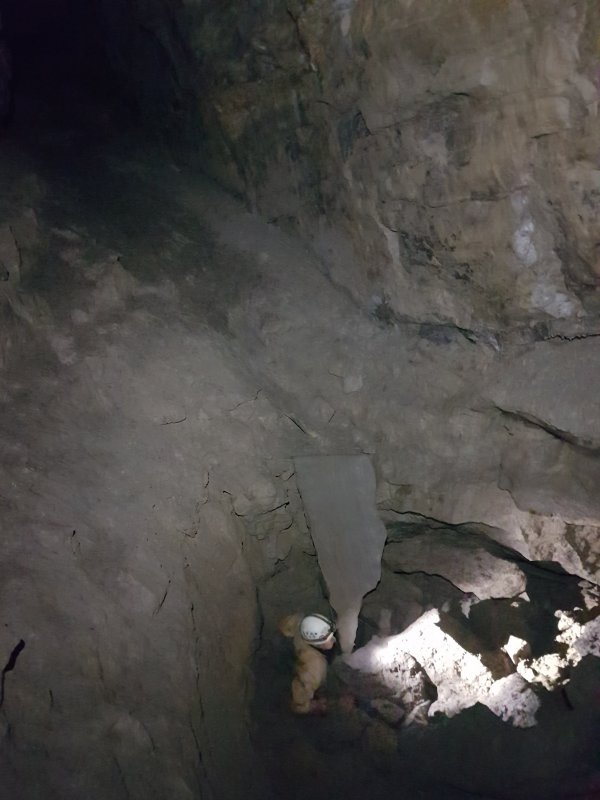
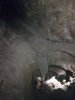 Blaen Elin begins as a hole in the floor just after Severn Tunnel Junction, just before the unnamed big passage.
Modelling by Pete, lighting by Tarquin and Pete
Blaen Elin begins as a hole in the floor just after Severn Tunnel Junction, just before the unnamed big passage.
Modelling by Pete, lighting by Tarquin and Pete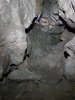 The first obstacle is an immediate climb.
Modelling by Pete, lighting by Tarquin and Pete
The first obstacle is an immediate climb.
Modelling by Pete, lighting by Tarquin and Pete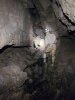 One direction chokes immediately, but the other direction passes through boulders to a streamway.
Modelling by Pete, lighting by Tarquin and Pete
One direction chokes immediately, but the other direction passes through boulders to a streamway.
Modelling by Pete, lighting by Tarquin and Pete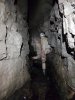 Blaen Elin Streamway, quite a pleasant little stream. What you don't realise at this point is that there is a large phreatic tube at the top of the rift, and that's where all the good stuff is.
Modelling by Pete, lighting by Tarquin and Pete
Blaen Elin Streamway, quite a pleasant little stream. What you don't realise at this point is that there is a large phreatic tube at the top of the rift, and that's where all the good stuff is.
Modelling by Pete, lighting by Tarquin and Pete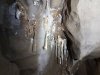 The streamway ends abruptly at a choke. An eyehole on the right or a descent into the choke's stream sink then looping back up to the right, gives access to a pretty little side passage.
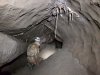 The pretty side passage.
Modelling by Pete, lighting by Tarquin and Pete
The pretty side passage.
Modelling by Pete, lighting by Tarquin and Pete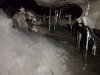 Formations in the side passage. The passage pinches out into a mud dig shortly afterwards, which must be very close to the Lower Series.
Modelling by Pete, lighting by Tarquin and Pete
Formations in the side passage. The passage pinches out into a mud dig shortly afterwards, which must be very close to the Lower Series.
Modelling by Pete, lighting by Tarquin and Pete A climb up before the choke, or a climb up from the start of the side passage, reaches the upper tube, which begins with a very pretty grotto. The tube ends at a choke here. This choke lines up with the choke in the Severn Tunnel Junction side passages above, suggesting that there is a major passage or a major fault up above.
Modelling by Pete, lighting by Tarquin and Pete
A climb up before the choke, or a climb up from the start of the side passage, reaches the upper tube, which begins with a very pretty grotto. The tube ends at a choke here. This choke lines up with the choke in the Severn Tunnel Junction side passages above, suggesting that there is a major passage or a major fault up above.
Modelling by Pete, lighting by Tarquin and Pete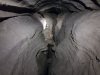 Heading back over the top of the Blaen Elin Streamway, the phreatic tube has some awkward little clambers.
Modelling by Pete, lighting by Tarquin and Pete
Heading back over the top of the Blaen Elin Streamway, the phreatic tube has some awkward little clambers.
Modelling by Pete, lighting by Tarquin and Pete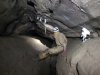 Formations start at one of the clambers. From here, you follow the muddy ledges instead.
Modelling by Pete, lighting by Tarquin and Pete
Formations start at one of the clambers. From here, you follow the muddy ledges instead.
Modelling by Pete, lighting by Tarquin and Pete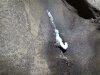 Hooked helictite.
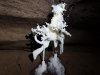 The most impressive helictite bunch.
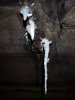 Helictites covering a stalactite.
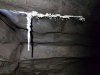 Helictites on a stalactite.
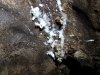 Helictites and small anthodites.
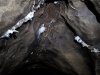 Anthodites on the seams.
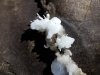 Immature anthodites.
 Anthodite.
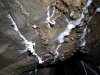 Another hooked helictite.
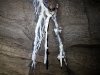 Helictites on stalactites.
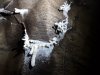 Helictite bunches.
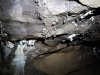 Helictites under the wall. The darker lumps look like they have formed as helictites, then spent some time underwater.
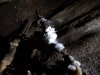 Helictites.
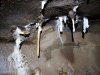 Helictites and fat straws.
 Helictites.
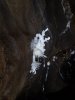 Anthodites.
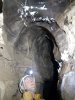 Anthodites in a ceiling rift.
Modelling by Pete, lighting by Tarquin and Pete
Anthodites in a ceiling rift.
Modelling by Pete, lighting by Tarquin and Pete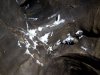 Ceiling anthodites.
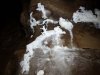 Helictites on the wall.
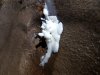 Helictites.
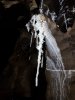 Helictite covered stalactites.
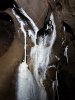 Smaller helictites on stalactites.
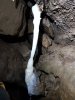 A squeeze up through a choke gives access to a final grotto.
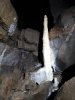 The passage ends at a choke immediately after a stalagmite. This is the other side of the boulders at the initial climb into the streamway, so there is nothing more to find up here anyway.
 A side rift ends immediately, with its own small decorations.
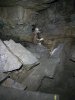 In between the boulder ruckle and the Fouth Choke in the big passage, a side rift to the left is the start of the Lower Series.
Modelling by Pete, lighting by Tarquin and Pete
In between the boulder ruckle and the Fouth Choke in the big passage, a side rift to the left is the start of the Lower Series.
Modelling by Pete, lighting by Tarquin and Pete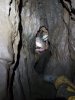 The passage descends a tight climb.
Modelling by Tarquin's leg and Pete, lighting by Tarquin and Pete
The passage descends a tight climb.
Modelling by Tarquin's leg and Pete, lighting by Tarquin and Pete The passage at the bottom looks too small to be right, but it is.
Modelling by Pete, lighting by Tarquin and Pete
The passage at the bottom looks too small to be right, but it is.
Modelling by Pete, lighting by Tarquin and Pete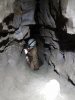 The passage beyond it remains tight.
Modelling by Pete, lighting by Tarquin and Pete
The passage beyond it remains tight.
Modelling by Pete, lighting by Tarquin and Pete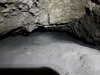 The second squeeze is quite intimidating, and looks impassable from the start. The floor rises over a rock, but the ceiling rises at the same time, and it is actually not too bad. Still, on my first visit here, we nearly gave up, assuming we had gone the wrong way.
 Exiting the squeeze. There is a blind passage to the left (that looks on the survey like it will be a round trip, but it isn't), while the way on is to the right, then left.
Modelling by Pete, lighting by Tarquin and Pete
Exiting the squeeze. There is a blind passage to the left (that looks on the survey like it will be a round trip, but it isn't), while the way on is to the right, then left.
Modelling by Pete, lighting by Tarquin and Pete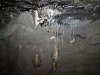 The passage appears to end abruptly at a fairly large chamber with some stal, and climbs on both sides.
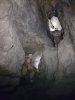 The climb on the right has a corkscrew to a higher level, followed by a climb up further to a roof passage.
Modelling by Pete and Pete, lighting by Tarquin, Pete and Pete
The climb on the right has a corkscrew to a higher level, followed by a climb up further to a roof passage.
Modelling by Pete and Pete, lighting by Tarquin, Pete and Pete The roof passage.
Modelling by Pete
The roof passage.
Modelling by Pete The passage ends at a pitch. Side passages give access to two alternative pitches, but this is the only one with hangers. The hangers are very poorly placed, and force a rope rub. There is a perfectly placed wall above the pitch which could have provided a free hang, but no. So a rope rub protector is needed. We used a natural for backup, and a 27 metre rope.
Modelling by Pete, lighting by Tarquin and Pete
The passage ends at a pitch. Side passages give access to two alternative pitches, but this is the only one with hangers. The hangers are very poorly placed, and force a rope rub. There is a perfectly placed wall above the pitch which could have provided a free hang, but no. So a rope rub protector is needed. We used a natural for backup, and a 27 metre rope.
Modelling by Pete, lighting by Tarquin and Pete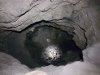 Looking down the pitch.
Modelling by Pete, lighting by Tarquin and Pete
Looking down the pitch.
Modelling by Pete, lighting by Tarquin and Pete Looking up the pitch.
Modelling by Pete, lighting by Tarquin and Pete
Looking up the pitch.
Modelling by Pete, lighting by Tarquin and Pete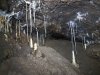 Decorated alcove half way down the pitch.
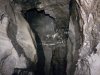 Ceiling of the pitch chamber, with formations.
Lighting by Tarquin and Pete
Ceiling of the pitch chamber, with formations.
Lighting by Tarquin and Pete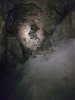 A steep ramp on one side gains the base of the alternative pitches. One is so short it almost looks free climbable, but all of them need equipment.
Modelling by Pete, lighting by Tarquin and Pete
A steep ramp on one side gains the base of the alternative pitches. One is so short it almost looks free climbable, but all of them need equipment.
Modelling by Pete, lighting by Tarquin and Pete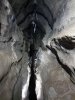 The way on is a tall rift.
Lighting by Tarquin and Pete
The way on is a tall rift.
Lighting by Tarquin and Pete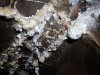 Ceiling of the rift. These are tucked so far up that they can hardly be seen from the bottom, and a very slippery chimney is required in order to see them.
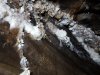 Ceiling of the rift.
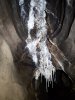 Heilictites and straws in the ceiling of the rift.
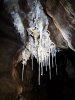 Heilictites and straws in the ceiling of the rift.
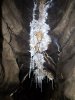 Heilictites and straws in the ceiling of the rift.
 Helictites in the ceiling of the rift.
 Helictites and anthodites in the ceiling of the rift.
 The rift ends at a chamber with admirable straw decorations.
 Stalagmites below the straws.
Modelling by Pete, lighting by Tarquin and Pete
Stalagmites below the straws.
Modelling by Pete, lighting by Tarquin and Pete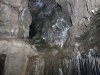 Large roof passage in the chamber, which seems to be an oxbow.
 The wall of the chamber has another straw display, and some very long helictites.
Modelling by Pete, lighting by Tarquin and Pete
The wall of the chamber has another straw display, and some very long helictites.
Modelling by Pete, lighting by Tarquin and Pete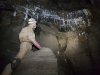 The longest helictites are 9 inches (23 cm) long. Below them is a finely layered sediment bank.
Modelling by Pete, lighting by Tarquin and Pete
The longest helictites are 9 inches (23 cm) long. Below them is a finely layered sediment bank.
Modelling by Pete, lighting by Tarquin and Pete The stalamites below are rather rubbish though.
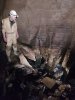 The way on is through a low crawl, with stacked tight oxbows. The large passage beyond splits into two routes, with one having a chamber with an inlet aven. The way on from there rejoins the other route.
Modelling by Pete, lighting by Tarquin and Pete
The way on is through a low crawl, with stacked tight oxbows. The large passage beyond splits into two routes, with one having a chamber with an inlet aven. The way on from there rejoins the other route.
Modelling by Pete, lighting by Tarquin and Pete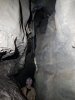 Long straw, about 5 feet (1.5 metres) long, in the passage beyond.
Modelling by Pete, lighting by Tarquin and Pete
Long straw, about 5 feet (1.5 metres) long, in the passage beyond.
Modelling by Pete, lighting by Tarquin and Pete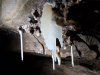 Translucent stal.
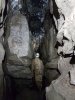 More straws.
Modelling by Pete, lighting by Tarquin and Pete
More straws.
Modelling by Pete, lighting by Tarquin and Pete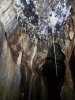 These are not as long as the lone straw, but they are still attractive.
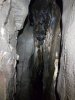 More straws. The way on is then to clamber to roof level and post yourself into a small passage over rocks.
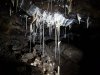 Immediately afterwards is the start of Isadora's Grotto, the best decorated piece of passage in the Lower Series.
Lighting by Pete
Immediately afterwards is the start of Isadora's Grotto, the best decorated piece of passage in the Lower Series.
Lighting by Pete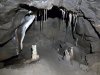 a side arch provides a way on, but firstly we will continue into the grotto.
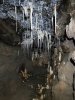 Isadora's Grotto.
Modelling by Pete, lighting by Tarquin and Pete
Isadora's Grotto.
Modelling by Pete, lighting by Tarquin and Pete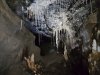 Isadora's Grotto, backlit.
Lighting by Tarquin and Pete
Isadora's Grotto, backlit.
Lighting by Tarquin and Pete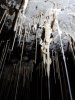 Helictite covered stalactite.
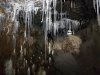 Isadora's Grotto.
Modelling by Pete, lighting by Tarquin and Pete
Isadora's Grotto.
Modelling by Pete, lighting by Tarquin and Pete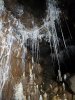 Isadora's Grotto.
Lighting by Tarquin and Pete
Isadora's Grotto.
Lighting by Tarquin and Pete Isadora's Grotto ends at a sand slope up to a dig. Amazingly, someone has managed to slide up this slope into the dig without breaking everything.
Modelling by Pete, lighting by Tarquin and Pete
Isadora's Grotto ends at a sand slope up to a dig. Amazingly, someone has managed to slide up this slope into the dig without breaking everything.
Modelling by Pete, lighting by Tarquin and Pete The side arch reaches a chimney down to a streamway.
Camera and setup by Pete, modelling by Tarquin, lighting by Pete and Tarquin
The side arch reaches a chimney down to a streamway.
Camera and setup by Pete, modelling by Tarquin, lighting by Pete and Tarquin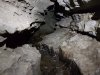 To the left is a very small inlet passage, which may be the stream from the Promised Land. It ends underneath the last inlet chamber, and is absolutely not worth following.
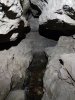 Downstream is longer, ending near the Blaen Elin side passage. The water presumably joins the Blaen Elin streamway at the choke. This passage is also absolutely not worth following.
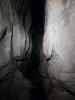 Instead, the best way on is ahead into the rift.
 Stal in the way on.
Modelling by Pete, lighting by Tarquin and Pete
Stal in the way on.
Modelling by Pete, lighting by Tarquin and Pete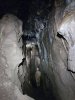 The passage is briefly quite grand.
Modelling by Pete, lighting by Tarquin and Pete
The passage is briefly quite grand.
Modelling by Pete, lighting by Tarquin and Pete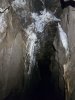 Ceiling of the passage.
 Helictites near the end.
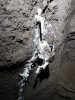 Helictites near the end.
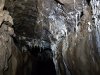 Ceiling of the passage.
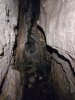 The passage appears to end, but a hole down enters a short rift, with a small inlet stream. This ends at a choke, which is beneath the floor of the blind side passage after the squeezes at the start of the Lower Series. This would have made a nice round trip, but instead, you have to return the same way.
 Blaen Elin begins as a hole in the floor just after Severn Tunnel Junction, just before the unnamed big passage.
Modelling by Pete, lighting by Tarquin and Pete
Blaen Elin begins as a hole in the floor just after Severn Tunnel Junction, just before the unnamed big passage.
Modelling by Pete, lighting by Tarquin and Pete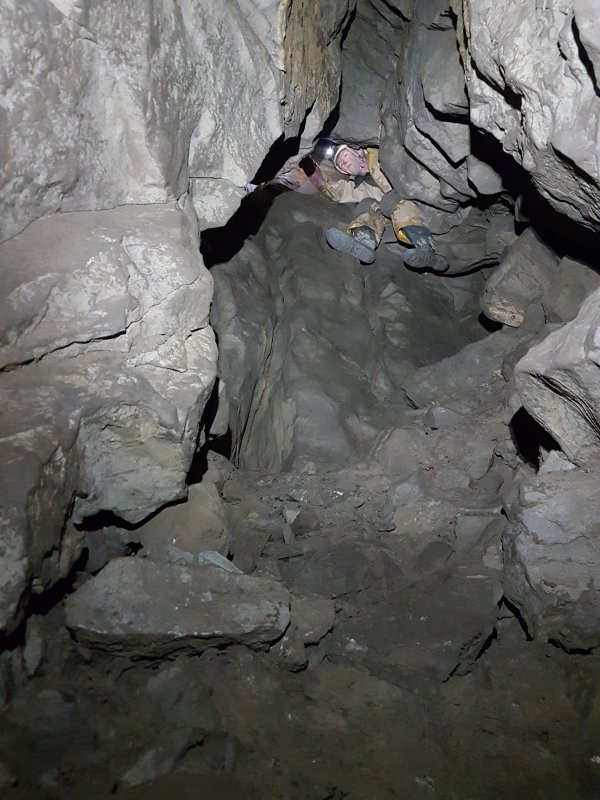 The first obstacle is an immediate climb.
Modelling by Pete, lighting by Tarquin and Pete
The first obstacle is an immediate climb.
Modelling by Pete, lighting by Tarquin and Pete One direction chokes immediately, but the other direction passes through boulders to a streamway.
Modelling by Pete, lighting by Tarquin and Pete
One direction chokes immediately, but the other direction passes through boulders to a streamway.
Modelling by Pete, lighting by Tarquin and Pete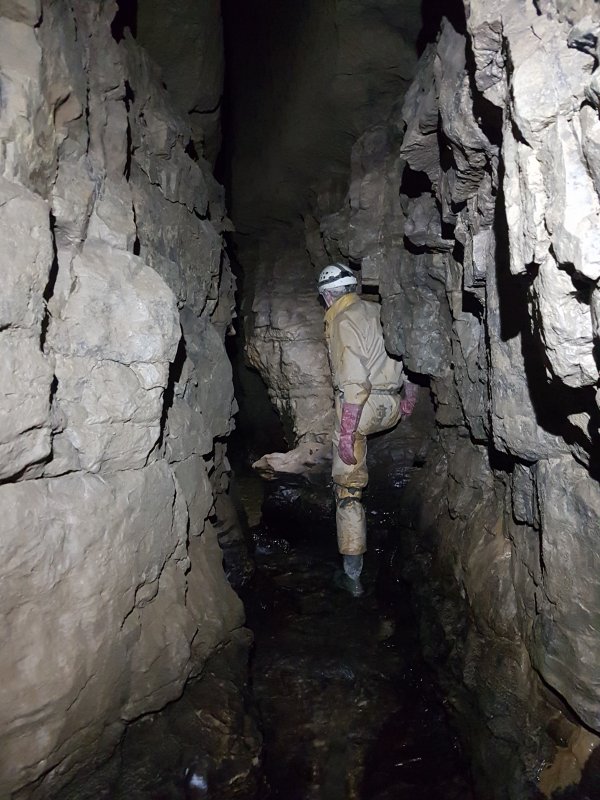 Blaen Elin Streamway, quite a pleasant little stream. What you don't realise at this point is that there is a large phreatic tube at the top of the rift, and that's where all the good stuff is.
Modelling by Pete, lighting by Tarquin and Pete
Blaen Elin Streamway, quite a pleasant little stream. What you don't realise at this point is that there is a large phreatic tube at the top of the rift, and that's where all the good stuff is.
Modelling by Pete, lighting by Tarquin and Pete The streamway ends abruptly at a choke. An eyehole on the right or a descent into the choke's stream sink then looping back up to the right, gives access to a pretty little side passage.
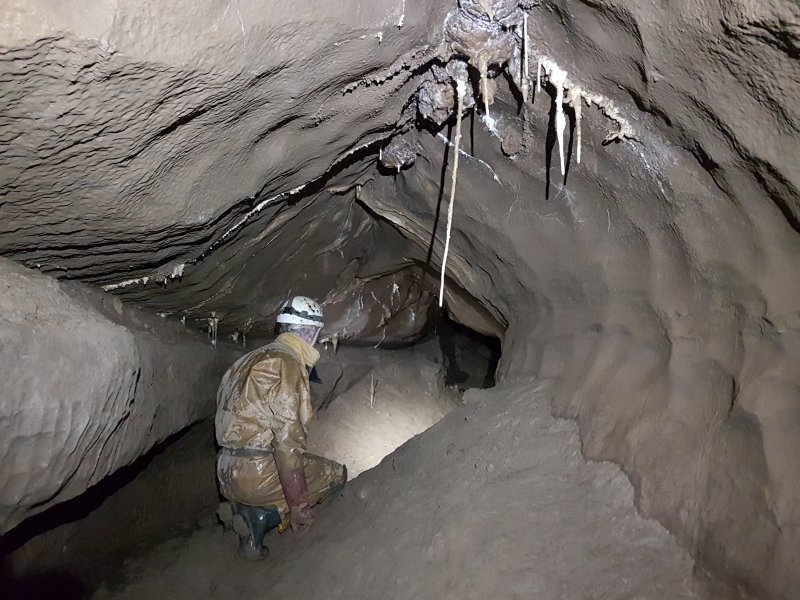 The pretty side passage.
Modelling by Pete, lighting by Tarquin and Pete
The pretty side passage.
Modelling by Pete, lighting by Tarquin and Pete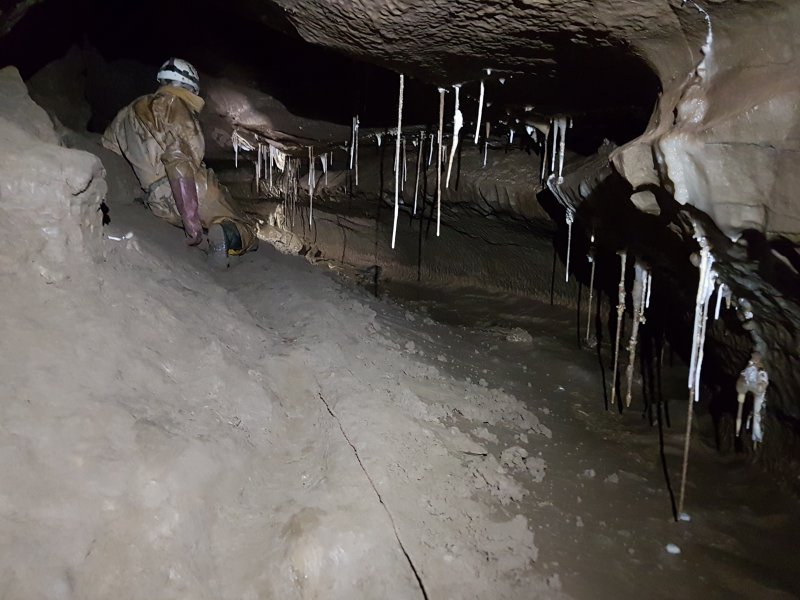 Formations in the side passage. The passage pinches out into a mud dig shortly afterwards, which must be very close to the Lower Series.
Modelling by Pete, lighting by Tarquin and Pete
Formations in the side passage. The passage pinches out into a mud dig shortly afterwards, which must be very close to the Lower Series.
Modelling by Pete, lighting by Tarquin and Pete A climb up before the choke, or a climb up from the start of the side passage, reaches the upper tube, which begins with a very pretty grotto. The tube ends at a choke here. This choke lines up with the choke in the Severn Tunnel Junction side passages above, suggesting that there is a major passage or a major fault up above.
Modelling by Pete, lighting by Tarquin and Pete
A climb up before the choke, or a climb up from the start of the side passage, reaches the upper tube, which begins with a very pretty grotto. The tube ends at a choke here. This choke lines up with the choke in the Severn Tunnel Junction side passages above, suggesting that there is a major passage or a major fault up above.
Modelling by Pete, lighting by Tarquin and Pete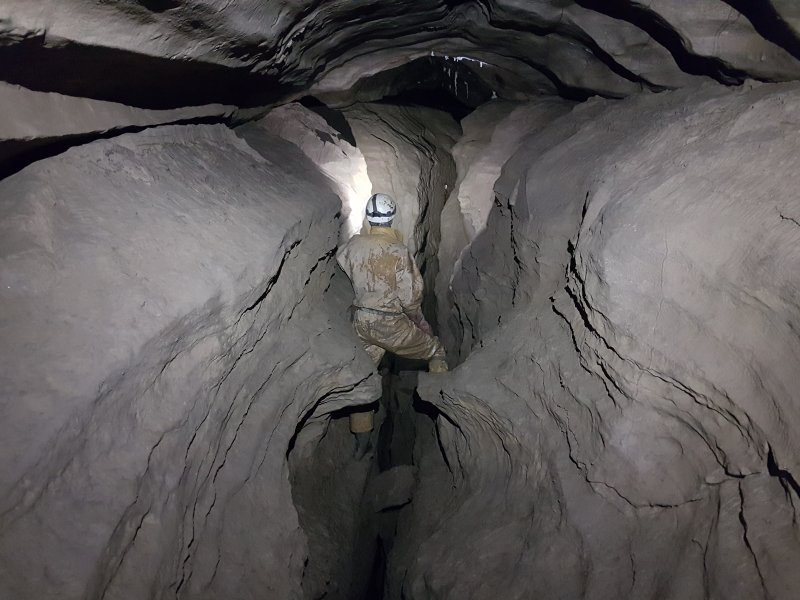 Heading back over the top of the Blaen Elin Streamway, the phreatic tube has some awkward little clambers.
Modelling by Pete, lighting by Tarquin and Pete
Heading back over the top of the Blaen Elin Streamway, the phreatic tube has some awkward little clambers.
Modelling by Pete, lighting by Tarquin and Pete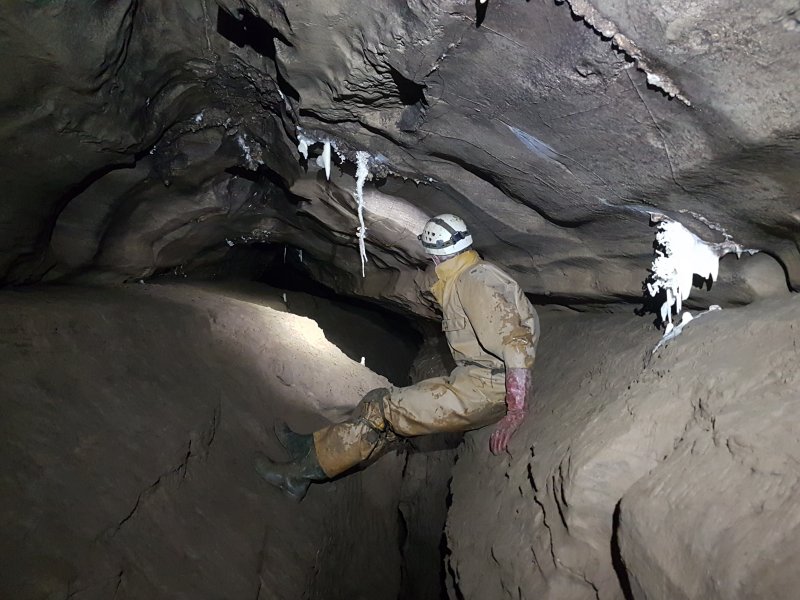 Formations start at one of the clambers. From here, you follow the muddy ledges instead.
Modelling by Pete, lighting by Tarquin and Pete
Formations start at one of the clambers. From here, you follow the muddy ledges instead.
Modelling by Pete, lighting by Tarquin and Pete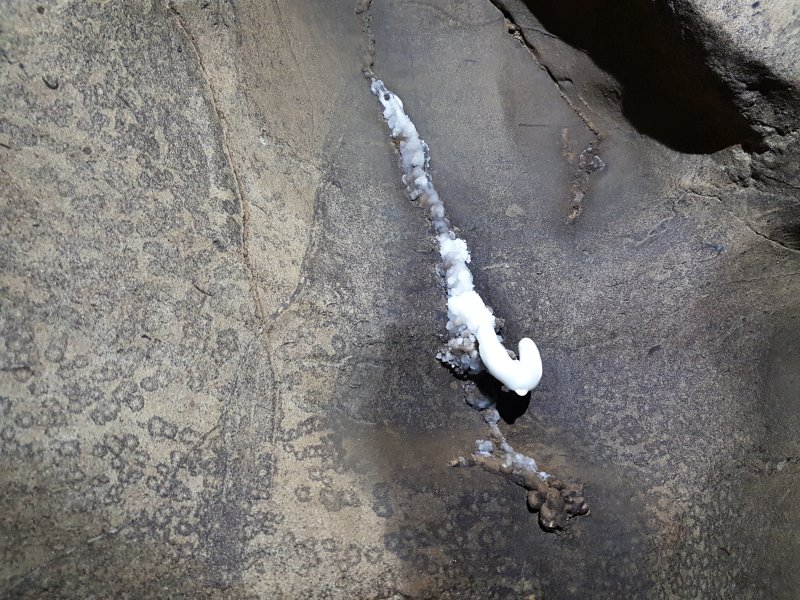 Hooked helictite.
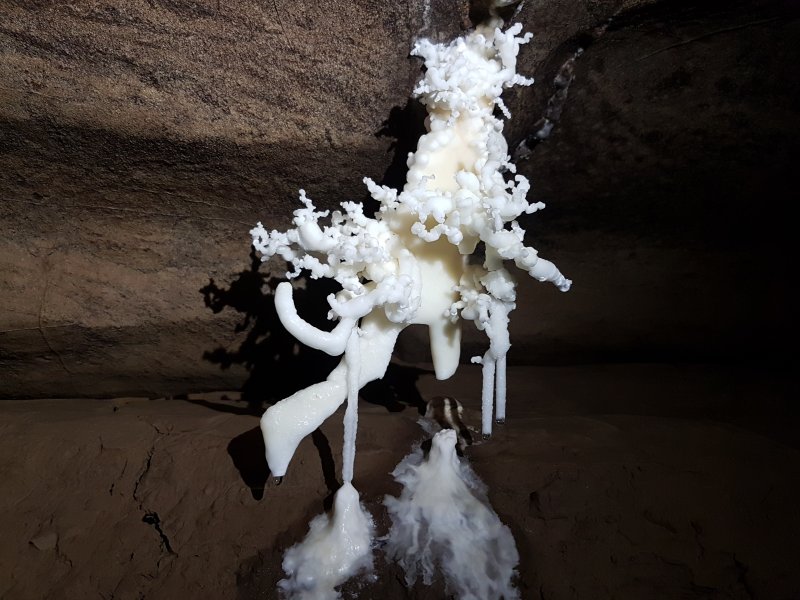 The most impressive helictite bunch.
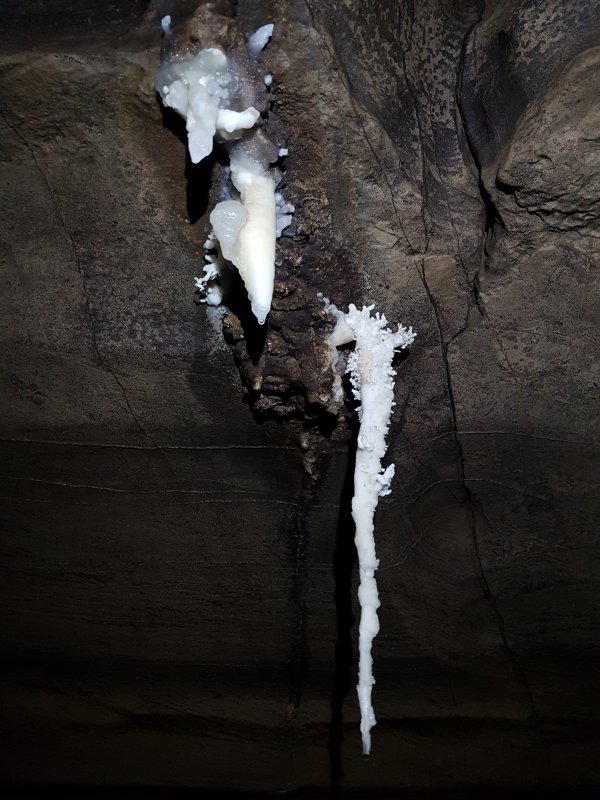 Helictites covering a stalactite.
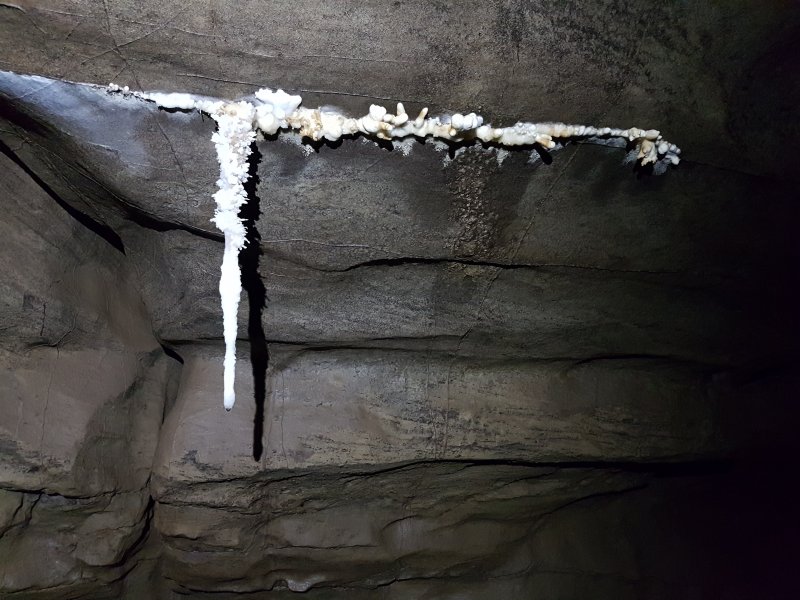 Helictites on a stalactite.
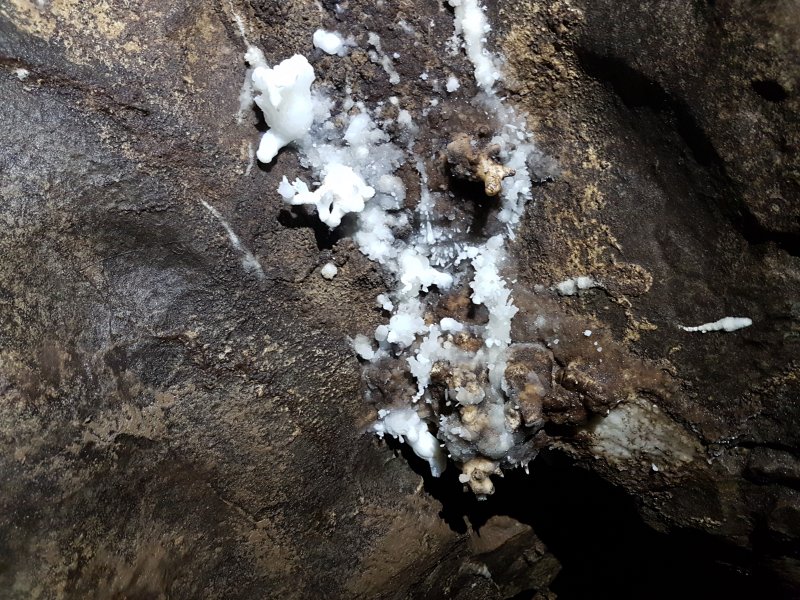 Helictites and small anthodites.
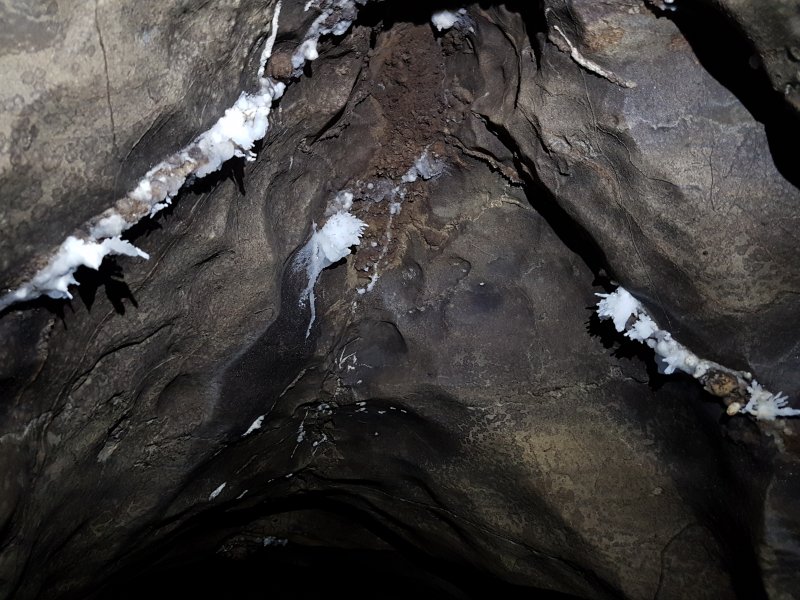 Anthodites on the seams.
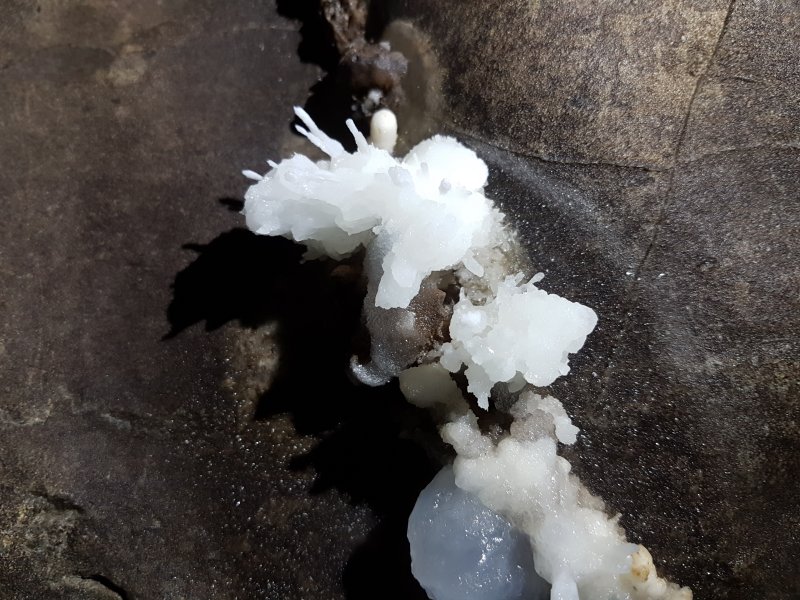 Immature anthodites.
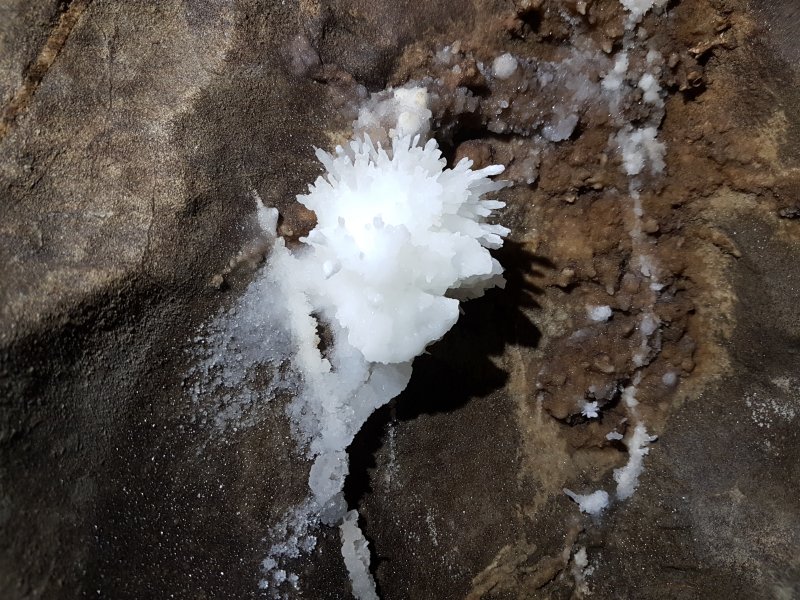 Anthodite.
 Another hooked helictite.
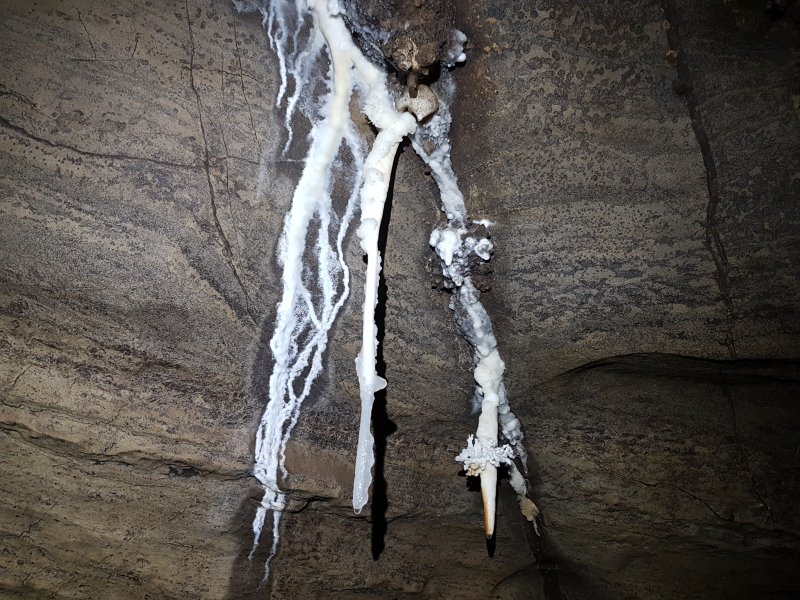 Helictites on stalactites.
 Helictite bunches.
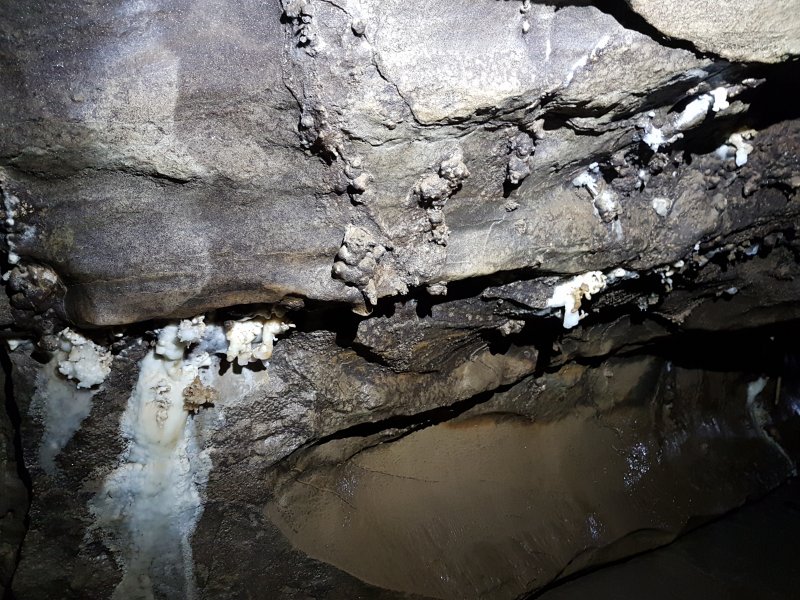 Helictites under the wall. The darker lumps look like they have formed as helictites, then spent some time underwater.
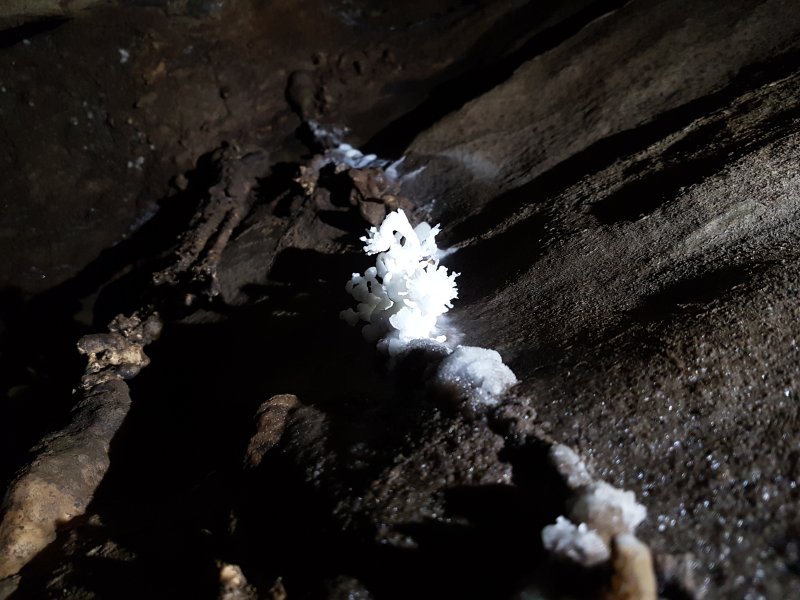 Helictites.
 Helictites and fat straws.
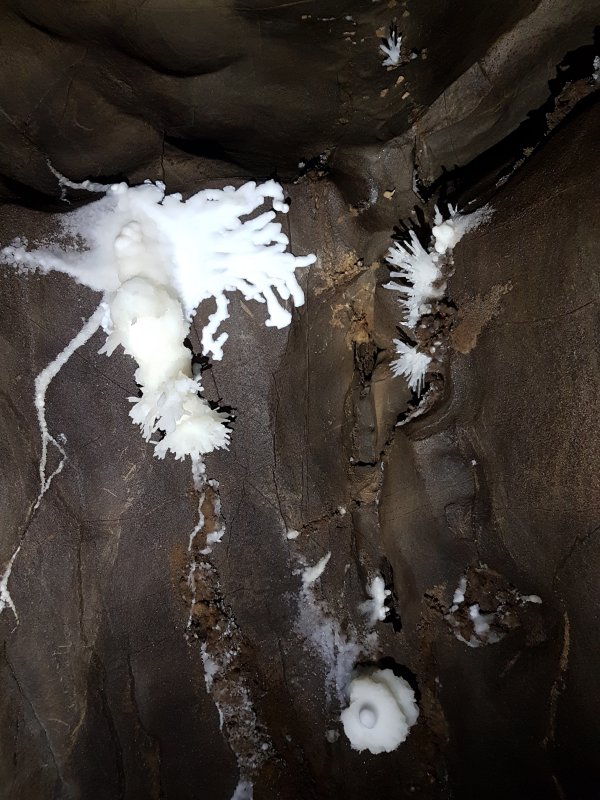 Helictites.
 Anthodites.
 Anthodites in a ceiling rift.
Modelling by Pete, lighting by Tarquin and Pete
Anthodites in a ceiling rift.
Modelling by Pete, lighting by Tarquin and Pete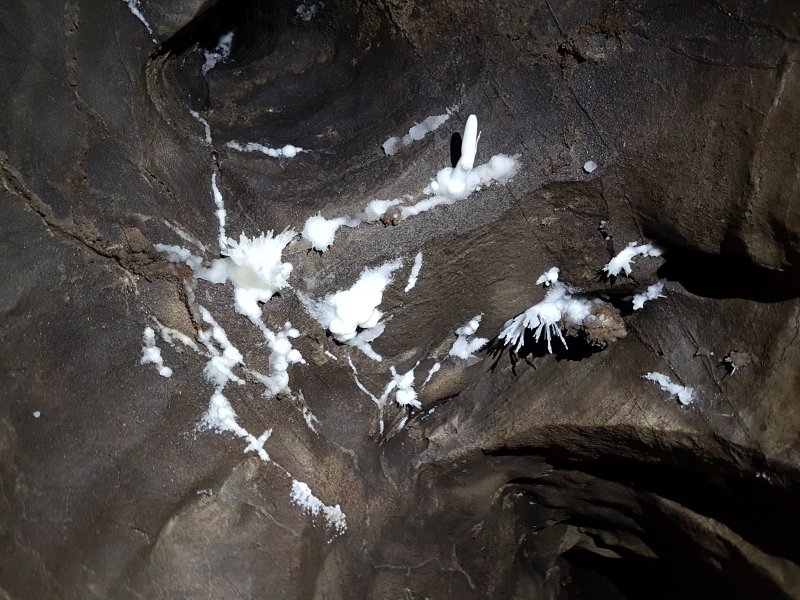 Ceiling anthodites.
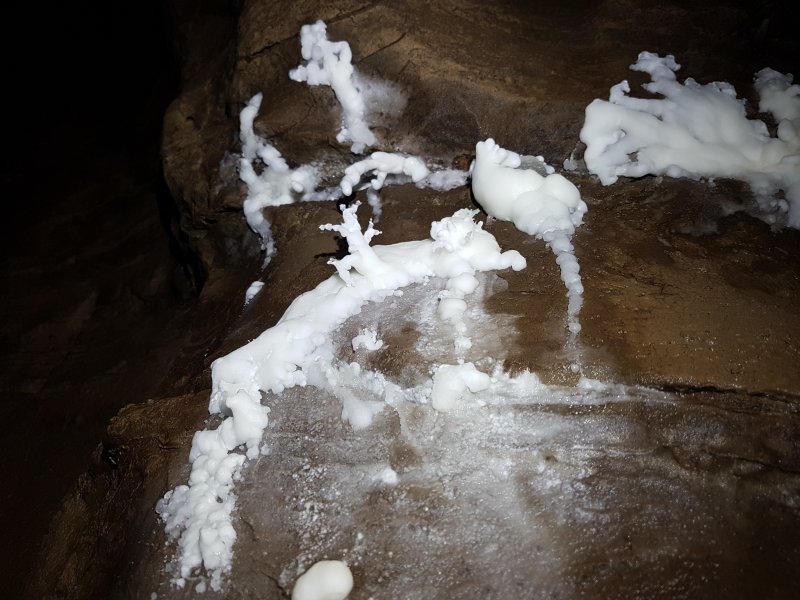 Helictites on the wall.
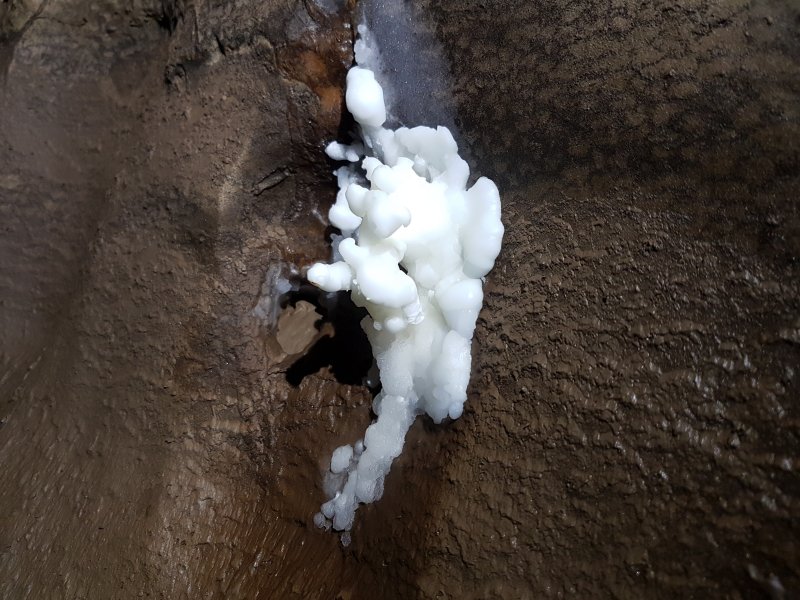 Helictites.
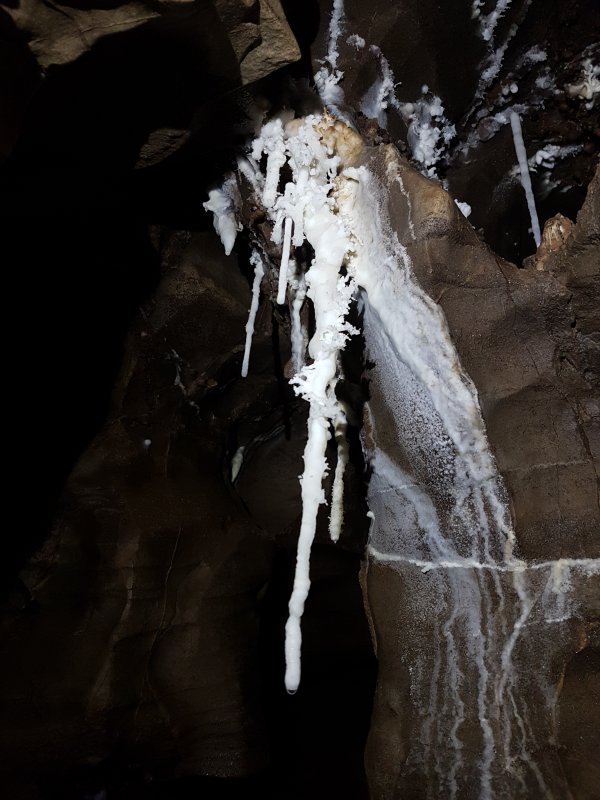 Helictite covered stalactites.
 Smaller helictites on stalactites.
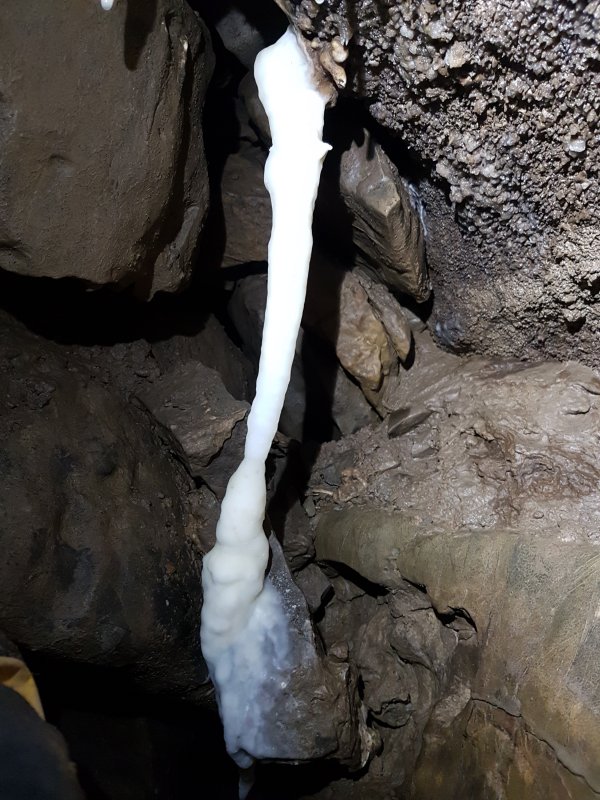 A squeeze up through a choke gives access to a final grotto.
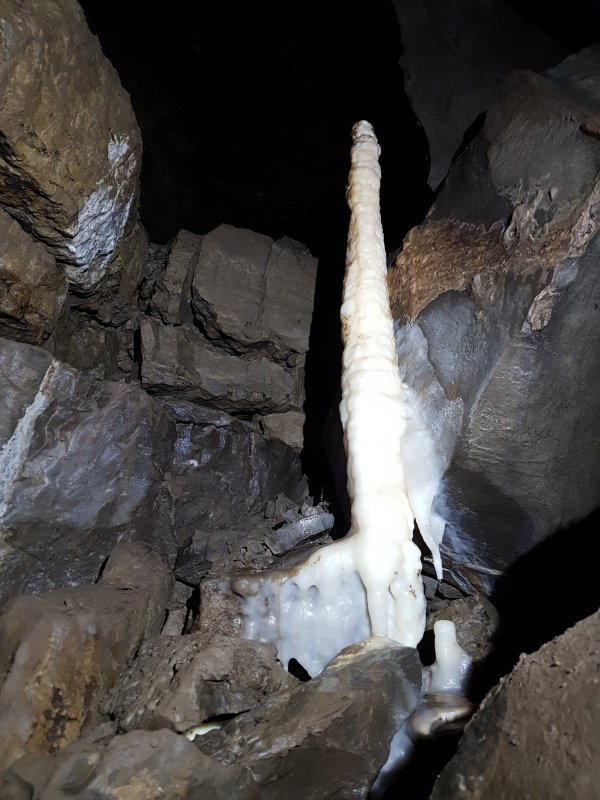 The passage ends at a choke immediately after a stalagmite. This is the other side of the boulders at the initial climb into the streamway, so there is nothing more to find up here anyway.
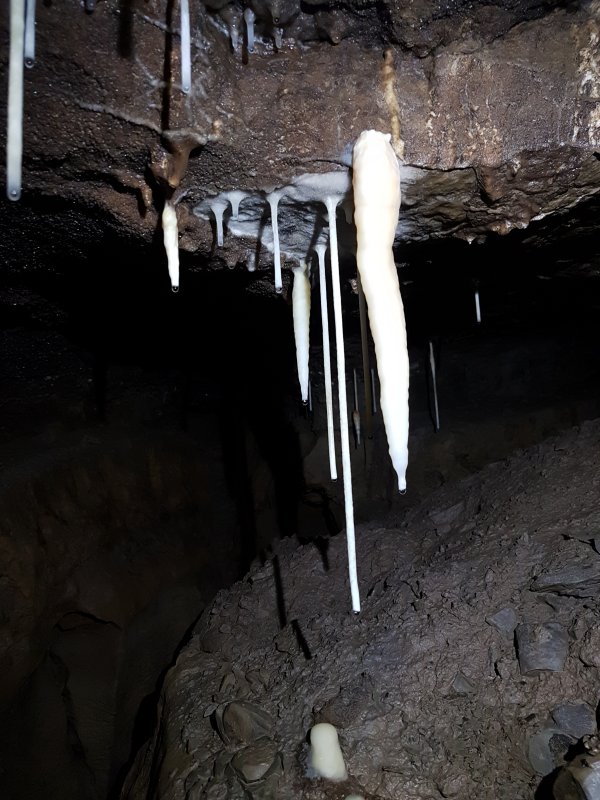 A side rift ends immediately, with its own small decorations.
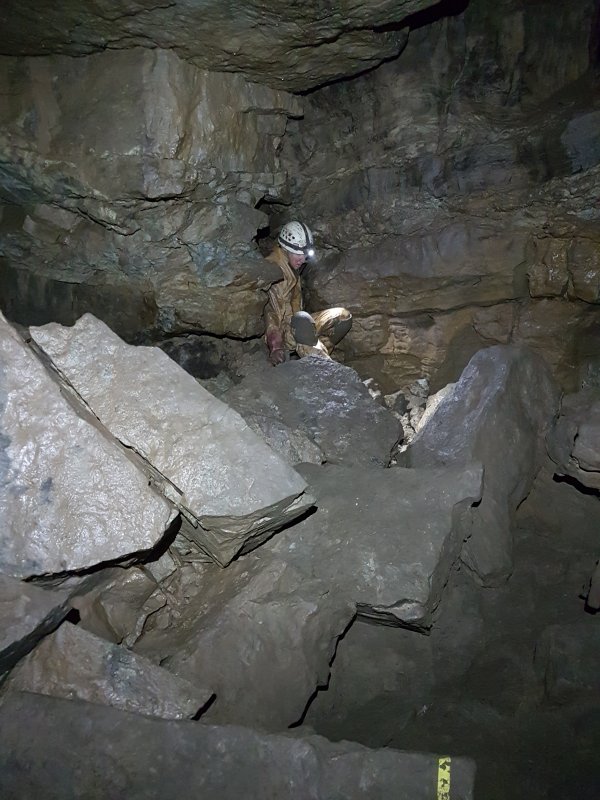 In between the boulder ruckle and the Fouth Choke in the big passage, a side rift to the left is the start of the Lower Series.
Modelling by Pete, lighting by Tarquin and Pete
In between the boulder ruckle and the Fouth Choke in the big passage, a side rift to the left is the start of the Lower Series.
Modelling by Pete, lighting by Tarquin and Pete The passage descends a tight climb.
Modelling by Tarquin's leg and Pete, lighting by Tarquin and Pete
The passage descends a tight climb.
Modelling by Tarquin's leg and Pete, lighting by Tarquin and Pete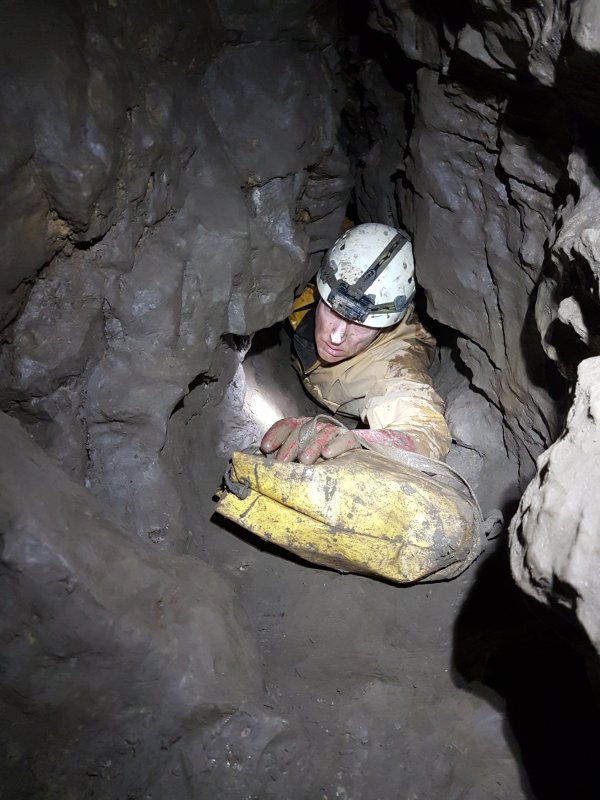 The passage at the bottom looks too small to be right, but it is.
Modelling by Pete, lighting by Tarquin and Pete
The passage at the bottom looks too small to be right, but it is.
Modelling by Pete, lighting by Tarquin and Pete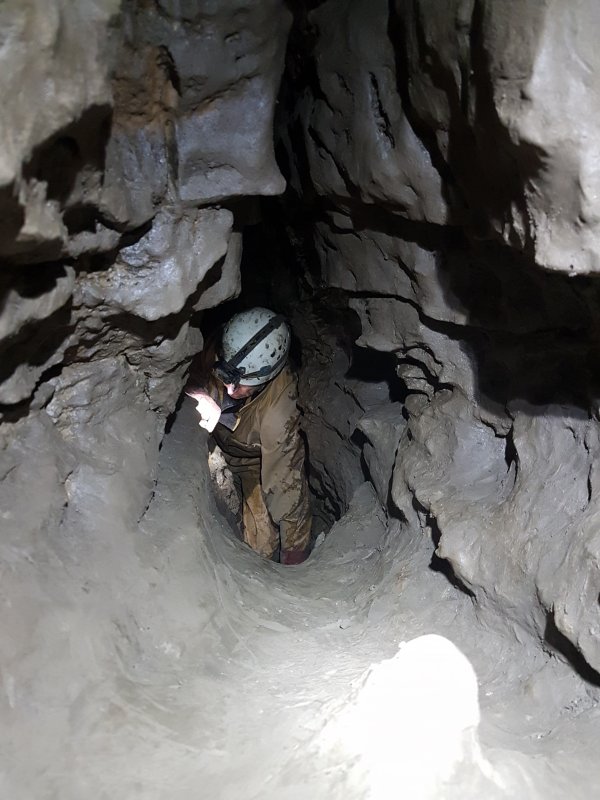 The passage beyond it remains tight.
Modelling by Pete, lighting by Tarquin and Pete
The passage beyond it remains tight.
Modelling by Pete, lighting by Tarquin and Pete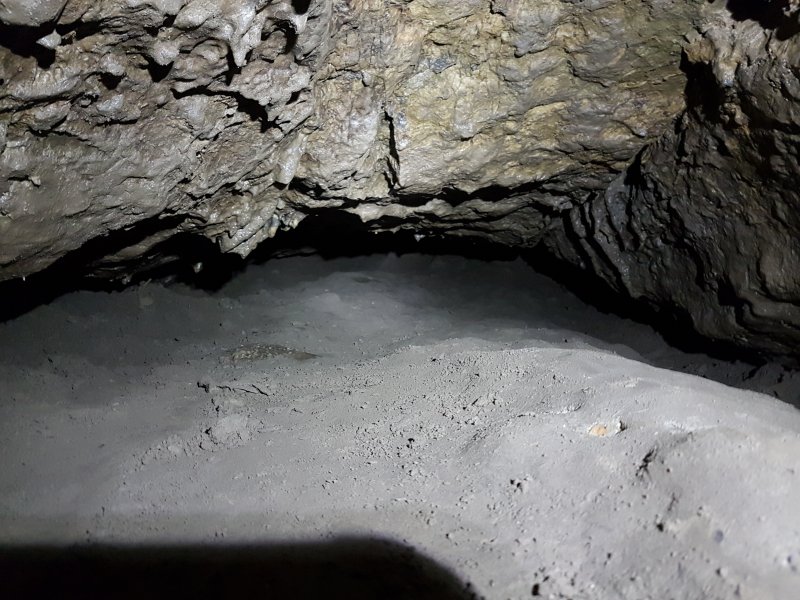 The second squeeze is quite intimidating, and looks impassable from the start. The floor rises over a rock, but the ceiling rises at the same time, and it is actually not too bad. Still, on my first visit here, we nearly gave up, assuming we had gone the wrong way.
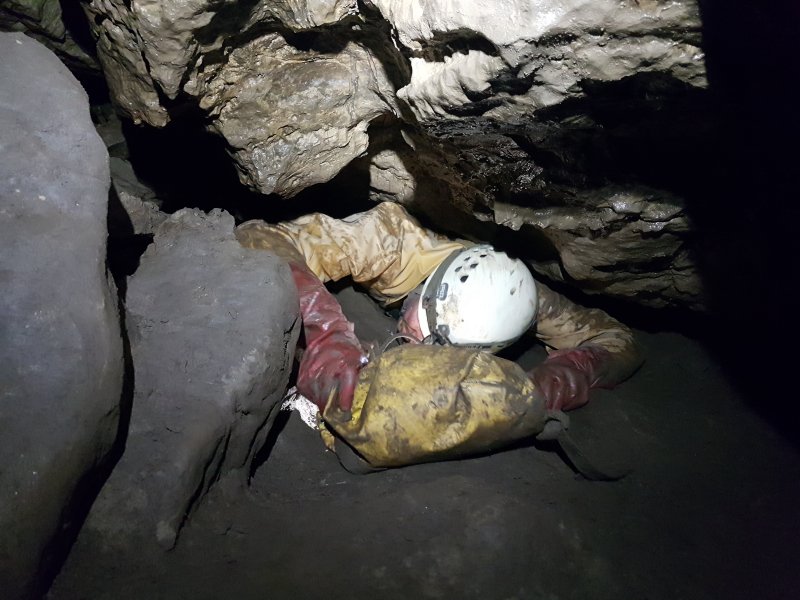 Exiting the squeeze. There is a blind passage to the left (that looks on the survey like it will be a round trip, but it isn't), while the way on is to the right, then left.
Modelling by Pete, lighting by Tarquin and Pete
Exiting the squeeze. There is a blind passage to the left (that looks on the survey like it will be a round trip, but it isn't), while the way on is to the right, then left.
Modelling by Pete, lighting by Tarquin and Pete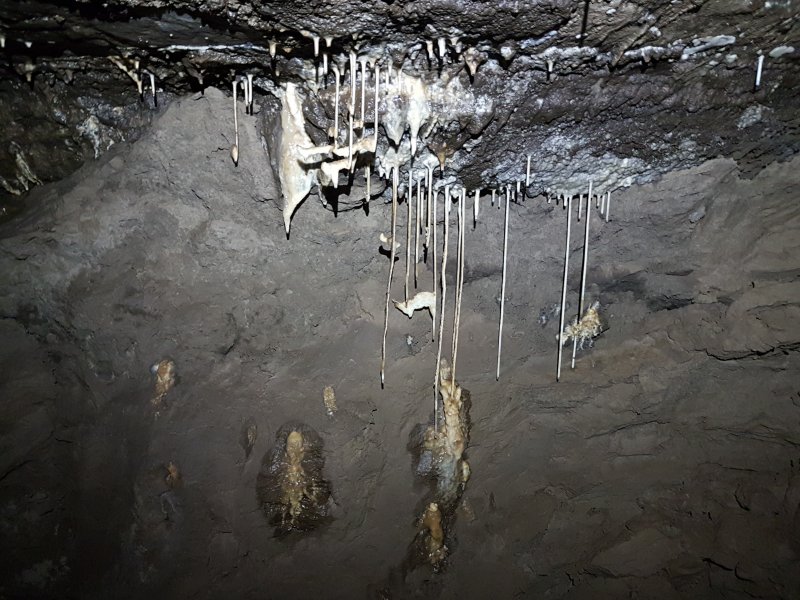 The passage appears to end abruptly at a fairly large chamber with some stal, and climbs on both sides.
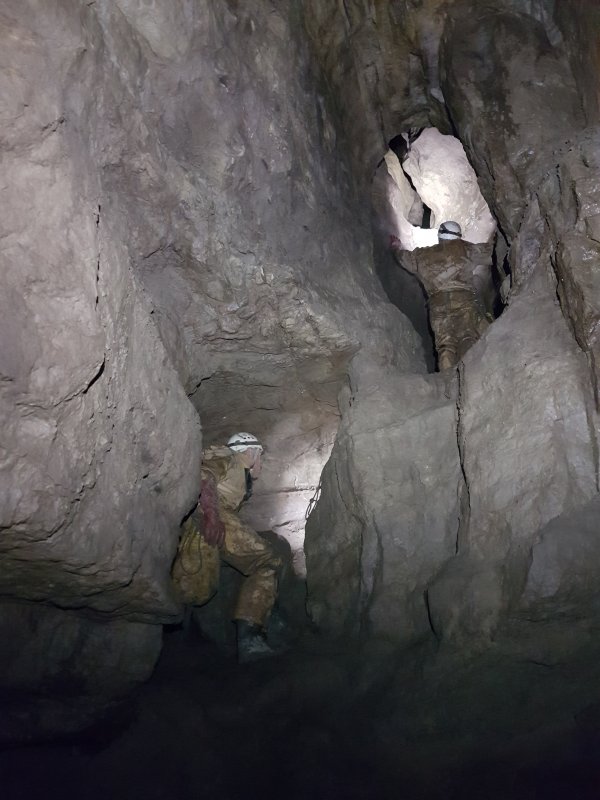 The climb on the right has a corkscrew to a higher level, followed by a climb up further to a roof passage.
Modelling by Pete and Pete, lighting by Tarquin, Pete and Pete
The climb on the right has a corkscrew to a higher level, followed by a climb up further to a roof passage.
Modelling by Pete and Pete, lighting by Tarquin, Pete and Pete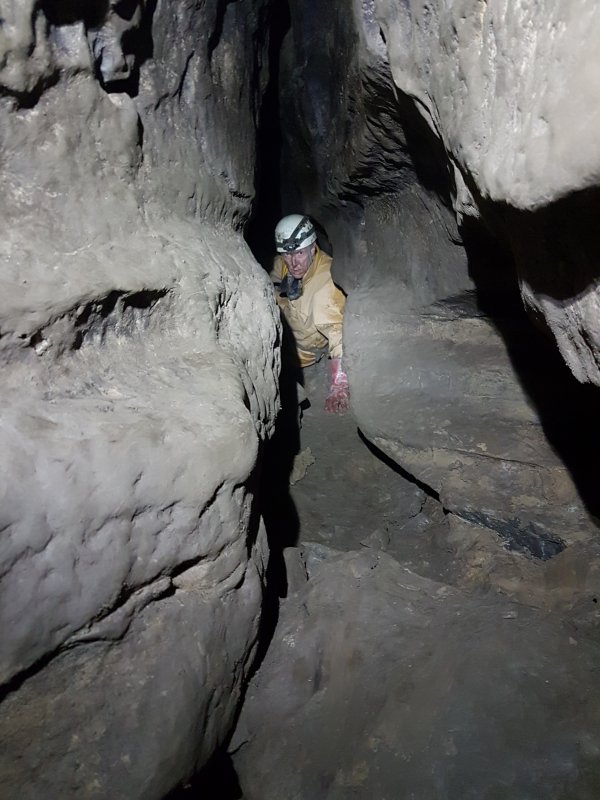 The roof passage.
Modelling by Pete
The roof passage.
Modelling by Pete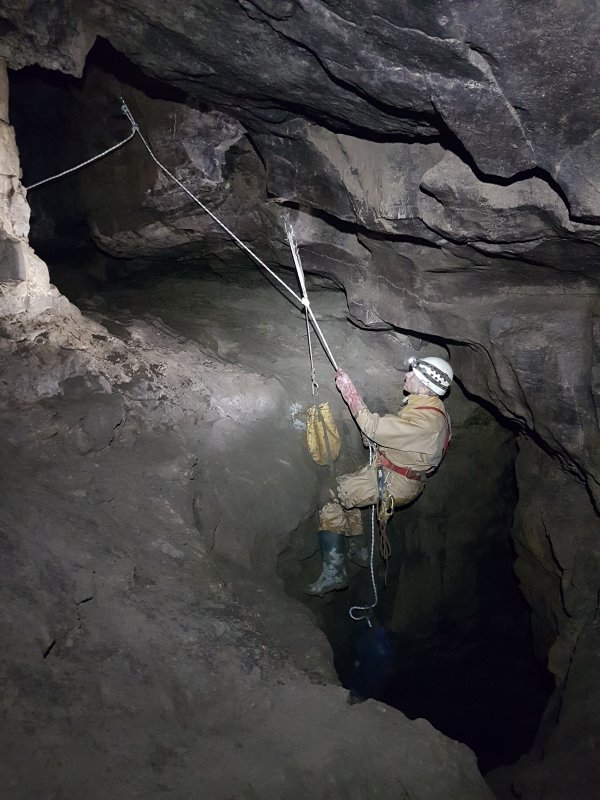 The passage ends at a pitch. Side passages give access to two alternative pitches, but this is the only one with hangers. The hangers are very poorly placed, and force a rope rub. There is a perfectly placed wall above the pitch which could have provided a free hang, but no. So a rope rub protector is needed. We used a natural for backup, and a 27 metre rope.
Modelling by Pete, lighting by Tarquin and Pete
The passage ends at a pitch. Side passages give access to two alternative pitches, but this is the only one with hangers. The hangers are very poorly placed, and force a rope rub. There is a perfectly placed wall above the pitch which could have provided a free hang, but no. So a rope rub protector is needed. We used a natural for backup, and a 27 metre rope.
Modelling by Pete, lighting by Tarquin and Pete Looking down the pitch.
Modelling by Pete, lighting by Tarquin and Pete
Looking down the pitch.
Modelling by Pete, lighting by Tarquin and Pete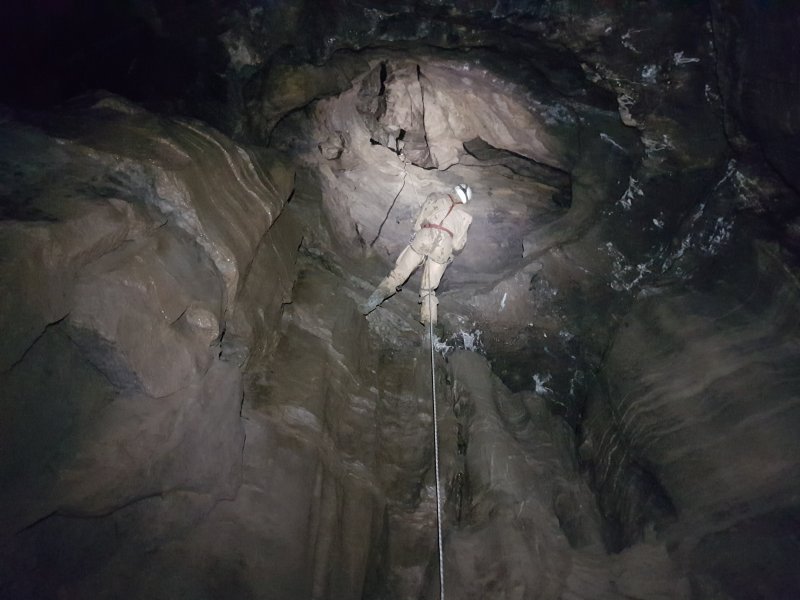 Looking up the pitch.
Modelling by Pete, lighting by Tarquin and Pete
Looking up the pitch.
Modelling by Pete, lighting by Tarquin and Pete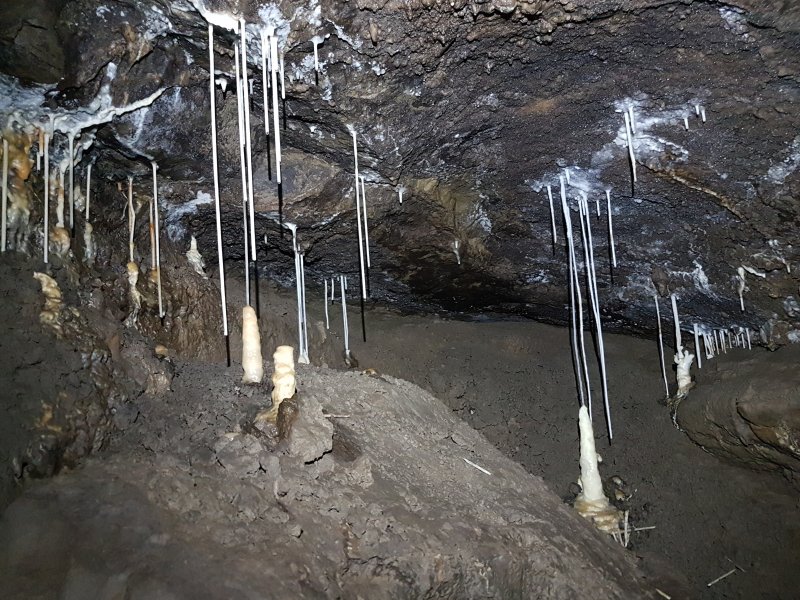 Decorated alcove half way down the pitch.
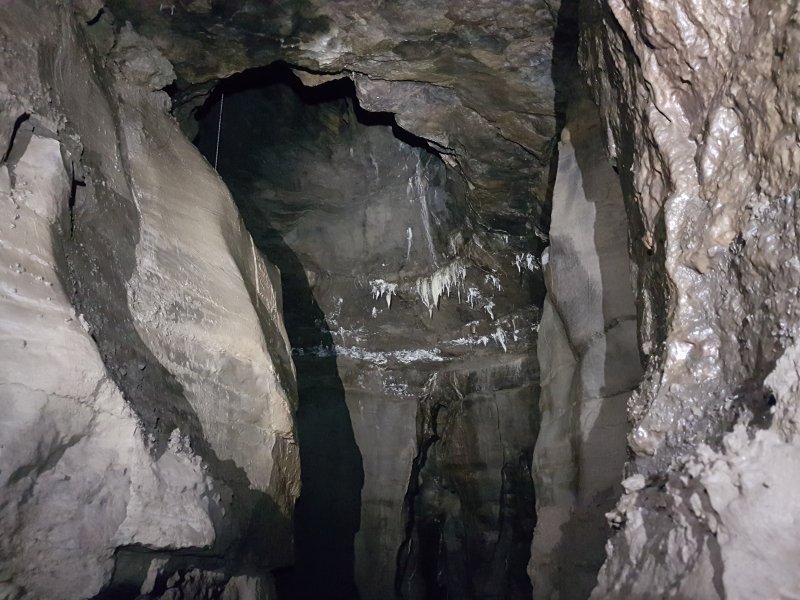 Ceiling of the pitch chamber, with formations.
Lighting by Tarquin and Pete
Ceiling of the pitch chamber, with formations.
Lighting by Tarquin and Pete A steep ramp on one side gains the base of the alternative pitches. One is so short it almost looks free climbable, but all of them need equipment.
Modelling by Pete, lighting by Tarquin and Pete
A steep ramp on one side gains the base of the alternative pitches. One is so short it almost looks free climbable, but all of them need equipment.
Modelling by Pete, lighting by Tarquin and Pete The way on is a tall rift.
Lighting by Tarquin and Pete
The way on is a tall rift.
Lighting by Tarquin and Pete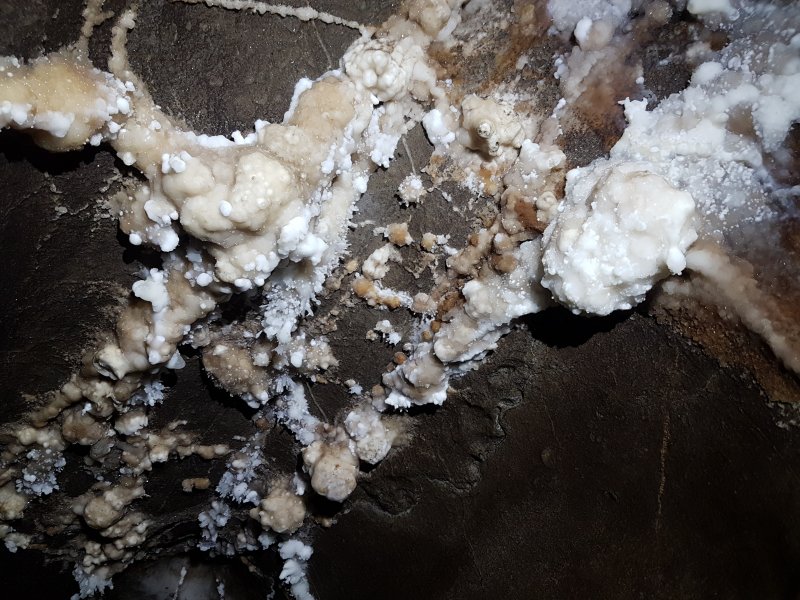 Ceiling of the rift. These are tucked so far up that they can hardly be seen from the bottom, and a very slippery chimney is required in order to see them.
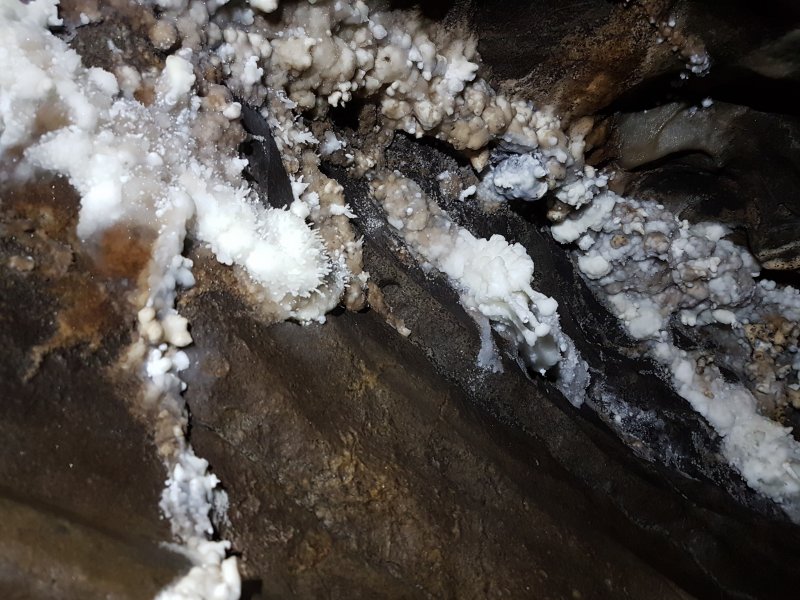 Ceiling of the rift.
 Heilictites and straws in the ceiling of the rift.
 Heilictites and straws in the ceiling of the rift.
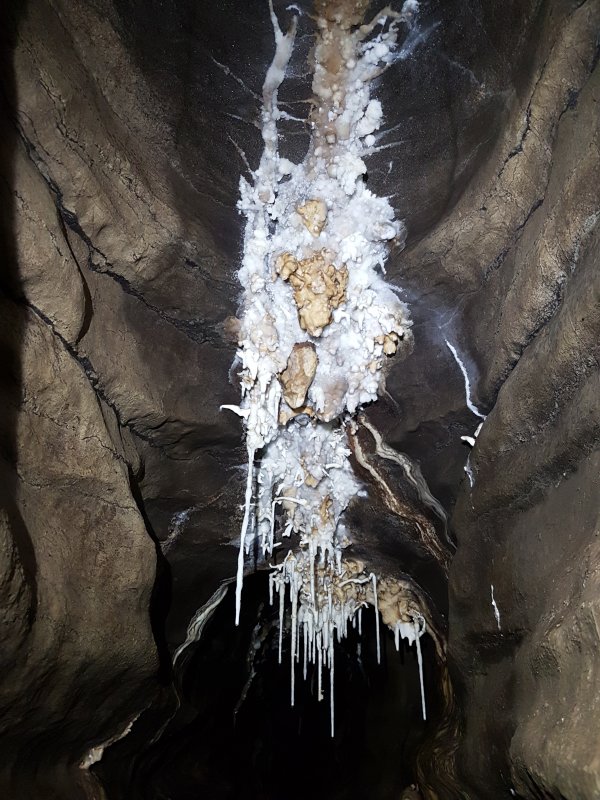 Heilictites and straws in the ceiling of the rift.
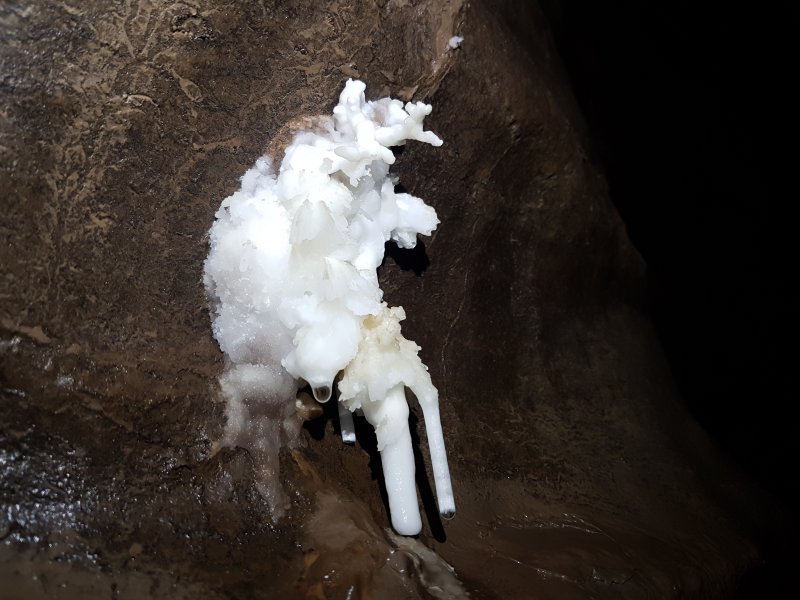 Helictites in the ceiling of the rift.
 Helictites and anthodites in the ceiling of the rift.
 The rift ends at a chamber with admirable straw decorations.
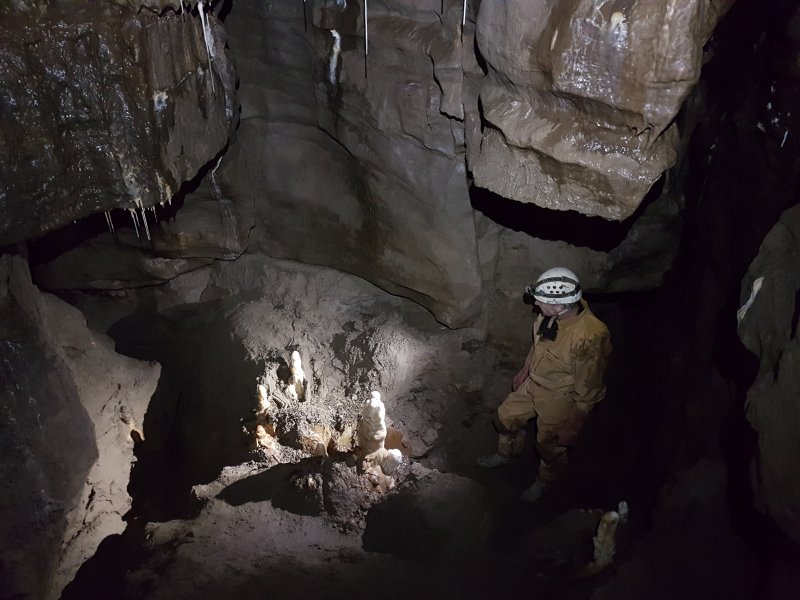 Stalagmites below the straws.
Modelling by Pete, lighting by Tarquin and Pete
Stalagmites below the straws.
Modelling by Pete, lighting by Tarquin and Pete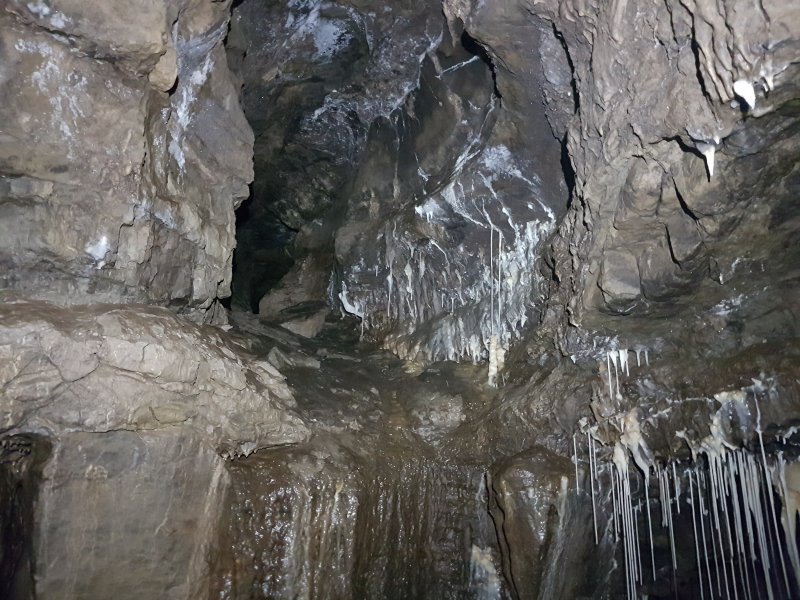 Large roof passage in the chamber, which seems to be an oxbow.
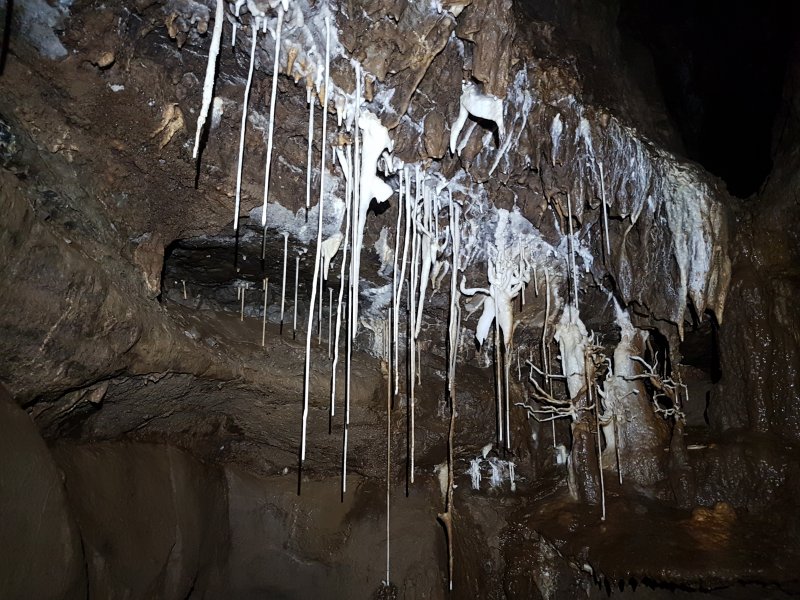 The wall of the chamber has another straw display, and some very long helictites.
Modelling by Pete, lighting by Tarquin and Pete
The wall of the chamber has another straw display, and some very long helictites.
Modelling by Pete, lighting by Tarquin and Pete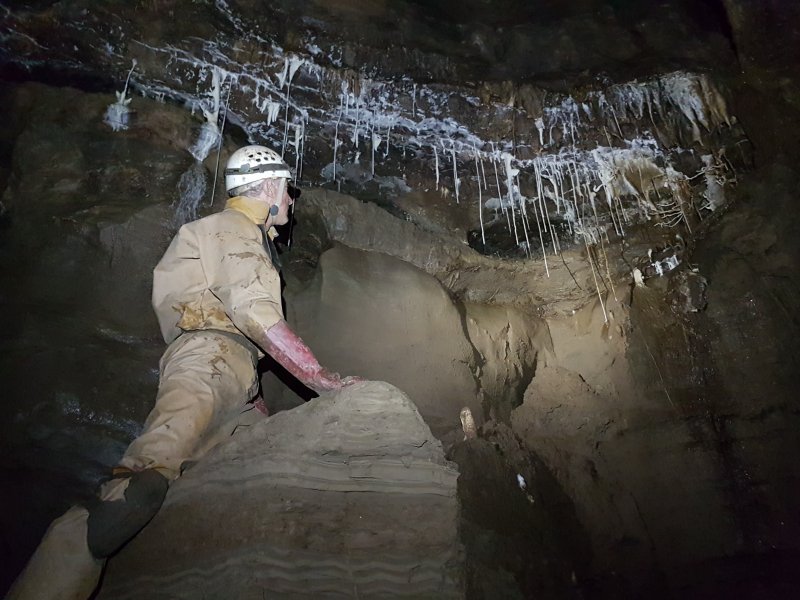 The longest helictites are 9 inches (23 cm) long. Below them is a finely layered sediment bank.
Modelling by Pete, lighting by Tarquin and Pete
The longest helictites are 9 inches (23 cm) long. Below them is a finely layered sediment bank.
Modelling by Pete, lighting by Tarquin and Pete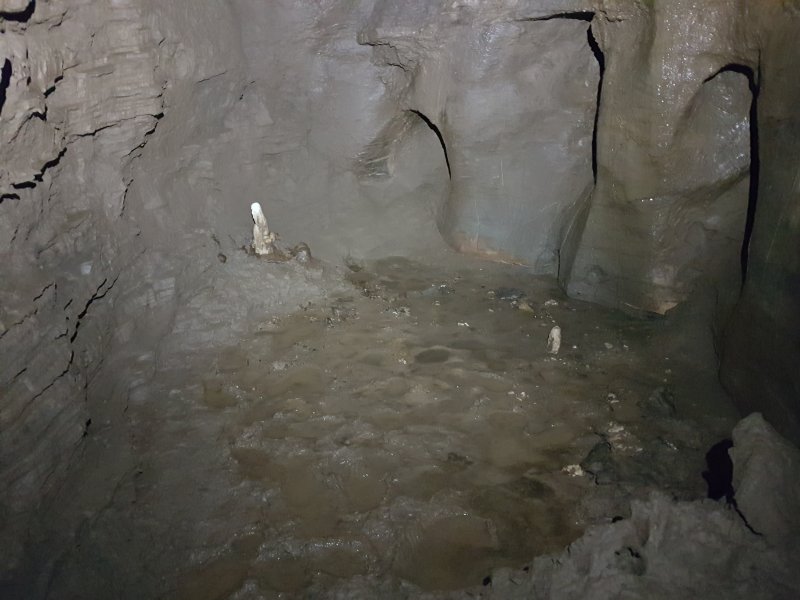 The stalamites below are rather rubbish though.
 The way on is through a low crawl, with stacked tight oxbows. The large passage beyond splits into two routes, with one having a chamber with an inlet aven. The way on from there rejoins the other route.
Modelling by Pete, lighting by Tarquin and Pete
The way on is through a low crawl, with stacked tight oxbows. The large passage beyond splits into two routes, with one having a chamber with an inlet aven. The way on from there rejoins the other route.
Modelling by Pete, lighting by Tarquin and Pete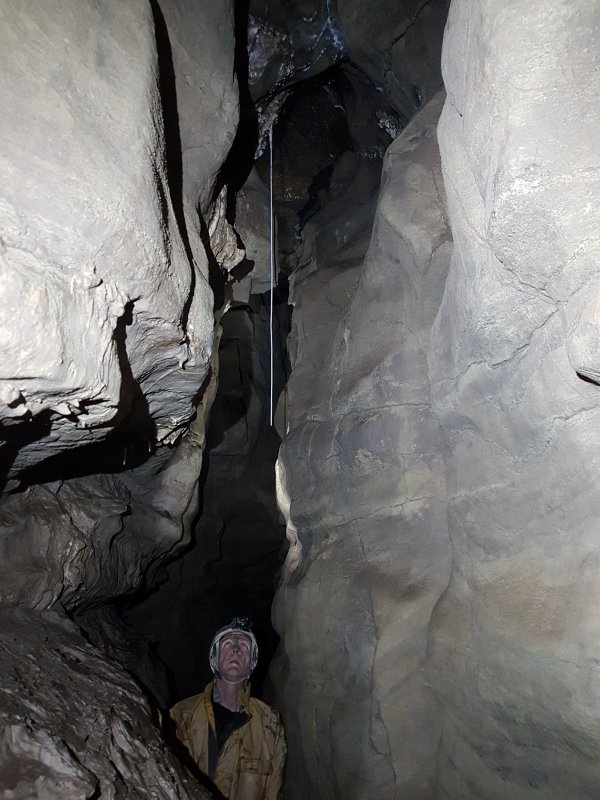 Long straw, about 5 feet (1.5 metres) long, in the passage beyond.
Modelling by Pete, lighting by Tarquin and Pete
Long straw, about 5 feet (1.5 metres) long, in the passage beyond.
Modelling by Pete, lighting by Tarquin and Pete More straws.
Modelling by Pete, lighting by Tarquin and Pete
More straws.
Modelling by Pete, lighting by Tarquin and Pete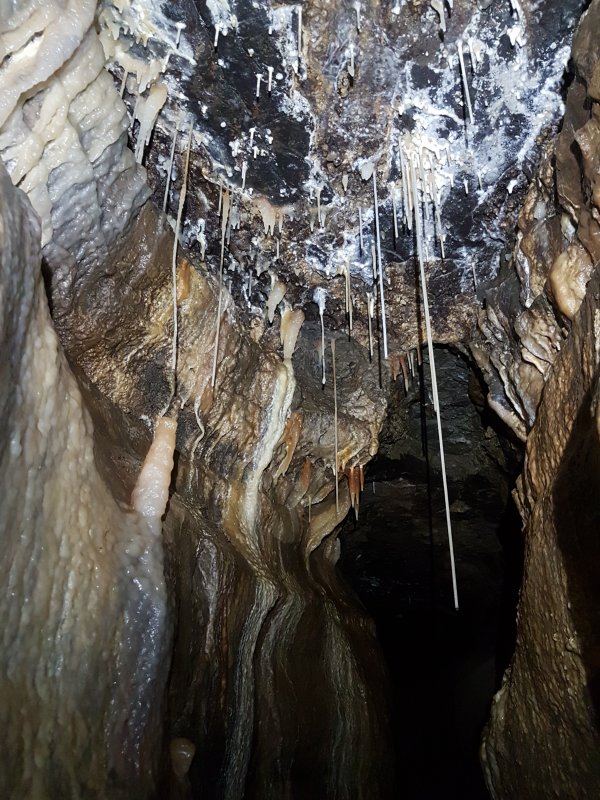 These are not as long as the lone straw, but they are still attractive.
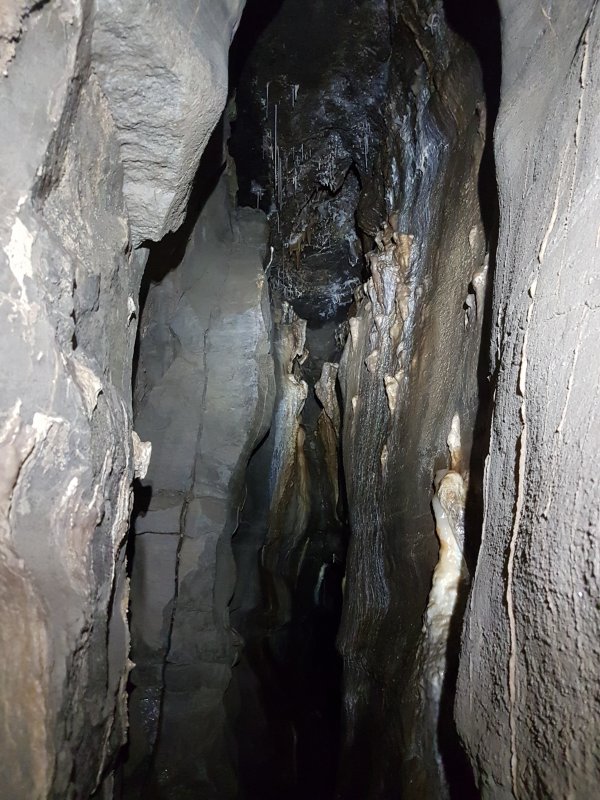 More straws. The way on is then to clamber to roof level and post yourself into a small passage over rocks.
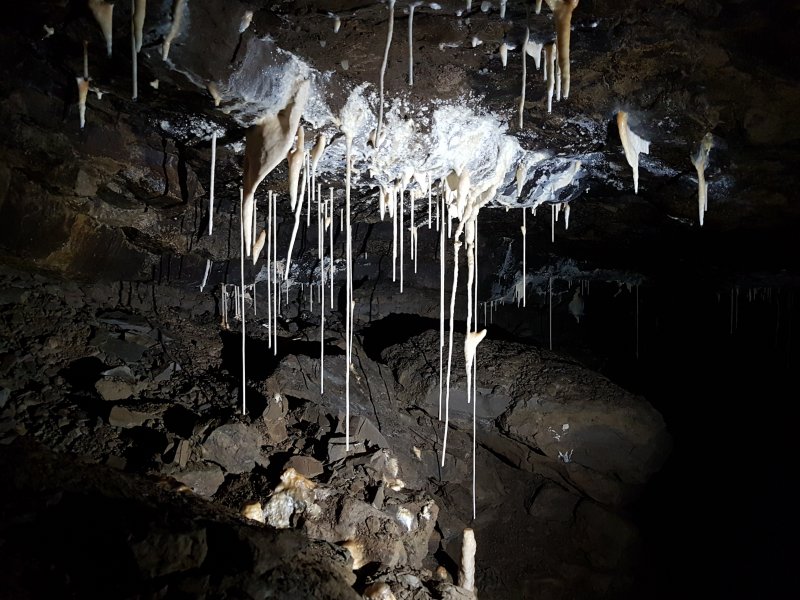 Immediately afterwards is the start of Isadora's Grotto, the best decorated piece of passage in the Lower Series.
Lighting by Pete
Immediately afterwards is the start of Isadora's Grotto, the best decorated piece of passage in the Lower Series.
Lighting by Pete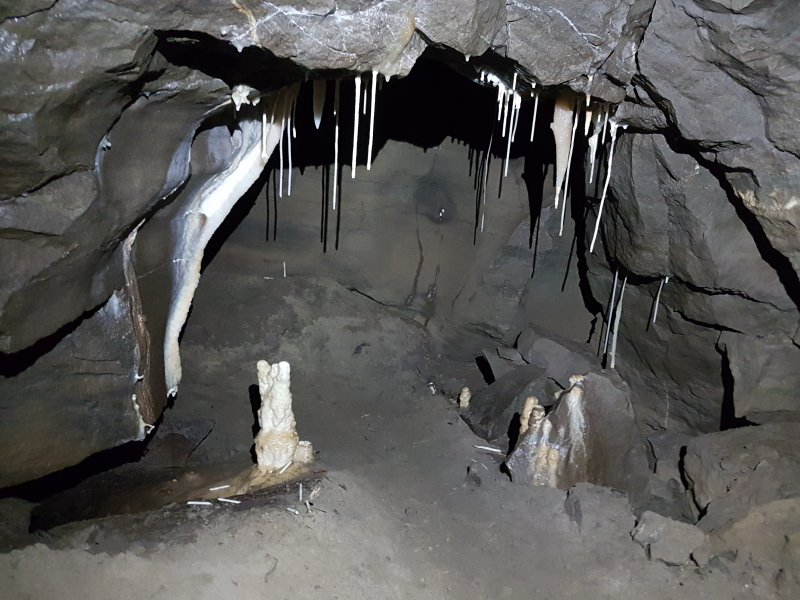 a side arch provides a way on, but firstly we will continue into the grotto.
 Isadora's Grotto.
Modelling by Pete, lighting by Tarquin and Pete
Isadora's Grotto.
Modelling by Pete, lighting by Tarquin and Pete Isadora's Grotto, backlit.
Lighting by Tarquin and Pete
Isadora's Grotto, backlit.
Lighting by Tarquin and Pete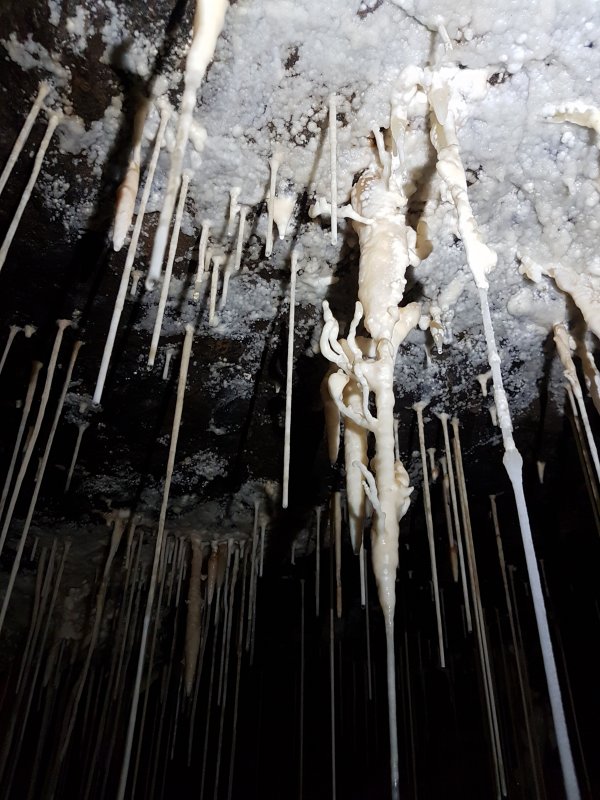 Helictite covered stalactite.
 Isadora's Grotto.
Modelling by Pete, lighting by Tarquin and Pete
Isadora's Grotto.
Modelling by Pete, lighting by Tarquin and Pete Isadora's Grotto.
Lighting by Tarquin and Pete
Isadora's Grotto.
Lighting by Tarquin and Pete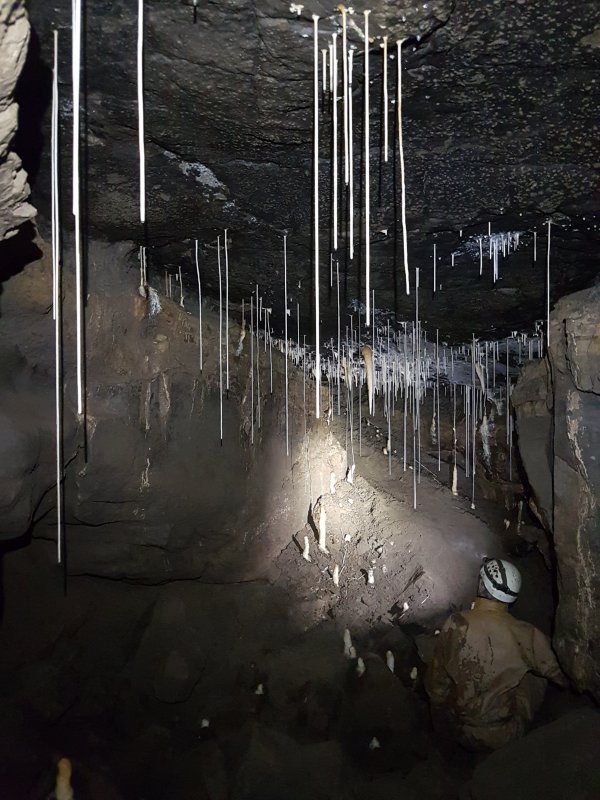 Isadora's Grotto ends at a sand slope up to a dig. Amazingly, someone has managed to slide up this slope into the dig without breaking everything.
Modelling by Pete, lighting by Tarquin and Pete
Isadora's Grotto ends at a sand slope up to a dig. Amazingly, someone has managed to slide up this slope into the dig without breaking everything.
Modelling by Pete, lighting by Tarquin and Pete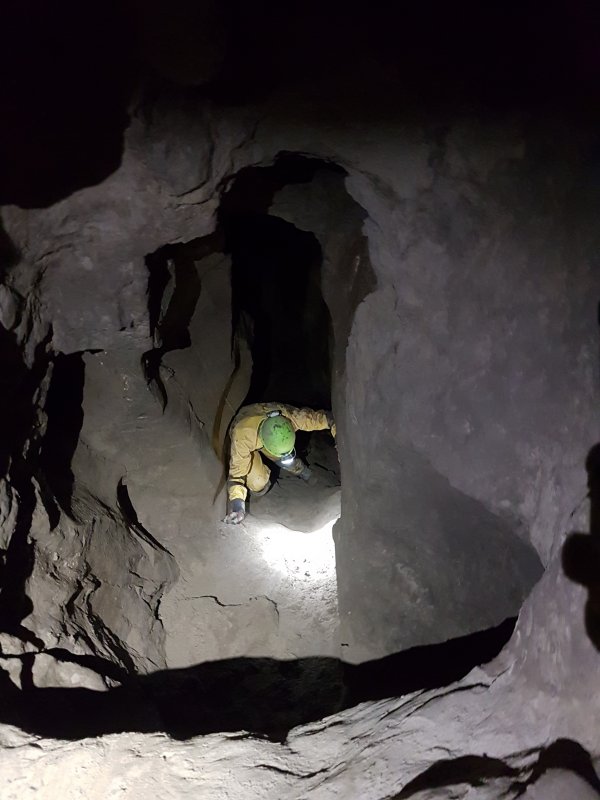 The side arch reaches a chimney down to a streamway.
Camera and setup by Pete, modelling by Tarquin, lighting by Pete and Tarquin
The side arch reaches a chimney down to a streamway.
Camera and setup by Pete, modelling by Tarquin, lighting by Pete and Tarquin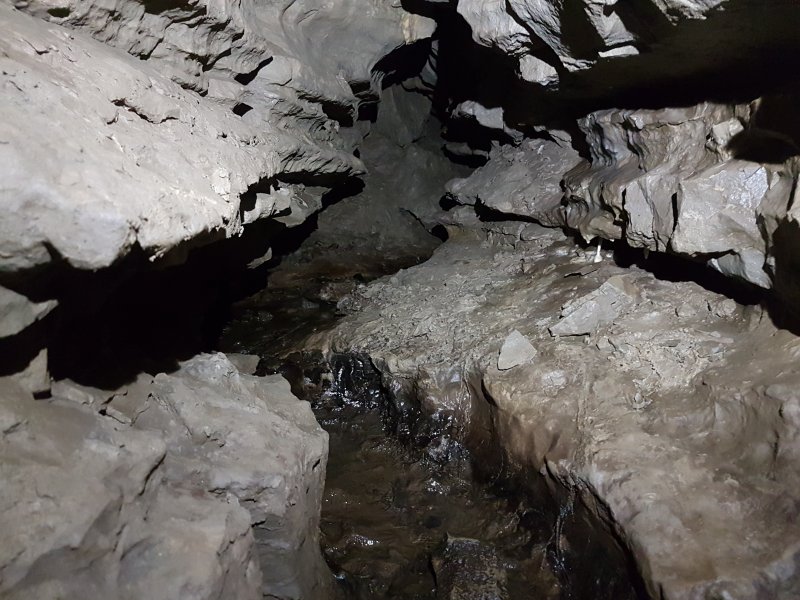 To the left is a very small inlet passage, which may be the stream from the Promised Land. It ends underneath the last inlet chamber, and is absolutely not worth following.
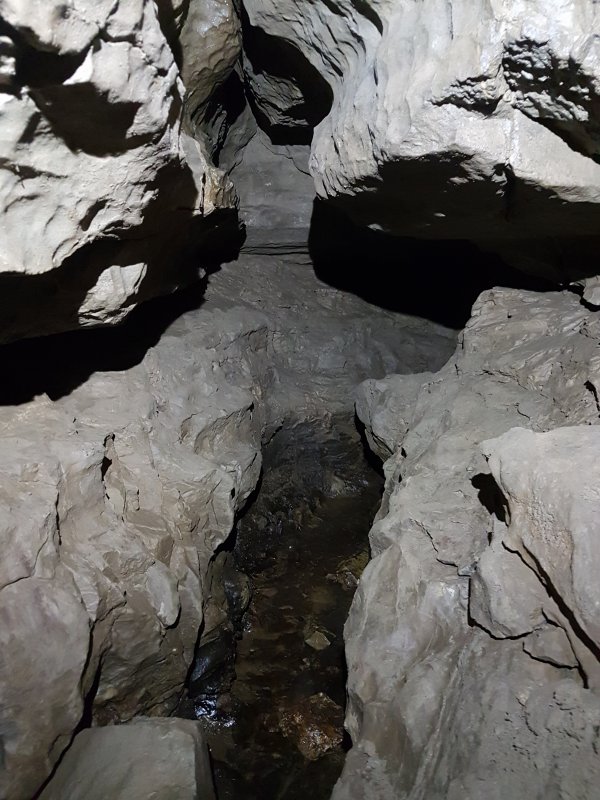 Downstream is longer, ending near the Blaen Elin side passage. The water presumably joins the Blaen Elin streamway at the choke. This passage is also absolutely not worth following.
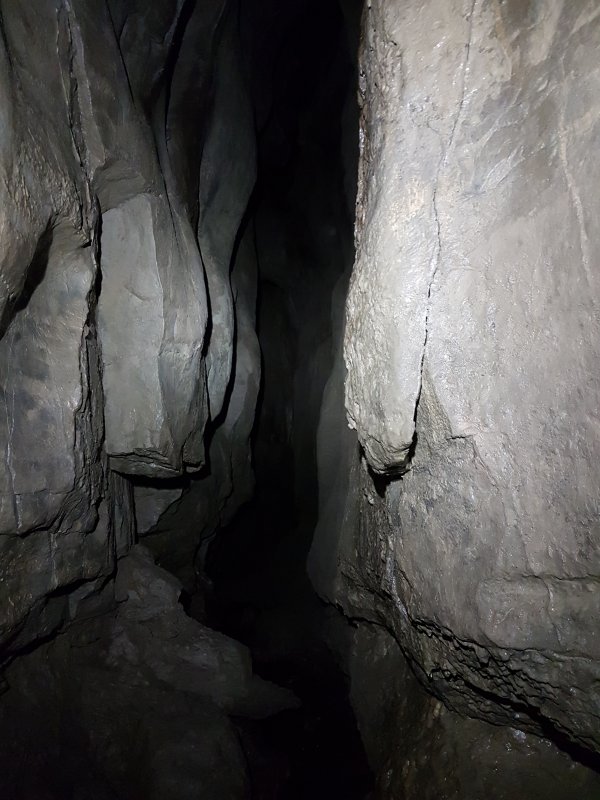 Instead, the best way on is ahead into the rift.
 Stal in the way on.
Modelling by Pete, lighting by Tarquin and Pete
Stal in the way on.
Modelling by Pete, lighting by Tarquin and Pete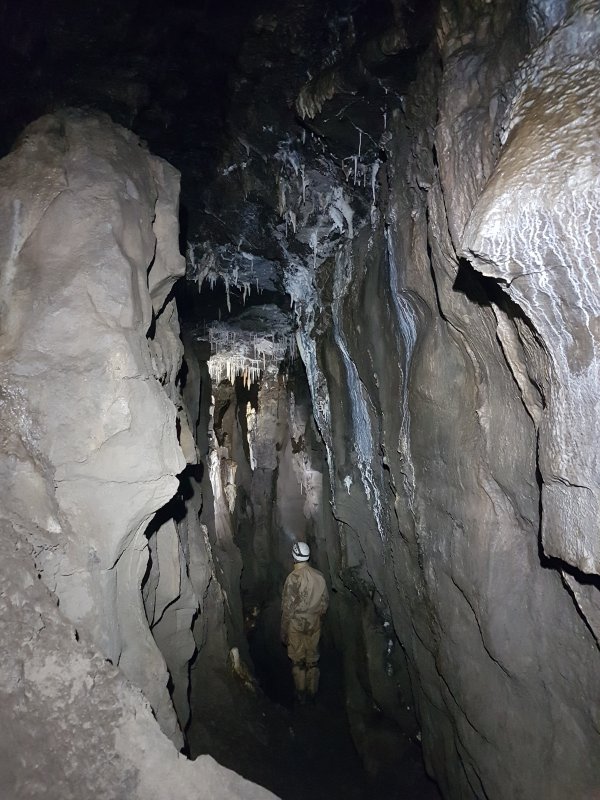 The passage is briefly quite grand.
Modelling by Pete, lighting by Tarquin and Pete
The passage is briefly quite grand.
Modelling by Pete, lighting by Tarquin and Pete Ceiling of the passage.
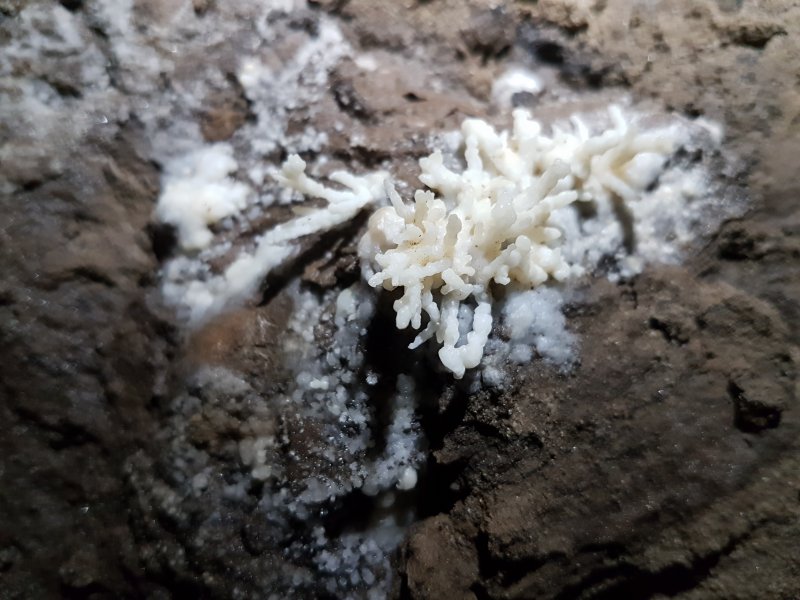 Helictites near the end.
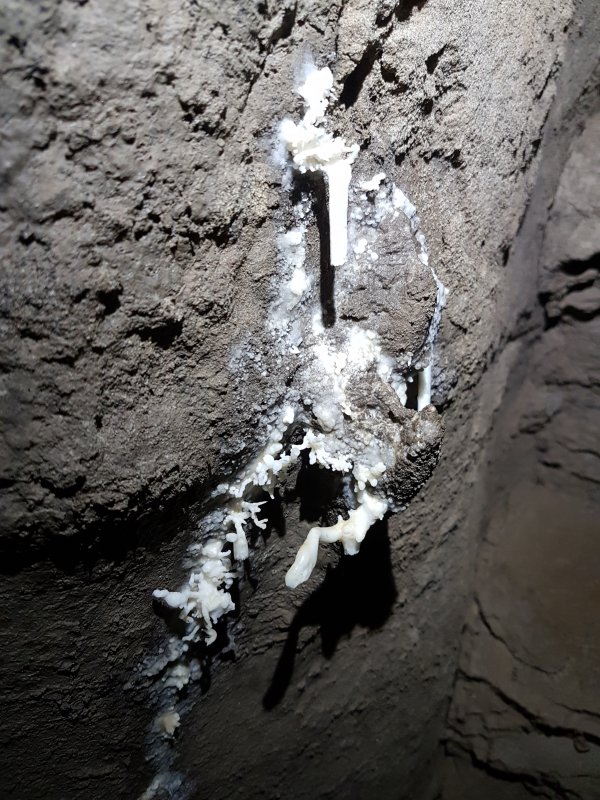 Helictites near the end.
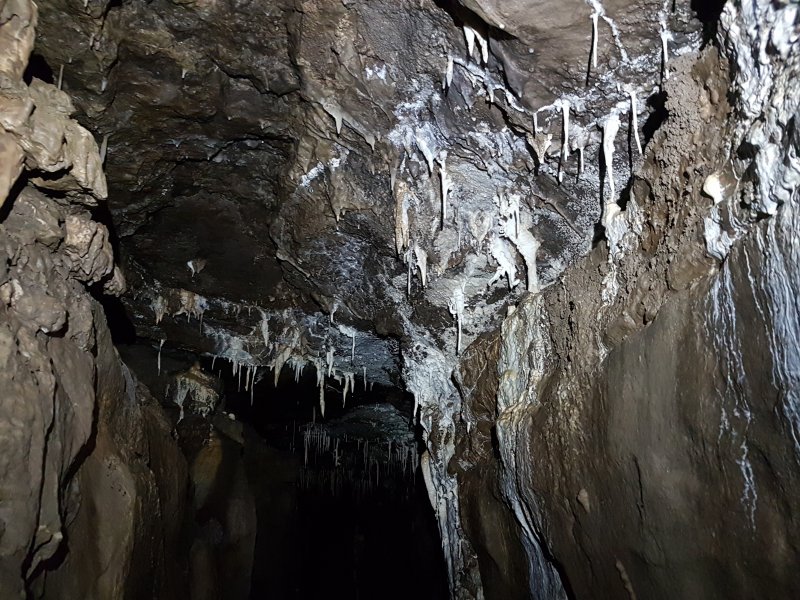 Ceiling of the passage.
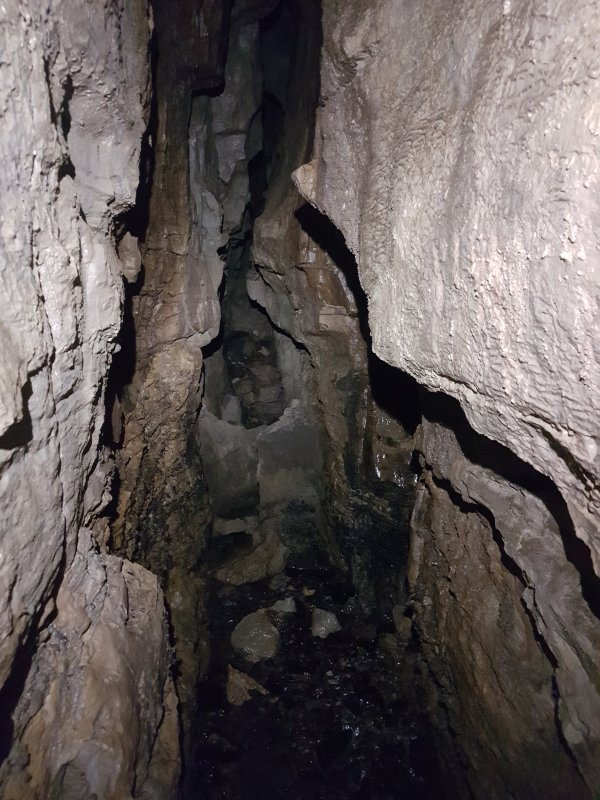 The passage appears to end, but a hole down enters a short rift, with a small inlet stream. This ends at a choke, which is beneath the floor of the blind side passage after the squeezes at the start of the Lower Series. This would have made a nice round trip, but instead, you have to return the same way.