Ogof Ffynnon Ddu Waterfall Series and Railton - Wild Series trip 04/04/2021
Unless otherwise stated, camera, setups, lighting, edits and gallery effects by Tarquin. Modelling and lighting at various points will be Pete Bolt.
These are the final two series in Ogof Ffynnon Ddu I. Waterfall Series is the latter of the two, and far more extensive, with better decorations. We were both trying to regain our caving fitness after a lengthy lockdown, so we chose to do a couple of series, allowing us to add on more after the first one if we still had the energy. As it turned out, both series, with photography, took under 5 hours. Each of these will get a good number of pictures, so if you don't like long galleries, perhaps try a different one...
 The lower portion of the OFD I Streamway, between Pluto's Bath and The Step.
Modelling by Pete, lighting by Tarquin and Pete
The lower portion of the OFD I Streamway, between Pluto's Bath and The Step.
Modelling by Pete, lighting by Tarquin and Pete The Step. This is a useful safety feature; if the rock you stand on has water over it, then the river is too powerful to be followed safely, and the Escape Route should be used instead. Here it is a few inches above the water, so we could continue upstream.
Modelling by Pete, lighting by Tarquin and Pete
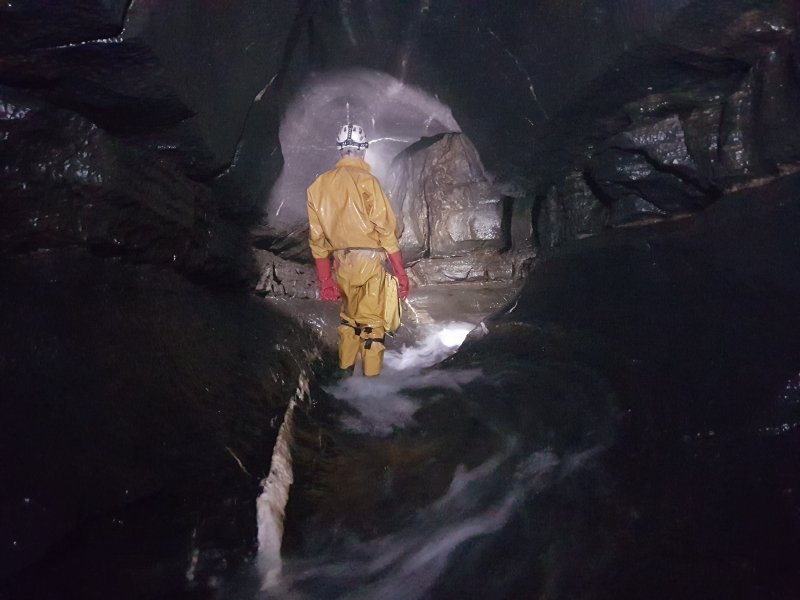
The Step. This is a useful safety feature; if the rock you stand on has water over it, then the river is too powerful to be followed safely, and the Escape Route should be used instead. Here it is a few inches above the water, so we could continue upstream.
Modelling by Pete, lighting by Tarquin and Pete Upstream of The Step. This superb river would make an excellent water slide, you just need a rubber ring.
Modelling by Pete, lighting by Tarquin and Pete
Upstream of The Step. This superb river would make an excellent water slide, you just need a rubber ring.
Modelling by Pete, lighting by Tarquin and Pete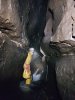 Crossing the First Pot. This is a very deep scour in the floor of the river, which would require swimming or a very difficult traverse. To make things easier, there is a scaffolding pole chained in place over the pot, which you walk over like a tightrope. In OFD II there are no poles, and you cross them the hard way.
Modelling by Pete, lighting by Tarquin and Pete
Crossing the First Pot. This is a very deep scour in the floor of the river, which would require swimming or a very difficult traverse. To make things easier, there is a scaffolding pole chained in place over the pot, which you walk over like a tightrope. In OFD II there are no poles, and you cross them the hard way.
Modelling by Pete, lighting by Tarquin and Pete Crossing Second Pot, which is much more obvious than the first one. This one would not be traversable.
Modelling by Pete, lighting by Tarquin and Pete
Crossing Second Pot, which is much more obvious than the first one. This one would not be traversable.
Modelling by Pete, lighting by Tarquin and Pete A cascade, which presents more of an obstacle than anything else in the river. Traverse the wall to avoid a soaking. Upstream of here, the Escape Route's Bolt Traverse can be glimpsed up on the ledges high above.
Modelling by Pete, lighting by Tarquin and Pete
A cascade, which presents more of an obstacle than anything else in the river. Traverse the wall to avoid a soaking. Upstream of here, the Escape Route's Bolt Traverse can be glimpsed up on the ledges high above.
Modelling by Pete, lighting by Tarquin and Pete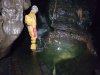 Third Pot, another deep scour, though perhaps not as deep as the others. There is a pole, again.
Modelling by Pete, lighting by Tarquin and Pete
Third Pot, another deep scour, though perhaps not as deep as the others. There is a pole, again.
Modelling by Pete, lighting by Tarquin and Pete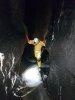 Fourth Pot, the last in OFD I. This could easily be traversed without the pole, and the biggest risk is that you might not see it.
Modelling by Pete, lighting by Tarquin and Pete
Fourth Pot, the last in OFD I. This could easily be traversed without the pole, and the biggest risk is that you might not see it.
Modelling by Pete, lighting by Tarquin and Pete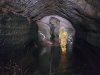 The last part of the streamway, just below the upstream sump. On the left here is The Slide, one of the ways into Railton - Wild Series, requiring a slippery climb.
Modelling by Pete, lighting by Tarquin and Pete
The last part of the streamway, just below the upstream sump. On the left here is The Slide, one of the ways into Railton - Wild Series, requiring a slippery climb.
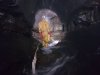
Modelling by Pete, lighting by Tarquin and Pete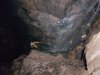 Continuing upstream along the inlet of Upper Flood Passage reaches the base of the waterfall that gives Waterfall Series its name. It is possible to free climb this, and earn a soaking.
Modelling by Pete, lighting by Tarquin and Pete
Continuing upstream along the inlet of Upper Flood Passage reaches the base of the waterfall that gives Waterfall Series its name. It is possible to free climb this, and earn a soaking.
Modelling by Pete, lighting by Tarquin and Pete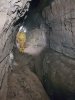 The dry way is to continue towards Boulder Chamber, then return via a traverse along the ledges, the later part of which has a cable.
Modelling by Pete, lighting by Tarquin and Pete
The dry way is to continue towards Boulder Chamber, then return via a traverse along the ledges, the later part of which has a cable.
Modelling by Pete, lighting by Tarquin and Pete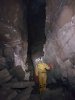 A scramble up through boulders reaches the main passage of Waterfall Series, which ends almost immediately to the left where it plummets into Upper Flood Passage. Towards the end, the boulders on the floor are wedged in the roof of Upper Flood Passage, and are not a solid floor.
Modelling by Pete, lighting by Tarquin and Pete
A scramble up through boulders reaches the main passage of Waterfall Series, which ends almost immediately to the left where it plummets into Upper Flood Passage. Towards the end, the boulders on the floor are wedged in the roof of Upper Flood Passage, and are not a solid floor.
Modelling by Pete, lighting by Tarquin and Pete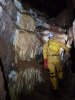 The main way on is ahead, along an enormous passage. The formations start immediately.
Modelling by Pete, lighting by Tarquin and Pete
The main way on is ahead, along an enormous passage. The formations start immediately.
Modelling by Pete, lighting by Tarquin and Pete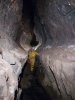 Early canyon style.
Modelling by Pete, lighting by Tarquin and Pete
Early canyon style.
Modelling by Pete, lighting by Tarquin and Pete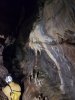 Formations in the canyon.
Modelling by Pete
Formations in the canyon.
Modelling by Pete Formations in the canyon.
 Formations in the canyon.
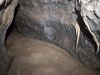 The canyon splits. Ahead-right is Wet Way, which also splits into the inlet on the left, and this crawl ahead.
 Formations in the side passage.
Modelling by Pete
Formations in the side passage.
Modelling by Pete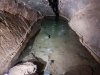 The passage ends at this gorgeous crystal pool, where it is taped off. The rift at the far end is only about 10 cm wide, but the survey shows that someone has at some point been through it, presumably below water level where it is a little wider. Whether they bailed/siphoned it, or dived it with bottles I do not know, but they gained about 75 metres of narrow passage that ended too tight; Much Binding.
Lighting by Tarquin and Pete
The passage ends at this gorgeous crystal pool, where it is taped off. The rift at the far end is only about 10 cm wide, but the survey shows that someone has at some point been through it, presumably below water level where it is a little wider. Whether they bailed/siphoned it, or dived it with bottles I do not know, but they gained about 75 metres of narrow passage that ended too tight; Much Binding.
Lighting by Tarquin and Pete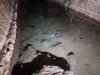 There are several calcite rafts on the pool, so going through it will not be an option again.
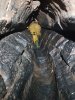 The Wet Way continues up the inlet to connect with Highgate.
Modelling by Pete, lighting by Tarquin and Pete
The Wet Way continues up the inlet to connect with Highgate.
Modelling by Pete, lighting by Tarquin and Pete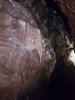 Formations in Dry Way, the huge canyon continuing ahead-left at the junction with Wet Way.
Lighting by Tarquin and Pete
Formations in Dry Way, the huge canyon continuing ahead-left at the junction with Wet Way.
Lighting by Tarquin and Pete Dry Way.
Modelling by Pete, lighting by Tarquin and Pete
Dry Way.
Modelling by Pete, lighting by Tarquin and Pete Whitewash formation in Dry Way.
Modelling by Pete, lighting by Tarquin and Pete
Whitewash formation in Dry Way.
Modelling by Pete, lighting by Tarquin and Pete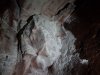 Formations in Dry Way.
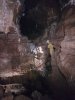 Idol Junction, where Highgate starts low on the right, and West Leg continues up the climb ahead. A side passage above the climb joins Highgate.
Modelling by Pete, lighting by Tarquin and Pete
Idol Junction, where Highgate starts low on the right, and West Leg continues up the climb ahead. A side passage above the climb joins Highgate.
Modelling by Pete, lighting by Tarquin and Pete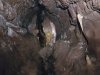 West Leg. A side passage on the right has an aven connecting with Peggy's Purgatory.
Modelling by Pete, lighting by Tarquin and Pete
West Leg. A side passage on the right has an aven connecting with Peggy's Purgatory.
Modelling by Pete, lighting by Tarquin and Pete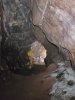 Top Loop, an oxbow to the upper part of West Leg, starting just before the corner.
Modelling by Pete, lighting by Tarquin and Pete
Top Loop, an oxbow to the upper part of West Leg, starting just before the corner.
Modelling by Pete, lighting by Tarquin and Pete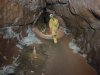 Top Loop.
Modelling by Pete, lighting by Tarquin and Pete
Top Loop.
Modelling by Pete, lighting by Tarquin and Pete When West Leg turns sharp left, a dead end passage has an aven that is the end of a tight round trip, which will be mentioned later.
Modelling by Pete, lighting by Tarquin and Pete
When West Leg turns sharp left, a dead end passage has an aven that is the end of a tight round trip, which will be mentioned later.
Modelling by Pete, lighting by Tarquin and Pete The natural bridge, seen from Muddy Way looking towards West Leg, where Top Loop joins from above the bridge to the right, and Top Way to the left.
Modelling by Pete, lighting by Tarquin and Pete
The natural bridge, seen from Muddy Way looking towards West Leg, where Top Loop joins from above the bridge to the right, and Top Way to the left.
Modelling by Pete, lighting by Tarquin and Pete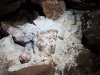 Moonmilk formations on the boulders in Muddy Way.
Modelling by Pete, lighting by Tarquin and Pete
Moonmilk formations on the boulders in Muddy Way.
Modelling by Pete, lighting by Tarquin and Pete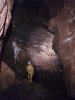 Muddy Way ends in a large chamber. A small passage behind the camera soon ends. Ahead is Clean Way. To the left is Pole Passage at ceiling level. To the right are Muddy Way and Top Way.
Modelling by Pete, lighting by Tarquin and Pete
Muddy Way ends in a large chamber. A small passage behind the camera soon ends. Ahead is Clean Way. To the left is Pole Passage at ceiling level. To the right are Muddy Way and Top Way.
Modelling by Pete, lighting by Tarquin and Pete Pole Passage, seen over the same chamber from Top Way. This needs bolting or maypole equipment, but the passage ends very quickly, and does not appear to be worth visiting.
Modelling by Pete, lighting by Tarquin and Pete
Pole Passage, seen over the same chamber from Top Way. This needs bolting or maypole equipment, but the passage ends very quickly, and does not appear to be worth visiting.
Modelling by Pete, lighting by Tarquin and Pete The chamber can also be reached via a different oxbow; Clean Way (though since it carries a stream, Clean Way is not an oxbow, Muddy Way is ... but whatever).
Modelling by Pete, lighting by Tarquin and Pete
The chamber can also be reached via a different oxbow; Clean Way (though since it carries a stream, Clean Way is not an oxbow, Muddy Way is ... but whatever).
Modelling by Pete, lighting by Tarquin and Pete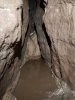 Clean Way's inlet ends at a flowstone formation.
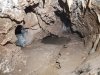 A small side passage ends at a choked alcove and silted sump, which will be seen later.
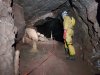 Formations at the start of Highgate, the way to the East Leg and the rest of the series.
Modelling by Pete, lighting by Tarquin and Pete
Formations at the start of Highgate, the way to the East Leg and the rest of the series.
Modelling by Pete, lighting by Tarquin and Pete Formations in Highgate.
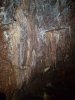 Formations in Highgate.
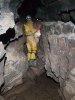 At a junction, East Gate continues upstream to the left.
Modelling by Pete, lighting by Tarquin and Pete
At a junction, East Gate continues upstream to the left.
Modelling by Pete, lighting by Tarquin and Pete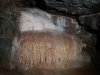 Flowstone in East Leg.
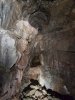 Stal in an alcove where a low oxbow ends.
Lighting by Tarquin and Pete
Stal in an alcove where a low oxbow ends.
Lighting by Tarquin and Pete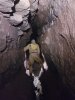 Traversing in East Leg.
Modelling by Pete, lighting by Tarquin and Pete
Traversing in East Leg.
Modelling by Pete, lighting by Tarquin and Pete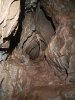 Column in an alcove at the junction with Cross Way.
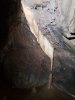 Formations in Cross Way.
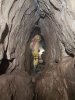 Cross Way.
Modelling by Pete, lighting by Tarquin and Pete
Cross Way.
Modelling by Pete, lighting by Tarquin and Pete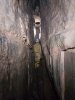 Cross Way appears to end.
Modelling by Pete, lighting by Tarquin and Pete
Cross Way appears to end.
Modelling by Pete, lighting by Tarquin and Pete Climbing into the continuation.
Modelling by Pete, lighting by Tarquin and Pete
Climbing into the continuation.
Modelling by Pete, lighting by Tarquin and Pete A side passage with a silted sump and choked alcove. Sounds familiar? It is the same sump and choked alcove as before, now from the other side.
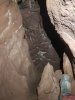 A climb overhead or a squeeze through an eyehole gains Peggy's Purgatory.
Modelling by Tarquin's hoof.
A climb overhead or a squeeze through an eyehole gains Peggy's Purgatory.
Modelling by Tarquin's hoof.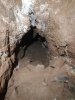 Descending into Peggy's Purgatory.
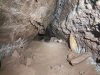 Peggy's Purgatory is an exceptionally tight crawl, tight enough that the surveyors could not fit along over half its 40 metre length. It connects to an aven in West Leg.
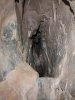 A climb up reaches a descent down a narrow rift. It can be free climbed up if needed.
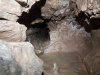 At the bottom is a tight tube. This is big enough for average sized cavers, but should only be followed feet first. We were feeling particularly wussy due to COVID belly - aka. weight gain - and decided not to go through it.
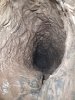 The other end of the tube drops out 4 metres up in the roof of the aven in West Leg, creating the round trip. It has very few holds, and head first is absolutely not recommended.
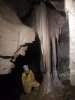 Superb column formation at the next junction in East Leg.
Modelling by Pete
Superb column formation at the next junction in East Leg.
Modelling by Pete Stal in the side passage at the junction.
Modelling by Pete
Stal in the side passage at the junction.
Modelling by Pete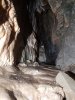 The side passage ends beyond a squeeze, with a wall of flowstone. I assume there is a crystal pool too, but did not want to push through and have to reverse it.
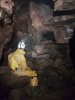 The chamber at the end of East Leg, which has a loop and many ways on.
Modelling by Pete, lighting by Tarquin and Pete
The chamber at the end of East Leg, which has a loop and many ways on.
Modelling by Pete, lighting by Tarquin and Pete Ahead chokes.
 Formations in a tiny side passage from the chamber.
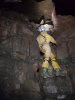 Climbing up to the upper level. This was a bad route, there is a much easier one in an alcove on the far side of the loop.
Modelling by Pete, lighting by Tarquin and Pete
Climbing up to the upper level. This was a bad route, there is a much easier one in an alcove on the far side of the loop.
Modelling by Pete, lighting by Tarquin and Pete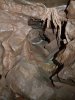 Formations in the upper chamber.
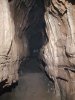 Rift towards Aven Chamber.
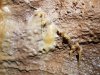 Immature helictites in the passage.
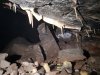 Formations in the crawl to Aven Chamber.
 Aven Chamber.
Modelling by Pete, lighting by Tarquin and Pete
Aven Chamber.
Modelling by Pete, lighting by Tarquin and Pete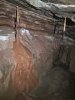 Formations in Aven Chamber.
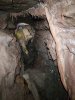 The largest side passage.
Modelling by Pete, lighting by Tarquin and Pete
The largest side passage.
Modelling by Pete, lighting by Tarquin and Pete The passage chokes, and its oxbow chokes. And all other side passages end quickly. End of East Leg.
Modelling by Pete, lighting by Tarquin and Pete
The passage chokes, and its oxbow chokes. And all other side passages end quickly. End of East Leg.
Modelling by Pete, lighting by Tarquin and Pete The other branch from the junction of Highgate and East Leg is the way to Crystal Pool Chamber, which starts as a climb into a chamber.
Modelling by Pete, lighting by Tarquin and Pete
The other branch from the junction of Highgate and East Leg is the way to Crystal Pool Chamber, which starts as a climb into a chamber.
Modelling by Pete, lighting by Tarquin and Pete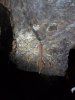 Stalactite in the chamber.
Lighting by Tarquin and Pete
Stalactite in the chamber.
Lighting by Tarquin and Pete One wall of the chamber is covered in helictites.
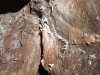 Helictites.
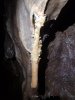 Helictites on a stalactite.
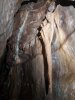 Helictites and stalactite.
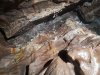 Helictites in the ceiling.
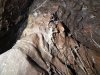 Helictites and straws.
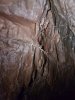 Helictites.
 Helictites.
 Helictites. These last ones sit directly above a very narrow rift, and the passage on the other side can be clearly seen; The Canyon. However, it is too narrow to get through, and a very long detour is needed to get there, including a pitch.
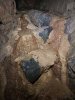 Doubling back over the way in is the passage to Crystal Pool Chamber, with this flowstone.
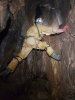 The first climb, which has very few holds.
Modelling by Pete, lighting by Tarquin and Pete
The first climb, which has very few holds.
Modelling by Pete, lighting by Tarquin and Pete The second climb.
Modelling by Pete, lighting by Tarquin and Pete
The second climb.
Modelling by Pete, lighting by Tarquin and Pete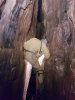 The third climb, stepping up the rift and traversing over the slot to reach the opening at the top.
Modelling by Pete, lighting by Tarquin and Pete
The third climb, stepping up the rift and traversing over the slot to reach the opening at the top.
Modelling by Pete, lighting by Tarquin and Pete Formations over the climbs.
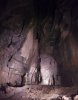 The rift pops out in Crystal Pool Chamber, a very dramatic space. The name seems a little overstated, but it does have a pretty pool in one corner. The only side passage we did not visit is to the right, the way to the pitch leading down to The Canyon and The Annex - another large chamber.
Modelling by Pete, lighting by Tarquin and Pete
The rift pops out in Crystal Pool Chamber, a very dramatic space. The name seems a little overstated, but it does have a pretty pool in one corner. The only side passage we did not visit is to the right, the way to the pitch leading down to The Canyon and The Annex - another large chamber.
Modelling by Pete, lighting by Tarquin and Pete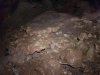 The floor of the chamber has a rather minimalistic set of stalagmites and flowstone.
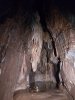 The main feature of the chamber is tucked into the alcove on the far side; the crystal pool, surrounded by curtains and stalactites.
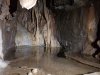 The crystal pool. Sadly, it sits on a high shelf, and it is hard to get a good view of the actual pool.
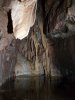 The formations surrounding the pool.
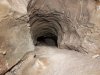 Beside the crystal pool is a tiny tube, which gets tighter. This provides a link to The Annex, but is tight enough that the surveyors could not fit.
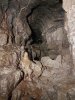 Starting on the left side of the chamber, a decorated passage gets too tight.
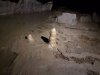 A rift and bedding on the left join, and gain some formations.
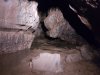 The ongoing passage.
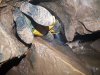 This then passes through a ridiculous looking squeeze which is a lot easier than it looks.
Modelling by Pete, lighting by Tarquin and Pete
This then passes through a ridiculous looking squeeze which is a lot easier than it looks.
Modelling by Pete, lighting by Tarquin and Pete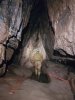 This gains a parallel chamber with some more formations.
Modelling by Pete, lighting by Tarquin and Pete
This gains a parallel chamber with some more formations.
Modelling by Pete, lighting by Tarquin and Pete At the far end is Tiger Aven. Ascending this means climbing on formations, so clean kit is required.
Modelling by Pete, lighting by Tarquin and Pete
At the far end is Tiger Aven. Ascending this means climbing on formations, so clean kit is required.
Modelling by Pete, lighting by Tarquin and Pete The middle part of Tiger Aven. Still climbing.
Modelling by Tarquin's clodhopper and Pete, lighting by Tarquin and Pete
The middle part of Tiger Aven. Still climbing.
Modelling by Tarquin's clodhopper and Pete, lighting by Tarquin and Pete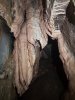 Formations in Tiger Aven.
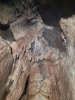 Formations in Tiger Aven.
 Formations in Tiger Aven.
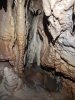 Formations in Tiger Aven.
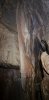 Formations in Tiger Aven.
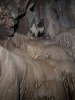 Formations in Tiger Aven.
 The top of Tiger Aven, which requires a much more exposed climb, 14 metres up. There is a fair amount of small passage up there, but the climb really deserves protection, so we left it, and headed elsewhere.
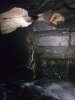 Back at the OFD I streamway's upstream sump, climbing up onto a ledge above the river gives access to the Railton - Wild Series.
Modelling by Pete, lighting by Tarquin and Pete
Back at the OFD I streamway's upstream sump, climbing up onto a ledge above the river gives access to the Railton - Wild Series.
Modelling by Pete, lighting by Tarquin and Pete Crawling into Railton - Wild Series.
Modelling by Pete
Crawling into Railton - Wild Series.
Modelling by Pete The crawl pops out in The Slide, which slopes back down to the river, and can be used to access the series, as long as you can get a grip on the end of the slope.
Modelling by Pete, lighting by Tarquin and Pete
The crawl pops out in The Slide, which slopes back down to the river, and can be used to access the series, as long as you can get a grip on the end of the slope.
Modelling by Pete, lighting by Tarquin and Pete A second crawl opposite the first leads onwards into the series.
Modelling by Pete, lighting by Tarquin and Pete
A second crawl opposite the first leads onwards into the series.
Modelling by Pete, lighting by Tarquin and Pete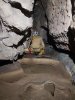 The crawl reaches Gour Passage, which heads in both directions, and is the start of the series' round trip. We started clockwise around the loop.
Modelling by Pete, lighting by Tarquin and Pete
The crawl reaches Gour Passage, which heads in both directions, and is the start of the series' round trip. We started clockwise around the loop.
Modelling by Pete, lighting by Tarquin and Pete Gour Passage.
Modelling by Pete, lighting by Tarquin and Pete
Gour Passage.
Modelling by Pete, lighting by Tarquin and Pete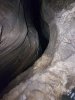 The passage ends at a junction where on one side is a drop down to the river again, directly over the Fourth Pot. It is definitely not free climbable.
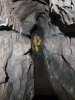 The way on is Thunder Passage, narrow and sometimes a little awkward, with a very meagre stream.
Modelling by Pete, lighting by Tarquin and Pete
The way on is Thunder Passage, narrow and sometimes a little awkward, with a very meagre stream.
Modelling by Pete, lighting by Tarquin and Pete A side passage on the left leads to Bailit Way.
Modelling by Pete, lighting by Tarquin and Pete
A side passage on the left leads to Bailit Way.
Modelling by Pete, lighting by Tarquin and Pete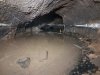 Bailit Way is accessed via a sump, and the name suggests it can be bailed, though siphoning would be a lot easier.
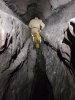 Continuing along Thunder Passage.
Modelling by Pete, lighting by Tarquin and Pete
Continuing along Thunder Passage.
Modelling by Pete, lighting by Tarquin and Pete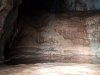 A low arch on the right is the start of Rodent Passage, starting as a flat out crawl into a puddle. Yuck!
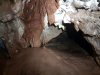 Formations in Rodent Passage.
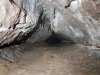 Rodent Passage remains a low crawl right to the end. Appropriate name. There are better places to see.
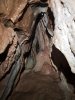 Formations in an alcove near the end of Thunder Passage.
 The passage ends in a small streamway, leading down to a silted sump.
Lighting by Tarquin and Pete
The passage ends in a small streamway, leading down to a silted sump.
Lighting by Tarquin and Pete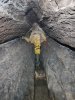 Upstream from Carrot Junction.
Modelling by Pete, lighting by Tarquin and Pete
Upstream from Carrot Junction.
Modelling by Pete, lighting by Tarquin and Pete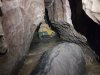 At the top, the streamway reaches a T-junction. To the left is a crawl in the stream to a chamber.
Modelling by Pete, lighting by Tarquin and Pete
At the top, the streamway reaches a T-junction. To the left is a crawl in the stream to a chamber.
Modelling by Pete, lighting by Tarquin and Pete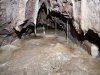 Formations in an alcove.
 Admirable formations in the chamber.
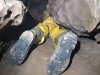 Pete did the honours and checked out the final dig.
Modelling by Pete
Pete did the honours and checked out the final dig.
Modelling by Pete The dig gets too tight.
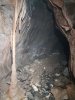 To the right from the T-junction is another crawl with a little stream and formations.
 Formations in the right streamway.
 Moonmilk covered alcove in the final chamber.
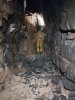 The final chamber.
Modelling by Pete, lighting by Tarquin and Pete
The final chamber.
Modelling by Pete, lighting by Tarquin and Pete From Carrot Junction, we headed down Whistle Passage, past a column which needs to be carefully avoided.
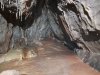 Formations in an alcove.
 Heading downhill over flowstone.
 Formations in Whistle Passage.
 Curtain.
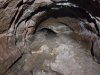 Inlet below Bat Aven. This ends at a silted sump, the other end of the earlier silted sump.
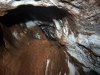 Bat Aven, which has a short side passage at the top.
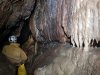 Wall of formations in Whistle Passage.
Modelling by Pete, lighting by Tarquin and Pete
Wall of formations in Whistle Passage.
Modelling by Pete, lighting by Tarquin and Pete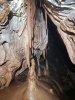 A very good set of formations.
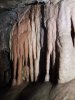 The wall of formations.
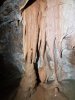 The wall of formations.
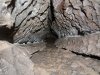 Tiny side passage at a junction.
 Formations after the junction.
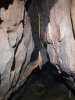 Formations on a natural rock bridge.
 Creamy flowstone.
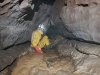 The final part of Whistle Passage, which ends at a junction.
Modelling by Pete, lighting by Tarquin and Pete
The final part of Whistle Passage, which ends at a junction.
Modelling by Pete, lighting by Tarquin and Pete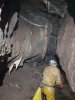 The way to Upper Flood Passage starts with formations.
Modelling by Pete, lighting by Tarquin and Pete
The way to Upper Flood Passage starts with formations.
Modelling by Pete, lighting by Tarquin and Pete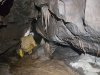 Formations on the way to Upper Flood Passage.
Modelling by Pete, lighting by Tarquin and Pete
Formations on the way to Upper Flood Passage.
Modelling by Pete, lighting by Tarquin and Pete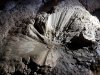 Mud splash.
Lighting by Pete
Mud splash.
Lighting by Pete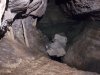 Above Upper Flood Passage. Getting further requires a wall of death run along the wall to reach the boulder bridges, but from there, the ledges required to reach Low's Chain do not look traversable without protection. Climbing down from the rock bridges also does not look possible.
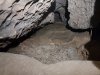 The easiest way to close the loop is via Geyser Crawl, to the right at the junction.
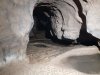 This reaches the start of Gour Passage.
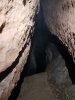 Ahead at the junction is another alternative, which reaches this window overlooking the river.
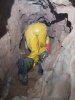 A crawl to the right, smaller than Geyser Crawl, heads back up to Gour Passage.
Modelling by Pete
A crawl to the right, smaller than Geyser Crawl, heads back up to Gour Passage.
Modelling by Pete Closing the loop, at the junction of Geyser Crawl, Gour Passage, and the way in.
Modelling by Pete, lighting by Tarquin and Pete
Closing the loop, at the junction of Geyser Crawl, Gour Passage, and the way in.
Modelling by Pete, lighting by Tarquin and Pete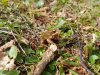 Common Frog who had reached the inside of the gate, who we assisted out of the cave. You've got dirt on your nose, by the way. Did you know? Just there.
Modelling by Ron
Common Frog who had reached the inside of the gate, who we assisted out of the cave. You've got dirt on your nose, by the way. Did you know? Just there.
Modelling by Ron
 The lower portion of the OFD I Streamway, between Pluto's Bath and The Step.
Modelling by Pete, lighting by Tarquin and Pete
The lower portion of the OFD I Streamway, between Pluto's Bath and The Step.
Modelling by Pete, lighting by Tarquin and Pete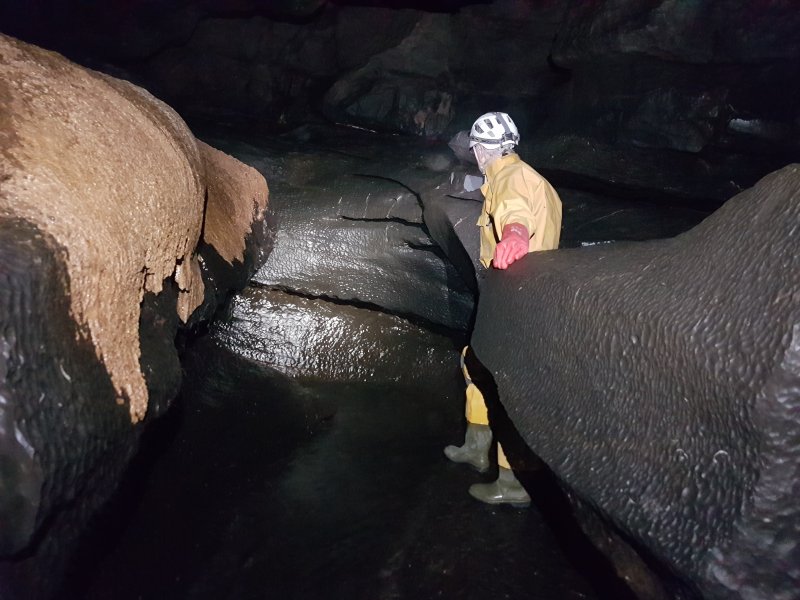 The Step. This is a useful safety feature; if the rock you stand on has water over it, then the river is too powerful to be followed safely, and the Escape Route should be used instead. Here it is a few inches above the water, so we could continue upstream.
Modelling by Pete, lighting by Tarquin and Pete
The Step. This is a useful safety feature; if the rock you stand on has water over it, then the river is too powerful to be followed safely, and the Escape Route should be used instead. Here it is a few inches above the water, so we could continue upstream.
Modelling by Pete, lighting by Tarquin and Pete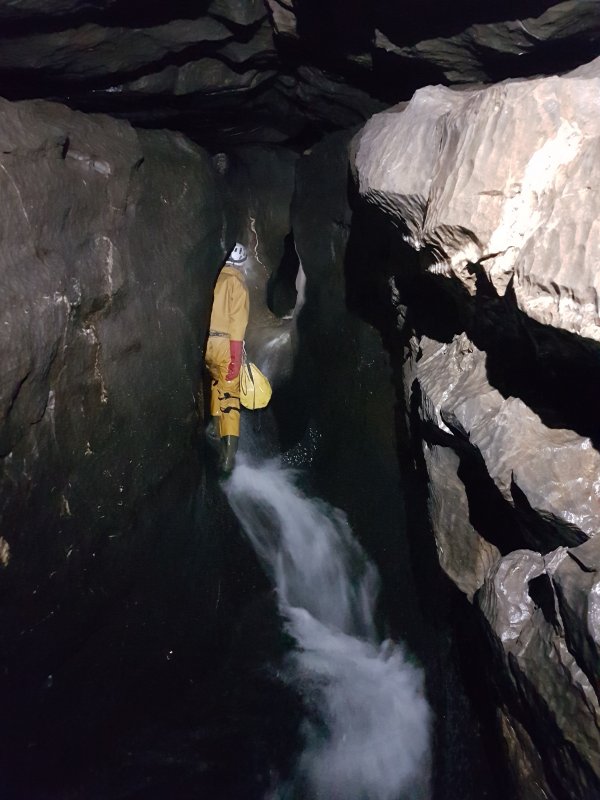 Upstream of The Step. This superb river would make an excellent water slide, you just need a rubber ring.
Modelling by Pete, lighting by Tarquin and Pete
Upstream of The Step. This superb river would make an excellent water slide, you just need a rubber ring.
Modelling by Pete, lighting by Tarquin and Pete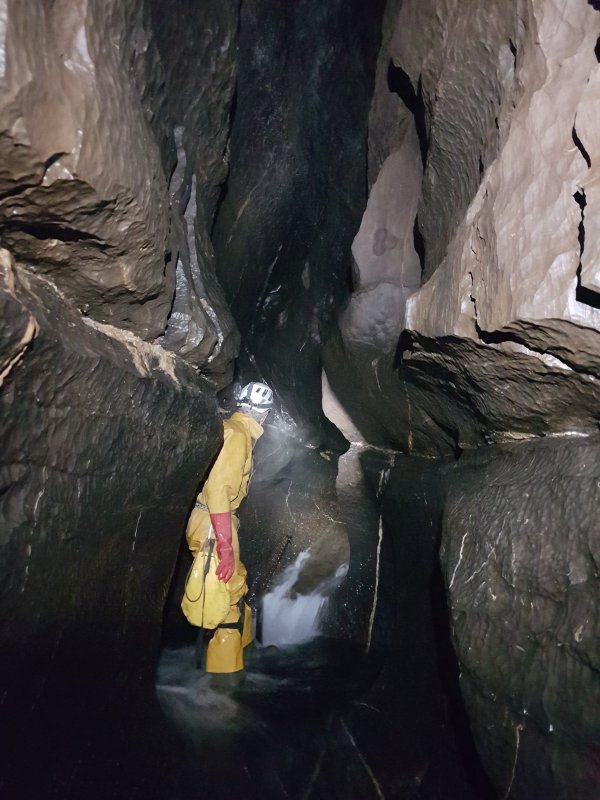 Crossing the First Pot. This is a very deep scour in the floor of the river, which would require swimming or a very difficult traverse. To make things easier, there is a scaffolding pole chained in place over the pot, which you walk over like a tightrope. In OFD II there are no poles, and you cross them the hard way.
Modelling by Pete, lighting by Tarquin and Pete
Crossing the First Pot. This is a very deep scour in the floor of the river, which would require swimming or a very difficult traverse. To make things easier, there is a scaffolding pole chained in place over the pot, which you walk over like a tightrope. In OFD II there are no poles, and you cross them the hard way.
Modelling by Pete, lighting by Tarquin and Pete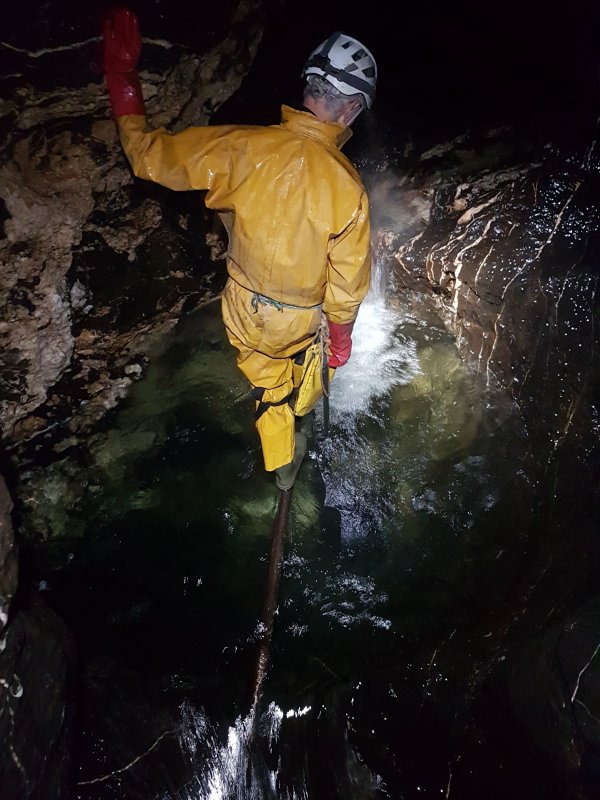 Crossing Second Pot, which is much more obvious than the first one. This one would not be traversable.
Modelling by Pete, lighting by Tarquin and Pete
Crossing Second Pot, which is much more obvious than the first one. This one would not be traversable.
Modelling by Pete, lighting by Tarquin and Pete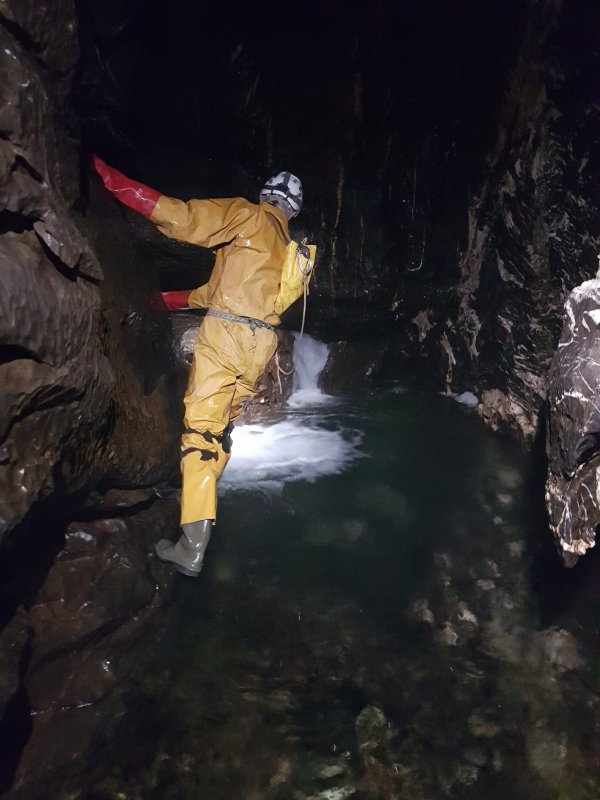 A cascade, which presents more of an obstacle than anything else in the river. Traverse the wall to avoid a soaking. Upstream of here, the Escape Route's Bolt Traverse can be glimpsed up on the ledges high above.
Modelling by Pete, lighting by Tarquin and Pete
A cascade, which presents more of an obstacle than anything else in the river. Traverse the wall to avoid a soaking. Upstream of here, the Escape Route's Bolt Traverse can be glimpsed up on the ledges high above.
Modelling by Pete, lighting by Tarquin and Pete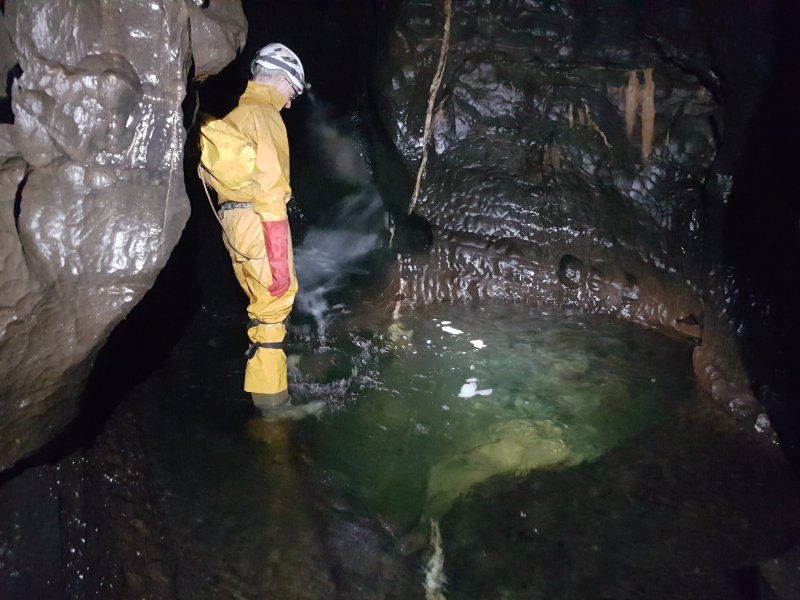 Third Pot, another deep scour, though perhaps not as deep as the others. There is a pole, again.
Modelling by Pete, lighting by Tarquin and Pete
Third Pot, another deep scour, though perhaps not as deep as the others. There is a pole, again.
Modelling by Pete, lighting by Tarquin and Pete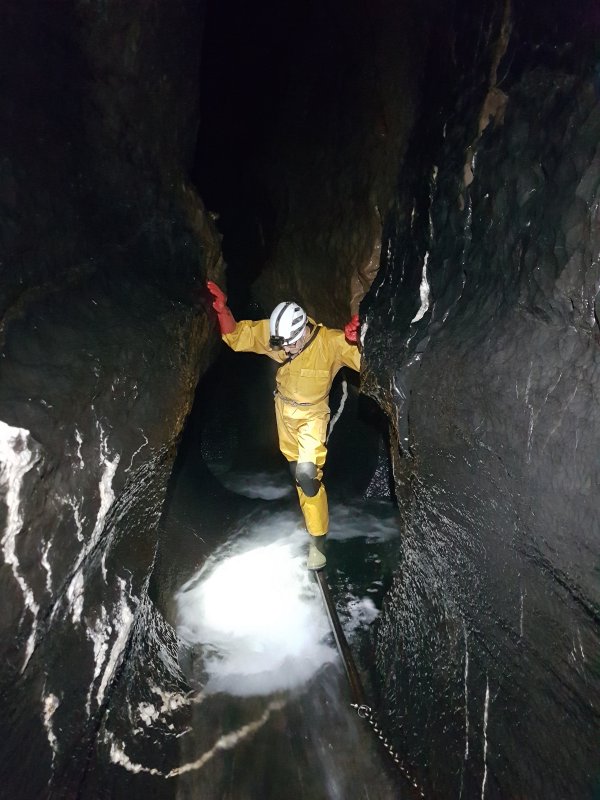 Fourth Pot, the last in OFD I. This could easily be traversed without the pole, and the biggest risk is that you might not see it.
Modelling by Pete, lighting by Tarquin and Pete
Fourth Pot, the last in OFD I. This could easily be traversed without the pole, and the biggest risk is that you might not see it.
Modelling by Pete, lighting by Tarquin and Pete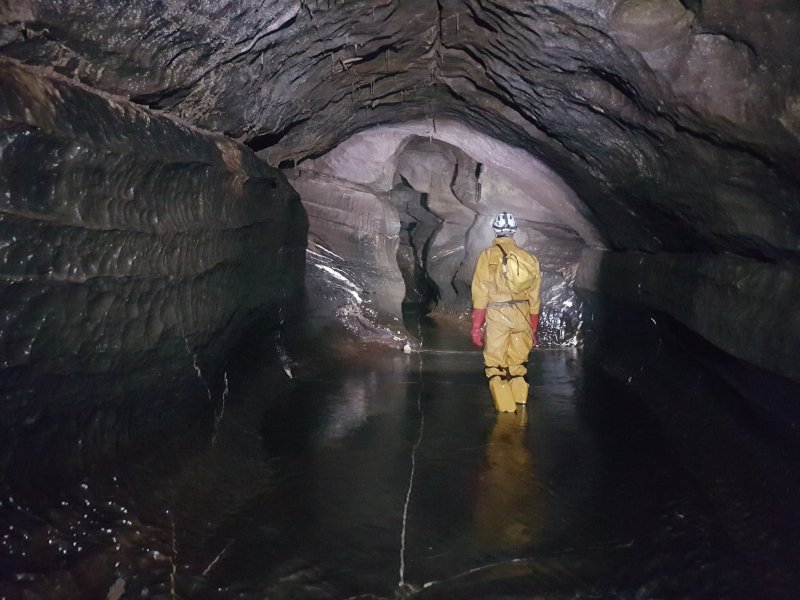 The last part of the streamway, just below the upstream sump. On the left here is The Slide, one of the ways into Railton - Wild Series, requiring a slippery climb.
Modelling by Pete, lighting by Tarquin and Pete
The last part of the streamway, just below the upstream sump. On the left here is The Slide, one of the ways into Railton - Wild Series, requiring a slippery climb.
Modelling by Pete, lighting by Tarquin and Pete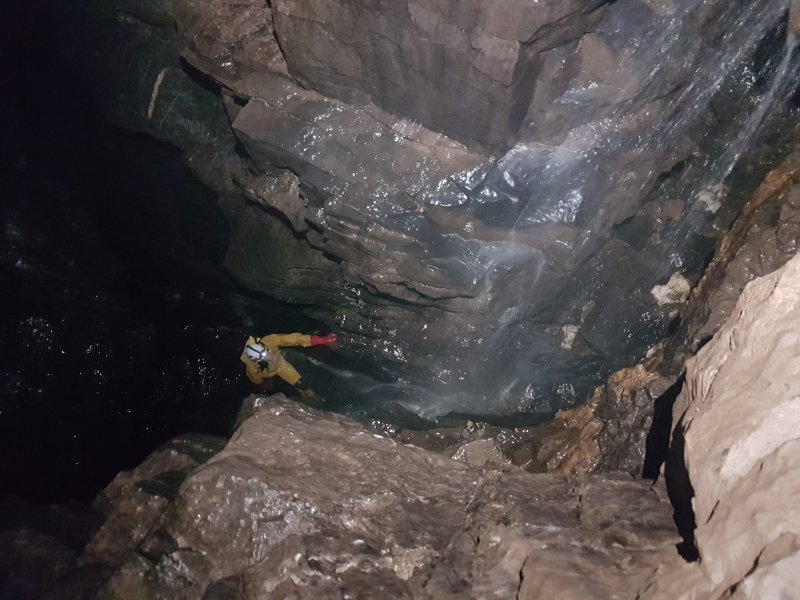 Continuing upstream along the inlet of Upper Flood Passage reaches the base of the waterfall that gives Waterfall Series its name. It is possible to free climb this, and earn a soaking.
Modelling by Pete, lighting by Tarquin and Pete
Continuing upstream along the inlet of Upper Flood Passage reaches the base of the waterfall that gives Waterfall Series its name. It is possible to free climb this, and earn a soaking.
Modelling by Pete, lighting by Tarquin and Pete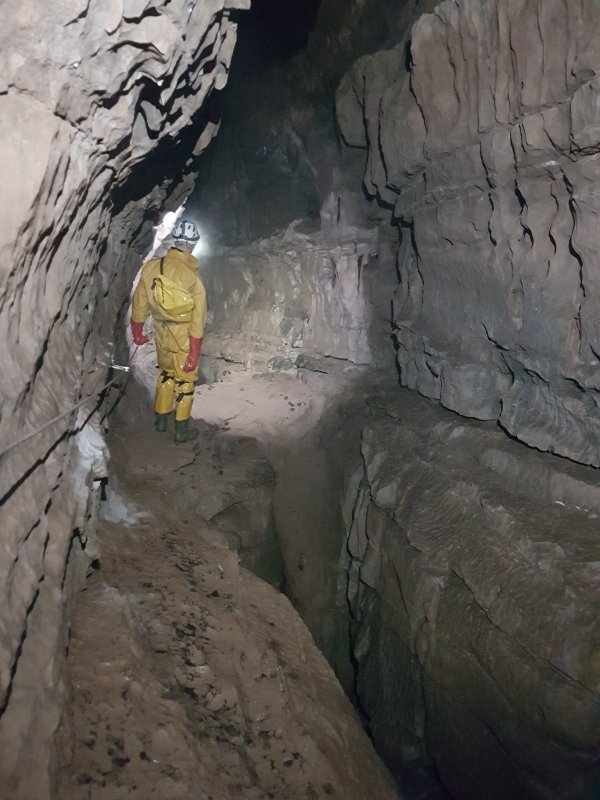 The dry way is to continue towards Boulder Chamber, then return via a traverse along the ledges, the later part of which has a cable.
Modelling by Pete, lighting by Tarquin and Pete
The dry way is to continue towards Boulder Chamber, then return via a traverse along the ledges, the later part of which has a cable.
Modelling by Pete, lighting by Tarquin and Pete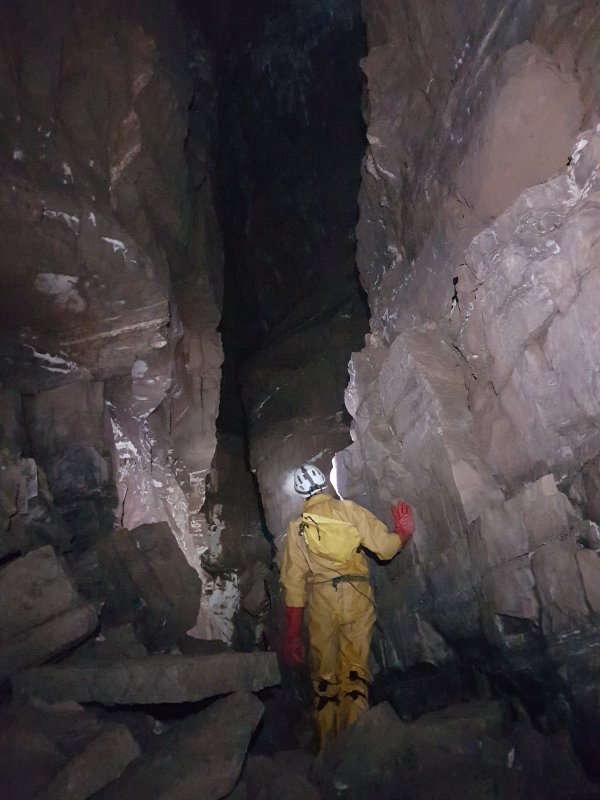 A scramble up through boulders reaches the main passage of Waterfall Series, which ends almost immediately to the left where it plummets into Upper Flood Passage. Towards the end, the boulders on the floor are wedged in the roof of Upper Flood Passage, and are not a solid floor.
Modelling by Pete, lighting by Tarquin and Pete
A scramble up through boulders reaches the main passage of Waterfall Series, which ends almost immediately to the left where it plummets into Upper Flood Passage. Towards the end, the boulders on the floor are wedged in the roof of Upper Flood Passage, and are not a solid floor.
Modelling by Pete, lighting by Tarquin and Pete The main way on is ahead, along an enormous passage. The formations start immediately.
Modelling by Pete, lighting by Tarquin and Pete
The main way on is ahead, along an enormous passage. The formations start immediately.
Modelling by Pete, lighting by Tarquin and Pete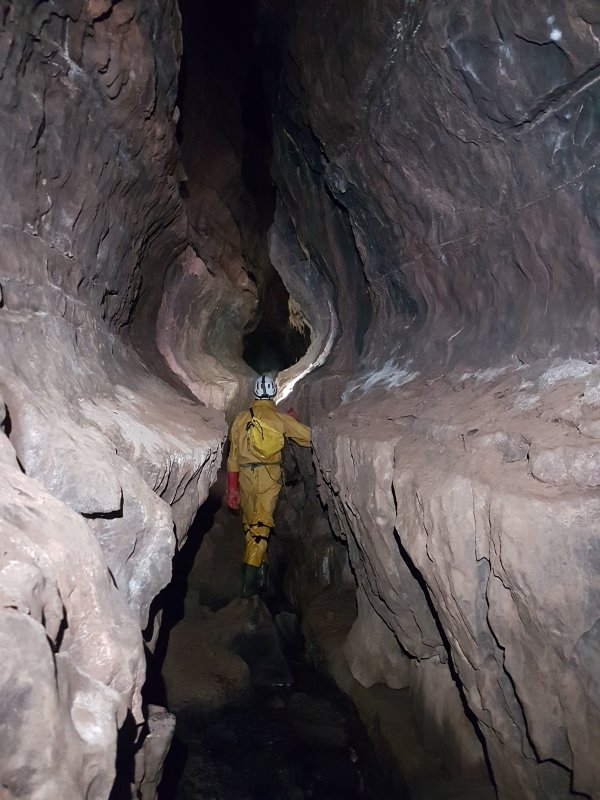 Early canyon style.
Modelling by Pete, lighting by Tarquin and Pete
Early canyon style.
Modelling by Pete, lighting by Tarquin and Pete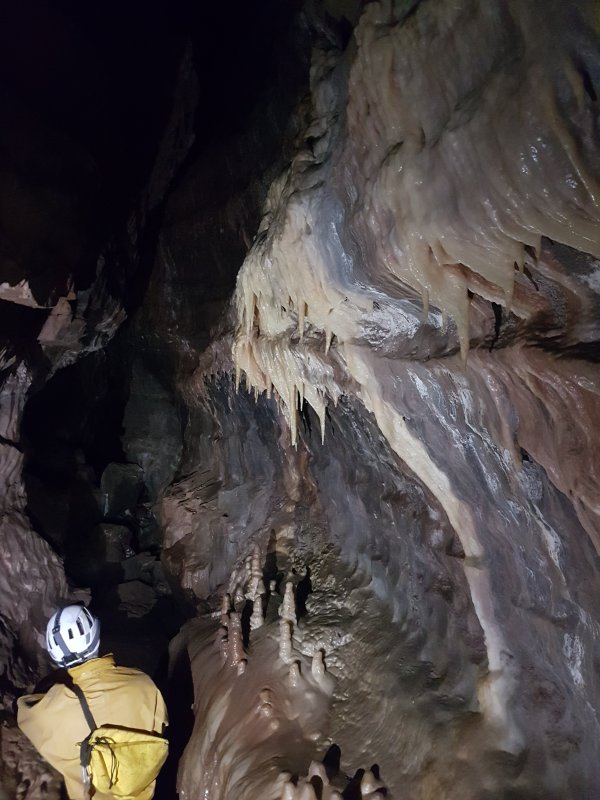 Formations in the canyon.
Modelling by Pete
Formations in the canyon.
Modelling by Pete Formations in the canyon.
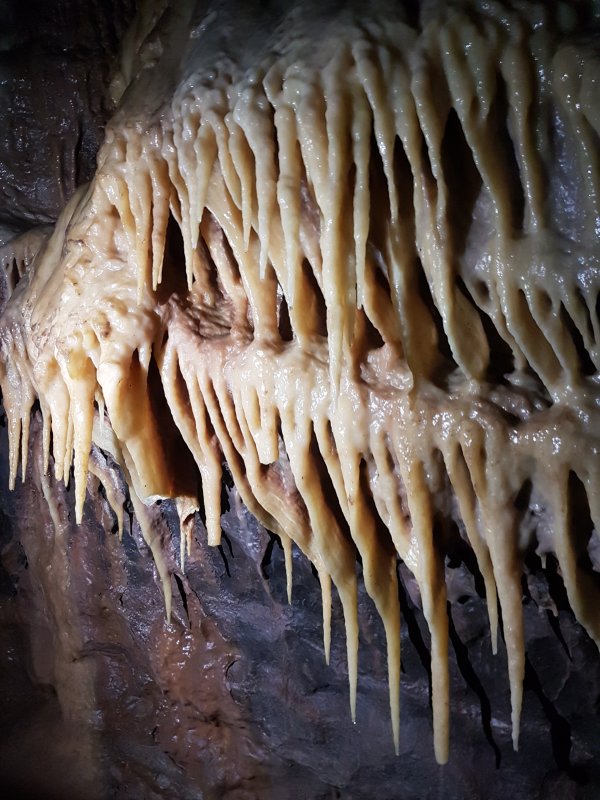 Formations in the canyon.
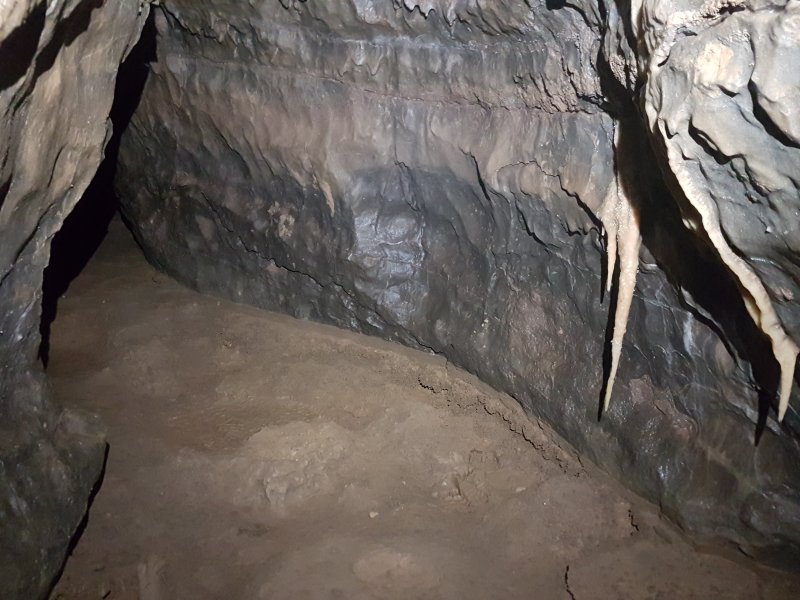 The canyon splits. Ahead-right is Wet Way, which also splits into the inlet on the left, and this crawl ahead.
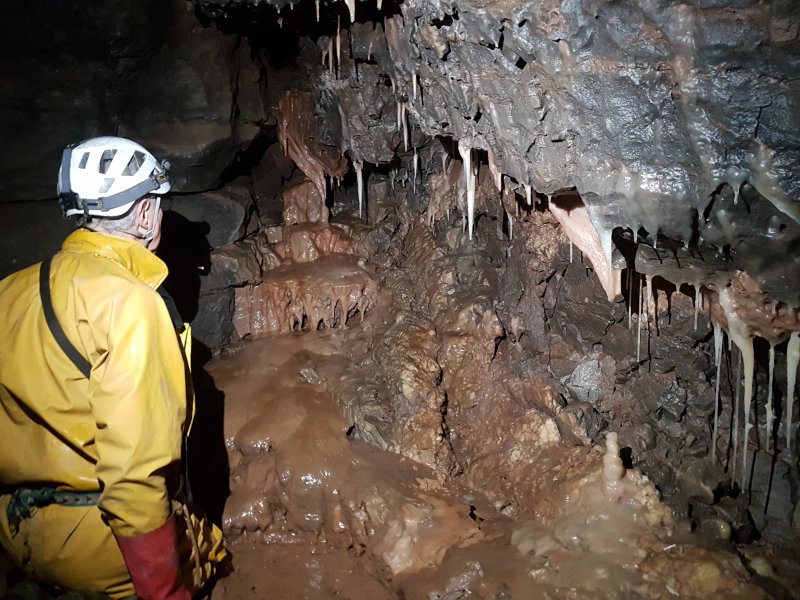 Formations in the side passage.
Modelling by Pete
Formations in the side passage.
Modelling by Pete The passage ends at this gorgeous crystal pool, where it is taped off. The rift at the far end is only about 10 cm wide, but the survey shows that someone has at some point been through it, presumably below water level where it is a little wider. Whether they bailed/siphoned it, or dived it with bottles I do not know, but they gained about 75 metres of narrow passage that ended too tight; Much Binding.
Lighting by Tarquin and Pete
The passage ends at this gorgeous crystal pool, where it is taped off. The rift at the far end is only about 10 cm wide, but the survey shows that someone has at some point been through it, presumably below water level where it is a little wider. Whether they bailed/siphoned it, or dived it with bottles I do not know, but they gained about 75 metres of narrow passage that ended too tight; Much Binding.
Lighting by Tarquin and Pete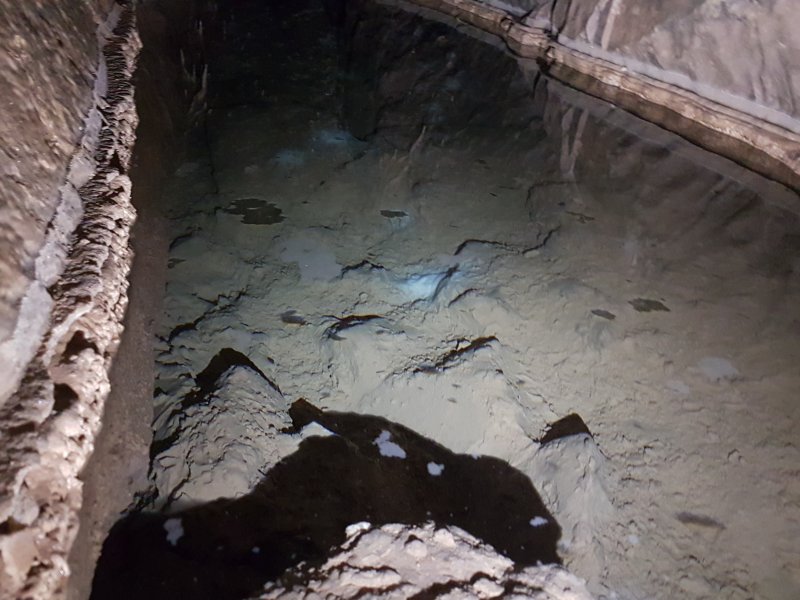 There are several calcite rafts on the pool, so going through it will not be an option again.
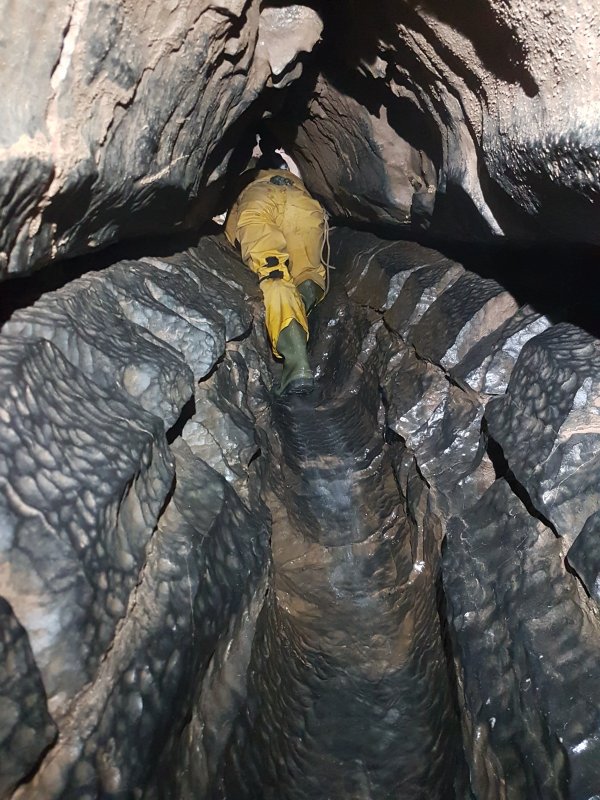 The Wet Way continues up the inlet to connect with Highgate.
Modelling by Pete, lighting by Tarquin and Pete
The Wet Way continues up the inlet to connect with Highgate.
Modelling by Pete, lighting by Tarquin and Pete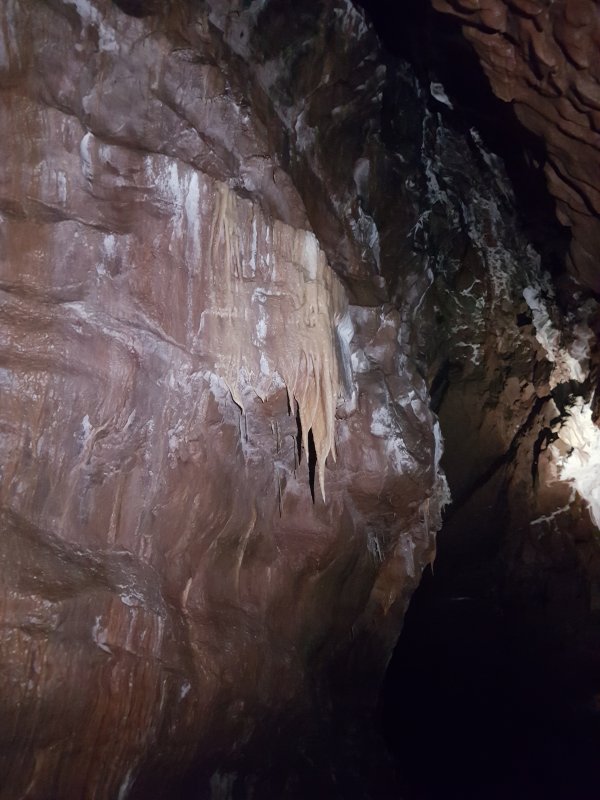 Formations in Dry Way, the huge canyon continuing ahead-left at the junction with Wet Way.
Lighting by Tarquin and Pete
Formations in Dry Way, the huge canyon continuing ahead-left at the junction with Wet Way.
Lighting by Tarquin and Pete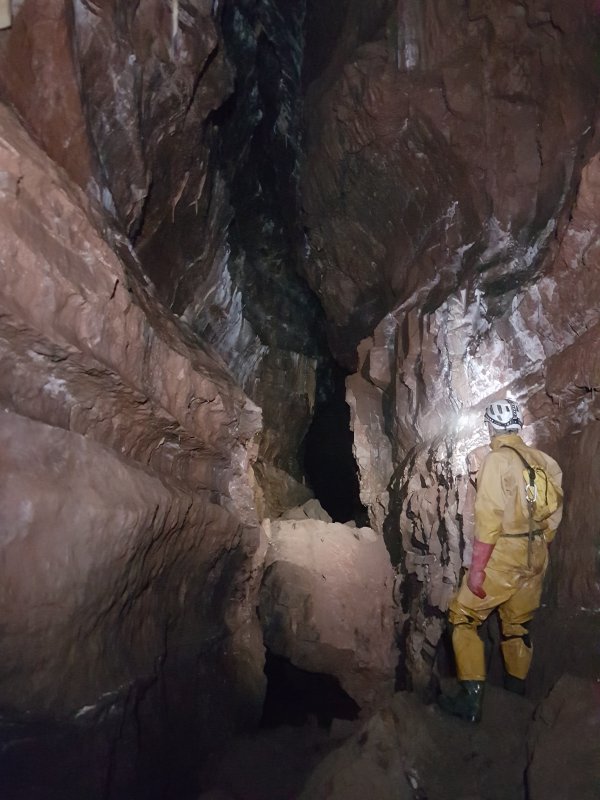 Dry Way.
Modelling by Pete, lighting by Tarquin and Pete
Dry Way.
Modelling by Pete, lighting by Tarquin and Pete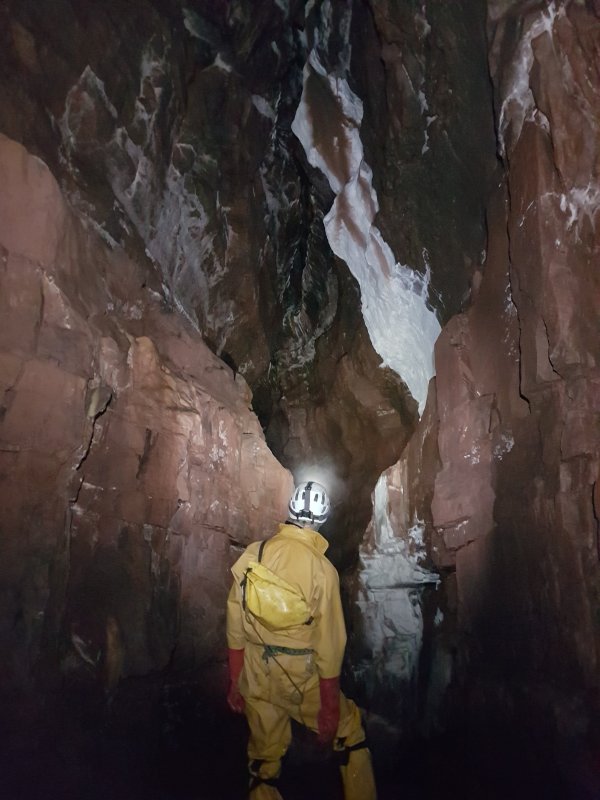 Whitewash formation in Dry Way.
Modelling by Pete, lighting by Tarquin and Pete
Whitewash formation in Dry Way.
Modelling by Pete, lighting by Tarquin and Pete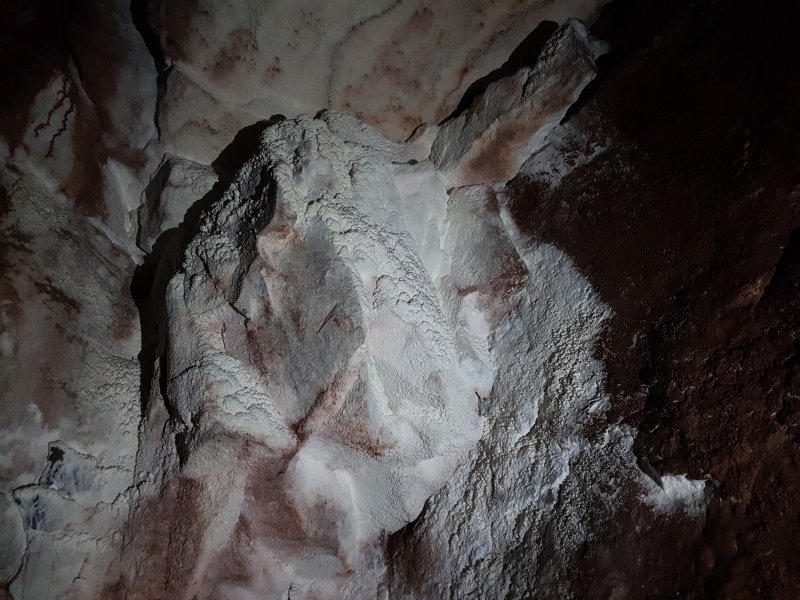 Formations in Dry Way.
 Idol Junction, where Highgate starts low on the right, and West Leg continues up the climb ahead. A side passage above the climb joins Highgate.
Modelling by Pete, lighting by Tarquin and Pete
Idol Junction, where Highgate starts low on the right, and West Leg continues up the climb ahead. A side passage above the climb joins Highgate.
Modelling by Pete, lighting by Tarquin and Pete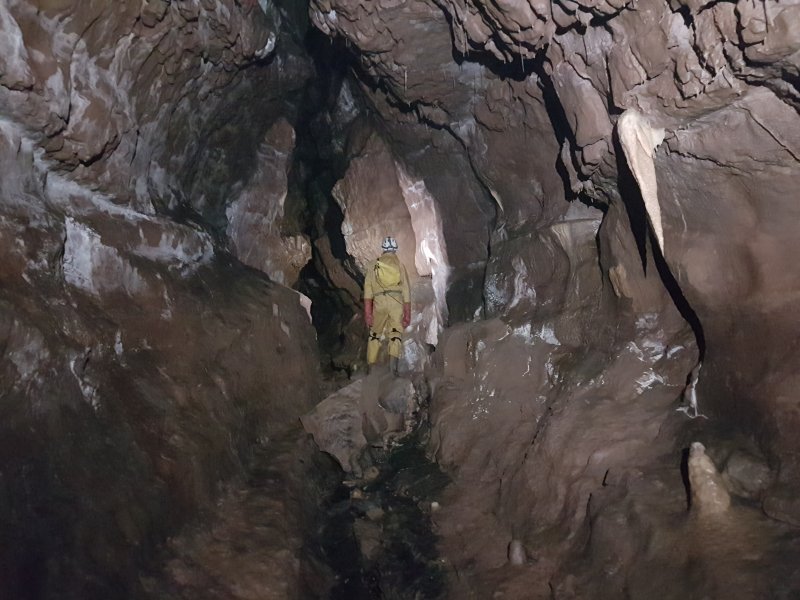 West Leg. A side passage on the right has an aven connecting with Peggy's Purgatory.
Modelling by Pete, lighting by Tarquin and Pete
West Leg. A side passage on the right has an aven connecting with Peggy's Purgatory.
Modelling by Pete, lighting by Tarquin and Pete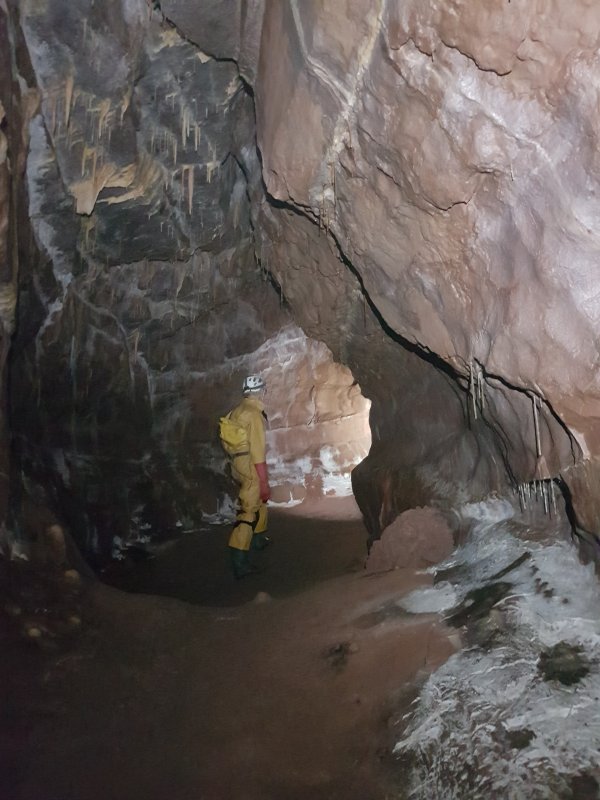 Top Loop, an oxbow to the upper part of West Leg, starting just before the corner.
Modelling by Pete, lighting by Tarquin and Pete
Top Loop, an oxbow to the upper part of West Leg, starting just before the corner.
Modelling by Pete, lighting by Tarquin and Pete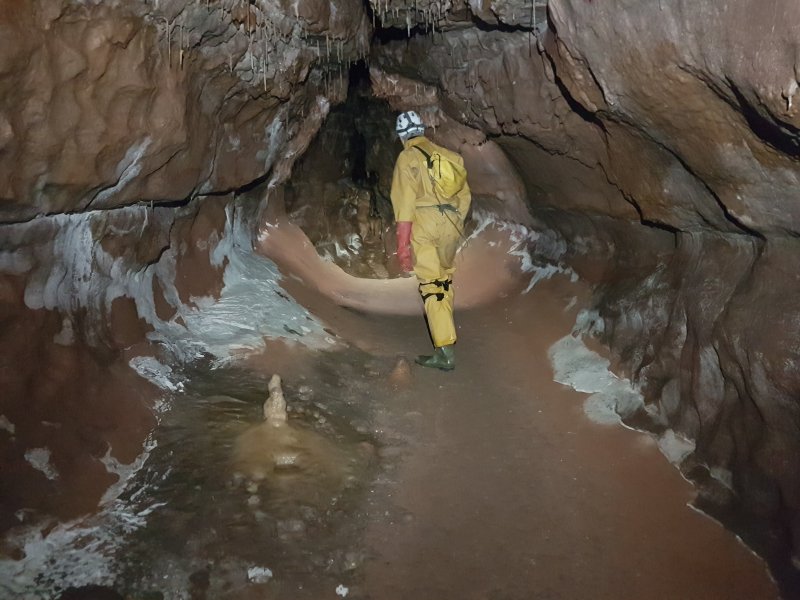 Top Loop.
Modelling by Pete, lighting by Tarquin and Pete
Top Loop.
Modelling by Pete, lighting by Tarquin and Pete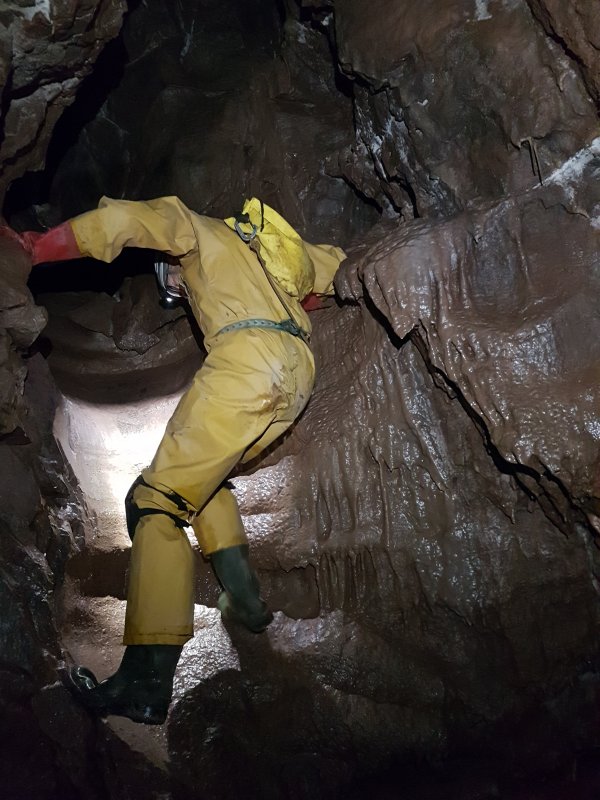 When West Leg turns sharp left, a dead end passage has an aven that is the end of a tight round trip, which will be mentioned later.
Modelling by Pete, lighting by Tarquin and Pete
When West Leg turns sharp left, a dead end passage has an aven that is the end of a tight round trip, which will be mentioned later.
Modelling by Pete, lighting by Tarquin and Pete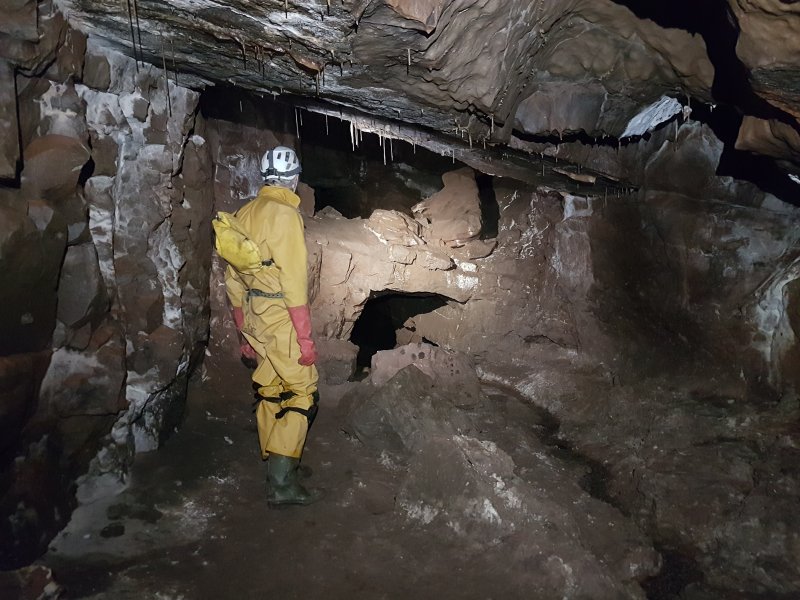 The natural bridge, seen from Muddy Way looking towards West Leg, where Top Loop joins from above the bridge to the right, and Top Way to the left.
Modelling by Pete, lighting by Tarquin and Pete
The natural bridge, seen from Muddy Way looking towards West Leg, where Top Loop joins from above the bridge to the right, and Top Way to the left.
Modelling by Pete, lighting by Tarquin and Pete Moonmilk formations on the boulders in Muddy Way.
Modelling by Pete, lighting by Tarquin and Pete
Moonmilk formations on the boulders in Muddy Way.
Modelling by Pete, lighting by Tarquin and Pete Muddy Way ends in a large chamber. A small passage behind the camera soon ends. Ahead is Clean Way. To the left is Pole Passage at ceiling level. To the right are Muddy Way and Top Way.
Modelling by Pete, lighting by Tarquin and Pete
Muddy Way ends in a large chamber. A small passage behind the camera soon ends. Ahead is Clean Way. To the left is Pole Passage at ceiling level. To the right are Muddy Way and Top Way.
Modelling by Pete, lighting by Tarquin and Pete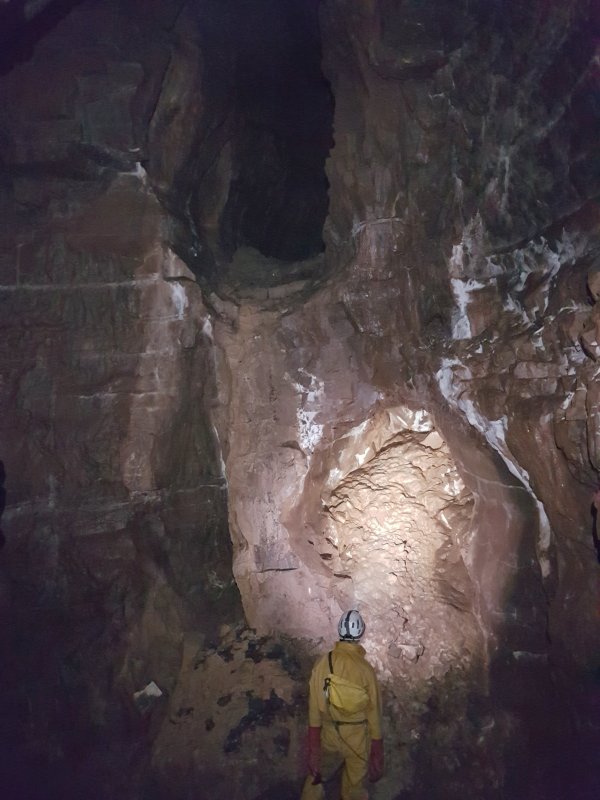 Pole Passage, seen over the same chamber from Top Way. This needs bolting or maypole equipment, but the passage ends very quickly, and does not appear to be worth visiting.
Modelling by Pete, lighting by Tarquin and Pete
Pole Passage, seen over the same chamber from Top Way. This needs bolting or maypole equipment, but the passage ends very quickly, and does not appear to be worth visiting.
Modelling by Pete, lighting by Tarquin and Pete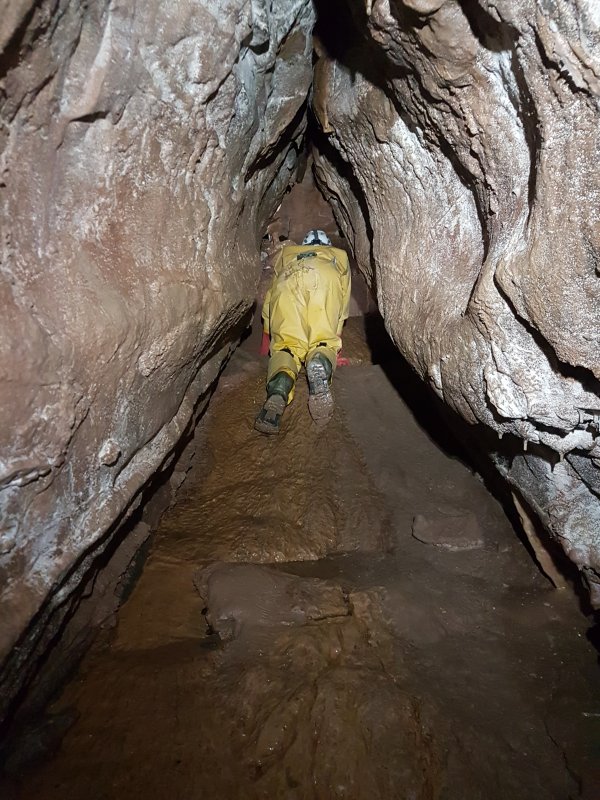 The chamber can also be reached via a different oxbow; Clean Way (though since it carries a stream, Clean Way is not an oxbow, Muddy Way is ... but whatever).
Modelling by Pete, lighting by Tarquin and Pete
The chamber can also be reached via a different oxbow; Clean Way (though since it carries a stream, Clean Way is not an oxbow, Muddy Way is ... but whatever).
Modelling by Pete, lighting by Tarquin and Pete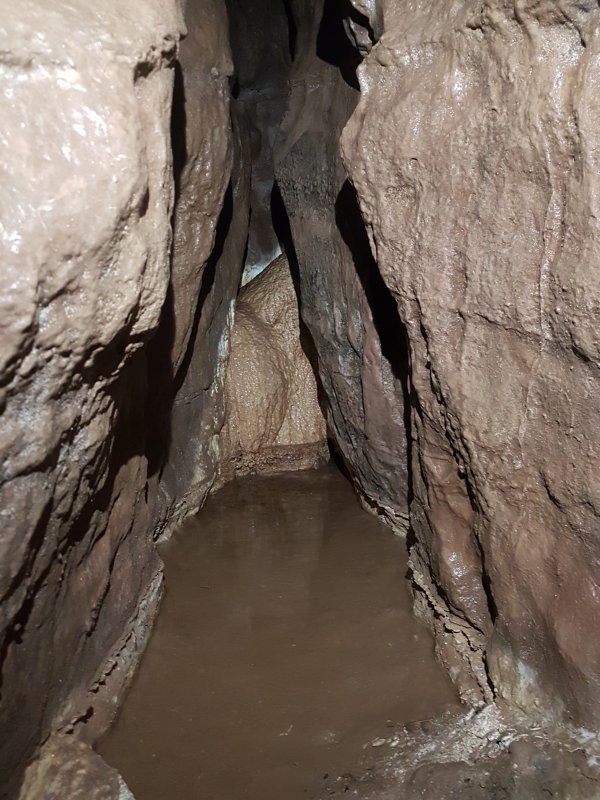 Clean Way's inlet ends at a flowstone formation.
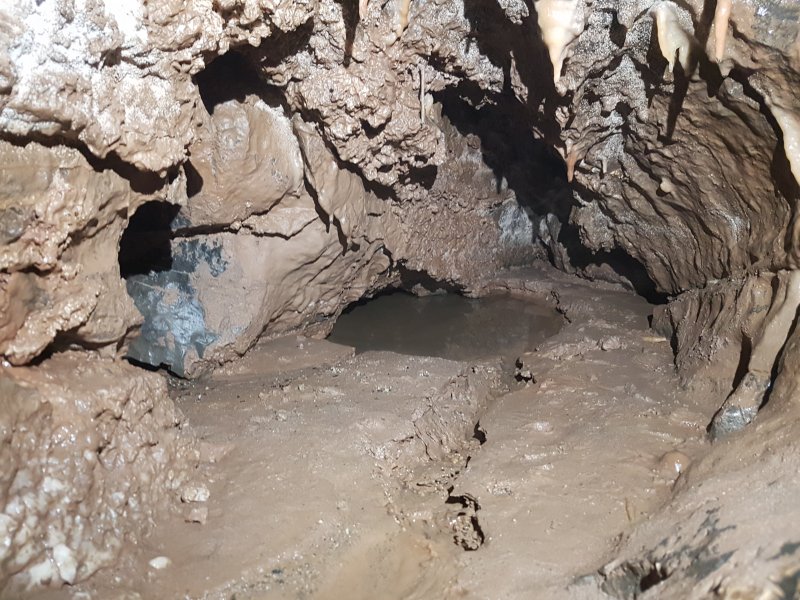 A small side passage ends at a choked alcove and silted sump, which will be seen later.
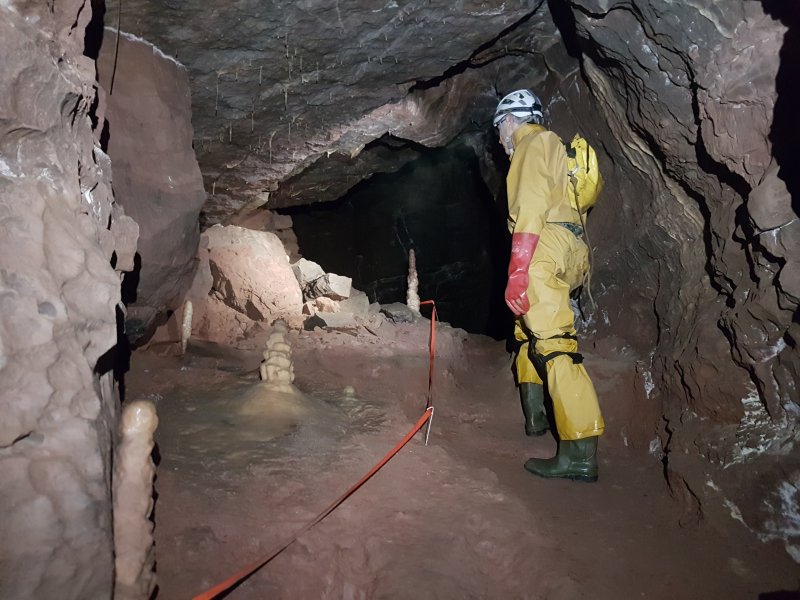 Formations at the start of Highgate, the way to the East Leg and the rest of the series.
Modelling by Pete, lighting by Tarquin and Pete
Formations at the start of Highgate, the way to the East Leg and the rest of the series.
Modelling by Pete, lighting by Tarquin and Pete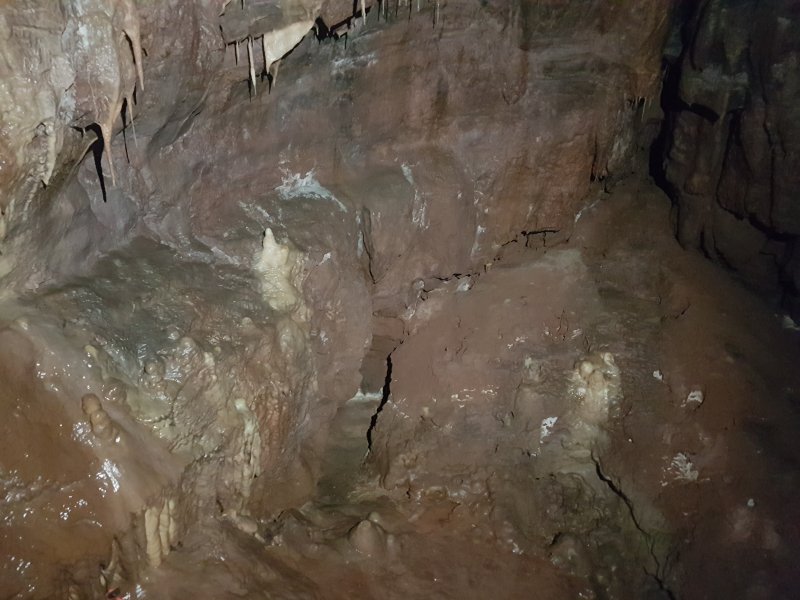 Formations in Highgate.
 Formations in Highgate.
 At a junction, East Gate continues upstream to the left.
Modelling by Pete, lighting by Tarquin and Pete
At a junction, East Gate continues upstream to the left.
Modelling by Pete, lighting by Tarquin and Pete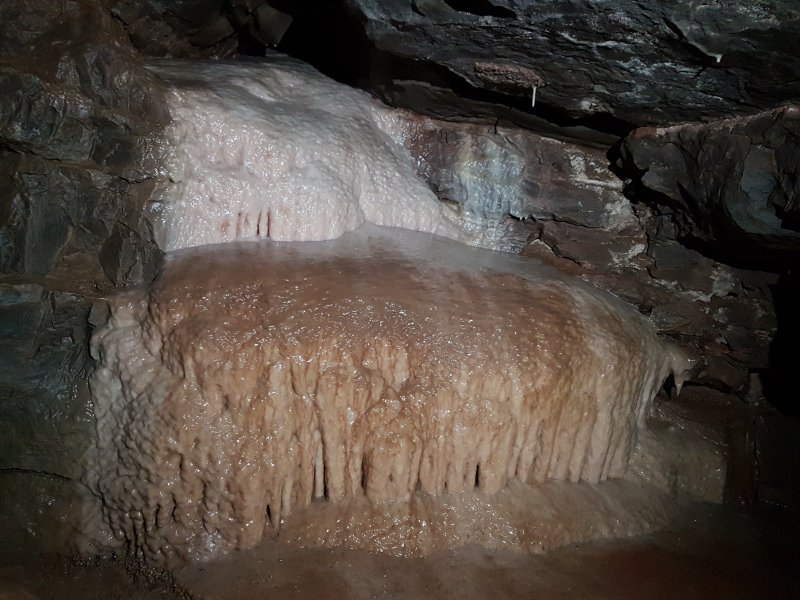 Flowstone in East Leg.
 Stal in an alcove where a low oxbow ends.
Lighting by Tarquin and Pete
Stal in an alcove where a low oxbow ends.
Lighting by Tarquin and Pete Traversing in East Leg.
Modelling by Pete, lighting by Tarquin and Pete
Traversing in East Leg.
Modelling by Pete, lighting by Tarquin and Pete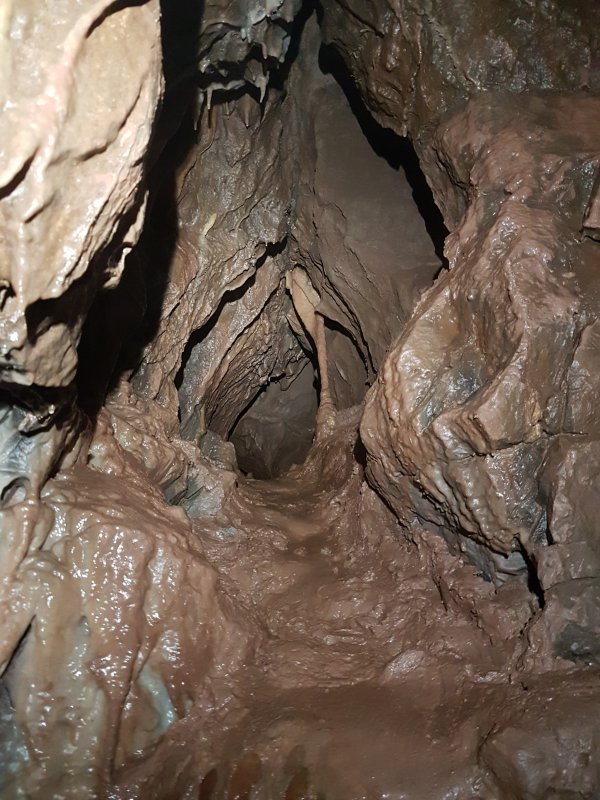 Column in an alcove at the junction with Cross Way.
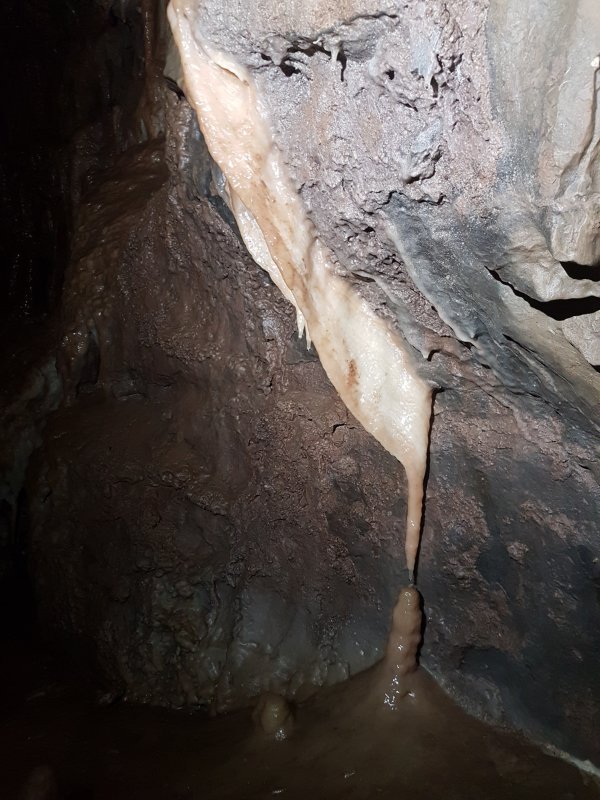 Formations in Cross Way.
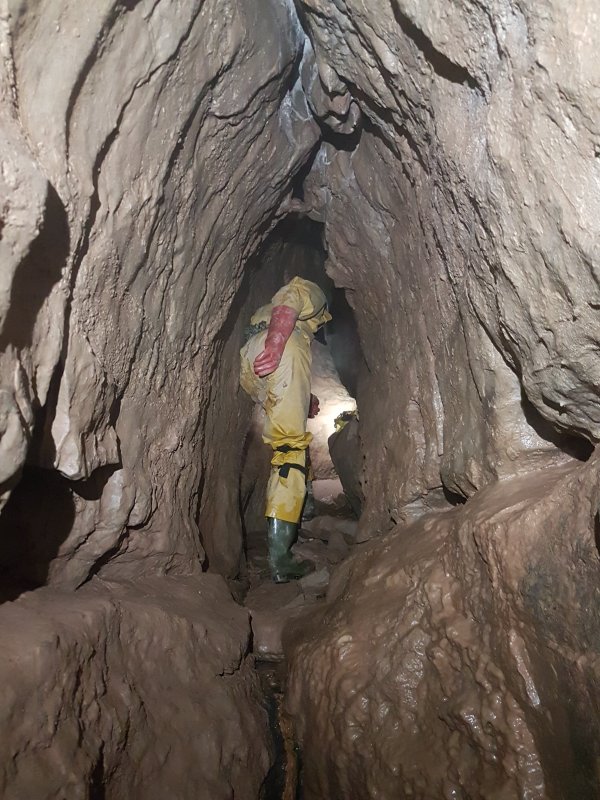 Cross Way.
Modelling by Pete, lighting by Tarquin and Pete
Cross Way.
Modelling by Pete, lighting by Tarquin and Pete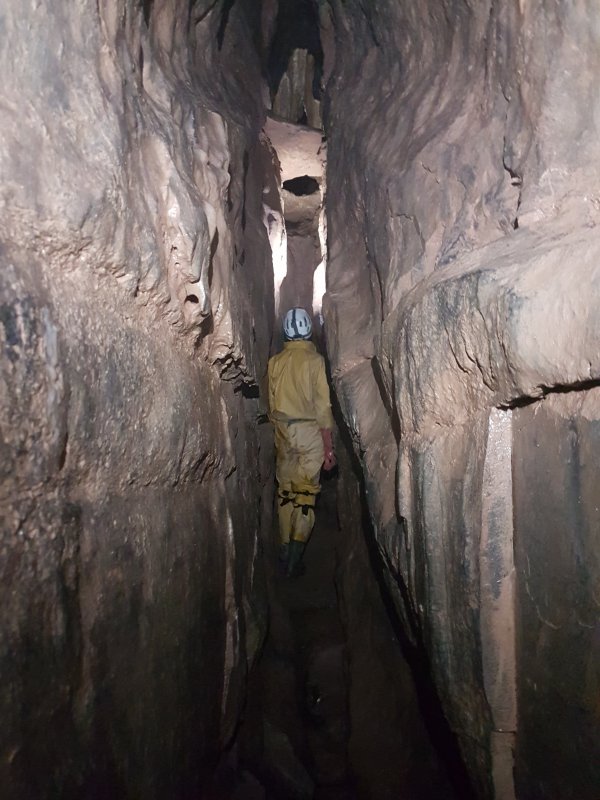 Cross Way appears to end.
Modelling by Pete, lighting by Tarquin and Pete
Cross Way appears to end.
Modelling by Pete, lighting by Tarquin and Pete Climbing into the continuation.
Modelling by Pete, lighting by Tarquin and Pete
Climbing into the continuation.
Modelling by Pete, lighting by Tarquin and Pete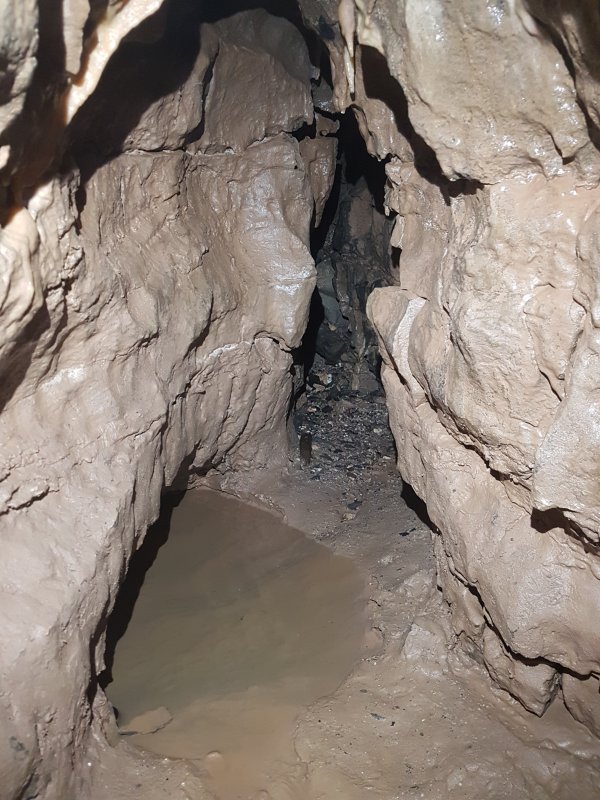 A side passage with a silted sump and choked alcove. Sounds familiar? It is the same sump and choked alcove as before, now from the other side.
 A climb overhead or a squeeze through an eyehole gains Peggy's Purgatory.
Modelling by Tarquin's hoof.
A climb overhead or a squeeze through an eyehole gains Peggy's Purgatory.
Modelling by Tarquin's hoof.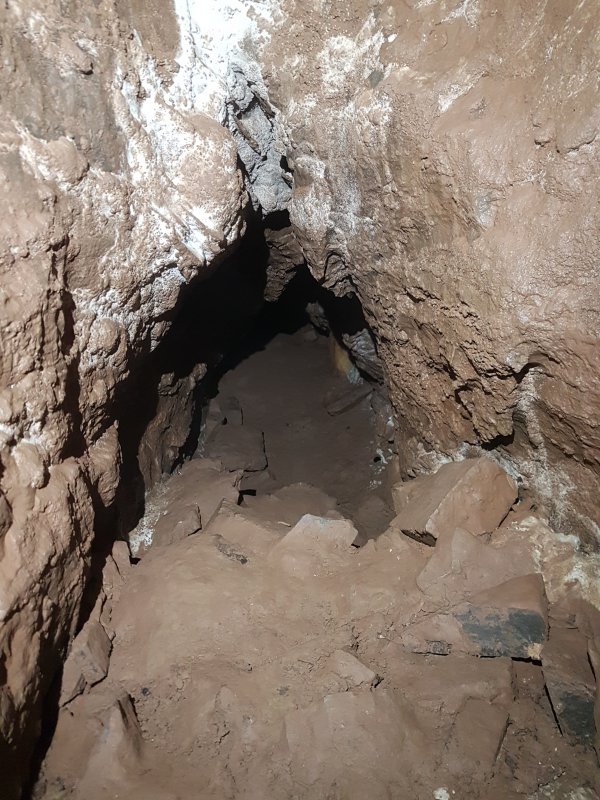 Descending into Peggy's Purgatory.
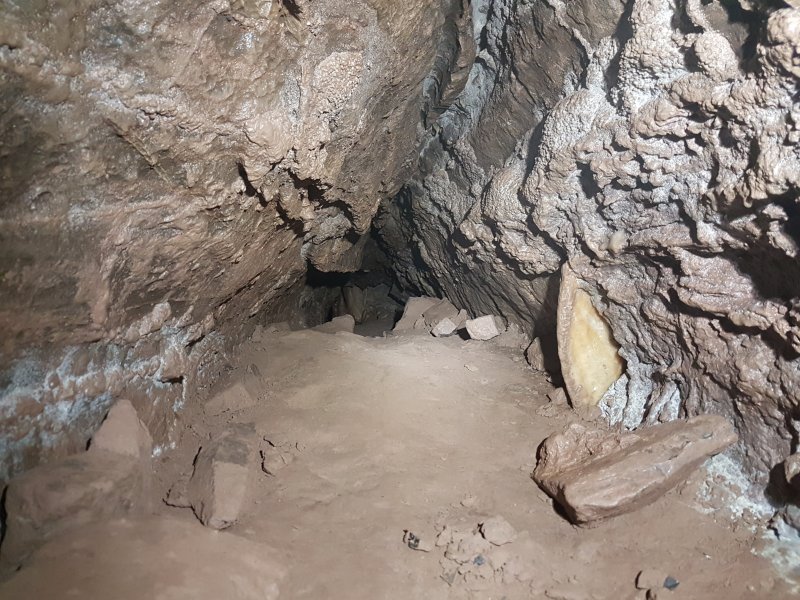 Peggy's Purgatory is an exceptionally tight crawl, tight enough that the surveyors could not fit along over half its 40 metre length. It connects to an aven in West Leg.
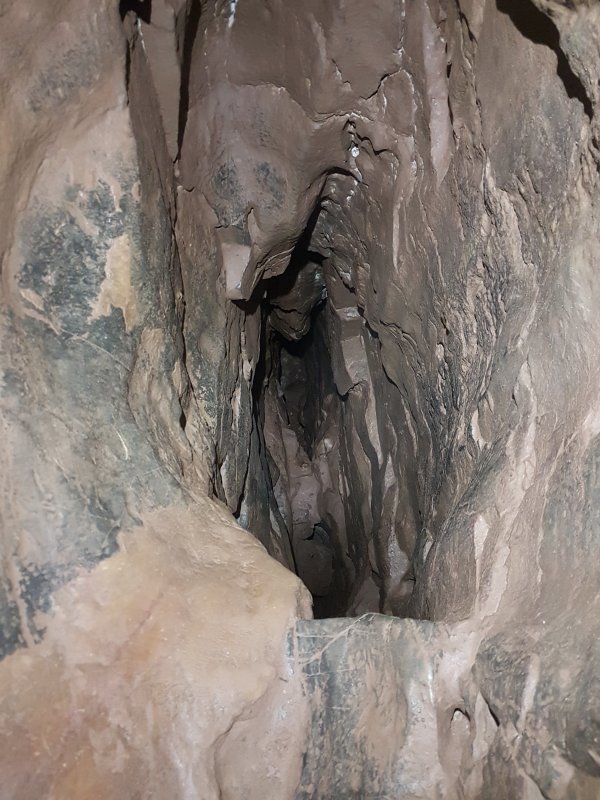 A climb up reaches a descent down a narrow rift. It can be free climbed up if needed.
 At the bottom is a tight tube. This is big enough for average sized cavers, but should only be followed feet first. We were feeling particularly wussy due to COVID belly - aka. weight gain - and decided not to go through it.
 The other end of the tube drops out 4 metres up in the roof of the aven in West Leg, creating the round trip. It has very few holds, and head first is absolutely not recommended.
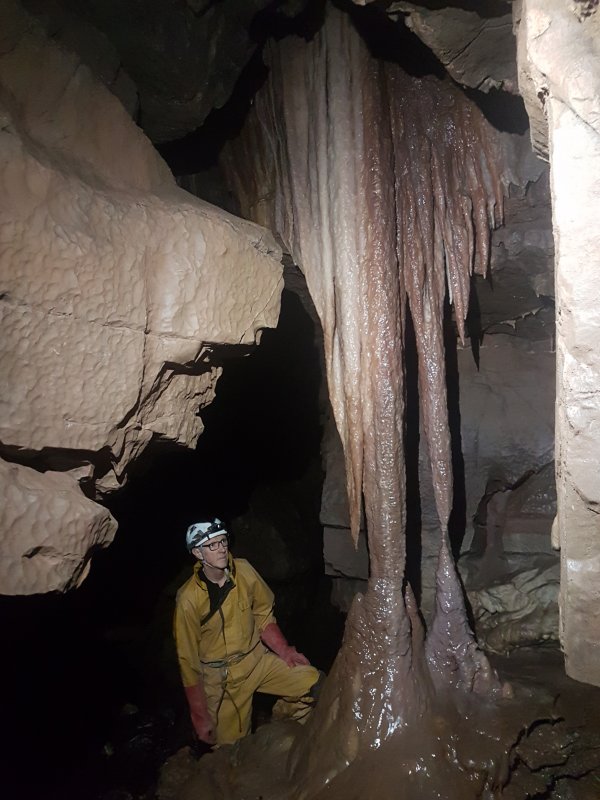 Superb column formation at the next junction in East Leg.
Modelling by Pete
Superb column formation at the next junction in East Leg.
Modelling by Pete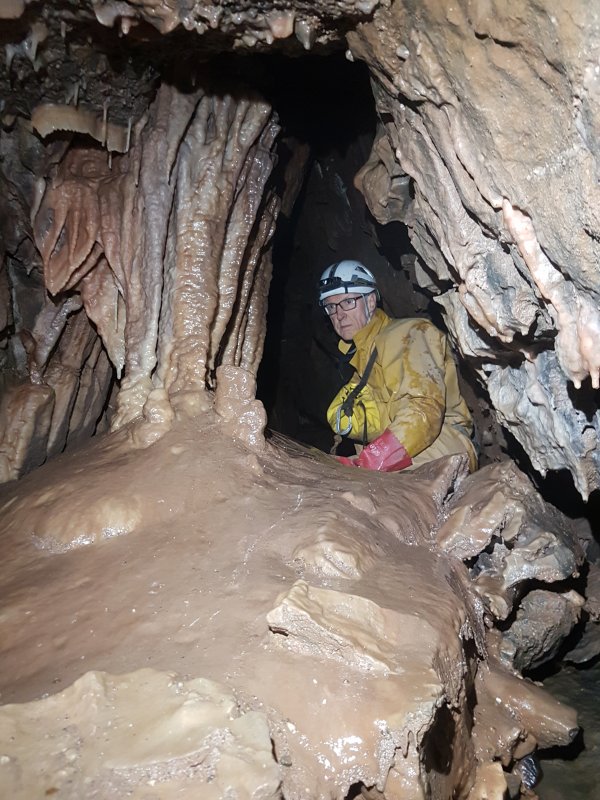 Stal in the side passage at the junction.
Modelling by Pete
Stal in the side passage at the junction.
Modelling by Pete The side passage ends beyond a squeeze, with a wall of flowstone. I assume there is a crystal pool too, but did not want to push through and have to reverse it.
 The chamber at the end of East Leg, which has a loop and many ways on.
Modelling by Pete, lighting by Tarquin and Pete
The chamber at the end of East Leg, which has a loop and many ways on.
Modelling by Pete, lighting by Tarquin and Pete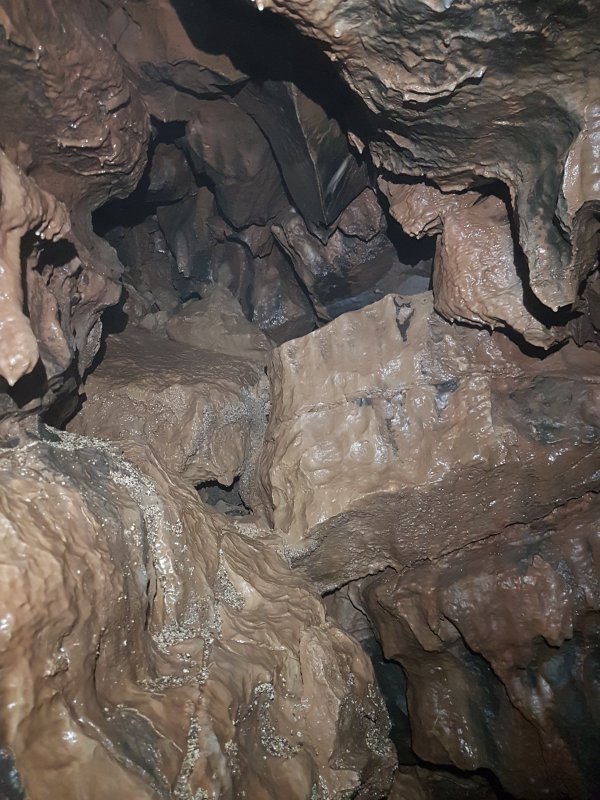 Ahead chokes.
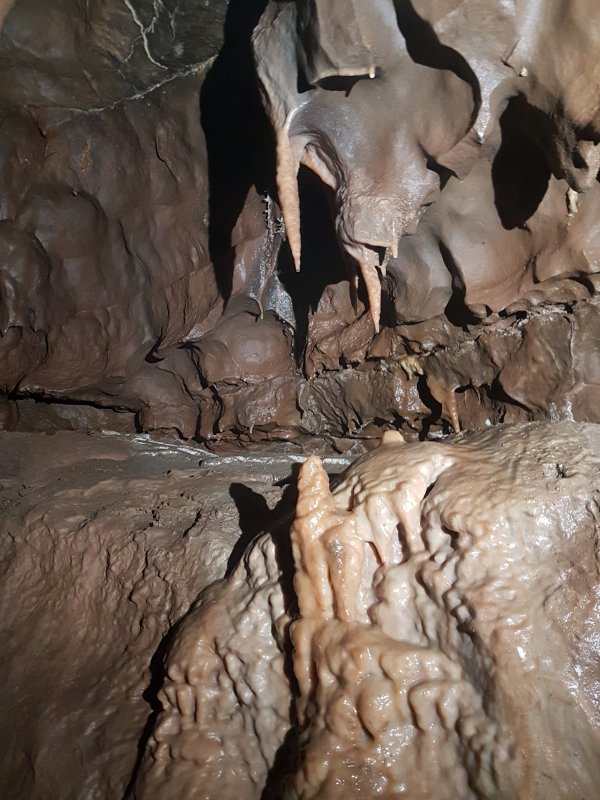 Formations in a tiny side passage from the chamber.
 Climbing up to the upper level. This was a bad route, there is a much easier one in an alcove on the far side of the loop.
Modelling by Pete, lighting by Tarquin and Pete
Climbing up to the upper level. This was a bad route, there is a much easier one in an alcove on the far side of the loop.
Modelling by Pete, lighting by Tarquin and Pete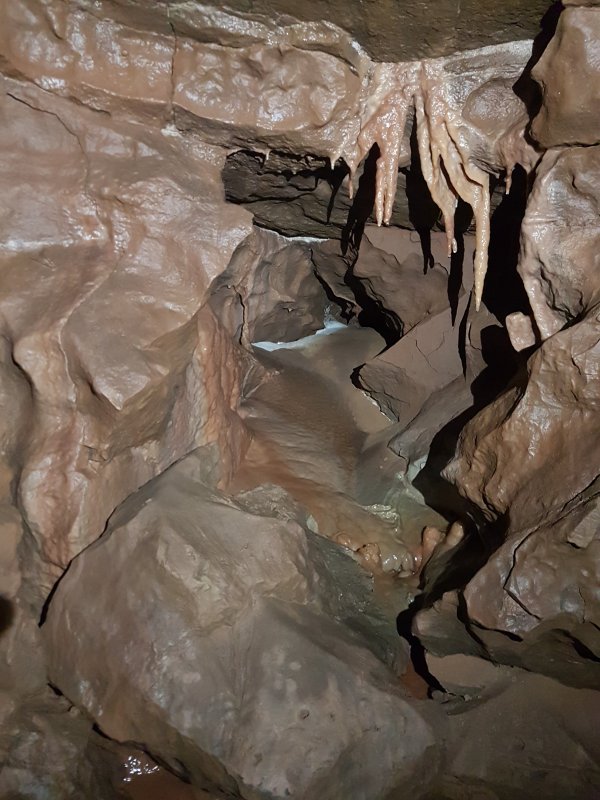 Formations in the upper chamber.
 Rift towards Aven Chamber.
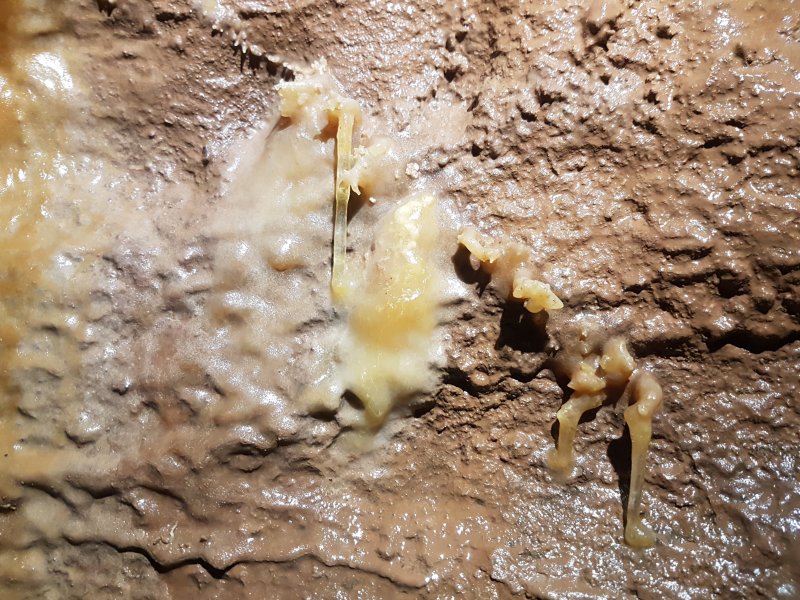 Immature helictites in the passage.
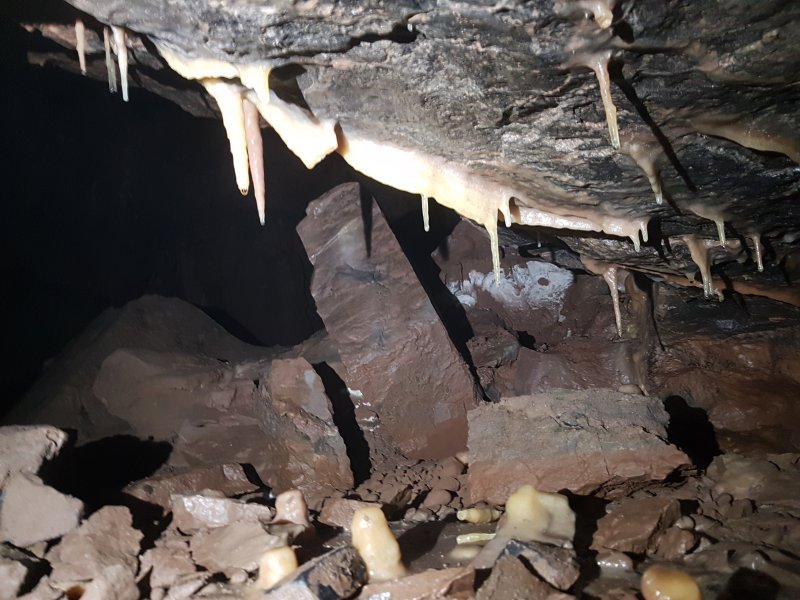 Formations in the crawl to Aven Chamber.
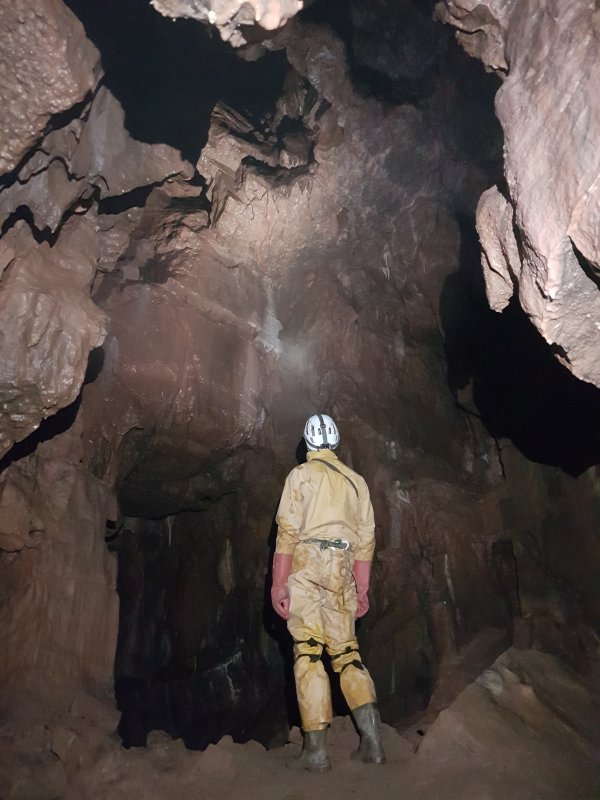 Aven Chamber.
Modelling by Pete, lighting by Tarquin and Pete
Aven Chamber.
Modelling by Pete, lighting by Tarquin and Pete Formations in Aven Chamber.
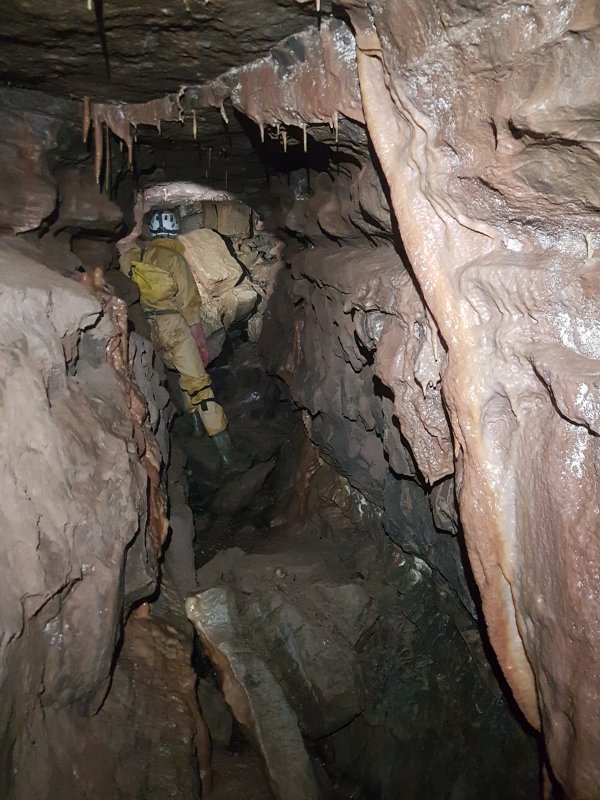 The largest side passage.
Modelling by Pete, lighting by Tarquin and Pete
The largest side passage.
Modelling by Pete, lighting by Tarquin and Pete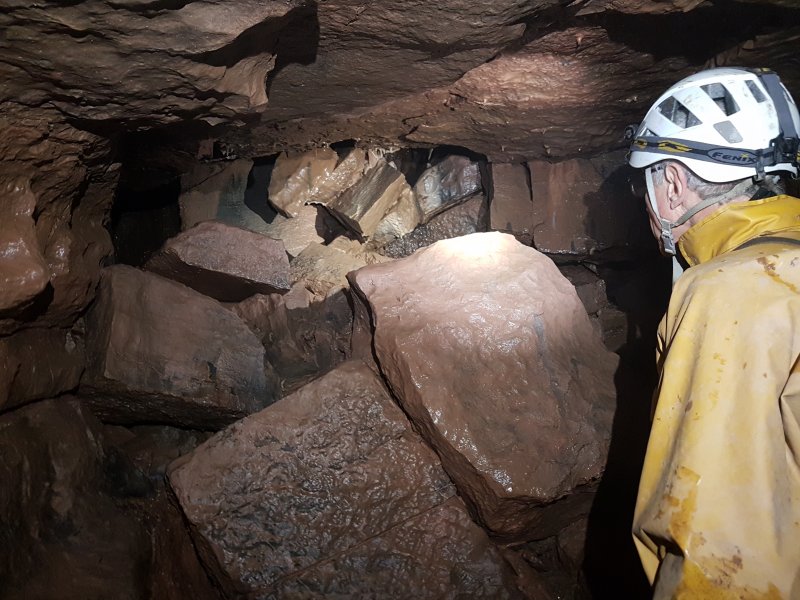 The passage chokes, and its oxbow chokes. And all other side passages end quickly. End of East Leg.
Modelling by Pete, lighting by Tarquin and Pete
The passage chokes, and its oxbow chokes. And all other side passages end quickly. End of East Leg.
Modelling by Pete, lighting by Tarquin and Pete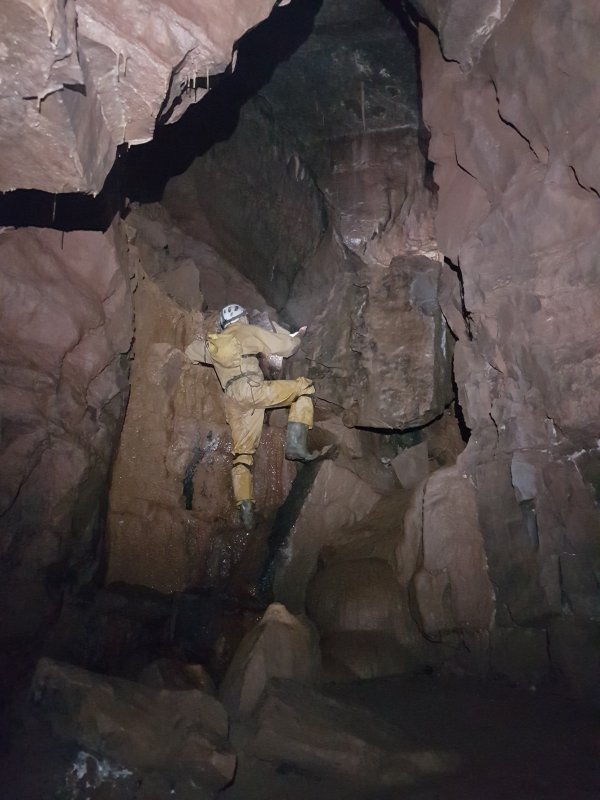 The other branch from the junction of Highgate and East Leg is the way to Crystal Pool Chamber, which starts as a climb into a chamber.
Modelling by Pete, lighting by Tarquin and Pete
The other branch from the junction of Highgate and East Leg is the way to Crystal Pool Chamber, which starts as a climb into a chamber.
Modelling by Pete, lighting by Tarquin and Pete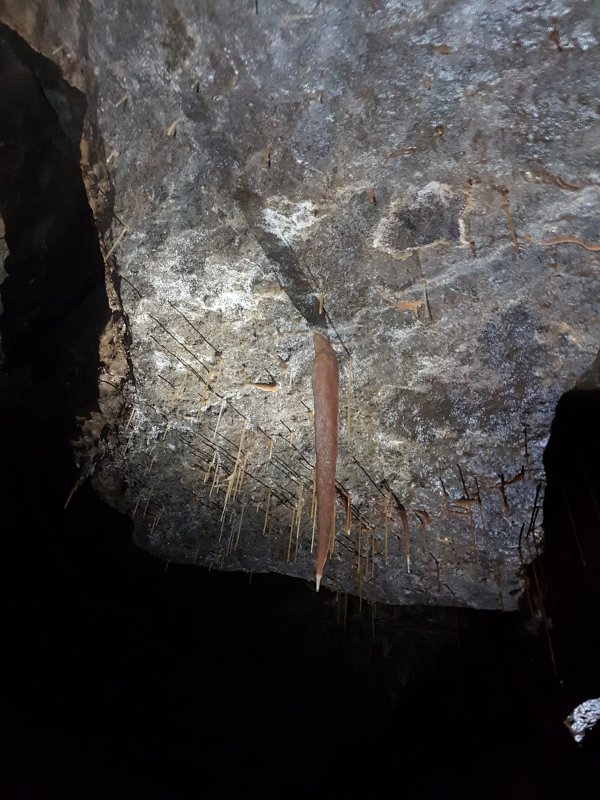 Stalactite in the chamber.
Lighting by Tarquin and Pete
Stalactite in the chamber.
Lighting by Tarquin and Pete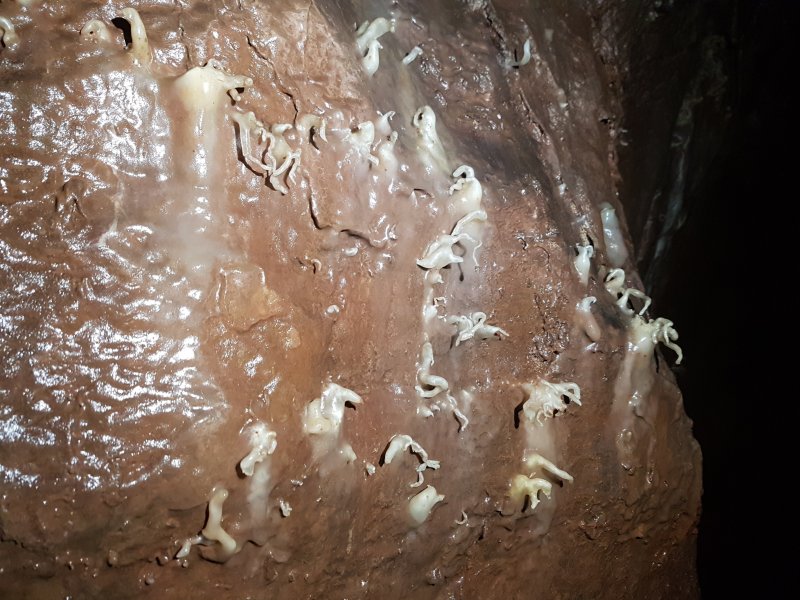 One wall of the chamber is covered in helictites.
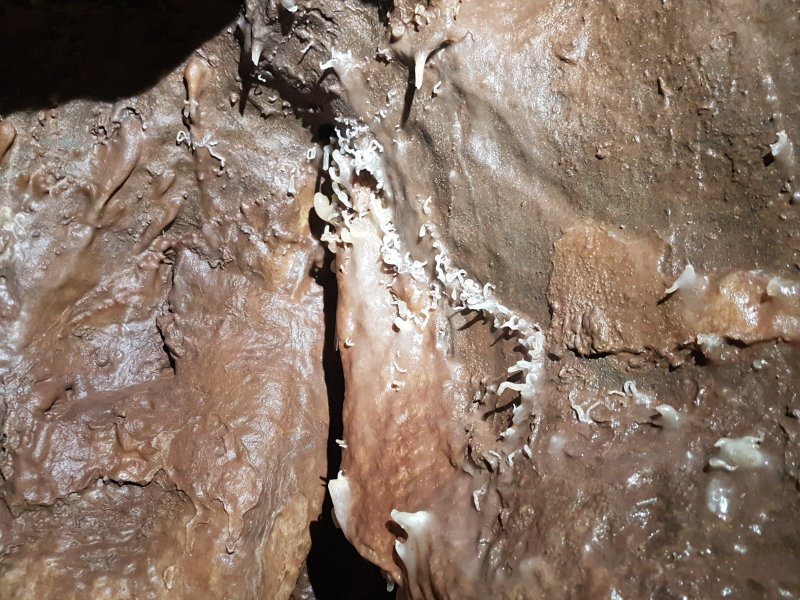 Helictites.
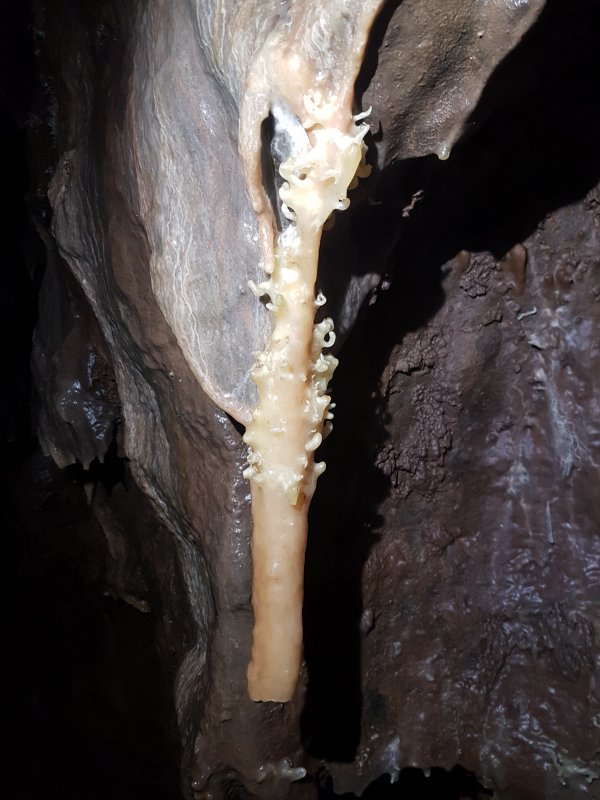 Helictites on a stalactite.
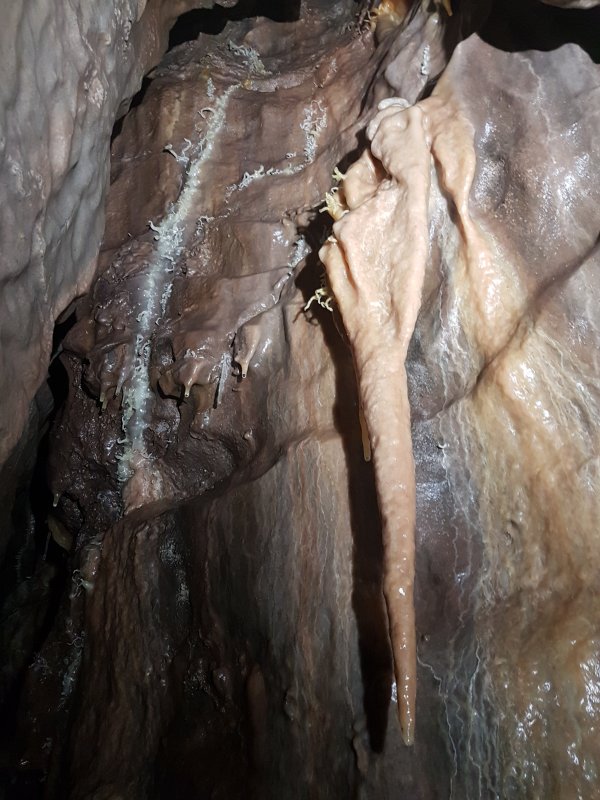 Helictites and stalactite.
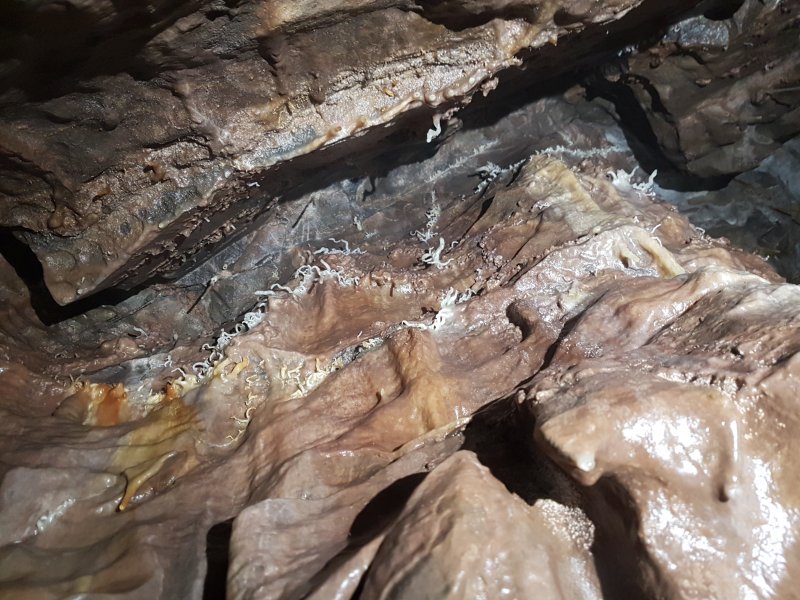 Helictites in the ceiling.
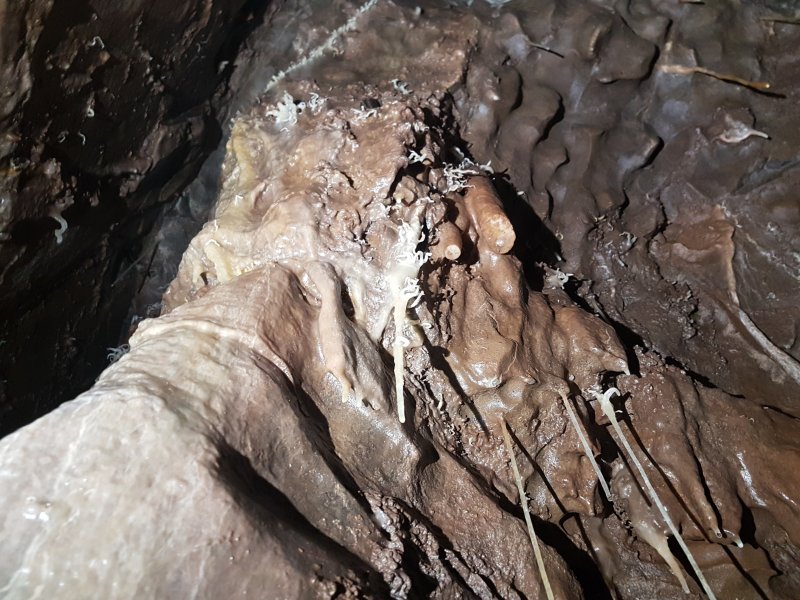 Helictites and straws.
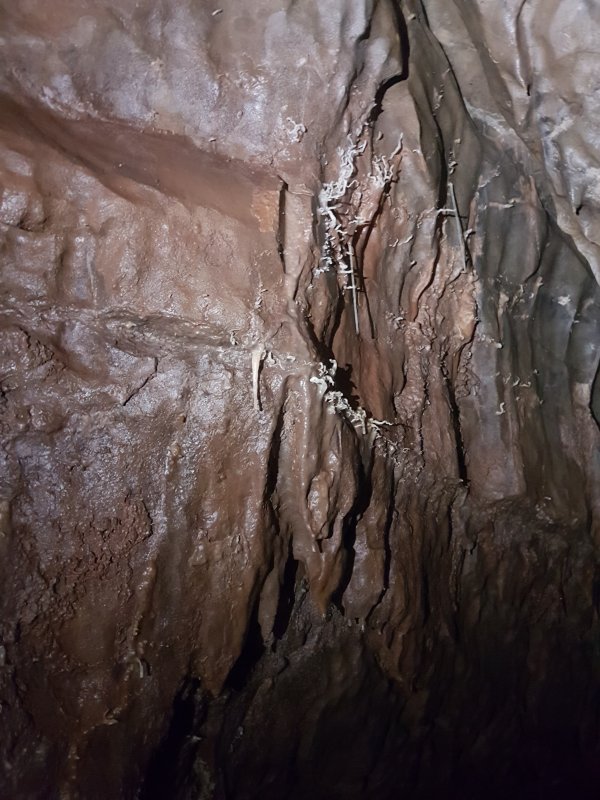 Helictites.
 Helictites.
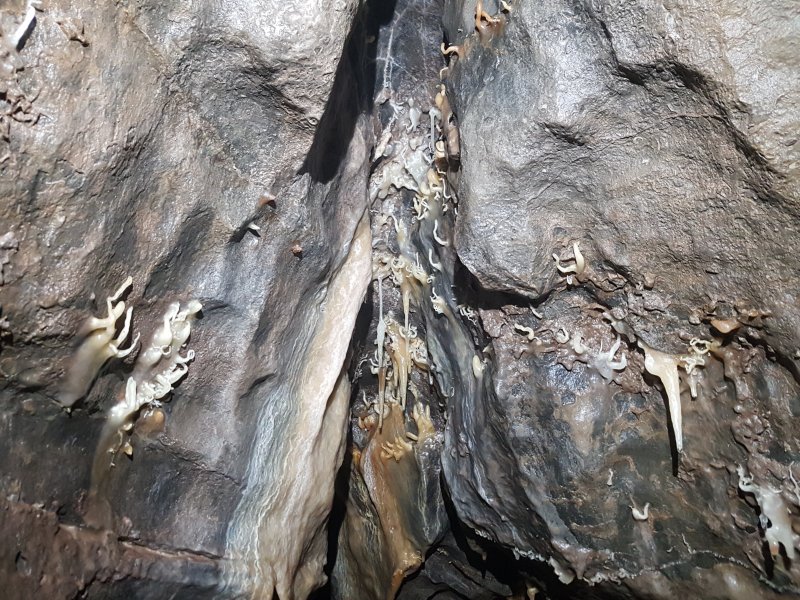 Helictites. These last ones sit directly above a very narrow rift, and the passage on the other side can be clearly seen; The Canyon. However, it is too narrow to get through, and a very long detour is needed to get there, including a pitch.
 Doubling back over the way in is the passage to Crystal Pool Chamber, with this flowstone.
 The first climb, which has very few holds.
Modelling by Pete, lighting by Tarquin and Pete
The first climb, which has very few holds.
Modelling by Pete, lighting by Tarquin and Pete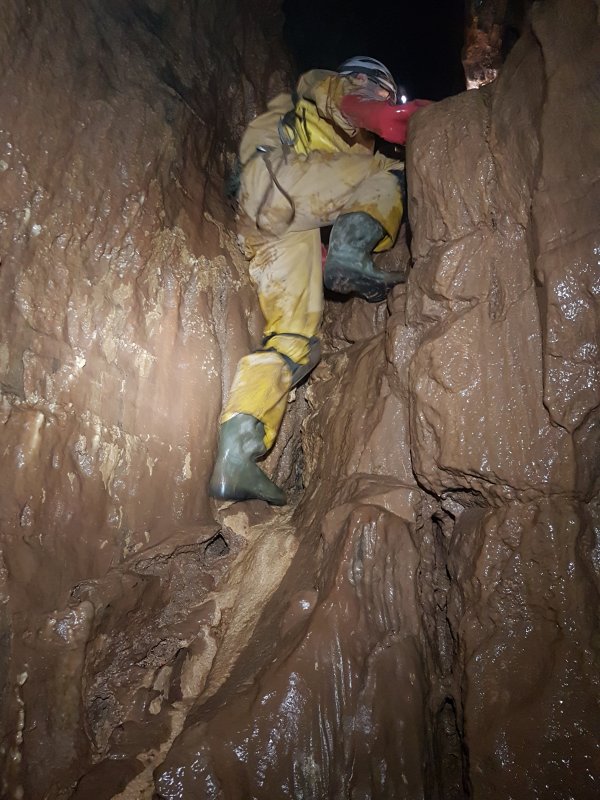 The second climb.
Modelling by Pete, lighting by Tarquin and Pete
The second climb.
Modelling by Pete, lighting by Tarquin and Pete The third climb, stepping up the rift and traversing over the slot to reach the opening at the top.
Modelling by Pete, lighting by Tarquin and Pete
The third climb, stepping up the rift and traversing over the slot to reach the opening at the top.
Modelling by Pete, lighting by Tarquin and Pete Formations over the climbs.
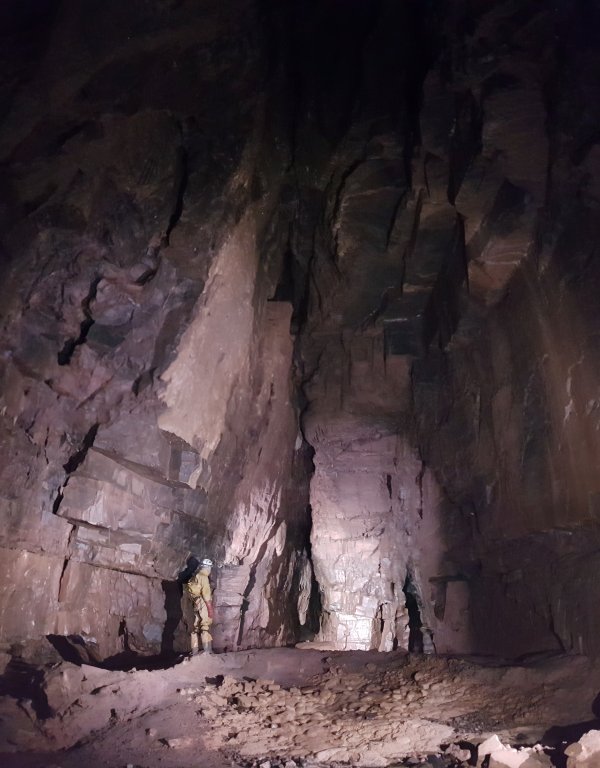 The rift pops out in Crystal Pool Chamber, a very dramatic space. The name seems a little overstated, but it does have a pretty pool in one corner. The only side passage we did not visit is to the right, the way to the pitch leading down to The Canyon and The Annex - another large chamber.
Modelling by Pete, lighting by Tarquin and Pete
The rift pops out in Crystal Pool Chamber, a very dramatic space. The name seems a little overstated, but it does have a pretty pool in one corner. The only side passage we did not visit is to the right, the way to the pitch leading down to The Canyon and The Annex - another large chamber.
Modelling by Pete, lighting by Tarquin and Pete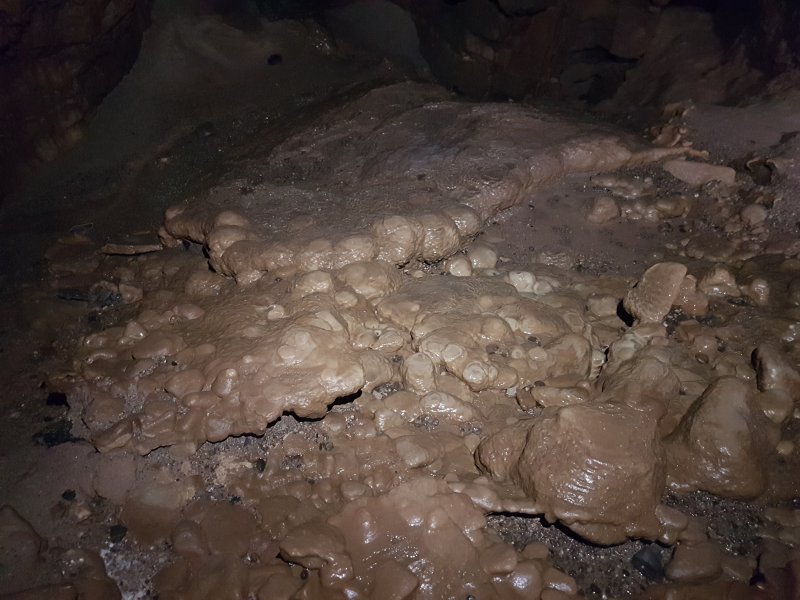 The floor of the chamber has a rather minimalistic set of stalagmites and flowstone.
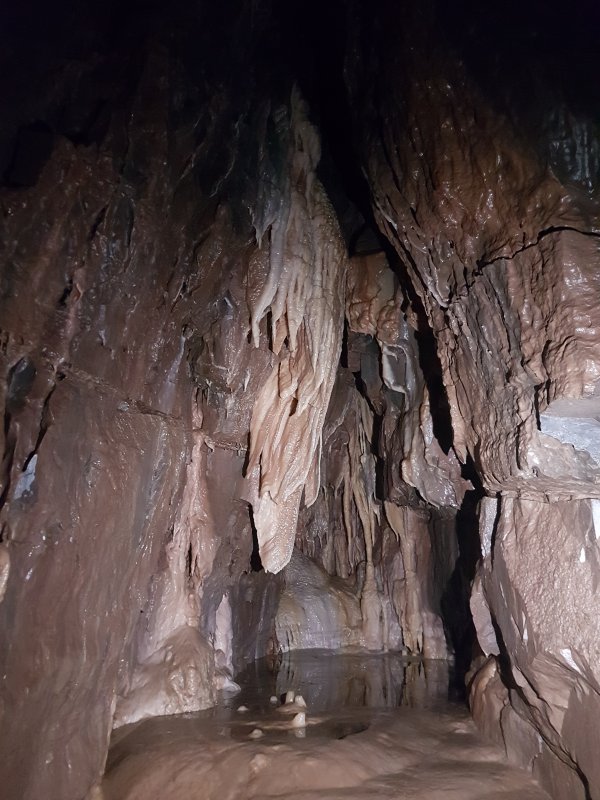 The main feature of the chamber is tucked into the alcove on the far side; the crystal pool, surrounded by curtains and stalactites.
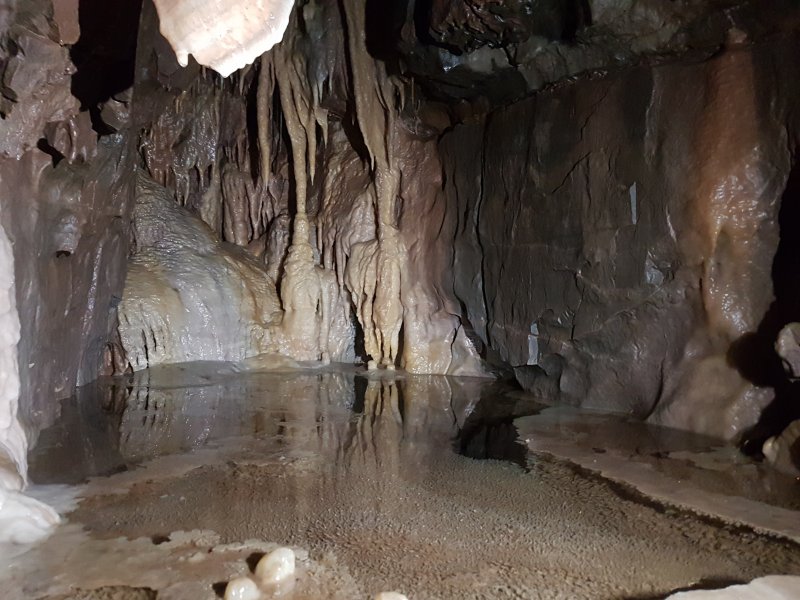 The crystal pool. Sadly, it sits on a high shelf, and it is hard to get a good view of the actual pool.
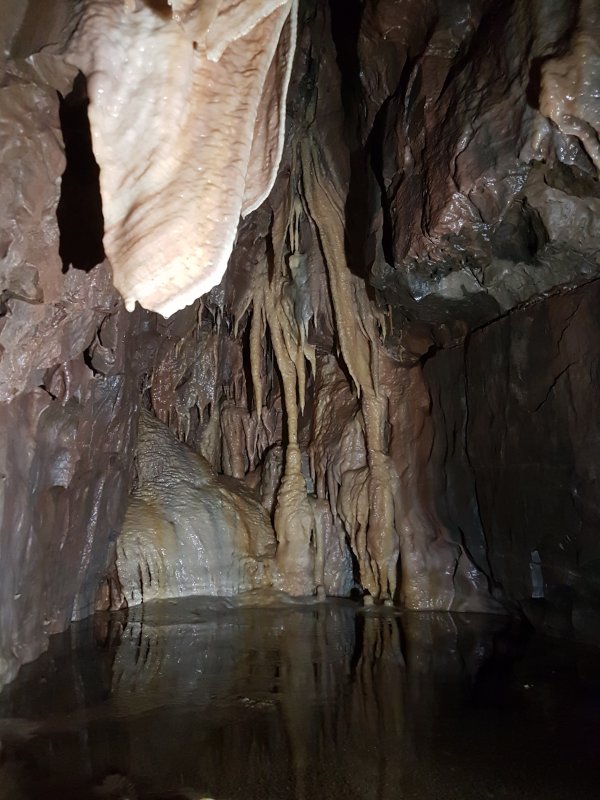 The formations surrounding the pool.
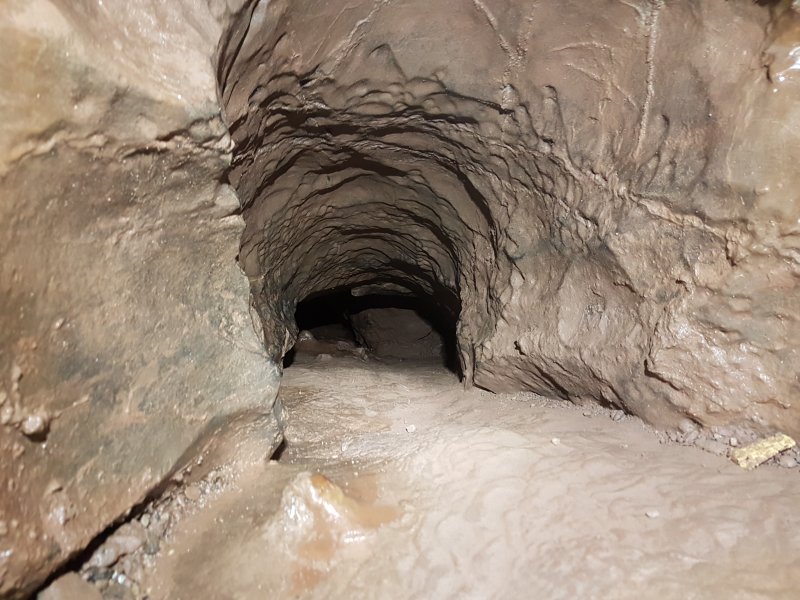 Beside the crystal pool is a tiny tube, which gets tighter. This provides a link to The Annex, but is tight enough that the surveyors could not fit.
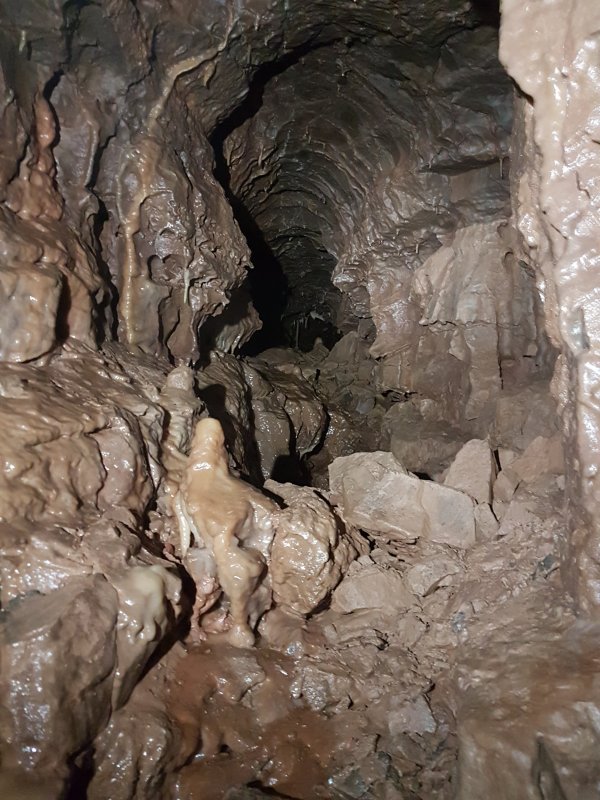 Starting on the left side of the chamber, a decorated passage gets too tight.
 A rift and bedding on the left join, and gain some formations.
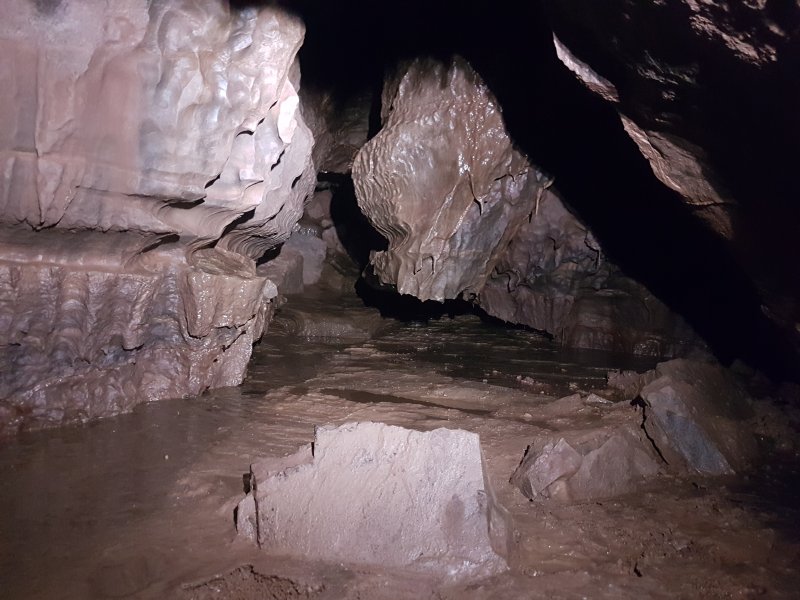 The ongoing passage.
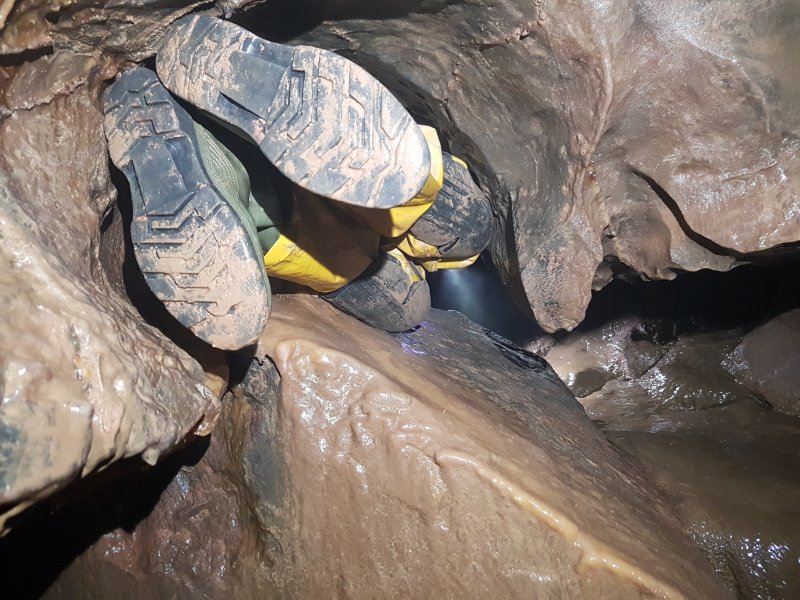 This then passes through a ridiculous looking squeeze which is a lot easier than it looks.
Modelling by Pete, lighting by Tarquin and Pete
This then passes through a ridiculous looking squeeze which is a lot easier than it looks.
Modelling by Pete, lighting by Tarquin and Pete This gains a parallel chamber with some more formations.
Modelling by Pete, lighting by Tarquin and Pete
This gains a parallel chamber with some more formations.
Modelling by Pete, lighting by Tarquin and Pete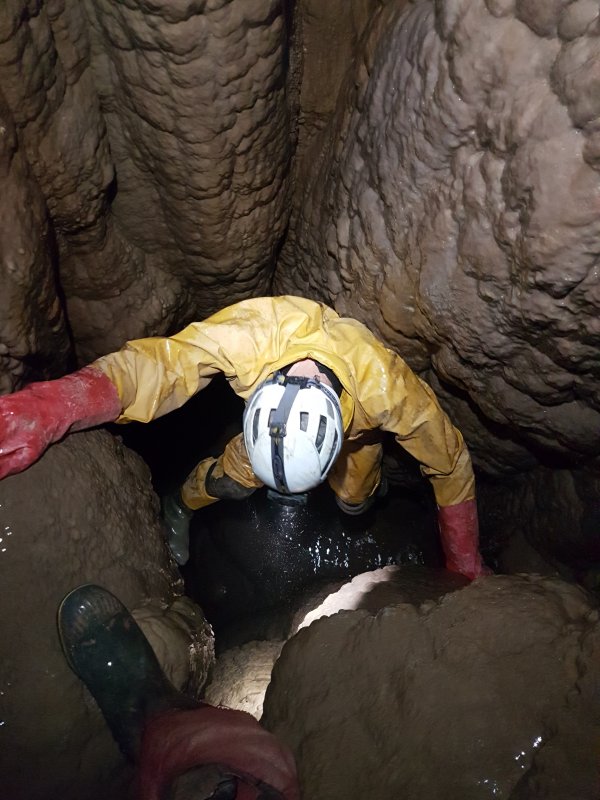 At the far end is Tiger Aven. Ascending this means climbing on formations, so clean kit is required.
Modelling by Pete, lighting by Tarquin and Pete
At the far end is Tiger Aven. Ascending this means climbing on formations, so clean kit is required.
Modelling by Pete, lighting by Tarquin and Pete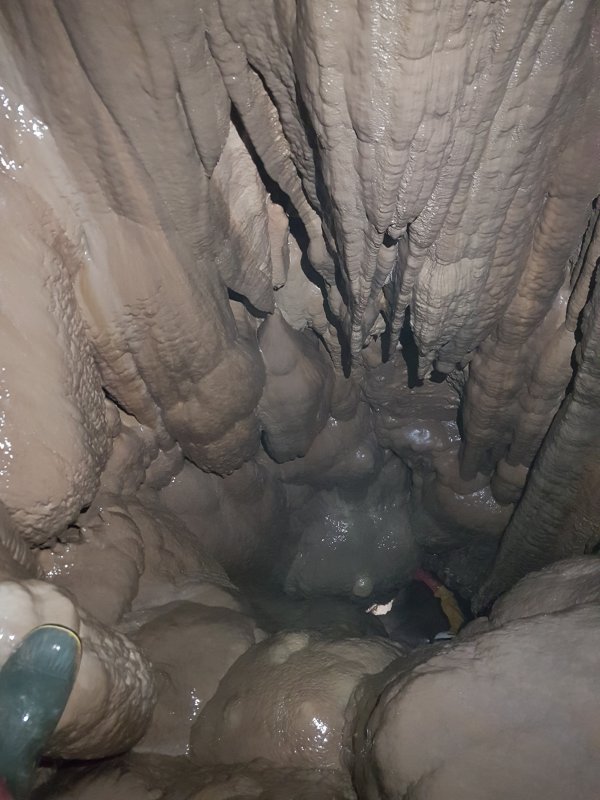 The middle part of Tiger Aven. Still climbing.
Modelling by Tarquin's clodhopper and Pete, lighting by Tarquin and Pete
The middle part of Tiger Aven. Still climbing.
Modelling by Tarquin's clodhopper and Pete, lighting by Tarquin and Pete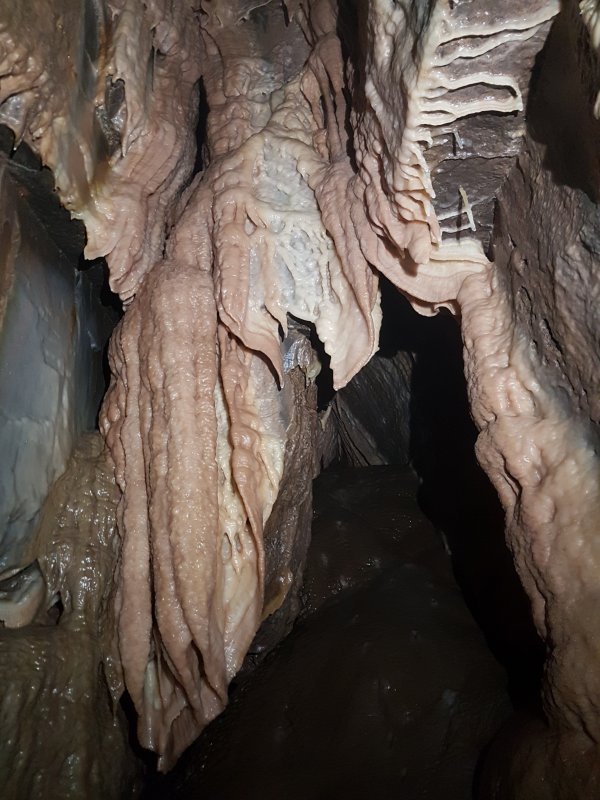 Formations in Tiger Aven.
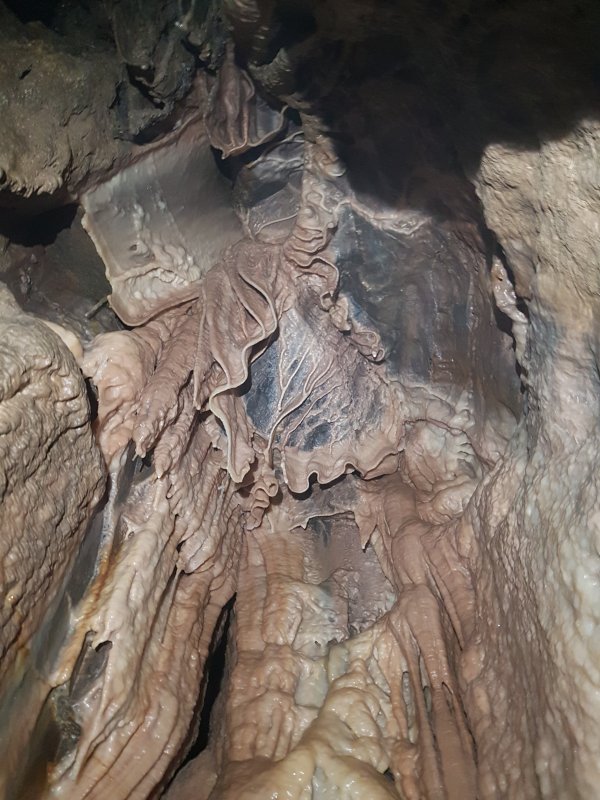 Formations in Tiger Aven.
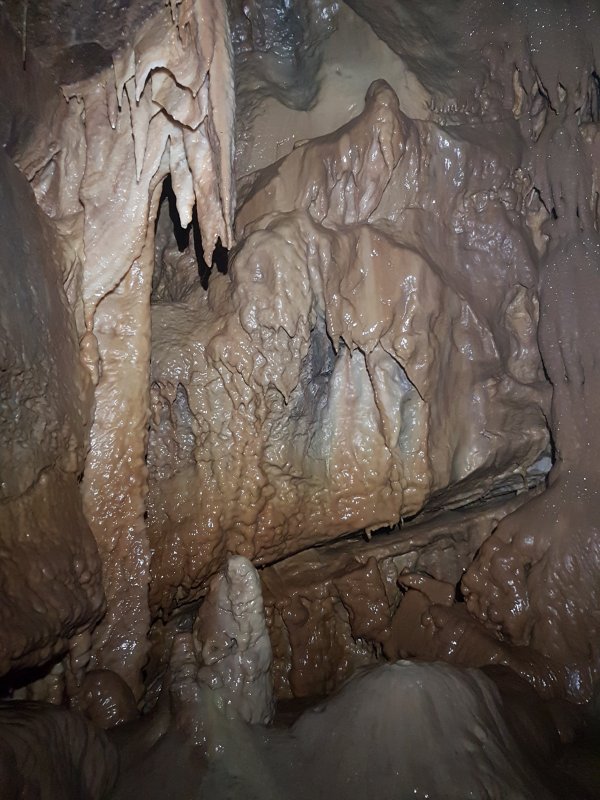 Formations in Tiger Aven.
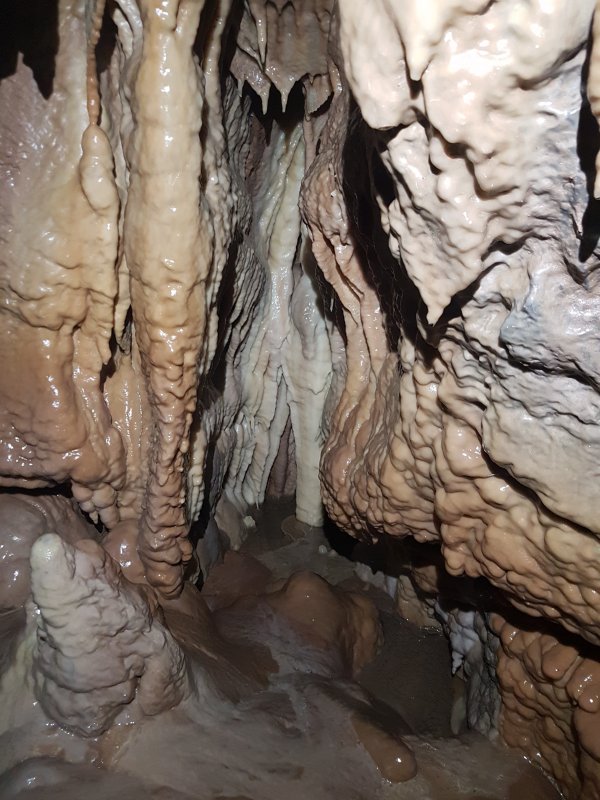 Formations in Tiger Aven.
 Formations in Tiger Aven.
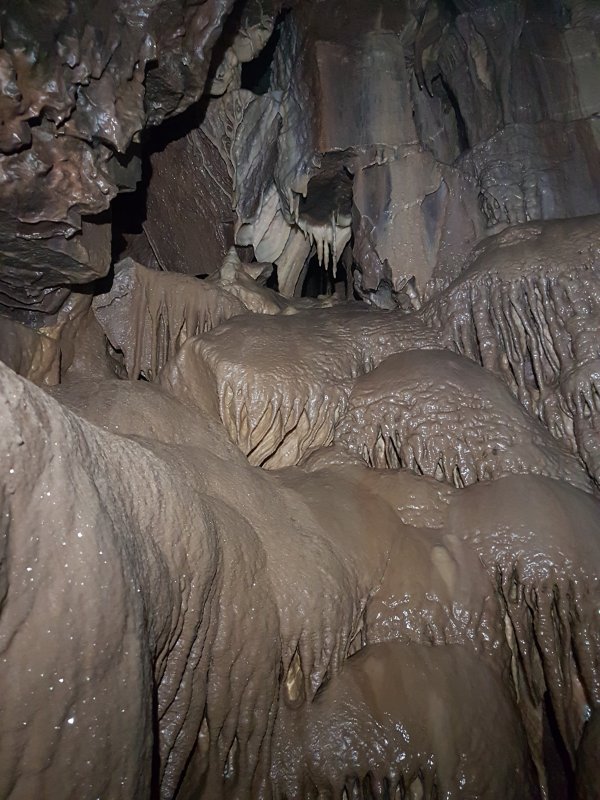 Formations in Tiger Aven.
 The top of Tiger Aven, which requires a much more exposed climb, 14 metres up. There is a fair amount of small passage up there, but the climb really deserves protection, so we left it, and headed elsewhere.
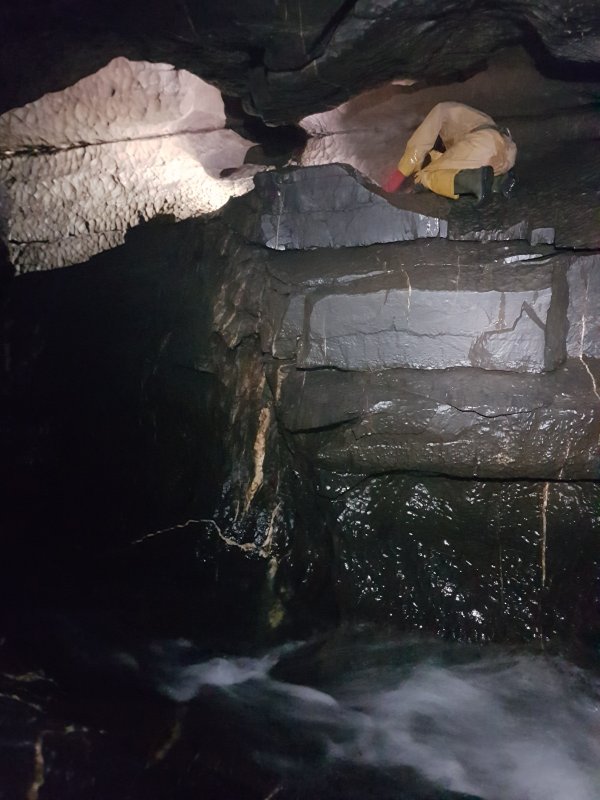 Back at the OFD I streamway's upstream sump, climbing up onto a ledge above the river gives access to the Railton - Wild Series.
Modelling by Pete, lighting by Tarquin and Pete
Back at the OFD I streamway's upstream sump, climbing up onto a ledge above the river gives access to the Railton - Wild Series.
Modelling by Pete, lighting by Tarquin and Pete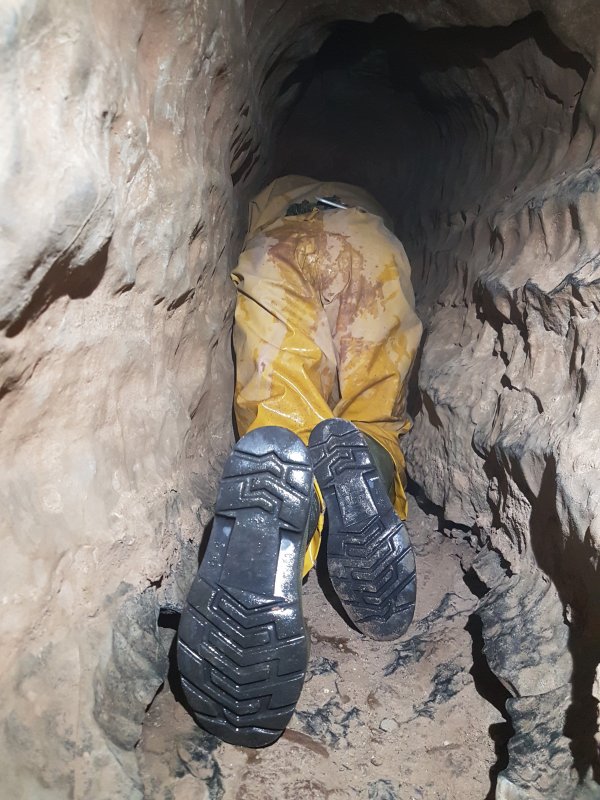 Crawling into Railton - Wild Series.
Modelling by Pete
Crawling into Railton - Wild Series.
Modelling by Pete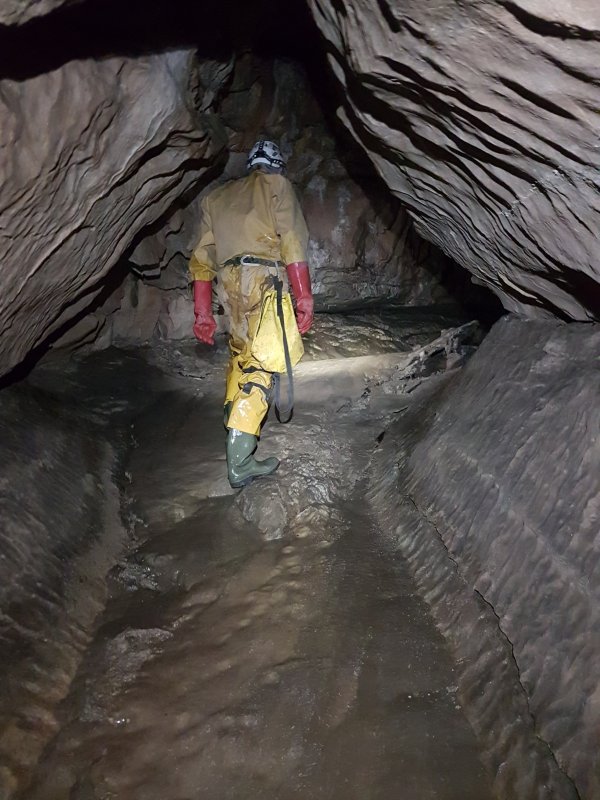 The crawl pops out in The Slide, which slopes back down to the river, and can be used to access the series, as long as you can get a grip on the end of the slope.
Modelling by Pete, lighting by Tarquin and Pete
The crawl pops out in The Slide, which slopes back down to the river, and can be used to access the series, as long as you can get a grip on the end of the slope.
Modelling by Pete, lighting by Tarquin and Pete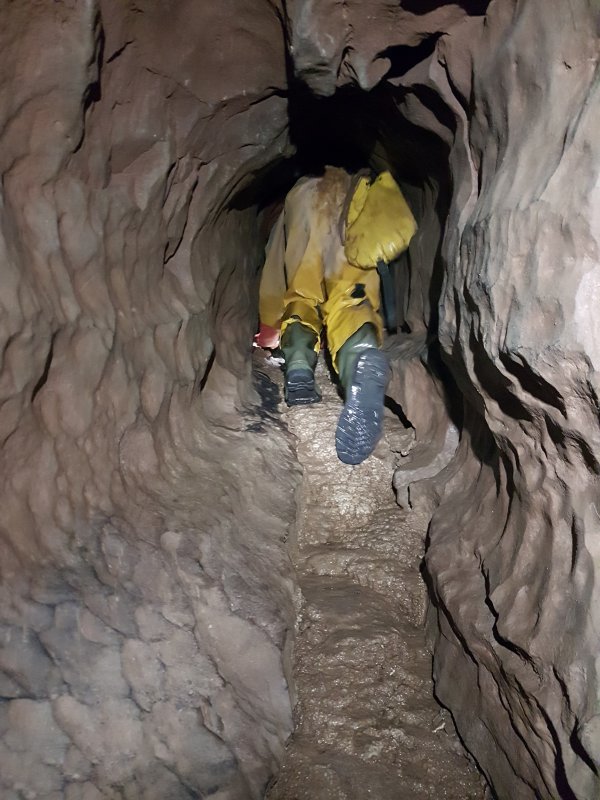 A second crawl opposite the first leads onwards into the series.
Modelling by Pete, lighting by Tarquin and Pete
A second crawl opposite the first leads onwards into the series.
Modelling by Pete, lighting by Tarquin and Pete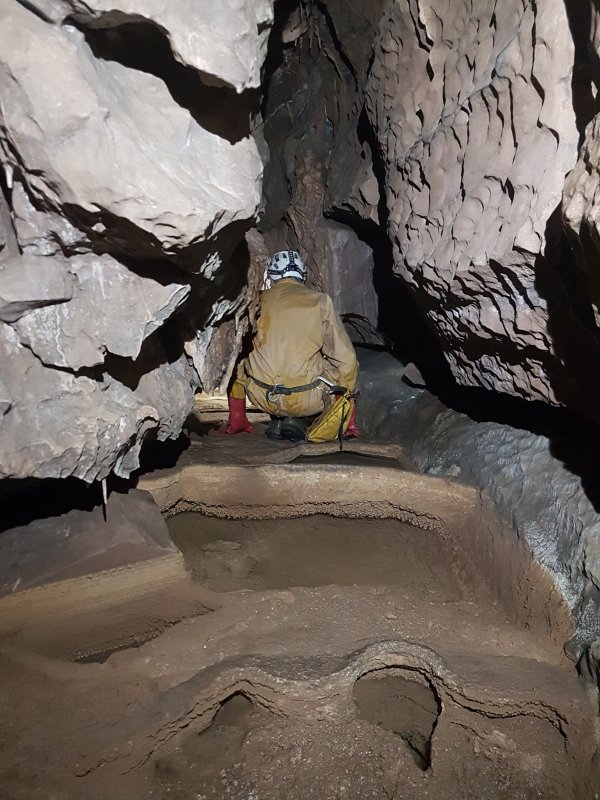 The crawl reaches Gour Passage, which heads in both directions, and is the start of the series' round trip. We started clockwise around the loop.
Modelling by Pete, lighting by Tarquin and Pete
The crawl reaches Gour Passage, which heads in both directions, and is the start of the series' round trip. We started clockwise around the loop.
Modelling by Pete, lighting by Tarquin and Pete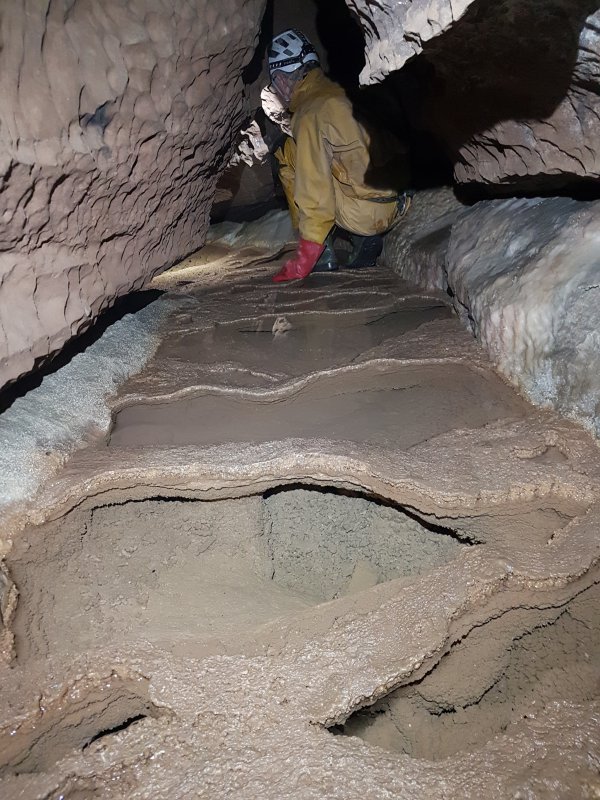 Gour Passage.
Modelling by Pete, lighting by Tarquin and Pete
Gour Passage.
Modelling by Pete, lighting by Tarquin and Pete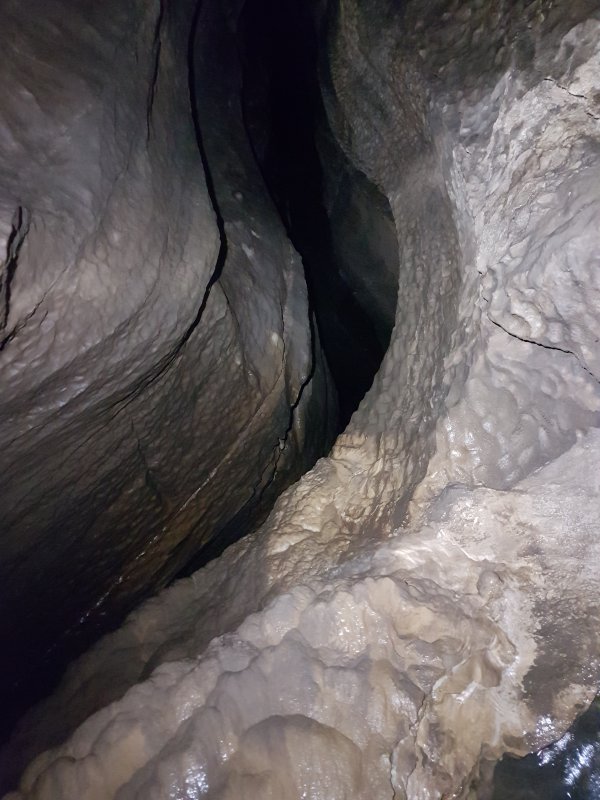 The passage ends at a junction where on one side is a drop down to the river again, directly over the Fourth Pot. It is definitely not free climbable.
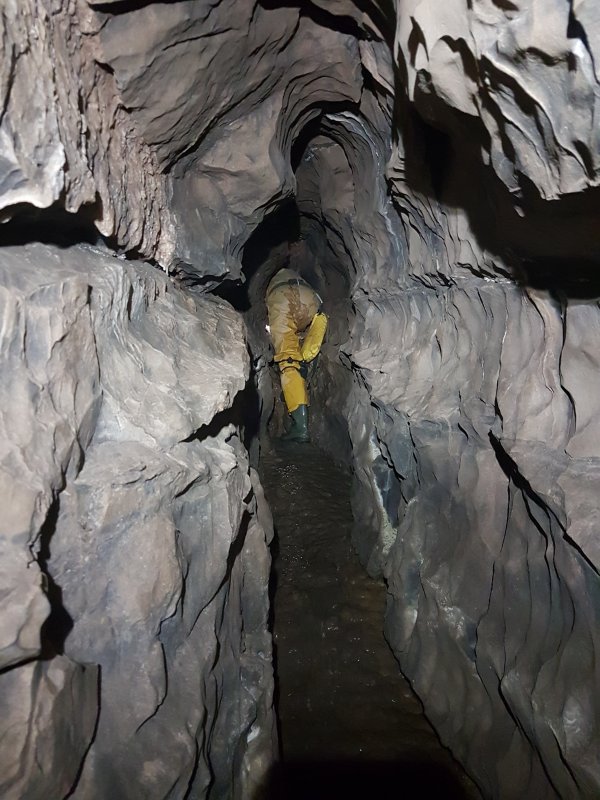 The way on is Thunder Passage, narrow and sometimes a little awkward, with a very meagre stream.
Modelling by Pete, lighting by Tarquin and Pete
The way on is Thunder Passage, narrow and sometimes a little awkward, with a very meagre stream.
Modelling by Pete, lighting by Tarquin and Pete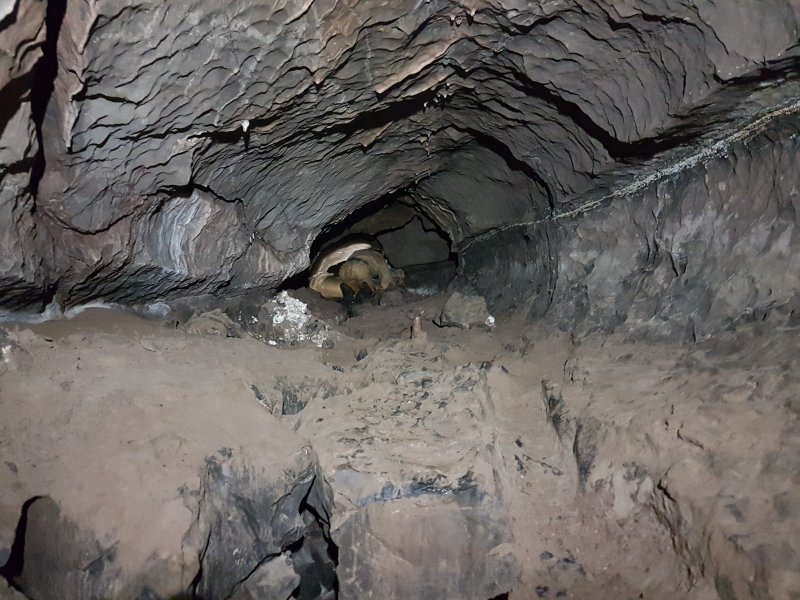 A side passage on the left leads to Bailit Way.
Modelling by Pete, lighting by Tarquin and Pete
A side passage on the left leads to Bailit Way.
Modelling by Pete, lighting by Tarquin and Pete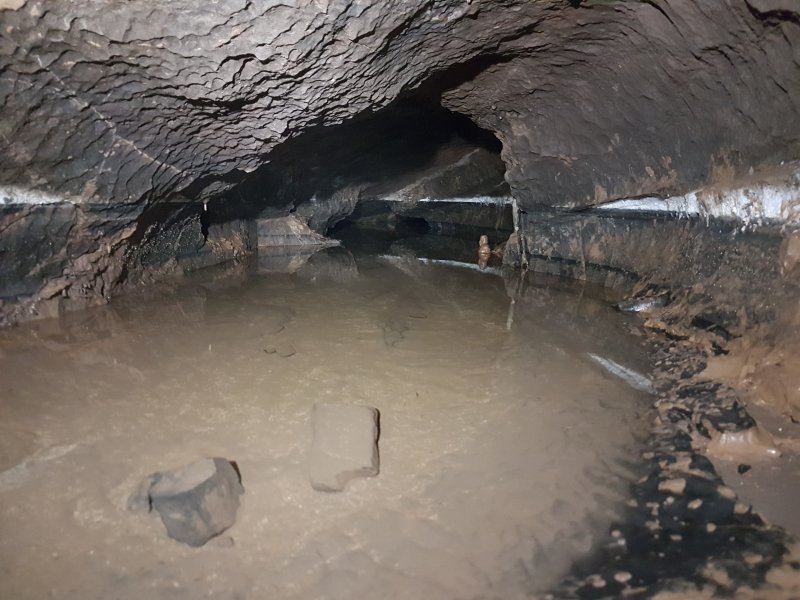 Bailit Way is accessed via a sump, and the name suggests it can be bailed, though siphoning would be a lot easier.
 Continuing along Thunder Passage.
Modelling by Pete, lighting by Tarquin and Pete
Continuing along Thunder Passage.
Modelling by Pete, lighting by Tarquin and Pete A low arch on the right is the start of Rodent Passage, starting as a flat out crawl into a puddle. Yuck!
 Formations in Rodent Passage.
 Rodent Passage remains a low crawl right to the end. Appropriate name. There are better places to see.
 Formations in an alcove near the end of Thunder Passage.
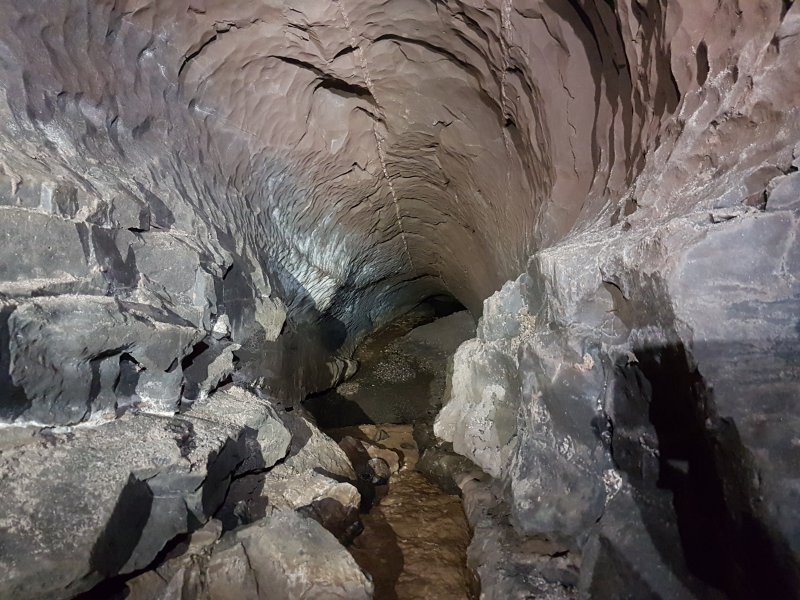 The passage ends in a small streamway, leading down to a silted sump.
Lighting by Tarquin and Pete
The passage ends in a small streamway, leading down to a silted sump.
Lighting by Tarquin and Pete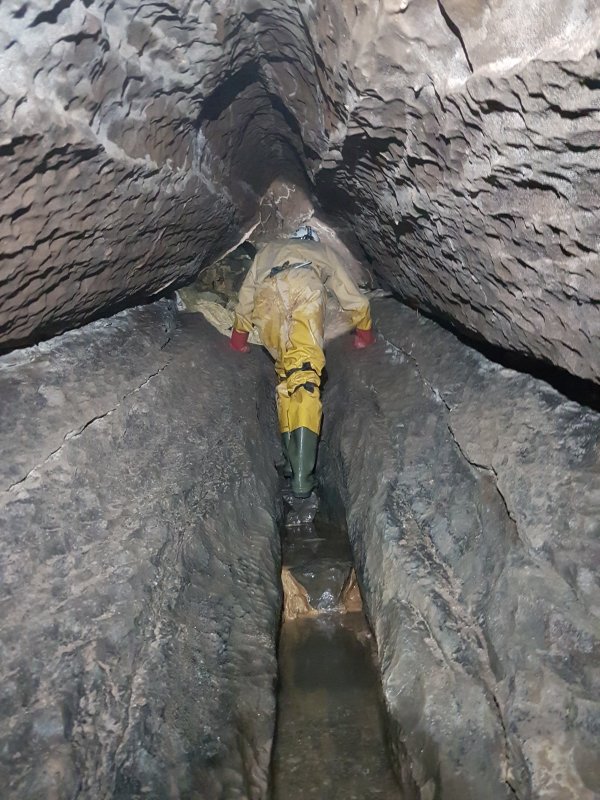 Upstream from Carrot Junction.
Modelling by Pete, lighting by Tarquin and Pete
Upstream from Carrot Junction.
Modelling by Pete, lighting by Tarquin and Pete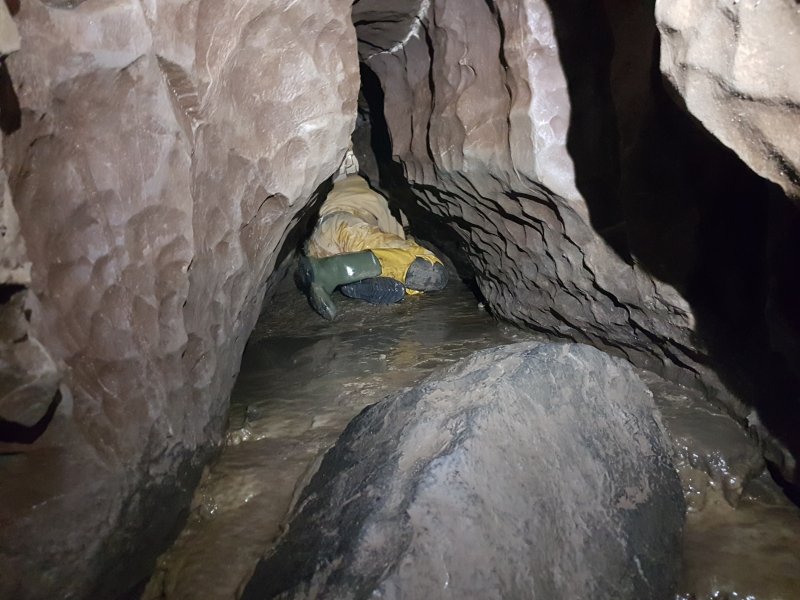 At the top, the streamway reaches a T-junction. To the left is a crawl in the stream to a chamber.
Modelling by Pete, lighting by Tarquin and Pete
At the top, the streamway reaches a T-junction. To the left is a crawl in the stream to a chamber.
Modelling by Pete, lighting by Tarquin and Pete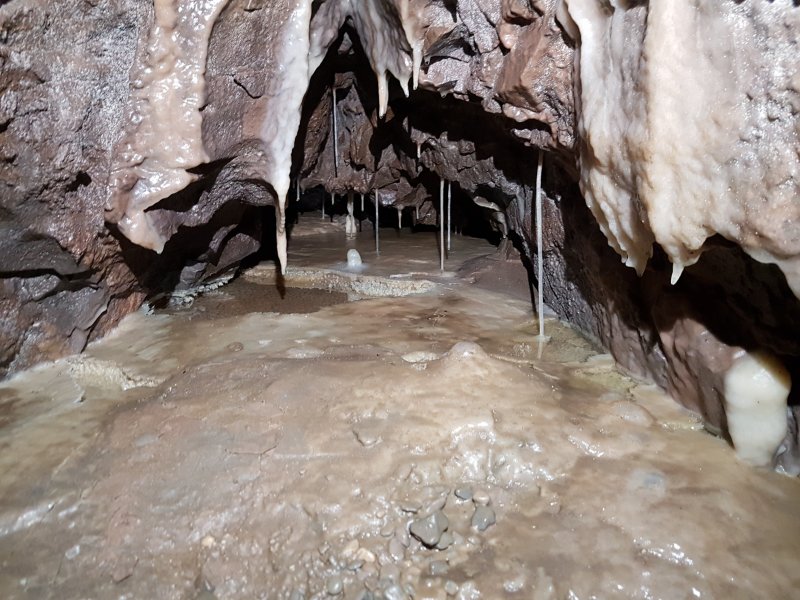 Formations in an alcove.
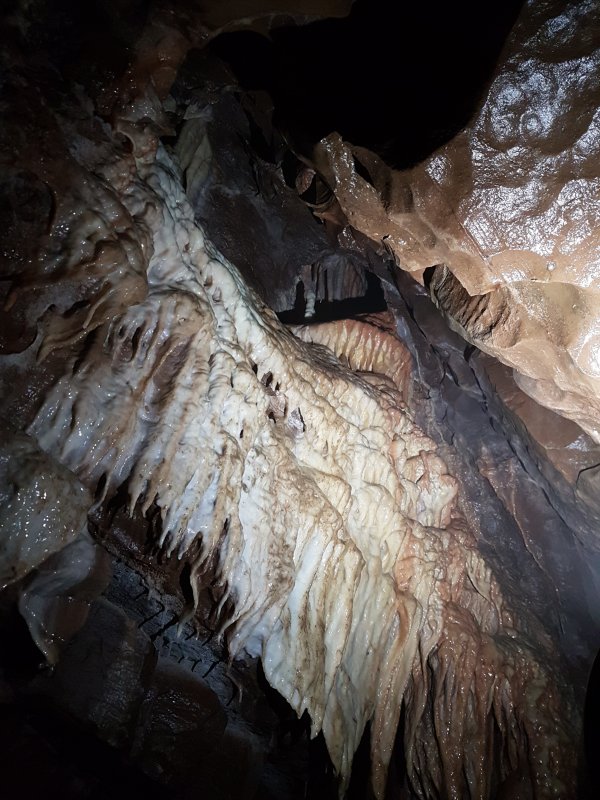 Admirable formations in the chamber.
 Pete did the honours and checked out the final dig.
Modelling by Pete
Pete did the honours and checked out the final dig.
Modelling by Pete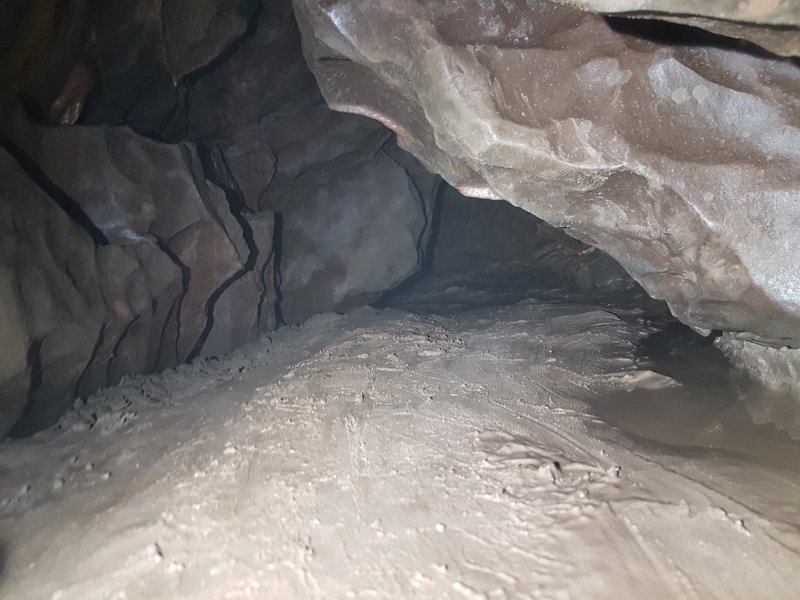 The dig gets too tight.
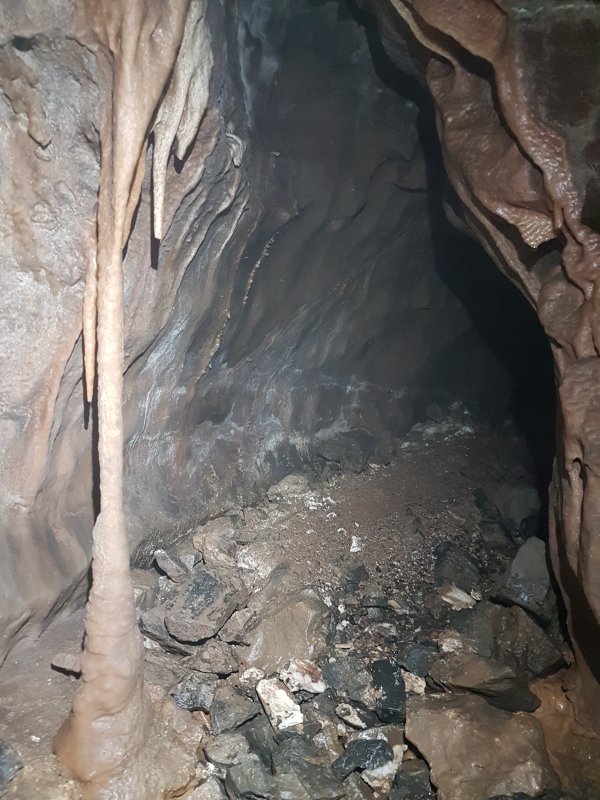 To the right from the T-junction is another crawl with a little stream and formations.
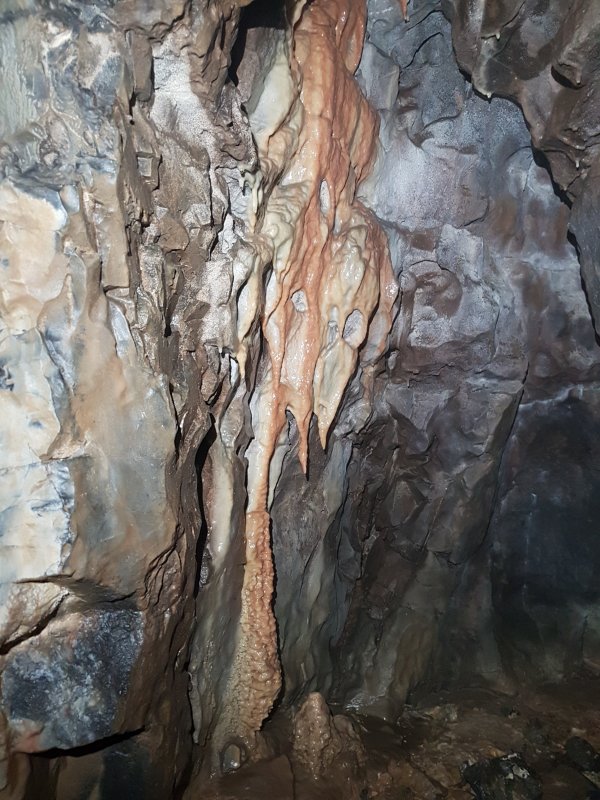 Formations in the right streamway.
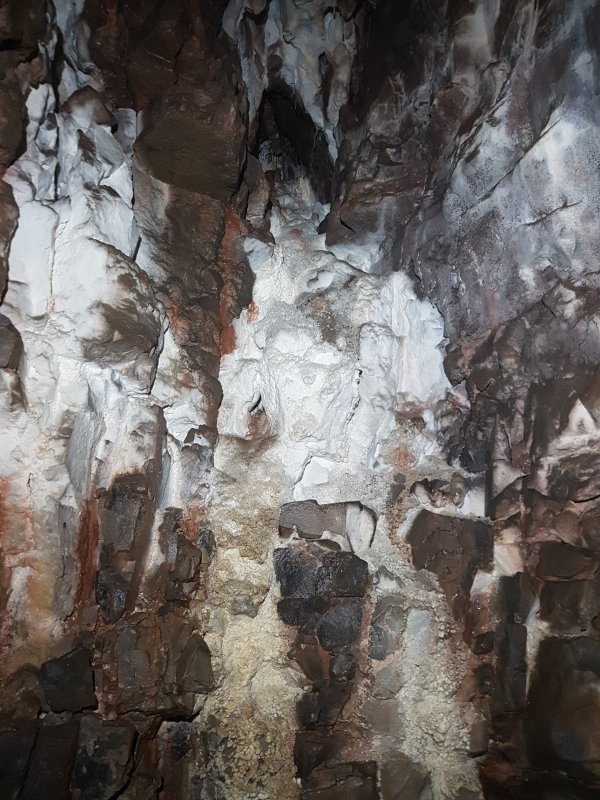 Moonmilk covered alcove in the final chamber.
 The final chamber.
Modelling by Pete, lighting by Tarquin and Pete
The final chamber.
Modelling by Pete, lighting by Tarquin and Pete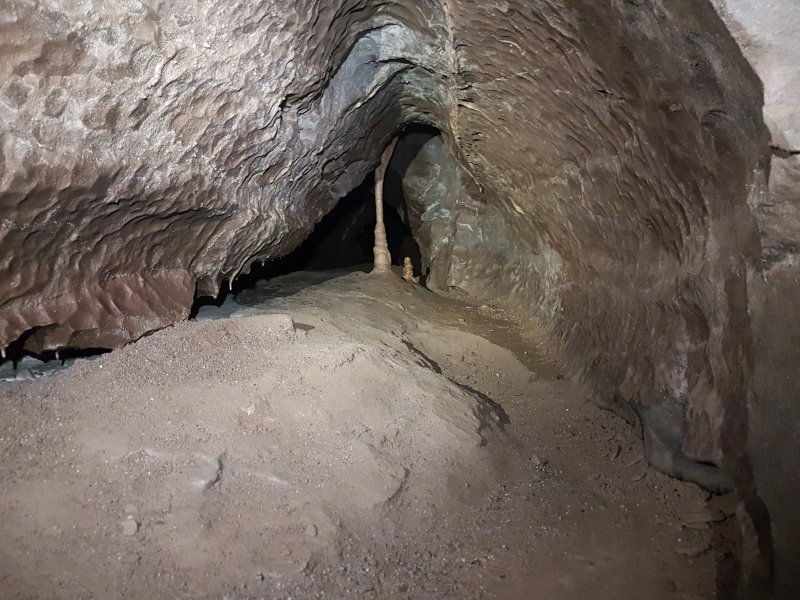 From Carrot Junction, we headed down Whistle Passage, past a column which needs to be carefully avoided.
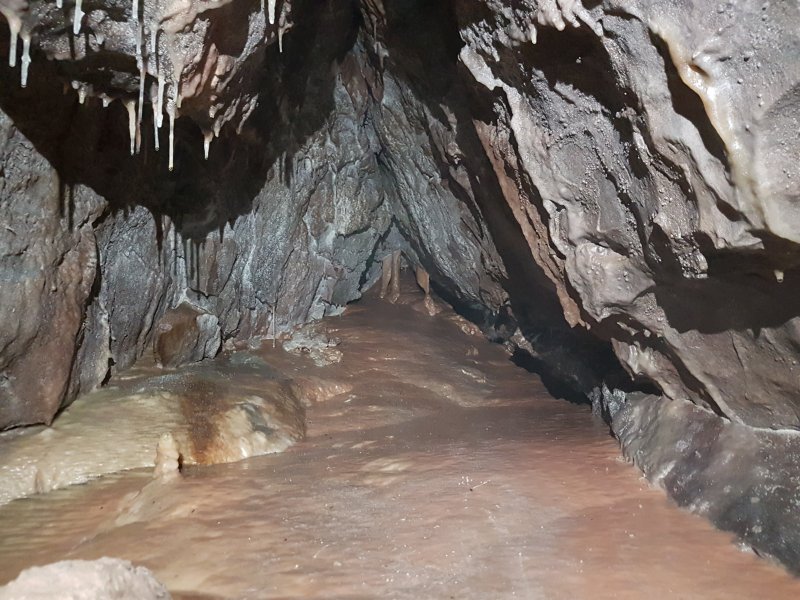 Formations in an alcove.
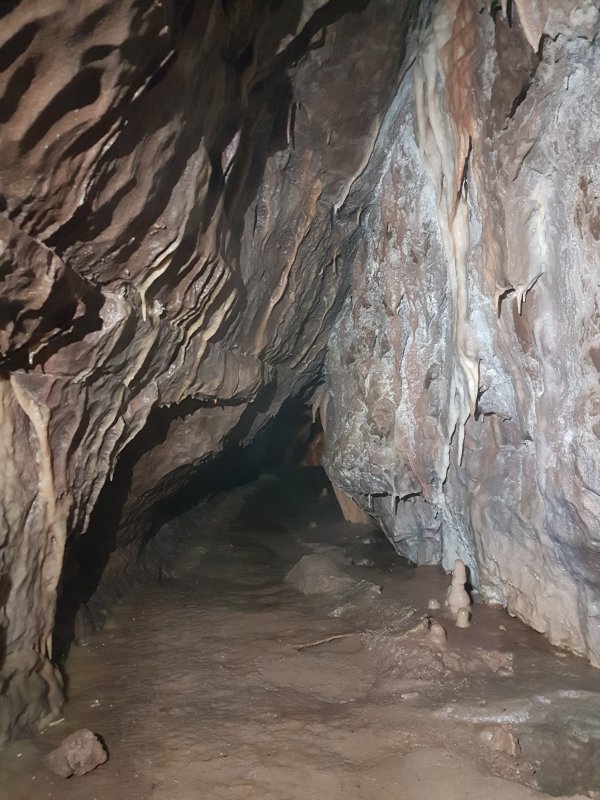 Heading downhill over flowstone.
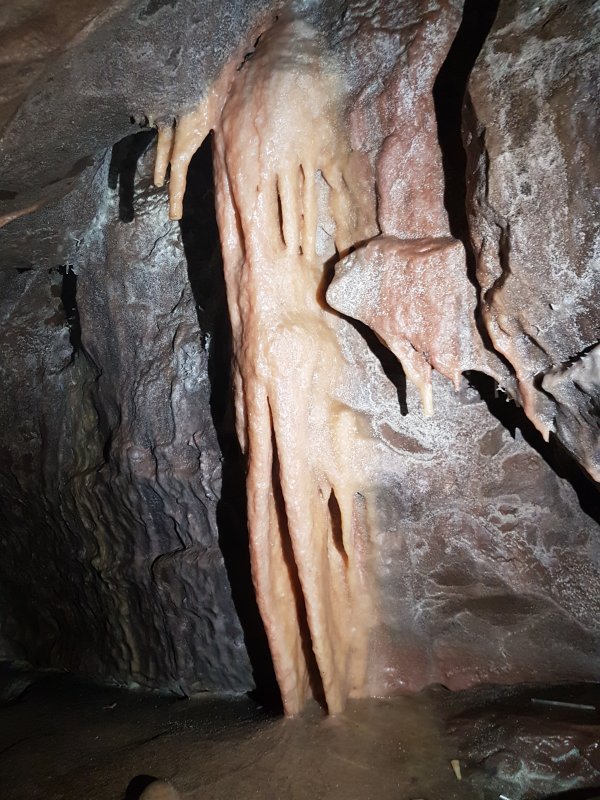 Formations in Whistle Passage.
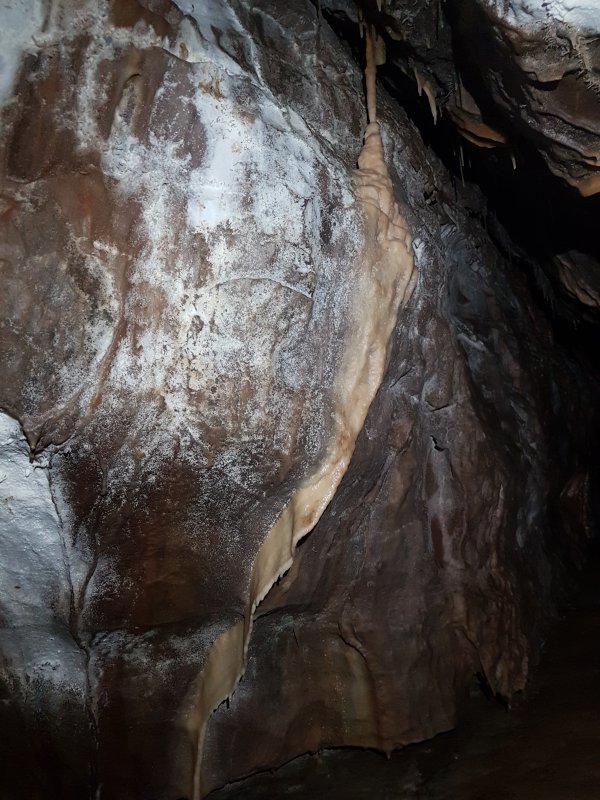 Curtain.
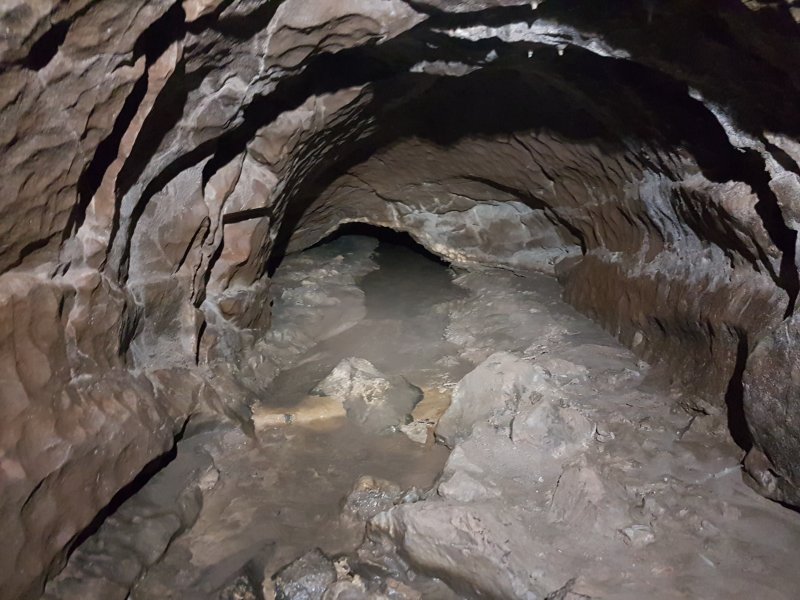 Inlet below Bat Aven. This ends at a silted sump, the other end of the earlier silted sump.
 Bat Aven, which has a short side passage at the top.
 Wall of formations in Whistle Passage.
Modelling by Pete, lighting by Tarquin and Pete
Wall of formations in Whistle Passage.
Modelling by Pete, lighting by Tarquin and Pete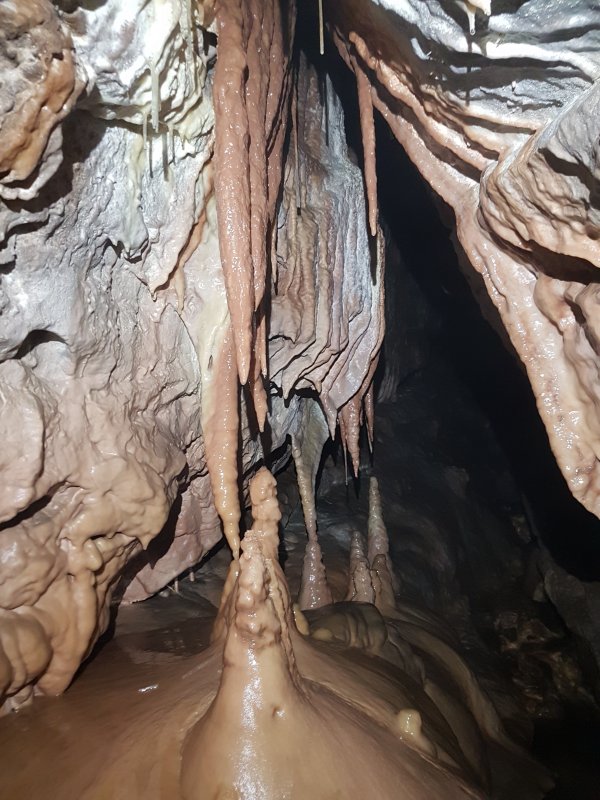 A very good set of formations.
 The wall of formations.
 The wall of formations.
 Tiny side passage at a junction.
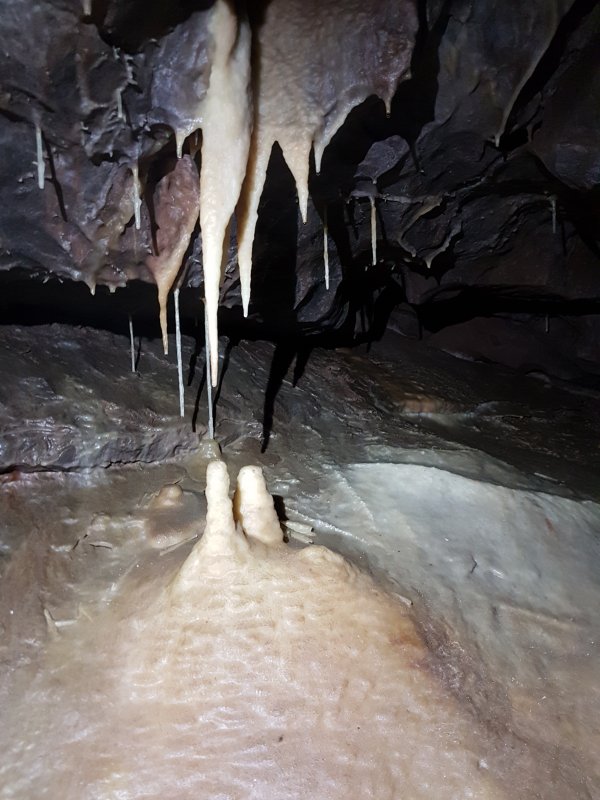 Formations after the junction.
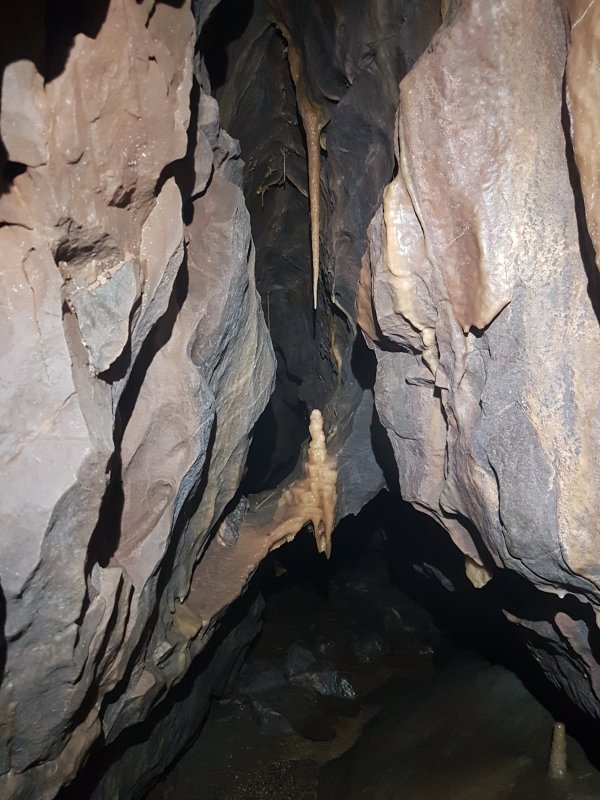 Formations on a natural rock bridge.
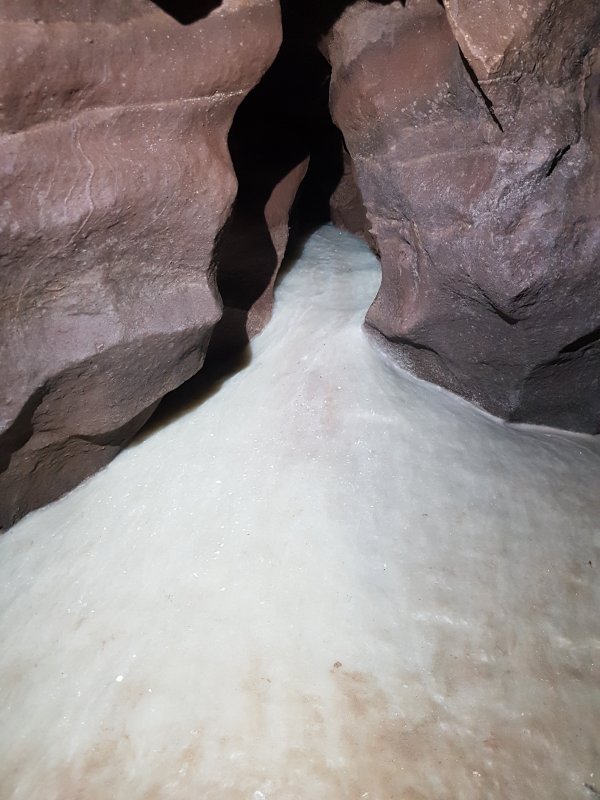 Creamy flowstone.
 The final part of Whistle Passage, which ends at a junction.
Modelling by Pete, lighting by Tarquin and Pete
The final part of Whistle Passage, which ends at a junction.
Modelling by Pete, lighting by Tarquin and Pete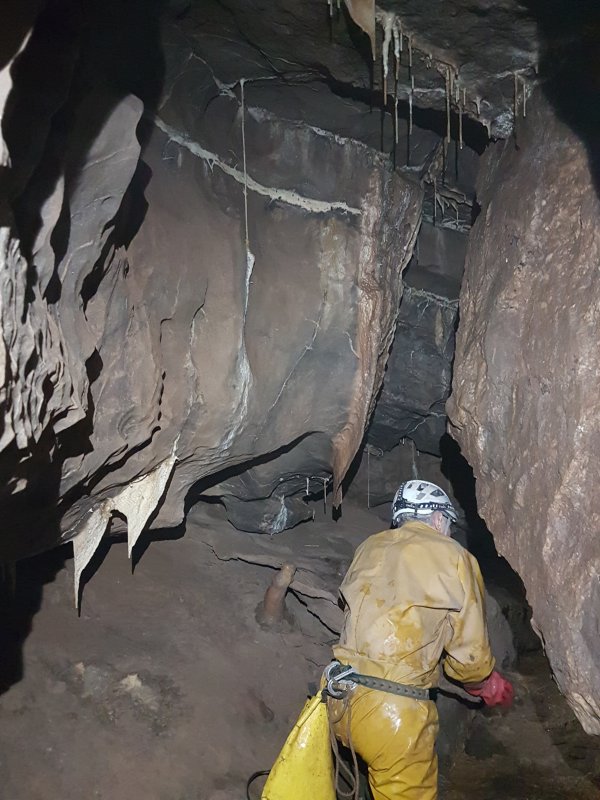 The way to Upper Flood Passage starts with formations.
Modelling by Pete, lighting by Tarquin and Pete
The way to Upper Flood Passage starts with formations.
Modelling by Pete, lighting by Tarquin and Pete Formations on the way to Upper Flood Passage.
Modelling by Pete, lighting by Tarquin and Pete
Formations on the way to Upper Flood Passage.
Modelling by Pete, lighting by Tarquin and Pete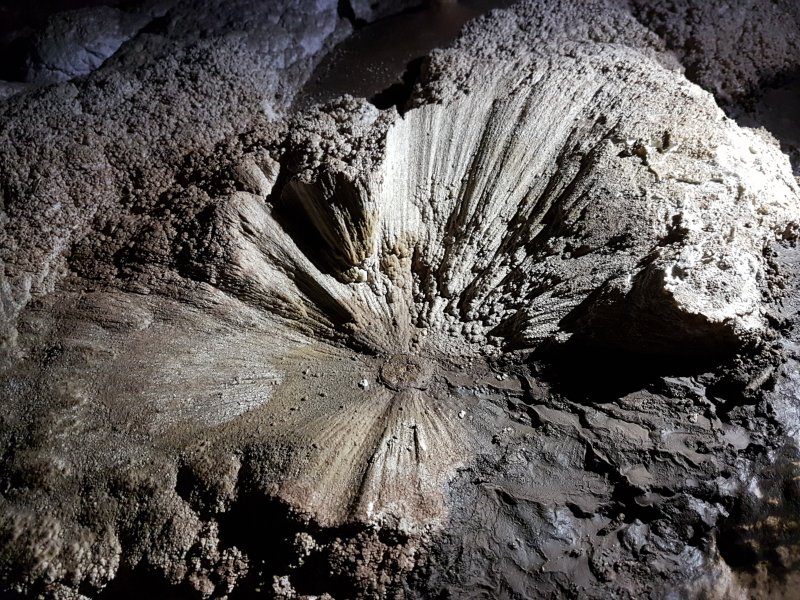 Mud splash.
Lighting by Pete
Mud splash.
Lighting by Pete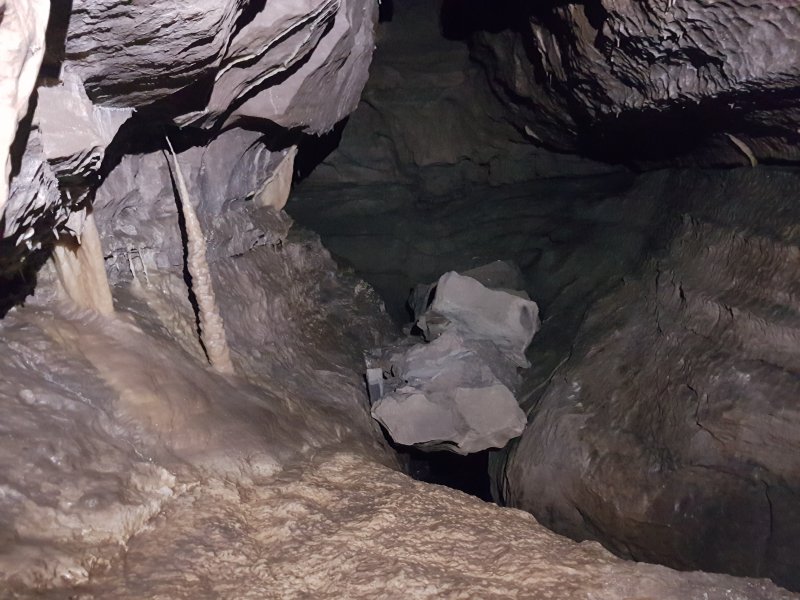 Above Upper Flood Passage. Getting further requires a wall of death run along the wall to reach the boulder bridges, but from there, the ledges required to reach Low's Chain do not look traversable without protection. Climbing down from the rock bridges also does not look possible.
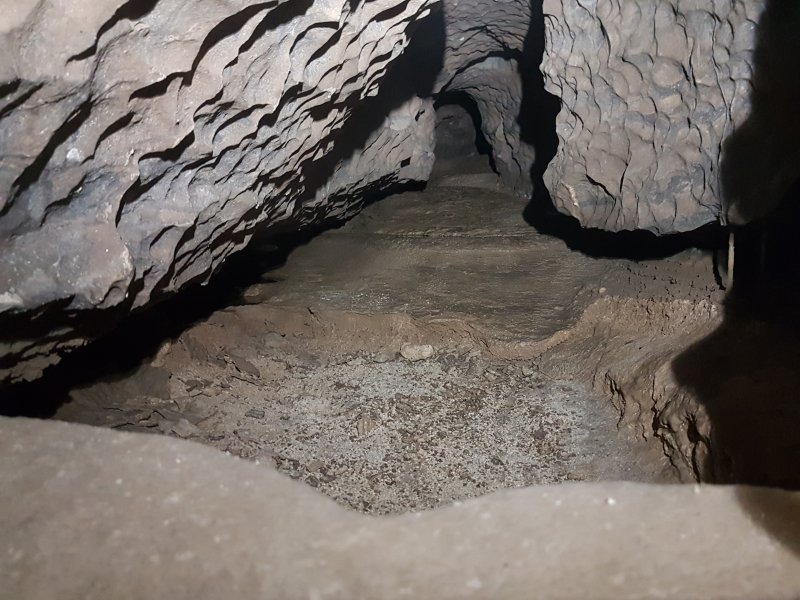 The easiest way to close the loop is via Geyser Crawl, to the right at the junction.
 This reaches the start of Gour Passage.
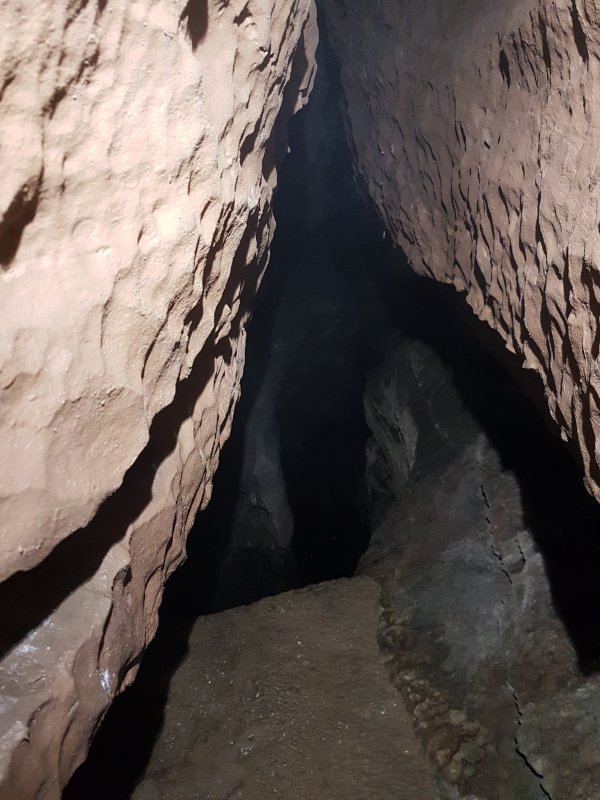 Ahead at the junction is another alternative, which reaches this window overlooking the river.
 A crawl to the right, smaller than Geyser Crawl, heads back up to Gour Passage.
Modelling by Pete
A crawl to the right, smaller than Geyser Crawl, heads back up to Gour Passage.
Modelling by Pete Closing the loop, at the junction of Geyser Crawl, Gour Passage, and the way in.
Modelling by Pete, lighting by Tarquin and Pete
Closing the loop, at the junction of Geyser Crawl, Gour Passage, and the way in.
Modelling by Pete, lighting by Tarquin and Pete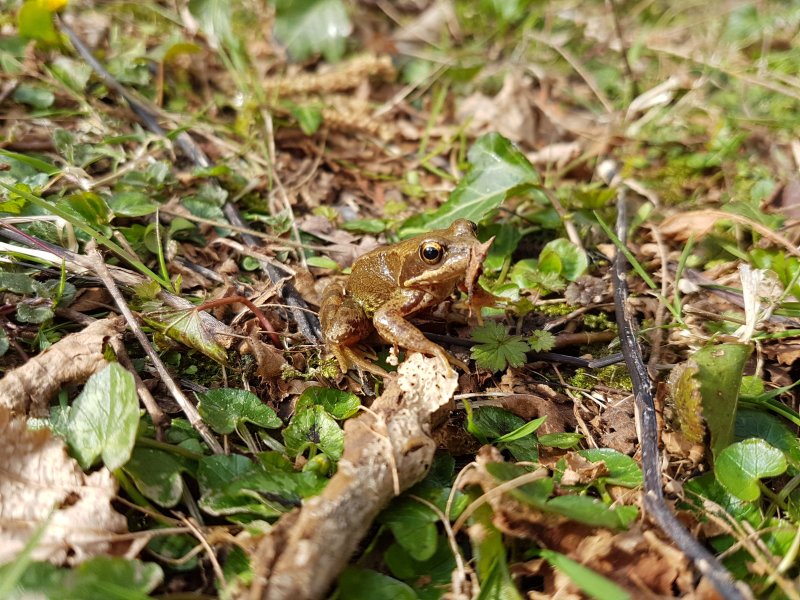 Common Frog who had reached the inside of the gate, who we assisted out of the cave. You've got dirt on your nose, by the way. Did you know? Just there.
Modelling by Ron
Common Frog who had reached the inside of the gate, who we assisted out of the cave. You've got dirt on your nose, by the way. Did you know? Just there.
Modelling by Ron