Ogof Ffynnon Ddu Cwm Dwr to I through trip 04/08/2019
This is one of the classic through trips in the UK's deepest cave system. Despite its depth, the whole trip requires no rope or ladder equipment, relying on a single fixed rope. However, we decided to complicate matters, extending the trip into the much longer OFD I Escape Route. In spite of this, and the photography, and some route finding errors in Cwm Dwr, the whole trip took less than 3.5 hours.
Unless otherwise stated, camera, setups, edits and gallery effects by Tarquin, modelling by Pete Bolt, lighting by Tarquin and Pete.
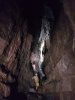 The camera chose to remain in its box through the Cwm Dwr entrance crawls, but made its first appearance in Cwm Dwr Jama - named because the passage style and formations reminded explorers of the caves of Slovenian caves (jama). This was the highlight of Cwm Dwr Quarry Cave before it was connected to the Ogof Ffynnon Ddu system.
 Cwm Dwr Jama.
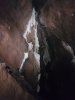 Cwm Dwr Jama.
Lighting by Tarquin
Cwm Dwr Jama.
Lighting by Tarquin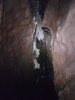 Cwm Dwr Jama.
Lighting by Tarquin
Cwm Dwr Jama.
Lighting by Tarquin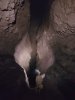 Left at Big Shack, right at the end of the big stuff. Then ... a traverse? No, can't be over the traverse, right down another passage, right at the next junction, back at Big Shack. Try again. Can't be left ... OK, it was the traverse - memory failure. Squeeze through the choke. Then left at the big passage (or right to look at The Smithy from the wrong end), then right over the sand banks, left then right at The Smithy, and finally Piccadilly begins with a series of little climbs.
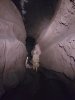 Stream in the beautiful keyhole of Piccadilly.
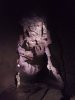 Waterfall in Piccadilly at the junction with Upper Piccadilly.
 The immense end of Piccadilly, with the way on below Pete's feet ahead, and the way to the upstream river to the left.
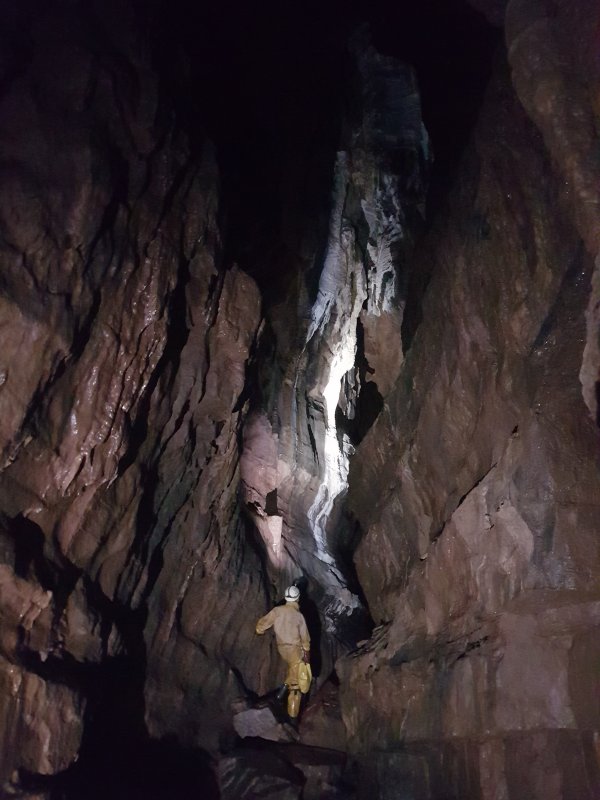
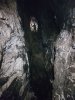 The deep rift looking towards the Diver's Pitch.
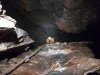 The Diver's Pitch. The fixed handline is the only rope used for the normal through trip, and it is even possible to free climb the pitch without it.
Modelling by Pete and Tarquin's welly
The Diver's Pitch. The fixed handline is the only rope used for the normal through trip, and it is even possible to free climb the pitch without it.
Modelling by Pete and Tarquin's welly Crawl at the top of the pitch. This is one of the tightest parts of the trip, matched only by the crawl in Cwm Dwr's Dim Dwr. The floor has several little holes that try to snatch anything attached to your belt, so this is more awkward than tight. This crawl marks the start of OFD 1½, but the divers originally reached the pitch from the other side, instead of using this passage.
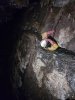 The crawls end at The Letter Box, a distinctive small passage emerging at the top of a climb.
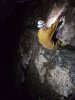 Pete demonstrates the correct use of the chain above the Letter Box, which forces you to navigate the crawl upside down.
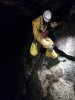 A bold step then lands on the side ledge, followed by a climb down to the floor. From here, the way on requires some knowledge, as there are several junctions, and the way on is not always the most obvious one.
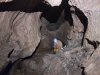 Phreatic maze beyond Pwll Twll.
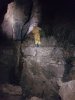 The passage ends at a climb, but this is largely bypassed with a hidden crawl, ending at a much shorter descent.
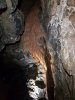 A crawl then ends at a beautiful curtain, thin enough to let light shine through it.
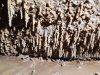 Pool fingers on the wall of The Connection.
Lighting by Tarquin
Pool fingers on the wall of The Connection.
Lighting by Tarquin Until the 1960s, this passage was filled with water, and these formations grew in a crystal pool.
Lighting by Tarquin
Until the 1960s, this passage was filled with water, and these formations grew in a crystal pool.
Lighting by Tarquin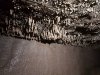 When trying to make the dry connection, diggers were digging into a mud plug, not knowing that a pool several metres deep was above them.
Lighting by Tarquin
When trying to make the dry connection, diggers were digging into a mud plug, not knowing that a pool several metres deep was above them.
Lighting by Tarquin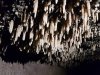 They left the dig one evening, and returned a few days later. The landowner at the resurgence questioned them about what had caused the river to run brown since they left.
Lighting by Tarquin
They left the dig one evening, and returned a few days later. The landowner at the resurgence questioned them about what had caused the river to run brown since they left.
Lighting by Tarquin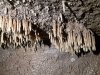 The mud plug had given way, washing out the passage below. This left the formations dry, and the connection open, allowing dry cavers to access the divers' extensions for the first time. They were very lucky not to have been there when the plug gave way, as the crawling sized passage would not have allowed a quick retreat.
Lighting by Tarquin
The mud plug had given way, washing out the passage below. This left the formations dry, and the connection open, allowing dry cavers to access the divers' extensions for the first time. They were very lucky not to have been there when the plug gave way, as the crawling sized passage would not have allowed a quick retreat.
Lighting by Tarquin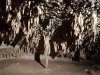 The longest of the pool fingers.
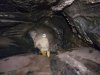 Steep passage leading to the sumps. This needs a lot of care, to avoid slipping. This passage marks the start of OFD I.
 Invisible from above is a drop down into Pot Sump. A slip at the top could end up with a fall down this.
Lighting by Tarquin
Invisible from above is a drop down into Pot Sump. A slip at the top could end up with a fall down this.
Lighting by Tarquin The passage continues above Pot Sump, to end in Dip Sump. Fish are regularly spotted here, often surprisingly large trout, usually blanched.
 The route through the choke leading into OFD I.
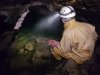 Part way through the choke is Hush Sump, the dive base used for the dives that produced the breakthrough. The sump remains slightly shallower than oxygen narcosis level until Nyphargus Niche, which was the original way out into OFD II. After that, the sump gets much deeper.
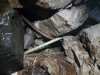 Bent scaffolding that once pretended to support the boulder above. It failed. I guess it's all OK as long as the replacement bar is straight...
Lighting by Tarquin
Bent scaffolding that once pretended to support the boulder above. It failed. I guess it's all OK as long as the replacement bar is straight...
Lighting by Tarquin Boulder Chamber, the dramatic passage at the other end of the choke. Pete is standing on the Rocking Boulder - a very large slab that see-saws when you stand on one end of it, creating a large booming sound when it lands on the boulders again - great for scaring people who are still making their way through the choke.
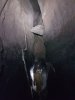 Upper Flood Passage, and a large, suspended mouse trap. The passage normally has static pools, and a small stream from Waterfall Series. However, in flood, Hush Sump pulses, filling the choke, and the flood pulse washes down this passage.
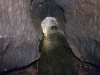 The upstream sump of the main river, officially known as The Sump. Not very imaginative.
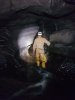 Downstream along the OFD I Main Streamway. This is similar to the awesome OFD II streamway, though the deep pools have scaffolding bars over them to make it easier to stay dry. The usual way out is down the stream, but it is relatively short and uneventful, so we took the Escape Route instead. Since the streamway can flood severely and very rapidly, cavers need to know the Escape Route - there are a few access routes along the streamway, usually up a chain on the side, with a reflector or disk to identify them.
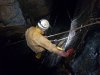 Taking Low's Chain (formerly mis-known as Lowe's Chain), the start of the Escape Route from Upper Flood Passage. This used to be a metal chain, requiring a good grip. The rope is a lot easier. It is possible to climb without the chain/rope, but the dismount is very tricky at the top.
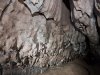 Deeply incised anastomosis on the ceiling of Low's Passage, looking like canine teeth.
 Ancient passage at the top of the boulder climbs, the start of Rawl Series. This is Selenite Corner, named for the white crystal growths all over the wall. In the other direction, the lengthy Don's Crawl and Double Beds Crawl reaches Starlight Chamber, but even though it is the widest passage in the cave, it is disappointingly low, and not very impressive at all. The floor of the chamber is a crater whose boulders form the Boulder Chamber choke below.
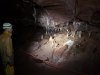 Formations in Roundabout Chamber.
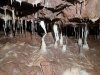 The two obviously bent ones are called The Bees Knees.
 Pete very quickly spots the correct way on in Roundabout Chamber, and fails to fall for the usual mistake (what a shame!), despite this being his first trip to the area. Anyone who fails to notice the way on ends up returning to the start of the chamber, and cavers can take a few attempts to realise that the way on is between the boulders.
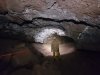 Rawl Series continues as Gypsum Passage.
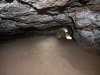 Lowering to a crawl.
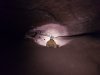 A brief rest before the crawl becomes lower. The lowest part is officially called Shale Crawl, but it is nicknamed Roly Poly, as a common method of progressing is to roll sideways rather than crawling forwards.
 The crawl ends fairly shortly and the larger size returns. The Subway drops off between boulders in this area into a blind lower level.
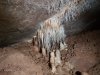 Tightly clustered straws in Rawl Series.
Lighting by Tarquin
Tightly clustered straws in Rawl Series.
Lighting by Tarquin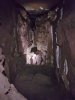 The next section is Bridge Passage, one of the largest passages in the cave, with a perfectly flat ceiling. The two huge pits in the floor are holes down into The Subway, with the route being to walk around the first one on the right, cross the natural bridge between them, and then walk around the second one on the left. In the distance is another large rock bridge, with a passage above and below, giving a double stacked bridge effect.
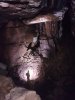 Beyond Bridge Passage is Pi Chamber. Ahead are two passages which reach Pillar Chamber.
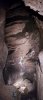 Soaring ceiling at the junction of Pi Chamber, Low Noway (ahead), High Noway (up right), Phil's Parade (up left) and Helter Skelter (down through boulders on the left). The two Noway passages (yes, No-way, not Norway) unite in Pillar Chamber. Phil's Parade almost touches Powell's Cave (and there are rumours that they may have once been connected).
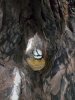 The Helter Skelter choke reaches Bolt Passage, also known as The Elephant's Arsehole, a slide down a vertical tube.
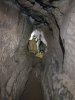 Levelling out.
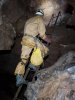 A ladder then descends to a ledge above the Main Streamway.
 This is the start of the Bolt Traverse, a relatively easy traverse on a wide ledge above the Main Streamway. In ages past, this was rigged with ropes and cables attached to rawl bolts.
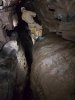 It's less than 10 metres to the streamway, but cowstails are a good idea, since a fall would still be pretty serious. At the end of the traverse, a second wire traverse is another one of the escape routes from the Main Streamway, and an alternative route to Column Passage.
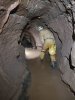 Meander Passage, the continuation of the Escape Route.
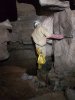 Airy Fairy, another wire traverse that accesses the Alpha and Beta ledges from the Main Streamway.
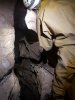 Airy Fairy is much more exposed, with a tricky sloping section.
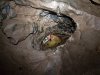 Continuing along Meander Passage reaches a crawl emerging in The Dugout. This was dug to make a connection, allowing the streamway to be completely avoided.
 The Dugout emerges in a chamber with flowstone formations.
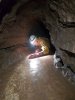 This is then followed by a lengthy crawl over calcite, almost smooth enough to be a long slide.
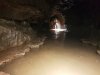 The insulting wet crawl at the end. Until this point, it is possible to be largely dry (at least since Cwm Dwr's crawls), so this crawl is most unwanted.
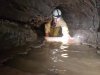 It is possible to stay dry - or perhaps get some wet knees - with some creative crawl traversing on the little ledges. But it's not really worth the effort. Just crawl through the water already.
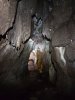 The crawl ends at Travertine Passage, which has some dark formations, stained with manganese or peat.
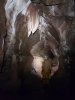 Heading towards The Step - the wrong way to head out, but the usual way to reach the Main Streamway - past some lovely curtains. Shortly up ahead is a very slippery climb up to Column Passage, or a slope down to Loopways.
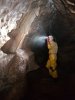 Curtain. This passage would have been the end of the proposed show cave.
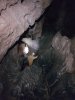 Loopways drops down to Beta Ledges, and The Step. The Step is the usual way to the Main Streamway, and has a small rise of rock that normally sits a few cm above the river. If it is underwater, then the cave is in flood, and the Main Streamway should be avoided.
 Heading down Travertine Passage towards the entrance.
 At the end of Travertine Passage is the water monitoring station. This reads the water level in the Main Streamway, and a cable and radio link then sends the data to the SWCC hut. The intention is to have this automatically post the data online, so it can be used to see the water levels before planning a trip, and potentially be able to combine it with weather data to predict future flooding patterns.
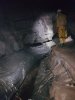 The concrete ledge above the water used to have a handrail, but this has decayed and been removed.
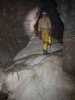 The Toast Rack, a beautifully decorated passage. This would have been destroyed if it had remained like this in a show cave. Maybe it once had a walkway.
 The Toast Rack is a great place to watch inexperienced, or experienced, cavers slip over while trying to walk.
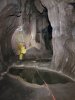 More formations, though these have had the bottoms damaged. This is likely due to intentional vandalism; the show cave project was halted after unknown vandals attacked the formations. There have been theories as to why someone might do this, as it prevented the business from succeeding. But there is still another show cave only a little further up the same valley.
 The end of the Toast Rack, and the end of the Escape Route.
 An alternative way to the Main Streamway from here is to traverse across Pluto's Bath. This is a testing ground for novice cavers, who often earn a dunking when they fail to master the technique. For additional fun, when the mud is stirred up, anyone who does not know the cave also doesn't realise there is a deep hole in the middle, and gets a dunking when walking through it.
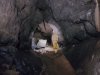 Cyril Powell Series, the main route to the entrance. This part is called Flood Passage. The concrete floor is part of the old show cave.
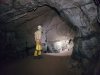 Flood Passage.
 A side passage on the right, Pearl Passage, leads towards the Downey's Cave entrance (now closed). The story goes that long ago when this entrance was open, there was a travelling vet that used to visit the area on foot, blowing a horn (trumpet) to notify the farmers that he was in the area. Locals would then bring their animals to the vet, to be tended to. The locals assumed the hole went to Hell (of course - where else would a cave lead?), but the vet was encouraged to go inside. He did this with a fire torch, blowing his horn regularly. The sound was heard to become quieter and quieter, until it could no longer be heard. The vet never returned to the surface. Just a story, right?
 An ominous hole in the floor.
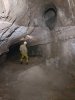 The hole drops into the ceiling of a short, blind passage, where Pete is standing. However, in the choke behind the camera, some distance away from the hole, explorers found the skeleton of a man. The second hole on the right is climbable, but cavers needed to build a pile of rocks to make access easier. An injury from falling down a hole, and a failed torch would have proven too much even for an experienced caver, let alone an inexperienced explorer. However, it is indeed just a story; there was a skeleton of a 20-25 year old person (possibly male) found here in 1946, but it was extremely old - Bronze Age or Neolithic - and seemed to have been deliberately buried here, via a route through the choke which is no longer open. This passage is named Skeleton Chamber (or Skeleton Pit) in the dubious honour of this event. (The tide line is historical, and the chamber would not have been full of water when the skeleton was placed here.) If you would like further information about the skeleton, see "A Fresh Examination of the Ogof Ffynnon Ddu Bones", by Mel Davies, published in the SWCC newsletter 115, in 1995.
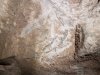 Scratch marks at the pit hole. This is not related to the skeleton, but even so, it serves as a horrifying thought of being trapped here in the dark, knowing there will be no rescue.
Lighting by Tarquin
Scratch marks at the pit hole. This is not related to the skeleton, but even so, it serves as a horrifying thought of being trapped here in the dark, knowing there will be no rescue.
Lighting by Tarquin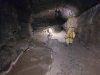 Main Passage, a part of Cyril Powell Series near the entrance. The pools on the left are natural, with a concrete drainage channel above them. The pools are normally full of water and niphargus shrimps, or the occasional lost frog.
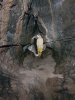 Just beyond the entrance ladder, a low bedding on the right reaches the original entrance, while ahead is Gothic Passage.
 Gothic Sump is the deepest point that dry cavers can reach in the cave, even though it is only just below the surface. The deepest part of the sump is also the deepest point in the cave. The sump chokes shortly before the resurgence.
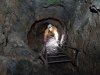 The OFD I entrance ladders and gate, leading to the surface. This entrance was mined for the showcave, and is not natural.
 The OFD I entrance. The original entrance is in a choked depression behind the camera.
Lighting by Sol and Pete
The OFD I entrance. The original entrance is in a choked depression behind the camera.
Lighting by Sol and Pete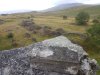 Brick at the old Penwyllt Brickworks. Another caving trip completed.
Lighting by Sol
Brick at the old Penwyllt Brickworks. Another caving trip completed.
Lighting by Sol
 The camera chose to remain in its box through the Cwm Dwr entrance crawls, but made its first appearance in Cwm Dwr Jama - named because the passage style and formations reminded explorers of the caves of Slovenian caves (jama). This was the highlight of Cwm Dwr Quarry Cave before it was connected to the Ogof Ffynnon Ddu system.
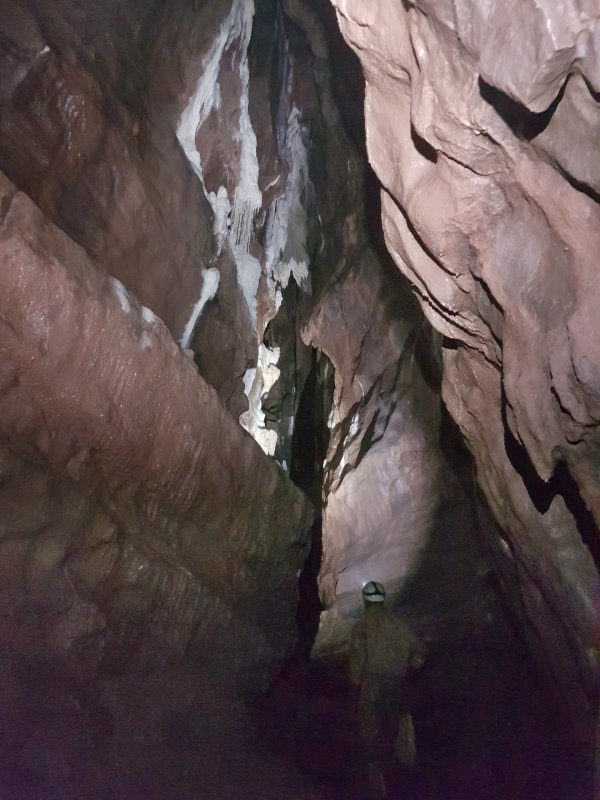 Cwm Dwr Jama.
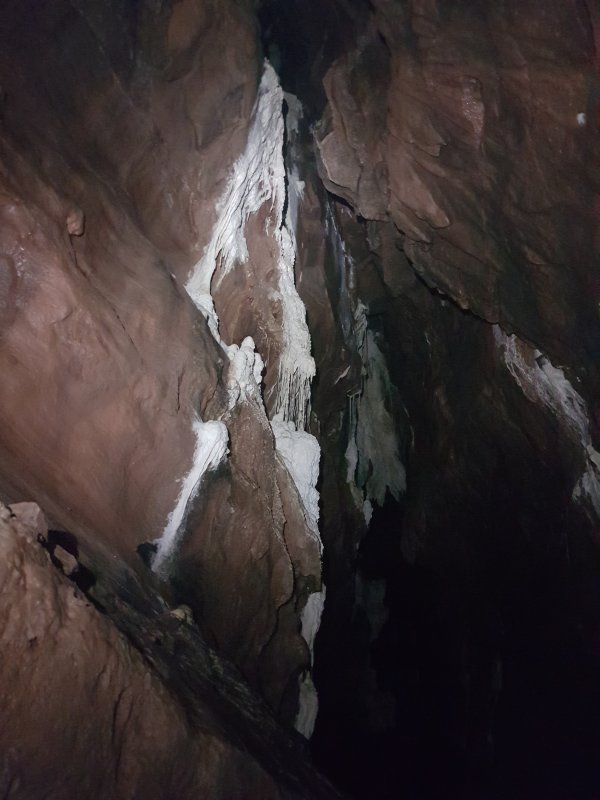 Cwm Dwr Jama.
Lighting by Tarquin
Cwm Dwr Jama.
Lighting by Tarquin Cwm Dwr Jama.
Lighting by Tarquin
Cwm Dwr Jama.
Lighting by Tarquin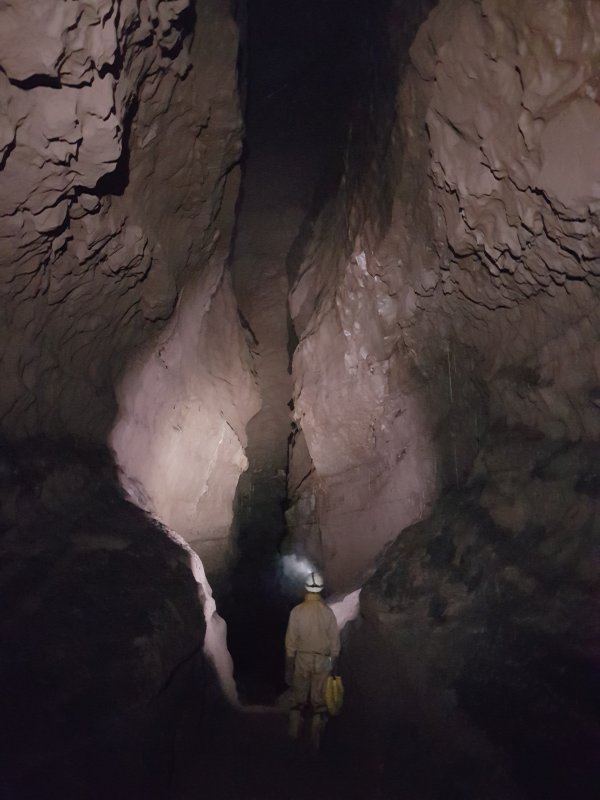 Left at Big Shack, right at the end of the big stuff. Then ... a traverse? No, can't be over the traverse, right down another passage, right at the next junction, back at Big Shack. Try again. Can't be left ... OK, it was the traverse - memory failure. Squeeze through the choke. Then left at the big passage (or right to look at The Smithy from the wrong end), then right over the sand banks, left then right at The Smithy, and finally Piccadilly begins with a series of little climbs.
 Stream in the beautiful keyhole of Piccadilly.
 Waterfall in Piccadilly at the junction with Upper Piccadilly.
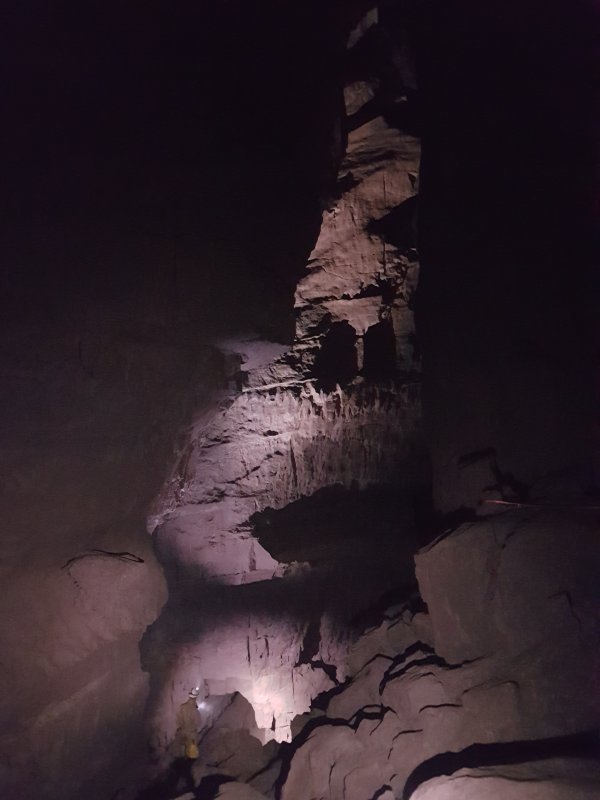 The immense end of Piccadilly, with the way on below Pete's feet ahead, and the way to the upstream river to the left.
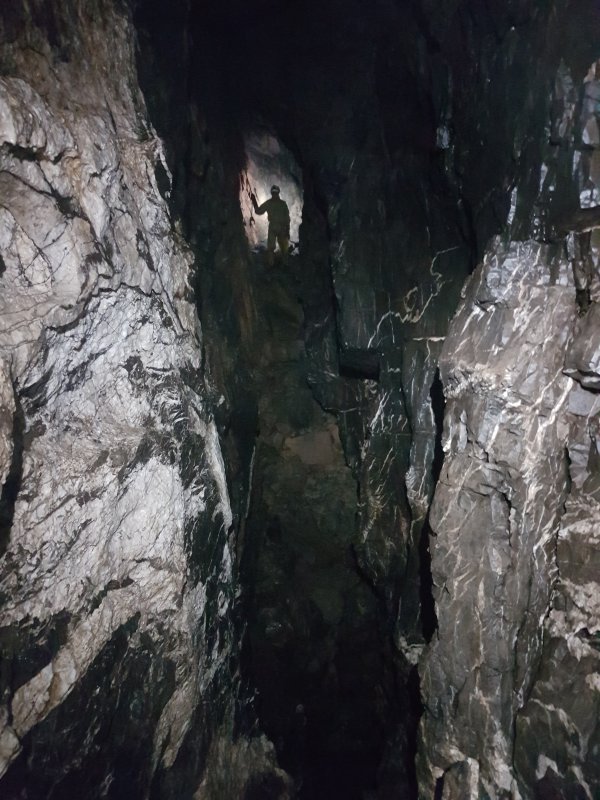 The deep rift looking towards the Diver's Pitch.
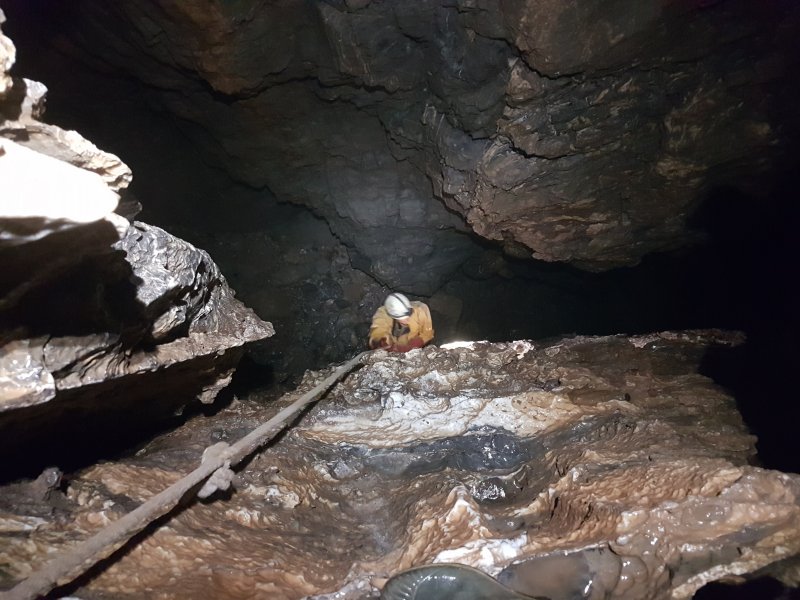 The Diver's Pitch. The fixed handline is the only rope used for the normal through trip, and it is even possible to free climb the pitch without it.
Modelling by Pete and Tarquin's welly
The Diver's Pitch. The fixed handline is the only rope used for the normal through trip, and it is even possible to free climb the pitch without it.
Modelling by Pete and Tarquin's welly Crawl at the top of the pitch. This is one of the tightest parts of the trip, matched only by the crawl in Cwm Dwr's Dim Dwr. The floor has several little holes that try to snatch anything attached to your belt, so this is more awkward than tight. This crawl marks the start of OFD 1½, but the divers originally reached the pitch from the other side, instead of using this passage.
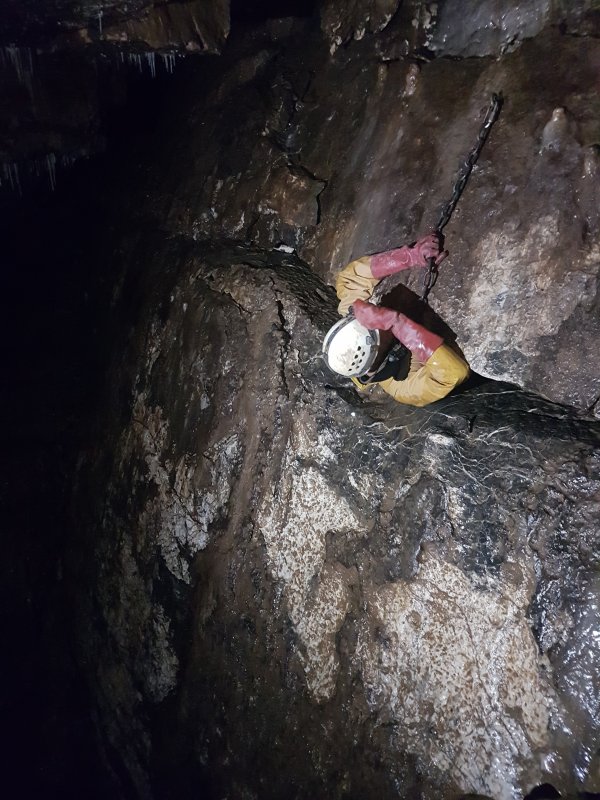 The crawls end at The Letter Box, a distinctive small passage emerging at the top of a climb.
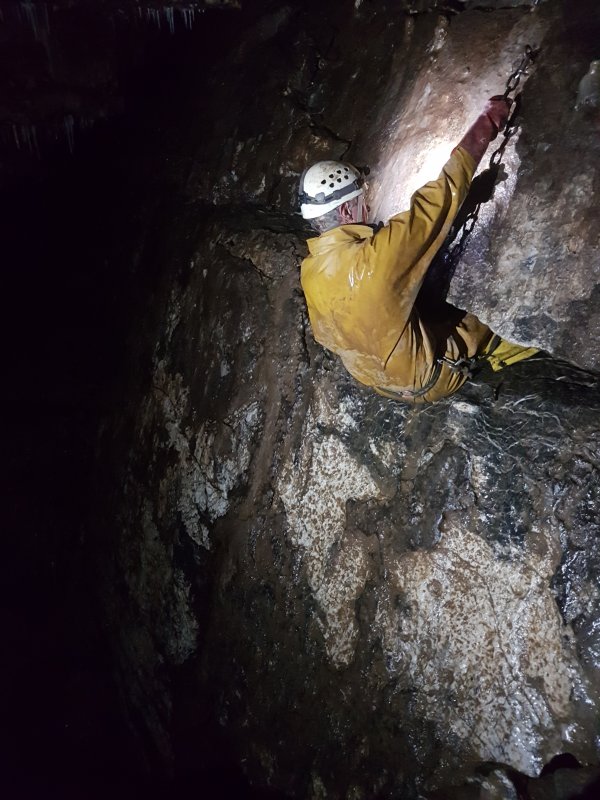 Pete demonstrates the correct use of the chain above the Letter Box, which forces you to navigate the crawl upside down.
 A bold step then lands on the side ledge, followed by a climb down to the floor. From here, the way on requires some knowledge, as there are several junctions, and the way on is not always the most obvious one.
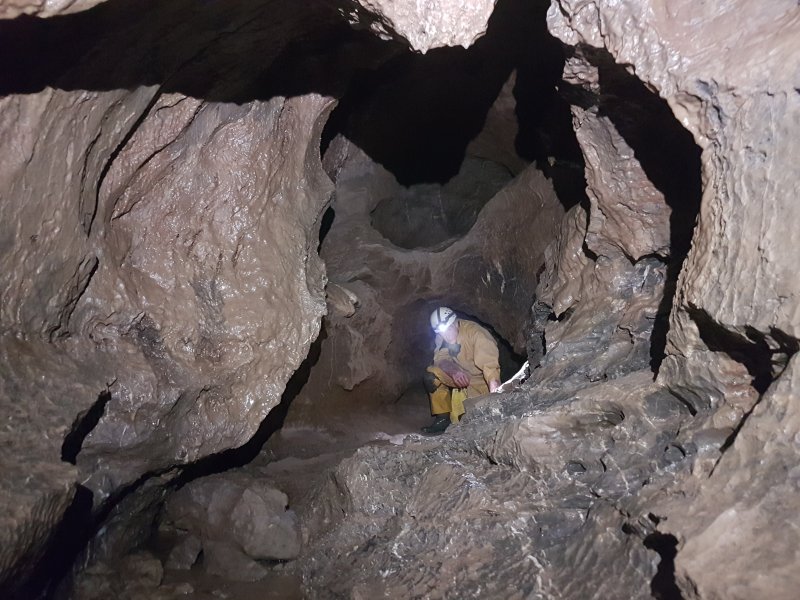 Phreatic maze beyond Pwll Twll.
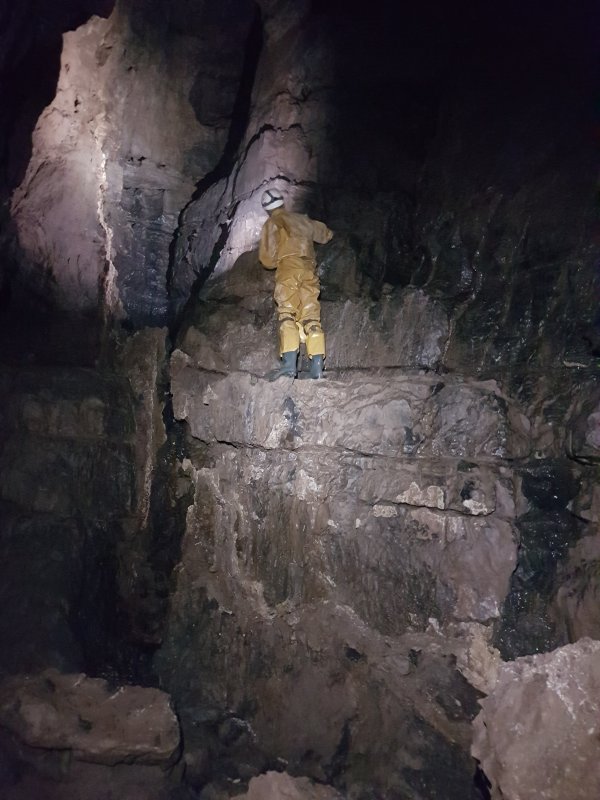 The passage ends at a climb, but this is largely bypassed with a hidden crawl, ending at a much shorter descent.
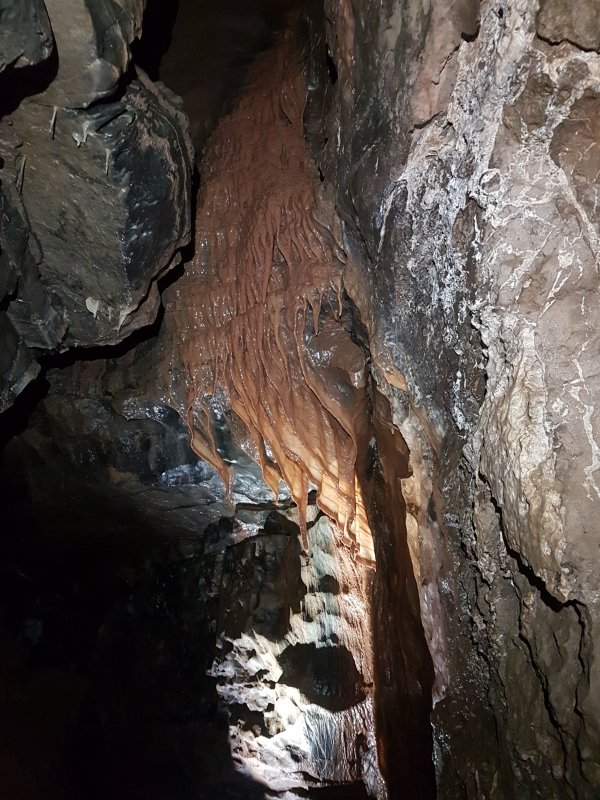 A crawl then ends at a beautiful curtain, thin enough to let light shine through it.
 Pool fingers on the wall of The Connection.
Lighting by Tarquin
Pool fingers on the wall of The Connection.
Lighting by Tarquin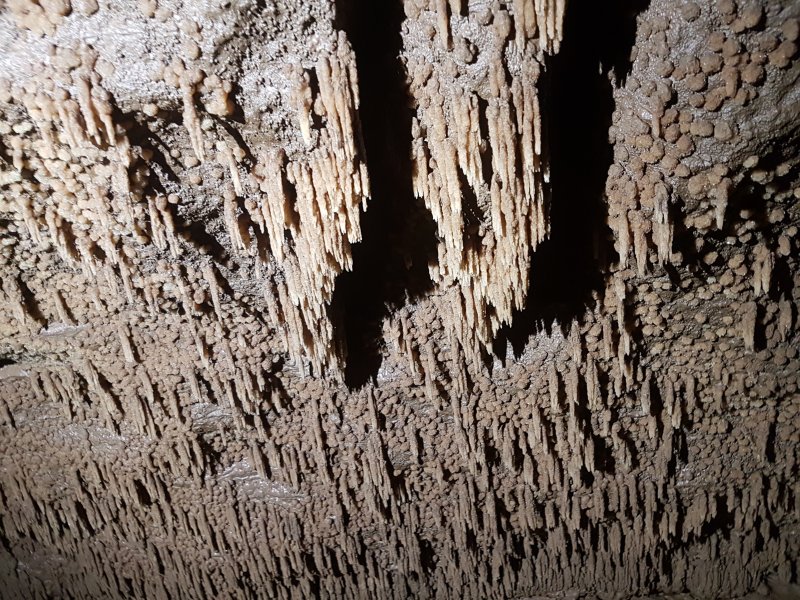 Until the 1960s, this passage was filled with water, and these formations grew in a crystal pool.
Lighting by Tarquin
Until the 1960s, this passage was filled with water, and these formations grew in a crystal pool.
Lighting by Tarquin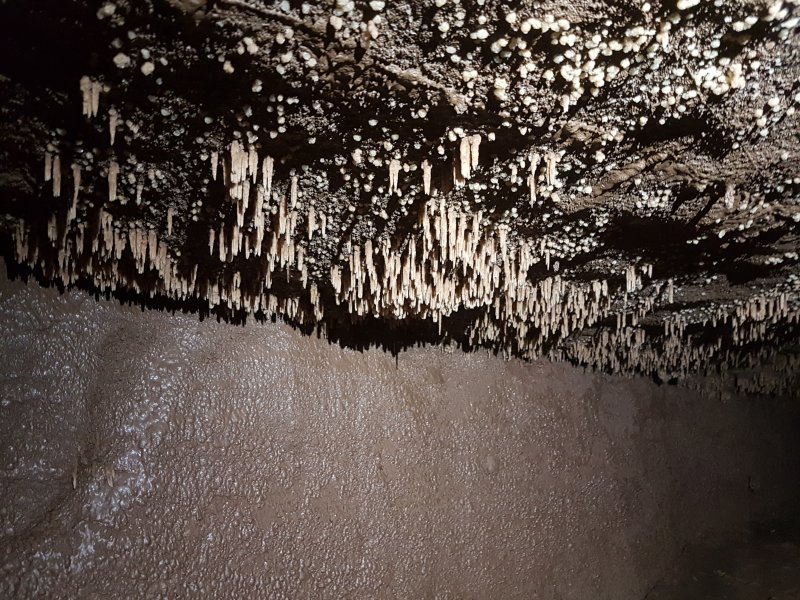 When trying to make the dry connection, diggers were digging into a mud plug, not knowing that a pool several metres deep was above them.
Lighting by Tarquin
When trying to make the dry connection, diggers were digging into a mud plug, not knowing that a pool several metres deep was above them.
Lighting by Tarquin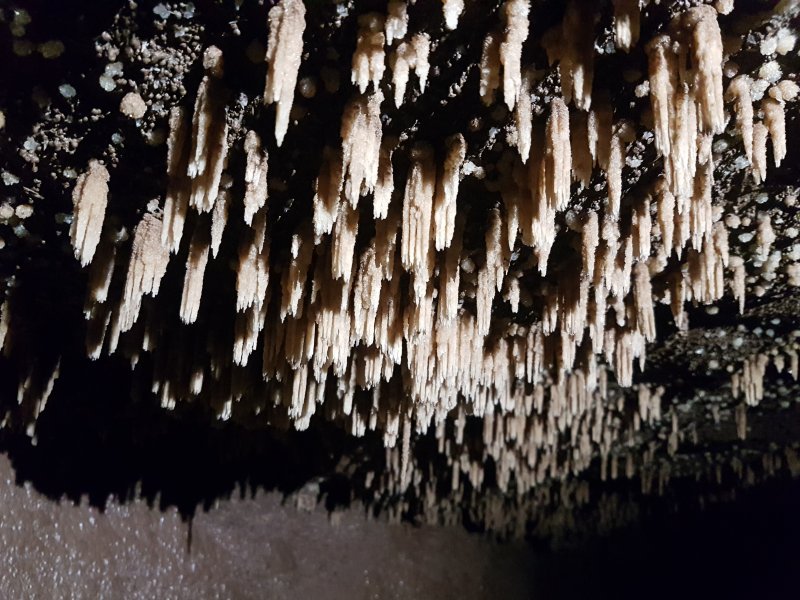 They left the dig one evening, and returned a few days later. The landowner at the resurgence questioned them about what had caused the river to run brown since they left.
Lighting by Tarquin
They left the dig one evening, and returned a few days later. The landowner at the resurgence questioned them about what had caused the river to run brown since they left.
Lighting by Tarquin The mud plug had given way, washing out the passage below. This left the formations dry, and the connection open, allowing dry cavers to access the divers' extensions for the first time. They were very lucky not to have been there when the plug gave way, as the crawling sized passage would not have allowed a quick retreat.
Lighting by Tarquin
The mud plug had given way, washing out the passage below. This left the formations dry, and the connection open, allowing dry cavers to access the divers' extensions for the first time. They were very lucky not to have been there when the plug gave way, as the crawling sized passage would not have allowed a quick retreat.
Lighting by Tarquin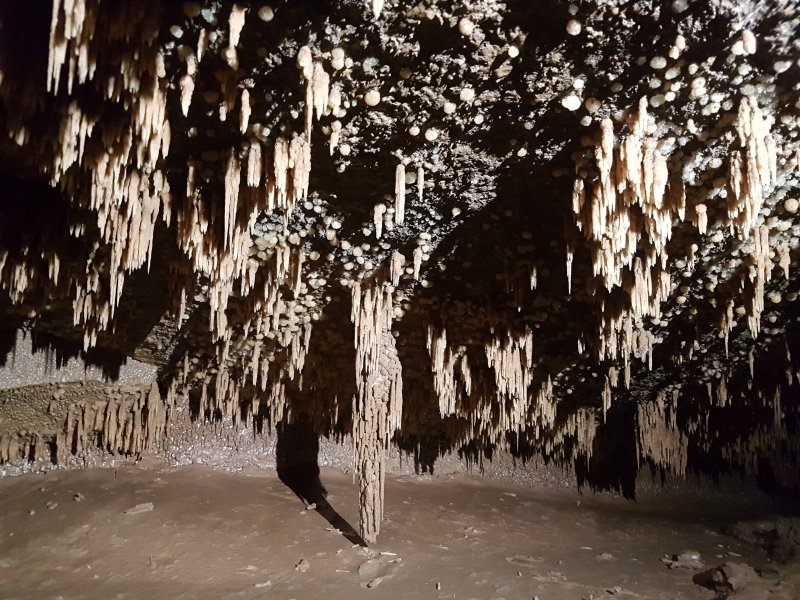 The longest of the pool fingers.
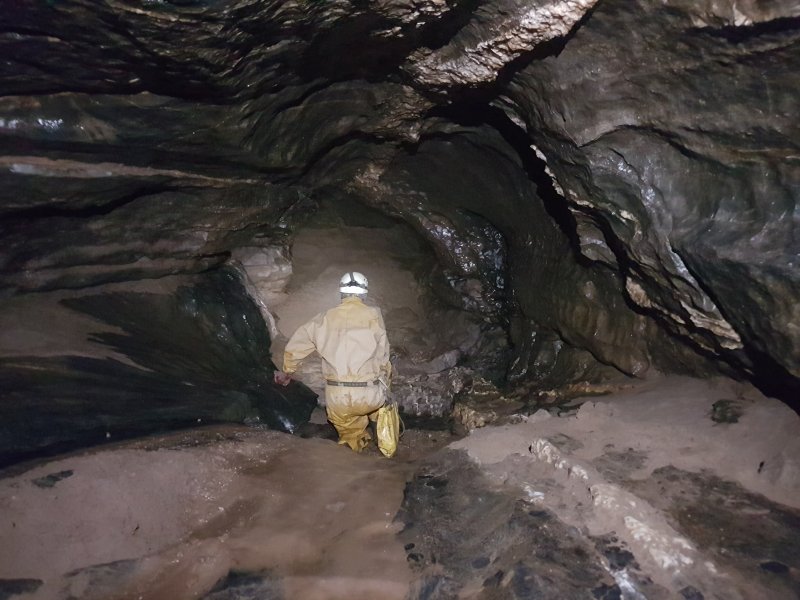 Steep passage leading to the sumps. This needs a lot of care, to avoid slipping. This passage marks the start of OFD I.
 Invisible from above is a drop down into Pot Sump. A slip at the top could end up with a fall down this.
Lighting by Tarquin
Invisible from above is a drop down into Pot Sump. A slip at the top could end up with a fall down this.
Lighting by Tarquin The passage continues above Pot Sump, to end in Dip Sump. Fish are regularly spotted here, often surprisingly large trout, usually blanched.
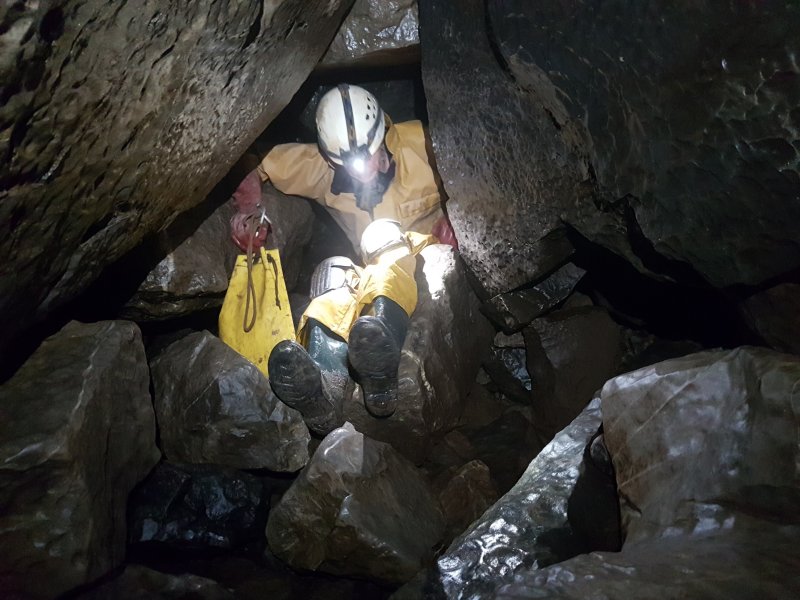 The route through the choke leading into OFD I.
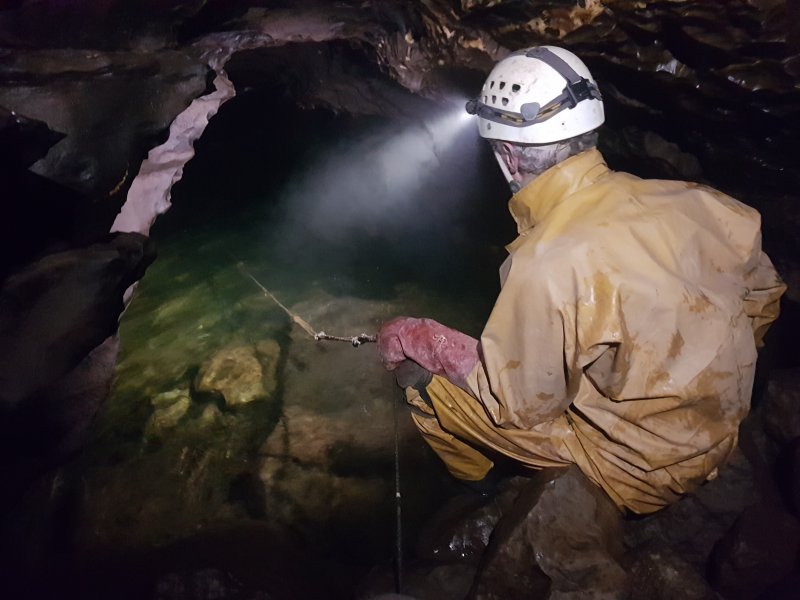 Part way through the choke is Hush Sump, the dive base used for the dives that produced the breakthrough. The sump remains slightly shallower than oxygen narcosis level until Nyphargus Niche, which was the original way out into OFD II. After that, the sump gets much deeper.
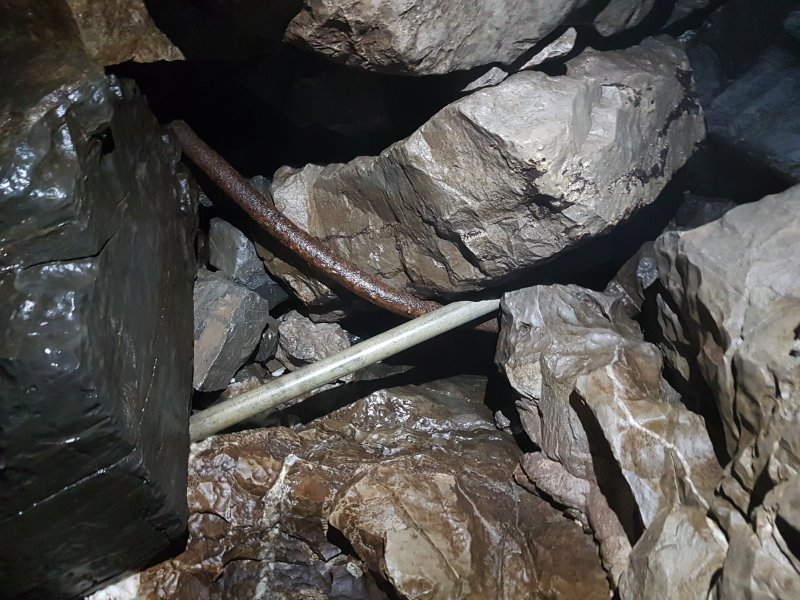 Bent scaffolding that once pretended to support the boulder above. It failed. I guess it's all OK as long as the replacement bar is straight...
Lighting by Tarquin
Bent scaffolding that once pretended to support the boulder above. It failed. I guess it's all OK as long as the replacement bar is straight...
Lighting by Tarquin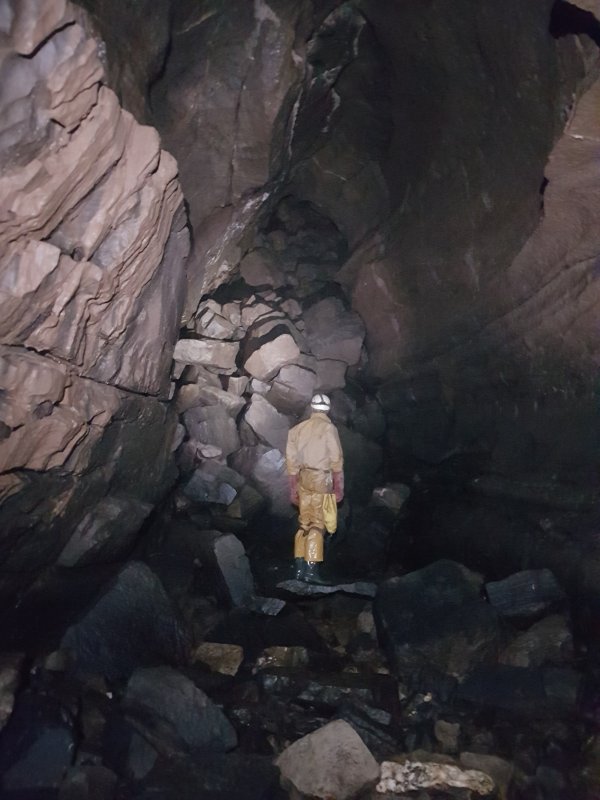 Boulder Chamber, the dramatic passage at the other end of the choke. Pete is standing on the Rocking Boulder - a very large slab that see-saws when you stand on one end of it, creating a large booming sound when it lands on the boulders again - great for scaring people who are still making their way through the choke.
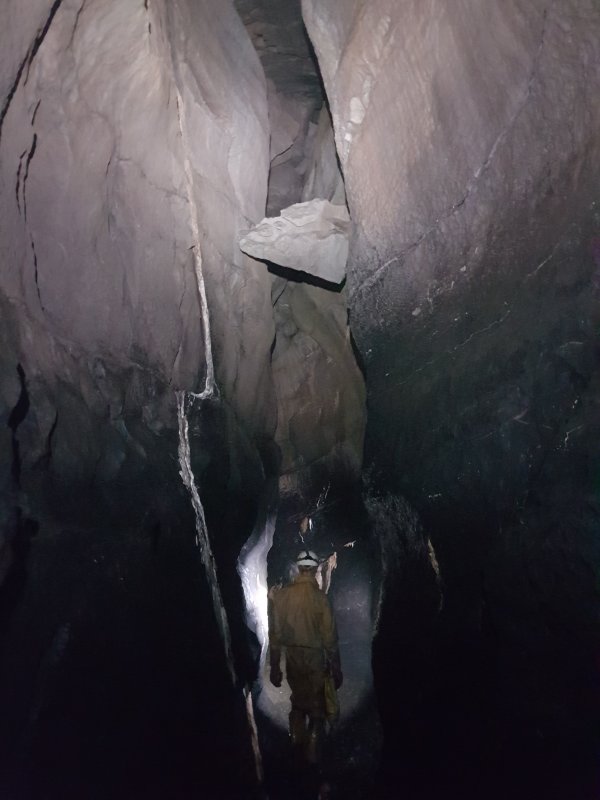 Upper Flood Passage, and a large, suspended mouse trap. The passage normally has static pools, and a small stream from Waterfall Series. However, in flood, Hush Sump pulses, filling the choke, and the flood pulse washes down this passage.
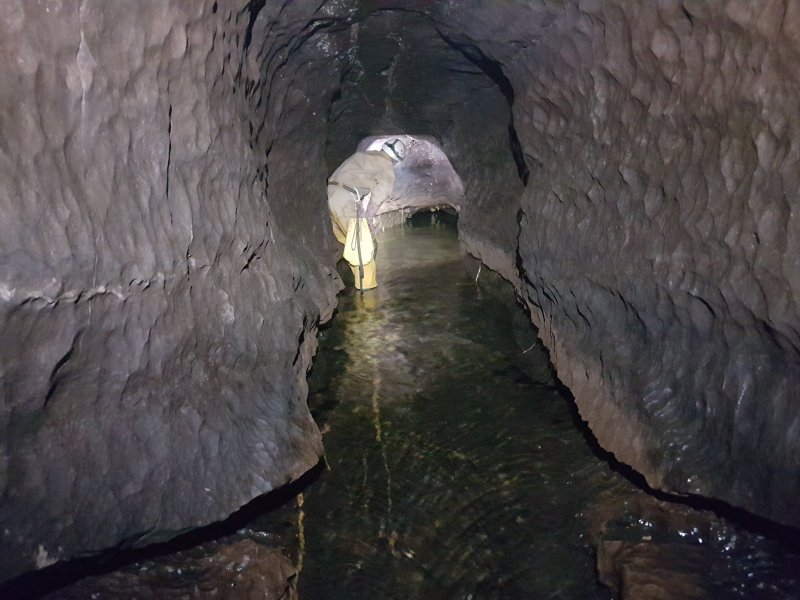 The upstream sump of the main river, officially known as The Sump. Not very imaginative.
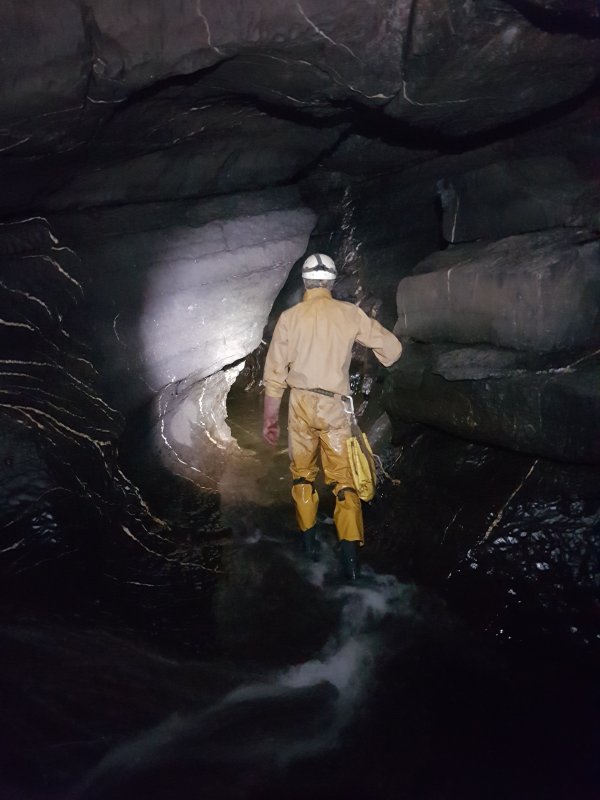 Downstream along the OFD I Main Streamway. This is similar to the awesome OFD II streamway, though the deep pools have scaffolding bars over them to make it easier to stay dry. The usual way out is down the stream, but it is relatively short and uneventful, so we took the Escape Route instead. Since the streamway can flood severely and very rapidly, cavers need to know the Escape Route - there are a few access routes along the streamway, usually up a chain on the side, with a reflector or disk to identify them.
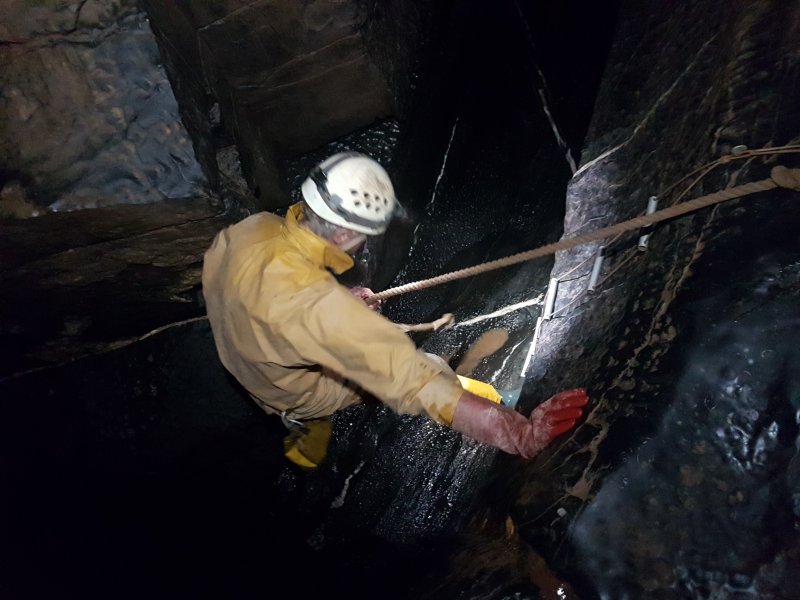 Taking Low's Chain (formerly mis-known as Lowe's Chain), the start of the Escape Route from Upper Flood Passage. This used to be a metal chain, requiring a good grip. The rope is a lot easier. It is possible to climb without the chain/rope, but the dismount is very tricky at the top.
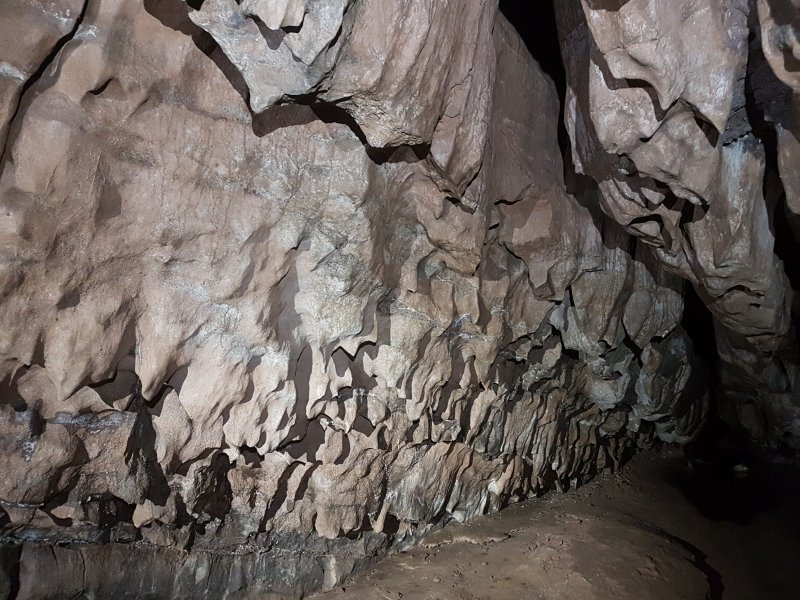 Deeply incised anastomosis on the ceiling of Low's Passage, looking like canine teeth.
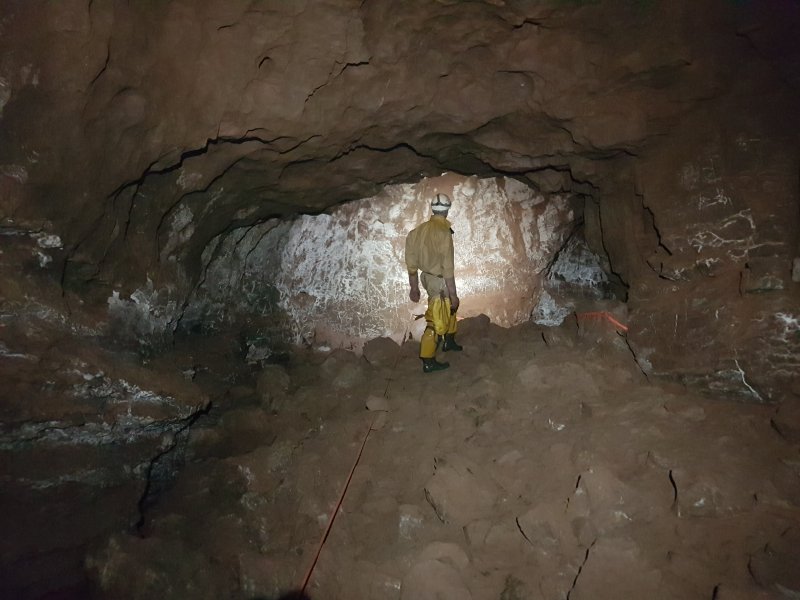 Ancient passage at the top of the boulder climbs, the start of Rawl Series. This is Selenite Corner, named for the white crystal growths all over the wall. In the other direction, the lengthy Don's Crawl and Double Beds Crawl reaches Starlight Chamber, but even though it is the widest passage in the cave, it is disappointingly low, and not very impressive at all. The floor of the chamber is a crater whose boulders form the Boulder Chamber choke below.
 Formations in Roundabout Chamber.
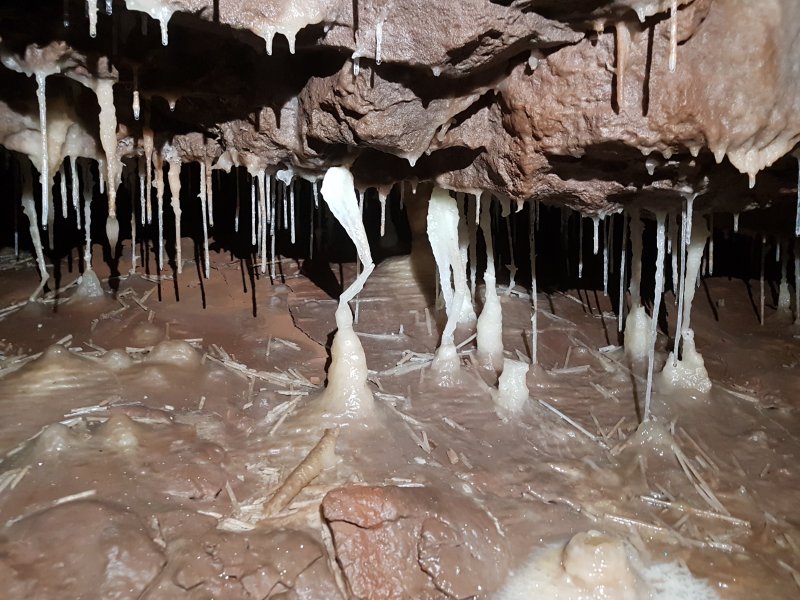 The two obviously bent ones are called The Bees Knees.
 Pete very quickly spots the correct way on in Roundabout Chamber, and fails to fall for the usual mistake (what a shame!), despite this being his first trip to the area. Anyone who fails to notice the way on ends up returning to the start of the chamber, and cavers can take a few attempts to realise that the way on is between the boulders.
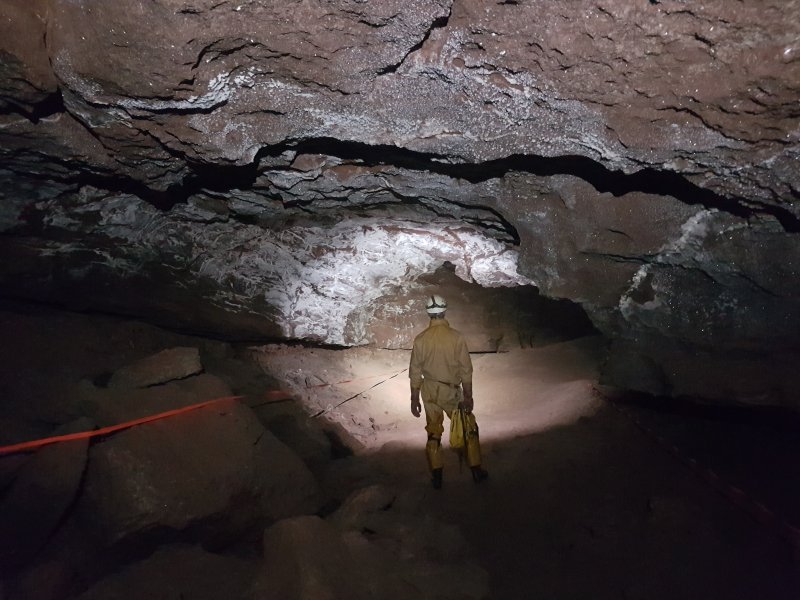 Rawl Series continues as Gypsum Passage.
 Lowering to a crawl.
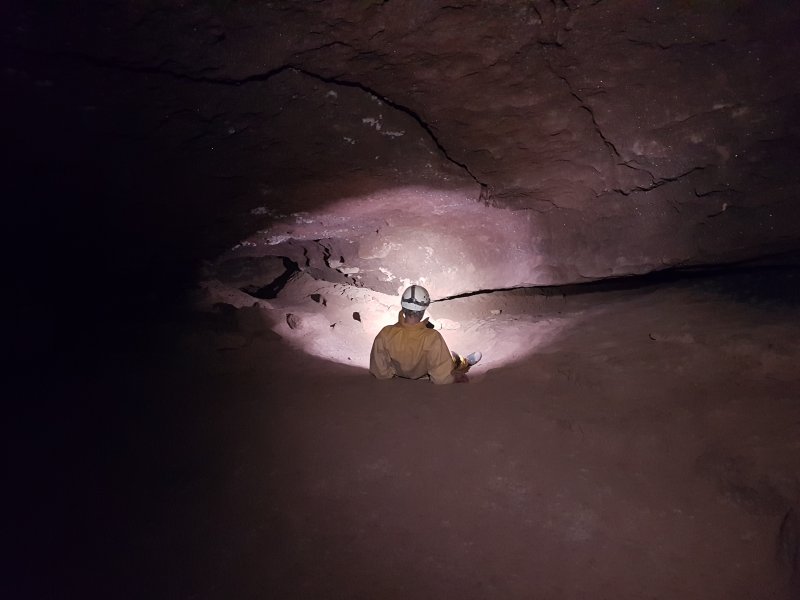 A brief rest before the crawl becomes lower. The lowest part is officially called Shale Crawl, but it is nicknamed Roly Poly, as a common method of progressing is to roll sideways rather than crawling forwards.
 The crawl ends fairly shortly and the larger size returns. The Subway drops off between boulders in this area into a blind lower level.
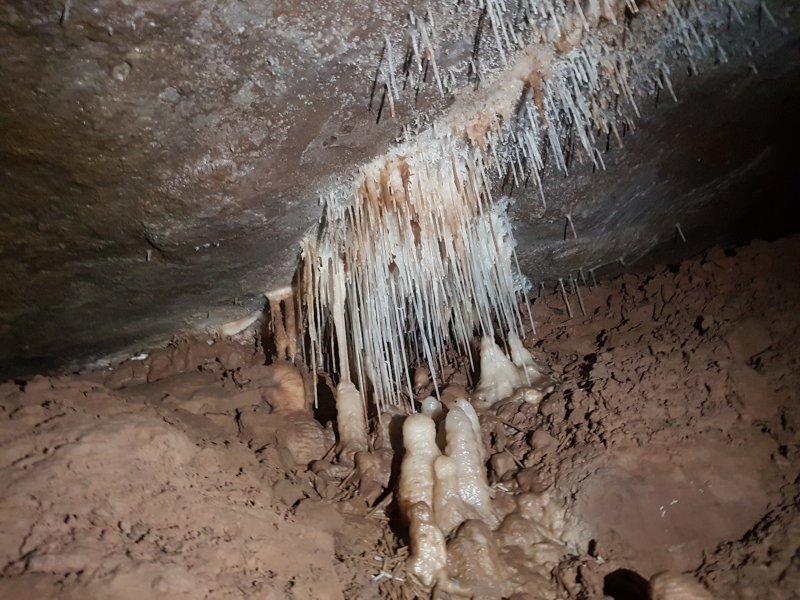 Tightly clustered straws in Rawl Series.
Lighting by Tarquin
Tightly clustered straws in Rawl Series.
Lighting by Tarquin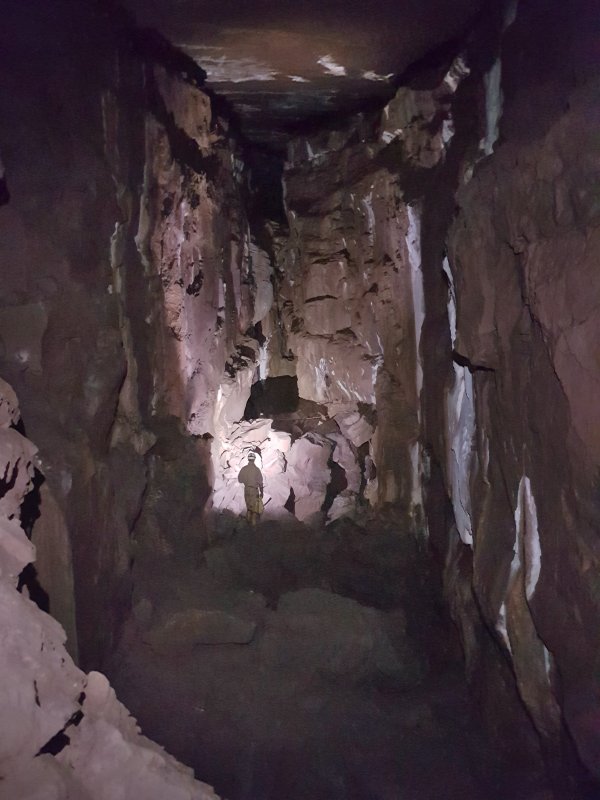 The next section is Bridge Passage, one of the largest passages in the cave, with a perfectly flat ceiling. The two huge pits in the floor are holes down into The Subway, with the route being to walk around the first one on the right, cross the natural bridge between them, and then walk around the second one on the left. In the distance is another large rock bridge, with a passage above and below, giving a double stacked bridge effect.
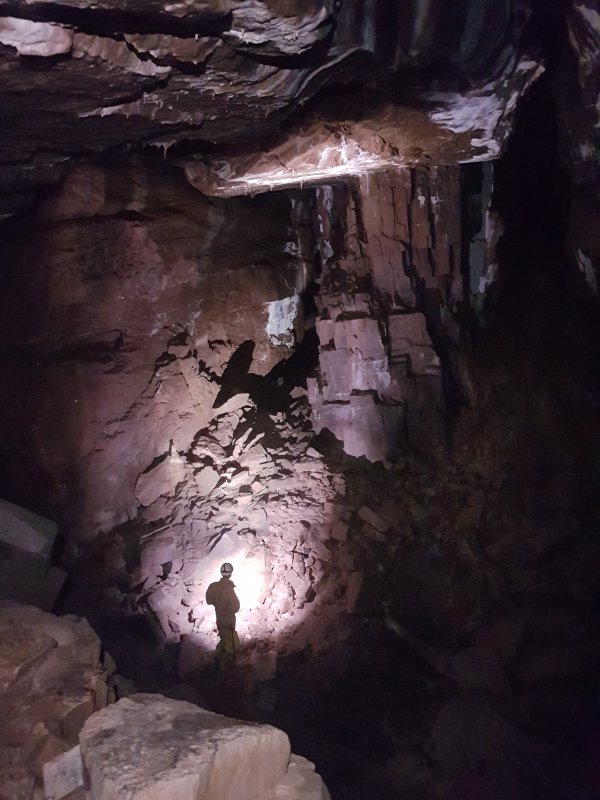 Beyond Bridge Passage is Pi Chamber. Ahead are two passages which reach Pillar Chamber.
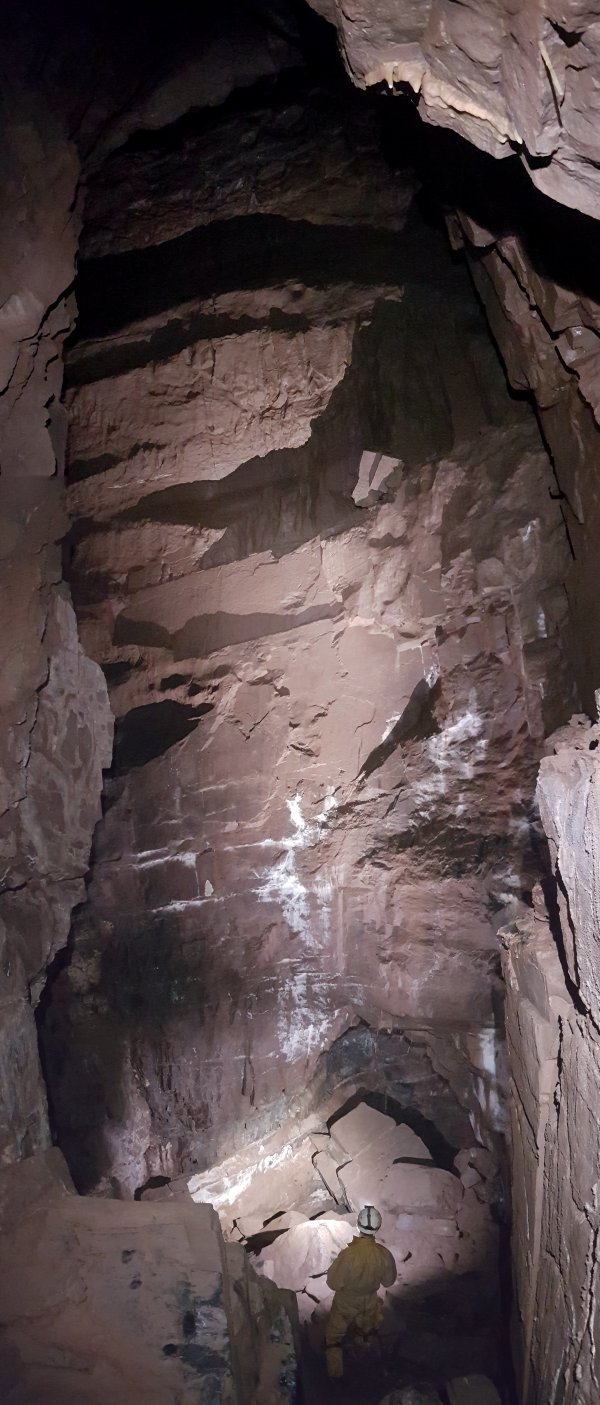 Soaring ceiling at the junction of Pi Chamber, Low Noway (ahead), High Noway (up right), Phil's Parade (up left) and Helter Skelter (down through boulders on the left). The two Noway passages (yes, No-way, not Norway) unite in Pillar Chamber. Phil's Parade almost touches Powell's Cave (and there are rumours that they may have once been connected).
 The Helter Skelter choke reaches Bolt Passage, also known as The Elephant's Arsehole, a slide down a vertical tube.
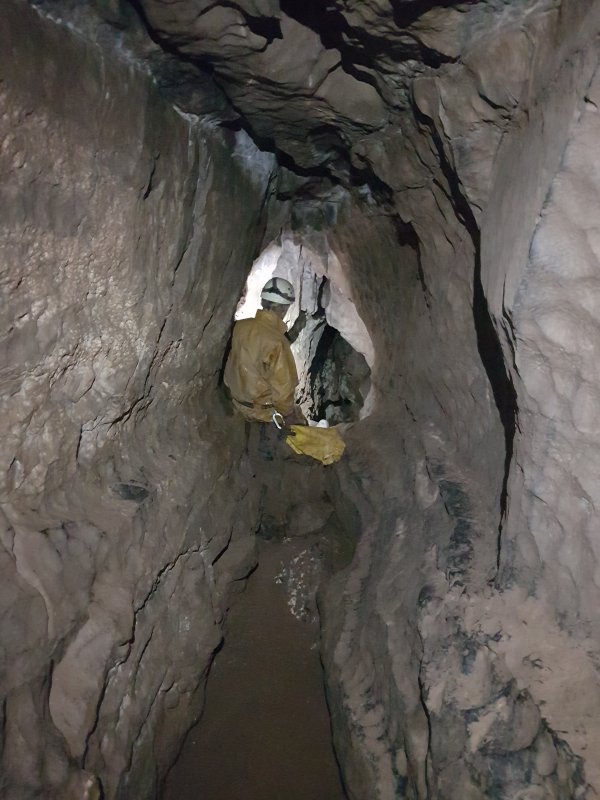 Levelling out.
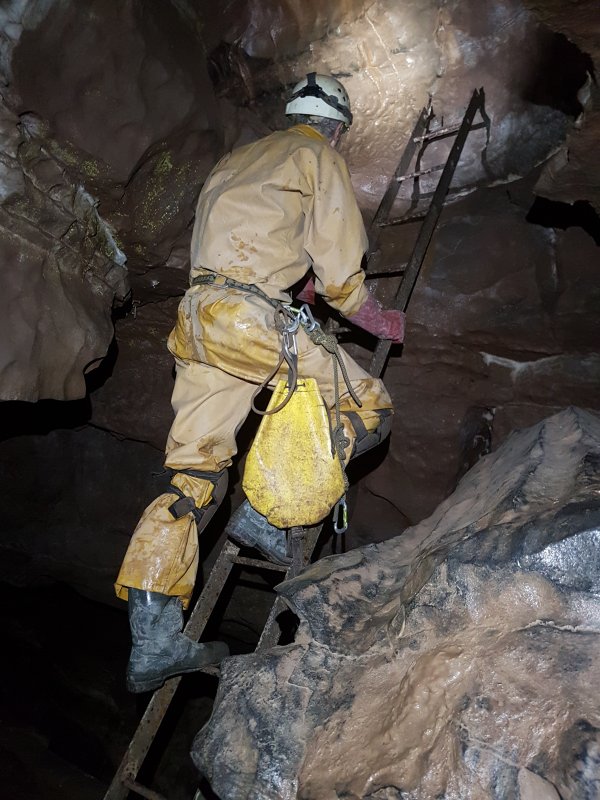 A ladder then descends to a ledge above the Main Streamway.
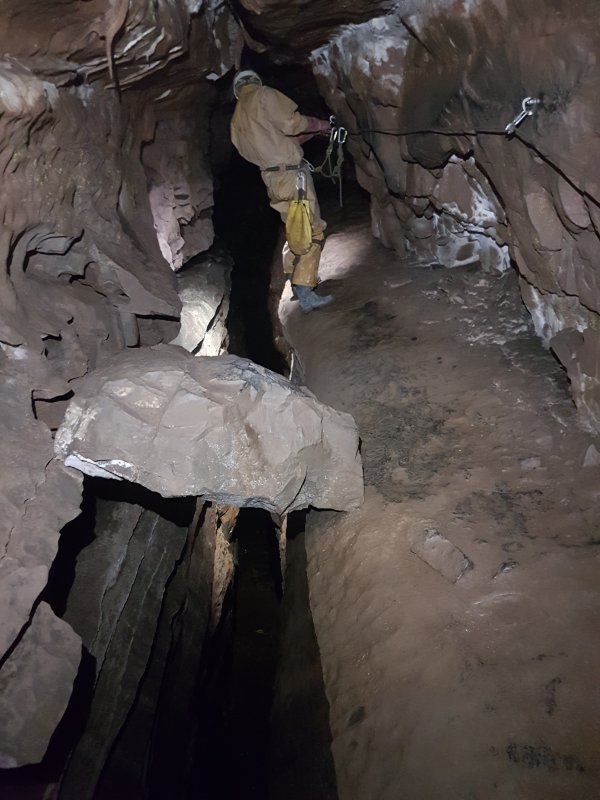 This is the start of the Bolt Traverse, a relatively easy traverse on a wide ledge above the Main Streamway. In ages past, this was rigged with ropes and cables attached to rawl bolts.
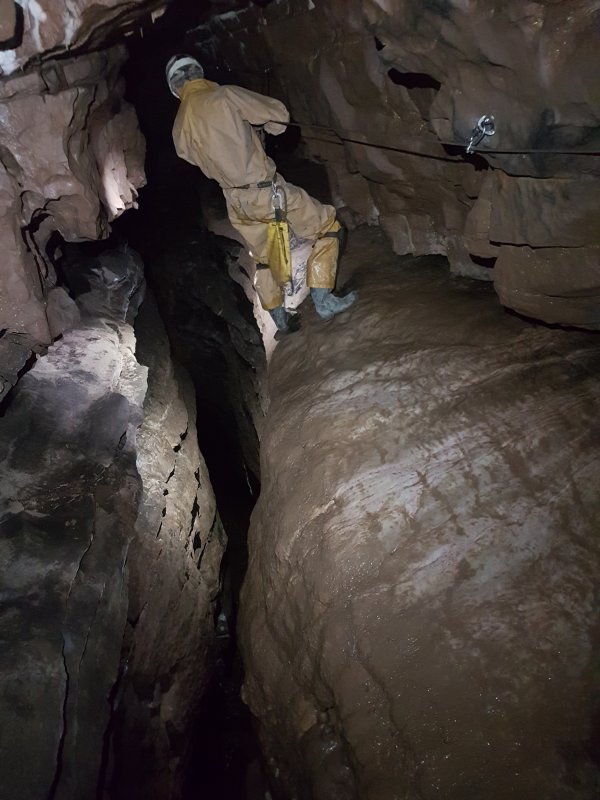 It's less than 10 metres to the streamway, but cowstails are a good idea, since a fall would still be pretty serious. At the end of the traverse, a second wire traverse is another one of the escape routes from the Main Streamway, and an alternative route to Column Passage.
 Meander Passage, the continuation of the Escape Route.
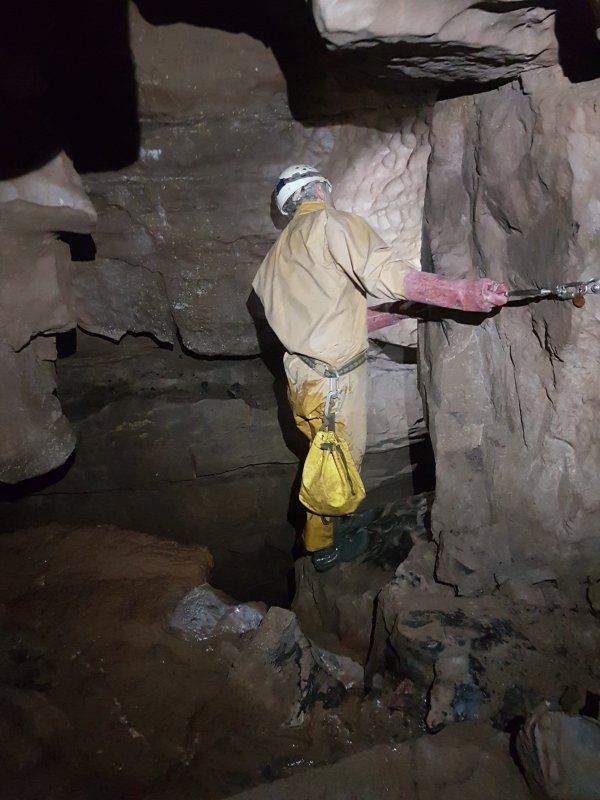 Airy Fairy, another wire traverse that accesses the Alpha and Beta ledges from the Main Streamway.
 Airy Fairy is much more exposed, with a tricky sloping section.
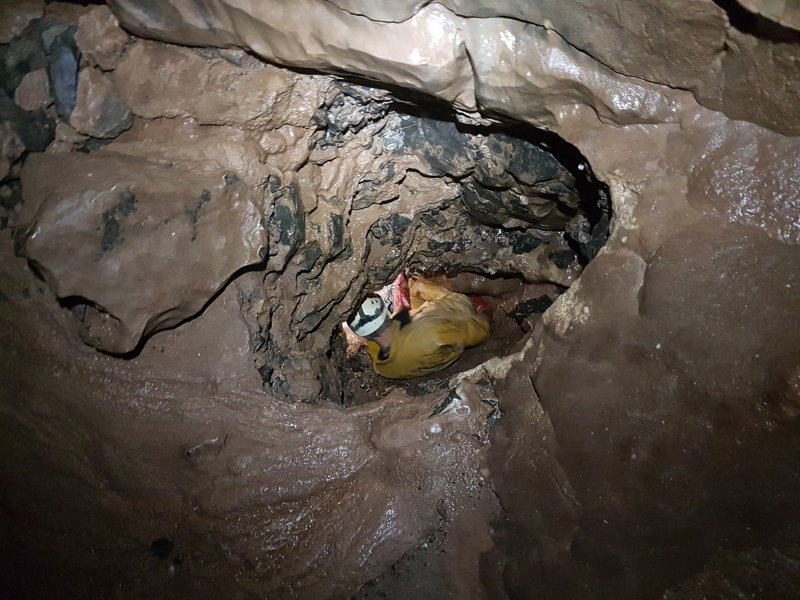 Continuing along Meander Passage reaches a crawl emerging in The Dugout. This was dug to make a connection, allowing the streamway to be completely avoided.
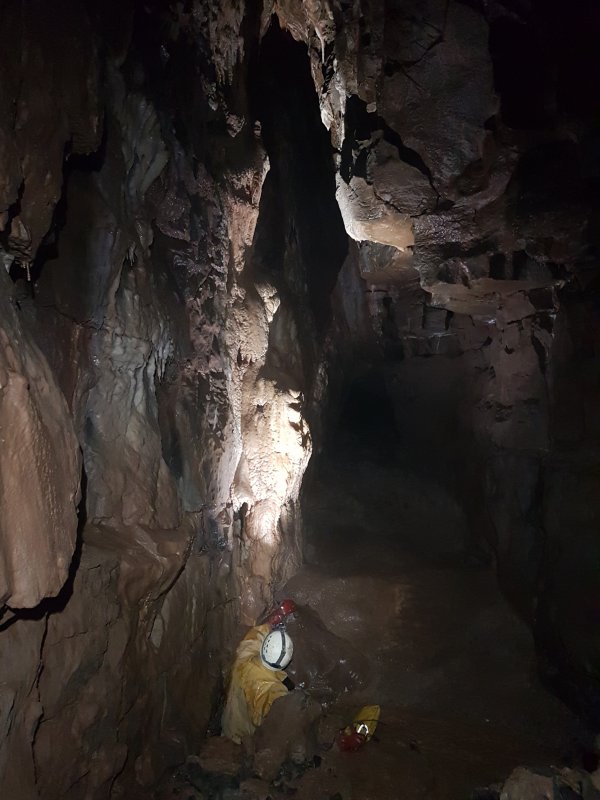 The Dugout emerges in a chamber with flowstone formations.
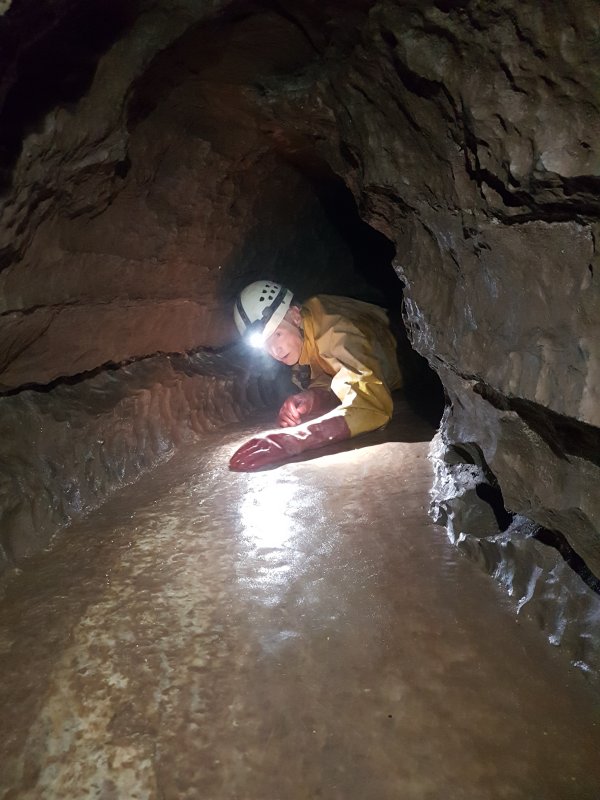 This is then followed by a lengthy crawl over calcite, almost smooth enough to be a long slide.
 The insulting wet crawl at the end. Until this point, it is possible to be largely dry (at least since Cwm Dwr's crawls), so this crawl is most unwanted.
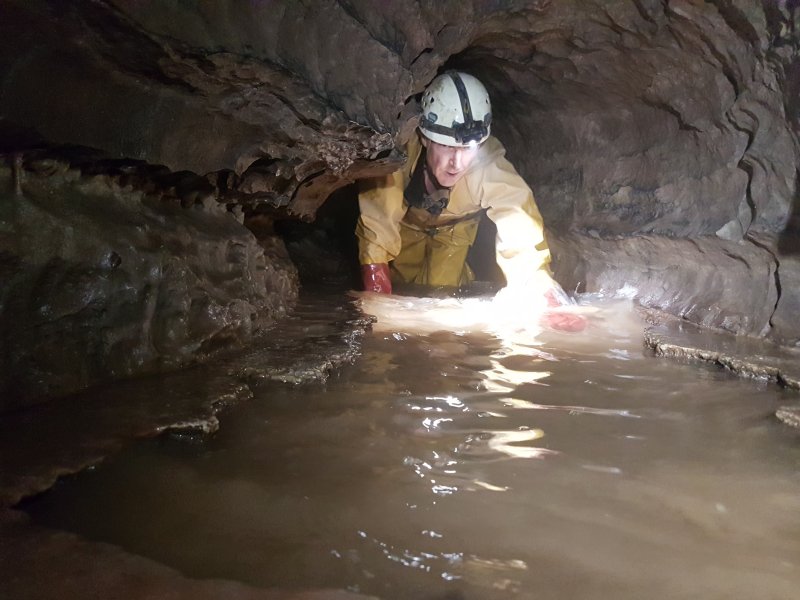 It is possible to stay dry - or perhaps get some wet knees - with some creative crawl traversing on the little ledges. But it's not really worth the effort. Just crawl through the water already.
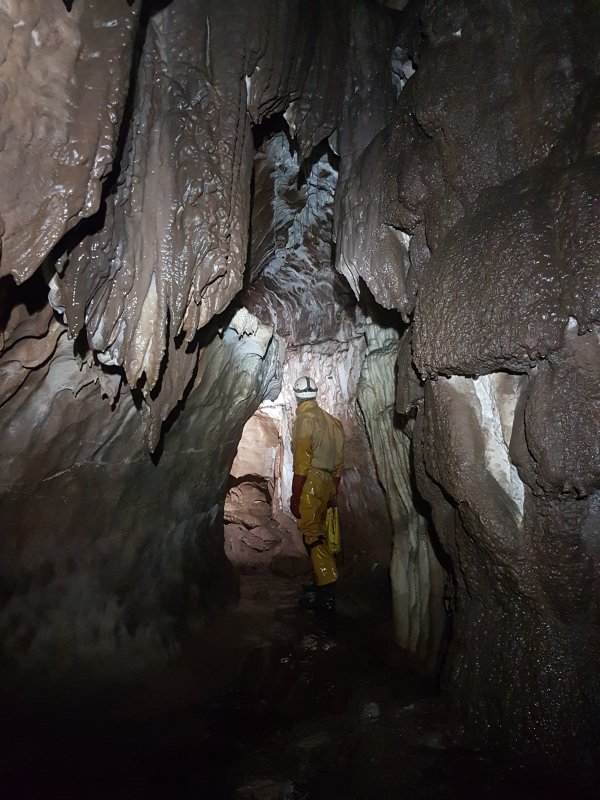 The crawl ends at Travertine Passage, which has some dark formations, stained with manganese or peat.
 Heading towards The Step - the wrong way to head out, but the usual way to reach the Main Streamway - past some lovely curtains. Shortly up ahead is a very slippery climb up to Column Passage, or a slope down to Loopways.
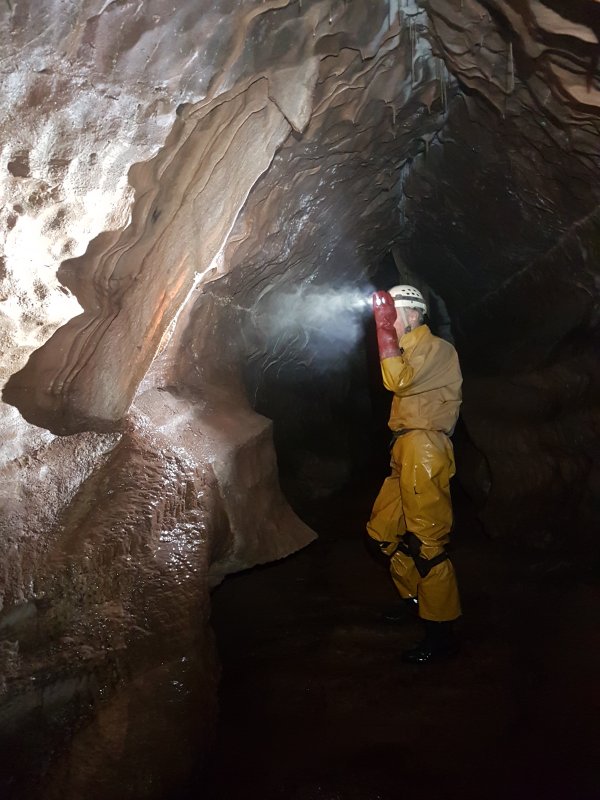 Curtain. This passage would have been the end of the proposed show cave.
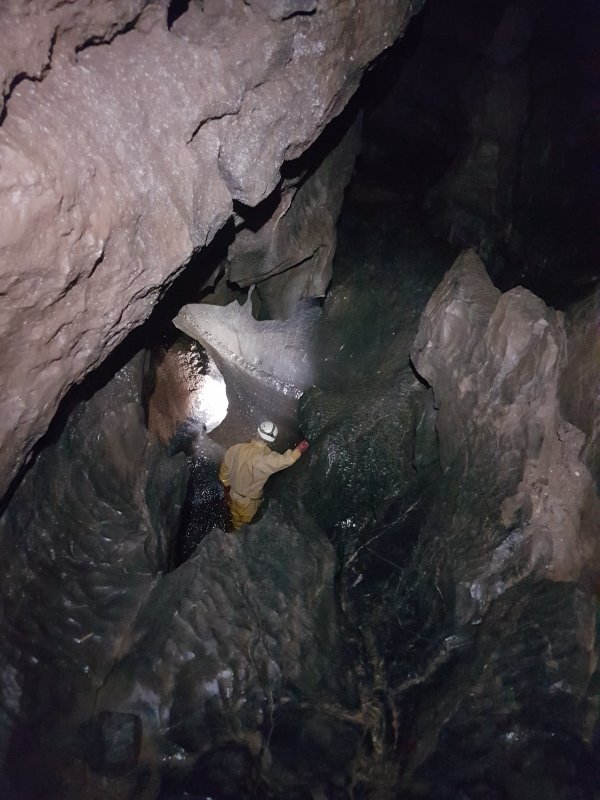 Loopways drops down to Beta Ledges, and The Step. The Step is the usual way to the Main Streamway, and has a small rise of rock that normally sits a few cm above the river. If it is underwater, then the cave is in flood, and the Main Streamway should be avoided.
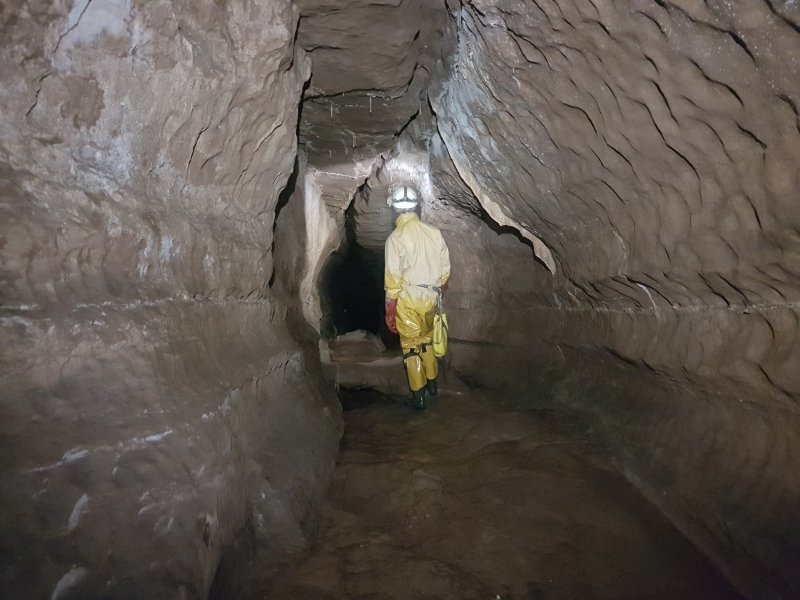 Heading down Travertine Passage towards the entrance.
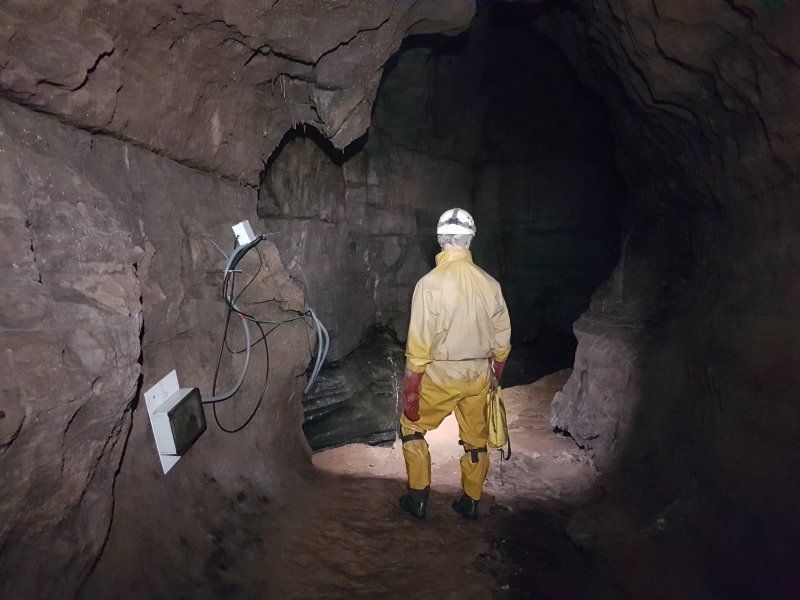 At the end of Travertine Passage is the water monitoring station. This reads the water level in the Main Streamway, and a cable and radio link then sends the data to the SWCC hut. The intention is to have this automatically post the data online, so it can be used to see the water levels before planning a trip, and potentially be able to combine it with weather data to predict future flooding patterns.
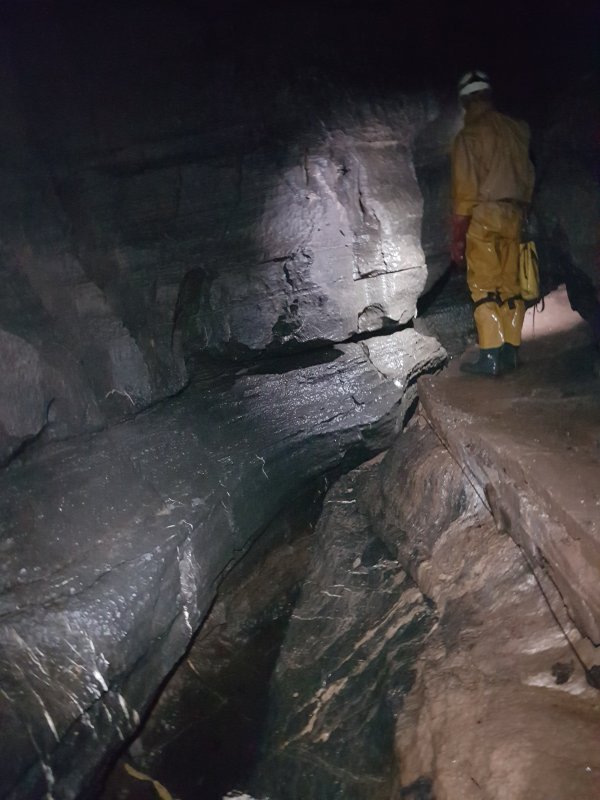 The concrete ledge above the water used to have a handrail, but this has decayed and been removed.
 The Toast Rack, a beautifully decorated passage. This would have been destroyed if it had remained like this in a show cave. Maybe it once had a walkway.
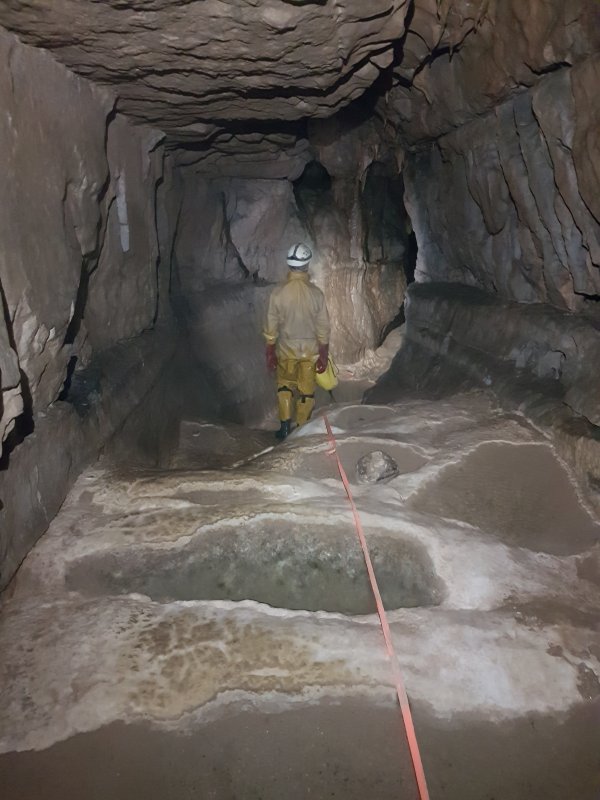 The Toast Rack is a great place to watch inexperienced, or experienced, cavers slip over while trying to walk.
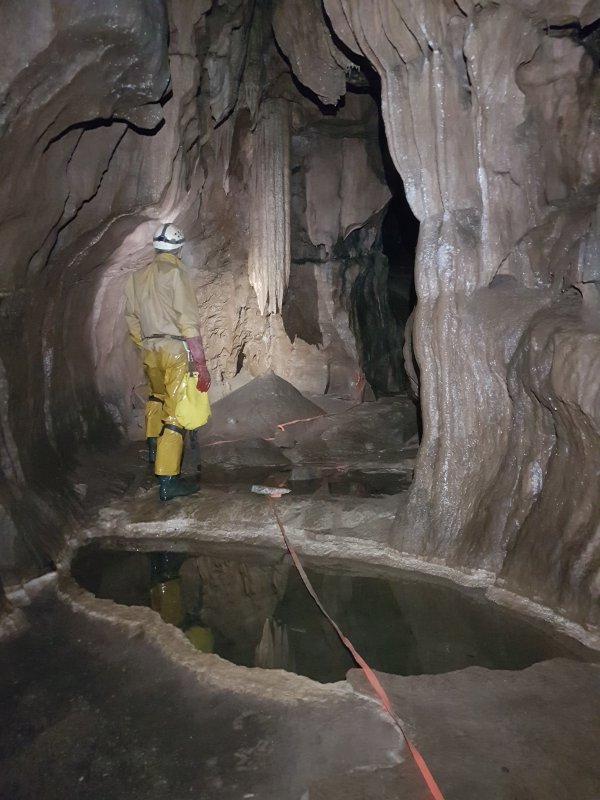 More formations, though these have had the bottoms damaged. This is likely due to intentional vandalism; the show cave project was halted after unknown vandals attacked the formations. There have been theories as to why someone might do this, as it prevented the business from succeeding. But there is still another show cave only a little further up the same valley.
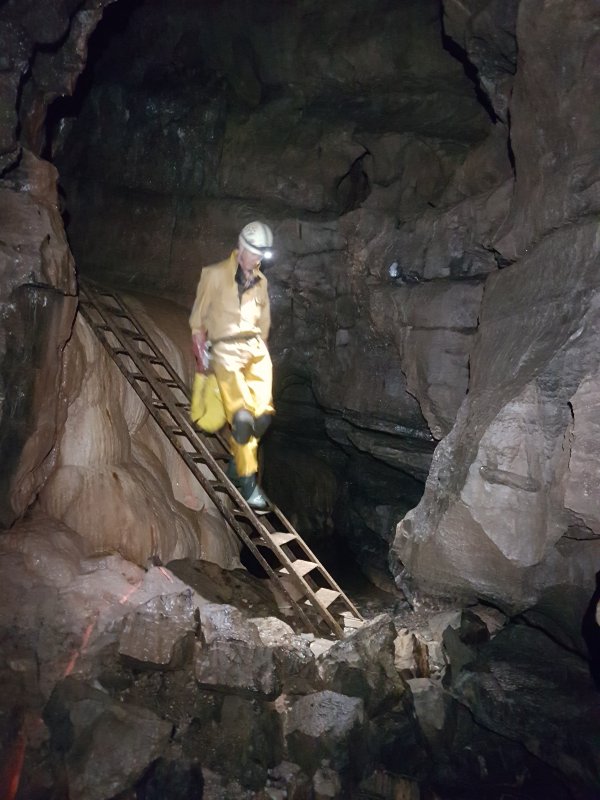 The end of the Toast Rack, and the end of the Escape Route.
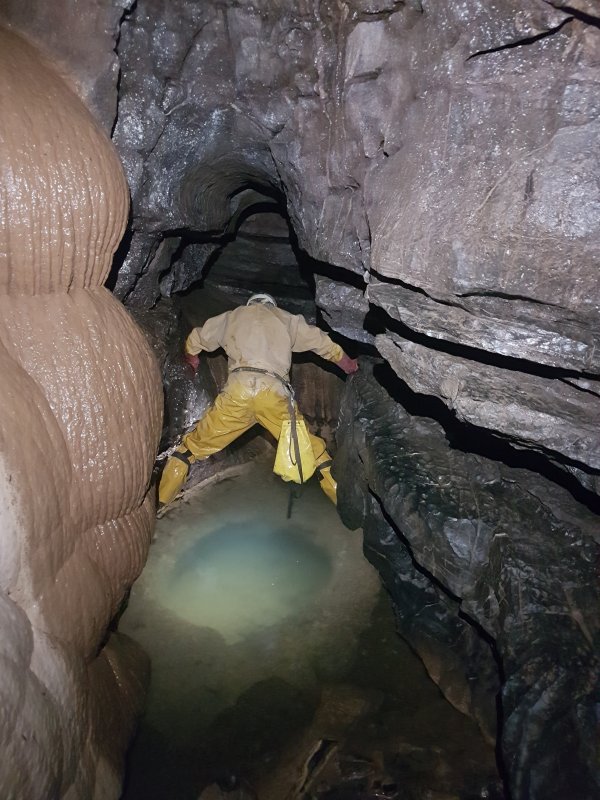 An alternative way to the Main Streamway from here is to traverse across Pluto's Bath. This is a testing ground for novice cavers, who often earn a dunking when they fail to master the technique. For additional fun, when the mud is stirred up, anyone who does not know the cave also doesn't realise there is a deep hole in the middle, and gets a dunking when walking through it.
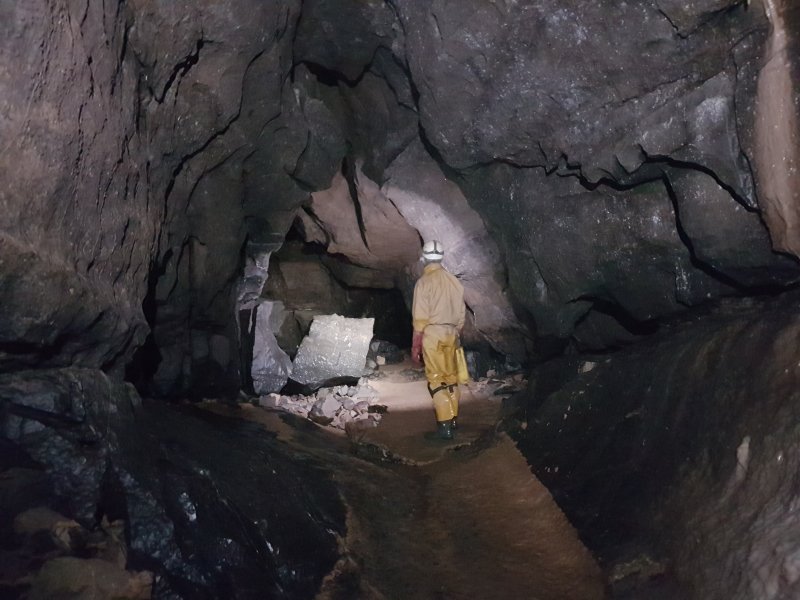 Cyril Powell Series, the main route to the entrance. This part is called Flood Passage. The concrete floor is part of the old show cave.
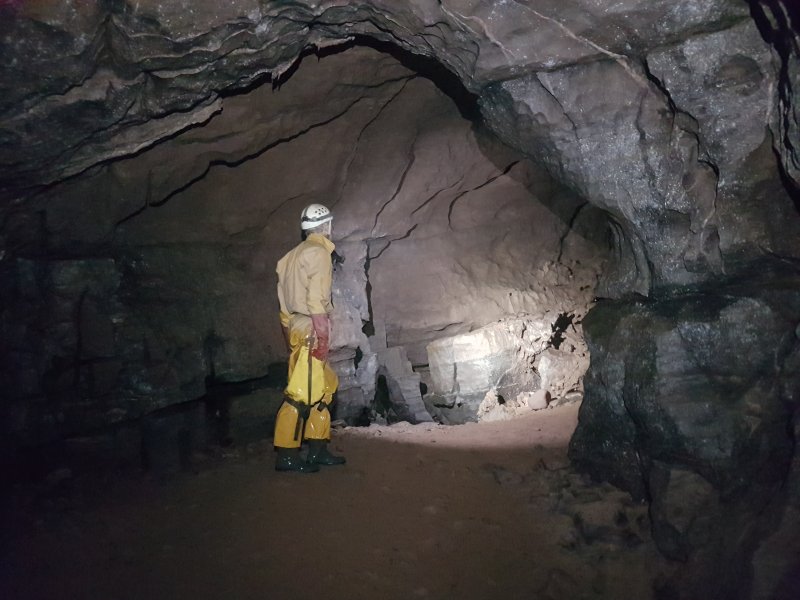 Flood Passage.
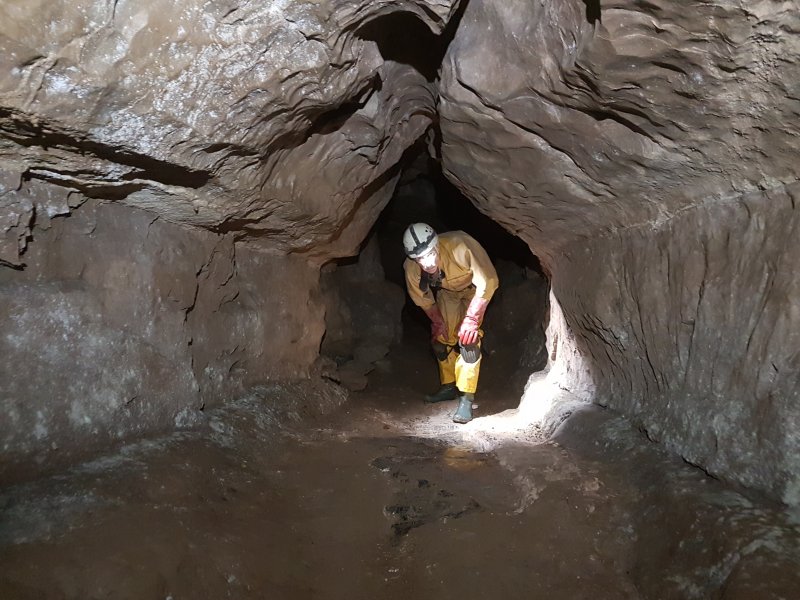 A side passage on the right, Pearl Passage, leads towards the Downey's Cave entrance (now closed). The story goes that long ago when this entrance was open, there was a travelling vet that used to visit the area on foot, blowing a horn (trumpet) to notify the farmers that he was in the area. Locals would then bring their animals to the vet, to be tended to. The locals assumed the hole went to Hell (of course - where else would a cave lead?), but the vet was encouraged to go inside. He did this with a fire torch, blowing his horn regularly. The sound was heard to become quieter and quieter, until it could no longer be heard. The vet never returned to the surface. Just a story, right?
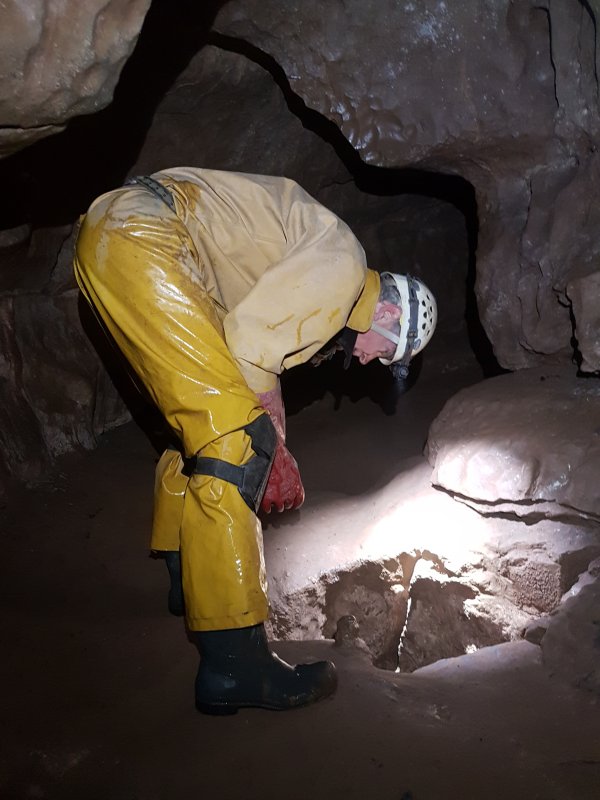 An ominous hole in the floor.
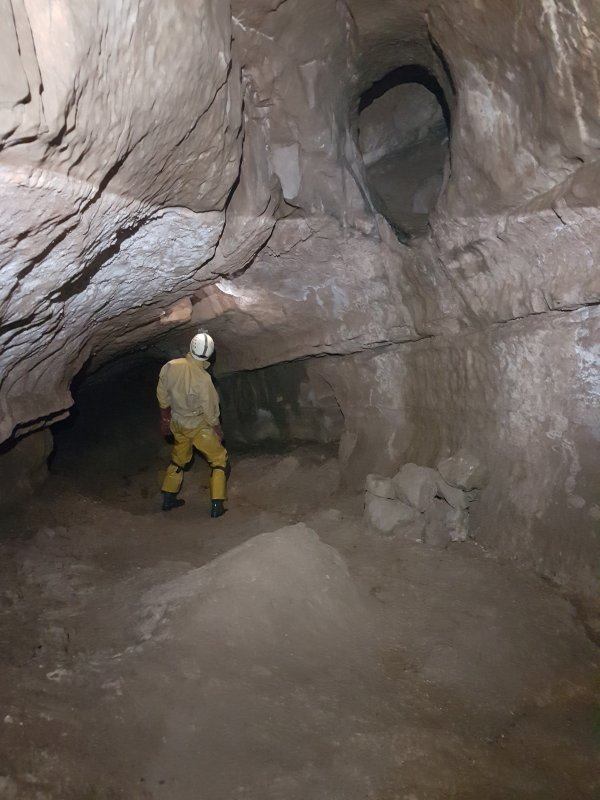 The hole drops into the ceiling of a short, blind passage, where Pete is standing. However, in the choke behind the camera, some distance away from the hole, explorers found the skeleton of a man. The second hole on the right is climbable, but cavers needed to build a pile of rocks to make access easier. An injury from falling down a hole, and a failed torch would have proven too much even for an experienced caver, let alone an inexperienced explorer. However, it is indeed just a story; there was a skeleton of a 20-25 year old person (possibly male) found here in 1946, but it was extremely old - Bronze Age or Neolithic - and seemed to have been deliberately buried here, via a route through the choke which is no longer open. This passage is named Skeleton Chamber (or Skeleton Pit) in the dubious honour of this event. (The tide line is historical, and the chamber would not have been full of water when the skeleton was placed here.) If you would like further information about the skeleton, see "A Fresh Examination of the Ogof Ffynnon Ddu Bones", by Mel Davies, published in the SWCC newsletter 115, in 1995.
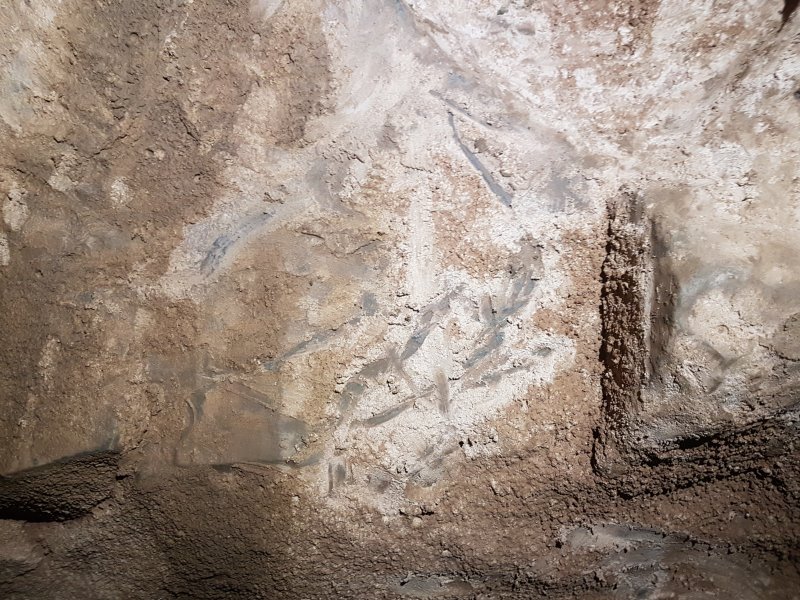 Scratch marks at the pit hole. This is not related to the skeleton, but even so, it serves as a horrifying thought of being trapped here in the dark, knowing there will be no rescue.
Lighting by Tarquin
Scratch marks at the pit hole. This is not related to the skeleton, but even so, it serves as a horrifying thought of being trapped here in the dark, knowing there will be no rescue.
Lighting by Tarquin Main Passage, a part of Cyril Powell Series near the entrance. The pools on the left are natural, with a concrete drainage channel above them. The pools are normally full of water and niphargus shrimps, or the occasional lost frog.
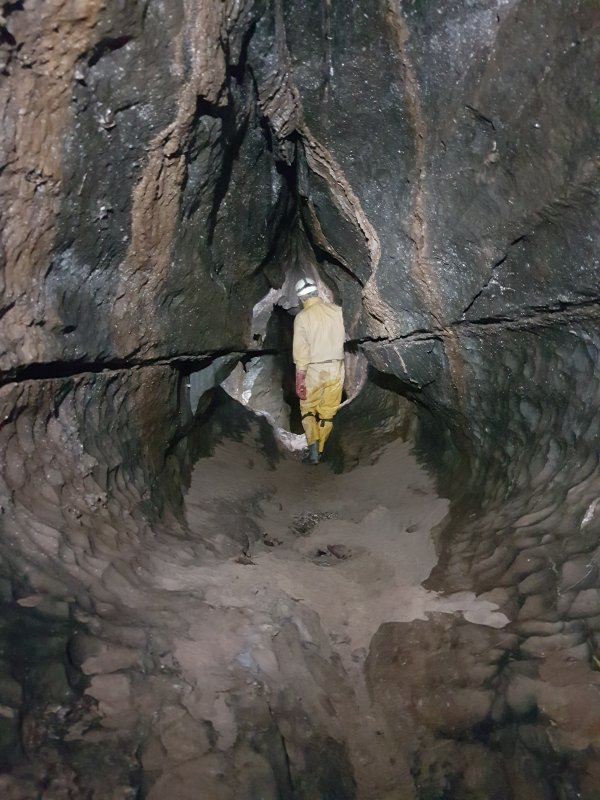 Just beyond the entrance ladder, a low bedding on the right reaches the original entrance, while ahead is Gothic Passage.
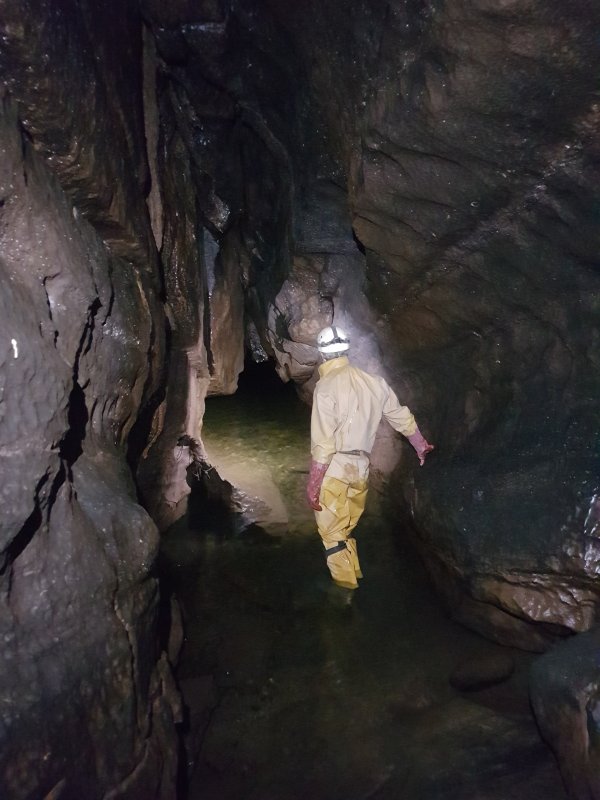 Gothic Sump is the deepest point that dry cavers can reach in the cave, even though it is only just below the surface. The deepest part of the sump is also the deepest point in the cave. The sump chokes shortly before the resurgence.
 The OFD I entrance ladders and gate, leading to the surface. This entrance was mined for the showcave, and is not natural.
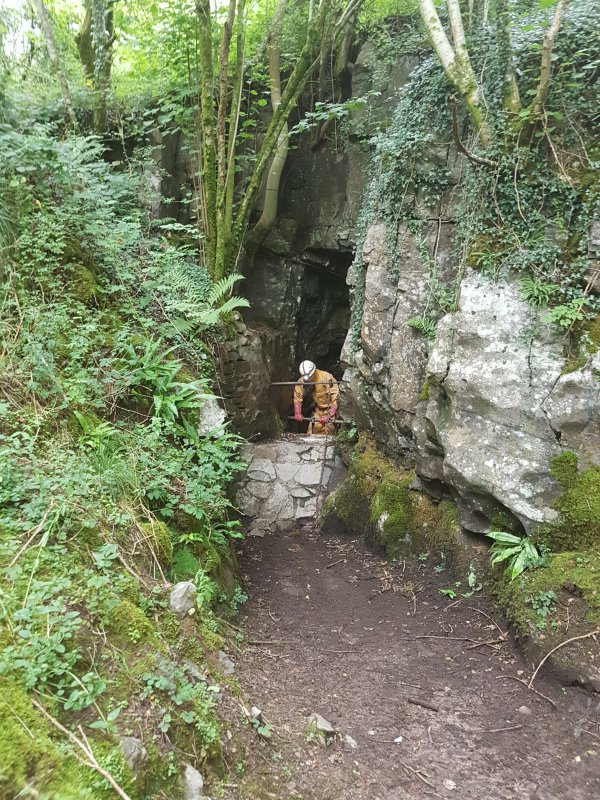 The OFD I entrance. The original entrance is in a choked depression behind the camera.
Lighting by Sol and Pete
The OFD I entrance. The original entrance is in a choked depression behind the camera.
Lighting by Sol and Pete Brick at the old Penwyllt Brickworks. Another caving trip completed.
Lighting by Sol
Brick at the old Penwyllt Brickworks. Another caving trip completed.
Lighting by Sol