Ogof Ffynnon Ddu Great Oxbow Series trip 08/01/2023
Unless otherwise stated, camera, setups, lighting, edits and gallery effects by Tarquin. Modelling and lighting at various points will be Steph Andrews and Pete Bolt.
This was a dedicated photography trip, and took a lengthy 7 hours for a relatively short series. This is due to the series being very well decorated, with many formations characteristically looking like poured honey of various shades. A number of the photographs were taken on a trip several years before, but this trip allowed us to complete the series. While it is officially known as Great Oxbow Series, it is often referred to as Upper Great Oxbow, to highlight the fact that it begins as a series of traverses high in the roof of Great Oxbow, which cannot be reached from Great Oxbow itself.
Much of the time was used to rig the traverses. While these can in theory be done without any traverse line, I would absolutely recommend one. A 20 metre rope would allow the first person to be belayed until they reach the next hanger. They can then rig it as a traverse line for the others, and then belay the last person over the traverse. A small team (4 people max) allows everyone to gather at each hanger to change the purpose of the rope. A longer rope might be needed for a larger team, so that more than one section can be rigged at once.
 Angel in the ceiling of Midnight Passage, shortly beyond Midnight Chamber. The round trip has started.
Modelling by Jophiel, lighting by Tarquin and Steph
Angel in the ceiling of Midnight Passage, shortly beyond Midnight Chamber. The round trip has started.
Modelling by Jophiel, lighting by Tarquin and Steph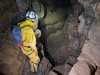 Midnight Passage has a series of climbs, reaching this; the start of the traverses. The rope is rigged from naturals in the floor, and a rawl bolt in the right wall, inconveniently placed just after the gap in the floor. The first part of the gap is a 24 metre pitch to the Main Streamway. The traverse starts along the ledge against the right wall.
Modelling by Pete, lighting by Tarquin, Steph and Pete
Midnight Passage has a series of climbs, reaching this; the start of the traverses. The rope is rigged from naturals in the floor, and a rawl bolt in the right wall, inconveniently placed just after the gap in the floor. The first part of the gap is a 24 metre pitch to the Main Streamway. The traverse starts along the ledge against the right wall.
Modelling by Pete, lighting by Tarquin, Steph and Pete The first traverse starts as a stepped slope far above the river, followed by a traverse along the ledges. At various points, it looks like there is a ledge of boulders a few metres down, but these are just wedged rocks sitting far above the floor, and they would not be enough to catch you. A rope is very strongly advised. The camera is sitting at the first hanger, just before the end of the traverse. At this point, the traverse is over the start of Great Oxbow.
Modelling by Steph, lighting by Tarquin, Steph and Pete
The first traverse starts as a stepped slope far above the river, followed by a traverse along the ledges. At various points, it looks like there is a ledge of boulders a few metres down, but these are just wedged rocks sitting far above the floor, and they would not be enough to catch you. A rope is very strongly advised. The camera is sitting at the first hanger, just before the end of the traverse. At this point, the traverse is over the start of Great Oxbow.
Modelling by Steph, lighting by Tarquin, Steph and Pete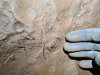 Fossil nautiloid.
Modelling by Steph
Fossil nautiloid.
Modelling by Steph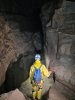 After a brief section of passage with a solid floor, the second traverse starts. Again, this looks like it has a floor of rocks a few metres down, but there are gaps dropping all the way down to Great Oxbow.
Modelling by Pete, lighting by Tarquin, Steph and Pete
After a brief section of passage with a solid floor, the second traverse starts. Again, this looks like it has a floor of rocks a few metres down, but there are gaps dropping all the way down to Great Oxbow.
Modelling by Pete, lighting by Tarquin, Steph and Pete The traverse has a good ledge, but the handholds are merely small finger grips. A rope is a very good idea, and there are hangers high on the left wall at the start of the traverse. The camera sits over some large jammed boulders, where there is another hanger.
Modelling by Steph, lighting by Tarquin, Steph and Pete
The traverse has a good ledge, but the handholds are merely small finger grips. A rope is a very good idea, and there are hangers high on the left wall at the start of the traverse. The camera sits over some large jammed boulders, where there is another hanger.
Modelling by Steph, lighting by Tarquin, Steph and Pete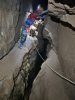 The third traverse starts immediately after the jammed boulders. At this point, it is 26 metres above Great Oxbow, and there is nothing to stop a fall. Use a rope! The camera sits at a point in the traverse where there is a hanger, but the ledge ends shortly afterwards.
Modelling by Steph and Pete, lighting by Tarquin, Steph and Pete
The third traverse starts immediately after the jammed boulders. At this point, it is 26 metres above Great Oxbow, and there is nothing to stop a fall. Use a rope! The camera sits at a point in the traverse where there is a hanger, but the ledge ends shortly afterwards.
Modelling by Steph and Pete, lighting by Tarquin, Steph and Pete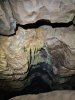 Stal below the traverse. The way on is to climb down several metres just after this, where the rift opens back up.
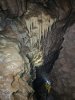 The clamber down the rift, which lands on calcited blocks below some formations. The hanger had an aging carabiner, which we used to belay each other down the climb. It is easier than it looks, but safety is a very good idea given the distance to the floor.
Modelling by Pete, lighting by Tarquin, Steph and Pete
The clamber down the rift, which lands on calcited blocks below some formations. The hanger had an aging carabiner, which we used to belay each other down the climb. It is easier than it looks, but safety is a very good idea given the distance to the floor.
Modelling by Pete, lighting by Tarquin, Steph and Pete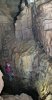 From the calcited boulders, the floor drops over 20 metres down into Great Oxbow again, so the way on is back up again, using Brigadier Glennie's Ladder, to reach the start of Great Oxbow Series.
Modelling by Steph, lighting by Tarquin, Pete and Steph
From the calcited boulders, the floor drops over 20 metres down into Great Oxbow again, so the way on is back up again, using Brigadier Glennie's Ladder, to reach the start of Great Oxbow Series.
Modelling by Steph, lighting by Tarquin, Pete and Steph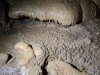 Muddied remains of a crystal pool.
 Flowstone and columns.
 Curtains from a series of roof tubes which connect to the upper passages.
Modelling by Pete, lighting by Tarquin and Steph
Curtains from a series of roof tubes which connect to the upper passages.
Modelling by Pete, lighting by Tarquin and Steph Stalactites.
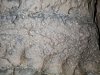 Fossil shells in the passage.
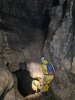 The passage then abruptly falls 23 metres into Great Oxbow. There is no belay, so the drop is skirted on the right side, without a safety line (we used ourselves as anchors for a traverse line for Steph).
Modelling by Pete, lighting by Tarquin, Steph and Pete
The passage then abruptly falls 23 metres into Great Oxbow. There is no belay, so the drop is skirted on the right side, without a safety line (we used ourselves as anchors for a traverse line for Steph).
Modelling by Pete, lighting by Tarquin, Steph and Pete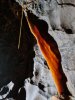 Hairy curtain.
Lighting by Steph
Hairy curtain.
Lighting by Steph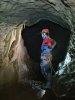 The way on into Great Oxbow Series is up a calcited ramp to the left, adorned with these formations.
Modelling by Steph, lighting by Tarquin, Steph and Pete
The way on into Great Oxbow Series is up a calcited ramp to the left, adorned with these formations.
Modelling by Steph, lighting by Tarquin, Steph and Pete Scallops in the passage below the ramp.
Lighting by Steph
Scallops in the passage below the ramp.
Lighting by Steph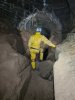 The passage below the ramp continues as a traverse route over the river. This can be used to access Sandfill Passage, Mutiny Junction, Marble Showers and Fault Aven Series, but is often described as being suitable only for those with long legs.
Modelling by Pete, lighting by Tarquin and Pete
The passage below the ramp continues as a traverse route over the river. This can be used to access Sandfill Passage, Mutiny Junction, Marble Showers and Fault Aven Series, but is often described as being suitable only for those with long legs.
Modelling by Pete, lighting by Tarquin and Pete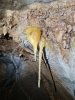 Small formations above the ramp
Lighting by Tarquin and Steph
Small formations above the ramp
Lighting by Tarquin and Steph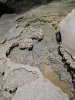 Dry crystal pool. Above this is a blind rift, starting with a pitch up. This is not the way on.
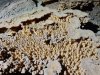 Muddied crystals in the dry pool.
 A crawl then reaches a 6 metre climb. While it has a lot of holds, as long as you can reach both walls. There is a crux move where it spans a little too wide for some people's comfort. Each time I have been here, a belay line was needed for most climbers, and many said that they would not have done the climb without it. There are no good belays at the top so a body belay is used.
Modelling by Steph, lighting by Tarquin and Pete
A crawl then reaches a 6 metre climb. While it has a lot of holds, as long as you can reach both walls. There is a crux move where it spans a little too wide for some people's comfort. Each time I have been here, a belay line was needed for most climbers, and many said that they would not have done the climb without it. There are no good belays at the top so a body belay is used.
Modelling by Steph, lighting by Tarquin and Pete Formations on the climb.
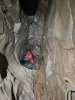 The passage then reaches a second little climb, which is about 4 metres (the survey says 3).
Modelling by Steph, lighting by Tarquin, Steph and Pete
The passage then reaches a second little climb, which is about 4 metres (the survey says 3).
Modelling by Steph, lighting by Tarquin, Steph and Pete Formations above the second climb.
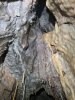 Helictites above the climb. One of them makes a long loop, connected to the rock at each end, so that it has nowhere left to grow.
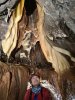 The climb emerges from a slippery hole below some beautiful curtains. One of them is slightly muddied and damaged, presumably from someone slipping down the hole and hitting it.
Modelling by Steph, lighting by Tarquin and Pete
The climb emerges from a slippery hole below some beautiful curtains. One of them is slightly muddied and damaged, presumably from someone slipping down the hole and hitting it.
Modelling by Steph, lighting by Tarquin and Pete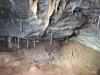 This section of passage is quite muddy, yet these formations have survived, on the side of a crawl.
Lighting by Tarquin and Steph
This section of passage is quite muddy, yet these formations have survived, on the side of a crawl.
Lighting by Tarquin and Steph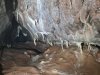 Small formations in a blind side passage.
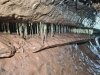 Grill of straws in the side of the passage.
Lighting by Tarquin and Steph
Grill of straws in the side of the passage.
Lighting by Tarquin and Steph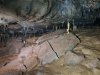 The ramp passage ends at a junction with a much larger passage. This is the major southern parallel of the series.
Lighting by Tarquin and Steph
The ramp passage ends at a junction with a much larger passage. This is the major southern parallel of the series.
Lighting by Tarquin and Steph Straw columns.
Lighting by Tarquin and Steph
Straw columns.
Lighting by Tarquin and Steph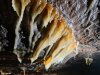 Curtains in the passage heading east from the junction.
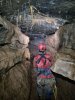 The start of the passage that heads east from the junction.
Modelling by Steph, lighting by Tarquin and Steph
The start of the passage that heads east from the junction.
Modelling by Steph, lighting by Tarquin and Steph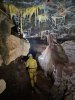 The passage them passes over a pitch to reach a beautifully decorated section. The formations here are various shades of honey, through to white and pink. The pitch swallows the stream which emerges from the passage, but even though it connects to the calcited ledges from the passage at the start of the series, the water takes its own route down to the river. There is also a little side stub of passage here, which reverberated the sound of the river beautifully, even though this passage is over 50 metres above the river, separated from it by several passages (Great Oxbow's lower passage, Great Oxbow, passage from Brigadier Glennie's Ladder, calcitd ledges, pitches). The river was running very high, but still, the sound was very impressive.
Modelling by Pete, lighting by Tarquin and Steph
The passage them passes over a pitch to reach a beautifully decorated section. The formations here are various shades of honey, through to white and pink. The pitch swallows the stream which emerges from the passage, but even though it connects to the calcited ledges from the passage at the start of the series, the water takes its own route down to the river. There is also a little side stub of passage here, which reverberated the sound of the river beautifully, even though this passage is over 50 metres above the river, separated from it by several passages (Great Oxbow's lower passage, Great Oxbow, passage from Brigadier Glennie's Ladder, calcitd ledges, pitches). The river was running very high, but still, the sound was very impressive.
Modelling by Pete, lighting by Tarquin and Steph Stained stal looking almost like blood. The pink colouring comes from the old red sandstone, but red this strong is likely to be haematite, a form of iron oxide.
 The stream creates a flowstone floor, with the walls adorned by yet more flowstone. We washed all the mud off our boots, and as much as possible from our suits, just prior to this.
Modelling by Pete, lighting by Tarquin and Steph
The stream creates a flowstone floor, with the walls adorned by yet more flowstone. We washed all the mud off our boots, and as much as possible from our suits, just prior to this.
Modelling by Pete, lighting by Tarquin and Steph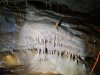 Flowstone with a single handprint. The stalagmite at the top looks like it is trying not to get washed over the edge of a waterfall.
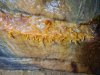 Honey coloured helictites.
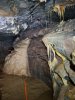 Banks of stal. The inlet is taped off here, but on our previous trip several years before, there was no tape. Perhaps there was meant to be tape, and someone had removed it, or the stream had washed it away. As a result, we had been able to follow and photograph the rest of the passage during that previous trip. The remaining pictures are from that trip, and are included here for the sake of completeness.
Lighting by Tarquin and Steph
Banks of stal. The inlet is taped off here, but on our previous trip several years before, there was no tape. Perhaps there was meant to be tape, and someone had removed it, or the stream had washed it away. As a result, we had been able to follow and photograph the rest of the passage during that previous trip. The remaining pictures are from that trip, and are included here for the sake of completeness.
Lighting by Tarquin and Steph Curtains.
 Honey and helictites.
 Honey and helictites.
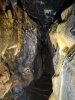 Passage through the honey.
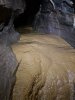 The flowstone floor of the passage, which continues for most of its length.
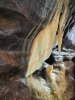 Curtain.
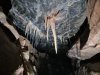 Stalactites.
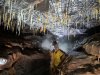 Honey dripping from the ceiling of the passage.
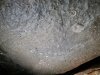 Fossil layer in the ceiling.
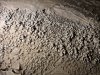 Crystal pool with rounded calcite crystals in the flowstone floor.
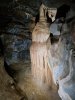 The last formation in the passage.
 The passage ends at a sump, with a significant flow of water emerging. This has never been passed, but is very close to a downstream sump in another passage. However, the amount of water emerging here is more than the amount flowing in the other passage.
 The western passage leading from the junction in the southern parallel, which starts with a blind 18 metre pitch. A crawl surrounded by honey-coloured formations offers a bypass.
Modelling by Steph, lighting by Tarquin, Steph and Pete
The western passage leading from the junction in the southern parallel, which starts with a blind 18 metre pitch. A crawl surrounded by honey-coloured formations offers a bypass.
Modelling by Steph, lighting by Tarquin, Steph and Pete Straws in the crawl.
Modelling by Steph, lighting by Tarquin, Steph and Pete
Straws in the crawl.
Modelling by Steph, lighting by Tarquin, Steph and Pete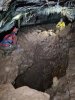 The passage then crosses a second pitch, bypassed by a careful step along a bridge between the pitches, and then a crawl along a ledge.
Modelling by Steph and Pete, lighting by Tarquin, Steph and Pete
The passage then crosses a second pitch, bypassed by a careful step along a bridge between the pitches, and then a crawl along a ledge.
Modelling by Steph and Pete, lighting by Tarquin, Steph and Pete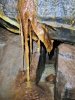 Curtain and crystal pool tucked into an alcove.
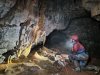 Formations at a double junction with the connecting passage.
Modelling by Steph, lighting by Tarquin, Steph and Pete
Formations at a double junction with the connecting passage.
Modelling by Steph, lighting by Tarquin, Steph and Pete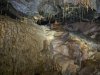 Flowstone in an alcove.
Lighting by Tarquin and Steph
Flowstone in an alcove.
Lighting by Tarquin and Steph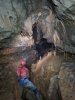 The passage increases significantly in size. While decorated, the formations are less impressive than before.
Modelling by Steph, lighting by Tarquin and Steph
The passage increases significantly in size. While decorated, the formations are less impressive than before.
Modelling by Steph, lighting by Tarquin and Steph Stal with natural black lines in it, looking almost like contour lines.
Lighting by Tarquin, Pete and Steph
Stal with natural black lines in it, looking almost like contour lines.
Lighting by Tarquin, Pete and Steph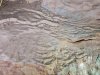 Pink mud, from the old red sandstone.
Lighting by Tarquin, Steph and Pete
Pink mud, from the old red sandstone.
Lighting by Tarquin, Steph and Pete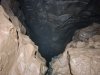 The passage ends at a 20 metre pitch down to the Mutiny Junction area. This provides a round trip opportunity, either back to the earlier traverses, or all the way around via Merthyr Vale and Deja Rue back to Midnight Chamber.
 A side passage leads up into a high level chamber called The Loft, which has no way on.
Lighting by Tarquin, Steph and Pete
A side passage leads up into a high level chamber called The Loft, which has no way on.
Lighting by Tarquin, Steph and Pete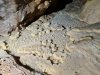 Crystal pool in the connecting passage. This passage connects the southern and northern parallels, and is a major route through the series. A 50 metre side passage here is very tight, so we did not follow it.
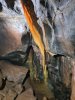 Translucent honey curtain in the connecting passage.
Lighting by Tarquin and Steph
Translucent honey curtain in the connecting passage.
Lighting by Tarquin and Steph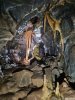 Curtains and columns.
Modelling by Pete, lighting by Tarquin, Pete and Steph
Curtains and columns.
Modelling by Pete, lighting by Tarquin, Pete and Steph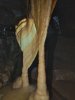 The main curtain column.
Lighting by Tarquin and Steph
The main curtain column.
Lighting by Tarquin and Steph Helictites in the connecting passage.
 Stalactites.
Modelling by Steph
Stalactites.
Modelling by Steph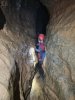 Much of the connecting passage is an awkward rift, where you traverse along a ledge, while wedged into the narrow gap.
Modelling by Steph, lighting by Tarquin and Steph
Much of the connecting passage is an awkward rift, where you traverse along a ledge, while wedged into the narrow gap.
Modelling by Steph, lighting by Tarquin and Steph Column.
Modelling by Pete, lighting by Tarquin and Pete
Column.
Modelling by Pete, lighting by Tarquin and Pete Stal grill blocking the lower level of the passage.
Modelling by Pete, lighting by Tarquin and Pete
Stal grill blocking the lower level of the passage.
Modelling by Pete, lighting by Tarquin and Pete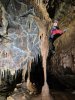 The usual way on is to traverse over the grill, rather than trying to crawl over crystal pools.
Modelling by Steph, lighting by Tarquin and Pete
The usual way on is to traverse over the grill, rather than trying to crawl over crystal pools.
Modelling by Steph, lighting by Tarquin and Pete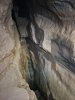 The passage ends at a 16 metre pitch down to Deja Rue. While it is possible to traverse using tiny ledges to reach the northern parallel, the span is quite wide, and mistakes could be serious, so it is best to avoid this route.
Lighting by Tarquin, Pete and Steph
The passage ends at a 16 metre pitch down to Deja Rue. While it is possible to traverse using tiny ledges to reach the northern parallel, the span is quite wide, and mistakes could be serious, so it is best to avoid this route.
Lighting by Tarquin, Pete and Steph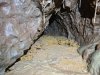 A crawl under the left wall reaches a passage containing this dry crystal pool. Although this passage will get you wet, it is the best way to reach the northern parallel.
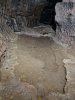 A crawl under the right wall also can be used to reach the northern parallel, but it requires crawling over calcite rafts. They seem to regrow quickly, and people do seem to use this route.
 Sunken calcite rafts.
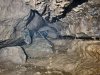 A crawl to the left can be used to bypass the rafts. This passes through a very tight squeeze to reach the northern parallel.
Modelling by Steph
A crawl to the left can be used to bypass the rafts. This passes through a very tight squeeze to reach the northern parallel.
Modelling by Steph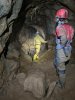 In the northern parallel, the eastern branch immediately crosses a 17 metre shaft. While it is possible to traverse along the left wall, the passage beyond chokes immediately, so it is not worth the risk.
Modelling by Steph and Pete, lighting by Tarquin, Steph and Pete
In the northern parallel, the eastern branch immediately crosses a 17 metre shaft. While it is possible to traverse along the left wall, the passage beyond chokes immediately, so it is not worth the risk.
Modelling by Steph and Pete, lighting by Tarquin, Steph and Pete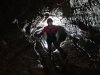 A phreatic tube leads below a tall aven before choking.
Modelling by Steph, lighting by Tarquin and Pete
A phreatic tube leads below a tall aven before choking.
Modelling by Steph, lighting by Tarquin and Pete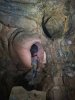 The next side passage is a pair of tubes.
Modelling by Steph, lighting by Tarquin, Pete and Steph
The next side passage is a pair of tubes.
Modelling by Steph, lighting by Tarquin, Pete and Steph The passages join then immediately choke. This point is about 30 metres below surface.
Modelling by Steph, lighting by Tarquin and Steph
The passages join then immediately choke. This point is about 30 metres below surface.
Modelling by Steph, lighting by Tarquin and Steph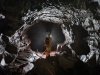 The eastern branch of the northern parallel, which starts as a phreatic tube.
Modelling by Pete, lighting by Tarquin and Steph
The eastern branch of the northern parallel, which starts as a phreatic tube.
Modelling by Pete, lighting by Tarquin and Steph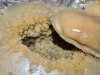 Small crystal pool.
 Boxwork on the ceiling of the tube. Several of the boxwork lines have grown helictites.
Lighting by Tarquin and Steph
Boxwork on the ceiling of the tube. Several of the boxwork lines have grown helictites.
Lighting by Tarquin and Steph Helictites in the tube.
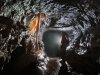 The dragon trapped in the rock, one of my favourite pictures from this entire set. This glowing curtain seems almost superimposed, but this is exactly how it came out of the camera. The effect is simply created by some well placed back-lighting.
Modelling by Steph, lighting by Tarquin, Steph and Pete
The dragon trapped in the rock, one of my favourite pictures from this entire set. This glowing curtain seems almost superimposed, but this is exactly how it came out of the camera. The effect is simply created by some well placed back-lighting.
Modelling by Steph, lighting by Tarquin, Steph and Pete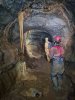 Twin stalactites.
Modelling by Steph and Pete, lighting by Tarquin, Steph and Pete
Twin stalactites.
Modelling by Steph and Pete, lighting by Tarquin, Steph and Pete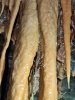 Hair.
Lighting by Tarquin and Steph
Hair.
Lighting by Tarquin and Steph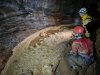 A large and impressive dried crystal pool.
Modelling by Steph and Pete, lighting by Tarquin, Steph and Pete
A large and impressive dried crystal pool.
Modelling by Steph and Pete, lighting by Tarquin, Steph and Pete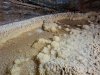 Detail of the crystals.
Lighting by Tarquin, Steph and Pete
Detail of the crystals.
Lighting by Tarquin, Steph and Pete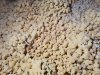 Detail of the crystals.
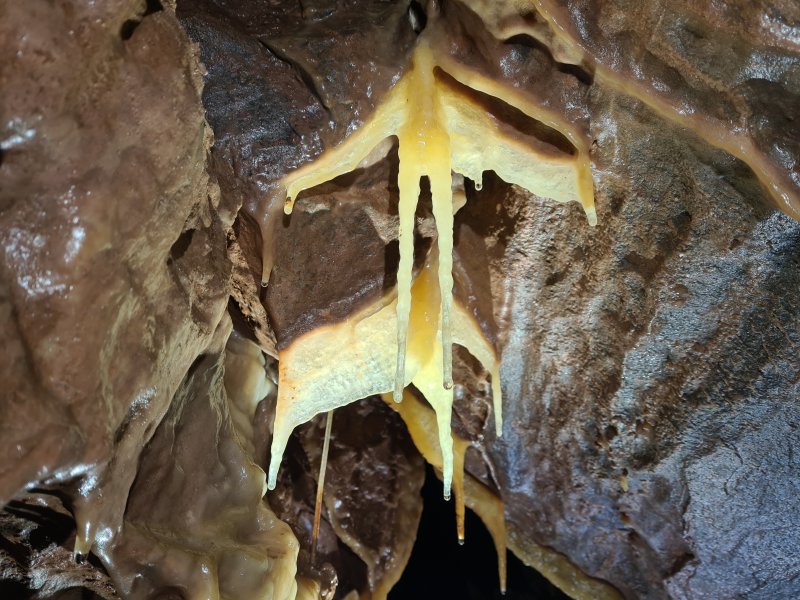
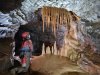 The iconic Great Oxbow Series formation, like something from a textbook.
Modelling by Steph, lighting by Tarquin and Pete
The iconic Great Oxbow Series formation, like something from a textbook.
Modelling by Steph, lighting by Tarquin and Pete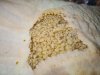 Dog tooth spar (big crystals) in a crystal pool on the formation. Sadly it is too far beyond a tape to use anything for scale, but each crystal is several centimetres across.
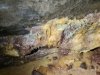 Helictites.
 Dried crystal pools and curtains.
Modelling by Steph, lighting by Tarquin and Steph
Dried crystal pools and curtains.
Modelling by Steph, lighting by Tarquin and Steph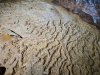 Rippled edges of crystal pools.
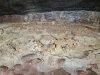 Formet calcite rafts in the dried crystal pools.
Lighting by Tarquin, Steph and Pete
Formet calcite rafts in the dried crystal pools.
Lighting by Tarquin, Steph and Pete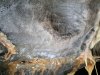 Contour patterns in the rock.
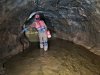 Shallow pool. Not enough to get wet feet.
Modelling by Steph, lighting by Tarquin and Steph
Shallow pool. Not enough to get wet feet.
Modelling by Steph, lighting by Tarquin and Steph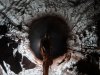 Almost perfect phreatic tube at the end of the northern parallel.
Modelling by Pete, lighting by Steph
Almost perfect phreatic tube at the end of the northern parallel.
Modelling by Pete, lighting by Steph Dry crystal pool in a side passage in a trench. The side passage is the upstream end of the inlet in the southern parallel, but at this point it has no stream.
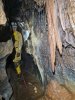 Straws and stalactites in the side passage.
Modelling by Pete, lighting by Tarquin and Steph
Straws and stalactites in the side passage.
Modelling by Pete, lighting by Tarquin and Steph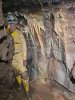 Decorated walls.
Modelling by Pete, lighting by Tarquin and Steph
Decorated walls.
Modelling by Pete, lighting by Tarquin and Steph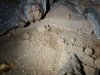 Dry crystal pool.
 Stalagmite in the middle of the passage. The passage was taped off at this point, but again, there had been no tape on our previous visit, and we had been able to continue, starting with a difficult traverse over a crystal pool. The remaining pictures are from that trip, and are included here for the sake of completeness.
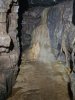 Small formation beyond the pool.
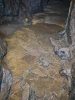 Crystal pools. The flow of water is definitely not enough to explain the amount of water in the other passage.
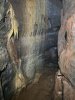 Walls of the passage.
 Curtains.
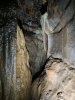 Muddied stal window.
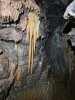 Stalactites.
 Flowstone.
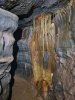 Straws.
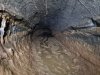 The downstream sump. The water flows beneath a false floor here, but there has to be another water source considering how much water emerges from the other end of the sump.
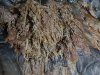 Returning to the normal route, these helictites and straws are in the ceiling just after the trench starts.
 Formations above the head of The Skyhook.
Modelling by Steph's helmet, lighting by Tarquin, Steph and Pete
Formations above the head of The Skyhook.
Modelling by Steph's helmet, lighting by Tarquin, Steph and Pete Formations in the rift above The Skyhook.
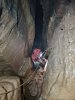 The Skyhook, an 11 metre pitch, with Steph's first abseil underground. The Skyhook used to be rigged from below, using a unique metal hook (The Skyhook), which could be pulled up on a piece of string, and latched onto an anchor at the top. This allowed a rope to be raised and retrieved from the bottom of the pitch. This has since been replaced with a more normal cordelette technique (or standard pull-through from the top), and at the time of our trip was permanently rigged.
Modelling by Steph, lighting by Tarquin, Steph and Pete
The Skyhook, an 11 metre pitch, with Steph's first abseil underground. The Skyhook used to be rigged from below, using a unique metal hook (The Skyhook), which could be pulled up on a piece of string, and latched onto an anchor at the top. This allowed a rope to be raised and retrieved from the bottom of the pitch. This has since been replaced with a more normal cordelette technique (or standard pull-through from the top), and at the time of our trip was permanently rigged.
Modelling by Steph, lighting by Tarquin, Steph and Pete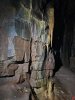 Formations below The Skyhook
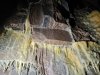 Helictites and straws below The Skyhook. We had now completed the loop, and it was time to head back out from Midnight Chamber.
 Angel in the ceiling of Midnight Passage, shortly beyond Midnight Chamber. The round trip has started.
Modelling by Jophiel, lighting by Tarquin and Steph
Angel in the ceiling of Midnight Passage, shortly beyond Midnight Chamber. The round trip has started.
Modelling by Jophiel, lighting by Tarquin and Steph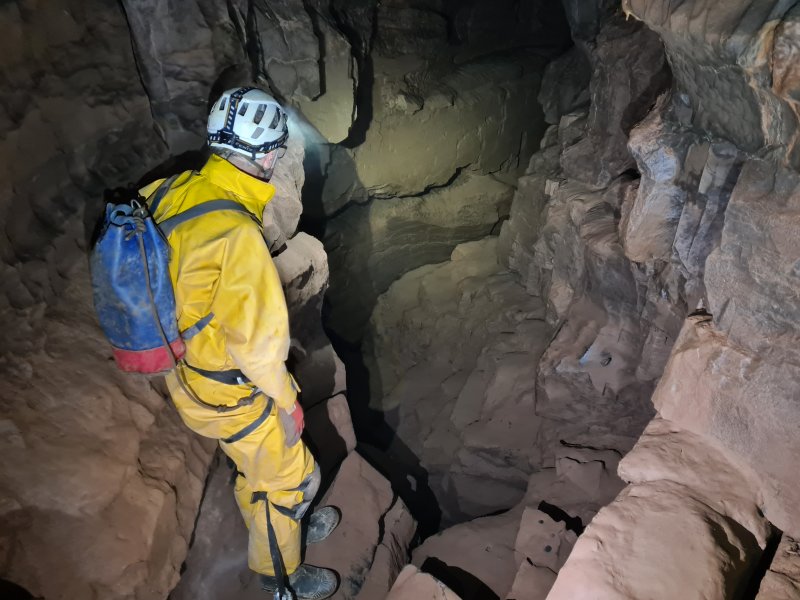 Midnight Passage has a series of climbs, reaching this; the start of the traverses. The rope is rigged from naturals in the floor, and a rawl bolt in the right wall, inconveniently placed just after the gap in the floor. The first part of the gap is a 24 metre pitch to the Main Streamway. The traverse starts along the ledge against the right wall.
Modelling by Pete, lighting by Tarquin, Steph and Pete
Midnight Passage has a series of climbs, reaching this; the start of the traverses. The rope is rigged from naturals in the floor, and a rawl bolt in the right wall, inconveniently placed just after the gap in the floor. The first part of the gap is a 24 metre pitch to the Main Streamway. The traverse starts along the ledge against the right wall.
Modelling by Pete, lighting by Tarquin, Steph and Pete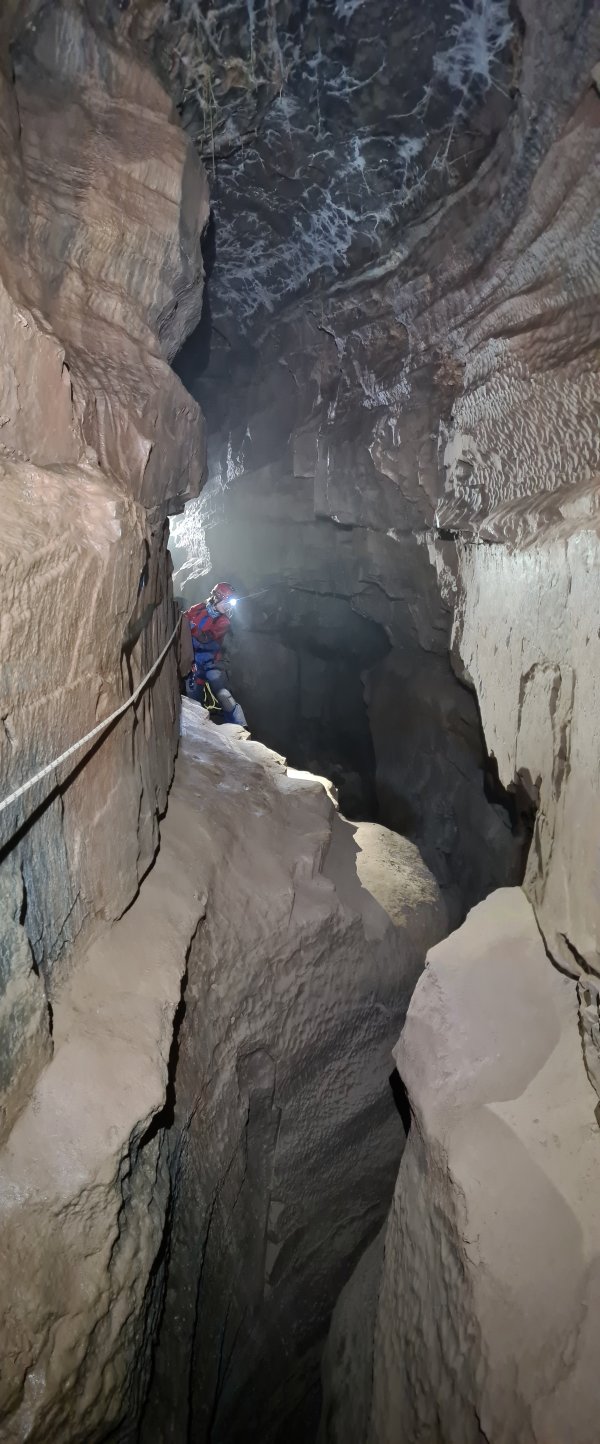 The first traverse starts as a stepped slope far above the river, followed by a traverse along the ledges. At various points, it looks like there is a ledge of boulders a few metres down, but these are just wedged rocks sitting far above the floor, and they would not be enough to catch you. A rope is very strongly advised. The camera is sitting at the first hanger, just before the end of the traverse. At this point, the traverse is over the start of Great Oxbow.
Modelling by Steph, lighting by Tarquin, Steph and Pete
The first traverse starts as a stepped slope far above the river, followed by a traverse along the ledges. At various points, it looks like there is a ledge of boulders a few metres down, but these are just wedged rocks sitting far above the floor, and they would not be enough to catch you. A rope is very strongly advised. The camera is sitting at the first hanger, just before the end of the traverse. At this point, the traverse is over the start of Great Oxbow.
Modelling by Steph, lighting by Tarquin, Steph and Pete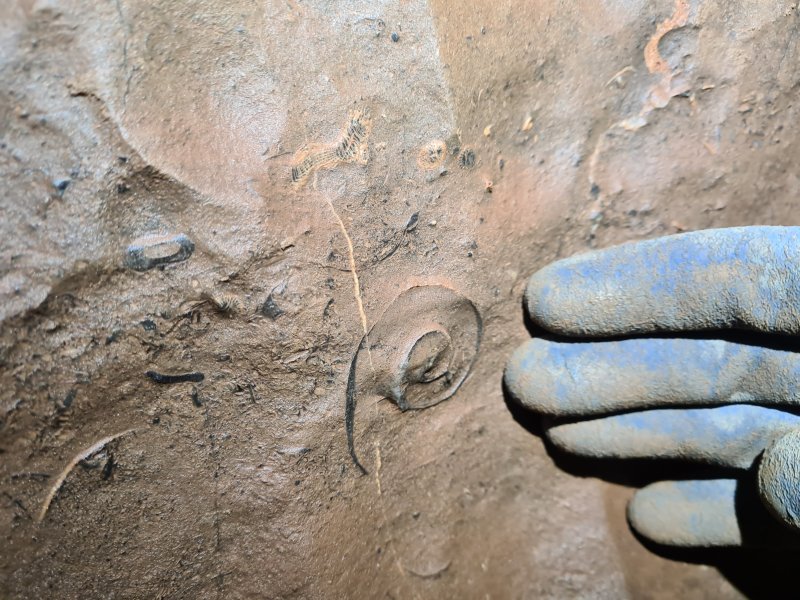 Fossil nautiloid.
Modelling by Steph
Fossil nautiloid.
Modelling by Steph After a brief section of passage with a solid floor, the second traverse starts. Again, this looks like it has a floor of rocks a few metres down, but there are gaps dropping all the way down to Great Oxbow.
Modelling by Pete, lighting by Tarquin, Steph and Pete
After a brief section of passage with a solid floor, the second traverse starts. Again, this looks like it has a floor of rocks a few metres down, but there are gaps dropping all the way down to Great Oxbow.
Modelling by Pete, lighting by Tarquin, Steph and Pete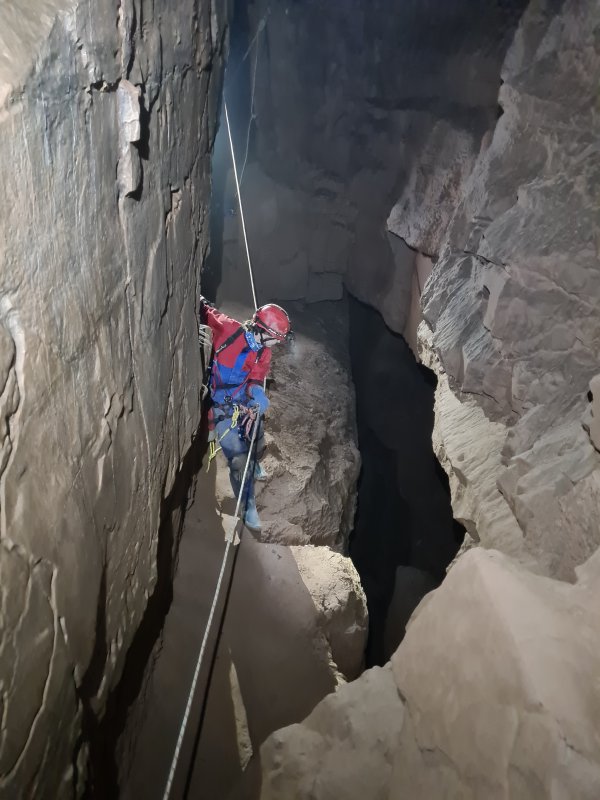 The traverse has a good ledge, but the handholds are merely small finger grips. A rope is a very good idea, and there are hangers high on the left wall at the start of the traverse. The camera sits over some large jammed boulders, where there is another hanger.
Modelling by Steph, lighting by Tarquin, Steph and Pete
The traverse has a good ledge, but the handholds are merely small finger grips. A rope is a very good idea, and there are hangers high on the left wall at the start of the traverse. The camera sits over some large jammed boulders, where there is another hanger.
Modelling by Steph, lighting by Tarquin, Steph and Pete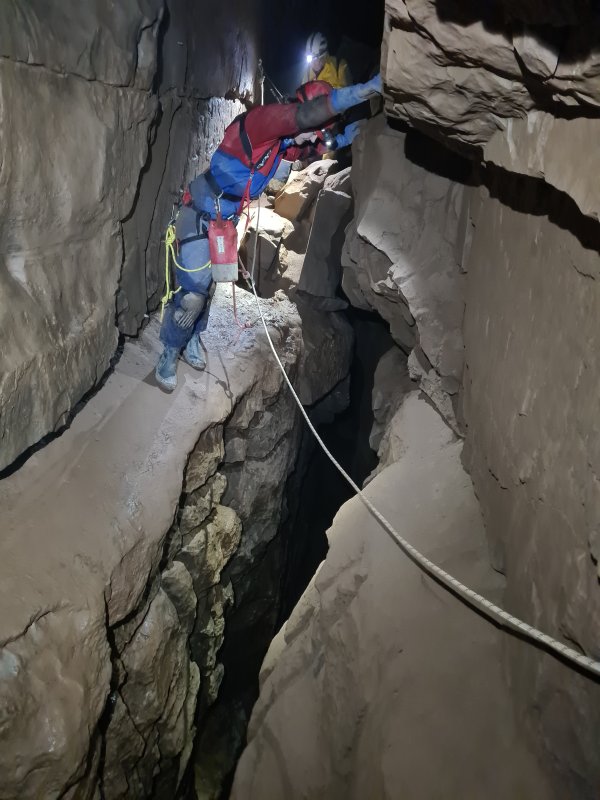 The third traverse starts immediately after the jammed boulders. At this point, it is 26 metres above Great Oxbow, and there is nothing to stop a fall. Use a rope! The camera sits at a point in the traverse where there is a hanger, but the ledge ends shortly afterwards.
Modelling by Steph and Pete, lighting by Tarquin, Steph and Pete
The third traverse starts immediately after the jammed boulders. At this point, it is 26 metres above Great Oxbow, and there is nothing to stop a fall. Use a rope! The camera sits at a point in the traverse where there is a hanger, but the ledge ends shortly afterwards.
Modelling by Steph and Pete, lighting by Tarquin, Steph and Pete Stal below the traverse. The way on is to climb down several metres just after this, where the rift opens back up.
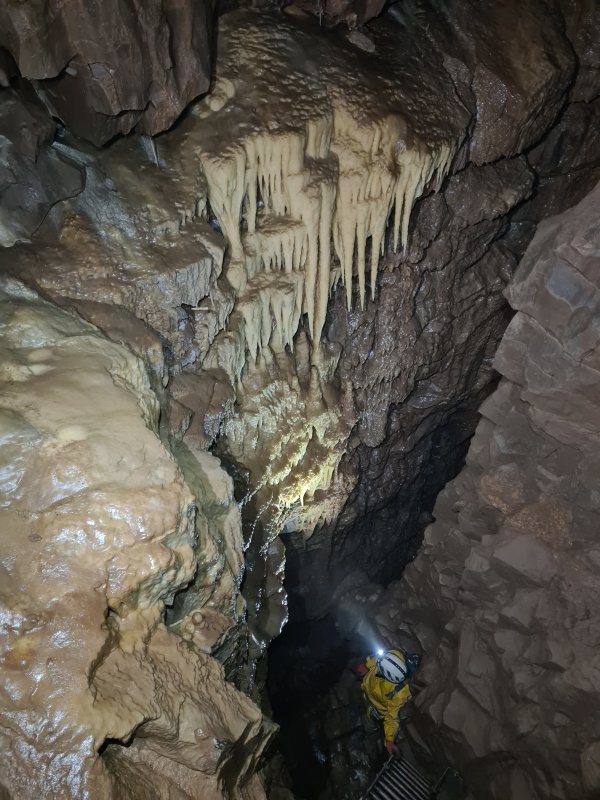 The clamber down the rift, which lands on calcited blocks below some formations. The hanger had an aging carabiner, which we used to belay each other down the climb. It is easier than it looks, but safety is a very good idea given the distance to the floor.
Modelling by Pete, lighting by Tarquin, Steph and Pete
The clamber down the rift, which lands on calcited blocks below some formations. The hanger had an aging carabiner, which we used to belay each other down the climb. It is easier than it looks, but safety is a very good idea given the distance to the floor.
Modelling by Pete, lighting by Tarquin, Steph and Pete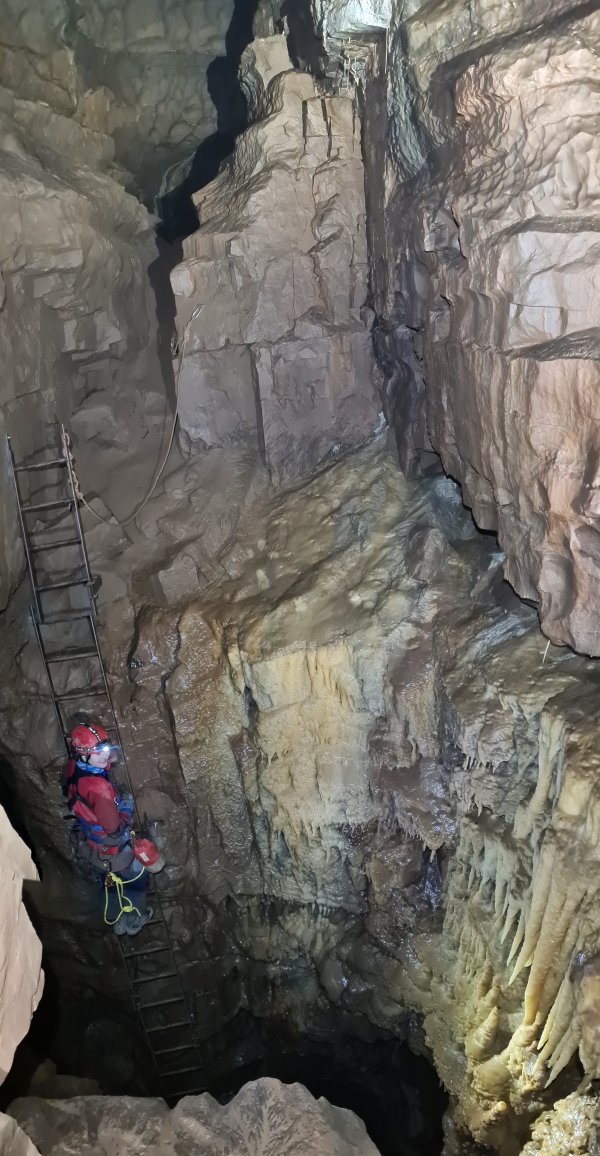 From the calcited boulders, the floor drops over 20 metres down into Great Oxbow again, so the way on is back up again, using Brigadier Glennie's Ladder, to reach the start of Great Oxbow Series.
Modelling by Steph, lighting by Tarquin, Pete and Steph
From the calcited boulders, the floor drops over 20 metres down into Great Oxbow again, so the way on is back up again, using Brigadier Glennie's Ladder, to reach the start of Great Oxbow Series.
Modelling by Steph, lighting by Tarquin, Pete and Steph Muddied remains of a crystal pool.
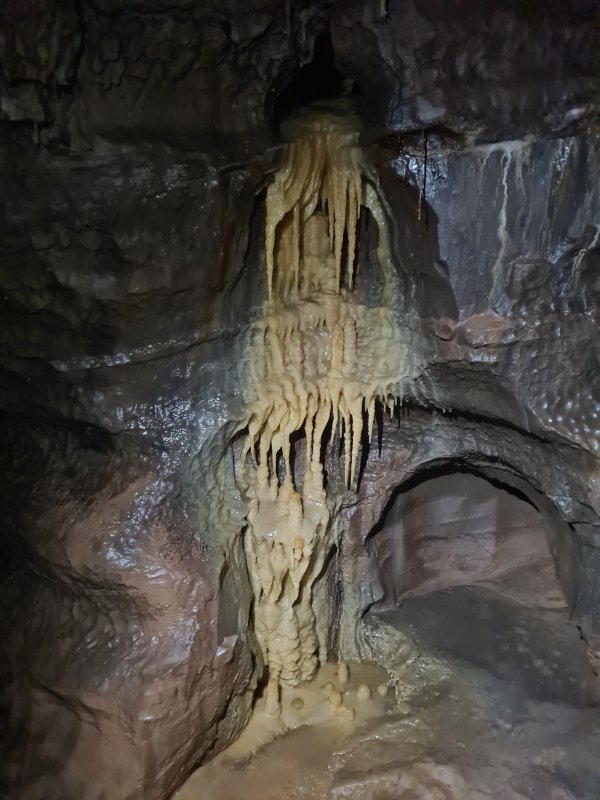 Flowstone and columns.
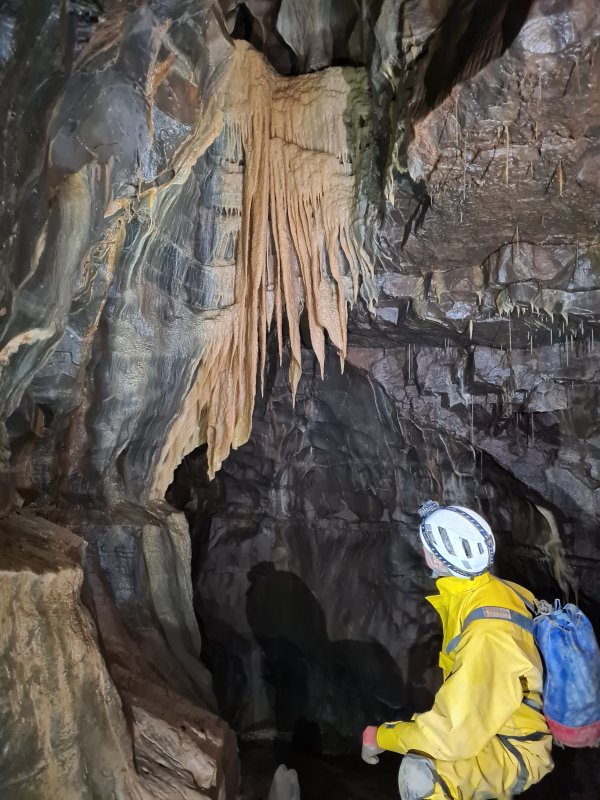 Curtains from a series of roof tubes which connect to the upper passages.
Modelling by Pete, lighting by Tarquin and Steph
Curtains from a series of roof tubes which connect to the upper passages.
Modelling by Pete, lighting by Tarquin and Steph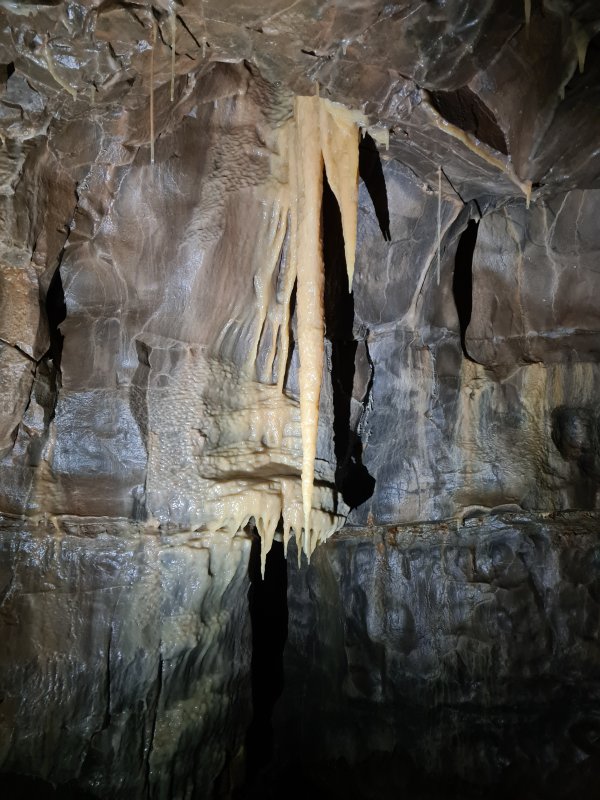 Stalactites.
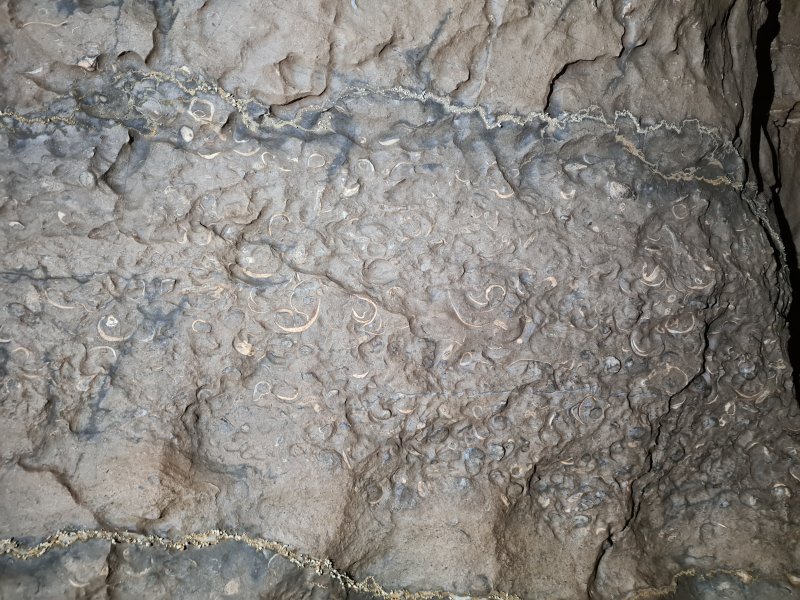 Fossil shells in the passage.
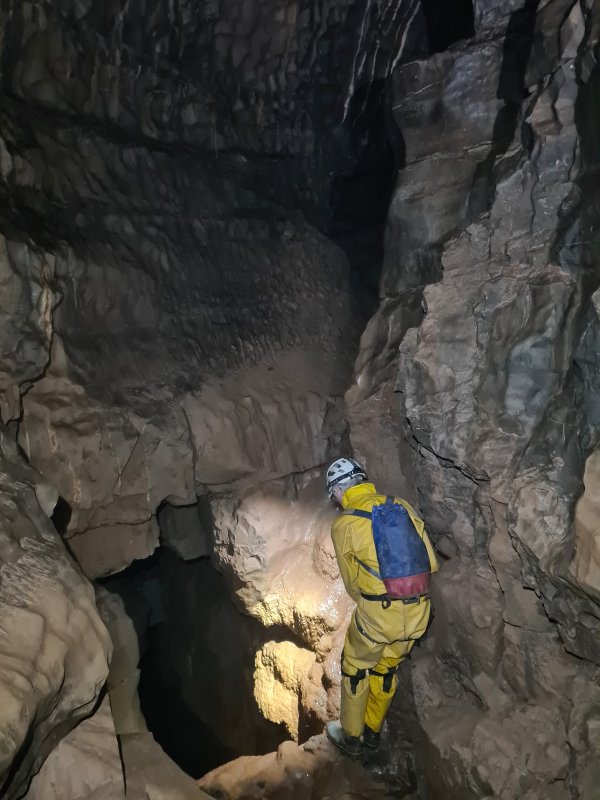 The passage then abruptly falls 23 metres into Great Oxbow. There is no belay, so the drop is skirted on the right side, without a safety line (we used ourselves as anchors for a traverse line for Steph).
Modelling by Pete, lighting by Tarquin, Steph and Pete
The passage then abruptly falls 23 metres into Great Oxbow. There is no belay, so the drop is skirted on the right side, without a safety line (we used ourselves as anchors for a traverse line for Steph).
Modelling by Pete, lighting by Tarquin, Steph and Pete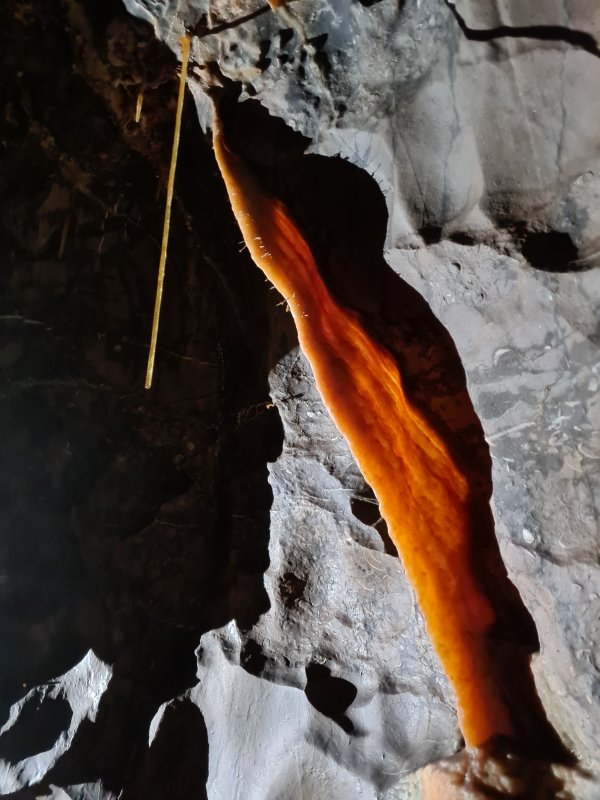 Hairy curtain.
Lighting by Steph
Hairy curtain.
Lighting by Steph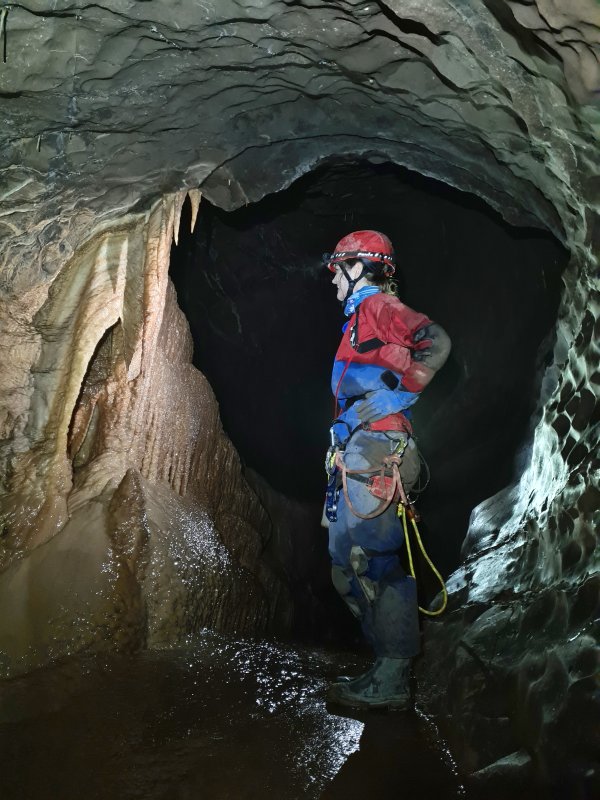 The way on into Great Oxbow Series is up a calcited ramp to the left, adorned with these formations.
Modelling by Steph, lighting by Tarquin, Steph and Pete
The way on into Great Oxbow Series is up a calcited ramp to the left, adorned with these formations.
Modelling by Steph, lighting by Tarquin, Steph and Pete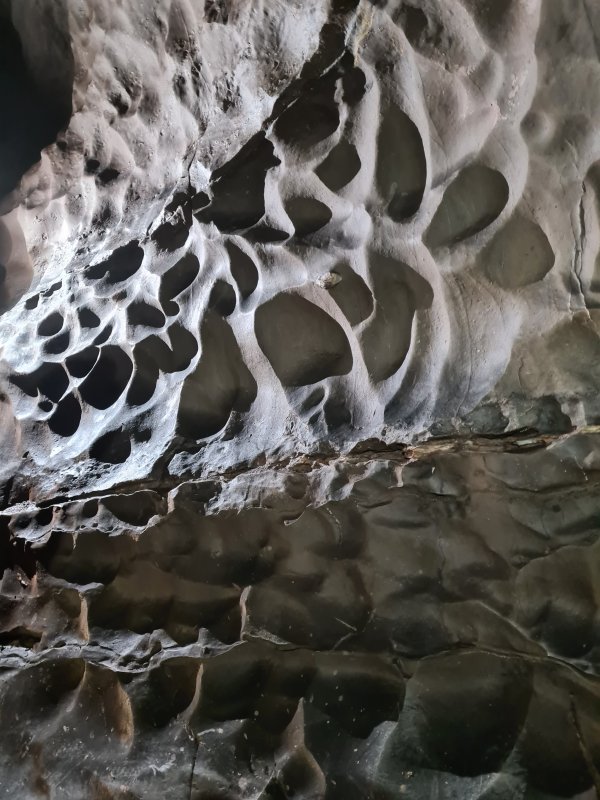 Scallops in the passage below the ramp.
Lighting by Steph
Scallops in the passage below the ramp.
Lighting by Steph The passage below the ramp continues as a traverse route over the river. This can be used to access Sandfill Passage, Mutiny Junction, Marble Showers and Fault Aven Series, but is often described as being suitable only for those with long legs.
Modelling by Pete, lighting by Tarquin and Pete
The passage below the ramp continues as a traverse route over the river. This can be used to access Sandfill Passage, Mutiny Junction, Marble Showers and Fault Aven Series, but is often described as being suitable only for those with long legs.
Modelling by Pete, lighting by Tarquin and Pete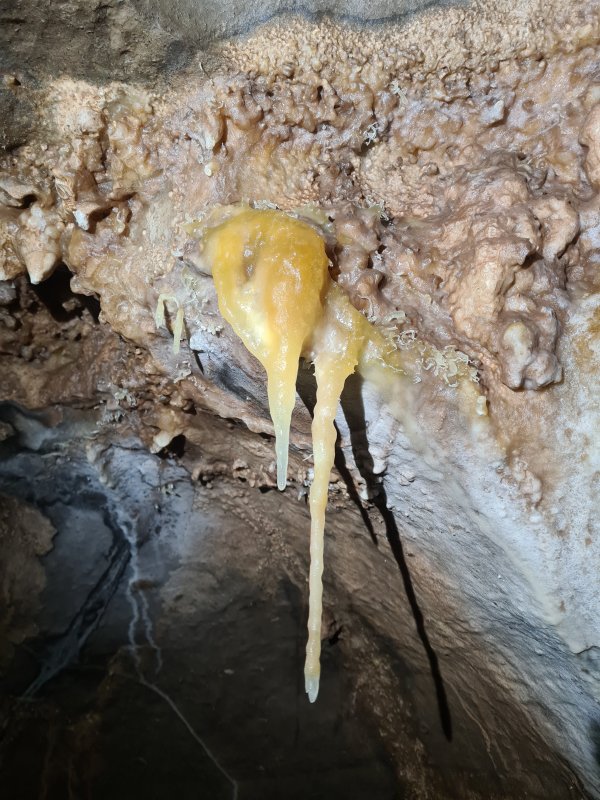 Small formations above the ramp
Lighting by Tarquin and Steph
Small formations above the ramp
Lighting by Tarquin and Steph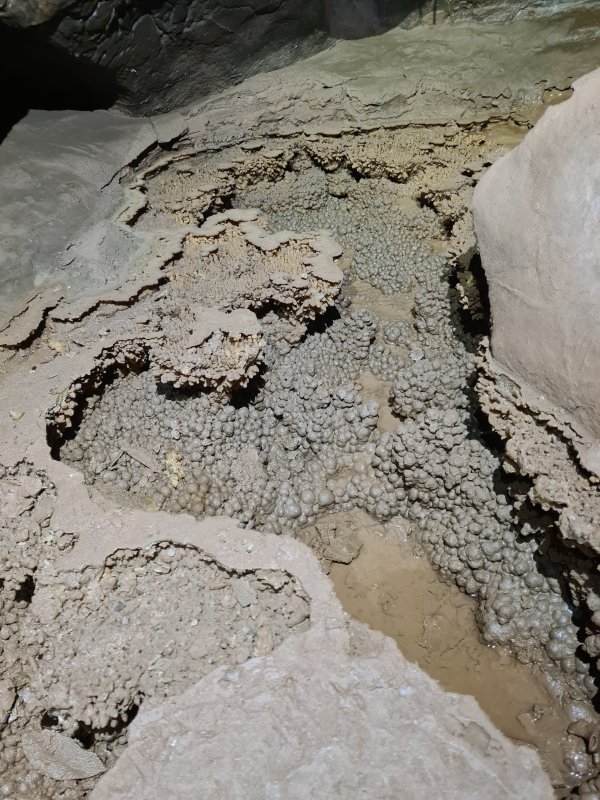 Dry crystal pool. Above this is a blind rift, starting with a pitch up. This is not the way on.
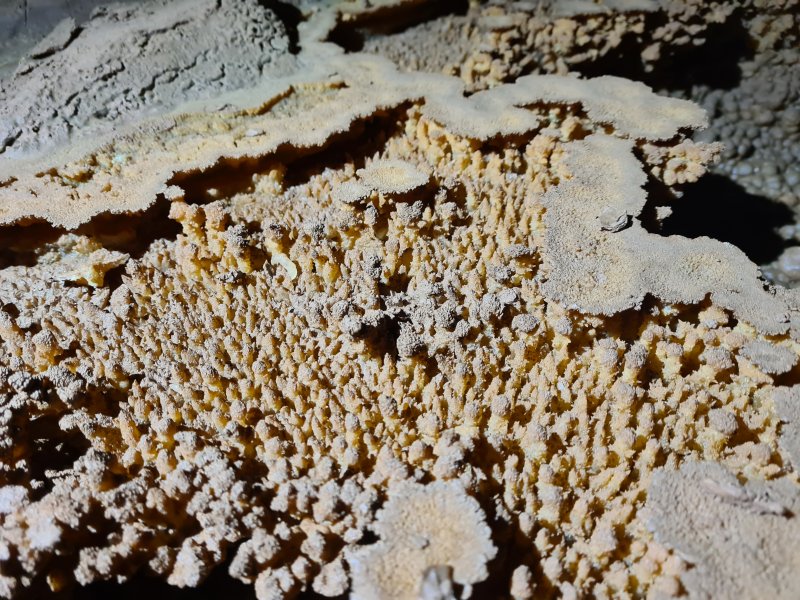 Muddied crystals in the dry pool.
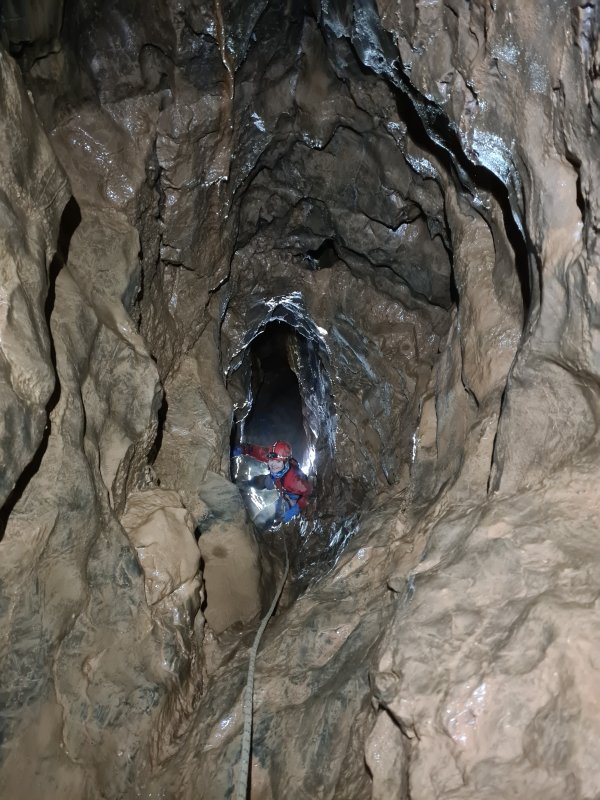 A crawl then reaches a 6 metre climb. While it has a lot of holds, as long as you can reach both walls. There is a crux move where it spans a little too wide for some people's comfort. Each time I have been here, a belay line was needed for most climbers, and many said that they would not have done the climb without it. There are no good belays at the top so a body belay is used.
Modelling by Steph, lighting by Tarquin and Pete
A crawl then reaches a 6 metre climb. While it has a lot of holds, as long as you can reach both walls. There is a crux move where it spans a little too wide for some people's comfort. Each time I have been here, a belay line was needed for most climbers, and many said that they would not have done the climb without it. There are no good belays at the top so a body belay is used.
Modelling by Steph, lighting by Tarquin and Pete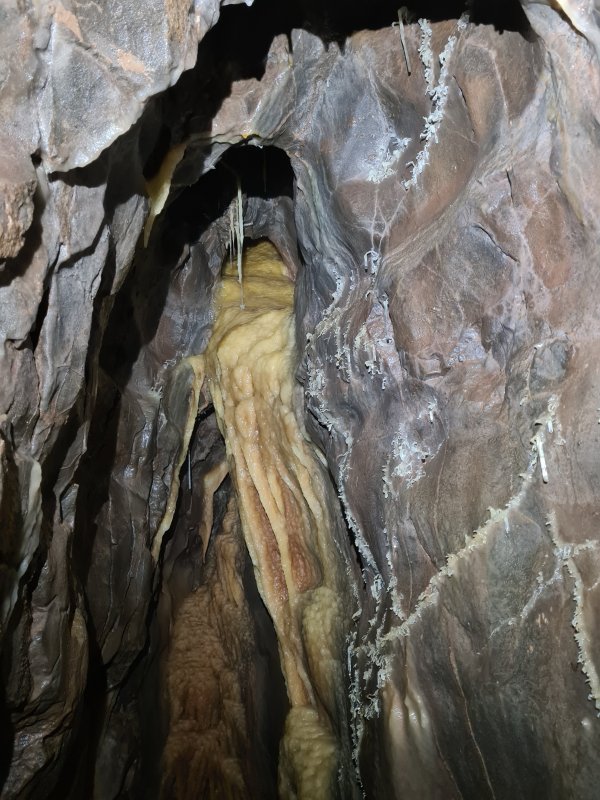 Formations on the climb.
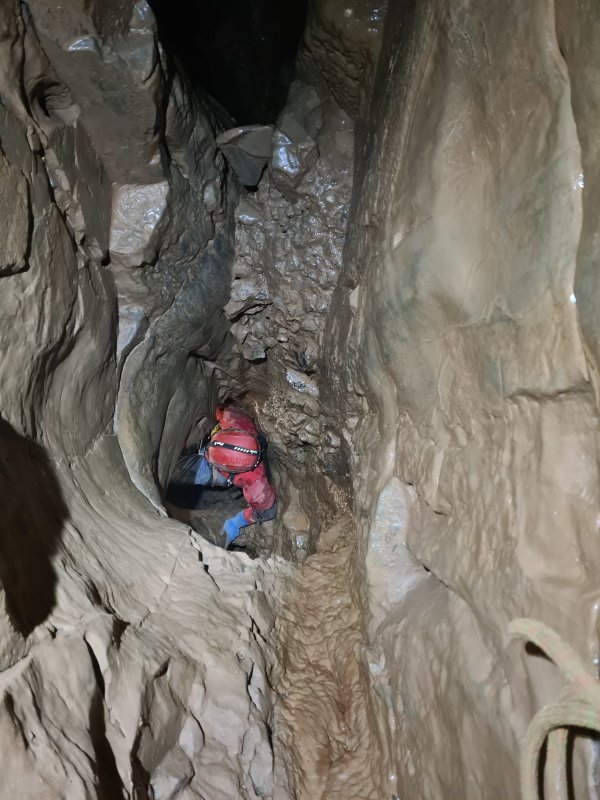 The passage then reaches a second little climb, which is about 4 metres (the survey says 3).
Modelling by Steph, lighting by Tarquin, Steph and Pete
The passage then reaches a second little climb, which is about 4 metres (the survey says 3).
Modelling by Steph, lighting by Tarquin, Steph and Pete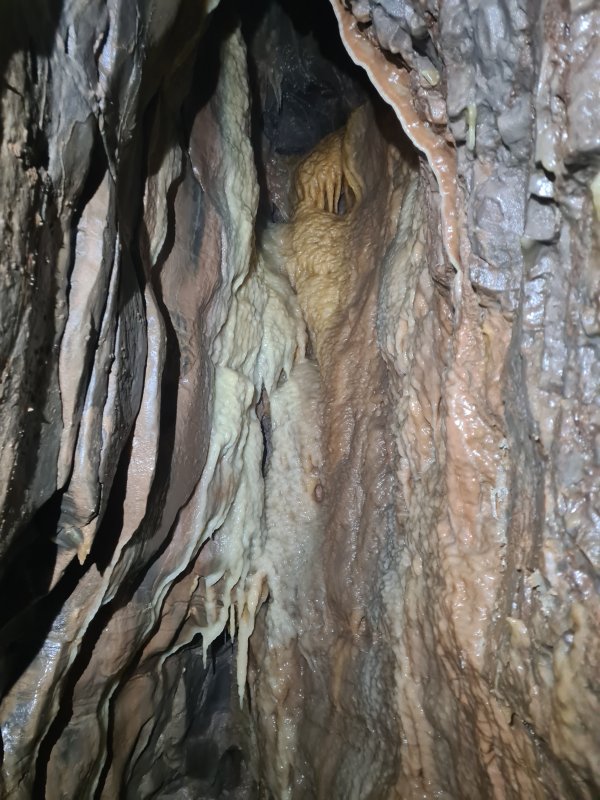 Formations above the second climb.
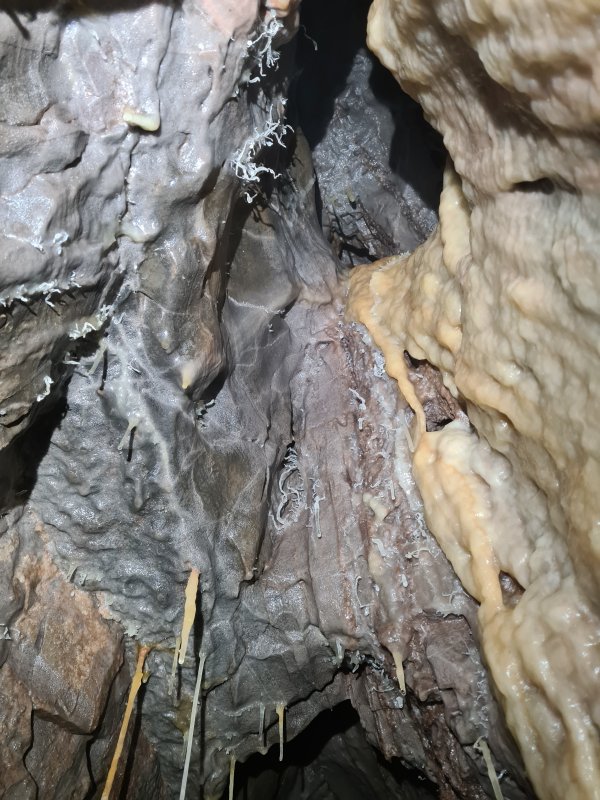 Helictites above the climb. One of them makes a long loop, connected to the rock at each end, so that it has nowhere left to grow.
 The climb emerges from a slippery hole below some beautiful curtains. One of them is slightly muddied and damaged, presumably from someone slipping down the hole and hitting it.
Modelling by Steph, lighting by Tarquin and Pete
The climb emerges from a slippery hole below some beautiful curtains. One of them is slightly muddied and damaged, presumably from someone slipping down the hole and hitting it.
Modelling by Steph, lighting by Tarquin and Pete This section of passage is quite muddy, yet these formations have survived, on the side of a crawl.
Lighting by Tarquin and Steph
This section of passage is quite muddy, yet these formations have survived, on the side of a crawl.
Lighting by Tarquin and Steph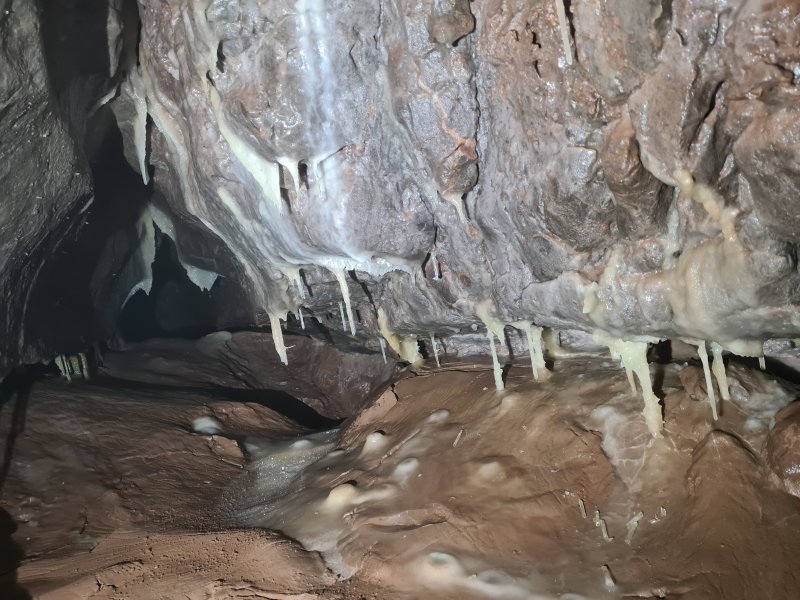 Small formations in a blind side passage.
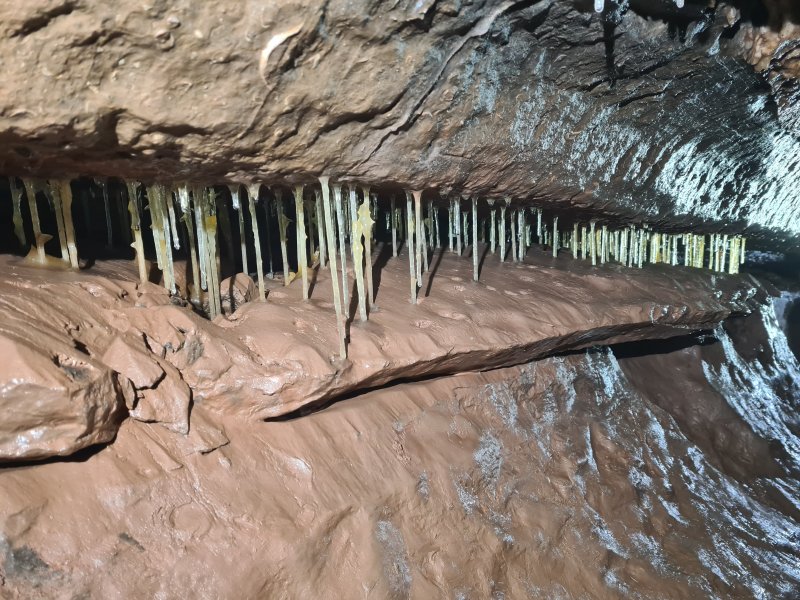 Grill of straws in the side of the passage.
Lighting by Tarquin and Steph
Grill of straws in the side of the passage.
Lighting by Tarquin and Steph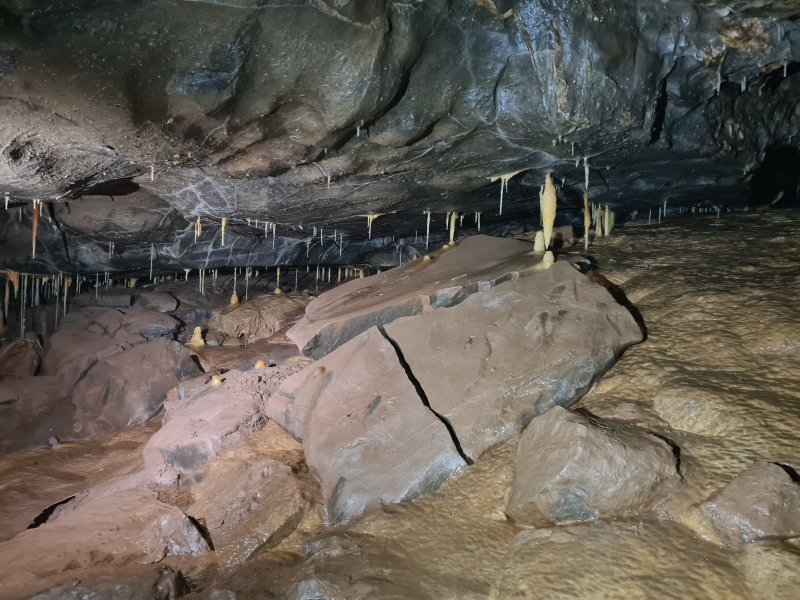 The ramp passage ends at a junction with a much larger passage. This is the major southern parallel of the series.
Lighting by Tarquin and Steph
The ramp passage ends at a junction with a much larger passage. This is the major southern parallel of the series.
Lighting by Tarquin and Steph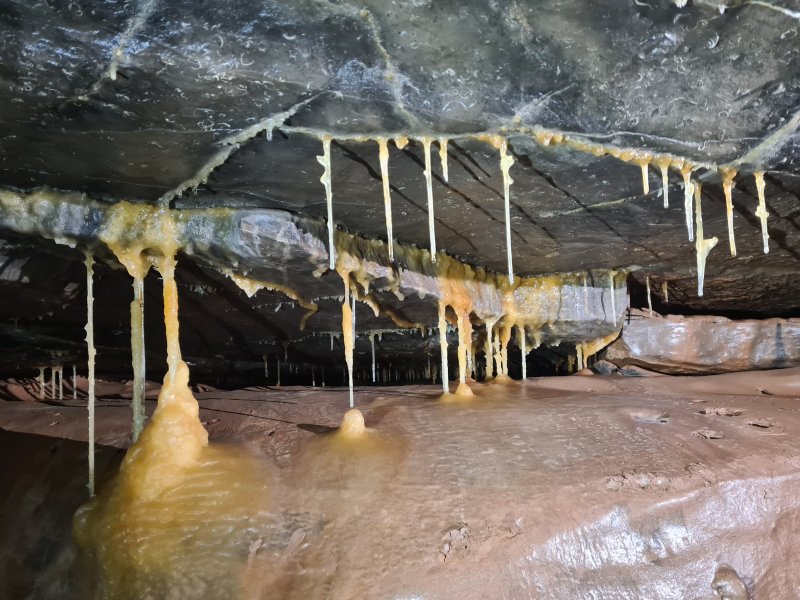 Straw columns.
Lighting by Tarquin and Steph
Straw columns.
Lighting by Tarquin and Steph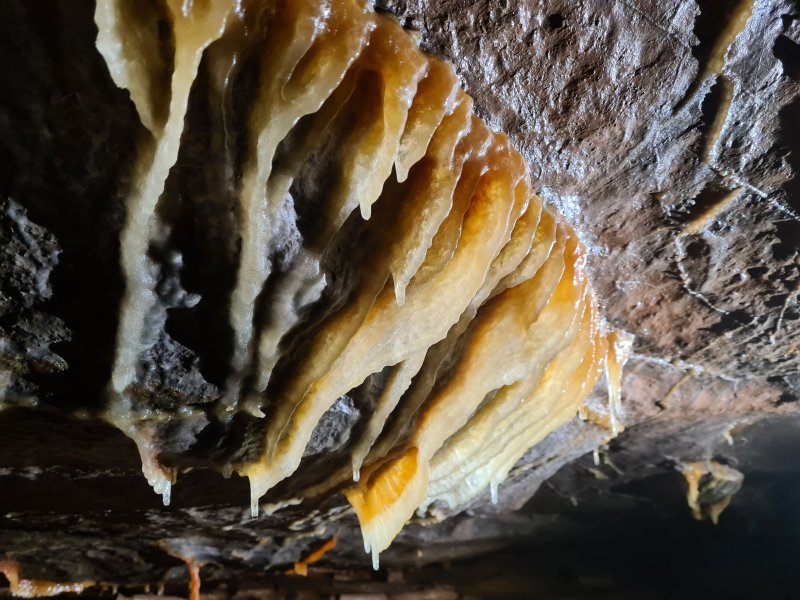 Curtains in the passage heading east from the junction.
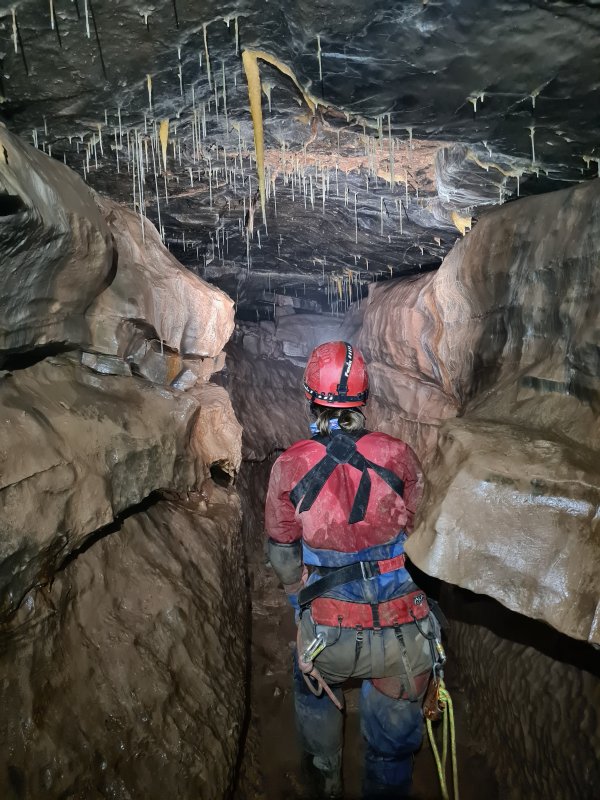 The start of the passage that heads east from the junction.
Modelling by Steph, lighting by Tarquin and Steph
The start of the passage that heads east from the junction.
Modelling by Steph, lighting by Tarquin and Steph The passage them passes over a pitch to reach a beautifully decorated section. The formations here are various shades of honey, through to white and pink. The pitch swallows the stream which emerges from the passage, but even though it connects to the calcited ledges from the passage at the start of the series, the water takes its own route down to the river. There is also a little side stub of passage here, which reverberated the sound of the river beautifully, even though this passage is over 50 metres above the river, separated from it by several passages (Great Oxbow's lower passage, Great Oxbow, passage from Brigadier Glennie's Ladder, calcitd ledges, pitches). The river was running very high, but still, the sound was very impressive.
Modelling by Pete, lighting by Tarquin and Steph
The passage them passes over a pitch to reach a beautifully decorated section. The formations here are various shades of honey, through to white and pink. The pitch swallows the stream which emerges from the passage, but even though it connects to the calcited ledges from the passage at the start of the series, the water takes its own route down to the river. There is also a little side stub of passage here, which reverberated the sound of the river beautifully, even though this passage is over 50 metres above the river, separated from it by several passages (Great Oxbow's lower passage, Great Oxbow, passage from Brigadier Glennie's Ladder, calcitd ledges, pitches). The river was running very high, but still, the sound was very impressive.
Modelling by Pete, lighting by Tarquin and Steph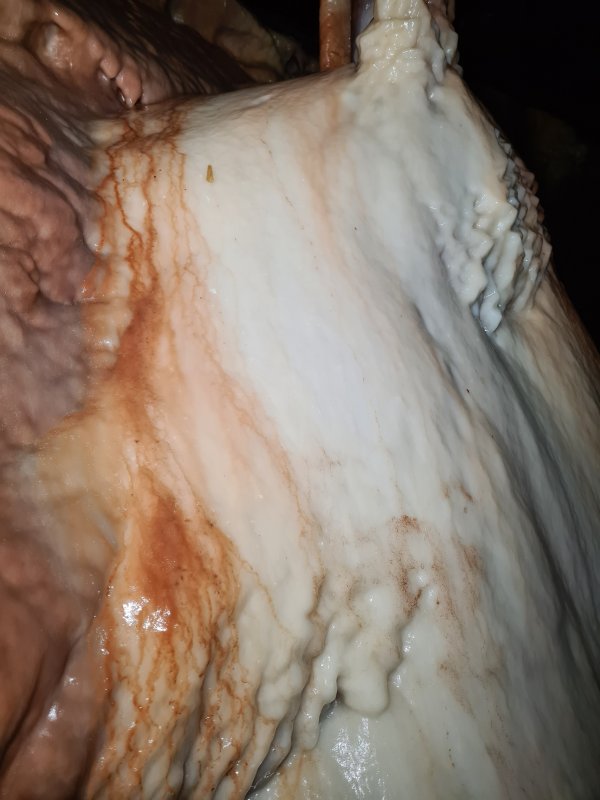 Stained stal looking almost like blood. The pink colouring comes from the old red sandstone, but red this strong is likely to be haematite, a form of iron oxide.
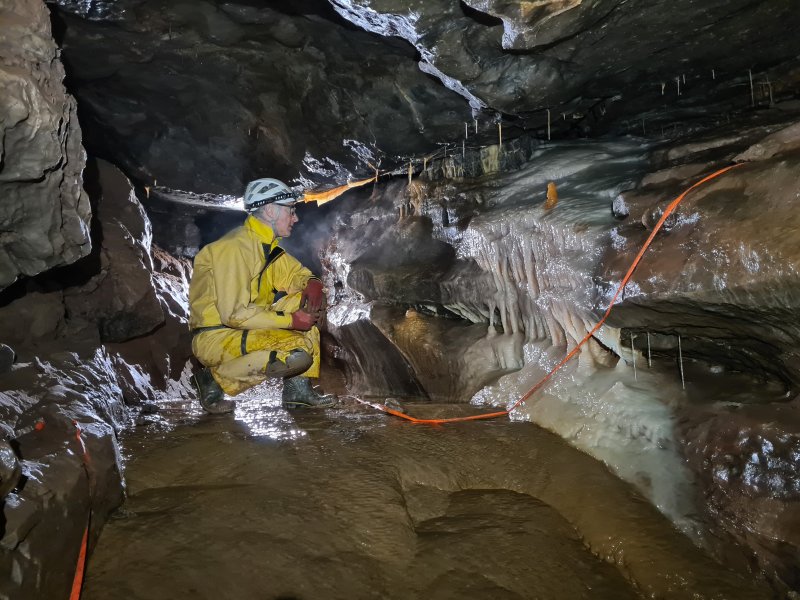 The stream creates a flowstone floor, with the walls adorned by yet more flowstone. We washed all the mud off our boots, and as much as possible from our suits, just prior to this.
Modelling by Pete, lighting by Tarquin and Steph
The stream creates a flowstone floor, with the walls adorned by yet more flowstone. We washed all the mud off our boots, and as much as possible from our suits, just prior to this.
Modelling by Pete, lighting by Tarquin and Steph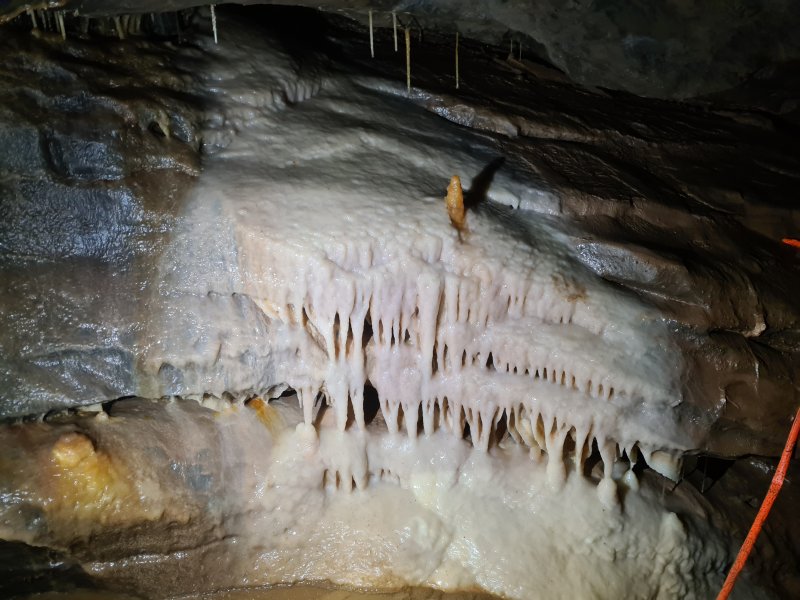 Flowstone with a single handprint. The stalagmite at the top looks like it is trying not to get washed over the edge of a waterfall.
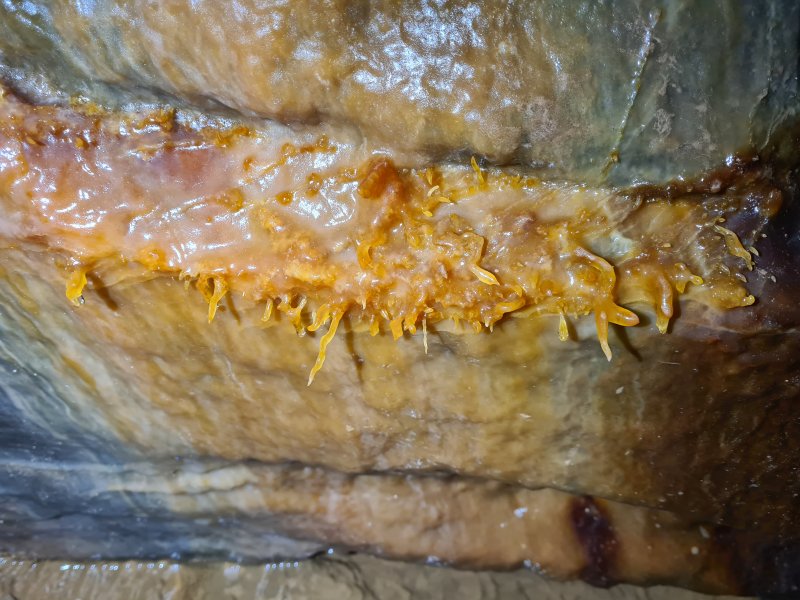 Honey coloured helictites.
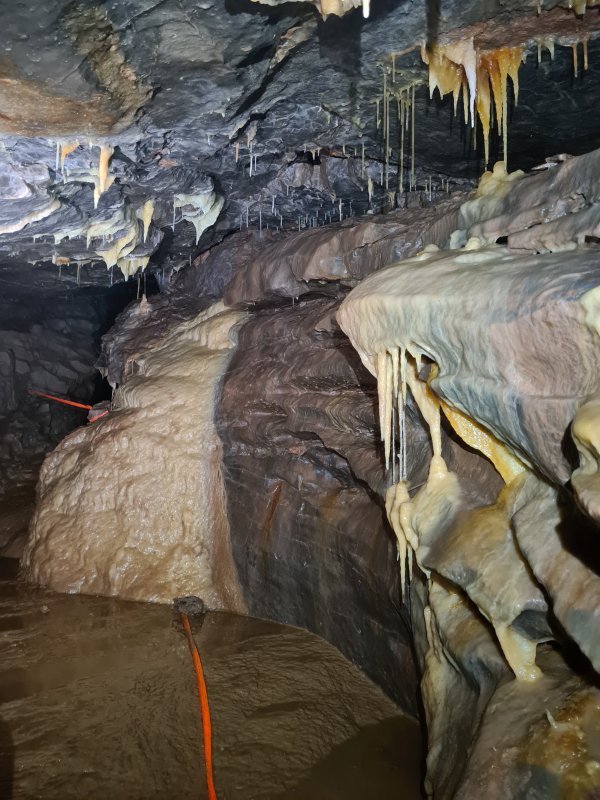 Banks of stal. The inlet is taped off here, but on our previous trip several years before, there was no tape. Perhaps there was meant to be tape, and someone had removed it, or the stream had washed it away. As a result, we had been able to follow and photograph the rest of the passage during that previous trip. The remaining pictures are from that trip, and are included here for the sake of completeness.
Lighting by Tarquin and Steph
Banks of stal. The inlet is taped off here, but on our previous trip several years before, there was no tape. Perhaps there was meant to be tape, and someone had removed it, or the stream had washed it away. As a result, we had been able to follow and photograph the rest of the passage during that previous trip. The remaining pictures are from that trip, and are included here for the sake of completeness.
Lighting by Tarquin and Steph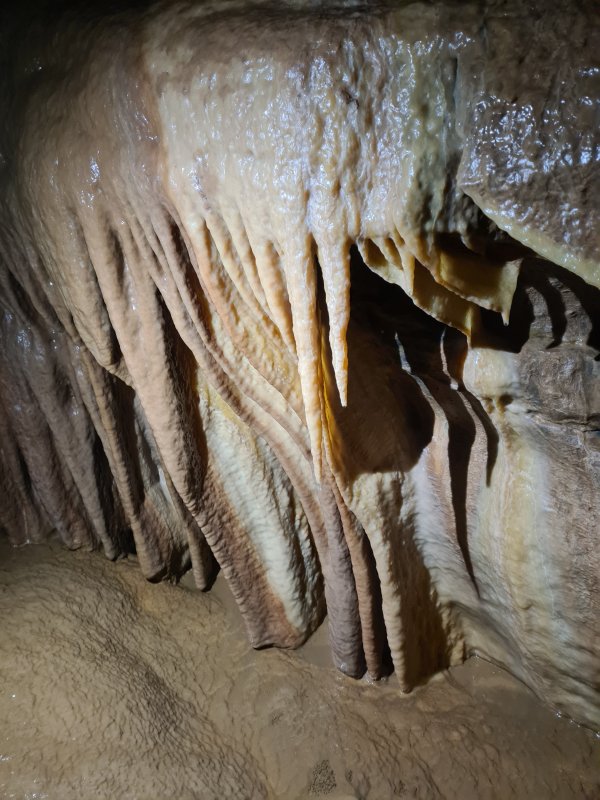 Curtains.
 Honey and helictites.
 Honey and helictites.
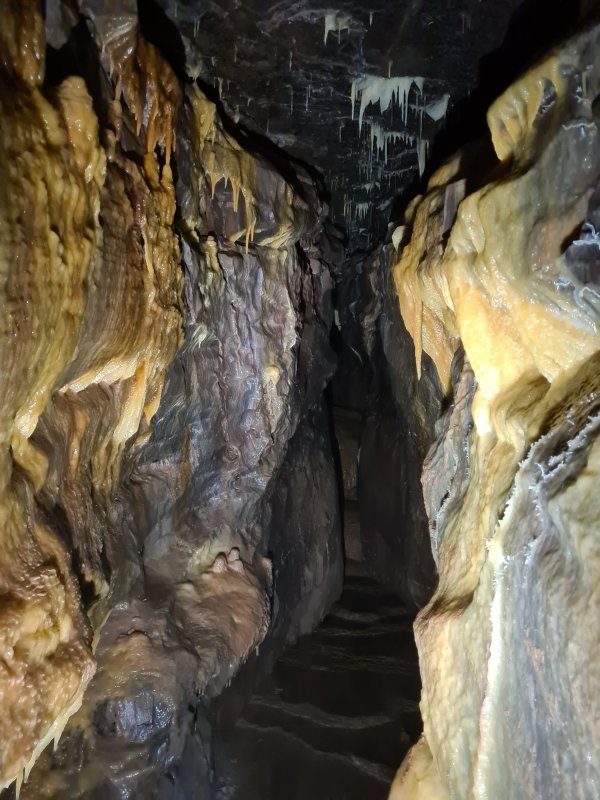 Passage through the honey.
 The flowstone floor of the passage, which continues for most of its length.
 Curtain.
 Stalactites.
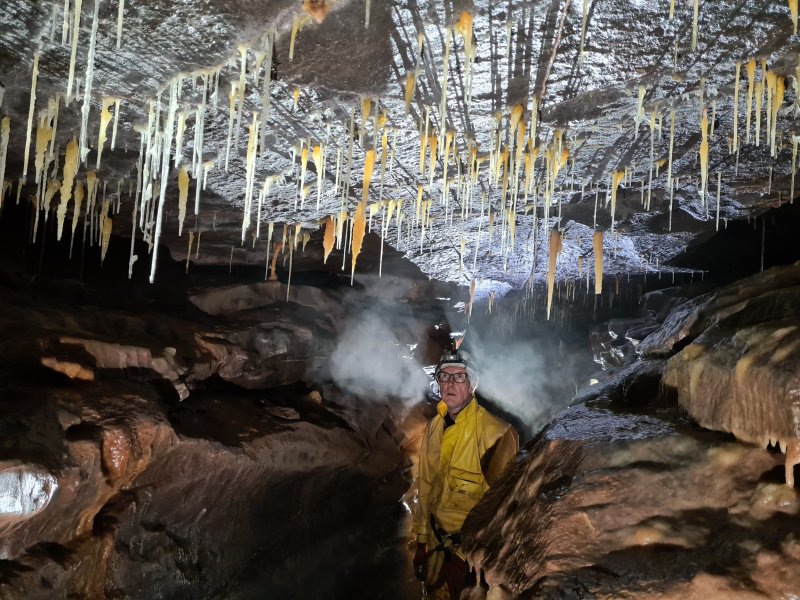 Honey dripping from the ceiling of the passage.
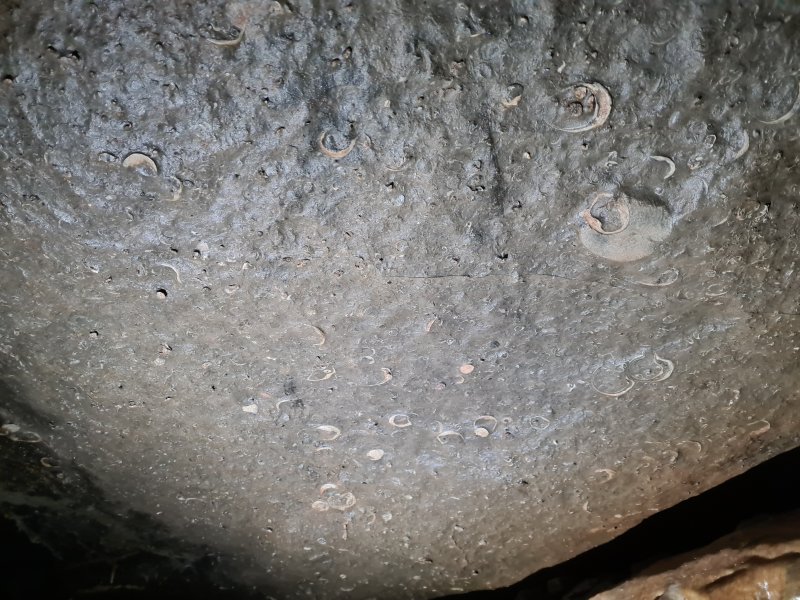 Fossil layer in the ceiling.
 Crystal pool with rounded calcite crystals in the flowstone floor.
 The last formation in the passage.
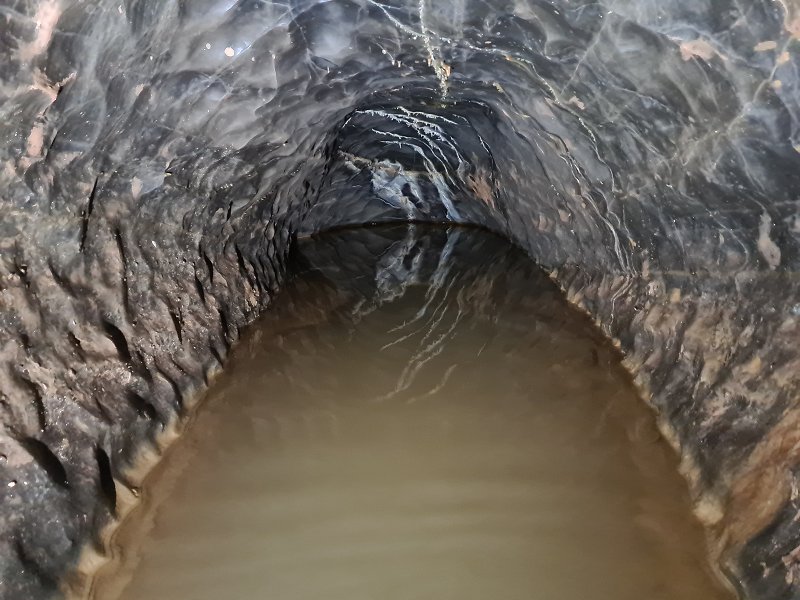 The passage ends at a sump, with a significant flow of water emerging. This has never been passed, but is very close to a downstream sump in another passage. However, the amount of water emerging here is more than the amount flowing in the other passage.
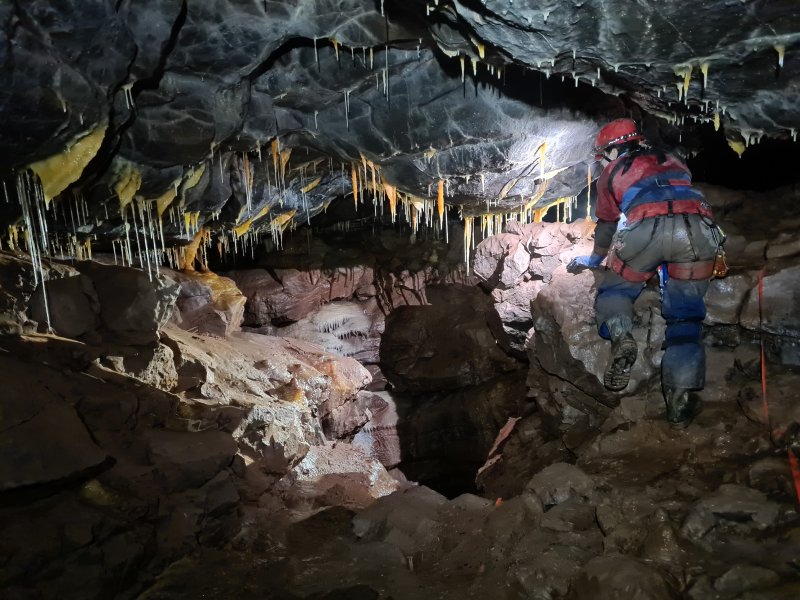 The western passage leading from the junction in the southern parallel, which starts with a blind 18 metre pitch. A crawl surrounded by honey-coloured formations offers a bypass.
Modelling by Steph, lighting by Tarquin, Steph and Pete
The western passage leading from the junction in the southern parallel, which starts with a blind 18 metre pitch. A crawl surrounded by honey-coloured formations offers a bypass.
Modelling by Steph, lighting by Tarquin, Steph and Pete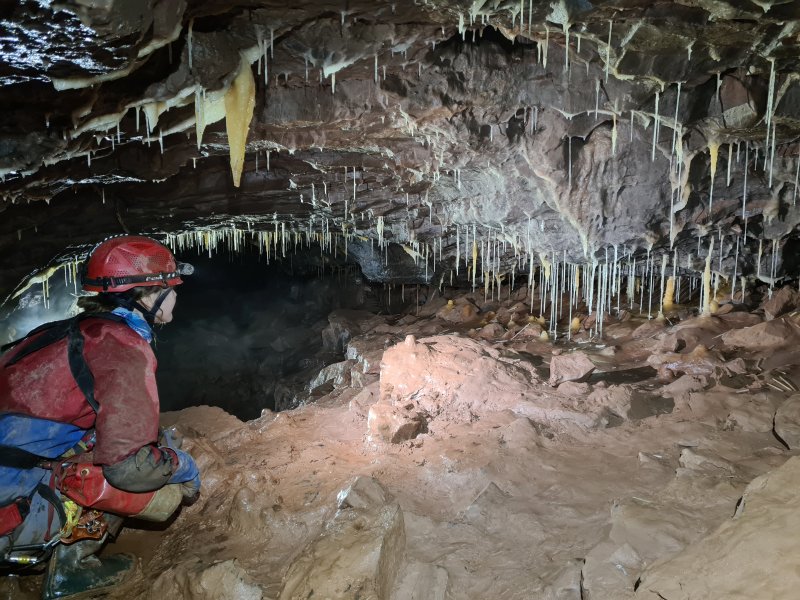 Straws in the crawl.
Modelling by Steph, lighting by Tarquin, Steph and Pete
Straws in the crawl.
Modelling by Steph, lighting by Tarquin, Steph and Pete The passage then crosses a second pitch, bypassed by a careful step along a bridge between the pitches, and then a crawl along a ledge.
Modelling by Steph and Pete, lighting by Tarquin, Steph and Pete
The passage then crosses a second pitch, bypassed by a careful step along a bridge between the pitches, and then a crawl along a ledge.
Modelling by Steph and Pete, lighting by Tarquin, Steph and Pete Curtain and crystal pool tucked into an alcove.
 Formations at a double junction with the connecting passage.
Modelling by Steph, lighting by Tarquin, Steph and Pete
Formations at a double junction with the connecting passage.
Modelling by Steph, lighting by Tarquin, Steph and Pete Flowstone in an alcove.
Lighting by Tarquin and Steph
Flowstone in an alcove.
Lighting by Tarquin and Steph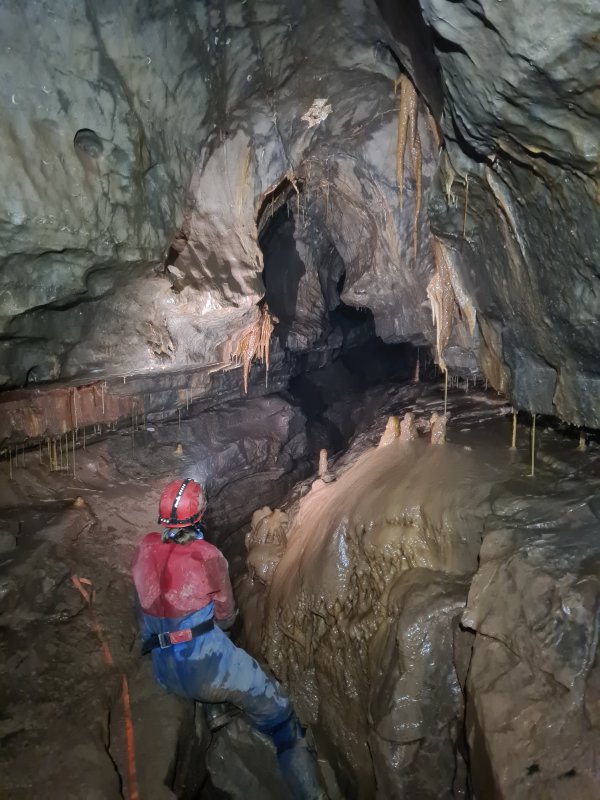 The passage increases significantly in size. While decorated, the formations are less impressive than before.
Modelling by Steph, lighting by Tarquin and Steph
The passage increases significantly in size. While decorated, the formations are less impressive than before.
Modelling by Steph, lighting by Tarquin and Steph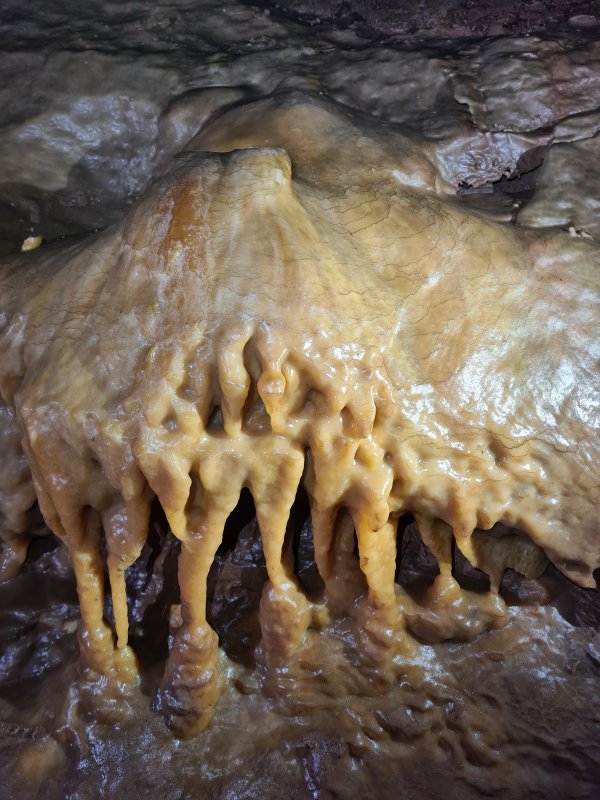 Stal with natural black lines in it, looking almost like contour lines.
Lighting by Tarquin, Pete and Steph
Stal with natural black lines in it, looking almost like contour lines.
Lighting by Tarquin, Pete and Steph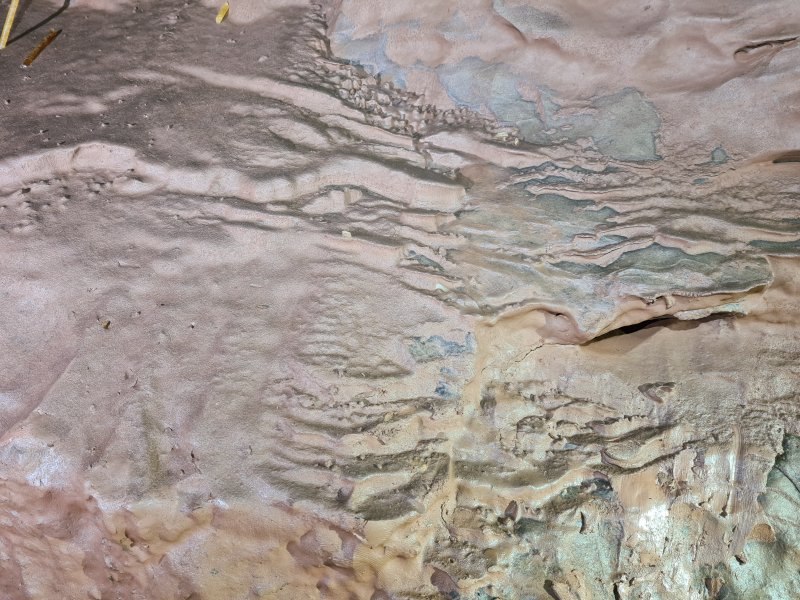 Pink mud, from the old red sandstone.
Lighting by Tarquin, Steph and Pete
Pink mud, from the old red sandstone.
Lighting by Tarquin, Steph and Pete The passage ends at a 20 metre pitch down to the Mutiny Junction area. This provides a round trip opportunity, either back to the earlier traverses, or all the way around via Merthyr Vale and Deja Rue back to Midnight Chamber.
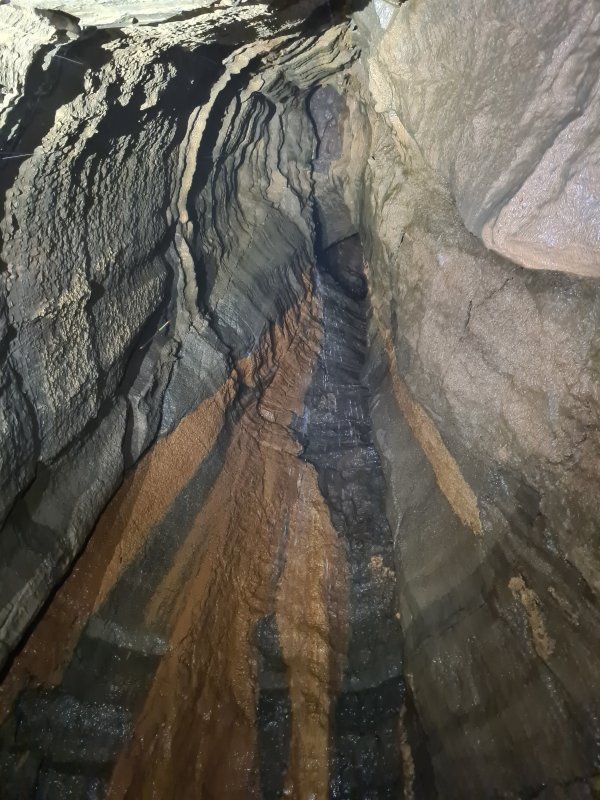 A side passage leads up into a high level chamber called The Loft, which has no way on.
Lighting by Tarquin, Steph and Pete
A side passage leads up into a high level chamber called The Loft, which has no way on.
Lighting by Tarquin, Steph and Pete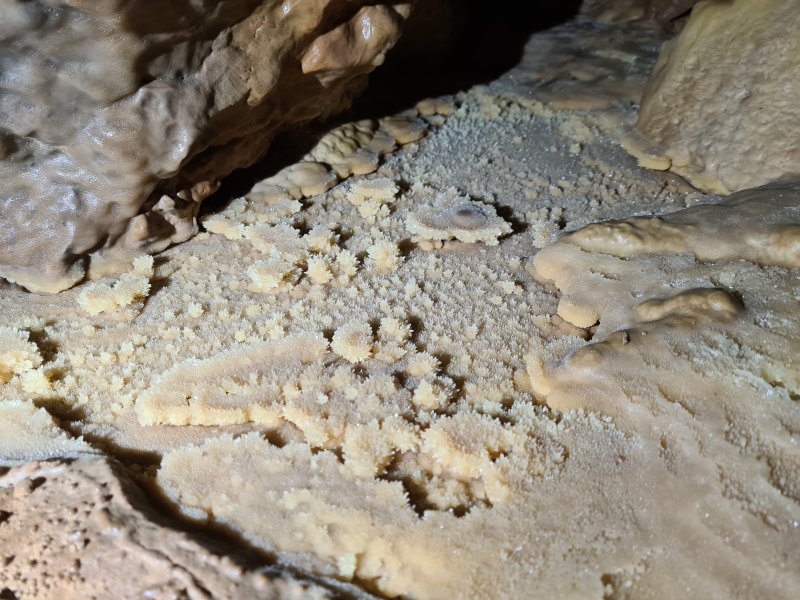 Crystal pool in the connecting passage. This passage connects the southern and northern parallels, and is a major route through the series. A 50 metre side passage here is very tight, so we did not follow it.
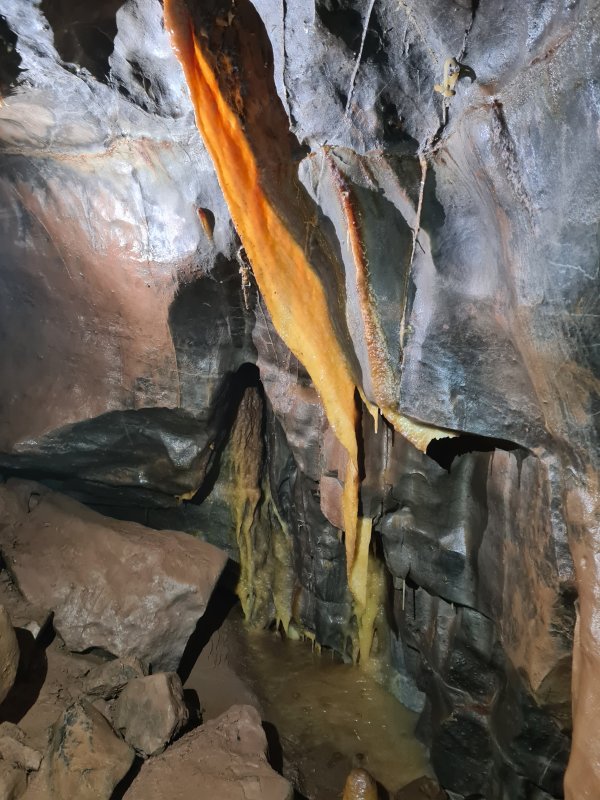 Translucent honey curtain in the connecting passage.
Lighting by Tarquin and Steph
Translucent honey curtain in the connecting passage.
Lighting by Tarquin and Steph Curtains and columns.
Modelling by Pete, lighting by Tarquin, Pete and Steph
Curtains and columns.
Modelling by Pete, lighting by Tarquin, Pete and Steph The main curtain column.
Lighting by Tarquin and Steph
The main curtain column.
Lighting by Tarquin and Steph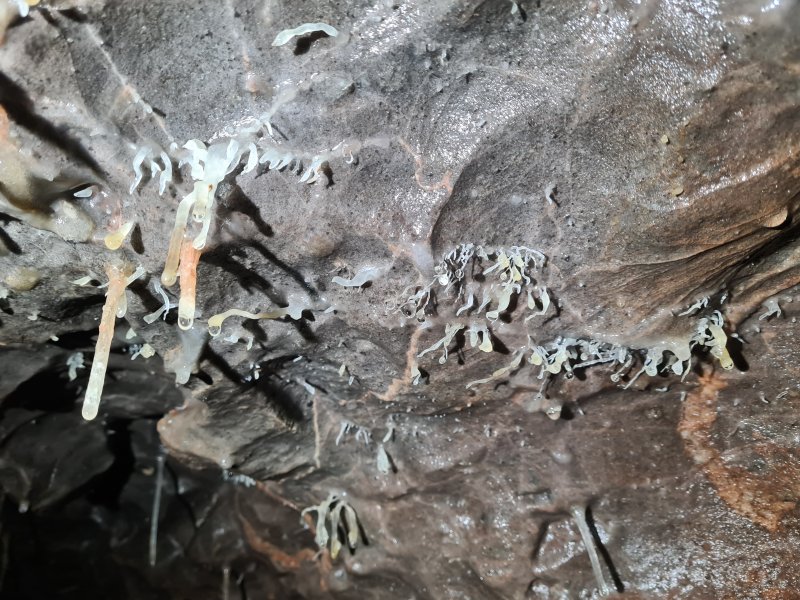 Helictites in the connecting passage.
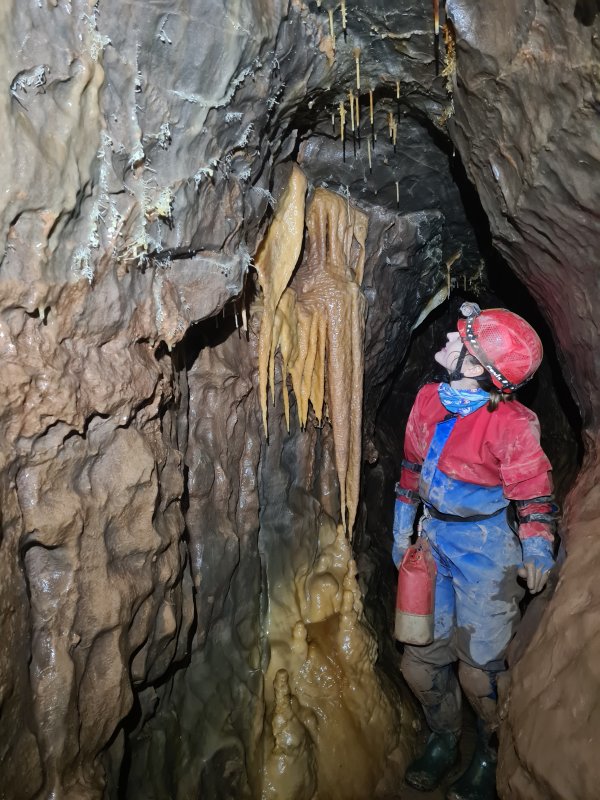 Stalactites.
Modelling by Steph
Stalactites.
Modelling by Steph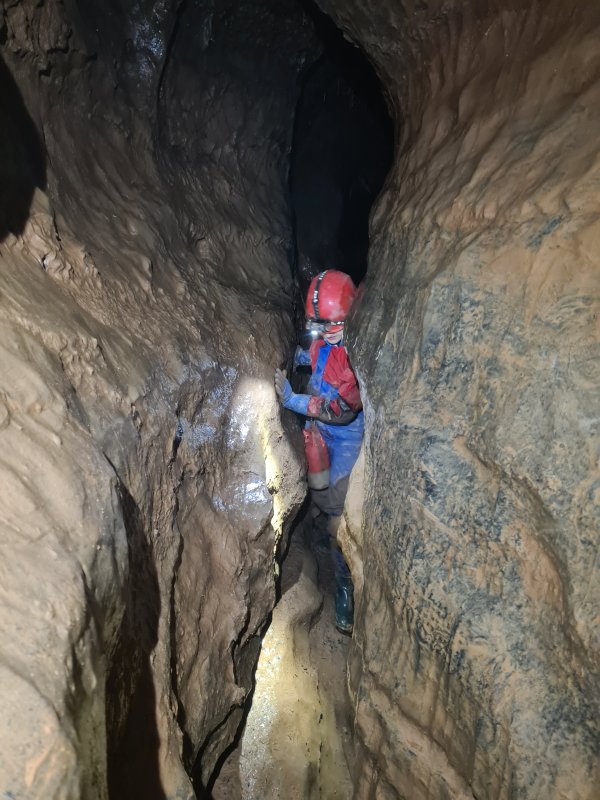 Much of the connecting passage is an awkward rift, where you traverse along a ledge, while wedged into the narrow gap.
Modelling by Steph, lighting by Tarquin and Steph
Much of the connecting passage is an awkward rift, where you traverse along a ledge, while wedged into the narrow gap.
Modelling by Steph, lighting by Tarquin and Steph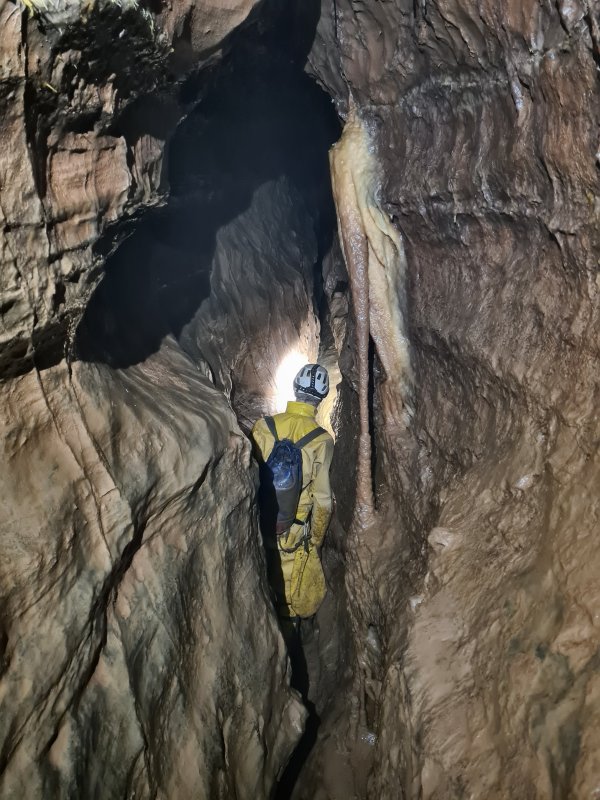 Column.
Modelling by Pete, lighting by Tarquin and Pete
Column.
Modelling by Pete, lighting by Tarquin and Pete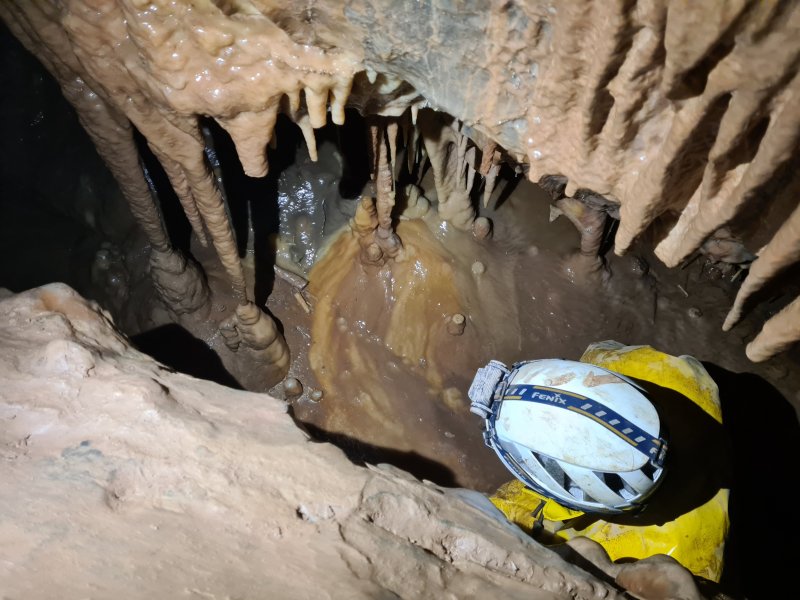 Stal grill blocking the lower level of the passage.
Modelling by Pete, lighting by Tarquin and Pete
Stal grill blocking the lower level of the passage.
Modelling by Pete, lighting by Tarquin and Pete The usual way on is to traverse over the grill, rather than trying to crawl over crystal pools.
Modelling by Steph, lighting by Tarquin and Pete
The usual way on is to traverse over the grill, rather than trying to crawl over crystal pools.
Modelling by Steph, lighting by Tarquin and Pete The passage ends at a 16 metre pitch down to Deja Rue. While it is possible to traverse using tiny ledges to reach the northern parallel, the span is quite wide, and mistakes could be serious, so it is best to avoid this route.
Lighting by Tarquin, Pete and Steph
The passage ends at a 16 metre pitch down to Deja Rue. While it is possible to traverse using tiny ledges to reach the northern parallel, the span is quite wide, and mistakes could be serious, so it is best to avoid this route.
Lighting by Tarquin, Pete and Steph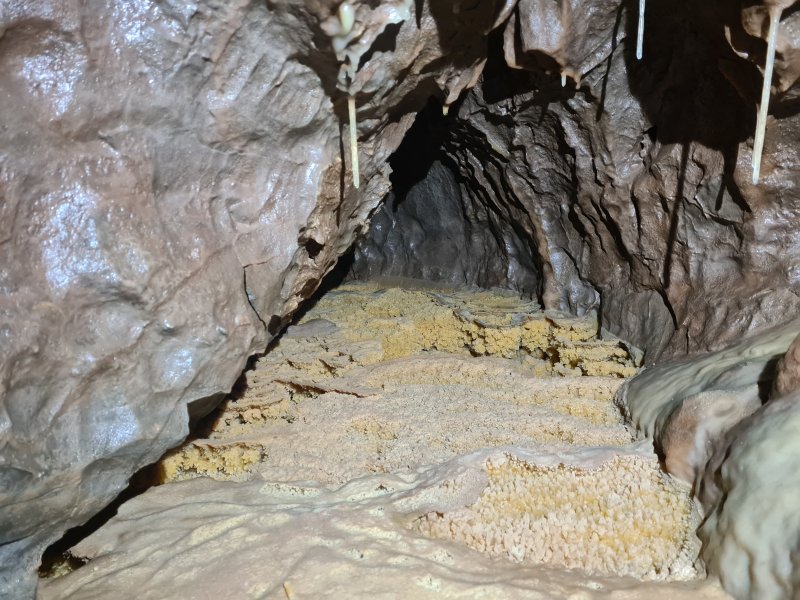 A crawl under the left wall reaches a passage containing this dry crystal pool. Although this passage will get you wet, it is the best way to reach the northern parallel.
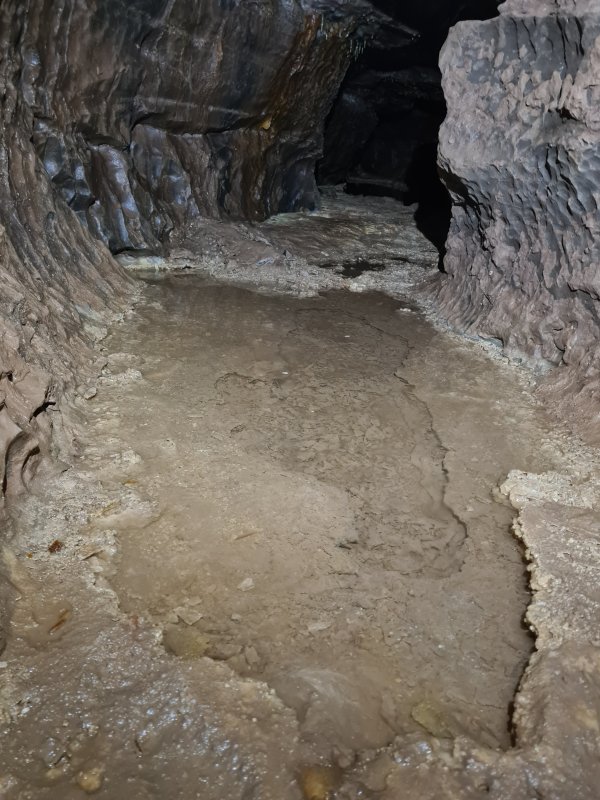 A crawl under the right wall also can be used to reach the northern parallel, but it requires crawling over calcite rafts. They seem to regrow quickly, and people do seem to use this route.
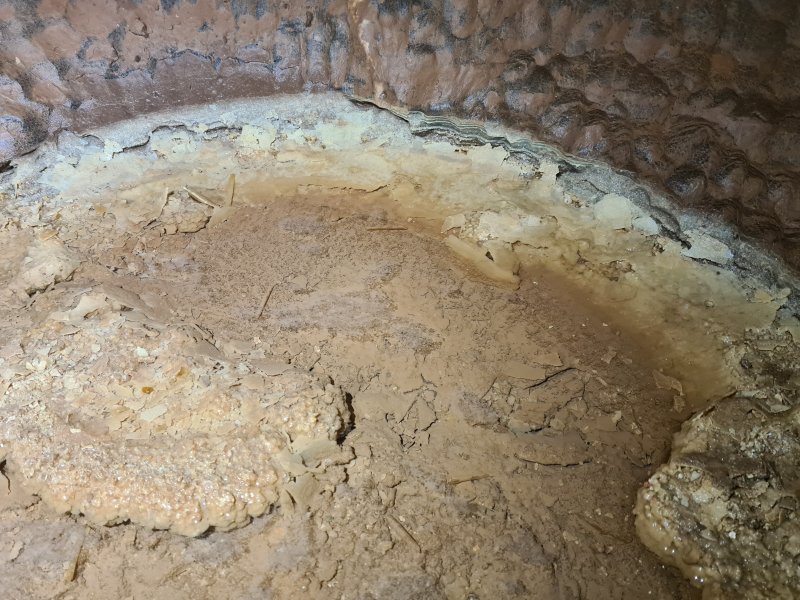 Sunken calcite rafts.
 A crawl to the left can be used to bypass the rafts. This passes through a very tight squeeze to reach the northern parallel.
Modelling by Steph
A crawl to the left can be used to bypass the rafts. This passes through a very tight squeeze to reach the northern parallel.
Modelling by Steph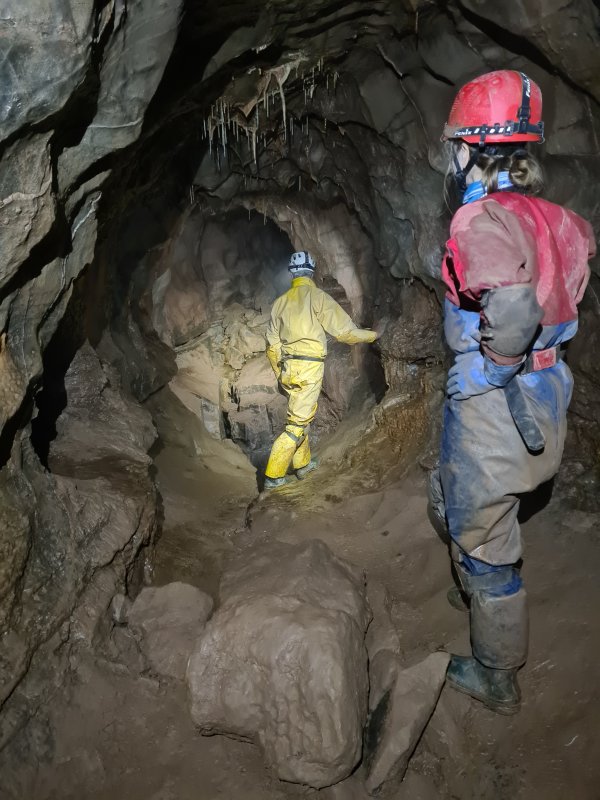 In the northern parallel, the eastern branch immediately crosses a 17 metre shaft. While it is possible to traverse along the left wall, the passage beyond chokes immediately, so it is not worth the risk.
Modelling by Steph and Pete, lighting by Tarquin, Steph and Pete
In the northern parallel, the eastern branch immediately crosses a 17 metre shaft. While it is possible to traverse along the left wall, the passage beyond chokes immediately, so it is not worth the risk.
Modelling by Steph and Pete, lighting by Tarquin, Steph and Pete A phreatic tube leads below a tall aven before choking.
Modelling by Steph, lighting by Tarquin and Pete
A phreatic tube leads below a tall aven before choking.
Modelling by Steph, lighting by Tarquin and Pete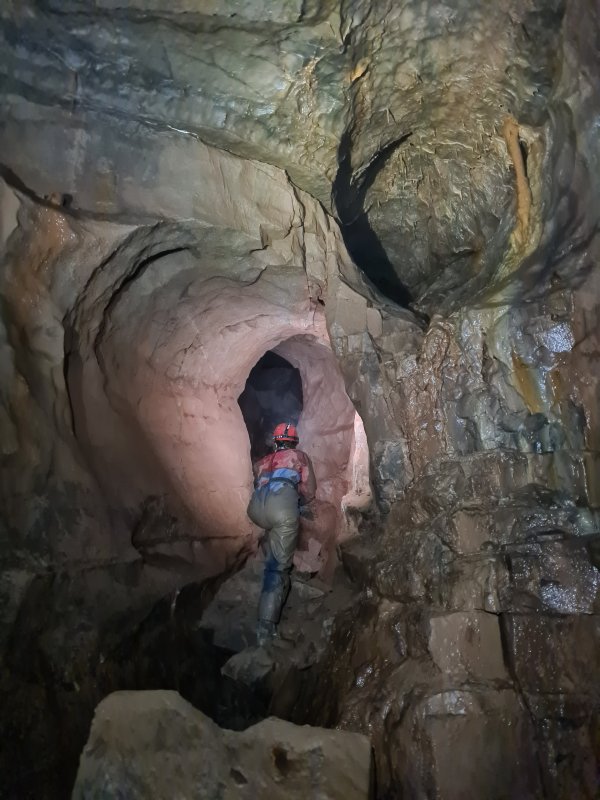 The next side passage is a pair of tubes.
Modelling by Steph, lighting by Tarquin, Pete and Steph
The next side passage is a pair of tubes.
Modelling by Steph, lighting by Tarquin, Pete and Steph The passages join then immediately choke. This point is about 30 metres below surface.
Modelling by Steph, lighting by Tarquin and Steph
The passages join then immediately choke. This point is about 30 metres below surface.
Modelling by Steph, lighting by Tarquin and Steph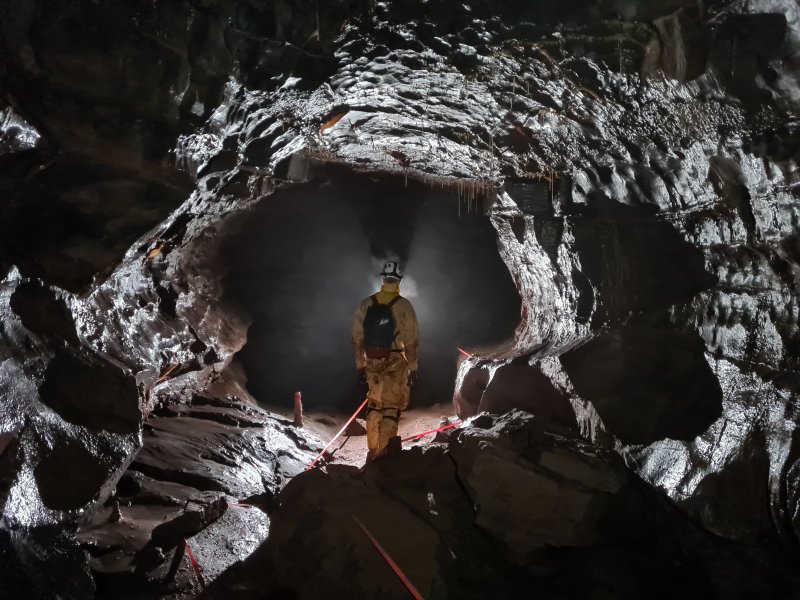 The eastern branch of the northern parallel, which starts as a phreatic tube.
Modelling by Pete, lighting by Tarquin and Steph
The eastern branch of the northern parallel, which starts as a phreatic tube.
Modelling by Pete, lighting by Tarquin and Steph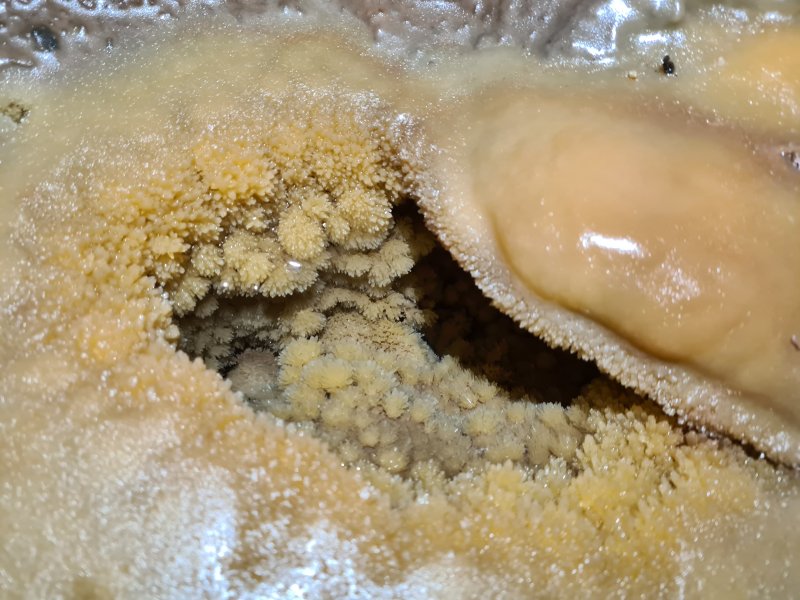 Small crystal pool.
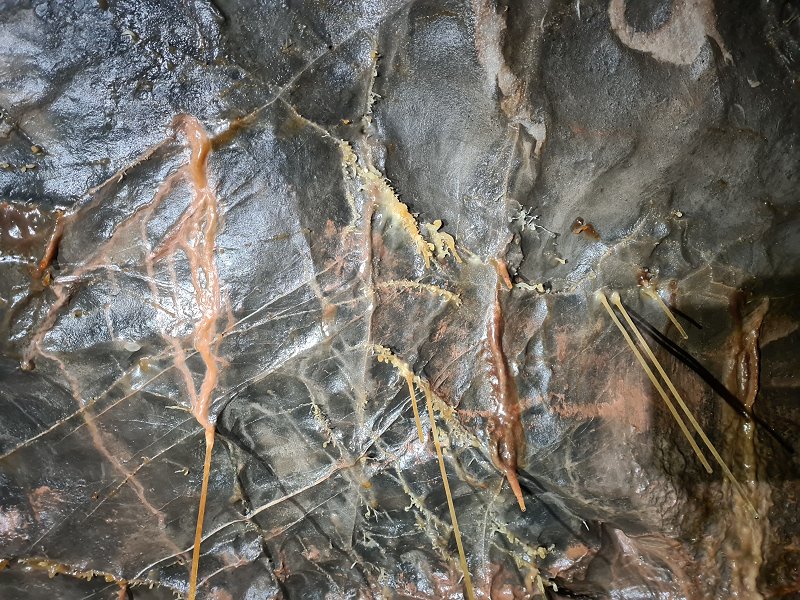 Boxwork on the ceiling of the tube. Several of the boxwork lines have grown helictites.
Lighting by Tarquin and Steph
Boxwork on the ceiling of the tube. Several of the boxwork lines have grown helictites.
Lighting by Tarquin and Steph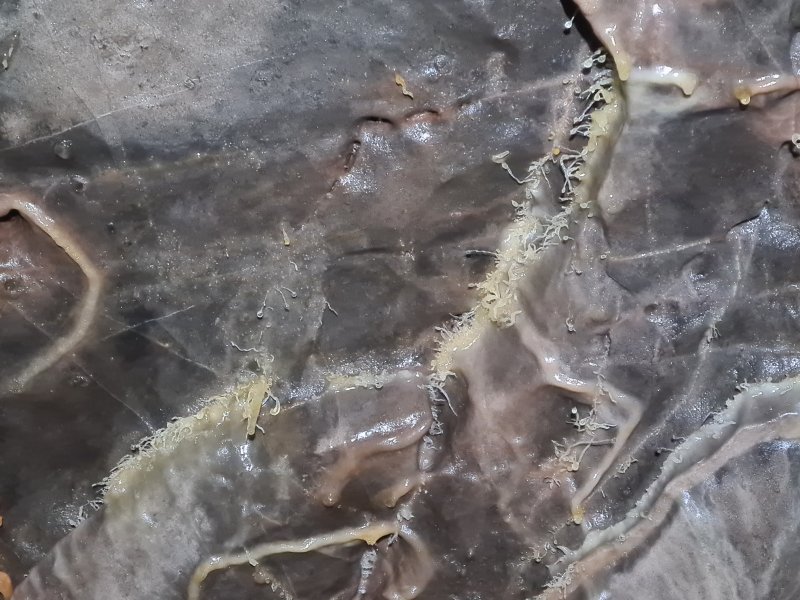 Helictites in the tube.
 The dragon trapped in the rock, one of my favourite pictures from this entire set. This glowing curtain seems almost superimposed, but this is exactly how it came out of the camera. The effect is simply created by some well placed back-lighting.
Modelling by Steph, lighting by Tarquin, Steph and Pete
The dragon trapped in the rock, one of my favourite pictures from this entire set. This glowing curtain seems almost superimposed, but this is exactly how it came out of the camera. The effect is simply created by some well placed back-lighting.
Modelling by Steph, lighting by Tarquin, Steph and Pete Twin stalactites.
Modelling by Steph and Pete, lighting by Tarquin, Steph and Pete
Twin stalactites.
Modelling by Steph and Pete, lighting by Tarquin, Steph and Pete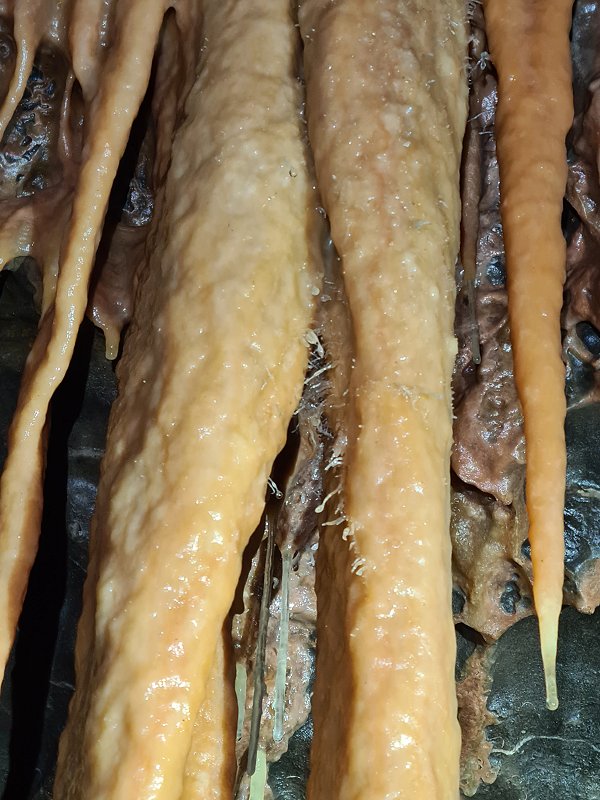 Hair.
Lighting by Tarquin and Steph
Hair.
Lighting by Tarquin and Steph A large and impressive dried crystal pool.
Modelling by Steph and Pete, lighting by Tarquin, Steph and Pete
A large and impressive dried crystal pool.
Modelling by Steph and Pete, lighting by Tarquin, Steph and Pete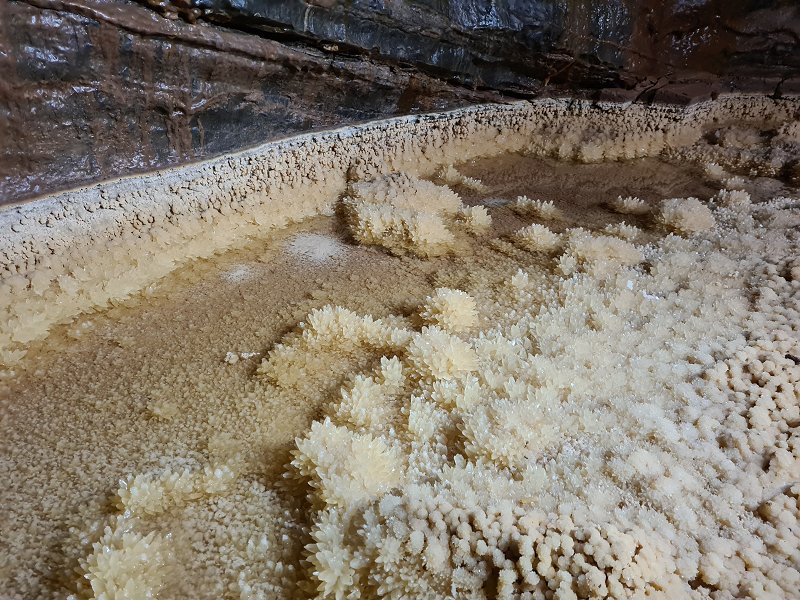 Detail of the crystals.
Lighting by Tarquin, Steph and Pete
Detail of the crystals.
Lighting by Tarquin, Steph and Pete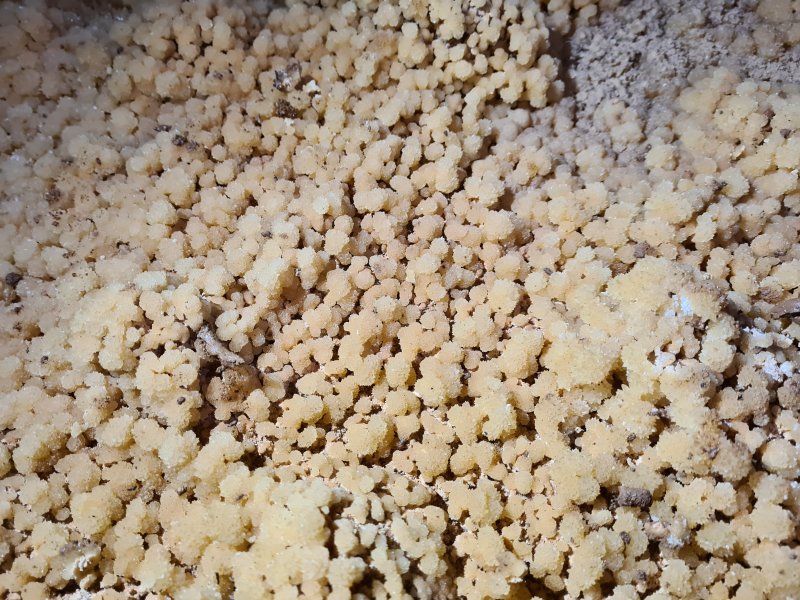 Detail of the crystals.
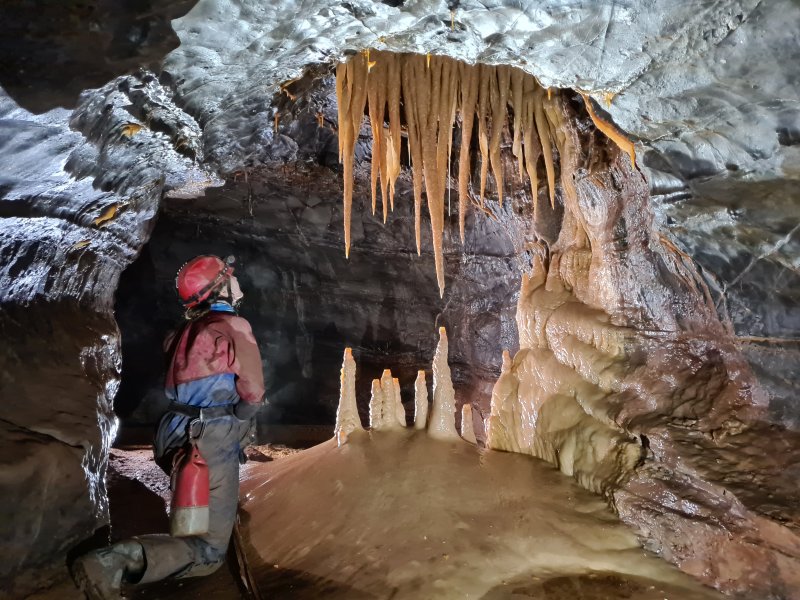 The iconic Great Oxbow Series formation, like something from a textbook.
Modelling by Steph, lighting by Tarquin and Pete
The iconic Great Oxbow Series formation, like something from a textbook.
Modelling by Steph, lighting by Tarquin and Pete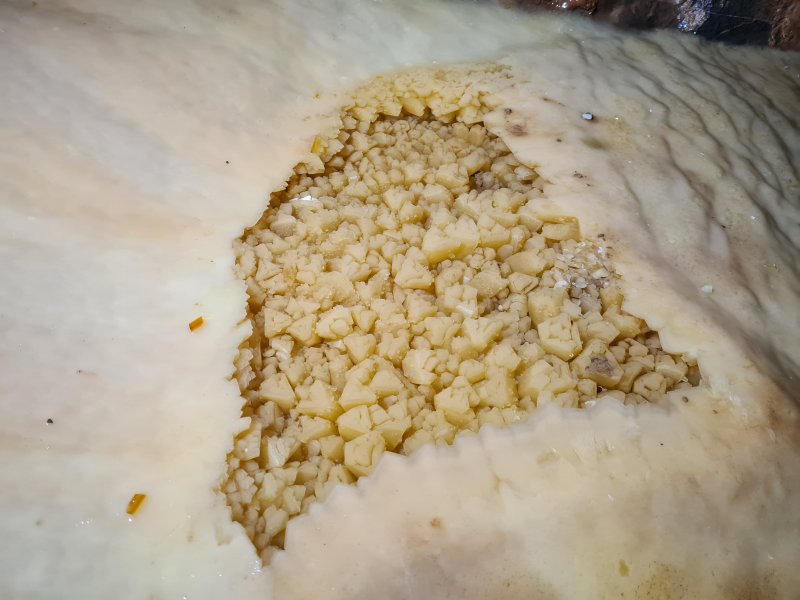 Dog tooth spar (big crystals) in a crystal pool on the formation. Sadly it is too far beyond a tape to use anything for scale, but each crystal is several centimetres across.
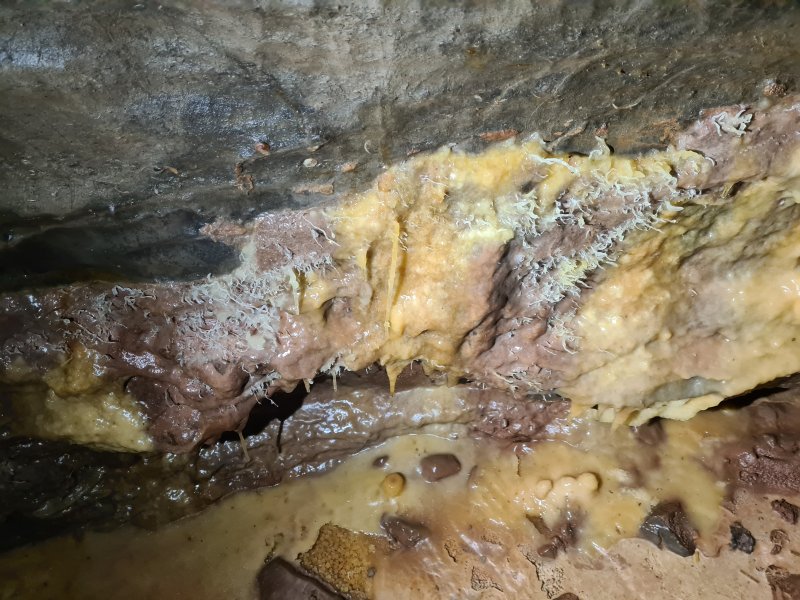 Helictites.
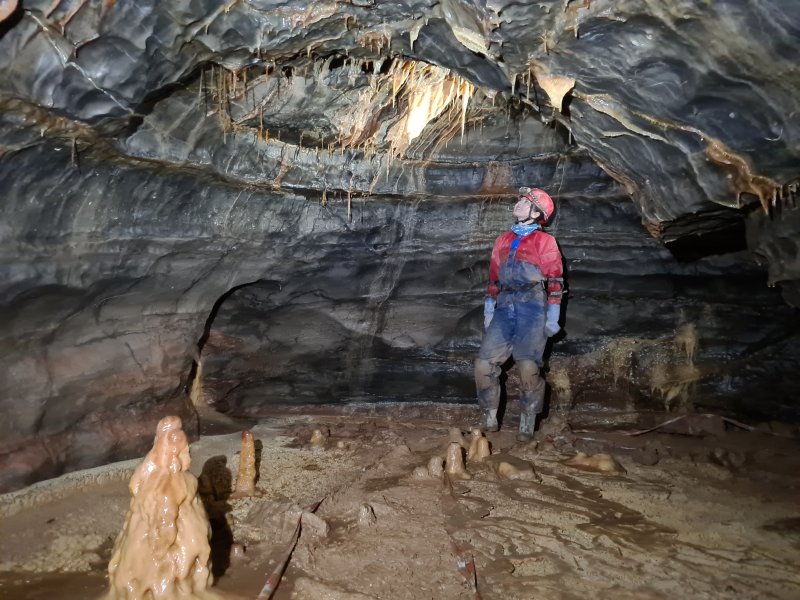 Dried crystal pools and curtains.
Modelling by Steph, lighting by Tarquin and Steph
Dried crystal pools and curtains.
Modelling by Steph, lighting by Tarquin and Steph Rippled edges of crystal pools.
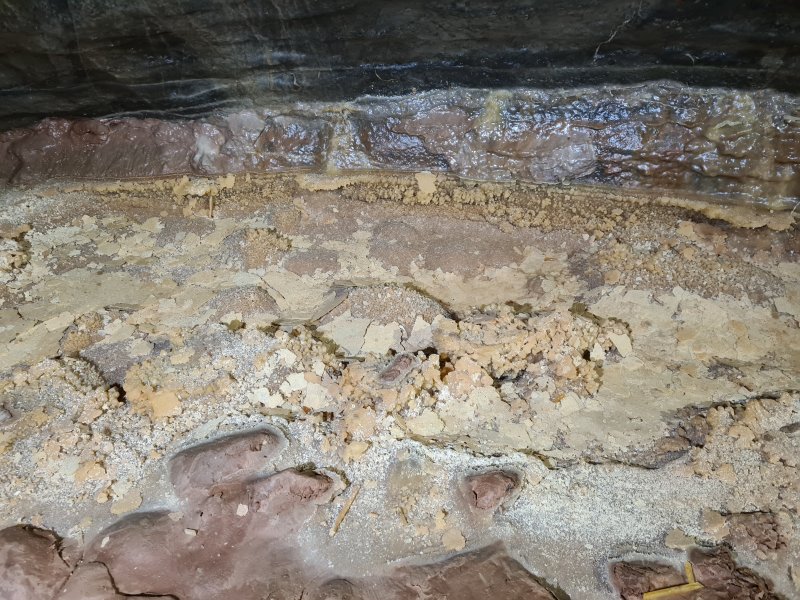 Formet calcite rafts in the dried crystal pools.
Lighting by Tarquin, Steph and Pete
Formet calcite rafts in the dried crystal pools.
Lighting by Tarquin, Steph and Pete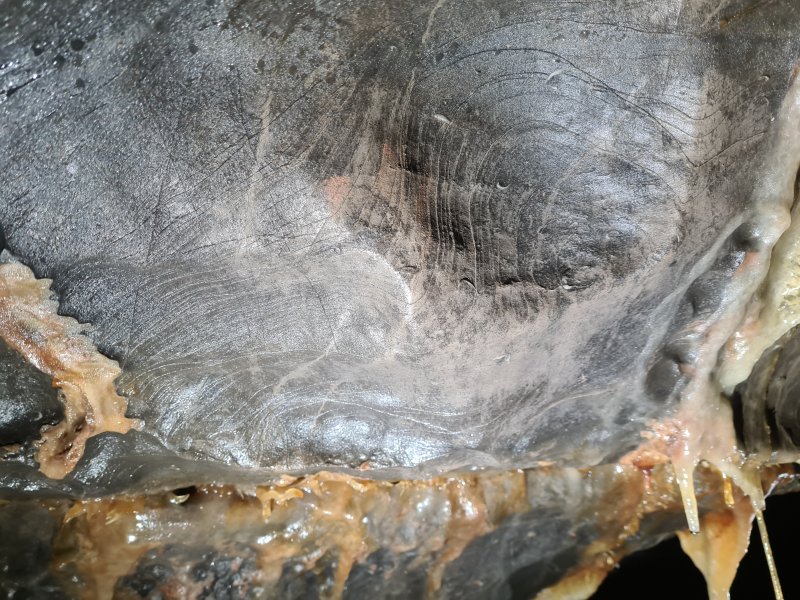 Contour patterns in the rock.
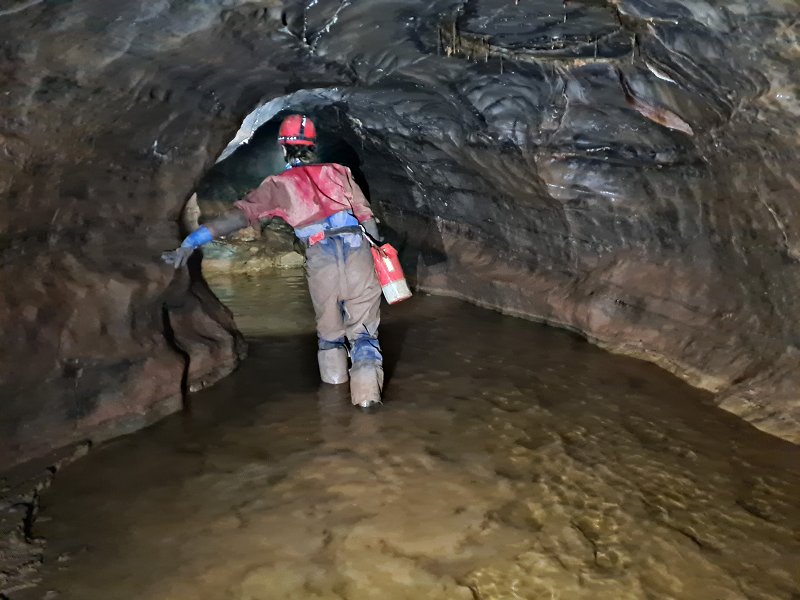 Shallow pool. Not enough to get wet feet.
Modelling by Steph, lighting by Tarquin and Steph
Shallow pool. Not enough to get wet feet.
Modelling by Steph, lighting by Tarquin and Steph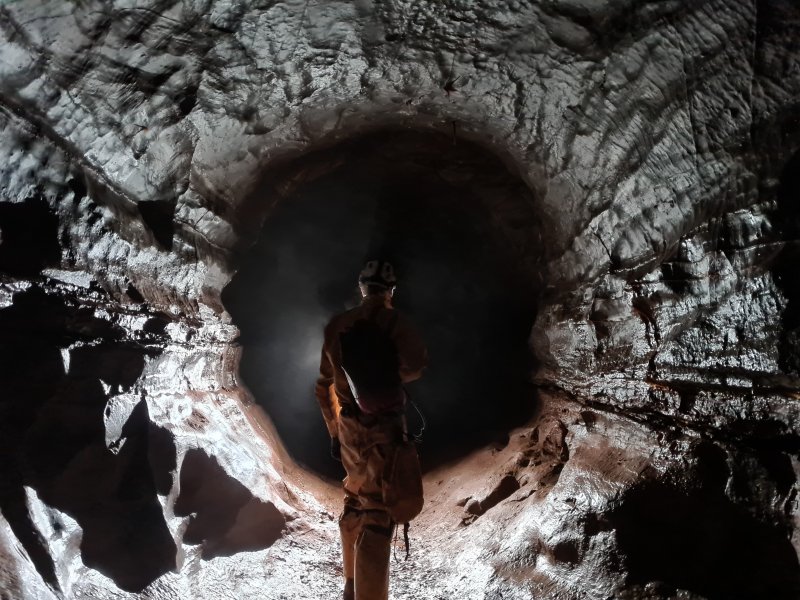 Almost perfect phreatic tube at the end of the northern parallel.
Modelling by Pete, lighting by Steph
Almost perfect phreatic tube at the end of the northern parallel.
Modelling by Pete, lighting by Steph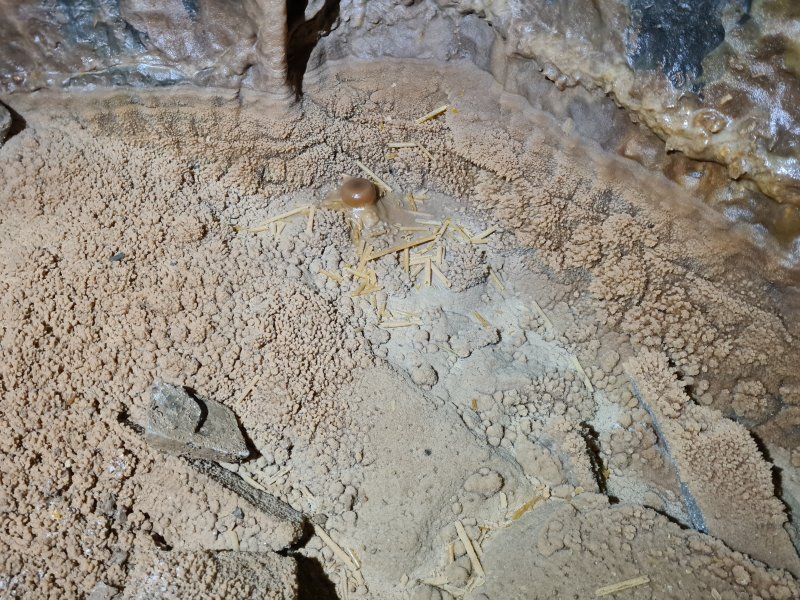 Dry crystal pool in a side passage in a trench. The side passage is the upstream end of the inlet in the southern parallel, but at this point it has no stream.
 Straws and stalactites in the side passage.
Modelling by Pete, lighting by Tarquin and Steph
Straws and stalactites in the side passage.
Modelling by Pete, lighting by Tarquin and Steph Decorated walls.
Modelling by Pete, lighting by Tarquin and Steph
Decorated walls.
Modelling by Pete, lighting by Tarquin and Steph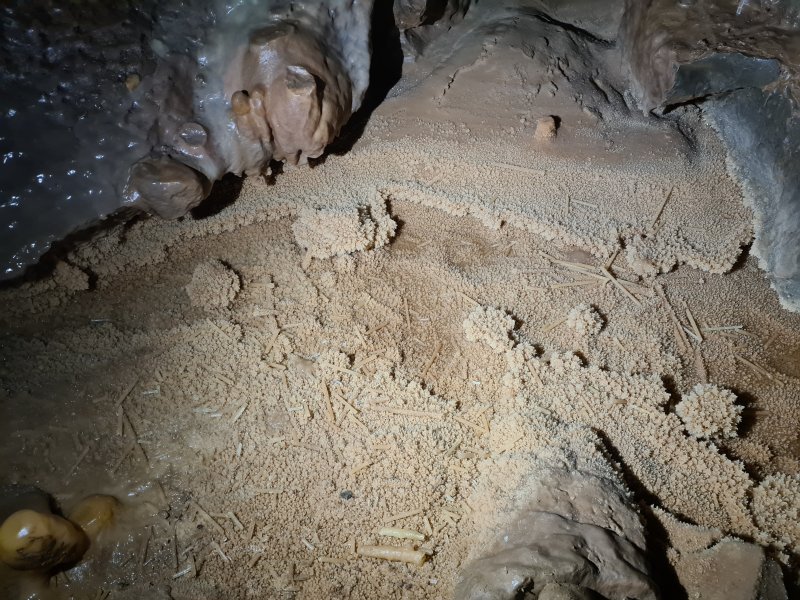 Dry crystal pool.
 Stalagmite in the middle of the passage. The passage was taped off at this point, but again, there had been no tape on our previous visit, and we had been able to continue, starting with a difficult traverse over a crystal pool. The remaining pictures are from that trip, and are included here for the sake of completeness.
 Small formation beyond the pool.
 Crystal pools. The flow of water is definitely not enough to explain the amount of water in the other passage.
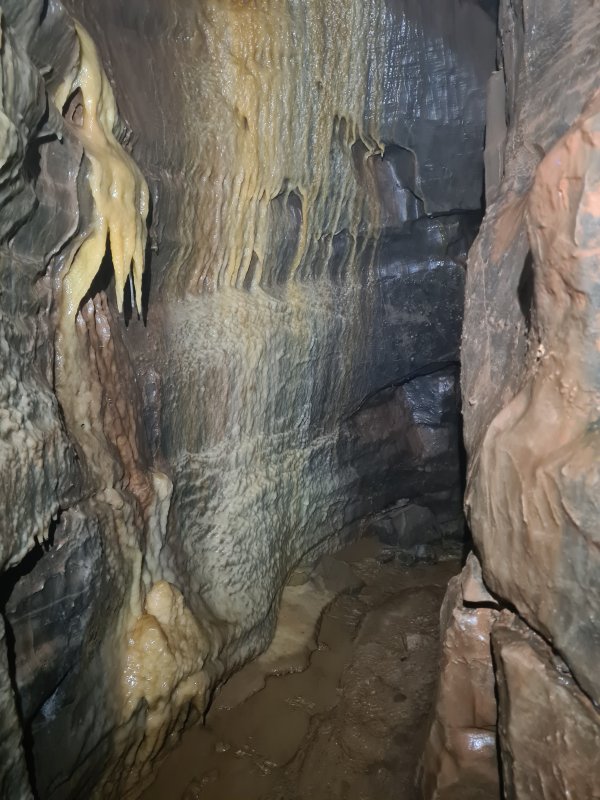 Walls of the passage.
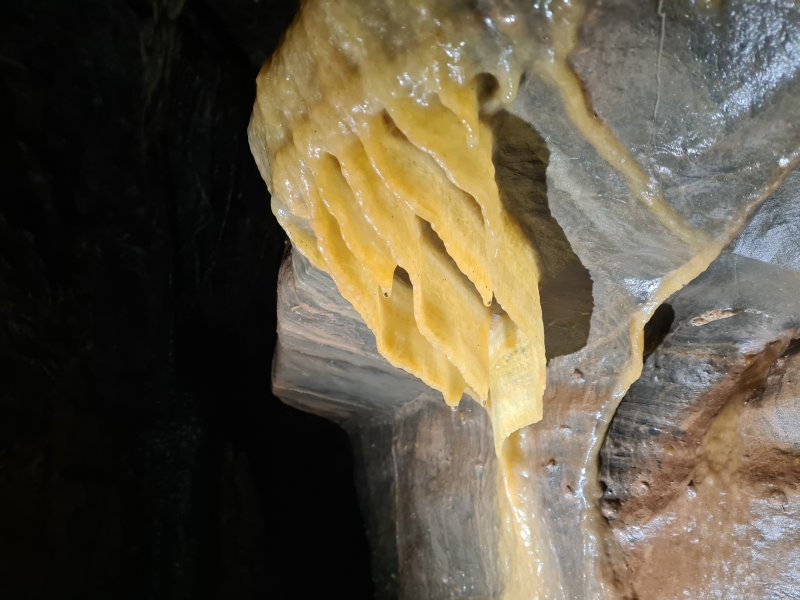 Curtains.
 Muddied stal window.
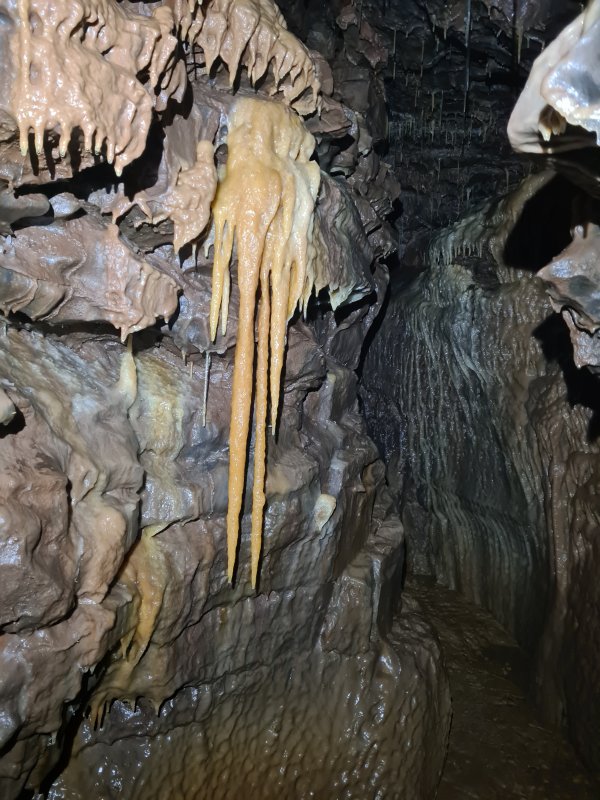 Stalactites.
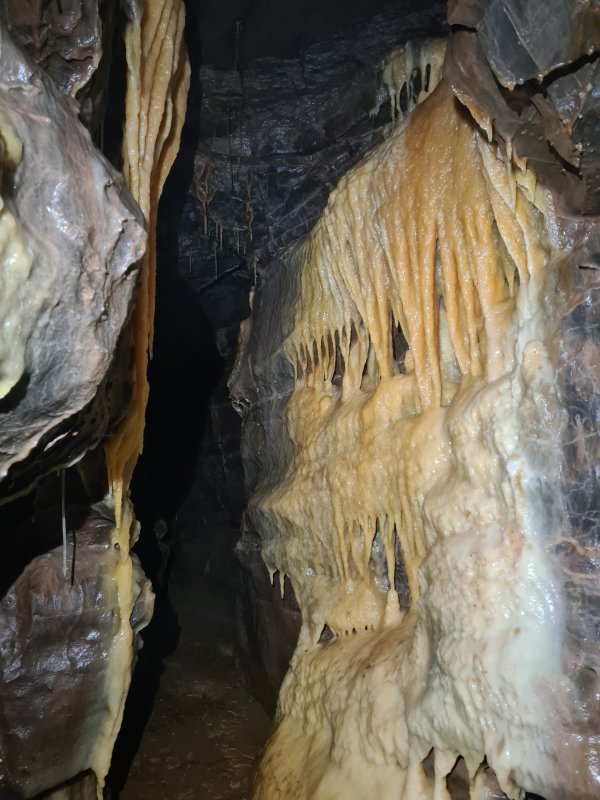 Flowstone.
 Straws.
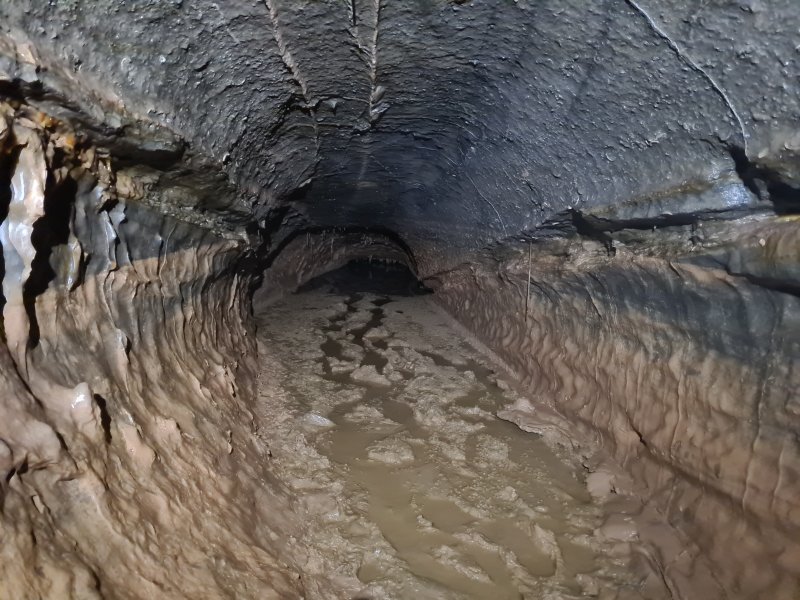 The downstream sump. The water flows beneath a false floor here, but there has to be another water source considering how much water emerges from the other end of the sump.
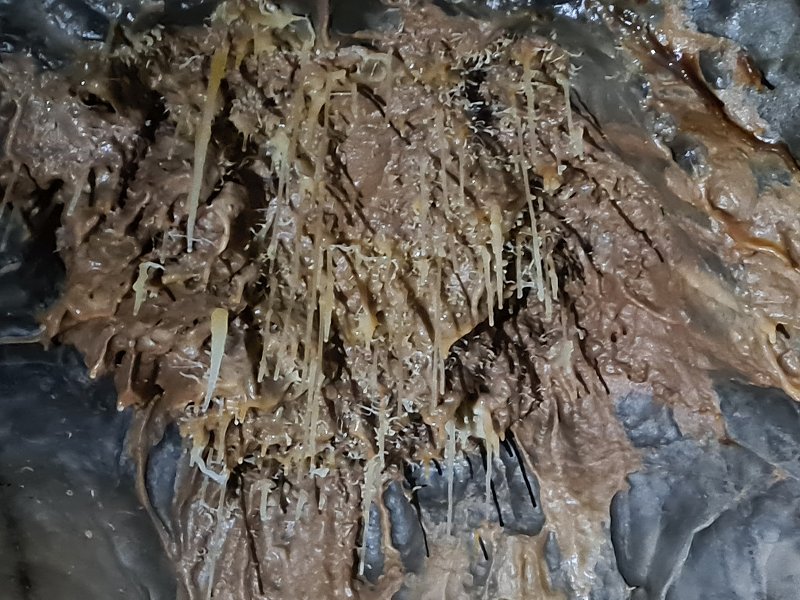 Returning to the normal route, these helictites and straws are in the ceiling just after the trench starts.
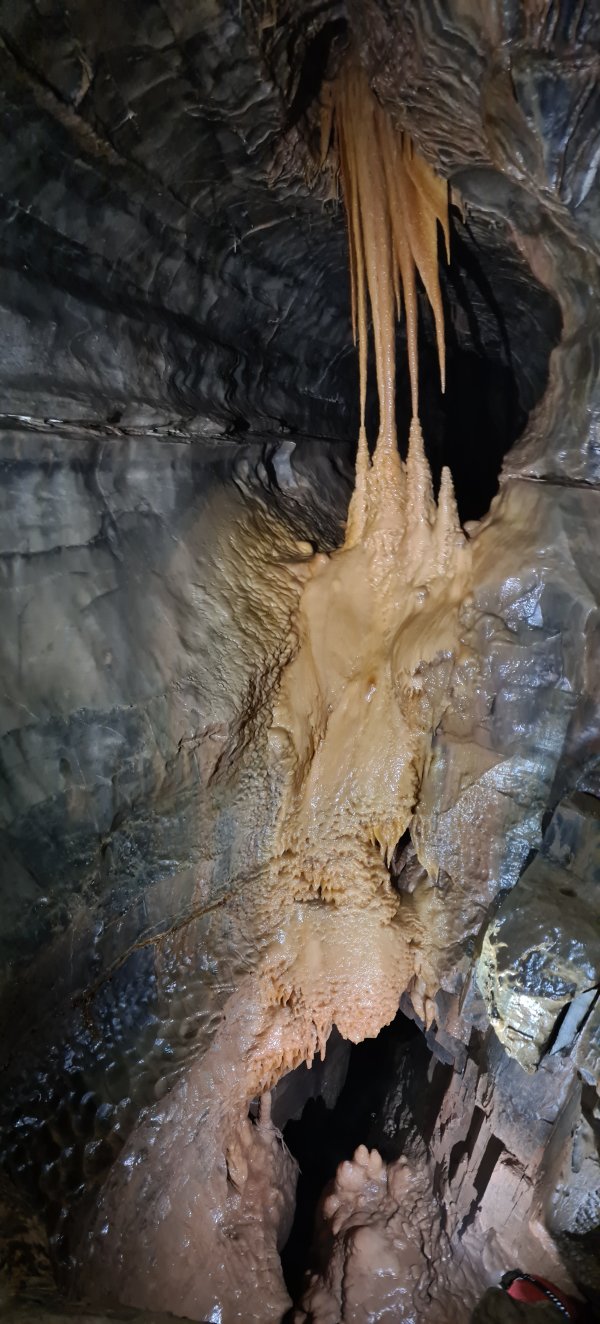 Formations above the head of The Skyhook.
Modelling by Steph's helmet, lighting by Tarquin, Steph and Pete
Formations above the head of The Skyhook.
Modelling by Steph's helmet, lighting by Tarquin, Steph and Pete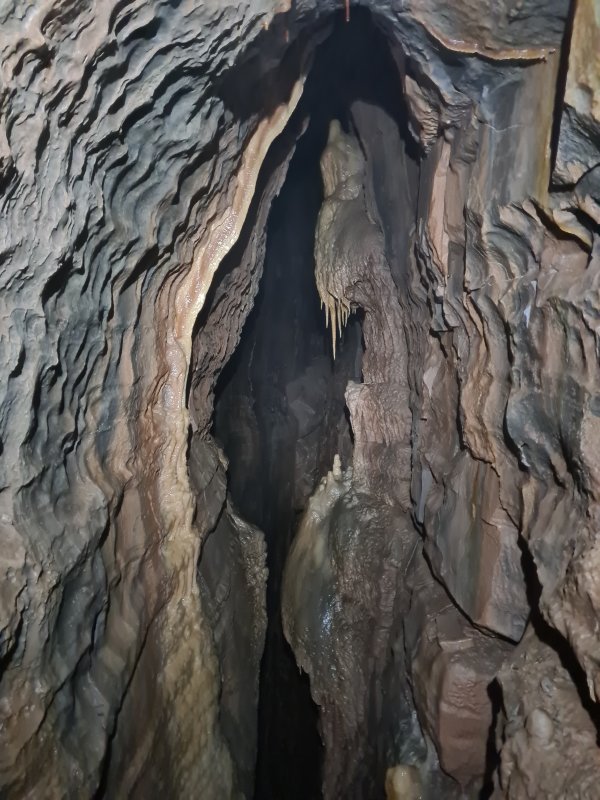 Formations in the rift above The Skyhook.
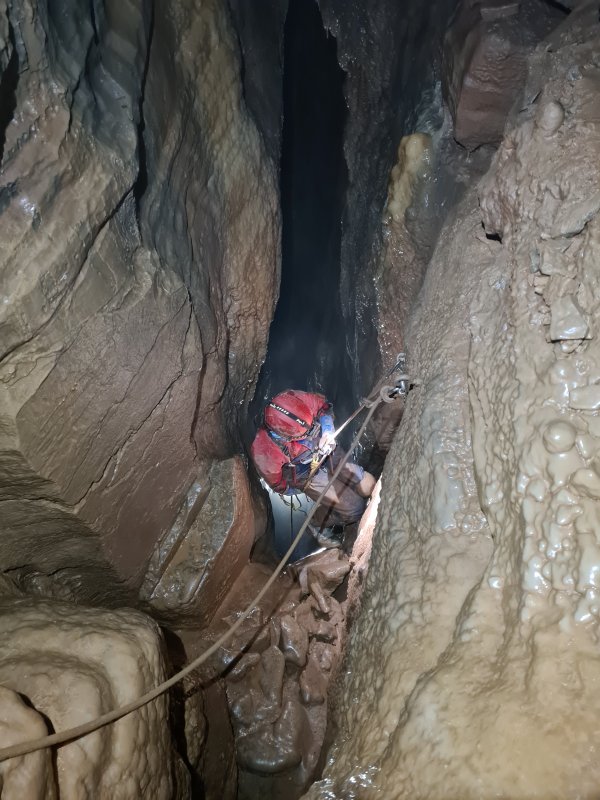 The Skyhook, an 11 metre pitch, with Steph's first abseil underground. The Skyhook used to be rigged from below, using a unique metal hook (The Skyhook), which could be pulled up on a piece of string, and latched onto an anchor at the top. This allowed a rope to be raised and retrieved from the bottom of the pitch. This has since been replaced with a more normal cordelette technique (or standard pull-through from the top), and at the time of our trip was permanently rigged.
Modelling by Steph, lighting by Tarquin, Steph and Pete
The Skyhook, an 11 metre pitch, with Steph's first abseil underground. The Skyhook used to be rigged from below, using a unique metal hook (The Skyhook), which could be pulled up on a piece of string, and latched onto an anchor at the top. This allowed a rope to be raised and retrieved from the bottom of the pitch. This has since been replaced with a more normal cordelette technique (or standard pull-through from the top), and at the time of our trip was permanently rigged.
Modelling by Steph, lighting by Tarquin, Steph and Pete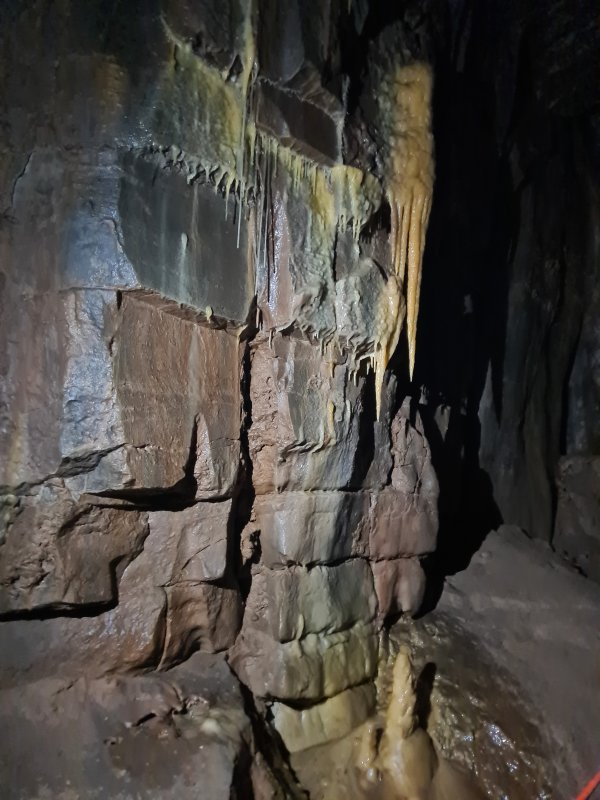 Formations below The Skyhook
 Helictites and straws below The Skyhook. We had now completed the loop, and it was time to head back out from Midnight Chamber.