Ogof Ffynnon Ddu Nether Rawl 09/02/2025 and 23/03/2025
Unless otherwise stated, camera, setups, lighting, edits and gallery effects by Tarquin. Modelling and lighting at various points will be Pete Bolt and Steph Andrews.
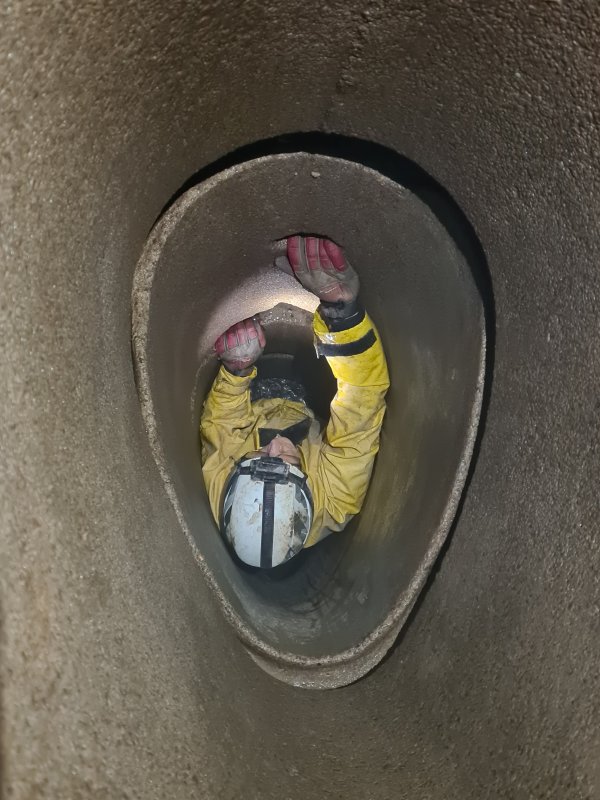
 The concrete tube entrance to Cwm Dwr Quarry Cave. Climbing relies on the artificial holds that have been chipped into the concrete, but this has been done on the wrong side, so you have to fit your shoulders into the narrow side instead of the side that is wide enough for a pair of shoulders. In this cave, it seems to be a tradition to keep using bad old approaches, so it is unlikely that anyone will put holds on the correct side. Just deal with it and climb.
Modelling by Pete, lighting by Tarquin and Pete
The concrete tube entrance to Cwm Dwr Quarry Cave. Climbing relies on the artificial holds that have been chipped into the concrete, but this has been done on the wrong side, so you have to fit your shoulders into the narrow side instead of the side that is wide enough for a pair of shoulders. In this cave, it seems to be a tradition to keep using bad old approaches, so it is unlikely that anyone will put holds on the correct side. Just deal with it and climb.
Modelling by Pete, lighting by Tarquin and Pete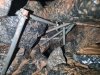 Cwm Dwr Choke. On the way in, you used to pass under a scaffold bar, and at the other end, you would pass over another bar. However, part of the choke collapsed above the first scaffold bar at the start of 2024. This new scaffolding was installed within a month, allowing access again.
 Once past the Main Route traverse, we turned right towards The Smithy, instead of taking the normal route to the left.
Modelling by Steph, lighting by Tarquin and Steph
Once past the Main Route traverse, we turned right towards The Smithy, instead of taking the normal route to the left.
Modelling by Steph, lighting by Tarquin and Steph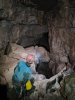 Top of The Smithy. This is the top of a tall drop, and although there appears to be a route down it, we bypassed it to the right of the camera.
Modelling by Steph, lighting by Tarquin and Steph
Top of The Smithy. This is the top of a tall drop, and although there appears to be a route down it, we bypassed it to the right of the camera.
Modelling by Steph, lighting by Tarquin and Steph The Smithy, seen in the opposite direction from below. The same boulders are being stood on.
Modelling by Steph, lighting by Tarquin and Steph
The Smithy, seen in the opposite direction from below. The same boulders are being stood on.
Modelling by Steph, lighting by Tarquin and Steph Fossils at The Smithy. These look like the bed seen at the very top of the limestone (above the honeycomb sandstone), at the top of Carreg Lem.
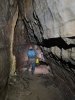 We visited a side passage at The Smithy. It is mostly walking sized, passing through a very short crawl, and ends at an almost-climbable pitch into a canyon that we would visit later.
Modelling by Steph, lighting by Tarquin and Steph
We visited a side passage at The Smithy. It is mostly walking sized, passing through a very short crawl, and ends at an almost-climbable pitch into a canyon that we would visit later.
Modelling by Steph, lighting by Tarquin and Steph The start of Sand Banks.
 Dry Route just after the junction with Sand Banks.
Modelling by Steph, lighting by Tarquin and Steph
Dry Route just after the junction with Sand Banks.
Modelling by Steph, lighting by Tarquin and Steph Just downstream from the junction of Dry Way and Nether Rawl is Piccadilly, a section with an incredible echo, and a waterfall pouring in from a blind side passage.
Modelling by Steph
Just downstream from the junction of Dry Way and Nether Rawl is Piccadilly, a section with an incredible echo, and a waterfall pouring in from a blind side passage.
Modelling by Steph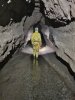 Upstream from the junction of Dry Way and Nether Rawl. This passage is really quite attractive, and would be lovely for stomping along for several km.
Modelling by Pete, lighting by Tarquin and Pete
Upstream from the junction of Dry Way and Nether Rawl. This passage is really quite attractive, and would be lovely for stomping along for several km.
Modelling by Pete, lighting by Tarquin and Pete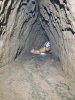 When Nether Rawl's stream first branches, we headed left beneath the pull-up cord to Upper Piccadilly. The passage then got very small, and we ducked into a dry crawl on the left. This clearly sometimes acts as a flood overflow, and can carry a stream.
Modelling by Pete, lighting by Tarquin and Pete
When Nether Rawl's stream first branches, we headed left beneath the pull-up cord to Upper Piccadilly. The passage then got very small, and we ducked into a dry crawl on the left. This clearly sometimes acts as a flood overflow, and can carry a stream.
Modelling by Pete, lighting by Tarquin and Pete The small passage gains a stream and enlarges a little, with beautiful surge marks and other mud formations.
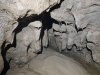 This then joins the downstream end of Chert Passage just before its silted sump, which is surrounded by more mud fowmations.
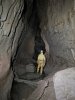 Upstream, Chert Passage quickly enlarges to very grant proportions.
Modelling by Pete, lighting by Tarquin and Pete
Upstream, Chert Passage quickly enlarges to very grant proportions.
Modelling by Pete, lighting by Tarquin and Pete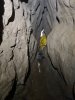 A small inlet passage to the right is the wet crawl to Anniversary Aven. There is a lot of cave up there that we left for another day. Immediately afterwards is a high level cross roads, with the left being stated as a climb but really being a pitch, leading to a pitch down to Heol Eira, and the passage to the right being unclimbable.
Modelling by Pete, lighting by Tarquin and Pete
A small inlet passage to the right is the wet crawl to Anniversary Aven. There is a lot of cave up there that we left for another day. Immediately afterwards is a high level cross roads, with the left being stated as a climb but really being a pitch, leading to a pitch down to Heol Eira, and the passage to the right being unclimbable.
Modelling by Pete, lighting by Tarquin and Pete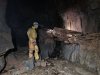 Chert Passage has a thick calcite crust on mud. In places, this has been washed out to create false floors. Near the end, the passage climbs steeply to a choke, with plenty of evidence of rocks crashing down the slope. It is not a place to spend time.
Modelling by Pete, lighting by Tarquin and Pete
Chert Passage has a thick calcite crust on mud. In places, this has been washed out to create false floors. Near the end, the passage climbs steeply to a choke, with plenty of evidence of rocks crashing down the slope. It is not a place to spend time.
Modelling by Pete, lighting by Tarquin and Pete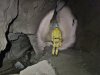 Continuing upstream on the right branch of Nether Rawl, the passage remains large for quite a while, with a series of oxbows, where it is easy not to realise that the stream has split yet again, and a major side passage has led off. We would use that later. A smaller side passage hidden behind boulders at one point takes the water over to the other branch shown earlier.
Modelling by Pete, lighting by Tarquin and Pete
Continuing upstream on the right branch of Nether Rawl, the passage remains large for quite a while, with a series of oxbows, where it is easy not to realise that the stream has split yet again, and a major side passage has led off. We would use that later. A smaller side passage hidden behind boulders at one point takes the water over to the other branch shown earlier.
Modelling by Pete, lighting by Tarquin and Pete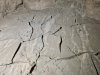 Cracked mud deposits.
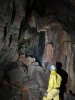 A calcited aven. The passage at the top can be more easily reached via another route, and we would visit it later.
Modelling by Pete, lighting by Tarquin and Pete
A calcited aven. The passage at the top can be more easily reached via another route, and we would visit it later.
Modelling by Pete, lighting by Tarquin and Pete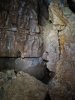 Where the big passage starts to close down, a small side passage can be reached up this exposed climb. This is relatively easy on the way up, but extremely hard on the way down. One of the main footholds, seen here as a little ledge on the right above the boulder, cannot be seen from above, and the climb seems best done facing outwards, with someone to guide you. It is not possible for someone to realistically spot you from below.
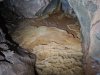 The small side passage reaches this beautiful crystal pool.
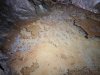 Detail of the left side of the pool.
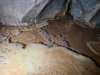 Central part of the pool, with calcite rafts.
 Detail of the right side of the pool.
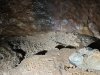 Dry crystal pool in a side passage.
 A couple of routes unite in a chamber, where there are more climbs into another choice of routes. Either works but one is easier.
Modelling by Pete, lighting by Tarquin and Pete
A couple of routes unite in a chamber, where there are more climbs into another choice of routes. Either works but one is easier.
Modelling by Pete, lighting by Tarquin and Pete Small helictites.
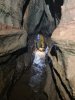 When the routes join, the way on stays small, but it is possible to stoop for most of it.
Modelling by Pete, lighting by Tarquin and Pete
When the routes join, the way on stays small, but it is possible to stoop for most of it.
Modelling by Pete, lighting by Tarquin and Pete This squeeze guards the way on, and it is quite tight, but looks smaller than it is.
Modelling by Pete, lighting by Tarquin and Pete
This squeeze guards the way on, and it is quite tight, but looks smaller than it is.
Modelling by Pete, lighting by Tarquin and Pete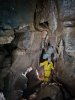 At a junction, the way on is ahead, while one side is stupidly tight, and the other requires climbing on a loose rock, but both can be reached more easily from the way on. The passage ahead ends in this chamber. The way in is seen on the left here. Tapioca is ahead-right. Down in the floor is a way below Tapioca. Behind the camera to the left is the passage with the big crystals, and behind the camera to the right is the long side passage with more formations. The pictures will be presented in that sequence.
Modelling by Pete, lighting by Tarquin and Pete
At a junction, the way on is ahead, while one side is stupidly tight, and the other requires climbing on a loose rock, but both can be reached more easily from the way on. The passage ahead ends in this chamber. The way in is seen on the left here. Tapioca is ahead-right. Down in the floor is a way below Tapioca. Behind the camera to the left is the passage with the big crystals, and behind the camera to the right is the long side passage with more formations. The pictures will be presented in that sequence.
Modelling by Pete, lighting by Tarquin and Pete The highlight of this area is Tapioca, one of the finest formations in Cwm Dwr. The texture is unusually creamy, and Tapioca is a good name.
Modelling by Pete, lighting by Tarquin and Pete
The highlight of this area is Tapioca, one of the finest formations in Cwm Dwr. The texture is unusually creamy, and Tapioca is a good name.
Modelling by Pete, lighting by Tarquin and Pete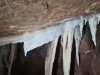 Translucent curtain, made from large crystals.
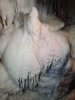 The majority of the formation is an unexpectedly bright white, but some sections have a faint pink from the old red sandstone mud. This part of the cave lies under the field to the right just after you pass through the Penwyllt car park, but despite being very close to Cwm Dwr Jama (which lies beneath the driveway between the Penwyllt car park and the public car park), and despite being fairly close to the old limekilns which created the Cwm Dwr Jama formations, its formations appear to be natural, not made from lime pollution.
Lighting by Tarquin and Pete
The majority of the formation is an unexpectedly bright white, but some sections have a faint pink from the old red sandstone mud. This part of the cave lies under the field to the right just after you pass through the Penwyllt car park, but despite being very close to Cwm Dwr Jama (which lies beneath the driveway between the Penwyllt car park and the public car park), and despite being fairly close to the old limekilns which created the Cwm Dwr Jama formations, its formations appear to be natural, not made from lime pollution.
Lighting by Tarquin and Pete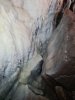 I guess we should be thankful they called it Tapioca. The other option was The Nut Room.
Lighting by Tarquin and Pete
I guess we should be thankful they called it Tapioca. The other option was The Nut Room.
Lighting by Tarquin and Pete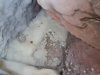 Crystal pool in the floor. The mud, incidentally, is splashed by visitors.
 The passage in the floor of the previous chamber drops into a small chamber below Tapioca, where the formations continue, with a set of translucent curtains.
 Creamy opening.
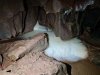 Secondary flow from the side.
 The passage can also be reached via this climb from the junction before Tapioca, but it relies on a dodgy rock flake that seems to be supported by nothing. The passage continues into a lower chamber.
Modelling by Pete, lighting by Tarquin and Pete
The passage can also be reached via this climb from the junction before Tapioca, but it relies on a dodgy rock flake that seems to be supported by nothing. The passage continues into a lower chamber.
Modelling by Pete, lighting by Tarquin and Pete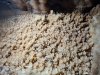 Dried crystal pool near the climb.
 Right next to the crystal pool is a set of large, triangular crystals. Sadly these are not protected (a common theme in this cave), and they have been muddied by cavers who did not realise they are there.
Lighting by Tarquin and Steph
Right next to the crystal pool is a set of large, triangular crystals. Sadly these are not protected (a common theme in this cave), and they have been muddied by cavers who did not realise they are there.
Lighting by Tarquin and Steph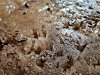 Detail of the triangular crystals.
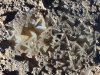 The best ones have a drip cleaning them.
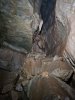 Calcited alcove in the chamber.
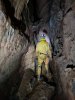 The passage leading off from the lower chamber, which quickly chokes.
Modelling by Pete, lighting by Tarquin and Pete
The passage leading off from the lower chamber, which quickly chokes.
Modelling by Pete, lighting by Tarquin and Pete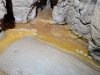 Crystal pool on the mud floor of the passage. This is a much more familiar colour, typical for this cave.
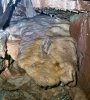 Tucked in the side of the chamber is a tiny side passage, which looks quite uninspiring. It ends with a view over flowstone, which seems to be sourced from a crystal pool in a passage above.
 A side passage from that passage has a choked aven with these curtains.
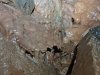 False floor below the curtains.
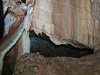 The edge of the aven has its own small formations.
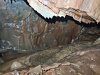 Hidden behind the formations is a small crystal pool.
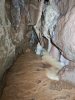 The formations combine to form this flowstone.
 Crystal pool filled with stars in the flowstone.
 Back at the junction where we entered the Tapioca area, the first side passage starts with this elaborate flowstone formation. The texture of it looks like sheep's wool, and close inspection shows a much more normal calcite underneath, so the surface texture appears to be a result of lime pollution.
Modelling by Pete, lighting by Tarquin and Pete
Back at the junction where we entered the Tapioca area, the first side passage starts with this elaborate flowstone formation. The texture of it looks like sheep's wool, and close inspection shows a much more normal calcite underneath, so the surface texture appears to be a result of lime pollution.
Modelling by Pete, lighting by Tarquin and Pete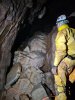 More flowstone below the flowstone formation.
Modelling by Pete, lighting by Tarquin and Pete
More flowstone below the flowstone formation.
Modelling by Pete, lighting by Tarquin and Pete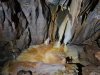 Rust-coloured formations in the side passage.
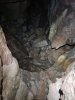 Opposite them is a pitch down into the lower chamber. This pitch is not labelled on the survey.
 The passage then passes through a rocky clamber, adorned with muddied white flowstone. The rocks are loose, and need to be treated with care.
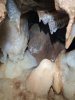 Flowstone in the rocky clamber.
 The clamber emerges into a very small chamber, adorned with flowstone. Stepping into the chamber is easy, but getting out without falling onto the formations is quite tricky, and is best done backwards, carefully stepping onto the loose rocks of the clamber. The main target can actually be seen without stepping into the chamber, and can be seen in this picture.
Lighting by Tarquin and Pete
The clamber emerges into a very small chamber, adorned with flowstone. Stepping into the chamber is easy, but getting out without falling onto the formations is quite tricky, and is best done backwards, carefully stepping onto the loose rocks of the clamber. The main target can actually be seen without stepping into the chamber, and can be seen in this picture.
Lighting by Tarquin and Pete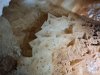 The main target is this crystal pool filled with enormous, geometric crystals.
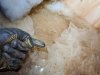 The size of the crystals is hard to appreciate without something for scale.
Modelling by a random glove
The size of the crystals is hard to appreciate without something for scale.
Modelling by a random glove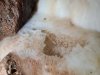 A second pool in the chamber.
 The upper part of the chamber, muddied during exploration, and now taped off because it does not go anywhere. Guess they did not know that muddy boots can actually be taken off.
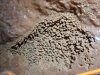 Crystal pool in the upper part of the chamber, now with more normal crystals. However, it still has some of the geometric crystals at the edge.
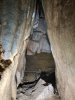 A taped-off rift in the upper part of the chamber has flowstone and a crystal pool, which sits above the flowstone in the uninspiring passage tucked into the side of the much earlier chamber. It is not possible to get close enough for a better picture.
 Close-up of the crystal pool in the taped-off rift, taken using digital zoom (unfortunately, this is why it is so grainy and poorly focused).
 Back at the junction where we entered the Tapioca area, the last passage is reached by crawling between boulders, rather than climbing down them. The rocks at the bottom have very distinctive patterns on them, looking like giraffe print. These appear to be vermiculations, clumping of mud caused by microbial action.
 The patterns cover a large area. In a small quality, it might be just a pattern formed by the sunction as rocks are pulled apart. But these are over many surfaces where that could not be the case.
 The passage is large, and climbs up to a heavily calcited choke. A clamber into a rift provides a way on. It splits, with the left branch quickly choking.
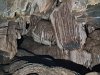 Top of the calcited choke.
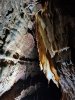 The right branch of the side passage quickly reaches a well decorated section, with these curtains.
Lighting by Pete
The right branch of the side passage quickly reaches a well decorated section, with these curtains.
Lighting by Pete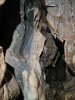 Hidden up a tricky climb beside the curtains is another small side passage, which ends immediately after this flowstone.
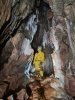 The main passage branch ends with this beautiful grotto. This sits directly below the bottom of the Penwyllt camping area.
Modelling by Pete, lighting by Tarquin and Pete
The main passage branch ends with this beautiful grotto. This sits directly below the bottom of the Penwyllt camping area.
Modelling by Pete, lighting by Tarquin and Pete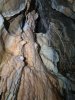 Ceiling of the grotto.
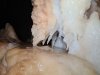 Detail of the formations in the grotto, which seem to have forgotten which way gravity points.
 Behind the grotto, the passage chokes, but a ridiculously small squeeze regains the passage.
Modelling by Steph
Behind the grotto, the passage chokes, but a ridiculously small squeeze regains the passage.
Modelling by Steph The squeeze is only passable by small cavers, and turns a right angled bend. The difficulty is the side-to-side size, rather than the height. Steph makes it look easy, but that is the joy of being tiny.
Modelling by Steph
The squeeze is only passable by small cavers, and turns a right angled bend. The difficulty is the side-to-side size, rather than the height. Steph makes it look easy, but that is the joy of being tiny.
Modelling by Steph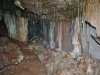 The passage then actually ends, at a calcited choke.
Camera, setup and lighting by Steph
The passage then actually ends, at a calcited choke.
Camera, setup and lighting by Steph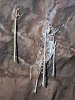 We reurned to Nether Rawl's oxbows, and took the large side passage, which contains these helictites above a canyon.
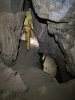 The passage looks over a canyon to the side passage which should lead directly to the Smithy, but it cannot be safely reached. Instead, our route followed a traverse ledge above the canyon where you have to lean onto the opposite wall.
Modelling by Pete, lighting by Tarquin and Pete
The passage looks over a canyon to the side passage which should lead directly to the Smithy, but it cannot be safely reached. Instead, our route followed a traverse ledge above the canyon where you have to lean onto the opposite wall.
Modelling by Pete, lighting by Tarquin and Pete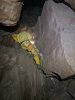 We then took a side passage, where a fairly tricky climb up the side of an enormous wedged boulder, gave access to an upper level that we had seen before, but could not reach.
Modelling by Pete, lighting by Tarquin and Pete
We then took a side passage, where a fairly tricky climb up the side of an enormous wedged boulder, gave access to an upper level that we had seen before, but could not reach.
Modelling by Pete, lighting by Tarquin and Pete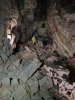 The upper level is dominated by this large chamber, which tops out at a choke made from huge blocks. A shattered loop of passage looks down an earlier decorated aven and the top of the Nether Rawl oxbows.
Modelling by Pete, lighting by Tarquin and Pete
The upper level is dominated by this large chamber, which tops out at a choke made from huge blocks. A shattered loop of passage looks down an earlier decorated aven and the top of the Nether Rawl oxbows.
Modelling by Pete, lighting by Tarquin and Pete We returned to the traverse passage, and continued along the next stage of it. At no point was it safe to climb down into the canyon.
Modelling by Pete, lighting by Tarquin and Pete
We returned to the traverse passage, and continued along the next stage of it. At no point was it safe to climb down into the canyon.
Modelling by Pete, lighting by Tarquin and Pete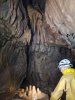 After some formations, the passage choked. The route then follows the small crawl to the left behind the formations, eventually climbing up into a rift just as we were ready to abandon the route for being too annoying.
Modelling by Pete, lighting by Tarquin and Pete
After some formations, the passage choked. The route then follows the small crawl to the left behind the formations, eventually climbing up into a rift just as we were ready to abandon the route for being too annoying.
Modelling by Pete, lighting by Tarquin and Pete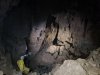 Just beyond the crawl is a junction where most routes go nowhere (but one chokes below The Smithy with the sound of roaring water). The only passage that goes anywhere breaks into this large chamber. There are two ways on, but only the large one is good.
Modelling by Pete, lighting by Tarquin and Pete
Just beyond the crawl is a junction where most routes go nowhere (but one chokes below The Smithy with the sound of roaring water). The only passage that goes anywhere breaks into this large chamber. There are two ways on, but only the large one is good.
Modelling by Pete, lighting by Tarquin and Pete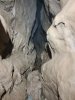 The smaller passage is this thrutchy awkwardness, and is best ignored.
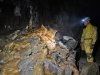 After the passages rejoin, they pass this large patch of honey-coloured flowstone, before rejoining the normal route at Big Shack 1.
Modelling by Pete, lighting by Tarquin and Pete
After the passages rejoin, they pass this large patch of honey-coloured flowstone, before rejoining the normal route at Big Shack 1.
Modelling by Pete, lighting by Tarquin and Pete
 The concrete tube entrance to Cwm Dwr Quarry Cave. Climbing relies on the artificial holds that have been chipped into the concrete, but this has been done on the wrong side, so you have to fit your shoulders into the narrow side instead of the side that is wide enough for a pair of shoulders. In this cave, it seems to be a tradition to keep using bad old approaches, so it is unlikely that anyone will put holds on the correct side. Just deal with it and climb.
Modelling by Pete, lighting by Tarquin and Pete
The concrete tube entrance to Cwm Dwr Quarry Cave. Climbing relies on the artificial holds that have been chipped into the concrete, but this has been done on the wrong side, so you have to fit your shoulders into the narrow side instead of the side that is wide enough for a pair of shoulders. In this cave, it seems to be a tradition to keep using bad old approaches, so it is unlikely that anyone will put holds on the correct side. Just deal with it and climb.
Modelling by Pete, lighting by Tarquin and Pete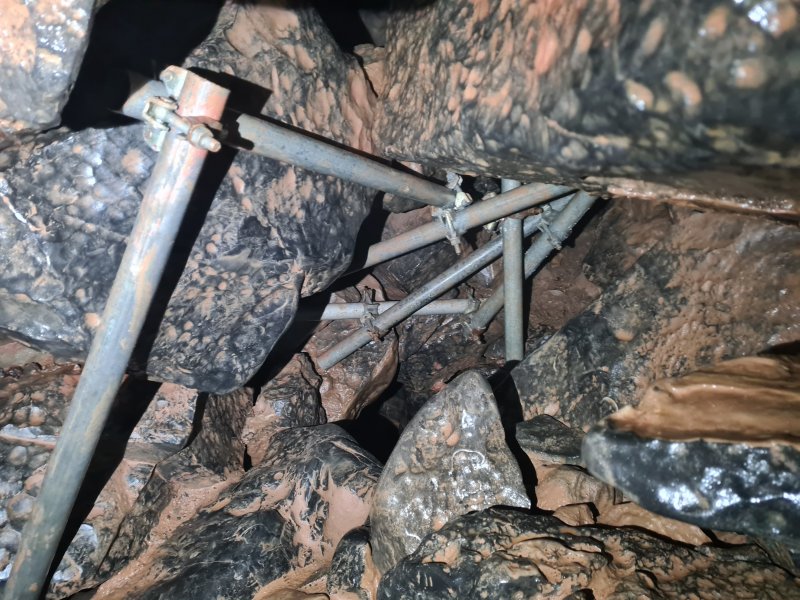 Cwm Dwr Choke. On the way in, you used to pass under a scaffold bar, and at the other end, you would pass over another bar. However, part of the choke collapsed above the first scaffold bar at the start of 2024. This new scaffolding was installed within a month, allowing access again.
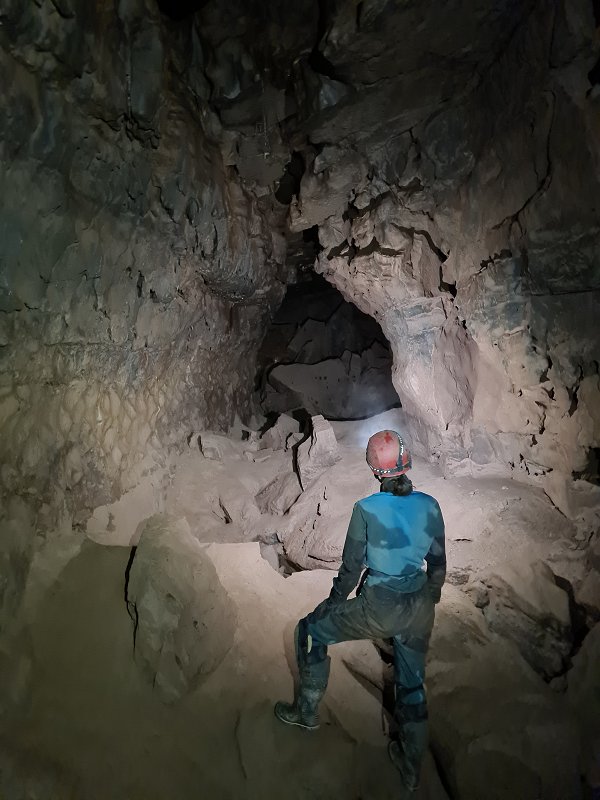 Once past the Main Route traverse, we turned right towards The Smithy, instead of taking the normal route to the left.
Modelling by Steph, lighting by Tarquin and Steph
Once past the Main Route traverse, we turned right towards The Smithy, instead of taking the normal route to the left.
Modelling by Steph, lighting by Tarquin and Steph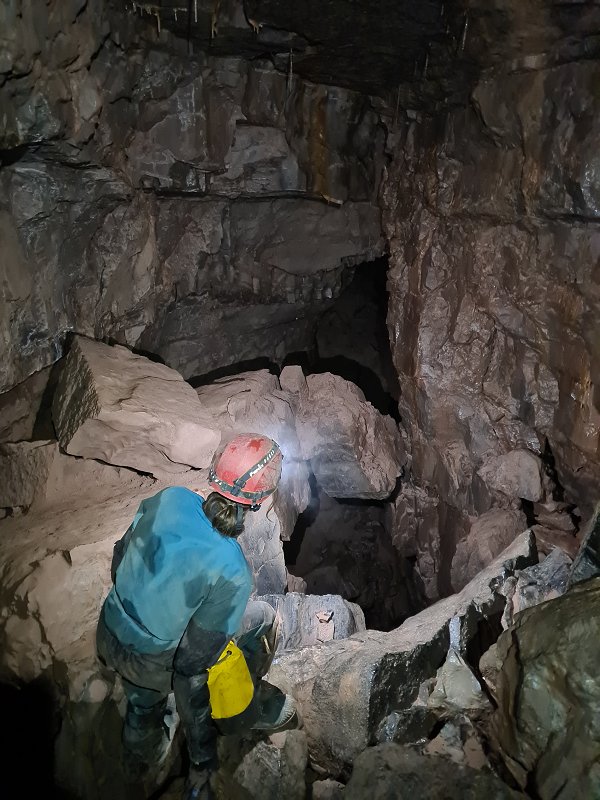 Top of The Smithy. This is the top of a tall drop, and although there appears to be a route down it, we bypassed it to the right of the camera.
Modelling by Steph, lighting by Tarquin and Steph
Top of The Smithy. This is the top of a tall drop, and although there appears to be a route down it, we bypassed it to the right of the camera.
Modelling by Steph, lighting by Tarquin and Steph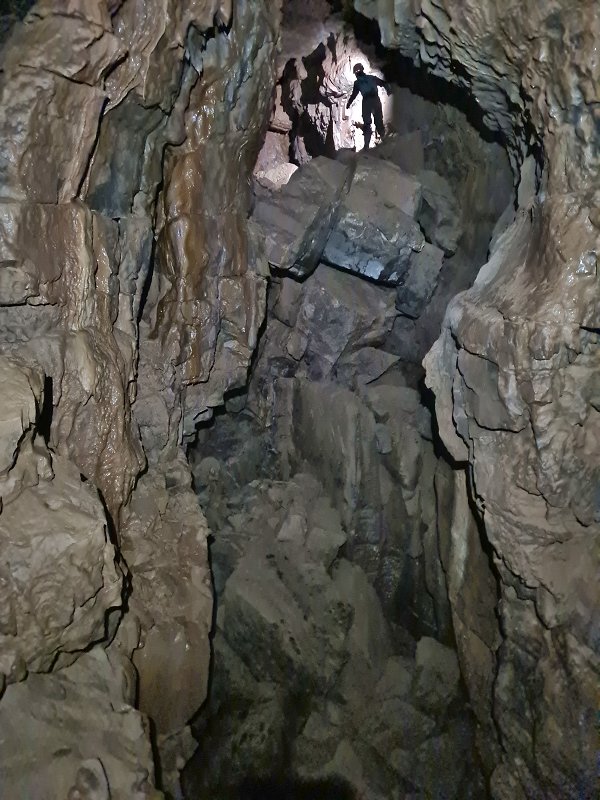 The Smithy, seen in the opposite direction from below. The same boulders are being stood on.
Modelling by Steph, lighting by Tarquin and Steph
The Smithy, seen in the opposite direction from below. The same boulders are being stood on.
Modelling by Steph, lighting by Tarquin and Steph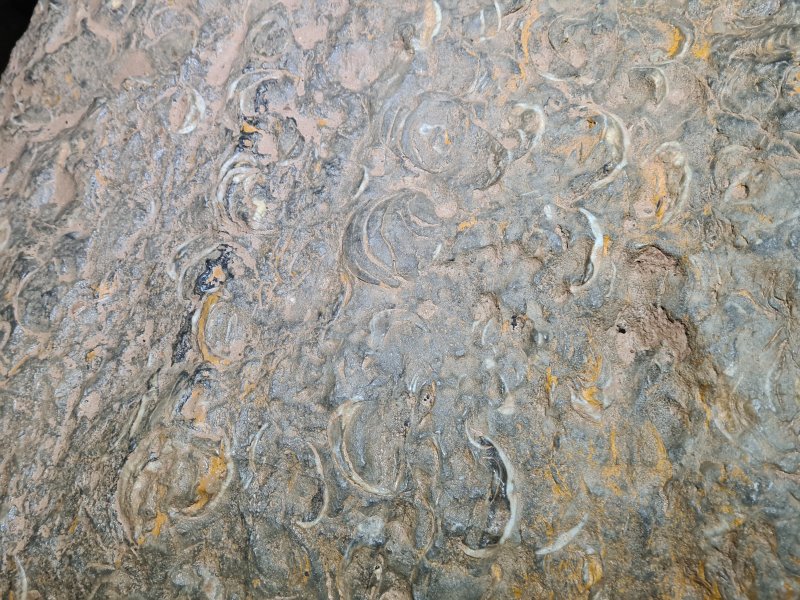 Fossils at The Smithy. These look like the bed seen at the very top of the limestone (above the honeycomb sandstone), at the top of Carreg Lem.
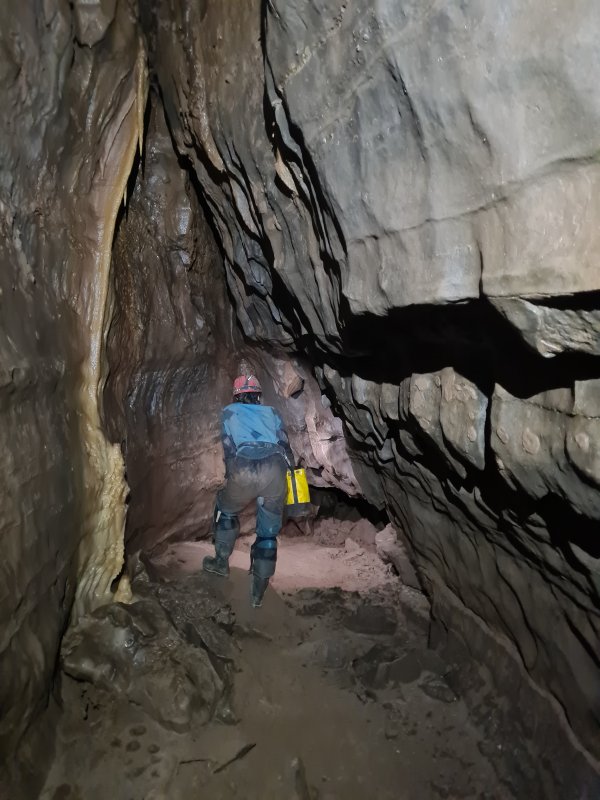 We visited a side passage at The Smithy. It is mostly walking sized, passing through a very short crawl, and ends at an almost-climbable pitch into a canyon that we would visit later.
Modelling by Steph, lighting by Tarquin and Steph
We visited a side passage at The Smithy. It is mostly walking sized, passing through a very short crawl, and ends at an almost-climbable pitch into a canyon that we would visit later.
Modelling by Steph, lighting by Tarquin and Steph The start of Sand Banks.
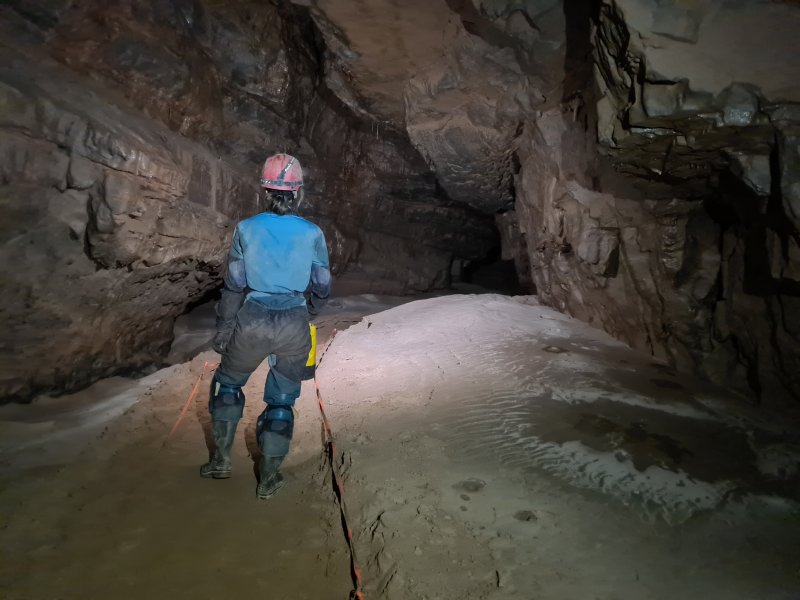 Dry Route just after the junction with Sand Banks.
Modelling by Steph, lighting by Tarquin and Steph
Dry Route just after the junction with Sand Banks.
Modelling by Steph, lighting by Tarquin and Steph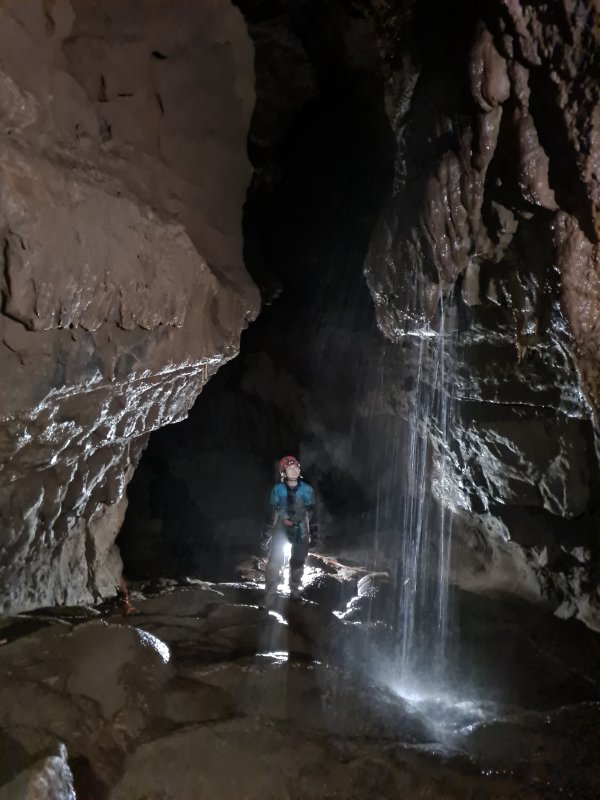 Just downstream from the junction of Dry Way and Nether Rawl is Piccadilly, a section with an incredible echo, and a waterfall pouring in from a blind side passage.
Modelling by Steph
Just downstream from the junction of Dry Way and Nether Rawl is Piccadilly, a section with an incredible echo, and a waterfall pouring in from a blind side passage.
Modelling by Steph Upstream from the junction of Dry Way and Nether Rawl. This passage is really quite attractive, and would be lovely for stomping along for several km.
Modelling by Pete, lighting by Tarquin and Pete
Upstream from the junction of Dry Way and Nether Rawl. This passage is really quite attractive, and would be lovely for stomping along for several km.
Modelling by Pete, lighting by Tarquin and Pete When Nether Rawl's stream first branches, we headed left beneath the pull-up cord to Upper Piccadilly. The passage then got very small, and we ducked into a dry crawl on the left. This clearly sometimes acts as a flood overflow, and can carry a stream.
Modelling by Pete, lighting by Tarquin and Pete
When Nether Rawl's stream first branches, we headed left beneath the pull-up cord to Upper Piccadilly. The passage then got very small, and we ducked into a dry crawl on the left. This clearly sometimes acts as a flood overflow, and can carry a stream.
Modelling by Pete, lighting by Tarquin and Pete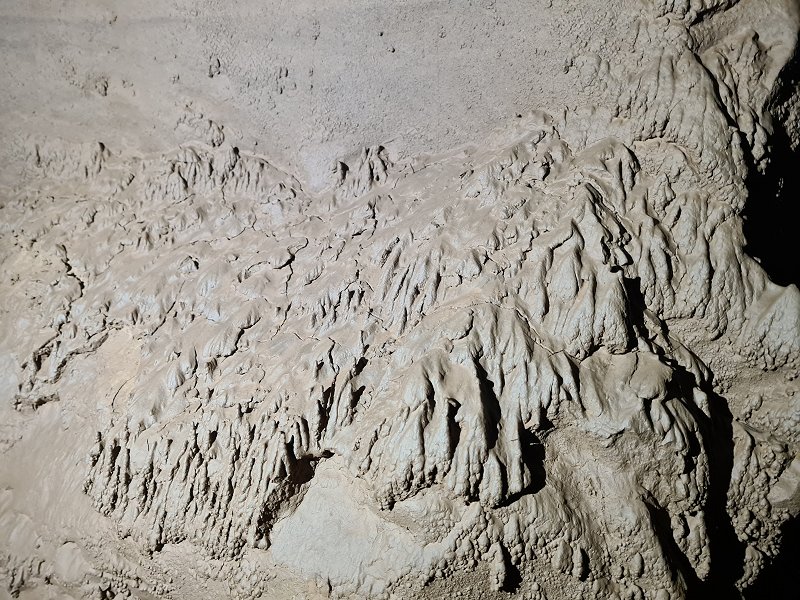 The small passage gains a stream and enlarges a little, with beautiful surge marks and other mud formations.
 This then joins the downstream end of Chert Passage just before its silted sump, which is surrounded by more mud fowmations.
 Upstream, Chert Passage quickly enlarges to very grant proportions.
Modelling by Pete, lighting by Tarquin and Pete
Upstream, Chert Passage quickly enlarges to very grant proportions.
Modelling by Pete, lighting by Tarquin and Pete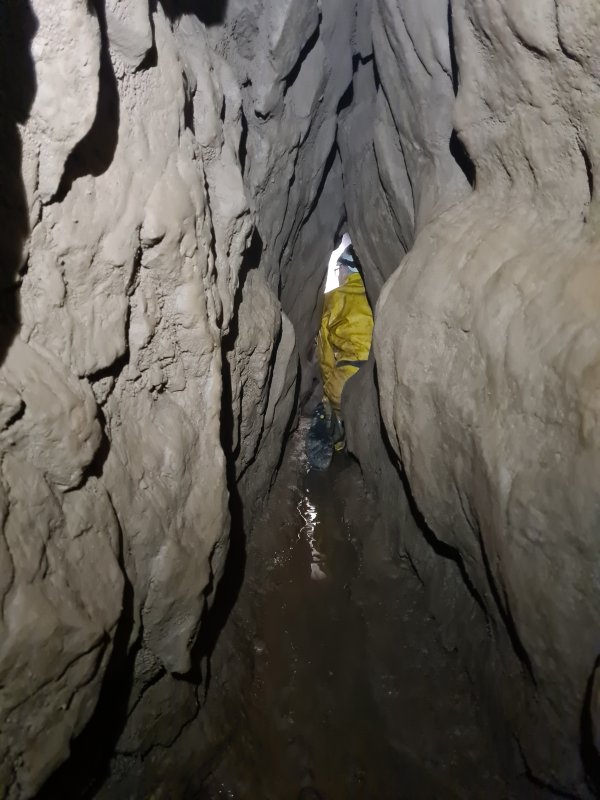 A small inlet passage to the right is the wet crawl to Anniversary Aven. There is a lot of cave up there that we left for another day. Immediately afterwards is a high level cross roads, with the left being stated as a climb but really being a pitch, leading to a pitch down to Heol Eira, and the passage to the right being unclimbable.
Modelling by Pete, lighting by Tarquin and Pete
A small inlet passage to the right is the wet crawl to Anniversary Aven. There is a lot of cave up there that we left for another day. Immediately afterwards is a high level cross roads, with the left being stated as a climb but really being a pitch, leading to a pitch down to Heol Eira, and the passage to the right being unclimbable.
Modelling by Pete, lighting by Tarquin and Pete Chert Passage has a thick calcite crust on mud. In places, this has been washed out to create false floors. Near the end, the passage climbs steeply to a choke, with plenty of evidence of rocks crashing down the slope. It is not a place to spend time.
Modelling by Pete, lighting by Tarquin and Pete
Chert Passage has a thick calcite crust on mud. In places, this has been washed out to create false floors. Near the end, the passage climbs steeply to a choke, with plenty of evidence of rocks crashing down the slope. It is not a place to spend time.
Modelling by Pete, lighting by Tarquin and Pete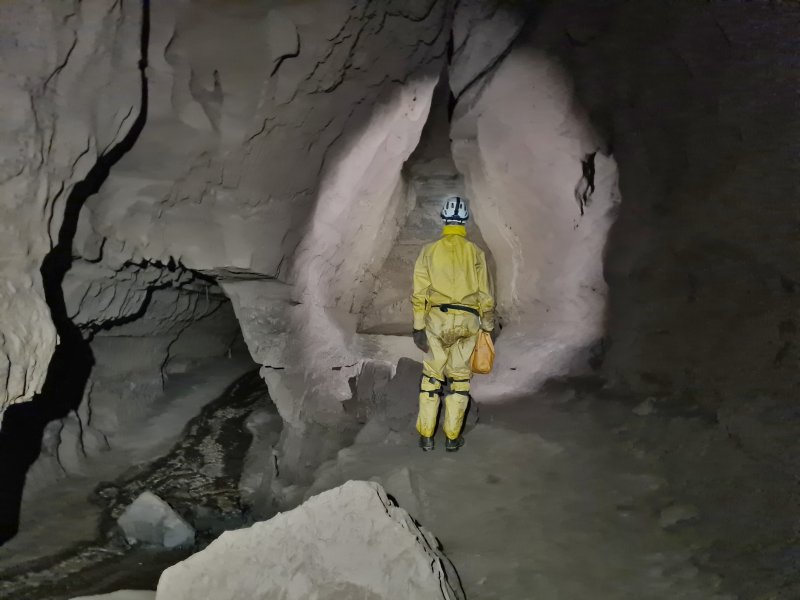 Continuing upstream on the right branch of Nether Rawl, the passage remains large for quite a while, with a series of oxbows, where it is easy not to realise that the stream has split yet again, and a major side passage has led off. We would use that later. A smaller side passage hidden behind boulders at one point takes the water over to the other branch shown earlier.
Modelling by Pete, lighting by Tarquin and Pete
Continuing upstream on the right branch of Nether Rawl, the passage remains large for quite a while, with a series of oxbows, where it is easy not to realise that the stream has split yet again, and a major side passage has led off. We would use that later. A smaller side passage hidden behind boulders at one point takes the water over to the other branch shown earlier.
Modelling by Pete, lighting by Tarquin and Pete Cracked mud deposits.
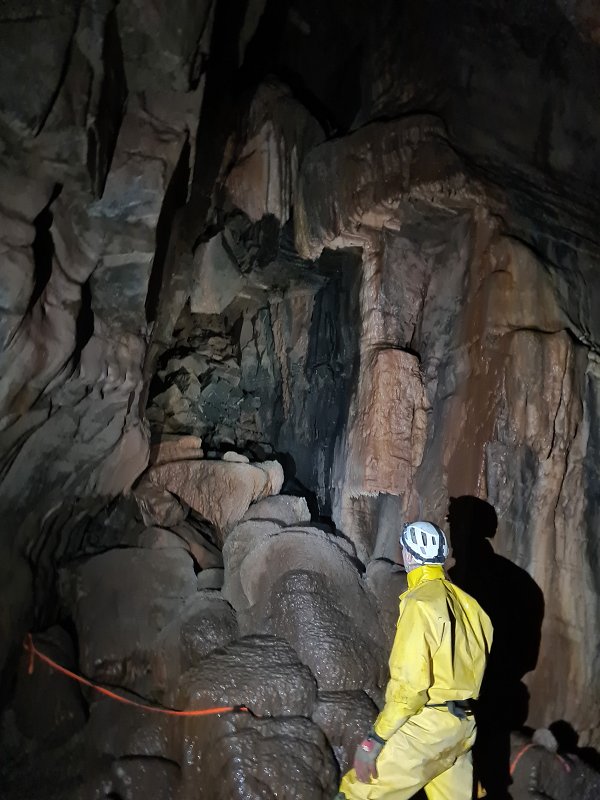 A calcited aven. The passage at the top can be more easily reached via another route, and we would visit it later.
Modelling by Pete, lighting by Tarquin and Pete
A calcited aven. The passage at the top can be more easily reached via another route, and we would visit it later.
Modelling by Pete, lighting by Tarquin and Pete Where the big passage starts to close down, a small side passage can be reached up this exposed climb. This is relatively easy on the way up, but extremely hard on the way down. One of the main footholds, seen here as a little ledge on the right above the boulder, cannot be seen from above, and the climb seems best done facing outwards, with someone to guide you. It is not possible for someone to realistically spot you from below.
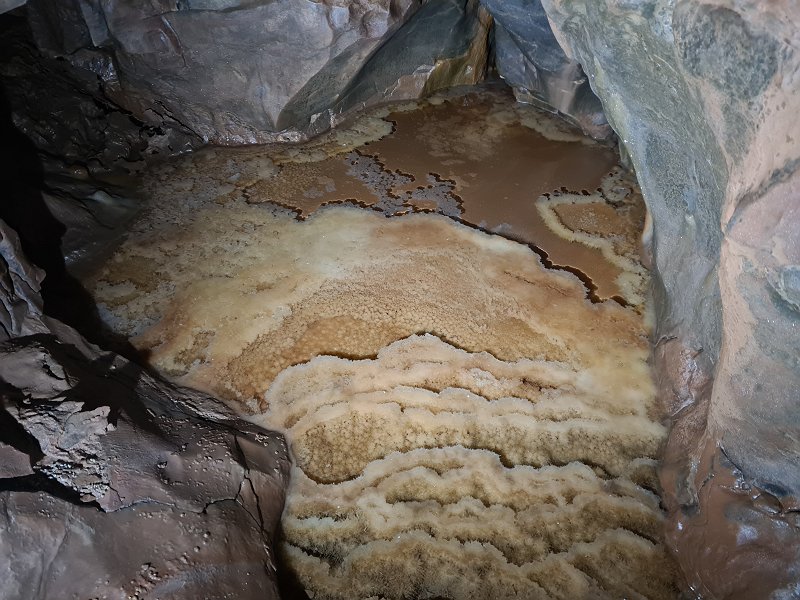 The small side passage reaches this beautiful crystal pool.
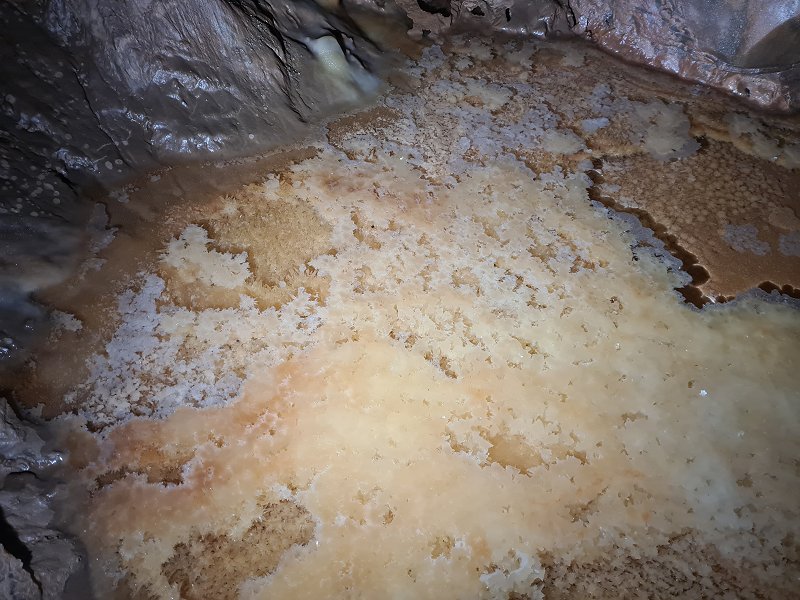 Detail of the left side of the pool.
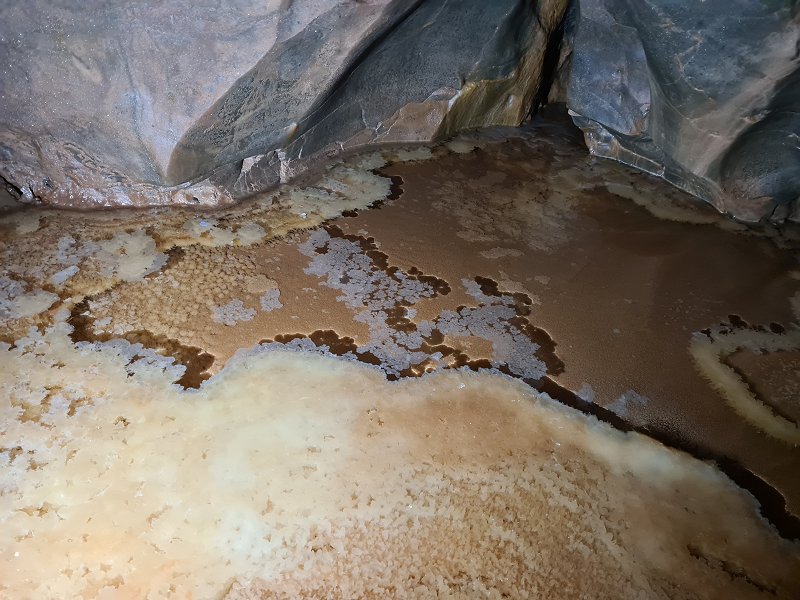 Central part of the pool, with calcite rafts.
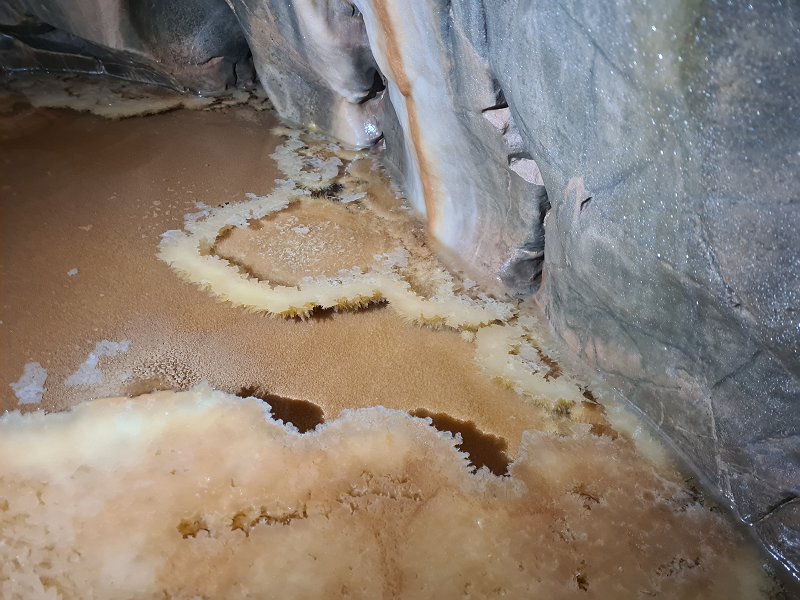 Detail of the right side of the pool.
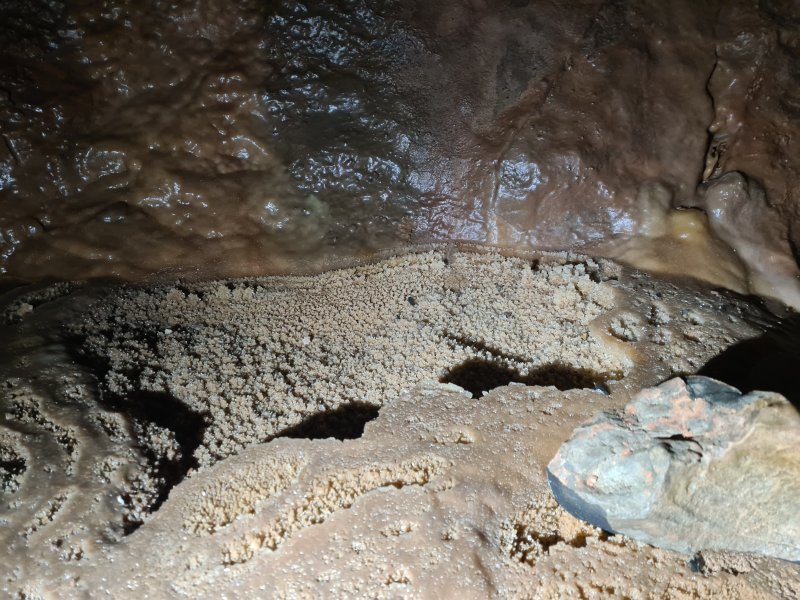 Dry crystal pool in a side passage.
 A couple of routes unite in a chamber, where there are more climbs into another choice of routes. Either works but one is easier.
Modelling by Pete, lighting by Tarquin and Pete
A couple of routes unite in a chamber, where there are more climbs into another choice of routes. Either works but one is easier.
Modelling by Pete, lighting by Tarquin and Pete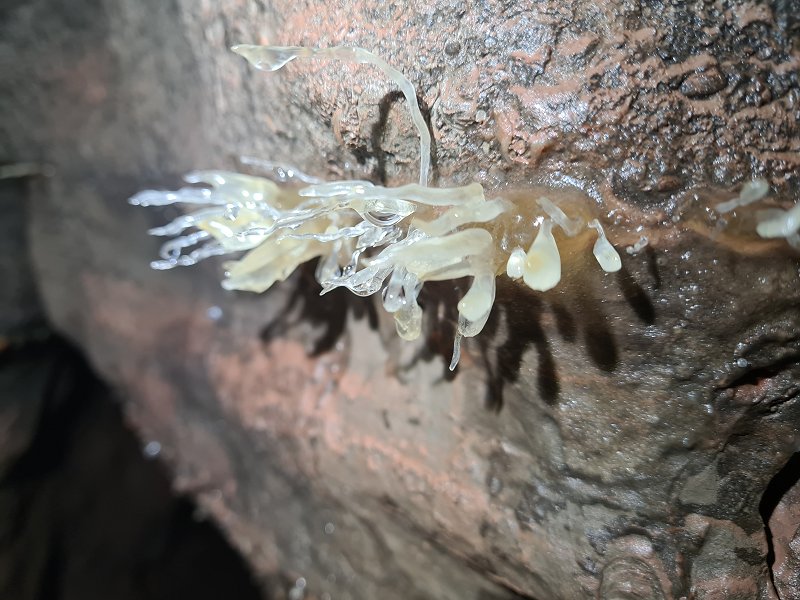 Small helictites.
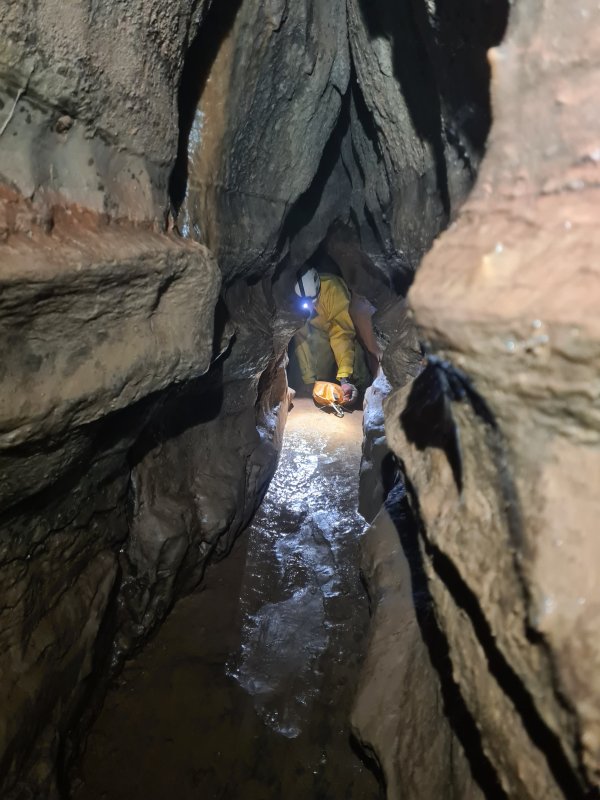 When the routes join, the way on stays small, but it is possible to stoop for most of it.
Modelling by Pete, lighting by Tarquin and Pete
When the routes join, the way on stays small, but it is possible to stoop for most of it.
Modelling by Pete, lighting by Tarquin and Pete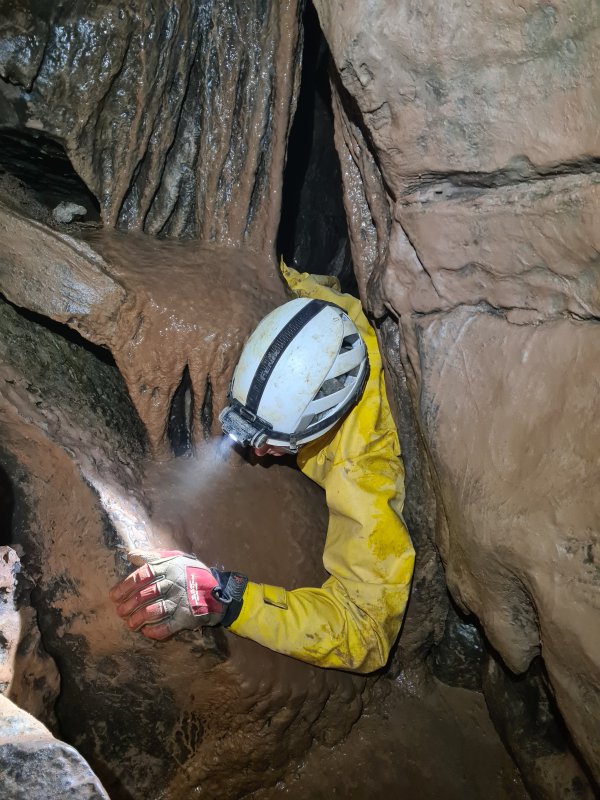 This squeeze guards the way on, and it is quite tight, but looks smaller than it is.
Modelling by Pete, lighting by Tarquin and Pete
This squeeze guards the way on, and it is quite tight, but looks smaller than it is.
Modelling by Pete, lighting by Tarquin and Pete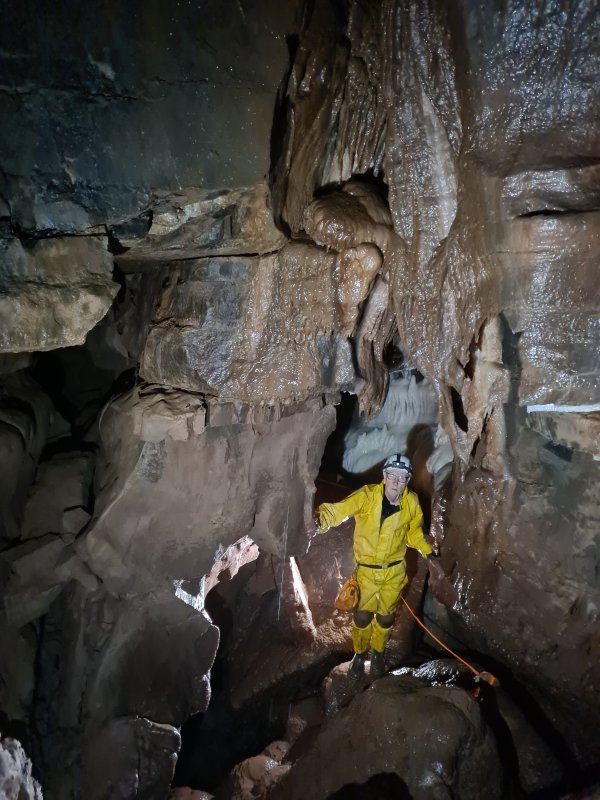 At a junction, the way on is ahead, while one side is stupidly tight, and the other requires climbing on a loose rock, but both can be reached more easily from the way on. The passage ahead ends in this chamber. The way in is seen on the left here. Tapioca is ahead-right. Down in the floor is a way below Tapioca. Behind the camera to the left is the passage with the big crystals, and behind the camera to the right is the long side passage with more formations. The pictures will be presented in that sequence.
Modelling by Pete, lighting by Tarquin and Pete
At a junction, the way on is ahead, while one side is stupidly tight, and the other requires climbing on a loose rock, but both can be reached more easily from the way on. The passage ahead ends in this chamber. The way in is seen on the left here. Tapioca is ahead-right. Down in the floor is a way below Tapioca. Behind the camera to the left is the passage with the big crystals, and behind the camera to the right is the long side passage with more formations. The pictures will be presented in that sequence.
Modelling by Pete, lighting by Tarquin and Pete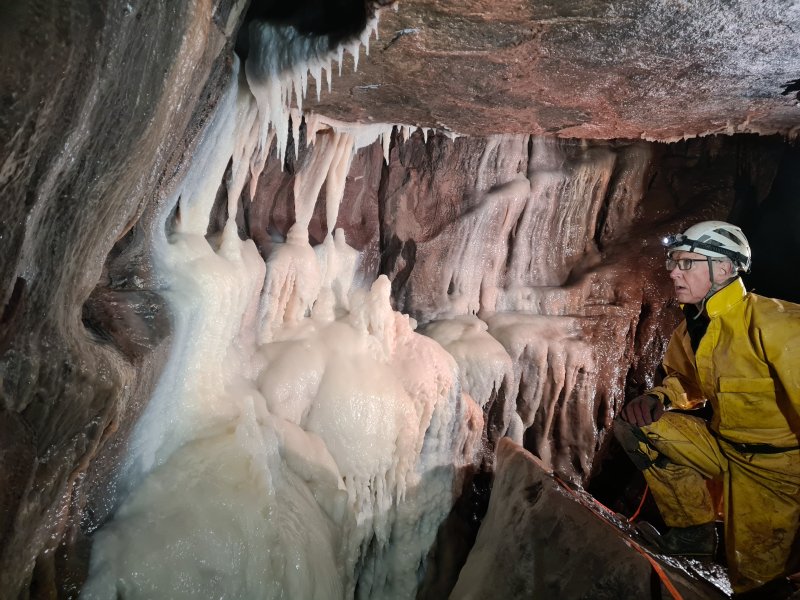 The highlight of this area is Tapioca, one of the finest formations in Cwm Dwr. The texture is unusually creamy, and Tapioca is a good name.
Modelling by Pete, lighting by Tarquin and Pete
The highlight of this area is Tapioca, one of the finest formations in Cwm Dwr. The texture is unusually creamy, and Tapioca is a good name.
Modelling by Pete, lighting by Tarquin and Pete Translucent curtain, made from large crystals.
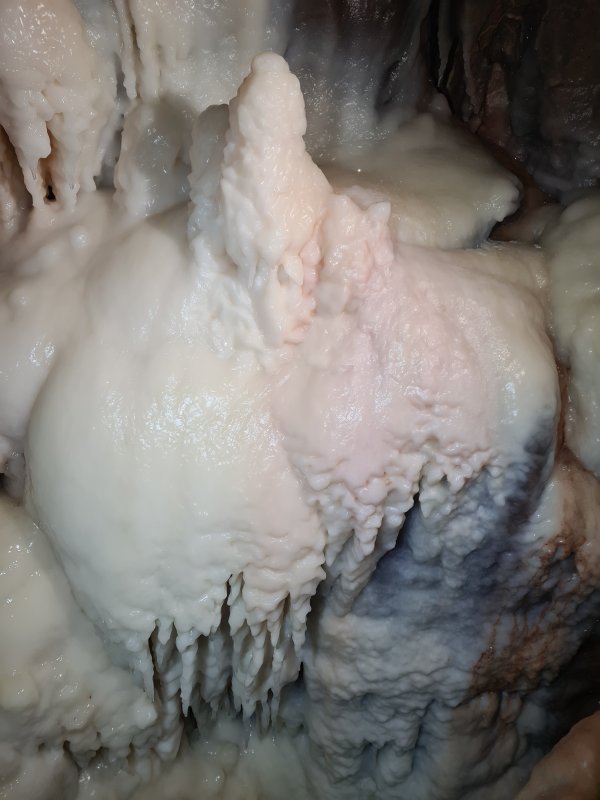 The majority of the formation is an unexpectedly bright white, but some sections have a faint pink from the old red sandstone mud. This part of the cave lies under the field to the right just after you pass through the Penwyllt car park, but despite being very close to Cwm Dwr Jama (which lies beneath the driveway between the Penwyllt car park and the public car park), and despite being fairly close to the old limekilns which created the Cwm Dwr Jama formations, its formations appear to be natural, not made from lime pollution.
Lighting by Tarquin and Pete
The majority of the formation is an unexpectedly bright white, but some sections have a faint pink from the old red sandstone mud. This part of the cave lies under the field to the right just after you pass through the Penwyllt car park, but despite being very close to Cwm Dwr Jama (which lies beneath the driveway between the Penwyllt car park and the public car park), and despite being fairly close to the old limekilns which created the Cwm Dwr Jama formations, its formations appear to be natural, not made from lime pollution.
Lighting by Tarquin and Pete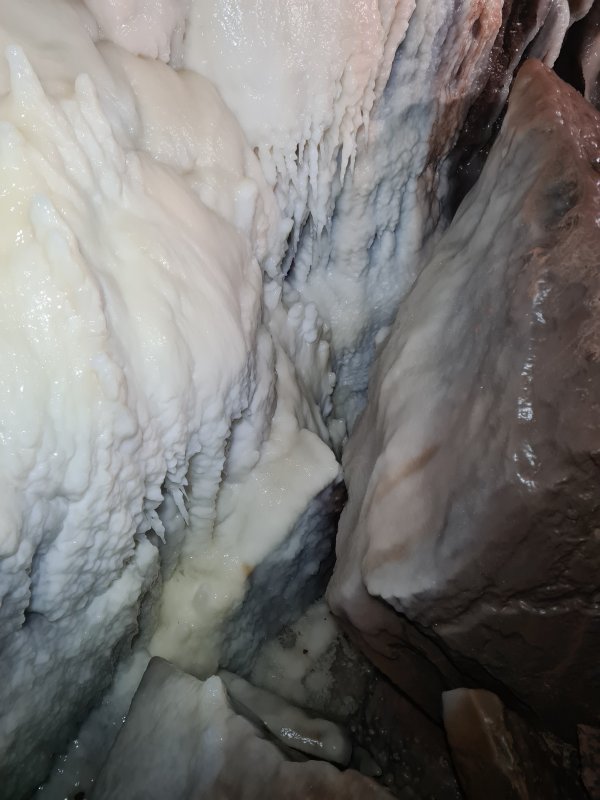 I guess we should be thankful they called it Tapioca. The other option was The Nut Room.
Lighting by Tarquin and Pete
I guess we should be thankful they called it Tapioca. The other option was The Nut Room.
Lighting by Tarquin and Pete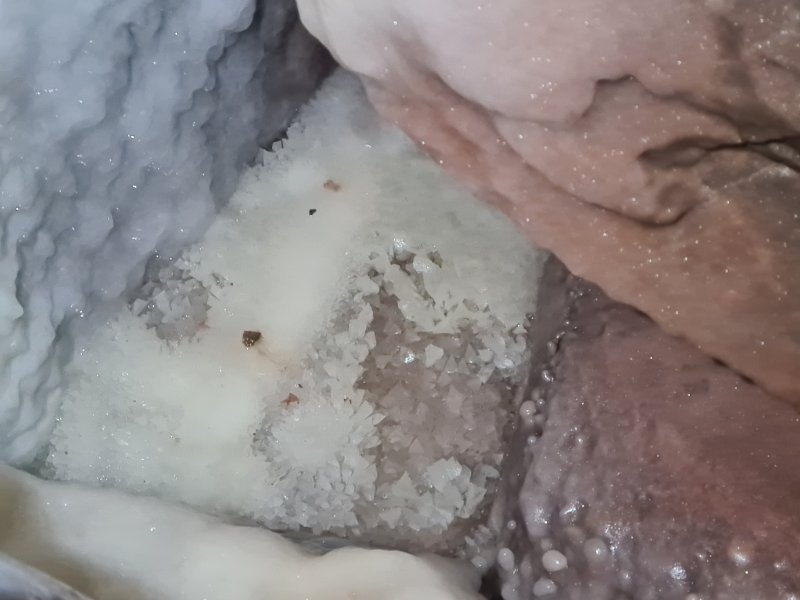 Crystal pool in the floor. The mud, incidentally, is splashed by visitors.
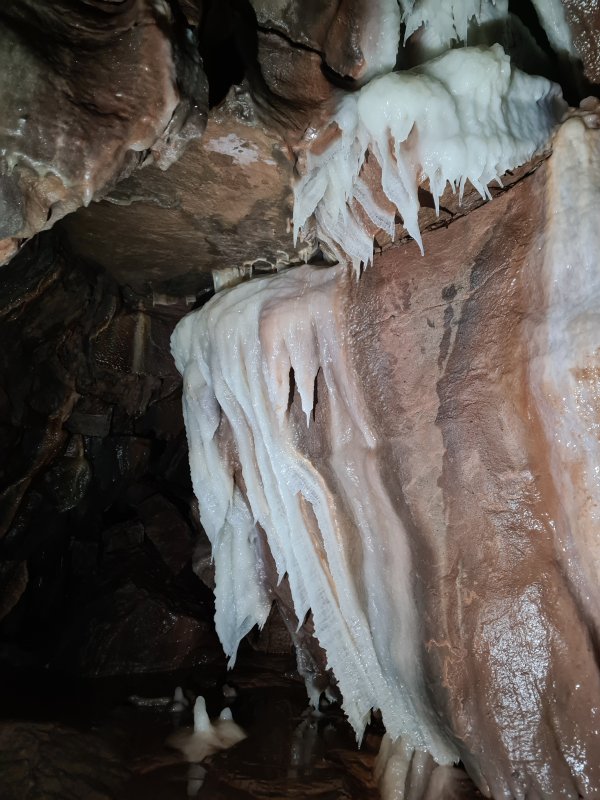 The passage in the floor of the previous chamber drops into a small chamber below Tapioca, where the formations continue, with a set of translucent curtains.
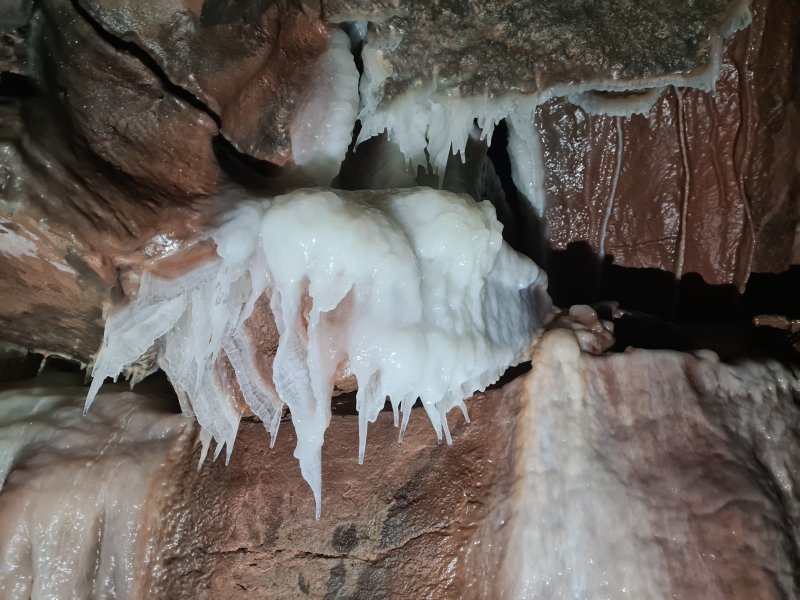 Creamy opening.
 Secondary flow from the side.
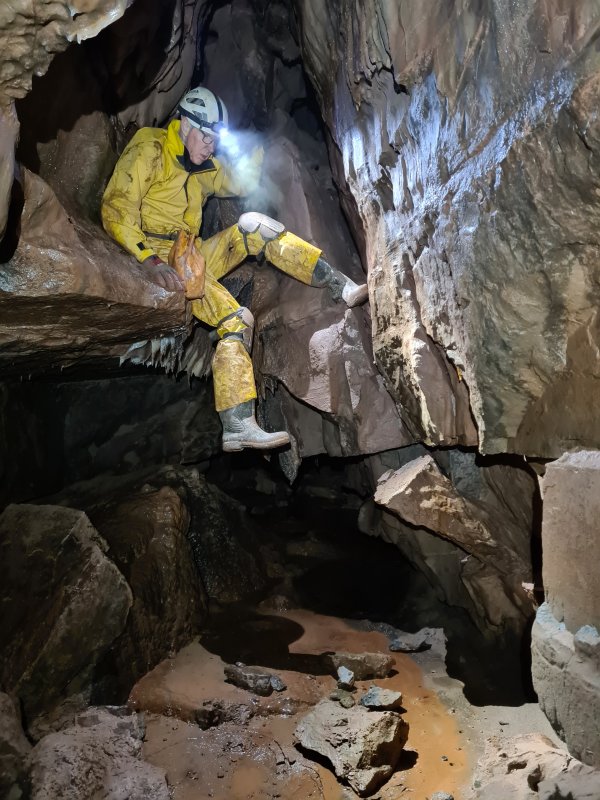 The passage can also be reached via this climb from the junction before Tapioca, but it relies on a dodgy rock flake that seems to be supported by nothing. The passage continues into a lower chamber.
Modelling by Pete, lighting by Tarquin and Pete
The passage can also be reached via this climb from the junction before Tapioca, but it relies on a dodgy rock flake that seems to be supported by nothing. The passage continues into a lower chamber.
Modelling by Pete, lighting by Tarquin and Pete Dried crystal pool near the climb.
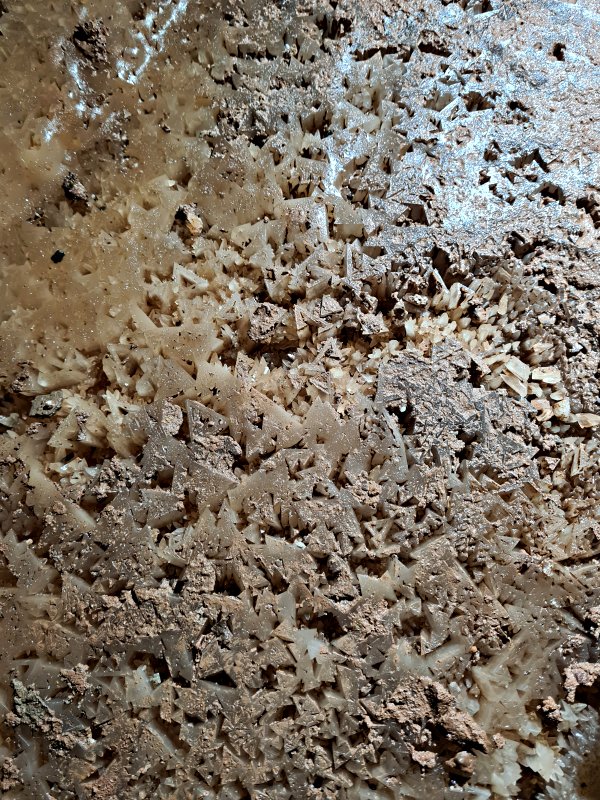 Right next to the crystal pool is a set of large, triangular crystals. Sadly these are not protected (a common theme in this cave), and they have been muddied by cavers who did not realise they are there.
Lighting by Tarquin and Steph
Right next to the crystal pool is a set of large, triangular crystals. Sadly these are not protected (a common theme in this cave), and they have been muddied by cavers who did not realise they are there.
Lighting by Tarquin and Steph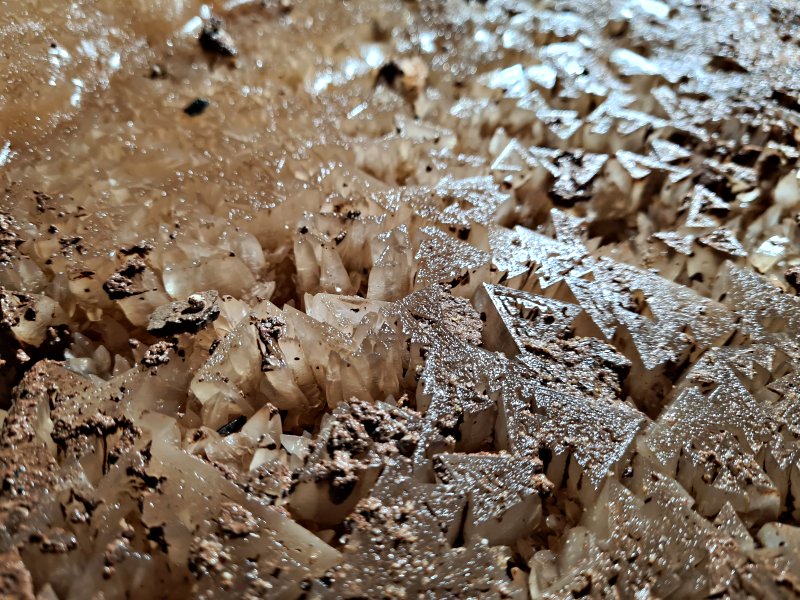 Detail of the triangular crystals.
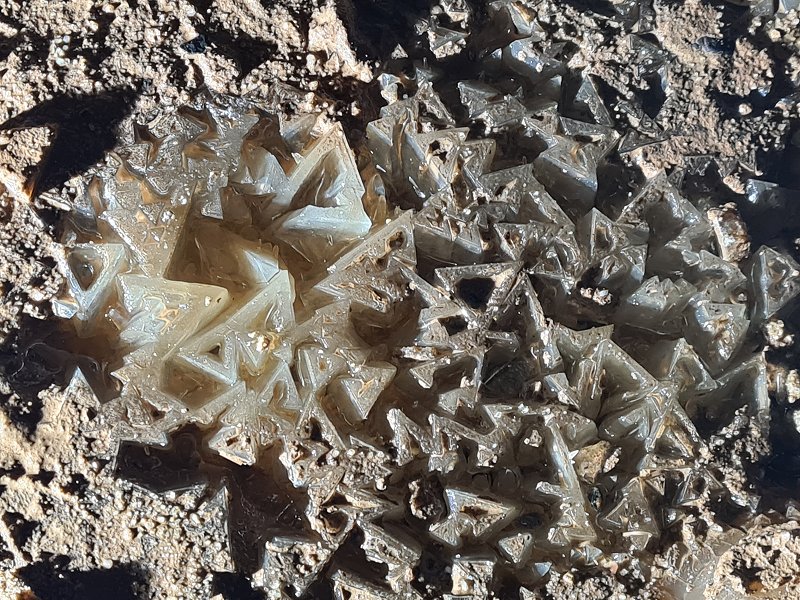 The best ones have a drip cleaning them.
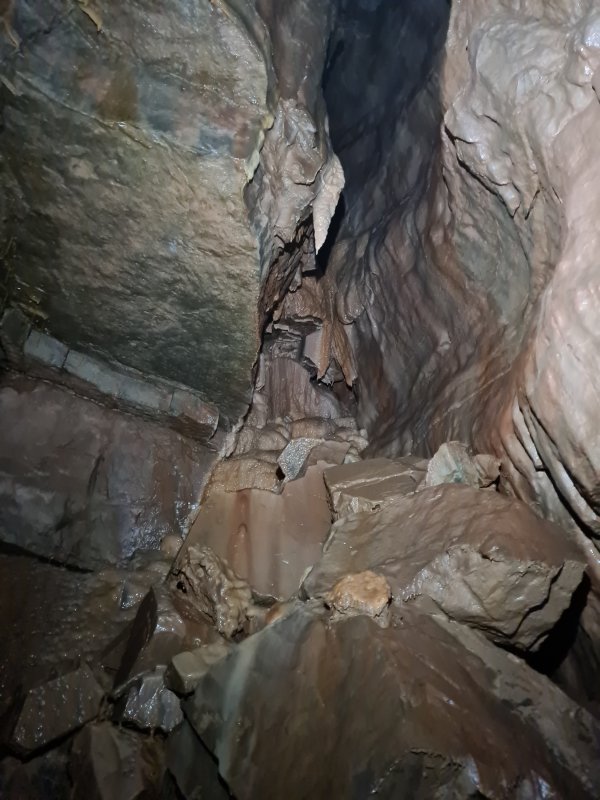 Calcited alcove in the chamber.
 The passage leading off from the lower chamber, which quickly chokes.
Modelling by Pete, lighting by Tarquin and Pete
The passage leading off from the lower chamber, which quickly chokes.
Modelling by Pete, lighting by Tarquin and Pete Crystal pool on the mud floor of the passage. This is a much more familiar colour, typical for this cave.
 Tucked in the side of the chamber is a tiny side passage, which looks quite uninspiring. It ends with a view over flowstone, which seems to be sourced from a crystal pool in a passage above.
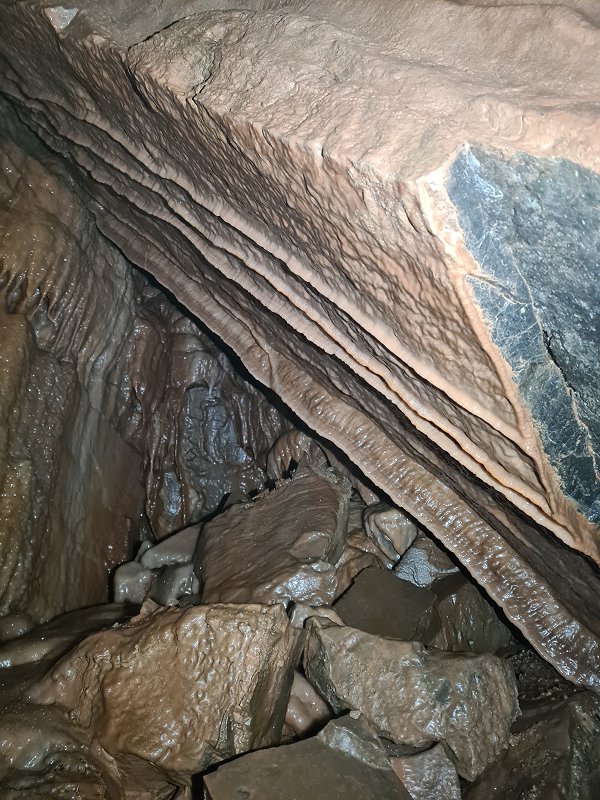 A side passage from that passage has a choked aven with these curtains.
 False floor below the curtains.
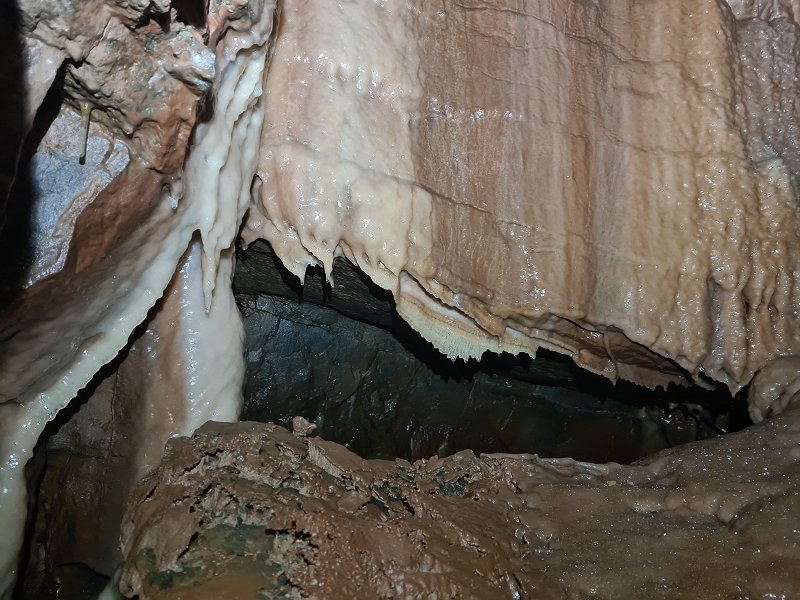 The edge of the aven has its own small formations.
 Hidden behind the formations is a small crystal pool.
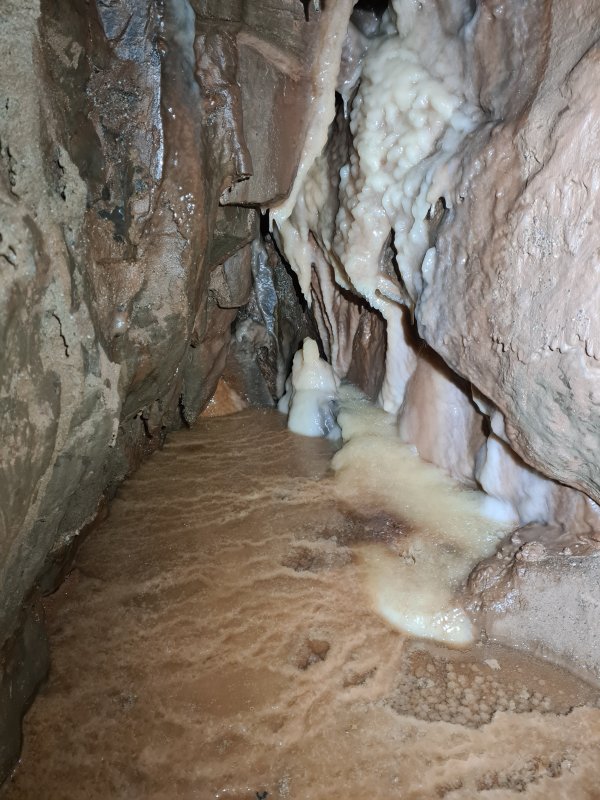 The formations combine to form this flowstone.
 Crystal pool filled with stars in the flowstone.
 Back at the junction where we entered the Tapioca area, the first side passage starts with this elaborate flowstone formation. The texture of it looks like sheep's wool, and close inspection shows a much more normal calcite underneath, so the surface texture appears to be a result of lime pollution.
Modelling by Pete, lighting by Tarquin and Pete
Back at the junction where we entered the Tapioca area, the first side passage starts with this elaborate flowstone formation. The texture of it looks like sheep's wool, and close inspection shows a much more normal calcite underneath, so the surface texture appears to be a result of lime pollution.
Modelling by Pete, lighting by Tarquin and Pete More flowstone below the flowstone formation.
Modelling by Pete, lighting by Tarquin and Pete
More flowstone below the flowstone formation.
Modelling by Pete, lighting by Tarquin and Pete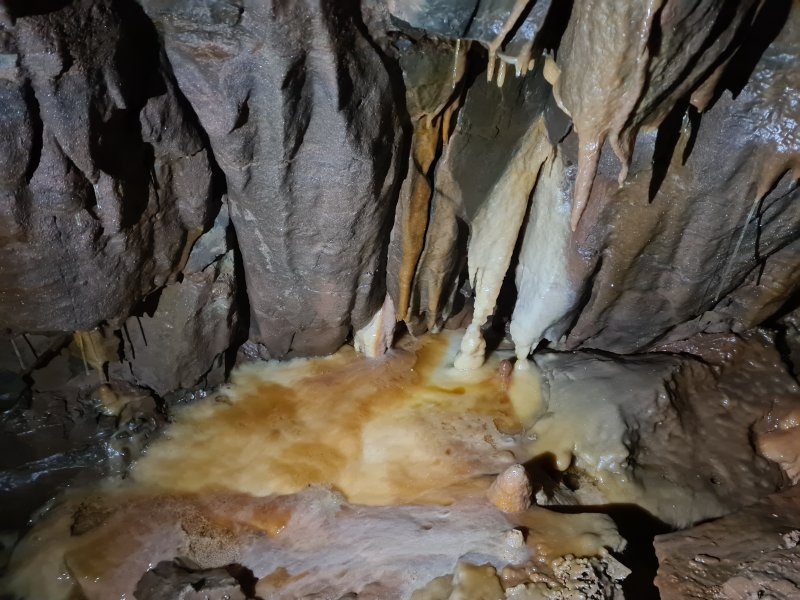 Rust-coloured formations in the side passage.
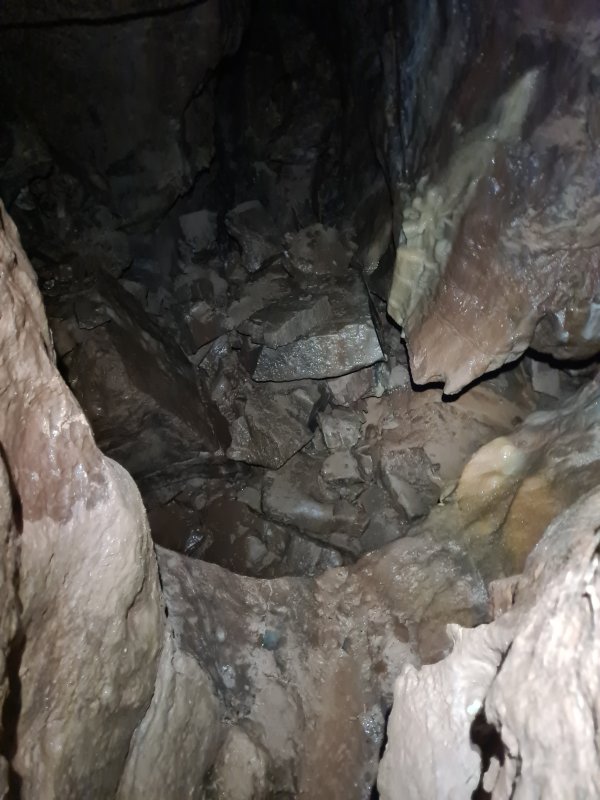 Opposite them is a pitch down into the lower chamber. This pitch is not labelled on the survey.
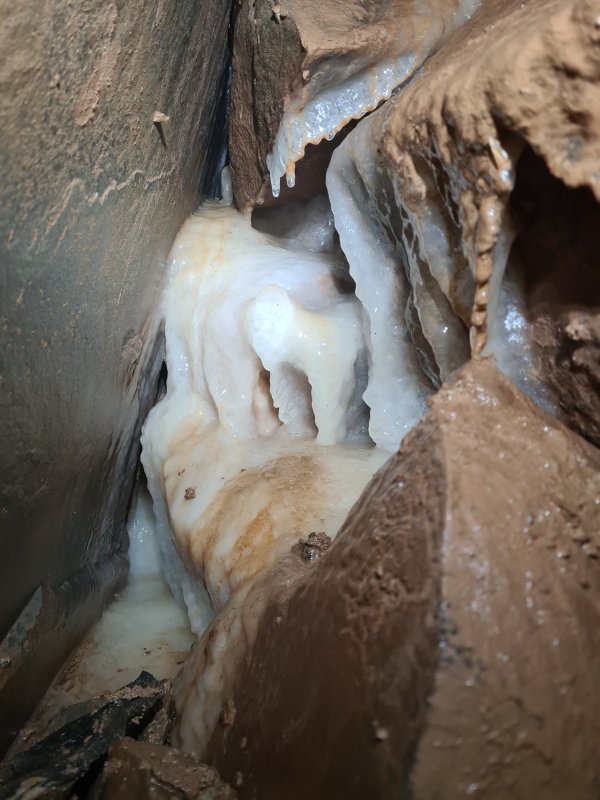 The passage then passes through a rocky clamber, adorned with muddied white flowstone. The rocks are loose, and need to be treated with care.
 Flowstone in the rocky clamber.
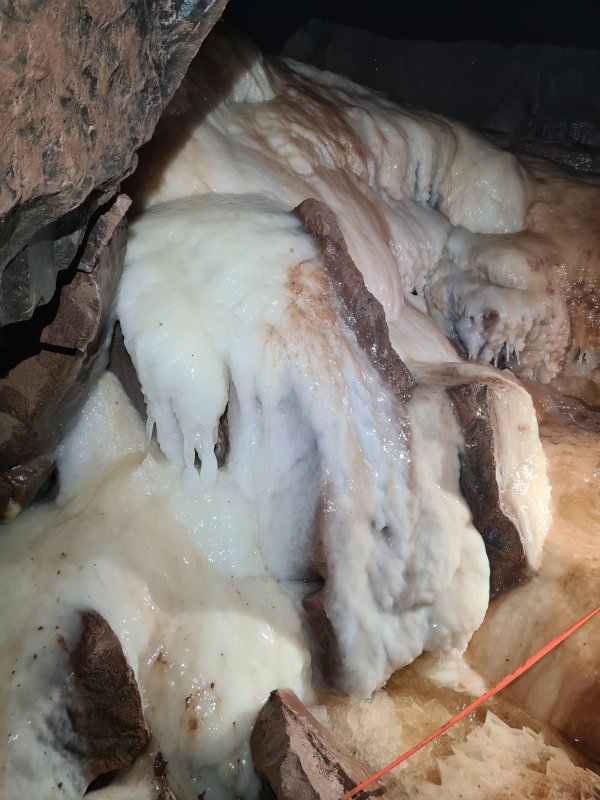 The clamber emerges into a very small chamber, adorned with flowstone. Stepping into the chamber is easy, but getting out without falling onto the formations is quite tricky, and is best done backwards, carefully stepping onto the loose rocks of the clamber. The main target can actually be seen without stepping into the chamber, and can be seen in this picture.
Lighting by Tarquin and Pete
The clamber emerges into a very small chamber, adorned with flowstone. Stepping into the chamber is easy, but getting out without falling onto the formations is quite tricky, and is best done backwards, carefully stepping onto the loose rocks of the clamber. The main target can actually be seen without stepping into the chamber, and can be seen in this picture.
Lighting by Tarquin and Pete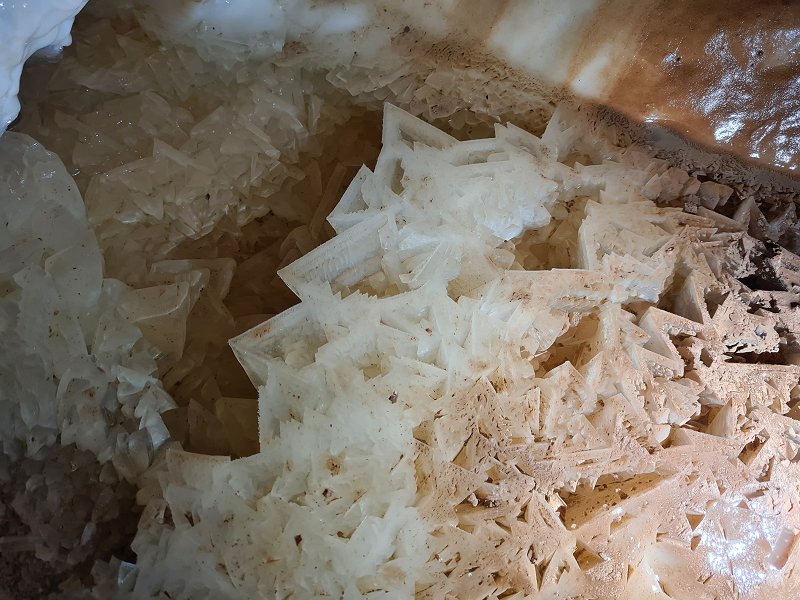 The main target is this crystal pool filled with enormous, geometric crystals.
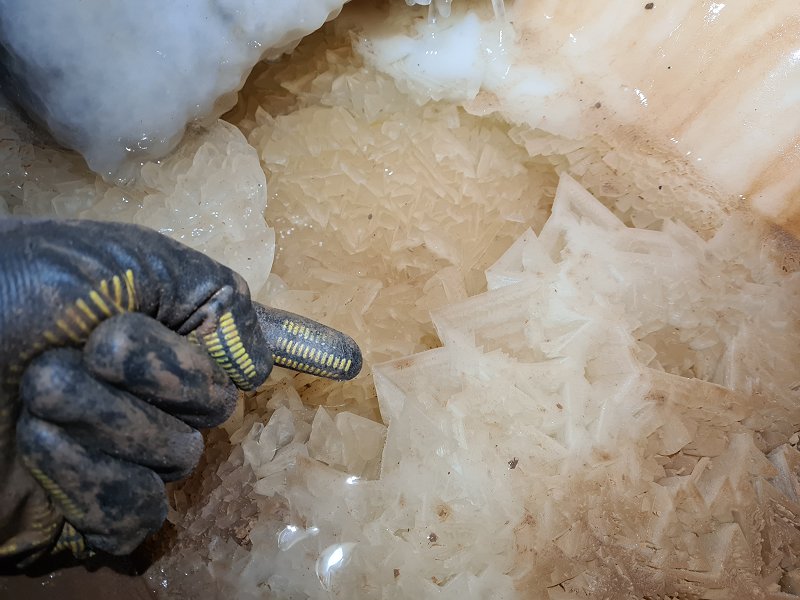 The size of the crystals is hard to appreciate without something for scale.
Modelling by a random glove
The size of the crystals is hard to appreciate without something for scale.
Modelling by a random glove A second pool in the chamber.
 The upper part of the chamber, muddied during exploration, and now taped off because it does not go anywhere. Guess they did not know that muddy boots can actually be taken off.
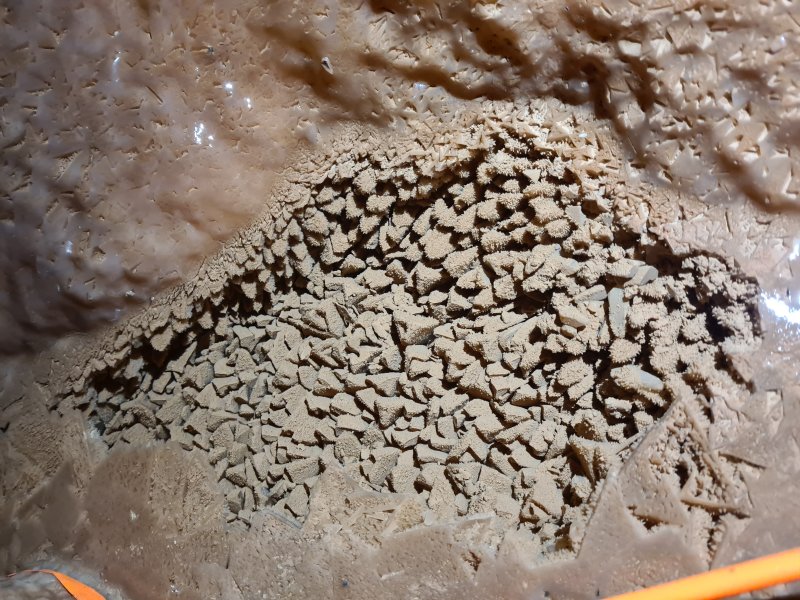 Crystal pool in the upper part of the chamber, now with more normal crystals. However, it still has some of the geometric crystals at the edge.
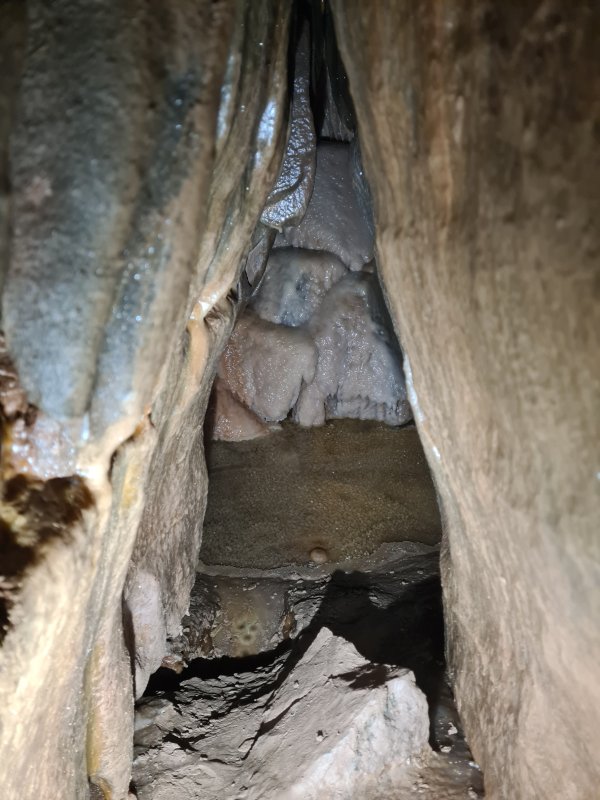 A taped-off rift in the upper part of the chamber has flowstone and a crystal pool, which sits above the flowstone in the uninspiring passage tucked into the side of the much earlier chamber. It is not possible to get close enough for a better picture.
 Close-up of the crystal pool in the taped-off rift, taken using digital zoom (unfortunately, this is why it is so grainy and poorly focused).
 Back at the junction where we entered the Tapioca area, the last passage is reached by crawling between boulders, rather than climbing down them. The rocks at the bottom have very distinctive patterns on them, looking like giraffe print. These appear to be vermiculations, clumping of mud caused by microbial action.
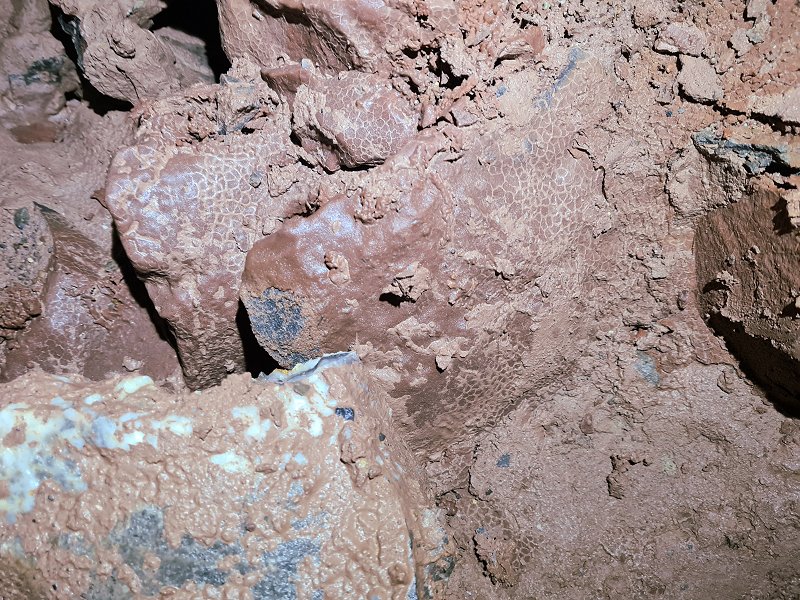 The patterns cover a large area. In a small quality, it might be just a pattern formed by the sunction as rocks are pulled apart. But these are over many surfaces where that could not be the case.
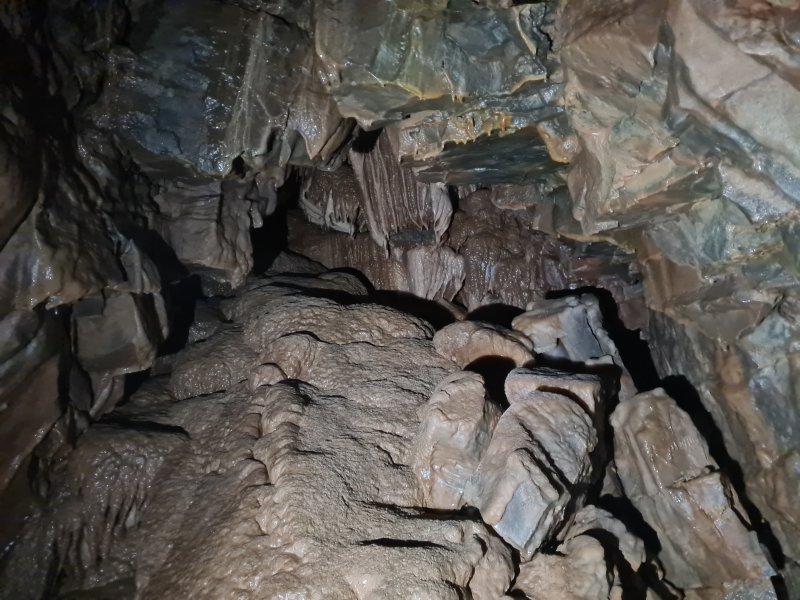 The passage is large, and climbs up to a heavily calcited choke. A clamber into a rift provides a way on. It splits, with the left branch quickly choking.
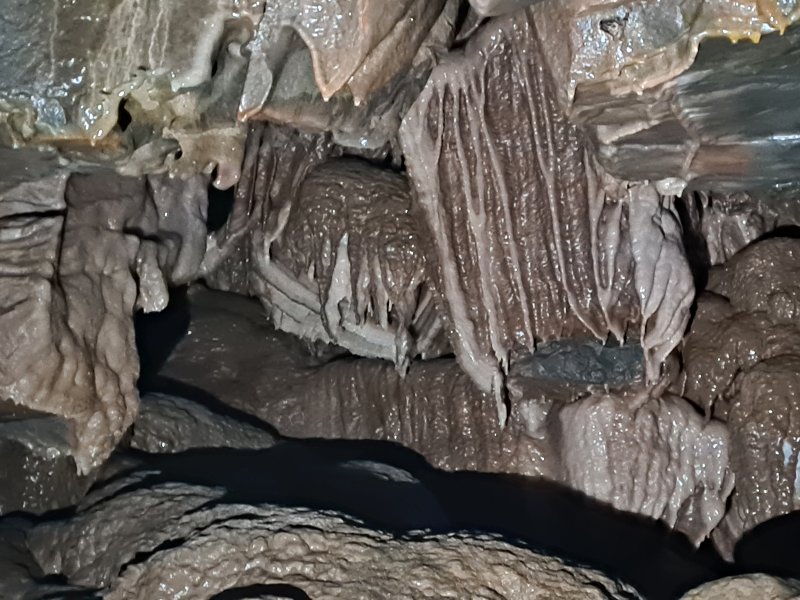 Top of the calcited choke.
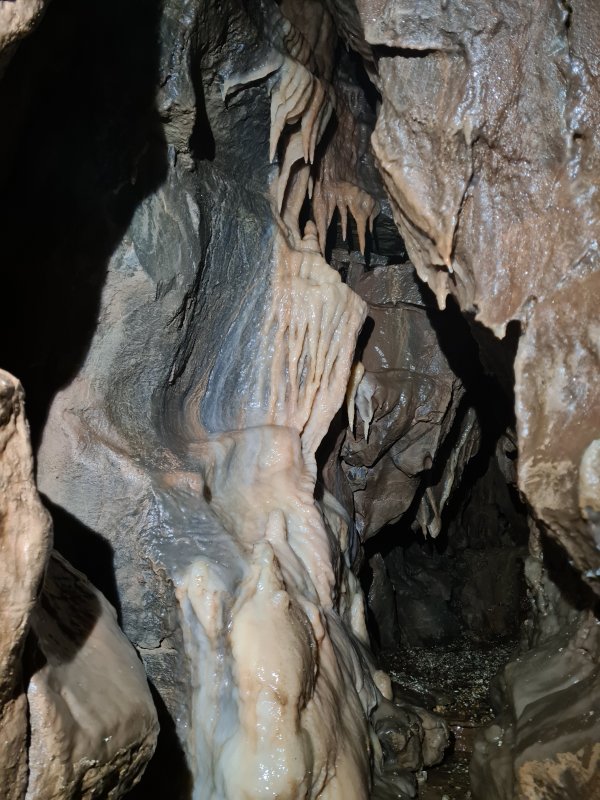 Hidden up a tricky climb beside the curtains is another small side passage, which ends immediately after this flowstone.
 The main passage branch ends with this beautiful grotto. This sits directly below the bottom of the Penwyllt camping area.
Modelling by Pete, lighting by Tarquin and Pete
The main passage branch ends with this beautiful grotto. This sits directly below the bottom of the Penwyllt camping area.
Modelling by Pete, lighting by Tarquin and Pete Ceiling of the grotto.
 Detail of the formations in the grotto, which seem to have forgotten which way gravity points.
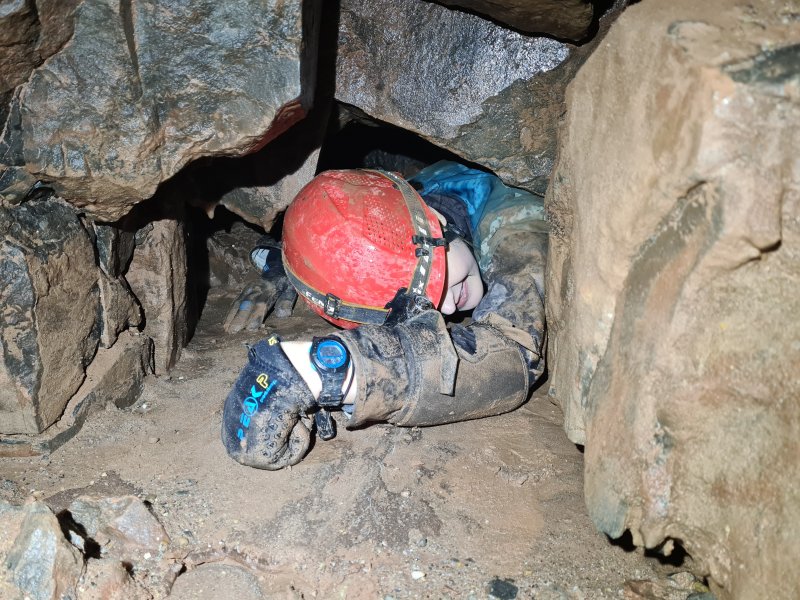 Behind the grotto, the passage chokes, but a ridiculously small squeeze regains the passage.
Modelling by Steph
Behind the grotto, the passage chokes, but a ridiculously small squeeze regains the passage.
Modelling by Steph The squeeze is only passable by small cavers, and turns a right angled bend. The difficulty is the side-to-side size, rather than the height. Steph makes it look easy, but that is the joy of being tiny.
Modelling by Steph
The squeeze is only passable by small cavers, and turns a right angled bend. The difficulty is the side-to-side size, rather than the height. Steph makes it look easy, but that is the joy of being tiny.
Modelling by Steph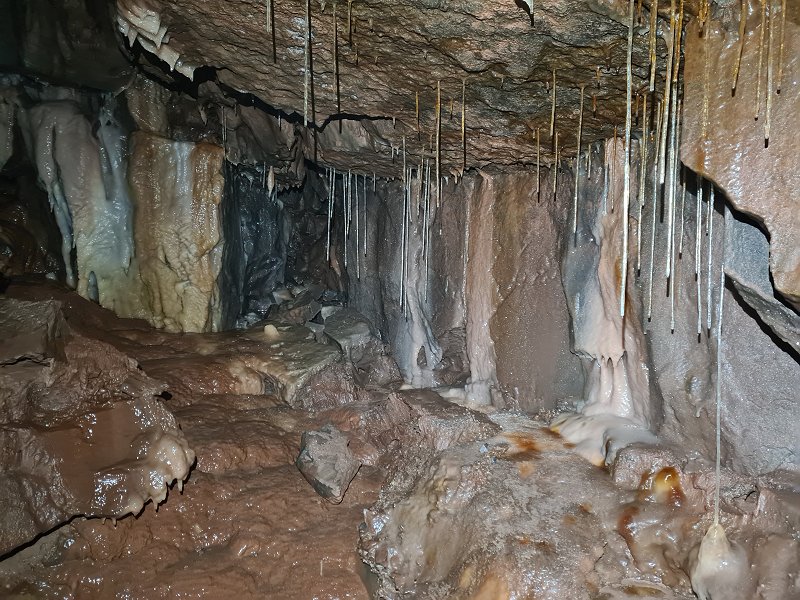 The passage then actually ends, at a calcited choke.
Camera, setup and lighting by Steph
The passage then actually ends, at a calcited choke.
Camera, setup and lighting by Steph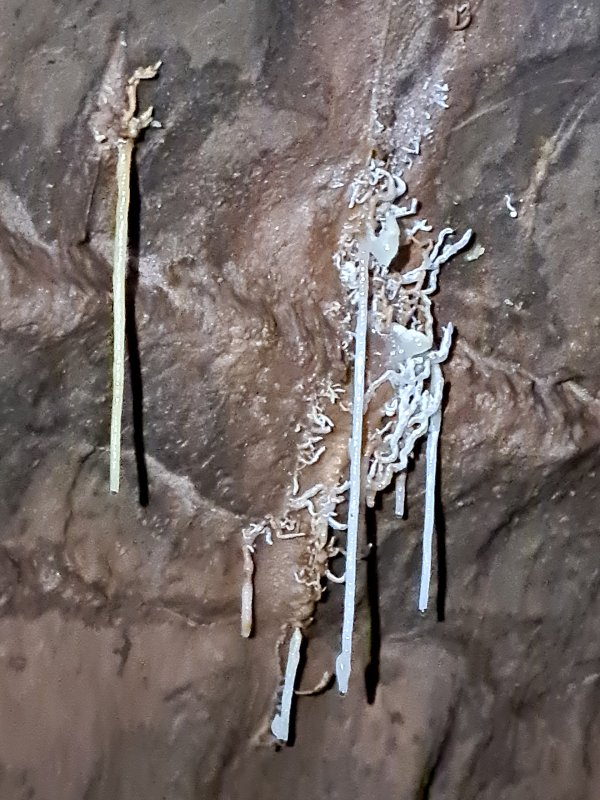 We reurned to Nether Rawl's oxbows, and took the large side passage, which contains these helictites above a canyon.
 The passage looks over a canyon to the side passage which should lead directly to the Smithy, but it cannot be safely reached. Instead, our route followed a traverse ledge above the canyon where you have to lean onto the opposite wall.
Modelling by Pete, lighting by Tarquin and Pete
The passage looks over a canyon to the side passage which should lead directly to the Smithy, but it cannot be safely reached. Instead, our route followed a traverse ledge above the canyon where you have to lean onto the opposite wall.
Modelling by Pete, lighting by Tarquin and Pete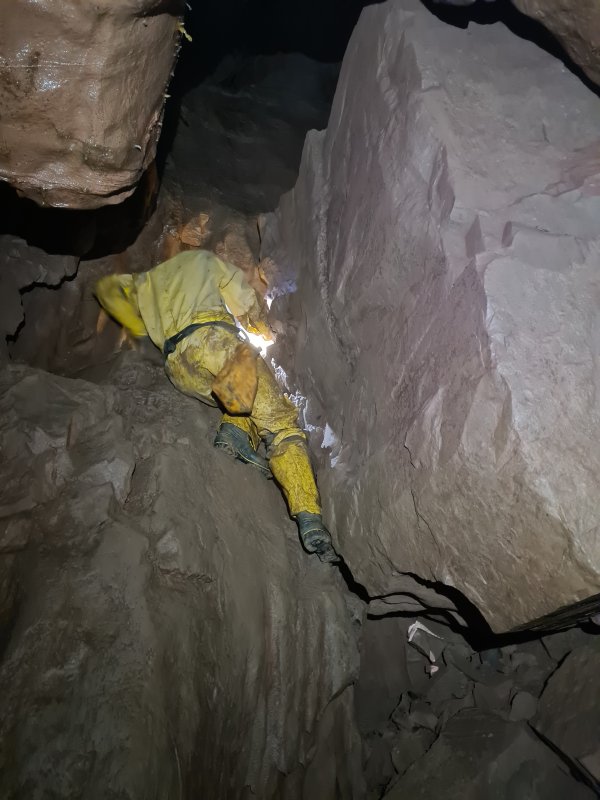 We then took a side passage, where a fairly tricky climb up the side of an enormous wedged boulder, gave access to an upper level that we had seen before, but could not reach.
Modelling by Pete, lighting by Tarquin and Pete
We then took a side passage, where a fairly tricky climb up the side of an enormous wedged boulder, gave access to an upper level that we had seen before, but could not reach.
Modelling by Pete, lighting by Tarquin and Pete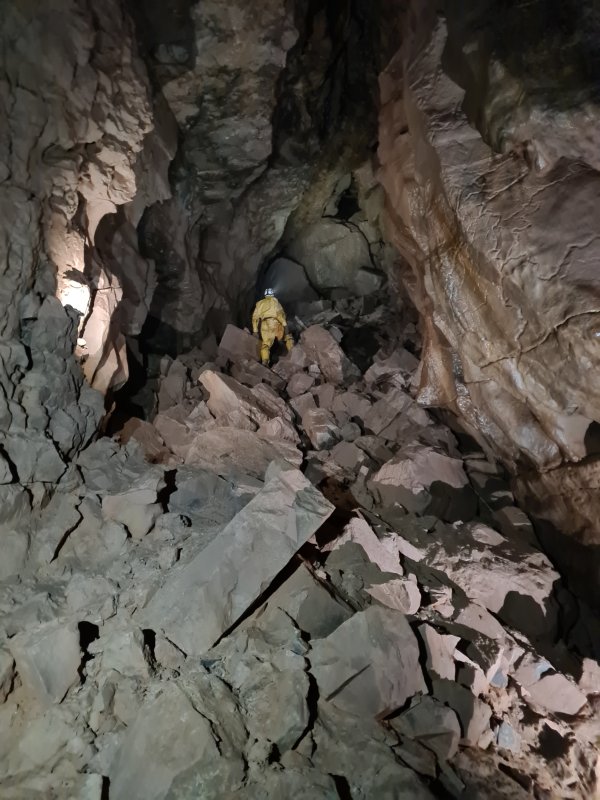 The upper level is dominated by this large chamber, which tops out at a choke made from huge blocks. A shattered loop of passage looks down an earlier decorated aven and the top of the Nether Rawl oxbows.
Modelling by Pete, lighting by Tarquin and Pete
The upper level is dominated by this large chamber, which tops out at a choke made from huge blocks. A shattered loop of passage looks down an earlier decorated aven and the top of the Nether Rawl oxbows.
Modelling by Pete, lighting by Tarquin and Pete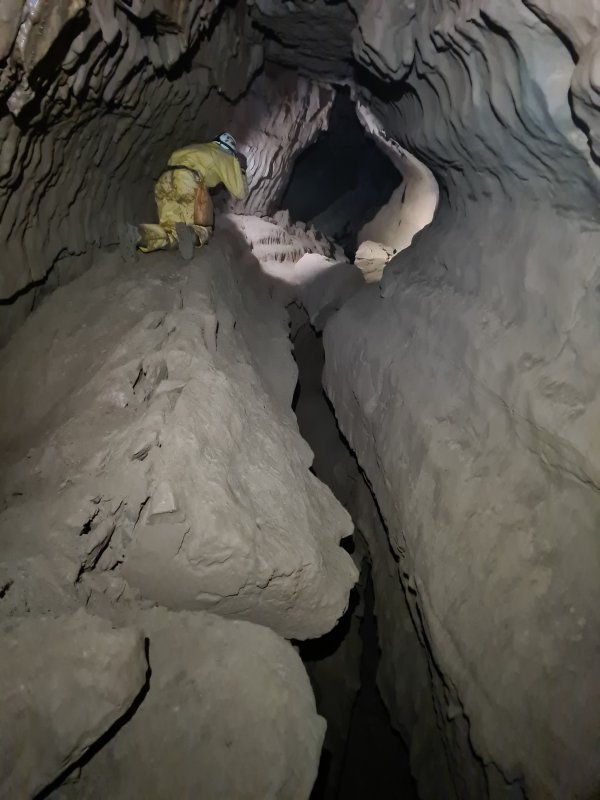 We returned to the traverse passage, and continued along the next stage of it. At no point was it safe to climb down into the canyon.
Modelling by Pete, lighting by Tarquin and Pete
We returned to the traverse passage, and continued along the next stage of it. At no point was it safe to climb down into the canyon.
Modelling by Pete, lighting by Tarquin and Pete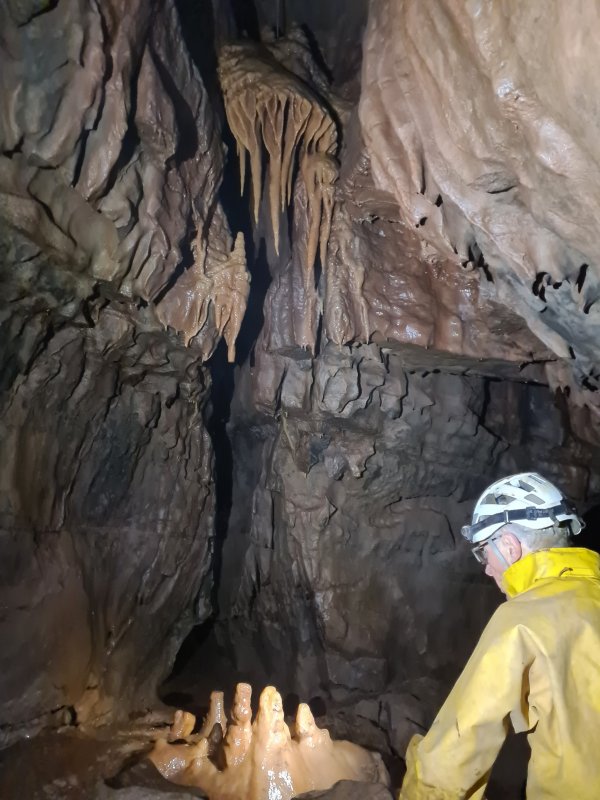 After some formations, the passage choked. The route then follows the small crawl to the left behind the formations, eventually climbing up into a rift just as we were ready to abandon the route for being too annoying.
Modelling by Pete, lighting by Tarquin and Pete
After some formations, the passage choked. The route then follows the small crawl to the left behind the formations, eventually climbing up into a rift just as we were ready to abandon the route for being too annoying.
Modelling by Pete, lighting by Tarquin and Pete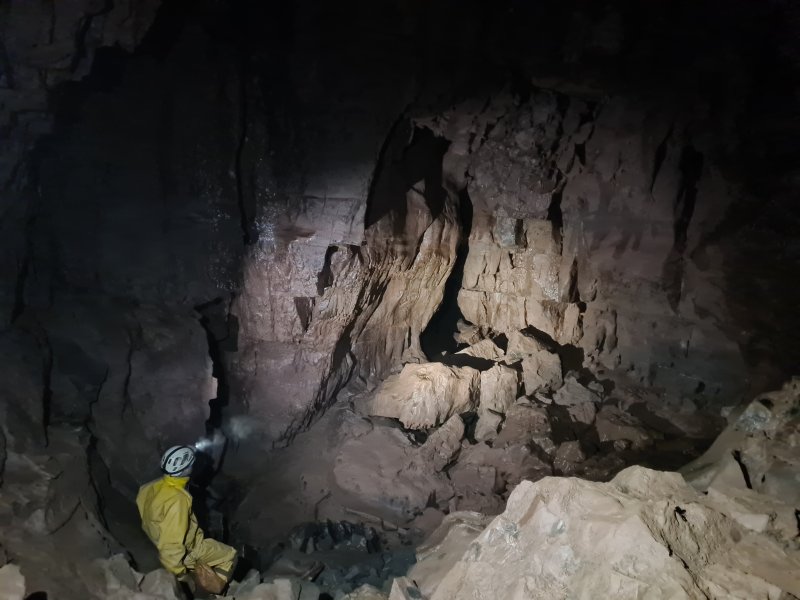 Just beyond the crawl is a junction where most routes go nowhere (but one chokes below The Smithy with the sound of roaring water). The only passage that goes anywhere breaks into this large chamber. There are two ways on, but only the large one is good.
Modelling by Pete, lighting by Tarquin and Pete
Just beyond the crawl is a junction where most routes go nowhere (but one chokes below The Smithy with the sound of roaring water). The only passage that goes anywhere breaks into this large chamber. There are two ways on, but only the large one is good.
Modelling by Pete, lighting by Tarquin and Pete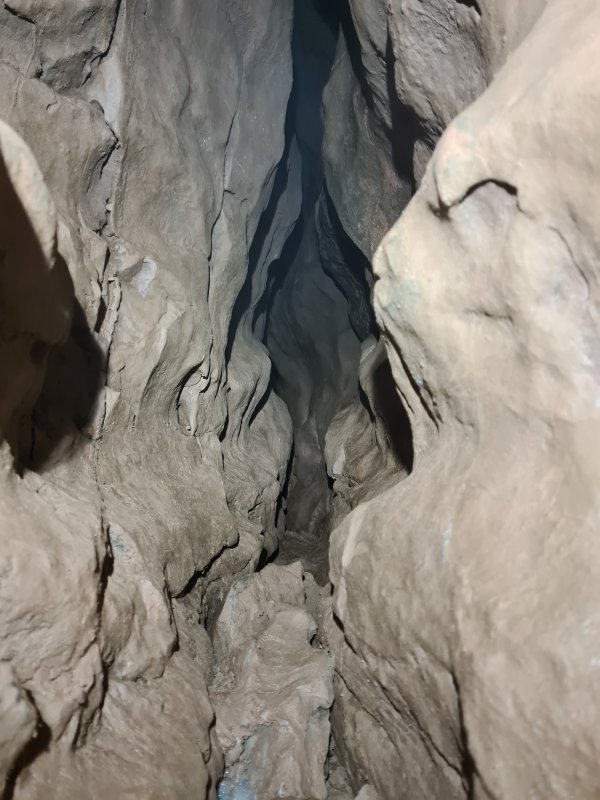 The smaller passage is this thrutchy awkwardness, and is best ignored.
 After the passages rejoin, they pass this large patch of honey-coloured flowstone, before rejoining the normal route at Big Shack 1.
Modelling by Pete, lighting by Tarquin and Pete
After the passages rejoin, they pass this large patch of honey-coloured flowstone, before rejoining the normal route at Big Shack 1.
Modelling by Pete, lighting by Tarquin and Pete