Ogof Ffynnon Ddu Northern Lights trips 13/12/2020 and 24/07/2021
Unless otherwise stated, camera, setups, lighting, edits and gallery effects by Tarquin. Modelling and lighting at various points will be Pete Bolt and Peter Wilton-Jones.
Northern Lights is the most recent major extension to Ogof Ffynnon Ddu, with the way in found in 1970, rediscovered in 1982, surveyed and finally pushed into the good stuff in 1985. It is also one of the best decorated parts of the cave. It's not particularly challenging to reach, though by OFD's standards, it's a good workout, and you get more than a little damp if you want to see most of the series. At 1.3 km in length, this is a good sized series. And there will be a lot of pictures.
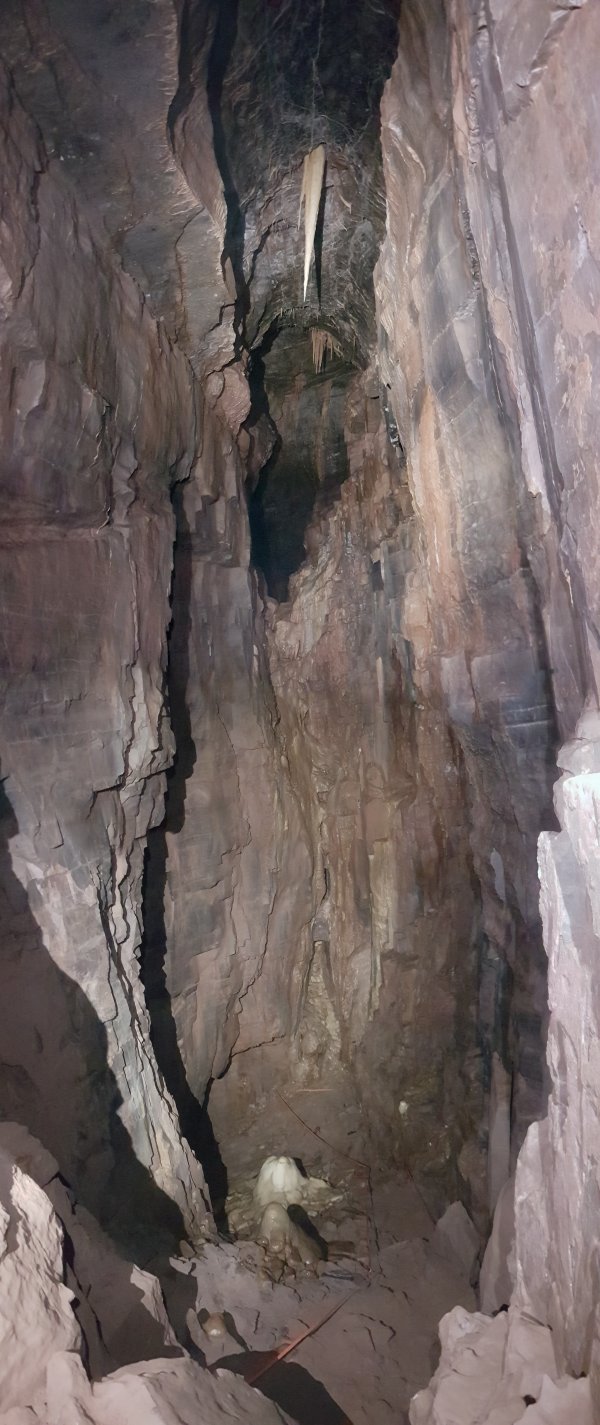
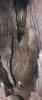 The way into Northern Lights had always been open, accessed via a couple of different routes. It can be seen here across Moonlight Chamber as a passage leading of at ceiling level. That's a long way up though, 10 metres from the floor, and it is not free climbable. The Moonlight Chamber stalactite is really quite long.
 Stal at the entry point to Moonlight Chamber.
Modelling by Pete, lighting by Tarquin and Pete
Stal at the entry point to Moonlight Chamber.
Modelling by Pete, lighting by Tarquin and Pete The usual way in is via Midnight Chamber.
Modelling by Pete, lighting by Tarquin and Pete
The usual way in is via Midnight Chamber.
Modelling by Pete, lighting by Tarquin and Pete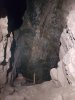 Stal in Midnight Chamber's top oxbow.
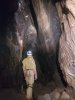 The Skyhook pitch, from the bottom. This is the exit from the Upper Great Oxbow, another beautifully decorated series.
Modelling by Pete, lighting by Tarquin and Pete
The Skyhook pitch, from the bottom. This is the exit from the Upper Great Oxbow, another beautifully decorated series.
Modelling by Pete, lighting by Tarquin and Pete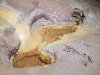 Crystal pool on the passage leading away from Midnight Chamber.
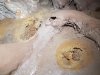 Crystal pools.
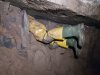 The passage appears to pinch out, and one of the ways on is through this ridiculous hole in the wall. A side passage here has an audible stream, sourced from Lavender Way. Beyond that it enters an extensive series of passages beneath the Upper Great Oxbow Series.
Modelling by Pete
The passage appears to pinch out, and one of the ways on is through this ridiculous hole in the wall. A side passage here has an audible stream, sourced from Lavender Way. Beyond that it enters an extensive series of passages beneath the Upper Great Oxbow Series.
Modelling by Pete The passage reaches a small cascade, and you might hope that the way on is up the cascade, but sadly I must draw your attention to the left side of the pool. Here, you get your first soaking. A perfectly placed crawl through the pool. In drought conditions, it is possible to get through with just wet wellies.
Modelling by Pete, lighting by Tarquin and Pete
The passage reaches a small cascade, and you might hope that the way on is up the cascade, but sadly I must draw your attention to the left side of the pool. Here, you get your first soaking. A perfectly placed crawl through the pool. In drought conditions, it is possible to get through with just wet wellies.
Modelling by Pete, lighting by Tarquin and Pete The original way that this area was found in 1970 was up the cascade, and up this climb, the top of which can also be reached from the Moonlight Chamber pitch. The boulders are now said to be loose, so this route is not used.
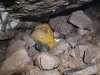 The crawl in water ended at a choke. This was dug in 1982.
Modelling by Pete, lighting by Tarquin and Pete
The crawl in water ended at a choke. This was dug in 1982.
Modelling by Pete, lighting by Tarquin and Pete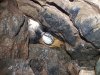 The route through the choke arrives in a chamber that had already been found, with the narrow stream cascading in. We would head upstream on a later trip - at the end of this gallery.
Modelling by Pete and Tarquin's welly, lighting by Tarquin and Pete
The route through the choke arrives in a chamber that had already been found, with the narrow stream cascading in. We would head upstream on a later trip - at the end of this gallery.
Modelling by Pete and Tarquin's welly, lighting by Tarquin and Pete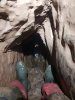 A second route out of the chamber, a very small, descending tube, with an awkward climb at the end. There are two ways on. The main way on is in the same direction as the tube.
Modelling by Tarquin's wellies and Pete
A second route out of the chamber, a very small, descending tube, with an awkward climb at the end. There are two ways on. The main way on is in the same direction as the tube.
Modelling by Tarquin's wellies and Pete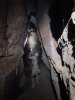 However, there is also this side passage to the right. It chokes, but has a roof tube that will be mentioned later.
Modelling by Peter, lighting by Tarquin and Peter
However, there is also this side passage to the right. It chokes, but has a roof tube that will be mentioned later.
Modelling by Peter, lighting by Tarquin and Peter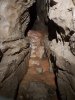 Continuing past Lavender Way, the passage ends at a flowstone formation. This passage, like many in the area, points out towards a blank area with no known cave.
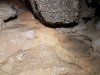 Crystal pool at the end.
 Lavender Way is an awkward passage, requiring a lot of traversing on ledges. Towards the end, it has a number of boulder obstacles that need to be passed.
Modelling by Pete, lighting by Tarquin and Pete
Lavender Way is an awkward passage, requiring a lot of traversing on ledges. Towards the end, it has a number of boulder obstacles that need to be passed.
Modelling by Pete, lighting by Tarquin and Pete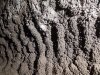 Mud formations in Lavender Way.
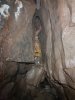 Lavender Way ends in a chamber called The Vault, though the survey has this label misplaced). From there, the way on is along a tight rift that turns into a squeeze up.
Modelling by Pete
Lavender Way ends in a chamber called The Vault, though the survey has this label misplaced). From there, the way on is along a tight rift that turns into a squeeze up.
Modelling by Pete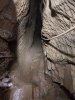 Heading back over the squeeze is a rift that passes over a traverse over The Vault. This can be used as an alternative exit in an emergency, if the choke in The Vault were to collapse (something the re-discoverers had worried about).
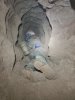 The alternative exit tube turns left at a junction, and looks very narrow, but it is actually quite easily passable.
Modelling by Peter, lighting by Tarquin and Peter
The alternative exit tube turns left at a junction, and looks very narrow, but it is actually quite easily passable.
Modelling by Peter, lighting by Tarquin and Peter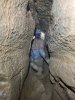 At another junction, it turns right and becomes more of a rift, with relatively comfortable proportions.
Modelling by Peter, lighting by Tarquin and Peter
At another junction, it turns right and becomes more of a rift, with relatively comfortable proportions.
Modelling by Peter, lighting by Tarquin and Peter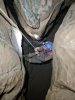 It ends at the rope down into the side passage before Lavender Way. An abseil is required, or you can just freehand it, if you are brave enough.
Modelling by Peter, lighting by Tarquin and Peter
It ends at the rope down into the side passage before Lavender Way. An abseil is required, or you can just freehand it, if you are brave enough.
Modelling by Peter, lighting by Tarquin and Peter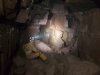 At the top of the squeeze from The Vault is Chamber 2, which is blind at both ends. The way back to The Vault is down on the right of the picture, and the way to Chamber 3 is a crawl under the wall to the left. Note that on the survey, the label for The Vault sits next to this chamber.
Modelling by Pete, lighting by Tarquin and Pete
At the top of the squeeze from The Vault is Chamber 2, which is blind at both ends. The way back to The Vault is down on the right of the picture, and the way to Chamber 3 is a crawl under the wall to the left. Note that on the survey, the label for The Vault sits next to this chamber.
Modelling by Pete, lighting by Tarquin and Pete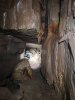 Chamber 3.
Modelling by Pete, lighting by Tarquin and Pete
Chamber 3.
Modelling by Pete, lighting by Tarquin and Pete Stal in Chamber 3.
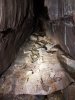 Chamber 4 is really just a junction. To the left is side passage with a delicate mud and cracked calcite floor. It ends at a chamber with an aven, but we didn't want to add unnecessary traffic past the calcite, so we left it alone.
Lighting by Tarquin and Pete
Chamber 4 is really just a junction. To the left is side passage with a delicate mud and cracked calcite floor. It ends at a chamber with an aven, but we didn't want to add unnecessary traffic past the calcite, so we left it alone.
Lighting by Tarquin and Pete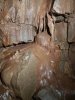 Stal in the chamber.
 The end of the chamber has an aven, which for some reason got called a fifth chamber. It is not a separate chamber, it is part of Chamber 4. This is as far as the 1970 exploration got, and as far as the 1982 rediscovery got.
Modelling by Pete, lighting by Tarquin and Pete
The end of the chamber has an aven, which for some reason got called a fifth chamber. It is not a separate chamber, it is part of Chamber 4. This is as far as the 1970 exploration got, and as far as the 1982 rediscovery got.
Modelling by Pete, lighting by Tarquin and Pete Calcite flow under the aven.
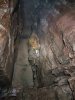 The climb is a lot more awkward than it looks. At the top, while flailing around trying to find holds that work, you have to post yourself into a narrow, horizontal slot at the top. It's not a squeeze, but it is awkward enough that it feels like one.
Modelling by Pete, lighting by Tarquin and Pete
The climb is a lot more awkward than it looks. At the top, while flailing around trying to find holds that work, you have to post yourself into a narrow, horizontal slot at the top. It's not a squeeze, but it is awkward enough that it feels like one.
Modelling by Pete, lighting by Tarquin and Pete The slot pops out in the side of Northern Lights, the most dramatic chamber in the Northern Lights series. Flowstone formations coat the walls, soaring up into the darkness, where a waterfall showers in. This chamber was first reached in 1985, and sits directly under the corner in the path that you walk up to reach Top Entrance.
Modelling by Pete, lighting by Tarquin and Pete
The slot pops out in the side of Northern Lights, the most dramatic chamber in the Northern Lights series. Flowstone formations coat the walls, soaring up into the darkness, where a waterfall showers in. This chamber was first reached in 1985, and sits directly under the corner in the path that you walk up to reach Top Entrance.
Modelling by Pete, lighting by Tarquin and Pete To the right, the chamber ends in a choke.
 Cave pearls in a pool on the floor of the chamber. The pool is about 10 cm across.
 Two more pools of cave pearls. The larger pool is 10 cm across.
 The cave pearl pools.
Modelling by Peter, lighting by Tarquin and Peter
The cave pearl pools.
Modelling by Peter, lighting by Tarquin and Peter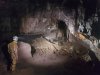 The best set of formations in the chamber, including one of the best curtains in the cave.
Modelling by Pete, lighting by Tarquin and Pete
The best set of formations in the chamber, including one of the best curtains in the cave.
Modelling by Pete, lighting by Tarquin and Pete Translucent with perfect colour bands.
 Wall of stal. The way into Northern Inlet is to duck under the wall.
Modelling by Pete, lighting by Tarquin and Pete
Wall of stal. The way into Northern Inlet is to duck under the wall.
Modelling by Pete, lighting by Tarquin and Pete Stalactite and stalagmite that are close to forming a complete column, at the entrance to Northern Inlet.
Modelling by Pete, lighting by Tarquin and Pete
Stalactite and stalagmite that are close to forming a complete column, at the entrance to Northern Inlet.
Modelling by Pete, lighting by Tarquin and Pete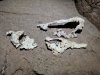 Probable decomposed calcite, looking like skull fragments.
 Twin set of stunning stactite and stalagmite clusters.
Modelling by Pete, lighting by Tarquin and Pete
Twin set of stunning stactite and stalagmite clusters.
Modelling by Pete, lighting by Tarquin and Pete Dried crystal pools.
 Crystal pools.
 Ceiling stal.
 Stalactites and stal boss - one could call it the Final Boss - near the end of Northern Inlet. The stream emerges from a side passage, and its source will be seen later.
Modelling by Pete, lighting by Tarquin and Pete
Stalactites and stal boss - one could call it the Final Boss - near the end of Northern Inlet. The stream emerges from a side passage, and its source will be seen later.
Modelling by Pete, lighting by Tarquin and Pete Calcite rafts in a dried crystal pool.
 The end of Northern Inlet, a choke that very nearly breaks through into the second half of the series.
 Cracked mud at the Mudlust end of Northern Lights chamber.
 The way out of the chamber leads directly into Mudlust Hall, the fantastic remains of a moonmilk crystal pool.
Modelling by Pete, lighting by Tarquin and Pete
The way out of the chamber leads directly into Mudlust Hall, the fantastic remains of a moonmilk crystal pool.
Modelling by Pete, lighting by Tarquin and Pete The old tide mark is clearly visible, along with the thickness of the moonmilk before the pool got washed out.
Modelling by Pete, lighting by Tarquin and Pete
The old tide mark is clearly visible, along with the thickness of the moonmilk before the pool got washed out.
Modelling by Pete, lighting by Tarquin and Pete Cracked mud in Mudlust Hall.
 The tide line gets deeper and deeper until it reaches ceiling level, blocking the passage completely.
Modelling by Pete, lighting by Tarquin and Pete
The tide line gets deeper and deeper until it reaches ceiling level, blocking the passage completely.
Modelling by Pete, lighting by Tarquin and Pete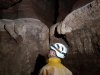 Layers of the moonmilk. The way on is into a narrower side passage, bypassing the blockage via some slithers through moonmilk covered constrictions, and gaining a stream.
Modelling by Pete, lighting by Tarquin and Pete
Layers of the moonmilk. The way on is into a narrower side passage, bypassing the blockage via some slithers through moonmilk covered constrictions, and gaining a stream.
Modelling by Pete, lighting by Tarquin and Pete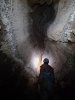 Moonmilk covered aven up a climb in the awkward section.
Modelling by Peter, lighting by Tarquin and Peter
Moonmilk covered aven up a climb in the awkward section.
Modelling by Peter, lighting by Tarquin and Peter Moonmilk and calcite.
 Alcove below the aven.
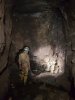 An inlet on the right marks the way on, with a rope leading into a roof tube above it.
Modelling by Pete, lighting by Tarquin and Pete
An inlet on the right marks the way on, with a rope leading into a roof tube above it.
Modelling by Pete, lighting by Tarquin and Pete The water rushing in from that inlet was definitely higher than normal thanks to the persistent rain. The foam as it flowed rapidly onwards towards the outlet was not at all comforting. It does lose some height here, but we didn't know how far it could back up.
 The water got deeper as it approached the sump. That looks like a good beer.
 The downstream sump. This is definitely a lot closer to us than it shows on the survey, so the water level is very high. The sump was dived during the original exploration, and was too tight. The water is next seen in the Lower Oxbow Extension.
 Seen in drought conditions some time later. The passage goes for quite some distance, through some low sections, around a wiggle, and finally to a silted sump.
Modelling by Peter, lighting by Tarquin and Peter
Seen in drought conditions some time later. The passage goes for quite some distance, through some low sections, around a wiggle, and finally to a silted sump.
Modelling by Peter, lighting by Tarquin and Peter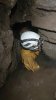 So we did what any good caver would do in elevated water conditions; we headed upstream into the duck. Or ... at least ... I made Pete test the duck first and check that it was OK before I followed him in. And yes, this picture was taken on the way out.
Modelling by Pete
So we did what any good caver would do in elevated water conditions; we headed upstream into the duck. Or ... at least ... I made Pete test the duck first and check that it was OK before I followed him in. And yes, this picture was taken on the way out.
Modelling by Pete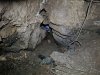 Seen in drought conditions on a subsequent trip, when it was possible to crawl through with just one wet leg. This shows the difference that flood conditions can make.
Modelling by Peter, lighting by Tarquin and Peter
Seen in drought conditions on a subsequent trip, when it was possible to crawl through with just one wet leg. This shows the difference that flood conditions can make.
Modelling by Peter, lighting by Tarquin and Peter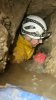 Inside the duck, there is still plenty of airspace. The flow was impressive, but the passage is wide enough for it to safely flow past.
Modelling by Pete
Inside the duck, there is still plenty of airspace. The flow was impressive, but the passage is wide enough for it to safely flow past.
Modelling by Pete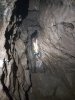 Pete overshot the climb up, and stayed in the stream as it got much tougher.
Modelling by Pete, lighting by Tarquin and Pete
Pete overshot the climb up, and stayed in the stream as it got much tougher.
Modelling by Pete, lighting by Tarquin and Pete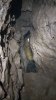 I called him back, feet first, from near the end of the passage. He had nearly doubled the length of flat out crawling in squalor, and then reversed half of it again. As it turned out, someone had rigged a rope to allow people to climb up at the end. Oh well, Pete got to enjoy some more wallowing. What a lucky fellow.
Modelling by Pete, lighting by Tarquin and Pete
I called him back, feet first, from near the end of the passage. He had nearly doubled the length of flat out crawling in squalor, and then reversed half of it again. As it turned out, someone had rigged a rope to allow people to climb up at the end. Oh well, Pete got to enjoy some more wallowing. What a lucky fellow.
Modelling by Pete, lighting by Tarquin and Pete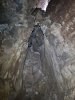 The rope climb is very hard to ascend, and should realistically be treated only as an emergency exit, in case the duck somehow manages to sump (which it didn't, in spite of the heavy rain and obvious flood conditions).
Modelling by Peter, lighting by Tarquin and Peter
The rope climb is very hard to ascend, and should realistically be treated only as an emergency exit, in case the duck somehow manages to sump (which it didn't, in spite of the heavy rain and obvious flood conditions).
Modelling by Peter, lighting by Tarquin and Peter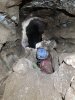 The top of the rope climb is a ledge made of moonmilk. The rope is tied to a bar lying on the moonmilk. That doesn't really seem all that safe, but it is still here. We used this route on our exit during the second trip. The passage leading from here reaches the top of the climb out of the duck.
Modelling by Peter, lighting by Tarquin and Peter
The top of the rope climb is a ledge made of moonmilk. The rope is tied to a bar lying on the moonmilk. That doesn't really seem all that safe, but it is still here. We used this route on our exit during the second trip. The passage leading from here reaches the top of the climb out of the duck.
Modelling by Peter, lighting by Tarquin and Peter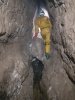 The passage above is much larger. The passage soon regains the stream at the rope climb up from the end of the duck.
Modelling by Pete, lighting by Tarquin and Pete
The passage above is much larger. The passage soon regains the stream at the rope climb up from the end of the duck.
Modelling by Pete, lighting by Tarquin and Pete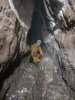 Moonmilk Revelry evidently once had extensive moonmilk, but it is not as dramatic as Mudlust Hall.
Modelling by Pete
Moonmilk Revelry evidently once had extensive moonmilk, but it is not as dramatic as Mudlust Hall.
Modelling by Pete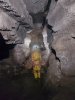 A climb down reaches a dramatic increase in passage size, with mud formations coating the walls, far below the old tide line. It is also possible to continue along the ledge, but that reaches an extremely exposed, sloping traverse with no hand holds, over to the upper level of Pen And Ink Passage. Someone was actually crazy enough to have crossed it, and their footprints are visible crossing the traverse.
Modelling by Pete, lighting by Tarquin and Pete
A climb down reaches a dramatic increase in passage size, with mud formations coating the walls, far below the old tide line. It is also possible to continue along the ledge, but that reaches an extremely exposed, sloping traverse with no hand holds, over to the upper level of Pen And Ink Passage. Someone was actually crazy enough to have crossed it, and their footprints are visible crossing the traverse.
Modelling by Pete, lighting by Tarquin and Pete Mud formations in Moonmilk Revelry.
 Calcited cascade.
Modelling by Pete, lighting by Tarquin and Pete
Calcited cascade.
Modelling by Pete, lighting by Tarquin and Pete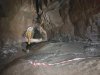 Peats' Playground (note the correct spelling - it was found by J. K. Peat and R. Peat, so it is Peat plural), looking in the western direction, to the left.
Modelling by Pete, lighting by Tarquin and Pete
Peats' Playground (note the correct spelling - it was found by J. K. Peat and R. Peat, so it is Peat plural), looking in the western direction, to the left.
Modelling by Pete, lighting by Tarquin and Pete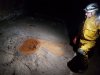 One of the most iconic formations, an iron-stained crystal pool.
Modelling and lighting by Pete
One of the most iconic formations, an iron-stained crystal pool.
Modelling and lighting by Pete It looks as unreal as the Grand Prismatic Spring.
Lighting by Pete
It looks as unreal as the Grand Prismatic Spring.
Lighting by Pete Bead formations. These do not appear to be cryostal, and look more like gypsum or moonmilk.
 A warren of old drip pockets.
 A stalactite cluster formation in Peats' Playground.
Modelling by Pete
A stalactite cluster formation in Peats' Playground.
Modelling by Pete Stalagmites.
Modelling by Pete, lighting by Tarquin and Pete
Stalagmites.
Modelling by Pete, lighting by Tarquin and Pete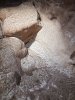 Rippled flowstone. This looks like moonmilk rather than calcite.
 Moonmilk growths.
 Choke at the end of the western branch of Peats' Playground.
 Mould ring of a marsh fly. This choke is about 20 metres below surface.
 Directly ahead at the junction with Peats' Playground is Pen And Ink Passage. Above it is a climb to an upper oxbow, which includes these gorgeous columns, but they are taped off from quite a distance away, and the passage was very misty.
 Pen And Ink is an awkward stream inlet.
Modelling by Pete, lighting by Tarquin and Pete
Pen And Ink is an awkward stream inlet.
Modelling by Pete, lighting by Tarquin and Pete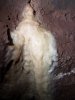 Stal with tiny helictites in Pen And Ink Passage.
 Stal in Pen And Ink Passage.
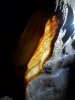 Ribbed curtain in Pen And Ink Passage.
Lighting by Pete
Ribbed curtain in Pen And Ink Passage.
Lighting by Pete Above a climb, Pen And Ink Passage gets much smaller.
Modelling by Pete, lighting by Tarquin and Pete
Above a climb, Pen And Ink Passage gets much smaller.
Modelling by Pete, lighting by Tarquin and Pete Pen And Ink Passage ends at a choke with a distinctively shaped wonky stalactite. The other side of this choke is reached later.
 A side passage starts at the climb, which starts low then becomes a narrow, awkward rift with a stream; Sordidia. This was deemed unworthy on our first trip, and it was only on the second trip that we decided to push to the end.
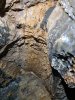 Flowstone in Sordidia.
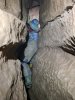 Sordidia spends most of its time being an awkward, thrutchy passage, much like a tighter version of Lavender Way or early Pen And Ink Passage.
Modelling by Peter, lighting by Tarquin and Peter
Sordidia spends most of its time being an awkward, thrutchy passage, much like a tighter version of Lavender Way or early Pen And Ink Passage.
Modelling by Peter, lighting by Tarquin and Peter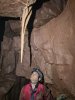 Stalactite in Sordidia, the best formation in the passage.
Modelling by Peter
Stalactite in Sordidia, the best formation in the passage.
Modelling by Peter Its stalagmite.
Lighting by Tarquin and Peter
Its stalagmite.
Lighting by Tarquin and Peter The final squeeze is exceptional, 8 inches wide at its widest point.
Modelling by Peter
The final squeeze is exceptional, 8 inches wide at its widest point.
Modelling by Peter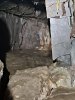 It ends immediately afterwards in a flowstone blockage. Those of us of normal size can see this view, but thinner cavers will see that the hidden side is a mirror image of the visible side. There is nothing worth pushing through that squeeze for.
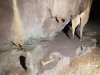 Back at the ribbed curtain is another inlet, which comes from an upper oxbow, with these small formations at its start. The stream comes from an inlet to the oxbow.
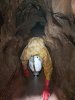 The oxbow starts crawling size but soon becomes walking size.
Modelling by Pete, lighting by Tarquin and Pete
The oxbow starts crawling size but soon becomes walking size.
Modelling by Pete, lighting by Tarquin and Pete Formations in the oxbow.
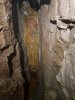 Formations in the oxbow.
 Flowstone below the formations.
 Crystal pool in the flowstone.
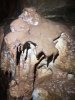 Formations in the oxbow.
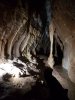 A climb up reaches the other end of the upper level to Pen And Ink Passage. The view of the formations is a lot better from this side.
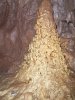 A climb back over the passage reaches a short side branch, with this strangely lumpy stalagmite. It must be where the tooth fairy stashes all those teeth. Mixed into a pile of mac and cheese.
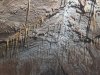 Straws in the side branch.
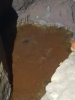 Crystal pool in the branch, hard to see properly.
 The eastern branch of Peats' Playground, to the right on the way in. This is much less grand than the other direction, being a crawl for quite some distance.
Modelling by Pete, lighting by Tarquin and Pete
The eastern branch of Peats' Playground, to the right on the way in. This is much less grand than the other direction, being a crawl for quite some distance.
Modelling by Pete, lighting by Tarquin and Pete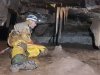 Stalactites in Peats' Playground, with a tide mark on the wall showing the old moonmilk line, and a muddy tide mark on the stalactites showing the old flooding line.
Modelling by Pete, lighting by Tarquin and Pete
Stalactites in Peats' Playground, with a tide mark on the wall showing the old moonmilk line, and a muddy tide mark on the stalactites showing the old flooding line.
Modelling by Pete, lighting by Tarquin and Pete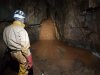 Flowstone in Peats' Playground.
Modelling by Pete, lighting by Tarquin and Pete
Flowstone in Peats' Playground.
Modelling by Pete, lighting by Tarquin and Pete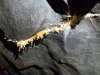 Helictites.
 Helictites.
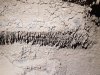 Mud formations. This place apparently used to flood regularly.
 The Devil's Dagger, one of the most iconic formations in the whole series.
Modelling by Pete
The Devil's Dagger, one of the most iconic formations in the whole series.
Modelling by Pete The Devil's Dagger.
Modelling by Pete, lighting by Tarquin and Pete
The Devil's Dagger.
Modelling by Pete, lighting by Tarquin and Pete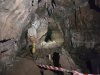 After passing the inlet of Keyhole Passage (covered later), whose stream sinks into the floor, the passage turns into Draenen for a moment, with gypsum and a few calcite formations.
Modelling by Pete, lighting by Tarquin and Pete
After passing the inlet of Keyhole Passage (covered later), whose stream sinks into the floor, the passage turns into Draenen for a moment, with gypsum and a few calcite formations.
Modelling by Pete, lighting by Tarquin and Pete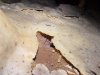 Dried pool on the side of a stalagmite.
 The Totem Poles, formations on a corner. The current survey shows a tiny stub passage on the right here. However, the original hydrology notes show a much longer side passage, so presumably it has not been surveyed. The water flows into Northern Inlet.
Modelling by Pete, lighting by Tarquin and Pete
The Totem Poles, formations on a corner. The current survey shows a tiny stub passage on the right here. However, the original hydrology notes show a much longer side passage, so presumably it has not been surveyed. The water flows into Northern Inlet.
Modelling by Pete, lighting by Tarquin and Pete Crystal pool at the Totem Poles.
 Looking back to the Totem Poles.
 Decomposed remains of a moonmilk false floor at the junction with Ferrets End, where there is a small inlet.
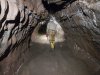 The start of Ferrets End.
Modelling by Pete, lighting by Tarquin and Pete
The start of Ferrets End.
Modelling by Pete, lighting by Tarquin and Pete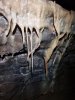 Formations in Ferrets End.
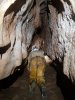 Nearing the end of Ferrets End.
Modelling by Pete, lighting by Tarquin and Pete
Nearing the end of Ferrets End.
Modelling by Pete, lighting by Tarquin and Pete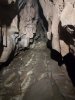 The end of the ferrets.
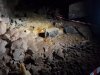 Continuing along Peats' Playground, which is adorned with a beautiful crystal pool formation. To the right here is a very short inlet, which collects water from a small sink seen on the walk up to Top Entrance.
Lighting by Tarquin and Pete
Continuing along Peats' Playground, which is adorned with a beautiful crystal pool formation. To the right here is a very short inlet, which collects water from a small sink seen on the walk up to Top Entrance.
Lighting by Tarquin and Pete Detail of the crystal pool.
 A smaller crystal pool.
 The last portion of passage called Peats' Playground.
 Stalactites and flowstone.
 Dried crystal pool with some incredible detail.
 Detail of the dried crystal pool.
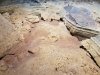 Old tide lines within the pool can be clearly seen.
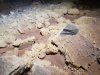 Anemone-like growths.
 Anemones.
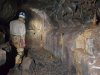 The passage turns a corner and gets renamed to Tiptoe Traverse.
Modelling by Pete, lighting by Tarquin and Pete
The passage turns a corner and gets renamed to Tiptoe Traverse.
Modelling by Pete, lighting by Tarquin and Pete Tiptoe Traverse is a walk along the edge of some beautiful flowstone formations.
 Detail of the flowstone.
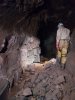 Not exactly traversing, just enjoying the formations.
Modelling by Pete, lighting by Tarquin and Pete
Not exactly traversing, just enjoying the formations.
Modelling by Pete, lighting by Tarquin and Pete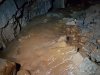 Flowstone in Tiptoe Traverse.
 The passage gets bigger, but less space is available to walk on next to the formations.
Modelling by Pete, lighting by Tarquin and Pete
The passage gets bigger, but less space is available to walk on next to the formations.
Modelling by Pete, lighting by Tarquin and Pete Crystal pools.
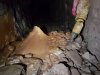 Mini boss near the end of the level.
Modelling by Pete, lighting by Tarquin and Pete
Mini boss near the end of the level.
Modelling by Pete, lighting by Tarquin and Pete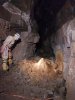 To get past the mini boss does almost require being on tiptoes, as it nearly fills the passage, even splattered up one wall.
Modelling by Pete, lighting by Tarquin and Pete
To get past the mini boss does almost require being on tiptoes, as it nearly fills the passage, even splattered up one wall.
Modelling by Pete, lighting by Tarquin and Pete The last section of passage.
Modelling by Pete, lighting by Tarquin and Pete
The last section of passage.
Modelling by Pete, lighting by Tarquin and Pete Looking back at the ceiling of the last section, with phreatic roof pendants.
 The choke at the end of Tiptoe Traverse. There is scope for further passage here, but only 30 metres of rock above. Given how steep the passage is, it would break surface not too far ahead.
 Keyhole Passage is a major inlet. It alternates between walking in the rift, and crawling on the ledges.
Modelling by Pete, lighting by Tarquin and Pete
Keyhole Passage is a major inlet. It alternates between walking in the rift, and crawling on the ledges.
Modelling by Pete, lighting by Tarquin and Pete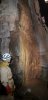 Flowstone formation in an aven.
Modelling by Pete
Flowstone formation in an aven.
Modelling by Pete Base of the aven.
Modelling by Pete
Base of the aven.
Modelling by Pete Flowstone coating the aven. Someone has climbed it, but no way on was found.
Lighting by Pete
Flowstone coating the aven. Someone has climbed it, but no way on was found.
Lighting by Pete Keyhole Passage's stream comes from a very low inlet.
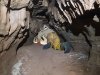 A crawl to the side is a dry link to the ongoing passages.
Modelling by Pete, lighting by Tarquin and Pete
A crawl to the side is a dry link to the ongoing passages.
Modelling by Pete, lighting by Tarquin and Pete Formations in the dry link.
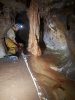 Column in the dry link.
Modelling by Pete, lighting by Tarquin and Pete
Column in the dry link.
Modelling by Pete, lighting by Tarquin and Pete Crystal pool at the column.
 Crystal pool at the column.
 Crystal pool at the column.
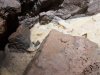 Dried crystal pool.
 A much larger stream is soon met. Downstream is taped off to protect the formations, and the passage chokes just after them. This is the upstream side of the choke at the end of Pen And Ink Passage.
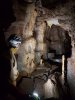 The upstream direction has more totem pole formations.
Modelling and lighting by Pete
The upstream direction has more totem pole formations.
Modelling and lighting by Pete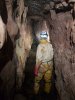 Formations in the upstream direction.
Modelling by Pete, lighting by Tarquin and Pete
Formations in the upstream direction.
Modelling by Pete, lighting by Tarquin and Pete A bouldery chamber in the upstream direction. Most of the water comes in from an inlet under the right wall, which looks very low and wet.
 On a subsequent visit with lower water, we visited the inlet, which is largely crawling through shattered rock, beneath hanging boulders.
Modelling by Peter
On a subsequent visit with lower water, we visited the inlet, which is largely crawling through shattered rock, beneath hanging boulders.
Modelling by Peter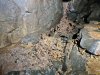 Decomposed calcite in the inlet.
 The inlet ends at a pinched choke just beyond a squeeze under a hanging boulder. The water probably comes from a pool in The Blockhouse.
 The way on ahead gets narrower and more awkward.
Modelling by Pete, lighting by Tarquin and Pete
The way on ahead gets narrower and more awkward.
Modelling by Pete, lighting by Tarquin and Pete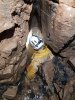 The final climb at the end.
Modelling by Pete, lighting by Tarquin and Pete
The final climb at the end.
Modelling by Pete, lighting by Tarquin and Pete The climb reaches The Blockhouse, the last chamber in the series.
Modelling by Pete, lighting by Tarquin and Pete
The climb reaches The Blockhouse, the last chamber in the series.
Modelling by Pete, lighting by Tarquin and Pete The Blockhouse is really a short passage rather than a chamber.
Modelling by Pete, lighting by Tarquin and Pete
The Blockhouse is really a short passage rather than a chamber.
Modelling by Pete, lighting by Tarquin and Pete Sump on the side of the passage. This seems to be a static pool rather than a passage.
 The Blockhouse has something which I have not seen west of Mynydd Llangatwg before, cryostal. Sadly, it is coated in modern stal, but it shows that the ice age permafrost has managed to create cryostal in this area, and that's a significant discovery.
 Cryostal.
 There are a few other bits tucked between the rocks that have no modern stal on them.
 Cryostal between the rocks.
 This right branch ends in a choke.
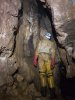 In the other direction is an inlet aven, the highest point in the series.
Modelling by Pete, lighting by Tarquin and Pete
In the other direction is an inlet aven, the highest point in the series.
Modelling by Pete, lighting by Tarquin and Pete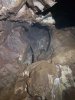 The top is blind, and less than 15 metres blow surface, directly below the top of the tramroad cutting.
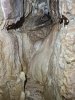 Stal in the aven.
 Stal in the aven.
 Below the aven, a side passage heads north and quickly chokes. The end of the series.
 On our second trip into the series, we decided to try climbing up the cascades at the 1982 breakthrough chamber - the way it had originally been found in 1970. This climb is stupidly narrow and awkward, but is not tight. The upper part is a steep water chute, where gravity is most unhelpful.
Modelling by Peter, lighting by Tarquin and Peter
On our second trip into the series, we decided to try climbing up the cascades at the 1982 breakthrough chamber - the way it had originally been found in 1970. This climb is stupidly narrow and awkward, but is not tight. The upper part is a steep water chute, where gravity is most unhelpful.
Modelling by Peter, lighting by Tarquin and Peter At the top, a climb enters a much better sized passage, where an inlet aven pinches out.
Modelling by Peter, lighting by Tarquin and Peter
At the top, a climb enters a much better sized passage, where an inlet aven pinches out.
Modelling by Peter, lighting by Tarquin and Peter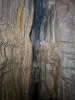 Climbing into the rift leading back over the water chute.
Modelling by Peter, lighting by Tarquin and Peter
Climbing into the rift leading back over the water chute.
Modelling by Peter, lighting by Tarquin and Peter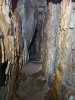 Stal in the rift, which needs to be carefully avoided, as the passage is only shoulder width.
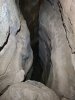 The rift ends at a junction at the head of the original climb up - the way that this area had been found in 1970.
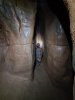 The first passage on the left starts as a distinctive sand floored rift, which ends at a choke.
Modelling by Peter, lighting by Tarquin and Peter
The first passage on the left starts as a distinctive sand floored rift, which ends at a choke.
Modelling by Peter, lighting by Tarquin and Peter Beside the choke is an ongoing narrow rift, that drops steeply downwards, and wiggles around like crazy, before rising back up again and ending close to Edward's Shortcut and the upstream end of Lugubrious Passage.
Modelling by Peter, lighting by Tarquin and Peter
Beside the choke is an ongoing narrow rift, that drops steeply downwards, and wiggles around like crazy, before rising back up again and ending close to Edward's Shortcut and the upstream end of Lugubrious Passage.
Modelling by Peter, lighting by Tarquin and Peter Ahead from the junction is a climb up into a large chamber.
Modelling by Peter, lighting by Tarquin and Peter
Ahead from the junction is a climb up into a large chamber.
Modelling by Peter, lighting by Tarquin and Peter Ahead just goes to a dig which branches before ending.
 To the right in the chamber is a 10 metre climb that at first looks impossible or at least stupid without a rope. However, it is actually quite possible, and a rope - while a good idea - was not needed.
Modelling by Peter, lighting by Tarquin and Peter
To the right in the chamber is a 10 metre climb that at first looks impossible or at least stupid without a rope. However, it is actually quite possible, and a rope - while a good idea - was not needed.
Modelling by Peter, lighting by Tarquin and Peter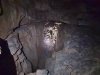 The balcony gives a good view back over the chamber, and reminds you how far off the floor you are.
Modelling by Peter, lighting by Tarquin and Peter
The balcony gives a good view back over the chamber, and reminds you how far off the floor you are.
Modelling by Peter, lighting by Tarquin and Peter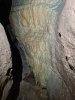 Flowstone in the passage leading from the balcony.
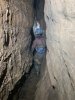 The passage leading from the balcony.
Modelling by Peter, lighting by Tarquin and Peter
The passage leading from the balcony.
Modelling by Peter, lighting by Tarquin and Peter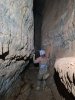 After passing a side passage, it gets wider.
Modelling by Peter, lighting by Tarquin and Peter
After passing a side passage, it gets wider.
Modelling by Peter, lighting by Tarquin and Peter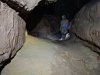 It ends at a slope into a very substantial enlargement, where a tape hints that this is somewhere to really watch your footing! Ahead is an exposed clamber down to a junction. The flowstone on the left is really quite attractive, and sparkles far more than most. Sadly the camera cannot do it any justice.
Modelling by Peter, lighting by Tarquin and Peter
It ends at a slope into a very substantial enlargement, where a tape hints that this is somewhere to really watch your footing! Ahead is an exposed clamber down to a junction. The flowstone on the left is really quite attractive, and sparkles far more than most. Sadly the camera cannot do it any justice.
Modelling by Peter, lighting by Tarquin and Peter Long curtain running down the wall of the enlargement.
Modelling by Peter, lighting by Tarquin and Peter
Long curtain running down the wall of the enlargement.
Modelling by Peter, lighting by Tarquin and Peter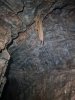 Stal in the ceiling of the enlargement.
Lighting by Tarquin and Peter
Stal in the ceiling of the enlargement.
Lighting by Tarquin and Peter To the left is a superb view of the 10 metre pitch dropping into Moonlight Chamber. It looks absolutely glorious from this position, with that stalactite in the middle.
Modelling by Peter, lighting by Tarquin and Peter
To the left is a superb view of the 10 metre pitch dropping into Moonlight Chamber. It looks absolutely glorious from this position, with that stalactite in the middle.
Modelling by Peter, lighting by Tarquin and Peter In the opposite direction is a 16 metre pitch, with a view all the way over to the top of The Skyhook, the pitch from Upper Great Oxbow.
Modelling by Peter, lighting by Tarquin and Peter
In the opposite direction is a 16 metre pitch, with a view all the way over to the top of The Skyhook, the pitch from Upper Great Oxbow.
Modelling by Peter, lighting by Tarquin and Peter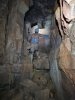 The side passage passed on the right, on the way from the balcony, is next, which starts with a climb into an upper development level.
Modelling by Peter, lighting by Tarquin and Peter
The side passage passed on the right, on the way from the balcony, is next, which starts with a climb into an upper development level.
Modelling by Peter, lighting by Tarquin and Peter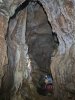 Passing through a window in the formations.
Modelling by Peter, lighting by Tarquin and Peter
Passing through a window in the formations.
Modelling by Peter, lighting by Tarquin and Peter Below the window is an undercut containing more formations.
 The passage is a standard OFD canyon, just like most other passages in the cave.
Modelling by Peter, lighting by Tarquin and Peter
The passage is a standard OFD canyon, just like most other passages in the cave.
Modelling by Peter, lighting by Tarquin and Peter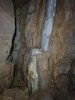 It ends at a junction with one wall covered in stal flow, which needs to be carefully avoided.
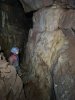 Flowstone in the left branch.
Modelling by Peter, lighting by Tarquin and Peter
Flowstone in the left branch.
Modelling by Peter, lighting by Tarquin and Peter The left branch ends at a flowstone covered mudbank.
Lighting by Tarquin and Peter
The left branch ends at a flowstone covered mudbank.
Lighting by Tarquin and Peter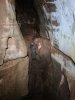 The right branch is more canyon, of course. It reaches a junction.
Modelling by Peter, lighting by Tarquin and Peter
The right branch is more canyon, of course. It reaches a junction.
Modelling by Peter, lighting by Tarquin and Peter Very large botryoidal stal at the junction.
 To the left drops past whitewashed walls.
 More impressive botryoids on the wall. They are large enough to make the walls look furry.
 The left branch ends at a choke, which is only 12 metres below surface.
Lighting by Tarquin and Peter
The left branch ends at a choke, which is only 12 metres below surface.
Lighting by Tarquin and Peter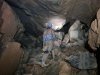 Up to the right from the junction is a badly shattered ceiling, and more avens, which must be even closer to the surface.
Modelling by Peter, lighting by Tarquin and Peter
Up to the right from the junction is a badly shattered ceiling, and more avens, which must be even closer to the surface.
Modelling by Peter, lighting by Tarquin and Peter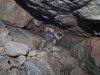 There is a parallel passage on each side of the shattered ceiling. This is the left parallel.
Modelling by Peter, lighting by Tarquin and Peter
There is a parallel passage on each side of the shattered ceiling. This is the left parallel.
Modelling by Peter, lighting by Tarquin and Peter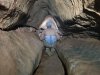 The left parallel has an attractive shape, shame it is so small.
Modelling by Peter, lighting by Tarquin and Peter
The left parallel has an attractive shape, shame it is so small.
Modelling by Peter, lighting by Tarquin and Peter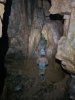 The right parallel is larger, but quickly pinches out ahead. A low passage on the left here ends quickly too.
Modelling by Peter, lighting by Tarquin and Peter
The right parallel is larger, but quickly pinches out ahead. A low passage on the left here ends quickly too.
Modelling by Peter, lighting by Tarquin and Peter Cracked mud in the right parallel. There is clear evidence that the water regularly washes through here and removes footprints in parts of the chamber. Hardly surprising considering how close it is to the surface.
 The way into Northern Lights had always been open, accessed via a couple of different routes. It can be seen here across Moonlight Chamber as a passage leading of at ceiling level. That's a long way up though, 10 metres from the floor, and it is not free climbable. The Moonlight Chamber stalactite is really quite long.
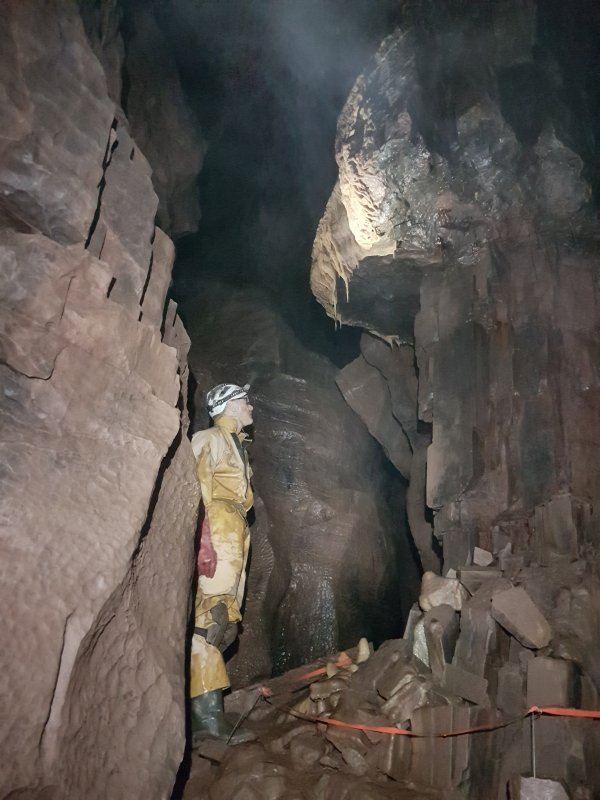 Stal at the entry point to Moonlight Chamber.
Modelling by Pete, lighting by Tarquin and Pete
Stal at the entry point to Moonlight Chamber.
Modelling by Pete, lighting by Tarquin and Pete The usual way in is via Midnight Chamber.
Modelling by Pete, lighting by Tarquin and Pete
The usual way in is via Midnight Chamber.
Modelling by Pete, lighting by Tarquin and Pete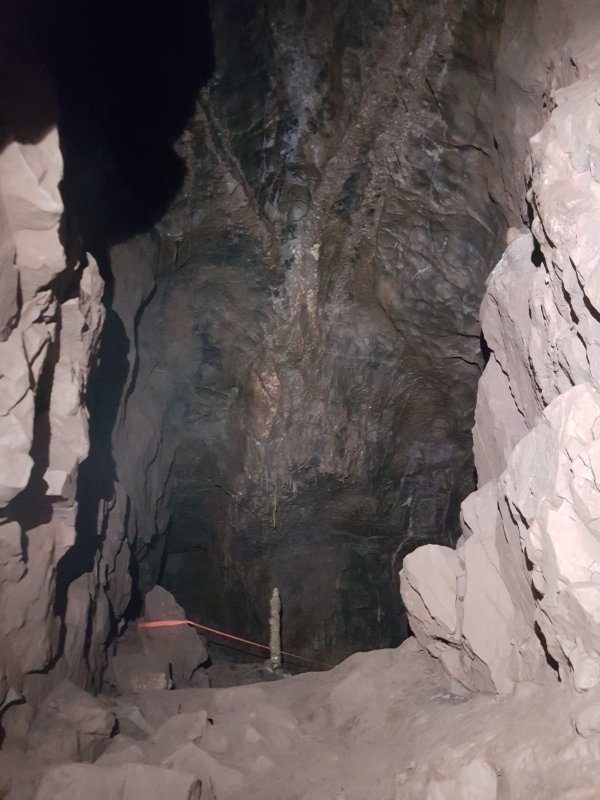 Stal in Midnight Chamber's top oxbow.
 The Skyhook pitch, from the bottom. This is the exit from the Upper Great Oxbow, another beautifully decorated series.
Modelling by Pete, lighting by Tarquin and Pete
The Skyhook pitch, from the bottom. This is the exit from the Upper Great Oxbow, another beautifully decorated series.
Modelling by Pete, lighting by Tarquin and Pete Crystal pool on the passage leading away from Midnight Chamber.
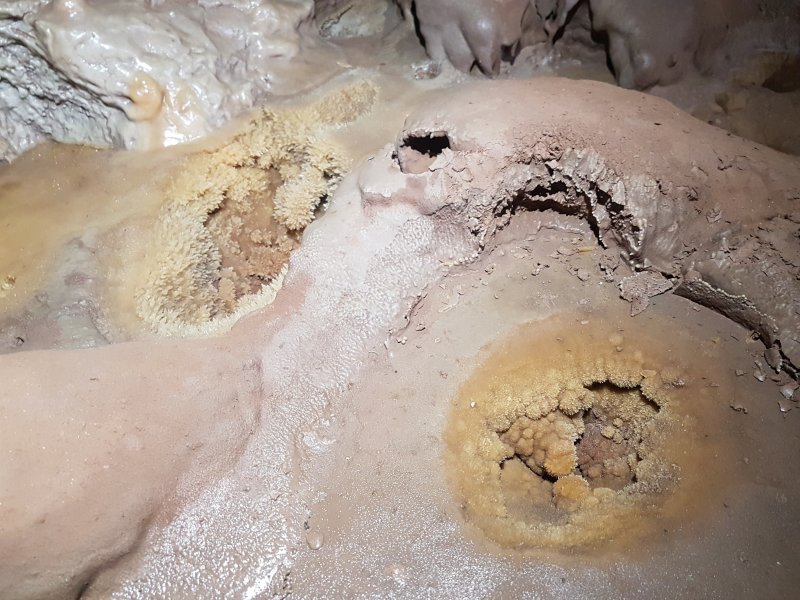 Crystal pools.
 The passage appears to pinch out, and one of the ways on is through this ridiculous hole in the wall. A side passage here has an audible stream, sourced from Lavender Way. Beyond that it enters an extensive series of passages beneath the Upper Great Oxbow Series.
Modelling by Pete
The passage appears to pinch out, and one of the ways on is through this ridiculous hole in the wall. A side passage here has an audible stream, sourced from Lavender Way. Beyond that it enters an extensive series of passages beneath the Upper Great Oxbow Series.
Modelling by Pete The passage reaches a small cascade, and you might hope that the way on is up the cascade, but sadly I must draw your attention to the left side of the pool. Here, you get your first soaking. A perfectly placed crawl through the pool. In drought conditions, it is possible to get through with just wet wellies.
Modelling by Pete, lighting by Tarquin and Pete
The passage reaches a small cascade, and you might hope that the way on is up the cascade, but sadly I must draw your attention to the left side of the pool. Here, you get your first soaking. A perfectly placed crawl through the pool. In drought conditions, it is possible to get through with just wet wellies.
Modelling by Pete, lighting by Tarquin and Pete The original way that this area was found in 1970 was up the cascade, and up this climb, the top of which can also be reached from the Moonlight Chamber pitch. The boulders are now said to be loose, so this route is not used.
 The crawl in water ended at a choke. This was dug in 1982.
Modelling by Pete, lighting by Tarquin and Pete
The crawl in water ended at a choke. This was dug in 1982.
Modelling by Pete, lighting by Tarquin and Pete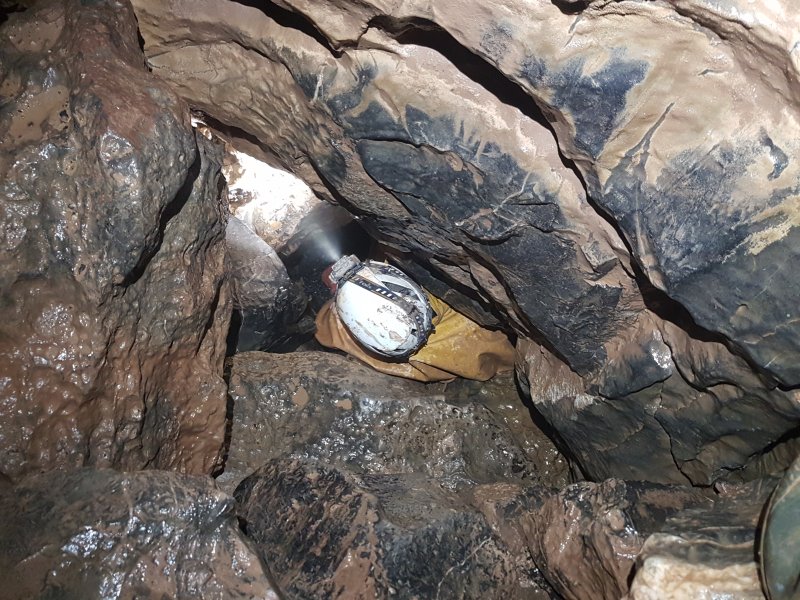 The route through the choke arrives in a chamber that had already been found, with the narrow stream cascading in. We would head upstream on a later trip - at the end of this gallery.
Modelling by Pete and Tarquin's welly, lighting by Tarquin and Pete
The route through the choke arrives in a chamber that had already been found, with the narrow stream cascading in. We would head upstream on a later trip - at the end of this gallery.
Modelling by Pete and Tarquin's welly, lighting by Tarquin and Pete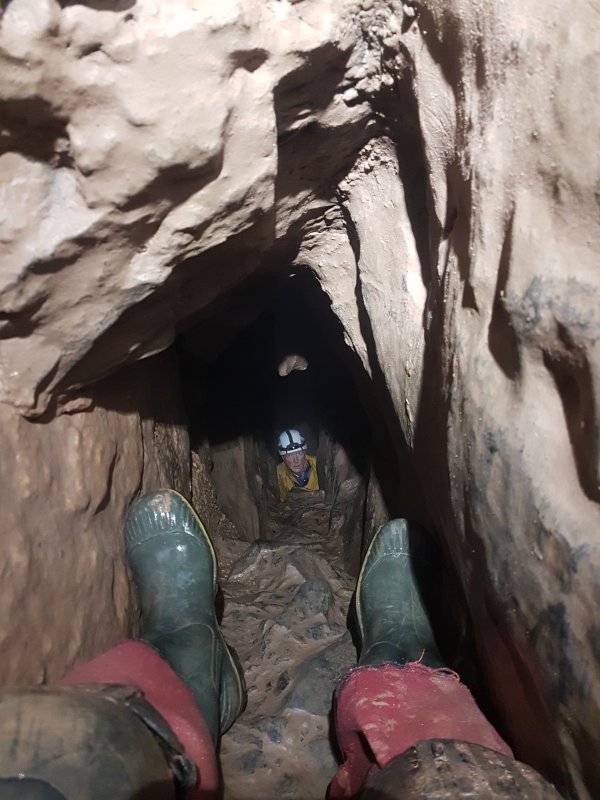 A second route out of the chamber, a very small, descending tube, with an awkward climb at the end. There are two ways on. The main way on is in the same direction as the tube.
Modelling by Tarquin's wellies and Pete
A second route out of the chamber, a very small, descending tube, with an awkward climb at the end. There are two ways on. The main way on is in the same direction as the tube.
Modelling by Tarquin's wellies and Pete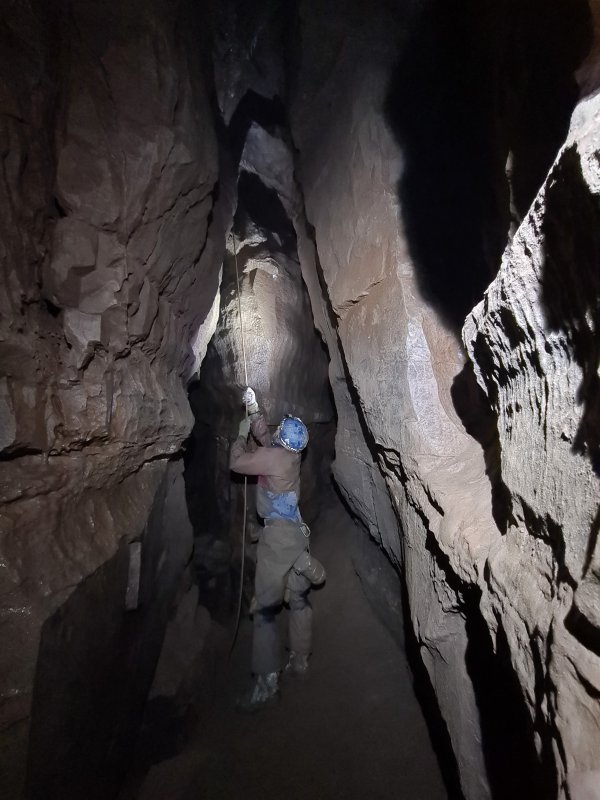 However, there is also this side passage to the right. It chokes, but has a roof tube that will be mentioned later.
Modelling by Peter, lighting by Tarquin and Peter
However, there is also this side passage to the right. It chokes, but has a roof tube that will be mentioned later.
Modelling by Peter, lighting by Tarquin and Peter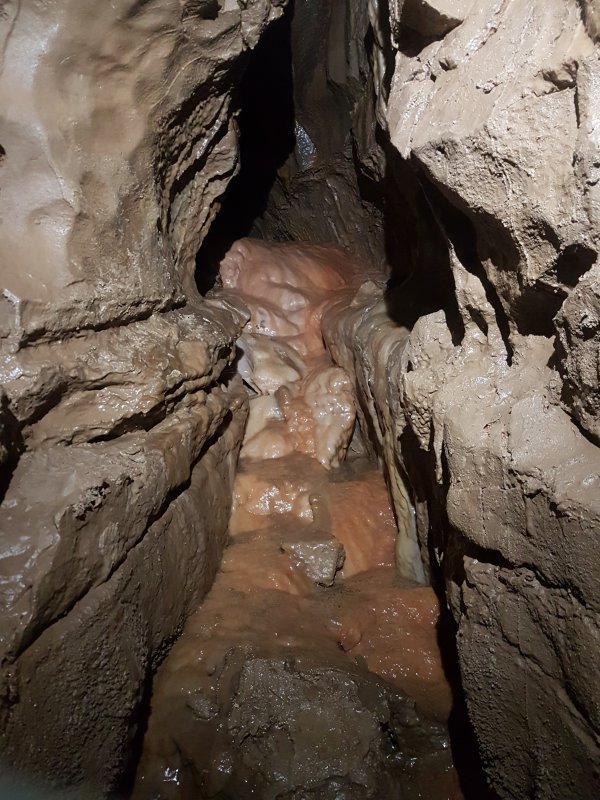 Continuing past Lavender Way, the passage ends at a flowstone formation. This passage, like many in the area, points out towards a blank area with no known cave.
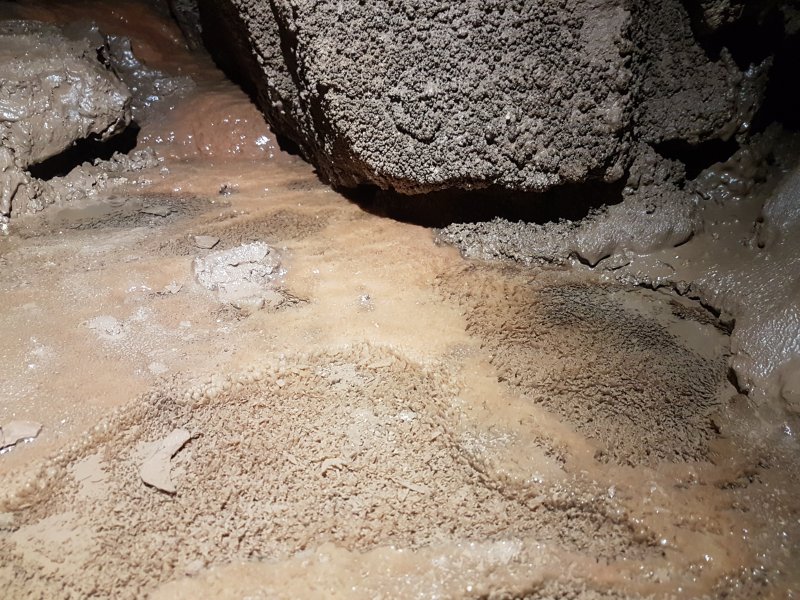 Crystal pool at the end.
 Lavender Way is an awkward passage, requiring a lot of traversing on ledges. Towards the end, it has a number of boulder obstacles that need to be passed.
Modelling by Pete, lighting by Tarquin and Pete
Lavender Way is an awkward passage, requiring a lot of traversing on ledges. Towards the end, it has a number of boulder obstacles that need to be passed.
Modelling by Pete, lighting by Tarquin and Pete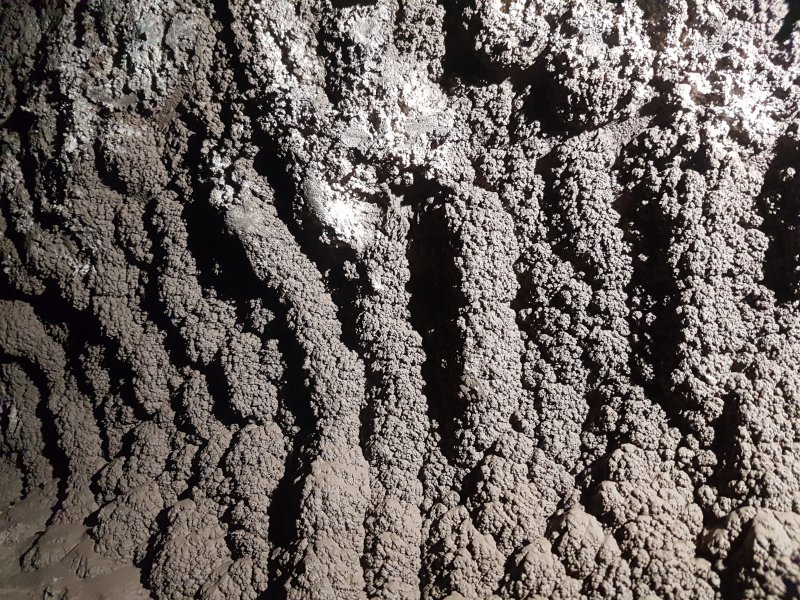 Mud formations in Lavender Way.
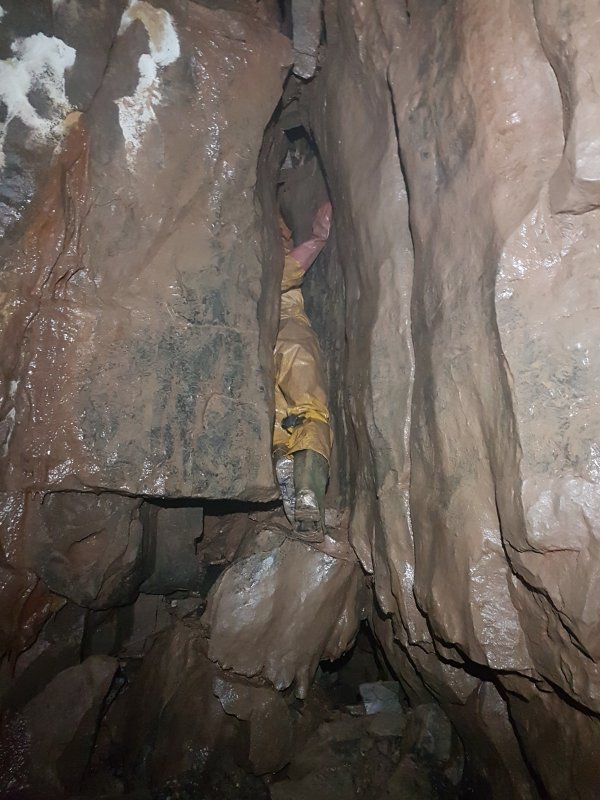 Lavender Way ends in a chamber called The Vault, though the survey has this label misplaced). From there, the way on is along a tight rift that turns into a squeeze up.
Modelling by Pete
Lavender Way ends in a chamber called The Vault, though the survey has this label misplaced). From there, the way on is along a tight rift that turns into a squeeze up.
Modelling by Pete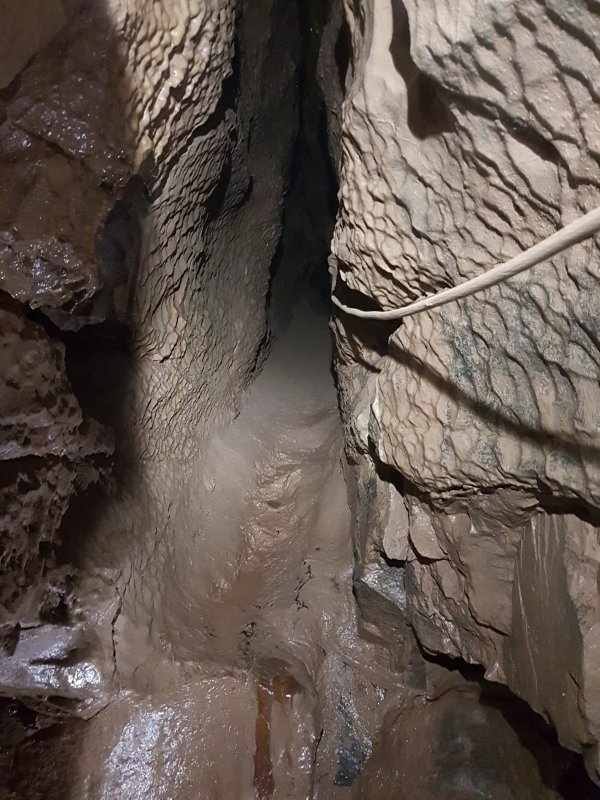 Heading back over the squeeze is a rift that passes over a traverse over The Vault. This can be used as an alternative exit in an emergency, if the choke in The Vault were to collapse (something the re-discoverers had worried about).
 The alternative exit tube turns left at a junction, and looks very narrow, but it is actually quite easily passable.
Modelling by Peter, lighting by Tarquin and Peter
The alternative exit tube turns left at a junction, and looks very narrow, but it is actually quite easily passable.
Modelling by Peter, lighting by Tarquin and Peter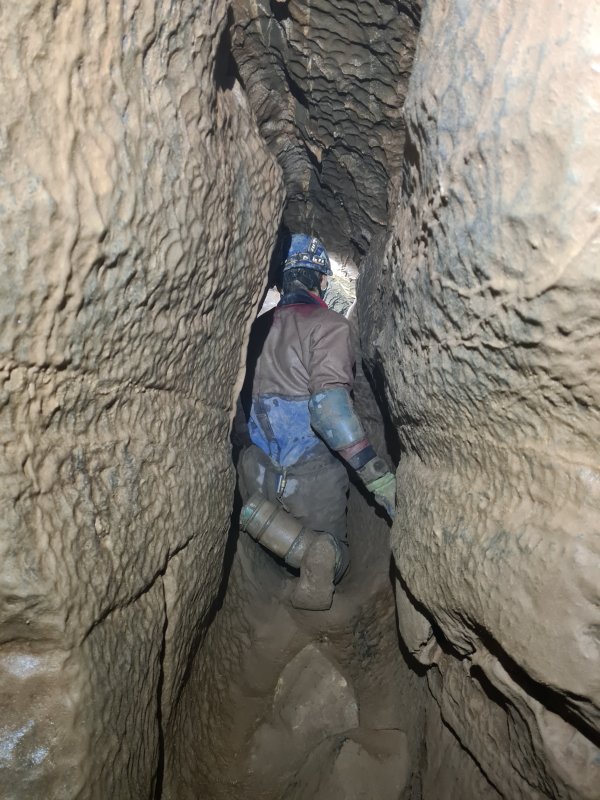 At another junction, it turns right and becomes more of a rift, with relatively comfortable proportions.
Modelling by Peter, lighting by Tarquin and Peter
At another junction, it turns right and becomes more of a rift, with relatively comfortable proportions.
Modelling by Peter, lighting by Tarquin and Peter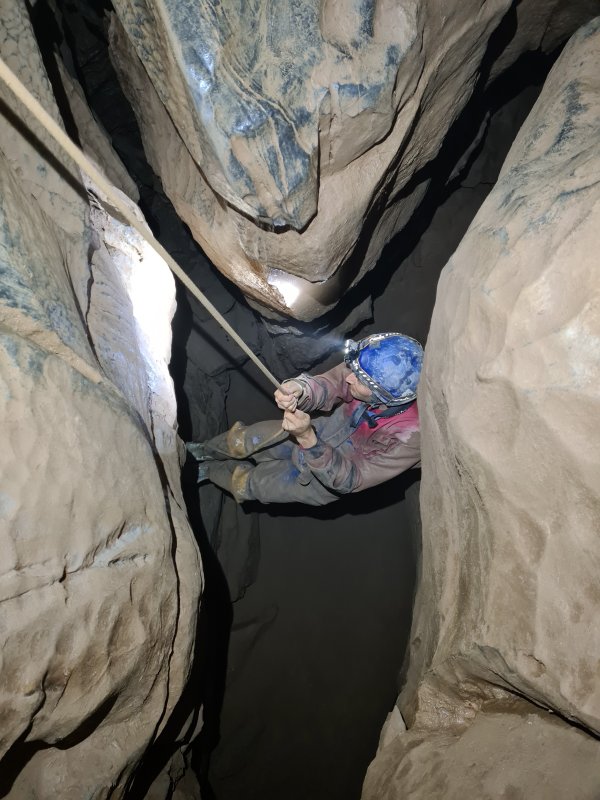 It ends at the rope down into the side passage before Lavender Way. An abseil is required, or you can just freehand it, if you are brave enough.
Modelling by Peter, lighting by Tarquin and Peter
It ends at the rope down into the side passage before Lavender Way. An abseil is required, or you can just freehand it, if you are brave enough.
Modelling by Peter, lighting by Tarquin and Peter At the top of the squeeze from The Vault is Chamber 2, which is blind at both ends. The way back to The Vault is down on the right of the picture, and the way to Chamber 3 is a crawl under the wall to the left. Note that on the survey, the label for The Vault sits next to this chamber.
Modelling by Pete, lighting by Tarquin and Pete
At the top of the squeeze from The Vault is Chamber 2, which is blind at both ends. The way back to The Vault is down on the right of the picture, and the way to Chamber 3 is a crawl under the wall to the left. Note that on the survey, the label for The Vault sits next to this chamber.
Modelling by Pete, lighting by Tarquin and Pete Chamber 3.
Modelling by Pete, lighting by Tarquin and Pete
Chamber 3.
Modelling by Pete, lighting by Tarquin and Pete Stal in Chamber 3.
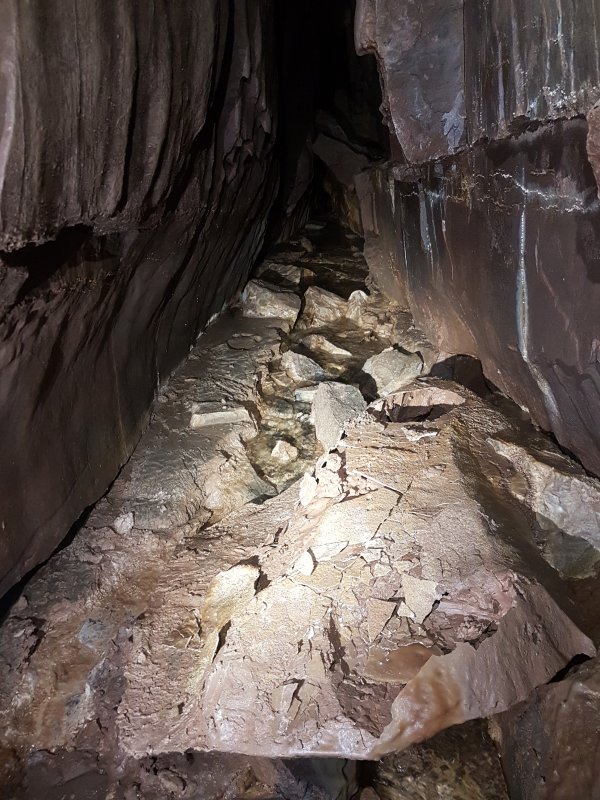 Chamber 4 is really just a junction. To the left is side passage with a delicate mud and cracked calcite floor. It ends at a chamber with an aven, but we didn't want to add unnecessary traffic past the calcite, so we left it alone.
Lighting by Tarquin and Pete
Chamber 4 is really just a junction. To the left is side passage with a delicate mud and cracked calcite floor. It ends at a chamber with an aven, but we didn't want to add unnecessary traffic past the calcite, so we left it alone.
Lighting by Tarquin and Pete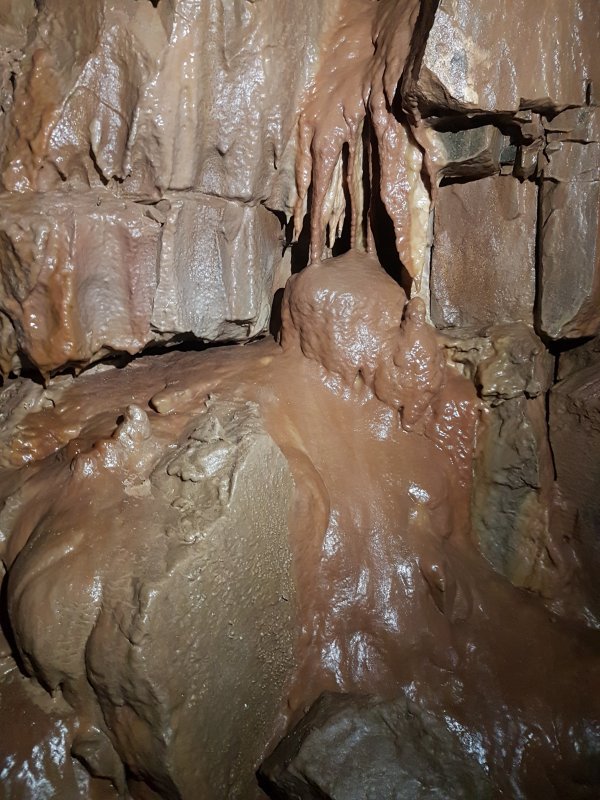 Stal in the chamber.
 The end of the chamber has an aven, which for some reason got called a fifth chamber. It is not a separate chamber, it is part of Chamber 4. This is as far as the 1970 exploration got, and as far as the 1982 rediscovery got.
Modelling by Pete, lighting by Tarquin and Pete
The end of the chamber has an aven, which for some reason got called a fifth chamber. It is not a separate chamber, it is part of Chamber 4. This is as far as the 1970 exploration got, and as far as the 1982 rediscovery got.
Modelling by Pete, lighting by Tarquin and Pete Calcite flow under the aven.
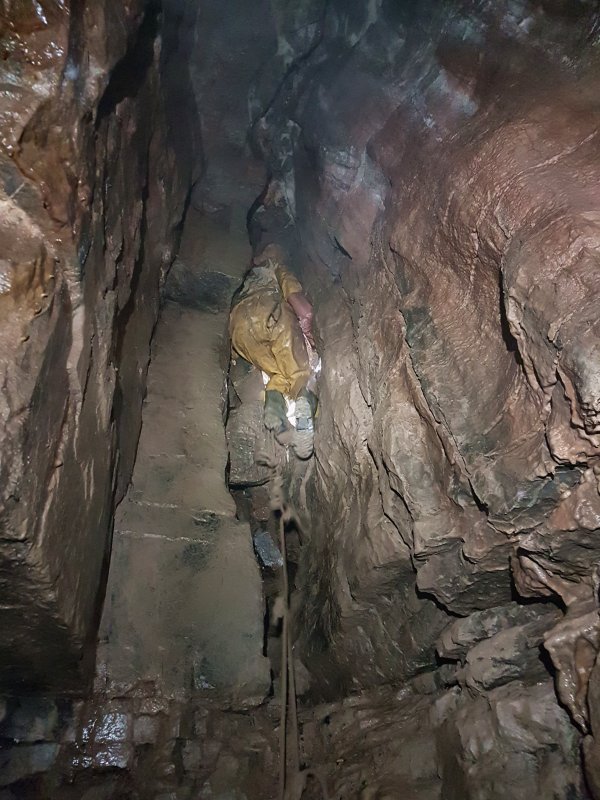 The climb is a lot more awkward than it looks. At the top, while flailing around trying to find holds that work, you have to post yourself into a narrow, horizontal slot at the top. It's not a squeeze, but it is awkward enough that it feels like one.
Modelling by Pete, lighting by Tarquin and Pete
The climb is a lot more awkward than it looks. At the top, while flailing around trying to find holds that work, you have to post yourself into a narrow, horizontal slot at the top. It's not a squeeze, but it is awkward enough that it feels like one.
Modelling by Pete, lighting by Tarquin and Pete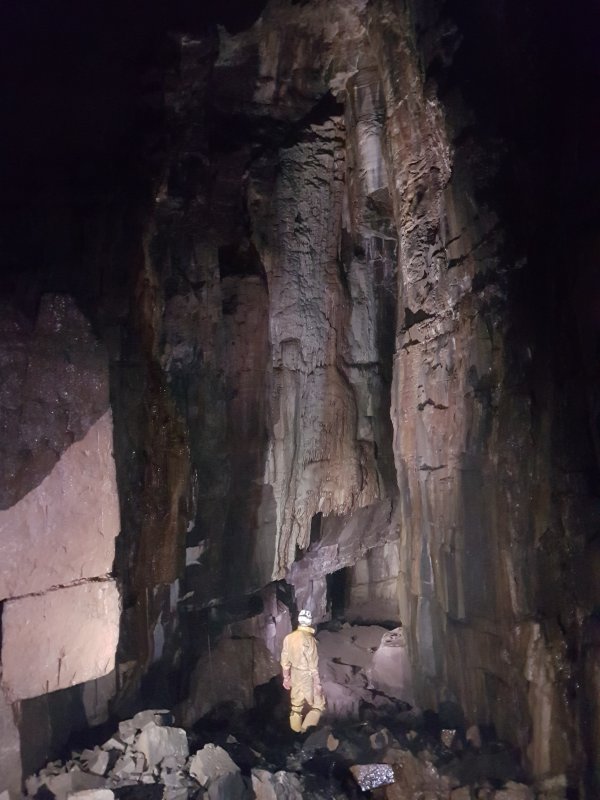 The slot pops out in the side of Northern Lights, the most dramatic chamber in the Northern Lights series. Flowstone formations coat the walls, soaring up into the darkness, where a waterfall showers in. This chamber was first reached in 1985, and sits directly under the corner in the path that you walk up to reach Top Entrance.
Modelling by Pete, lighting by Tarquin and Pete
The slot pops out in the side of Northern Lights, the most dramatic chamber in the Northern Lights series. Flowstone formations coat the walls, soaring up into the darkness, where a waterfall showers in. This chamber was first reached in 1985, and sits directly under the corner in the path that you walk up to reach Top Entrance.
Modelling by Pete, lighting by Tarquin and Pete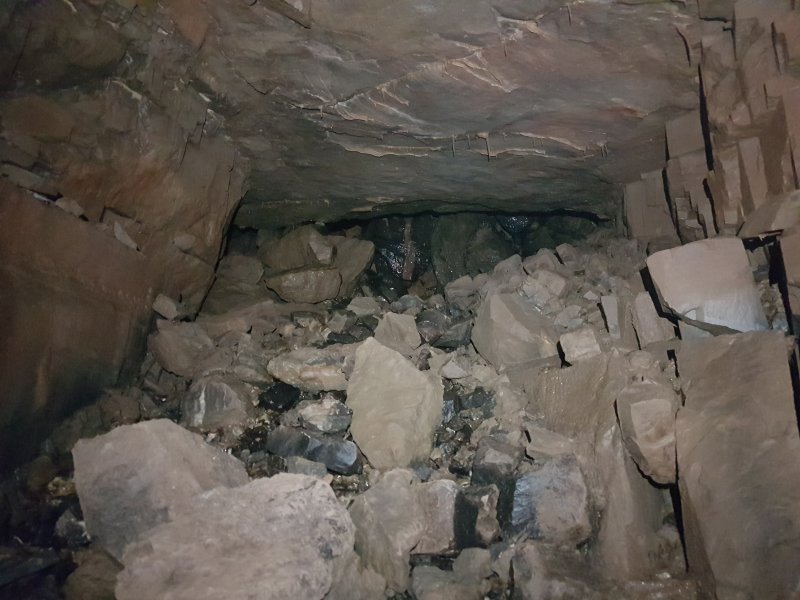 To the right, the chamber ends in a choke.
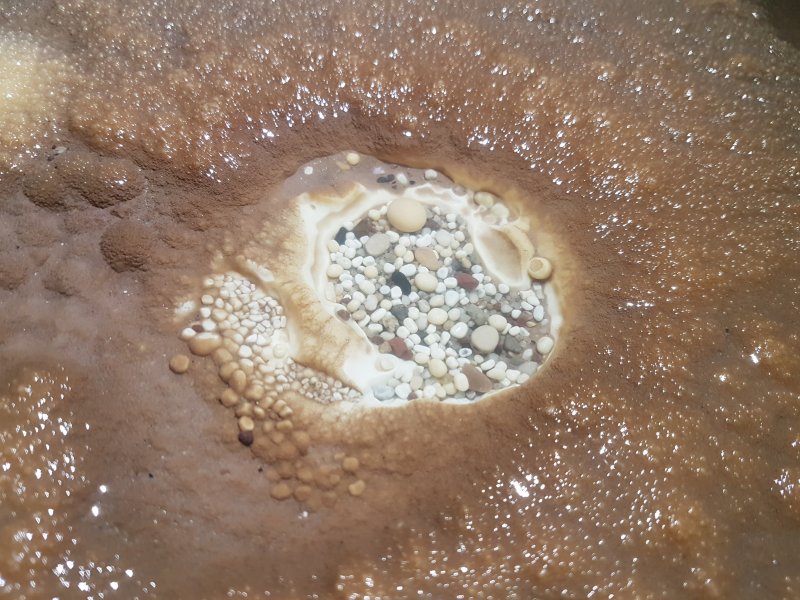 Cave pearls in a pool on the floor of the chamber. The pool is about 10 cm across.
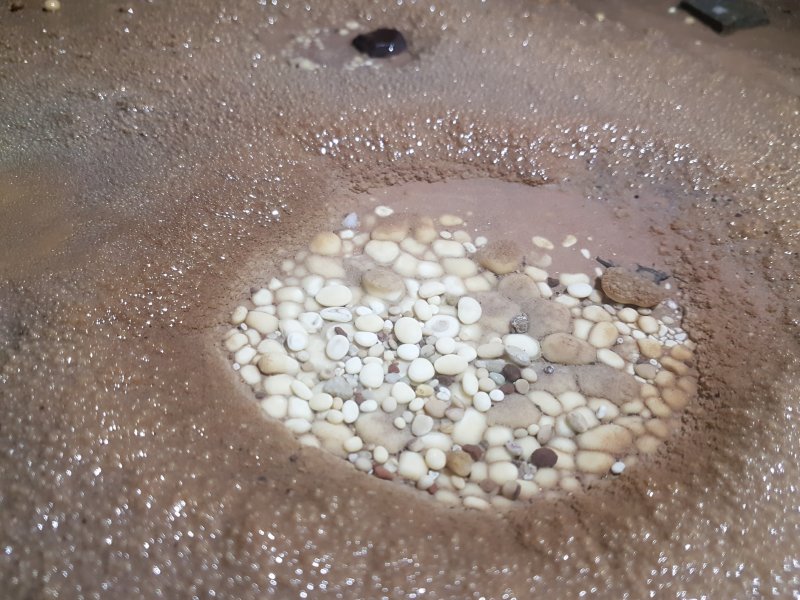 Two more pools of cave pearls. The larger pool is 10 cm across.
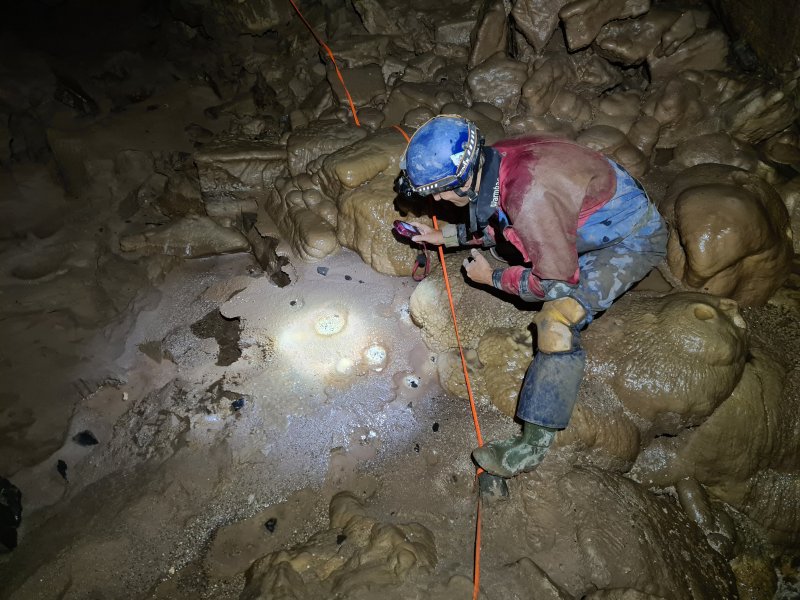 The cave pearl pools.
Modelling by Peter, lighting by Tarquin and Peter
The cave pearl pools.
Modelling by Peter, lighting by Tarquin and Peter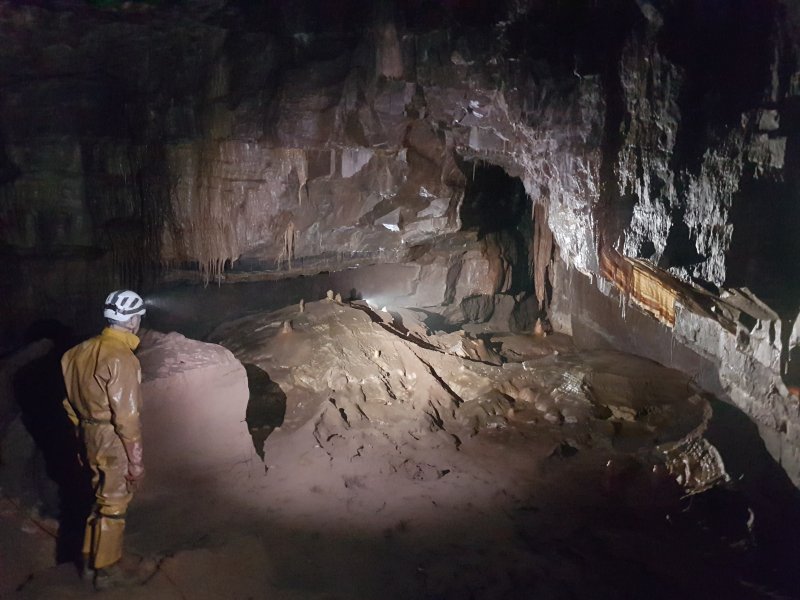 The best set of formations in the chamber, including one of the best curtains in the cave.
Modelling by Pete, lighting by Tarquin and Pete
The best set of formations in the chamber, including one of the best curtains in the cave.
Modelling by Pete, lighting by Tarquin and Pete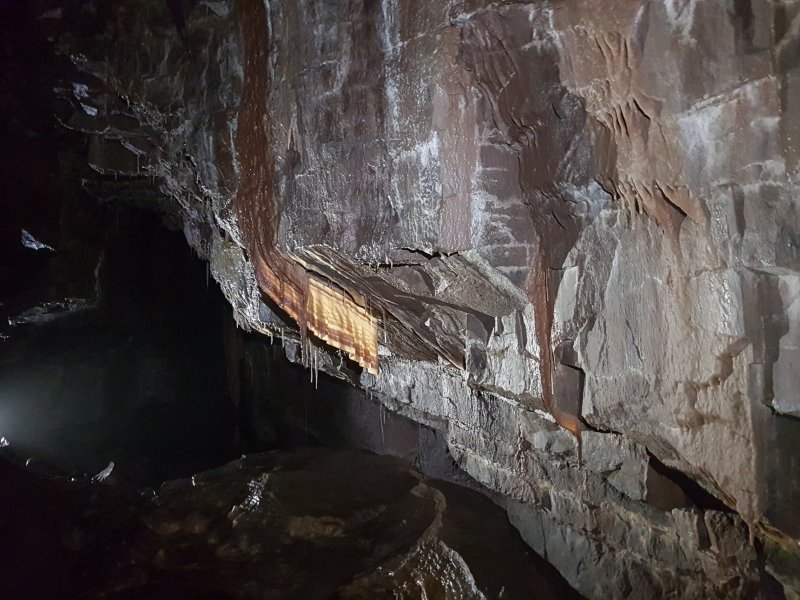 Translucent with perfect colour bands.
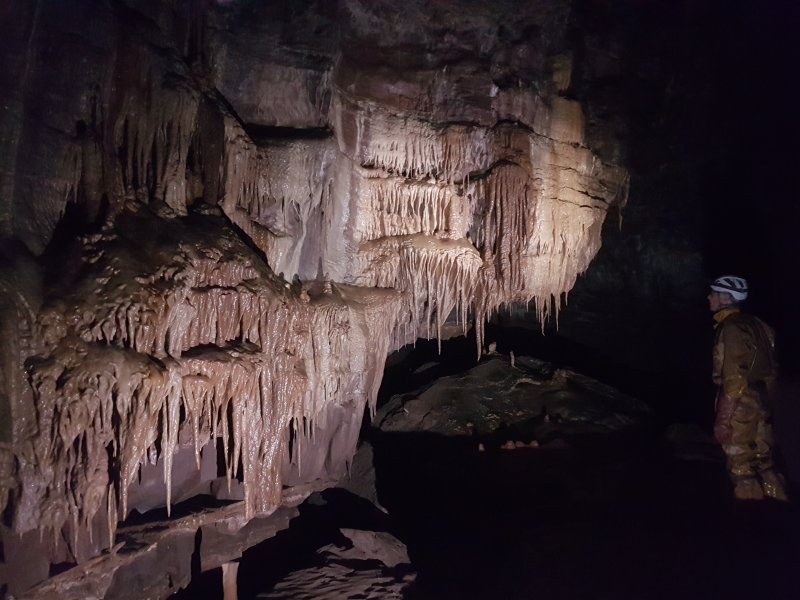 Wall of stal. The way into Northern Inlet is to duck under the wall.
Modelling by Pete, lighting by Tarquin and Pete
Wall of stal. The way into Northern Inlet is to duck under the wall.
Modelling by Pete, lighting by Tarquin and Pete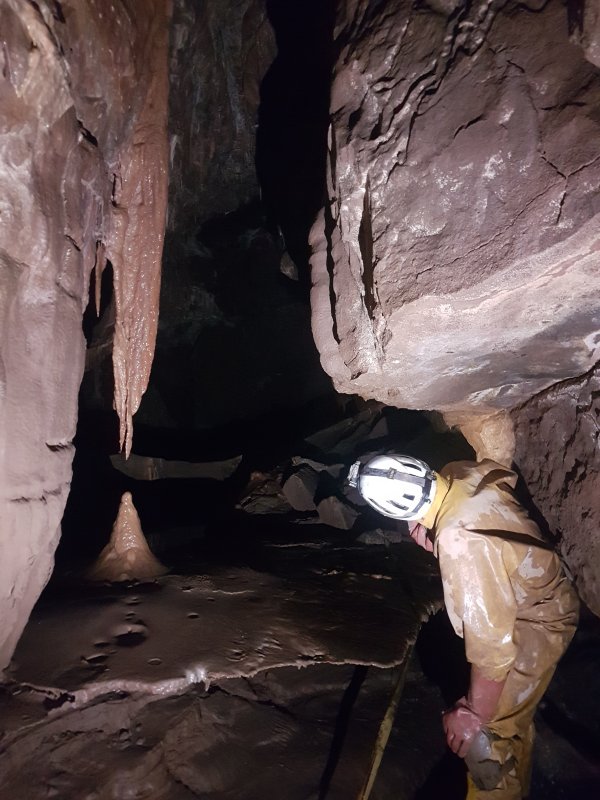 Stalactite and stalagmite that are close to forming a complete column, at the entrance to Northern Inlet.
Modelling by Pete, lighting by Tarquin and Pete
Stalactite and stalagmite that are close to forming a complete column, at the entrance to Northern Inlet.
Modelling by Pete, lighting by Tarquin and Pete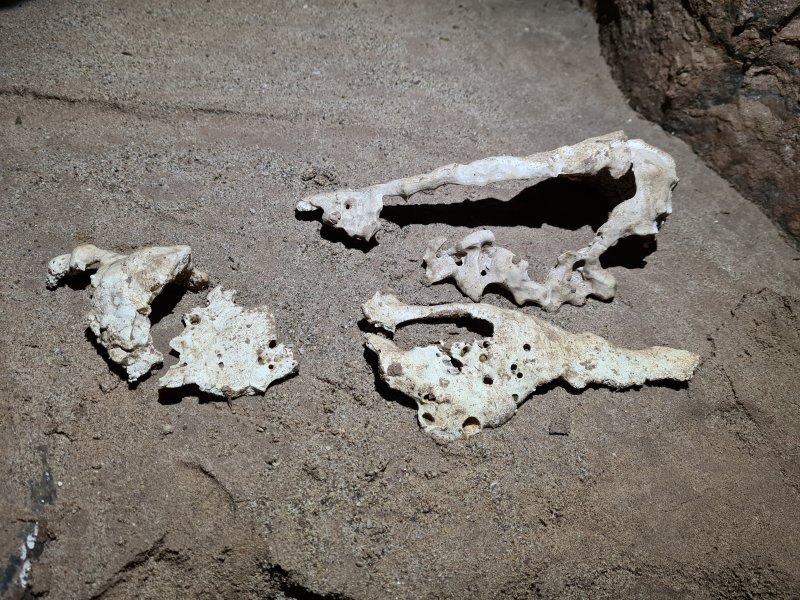 Probable decomposed calcite, looking like skull fragments.
 Twin set of stunning stactite and stalagmite clusters.
Modelling by Pete, lighting by Tarquin and Pete
Twin set of stunning stactite and stalagmite clusters.
Modelling by Pete, lighting by Tarquin and Pete Dried crystal pools.
 Crystal pools.
 Ceiling stal.
 Stalactites and stal boss - one could call it the Final Boss - near the end of Northern Inlet. The stream emerges from a side passage, and its source will be seen later.
Modelling by Pete, lighting by Tarquin and Pete
Stalactites and stal boss - one could call it the Final Boss - near the end of Northern Inlet. The stream emerges from a side passage, and its source will be seen later.
Modelling by Pete, lighting by Tarquin and Pete Calcite rafts in a dried crystal pool.
 The end of Northern Inlet, a choke that very nearly breaks through into the second half of the series.
 Cracked mud at the Mudlust end of Northern Lights chamber.
 The way out of the chamber leads directly into Mudlust Hall, the fantastic remains of a moonmilk crystal pool.
Modelling by Pete, lighting by Tarquin and Pete
The way out of the chamber leads directly into Mudlust Hall, the fantastic remains of a moonmilk crystal pool.
Modelling by Pete, lighting by Tarquin and Pete The old tide mark is clearly visible, along with the thickness of the moonmilk before the pool got washed out.
Modelling by Pete, lighting by Tarquin and Pete
The old tide mark is clearly visible, along with the thickness of the moonmilk before the pool got washed out.
Modelling by Pete, lighting by Tarquin and Pete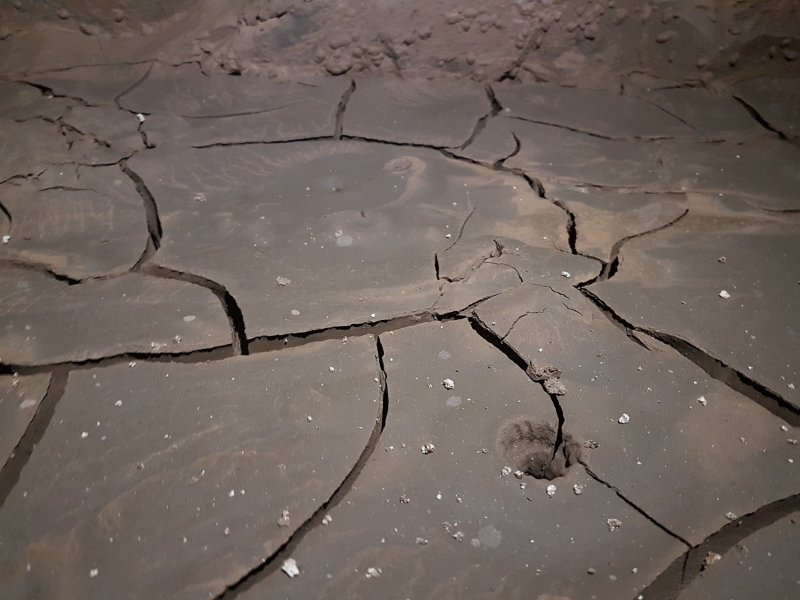 Cracked mud in Mudlust Hall.
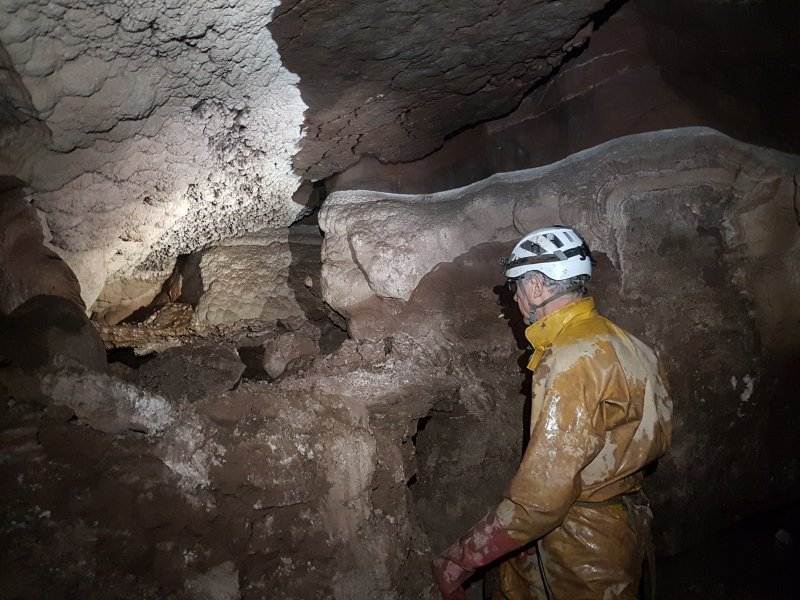 The tide line gets deeper and deeper until it reaches ceiling level, blocking the passage completely.
Modelling by Pete, lighting by Tarquin and Pete
The tide line gets deeper and deeper until it reaches ceiling level, blocking the passage completely.
Modelling by Pete, lighting by Tarquin and Pete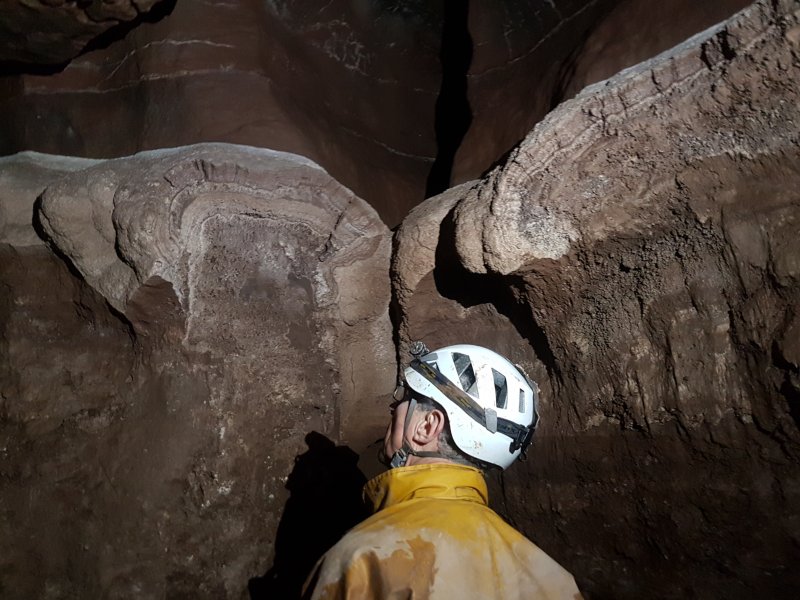 Layers of the moonmilk. The way on is into a narrower side passage, bypassing the blockage via some slithers through moonmilk covered constrictions, and gaining a stream.
Modelling by Pete, lighting by Tarquin and Pete
Layers of the moonmilk. The way on is into a narrower side passage, bypassing the blockage via some slithers through moonmilk covered constrictions, and gaining a stream.
Modelling by Pete, lighting by Tarquin and Pete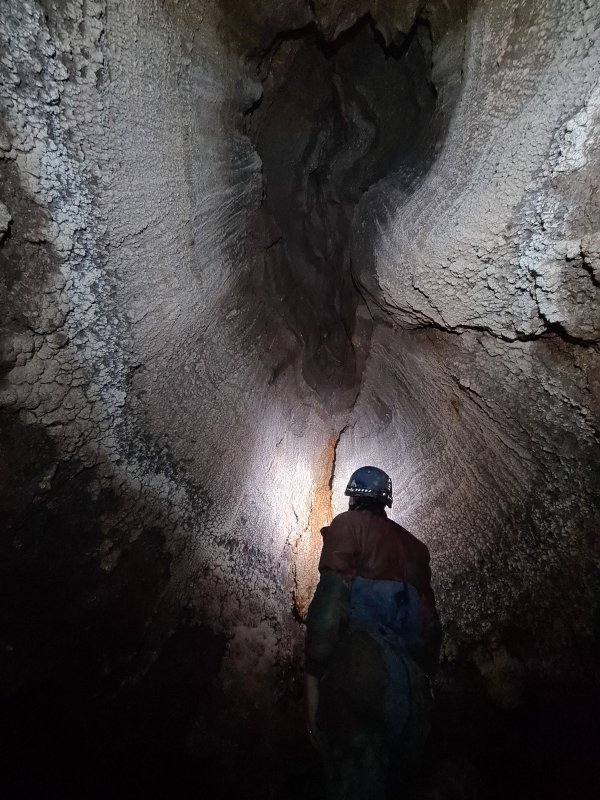 Moonmilk covered aven up a climb in the awkward section.
Modelling by Peter, lighting by Tarquin and Peter
Moonmilk covered aven up a climb in the awkward section.
Modelling by Peter, lighting by Tarquin and Peter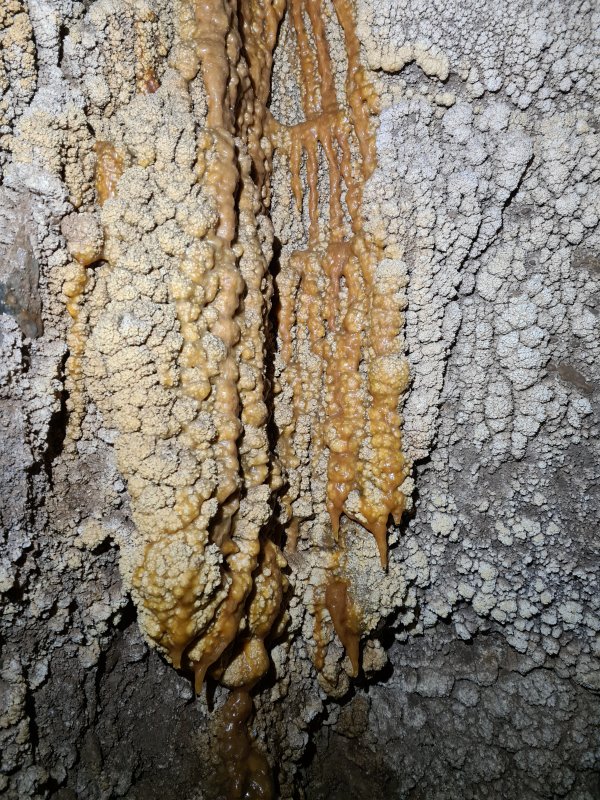 Moonmilk and calcite.
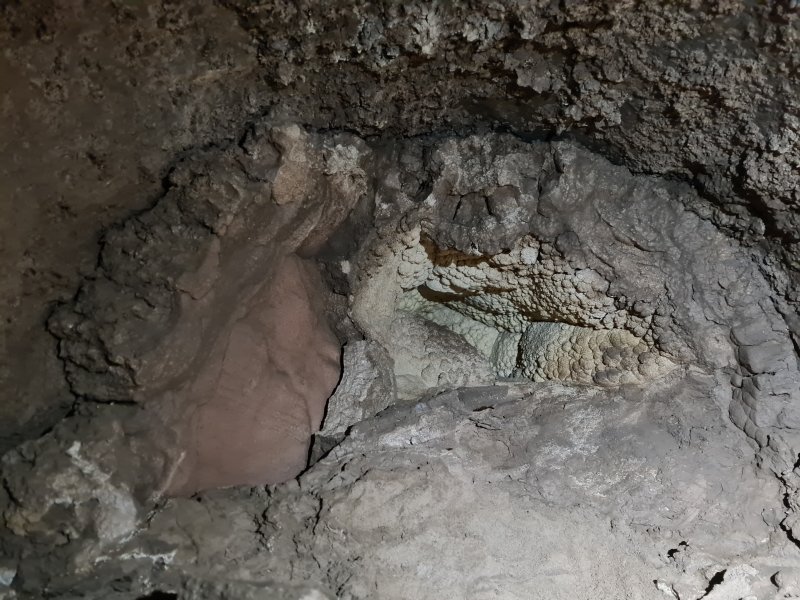 Alcove below the aven.
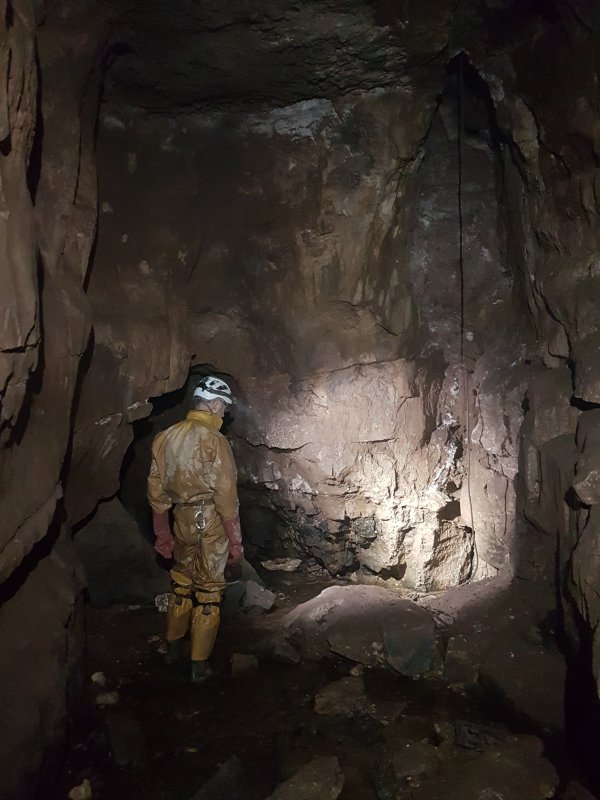 An inlet on the right marks the way on, with a rope leading into a roof tube above it.
Modelling by Pete, lighting by Tarquin and Pete
An inlet on the right marks the way on, with a rope leading into a roof tube above it.
Modelling by Pete, lighting by Tarquin and Pete The water rushing in from that inlet was definitely higher than normal thanks to the persistent rain. The foam as it flowed rapidly onwards towards the outlet was not at all comforting. It does lose some height here, but we didn't know how far it could back up.
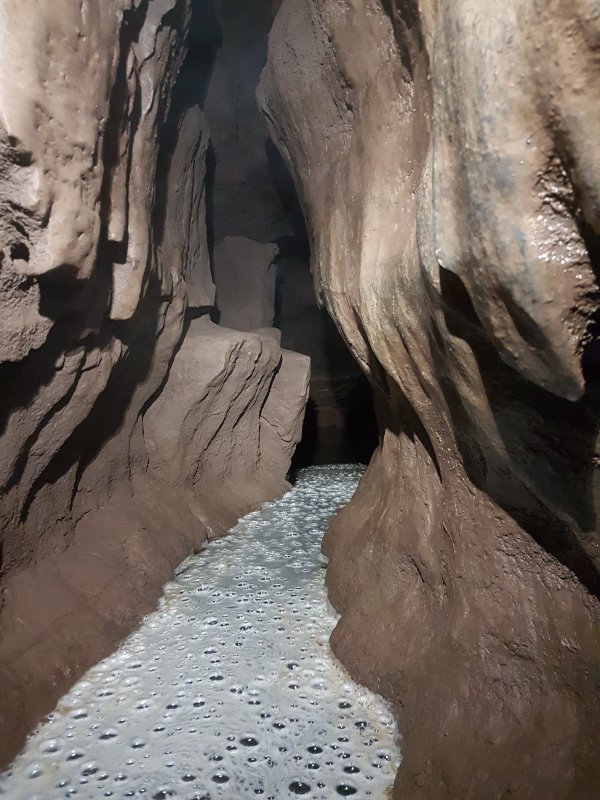 The water got deeper as it approached the sump. That looks like a good beer.
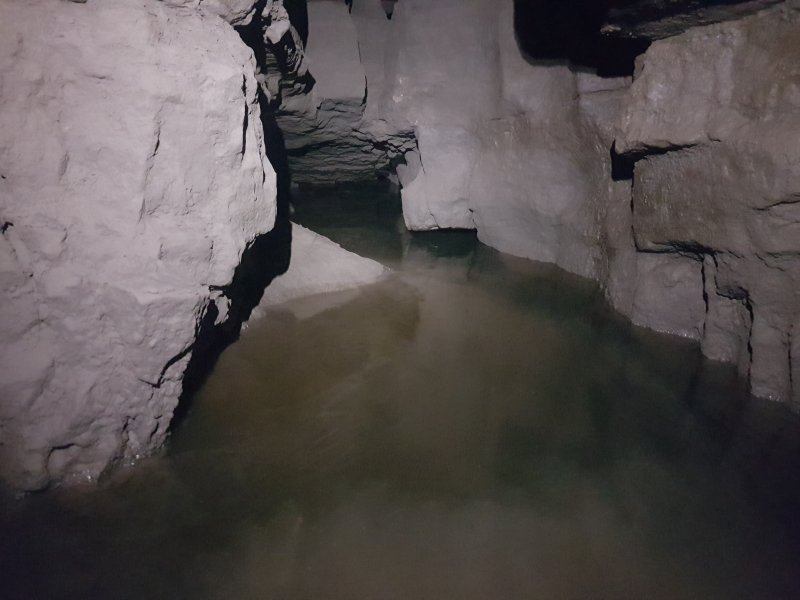 The downstream sump. This is definitely a lot closer to us than it shows on the survey, so the water level is very high. The sump was dived during the original exploration, and was too tight. The water is next seen in the Lower Oxbow Extension.
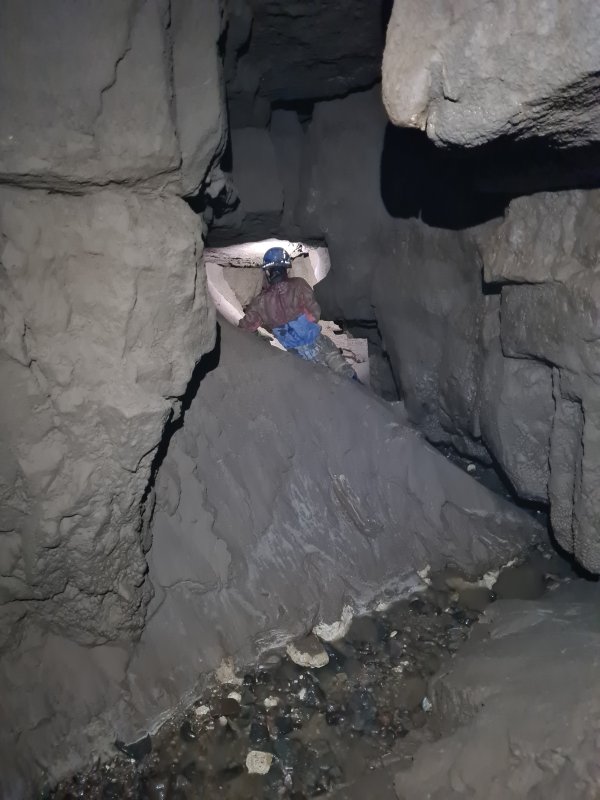 Seen in drought conditions some time later. The passage goes for quite some distance, through some low sections, around a wiggle, and finally to a silted sump.
Modelling by Peter, lighting by Tarquin and Peter
Seen in drought conditions some time later. The passage goes for quite some distance, through some low sections, around a wiggle, and finally to a silted sump.
Modelling by Peter, lighting by Tarquin and Peter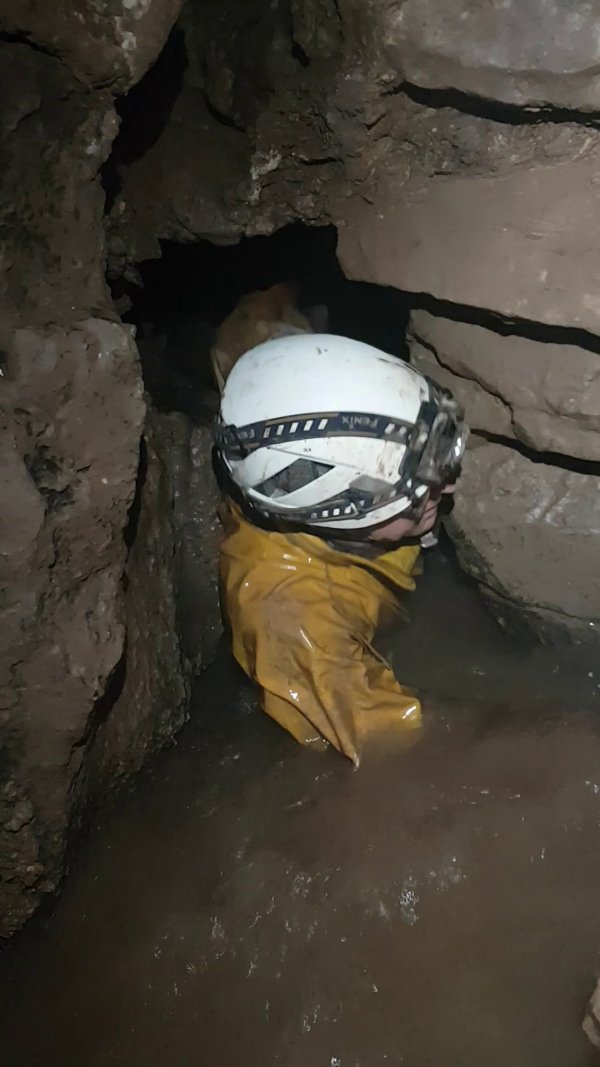 So we did what any good caver would do in elevated water conditions; we headed upstream into the duck. Or ... at least ... I made Pete test the duck first and check that it was OK before I followed him in. And yes, this picture was taken on the way out.
Modelling by Pete
So we did what any good caver would do in elevated water conditions; we headed upstream into the duck. Or ... at least ... I made Pete test the duck first and check that it was OK before I followed him in. And yes, this picture was taken on the way out.
Modelling by Pete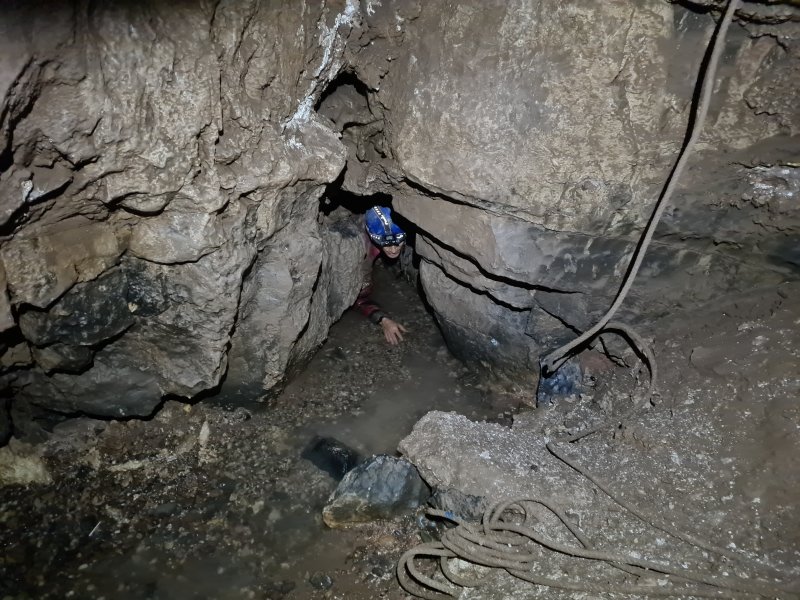 Seen in drought conditions on a subsequent trip, when it was possible to crawl through with just one wet leg. This shows the difference that flood conditions can make.
Modelling by Peter, lighting by Tarquin and Peter
Seen in drought conditions on a subsequent trip, when it was possible to crawl through with just one wet leg. This shows the difference that flood conditions can make.
Modelling by Peter, lighting by Tarquin and Peter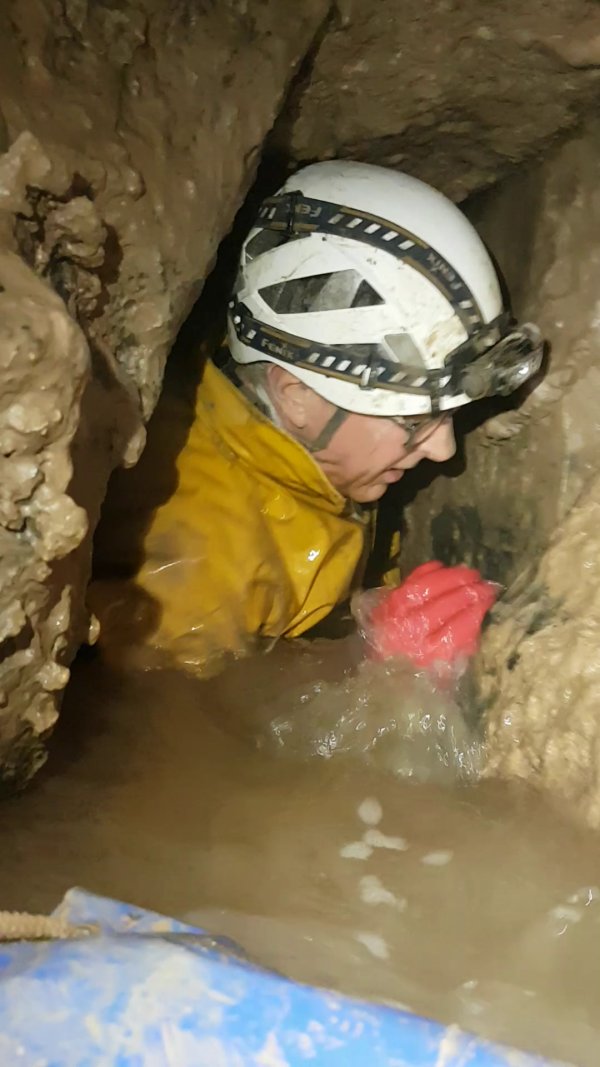 Inside the duck, there is still plenty of airspace. The flow was impressive, but the passage is wide enough for it to safely flow past.
Modelling by Pete
Inside the duck, there is still plenty of airspace. The flow was impressive, but the passage is wide enough for it to safely flow past.
Modelling by Pete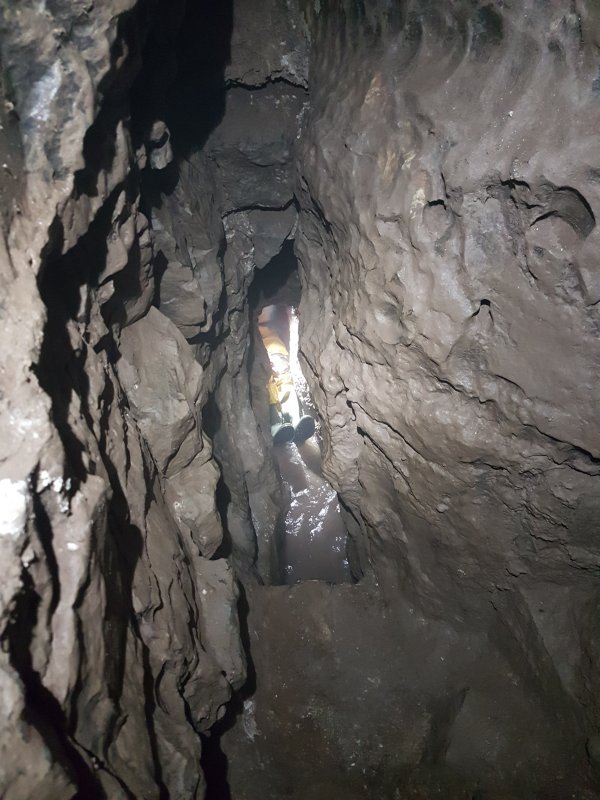 Pete overshot the climb up, and stayed in the stream as it got much tougher.
Modelling by Pete, lighting by Tarquin and Pete
Pete overshot the climb up, and stayed in the stream as it got much tougher.
Modelling by Pete, lighting by Tarquin and Pete I called him back, feet first, from near the end of the passage. He had nearly doubled the length of flat out crawling in squalor, and then reversed half of it again. As it turned out, someone had rigged a rope to allow people to climb up at the end. Oh well, Pete got to enjoy some more wallowing. What a lucky fellow.
Modelling by Pete, lighting by Tarquin and Pete
I called him back, feet first, from near the end of the passage. He had nearly doubled the length of flat out crawling in squalor, and then reversed half of it again. As it turned out, someone had rigged a rope to allow people to climb up at the end. Oh well, Pete got to enjoy some more wallowing. What a lucky fellow.
Modelling by Pete, lighting by Tarquin and Pete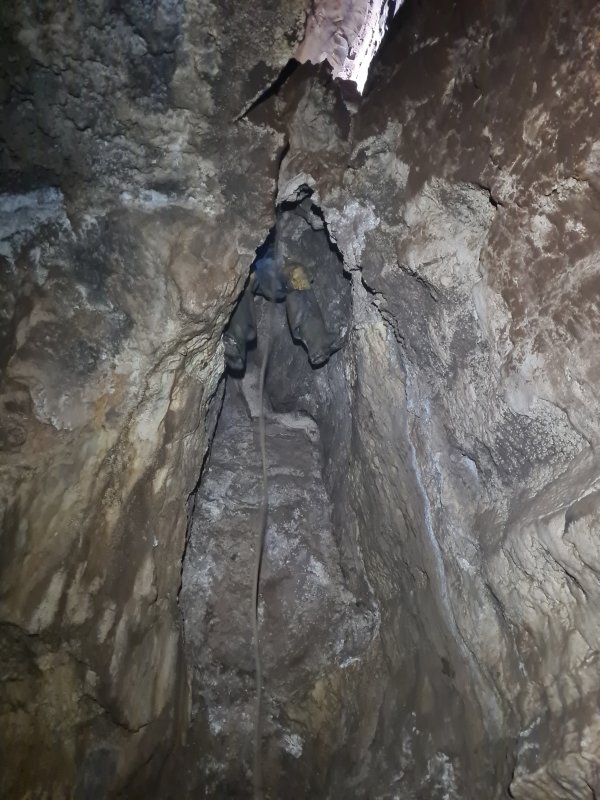 The rope climb is very hard to ascend, and should realistically be treated only as an emergency exit, in case the duck somehow manages to sump (which it didn't, in spite of the heavy rain and obvious flood conditions).
Modelling by Peter, lighting by Tarquin and Peter
The rope climb is very hard to ascend, and should realistically be treated only as an emergency exit, in case the duck somehow manages to sump (which it didn't, in spite of the heavy rain and obvious flood conditions).
Modelling by Peter, lighting by Tarquin and Peter The top of the rope climb is a ledge made of moonmilk. The rope is tied to a bar lying on the moonmilk. That doesn't really seem all that safe, but it is still here. We used this route on our exit during the second trip. The passage leading from here reaches the top of the climb out of the duck.
Modelling by Peter, lighting by Tarquin and Peter
The top of the rope climb is a ledge made of moonmilk. The rope is tied to a bar lying on the moonmilk. That doesn't really seem all that safe, but it is still here. We used this route on our exit during the second trip. The passage leading from here reaches the top of the climb out of the duck.
Modelling by Peter, lighting by Tarquin and Peter The passage above is much larger. The passage soon regains the stream at the rope climb up from the end of the duck.
Modelling by Pete, lighting by Tarquin and Pete
The passage above is much larger. The passage soon regains the stream at the rope climb up from the end of the duck.
Modelling by Pete, lighting by Tarquin and Pete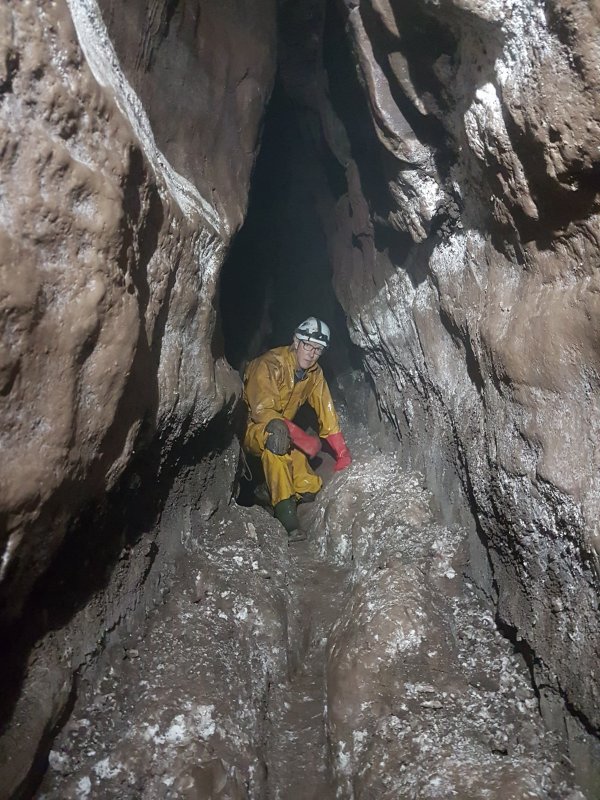 Moonmilk Revelry evidently once had extensive moonmilk, but it is not as dramatic as Mudlust Hall.
Modelling by Pete
Moonmilk Revelry evidently once had extensive moonmilk, but it is not as dramatic as Mudlust Hall.
Modelling by Pete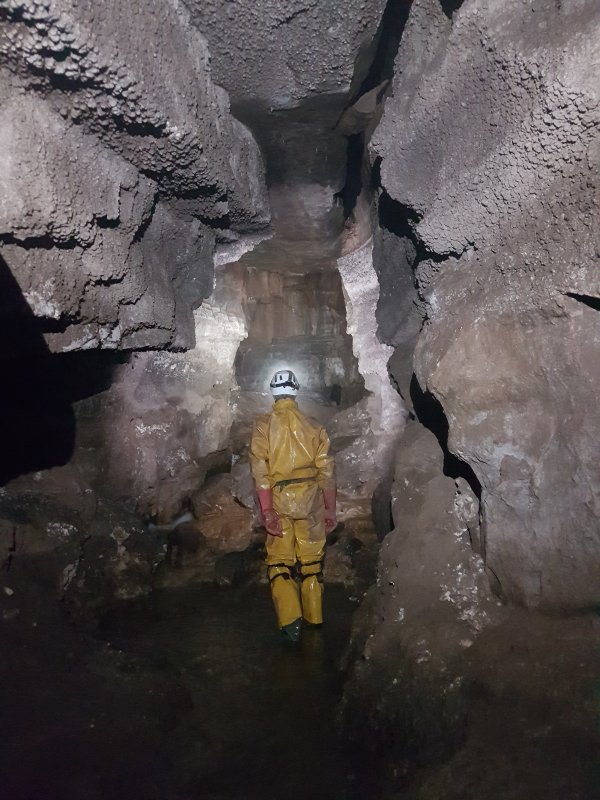 A climb down reaches a dramatic increase in passage size, with mud formations coating the walls, far below the old tide line. It is also possible to continue along the ledge, but that reaches an extremely exposed, sloping traverse with no hand holds, over to the upper level of Pen And Ink Passage. Someone was actually crazy enough to have crossed it, and their footprints are visible crossing the traverse.
Modelling by Pete, lighting by Tarquin and Pete
A climb down reaches a dramatic increase in passage size, with mud formations coating the walls, far below the old tide line. It is also possible to continue along the ledge, but that reaches an extremely exposed, sloping traverse with no hand holds, over to the upper level of Pen And Ink Passage. Someone was actually crazy enough to have crossed it, and their footprints are visible crossing the traverse.
Modelling by Pete, lighting by Tarquin and Pete Mud formations in Moonmilk Revelry.
 Calcited cascade.
Modelling by Pete, lighting by Tarquin and Pete
Calcited cascade.
Modelling by Pete, lighting by Tarquin and Pete Peats' Playground (note the correct spelling - it was found by J. K. Peat and R. Peat, so it is Peat plural), looking in the western direction, to the left.
Modelling by Pete, lighting by Tarquin and Pete
Peats' Playground (note the correct spelling - it was found by J. K. Peat and R. Peat, so it is Peat plural), looking in the western direction, to the left.
Modelling by Pete, lighting by Tarquin and Pete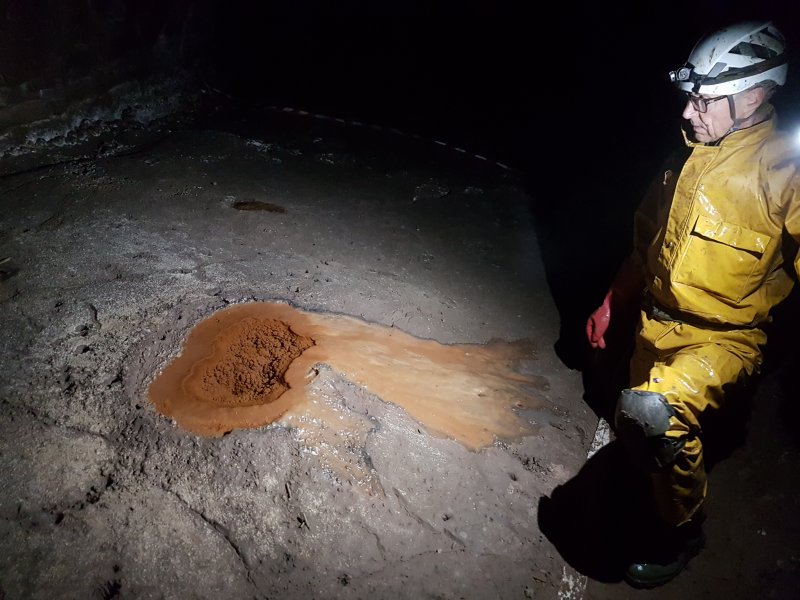 One of the most iconic formations, an iron-stained crystal pool.
Modelling and lighting by Pete
One of the most iconic formations, an iron-stained crystal pool.
Modelling and lighting by Pete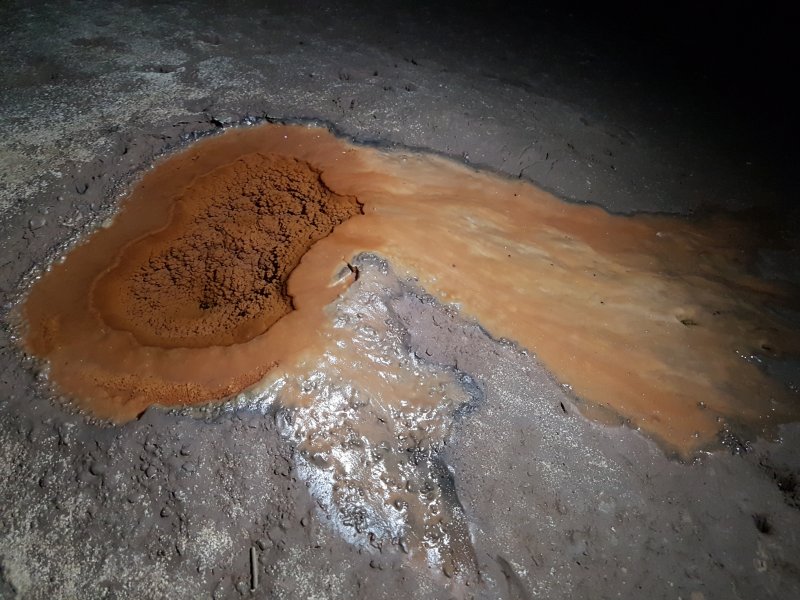 It looks as unreal as the Grand Prismatic Spring.
Lighting by Pete
It looks as unreal as the Grand Prismatic Spring.
Lighting by Pete Bead formations. These do not appear to be cryostal, and look more like gypsum or moonmilk.
 A warren of old drip pockets.
 A stalactite cluster formation in Peats' Playground.
Modelling by Pete
A stalactite cluster formation in Peats' Playground.
Modelling by Pete Stalagmites.
Modelling by Pete, lighting by Tarquin and Pete
Stalagmites.
Modelling by Pete, lighting by Tarquin and Pete Rippled flowstone. This looks like moonmilk rather than calcite.
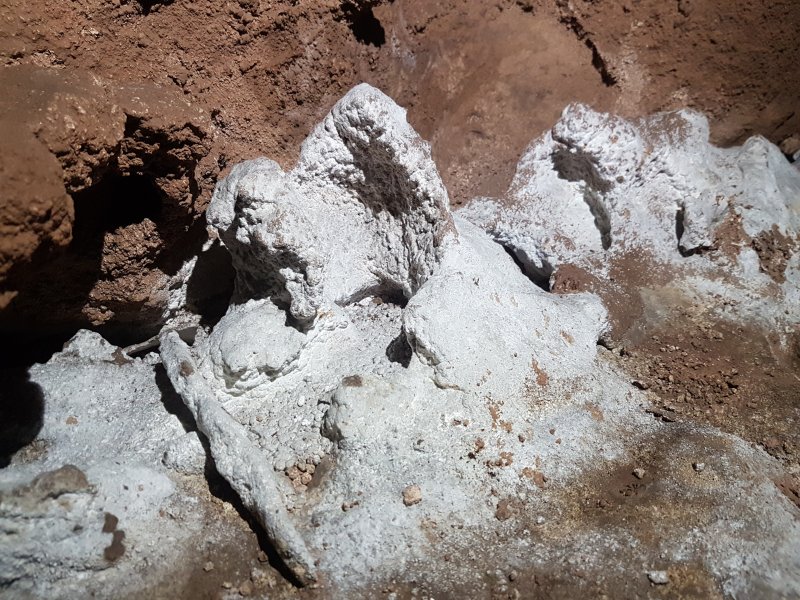 Moonmilk growths.
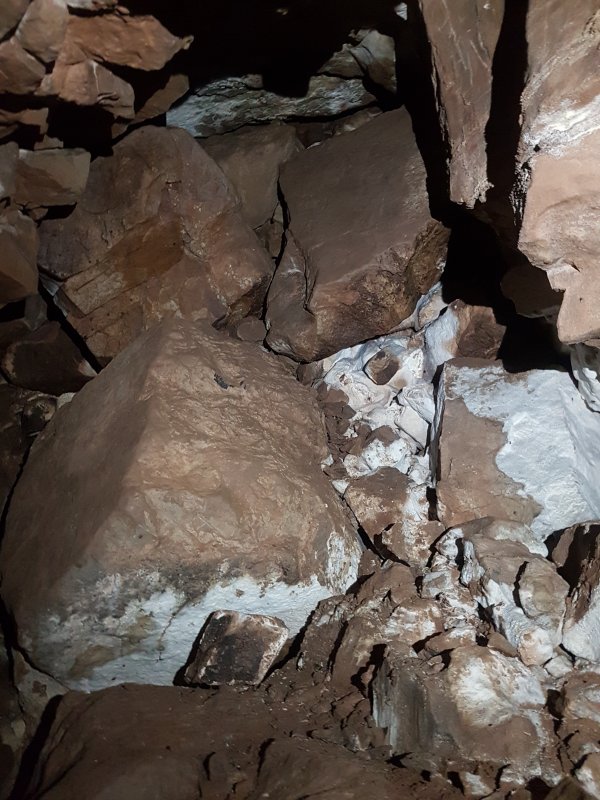 Choke at the end of the western branch of Peats' Playground.
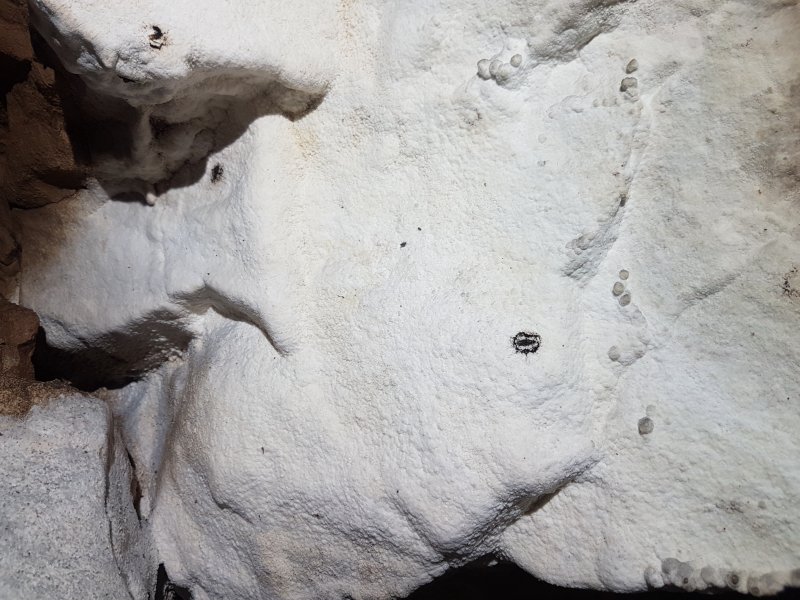 Mould ring of a marsh fly. This choke is about 20 metres below surface.
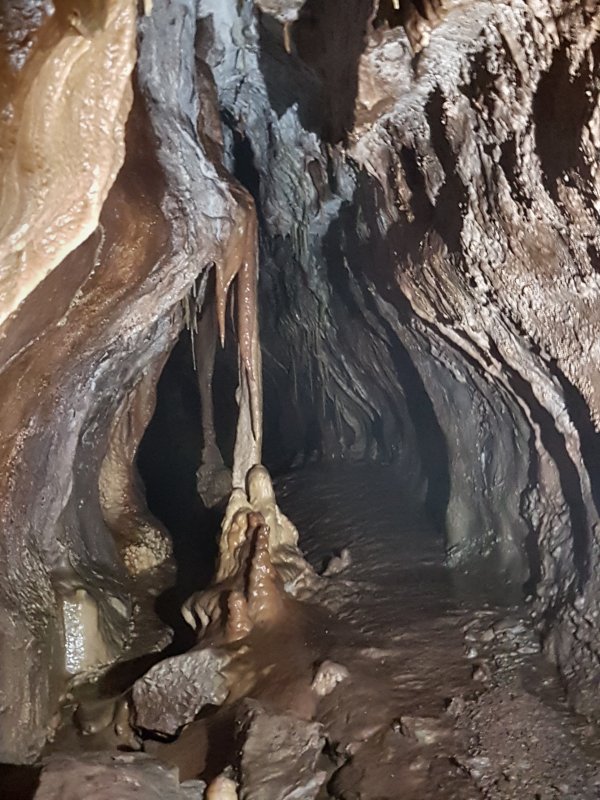 Directly ahead at the junction with Peats' Playground is Pen And Ink Passage. Above it is a climb to an upper oxbow, which includes these gorgeous columns, but they are taped off from quite a distance away, and the passage was very misty.
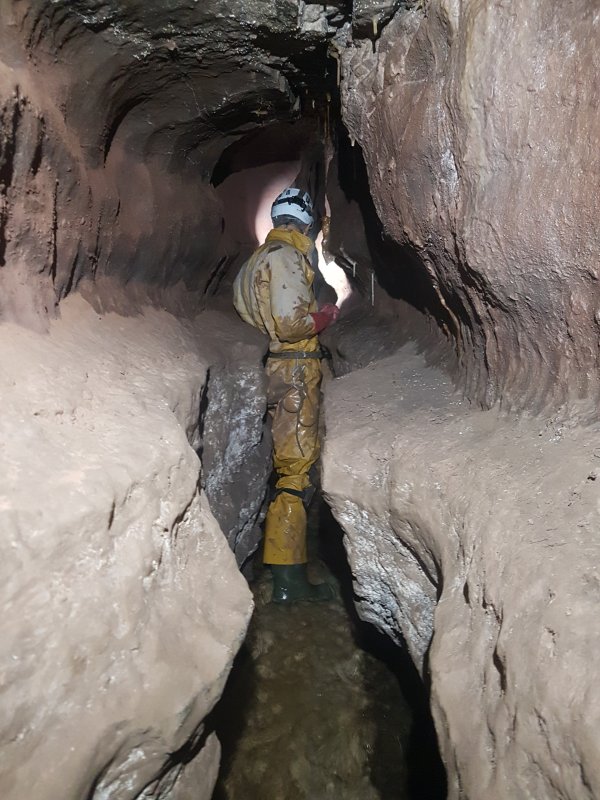 Pen And Ink is an awkward stream inlet.
Modelling by Pete, lighting by Tarquin and Pete
Pen And Ink is an awkward stream inlet.
Modelling by Pete, lighting by Tarquin and Pete Stal with tiny helictites in Pen And Ink Passage.
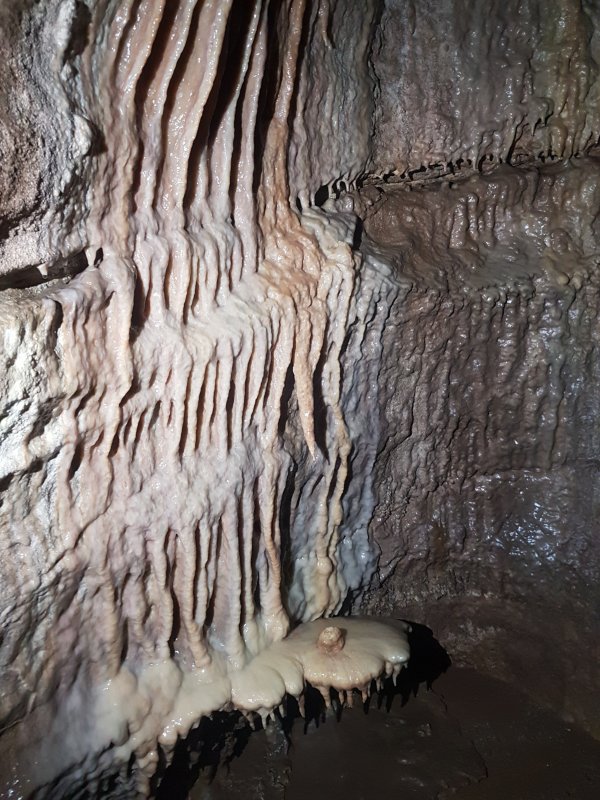 Stal in Pen And Ink Passage.
 Ribbed curtain in Pen And Ink Passage.
Lighting by Pete
Ribbed curtain in Pen And Ink Passage.
Lighting by Pete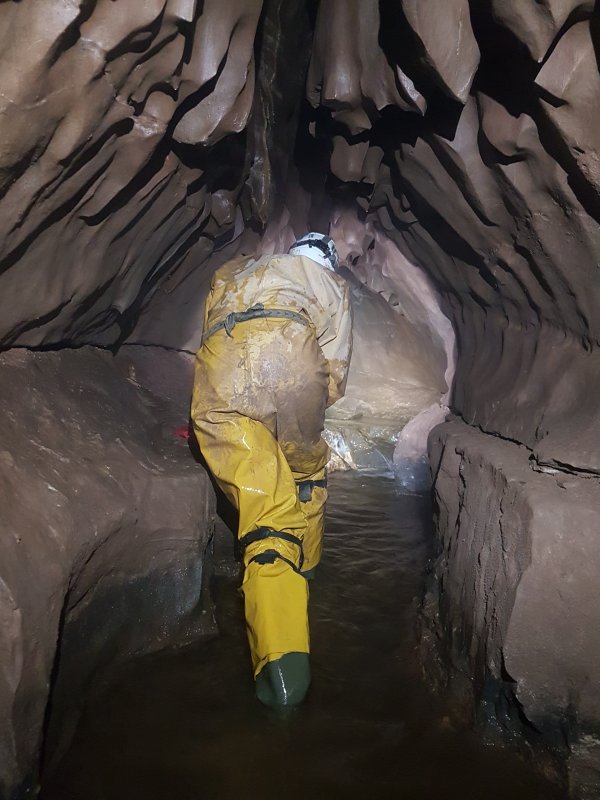 Above a climb, Pen And Ink Passage gets much smaller.
Modelling by Pete, lighting by Tarquin and Pete
Above a climb, Pen And Ink Passage gets much smaller.
Modelling by Pete, lighting by Tarquin and Pete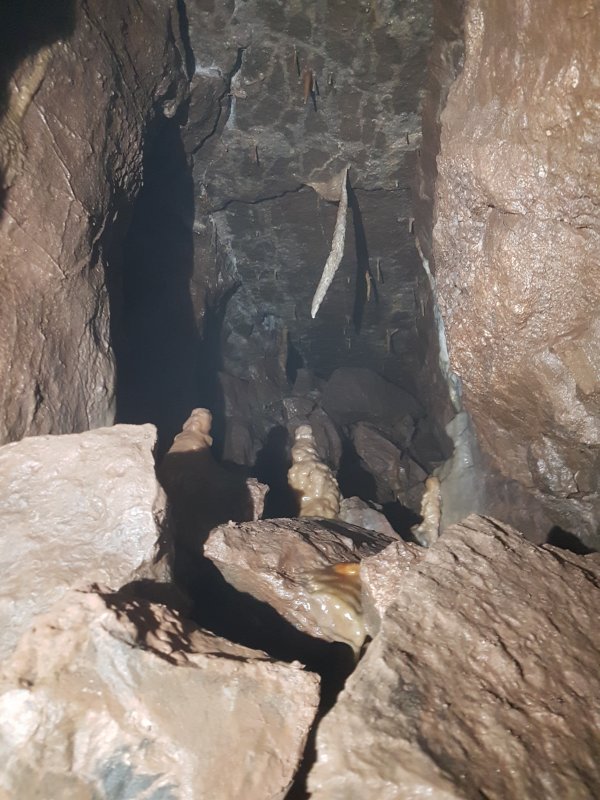 Pen And Ink Passage ends at a choke with a distinctively shaped wonky stalactite. The other side of this choke is reached later.
 A side passage starts at the climb, which starts low then becomes a narrow, awkward rift with a stream; Sordidia. This was deemed unworthy on our first trip, and it was only on the second trip that we decided to push to the end.
 Flowstone in Sordidia.
 Sordidia spends most of its time being an awkward, thrutchy passage, much like a tighter version of Lavender Way or early Pen And Ink Passage.
Modelling by Peter, lighting by Tarquin and Peter
Sordidia spends most of its time being an awkward, thrutchy passage, much like a tighter version of Lavender Way or early Pen And Ink Passage.
Modelling by Peter, lighting by Tarquin and Peter Stalactite in Sordidia, the best formation in the passage.
Modelling by Peter
Stalactite in Sordidia, the best formation in the passage.
Modelling by Peter Its stalagmite.
Lighting by Tarquin and Peter
Its stalagmite.
Lighting by Tarquin and Peter The final squeeze is exceptional, 8 inches wide at its widest point.
Modelling by Peter
The final squeeze is exceptional, 8 inches wide at its widest point.
Modelling by Peter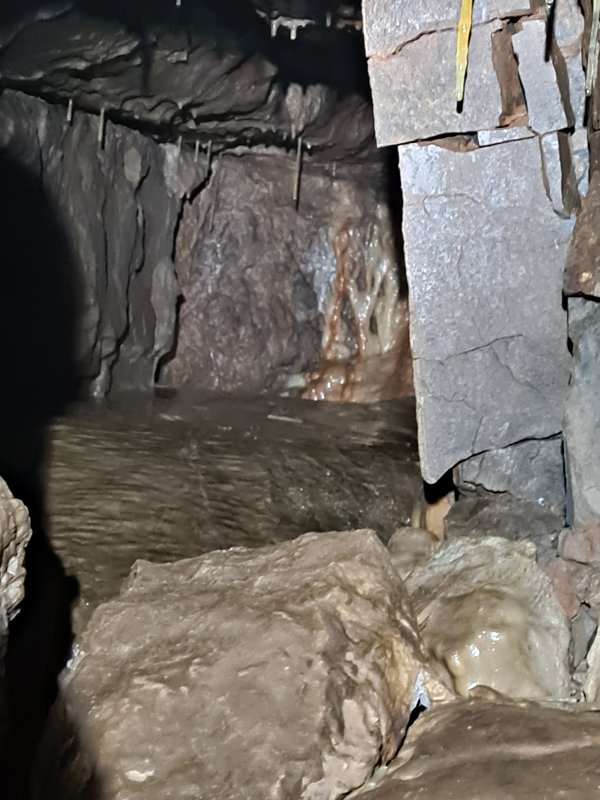 It ends immediately afterwards in a flowstone blockage. Those of us of normal size can see this view, but thinner cavers will see that the hidden side is a mirror image of the visible side. There is nothing worth pushing through that squeeze for.
 Back at the ribbed curtain is another inlet, which comes from an upper oxbow, with these small formations at its start. The stream comes from an inlet to the oxbow.
 The oxbow starts crawling size but soon becomes walking size.
Modelling by Pete, lighting by Tarquin and Pete
The oxbow starts crawling size but soon becomes walking size.
Modelling by Pete, lighting by Tarquin and Pete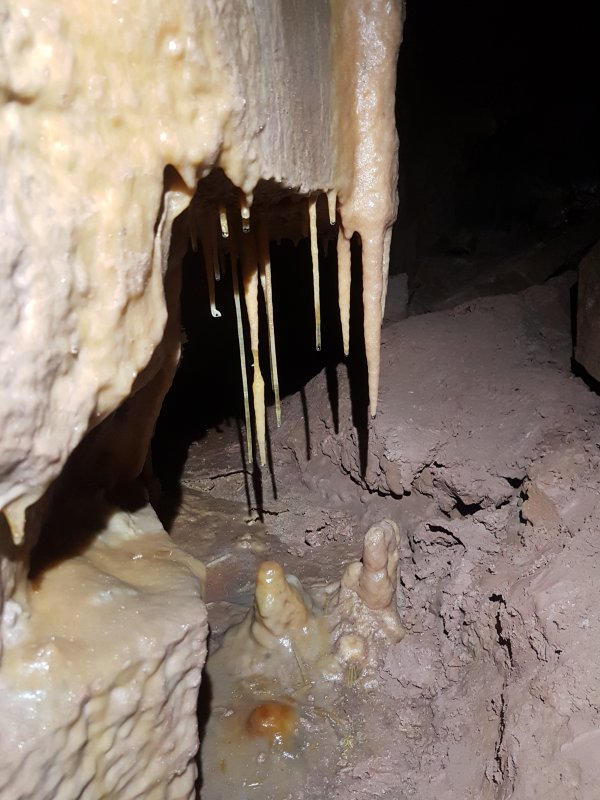 Formations in the oxbow.
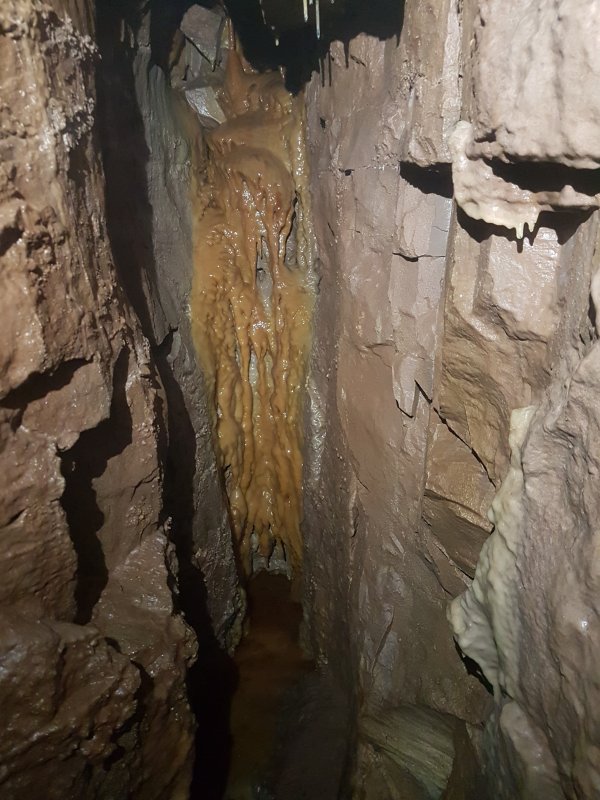 Formations in the oxbow.
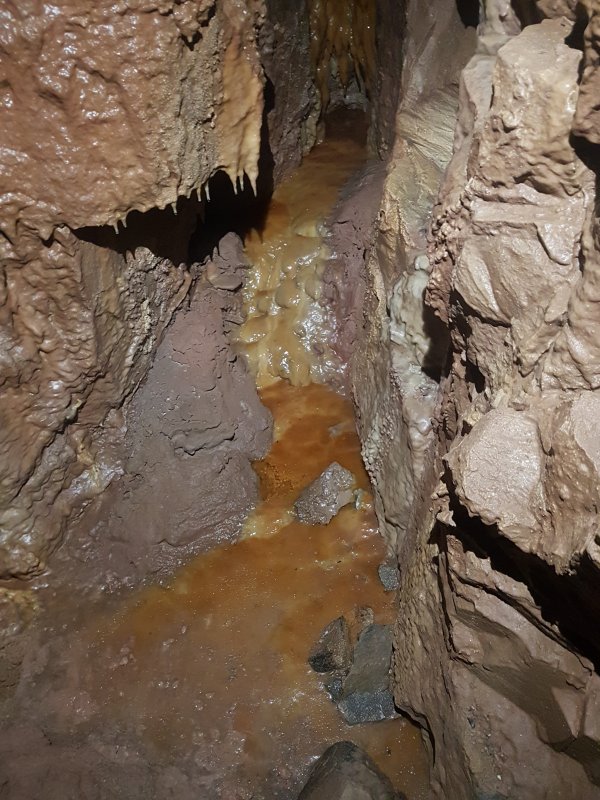 Flowstone below the formations.
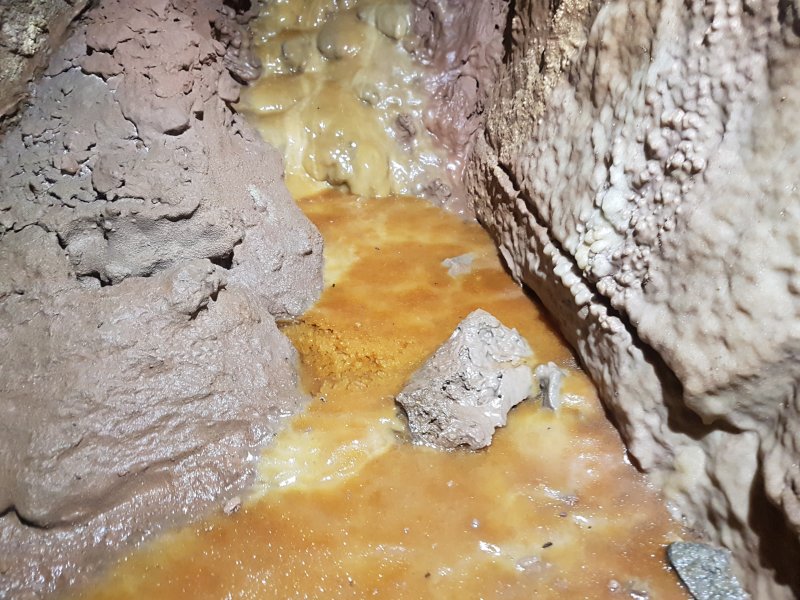 Crystal pool in the flowstone.
 Formations in the oxbow.
 A climb up reaches the other end of the upper level to Pen And Ink Passage. The view of the formations is a lot better from this side.
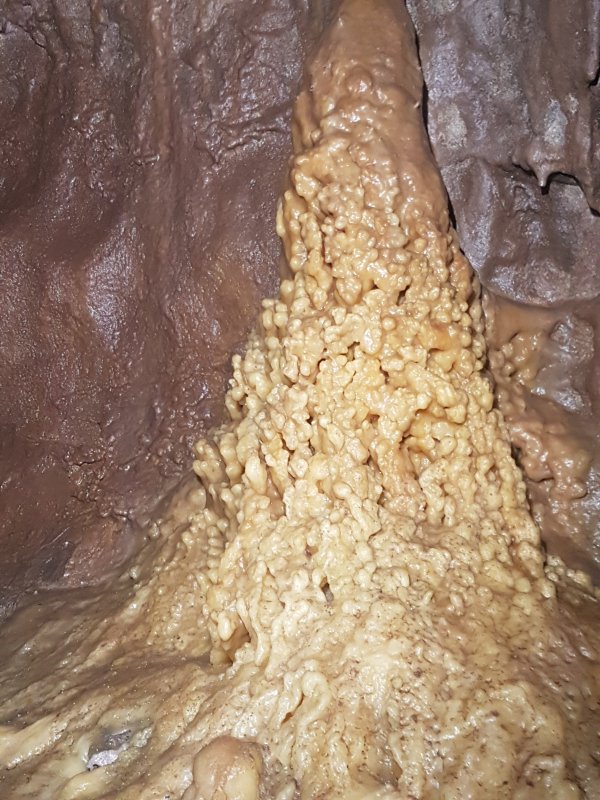 A climb back over the passage reaches a short side branch, with this strangely lumpy stalagmite. It must be where the tooth fairy stashes all those teeth. Mixed into a pile of mac and cheese.
 Straws in the side branch.
 Crystal pool in the branch, hard to see properly.
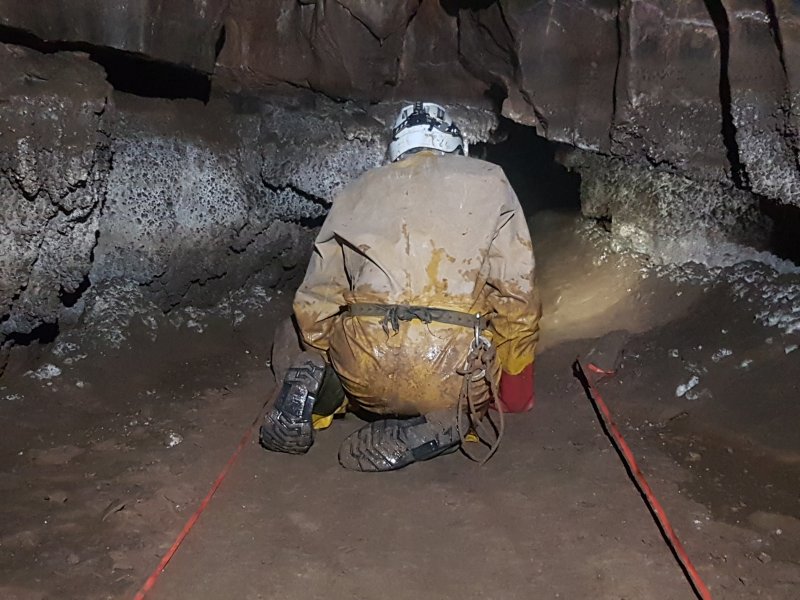 The eastern branch of Peats' Playground, to the right on the way in. This is much less grand than the other direction, being a crawl for quite some distance.
Modelling by Pete, lighting by Tarquin and Pete
The eastern branch of Peats' Playground, to the right on the way in. This is much less grand than the other direction, being a crawl for quite some distance.
Modelling by Pete, lighting by Tarquin and Pete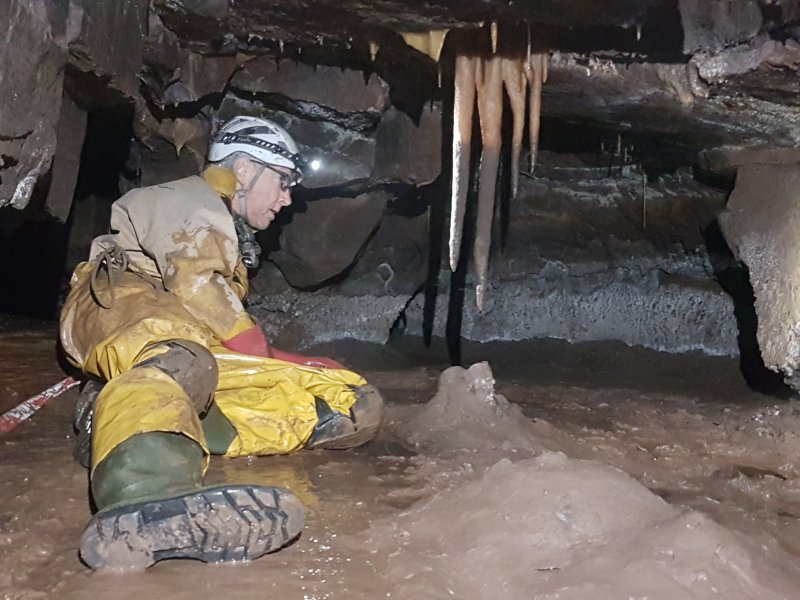 Stalactites in Peats' Playground, with a tide mark on the wall showing the old moonmilk line, and a muddy tide mark on the stalactites showing the old flooding line.
Modelling by Pete, lighting by Tarquin and Pete
Stalactites in Peats' Playground, with a tide mark on the wall showing the old moonmilk line, and a muddy tide mark on the stalactites showing the old flooding line.
Modelling by Pete, lighting by Tarquin and Pete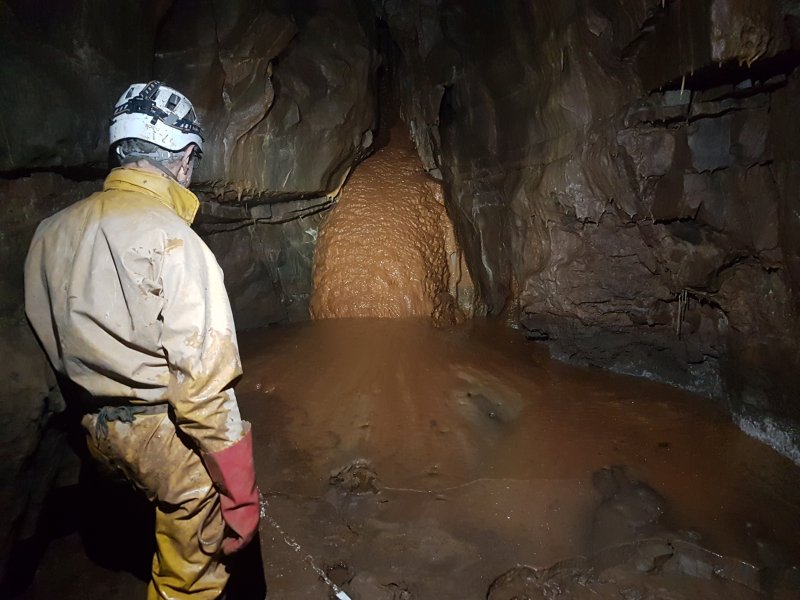 Flowstone in Peats' Playground.
Modelling by Pete, lighting by Tarquin and Pete
Flowstone in Peats' Playground.
Modelling by Pete, lighting by Tarquin and Pete Helictites.
 Helictites.
 Mud formations. This place apparently used to flood regularly.
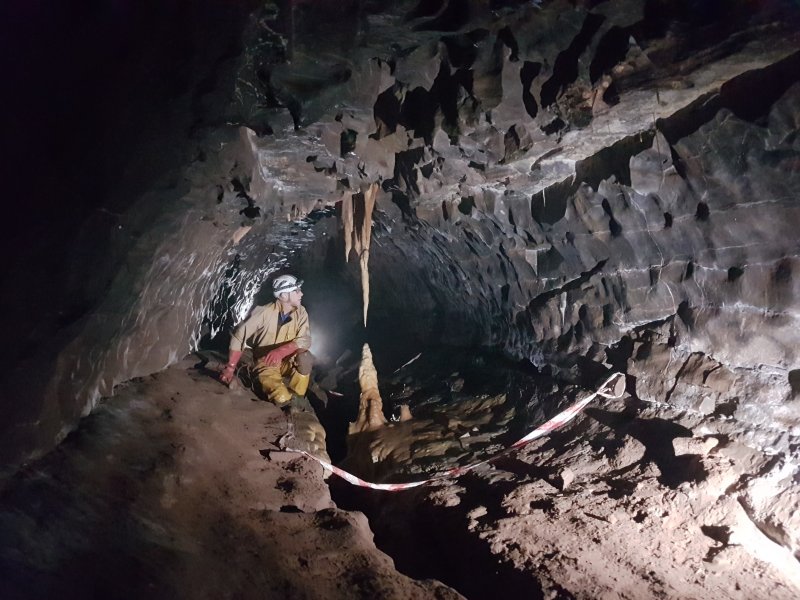 The Devil's Dagger, one of the most iconic formations in the whole series.
Modelling by Pete
The Devil's Dagger, one of the most iconic formations in the whole series.
Modelling by Pete The Devil's Dagger.
Modelling by Pete, lighting by Tarquin and Pete
The Devil's Dagger.
Modelling by Pete, lighting by Tarquin and Pete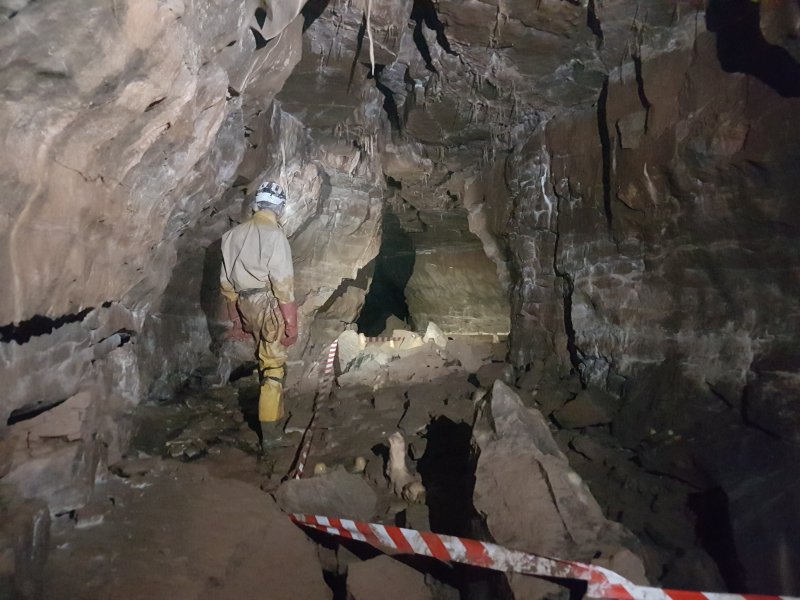 After passing the inlet of Keyhole Passage (covered later), whose stream sinks into the floor, the passage turns into Draenen for a moment, with gypsum and a few calcite formations.
Modelling by Pete, lighting by Tarquin and Pete
After passing the inlet of Keyhole Passage (covered later), whose stream sinks into the floor, the passage turns into Draenen for a moment, with gypsum and a few calcite formations.
Modelling by Pete, lighting by Tarquin and Pete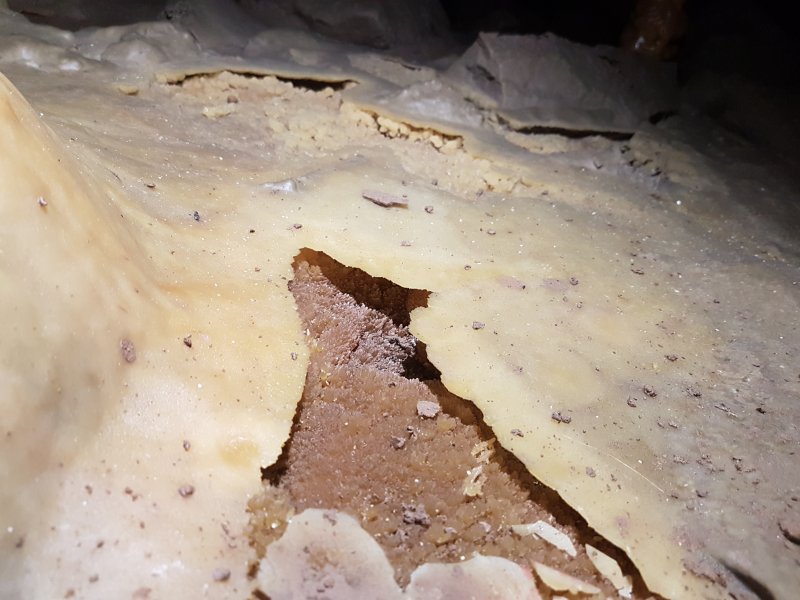 Dried pool on the side of a stalagmite.
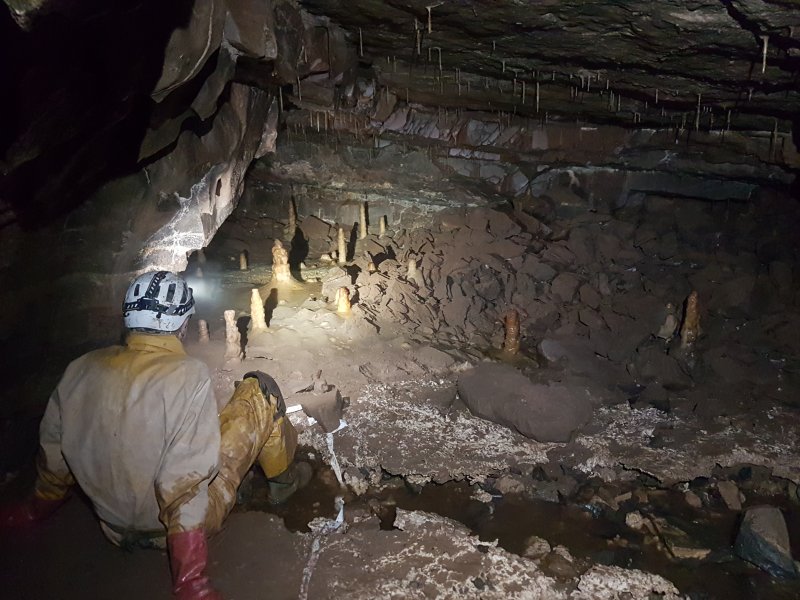 The Totem Poles, formations on a corner. The current survey shows a tiny stub passage on the right here. However, the original hydrology notes show a much longer side passage, so presumably it has not been surveyed. The water flows into Northern Inlet.
Modelling by Pete, lighting by Tarquin and Pete
The Totem Poles, formations on a corner. The current survey shows a tiny stub passage on the right here. However, the original hydrology notes show a much longer side passage, so presumably it has not been surveyed. The water flows into Northern Inlet.
Modelling by Pete, lighting by Tarquin and Pete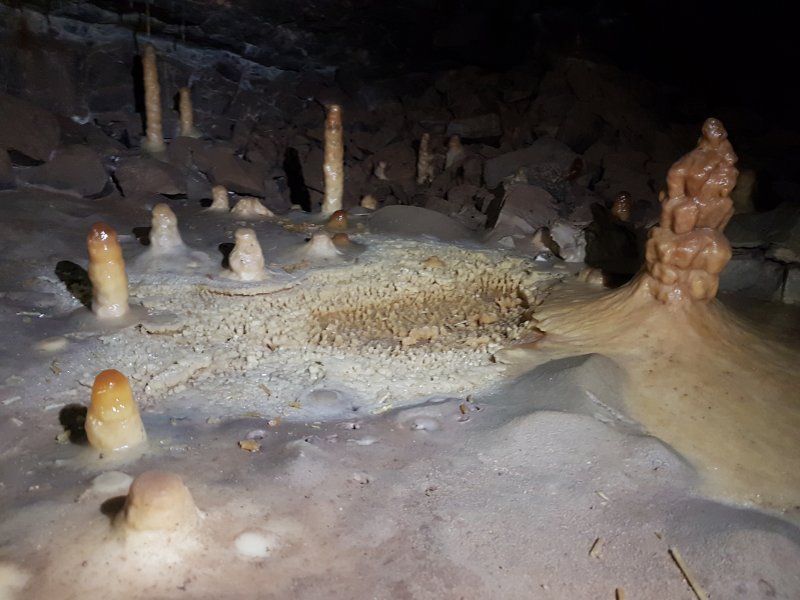 Crystal pool at the Totem Poles.
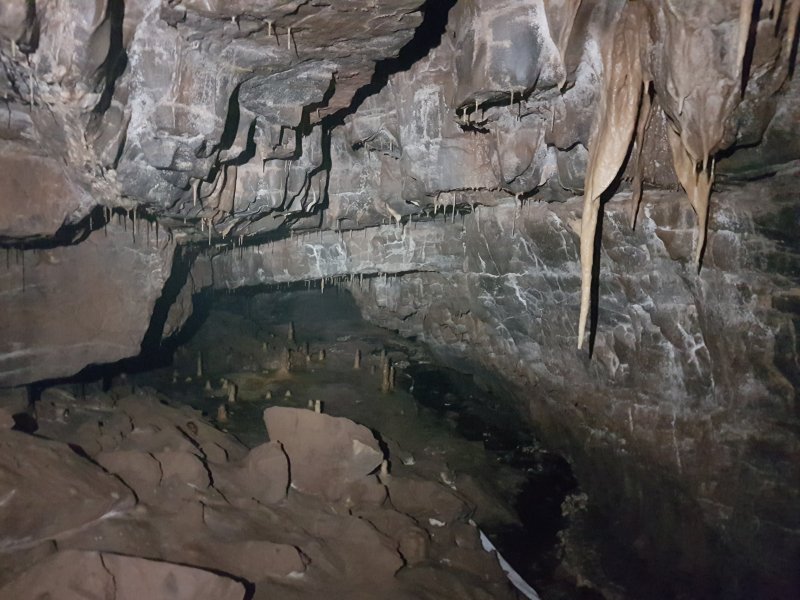 Looking back to the Totem Poles.
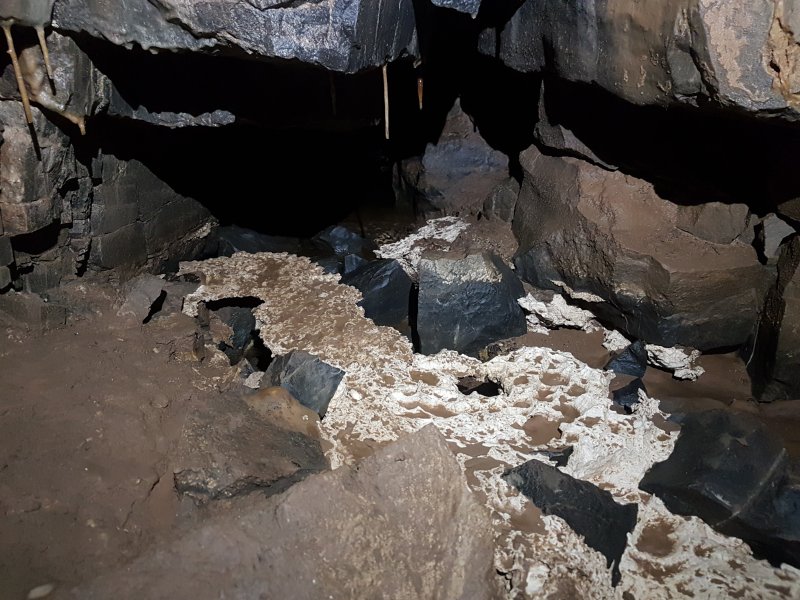 Decomposed remains of a moonmilk false floor at the junction with Ferrets End, where there is a small inlet.
 The start of Ferrets End.
Modelling by Pete, lighting by Tarquin and Pete
The start of Ferrets End.
Modelling by Pete, lighting by Tarquin and Pete Formations in Ferrets End.
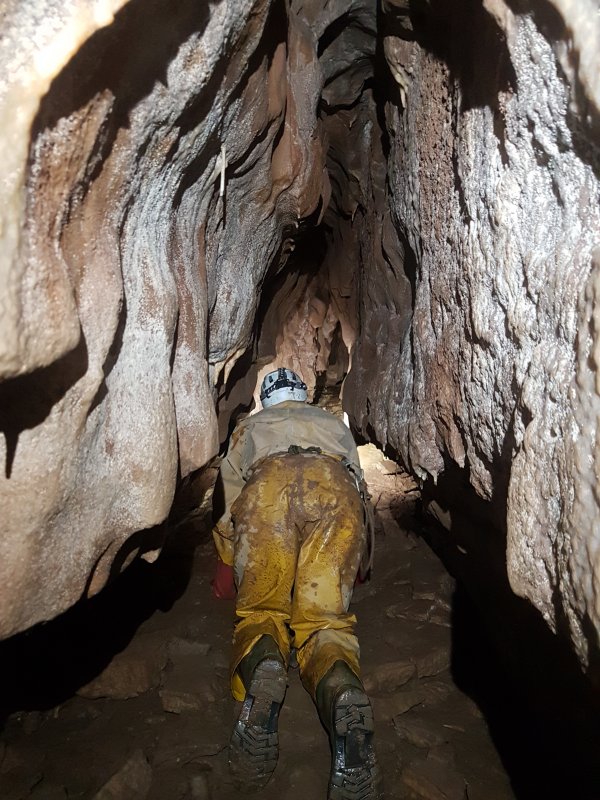 Nearing the end of Ferrets End.
Modelling by Pete, lighting by Tarquin and Pete
Nearing the end of Ferrets End.
Modelling by Pete, lighting by Tarquin and Pete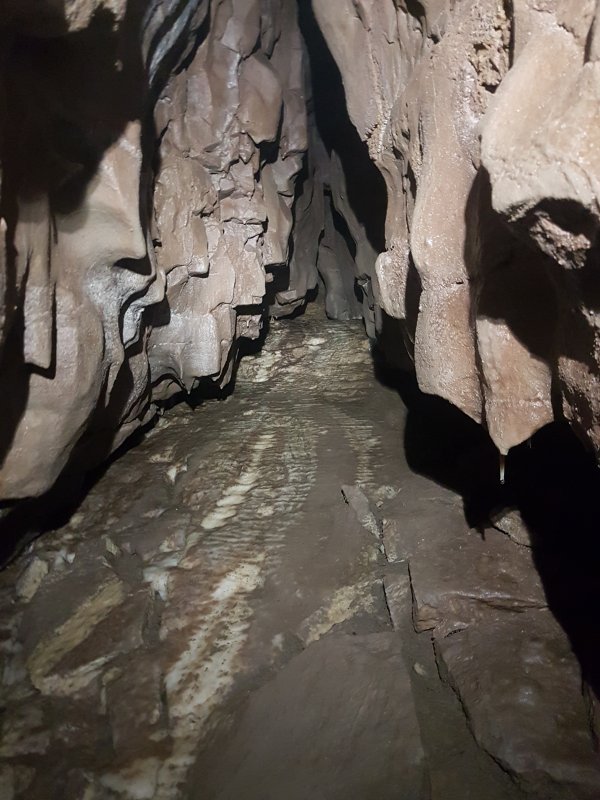 The end of the ferrets.
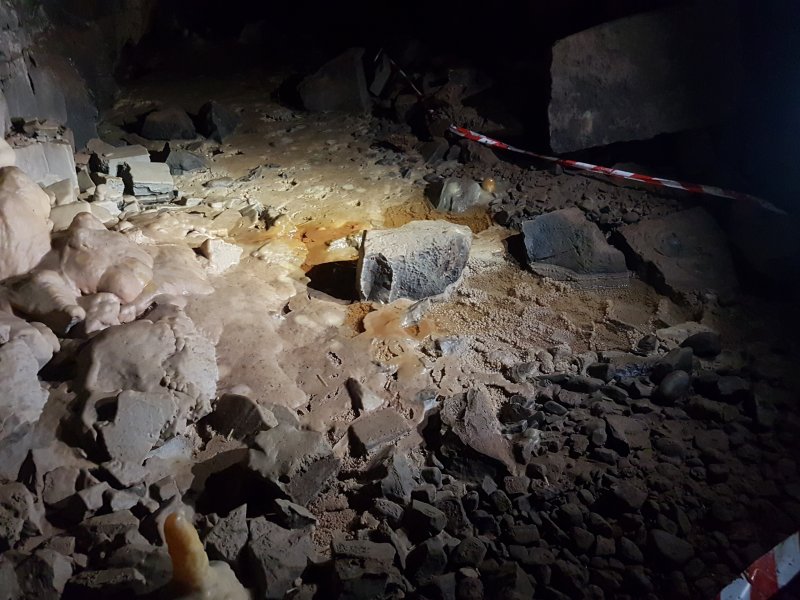 Continuing along Peats' Playground, which is adorned with a beautiful crystal pool formation. To the right here is a very short inlet, which collects water from a small sink seen on the walk up to Top Entrance.
Lighting by Tarquin and Pete
Continuing along Peats' Playground, which is adorned with a beautiful crystal pool formation. To the right here is a very short inlet, which collects water from a small sink seen on the walk up to Top Entrance.
Lighting by Tarquin and Pete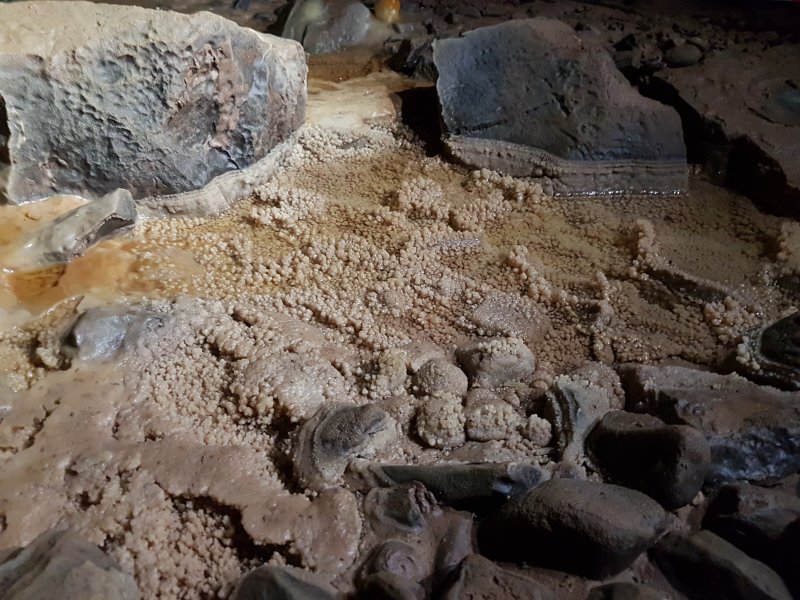 Detail of the crystal pool.
 A smaller crystal pool.
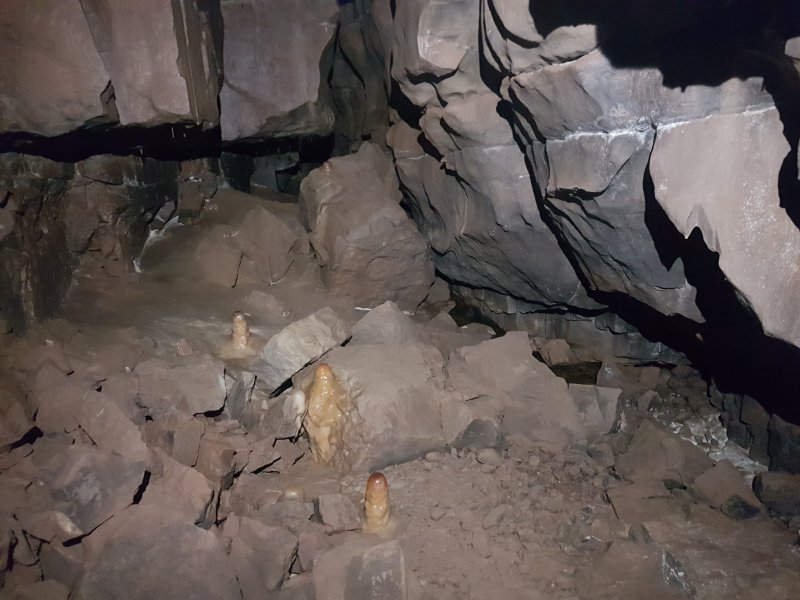 The last portion of passage called Peats' Playground.
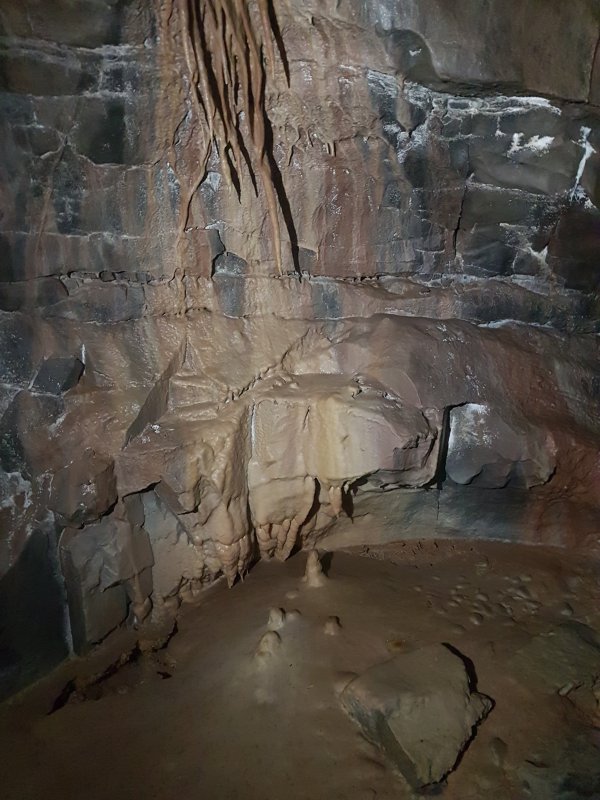 Stalactites and flowstone.
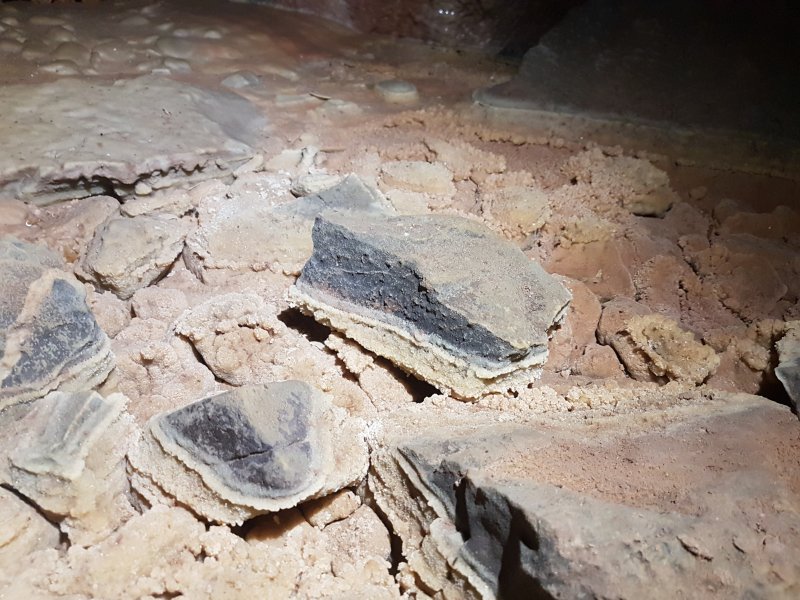 Dried crystal pool with some incredible detail.
 Detail of the dried crystal pool.
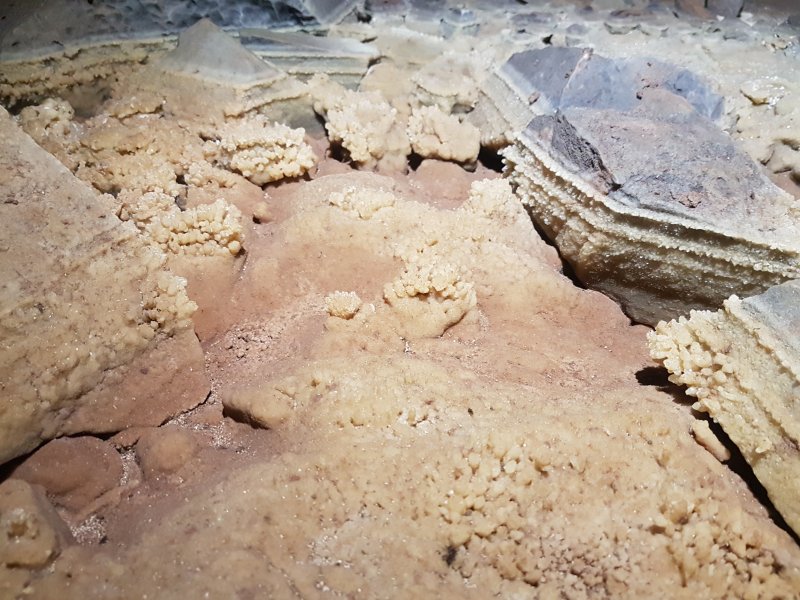 Old tide lines within the pool can be clearly seen.
 Anemone-like growths.
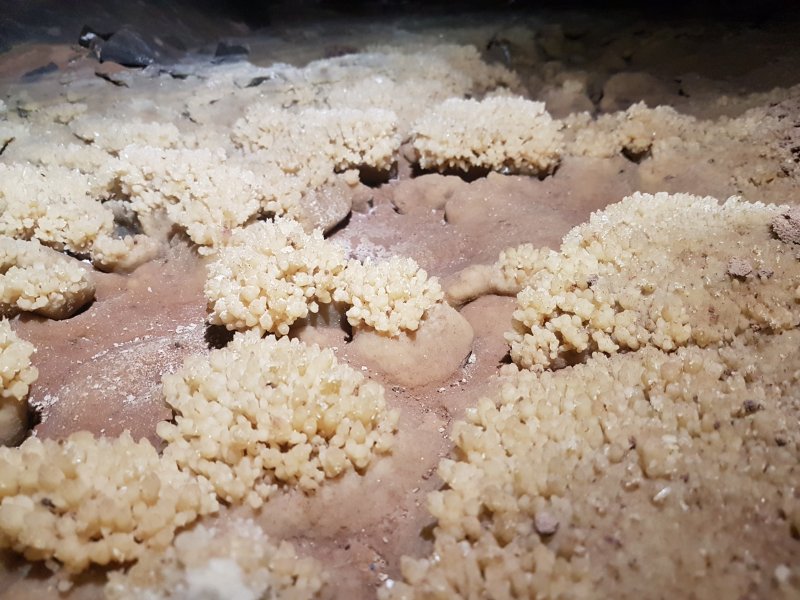 Anemones.
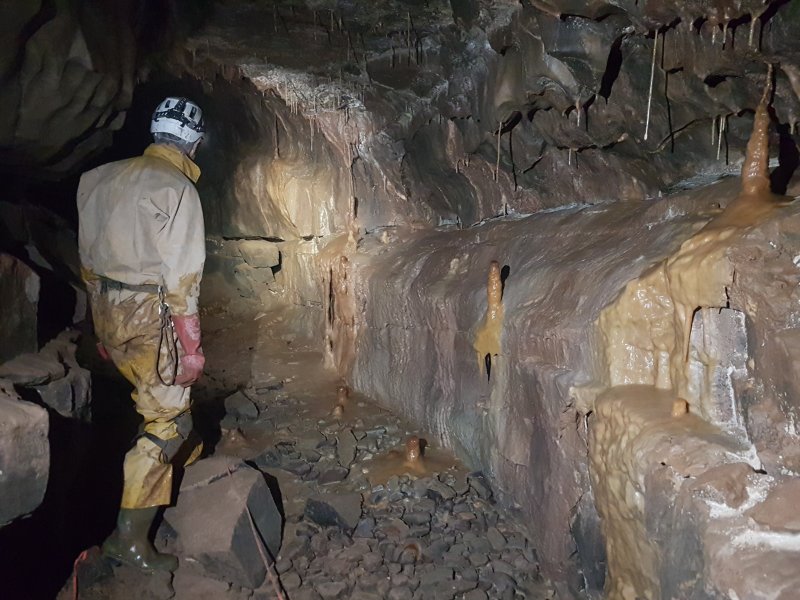 The passage turns a corner and gets renamed to Tiptoe Traverse.
Modelling by Pete, lighting by Tarquin and Pete
The passage turns a corner and gets renamed to Tiptoe Traverse.
Modelling by Pete, lighting by Tarquin and Pete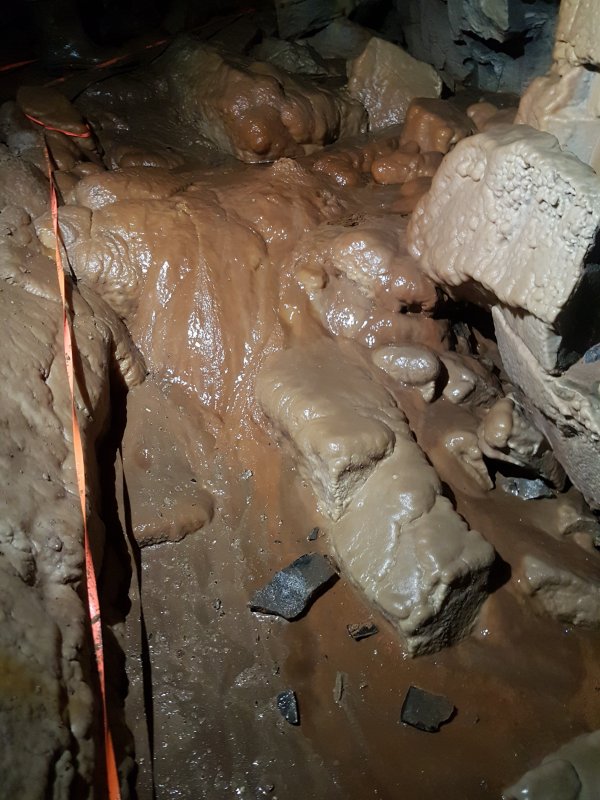 Tiptoe Traverse is a walk along the edge of some beautiful flowstone formations.
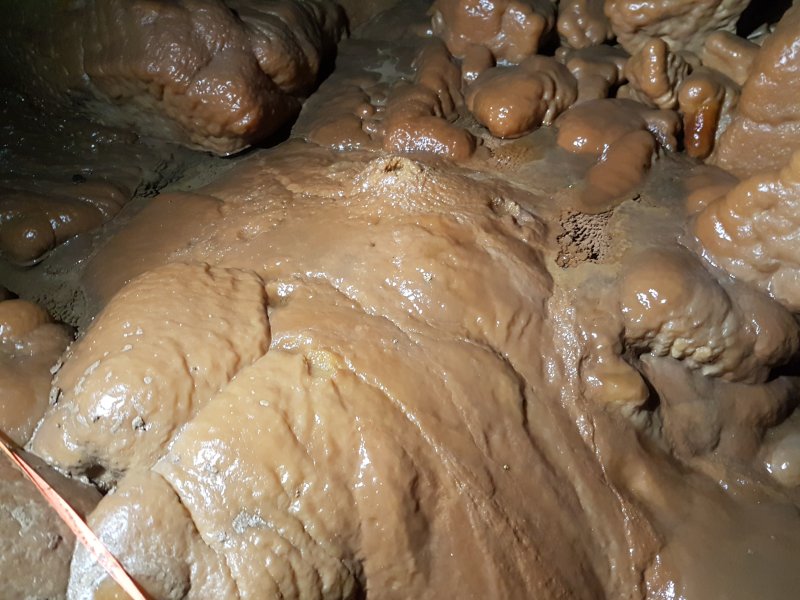 Detail of the flowstone.
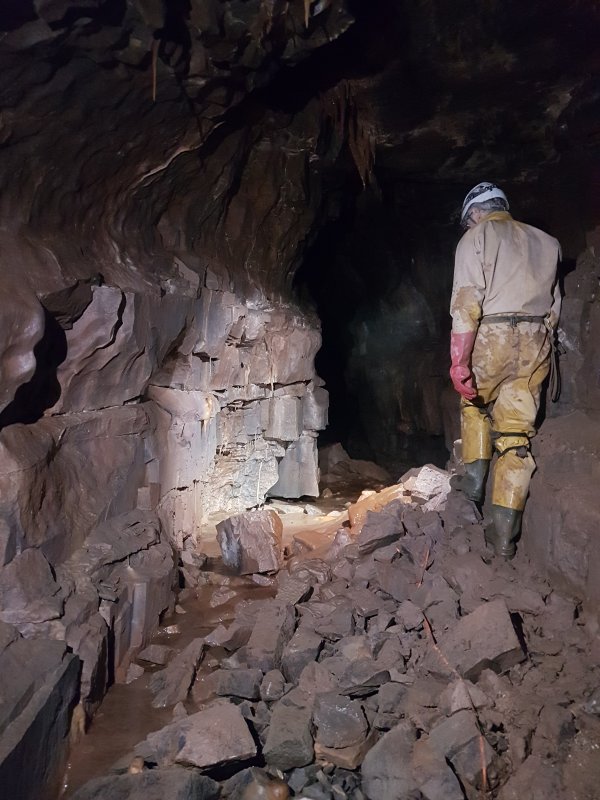 Not exactly traversing, just enjoying the formations.
Modelling by Pete, lighting by Tarquin and Pete
Not exactly traversing, just enjoying the formations.
Modelling by Pete, lighting by Tarquin and Pete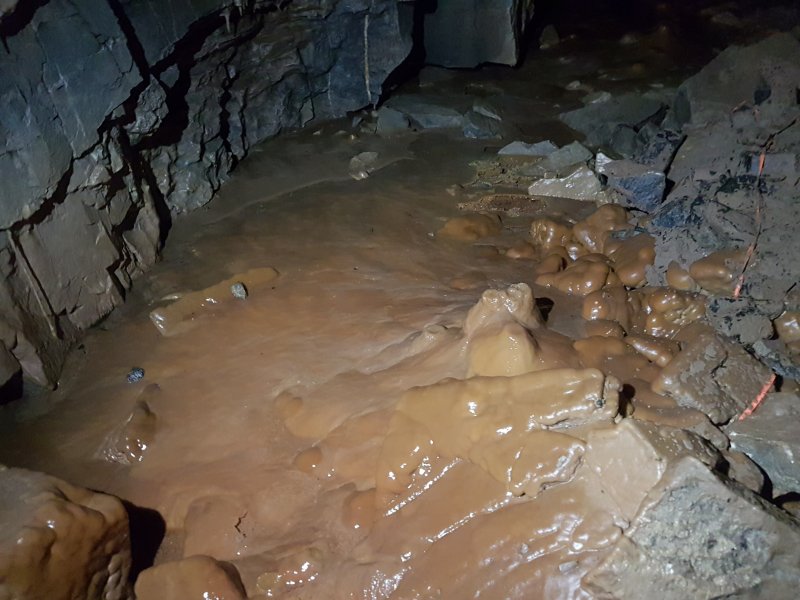 Flowstone in Tiptoe Traverse.
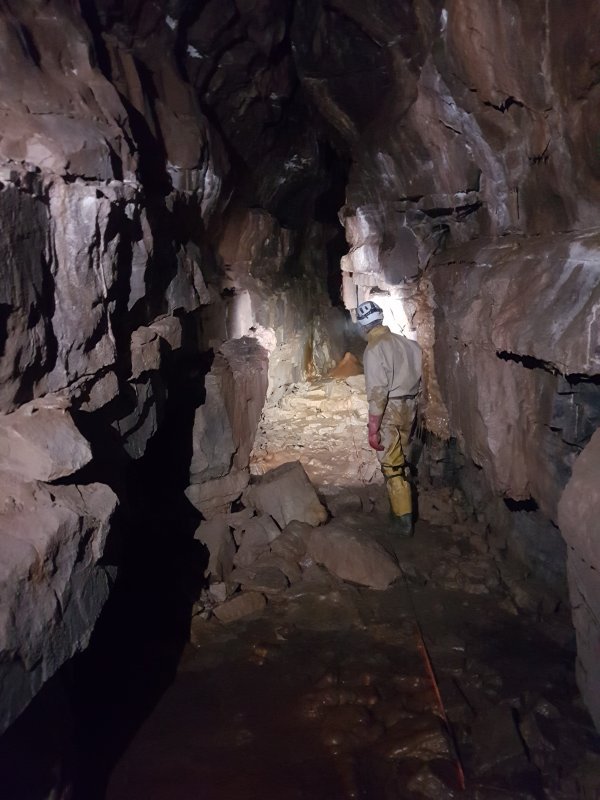 The passage gets bigger, but less space is available to walk on next to the formations.
Modelling by Pete, lighting by Tarquin and Pete
The passage gets bigger, but less space is available to walk on next to the formations.
Modelling by Pete, lighting by Tarquin and Pete Crystal pools.
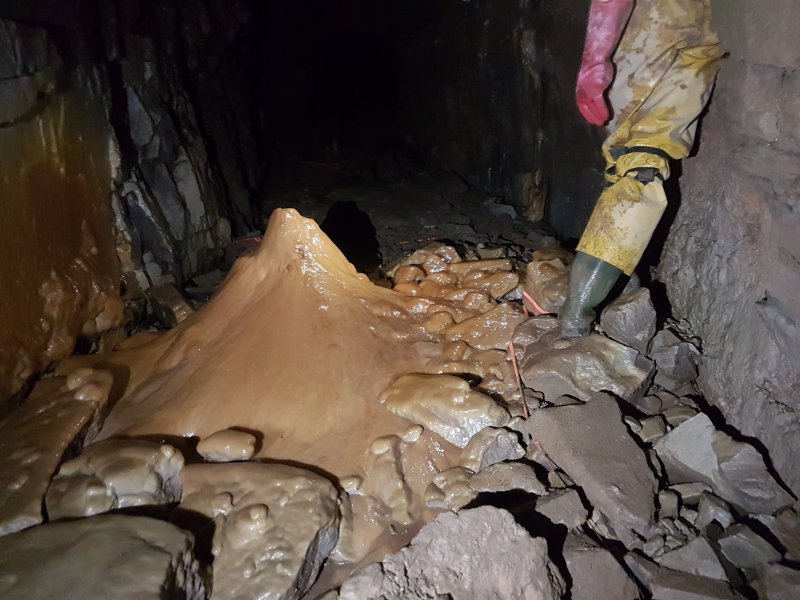 Mini boss near the end of the level.
Modelling by Pete, lighting by Tarquin and Pete
Mini boss near the end of the level.
Modelling by Pete, lighting by Tarquin and Pete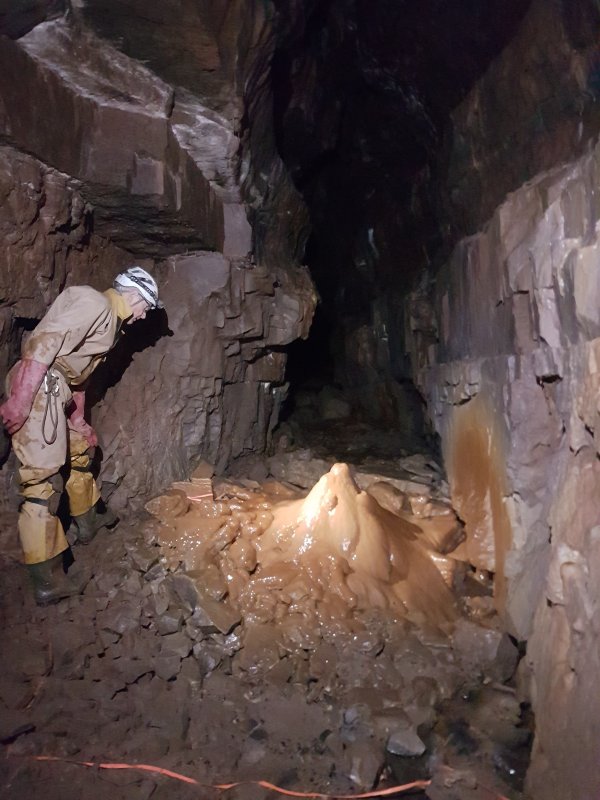 To get past the mini boss does almost require being on tiptoes, as it nearly fills the passage, even splattered up one wall.
Modelling by Pete, lighting by Tarquin and Pete
To get past the mini boss does almost require being on tiptoes, as it nearly fills the passage, even splattered up one wall.
Modelling by Pete, lighting by Tarquin and Pete The last section of passage.
Modelling by Pete, lighting by Tarquin and Pete
The last section of passage.
Modelling by Pete, lighting by Tarquin and Pete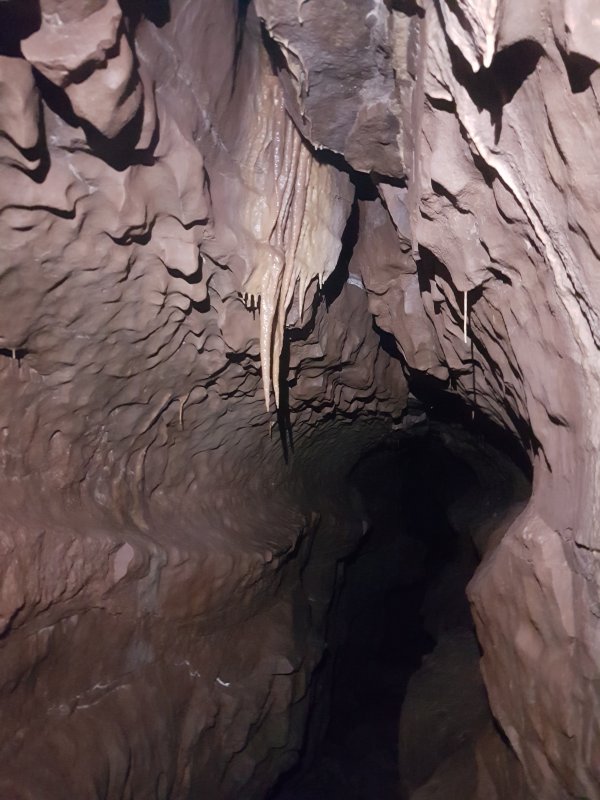 Looking back at the ceiling of the last section, with phreatic roof pendants.
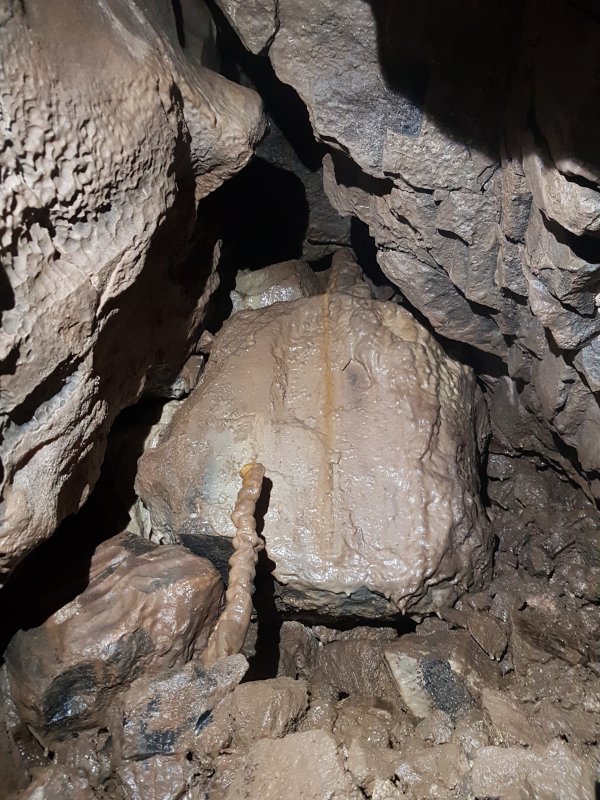 The choke at the end of Tiptoe Traverse. There is scope for further passage here, but only 30 metres of rock above. Given how steep the passage is, it would break surface not too far ahead.
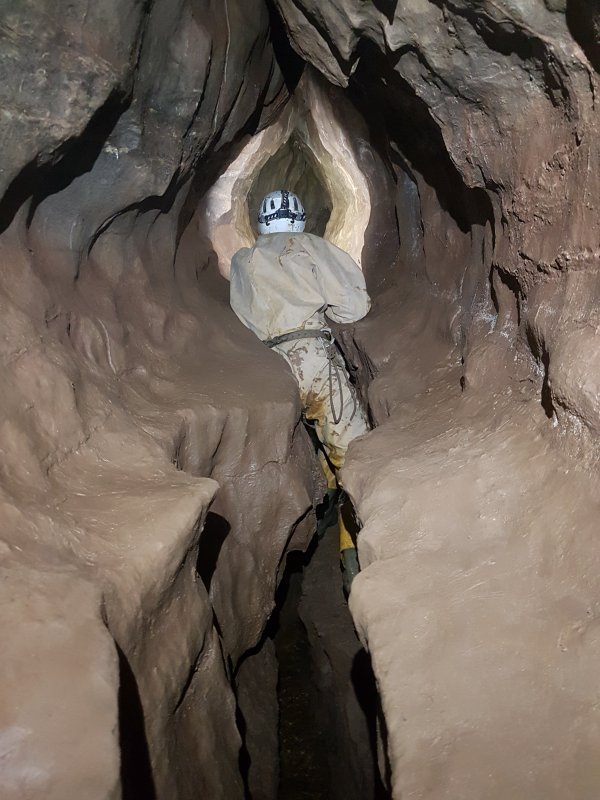 Keyhole Passage is a major inlet. It alternates between walking in the rift, and crawling on the ledges.
Modelling by Pete, lighting by Tarquin and Pete
Keyhole Passage is a major inlet. It alternates between walking in the rift, and crawling on the ledges.
Modelling by Pete, lighting by Tarquin and Pete Flowstone formation in an aven.
Modelling by Pete
Flowstone formation in an aven.
Modelling by Pete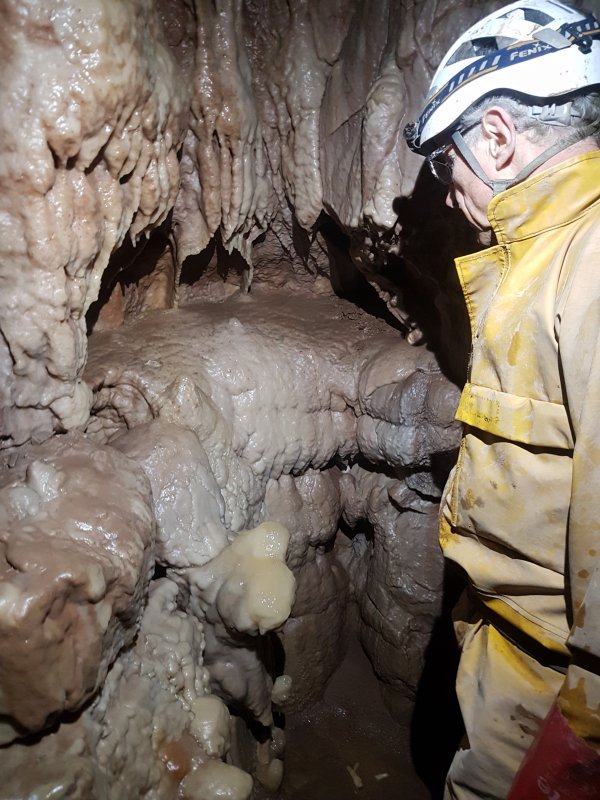 Base of the aven.
Modelling by Pete
Base of the aven.
Modelling by Pete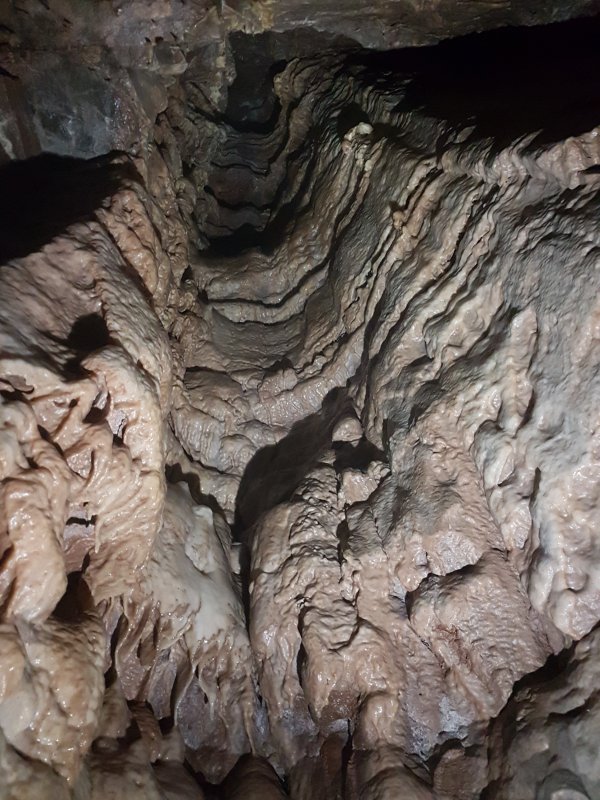 Flowstone coating the aven. Someone has climbed it, but no way on was found.
Lighting by Pete
Flowstone coating the aven. Someone has climbed it, but no way on was found.
Lighting by Pete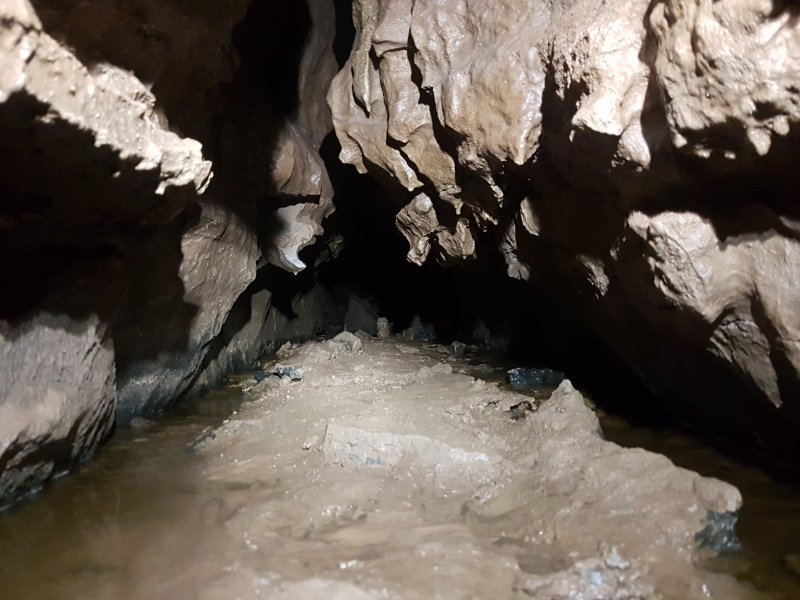 Keyhole Passage's stream comes from a very low inlet.
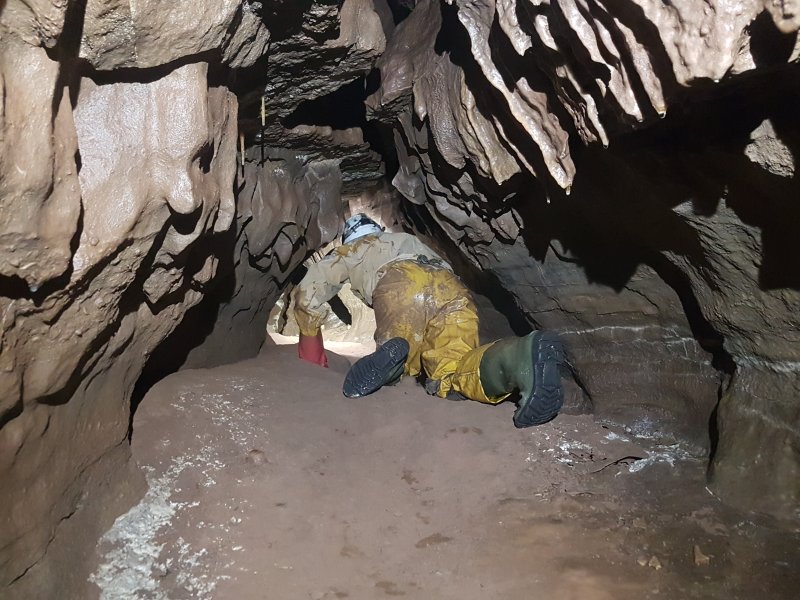 A crawl to the side is a dry link to the ongoing passages.
Modelling by Pete, lighting by Tarquin and Pete
A crawl to the side is a dry link to the ongoing passages.
Modelling by Pete, lighting by Tarquin and Pete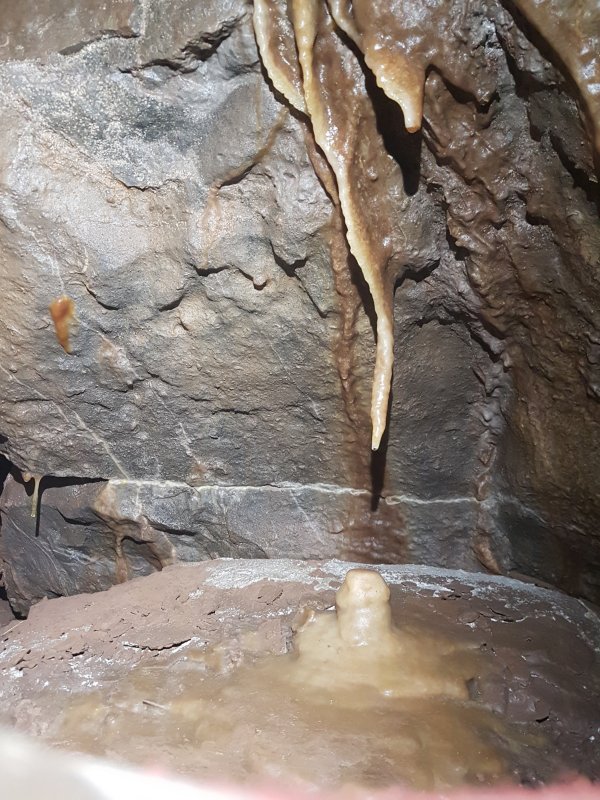 Formations in the dry link.
 Column in the dry link.
Modelling by Pete, lighting by Tarquin and Pete
Column in the dry link.
Modelling by Pete, lighting by Tarquin and Pete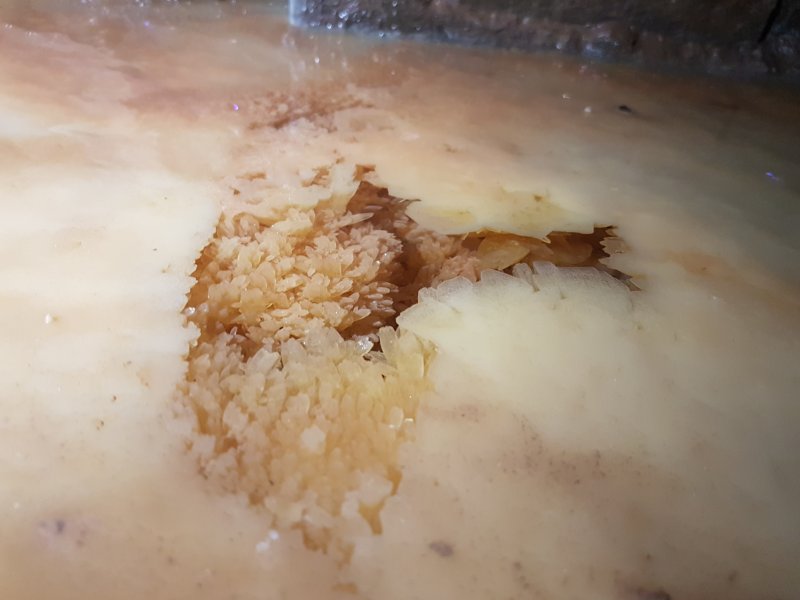 Crystal pool at the column.
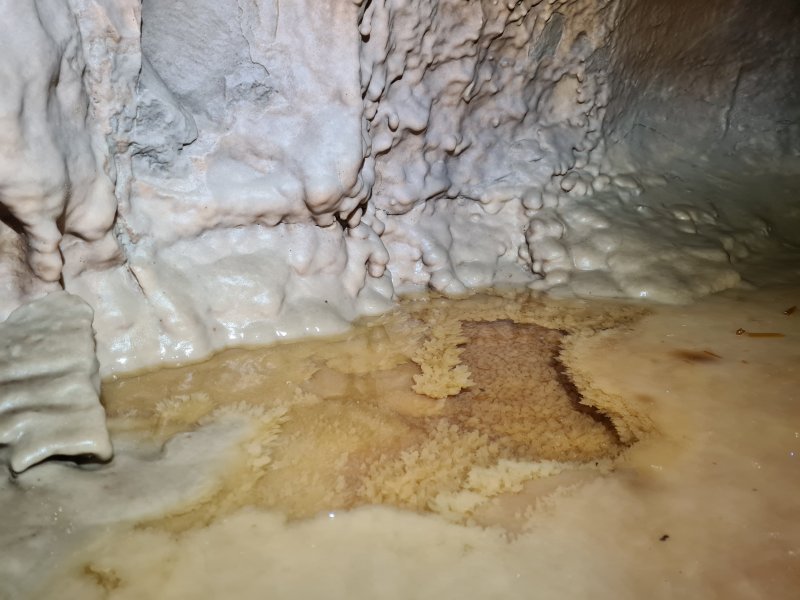 Crystal pool at the column.
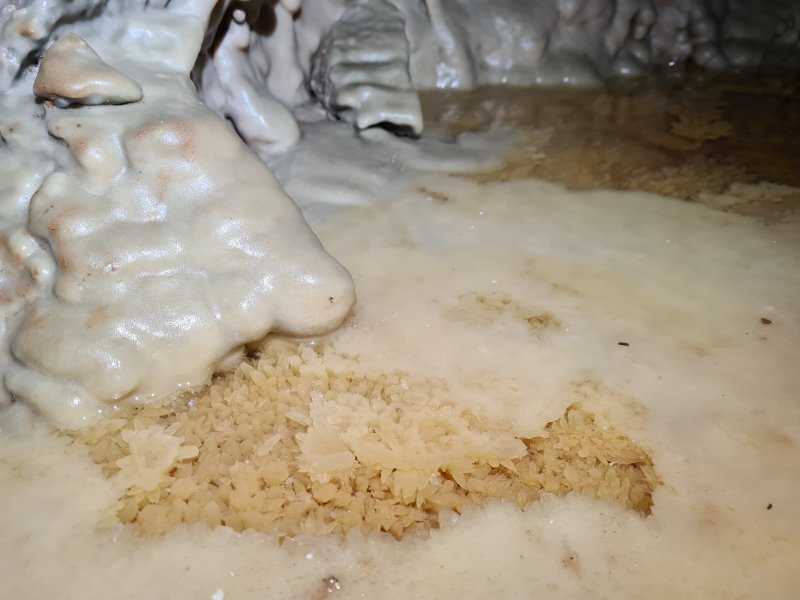 Crystal pool at the column.
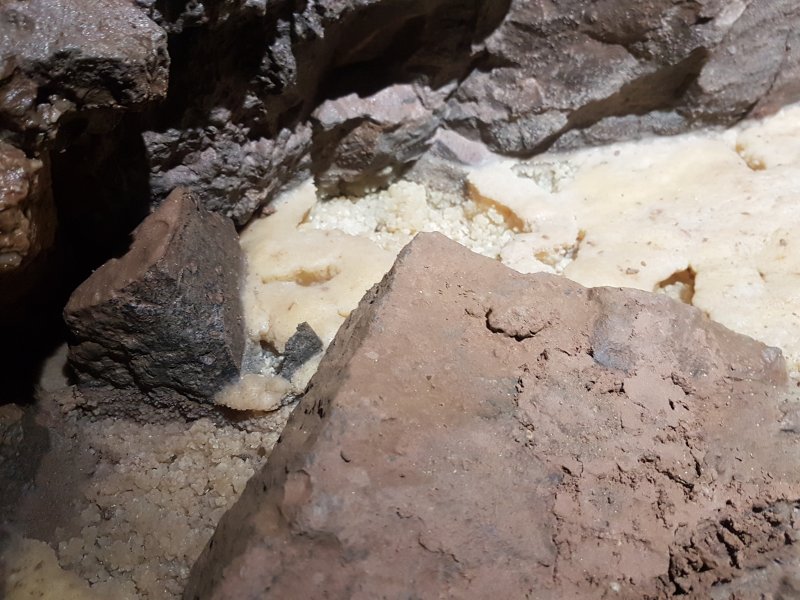 Dried crystal pool.
 A much larger stream is soon met. Downstream is taped off to protect the formations, and the passage chokes just after them. This is the upstream side of the choke at the end of Pen And Ink Passage.
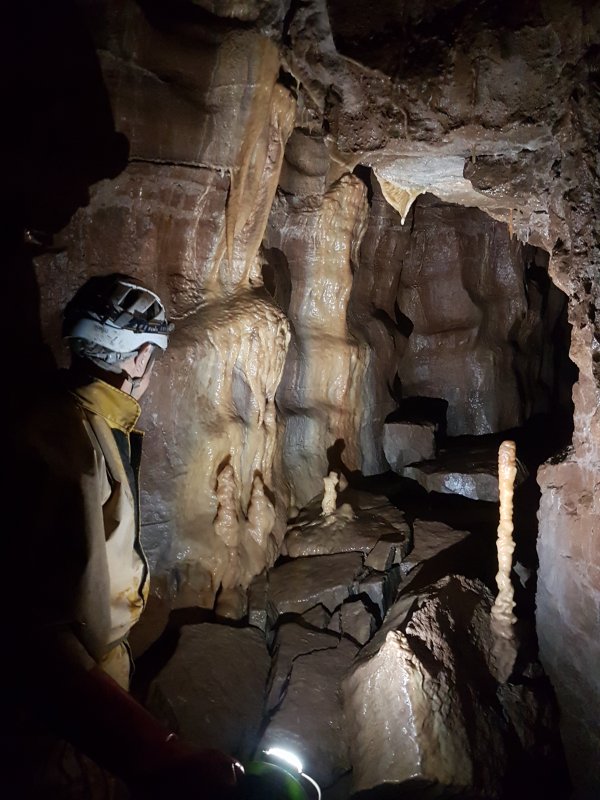 The upstream direction has more totem pole formations.
Modelling and lighting by Pete
The upstream direction has more totem pole formations.
Modelling and lighting by Pete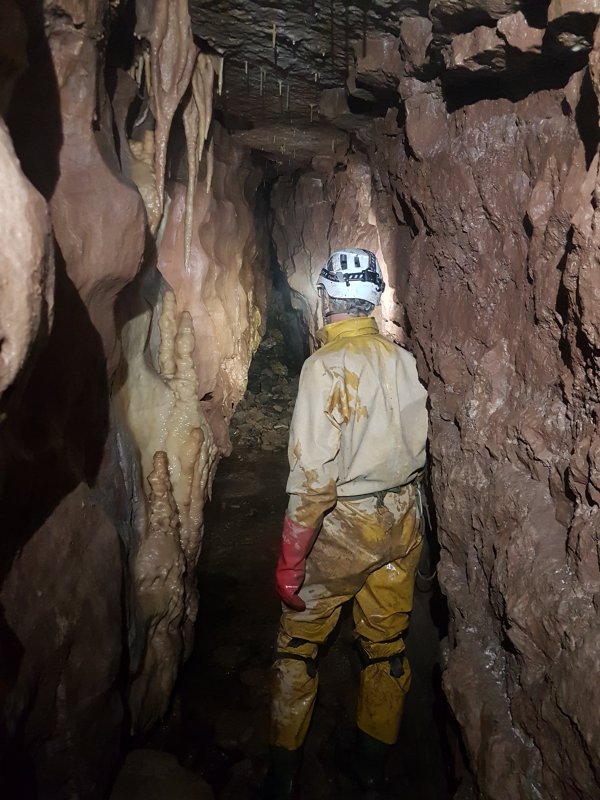 Formations in the upstream direction.
Modelling by Pete, lighting by Tarquin and Pete
Formations in the upstream direction.
Modelling by Pete, lighting by Tarquin and Pete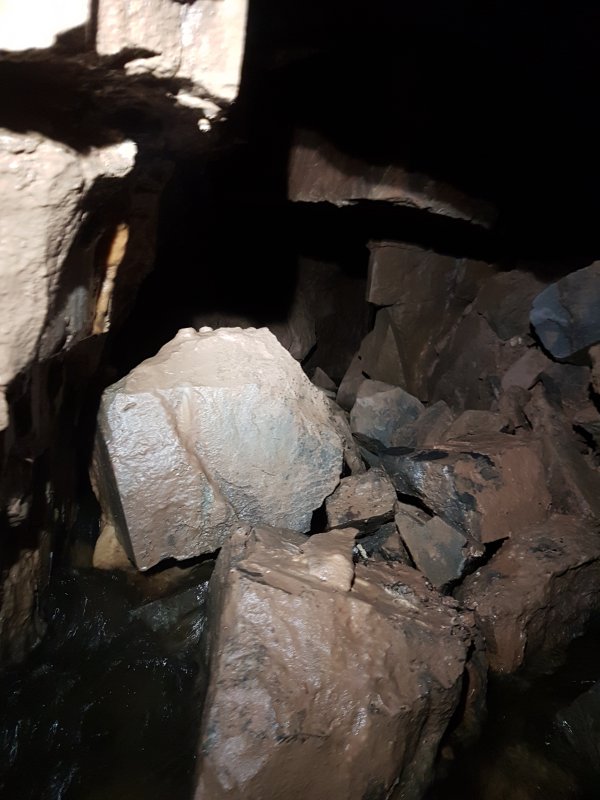 A bouldery chamber in the upstream direction. Most of the water comes in from an inlet under the right wall, which looks very low and wet.
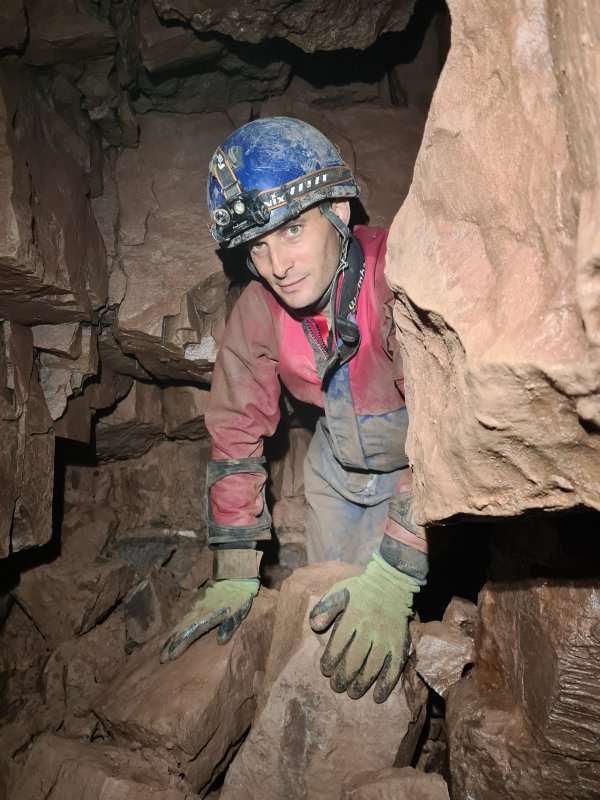 On a subsequent visit with lower water, we visited the inlet, which is largely crawling through shattered rock, beneath hanging boulders.
Modelling by Peter
On a subsequent visit with lower water, we visited the inlet, which is largely crawling through shattered rock, beneath hanging boulders.
Modelling by Peter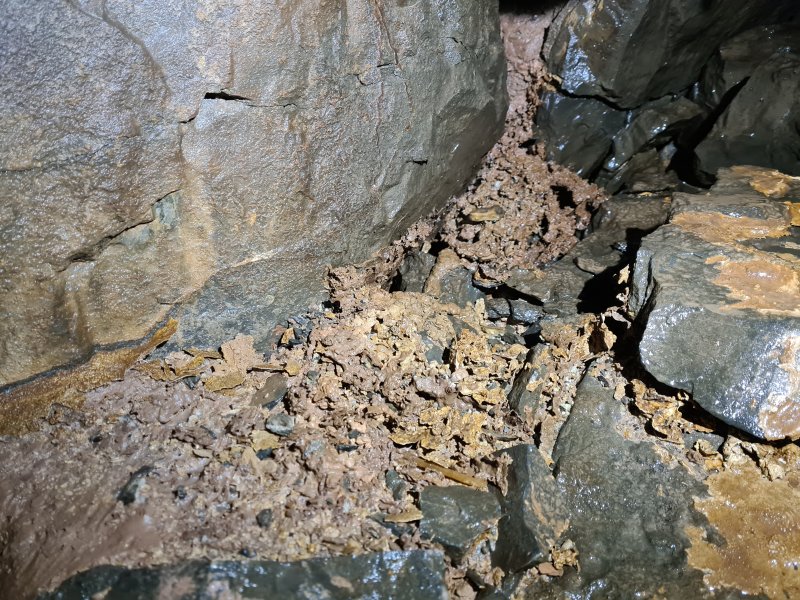 Decomposed calcite in the inlet.
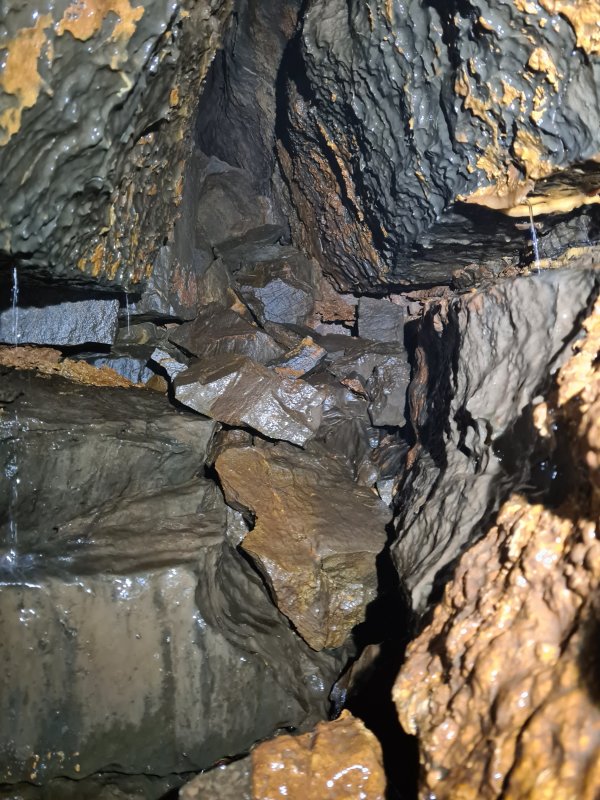 The inlet ends at a pinched choke just beyond a squeeze under a hanging boulder. The water probably comes from a pool in The Blockhouse.
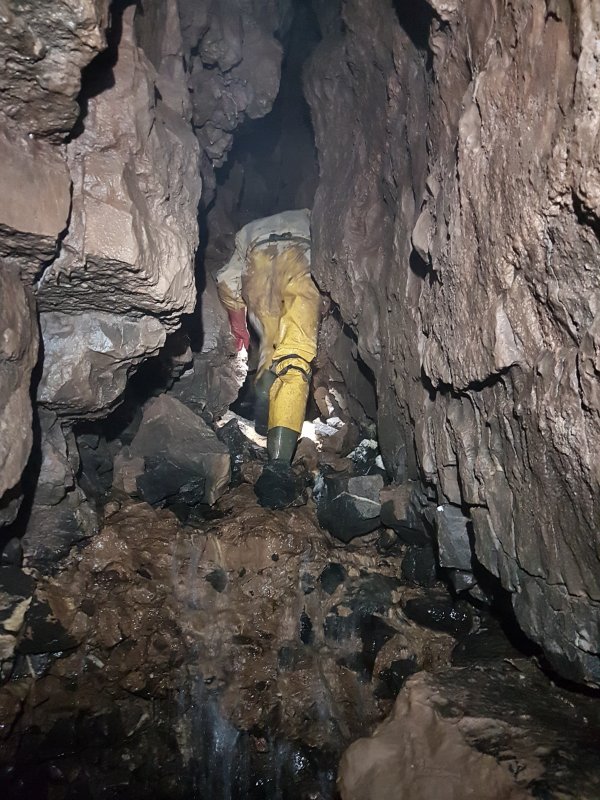 The way on ahead gets narrower and more awkward.
Modelling by Pete, lighting by Tarquin and Pete
The way on ahead gets narrower and more awkward.
Modelling by Pete, lighting by Tarquin and Pete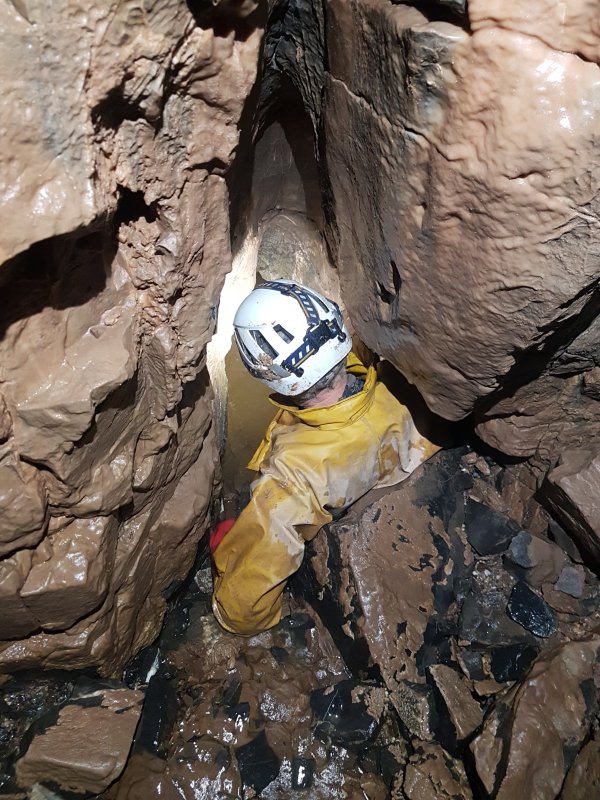 The final climb at the end.
Modelling by Pete, lighting by Tarquin and Pete
The final climb at the end.
Modelling by Pete, lighting by Tarquin and Pete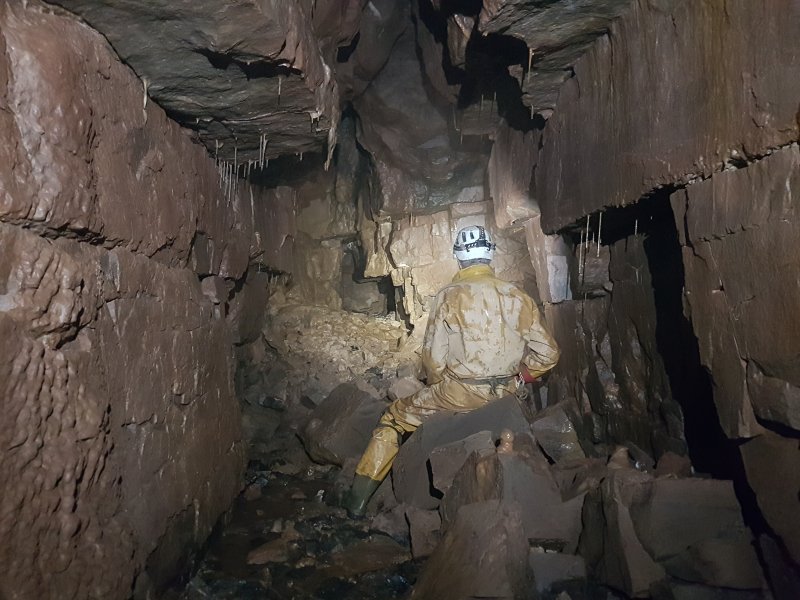 The climb reaches The Blockhouse, the last chamber in the series.
Modelling by Pete, lighting by Tarquin and Pete
The climb reaches The Blockhouse, the last chamber in the series.
Modelling by Pete, lighting by Tarquin and Pete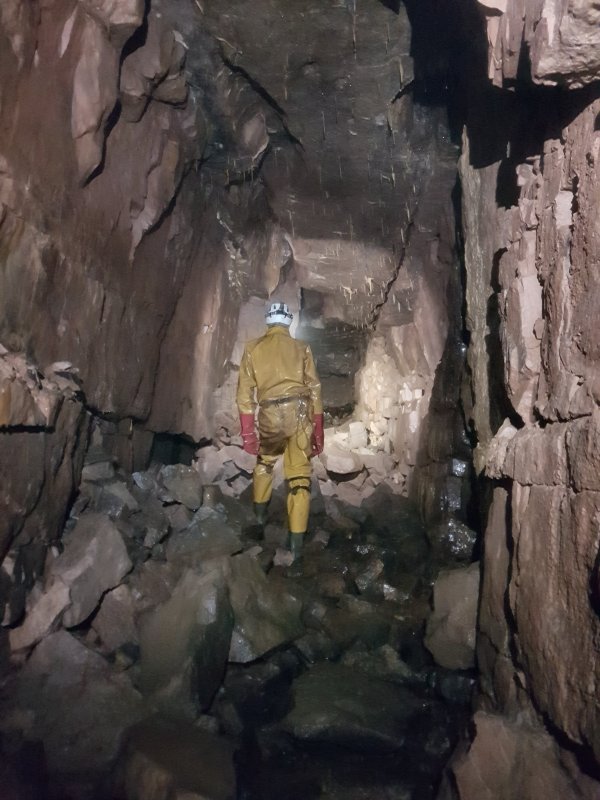 The Blockhouse is really a short passage rather than a chamber.
Modelling by Pete, lighting by Tarquin and Pete
The Blockhouse is really a short passage rather than a chamber.
Modelling by Pete, lighting by Tarquin and Pete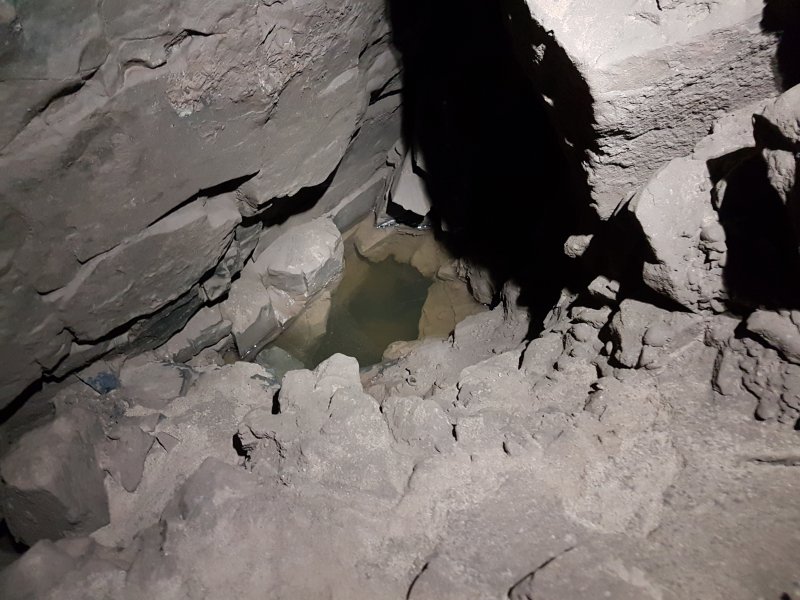 Sump on the side of the passage. This seems to be a static pool rather than a passage.
 The Blockhouse has something which I have not seen west of Mynydd Llangatwg before, cryostal. Sadly, it is coated in modern stal, but it shows that the ice age permafrost has managed to create cryostal in this area, and that's a significant discovery.
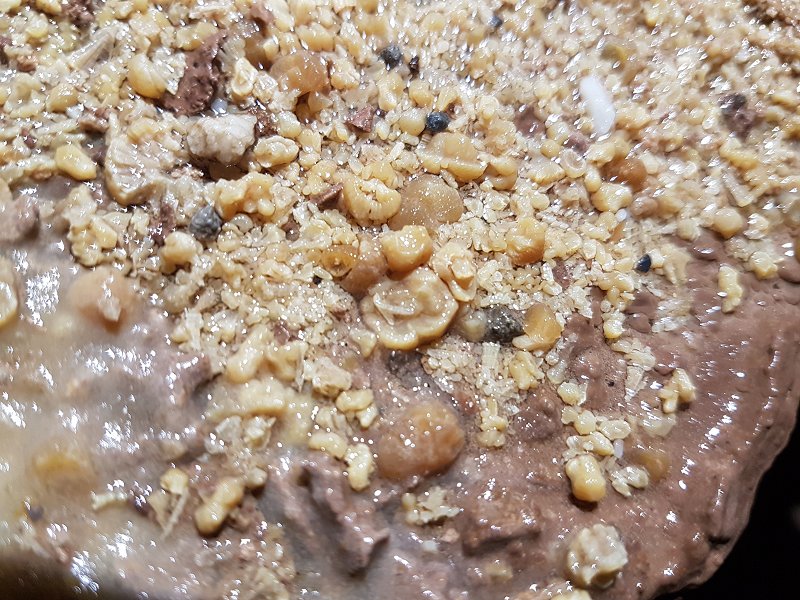 Cryostal.
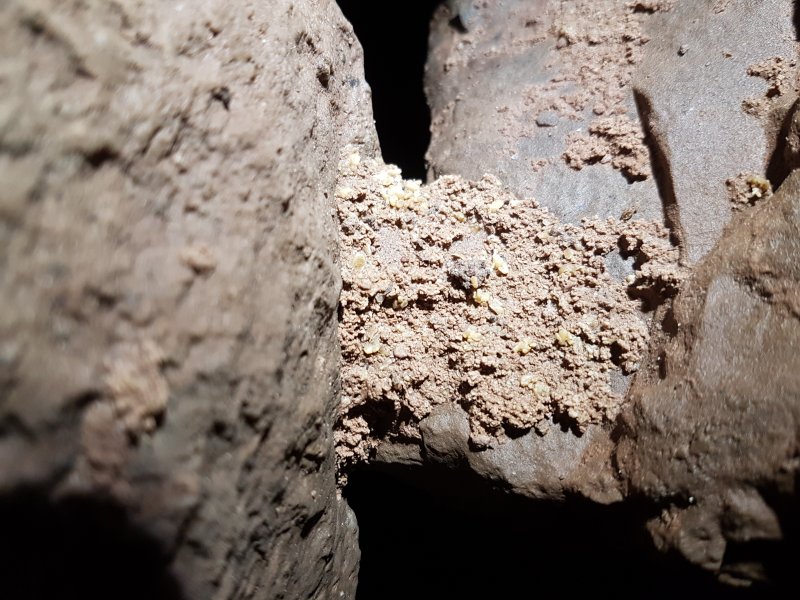 There are a few other bits tucked between the rocks that have no modern stal on them.
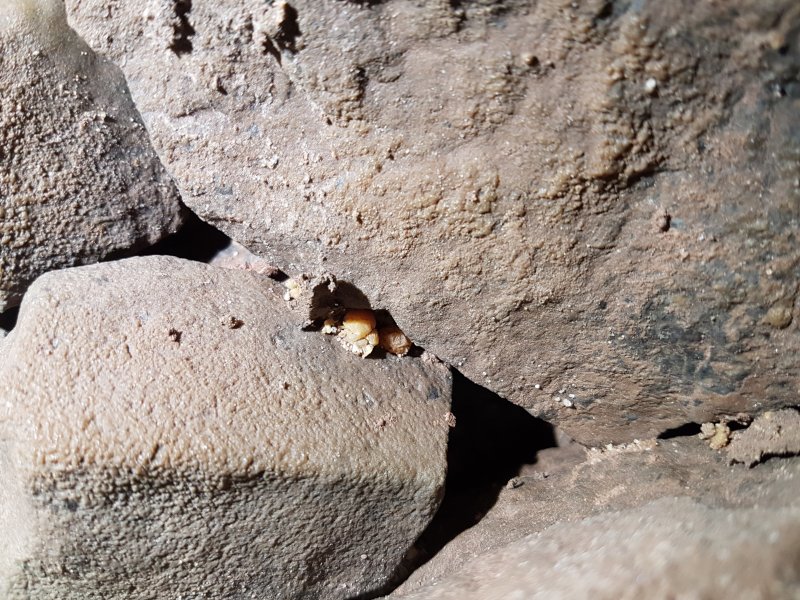 Cryostal between the rocks.
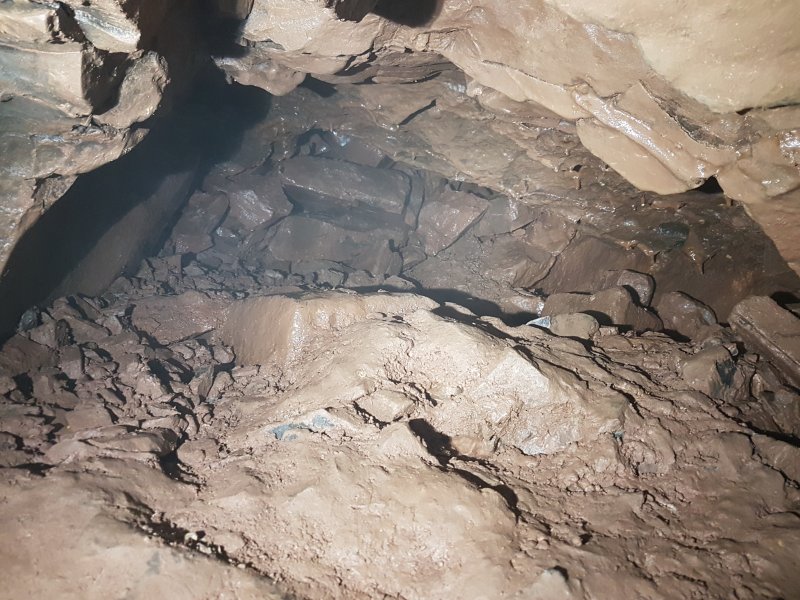 This right branch ends in a choke.
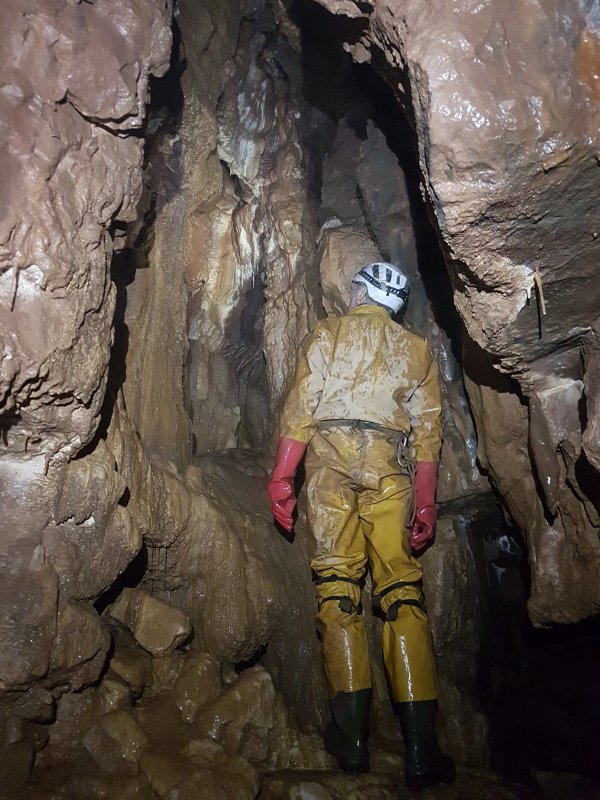 In the other direction is an inlet aven, the highest point in the series.
Modelling by Pete, lighting by Tarquin and Pete
In the other direction is an inlet aven, the highest point in the series.
Modelling by Pete, lighting by Tarquin and Pete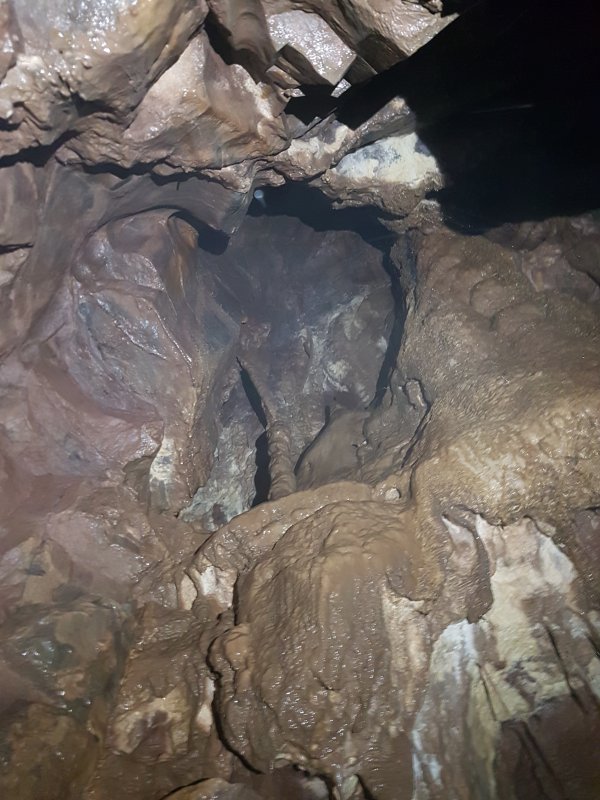 The top is blind, and less than 15 metres blow surface, directly below the top of the tramroad cutting.
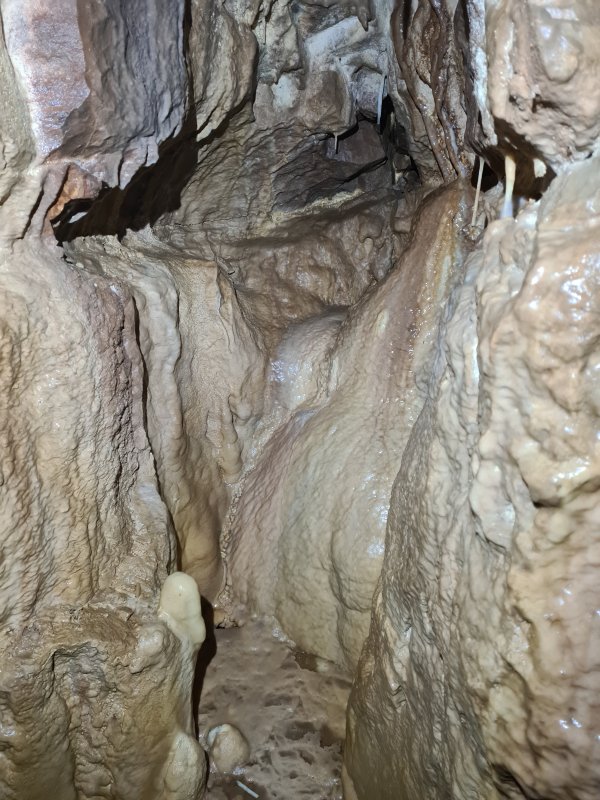 Stal in the aven.
 Stal in the aven.
 Below the aven, a side passage heads north and quickly chokes. The end of the series.
 On our second trip into the series, we decided to try climbing up the cascades at the 1982 breakthrough chamber - the way it had originally been found in 1970. This climb is stupidly narrow and awkward, but is not tight. The upper part is a steep water chute, where gravity is most unhelpful.
Modelling by Peter, lighting by Tarquin and Peter
On our second trip into the series, we decided to try climbing up the cascades at the 1982 breakthrough chamber - the way it had originally been found in 1970. This climb is stupidly narrow and awkward, but is not tight. The upper part is a steep water chute, where gravity is most unhelpful.
Modelling by Peter, lighting by Tarquin and Peter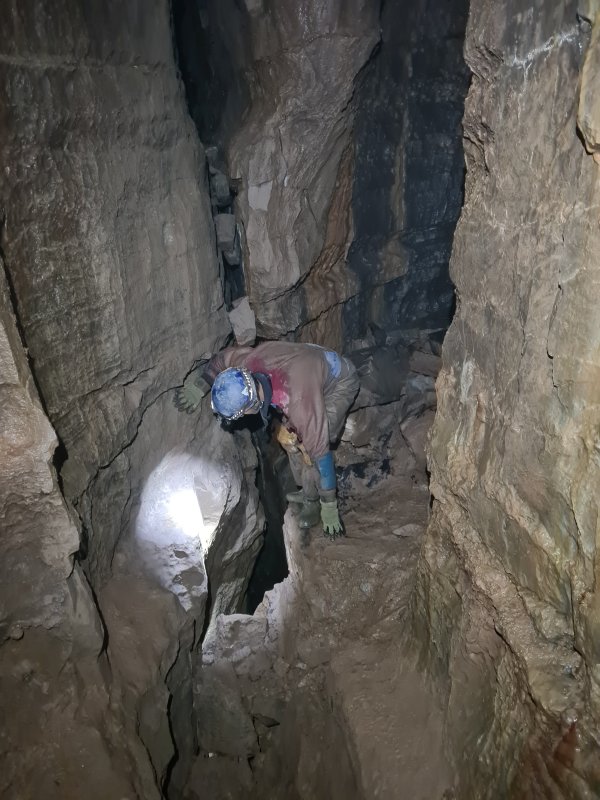 At the top, a climb enters a much better sized passage, where an inlet aven pinches out.
Modelling by Peter, lighting by Tarquin and Peter
At the top, a climb enters a much better sized passage, where an inlet aven pinches out.
Modelling by Peter, lighting by Tarquin and Peter Climbing into the rift leading back over the water chute.
Modelling by Peter, lighting by Tarquin and Peter
Climbing into the rift leading back over the water chute.
Modelling by Peter, lighting by Tarquin and Peter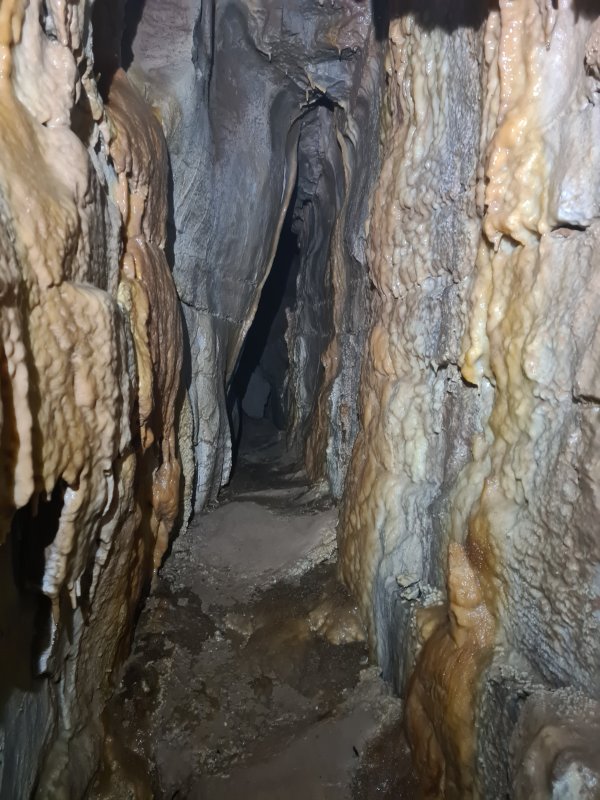 Stal in the rift, which needs to be carefully avoided, as the passage is only shoulder width.
 The rift ends at a junction at the head of the original climb up - the way that this area had been found in 1970.
 The first passage on the left starts as a distinctive sand floored rift, which ends at a choke.
Modelling by Peter, lighting by Tarquin and Peter
The first passage on the left starts as a distinctive sand floored rift, which ends at a choke.
Modelling by Peter, lighting by Tarquin and Peter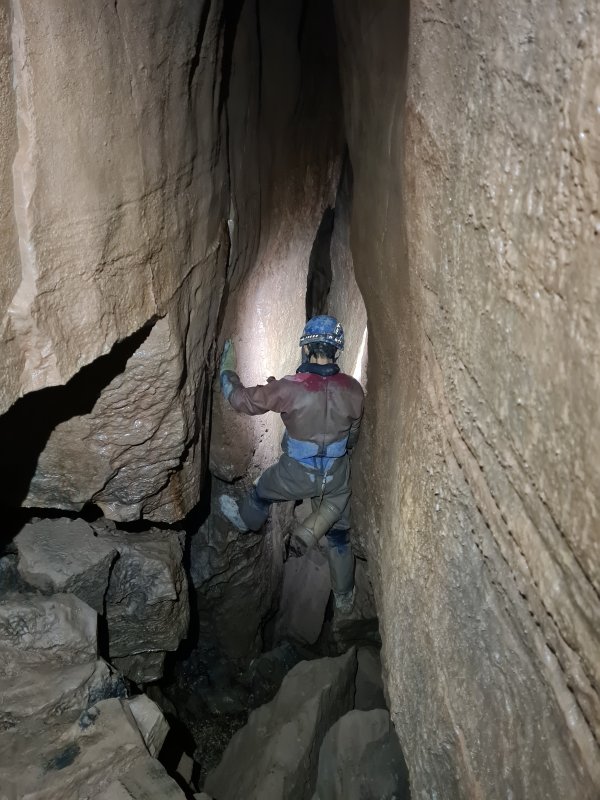 Beside the choke is an ongoing narrow rift, that drops steeply downwards, and wiggles around like crazy, before rising back up again and ending close to Edward's Shortcut and the upstream end of Lugubrious Passage.
Modelling by Peter, lighting by Tarquin and Peter
Beside the choke is an ongoing narrow rift, that drops steeply downwards, and wiggles around like crazy, before rising back up again and ending close to Edward's Shortcut and the upstream end of Lugubrious Passage.
Modelling by Peter, lighting by Tarquin and Peter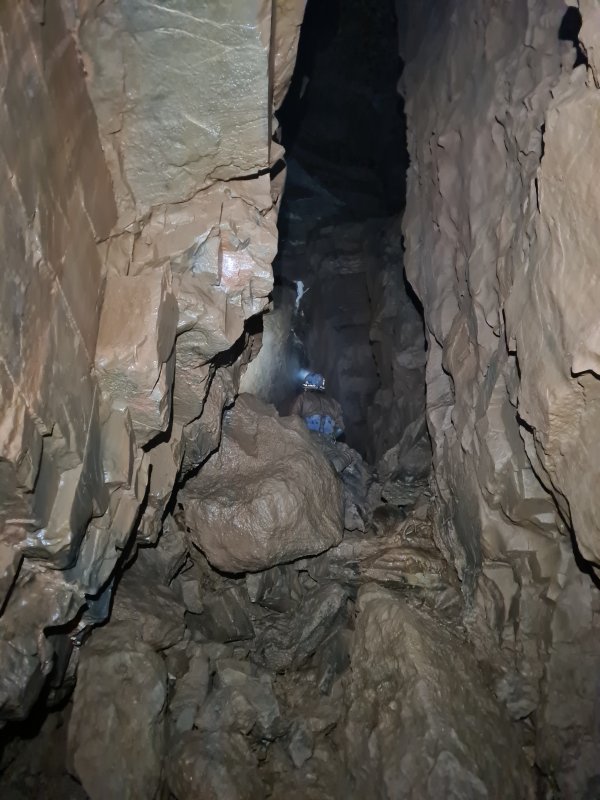 Ahead from the junction is a climb up into a large chamber.
Modelling by Peter, lighting by Tarquin and Peter
Ahead from the junction is a climb up into a large chamber.
Modelling by Peter, lighting by Tarquin and Peter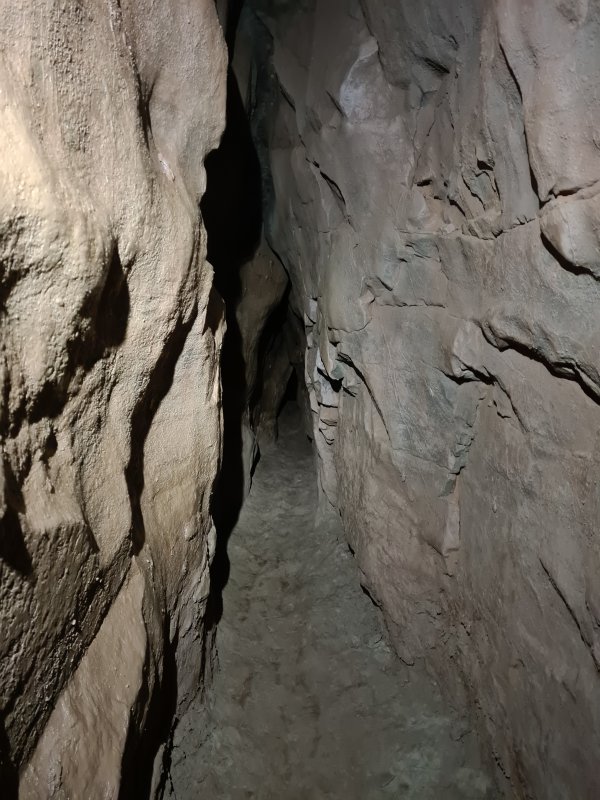 Ahead just goes to a dig which branches before ending.
 To the right in the chamber is a 10 metre climb that at first looks impossible or at least stupid without a rope. However, it is actually quite possible, and a rope - while a good idea - was not needed.
Modelling by Peter, lighting by Tarquin and Peter
To the right in the chamber is a 10 metre climb that at first looks impossible or at least stupid without a rope. However, it is actually quite possible, and a rope - while a good idea - was not needed.
Modelling by Peter, lighting by Tarquin and Peter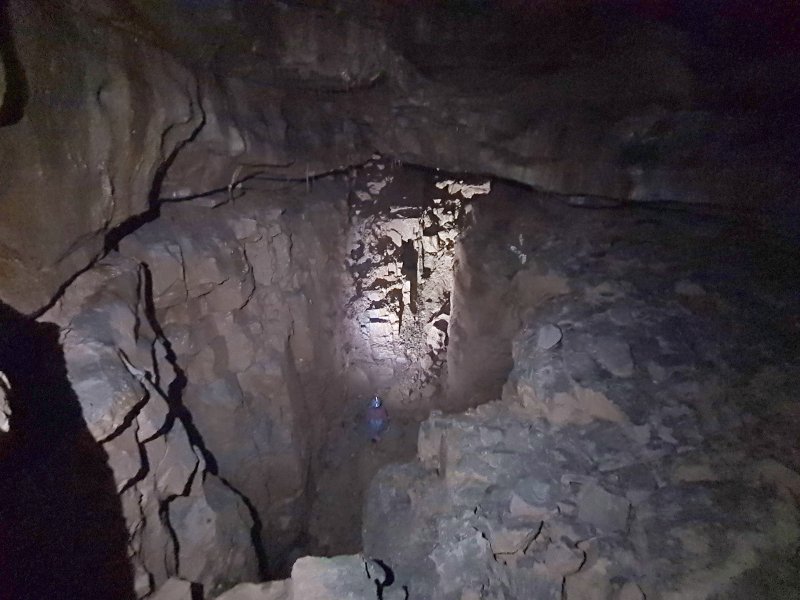 The balcony gives a good view back over the chamber, and reminds you how far off the floor you are.
Modelling by Peter, lighting by Tarquin and Peter
The balcony gives a good view back over the chamber, and reminds you how far off the floor you are.
Modelling by Peter, lighting by Tarquin and Peter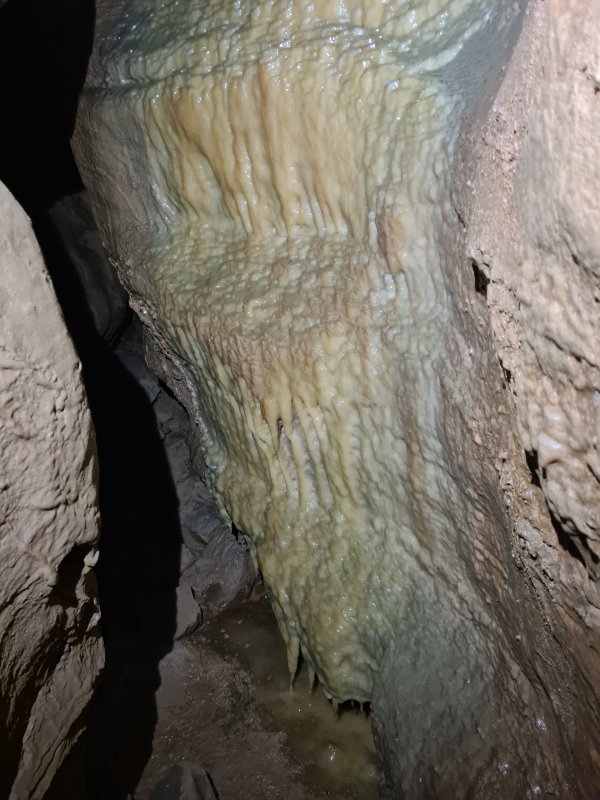 Flowstone in the passage leading from the balcony.
 The passage leading from the balcony.
Modelling by Peter, lighting by Tarquin and Peter
The passage leading from the balcony.
Modelling by Peter, lighting by Tarquin and Peter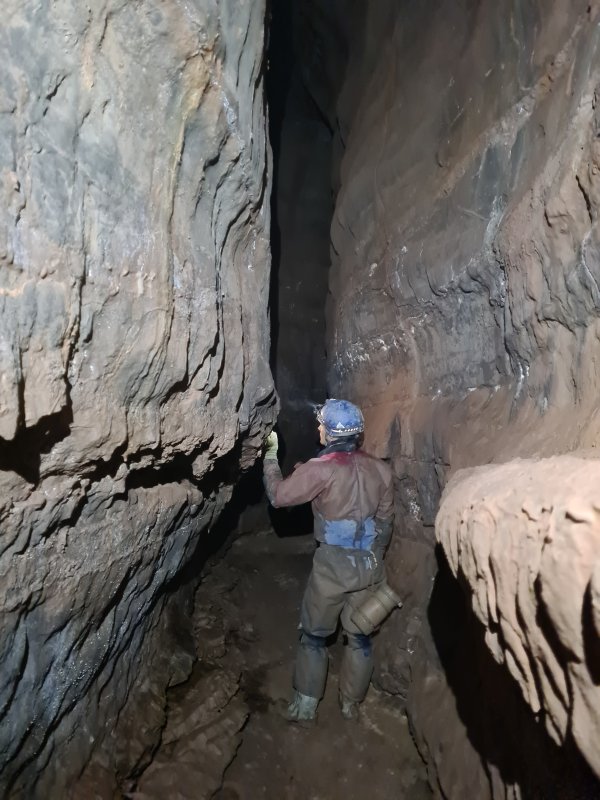 After passing a side passage, it gets wider.
Modelling by Peter, lighting by Tarquin and Peter
After passing a side passage, it gets wider.
Modelling by Peter, lighting by Tarquin and Peter It ends at a slope into a very substantial enlargement, where a tape hints that this is somewhere to really watch your footing! Ahead is an exposed clamber down to a junction. The flowstone on the left is really quite attractive, and sparkles far more than most. Sadly the camera cannot do it any justice.
Modelling by Peter, lighting by Tarquin and Peter
It ends at a slope into a very substantial enlargement, where a tape hints that this is somewhere to really watch your footing! Ahead is an exposed clamber down to a junction. The flowstone on the left is really quite attractive, and sparkles far more than most. Sadly the camera cannot do it any justice.
Modelling by Peter, lighting by Tarquin and Peter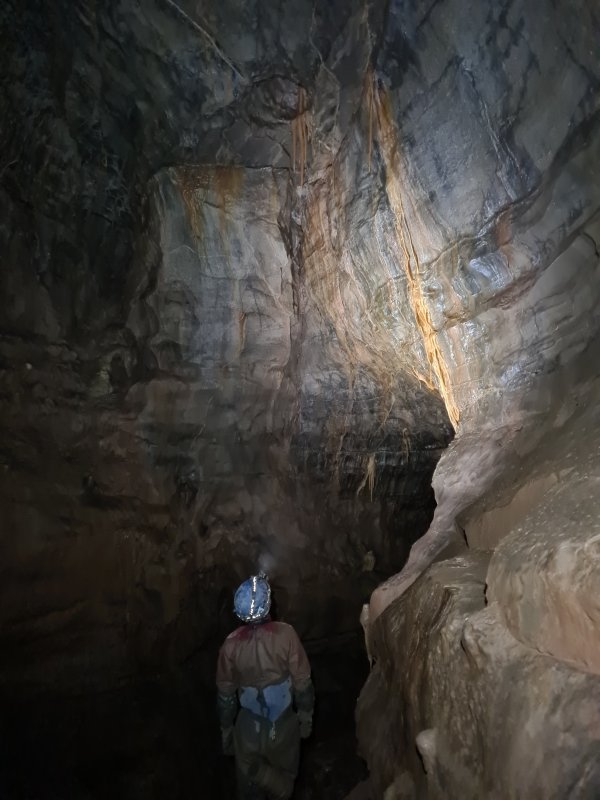 Long curtain running down the wall of the enlargement.
Modelling by Peter, lighting by Tarquin and Peter
Long curtain running down the wall of the enlargement.
Modelling by Peter, lighting by Tarquin and Peter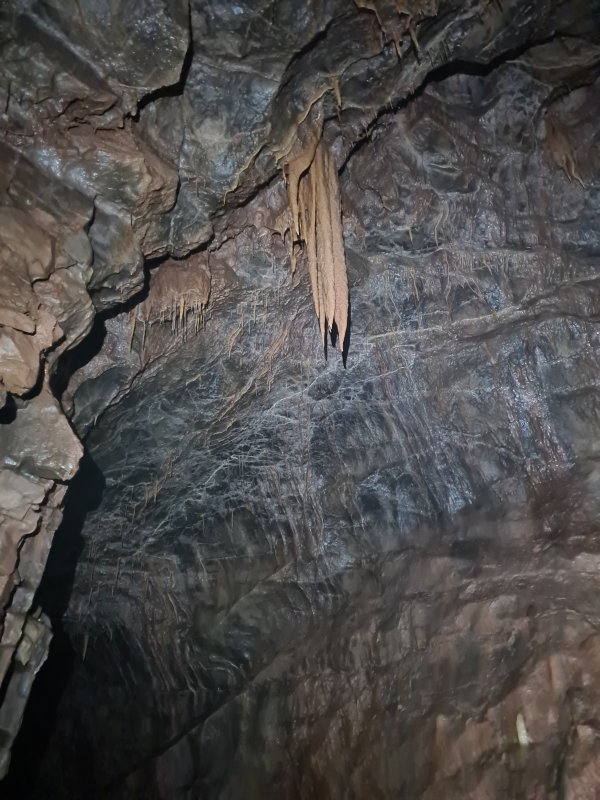 Stal in the ceiling of the enlargement.
Lighting by Tarquin and Peter
Stal in the ceiling of the enlargement.
Lighting by Tarquin and Peter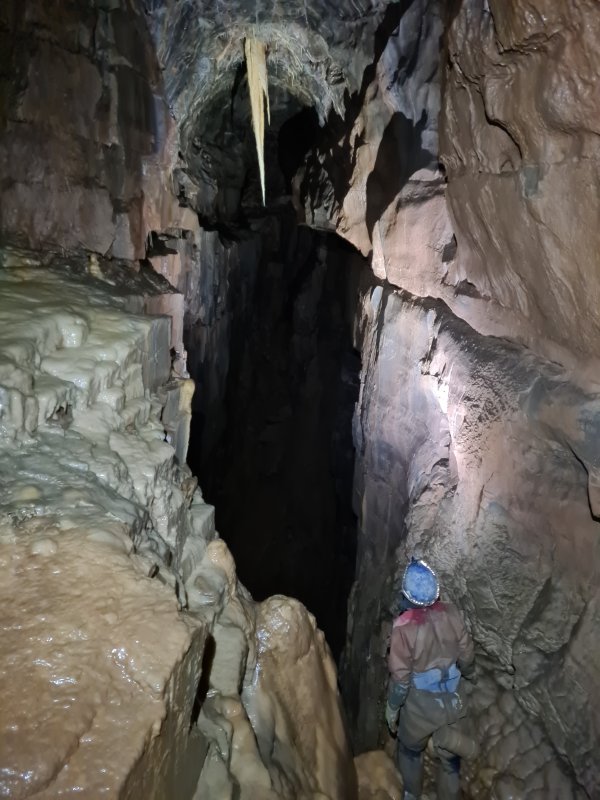 To the left is a superb view of the 10 metre pitch dropping into Moonlight Chamber. It looks absolutely glorious from this position, with that stalactite in the middle.
Modelling by Peter, lighting by Tarquin and Peter
To the left is a superb view of the 10 metre pitch dropping into Moonlight Chamber. It looks absolutely glorious from this position, with that stalactite in the middle.
Modelling by Peter, lighting by Tarquin and Peter In the opposite direction is a 16 metre pitch, with a view all the way over to the top of The Skyhook, the pitch from Upper Great Oxbow.
Modelling by Peter, lighting by Tarquin and Peter
In the opposite direction is a 16 metre pitch, with a view all the way over to the top of The Skyhook, the pitch from Upper Great Oxbow.
Modelling by Peter, lighting by Tarquin and Peter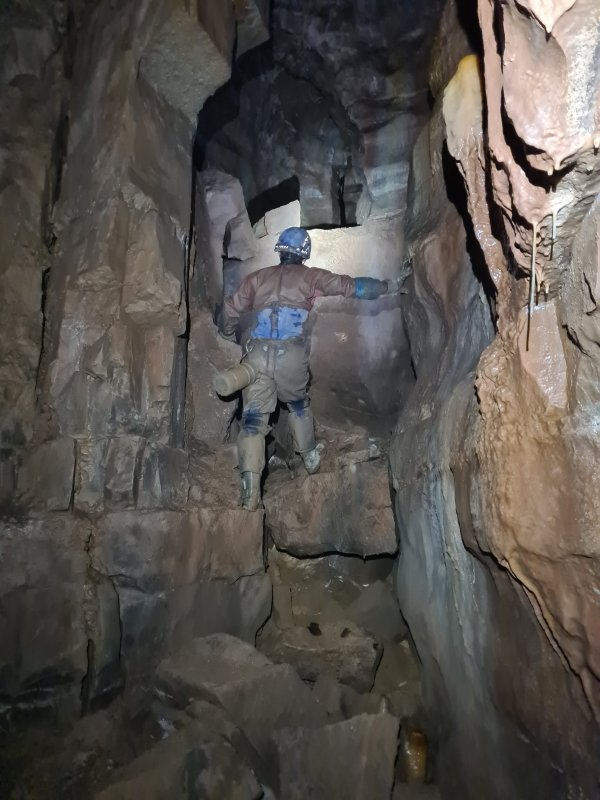 The side passage passed on the right, on the way from the balcony, is next, which starts with a climb into an upper development level.
Modelling by Peter, lighting by Tarquin and Peter
The side passage passed on the right, on the way from the balcony, is next, which starts with a climb into an upper development level.
Modelling by Peter, lighting by Tarquin and Peter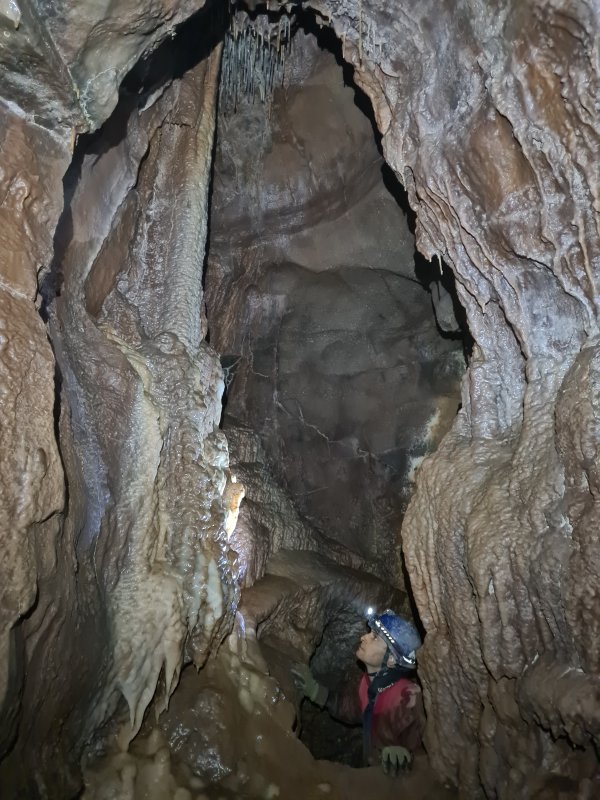 Passing through a window in the formations.
Modelling by Peter, lighting by Tarquin and Peter
Passing through a window in the formations.
Modelling by Peter, lighting by Tarquin and Peter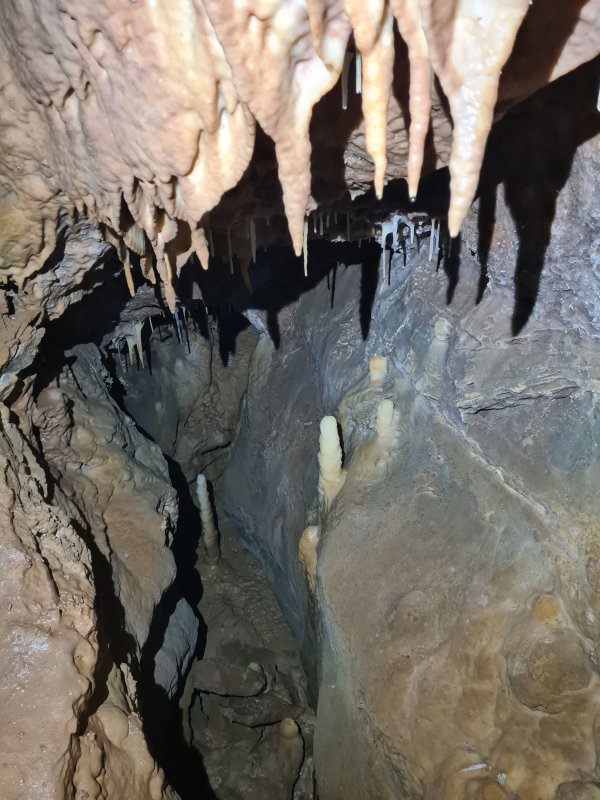 Below the window is an undercut containing more formations.
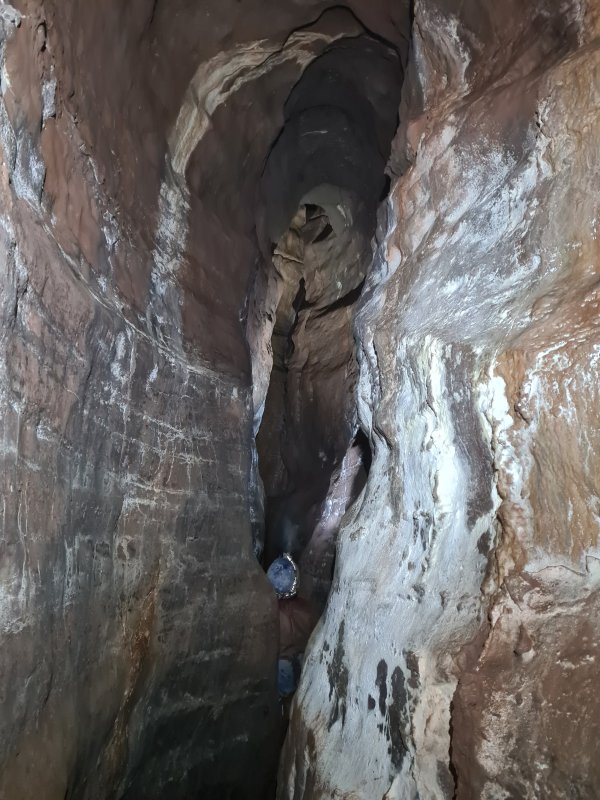 The passage is a standard OFD canyon, just like most other passages in the cave.
Modelling by Peter, lighting by Tarquin and Peter
The passage is a standard OFD canyon, just like most other passages in the cave.
Modelling by Peter, lighting by Tarquin and Peter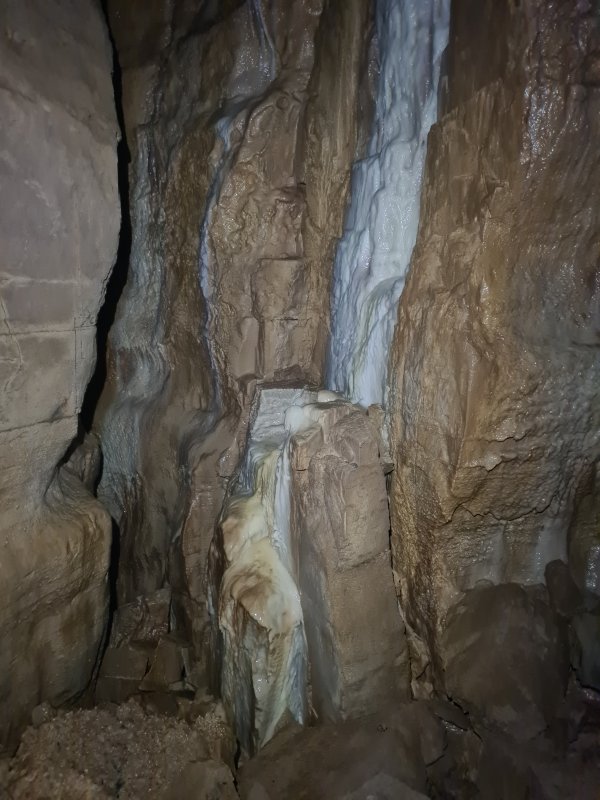 It ends at a junction with one wall covered in stal flow, which needs to be carefully avoided.
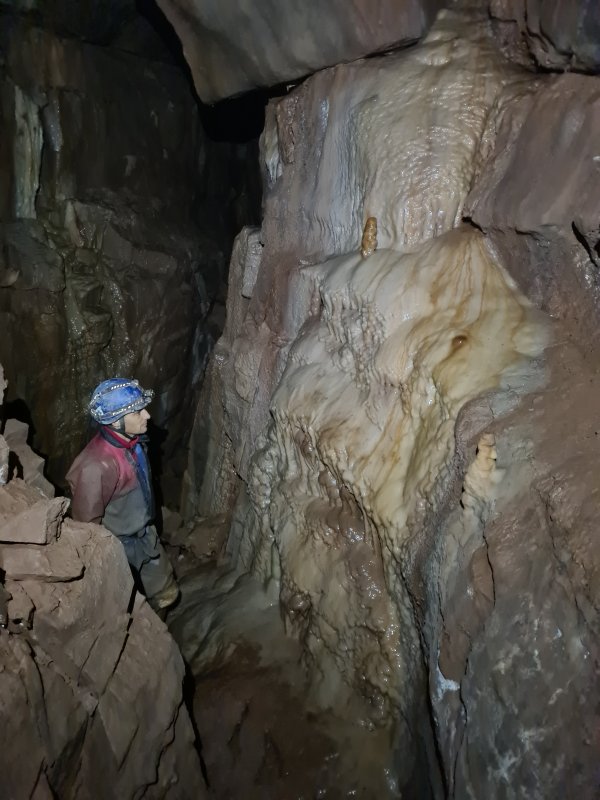 Flowstone in the left branch.
Modelling by Peter, lighting by Tarquin and Peter
Flowstone in the left branch.
Modelling by Peter, lighting by Tarquin and Peter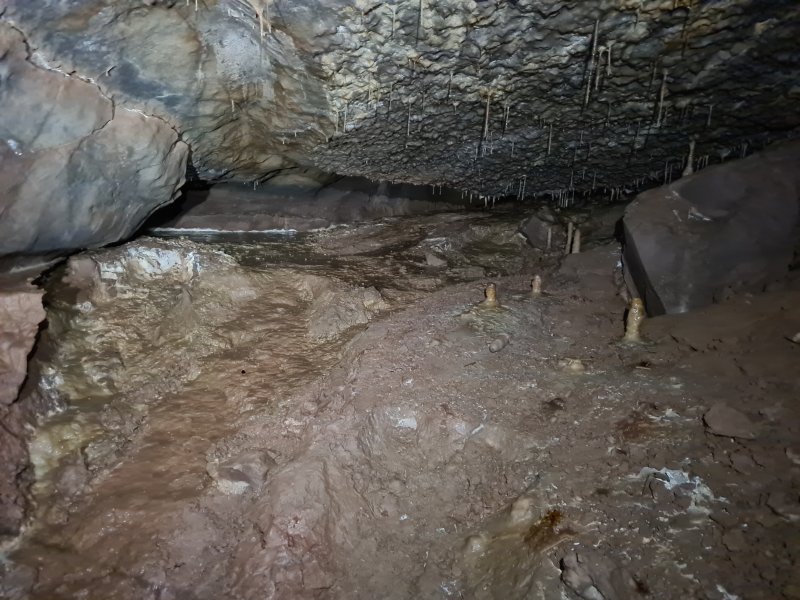 The left branch ends at a flowstone covered mudbank.
Lighting by Tarquin and Peter
The left branch ends at a flowstone covered mudbank.
Lighting by Tarquin and Peter The right branch is more canyon, of course. It reaches a junction.
Modelling by Peter, lighting by Tarquin and Peter
The right branch is more canyon, of course. It reaches a junction.
Modelling by Peter, lighting by Tarquin and Peter Very large botryoidal stal at the junction.
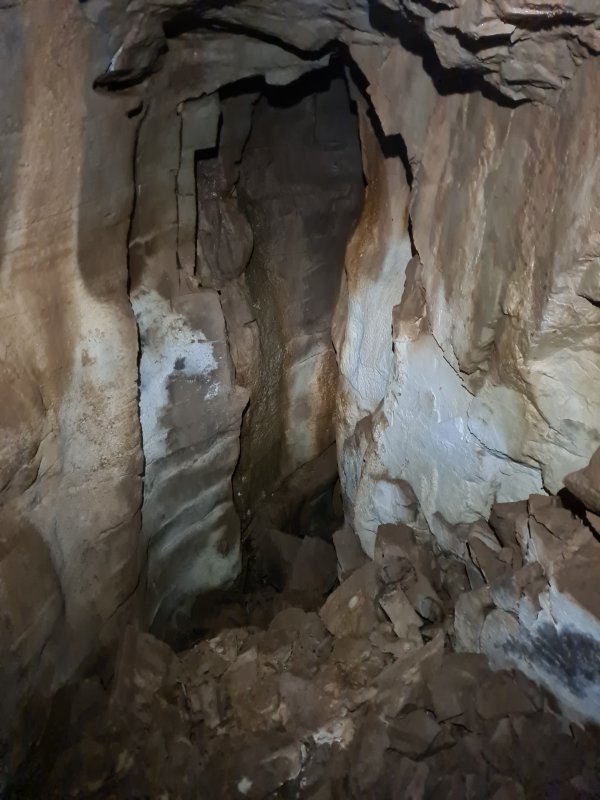 To the left drops past whitewashed walls.
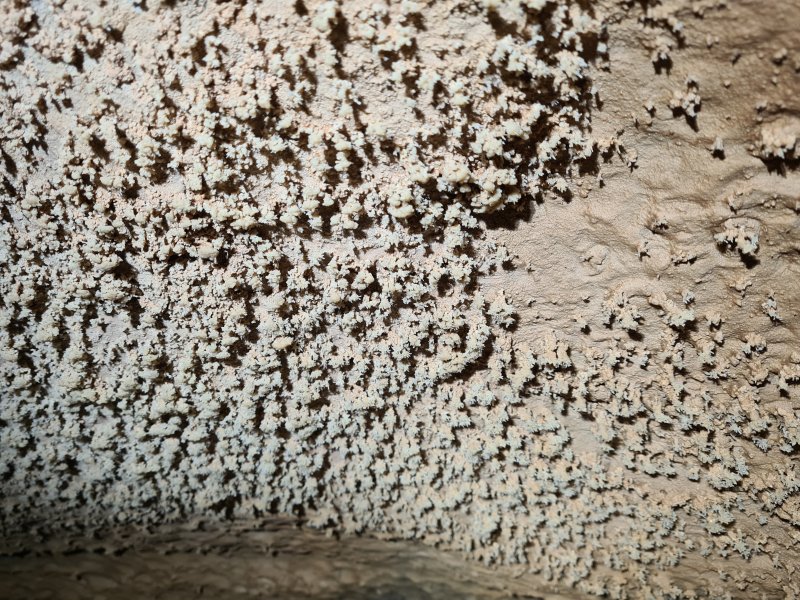 More impressive botryoids on the wall. They are large enough to make the walls look furry.
 The left branch ends at a choke, which is only 12 metres below surface.
Lighting by Tarquin and Peter
The left branch ends at a choke, which is only 12 metres below surface.
Lighting by Tarquin and Peter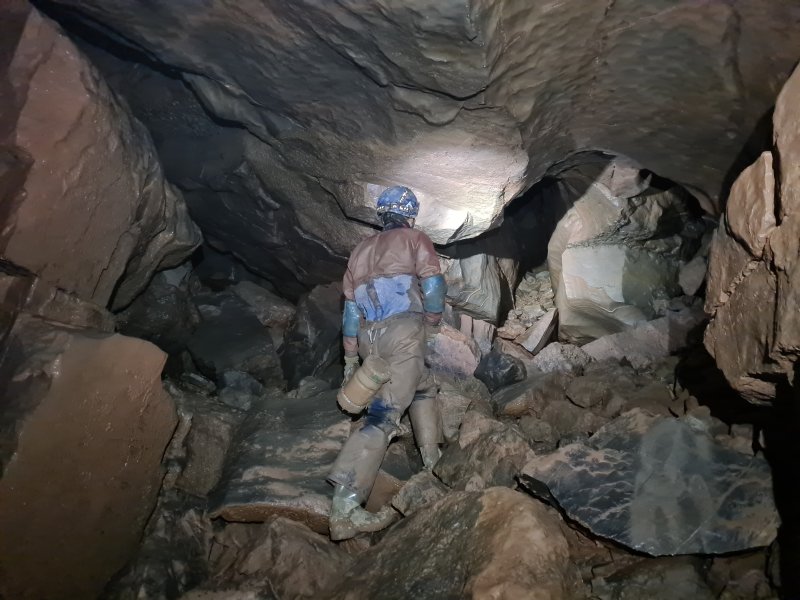 Up to the right from the junction is a badly shattered ceiling, and more avens, which must be even closer to the surface.
Modelling by Peter, lighting by Tarquin and Peter
Up to the right from the junction is a badly shattered ceiling, and more avens, which must be even closer to the surface.
Modelling by Peter, lighting by Tarquin and Peter There is a parallel passage on each side of the shattered ceiling. This is the left parallel.
Modelling by Peter, lighting by Tarquin and Peter
There is a parallel passage on each side of the shattered ceiling. This is the left parallel.
Modelling by Peter, lighting by Tarquin and Peter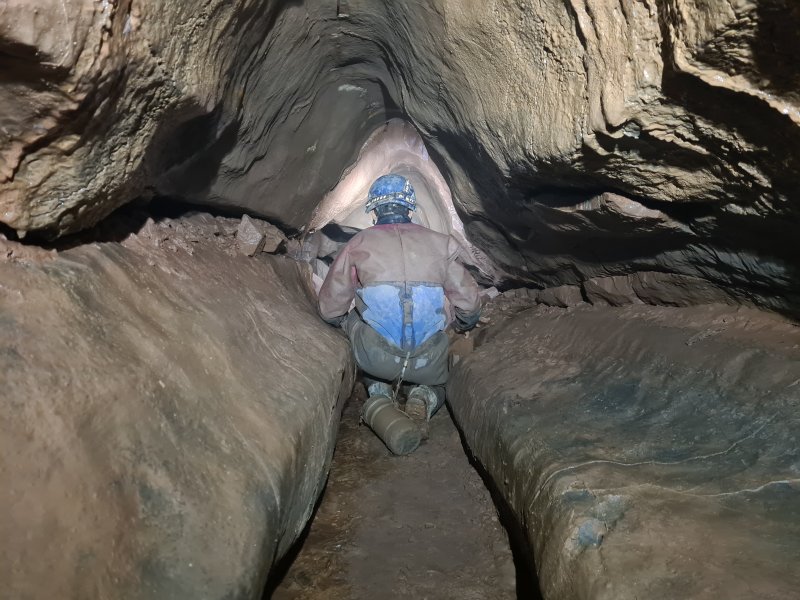 The left parallel has an attractive shape, shame it is so small.
Modelling by Peter, lighting by Tarquin and Peter
The left parallel has an attractive shape, shame it is so small.
Modelling by Peter, lighting by Tarquin and Peter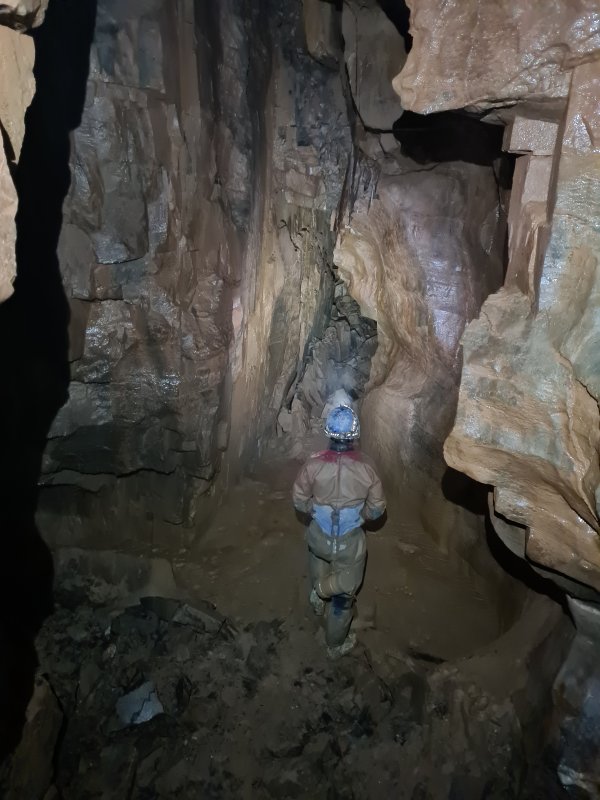 The right parallel is larger, but quickly pinches out ahead. A low passage on the left here ends quickly too.
Modelling by Peter, lighting by Tarquin and Peter
The right parallel is larger, but quickly pinches out ahead. A low passage on the left here ends quickly too.
Modelling by Peter, lighting by Tarquin and Peter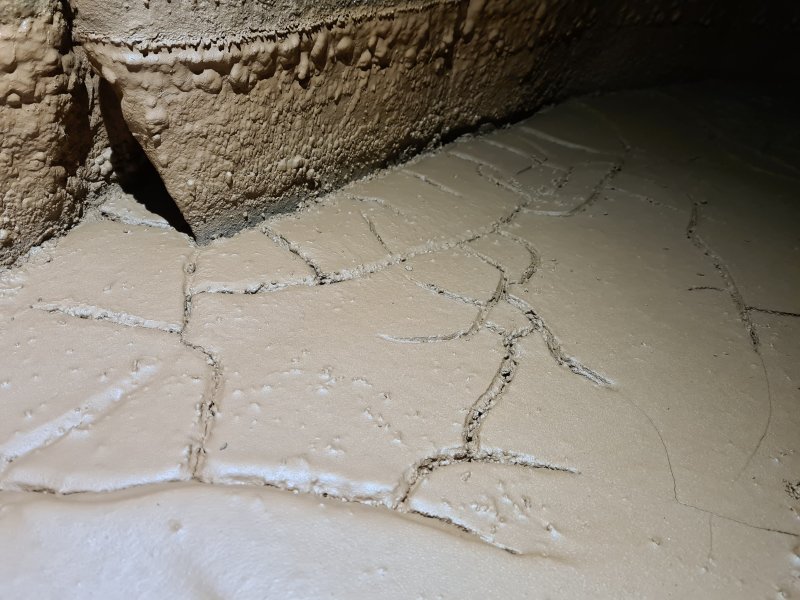 Cracked mud in the right parallel. There is clear evidence that the water regularly washes through here and removes footprints in parts of the chamber. Hardly surprising considering how close it is to the surface.