Ogof Ffynnon Ddu Lugubrious trips 19/12/2023 and 18/02/2024
This was a pair of trips intended to completely explore Lugubrious, one of the areas of the cave I had not visited before. The passage has a rather inappropriate name, clearly chosen to match Salubrious, rather than being descriptive. The passage is actually very beautiful, both in terms of its decorations, and the passage itself. The name supposedly relates more to the upstream end, but it is actually quite a fun streamway, with a really beautiful grotto as a reward. This is a very complete gallery.
While there are a few ways into the series, only three of them can be used without ropes, and one additional one can be used only by very small cavers. The series is effectively split into two sections because of a taped-off passage at a grotto, leaving that section accessible via Cross Rift, while the other section is accessible via either Shatter Pillar (a shortcut to the grotto) or Midnight Passage. The easiest and most attractive access is via Midnight Passage.
Unless otherwise stated, camera, setups, lighting, edits and gallery effects by Tarquin. Modelling and lighting at various points will be Steph Andrews and Pete Bolt.
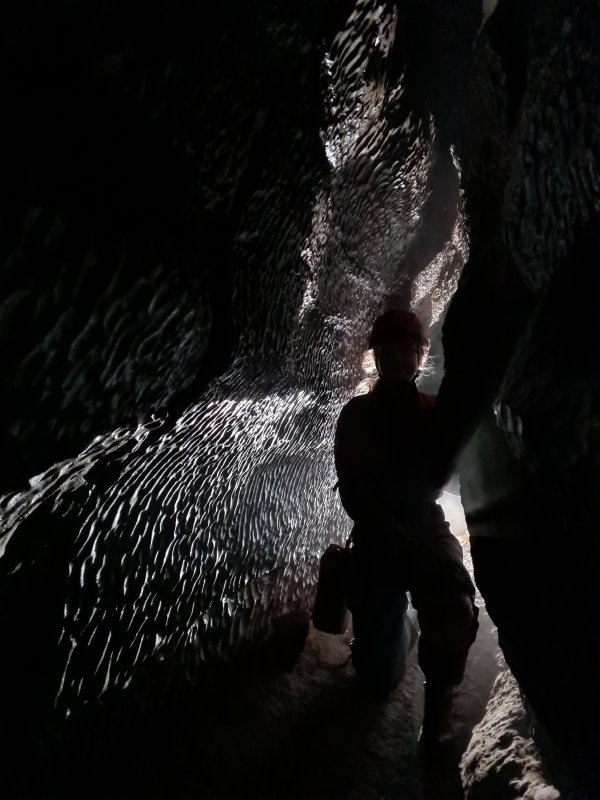
 The route from Midnight Passage starts near Midnight Chamber, and is easy to follow by accident on the way out from there. It is immediately distinctive for its gorgeous scallops.
Modelling by Steph
The route from Midnight Passage starts near Midnight Chamber, and is easy to follow by accident on the way out from there. It is immediately distinctive for its gorgeous scallops.
Modelling by Steph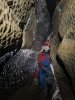 Front lighting.
Modelling by Steph
Front lighting.
Modelling by Steph Scalloped passage.
Modelling by Steph
Scalloped passage.
Modelling by Steph Stal in the scalloped passage.
Lighting by Steph
Stal in the scalloped passage.
Lighting by Steph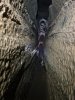 Scalloped passage.
Modelling by Steph, lighting by Tarquin and Steph
Scalloped passage.
Modelling by Steph, lighting by Tarquin and Steph A side passage has a set of roof tubes, with another way into the series from Cross Rift, but not only is the climb quite tricky, the passages are tiny and very muddy. One of the side tubes is 50 metres of misery which goes nowhere, so we left most of the roof tubes alone.
Lighting by Steph
A side passage has a set of roof tubes, with another way into the series from Cross Rift, but not only is the climb quite tricky, the passages are tiny and very muddy. One of the side tubes is 50 metres of misery which goes nowhere, so we left most of the roof tubes alone.
Lighting by Steph Only one of the roof tubes is reasonably sized, and it is an oxbow back to the scalloped passage.
Modelling by Steph, lighting by Tarquin and Steph
Only one of the roof tubes is reasonably sized, and it is an oxbow back to the scalloped passage.
Modelling by Steph, lighting by Tarquin and Steph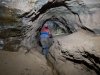 The route changes after the side passage, becoming an arched phreas with sand banks.
Modelling by Steph, lighting by Tarquin and Steph
The route changes after the side passage, becoming an arched phreas with sand banks.
Modelling by Steph, lighting by Tarquin and Steph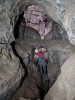 After traversing over a too-tight stream outlet, it reaches a junction at very distinctive rock bridge. This is shaped like the old comic version of Garfield, with an open mouth and curved eyes. The upstream passage of Lugubrious is ahead, and the downstream passage is to the right.
Modelling by Steph, lighting by Tarquin and Steph
After traversing over a too-tight stream outlet, it reaches a junction at very distinctive rock bridge. This is shaped like the old comic version of Garfield, with an open mouth and curved eyes. The upstream passage of Lugubrious is ahead, and the downstream passage is to the right.
Modelling by Steph, lighting by Tarquin and Steph We headed downstream, initially along a sandy phreatic tube.
Modelling by Steph, lighting by Tarquin and Steph
We headed downstream, initially along a sandy phreatic tube.
Modelling by Steph, lighting by Tarquin and Steph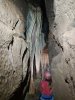 An oxbow to the left has this viewing window over a beautiful stal flow.
Modelling by Steph, lighting by Tarquin and Steph
An oxbow to the left has this viewing window over a beautiful stal flow.
Modelling by Steph, lighting by Tarquin and Steph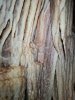 Curtains of the stal flow, with rich sandstone stains that look like blood dribbles.
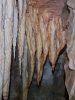 Red stained stal.
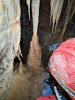 Base of the columns. The stal flow continues into the darkness below.
Modelling by Steph, lighting by Tarquin and Steph
Base of the columns. The stal flow continues into the darkness below.
Modelling by Steph, lighting by Tarquin and Steph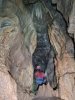 The main route continues down a climb, to where the stream is regained below the camera. It then charges off down a very tricky climb, so the way on is through a window in the stal below the oxbow.
Modelling by Steph, lighting by Tarquin and Steph
The main route continues down a climb, to where the stream is regained below the camera. It then charges off down a very tricky climb, so the way on is through a window in the stal below the oxbow.
Modelling by Steph, lighting by Tarquin and Steph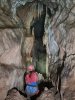 Looking back through the stal window. It looks much better from this direction. To the right is the climb back up to the Garfield junction. To the left is the downstream route to the very tricky climb.
Modelling by Steph, lighting by Tarquin and Steph
Looking back through the stal window. It looks much better from this direction. To the right is the climb back up to the Garfield junction. To the left is the downstream route to the very tricky climb.
Modelling by Steph, lighting by Tarquin and Steph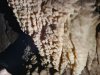 Textured stal.
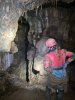 The passage then meets this enormous chasm, with the river roaring away 30 metres below. The survey shows this as a single passage at the same height, but it is actually a pitch of 6 metres to a ledge, then a traverse for 15 metres, to reach part way down a pitch connecting Cross Rift to a series of oxbows on the southern side of the Main Streamway.
Modelling by Steph, lighting by Tarquin and Steph
The passage then meets this enormous chasm, with the river roaring away 30 metres below. The survey shows this as a single passage at the same height, but it is actually a pitch of 6 metres to a ledge, then a traverse for 15 metres, to reach part way down a pitch connecting Cross Rift to a series of oxbows on the southern side of the Main Streamway.
Modelling by Steph, lighting by Tarquin and Steph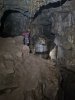 The way on is to avoid falling down the chasm, and cross the rocky bank (seen on the left here) to reach a crawl back into Lugubrious.
Modelling by Steph, lighting by Tarquin and Steph
The way on is to avoid falling down the chasm, and cross the rocky bank (seen on the left here) to reach a crawl back into Lugubrious.
Modelling by Steph, lighting by Tarquin and Steph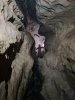 Downstream Lugubrious. Initially, a climb down to the stream is the easiest way on.
Modelling by Steph, lighting by Tarquin and Steph
Downstream Lugubrious. Initially, a climb down to the stream is the easiest way on.
Modelling by Steph, lighting by Tarquin and Steph Stream level then becomes too tight, and the way on is to traverse over it for some distance to reach a climb down to it.
Modelling by Steph
Stream level then becomes too tight, and the way on is to traverse over it for some distance to reach a climb down to it.
Modelling by Steph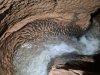 The large passage then heads off on its own, and the stream continues as a narrow meander, with distinctive striping.
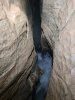 The stream then launches over the edge of a 21 metre waterfall, to reach the Main Streamway. There is potential for a traverse over it to rig a pitch clean from the water.
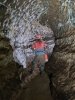 The large passage begins as a scalloped tube.
Modelling by Steph, lighting by Tarquin and Steph
The large passage begins as a scalloped tube.
Modelling by Steph, lighting by Tarquin and Steph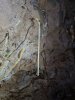 A helictite that changed its mind.
Lighting by Tarquin and Steph
A helictite that changed its mind.
Lighting by Tarquin and Steph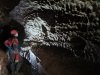 Gorgeous scallops on a corner.
Modelling by Steph, lighting by Tarquin and Steph
Gorgeous scallops on a corner.
Modelling by Steph, lighting by Tarquin and Steph The passage continues as a large tube with plenty of straws, to suddenly fall 19 metres to the Main Streamway. There is also a fairly horrifying traverse on a tiny ledge out to a massive jammed boulder, adorned with a set of footprints from some crazy caver. They appear to have been looking for other side passages, but the only thing downstream is the Midnight Passage traverse.
Modelling by Steph, lighting by Tarquin and Steph
The passage continues as a large tube with plenty of straws, to suddenly fall 19 metres to the Main Streamway. There is also a fairly horrifying traverse on a tiny ledge out to a massive jammed boulder, adorned with a set of footprints from some crazy caver. They appear to have been looking for other side passages, but the only thing downstream is the Midnight Passage traverse.
Modelling by Steph, lighting by Tarquin and Steph We returned to the Garfield junction, and started heading upstream. This started off as a winding traverse above the stream, one of those traverses that needs you to push your feet sideways, since it only has limited ledges.
Modelling by Steph, lighting by Tarquin and Steph
We returned to the Garfield junction, and started heading upstream. This started off as a winding traverse above the stream, one of those traverses that needs you to push your feet sideways, since it only has limited ledges.
Modelling by Steph, lighting by Tarquin and Steph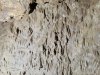 Surge mark mud formations.
 The upstream passage is quite narrow, and takes some work to get upstream, with lots of tiny cascades. At one point, there is a roof tube that heads back over the passage, but this becomes a crawl, so we left it alone.
Modelling by Pete, lighting by Tarquin and Pete
The upstream passage is quite narrow, and takes some work to get upstream, with lots of tiny cascades. At one point, there is a roof tube that heads back over the passage, but this becomes a crawl, so we left it alone.
Modelling by Pete, lighting by Tarquin and Pete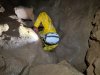 A tricky climb up through a squeeze then marks the end of the upstream difficulties.
Modelling by Pete, lighting by Tarquin and Pete
A tricky climb up through a squeeze then marks the end of the upstream difficulties.
Modelling by Pete, lighting by Tarquin and Pete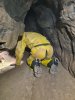 A side passage lowers to an easy crawl (ignore the tiny side passages), reaching a climb up rocks to Shatter Pillar. This provides an easy route into here, if you want to avoid the squeeze. Pete decided to wear a shattered oversuit for this trip, so you're going to get a lot of views like this...
Modelling by Pete, lighting by Tarquin and Pete
A side passage lowers to an easy crawl (ignore the tiny side passages), reaching a climb up rocks to Shatter Pillar. This provides an easy route into here, if you want to avoid the squeeze. Pete decided to wear a shattered oversuit for this trip, so you're going to get a lot of views like this...
Modelling by Pete, lighting by Tarquin and Pete Heading upstream, we turned right at a junction, following the stream into a dead end passage, through a chamber (which is not as circular as the survey shows it).
Modelling by Pete, lighting by Tarquin and Pete
Heading upstream, we turned right at a junction, following the stream into a dead end passage, through a chamber (which is not as circular as the survey shows it).
Modelling by Pete, lighting by Tarquin and Pete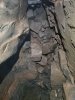 The ongoing passage passes under a horrifying ceiling of hanging death, which looks like it might come down if you breathe on it too hard. This is roughly underneath the steep slope down from Edward's Shortcut.
Modelling by Pete, lighting by Tarquin and Pete
The ongoing passage passes under a horrifying ceiling of hanging death, which looks like it might come down if you breathe on it too hard. This is roughly underneath the steep slope down from Edward's Shortcut.
Modelling by Pete, lighting by Tarquin and Pete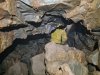 The ongoing passage starts big enough, but degenerates into a series of choked passages.
Modelling by Pete, lighting by Tarquin and Pete
The ongoing passage starts big enough, but degenerates into a series of choked passages.
Modelling by Pete, lighting by Tarquin and Pete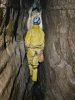 One of the choked ends. The other proved to contain a boulder squeeze too tight for us to bother with, so we left it alone.
Modelling by Pete, lighting by Tarquin and Pete
One of the choked ends. The other proved to contain a boulder squeeze too tight for us to bother with, so we left it alone.
Modelling by Pete, lighting by Tarquin and Pete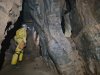 Instead, we returned to the earlier junction (just after the squeeze up), and headed along the much more inviting dry branch, which soon gained a small stream.
Modelling by Pete, lighting by Tarquin and Pete
Instead, we returned to the earlier junction (just after the squeeze up), and headed along the much more inviting dry branch, which soon gained a small stream.
Modelling by Pete, lighting by Tarquin and Pete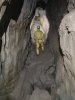 We climbed up into a larger passage above the stream (the stream passage is the slot in the floor), which ended at a choke and aven in one direction. In the other direction is an oxbow which bypasses part of the stream passage. Either the oxbow or the stream requires a clamber, but the oxbow is nicer.
Modelling by Pete, lighting by Tarquin and Pete
We climbed up into a larger passage above the stream (the stream passage is the slot in the floor), which ended at a choke and aven in one direction. In the other direction is an oxbow which bypasses part of the stream passage. Either the oxbow or the stream requires a clamber, but the oxbow is nicer.
Modelling by Pete, lighting by Tarquin and Pete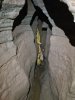 We headed further upstream, which became narrow, and turned sharp right bends to a very tricky climb. Pete was unable to climb it, after several attempts, so I did the rest of it alone.
Modelling by Pete, lighting by Tarquin and Pete
We headed further upstream, which became narrow, and turned sharp right bends to a very tricky climb. Pete was unable to climb it, after several attempts, so I did the rest of it alone.
Modelling by Pete, lighting by Tarquin and Pete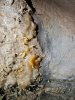 Stal in the narrow passage.
 The passage passes up through a hole which is nearly filled with rocks, into a very wet aven.
 The aven is surprisingly grand given the passage before it.
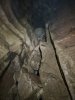 The water showers in from a high level passage, which passes through a very loose choke to reach a later passage. It does not look free climbable.
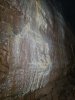 Wall of the aven.
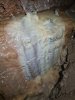 Small stal flow in the aven.
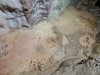 Crystal pools below.
 Crystal pools.
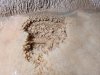 Crystal pools.
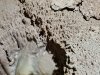 Tiny hoodoos beside the stal.
 Drip pockets.
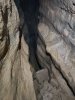 From the aven, a passage immediately drops down into the earlier choked passage. The drop is only about 3 metres, but impossible to free climb.
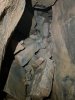 Choked side passage at the aven.
 We returned to the earlier oxbow, and took a side passage, which immediately gained much larger proportions.
Modelling by Pete, lighting by Tarquin and Pete
We returned to the earlier oxbow, and took a side passage, which immediately gained much larger proportions.
Modelling by Pete, lighting by Tarquin and Pete White stal flow on the wall.
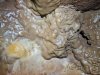 Fried egg, sunny side up.
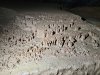 Superb set of miniature hoodoos.
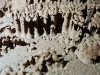 Each hoodoo has a tiny conical hat. The result looks extremely similar to the limestone hoodoos I had seen in Saudi Arabia.
 The survey shows a climb into a side passage above. This smooth sided passage is the climb, up to the ledge, traverse and step over to a passage tucked into the gap on the left, over a 7 metre drop. Absolutely ridiculous. The passage links to the wet aven seen earlier, via 40 metres of passage. It is absolutely not worth risking your life for that!
Lighting by Tarquin and Pete
The survey shows a climb into a side passage above. This smooth sided passage is the climb, up to the ledge, traverse and step over to a passage tucked into the gap on the left, over a 7 metre drop. Absolutely ridiculous. The passage links to the wet aven seen earlier, via 40 metres of passage. It is absolutely not worth risking your life for that!
Lighting by Tarquin and Pete We took a side passage into a very large chamber, that sadly chokes, though someone has bolted far up the choke.
Modelling by Pete, lighting by Tarquin and Pete
We took a side passage into a very large chamber, that sadly chokes, though someone has bolted far up the choke.
Modelling by Pete, lighting by Tarquin and Pete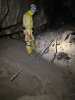 Maypole used for climbing avens.
Modelling by Pete, lighting by Tarquin and Pete
Maypole used for climbing avens.
Modelling by Pete, lighting by Tarquin and Pete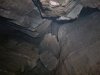 The survey shows a side passage, but it is accessed via this 8 metre aven. No thanks.
 Instead, we returned beneath the crazy climb, and followed the passage towards the grotto.
Modelling by Pete, lighting by Tarquin and Pete
Instead, we returned beneath the crazy climb, and followed the passage towards the grotto.
Modelling by Pete, lighting by Tarquin and Pete Lemon drizzle cake.
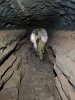 Distinctive tide mark.
Modelling by Pete, lighting by Tarquin and Pete
Distinctive tide mark.
Modelling by Pete, lighting by Tarquin and Pete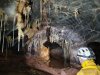 The highlight of upstream Lugubrious is this grotto. The quickest way to reach it is to drop down the hole at Shatter Pillar, take lefts at every significant junction, and climb up when easily possible.
Modelling by Pete, lighting by Tarquin and Pete
The highlight of upstream Lugubrious is this grotto. The quickest way to reach it is to drop down the hole at Shatter Pillar, take lefts at every significant junction, and climb up when easily possible.
Modelling by Pete, lighting by Tarquin and Pete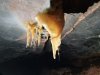 Translucent stal.
Lighting by Pete
Translucent stal.
Lighting by Pete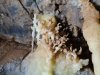 Helictites, a little more intricate than the usual for this cave.
Lighting by Pete
Helictites, a little more intricate than the usual for this cave.
Lighting by Pete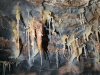 Straws and helictites.
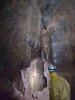 The passage below the grotto descends to this pitch down into Cross Rift.
Modelling by Pete, lighting by Tarquin and Pete
The passage below the grotto descends to this pitch down into Cross Rift.
Modelling by Pete, lighting by Tarquin and Pete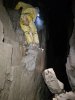 To get to the section beyond the grotto, we return to Cross Rift, and climb up the awkward rocky climb and balancing act climb leading to Moonlight Chamber.
Modelling by Pete, lighting by Tarquin and Pete
To get to the section beyond the grotto, we return to Cross Rift, and climb up the awkward rocky climb and balancing act climb leading to Moonlight Chamber.
Modelling by Pete, lighting by Tarquin and Pete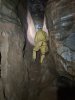 A ramp to the right just before the next little climb is the way into the next section.
Modelling by Pete, lighting by Tarquin and Pete
A ramp to the right just before the next little climb is the way into the next section.
Modelling by Pete, lighting by Tarquin and Pete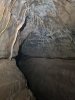 Ceiling above the ramp.
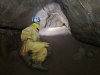 The ramp becomes a crawl, which splits into left and right branches. The right branch reaches the other side of the grotto.
Modelling by Pete, lighting by Tarquin and Pete
The ramp becomes a crawl, which splits into left and right branches. The right branch reaches the other side of the grotto.
Modelling by Pete, lighting by Tarquin and Pete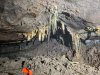 Stal in the crawl to the right.
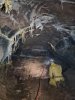 The crawl ends at a junction with a larger passage, where we head left.
Modelling by Pete, lighting by Tarquin and Pete
The crawl ends at a junction with a larger passage, where we head left.
Modelling by Pete, lighting by Tarquin and Pete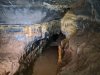 The other side of the grotto. Nice, but it definitely looks better from the other side.
Lighting by Tarquin and Pete
The other side of the grotto. Nice, but it definitely looks better from the other side.
Lighting by Tarquin and Pete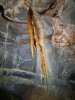 The passage continuing past the grotto has some very rich stalactites.
 Ceiling of the passage beyond the grotto. It then splits into a larger passage left, and smaller passage ahead-right.
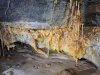 Honey flowstone, helictites and straws.
Lighting by Tarquin and Pete
Honey flowstone, helictites and straws.
Lighting by Tarquin and Pete Straws and helictites making a hysteresis curve.
Lighting by Tarquin and Pete
Straws and helictites making a hysteresis curve.
Lighting by Tarquin and Pete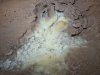 Creamy white crystal pool.
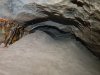 The passage lowers to a crawl, and ends very close to the end of Frozen River.
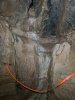 The side passage at the last junction reaches a climb down into a pit with this flowstone.
 The floor of the pit drops 10 metres down into Cross Rift, something you only notice after you have climbed down into it. Then you have to climb back over that hole to get back onto solid ground. Fun times.
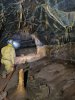 We return to the bigger passage, and head in the other direction along it. The honey cloured formations continue.
Modelling by Pete, lighting by Tarquin and Pete
We return to the bigger passage, and head in the other direction along it. The honey cloured formations continue.
Modelling by Pete, lighting by Tarquin and Pete Fallen straws.
 Immature honey helictites.
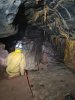 The passage ends at a balcony with a 3 metre pitch down to the ramp from earlier, but with a hole dropping down nearly 20 metres into Cross Rift.
Modelling by Pete, lighting by Tarquin and Pete
The passage ends at a balcony with a 3 metre pitch down to the ramp from earlier, but with a hole dropping down nearly 20 metres into Cross Rift.
Modelling by Pete, lighting by Tarquin and Pete We return to the other branch of the crawl, which gains a larger passage that loops part way around the others, where we initially head right.
Modelling by Pete, lighting by Tarquin and Pete
We return to the other branch of the crawl, which gains a larger passage that loops part way around the others, where we initially head right.
Modelling by Pete, lighting by Tarquin and Pete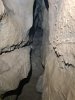 A small side passage to the left ends quickly.
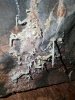 Helictites in the larger passage.
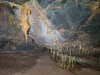 Straws in the larger passage.
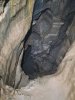 The larger passage drops down a pitch into the passage on the earlier side of the grotto, near the crazy climb. It also has an ongoing passage to the crazy climb, but it would mean traversing over this hole, which would be very risky.
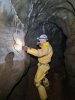 Bow and arrow straw in the other direction along the larger passage.
Modelling by Pete, lighting by Tarquin and Pete
Bow and arrow straw in the other direction along the larger passage.
Modelling by Pete, lighting by Tarquin and Pete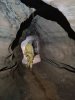 The larger passage.
Modelling by Pete, lighting by Tarquin and Pete
The larger passage.
Modelling by Pete, lighting by Tarquin and Pete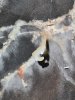 Helictite shaped like a hand.
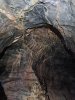 The passage ends at a pitch down into Moonlight Chamber, with this ceiling.
 The pitch into Moonlight Chamber. It may have been possible to traverse out into the passage to the right, and shimmy down near the rock, but from the top, it looked too easy to get it wrong and fall, so we made the decision not to, and went back around to reach it instead.
Modelling by Pete, lighting by Tarquin and Pete
The pitch into Moonlight Chamber. It may have been possible to traverse out into the passage to the right, and shimmy down near the rock, but from the top, it looked too easy to get it wrong and fall, so we made the decision not to, and went back around to reach it instead.
Modelling by Pete, lighting by Tarquin and Pete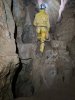 Climb down to the bottom of the ramp from Moonlight Chamber. The ramp is to the right here. The balcony is up to the left. The hole down to the left drops 16 metres to Cross Rift.
Modelling by Pete, lighting by Tarquin and Pete
Climb down to the bottom of the ramp from Moonlight Chamber. The ramp is to the right here. The balcony is up to the left. The hole down to the left drops 16 metres to Cross Rift.
Modelling by Pete, lighting by Tarquin and Pete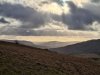 Sun streamers over Mynydd Allt-y-grug (338 metres).
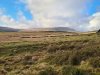 Evening light on Fan Hir (781 metres).
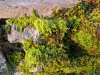 Moss at Penwyllt, in sunset light.
 The route from Midnight Passage starts near Midnight Chamber, and is easy to follow by accident on the way out from there. It is immediately distinctive for its gorgeous scallops.
Modelling by Steph
The route from Midnight Passage starts near Midnight Chamber, and is easy to follow by accident on the way out from there. It is immediately distinctive for its gorgeous scallops.
Modelling by Steph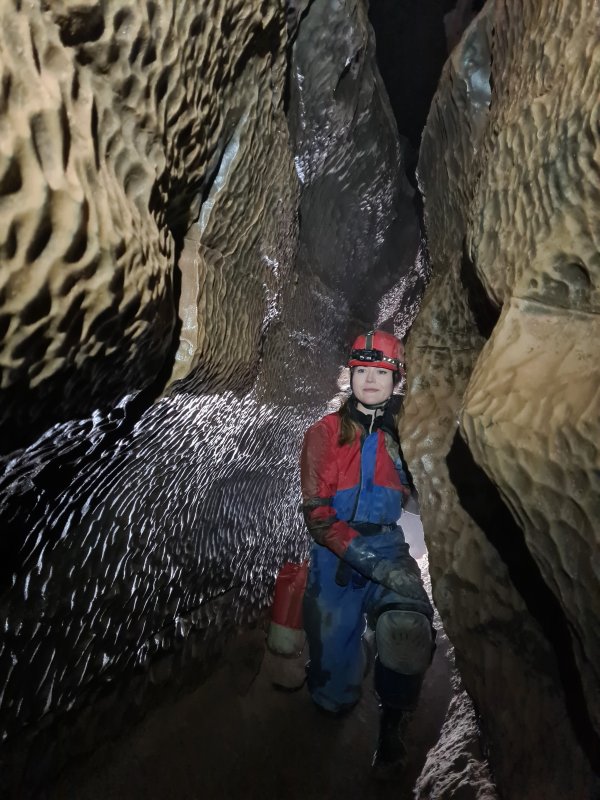 Front lighting.
Modelling by Steph
Front lighting.
Modelling by Steph Scalloped passage.
Modelling by Steph
Scalloped passage.
Modelling by Steph Stal in the scalloped passage.
Lighting by Steph
Stal in the scalloped passage.
Lighting by Steph Scalloped passage.
Modelling by Steph, lighting by Tarquin and Steph
Scalloped passage.
Modelling by Steph, lighting by Tarquin and Steph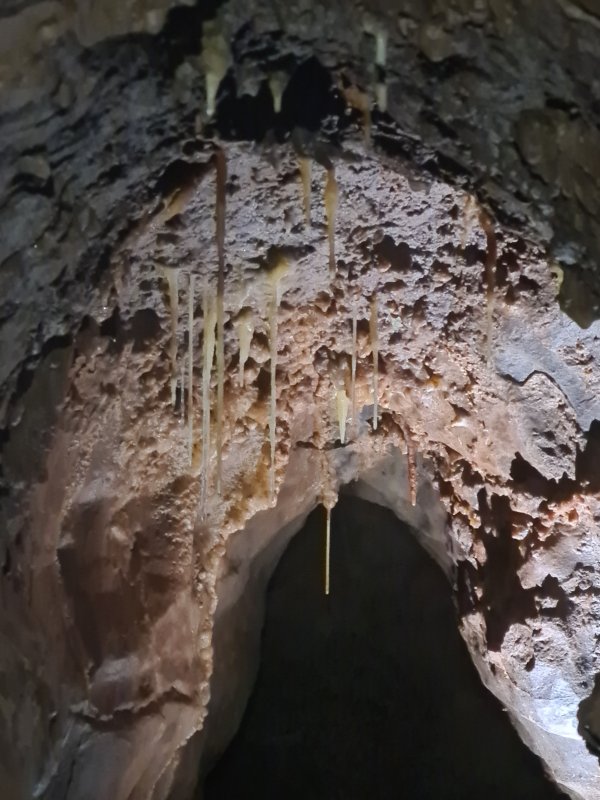 A side passage has a set of roof tubes, with another way into the series from Cross Rift, but not only is the climb quite tricky, the passages are tiny and very muddy. One of the side tubes is 50 metres of misery which goes nowhere, so we left most of the roof tubes alone.
Lighting by Steph
A side passage has a set of roof tubes, with another way into the series from Cross Rift, but not only is the climb quite tricky, the passages are tiny and very muddy. One of the side tubes is 50 metres of misery which goes nowhere, so we left most of the roof tubes alone.
Lighting by Steph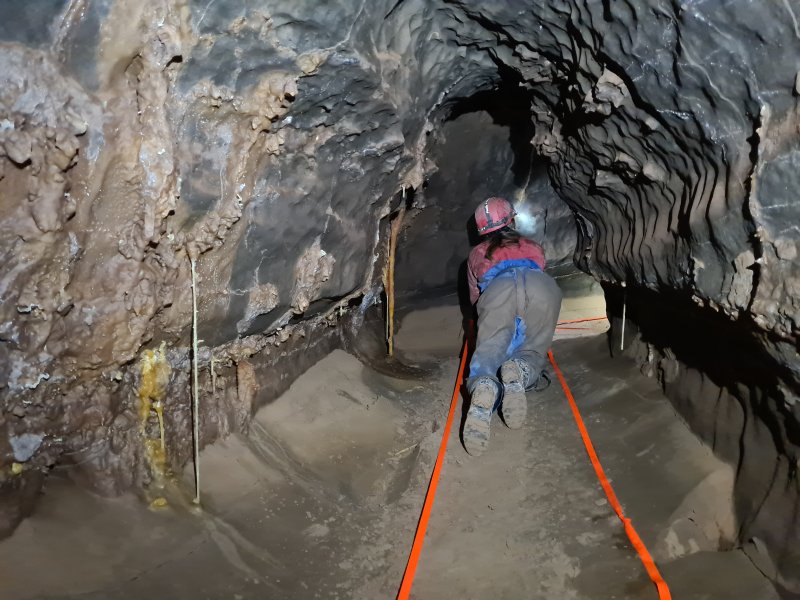 Only one of the roof tubes is reasonably sized, and it is an oxbow back to the scalloped passage.
Modelling by Steph, lighting by Tarquin and Steph
Only one of the roof tubes is reasonably sized, and it is an oxbow back to the scalloped passage.
Modelling by Steph, lighting by Tarquin and Steph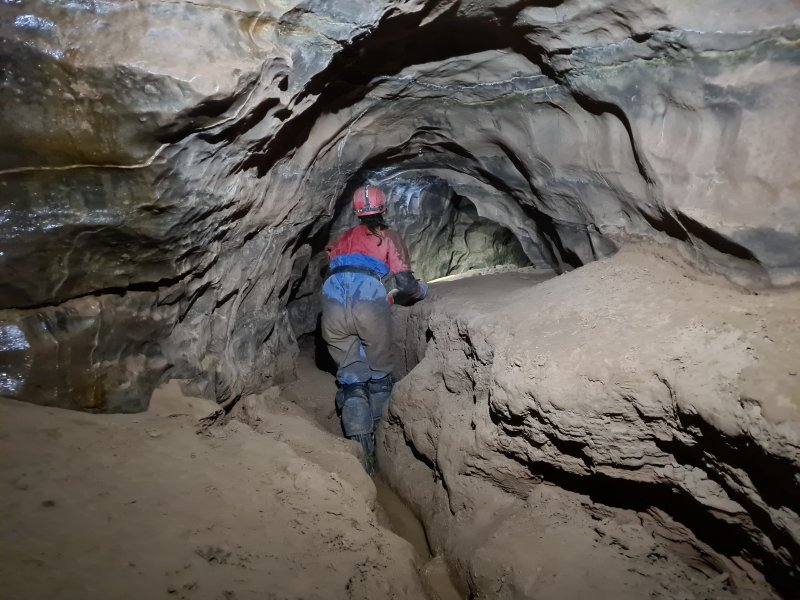 The route changes after the side passage, becoming an arched phreas with sand banks.
Modelling by Steph, lighting by Tarquin and Steph
The route changes after the side passage, becoming an arched phreas with sand banks.
Modelling by Steph, lighting by Tarquin and Steph After traversing over a too-tight stream outlet, it reaches a junction at very distinctive rock bridge. This is shaped like the old comic version of Garfield, with an open mouth and curved eyes. The upstream passage of Lugubrious is ahead, and the downstream passage is to the right.
Modelling by Steph, lighting by Tarquin and Steph
After traversing over a too-tight stream outlet, it reaches a junction at very distinctive rock bridge. This is shaped like the old comic version of Garfield, with an open mouth and curved eyes. The upstream passage of Lugubrious is ahead, and the downstream passage is to the right.
Modelling by Steph, lighting by Tarquin and Steph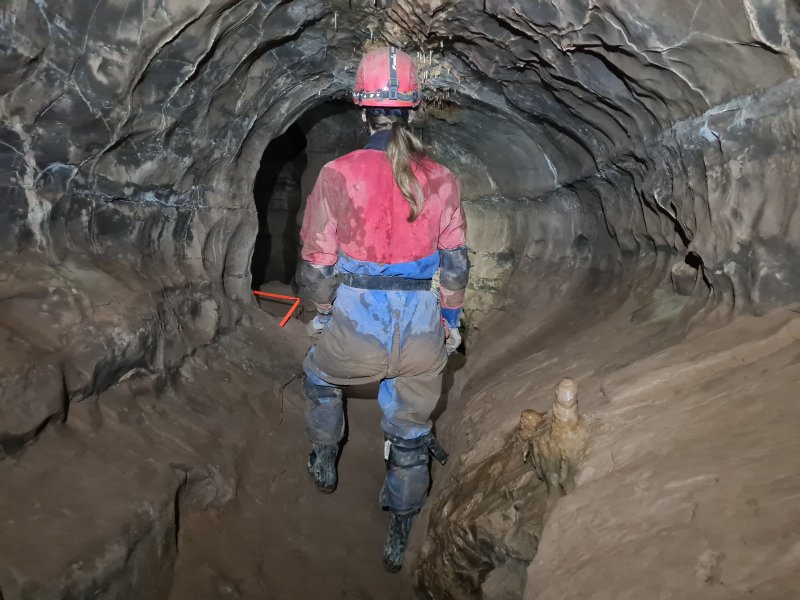 We headed downstream, initially along a sandy phreatic tube.
Modelling by Steph, lighting by Tarquin and Steph
We headed downstream, initially along a sandy phreatic tube.
Modelling by Steph, lighting by Tarquin and Steph An oxbow to the left has this viewing window over a beautiful stal flow.
Modelling by Steph, lighting by Tarquin and Steph
An oxbow to the left has this viewing window over a beautiful stal flow.
Modelling by Steph, lighting by Tarquin and Steph Curtains of the stal flow, with rich sandstone stains that look like blood dribbles.
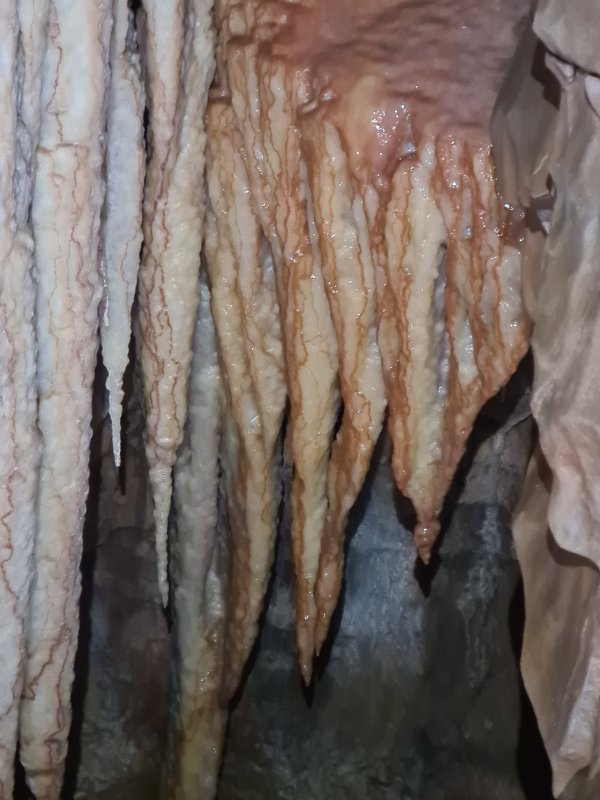 Red stained stal.
 Base of the columns. The stal flow continues into the darkness below.
Modelling by Steph, lighting by Tarquin and Steph
Base of the columns. The stal flow continues into the darkness below.
Modelling by Steph, lighting by Tarquin and Steph The main route continues down a climb, to where the stream is regained below the camera. It then charges off down a very tricky climb, so the way on is through a window in the stal below the oxbow.
Modelling by Steph, lighting by Tarquin and Steph
The main route continues down a climb, to where the stream is regained below the camera. It then charges off down a very tricky climb, so the way on is through a window in the stal below the oxbow.
Modelling by Steph, lighting by Tarquin and Steph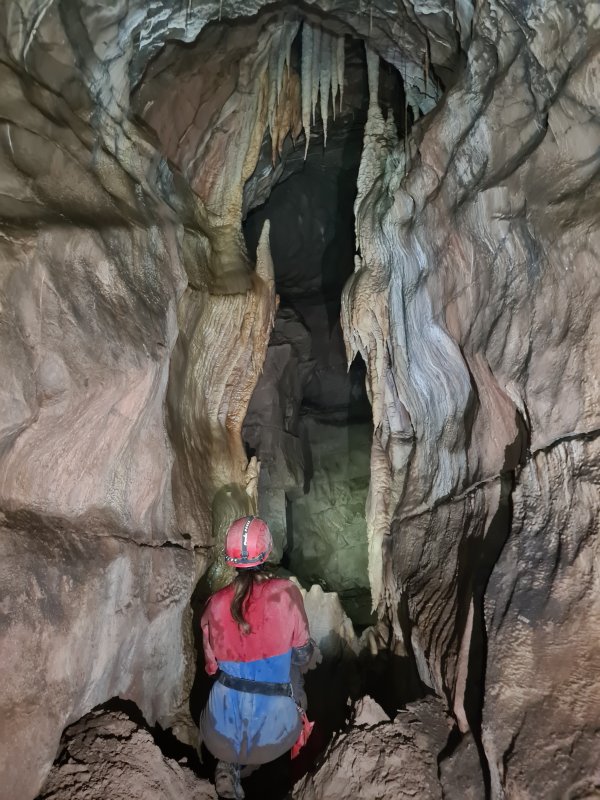 Looking back through the stal window. It looks much better from this direction. To the right is the climb back up to the Garfield junction. To the left is the downstream route to the very tricky climb.
Modelling by Steph, lighting by Tarquin and Steph
Looking back through the stal window. It looks much better from this direction. To the right is the climb back up to the Garfield junction. To the left is the downstream route to the very tricky climb.
Modelling by Steph, lighting by Tarquin and Steph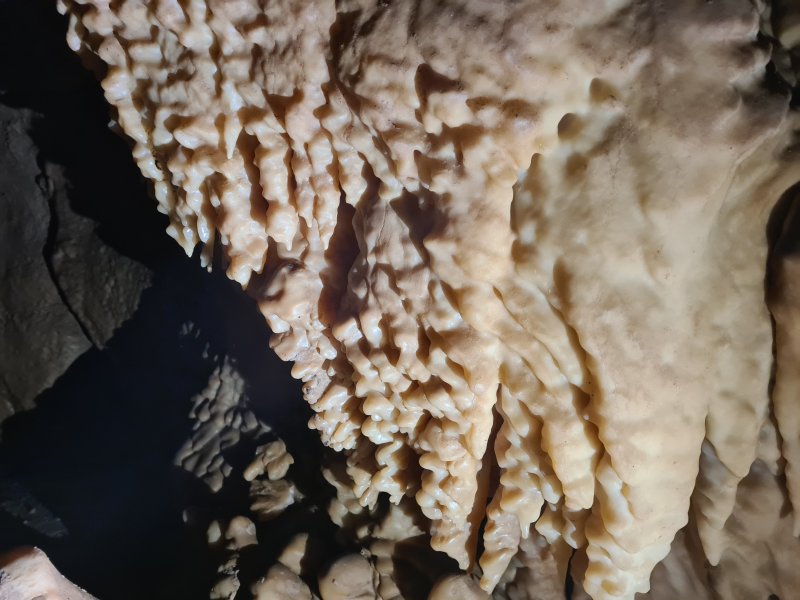 Textured stal.
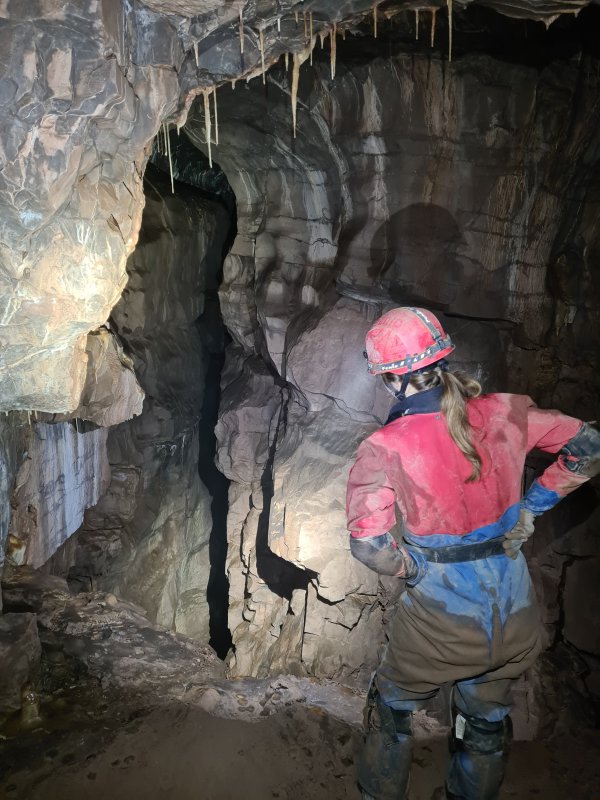 The passage then meets this enormous chasm, with the river roaring away 30 metres below. The survey shows this as a single passage at the same height, but it is actually a pitch of 6 metres to a ledge, then a traverse for 15 metres, to reach part way down a pitch connecting Cross Rift to a series of oxbows on the southern side of the Main Streamway.
Modelling by Steph, lighting by Tarquin and Steph
The passage then meets this enormous chasm, with the river roaring away 30 metres below. The survey shows this as a single passage at the same height, but it is actually a pitch of 6 metres to a ledge, then a traverse for 15 metres, to reach part way down a pitch connecting Cross Rift to a series of oxbows on the southern side of the Main Streamway.
Modelling by Steph, lighting by Tarquin and Steph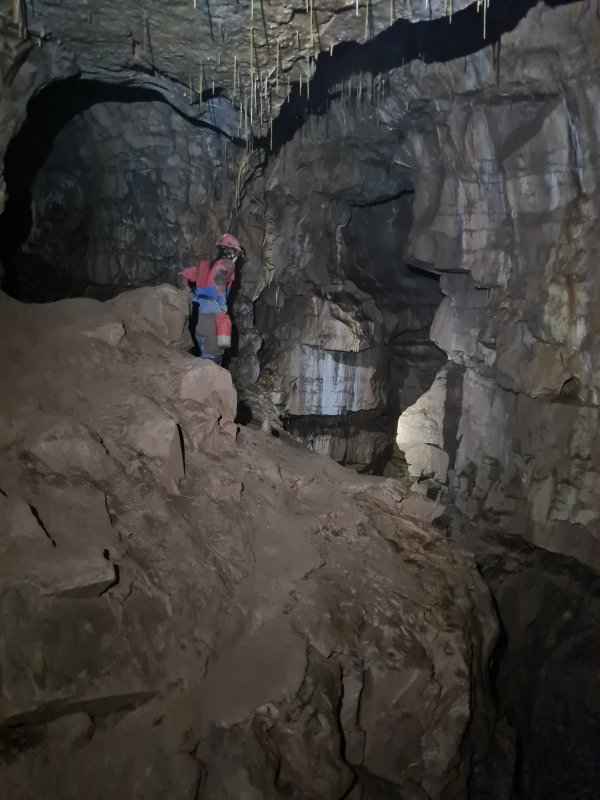 The way on is to avoid falling down the chasm, and cross the rocky bank (seen on the left here) to reach a crawl back into Lugubrious.
Modelling by Steph, lighting by Tarquin and Steph
The way on is to avoid falling down the chasm, and cross the rocky bank (seen on the left here) to reach a crawl back into Lugubrious.
Modelling by Steph, lighting by Tarquin and Steph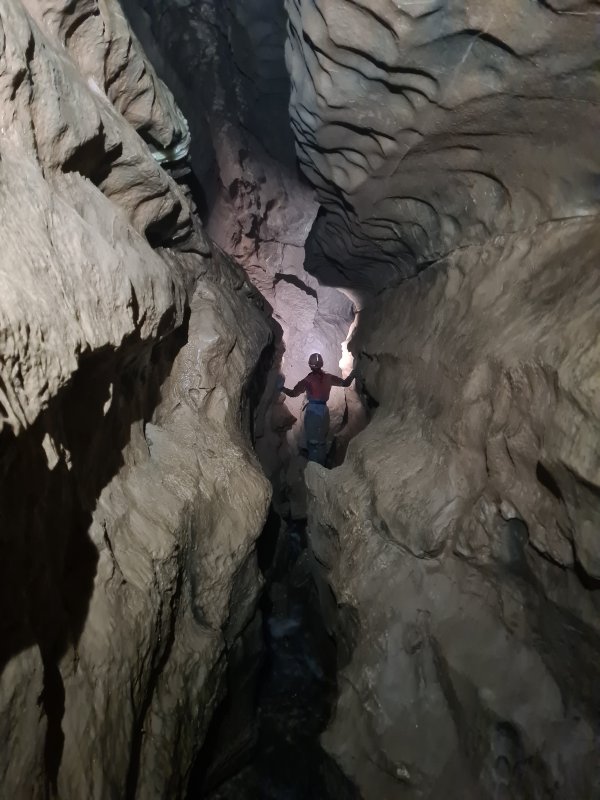 Downstream Lugubrious. Initially, a climb down to the stream is the easiest way on.
Modelling by Steph, lighting by Tarquin and Steph
Downstream Lugubrious. Initially, a climb down to the stream is the easiest way on.
Modelling by Steph, lighting by Tarquin and Steph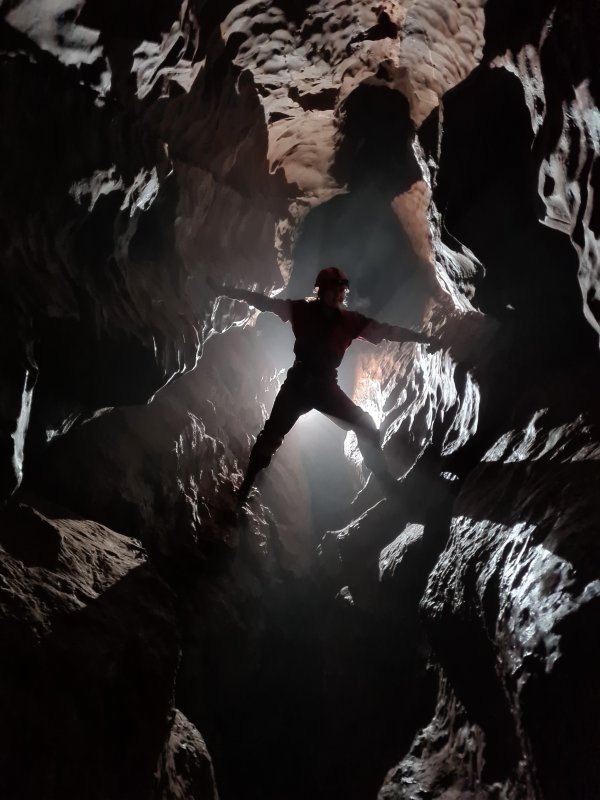 Stream level then becomes too tight, and the way on is to traverse over it for some distance to reach a climb down to it.
Modelling by Steph
Stream level then becomes too tight, and the way on is to traverse over it for some distance to reach a climb down to it.
Modelling by Steph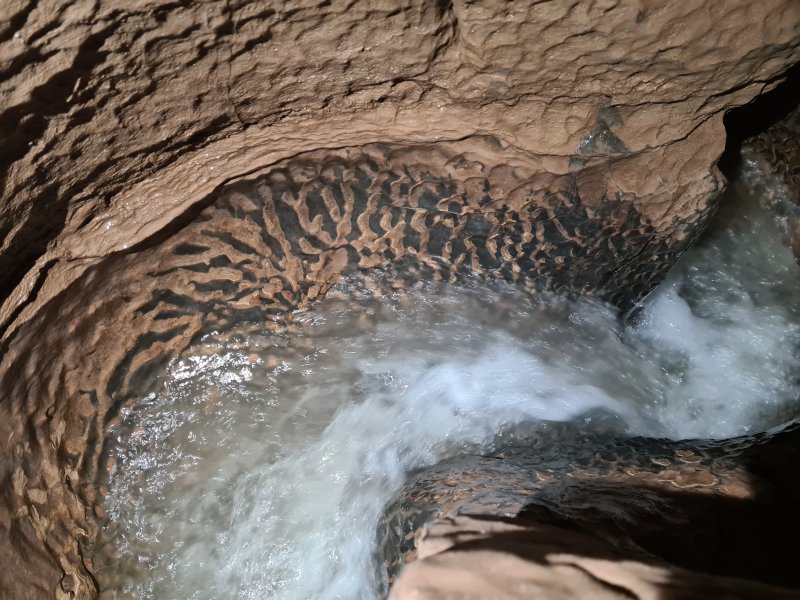 The large passage then heads off on its own, and the stream continues as a narrow meander, with distinctive striping.
 The stream then launches over the edge of a 21 metre waterfall, to reach the Main Streamway. There is potential for a traverse over it to rig a pitch clean from the water.
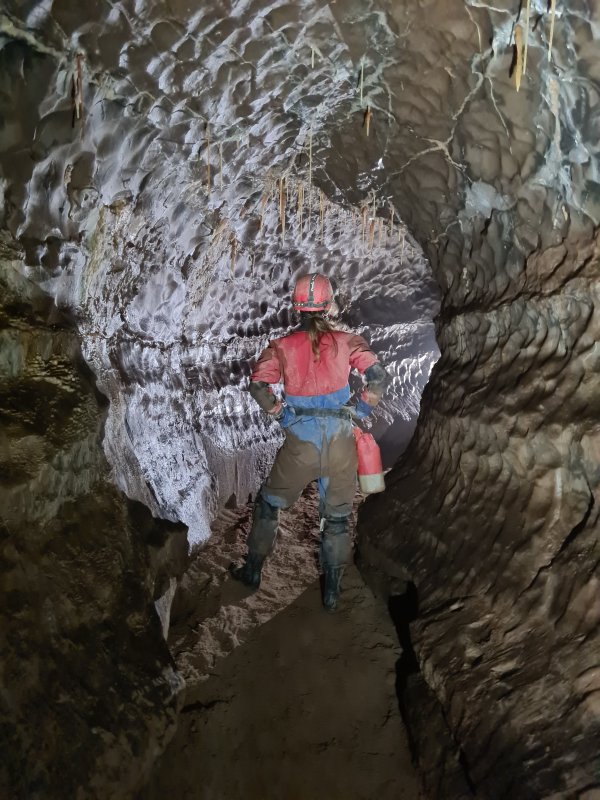 The large passage begins as a scalloped tube.
Modelling by Steph, lighting by Tarquin and Steph
The large passage begins as a scalloped tube.
Modelling by Steph, lighting by Tarquin and Steph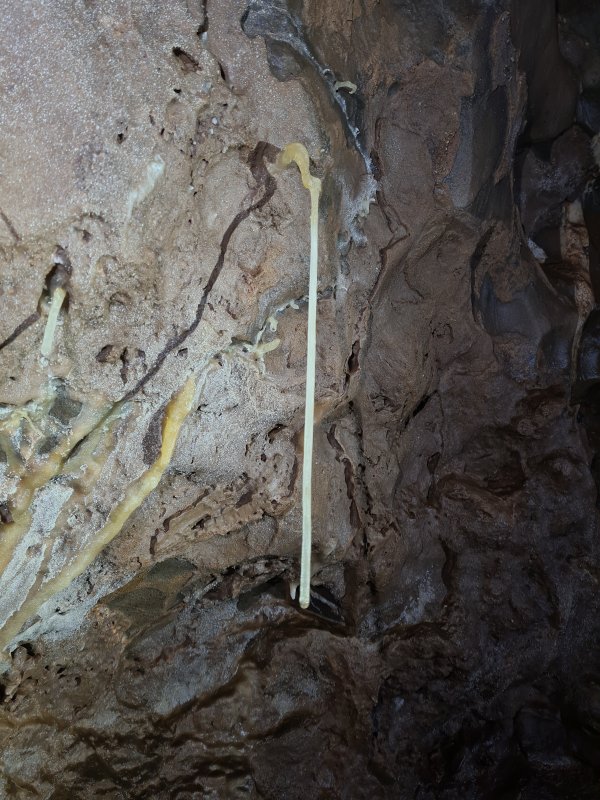 A helictite that changed its mind.
Lighting by Tarquin and Steph
A helictite that changed its mind.
Lighting by Tarquin and Steph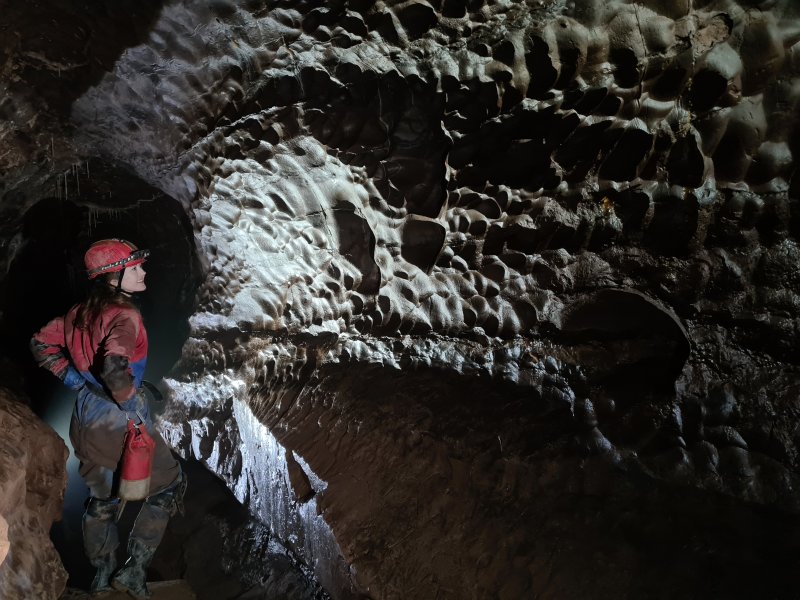 Gorgeous scallops on a corner.
Modelling by Steph, lighting by Tarquin and Steph
Gorgeous scallops on a corner.
Modelling by Steph, lighting by Tarquin and Steph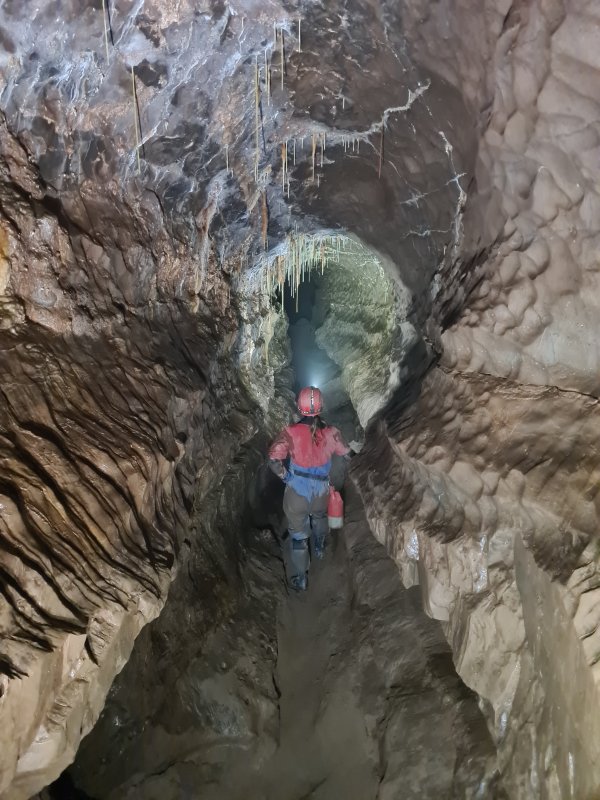 The passage continues as a large tube with plenty of straws, to suddenly fall 19 metres to the Main Streamway. There is also a fairly horrifying traverse on a tiny ledge out to a massive jammed boulder, adorned with a set of footprints from some crazy caver. They appear to have been looking for other side passages, but the only thing downstream is the Midnight Passage traverse.
Modelling by Steph, lighting by Tarquin and Steph
The passage continues as a large tube with plenty of straws, to suddenly fall 19 metres to the Main Streamway. There is also a fairly horrifying traverse on a tiny ledge out to a massive jammed boulder, adorned with a set of footprints from some crazy caver. They appear to have been looking for other side passages, but the only thing downstream is the Midnight Passage traverse.
Modelling by Steph, lighting by Tarquin and Steph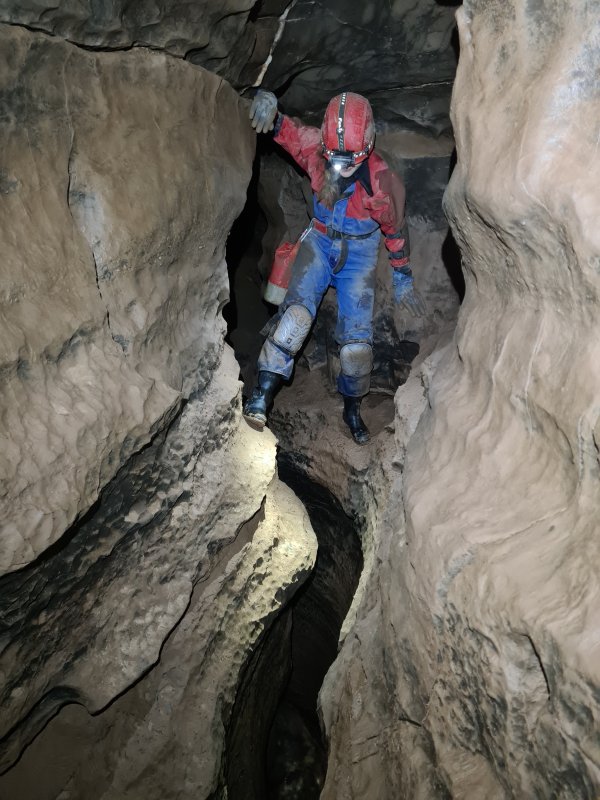 We returned to the Garfield junction, and started heading upstream. This started off as a winding traverse above the stream, one of those traverses that needs you to push your feet sideways, since it only has limited ledges.
Modelling by Steph, lighting by Tarquin and Steph
We returned to the Garfield junction, and started heading upstream. This started off as a winding traverse above the stream, one of those traverses that needs you to push your feet sideways, since it only has limited ledges.
Modelling by Steph, lighting by Tarquin and Steph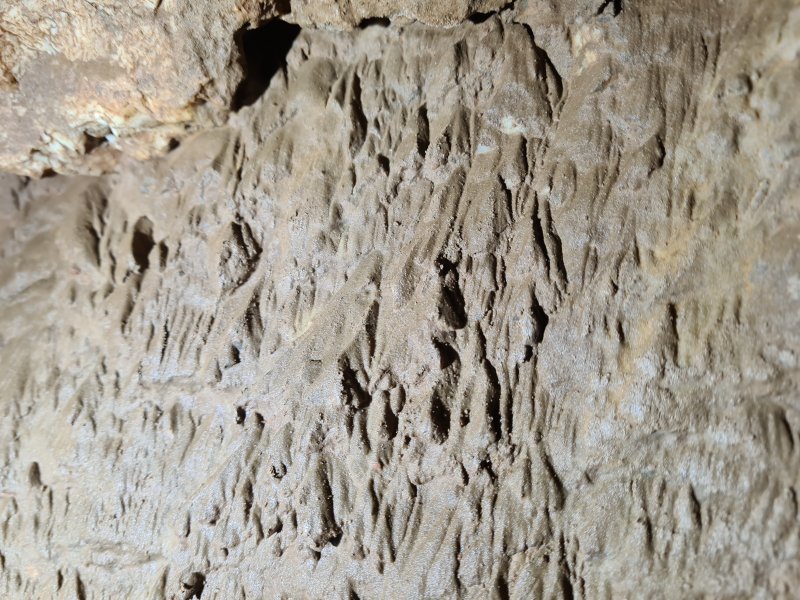 Surge mark mud formations.
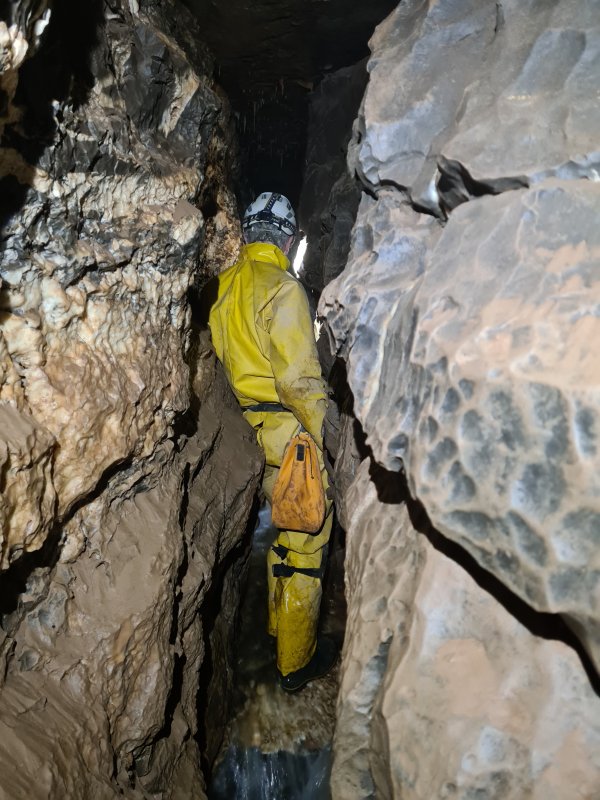 The upstream passage is quite narrow, and takes some work to get upstream, with lots of tiny cascades. At one point, there is a roof tube that heads back over the passage, but this becomes a crawl, so we left it alone.
Modelling by Pete, lighting by Tarquin and Pete
The upstream passage is quite narrow, and takes some work to get upstream, with lots of tiny cascades. At one point, there is a roof tube that heads back over the passage, but this becomes a crawl, so we left it alone.
Modelling by Pete, lighting by Tarquin and Pete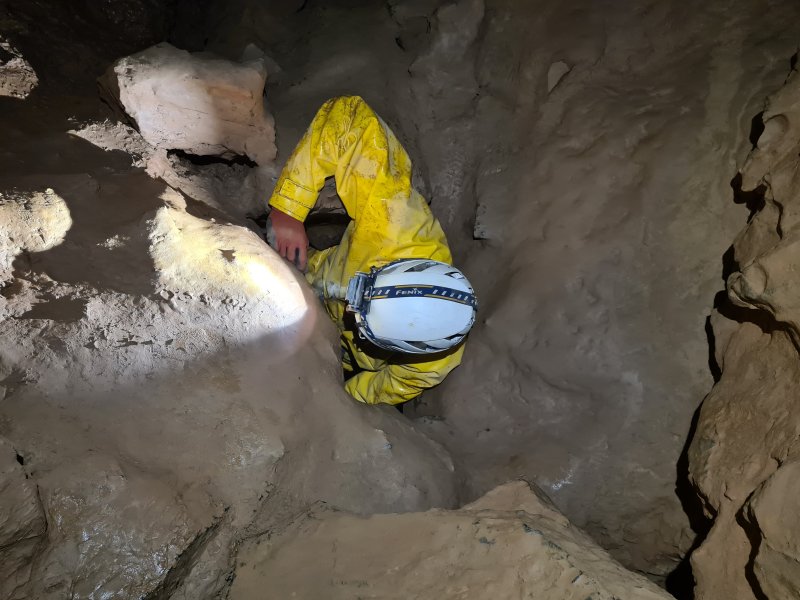 A tricky climb up through a squeeze then marks the end of the upstream difficulties.
Modelling by Pete, lighting by Tarquin and Pete
A tricky climb up through a squeeze then marks the end of the upstream difficulties.
Modelling by Pete, lighting by Tarquin and Pete A side passage lowers to an easy crawl (ignore the tiny side passages), reaching a climb up rocks to Shatter Pillar. This provides an easy route into here, if you want to avoid the squeeze. Pete decided to wear a shattered oversuit for this trip, so you're going to get a lot of views like this...
Modelling by Pete, lighting by Tarquin and Pete
A side passage lowers to an easy crawl (ignore the tiny side passages), reaching a climb up rocks to Shatter Pillar. This provides an easy route into here, if you want to avoid the squeeze. Pete decided to wear a shattered oversuit for this trip, so you're going to get a lot of views like this...
Modelling by Pete, lighting by Tarquin and Pete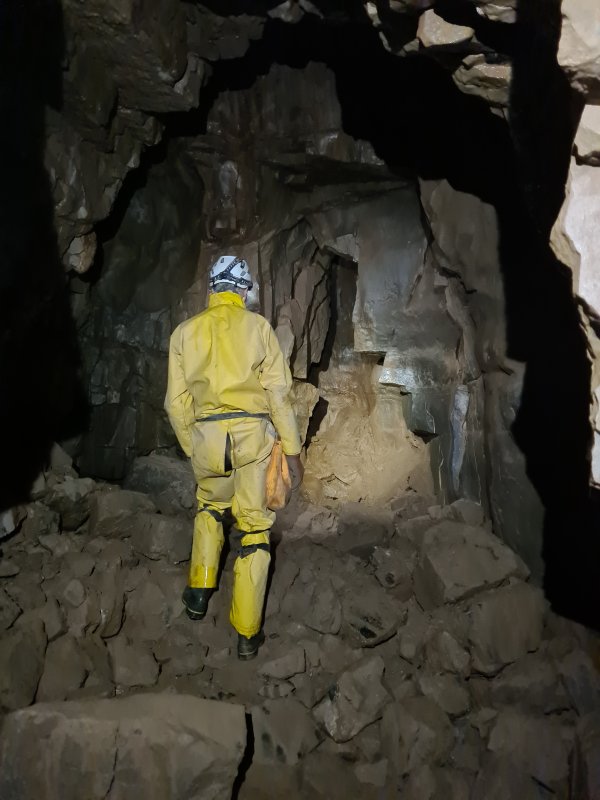 Heading upstream, we turned right at a junction, following the stream into a dead end passage, through a chamber (which is not as circular as the survey shows it).
Modelling by Pete, lighting by Tarquin and Pete
Heading upstream, we turned right at a junction, following the stream into a dead end passage, through a chamber (which is not as circular as the survey shows it).
Modelling by Pete, lighting by Tarquin and Pete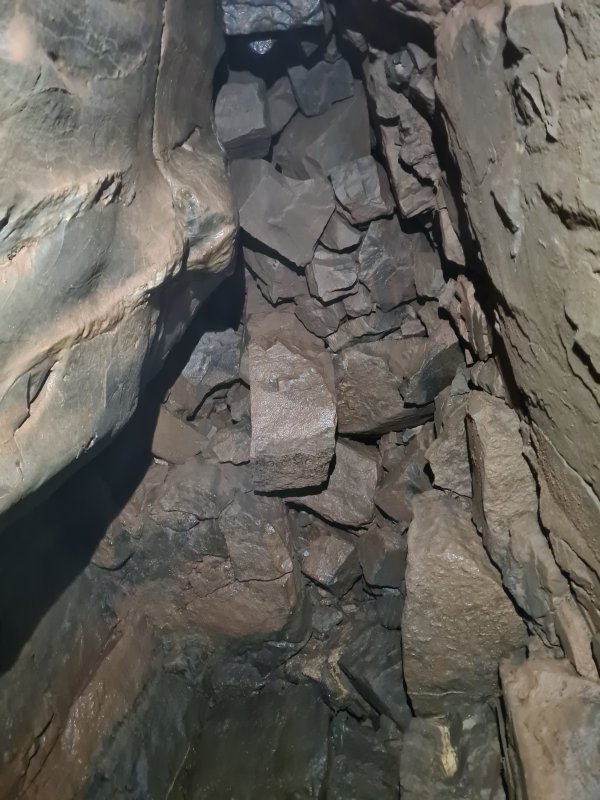 The ongoing passage passes under a horrifying ceiling of hanging death, which looks like it might come down if you breathe on it too hard. This is roughly underneath the steep slope down from Edward's Shortcut.
Modelling by Pete, lighting by Tarquin and Pete
The ongoing passage passes under a horrifying ceiling of hanging death, which looks like it might come down if you breathe on it too hard. This is roughly underneath the steep slope down from Edward's Shortcut.
Modelling by Pete, lighting by Tarquin and Pete The ongoing passage starts big enough, but degenerates into a series of choked passages.
Modelling by Pete, lighting by Tarquin and Pete
The ongoing passage starts big enough, but degenerates into a series of choked passages.
Modelling by Pete, lighting by Tarquin and Pete One of the choked ends. The other proved to contain a boulder squeeze too tight for us to bother with, so we left it alone.
Modelling by Pete, lighting by Tarquin and Pete
One of the choked ends. The other proved to contain a boulder squeeze too tight for us to bother with, so we left it alone.
Modelling by Pete, lighting by Tarquin and Pete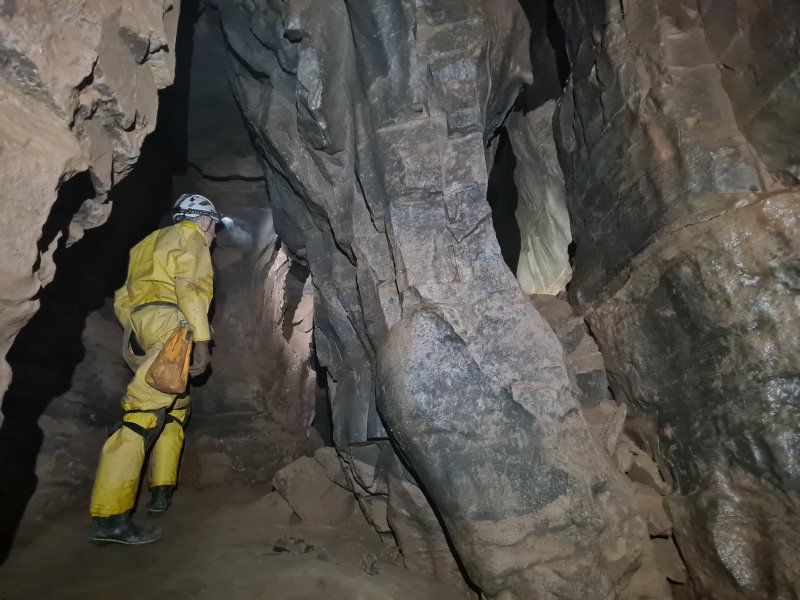 Instead, we returned to the earlier junction (just after the squeeze up), and headed along the much more inviting dry branch, which soon gained a small stream.
Modelling by Pete, lighting by Tarquin and Pete
Instead, we returned to the earlier junction (just after the squeeze up), and headed along the much more inviting dry branch, which soon gained a small stream.
Modelling by Pete, lighting by Tarquin and Pete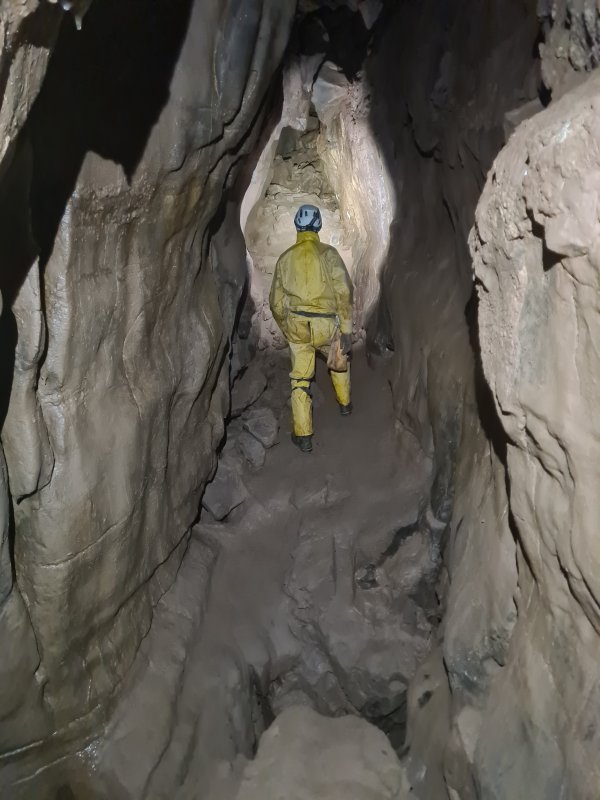 We climbed up into a larger passage above the stream (the stream passage is the slot in the floor), which ended at a choke and aven in one direction. In the other direction is an oxbow which bypasses part of the stream passage. Either the oxbow or the stream requires a clamber, but the oxbow is nicer.
Modelling by Pete, lighting by Tarquin and Pete
We climbed up into a larger passage above the stream (the stream passage is the slot in the floor), which ended at a choke and aven in one direction. In the other direction is an oxbow which bypasses part of the stream passage. Either the oxbow or the stream requires a clamber, but the oxbow is nicer.
Modelling by Pete, lighting by Tarquin and Pete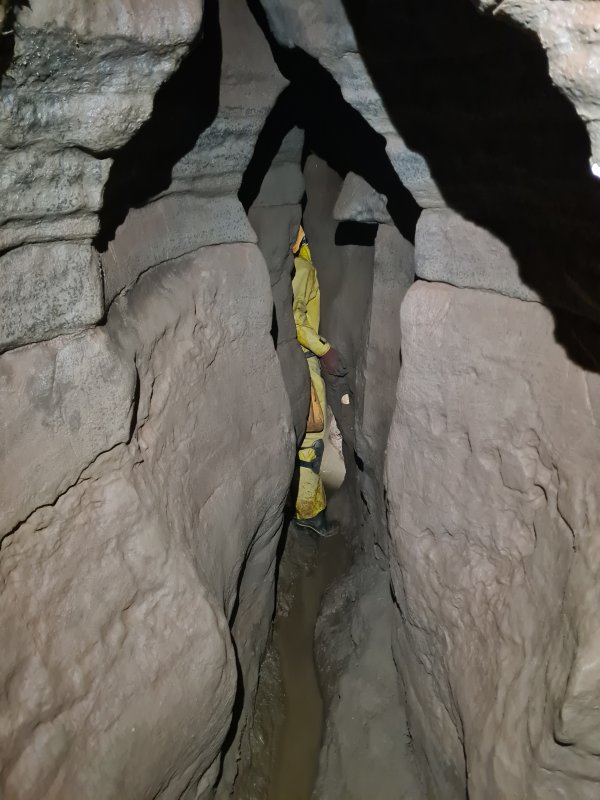 We headed further upstream, which became narrow, and turned sharp right bends to a very tricky climb. Pete was unable to climb it, after several attempts, so I did the rest of it alone.
Modelling by Pete, lighting by Tarquin and Pete
We headed further upstream, which became narrow, and turned sharp right bends to a very tricky climb. Pete was unable to climb it, after several attempts, so I did the rest of it alone.
Modelling by Pete, lighting by Tarquin and Pete Stal in the narrow passage.
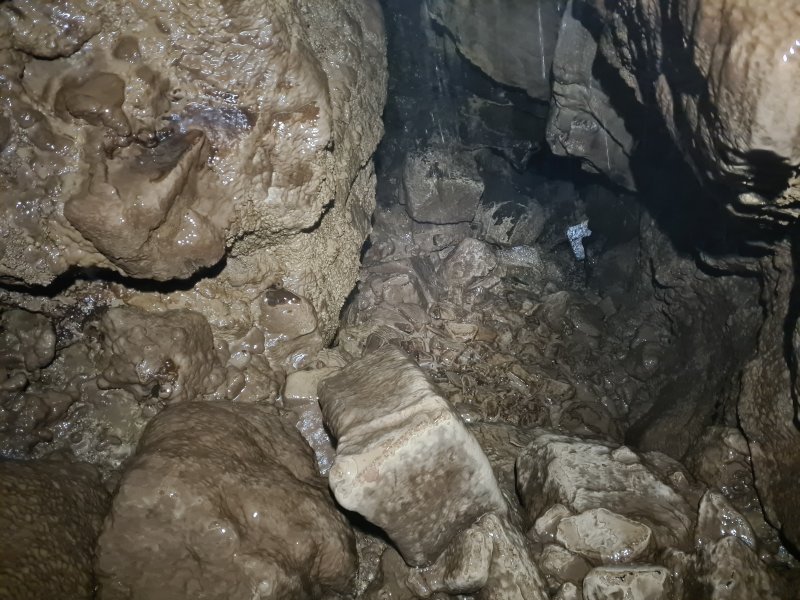 The passage passes up through a hole which is nearly filled with rocks, into a very wet aven.
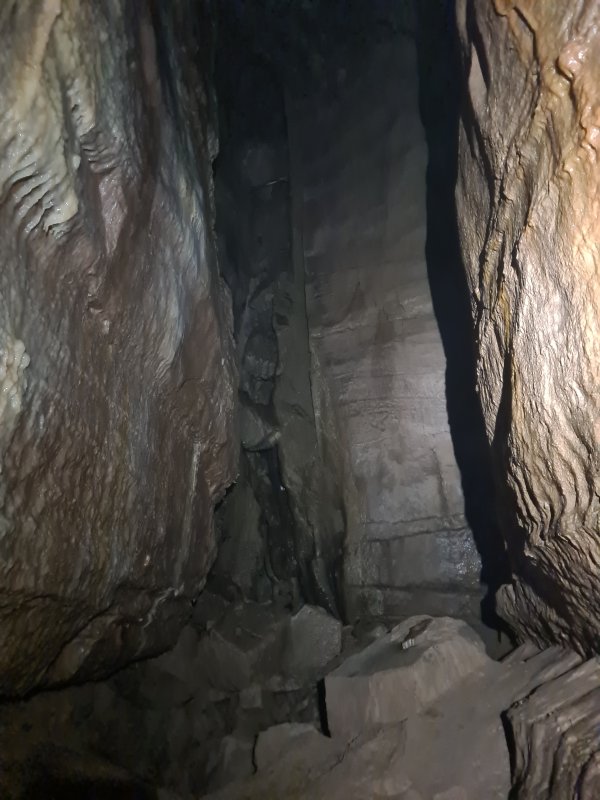 The aven is surprisingly grand given the passage before it.
 The water showers in from a high level passage, which passes through a very loose choke to reach a later passage. It does not look free climbable.
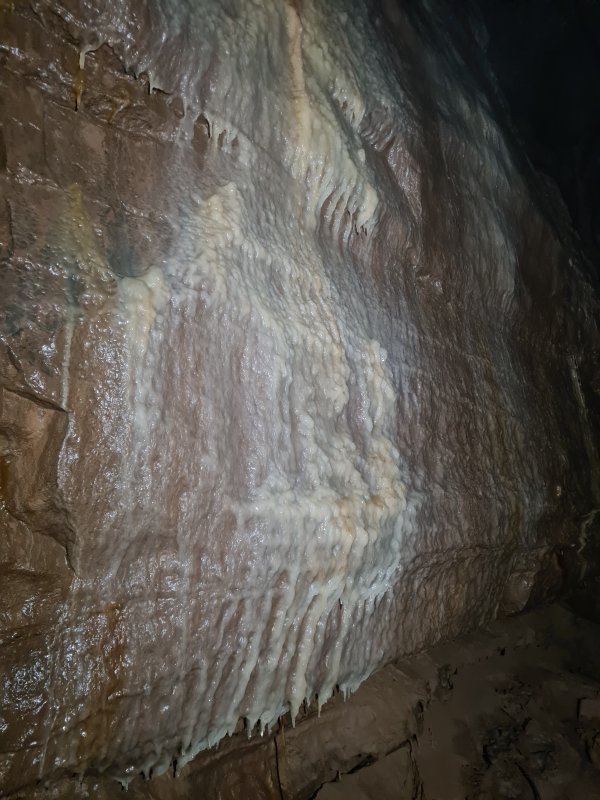 Wall of the aven.
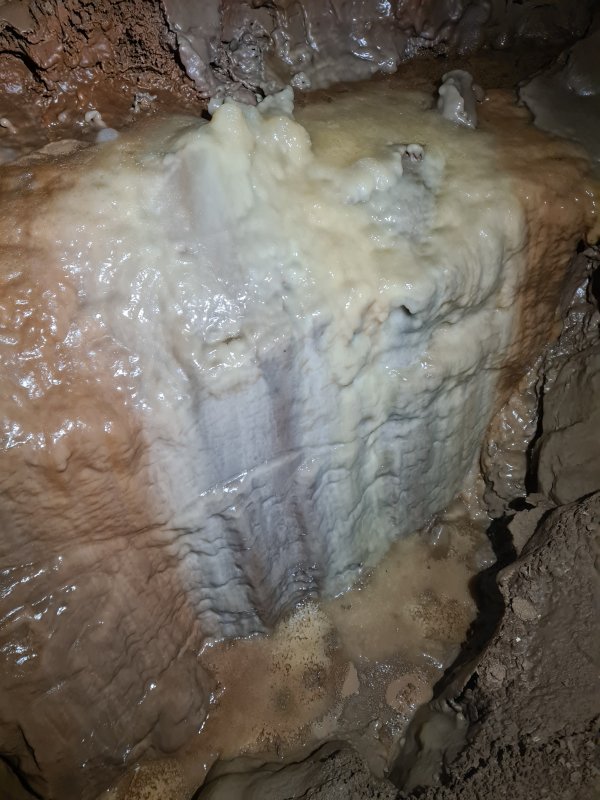 Small stal flow in the aven.
 Crystal pools below.
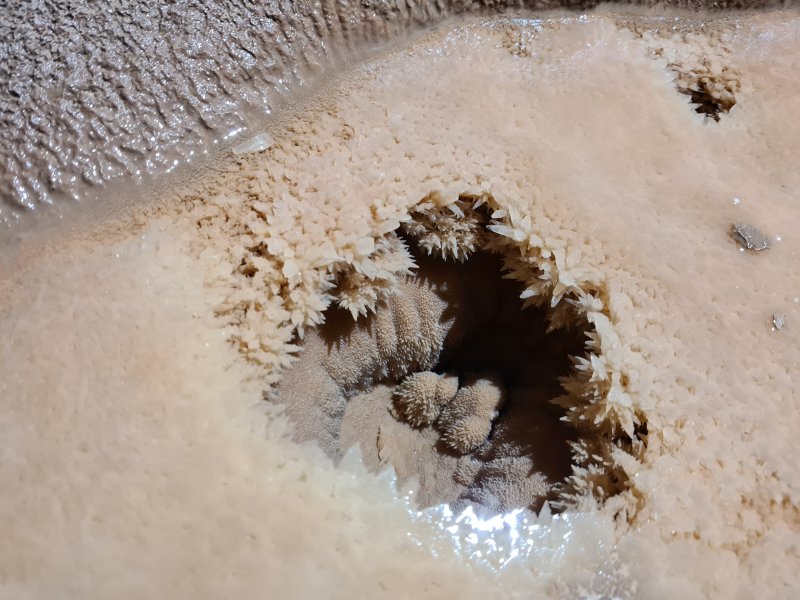 Crystal pools.
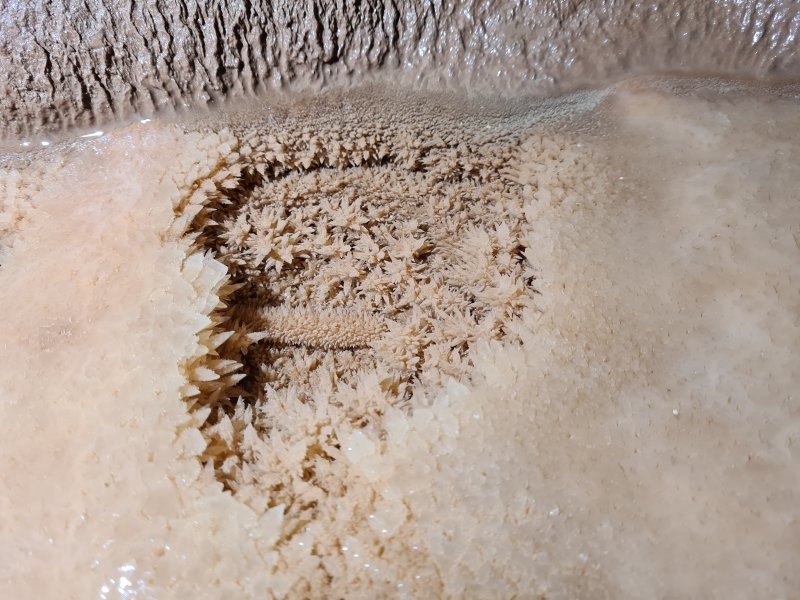 Crystal pools.
 Tiny hoodoos beside the stal.
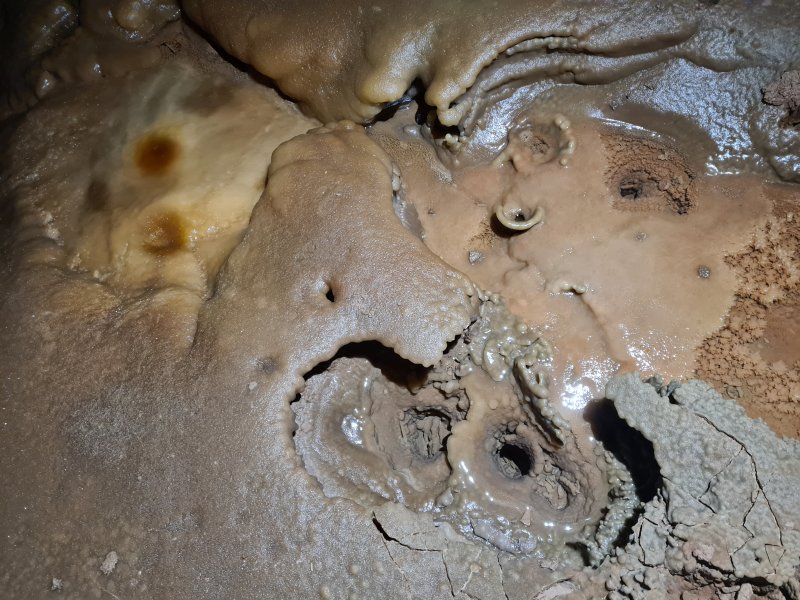 Drip pockets.
 From the aven, a passage immediately drops down into the earlier choked passage. The drop is only about 3 metres, but impossible to free climb.
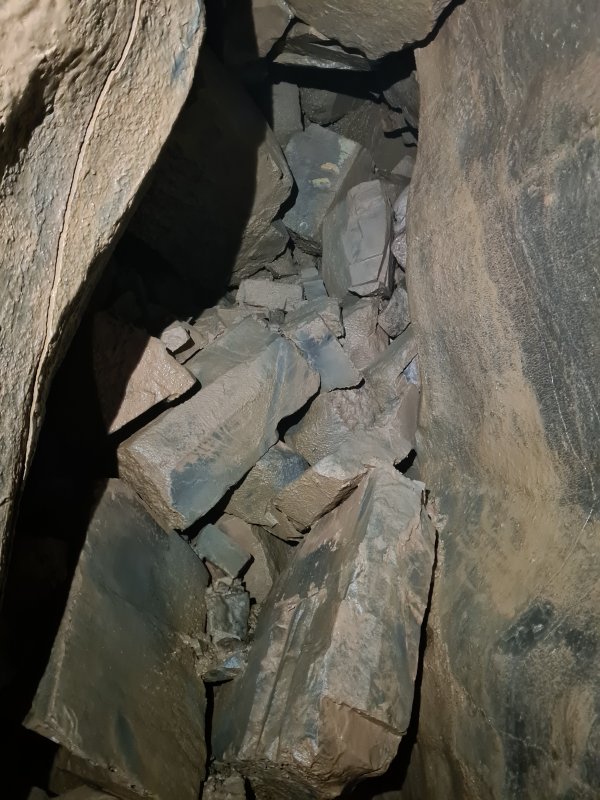 Choked side passage at the aven.
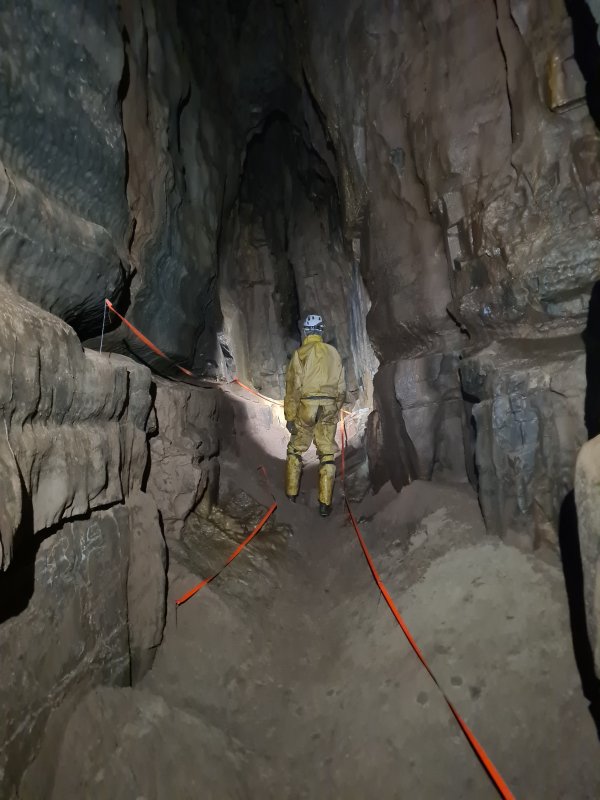 We returned to the earlier oxbow, and took a side passage, which immediately gained much larger proportions.
Modelling by Pete, lighting by Tarquin and Pete
We returned to the earlier oxbow, and took a side passage, which immediately gained much larger proportions.
Modelling by Pete, lighting by Tarquin and Pete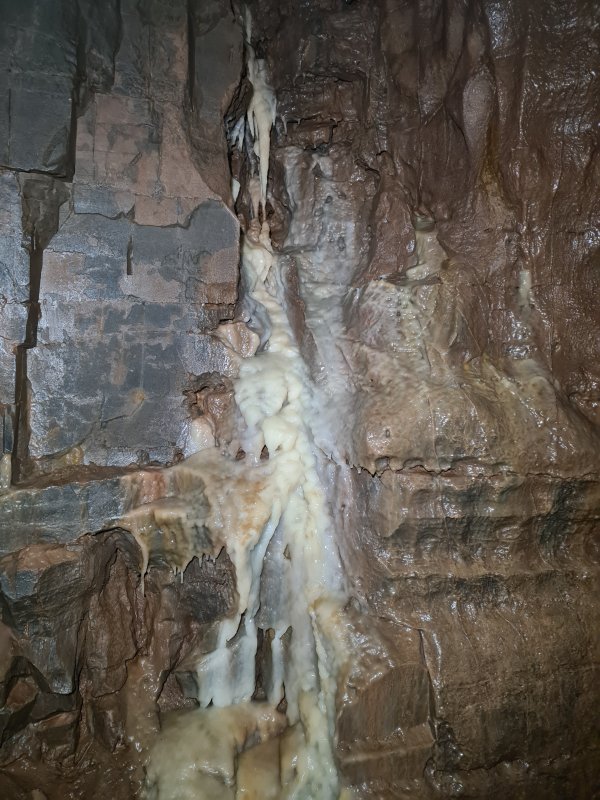 White stal flow on the wall.
 Fried egg, sunny side up.
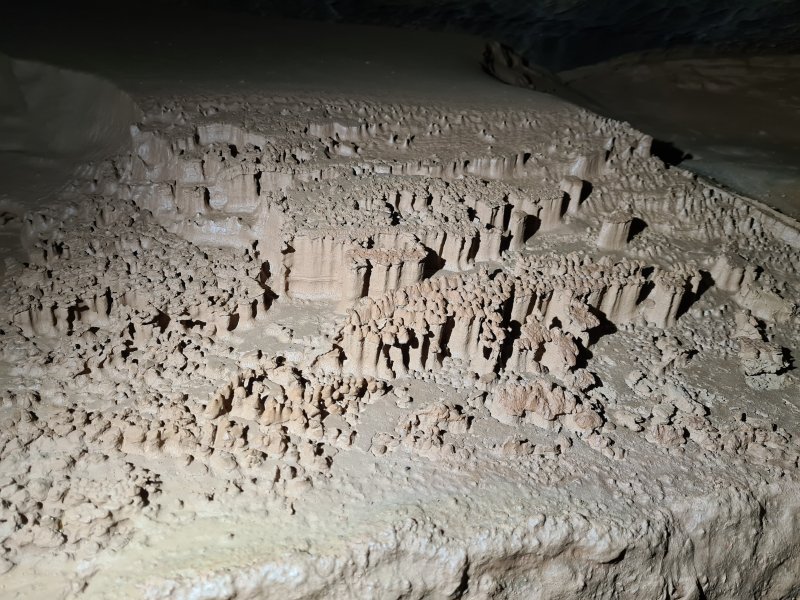 Superb set of miniature hoodoos.
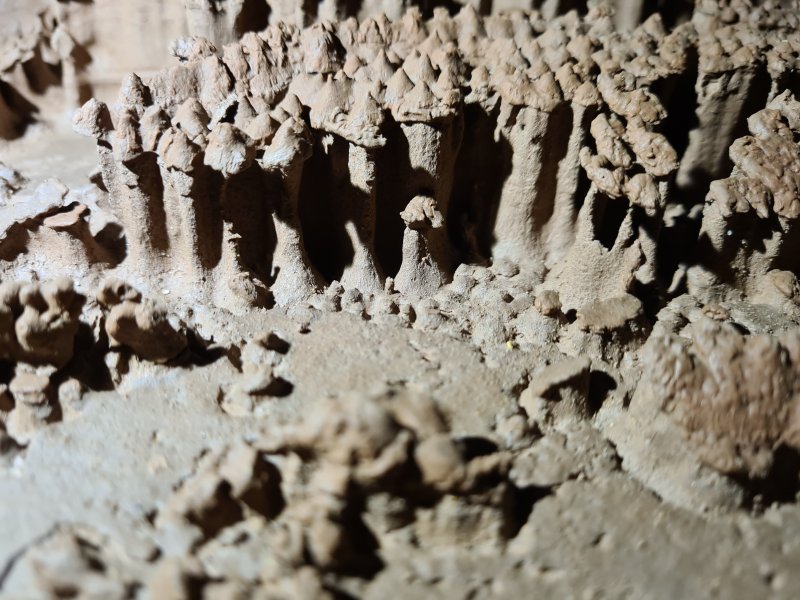 Each hoodoo has a tiny conical hat. The result looks extremely similar to the limestone hoodoos I had seen in Saudi Arabia.
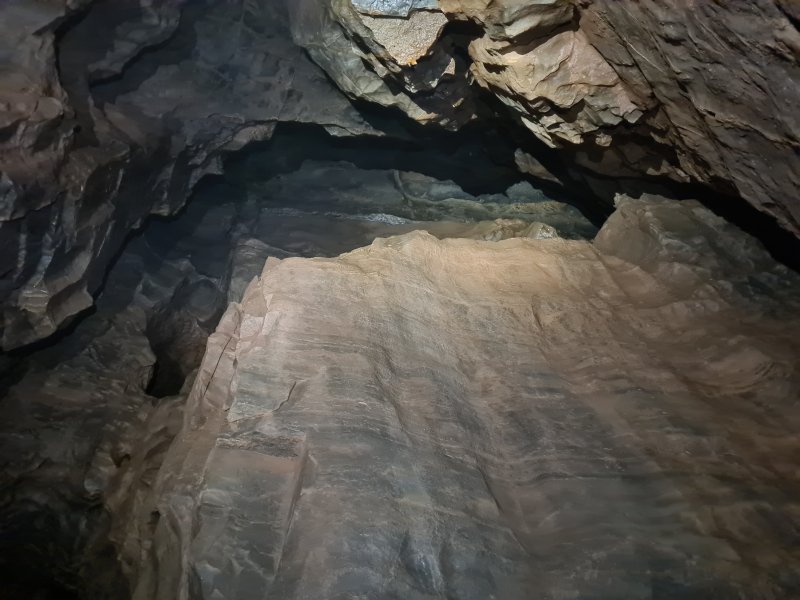 The survey shows a climb into a side passage above. This smooth sided passage is the climb, up to the ledge, traverse and step over to a passage tucked into the gap on the left, over a 7 metre drop. Absolutely ridiculous. The passage links to the wet aven seen earlier, via 40 metres of passage. It is absolutely not worth risking your life for that!
Lighting by Tarquin and Pete
The survey shows a climb into a side passage above. This smooth sided passage is the climb, up to the ledge, traverse and step over to a passage tucked into the gap on the left, over a 7 metre drop. Absolutely ridiculous. The passage links to the wet aven seen earlier, via 40 metres of passage. It is absolutely not worth risking your life for that!
Lighting by Tarquin and Pete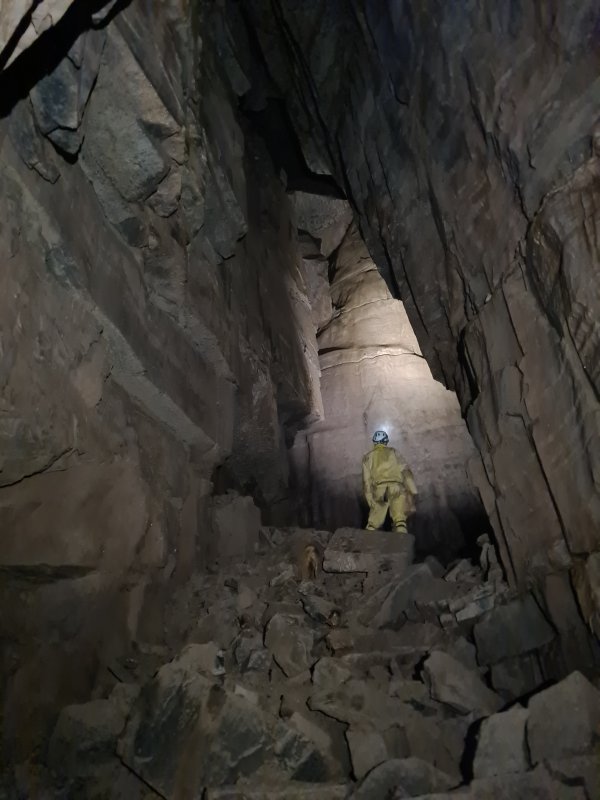 We took a side passage into a very large chamber, that sadly chokes, though someone has bolted far up the choke.
Modelling by Pete, lighting by Tarquin and Pete
We took a side passage into a very large chamber, that sadly chokes, though someone has bolted far up the choke.
Modelling by Pete, lighting by Tarquin and Pete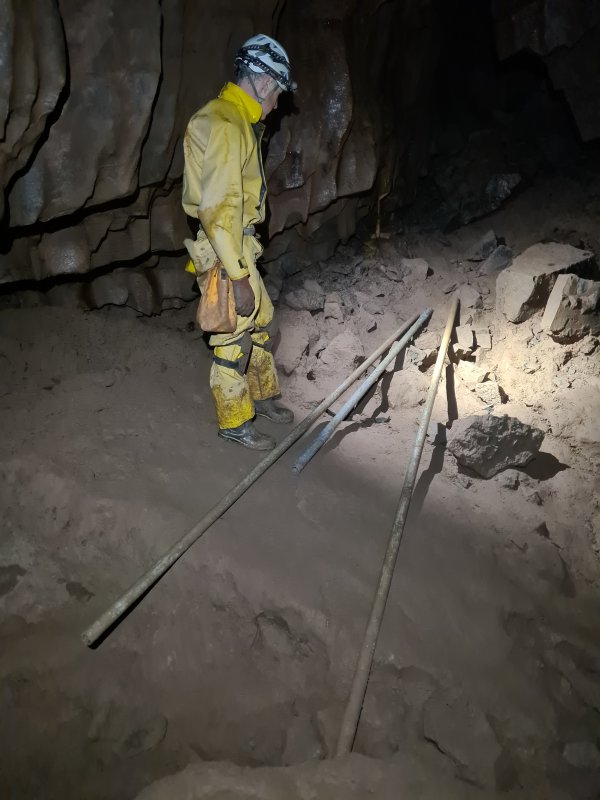 Maypole used for climbing avens.
Modelling by Pete, lighting by Tarquin and Pete
Maypole used for climbing avens.
Modelling by Pete, lighting by Tarquin and Pete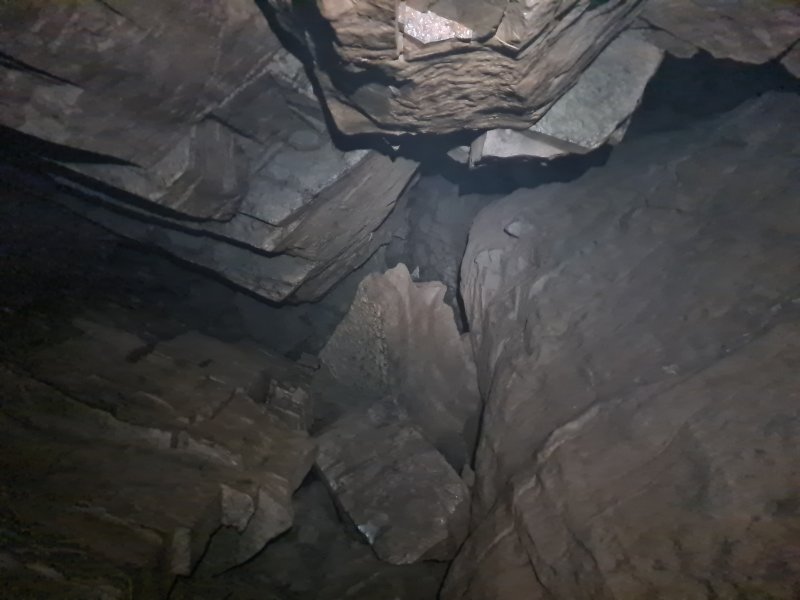 The survey shows a side passage, but it is accessed via this 8 metre aven. No thanks.
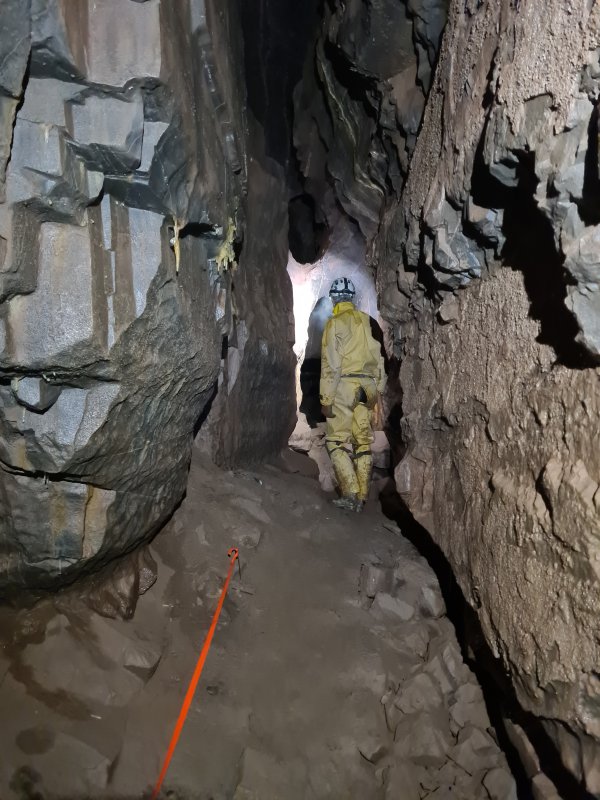 Instead, we returned beneath the crazy climb, and followed the passage towards the grotto.
Modelling by Pete, lighting by Tarquin and Pete
Instead, we returned beneath the crazy climb, and followed the passage towards the grotto.
Modelling by Pete, lighting by Tarquin and Pete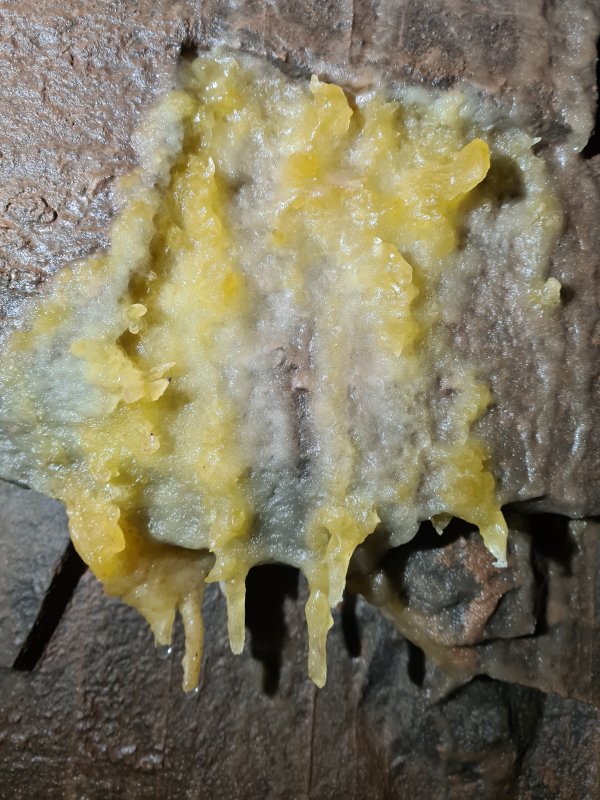 Lemon drizzle cake.
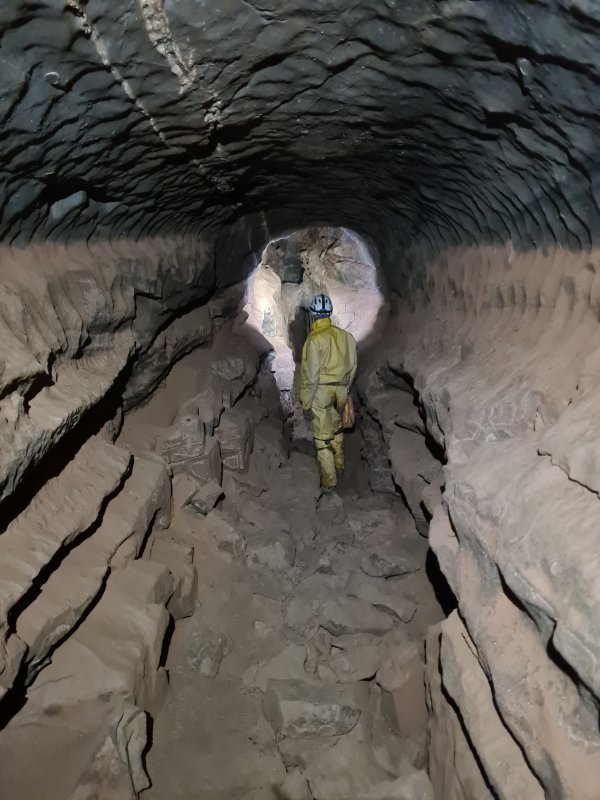 Distinctive tide mark.
Modelling by Pete, lighting by Tarquin and Pete
Distinctive tide mark.
Modelling by Pete, lighting by Tarquin and Pete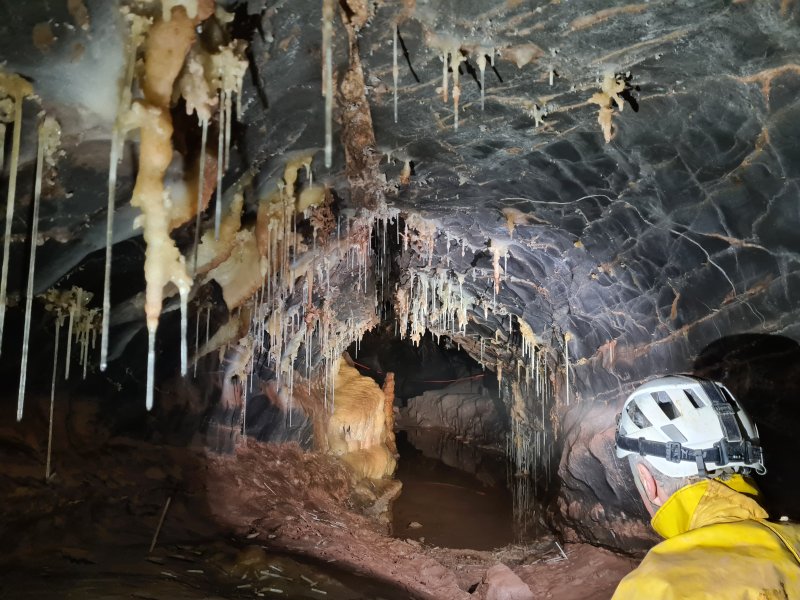 The highlight of upstream Lugubrious is this grotto. The quickest way to reach it is to drop down the hole at Shatter Pillar, take lefts at every significant junction, and climb up when easily possible.
Modelling by Pete, lighting by Tarquin and Pete
The highlight of upstream Lugubrious is this grotto. The quickest way to reach it is to drop down the hole at Shatter Pillar, take lefts at every significant junction, and climb up when easily possible.
Modelling by Pete, lighting by Tarquin and Pete Helictites, a little more intricate than the usual for this cave.
Lighting by Pete
Helictites, a little more intricate than the usual for this cave.
Lighting by Pete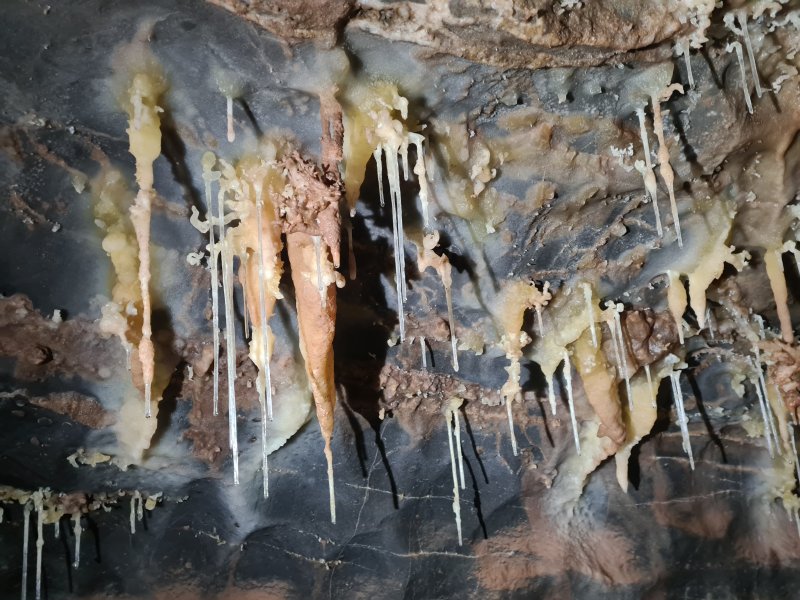 Straws and helictites.
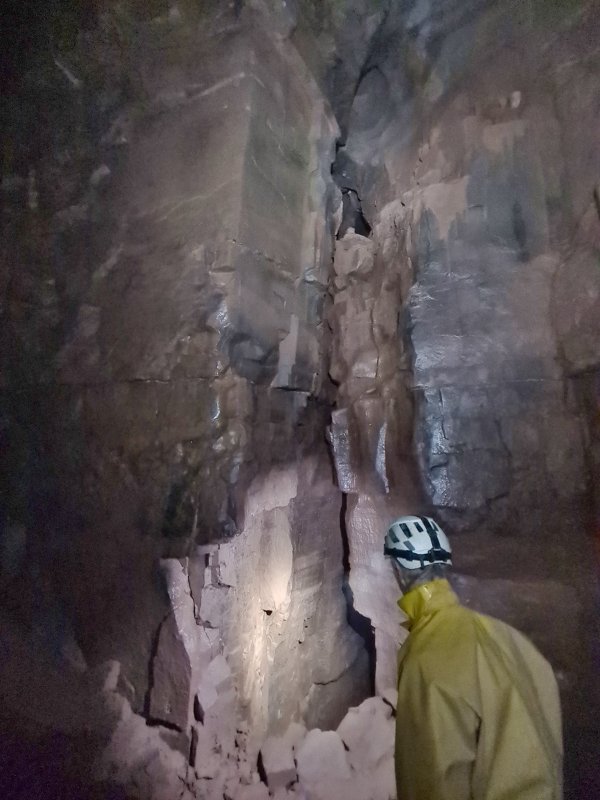 The passage below the grotto descends to this pitch down into Cross Rift.
Modelling by Pete, lighting by Tarquin and Pete
The passage below the grotto descends to this pitch down into Cross Rift.
Modelling by Pete, lighting by Tarquin and Pete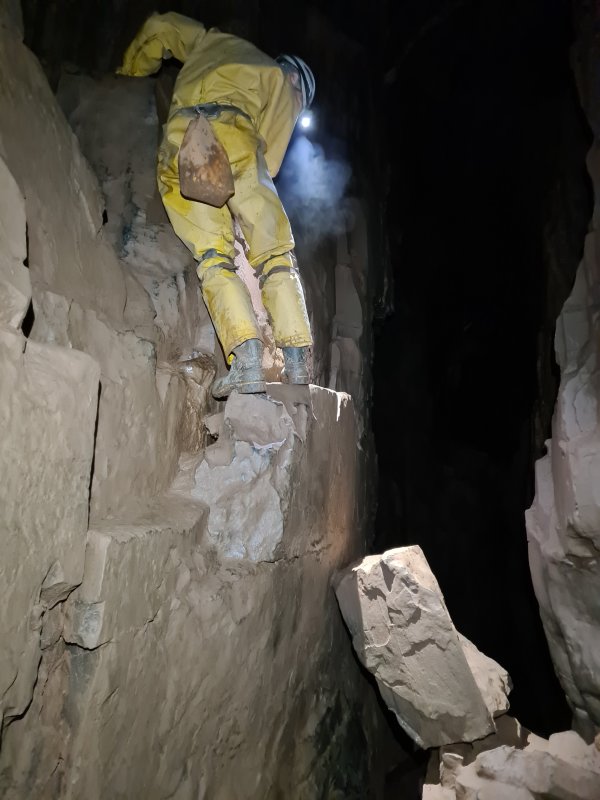 To get to the section beyond the grotto, we return to Cross Rift, and climb up the awkward rocky climb and balancing act climb leading to Moonlight Chamber.
Modelling by Pete, lighting by Tarquin and Pete
To get to the section beyond the grotto, we return to Cross Rift, and climb up the awkward rocky climb and balancing act climb leading to Moonlight Chamber.
Modelling by Pete, lighting by Tarquin and Pete A ramp to the right just before the next little climb is the way into the next section.
Modelling by Pete, lighting by Tarquin and Pete
A ramp to the right just before the next little climb is the way into the next section.
Modelling by Pete, lighting by Tarquin and Pete Ceiling above the ramp.
 The ramp becomes a crawl, which splits into left and right branches. The right branch reaches the other side of the grotto.
Modelling by Pete, lighting by Tarquin and Pete
The ramp becomes a crawl, which splits into left and right branches. The right branch reaches the other side of the grotto.
Modelling by Pete, lighting by Tarquin and Pete Stal in the crawl to the right.
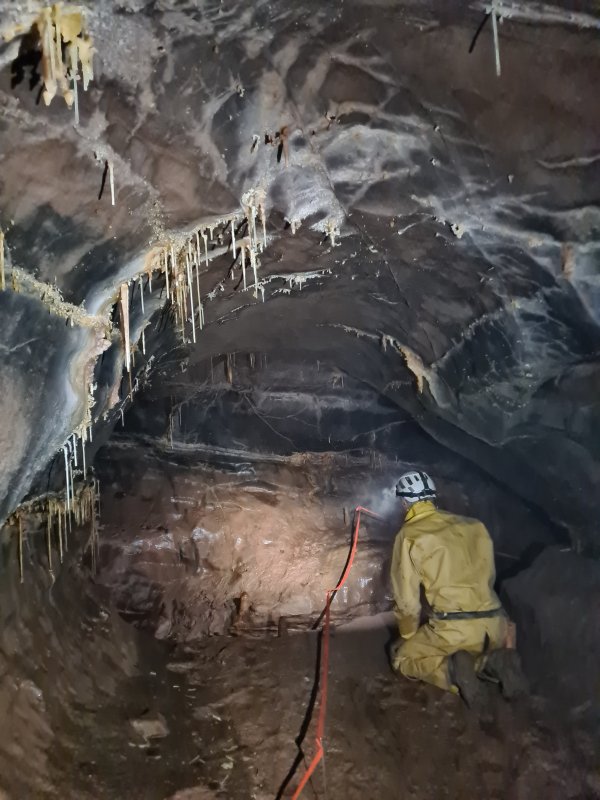 The crawl ends at a junction with a larger passage, where we head left.
Modelling by Pete, lighting by Tarquin and Pete
The crawl ends at a junction with a larger passage, where we head left.
Modelling by Pete, lighting by Tarquin and Pete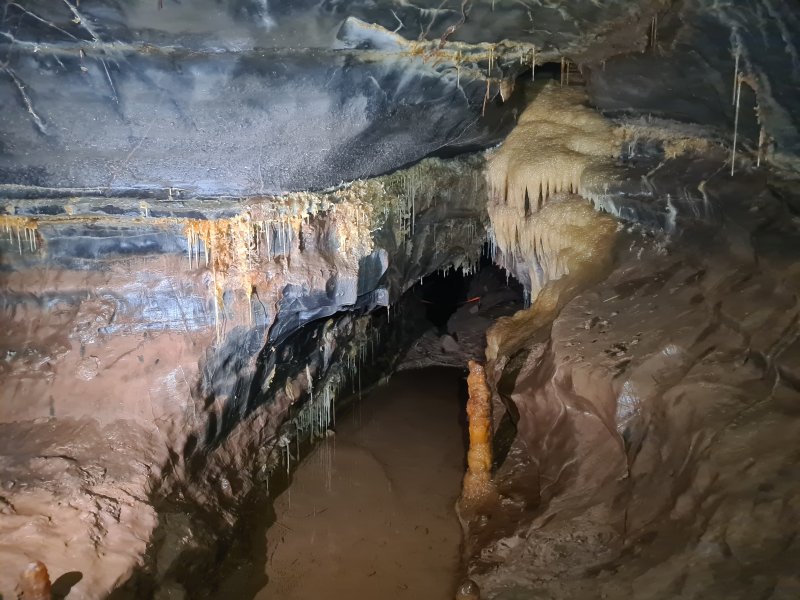 The other side of the grotto. Nice, but it definitely looks better from the other side.
Lighting by Tarquin and Pete
The other side of the grotto. Nice, but it definitely looks better from the other side.
Lighting by Tarquin and Pete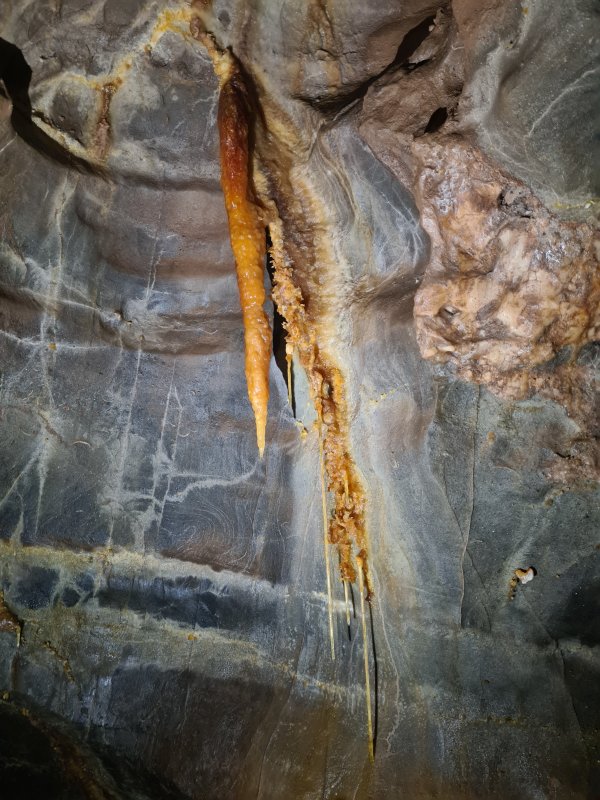 The passage continuing past the grotto has some very rich stalactites.
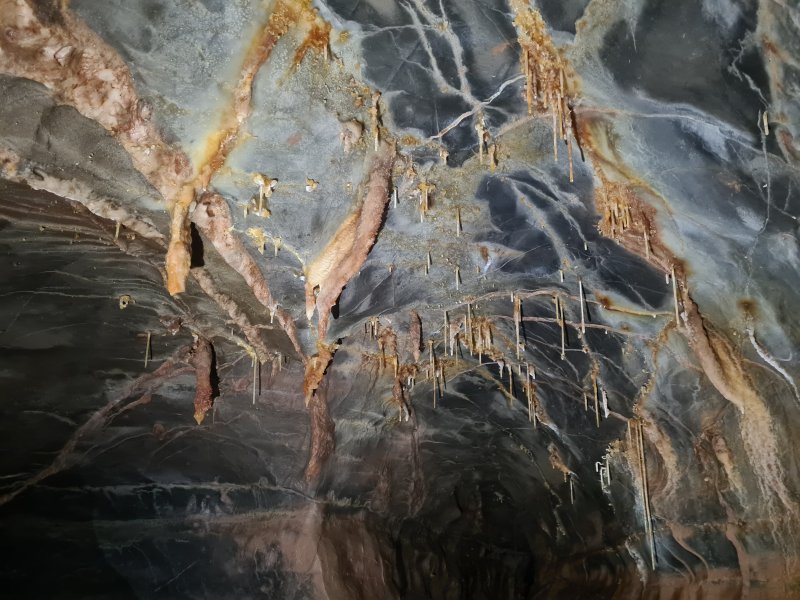 Ceiling of the passage beyond the grotto. It then splits into a larger passage left, and smaller passage ahead-right.
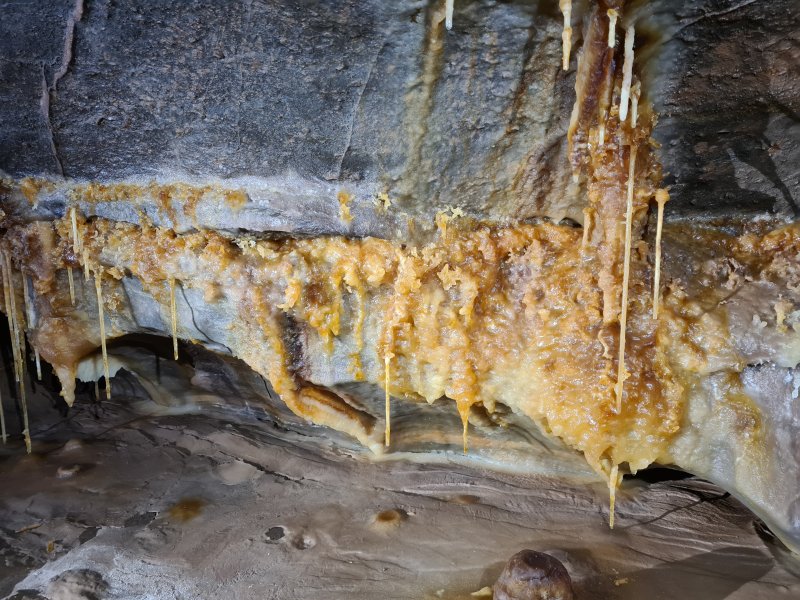 Honey flowstone, helictites and straws.
Lighting by Tarquin and Pete
Honey flowstone, helictites and straws.
Lighting by Tarquin and Pete Straws and helictites making a hysteresis curve.
Lighting by Tarquin and Pete
Straws and helictites making a hysteresis curve.
Lighting by Tarquin and Pete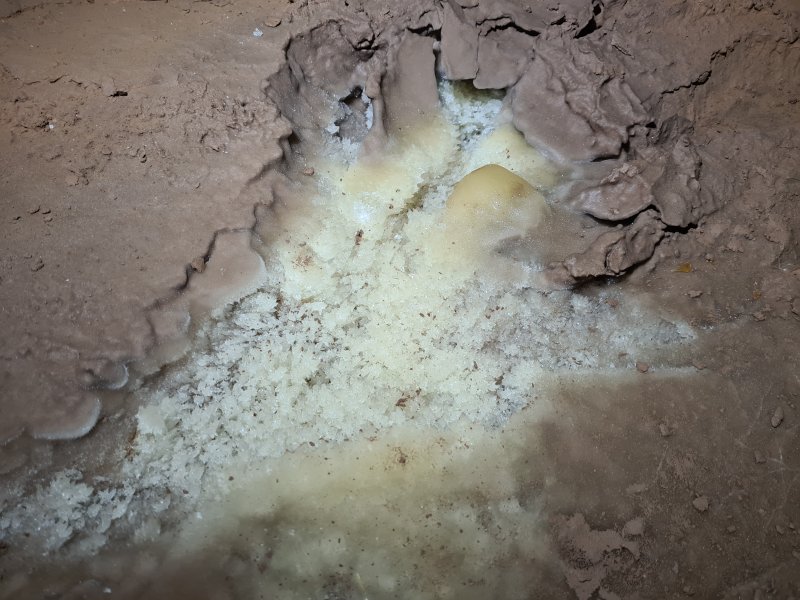 Creamy white crystal pool.
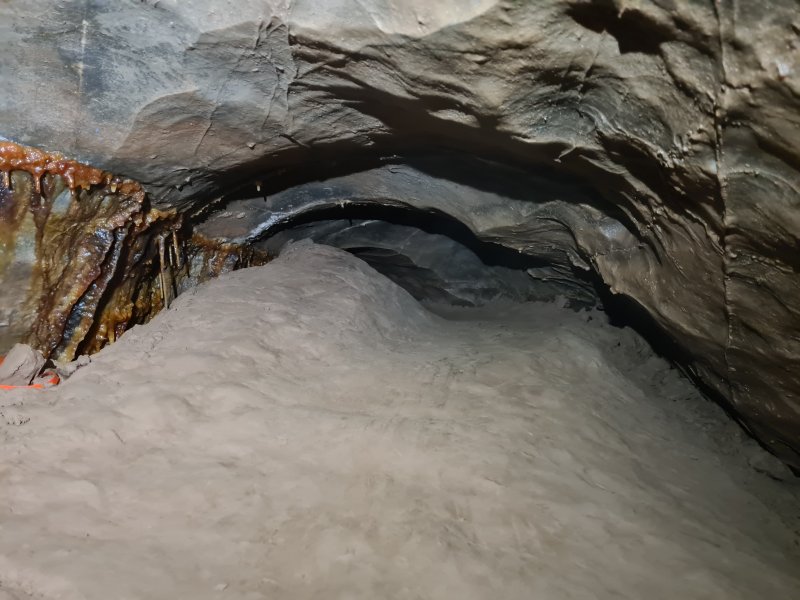 The passage lowers to a crawl, and ends very close to the end of Frozen River.
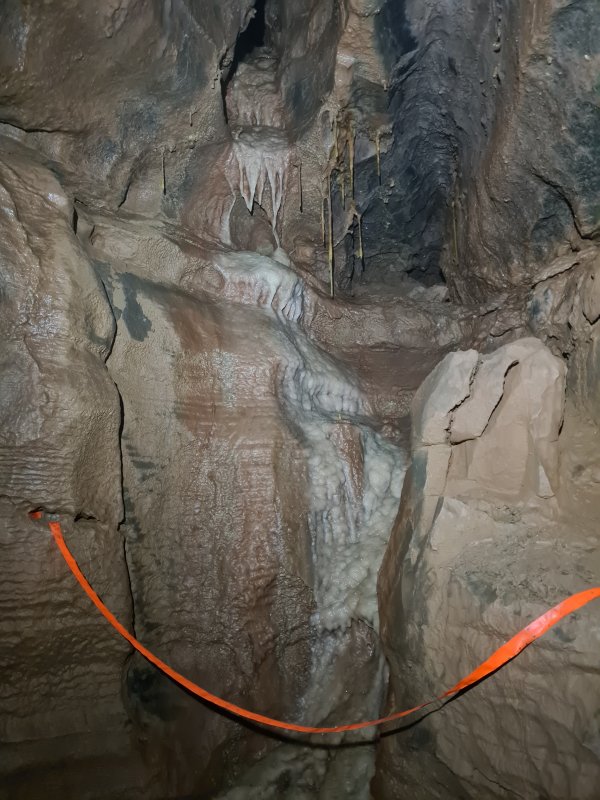 The side passage at the last junction reaches a climb down into a pit with this flowstone.
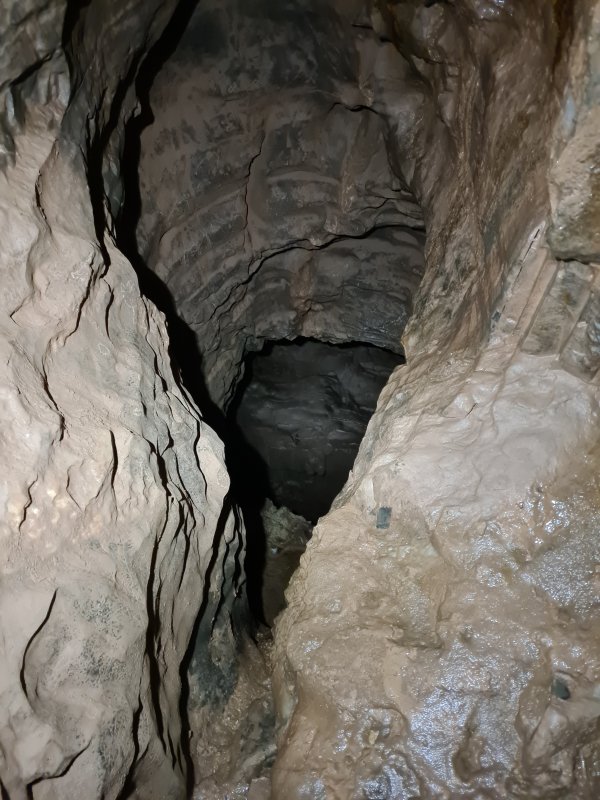 The floor of the pit drops 10 metres down into Cross Rift, something you only notice after you have climbed down into it. Then you have to climb back over that hole to get back onto solid ground. Fun times.
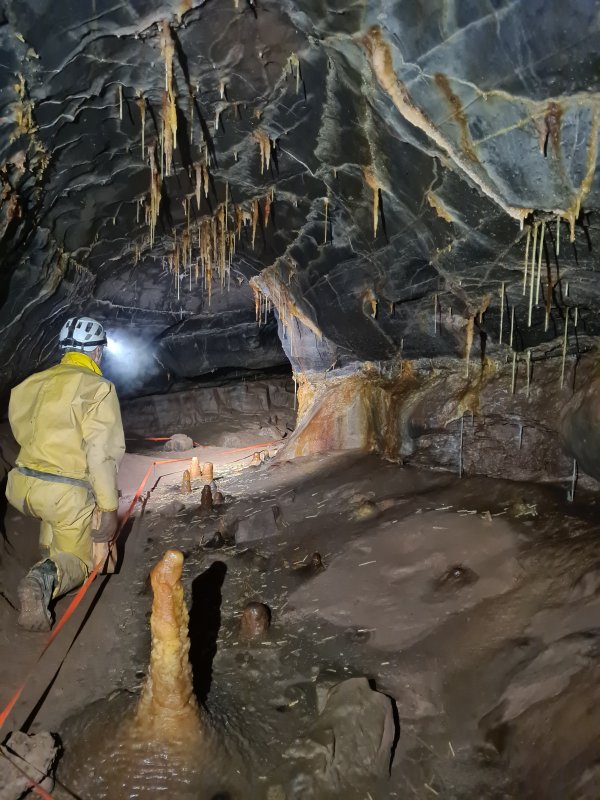 We return to the bigger passage, and head in the other direction along it. The honey cloured formations continue.
Modelling by Pete, lighting by Tarquin and Pete
We return to the bigger passage, and head in the other direction along it. The honey cloured formations continue.
Modelling by Pete, lighting by Tarquin and Pete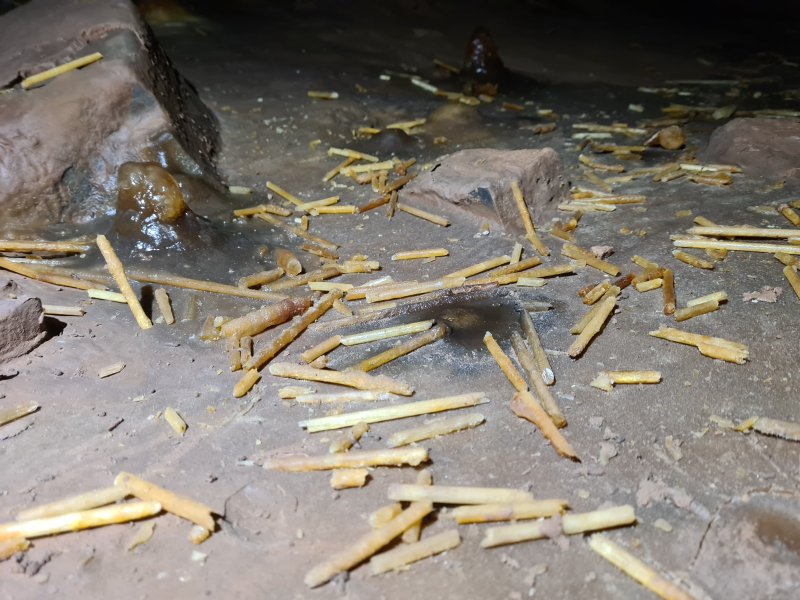 Fallen straws.
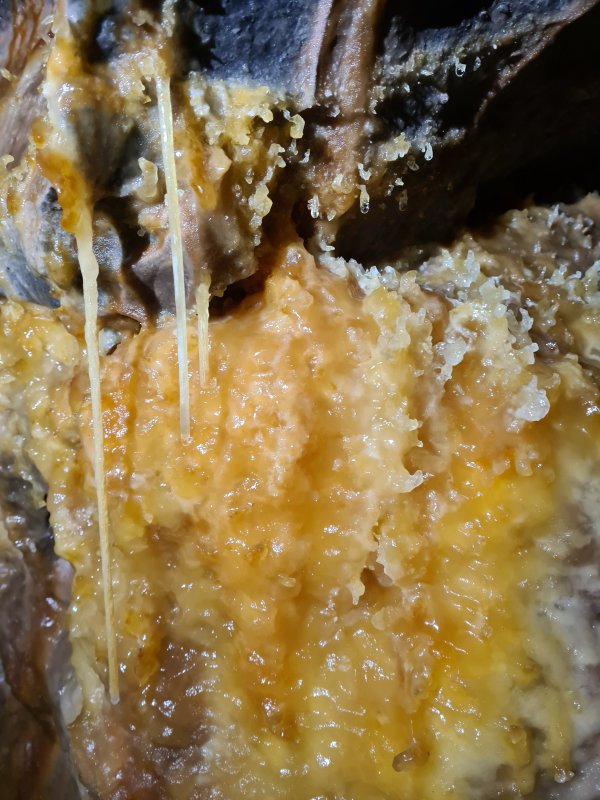 Immature honey helictites.
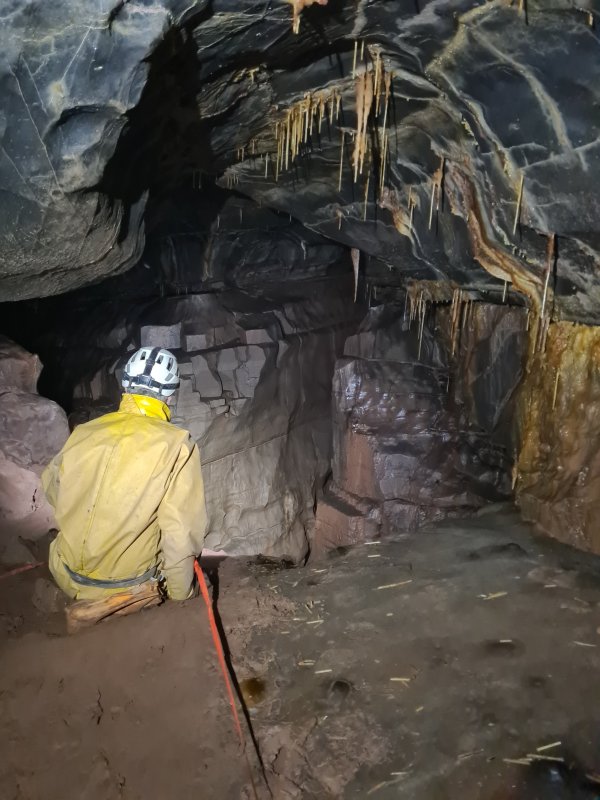 The passage ends at a balcony with a 3 metre pitch down to the ramp from earlier, but with a hole dropping down nearly 20 metres into Cross Rift.
Modelling by Pete, lighting by Tarquin and Pete
The passage ends at a balcony with a 3 metre pitch down to the ramp from earlier, but with a hole dropping down nearly 20 metres into Cross Rift.
Modelling by Pete, lighting by Tarquin and Pete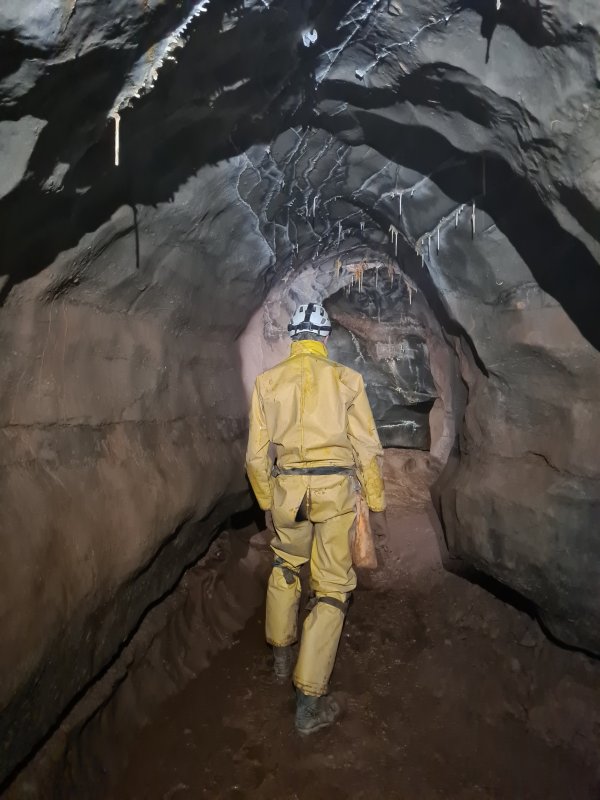 We return to the other branch of the crawl, which gains a larger passage that loops part way around the others, where we initially head right.
Modelling by Pete, lighting by Tarquin and Pete
We return to the other branch of the crawl, which gains a larger passage that loops part way around the others, where we initially head right.
Modelling by Pete, lighting by Tarquin and Pete A small side passage to the left ends quickly.
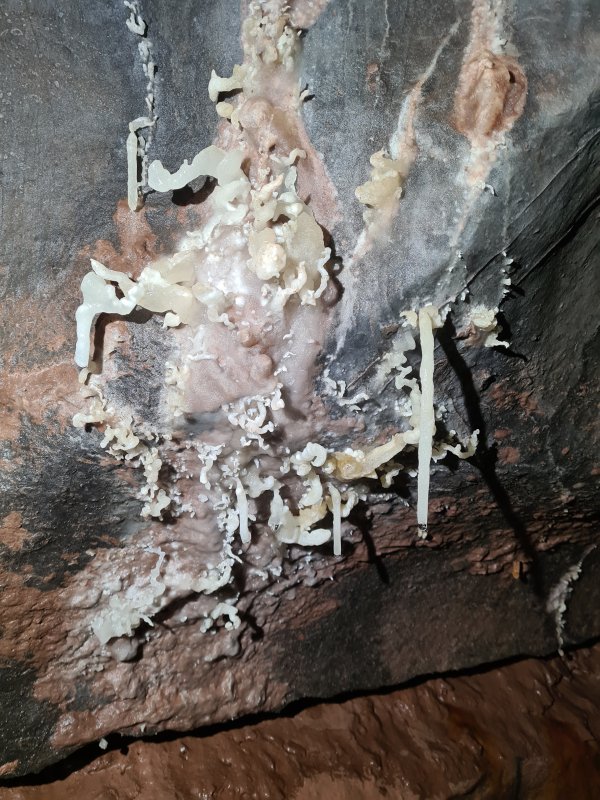 Helictites in the larger passage.
 Straws in the larger passage.
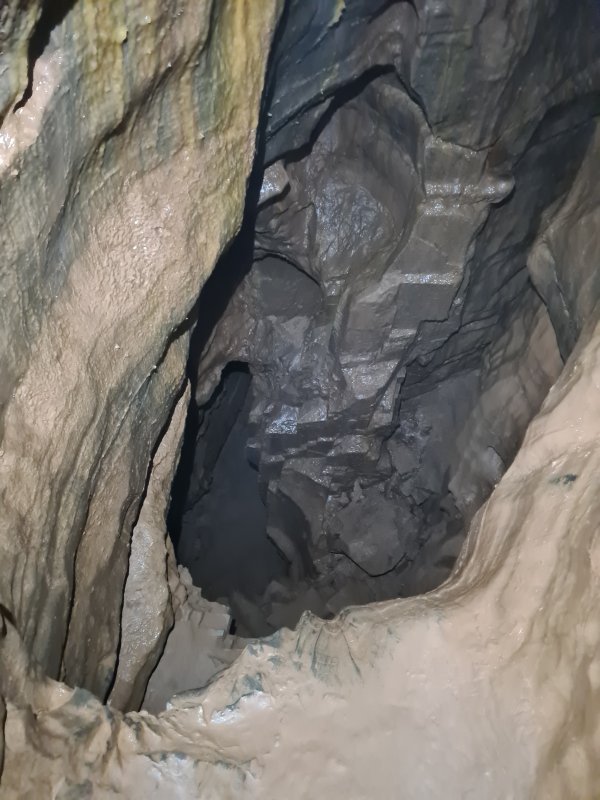 The larger passage drops down a pitch into the passage on the earlier side of the grotto, near the crazy climb. It also has an ongoing passage to the crazy climb, but it would mean traversing over this hole, which would be very risky.
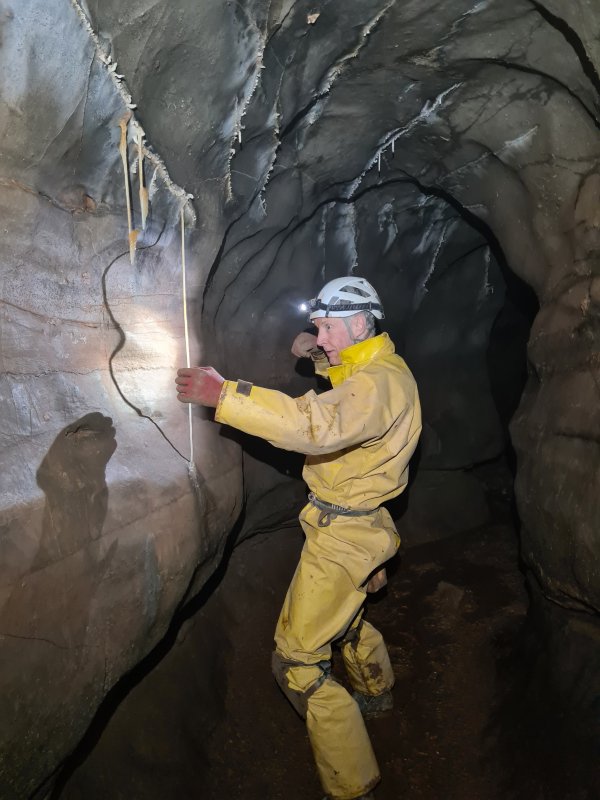 Bow and arrow straw in the other direction along the larger passage.
Modelling by Pete, lighting by Tarquin and Pete
Bow and arrow straw in the other direction along the larger passage.
Modelling by Pete, lighting by Tarquin and Pete The larger passage.
Modelling by Pete, lighting by Tarquin and Pete
The larger passage.
Modelling by Pete, lighting by Tarquin and Pete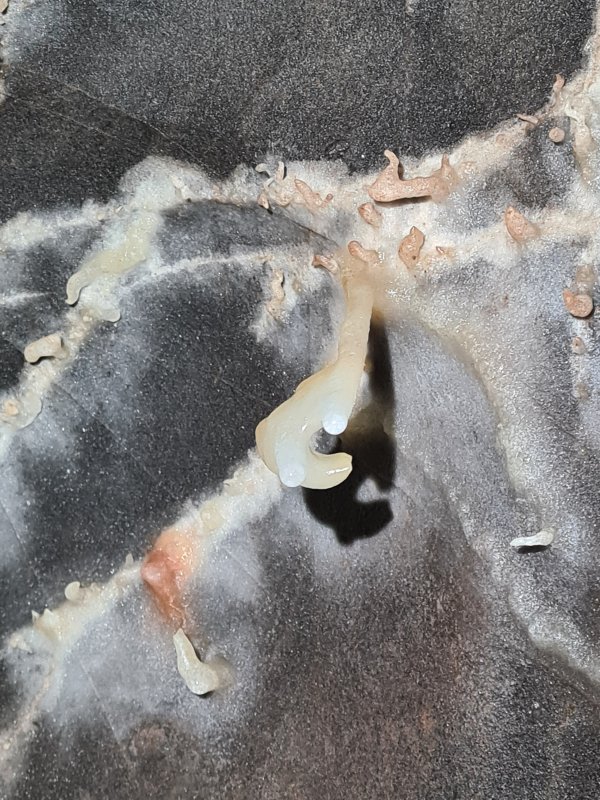 Helictite shaped like a hand.
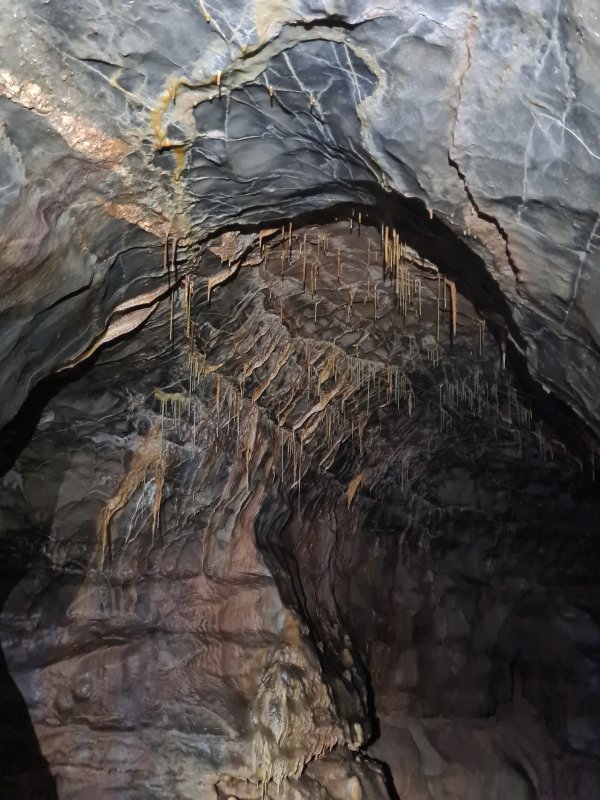 The passage ends at a pitch down into Moonlight Chamber, with this ceiling.
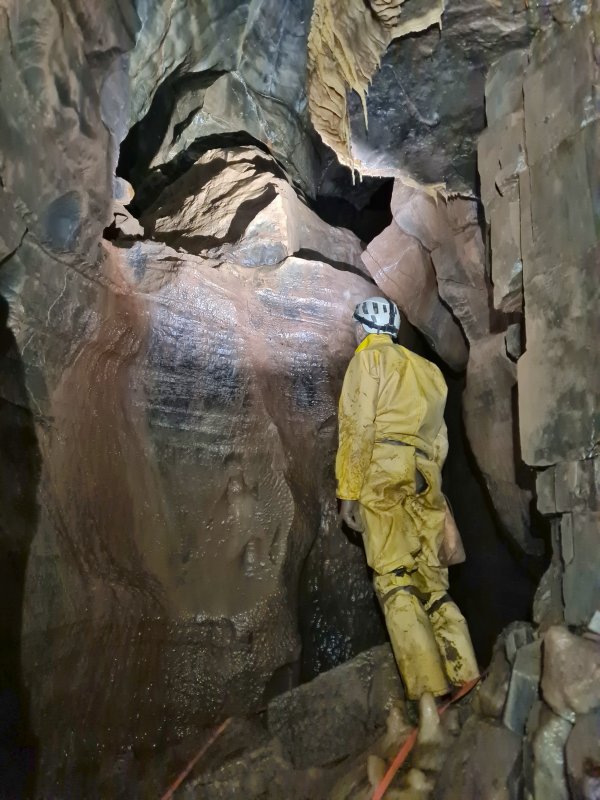 The pitch into Moonlight Chamber. It may have been possible to traverse out into the passage to the right, and shimmy down near the rock, but from the top, it looked too easy to get it wrong and fall, so we made the decision not to, and went back around to reach it instead.
Modelling by Pete, lighting by Tarquin and Pete
The pitch into Moonlight Chamber. It may have been possible to traverse out into the passage to the right, and shimmy down near the rock, but from the top, it looked too easy to get it wrong and fall, so we made the decision not to, and went back around to reach it instead.
Modelling by Pete, lighting by Tarquin and Pete Climb down to the bottom of the ramp from Moonlight Chamber. The ramp is to the right here. The balcony is up to the left. The hole down to the left drops 16 metres to Cross Rift.
Modelling by Pete, lighting by Tarquin and Pete
Climb down to the bottom of the ramp from Moonlight Chamber. The ramp is to the right here. The balcony is up to the left. The hole down to the left drops 16 metres to Cross Rift.
Modelling by Pete, lighting by Tarquin and Pete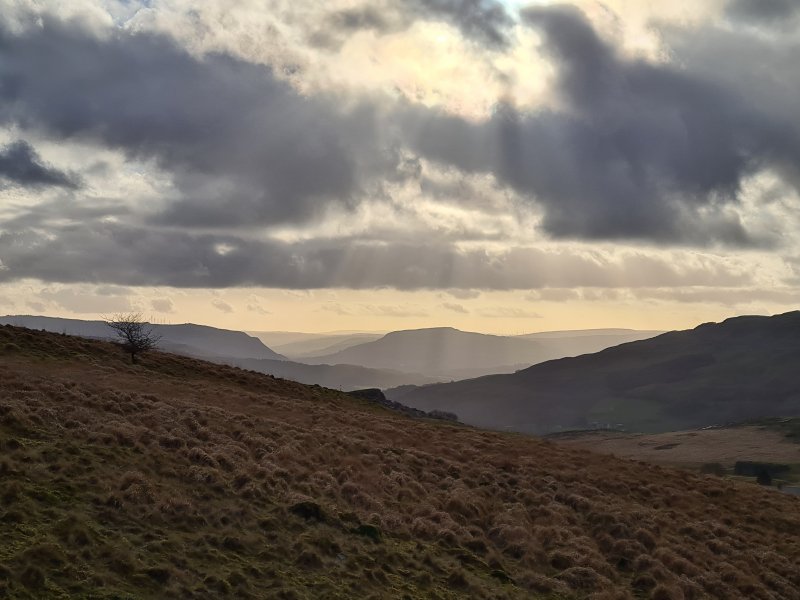 Sun streamers over Mynydd Allt-y-grug (338 metres).
 Evening light on Fan Hir (781 metres).
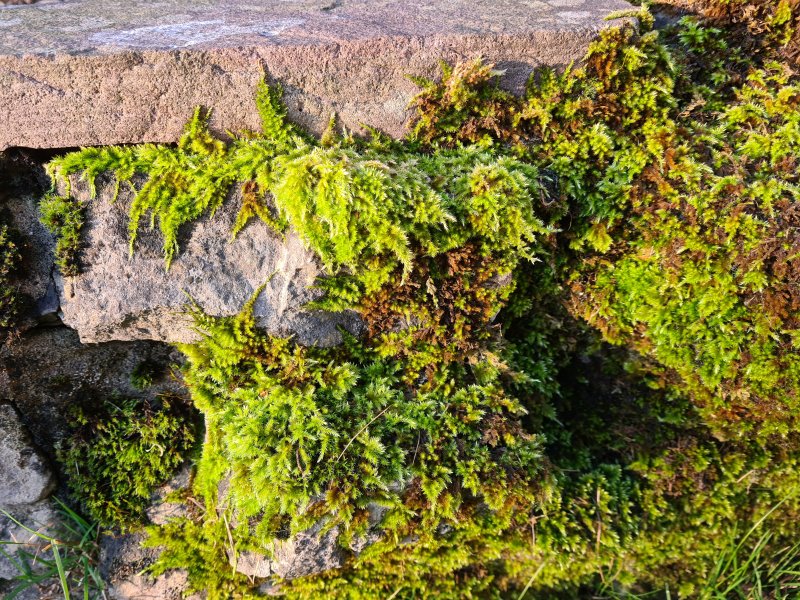 Moss at Penwyllt, in sunset light.