Ogof Ffynnon Ddu Northern Canyon and Labyrinth trips 29/11/2020 and 05/12/2020
Unless otherwise stated, camera, setups, lighting, edits and gallery effects by Tarquin. Modelling and lighting at various points will be Gareth Davies and Paul Tarrant.
This was two separate trips, one to Northern Canyon, and another covering large parts of the Brickyard, Labyrinth and Cross Rift. The pictures are presented out of sequence in order to produce a logical progression through the cave.
 Traversing over the deep chasm in Edward's Shortcut. This was Gareth's first proper tourist trip after recovering from a broken colar bone, so we had intentionally chosen a route with a few climbs, but nothing as crazy as we might usually do.
Modelling by Gareth, lighting by Tarquin and Gareth
Traversing over the deep chasm in Edward's Shortcut. This was Gareth's first proper tourist trip after recovering from a broken colar bone, so we had intentionally chosen a route with a few climbs, but nothing as crazy as we might usually do.
Modelling by Gareth, lighting by Tarquin and Gareth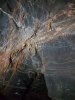 Formations in the ceiling of one of the passages linking Shatter Pillar and Cross Rift.
 Helictites in the passage linking Shatter Pillar and Cross Rift.
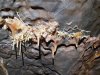 Helictites in Northern Canyon.
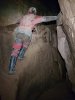 Wall traverse in Northern Cayon.
Modelling by Gareth, lighting by Tarquin and Gareth
Wall traverse in Northern Cayon.
Modelling by Gareth, lighting by Tarquin and Gareth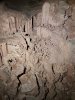 Hoodoos in a chamber in Northern Canyon.
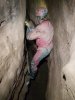 Another traverse in Northern Canyon.
Modelling by Gareth, lighting by Tarquin and Gareth
Another traverse in Northern Canyon.
Modelling by Gareth, lighting by Tarquin and Gareth Formations in an alcove.
 A more normal part of Northern Canyon. It's mostly a comfortable passage.
Modelling by Gareth, lighting by Tarquin and Gareth
A more normal part of Northern Canyon. It's mostly a comfortable passage.
Modelling by Gareth, lighting by Tarquin and Gareth It definitely does have some memorable climbs though.
Modelling by Gareth, lighting by Tarquin and Gareth
It definitely does have some memorable climbs though.
Modelling by Gareth, lighting by Tarquin and Gareth This one looks a little devoid of holds, but is not particularly hard. As long as both of your arms work.
Modelling by Gareth, lighting by Tarquin and Gareth
This one looks a little devoid of holds, but is not particularly hard. As long as both of your arms work.
Modelling by Gareth, lighting by Tarquin and Gareth The second one is a series of steps up the wall ledges.
Modelling by Gareth, lighting by Tarquin and Gareth
The second one is a series of steps up the wall ledges.
Modelling by Gareth, lighting by Tarquin and Gareth Another step, another step.
Modelling by Gareth, lighting by Tarquin and Gareth
Another step, another step.
Modelling by Gareth, lighting by Tarquin and Gareth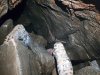 At the top of the climb is a choke, made from the floor of Shale Chamber, 18 metres above. The way on is to ignore the ascending hole through the choke, and instead to crawl under the wall into the continuing canyon.
Modelling by Gareth, lighting by Tarquin and Gareth
At the top of the climb is a choke, made from the floor of Shale Chamber, 18 metres above. The way on is to ignore the ascending hole through the choke, and instead to crawl under the wall into the continuing canyon.
Modelling by Gareth, lighting by Tarquin and Gareth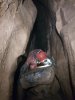 The way on is down, reversing the last two climbs in one step. It looks like a step off into nothingness, with no holds below the top.
Modelling by Gareth, lighting by Tarquin and Gareth
The way on is down, reversing the last two climbs in one step. It looks like a step off into nothingness, with no holds below the top.
Modelling by Gareth, lighting by Tarquin and Gareth Tucking under the boulder provides a much easier alternative.
Modelling by Gareth, lighting by Tarquin and Gareth
Tucking under the boulder provides a much easier alternative.
Modelling by Gareth, lighting by Tarquin and Gareth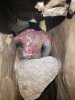 This lands on a second boulder, where there is a much easier climb down hidden underneath the upper boulders.
Modelling by Gareth, lighting by Tarquin and Gareth
This lands on a second boulder, where there is a much easier climb down hidden underneath the upper boulders.
Modelling by Gareth, lighting by Tarquin and Gareth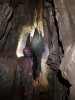 A couple of junctions further, rather than turning left into the continuation of Northern Canyon, we take a detour into the passage staggered ahead. This reaches a window of formations. Beyond here, it passes through a knee-wetting canal to reach Salubrious Passage at the first junction downstream from the Corkscrew.
Modelling by Gareth, lighting by Tarquin and Gareth
A couple of junctions further, rather than turning left into the continuation of Northern Canyon, we take a detour into the passage staggered ahead. This reaches a window of formations. Beyond here, it passes through a knee-wetting canal to reach Salubrious Passage at the first junction downstream from the Corkscrew.
Modelling by Gareth, lighting by Tarquin and Gareth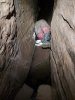 Continuing along Northern Canyon, and another climb.
Modelling by Gareth, lighting by Tarquin and Gareth
Continuing along Northern Canyon, and another climb.
Modelling by Gareth, lighting by Tarquin and Gareth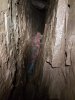 Wedge shaped canyon.
Modelling by Gareth, lighting by Tarquin and Gareth
Wedge shaped canyon.
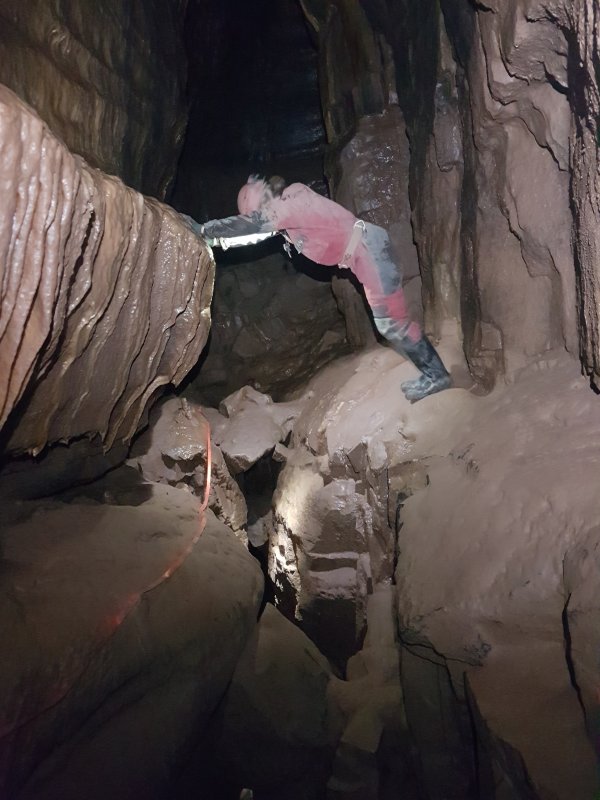
Modelling by Gareth, lighting by Tarquin and Gareth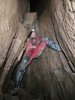 The last climb is particularly tricky, requiring a lot of arm strength. How's that shoulder?
Modelling by Gareth, lighting by Tarquin and Gareth
The last climb is particularly tricky, requiring a lot of arm strength. How's that shoulder?
Modelling by Gareth, lighting by Tarquin and Gareth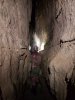 Just past the junctions with Labyrinth, the passage passes a pitch from the Brickyard, then connects to Arête.
Modelling by Gareth, lighting by Tarquin and Gareth
Just past the junctions with Labyrinth, the passage passes a pitch from the Brickyard, then connects to Arête.
Modelling by Gareth, lighting by Tarquin and Gareth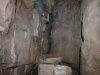 The start of the route from Arête to Salubrious
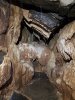 Grotto below the climb down to Salubrious.
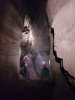 Returning through Labyrinth to Cairn Chamber.
Modelling by Paul and Gareth, lighting by Tarquin, Paul and Gareth
Returning through Labyrinth to Cairn Chamber.
Modelling by Paul and Gareth, lighting by Tarquin, Paul and Gareth Gour pools in Cairn Chamber.
 Calcite flow in a side passage on the northwest side of Cairn Chamber.
 Calcite flow.
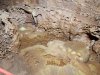 Crystal pool below the calcite flow.
 Decomposed calcite.
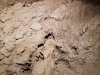 Mud formations in the passage.
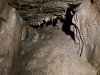 Calcited alcove.
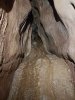 Calcite blockage at the end of the passage.
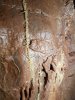 Helictites at the junction of the side passage and main route to The Columns.
Lighting by Tarquin, Gareth and Paul
Helictites at the junction of the side passage and main route to The Columns.
Lighting by Tarquin, Gareth and Paul Helictites.
Lighting by Tarquin, Gareth and Paul
Helictites.
Lighting by Tarquin, Gareth and Paul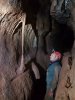 Distinctive column on the route to The Columns.
Modelling by Paul
Distinctive column on the route to The Columns.
Modelling by Paul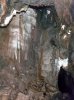 Tall chamber with a calcited aven, on the route to The Columns.
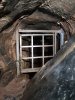 Gateway to The Columns, which is open only on specific days, typically bank holidays.
 Stal in the side passages to the left of the main route, requiring a small climb to reach them.
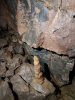 Stal in the left side passages.
 Stal in the left side passages.
 Stal in the side passages on the right side of the main route that lead to a chamber.
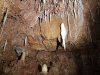 Stal in the right side passages.
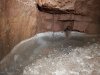 Pom pom formation in the chamber.
 Stal in the chamber.
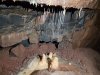 Stal in the chamber.
 Formations in a side passage climbing above the chamber.
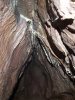 Formations in the side passage.
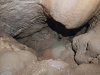 Choked pit in the floor of the side passage.
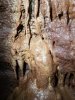 Formations in the side passage.
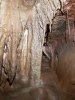 Formations in the side passage.
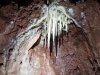 Formations in the side passage.
 Mud formations in the route leading off the chamber.
Lighting by Tarquin and Gareth
Mud formations in the route leading off the chamber.
Lighting by Tarquin and Gareth Stalagmite in the loop.
 Upper side passage which forms a loop of its own. The floor is a dried moonmilk crystal pool.
 Helictites in the upper loop.
 Formations in the loop.
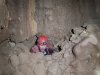 The loop pops through a hidden hole in the aven chamber.
Modelling by Gareth
The loop pops through a hidden hole in the aven chamber.
Modelling by Gareth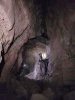 At the end of Cairn Chamber is a climb up to an upper level, leading back out to Big Chamber Near The Entrance and the Brickyard. This is one of the few ways of getting between the levels without a pitch (the others are two routes from The Corkscrew, and Edward's Shortcut).
Modelling by Paul and Gareth, lighting by Tarquin, Paul and Gareth
At the end of Cairn Chamber is a climb up to an upper level, leading back out to Big Chamber Near The Entrance and the Brickyard. This is one of the few ways of getting between the levels without a pitch (the others are two routes from The Corkscrew, and Edward's Shortcut).
Modelling by Paul and Gareth, lighting by Tarquin, Paul and Gareth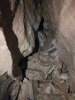 Climbing up past the calcited choke in Cairn Chamber.
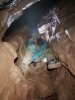 The route to Big Chamber passes over a traverse that can feel a bit exposed, over a pitch to a lower level.
Modelling by Paul, lighting by Tarquin, Paul and Gareth
The route to Big Chamber passes over a traverse that can feel a bit exposed, over a pitch to a lower level.
Modelling by Paul, lighting by Tarquin, Paul and Gareth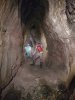 The right hand passage leading off from Big Chamber Near The Entrance.
Modelling by Gareth and Paul, lighting by Tarquin, Gareth and Paul
The right hand passage leading off from Big Chamber Near The Entrance.
Modelling by Gareth and Paul, lighting by Tarquin, Gareth and Paul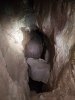 The passage ends at a pitch to a lower level, which leads to Labyrinth via a pitch.
Lighting by Tarquin and Gareth
The passage ends at a pitch to a lower level, which leads to Labyrinth via a pitch.
Lighting by Tarquin and Gareth
 Traversing over the deep chasm in Edward's Shortcut. This was Gareth's first proper tourist trip after recovering from a broken colar bone, so we had intentionally chosen a route with a few climbs, but nothing as crazy as we might usually do.
Modelling by Gareth, lighting by Tarquin and Gareth
Traversing over the deep chasm in Edward's Shortcut. This was Gareth's first proper tourist trip after recovering from a broken colar bone, so we had intentionally chosen a route with a few climbs, but nothing as crazy as we might usually do.
Modelling by Gareth, lighting by Tarquin and Gareth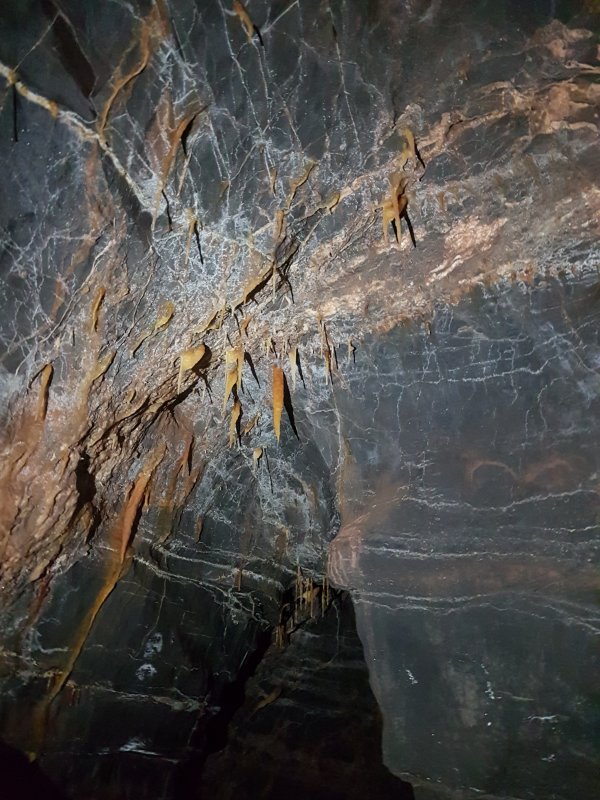 Formations in the ceiling of one of the passages linking Shatter Pillar and Cross Rift.
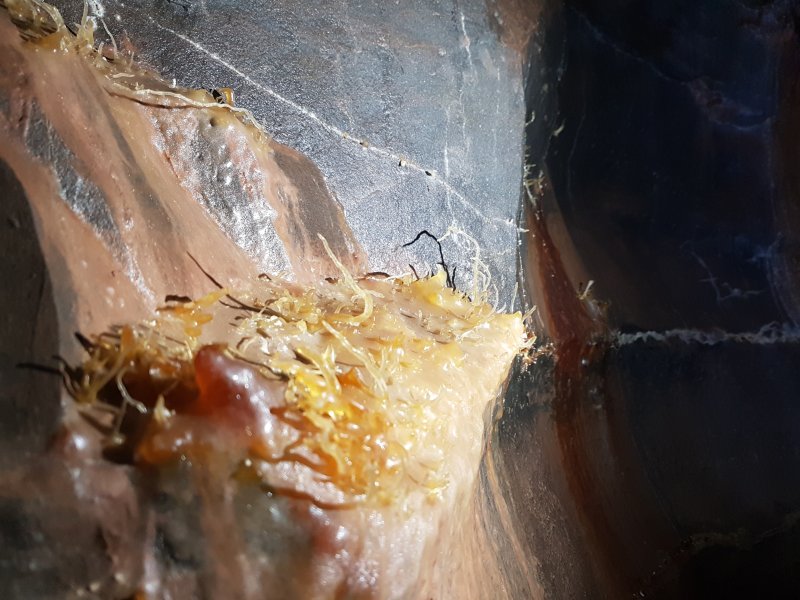 Helictites in the passage linking Shatter Pillar and Cross Rift.
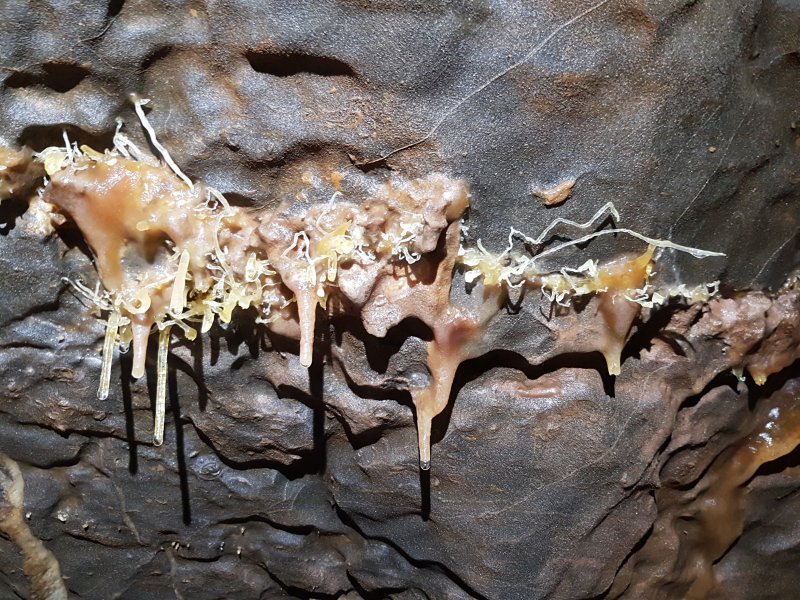 Helictites in Northern Canyon.
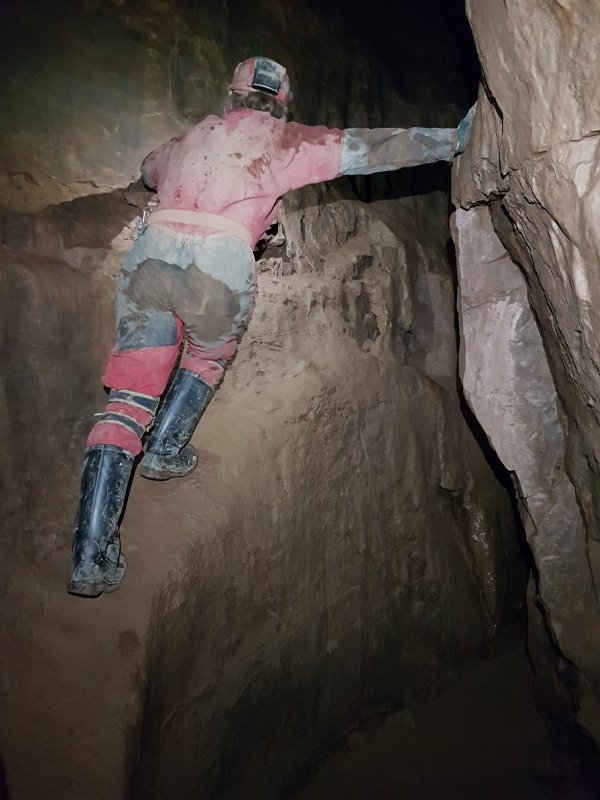 Wall traverse in Northern Cayon.
Modelling by Gareth, lighting by Tarquin and Gareth
Wall traverse in Northern Cayon.
Modelling by Gareth, lighting by Tarquin and Gareth Hoodoos in a chamber in Northern Canyon.
 Another traverse in Northern Canyon.
Modelling by Gareth, lighting by Tarquin and Gareth
Another traverse in Northern Canyon.
Modelling by Gareth, lighting by Tarquin and Gareth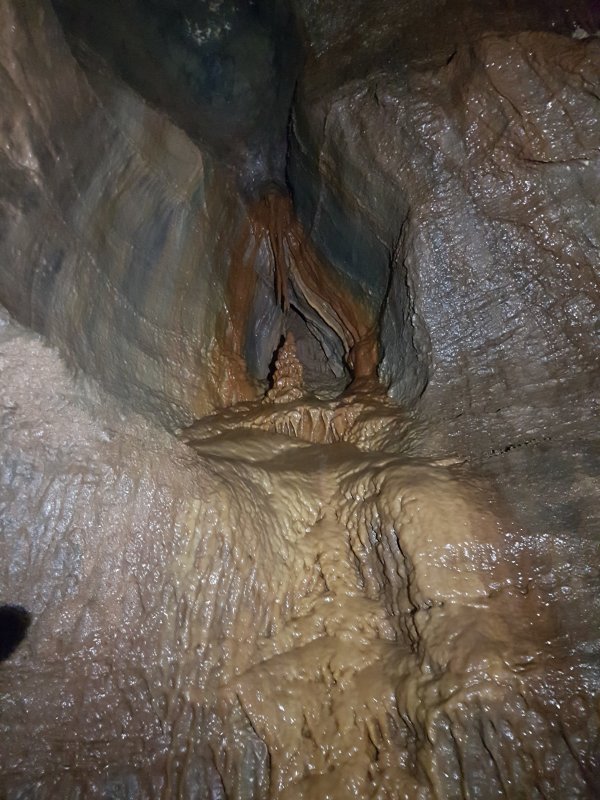 Formations in an alcove.
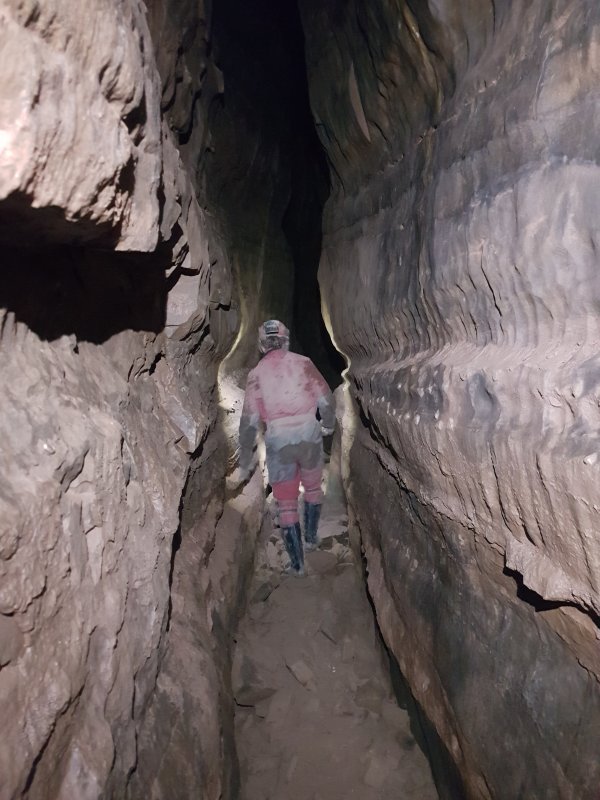 A more normal part of Northern Canyon. It's mostly a comfortable passage.
Modelling by Gareth, lighting by Tarquin and Gareth
A more normal part of Northern Canyon. It's mostly a comfortable passage.
Modelling by Gareth, lighting by Tarquin and Gareth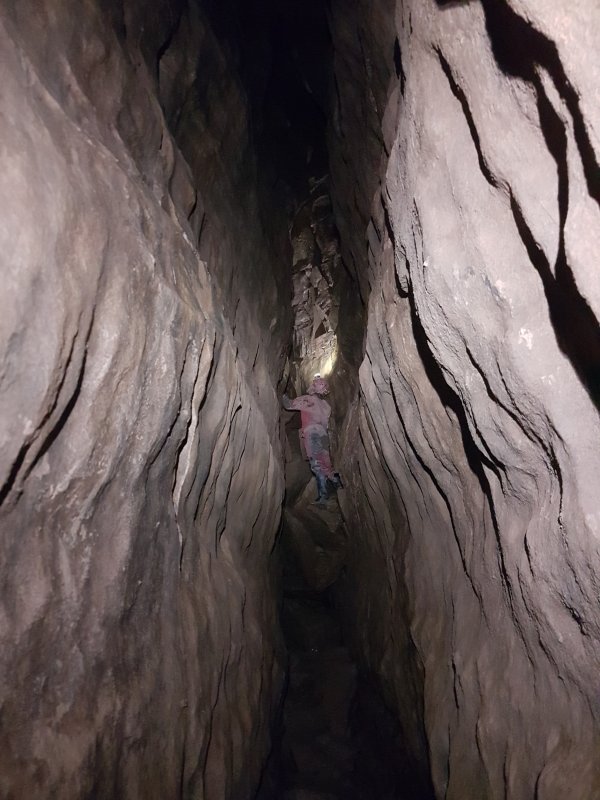 It definitely does have some memorable climbs though.
Modelling by Gareth, lighting by Tarquin and Gareth
It definitely does have some memorable climbs though.
Modelling by Gareth, lighting by Tarquin and Gareth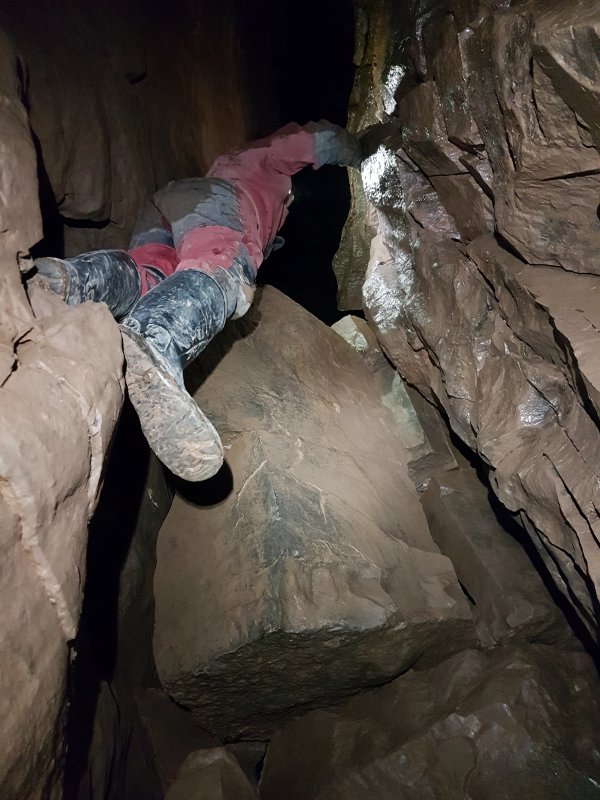 This one looks a little devoid of holds, but is not particularly hard. As long as both of your arms work.
Modelling by Gareth, lighting by Tarquin and Gareth
This one looks a little devoid of holds, but is not particularly hard. As long as both of your arms work.
Modelling by Gareth, lighting by Tarquin and Gareth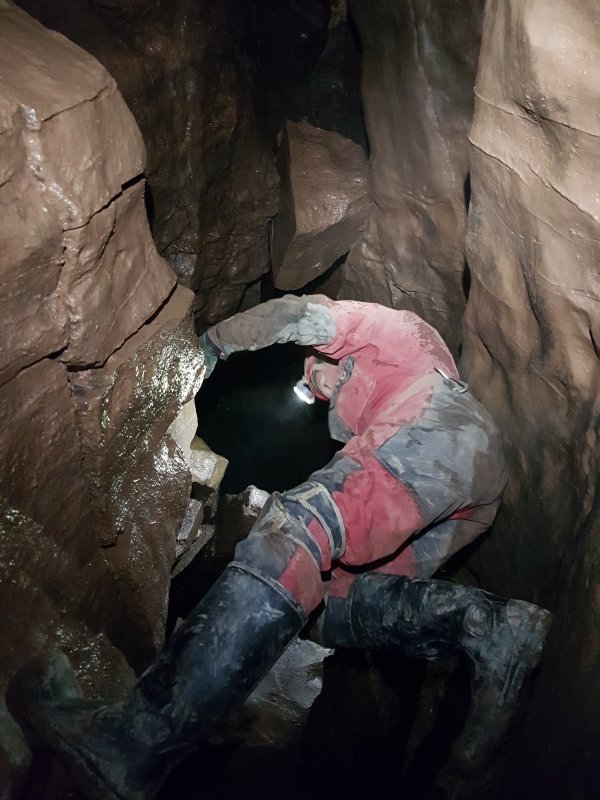 The second one is a series of steps up the wall ledges.
Modelling by Gareth, lighting by Tarquin and Gareth
The second one is a series of steps up the wall ledges.
Modelling by Gareth, lighting by Tarquin and Gareth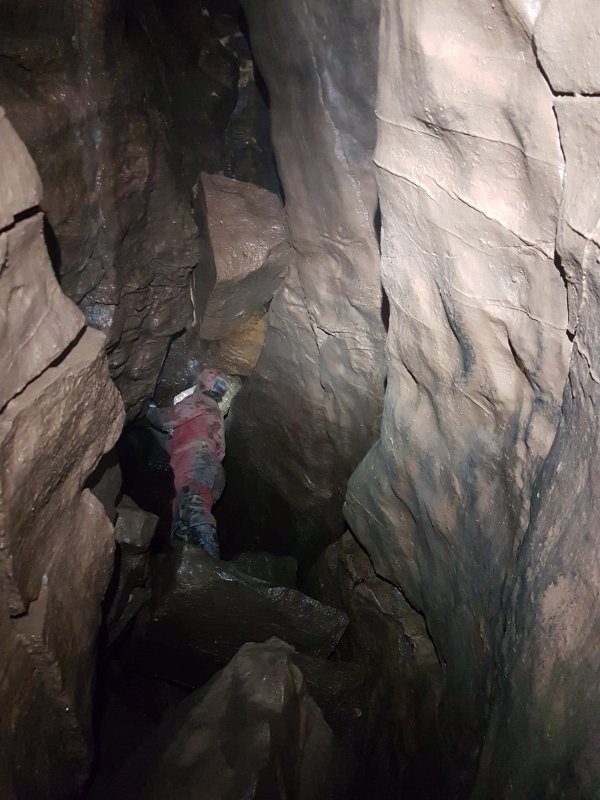 Another step, another step.
Modelling by Gareth, lighting by Tarquin and Gareth
Another step, another step.
Modelling by Gareth, lighting by Tarquin and Gareth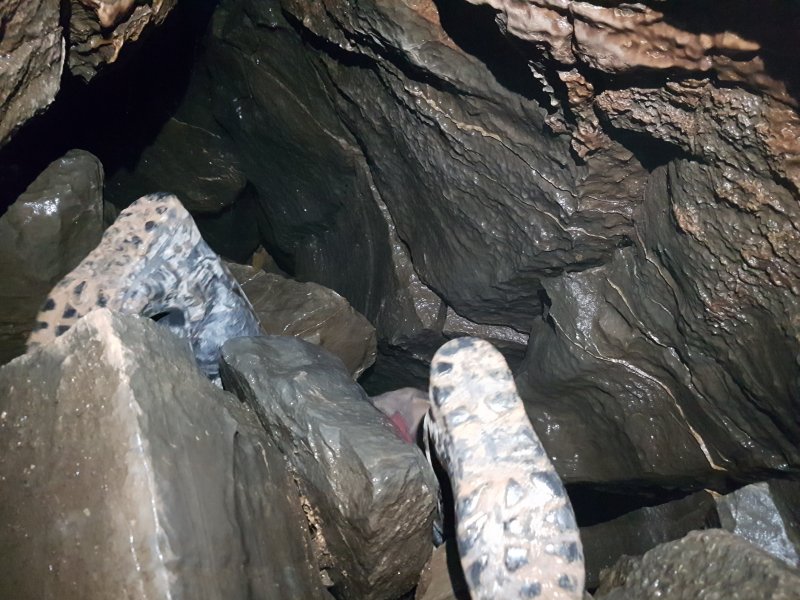 At the top of the climb is a choke, made from the floor of Shale Chamber, 18 metres above. The way on is to ignore the ascending hole through the choke, and instead to crawl under the wall into the continuing canyon.
Modelling by Gareth, lighting by Tarquin and Gareth
At the top of the climb is a choke, made from the floor of Shale Chamber, 18 metres above. The way on is to ignore the ascending hole through the choke, and instead to crawl under the wall into the continuing canyon.
Modelling by Gareth, lighting by Tarquin and Gareth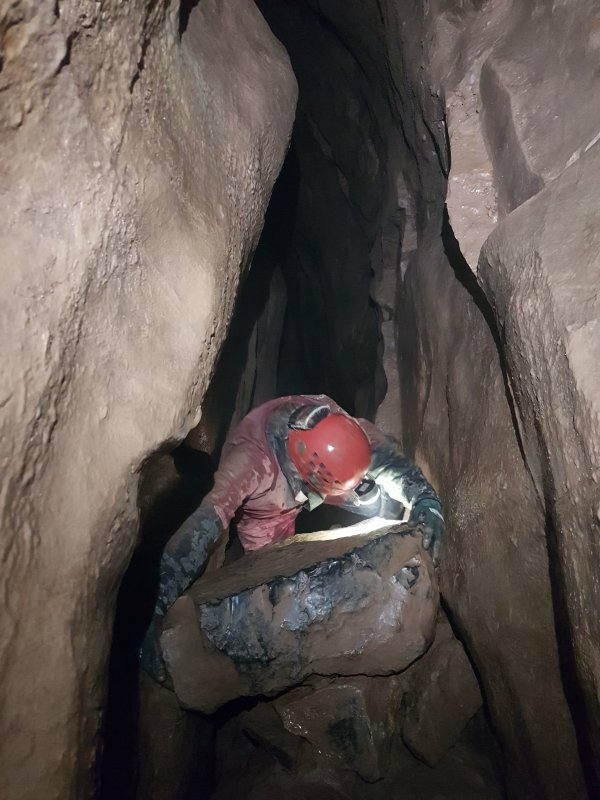 The way on is down, reversing the last two climbs in one step. It looks like a step off into nothingness, with no holds below the top.
Modelling by Gareth, lighting by Tarquin and Gareth
The way on is down, reversing the last two climbs in one step. It looks like a step off into nothingness, with no holds below the top.
Modelling by Gareth, lighting by Tarquin and Gareth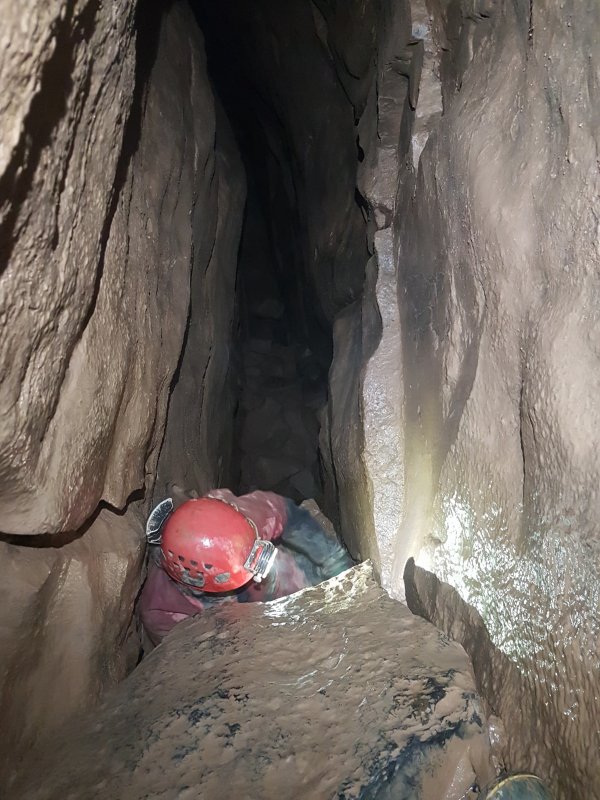 Tucking under the boulder provides a much easier alternative.
Modelling by Gareth, lighting by Tarquin and Gareth
Tucking under the boulder provides a much easier alternative.
Modelling by Gareth, lighting by Tarquin and Gareth This lands on a second boulder, where there is a much easier climb down hidden underneath the upper boulders.
Modelling by Gareth, lighting by Tarquin and Gareth
This lands on a second boulder, where there is a much easier climb down hidden underneath the upper boulders.
Modelling by Gareth, lighting by Tarquin and Gareth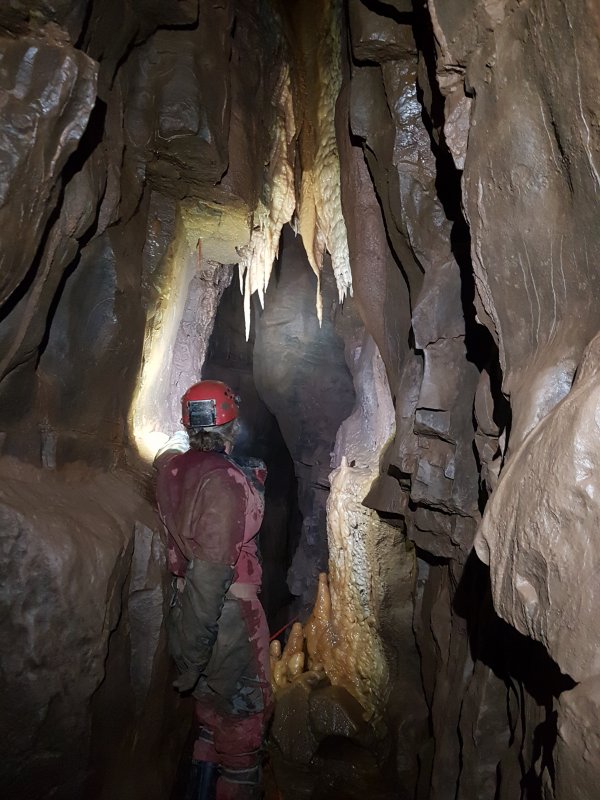 A couple of junctions further, rather than turning left into the continuation of Northern Canyon, we take a detour into the passage staggered ahead. This reaches a window of formations. Beyond here, it passes through a knee-wetting canal to reach Salubrious Passage at the first junction downstream from the Corkscrew.
Modelling by Gareth, lighting by Tarquin and Gareth
A couple of junctions further, rather than turning left into the continuation of Northern Canyon, we take a detour into the passage staggered ahead. This reaches a window of formations. Beyond here, it passes through a knee-wetting canal to reach Salubrious Passage at the first junction downstream from the Corkscrew.
Modelling by Gareth, lighting by Tarquin and Gareth Continuing along Northern Canyon, and another climb.
Modelling by Gareth, lighting by Tarquin and Gareth
Continuing along Northern Canyon, and another climb.
Modelling by Gareth, lighting by Tarquin and Gareth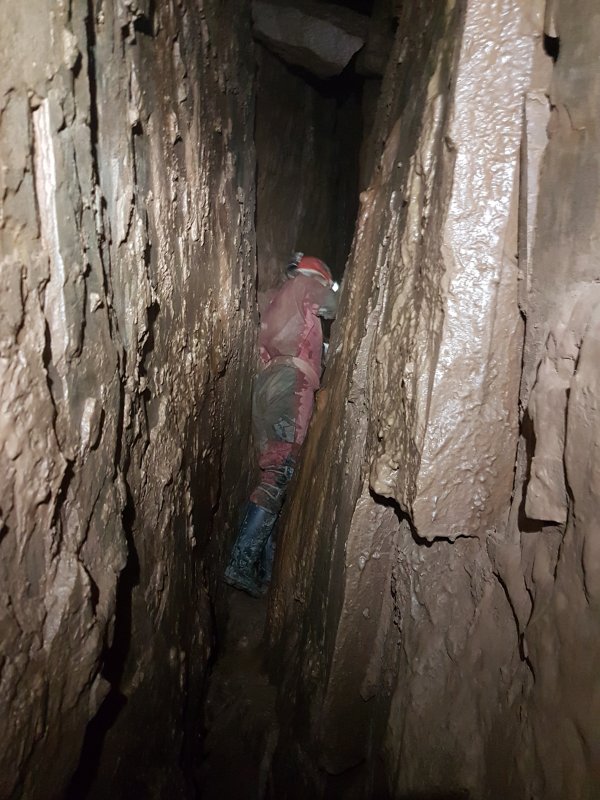 Wedge shaped canyon.
Modelling by Gareth, lighting by Tarquin and Gareth
Wedge shaped canyon.
Modelling by Gareth, lighting by Tarquin and Gareth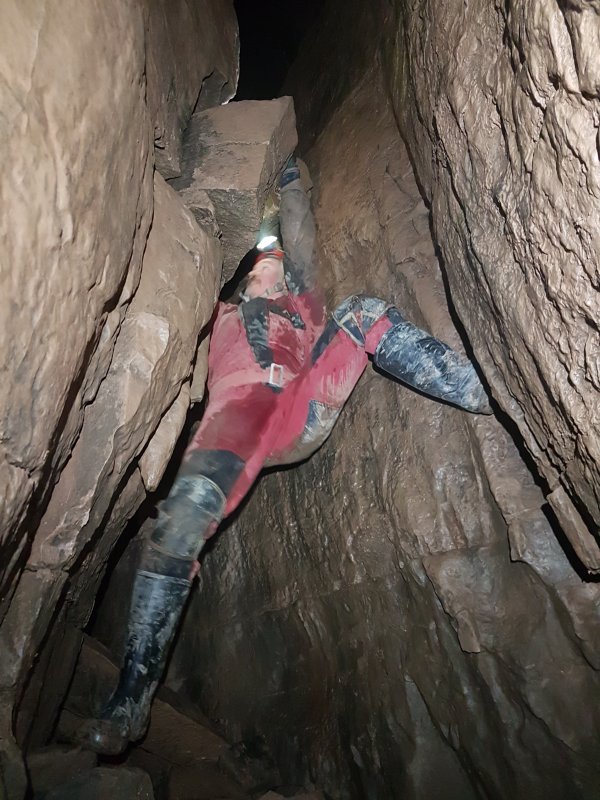 The last climb is particularly tricky, requiring a lot of arm strength. How's that shoulder?
Modelling by Gareth, lighting by Tarquin and Gareth
The last climb is particularly tricky, requiring a lot of arm strength. How's that shoulder?
Modelling by Gareth, lighting by Tarquin and Gareth Just past the junctions with Labyrinth, the passage passes a pitch from the Brickyard, then connects to Arête.
Modelling by Gareth, lighting by Tarquin and Gareth
Just past the junctions with Labyrinth, the passage passes a pitch from the Brickyard, then connects to Arête.
Modelling by Gareth, lighting by Tarquin and Gareth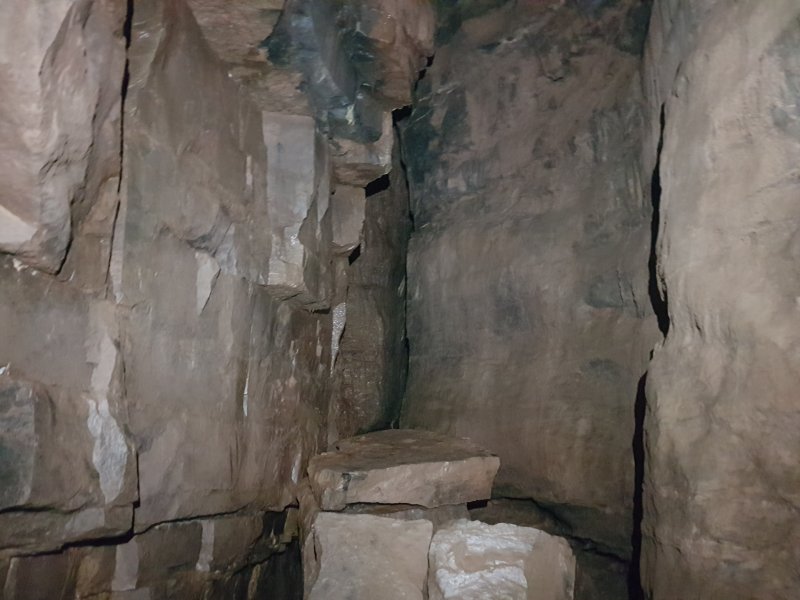 The start of the route from Arête to Salubrious
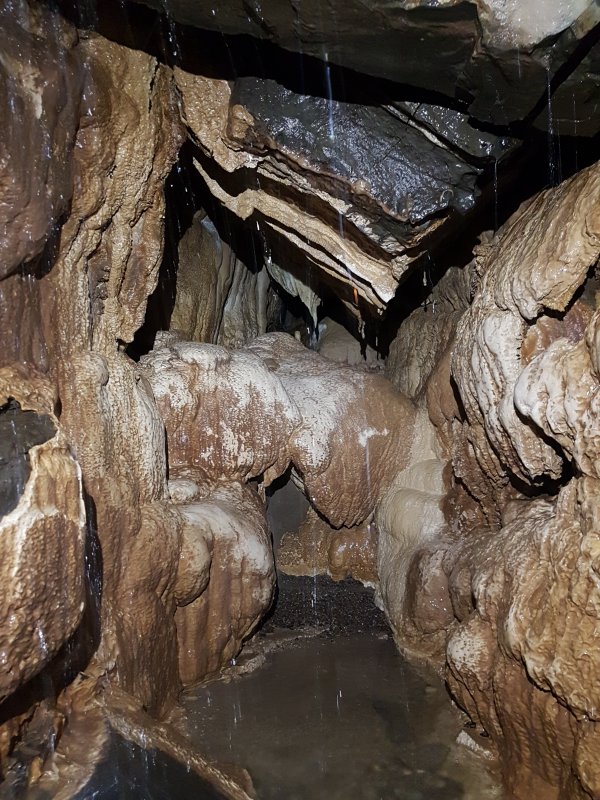 Grotto below the climb down to Salubrious.
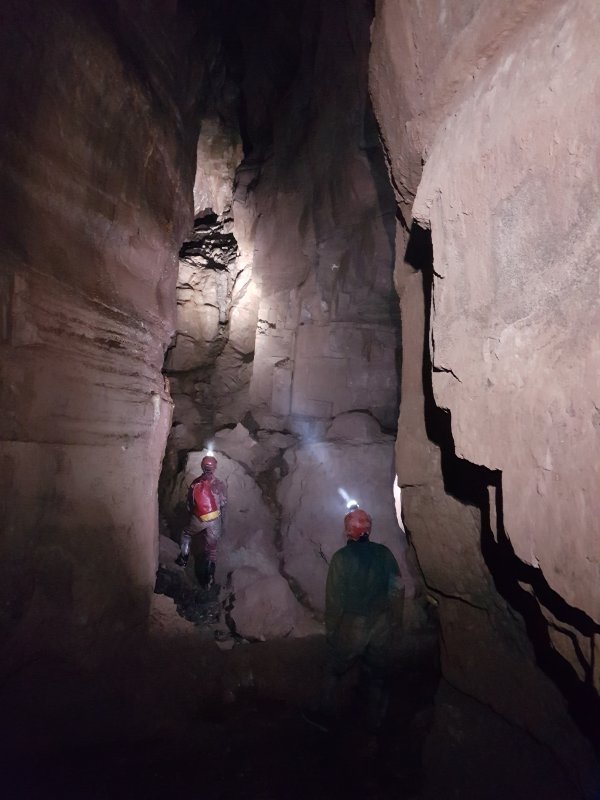 Returning through Labyrinth to Cairn Chamber.
Modelling by Paul and Gareth, lighting by Tarquin, Paul and Gareth
Returning through Labyrinth to Cairn Chamber.
Modelling by Paul and Gareth, lighting by Tarquin, Paul and Gareth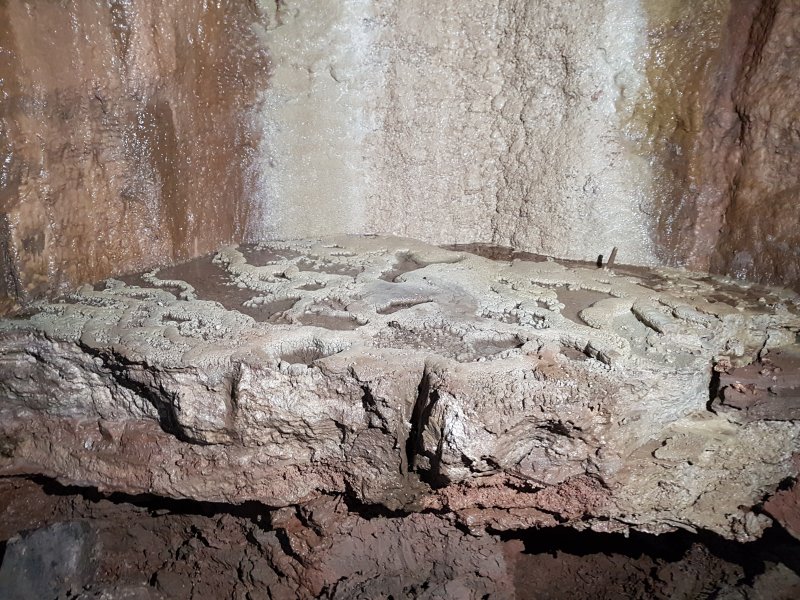 Gour pools in Cairn Chamber.
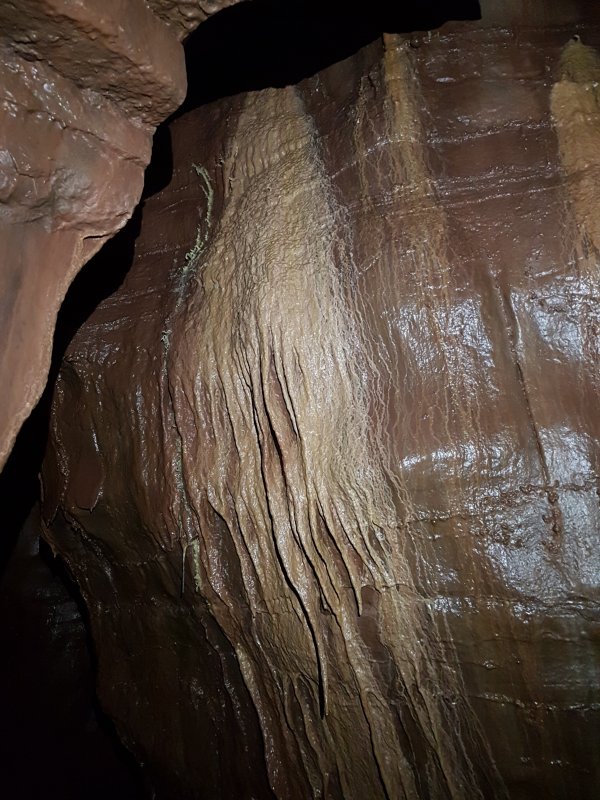 Calcite flow in a side passage on the northwest side of Cairn Chamber.
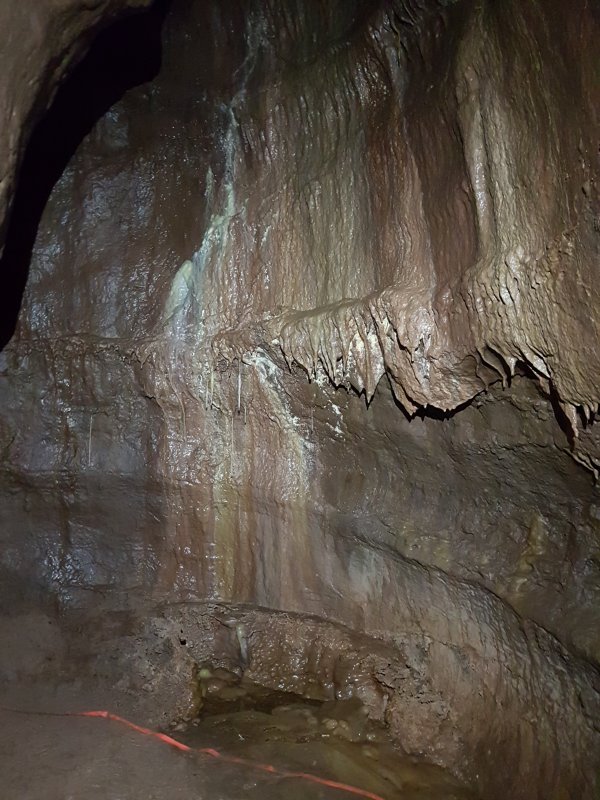 Calcite flow.
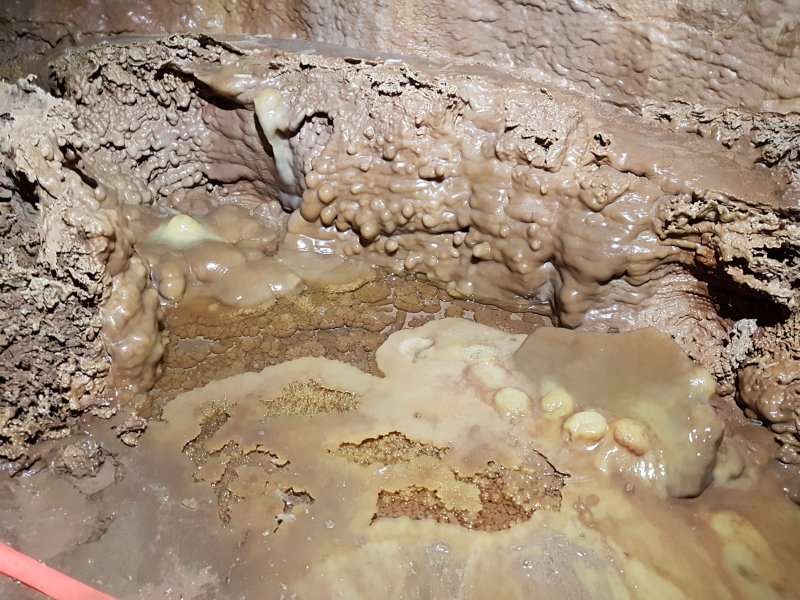 Crystal pool below the calcite flow.
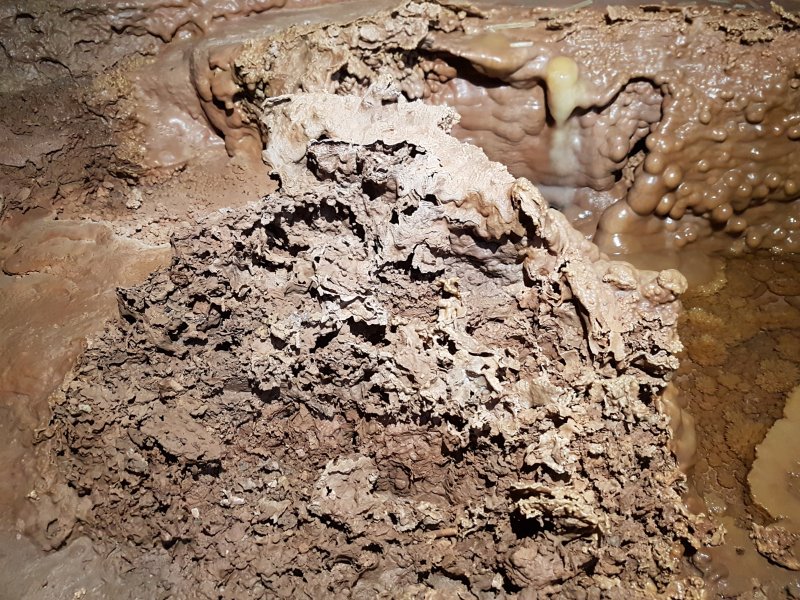 Decomposed calcite.
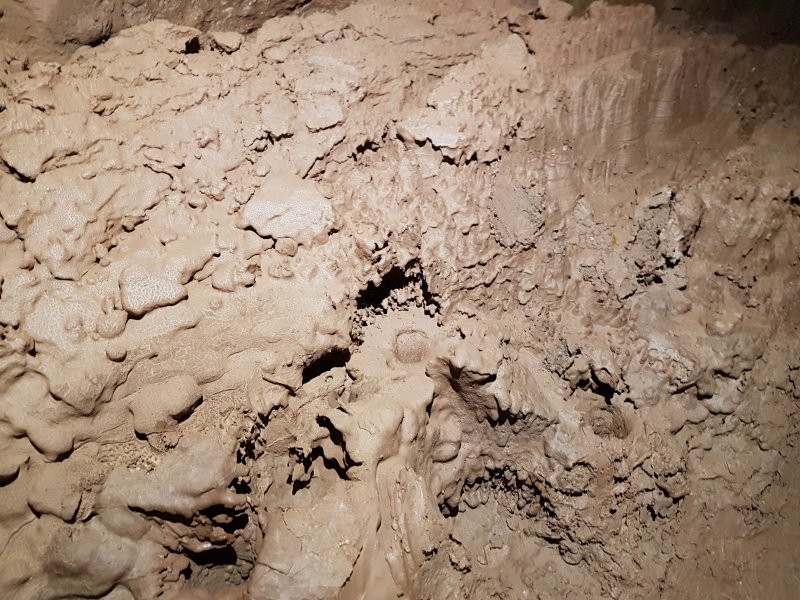 Mud formations in the passage.
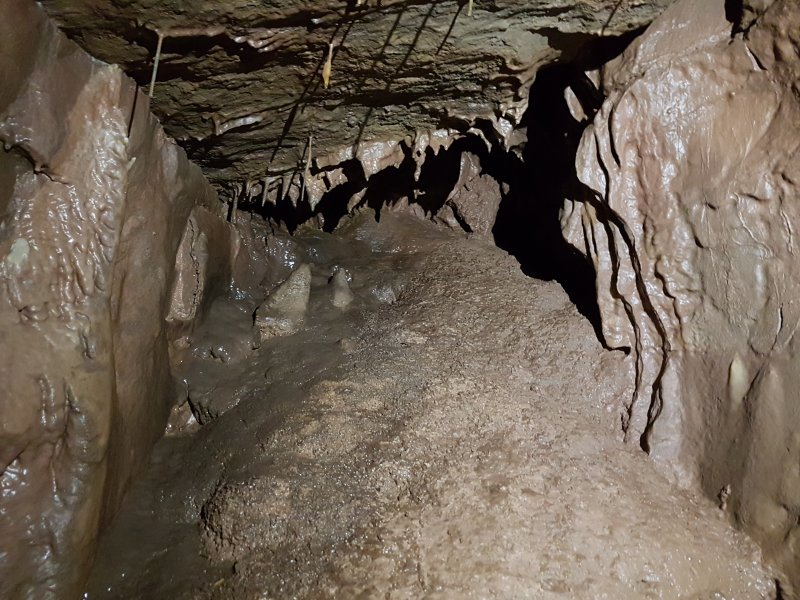 Calcited alcove.
 Calcite blockage at the end of the passage.
 Helictites at the junction of the side passage and main route to The Columns.
Lighting by Tarquin, Gareth and Paul
Helictites at the junction of the side passage and main route to The Columns.
Lighting by Tarquin, Gareth and Paul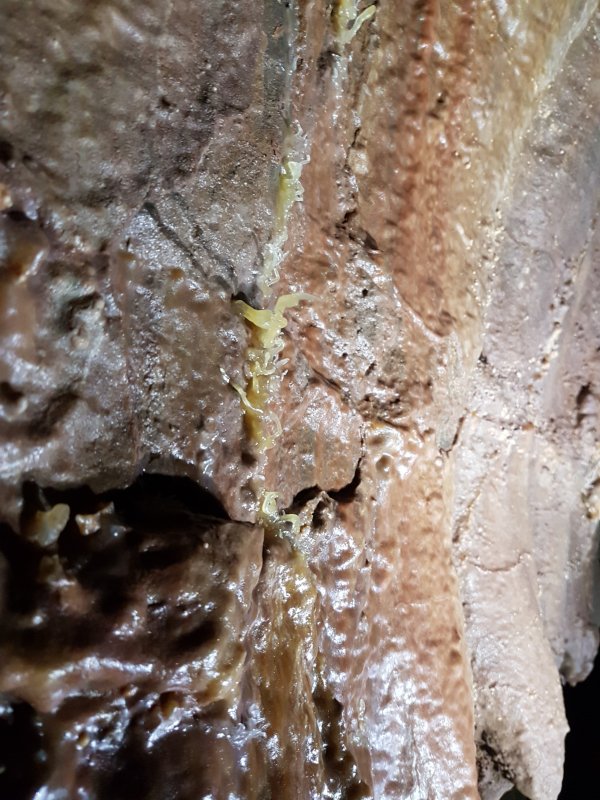 Helictites.
Lighting by Tarquin, Gareth and Paul
Helictites.
Lighting by Tarquin, Gareth and Paul Distinctive column on the route to The Columns.
Modelling by Paul
Distinctive column on the route to The Columns.
Modelling by Paul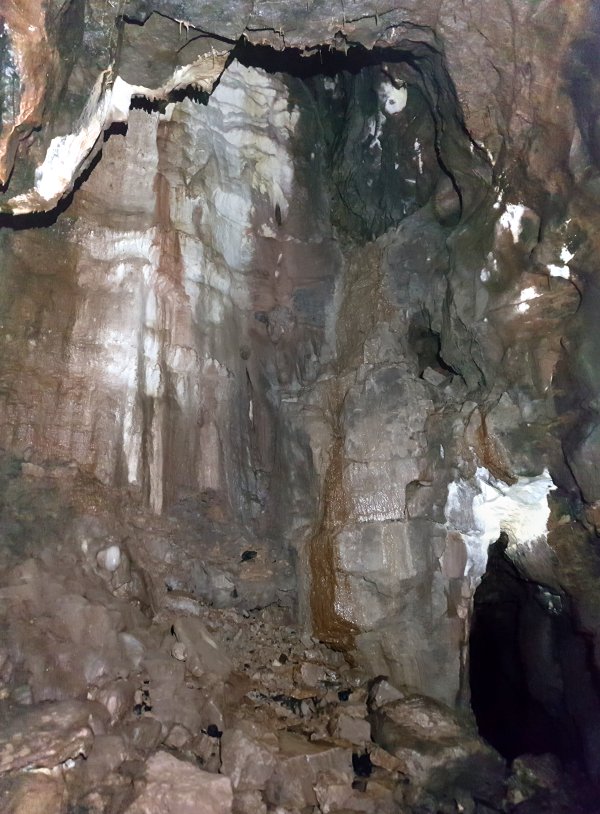 Tall chamber with a calcited aven, on the route to The Columns.
 Gateway to The Columns, which is open only on specific days, typically bank holidays.
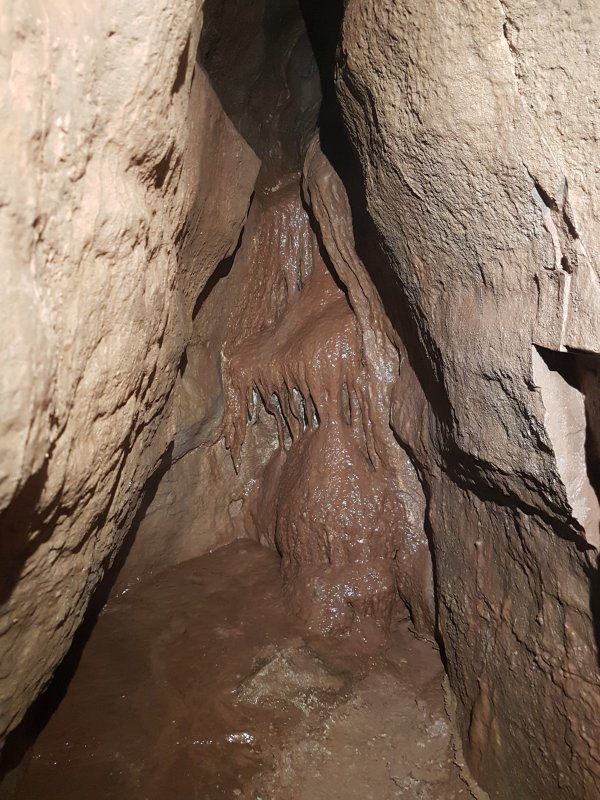 Stal in the side passages to the left of the main route, requiring a small climb to reach them.
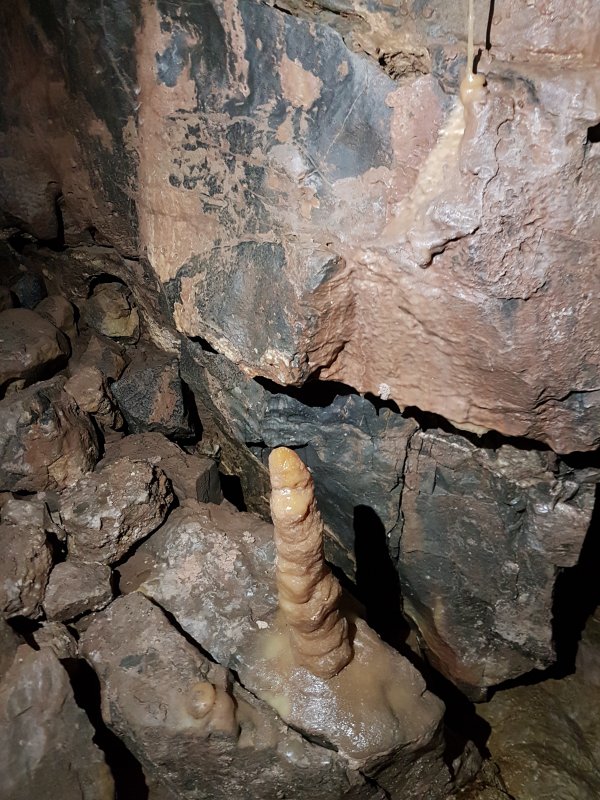 Stal in the left side passages.
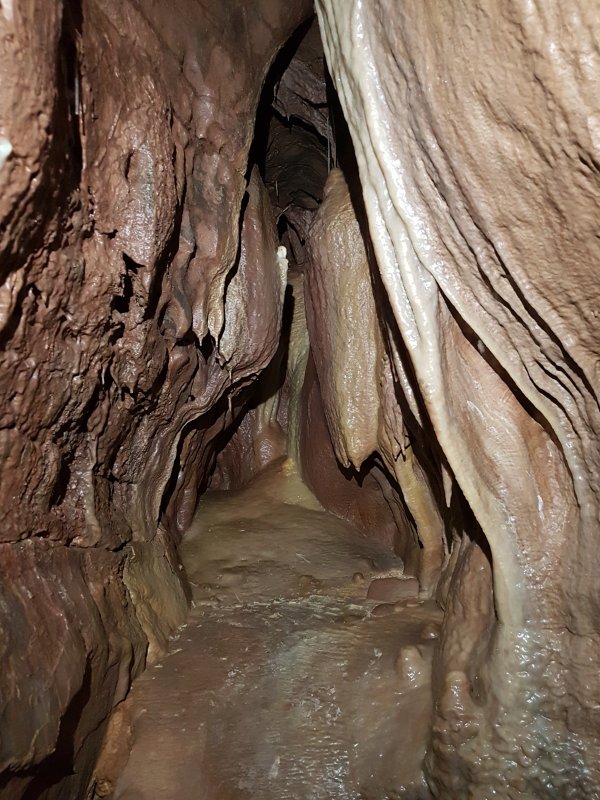 Stal in the left side passages.
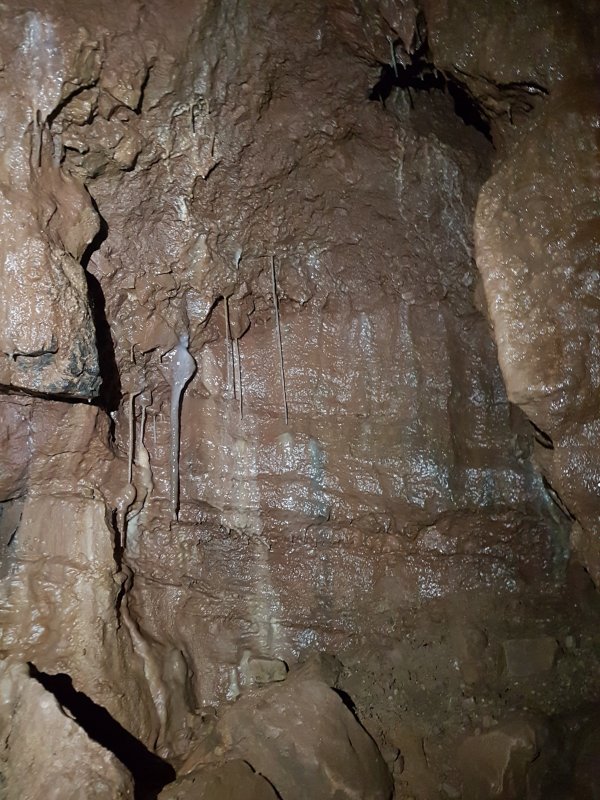 Stal in the side passages on the right side of the main route that lead to a chamber.
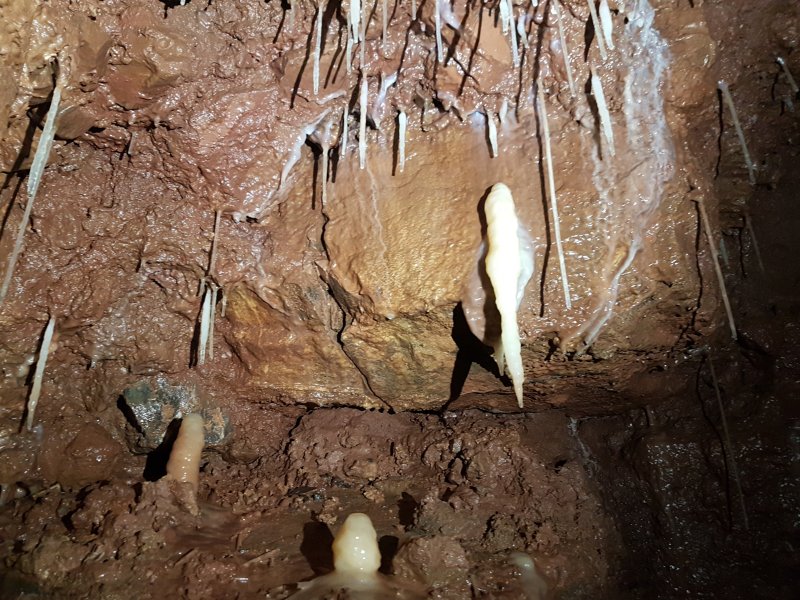 Stal in the right side passages.
 Pom pom formation in the chamber.
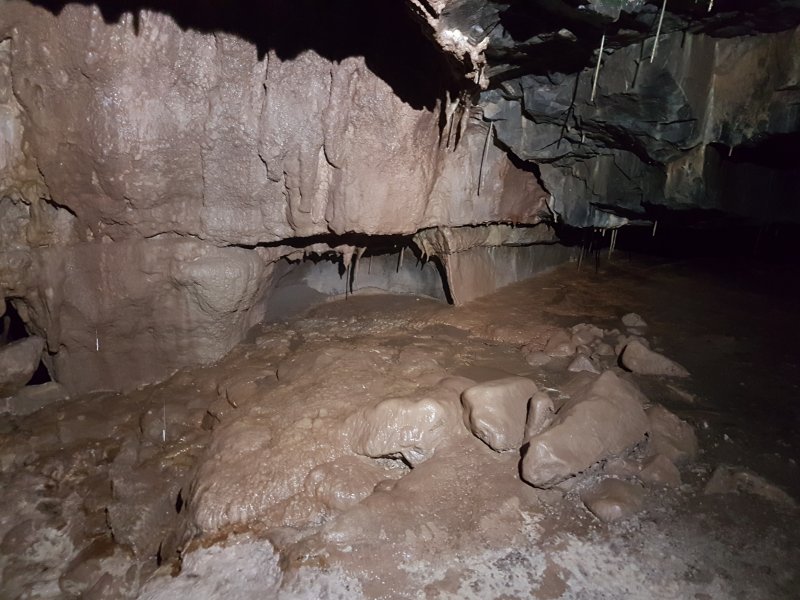 Stal in the chamber.
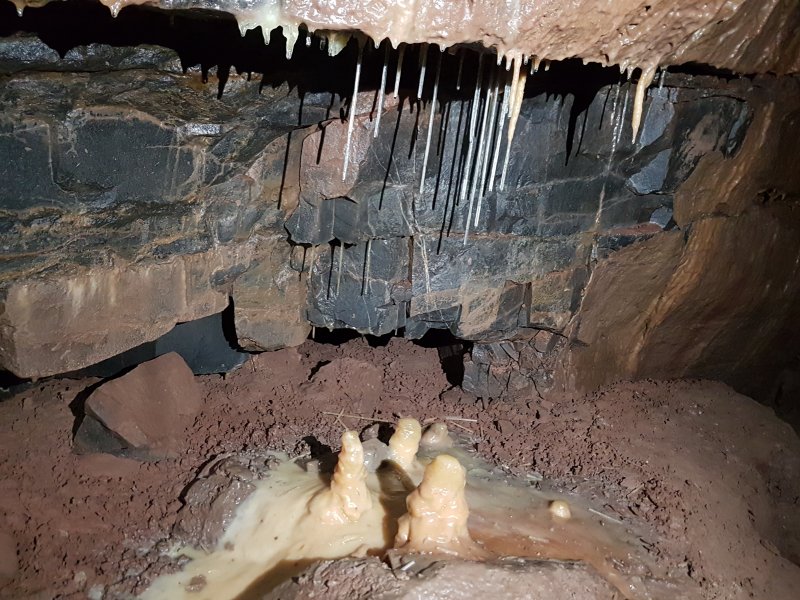 Stal in the chamber.
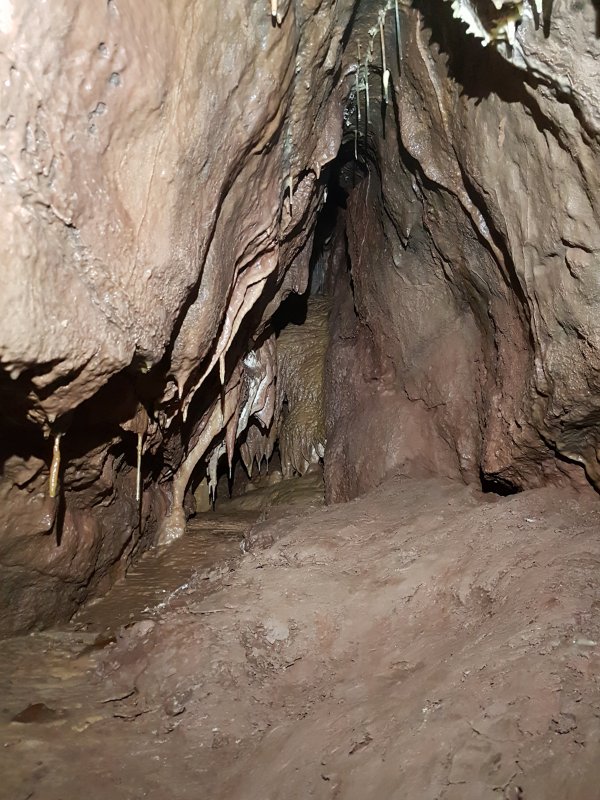 Formations in a side passage climbing above the chamber.
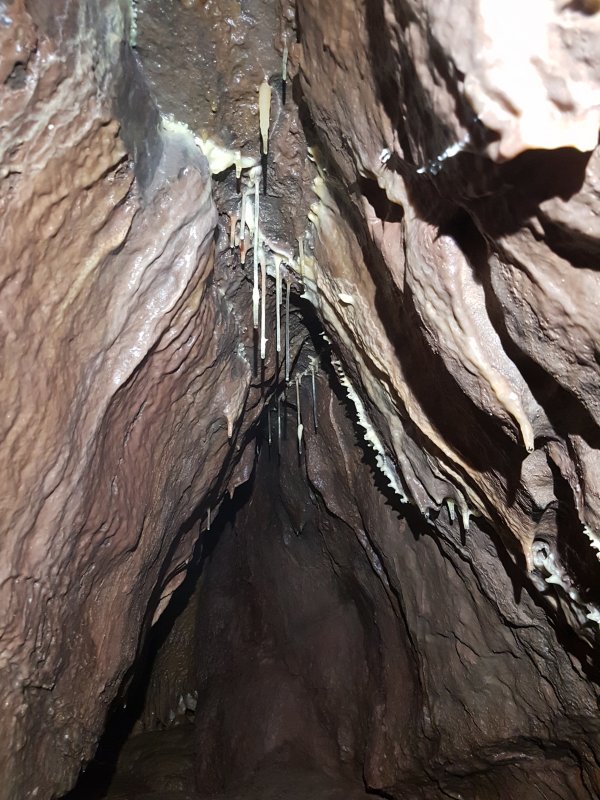 Formations in the side passage.
 Choked pit in the floor of the side passage.
 Formations in the side passage.
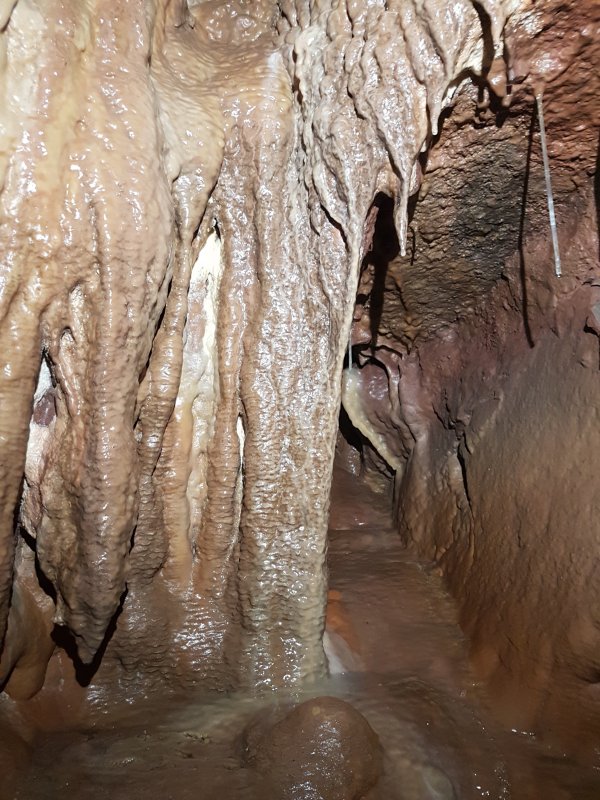 Formations in the side passage.
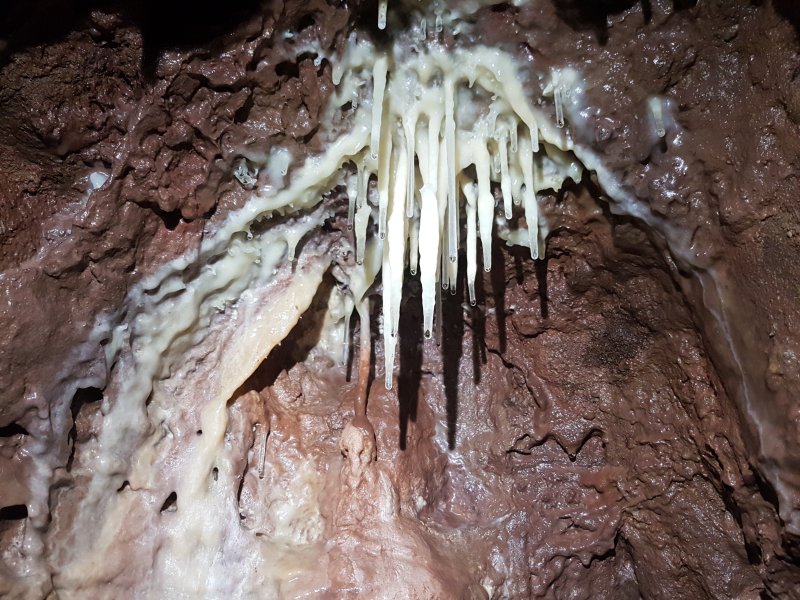 Formations in the side passage.
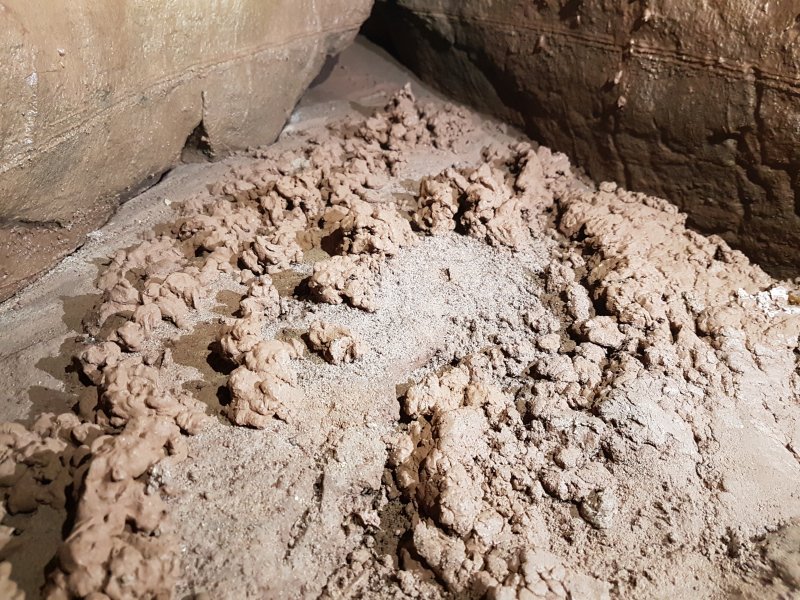 Mud formations in the route leading off the chamber.
Lighting by Tarquin and Gareth
Mud formations in the route leading off the chamber.
Lighting by Tarquin and Gareth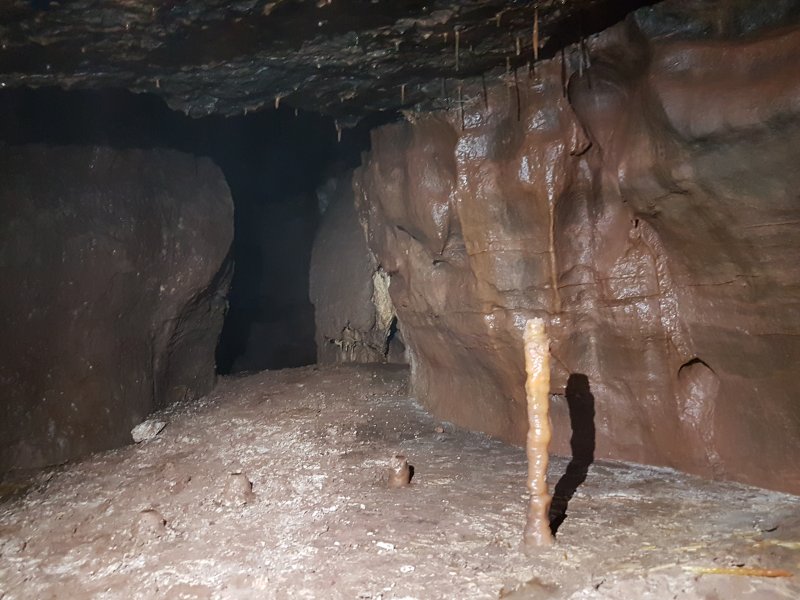 Stalagmite in the loop.
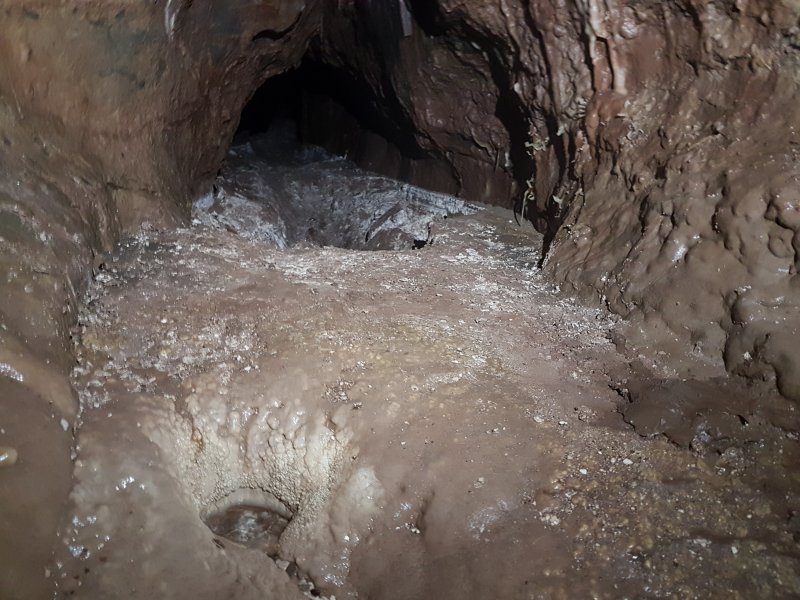 Upper side passage which forms a loop of its own. The floor is a dried moonmilk crystal pool.
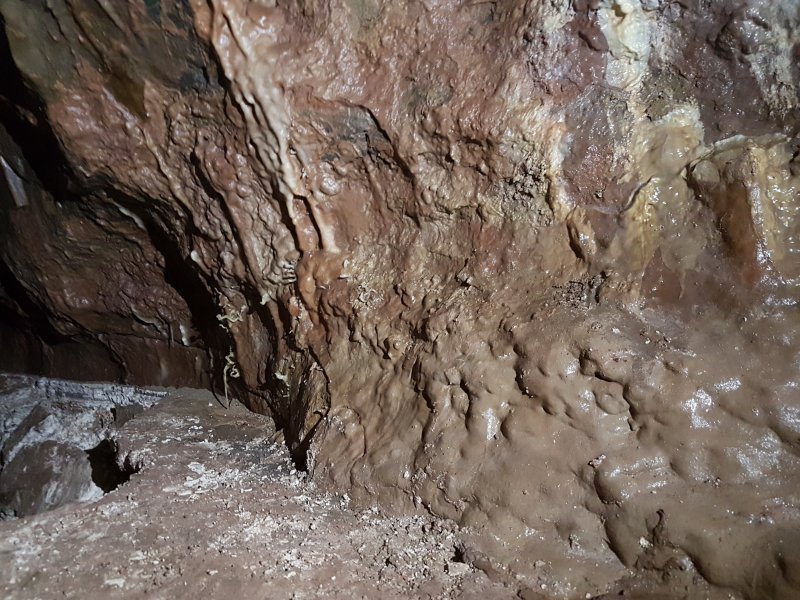 Helictites in the upper loop.
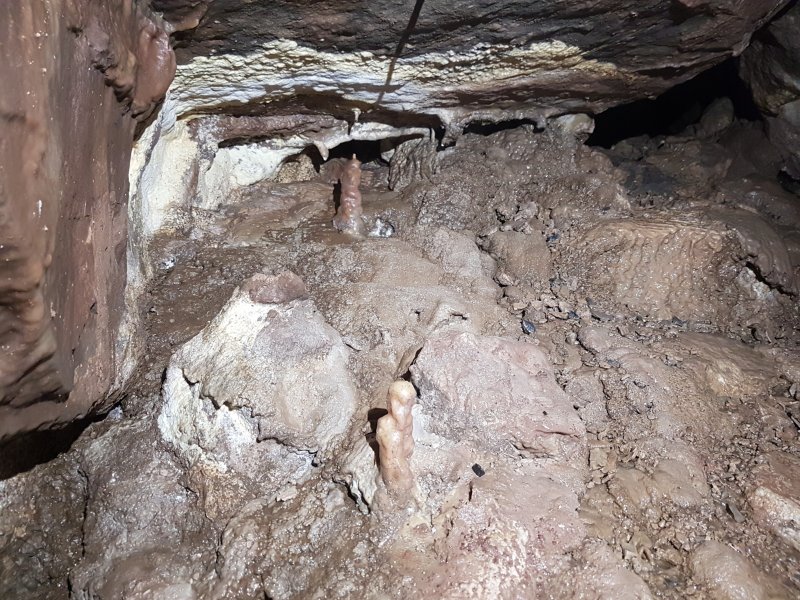 Formations in the loop.
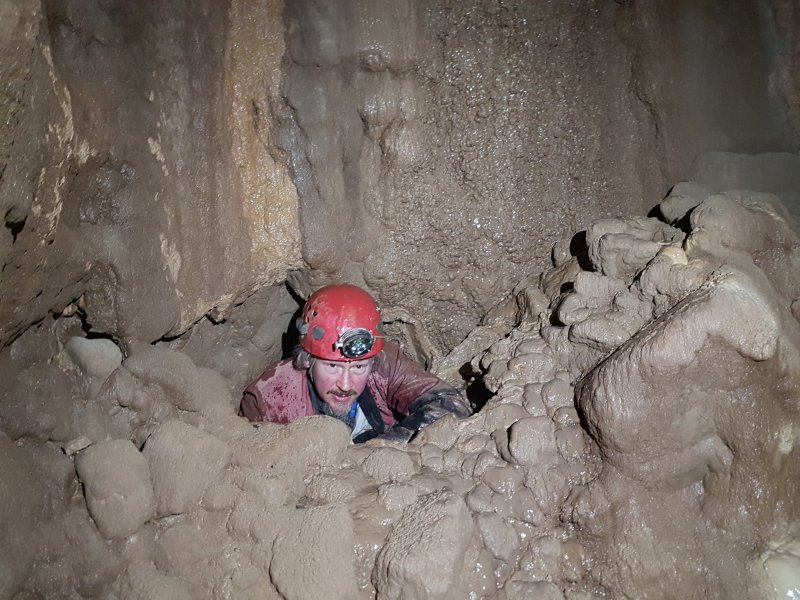 The loop pops through a hidden hole in the aven chamber.
Modelling by Gareth
The loop pops through a hidden hole in the aven chamber.
Modelling by Gareth At the end of Cairn Chamber is a climb up to an upper level, leading back out to Big Chamber Near The Entrance and the Brickyard. This is one of the few ways of getting between the levels without a pitch (the others are two routes from The Corkscrew, and Edward's Shortcut).
Modelling by Paul and Gareth, lighting by Tarquin, Paul and Gareth
At the end of Cairn Chamber is a climb up to an upper level, leading back out to Big Chamber Near The Entrance and the Brickyard. This is one of the few ways of getting between the levels without a pitch (the others are two routes from The Corkscrew, and Edward's Shortcut).
Modelling by Paul and Gareth, lighting by Tarquin, Paul and Gareth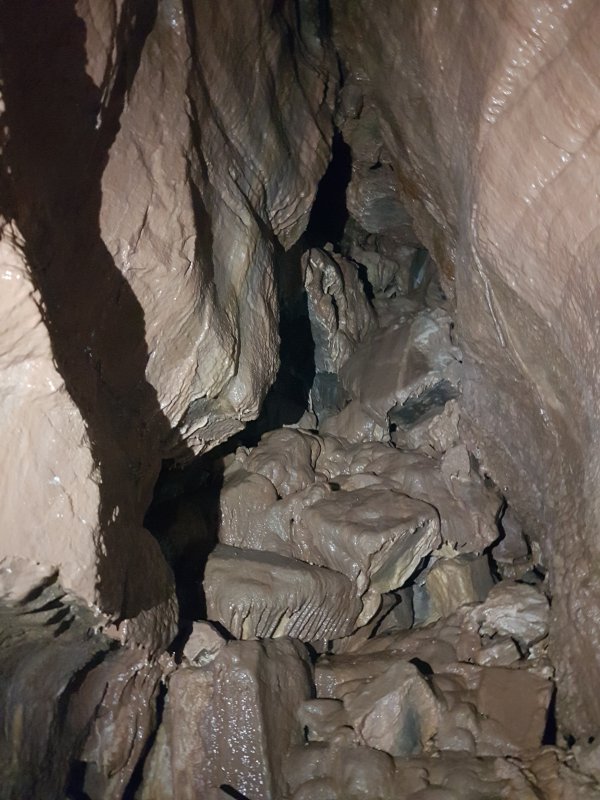 Climbing up past the calcited choke in Cairn Chamber.
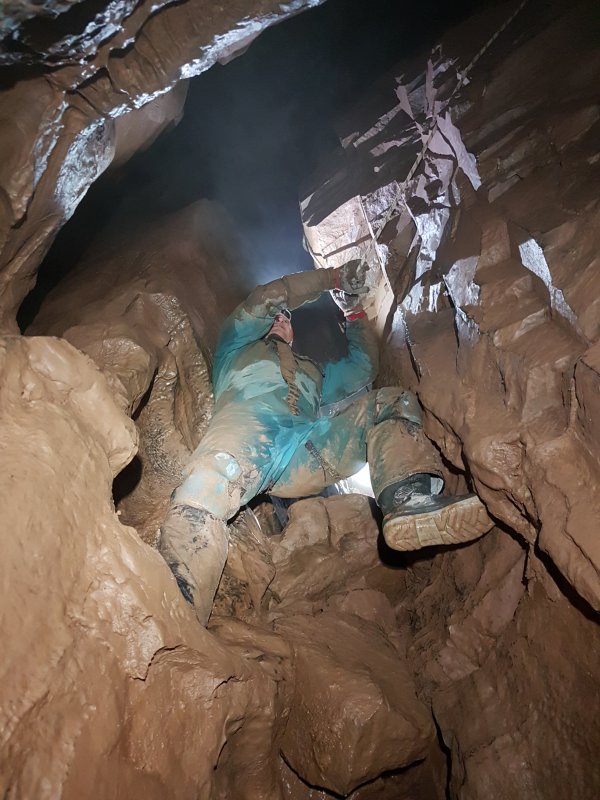 The route to Big Chamber passes over a traverse that can feel a bit exposed, over a pitch to a lower level.
Modelling by Paul, lighting by Tarquin, Paul and Gareth
The route to Big Chamber passes over a traverse that can feel a bit exposed, over a pitch to a lower level.
Modelling by Paul, lighting by Tarquin, Paul and Gareth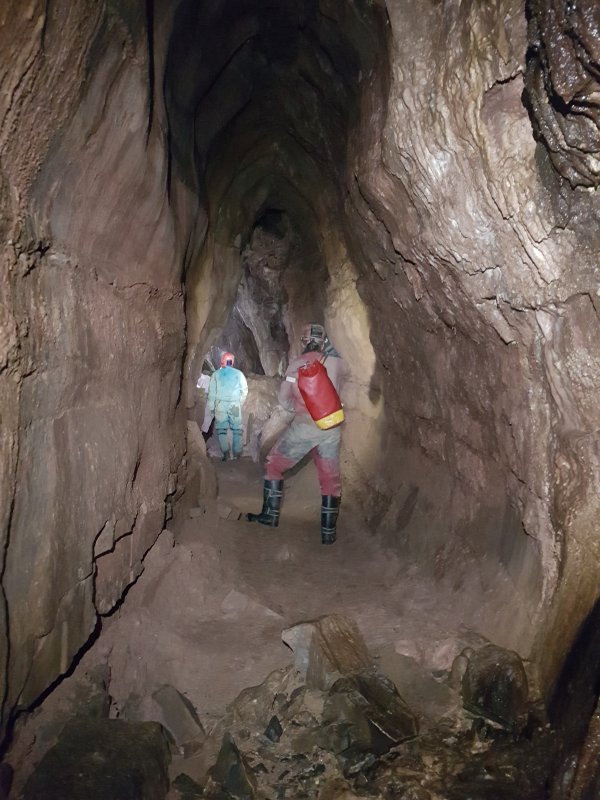 The right hand passage leading off from Big Chamber Near The Entrance.
Modelling by Gareth and Paul, lighting by Tarquin, Gareth and Paul
The right hand passage leading off from Big Chamber Near The Entrance.
Modelling by Gareth and Paul, lighting by Tarquin, Gareth and Paul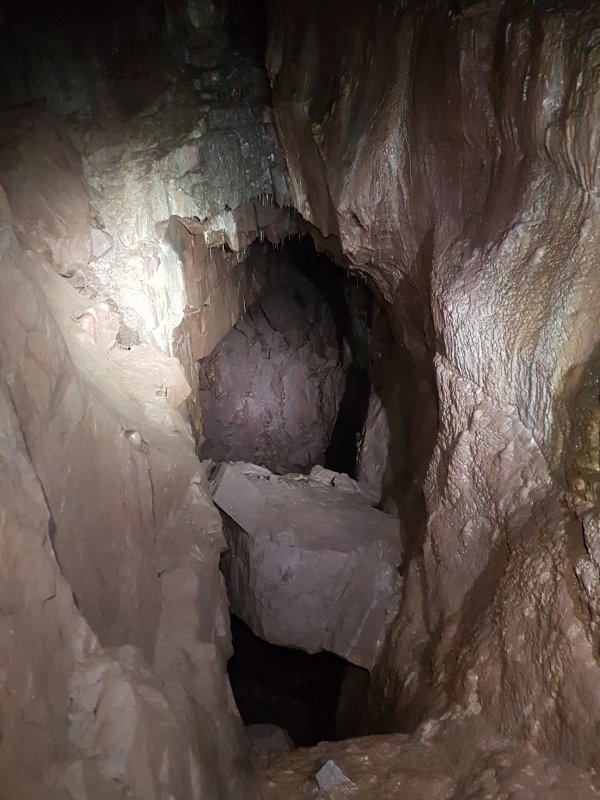 The passage ends at a pitch to a lower level, which leads to Labyrinth via a pitch.
Lighting by Tarquin and Gareth
The passage ends at a pitch to a lower level, which leads to Labyrinth via a pitch.
Lighting by Tarquin and Gareth