Ponterwyd area mines trip 15/05/2021
Unless otherwise stated, camera, setups, lighting, edits and gallery effects by Tarquin. Modelling and lighting at various points will be Alan Braybrooke, Ian Cooper, Ian Holmes, John Roe, Peter Dennis and Rich Hill.
This was a tour of three unrelated lead mines to the west of Ponterwyd (but not Ponterwyd Mine itself).
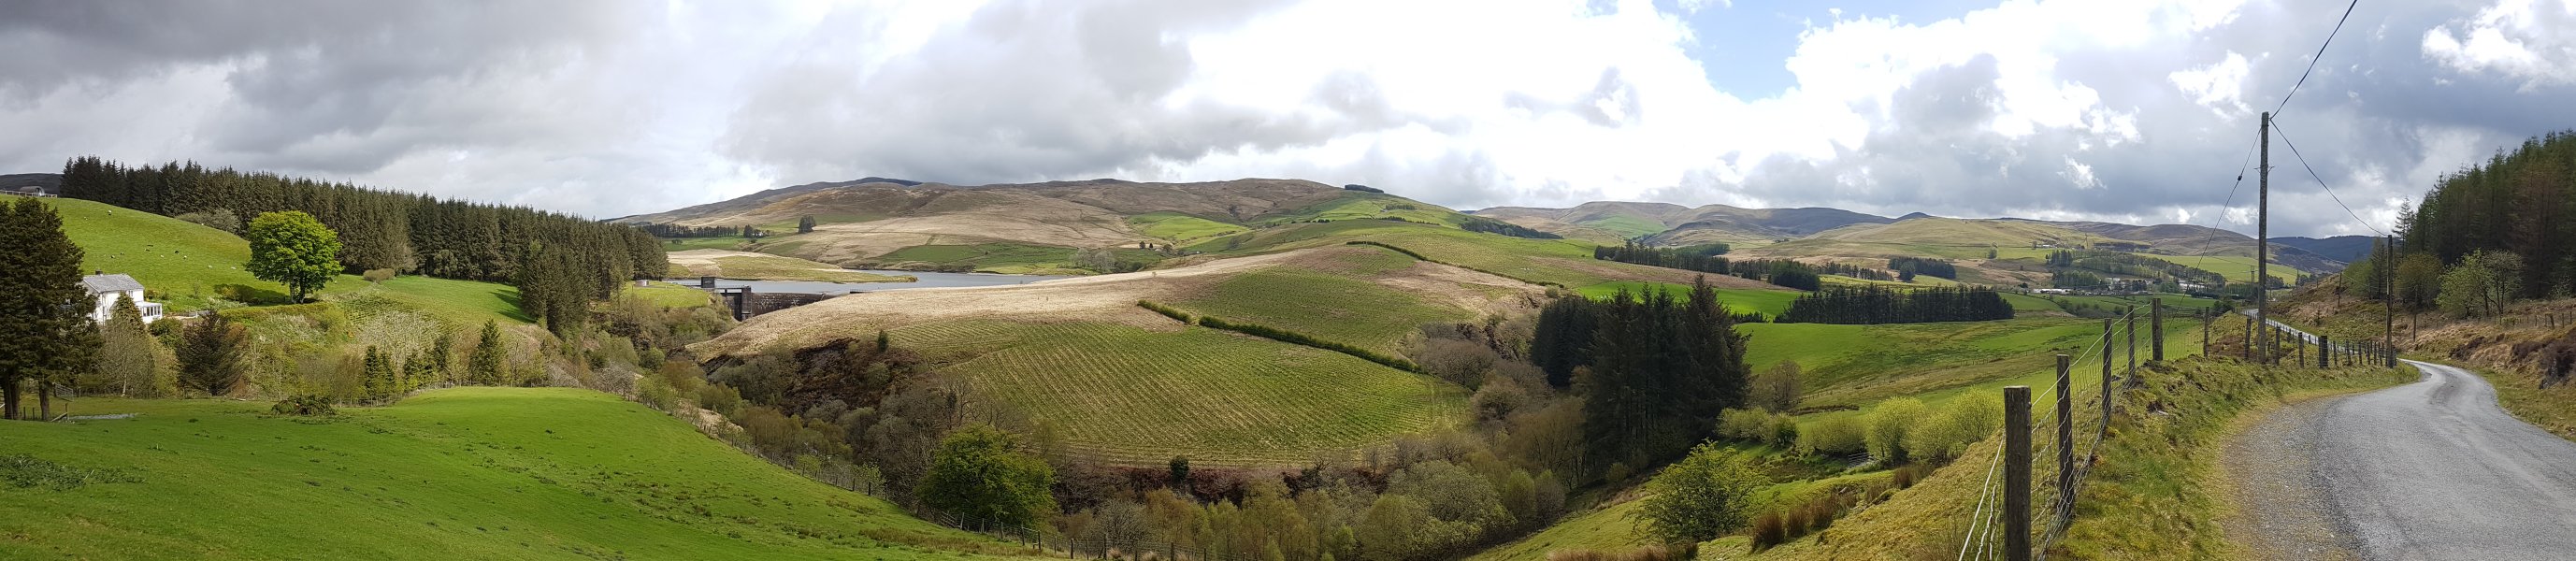
 View over the mid Afon Rheidol from the Craignant-mawr farm beside Dinas Reservoir. On the left behind the trees is the top of Disgwylfa Fawr (507 metres). In the middle are Y Garn (684 metres) and Drybedd (566 metres). On the right is the long, rumbling ridge of Draws Drum (over 570 metres).
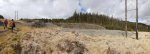 Walking up past the tips of Bog Mine. A lot of rock has been moved here, so this must have been a very active mine.
Modelling by Ian Holmes and Ian Cooper
Walking up past the tips of Bog Mine. A lot of rock has been moved here, so this must have been a very active mine.
Modelling by Ian Holmes and Ian Cooper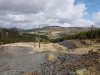 View towards the upper Rheidol. In the distance are Drosgol (550 metres), Banc Llechwedd-mawr (560 metres) and Clipyn Du (582 metres). On the right are Y Garn and Drybedd.
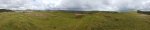 360° view from Mynydd Ponterwyd. From left to right; Banc Craignant Mawr (388 metres), Disgwylfa Fawr, the very distant top of Aran Fawddwy (905 metres), Drosgol, Banc Llechwedd-mawr, Clipyn Du, Can Hyddgen (566 metres), Y Garn, Drybedd, Cripiau (524 metres), Draws Drum, Pen y Garn (611 metres), Waun Claerddu's Carnyrhyrddod (594 metres), Bryn Rhosau (397 metres), Banc Bwa-drain (389 metres), a distant view of the sea, and Mynydd Ponterwyd (391 metres).
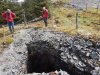 The top of Bog Mine's main shaft, which still has its ginging.
Modelling by Alan and Ian Holmes
The top of Bog Mine's main shaft, which still has its ginging.
Modelling by Alan and Ian Holmes This shaft had an engine house, and is therefore a bit more modern than the nearby Llywernog Mine.
 Looking down the shaft, there appears to be a blockage of dumped fence wire several metres down.
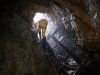 The fence wire can be bypassed, and the base of the accessible shaft is reached shortly afterwards.
Modelling by Peter, lighting by Tarquin, Peter and Sol
The fence wire can be bypassed, and the base of the accessible shaft is reached shortly afterwards.
Modelling by Peter, lighting by Tarquin, Peter and Sol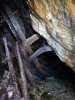 The shaft lands in a stoped out level, where there is a large wooden structure for guiding kibbles or skips (a square kibble) up the winze. This sort of structure is called a skipway if skips were used. Incidentally, we were carrying a gas meter, and it did not detect any bad air here.
Lighting by Tarquin, Rich and Peter
The shaft lands in a stoped out level, where there is a large wooden structure for guiding kibbles or skips (a square kibble) up the winze. This sort of structure is called a skipway if skips were used. Incidentally, we were carrying a gas meter, and it did not detect any bad air here.
Lighting by Tarquin, Rich and Peter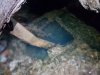 The winze continues downwards for an unknown depth.
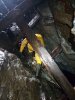 The only way to pass the winze is to clamber through the wooden guide structure.
Modelling by Peter, lighting by Tarquin and Peter
The only way to pass the winze is to clamber through the wooden guide structure.
Modelling by Peter, lighting by Tarquin and Peter Truck wheel being used as a pulley on the guide structure.
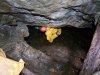 Climbing down the other side of the structure reaches a passage.
Modelling by Peter, lighting by Tarquin and Peter
Climbing down the other side of the structure reaches a passage.
Modelling by Peter, lighting by Tarquin and Peter The edge of the shaft, showing that it has been poorly capped with boards. We stayed well clear of it, as it may be a false floor for some distance. The wooden box structure has a large pipe coming out of the bottom, and may be a water trough at the top of a pumping stage.
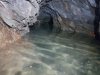 The passage continued onwards, but we did not want to get wet so early in the day, so we returned to surface.
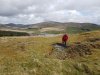 Standing over another shaft at the far ond of the ridge, in front of Drosgol, Banc Llechwedd-mawr, Y Garn and Drybedd.
Modelling by Alan
Standing over another shaft at the far ond of the ridge, in front of Drosgol, Banc Llechwedd-mawr, Y Garn and Drybedd.
Modelling by Alan This shaft has no protection.
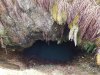 The shaft almost immediately lands in water, and climbing out would prove extremely difficult. This shaft is much higher than the main shaft, and has a much higher water level, so it would appear to be unconnected to the other shaft.
 If you do fall in, this passage supposedly connects to the shaft, providing an exit route. A short, dry passage lies below it.
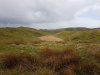 A boggy depression nearby, which shows why the shaft is flooded.
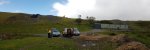 On the other side of the Llywernog Valley is the Blaen Brwyno farm, and the site of the Cwmbrwyno Mine. Seen here are a very obvious water wheel house on the left, and a former office building behind the sheds. In front of the sheds is an adit.
Modelling by Rich, Alan, Ian Holmes and John
On the other side of the Llywernog Valley is the Blaen Brwyno farm, and the site of the Cwmbrwyno Mine. Seen here are a very obvious water wheel house on the left, and a former office building behind the sheds. In front of the sheds is an adit.
Modelling by Rich, Alan, Ian Holmes and John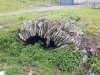 The adit may look enticing to a mine explorer.
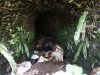 However, the adit is full of dumped rubbish, white goods, gas bottles and medical waste from the sheep farming. Apparently it chokes beneath the track, but this is not the place to go exploring to check on it.
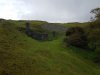 The former offiec building, or perhaps a smithy. That chimney is substantial.
 Top of the wheel pit. The main adit entrance is behind the camera.
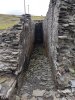 Front of the wheel pit.
 A very small drainage culvert near the wheel pit. This seems to be unrelated to the lower adit, but maybe it connected to it.
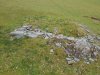 Remains of a building neer the wheel pit.
 At the upper end of the valley is a very large tip from the Cwmbrwyno Mine, which is a place where rare species of metal-tolerant lichens grow, and is therefore a protected habitat. Behind it is Llechwedd Du (330 metres).
Modelling by Ian Cooper
At the upper end of the valley is a very large tip from the Cwmbrwyno Mine, which is a place where rare species of metal-tolerant lichens grow, and is therefore a protected habitat. Behind it is Llechwedd Du (330 metres).
Modelling by Ian Cooper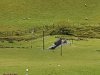 There is a second wheel pit slightly further down the valley, and there are some other entrances there too.
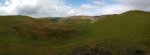 View over Nant yr Arian from Cefn Cwmbrwyno. In the valley is the forested Esgair Nanyrarian ridge. Behind that are Pen y Graig Ddu (323 metres) with Banc Coed-laith (326 metres) down to the left, and Banc Trawsnant (406 metres). Banc y Garn (437 metres), Pen Craigypistyll (455 metres) and the distant Mynydd Moel (863 metres) peer over the ridge behind Mynydd Merch (396 metres). Pen y Darren (392 metres) is on the right.
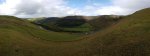 Nant yr Arian. The mountais are the same as the last picture, with Blaen Llywernog (401 metres) now visible on the right, and Pen Pumlumon Fawr (752 metres) and Y Garn in the distant right.
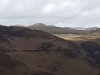 Distant view of Pen Craigypistyll, Pen y Gadair (893 metres) and Mynydd Moel.
 Pen Pumlumon Fawr and Y Garn.
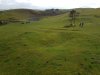 Looking from the top of the Cwmbrwyno Mine site along the lode. Several entrances are visible, as well as some stope collapses. The part near the camera seems to be a scrape and a series of drainage ditches aiming water away from the lode.
Modelling by Peter, Rich and Ian Cooper
Looking from the top of the Cwmbrwyno Mine site along the lode. Several entrances are visible, as well as some stope collapses. The part near the camera seems to be a scrape and a series of drainage ditches aiming water away from the lode.
Modelling by Peter, Rich and Ian Cooper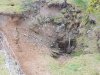 The first depression is very new, and it seems to be a stope that has collapsed. It has been used as a rubbish tip.
 The first entrance is fenced off to prevent sheep falling in, like most of the others.
Modelling by Ian Holmes, John, Peter, Ian Cooper, Rich and Alan
The first entrance is fenced off to prevent sheep falling in, like most of the others.
Modelling by Ian Holmes, John, Peter, Ian Cooper, Rich and Alan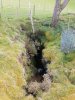 Nevertheless, sheep being what they are, one has managed to get past the fence and fall in. Another decaying sheep is up at the top tangled in the bush. The hole is too steep to climb, even for us.
Modelling by Mary and her little lamb
Nevertheless, sheep being what they are, one has managed to get past the fence and fall in. Another decaying sheep is up at the top tangled in the bush. The hole is too steep to climb, even for us.
Modelling by Mary and her little lamb The next hole is also an abrupt drop, but this one can be climbed with care.
 The hole has once again been used as an illegal rubbish dump. This time, there is corrugated asbestos mixed in with the farm waste. This will have taken significant effort to take up the hill and be put here. It did not fall in by accident.
 This seems to be the top of a stope, and was probably accessed from below, but excavation would not be possible here.
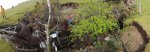 The next hole is a horrendous mess of dumped waste. There is absolutely no pretence here. It was not an attempt to save sheep. Dumped waste is dumped waste. The environmental pollution must be substantial. These depressions are just being used to dispose of waste and avoid official waste disposal services.
Modelling by Peter, Rich and Ian Cooper
The next hole is a horrendous mess of dumped waste. There is absolutely no pretence here. It was not an attempt to save sheep. Dumped waste is dumped waste. The environmental pollution must be substantial. These depressions are just being used to dispose of waste and avoid official waste disposal services.
Modelling by Peter, Rich and Ian Cooper Down the bottom are several chemical containers. We did not dare venture down there to see if there was any further passage.
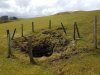 The next hole is the most substantial of all, and rather unassuming, with just a little fence.
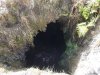 This hole has several more bags of dumped junk. A very steep winze leads off at the bottom, and it is not possible to free climb. We will see this hole from part way down later on.
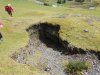 The next depression is a scrape.
Modelling by Ian Holmes and John
The next depression is a scrape.
Modelling by Ian Holmes and John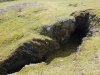 The other end of it seems to have been used as a shallow drift. This no longer sits on the original lode, and has deviated from it by about 45°.
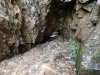 It passes through a low crawl into another skylight, but given the amount of rubbish everywhere, I wasn't willing to crawl on anything.
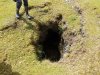 The last hole of the main group has no fence, so surely it should be safe, no?
Modelling by Ian Holmes
The last hole of the main group has no fence, so surely it should be safe, no?
Modelling by Ian Holmes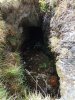 It drops into the drift passage, and descends very steeply. Once again, it is absolutely full of rubbish, and a lot of wool.
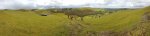 Some distance away, roughly in line with the new direction, is small outcrop. On the left is Cefn Cwmbrwyno, then Banc Bwa-drain, Pen y Garn, Mynydd Ffynnon-wen (378 metres), Carnyrhyrddod, Llechwedd Du, Allt Ddu (323 metres), and Banc Hafodau (346 metres). On the other side of the deep valley are Banc Coed-laith and Pen y Graig Ddu. In the sunlit valley is a very tight S-bend in the A-road, which catches out drivers on their way to Aberystwyth.
Modelling by Alan, Ian Holmes, John, Peter, Ian Cooper and Rich
Some distance away, roughly in line with the new direction, is small outcrop. On the left is Cefn Cwmbrwyno, then Banc Bwa-drain, Pen y Garn, Mynydd Ffynnon-wen (378 metres), Carnyrhyrddod, Llechwedd Du, Allt Ddu (323 metres), and Banc Hafodau (346 metres). On the other side of the deep valley are Banc Coed-laith and Pen y Graig Ddu. In the sunlit valley is a very tight S-bend in the A-road, which catches out drivers on their way to Aberystwyth.
Modelling by Alan, Ian Holmes, John, Peter, Ian Cooper and Rich A small hole in the outcrop, which seems to be unrelated to the main group.
Modelling by John and Ian Holmes
A small hole in the outcrop, which seems to be unrelated to the main group.
Modelling by John and Ian Holmes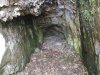 It is only a shallow trial, barely long enough to get out of the sun.
 Entrance to the main Cwmbrwyno Mine adit. The other entrances run along the ridge in the background.
Modelling by Peter, Alan and Rich
Entrance to the main Cwmbrwyno Mine adit. The other entrances run along the ridge in the background.
Modelling by Peter, Alan and Rich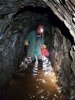 The adit starts, rather insultingly, by forcing you to get wet feet.
Modelling by Alan, lighting by Tarquin, Alan and Sol
The adit starts, rather insultingly, by forcing you to get wet feet.
Modelling by Alan, lighting by Tarquin, Alan and Sol The early adit.
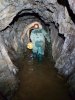 It remains similarly wet for quite some time.
Modelling by Alan, lighting by Tarquin, Alan and Peter
It remains similarly wet for quite some time.
Modelling by Alan, lighting by Tarquin, Alan and Peter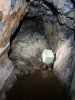 The water ends at a corner, where it is held back by a pile of rocks.
Lighting by Tarquin and Alan
The water ends at a corner, where it is held back by a pile of rocks.
Lighting by Tarquin and Alan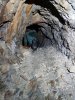 Crawling over the rock pile.
Modelling by Alan, lighting by Tarquin and Alan
Crawling over the rock pile.
Modelling by Alan, lighting by Tarquin and Alan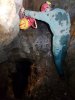 The crawl ends at a traverse over a very deep hole. The ledge is not particularly great. It feels soft at first, then becomes a slope with gravel on it.
Modelling by Alan, lighting by Tarquin and Alan
The crawl ends at a traverse over a very deep hole. The ledge is not particularly great. It feels soft at first, then becomes a slope with gravel on it.
Modelling by Alan, lighting by Tarquin and Alan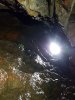 Looking up perhaps 20 metres or more to the surface. This is the fenced hole that we saw earlier. It is definitely not free climbable.
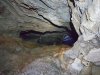 Looking down below the traverse, into a heavily stoped lode. There is a small ledge 5 metres down with the stope continuing on the other side of it, but the floor begins to slope away at 15-20 metres down, and seems to keep going. We do not know how deep this is, but a variety of hangers and spits are at the top, so someone has descended here. The bag on the ledge is more rubbish that has fallen down, but down there must be more at the bottom. The ledge is covered in loose stones, so this is not a great place to descend.
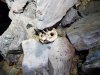 Sheep skull on the ledge. It is at this moment that you realise that the smell is not rubbish but dead sheep, and the soft patch at the start of the ledge is the remains of a very well decomposed sheep, liberally splattered up and down the walls. It was everywhere, like pulled mutton.
Modelling by Sheila
Sheep skull on the ledge. It is at this moment that you realise that the smell is not rubbish but dead sheep, and the soft patch at the start of the ledge is the remains of a very well decomposed sheep, liberally splattered up and down the walls. It was everywhere, like pulled mutton.
Modelling by Sheila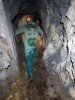 The continuing passage is thankfully dry.
Modelling by Alan, lighting by Tarquin and Alan
The continuing passage is thankfully dry.
Modelling by Alan, lighting by Tarquin and Alan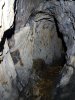 Light coloured coating on the walls.
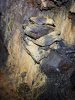 Yellow stained walls, presumably sulphur or ochre.
 Orange flowstone.
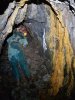 An arch of orange flowstone.
Modelling by Alan, lighting by Tarquin and Alan
An arch of orange flowstone.
Modelling by Alan, lighting by Tarquin and Alan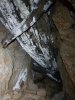 The passage ends abruptly at a small stope with a ceiling of deads. The wood is visibly bowing under the weight of the rocks, and looks set to fail soon. Not a comfortable place.
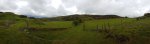 Walking through fields near Ysbyty Cynfyn. The hills are Erw Barfau (428 metres), Mynydd Bach (370 metres), Pen Felin-wynt (372 metres) and the long ridge of Bryn Bras (370 metres).
Modelling by Ian Holmes, John, Peter, Alan and Rich
Walking through fields near Ysbyty Cynfyn. The hills are Erw Barfau (428 metres), Mynydd Bach (370 metres), Pen Felin-wynt (372 metres) and the long ridge of Bryn Bras (370 metres).
Modelling by Ian Holmes, John, Peter, Alan and Rich It looks beautiful, and it really was. Right up until the walk back, when there were some locals with a high powered rifle, complete with silencer and long distance scope, shooting at the bank right beside the public footpath. They did at least stop shooting as we walked past, but restarted as soon as we were out of their sight, but still in the firing line if they were to miss. Pretty sure that is not how it's supposed to be done.
Modelling by Ian Holmes, John, Alan, Rich and Peter
It looks beautiful, and it really was. Right up until the walk back, when there were some locals with a high powered rifle, complete with silencer and long distance scope, shooting at the bank right beside the public footpath. They did at least stop shooting as we walked past, but restarted as soon as we were out of their sight, but still in the firing line if they were to miss. Pretty sure that is not how it's supposed to be done.
Modelling by Ian Holmes, John, Alan, Rich and Peter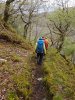 Dropping into the woodlands around the Afon Rheidol.
Modelling by Rich, Alan, John and Peter
Dropping into the woodlands around the Afon Rheidol.
Modelling by Rich, Alan, John and Peter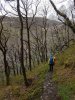 Afon Rheidol woodland.
Modelling by Rich, Alan, John, Peter and Ian Holmes
Afon Rheidol woodland.
Modelling by Rich, Alan, John, Peter and Ian Holmes The Rheidol gorge, most definitely not navigable without a kayak.
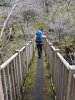 Parson's Bridge, a disturbingly bouncy bridge over the gorge. From here we ignore the path to the left, and continue along a path ahead, conveniently marked with a sign saying that the path was not a path. And these were not the droids we were looking for.
Modelling by Rich, Alan, John and Peter
Parson's Bridge, a disturbingly bouncy bridge over the gorge. From here we ignore the path to the left, and continue along a path ahead, conveniently marked with a sign saying that the path was not a path. And these were not the droids we were looking for.
Modelling by Rich, Alan, John and Peter Upstream Rheidol gorge.
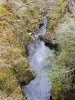 Downstream Rheidol gorge.
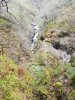 The gorge turns a corner, but continuing along the same line, directly under the path, is a trial adit.
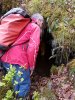 The trial adit entrance.
Modelling by Alan
The trial adit entrance.
Modelling by Alan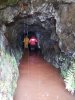 The start of the trial adit. Wet feet again.
Modelling by Ian Holmes and Peter
The start of the trial adit. Wet feet again.
Modelling by Ian Holmes and Peter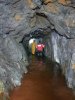 Not a bad length for a trial adit. But also a bit meh.
Modelling by Ian Holmes and Peter
Not a bad length for a trial adit. But also a bit meh.
Modelling by Ian Holmes and Peter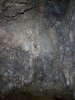 A blank end, with the remains of shotholes.
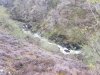 Upstream, the gorge turns into steep but navigable sides.
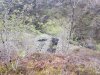 The gentle bank of the river was used as the dressing floor, and had its own water wheel for the purpose. This was its wheel pit.
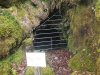 A little further upstream, the Temple mines start. There are three levels of adit here. This is the middle level. There is an upper level above it that ends at a the top of a deep stope, but we did not have the time to visit it.
 The middle level is gated without any way to open the gate. It is apparently unsafe to follow because it drops into the level below. It is likely to have been a channel for the water wheel sweep rods or chains, rather than for miners.
 At the next stream, where there is a stile on our not-a-path (!), we take a path heading down to the river bank.
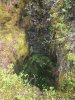 There is a shaft beside the path, but it is fenced off so we could not see how far down it went.
 On the opposite side of the river are two trial adits, one in each of the clefts.
 Looking downstream towards the dressing floor.
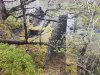 Looking down onto the main Temple mine water wheel pit. There is a romantic dreaminess to the way it looks from here.
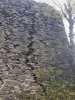 From the bottom, a large fracture is visible, so it might be a little unstable.
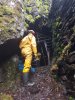 The lower adit's entrance is right beside the water wheel.
Modelling by Peter and Rich, lighting by Sol and Rich
The lower adit's entrance is right beside the water wheel.
Modelling by Peter and Rich, lighting by Sol and Rich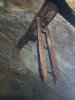 Spike aimed at your head just inside the entrance.
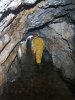 The start of the lower Temple mine adit.
Modelling by Peter and Rich, lighting by Tarquin, Peter and Rich
The start of the lower Temple mine adit.
Modelling by Peter and Rich, lighting by Tarquin, Peter and Rich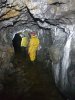 Before the stope.
Modelling by Peter and Rich, lighting by Tarquin, Peter and Rich
Before the stope.
Modelling by Peter and Rich, lighting by Tarquin, Peter and Rich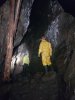 The stope is an enormous surprise, suddenly soaring up into the darkness.
Modelling by Peter and Rich, lighting by Tarquin, Peter and Rich
The stope is an enormous surprise, suddenly soaring up into the darkness.
Modelling by Peter and Rich, lighting by Tarquin, Peter and Rich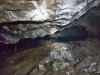 Looking up, a ceiling can be seen, except that as you can see from the hole in it, it is not a ceiling. Those are wooden boards supporting rocks. So if you are walking along the rubble floor in the levels above - presumably the top level - you are walking on that false floor, way up in the ceiling. Pretty horrifying.
Lighting by Tarquin and John
Looking up, a ceiling can be seen, except that as you can see from the hole in it, it is not a ceiling. Those are wooden boards supporting rocks. So if you are walking along the rubble floor in the levels above - presumably the top level - you are walking on that false floor, way up in the ceiling. Pretty horrifying.
Lighting by Tarquin and John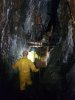 Then we pass an oddly placed headframe for a mineshaft. Except we are part way underground already.
Modelling by Peter and Rich, lighting by Tarquin, Peter and Rich
Then we pass an oddly placed headframe for a mineshaft. Except we are part way underground already.
Modelling by Peter and Rich, lighting by Tarquin, Peter and Rich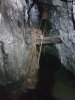 The headframe.
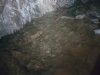 And that is when you realise that the flat floor underwater is not a solid floor. It is a mineshaft covered with some rotting wooden boards. Sneak carefully around the edge.
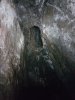 The middle level falls through the ceiling above. Presumably the sweep rods or chains were brought down through one of these holes, via the headframe, and into the capped shaft.
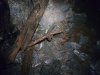 Winze chain.
 Hole into the upper levels, where someone has rigged a rope to explore them.
Lighting by Tarquin and Rich
Hole into the upper levels, where someone has rigged a rope to explore them.
Lighting by Tarquin and Rich In the end of the stope.
Modelling by Peter, Alan, Rich and John, lighting by Tarquin, Peter, Alan, Rich and John
In the end of the stope.
Modelling by Peter, Alan, Rich and John, lighting by Tarquin, Peter, Alan, Rich and John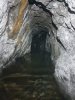 The level continues beyond the stopes.
 And ends at an abrupt wall.
 View over the mid Afon Rheidol from the Craignant-mawr farm beside Dinas Reservoir. On the left behind the trees is the top of Disgwylfa Fawr (507 metres). In the middle are Y Garn (684 metres) and Drybedd (566 metres). On the right is the long, rumbling ridge of Draws Drum (over 570 metres).
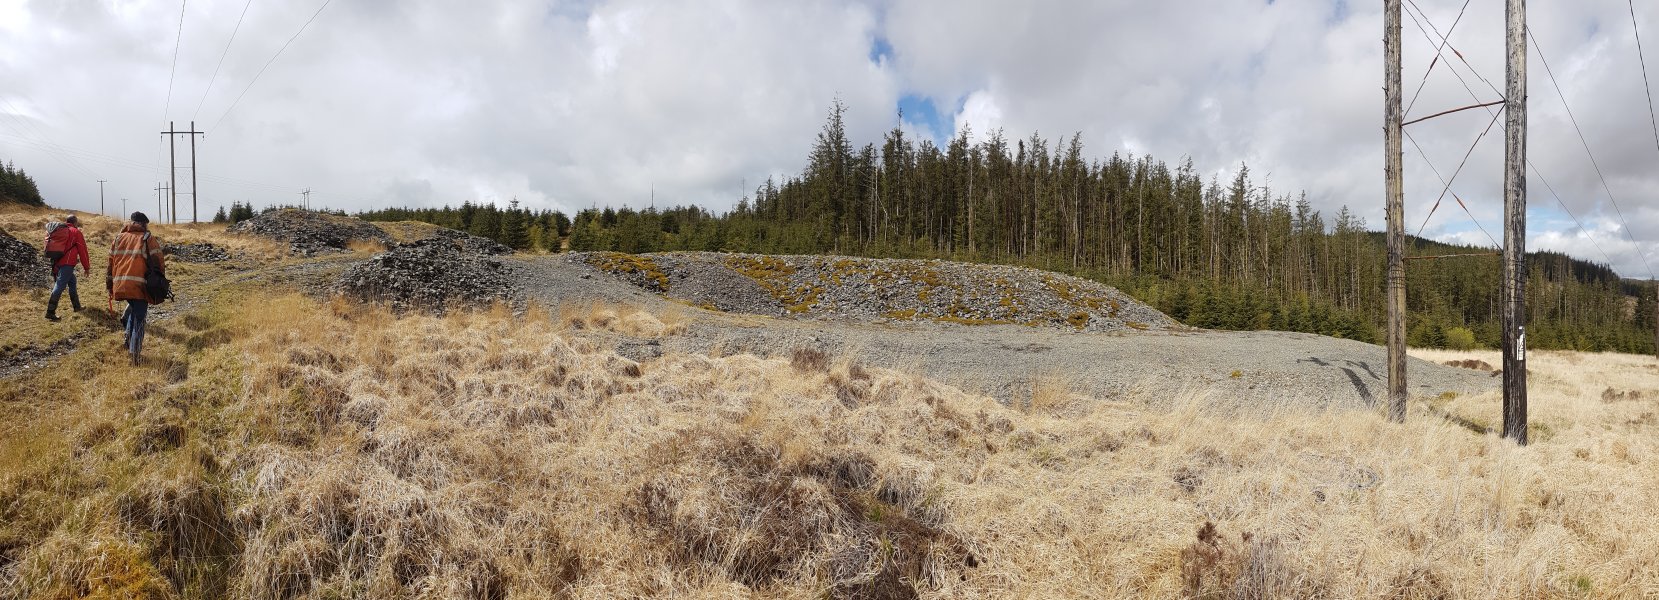 Walking up past the tips of Bog Mine. A lot of rock has been moved here, so this must have been a very active mine.
Modelling by Ian Holmes and Ian Cooper
Walking up past the tips of Bog Mine. A lot of rock has been moved here, so this must have been a very active mine.
Modelling by Ian Holmes and Ian Cooper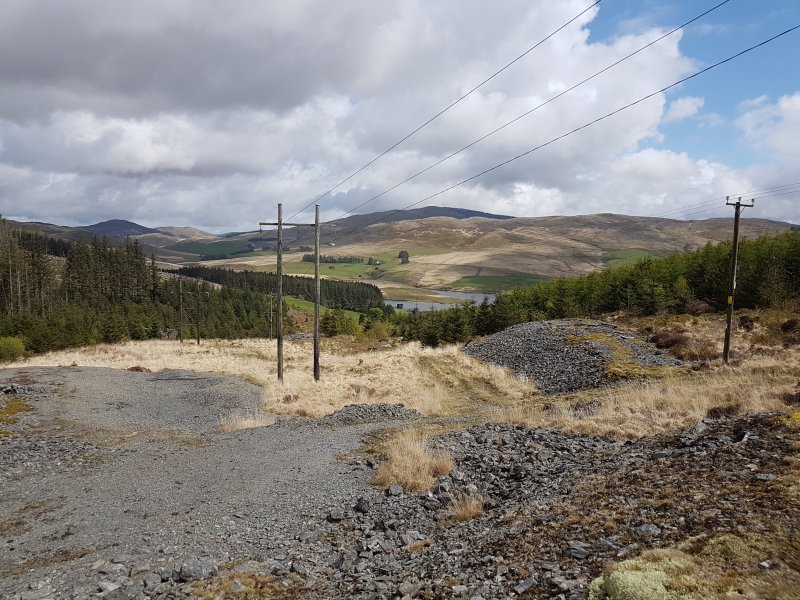 View towards the upper Rheidol. In the distance are Drosgol (550 metres), Banc Llechwedd-mawr (560 metres) and Clipyn Du (582 metres). On the right are Y Garn and Drybedd.
 360° view from Mynydd Ponterwyd. From left to right; Banc Craignant Mawr (388 metres), Disgwylfa Fawr, the very distant top of Aran Fawddwy (905 metres), Drosgol, Banc Llechwedd-mawr, Clipyn Du, Can Hyddgen (566 metres), Y Garn, Drybedd, Cripiau (524 metres), Draws Drum, Pen y Garn (611 metres), Waun Claerddu's Carnyrhyrddod (594 metres), Bryn Rhosau (397 metres), Banc Bwa-drain (389 metres), a distant view of the sea, and Mynydd Ponterwyd (391 metres).
 The top of Bog Mine's main shaft, which still has its ginging.
Modelling by Alan and Ian Holmes
The top of Bog Mine's main shaft, which still has its ginging.
Modelling by Alan and Ian Holmes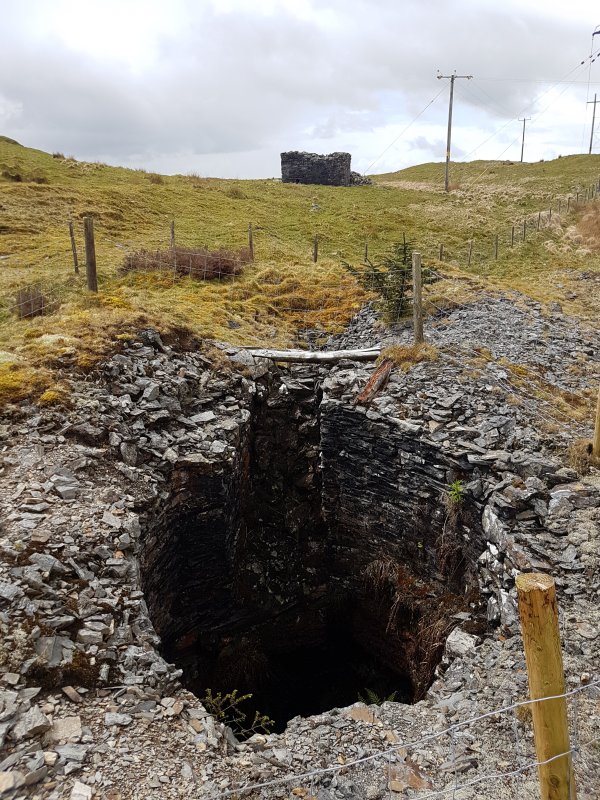 This shaft had an engine house, and is therefore a bit more modern than the nearby Llywernog Mine.
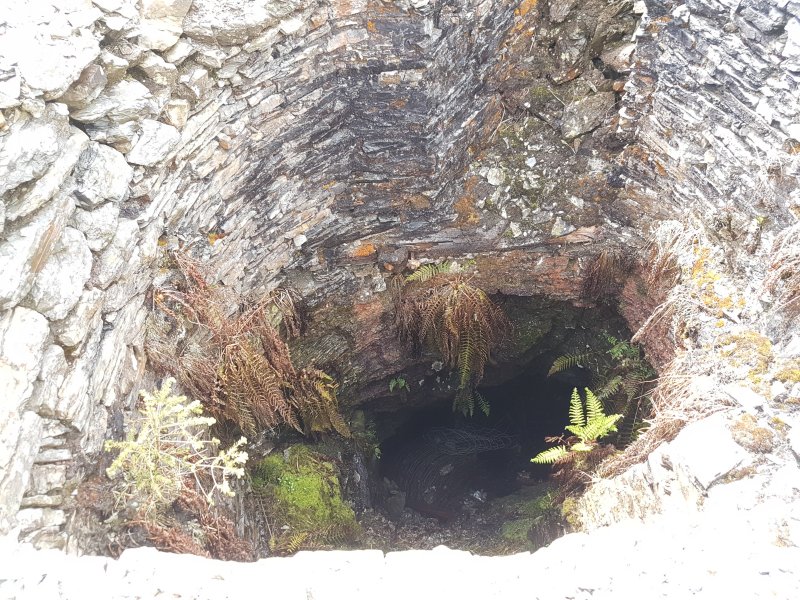 Looking down the shaft, there appears to be a blockage of dumped fence wire several metres down.
 The fence wire can be bypassed, and the base of the accessible shaft is reached shortly afterwards.
Modelling by Peter, lighting by Tarquin, Peter and Sol
The fence wire can be bypassed, and the base of the accessible shaft is reached shortly afterwards.
Modelling by Peter, lighting by Tarquin, Peter and Sol The shaft lands in a stoped out level, where there is a large wooden structure for guiding kibbles or skips (a square kibble) up the winze. This sort of structure is called a skipway if skips were used. Incidentally, we were carrying a gas meter, and it did not detect any bad air here.
Lighting by Tarquin, Rich and Peter
The shaft lands in a stoped out level, where there is a large wooden structure for guiding kibbles or skips (a square kibble) up the winze. This sort of structure is called a skipway if skips were used. Incidentally, we were carrying a gas meter, and it did not detect any bad air here.
Lighting by Tarquin, Rich and Peter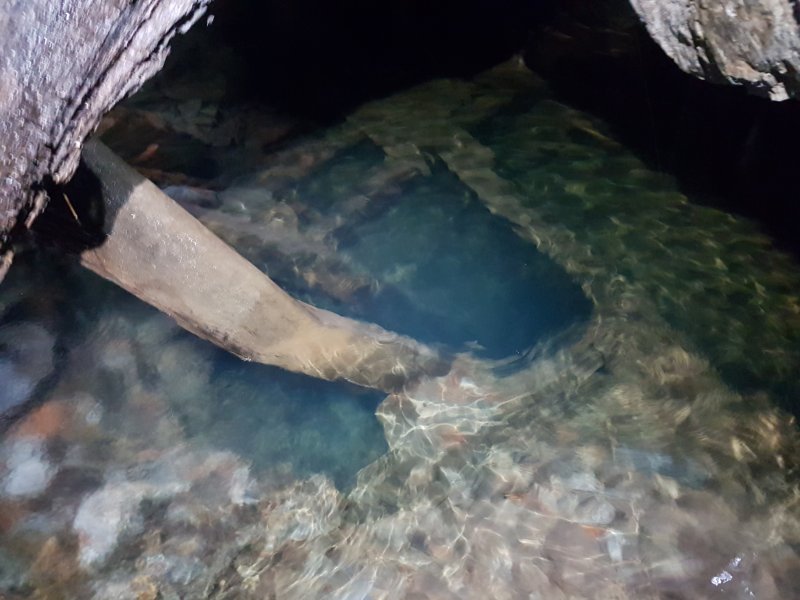 The winze continues downwards for an unknown depth.
 The only way to pass the winze is to clamber through the wooden guide structure.
Modelling by Peter, lighting by Tarquin and Peter
The only way to pass the winze is to clamber through the wooden guide structure.
Modelling by Peter, lighting by Tarquin and Peter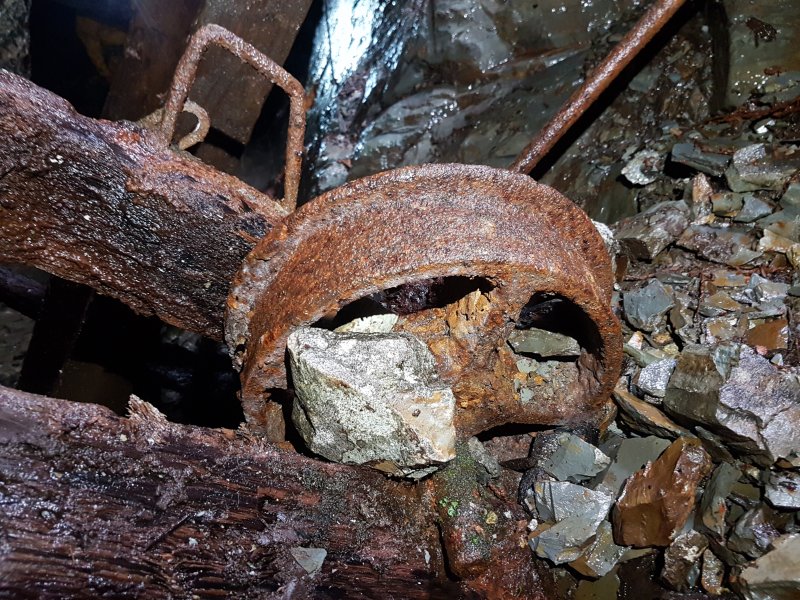 Truck wheel being used as a pulley on the guide structure.
 Climbing down the other side of the structure reaches a passage.
Modelling by Peter, lighting by Tarquin and Peter
Climbing down the other side of the structure reaches a passage.
Modelling by Peter, lighting by Tarquin and Peter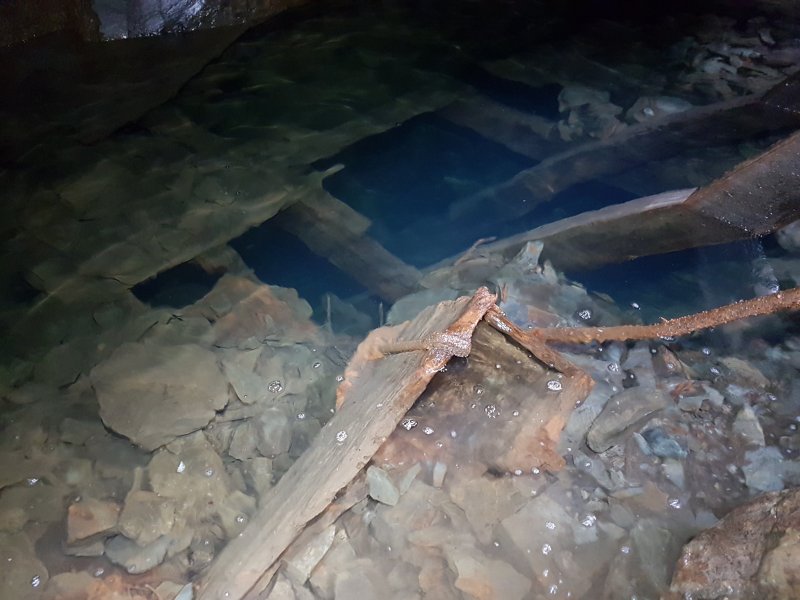 The edge of the shaft, showing that it has been poorly capped with boards. We stayed well clear of it, as it may be a false floor for some distance. The wooden box structure has a large pipe coming out of the bottom, and may be a water trough at the top of a pumping stage.
 The passage continued onwards, but we did not want to get wet so early in the day, so we returned to surface.
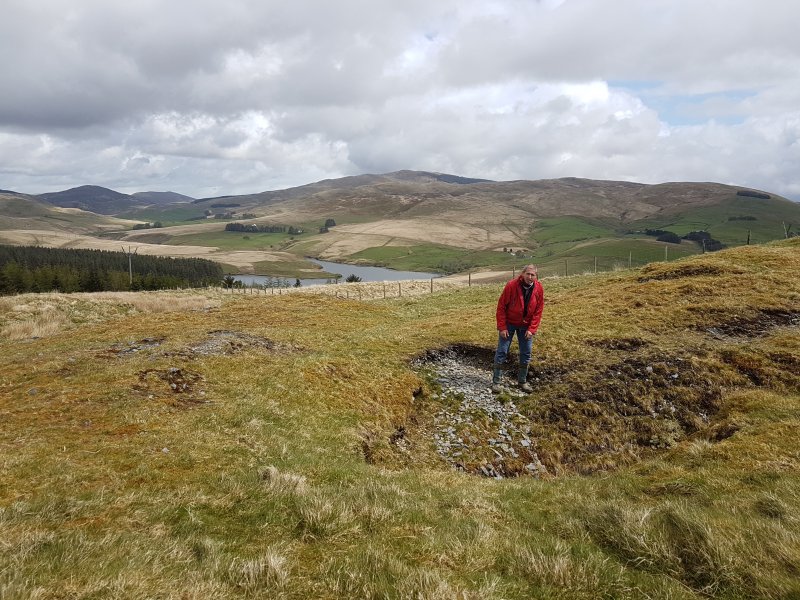 Standing over another shaft at the far ond of the ridge, in front of Drosgol, Banc Llechwedd-mawr, Y Garn and Drybedd.
Modelling by Alan
Standing over another shaft at the far ond of the ridge, in front of Drosgol, Banc Llechwedd-mawr, Y Garn and Drybedd.
Modelling by Alan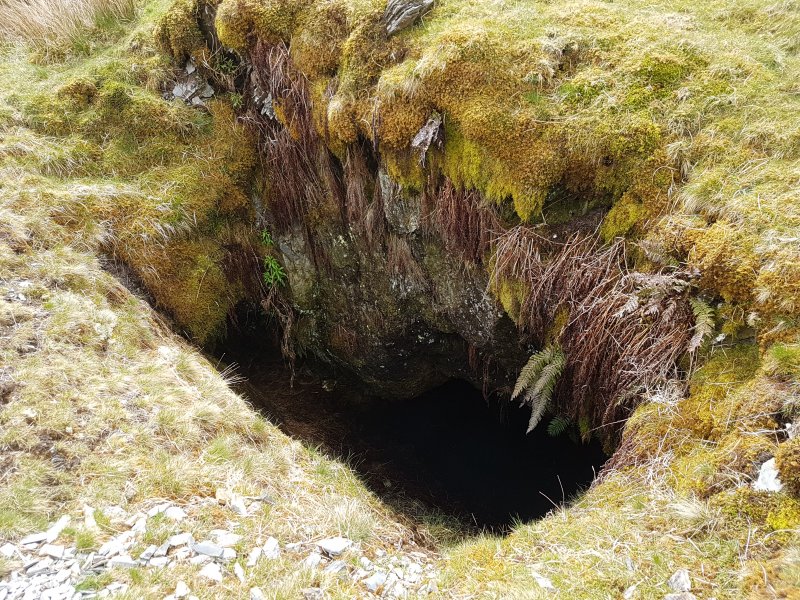 This shaft has no protection.
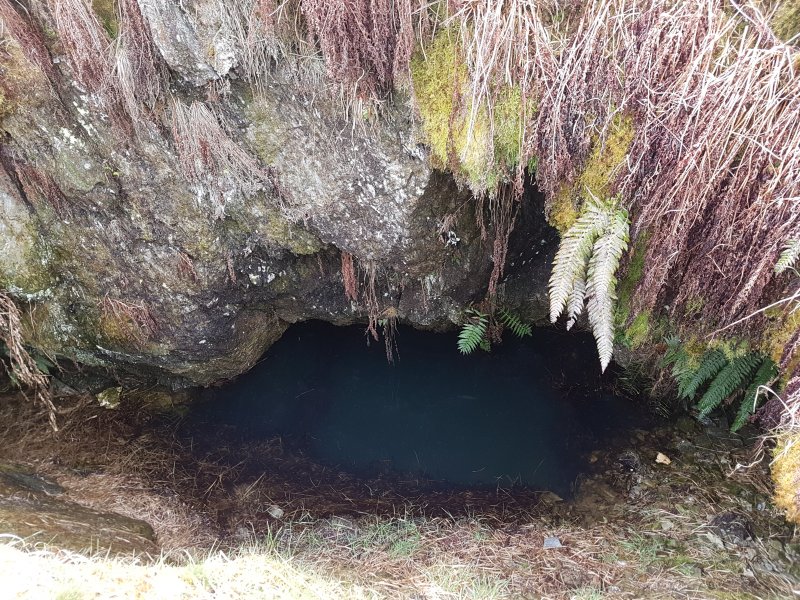 The shaft almost immediately lands in water, and climbing out would prove extremely difficult. This shaft is much higher than the main shaft, and has a much higher water level, so it would appear to be unconnected to the other shaft.
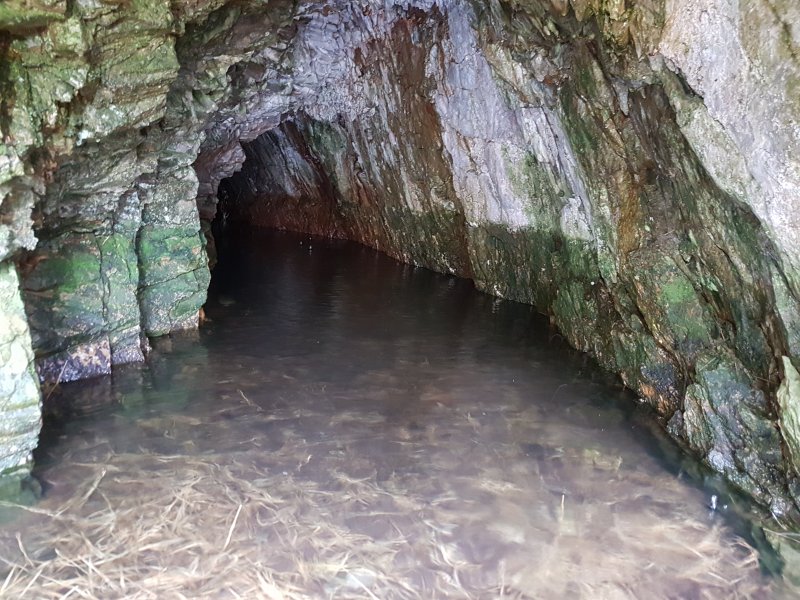 If you do fall in, this passage supposedly connects to the shaft, providing an exit route. A short, dry passage lies below it.
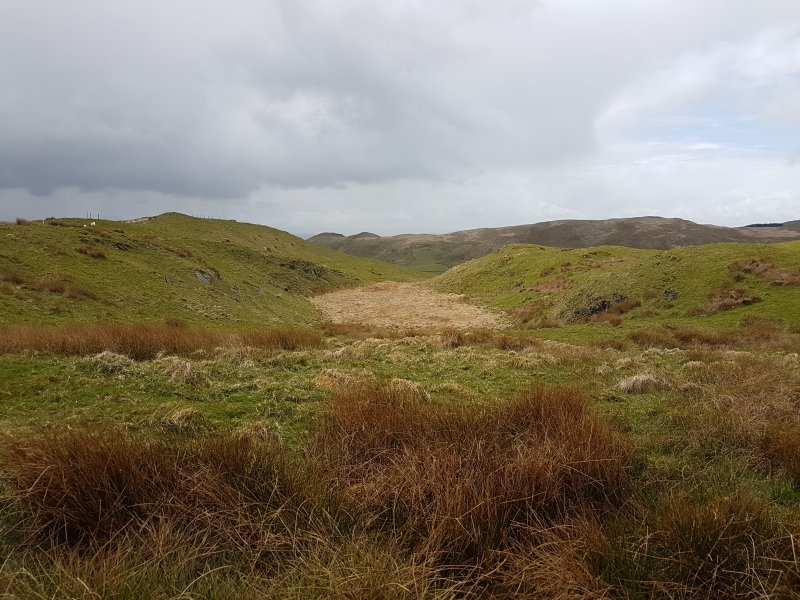 A boggy depression nearby, which shows why the shaft is flooded.
 On the other side of the Llywernog Valley is the Blaen Brwyno farm, and the site of the Cwmbrwyno Mine. Seen here are a very obvious water wheel house on the left, and a former office building behind the sheds. In front of the sheds is an adit.
Modelling by Rich, Alan, Ian Holmes and John
On the other side of the Llywernog Valley is the Blaen Brwyno farm, and the site of the Cwmbrwyno Mine. Seen here are a very obvious water wheel house on the left, and a former office building behind the sheds. In front of the sheds is an adit.
Modelling by Rich, Alan, Ian Holmes and John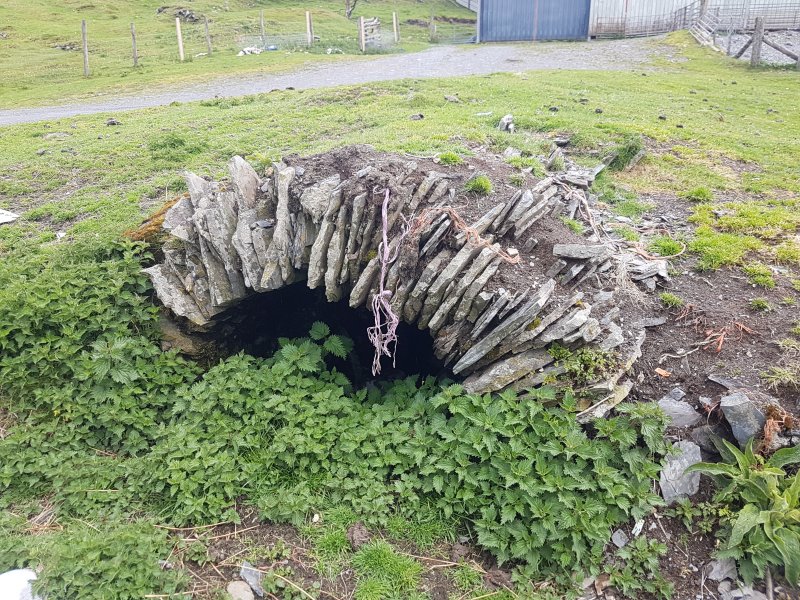 The adit may look enticing to a mine explorer.
 However, the adit is full of dumped rubbish, white goods, gas bottles and medical waste from the sheep farming. Apparently it chokes beneath the track, but this is not the place to go exploring to check on it.
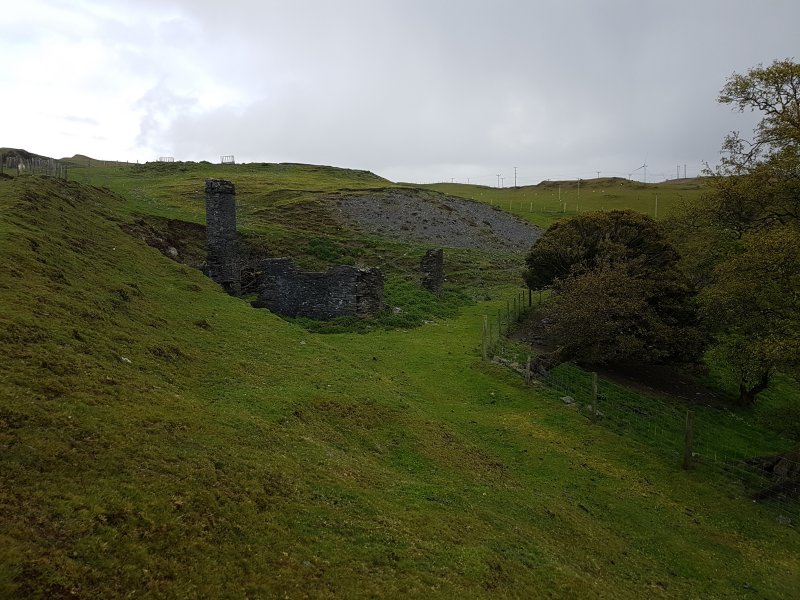 The former offiec building, or perhaps a smithy. That chimney is substantial.
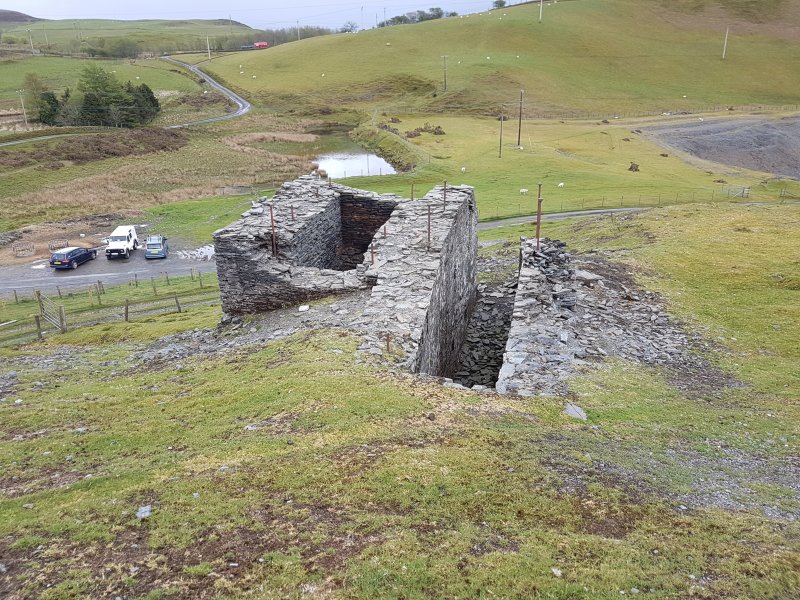 Top of the wheel pit. The main adit entrance is behind the camera.
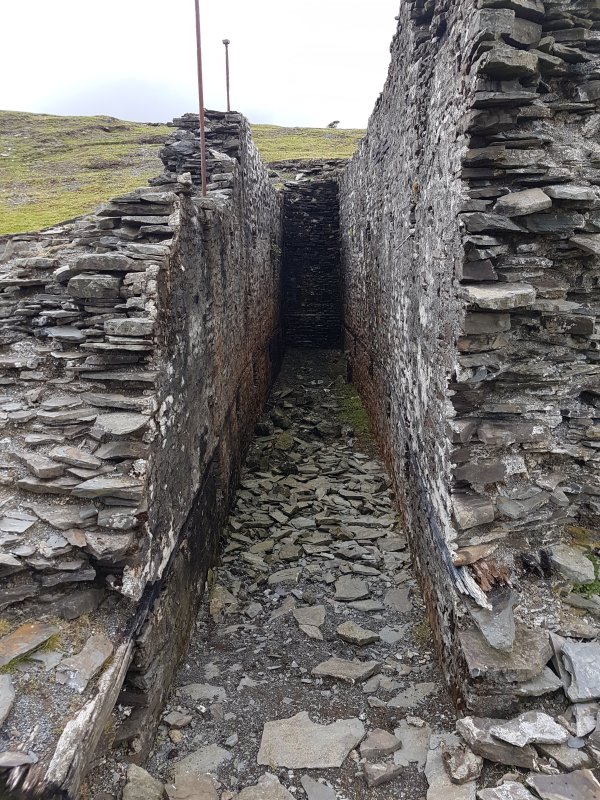 Front of the wheel pit.
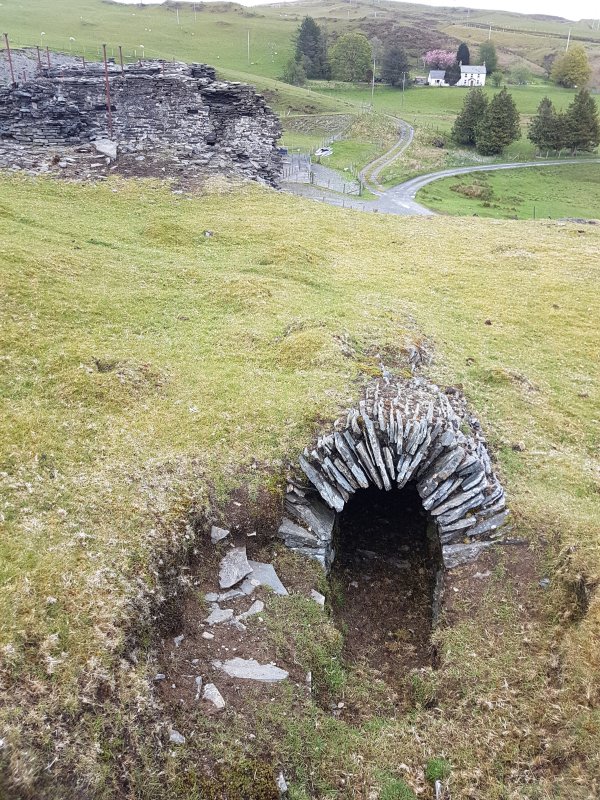 A very small drainage culvert near the wheel pit. This seems to be unrelated to the lower adit, but maybe it connected to it.
 Remains of a building neer the wheel pit.
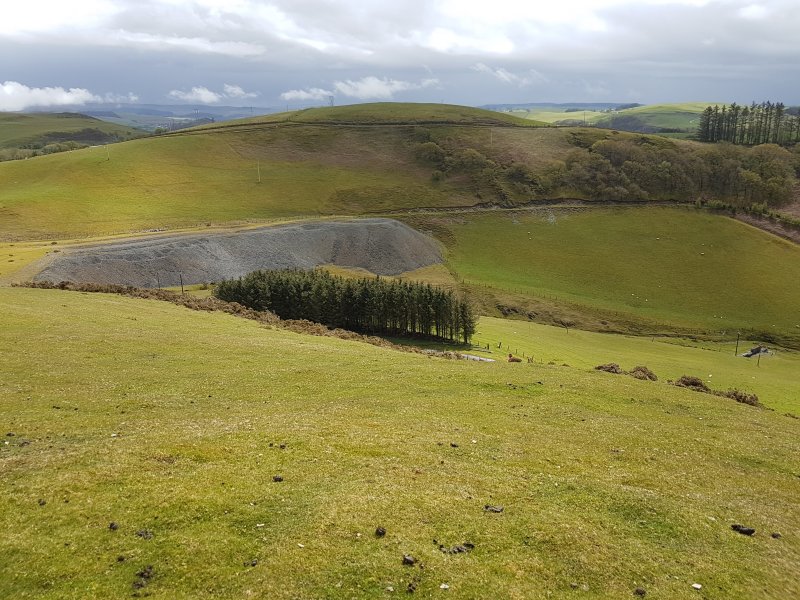 At the upper end of the valley is a very large tip from the Cwmbrwyno Mine, which is a place where rare species of metal-tolerant lichens grow, and is therefore a protected habitat. Behind it is Llechwedd Du (330 metres).
Modelling by Ian Cooper
At the upper end of the valley is a very large tip from the Cwmbrwyno Mine, which is a place where rare species of metal-tolerant lichens grow, and is therefore a protected habitat. Behind it is Llechwedd Du (330 metres).
Modelling by Ian Cooper There is a second wheel pit slightly further down the valley, and there are some other entrances there too.
 View over Nant yr Arian from Cefn Cwmbrwyno. In the valley is the forested Esgair Nanyrarian ridge. Behind that are Pen y Graig Ddu (323 metres) with Banc Coed-laith (326 metres) down to the left, and Banc Trawsnant (406 metres). Banc y Garn (437 metres), Pen Craigypistyll (455 metres) and the distant Mynydd Moel (863 metres) peer over the ridge behind Mynydd Merch (396 metres). Pen y Darren (392 metres) is on the right.
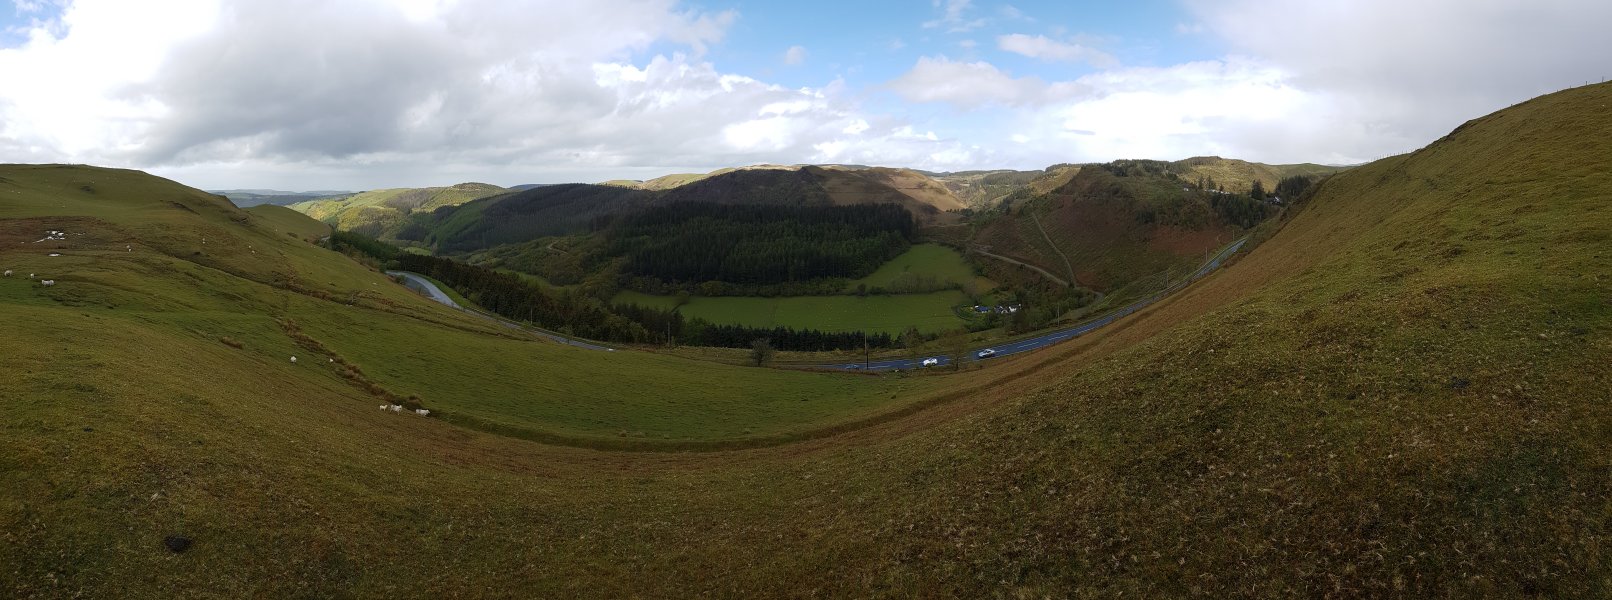 Nant yr Arian. The mountais are the same as the last picture, with Blaen Llywernog (401 metres) now visible on the right, and Pen Pumlumon Fawr (752 metres) and Y Garn in the distant right.
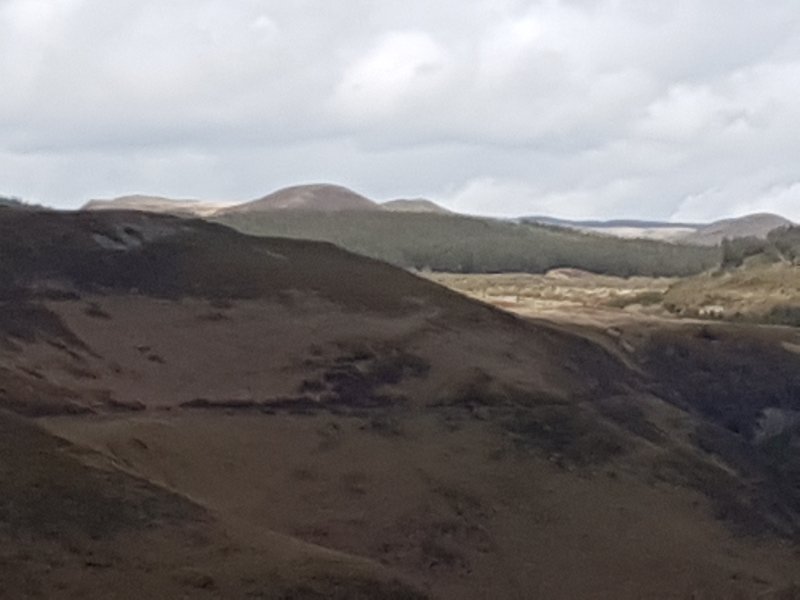 Distant view of Pen Craigypistyll, Pen y Gadair (893 metres) and Mynydd Moel.
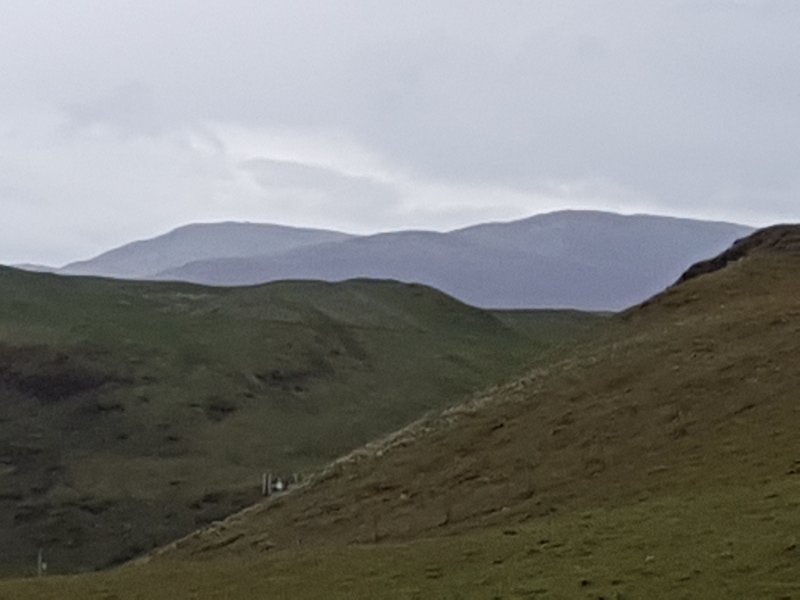 Pen Pumlumon Fawr and Y Garn.
 Looking from the top of the Cwmbrwyno Mine site along the lode. Several entrances are visible, as well as some stope collapses. The part near the camera seems to be a scrape and a series of drainage ditches aiming water away from the lode.
Modelling by Peter, Rich and Ian Cooper
Looking from the top of the Cwmbrwyno Mine site along the lode. Several entrances are visible, as well as some stope collapses. The part near the camera seems to be a scrape and a series of drainage ditches aiming water away from the lode.
Modelling by Peter, Rich and Ian Cooper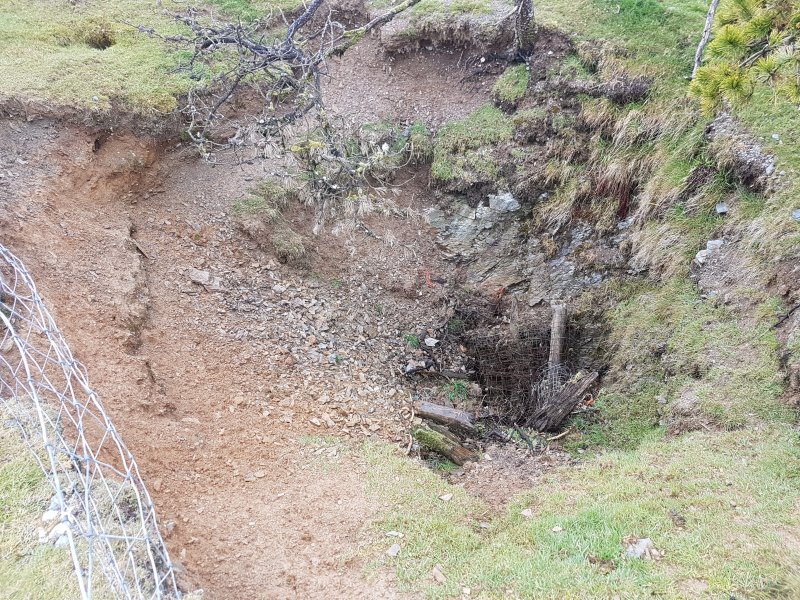 The first depression is very new, and it seems to be a stope that has collapsed. It has been used as a rubbish tip.
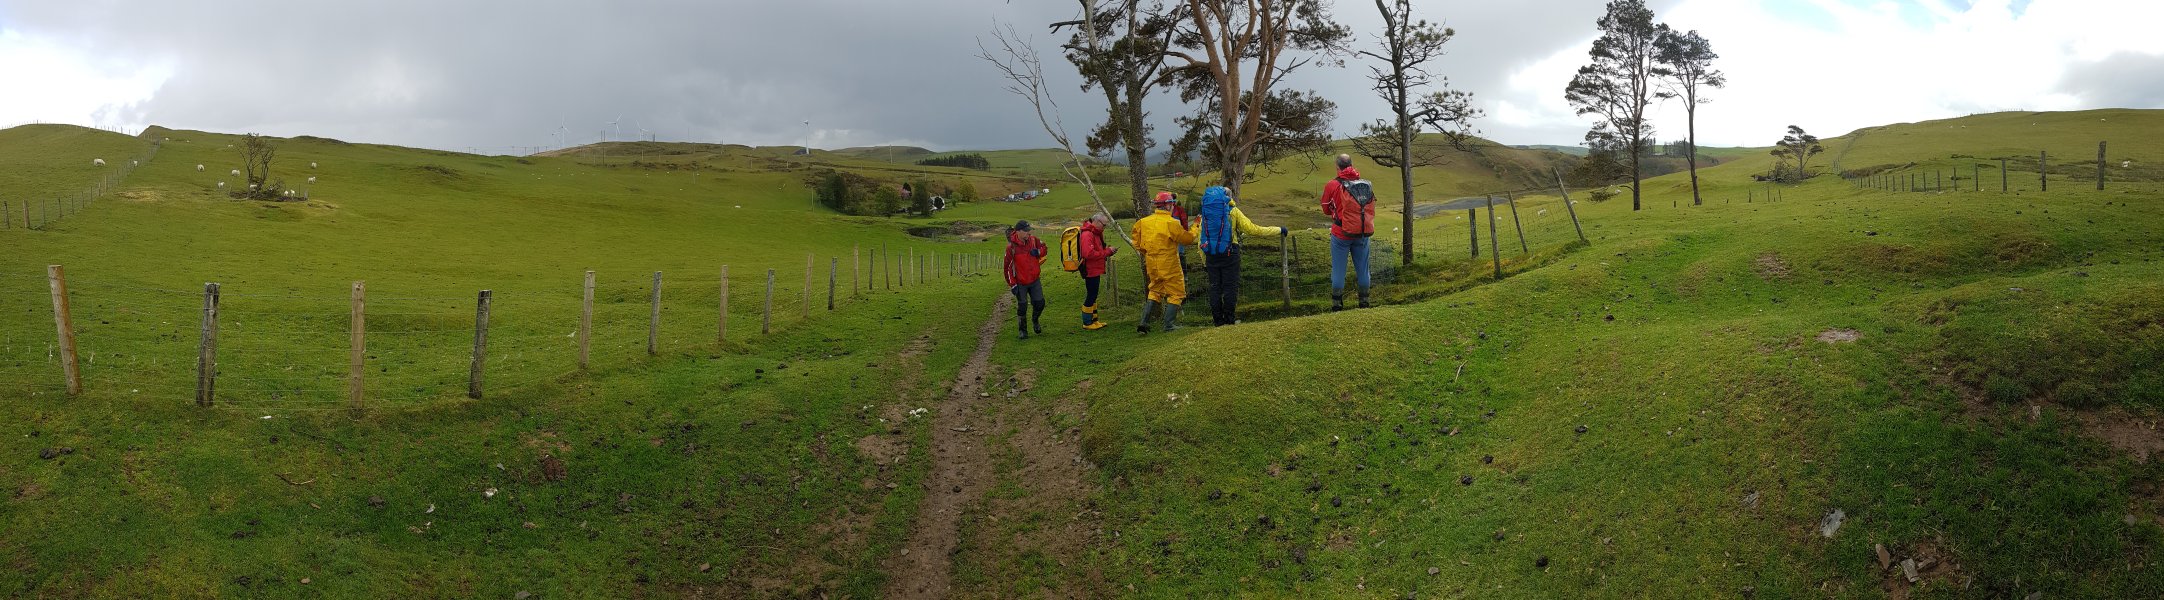 The first entrance is fenced off to prevent sheep falling in, like most of the others.
Modelling by Ian Holmes, John, Peter, Ian Cooper, Rich and Alan
The first entrance is fenced off to prevent sheep falling in, like most of the others.
Modelling by Ian Holmes, John, Peter, Ian Cooper, Rich and Alan Nevertheless, sheep being what they are, one has managed to get past the fence and fall in. Another decaying sheep is up at the top tangled in the bush. The hole is too steep to climb, even for us.
Modelling by Mary and her little lamb
Nevertheless, sheep being what they are, one has managed to get past the fence and fall in. Another decaying sheep is up at the top tangled in the bush. The hole is too steep to climb, even for us.
Modelling by Mary and her little lamb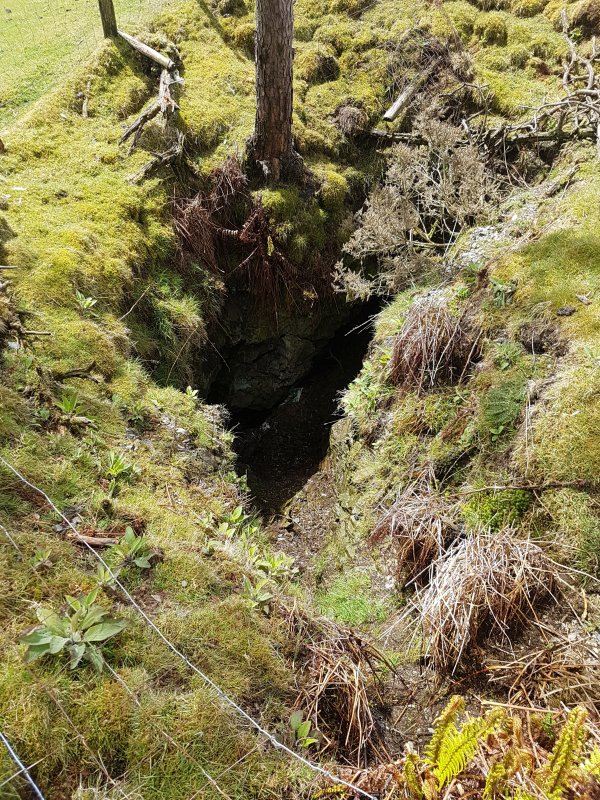 The next hole is also an abrupt drop, but this one can be climbed with care.
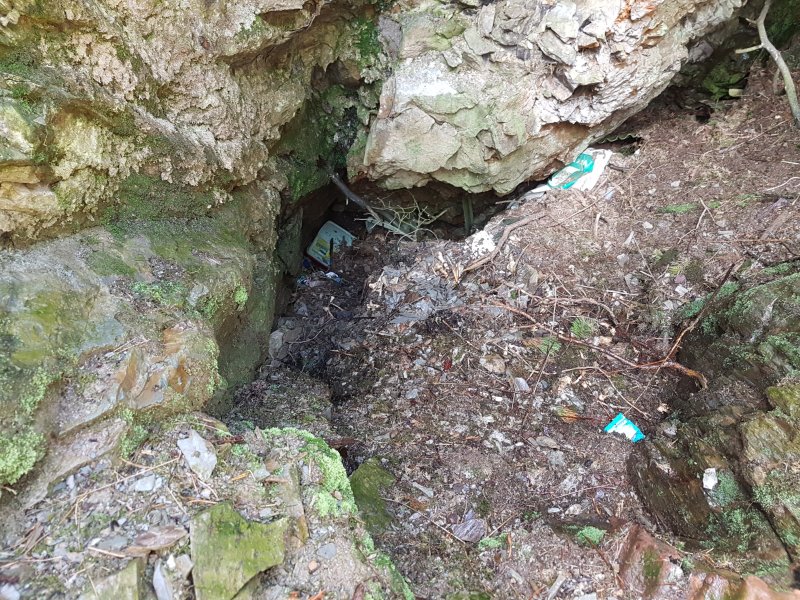 The hole has once again been used as an illegal rubbish dump. This time, there is corrugated asbestos mixed in with the farm waste. This will have taken significant effort to take up the hill and be put here. It did not fall in by accident.
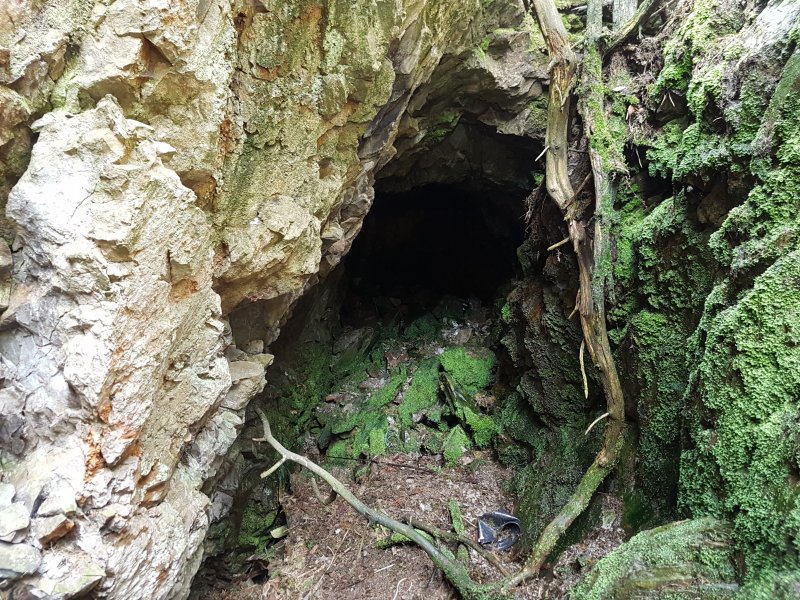 This seems to be the top of a stope, and was probably accessed from below, but excavation would not be possible here.
 The next hole is a horrendous mess of dumped waste. There is absolutely no pretence here. It was not an attempt to save sheep. Dumped waste is dumped waste. The environmental pollution must be substantial. These depressions are just being used to dispose of waste and avoid official waste disposal services.
Modelling by Peter, Rich and Ian Cooper
The next hole is a horrendous mess of dumped waste. There is absolutely no pretence here. It was not an attempt to save sheep. Dumped waste is dumped waste. The environmental pollution must be substantial. These depressions are just being used to dispose of waste and avoid official waste disposal services.
Modelling by Peter, Rich and Ian Cooper Down the bottom are several chemical containers. We did not dare venture down there to see if there was any further passage.
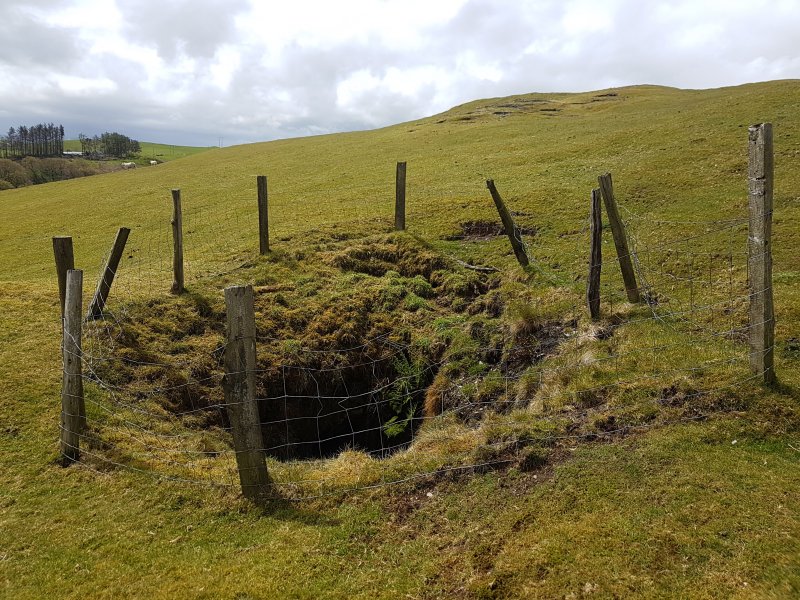 The next hole is the most substantial of all, and rather unassuming, with just a little fence.
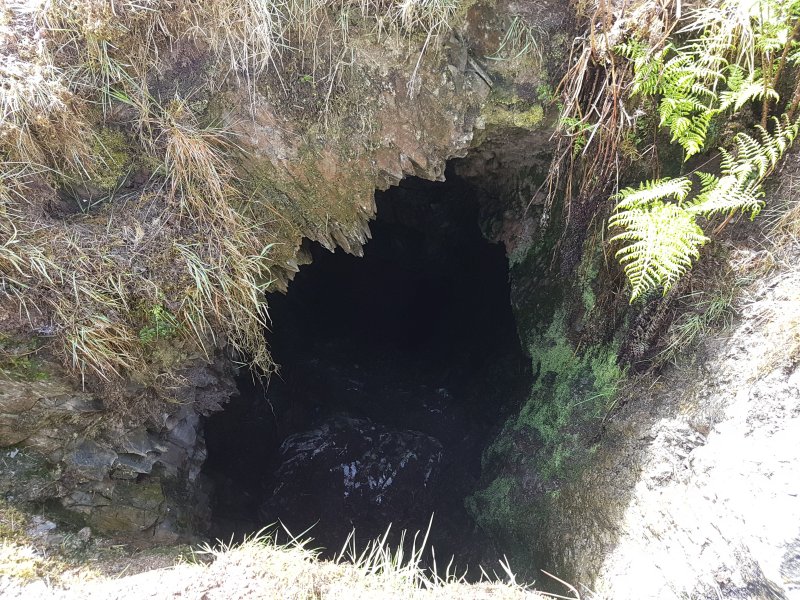 This hole has several more bags of dumped junk. A very steep winze leads off at the bottom, and it is not possible to free climb. We will see this hole from part way down later on.
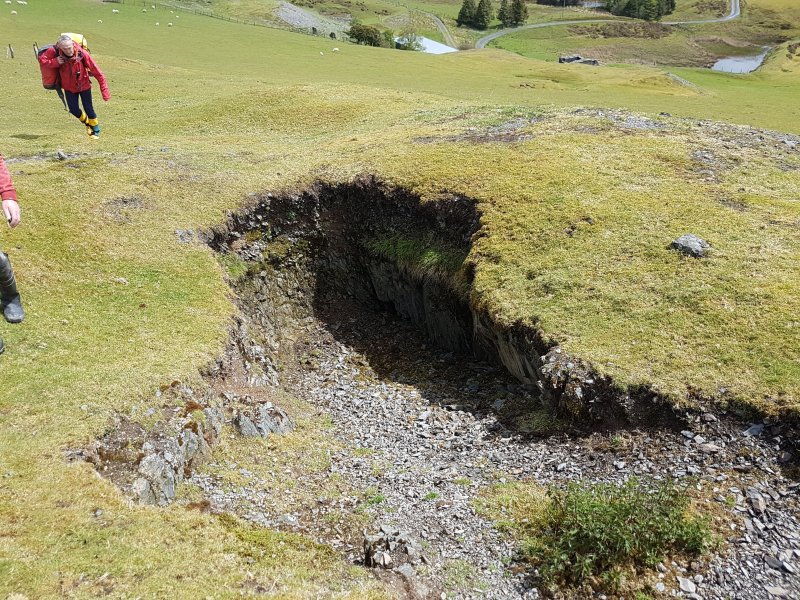 The next depression is a scrape.
Modelling by Ian Holmes and John
The next depression is a scrape.
Modelling by Ian Holmes and John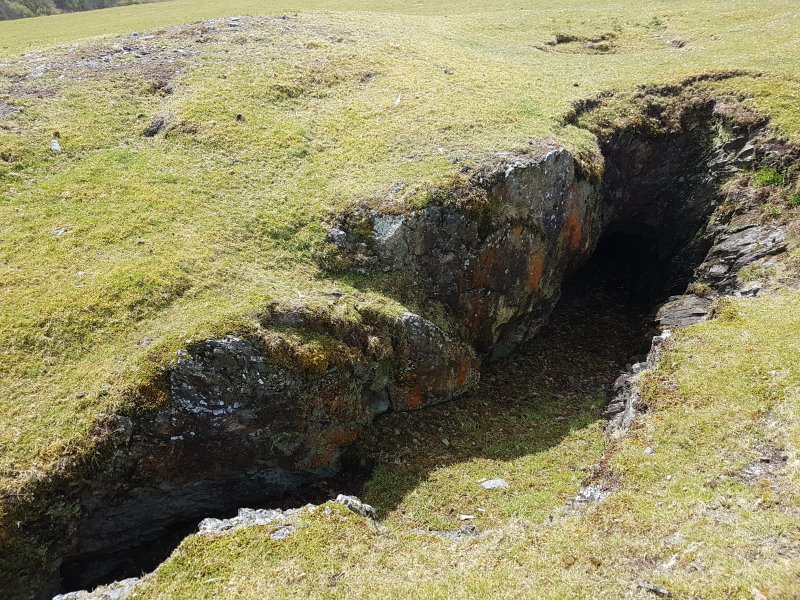 The other end of it seems to have been used as a shallow drift. This no longer sits on the original lode, and has deviated from it by about 45°.
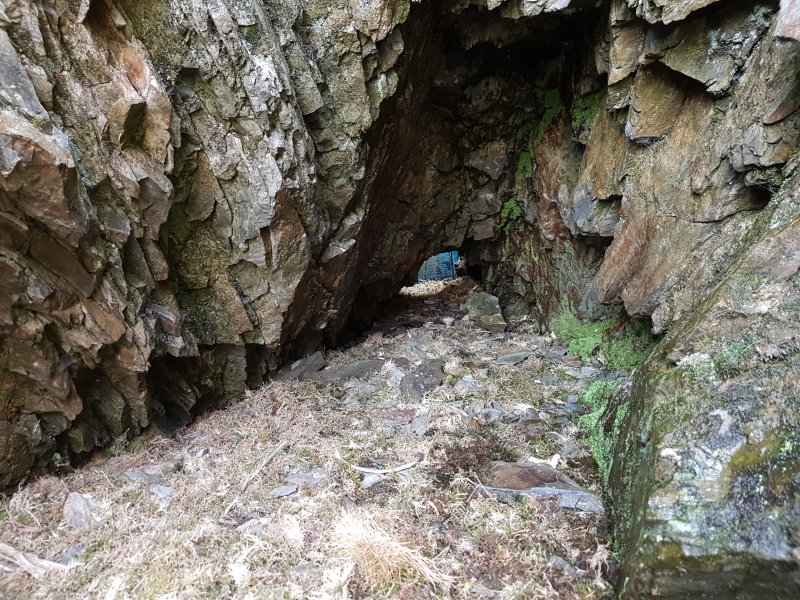 It passes through a low crawl into another skylight, but given the amount of rubbish everywhere, I wasn't willing to crawl on anything.
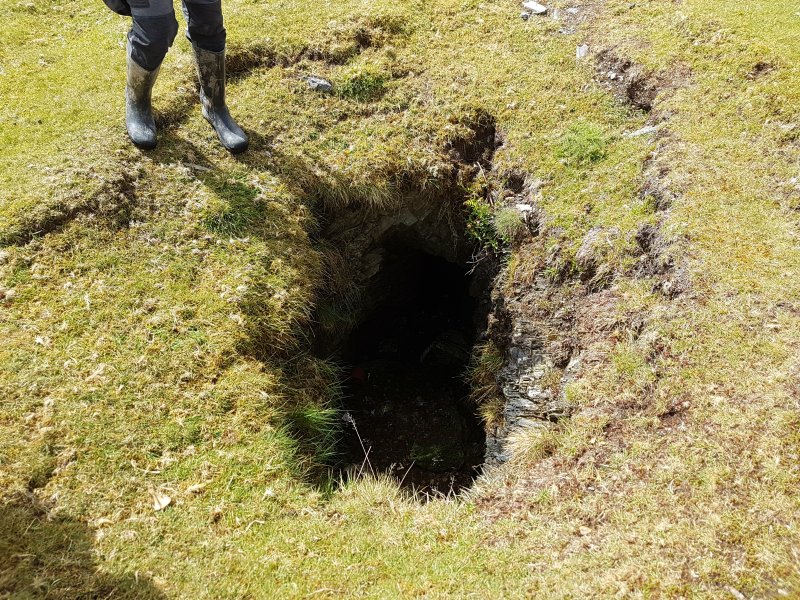 The last hole of the main group has no fence, so surely it should be safe, no?
Modelling by Ian Holmes
The last hole of the main group has no fence, so surely it should be safe, no?
Modelling by Ian Holmes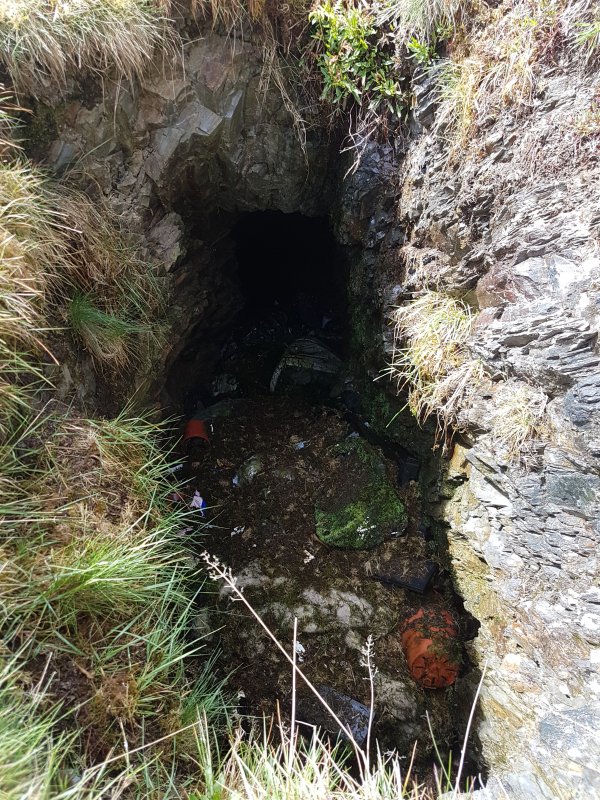 It drops into the drift passage, and descends very steeply. Once again, it is absolutely full of rubbish, and a lot of wool.
 Some distance away, roughly in line with the new direction, is small outcrop. On the left is Cefn Cwmbrwyno, then Banc Bwa-drain, Pen y Garn, Mynydd Ffynnon-wen (378 metres), Carnyrhyrddod, Llechwedd Du, Allt Ddu (323 metres), and Banc Hafodau (346 metres). On the other side of the deep valley are Banc Coed-laith and Pen y Graig Ddu. In the sunlit valley is a very tight S-bend in the A-road, which catches out drivers on their way to Aberystwyth.
Modelling by Alan, Ian Holmes, John, Peter, Ian Cooper and Rich
Some distance away, roughly in line with the new direction, is small outcrop. On the left is Cefn Cwmbrwyno, then Banc Bwa-drain, Pen y Garn, Mynydd Ffynnon-wen (378 metres), Carnyrhyrddod, Llechwedd Du, Allt Ddu (323 metres), and Banc Hafodau (346 metres). On the other side of the deep valley are Banc Coed-laith and Pen y Graig Ddu. In the sunlit valley is a very tight S-bend in the A-road, which catches out drivers on their way to Aberystwyth.
Modelling by Alan, Ian Holmes, John, Peter, Ian Cooper and Rich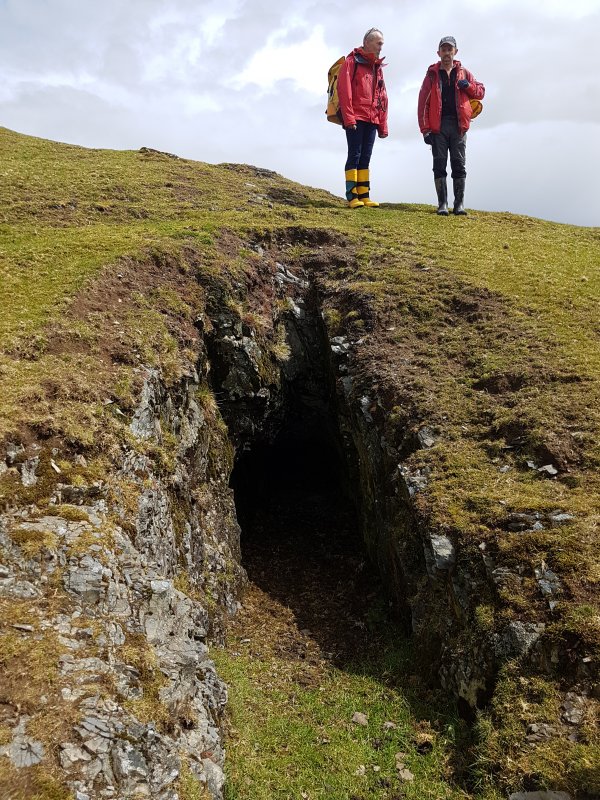 A small hole in the outcrop, which seems to be unrelated to the main group.
Modelling by John and Ian Holmes
A small hole in the outcrop, which seems to be unrelated to the main group.
Modelling by John and Ian Holmes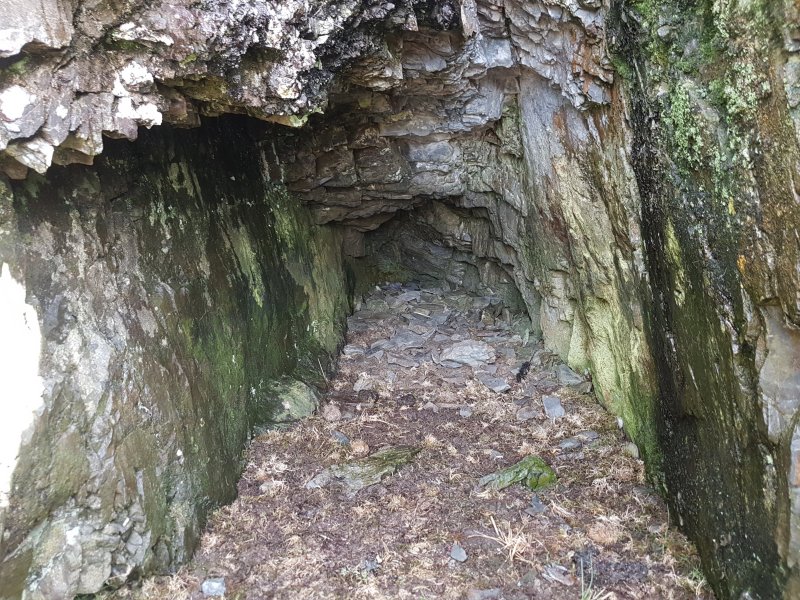 It is only a shallow trial, barely long enough to get out of the sun.
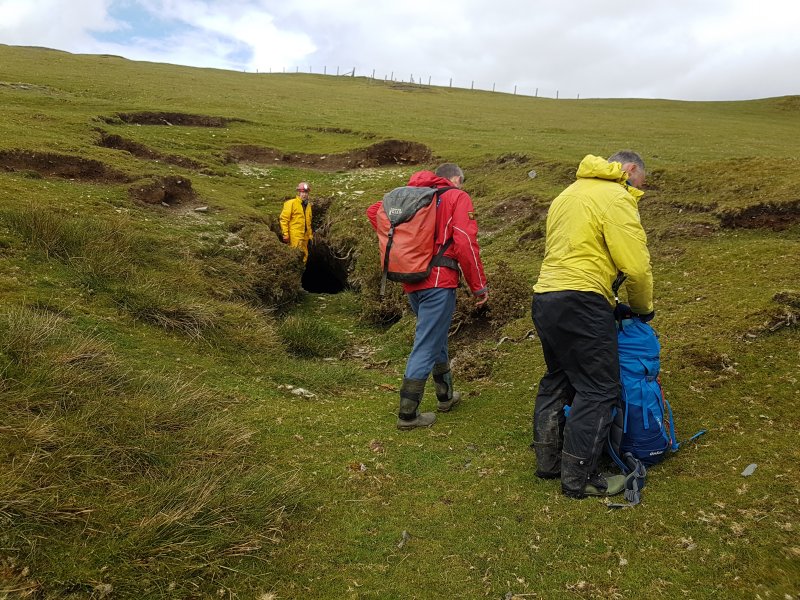 Entrance to the main Cwmbrwyno Mine adit. The other entrances run along the ridge in the background.
Modelling by Peter, Alan and Rich
Entrance to the main Cwmbrwyno Mine adit. The other entrances run along the ridge in the background.
Modelling by Peter, Alan and Rich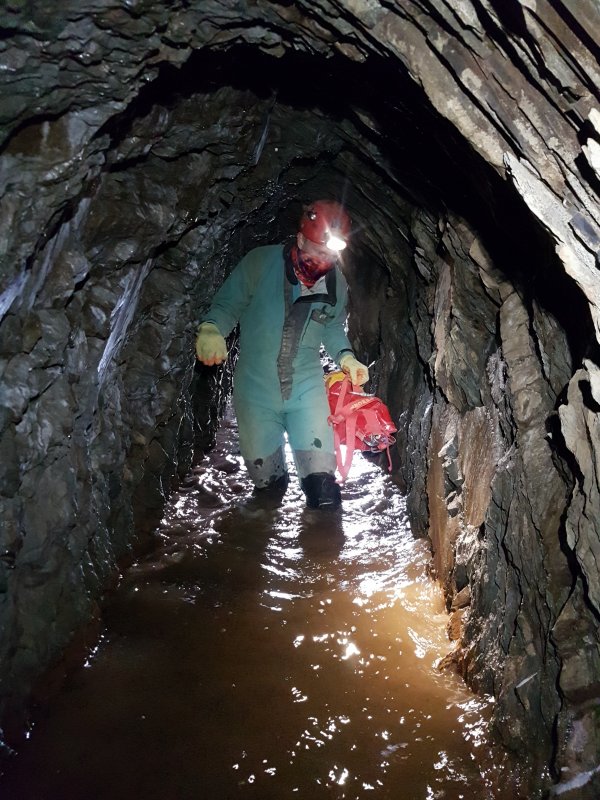 The adit starts, rather insultingly, by forcing you to get wet feet.
Modelling by Alan, lighting by Tarquin, Alan and Sol
The adit starts, rather insultingly, by forcing you to get wet feet.
Modelling by Alan, lighting by Tarquin, Alan and Sol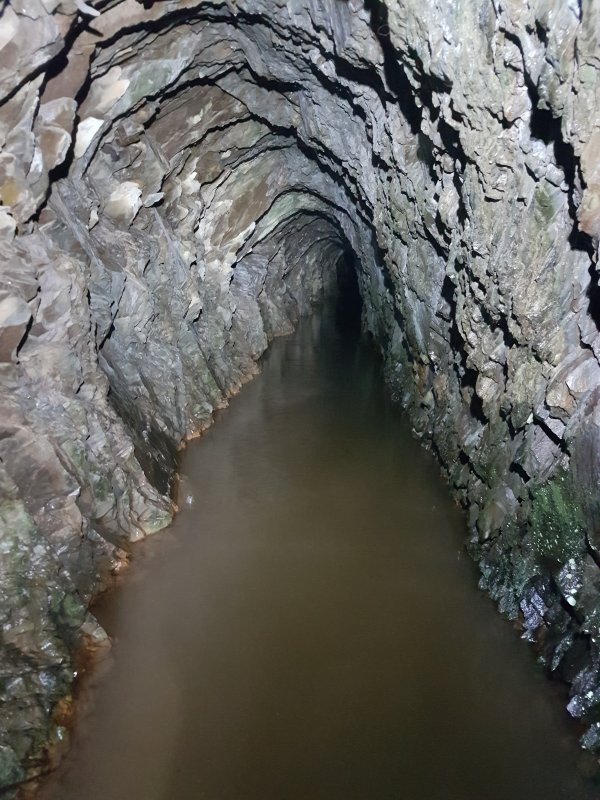 The early adit.
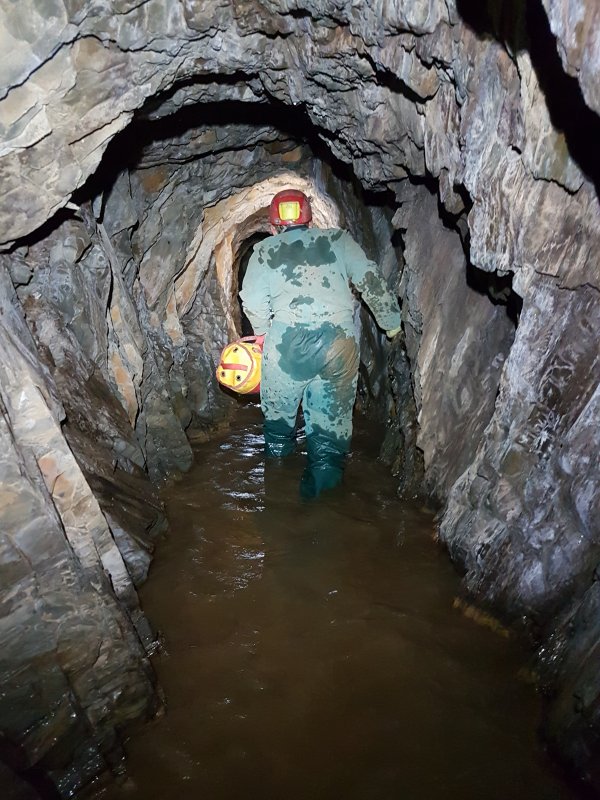 It remains similarly wet for quite some time.
Modelling by Alan, lighting by Tarquin, Alan and Peter
It remains similarly wet for quite some time.
Modelling by Alan, lighting by Tarquin, Alan and Peter The water ends at a corner, where it is held back by a pile of rocks.
Lighting by Tarquin and Alan
The water ends at a corner, where it is held back by a pile of rocks.
Lighting by Tarquin and Alan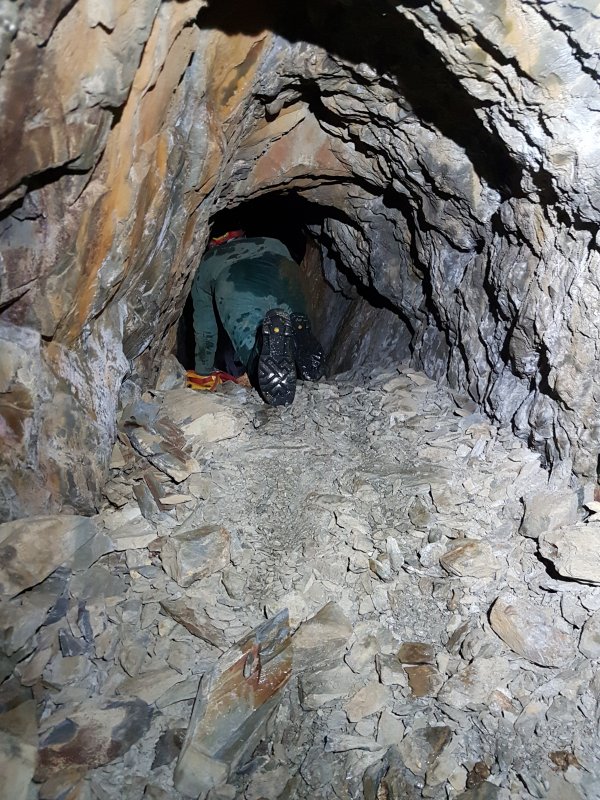 Crawling over the rock pile.
Modelling by Alan, lighting by Tarquin and Alan
Crawling over the rock pile.
Modelling by Alan, lighting by Tarquin and Alan The crawl ends at a traverse over a very deep hole. The ledge is not particularly great. It feels soft at first, then becomes a slope with gravel on it.
Modelling by Alan, lighting by Tarquin and Alan
The crawl ends at a traverse over a very deep hole. The ledge is not particularly great. It feels soft at first, then becomes a slope with gravel on it.
Modelling by Alan, lighting by Tarquin and Alan Looking up perhaps 20 metres or more to the surface. This is the fenced hole that we saw earlier. It is definitely not free climbable.
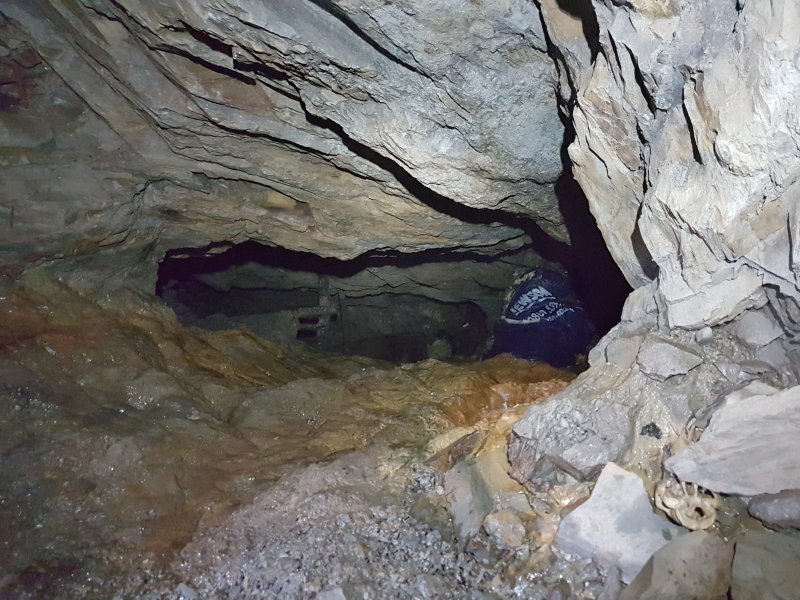 Looking down below the traverse, into a heavily stoped lode. There is a small ledge 5 metres down with the stope continuing on the other side of it, but the floor begins to slope away at 15-20 metres down, and seems to keep going. We do not know how deep this is, but a variety of hangers and spits are at the top, so someone has descended here. The bag on the ledge is more rubbish that has fallen down, but down there must be more at the bottom. The ledge is covered in loose stones, so this is not a great place to descend.
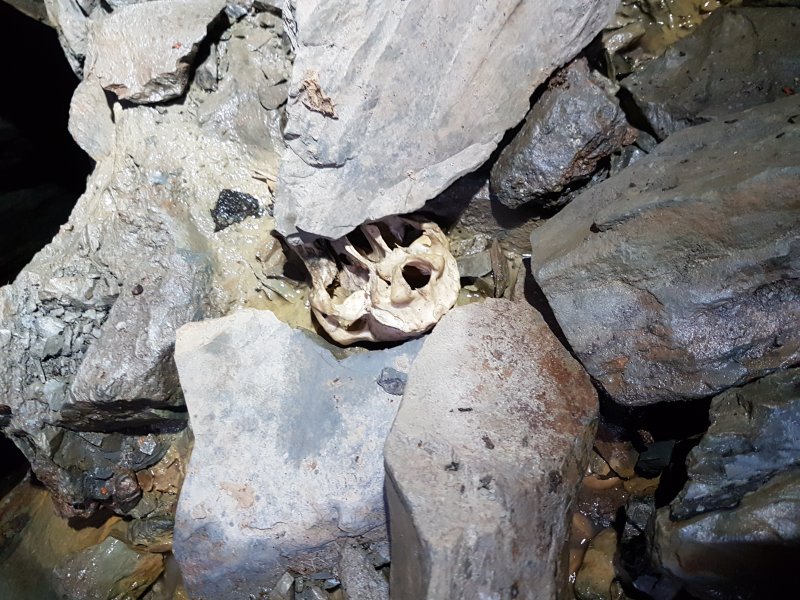 Sheep skull on the ledge. It is at this moment that you realise that the smell is not rubbish but dead sheep, and the soft patch at the start of the ledge is the remains of a very well decomposed sheep, liberally splattered up and down the walls. It was everywhere, like pulled mutton.
Modelling by Sheila
Sheep skull on the ledge. It is at this moment that you realise that the smell is not rubbish but dead sheep, and the soft patch at the start of the ledge is the remains of a very well decomposed sheep, liberally splattered up and down the walls. It was everywhere, like pulled mutton.
Modelling by Sheila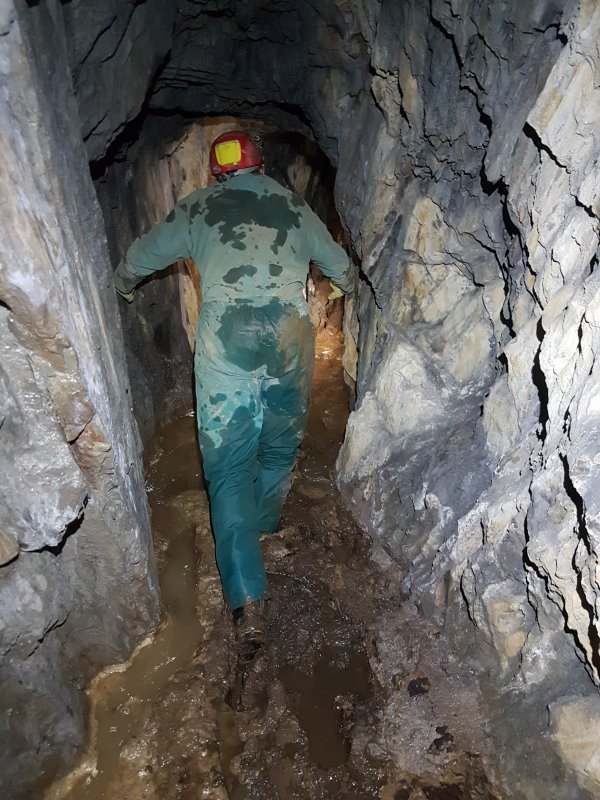 The continuing passage is thankfully dry.
Modelling by Alan, lighting by Tarquin and Alan
The continuing passage is thankfully dry.
Modelling by Alan, lighting by Tarquin and Alan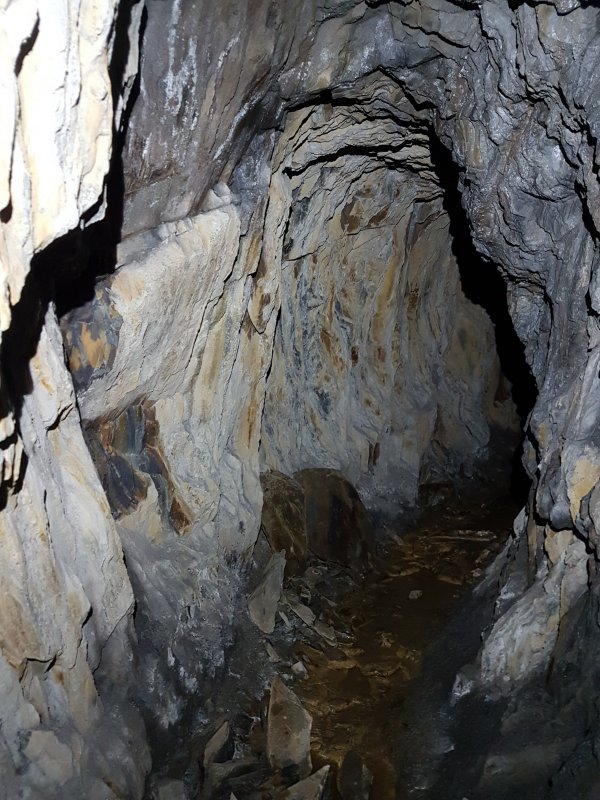 Light coloured coating on the walls.
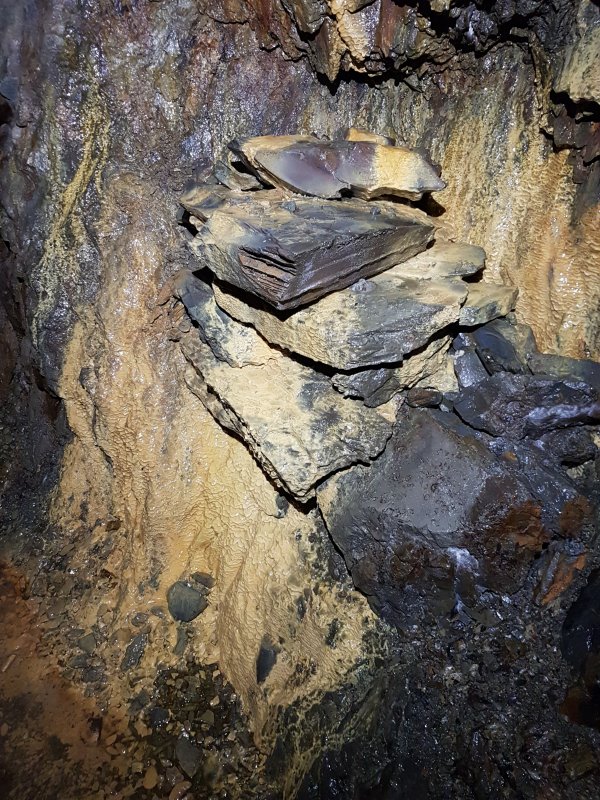 Yellow stained walls, presumably sulphur or ochre.
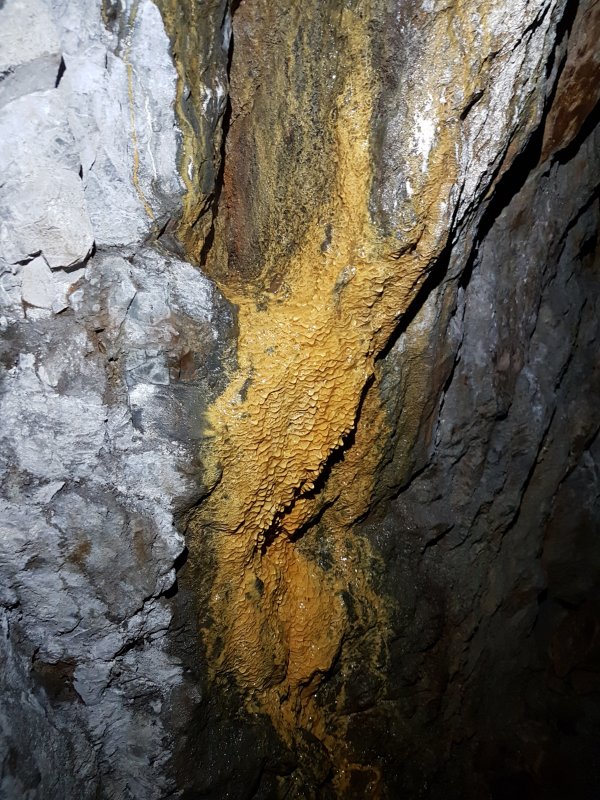 Orange flowstone.
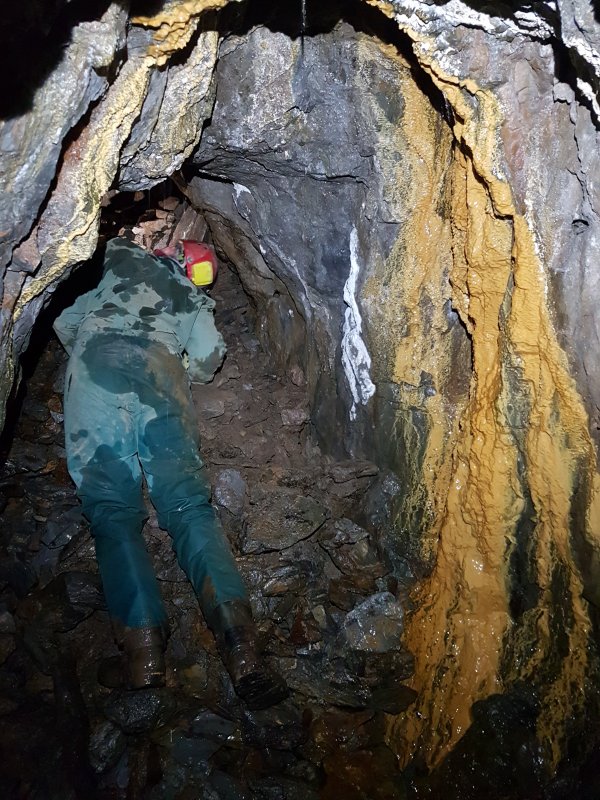 An arch of orange flowstone.
Modelling by Alan, lighting by Tarquin and Alan
An arch of orange flowstone.
Modelling by Alan, lighting by Tarquin and Alan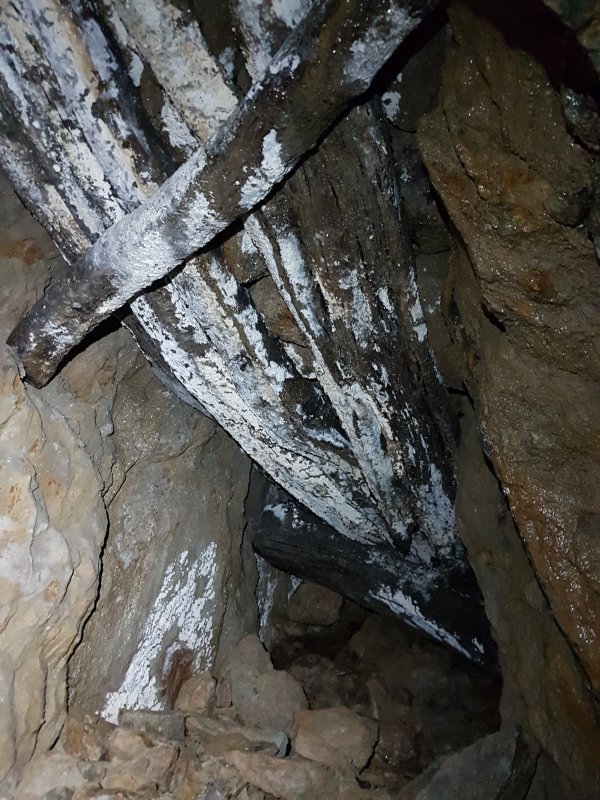 The passage ends abruptly at a small stope with a ceiling of deads. The wood is visibly bowing under the weight of the rocks, and looks set to fail soon. Not a comfortable place.
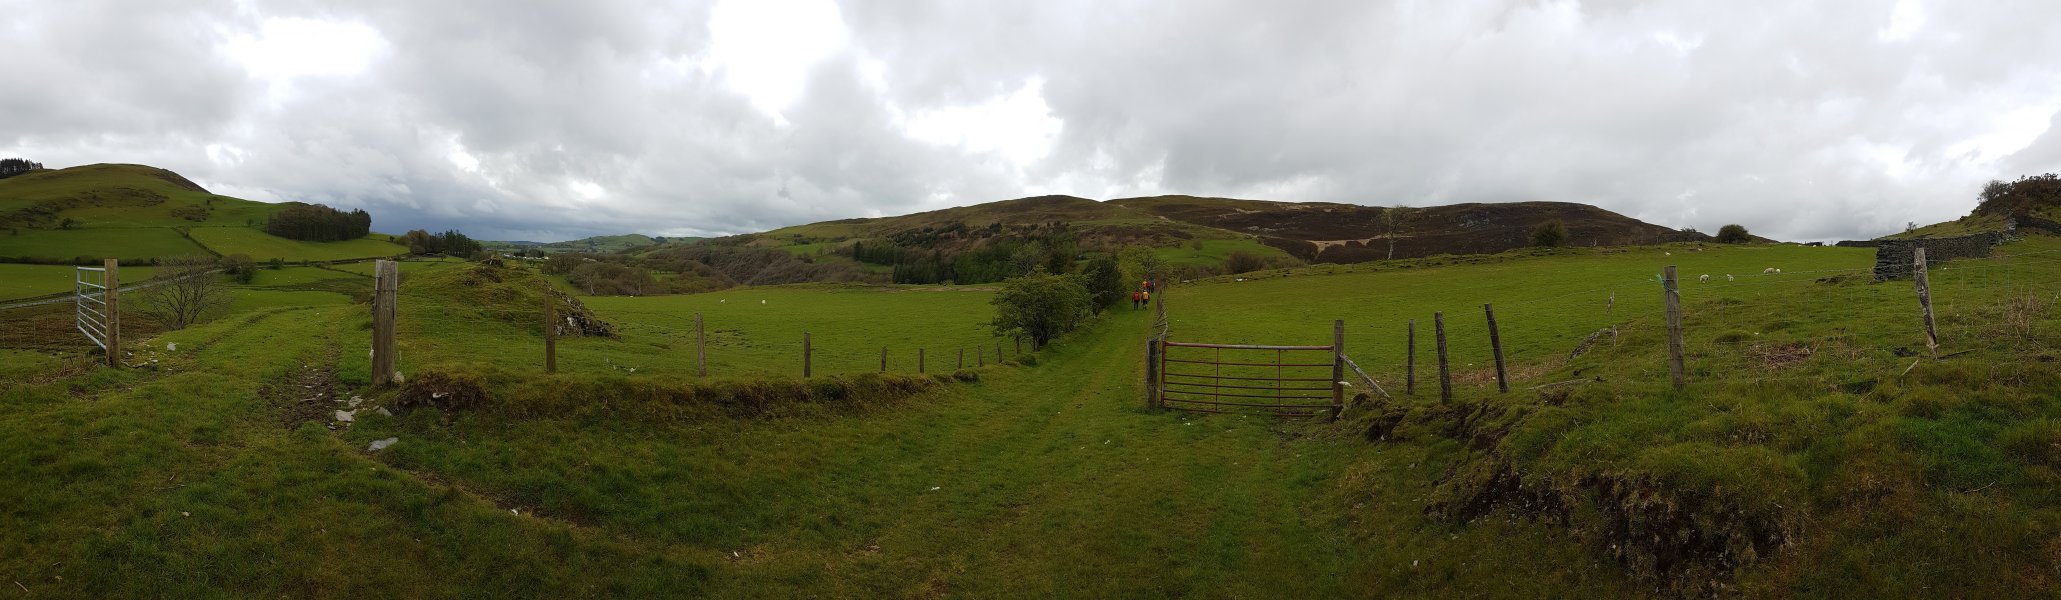 Walking through fields near Ysbyty Cynfyn. The hills are Erw Barfau (428 metres), Mynydd Bach (370 metres), Pen Felin-wynt (372 metres) and the long ridge of Bryn Bras (370 metres).
Modelling by Ian Holmes, John, Peter, Alan and Rich
Walking through fields near Ysbyty Cynfyn. The hills are Erw Barfau (428 metres), Mynydd Bach (370 metres), Pen Felin-wynt (372 metres) and the long ridge of Bryn Bras (370 metres).
Modelling by Ian Holmes, John, Peter, Alan and Rich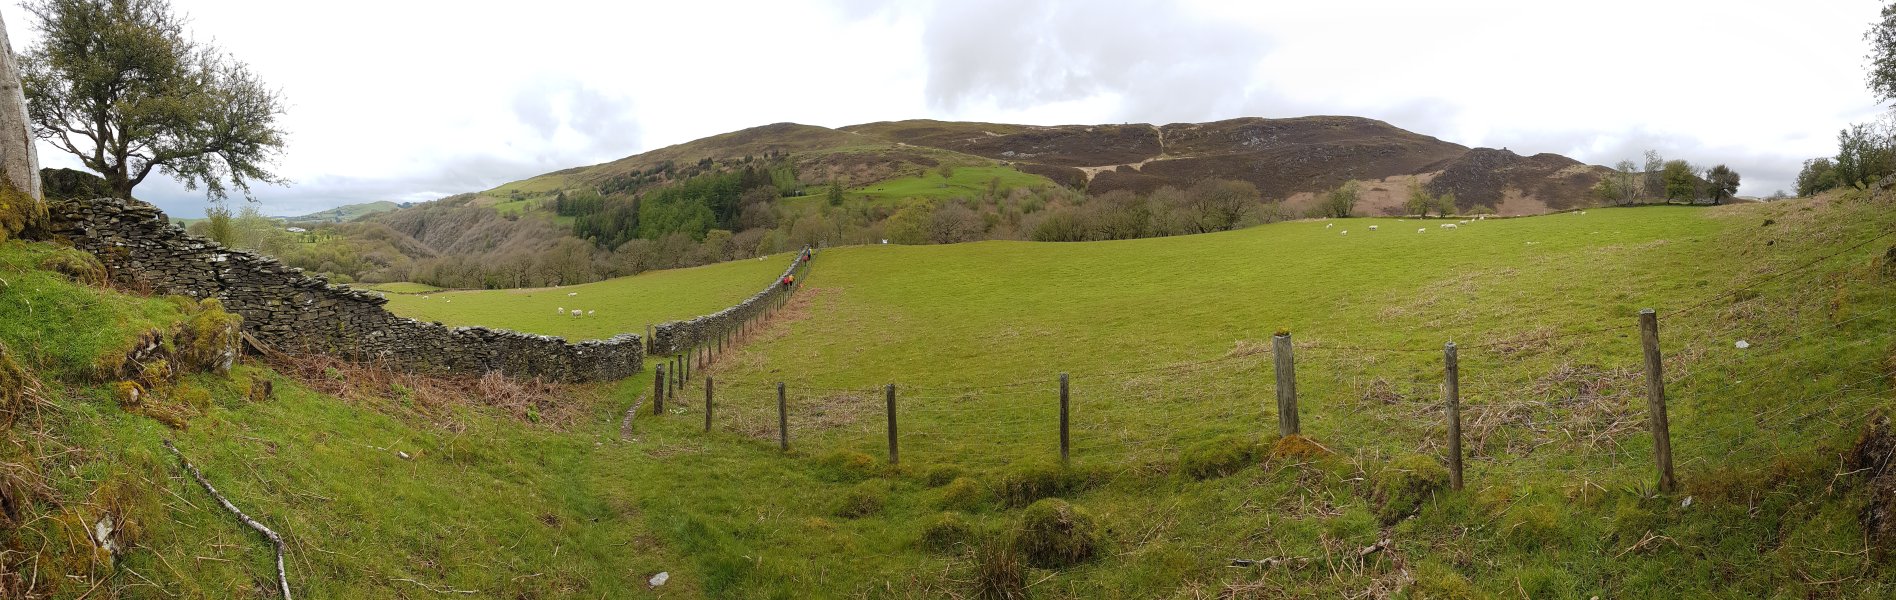 It looks beautiful, and it really was. Right up until the walk back, when there were some locals with a high powered rifle, complete with silencer and long distance scope, shooting at the bank right beside the public footpath. They did at least stop shooting as we walked past, but restarted as soon as we were out of their sight, but still in the firing line if they were to miss. Pretty sure that is not how it's supposed to be done.
Modelling by Ian Holmes, John, Alan, Rich and Peter
It looks beautiful, and it really was. Right up until the walk back, when there were some locals with a high powered rifle, complete with silencer and long distance scope, shooting at the bank right beside the public footpath. They did at least stop shooting as we walked past, but restarted as soon as we were out of their sight, but still in the firing line if they were to miss. Pretty sure that is not how it's supposed to be done.
Modelling by Ian Holmes, John, Alan, Rich and Peter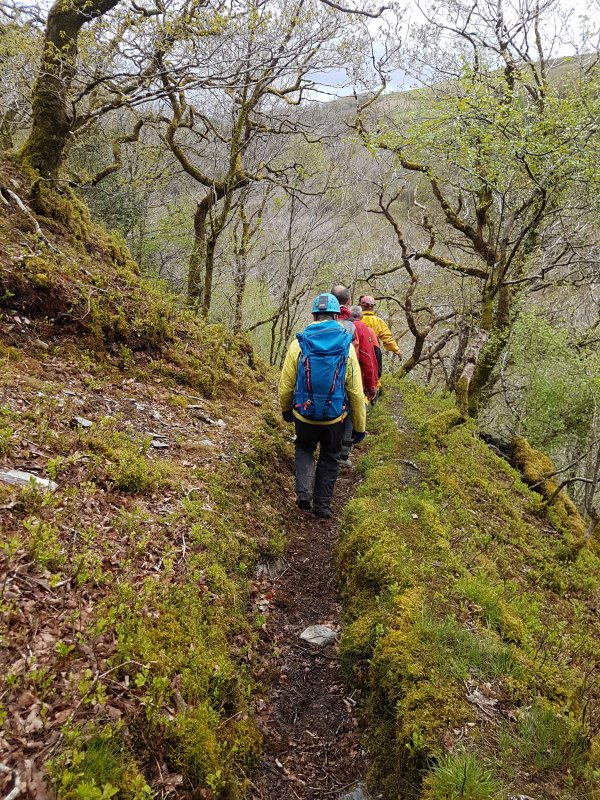 Dropping into the woodlands around the Afon Rheidol.
Modelling by Rich, Alan, John and Peter
Dropping into the woodlands around the Afon Rheidol.
Modelling by Rich, Alan, John and Peter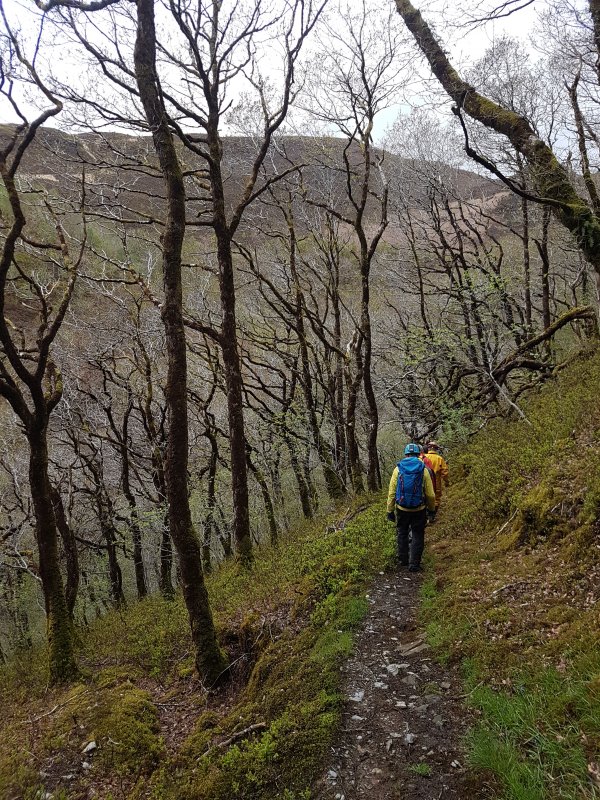 Afon Rheidol woodland.
Modelling by Rich, Alan, John, Peter and Ian Holmes
Afon Rheidol woodland.
Modelling by Rich, Alan, John, Peter and Ian Holmes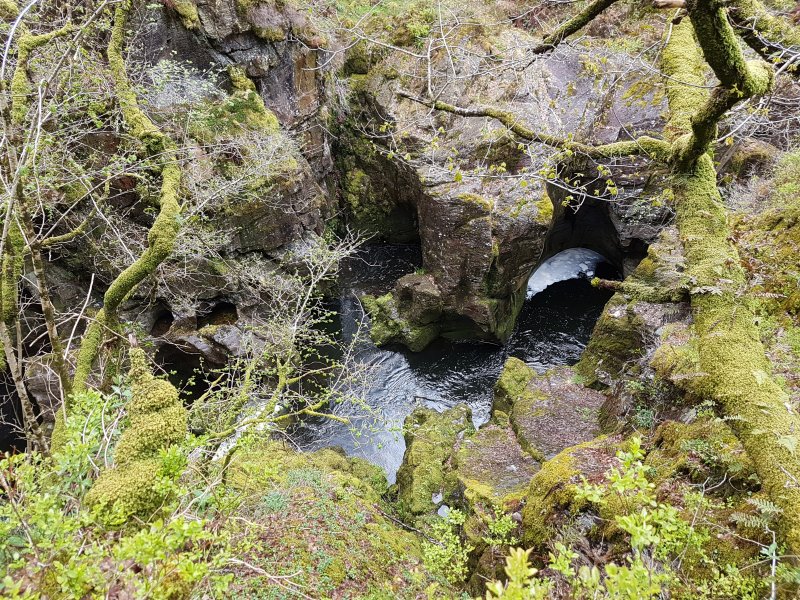 The Rheidol gorge, most definitely not navigable without a kayak.
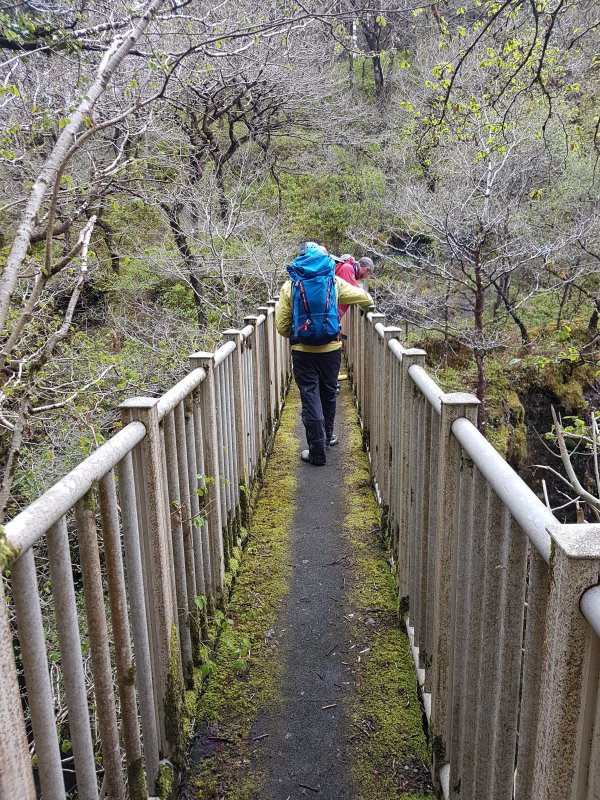 Parson's Bridge, a disturbingly bouncy bridge over the gorge. From here we ignore the path to the left, and continue along a path ahead, conveniently marked with a sign saying that the path was not a path. And these were not the droids we were looking for.
Modelling by Rich, Alan, John and Peter
Parson's Bridge, a disturbingly bouncy bridge over the gorge. From here we ignore the path to the left, and continue along a path ahead, conveniently marked with a sign saying that the path was not a path. And these were not the droids we were looking for.
Modelling by Rich, Alan, John and Peter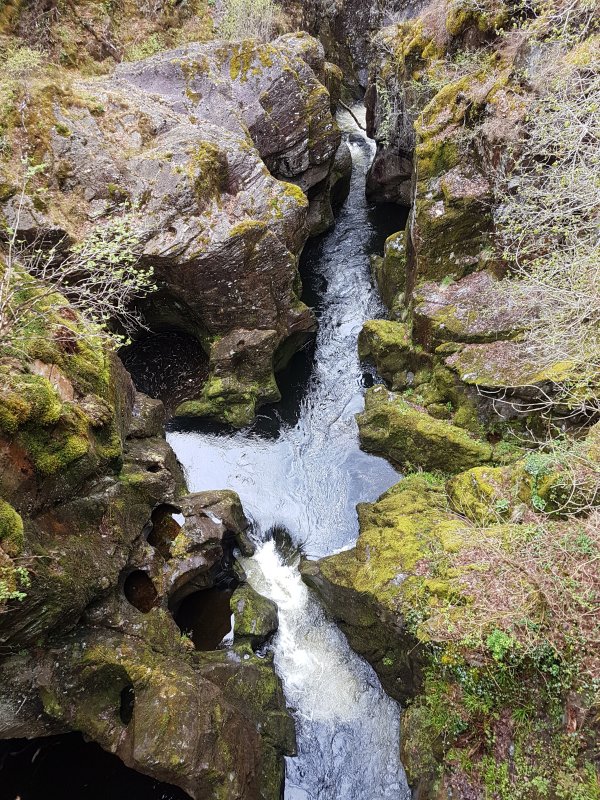 Upstream Rheidol gorge.
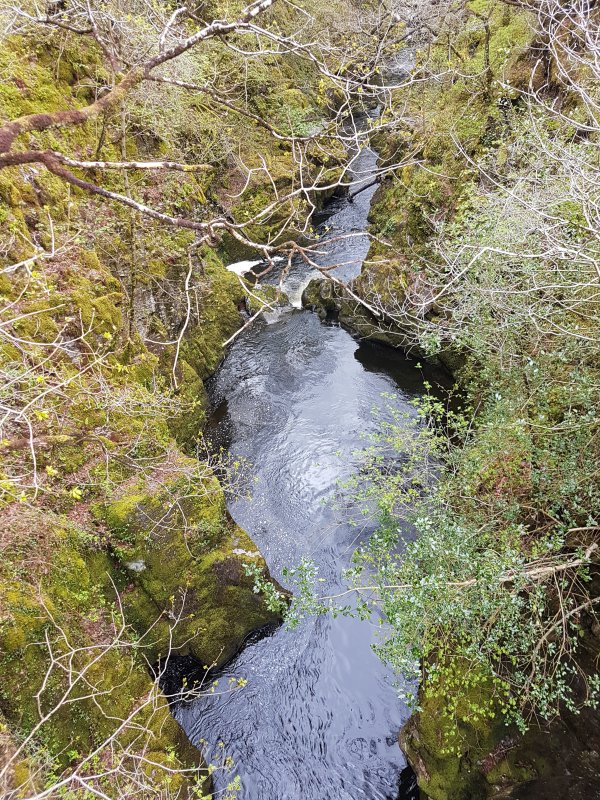 Downstream Rheidol gorge.
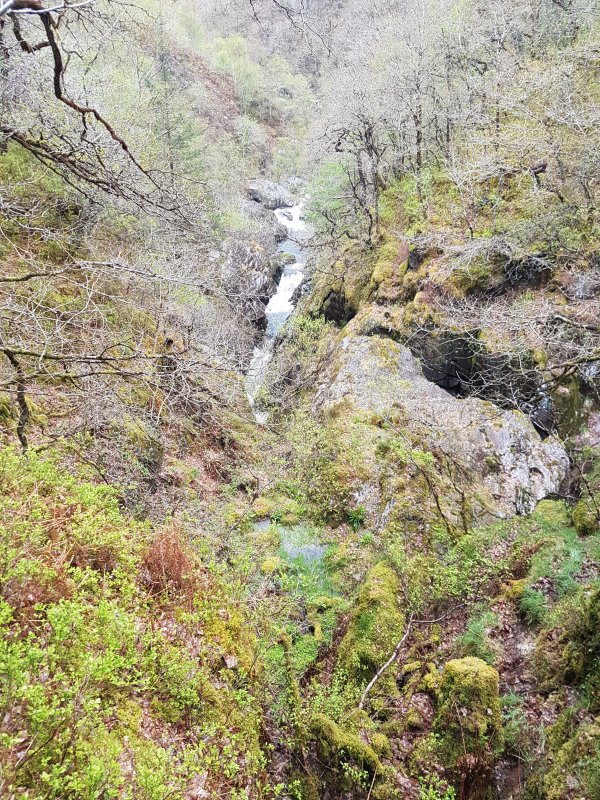 The gorge turns a corner, but continuing along the same line, directly under the path, is a trial adit.
 The trial adit entrance.
Modelling by Alan
The trial adit entrance.
Modelling by Alan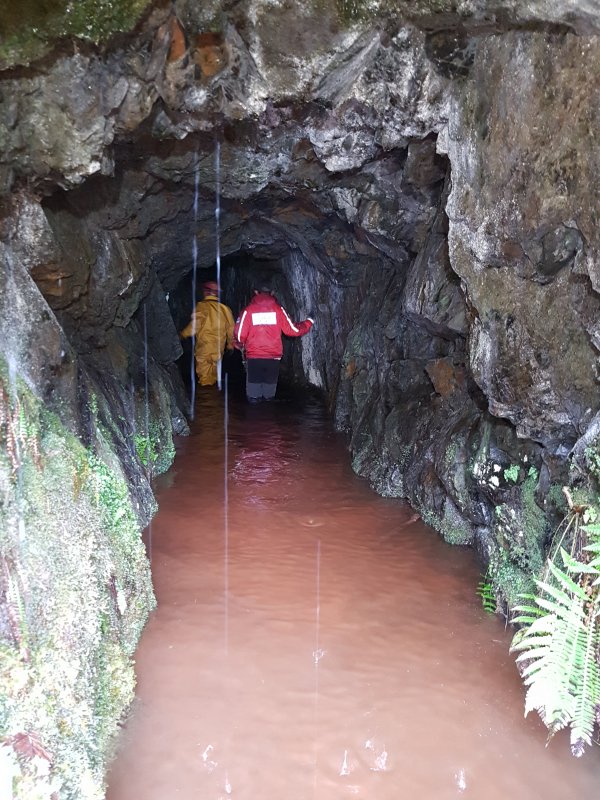 The start of the trial adit. Wet feet again.
Modelling by Ian Holmes and Peter
The start of the trial adit. Wet feet again.
Modelling by Ian Holmes and Peter Not a bad length for a trial adit. But also a bit meh.
Modelling by Ian Holmes and Peter
Not a bad length for a trial adit. But also a bit meh.
Modelling by Ian Holmes and Peter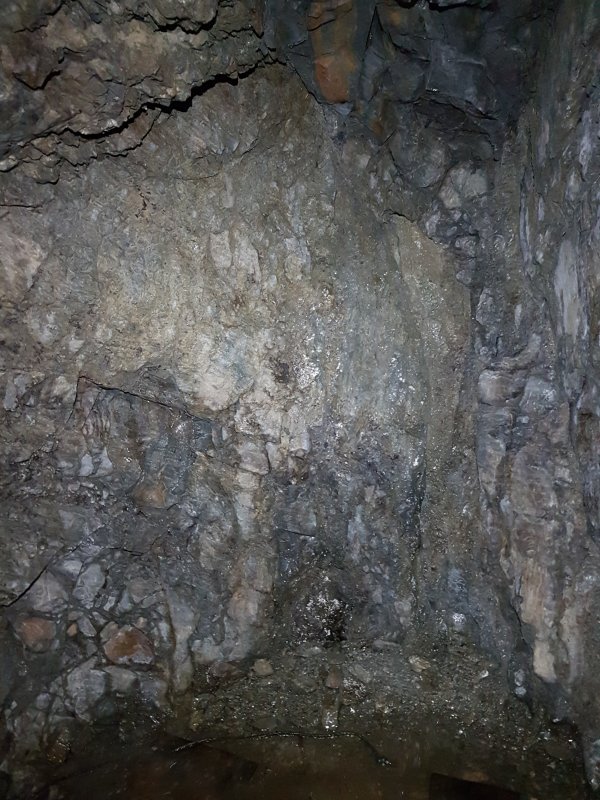 A blank end, with the remains of shotholes.
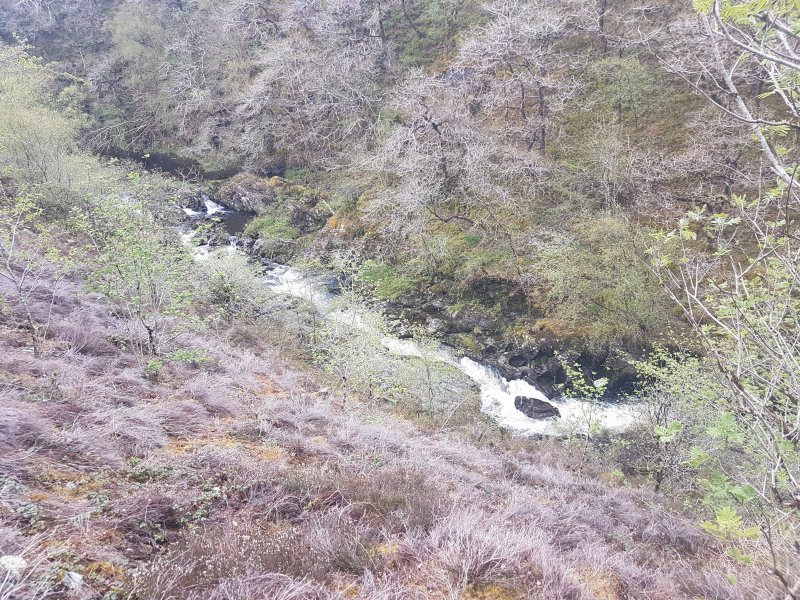 Upstream, the gorge turns into steep but navigable sides.
 The gentle bank of the river was used as the dressing floor, and had its own water wheel for the purpose. This was its wheel pit.
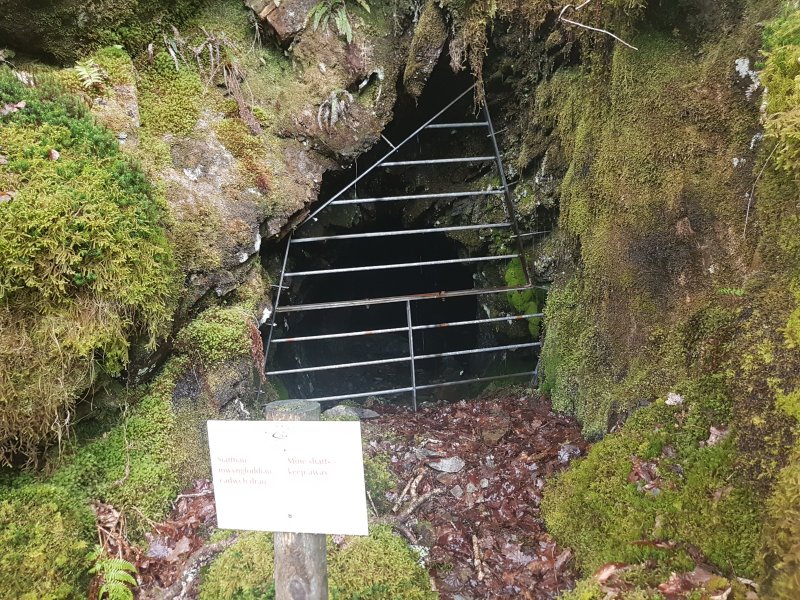 A little further upstream, the Temple mines start. There are three levels of adit here. This is the middle level. There is an upper level above it that ends at a the top of a deep stope, but we did not have the time to visit it.
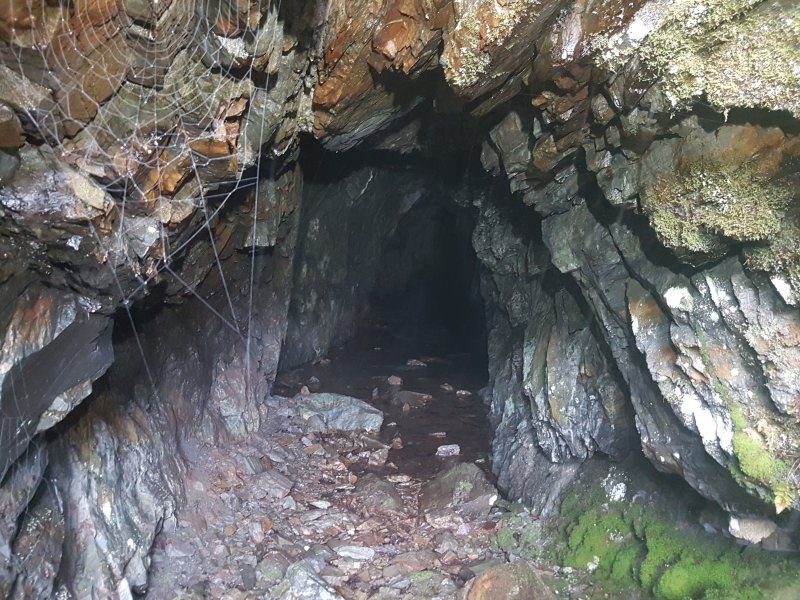 The middle level is gated without any way to open the gate. It is apparently unsafe to follow because it drops into the level below. It is likely to have been a channel for the water wheel sweep rods or chains, rather than for miners.
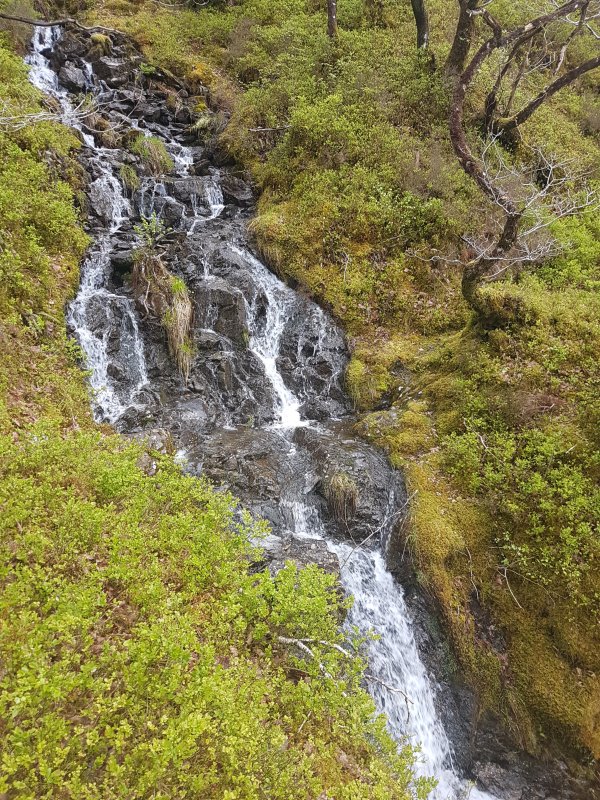 At the next stream, where there is a stile on our not-a-path (!), we take a path heading down to the river bank.
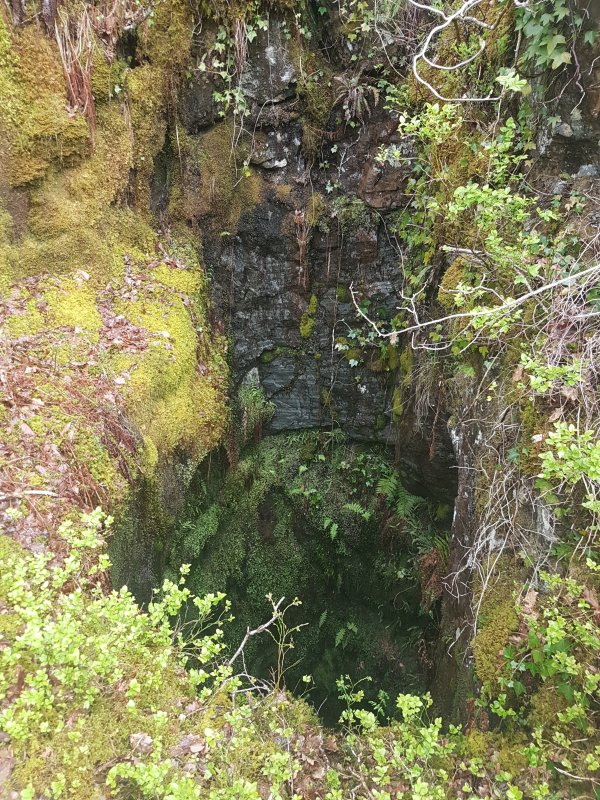 There is a shaft beside the path, but it is fenced off so we could not see how far down it went.
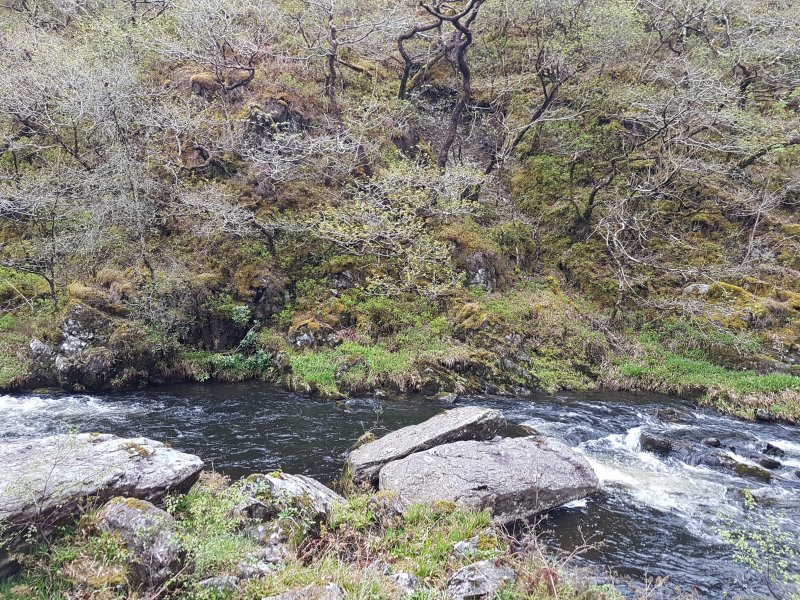 On the opposite side of the river are two trial adits, one in each of the clefts.
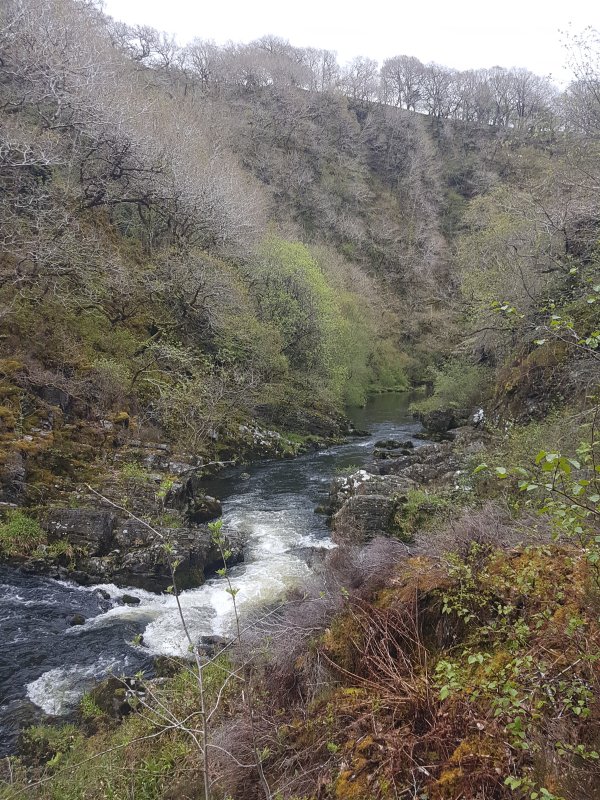 Looking downstream towards the dressing floor.
 Looking down onto the main Temple mine water wheel pit. There is a romantic dreaminess to the way it looks from here.
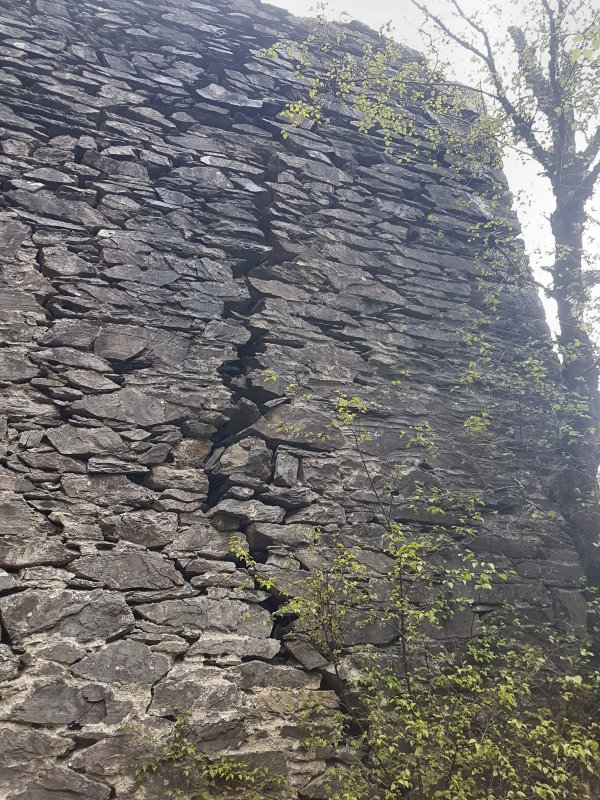 From the bottom, a large fracture is visible, so it might be a little unstable.
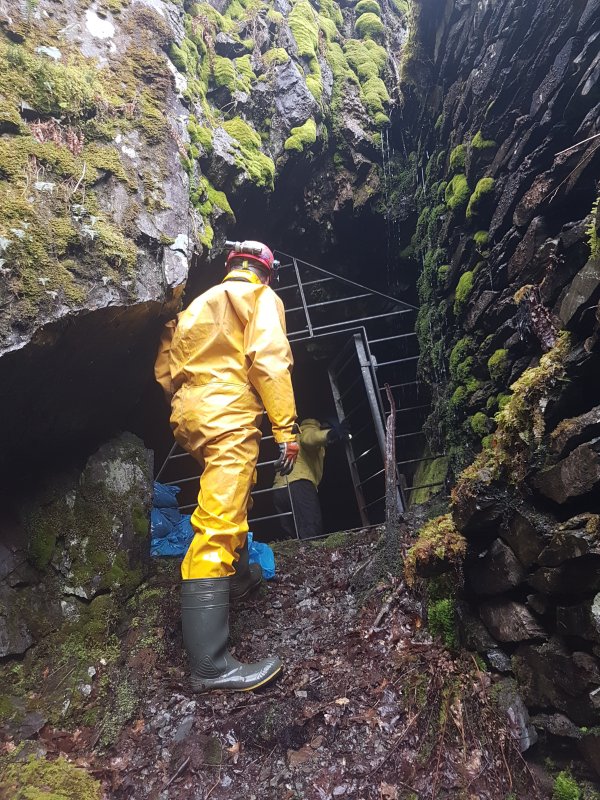 The lower adit's entrance is right beside the water wheel.
Modelling by Peter and Rich, lighting by Sol and Rich
The lower adit's entrance is right beside the water wheel.
Modelling by Peter and Rich, lighting by Sol and Rich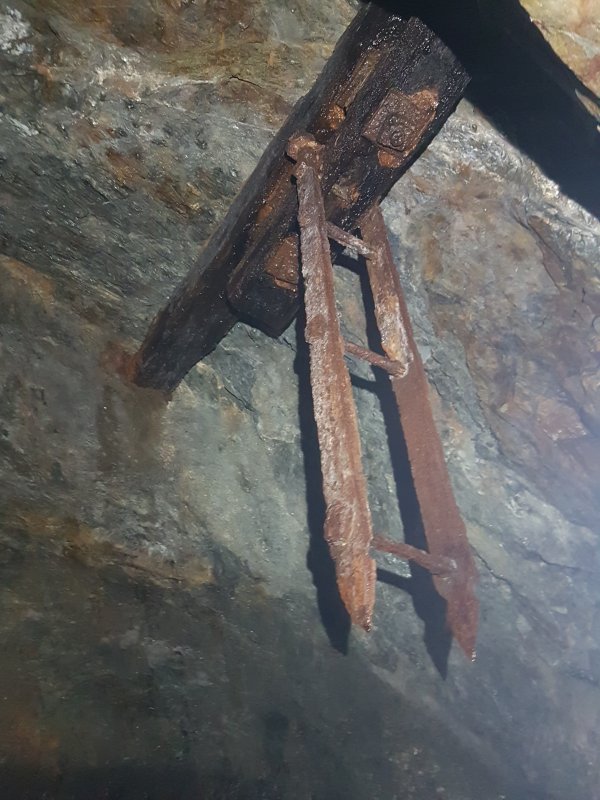 Spike aimed at your head just inside the entrance.
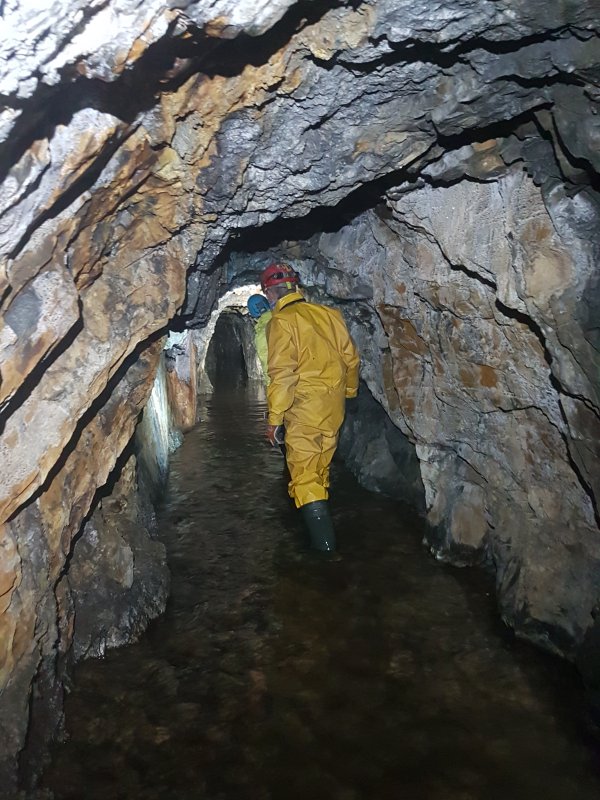 The start of the lower Temple mine adit.
Modelling by Peter and Rich, lighting by Tarquin, Peter and Rich
The start of the lower Temple mine adit.
Modelling by Peter and Rich, lighting by Tarquin, Peter and Rich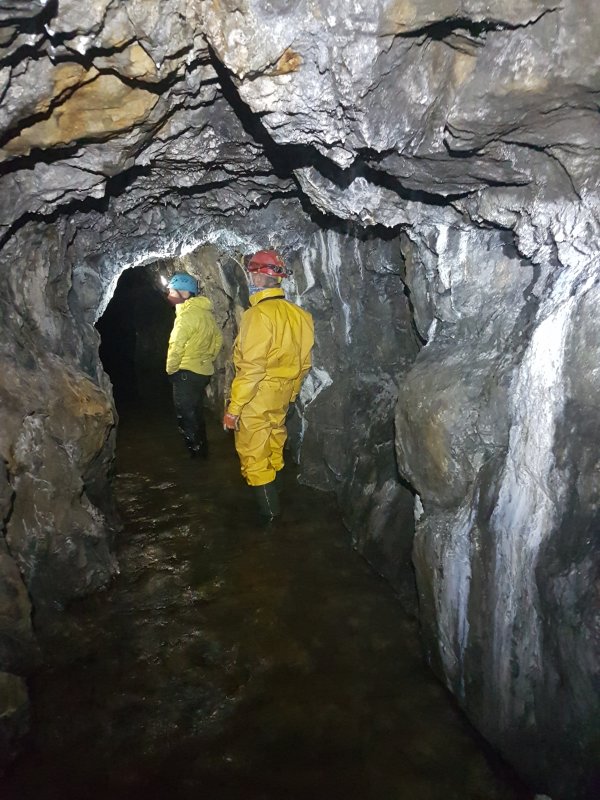 Before the stope.
Modelling by Peter and Rich, lighting by Tarquin, Peter and Rich
Before the stope.
Modelling by Peter and Rich, lighting by Tarquin, Peter and Rich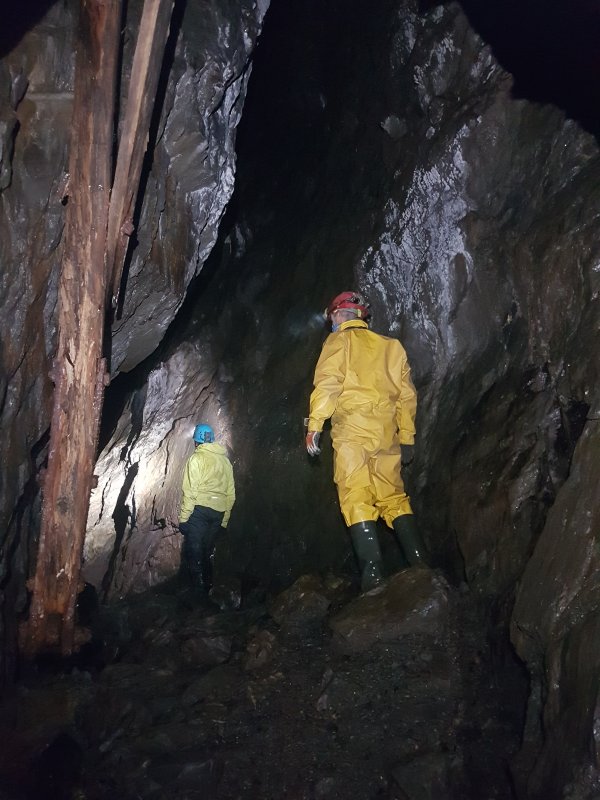 The stope is an enormous surprise, suddenly soaring up into the darkness.
Modelling by Peter and Rich, lighting by Tarquin, Peter and Rich
The stope is an enormous surprise, suddenly soaring up into the darkness.
Modelling by Peter and Rich, lighting by Tarquin, Peter and Rich Looking up, a ceiling can be seen, except that as you can see from the hole in it, it is not a ceiling. Those are wooden boards supporting rocks. So if you are walking along the rubble floor in the levels above - presumably the top level - you are walking on that false floor, way up in the ceiling. Pretty horrifying.
Lighting by Tarquin and John
Looking up, a ceiling can be seen, except that as you can see from the hole in it, it is not a ceiling. Those are wooden boards supporting rocks. So if you are walking along the rubble floor in the levels above - presumably the top level - you are walking on that false floor, way up in the ceiling. Pretty horrifying.
Lighting by Tarquin and John Then we pass an oddly placed headframe for a mineshaft. Except we are part way underground already.
Modelling by Peter and Rich, lighting by Tarquin, Peter and Rich
Then we pass an oddly placed headframe for a mineshaft. Except we are part way underground already.
Modelling by Peter and Rich, lighting by Tarquin, Peter and Rich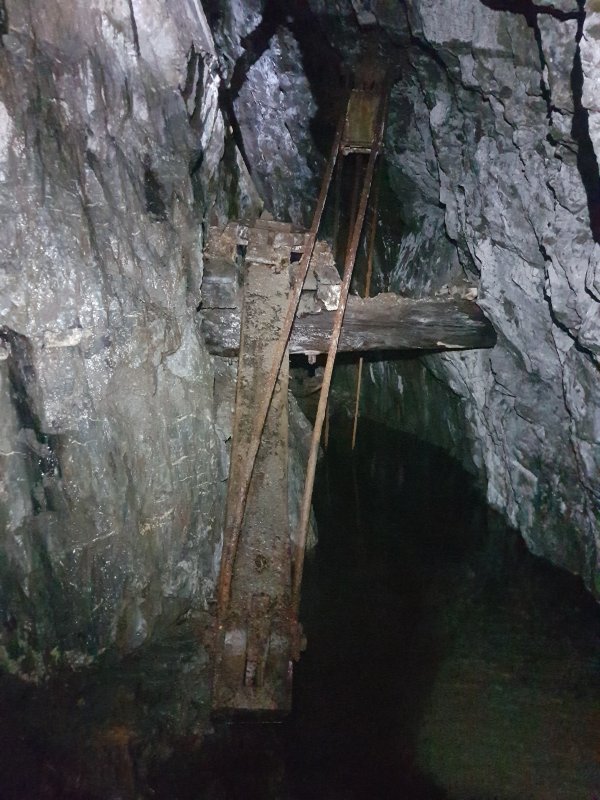 The headframe.
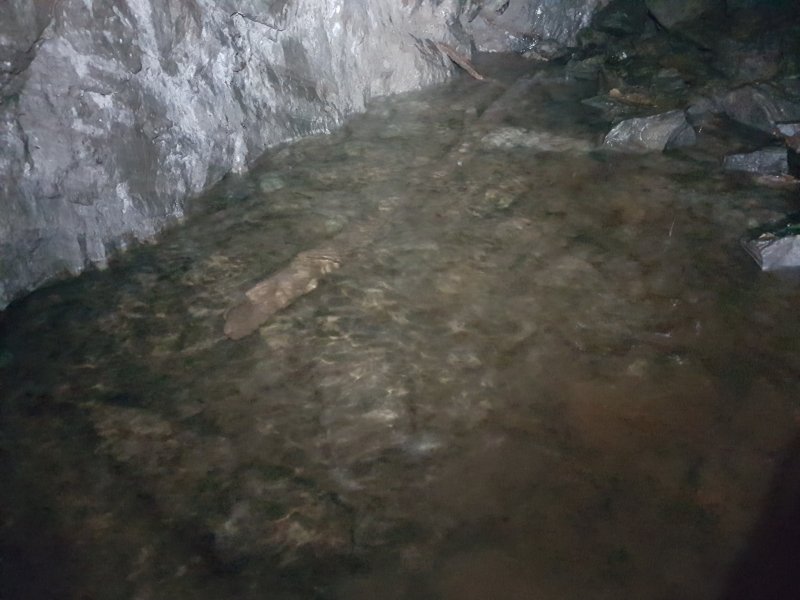 And that is when you realise that the flat floor underwater is not a solid floor. It is a mineshaft covered with some rotting wooden boards. Sneak carefully around the edge.
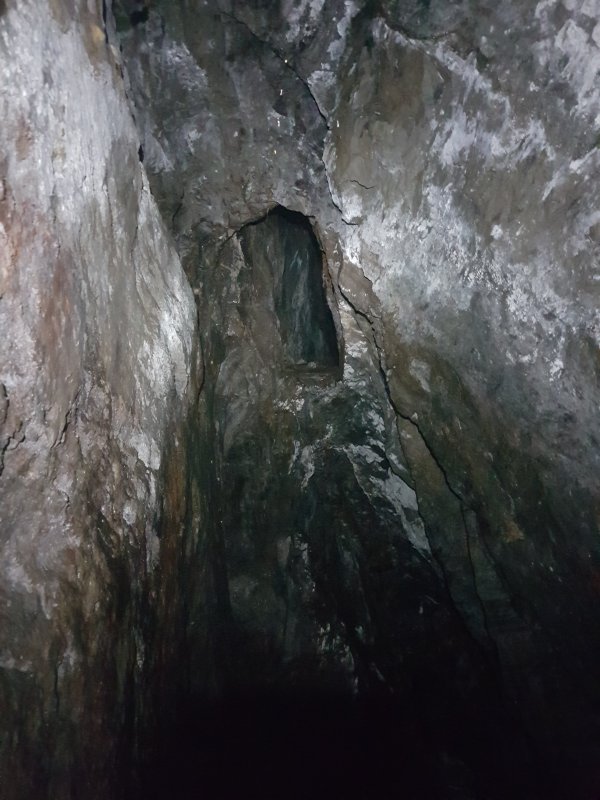 The middle level falls through the ceiling above. Presumably the sweep rods or chains were brought down through one of these holes, via the headframe, and into the capped shaft.
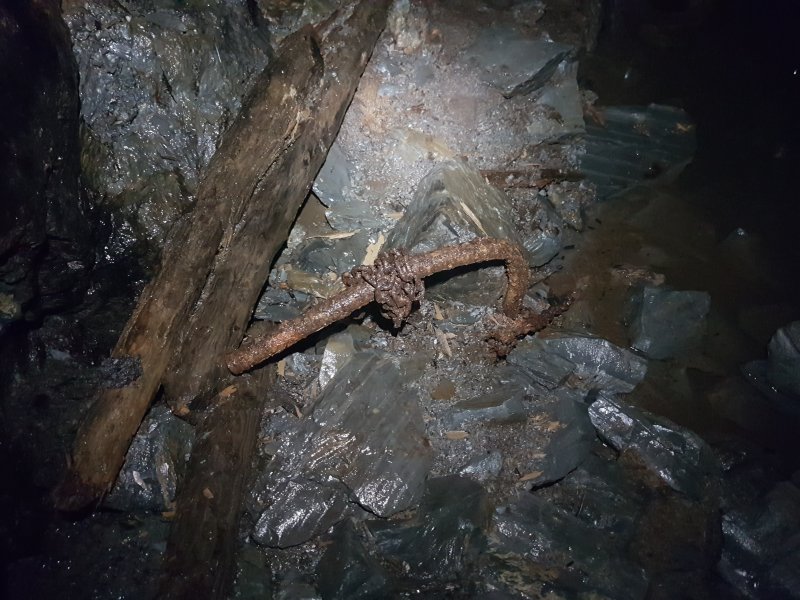 Winze chain.
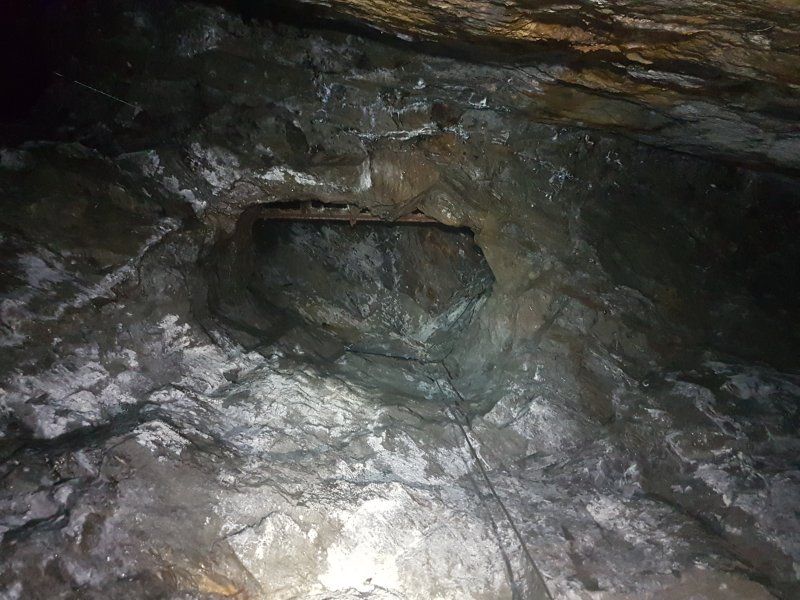 Hole into the upper levels, where someone has rigged a rope to explore them.
Lighting by Tarquin and Rich
Hole into the upper levels, where someone has rigged a rope to explore them.
Lighting by Tarquin and Rich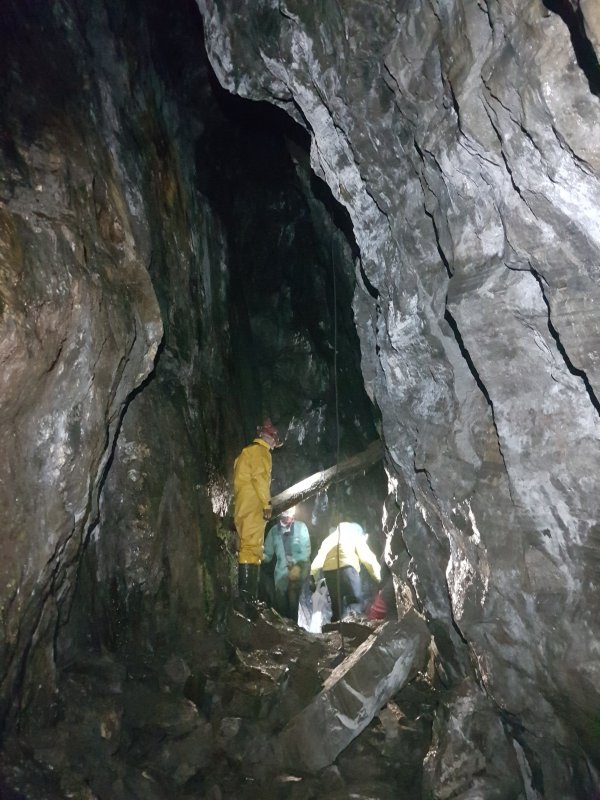 In the end of the stope.
Modelling by Peter, Alan, Rich and John, lighting by Tarquin, Peter, Alan, Rich and John
In the end of the stope.
Modelling by Peter, Alan, Rich and John, lighting by Tarquin, Peter, Alan, Rich and John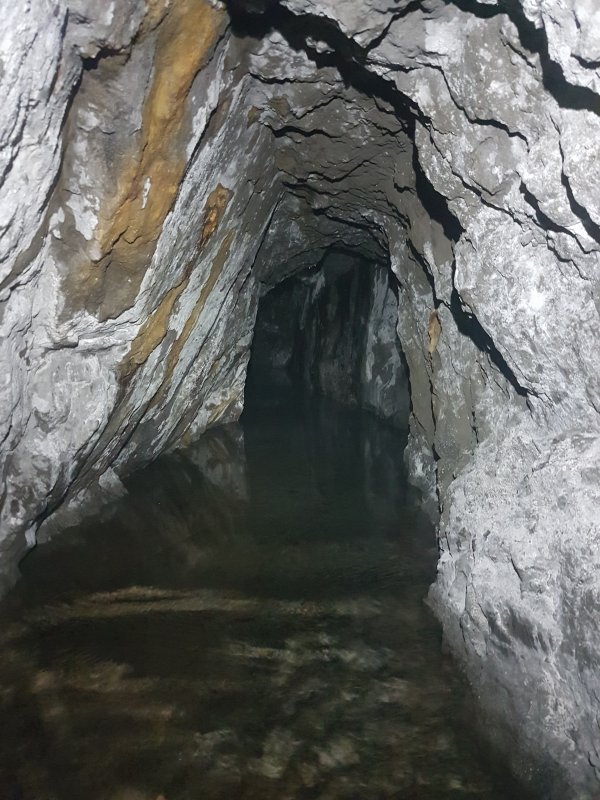 The level continues beyond the stopes.
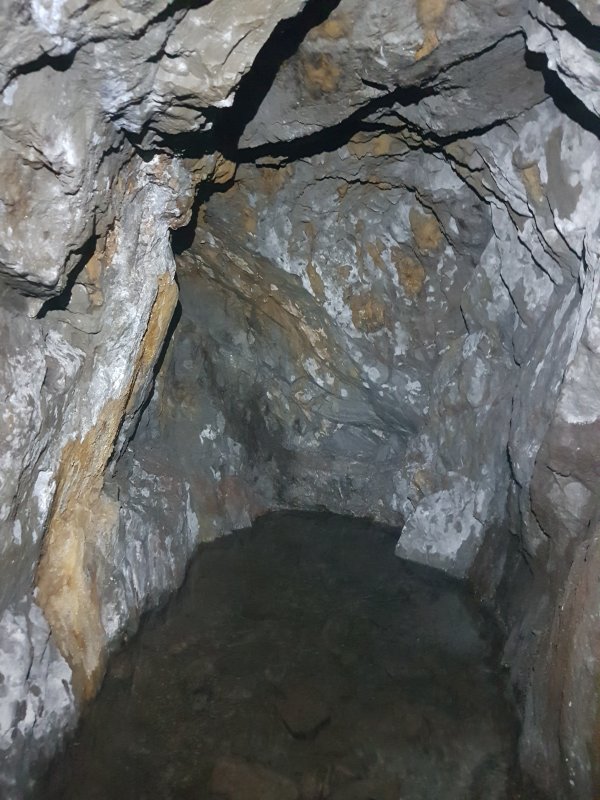 And ends at an abrupt wall.