Pwll Dwfn
Unless otherwise stated, camera, setups, lighting, edits and gallery effects by Tarquin. Modelling and lighting at various points will be Gareth Davies, George Linnane and Peter Wilton-Jones.
This is a series of pictures that we took during the surveying of Pwll Dwfn, to aid with drawing up, and to show the nature of the passages. They are intended to be viewed in conjunction with the survey. They are not intended to be artworks.
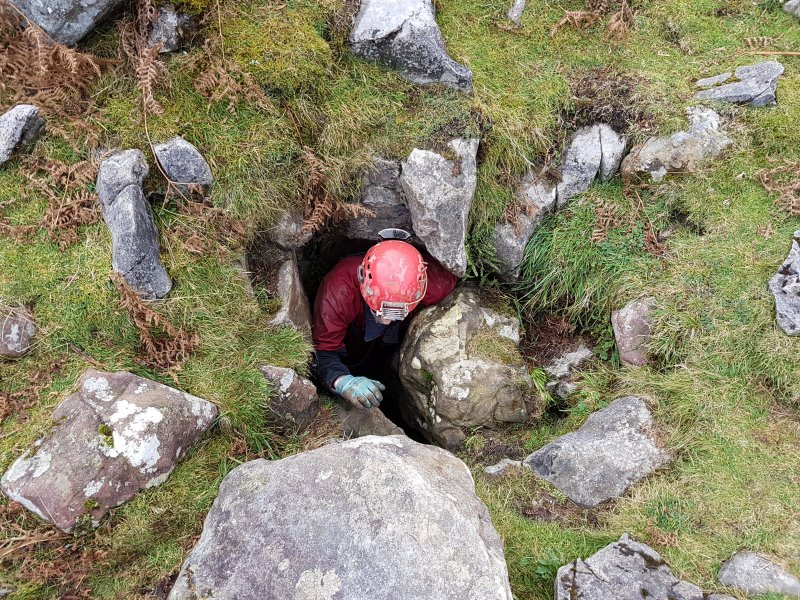
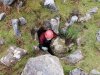 The entrance.
Modelling by Gareth
The entrance.
Modelling by Gareth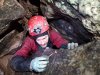 Squeeze just inside the entrance.
Modelling by Gareth, lighting by Tarquin and Sol
Squeeze just inside the entrance.
Modelling by Gareth, lighting by Tarquin and Sol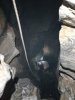 High water at First Pitch.
Modelling by Gareth, lighting by Tarquin and Gareth
High water at First Pitch.
Modelling by Gareth, lighting by Tarquin and Gareth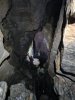 Looking down First Pitch in normal water conditions. The rope in the ceiling is the bolt traverse route. The point of the boulder Gareth is standing on is one of our permanent survey stations. Second pitch is immediately in front of Gareth.
Modelling by Gareth, lighting by Tarquin and Gareth
Looking down First Pitch in normal water conditions. The rope in the ceiling is the bolt traverse route. The point of the boulder Gareth is standing on is one of our permanent survey stations. Second pitch is immediately in front of Gareth.
Modelling by Gareth, lighting by Tarquin and Gareth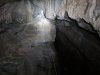 Main Y-hang for the bolt traverse route on First Pitch. There are no ledges for your feet, and it really is a crazy route.
Lighting by Tarquin and Gareth
Main Y-hang for the bolt traverse route on First Pitch. There are no ledges for your feet, and it really is a crazy route.
Lighting by Tarquin and Gareth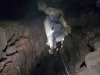 Near the top of First Pitch.
Modelling by Gareth, lighting by Tarquin and Gareth
Near the top of First Pitch.
Modelling by Gareth, lighting by Tarquin and Gareth Part way down First Pitch. The route into the choke is immediately ahead.
Modelling by Gareth, lighting by Tarquin and Gareth
Part way down First Pitch. The route into the choke is immediately ahead.
Modelling by Gareth, lighting by Tarquin and Gareth The route into the choke below First Pitch. This is invisible in higher water conditions, as too much water showers in from the ceiling.
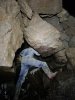 Clambering through the choke behind First Pitch. This is a loose area, where your SRT gear snags the boulders and moves them. It is not worth visiting.
Modelling by Gareth, lighting by Tarquin and Gareth
Clambering through the choke behind First Pitch. This is a loose area, where your SRT gear snags the boulders and moves them. It is not worth visiting.
Modelling by Gareth, lighting by Tarquin and Gareth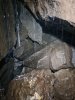 Drippy archway in the choke behind First Pitch. Behind it is a wet alcove with water showing in from above, and a pit in the floor drops under the choke to a visual connection back through the choke to the start.
Modelling by portions of Gareth, lighting by Tarquin and Gareth
Drippy archway in the choke behind First Pitch. Behind it is a wet alcove with water showing in from above, and a pit in the floor drops under the choke to a visual connection back through the choke to the start.
Modelling by portions of Gareth, lighting by Tarquin and Gareth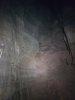 Alcove in the ceiling of Second Pitch, which hides the window of the short passage above the CUCC Old Flyover.
 Looking down Second Pitch.
Modelling by Gareth, lighting by Tarquin and Gareth
Looking down Second Pitch.
Modelling by Gareth, lighting by Tarquin and Gareth At the rebelay on Second Pitch. Gareth is pointing at one of our permanent survey stations, marked by three inconspicuous scratches pointing in to the station.
Modelling by Gareth, lighting by Tarquin and Gareth
At the rebelay on Second Pitch. Gareth is pointing at one of our permanent survey stations, marked by three inconspicuous scratches pointing in to the station.
Modelling by Gareth, lighting by Tarquin and Gareth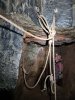 The actual rebelay on Second Pitch, which is notorious for being a hanging rebelay, with nowhere to put your feet. It is needed to avoid a significant rope rub. Gareth is standing on the CUCC Old Flyover ledge.
Modelling by Gareth, lighting by Tarquin and Gareth
The actual rebelay on Second Pitch, which is notorious for being a hanging rebelay, with nowhere to put your feet. It is needed to avoid a significant rope rub. Gareth is standing on the CUCC Old Flyover ledge.
Modelling by Gareth, lighting by Tarquin and Gareth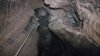 Second Pitch has a deviation that serves almost no purpose, but in very wet weather, it reduces swinging, keeping you out of the water.
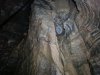 Stal covered alcove part way down Second Pitch.
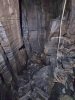 Large rock pillar on the side of Second Pitch.
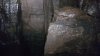 Top of the rock pillar at Second Pitch.
 Base of Second Pitch, which is a lot smaller than its middle.
 Top of the sloping rift of Third Pitch. This slopes far beyond the bottom of the pitch, but is the wall you see at the top, and gave us some trouble when deciding how to draw it up. This is where the first attempt to survey the cave had stopped, as traditional techniques cannot easily cope with this kind of sloping pitch.
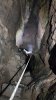 Descending Third Pitch.
Modelling by Gareth, lighting by Tarquin and Gareth
Descending Third Pitch.
Modelling by Gareth, lighting by Tarquin and Gareth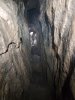 Climbing up to the balcony at the end of Third Pitch. We rigged a handline for the descent, but it was not necessary.
Modelling by Gareth, lighting by Tarquin and Gareth
Climbing up to the balcony at the end of Third Pitch. We rigged a handline for the descent, but it was not necessary.
Modelling by Gareth, lighting by Tarquin and Gareth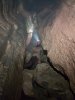 Balcony at the end of Third Pitch. It chokes immediately up ahead, and the choke sits directly above the choke in Poacher's Passage, suggesting potential for an enormous pitch between them.
Modelling by Gareth, lighting by Tarquin and Gareth
Balcony at the end of Third Pitch. It chokes immediately up ahead, and the choke sits directly above the choke in Poacher's Passage, suggesting potential for an enormous pitch between them.
Modelling by Gareth, lighting by Tarquin and Gareth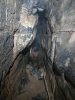 The tube part way down Third Pitch which is the usual way on, immediately becoming a rift.
Modelling by Gareth, lighting by Tarquin and Gareth
The tube part way down Third Pitch which is the usual way on, immediately becoming a rift.
Modelling by Gareth, lighting by Tarquin and Gareth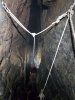 The upper Y-hang within the passage between Third Pitch and Fourth Pitch.
Modelling by Gareth, lighting by Tarquin and Gareth
The upper Y-hang within the passage between Third Pitch and Fourth Pitch.
Modelling by Gareth, lighting by Tarquin and Gareth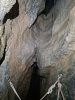 Immediately above the upper Y-hang in the passage between Third Pitch and Fourth Pitch, is a too-tight tube leading up into the upper aven.
Modelling by Gareth, lighting by Tarquin and Gareth
Immediately above the upper Y-hang in the passage between Third Pitch and Fourth Pitch, is a too-tight tube leading up into the upper aven.
Modelling by Gareth, lighting by Tarquin and Gareth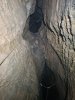 The aven above the passage between Third Pitch and Fourth Pitch. The Y-hang to the right is the main route's upper Y-hang.
 Tiny floor in the aven above the passage between Third Pitch and Fourth Pitch, formed by a rock bridge. During the 1960s, ropes were threaded over this rock bridge to act as a belay for ladders on the Fourth Pitch.
Modelling by Tarquin and vague hints of Gareth, lighting by Tarquin and Gareth
Tiny floor in the aven above the passage between Third Pitch and Fourth Pitch, formed by a rock bridge. During the 1960s, ropes were threaded over this rock bridge to act as a belay for ladders on the Fourth Pitch.
Modelling by Tarquin and vague hints of Gareth, lighting by Tarquin and Gareth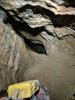 Hole dropping down to the upper Y-hang in the aven above the passage between Third Pitch and Fourth Pitch.
Modelling by portions of Tarquin
Hole dropping down to the upper Y-hang in the aven above the passage between Third Pitch and Fourth Pitch.
Modelling by portions of Tarquin Top of the aven above the passage between Third Pitch and Fourth Pitch. This section has a particularly phallic shape in elevation view. The too-tight rift to the right has a visual connection to the top of the CUCC Old Flyover pitch. The alcove ahead seems to hide a tiny solution tube, but it is too tight.
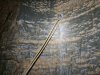 The western side of the Y-hang in the aven above the passage between Third Pitch and Fourth Pitch.
 The eastern side of the Y-hang in the aven above the passage between Third Pitch and Fourth Pitch.
Modelling by the top of Gareth, lighting by Tarquin and Gareth
The eastern side of the Y-hang in the aven above the passage between Third Pitch and Fourth Pitch.
Modelling by the top of Gareth, lighting by Tarquin and Gareth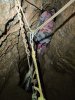 The way on from the aven above the passage between Third Pitch and Fourth Pitch is quite tight, and needs to be done while connected to a rope. This is how the CUCC Old Flyover was originally climbed.
Modelling by Gareth, lighting by Tarquin and Gareth
The way on from the aven above the passage between Third Pitch and Fourth Pitch is quite tight, and needs to be done while connected to a rope. This is how the CUCC Old Flyover was originally climbed.
Modelling by Gareth, lighting by Tarquin and Gareth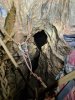 The route from the aven above the passage between Third Pitch and Fourth Pitch passes through a keyhole section with no floor, opening out into the main aven 27 metres above the floor.
Modelling by Gareth, lighting by Tarquin and Gareth
The route from the aven above the passage between Third Pitch and Fourth Pitch passes through a keyhole section with no floor, opening out into the main aven 27 metres above the floor.
Modelling by Gareth, lighting by Tarquin and Gareth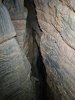 The route from the aven above the passage between Third Pitch and Fourth Pitch, where it connects to the main aven. The original rope can be seen climbing up to the top of CUCC Old Flyover, and had been in use until 2010, when the bolting work was completed.
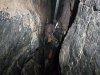 The Y-hang at the head of Fourth Pitch.
Modelling by Gareth, lighting by Tarquin and Gareth
The Y-hang at the head of Fourth Pitch.
Modelling by Gareth, lighting by Tarquin and Gareth Rigging the deviation on Fourth Pitch. The rebelay in the background was the CUCC Old Flyover rebelay from 2011. That has now been replaced with a deviation.
Modelling by Gareth, lighting by Tarquin and Gareth
Rigging the deviation on Fourth Pitch. The rebelay in the background was the CUCC Old Flyover rebelay from 2011. That has now been replaced with a deviation.
Modelling by Gareth, lighting by Tarquin and Gareth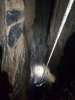 Looking at the far wall beyond the deviation on Fourth Pitch.
Modelling by George, lighting by Tarquin and George
Looking at the far wall beyond the deviation on Fourth Pitch.
Modelling by George, lighting by Tarquin and George Looking down the section of Fourth Pitch below the deviation.
Modelling by George, lighting by Tarquin and George
Looking down the section of Fourth Pitch below the deviation.
Modelling by George, lighting by Tarquin and George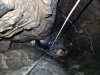 Base of the main section of Fourth Pitch.
Modelling by Gareth, lighting by Tarquin and Gareth
Base of the main section of Fourth Pitch.
Modelling by Gareth, lighting by Tarquin and Gareth The old traverse line into CUCC Old Flyover from Second Pitch. We had doubled up the rope and maillons for our first crossing, but on the day we surveyed the big pitch, we used the old and badly worn maillons, which were installed some time before 2011.
Modelling by Gareth, lighting by Tarquin and Gareth
The old traverse line into CUCC Old Flyover from Second Pitch. We had doubled up the rope and maillons for our first crossing, but on the day we surveyed the big pitch, we used the old and badly worn maillons, which were installed some time before 2011.
Modelling by Gareth, lighting by Tarquin and Gareth The new P-hangers, which were installed at the end of the project.
 Bolting into the aven above the ledge at the start of CUCC Old Flyover.
Modelling by Gareth, lighting by Tarquin and Gareth
Bolting into the aven above the ledge at the start of CUCC Old Flyover.
Modelling by Gareth, lighting by Tarquin and Gareth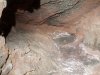 Sand fill at one end of the passage at the top of the aven above the ledge at the start of CUCC Old Flyover.
 The main direction along the passage at the top of the aven above the ledge at the start of CUCC Old Flyover.
Modelling by Gareth
The main direction along the passage at the top of the aven above the ledge at the start of CUCC Old Flyover.
Modelling by Gareth The main direction along the passage at the top of the aven above the ledge at the start of CUCC Old Flyover, ends at a window that drops 18 metres down Second Pitch.
Modelling by portions of Gareth, lighting by Tarquin and Gareth
The main direction along the passage at the top of the aven above the ledge at the start of CUCC Old Flyover, ends at a window that drops 18 metres down Second Pitch.
Modelling by portions of Gareth, lighting by Tarquin and Gareth Top of the blasted squeeze that connected CUCC Old Flyover to Second Pitch. While this is not particularly tight, it does normally need SRT gear to be removed, while standing on the sandy ledge near the top of Second Pitch. The handline is sometimes helpful for getting up out of the squeeze.
Modelling by Gareth, lighting by Tarquin and Gareth
Top of the blasted squeeze that connected CUCC Old Flyover to Second Pitch. While this is not particularly tight, it does normally need SRT gear to be removed, while standing on the sandy ledge near the top of Second Pitch. The handline is sometimes helpful for getting up out of the squeeze.
Modelling by Gareth, lighting by Tarquin and Gareth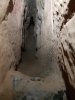 The tightest part of the CUCC Old Flyover squeeze is at this little step. The step makes it very difficult to haul bags through with a donkey's dick, so a hauling line is a good idea.
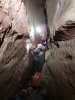 Surveying in the narrow section of CUCC Old Flyover after the squeeze.
Modelling by Gareth, lighting by Tarquin and Gareth
Surveying in the narrow section of CUCC Old Flyover after the squeeze.
Modelling by Gareth, lighting by Tarquin and Gareth The narrow section of CUCC Old Flyover after the squeeze is where we had abandoned our first attempt to survey here, due to a failed Disto calibration. That is a look of resignation.
Modelling by Gareth
The narrow section of CUCC Old Flyover after the squeeze is where we had abandoned our first attempt to survey here, due to a failed Disto calibration. That is a look of resignation.
Modelling by Gareth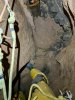 The tiny space where you have to get your SRT gear back on, between the climbs at the head of the CUCC Old Flyover big pitch.
Modelling by Tarquin
The tiny space where you have to get your SRT gear back on, between the climbs at the head of the CUCC Old Flyover big pitch.
Modelling by Tarquin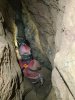 The new backup P-hangers for the CUCC Old Flyover big pitch.
Modelling by Gareth, lighting by Tarquin and Gareth
The new backup P-hangers for the CUCC Old Flyover big pitch.
Modelling by Gareth, lighting by Tarquin and Gareth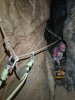 The old arrangement of backup anchors for the CUCC Old Flyover big pitch.
Modelling by Gareth, lighting by Tarquin and Gareth
The old arrangement of backup anchors for the CUCC Old Flyover big pitch.
Modelling by Gareth, lighting by Tarquin and Gareth Looking back up the two little climbs at the head of the CUCC Old Flyover big pitch.
Modelling by Gareth, lighting by Tarquin and Gareth
Looking back up the two little climbs at the head of the CUCC Old Flyover big pitch.
Modelling by Gareth, lighting by Tarquin and Gareth Top of the aven above CUCC Old Flyover's big pitch. It is a blind solutional pocket.
 Formations in an alcove near the head of the CUCC Old Flyover big pitch.
 Formations at the head of the CUCC Old Flyover big pitch.
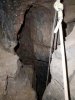 Lip of the CUCC Old Flyover big pitch.
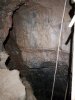 Head of the CUCC Old Flyover big pitch.
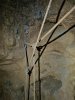 Old rigging at the head of the CUCC Old Flyover big pitch. The rope on the left is the 2011 rope that leads down the main route, while the rope to the right is the 2010 rope which was originally used after this aven was first climbed. The new P-hangers can be seen in the ceiling, just after their installation.
 Diverging routes for the ropes at the top of the CUCC Old Flyover big pitch. The modern route follows the route on the left.
 Installing the new P-hangers at the top of the CUCC Old Flyover big pitch.
Modelling by Gareth, lighting by Tarquin and Gareth
Installing the new P-hangers at the top of the CUCC Old Flyover big pitch.
Modelling by Gareth, lighting by Tarquin and Gareth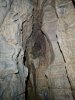 Blind alcove at the top of the CUCC Old Flyover big pitch. It appears to connect to the floor of the little climbs above the pitch.
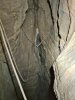 Crazy rebelay Y-hang on the original route that was used to bolt CUCC Old Flyover. The rope drops all the way down from there to reach the route from the aven above the passage between Third Pitch and Fourth Pitch. The alcove beyond the Y-hang has a visual connection to the top of the same aven, which we only found out about because our laser lines intersected each other.
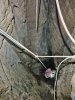 Looking down to the second rebelay in the CUCC Old Flyover big pitch, which has now been turned into a Y-hang like the one above it.
Modelling by Gareth, lighting by Tarquin and Gareth
Looking down to the second rebelay in the CUCC Old Flyover big pitch, which has now been turned into a Y-hang like the one above it.
Modelling by Gareth, lighting by Tarquin and Gareth Looking up at the third rebelay in the CUCC Old Flyover big pitch, which has now been converted into a deviation.
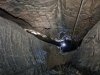 The largest section of the CUCC Old Flyover big pitch.
Modelling by Gareth, lighting by Tarquin and Gareth
The largest section of the CUCC Old Flyover big pitch.
Modelling by Gareth, lighting by Tarquin and Gareth The drop below the largest section of the CUCC Old Flyover big pitch lands on a rock and sand covered ledge.
Modelling by Gareth, lighting by Tarquin and Gareth
The drop below the largest section of the CUCC Old Flyover big pitch lands on a rock and sand covered ledge.
Modelling by Gareth, lighting by Tarquin and Gareth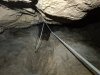 Looking back up at the rebelay at the bottom of the largest section of the CUCC Old Flyover big pitch.
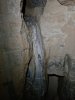 The stal alcove below the largest section of the CUCC Old Flyover big pitch. It seems to go back some distance, and we could not actually see the back, but the laser saw walls on all sides, so it appears to be just an alcove.
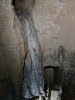 Looking down into the sandy alcove on the CUCC Old Flyover big pitch.
Lighting by Tarquin and Gareth
Looking down into the sandy alcove on the CUCC Old Flyover big pitch.
Lighting by Tarquin and Gareth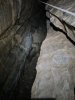 Looking down into the sandy alcove on the CUCC Old Flyover big pitch.
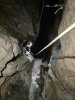 Looking down the last section of the CUCC Old Flyover route, from the approximate location of the new deviation. The Fourth Pitch main route's deviation can be seen at the top, while one of the rebelays on the CUCC Old Flyover route is down below.
Modelling by Gareth, lighting by Tarquin and Gareth
Looking down the last section of the CUCC Old Flyover route, from the approximate location of the new deviation. The Fourth Pitch main route's deviation can be seen at the top, while one of the rebelays on the CUCC Old Flyover route is down below.
Modelling by Gareth, lighting by Tarquin and Gareth The rock and sand covered ledge on the CUCC Old Flyover big pitch.
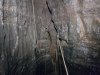 The old rebelays at the base of the main part of Fourth Pitch. This has now been rearranged so that the two routes share the normal rebelay, and the rebelay has an optional Y-hang, to avoid a rope rub if the rebelay fails for some reason. Behind the ropes is the entrance to the little oxbow which drops into the ceiling of the chamber below.
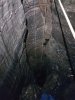 Lip of the last stage of Fourth Pitch.
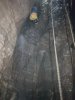 Last stage of the Fourth Pitch, now with both routes joined. It is possible to free climb this in lower water conditions.
Lighting by Tarquin and Gareth
Last stage of the Fourth Pitch, now with both routes joined. It is possible to free climb this in lower water conditions.
Lighting by Tarquin and Gareth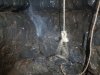 Base of the Fourth Pitch.
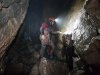 Chamber at the base of Fourth Pitch. Gareth is pointing at one of our permanent survey stations. Above his head is an aven looping around to the top of the last drop.
Modelling by Gareth, lighting by Tarquin and Gareth
Chamber at the base of Fourth Pitch. Gareth is pointing at one of our permanent survey stations. Above his head is an aven looping around to the top of the last drop.
Modelling by Gareth, lighting by Tarquin and Gareth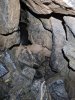 The way on from the chamber at the base of Fourth Pitch, under the wedged rock. The normal approach is to drop down the hole and continue under rocks into the obvious passage.
Lighting by Tarquin and Gareth
The way on from the chamber at the base of Fourth Pitch, under the wedged rock. The normal approach is to drop down the hole and continue under rocks into the obvious passage.
Lighting by Tarquin and Gareth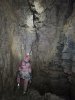 Chamber at the base of Loose Slab Aven.
Modelling by Gareth, lighting by Tarquin and Gareth
Chamber at the base of Loose Slab Aven.
Modelling by Gareth, lighting by Tarquin and Gareth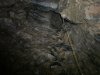 Lowest part of Loose Slab Aven. Somehow, this was not seen in 1947 (bad lighting), drawn as two avens in 1962, not seen in 1988, and drawn incorrectly in 2000.
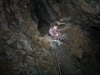 Rearranging the first rebelay in Loose Slab Aven.
Modelling by Gareth, lighting by Tarquin and Gareth
Rearranging the first rebelay in Loose Slab Aven.
Modelling by Gareth, lighting by Tarquin and Gareth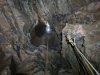 Approaching the second rebelay in Loose Slab Aven.
Modelling by Gareth, lighting by Tarquin and Gareth
Approaching the second rebelay in Loose Slab Aven.
Modelling by Gareth, lighting by Tarquin and Gareth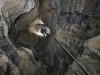 Approaching the top of Loose Slab Aven. This was first reached by Pete Bolt.
Modelling by Gareth, lighting by Tarquin and Gareth
Approaching the top of Loose Slab Aven. This was first reached by Pete Bolt.
Modelling by Gareth, lighting by Tarquin and Gareth Lip of Loose Slab Aven.
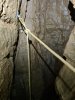 The main hanger at the top of Loose Slab Aven.
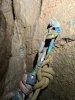 Backup hanger at the top of Loose Slab Aven.
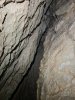 The rift at the top of Loose Slab Aven, which pinches out into a narrow cleft.
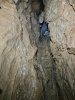 Climb at the top of Loose Slab Aven.
Modelling by Gareth
Climb at the top of Loose Slab Aven.
Modelling by Gareth Squeeze under a rock at the top of the climb in Loose Slab Aven. Gareth enlarged this a little.
Modelling by Gareth, lighting by Tarquin and Gareth
Squeeze under a rock at the top of the climb in Loose Slab Aven. Gareth enlarged this a little.
Modelling by Gareth, lighting by Tarquin and Gareth Narrow section near the start of the passage from Loose Slab Aven.
Modelling by Gareth, lighting by Tarquin and Gareth
Narrow section near the start of the passage from Loose Slab Aven.
Modelling by Gareth, lighting by Tarquin and Gareth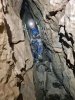 The slanting passage looks much bigger on the survey than it is, because of the slant.
Modelling by Gareth, lighting by Tarquin and Gareth
The slanting passage looks much bigger on the survey than it is, because of the slant.
Modelling by Gareth, lighting by Tarquin and Gareth At the choke at the end of Loose Slab Aven.
Modelling by Gareth, lighting by Tarquin and Gareth
At the choke at the end of Loose Slab Aven.
Modelling by Gareth, lighting by Tarquin and Gareth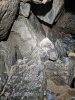 The choke at the end of Loose Slab Aven lies directly below the floor of Third Pitch, about 7 metres down.
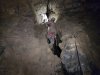 Bolt climb into the rift above Fifth Pitch, from the chamber below Loose Slab Aven.
Modelling by Gareth, lighting by Tarquin and Gareth
Bolt climb into the rift above Fifth Pitch, from the chamber below Loose Slab Aven.
Modelling by Gareth, lighting by Tarquin and Gareth Proof that I was surveying! In the rift above Fifth Pitch, below the too-tight aven. At this point, we are both connected to the rope, since the mud floor is suspended on jammed rocks, with a visible hole down Fifth Pitch.
Camera and setup by Gareth, modelling by Tarquin, lighting by Gareth and Tarquin
Proof that I was surveying! In the rift above Fifth Pitch, below the too-tight aven. At this point, we are both connected to the rope, since the mud floor is suspended on jammed rocks, with a visible hole down Fifth Pitch.
Camera and setup by Gareth, modelling by Tarquin, lighting by Gareth and Tarquin Near the end of the rift above Fifth Pitch.
Modelling by Gareth, lighting by Tarquin and Gareth
Near the end of the rift above Fifth Pitch.
Modelling by Gareth, lighting by Tarquin and Gareth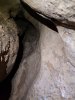 Cleft in the ceiling near the end of the rift above Fifth Pitch.
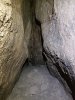 Silted end of the rift above Fifth Pitch.
 Selection of unofficial hangers that can be used as a backup for Fifth Pitch, in the chamber below Loose Slab Aven.
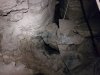 Boulders jammed over the route to Fifth Pitch in the chamber below Loose Slab Aven.
 Detail of the jammed boulders over the route to Fifth Pitch in the chamber below Loose Slab Aven.
Modelling by Tarquin
Detail of the jammed boulders over the route to Fifth Pitch in the chamber below Loose Slab Aven.
Modelling by Tarquin Descent route under the jammed boulders towards Fifth Pitch in the chamber below Loose Slab Aven.
Modelling by Tarquin
Descent route under the jammed boulders towards Fifth Pitch in the chamber below Loose Slab Aven.
Modelling by Tarquin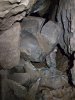 Looking up at the jammed boulders from the head of Fifth Pitch.
Modelling by Gareth, lighting by Tarquin and Gareth
Looking up at the jammed boulders from the head of Fifth Pitch.
Modelling by Gareth, lighting by Tarquin and Gareth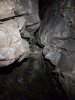 Hole in the veiling of Fifth Pitch which connects to the rift above.
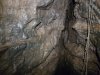 Rift over Fifth Pitch, which immediately closes down. One traverse hanger and the Y-hang hangers can be seen.
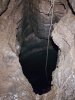 Lip of Fifth Pitch.
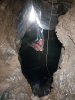 Marking a survey station at the deviation on Fifth Pitch.
Modelling by Gareth, lighting by Tarquin and Gareth
Marking a survey station at the deviation on Fifth Pitch.
Modelling by Gareth, lighting by Tarquin and Gareth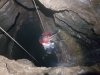 Traverse ledge on Fifth Pitch which leads to Poacher's Passage.
Modelling by Gareth, lighting by Tarquin and Gareth
Traverse ledge on Fifth Pitch which leads to Poacher's Passage.
Modelling by Gareth, lighting by Tarquin and Gareth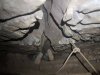 Crawl into Poacher's Passage.
Modelling by Gareth
Crawl into Poacher's Passage.
Modelling by Gareth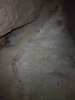 Sand floor in the large chamber in Poacher's Passage. Presumably, there is a sand-filled connection down through the floor to the choked side passage at the base of Fifth Pitch.
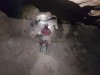 The large section of Poacher's Passage, which ends abruptly at a choke made from large boulders.
Modelling by Gareth, lighting by Tarquin and Gareth
The large section of Poacher's Passage, which ends abruptly at a choke made from large boulders.
Modelling by Gareth, lighting by Tarquin and Gareth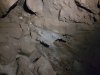 False floor in Poacher's Passage.
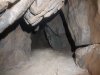 The sandy crawl that skirts the edge of the Poacher's Passage choke, before ending in sand fill.
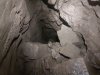 A climb up in the sandy crawl in Poacher's Passage leads up into the heart of the choke, with windows back down into it. The highest climb leads up into this short section of solid passage, ending definitively in the choke. This is directly below the Third Pitch balcony, and feels like it is below the floor of an enormous shaft.
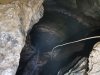 Water backed up above the rocks at the base of Fifth Pitch during a flood.
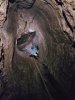 Below the deviation on Fifth Pitch, in dry conditions.
Modelling by Peter, lighting by Tarquin and Peter
Below the deviation on Fifth Pitch, in dry conditions.
Modelling by Peter, lighting by Tarquin and Peter Nearing the base of Fifth Pitch, in wet conditions.
Modelling by George, lighting by Tarquin and George
Nearing the base of Fifth Pitch, in wet conditions.
Modelling by George, lighting by Tarquin and George Coming in to land in Fifth Pitch, in wet conditions.
Modelling by George, lighting by Tarquin and George
Coming in to land in Fifth Pitch, in wet conditions.
Modelling by George, lighting by Tarquin and George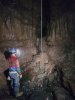 The chamber at the bottom of Fifth Pitch, in dry conditions.
Modelling by Peter, lighting by Tarquin and Peter
The chamber at the bottom of Fifth Pitch, in dry conditions.
Modelling by Peter, lighting by Tarquin and Peter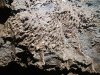 Lithostrotion fossils at the base of Fifth Pitch.
 Lithostrotion fossils at the base of Fifth Pitch.
 Lithostrotion fossils at the base of Fifth Pitch.
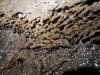 Lithostrotion fossils at the base of Fifth Pitch.
 Lithostrotion fossils at the base of Fifth Pitch.
 Lithostrotion fossils at the base of Fifth Pitch.
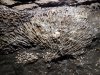 Lithostrotion fossils at the base of Fifth Pitch.
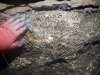 Lithostrotion fossils at the base of Fifth Pitch, with a hand for scale.
Modelling by Tarquin
Lithostrotion fossils at the base of Fifth Pitch, with a hand for scale.
Modelling by Tarquin 1.4 metre deep pool in the floor of Fifth Pitch. This is hydrologically connected with the nearby sump, but although it must technically be a choked sump in its own right, there is no passage that can be accessed.
 Looking into the terminal sump. The scaffolding platform originally formed a bridge over the sump, but now supports a large amount of digging spoil from the sump itself.
Modelling by George and Gareth, lighting by Tarquin, George and Gareth
Looking into the terminal sump. The scaffolding platform originally formed a bridge over the sump, but now supports a large amount of digging spoil from the sump itself.
Modelling by George and Gareth, lighting by Tarquin, George and Gareth The sump as it normally appears.
Lighting by Tarquin and Gareth
The sump as it normally appears.
Lighting by Tarquin and Gareth The sump in low water conditions, which made it possible to survey the sump with a Disto. The outlet is on the right at the far end, and divers would swim until their fins were in line with the far wall, to dig in the outlet.
Lighting by Tarquin and Gareth
The sump in low water conditions, which made it possible to survey the sump with a Disto. The outlet is on the right at the far end, and divers would swim until their fins were in line with the far wall, to dig in the outlet.
Lighting by Tarquin and Gareth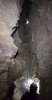 Climb beyond the sump towards Enterprise Aven. The bottom is an inlet, carrying the water from Enterprise Aven.
Modelling by Gareth and George, lighting by Tarquin, Gareth and George
Climb beyond the sump towards Enterprise Aven. The bottom is an inlet, carrying the water from Enterprise Aven.
Modelling by Gareth and George, lighting by Tarquin, Gareth and George The former end of the passage at the top of the climb, which now leads into Enterprise Aven.
Modelling by Gareth, lighting by Tarquin and Gareth
The former end of the passage at the top of the climb, which now leads into Enterprise Aven.
Modelling by Gareth, lighting by Tarquin and Gareth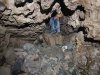 The dig which broke into Enterprise Aven.
Modelling by Gareth
The dig which broke into Enterprise Aven.
Modelling by Gareth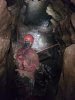 The dig emerges in a chamber at the very bottom of Enterprise Aven. A choke made from enormous boulders lines one wall, which fills the bottom of what would have been the aven. A small, dead-end inlet emerges from under the side wall.
Modelling by Gareth, lighting by Tarquin and Gareth
The dig emerges in a chamber at the very bottom of Enterprise Aven. A choke made from enormous boulders lines one wall, which fills the bottom of what would have been the aven. A small, dead-end inlet emerges from under the side wall.
Modelling by Gareth, lighting by Tarquin and Gareth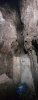 At the bottom of Enterprise Aven, a rift to the west climbs steeply to a conclusive end. This is the bottom of a former route that the water took down Enterprise Aven.
 The bottom pitch of Enterprise Aven is only a little over 8 metres high, and was originally free climbed.
Modelling by Gareth, lighting by Tarquin and Gareth
The bottom pitch of Enterprise Aven is only a little over 8 metres high, and was originally free climbed.
Modelling by Gareth, lighting by Tarquin and Gareth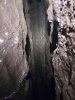 Most of the way up the bottom pitch of Enterprise Aven, the rift to the west has a blank wall.
 High up in the rift on the west side of the bottom of Enterprise Aven, we could see into a very narrow alcove, and wanted to make sure it closed down properly.
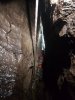 Gareth bolted over from the top of the bottom pitch of Enterprise Aven, to check the alcove to the west.
Modelling by Gareth, lighting by Tarquin and Gareth
Gareth bolted over from the top of the bottom pitch of Enterprise Aven, to check the alcove to the west.
Modelling by Gareth, lighting by Tarquin and Gareth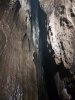 Gareth proved that the alcove to the west of the bottom of Enterprise Aven was only an alcove, going back about 50 cm.
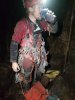 Kitting up for bolting work at the bottom of the main part of Enterprise Aven.
Modelling by Gareth, lighting by Tarquin and Gareth
Kitting up for bolting work at the bottom of the main part of Enterprise Aven.
Modelling by Gareth, lighting by Tarquin and Gareth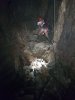 Base of the main part of Enterprise Aven, at the bottom of its second pitch.
Modelling by Gareth, lighting by Tarquin and Gareth
Base of the main part of Enterprise Aven, at the bottom of its second pitch.
Modelling by Gareth, lighting by Tarquin and Gareth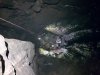 The largest part of Enterprise Aven, at the bottom of its second pitch.
Modelling by Gareth, lighting by Tarquin and Gareth
The largest part of Enterprise Aven, at the bottom of its second pitch.
Modelling by Gareth, lighting by Tarquin and Gareth Nearly at the top of the second pitch of Enterprise Aven.
Modelling by Gareth, lighting by Tarquin and Gareth
Nearly at the top of the second pitch of Enterprise Aven.
Modelling by Gareth, lighting by Tarquin and Gareth Top of the second pitch of Enterprise Aven.
Modelling by Peter, lighting by Tarquin and Peter
Top of the second pitch of Enterprise Aven.
Modelling by Peter, lighting by Tarquin and Peter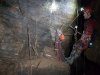 At the Y-hang at the top of the second pitch of Enterprise Aven. The rift behind Gareth is the eastern rift that we would be bolting.
Modelling by Gareth, lighting by Tarquin and Gareth
At the Y-hang at the top of the second pitch of Enterprise Aven. The rift behind Gareth is the eastern rift that we would be bolting.
Modelling by Gareth, lighting by Tarquin and Gareth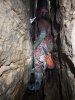 Starting to bolt east from the top of the second pitch of Enterprise Aven.
Modelling by Gareth, lighting by Tarquin and Gareth
Starting to bolt east from the top of the second pitch of Enterprise Aven.
Modelling by Gareth, lighting by Tarquin and Gareth Bolting east from the top of the second pitch of Enterprise Aven.
Modelling by Gareth, lighting by Tarquin and Gareth
Bolting east from the top of the second pitch of Enterprise Aven.
Modelling by Gareth, lighting by Tarquin and Gareth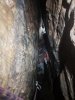 The alcove to the east from the top of the second pitch of Enterprise Aven. It goes back about 3 metres, but pinched out.
Modelling by Gareth, lighting by Tarquin and Gareth
The alcove to the east from the top of the second pitch of Enterprise Aven. It goes back about 3 metres, but pinched out.
Modelling by Gareth, lighting by Tarquin and Gareth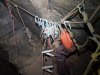 Bolting gear left on the traverse line at the top of the second pitch of Enterprise Aven.
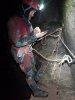 Surveying on the sloping ledge at the top of the second pitch of Enterprise Aven. Many people find this ledge uncomfortable because it slopes enough to make you rely on the rope.
Modelling by Gareth, lighting by Tarquin and Gareth
Surveying on the sloping ledge at the top of the second pitch of Enterprise Aven. Many people find this ledge uncomfortable because it slopes enough to make you rely on the rope.
Modelling by Gareth, lighting by Tarquin and Gareth The third pitch of Enterprise Aven, with its distinctive T-shaped cross section. The second pitch is visible below.
Modelling by Gareth, lighting by Tarquin and Gareth
The third pitch of Enterprise Aven, with its distinctive T-shaped cross section. The second pitch is visible below.
Modelling by Gareth, lighting by Tarquin and Gareth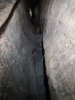 Cleft of the third pitch of Enterprise Aven. This is dry, as the water has skipped sideways into a parallel cleft, and emerges above the bottom pitch instead.
Modelling by Gareth, lighting by Tarquin and Gareth
Cleft of the third pitch of Enterprise Aven. This is dry, as the water has skipped sideways into a parallel cleft, and emerges above the bottom pitch instead.
Modelling by Gareth, lighting by Tarquin and Gareth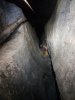 Approaching the top of the third pitch of Enterprise Aven.
Modelling by Gareth, lighting by Tarquin and Gareth
Approaching the top of the third pitch of Enterprise Aven.
Modelling by Gareth, lighting by Tarquin and Gareth Pitch head of the third pitch of Enterprise Aven. The etrier makes this more comfortable, but is not actually needed.
Modelling by Gareth, lighting by Tarquin and Gareth
Pitch head of the third pitch of Enterprise Aven. The etrier makes this more comfortable, but is not actually needed.
Modelling by Gareth, lighting by Tarquin and Gareth Ledge of jammed boulders to one side of the head of the third pitch of Enterprise Aven. We checked all of the alcoves, and all appeared to close down.
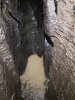 At the head of the third pitch of Enterprise Aven, a short rift ends at an inlet and small pool. The outflow sinks into the floor.
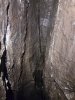 The blank wall at the end of the rift at the head of the third pitch of Enterprise Aven.
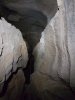 Looking up from the bottom of the fourth pitch of Enterprise Aven.
 The fourth pitch of Enterprise Aven has a narrow ledge half way up, with its own side passage.
Modelling by Gareth, lighting by Tarquin and Gareth
The fourth pitch of Enterprise Aven has a narrow ledge half way up, with its own side passage.
Modelling by Gareth, lighting by Tarquin and Gareth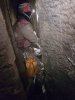 Making our way along the ledge passage, half way up the fourth pitch of Enterprise Aven.
Modelling by Gareth, lighting by Tarquin and Gareth
Making our way along the ledge passage, half way up the fourth pitch of Enterprise Aven.
Modelling by Gareth, lighting by Tarquin and Gareth Fossil shells in the ledge passage, half way up the fourth pitch of Enterprise Aven.
 Fossil shells in the ledge passage, half way up the fourth pitch of Enterprise Aven.
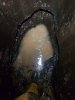 Pool at the end of the ledge passage, half way up the fourth pitch of Enterprise Aven. This is supplied from a small aven above.
Modelling by Portions of Tarquin
Pool at the end of the ledge passage, half way up the fourth pitch of Enterprise Aven. This is supplied from a small aven above.
Modelling by Portions of Tarquin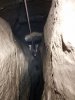 Looking down from the top of the fourth pitch of Enterprise Aven.
Modelling by Gareth, lighting by Tarquin and Gareth
Looking down from the top of the fourth pitch of Enterprise Aven.
Modelling by Gareth, lighting by Tarquin and Gareth Head of the fourth pitch of Enterprise Aven.
Lighting by Tarquin and Gareth
Head of the fourth pitch of Enterprise Aven.
Lighting by Tarquin and Gareth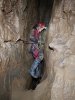 Behind the ropes at the head of the fourth pitch of Enterprise Aven. This may look like a mistake, but it was intentional, to make it possible to survey the rifts to the side of the pitch head.
Modelling by Gareth, lighting by Tarquin and Gareth
Behind the ropes at the head of the fourth pitch of Enterprise Aven. This may look like a mistake, but it was intentional, to make it possible to survey the rifts to the side of the pitch head.
Modelling by Gareth, lighting by Tarquin and Gareth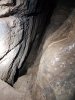 The rift to the side at the top of the fourth pitch of Enterprise Aven drops down all the way to the bottom of its second pitch.
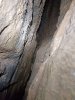 The rift to the side at the top of the fourth pitch of Enterprise Aven ends fairly conclusively.
 The rift to the side at the top of the fourth pitch of Enterprise Aven continues upwards, and appears to have a small tube connecting with the top of its fifth pitch.
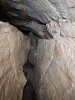 The jammed rocks 5 metres up in the ceiling of the fourth pitch of Enterprise Aven, which form the floor of the top of its fifth pitch.
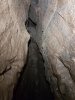 Gaps between the rocks in the ceiling of the fourth pitch of Enterprise Aven, which the fifth pitch passes through.
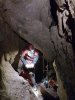 Leaning boulder wedged in the passage at the top of the fourth pitch of Enterprise Aven. Its fifth pitch starts just on the other side of it.
Modelling by Gareth, lighting by Tarquin and Gareth
Leaning boulder wedged in the passage at the top of the fourth pitch of Enterprise Aven. Its fifth pitch starts just on the other side of it.
Modelling by Gareth, lighting by Tarquin and Gareth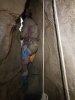 The fourth pitch of Enterprise Aven is much like the ones before it, heading a short distance along the same rift. However, it is more substantial, and forms a good place to get off the rope. It continues beyond the base of its fifth pitch.
Modelling by Gareth, lighting by Tarquin and Gareth
The fourth pitch of Enterprise Aven is much like the ones before it, heading a short distance along the same rift. However, it is more substantial, and forms a good place to get off the rope. It continues beyond the base of its fifth pitch.
Modelling by Gareth, lighting by Tarquin and Gareth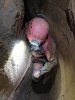 The passage at the top of the fourth pitch of Enterprise Aven passes through a squeeze, where progress is easier near floor level.
Modelling by Gareth, lighting by Tarquin and Gareth
The passage at the top of the fourth pitch of Enterprise Aven passes through a squeeze, where progress is easier near floor level.
Modelling by Gareth, lighting by Tarquin and Gareth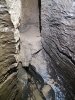 The squeeze in the passage at the top of the fourth pitch of Enterprise Aven gains a rift where the small stream flows out. It follows a trench in the floor above for a short distance, then falls through the floor into the passage below.
 Pool at the end of the passage at the top of the fourth pitch of Enterprise Aven.
Camera, setup, modelling and lighting by Gareth
Pool at the end of the passage at the top of the fourth pitch of Enterprise Aven.
Camera, setup, modelling and lighting by Gareth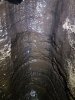 Wall above the pool at the end of the passage at the top of the fourth pitch of Enterprise Aven.
 Inlet above the pool at the end of the passage at the top of the fourth pitch of Enterprise Aven.
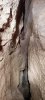 The rift above the squeeze in the passage at the top of the fourth pitch of Enterprise Aven follows the same line as the passage below it, widening in a couple of places. The lower of them is barely wide enough to fit along, but all levels of the rift close down as the water route steps higher and higher in the rift.
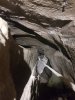 The fifth pitch of Enterprise Aven.
Modelling by Gareth, lighting by Tarquin and Gareth
The fifth pitch of Enterprise Aven.
Modelling by Gareth, lighting by Tarquin and Gareth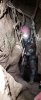 Surveying at the head of the fifth pitch of Enterprise Aven, which is not really a pitch head so much as a place to float in space. There is no solid floor. There are just tiny ledges, and platforms made of jammed boulders. A Thrutch Too Far is to the left behind Gareth, while the top of the aven is to the right of the camera.
Modelling by Gareth and portions of Tarquin, lighting by Tarquin and Gareth
Surveying at the head of the fifth pitch of Enterprise Aven, which is not really a pitch head so much as a place to float in space. There is no solid floor. There are just tiny ledges, and platforms made of jammed boulders. A Thrutch Too Far is to the left behind Gareth, while the top of the aven is to the right of the camera.
Modelling by Gareth and portions of Tarquin, lighting by Tarquin and Gareth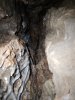 This alcove in the ceiling forms the top of Enterprise Aven, 42 metres above the base of its second pitch, or 48 metres above the base of its first pitch. This picture was taken while lying on a ledge of jammed boulders, and was not in the least bit solid, so I remained on the rope.
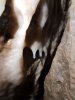 Formations in the alcove.
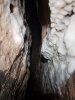 From the very top of Enterprise Aven, a calcited slot next to the jammed boulders drops 40 metres to the bottom of the second pitch of the aven.
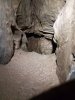 A tiny little side passage at the top of Enterprise Aven is impassable, but the camera can see further.
 The tiny side passage at the top of Enterprise Aven has a stal flow that seems to continue until it connects to the top of the rift seen above the fourth pitch of Enterprise Aven.
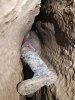 From the pitch head of the fifth pitch of Enterprise Aven, the top level of the rift can be followed through a floor-less section called A Thrutch Too Far. To get into this, you need to remove SRT gear, but somehow remain safely attached to the rope, and then post yourself into this passage without any SRT gear or bags to get caught. We used cows tails attached to a belay belt, taking off SRT gear and hanging it from the rope at the pitch head. A hauling line is very helpful for moving equipment.
Modelling by Gareth
From the pitch head of the fifth pitch of Enterprise Aven, the top level of the rift can be followed through a floor-less section called A Thrutch Too Far. To get into this, you need to remove SRT gear, but somehow remain safely attached to the rope, and then post yourself into this passage without any SRT gear or bags to get caught. We used cows tails attached to a belay belt, taking off SRT gear and hanging it from the rope at the pitch head. A hauling line is very helpful for moving equipment.
Modelling by Gareth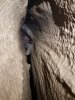 Progressing along A Thrutch Too Far.
Modelling by Gareth
Progressing along A Thrutch Too Far.
Modelling by Gareth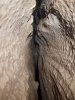 A Thrutch Too Far is 10 metres long in total, with a resting spot on a sandy bridge at half way, seen in the distance here. The second half is easier.
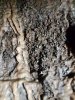 Textured wall around the place where you change levels in A Thrutch Too Far.
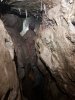 After changing levels in A Thrutch Too Far, it becomes possible to walk again.
Modelling by Gareth, lighting by Tarquin and Gareth
After changing levels in A Thrutch Too Far, it becomes possible to walk again.
Modelling by Gareth, lighting by Tarquin and Gareth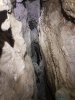 The holes in the floor of the passage beyond A Thrutch Too Far drop down to where the water flows in a lower widening.
 Stream flowing down the holes in the floor of the passage beyond A Thrutch Too Far.
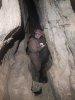 Start of the waterworn section of the passage beyond A Thrutch Too Far, where a roof cleft and floor meander start to follow the passage.
Modelling by Gareth, lighting by Tarquin and Gareth
Start of the waterworn section of the passage beyond A Thrutch Too Far, where a roof cleft and floor meander start to follow the passage.
Modelling by Gareth, lighting by Tarquin and Gareth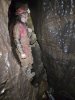 At the end of the waterworn section of the passage beyond A Thrutch Too Far is the main inlet, which showers water in from above. It is too narrow to dig, but it has the most promise in the entire passage, probably being sourced from avens climbing up to the surface.
Modelling by Gareth, lighting by Tarquin and Gareth
At the end of the waterworn section of the passage beyond A Thrutch Too Far is the main inlet, which showers water in from above. It is too narrow to dig, but it has the most promise in the entire passage, probably being sourced from avens climbing up to the surface.
Modelling by Gareth, lighting by Tarquin and Gareth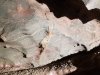 Rock patterns after the last climb in the passage beyond A Thrutch Too Far.
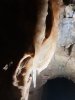 Formations after the last climb in the passage beyond A Thrutch Too Far.
 What looks like a walking section just before the end of the passage beyond A Thrutch Too Far, but it actually contains a significant squeeze.
Modelling by Gareth, lighting by Tarquin and Gareth
What looks like a walking section just before the end of the passage beyond A Thrutch Too Far, but it actually contains a significant squeeze.
Modelling by Gareth, lighting by Tarquin and Gareth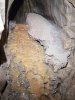 The passage beyond A Thrutch Too Far ends in a calcite blockage, where a faint sound of flowing water can be heard.
 The entrance.
Modelling by Gareth
The entrance.
Modelling by Gareth Squeeze just inside the entrance.
Modelling by Gareth, lighting by Tarquin and Sol
Squeeze just inside the entrance.
Modelling by Gareth, lighting by Tarquin and Sol High water at First Pitch.
Modelling by Gareth, lighting by Tarquin and Gareth
High water at First Pitch.
Modelling by Gareth, lighting by Tarquin and Gareth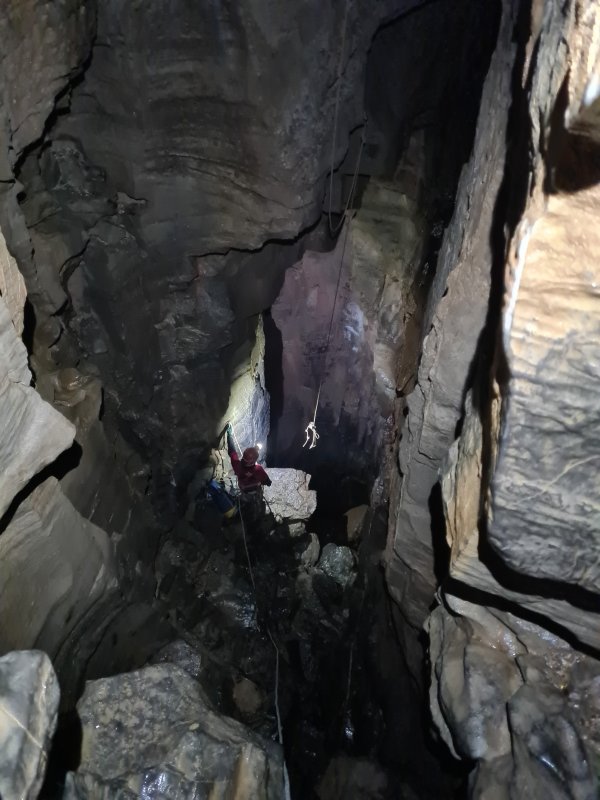 Looking down First Pitch in normal water conditions. The rope in the ceiling is the bolt traverse route. The point of the boulder Gareth is standing on is one of our permanent survey stations. Second pitch is immediately in front of Gareth.
Modelling by Gareth, lighting by Tarquin and Gareth
Looking down First Pitch in normal water conditions. The rope in the ceiling is the bolt traverse route. The point of the boulder Gareth is standing on is one of our permanent survey stations. Second pitch is immediately in front of Gareth.
Modelling by Gareth, lighting by Tarquin and Gareth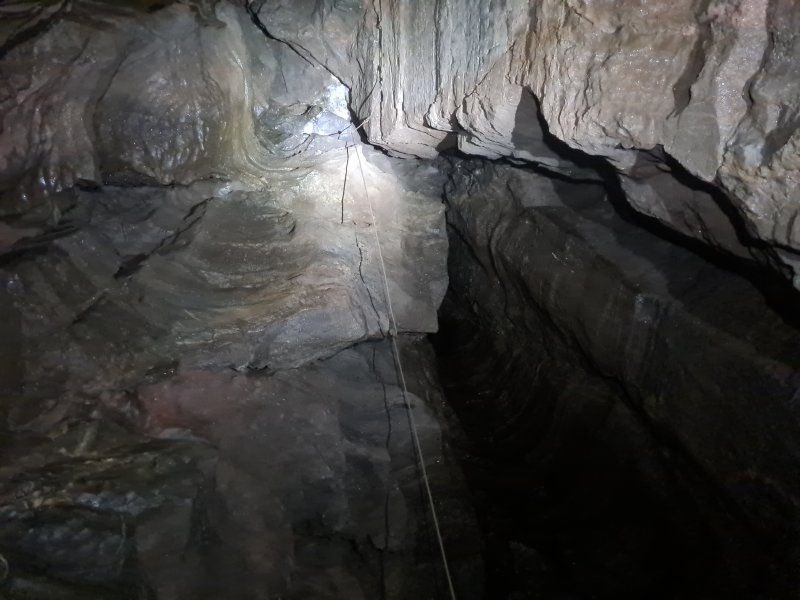 Main Y-hang for the bolt traverse route on First Pitch. There are no ledges for your feet, and it really is a crazy route.
Lighting by Tarquin and Gareth
Main Y-hang for the bolt traverse route on First Pitch. There are no ledges for your feet, and it really is a crazy route.
Lighting by Tarquin and Gareth Near the top of First Pitch.
Modelling by Gareth, lighting by Tarquin and Gareth
Near the top of First Pitch.
Modelling by Gareth, lighting by Tarquin and Gareth Part way down First Pitch. The route into the choke is immediately ahead.
Modelling by Gareth, lighting by Tarquin and Gareth
Part way down First Pitch. The route into the choke is immediately ahead.
Modelling by Gareth, lighting by Tarquin and Gareth The route into the choke below First Pitch. This is invisible in higher water conditions, as too much water showers in from the ceiling.
 Clambering through the choke behind First Pitch. This is a loose area, where your SRT gear snags the boulders and moves them. It is not worth visiting.
Modelling by Gareth, lighting by Tarquin and Gareth
Clambering through the choke behind First Pitch. This is a loose area, where your SRT gear snags the boulders and moves them. It is not worth visiting.
Modelling by Gareth, lighting by Tarquin and Gareth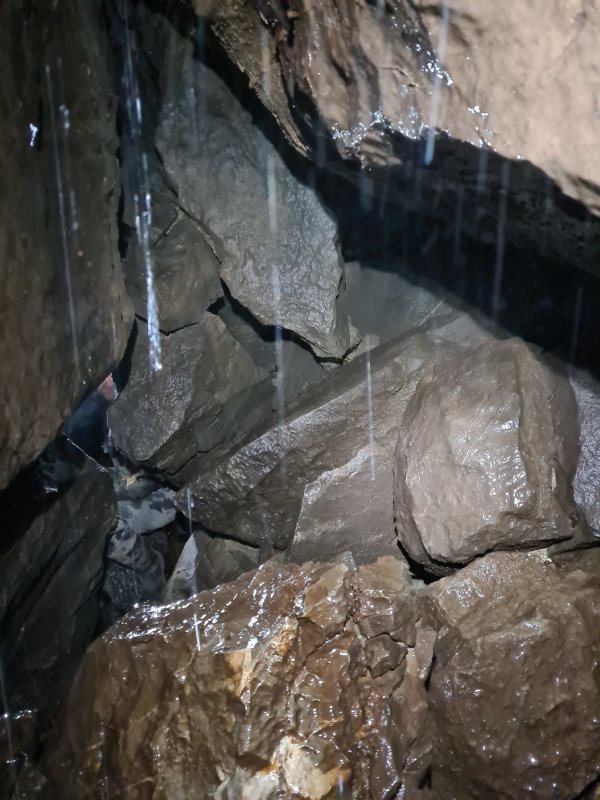 Drippy archway in the choke behind First Pitch. Behind it is a wet alcove with water showing in from above, and a pit in the floor drops under the choke to a visual connection back through the choke to the start.
Modelling by portions of Gareth, lighting by Tarquin and Gareth
Drippy archway in the choke behind First Pitch. Behind it is a wet alcove with water showing in from above, and a pit in the floor drops under the choke to a visual connection back through the choke to the start.
Modelling by portions of Gareth, lighting by Tarquin and Gareth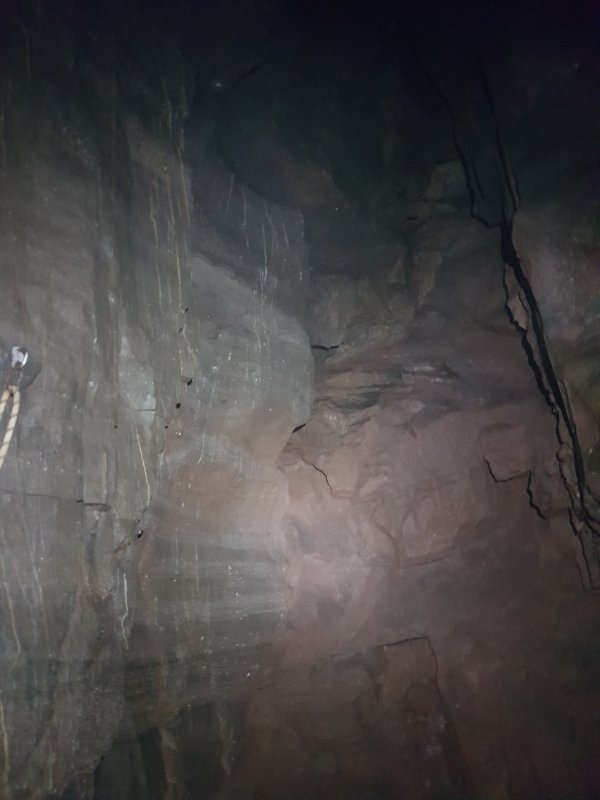 Alcove in the ceiling of Second Pitch, which hides the window of the short passage above the CUCC Old Flyover.
 Looking down Second Pitch.
Modelling by Gareth, lighting by Tarquin and Gareth
Looking down Second Pitch.
Modelling by Gareth, lighting by Tarquin and Gareth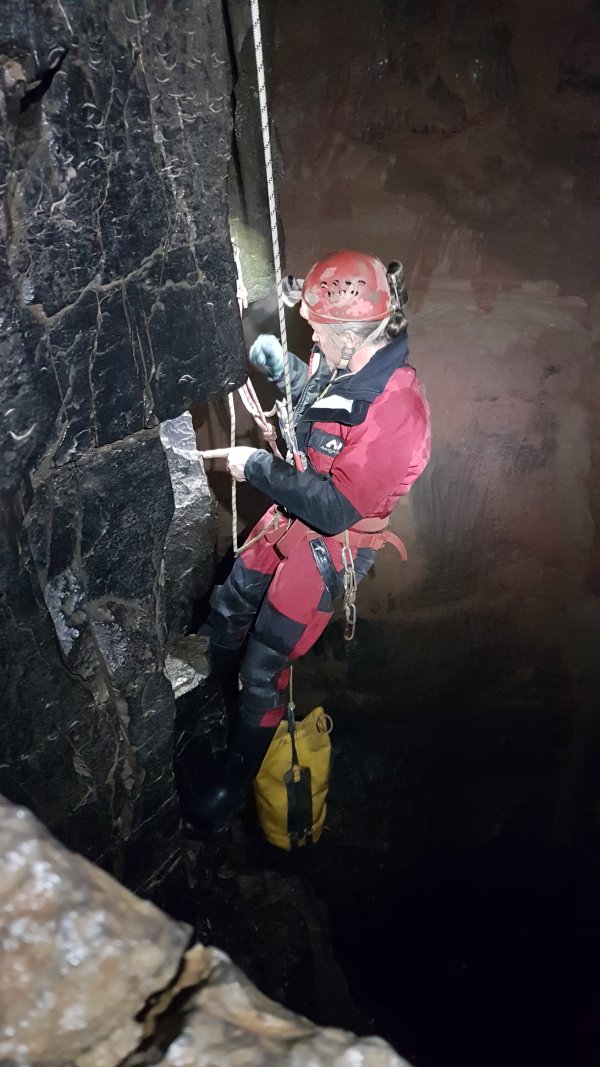 At the rebelay on Second Pitch. Gareth is pointing at one of our permanent survey stations, marked by three inconspicuous scratches pointing in to the station.
Modelling by Gareth, lighting by Tarquin and Gareth
At the rebelay on Second Pitch. Gareth is pointing at one of our permanent survey stations, marked by three inconspicuous scratches pointing in to the station.
Modelling by Gareth, lighting by Tarquin and Gareth The actual rebelay on Second Pitch, which is notorious for being a hanging rebelay, with nowhere to put your feet. It is needed to avoid a significant rope rub. Gareth is standing on the CUCC Old Flyover ledge.
Modelling by Gareth, lighting by Tarquin and Gareth
The actual rebelay on Second Pitch, which is notorious for being a hanging rebelay, with nowhere to put your feet. It is needed to avoid a significant rope rub. Gareth is standing on the CUCC Old Flyover ledge.
Modelling by Gareth, lighting by Tarquin and Gareth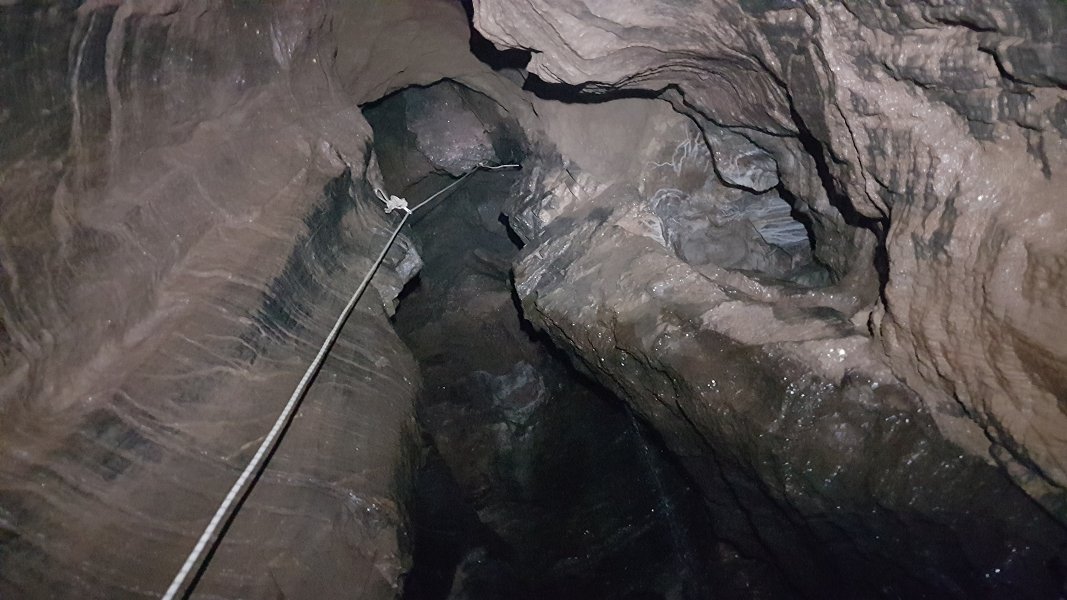 Second Pitch has a deviation that serves almost no purpose, but in very wet weather, it reduces swinging, keeping you out of the water.
 Stal covered alcove part way down Second Pitch.
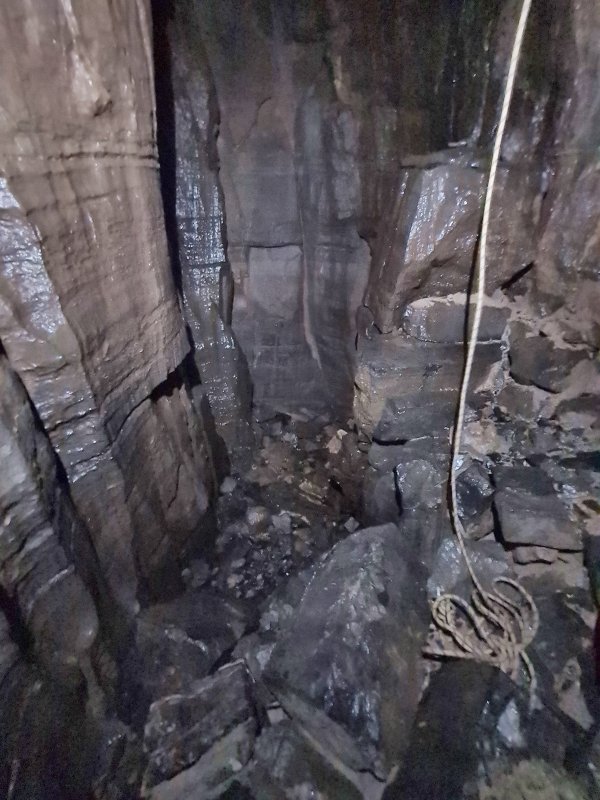 Large rock pillar on the side of Second Pitch.
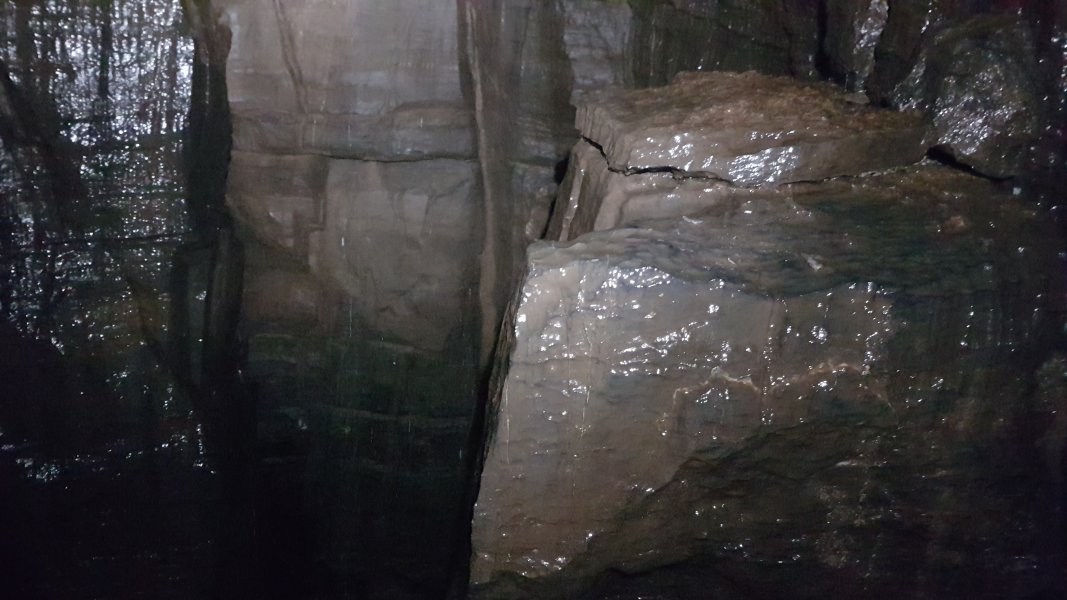 Top of the rock pillar at Second Pitch.
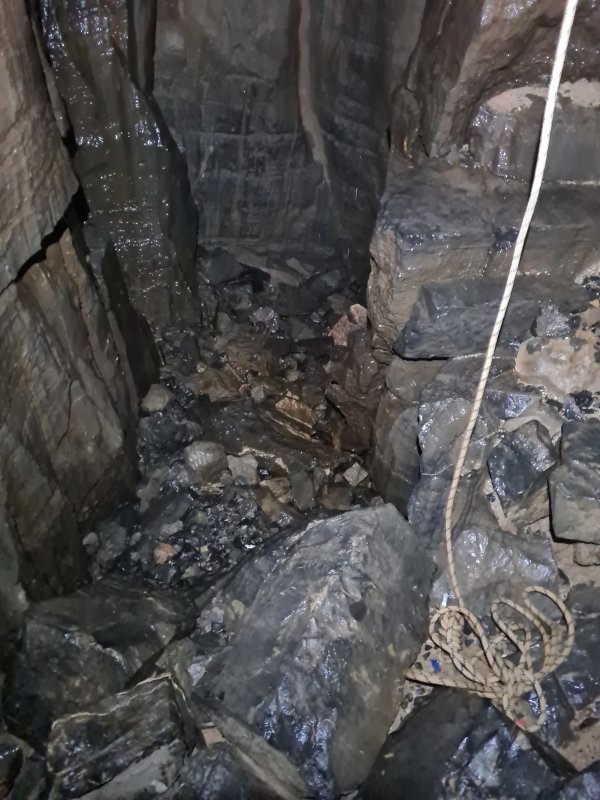 Base of Second Pitch, which is a lot smaller than its middle.
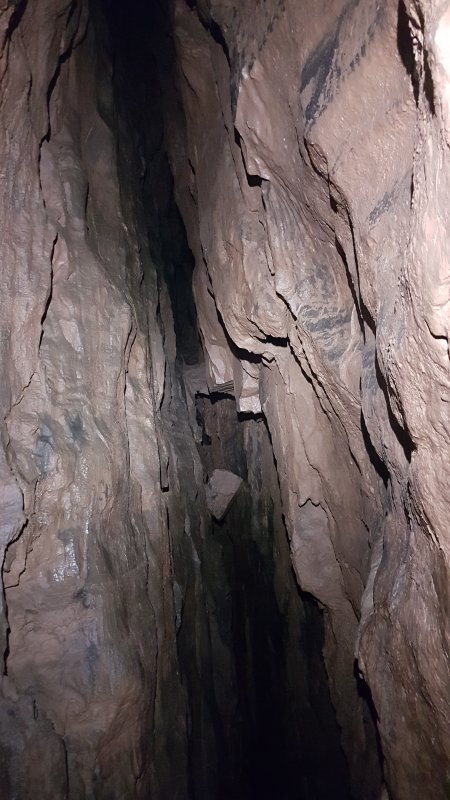 Top of the sloping rift of Third Pitch. This slopes far beyond the bottom of the pitch, but is the wall you see at the top, and gave us some trouble when deciding how to draw it up. This is where the first attempt to survey the cave had stopped, as traditional techniques cannot easily cope with this kind of sloping pitch.
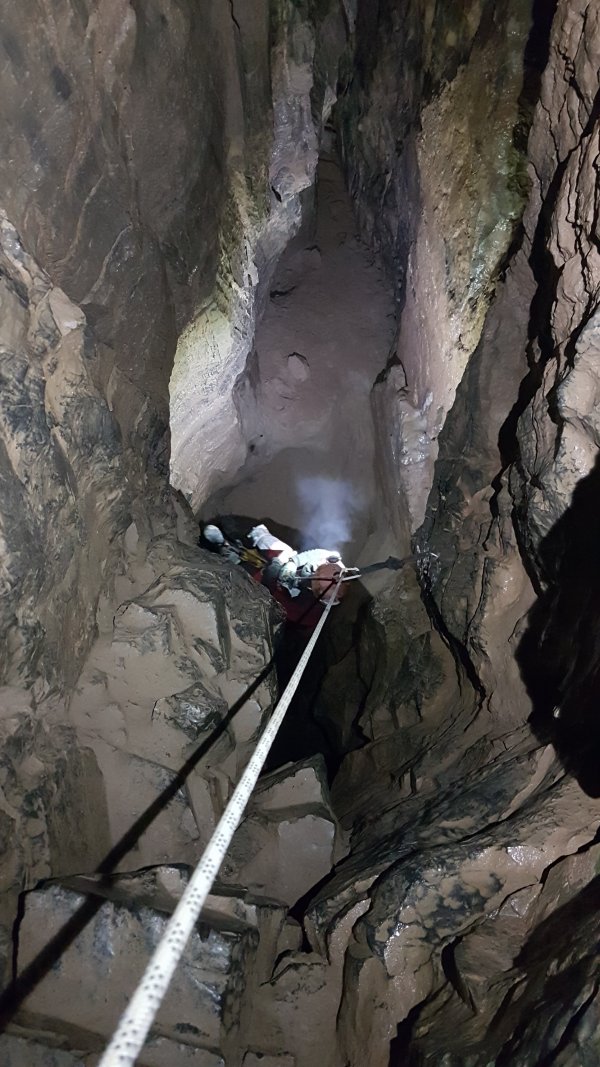 Descending Third Pitch.
Modelling by Gareth, lighting by Tarquin and Gareth
Descending Third Pitch.
Modelling by Gareth, lighting by Tarquin and Gareth Climbing up to the balcony at the end of Third Pitch. We rigged a handline for the descent, but it was not necessary.
Modelling by Gareth, lighting by Tarquin and Gareth
Climbing up to the balcony at the end of Third Pitch. We rigged a handline for the descent, but it was not necessary.
Modelling by Gareth, lighting by Tarquin and Gareth Balcony at the end of Third Pitch. It chokes immediately up ahead, and the choke sits directly above the choke in Poacher's Passage, suggesting potential for an enormous pitch between them.
Modelling by Gareth, lighting by Tarquin and Gareth
Balcony at the end of Third Pitch. It chokes immediately up ahead, and the choke sits directly above the choke in Poacher's Passage, suggesting potential for an enormous pitch between them.
Modelling by Gareth, lighting by Tarquin and Gareth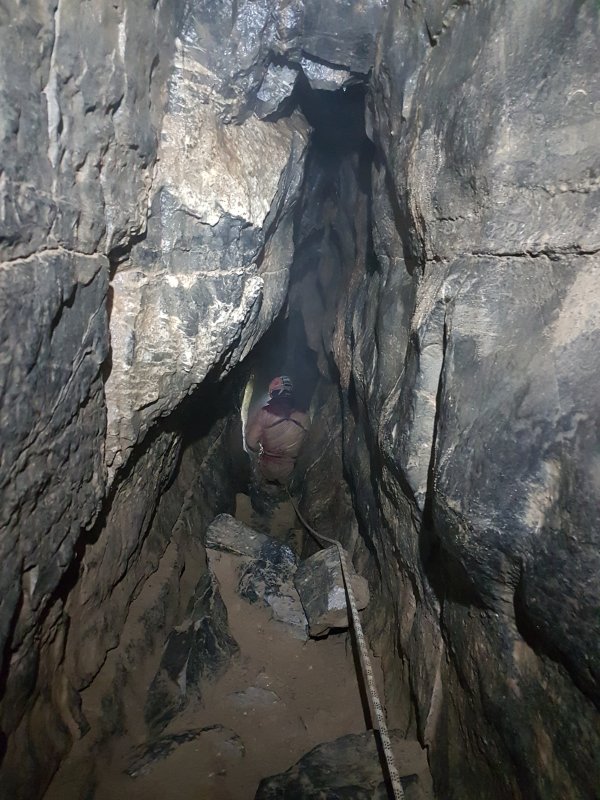 The tube part way down Third Pitch which is the usual way on, immediately becoming a rift.
Modelling by Gareth, lighting by Tarquin and Gareth
The tube part way down Third Pitch which is the usual way on, immediately becoming a rift.
Modelling by Gareth, lighting by Tarquin and Gareth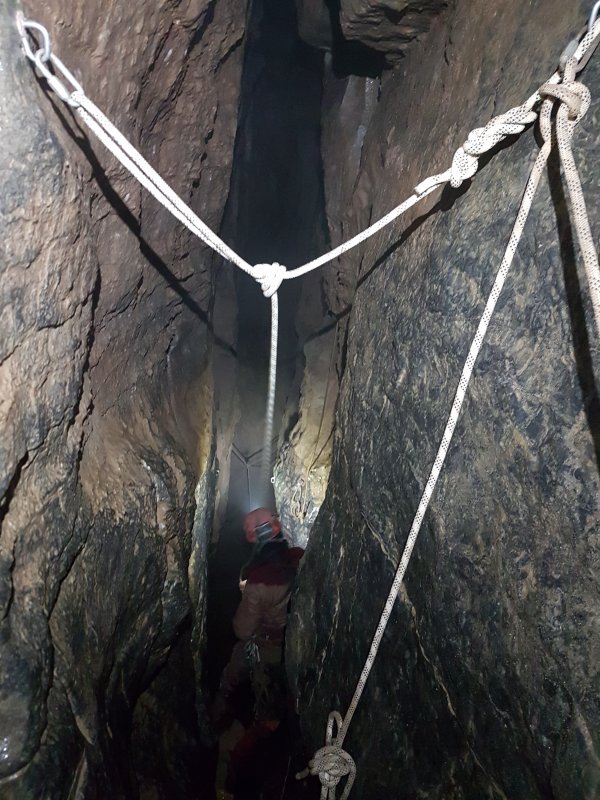 The upper Y-hang within the passage between Third Pitch and Fourth Pitch.
Modelling by Gareth, lighting by Tarquin and Gareth
The upper Y-hang within the passage between Third Pitch and Fourth Pitch.
Modelling by Gareth, lighting by Tarquin and Gareth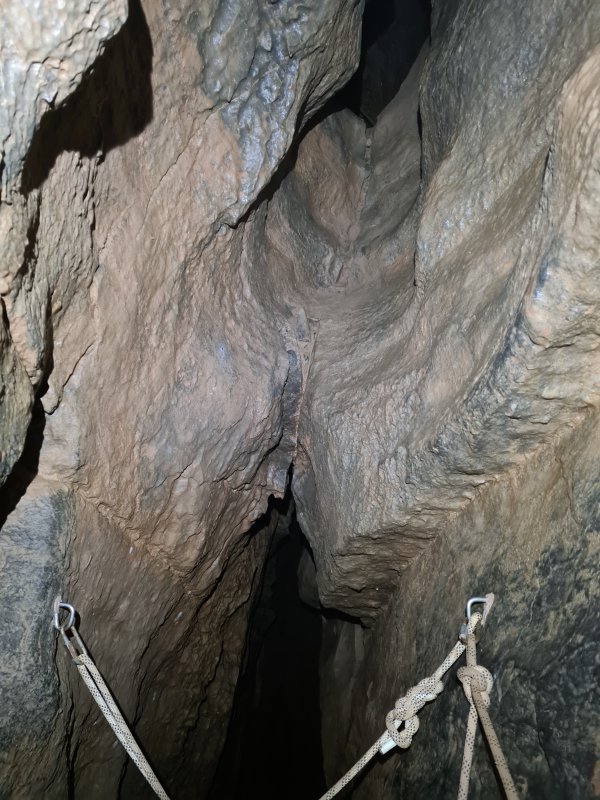 Immediately above the upper Y-hang in the passage between Third Pitch and Fourth Pitch, is a too-tight tube leading up into the upper aven.
Modelling by Gareth, lighting by Tarquin and Gareth
Immediately above the upper Y-hang in the passage between Third Pitch and Fourth Pitch, is a too-tight tube leading up into the upper aven.
Modelling by Gareth, lighting by Tarquin and Gareth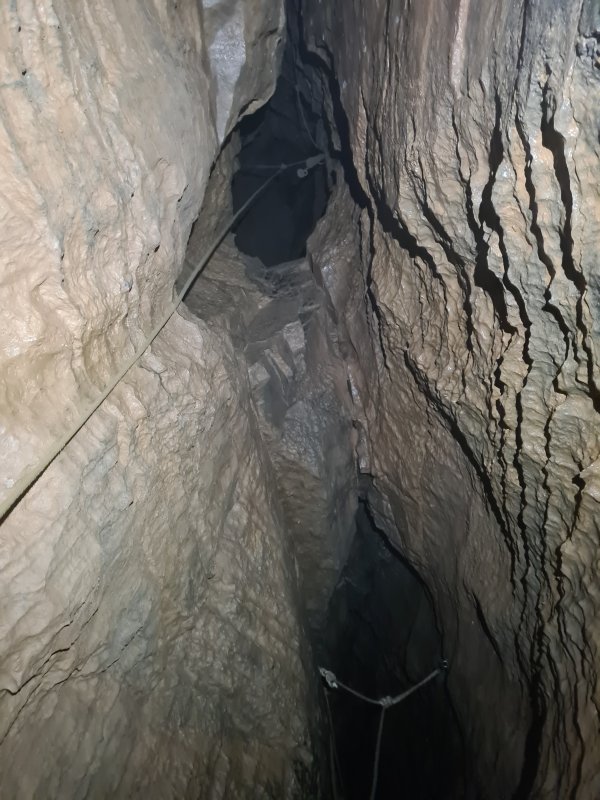 The aven above the passage between Third Pitch and Fourth Pitch. The Y-hang to the right is the main route's upper Y-hang.
 Tiny floor in the aven above the passage between Third Pitch and Fourth Pitch, formed by a rock bridge. During the 1960s, ropes were threaded over this rock bridge to act as a belay for ladders on the Fourth Pitch.
Modelling by Tarquin and vague hints of Gareth, lighting by Tarquin and Gareth
Tiny floor in the aven above the passage between Third Pitch and Fourth Pitch, formed by a rock bridge. During the 1960s, ropes were threaded over this rock bridge to act as a belay for ladders on the Fourth Pitch.
Modelling by Tarquin and vague hints of Gareth, lighting by Tarquin and Gareth Hole dropping down to the upper Y-hang in the aven above the passage between Third Pitch and Fourth Pitch.
Modelling by portions of Tarquin
Hole dropping down to the upper Y-hang in the aven above the passage between Third Pitch and Fourth Pitch.
Modelling by portions of Tarquin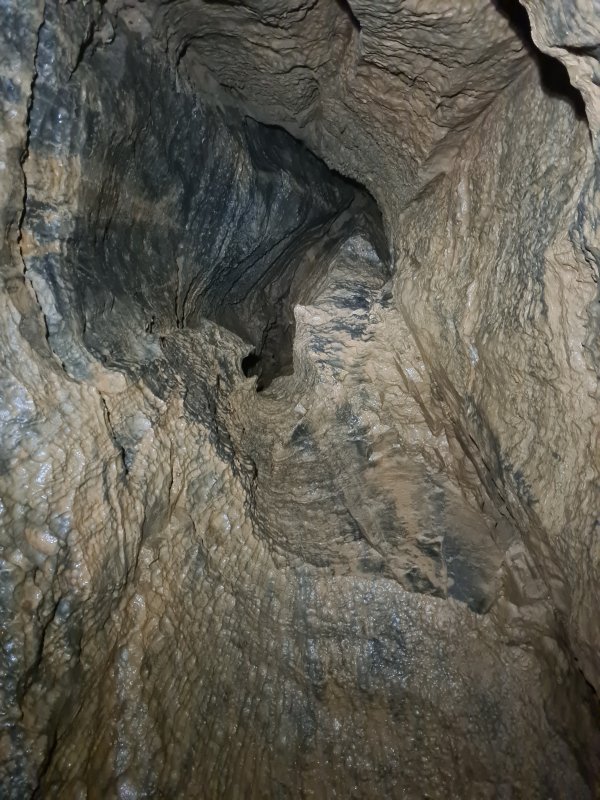 Top of the aven above the passage between Third Pitch and Fourth Pitch. This section has a particularly phallic shape in elevation view. The too-tight rift to the right has a visual connection to the top of the CUCC Old Flyover pitch. The alcove ahead seems to hide a tiny solution tube, but it is too tight.
 The western side of the Y-hang in the aven above the passage between Third Pitch and Fourth Pitch.
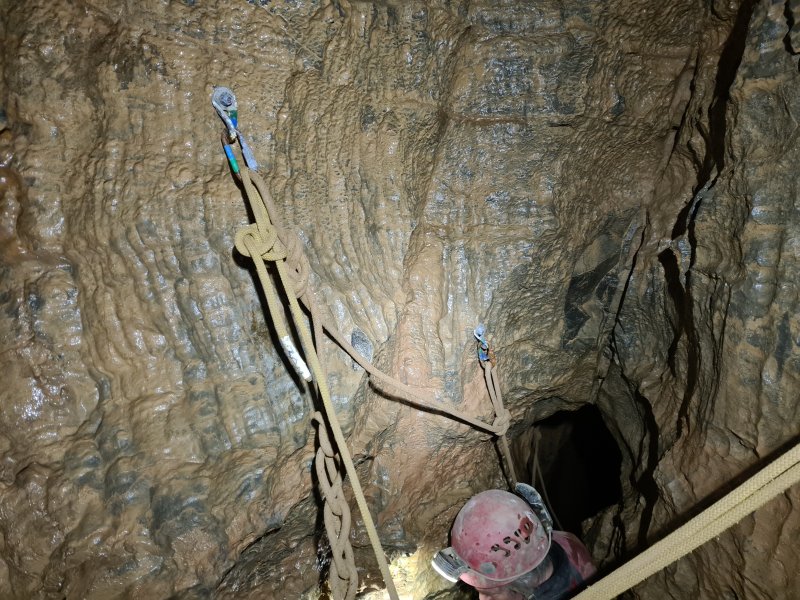 The eastern side of the Y-hang in the aven above the passage between Third Pitch and Fourth Pitch.
Modelling by the top of Gareth, lighting by Tarquin and Gareth
The eastern side of the Y-hang in the aven above the passage between Third Pitch and Fourth Pitch.
Modelling by the top of Gareth, lighting by Tarquin and Gareth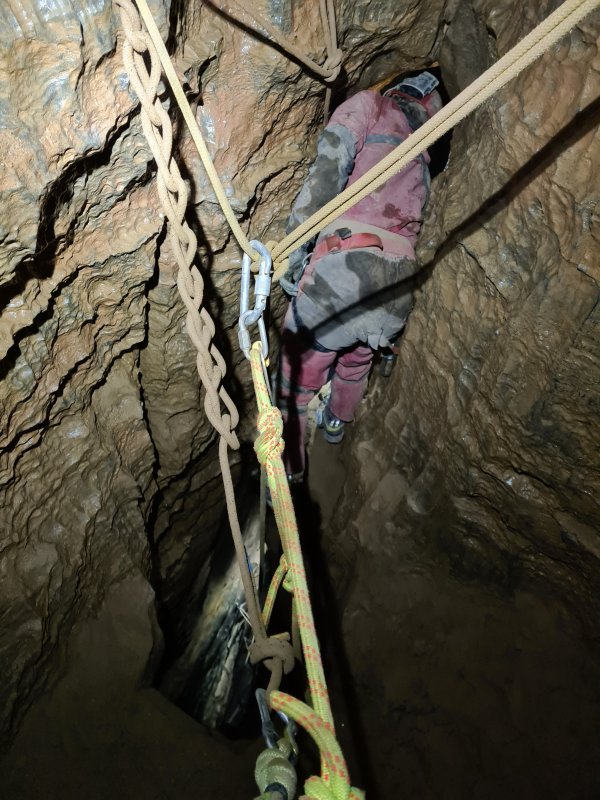 The way on from the aven above the passage between Third Pitch and Fourth Pitch is quite tight, and needs to be done while connected to a rope. This is how the CUCC Old Flyover was originally climbed.
Modelling by Gareth, lighting by Tarquin and Gareth
The way on from the aven above the passage between Third Pitch and Fourth Pitch is quite tight, and needs to be done while connected to a rope. This is how the CUCC Old Flyover was originally climbed.
Modelling by Gareth, lighting by Tarquin and Gareth The route from the aven above the passage between Third Pitch and Fourth Pitch passes through a keyhole section with no floor, opening out into the main aven 27 metres above the floor.
Modelling by Gareth, lighting by Tarquin and Gareth
The route from the aven above the passage between Third Pitch and Fourth Pitch passes through a keyhole section with no floor, opening out into the main aven 27 metres above the floor.
Modelling by Gareth, lighting by Tarquin and Gareth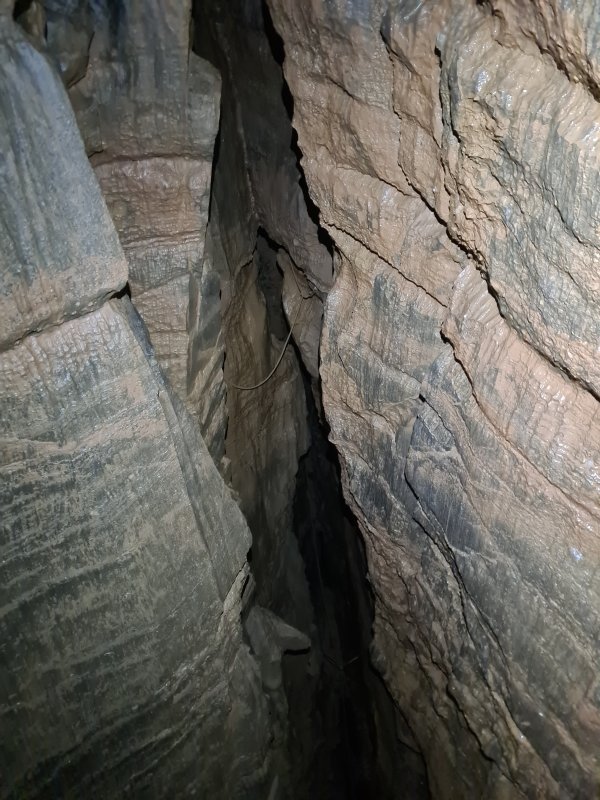 The route from the aven above the passage between Third Pitch and Fourth Pitch, where it connects to the main aven. The original rope can be seen climbing up to the top of CUCC Old Flyover, and had been in use until 2010, when the bolting work was completed.
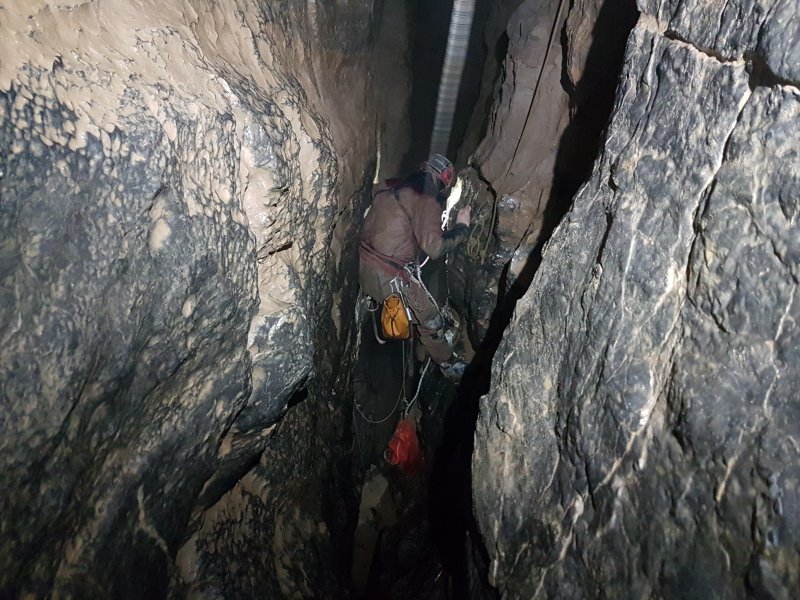 The Y-hang at the head of Fourth Pitch.
Modelling by Gareth, lighting by Tarquin and Gareth
The Y-hang at the head of Fourth Pitch.
Modelling by Gareth, lighting by Tarquin and Gareth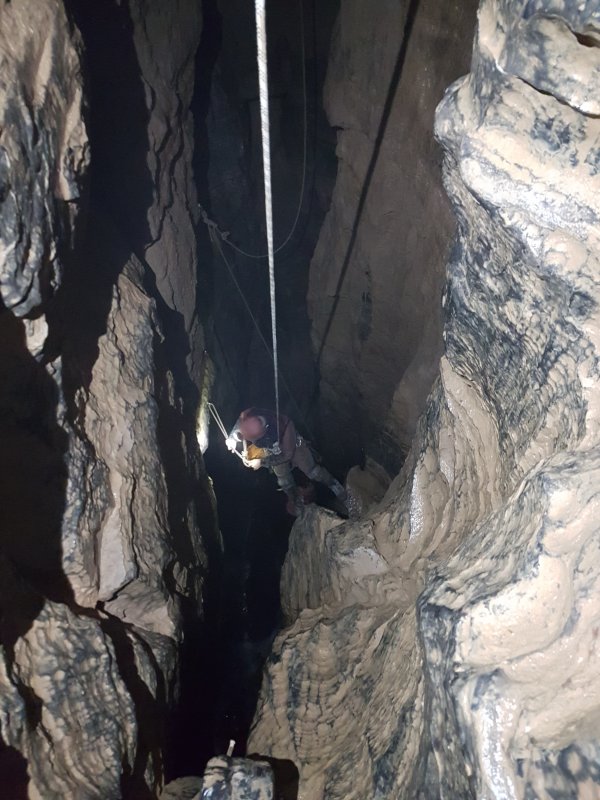 Rigging the deviation on Fourth Pitch. The rebelay in the background was the CUCC Old Flyover rebelay from 2011. That has now been replaced with a deviation.
Modelling by Gareth, lighting by Tarquin and Gareth
Rigging the deviation on Fourth Pitch. The rebelay in the background was the CUCC Old Flyover rebelay from 2011. That has now been replaced with a deviation.
Modelling by Gareth, lighting by Tarquin and Gareth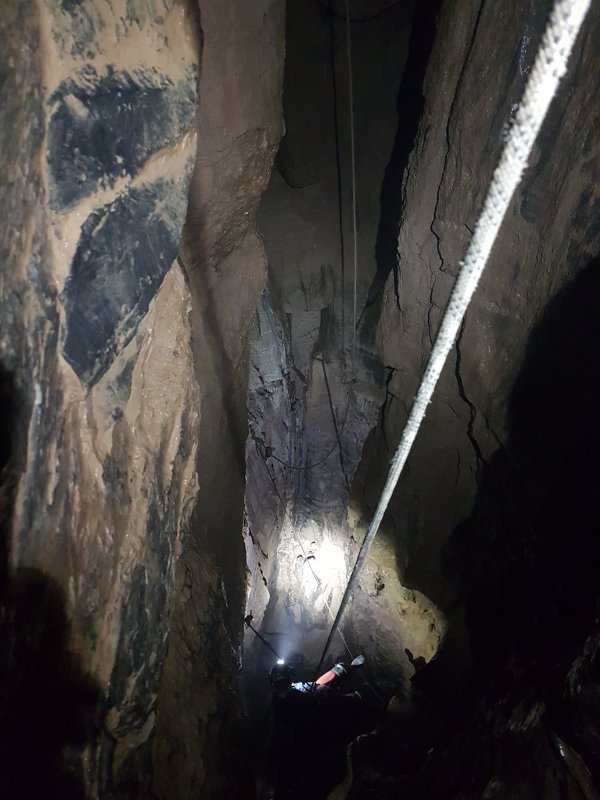 Looking at the far wall beyond the deviation on Fourth Pitch.
Modelling by George, lighting by Tarquin and George
Looking at the far wall beyond the deviation on Fourth Pitch.
Modelling by George, lighting by Tarquin and George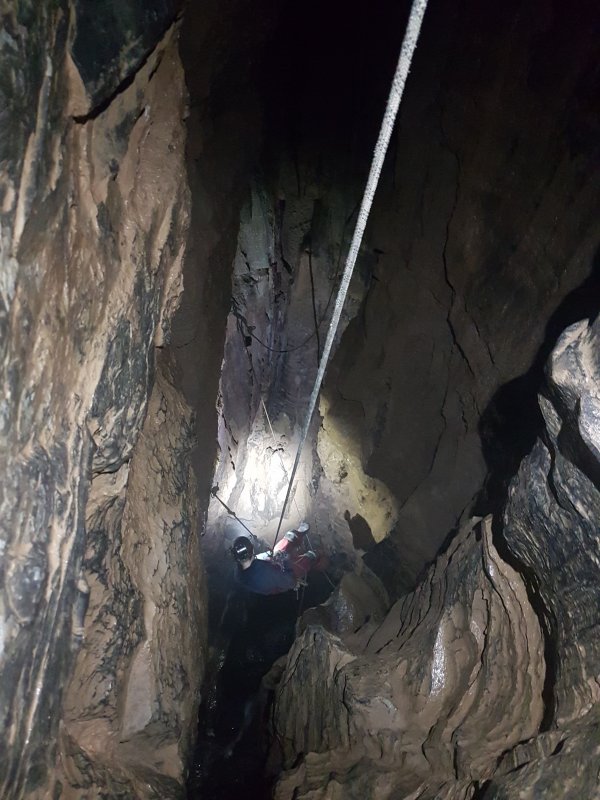 Looking down the section of Fourth Pitch below the deviation.
Modelling by George, lighting by Tarquin and George
Looking down the section of Fourth Pitch below the deviation.
Modelling by George, lighting by Tarquin and George Base of the main section of Fourth Pitch.
Modelling by Gareth, lighting by Tarquin and Gareth
Base of the main section of Fourth Pitch.
Modelling by Gareth, lighting by Tarquin and Gareth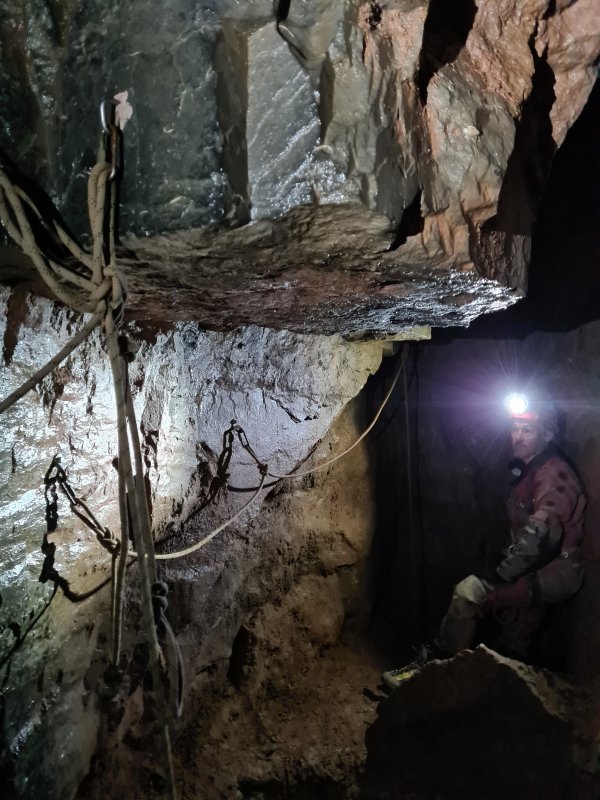 The old traverse line into CUCC Old Flyover from Second Pitch. We had doubled up the rope and maillons for our first crossing, but on the day we surveyed the big pitch, we used the old and badly worn maillons, which were installed some time before 2011.
Modelling by Gareth, lighting by Tarquin and Gareth
The old traverse line into CUCC Old Flyover from Second Pitch. We had doubled up the rope and maillons for our first crossing, but on the day we surveyed the big pitch, we used the old and badly worn maillons, which were installed some time before 2011.
Modelling by Gareth, lighting by Tarquin and Gareth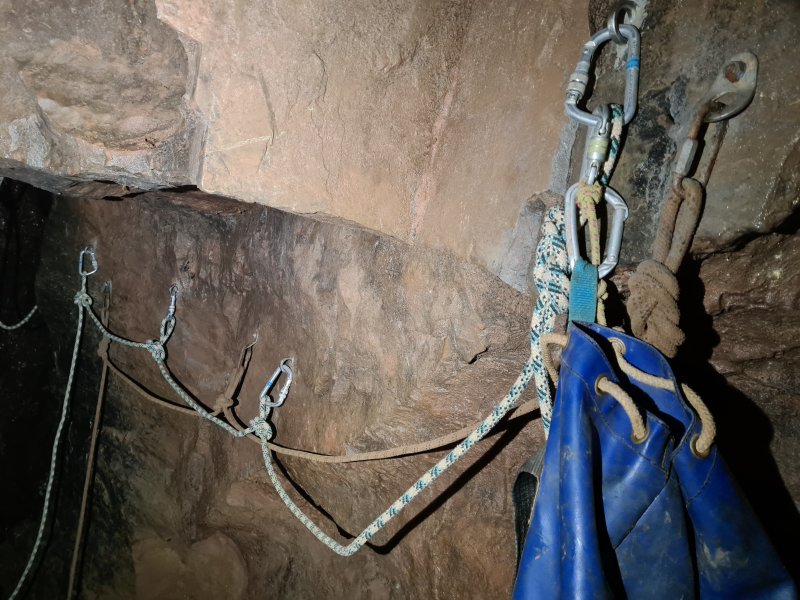 The new P-hangers, which were installed at the end of the project.
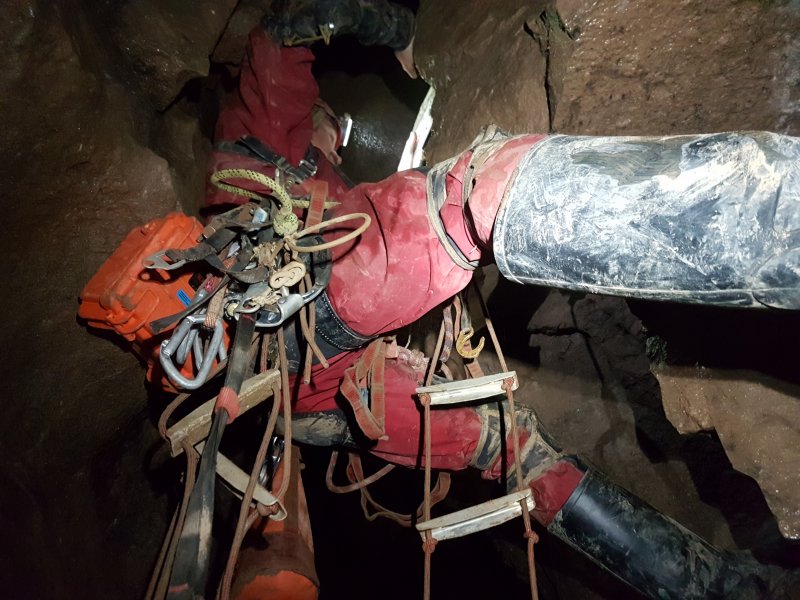 Bolting into the aven above the ledge at the start of CUCC Old Flyover.
Modelling by Gareth, lighting by Tarquin and Gareth
Bolting into the aven above the ledge at the start of CUCC Old Flyover.
Modelling by Gareth, lighting by Tarquin and Gareth Sand fill at one end of the passage at the top of the aven above the ledge at the start of CUCC Old Flyover.
 The main direction along the passage at the top of the aven above the ledge at the start of CUCC Old Flyover.
Modelling by Gareth
The main direction along the passage at the top of the aven above the ledge at the start of CUCC Old Flyover.
Modelling by Gareth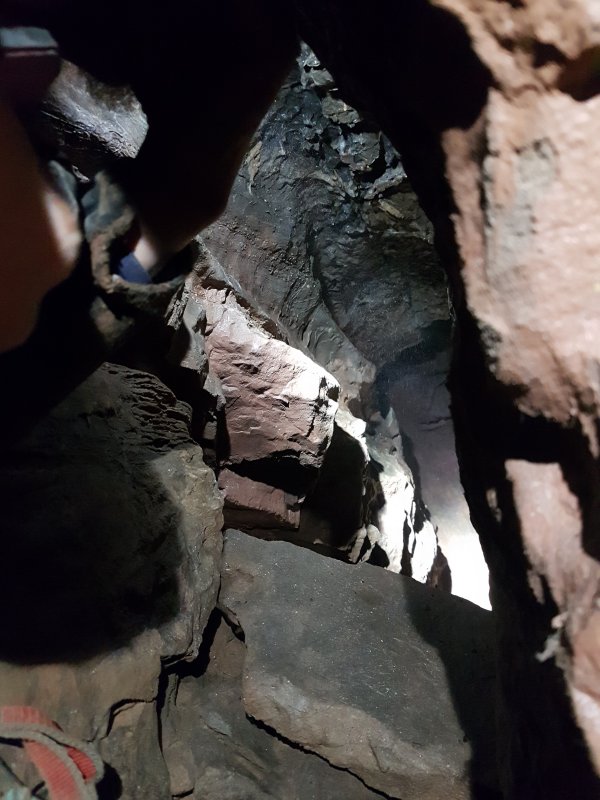 The main direction along the passage at the top of the aven above the ledge at the start of CUCC Old Flyover, ends at a window that drops 18 metres down Second Pitch.
Modelling by portions of Gareth, lighting by Tarquin and Gareth
The main direction along the passage at the top of the aven above the ledge at the start of CUCC Old Flyover, ends at a window that drops 18 metres down Second Pitch.
Modelling by portions of Gareth, lighting by Tarquin and Gareth Top of the blasted squeeze that connected CUCC Old Flyover to Second Pitch. While this is not particularly tight, it does normally need SRT gear to be removed, while standing on the sandy ledge near the top of Second Pitch. The handline is sometimes helpful for getting up out of the squeeze.
Modelling by Gareth, lighting by Tarquin and Gareth
Top of the blasted squeeze that connected CUCC Old Flyover to Second Pitch. While this is not particularly tight, it does normally need SRT gear to be removed, while standing on the sandy ledge near the top of Second Pitch. The handline is sometimes helpful for getting up out of the squeeze.
Modelling by Gareth, lighting by Tarquin and Gareth The tightest part of the CUCC Old Flyover squeeze is at this little step. The step makes it very difficult to haul bags through with a donkey's dick, so a hauling line is a good idea.
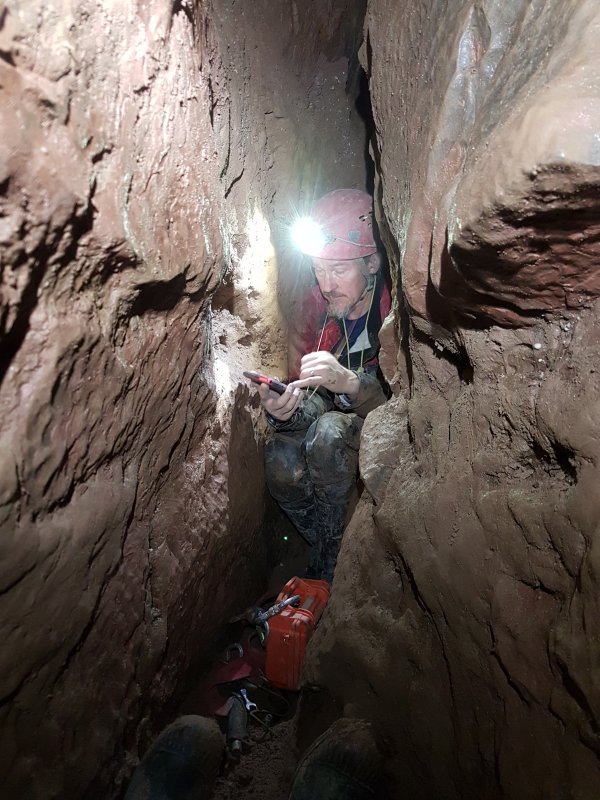 Surveying in the narrow section of CUCC Old Flyover after the squeeze.
Modelling by Gareth, lighting by Tarquin and Gareth
Surveying in the narrow section of CUCC Old Flyover after the squeeze.
Modelling by Gareth, lighting by Tarquin and Gareth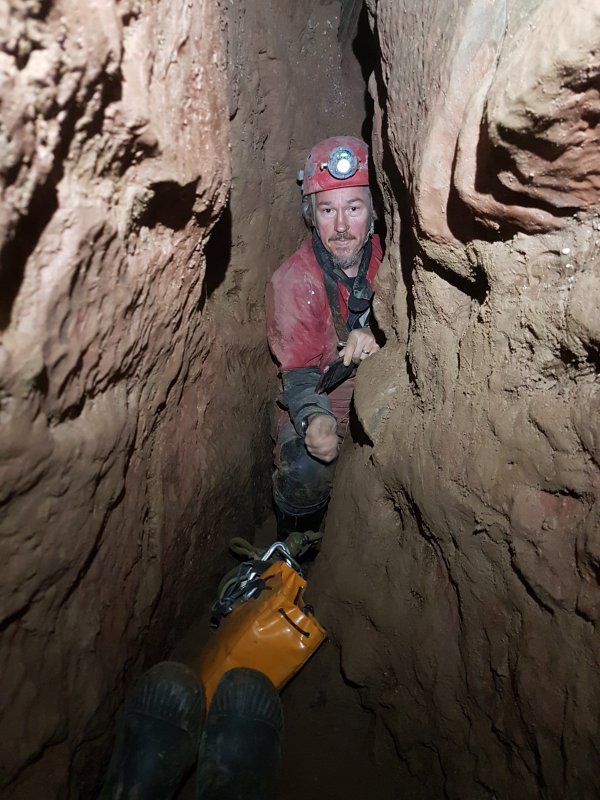 The narrow section of CUCC Old Flyover after the squeeze is where we had abandoned our first attempt to survey here, due to a failed Disto calibration. That is a look of resignation.
Modelling by Gareth
The narrow section of CUCC Old Flyover after the squeeze is where we had abandoned our first attempt to survey here, due to a failed Disto calibration. That is a look of resignation.
Modelling by Gareth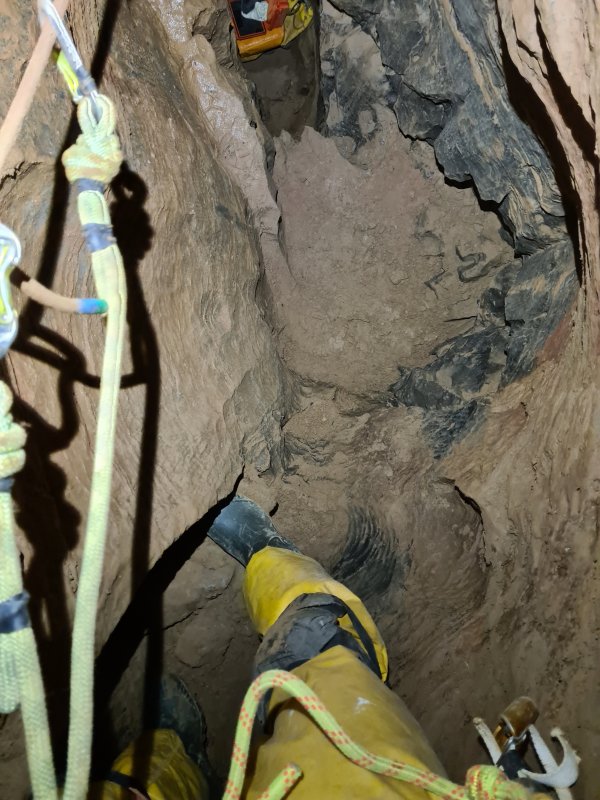 The tiny space where you have to get your SRT gear back on, between the climbs at the head of the CUCC Old Flyover big pitch.
Modelling by Tarquin
The tiny space where you have to get your SRT gear back on, between the climbs at the head of the CUCC Old Flyover big pitch.
Modelling by Tarquin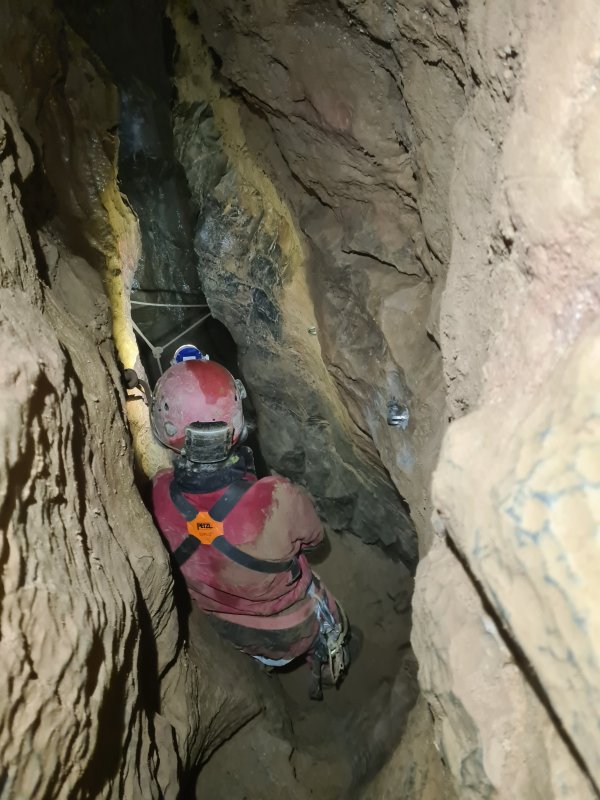 The new backup P-hangers for the CUCC Old Flyover big pitch.
Modelling by Gareth, lighting by Tarquin and Gareth
The new backup P-hangers for the CUCC Old Flyover big pitch.
Modelling by Gareth, lighting by Tarquin and Gareth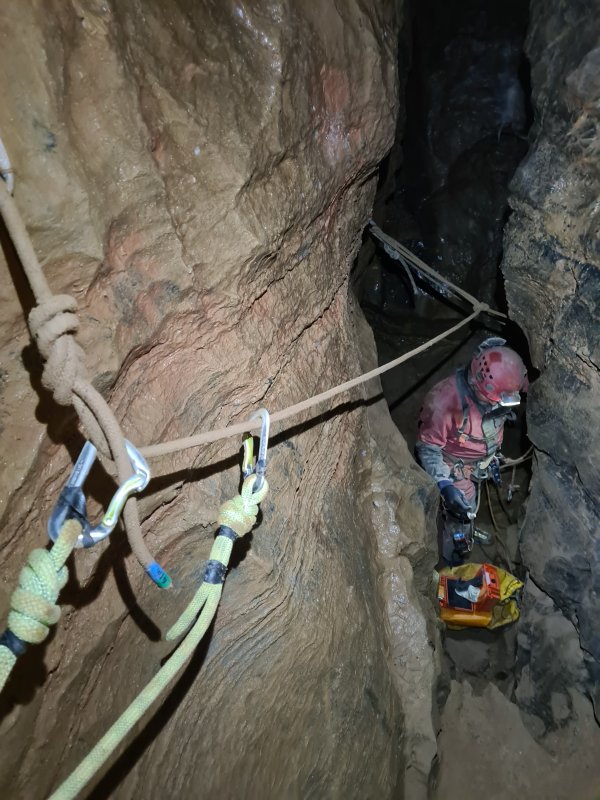 The old arrangement of backup anchors for the CUCC Old Flyover big pitch.
Modelling by Gareth, lighting by Tarquin and Gareth
The old arrangement of backup anchors for the CUCC Old Flyover big pitch.
Modelling by Gareth, lighting by Tarquin and Gareth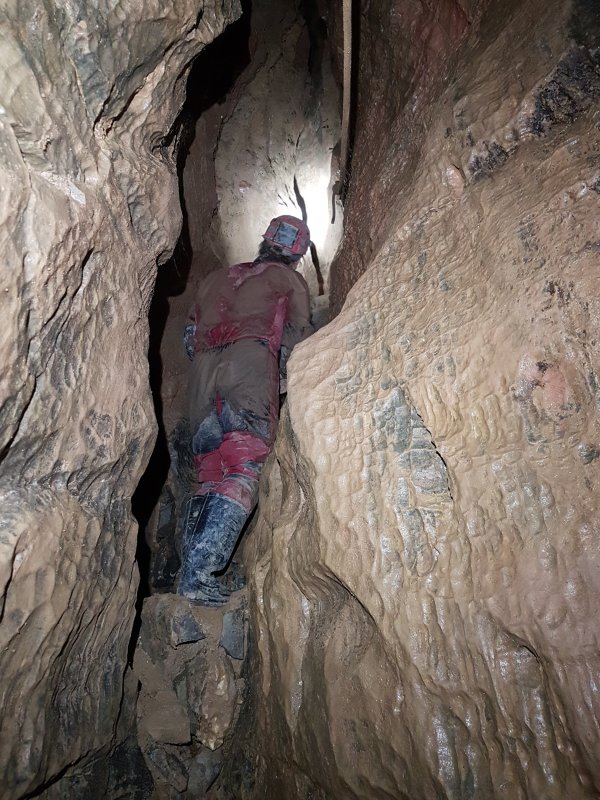 Looking back up the two little climbs at the head of the CUCC Old Flyover big pitch.
Modelling by Gareth, lighting by Tarquin and Gareth
Looking back up the two little climbs at the head of the CUCC Old Flyover big pitch.
Modelling by Gareth, lighting by Tarquin and Gareth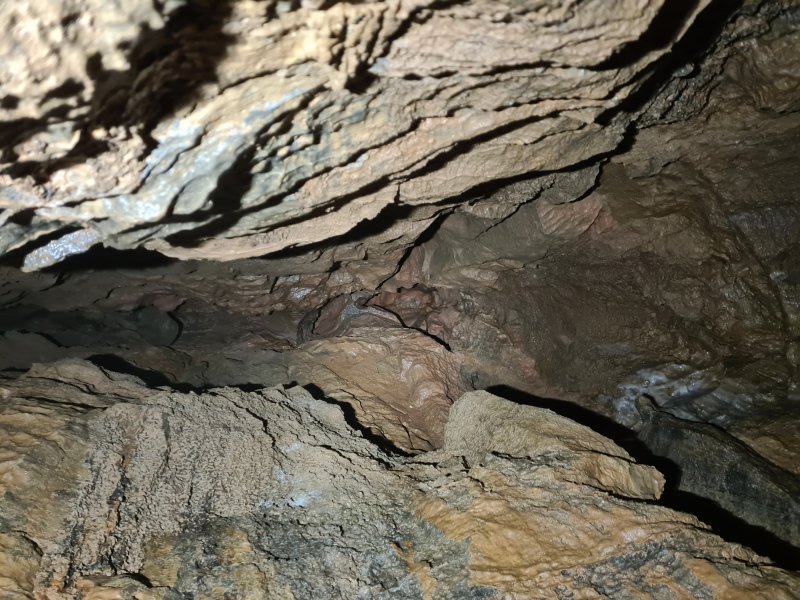 Top of the aven above CUCC Old Flyover's big pitch. It is a blind solutional pocket.
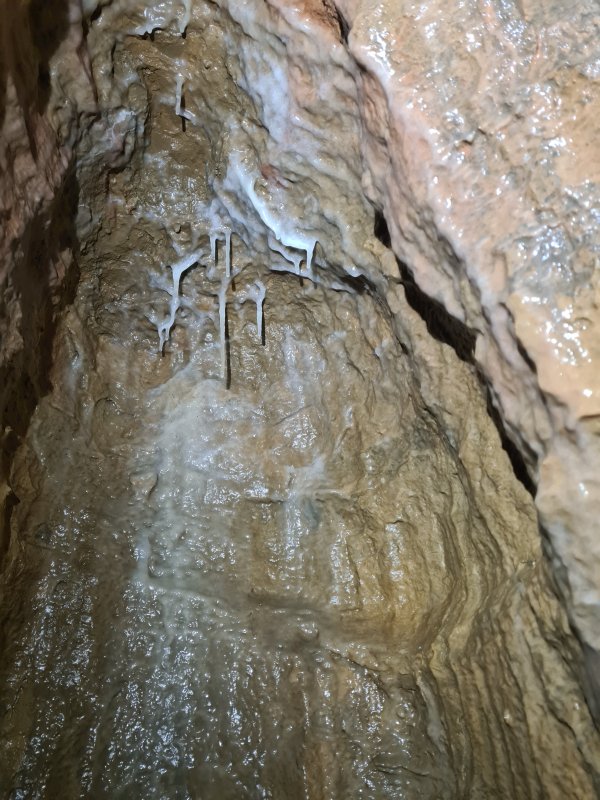 Formations in an alcove near the head of the CUCC Old Flyover big pitch.
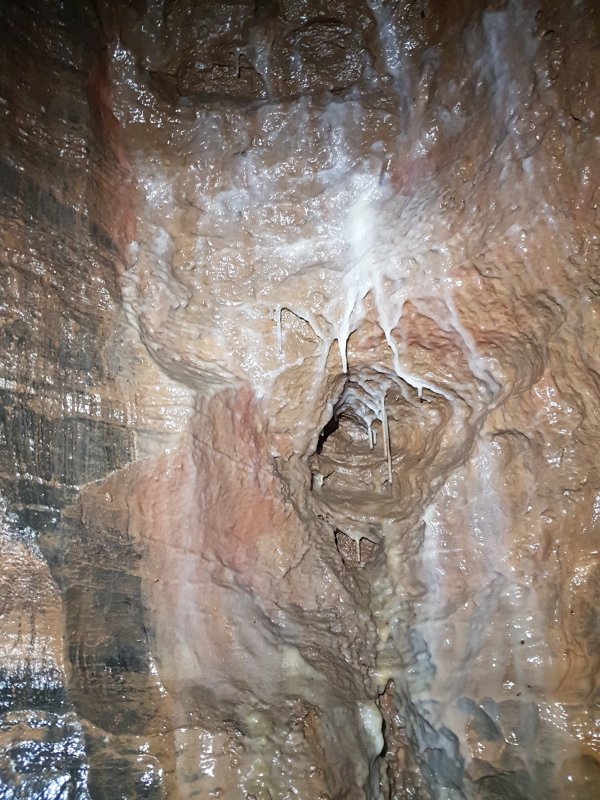 Formations at the head of the CUCC Old Flyover big pitch.
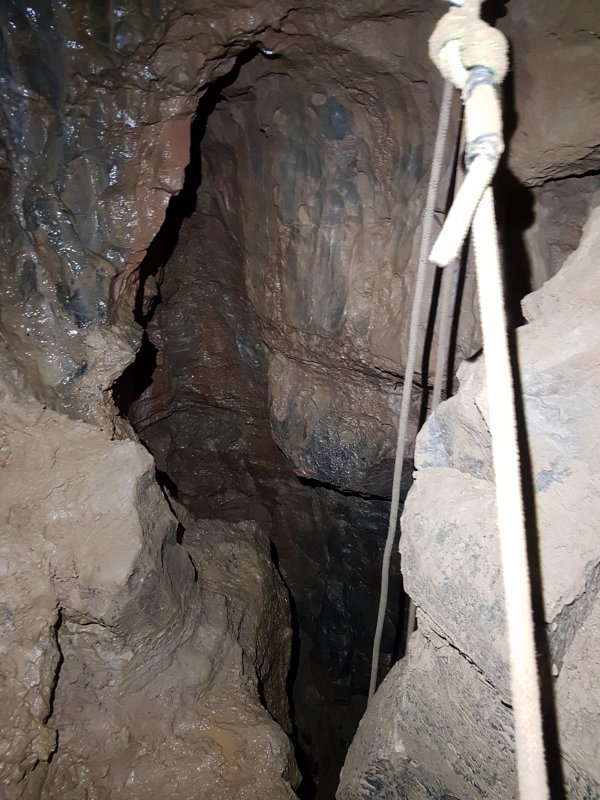 Lip of the CUCC Old Flyover big pitch.
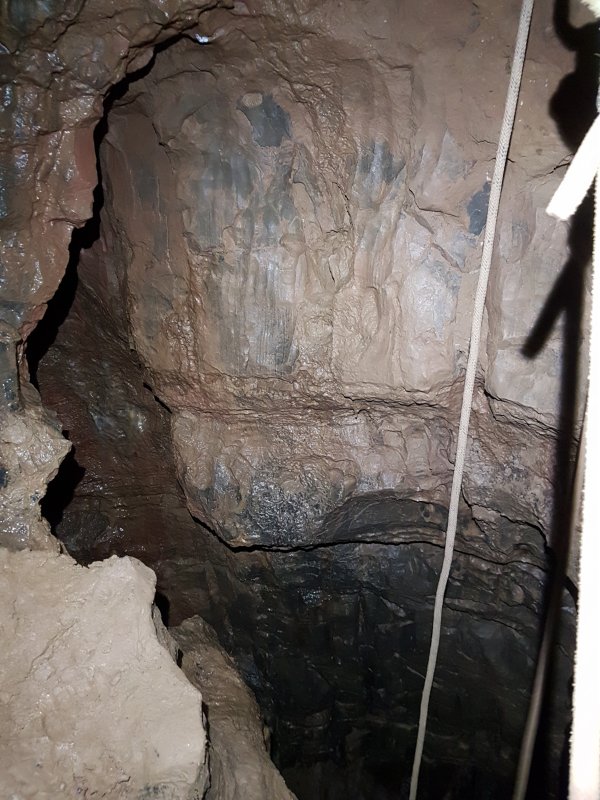 Head of the CUCC Old Flyover big pitch.
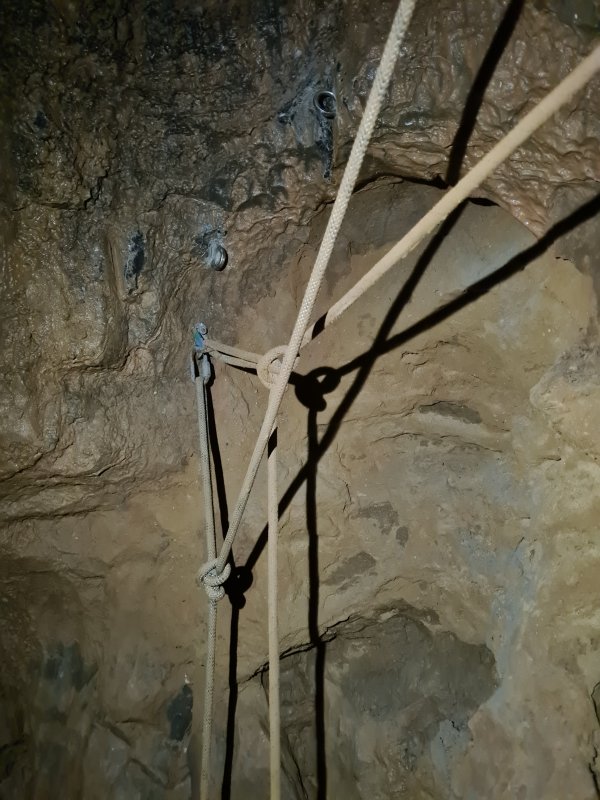 Old rigging at the head of the CUCC Old Flyover big pitch. The rope on the left is the 2011 rope that leads down the main route, while the rope to the right is the 2010 rope which was originally used after this aven was first climbed. The new P-hangers can be seen in the ceiling, just after their installation.
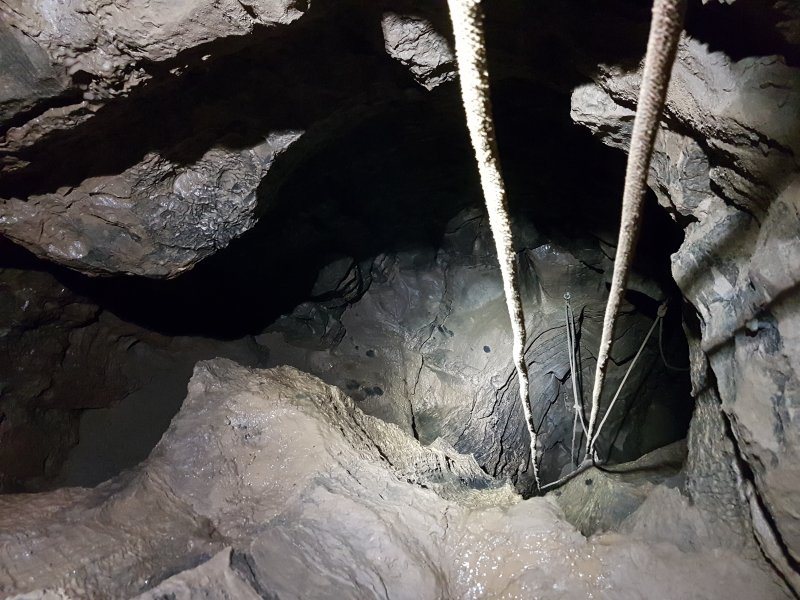 Diverging routes for the ropes at the top of the CUCC Old Flyover big pitch. The modern route follows the route on the left.
 Installing the new P-hangers at the top of the CUCC Old Flyover big pitch.
Modelling by Gareth, lighting by Tarquin and Gareth
Installing the new P-hangers at the top of the CUCC Old Flyover big pitch.
Modelling by Gareth, lighting by Tarquin and Gareth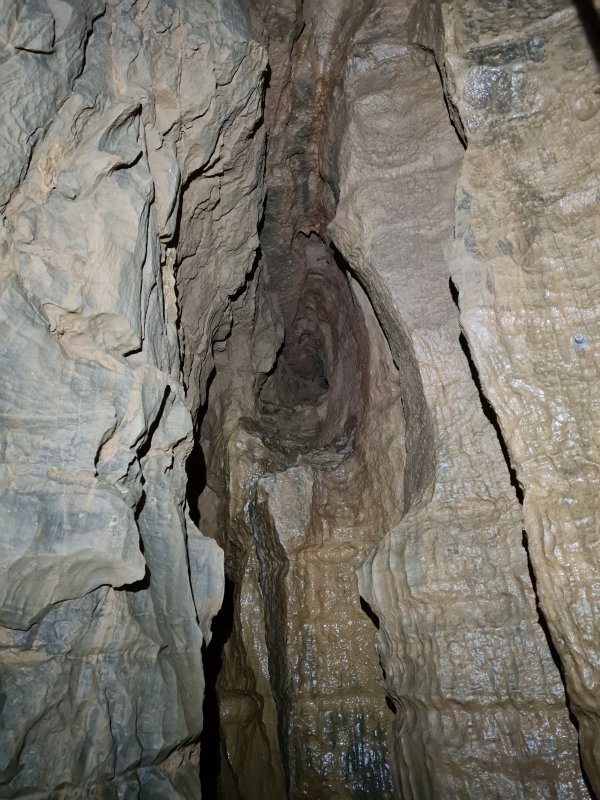 Blind alcove at the top of the CUCC Old Flyover big pitch. It appears to connect to the floor of the little climbs above the pitch.
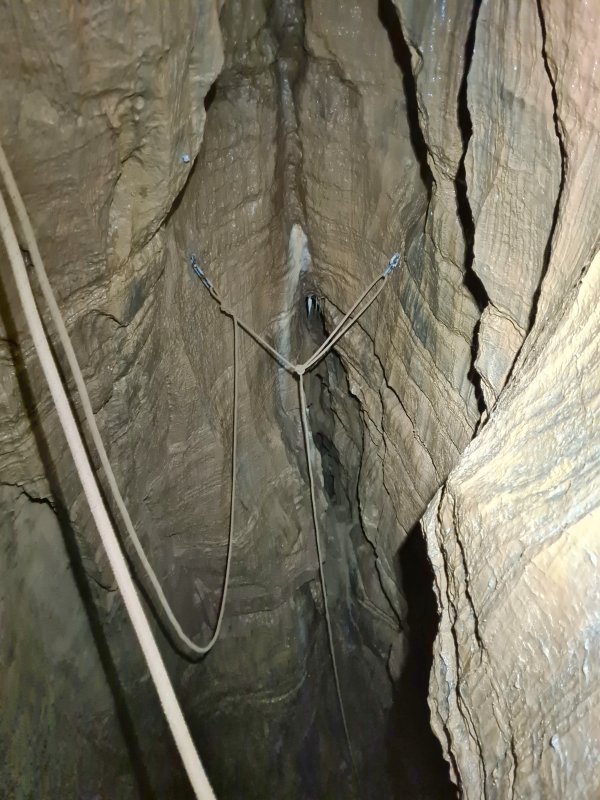 Crazy rebelay Y-hang on the original route that was used to bolt CUCC Old Flyover. The rope drops all the way down from there to reach the route from the aven above the passage between Third Pitch and Fourth Pitch. The alcove beyond the Y-hang has a visual connection to the top of the same aven, which we only found out about because our laser lines intersected each other.
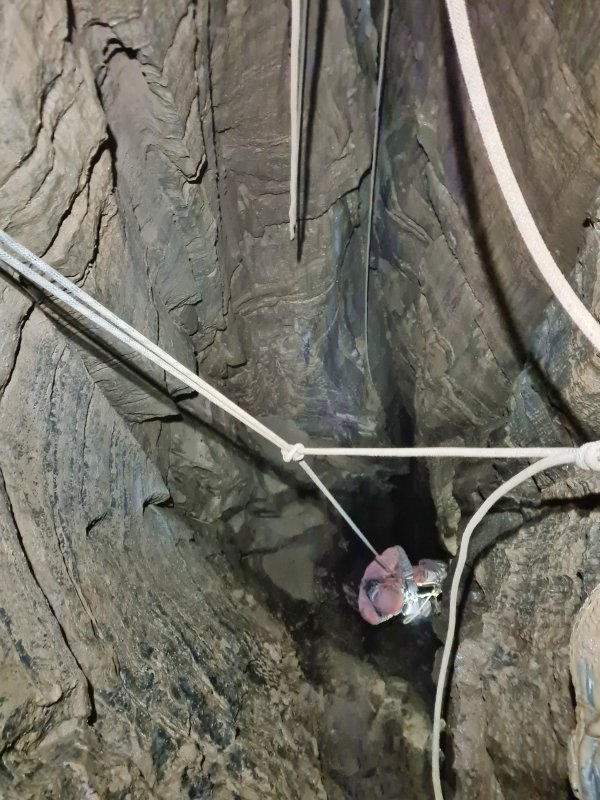 Looking down to the second rebelay in the CUCC Old Flyover big pitch, which has now been turned into a Y-hang like the one above it.
Modelling by Gareth, lighting by Tarquin and Gareth
Looking down to the second rebelay in the CUCC Old Flyover big pitch, which has now been turned into a Y-hang like the one above it.
Modelling by Gareth, lighting by Tarquin and Gareth Looking up at the third rebelay in the CUCC Old Flyover big pitch, which has now been converted into a deviation.
 The largest section of the CUCC Old Flyover big pitch.
Modelling by Gareth, lighting by Tarquin and Gareth
The largest section of the CUCC Old Flyover big pitch.
Modelling by Gareth, lighting by Tarquin and Gareth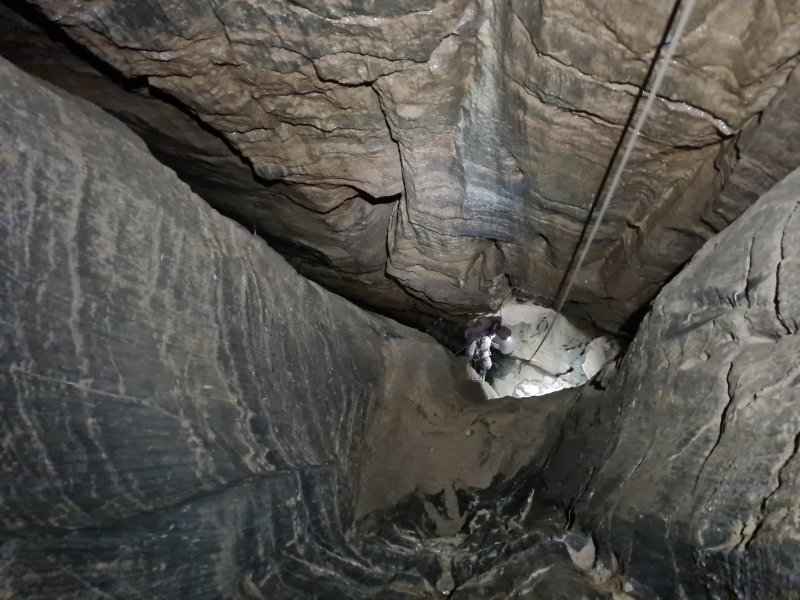 The drop below the largest section of the CUCC Old Flyover big pitch lands on a rock and sand covered ledge.
Modelling by Gareth, lighting by Tarquin and Gareth
The drop below the largest section of the CUCC Old Flyover big pitch lands on a rock and sand covered ledge.
Modelling by Gareth, lighting by Tarquin and Gareth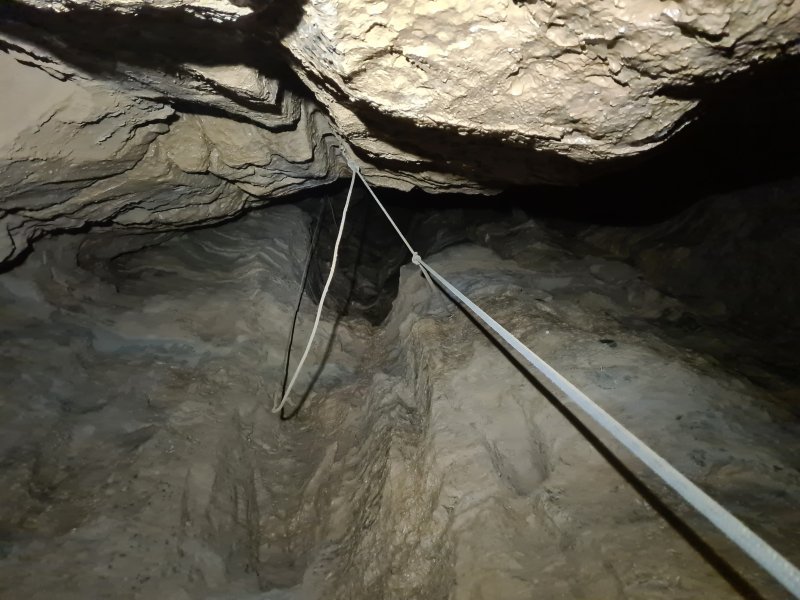 Looking back up at the rebelay at the bottom of the largest section of the CUCC Old Flyover big pitch.
 The stal alcove below the largest section of the CUCC Old Flyover big pitch. It seems to go back some distance, and we could not actually see the back, but the laser saw walls on all sides, so it appears to be just an alcove.
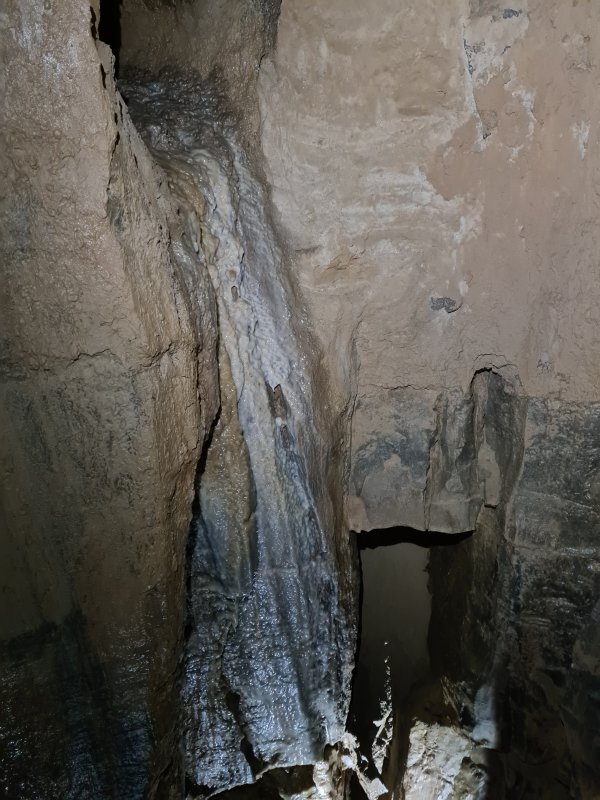 Looking down into the sandy alcove on the CUCC Old Flyover big pitch.
Lighting by Tarquin and Gareth
Looking down into the sandy alcove on the CUCC Old Flyover big pitch.
Lighting by Tarquin and Gareth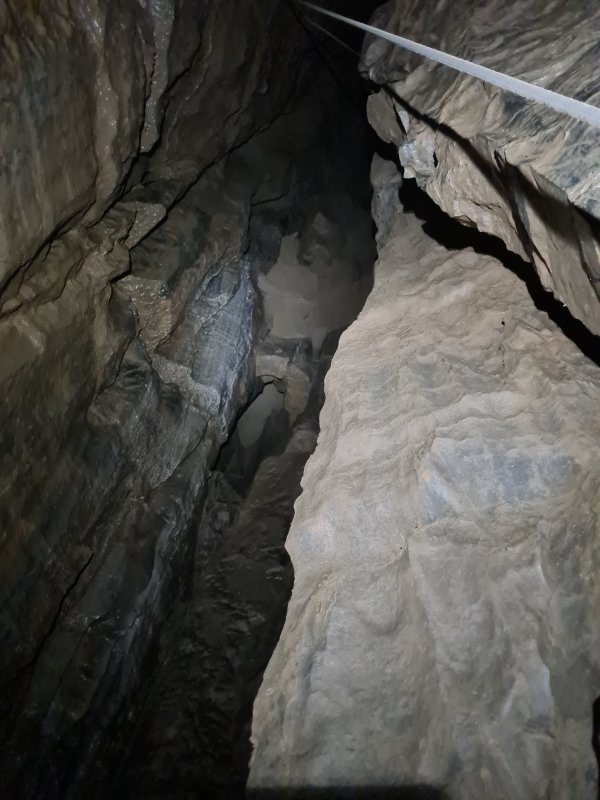 Looking down into the sandy alcove on the CUCC Old Flyover big pitch.
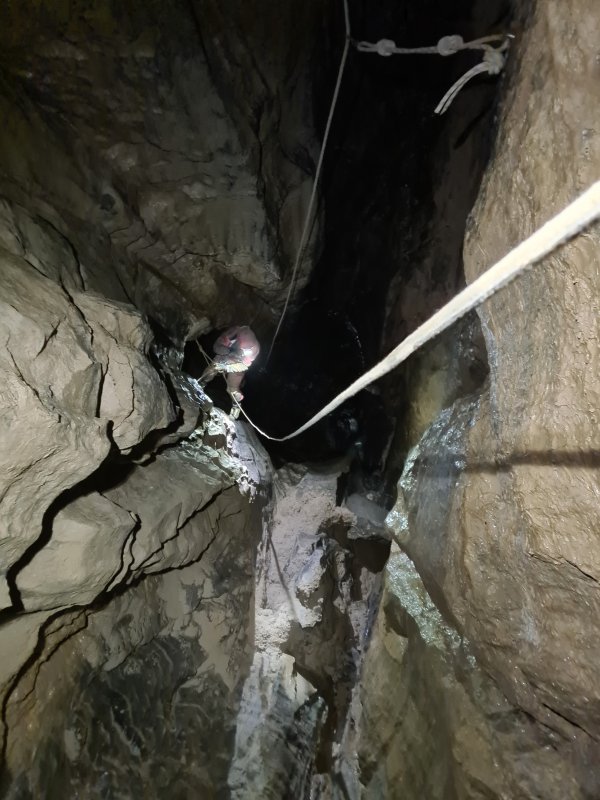 Looking down the last section of the CUCC Old Flyover route, from the approximate location of the new deviation. The Fourth Pitch main route's deviation can be seen at the top, while one of the rebelays on the CUCC Old Flyover route is down below.
Modelling by Gareth, lighting by Tarquin and Gareth
Looking down the last section of the CUCC Old Flyover route, from the approximate location of the new deviation. The Fourth Pitch main route's deviation can be seen at the top, while one of the rebelays on the CUCC Old Flyover route is down below.
Modelling by Gareth, lighting by Tarquin and Gareth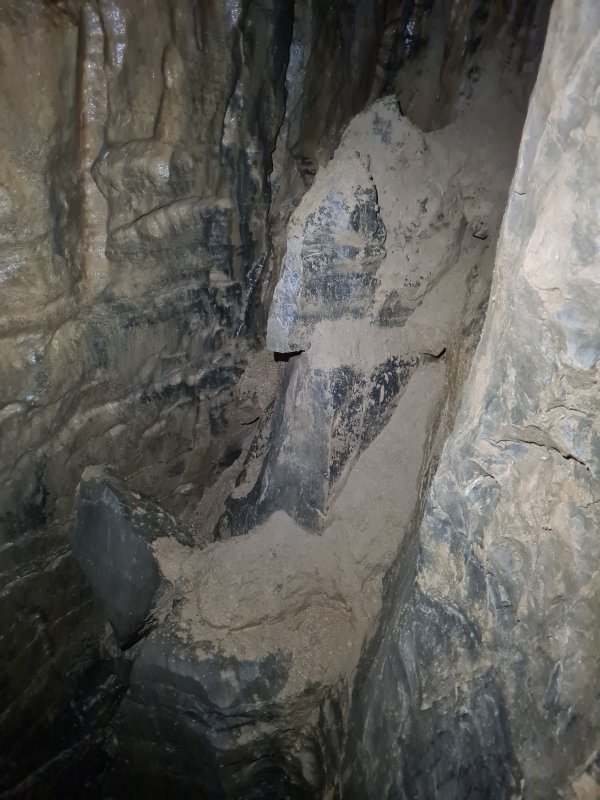 The rock and sand covered ledge on the CUCC Old Flyover big pitch.
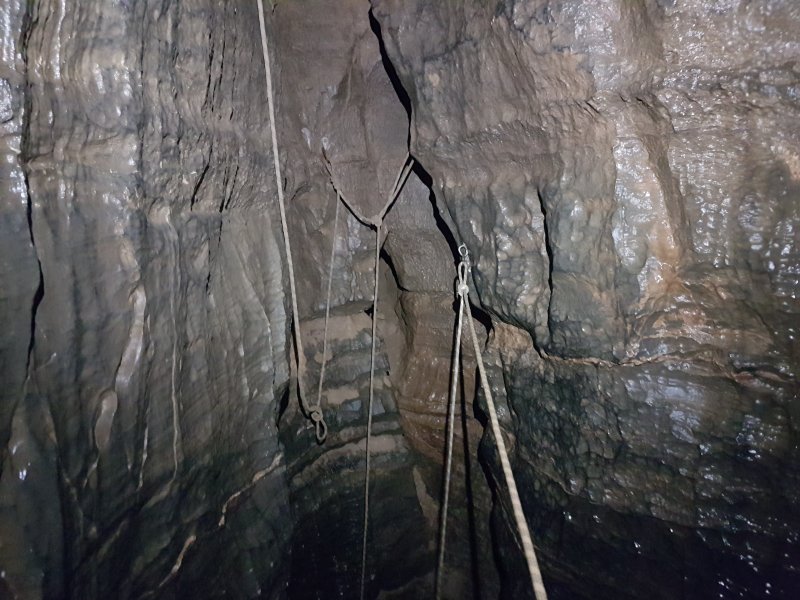 The old rebelays at the base of the main part of Fourth Pitch. This has now been rearranged so that the two routes share the normal rebelay, and the rebelay has an optional Y-hang, to avoid a rope rub if the rebelay fails for some reason. Behind the ropes is the entrance to the little oxbow which drops into the ceiling of the chamber below.
 Lip of the last stage of Fourth Pitch.
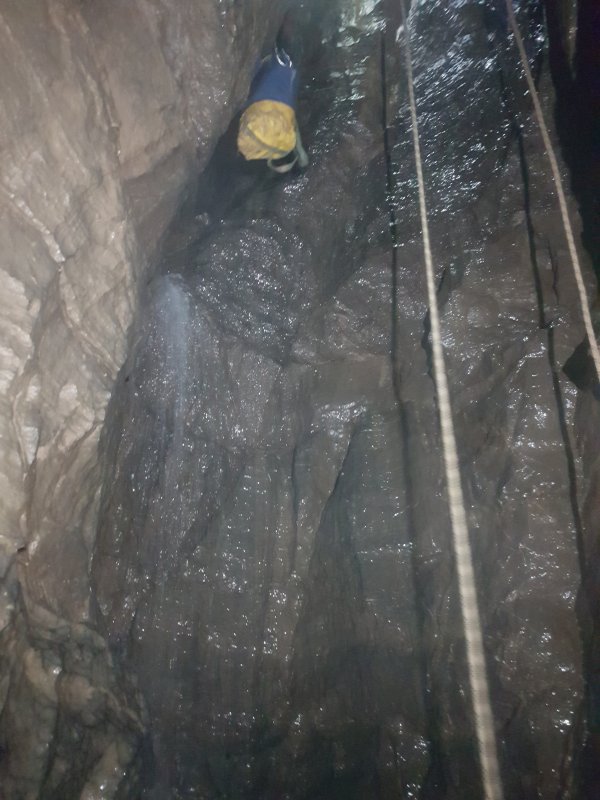 Last stage of the Fourth Pitch, now with both routes joined. It is possible to free climb this in lower water conditions.
Lighting by Tarquin and Gareth
Last stage of the Fourth Pitch, now with both routes joined. It is possible to free climb this in lower water conditions.
Lighting by Tarquin and Gareth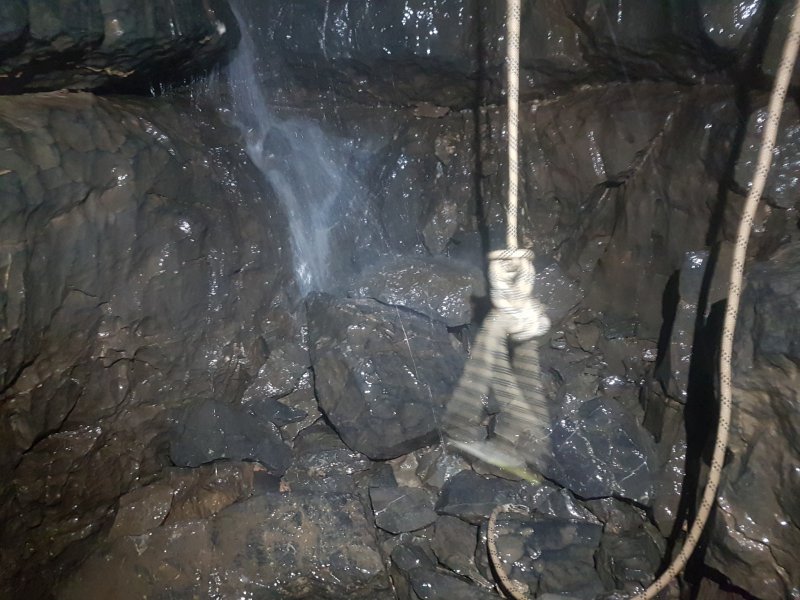 Base of the Fourth Pitch.
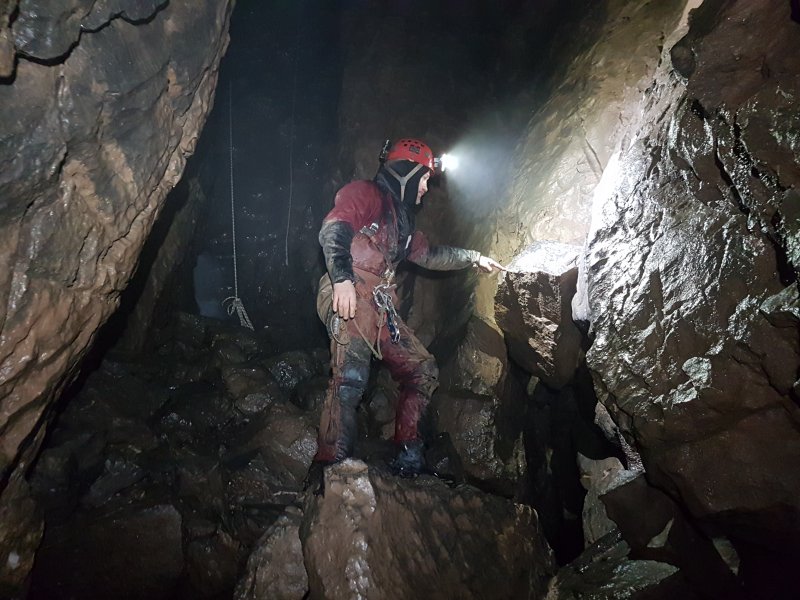 Chamber at the base of Fourth Pitch. Gareth is pointing at one of our permanent survey stations. Above his head is an aven looping around to the top of the last drop.
Modelling by Gareth, lighting by Tarquin and Gareth
Chamber at the base of Fourth Pitch. Gareth is pointing at one of our permanent survey stations. Above his head is an aven looping around to the top of the last drop.
Modelling by Gareth, lighting by Tarquin and Gareth The way on from the chamber at the base of Fourth Pitch, under the wedged rock. The normal approach is to drop down the hole and continue under rocks into the obvious passage.
Lighting by Tarquin and Gareth
The way on from the chamber at the base of Fourth Pitch, under the wedged rock. The normal approach is to drop down the hole and continue under rocks into the obvious passage.
Lighting by Tarquin and Gareth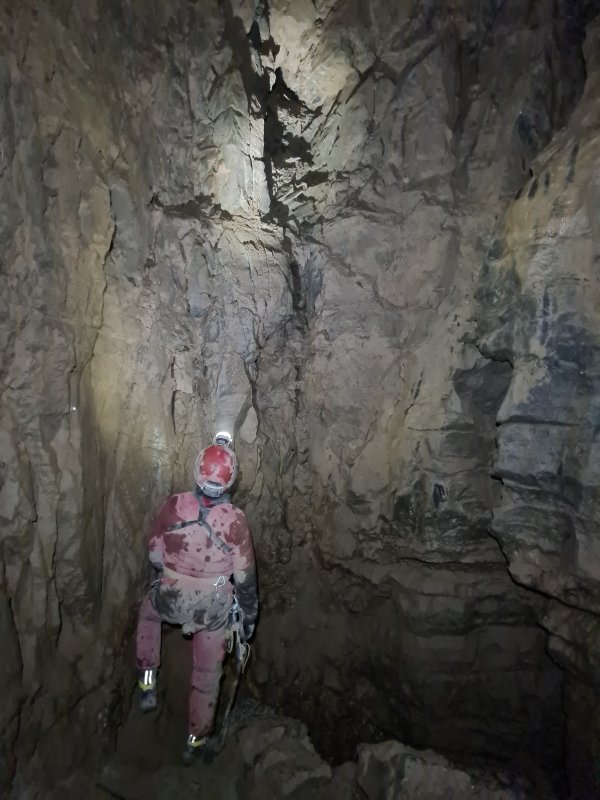 Chamber at the base of Loose Slab Aven.
Modelling by Gareth, lighting by Tarquin and Gareth
Chamber at the base of Loose Slab Aven.
Modelling by Gareth, lighting by Tarquin and Gareth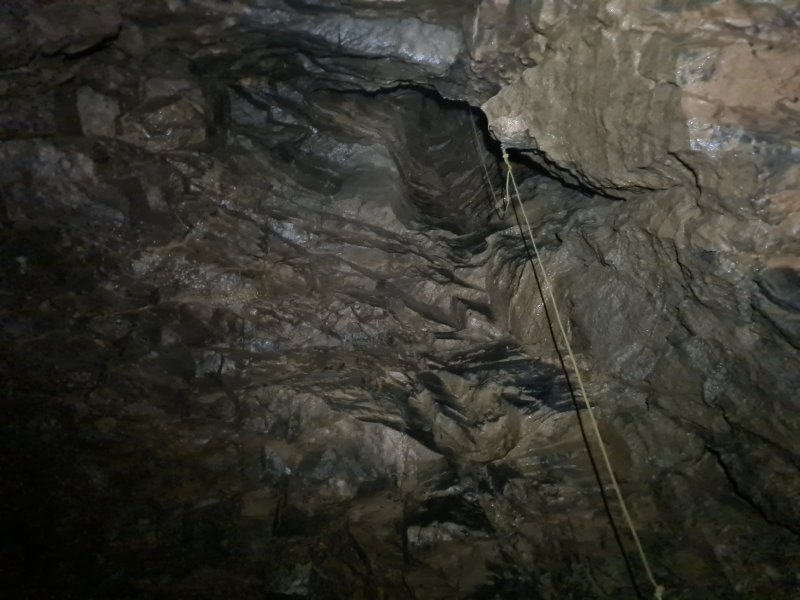 Lowest part of Loose Slab Aven. Somehow, this was not seen in 1947 (bad lighting), drawn as two avens in 1962, not seen in 1988, and drawn incorrectly in 2000.
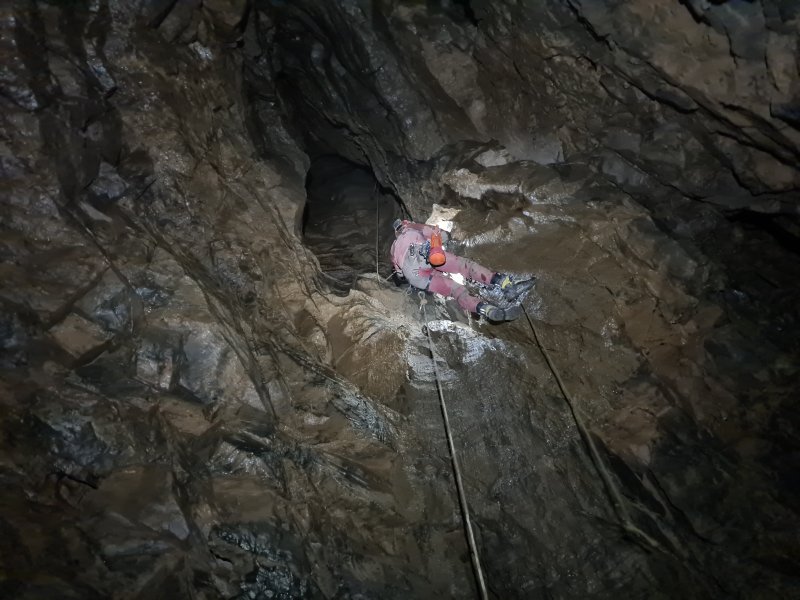 Rearranging the first rebelay in Loose Slab Aven.
Modelling by Gareth, lighting by Tarquin and Gareth
Rearranging the first rebelay in Loose Slab Aven.
Modelling by Gareth, lighting by Tarquin and Gareth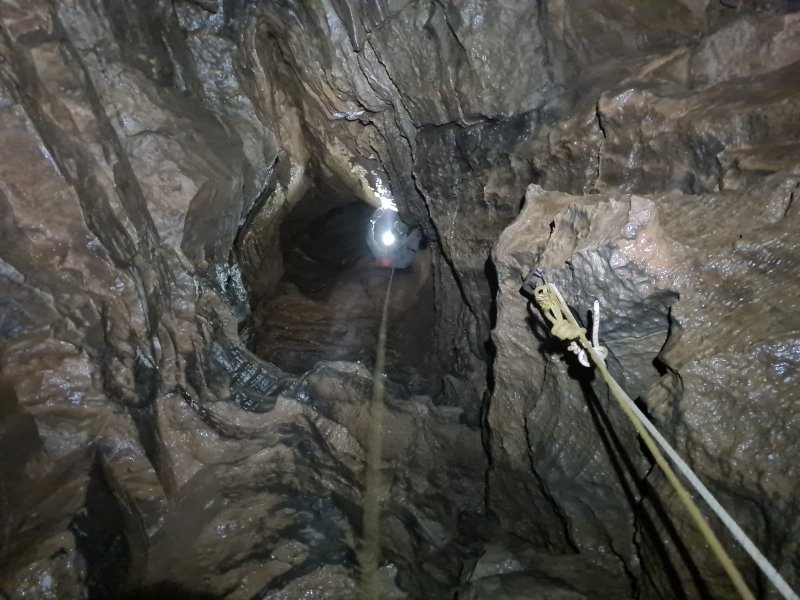 Approaching the second rebelay in Loose Slab Aven.
Modelling by Gareth, lighting by Tarquin and Gareth
Approaching the second rebelay in Loose Slab Aven.
Modelling by Gareth, lighting by Tarquin and Gareth Approaching the top of Loose Slab Aven. This was first reached by Pete Bolt.
Modelling by Gareth, lighting by Tarquin and Gareth
Approaching the top of Loose Slab Aven. This was first reached by Pete Bolt.
Modelling by Gareth, lighting by Tarquin and Gareth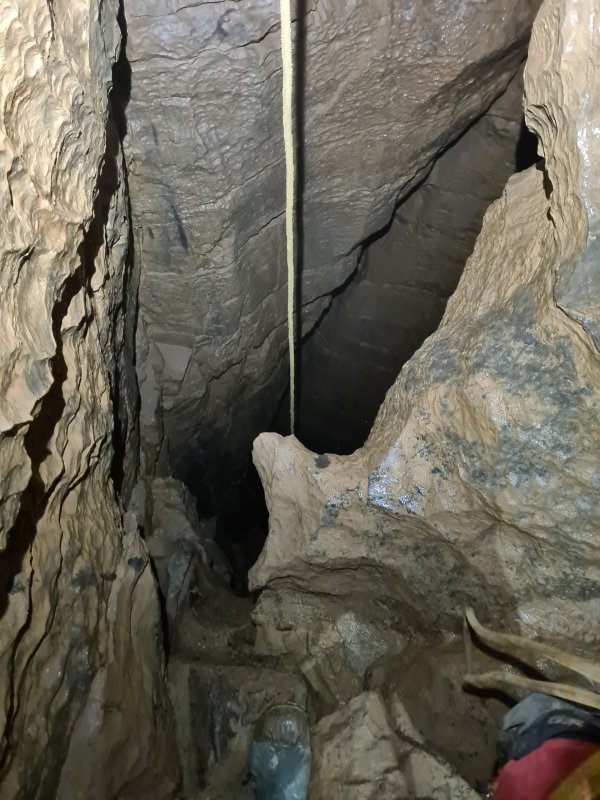 Lip of Loose Slab Aven.
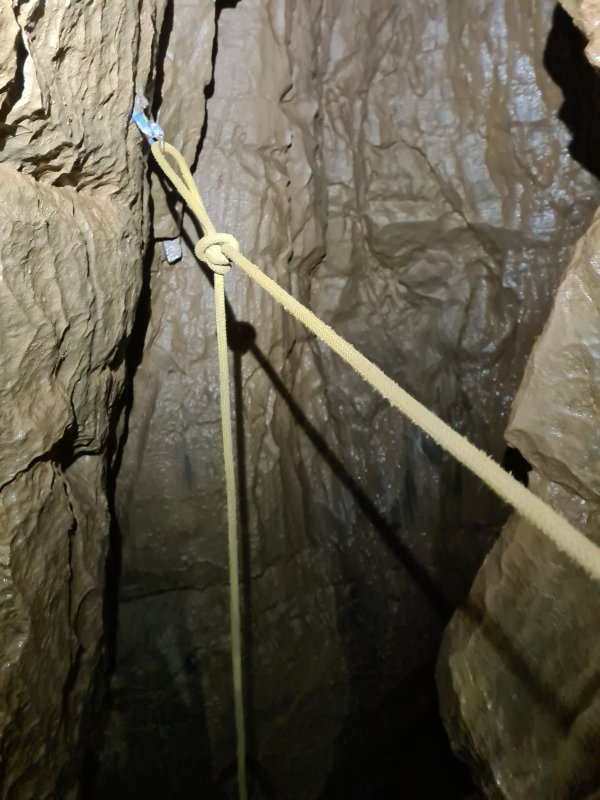 The main hanger at the top of Loose Slab Aven.
 Backup hanger at the top of Loose Slab Aven.
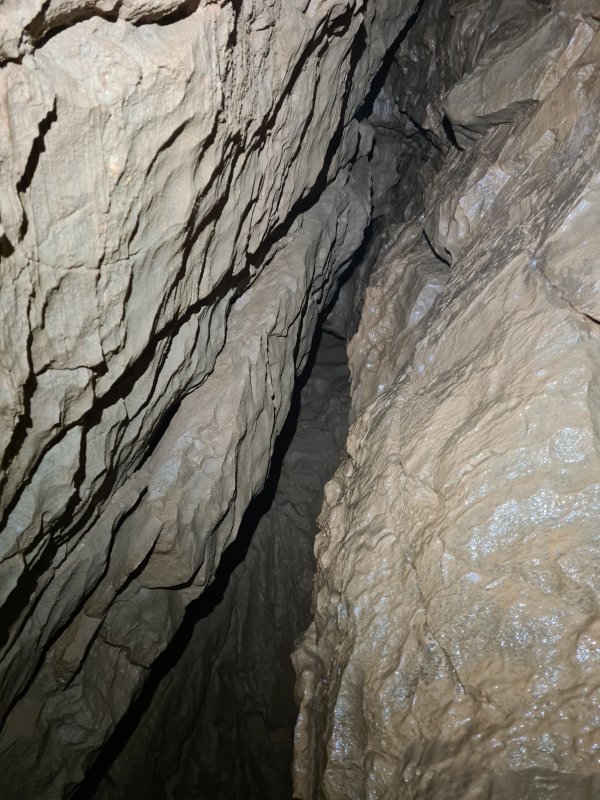 The rift at the top of Loose Slab Aven, which pinches out into a narrow cleft.
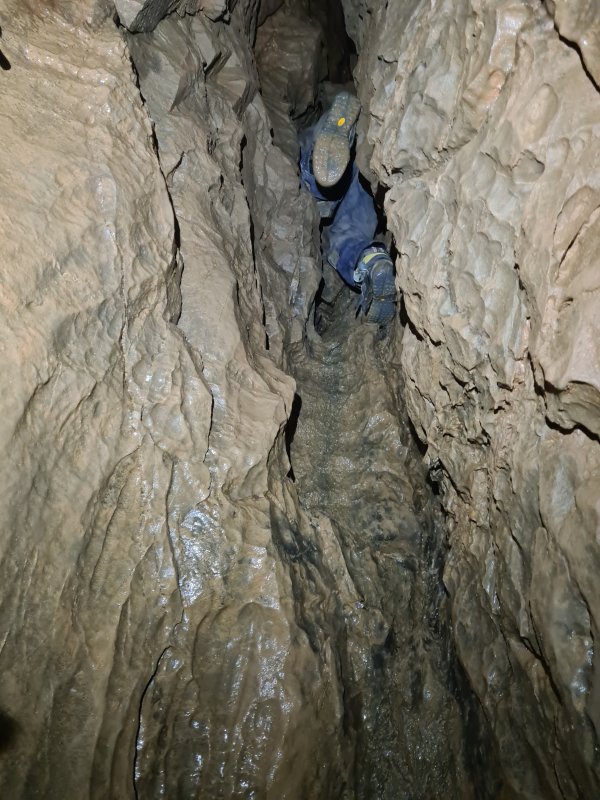 Climb at the top of Loose Slab Aven.
Modelling by Gareth
Climb at the top of Loose Slab Aven.
Modelling by Gareth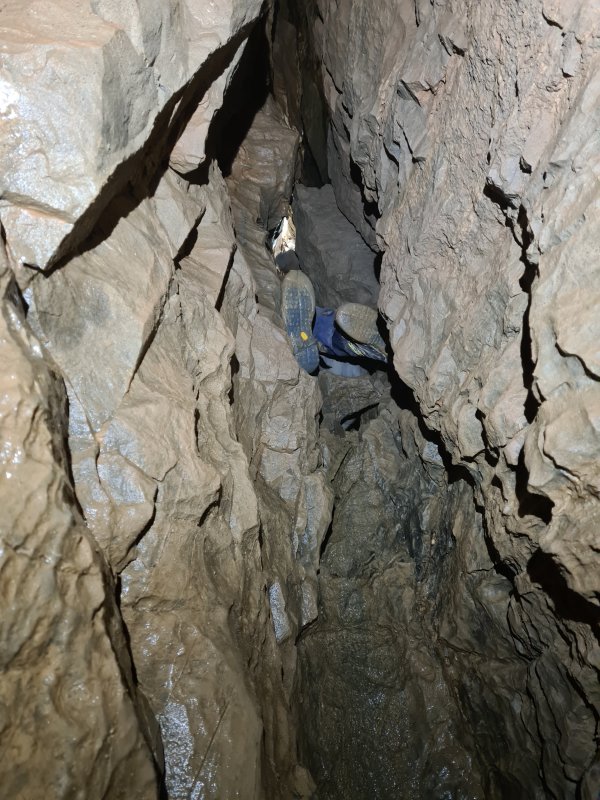 Squeeze under a rock at the top of the climb in Loose Slab Aven. Gareth enlarged this a little.
Modelling by Gareth, lighting by Tarquin and Gareth
Squeeze under a rock at the top of the climb in Loose Slab Aven. Gareth enlarged this a little.
Modelling by Gareth, lighting by Tarquin and Gareth Narrow section near the start of the passage from Loose Slab Aven.
Modelling by Gareth, lighting by Tarquin and Gareth
Narrow section near the start of the passage from Loose Slab Aven.
Modelling by Gareth, lighting by Tarquin and Gareth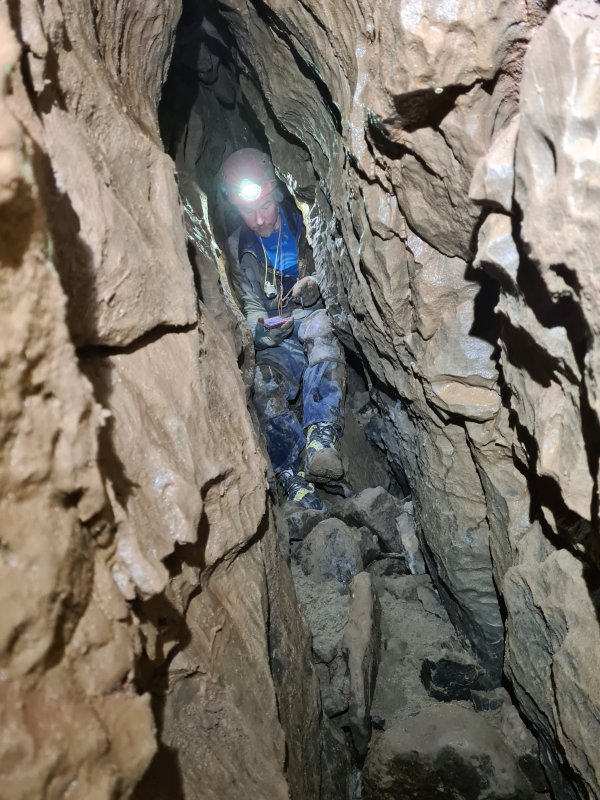 The slanting passage looks much bigger on the survey than it is, because of the slant.
Modelling by Gareth, lighting by Tarquin and Gareth
The slanting passage looks much bigger on the survey than it is, because of the slant.
Modelling by Gareth, lighting by Tarquin and Gareth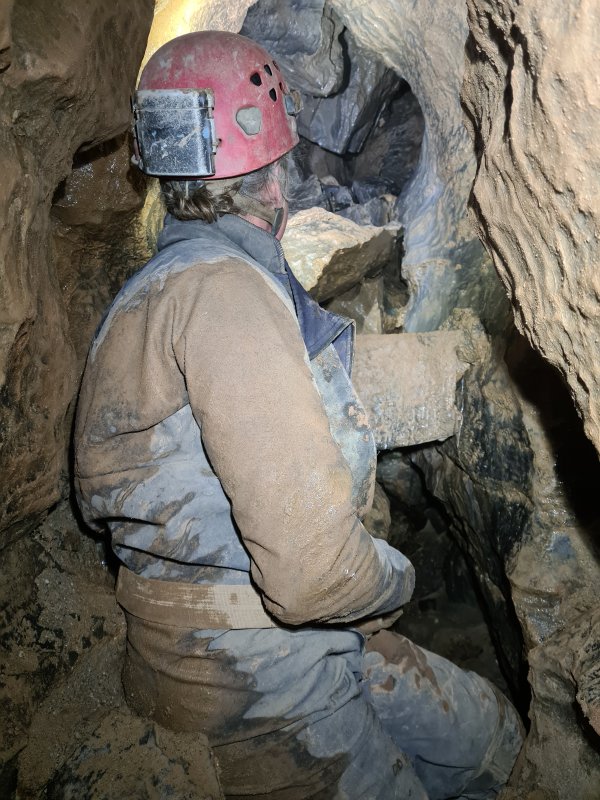 At the choke at the end of Loose Slab Aven.
Modelling by Gareth, lighting by Tarquin and Gareth
At the choke at the end of Loose Slab Aven.
Modelling by Gareth, lighting by Tarquin and Gareth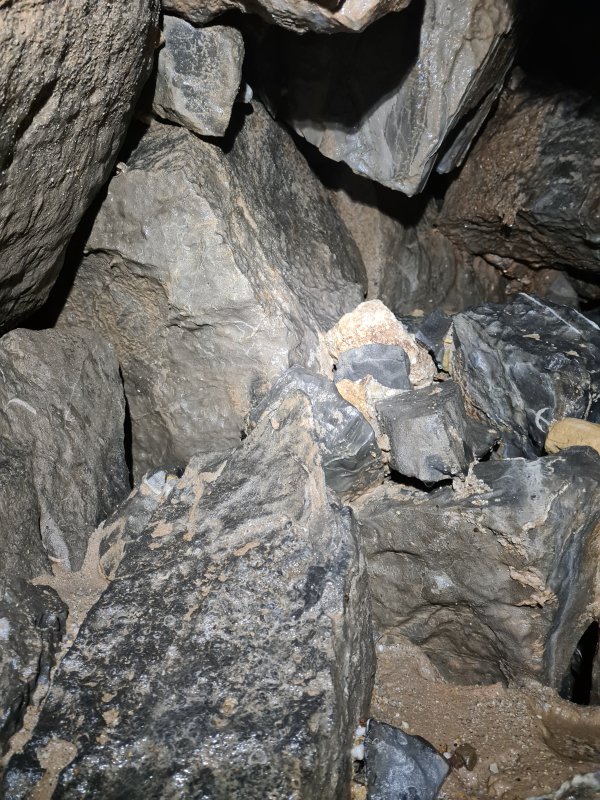 The choke at the end of Loose Slab Aven lies directly below the floor of Third Pitch, about 7 metres down.
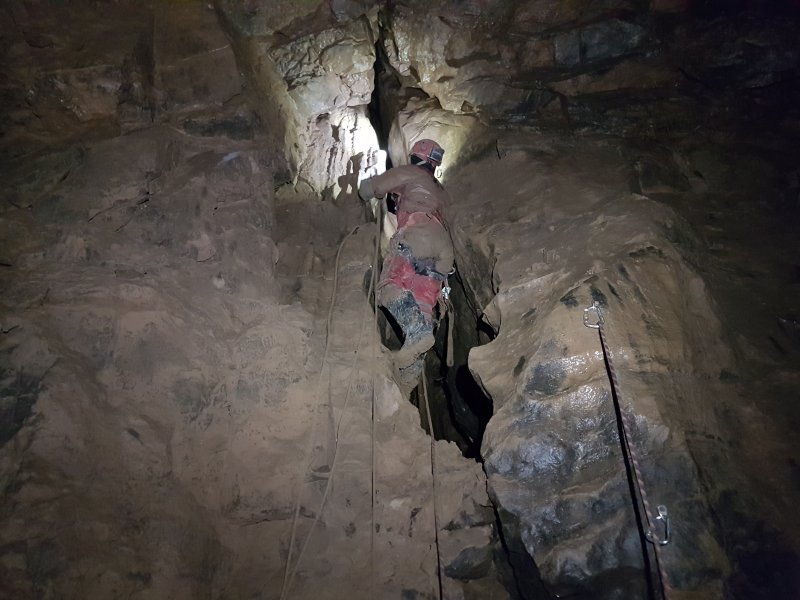 Bolt climb into the rift above Fifth Pitch, from the chamber below Loose Slab Aven.
Modelling by Gareth, lighting by Tarquin and Gareth
Bolt climb into the rift above Fifth Pitch, from the chamber below Loose Slab Aven.
Modelling by Gareth, lighting by Tarquin and Gareth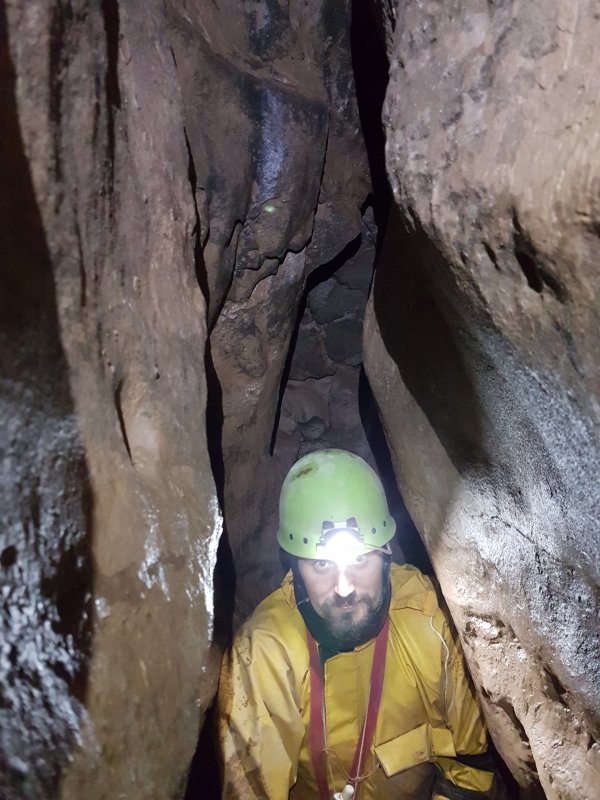 Proof that I was surveying! In the rift above Fifth Pitch, below the too-tight aven. At this point, we are both connected to the rope, since the mud floor is suspended on jammed rocks, with a visible hole down Fifth Pitch.
Camera and setup by Gareth, modelling by Tarquin, lighting by Gareth and Tarquin
Proof that I was surveying! In the rift above Fifth Pitch, below the too-tight aven. At this point, we are both connected to the rope, since the mud floor is suspended on jammed rocks, with a visible hole down Fifth Pitch.
Camera and setup by Gareth, modelling by Tarquin, lighting by Gareth and Tarquin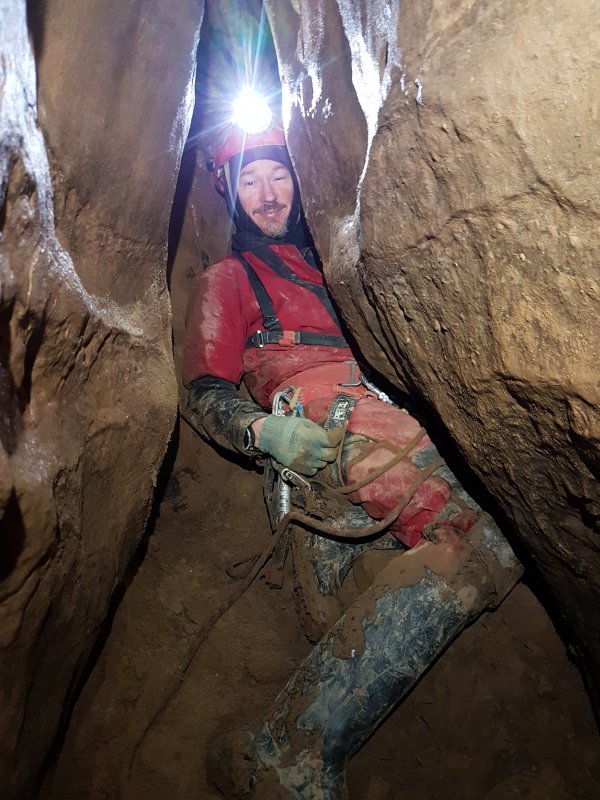 Near the end of the rift above Fifth Pitch.
Modelling by Gareth, lighting by Tarquin and Gareth
Near the end of the rift above Fifth Pitch.
Modelling by Gareth, lighting by Tarquin and Gareth Cleft in the ceiling near the end of the rift above Fifth Pitch.
 Silted end of the rift above Fifth Pitch.
 Selection of unofficial hangers that can be used as a backup for Fifth Pitch, in the chamber below Loose Slab Aven.
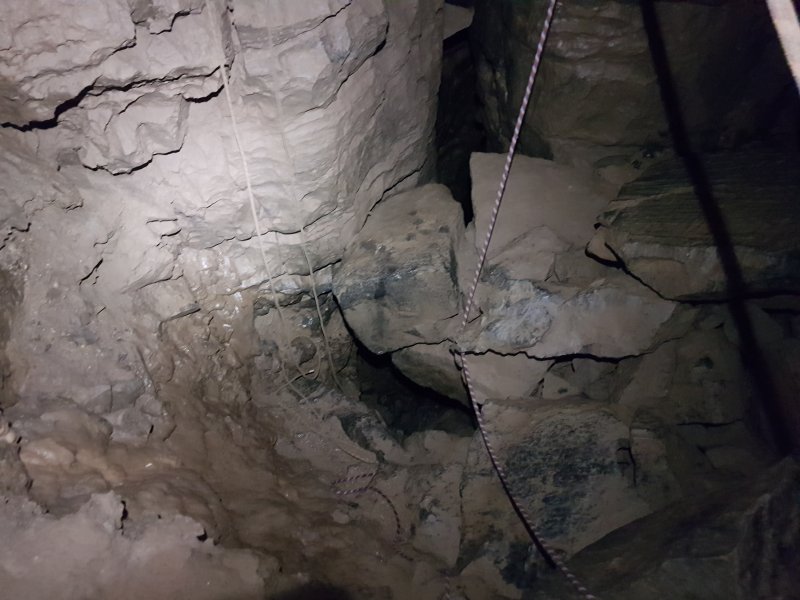 Boulders jammed over the route to Fifth Pitch in the chamber below Loose Slab Aven.
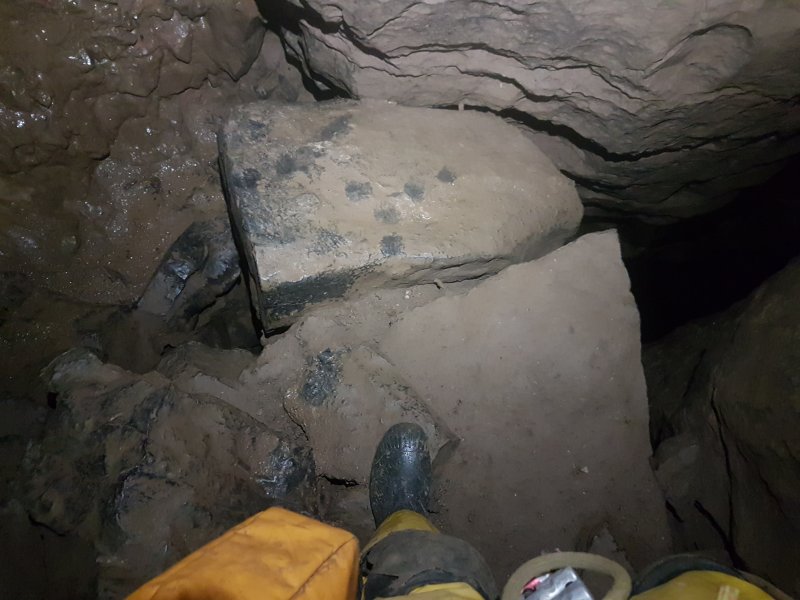 Detail of the jammed boulders over the route to Fifth Pitch in the chamber below Loose Slab Aven.
Modelling by Tarquin
Detail of the jammed boulders over the route to Fifth Pitch in the chamber below Loose Slab Aven.
Modelling by Tarquin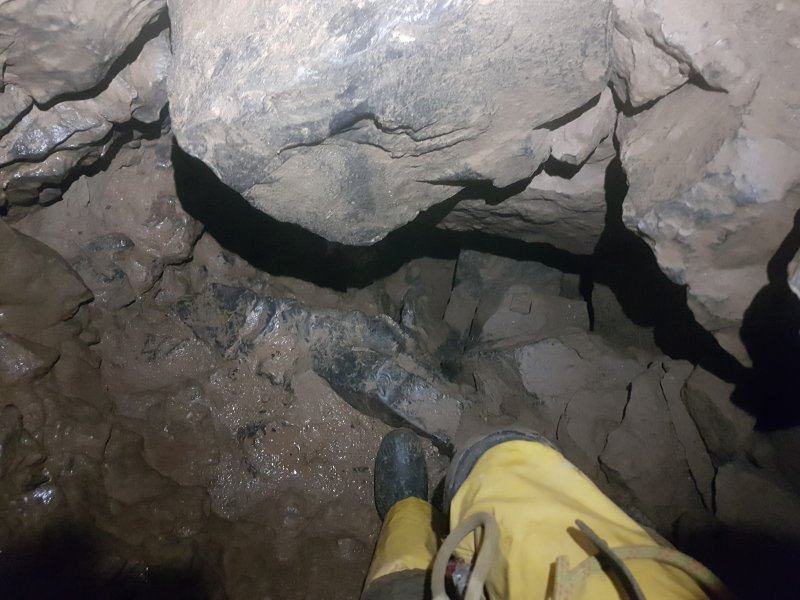 Descent route under the jammed boulders towards Fifth Pitch in the chamber below Loose Slab Aven.
Modelling by Tarquin
Descent route under the jammed boulders towards Fifth Pitch in the chamber below Loose Slab Aven.
Modelling by Tarquin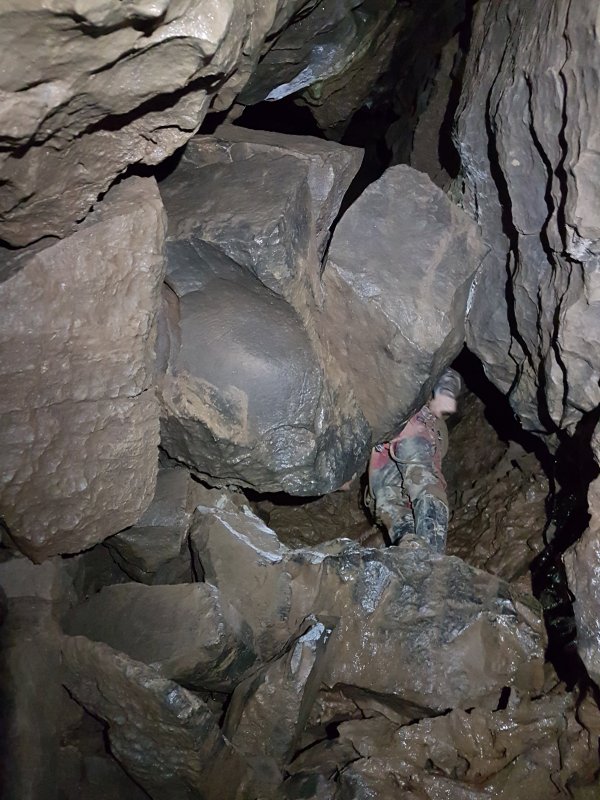 Looking up at the jammed boulders from the head of Fifth Pitch.
Modelling by Gareth, lighting by Tarquin and Gareth
Looking up at the jammed boulders from the head of Fifth Pitch.
Modelling by Gareth, lighting by Tarquin and Gareth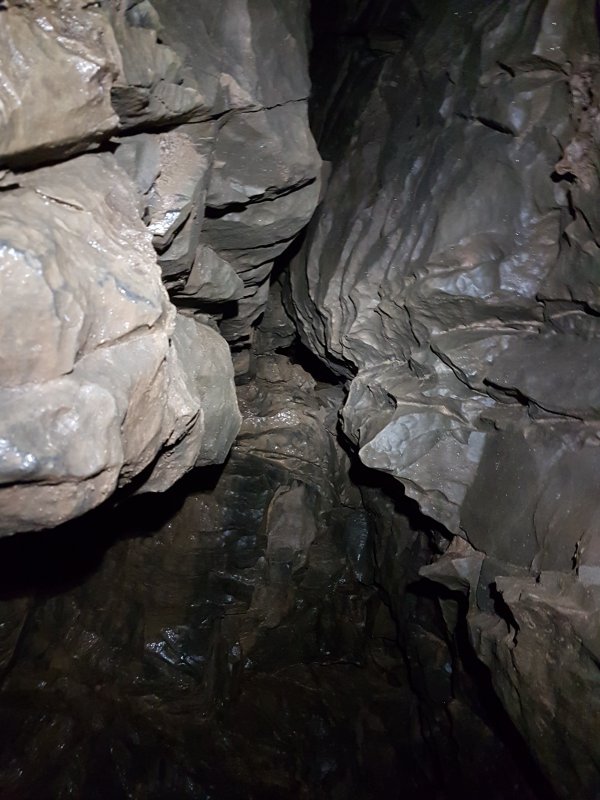 Hole in the veiling of Fifth Pitch which connects to the rift above.
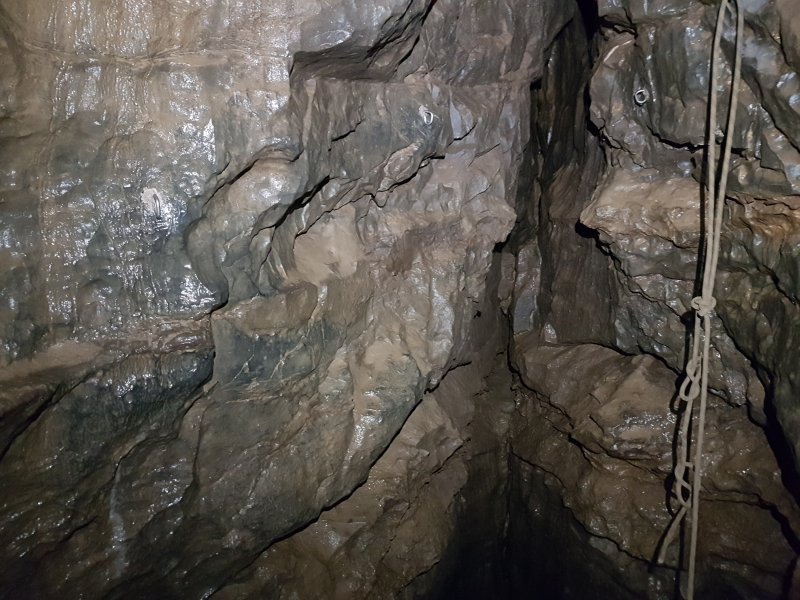 Rift over Fifth Pitch, which immediately closes down. One traverse hanger and the Y-hang hangers can be seen.
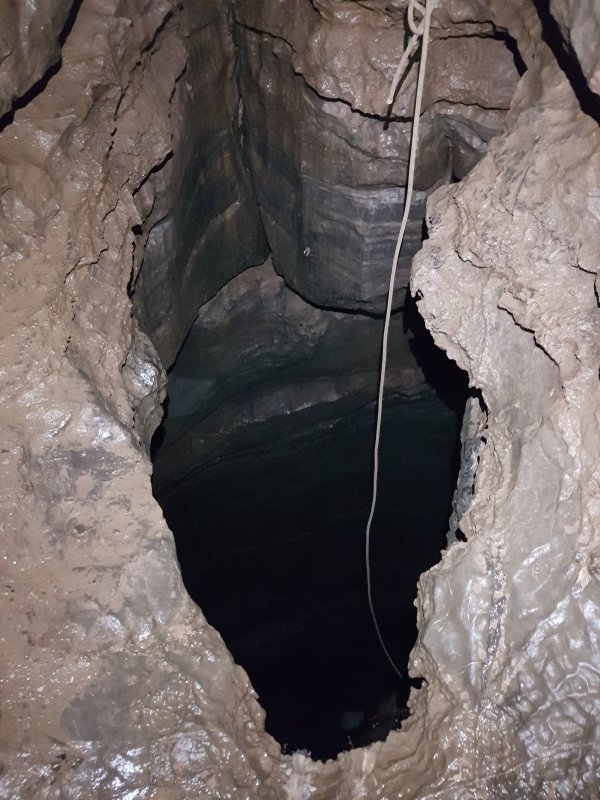 Lip of Fifth Pitch.
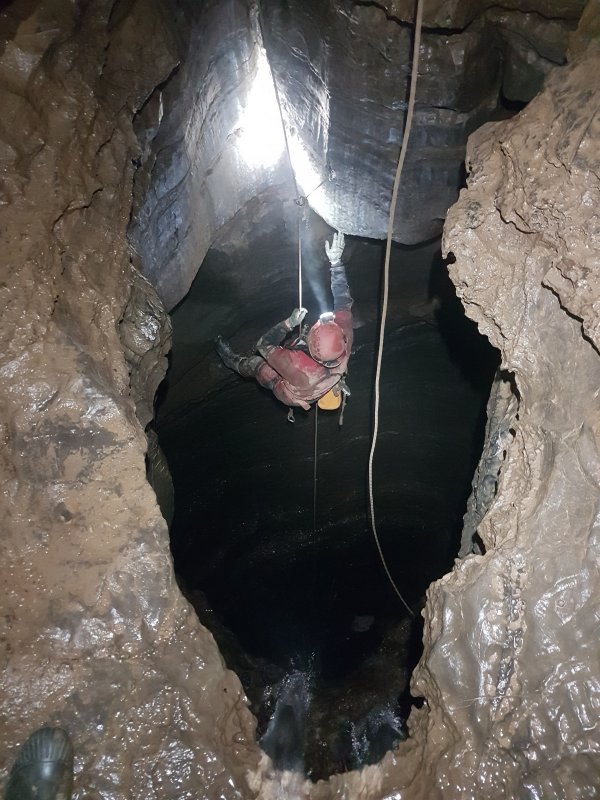 Marking a survey station at the deviation on Fifth Pitch.
Modelling by Gareth, lighting by Tarquin and Gareth
Marking a survey station at the deviation on Fifth Pitch.
Modelling by Gareth, lighting by Tarquin and Gareth Traverse ledge on Fifth Pitch which leads to Poacher's Passage.
Modelling by Gareth, lighting by Tarquin and Gareth
Traverse ledge on Fifth Pitch which leads to Poacher's Passage.
Modelling by Gareth, lighting by Tarquin and Gareth Crawl into Poacher's Passage.
Modelling by Gareth
Crawl into Poacher's Passage.
Modelling by Gareth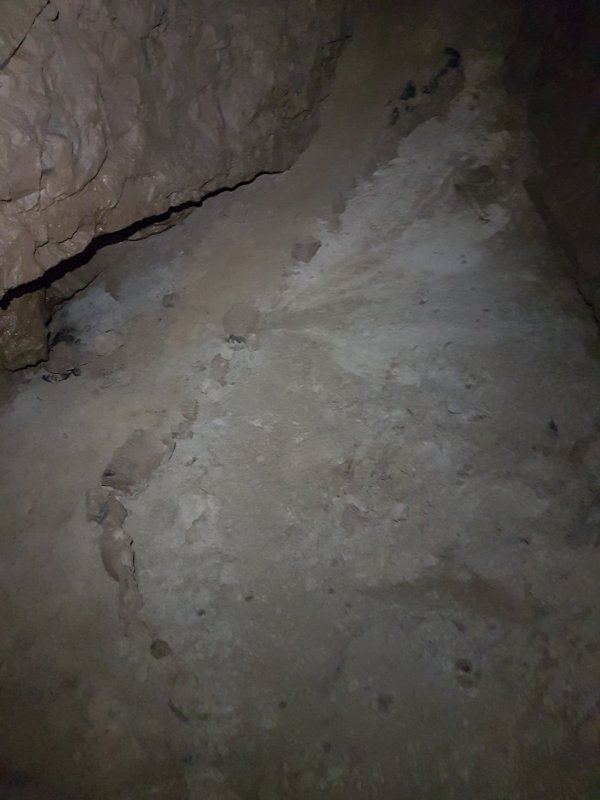 Sand floor in the large chamber in Poacher's Passage. Presumably, there is a sand-filled connection down through the floor to the choked side passage at the base of Fifth Pitch.
 The large section of Poacher's Passage, which ends abruptly at a choke made from large boulders.
Modelling by Gareth, lighting by Tarquin and Gareth
The large section of Poacher's Passage, which ends abruptly at a choke made from large boulders.
Modelling by Gareth, lighting by Tarquin and Gareth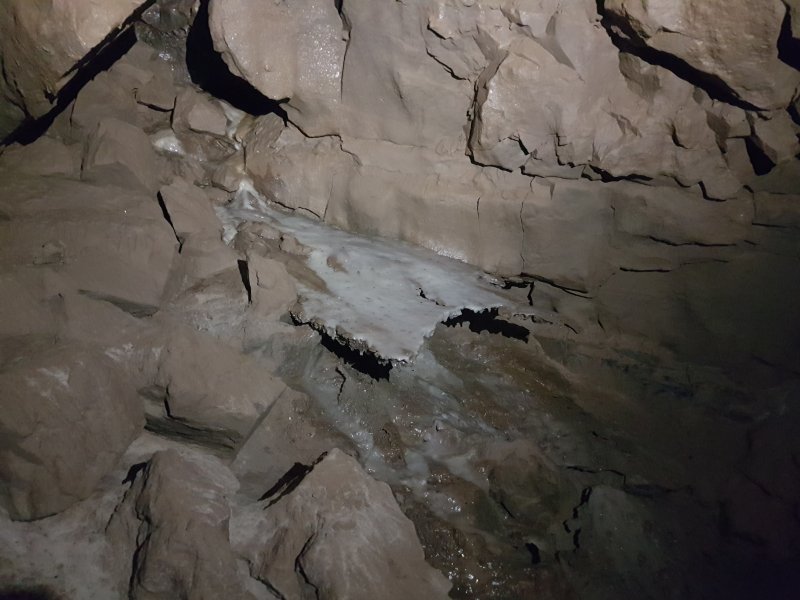 False floor in Poacher's Passage.
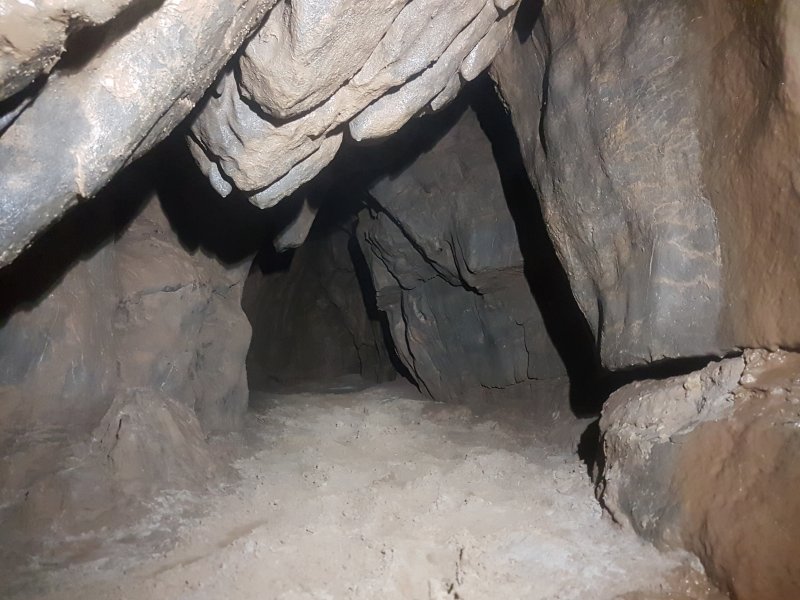 The sandy crawl that skirts the edge of the Poacher's Passage choke, before ending in sand fill.
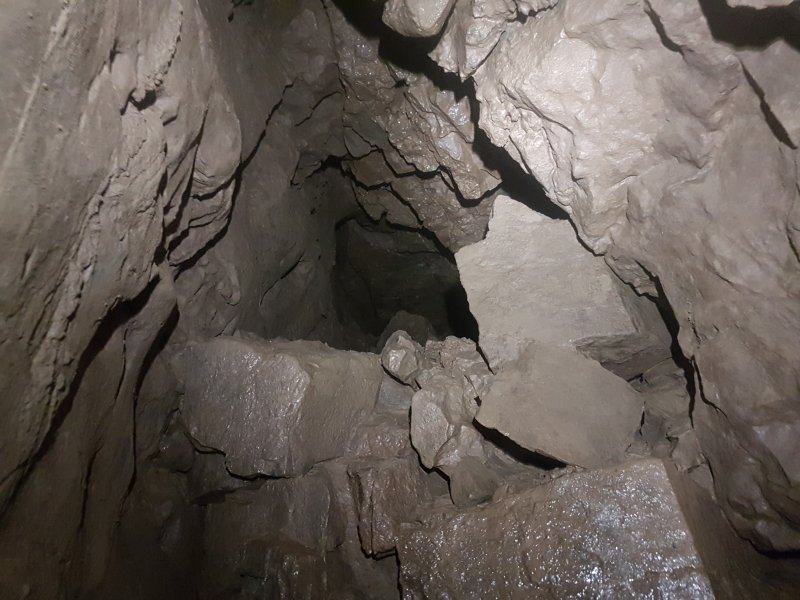 A climb up in the sandy crawl in Poacher's Passage leads up into the heart of the choke, with windows back down into it. The highest climb leads up into this short section of solid passage, ending definitively in the choke. This is directly below the Third Pitch balcony, and feels like it is below the floor of an enormous shaft.
 Water backed up above the rocks at the base of Fifth Pitch during a flood.
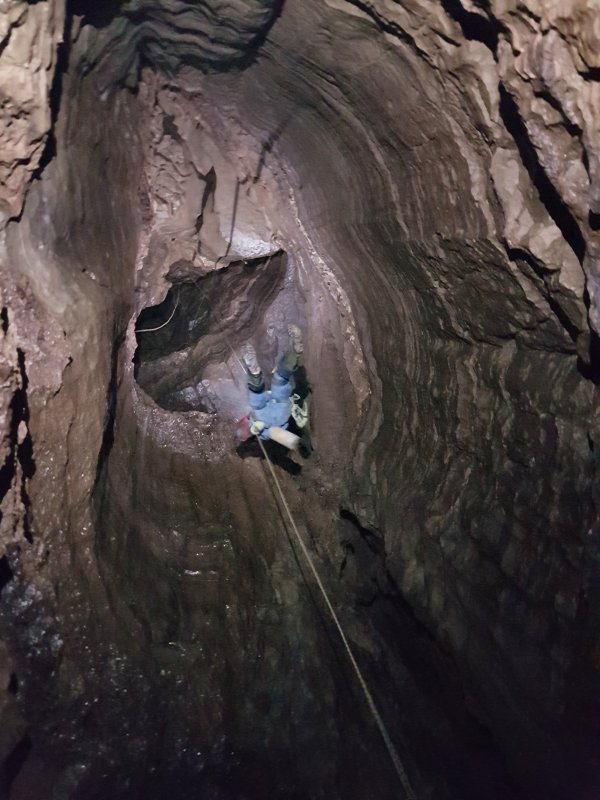 Below the deviation on Fifth Pitch, in dry conditions.
Modelling by Peter, lighting by Tarquin and Peter
Below the deviation on Fifth Pitch, in dry conditions.
Modelling by Peter, lighting by Tarquin and Peter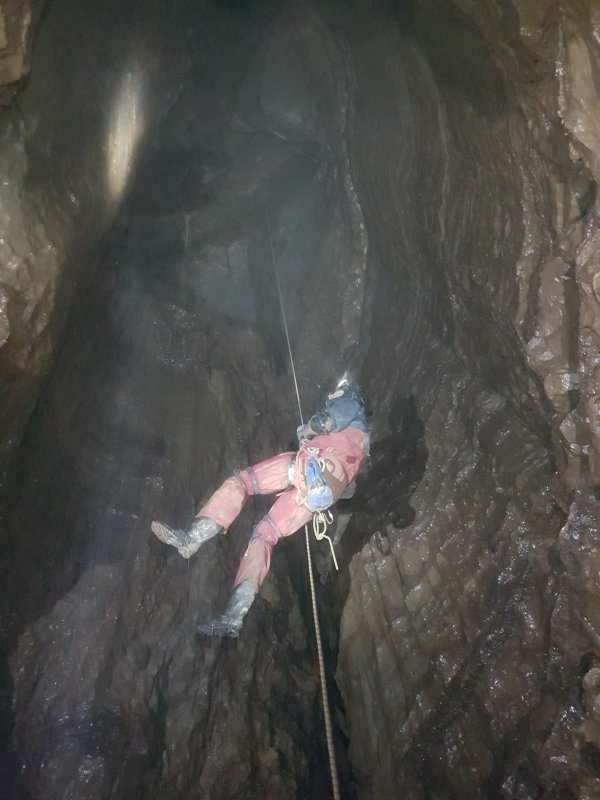 Nearing the base of Fifth Pitch, in wet conditions.
Modelling by George, lighting by Tarquin and George
Nearing the base of Fifth Pitch, in wet conditions.
Modelling by George, lighting by Tarquin and George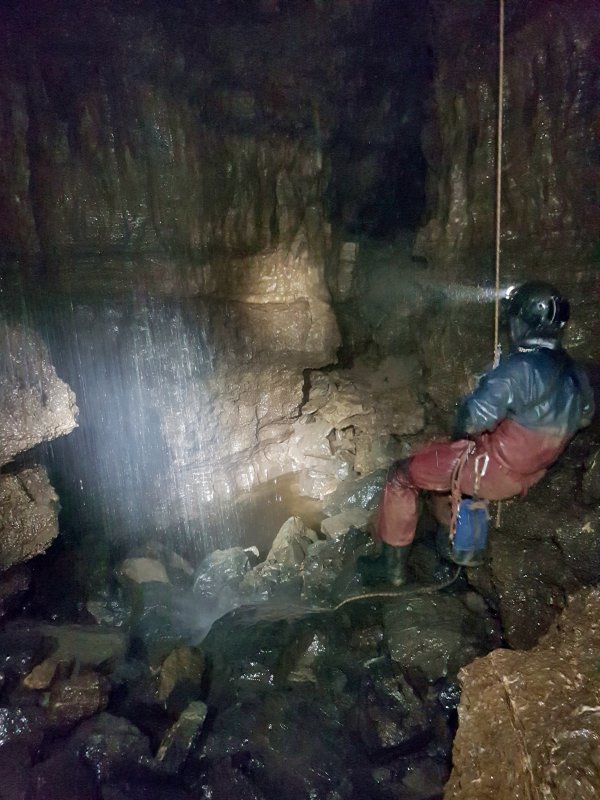 Coming in to land in Fifth Pitch, in wet conditions.
Modelling by George, lighting by Tarquin and George
Coming in to land in Fifth Pitch, in wet conditions.
Modelling by George, lighting by Tarquin and George The chamber at the bottom of Fifth Pitch, in dry conditions.
Modelling by Peter, lighting by Tarquin and Peter
The chamber at the bottom of Fifth Pitch, in dry conditions.
Modelling by Peter, lighting by Tarquin and Peter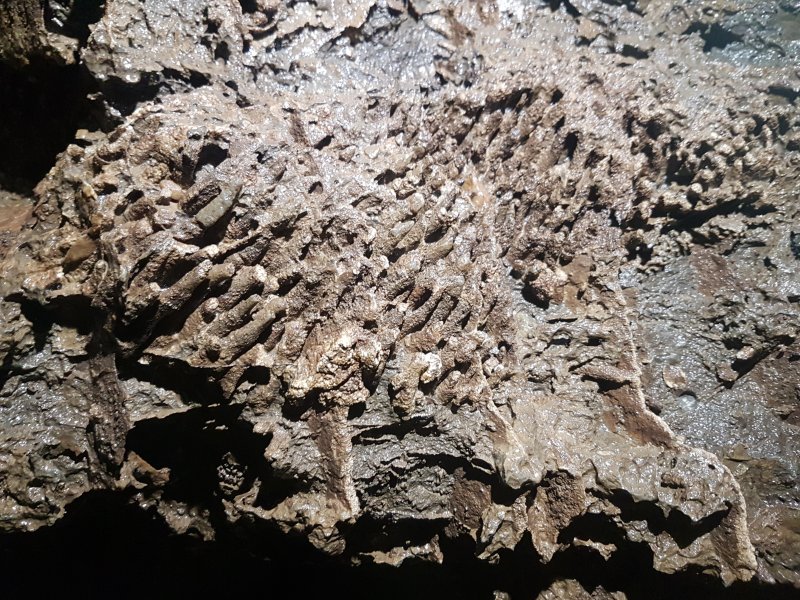 Lithostrotion fossils at the base of Fifth Pitch.
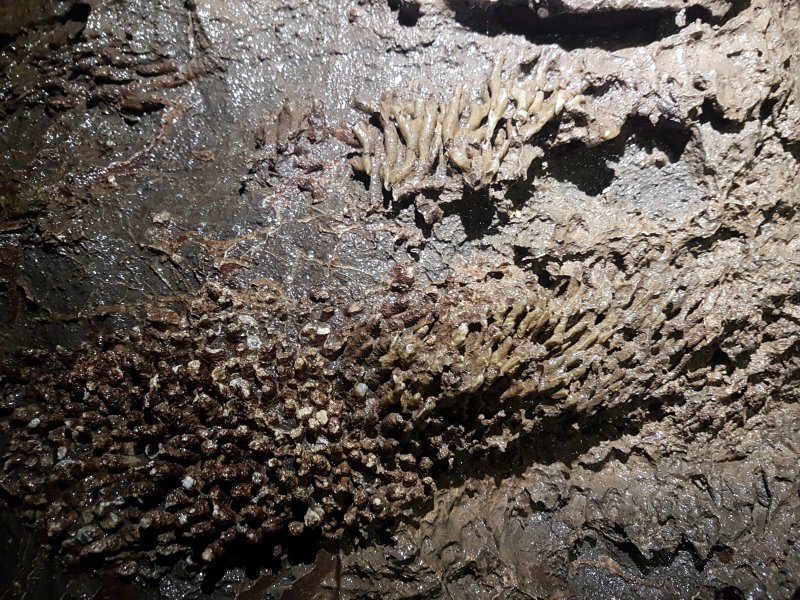 Lithostrotion fossils at the base of Fifth Pitch.
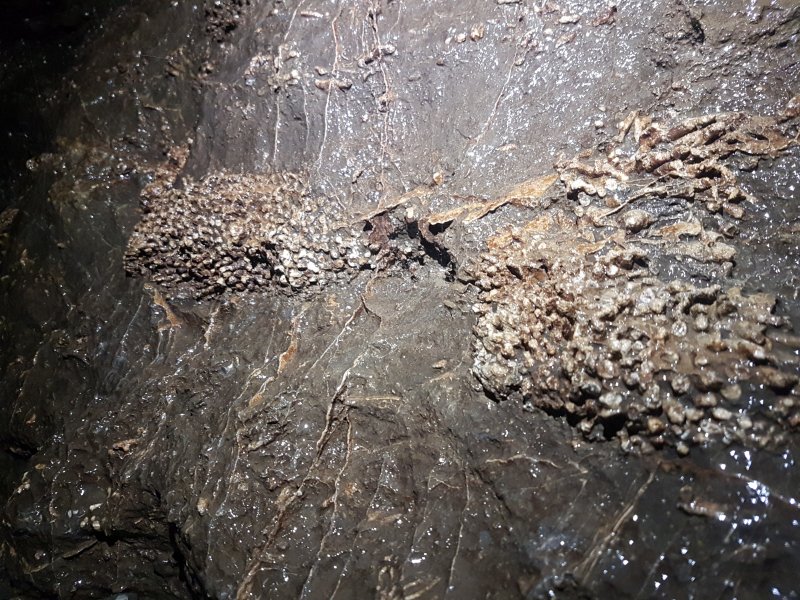 Lithostrotion fossils at the base of Fifth Pitch.
 Lithostrotion fossils at the base of Fifth Pitch.
 Lithostrotion fossils at the base of Fifth Pitch.
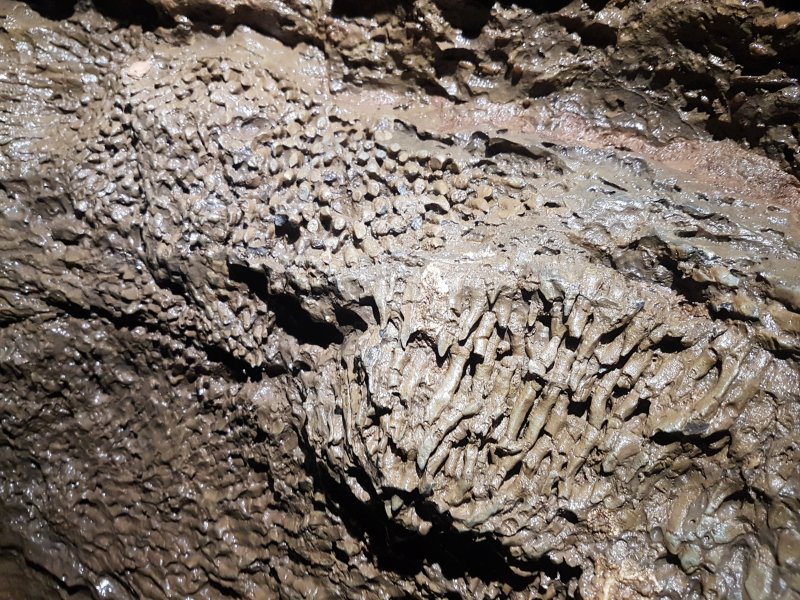 Lithostrotion fossils at the base of Fifth Pitch.
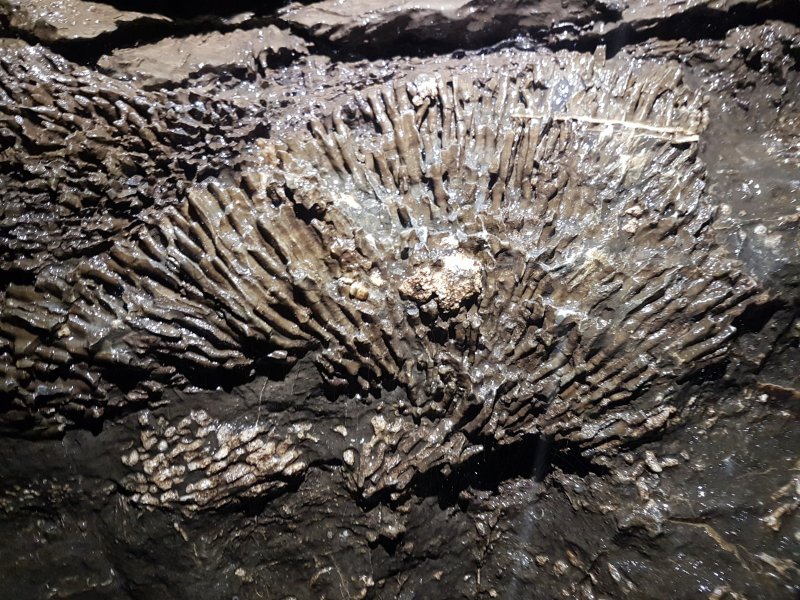 Lithostrotion fossils at the base of Fifth Pitch.
 Lithostrotion fossils at the base of Fifth Pitch, with a hand for scale.
Modelling by Tarquin
Lithostrotion fossils at the base of Fifth Pitch, with a hand for scale.
Modelling by Tarquin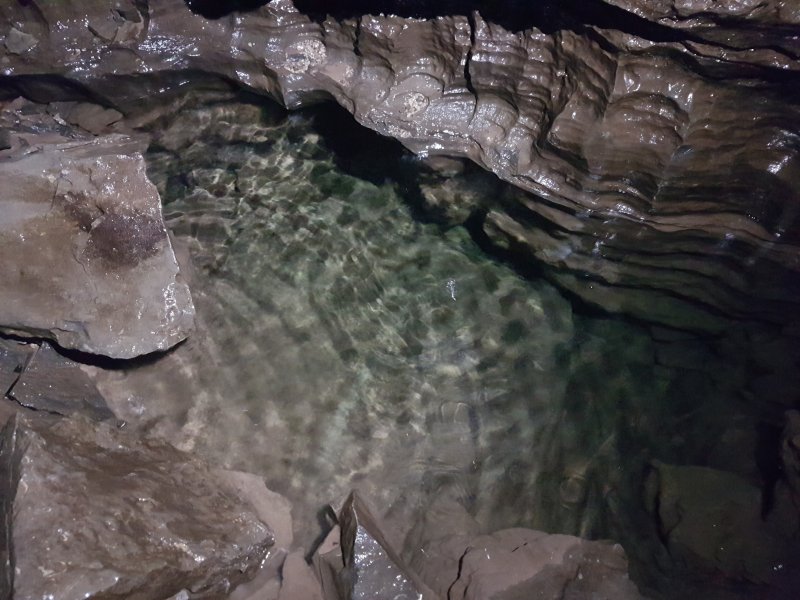 1.4 metre deep pool in the floor of Fifth Pitch. This is hydrologically connected with the nearby sump, but although it must technically be a choked sump in its own right, there is no passage that can be accessed.
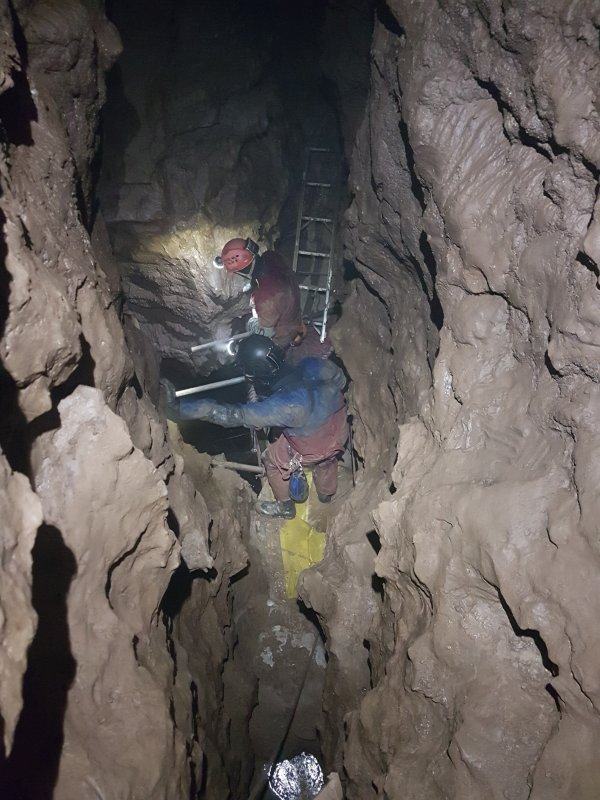 Looking into the terminal sump. The scaffolding platform originally formed a bridge over the sump, but now supports a large amount of digging spoil from the sump itself.
Modelling by George and Gareth, lighting by Tarquin, George and Gareth
Looking into the terminal sump. The scaffolding platform originally formed a bridge over the sump, but now supports a large amount of digging spoil from the sump itself.
Modelling by George and Gareth, lighting by Tarquin, George and Gareth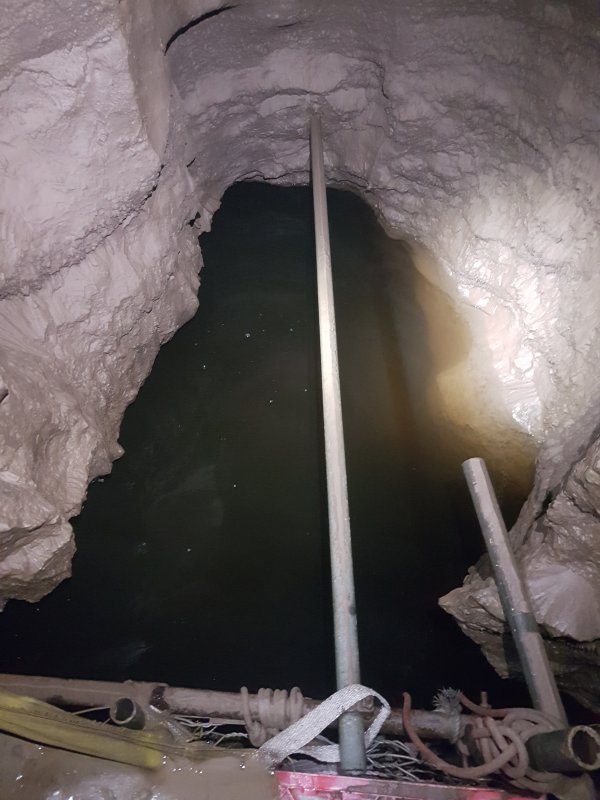 The sump as it normally appears.
Lighting by Tarquin and Gareth
The sump as it normally appears.
Lighting by Tarquin and Gareth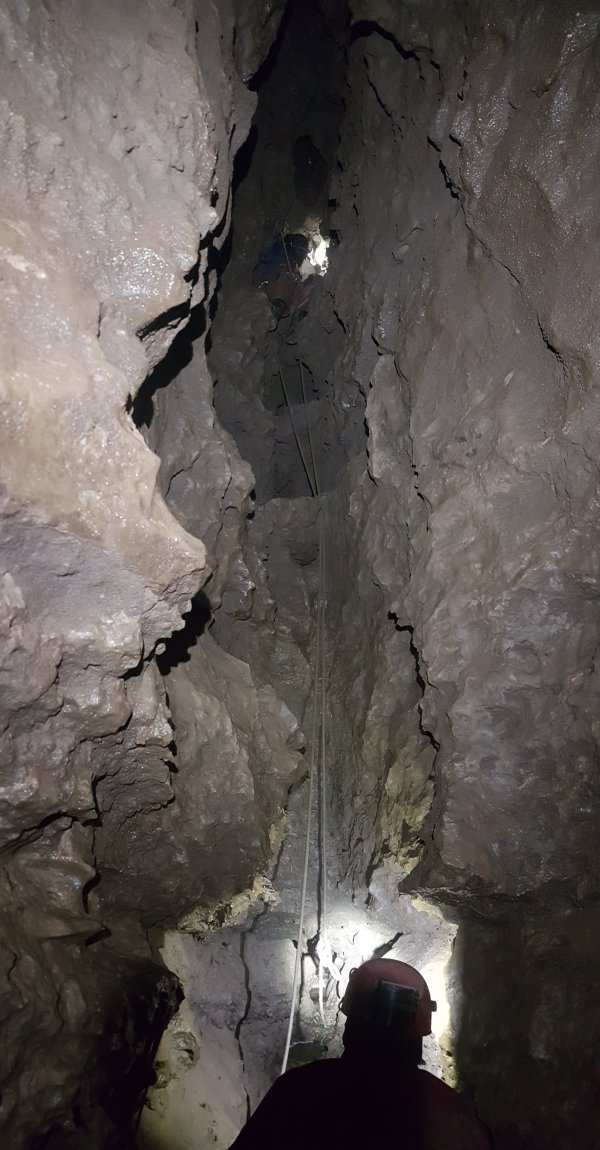 Climb beyond the sump towards Enterprise Aven. The bottom is an inlet, carrying the water from Enterprise Aven.
Modelling by Gareth and George, lighting by Tarquin, Gareth and George
Climb beyond the sump towards Enterprise Aven. The bottom is an inlet, carrying the water from Enterprise Aven.
Modelling by Gareth and George, lighting by Tarquin, Gareth and George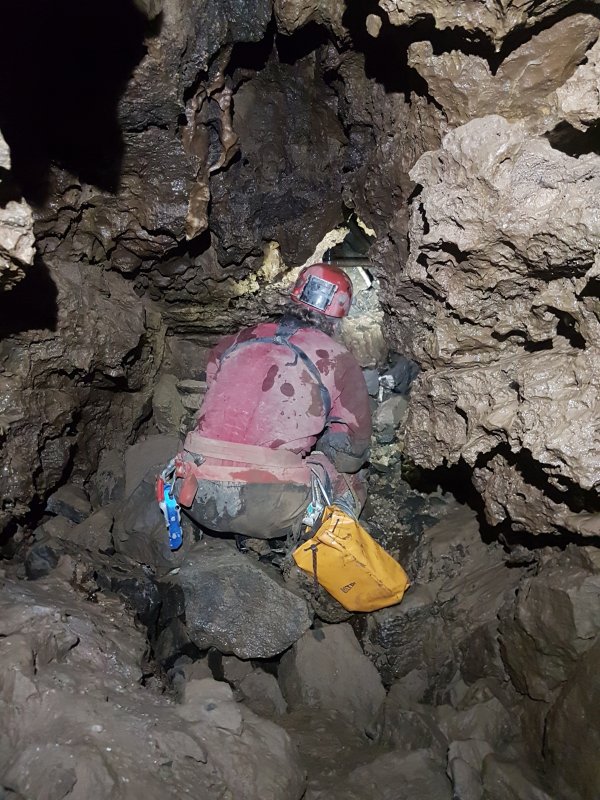 The former end of the passage at the top of the climb, which now leads into Enterprise Aven.
Modelling by Gareth, lighting by Tarquin and Gareth
The former end of the passage at the top of the climb, which now leads into Enterprise Aven.
Modelling by Gareth, lighting by Tarquin and Gareth The dig which broke into Enterprise Aven.
Modelling by Gareth
The dig which broke into Enterprise Aven.
Modelling by Gareth The dig emerges in a chamber at the very bottom of Enterprise Aven. A choke made from enormous boulders lines one wall, which fills the bottom of what would have been the aven. A small, dead-end inlet emerges from under the side wall.
Modelling by Gareth, lighting by Tarquin and Gareth
The dig emerges in a chamber at the very bottom of Enterprise Aven. A choke made from enormous boulders lines one wall, which fills the bottom of what would have been the aven. A small, dead-end inlet emerges from under the side wall.
Modelling by Gareth, lighting by Tarquin and Gareth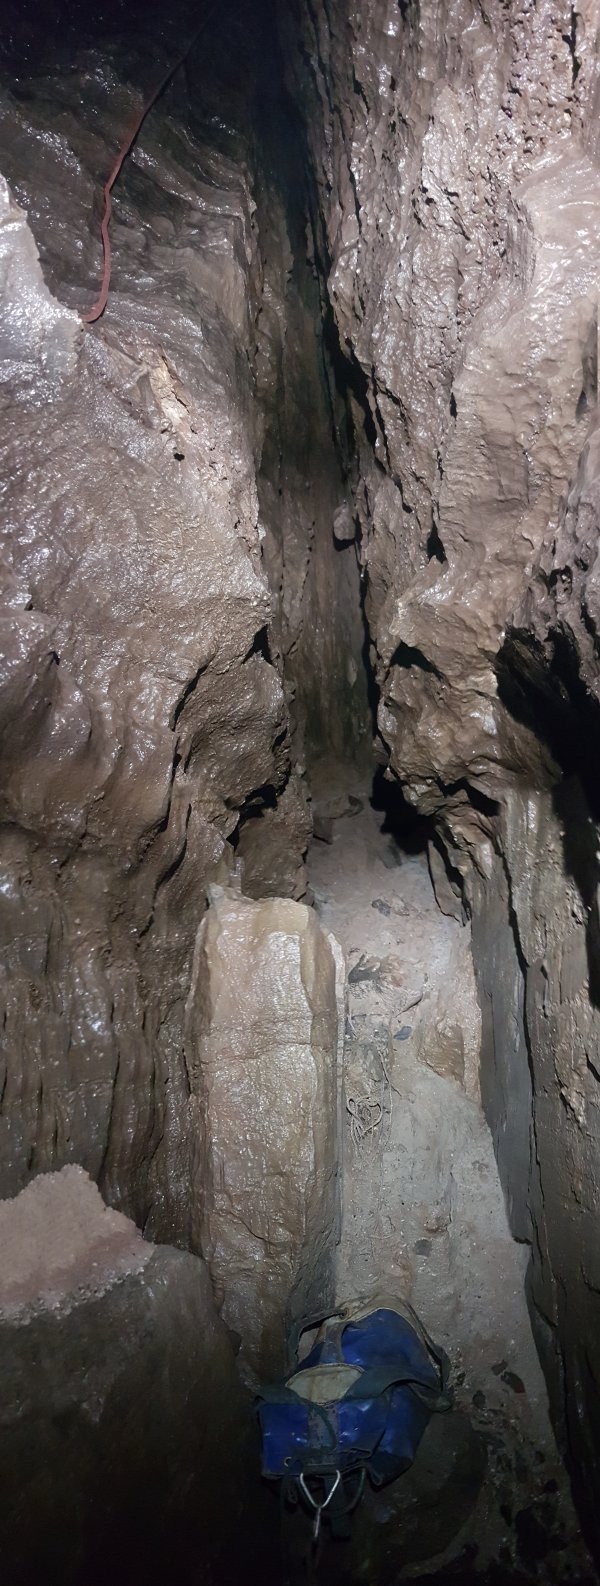 At the bottom of Enterprise Aven, a rift to the west climbs steeply to a conclusive end. This is the bottom of a former route that the water took down Enterprise Aven.
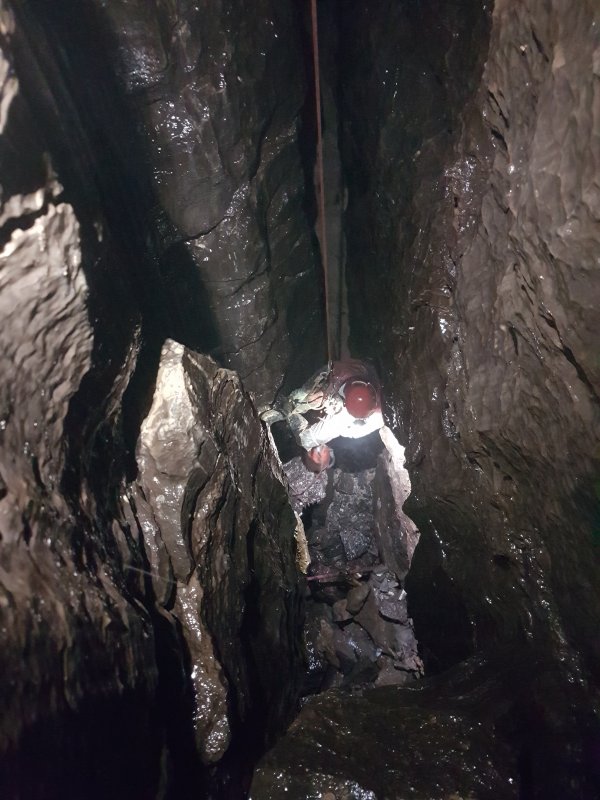 The bottom pitch of Enterprise Aven is only a little over 8 metres high, and was originally free climbed.
Modelling by Gareth, lighting by Tarquin and Gareth
The bottom pitch of Enterprise Aven is only a little over 8 metres high, and was originally free climbed.
Modelling by Gareth, lighting by Tarquin and Gareth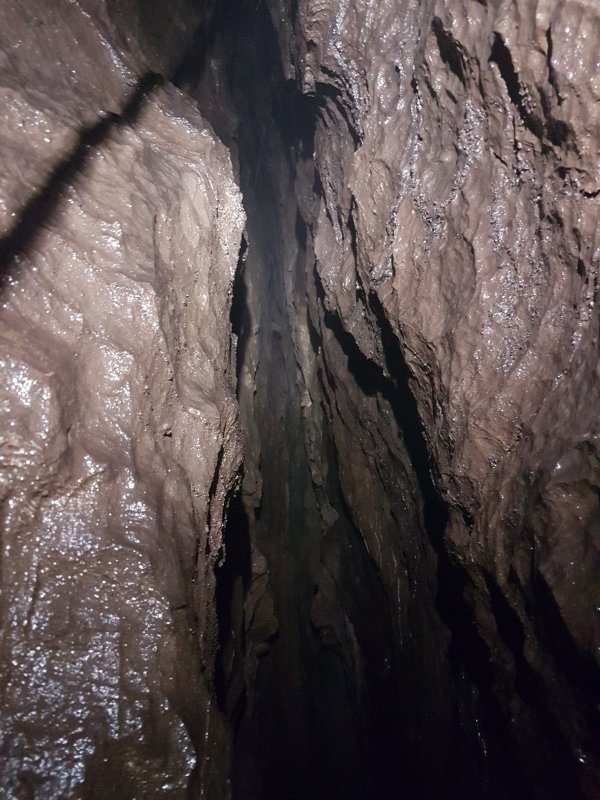 High up in the rift on the west side of the bottom of Enterprise Aven, we could see into a very narrow alcove, and wanted to make sure it closed down properly.
 Gareth bolted over from the top of the bottom pitch of Enterprise Aven, to check the alcove to the west.
Modelling by Gareth, lighting by Tarquin and Gareth
Gareth bolted over from the top of the bottom pitch of Enterprise Aven, to check the alcove to the west.
Modelling by Gareth, lighting by Tarquin and Gareth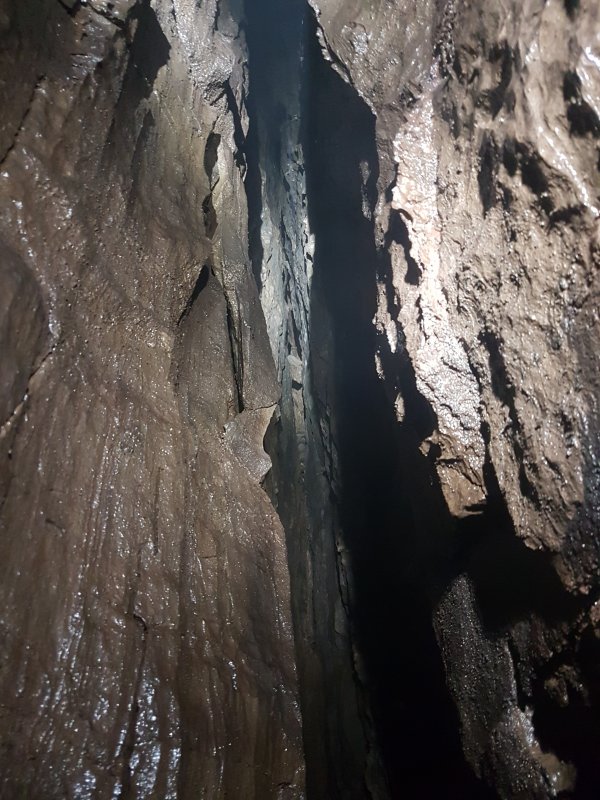 Gareth proved that the alcove to the west of the bottom of Enterprise Aven was only an alcove, going back about 50 cm.
 Kitting up for bolting work at the bottom of the main part of Enterprise Aven.
Modelling by Gareth, lighting by Tarquin and Gareth
Kitting up for bolting work at the bottom of the main part of Enterprise Aven.
Modelling by Gareth, lighting by Tarquin and Gareth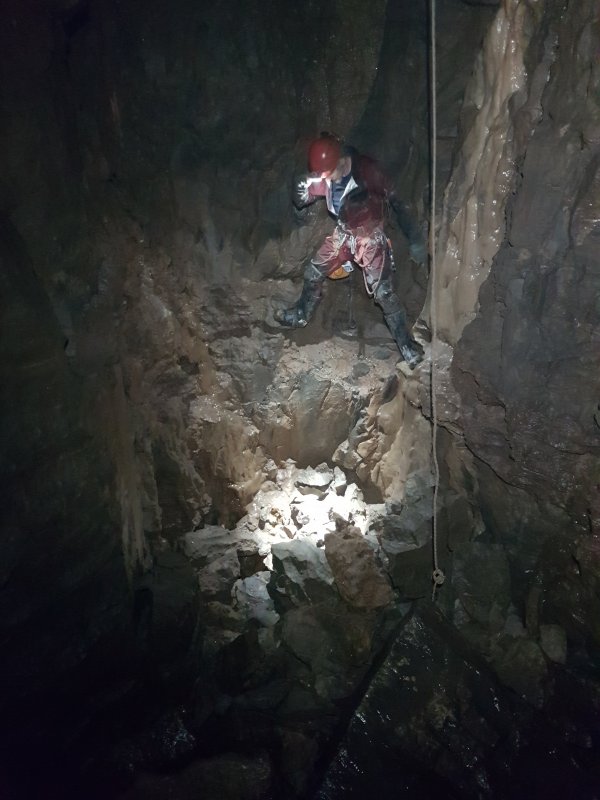 Base of the main part of Enterprise Aven, at the bottom of its second pitch.
Modelling by Gareth, lighting by Tarquin and Gareth
Base of the main part of Enterprise Aven, at the bottom of its second pitch.
Modelling by Gareth, lighting by Tarquin and Gareth The largest part of Enterprise Aven, at the bottom of its second pitch.
Modelling by Gareth, lighting by Tarquin and Gareth
The largest part of Enterprise Aven, at the bottom of its second pitch.
Modelling by Gareth, lighting by Tarquin and Gareth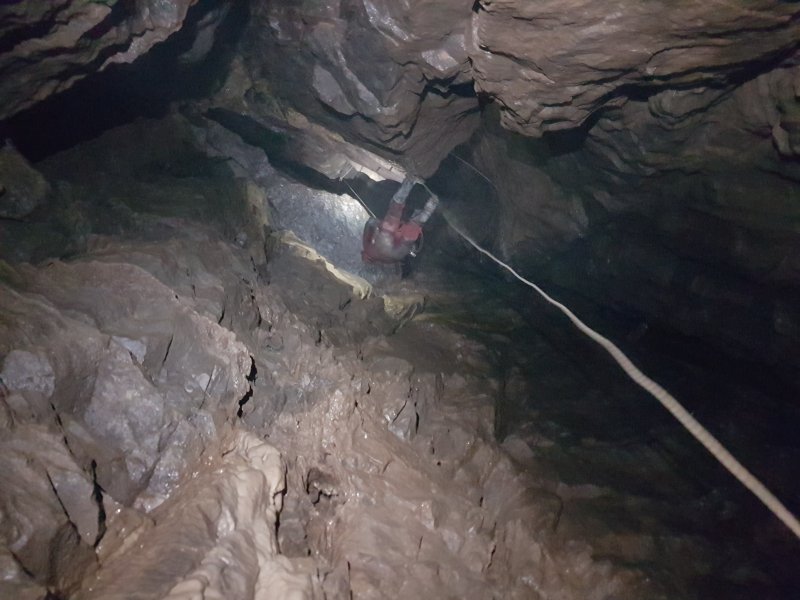 Nearly at the top of the second pitch of Enterprise Aven.
Modelling by Gareth, lighting by Tarquin and Gareth
Nearly at the top of the second pitch of Enterprise Aven.
Modelling by Gareth, lighting by Tarquin and Gareth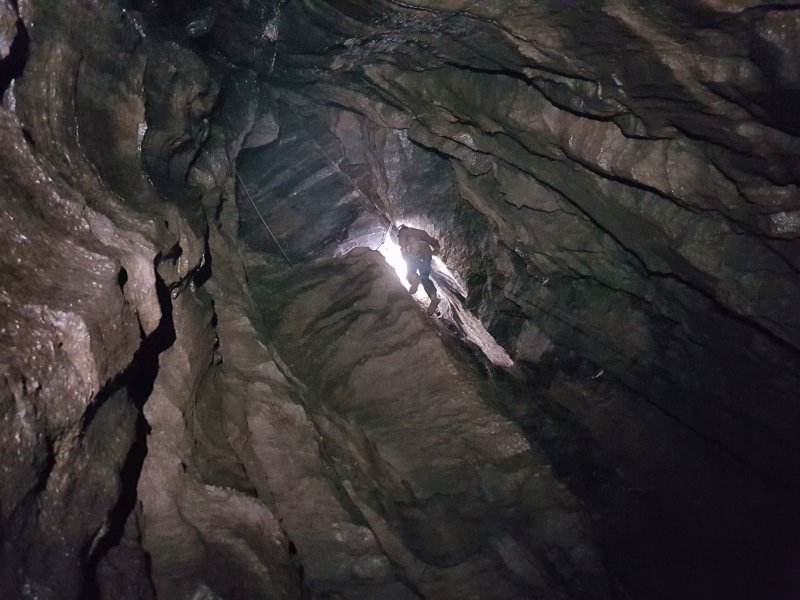 Top of the second pitch of Enterprise Aven.
Modelling by Peter, lighting by Tarquin and Peter
Top of the second pitch of Enterprise Aven.
Modelling by Peter, lighting by Tarquin and Peter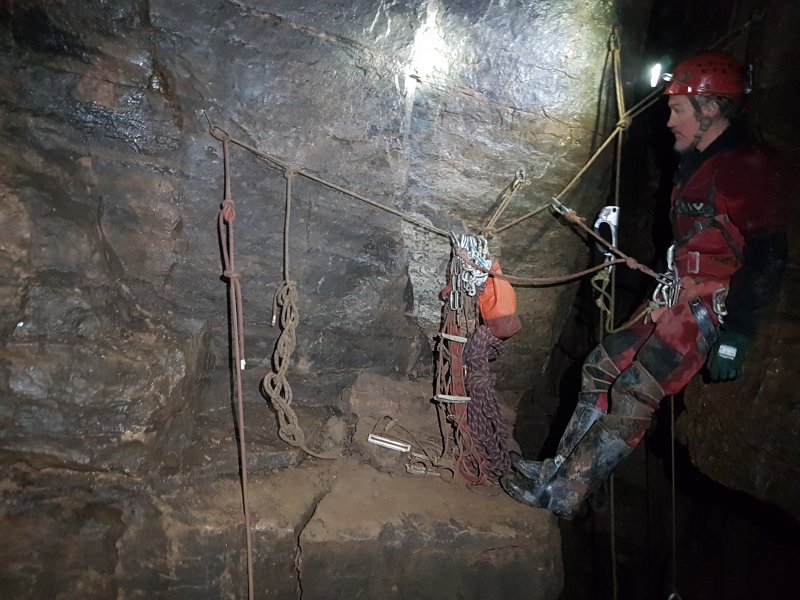 At the Y-hang at the top of the second pitch of Enterprise Aven. The rift behind Gareth is the eastern rift that we would be bolting.
Modelling by Gareth, lighting by Tarquin and Gareth
At the Y-hang at the top of the second pitch of Enterprise Aven. The rift behind Gareth is the eastern rift that we would be bolting.
Modelling by Gareth, lighting by Tarquin and Gareth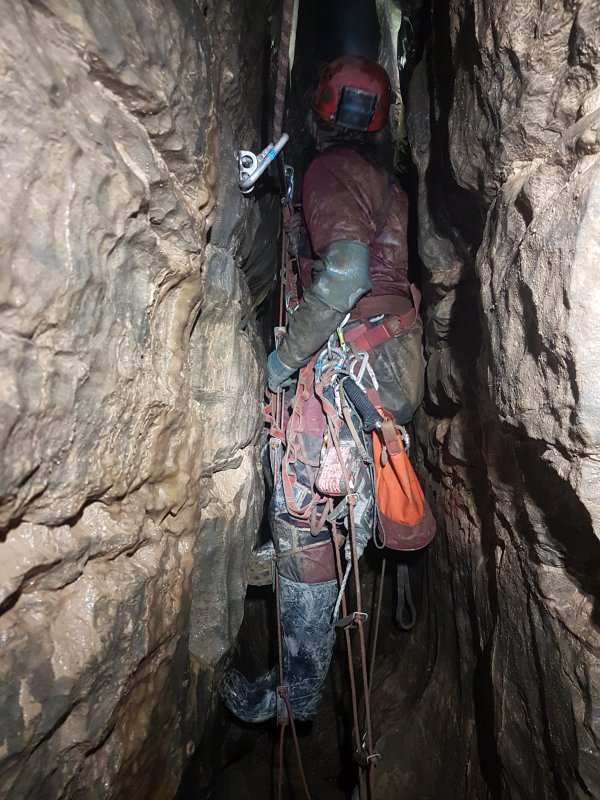 Starting to bolt east from the top of the second pitch of Enterprise Aven.
Modelling by Gareth, lighting by Tarquin and Gareth
Starting to bolt east from the top of the second pitch of Enterprise Aven.
Modelling by Gareth, lighting by Tarquin and Gareth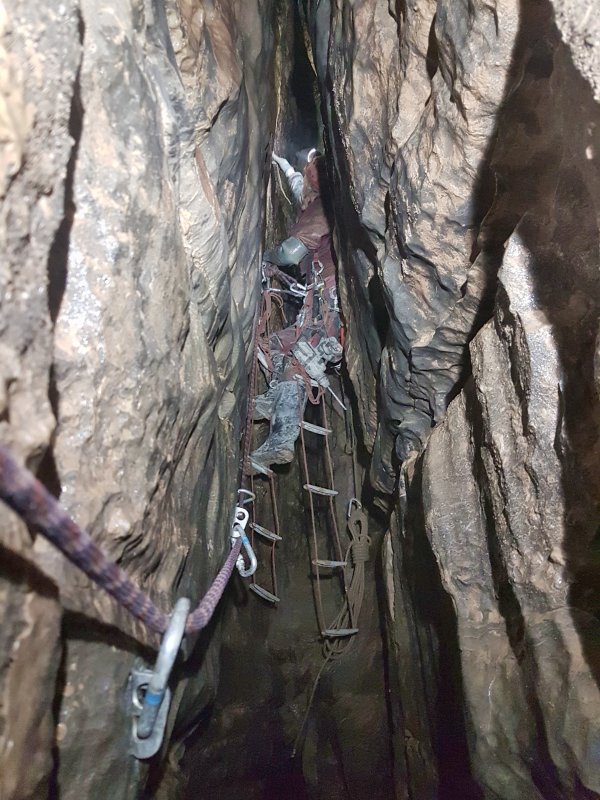 Bolting east from the top of the second pitch of Enterprise Aven.
Modelling by Gareth, lighting by Tarquin and Gareth
Bolting east from the top of the second pitch of Enterprise Aven.
Modelling by Gareth, lighting by Tarquin and Gareth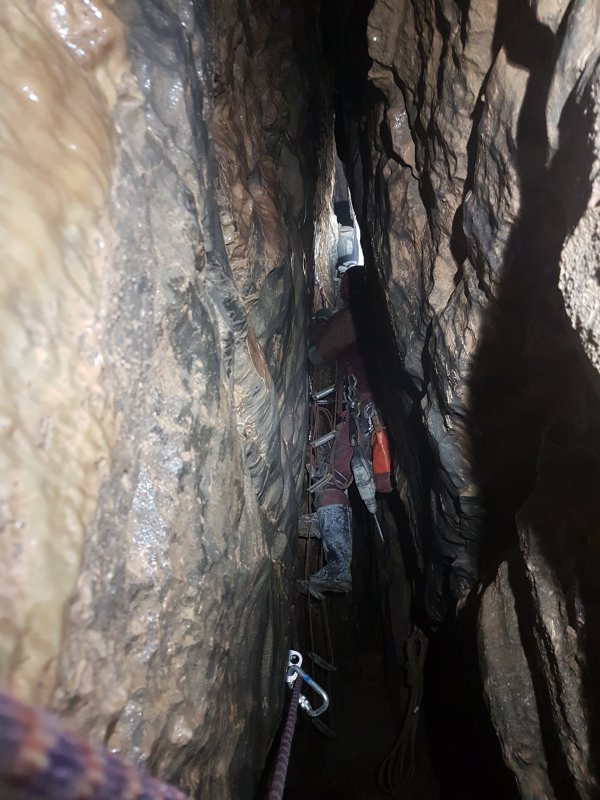 The alcove to the east from the top of the second pitch of Enterprise Aven. It goes back about 3 metres, but pinched out.
Modelling by Gareth, lighting by Tarquin and Gareth
The alcove to the east from the top of the second pitch of Enterprise Aven. It goes back about 3 metres, but pinched out.
Modelling by Gareth, lighting by Tarquin and Gareth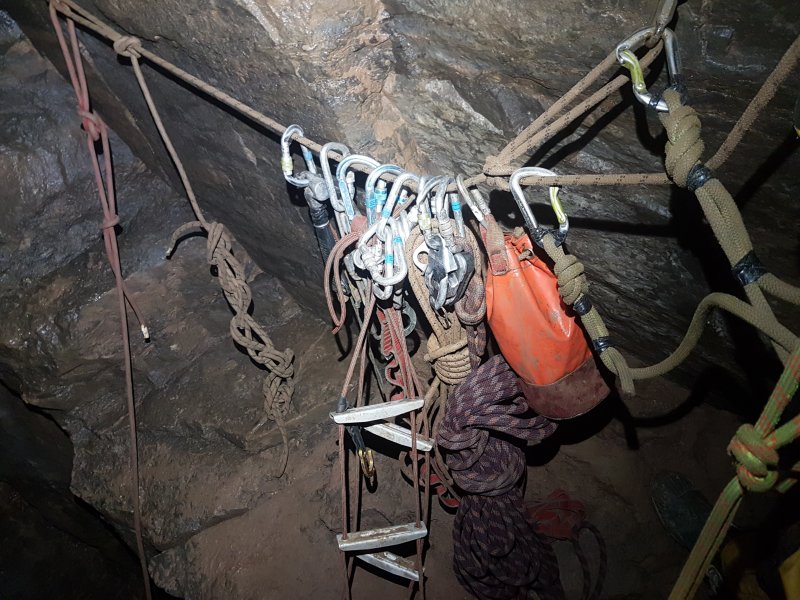 Bolting gear left on the traverse line at the top of the second pitch of Enterprise Aven.
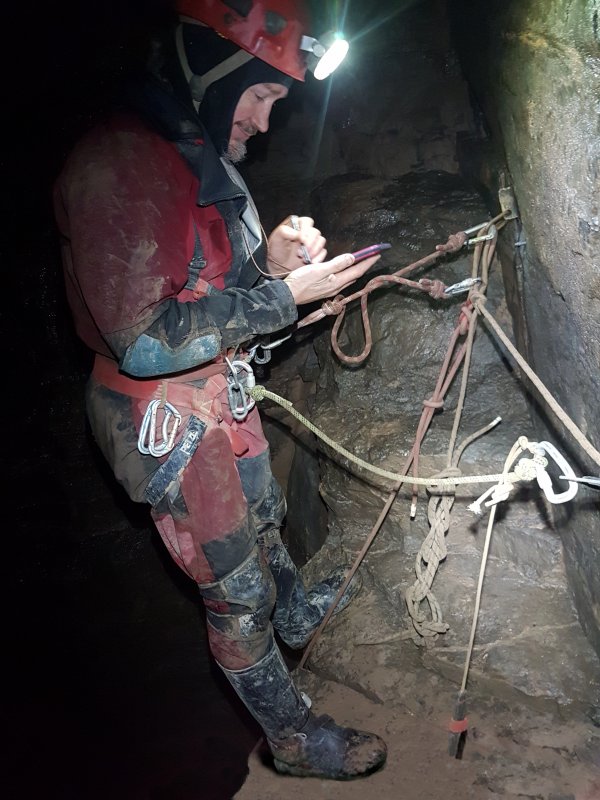 Surveying on the sloping ledge at the top of the second pitch of Enterprise Aven. Many people find this ledge uncomfortable because it slopes enough to make you rely on the rope.
Modelling by Gareth, lighting by Tarquin and Gareth
Surveying on the sloping ledge at the top of the second pitch of Enterprise Aven. Many people find this ledge uncomfortable because it slopes enough to make you rely on the rope.
Modelling by Gareth, lighting by Tarquin and Gareth The third pitch of Enterprise Aven, with its distinctive T-shaped cross section. The second pitch is visible below.
Modelling by Gareth, lighting by Tarquin and Gareth
The third pitch of Enterprise Aven, with its distinctive T-shaped cross section. The second pitch is visible below.
Modelling by Gareth, lighting by Tarquin and Gareth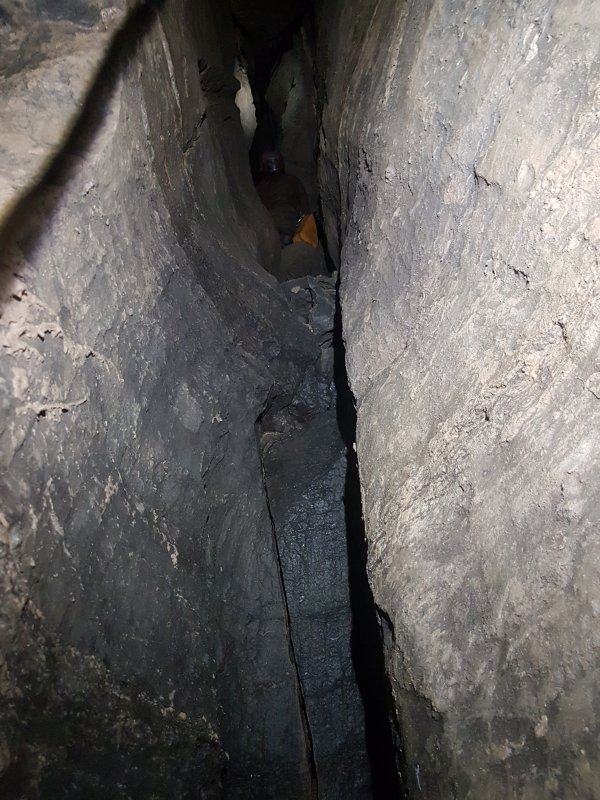 Cleft of the third pitch of Enterprise Aven. This is dry, as the water has skipped sideways into a parallel cleft, and emerges above the bottom pitch instead.
Modelling by Gareth, lighting by Tarquin and Gareth
Cleft of the third pitch of Enterprise Aven. This is dry, as the water has skipped sideways into a parallel cleft, and emerges above the bottom pitch instead.
Modelling by Gareth, lighting by Tarquin and Gareth Approaching the top of the third pitch of Enterprise Aven.
Modelling by Gareth, lighting by Tarquin and Gareth
Approaching the top of the third pitch of Enterprise Aven.
Modelling by Gareth, lighting by Tarquin and Gareth Pitch head of the third pitch of Enterprise Aven. The etrier makes this more comfortable, but is not actually needed.
Modelling by Gareth, lighting by Tarquin and Gareth
Pitch head of the third pitch of Enterprise Aven. The etrier makes this more comfortable, but is not actually needed.
Modelling by Gareth, lighting by Tarquin and Gareth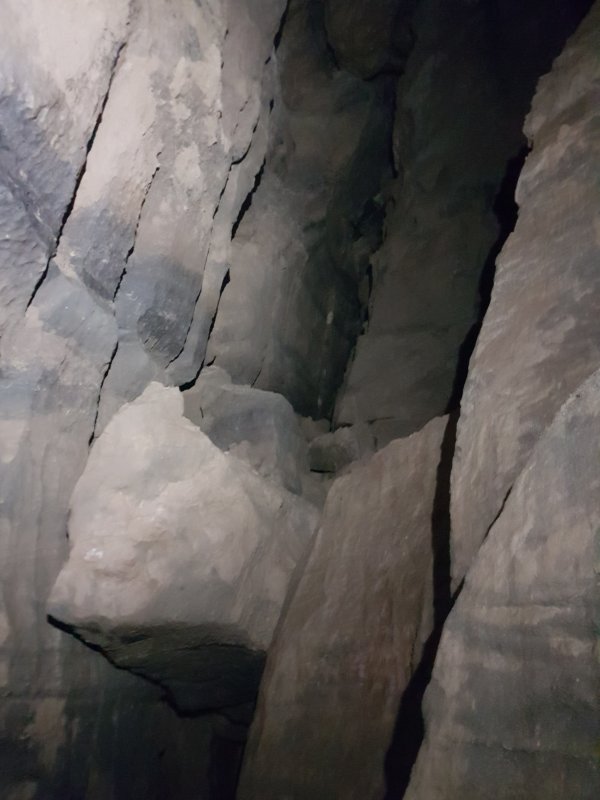 Ledge of jammed boulders to one side of the head of the third pitch of Enterprise Aven. We checked all of the alcoves, and all appeared to close down.
 At the head of the third pitch of Enterprise Aven, a short rift ends at an inlet and small pool. The outflow sinks into the floor.
 The blank wall at the end of the rift at the head of the third pitch of Enterprise Aven.
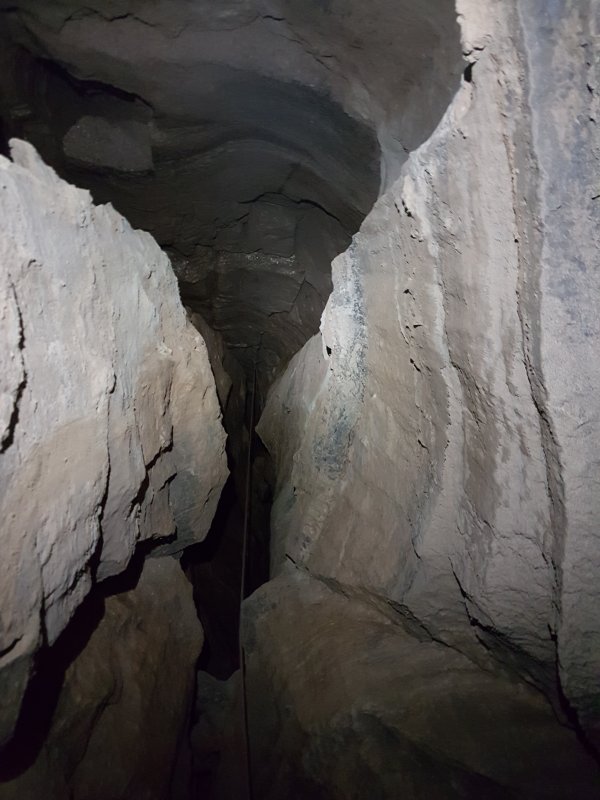 Looking up from the bottom of the fourth pitch of Enterprise Aven.
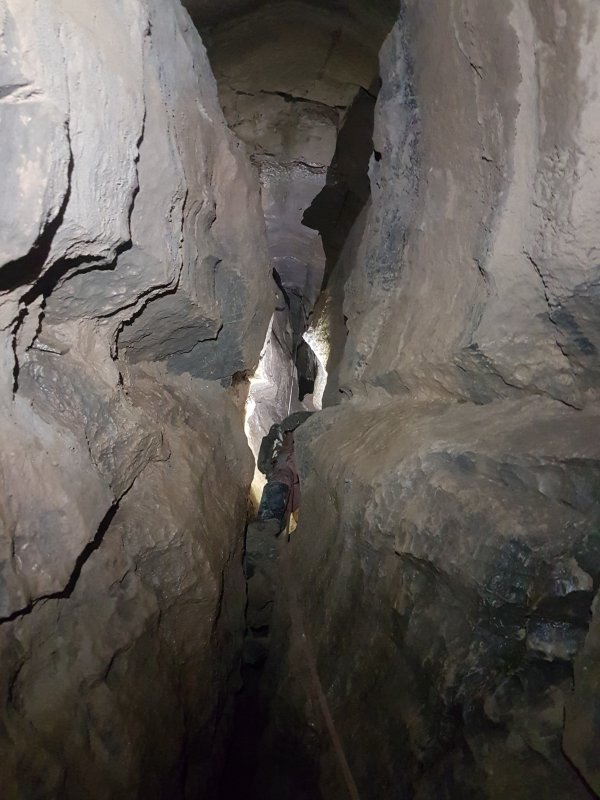 The fourth pitch of Enterprise Aven has a narrow ledge half way up, with its own side passage.
Modelling by Gareth, lighting by Tarquin and Gareth
The fourth pitch of Enterprise Aven has a narrow ledge half way up, with its own side passage.
Modelling by Gareth, lighting by Tarquin and Gareth Making our way along the ledge passage, half way up the fourth pitch of Enterprise Aven.
Modelling by Gareth, lighting by Tarquin and Gareth
Making our way along the ledge passage, half way up the fourth pitch of Enterprise Aven.
Modelling by Gareth, lighting by Tarquin and Gareth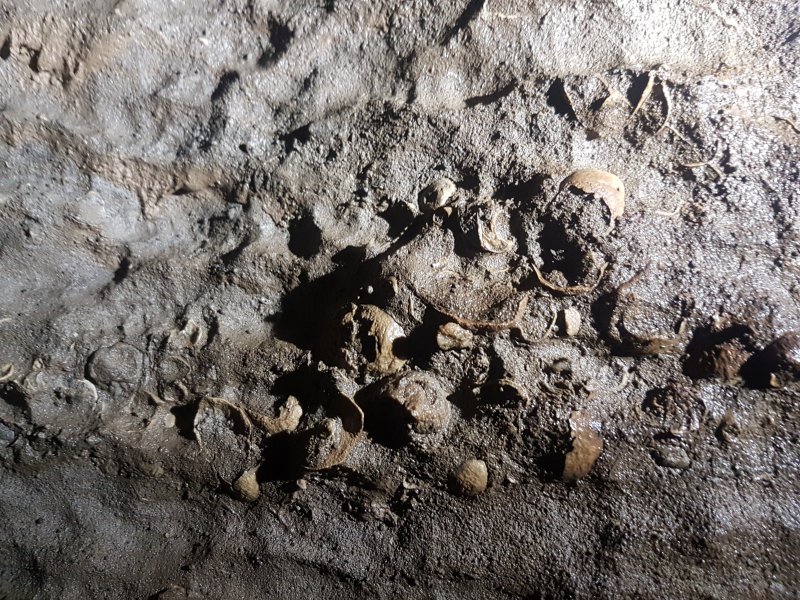 Fossil shells in the ledge passage, half way up the fourth pitch of Enterprise Aven.
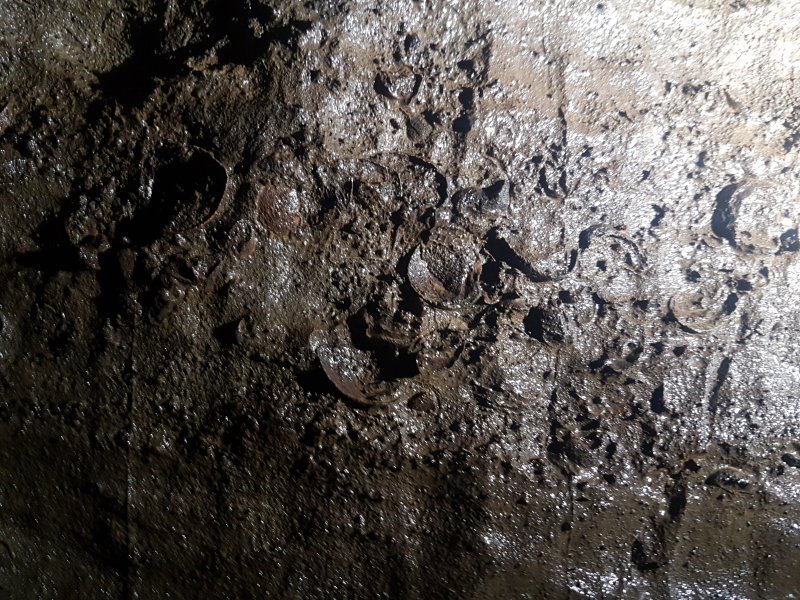 Fossil shells in the ledge passage, half way up the fourth pitch of Enterprise Aven.
 Pool at the end of the ledge passage, half way up the fourth pitch of Enterprise Aven. This is supplied from a small aven above.
Modelling by Portions of Tarquin
Pool at the end of the ledge passage, half way up the fourth pitch of Enterprise Aven. This is supplied from a small aven above.
Modelling by Portions of Tarquin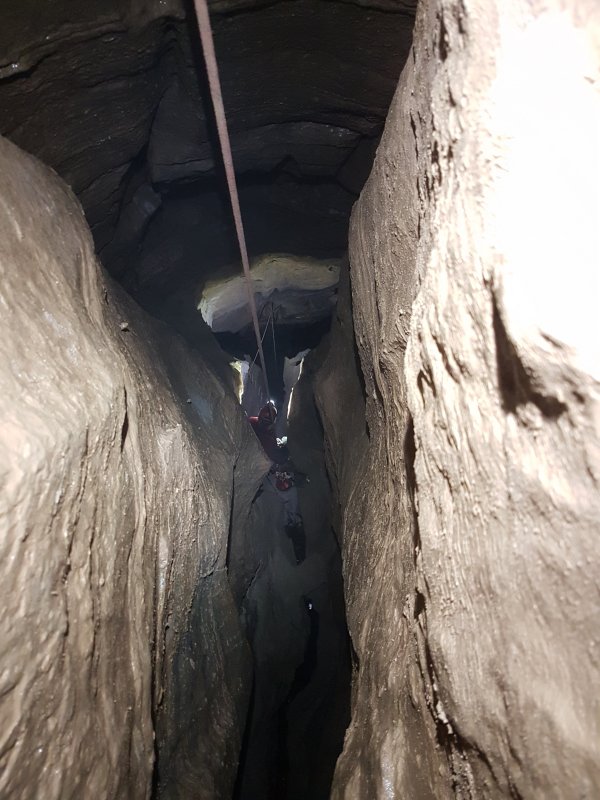 Looking down from the top of the fourth pitch of Enterprise Aven.
Modelling by Gareth, lighting by Tarquin and Gareth
Looking down from the top of the fourth pitch of Enterprise Aven.
Modelling by Gareth, lighting by Tarquin and Gareth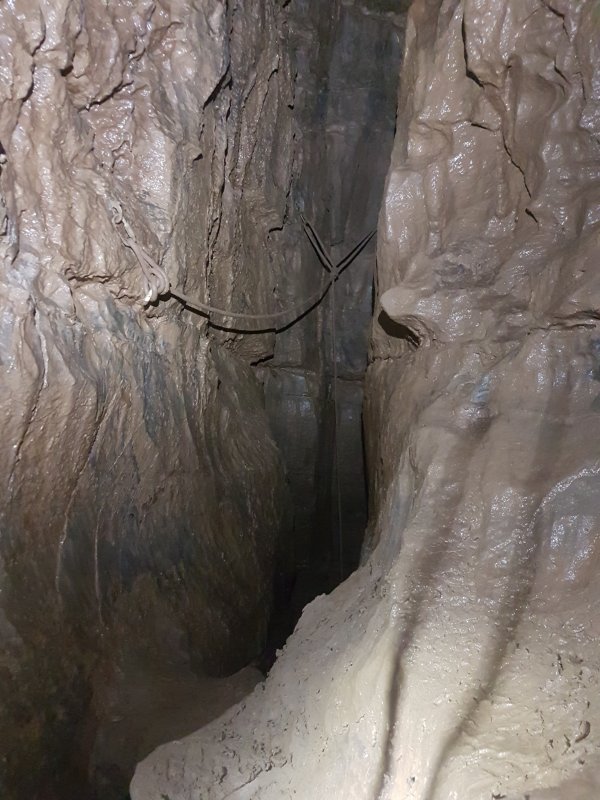 Head of the fourth pitch of Enterprise Aven.
Lighting by Tarquin and Gareth
Head of the fourth pitch of Enterprise Aven.
Lighting by Tarquin and Gareth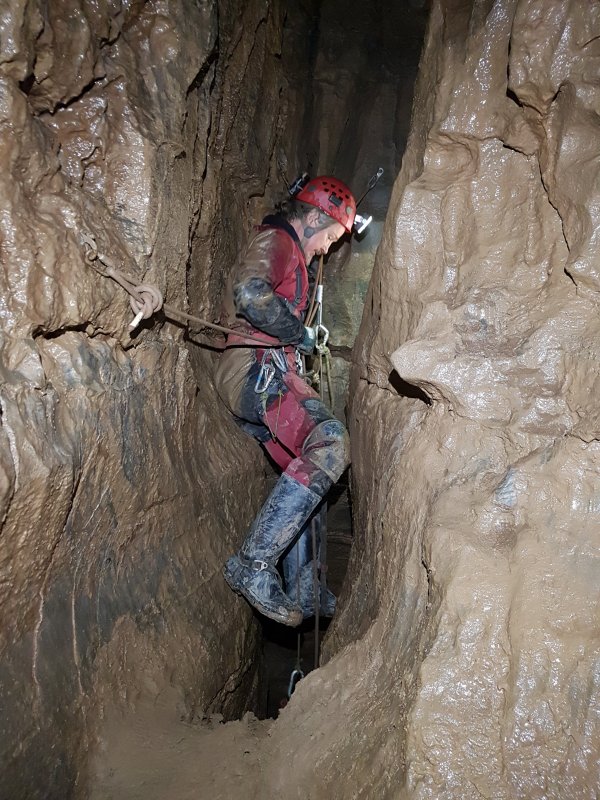 Behind the ropes at the head of the fourth pitch of Enterprise Aven. This may look like a mistake, but it was intentional, to make it possible to survey the rifts to the side of the pitch head.
Modelling by Gareth, lighting by Tarquin and Gareth
Behind the ropes at the head of the fourth pitch of Enterprise Aven. This may look like a mistake, but it was intentional, to make it possible to survey the rifts to the side of the pitch head.
Modelling by Gareth, lighting by Tarquin and Gareth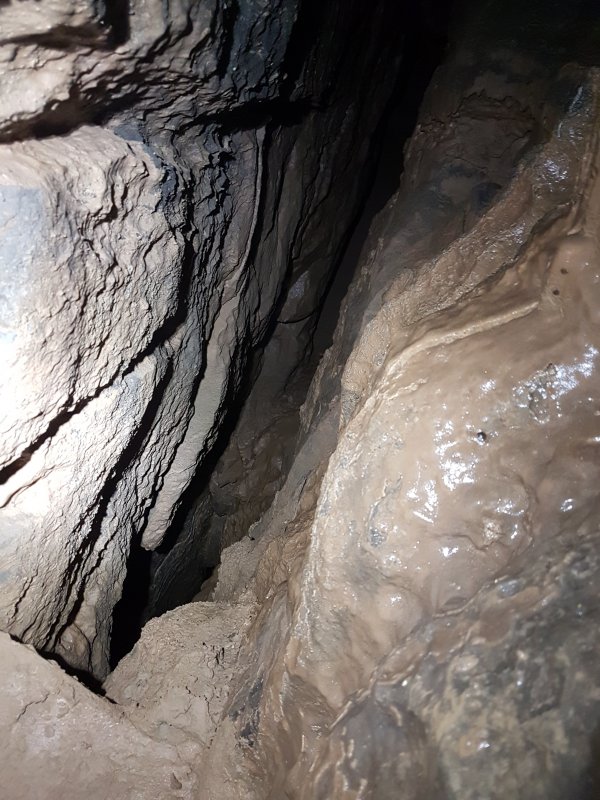 The rift to the side at the top of the fourth pitch of Enterprise Aven drops down all the way to the bottom of its second pitch.
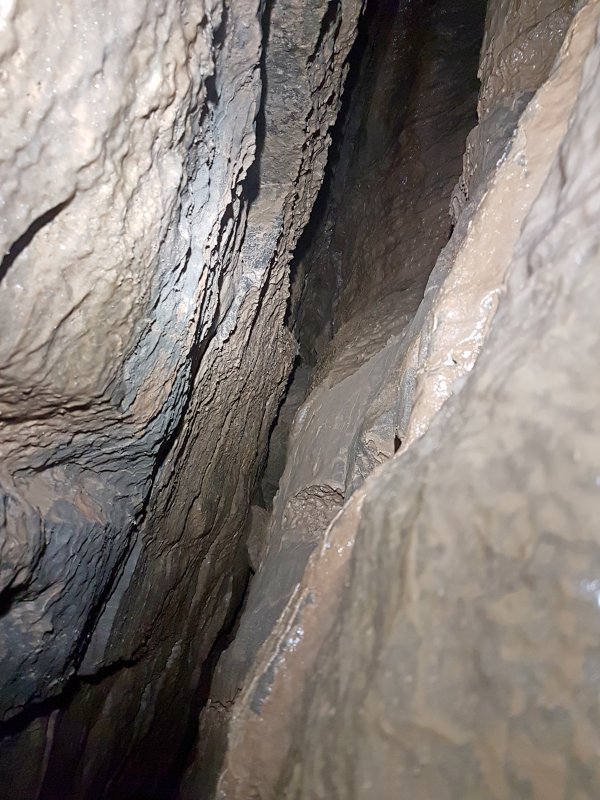 The rift to the side at the top of the fourth pitch of Enterprise Aven ends fairly conclusively.
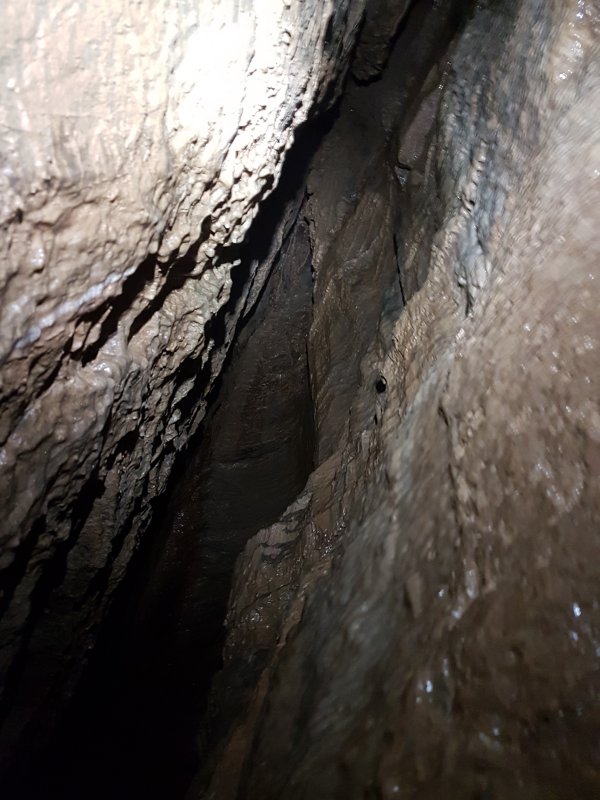 The rift to the side at the top of the fourth pitch of Enterprise Aven continues upwards, and appears to have a small tube connecting with the top of its fifth pitch.
 The jammed rocks 5 metres up in the ceiling of the fourth pitch of Enterprise Aven, which form the floor of the top of its fifth pitch.
 Gaps between the rocks in the ceiling of the fourth pitch of Enterprise Aven, which the fifth pitch passes through.
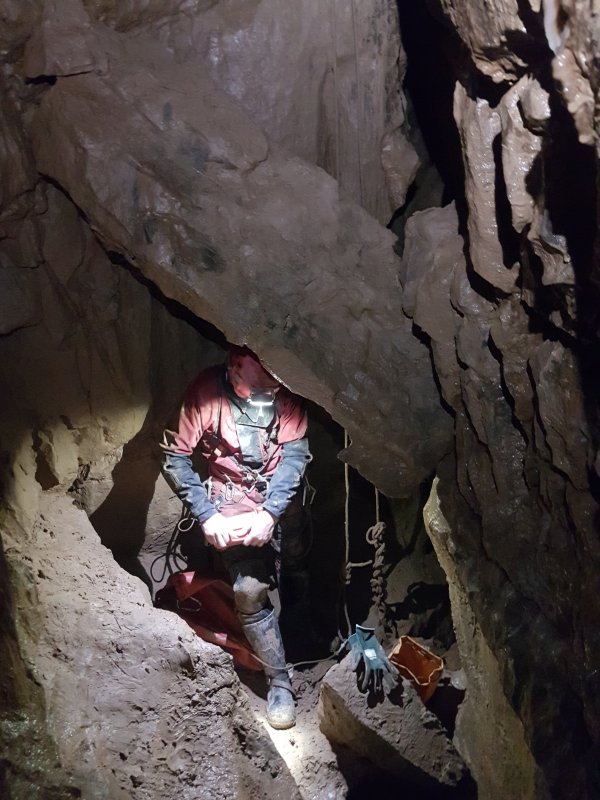 Leaning boulder wedged in the passage at the top of the fourth pitch of Enterprise Aven. Its fifth pitch starts just on the other side of it.
Modelling by Gareth, lighting by Tarquin and Gareth
Leaning boulder wedged in the passage at the top of the fourth pitch of Enterprise Aven. Its fifth pitch starts just on the other side of it.
Modelling by Gareth, lighting by Tarquin and Gareth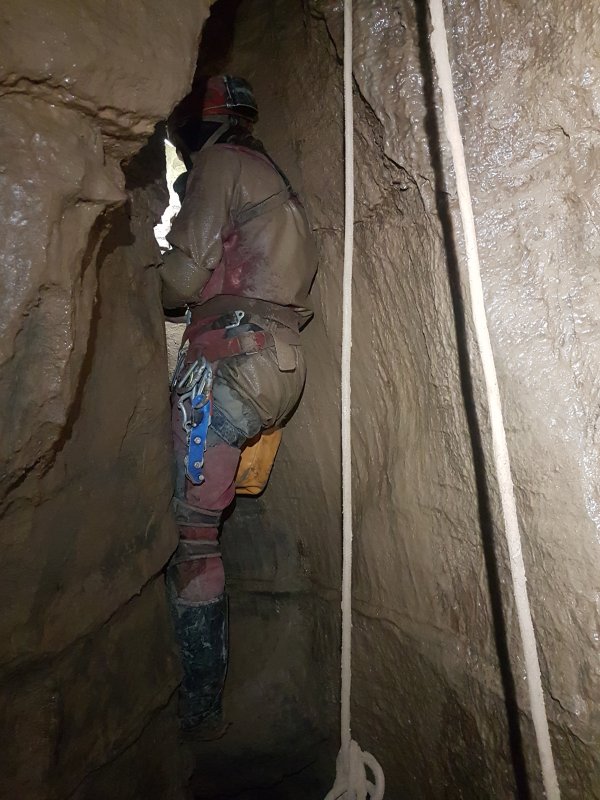 The fourth pitch of Enterprise Aven is much like the ones before it, heading a short distance along the same rift. However, it is more substantial, and forms a good place to get off the rope. It continues beyond the base of its fifth pitch.
Modelling by Gareth, lighting by Tarquin and Gareth
The fourth pitch of Enterprise Aven is much like the ones before it, heading a short distance along the same rift. However, it is more substantial, and forms a good place to get off the rope. It continues beyond the base of its fifth pitch.
Modelling by Gareth, lighting by Tarquin and Gareth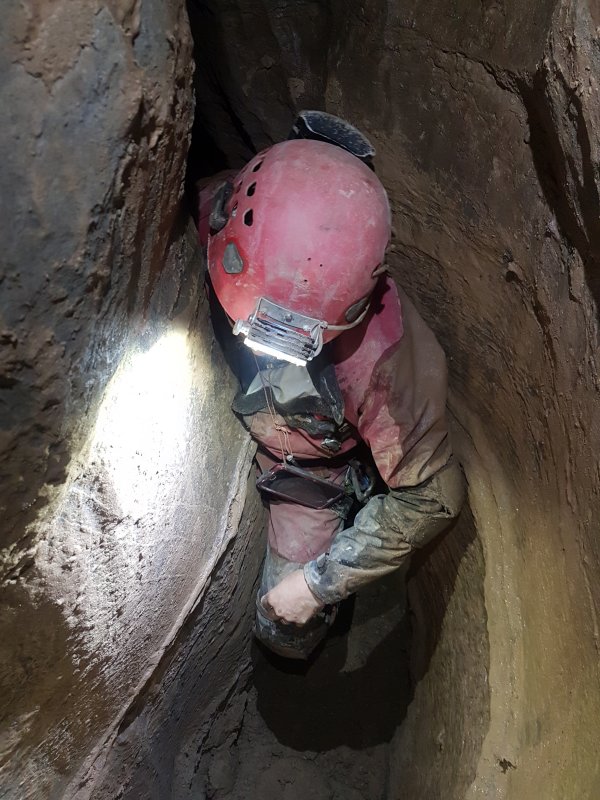 The passage at the top of the fourth pitch of Enterprise Aven passes through a squeeze, where progress is easier near floor level.
Modelling by Gareth, lighting by Tarquin and Gareth
The passage at the top of the fourth pitch of Enterprise Aven passes through a squeeze, where progress is easier near floor level.
Modelling by Gareth, lighting by Tarquin and Gareth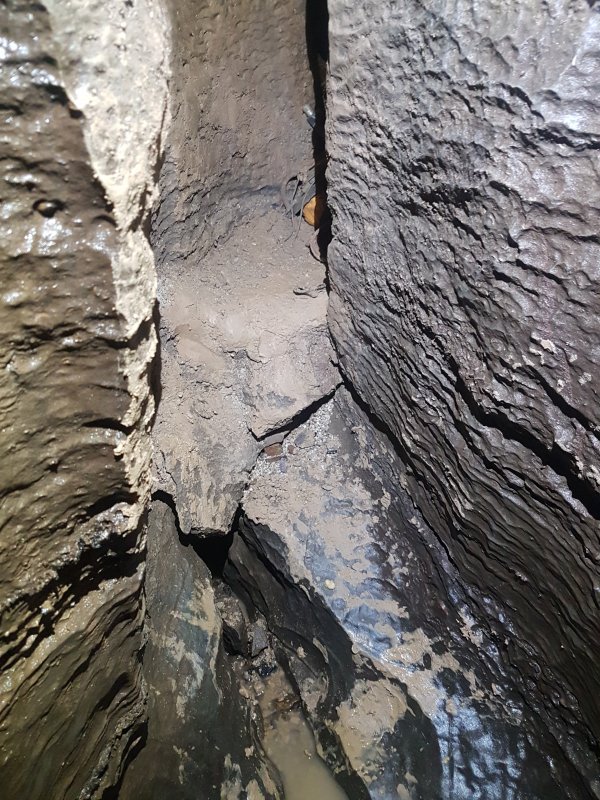 The squeeze in the passage at the top of the fourth pitch of Enterprise Aven gains a rift where the small stream flows out. It follows a trench in the floor above for a short distance, then falls through the floor into the passage below.
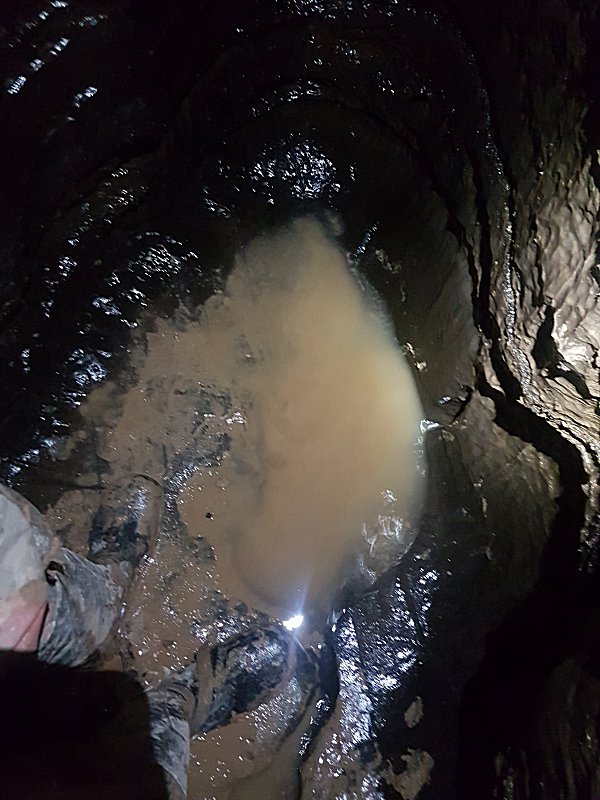 Pool at the end of the passage at the top of the fourth pitch of Enterprise Aven.
Camera, setup, modelling and lighting by Gareth
Pool at the end of the passage at the top of the fourth pitch of Enterprise Aven.
Camera, setup, modelling and lighting by Gareth Wall above the pool at the end of the passage at the top of the fourth pitch of Enterprise Aven.
 Inlet above the pool at the end of the passage at the top of the fourth pitch of Enterprise Aven.
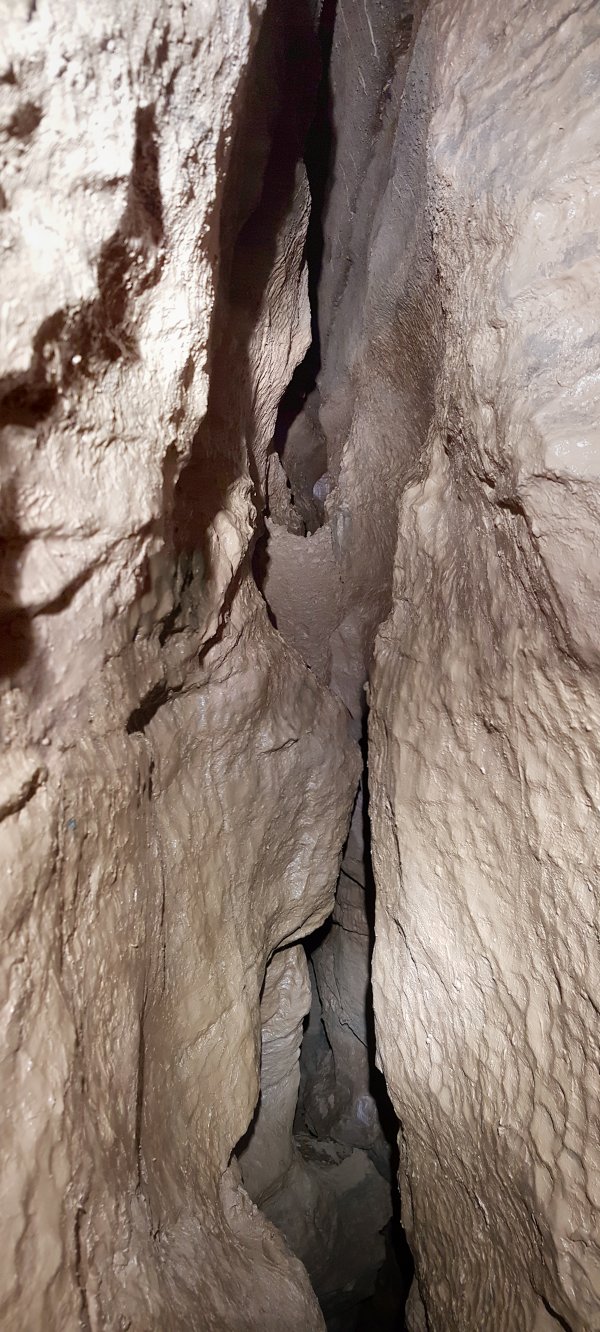 The rift above the squeeze in the passage at the top of the fourth pitch of Enterprise Aven follows the same line as the passage below it, widening in a couple of places. The lower of them is barely wide enough to fit along, but all levels of the rift close down as the water route steps higher and higher in the rift.
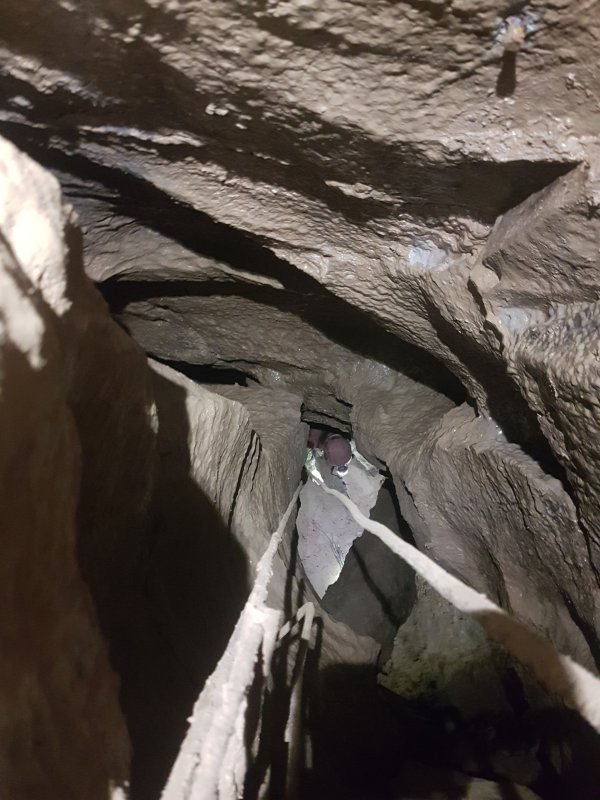 The fifth pitch of Enterprise Aven.
Modelling by Gareth, lighting by Tarquin and Gareth
The fifth pitch of Enterprise Aven.
Modelling by Gareth, lighting by Tarquin and Gareth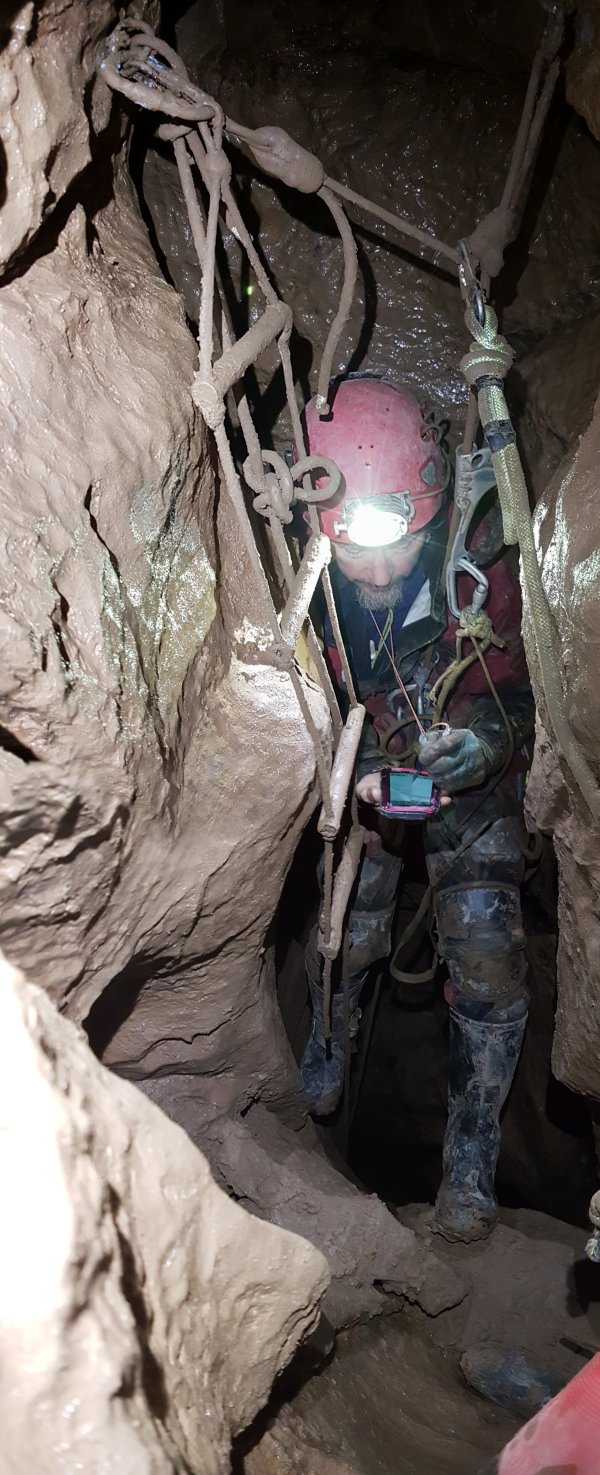 Surveying at the head of the fifth pitch of Enterprise Aven, which is not really a pitch head so much as a place to float in space. There is no solid floor. There are just tiny ledges, and platforms made of jammed boulders. A Thrutch Too Far is to the left behind Gareth, while the top of the aven is to the right of the camera.
Modelling by Gareth and portions of Tarquin, lighting by Tarquin and Gareth
Surveying at the head of the fifth pitch of Enterprise Aven, which is not really a pitch head so much as a place to float in space. There is no solid floor. There are just tiny ledges, and platforms made of jammed boulders. A Thrutch Too Far is to the left behind Gareth, while the top of the aven is to the right of the camera.
Modelling by Gareth and portions of Tarquin, lighting by Tarquin and Gareth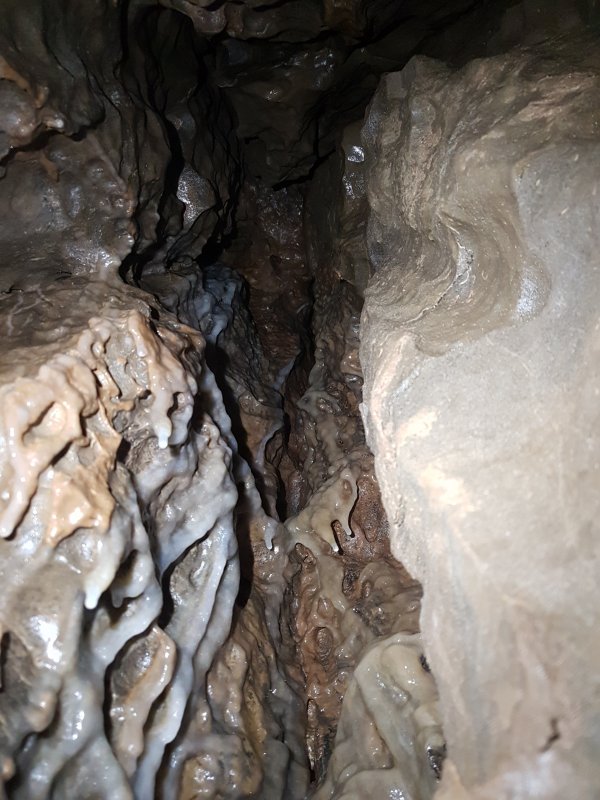 This alcove in the ceiling forms the top of Enterprise Aven, 42 metres above the base of its second pitch, or 48 metres above the base of its first pitch. This picture was taken while lying on a ledge of jammed boulders, and was not in the least bit solid, so I remained on the rope.
 Formations in the alcove.
 From the very top of Enterprise Aven, a calcited slot next to the jammed boulders drops 40 metres to the bottom of the second pitch of the aven.
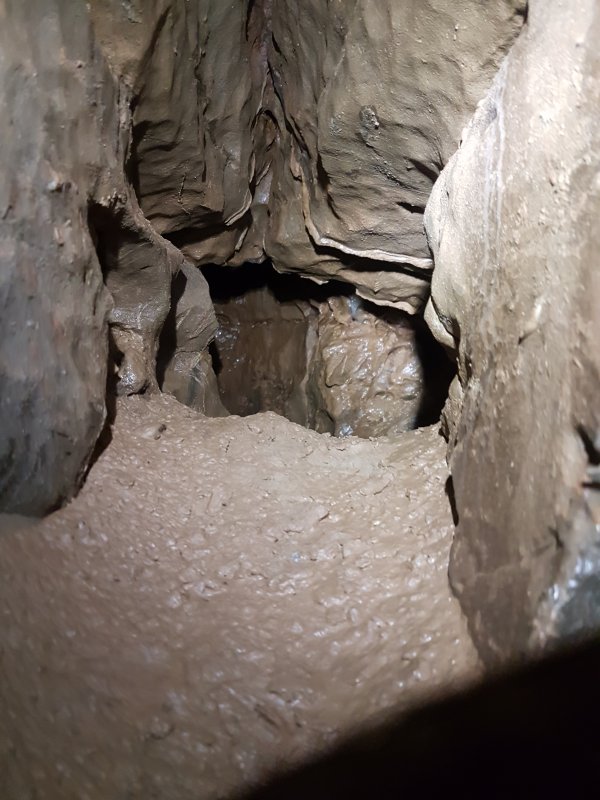 A tiny little side passage at the top of Enterprise Aven is impassable, but the camera can see further.
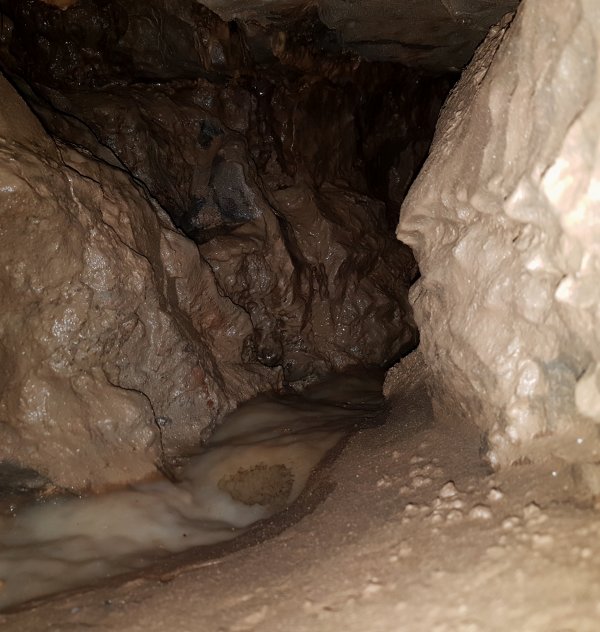 The tiny side passage at the top of Enterprise Aven has a stal flow that seems to continue until it connects to the top of the rift seen above the fourth pitch of Enterprise Aven.
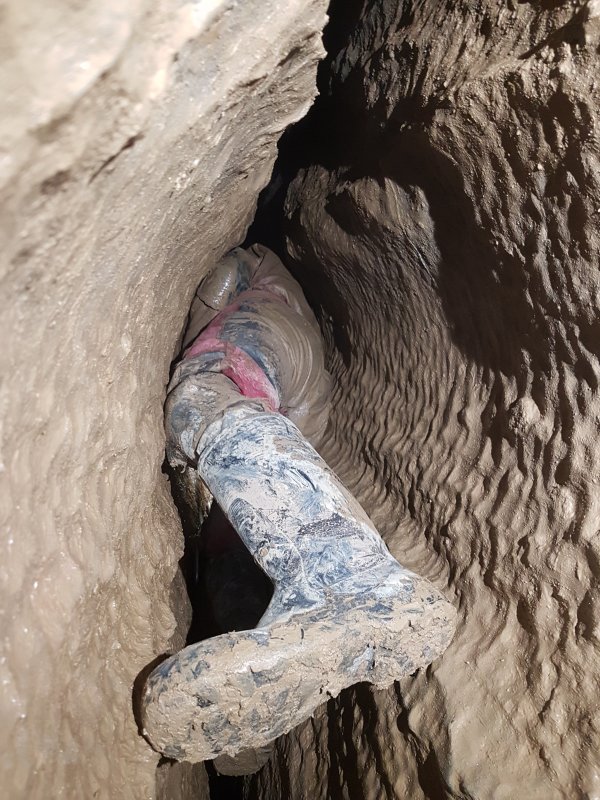 From the pitch head of the fifth pitch of Enterprise Aven, the top level of the rift can be followed through a floor-less section called A Thrutch Too Far. To get into this, you need to remove SRT gear, but somehow remain safely attached to the rope, and then post yourself into this passage without any SRT gear or bags to get caught. We used cows tails attached to a belay belt, taking off SRT gear and hanging it from the rope at the pitch head. A hauling line is very helpful for moving equipment.
Modelling by Gareth
From the pitch head of the fifth pitch of Enterprise Aven, the top level of the rift can be followed through a floor-less section called A Thrutch Too Far. To get into this, you need to remove SRT gear, but somehow remain safely attached to the rope, and then post yourself into this passage without any SRT gear or bags to get caught. We used cows tails attached to a belay belt, taking off SRT gear and hanging it from the rope at the pitch head. A hauling line is very helpful for moving equipment.
Modelling by Gareth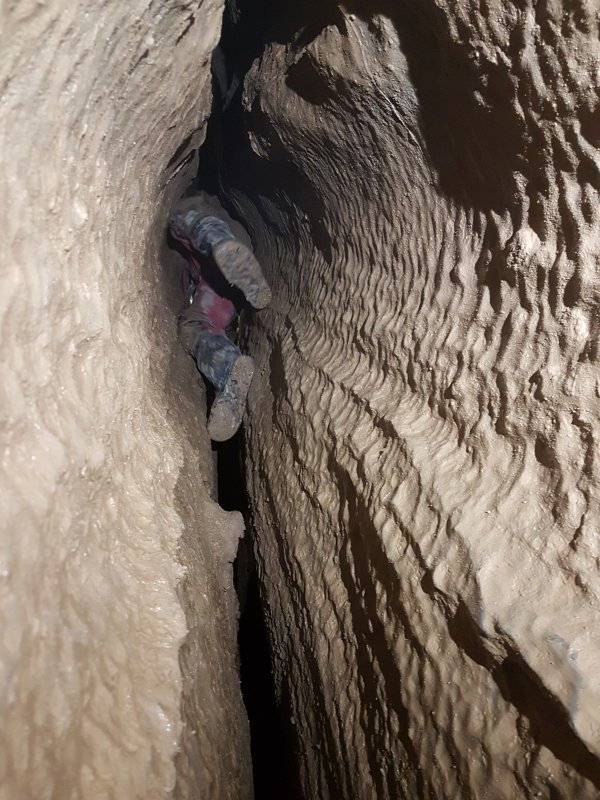 Progressing along A Thrutch Too Far.
Modelling by Gareth
Progressing along A Thrutch Too Far.
Modelling by Gareth A Thrutch Too Far is 10 metres long in total, with a resting spot on a sandy bridge at half way, seen in the distance here. The second half is easier.
 Textured wall around the place where you change levels in A Thrutch Too Far.
 After changing levels in A Thrutch Too Far, it becomes possible to walk again.
Modelling by Gareth, lighting by Tarquin and Gareth
After changing levels in A Thrutch Too Far, it becomes possible to walk again.
Modelling by Gareth, lighting by Tarquin and Gareth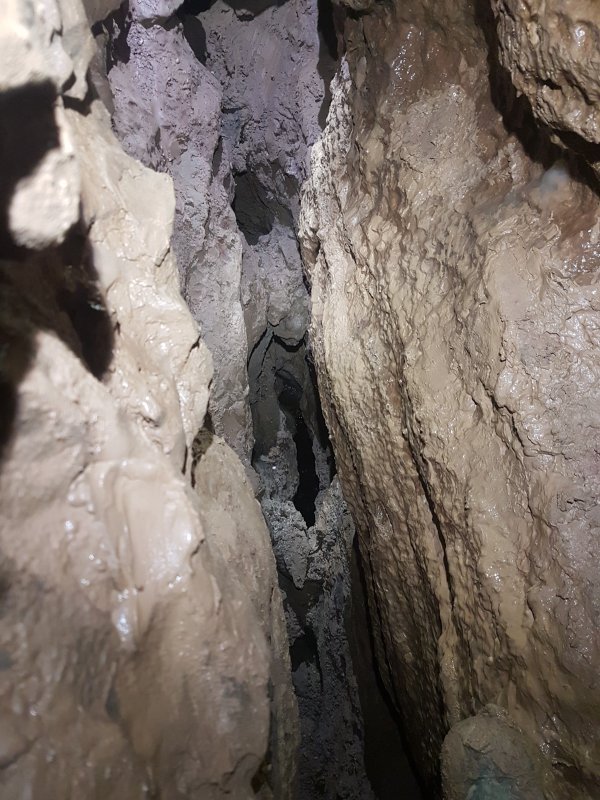 The holes in the floor of the passage beyond A Thrutch Too Far drop down to where the water flows in a lower widening.
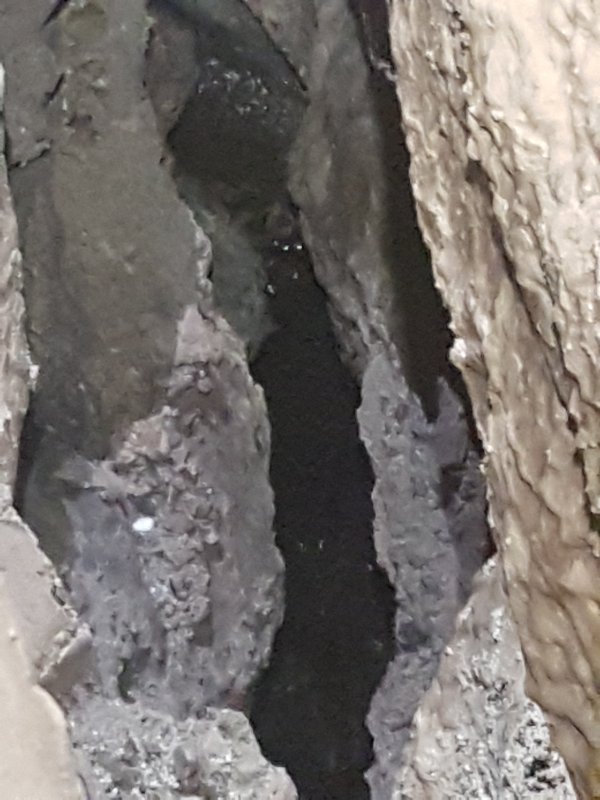 Stream flowing down the holes in the floor of the passage beyond A Thrutch Too Far.
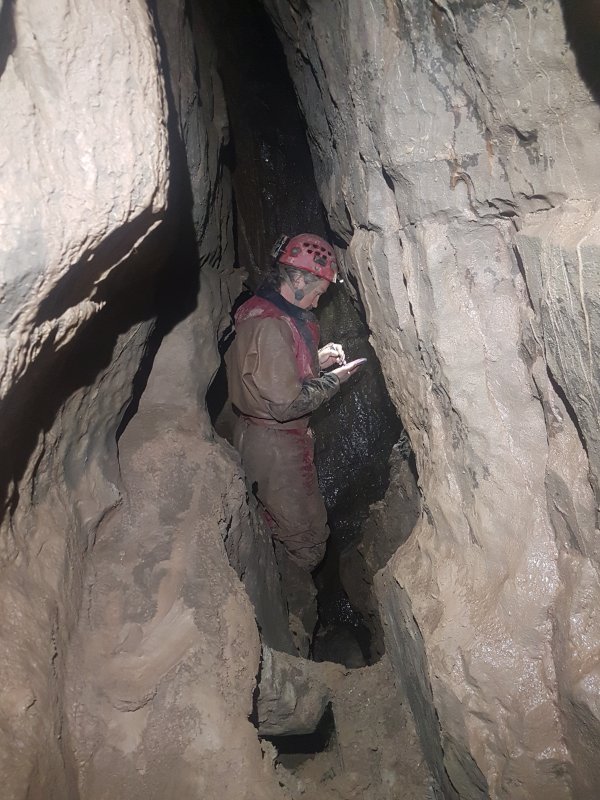 Start of the waterworn section of the passage beyond A Thrutch Too Far, where a roof cleft and floor meander start to follow the passage.
Modelling by Gareth, lighting by Tarquin and Gareth
Start of the waterworn section of the passage beyond A Thrutch Too Far, where a roof cleft and floor meander start to follow the passage.
Modelling by Gareth, lighting by Tarquin and Gareth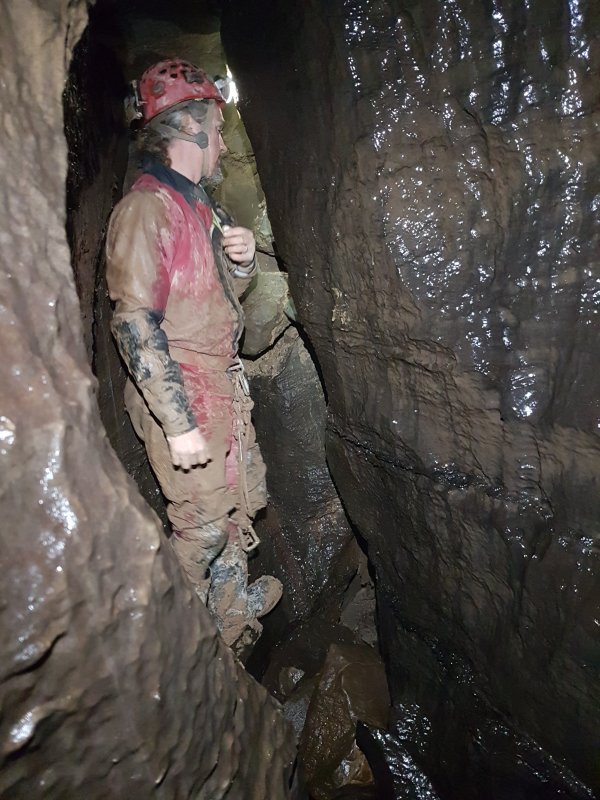 At the end of the waterworn section of the passage beyond A Thrutch Too Far is the main inlet, which showers water in from above. It is too narrow to dig, but it has the most promise in the entire passage, probably being sourced from avens climbing up to the surface.
Modelling by Gareth, lighting by Tarquin and Gareth
At the end of the waterworn section of the passage beyond A Thrutch Too Far is the main inlet, which showers water in from above. It is too narrow to dig, but it has the most promise in the entire passage, probably being sourced from avens climbing up to the surface.
Modelling by Gareth, lighting by Tarquin and Gareth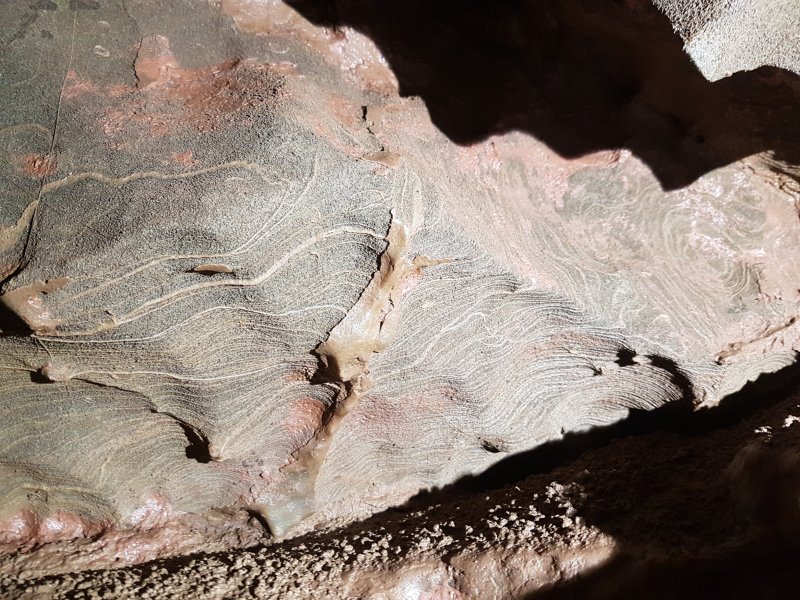 Rock patterns after the last climb in the passage beyond A Thrutch Too Far.
 Formations after the last climb in the passage beyond A Thrutch Too Far.
 What looks like a walking section just before the end of the passage beyond A Thrutch Too Far, but it actually contains a significant squeeze.
Modelling by Gareth, lighting by Tarquin and Gareth
What looks like a walking section just before the end of the passage beyond A Thrutch Too Far, but it actually contains a significant squeeze.
Modelling by Gareth, lighting by Tarquin and Gareth The passage beyond A Thrutch Too Far ends in a calcite blockage, where a faint sound of flowing water can be heard.