Cwm Pwll-y-Rhyd trip 26/07/2020
Unless otherwise stated, camera, setups, lighting, edits and gallery effects by Tarquin. Modelling and lighting at various points will be Gareth Davies and Pete Bolt.
We had planned to visit Town Drain, but an impressively heavy downpour as we arrived made us a little uneasy about being in such a flood-prone cave. So we decided to visit Cwm Pwll-y-Rhyd instead. A cave that floods powerfully enough to swallow whole trees. Our theory was that we would be nearer to the surface, and could at least hear it start. Safety first.
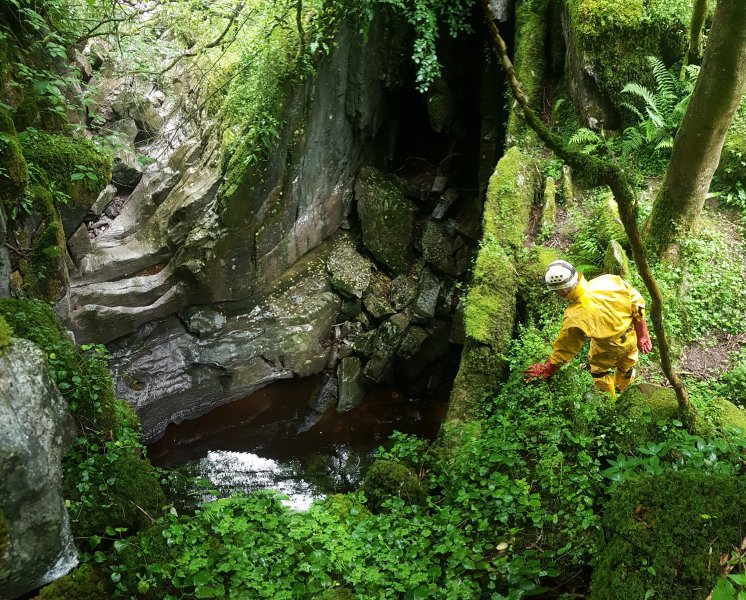
 Pwll y Ryd is a large waterfall entrance to the cave, which swallows the river in flood. Normally the water sinks into the various Bridge Cave sinks upstream, but in severe flood, a torrent powerful enough to carry entire trees, thunders into this hole. The continuing valley, Cwm Pwll-y-Rhyd, remains dry. The cave system, Cwm Pwll-y-Rhyd, takes its name from the valley, which in turn takes its name from the cave.
Modelling by Pete, lighting by Sol and Pete
Pwll y Ryd is a large waterfall entrance to the cave, which swallows the river in flood. Normally the water sinks into the various Bridge Cave sinks upstream, but in severe flood, a torrent powerful enough to carry entire trees, thunders into this hole. The continuing valley, Cwm Pwll-y-Rhyd, remains dry. The cave system, Cwm Pwll-y-Rhyd, takes its name from the valley, which in turn takes its name from the cave.
Modelling by Pete, lighting by Sol and Pete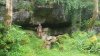 The normal entrance is in the western wall of the dry valley, where there is a very visible bedding plane deeply cut into the bank. There are in fact several entrances hidden in the boulders here.
Modelling by Gareth, lighting by Sol and Gareth
The normal entrance is in the western wall of the dry valley, where there is a very visible bedding plane deeply cut into the bank. There are in fact several entrances hidden in the boulders here.
Modelling by Gareth, lighting by Sol and Gareth The bedding forms the highest level of the cave on this bank, with a hole dropping into the lower levels. The bedding continues ahead, while we bypass it with a crawl just below.
Modelling by Gareth, lighting by Sol, Tarquin and Gareth
The bedding forms the highest level of the cave on this bank, with a hole dropping into the lower levels. The bedding continues ahead, while we bypass it with a crawl just below.
Modelling by Gareth, lighting by Sol, Tarquin and Gareth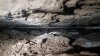 The bedding continues off into the distance, becoming increasingly tight.
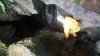 In the boulders outside, a much larger route leads down into the cave, and is the dry way into the inner cave. At this point, it is roughly the third level down in the layering of passages.
Modelling by Pete, lighting by Sol and Pete
In the boulders outside, a much larger route leads down into the cave, and is the dry way into the inner cave. At this point, it is roughly the third level down in the layering of passages.
Modelling by Pete, lighting by Sol and Pete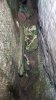 Bones in the passage.
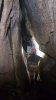 The passage becomes a tall rift dropping directly into the river chamber - the fourth level. At the river, there are several ways on, including the upstream river under an arch to the right, an upper passage and eyehole to the river on the right, and a river passage ahead.
Modelling by Gareth and Pete, lighting by Tarquin, Gareth and Pete
The passage becomes a tall rift dropping directly into the river chamber - the fourth level. At the river, there are several ways on, including the upstream river under an arch to the right, an upper passage and eyehole to the river on the right, and a river passage ahead.
Modelling by Gareth and Pete, lighting by Tarquin, Gareth and Pete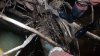 The river is of unknown depth but, fortunately, some jammed logs provided a walkway over the river. They bounced around a little as we walked, and we had to be careful not to slip in, but this was a lot better than swimming.
Modelling and lighting by Tarquin and Gareth
The river is of unknown depth but, fortunately, some jammed logs provided a walkway over the river. They bounced around a little as we walked, and we had to be careful not to slip in, but this was a lot better than swimming.
Modelling and lighting by Tarquin and Gareth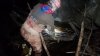 We crossed the logs like spiders negotiating a web.
Modelling by Gareth, lighting by Tarquin and Gareth
We crossed the logs like spiders negotiating a web.
Modelling by Gareth, lighting by Tarquin and Gareth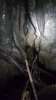 The rift ahead is the downstream end of the river. We followed it by traversing along the rift, one foot on each side.
Lighting by Tarquin and Gareth
The rift ahead is the downstream end of the river. We followed it by traversing along the rift, one foot on each side.
Lighting by Tarquin and Gareth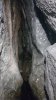 The passage ends at a sump. Under the water to the left leads downstream into White Lady Cave. A side branch within it leads back to the right into White Lady 2, a dry series.
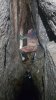 Gareth tried stepping onto some logs floating in the sump, but this was more like a log rolling contest with himself. The logs could not support his weight, so he returned.
Modelling by Gareth, lighting by Tarquin and Gareth
Gareth tried stepping onto some logs floating in the sump, but this was more like a log rolling contest with himself. The logs could not support his weight, so he returned.
Modelling by Gareth, lighting by Tarquin and Gareth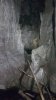 On the right side of the river chamber, a side passage climbs very steeply up into the ceiling. At its start, an obvious eyehole drops back down into the river.
Modelling by Pete, lighting by Tarquin and Pete
On the right side of the river chamber, a side passage climbs very steeply up into the ceiling. At its start, an obvious eyehole drops back down into the river.
Modelling by Pete, lighting by Tarquin and Pete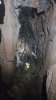 Looking down from the side passage into the river. Up here is probably safe from floods, but the sticks jammed high into the roof are a little disconcerting. Up to the left of the camera is an aven with a visible passage at the top. This passage was not followed, but may connect with the bedding above the entrance.
Modelling by Pete, lighting by Tarquin and Pete
Looking down from the side passage into the river. Up here is probably safe from floods, but the sticks jammed high into the roof are a little disconcerting. Up to the left of the camera is an aven with a visible passage at the top. This passage was not followed, but may connect with the bedding above the entrance.
Modelling by Pete, lighting by Tarquin and Pete Ceiling at the end of the side passage, which ends conclusively.
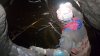 Dropping down through the eyehole, landing on some much less stable trees. These moved and bounced a lot more, sinking into the murky water.
Modelling by Gareth, lighting by Tarquin and Gareth
Dropping down through the eyehole, landing on some much less stable trees. These moved and bounced a lot more, sinking into the murky water.
Modelling by Gareth, lighting by Tarquin and Gareth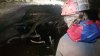 The trees float in the upstream river, which runs in a wide bedding.
Modelling by Gareth, lighting by Tarquin and Gareth
The trees float in the upstream river, which runs in a wide bedding.
Modelling by Gareth, lighting by Tarquin and Gareth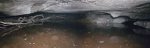 We returned to the river chamber, and headed upstream into the same bedding, this time with the floor shallow enough to walk. On the left are the trees seen from the eyehole. On the right is the upstream duck.
Lighting by Tarquin, Gareth and Pete
We returned to the river chamber, and headed upstream into the same bedding, this time with the floor shallow enough to walk. On the left are the trees seen from the eyehole. On the right is the upstream duck.
Lighting by Tarquin, Gareth and Pete These are full sized trees, rammed into the side of the bedding by floodwater.
Lighting by Tarquin and Pete
These are full sized trees, rammed into the side of the bedding by floodwater.
Lighting by Tarquin and Pete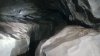 On the right side of the bedding is a short side passage which appears to be a dead end.
Lighting by Tarquin and Gareth
On the right side of the bedding is a short side passage which appears to be a dead end.
Lighting by Tarquin and Gareth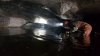 Upstream duck leading back out into Pwll y Rhyd. We were wearing the wrong clothing, and I was being a wuss. Up to the right above the duck is the way to another entrance, but it cannot be free climbed.
Modelling by Gareth, lighting by Tarquin, Gareth and Sol
Upstream duck leading back out into Pwll y Rhyd. We were wearing the wrong clothing, and I was being a wuss. Up to the right above the duck is the way to another entrance, but it cannot be free climbed.
Modelling by Gareth, lighting by Tarquin, Gareth and Sol The water is not too deep here, but gets deeper as you approach the duck.
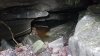 The upstream side of the duck, seen from Pwll y Rhyd. Hidden on the right here is a small passage that can be dug to reach White Lady 2. The passage way re-fills most winters.
Lighting by Tarquin and Sol
The upstream side of the duck, seen from Pwll y Rhyd. Hidden on the right here is a small passage that can be dug to reach White Lady 2. The passage way re-fills most winters.
Lighting by Tarquin and Sol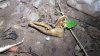 Hidden beneath the boulders at the entrance is a loop route within the boulders, containing some more bones.
Modelling by Gnasher
Hidden beneath the boulders at the entrance is a loop route within the boulders, containing some more bones.
Modelling by Gnasher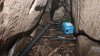 A (level 3) side passage off the loop is filled with debris from flooding.
 The floor becomes a bed of branches flooded into here. It's hard to know whether the floor is safe enough to walk on, as the branches bounce around like a mattress. The passage suddenly drops out into the river bedding immediately downstream of the duck; the aven seen earlier.
Modelling by Gareth, lighting by Tarquin and Gareth
The floor becomes a bed of branches flooded into here. It's hard to know whether the floor is safe enough to walk on, as the branches bounce around like a mattress. The passage suddenly drops out into the river bedding immediately downstream of the duck; the aven seen earlier.
Modelling by Gareth, lighting by Tarquin and Gareth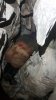 Another hole from the boulders leads down into a tight passage, the second level of the cave.
Modelling by Gareth, lighting by Tarquin and Gareth
Another hole from the boulders leads down into a tight passage, the second level of the cave.
Modelling by Gareth, lighting by Tarquin and Gareth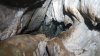 The passage passes through a squeeze , adorned with cave spiders, to reach a window down into the Pwll y Rhyd chasm. A passage can be seen continuing ahead, but it cannot be reached from here.
Modelling by Pete, lighting by Tarquin and Pete
The passage passes through a squeeze , adorned with cave spiders, to reach a window down into the Pwll y Rhyd chasm. A passage can be seen continuing ahead, but it cannot be reached from here.
Modelling by Pete, lighting by Tarquin and Pete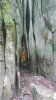 Immediately upstream of Pwll y Rhyd, a rift on the western bank is yet another entrance to the cave.
Modelling by Pete, lighting by Sol and Gareth
Immediately upstream of Pwll y Rhyd, a rift on the western bank is yet another entrance to the cave.
Modelling by Pete, lighting by Sol and Gareth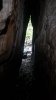 Inside the rift.
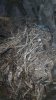 Mound of debris at a junction.
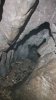 To the left is a debris filled passage.
 This ends at a window down to the Pwll y Rhyd chasm. Ahead through another window is the continuing passage, which is the tight passage seen before.
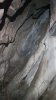 The passage to the right at the junction.
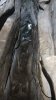 This passage leads up to another entrance, hidden on the slope above the river.
 Formations on the passage wall.
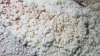 Detail of the formations.
 A slanting squeeze on the wall reaches a continuing passage heading upstream.
Modelling by Gareth, lighting by Tarquin and Gareth
A slanting squeeze on the wall reaches a continuing passage heading upstream.
Modelling by Gareth, lighting by Tarquin and Gareth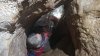 The passage continues and has been pushed, but is a bit too tight for us. Perhaps it gains another entrance. None of these smaller passages are on the survey.
Modelling by Gareth, lighting by Tarquin and Gareth
The passage continues and has been pushed, but is a bit too tight for us. Perhaps it gains another entrance. None of these smaller passages are on the survey.
Modelling by Gareth, lighting by Tarquin and Gareth Looking from the west side of Pwll y Rhyd towards the east side, where there are further passages - those passages have no physical connection to the western passages, so could be considered a separate cave, depending on how you want to define it. When the river is in flood, the water can fill up as high as the ledge. The ledge becomes impassable in even low flood conditions, as the waterfall runs over it. Sadly, there is no convenient route down at the western end, and either a rope descent or a swim across the pool are required.
Modelling by Gareth and Pete, lighting by Sol and Pete
Looking from the west side of Pwll y Rhyd towards the east side, where there are further passages - those passages have no physical connection to the western passages, so could be considered a separate cave, depending on how you want to define it. When the river is in flood, the water can fill up as high as the ledge. The ledge becomes impassable in even low flood conditions, as the waterfall runs over it. Sadly, there is no convenient route down at the western end, and either a rope descent or a swim across the pool are required.
Modelling by Gareth and Pete, lighting by Sol and Pete Looking from the east side of Pwll y Rhyd towards the west side. The window passages sit in the roof of the apex, while the duck is ahead. Pete is standing at the river inlet, and in flood the river normally falls into rifts just upstream, and flows under natural rock bridges onto the ledge.
Modelling by Pete
Looking from the east side of Pwll y Rhyd towards the west side. The window passages sit in the roof of the apex, while the duck is ahead. Pete is standing at the river inlet, and in flood the river normally falls into rifts just upstream, and flows under natural rock bridges onto the ledge.
Modelling by Pete Short phreatic tube on the southern side. It only went as far as we could see, but perhaps could be opened up by flooding.
Modelling by Pete, lighting by Tarquin and Pete
Short phreatic tube on the southern side. It only went as far as we could see, but perhaps could be opened up by flooding.
Modelling by Pete, lighting by Tarquin and Pete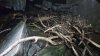 Debris almost filling the eastern passage.
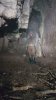 The main eastern passage. On the right side is a short aven loop.
Modelling by Gareth, lighting by Tarquin and Gareth
The main eastern passage. On the right side is a short aven loop.
Modelling by Gareth, lighting by Tarquin and Gareth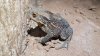 A common toad who has decided to take up residence in the eastern passage. He was not interested in our offer of assistance to relocate, and was determined to remain with the blank wall that he found truly fascinating.
Modelling by Brian
A common toad who has decided to take up residence in the eastern passage. He was not interested in our offer of assistance to relocate, and was determined to remain with the blank wall that he found truly fascinating.
Modelling by Brian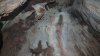 Chamber filled with moonmilk.
Modelling by Pete, lighting by Tarquin and Pete
Chamber filled with moonmilk.
Modelling by Pete, lighting by Tarquin and Pete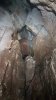 Climb up in the moonmilk chamber.
Modelling by Gareth, lighting by Tarquin and Gareth
Climb up in the moonmilk chamber.
Modelling by Gareth, lighting by Tarquin and Gareth Ledge with a view over the moonmilk chamber.
Modelling by Pete, lighting by Tarquin and Pete
Ledge with a view over the moonmilk chamber.
Modelling by Pete, lighting by Tarquin and Pete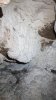 Moonmilk.
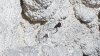 Cave spider living on the moonmilk.
Modelling by Charlotte
Cave spider living on the moonmilk.
Modelling by Charlotte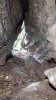 Triangular passage leading off from the top towards daylight.
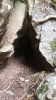 The passage housed a few more spiders that did not need to be flattened, so we left it alone, and checked it out from the outside.
 Seen in situ. The path towards White Lady cave and Town Drain passes along the top of this picture as it skirts the Pwll y Rhyd buttress.
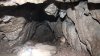 Crawl leading off from the moonmilk chamber, which immediately splits in two, with the left branch being at the left edge of this picture.
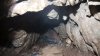 Heading into the right branch of the crawl.
Modelling by Gareth
Heading into the right branch of the crawl.
Modelling by Gareth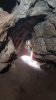 The passage remains a crawl for almost its whole length, passing over old formations, and showing signs of complete flooding.
Modelling by Pete, lighting by Tarquin and Pete
The passage remains a crawl for almost its whole length, passing over old formations, and showing signs of complete flooding.
Modelling by Pete, lighting by Tarquin and Pete Clamber down into a muddy little chamber, with a lower crawl visible through an eyehole.
 Bones in the mud.
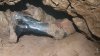 Heading into the final section of the crawl on the other side of the chamber.
Modelling by Gareth
Heading into the final section of the crawl on the other side of the chamber.
Modelling by Gareth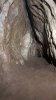 The crawl pinches out and ends. It draughts but it must be very close to the short phreatic tube seen earlier. The draught is almost certinly from that. Neither passage is on the survey.
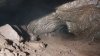 Start of the left branch of the crawl.
 In the left branch of the crawl.
Modelling by Pete, lighting by Tarquin and Pete
In the left branch of the crawl.
Modelling by Pete, lighting by Tarquin and Pete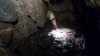 The crawl splits into upper and lower levels which both enter a little chamber. From here, there are several ways on.
Modelling by Gareth and Pete, lighting by Tarquin and Pete
The crawl splits into upper and lower levels which both enter a little chamber. From here, there are several ways on.
Modelling by Gareth and Pete, lighting by Tarquin and Pete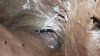 Upper tubes on the right end quickly.
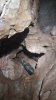 An awkward passage ahead-right also ends.
Modelling by Gareth
An awkward passage ahead-right also ends.
Modelling by Gareth Continuing ahead-left into more crawling.
Modelling by Gareth, lighting by Tarquin and Gareth
Continuing ahead-left into more crawling.
Modelling by Gareth, lighting by Tarquin and Gareth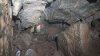 Passing through a bedding.
Modelling by Gareth, lighting by Tarquin and Gareth
Passing through a bedding.
Modelling by Gareth, lighting by Tarquin and Gareth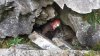 The passage ends at an entrance a little above river level on the buttress.
Modelling by Gareth, lighting by Sol and Gareth
The passage ends at an entrance a little above river level on the buttress.
Modelling by Gareth, lighting by Sol and Gareth A really unusual thing given the date; we were finally allowed to sit at a pub, and have drinks. The queue and sanitiser are because the COVID lockdown closure of pubs had finally been partly lifted, allowing use of pub beer gardens.
Modelling by Gareth and Pete
A really unusual thing given the date; we were finally allowed to sit at a pub, and have drinks. The queue and sanitiser are because the COVID lockdown closure of pubs had finally been partly lifted, allowing use of pub beer gardens.
Modelling by Gareth and Pete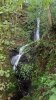 Small waterfall on the route towards Sgwd Gwladus.
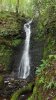 Small waterfall above it, several metres tall.
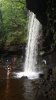 Walking the path behind Sgwd Gwladus.
 Diving in from the base of the waterfall.
 Pwll y Ryd is a large waterfall entrance to the cave, which swallows the river in flood. Normally the water sinks into the various Bridge Cave sinks upstream, but in severe flood, a torrent powerful enough to carry entire trees, thunders into this hole. The continuing valley, Cwm Pwll-y-Rhyd, remains dry. The cave system, Cwm Pwll-y-Rhyd, takes its name from the valley, which in turn takes its name from the cave.
Modelling by Pete, lighting by Sol and Pete
Pwll y Ryd is a large waterfall entrance to the cave, which swallows the river in flood. Normally the water sinks into the various Bridge Cave sinks upstream, but in severe flood, a torrent powerful enough to carry entire trees, thunders into this hole. The continuing valley, Cwm Pwll-y-Rhyd, remains dry. The cave system, Cwm Pwll-y-Rhyd, takes its name from the valley, which in turn takes its name from the cave.
Modelling by Pete, lighting by Sol and Pete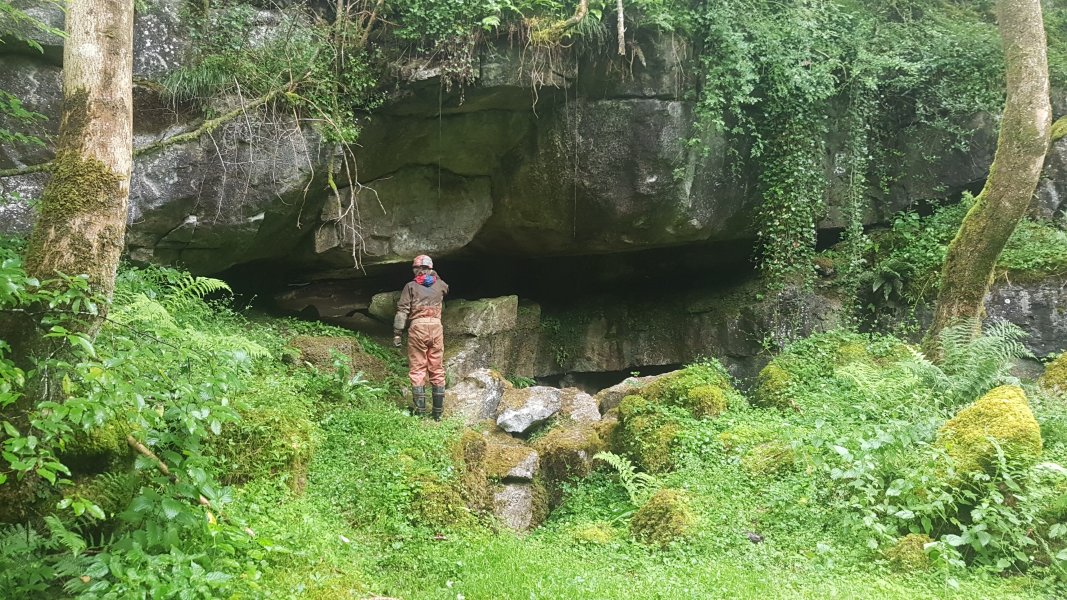 The normal entrance is in the western wall of the dry valley, where there is a very visible bedding plane deeply cut into the bank. There are in fact several entrances hidden in the boulders here.
Modelling by Gareth, lighting by Sol and Gareth
The normal entrance is in the western wall of the dry valley, where there is a very visible bedding plane deeply cut into the bank. There are in fact several entrances hidden in the boulders here.
Modelling by Gareth, lighting by Sol and Gareth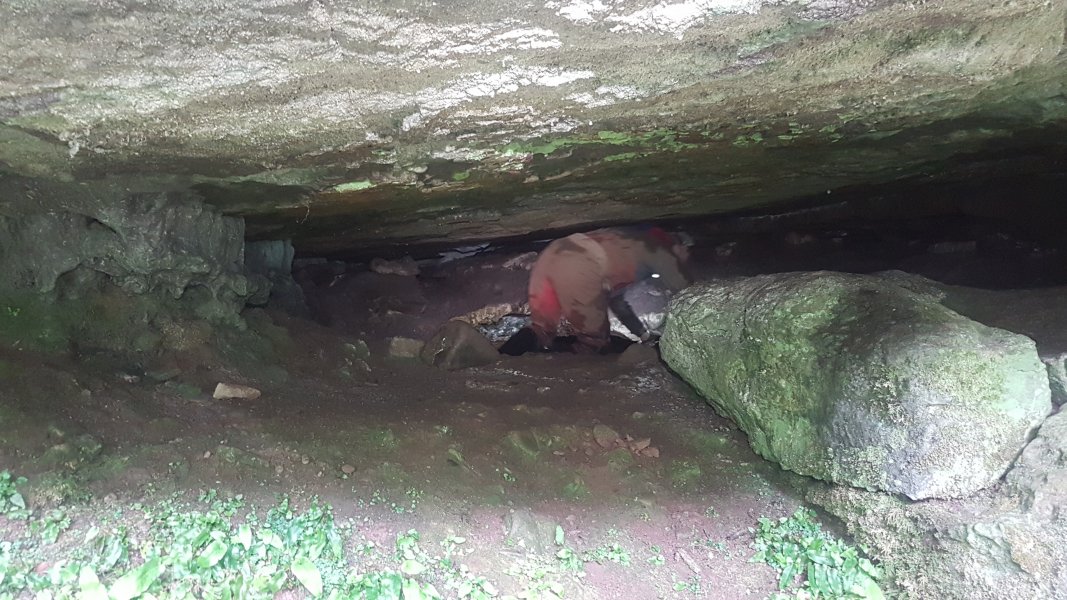 The bedding forms the highest level of the cave on this bank, with a hole dropping into the lower levels. The bedding continues ahead, while we bypass it with a crawl just below.
Modelling by Gareth, lighting by Sol, Tarquin and Gareth
The bedding forms the highest level of the cave on this bank, with a hole dropping into the lower levels. The bedding continues ahead, while we bypass it with a crawl just below.
Modelling by Gareth, lighting by Sol, Tarquin and Gareth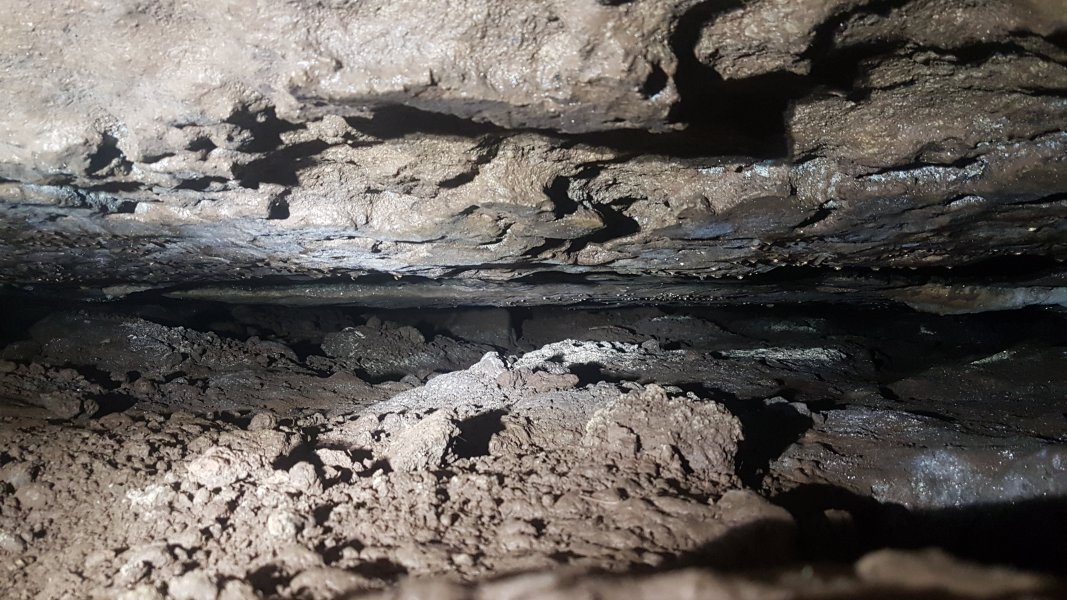 The bedding continues off into the distance, becoming increasingly tight.
 In the boulders outside, a much larger route leads down into the cave, and is the dry way into the inner cave. At this point, it is roughly the third level down in the layering of passages.
Modelling by Pete, lighting by Sol and Pete
In the boulders outside, a much larger route leads down into the cave, and is the dry way into the inner cave. At this point, it is roughly the third level down in the layering of passages.
Modelling by Pete, lighting by Sol and Pete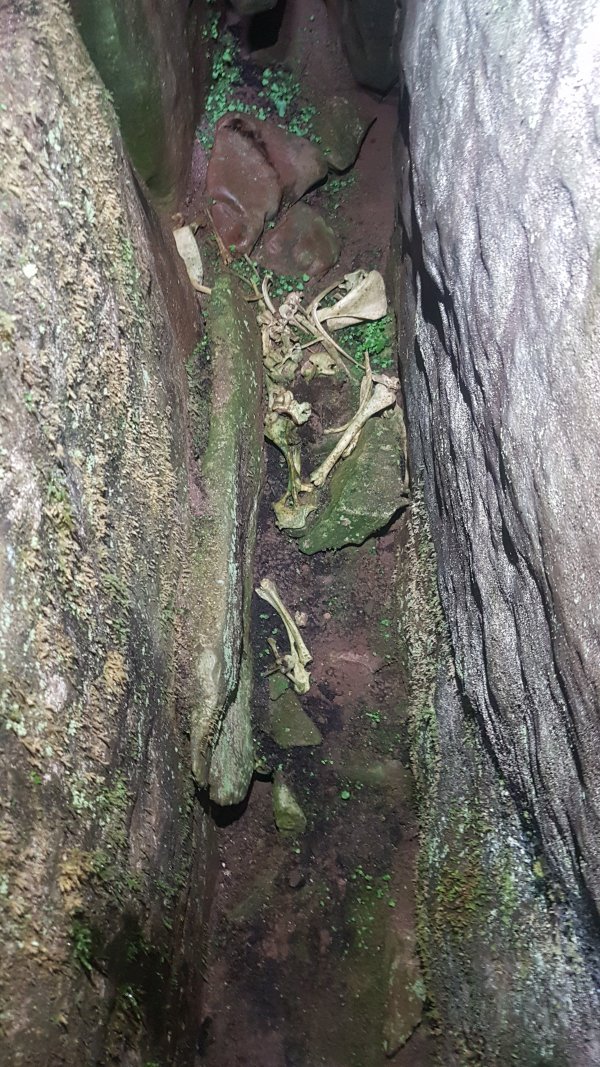 Bones in the passage.
 The passage becomes a tall rift dropping directly into the river chamber - the fourth level. At the river, there are several ways on, including the upstream river under an arch to the right, an upper passage and eyehole to the river on the right, and a river passage ahead.
Modelling by Gareth and Pete, lighting by Tarquin, Gareth and Pete
The passage becomes a tall rift dropping directly into the river chamber - the fourth level. At the river, there are several ways on, including the upstream river under an arch to the right, an upper passage and eyehole to the river on the right, and a river passage ahead.
Modelling by Gareth and Pete, lighting by Tarquin, Gareth and Pete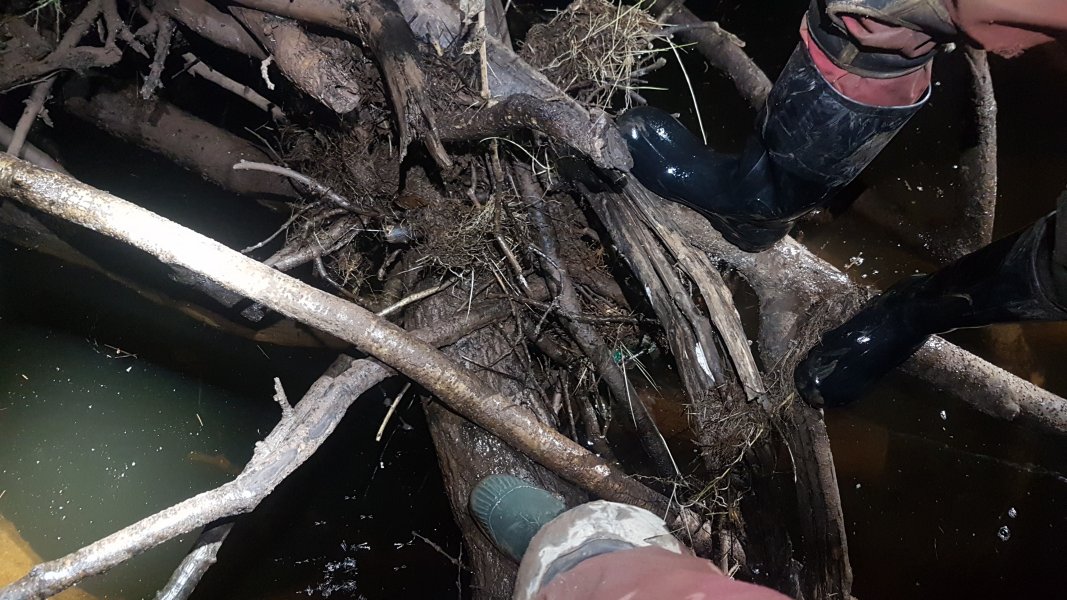 The river is of unknown depth but, fortunately, some jammed logs provided a walkway over the river. They bounced around a little as we walked, and we had to be careful not to slip in, but this was a lot better than swimming.
Modelling and lighting by Tarquin and Gareth
The river is of unknown depth but, fortunately, some jammed logs provided a walkway over the river. They bounced around a little as we walked, and we had to be careful not to slip in, but this was a lot better than swimming.
Modelling and lighting by Tarquin and Gareth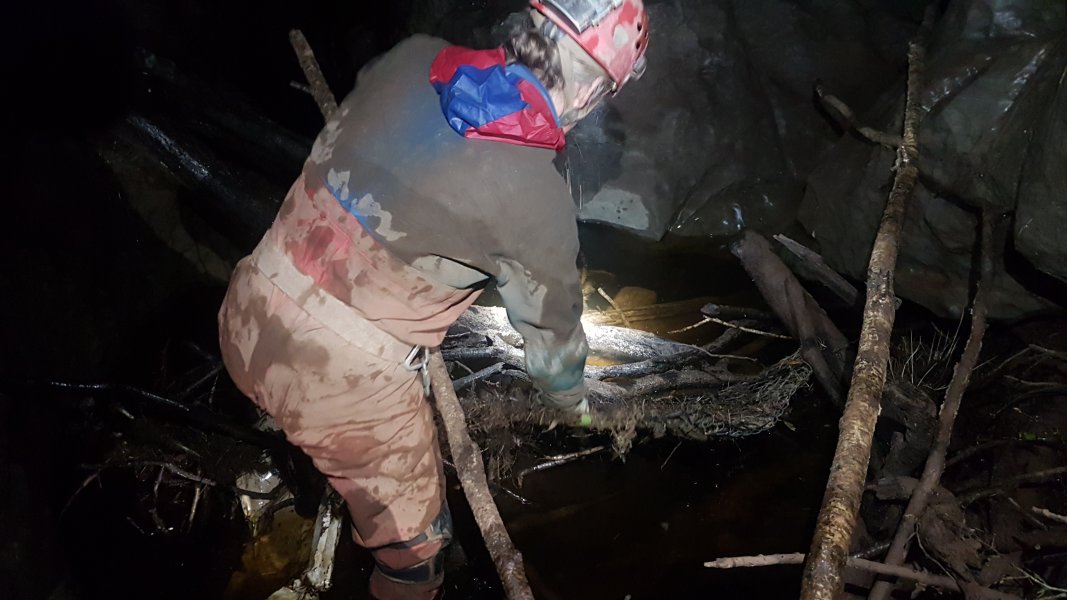 We crossed the logs like spiders negotiating a web.
Modelling by Gareth, lighting by Tarquin and Gareth
We crossed the logs like spiders negotiating a web.
Modelling by Gareth, lighting by Tarquin and Gareth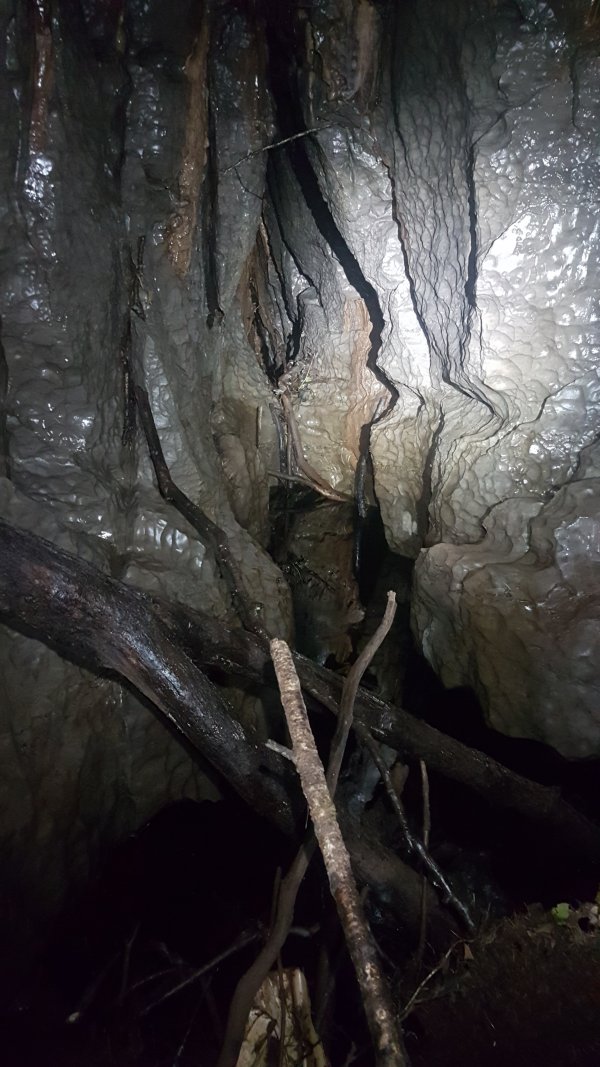 The rift ahead is the downstream end of the river. We followed it by traversing along the rift, one foot on each side.
Lighting by Tarquin and Gareth
The rift ahead is the downstream end of the river. We followed it by traversing along the rift, one foot on each side.
Lighting by Tarquin and Gareth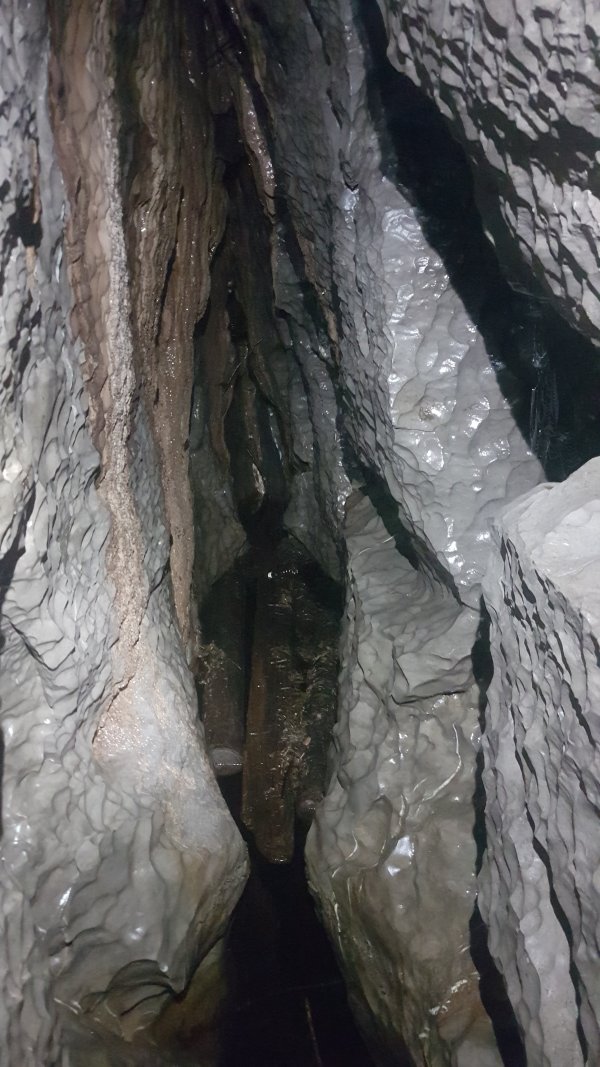 The passage ends at a sump. Under the water to the left leads downstream into White Lady Cave. A side branch within it leads back to the right into White Lady 2, a dry series.
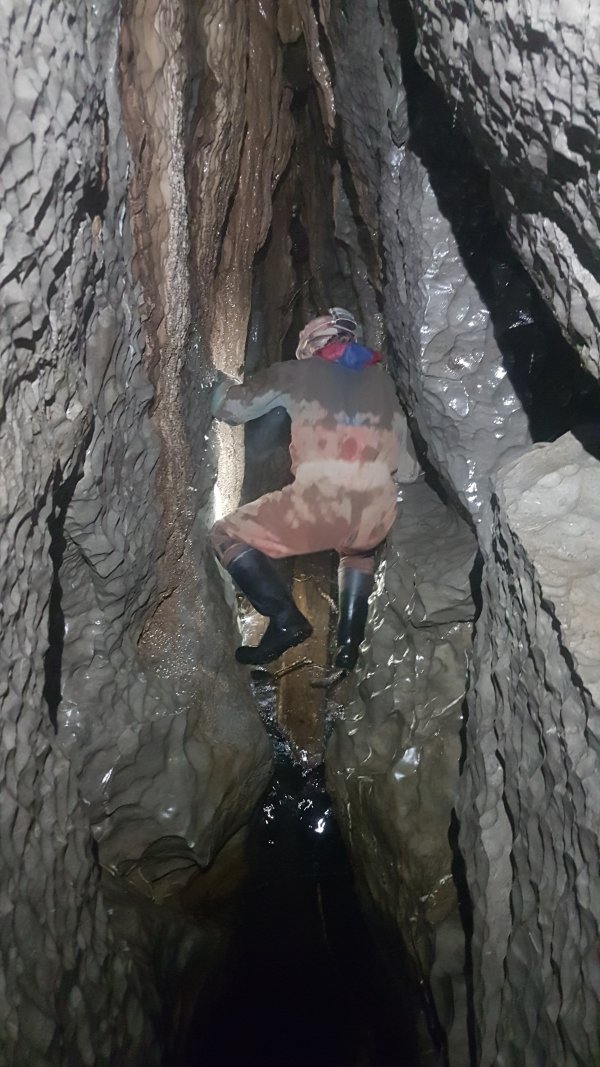 Gareth tried stepping onto some logs floating in the sump, but this was more like a log rolling contest with himself. The logs could not support his weight, so he returned.
Modelling by Gareth, lighting by Tarquin and Gareth
Gareth tried stepping onto some logs floating in the sump, but this was more like a log rolling contest with himself. The logs could not support his weight, so he returned.
Modelling by Gareth, lighting by Tarquin and Gareth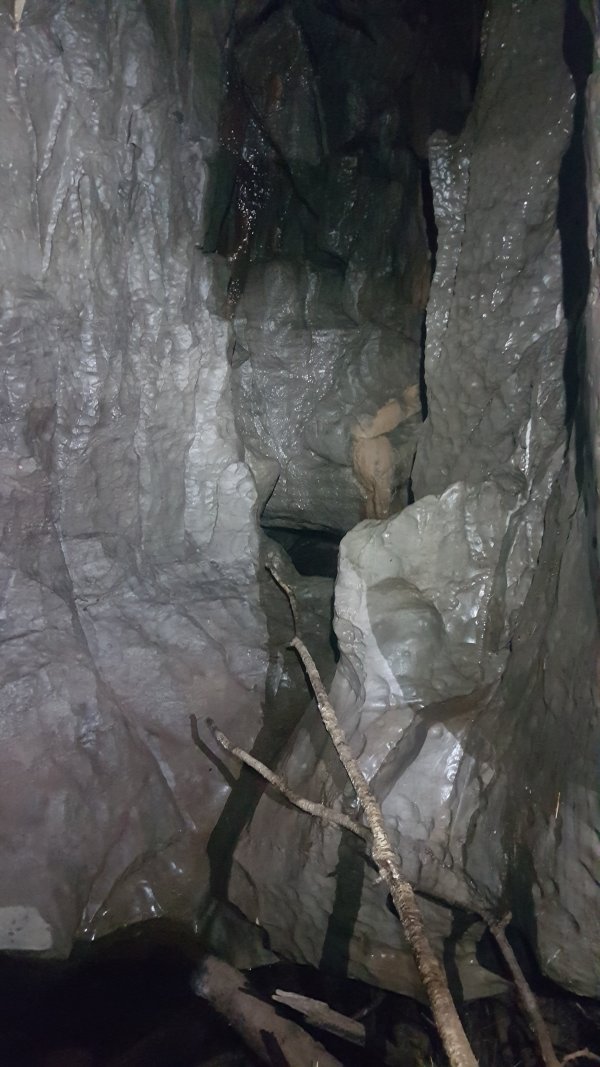 On the right side of the river chamber, a side passage climbs very steeply up into the ceiling. At its start, an obvious eyehole drops back down into the river.
Modelling by Pete, lighting by Tarquin and Pete
On the right side of the river chamber, a side passage climbs very steeply up into the ceiling. At its start, an obvious eyehole drops back down into the river.
Modelling by Pete, lighting by Tarquin and Pete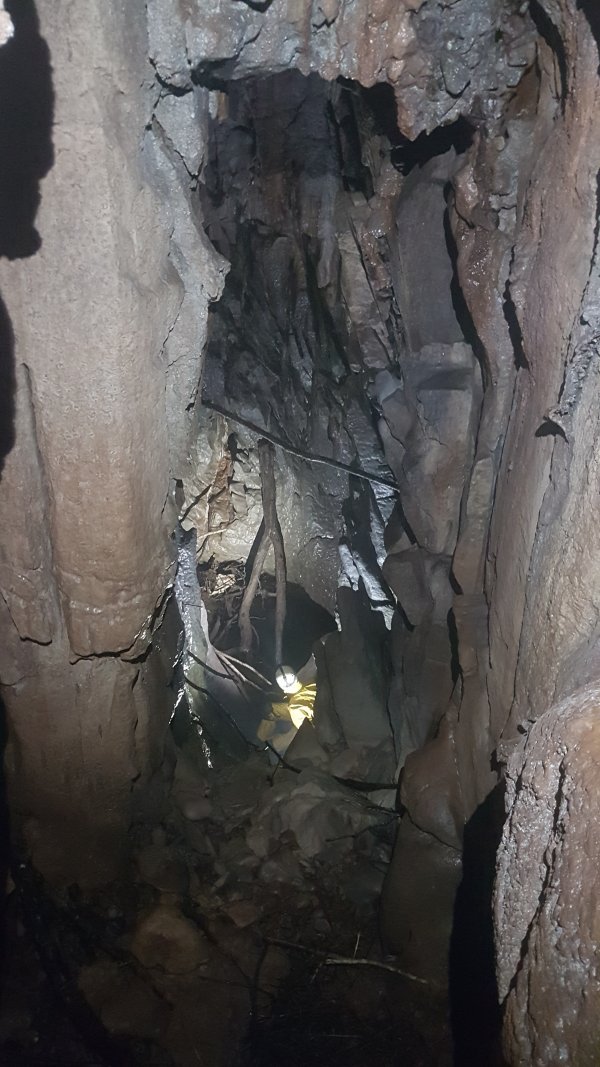 Looking down from the side passage into the river. Up here is probably safe from floods, but the sticks jammed high into the roof are a little disconcerting. Up to the left of the camera is an aven with a visible passage at the top. This passage was not followed, but may connect with the bedding above the entrance.
Modelling by Pete, lighting by Tarquin and Pete
Looking down from the side passage into the river. Up here is probably safe from floods, but the sticks jammed high into the roof are a little disconcerting. Up to the left of the camera is an aven with a visible passage at the top. This passage was not followed, but may connect with the bedding above the entrance.
Modelling by Pete, lighting by Tarquin and Pete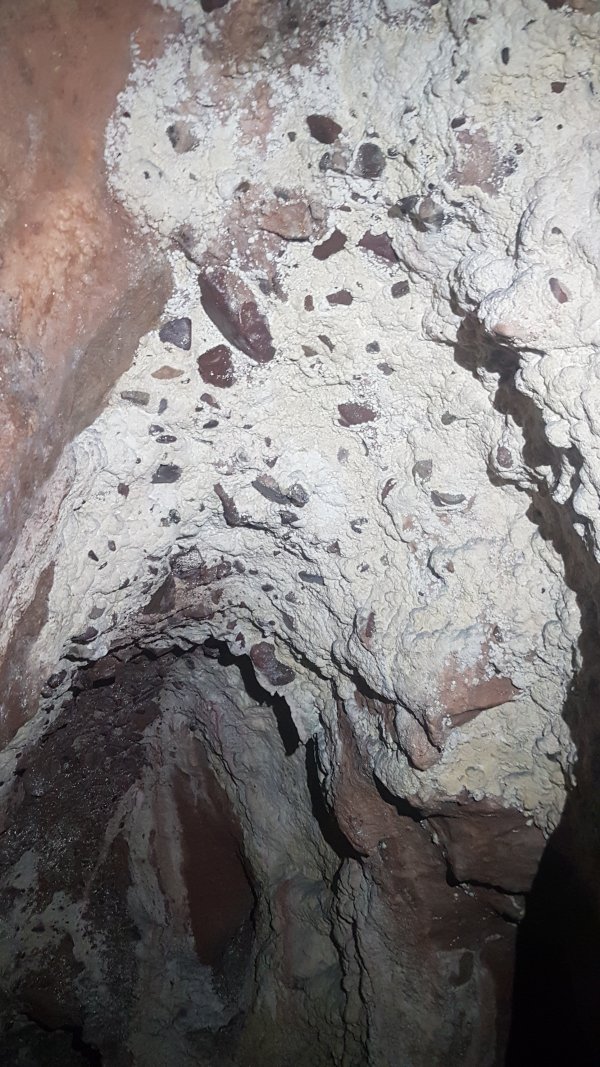 Ceiling at the end of the side passage, which ends conclusively.
 Dropping down through the eyehole, landing on some much less stable trees. These moved and bounced a lot more, sinking into the murky water.
Modelling by Gareth, lighting by Tarquin and Gareth
Dropping down through the eyehole, landing on some much less stable trees. These moved and bounced a lot more, sinking into the murky water.
Modelling by Gareth, lighting by Tarquin and Gareth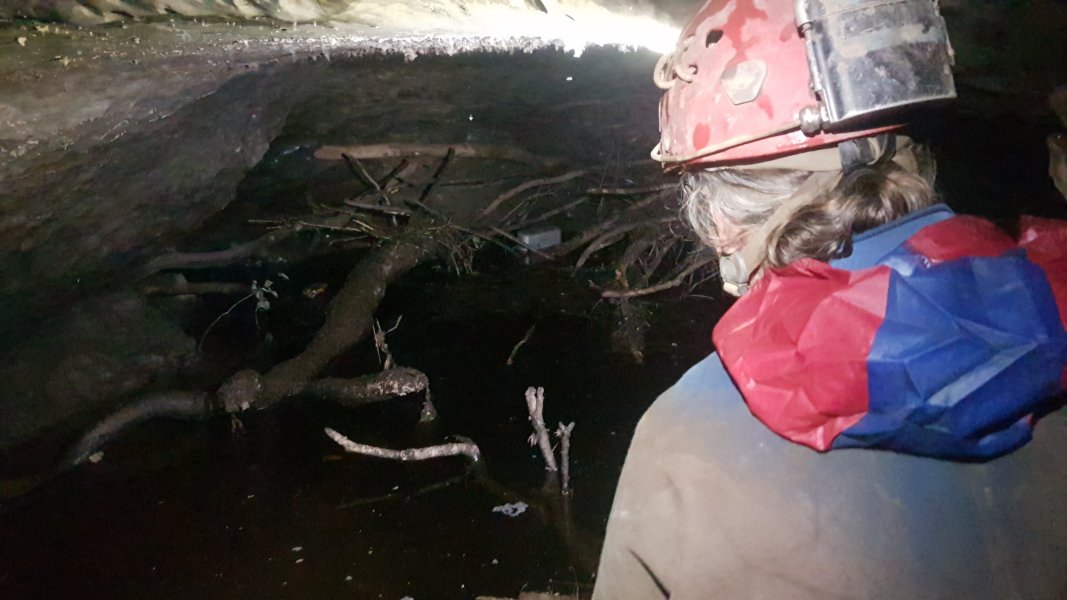 The trees float in the upstream river, which runs in a wide bedding.
Modelling by Gareth, lighting by Tarquin and Gareth
The trees float in the upstream river, which runs in a wide bedding.
Modelling by Gareth, lighting by Tarquin and Gareth We returned to the river chamber, and headed upstream into the same bedding, this time with the floor shallow enough to walk. On the left are the trees seen from the eyehole. On the right is the upstream duck.
Lighting by Tarquin, Gareth and Pete
We returned to the river chamber, and headed upstream into the same bedding, this time with the floor shallow enough to walk. On the left are the trees seen from the eyehole. On the right is the upstream duck.
Lighting by Tarquin, Gareth and Pete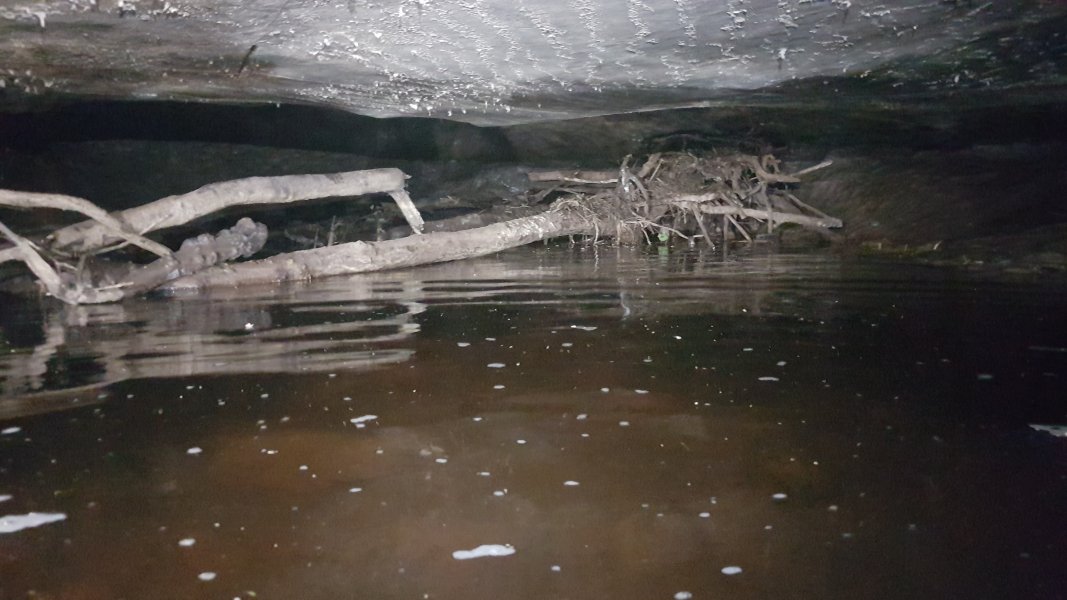 These are full sized trees, rammed into the side of the bedding by floodwater.
Lighting by Tarquin and Pete
These are full sized trees, rammed into the side of the bedding by floodwater.
Lighting by Tarquin and Pete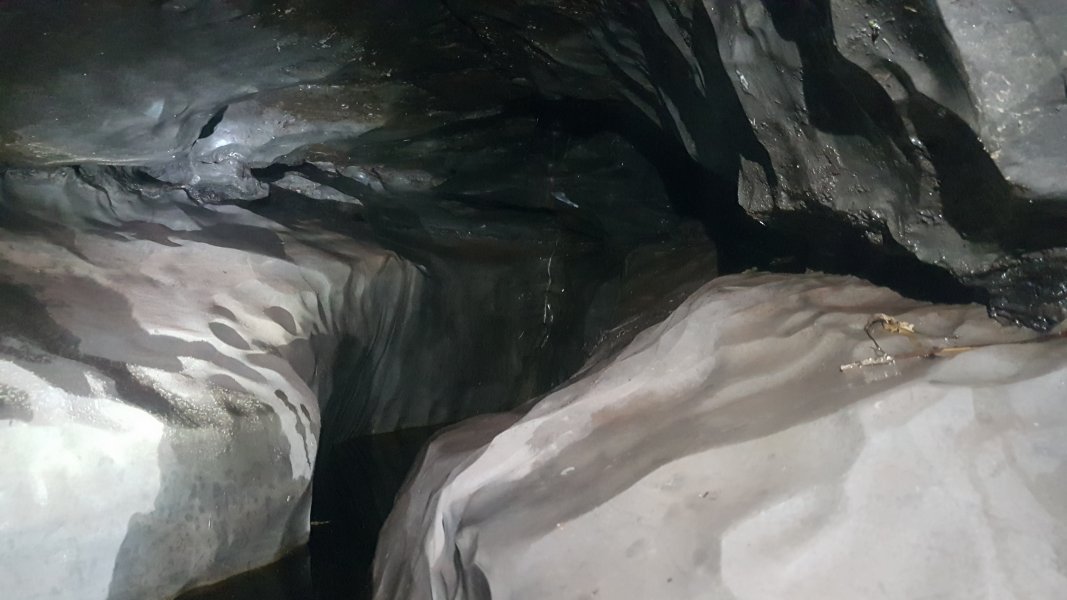 On the right side of the bedding is a short side passage which appears to be a dead end.
Lighting by Tarquin and Gareth
On the right side of the bedding is a short side passage which appears to be a dead end.
Lighting by Tarquin and Gareth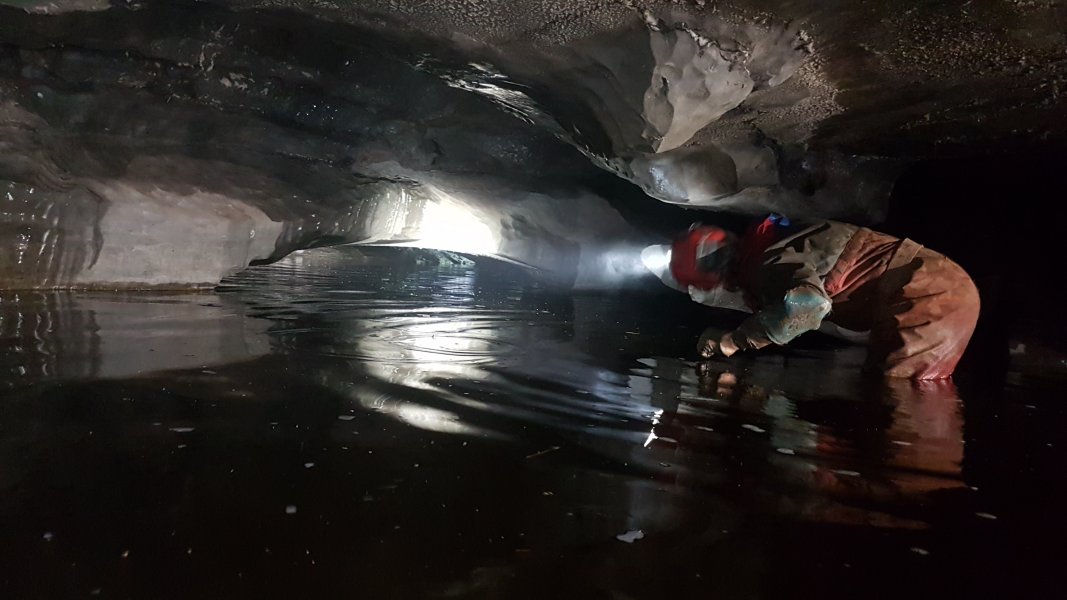 Upstream duck leading back out into Pwll y Rhyd. We were wearing the wrong clothing, and I was being a wuss. Up to the right above the duck is the way to another entrance, but it cannot be free climbed.
Modelling by Gareth, lighting by Tarquin, Gareth and Sol
Upstream duck leading back out into Pwll y Rhyd. We were wearing the wrong clothing, and I was being a wuss. Up to the right above the duck is the way to another entrance, but it cannot be free climbed.
Modelling by Gareth, lighting by Tarquin, Gareth and Sol The water is not too deep here, but gets deeper as you approach the duck.
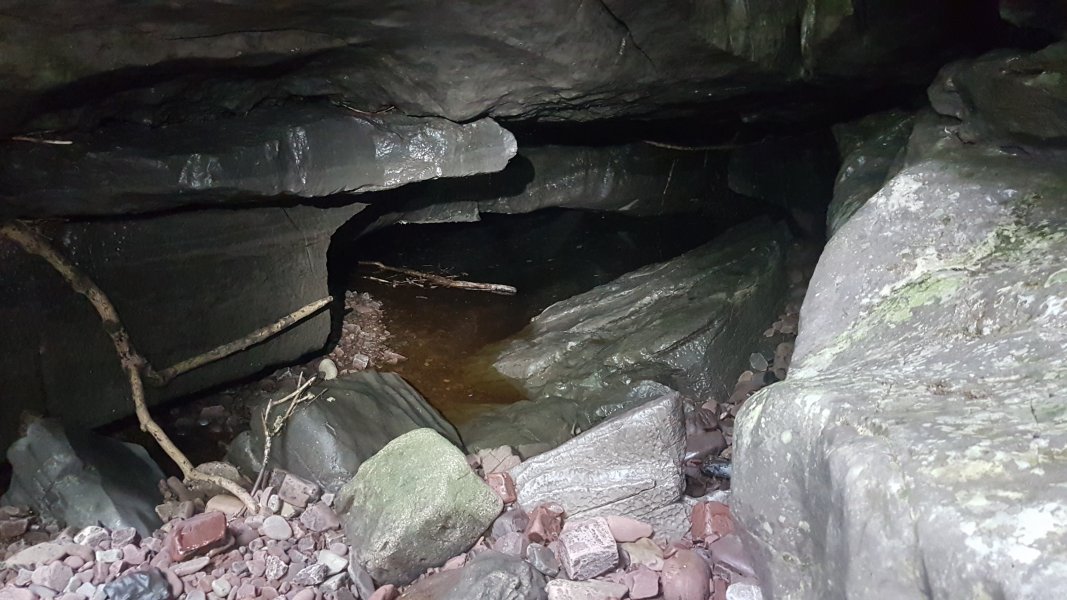 The upstream side of the duck, seen from Pwll y Rhyd. Hidden on the right here is a small passage that can be dug to reach White Lady 2. The passage way re-fills most winters.
Lighting by Tarquin and Sol
The upstream side of the duck, seen from Pwll y Rhyd. Hidden on the right here is a small passage that can be dug to reach White Lady 2. The passage way re-fills most winters.
Lighting by Tarquin and Sol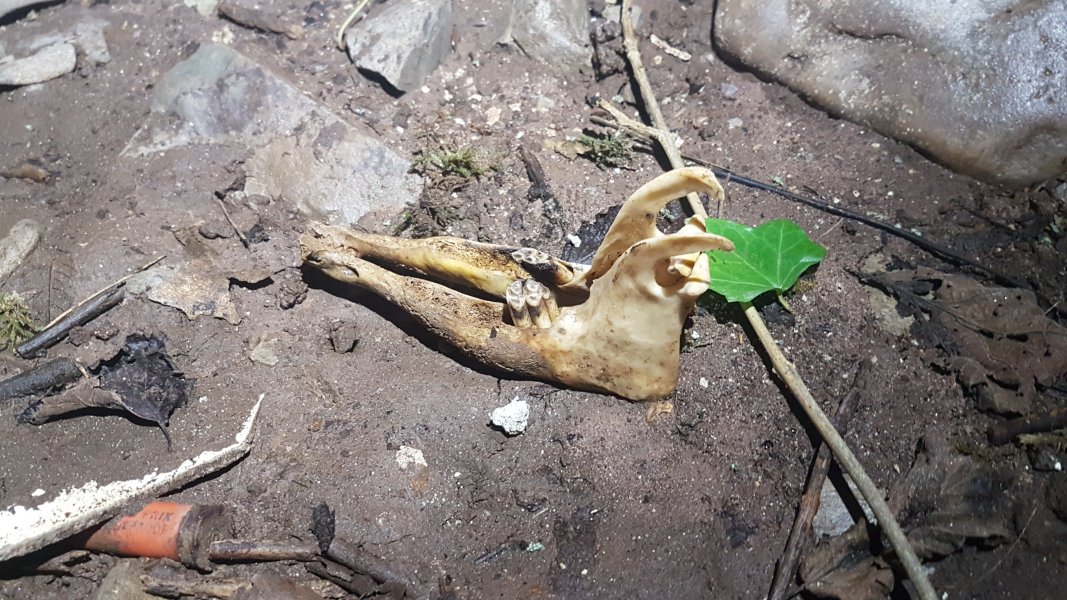 Hidden beneath the boulders at the entrance is a loop route within the boulders, containing some more bones.
Modelling by Gnasher
Hidden beneath the boulders at the entrance is a loop route within the boulders, containing some more bones.
Modelling by Gnasher A (level 3) side passage off the loop is filled with debris from flooding.
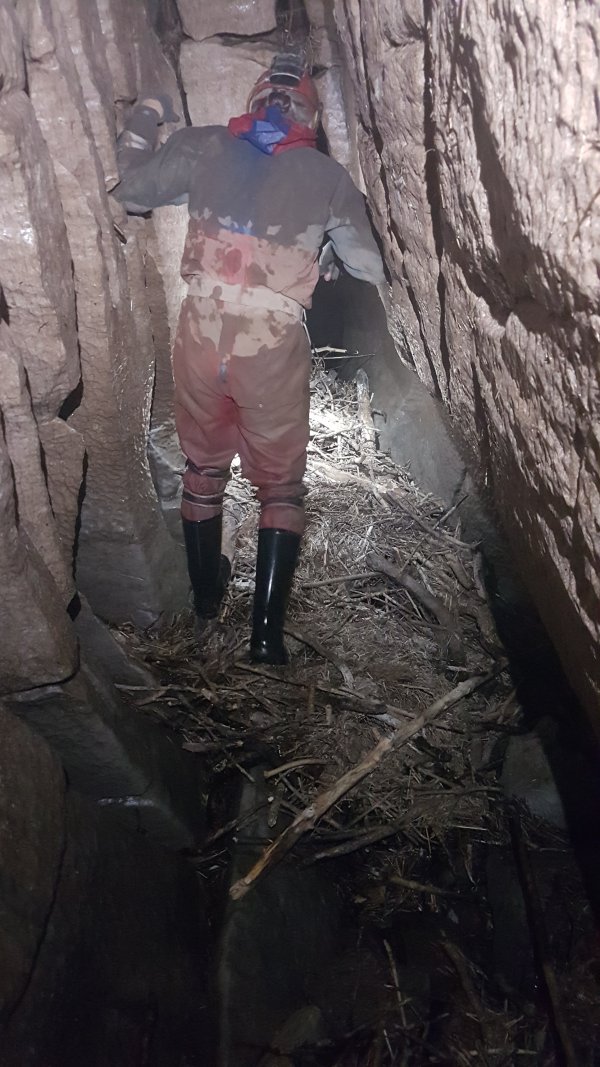 The floor becomes a bed of branches flooded into here. It's hard to know whether the floor is safe enough to walk on, as the branches bounce around like a mattress. The passage suddenly drops out into the river bedding immediately downstream of the duck; the aven seen earlier.
Modelling by Gareth, lighting by Tarquin and Gareth
The floor becomes a bed of branches flooded into here. It's hard to know whether the floor is safe enough to walk on, as the branches bounce around like a mattress. The passage suddenly drops out into the river bedding immediately downstream of the duck; the aven seen earlier.
Modelling by Gareth, lighting by Tarquin and Gareth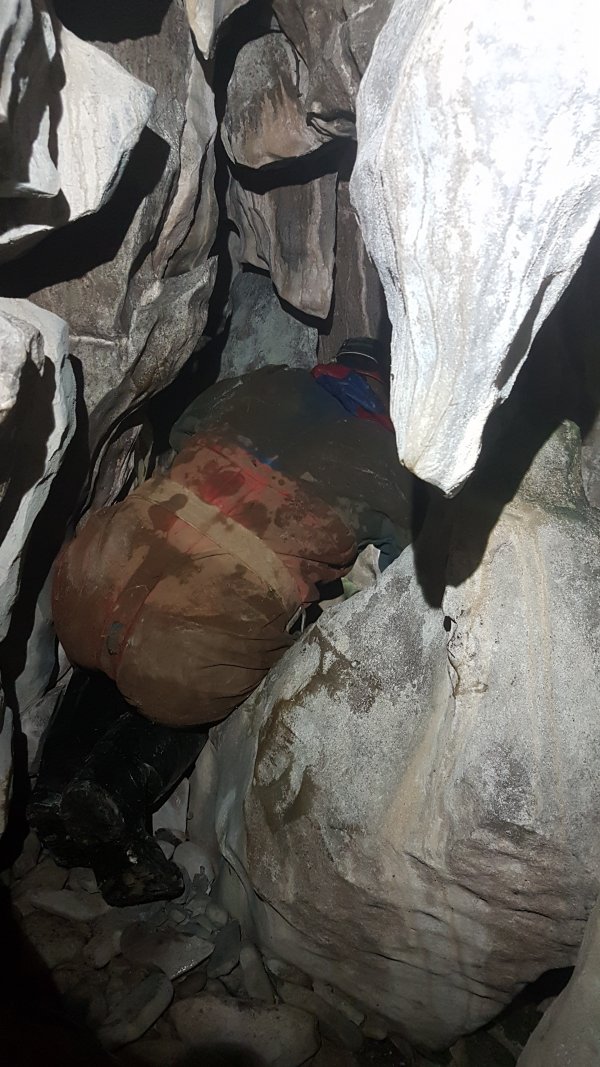 Another hole from the boulders leads down into a tight passage, the second level of the cave.
Modelling by Gareth, lighting by Tarquin and Gareth
Another hole from the boulders leads down into a tight passage, the second level of the cave.
Modelling by Gareth, lighting by Tarquin and Gareth The passage passes through a squeeze , adorned with cave spiders, to reach a window down into the Pwll y Rhyd chasm. A passage can be seen continuing ahead, but it cannot be reached from here.
Modelling by Pete, lighting by Tarquin and Pete
The passage passes through a squeeze , adorned with cave spiders, to reach a window down into the Pwll y Rhyd chasm. A passage can be seen continuing ahead, but it cannot be reached from here.
Modelling by Pete, lighting by Tarquin and Pete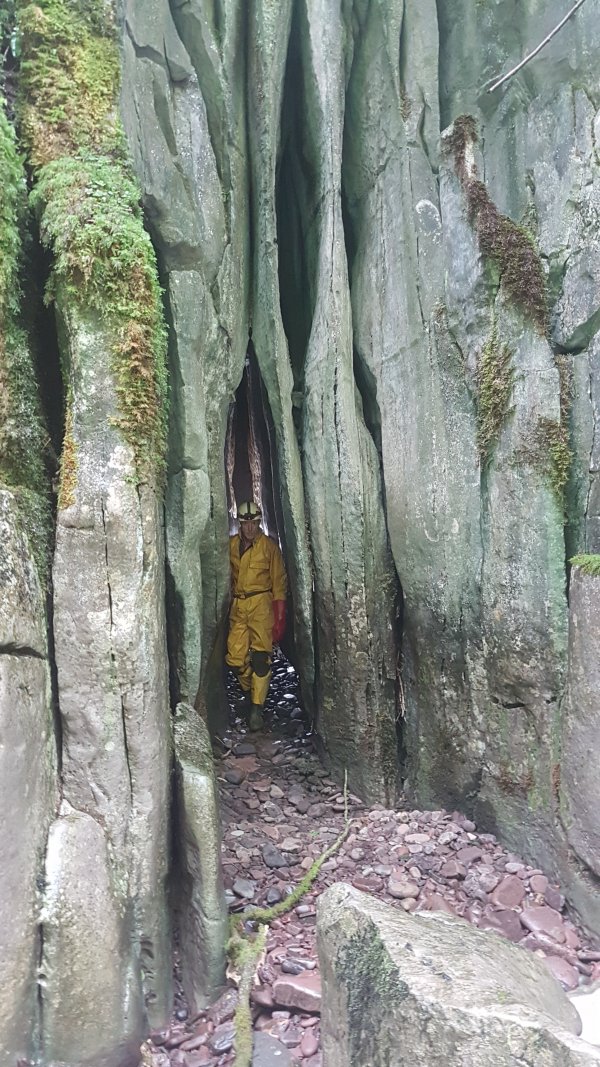 Immediately upstream of Pwll y Rhyd, a rift on the western bank is yet another entrance to the cave.
Modelling by Pete, lighting by Sol and Gareth
Immediately upstream of Pwll y Rhyd, a rift on the western bank is yet another entrance to the cave.
Modelling by Pete, lighting by Sol and Gareth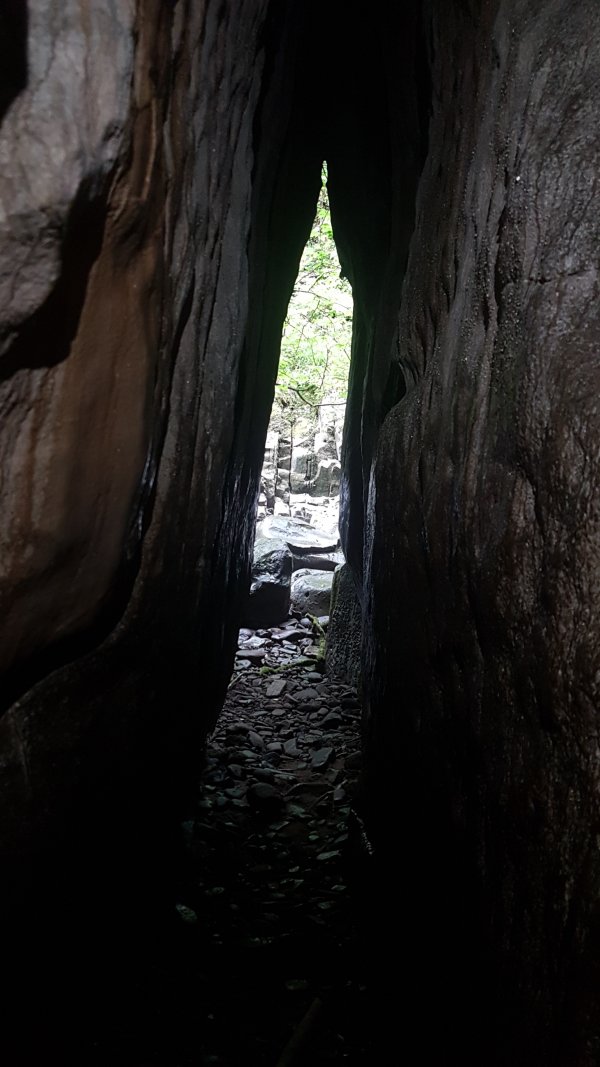 Inside the rift.
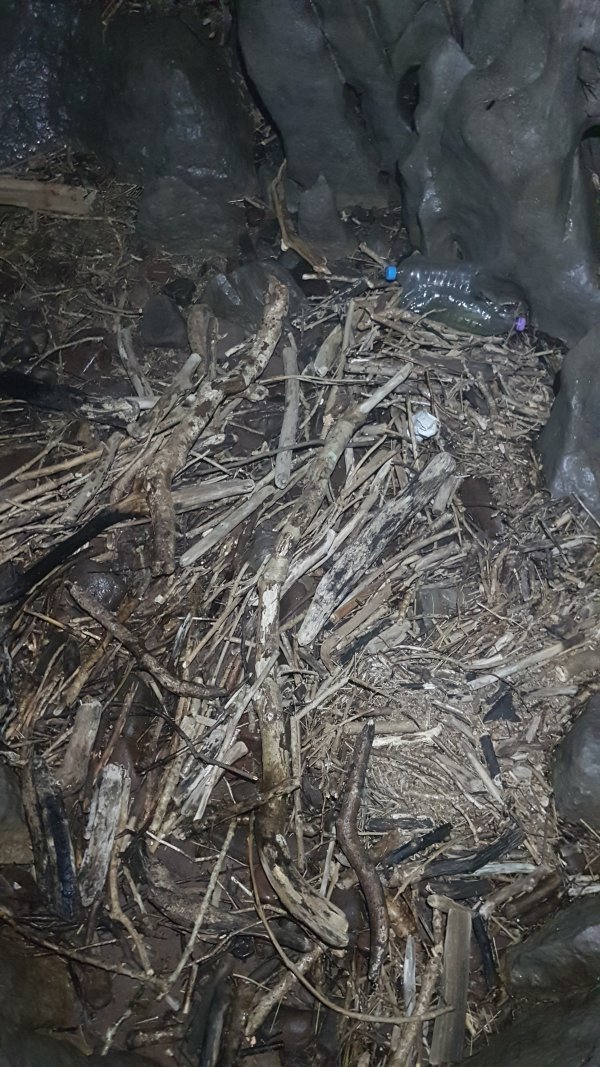 Mound of debris at a junction.
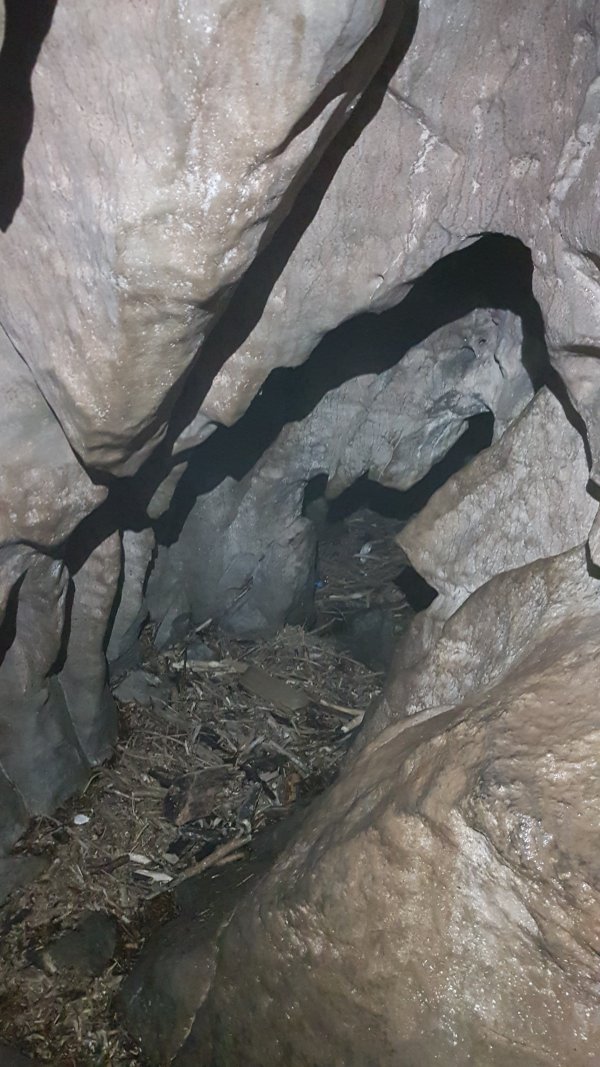 To the left is a debris filled passage.
 This ends at a window down to the Pwll y Rhyd chasm. Ahead through another window is the continuing passage, which is the tight passage seen before.
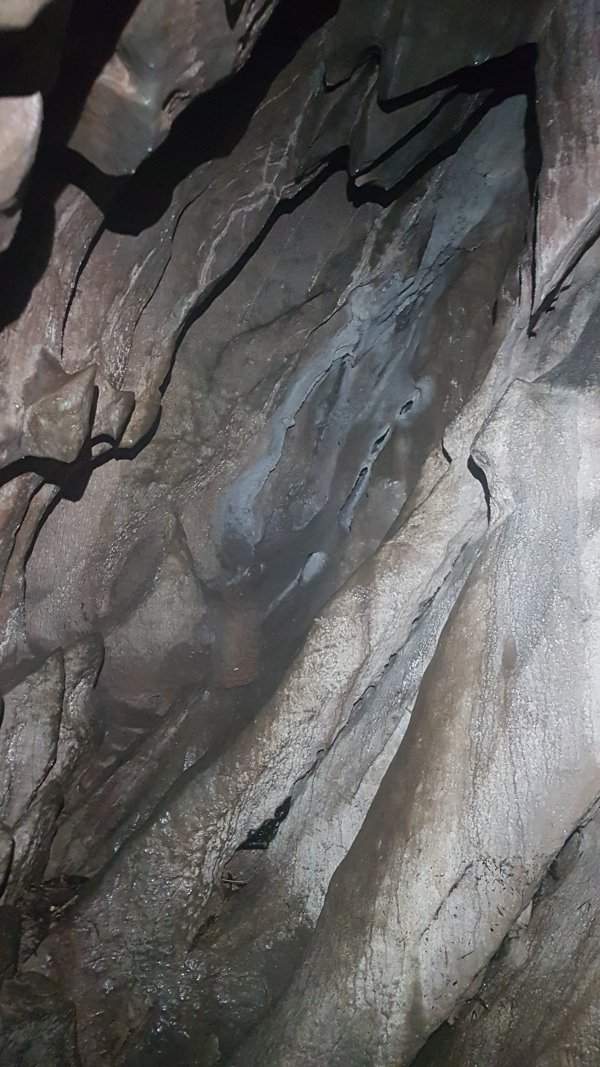 The passage to the right at the junction.
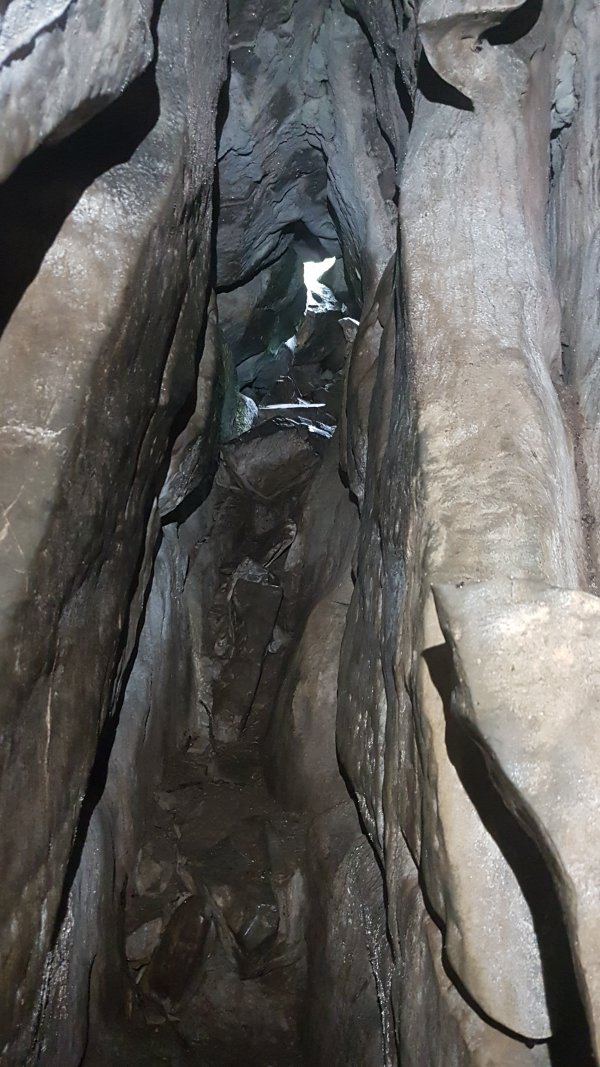 This passage leads up to another entrance, hidden on the slope above the river.
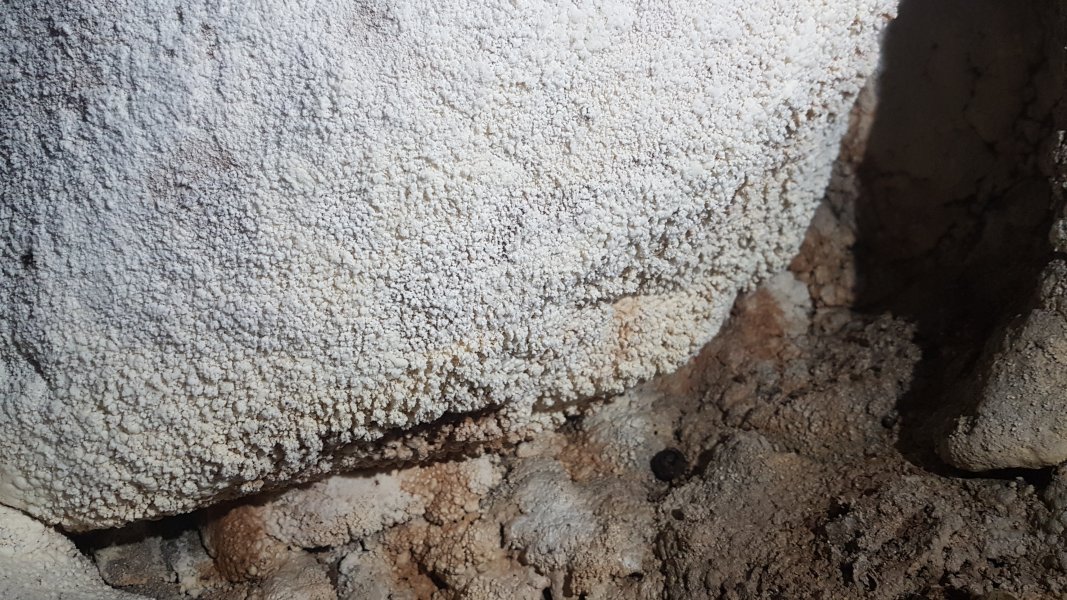 Formations on the passage wall.
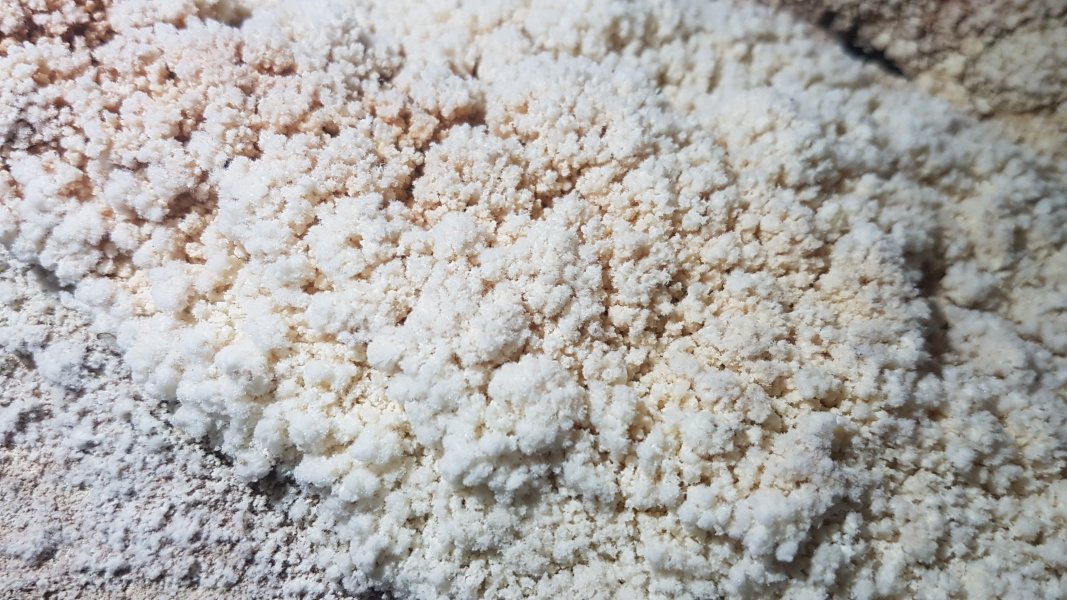 Detail of the formations.
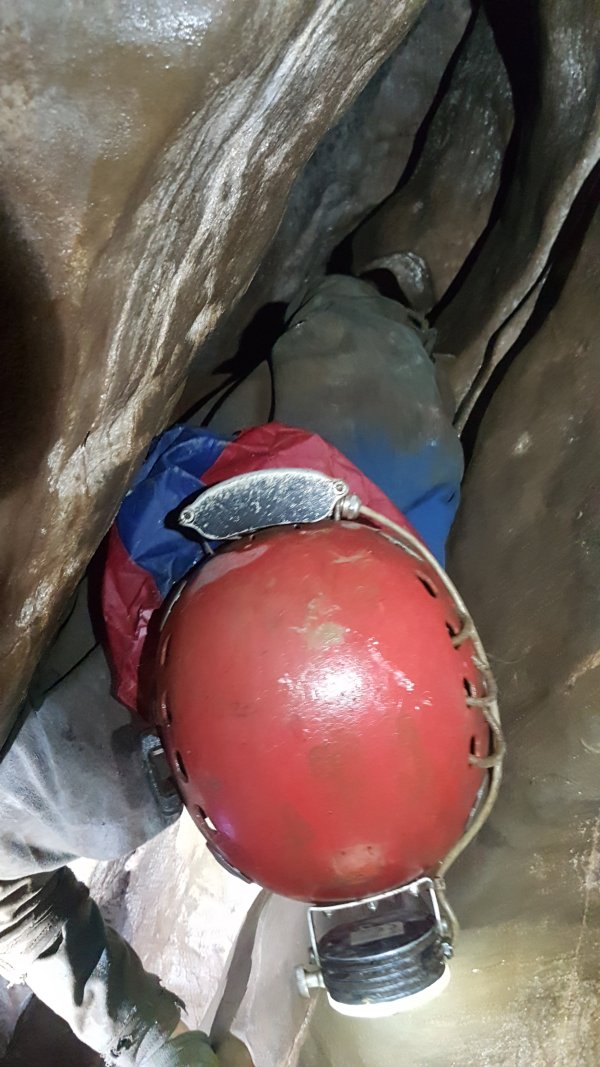 A slanting squeeze on the wall reaches a continuing passage heading upstream.
Modelling by Gareth, lighting by Tarquin and Gareth
A slanting squeeze on the wall reaches a continuing passage heading upstream.
Modelling by Gareth, lighting by Tarquin and Gareth The passage continues and has been pushed, but is a bit too tight for us. Perhaps it gains another entrance. None of these smaller passages are on the survey.
Modelling by Gareth, lighting by Tarquin and Gareth
The passage continues and has been pushed, but is a bit too tight for us. Perhaps it gains another entrance. None of these smaller passages are on the survey.
Modelling by Gareth, lighting by Tarquin and Gareth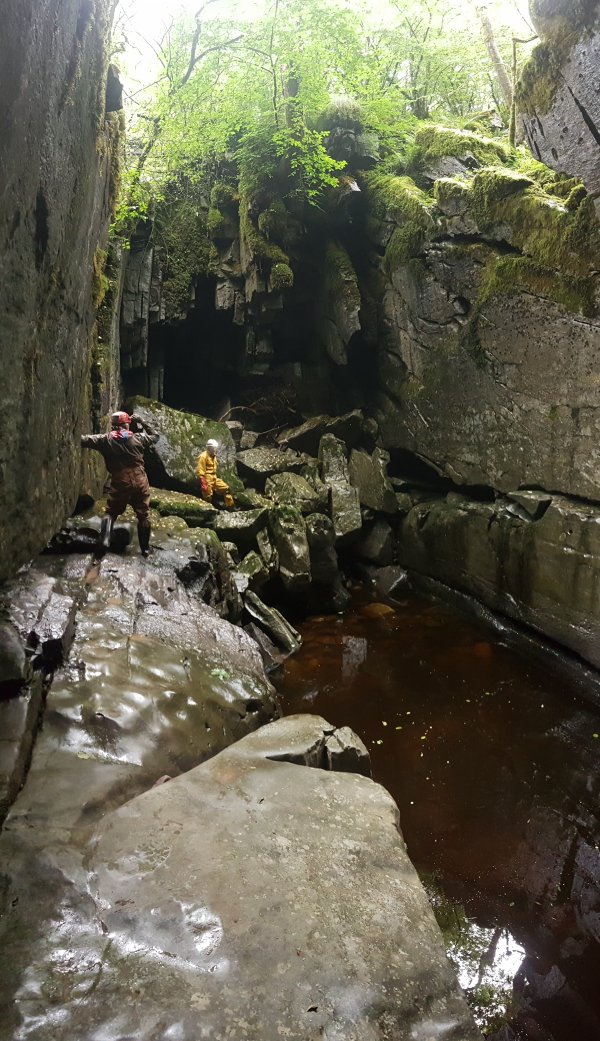 Looking from the west side of Pwll y Rhyd towards the east side, where there are further passages - those passages have no physical connection to the western passages, so could be considered a separate cave, depending on how you want to define it. When the river is in flood, the water can fill up as high as the ledge. The ledge becomes impassable in even low flood conditions, as the waterfall runs over it. Sadly, there is no convenient route down at the western end, and either a rope descent or a swim across the pool are required.
Modelling by Gareth and Pete, lighting by Sol and Pete
Looking from the west side of Pwll y Rhyd towards the east side, where there are further passages - those passages have no physical connection to the western passages, so could be considered a separate cave, depending on how you want to define it. When the river is in flood, the water can fill up as high as the ledge. The ledge becomes impassable in even low flood conditions, as the waterfall runs over it. Sadly, there is no convenient route down at the western end, and either a rope descent or a swim across the pool are required.
Modelling by Gareth and Pete, lighting by Sol and Pete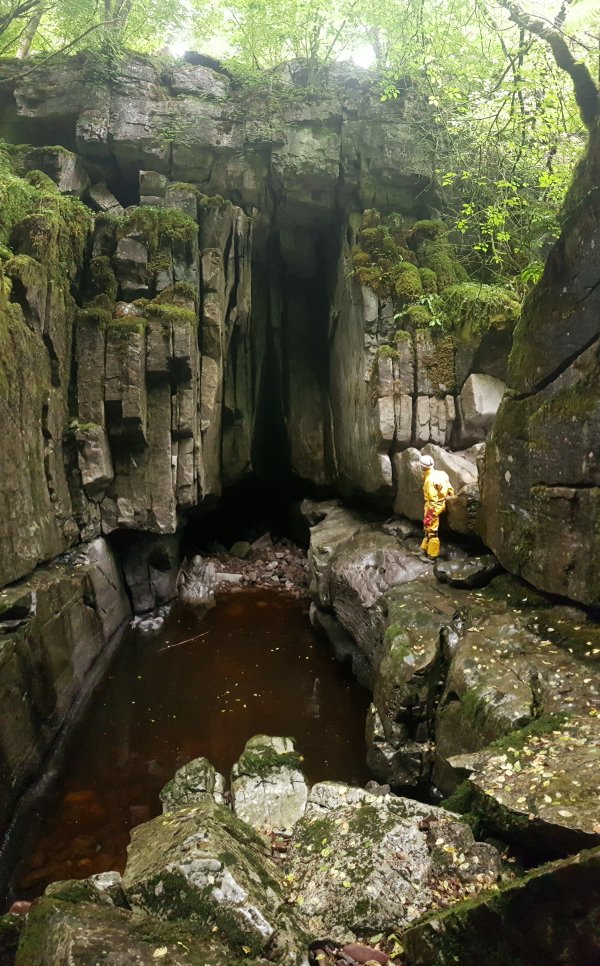 Looking from the east side of Pwll y Rhyd towards the west side. The window passages sit in the roof of the apex, while the duck is ahead. Pete is standing at the river inlet, and in flood the river normally falls into rifts just upstream, and flows under natural rock bridges onto the ledge.
Modelling by Pete
Looking from the east side of Pwll y Rhyd towards the west side. The window passages sit in the roof of the apex, while the duck is ahead. Pete is standing at the river inlet, and in flood the river normally falls into rifts just upstream, and flows under natural rock bridges onto the ledge.
Modelling by Pete Short phreatic tube on the southern side. It only went as far as we could see, but perhaps could be opened up by flooding.
Modelling by Pete, lighting by Tarquin and Pete
Short phreatic tube on the southern side. It only went as far as we could see, but perhaps could be opened up by flooding.
Modelling by Pete, lighting by Tarquin and Pete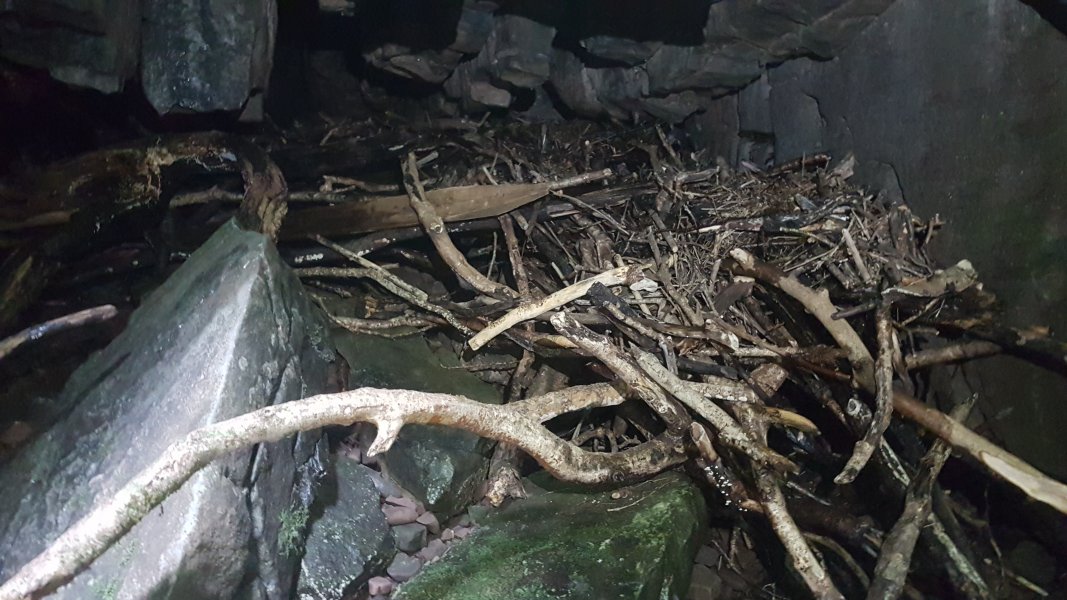 Debris almost filling the eastern passage.
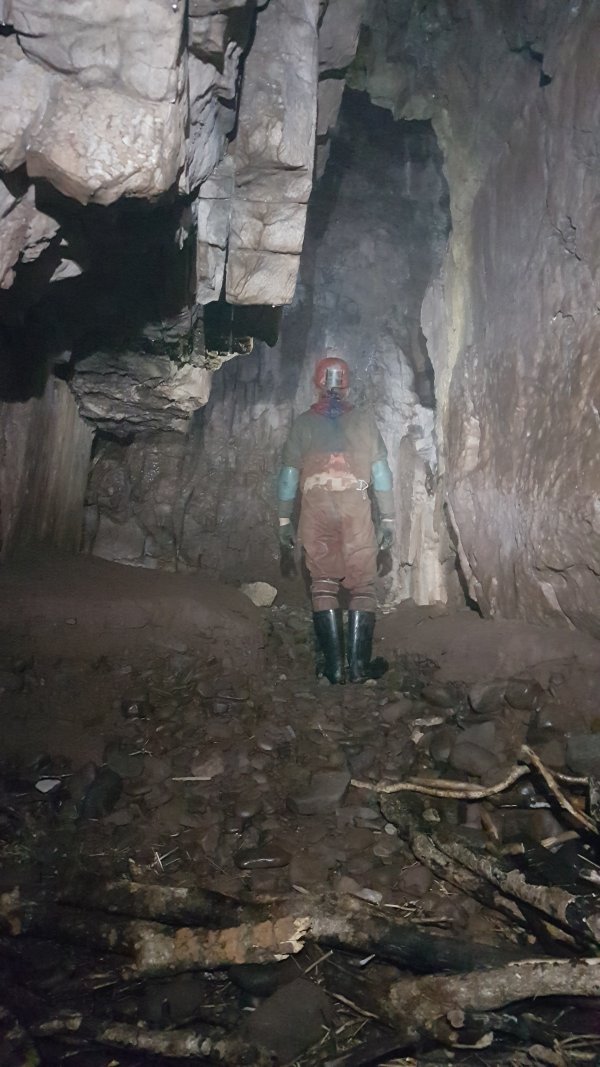 The main eastern passage. On the right side is a short aven loop.
Modelling by Gareth, lighting by Tarquin and Gareth
The main eastern passage. On the right side is a short aven loop.
Modelling by Gareth, lighting by Tarquin and Gareth A common toad who has decided to take up residence in the eastern passage. He was not interested in our offer of assistance to relocate, and was determined to remain with the blank wall that he found truly fascinating.
Modelling by Brian
A common toad who has decided to take up residence in the eastern passage. He was not interested in our offer of assistance to relocate, and was determined to remain with the blank wall that he found truly fascinating.
Modelling by Brian Chamber filled with moonmilk.
Modelling by Pete, lighting by Tarquin and Pete
Chamber filled with moonmilk.
Modelling by Pete, lighting by Tarquin and Pete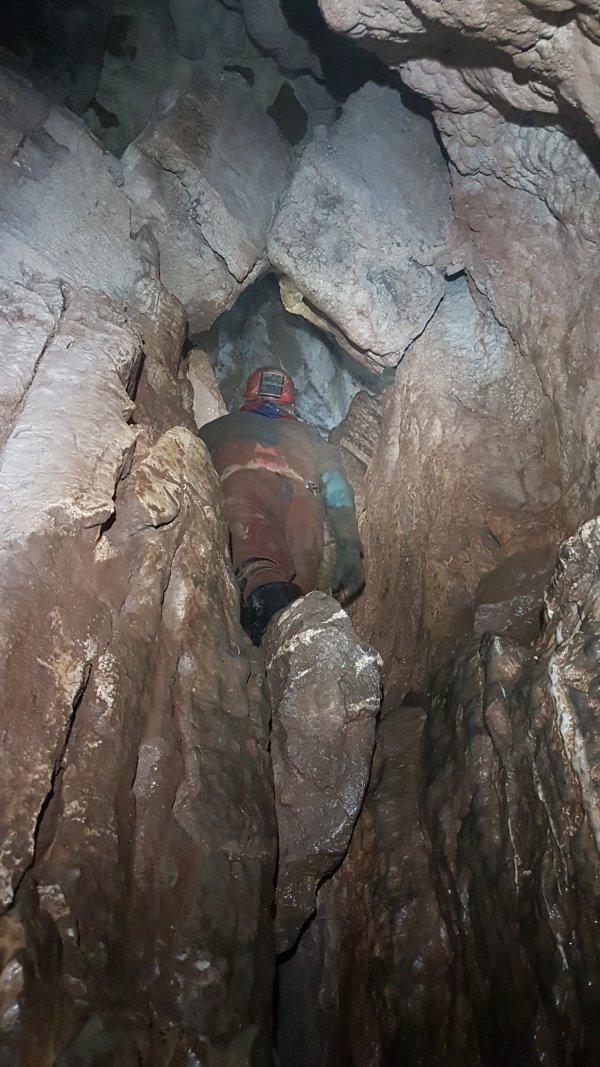 Climb up in the moonmilk chamber.
Modelling by Gareth, lighting by Tarquin and Gareth
Climb up in the moonmilk chamber.
Modelling by Gareth, lighting by Tarquin and Gareth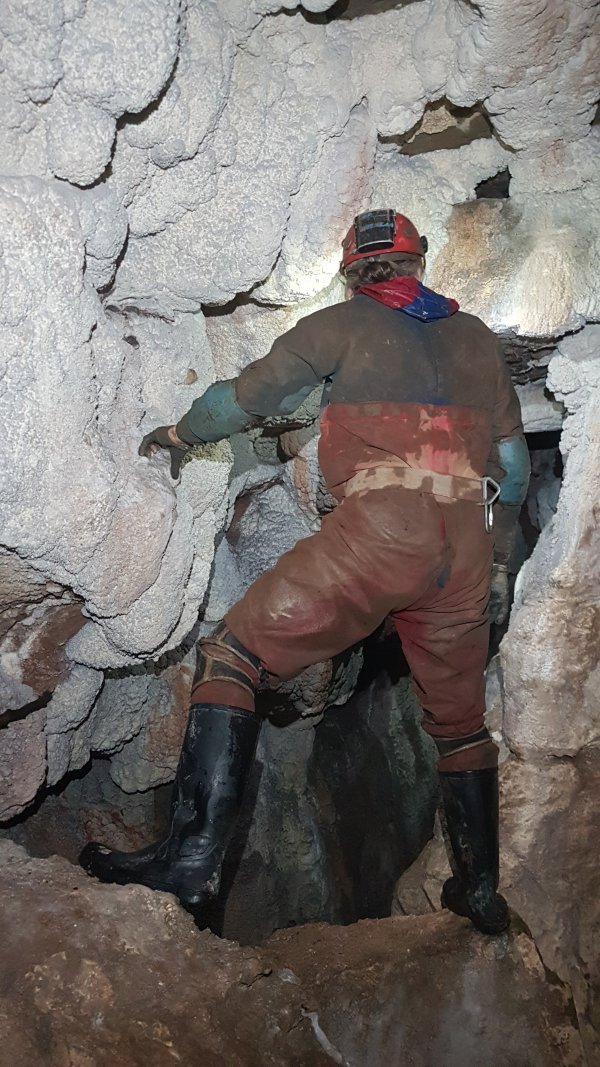 Ledge with a view over the moonmilk chamber.
Modelling by Pete, lighting by Tarquin and Pete
Ledge with a view over the moonmilk chamber.
Modelling by Pete, lighting by Tarquin and Pete Moonmilk.
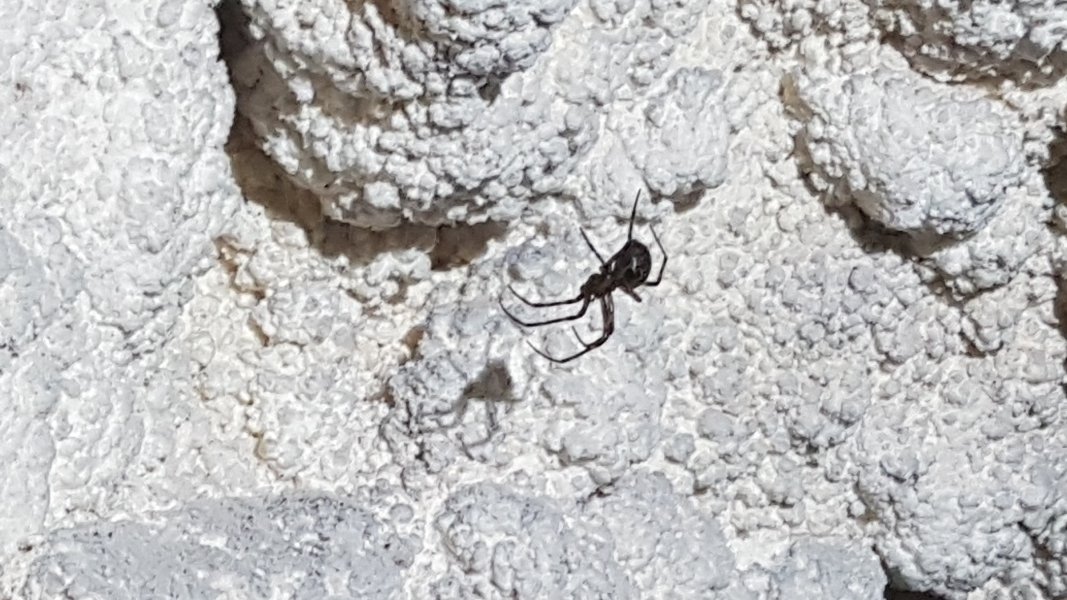 Cave spider living on the moonmilk.
Modelling by Charlotte
Cave spider living on the moonmilk.
Modelling by Charlotte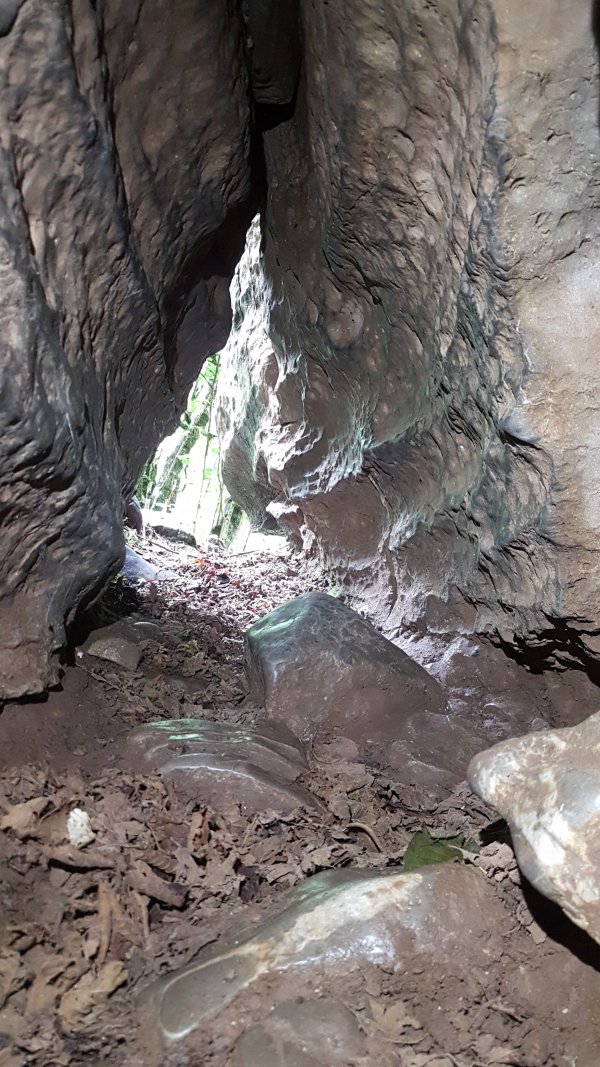 Triangular passage leading off from the top towards daylight.
 The passage housed a few more spiders that did not need to be flattened, so we left it alone, and checked it out from the outside.
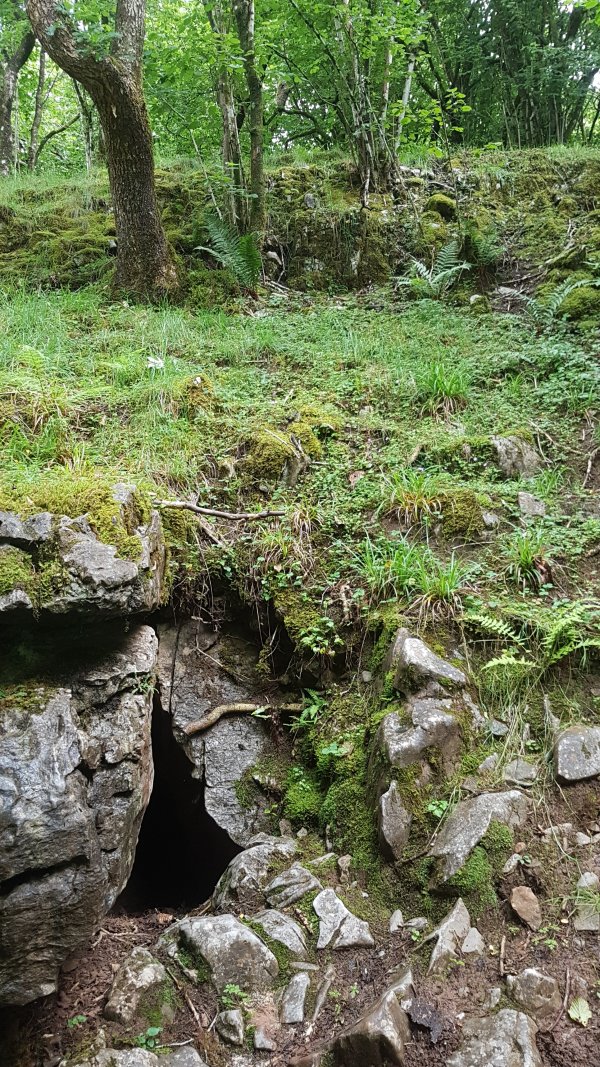 Seen in situ. The path towards White Lady cave and Town Drain passes along the top of this picture as it skirts the Pwll y Rhyd buttress.
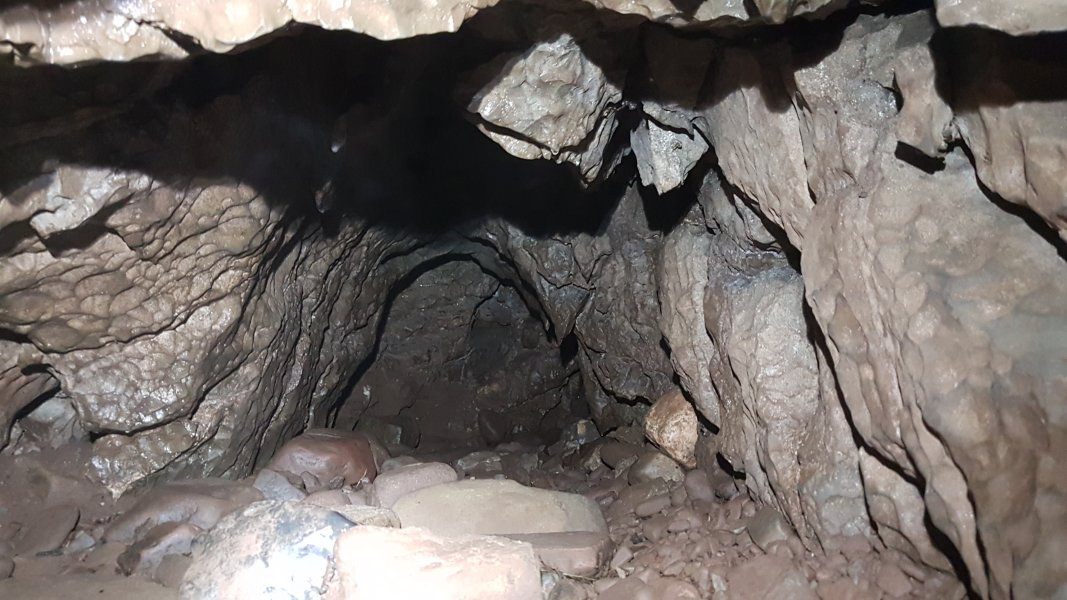 Crawl leading off from the moonmilk chamber, which immediately splits in two, with the left branch being at the left edge of this picture.
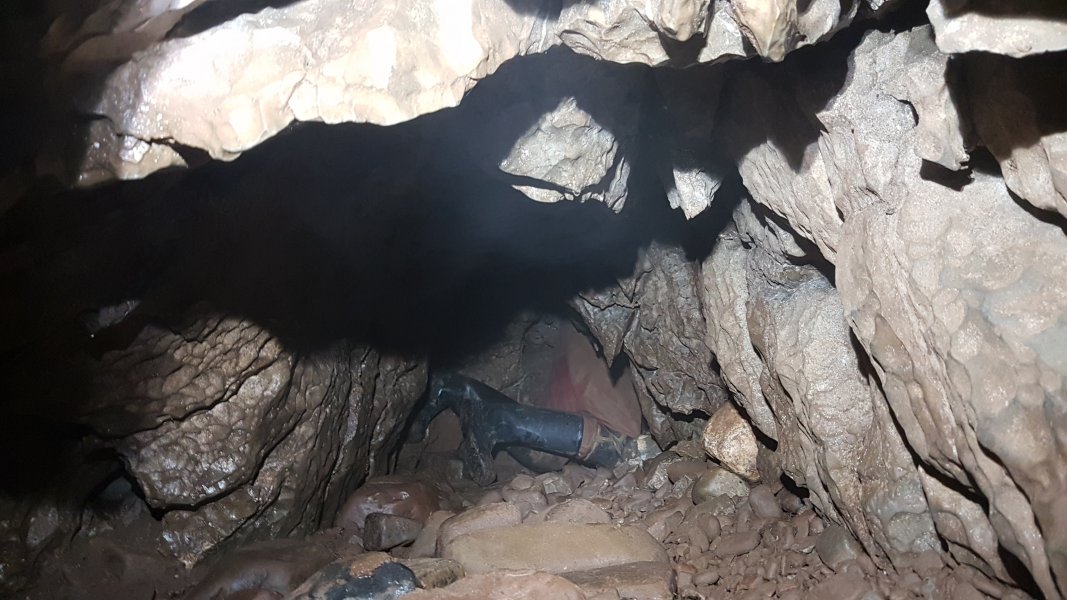 Heading into the right branch of the crawl.
Modelling by Gareth
Heading into the right branch of the crawl.
Modelling by Gareth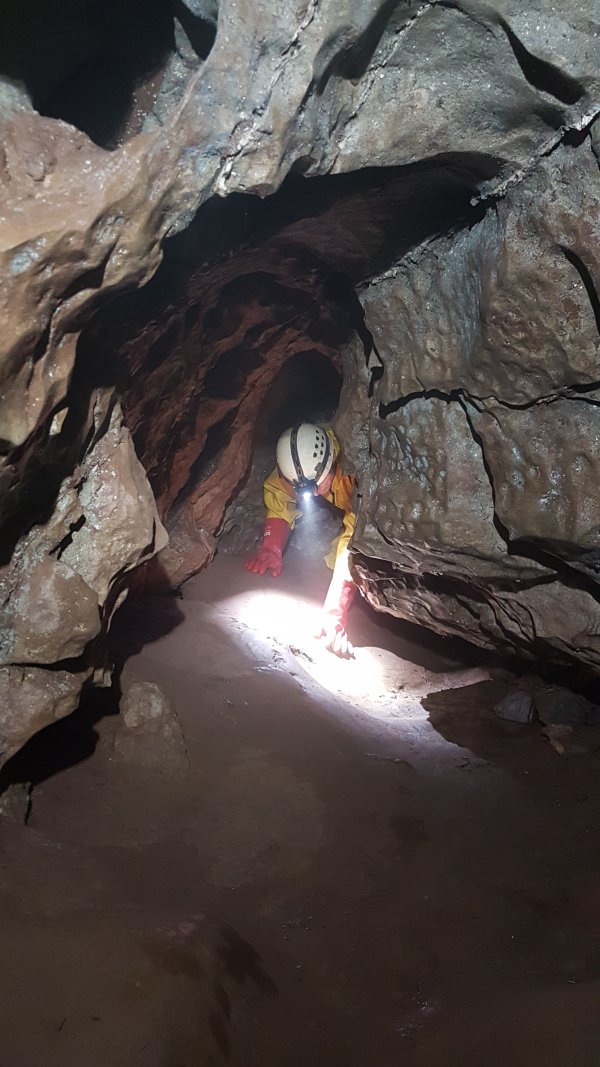 The passage remains a crawl for almost its whole length, passing over old formations, and showing signs of complete flooding.
Modelling by Pete, lighting by Tarquin and Pete
The passage remains a crawl for almost its whole length, passing over old formations, and showing signs of complete flooding.
Modelling by Pete, lighting by Tarquin and Pete Clamber down into a muddy little chamber, with a lower crawl visible through an eyehole.
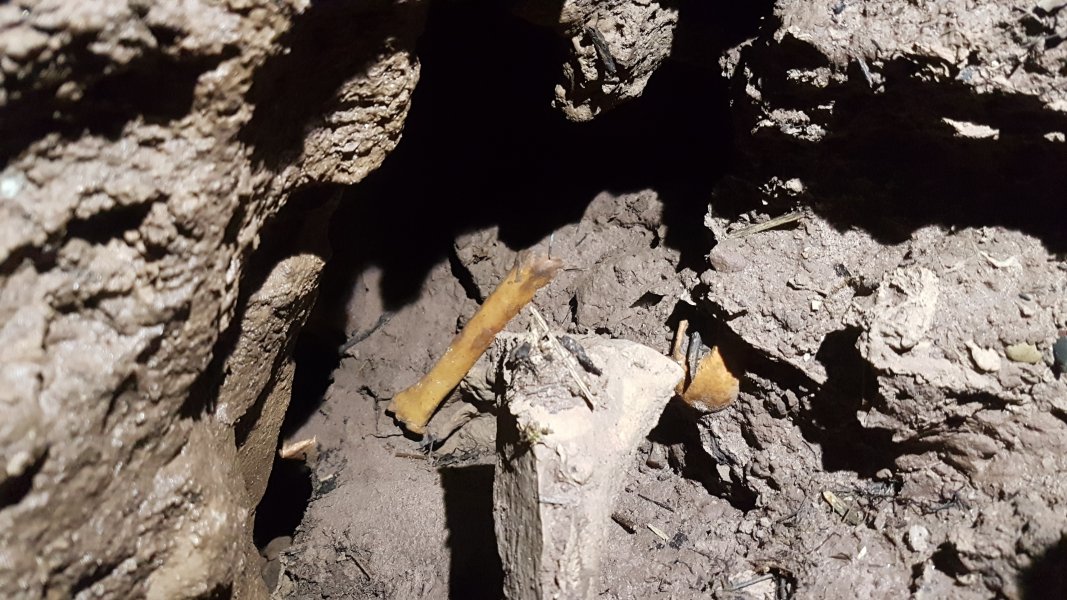 Bones in the mud.
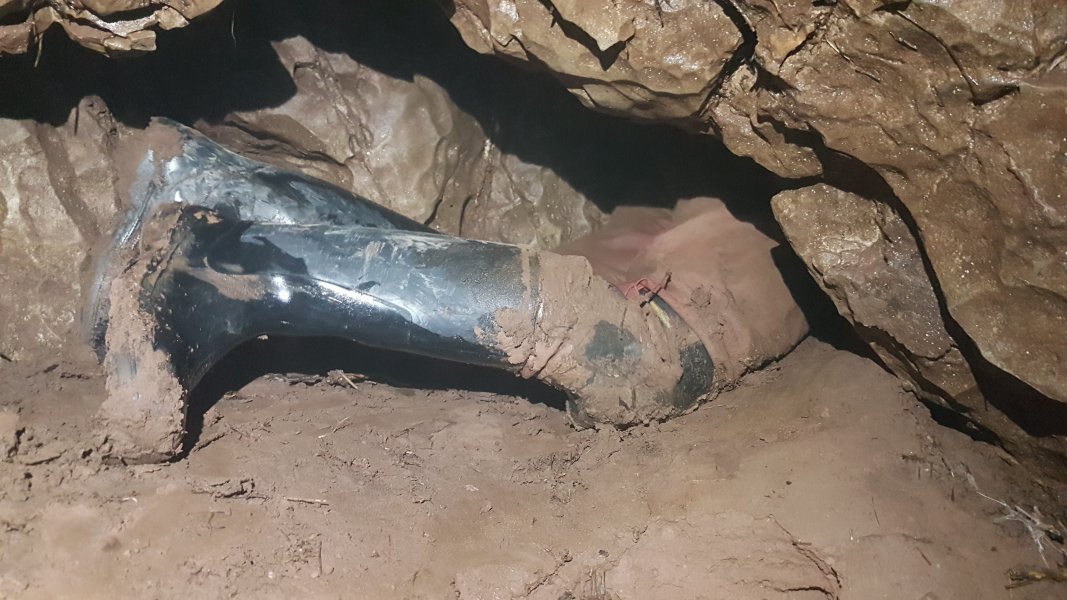 Heading into the final section of the crawl on the other side of the chamber.
Modelling by Gareth
Heading into the final section of the crawl on the other side of the chamber.
Modelling by Gareth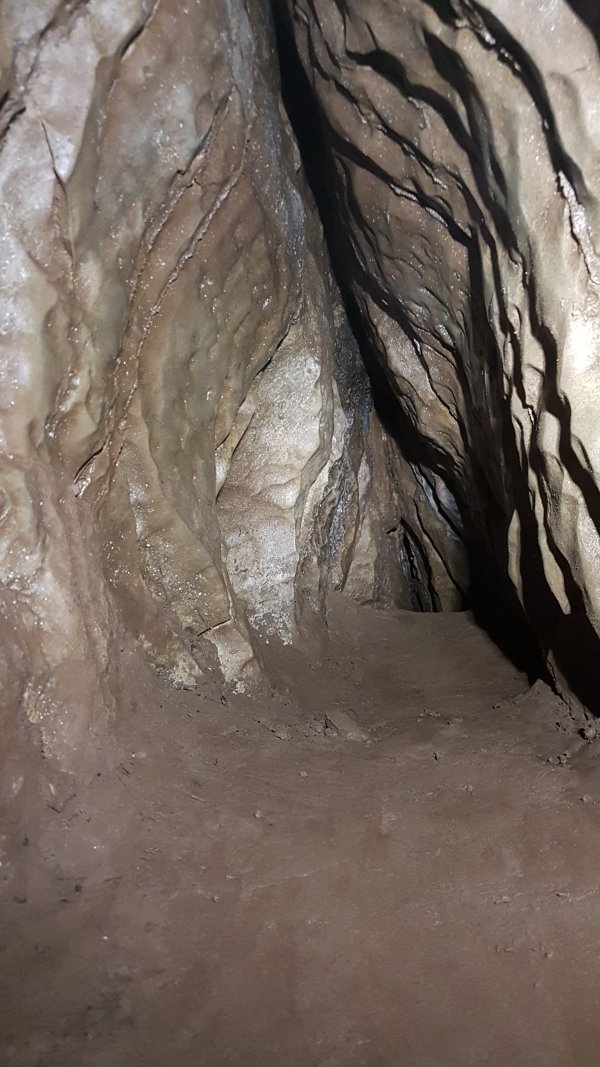 The crawl pinches out and ends. It draughts but it must be very close to the short phreatic tube seen earlier. The draught is almost certinly from that. Neither passage is on the survey.
 Start of the left branch of the crawl.
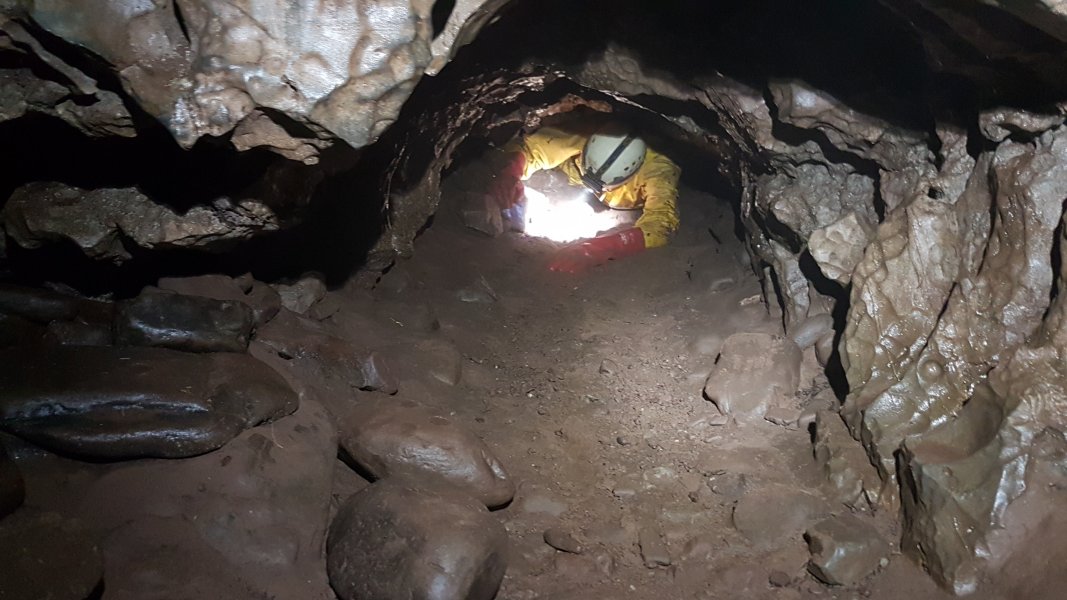 In the left branch of the crawl.
Modelling by Pete, lighting by Tarquin and Pete
In the left branch of the crawl.
Modelling by Pete, lighting by Tarquin and Pete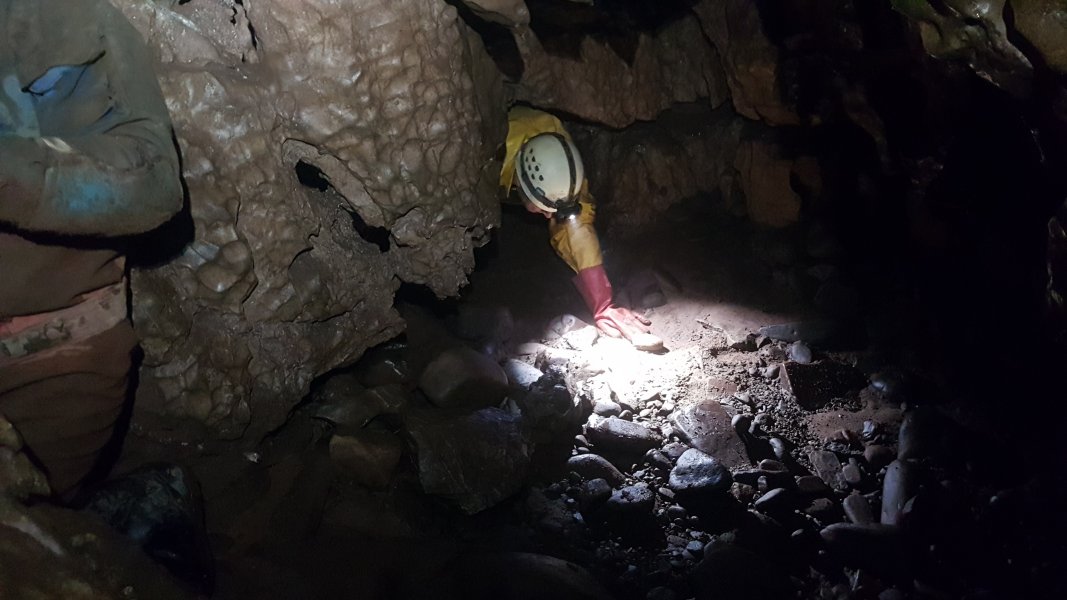 The crawl splits into upper and lower levels which both enter a little chamber. From here, there are several ways on.
Modelling by Gareth and Pete, lighting by Tarquin and Pete
The crawl splits into upper and lower levels which both enter a little chamber. From here, there are several ways on.
Modelling by Gareth and Pete, lighting by Tarquin and Pete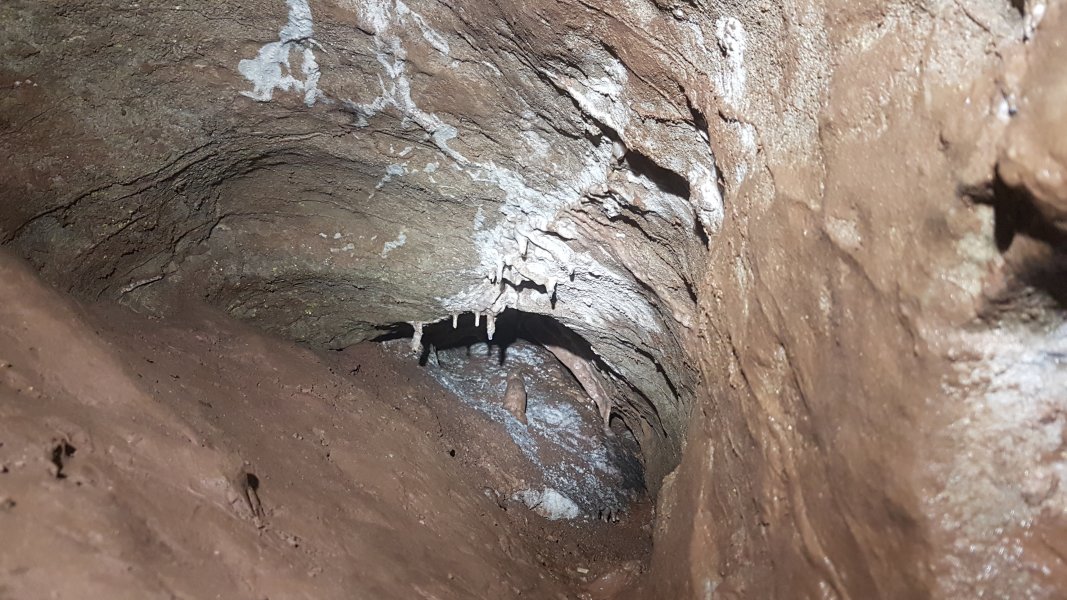 Upper tubes on the right end quickly.
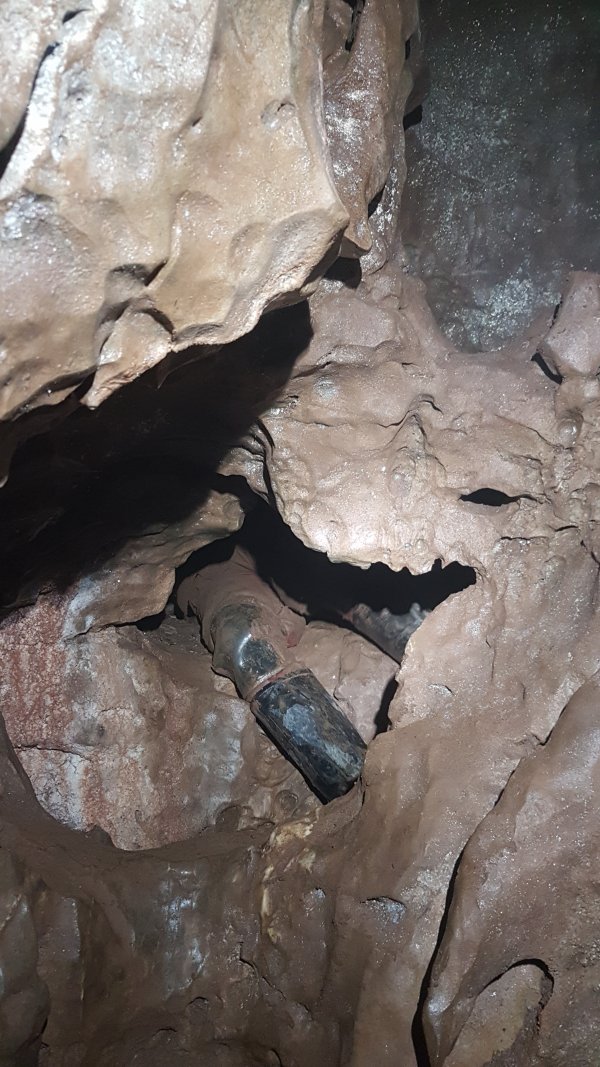 An awkward passage ahead-right also ends.
Modelling by Gareth
An awkward passage ahead-right also ends.
Modelling by Gareth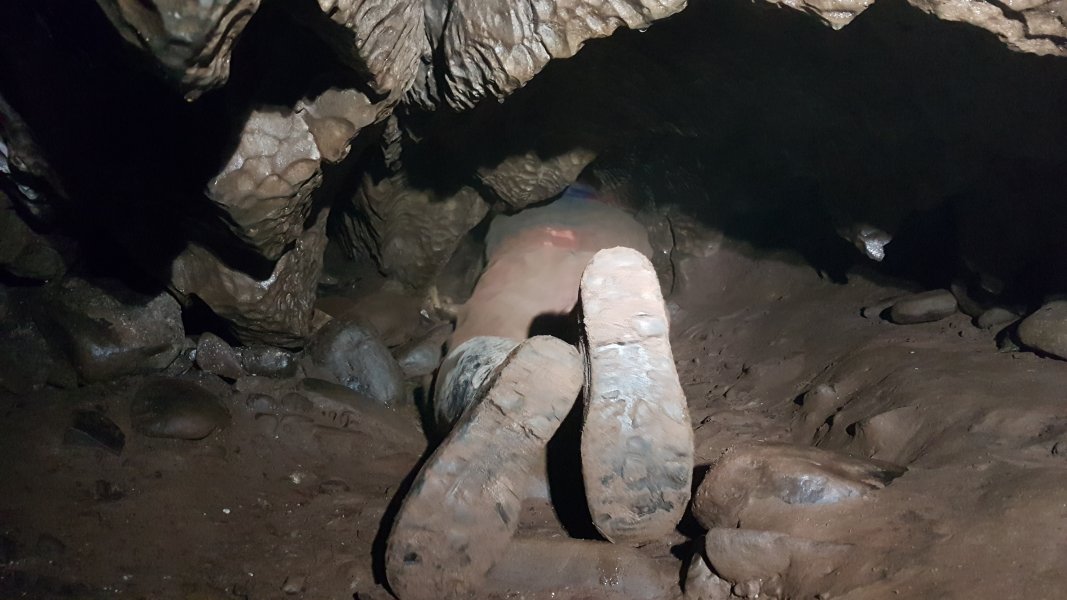 Continuing ahead-left into more crawling.
Modelling by Gareth, lighting by Tarquin and Gareth
Continuing ahead-left into more crawling.
Modelling by Gareth, lighting by Tarquin and Gareth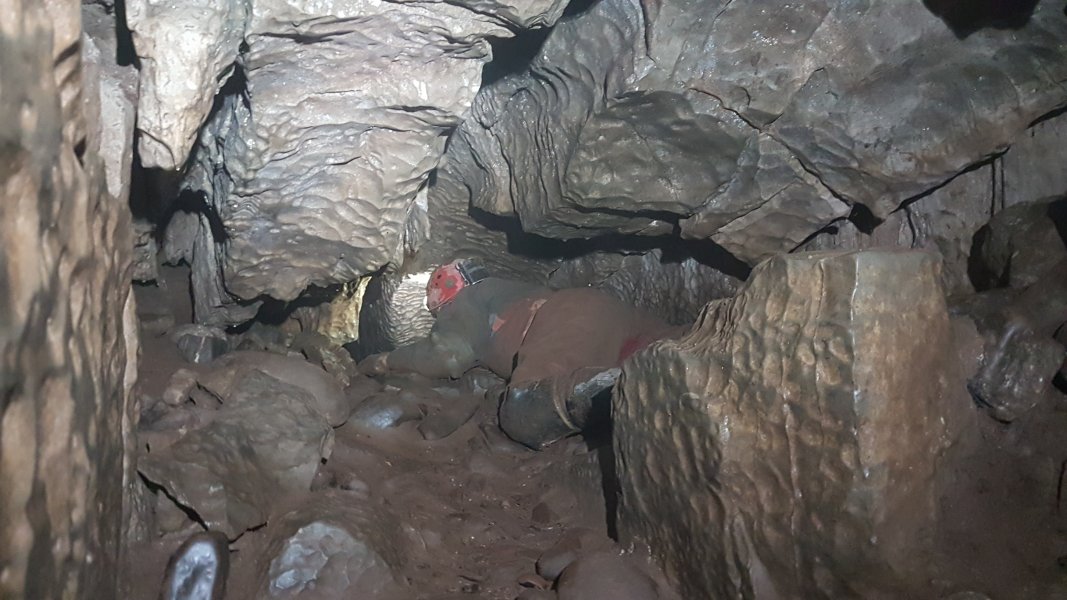 Passing through a bedding.
Modelling by Gareth, lighting by Tarquin and Gareth
Passing through a bedding.
Modelling by Gareth, lighting by Tarquin and Gareth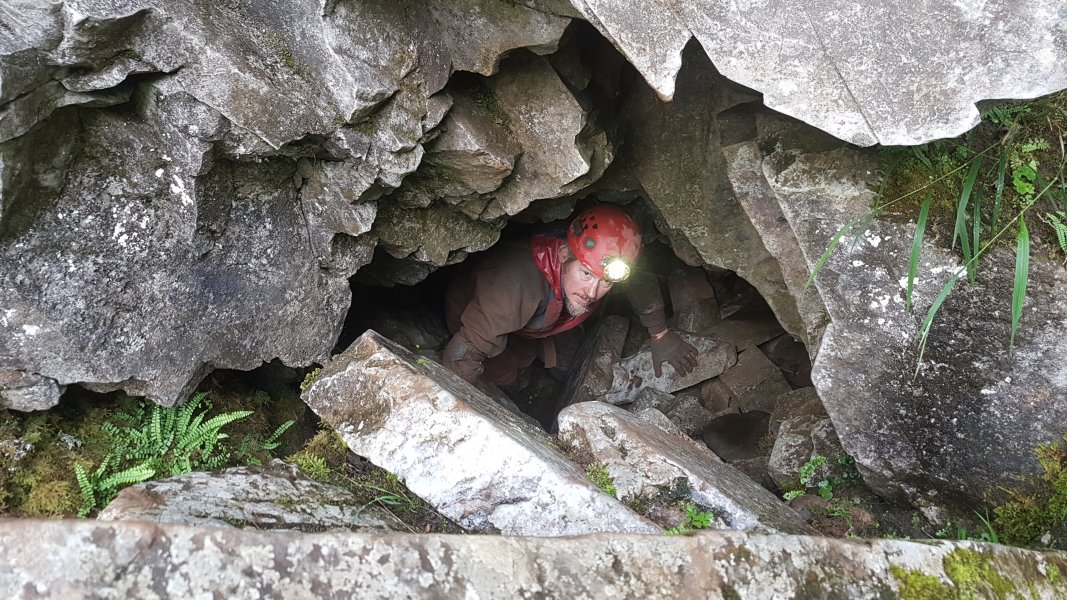 The passage ends at an entrance a little above river level on the buttress.
Modelling by Gareth, lighting by Sol and Gareth
The passage ends at an entrance a little above river level on the buttress.
Modelling by Gareth, lighting by Sol and Gareth A really unusual thing given the date; we were finally allowed to sit at a pub, and have drinks. The queue and sanitiser are because the COVID lockdown closure of pubs had finally been partly lifted, allowing use of pub beer gardens.
Modelling by Gareth and Pete
A really unusual thing given the date; we were finally allowed to sit at a pub, and have drinks. The queue and sanitiser are because the COVID lockdown closure of pubs had finally been partly lifted, allowing use of pub beer gardens.
Modelling by Gareth and Pete Small waterfall on the route towards Sgwd Gwladus.
 Small waterfall above it, several metres tall.
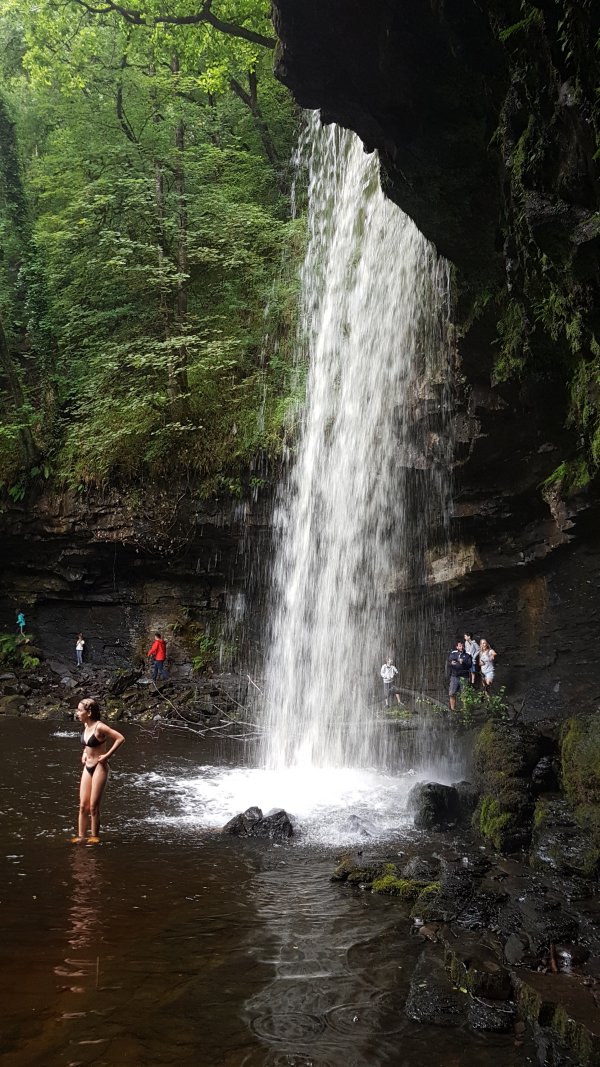 Walking the path behind Sgwd Gwladus.
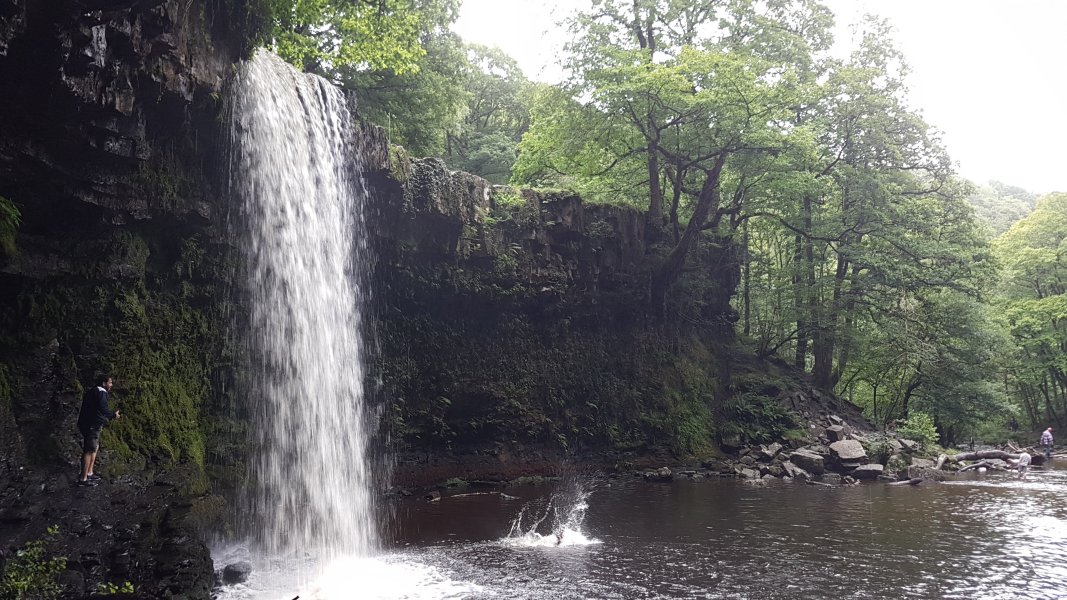 Diving in from the base of the waterfall.