Ogof Rhyd Sych trip 26/06/2018
This is a cave with two completely different stories to tell. Its first half is dominated by impressively tight and awkward crawls, while its second half is very grand passage with superb formations, a great reward for the very significant investment. The total trip was 4 hours and 45 minutes, which allowed plenty of time for photography, and a gentle pace. With a length of only 1 km, of which only about 750 metres is visited on a typical trip, this should show just how slow progress is through the first half of the cave. The proportion of photographs covering the first and second halves of the cave will reflect how much time it takes to travel through each of those sections.
Unless otherwise stated, camera, setups, lighting, edits and gallery effects by Tarquin. Modelling and lighting at various points will be Pete Bolt, Claire Cohen, Kevin Hilton and Clive Westlake.
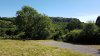 Morlais quarries, dominating the view of the Taf Fechan valley, seen from Vaynor churchyard. These are a popular climbing spot, and have a few short caves, but there are no major caves in this entire mountain group - the nearest significant caves are in the Southeast Beacons (Ogof Ap Robert and Ogof Tarddiad Rhymney) and Fforest Fawr (Ogof Fawr).
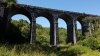 Pontsarn Viaduct, part of the rich industrial heritage of the area.
Modelling by Pete
Pontsarn Viaduct, part of the rich industrial heritage of the area.
Modelling by Pete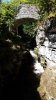 Cascades below the road bridge at Pontsarn. These are a popular swimming spot, and some children were carefully aiming insane jumps from the bridge into the narrow plunge pool below.
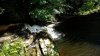 Pontsarn Blue Pool, one of two waterfalls on the river that are known as Pwll Glas in Welsh.
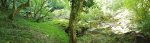 Nant y Glais, a small tributary stream which is almost running dry in the hot weather. The water seems to be flowing through a shallow cave at this point (Ogof Johnny Bach), as there is more water in the river just upstream.
Modelling by Pete, Kevin, Claire and Clive
Nant y Glais, a small tributary stream which is almost running dry in the hot weather. The water seems to be flowing through a shallow cave at this point (Ogof Johnny Bach), as there is more water in the river just upstream.
Modelling by Pete, Kevin, Claire and Clive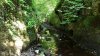 Nant y Glais digs a short gorge, which contains the caves. The gorge itself appears to be an unroofed cave.
 The entrance to Ogof Pysgodyn Gwyn, a tiny resurgence cave on the left side of the gorge. The resurgence is under the wall to the right, not the obvious rift. It carries water from slightly higher up the river.
 The name means "white fish", after the blanched cave trout that live in it. We were mistakenly told that it was called Pysgodyn Gnau, meaning "nuts fish", which would have been far more appropriate, as you would have to be nuts to want to dive that tiny passage just to access its 30 metres of sump.
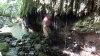 Immediately afterwards is a tufa/flowstone overhang, with water dribbling off it. It is hard to call it a waterfall but you can stand behind it. The water comes from Tufa Spring, immediately above the tufa.
Modelling by Kevin
Immediately afterwards is a tufa/flowstone overhang, with water dribbling off it. It is hard to call it a waterfall but you can stand behind it. The water comes from Tufa Spring, immediately above the tufa.
Modelling by Kevin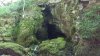 Just before the gorge ends is the large entrance to Ogof Rhyd Sych, on the right.
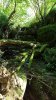 The dry waterfall at the head of the gorge. The entrance to Ogof Dŵr Dwfn is in the roof of the undercut to the left. The top of the waterfall is the old "dry ford"; Rhyd Sych. The main cave normally takes the full flow of the stream except in flood, and is named after the ford. A little further upstream on the left is Ogof y Ci, the longest in the area at around 1.4 km long - it is normally misquoted as 548 metres.
 Heading in to the lush entrance of Ogof Rhyd Sych.
Modelling by Claire and Kevin, lighting by Sol, Claire and Kevin
Heading in to the lush entrance of Ogof Rhyd Sych.
Modelling by Claire and Kevin, lighting by Sol, Claire and Kevin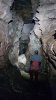 The grand entrance passage, with its beautifuly waterwashed character, similar to Ogof Ffynnon Ddu's streamway, or a Yorkshire pothole. Enjoy it, because it is the best passage for a long while.
Modelling by Claire, lighting by Tarquin and Claire
The grand entrance passage, with its beautifuly waterwashed character, similar to Ogof Ffynnon Ddu's streamway, or a Yorkshire pothole. Enjoy it, because it is the best passage for a long while.
Modelling by Claire, lighting by Tarquin and Claire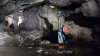 The largest part of the entrance passage, just before the duck.
Modelling by Clive and Kevin, lighting by Tarquin, Pete, Clive and Kevin
The largest part of the entrance passage, just before the duck.
Modelling by Clive and Kevin, lighting by Tarquin, Pete, Clive and Kevin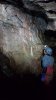 Flowstone wall in the large passage.
Modelling by Claire, lighting by Tarquin and Claire
Flowstone wall in the large passage.
Modelling by Claire, lighting by Tarquin and Claire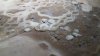 Cave pearls on the flowstone. The largest are about 2 cm in diameter.
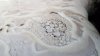 More pearls, this time about 1 cm in diameter.
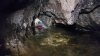 The large passage ends abruptly at a former Sump, which was altered to turn it into a duck. There is a tempting bedding dig above it, but the way on is through the duck, earning a soaking. In these extremely low water conditions, faces and backs could remain dry.
Modelling by Claire, lighting by Tarquin and Claire
The large passage ends abruptly at a former Sump, which was altered to turn it into a duck. There is a tempting bedding dig above it, but the way on is through the duck, earning a soaking. In these extremely low water conditions, faces and backs could remain dry.
Modelling by Claire, lighting by Tarquin and Claire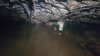 Exiting the far side of the duck.
Modelling by Claire, lighting by Tarquin and Claire
Exiting the far side of the duck.
Modelling by Claire, lighting by Tarquin and Claire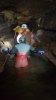 The queue to get out of the pool, hampered by the first "squeeze".
Modelling by Claire, Kevin and Pete, lighting by Tarquin, Claire, Kevin and Pete
The queue to get out of the pool, hampered by the first "squeeze".
Modelling by Claire, Kevin and Pete, lighting by Tarquin, Claire, Kevin and Pete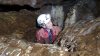 Immediately after the duck, the cave's character makes itself known, with the first squeeze.
Modelling by Kevin, lighting by Tarquin and Kevin
Immediately after the duck, the cave's character makes itself known, with the first squeeze.
Modelling by Kevin, lighting by Tarquin and Kevin The squeeze is not particularly tight, but it comes with a good dose of mud, while you attempt not to faceplant into a muddy pool.
Modelling by Claire, lighting by Tarquin and Claire
The squeeze is not particularly tight, but it comes with a good dose of mud, while you attempt not to faceplant into a muddy pool.
Modelling by Claire, lighting by Tarquin and Claire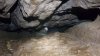 Muddy sloping bedding. This is the largest of the beddings, and is not treated as being the first bedding, because it is not tight enough. The zeroth bedding. Because beddings start at 0.
Modelling by Kevin, lighting by Tarquin and Kevin
Muddy sloping bedding. This is the largest of the beddings, and is not treated as being the first bedding, because it is not tight enough. The zeroth bedding. Because beddings start at 0.
Modelling by Kevin, lighting by Tarquin and Kevin Just when it looks like it is going to get bigger, the way on turns out to be another stupidly small hole in the floor.
Modelling by Claire, lighting by Tarquin and Claire
Just when it looks like it is going to get bigger, the way on turns out to be another stupidly small hole in the floor.
Modelling by Claire, lighting by Tarquin and Claire Unlike the last one, this does not require a squeeze, but it instead drops you into a water bath, for a second soaking.
Modelling by Claire, lighting by Tarquin and Claire
Unlike the last one, this does not require a squeeze, but it instead drops you into a water bath, for a second soaking.
Modelling by Claire, lighting by Tarquin and Claire The first bedding then begins for real. This is the second tightest bedding, but is fairly easy to negotiate, as long as you are thin enough.
Modelling by Kevin
The first bedding then begins for real. This is the second tightest bedding, but is fairly easy to negotiate, as long as you are thin enough.
Modelling by Kevin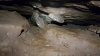 So low that even a pair of wellies cannot fit through upright.
Modelling by Kevin
So low that even a pair of wellies cannot fit through upright.
Modelling by Kevin Wriggle wriggle.
Modelling by Claire, lighting by Tarquin and Claire
Wriggle wriggle.
Modelling by Claire, lighting by Tarquin and Claire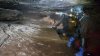 The bedding ends in a large cross passage, which pinches out to nothing uphill, and ends at the tiny Sump 1 downhill connecting back to the previous pools. Why on earth is this even here? Perhaps all these parallel passages explain why the way on seems so small, because the cave's size is wasted on an extremely wide series of beddings instead of a single large passage.
Modelling by Claire, Clive and Pete, lighting by Tarquin, Claire, Clive and Pete
The bedding ends in a large cross passage, which pinches out to nothing uphill, and ends at the tiny Sump 1 downhill connecting back to the previous pools. Why on earth is this even here? Perhaps all these parallel passages explain why the way on seems so small, because the cave's size is wasted on an extremely wide series of beddings instead of a single large passage.
Modelling by Claire, Clive and Pete, lighting by Tarquin, Claire, Clive and Pete Formations in the cross passage.
 Underwater helictite in the cross passage.
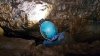 The bedding on the other side closes down. The way on is to go a little up the cross passage, then take a slot down beside the formations, into the continuing bedding. It looks impossible, and the formations somehow have survived the onslaught, so they appear at first to be untouched.
Modelling by Clive, lighting by Tarquin and Clive
The bedding on the other side closes down. The way on is to go a little up the cross passage, then take a slot down beside the formations, into the continuing bedding. It looks impossible, and the formations somehow have survived the onslaught, so they appear at first to be untouched.
Modelling by Clive, lighting by Tarquin and Clive Sliding over the formations into the bedding.
Modelling by Clive, lighting by Tarquin and Clive
Sliding over the formations into the bedding.
Modelling by Clive, lighting by Tarquin and Clive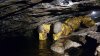 The slot drops you into another pool at the start of the second bedding.
Modelling by Pete, lighting by Tarquin and Pete
The slot drops you into another pool at the start of the second bedding.
Modelling by Pete, lighting by Tarquin and Pete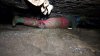 The second bedding is mercifully short, and is substantially larger than the one before it.
Modelling by Claire, lighting by Tarquin and Claire
The second bedding is mercifully short, and is substantially larger than the one before it.
Modelling by Claire, lighting by Tarquin and Claire The second bedding ends at another larger cross passage, with sump 2 at its lower end, connecting back to Sump 1.
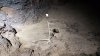 A plant trying to grow in complete darkness at Sump 2.
 The floor is made from a stream of attractive flowstone.
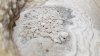 Cave pearls covered in furry crystals.
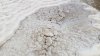 Larger versions.
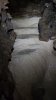 The passage ends at flowstone fill, but there is an alternative extremely tight route on the right from here that connects with the maze of roof passages, providing an alternative way through the cave. I have once spent a great deal of time failing to find the way through here, ending at a far too tight slot.
 The usual way on is into the third bedding, which is the tightest of the beddings, and can be very intimidating indeed.
Modelling by Claire and Clive, lighting by Tarquin, Kevin and Claire
The usual way on is into the third bedding, which is the tightest of the beddings, and can be very intimidating indeed.
Modelling by Claire and Clive, lighting by Tarquin, Kevin and Claire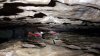 The third bedding was initially blasted to make it large enough to fit, but most of it is still in its impressive, natural state. The route you choose depends on what gap you can fit through, but it normally starts by aiming uphill then downhill a couple of times.
Modelling by Kevin and Claire, lighting by Tarquin, Kevin and Claire
The third bedding was initially blasted to make it large enough to fit, but most of it is still in its impressive, natural state. The route you choose depends on what gap you can fit through, but it normally starts by aiming uphill then downhill a couple of times.
Modelling by Kevin and Claire, lighting by Tarquin, Kevin and Claire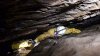 The natural floor is very rough and snatchy, making this part really quite difficult to get over.
Modelling by Pete, lighting by Tarquin and Pete
The natural floor is very rough and snatchy, making this part really quite difficult to get over.
Modelling by Pete, lighting by Tarquin and Pete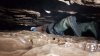 The floor gets rougher, and it takes more effort to locate the wide sections, while avoiding the jagged floor which tries to bruise your ribs. This is the tightest section. Some find it easier to take helmets off, so that the battery pack and lamp don't prevent you turning your head from side to side while scanning for the route. Either that or you have to locate a hole in the floor and turn your head while your lamp is in the hole.
Modelling by Kevin, lighting by Tarquin and Kevin
The floor gets rougher, and it takes more effort to locate the wide sections, while avoiding the jagged floor which tries to bruise your ribs. This is the tightest section. Some find it easier to take helmets off, so that the battery pack and lamp don't prevent you turning your head from side to side while scanning for the route. Either that or you have to locate a hole in the floor and turn your head while your lamp is in the hole.
Modelling by Kevin, lighting by Tarquin and Kevin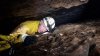 Getting through the tightest section, with another uphill-downhill zig-zag. This is not a staged photo - this section of the cave is extremely tiring.
Modelling by Pete, lighting by Tarquin and Pete
Getting through the tightest section, with another uphill-downhill zig-zag. This is not a staged photo - this section of the cave is extremely tiring.
Modelling by Pete, lighting by Tarquin and Pete The route then reaches the stream flowing through the bedding, and turns left to follow the stream uphill.
Modelling by Kevin, lighting by Tarquin and Kevin
The route then reaches the stream flowing through the bedding, and turns left to follow the stream uphill.
Modelling by Kevin, lighting by Tarquin and Kevin A hole up marks the end of the beddings, and the start of the stream rift. Several roof beddings offer oxbows and different ways into the roof series, eventually connecting back to the alternative route.
Modelling by Claire, lighting by Tarquin and Claire
A hole up marks the end of the beddings, and the start of the stream rift. Several roof beddings offer oxbows and different ways into the roof series, eventually connecting back to the alternative route.
Modelling by Claire, lighting by Tarquin and Claire The stream rift. It's going to be good now, right?
Modelling by Claire, lighting by Tarquin and Claire
The stream rift. It's going to be good now, right?
Modelling by Claire, lighting by Tarquin and Claire The stream rift does not stay large, and instead becomes quite narrow.
Modelling by Claire and Kevin, lighting by Tarquin, Claire and Kevin
The stream rift does not stay large, and instead becomes quite narrow.
Modelling by Claire and Kevin, lighting by Tarquin, Claire and Kevin Small waterfall, where we climb up to a higher level.
Lighting by Tarquin
Small waterfall, where we climb up to a higher level.
Lighting by Tarquin And it becomes much tighter.
Modelling by Claire, lighting by Tarquin and Claire
And it becomes much tighter.
Modelling by Claire, lighting by Tarquin and Claire And then it gets even tighter again, with a squeeze where you have to hang on the ledge and align your body into the wide section, and try not to slip down too far.
Modelling by Claire
And then it gets even tighter again, with a squeeze where you have to hang on the ledge and align your body into the wide section, and try not to slip down too far.
Modelling by Claire Even on the way out, Claire makes this look far too easy. It is certainly not as easy as it looks.
Modelling by Claire, lighting by Tarquin and Claire
Even on the way out, Claire makes this look far too easy. It is certainly not as easy as it looks.
Modelling by Claire, lighting by Tarquin and Claire Through, but you still have to keep up a little longer, and don't swing upright too soon.
Modelling by Claire, lighting by Tarquin and Claire
Through, but you still have to keep up a little longer, and don't swing upright too soon.
Modelling by Claire, lighting by Tarquin and Claire Squeezing through the next tight section.
Modelling by Pete, lighting by Tarquin and Pete
Squeezing through the next tight section.
Modelling by Pete, lighting by Tarquin and Pete Wading along the rift. There was flood scum about 1.5 metres up the walls here, showing how severe the floods can be during winter.
Modelling by Pete, lighting by Tarquin and Pete
Wading along the rift. There was flood scum about 1.5 metres up the walls here, showing how severe the floods can be during winter.
Modelling by Pete, lighting by Tarquin and Pete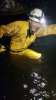 The victim realises why the photographer was waiting for him to step around the corner. Surprisingly deep water.
Modelling by Pete, lighting by Tarquin and Pete
The victim realises why the photographer was waiting for him to step around the corner. Surprisingly deep water.
Modelling by Pete, lighting by Tarquin and Pete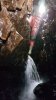 Climbing up a Waterfall, where several more roof oxbows connect.
Modelling by Claire, lighting by Tarquin and Claire
Climbing up a Waterfall, where several more roof oxbows connect.
Modelling by Claire, lighting by Tarquin and Claire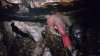 The stream begins flowing through more beddings, much higher than before, but with many more annoying rock projections that snag everything.
Modelling by Claire, lighting by Tarquin, Claire and Kevin
The stream begins flowing through more beddings, much higher than before, but with many more annoying rock projections that snag everything.
Modelling by Claire, lighting by Tarquin, Claire and Kevin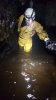 More wading.
Modelling by Pete, lighting by Tarquin and Pete
More wading.
Modelling by Pete, lighting by Tarquin and Pete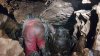 Yet more uncomfortable, snatchy beddings. You can sometimes choose which bedding to go through, as there are a few oxbows. Some may be worse than others, choose wisely.
Modelling by Claire, Kevin and Clive, lighting by Tarquin, Claire and Kevin
Yet more uncomfortable, snatchy beddings. You can sometimes choose which bedding to go through, as there are a few oxbows. Some may be worse than others, choose wisely.
Modelling by Claire, Kevin and Clive, lighting by Tarquin, Claire and Kevin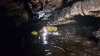 You chose ... poorly. But none of the routes were any better.
Modelling by Pete, lighting by Tarquin and Pete
You chose ... poorly. But none of the routes were any better.
Modelling by Pete, lighting by Tarquin and Pete Annoying but beautiful rock projections.
Modelling by Pete, lighting by Tarquin and Pete
Annoying but beautiful rock projections.
Modelling by Pete, lighting by Tarquin and Pete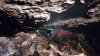 Not even half way through the cave yet...
Modelling by Claire and Kevin, lighting by Tarquin, Claire and Kevin
Not even half way through the cave yet...
Modelling by Claire and Kevin, lighting by Tarquin, Claire and Kevin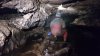 Crouching size? This is progress!
Modelling by Claire, lighting by Tarquin and Claire
Crouching size? This is progress!
Modelling by Claire, lighting by Tarquin and Claire Gour pools in an alcove.
 Ah no, just another crawl again.
Modelling by Pete, lighting by Tarquin and Pete
Ah no, just another crawl again.
Modelling by Pete, lighting by Tarquin and Pete The formations begin, with some attractive columns, redissolving curtains, and numerous stalactites.
Modelling by Pete, lighting by Tarquin and Pete
The formations begin, with some attractive columns, redissolving curtains, and numerous stalactites.
Modelling by Pete, lighting by Tarquin and Pete You get the impression that you are only seeing the bottom of the good stuff.
Modelling by Pete, lighting by Tarquin and Pete
You get the impression that you are only seeing the bottom of the good stuff.
Modelling by Pete, lighting by Tarquin and Pete Grotto hidden above.
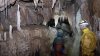 Suddenly we emerge in a superb grotto, hidden above the stream. The passage is taped off, as the formations can all be seen from here anyway. The route is to drop back down to the stream.
Modelling by Pete and Claire, lighting by Tarquin, Pete and Claire
Suddenly we emerge in a superb grotto, hidden above the stream. The passage is taped off, as the formations can all be seen from here anyway. The route is to drop back down to the stream.
Modelling by Pete and Claire, lighting by Tarquin, Pete and Claire Dried crystal pool in the grotto.
 Crystal pool in the grotto.
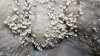 Botryoids n the grotto.
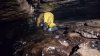 The Crawl, the final insult before the good stuff.
Modelling by Pete, lighting by Tarquin and Pete
The Crawl, the final insult before the good stuff.
Modelling by Pete, lighting by Tarquin and Pete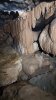 Stal in The Crawl.
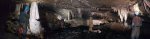 At long last, the great reveal; Stal Chamber. This is one of the most elaborately decorated parts of the cave, and a superb reward for the effort up to this point.
Modelling by Clive, Claire, Pete and Kevin, lighting by Tarquin, Clive, Claire, Pete and Kevin
At long last, the great reveal; Stal Chamber. This is one of the most elaborately decorated parts of the cave, and a superb reward for the effort up to this point.
Modelling by Clive, Claire, Pete and Kevin, lighting by Tarquin, Clive, Claire, Pete and Kevin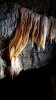 Translucent curtains in Stal Chamber.
Lighting by Pete
Translucent curtains in Stal Chamber.
Lighting by Pete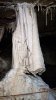 The broken column, which has snapped, misaligned, then cemented and regrown.
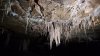 Stalactites in the middle of the chamber.
Lighting by Pete
Stalactites in the middle of the chamber.
Lighting by Pete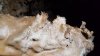 Fractal botryoids.
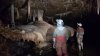 Superb columns and flowstone.
Modelling by Claire and Kevin, lighting by Tarquin, Pete, Claire and Kevin
Superb columns and flowstone.
Modelling by Claire and Kevin, lighting by Tarquin, Pete, Claire and Kevin Glistening crystals in the flowstone pools.
 Stalactites like canine teeth.
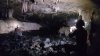 Clive setting up for a traditional photograph, using flashbulbs, a flashgun, and a tripod mounted camera. The results are so much better than I can achieve with a phone camera, and the colours produced by the flashbulbs are simply gorgeous.
Setup by Clive, modelling by Kevin (plus Clive and Claire seen here), lighting by Pete, Kevin and Claire (and Clive here)
Clive setting up for a traditional photograph, using flashbulbs, a flashgun, and a tripod mounted camera. The results are so much better than I can achieve with a phone camera, and the colours produced by the flashbulbs are simply gorgeous.
Setup by Clive, modelling by Kevin (plus Clive and Claire seen here), lighting by Pete, Kevin and Claire (and Clive here)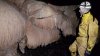 Naturally fractured flowstone.
Modelling by Pete, lighting by Tarquin and Pete
Naturally fractured flowstone.
Modelling by Pete, lighting by Tarquin and Pete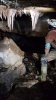 Simple stalactites.
Modelling by Kevin, lighting by Tarquin, Pete and Kevin
Simple stalactites.
Modelling by Kevin, lighting by Tarquin, Pete and Kevin A crawl over flowstone then reaches the major passage.
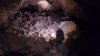 First Boulder Choke, a simply enormous pile of boulders, marking the start of the big stuff. It seems very odd that the first half of the cave is so small, when the rest of the cave upstream is so big. So either there is a hidden major side passage here that used to be the downstream cave, or the first half of the cave is in a far harder wearing rock (it does appear to be dolomitised) than the second half. They feel like they were formed by different processes, and different geological eras.
Modelling by Kevin and Pete, lighting by Tarquin, Kevin and Pete
First Boulder Choke, a simply enormous pile of boulders, marking the start of the big stuff. It seems very odd that the first half of the cave is so small, when the rest of the cave upstream is so big. So either there is a hidden major side passage here that used to be the downstream cave, or the first half of the cave is in a far harder wearing rock (it does appear to be dolomitised) than the second half. They feel like they were formed by different processes, and different geological eras.
Modelling by Kevin and Pete, lighting by Tarquin, Kevin and Pete Ridged mud above the First Boulder Choke.
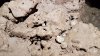 For most of the rest of the passage, the muddy rocks are often covered in large snail shells (that could be mistaken for cryostal). These suggest a close link to the surface, but there are no avens here. Perhaps they were washed in with the mud.
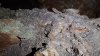 Blue and purple shales, suggesting that the size could be as a result of fallen shale, which could easily have been washed away, leaving a bigger space. However, there is no sign of debris filling the smaller passages, so this seems unlikely.
 Much of the mud is pink tinted, and is therefore likely to be formed from Old Red Sandstone. This forms the bedrock below, but rises up to the mountain summits as a result of the dip. Fine clay made from this rock suggests that it was probably formed by glacial action, and then either washed into the cave by periglacial meltwater, or a later river. The valley itself seems to have formed the caves, so a later river is most likely. But then why is this passage so much bigger than the downstream cave, and did it previously have another major outlet passage which was in use while the river was washing in all the clay and snails?
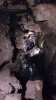 The enormous passage of Main Chamber (it's a passage, not a chamber), the largest in the cave.
Modelling by Claire, Kevin and Pete, lighting by Clive, Claire, Kevin and Pete
The enormous passage of Main Chamber (it's a passage, not a chamber), the largest in the cave.
Modelling by Claire, Kevin and Pete, lighting by Clive, Claire, Kevin and Pete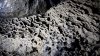 Elaborate gours and purple stones in the Main Chamber.
 Second Boulder Chamber, another impressively large section of passage.
Modelling by Claire, Kevin and Pete, lighting by Tarquin, Claire, Kevin and Pete
Second Boulder Chamber, another impressively large section of passage.
Modelling by Claire, Kevin and Pete, lighting by Tarquin, Claire, Kevin and Pete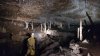 At the end of Second Boulder Chamber is Dap's Dilema, a choice between going through a grotto, or climbing down to the stream. The grotto is quite beautiful, and deserves to be left alone.
Modelling by Pete, lighting by Tarquin, Kevin, Claire and Pete
At the end of Second Boulder Chamber is Dap's Dilema, a choice between going through a grotto, or climbing down to the stream. The grotto is quite beautiful, and deserves to be left alone.
Modelling by Pete, lighting by Tarquin, Kevin, Claire and Pete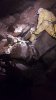 The drop to the stream at Dap's Dilema is not at all comfortable, being a pile of boulders precariously poised on top of other boulders, all supported by nothing but air.
Modelling by Pete, lighting by Tarquin and Pete
The drop to the stream at Dap's Dilema is not at all comfortable, being a pile of boulders precariously poised on top of other boulders, all supported by nothing but air.
Modelling by Pete, lighting by Tarquin and Pete Stal in the river route.
Grandstanding by Pete, lighting by Tarquin, Clive and Pete
Stal in the river route.
Grandstanding by Pete, lighting by Tarquin, Clive and Pete Translucent curtains.
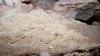 Crystal covered rock at a choked section.
 Cemented-in cave pearls, so pure that they look like snowballs.
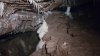 Stal in the choked section. Creature Crawl (written as Carature Crawl on the original survey) should lead off somewhere about here.
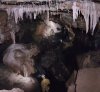 Another superb view, this time from a balcony overlooking the final chamber.
Modelling by Pete, Kevin and Claire, lighting by Tarquin, Pete, Kevin and Claire
Another superb view, this time from a balcony overlooking the final chamber.
Modelling by Pete, Kevin and Claire, lighting by Tarquin, Pete, Kevin and Claire Below the balcony.
Modelling by Kevin, lighting by Tarquin and Kevin
Below the balcony.
Modelling by Kevin, lighting by Tarquin and Kevin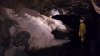 The massive bank of glittering flowstone that dominates the chamber.
Modelling by Pete, lighting by Tarquin and Pete
The massive bank of glittering flowstone that dominates the chamber.
Modelling by Pete, lighting by Tarquin and Pete Clive setting up for his traditional style photograph (which again looked far better than mine).
Modelling by Pete, Claire and Kevin, lighting by Tarquin, Pete, Claire and Kevin
Clive setting up for his traditional style photograph (which again looked far better than mine).
Modelling by Pete, Claire and Kevin, lighting by Tarquin, Pete, Claire and Kevin The master at work. For those interested, Clive is using a digital Lumix GX1 with an Olympus M.Zuiko 17mm f1.8 for Olympus and Panasonic Micro 4/3 Cameras lens, as well as a 12mm f2 same-brand lens for other pictures. Together, they are light enough to use on a compact telescopic tripod. He uses Tickystar Allround compact folding flashbulb reflectors.
Modelling by Clive, lighting by Pete
The master at work. For those interested, Clive is using a digital Lumix GX1 with an Olympus M.Zuiko 17mm f1.8 for Olympus and Panasonic Micro 4/3 Cameras lens, as well as a 12mm f2 same-brand lens for other pictures. Together, they are light enough to use on a compact telescopic tripod. He uses Tickystar Allround compact folding flashbulb reflectors.
Modelling by Clive, lighting by Pete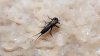 The exuvia (shed skin) of a mayfly nymph, on the flowstone.
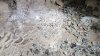 Large cave pearls below the formation.
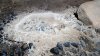 Calcited pebbles.
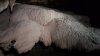 Second part of the flowstone formation.
Lighting by Tarquin and Claire
Second part of the flowstone formation.
Lighting by Tarquin and Claire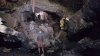 Terminal choke. This is the end of the cave, situated beneath a large shakehole. Ogof Robin Goch ends behind the wall to the left, choking beneath the same shakehole. Note the sloping stalamites on the boulder, and the translucent curtain.
Modelling by Claire, Pete and Kevin, lighting by Tarquin, Claire, Pete and Kevin
Terminal choke. This is the end of the cave, situated beneath a large shakehole. Ogof Robin Goch ends behind the wall to the left, choking beneath the same shakehole. Note the sloping stalamites on the boulder, and the translucent curtain.
Modelling by Claire, Pete and Kevin, lighting by Tarquin, Claire, Pete and Kevin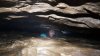 Navigating out through the third bedding - route finding can be difficult here, even though you can see the destination, and some time was spent trying to find the correct way.
Modelling by Clive, lighting by Tarquin and Pete
Navigating out through the third bedding - route finding can be difficult here, even though you can see the destination, and some time was spent trying to find the correct way.
Modelling by Clive, lighting by Tarquin and Pete Trevor, a common toad who was found washed into Sump 2. He does not belong in the cave, and would die, since his hunting is severely limited in absolute darkness. It is impressive that he had managed to survive being washed all the way into here from the surface.
Modelling by Trevor, lighting by Tarquin and Claire
Trevor, a common toad who was found washed into Sump 2. He does not belong in the cave, and would die, since his hunting is severely limited in absolute darkness. It is impressive that he had managed to survive being washed all the way into here from the surface.
Modelling by Trevor, lighting by Tarquin and Claire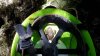 Since we had nowhere else to carry him (he could travel with cameras, but would have been killed), Trevor was carried out in my helmet. A little odd to have a toad sitting on your head, or hopping on your hair, but it works.
Modelling by Trevor
Since we had nowhere else to carry him (he could travel with cameras, but would have been killed), Trevor was carried out in my helmet. A little odd to have a toad sitting on your head, or hopping on your hair, but it works.
Modelling by Trevor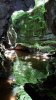 Exiting into glorious sunshine.
Lighting by Sol and Tarquin
Exiting into glorious sunshine.
Lighting by Sol and Tarquin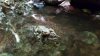 Trevor in his new home, back out on the surface. The pools and gorge banks here are a much better place for him.
Modelling by Trevor
Trevor in his new home, back out on the surface. The pools and gorge banks here are a much better place for him.
Modelling by Trevor
 Morlais quarries, dominating the view of the Taf Fechan valley, seen from Vaynor churchyard. These are a popular climbing spot, and have a few short caves, but there are no major caves in this entire mountain group - the nearest significant caves are in the Southeast Beacons (Ogof Ap Robert and Ogof Tarddiad Rhymney) and Fforest Fawr (Ogof Fawr).
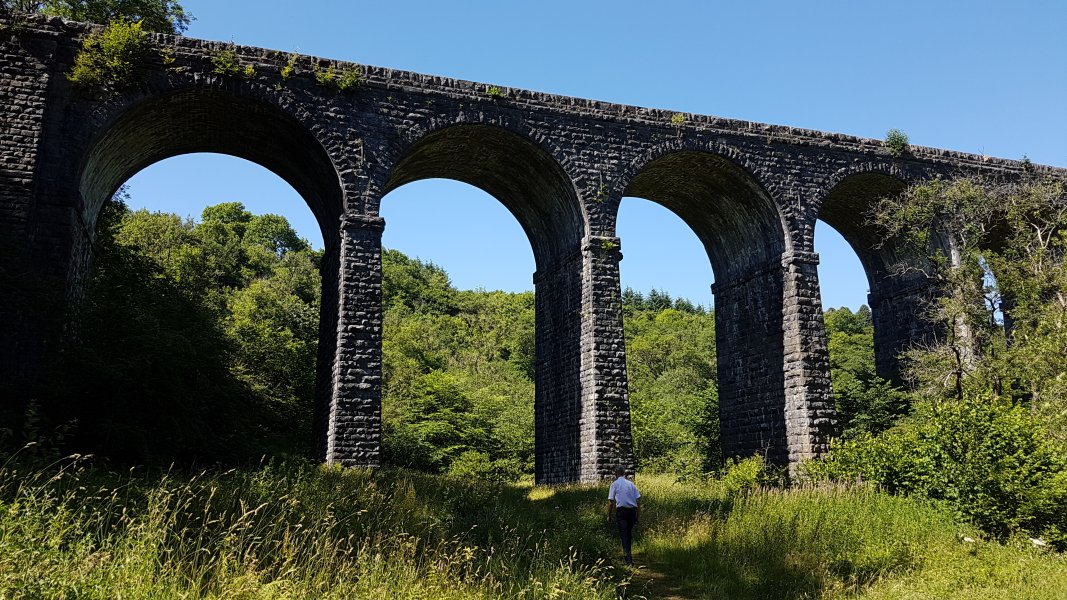 Pontsarn Viaduct, part of the rich industrial heritage of the area.
Modelling by Pete
Pontsarn Viaduct, part of the rich industrial heritage of the area.
Modelling by Pete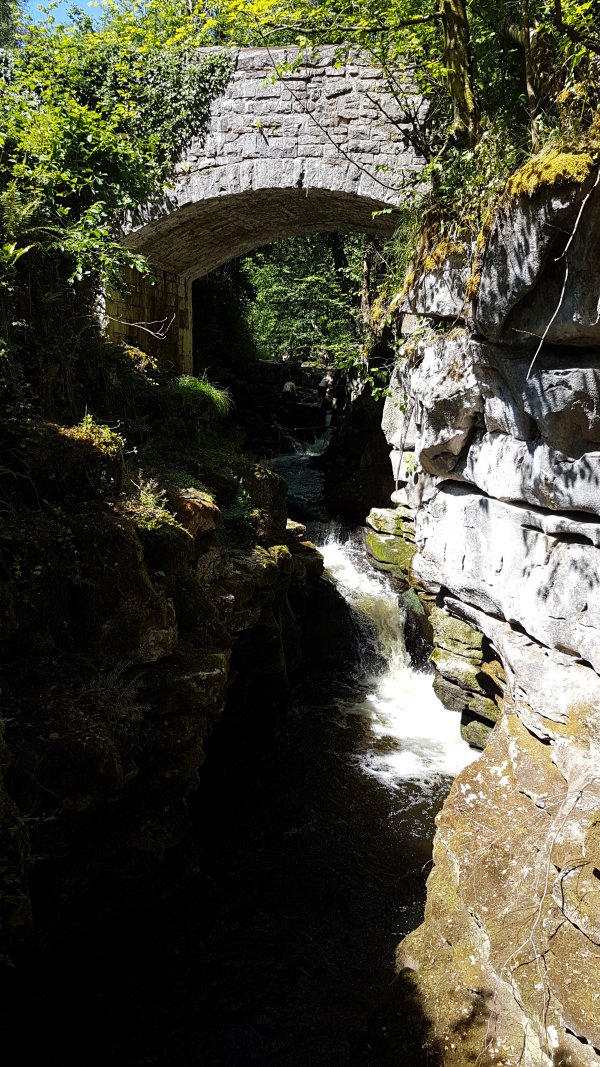 Cascades below the road bridge at Pontsarn. These are a popular swimming spot, and some children were carefully aiming insane jumps from the bridge into the narrow plunge pool below.
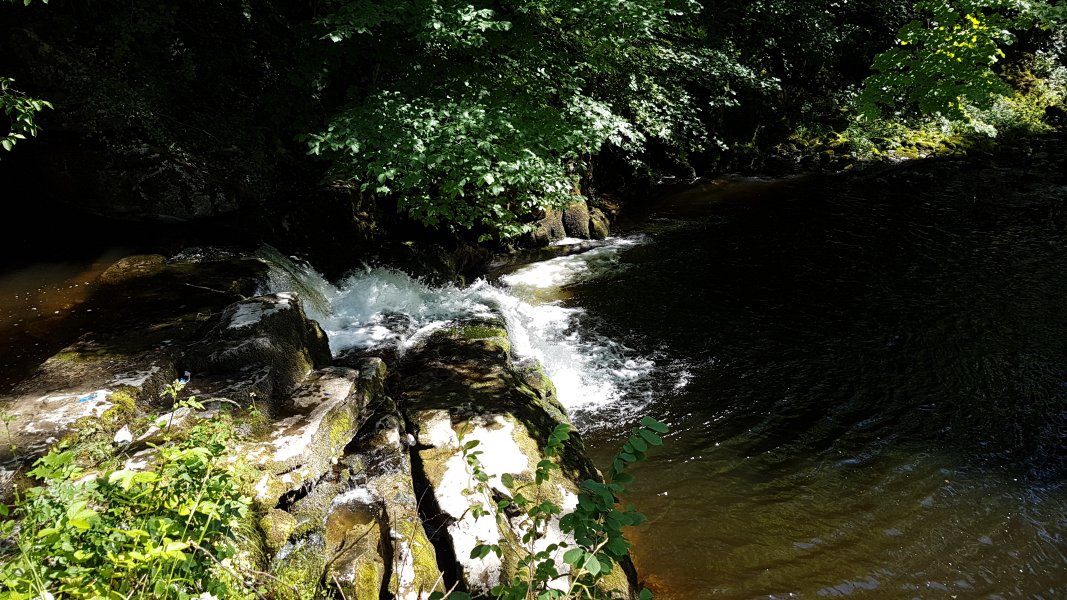 Pontsarn Blue Pool, one of two waterfalls on the river that are known as Pwll Glas in Welsh.
 Nant y Glais, a small tributary stream which is almost running dry in the hot weather. The water seems to be flowing through a shallow cave at this point (Ogof Johnny Bach), as there is more water in the river just upstream.
Modelling by Pete, Kevin, Claire and Clive
Nant y Glais, a small tributary stream which is almost running dry in the hot weather. The water seems to be flowing through a shallow cave at this point (Ogof Johnny Bach), as there is more water in the river just upstream.
Modelling by Pete, Kevin, Claire and Clive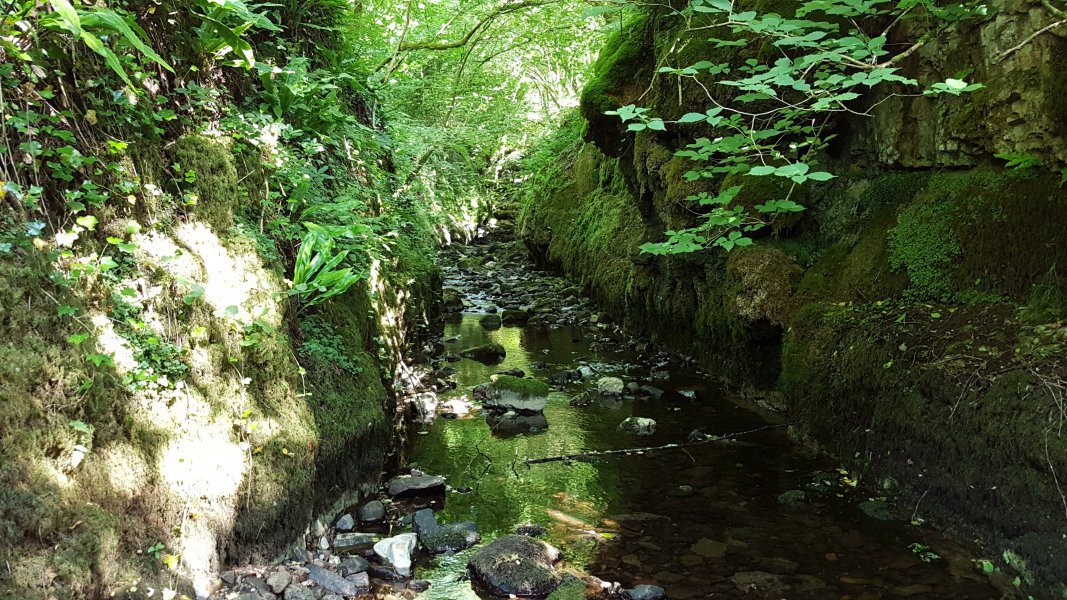 Nant y Glais digs a short gorge, which contains the caves. The gorge itself appears to be an unroofed cave.
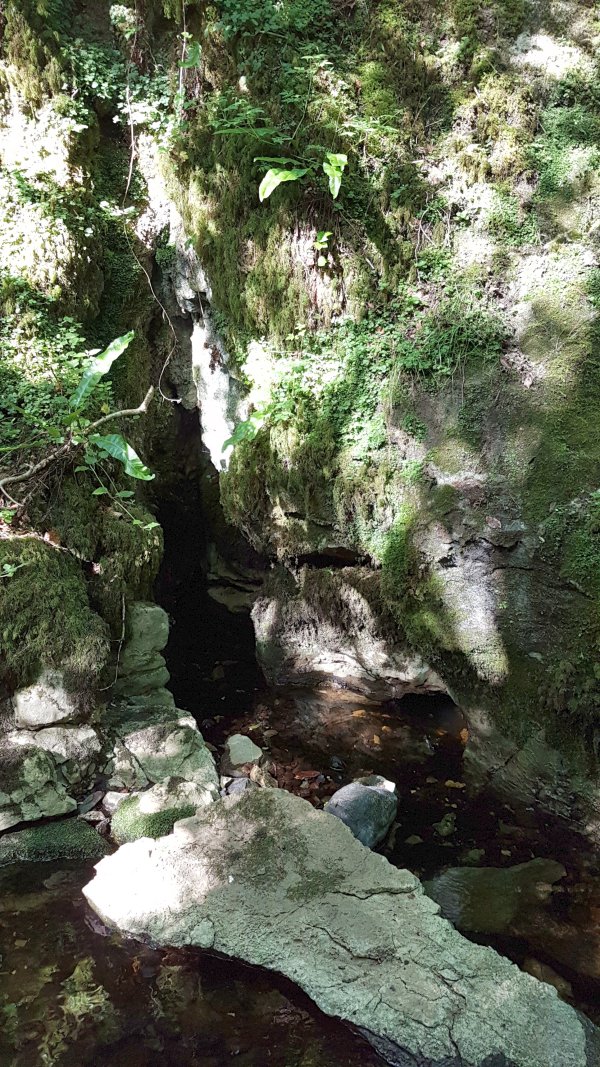 The entrance to Ogof Pysgodyn Gwyn, a tiny resurgence cave on the left side of the gorge. The resurgence is under the wall to the right, not the obvious rift. It carries water from slightly higher up the river.
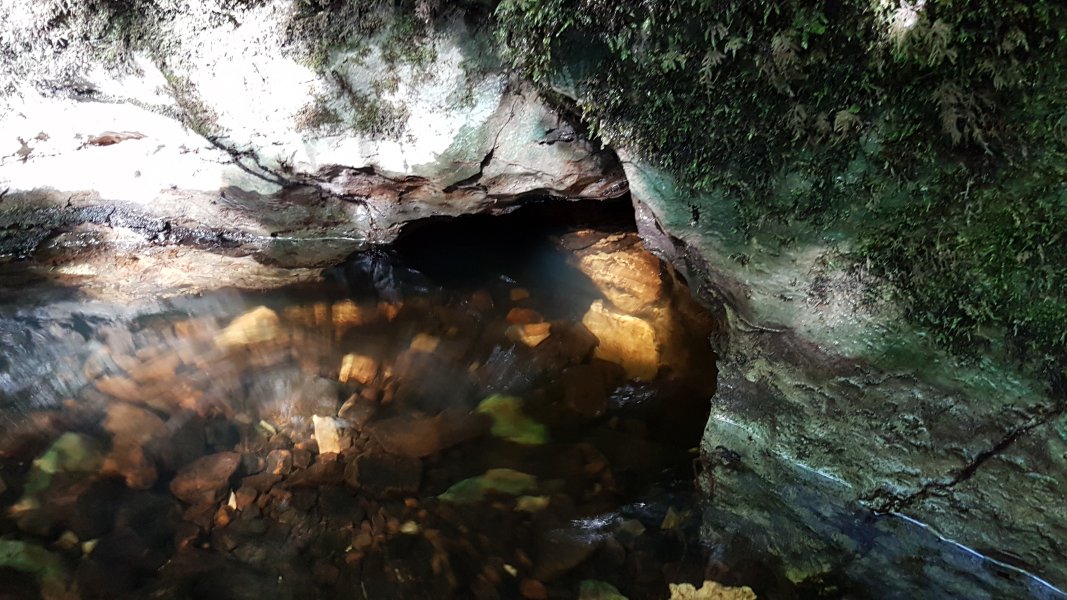 The name means "white fish", after the blanched cave trout that live in it. We were mistakenly told that it was called Pysgodyn Gnau, meaning "nuts fish", which would have been far more appropriate, as you would have to be nuts to want to dive that tiny passage just to access its 30 metres of sump.
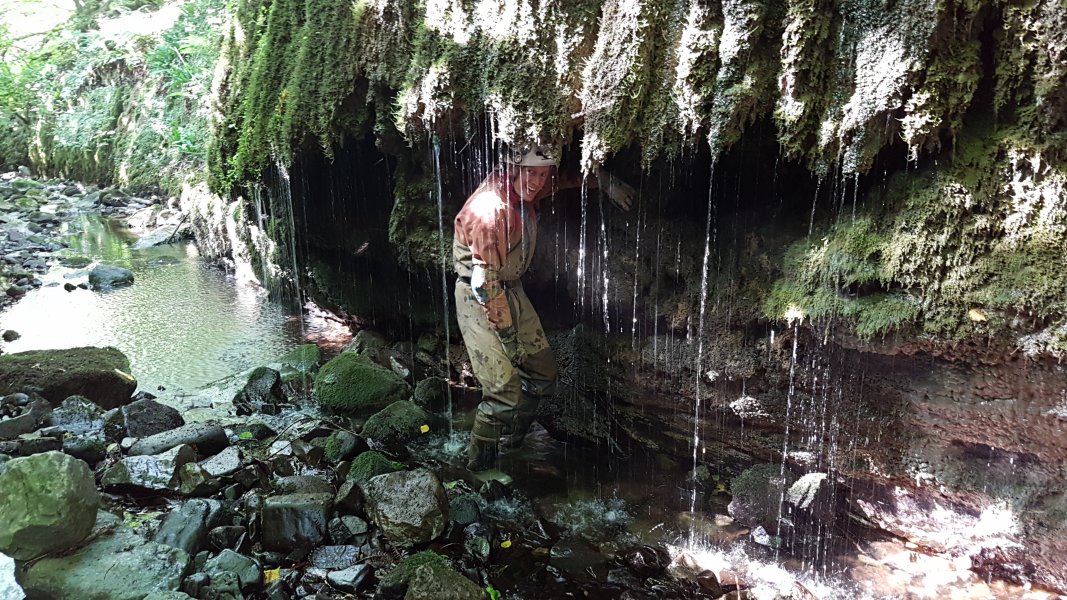 Immediately afterwards is a tufa/flowstone overhang, with water dribbling off it. It is hard to call it a waterfall but you can stand behind it. The water comes from Tufa Spring, immediately above the tufa.
Modelling by Kevin
Immediately afterwards is a tufa/flowstone overhang, with water dribbling off it. It is hard to call it a waterfall but you can stand behind it. The water comes from Tufa Spring, immediately above the tufa.
Modelling by Kevin Just before the gorge ends is the large entrance to Ogof Rhyd Sych, on the right.
 The dry waterfall at the head of the gorge. The entrance to Ogof Dŵr Dwfn is in the roof of the undercut to the left. The top of the waterfall is the old "dry ford"; Rhyd Sych. The main cave normally takes the full flow of the stream except in flood, and is named after the ford. A little further upstream on the left is Ogof y Ci, the longest in the area at around 1.4 km long - it is normally misquoted as 548 metres.
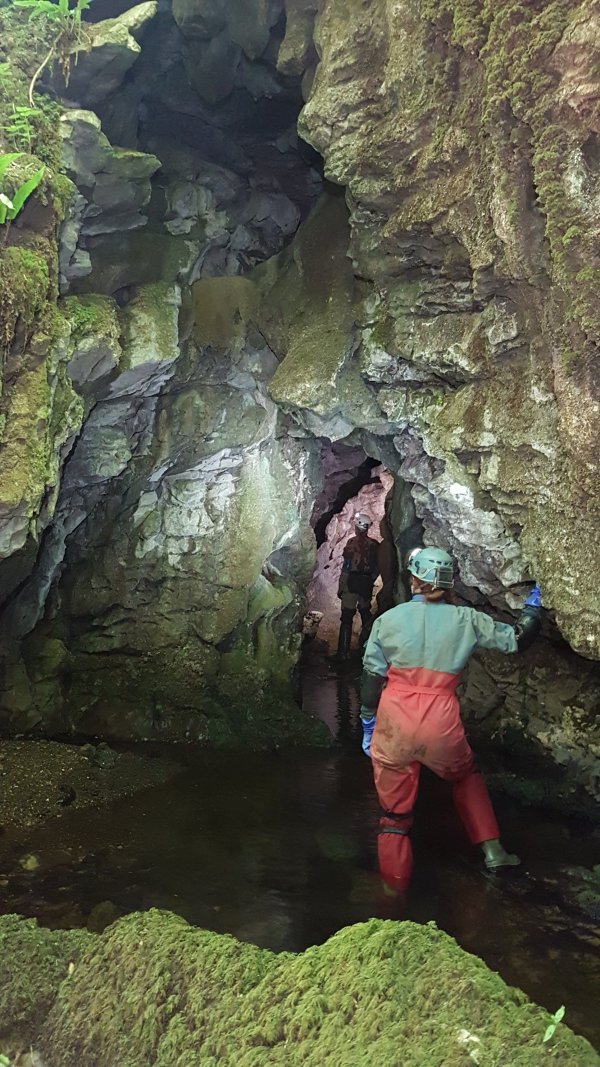 Heading in to the lush entrance of Ogof Rhyd Sych.
Modelling by Claire and Kevin, lighting by Sol, Claire and Kevin
Heading in to the lush entrance of Ogof Rhyd Sych.
Modelling by Claire and Kevin, lighting by Sol, Claire and Kevin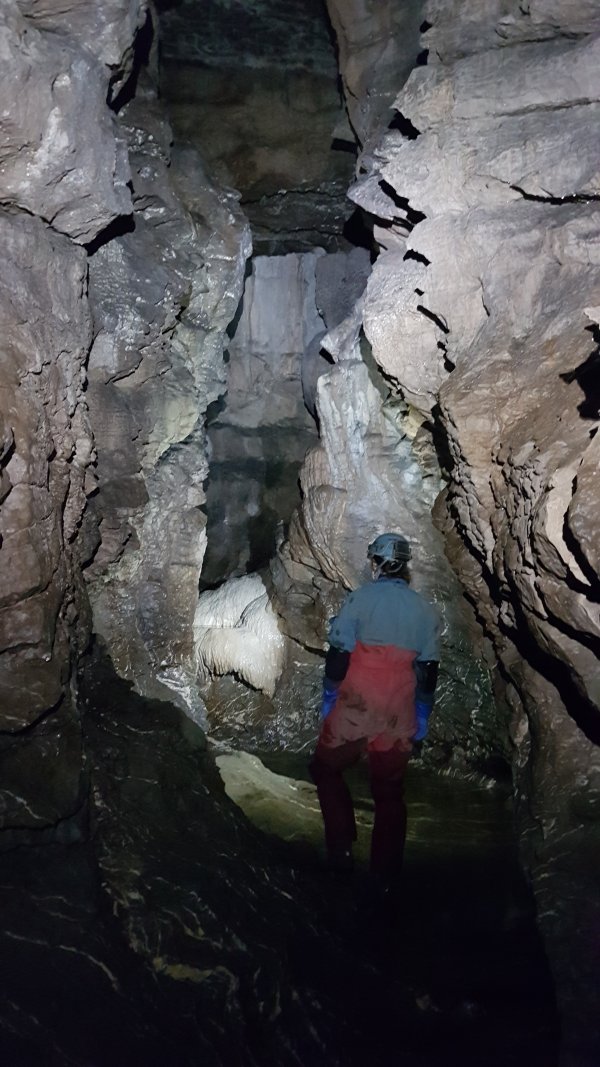 The grand entrance passage, with its beautifuly waterwashed character, similar to Ogof Ffynnon Ddu's streamway, or a Yorkshire pothole. Enjoy it, because it is the best passage for a long while.
Modelling by Claire, lighting by Tarquin and Claire
The grand entrance passage, with its beautifuly waterwashed character, similar to Ogof Ffynnon Ddu's streamway, or a Yorkshire pothole. Enjoy it, because it is the best passage for a long while.
Modelling by Claire, lighting by Tarquin and Claire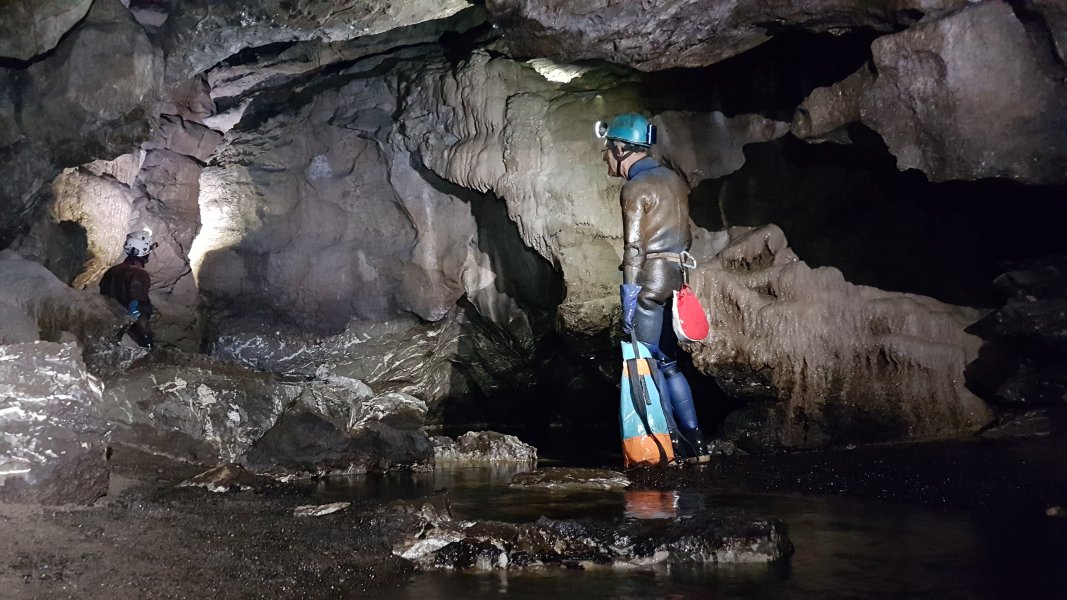 The largest part of the entrance passage, just before the duck.
Modelling by Clive and Kevin, lighting by Tarquin, Pete, Clive and Kevin
The largest part of the entrance passage, just before the duck.
Modelling by Clive and Kevin, lighting by Tarquin, Pete, Clive and Kevin Flowstone wall in the large passage.
Modelling by Claire, lighting by Tarquin and Claire
Flowstone wall in the large passage.
Modelling by Claire, lighting by Tarquin and Claire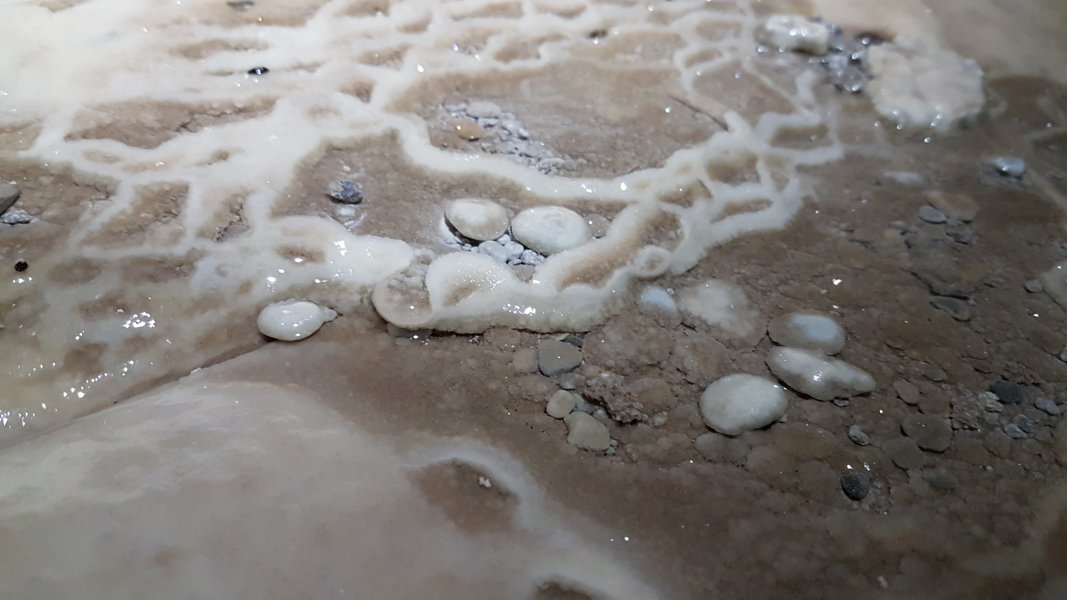 Cave pearls on the flowstone. The largest are about 2 cm in diameter.
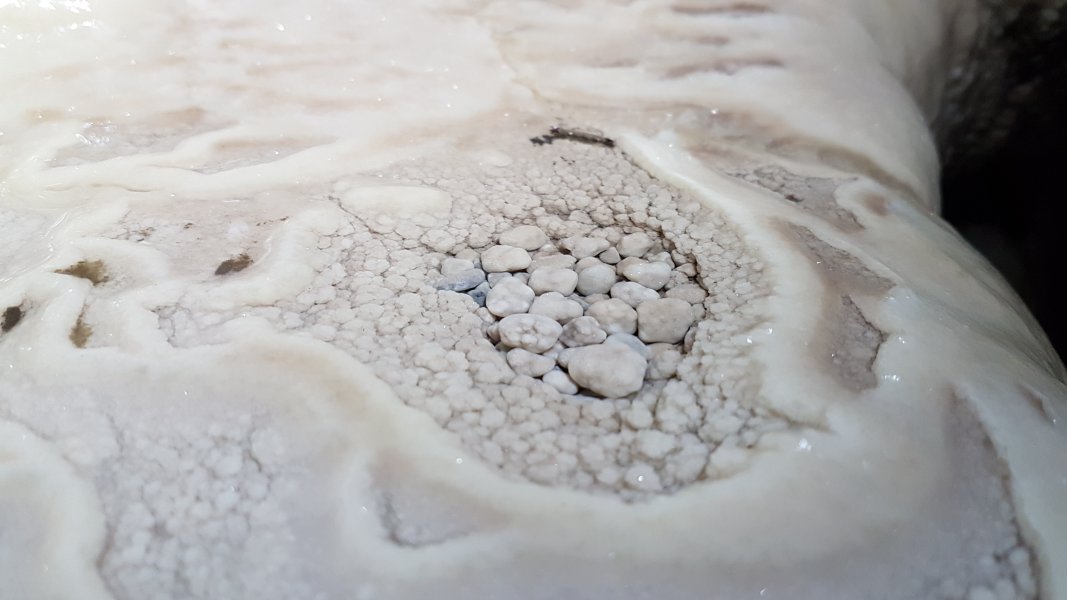 More pearls, this time about 1 cm in diameter.
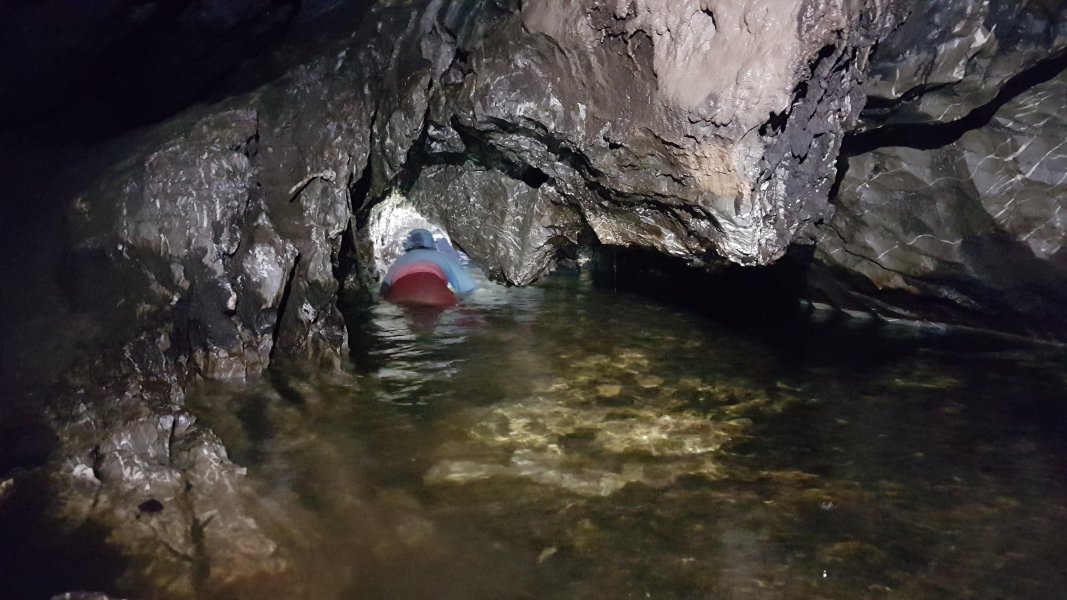 The large passage ends abruptly at a former Sump, which was altered to turn it into a duck. There is a tempting bedding dig above it, but the way on is through the duck, earning a soaking. In these extremely low water conditions, faces and backs could remain dry.
Modelling by Claire, lighting by Tarquin and Claire
The large passage ends abruptly at a former Sump, which was altered to turn it into a duck. There is a tempting bedding dig above it, but the way on is through the duck, earning a soaking. In these extremely low water conditions, faces and backs could remain dry.
Modelling by Claire, lighting by Tarquin and Claire Exiting the far side of the duck.
Modelling by Claire, lighting by Tarquin and Claire
Exiting the far side of the duck.
Modelling by Claire, lighting by Tarquin and Claire The queue to get out of the pool, hampered by the first "squeeze".
Modelling by Claire, Kevin and Pete, lighting by Tarquin, Claire, Kevin and Pete
The queue to get out of the pool, hampered by the first "squeeze".
Modelling by Claire, Kevin and Pete, lighting by Tarquin, Claire, Kevin and Pete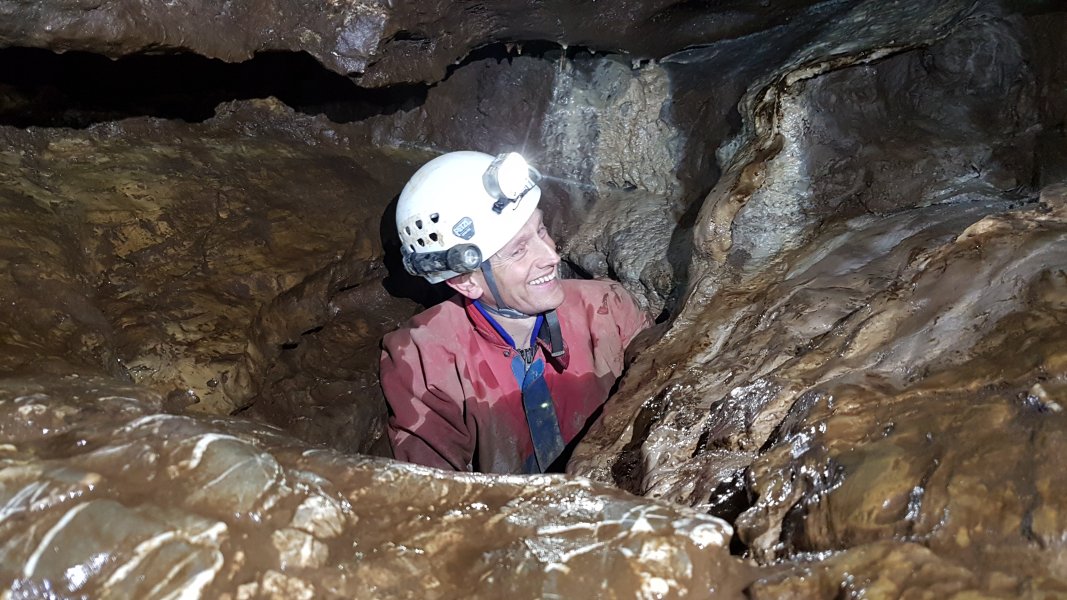 Immediately after the duck, the cave's character makes itself known, with the first squeeze.
Modelling by Kevin, lighting by Tarquin and Kevin
Immediately after the duck, the cave's character makes itself known, with the first squeeze.
Modelling by Kevin, lighting by Tarquin and Kevin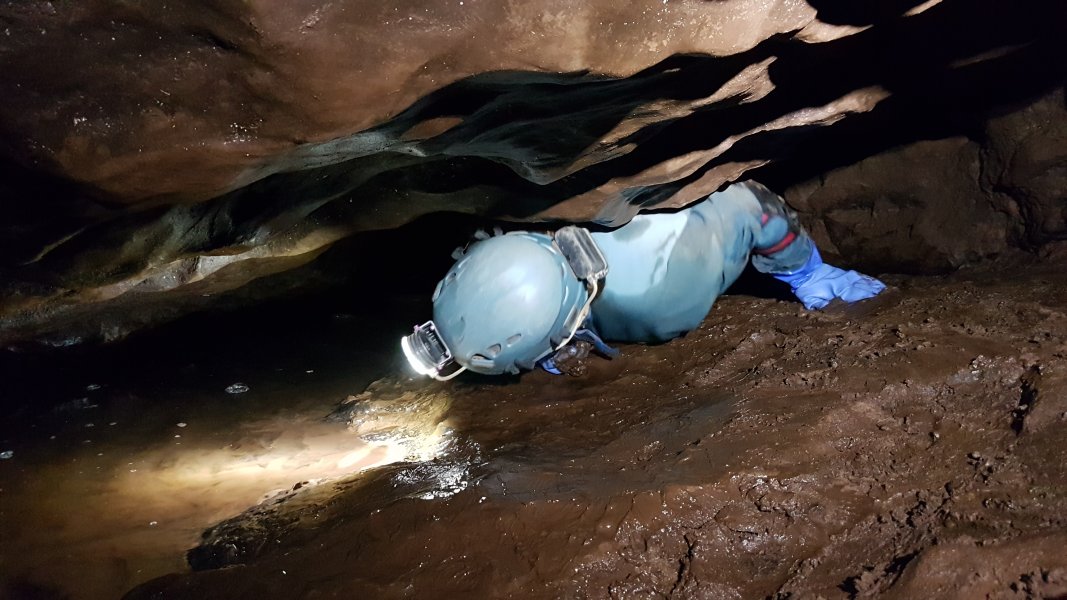 The squeeze is not particularly tight, but it comes with a good dose of mud, while you attempt not to faceplant into a muddy pool.
Modelling by Claire, lighting by Tarquin and Claire
The squeeze is not particularly tight, but it comes with a good dose of mud, while you attempt not to faceplant into a muddy pool.
Modelling by Claire, lighting by Tarquin and Claire Muddy sloping bedding. This is the largest of the beddings, and is not treated as being the first bedding, because it is not tight enough. The zeroth bedding. Because beddings start at 0.
Modelling by Kevin, lighting by Tarquin and Kevin
Muddy sloping bedding. This is the largest of the beddings, and is not treated as being the first bedding, because it is not tight enough. The zeroth bedding. Because beddings start at 0.
Modelling by Kevin, lighting by Tarquin and Kevin Just when it looks like it is going to get bigger, the way on turns out to be another stupidly small hole in the floor.
Modelling by Claire, lighting by Tarquin and Claire
Just when it looks like it is going to get bigger, the way on turns out to be another stupidly small hole in the floor.
Modelling by Claire, lighting by Tarquin and Claire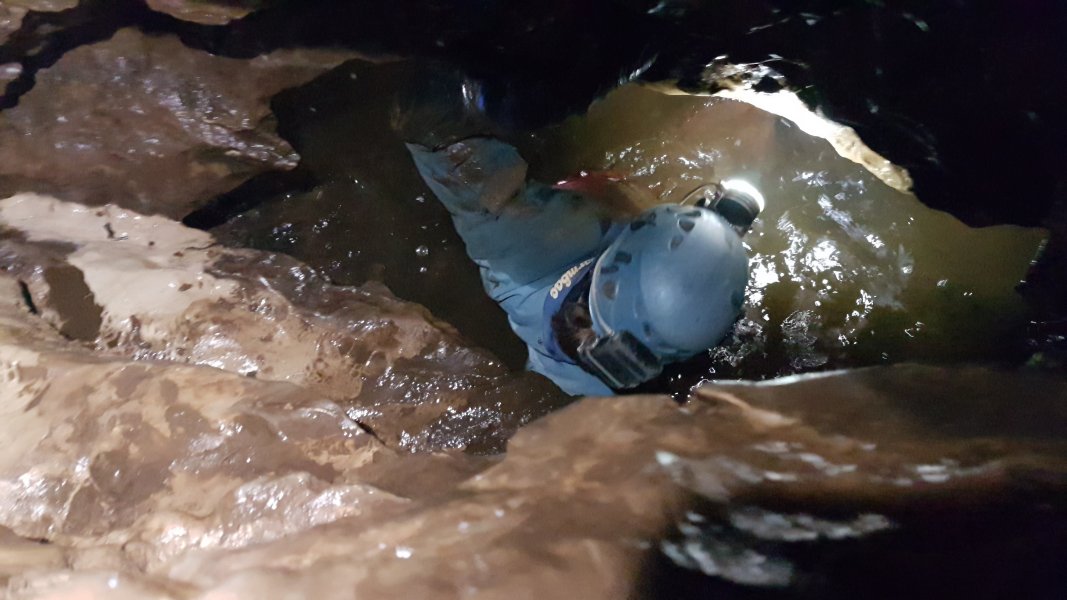 Unlike the last one, this does not require a squeeze, but it instead drops you into a water bath, for a second soaking.
Modelling by Claire, lighting by Tarquin and Claire
Unlike the last one, this does not require a squeeze, but it instead drops you into a water bath, for a second soaking.
Modelling by Claire, lighting by Tarquin and Claire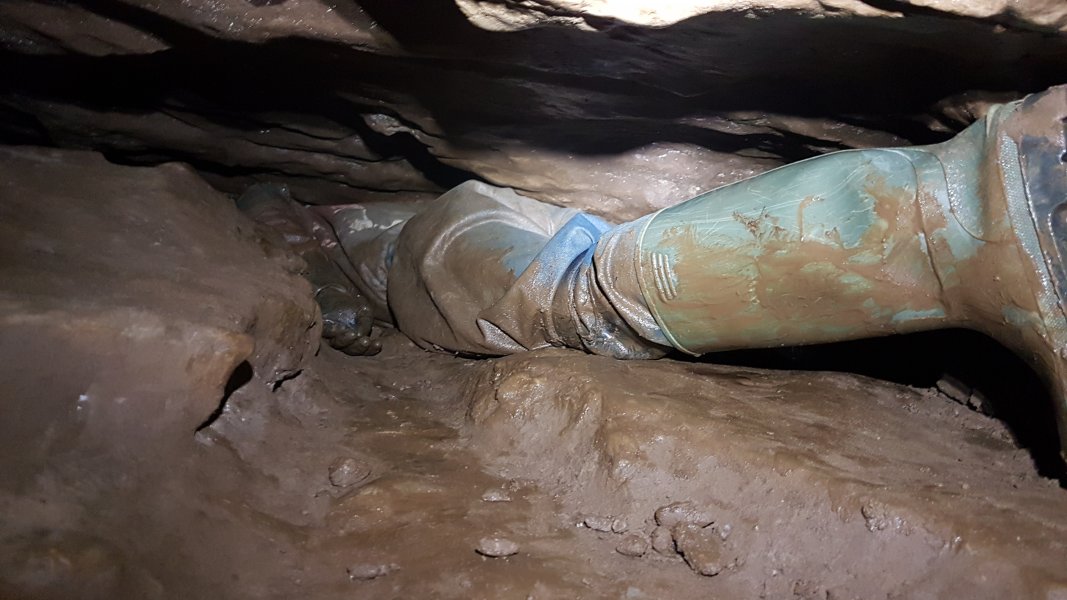 The first bedding then begins for real. This is the second tightest bedding, but is fairly easy to negotiate, as long as you are thin enough.
Modelling by Kevin
The first bedding then begins for real. This is the second tightest bedding, but is fairly easy to negotiate, as long as you are thin enough.
Modelling by Kevin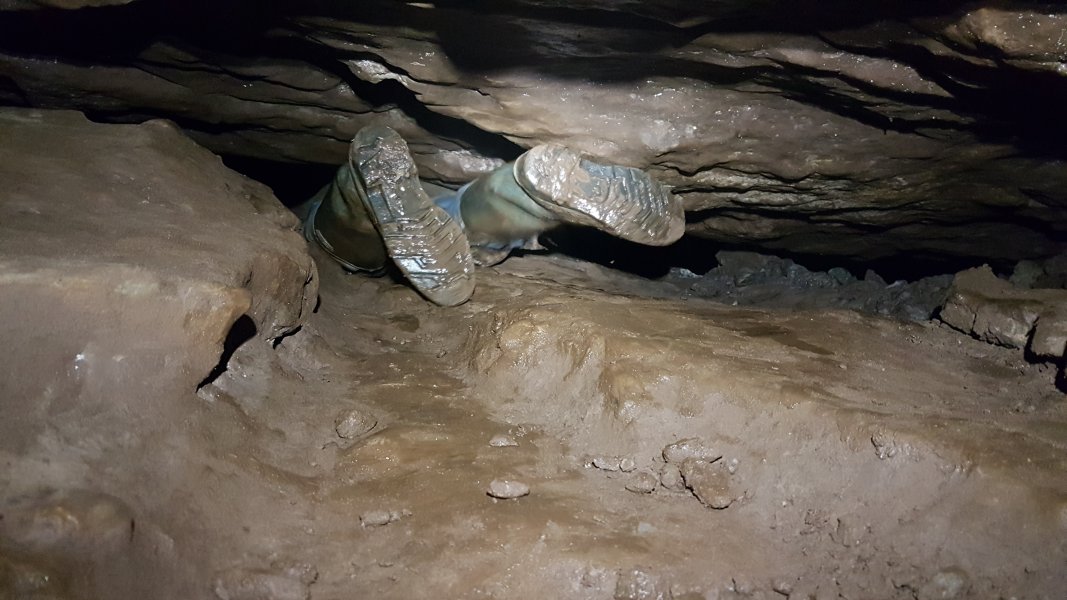 So low that even a pair of wellies cannot fit through upright.
Modelling by Kevin
So low that even a pair of wellies cannot fit through upright.
Modelling by Kevin Wriggle wriggle.
Modelling by Claire, lighting by Tarquin and Claire
Wriggle wriggle.
Modelling by Claire, lighting by Tarquin and Claire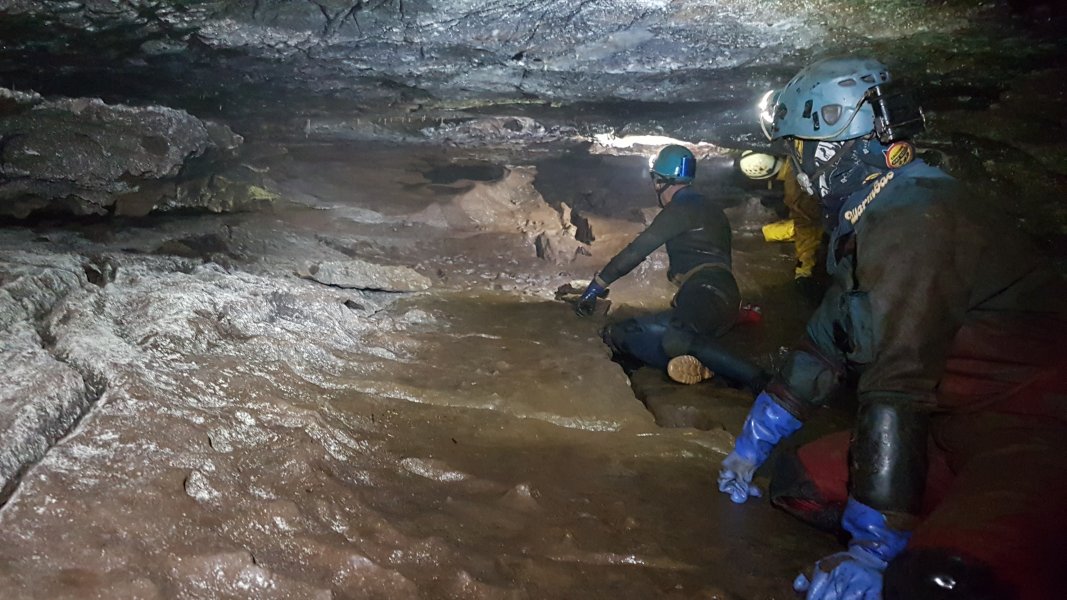 The bedding ends in a large cross passage, which pinches out to nothing uphill, and ends at the tiny Sump 1 downhill connecting back to the previous pools. Why on earth is this even here? Perhaps all these parallel passages explain why the way on seems so small, because the cave's size is wasted on an extremely wide series of beddings instead of a single large passage.
Modelling by Claire, Clive and Pete, lighting by Tarquin, Claire, Clive and Pete
The bedding ends in a large cross passage, which pinches out to nothing uphill, and ends at the tiny Sump 1 downhill connecting back to the previous pools. Why on earth is this even here? Perhaps all these parallel passages explain why the way on seems so small, because the cave's size is wasted on an extremely wide series of beddings instead of a single large passage.
Modelling by Claire, Clive and Pete, lighting by Tarquin, Claire, Clive and Pete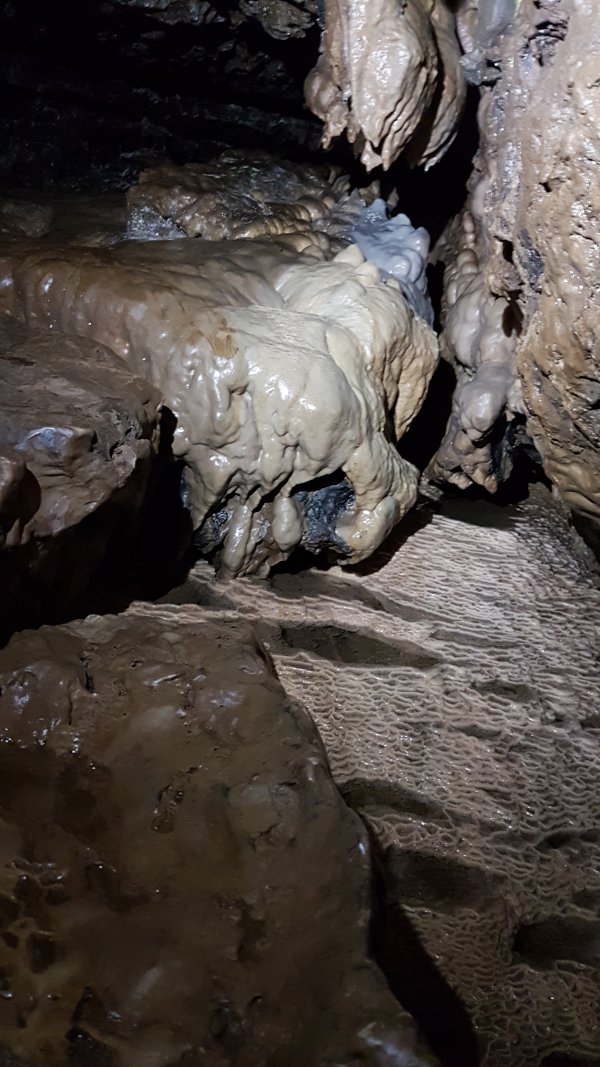 Formations in the cross passage.
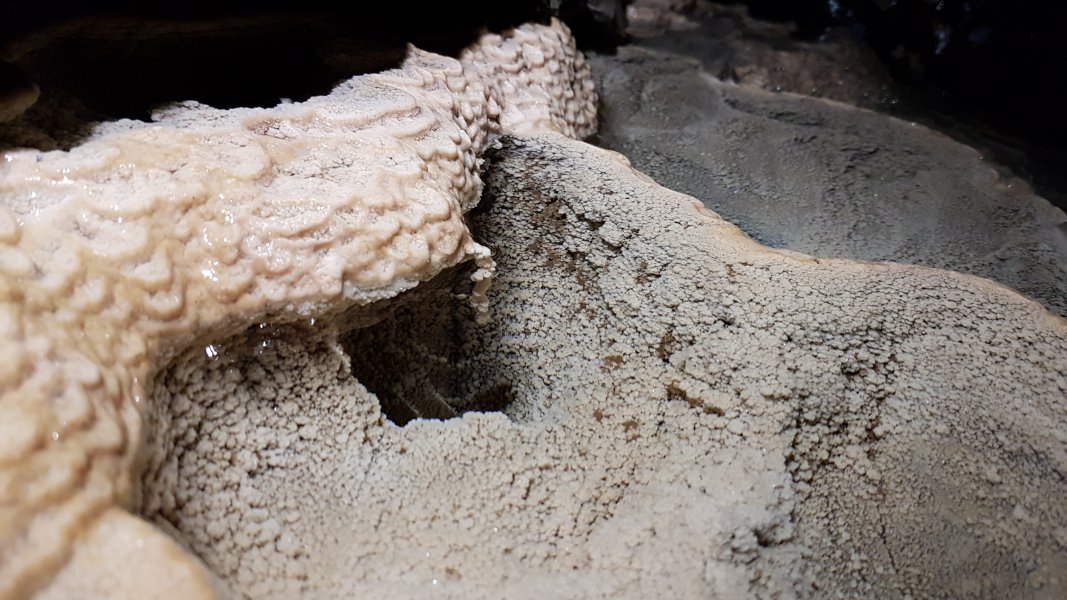 Underwater helictite in the cross passage.
 The bedding on the other side closes down. The way on is to go a little up the cross passage, then take a slot down beside the formations, into the continuing bedding. It looks impossible, and the formations somehow have survived the onslaught, so they appear at first to be untouched.
Modelling by Clive, lighting by Tarquin and Clive
The bedding on the other side closes down. The way on is to go a little up the cross passage, then take a slot down beside the formations, into the continuing bedding. It looks impossible, and the formations somehow have survived the onslaught, so they appear at first to be untouched.
Modelling by Clive, lighting by Tarquin and Clive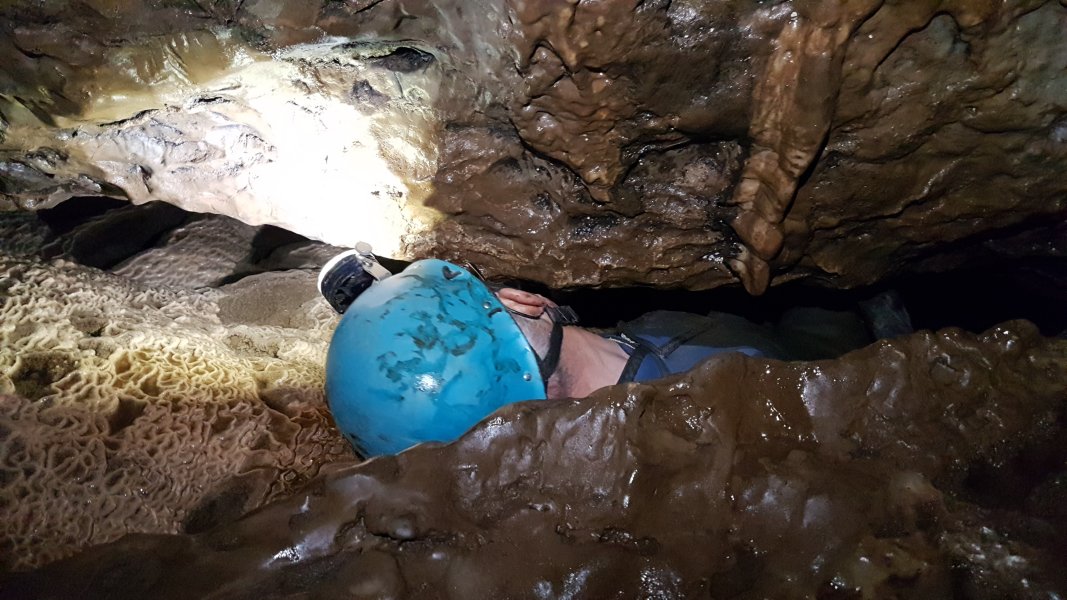 Sliding over the formations into the bedding.
Modelling by Clive, lighting by Tarquin and Clive
Sliding over the formations into the bedding.
Modelling by Clive, lighting by Tarquin and Clive The slot drops you into another pool at the start of the second bedding.
Modelling by Pete, lighting by Tarquin and Pete
The slot drops you into another pool at the start of the second bedding.
Modelling by Pete, lighting by Tarquin and Pete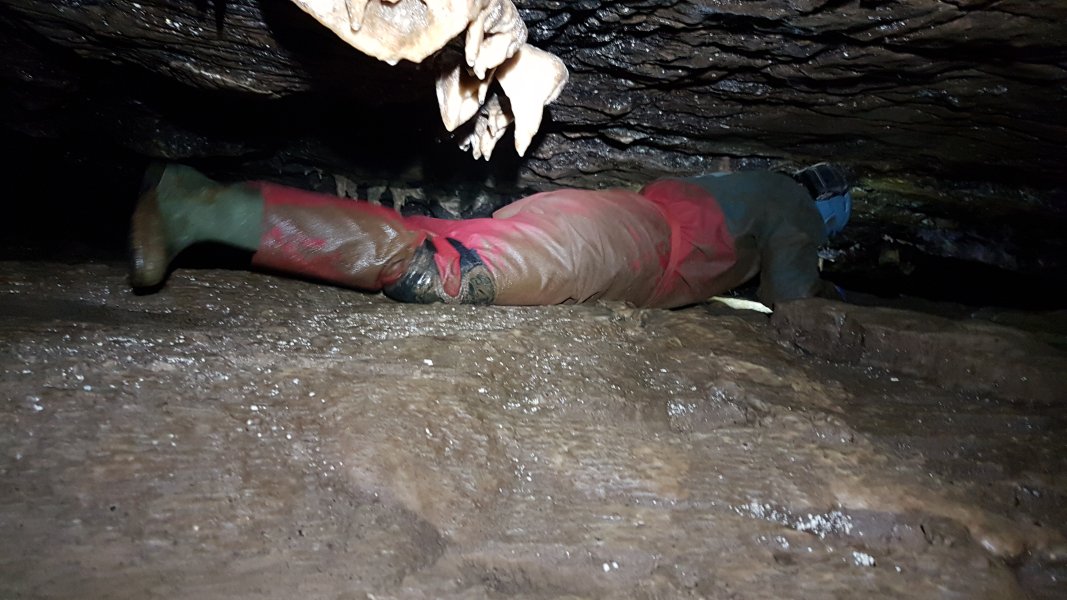 The second bedding is mercifully short, and is substantially larger than the one before it.
Modelling by Claire, lighting by Tarquin and Claire
The second bedding is mercifully short, and is substantially larger than the one before it.
Modelling by Claire, lighting by Tarquin and Claire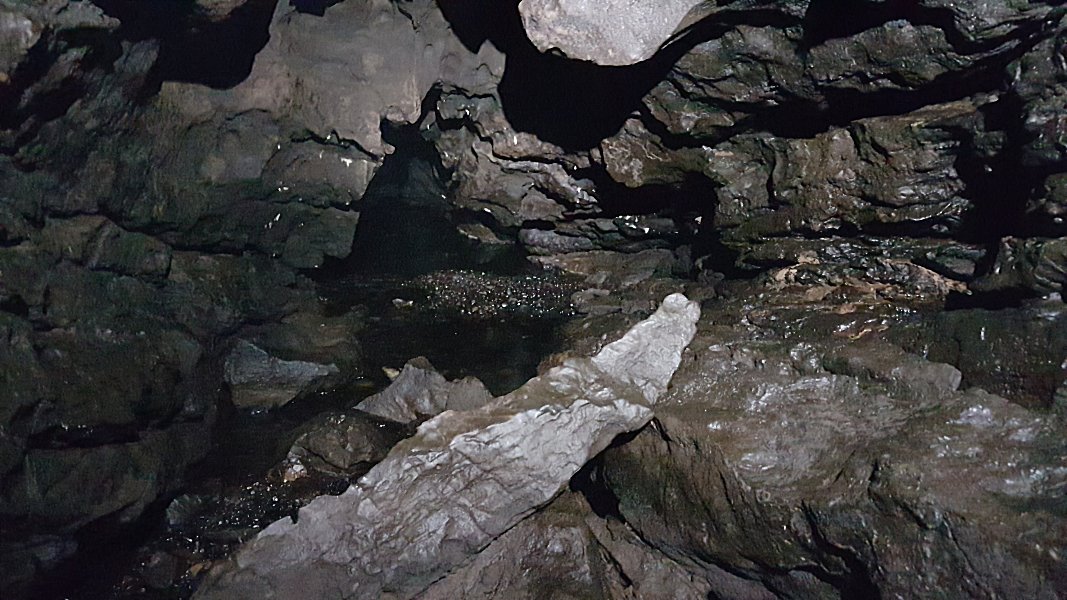 The second bedding ends at another larger cross passage, with sump 2 at its lower end, connecting back to Sump 1.
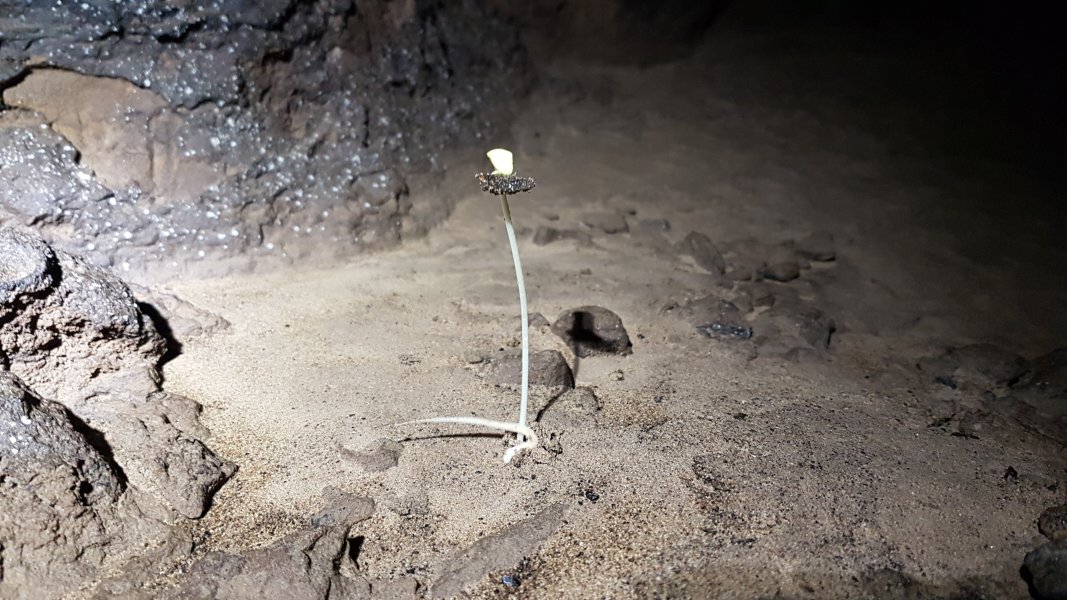 A plant trying to grow in complete darkness at Sump 2.
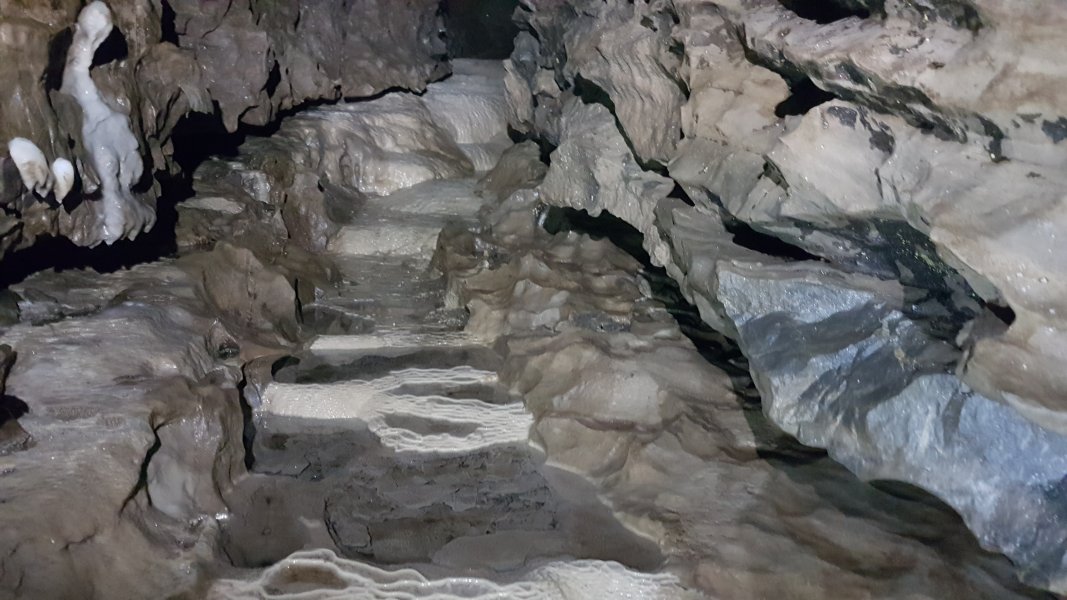 The floor is made from a stream of attractive flowstone.
 Cave pearls covered in furry crystals.
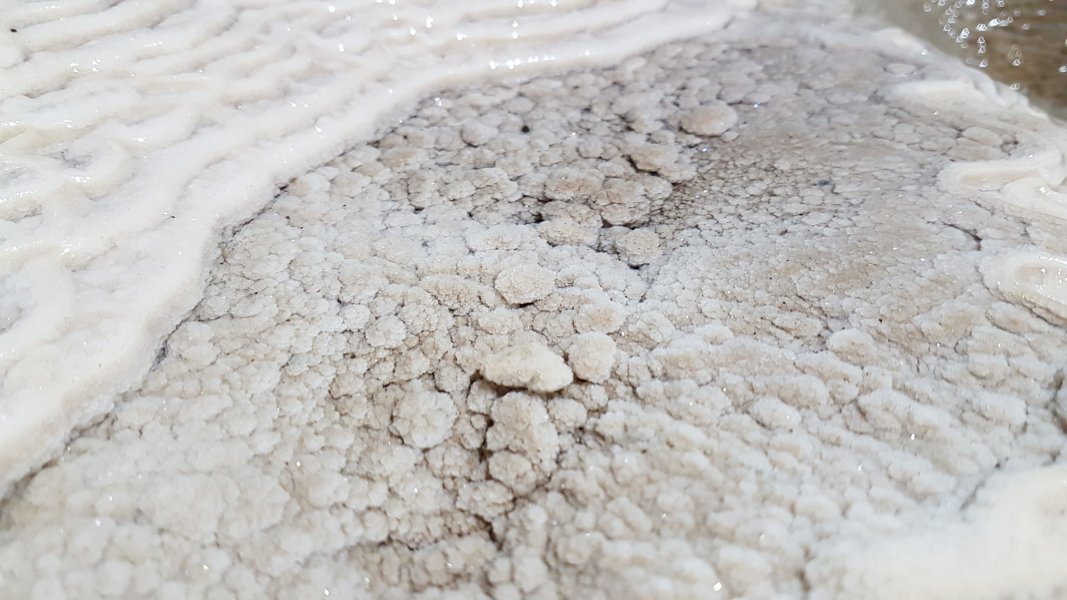 Larger versions.
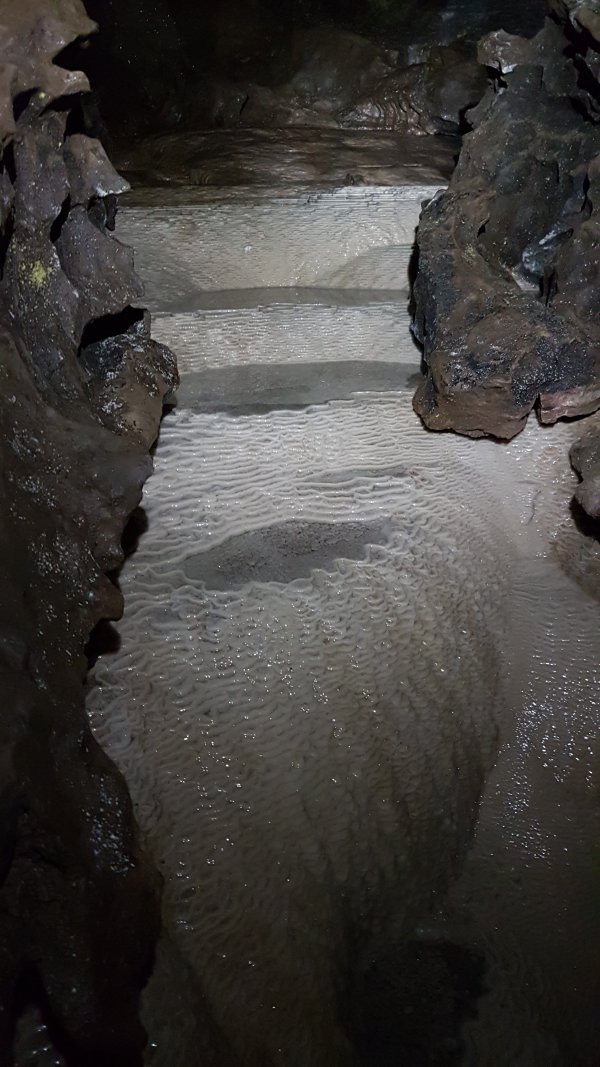 The passage ends at flowstone fill, but there is an alternative extremely tight route on the right from here that connects with the maze of roof passages, providing an alternative way through the cave. I have once spent a great deal of time failing to find the way through here, ending at a far too tight slot.
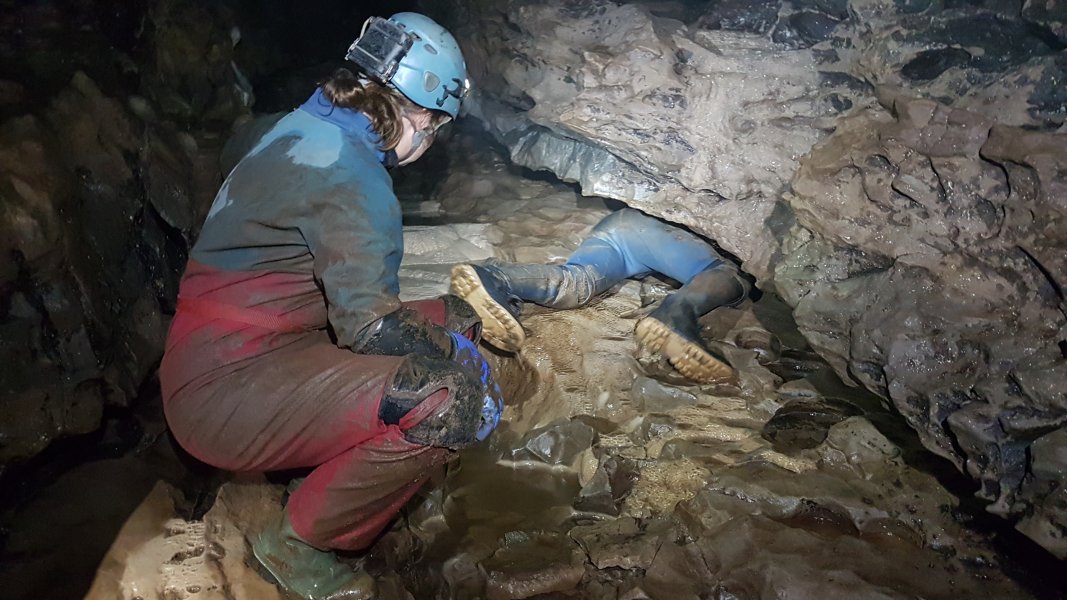 The usual way on is into the third bedding, which is the tightest of the beddings, and can be very intimidating indeed.
Modelling by Claire and Clive, lighting by Tarquin, Kevin and Claire
The usual way on is into the third bedding, which is the tightest of the beddings, and can be very intimidating indeed.
Modelling by Claire and Clive, lighting by Tarquin, Kevin and Claire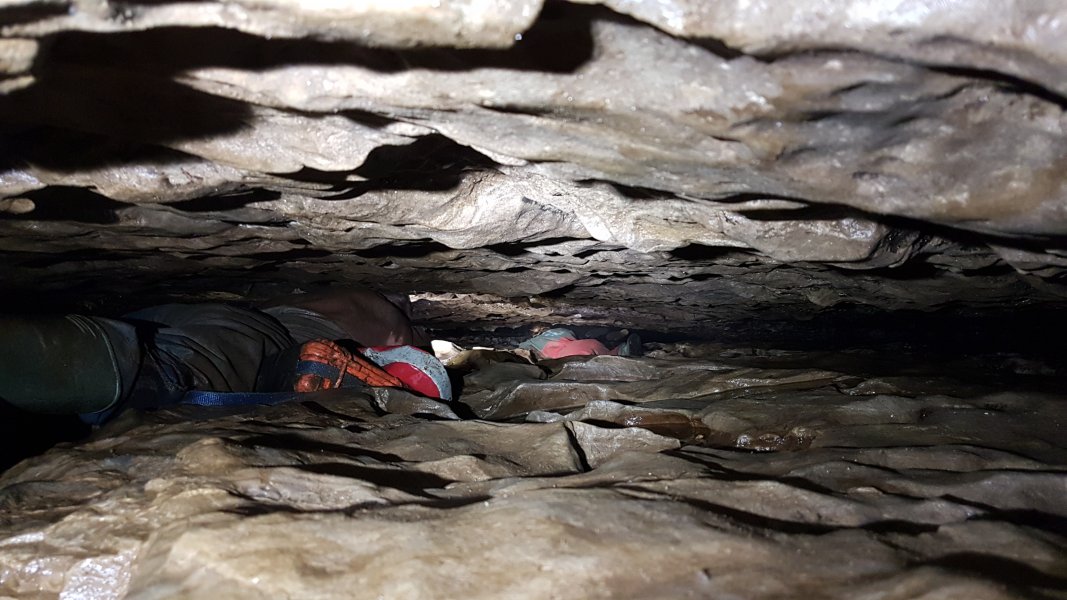 The third bedding was initially blasted to make it large enough to fit, but most of it is still in its impressive, natural state. The route you choose depends on what gap you can fit through, but it normally starts by aiming uphill then downhill a couple of times.
Modelling by Kevin and Claire, lighting by Tarquin, Kevin and Claire
The third bedding was initially blasted to make it large enough to fit, but most of it is still in its impressive, natural state. The route you choose depends on what gap you can fit through, but it normally starts by aiming uphill then downhill a couple of times.
Modelling by Kevin and Claire, lighting by Tarquin, Kevin and Claire The natural floor is very rough and snatchy, making this part really quite difficult to get over.
Modelling by Pete, lighting by Tarquin and Pete
The natural floor is very rough and snatchy, making this part really quite difficult to get over.
Modelling by Pete, lighting by Tarquin and Pete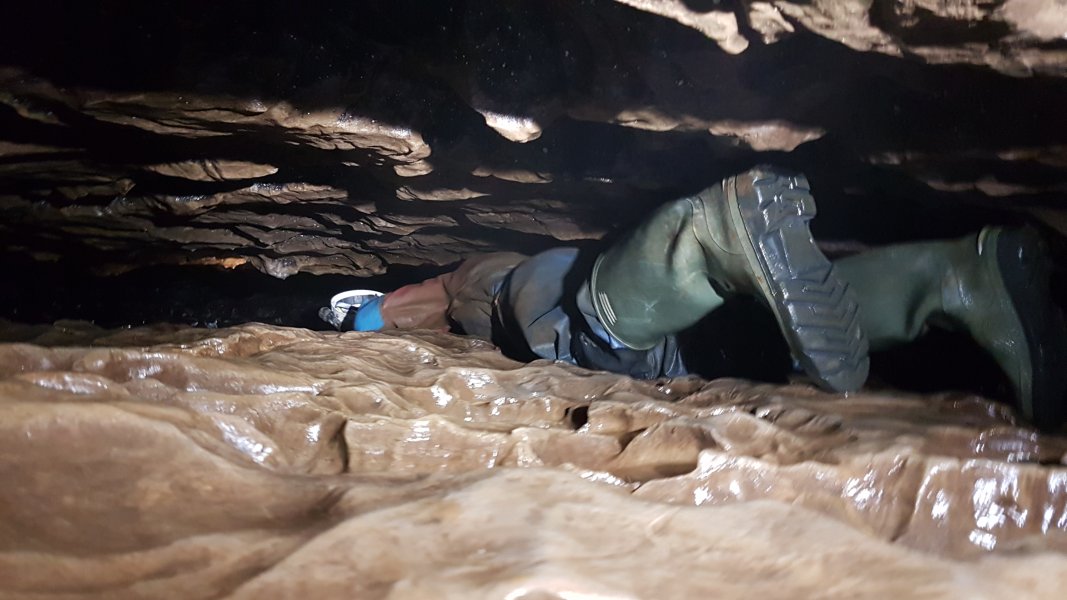 The floor gets rougher, and it takes more effort to locate the wide sections, while avoiding the jagged floor which tries to bruise your ribs. This is the tightest section. Some find it easier to take helmets off, so that the battery pack and lamp don't prevent you turning your head from side to side while scanning for the route. Either that or you have to locate a hole in the floor and turn your head while your lamp is in the hole.
Modelling by Kevin, lighting by Tarquin and Kevin
The floor gets rougher, and it takes more effort to locate the wide sections, while avoiding the jagged floor which tries to bruise your ribs. This is the tightest section. Some find it easier to take helmets off, so that the battery pack and lamp don't prevent you turning your head from side to side while scanning for the route. Either that or you have to locate a hole in the floor and turn your head while your lamp is in the hole.
Modelling by Kevin, lighting by Tarquin and Kevin Getting through the tightest section, with another uphill-downhill zig-zag. This is not a staged photo - this section of the cave is extremely tiring.
Modelling by Pete, lighting by Tarquin and Pete
Getting through the tightest section, with another uphill-downhill zig-zag. This is not a staged photo - this section of the cave is extremely tiring.
Modelling by Pete, lighting by Tarquin and Pete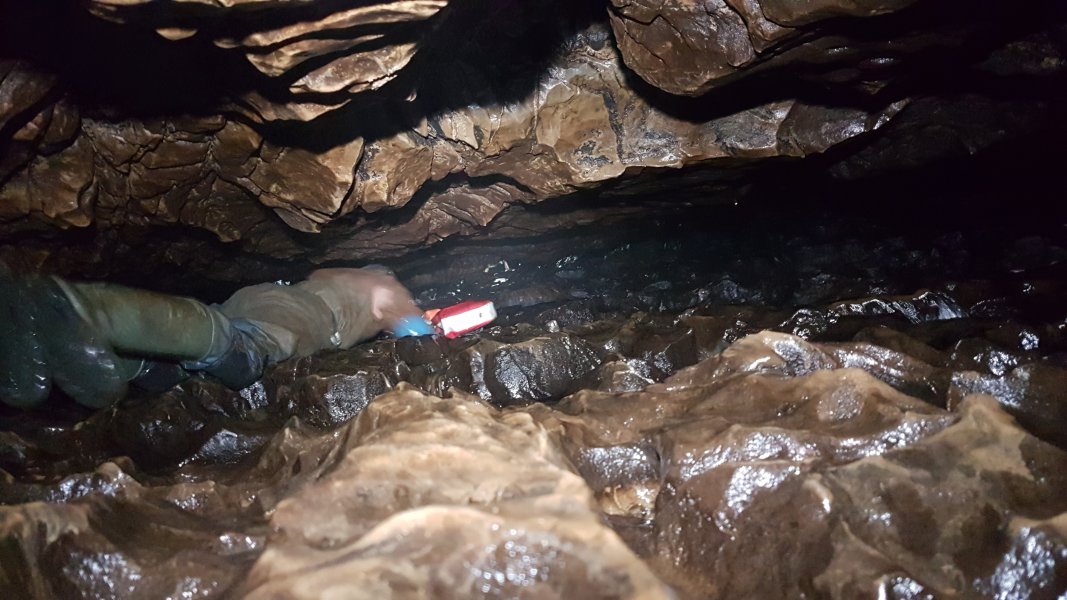 The route then reaches the stream flowing through the bedding, and turns left to follow the stream uphill.
Modelling by Kevin, lighting by Tarquin and Kevin
The route then reaches the stream flowing through the bedding, and turns left to follow the stream uphill.
Modelling by Kevin, lighting by Tarquin and Kevin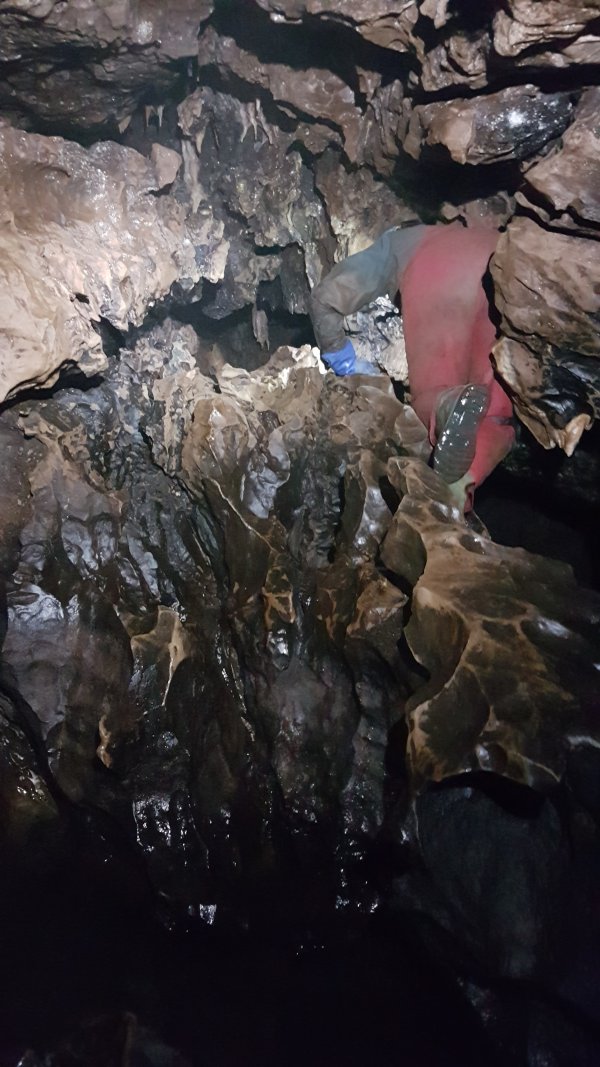 A hole up marks the end of the beddings, and the start of the stream rift. Several roof beddings offer oxbows and different ways into the roof series, eventually connecting back to the alternative route.
Modelling by Claire, lighting by Tarquin and Claire
A hole up marks the end of the beddings, and the start of the stream rift. Several roof beddings offer oxbows and different ways into the roof series, eventually connecting back to the alternative route.
Modelling by Claire, lighting by Tarquin and Claire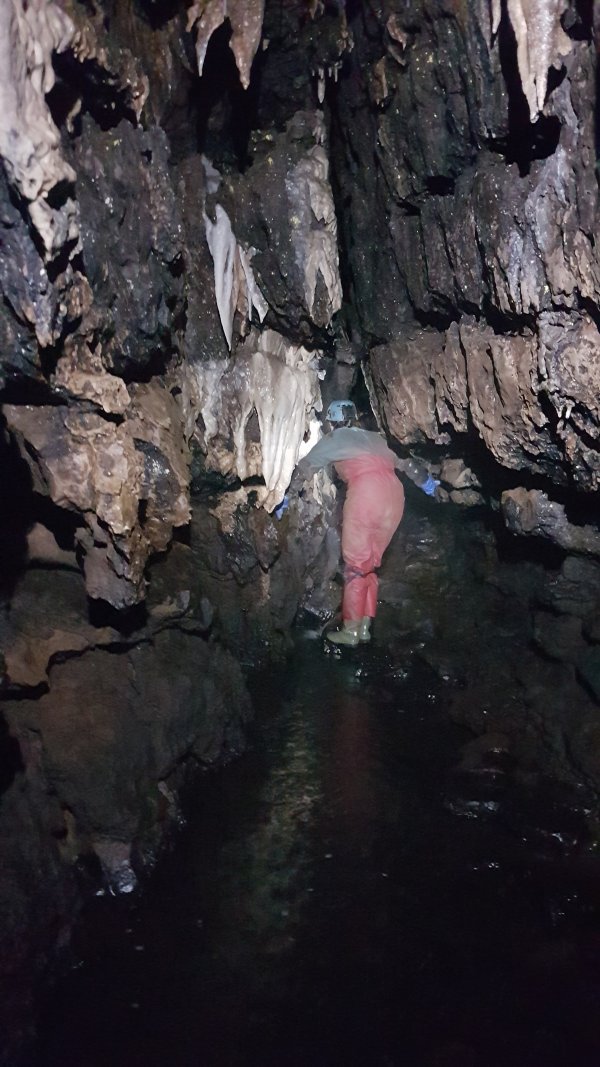 The stream rift. It's going to be good now, right?
Modelling by Claire, lighting by Tarquin and Claire
The stream rift. It's going to be good now, right?
Modelling by Claire, lighting by Tarquin and Claire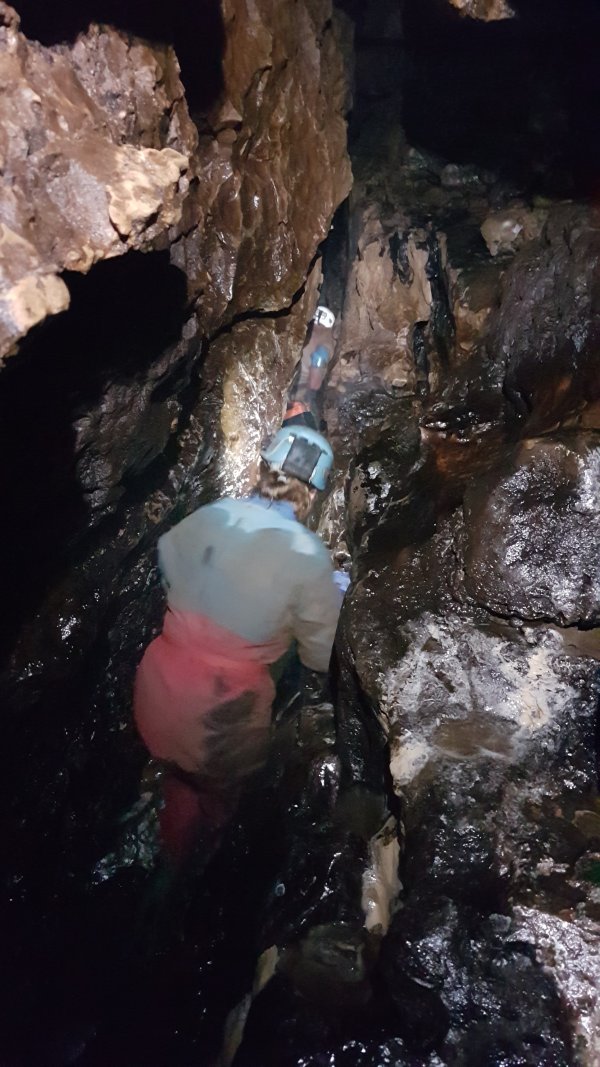 The stream rift does not stay large, and instead becomes quite narrow.
Modelling by Claire and Kevin, lighting by Tarquin, Claire and Kevin
The stream rift does not stay large, and instead becomes quite narrow.
Modelling by Claire and Kevin, lighting by Tarquin, Claire and Kevin Small waterfall, where we climb up to a higher level.
Lighting by Tarquin
Small waterfall, where we climb up to a higher level.
Lighting by Tarquin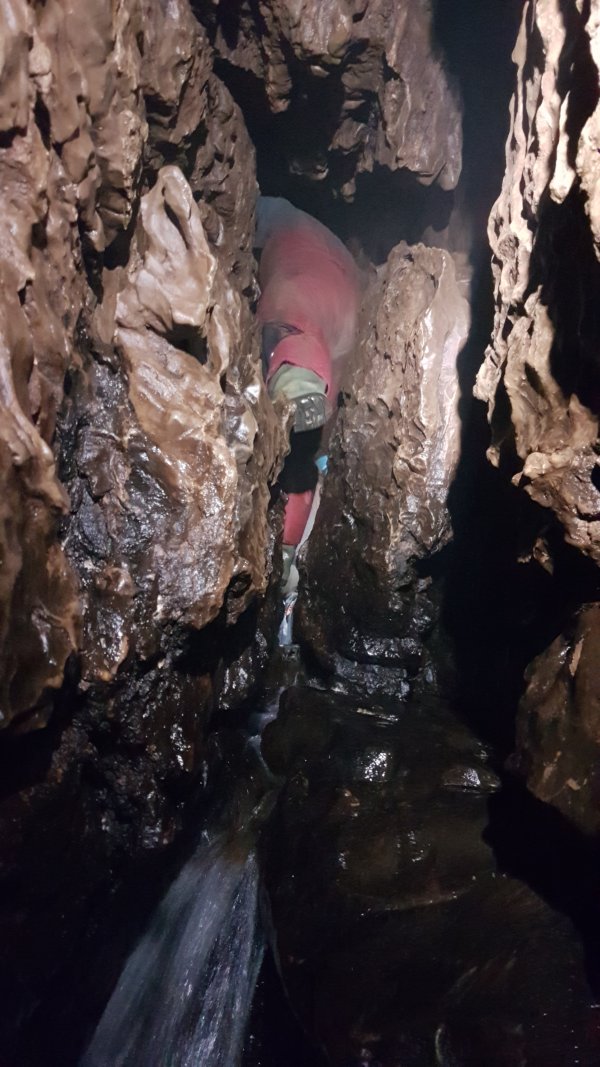 And it becomes much tighter.
Modelling by Claire, lighting by Tarquin and Claire
And it becomes much tighter.
Modelling by Claire, lighting by Tarquin and Claire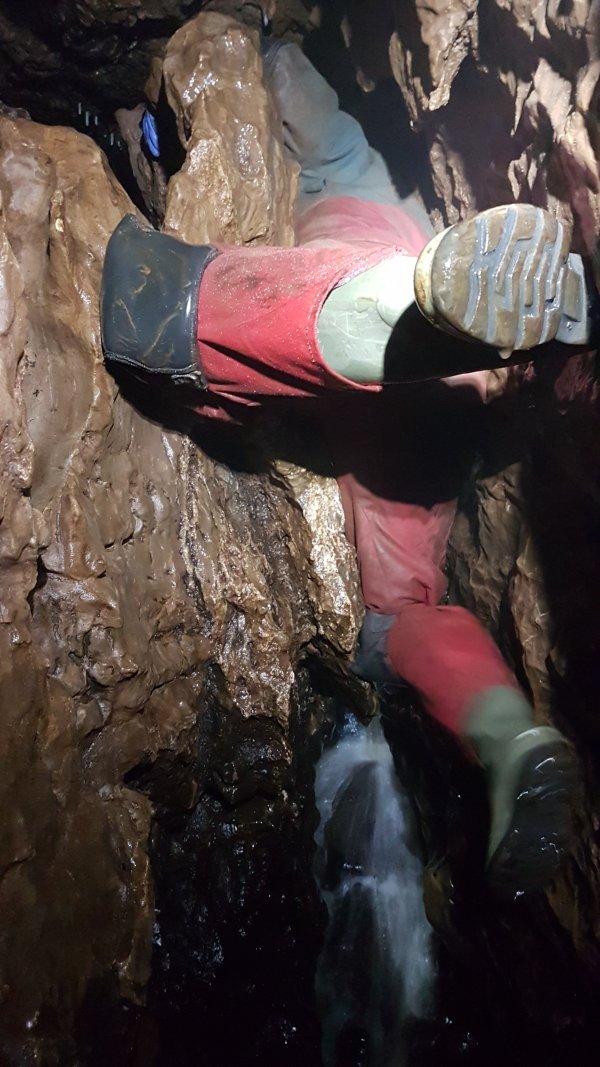 And then it gets even tighter again, with a squeeze where you have to hang on the ledge and align your body into the wide section, and try not to slip down too far.
Modelling by Claire
And then it gets even tighter again, with a squeeze where you have to hang on the ledge and align your body into the wide section, and try not to slip down too far.
Modelling by Claire Even on the way out, Claire makes this look far too easy. It is certainly not as easy as it looks.
Modelling by Claire, lighting by Tarquin and Claire
Even on the way out, Claire makes this look far too easy. It is certainly not as easy as it looks.
Modelling by Claire, lighting by Tarquin and Claire Through, but you still have to keep up a little longer, and don't swing upright too soon.
Modelling by Claire, lighting by Tarquin and Claire
Through, but you still have to keep up a little longer, and don't swing upright too soon.
Modelling by Claire, lighting by Tarquin and Claire Squeezing through the next tight section.
Modelling by Pete, lighting by Tarquin and Pete
Squeezing through the next tight section.
Modelling by Pete, lighting by Tarquin and Pete Wading along the rift. There was flood scum about 1.5 metres up the walls here, showing how severe the floods can be during winter.
Modelling by Pete, lighting by Tarquin and Pete
Wading along the rift. There was flood scum about 1.5 metres up the walls here, showing how severe the floods can be during winter.
Modelling by Pete, lighting by Tarquin and Pete The victim realises why the photographer was waiting for him to step around the corner. Surprisingly deep water.
Modelling by Pete, lighting by Tarquin and Pete
The victim realises why the photographer was waiting for him to step around the corner. Surprisingly deep water.
Modelling by Pete, lighting by Tarquin and Pete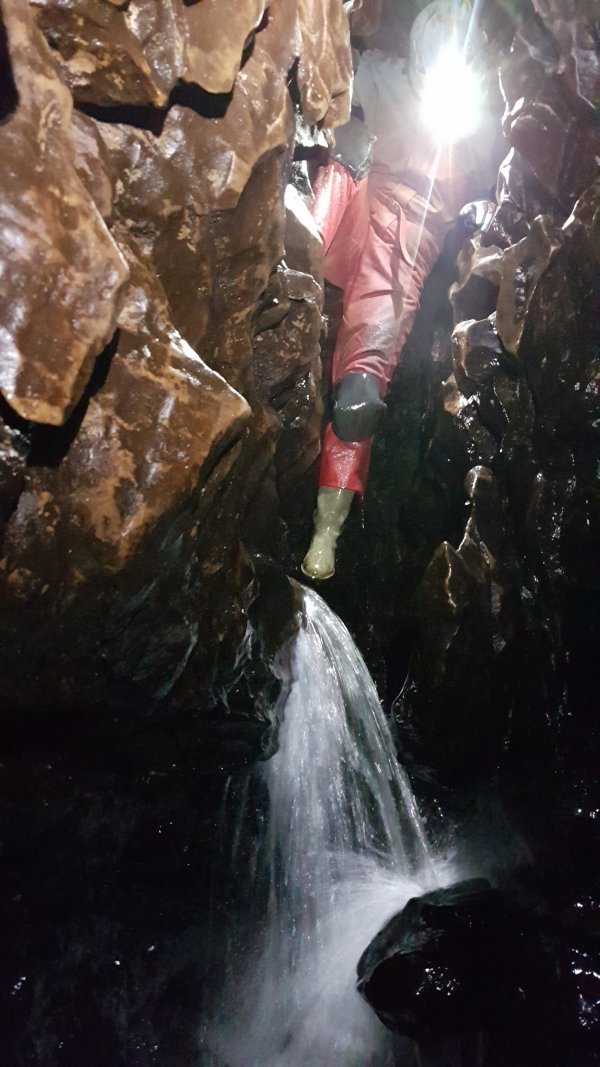 Climbing up a Waterfall, where several more roof oxbows connect.
Modelling by Claire, lighting by Tarquin and Claire
Climbing up a Waterfall, where several more roof oxbows connect.
Modelling by Claire, lighting by Tarquin and Claire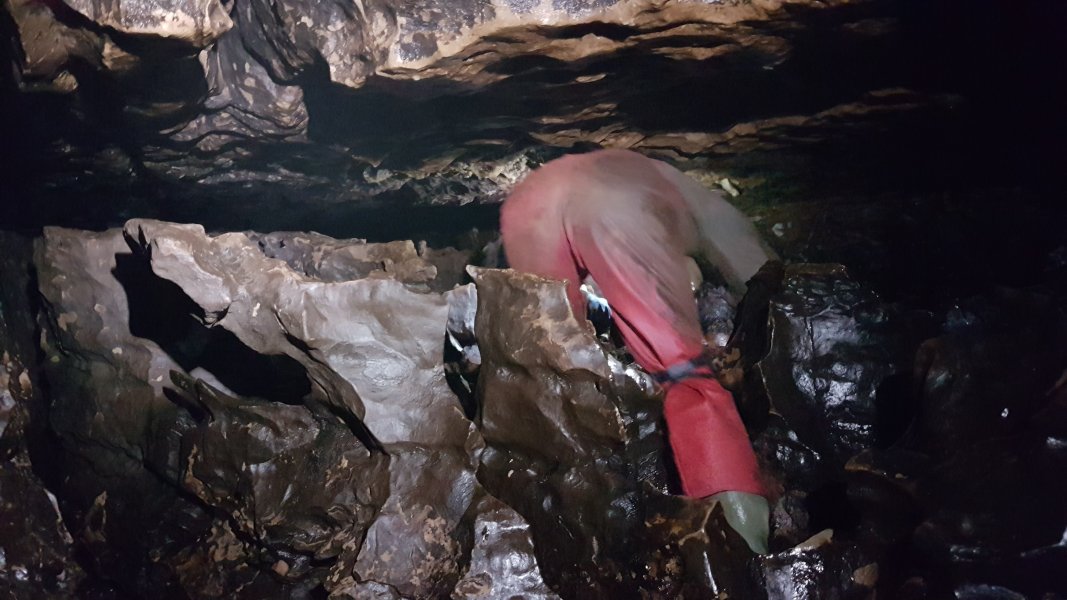 The stream begins flowing through more beddings, much higher than before, but with many more annoying rock projections that snag everything.
Modelling by Claire, lighting by Tarquin, Claire and Kevin
The stream begins flowing through more beddings, much higher than before, but with many more annoying rock projections that snag everything.
Modelling by Claire, lighting by Tarquin, Claire and Kevin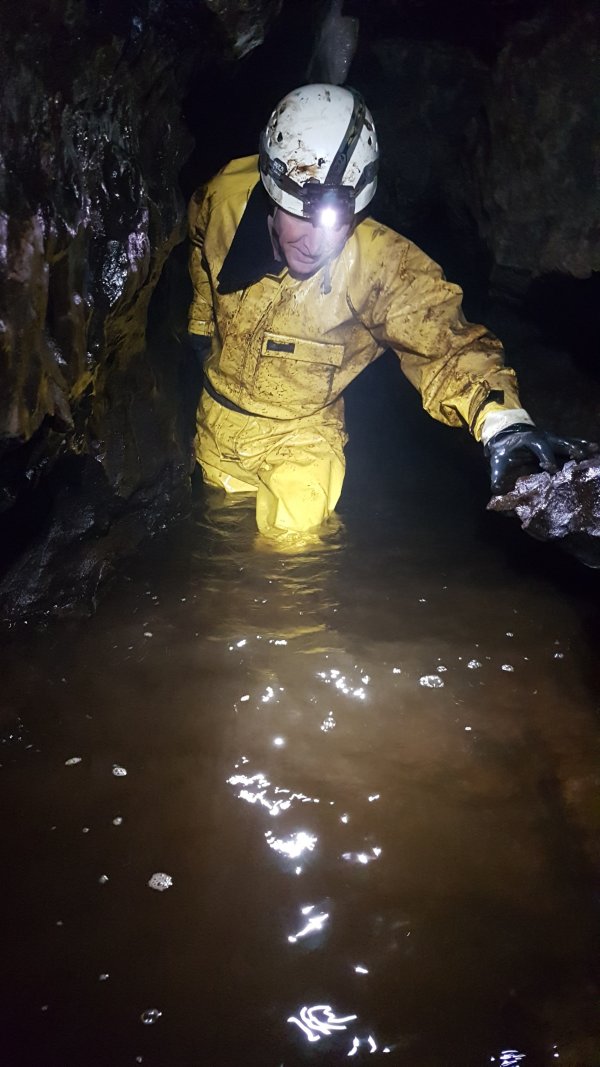 More wading.
Modelling by Pete, lighting by Tarquin and Pete
More wading.
Modelling by Pete, lighting by Tarquin and Pete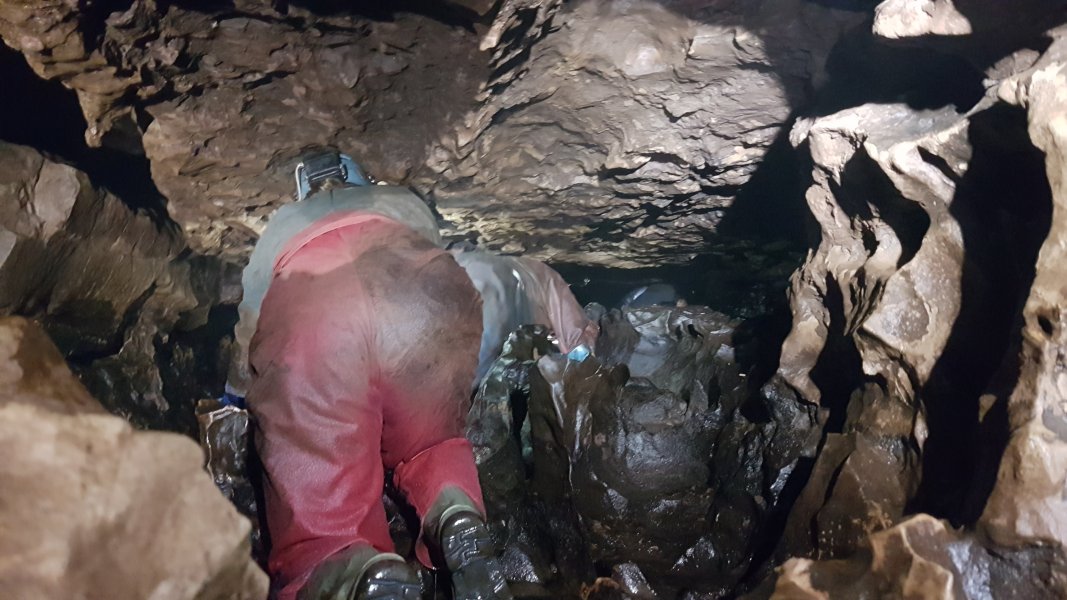 Yet more uncomfortable, snatchy beddings. You can sometimes choose which bedding to go through, as there are a few oxbows. Some may be worse than others, choose wisely.
Modelling by Claire, Kevin and Clive, lighting by Tarquin, Claire and Kevin
Yet more uncomfortable, snatchy beddings. You can sometimes choose which bedding to go through, as there are a few oxbows. Some may be worse than others, choose wisely.
Modelling by Claire, Kevin and Clive, lighting by Tarquin, Claire and Kevin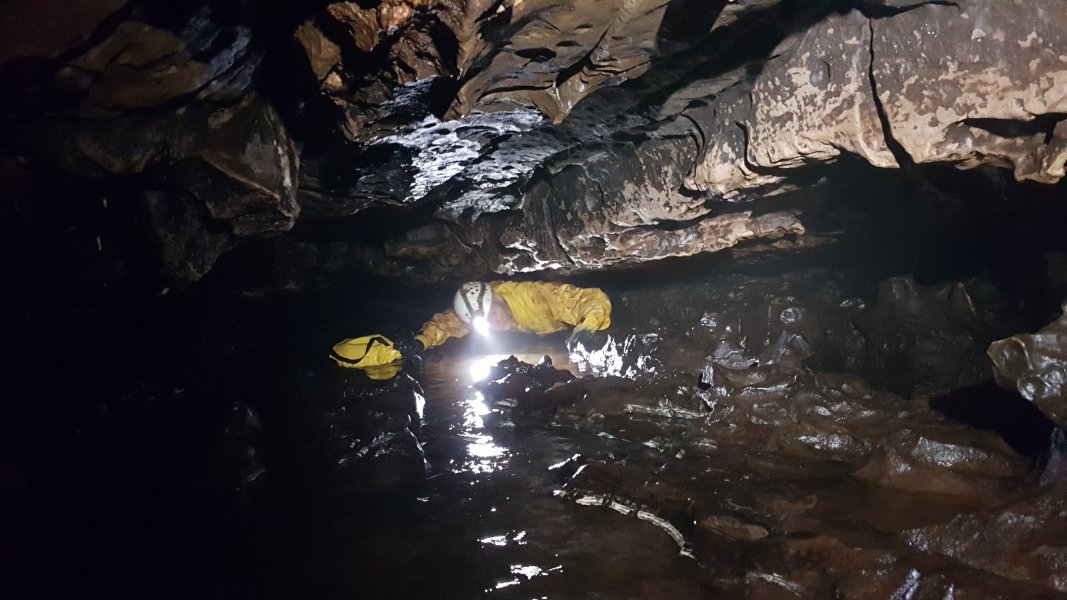 You chose ... poorly. But none of the routes were any better.
Modelling by Pete, lighting by Tarquin and Pete
You chose ... poorly. But none of the routes were any better.
Modelling by Pete, lighting by Tarquin and Pete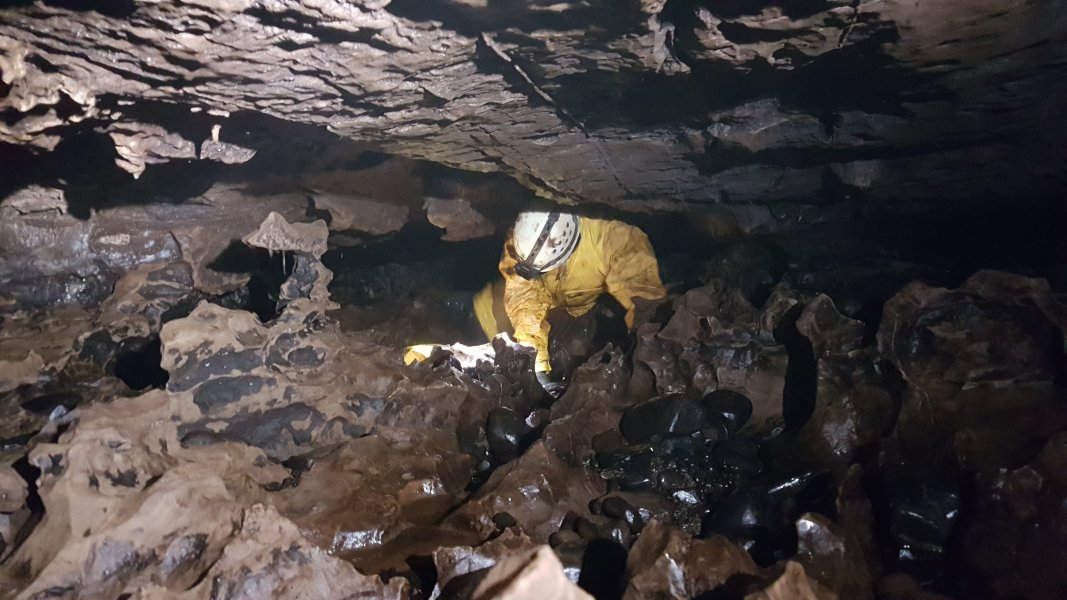 Annoying but beautiful rock projections.
Modelling by Pete, lighting by Tarquin and Pete
Annoying but beautiful rock projections.
Modelling by Pete, lighting by Tarquin and Pete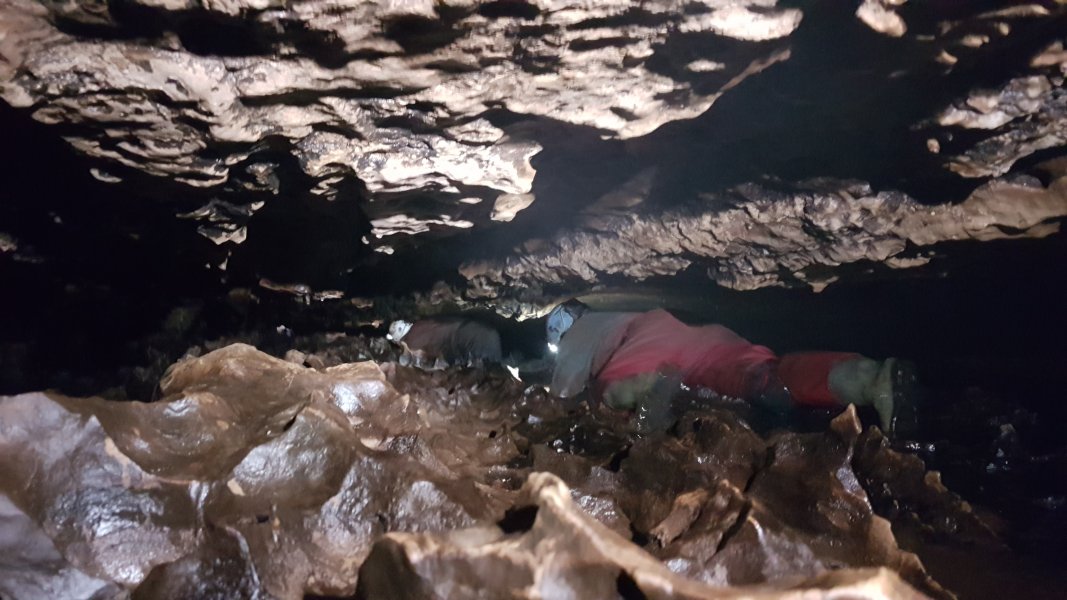 Not even half way through the cave yet...
Modelling by Claire and Kevin, lighting by Tarquin, Claire and Kevin
Not even half way through the cave yet...
Modelling by Claire and Kevin, lighting by Tarquin, Claire and Kevin Crouching size? This is progress!
Modelling by Claire, lighting by Tarquin and Claire
Crouching size? This is progress!
Modelling by Claire, lighting by Tarquin and Claire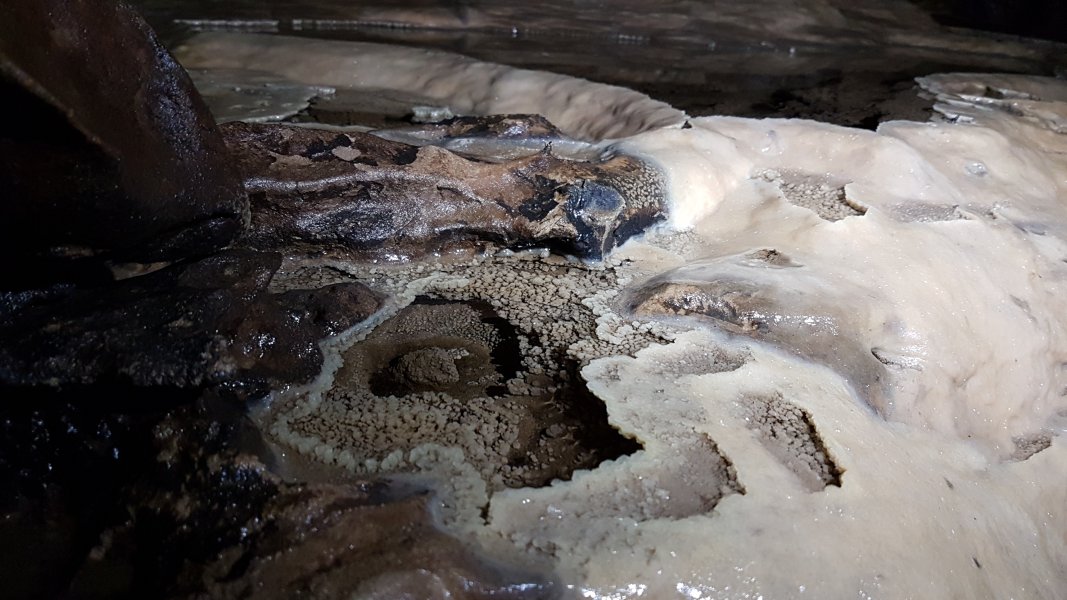 Gour pools in an alcove.
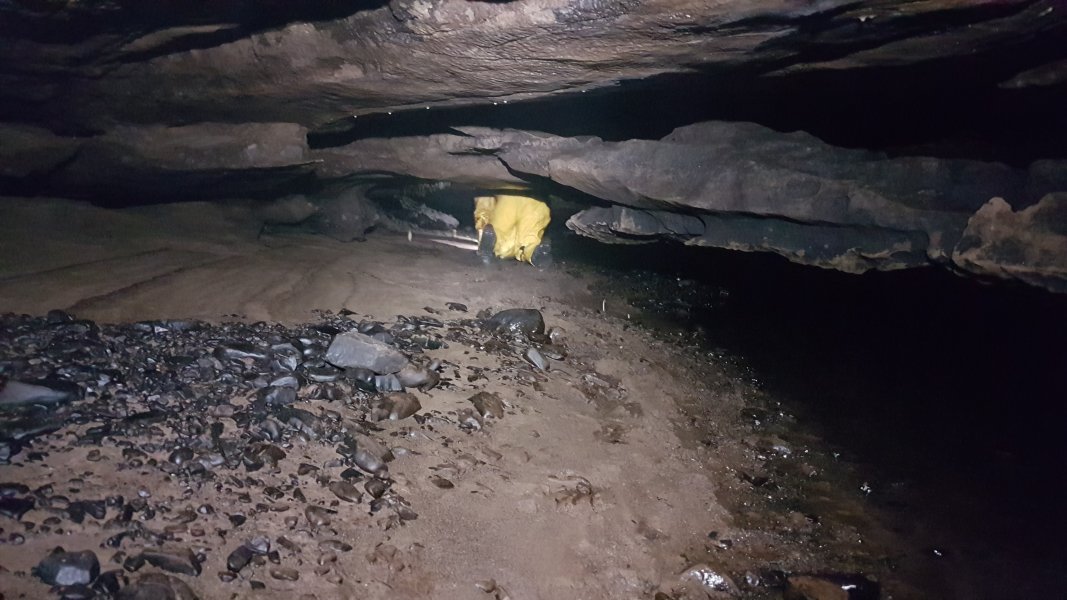 Ah no, just another crawl again.
Modelling by Pete, lighting by Tarquin and Pete
Ah no, just another crawl again.
Modelling by Pete, lighting by Tarquin and Pete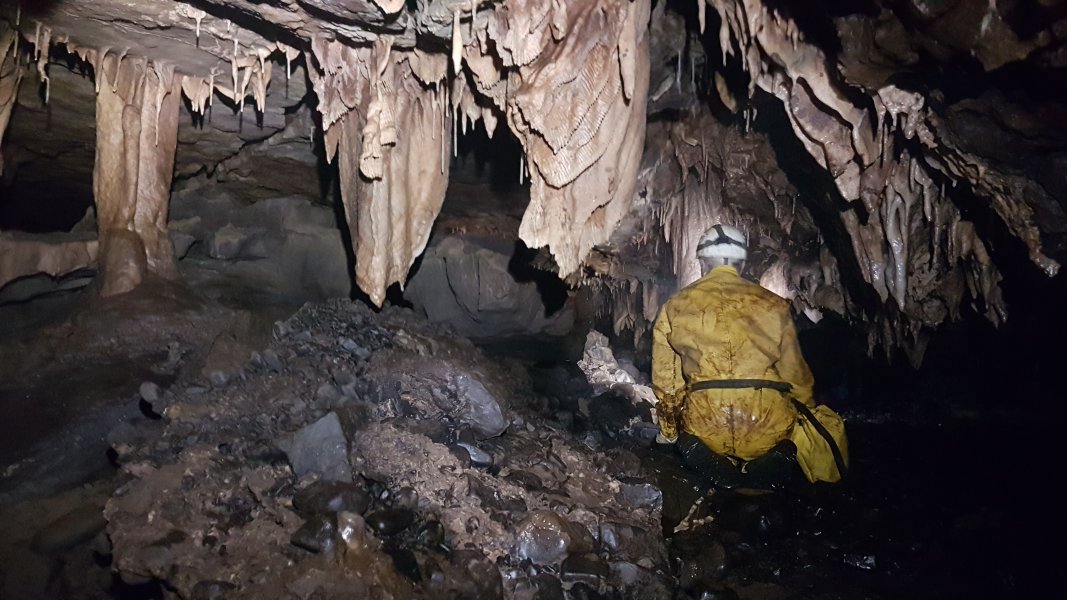 The formations begin, with some attractive columns, redissolving curtains, and numerous stalactites.
Modelling by Pete, lighting by Tarquin and Pete
The formations begin, with some attractive columns, redissolving curtains, and numerous stalactites.
Modelling by Pete, lighting by Tarquin and Pete You get the impression that you are only seeing the bottom of the good stuff.
Modelling by Pete, lighting by Tarquin and Pete
You get the impression that you are only seeing the bottom of the good stuff.
Modelling by Pete, lighting by Tarquin and Pete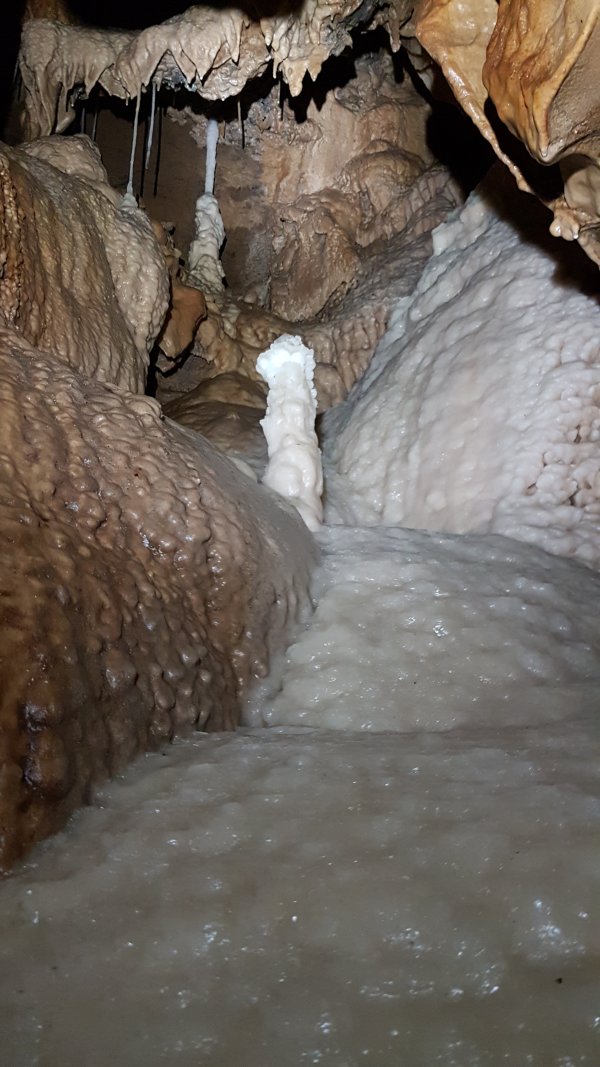 Grotto hidden above.
 Suddenly we emerge in a superb grotto, hidden above the stream. The passage is taped off, as the formations can all be seen from here anyway. The route is to drop back down to the stream.
Modelling by Pete and Claire, lighting by Tarquin, Pete and Claire
Suddenly we emerge in a superb grotto, hidden above the stream. The passage is taped off, as the formations can all be seen from here anyway. The route is to drop back down to the stream.
Modelling by Pete and Claire, lighting by Tarquin, Pete and Claire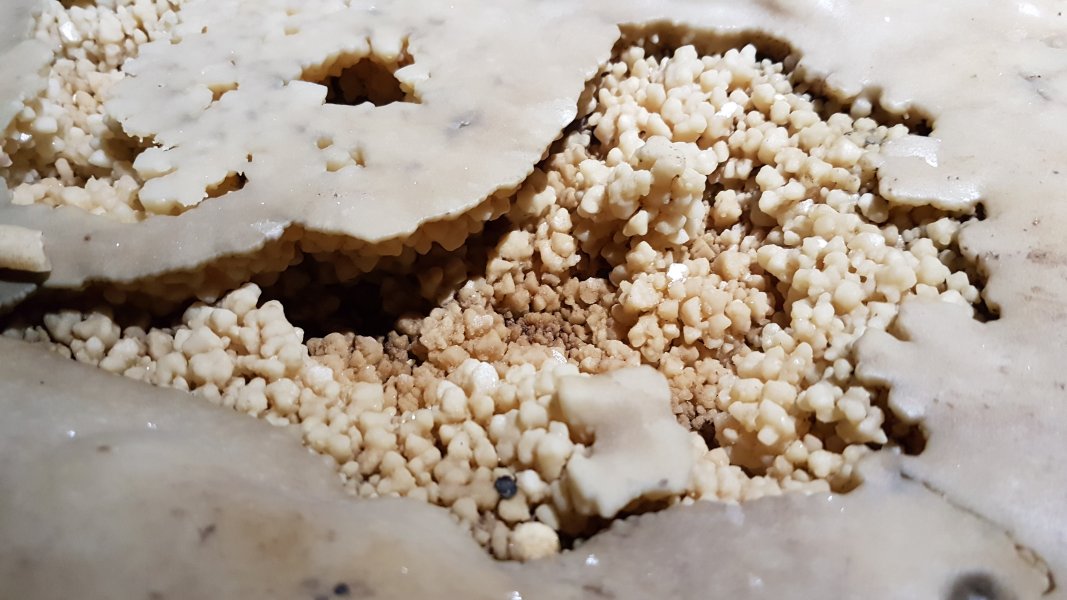 Dried crystal pool in the grotto.
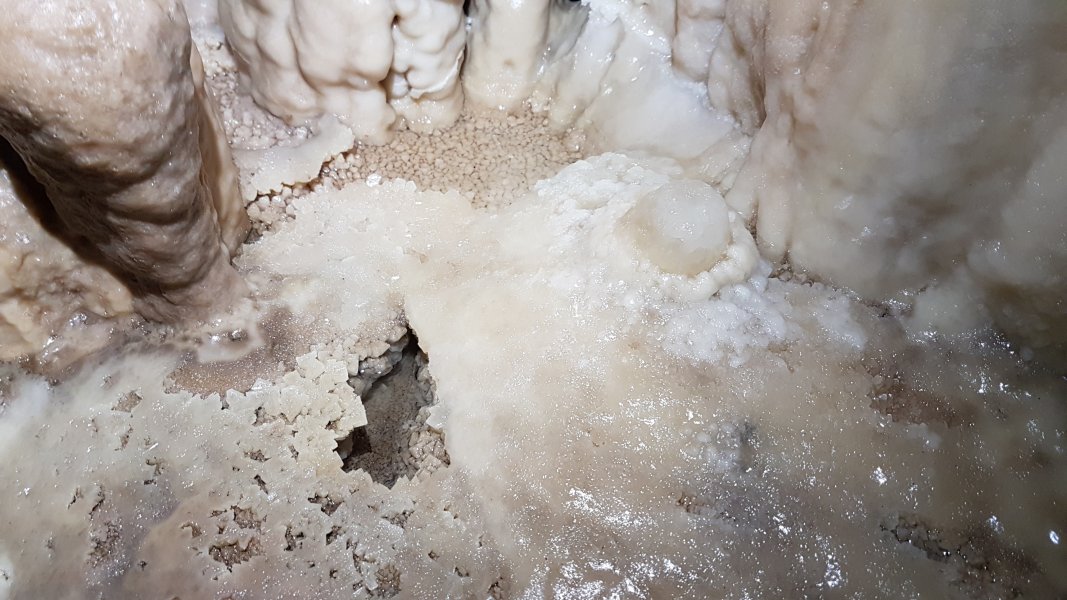 Crystal pool in the grotto.
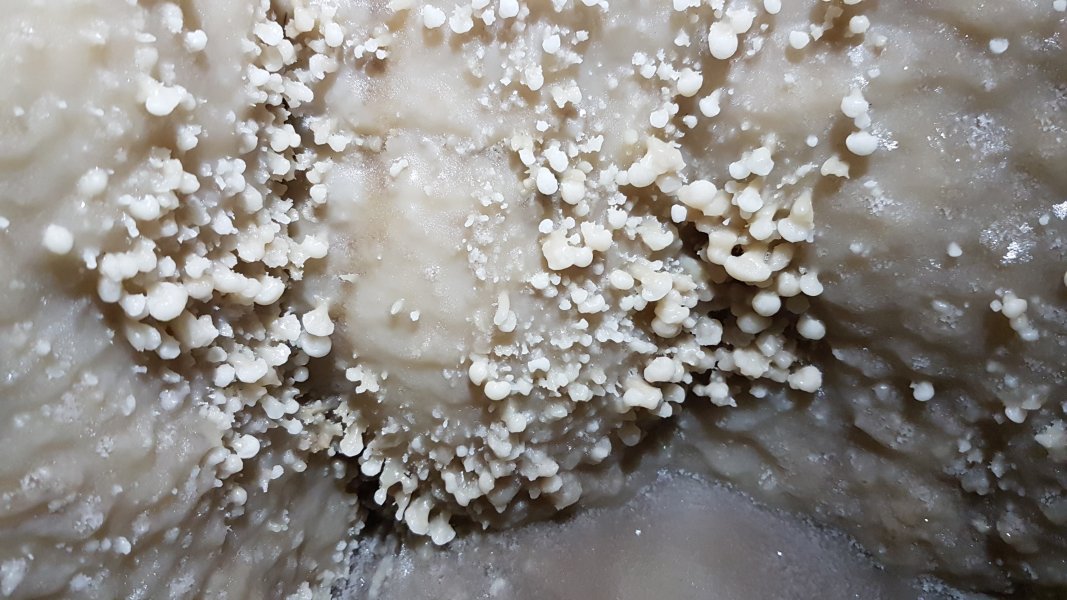 Botryoids n the grotto.
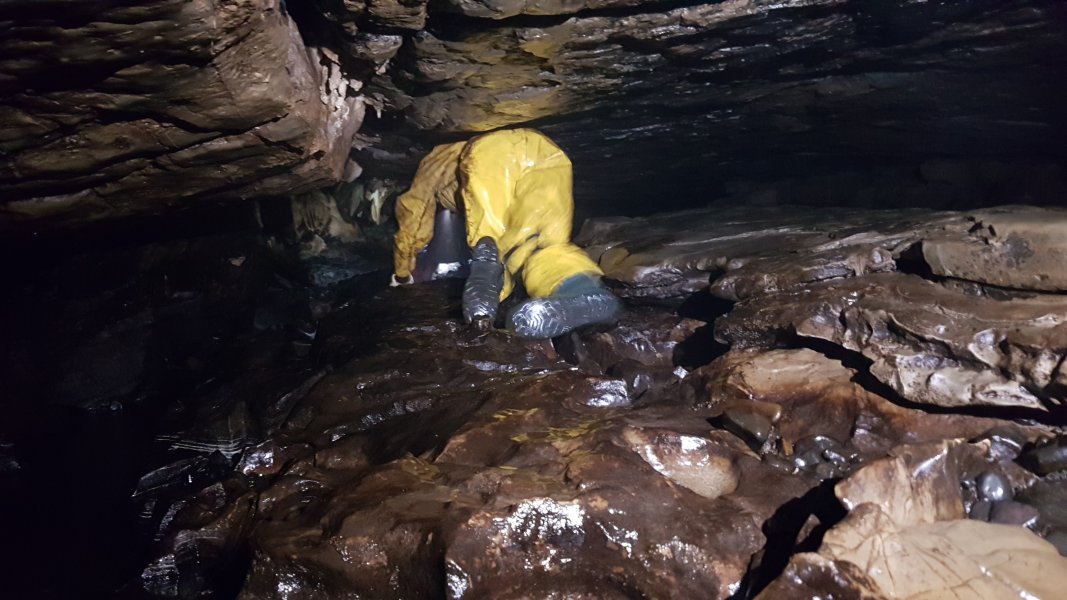 The Crawl, the final insult before the good stuff.
Modelling by Pete, lighting by Tarquin and Pete
The Crawl, the final insult before the good stuff.
Modelling by Pete, lighting by Tarquin and Pete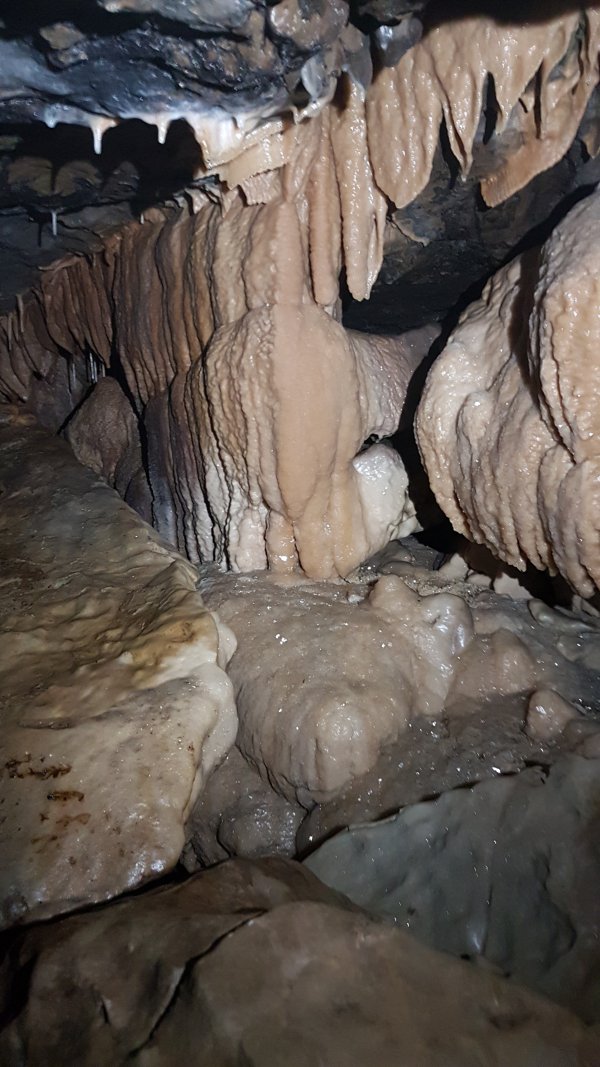 Stal in The Crawl.
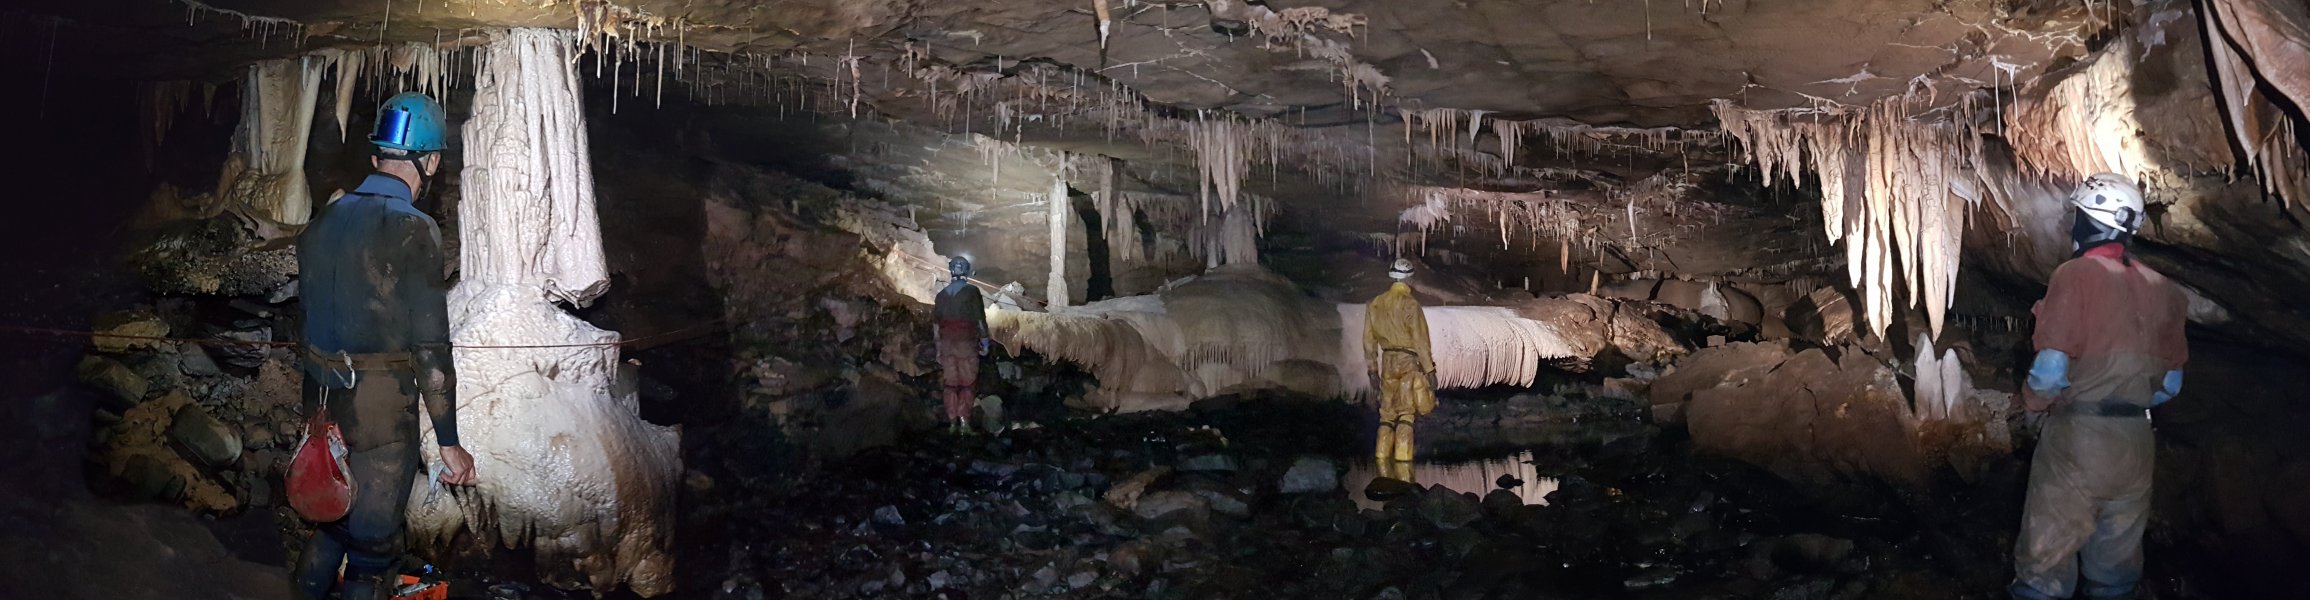 At long last, the great reveal; Stal Chamber. This is one of the most elaborately decorated parts of the cave, and a superb reward for the effort up to this point.
Modelling by Clive, Claire, Pete and Kevin, lighting by Tarquin, Clive, Claire, Pete and Kevin
At long last, the great reveal; Stal Chamber. This is one of the most elaborately decorated parts of the cave, and a superb reward for the effort up to this point.
Modelling by Clive, Claire, Pete and Kevin, lighting by Tarquin, Clive, Claire, Pete and Kevin Translucent curtains in Stal Chamber.
Lighting by Pete
Translucent curtains in Stal Chamber.
Lighting by Pete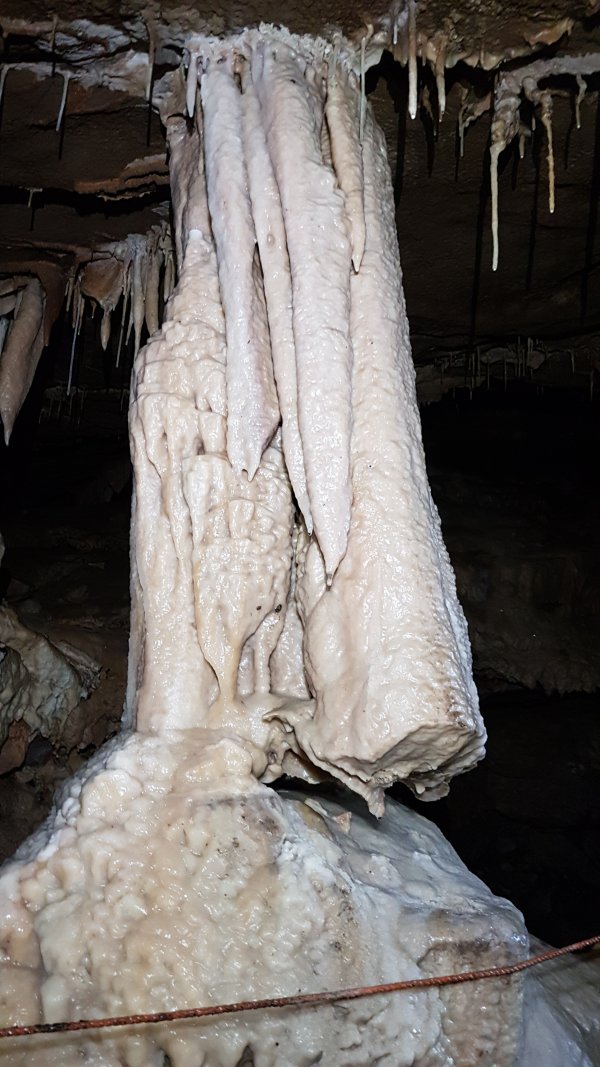 The broken column, which has snapped, misaligned, then cemented and regrown.
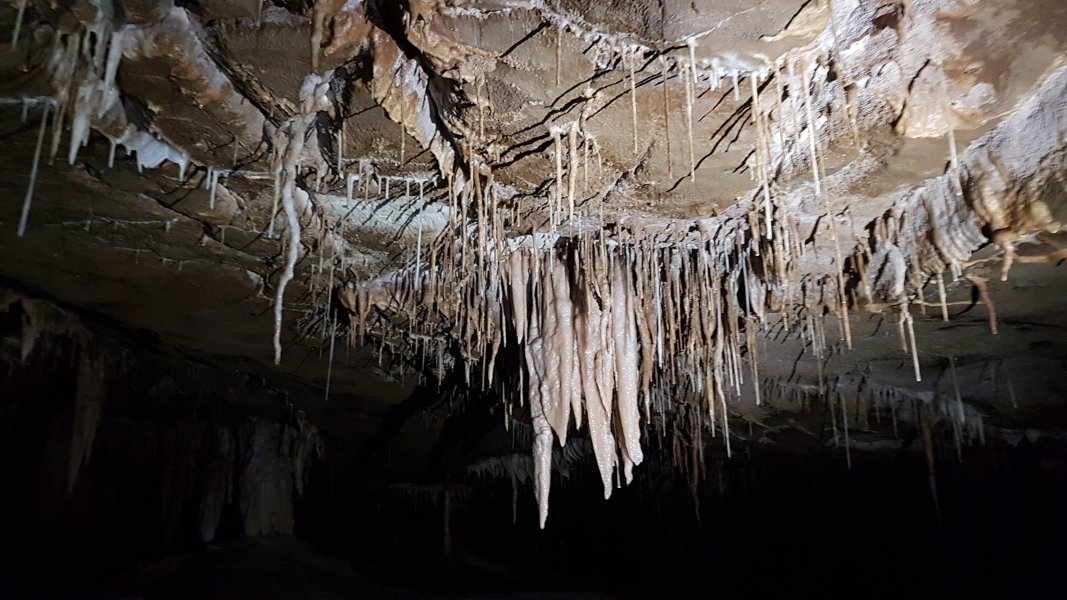 Stalactites in the middle of the chamber.
Lighting by Pete
Stalactites in the middle of the chamber.
Lighting by Pete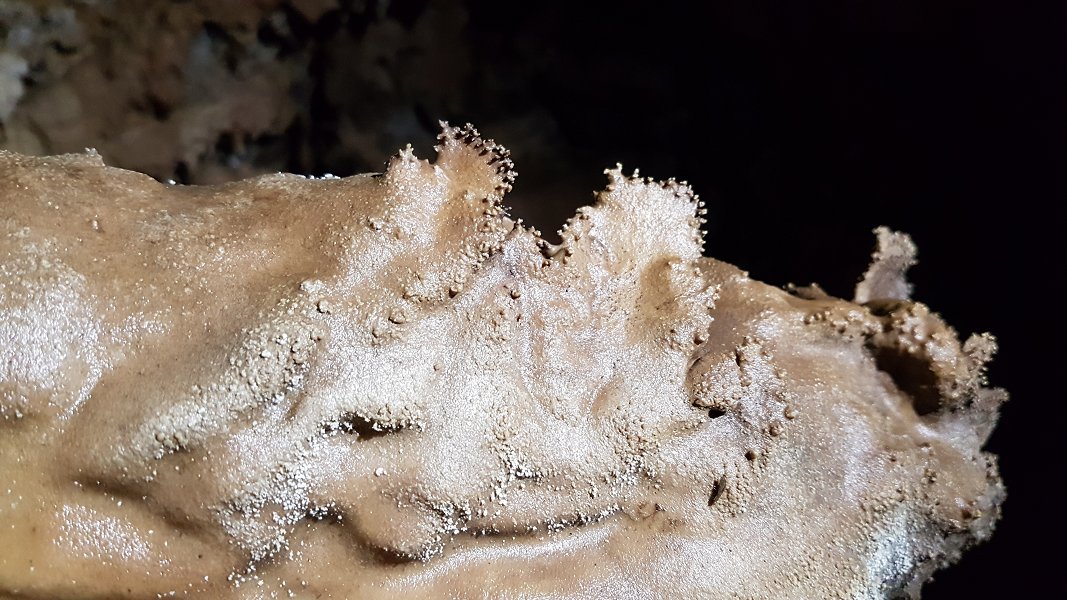 Fractal botryoids.
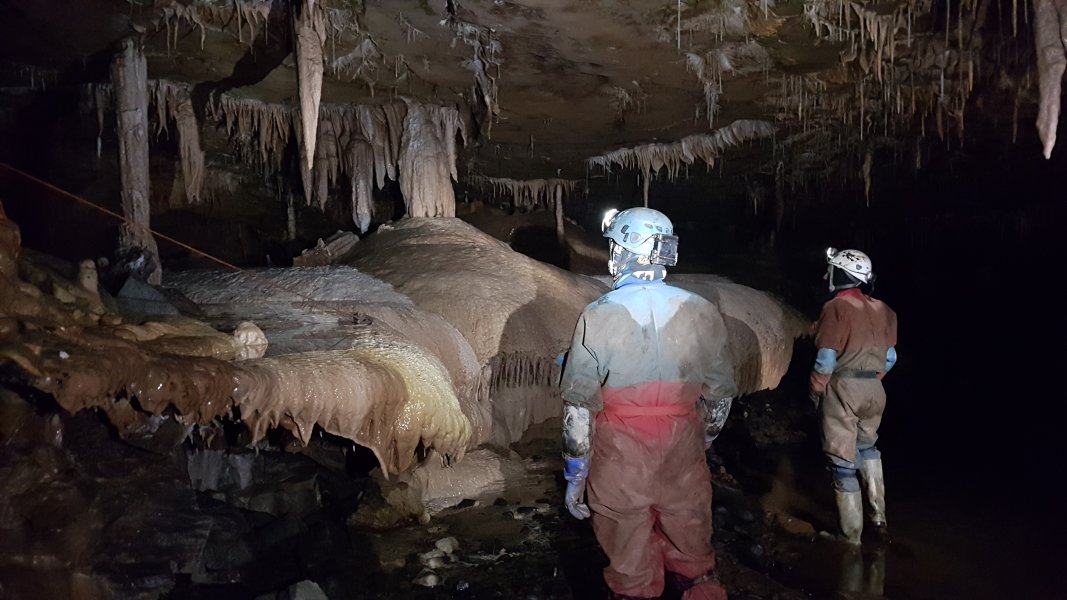 Superb columns and flowstone.
Modelling by Claire and Kevin, lighting by Tarquin, Pete, Claire and Kevin
Superb columns and flowstone.
Modelling by Claire and Kevin, lighting by Tarquin, Pete, Claire and Kevin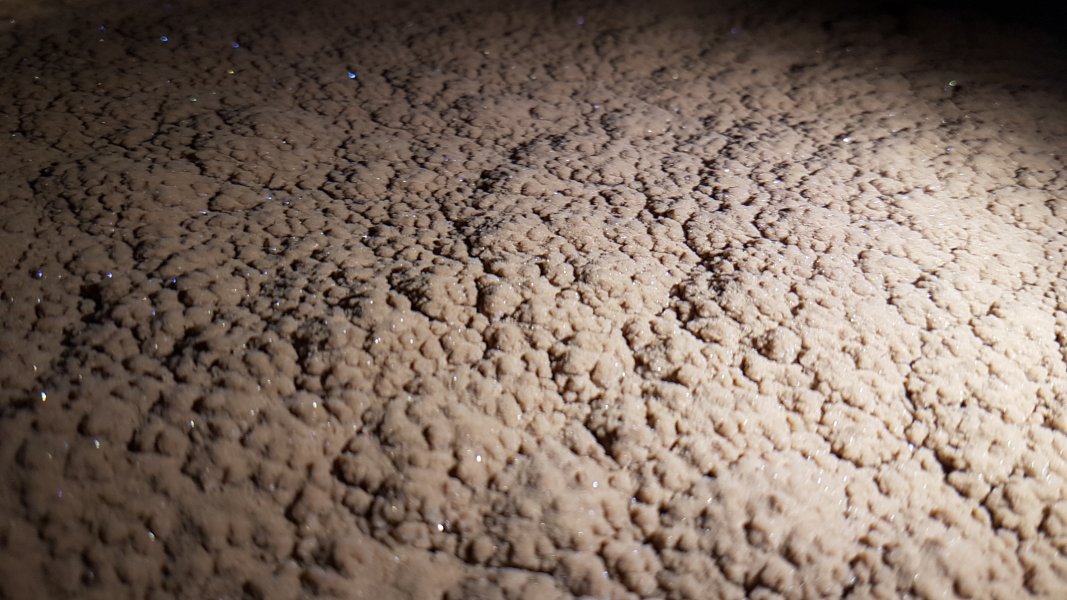 Glistening crystals in the flowstone pools.
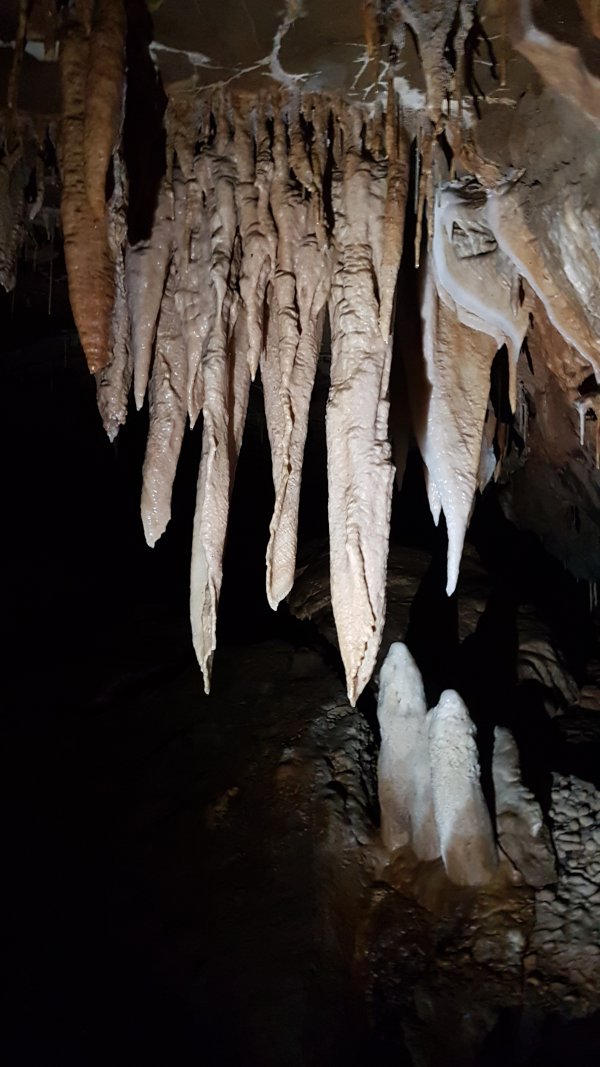 Stalactites like canine teeth.
 Clive setting up for a traditional photograph, using flashbulbs, a flashgun, and a tripod mounted camera. The results are so much better than I can achieve with a phone camera, and the colours produced by the flashbulbs are simply gorgeous.
Setup by Clive, modelling by Kevin (plus Clive and Claire seen here), lighting by Pete, Kevin and Claire (and Clive here)
Clive setting up for a traditional photograph, using flashbulbs, a flashgun, and a tripod mounted camera. The results are so much better than I can achieve with a phone camera, and the colours produced by the flashbulbs are simply gorgeous.
Setup by Clive, modelling by Kevin (plus Clive and Claire seen here), lighting by Pete, Kevin and Claire (and Clive here) Naturally fractured flowstone.
Modelling by Pete, lighting by Tarquin and Pete
Naturally fractured flowstone.
Modelling by Pete, lighting by Tarquin and Pete Simple stalactites.
Modelling by Kevin, lighting by Tarquin, Pete and Kevin
Simple stalactites.
Modelling by Kevin, lighting by Tarquin, Pete and Kevin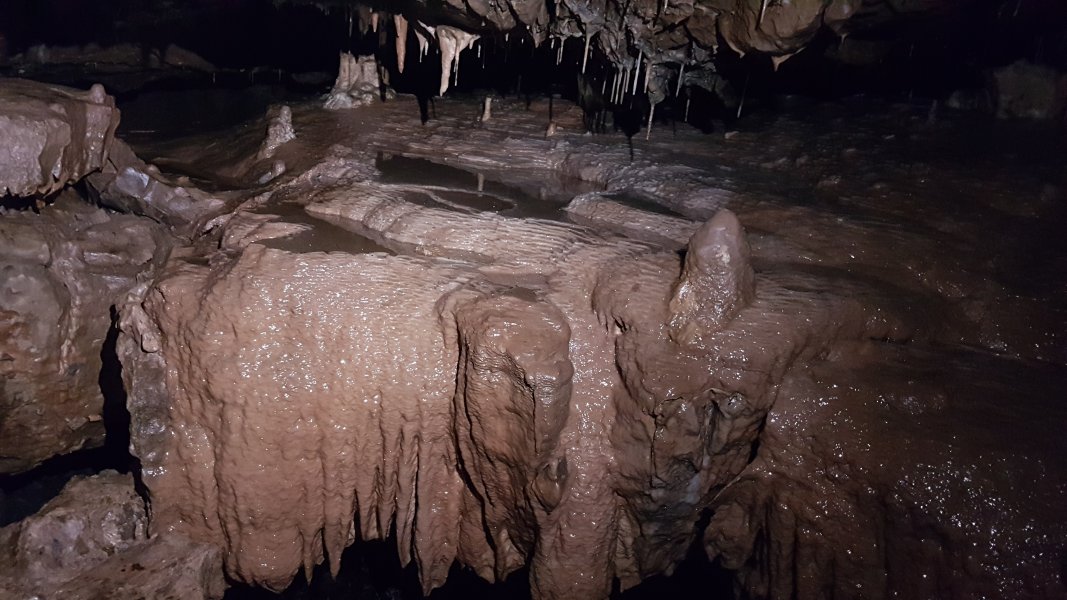 A crawl over flowstone then reaches the major passage.
 First Boulder Choke, a simply enormous pile of boulders, marking the start of the big stuff. It seems very odd that the first half of the cave is so small, when the rest of the cave upstream is so big. So either there is a hidden major side passage here that used to be the downstream cave, or the first half of the cave is in a far harder wearing rock (it does appear to be dolomitised) than the second half. They feel like they were formed by different processes, and different geological eras.
Modelling by Kevin and Pete, lighting by Tarquin, Kevin and Pete
First Boulder Choke, a simply enormous pile of boulders, marking the start of the big stuff. It seems very odd that the first half of the cave is so small, when the rest of the cave upstream is so big. So either there is a hidden major side passage here that used to be the downstream cave, or the first half of the cave is in a far harder wearing rock (it does appear to be dolomitised) than the second half. They feel like they were formed by different processes, and different geological eras.
Modelling by Kevin and Pete, lighting by Tarquin, Kevin and Pete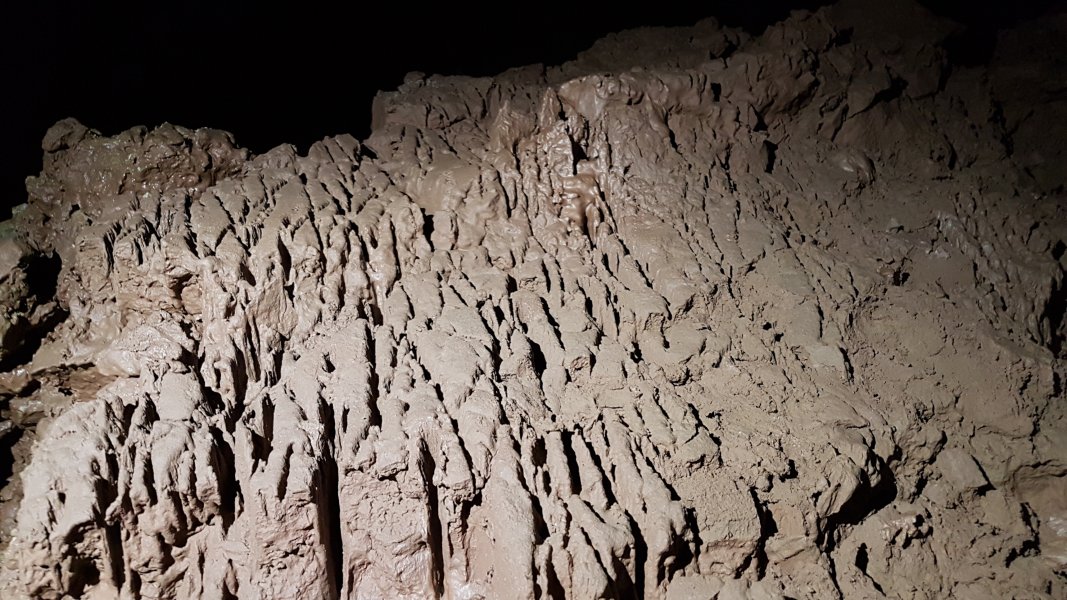 Ridged mud above the First Boulder Choke.
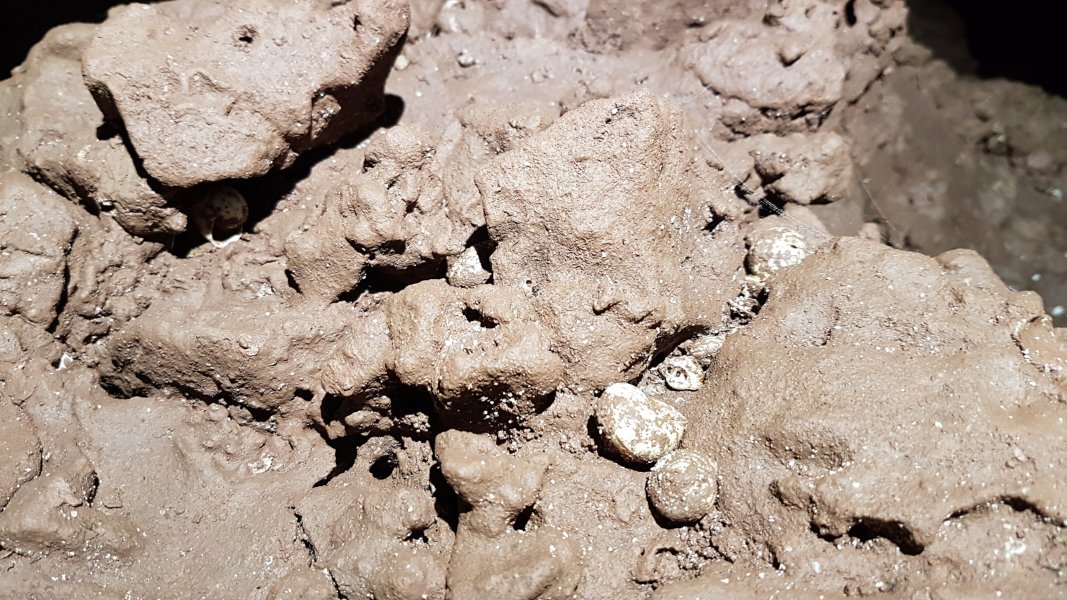 For most of the rest of the passage, the muddy rocks are often covered in large snail shells (that could be mistaken for cryostal). These suggest a close link to the surface, but there are no avens here. Perhaps they were washed in with the mud.
 Blue and purple shales, suggesting that the size could be as a result of fallen shale, which could easily have been washed away, leaving a bigger space. However, there is no sign of debris filling the smaller passages, so this seems unlikely.
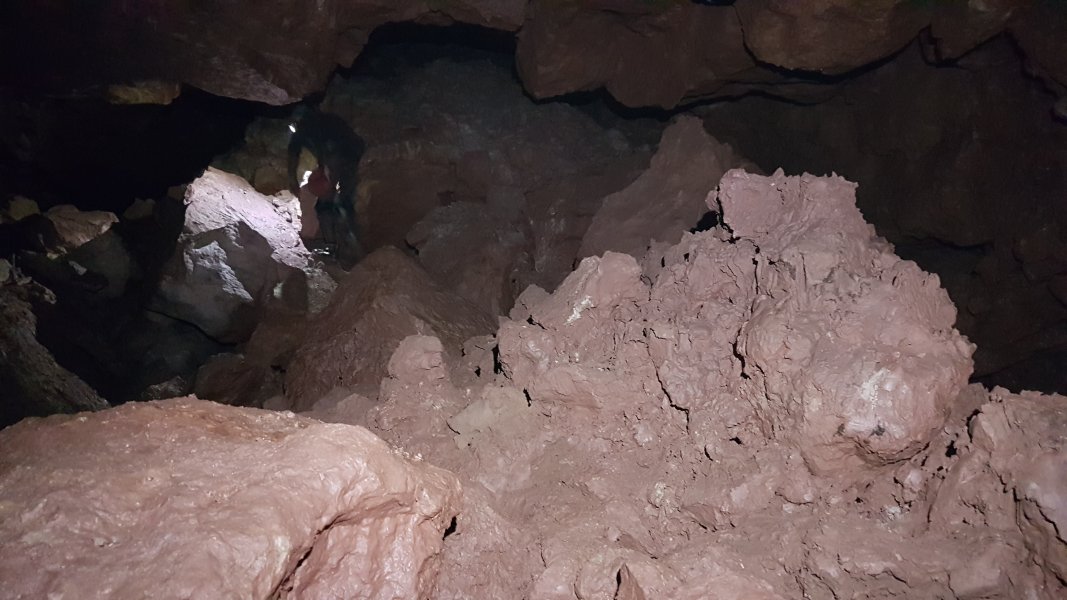 Much of the mud is pink tinted, and is therefore likely to be formed from Old Red Sandstone. This forms the bedrock below, but rises up to the mountain summits as a result of the dip. Fine clay made from this rock suggests that it was probably formed by glacial action, and then either washed into the cave by periglacial meltwater, or a later river. The valley itself seems to have formed the caves, so a later river is most likely. But then why is this passage so much bigger than the downstream cave, and did it previously have another major outlet passage which was in use while the river was washing in all the clay and snails?
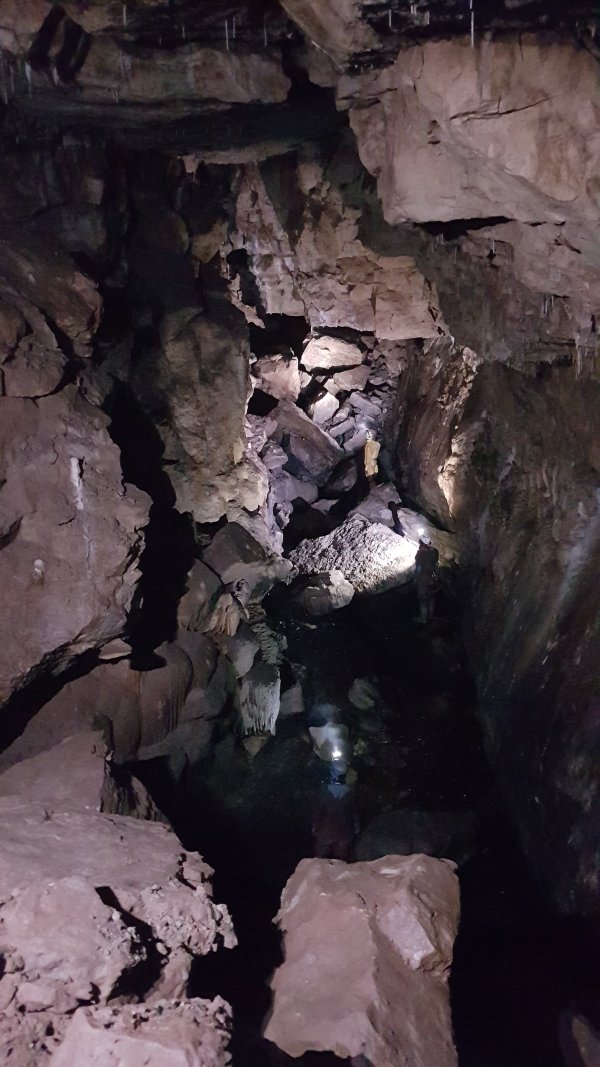 The enormous passage of Main Chamber (it's a passage, not a chamber), the largest in the cave.
Modelling by Claire, Kevin and Pete, lighting by Clive, Claire, Kevin and Pete
The enormous passage of Main Chamber (it's a passage, not a chamber), the largest in the cave.
Modelling by Claire, Kevin and Pete, lighting by Clive, Claire, Kevin and Pete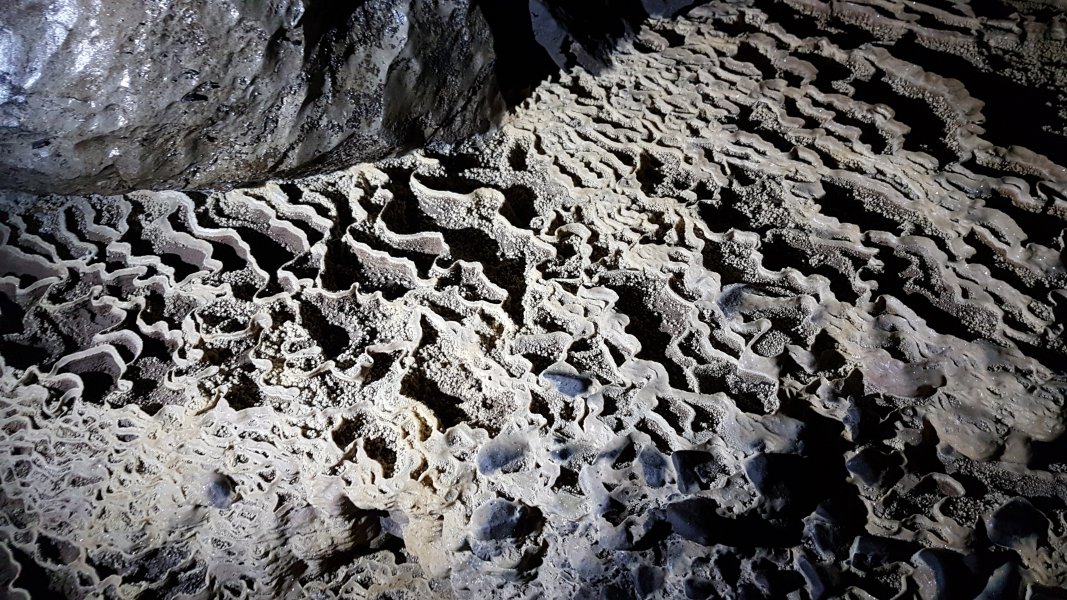 Elaborate gours and purple stones in the Main Chamber.
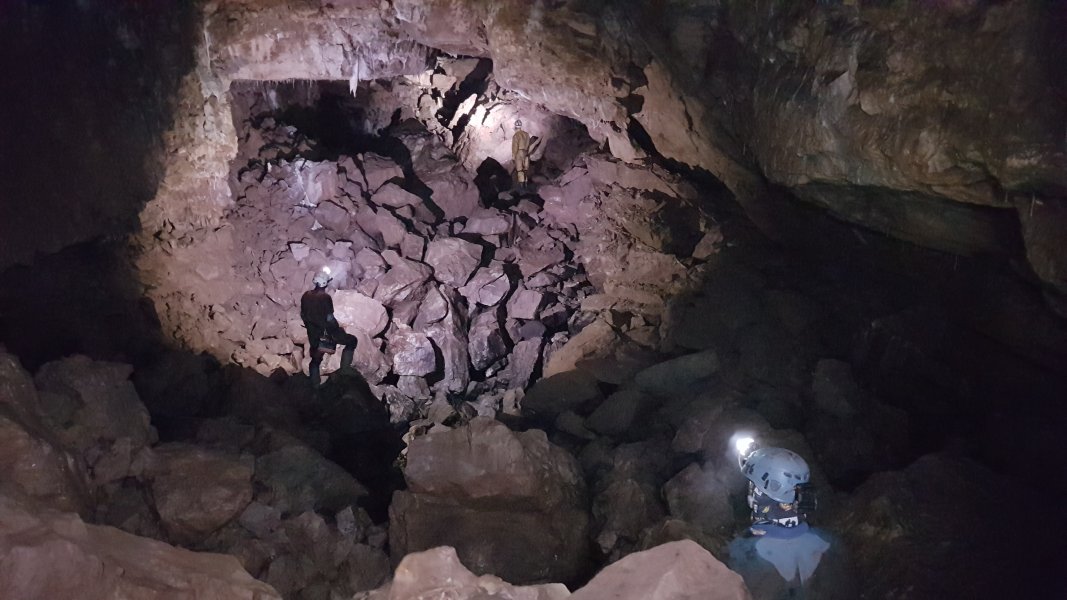 Second Boulder Chamber, another impressively large section of passage.
Modelling by Claire, Kevin and Pete, lighting by Tarquin, Claire, Kevin and Pete
Second Boulder Chamber, another impressively large section of passage.
Modelling by Claire, Kevin and Pete, lighting by Tarquin, Claire, Kevin and Pete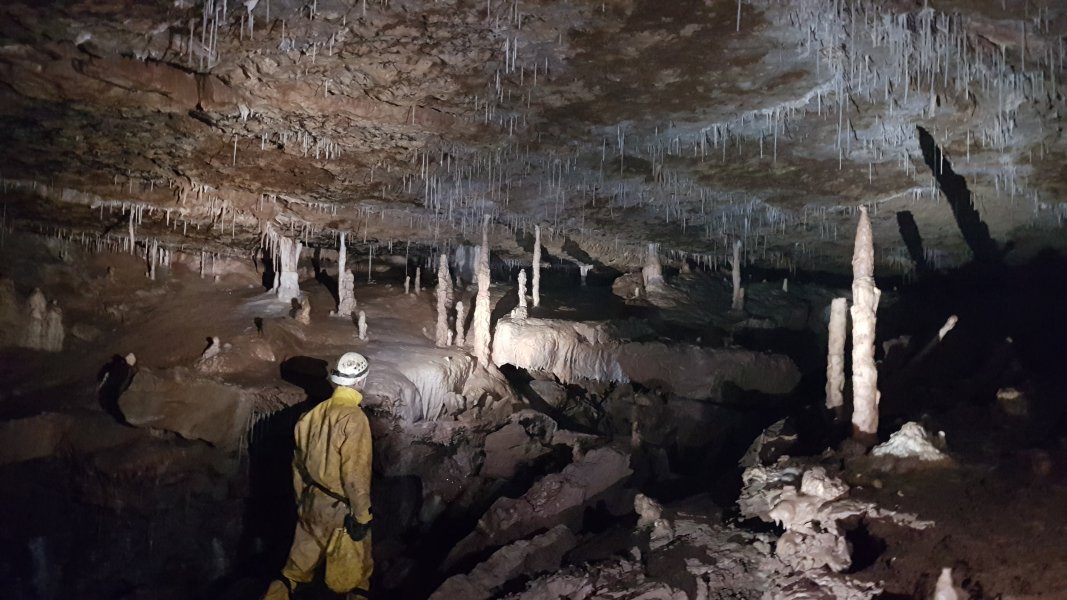 At the end of Second Boulder Chamber is Dap's Dilema, a choice between going through a grotto, or climbing down to the stream. The grotto is quite beautiful, and deserves to be left alone.
Modelling by Pete, lighting by Tarquin, Kevin, Claire and Pete
At the end of Second Boulder Chamber is Dap's Dilema, a choice between going through a grotto, or climbing down to the stream. The grotto is quite beautiful, and deserves to be left alone.
Modelling by Pete, lighting by Tarquin, Kevin, Claire and Pete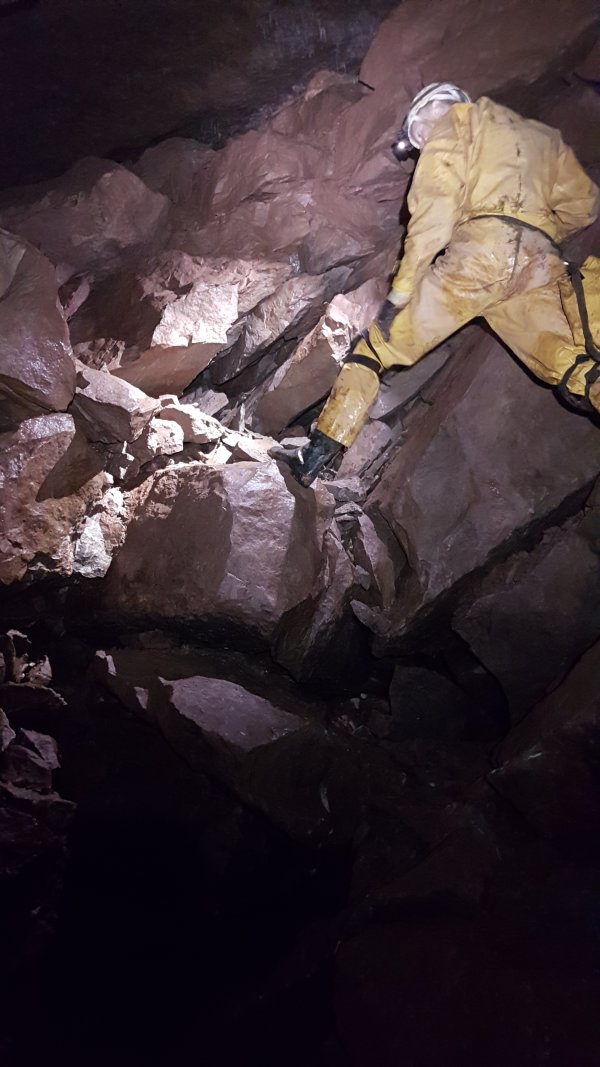 The drop to the stream at Dap's Dilema is not at all comfortable, being a pile of boulders precariously poised on top of other boulders, all supported by nothing but air.
Modelling by Pete, lighting by Tarquin and Pete
The drop to the stream at Dap's Dilema is not at all comfortable, being a pile of boulders precariously poised on top of other boulders, all supported by nothing but air.
Modelling by Pete, lighting by Tarquin and Pete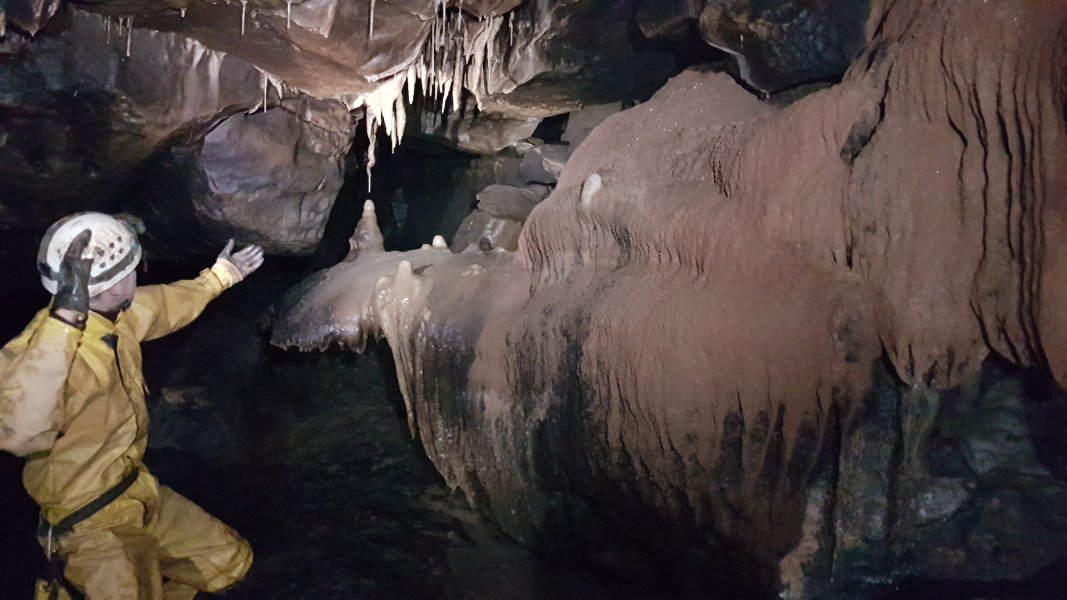 Stal in the river route.
Grandstanding by Pete, lighting by Tarquin, Clive and Pete
Stal in the river route.
Grandstanding by Pete, lighting by Tarquin, Clive and Pete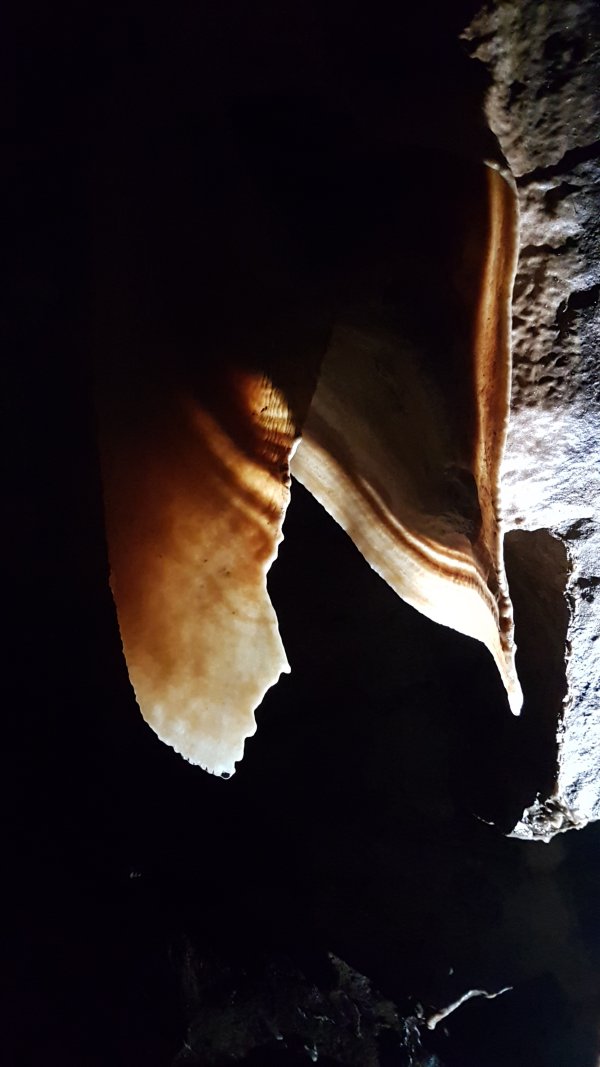 Translucent curtains.
 Crystal covered rock at a choked section.
 Cemented-in cave pearls, so pure that they look like snowballs.
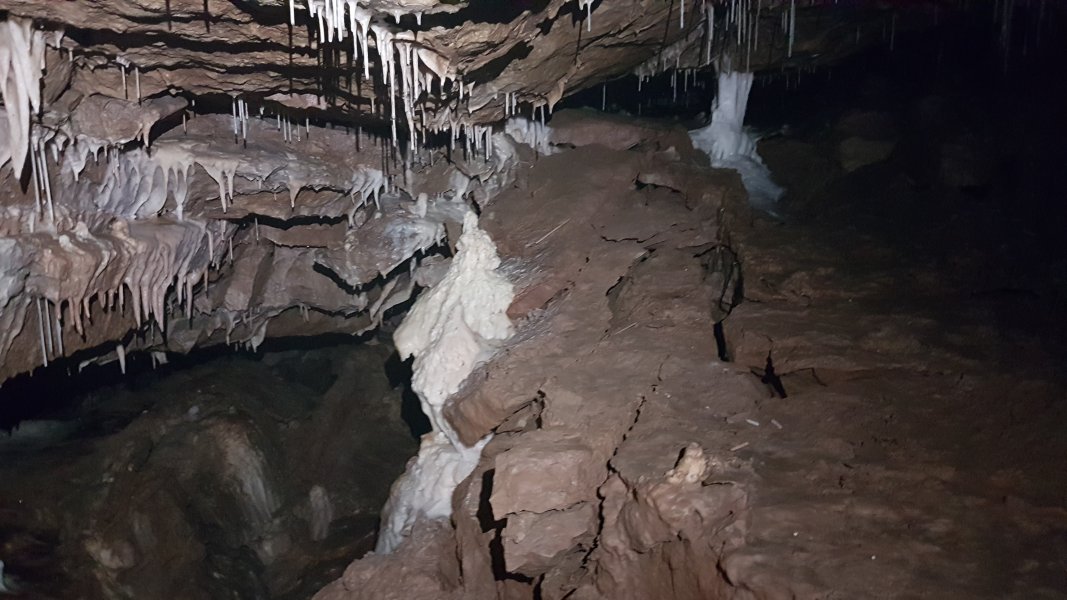 Stal in the choked section. Creature Crawl (written as Carature Crawl on the original survey) should lead off somewhere about here.
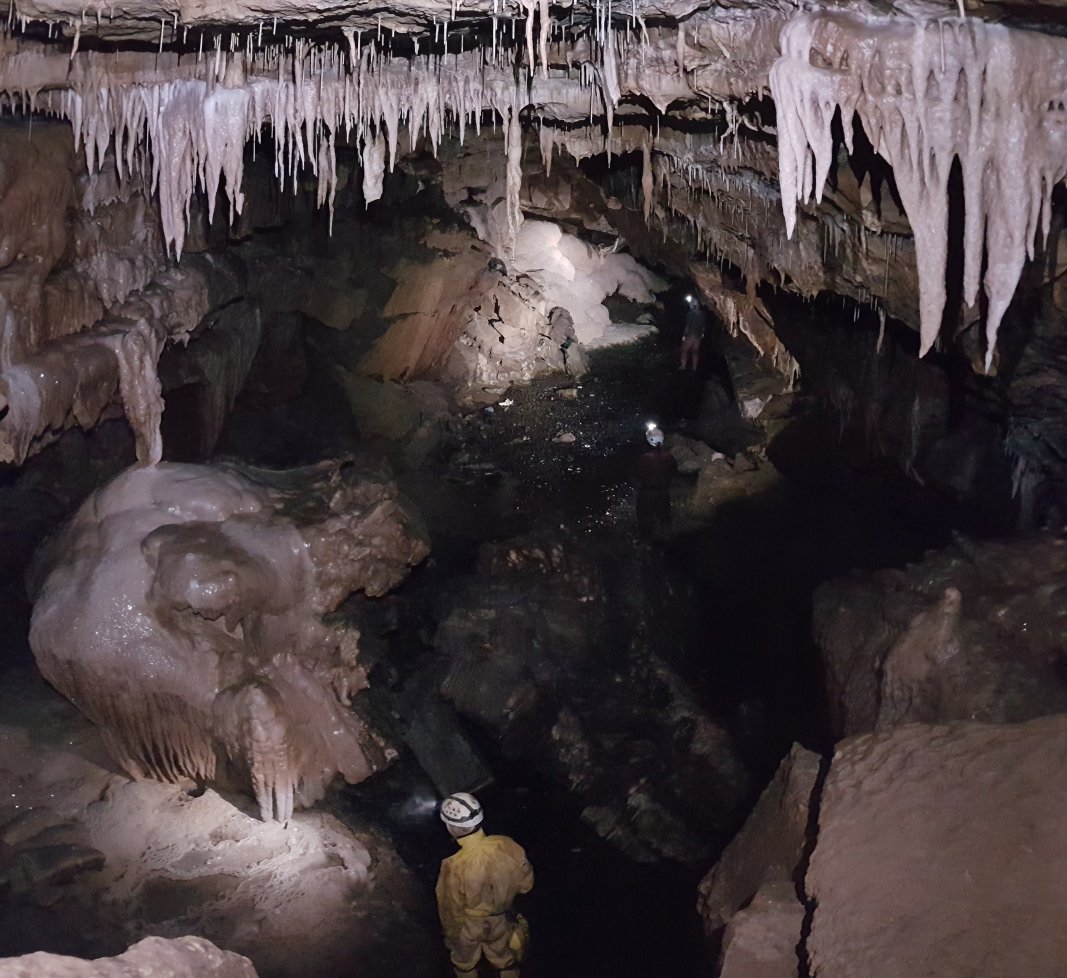 Another superb view, this time from a balcony overlooking the final chamber.
Modelling by Pete, Kevin and Claire, lighting by Tarquin, Pete, Kevin and Claire
Another superb view, this time from a balcony overlooking the final chamber.
Modelling by Pete, Kevin and Claire, lighting by Tarquin, Pete, Kevin and Claire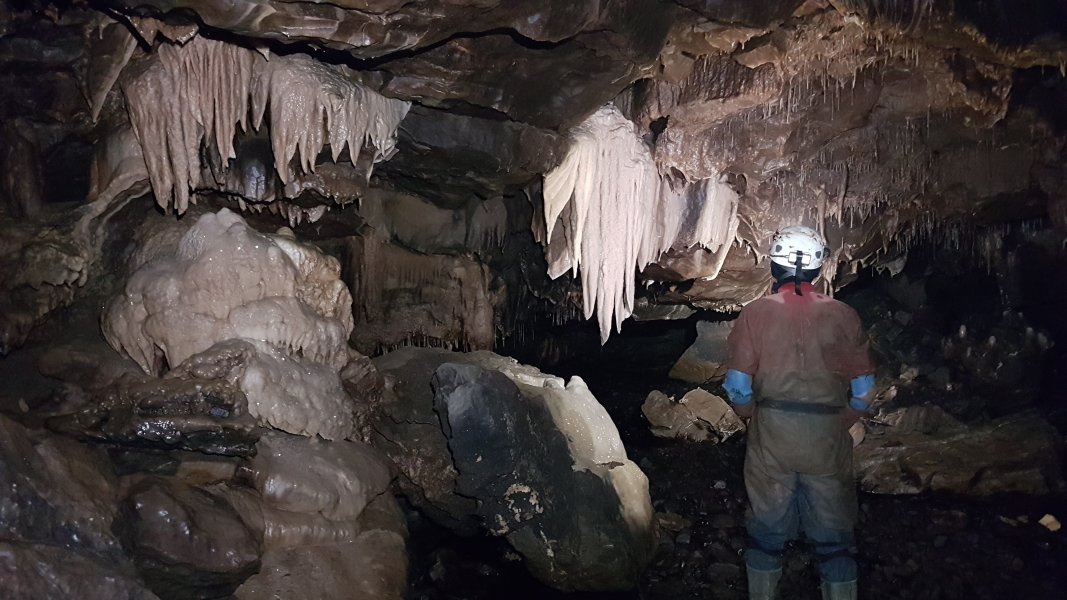 Below the balcony.
Modelling by Kevin, lighting by Tarquin and Kevin
Below the balcony.
Modelling by Kevin, lighting by Tarquin and Kevin The massive bank of glittering flowstone that dominates the chamber.
Modelling by Pete, lighting by Tarquin and Pete
The massive bank of glittering flowstone that dominates the chamber.
Modelling by Pete, lighting by Tarquin and Pete Clive setting up for his traditional style photograph (which again looked far better than mine).
Modelling by Pete, Claire and Kevin, lighting by Tarquin, Pete, Claire and Kevin
Clive setting up for his traditional style photograph (which again looked far better than mine).
Modelling by Pete, Claire and Kevin, lighting by Tarquin, Pete, Claire and Kevin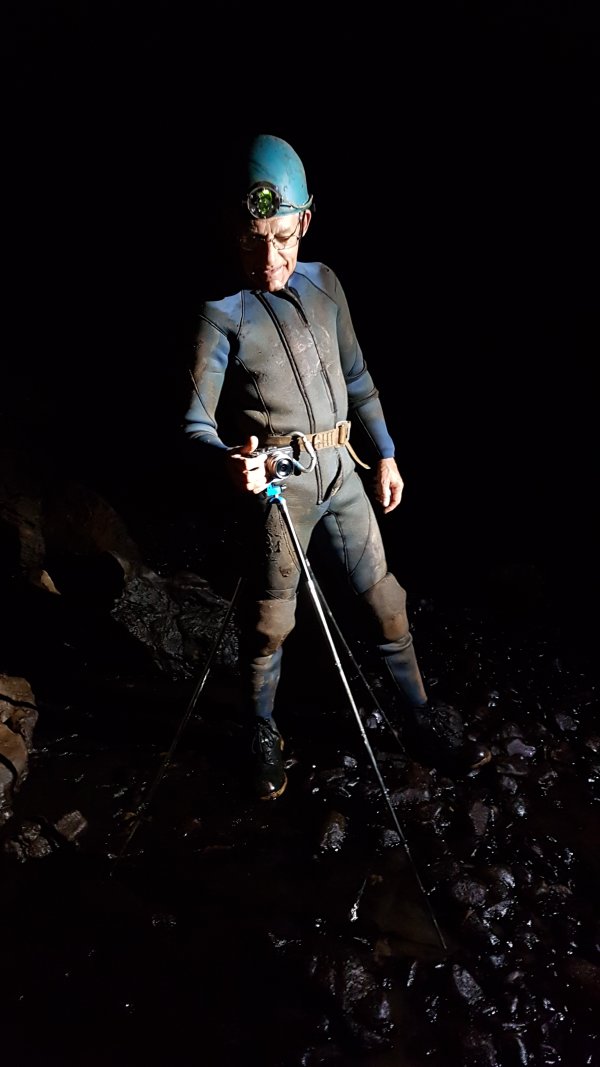 The master at work. For those interested, Clive is using a digital Lumix GX1 with an Olympus M.Zuiko 17mm f1.8 for Olympus and Panasonic Micro 4/3 Cameras lens, as well as a 12mm f2 same-brand lens for other pictures. Together, they are light enough to use on a compact telescopic tripod. He uses Tickystar Allround compact folding flashbulb reflectors.
Modelling by Clive, lighting by Pete
The master at work. For those interested, Clive is using a digital Lumix GX1 with an Olympus M.Zuiko 17mm f1.8 for Olympus and Panasonic Micro 4/3 Cameras lens, as well as a 12mm f2 same-brand lens for other pictures. Together, they are light enough to use on a compact telescopic tripod. He uses Tickystar Allround compact folding flashbulb reflectors.
Modelling by Clive, lighting by Pete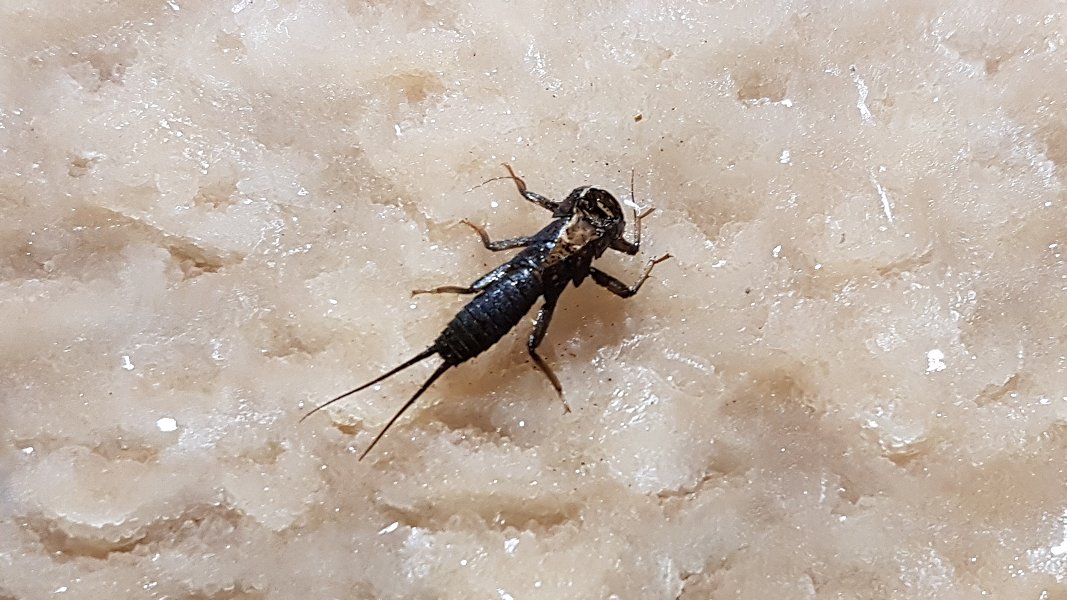 The exuvia (shed skin) of a mayfly nymph, on the flowstone.
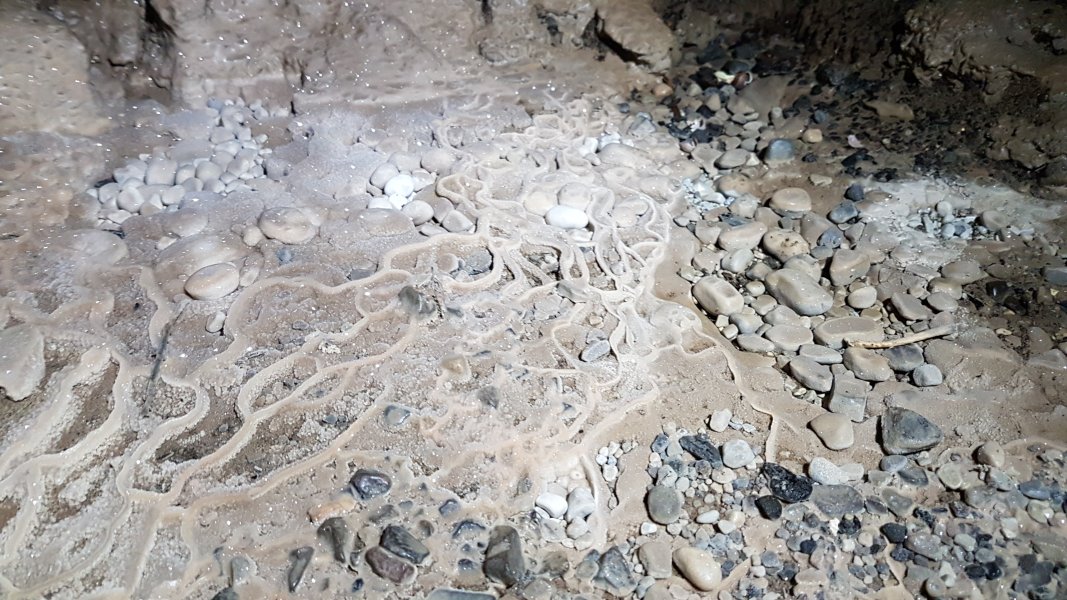 Large cave pearls below the formation.
 Calcited pebbles.
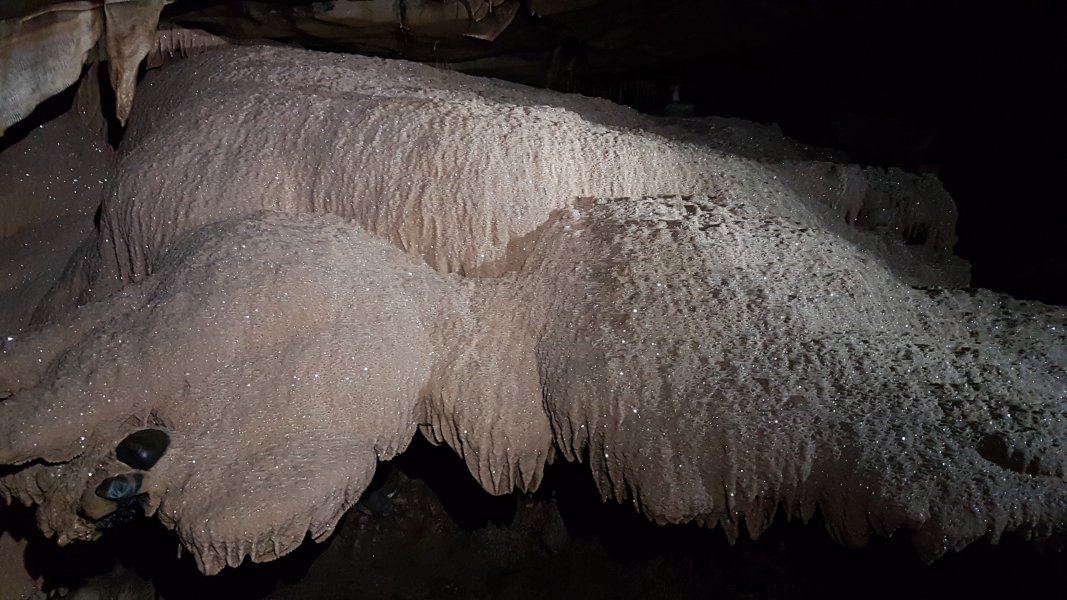 Second part of the flowstone formation.
Lighting by Tarquin and Claire
Second part of the flowstone formation.
Lighting by Tarquin and Claire Terminal choke. This is the end of the cave, situated beneath a large shakehole. Ogof Robin Goch ends behind the wall to the left, choking beneath the same shakehole. Note the sloping stalamites on the boulder, and the translucent curtain.
Modelling by Claire, Pete and Kevin, lighting by Tarquin, Claire, Pete and Kevin
Terminal choke. This is the end of the cave, situated beneath a large shakehole. Ogof Robin Goch ends behind the wall to the left, choking beneath the same shakehole. Note the sloping stalamites on the boulder, and the translucent curtain.
Modelling by Claire, Pete and Kevin, lighting by Tarquin, Claire, Pete and Kevin Navigating out through the third bedding - route finding can be difficult here, even though you can see the destination, and some time was spent trying to find the correct way.
Modelling by Clive, lighting by Tarquin and Pete
Navigating out through the third bedding - route finding can be difficult here, even though you can see the destination, and some time was spent trying to find the correct way.
Modelling by Clive, lighting by Tarquin and Pete Trevor, a common toad who was found washed into Sump 2. He does not belong in the cave, and would die, since his hunting is severely limited in absolute darkness. It is impressive that he had managed to survive being washed all the way into here from the surface.
Modelling by Trevor, lighting by Tarquin and Claire
Trevor, a common toad who was found washed into Sump 2. He does not belong in the cave, and would die, since his hunting is severely limited in absolute darkness. It is impressive that he had managed to survive being washed all the way into here from the surface.
Modelling by Trevor, lighting by Tarquin and Claire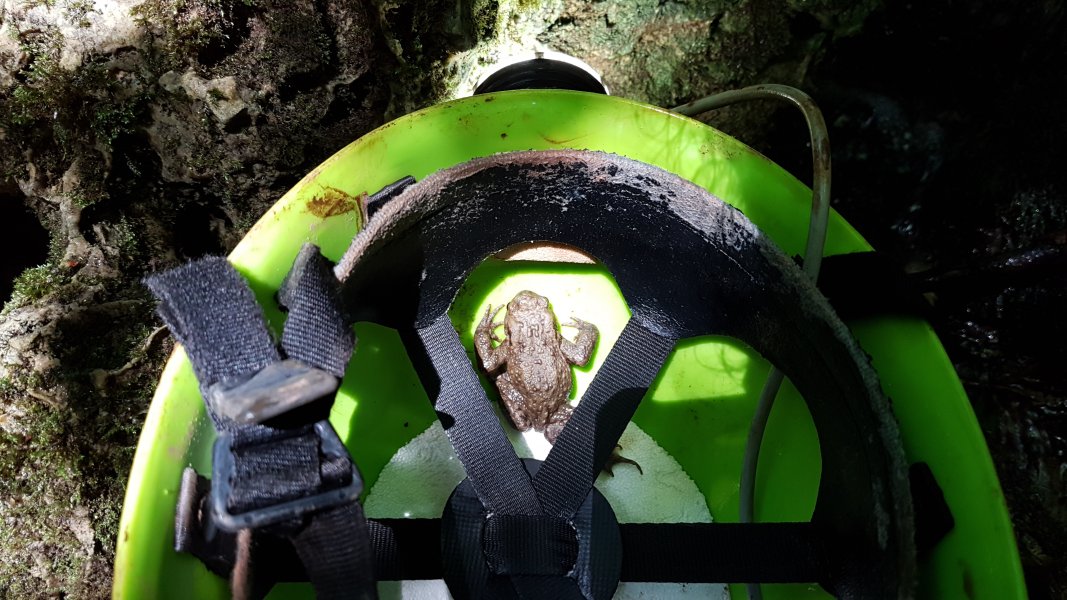 Since we had nowhere else to carry him (he could travel with cameras, but would have been killed), Trevor was carried out in my helmet. A little odd to have a toad sitting on your head, or hopping on your hair, but it works.
Modelling by Trevor
Since we had nowhere else to carry him (he could travel with cameras, but would have been killed), Trevor was carried out in my helmet. A little odd to have a toad sitting on your head, or hopping on your hair, but it works.
Modelling by Trevor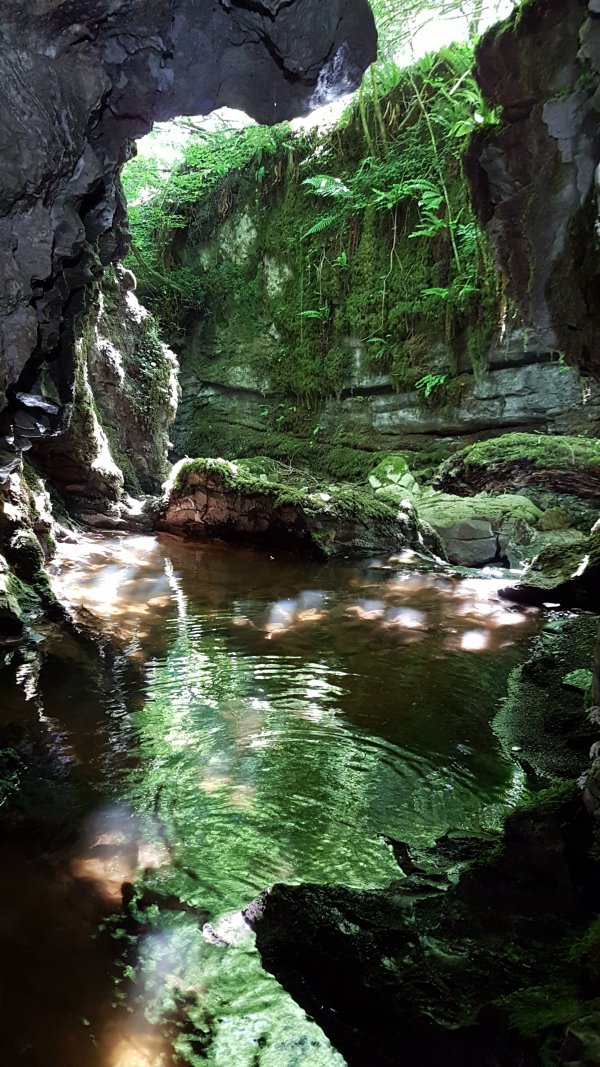 Exiting into glorious sunshine.
Lighting by Sol and Tarquin
Exiting into glorious sunshine.
Lighting by Sol and Tarquin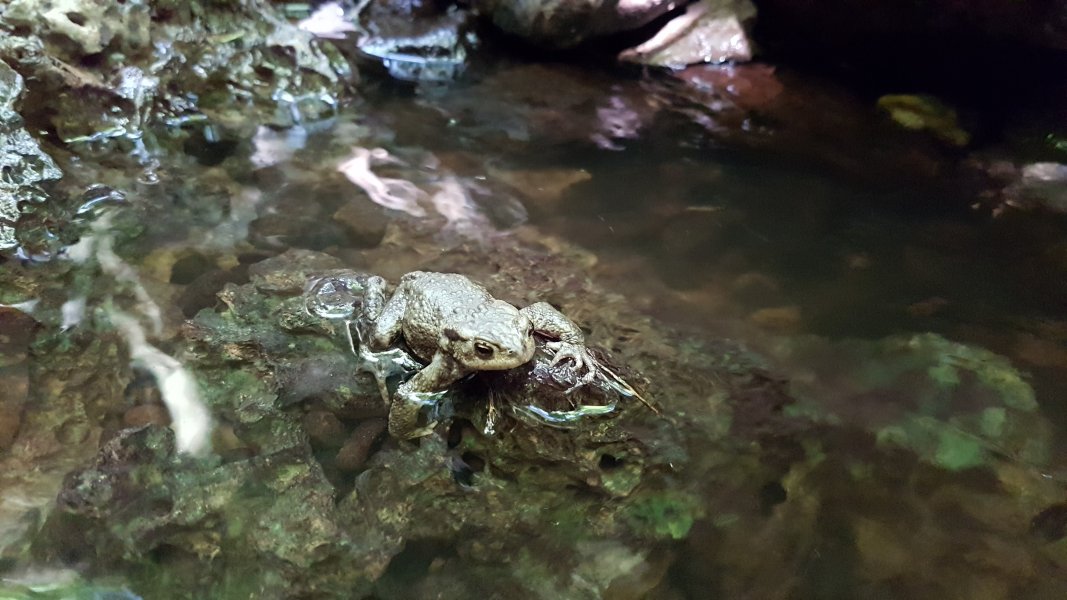 Trevor in his new home, back out on the surface. The pools and gorge banks here are a much better place for him.
Modelling by Trevor
Trevor in his new home, back out on the surface. The pools and gorge banks here are a much better place for him.
Modelling by Trevor