Slaughter Stream Cave Snow Garden trip 19/08/2018
Unless otherwise stated, camera, setups, lighting, edits and gallery effects by Tarquin. Modelling and lighting at various points will be Claire Vivian, Duncan Hornby, Mark Hampson, Andy Jones, Darren Mackenzie and John Cliffe.
 Crossing the fields towards the cave entrance. It doesn't even look possible that this area could conceal one of the longest and deepest caves in the Forest Of Dean. The entrance lies within the trees in the centre of the picture. The camera sits rougly over Chunnel East, with Gnome Garden under the field ahead. Most of the cave is beneath the village to the right, with the water flowing ahead-right.
Modelling by Andy
Crossing the fields towards the cave entrance. It doesn't even look possible that this area could conceal one of the longest and deepest caves in the Forest Of Dean. The entrance lies within the trees in the centre of the picture. The camera sits rougly over Chunnel East, with Gnome Garden under the field ahead. Most of the cave is beneath the village to the right, with the water flowing ahead-right.
Modelling by Andy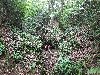 Wet Sink, a very large depression in the wood. In the past, a large waterfall fed this in wet weather, but it is now dry in all conditions, as the water sinks in several places on the far side of the depression. At least the bottom half of the depth has been completely excavated, with dry stone walling holding back the digging spoil. The cave heads behind the camera.
Modelling by Darren and Andy
Wet Sink, a very large depression in the wood. In the past, a large waterfall fed this in wet weather, but it is now dry in all conditions, as the water sinks in several places on the far side of the depression. At least the bottom half of the depth has been completely excavated, with dry stone walling holding back the digging spoil. The cave heads behind the camera.
Modelling by Darren and Andy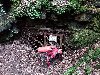 Impressive gate in the depression.
Modelling by Andy
Impressive gate in the depression.
Modelling by Andy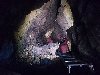 The original dig descends down a series of ladders, all of which is totally excavated. The amount of digging spoil removed would put most digs to shame.
Modelling by Darren and Andy, lighting by Sol, Darren and Andy
The original dig descends down a series of ladders, all of which is totally excavated. The amount of digging spoil removed would put most digs to shame.
Modelling by Darren and Andy, lighting by Sol, Darren and Andy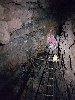 The first pitch, Mouse Aven, is descended via a ladder.
Modelling by Darren, lighting by Tarquin and Darren
The first pitch, Mouse Aven, is descended via a ladder.
Modelling by Darren, lighting by Tarquin and Darren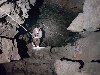 The breakthrough dig leads directly to Balcony Pitch. For some reason known only to the local cavers, this pitch uses SRT instead of fixed ladders, so SRT kit is needed as well. The rope rebelays to a large boulder (!) then continues down the next pitch.
Modelling by Mark, lighting by Tarquin and Mark
The breakthrough dig leads directly to Balcony Pitch. For some reason known only to the local cavers, this pitch uses SRT instead of fixed ladders, so SRT kit is needed as well. The rope rebelays to a large boulder (!) then continues down the next pitch.
Modelling by Mark, lighting by Tarquin and Mark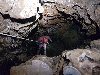 Pen Pot Pitch follows immediately. This is the largest of the pitches, at 10 metres.
Modelling by Andy, lighting by Tarquin and Andy
Pen Pot Pitch follows immediately. This is the largest of the pitches, at 10 metres.
Modelling by Andy, lighting by Tarquin and Andy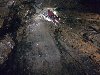 Pen Pot Pitch can also be descended by electron ladder, with the route seen in the black smudge on the left here. It lands lower down, below a free climb from the base of the rope pitch, making it a 15 metre pitch instead.
Modelling by Darren, lighting by Tarquin, Andy and Darren
Pen Pot Pitch can also be descended by electron ladder, with the route seen in the black smudge on the left here. It lands lower down, below a free climb from the base of the rope pitch, making it a 15 metre pitch instead.
Modelling by Darren, lighting by Tarquin, Andy and Darren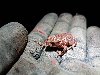 Young common toad at the base of the pitch. It was not supposed to be here, so we kept it in a rope bag while we were caving, so it could be collected at the end of the trip.
Modelling by Bufo
Young common toad at the base of the pitch. It was not supposed to be here, so we kept it in a rope bag while we were caving, so it could be collected at the end of the trip.
Modelling by Bufo A crawl then offers a small insult before the main cave is reached.
Modelling by Mark, lighting by Tarquin and Mark
A crawl then offers a small insult before the main cave is reached.
Modelling by Mark, lighting by Tarquin and Mark An inlet (which may sometimes be contaminated with overflowing sewage) then leads to Cross Stream Junction. Cavers can choose the easy wet crawl, or dry scramble.
Modelling by Duncan and Darren, lighting by Tarquin, Duncan and Darren
An inlet (which may sometimes be contaminated with overflowing sewage) then leads to Cross Stream Junction. Cavers can choose the easy wet crawl, or dry scramble.
Modelling by Duncan and Darren, lighting by Tarquin, Duncan and Darren Cross Stream Junction marks the start of the Main Stream Passage, which leads downstream (seen to the right here). This trip, however, would take us upstream (behind the camera) into the fossil Upper Series.
Modelling by Claire, lighting by Tarquin, Claire and Mark
Cross Stream Junction marks the start of the Main Stream Passage, which leads downstream (seen to the right here). This trip, however, would take us upstream (behind the camera) into the fossil Upper Series.
Modelling by Claire, lighting by Tarquin, Claire and Mark Some damp crawls gain Zuree Aven, which lies below the current stream sinks.
Modelling by Duncan and Claire, lighting by Tarquin, Duncan and Claire
Some damp crawls gain Zuree Aven, which lies below the current stream sinks.
Modelling by Duncan and Claire, lighting by Tarquin, Duncan and Claire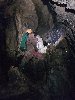 The stream enters from a side aven, which is our way on, ascending the aven via a series of free climbs.
Modelling by Claire, lighting by Tarquin and Claire
The stream enters from a side aven, which is our way on, ascending the aven via a series of free climbs.
Modelling by Claire, lighting by Tarquin and Claire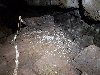 At the top, we leave the stream completely, and head into the Graveyard. The floor is covered in microbial deposits.
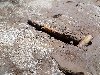 The deposits appear to be cryostal, but the mud is wrong, and the presence of recent bones within the mud would make it highly unlikely for cryogenic processes to be involved. The microbes may be decomposition-related though.
Lighting by Claire
The deposits appear to be cryostal, but the mud is wrong, and the presence of recent bones within the mud would make it highly unlikely for cryogenic processes to be involved. The microbes may be decomposition-related though.
Lighting by Claire A small side passage with a tiny stream contains some straws and stalactites.
 It ends abruptly at a pitch, with a large curtain stalactite.
 The pitch base connects with a side passage near Cross Stream Junction.
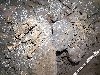 A very well preserved skeleton of a badger in the Graveyard.
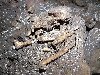 The lack of decay suggests that the badger only recently died. The skull is still very well preserved. However, there are no current entrances anywhere near here. Maybe the badger had dug a set that intersected one of the avens nearby though, such as The Gravity Dig, where remains of victorian pottery have been found. It seems likely that it could have died shortly after falling down one of them.
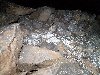 More microbial deposits.
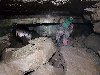 Gnome Garden, a section of the passage with some small formations.
Modelling by Claire, lighting by Tarquin and Claire
Gnome Garden, a section of the passage with some small formations.
Modelling by Claire, lighting by Tarquin and Claire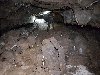 Gnome Garden.
Modelling by Duncan, lighting by Tarquin and Duncan
Gnome Garden.
Modelling by Duncan, lighting by Tarquin and Duncan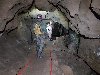 Virgin's Delight, the next section of passage.
Modelling by Duncan and Claire, lighting by Tarquin, Duncan and Claire
Virgin's Delight, the next section of passage.
Modelling by Duncan and Claire, lighting by Tarquin, Duncan and Claire Wall deposits in Virgin's Delight. These appear to be botrioidal condensation deposits.
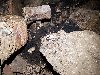 Guano deposits at the junction with The Chunnel.
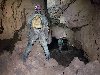 The Chunnel, a large fossil passage.
Modelling by Duncan and Claire, lighting by Tarquin, Mark, Duncan and Claire
The Chunnel, a large fossil passage.
Modelling by Duncan and Claire, lighting by Tarquin, Mark, Duncan and Claire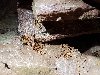 Rodent skeleton, probably a rat, in The Chunnel.
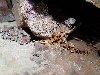 The characteristic rodent teeth are quite obvious.
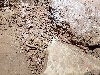 More random bones.
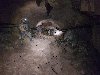 The largest section of The Chunnel, one of the largest passages in the cave. Just up ahead, a major passage on the right is Bicknor Street Passage, while on the left is Coal Seam Passage, the main Round Trip route to the Main Stream Passage. Half of the team would follow the Round Trip, while the rest of us continued to the end.
Modelling by Duncan, Mark and Claire, lighting by Tarquin, John, Duncan, Mark and Claire
The largest section of The Chunnel, one of the largest passages in the cave. Just up ahead, a major passage on the right is Bicknor Street Passage, while on the left is Coal Seam Passage, the main Round Trip route to the Main Stream Passage. Half of the team would follow the Round Trip, while the rest of us continued to the end.
Modelling by Duncan, Mark and Claire, lighting by Tarquin, John, Duncan, Mark and Claire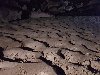 A side passage is the way on, through The Three Deserts. The name is very appropriate, as the passage has miniature sand dunes for a large part of its length.
Lighting by Mark and Claire.
A side passage is the way on, through The Three Deserts. The name is very appropriate, as the passage has miniature sand dunes for a large part of its length.
Lighting by Mark and Claire.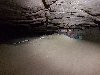 The Three Deserts also earns its name because of the work required to pass the lengthy triple crawl, and the heat and dehydration that it creates. Visitors often forget to take enough drinking water with them, through this very dry section of cave.
Modelling by Claire, lighting by Tarquin and Claire
The Three Deserts also earns its name because of the work required to pass the lengthy triple crawl, and the heat and dehydration that it creates. Visitors often forget to take enough drinking water with them, through this very dry section of cave.
Modelling by Claire, lighting by Tarquin and Claire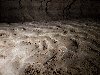 Painted sands of The Three Deserts.
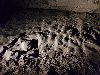 Dunes.
Lighting by Mark
Dunes.
Lighting by Mark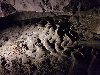 Dunes.
Lighting by Mark
Dunes.
Lighting by Mark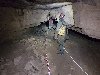 Beyond The Tree Deserts, the passage becomes a more comfortable size.
Modelling by Duncan and Claire, lighting by Tarquin, Duncan and Claire
Beyond The Tree Deserts, the passage becomes a more comfortable size.
Modelling by Duncan and Claire, lighting by Tarquin, Duncan and Claire Beyond Vittals Stop, where we met the demon of Flow Choke Passage. Although this is the major passage leading on from Vittals Stop (the usual place to stop for nourishment), it is not the major destination. Most visitors head down Dog's Grave Passage instead. However, the passage itself is very impressive, and also offers a round trip for cavers who are daring enough.
Modelling by Mark, lighting by Tarquin, Mark and Duncan
Beyond Vittals Stop, where we met the demon of Flow Choke Passage. Although this is the major passage leading on from Vittals Stop (the usual place to stop for nourishment), it is not the major destination. Most visitors head down Dog's Grave Passage instead. However, the passage itself is very impressive, and also offers a round trip for cavers who are daring enough.
Modelling by Mark, lighting by Tarquin, Mark and Duncan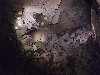 Chamber just after the junction with Hull Passage in Flow Choke Passage, one of the largest spaces in the cave.
Modelling by Duncan, Mark and Claire, lighting by Tarquin, Duncan, Mark and Claire
Chamber just after the junction with Hull Passage in Flow Choke Passage, one of the largest spaces in the cave.
Modelling by Duncan, Mark and Claire, lighting by Tarquin, Duncan, Mark and Claire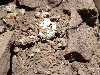 Cryostal in the chamber.
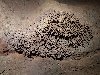 Large fossil coral on the wall of the passage.
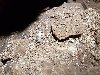 Cryostal.
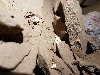 Cryostal.
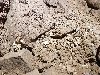 Cryostal.
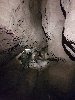 Fault-controlled section of Flow Choke Passage.
Modelling by Duncan, Mark and Claire, lighting by Tarquin, Duncan, Mark and Claire
Fault-controlled section of Flow Choke Passage.
Modelling by Duncan, Mark and Claire, lighting by Tarquin, Duncan, Mark and Claire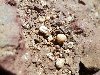 More cryostal.
 And a final cryostal deposit.
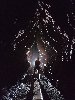 Superb section of Flow Choke Passage.
Modelling by Claire, lighting by Duncan
Superb section of Flow Choke Passage.
Modelling by Claire, lighting by Duncan Cracking wet mud.
Lighting by Claire
Cracking wet mud.
Lighting by Claire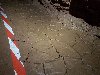 Mud cracks.
Lighting by Claire
Mud cracks.
Lighting by Claire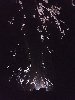 Flow Choke Passage.
Lighting by Duncan
Flow Choke Passage.
Lighting by Duncan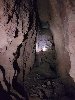 The passage ends abruptly at the Flow Choke, which has so far resisted digging, despite being a very obvious major lead. The small dig at the top of the broken ladder only penetrates a short distance into the choke. This is possibly the site of an old entrance, or perhaps it is just a big choke, but either way, there should be a continuing big passage on the other side.
Modelling by Claire, lighting by Tarquin and Claire
The passage ends abruptly at the Flow Choke, which has so far resisted digging, despite being a very obvious major lead. The small dig at the top of the broken ladder only penetrates a short distance into the choke. This is possibly the site of an old entrance, or perhaps it is just a big choke, but either way, there should be a continuing big passage on the other side.
Modelling by Claire, lighting by Tarquin and Claire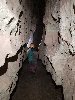 Hull Passage.
Modelling by Claire, lighting by Tarquin and Claire
Hull Passage.
Modelling by Claire, lighting by Tarquin and Claire Dusty deposits in Hull Passage, which appear to be decomposing bone.
 Decomposing bone.
 The tight slot down into Dog's Grave Passage, creating the short round trip. This looks stupidly narrow from above, and it is quite committing. However, it is possible for most cavers to pass through, though some may find it uncomfortably tight. Gravity helps, thankfully.
Modelling by Claire and Duncan, lighting by Tarquin, Claire and Duncan
The tight slot down into Dog's Grave Passage, creating the short round trip. This looks stupidly narrow from above, and it is quite committing. However, it is possible for most cavers to pass through, though some may find it uncomfortably tight. Gravity helps, thankfully.
Modelling by Claire and Duncan, lighting by Tarquin, Claire and Duncan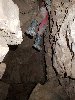 The tight part opens out immediately to become too wide to allow chimneying, with loose rocks making up the far wall. There is a ledge on one wall, but the drop below that is too far to step down, and the passage is too high to hold on to the ceiling for support. The first person usually falls to the floor, then guides subsequent cavers towards the ledges, perhaps also offering a knee as a foothold.
Modelling by Claire, lighting by Tarquin and Claire
The tight part opens out immediately to become too wide to allow chimneying, with loose rocks making up the far wall. There is a ledge on one wall, but the drop below that is too far to step down, and the passage is too high to hold on to the ceiling for support. The first person usually falls to the floor, then guides subsequent cavers towards the ledges, perhaps also offering a knee as a foothold.
Modelling by Claire, lighting by Tarquin and Claire Dog's Grave Passage is much smaller passage than Flow Choke Passage, perhaps being a later outflow that took over from The Three Deserts, carrying water to Kuwait Passage. Shortly after its start at Flow Choke Passage, there are a series of mudbanks with retaining walls instead of conservation tapes.
Modelling by Claire, Duncan and Mark, lighting by Tarquin, Duncan and Mark
Dog's Grave Passage is much smaller passage than Flow Choke Passage, perhaps being a later outflow that took over from The Three Deserts, carrying water to Kuwait Passage. Shortly after its start at Flow Choke Passage, there are a series of mudbanks with retaining walls instead of conservation tapes.
Modelling by Claire, Duncan and Mark, lighting by Tarquin, Duncan and Mark The mudbanks have a set of dog paw prints, very clearly visible once you realise what you are looking for.
Lighting by Duncan
The mudbanks have a set of dog paw prints, very clearly visible once you realise what you are looking for.
Lighting by Duncan The paw prints show that the dog walked into the passage, lost, completely blind in the dark, hugging the wall, and hoping to find a way out. There could not have been an entrance anywhere near here, so the dog must have been very lost indeed, heading away from whatever entrance it had made its way in through. Perhaps somewhere near the Flow Choke, or perhaps the Gravity Dig near The Graveyard, an eternity away in the dark.
Lighting by Duncan
The paw prints show that the dog walked into the passage, lost, completely blind in the dark, hugging the wall, and hoping to find a way out. There could not have been an entrance anywhere near here, so the dog must have been very lost indeed, heading away from whatever entrance it had made its way in through. Perhaps somewhere near the Flow Choke, or perhaps the Gravity Dig near The Graveyard, an eternity away in the dark.
Lighting by Duncan A very lonely way to spend its last days.
Lighting by Duncan
A very lonely way to spend its last days.
Lighting by Duncan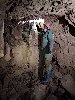 A shattered pillar making a feeble attempt to support the roof.
Modelling by Duncan, lighting by Tarquin, Claire and Duncan
A shattered pillar making a feeble attempt to support the roof.
Modelling by Duncan, lighting by Tarquin, Claire and Duncan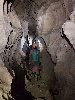 Dog's Grave Passage near the connection with Hull Passage.
Modelling by Claire and Duncan, lighting by Tarquin, Mark, Claire and Duncan
Dog's Grave Passage near the connection with Hull Passage.
Modelling by Claire and Duncan, lighting by Tarquin, Mark, Claire and Duncan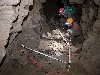 The Dog's Grave. This is the spot where an exhaused and starving dog finally laid down and gave up. Cavers have built a wall around the dog, added a chew toy, a lead, and a remembrance poppy.
Modelling by Claire and Mark, lighting by Tarquin, Claire and Mark
The Dog's Grave. This is the spot where an exhaused and starving dog finally laid down and gave up. Cavers have built a wall around the dog, added a chew toy, a lead, and a remembrance poppy.
Modelling by Claire and Mark, lighting by Tarquin, Claire and Mark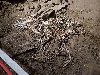 The dog in Dog's Grave Passage has been named Norman. The skeleton is old, but not as old as you might expect. It has decayed significantly since it was discovered in 1990. Estimates are that the bones are less than 300 years old. (Estimates of "tens of thousands of years" are considered incorrect.) Results of formal analysis could not be found.
Modelling by Norman, lighting by Tarquin and Claire
The dog in Dog's Grave Passage has been named Norman. The skeleton is old, but not as old as you might expect. It has decayed significantly since it was discovered in 1990. Estimates are that the bones are less than 300 years old. (Estimates of "tens of thousands of years" are considered incorrect.) Results of formal analysis could not be found.
Modelling by Norman, lighting by Tarquin and Claire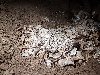 Skull of Norman the Dog. It is quite decomposed, but a canine tooth can be clearly seen on the left.
Modelling by Norman, lighting by Tarquin and Claire
Skull of Norman the Dog. It is quite decomposed, but a canine tooth can be clearly seen on the left.
Modelling by Norman, lighting by Tarquin and Claire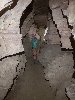 Beyond Norman, the passage again becomes a comfortable water-worn canyon, with occasional annoying boulder obstacles.
Modelling by Mark, lighting by Tarquin and Mark
Beyond Norman, the passage again becomes a comfortable water-worn canyon, with occasional annoying boulder obstacles.
Modelling by Mark, lighting by Tarquin and Mark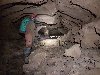 A former sumped section, with the characteristic phreatic shape.
Modelling by Mark and Claire, lighting by Tarquin, Mark, Claire and Duncan
A former sumped section, with the characteristic phreatic shape.
Modelling by Mark and Claire, lighting by Tarquin, Mark, Claire and Duncan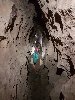 Back to its normal rift shape.
Modelling by Mark and Claire, lighting by Tarquin, Mark, Claire and Duncan
Back to its normal rift shape.
Modelling by Mark and Claire, lighting by Tarquin, Mark, Claire and Duncan Traverse. This part of the cave is so much longer than it appears on the survey, and it is really quite demanding to reach.
Modelling by Claire, lighting by Mark
Traverse. This part of the cave is so much longer than it appears on the survey, and it is really quite demanding to reach.
Modelling by Claire, lighting by Mark Crystals in Dog's Grave Passage.
 Tube before the camp, which I think is called the Pig Trough.
Modelling by Duncan, lighting by Duncan and Claire
Tube before the camp, which I think is called the Pig Trough.
Modelling by Duncan, lighting by Duncan and Claire The camp. It may seem completely out of place, but there is a nearby rift dropping down to a too-tight streamway, and there is nowhere else that could serve as a camp in this otherwise dry area of cave. Shortly afterwards, we left Duncan to rest while we tried to reach the end. Duncan's decision was definitely a smart one; we were all on our second day after a good caving trip the day before, and we had underestimated the distance to the end.
Modelling by Duncan, lighting by Tarquin, Duncan and Claire
The camp. It may seem completely out of place, but there is a nearby rift dropping down to a too-tight streamway, and there is nowhere else that could serve as a camp in this otherwise dry area of cave. Shortly afterwards, we left Duncan to rest while we tried to reach the end. Duncan's decision was definitely a smart one; we were all on our second day after a good caving trip the day before, and we had underestimated the distance to the end.
Modelling by Duncan, lighting by Tarquin, Duncan and Claire There was still a very long way to the end of the passage, and it got much harder as we got further along. This traverse - which I believe is called Second Traverse - is typical.
Modelling by Claire, lighting by Tarquin, Claire and Mark
There was still a very long way to the end of the passage, and it got much harder as we got further along. This traverse - which I believe is called Second Traverse - is typical.
Modelling by Claire, lighting by Tarquin, Claire and Mark A small, calcited inlet brought about a complete change in the passage. From here, there would be crystals and calcite everywhere, with scrambles and traversing required to avoid it.
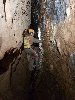 Chimneying up into the calcited rift.
Modelling by Claire, lighting by Tarquin and Claire
Chimneying up into the calcited rift.
Modelling by Claire, lighting by Tarquin and Claire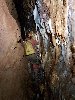 Edging slowly along the rift, trying to avoid touching the calcite. Anywhere else, this sort of passage would simply be off limits. But what it leads to here is so much better, so it was considered acceptable to risk the damage to this little part.
Modelling by Claire, lighting by Tarquin and Claire
Edging slowly along the rift, trying to avoid touching the calcite. Anywhere else, this sort of passage would simply be off limits. But what it leads to here is so much better, so it was considered acceptable to risk the damage to this little part.
Modelling by Claire, lighting by Tarquin and Claire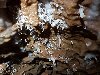 Helictites just a few centimetres from my knee pads. Each passing caver has managed to avoid crushing them.
 Somewhat muddied stal, passed by pulling clothing carefully away from it. Clearly it has been contacted in the past, but we all managed to avoid it.
Modelling by Mark, lighting by Tarquin and Mark
Somewhat muddied stal, passed by pulling clothing carefully away from it. Clearly it has been contacted in the past, but we all managed to avoid it.
Modelling by Mark, lighting by Tarquin and Mark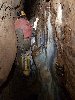 Dodging the calcite.
Modelling by Claire, lighting by Tarquin and Claire
Dodging the calcite.
Modelling by Claire, lighting by Tarquin and Claire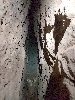 Calcite rafts hidden in the rift below. These could easily be an attraction in their own right, but they are almost impossible to reach, down the squeeze-sized rift, with no climbing holds.
 A final climb, landing on a sandy floor. It feels like a dead end, but the way on is a tiny archway hidden under the wall. Claire accidentally wedged herself perfectly into position for this picture, with one tackle bag snagged on the rocks behind her, and one tackle bag spilling its contents down the climb. The picture looks intentional, however.
Modelling by Claire, lighting by Tarquin and Claire
A final climb, landing on a sandy floor. It feels like a dead end, but the way on is a tiny archway hidden under the wall. Claire accidentally wedged herself perfectly into position for this picture, with one tackle bag snagged on the rocks behind her, and one tackle bag spilling its contents down the climb. The picture looks intentional, however.
Modelling by Claire, lighting by Tarquin and Claire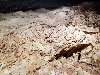 Snow Garden starts immediately, with the crawl under the archway being between banks of stacked calcite rafts.
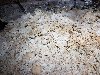 Stacked calcite rafts in the crawl.
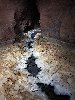 Snow Garden is so much better than expected. In pictures, it looks like a mess of crystals with a gap in the middle. But instead, it is a lengthy crystal pool, with layers of stacked calcite rafts. The gap in the middle is water, with rafts floating on its surface. Floating calcite rafts are relatively rare anywhere else.
Lighting by Tarquin and Mark
Snow Garden is so much better than expected. In pictures, it looks like a mess of crystals with a gap in the middle. But instead, it is a lengthy crystal pool, with layers of stacked calcite rafts. The gap in the middle is water, with rafts floating on its surface. Floating calcite rafts are relatively rare anywhere else.
Lighting by Tarquin and Mark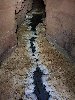 The pool extends into the distance along the rift, which runs parallel to the main rift. Someone has traversed above it to confirm that it completely closes down at roof level too.
 The far end of the pool has a single raft which is probably one of the largest in the country, at about 2.5 metres long. The smaller one beyond it is about 1 metre across in each direction, and is the second largest that I have seen.
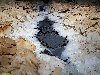 There are so many rafts in one place that it looks like a baked gratin dauphinois. Presumably, the pool used to be deeper, and these are the rafts that sank over hundreds of years.
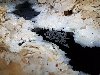 Some of the rafts are still floating.
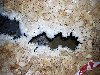 End of the rafts in one direction.
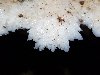 Detail of the crystals.
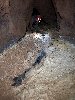 In the other direction, Snow Garden continues along the rift. The route is to crawl along a ledge made up from the fallen rafts. The whole time, you wonder if the floor might give way and tip you into the pool, which would destroy any existing rafts. Fortunately, it seems quite strong.
Modelling by Mark, lighting by Tarquin and Mark
In the other direction, Snow Garden continues along the rift. The route is to crawl along a ledge made up from the fallen rafts. The whole time, you wonder if the floor might give way and tip you into the pool, which would destroy any existing rafts. Fortunately, it seems quite strong.
Modelling by Mark, lighting by Tarquin and Mark Even the conservation tape has no idea how to deal with this.
 Nearing the end of the Snow Garden.
 Layered rafts.
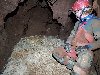 The end of the Snow Garden. The rope leads up a tight rift into a recent 1 km extension, which closes the loop and ends over the top of the far end of Kuwait Passage's furthest reaches. This would create a long round trip via Main Stream Passage, but even though it has vocal connections, it is unlikely to ever be connected; a connection would cause too much tourist traffic, and these formations would be destroyed.
Modelling by Mark, lighting by Tarquin and Mark
The end of the Snow Garden. The rope leads up a tight rift into a recent 1 km extension, which closes the loop and ends over the top of the far end of Kuwait Passage's furthest reaches. This would create a long round trip via Main Stream Passage, but even though it has vocal connections, it is unlikely to ever be connected; a connection would cause too much tourist traffic, and these formations would be destroyed.
Modelling by Mark, lighting by Tarquin and Mark After a long exit, we collected the toad, and took it back to the surface streams. Of course, there is a chance that it might get washed back into a sink, but this is its home, and there is nowhere better.
Modelling by Bufo
After a long exit, we collected the toad, and took it back to the surface streams. Of course, there is a chance that it might get washed back into a sink, but this is its home, and there is nowhere better.
Modelling by Bufo
 Crossing the fields towards the cave entrance. It doesn't even look possible that this area could conceal one of the longest and deepest caves in the Forest Of Dean. The entrance lies within the trees in the centre of the picture. The camera sits rougly over Chunnel East, with Gnome Garden under the field ahead. Most of the cave is beneath the village to the right, with the water flowing ahead-right.
Modelling by Andy
Crossing the fields towards the cave entrance. It doesn't even look possible that this area could conceal one of the longest and deepest caves in the Forest Of Dean. The entrance lies within the trees in the centre of the picture. The camera sits rougly over Chunnel East, with Gnome Garden under the field ahead. Most of the cave is beneath the village to the right, with the water flowing ahead-right.
Modelling by Andy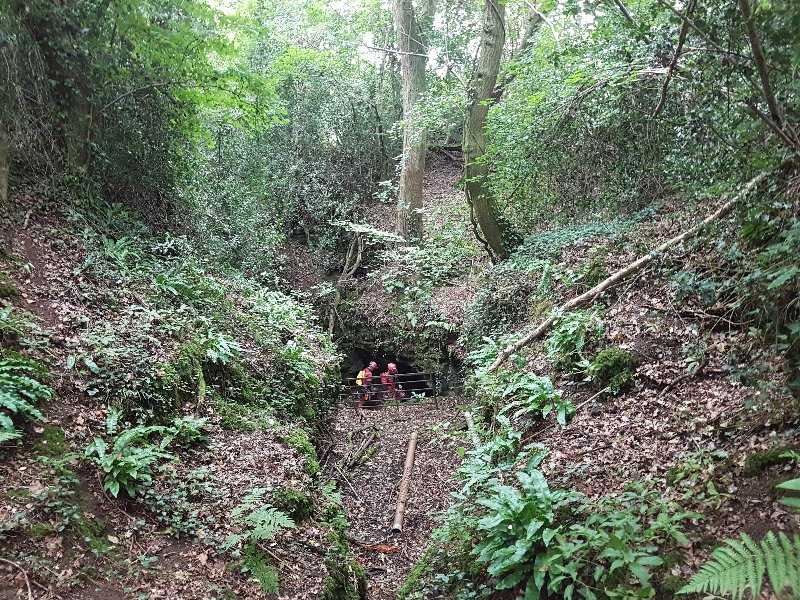 Wet Sink, a very large depression in the wood. In the past, a large waterfall fed this in wet weather, but it is now dry in all conditions, as the water sinks in several places on the far side of the depression. At least the bottom half of the depth has been completely excavated, with dry stone walling holding back the digging spoil. The cave heads behind the camera.
Modelling by Darren and Andy
Wet Sink, a very large depression in the wood. In the past, a large waterfall fed this in wet weather, but it is now dry in all conditions, as the water sinks in several places on the far side of the depression. At least the bottom half of the depth has been completely excavated, with dry stone walling holding back the digging spoil. The cave heads behind the camera.
Modelling by Darren and Andy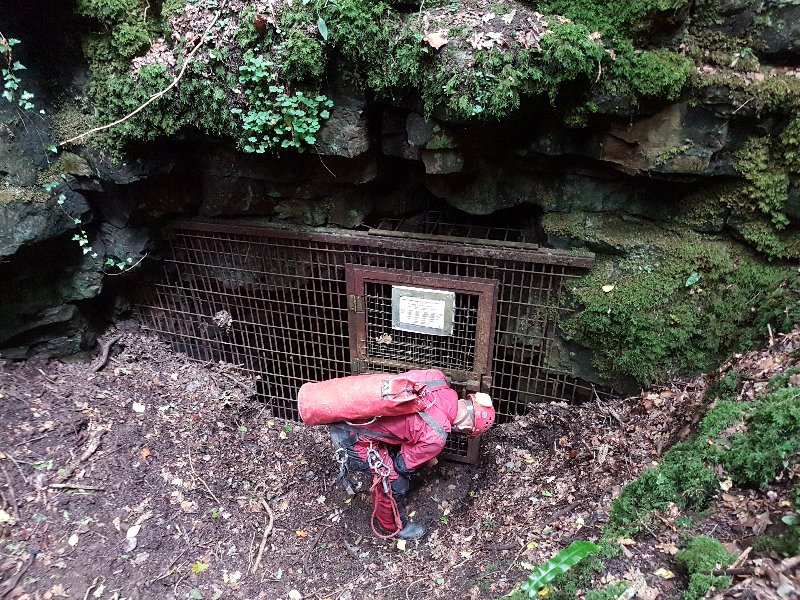 Impressive gate in the depression.
Modelling by Andy
Impressive gate in the depression.
Modelling by Andy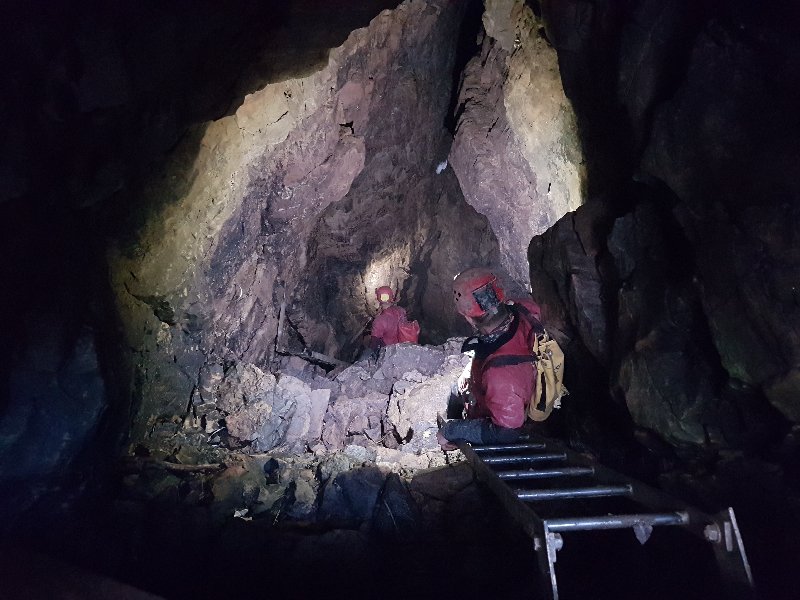 The original dig descends down a series of ladders, all of which is totally excavated. The amount of digging spoil removed would put most digs to shame.
Modelling by Darren and Andy, lighting by Sol, Darren and Andy
The original dig descends down a series of ladders, all of which is totally excavated. The amount of digging spoil removed would put most digs to shame.
Modelling by Darren and Andy, lighting by Sol, Darren and Andy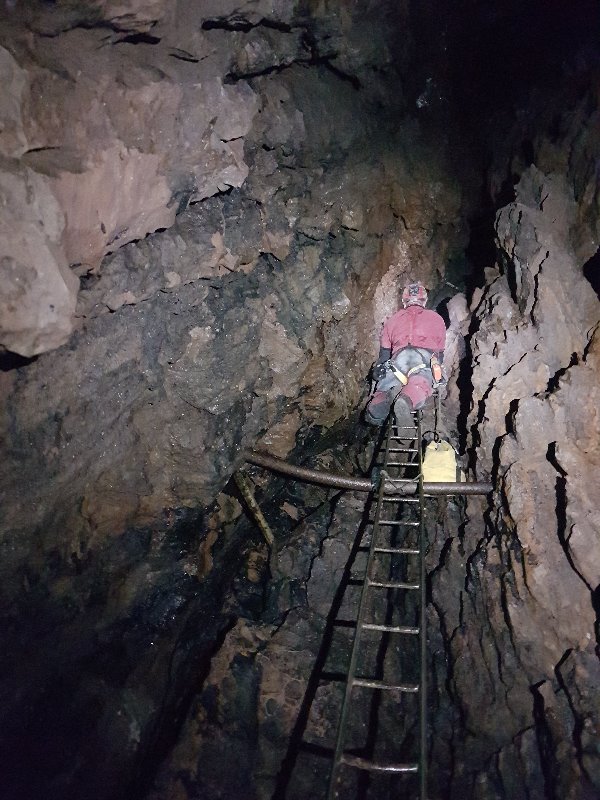 The first pitch, Mouse Aven, is descended via a ladder.
Modelling by Darren, lighting by Tarquin and Darren
The first pitch, Mouse Aven, is descended via a ladder.
Modelling by Darren, lighting by Tarquin and Darren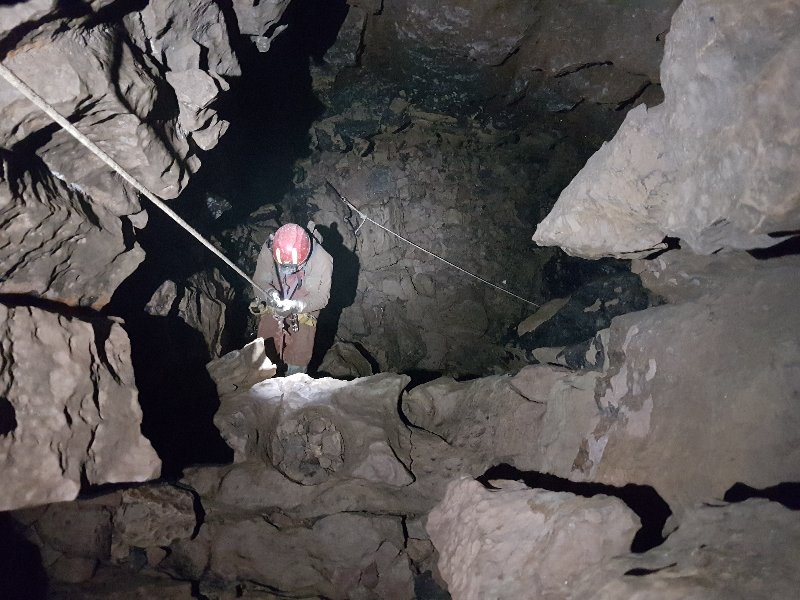 The breakthrough dig leads directly to Balcony Pitch. For some reason known only to the local cavers, this pitch uses SRT instead of fixed ladders, so SRT kit is needed as well. The rope rebelays to a large boulder (!) then continues down the next pitch.
Modelling by Mark, lighting by Tarquin and Mark
The breakthrough dig leads directly to Balcony Pitch. For some reason known only to the local cavers, this pitch uses SRT instead of fixed ladders, so SRT kit is needed as well. The rope rebelays to a large boulder (!) then continues down the next pitch.
Modelling by Mark, lighting by Tarquin and Mark Pen Pot Pitch follows immediately. This is the largest of the pitches, at 10 metres.
Modelling by Andy, lighting by Tarquin and Andy
Pen Pot Pitch follows immediately. This is the largest of the pitches, at 10 metres.
Modelling by Andy, lighting by Tarquin and Andy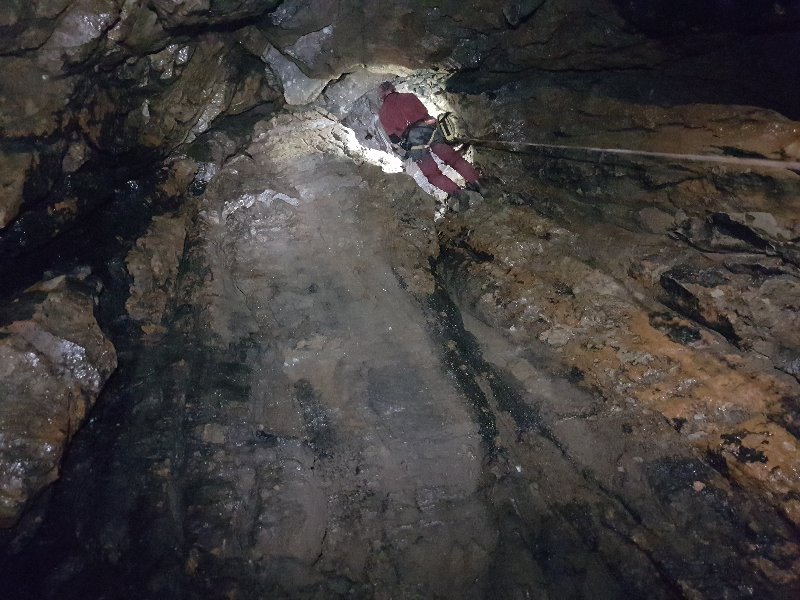 Pen Pot Pitch can also be descended by electron ladder, with the route seen in the black smudge on the left here. It lands lower down, below a free climb from the base of the rope pitch, making it a 15 metre pitch instead.
Modelling by Darren, lighting by Tarquin, Andy and Darren
Pen Pot Pitch can also be descended by electron ladder, with the route seen in the black smudge on the left here. It lands lower down, below a free climb from the base of the rope pitch, making it a 15 metre pitch instead.
Modelling by Darren, lighting by Tarquin, Andy and Darren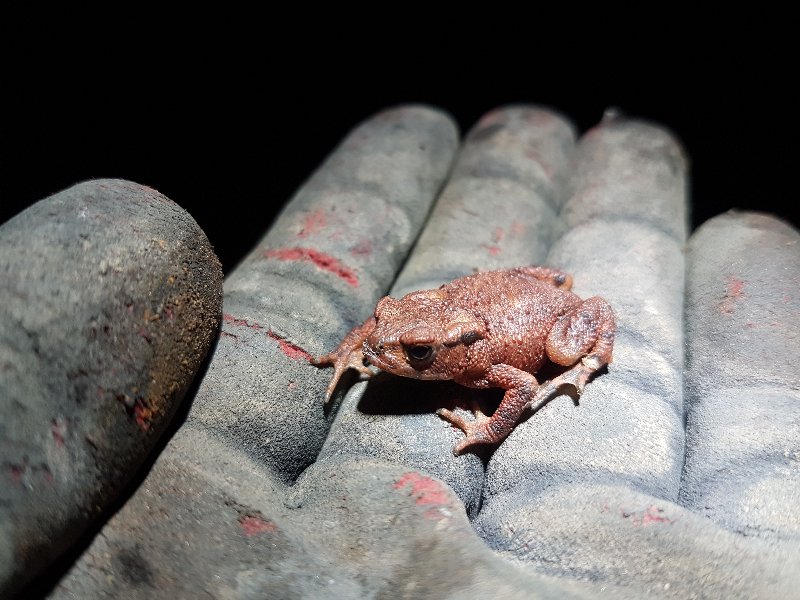 Young common toad at the base of the pitch. It was not supposed to be here, so we kept it in a rope bag while we were caving, so it could be collected at the end of the trip.
Modelling by Bufo
Young common toad at the base of the pitch. It was not supposed to be here, so we kept it in a rope bag while we were caving, so it could be collected at the end of the trip.
Modelling by Bufo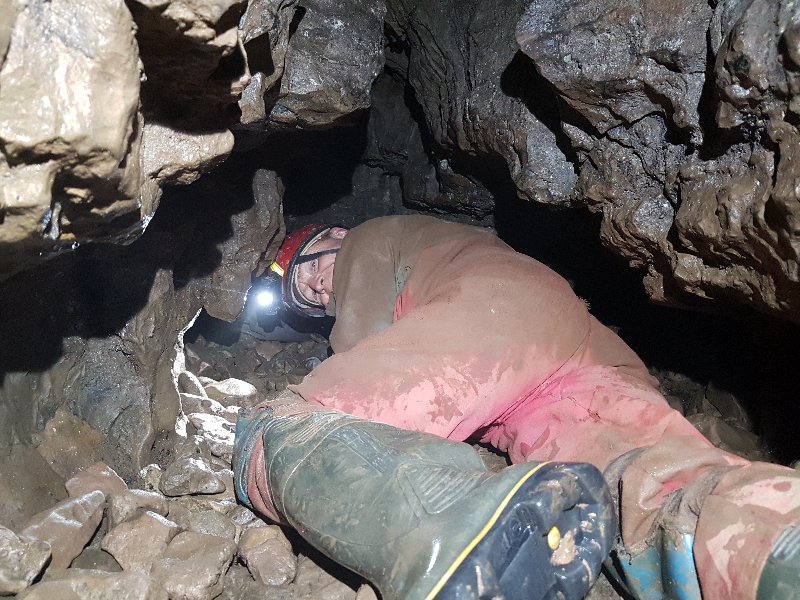 A crawl then offers a small insult before the main cave is reached.
Modelling by Mark, lighting by Tarquin and Mark
A crawl then offers a small insult before the main cave is reached.
Modelling by Mark, lighting by Tarquin and Mark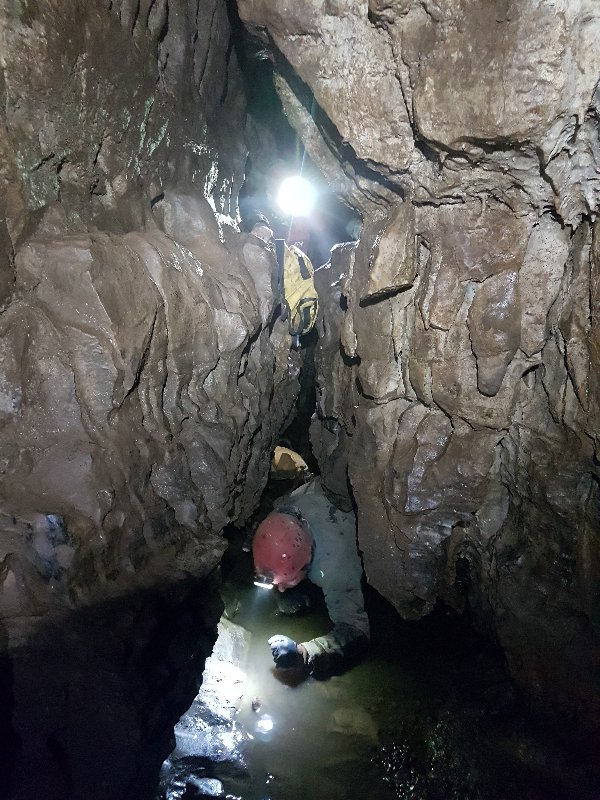 An inlet (which may sometimes be contaminated with overflowing sewage) then leads to Cross Stream Junction. Cavers can choose the easy wet crawl, or dry scramble.
Modelling by Duncan and Darren, lighting by Tarquin, Duncan and Darren
An inlet (which may sometimes be contaminated with overflowing sewage) then leads to Cross Stream Junction. Cavers can choose the easy wet crawl, or dry scramble.
Modelling by Duncan and Darren, lighting by Tarquin, Duncan and Darren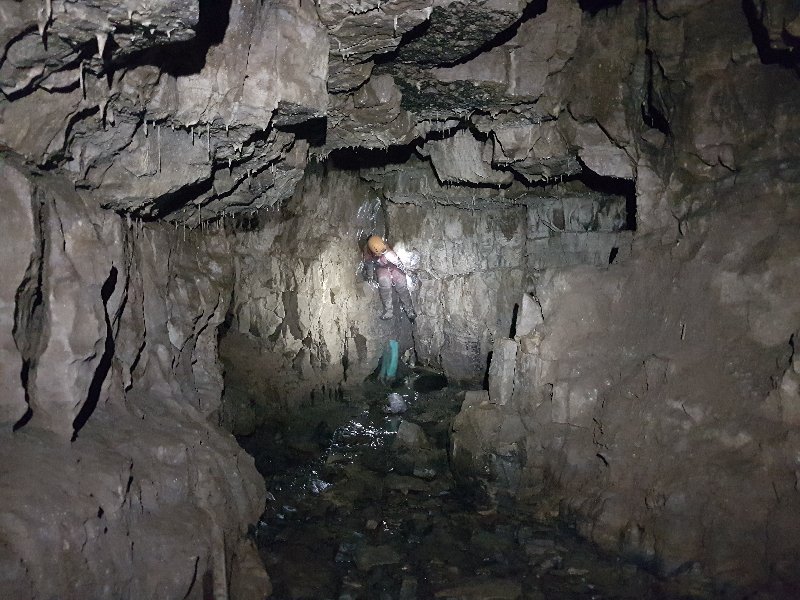 Cross Stream Junction marks the start of the Main Stream Passage, which leads downstream (seen to the right here). This trip, however, would take us upstream (behind the camera) into the fossil Upper Series.
Modelling by Claire, lighting by Tarquin, Claire and Mark
Cross Stream Junction marks the start of the Main Stream Passage, which leads downstream (seen to the right here). This trip, however, would take us upstream (behind the camera) into the fossil Upper Series.
Modelling by Claire, lighting by Tarquin, Claire and Mark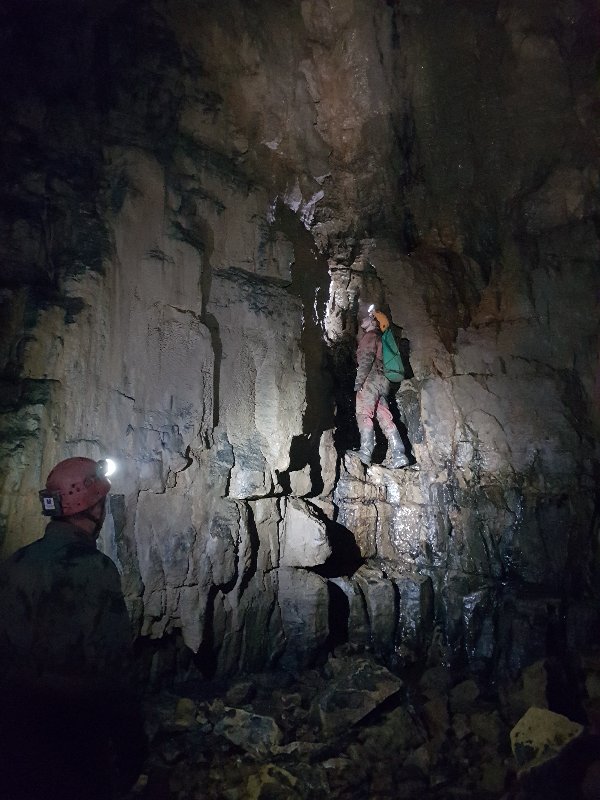 Some damp crawls gain Zuree Aven, which lies below the current stream sinks.
Modelling by Duncan and Claire, lighting by Tarquin, Duncan and Claire
Some damp crawls gain Zuree Aven, which lies below the current stream sinks.
Modelling by Duncan and Claire, lighting by Tarquin, Duncan and Claire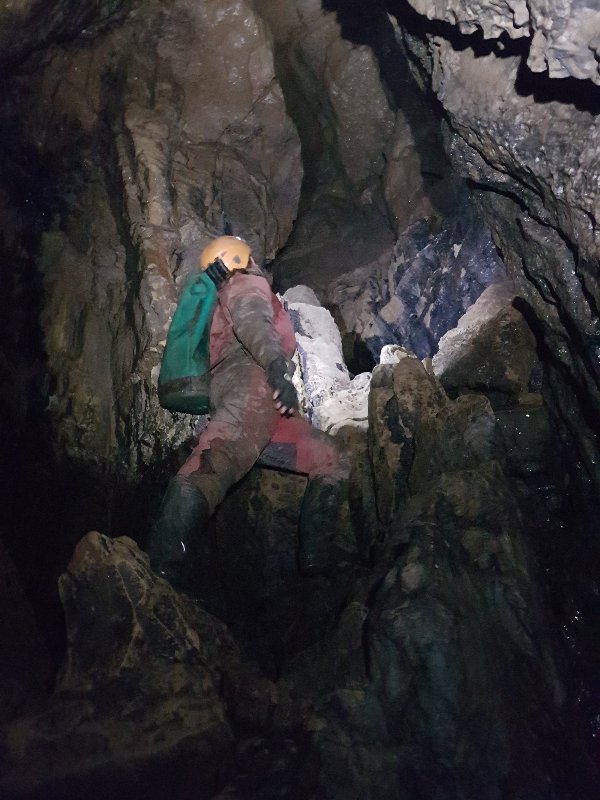 The stream enters from a side aven, which is our way on, ascending the aven via a series of free climbs.
Modelling by Claire, lighting by Tarquin and Claire
The stream enters from a side aven, which is our way on, ascending the aven via a series of free climbs.
Modelling by Claire, lighting by Tarquin and Claire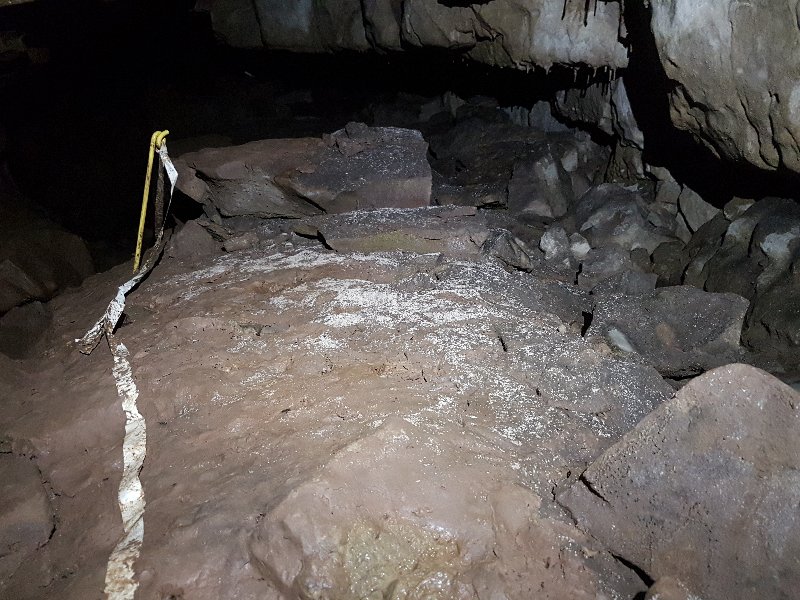 At the top, we leave the stream completely, and head into the Graveyard. The floor is covered in microbial deposits.
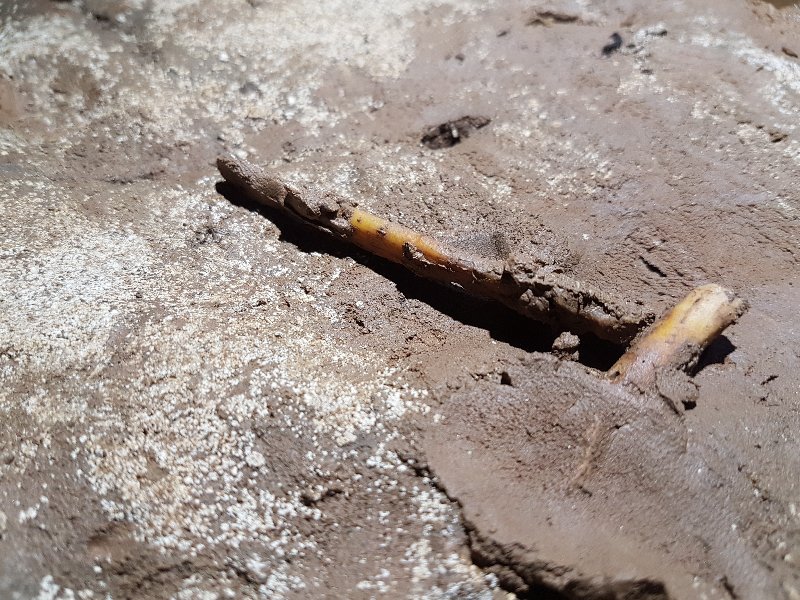 The deposits appear to be cryostal, but the mud is wrong, and the presence of recent bones within the mud would make it highly unlikely for cryogenic processes to be involved. The microbes may be decomposition-related though.
Lighting by Claire
The deposits appear to be cryostal, but the mud is wrong, and the presence of recent bones within the mud would make it highly unlikely for cryogenic processes to be involved. The microbes may be decomposition-related though.
Lighting by Claire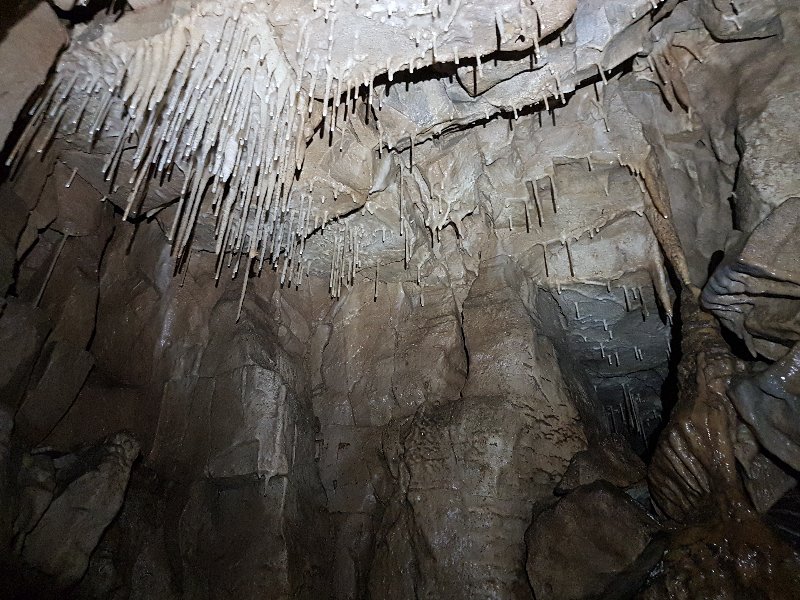 A small side passage with a tiny stream contains some straws and stalactites.
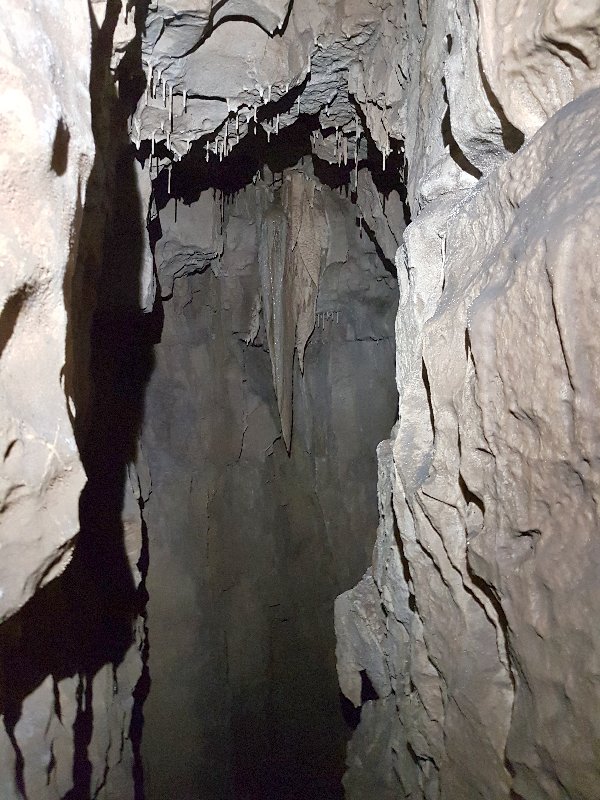 It ends abruptly at a pitch, with a large curtain stalactite.
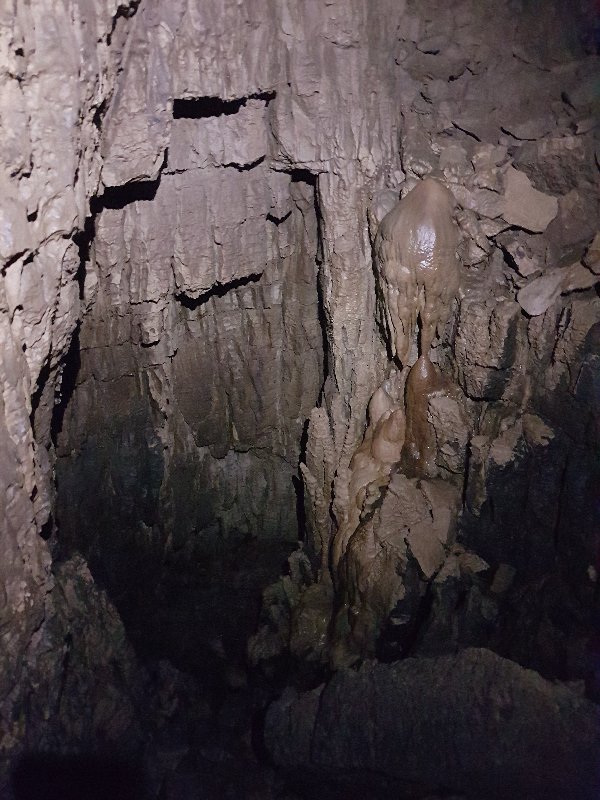 The pitch base connects with a side passage near Cross Stream Junction.
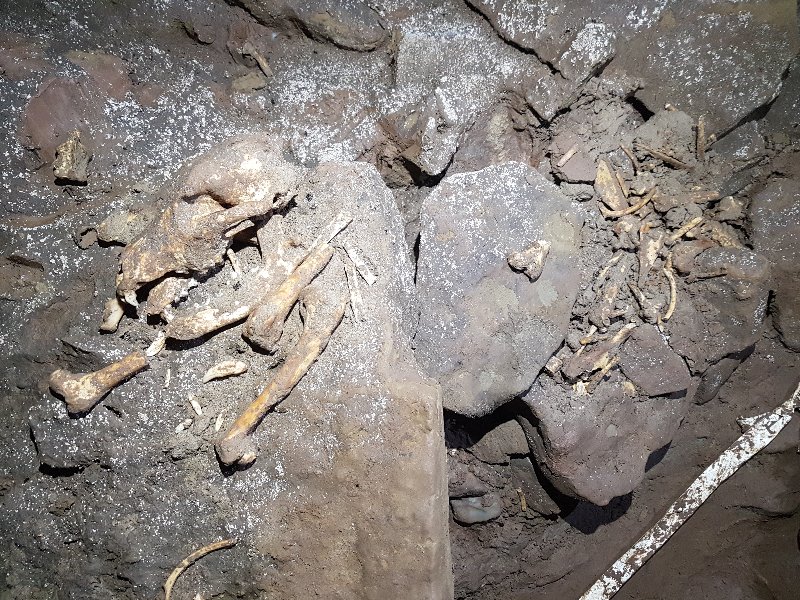 A very well preserved skeleton of a badger in the Graveyard.
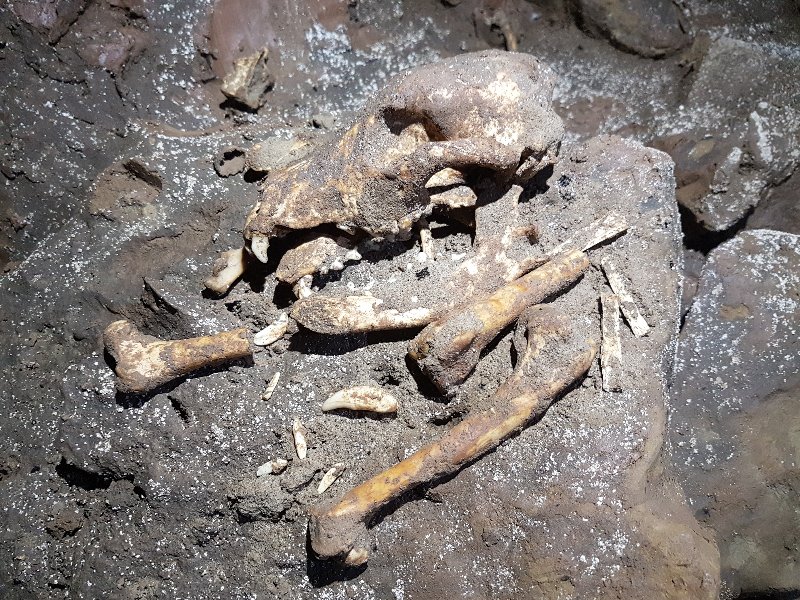 The lack of decay suggests that the badger only recently died. The skull is still very well preserved. However, there are no current entrances anywhere near here. Maybe the badger had dug a set that intersected one of the avens nearby though, such as The Gravity Dig, where remains of victorian pottery have been found. It seems likely that it could have died shortly after falling down one of them.
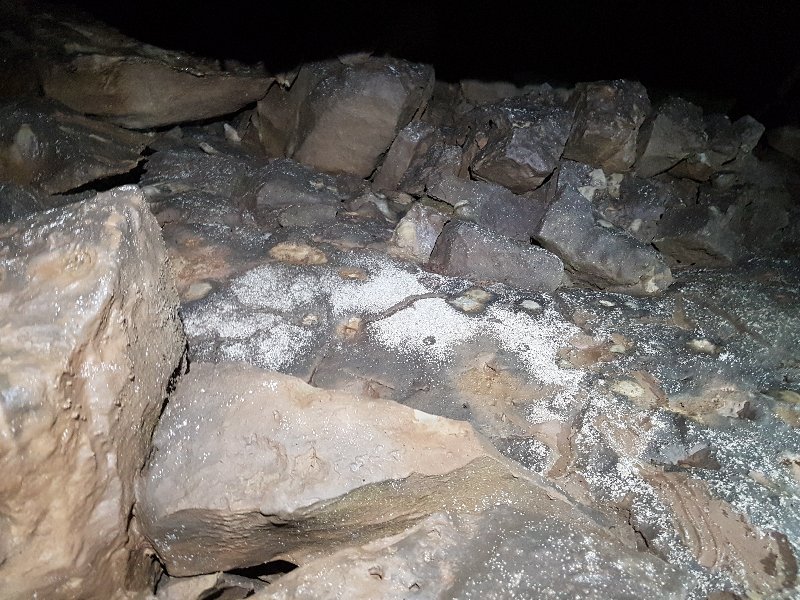 More microbial deposits.
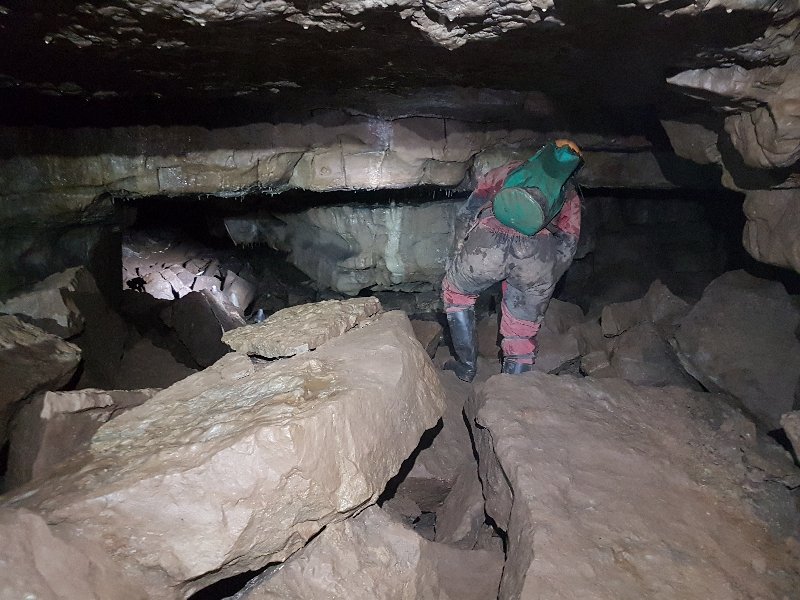 Gnome Garden, a section of the passage with some small formations.
Modelling by Claire, lighting by Tarquin and Claire
Gnome Garden, a section of the passage with some small formations.
Modelling by Claire, lighting by Tarquin and Claire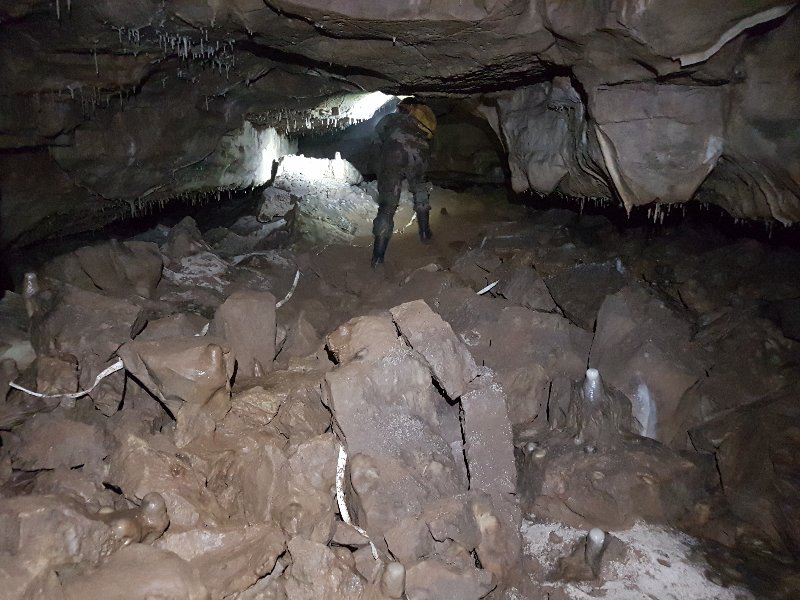 Gnome Garden.
Modelling by Duncan, lighting by Tarquin and Duncan
Gnome Garden.
Modelling by Duncan, lighting by Tarquin and Duncan Virgin's Delight, the next section of passage.
Modelling by Duncan and Claire, lighting by Tarquin, Duncan and Claire
Virgin's Delight, the next section of passage.
Modelling by Duncan and Claire, lighting by Tarquin, Duncan and Claire Wall deposits in Virgin's Delight. These appear to be botrioidal condensation deposits.
 Guano deposits at the junction with The Chunnel.
 The Chunnel, a large fossil passage.
Modelling by Duncan and Claire, lighting by Tarquin, Mark, Duncan and Claire
The Chunnel, a large fossil passage.
Modelling by Duncan and Claire, lighting by Tarquin, Mark, Duncan and Claire Rodent skeleton, probably a rat, in The Chunnel.
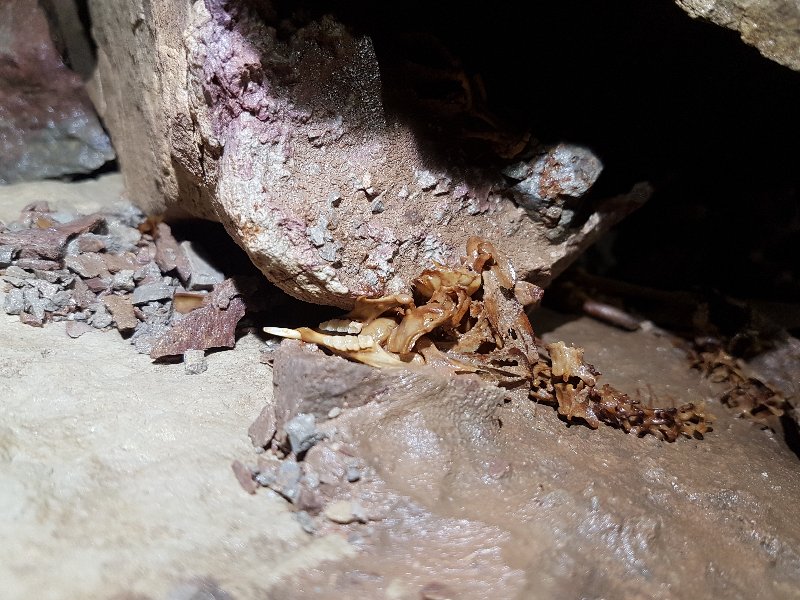 The characteristic rodent teeth are quite obvious.
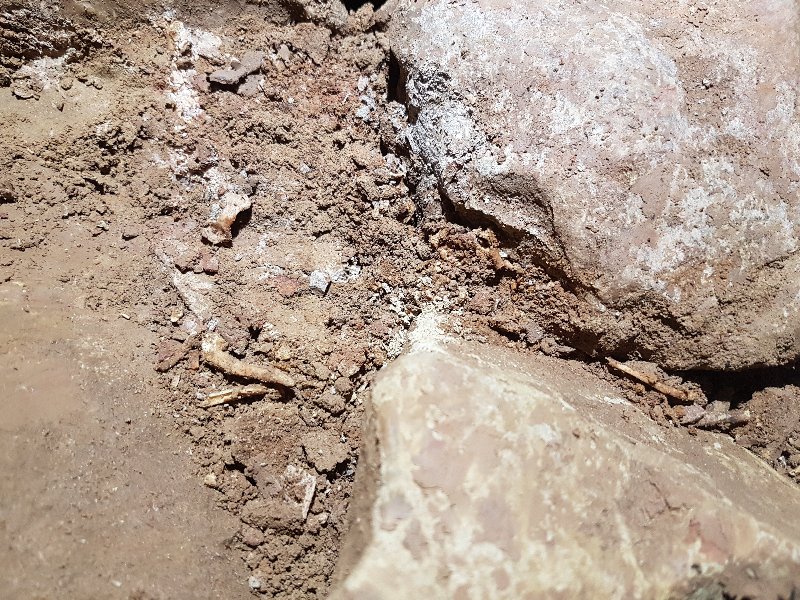 More random bones.
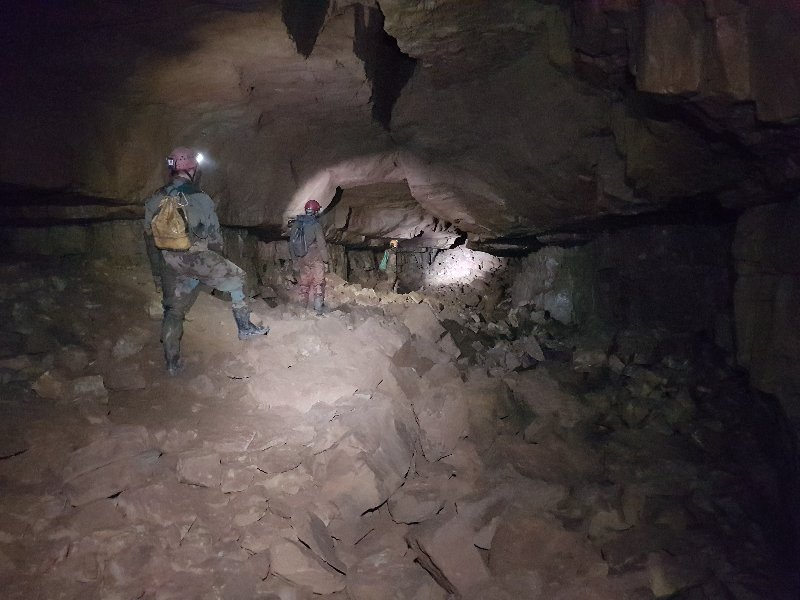 The largest section of The Chunnel, one of the largest passages in the cave. Just up ahead, a major passage on the right is Bicknor Street Passage, while on the left is Coal Seam Passage, the main Round Trip route to the Main Stream Passage. Half of the team would follow the Round Trip, while the rest of us continued to the end.
Modelling by Duncan, Mark and Claire, lighting by Tarquin, John, Duncan, Mark and Claire
The largest section of The Chunnel, one of the largest passages in the cave. Just up ahead, a major passage on the right is Bicknor Street Passage, while on the left is Coal Seam Passage, the main Round Trip route to the Main Stream Passage. Half of the team would follow the Round Trip, while the rest of us continued to the end.
Modelling by Duncan, Mark and Claire, lighting by Tarquin, John, Duncan, Mark and Claire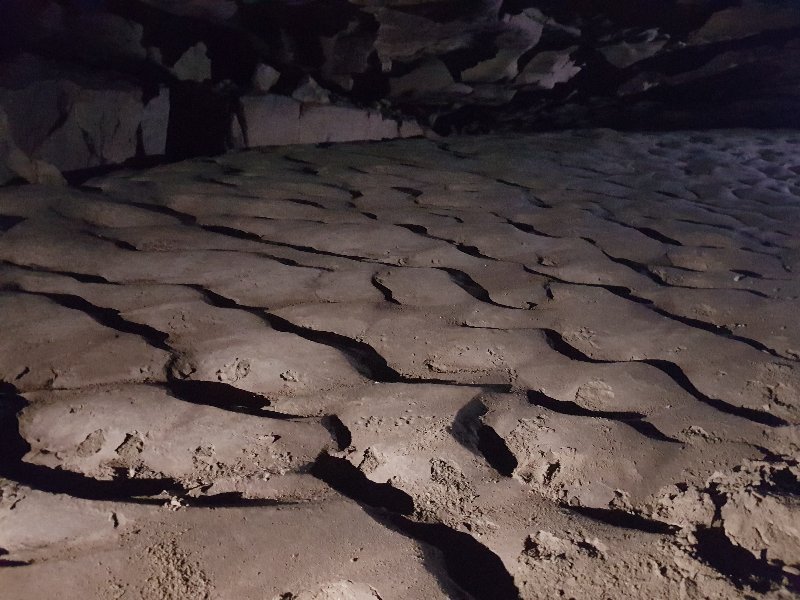 A side passage is the way on, through The Three Deserts. The name is very appropriate, as the passage has miniature sand dunes for a large part of its length.
Lighting by Mark and Claire.
A side passage is the way on, through The Three Deserts. The name is very appropriate, as the passage has miniature sand dunes for a large part of its length.
Lighting by Mark and Claire.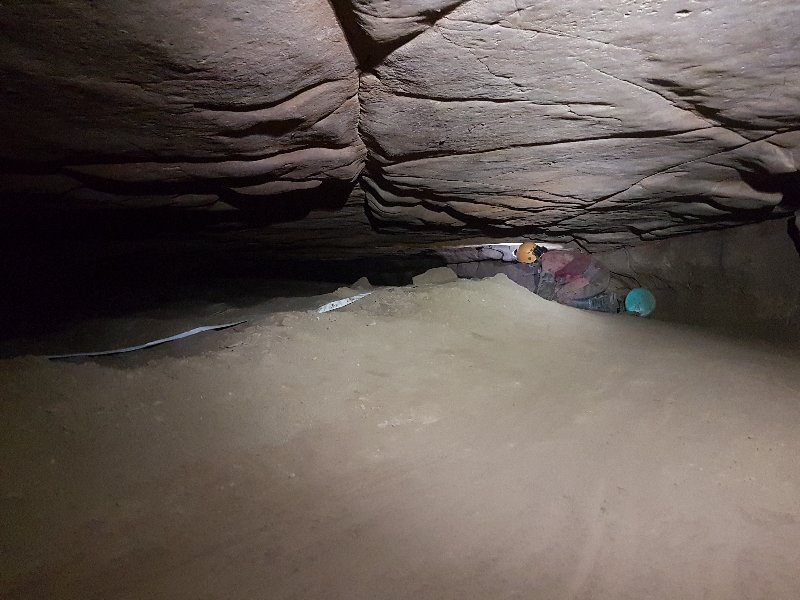 The Three Deserts also earns its name because of the work required to pass the lengthy triple crawl, and the heat and dehydration that it creates. Visitors often forget to take enough drinking water with them, through this very dry section of cave.
Modelling by Claire, lighting by Tarquin and Claire
The Three Deserts also earns its name because of the work required to pass the lengthy triple crawl, and the heat and dehydration that it creates. Visitors often forget to take enough drinking water with them, through this very dry section of cave.
Modelling by Claire, lighting by Tarquin and Claire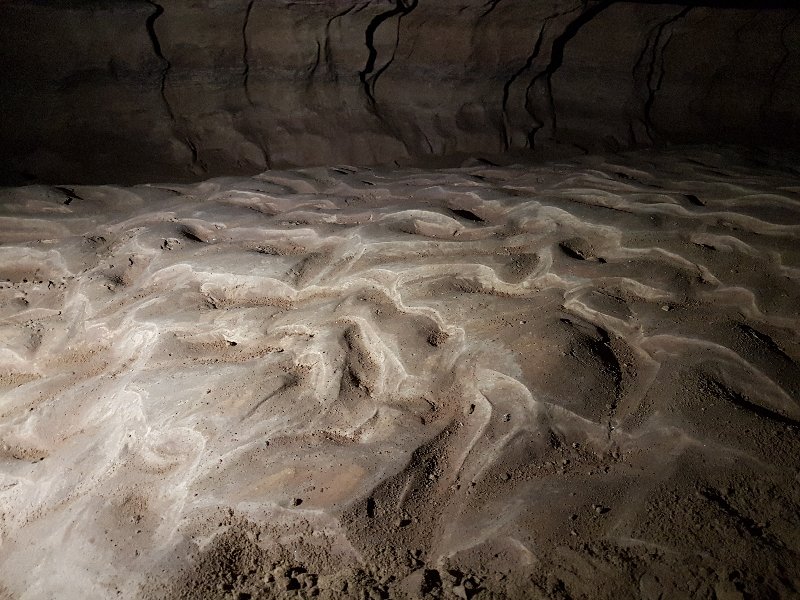 Painted sands of The Three Deserts.
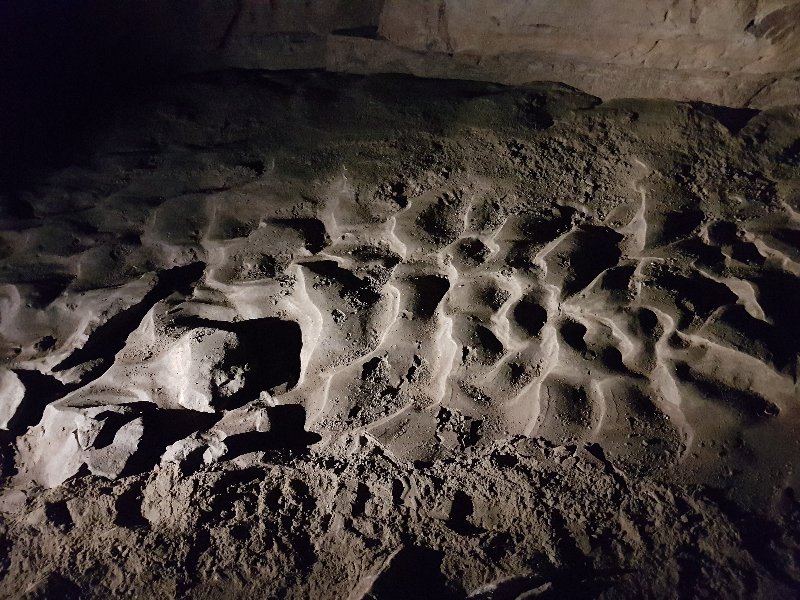 Dunes.
Lighting by Mark
Dunes.
Lighting by Mark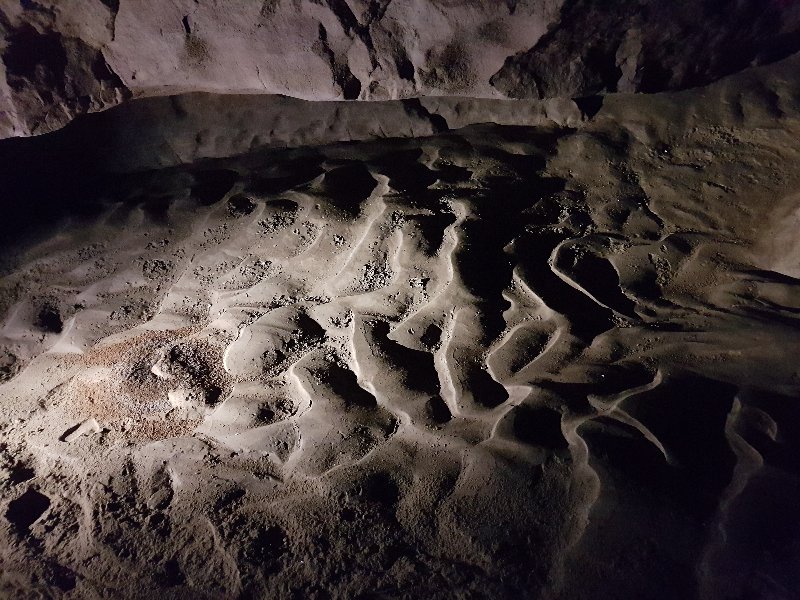 Dunes.
Lighting by Mark
Dunes.
Lighting by Mark Beyond The Tree Deserts, the passage becomes a more comfortable size.
Modelling by Duncan and Claire, lighting by Tarquin, Duncan and Claire
Beyond The Tree Deserts, the passage becomes a more comfortable size.
Modelling by Duncan and Claire, lighting by Tarquin, Duncan and Claire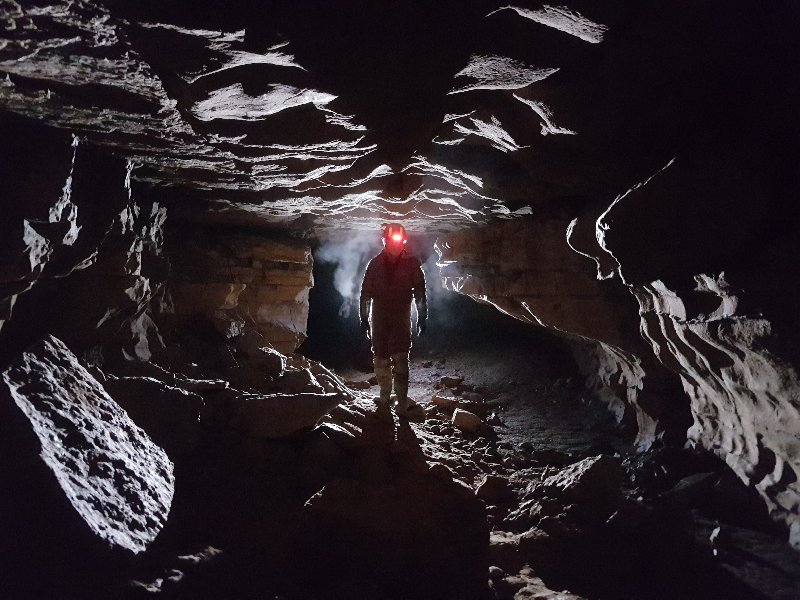 Beyond Vittals Stop, where we met the demon of Flow Choke Passage. Although this is the major passage leading on from Vittals Stop (the usual place to stop for nourishment), it is not the major destination. Most visitors head down Dog's Grave Passage instead. However, the passage itself is very impressive, and also offers a round trip for cavers who are daring enough.
Modelling by Mark, lighting by Tarquin, Mark and Duncan
Beyond Vittals Stop, where we met the demon of Flow Choke Passage. Although this is the major passage leading on from Vittals Stop (the usual place to stop for nourishment), it is not the major destination. Most visitors head down Dog's Grave Passage instead. However, the passage itself is very impressive, and also offers a round trip for cavers who are daring enough.
Modelling by Mark, lighting by Tarquin, Mark and Duncan Chamber just after the junction with Hull Passage in Flow Choke Passage, one of the largest spaces in the cave.
Modelling by Duncan, Mark and Claire, lighting by Tarquin, Duncan, Mark and Claire
Chamber just after the junction with Hull Passage in Flow Choke Passage, one of the largest spaces in the cave.
Modelling by Duncan, Mark and Claire, lighting by Tarquin, Duncan, Mark and Claire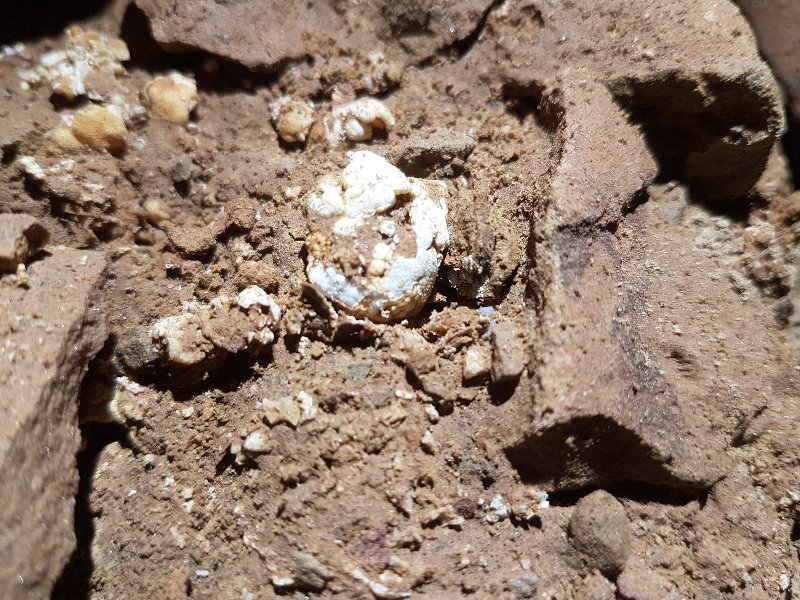 Cryostal in the chamber.
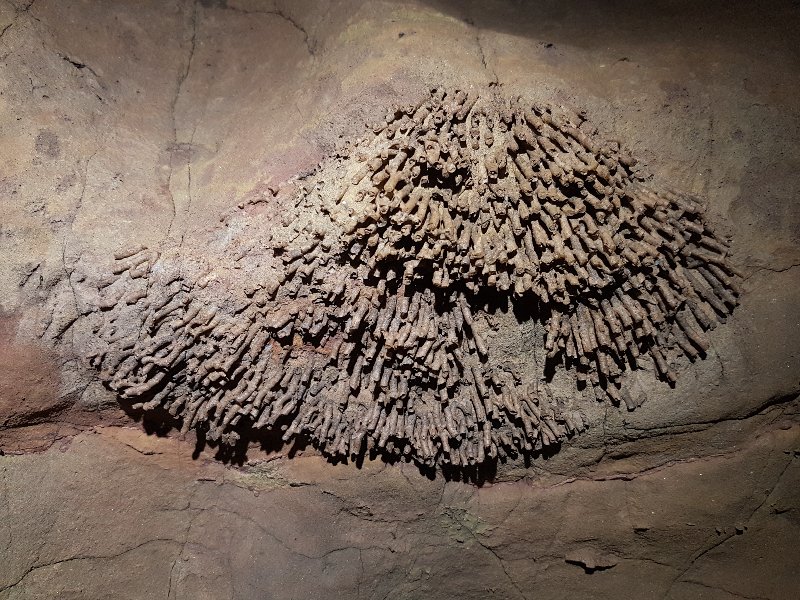 Large fossil coral on the wall of the passage.
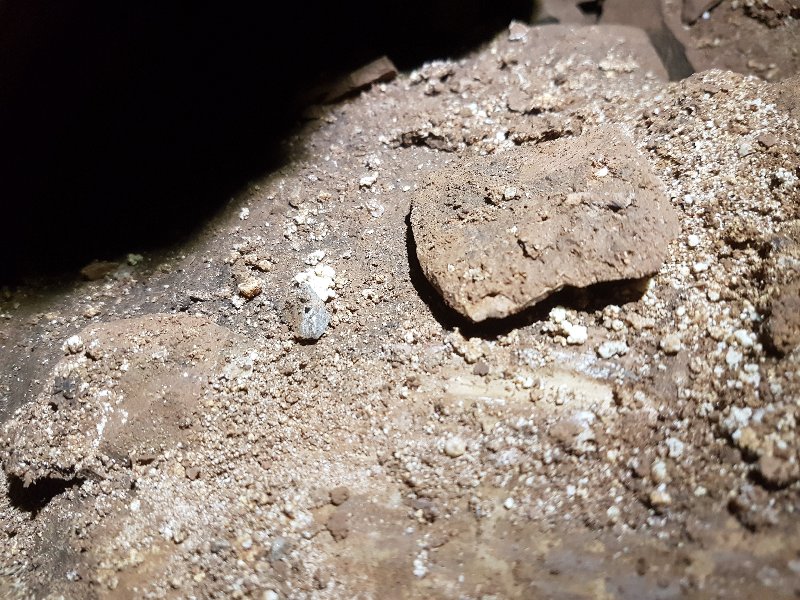 Cryostal.
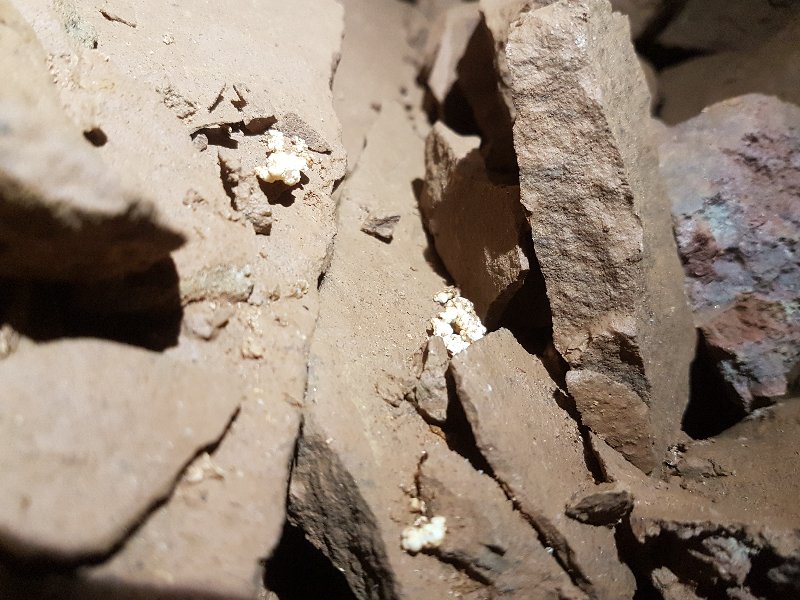 Cryostal.
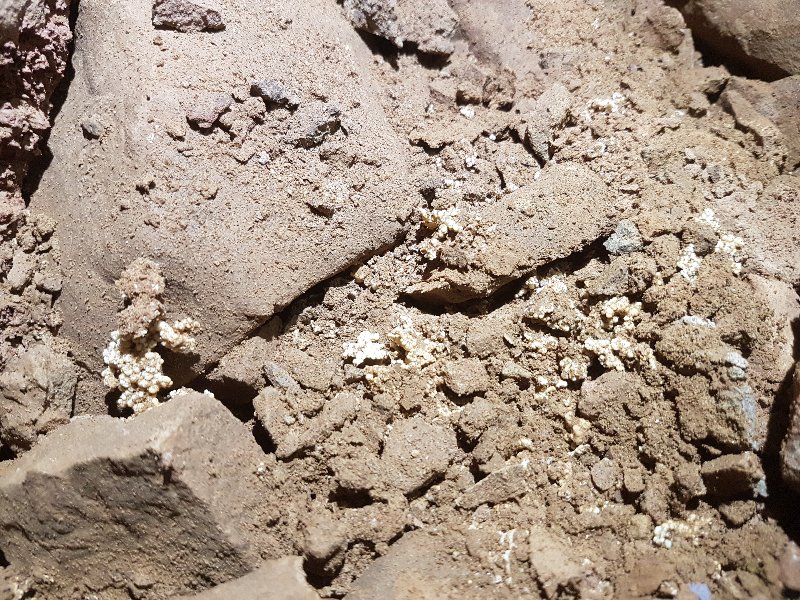 Cryostal.
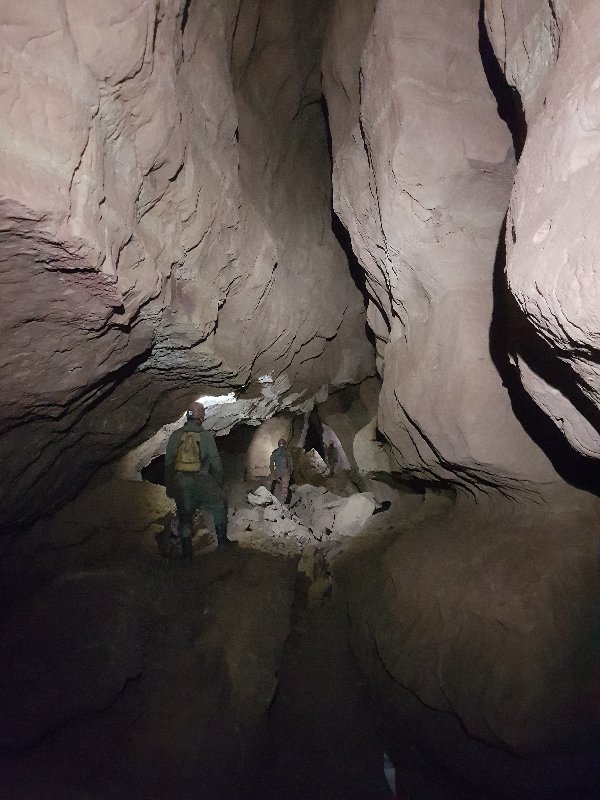 Fault-controlled section of Flow Choke Passage.
Modelling by Duncan, Mark and Claire, lighting by Tarquin, Duncan, Mark and Claire
Fault-controlled section of Flow Choke Passage.
Modelling by Duncan, Mark and Claire, lighting by Tarquin, Duncan, Mark and Claire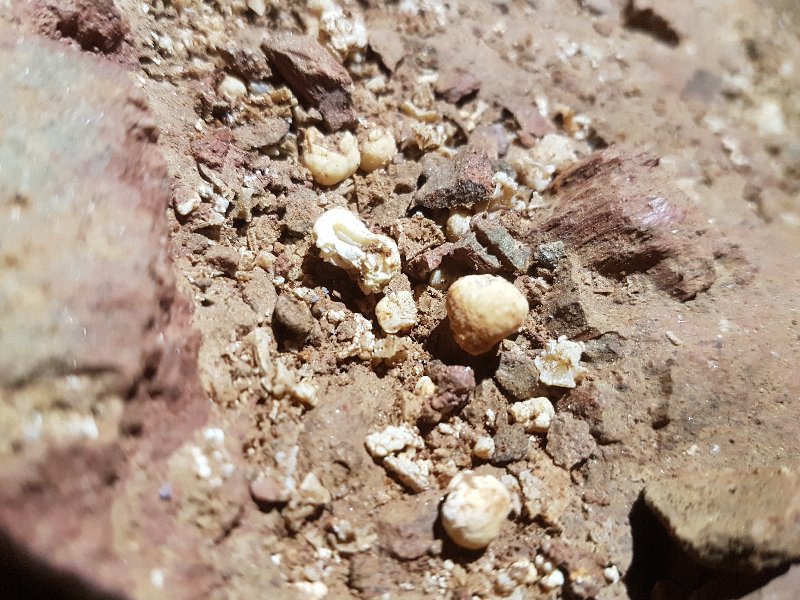 More cryostal.
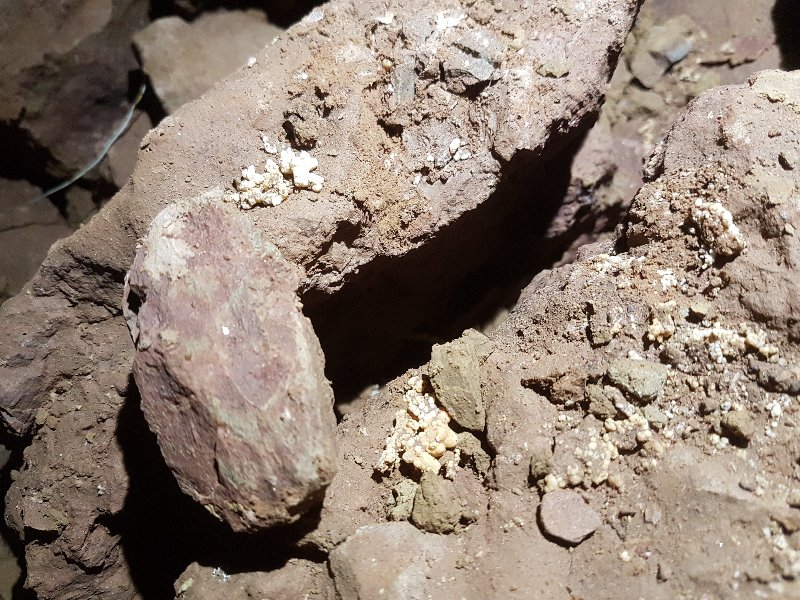 And a final cryostal deposit.
 Superb section of Flow Choke Passage.
Modelling by Claire, lighting by Duncan
Superb section of Flow Choke Passage.
Modelling by Claire, lighting by Duncan Cracking wet mud.
Lighting by Claire
Cracking wet mud.
Lighting by Claire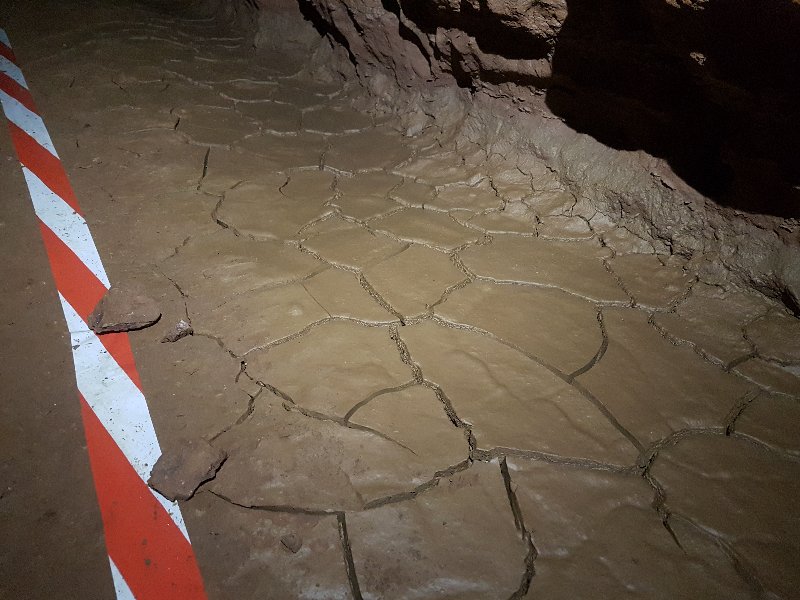 Mud cracks.
Lighting by Claire
Mud cracks.
Lighting by Claire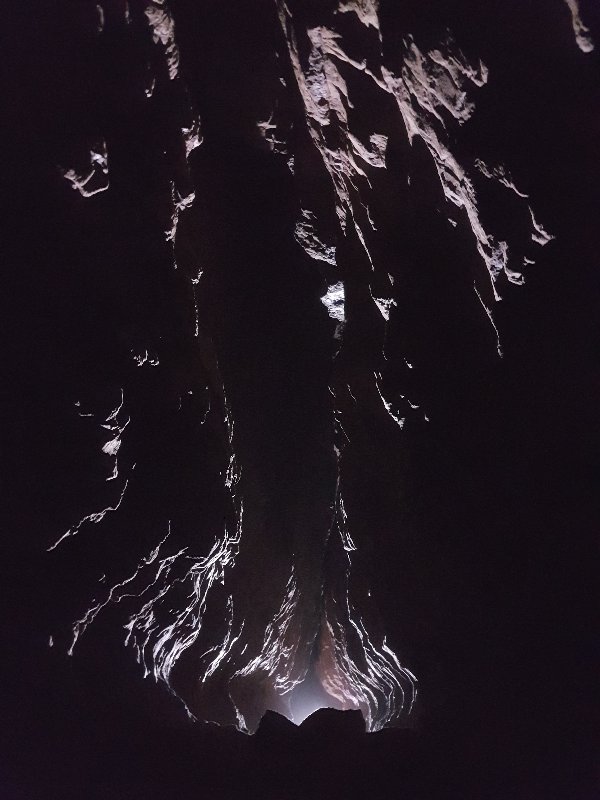 Flow Choke Passage.
Lighting by Duncan
Flow Choke Passage.
Lighting by Duncan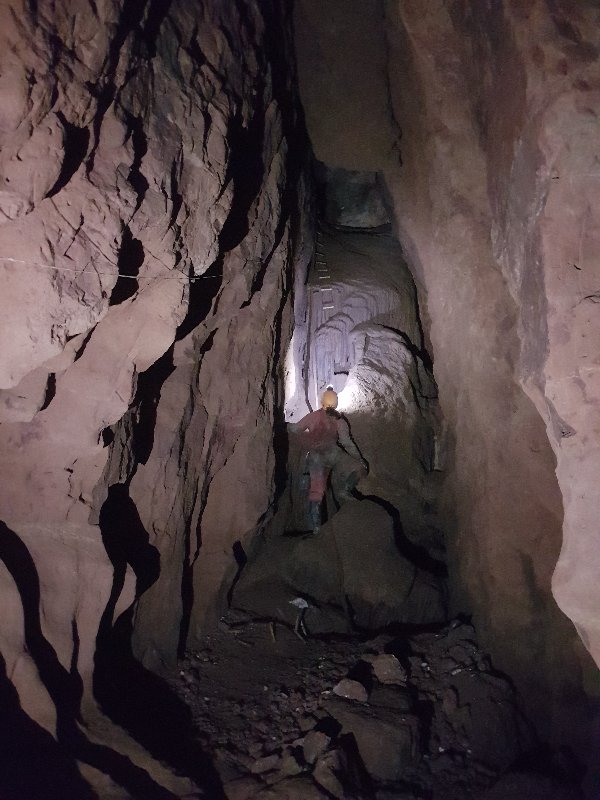 The passage ends abruptly at the Flow Choke, which has so far resisted digging, despite being a very obvious major lead. The small dig at the top of the broken ladder only penetrates a short distance into the choke. This is possibly the site of an old entrance, or perhaps it is just a big choke, but either way, there should be a continuing big passage on the other side.
Modelling by Claire, lighting by Tarquin and Claire
The passage ends abruptly at the Flow Choke, which has so far resisted digging, despite being a very obvious major lead. The small dig at the top of the broken ladder only penetrates a short distance into the choke. This is possibly the site of an old entrance, or perhaps it is just a big choke, but either way, there should be a continuing big passage on the other side.
Modelling by Claire, lighting by Tarquin and Claire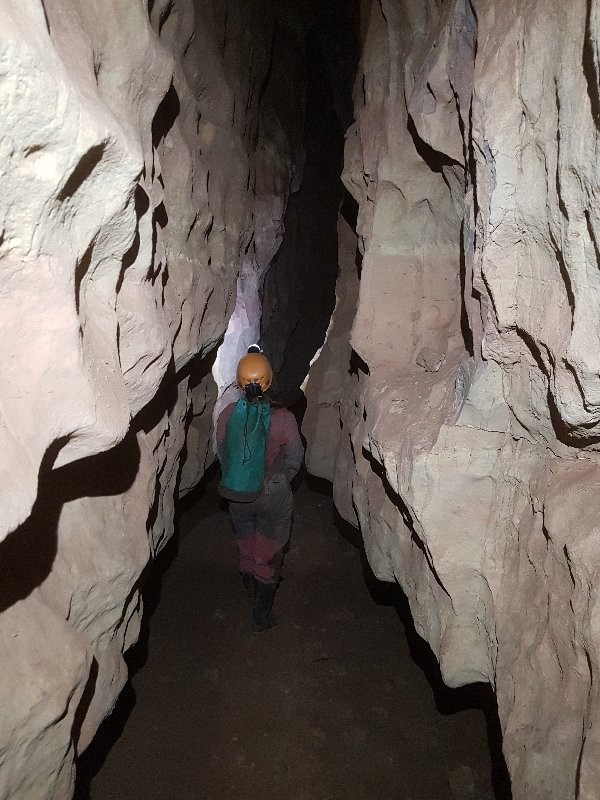 Hull Passage.
Modelling by Claire, lighting by Tarquin and Claire
Hull Passage.
Modelling by Claire, lighting by Tarquin and Claire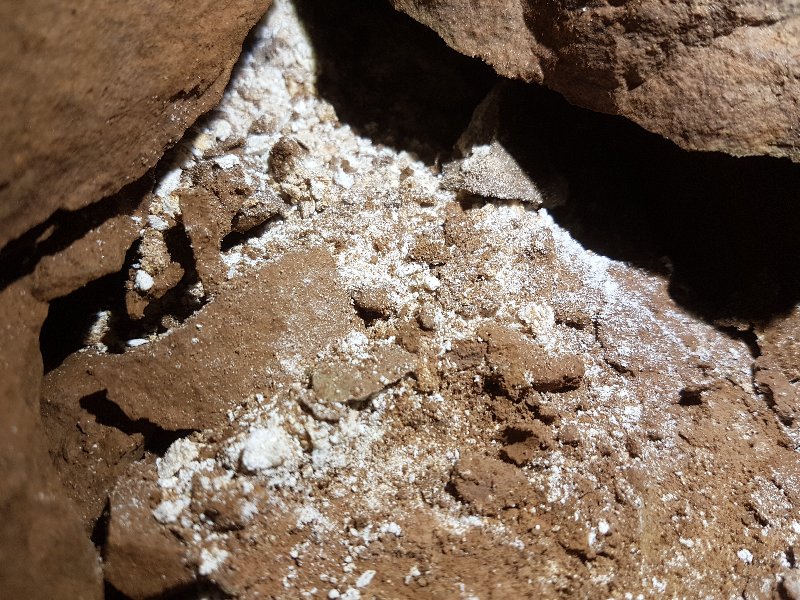 Dusty deposits in Hull Passage, which appear to be decomposing bone.
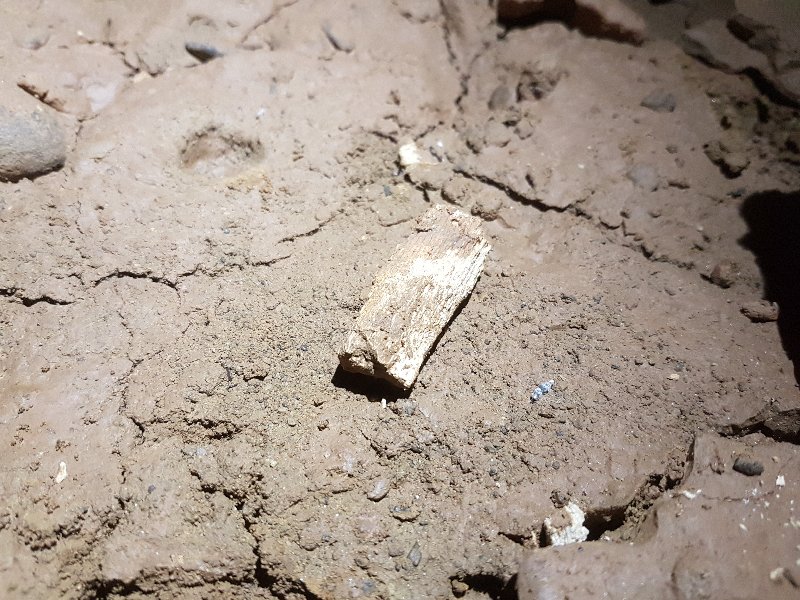 Decomposing bone.
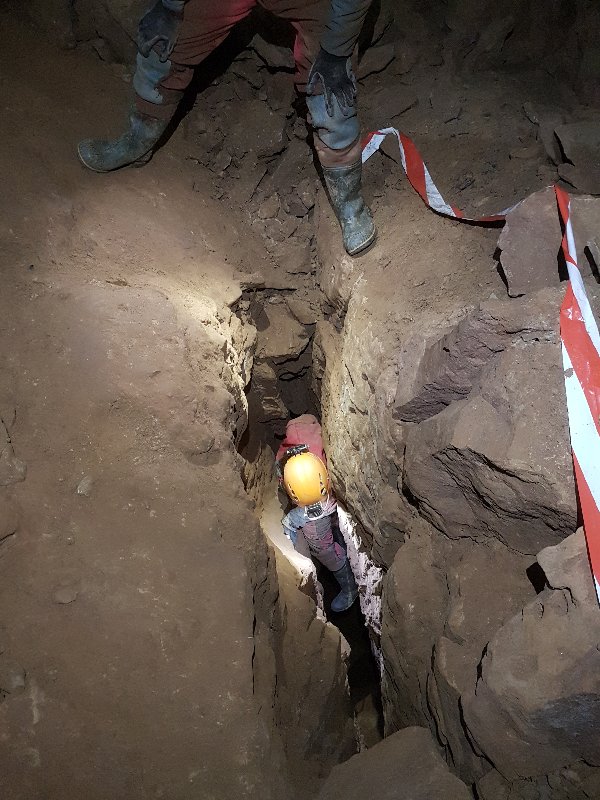 The tight slot down into Dog's Grave Passage, creating the short round trip. This looks stupidly narrow from above, and it is quite committing. However, it is possible for most cavers to pass through, though some may find it uncomfortably tight. Gravity helps, thankfully.
Modelling by Claire and Duncan, lighting by Tarquin, Claire and Duncan
The tight slot down into Dog's Grave Passage, creating the short round trip. This looks stupidly narrow from above, and it is quite committing. However, it is possible for most cavers to pass through, though some may find it uncomfortably tight. Gravity helps, thankfully.
Modelling by Claire and Duncan, lighting by Tarquin, Claire and Duncan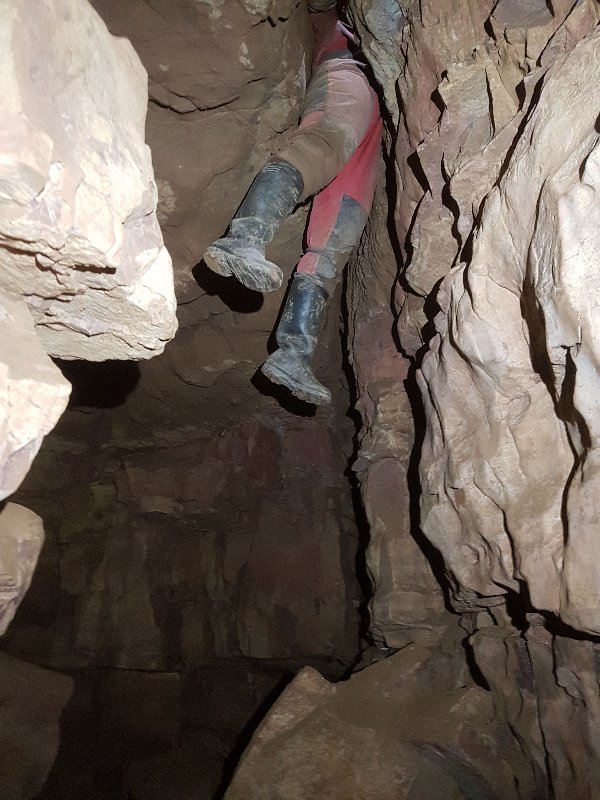 The tight part opens out immediately to become too wide to allow chimneying, with loose rocks making up the far wall. There is a ledge on one wall, but the drop below that is too far to step down, and the passage is too high to hold on to the ceiling for support. The first person usually falls to the floor, then guides subsequent cavers towards the ledges, perhaps also offering a knee as a foothold.
Modelling by Claire, lighting by Tarquin and Claire
The tight part opens out immediately to become too wide to allow chimneying, with loose rocks making up the far wall. There is a ledge on one wall, but the drop below that is too far to step down, and the passage is too high to hold on to the ceiling for support. The first person usually falls to the floor, then guides subsequent cavers towards the ledges, perhaps also offering a knee as a foothold.
Modelling by Claire, lighting by Tarquin and Claire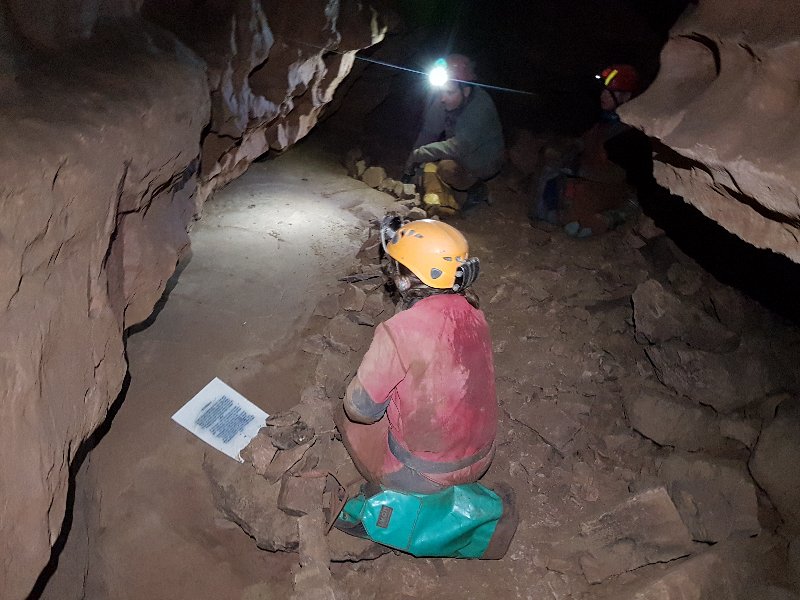 Dog's Grave Passage is much smaller passage than Flow Choke Passage, perhaps being a later outflow that took over from The Three Deserts, carrying water to Kuwait Passage. Shortly after its start at Flow Choke Passage, there are a series of mudbanks with retaining walls instead of conservation tapes.
Modelling by Claire, Duncan and Mark, lighting by Tarquin, Duncan and Mark
Dog's Grave Passage is much smaller passage than Flow Choke Passage, perhaps being a later outflow that took over from The Three Deserts, carrying water to Kuwait Passage. Shortly after its start at Flow Choke Passage, there are a series of mudbanks with retaining walls instead of conservation tapes.
Modelling by Claire, Duncan and Mark, lighting by Tarquin, Duncan and Mark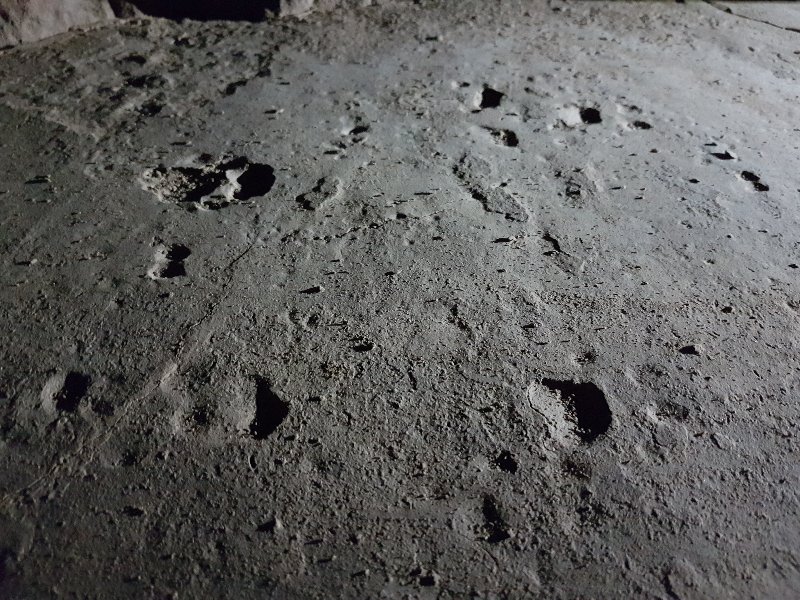 The mudbanks have a set of dog paw prints, very clearly visible once you realise what you are looking for.
Lighting by Duncan
The mudbanks have a set of dog paw prints, very clearly visible once you realise what you are looking for.
Lighting by Duncan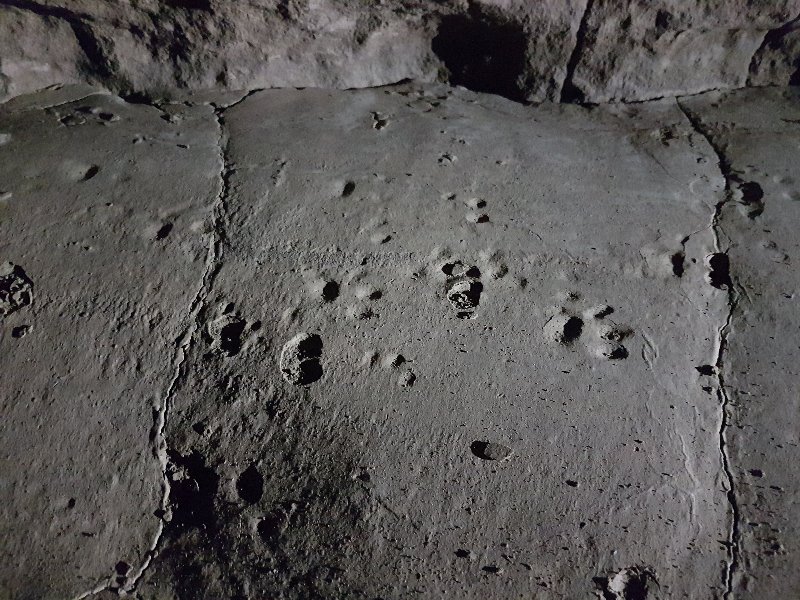 The paw prints show that the dog walked into the passage, lost, completely blind in the dark, hugging the wall, and hoping to find a way out. There could not have been an entrance anywhere near here, so the dog must have been very lost indeed, heading away from whatever entrance it had made its way in through. Perhaps somewhere near the Flow Choke, or perhaps the Gravity Dig near The Graveyard, an eternity away in the dark.
Lighting by Duncan
The paw prints show that the dog walked into the passage, lost, completely blind in the dark, hugging the wall, and hoping to find a way out. There could not have been an entrance anywhere near here, so the dog must have been very lost indeed, heading away from whatever entrance it had made its way in through. Perhaps somewhere near the Flow Choke, or perhaps the Gravity Dig near The Graveyard, an eternity away in the dark.
Lighting by Duncan A very lonely way to spend its last days.
Lighting by Duncan
A very lonely way to spend its last days.
Lighting by Duncan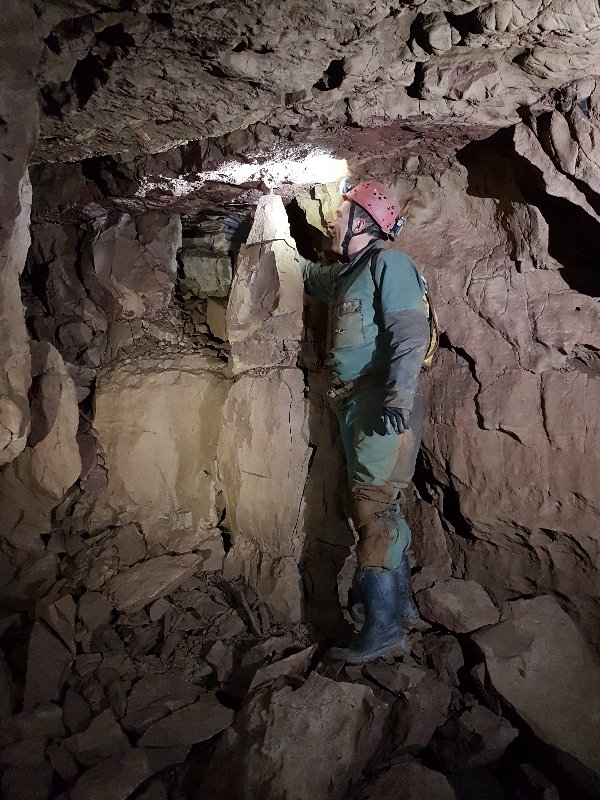 A shattered pillar making a feeble attempt to support the roof.
Modelling by Duncan, lighting by Tarquin, Claire and Duncan
A shattered pillar making a feeble attempt to support the roof.
Modelling by Duncan, lighting by Tarquin, Claire and Duncan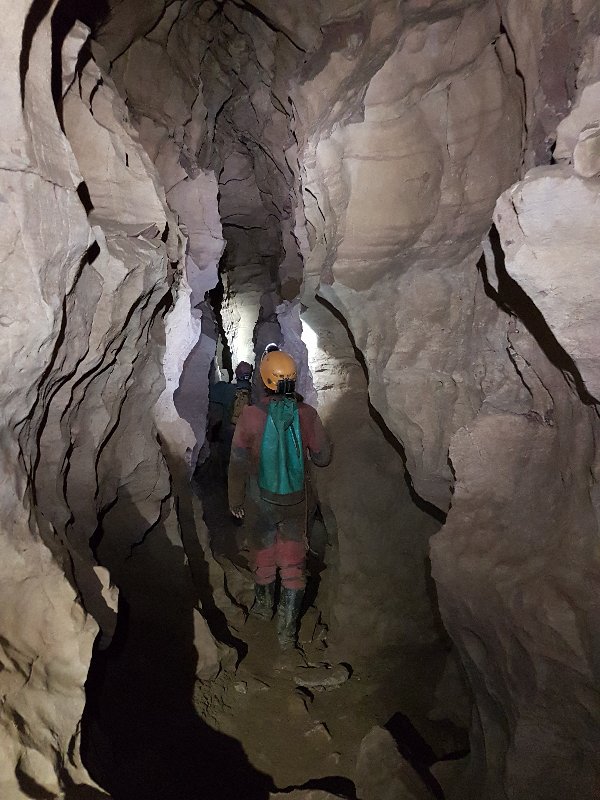 Dog's Grave Passage near the connection with Hull Passage.
Modelling by Claire and Duncan, lighting by Tarquin, Mark, Claire and Duncan
Dog's Grave Passage near the connection with Hull Passage.
Modelling by Claire and Duncan, lighting by Tarquin, Mark, Claire and Duncan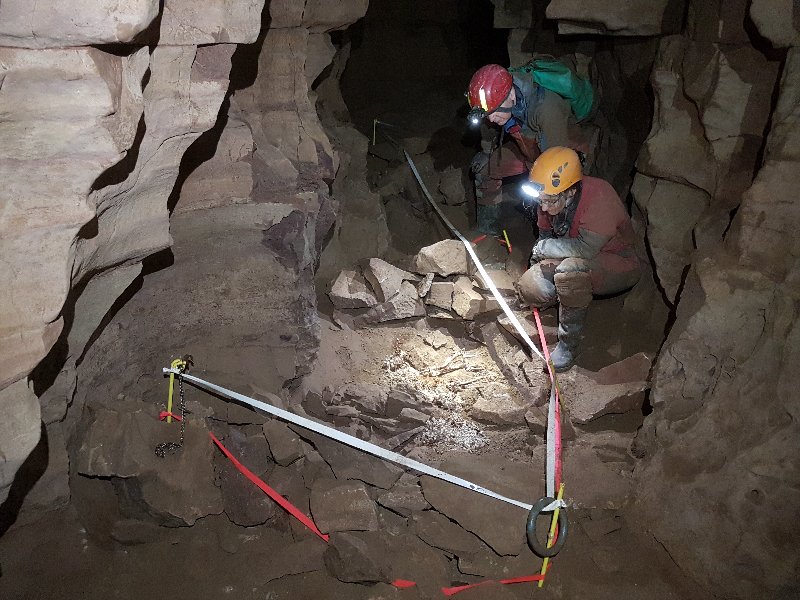 The Dog's Grave. This is the spot where an exhaused and starving dog finally laid down and gave up. Cavers have built a wall around the dog, added a chew toy, a lead, and a remembrance poppy.
Modelling by Claire and Mark, lighting by Tarquin, Claire and Mark
The Dog's Grave. This is the spot where an exhaused and starving dog finally laid down and gave up. Cavers have built a wall around the dog, added a chew toy, a lead, and a remembrance poppy.
Modelling by Claire and Mark, lighting by Tarquin, Claire and Mark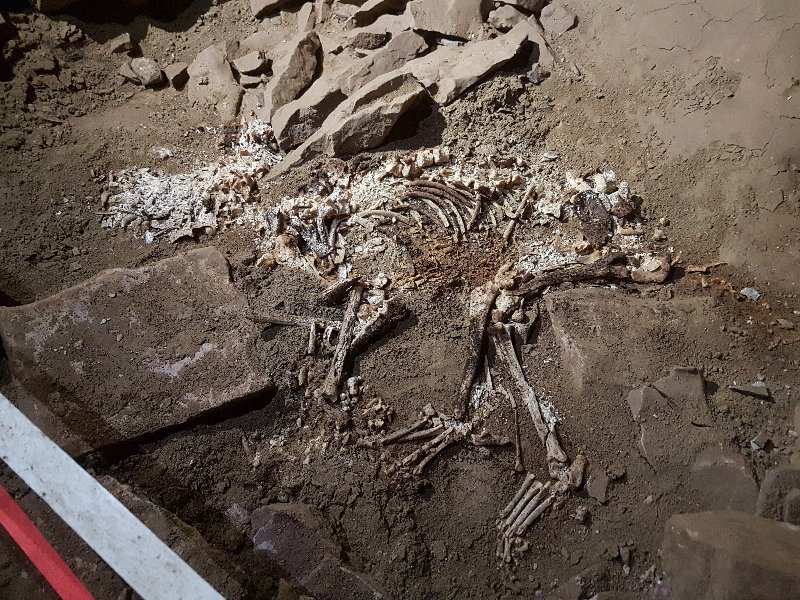 The dog in Dog's Grave Passage has been named Norman. The skeleton is old, but not as old as you might expect. It has decayed significantly since it was discovered in 1990. Estimates are that the bones are less than 300 years old. (Estimates of "tens of thousands of years" are considered incorrect.) Results of formal analysis could not be found.
Modelling by Norman, lighting by Tarquin and Claire
The dog in Dog's Grave Passage has been named Norman. The skeleton is old, but not as old as you might expect. It has decayed significantly since it was discovered in 1990. Estimates are that the bones are less than 300 years old. (Estimates of "tens of thousands of years" are considered incorrect.) Results of formal analysis could not be found.
Modelling by Norman, lighting by Tarquin and Claire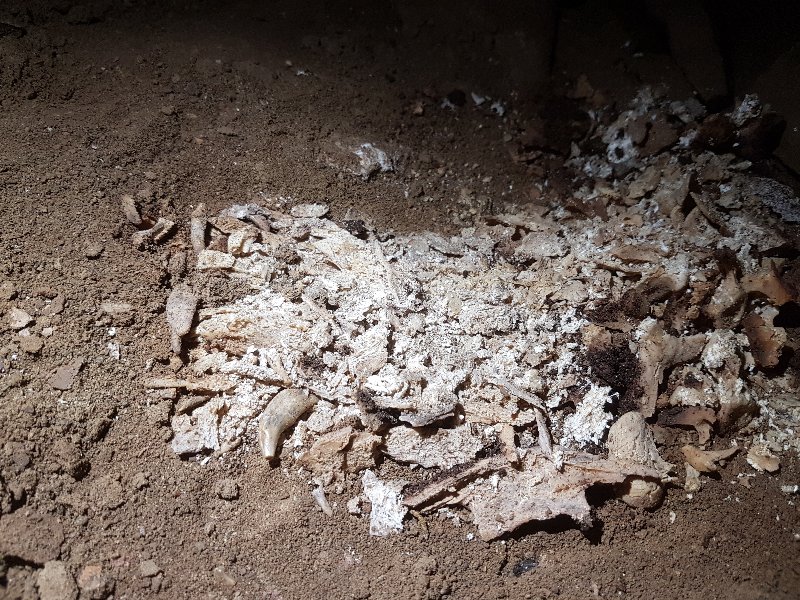 Skull of Norman the Dog. It is quite decomposed, but a canine tooth can be clearly seen on the left.
Modelling by Norman, lighting by Tarquin and Claire
Skull of Norman the Dog. It is quite decomposed, but a canine tooth can be clearly seen on the left.
Modelling by Norman, lighting by Tarquin and Claire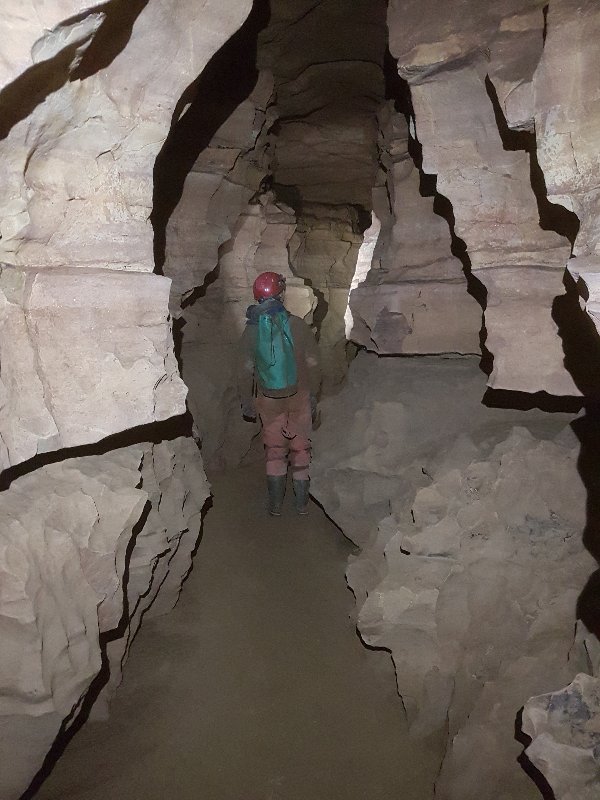 Beyond Norman, the passage again becomes a comfortable water-worn canyon, with occasional annoying boulder obstacles.
Modelling by Mark, lighting by Tarquin and Mark
Beyond Norman, the passage again becomes a comfortable water-worn canyon, with occasional annoying boulder obstacles.
Modelling by Mark, lighting by Tarquin and Mark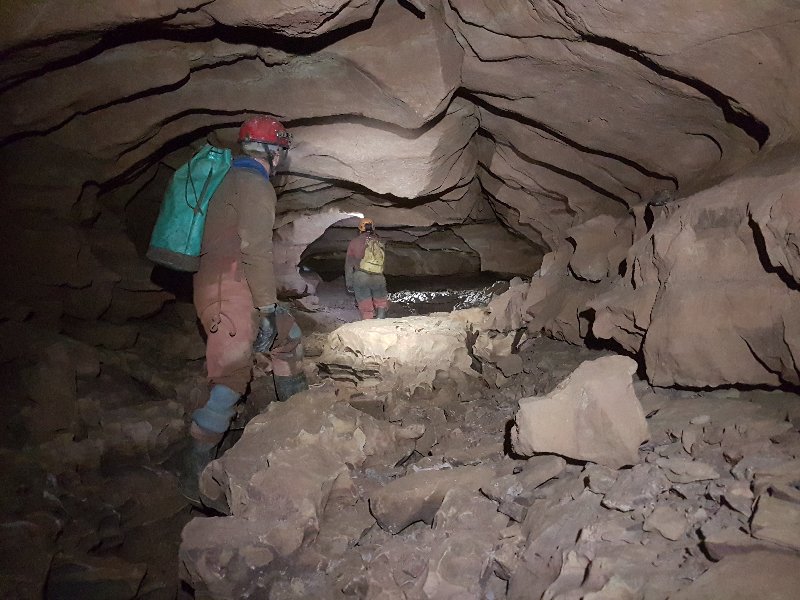 A former sumped section, with the characteristic phreatic shape.
Modelling by Mark and Claire, lighting by Tarquin, Mark, Claire and Duncan
A former sumped section, with the characteristic phreatic shape.
Modelling by Mark and Claire, lighting by Tarquin, Mark, Claire and Duncan Back to its normal rift shape.
Modelling by Mark and Claire, lighting by Tarquin, Mark, Claire and Duncan
Back to its normal rift shape.
Modelling by Mark and Claire, lighting by Tarquin, Mark, Claire and Duncan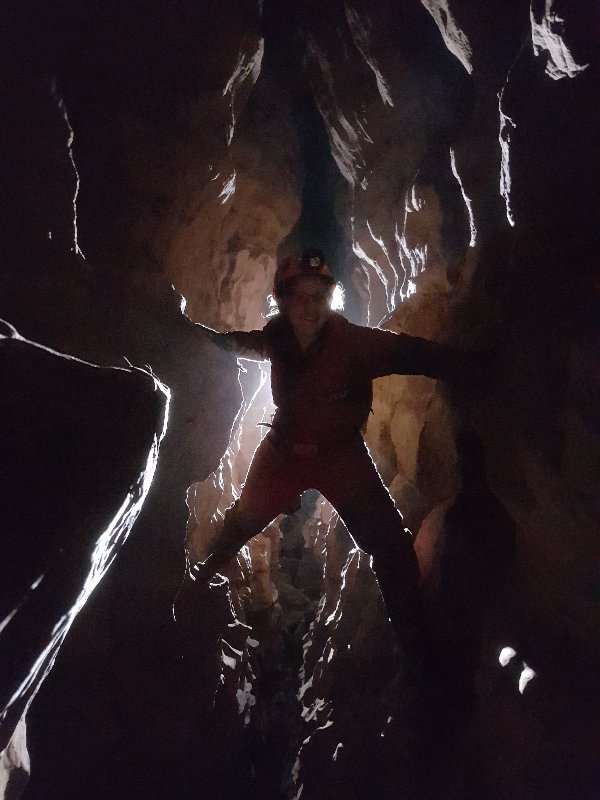 Traverse. This part of the cave is so much longer than it appears on the survey, and it is really quite demanding to reach.
Modelling by Claire, lighting by Mark
Traverse. This part of the cave is so much longer than it appears on the survey, and it is really quite demanding to reach.
Modelling by Claire, lighting by Mark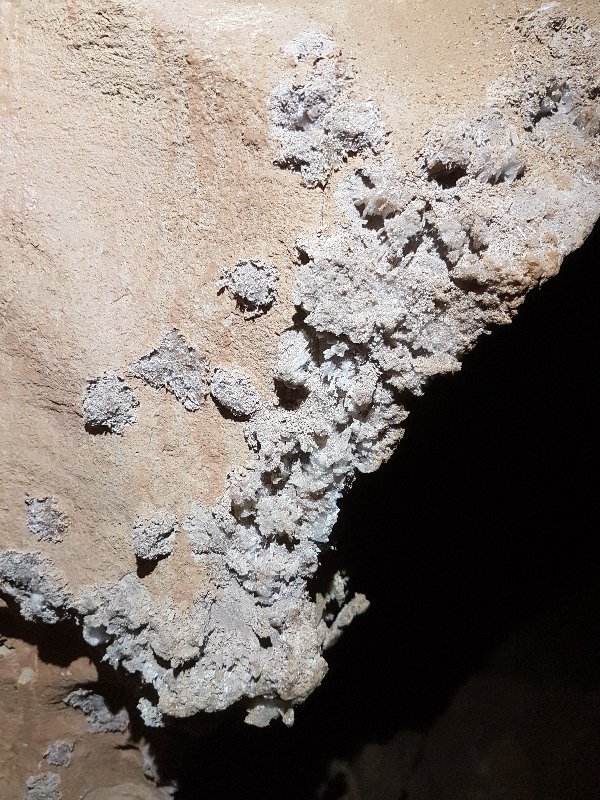 Crystals in Dog's Grave Passage.
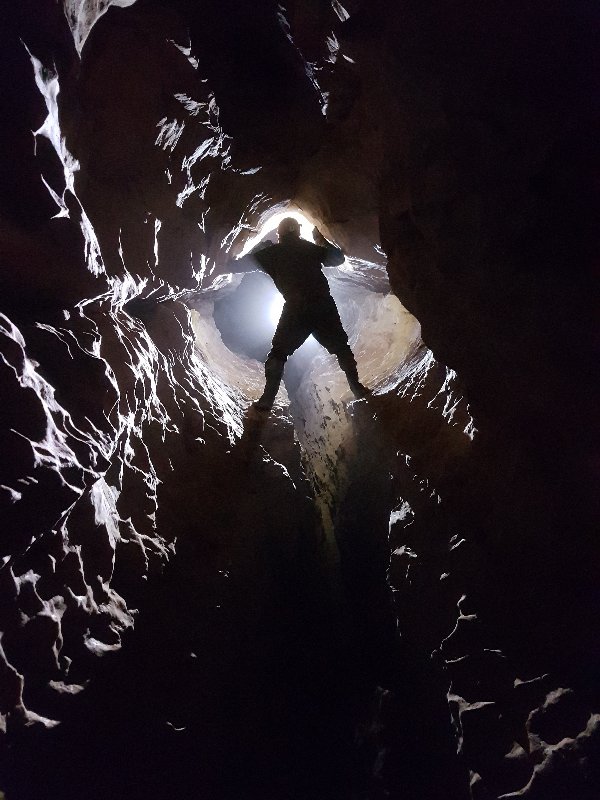 Tube before the camp, which I think is called the Pig Trough.
Modelling by Duncan, lighting by Duncan and Claire
Tube before the camp, which I think is called the Pig Trough.
Modelling by Duncan, lighting by Duncan and Claire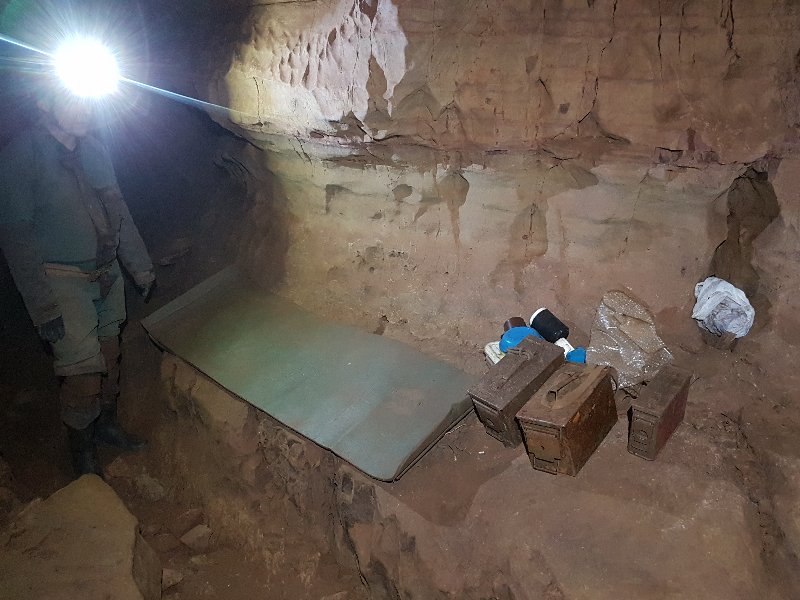 The camp. It may seem completely out of place, but there is a nearby rift dropping down to a too-tight streamway, and there is nowhere else that could serve as a camp in this otherwise dry area of cave. Shortly afterwards, we left Duncan to rest while we tried to reach the end. Duncan's decision was definitely a smart one; we were all on our second day after a good caving trip the day before, and we had underestimated the distance to the end.
Modelling by Duncan, lighting by Tarquin, Duncan and Claire
The camp. It may seem completely out of place, but there is a nearby rift dropping down to a too-tight streamway, and there is nowhere else that could serve as a camp in this otherwise dry area of cave. Shortly afterwards, we left Duncan to rest while we tried to reach the end. Duncan's decision was definitely a smart one; we were all on our second day after a good caving trip the day before, and we had underestimated the distance to the end.
Modelling by Duncan, lighting by Tarquin, Duncan and Claire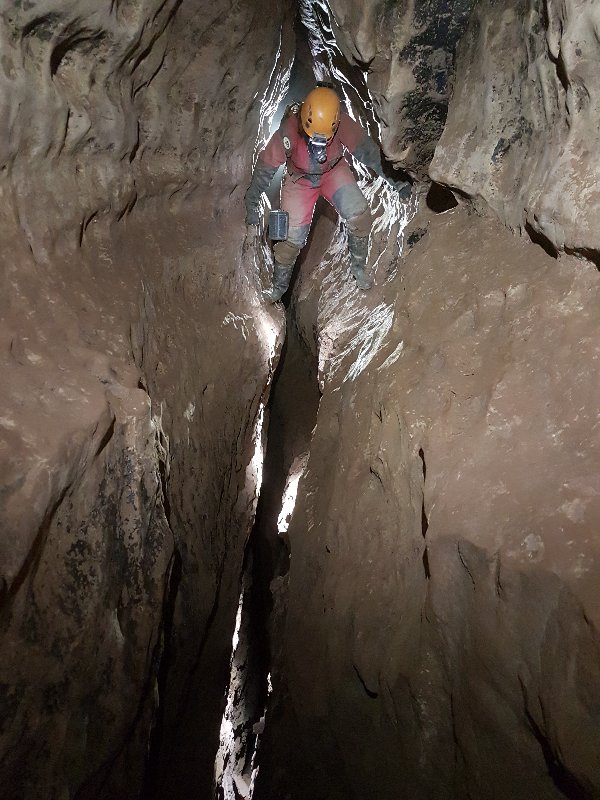 There was still a very long way to the end of the passage, and it got much harder as we got further along. This traverse - which I believe is called Second Traverse - is typical.
Modelling by Claire, lighting by Tarquin, Claire and Mark
There was still a very long way to the end of the passage, and it got much harder as we got further along. This traverse - which I believe is called Second Traverse - is typical.
Modelling by Claire, lighting by Tarquin, Claire and Mark A small, calcited inlet brought about a complete change in the passage. From here, there would be crystals and calcite everywhere, with scrambles and traversing required to avoid it.
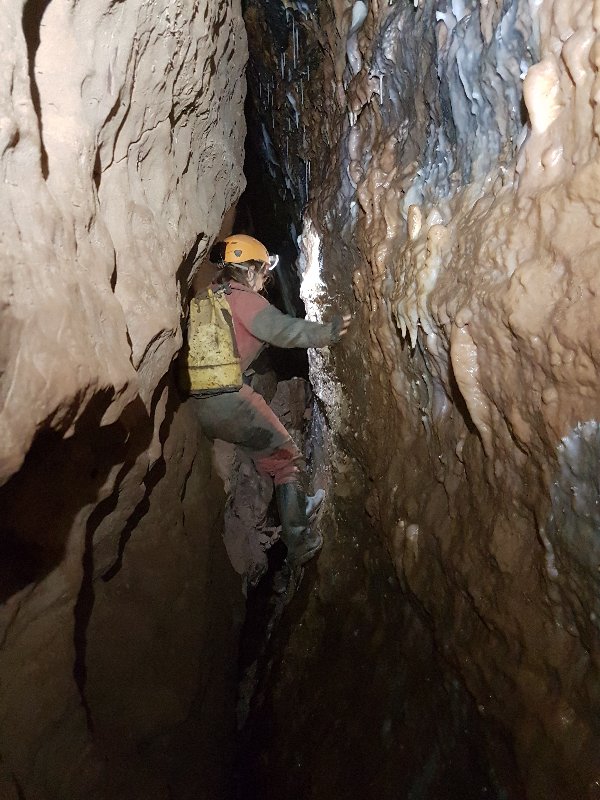 Chimneying up into the calcited rift.
Modelling by Claire, lighting by Tarquin and Claire
Chimneying up into the calcited rift.
Modelling by Claire, lighting by Tarquin and Claire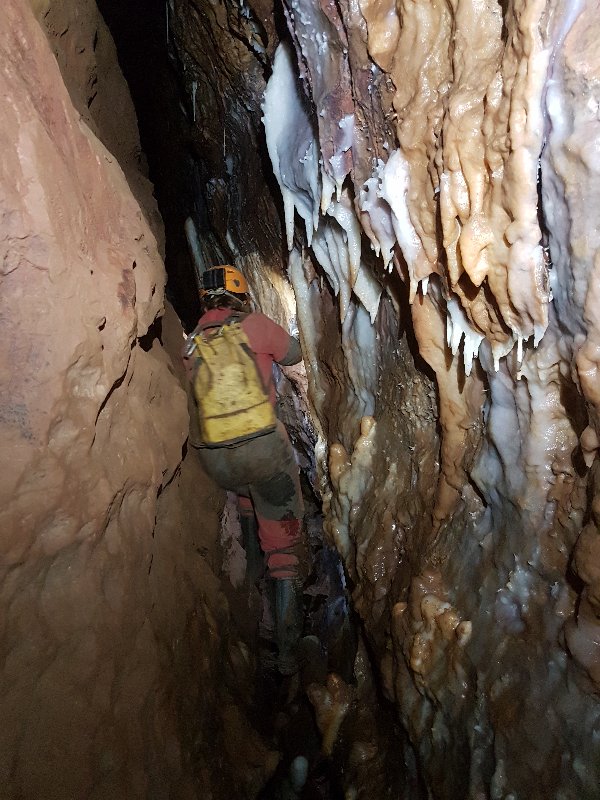 Edging slowly along the rift, trying to avoid touching the calcite. Anywhere else, this sort of passage would simply be off limits. But what it leads to here is so much better, so it was considered acceptable to risk the damage to this little part.
Modelling by Claire, lighting by Tarquin and Claire
Edging slowly along the rift, trying to avoid touching the calcite. Anywhere else, this sort of passage would simply be off limits. But what it leads to here is so much better, so it was considered acceptable to risk the damage to this little part.
Modelling by Claire, lighting by Tarquin and Claire Helictites just a few centimetres from my knee pads. Each passing caver has managed to avoid crushing them.
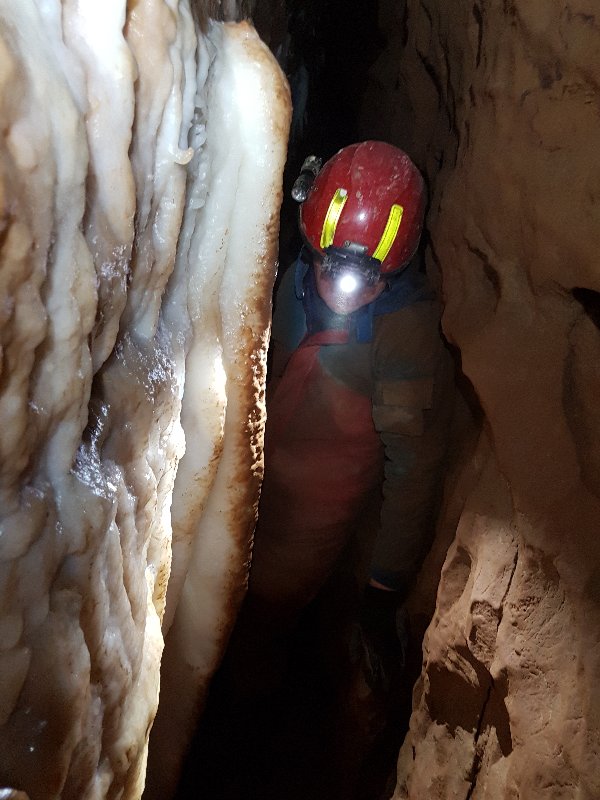 Somewhat muddied stal, passed by pulling clothing carefully away from it. Clearly it has been contacted in the past, but we all managed to avoid it.
Modelling by Mark, lighting by Tarquin and Mark
Somewhat muddied stal, passed by pulling clothing carefully away from it. Clearly it has been contacted in the past, but we all managed to avoid it.
Modelling by Mark, lighting by Tarquin and Mark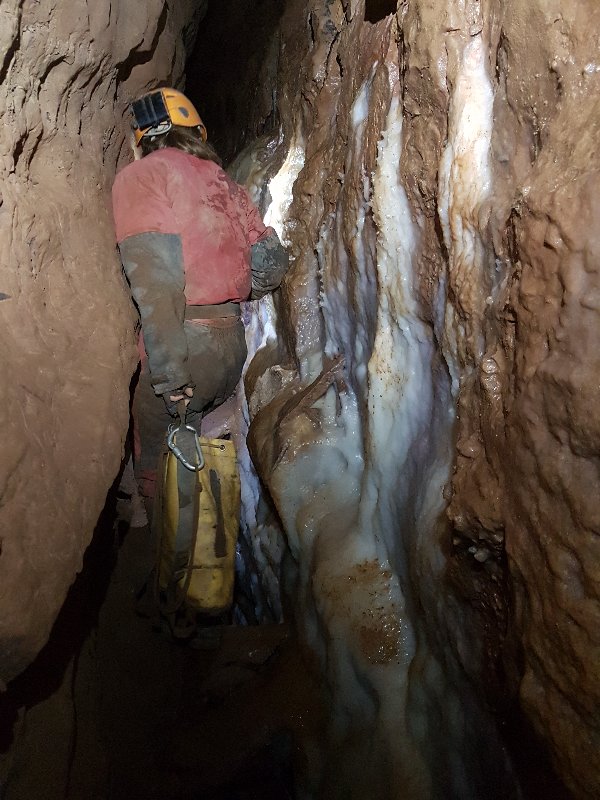 Dodging the calcite.
Modelling by Claire, lighting by Tarquin and Claire
Dodging the calcite.
Modelling by Claire, lighting by Tarquin and Claire Calcite rafts hidden in the rift below. These could easily be an attraction in their own right, but they are almost impossible to reach, down the squeeze-sized rift, with no climbing holds.
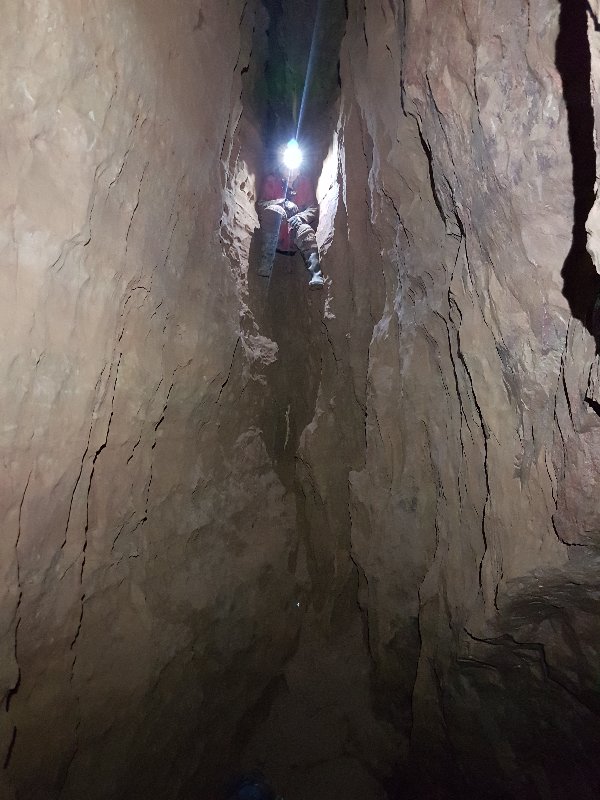 A final climb, landing on a sandy floor. It feels like a dead end, but the way on is a tiny archway hidden under the wall. Claire accidentally wedged herself perfectly into position for this picture, with one tackle bag snagged on the rocks behind her, and one tackle bag spilling its contents down the climb. The picture looks intentional, however.
Modelling by Claire, lighting by Tarquin and Claire
A final climb, landing on a sandy floor. It feels like a dead end, but the way on is a tiny archway hidden under the wall. Claire accidentally wedged herself perfectly into position for this picture, with one tackle bag snagged on the rocks behind her, and one tackle bag spilling its contents down the climb. The picture looks intentional, however.
Modelling by Claire, lighting by Tarquin and Claire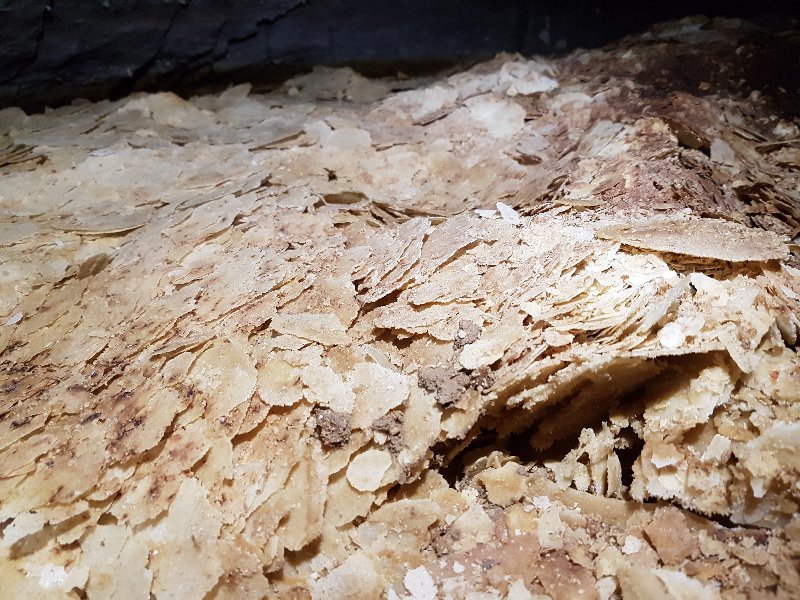 Snow Garden starts immediately, with the crawl under the archway being between banks of stacked calcite rafts.
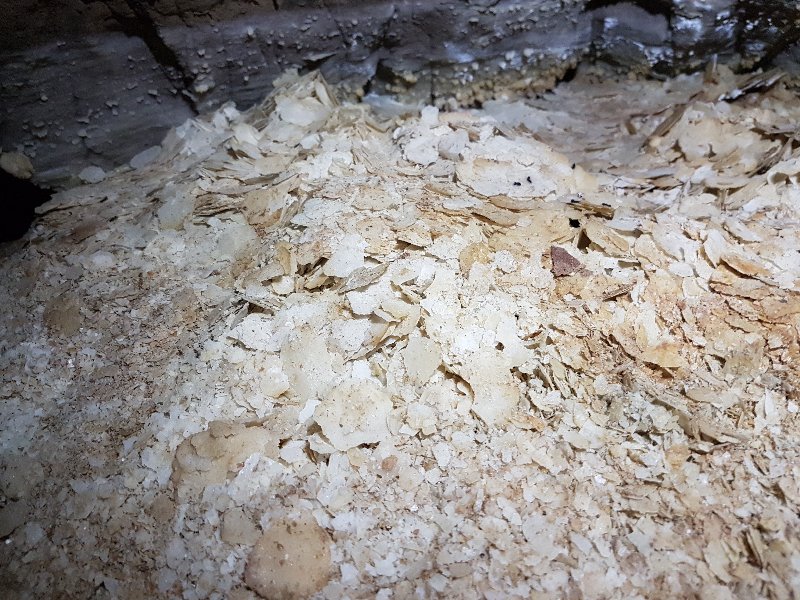 Stacked calcite rafts in the crawl.
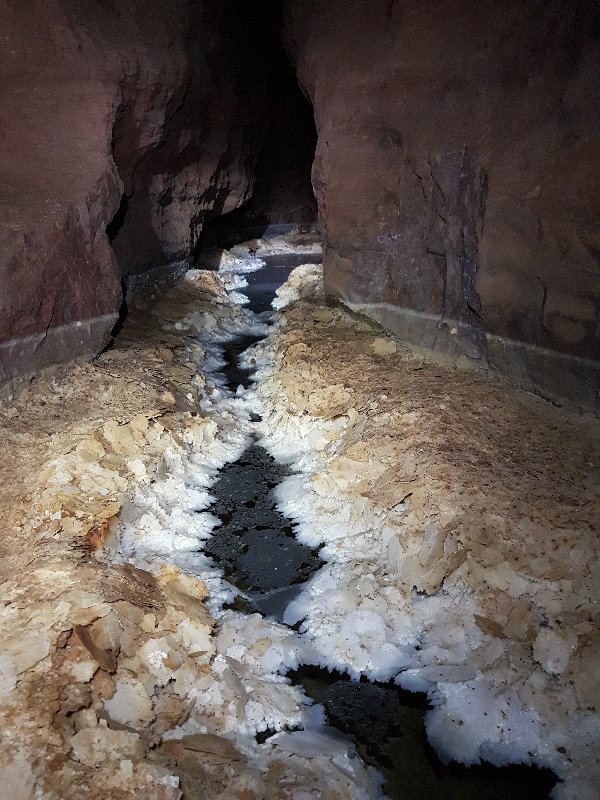 Snow Garden is so much better than expected. In pictures, it looks like a mess of crystals with a gap in the middle. But instead, it is a lengthy crystal pool, with layers of stacked calcite rafts. The gap in the middle is water, with rafts floating on its surface. Floating calcite rafts are relatively rare anywhere else.
Lighting by Tarquin and Mark
Snow Garden is so much better than expected. In pictures, it looks like a mess of crystals with a gap in the middle. But instead, it is a lengthy crystal pool, with layers of stacked calcite rafts. The gap in the middle is water, with rafts floating on its surface. Floating calcite rafts are relatively rare anywhere else.
Lighting by Tarquin and Mark The pool extends into the distance along the rift, which runs parallel to the main rift. Someone has traversed above it to confirm that it completely closes down at roof level too.
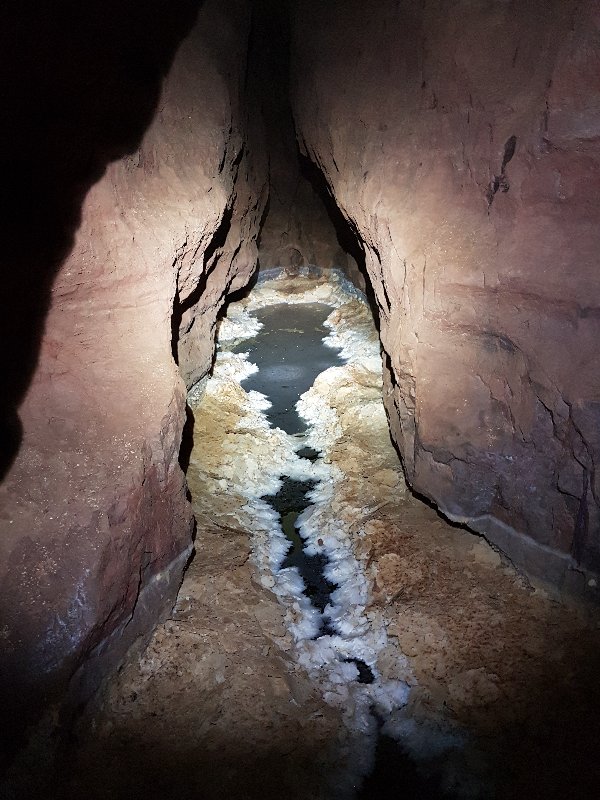 The far end of the pool has a single raft which is probably one of the largest in the country, at about 2.5 metres long. The smaller one beyond it is about 1 metre across in each direction, and is the second largest that I have seen.
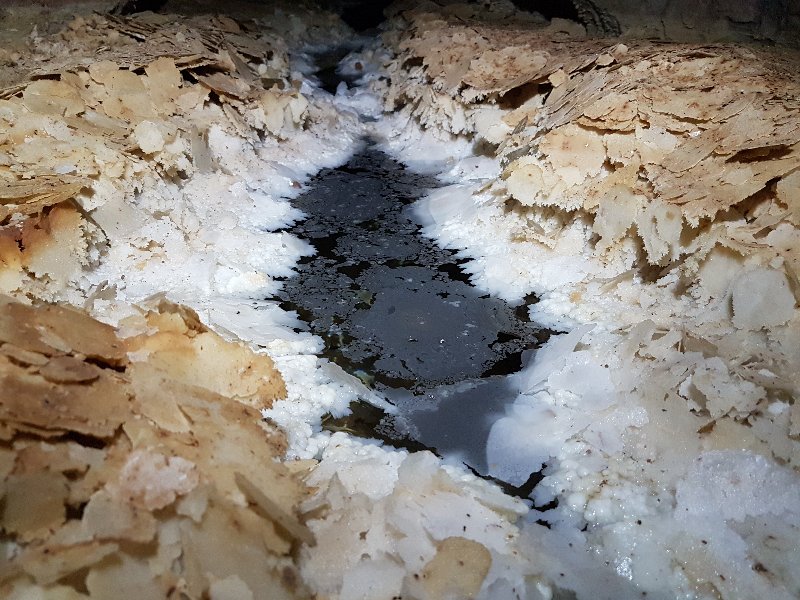 There are so many rafts in one place that it looks like a baked gratin dauphinois. Presumably, the pool used to be deeper, and these are the rafts that sank over hundreds of years.
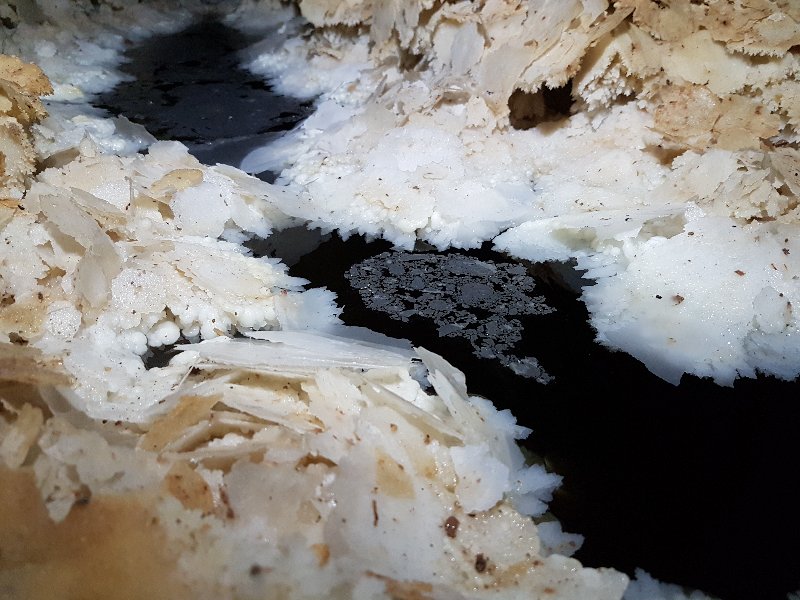 Some of the rafts are still floating.
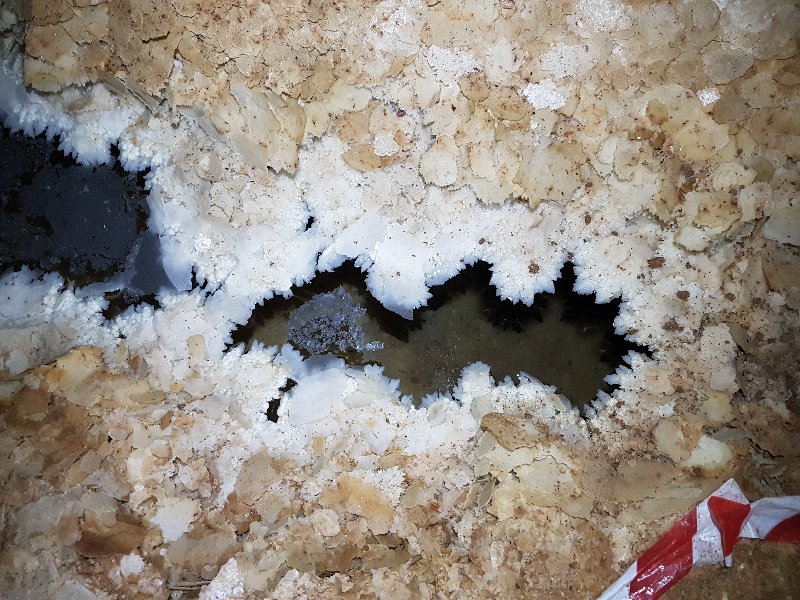 End of the rafts in one direction.
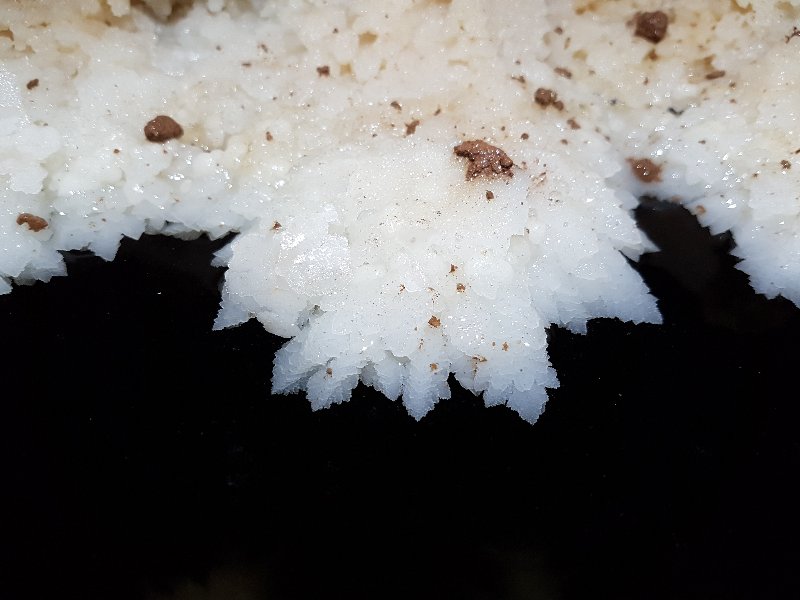 Detail of the crystals.
 In the other direction, Snow Garden continues along the rift. The route is to crawl along a ledge made up from the fallen rafts. The whole time, you wonder if the floor might give way and tip you into the pool, which would destroy any existing rafts. Fortunately, it seems quite strong.
Modelling by Mark, lighting by Tarquin and Mark
In the other direction, Snow Garden continues along the rift. The route is to crawl along a ledge made up from the fallen rafts. The whole time, you wonder if the floor might give way and tip you into the pool, which would destroy any existing rafts. Fortunately, it seems quite strong.
Modelling by Mark, lighting by Tarquin and Mark Even the conservation tape has no idea how to deal with this.
 Nearing the end of the Snow Garden.
 Layered rafts.
 The end of the Snow Garden. The rope leads up a tight rift into a recent 1 km extension, which closes the loop and ends over the top of the far end of Kuwait Passage's furthest reaches. This would create a long round trip via Main Stream Passage, but even though it has vocal connections, it is unlikely to ever be connected; a connection would cause too much tourist traffic, and these formations would be destroyed.
Modelling by Mark, lighting by Tarquin and Mark
The end of the Snow Garden. The rope leads up a tight rift into a recent 1 km extension, which closes the loop and ends over the top of the far end of Kuwait Passage's furthest reaches. This would create a long round trip via Main Stream Passage, but even though it has vocal connections, it is unlikely to ever be connected; a connection would cause too much tourist traffic, and these formations would be destroyed.
Modelling by Mark, lighting by Tarquin and Mark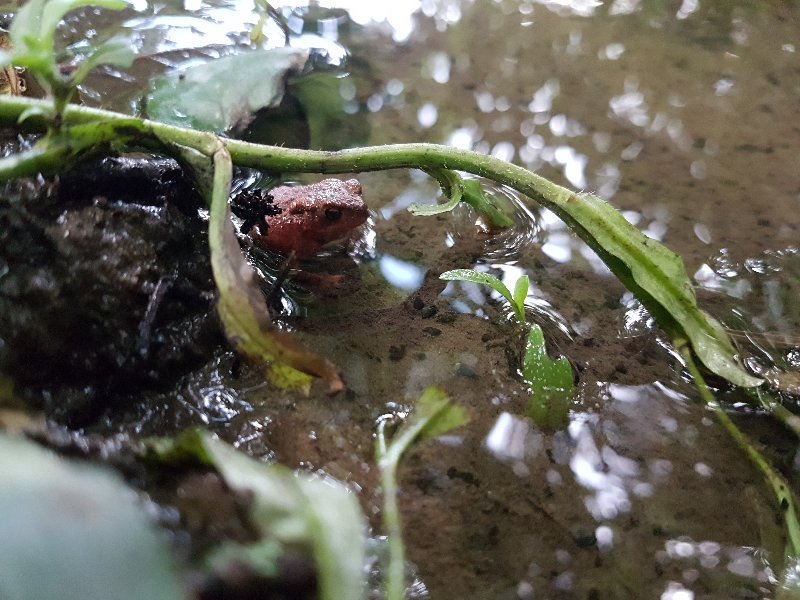 After a long exit, we collected the toad, and took it back to the surface streams. Of course, there is a chance that it might get washed back into a sink, but this is its home, and there is nowhere better.
Modelling by Bufo
After a long exit, we collected the toad, and took it back to the surface streams. Of course, there is a chance that it might get washed back into a sink, but this is its home, and there is nowhere better.
Modelling by Bufo