Tunnel Cave trip 12/12/2021
Unless otherwise stated, camera, setups, lighting, edits and gallery effects by Tarquin. Modelling and lighting at various points will be Peter Wilton-Jones and Gareth Davies.
This cave was originally discovered via a miserable crawl up the resurgence in the valley below. The immense passages that were discovered were then connected via a much larger tunnel, and the bottom end of the cave was turned into Cathedral Cave, part of the Dan-yr-Ogof showcave site. The cave was explored upwards, and connected to the surface at the highest point in the cave, producing a through trip. Cavers are no longer allowed to access the cave via the showcave, and all access happens via the Tunnel Cave entrance.
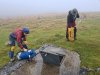 Entrance to Tunnel Cave. It was terrible weather for standing around on the surface, and we were all hoping to get the entrance pitch rigged quickly, so we could get out of the rain.
Modelling by Peter and Gareth
Entrance to Tunnel Cave. It was terrible weather for standing around on the surface, and we were all hoping to get the entrance pitch rigged quickly, so we could get out of the rain.
Modelling by Peter and Gareth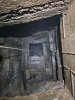 The entrance pitch, shuttered at the top. This was almost entirely enlarged, to connect the aven (which was discovered and climbed from below via the Cathedral Cave entrance) to the surface.
Modelling by Peter, lighting by Tarquin and Peter
The entrance pitch, shuttered at the top. This was almost entirely enlarged, to connect the aven (which was discovered and climbed from below via the Cathedral Cave entrance) to the surface.
Modelling by Peter, lighting by Tarquin and Peter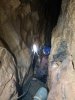 Head of the main shaft of Cascade Aven.
Modelling by Peter, lighting by Tarquin and Peter
Head of the main shaft of Cascade Aven.
Modelling by Peter, lighting by Tarquin and Peter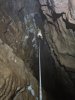 The main shaft of Cascade Aven. This is about 12 metres high.
Modelling by Gareth, lighting by Tarquin and Gareth
The main shaft of Cascade Aven. This is about 12 metres high.
Modelling by Gareth, lighting by Tarquin and Gareth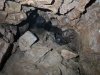 Entrance to Cascade Aven Extension, at the top of the calcite slope where the pitch lands. This is a complex series of passages that will be left for another day
 Above the calcite slope is an upper bench filled with calcite flow.
 Looking down the calcite slope, officially known as the Second Cascade, which leads along the Wire Traverse (now roped) above the next pitch.
Modelling by Gareth, lighting by Tarquin and Gareth
Looking down the calcite slope, officially known as the Second Cascade, which leads along the Wire Traverse (now roped) above the next pitch.
Modelling by Gareth, lighting by Tarquin and Gareth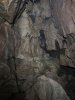 Start of a side passage called The Oasis, at the end of the Wire Traverse.
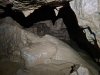 Stalagmite boss in The Oasis.
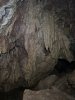 Formations in The Oasis.
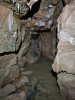 The Oasis ends just beyond a pool.
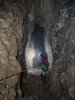 Top of the First Cascade, the third pitch, most of which is a calcite slope, which gives Cascade Aven its name - there is very little water flow here, only a few dribbles.
Modelling by Peter, lighting by Tarquin and Peter
Top of the First Cascade, the third pitch, most of which is a calcite slope, which gives Cascade Aven its name - there is very little water flow here, only a few dribbles.
Modelling by Peter, lighting by Tarquin and Peter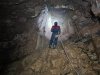 Bottom of the First Cascade, which ends in Cascade Aven Chamber. The dribbles gather into a small stream.
Modelling by Peter, lighting by Tarquin and Peter
Bottom of the First Cascade, which ends in Cascade Aven Chamber. The dribbles gather into a small stream.
Modelling by Peter, lighting by Tarquin and Peter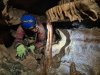 Formations in the small crawl leading out from the chamber.
Modelling by Peter, lighting by Tarquin and Peter
Formations in the small crawl leading out from the chamber.
Modelling by Peter, lighting by Tarquin and Peter The crawl lands in a tall chamber with calcited rifts which appear to be blind.
Lighting by Tarquin, Peter and Gareth
The crawl lands in a tall chamber with calcited rifts which appear to be blind.
Lighting by Tarquin, Peter and Gareth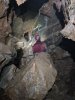 Passage leading to the 15 Foot Pot.
Modelling by Gareth, lighting by Tarquin and Gareth
Passage leading to the 15 Foot Pot.
Modelling by Gareth, lighting by Tarquin and Gareth Formations in the passage.
 Formations in the passage.
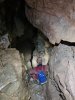 Climb down into 15 Foot Pot.
Modelling by Gareth, lighting by Tarquin and Gareth
Climb down into 15 Foot Pot.
Modelling by Gareth, lighting by Tarquin and Gareth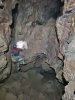 15 Foot Pot is a fairly large chamber, with several ways off. Under the right wall is the entrance to Paul And Barnabas Extension, which we had planned to visit, but which had to wait for another day. Up the climb ahead is the normal way on via Wiggly Stal Passage. Down in the floor ahead is blind, but tucked into the left wall (just into the right of his feet) is the almost invisible hole into Marble Arch Passage. The climb into Wiggly Stal Passage has an entertaining lack of holds.
Modelling by Peter, lighting by Tarquin and Peter
15 Foot Pot is a fairly large chamber, with several ways off. Under the right wall is the entrance to Paul And Barnabas Extension, which we had planned to visit, but which had to wait for another day. Up the climb ahead is the normal way on via Wiggly Stal Passage. Down in the floor ahead is blind, but tucked into the left wall (just into the right of his feet) is the almost invisible hole into Marble Arch Passage. The climb into Wiggly Stal Passage has an entertaining lack of holds.
Modelling by Peter, lighting by Tarquin and Peter Wiggly stal column in Wiggly Stal Passage.
Modelling by Peter
Wiggly stal column in Wiggly Stal Passage.
Modelling by Peter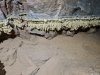 Former crystal pool in Wiggly Stal Passage.
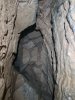 A hole in the floor, normally stepped over without noticing it, is Pot Hole Passage, the way into 35 Foot Pot Series.
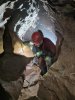 Pot Hole Passage.
Modelling by Gareth, lighting by Tarquin, Gareth and Peter
Pot Hole Passage.
Modelling by Gareth, lighting by Tarquin, Gareth and Peter The 35 Foot Pot, which can be descended to reach the 35 Foot Pot Series.
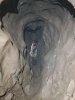 Alternatively, a traverse over the pot reaches The Shute (that's how it's spelled on the survey, don't blame me), which drops down steeply, with a climb part way, to the head of a much smaller pitch.
Modelling by Gareth, lighting by Tarquin and Gareth
Alternatively, a traverse over the pot reaches The Shute (that's how it's spelled on the survey, don't blame me), which drops down steeply, with a climb part way, to the head of a much smaller pitch.
Modelling by Gareth, lighting by Tarquin and Gareth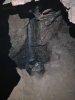 The loud sound of water in The Shute comes from this inlet waterfall. The chamber is presumably Waterfall Chamber, but we did not get into it in order to prove that.
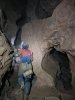 Wiggly Stal Passage (left) ends at the junction with Marble Arch Passage (right). This is the Marble Arch, which contains less marbling than Draenen's White Arch Passage (which is also not white). The way on is behind the camera.
Modelling by Peter, lighting by Tarquin and Peter
Wiggly Stal Passage (left) ends at the junction with Marble Arch Passage (right). This is the Marble Arch, which contains less marbling than Draenen's White Arch Passage (which is also not white). The way on is behind the camera.
Modelling by Peter, lighting by Tarquin and Peter Heading back up Marble Arch Passage (on the way out of the cave).
Modelling by Gareth, lighting by Tarquin and Gareth
Heading back up Marble Arch Passage (on the way out of the cave).
Modelling by Gareth, lighting by Tarquin and Gareth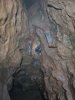 Traversing over a blind pot in Marble Arch Passage.
Modelling by Gareth, lighting by Tarquin and Gareth
Traversing over a blind pot in Marble Arch Passage.
Modelling by Gareth, lighting by Tarquin and Gareth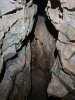 Blind cross rift in Marble Arch Passage.
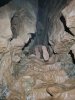 Marble Arch Passage is a lot more awkward than the Wiggy Stal alternative.
Modelling by Gareth, lighting by Tarquin and Gareth
Marble Arch Passage is a lot more awkward than the Wiggy Stal alternative.
Modelling by Gareth, lighting by Tarquin and Gareth Marble Arch Passage ends at a ridiculous eye hole, which you post yourself through feet first.
Modelling by Gareth, lighting by Tarquin and Gareth
Marble Arch Passage ends at a ridiculous eye hole, which you post yourself through feet first.
Modelling by Gareth, lighting by Tarquin and Gareth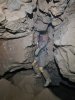 Dropping out of the eye hole into 15 Foot Pot.
Modelling by Peter, lighting by Tarquin and Peter
Dropping out of the eye hole into 15 Foot Pot.
Modelling by Peter, lighting by Tarquin and Peter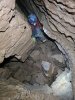 Below Marble Arch, continuing into the cave, through a series of meanders. This passage is known as West Passage, but since that name could be applied to the entire route leading all the way back to the entrance, it's not a particularly useful name.
Modelling by Peter, lighting by Tarquin and Peter
Below Marble Arch, continuing into the cave, through a series of meanders. This passage is known as West Passage, but since that name could be applied to the entire route leading all the way back to the entrance, it's not a particularly useful name.
Modelling by Peter, lighting by Tarquin and Peter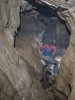 Near Saddle Corner, where there is a way down to the right leading into the bottom of 35 Foot Pot Series. That route does not require any ropes or ladders.
Modelling by Peter, lighting by Tarquin and Peter
Near Saddle Corner, where there is a way down to the right leading into the bottom of 35 Foot Pot Series. That route does not require any ropes or ladders.
Modelling by Peter, lighting by Tarquin and Peter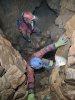 Now beyond the connection with Cross Passage (the round trip), this climb down is at Cross Joint.
Modelling by Peter, Gareth and Tarquin's toes, lighting by Tarquin, Peter and Gareth
Now beyond the connection with Cross Passage (the round trip), this climb down is at Cross Joint.
Modelling by Peter, Gareth and Tarquin's toes, lighting by Tarquin, Peter and Gareth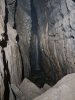 Cascading inlet in Cross Joint, a short side passage that goes nowhere.
 Beyond Cross Joint.
Modelling by Peter
Beyond Cross Joint.
Modelling by Peter Stal.
Stal.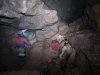 At a junction imaginatively named "The Junction", looking back up towards the entrance. On the left is West Passage, on the right is East Passage, and the way downstream is behind the camera.
Modelling by Peter and Gareth, lighting by Tarquin, Peter and Gareth
At a junction imaginatively named "The Junction", looking back up towards the entrance. On the left is West Passage, on the right is East Passage, and the way downstream is behind the camera.
Modelling by Peter and Gareth, lighting by Tarquin, Peter and Gareth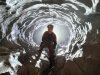 Phreatic tube downstream from The Junction. Most of the downstream passage is a keyhole shaped canyon.
Modelling by Gareth, lighting by Tarquin, Gareth's feeble glow and Peter
Phreatic tube downstream from The Junction. Most of the downstream passage is a keyhole shaped canyon.
Modelling by Gareth, lighting by Tarquin, Gareth's feeble glow and Peter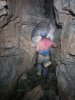 For large parts of the downstream passage, the trench is too wide to stay in the tube above, so you climb down into the trench.
Modelling by Peter, lighting by Tarquin and Peter
For large parts of the downstream passage, the trench is too wide to stay in the tube above, so you climb down into the trench.
Modelling by Peter, lighting by Tarquin and Peter Most of the time is spent trying to decide if you should traverse over this bit in the tube, clamber down into the trench, clamber back up into the tube, or try and stay level over boulders.
Modelling by Peter and Gareth, lighting by Tarquin, Peter and Gareth
Most of the time is spent trying to decide if you should traverse over this bit in the tube, clamber down into the trench, clamber back up into the tube, or try and stay level over boulders.
Modelling by Peter and Gareth, lighting by Tarquin, Peter and Gareth Textured calcite surface.
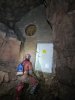 The passage abruptly ends at a concrete wall, with a ventillation duct, and a PVC door. The door enters an airlock, and a door on the other side enters the end of the showcave, with the passage emerging in the end of Davy Price's Hall.
Modelling by Gareth, lighting by Tarquin, Peter and Gareth
The passage abruptly ends at a concrete wall, with a ventillation duct, and a PVC door. The door enters an airlock, and a door on the other side enters the end of the showcave, with the passage emerging in the end of Davy Price's Hall.
Modelling by Gareth, lighting by Tarquin, Peter and Gareth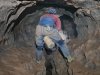 East Passage starts out with some traverses in a smaller keyhole.
Modelling by Peter, lighting by Tarquin and Peter
East Passage starts out with some traverses in a smaller keyhole.
Modelling by Peter, lighting by Tarquin and Peter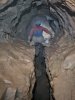 Wider section of traverse.
Modelling by Peter, lighting by Tarquin and Peter
Wider section of traverse.
Modelling by Peter, lighting by Tarquin and Peter Crawl up calcite.
Modelling by Peter, lighting by Tarquin and Peter
Crawl up calcite.
Modelling by Peter, lighting by Tarquin and Peter This would have originally been a very beautiful calcite flow.
Modelling by Peter, lighting by Tarquin and Peter
This would have originally been a very beautiful calcite flow.
Modelling by Peter, lighting by Tarquin and Peter Stalactites and columns.
Modelling by Peter, lighting by Tarquin and Peter
Stalactites and columns.
Modelling by Peter, lighting by Tarquin and Peter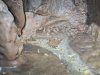 Dried crystal pool behind the columns.
Lighting by Tarquin and Peter
Dried crystal pool behind the columns.
Lighting by Tarquin and Peter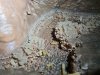 Dried crystal pool.
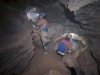 Junction of Cross Passage (left) and East Passage (right).
Modelling by Peter and Gareth, lighting by Tarquin, Peter and Gareth
Junction of Cross Passage (left) and East Passage (right).
Modelling by Peter and Gareth, lighting by Tarquin, Peter and Gareth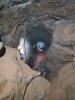 Cross Passage forms part of the very small round trip, and is often visited for that purpose. This is one of its larger sections.
Modelling by Peter, lighting by Tarquin and Peter
Cross Passage forms part of the very small round trip, and is often visited for that purpose. This is one of its larger sections.
Modelling by Peter, lighting by Tarquin and Peter Cross Passage lowers to a flat out crawl with a very shallow puddle. Shortly afterwards, it connects to West Passage, completing the round trip.
 East Passage continues with more traversing.
Modelling by Gareth, lighting by Tarquin and Gareth
East Passage continues with more traversing.
Modelling by Gareth, lighting by Tarquin and Gareth Rifty passage in East Passage, with formations.
Modelling by Peter, lighting by Tarquin and Peter
Rifty passage in East Passage, with formations.
Modelling by Peter, lighting by Tarquin and Peter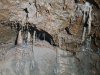 Formations.
 Water flows in from a little inlet, and, curiously, flows the wrong way along the passage; northwards. The entire cave drains to the south, and East Passage is a former inlet that flowed south.
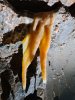 Formations near the inlet.
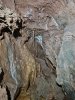 The water flows into a side passage, which is the way to Xmas Grotto. These straws are near its start.
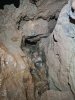 The water flows out into an impenetrable rift, and is next seen in the downstream cave.
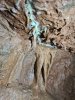 Formations.
 The passage drops into a shattered chamber with more formations.
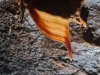 Curtain.
 There are several passages in this area, with these formations in a dead end side passage.
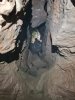 The main way on.
Modelling by Peter, lighting by Tarquin, Peter and Gareth
The main way on.
Modelling by Peter, lighting by Tarquin, Peter and Gareth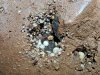 Pebbles in a drip pocket. These are quartz, from the caprock.
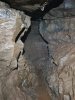 The main way on, a stooping sized rift.
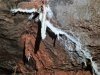 Weirdly shaped stalactite near Xmas Grotto.
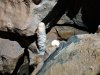 Stalagmite.
 Decorated alcove near Xmas Grotto. The stal in this area, including the grotto itself, appears to be made of the more fragile, powdery type of calcite that is seen near the outflow from limekilns or lime mortared structures. It forms much more quickly than normal calcite.
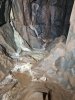 Decorations in a short oxbow.
 A picture of a photographer taking a picture of a photographer taking a picture of the beautiful Xmas Grotto. This is one of the more impressive attractions in this cave, and is a common destination.
Modelling by Gareth and Peter, lighting by Tarquin, Gareth and Peter
A picture of a photographer taking a picture of a photographer taking a picture of the beautiful Xmas Grotto. This is one of the more impressive attractions in this cave, and is a common destination.
Modelling by Gareth and Peter, lighting by Tarquin, Gareth and Peter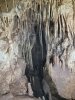 The lower part of the grotto, which descends to silt fill. This grotto has clearly flooded many times.
Lighting by Tarquin and Gareth
The lower part of the grotto, which descends to silt fill. This grotto has clearly flooded many times.
Lighting by Tarquin and Gareth Tide mark on the formations in the ceiling. This shows how far up the historical flood waters have come.
 Contrast between clean and flood stained.
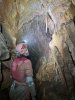 Formations in the main East Passage.
Modelling by Gareth, lighting by Tarquin and Gareth
Formations in the main East Passage.
Modelling by Gareth, lighting by Tarquin and Gareth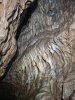 Formations in East Passage
 Entering Steeple Aven Passage (which does not actually contain Steeple Aven; that's not confusing or anything...).
Modelling by Gareth, lighting by Tarquin and Gareth
Entering Steeple Aven Passage (which does not actually contain Steeple Aven; that's not confusing or anything...).
Modelling by Gareth, lighting by Tarquin and Gareth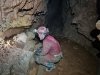 Steeple Aven Passage starts as a tall rift.
Modelling by Gareth, lighting by Tarquin and Gareth
Steeple Aven Passage starts as a tall rift.
Modelling by Gareth, lighting by Tarquin and Gareth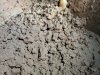 The mud in parts of the passage are cryogenic, formed by freeze-thaw ice crystals during the end of an ice age. However, there were no cryogenic calcite deposits seen anywhere.
Lighting by Tarquin and Gareth
The mud in parts of the passage are cryogenic, formed by freeze-thaw ice crystals during the end of an ice age. However, there were no cryogenic calcite deposits seen anywhere.
Lighting by Tarquin and Gareth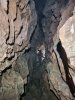 Steeple Aven Passage.
Modelling by Gareth, lighting by Tarquin and Gareth
Steeple Aven Passage.
Modelling by Gareth, lighting by Tarquin and Gareth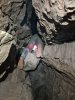 Boulder obstacles before Fork Junction.
Modelling by Gareth, lighting by Tarquin and Gareth
Boulder obstacles before Fork Junction.
Modelling by Gareth, lighting by Tarquin and Gareth Fork Junction.
Modelling by Gareth, lighting by Tarquin and Gareth
Fork Junction.
Modelling by Gareth, lighting by Tarquin and Gareth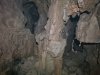 At Fork Junction, there is a choice of routes, but both end up in the same place.
Modelling by Gareth, lighting by Tarquin and Gareth
At Fork Junction, there is a choice of routes, but both end up in the same place.
Modelling by Gareth, lighting by Tarquin and Gareth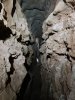 Left hand passage from Fork Junction.
Modelling by Peter, lighting by Tarquin, Peter and Gareth
Left hand passage from Fork Junction.
Modelling by Peter, lighting by Tarquin, Peter and Gareth Dried crystal pool in the left hand passage.
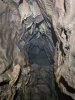 The left hand passage has a small choke to one side.
 A climb up through a hole then connects to the right hand passage, just above The Tube.
Modelling by Peter, lighting by Tarquin and Peter
A climb up through a hole then connects to the right hand passage, just above The Tube.
Modelling by Peter, lighting by Tarquin and Peter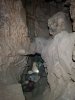 The right hand passage quickly reaches a chamber, with a low passage leading into a second, low chamber.
Modelling by Gareth, lighting by Tarquin and Gareth
The right hand passage quickly reaches a chamber, with a low passage leading into a second, low chamber.
Modelling by Gareth, lighting by Tarquin and Gareth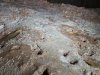 Mud formations with crystal and microbial deposits in the chambers.
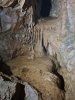 Flowstone formation in the lower chamber.
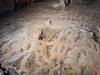 Pools in the flowstone formation.
 Climb from the larger chamber up to The Tube.
Modelling by Peter, lighting by Tarquin and Peter
Climb from the larger chamber up to The Tube.
Modelling by Peter, lighting by Tarquin and Peter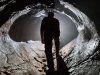 The Tube, a steeply sloping phreas.
Modelling by Gareth and Peter's legs, lighting by Peter
The Tube, a steeply sloping phreas.
Modelling by Gareth and Peter's legs, lighting by Peter Immediately above The Tube, where the forks rejoin, is a hole under the wall on the right leading into Whitsun Grotto.
Modelling by Gareth and Peter's welly, lighting by Tarquin and Gareth
Immediately above The Tube, where the forks rejoin, is a hole under the wall on the right leading into Whitsun Grotto.
Modelling by Gareth and Peter's welly, lighting by Tarquin and Gareth Formations in the passage leading to Whitsun Grotto.
 Muddied formations in the crawling sized passage leading to Whitsun Grotto.
 The passage to Whitsun Grotto, small and wriggly.
 Whitsun Grotto.
Modelling by Peter and Gareth, lighting by Tarquin, Peter and Gareth
Whitsun Grotto.
Modelling by Peter and Gareth, lighting by Tarquin, Peter and Gareth Muddied, dry crystal pool in Whitsun Grotto.
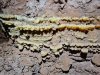 Crystal growth at the old water lines.
 Whitsun Grotto's main dry crystal pool.
Modelling by Gareth's knee, lighting by Gareth
Whitsun Grotto's main dry crystal pool.
Modelling by Gareth's knee, lighting by Gareth Whitsun Grotto's main dry crystal pool.
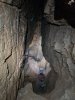 The main passage enlarges dramatically at Steeple Aven.
Modelling by Peter, lighting by Tarquin and Peter
The main passage enlarges dramatically at Steeple Aven.
Modelling by Peter, lighting by Tarquin and Peter Steeple Aven is 18 metres high, with a chamber at the top called Sisyphean Chamber, which only has a tiny crawl leading onwards. It is not really worth the effort needed to reach it.
Lighting by Tarquin, Gareth and Peter
Steeple Aven is 18 metres high, with a chamber at the top called Sisyphean Chamber, which only has a tiny crawl leading onwards. It is not really worth the effort needed to reach it.
Lighting by Tarquin, Gareth and Peter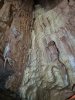 Flowstone in Steeple Aven.
 Calcited floor below Steeple Aven.
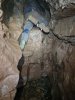 Climb up into Switch-back Passage.
Modelling by Peter, lighting by Tarquin and Peter
Climb up into Switch-back Passage.
Modelling by Peter, lighting by Tarquin and Peter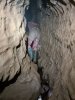 Switch-back Passage is an awkward traverse.
Modelling by Gareth, lighting by Tarquin and Gareth
Switch-back Passage is an awkward traverse.
Modelling by Gareth, lighting by Tarquin and Gareth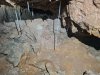 Normally, Switch-back Passage involves a climb down into a small enlargement, and then a climb back up into the continuation. These formations are in the enlargement.
Lighting by Tarquin and Gareth
Normally, Switch-back Passage involves a climb down into a small enlargement, and then a climb back up into the continuation. These formations are in the enlargement.
Lighting by Tarquin and Gareth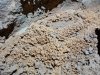 Crystal pool in a small side passage leading off from the enlargement.
 Formations in the side passage.
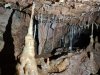 Formations in the side passage.
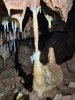 Column with a pet helictite.
 Wriggling past the helictite column, which has managed to survive the passing cavers.
Modelling by Gareth and Peter, lighting by Tarquin, Gareth and Peter
Wriggling past the helictite column, which has managed to survive the passing cavers.
Modelling by Gareth and Peter, lighting by Tarquin, Gareth and Peter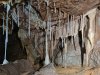 Formations in the side passage.
Lighting by Tarquin and Gareth
Formations in the side passage.
Lighting by Tarquin and Gareth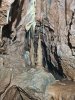 Formations in the grotto at the end of the side passage.
 Coloured flowstone in the grotto.
 Dry crystal pool in the grotto.
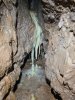 Stalactite columns in the grotto.
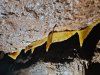 Richly coloured curtains in the grotto.
 Dry crystal pool in the grotto.
 Climbing back up into the continuation of Switch-back Passage. It is also possible - though difficult - to traverse over the enlargement, but this misses out on the grotto.
Modelling by Peter, lighting by Tarquin and Peter
Climbing back up into the continuation of Switch-back Passage. It is also possible - though difficult - to traverse over the enlargement, but this misses out on the grotto.
Modelling by Peter, lighting by Tarquin and Peter End of Switch-back Passage, much more awkward than the start. There is also a small oxbow above here, showing that the water originally twisted into a corkscrew to create Switch-back Passage.
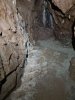 The passage emerges into another big rift. To the left, this closes down with some formations on the sand.
 Dry crystal pools in the left end of the rift.
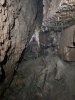 The way on is to the right in the big rift.
Modelling by Gareth, lighting by Tarquin and Gareth
The way on is to the right in the big rift.
Modelling by Gareth, lighting by Tarquin and Gareth Clambering over jammed rocks.
Modelling by Gareth, lighting by Tarquin and Gareth
Clambering over jammed rocks.
Modelling by Gareth, lighting by Tarquin and Gareth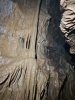 Flowstone formations in the big rift.
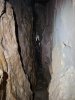 Tall section of the big rift.
Modelling by Gareth, lighting by Tarquin and Gareth
Tall section of the big rift.
Modelling by Gareth, lighting by Tarquin and Gareth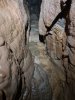 Flowstone covered floor and walls.
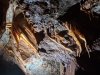 By far the best set of curtains in the cave, in the ceiling of the enlargement at the end of the big rift.
Lighting by Peter and Gareth
By far the best set of curtains in the cave, in the ceiling of the enlargement at the end of the big rift.
Lighting by Peter and Gareth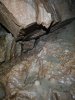 Stalagmite flow on the boulders below the curtains.
 Continuing onwards requires a tricky climb and a slow motion wall-of-death style walk into the next rift.
Modelling by Gareth
Continuing onwards requires a tricky climb and a slow motion wall-of-death style walk into the next rift.
Modelling by Gareth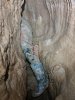 Squeezing along the top of the rift.
Modelling by Gareth
Squeezing along the top of the rift.
Modelling by Gareth Descending into the rift once it becomes wide enough to walk along the bottom.
Modelling by Gareth, lighting by Tarquin and Gareth
Descending into the rift once it becomes wide enough to walk along the bottom.
Modelling by Gareth, lighting by Tarquin and Gareth Final Chamber, the last big enlargement along the right.
Modelling by Peter and Gareth, lighting by Tarquin, Peter and Gareth
Final Chamber, the last big enlargement along the right.
Modelling by Peter and Gareth, lighting by Tarquin, Peter and Gareth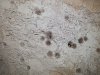 Drip pockets in Final Chamber.
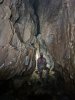 The passage ends abruptly both above and below the jammed boulders. The end of the cave, and end of the gallery.
Modelling by Gareth, lighting by Tarquin, Peter and Gareth
The passage ends abruptly both above and below the jammed boulders. The end of the cave, and end of the gallery.
Modelling by Gareth, lighting by Tarquin, Peter and Gareth
 Entrance to Tunnel Cave. It was terrible weather for standing around on the surface, and we were all hoping to get the entrance pitch rigged quickly, so we could get out of the rain.
Modelling by Peter and Gareth
Entrance to Tunnel Cave. It was terrible weather for standing around on the surface, and we were all hoping to get the entrance pitch rigged quickly, so we could get out of the rain.
Modelling by Peter and Gareth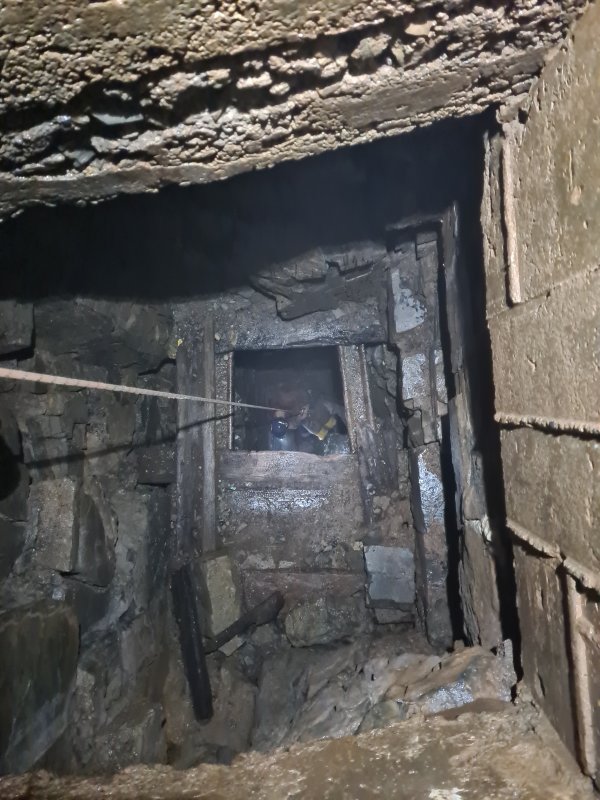 The entrance pitch, shuttered at the top. This was almost entirely enlarged, to connect the aven (which was discovered and climbed from below via the Cathedral Cave entrance) to the surface.
Modelling by Peter, lighting by Tarquin and Peter
The entrance pitch, shuttered at the top. This was almost entirely enlarged, to connect the aven (which was discovered and climbed from below via the Cathedral Cave entrance) to the surface.
Modelling by Peter, lighting by Tarquin and Peter Head of the main shaft of Cascade Aven.
Modelling by Peter, lighting by Tarquin and Peter
Head of the main shaft of Cascade Aven.
Modelling by Peter, lighting by Tarquin and Peter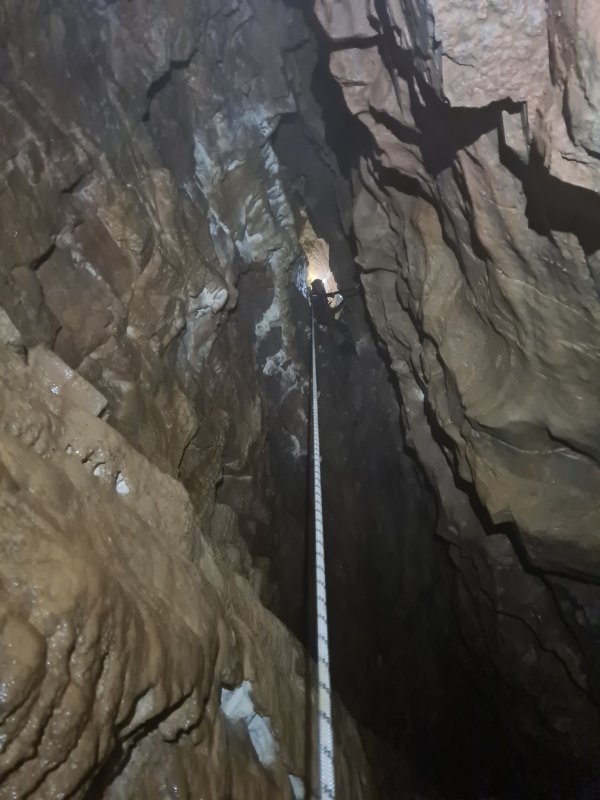 The main shaft of Cascade Aven. This is about 12 metres high.
Modelling by Gareth, lighting by Tarquin and Gareth
The main shaft of Cascade Aven. This is about 12 metres high.
Modelling by Gareth, lighting by Tarquin and Gareth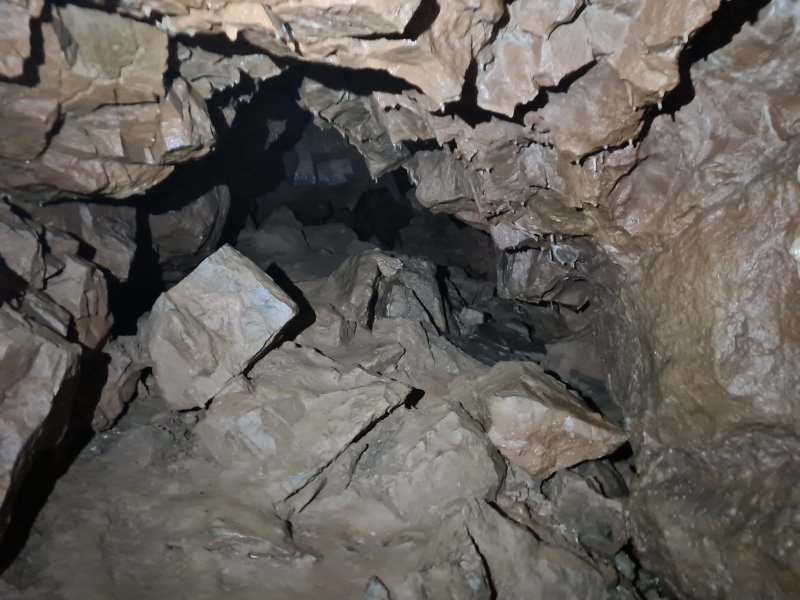 Entrance to Cascade Aven Extension, at the top of the calcite slope where the pitch lands. This is a complex series of passages that will be left for another day
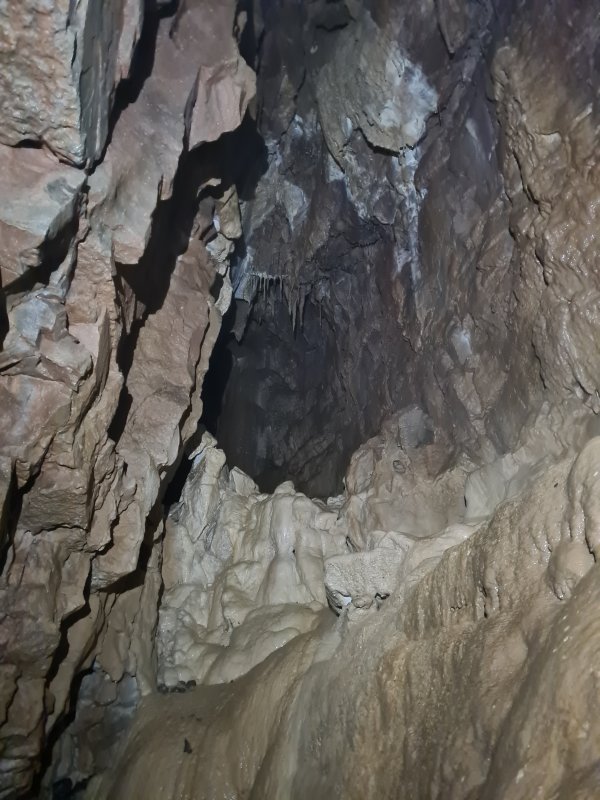 Above the calcite slope is an upper bench filled with calcite flow.
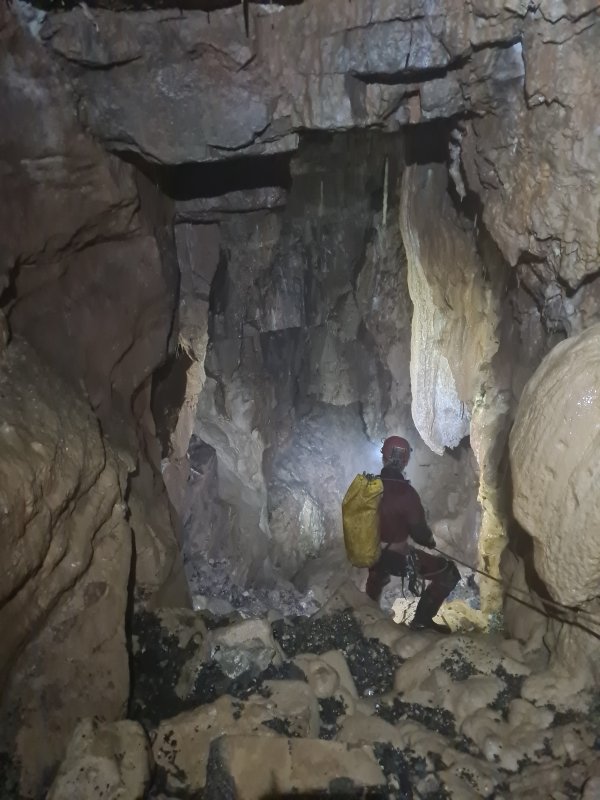 Looking down the calcite slope, officially known as the Second Cascade, which leads along the Wire Traverse (now roped) above the next pitch.
Modelling by Gareth, lighting by Tarquin and Gareth
Looking down the calcite slope, officially known as the Second Cascade, which leads along the Wire Traverse (now roped) above the next pitch.
Modelling by Gareth, lighting by Tarquin and Gareth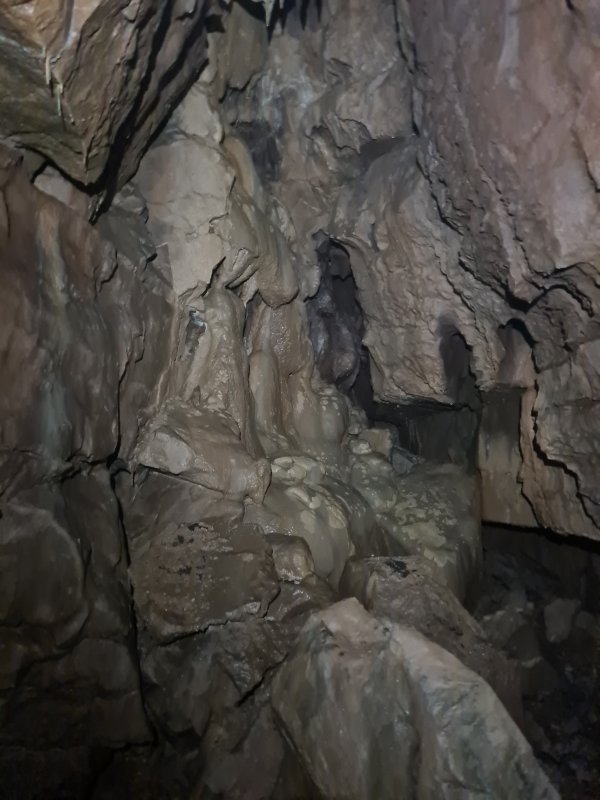 Start of a side passage called The Oasis, at the end of the Wire Traverse.
 Stalagmite boss in The Oasis.
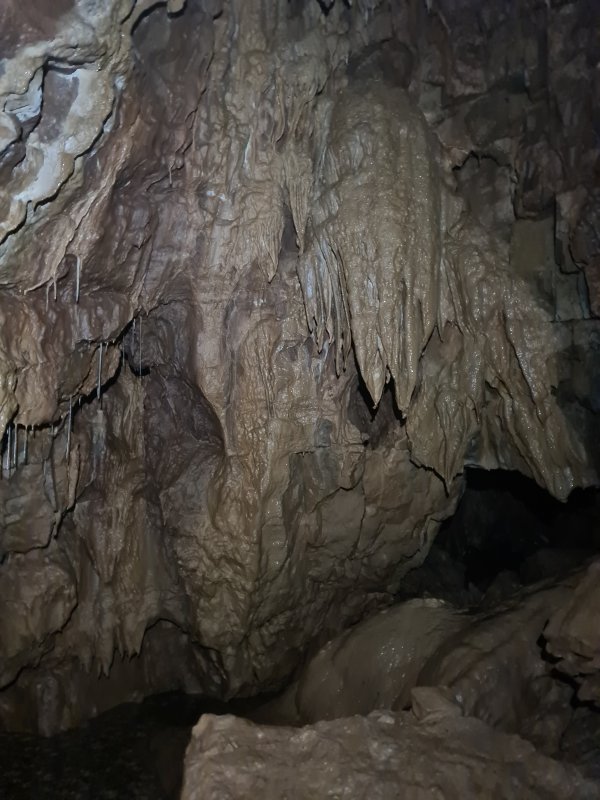 Formations in The Oasis.
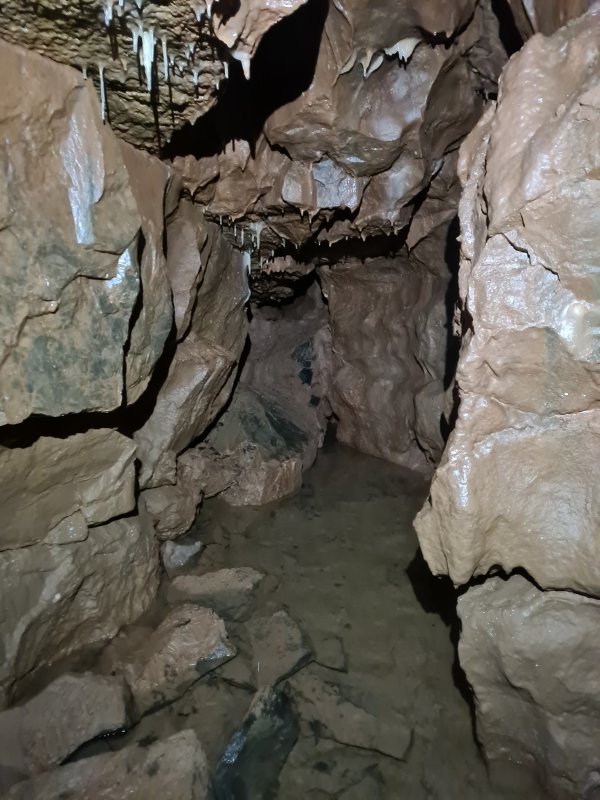 The Oasis ends just beyond a pool.
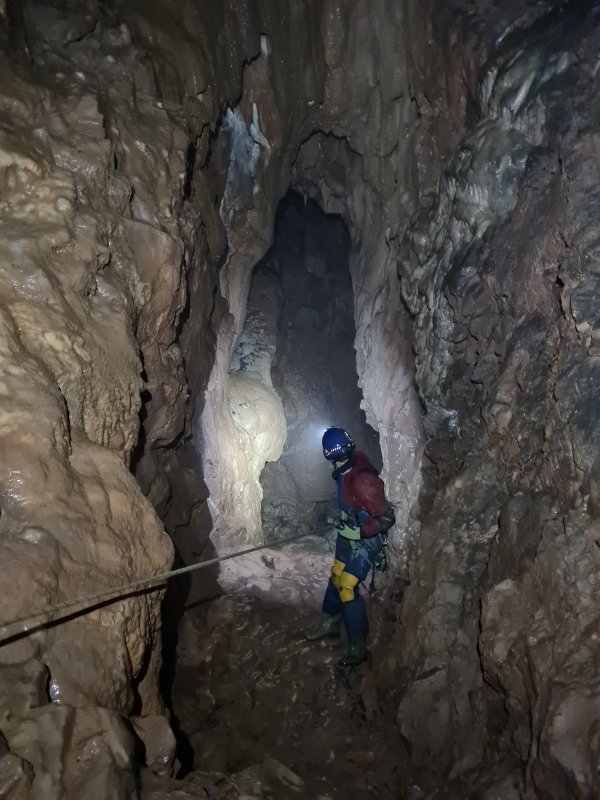 Top of the First Cascade, the third pitch, most of which is a calcite slope, which gives Cascade Aven its name - there is very little water flow here, only a few dribbles.
Modelling by Peter, lighting by Tarquin and Peter
Top of the First Cascade, the third pitch, most of which is a calcite slope, which gives Cascade Aven its name - there is very little water flow here, only a few dribbles.
Modelling by Peter, lighting by Tarquin and Peter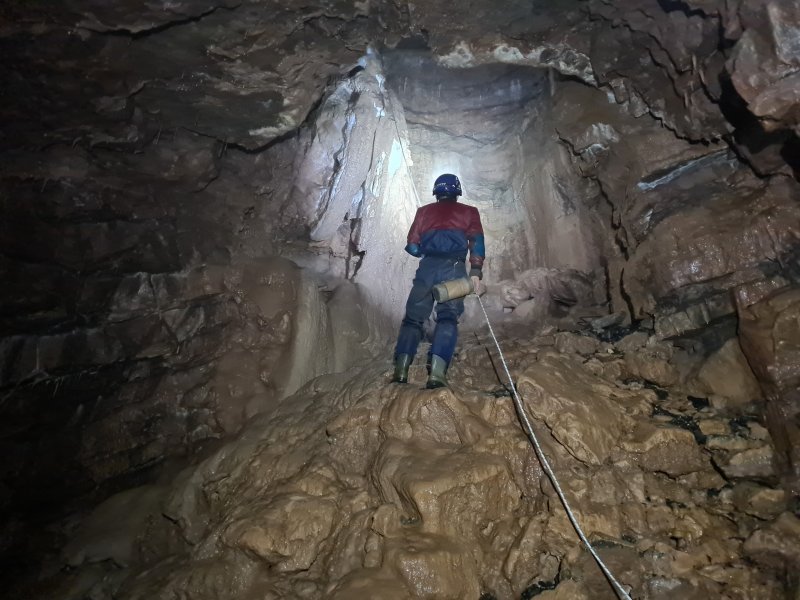 Bottom of the First Cascade, which ends in Cascade Aven Chamber. The dribbles gather into a small stream.
Modelling by Peter, lighting by Tarquin and Peter
Bottom of the First Cascade, which ends in Cascade Aven Chamber. The dribbles gather into a small stream.
Modelling by Peter, lighting by Tarquin and Peter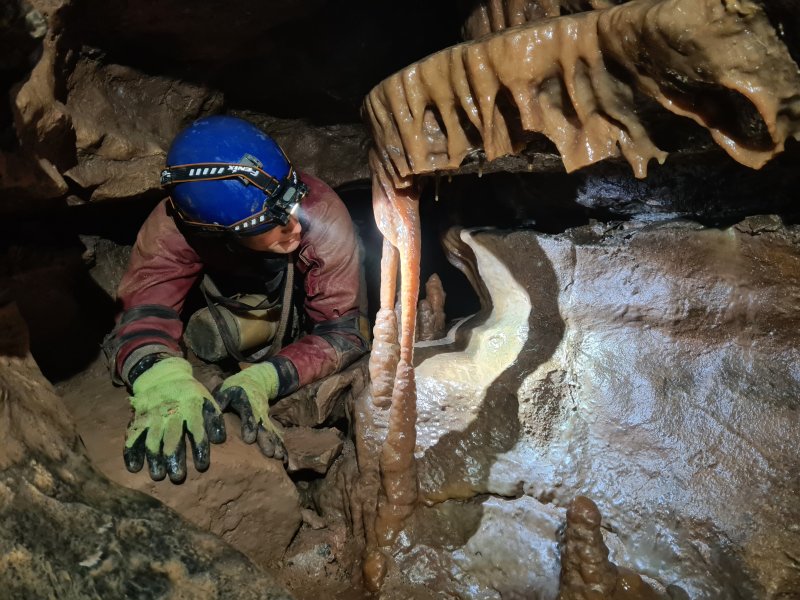 Formations in the small crawl leading out from the chamber.
Modelling by Peter, lighting by Tarquin and Peter
Formations in the small crawl leading out from the chamber.
Modelling by Peter, lighting by Tarquin and Peter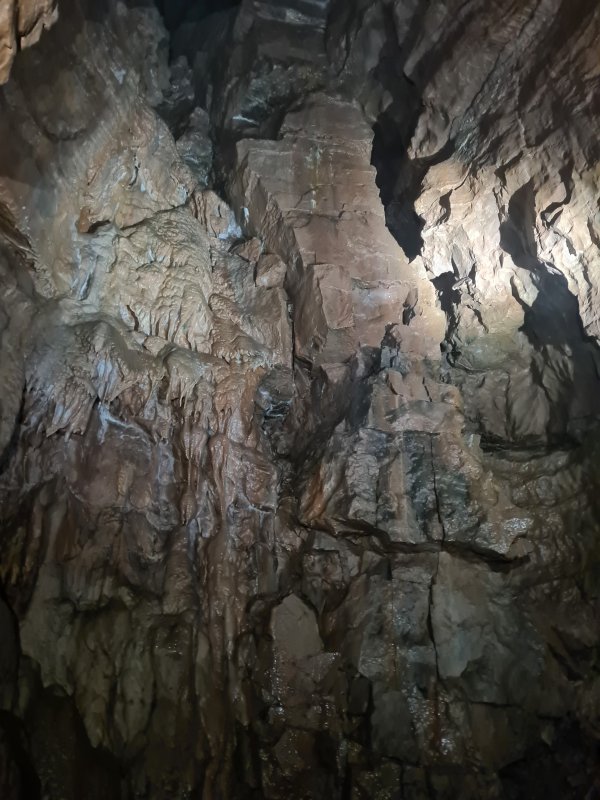 The crawl lands in a tall chamber with calcited rifts which appear to be blind.
Lighting by Tarquin, Peter and Gareth
The crawl lands in a tall chamber with calcited rifts which appear to be blind.
Lighting by Tarquin, Peter and Gareth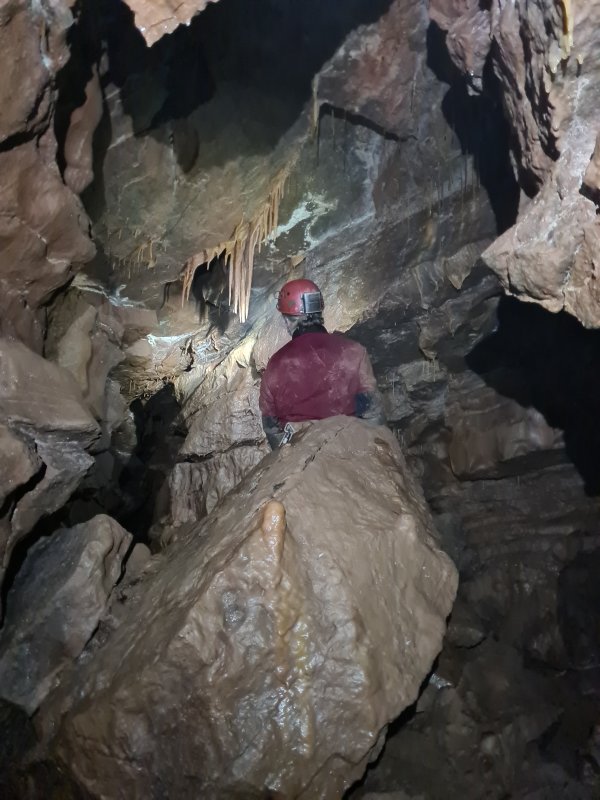 Passage leading to the 15 Foot Pot.
Modelling by Gareth, lighting by Tarquin and Gareth
Passage leading to the 15 Foot Pot.
Modelling by Gareth, lighting by Tarquin and Gareth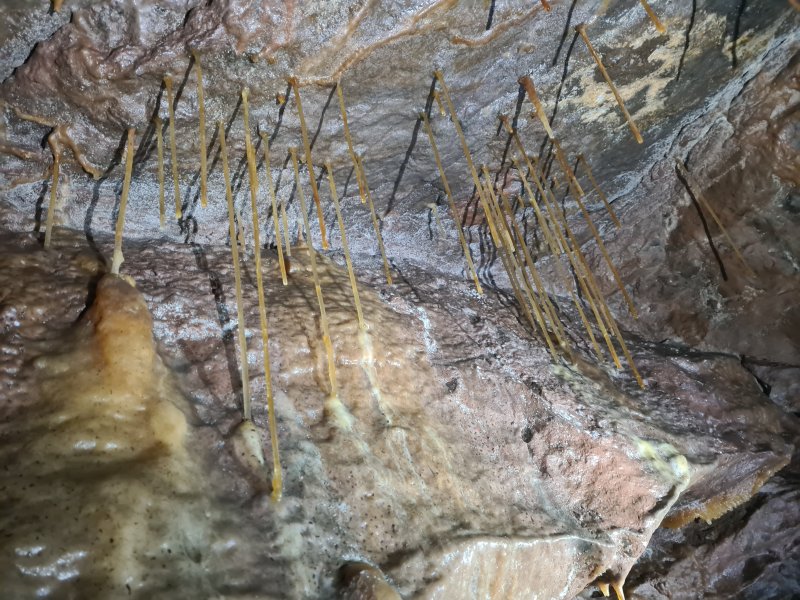 Formations in the passage.
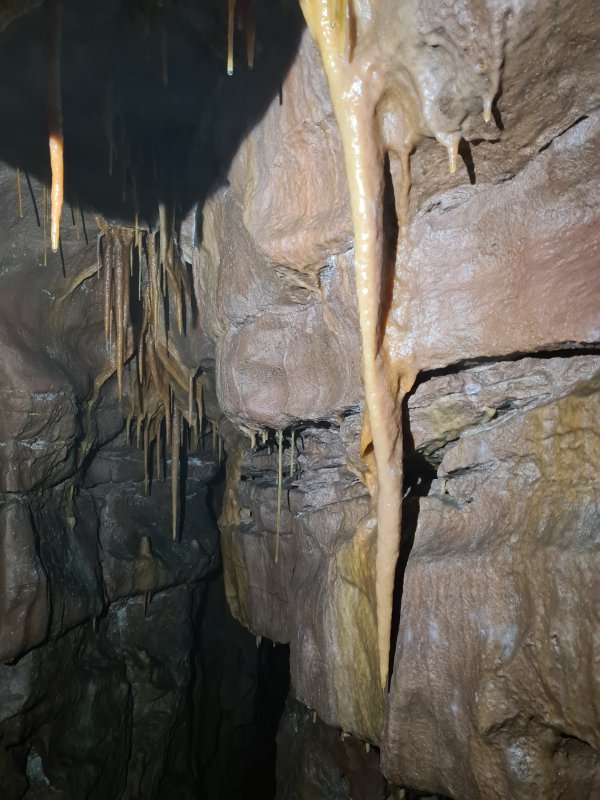 Formations in the passage.
 Climb down into 15 Foot Pot.
Modelling by Gareth, lighting by Tarquin and Gareth
Climb down into 15 Foot Pot.
Modelling by Gareth, lighting by Tarquin and Gareth 15 Foot Pot is a fairly large chamber, with several ways off. Under the right wall is the entrance to Paul And Barnabas Extension, which we had planned to visit, but which had to wait for another day. Up the climb ahead is the normal way on via Wiggly Stal Passage. Down in the floor ahead is blind, but tucked into the left wall (just into the right of his feet) is the almost invisible hole into Marble Arch Passage. The climb into Wiggly Stal Passage has an entertaining lack of holds.
Modelling by Peter, lighting by Tarquin and Peter
15 Foot Pot is a fairly large chamber, with several ways off. Under the right wall is the entrance to Paul And Barnabas Extension, which we had planned to visit, but which had to wait for another day. Up the climb ahead is the normal way on via Wiggly Stal Passage. Down in the floor ahead is blind, but tucked into the left wall (just into the right of his feet) is the almost invisible hole into Marble Arch Passage. The climb into Wiggly Stal Passage has an entertaining lack of holds.
Modelling by Peter, lighting by Tarquin and Peter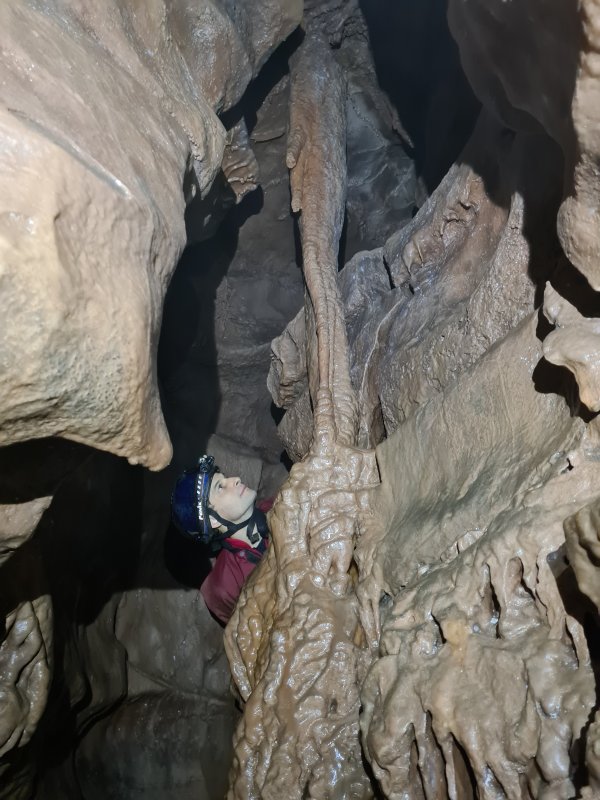 Wiggly stal column in Wiggly Stal Passage.
Modelling by Peter
Wiggly stal column in Wiggly Stal Passage.
Modelling by Peter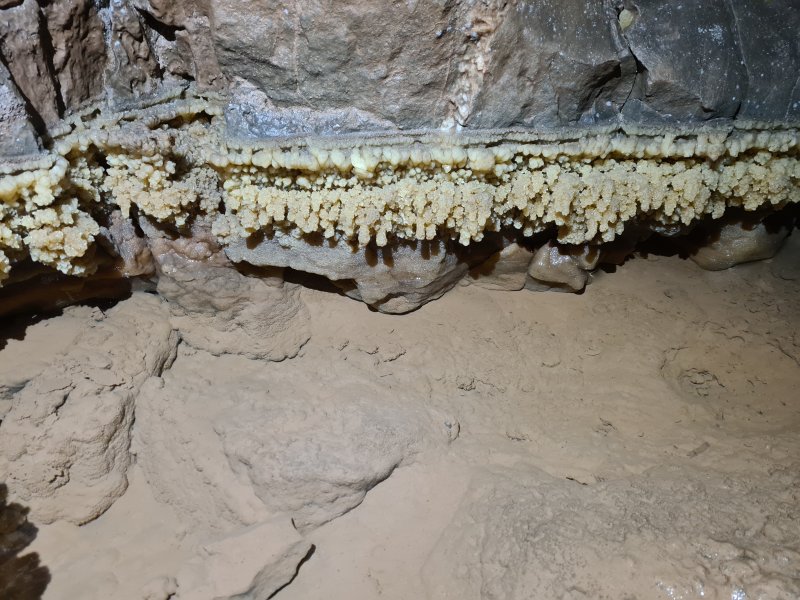 Former crystal pool in Wiggly Stal Passage.
 A hole in the floor, normally stepped over without noticing it, is Pot Hole Passage, the way into 35 Foot Pot Series.
 Pot Hole Passage.
Modelling by Gareth, lighting by Tarquin, Gareth and Peter
Pot Hole Passage.
Modelling by Gareth, lighting by Tarquin, Gareth and Peter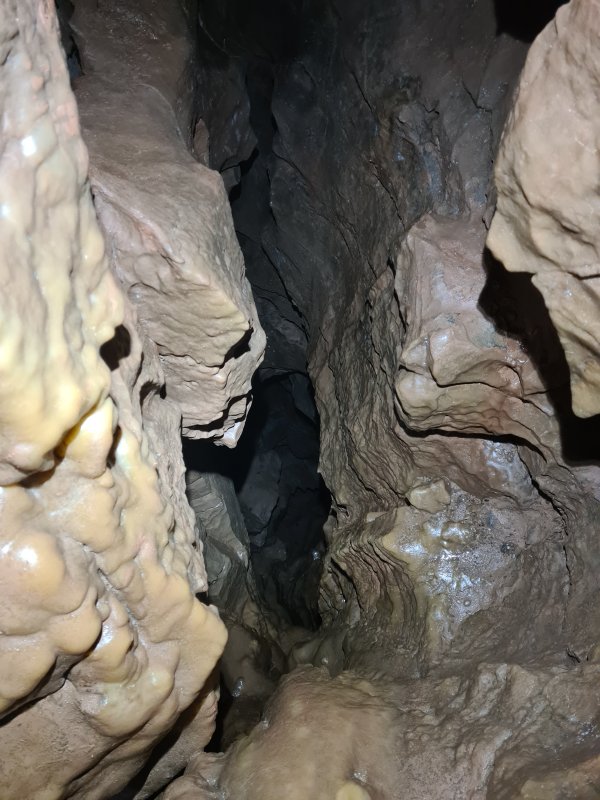 The 35 Foot Pot, which can be descended to reach the 35 Foot Pot Series.
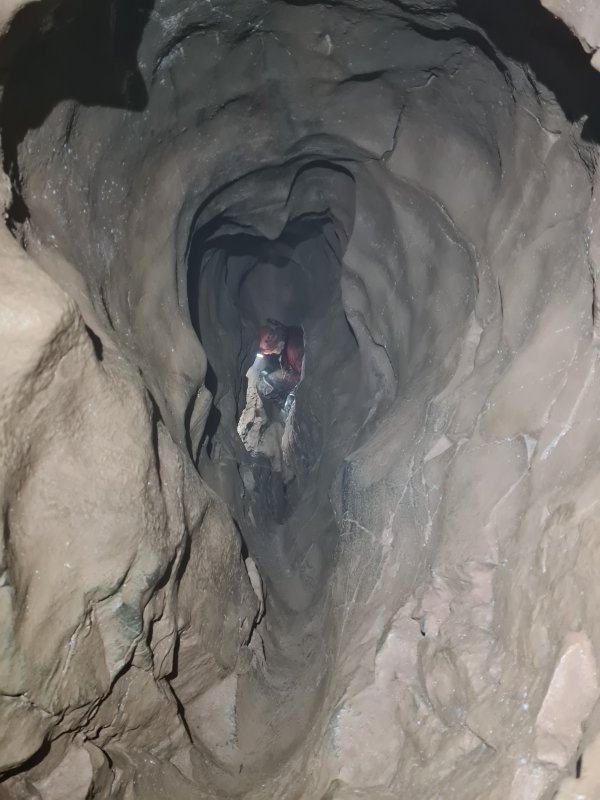 Alternatively, a traverse over the pot reaches The Shute (that's how it's spelled on the survey, don't blame me), which drops down steeply, with a climb part way, to the head of a much smaller pitch.
Modelling by Gareth, lighting by Tarquin and Gareth
Alternatively, a traverse over the pot reaches The Shute (that's how it's spelled on the survey, don't blame me), which drops down steeply, with a climb part way, to the head of a much smaller pitch.
Modelling by Gareth, lighting by Tarquin and Gareth The loud sound of water in The Shute comes from this inlet waterfall. The chamber is presumably Waterfall Chamber, but we did not get into it in order to prove that.
 Wiggly Stal Passage (left) ends at the junction with Marble Arch Passage (right). This is the Marble Arch, which contains less marbling than Draenen's White Arch Passage (which is also not white). The way on is behind the camera.
Modelling by Peter, lighting by Tarquin and Peter
Wiggly Stal Passage (left) ends at the junction with Marble Arch Passage (right). This is the Marble Arch, which contains less marbling than Draenen's White Arch Passage (which is also not white). The way on is behind the camera.
Modelling by Peter, lighting by Tarquin and Peter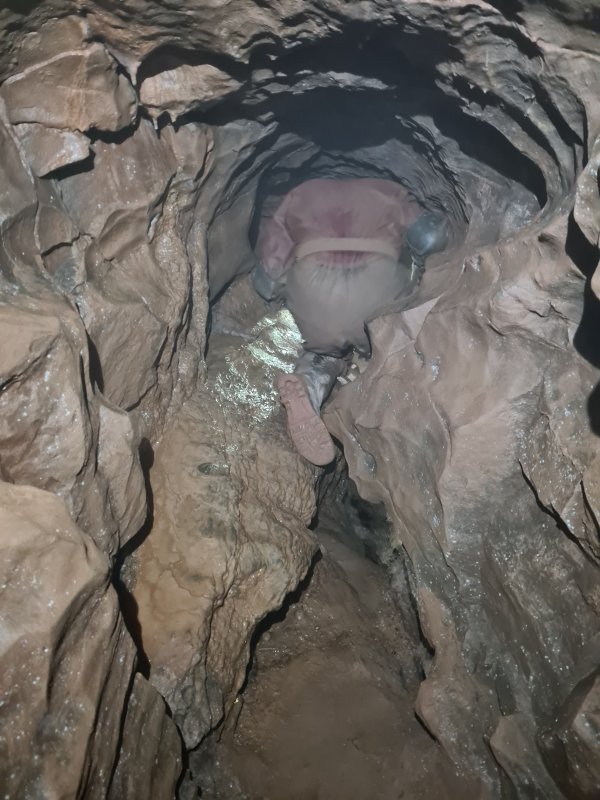 Heading back up Marble Arch Passage (on the way out of the cave).
Modelling by Gareth, lighting by Tarquin and Gareth
Heading back up Marble Arch Passage (on the way out of the cave).
Modelling by Gareth, lighting by Tarquin and Gareth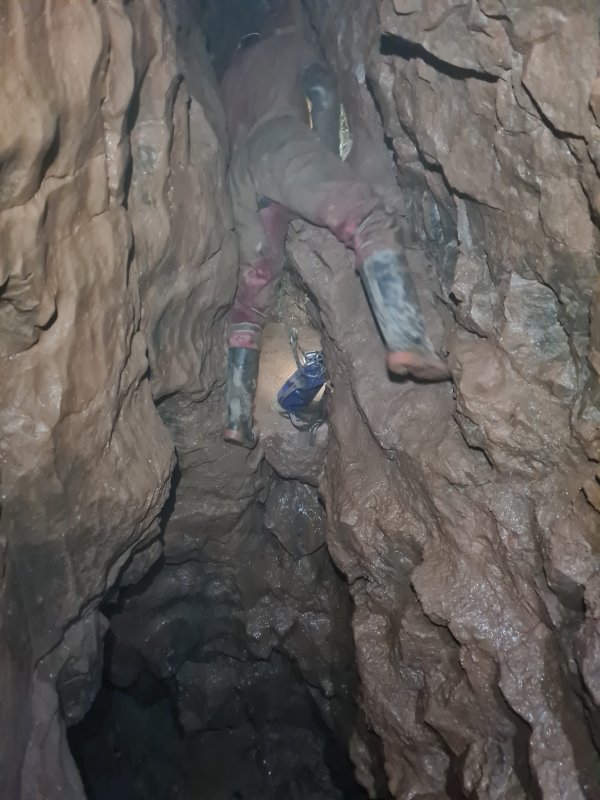 Traversing over a blind pot in Marble Arch Passage.
Modelling by Gareth, lighting by Tarquin and Gareth
Traversing over a blind pot in Marble Arch Passage.
Modelling by Gareth, lighting by Tarquin and Gareth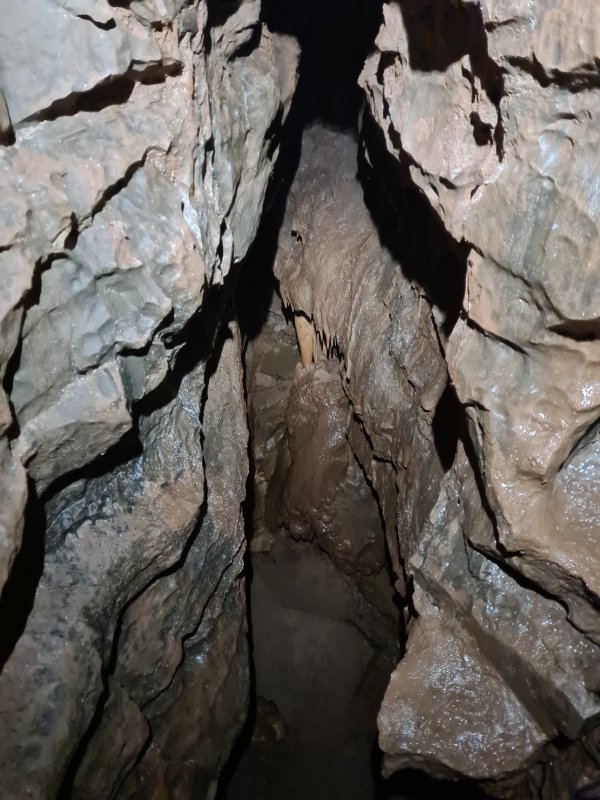 Blind cross rift in Marble Arch Passage.
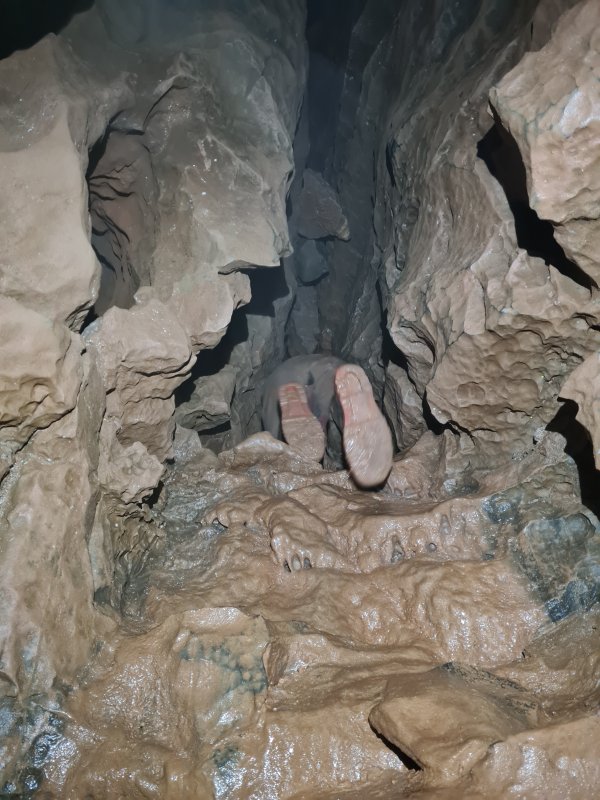 Marble Arch Passage is a lot more awkward than the Wiggy Stal alternative.
Modelling by Gareth, lighting by Tarquin and Gareth
Marble Arch Passage is a lot more awkward than the Wiggy Stal alternative.
Modelling by Gareth, lighting by Tarquin and Gareth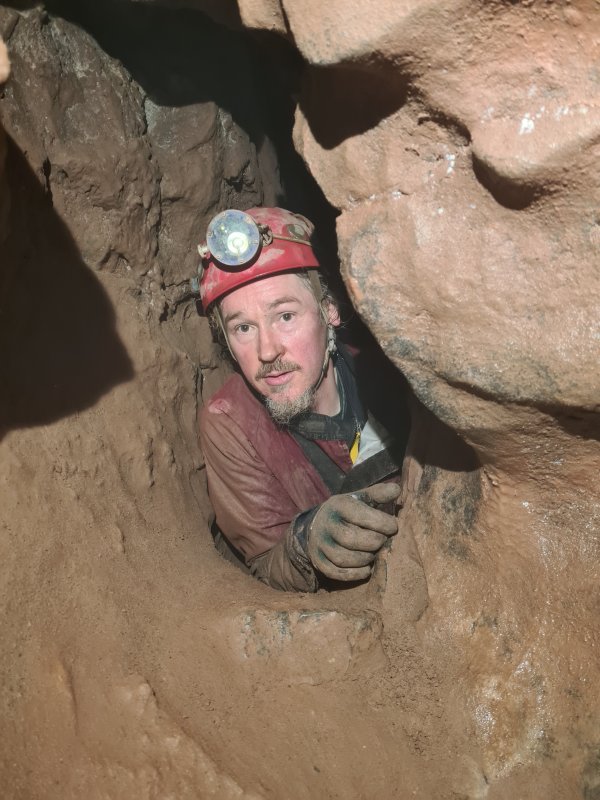 Marble Arch Passage ends at a ridiculous eye hole, which you post yourself through feet first.
Modelling by Gareth, lighting by Tarquin and Gareth
Marble Arch Passage ends at a ridiculous eye hole, which you post yourself through feet first.
Modelling by Gareth, lighting by Tarquin and Gareth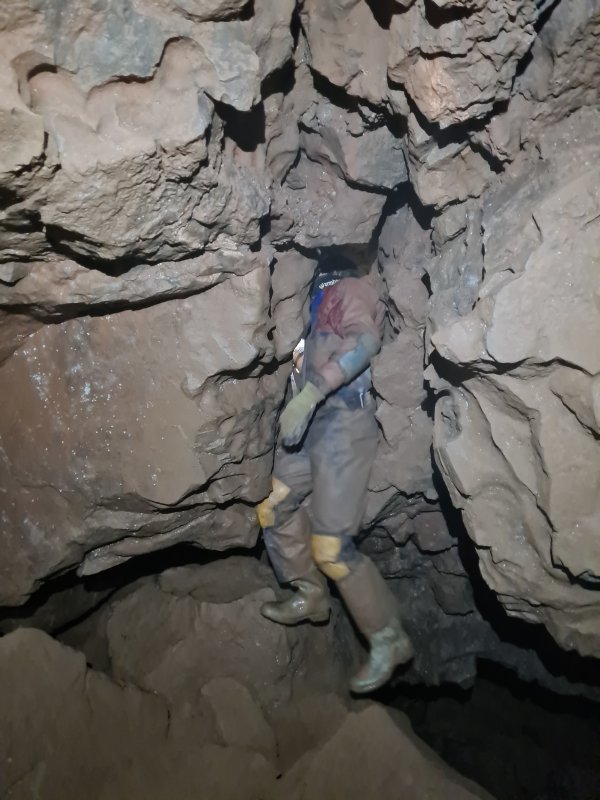 Dropping out of the eye hole into 15 Foot Pot.
Modelling by Peter, lighting by Tarquin and Peter
Dropping out of the eye hole into 15 Foot Pot.
Modelling by Peter, lighting by Tarquin and Peter Below Marble Arch, continuing into the cave, through a series of meanders. This passage is known as West Passage, but since that name could be applied to the entire route leading all the way back to the entrance, it's not a particularly useful name.
Modelling by Peter, lighting by Tarquin and Peter
Below Marble Arch, continuing into the cave, through a series of meanders. This passage is known as West Passage, but since that name could be applied to the entire route leading all the way back to the entrance, it's not a particularly useful name.
Modelling by Peter, lighting by Tarquin and Peter Near Saddle Corner, where there is a way down to the right leading into the bottom of 35 Foot Pot Series. That route does not require any ropes or ladders.
Modelling by Peter, lighting by Tarquin and Peter
Near Saddle Corner, where there is a way down to the right leading into the bottom of 35 Foot Pot Series. That route does not require any ropes or ladders.
Modelling by Peter, lighting by Tarquin and Peter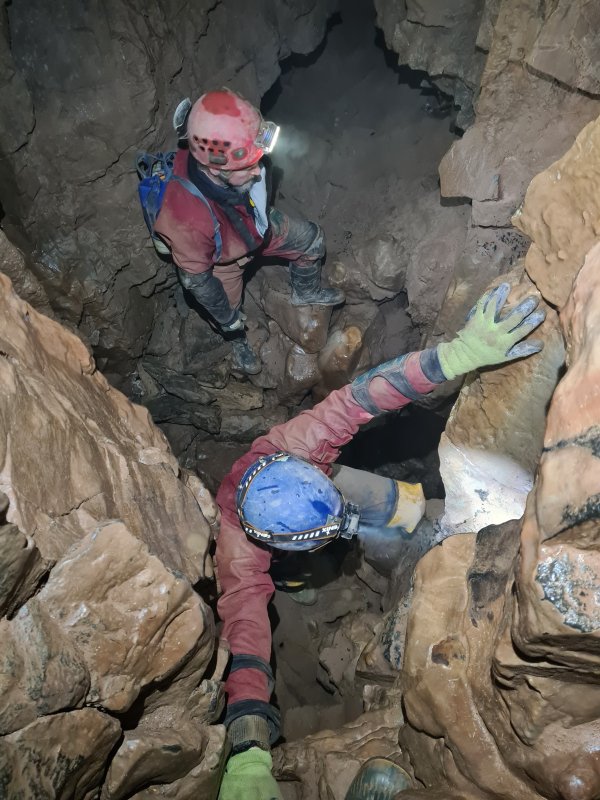 Now beyond the connection with Cross Passage (the round trip), this climb down is at Cross Joint.
Modelling by Peter, Gareth and Tarquin's toes, lighting by Tarquin, Peter and Gareth
Now beyond the connection with Cross Passage (the round trip), this climb down is at Cross Joint.
Modelling by Peter, Gareth and Tarquin's toes, lighting by Tarquin, Peter and Gareth Cascading inlet in Cross Joint, a short side passage that goes nowhere.
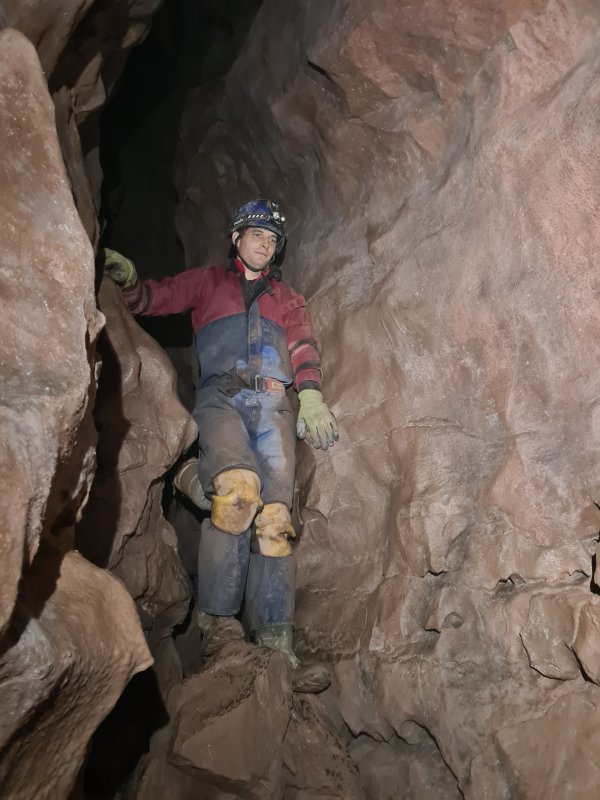 Beyond Cross Joint.
Modelling by Peter
Beyond Cross Joint.
Modelling by Peter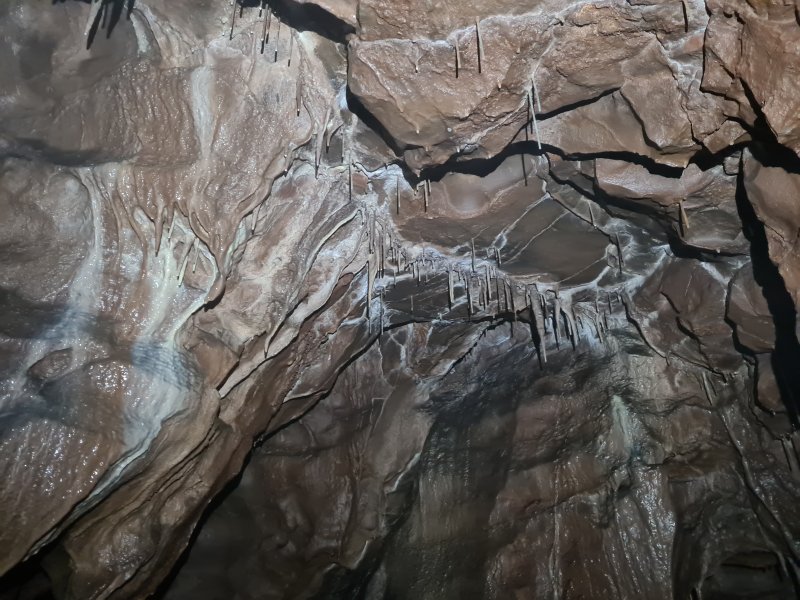 Stal.
Stal.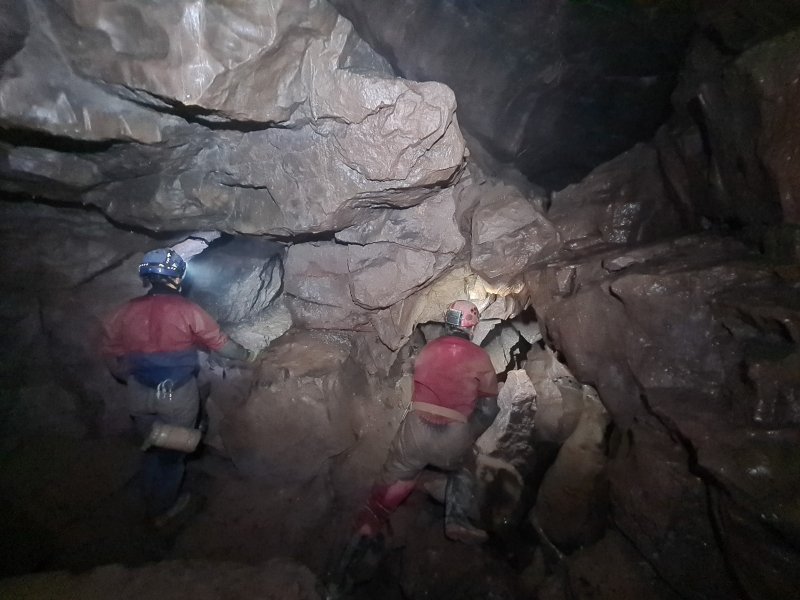 At a junction imaginatively named "The Junction", looking back up towards the entrance. On the left is West Passage, on the right is East Passage, and the way downstream is behind the camera.
Modelling by Peter and Gareth, lighting by Tarquin, Peter and Gareth
At a junction imaginatively named "The Junction", looking back up towards the entrance. On the left is West Passage, on the right is East Passage, and the way downstream is behind the camera.
Modelling by Peter and Gareth, lighting by Tarquin, Peter and Gareth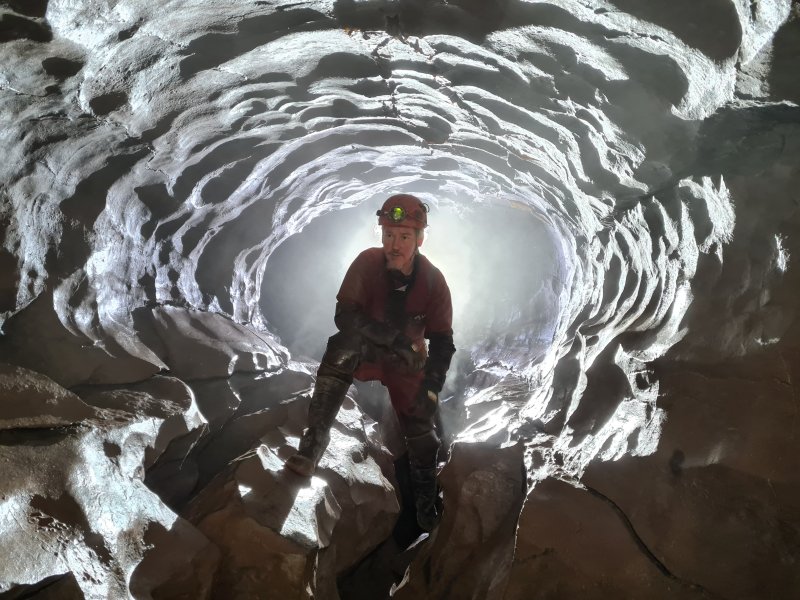 Phreatic tube downstream from The Junction. Most of the downstream passage is a keyhole shaped canyon.
Modelling by Gareth, lighting by Tarquin, Gareth's feeble glow and Peter
Phreatic tube downstream from The Junction. Most of the downstream passage is a keyhole shaped canyon.
Modelling by Gareth, lighting by Tarquin, Gareth's feeble glow and Peter For large parts of the downstream passage, the trench is too wide to stay in the tube above, so you climb down into the trench.
Modelling by Peter, lighting by Tarquin and Peter
For large parts of the downstream passage, the trench is too wide to stay in the tube above, so you climb down into the trench.
Modelling by Peter, lighting by Tarquin and Peter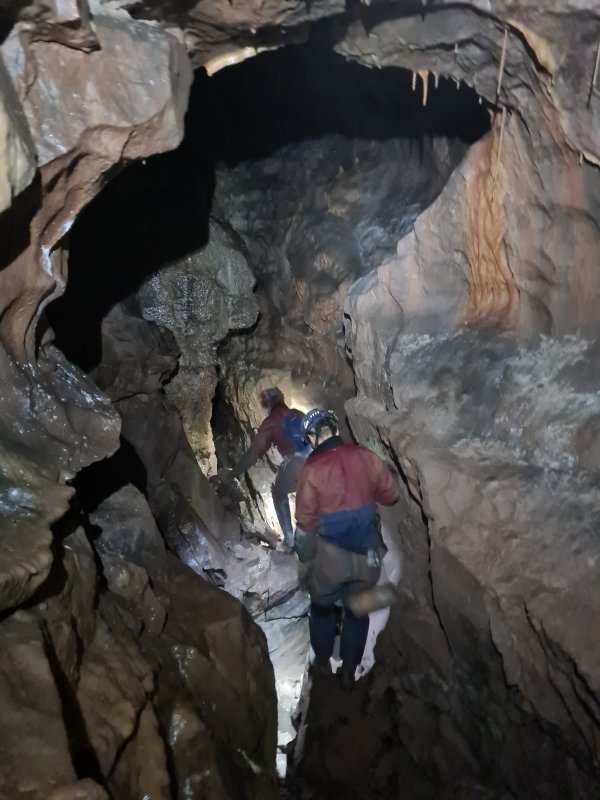 Most of the time is spent trying to decide if you should traverse over this bit in the tube, clamber down into the trench, clamber back up into the tube, or try and stay level over boulders.
Modelling by Peter and Gareth, lighting by Tarquin, Peter and Gareth
Most of the time is spent trying to decide if you should traverse over this bit in the tube, clamber down into the trench, clamber back up into the tube, or try and stay level over boulders.
Modelling by Peter and Gareth, lighting by Tarquin, Peter and Gareth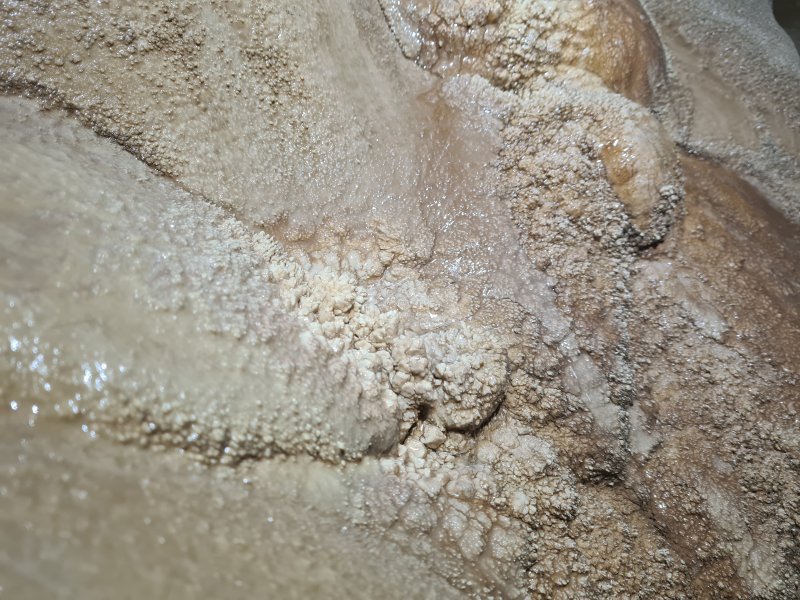 Textured calcite surface.
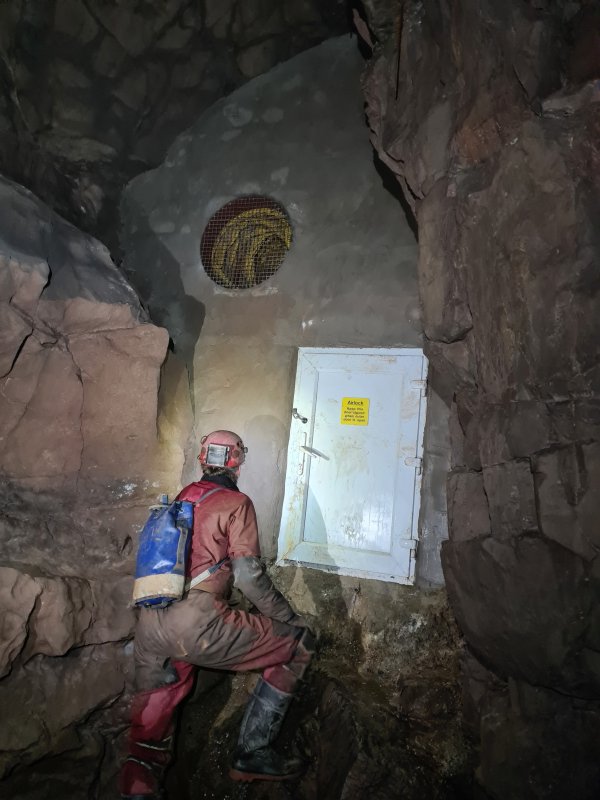 The passage abruptly ends at a concrete wall, with a ventillation duct, and a PVC door. The door enters an airlock, and a door on the other side enters the end of the showcave, with the passage emerging in the end of Davy Price's Hall.
Modelling by Gareth, lighting by Tarquin, Peter and Gareth
The passage abruptly ends at a concrete wall, with a ventillation duct, and a PVC door. The door enters an airlock, and a door on the other side enters the end of the showcave, with the passage emerging in the end of Davy Price's Hall.
Modelling by Gareth, lighting by Tarquin, Peter and Gareth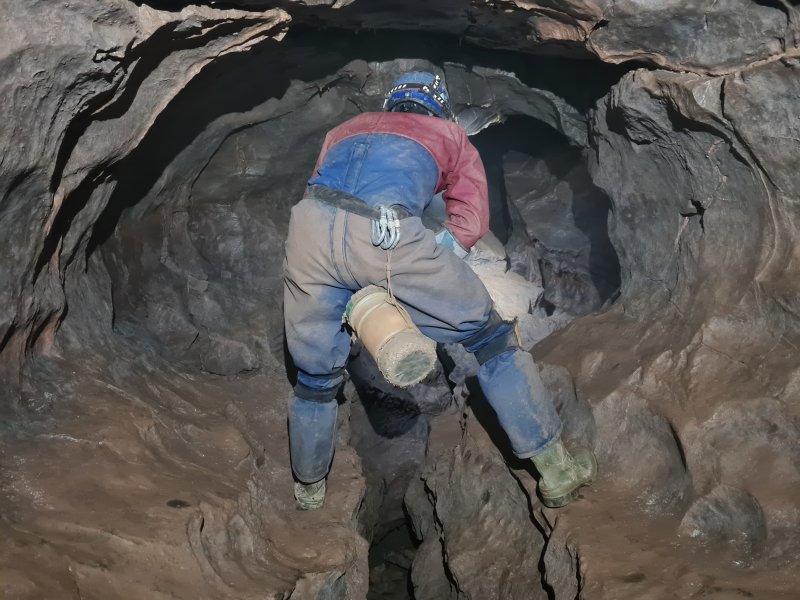 East Passage starts out with some traverses in a smaller keyhole.
Modelling by Peter, lighting by Tarquin and Peter
East Passage starts out with some traverses in a smaller keyhole.
Modelling by Peter, lighting by Tarquin and Peter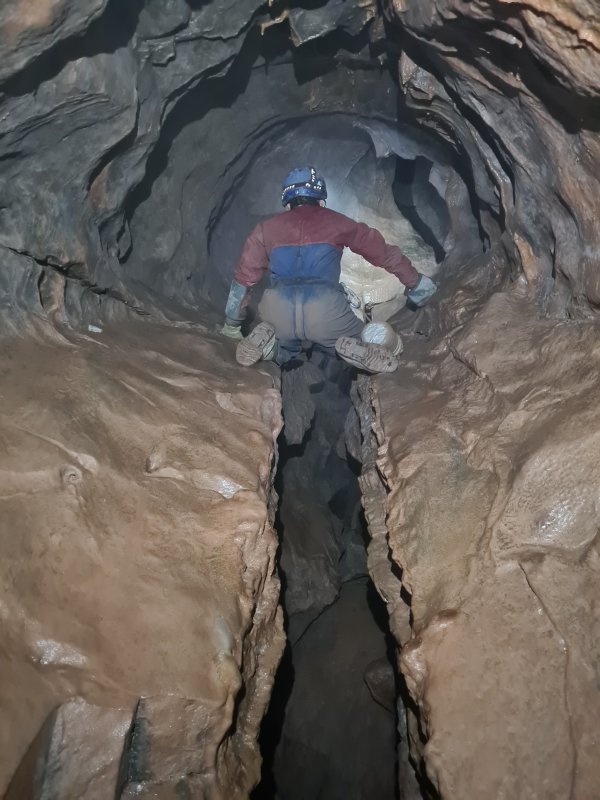 Wider section of traverse.
Modelling by Peter, lighting by Tarquin and Peter
Wider section of traverse.
Modelling by Peter, lighting by Tarquin and Peter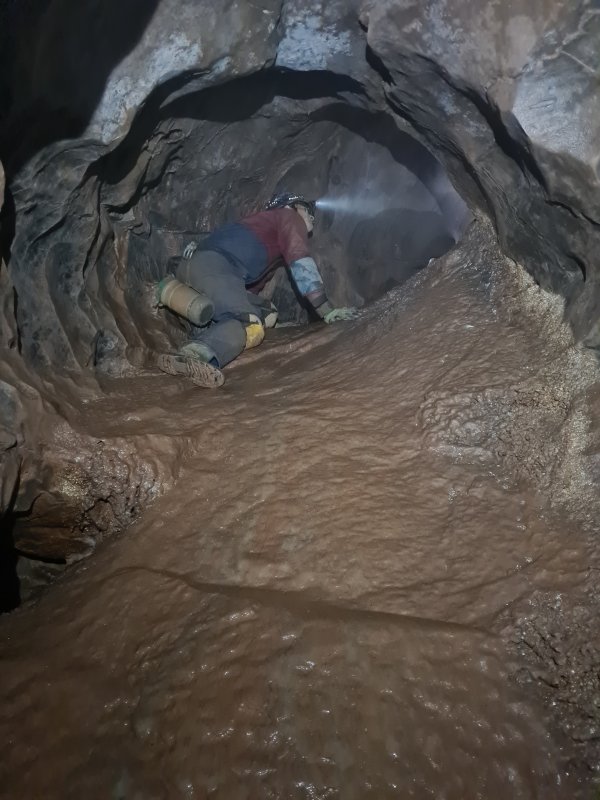 Crawl up calcite.
Modelling by Peter, lighting by Tarquin and Peter
Crawl up calcite.
Modelling by Peter, lighting by Tarquin and Peter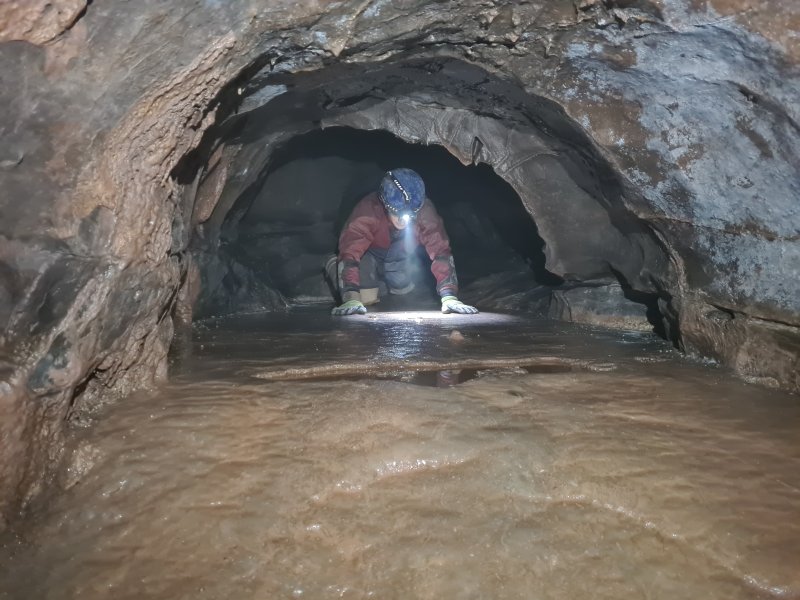 This would have originally been a very beautiful calcite flow.
Modelling by Peter, lighting by Tarquin and Peter
This would have originally been a very beautiful calcite flow.
Modelling by Peter, lighting by Tarquin and Peter Stalactites and columns.
Modelling by Peter, lighting by Tarquin and Peter
Stalactites and columns.
Modelling by Peter, lighting by Tarquin and Peter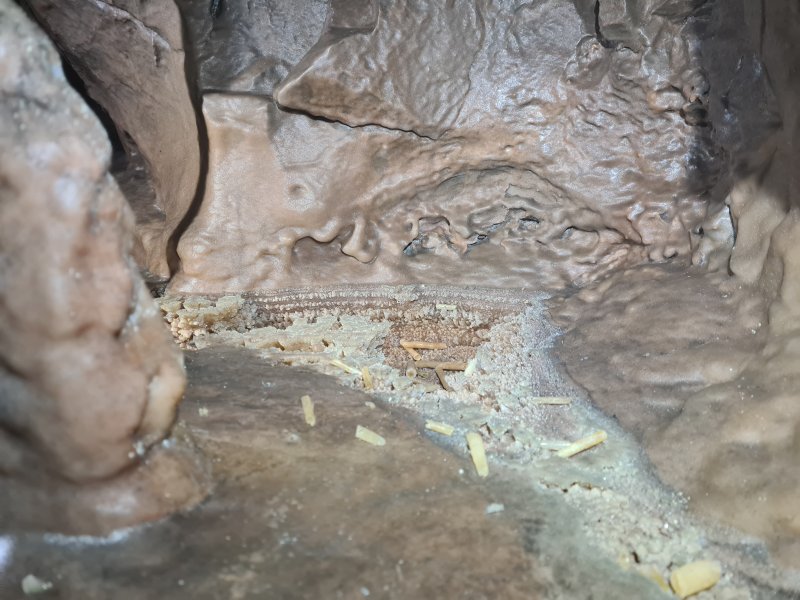 Dried crystal pool behind the columns.
Lighting by Tarquin and Peter
Dried crystal pool behind the columns.
Lighting by Tarquin and Peter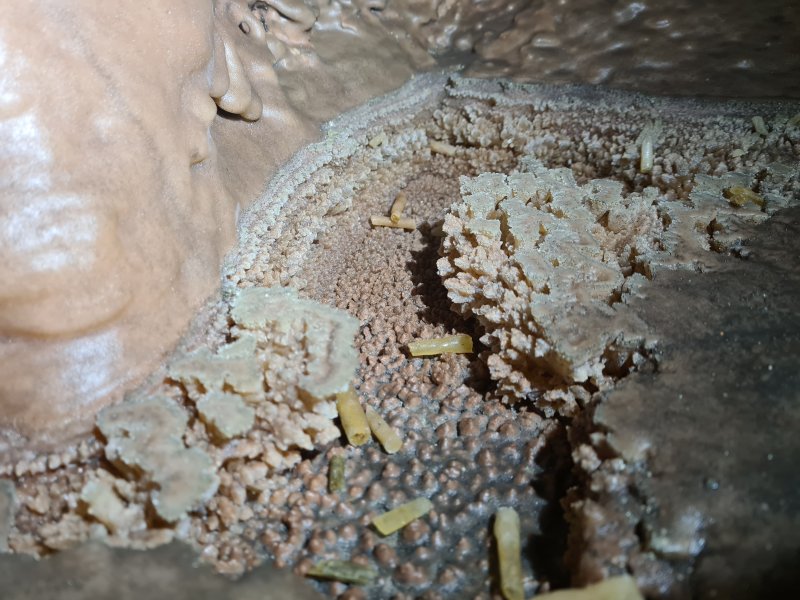 Dried crystal pool.
 Junction of Cross Passage (left) and East Passage (right).
Modelling by Peter and Gareth, lighting by Tarquin, Peter and Gareth
Junction of Cross Passage (left) and East Passage (right).
Modelling by Peter and Gareth, lighting by Tarquin, Peter and Gareth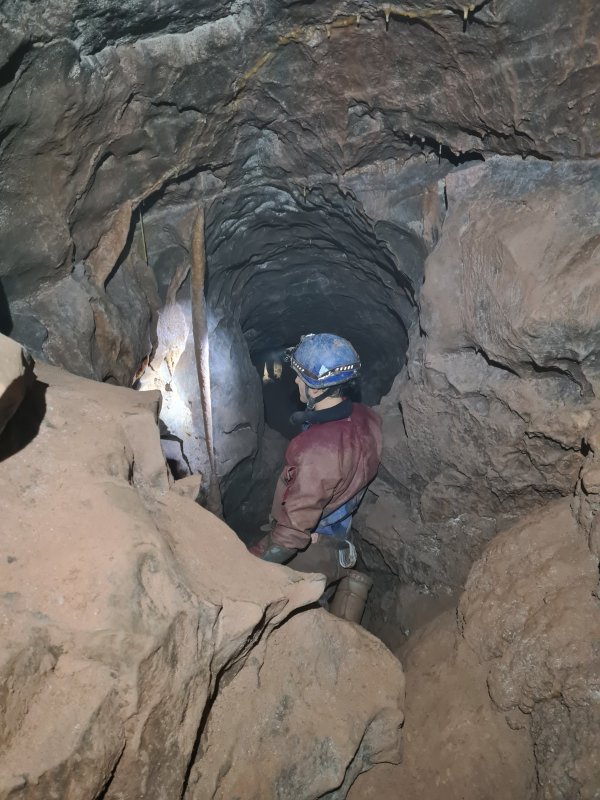 Cross Passage forms part of the very small round trip, and is often visited for that purpose. This is one of its larger sections.
Modelling by Peter, lighting by Tarquin and Peter
Cross Passage forms part of the very small round trip, and is often visited for that purpose. This is one of its larger sections.
Modelling by Peter, lighting by Tarquin and Peter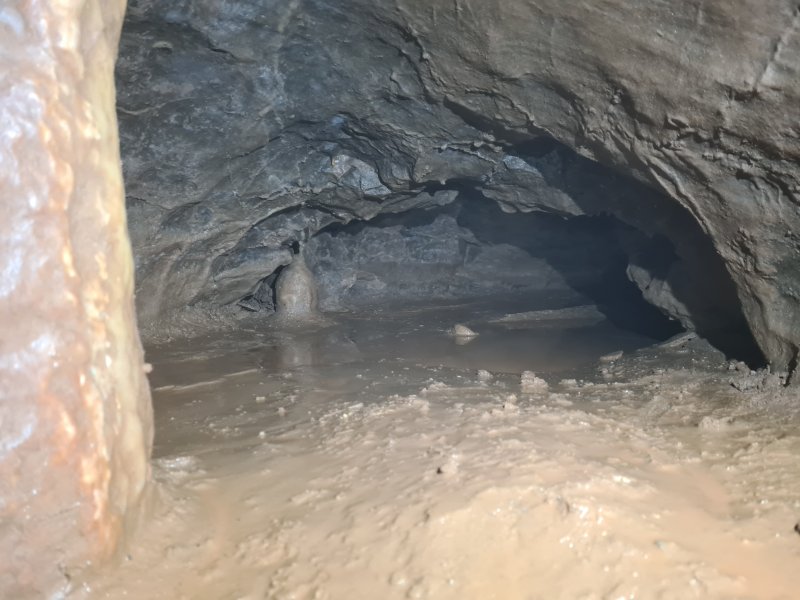 Cross Passage lowers to a flat out crawl with a very shallow puddle. Shortly afterwards, it connects to West Passage, completing the round trip.
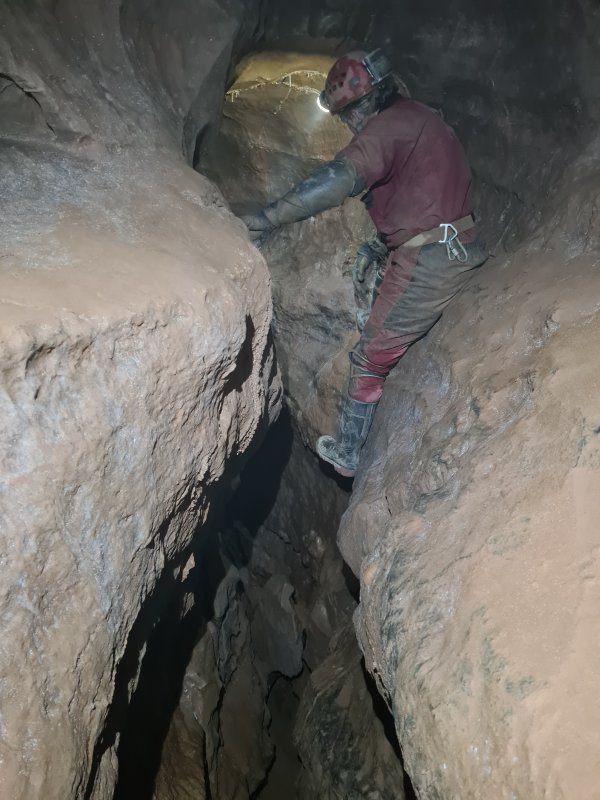 East Passage continues with more traversing.
Modelling by Gareth, lighting by Tarquin and Gareth
East Passage continues with more traversing.
Modelling by Gareth, lighting by Tarquin and Gareth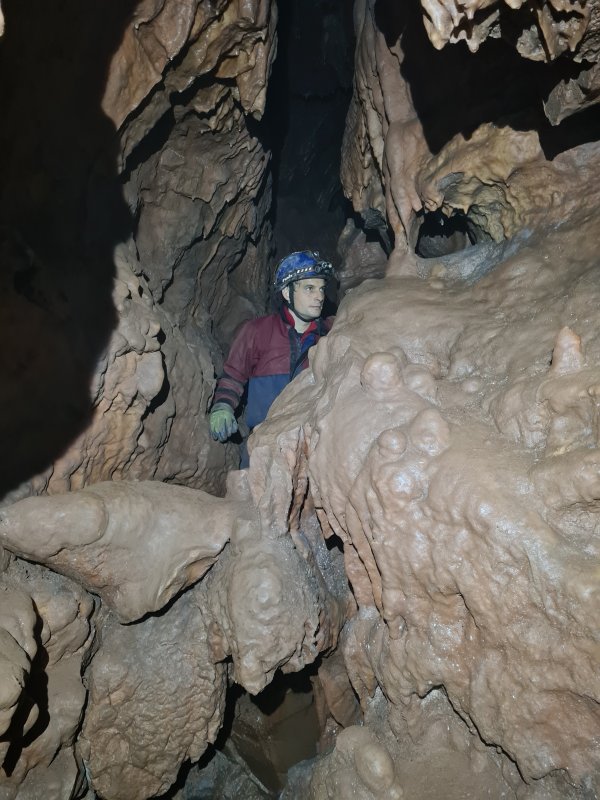 Rifty passage in East Passage, with formations.
Modelling by Peter, lighting by Tarquin and Peter
Rifty passage in East Passage, with formations.
Modelling by Peter, lighting by Tarquin and Peter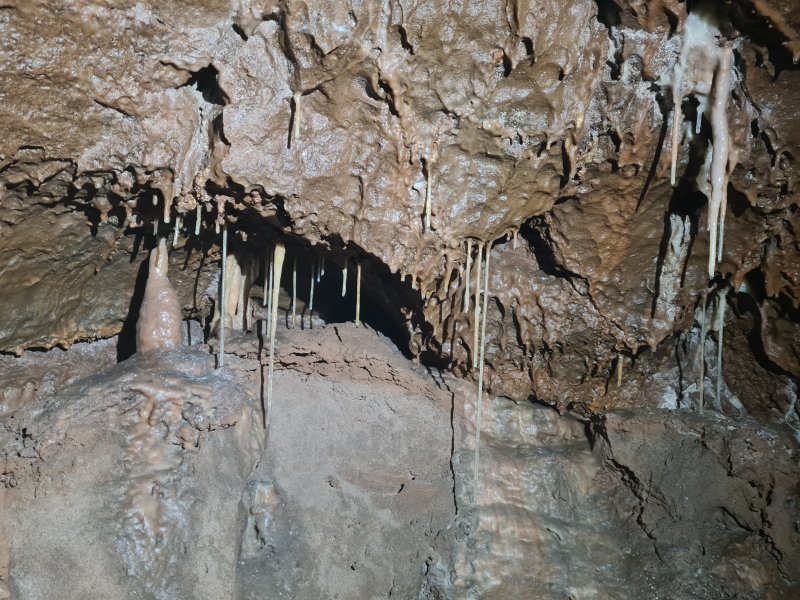 Formations.
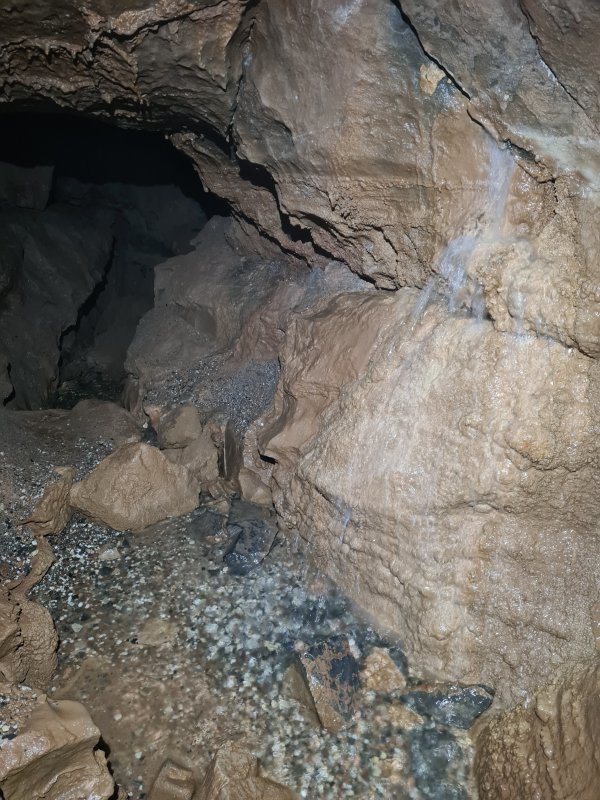 Water flows in from a little inlet, and, curiously, flows the wrong way along the passage; northwards. The entire cave drains to the south, and East Passage is a former inlet that flowed south.
 Formations near the inlet.
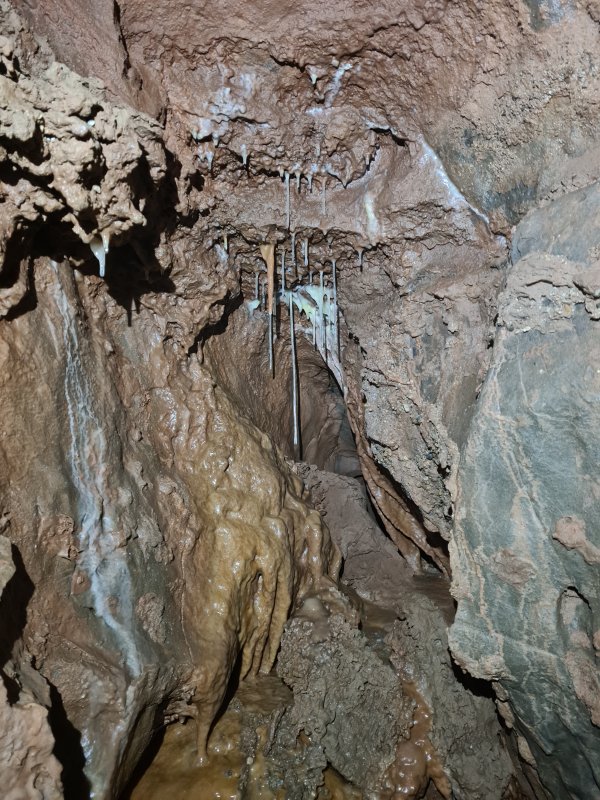 The water flows into a side passage, which is the way to Xmas Grotto. These straws are near its start.
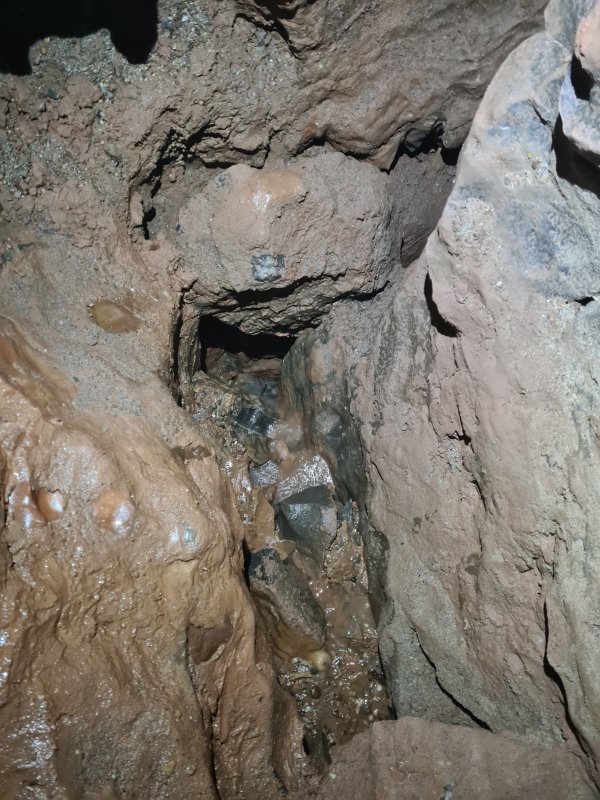 The water flows out into an impenetrable rift, and is next seen in the downstream cave.
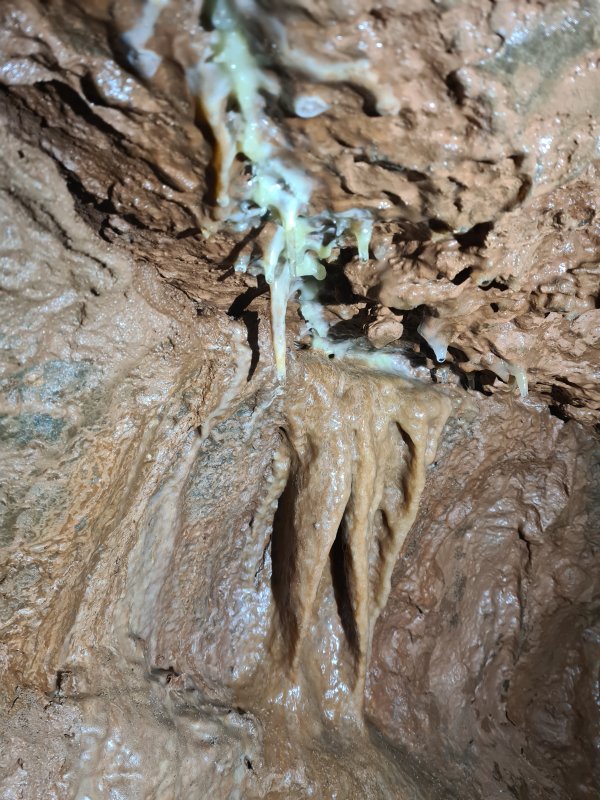 Formations.
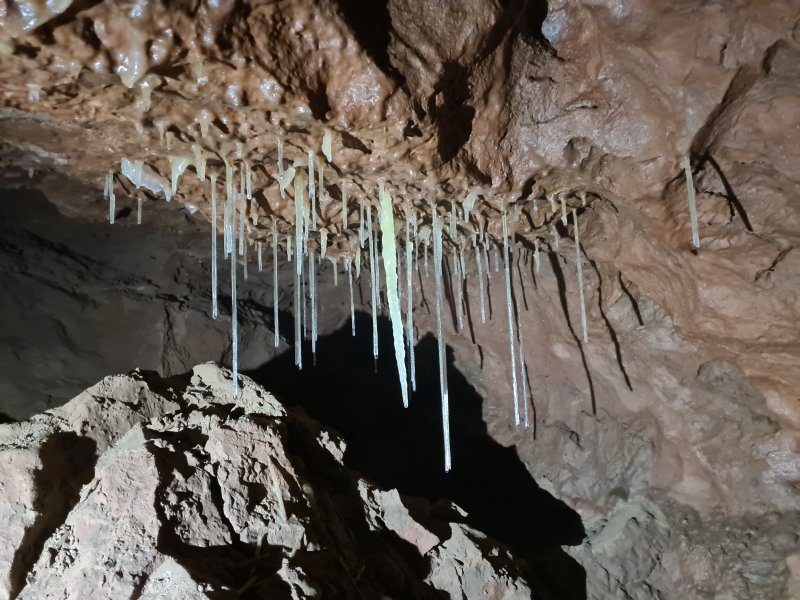 The passage drops into a shattered chamber with more formations.
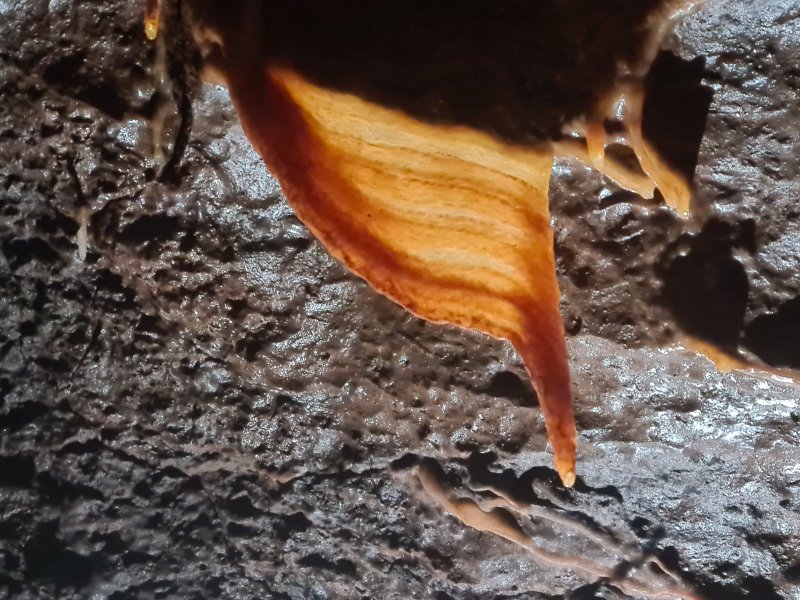 Curtain.
 There are several passages in this area, with these formations in a dead end side passage.
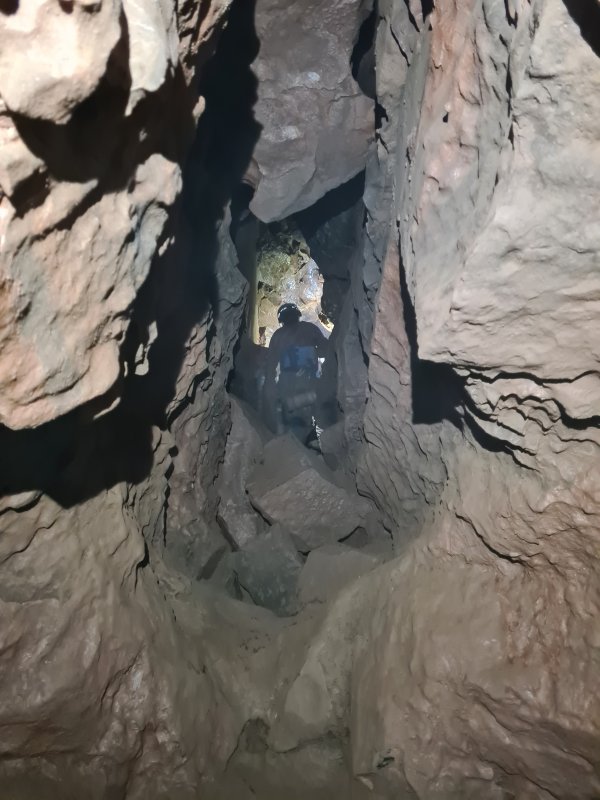 The main way on.
Modelling by Peter, lighting by Tarquin, Peter and Gareth
The main way on.
Modelling by Peter, lighting by Tarquin, Peter and Gareth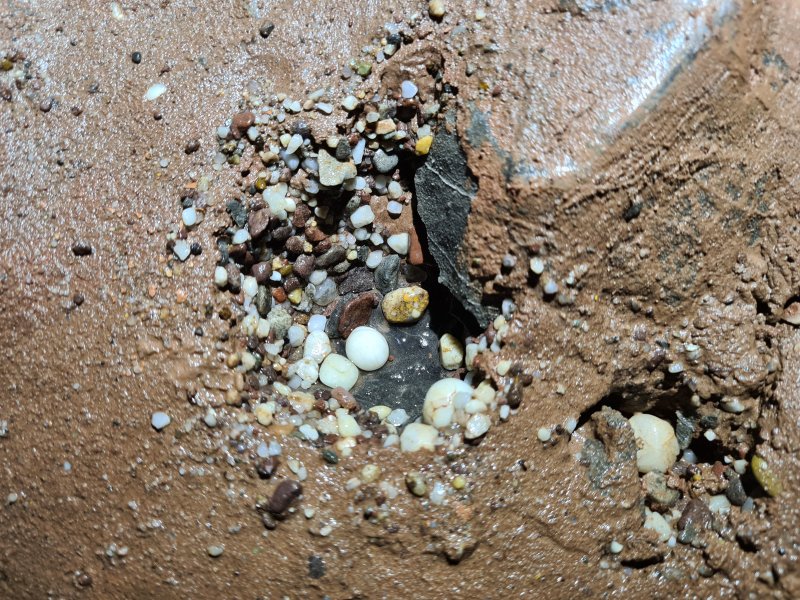 Pebbles in a drip pocket. These are quartz, from the caprock.
 The main way on, a stooping sized rift.
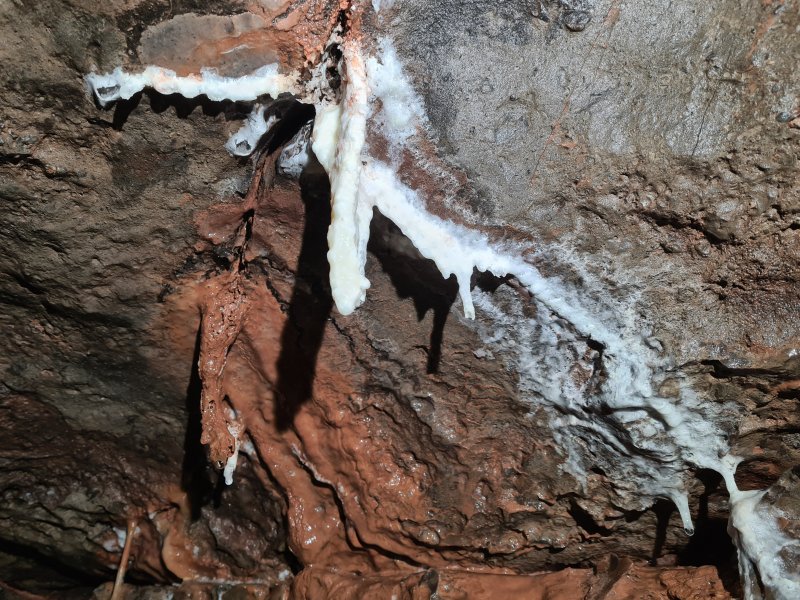 Weirdly shaped stalactite near Xmas Grotto.
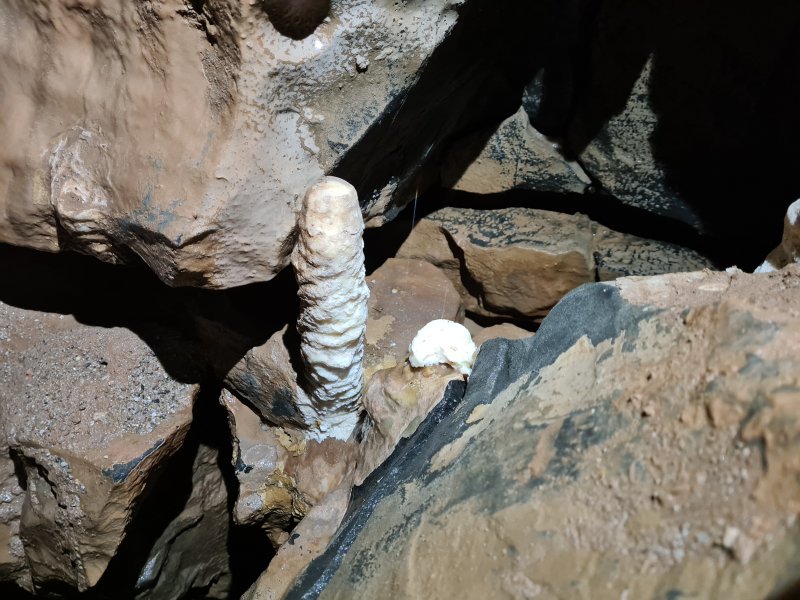 Stalagmite.
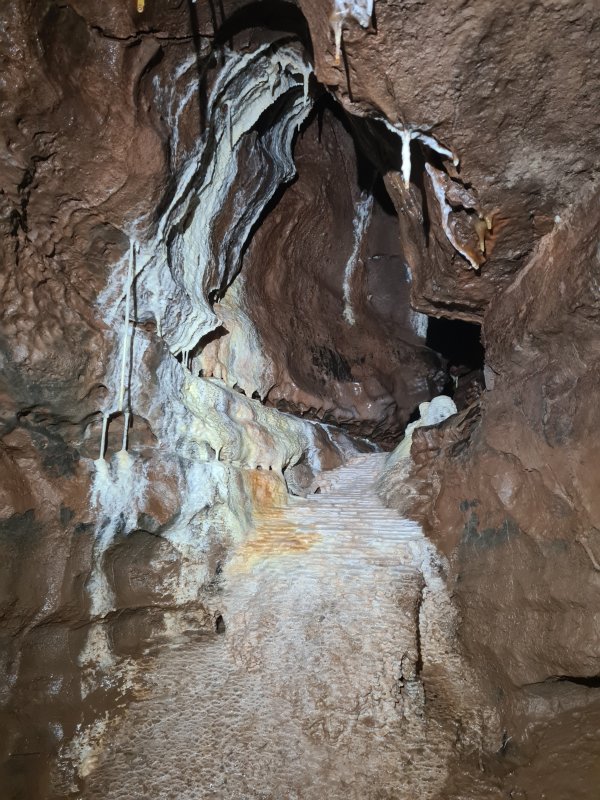 Decorated alcove near Xmas Grotto. The stal in this area, including the grotto itself, appears to be made of the more fragile, powdery type of calcite that is seen near the outflow from limekilns or lime mortared structures. It forms much more quickly than normal calcite.
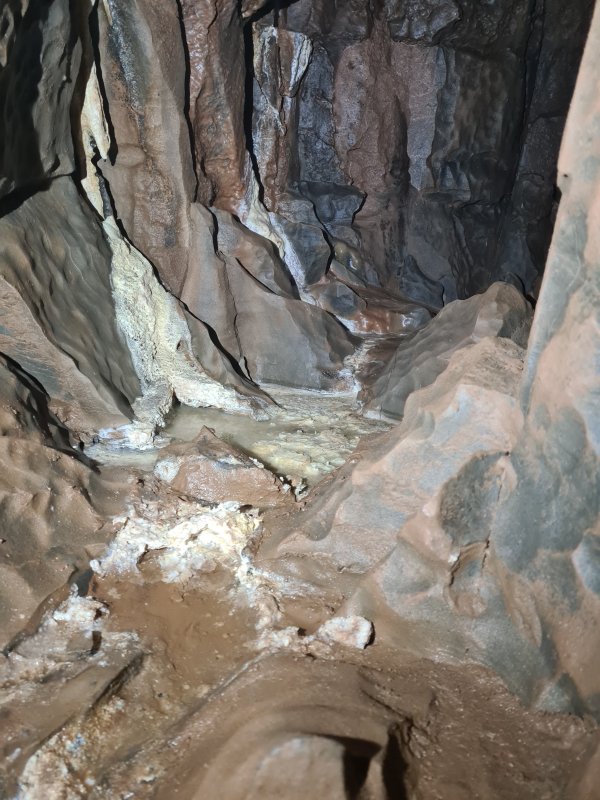 Decorations in a short oxbow.
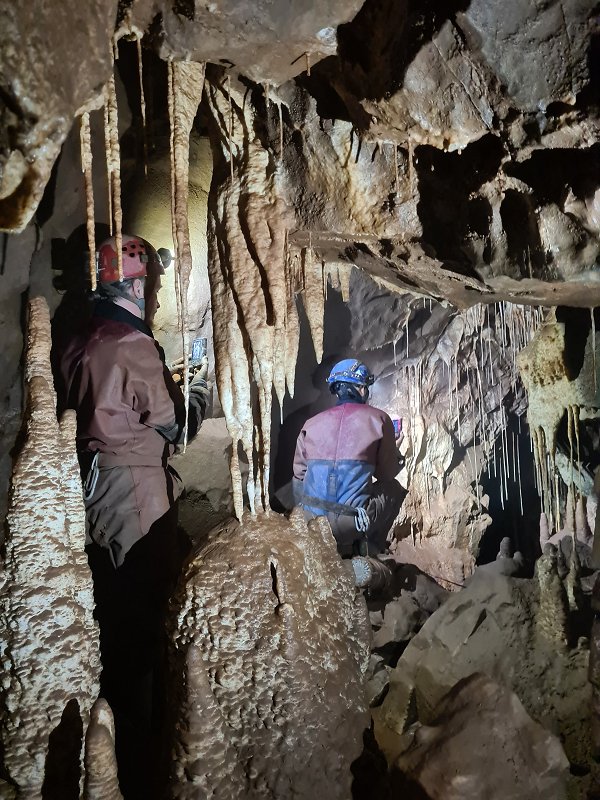 A picture of a photographer taking a picture of a photographer taking a picture of the beautiful Xmas Grotto. This is one of the more impressive attractions in this cave, and is a common destination.
Modelling by Gareth and Peter, lighting by Tarquin, Gareth and Peter
A picture of a photographer taking a picture of a photographer taking a picture of the beautiful Xmas Grotto. This is one of the more impressive attractions in this cave, and is a common destination.
Modelling by Gareth and Peter, lighting by Tarquin, Gareth and Peter The lower part of the grotto, which descends to silt fill. This grotto has clearly flooded many times.
Lighting by Tarquin and Gareth
The lower part of the grotto, which descends to silt fill. This grotto has clearly flooded many times.
Lighting by Tarquin and Gareth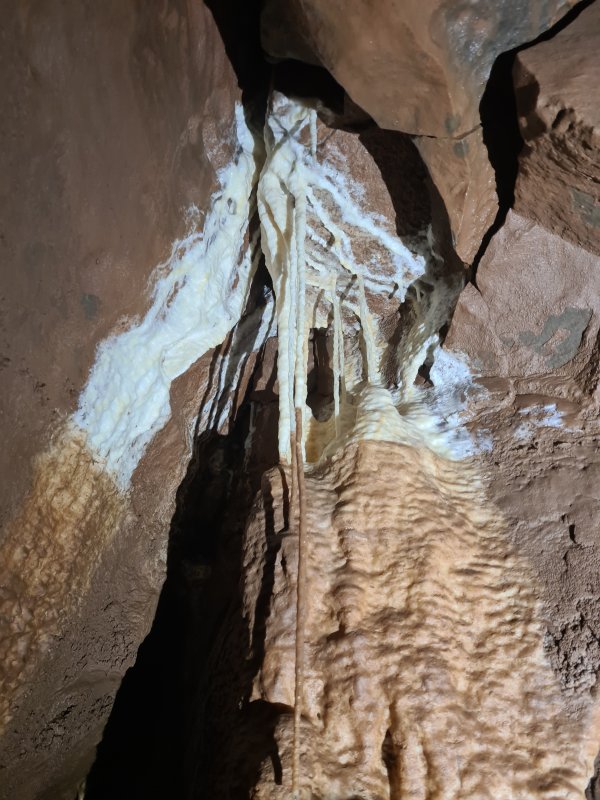 Tide mark on the formations in the ceiling. This shows how far up the historical flood waters have come.
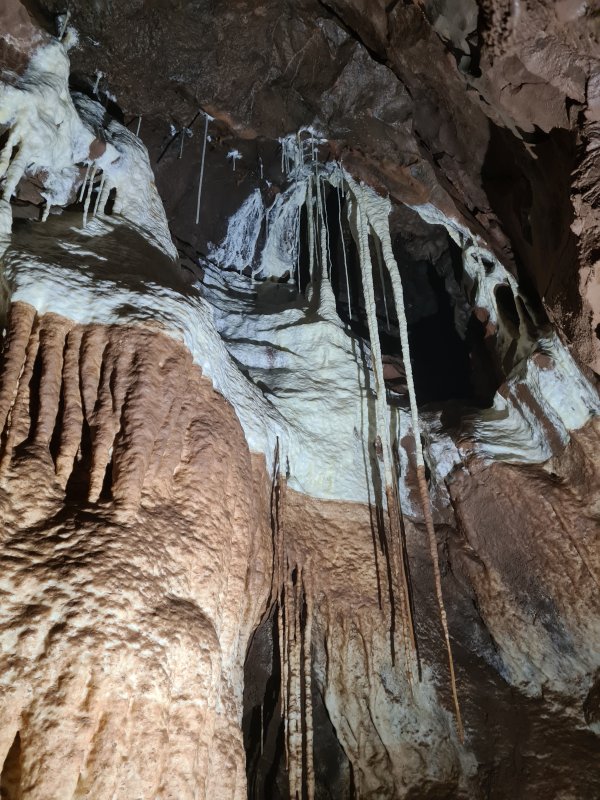 Contrast between clean and flood stained.
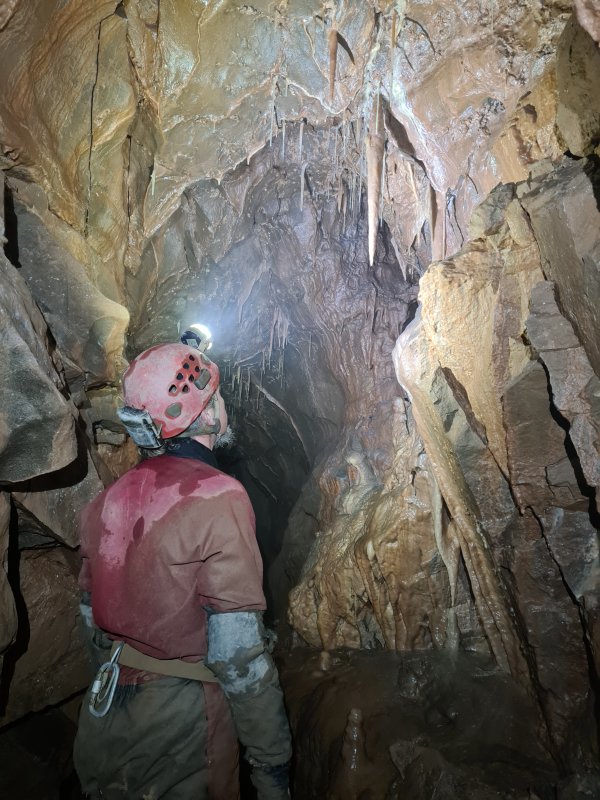 Formations in the main East Passage.
Modelling by Gareth, lighting by Tarquin and Gareth
Formations in the main East Passage.
Modelling by Gareth, lighting by Tarquin and Gareth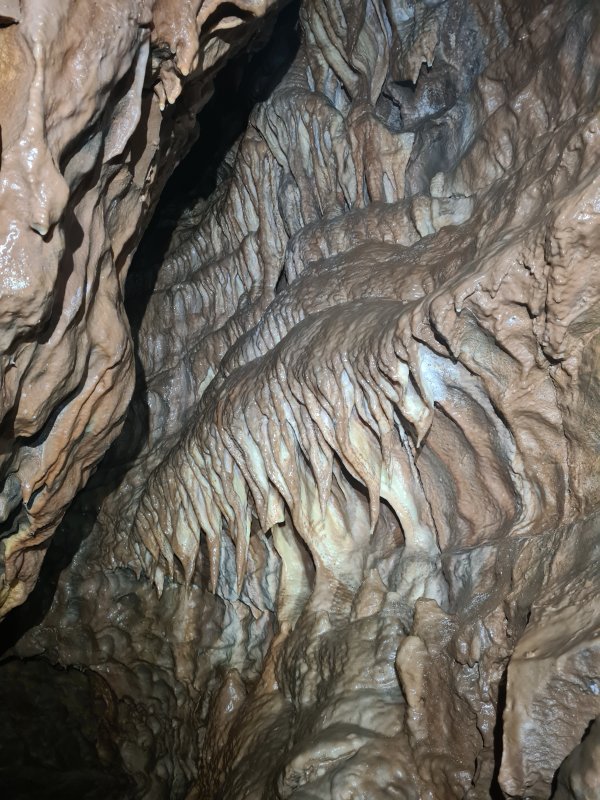 Formations in East Passage
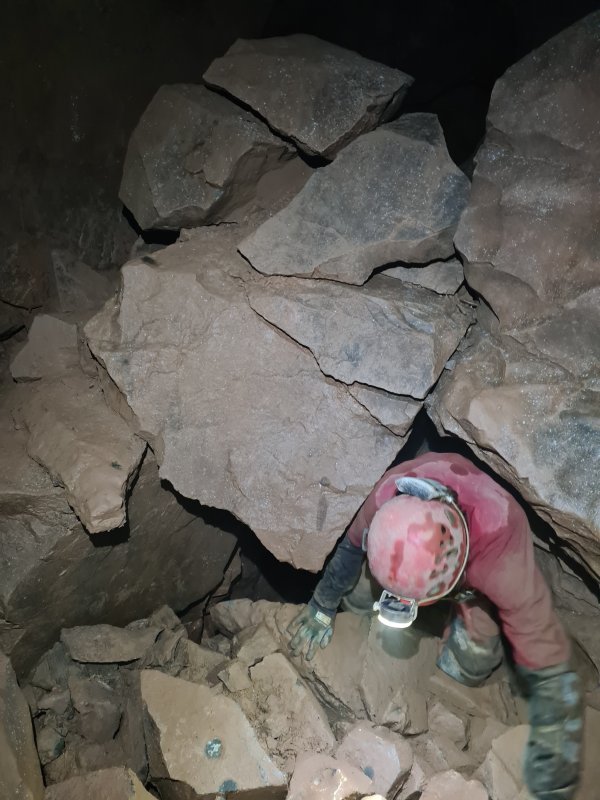 Entering Steeple Aven Passage (which does not actually contain Steeple Aven; that's not confusing or anything...).
Modelling by Gareth, lighting by Tarquin and Gareth
Entering Steeple Aven Passage (which does not actually contain Steeple Aven; that's not confusing or anything...).
Modelling by Gareth, lighting by Tarquin and Gareth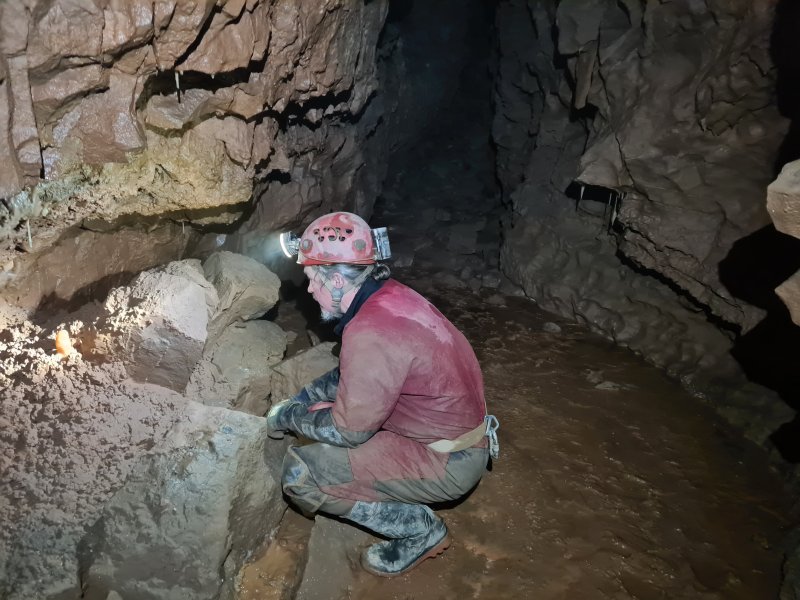 Steeple Aven Passage starts as a tall rift.
Modelling by Gareth, lighting by Tarquin and Gareth
Steeple Aven Passage starts as a tall rift.
Modelling by Gareth, lighting by Tarquin and Gareth The mud in parts of the passage are cryogenic, formed by freeze-thaw ice crystals during the end of an ice age. However, there were no cryogenic calcite deposits seen anywhere.
Lighting by Tarquin and Gareth
The mud in parts of the passage are cryogenic, formed by freeze-thaw ice crystals during the end of an ice age. However, there were no cryogenic calcite deposits seen anywhere.
Lighting by Tarquin and Gareth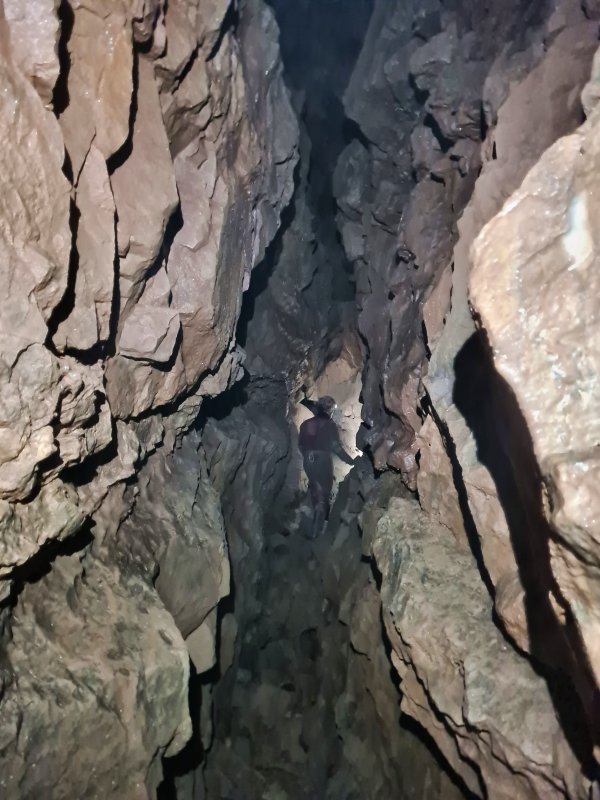 Steeple Aven Passage.
Modelling by Gareth, lighting by Tarquin and Gareth
Steeple Aven Passage.
Modelling by Gareth, lighting by Tarquin and Gareth Boulder obstacles before Fork Junction.
Modelling by Gareth, lighting by Tarquin and Gareth
Boulder obstacles before Fork Junction.
Modelling by Gareth, lighting by Tarquin and Gareth Fork Junction.
Modelling by Gareth, lighting by Tarquin and Gareth
Fork Junction.
Modelling by Gareth, lighting by Tarquin and Gareth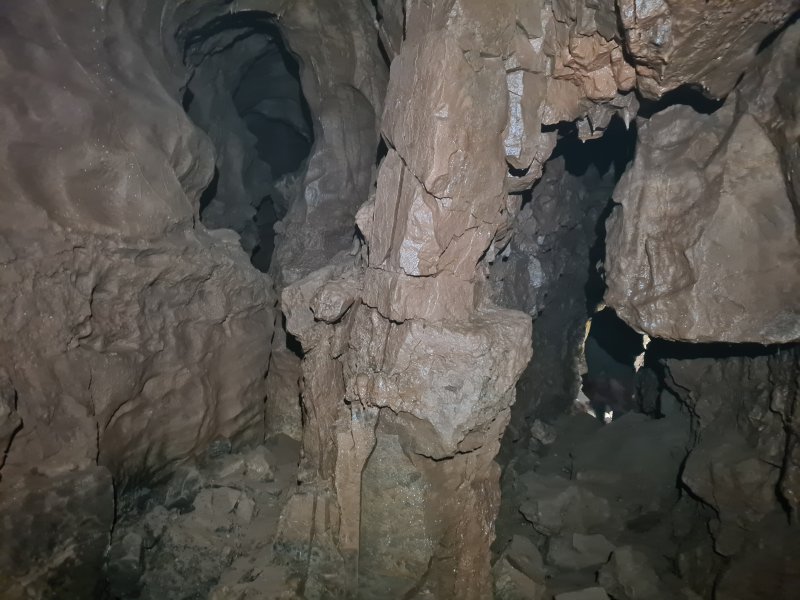 At Fork Junction, there is a choice of routes, but both end up in the same place.
Modelling by Gareth, lighting by Tarquin and Gareth
At Fork Junction, there is a choice of routes, but both end up in the same place.
Modelling by Gareth, lighting by Tarquin and Gareth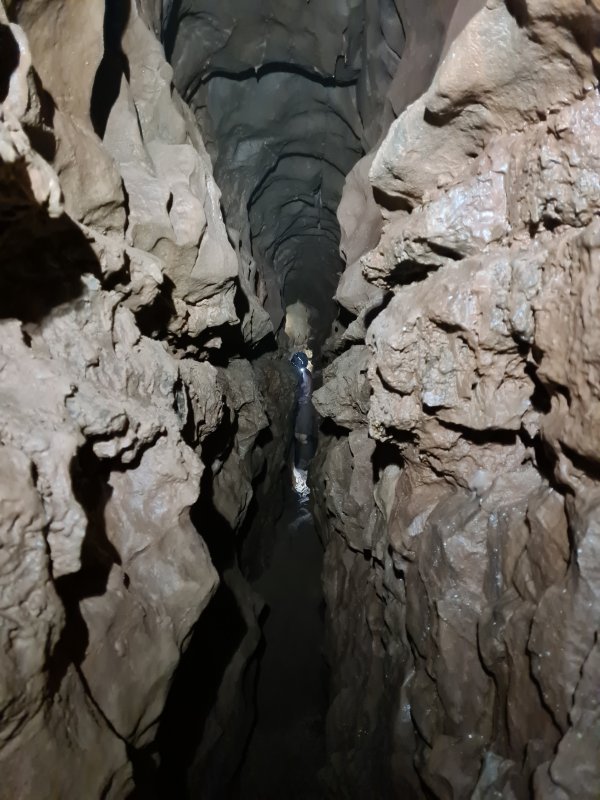 Left hand passage from Fork Junction.
Modelling by Peter, lighting by Tarquin, Peter and Gareth
Left hand passage from Fork Junction.
Modelling by Peter, lighting by Tarquin, Peter and Gareth Dried crystal pool in the left hand passage.
 The left hand passage has a small choke to one side.
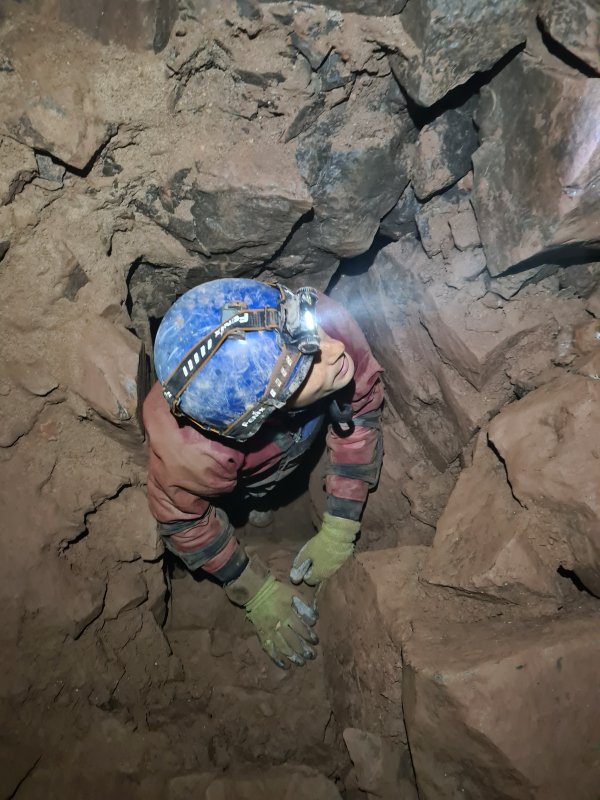 A climb up through a hole then connects to the right hand passage, just above The Tube.
Modelling by Peter, lighting by Tarquin and Peter
A climb up through a hole then connects to the right hand passage, just above The Tube.
Modelling by Peter, lighting by Tarquin and Peter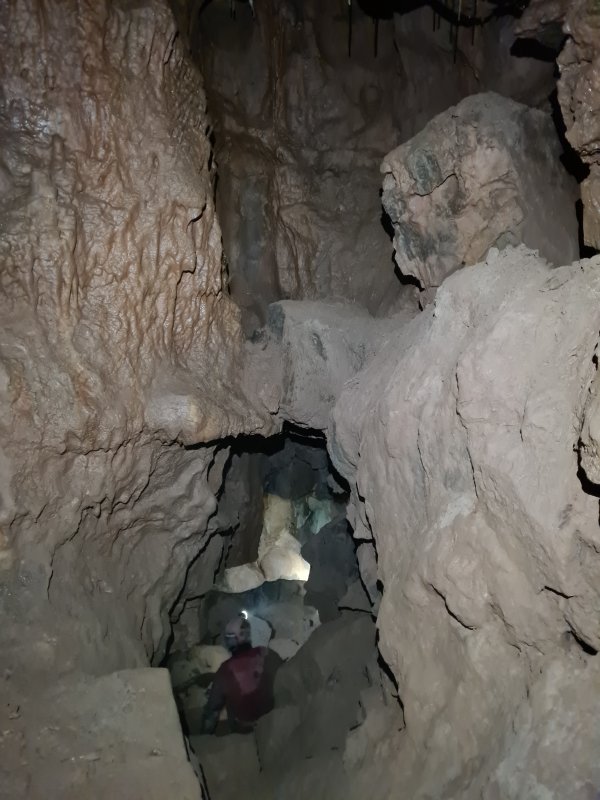 The right hand passage quickly reaches a chamber, with a low passage leading into a second, low chamber.
Modelling by Gareth, lighting by Tarquin and Gareth
The right hand passage quickly reaches a chamber, with a low passage leading into a second, low chamber.
Modelling by Gareth, lighting by Tarquin and Gareth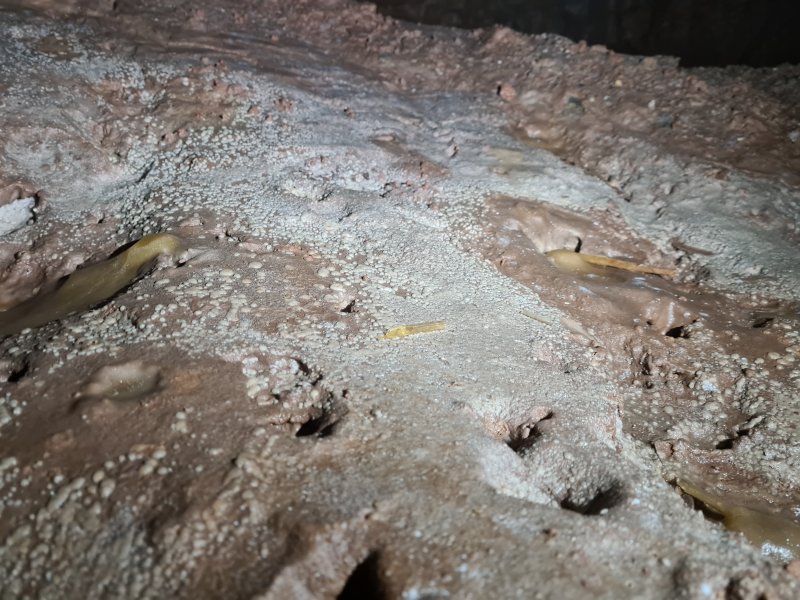 Mud formations with crystal and microbial deposits in the chambers.
 Flowstone formation in the lower chamber.
 Pools in the flowstone formation.
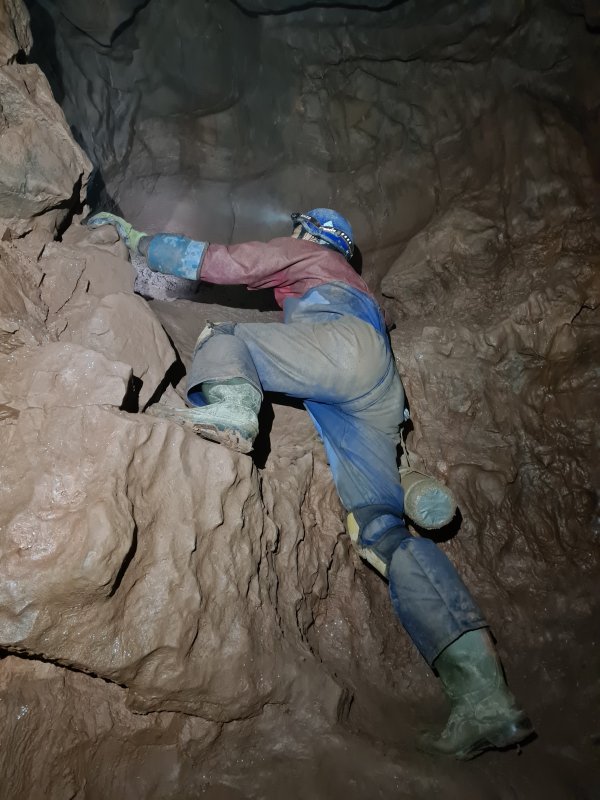 Climb from the larger chamber up to The Tube.
Modelling by Peter, lighting by Tarquin and Peter
Climb from the larger chamber up to The Tube.
Modelling by Peter, lighting by Tarquin and Peter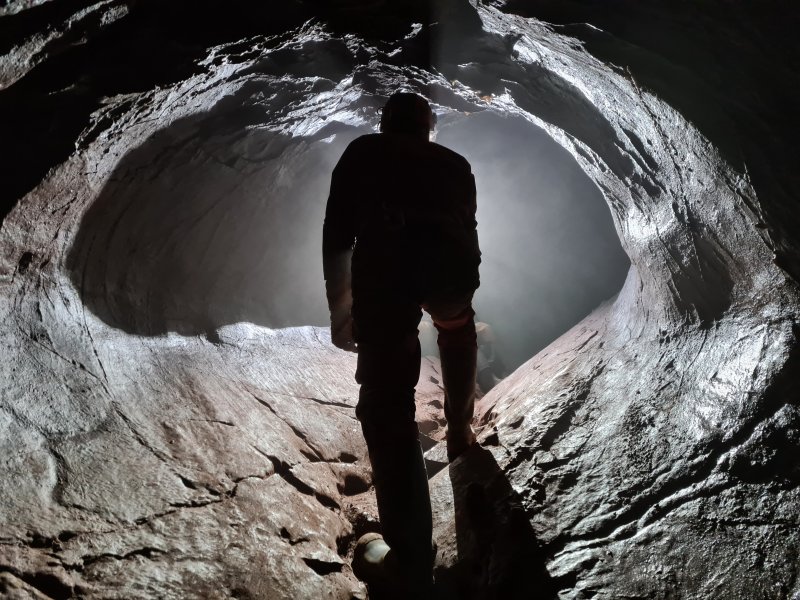 The Tube, a steeply sloping phreas.
Modelling by Gareth and Peter's legs, lighting by Peter
The Tube, a steeply sloping phreas.
Modelling by Gareth and Peter's legs, lighting by Peter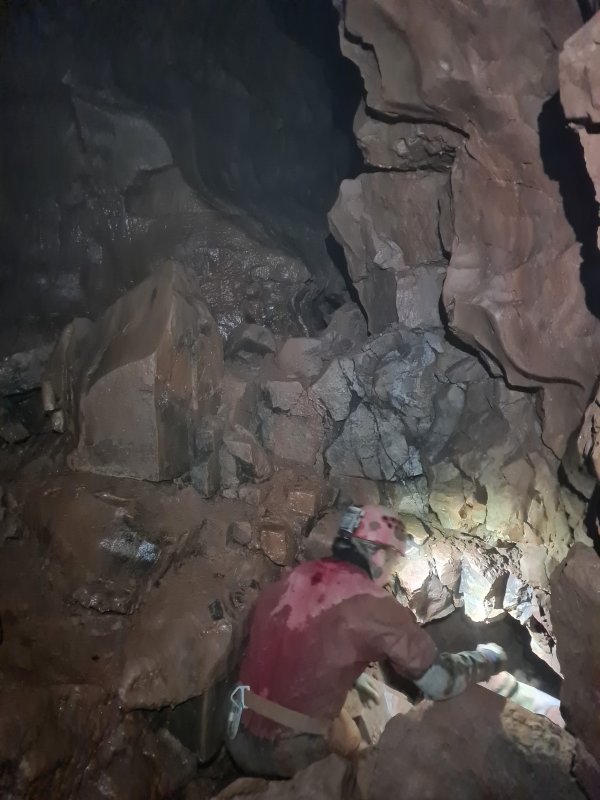 Immediately above The Tube, where the forks rejoin, is a hole under the wall on the right leading into Whitsun Grotto.
Modelling by Gareth and Peter's welly, lighting by Tarquin and Gareth
Immediately above The Tube, where the forks rejoin, is a hole under the wall on the right leading into Whitsun Grotto.
Modelling by Gareth and Peter's welly, lighting by Tarquin and Gareth Formations in the passage leading to Whitsun Grotto.
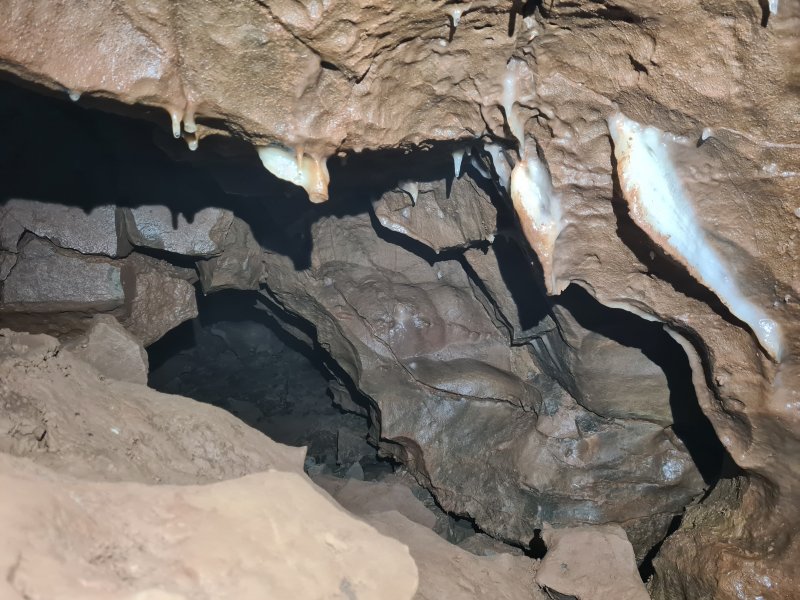 Muddied formations in the crawling sized passage leading to Whitsun Grotto.
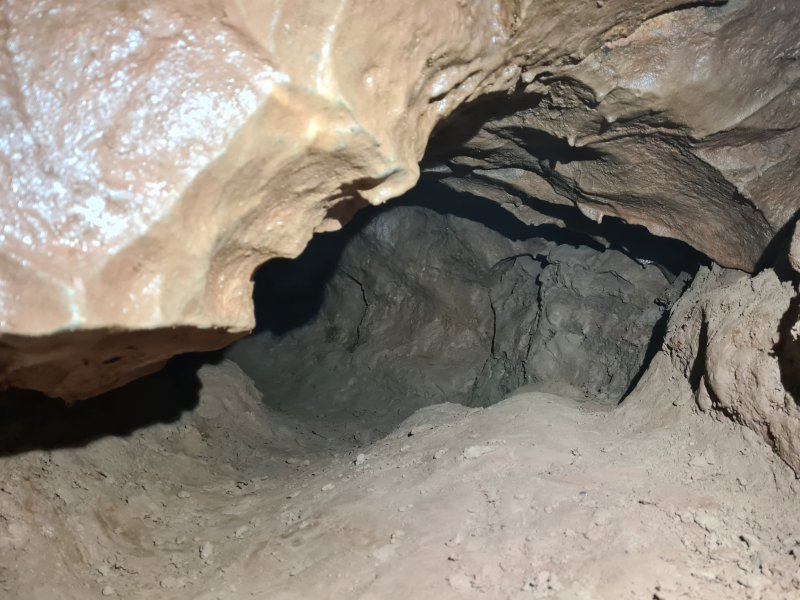 The passage to Whitsun Grotto, small and wriggly.
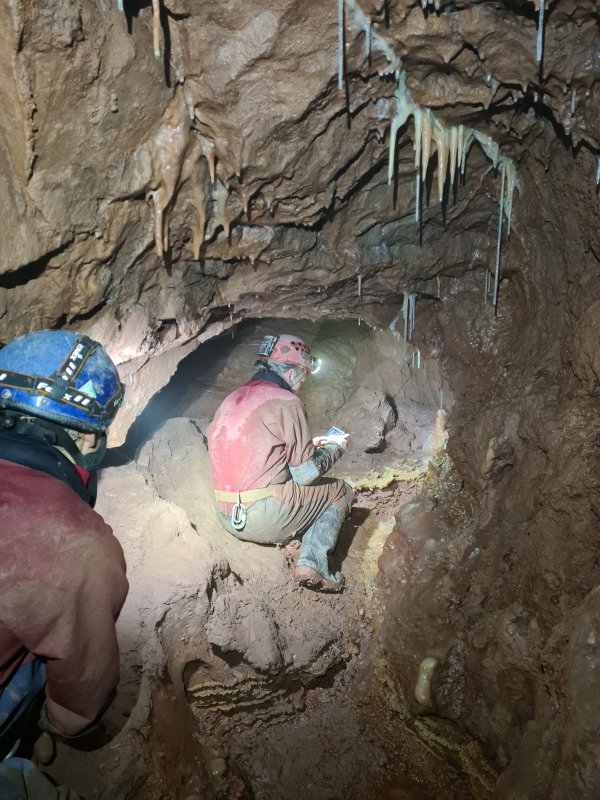 Whitsun Grotto.
Modelling by Peter and Gareth, lighting by Tarquin, Peter and Gareth
Whitsun Grotto.
Modelling by Peter and Gareth, lighting by Tarquin, Peter and Gareth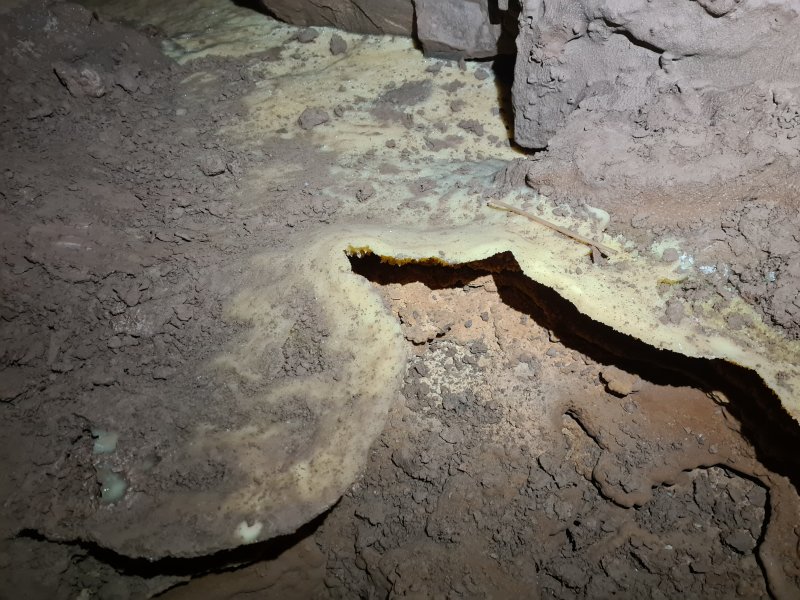 Muddied, dry crystal pool in Whitsun Grotto.
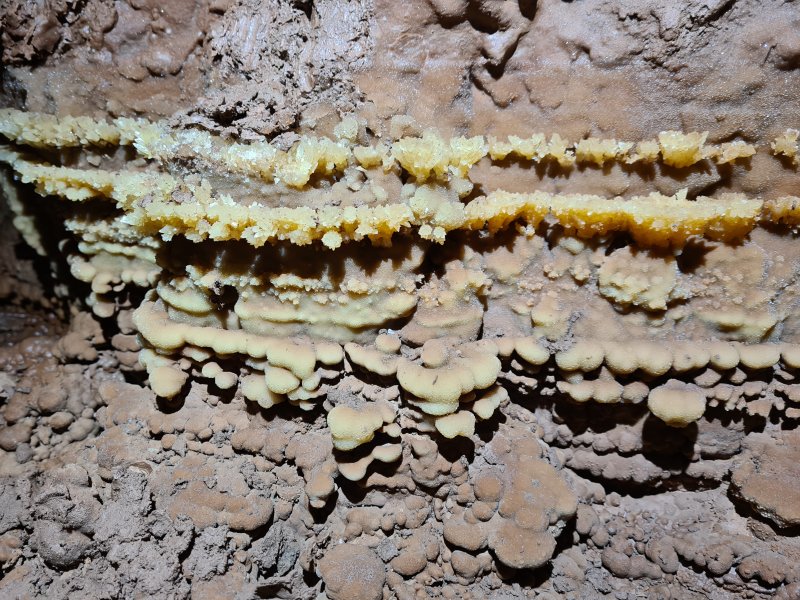 Crystal growth at the old water lines.
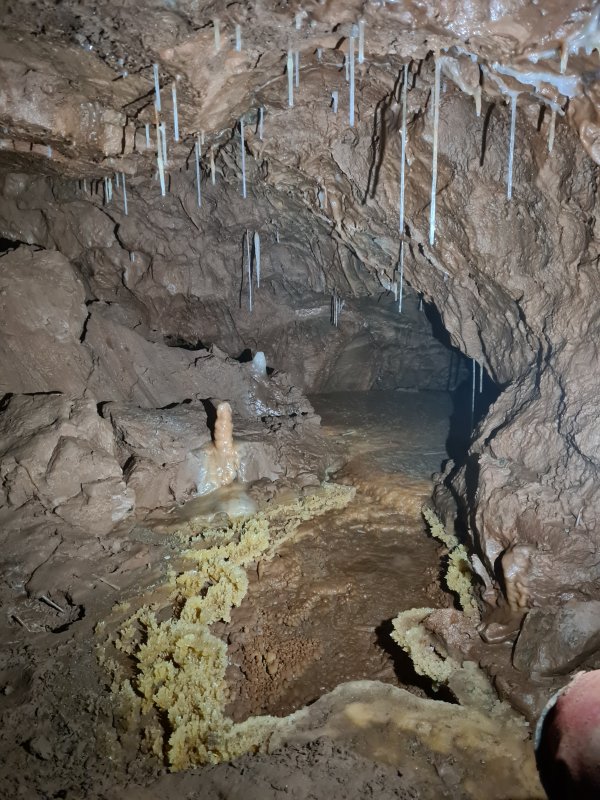 Whitsun Grotto's main dry crystal pool.
Modelling by Gareth's knee, lighting by Gareth
Whitsun Grotto's main dry crystal pool.
Modelling by Gareth's knee, lighting by Gareth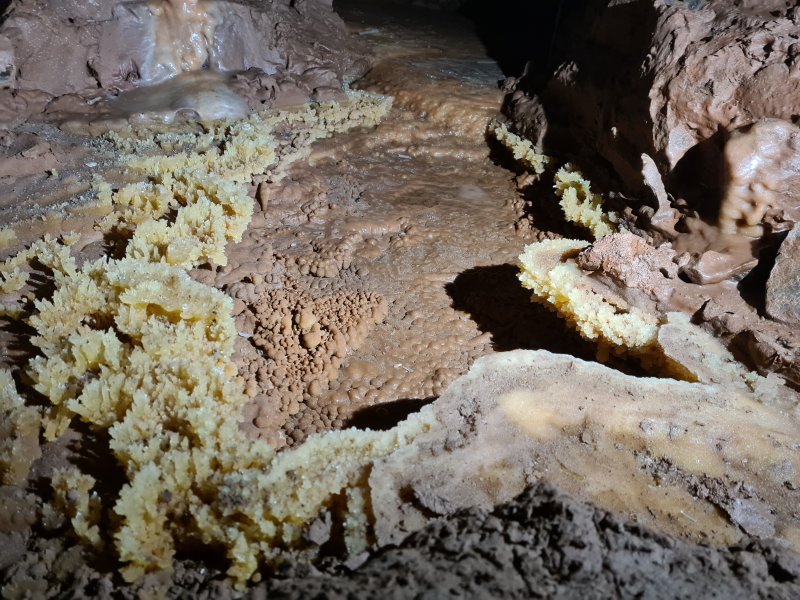 Whitsun Grotto's main dry crystal pool.
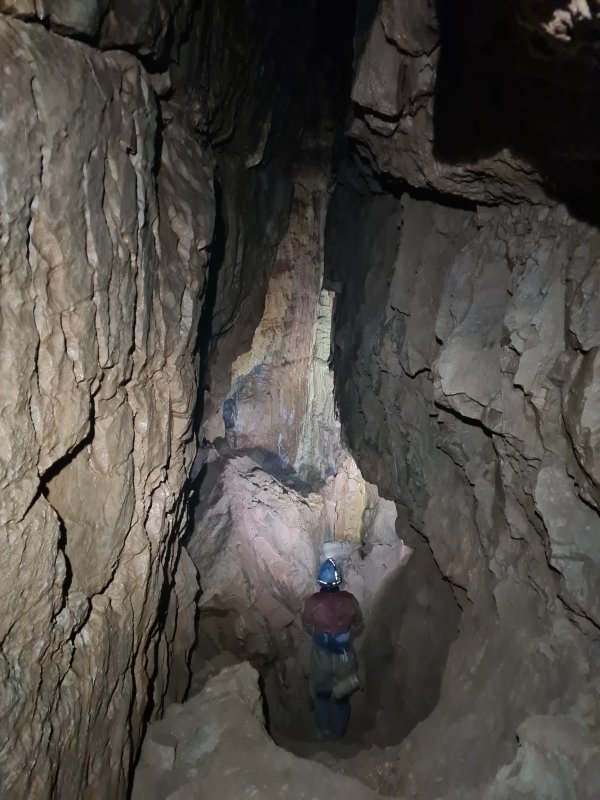 The main passage enlarges dramatically at Steeple Aven.
Modelling by Peter, lighting by Tarquin and Peter
The main passage enlarges dramatically at Steeple Aven.
Modelling by Peter, lighting by Tarquin and Peter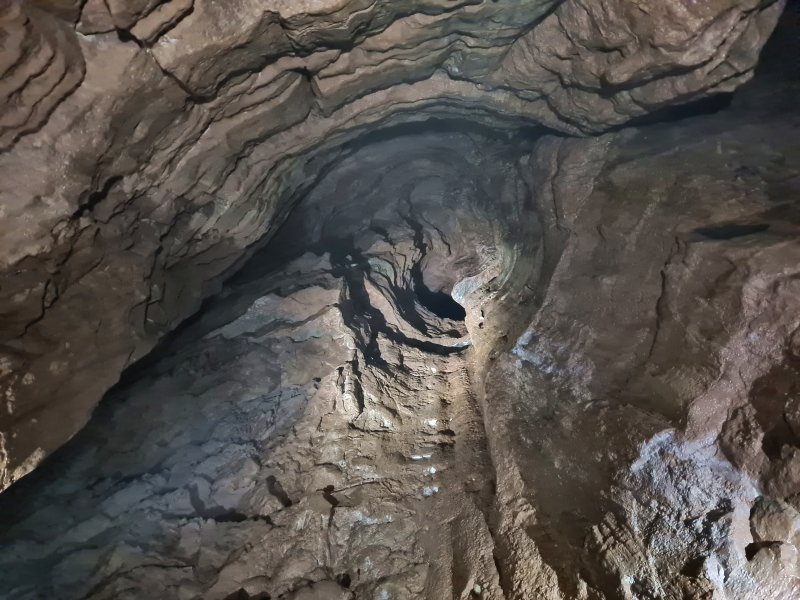 Steeple Aven is 18 metres high, with a chamber at the top called Sisyphean Chamber, which only has a tiny crawl leading onwards. It is not really worth the effort needed to reach it.
Lighting by Tarquin, Gareth and Peter
Steeple Aven is 18 metres high, with a chamber at the top called Sisyphean Chamber, which only has a tiny crawl leading onwards. It is not really worth the effort needed to reach it.
Lighting by Tarquin, Gareth and Peter Flowstone in Steeple Aven.
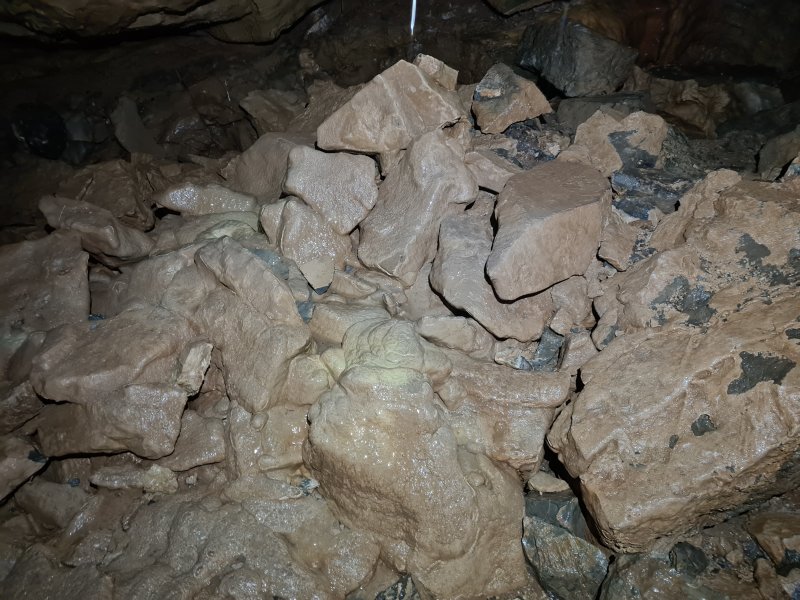 Calcited floor below Steeple Aven.
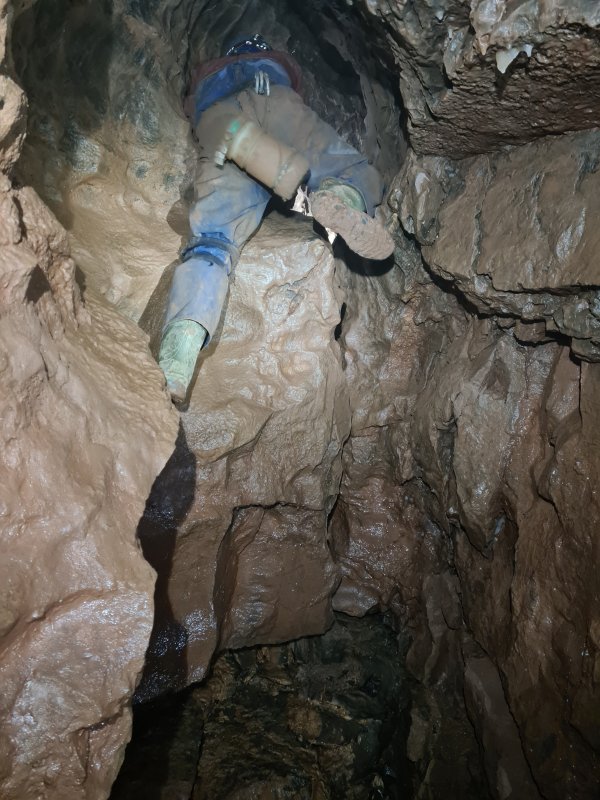 Climb up into Switch-back Passage.
Modelling by Peter, lighting by Tarquin and Peter
Climb up into Switch-back Passage.
Modelling by Peter, lighting by Tarquin and Peter Switch-back Passage is an awkward traverse.
Modelling by Gareth, lighting by Tarquin and Gareth
Switch-back Passage is an awkward traverse.
Modelling by Gareth, lighting by Tarquin and Gareth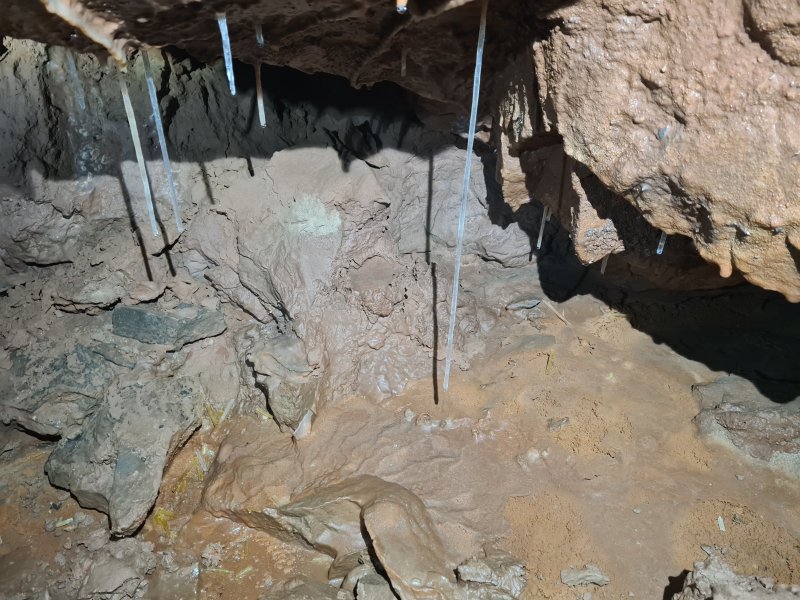 Normally, Switch-back Passage involves a climb down into a small enlargement, and then a climb back up into the continuation. These formations are in the enlargement.
Lighting by Tarquin and Gareth
Normally, Switch-back Passage involves a climb down into a small enlargement, and then a climb back up into the continuation. These formations are in the enlargement.
Lighting by Tarquin and Gareth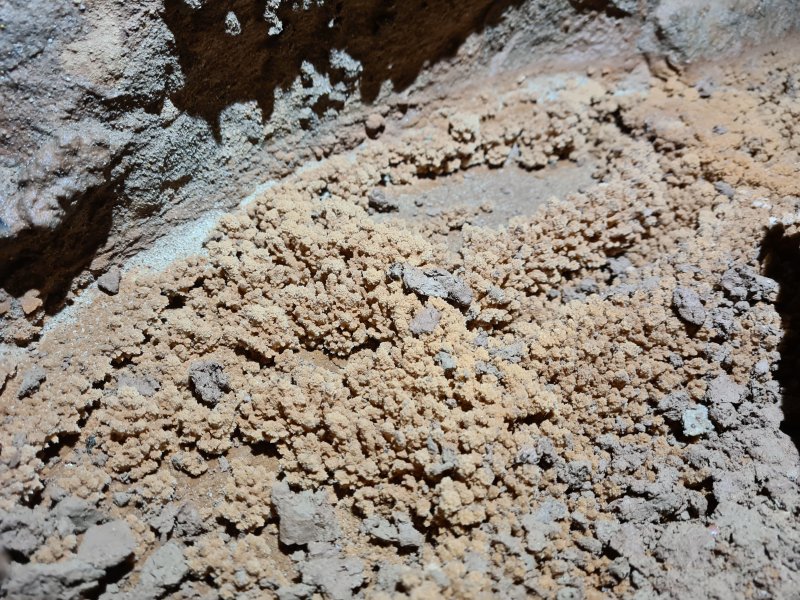 Crystal pool in a small side passage leading off from the enlargement.
 Formations in the side passage.
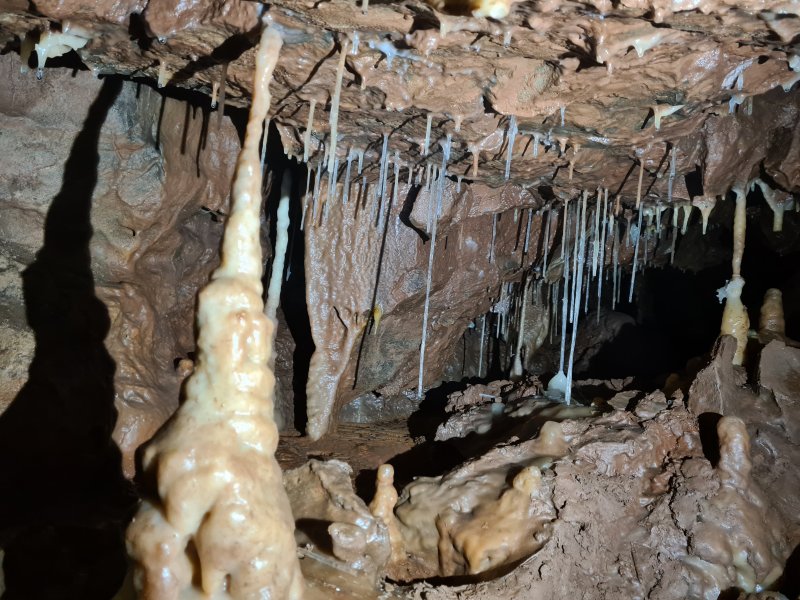 Formations in the side passage.
 Column with a pet helictite.
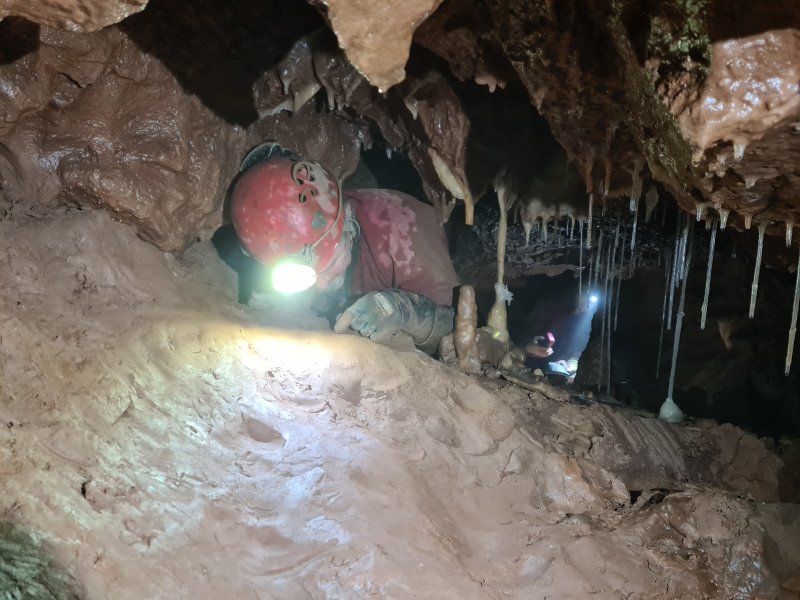 Wriggling past the helictite column, which has managed to survive the passing cavers.
Modelling by Gareth and Peter, lighting by Tarquin, Gareth and Peter
Wriggling past the helictite column, which has managed to survive the passing cavers.
Modelling by Gareth and Peter, lighting by Tarquin, Gareth and Peter Formations in the side passage.
Lighting by Tarquin and Gareth
Formations in the side passage.
Lighting by Tarquin and Gareth Formations in the grotto at the end of the side passage.
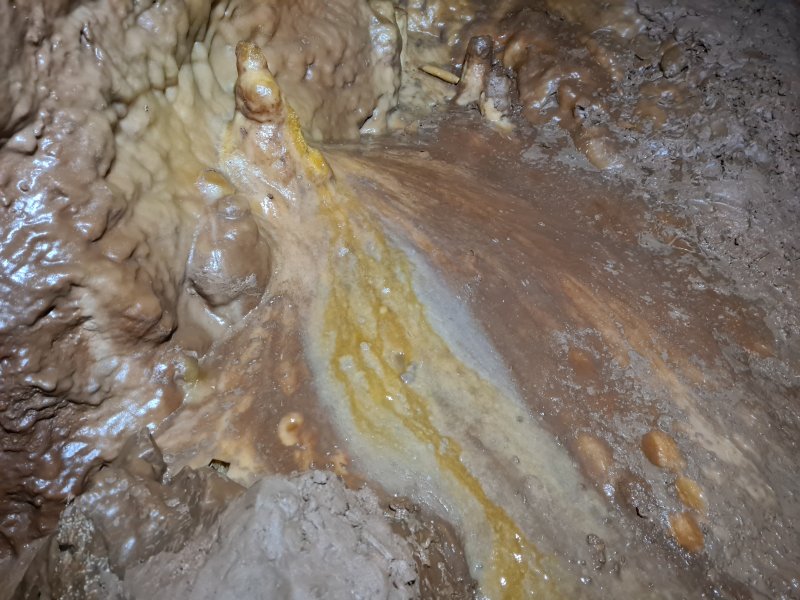 Coloured flowstone in the grotto.
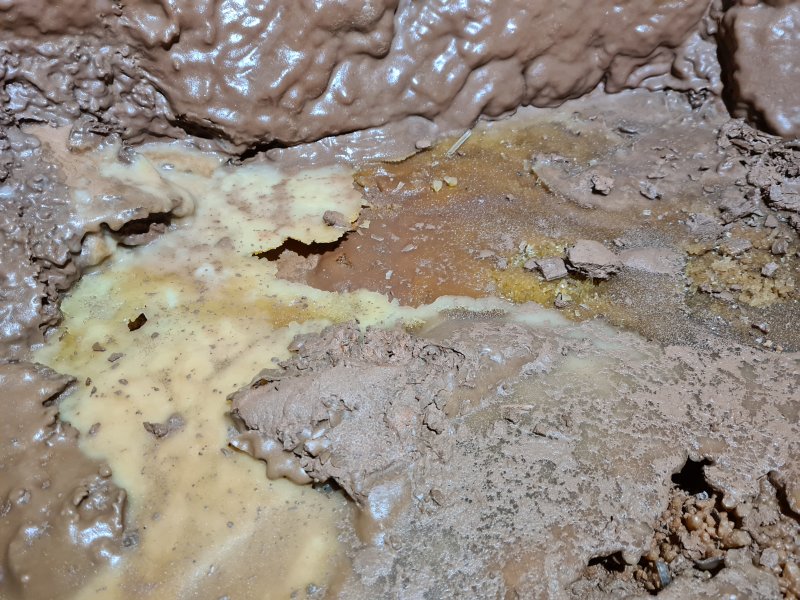 Dry crystal pool in the grotto.
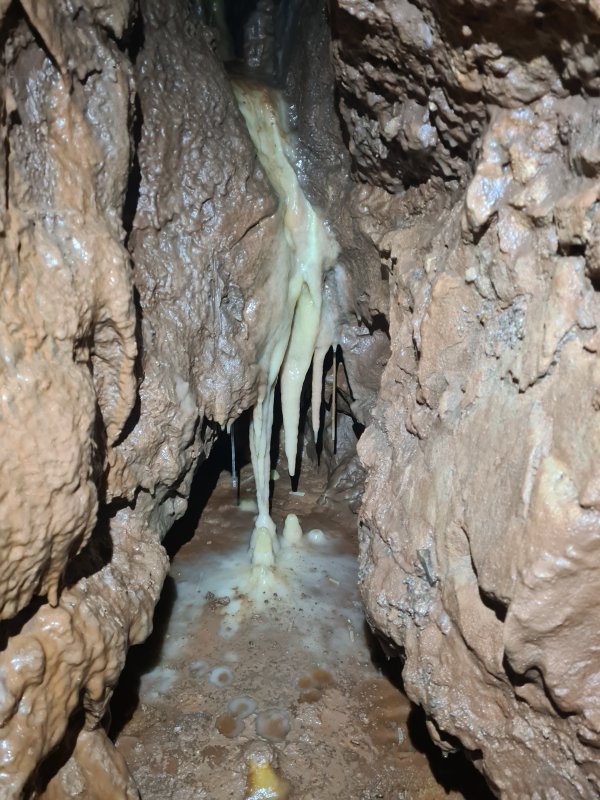 Stalactite columns in the grotto.
 Richly coloured curtains in the grotto.
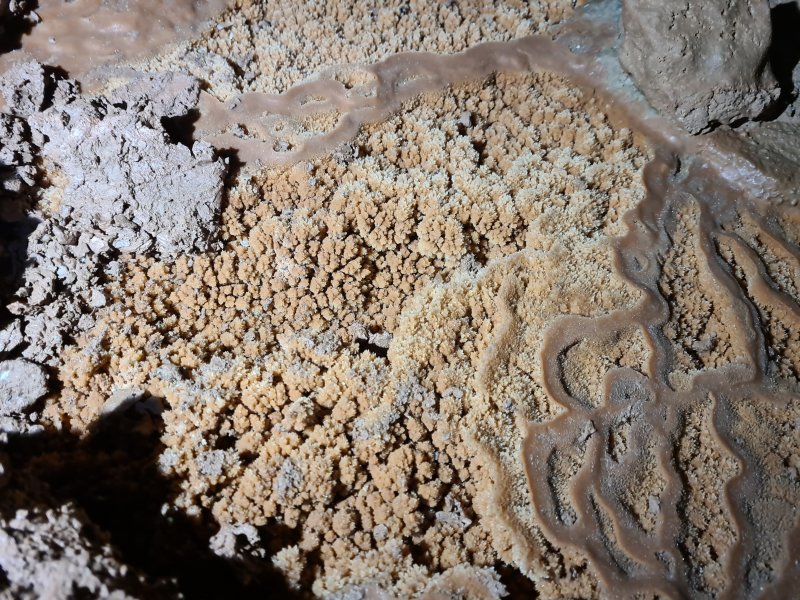 Dry crystal pool in the grotto.
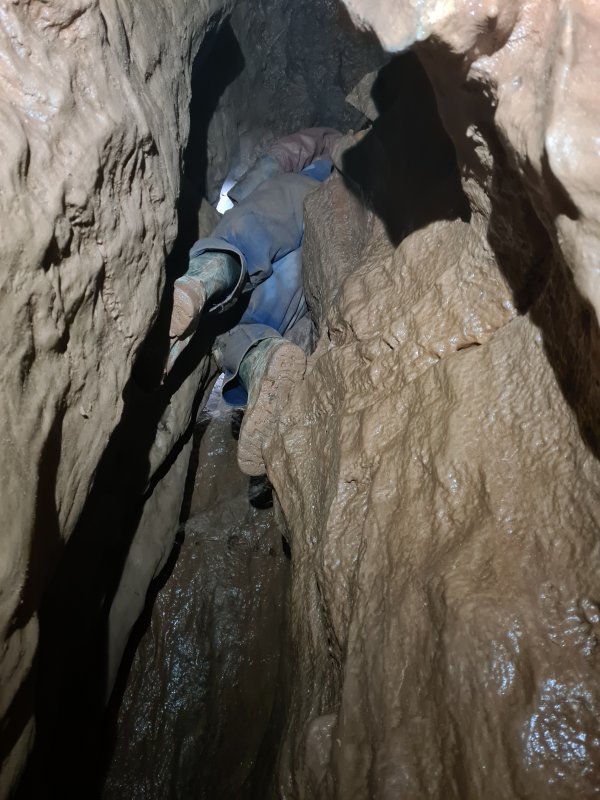 Climbing back up into the continuation of Switch-back Passage. It is also possible - though difficult - to traverse over the enlargement, but this misses out on the grotto.
Modelling by Peter, lighting by Tarquin and Peter
Climbing back up into the continuation of Switch-back Passage. It is also possible - though difficult - to traverse over the enlargement, but this misses out on the grotto.
Modelling by Peter, lighting by Tarquin and Peter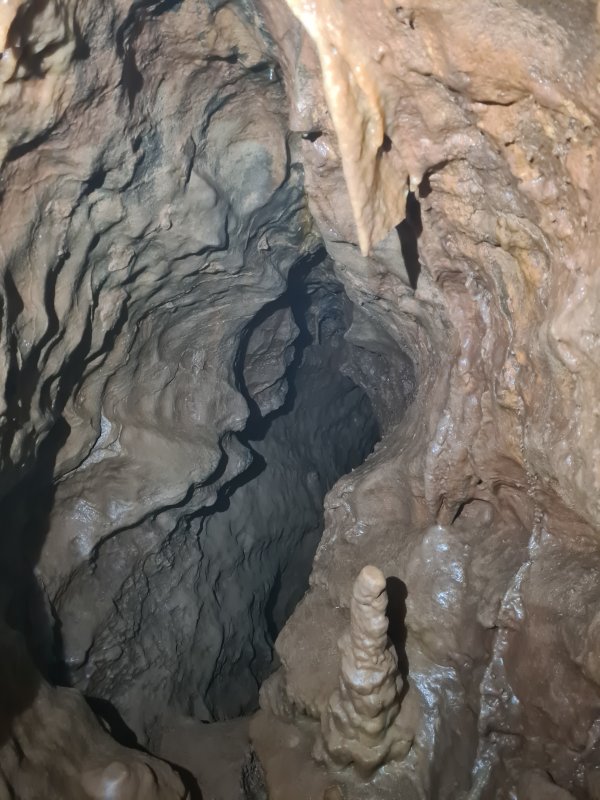 End of Switch-back Passage, much more awkward than the start. There is also a small oxbow above here, showing that the water originally twisted into a corkscrew to create Switch-back Passage.
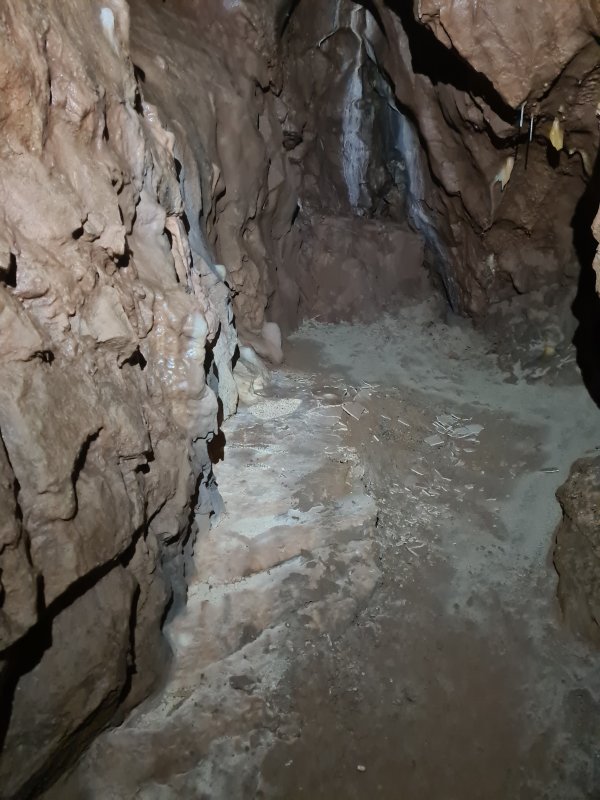 The passage emerges into another big rift. To the left, this closes down with some formations on the sand.
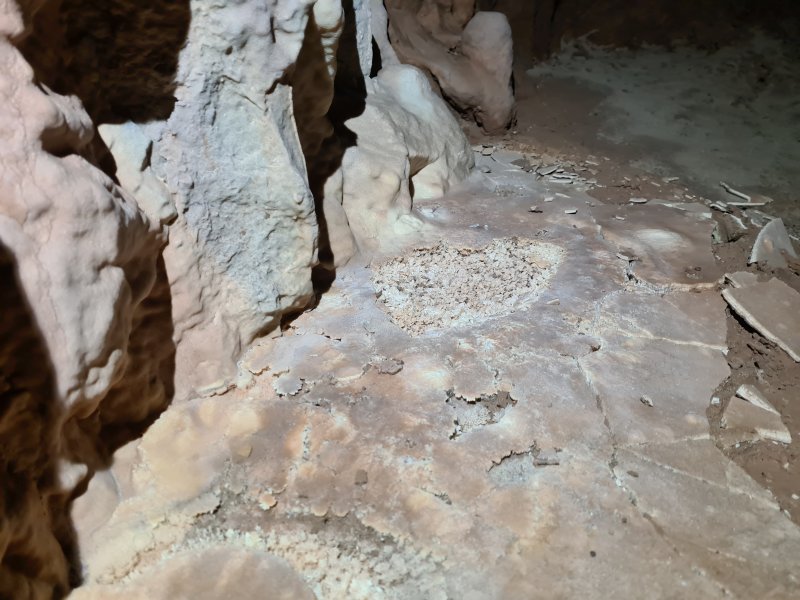 Dry crystal pools in the left end of the rift.
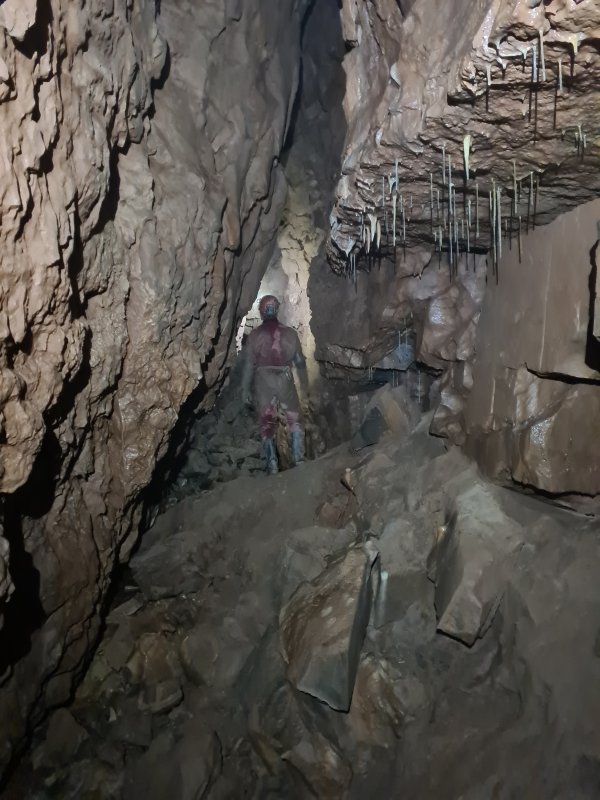 The way on is to the right in the big rift.
Modelling by Gareth, lighting by Tarquin and Gareth
The way on is to the right in the big rift.
Modelling by Gareth, lighting by Tarquin and Gareth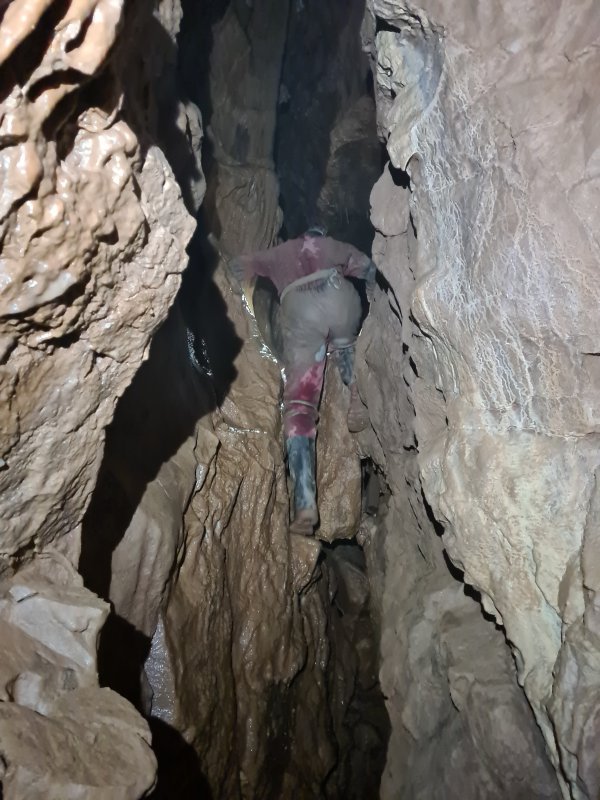 Clambering over jammed rocks.
Modelling by Gareth, lighting by Tarquin and Gareth
Clambering over jammed rocks.
Modelling by Gareth, lighting by Tarquin and Gareth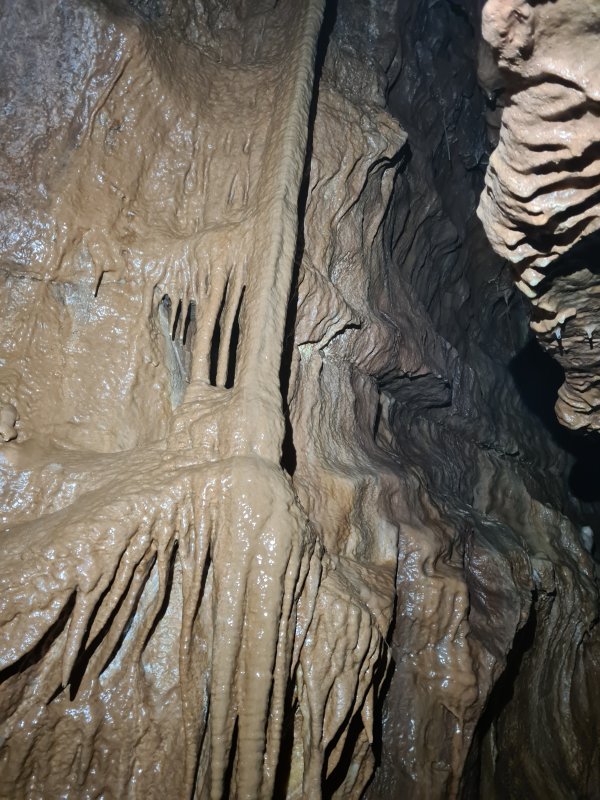 Flowstone formations in the big rift.
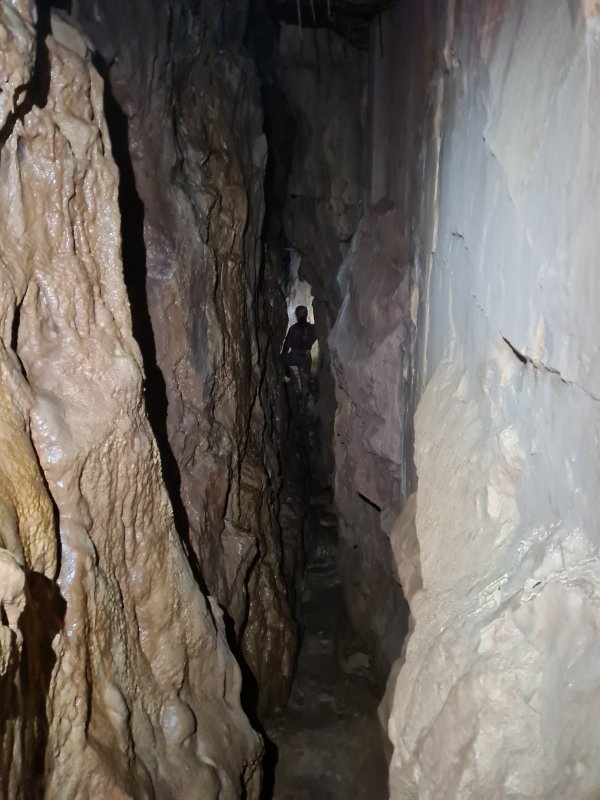 Tall section of the big rift.
Modelling by Gareth, lighting by Tarquin and Gareth
Tall section of the big rift.
Modelling by Gareth, lighting by Tarquin and Gareth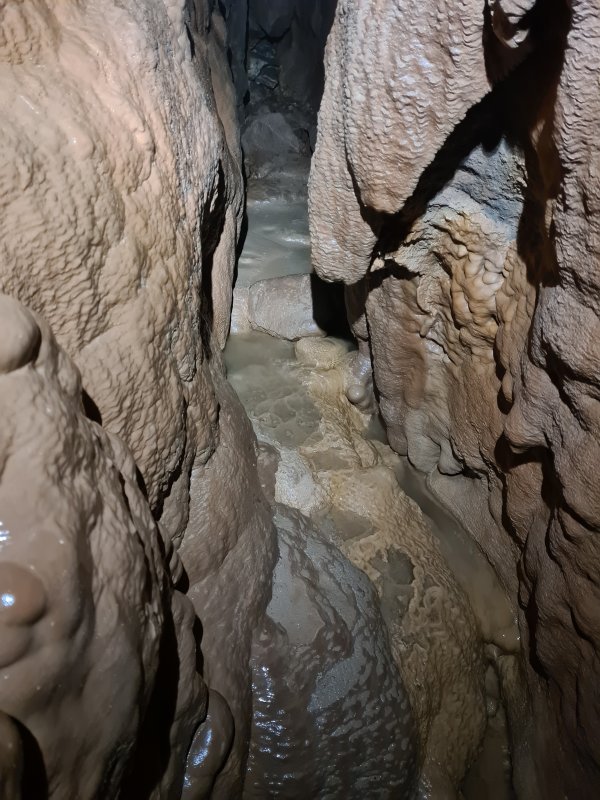 Flowstone covered floor and walls.
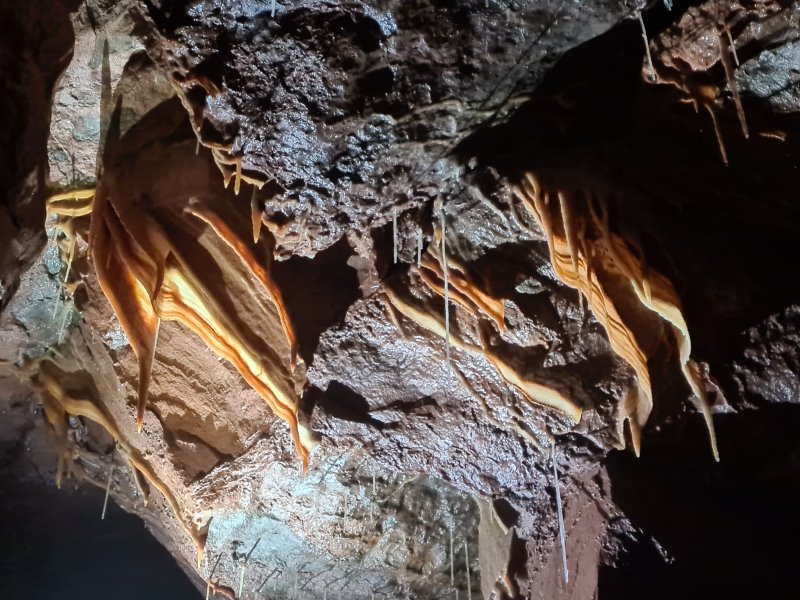 By far the best set of curtains in the cave, in the ceiling of the enlargement at the end of the big rift.
Lighting by Peter and Gareth
By far the best set of curtains in the cave, in the ceiling of the enlargement at the end of the big rift.
Lighting by Peter and Gareth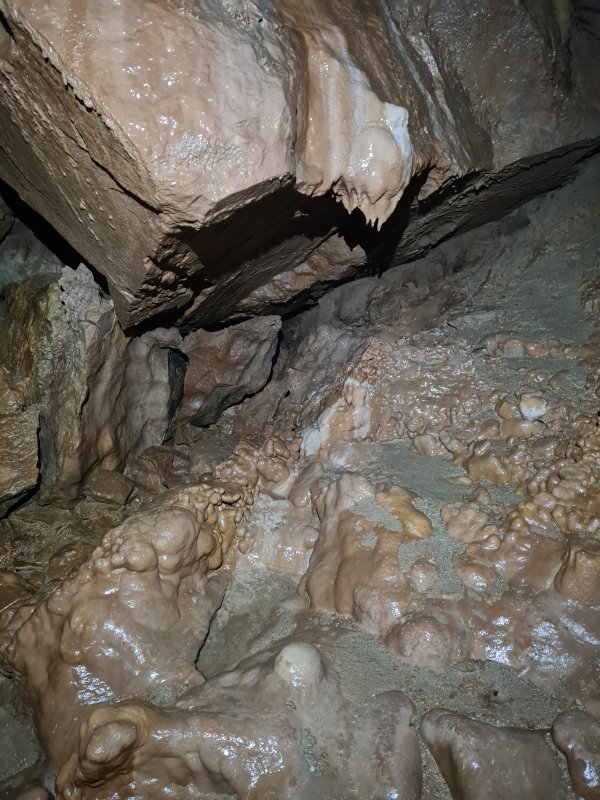 Stalagmite flow on the boulders below the curtains.
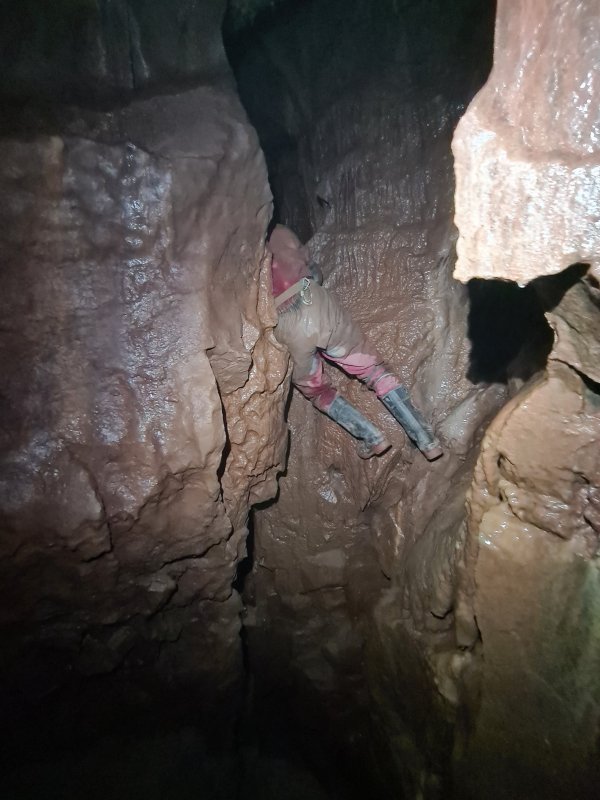 Continuing onwards requires a tricky climb and a slow motion wall-of-death style walk into the next rift.
Modelling by Gareth
Continuing onwards requires a tricky climb and a slow motion wall-of-death style walk into the next rift.
Modelling by Gareth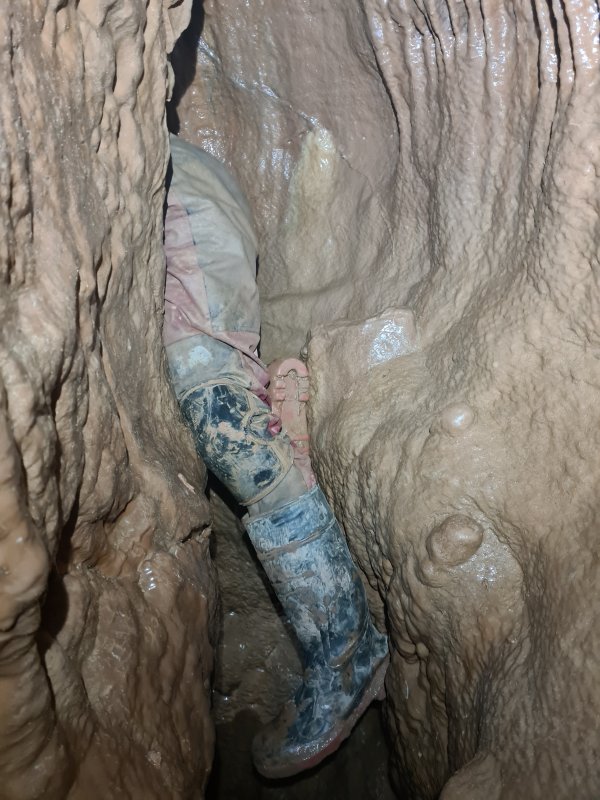 Squeezing along the top of the rift.
Modelling by Gareth
Squeezing along the top of the rift.
Modelling by Gareth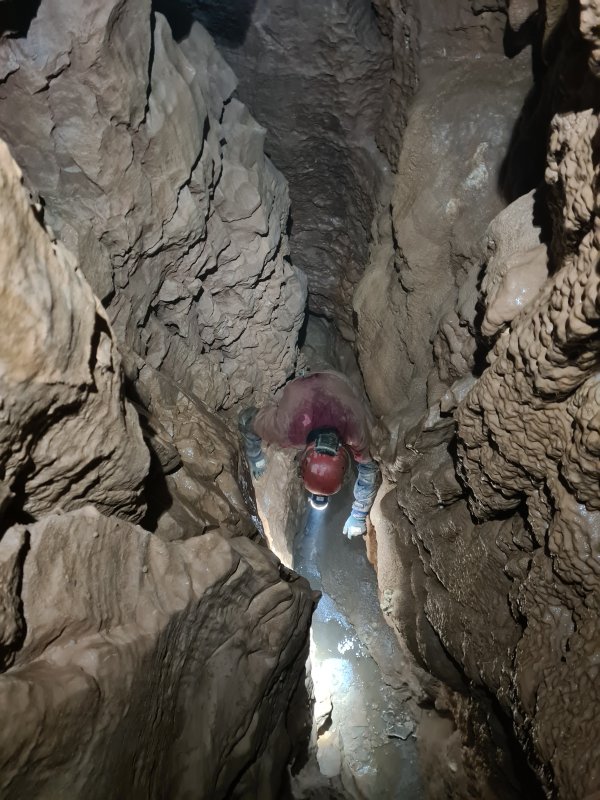 Descending into the rift once it becomes wide enough to walk along the bottom.
Modelling by Gareth, lighting by Tarquin and Gareth
Descending into the rift once it becomes wide enough to walk along the bottom.
Modelling by Gareth, lighting by Tarquin and Gareth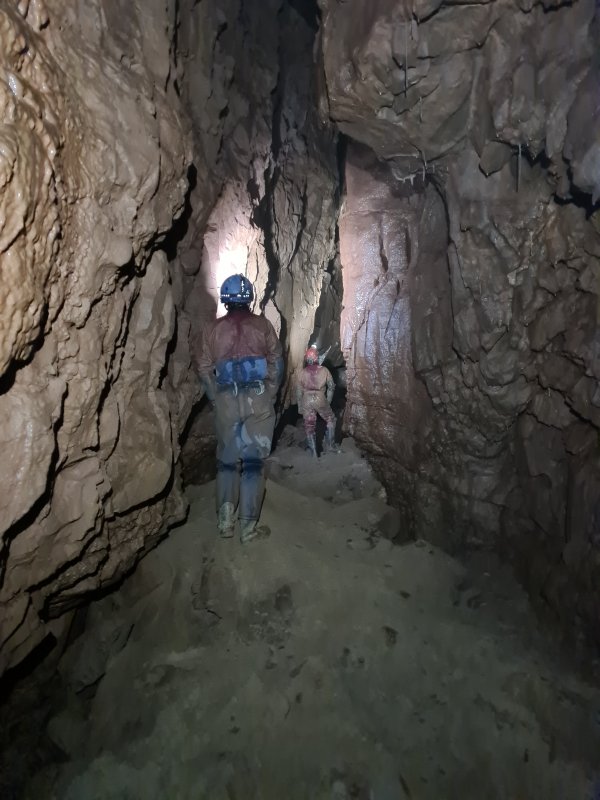 Final Chamber, the last big enlargement along the right.
Modelling by Peter and Gareth, lighting by Tarquin, Peter and Gareth
Final Chamber, the last big enlargement along the right.
Modelling by Peter and Gareth, lighting by Tarquin, Peter and Gareth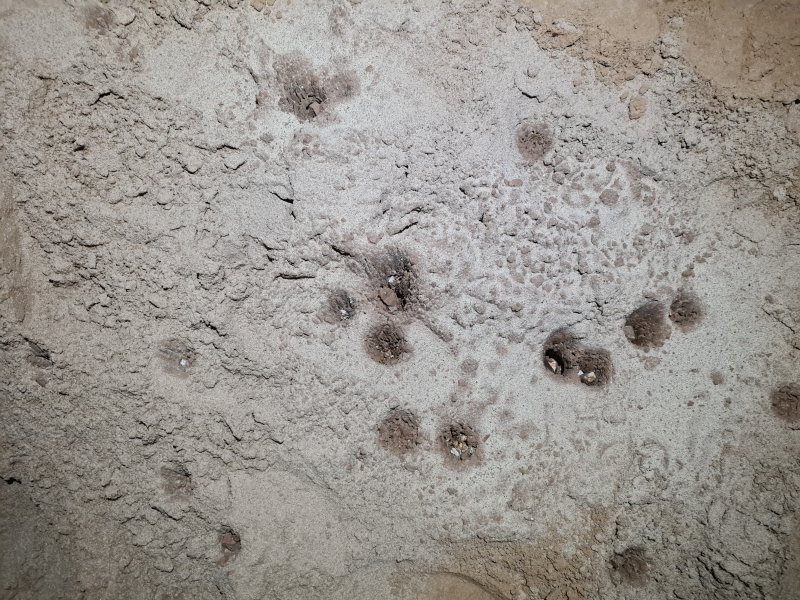 Drip pockets in Final Chamber.
 The passage ends abruptly both above and below the jammed boulders. The end of the cave, and end of the gallery.
Modelling by Gareth, lighting by Tarquin, Peter and Gareth
The passage ends abruptly both above and below the jammed boulders. The end of the cave, and end of the gallery.
Modelling by Gareth, lighting by Tarquin, Peter and Gareth