Wookey Hole 20-24 trips 20/05/2021 and 03/06/2021
Unless otherwise stated, camera, setups, lighting, edits and gallery effects by Tarquin. Modelling and lighting at various points will be Pete Bolt, Vince Simmonds, Callum Simmonds, Graham "Jake" Johnson, Nick Hawkes, Robin "Tav" Taviner, Duncan Price and Mike Moxon.
These were two trips to see the recent extensions in the dry parts of Wookey Hole, including the Land Of Hope And Glory extension to Wookey 20 and the connection to Wookey 24. Both trips were rushed, as the trips needed to coincide with digging trips (and we were distracting the diggers from their task) so that the cave could be locked and unlocked. We are both very grateful to the diggers for taking the time out from their usual digging to show us their discoveries.
 Passing the paper mill on the way to the cave. This mill is over 400 years old, and is the oldest surviving one in the UK. It is run as part of the tourist attraction of Wookey Hole Caves. The diggers are almost all present here, having been given special permission to explore the caves after hours.
Modelling by Tav, Jake, Pete, Duncan, Callum, Nick, Mike and Vince, lighting by the evil day star
Passing the paper mill on the way to the cave. This mill is over 400 years old, and is the oldest surviving one in the UK. It is run as part of the tourist attraction of Wookey Hole Caves. The diggers are almost all present here, having been given special permission to explore the caves after hours.
Modelling by Tav, Jake, Pete, Duncan, Callum, Nick, Mike and Vince, lighting by the evil day star Approaching the cave, with its imposing cliff.
Modelling by Pete, Tav, Jake, Callum, Nick, Vince and Duncan, lighting by Sol
Approaching the cave, with its imposing cliff.
Modelling by Pete, Tav, Jake, Callum, Nick, Vince and Duncan, lighting by Sol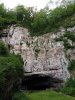 The resurgence, which drains most of the major Mendip caves. The river is tapped into a leat for the mill. Up to the left is the main showcave entrance, and in the cliff just off to the right is an artificial entrance into Wookey 9 (2). The show cave exit is off to the right, through an artificial tunnel. The showcave route passes through the first three chambers. Wookey 4 and 5 are kept sumped by the weir at the resurgence. Wookey 6 and 7 were discovered during the World's first cave dives, in 1935. The showcave has since been connected to Wookey 9 with artificial tunnels. Unlike most caves, where the number relates to pieces of cave separated by sumps or major chokes, the numbers in Wookey Hole can also refer to chamber numbers, where the chambers may in fact be fully underwater; 1-4 have dry connections and so do several others, while 14-18 are fully submerged.
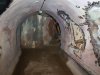 The showcave exit starts as a concrete tube, which then passes an additional artificial entrance.
Modelling by Pete and Callum, lighting by Tarquin, Pete and Callum
The showcave exit starts as a concrete tube, which then passes an additional artificial entrance.
Modelling by Pete and Callum, lighting by Tarquin, Pete and Callum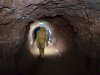 The showcave's artificial Kilmersdon Tunnel connecting to Wookey 9.
Modelling by Pete, Callum and Vince, lighting by Tarquin, Pete, Callum and Vince
The showcave's artificial Kilmersdon Tunnel connecting to Wookey 9.
Modelling by Pete, Callum and Vince, lighting by Tarquin, Pete, Callum and Vince Kilmersdon Tunnel.
Modelling by Pete, Callum and Vince, lighting by Tarquin, Pete, Callum and Vince
Kilmersdon Tunnel.
Modelling by Pete, Callum and Vince, lighting by Tarquin, Pete, Callum and Vince Wookey 9, the end of the showcave tour, and the former dive base for cave divers wishing to visit the rest of the flooded cave. Naturally, this was not connected to the earlier chambers by a dry route, so the showcave mined the passages to reach it and extend their route. An artificial entrance had already been added into the series of roof passages above the camera; 9(2) Extensions, in order to create a more accurate survey for use in the mining operation. In 2015, they added a new tunnel into Wookey 20.
Lighting by Tarquin, Pete and Callum
Wookey 9, the end of the showcave tour, and the former dive base for cave divers wishing to visit the rest of the flooded cave. Naturally, this was not connected to the earlier chambers by a dry route, so the showcave mined the passages to reach it and extend their route. An artificial entrance had already been added into the series of roof passages above the camera; 9(2) Extensions, in order to create a more accurate survey for use in the mining operation. In 2015, they added a new tunnel into Wookey 20.
Lighting by Tarquin, Pete and Callum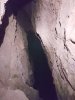 Part way along, the new tunnel intercepts an airbell, which appears to be Wookey 13.
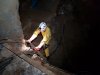 The tunnel ends abruptly at a climb down into Wookey 20. The tourist route has not yet been completed, but dry cavers can now visit this previously divers-only part of the cave.
Modelling by Pete and Callum's legs, lighting by Tarquin, Pete and Callum
The tunnel ends abruptly at a climb down into Wookey 20. The tourist route has not yet been completed, but dry cavers can now visit this previously divers-only part of the cave.
Modelling by Pete and Callum's legs, lighting by Tarquin, Pete and Callum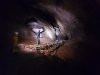 The large and impressive chamber of Wookey 20, with some large rocks growing out of the wall like giant bracket fungi.
Modelling by Pete, Callum and Vince, lighting by Tarquin, Pete, Callum and Vince
The large and impressive chamber of Wookey 20, with some large rocks growing out of the wall like giant bracket fungi.
Modelling by Pete, Callum and Vince, lighting by Tarquin, Pete, Callum and Vince One side of the chamber has a deep, static pool that does not seem to connect to any of the other sumps. The sumps leading both upstream and downstream lie at the far end of the chamber.
Lighting by Tarquin, Pete, Callum and Vince
One side of the chamber has a deep, static pool that does not seem to connect to any of the other sumps. The sumps leading both upstream and downstream lie at the far end of the chamber.
Lighting by Tarquin, Pete, Callum and Vince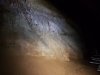 Finely etched fluting on the wall of Chamber 21.
Lighting by Tarquin, Pete, Callum and Vince
Finely etched fluting on the wall of Chamber 21.
Lighting by Tarquin, Pete, Callum and Vince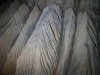 Detail of the fluting.
 Opposite the static pool is the dry way on, the longest single side passage in the system even before the breakthroughs. It soon passes the very small Two Ws Series, a side passage containing its own sump.
Modelling by Pete, Callum and Vince, lighting by Tarquin, Pete, Callum and Vince
Opposite the static pool is the dry way on, the longest single side passage in the system even before the breakthroughs. It soon passes the very small Two Ws Series, a side passage containing its own sump.
Modelling by Pete, Callum and Vince, lighting by Tarquin, Pete, Callum and Vince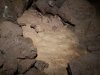 Early flowstone.
 This passage is very steep, gaining a considerable 60 metres of height over its first 200 metres. You definitely notice that you are working.
Modelling by Pete and Callum, lighting by Tarquin, Pete, Callum and Vince
This passage is very steep, gaining a considerable 60 metres of height over its first 200 metres. You definitely notice that you are working.
Modelling by Pete and Callum, lighting by Tarquin, Pete, Callum and Vince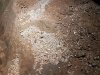 Cryostal in the passage. This is the first cave where cryostal - or Cryogenic Cave Calcite (CCCs) - was recognised in the UK, but it has subsequently been found in several Mendip caves, many Forest of Dean caves, most major South Wales caves, and a handful of caves in Derbyshire, Yorkshire and Scotland. While South Wales seems to have by far the most abundant deposits, Wookey Hole has an impressive amount too.
 Dried gour pools.
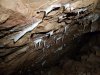 Small curtains covering the steeply sloping ceiling. The dip of the Mendip limestone is very apparent here.
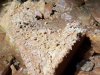 Spiky crystal growth on flowstone.
 Spiky crystal growth.
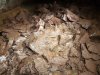 A large patch of cryostal.
Lighting by Tarquin and Pete
A large patch of cryostal.
Lighting by Tarquin and Pete A thick layer of cryostal.
Lighting by Tarquin and Pete
A thick layer of cryostal.
Lighting by Tarquin and Pete Stal in the top of the bedding.
 Gour pools where the passage temporarily reduces in size.
 Multicoloured flowstone.
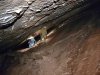 Steeply inclined bedding.
Modelling by Pete, Callum and Vince, lighting by Tarquin, Pete, Callum and Vince
Steeply inclined bedding.
Modelling by Pete, Callum and Vince, lighting by Tarquin, Pete, Callum and Vince The bedding becomes so steep that there is a risk of slipping down it, so there is a traverse line (the blur in the ceiling) to help guide you over it.
Modelling by Pete, Callum and Vince, lighting by Tarquin, Pete, Callum and Vince
The bedding becomes so steep that there is a risk of slipping down it, so there is a traverse line (the blur in the ceiling) to help guide you over it.
Modelling by Pete, Callum and Vince, lighting by Tarquin, Pete, Callum and Vince Decorations in the ceiling of the bedding.
Lighting by Tarquin and Pete
Decorations in the ceiling of the bedding.
Lighting by Tarquin and Pete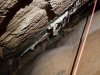 The path then ascends the steep flowstone to the high point.
 Stal along the top of the passage.
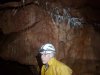 Chamber at the top of the passage. This was about as far as cavers could previously go, but there is now a choice of routes.
Modelling by Pete
Chamber at the top of the passage. This was about as far as cavers could previously go, but there is now a choice of routes.
Modelling by Pete On the first trip, we continued in the same direction, descending through a ruckle with the aid of a handline. The diggers have worked extremely hard here, dig after dig, chokes and mud, and have been rewarded with several breakthroughs.
Modelling by hints of Pete, Callum and hints of Vince, lighting by Tarquin, Pete, Callum and Vince
On the first trip, we continued in the same direction, descending through a ruckle with the aid of a handline. The diggers have worked extremely hard here, dig after dig, chokes and mud, and have been rewarded with several breakthroughs.
Modelling by hints of Pete, Callum and hints of Vince, lighting by Tarquin, Pete, Callum and Vince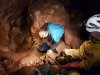 The route clambers down flowstone covered boulders.
Modelling by Pete, Callum and Vince, lighting by Tarquin, Pete, Callum and Vince
The route clambers down flowstone covered boulders.
Modelling by Pete, Callum and Vince, lighting by Tarquin, Pete, Callum and Vince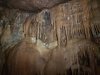 Stal above the clamber.
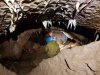 The clamber eases off into an arched passage.
Modelling by Pete, Callum and Vince, lighting by Tarquin, Pete, Callum and Vince
The clamber eases off into an arched passage.
Modelling by Pete, Callum and Vince, lighting by Tarquin, Pete, Callum and Vince Then a second little clamber reaches a flowstone covered wall.
Modelling by Callum, lighting by Tarquin, Pete and Callum
Then a second little clamber reaches a flowstone covered wall.
Modelling by Callum, lighting by Tarquin, Pete and Callum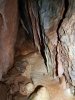 Flowstone below the clamber.
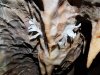 Helictites in the form of Predator's mouth.
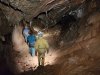 The first section of lower level cave is well decorated, like the passage that preceded it.
Modelling by Pete, Callum and Vince, lighting by Tarquin, Pete, Callum and Vince
The first section of lower level cave is well decorated, like the passage that preceded it.
Modelling by Pete, Callum and Vince, lighting by Tarquin, Pete, Callum and Vince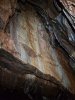 Flowstone covered wall. Interestingly, this wall is vertical - an unusual sight in this steeply dipping limestone.
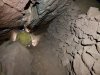 Spoil from the next major dig. An impressive amount of work went on here.
Modelling by Pete, lighting by Tarquin and Pete
Spoil from the next major dig. An impressive amount of work went on here.
Modelling by Pete, lighting by Tarquin and Pete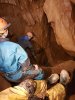 Descending through the new passage.
Modelling by Pete, Callum and Vince, lighting by Tarquin, Pete, Callum and Vince
Descending through the new passage.
Modelling by Pete, Callum and Vince, lighting by Tarquin, Pete, Callum and Vince Mud formations.
 The old mud line.
 Grotto section before the next dig.
Modelling by Pete, Callum and Vince, lighting by Tarquin, Pete, Callum and Vince
Grotto section before the next dig.
Modelling by Pete, Callum and Vince, lighting by Tarquin, Pete, Callum and Vince Floor of the grotto section.
 Fuzzy Wuzzy dig, the one that gave the major breakthrough. This is named as a Dad's Army reference.
 The major breakthrough starts with a tall chamber, where there are three ways on. Fuzzy Wuzzy is in the floor to the right here. Behind the camera is a descent to the current digs. Tucked up in the left wall seen here is a surprisingly large passage that is invisible from almost all angles, which is the end of the round trip. Up the steep climb seen ahead-left here is the main way into Land Of Hope And Glory, the start of the round trip.
Modelling by Pete, Callum and Vince, lighting by Tarquin, Pete, Callum and Vince
The major breakthrough starts with a tall chamber, where there are three ways on. Fuzzy Wuzzy is in the floor to the right here. Behind the camera is a descent to the current digs. Tucked up in the left wall seen here is a surprisingly large passage that is invisible from almost all angles, which is the end of the round trip. Up the steep climb seen ahead-left here is the main way into Land Of Hope And Glory, the start of the round trip.
Modelling by Pete, Callum and Vince, lighting by Tarquin, Pete, Callum and Vince Cryostal on the floor of the breakthrough chamber.
 Cryostal.
 Detail of the cryostal.
 This part of the cave is formed in comglomerate, made from chunks of limestone in a Mercia Mudstone matrix. Caves in conglomerate are very rare, but there was enough limestone in the mix for the cave to manage to form. It looks very similar to fault breccia, with jagged limestone chunks. In this case, it is a Neptunian dyke (fracture filled with erosion debris).
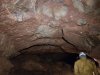 The passage at the top of the climb has more conglomerate, where it is much more visible as a conglomerate, with very large limestone boulders.
Modelling by Pete and Callum, lighting by Tarquin, Pete and Callum
The passage at the top of the climb has more conglomerate, where it is much more visible as a conglomerate, with very large limestone boulders.
Modelling by Pete and Callum, lighting by Tarquin, Pete and Callum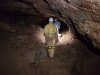 Passage at the top of the climb. The bedding to the left cuts off the next corner. There is also a bedding in the floor, that extends slightly further than the passage, heading towards a side passage in Wookey 24.
Modelling by Pete, Callum's arm and Vince, lighting by Tarquin, Pete, Callum and Vince
Passage at the top of the climb. The bedding to the left cuts off the next corner. There is also a bedding in the floor, that extends slightly further than the passage, heading towards a side passage in Wookey 24.
Modelling by Pete, Callum's arm and Vince, lighting by Tarquin, Pete, Callum and Vince The passage changes character completely at a corner, where the floor bedding continues a short distance ahead.
Modelling by Vince and Callum, lighting by Tarquin, Pete, Vince and Callum
The passage changes character completely at a corner, where the floor bedding continues a short distance ahead.
Modelling by Vince and Callum, lighting by Tarquin, Pete, Vince and Callum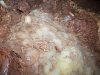 The floor has a powder that looks like cryostal, but which appears to be shattered crystals instead. Perhaps this is a result of movement of the fault, crushing calcite.
 At the corner, the route climbs up into a rift instead.
Modelling by Callum, lighting by Tarquin and Callum
At the corner, the route climbs up into a rift instead.
Modelling by Callum, lighting by Tarquin and Callum Conglomerate containing a high amount of haematite - red ochre.
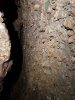 The rift is completely formed in oversuit-destroying conglomerate.
 The rift then descends through a geologist's dream. There are signs of hydrothermal activity, geothermal dykes, and folding. Tucked under the wall are two passages, the first connects back to before the climb, and the second is the continuation of the round trip.
Modelling by Callum and Vince, lighting by Tarquin, Pete, Callum and Vince
The rift then descends through a geologist's dream. There are signs of hydrothermal activity, geothermal dykes, and folding. Tucked under the wall are two passages, the first connects back to before the climb, and the second is the continuation of the round trip.
Modelling by Callum and Vince, lighting by Tarquin, Pete, Callum and Vince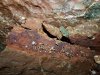 Rich haematite rock.
 Intrusion which appears to be an intrusive dyke (a fracture in the rock filled with heated/igneous material).
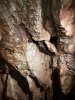 Crystalline rods.
Lighting by Tarquin and Pete
Crystalline rods.
Lighting by Tarquin and Pete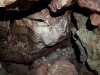 Very visible fold.
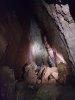 The passage then breaks into the splendour of Land Of Hope And Glory's big rift. This is some 70 metres long, 8 metres wide, and 25 metres tall, sloping at Mendip's typical steep dip. It requires more light than we had with us. The walls are stained a deep, rich red, the ceiling is white, and there are more incredible geological formations. What a place!
Modelling by Pete, Callum and Vince, lighting by Tarquin, Pete, Callum and Vince
The passage then breaks into the splendour of Land Of Hope And Glory's big rift. This is some 70 metres long, 8 metres wide, and 25 metres tall, sloping at Mendip's typical steep dip. It requires more light than we had with us. The walls are stained a deep, rich red, the ceiling is white, and there are more incredible geological formations. What a place!
Modelling by Pete, Callum and Vince, lighting by Tarquin, Pete, Callum and Vince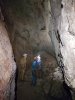 The top end of the rift closes down abruptly, with just a few solutional pockets.
Modelling by Pete, Callum and Vince, lighting by Tarquin, Pete, Callum and Vince
The top end of the rift closes down abruptly, with just a few solutional pockets.
Modelling by Pete, Callum and Vince, lighting by Tarquin, Pete, Callum and Vince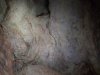 Colours at the top of the rift, with grey and lilac tinted walls, and green tinted clay (Tea Green Marl).
Lighting by Tarquin and Pete
Colours at the top of the rift, with grey and lilac tinted walls, and green tinted clay (Tea Green Marl).
Lighting by Tarquin and Pete Veining in the boulders.
 Hydrothermal crystal growth on the walls of the rift. These would appear to have been created by the passage being part of a geyser system, much like Pen Park Hole.
Lighting by Tarquin and Pete
Hydrothermal crystal growth on the walls of the rift. These would appear to have been created by the passage being part of a geyser system, much like Pen Park Hole.
Lighting by Tarquin and Pete The best geode I have personally seen underground, in the wall of the big rift. The crystals are known as dogtooth spar.
Modelling by Tarquin
The best geode I have personally seen underground, in the wall of the big rift. The crystals are known as dogtooth spar.
Modelling by Tarquin Crystals in the huge geode.
 A second huge geode at the top of the rift.
 Formations in the big rift, something lacking elsewhere in the extension.
 The walls are stained with a thick coat of haematite, which gives the red, black and maroon colouring.
 Haematite boulder.
Modelling by Pete, lighting by Tarquin and Pete
Haematite boulder.
Modelling by Pete, lighting by Tarquin and Pete Haematite and crystal layers.
 Pile of limestone and haematite boulders.
Lighting by Tarquin and Callum
Pile of limestone and haematite boulders.
Lighting by Tarquin and Callum Detail of the haematite rocks.
 The top of the big rift.
Modelling by Callum, lighting by Tarquin, Vince and Pete
The top of the big rift.
Modelling by Callum, lighting by Tarquin, Vince and Pete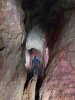 From here, you can see the huge aven at the high point of the ceiling. This was climbed for 15 metres, but the passage at the top closed down after just 25 metres in more Tea Green Marl fill.
Modelling by Callum, lighting by Tarquin, Vince, Callum and Pete
From here, you can see the huge aven at the high point of the ceiling. This was climbed for 15 metres, but the passage at the top closed down after just 25 metres in more Tea Green Marl fill.
Modelling by Callum, lighting by Tarquin, Vince, Callum and Pete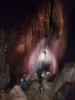 Looking down the middle portion of the big rift, with the way in on the left. Here you can see the huge scale of the place, with Pete in the distance.
Modelling by Vince, Callum and Pete, lighting by Tarquin, Vince, Callum and Pete
Looking down the middle portion of the big rift, with the way in on the left. Here you can see the huge scale of the place, with Pete in the distance.
Modelling by Vince, Callum and Pete, lighting by Tarquin, Vince, Callum and Pete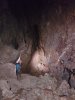 The bottom part of the rift, which abruptly ends, without any obvious passage, or anywhere obvious to dig. There is a climb down needed to see the bottom, and visits are discouraged, to protect the vulnerable mud formations. We were allowed to visit for the photography.
Modelling by Callum and Pete, lighting by Tarquin, Callum and Pete
The bottom part of the rift, which abruptly ends, without any obvious passage, or anywhere obvious to dig. There is a climb down needed to see the bottom, and visits are discouraged, to protect the vulnerable mud formations. We were allowed to visit for the photography.
Modelling by Callum and Pete, lighting by Tarquin, Callum and Pete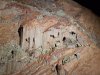 Mud drapes beside the climb. These are exactly where you want to put your feet while climbing.
 Mud drapes by the climb.
 Mud drapes by the climb.
 Mud formations.
 Mud formations.
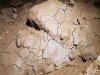 Mud formations.
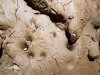 Mud formations with drip pockets.
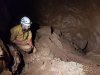 The bottom of the rift is dominated by a forest of hoodoos. Even if it were an obvious place to dig (that depression in the floor looks like the bottom of a pool, not a soakaway), it would be criminal to dig here.
Modelling by Pete
The bottom of the rift is dominated by a forest of hoodoos. Even if it were an obvious place to dig (that depression in the floor looks like the bottom of a pool, not a soakaway), it would be criminal to dig here.
Modelling by Pete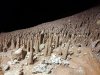 Hoodoos. Each capped with a tiny pebble, protecting the tower of mud from being washed away like the mud around it.
Lighting by Tarquin and Pete
Hoodoos. Each capped with a tiny pebble, protecting the tower of mud from being washed away like the mud around it.
Lighting by Tarquin and Pete Hoodoos.
 Hoodoos.
 Heading out through the round trip, where there is more crystal growth evidence of hydrothermal activity.
 The return branch starts fairly small.
Modelling by Pete, lighting by Tarquin, Pete and Calum
The return branch starts fairly small.
Modelling by Pete, lighting by Tarquin, Pete and Calum It then becomes a wide bedding.
Modelling by Pete, Callum and Vince, lighting by Tarquin, Pete, Callum and Vince
It then becomes a wide bedding.
Modelling by Pete, Callum and Vince, lighting by Tarquin, Pete, Callum and Vince Stal in the return passage, with insects flying through the picture.
Modelling by a bunch of winged creatures
Stal in the return passage, with insects flying through the picture.
Modelling by a bunch of winged creatures Cryostal in the return passage. The texture is clearly visible, particularly the larger beads.
 Cryostal in the return passage.
 Fossil coral, probably the common Lithostrotion.
 Large chunks of broken coral, probably a horn coral or similar rugose coral, with some smaller Lithostrotion pieces.
 More chunks of large coral fossil.
 The passage ends back at the chamber at the start of Land Of Hope And Glory. From there, we head down into the new digs. The passage descends steeply, running parallel to the bottom of the big rift. The hope is that this will reach a way on, and avoid destroying mud formations.
Modelling by Pete and Callum, lighting by Tarquin, Pete and Callum
The passage ends back at the chamber at the start of Land Of Hope And Glory. From there, we head down into the new digs. The passage descends steeply, running parallel to the bottom of the big rift. The hope is that this will reach a way on, and avoid destroying mud formations.
Modelling by Pete and Callum, lighting by Tarquin, Pete and Callum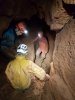 The dig splits into an upper and lower level, running parallel to each other. Another mammoth amount of mud removal is taking place here, much like the previous digs. We helped a small amount, while marvelling at the dry stone wall construction for spoil.
Modelling by Pete, Callum, Jake and parts of Vince, lighting by Tarquin, Pete, Callum, Jake and Vince
The dig splits into an upper and lower level, running parallel to each other. Another mammoth amount of mud removal is taking place here, much like the previous digs. We helped a small amount, while marvelling at the dry stone wall construction for spoil.
Modelling by Pete, Callum, Jake and parts of Vince, lighting by Tarquin, Pete, Callum, Jake and Vince Efforts were being concentrated on the upper tube, which is currently filled with mud.
Modelling by Nick, lighting by Tarquin and Nick
Efforts were being concentrated on the upper tube, which is currently filled with mud.
Modelling by Nick, lighting by Tarquin and Nick We returned for a later trip, this time taking the other route from the top chamber in Wookey 20. This starts as an obvious funnel of calcite, requiring a handline to keep control.
Modelling by Callum, lighting by Tarquin and Callum
We returned for a later trip, this time taking the other route from the top chamber in Wookey 20. This starts as an obvious funnel of calcite, requiring a handline to keep control.
Modelling by Callum, lighting by Tarquin and Callum Lithostrotion fossils on the climb.
 The route continues extremely steeply, with the rope rebelaying a few times.
Modelling by Callum, lighting by Tarquin, Callum and Vince
The route continues extremely steeply, with the rope rebelaying a few times.
Modelling by Callum, lighting by Tarquin, Callum and Vince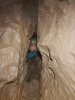 The route then becomes a lot harder, and this appears to be the old end of the passage, where the dry diggers started their dig.
Modelling by Callum, lighting by Tarquin and Callum
The route then becomes a lot harder, and this appears to be the old end of the passage, where the dry diggers started their dig.
Modelling by Callum, lighting by Tarquin and Callum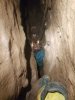 The slot continues.
Modelling and lighting by Tarquin and Callum
The slot continues.
Modelling and lighting by Tarquin and Callum Descending the slots.
Modelling by Pete, lighting by Tarquin and Pete
Descending the slots.
Modelling by Pete, lighting by Tarquin and Pete The last drop of the upper set, which is uncomfortably tight. The ladder is hard to use in such a narrow, slimy space, but in the past, they used to climb back up this without a ladder at all, because it was apparently more grippy back then. How on earth?!
Modelling by Pete, lighting by Tarquin and Pete
The last drop of the upper set, which is uncomfortably tight. The ladder is hard to use in such a narrow, slimy space, but in the past, they used to climb back up this without a ladder at all, because it was apparently more grippy back then. How on earth?!
Modelling by Pete, lighting by Tarquin and Pete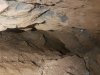 The breakthrough gave access to this muddy descent, which drops down to Wookey 23¾. The sump in that section seems to carry the downstream water from Wookey 24, and take it through to the main downstream cave, presumably the Wookey 22 upstream sump. The descent to that sump is supposed to be harder than the route to Wookey 24, so it needs more time than we had available.
 Instead, we scramble up cemented digging spoil, and head through a dig into Beginner's Luck. This dig connected Wookey 20 and Wookey 24, and gave dry cavers access to a huge load of passage. The largest piece of unconnected dry cave is now Wookey 22-23.
Modelling by Callum
Instead, we scramble up cemented digging spoil, and head through a dig into Beginner's Luck. This dig connected Wookey 20 and Wookey 24, and gave dry cavers access to a huge load of passage. The largest piece of unconnected dry cave is now Wookey 22-23.
Modelling by Callum Beginner's Luck, a wide bedding that looks really promising downhill but goes nowhere. This was found from the bottom up, in Wookey 24, so technically, this is now Wookey 24. However, it is not the grand piece of Wookey 24 that everyone wants to see. Instead, we head up the bedding through a ruckle.
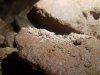 Fine, wispy cryostal in Beginner's Luck, under your feet as you climb through the ruckle. Somehow, it has survived.
 Drip splashes in Beginner's Luck.
 The way onwards returns to the familiar ridiculous slot dimensions.
Modelling by Callum and Vince, lighting by Tarquin, Callum and Vince
The way onwards returns to the familiar ridiculous slot dimensions.
Modelling by Callum and Vince, lighting by Tarquin, Callum and Vince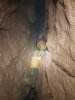 Even the easy parts of the route are like a contortionist's puzzle.
Modelling by Pete, lighting by Tarquin and Pete
Even the easy parts of the route are like a contortionist's puzzle.
Modelling by Pete, lighting by Tarquin and Pete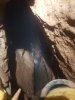 The tightest part of the route looks like it will be irreversible when seen from the top. However, you do not need to remove your helmet.
Modelling by Tarquin's legs and Callum, lighting by Tarquin, Callum and Vince
The tightest part of the route looks like it will be irreversible when seen from the top. However, you do not need to remove your helmet.
Modelling by Tarquin's legs and Callum, lighting by Tarquin, Callum and Vince You have to find the widest part, but it is actually a lot easier than it looks on the return, as there are some holds in convenient places. I had stated on the way in that this was so hard that I would not want to return again, but retracted that statement after getting back out. This passage was originally explored from below, using rock removal techniques to expand it.
Modelling by Pete, lighting by Tarquin and Pete
You have to find the widest part, but it is actually a lot easier than it looks on the return, as there are some holds in convenient places. I had stated on the way in that this was so hard that I would not want to return again, but retracted that statement after getting back out. This passage was originally explored from below, using rock removal techniques to expand it.
Modelling by Pete, lighting by Tarquin and Pete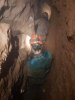 It then becomes just an awkward rift instead of a nightmare.
Modelling by Callum and Vince, lighting by Tarquin, Callum and Vince
It then becomes just an awkward rift instead of a nightmare.
Modelling by Callum and Vince, lighting by Tarquin, Callum and Vince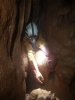 Wriggling through the awkward parts.
Modelling by Pete, lighting by Tarquin and Pete
Wriggling through the awkward parts.
Modelling by Pete, lighting by Tarquin and Pete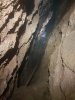 The final descent is assisted by a rope, and it is clear that something very big has appeared in front.
Modelling by Callum and Vince, lighting by Tarquin, Callum and Vince
The final descent is assisted by a rope, and it is clear that something very big has appeared in front.
Modelling by Callum and Vince, lighting by Tarquin, Callum and Vince Wookey 24 appears as a grand passage. Avoiding the last drop, the route passes through a crack in the left wall, and drops into the upstream rift. The water enters the large passage from the left, runs below boulders and flows out beneath the camera, onwards towards Wookey 23¾. The fog is unavoidable, as the chamber is very humid indeed, even in these low water conditions.
Modelling by Pete and Vince, lighting by Tarquin, Pete, Vince and Callum
Wookey 24 appears as a grand passage. Avoiding the last drop, the route passes through a crack in the left wall, and drops into the upstream rift. The water enters the large passage from the left, runs below boulders and flows out beneath the camera, onwards towards Wookey 23¾. The fog is unavoidable, as the chamber is very humid indeed, even in these low water conditions.
Modelling by Pete and Vince, lighting by Tarquin, Pete, Vince and Callum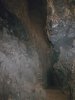 Up in the wall to the left is a ladder route that avoids the swim in the main river upstream, reaching the upstream passage more easily. However, it takes a lot of time, and we didn't have any.
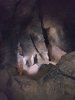 Wookey 24's "fossil" passage is simply enormous compared with everything up until this point.
Modelling by Pete, Vince and Callum, lighting by Tarquin, Pete, Vince and Callum
Wookey 24's "fossil" passage is simply enormous compared with everything up until this point.
Modelling by Pete, Vince and Callum, lighting by Tarquin, Pete, Vince and Callum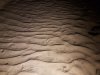 Fresh sand ripples. There were no footprints here, and there was a flood scum line high up on the wall. This place floods, really seriously, turning the normally static sumps through to Wookey 23-22 into an active overflow channel.
 The last section of passage before the sump.
Modelling by Pete, Vince and Callum, lighting by Tarquin, Pete, Vince and Callum
The last section of passage before the sump.
Modelling by Pete, Vince and Callum, lighting by Tarquin, Pete, Vince and Callum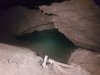 The static sump leading through to Wookey 23. This is the original route into Wookey 24, and for divers, it is still the preferred method, avoiding those insane rifts.
 Drip pockets near the sump, that have somehow survived the flooding.
 Mud formations near the sump, which appear to be stained with manganese.
 The upstream passage is much narrower, completely lacking the grandure. It begins as a traverse over a slot.
Modelling by Pete, Callum and Vince, lighting by Tarquin, Pete, Callum and Vince
The upstream passage is much narrower, completely lacking the grandure. It begins as a traverse over a slot.
Modelling by Pete, Callum and Vince, lighting by Tarquin, Pete, Callum and Vince The water charges off under the boulders of the larger passage.
 The water emerges from a deep pool at Sting Corner. The current here is very strong, and swimming is required further upstream. This can be quite challenging, especially for divers who have to do so with all of their diving equipment. Sadly, we had completely run out of time, and needed to head out. Amazingly, this short distance had taken us more time than all of Land Of Hope And Glory.
Lighting by Tarquin, Pete, Callum and Vince
The water emerges from a deep pool at Sting Corner. The current here is very strong, and swimming is required further upstream. This can be quite challenging, especially for divers who have to do so with all of their diving equipment. Sadly, we had completely run out of time, and needed to head out. Amazingly, this short distance had taken us more time than all of Land Of Hope And Glory.
Lighting by Tarquin, Pete, Callum and Vince
 Passing the paper mill on the way to the cave. This mill is over 400 years old, and is the oldest surviving one in the UK. It is run as part of the tourist attraction of Wookey Hole Caves. The diggers are almost all present here, having been given special permission to explore the caves after hours.
Modelling by Tav, Jake, Pete, Duncan, Callum, Nick, Mike and Vince, lighting by the evil day star
Passing the paper mill on the way to the cave. This mill is over 400 years old, and is the oldest surviving one in the UK. It is run as part of the tourist attraction of Wookey Hole Caves. The diggers are almost all present here, having been given special permission to explore the caves after hours.
Modelling by Tav, Jake, Pete, Duncan, Callum, Nick, Mike and Vince, lighting by the evil day star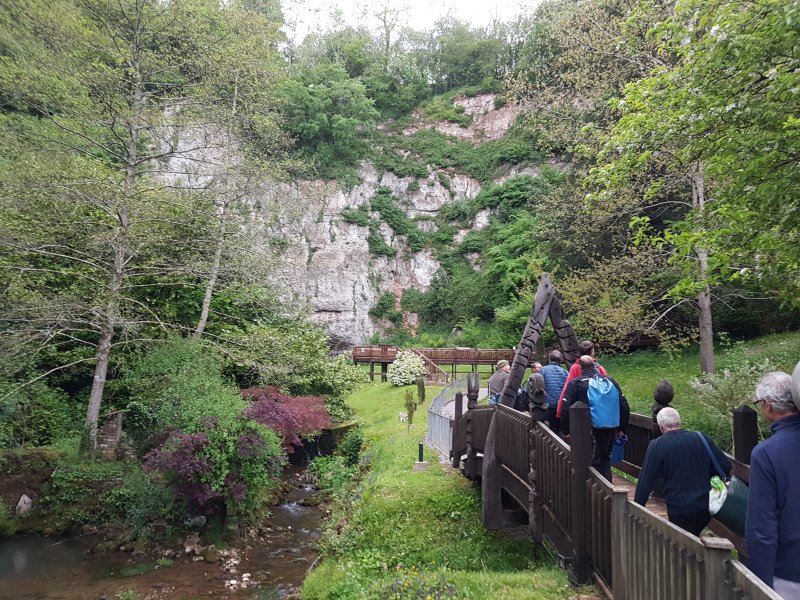 Approaching the cave, with its imposing cliff.
Modelling by Pete, Tav, Jake, Callum, Nick, Vince and Duncan, lighting by Sol
Approaching the cave, with its imposing cliff.
Modelling by Pete, Tav, Jake, Callum, Nick, Vince and Duncan, lighting by Sol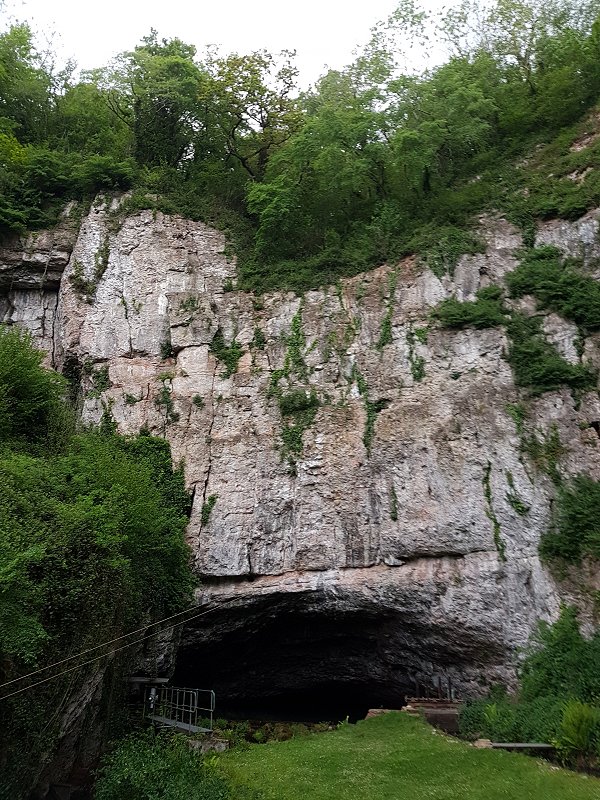 The resurgence, which drains most of the major Mendip caves. The river is tapped into a leat for the mill. Up to the left is the main showcave entrance, and in the cliff just off to the right is an artificial entrance into Wookey 9 (2). The show cave exit is off to the right, through an artificial tunnel. The showcave route passes through the first three chambers. Wookey 4 and 5 are kept sumped by the weir at the resurgence. Wookey 6 and 7 were discovered during the World's first cave dives, in 1935. The showcave has since been connected to Wookey 9 with artificial tunnels. Unlike most caves, where the number relates to pieces of cave separated by sumps or major chokes, the numbers in Wookey Hole can also refer to chamber numbers, where the chambers may in fact be fully underwater; 1-4 have dry connections and so do several others, while 14-18 are fully submerged.
 The showcave exit starts as a concrete tube, which then passes an additional artificial entrance.
Modelling by Pete and Callum, lighting by Tarquin, Pete and Callum
The showcave exit starts as a concrete tube, which then passes an additional artificial entrance.
Modelling by Pete and Callum, lighting by Tarquin, Pete and Callum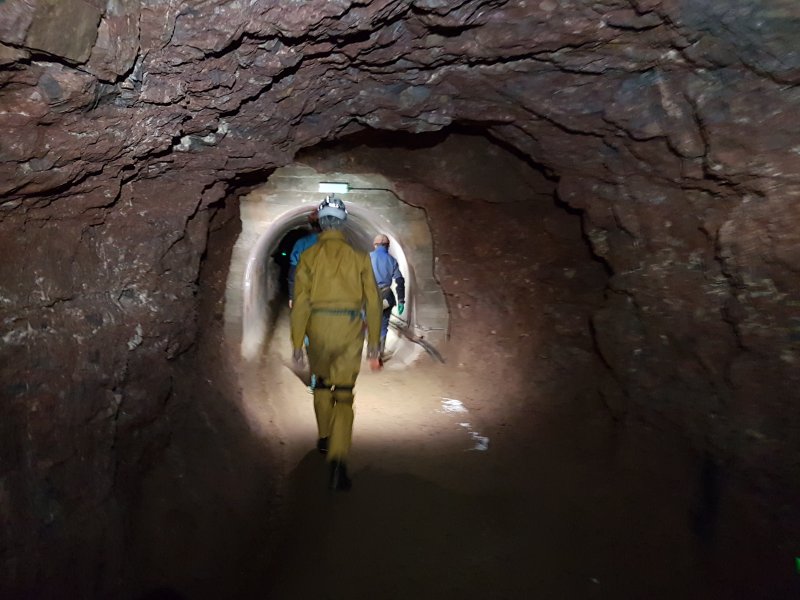 The showcave's artificial Kilmersdon Tunnel connecting to Wookey 9.
Modelling by Pete, Callum and Vince, lighting by Tarquin, Pete, Callum and Vince
The showcave's artificial Kilmersdon Tunnel connecting to Wookey 9.
Modelling by Pete, Callum and Vince, lighting by Tarquin, Pete, Callum and Vince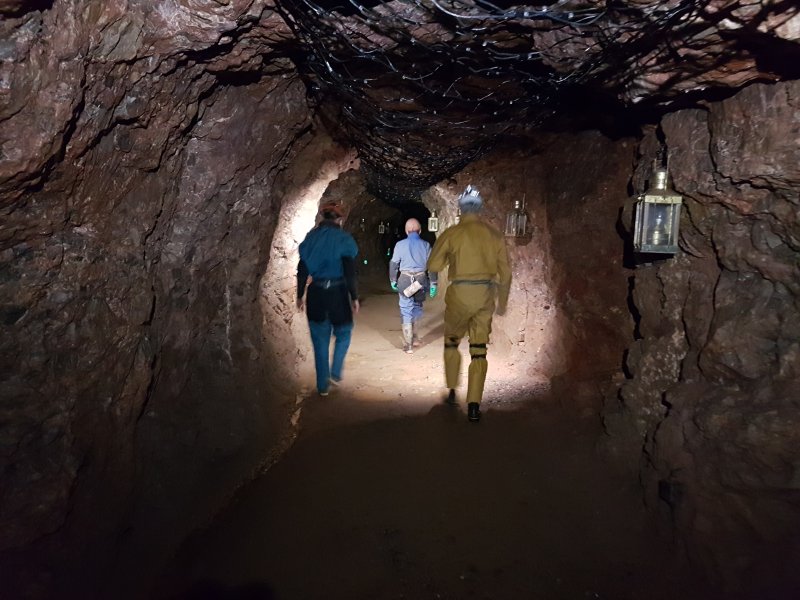 Kilmersdon Tunnel.
Modelling by Pete, Callum and Vince, lighting by Tarquin, Pete, Callum and Vince
Kilmersdon Tunnel.
Modelling by Pete, Callum and Vince, lighting by Tarquin, Pete, Callum and Vince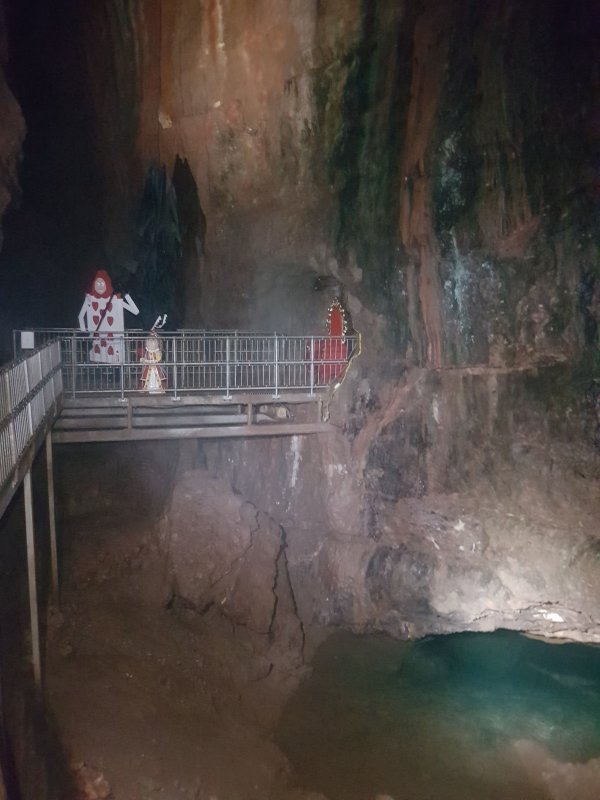 Wookey 9, the end of the showcave tour, and the former dive base for cave divers wishing to visit the rest of the flooded cave. Naturally, this was not connected to the earlier chambers by a dry route, so the showcave mined the passages to reach it and extend their route. An artificial entrance had already been added into the series of roof passages above the camera; 9(2) Extensions, in order to create a more accurate survey for use in the mining operation. In 2015, they added a new tunnel into Wookey 20.
Lighting by Tarquin, Pete and Callum
Wookey 9, the end of the showcave tour, and the former dive base for cave divers wishing to visit the rest of the flooded cave. Naturally, this was not connected to the earlier chambers by a dry route, so the showcave mined the passages to reach it and extend their route. An artificial entrance had already been added into the series of roof passages above the camera; 9(2) Extensions, in order to create a more accurate survey for use in the mining operation. In 2015, they added a new tunnel into Wookey 20.
Lighting by Tarquin, Pete and Callum Part way along, the new tunnel intercepts an airbell, which appears to be Wookey 13.
 The tunnel ends abruptly at a climb down into Wookey 20. The tourist route has not yet been completed, but dry cavers can now visit this previously divers-only part of the cave.
Modelling by Pete and Callum's legs, lighting by Tarquin, Pete and Callum
The tunnel ends abruptly at a climb down into Wookey 20. The tourist route has not yet been completed, but dry cavers can now visit this previously divers-only part of the cave.
Modelling by Pete and Callum's legs, lighting by Tarquin, Pete and Callum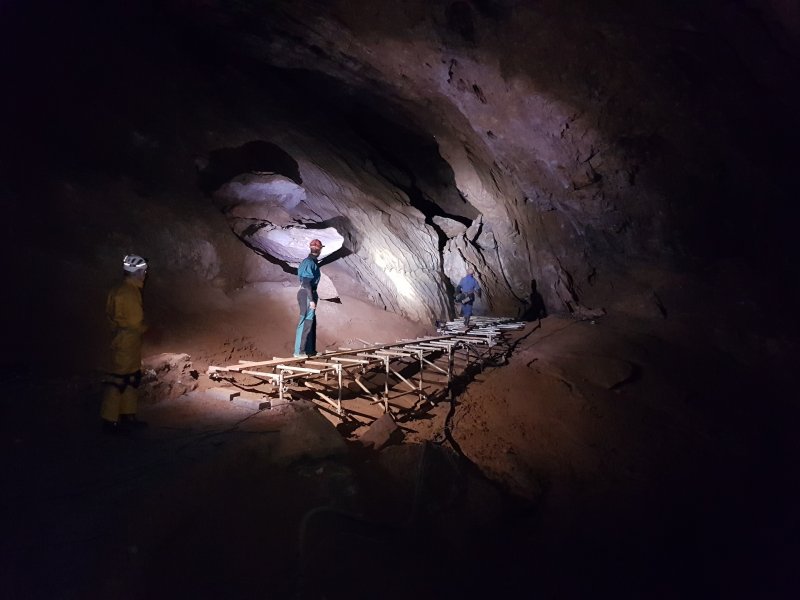 The large and impressive chamber of Wookey 20, with some large rocks growing out of the wall like giant bracket fungi.
Modelling by Pete, Callum and Vince, lighting by Tarquin, Pete, Callum and Vince
The large and impressive chamber of Wookey 20, with some large rocks growing out of the wall like giant bracket fungi.
Modelling by Pete, Callum and Vince, lighting by Tarquin, Pete, Callum and Vince One side of the chamber has a deep, static pool that does not seem to connect to any of the other sumps. The sumps leading both upstream and downstream lie at the far end of the chamber.
Lighting by Tarquin, Pete, Callum and Vince
One side of the chamber has a deep, static pool that does not seem to connect to any of the other sumps. The sumps leading both upstream and downstream lie at the far end of the chamber.
Lighting by Tarquin, Pete, Callum and Vince Finely etched fluting on the wall of Chamber 21.
Lighting by Tarquin, Pete, Callum and Vince
Finely etched fluting on the wall of Chamber 21.
Lighting by Tarquin, Pete, Callum and Vince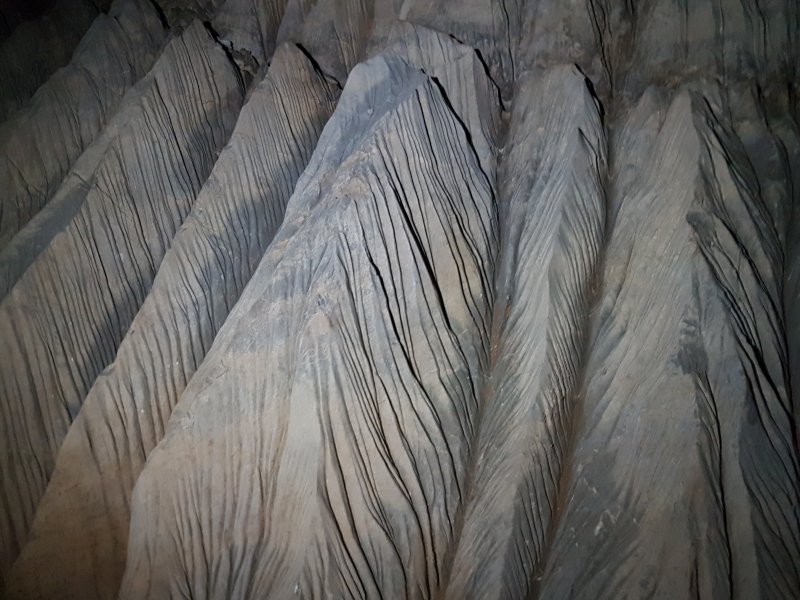 Detail of the fluting.
 Opposite the static pool is the dry way on, the longest single side passage in the system even before the breakthroughs. It soon passes the very small Two Ws Series, a side passage containing its own sump.
Modelling by Pete, Callum and Vince, lighting by Tarquin, Pete, Callum and Vince
Opposite the static pool is the dry way on, the longest single side passage in the system even before the breakthroughs. It soon passes the very small Two Ws Series, a side passage containing its own sump.
Modelling by Pete, Callum and Vince, lighting by Tarquin, Pete, Callum and Vince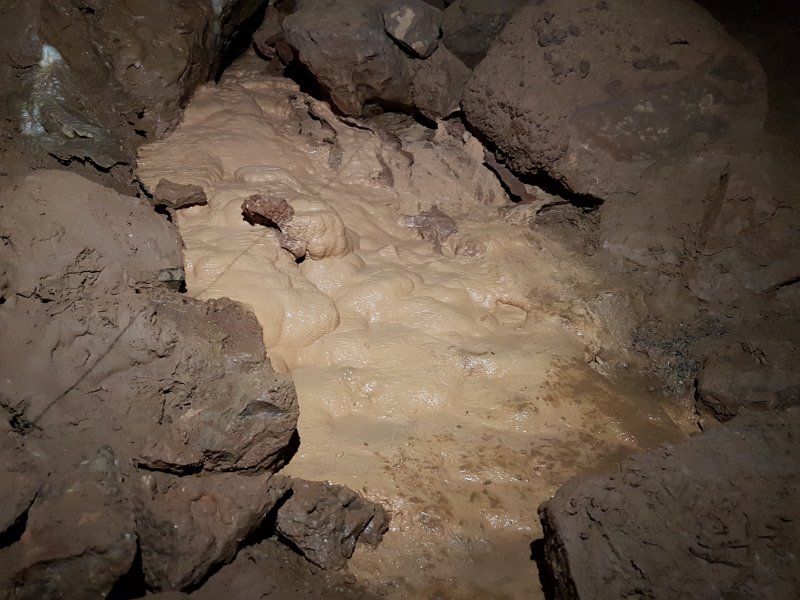 Early flowstone.
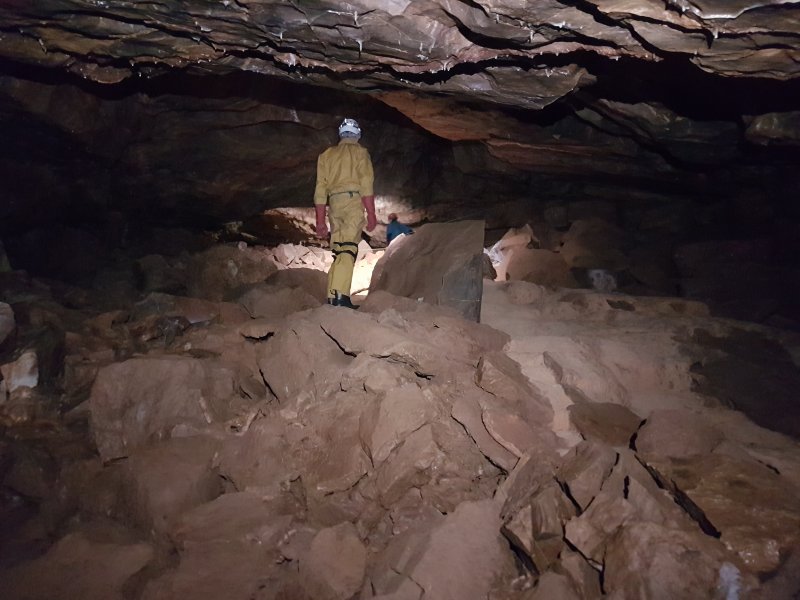 This passage is very steep, gaining a considerable 60 metres of height over its first 200 metres. You definitely notice that you are working.
Modelling by Pete and Callum, lighting by Tarquin, Pete, Callum and Vince
This passage is very steep, gaining a considerable 60 metres of height over its first 200 metres. You definitely notice that you are working.
Modelling by Pete and Callum, lighting by Tarquin, Pete, Callum and Vince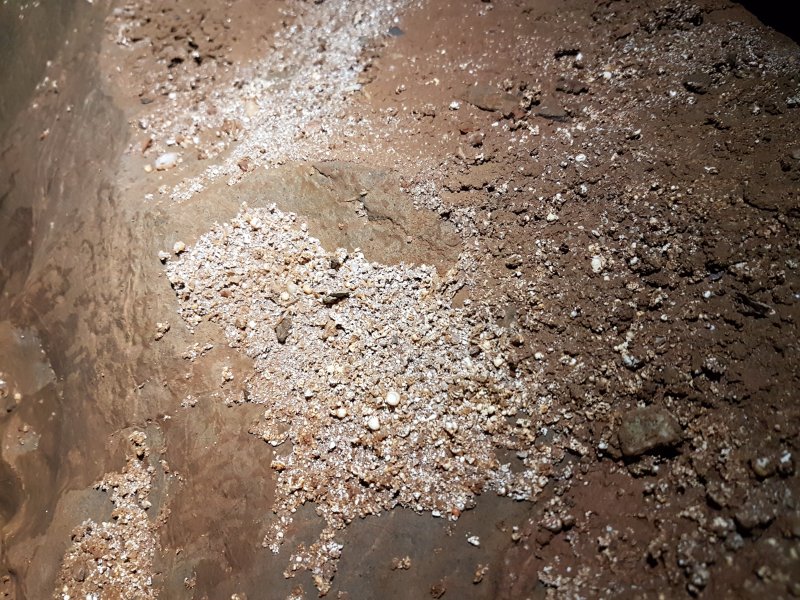 Cryostal in the passage. This is the first cave where cryostal - or Cryogenic Cave Calcite (CCCs) - was recognised in the UK, but it has subsequently been found in several Mendip caves, many Forest of Dean caves, most major South Wales caves, and a handful of caves in Derbyshire, Yorkshire and Scotland. While South Wales seems to have by far the most abundant deposits, Wookey Hole has an impressive amount too.
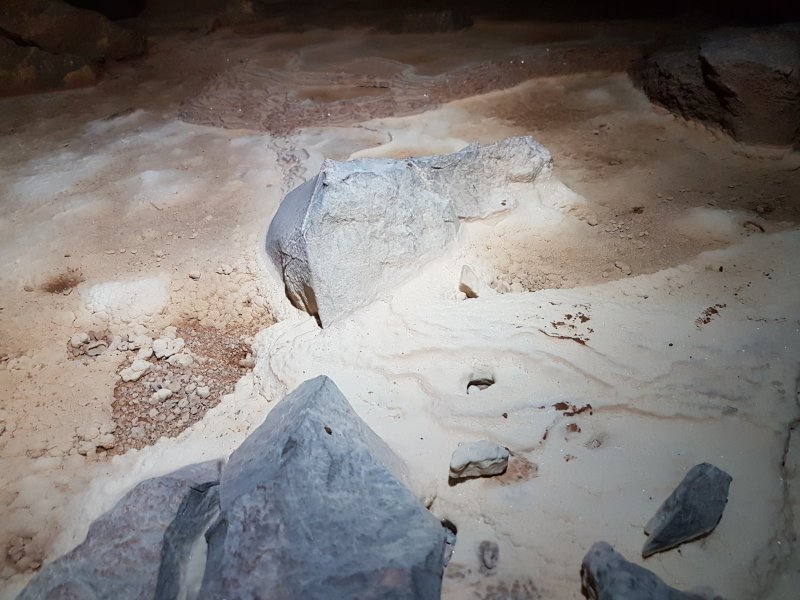 Dried gour pools.
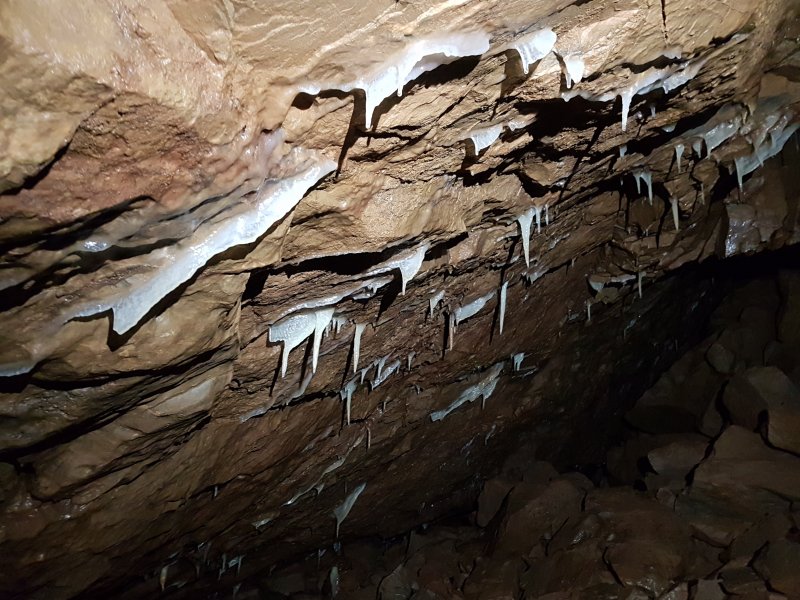 Small curtains covering the steeply sloping ceiling. The dip of the Mendip limestone is very apparent here.
 Spiky crystal growth on flowstone.
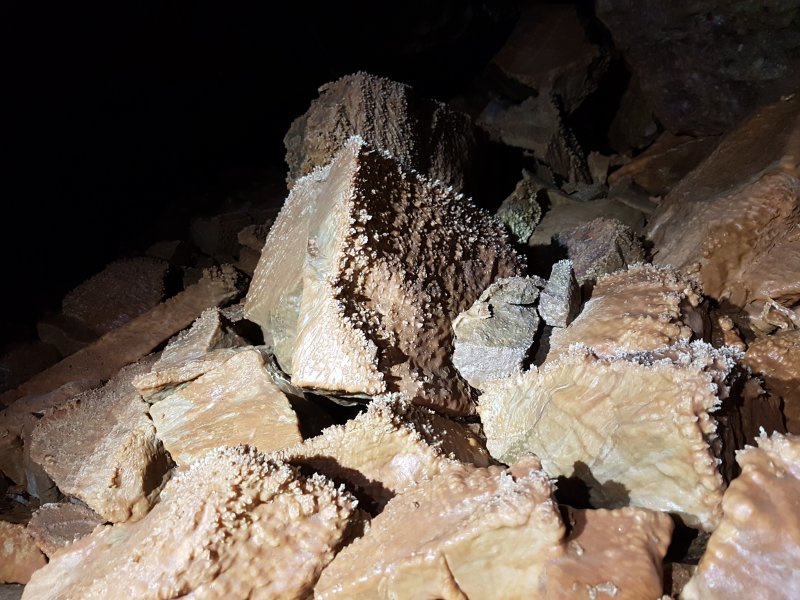 Spiky crystal growth.
 A large patch of cryostal.
Lighting by Tarquin and Pete
A large patch of cryostal.
Lighting by Tarquin and Pete A thick layer of cryostal.
Lighting by Tarquin and Pete
A thick layer of cryostal.
Lighting by Tarquin and Pete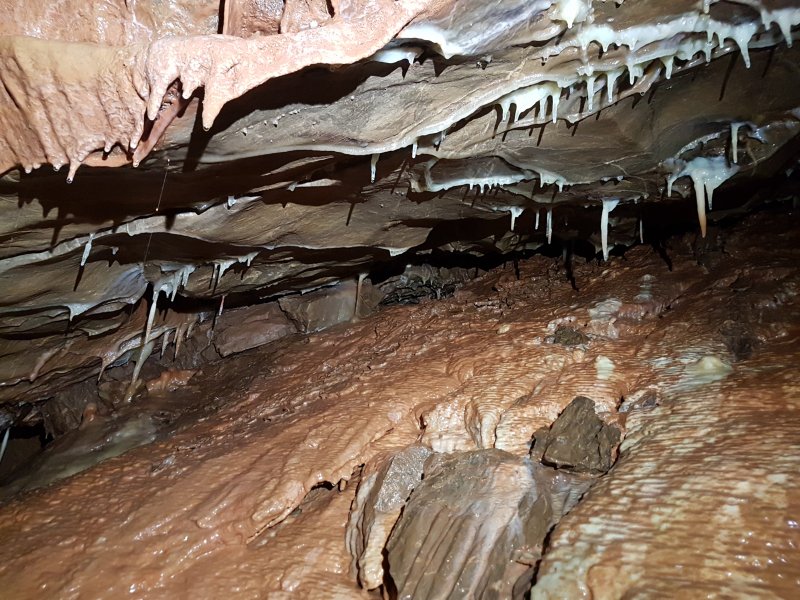 Stal in the top of the bedding.
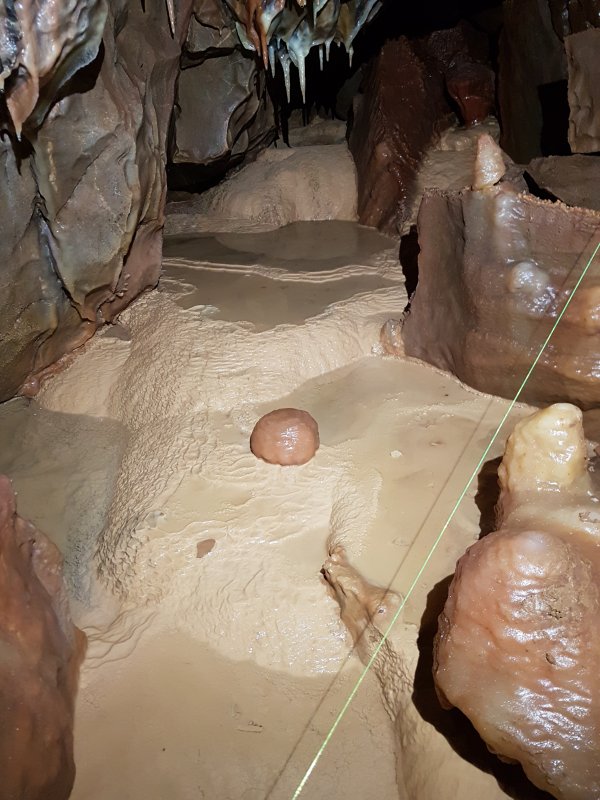 Gour pools where the passage temporarily reduces in size.
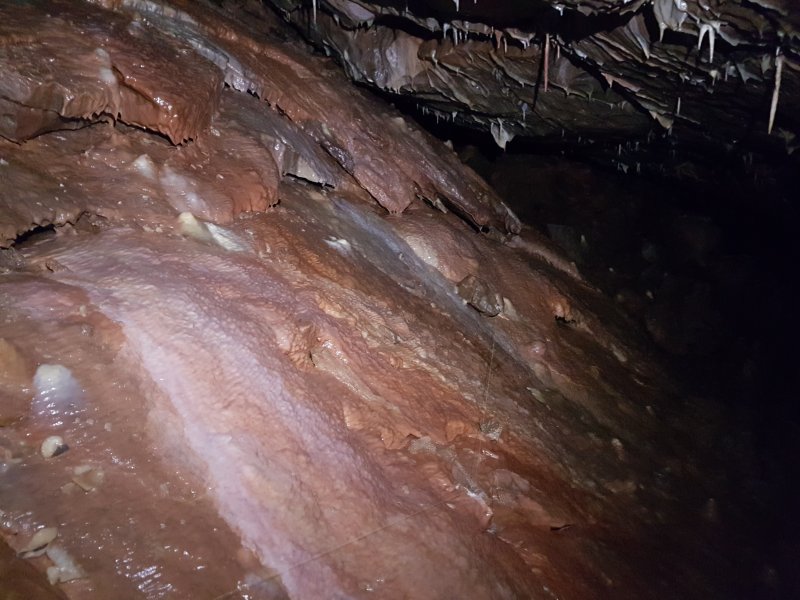 Multicoloured flowstone.
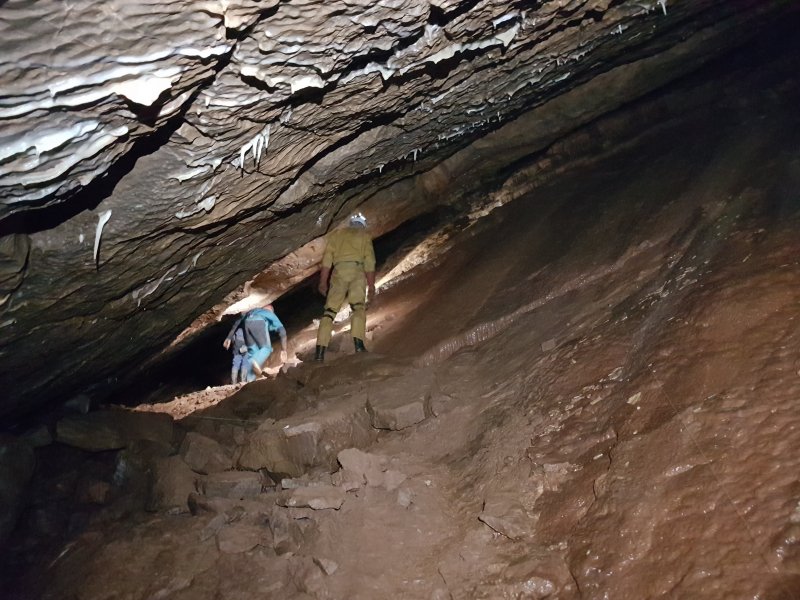 Steeply inclined bedding.
Modelling by Pete, Callum and Vince, lighting by Tarquin, Pete, Callum and Vince
Steeply inclined bedding.
Modelling by Pete, Callum and Vince, lighting by Tarquin, Pete, Callum and Vince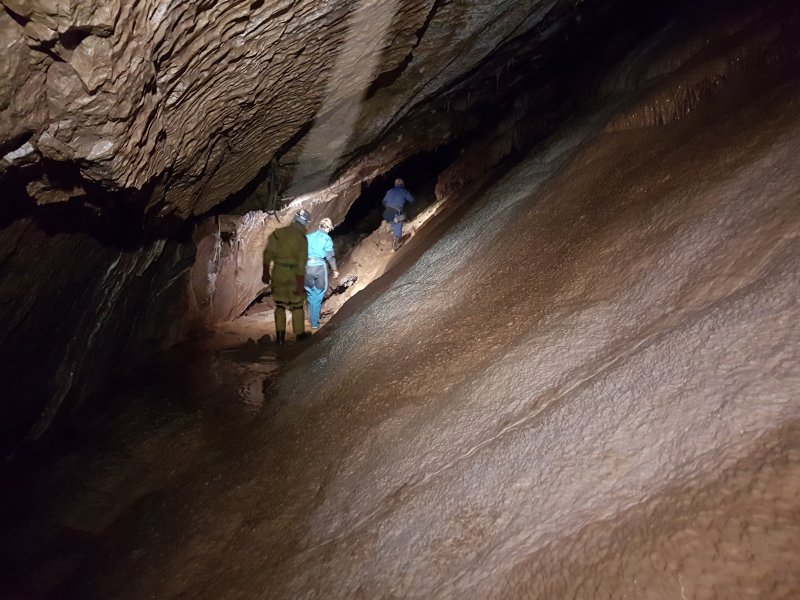 The bedding becomes so steep that there is a risk of slipping down it, so there is a traverse line (the blur in the ceiling) to help guide you over it.
Modelling by Pete, Callum and Vince, lighting by Tarquin, Pete, Callum and Vince
The bedding becomes so steep that there is a risk of slipping down it, so there is a traverse line (the blur in the ceiling) to help guide you over it.
Modelling by Pete, Callum and Vince, lighting by Tarquin, Pete, Callum and Vince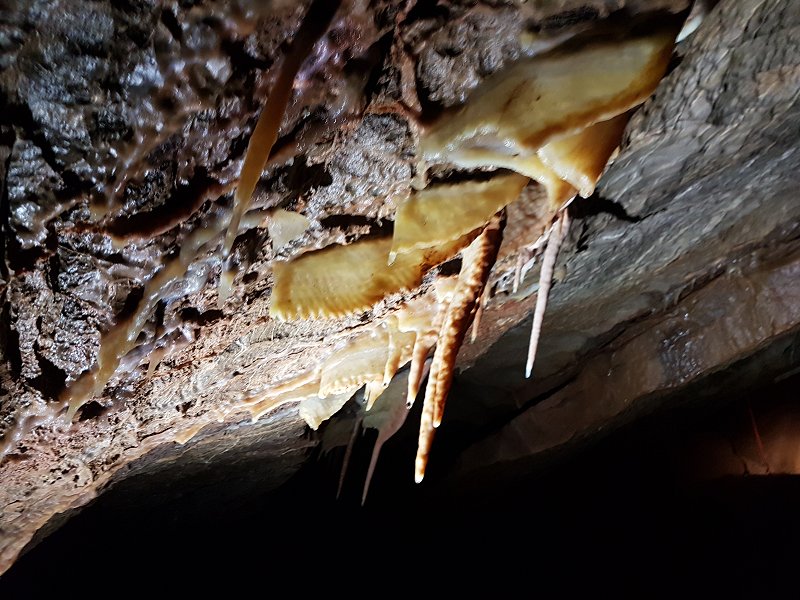 Decorations in the ceiling of the bedding.
Lighting by Tarquin and Pete
Decorations in the ceiling of the bedding.
Lighting by Tarquin and Pete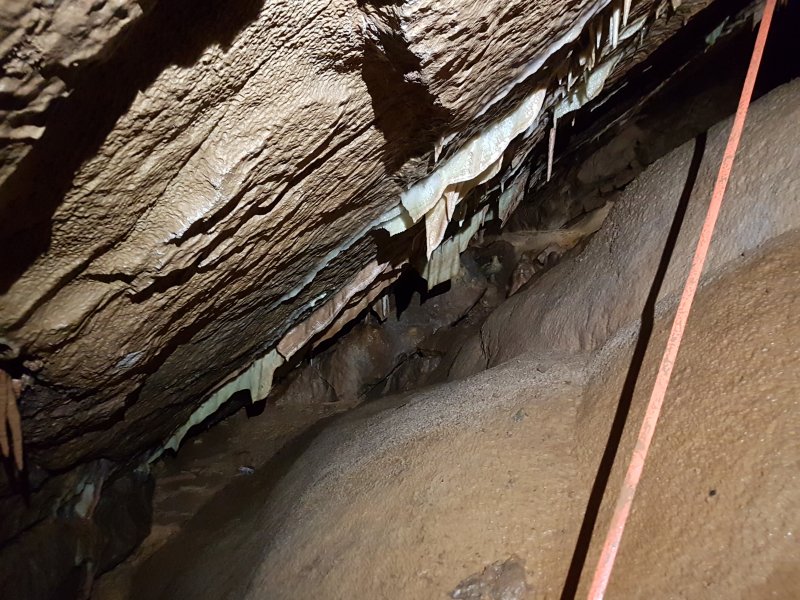 The path then ascends the steep flowstone to the high point.
 Stal along the top of the passage.
 Chamber at the top of the passage. This was about as far as cavers could previously go, but there is now a choice of routes.
Modelling by Pete
Chamber at the top of the passage. This was about as far as cavers could previously go, but there is now a choice of routes.
Modelling by Pete On the first trip, we continued in the same direction, descending through a ruckle with the aid of a handline. The diggers have worked extremely hard here, dig after dig, chokes and mud, and have been rewarded with several breakthroughs.
Modelling by hints of Pete, Callum and hints of Vince, lighting by Tarquin, Pete, Callum and Vince
On the first trip, we continued in the same direction, descending through a ruckle with the aid of a handline. The diggers have worked extremely hard here, dig after dig, chokes and mud, and have been rewarded with several breakthroughs.
Modelling by hints of Pete, Callum and hints of Vince, lighting by Tarquin, Pete, Callum and Vince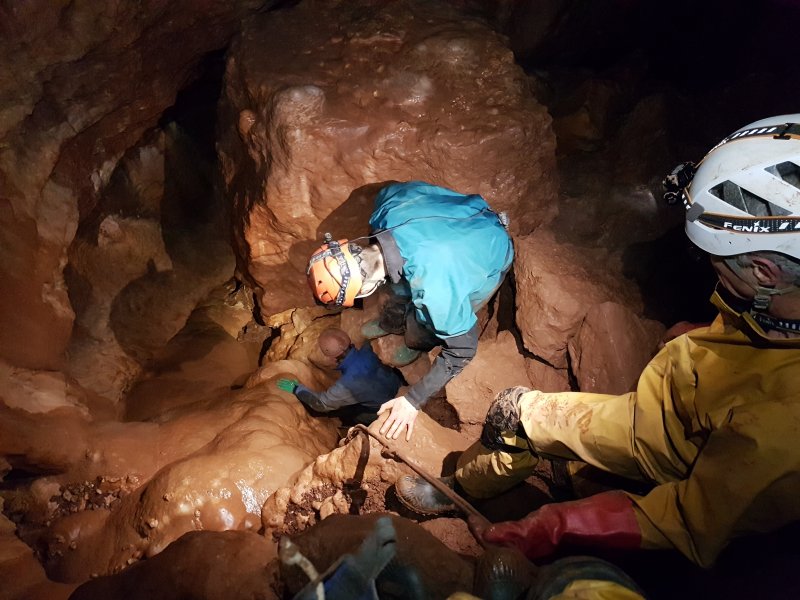 The route clambers down flowstone covered boulders.
Modelling by Pete, Callum and Vince, lighting by Tarquin, Pete, Callum and Vince
The route clambers down flowstone covered boulders.
Modelling by Pete, Callum and Vince, lighting by Tarquin, Pete, Callum and Vince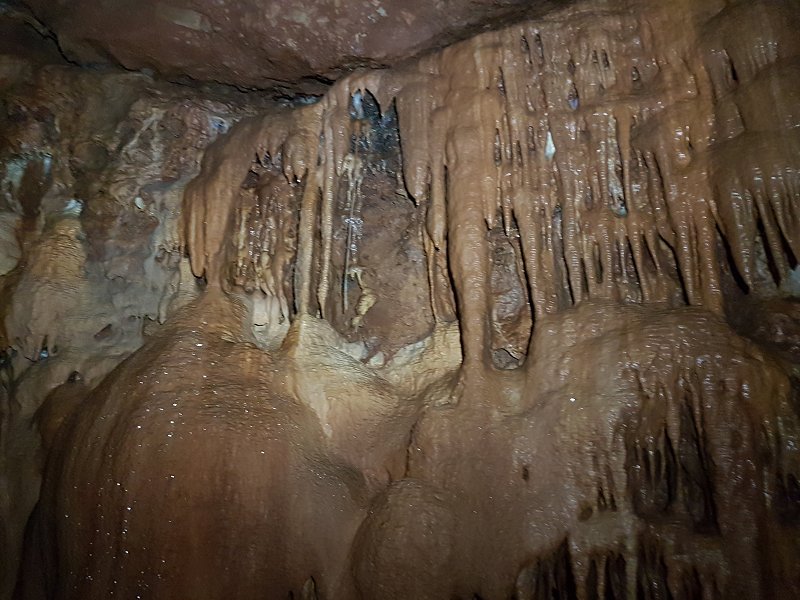 Stal above the clamber.
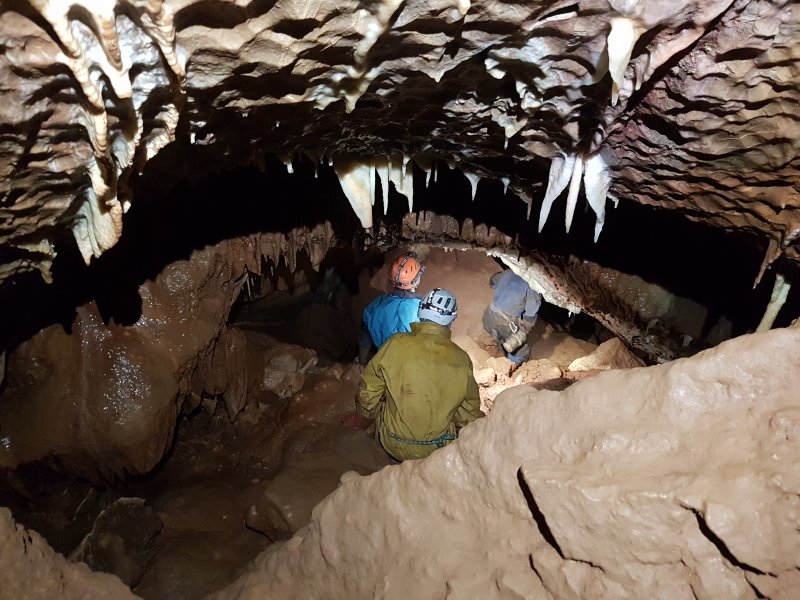 The clamber eases off into an arched passage.
Modelling by Pete, Callum and Vince, lighting by Tarquin, Pete, Callum and Vince
The clamber eases off into an arched passage.
Modelling by Pete, Callum and Vince, lighting by Tarquin, Pete, Callum and Vince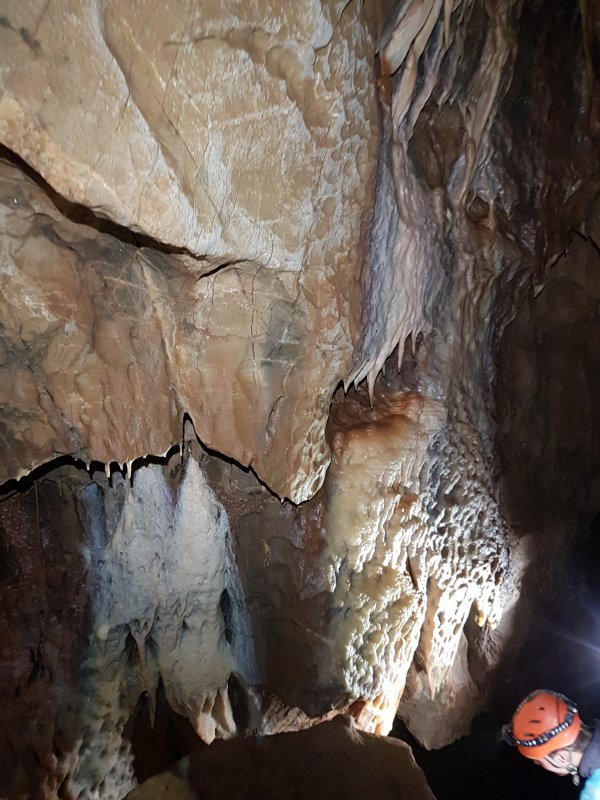 Then a second little clamber reaches a flowstone covered wall.
Modelling by Callum, lighting by Tarquin, Pete and Callum
Then a second little clamber reaches a flowstone covered wall.
Modelling by Callum, lighting by Tarquin, Pete and Callum Flowstone below the clamber.
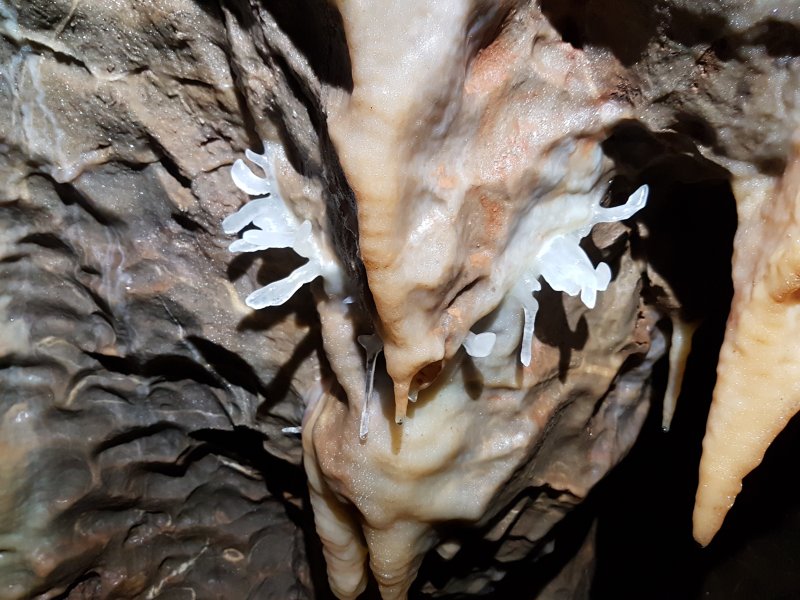 Helictites in the form of Predator's mouth.
 The first section of lower level cave is well decorated, like the passage that preceded it.
Modelling by Pete, Callum and Vince, lighting by Tarquin, Pete, Callum and Vince
The first section of lower level cave is well decorated, like the passage that preceded it.
Modelling by Pete, Callum and Vince, lighting by Tarquin, Pete, Callum and Vince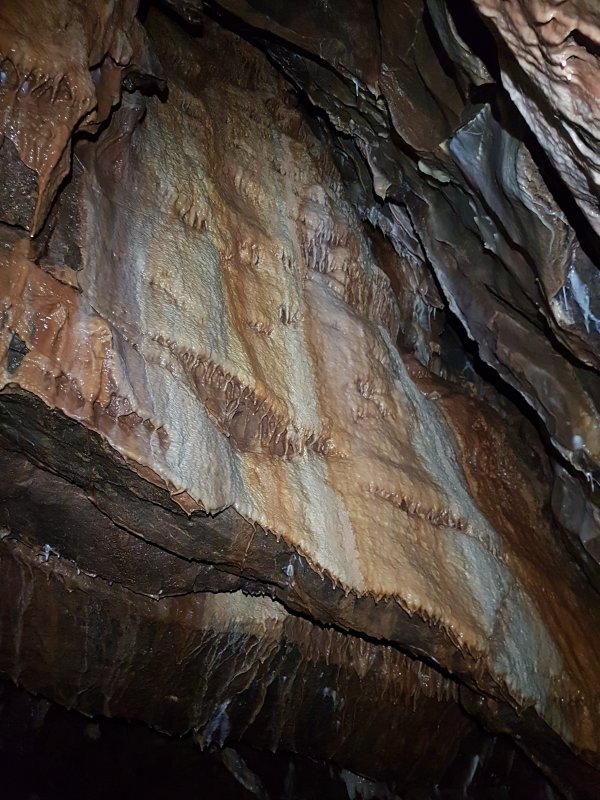 Flowstone covered wall. Interestingly, this wall is vertical - an unusual sight in this steeply dipping limestone.
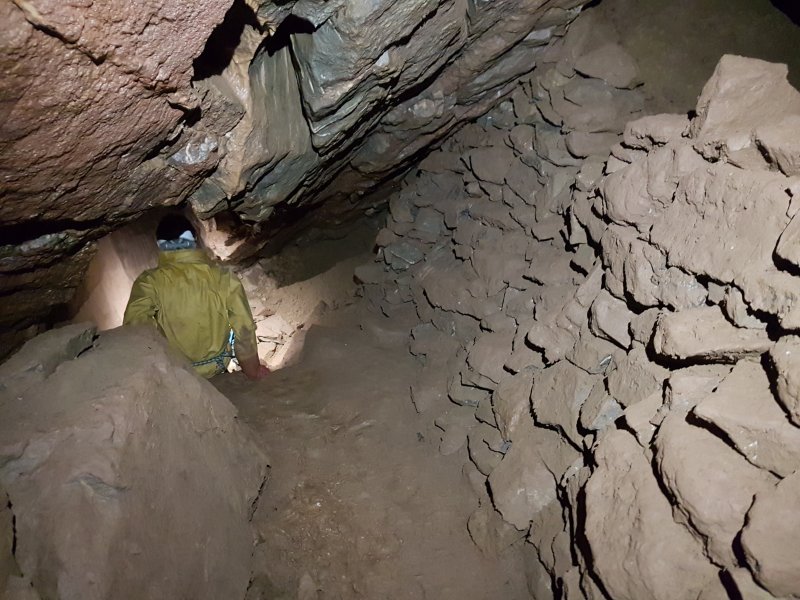 Spoil from the next major dig. An impressive amount of work went on here.
Modelling by Pete, lighting by Tarquin and Pete
Spoil from the next major dig. An impressive amount of work went on here.
Modelling by Pete, lighting by Tarquin and Pete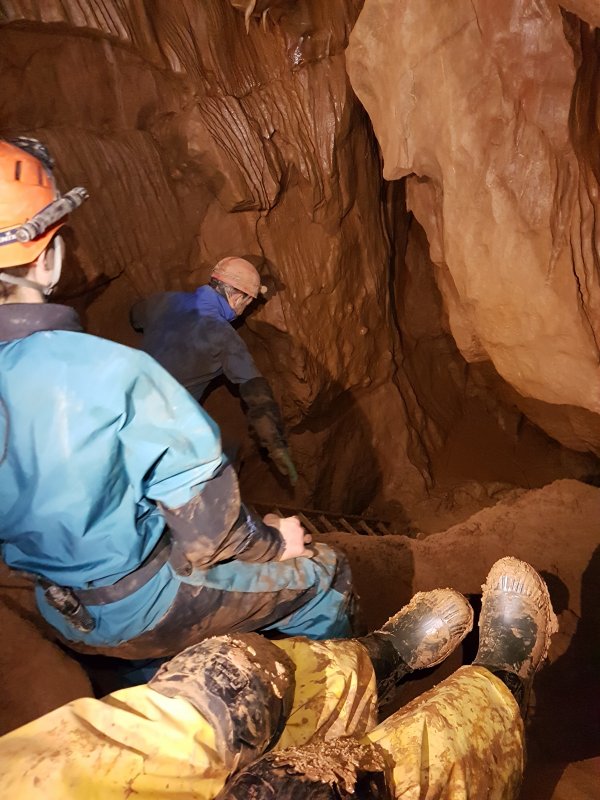 Descending through the new passage.
Modelling by Pete, Callum and Vince, lighting by Tarquin, Pete, Callum and Vince
Descending through the new passage.
Modelling by Pete, Callum and Vince, lighting by Tarquin, Pete, Callum and Vince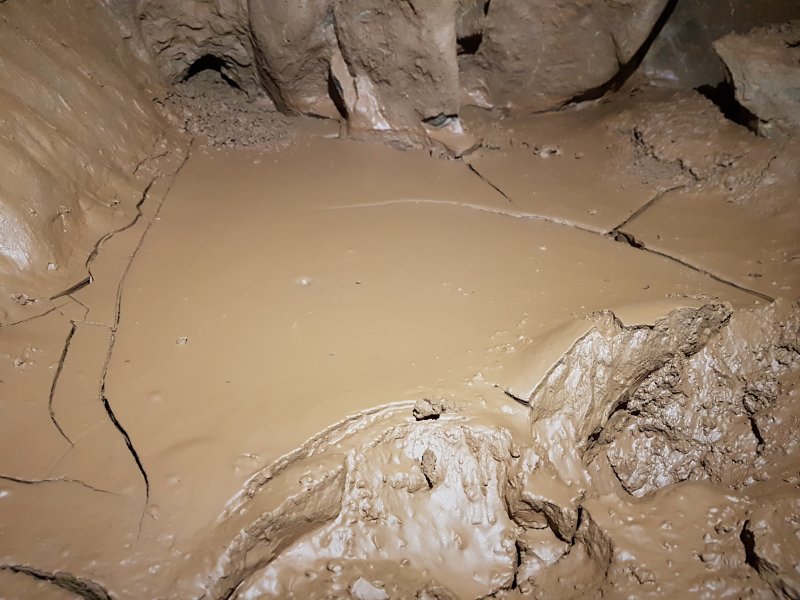 Mud formations.
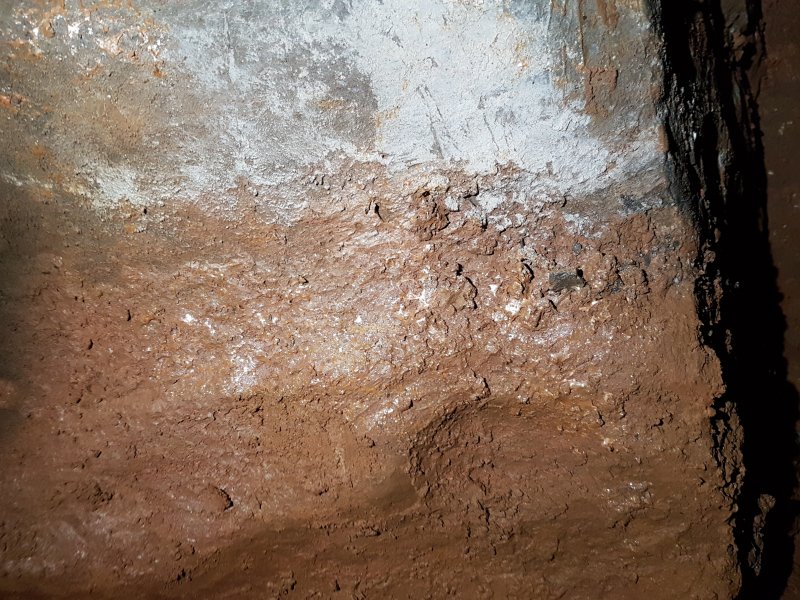 The old mud line.
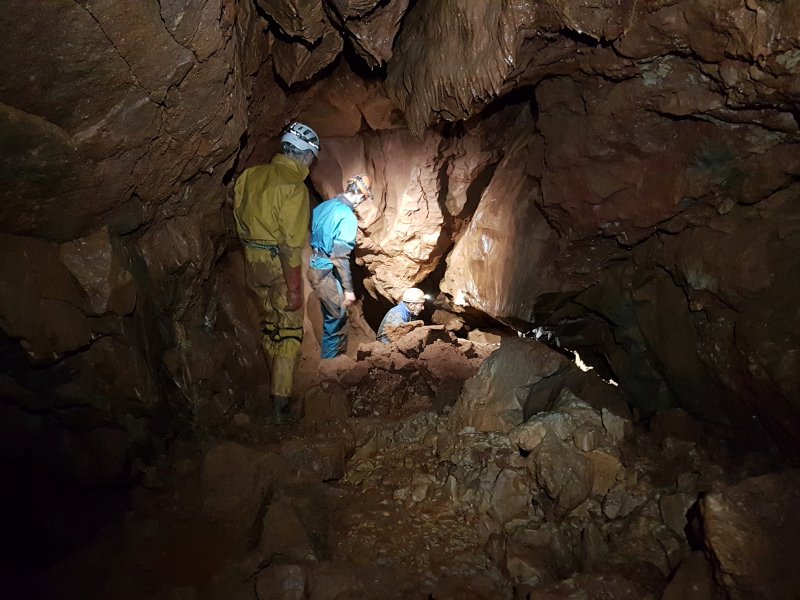 Grotto section before the next dig.
Modelling by Pete, Callum and Vince, lighting by Tarquin, Pete, Callum and Vince
Grotto section before the next dig.
Modelling by Pete, Callum and Vince, lighting by Tarquin, Pete, Callum and Vince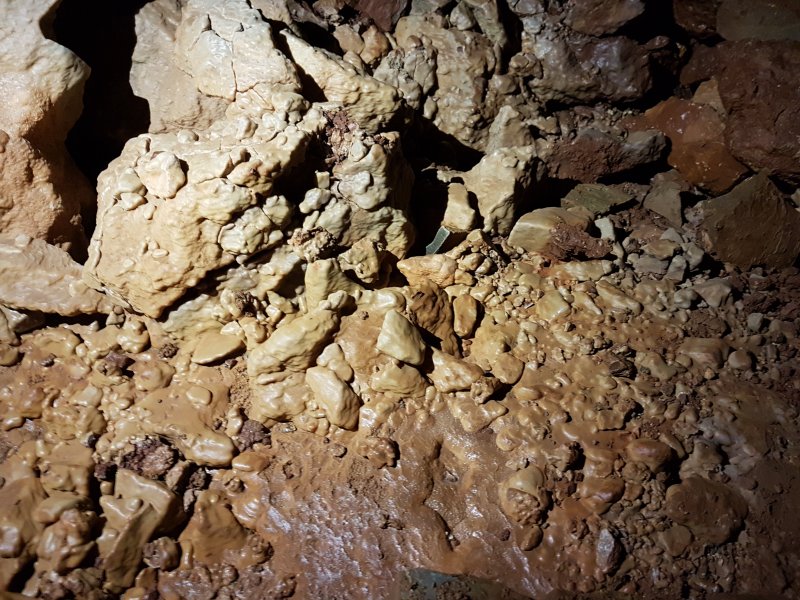 Floor of the grotto section.
 Fuzzy Wuzzy dig, the one that gave the major breakthrough. This is named as a Dad's Army reference.
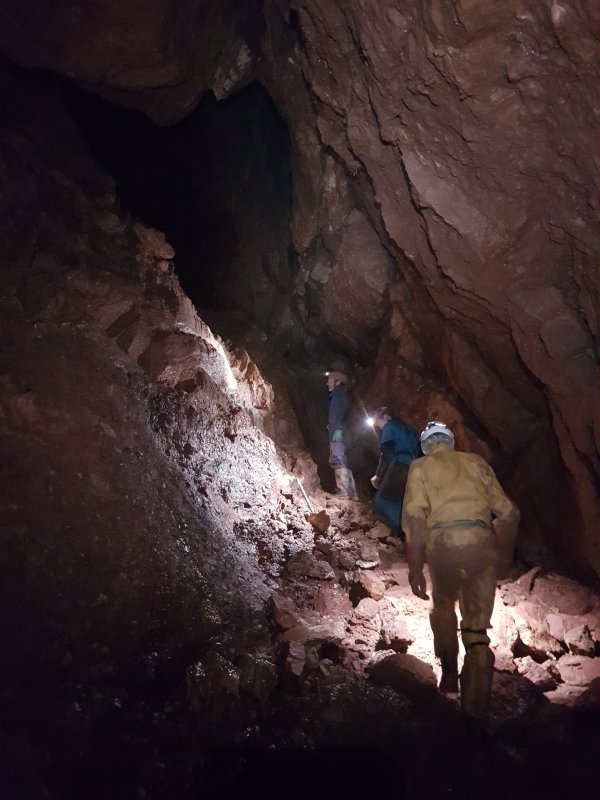 The major breakthrough starts with a tall chamber, where there are three ways on. Fuzzy Wuzzy is in the floor to the right here. Behind the camera is a descent to the current digs. Tucked up in the left wall seen here is a surprisingly large passage that is invisible from almost all angles, which is the end of the round trip. Up the steep climb seen ahead-left here is the main way into Land Of Hope And Glory, the start of the round trip.
Modelling by Pete, Callum and Vince, lighting by Tarquin, Pete, Callum and Vince
The major breakthrough starts with a tall chamber, where there are three ways on. Fuzzy Wuzzy is in the floor to the right here. Behind the camera is a descent to the current digs. Tucked up in the left wall seen here is a surprisingly large passage that is invisible from almost all angles, which is the end of the round trip. Up the steep climb seen ahead-left here is the main way into Land Of Hope And Glory, the start of the round trip.
Modelling by Pete, Callum and Vince, lighting by Tarquin, Pete, Callum and Vince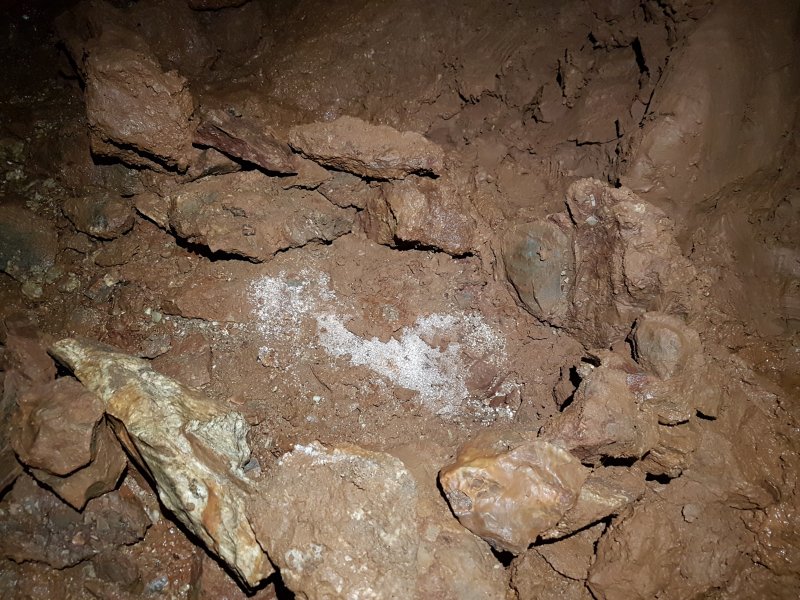 Cryostal on the floor of the breakthrough chamber.
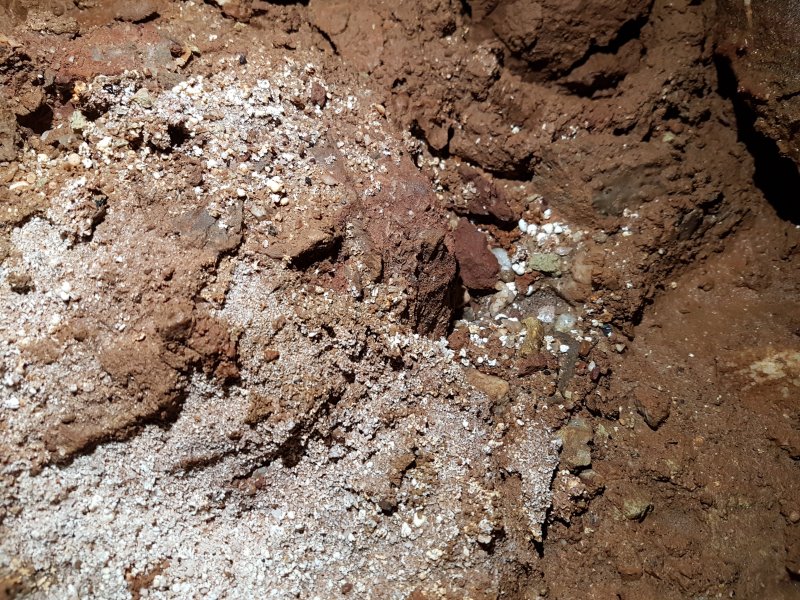 Cryostal.
 Detail of the cryostal.
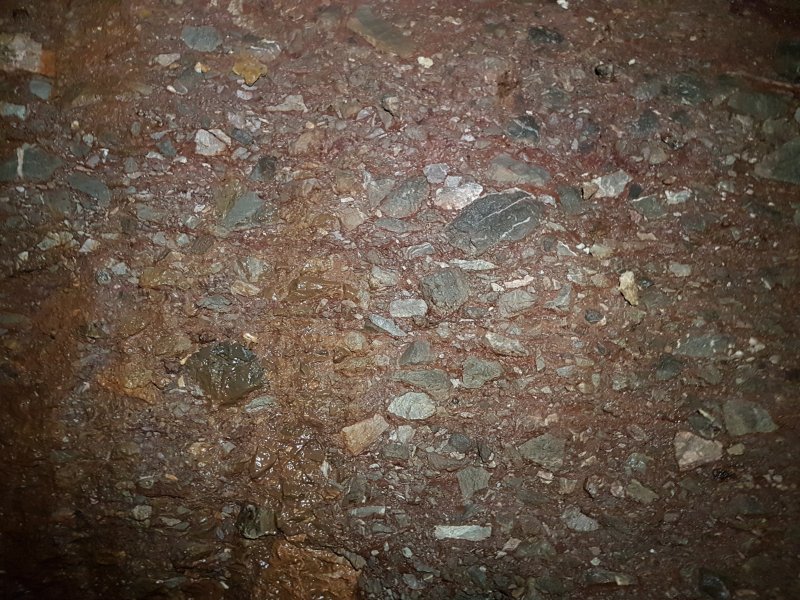 This part of the cave is formed in comglomerate, made from chunks of limestone in a Mercia Mudstone matrix. Caves in conglomerate are very rare, but there was enough limestone in the mix for the cave to manage to form. It looks very similar to fault breccia, with jagged limestone chunks. In this case, it is a Neptunian dyke (fracture filled with erosion debris).
 The passage at the top of the climb has more conglomerate, where it is much more visible as a conglomerate, with very large limestone boulders.
Modelling by Pete and Callum, lighting by Tarquin, Pete and Callum
The passage at the top of the climb has more conglomerate, where it is much more visible as a conglomerate, with very large limestone boulders.
Modelling by Pete and Callum, lighting by Tarquin, Pete and Callum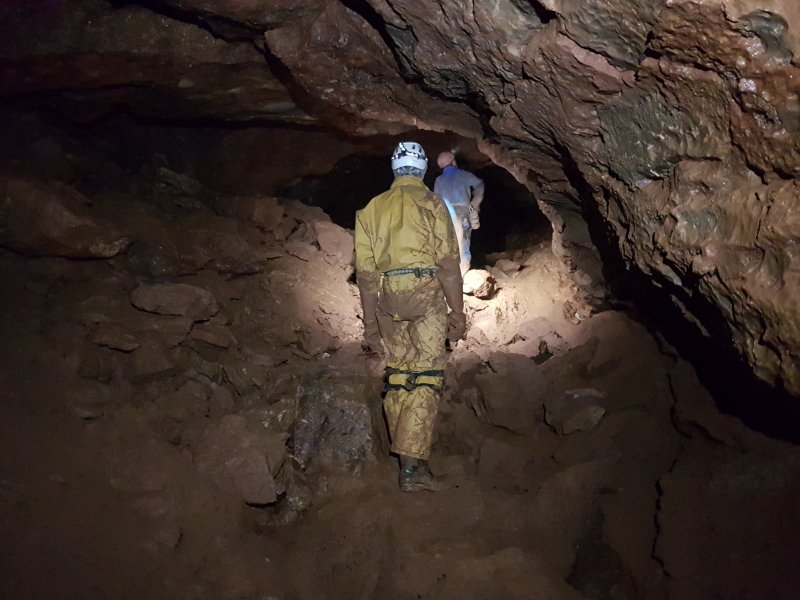 Passage at the top of the climb. The bedding to the left cuts off the next corner. There is also a bedding in the floor, that extends slightly further than the passage, heading towards a side passage in Wookey 24.
Modelling by Pete, Callum's arm and Vince, lighting by Tarquin, Pete, Callum and Vince
Passage at the top of the climb. The bedding to the left cuts off the next corner. There is also a bedding in the floor, that extends slightly further than the passage, heading towards a side passage in Wookey 24.
Modelling by Pete, Callum's arm and Vince, lighting by Tarquin, Pete, Callum and Vince The passage changes character completely at a corner, where the floor bedding continues a short distance ahead.
Modelling by Vince and Callum, lighting by Tarquin, Pete, Vince and Callum
The passage changes character completely at a corner, where the floor bedding continues a short distance ahead.
Modelling by Vince and Callum, lighting by Tarquin, Pete, Vince and Callum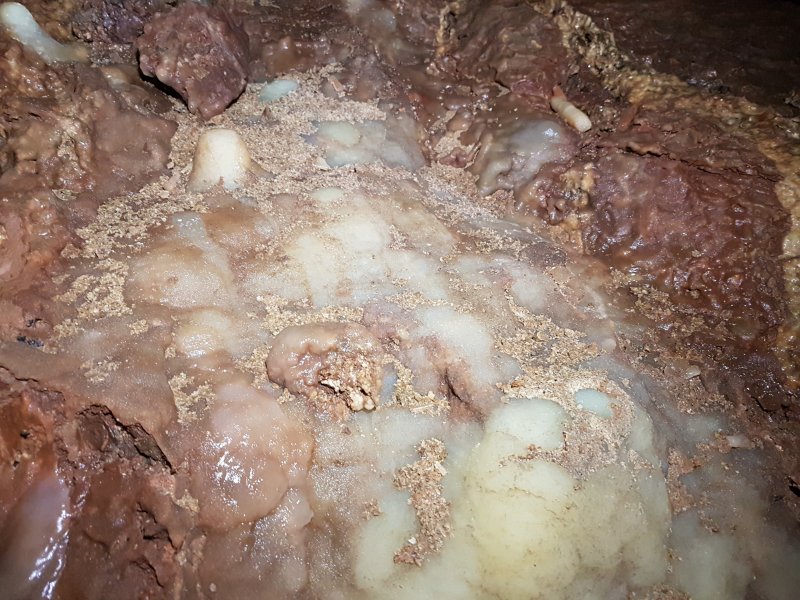 The floor has a powder that looks like cryostal, but which appears to be shattered crystals instead. Perhaps this is a result of movement of the fault, crushing calcite.
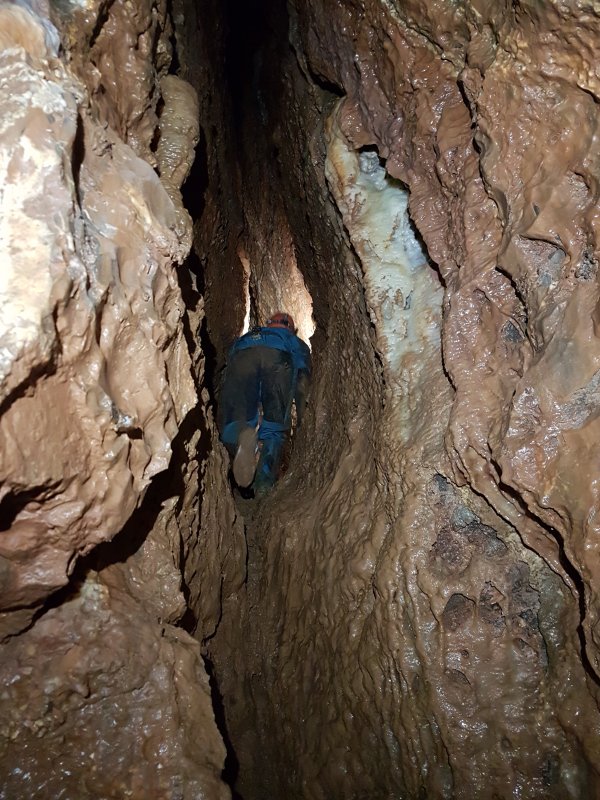 At the corner, the route climbs up into a rift instead.
Modelling by Callum, lighting by Tarquin and Callum
At the corner, the route climbs up into a rift instead.
Modelling by Callum, lighting by Tarquin and Callum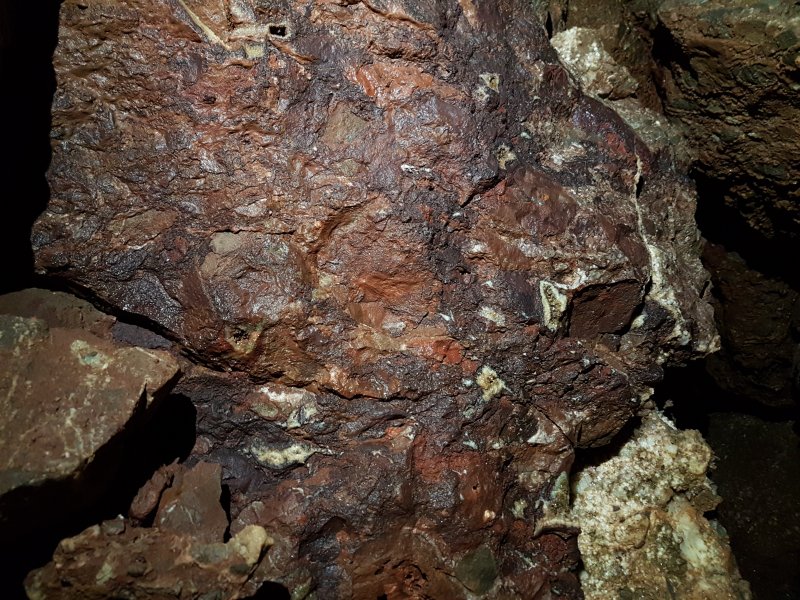 Conglomerate containing a high amount of haematite - red ochre.
 The rift is completely formed in oversuit-destroying conglomerate.
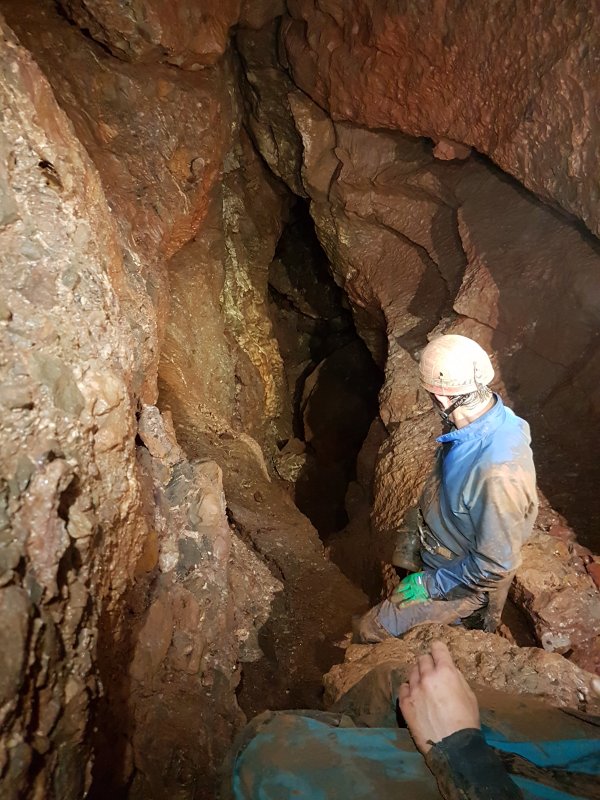 The rift then descends through a geologist's dream. There are signs of hydrothermal activity, geothermal dykes, and folding. Tucked under the wall are two passages, the first connects back to before the climb, and the second is the continuation of the round trip.
Modelling by Callum and Vince, lighting by Tarquin, Pete, Callum and Vince
The rift then descends through a geologist's dream. There are signs of hydrothermal activity, geothermal dykes, and folding. Tucked under the wall are two passages, the first connects back to before the climb, and the second is the continuation of the round trip.
Modelling by Callum and Vince, lighting by Tarquin, Pete, Callum and Vince Rich haematite rock.
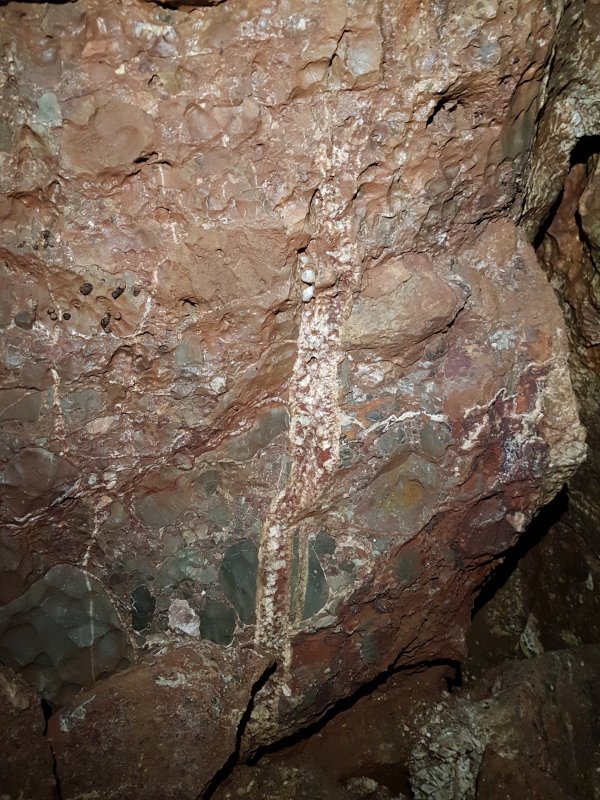 Intrusion which appears to be an intrusive dyke (a fracture in the rock filled with heated/igneous material).
 Crystalline rods.
Lighting by Tarquin and Pete
Crystalline rods.
Lighting by Tarquin and Pete Very visible fold.
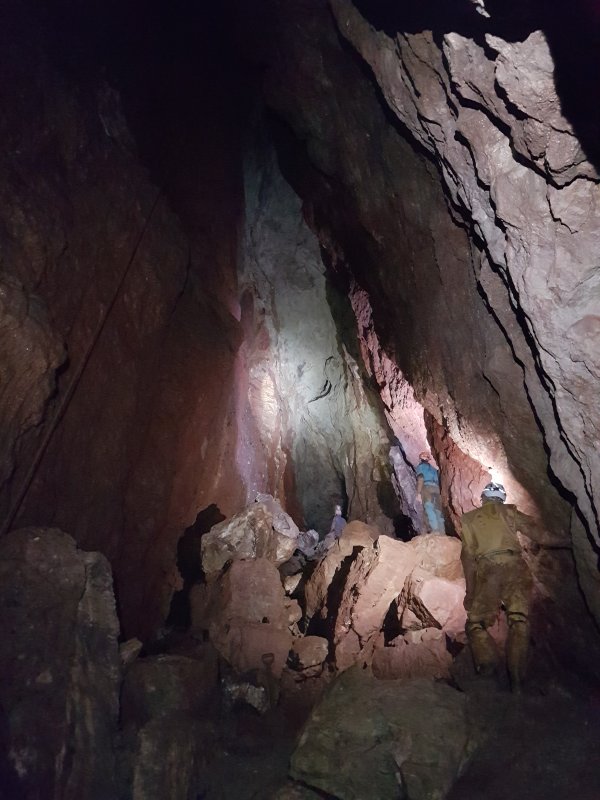 The passage then breaks into the splendour of Land Of Hope And Glory's big rift. This is some 70 metres long, 8 metres wide, and 25 metres tall, sloping at Mendip's typical steep dip. It requires more light than we had with us. The walls are stained a deep, rich red, the ceiling is white, and there are more incredible geological formations. What a place!
Modelling by Pete, Callum and Vince, lighting by Tarquin, Pete, Callum and Vince
The passage then breaks into the splendour of Land Of Hope And Glory's big rift. This is some 70 metres long, 8 metres wide, and 25 metres tall, sloping at Mendip's typical steep dip. It requires more light than we had with us. The walls are stained a deep, rich red, the ceiling is white, and there are more incredible geological formations. What a place!
Modelling by Pete, Callum and Vince, lighting by Tarquin, Pete, Callum and Vince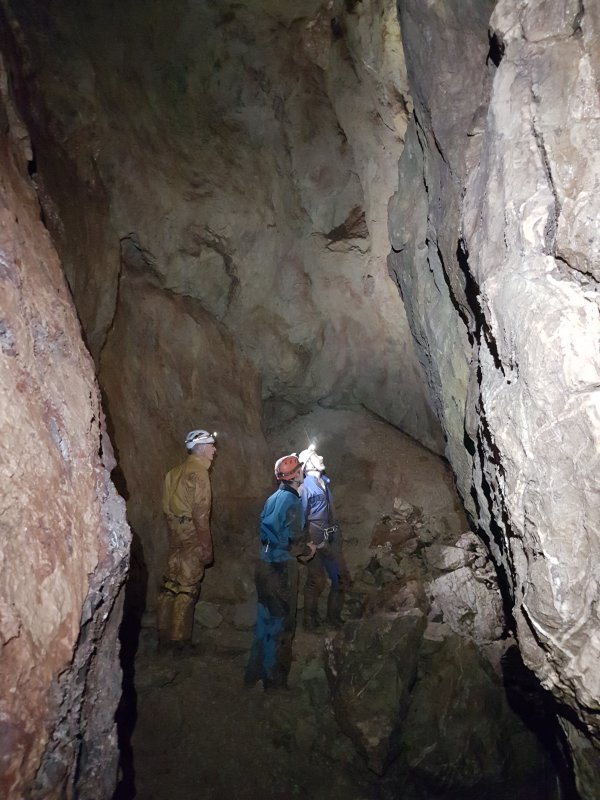 The top end of the rift closes down abruptly, with just a few solutional pockets.
Modelling by Pete, Callum and Vince, lighting by Tarquin, Pete, Callum and Vince
The top end of the rift closes down abruptly, with just a few solutional pockets.
Modelling by Pete, Callum and Vince, lighting by Tarquin, Pete, Callum and Vince Colours at the top of the rift, with grey and lilac tinted walls, and green tinted clay (Tea Green Marl).
Lighting by Tarquin and Pete
Colours at the top of the rift, with grey and lilac tinted walls, and green tinted clay (Tea Green Marl).
Lighting by Tarquin and Pete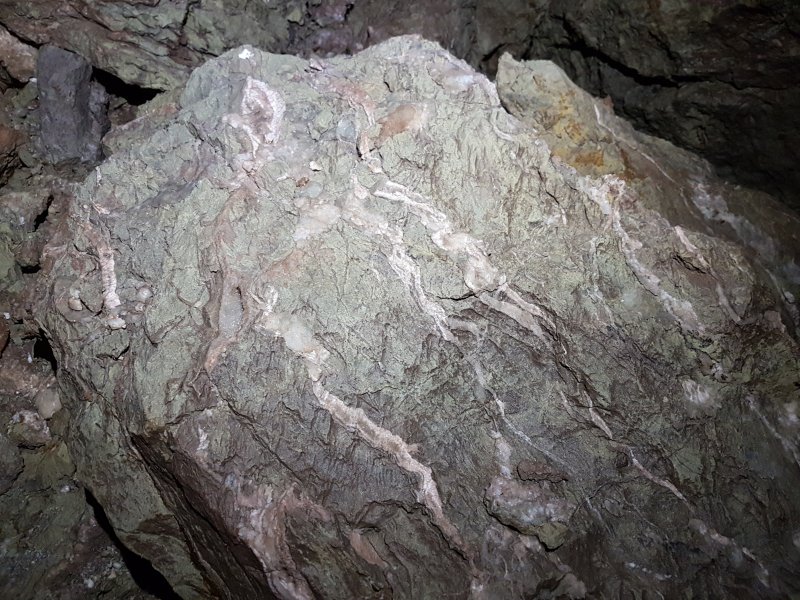 Veining in the boulders.
 Hydrothermal crystal growth on the walls of the rift. These would appear to have been created by the passage being part of a geyser system, much like Pen Park Hole.
Lighting by Tarquin and Pete
Hydrothermal crystal growth on the walls of the rift. These would appear to have been created by the passage being part of a geyser system, much like Pen Park Hole.
Lighting by Tarquin and Pete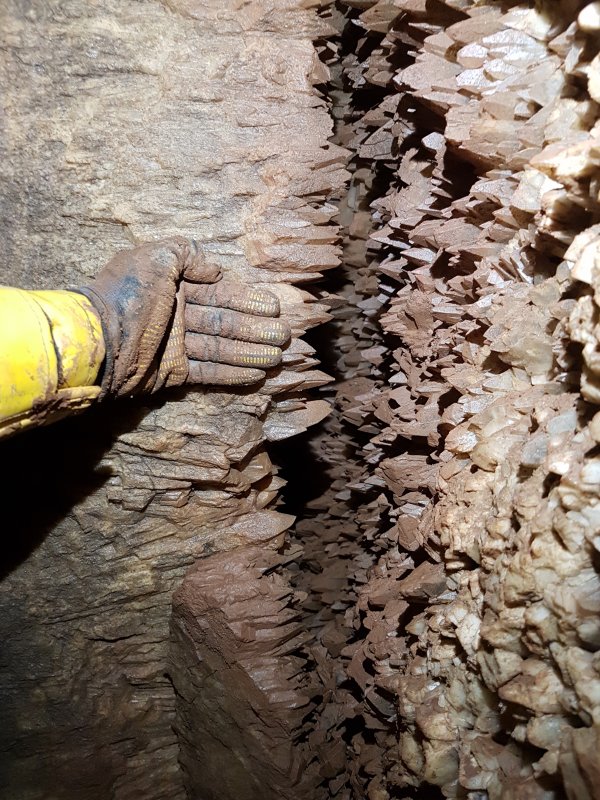 The best geode I have personally seen underground, in the wall of the big rift. The crystals are known as dogtooth spar.
Modelling by Tarquin
The best geode I have personally seen underground, in the wall of the big rift. The crystals are known as dogtooth spar.
Modelling by Tarquin Crystals in the huge geode.
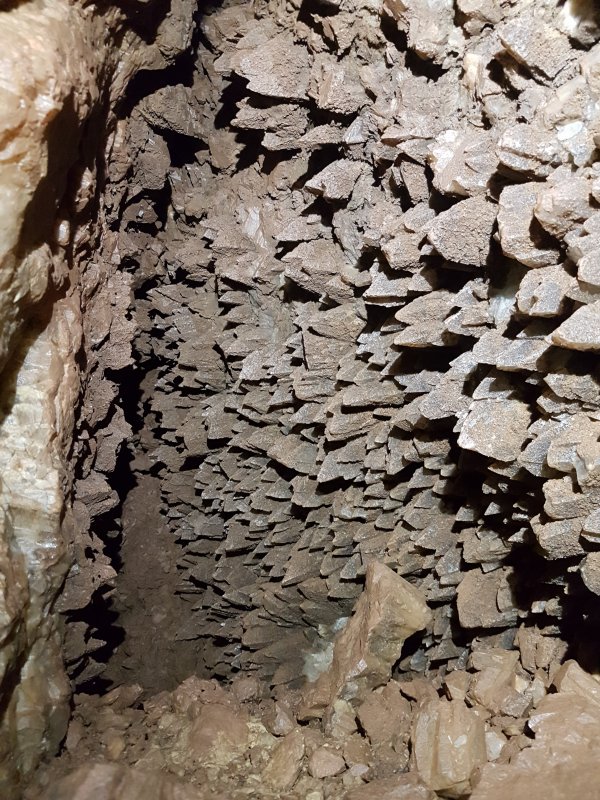 A second huge geode at the top of the rift.
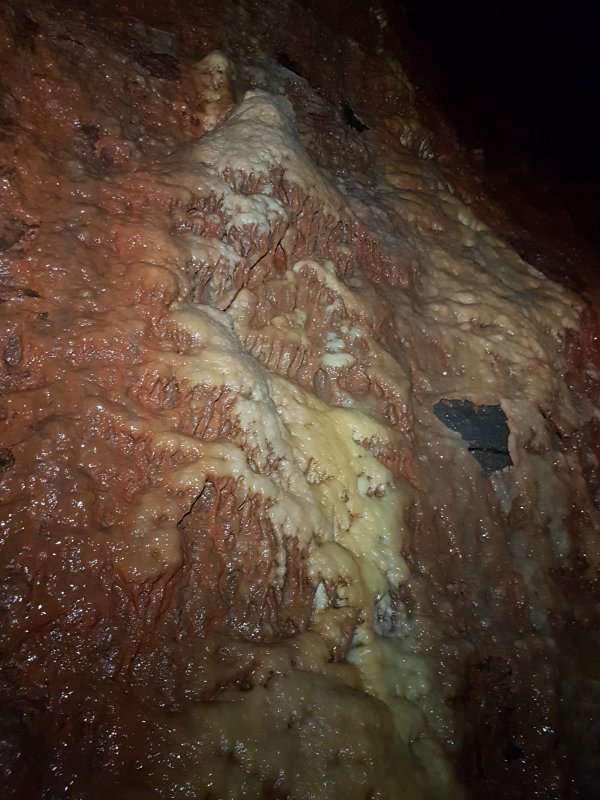 Formations in the big rift, something lacking elsewhere in the extension.
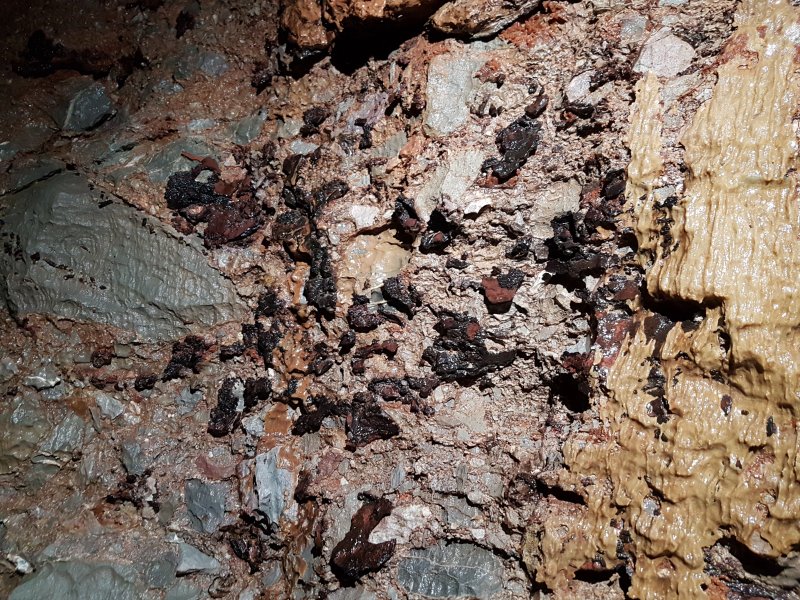 The walls are stained with a thick coat of haematite, which gives the red, black and maroon colouring.
 Haematite boulder.
Modelling by Pete, lighting by Tarquin and Pete
Haematite boulder.
Modelling by Pete, lighting by Tarquin and Pete Haematite and crystal layers.
 Pile of limestone and haematite boulders.
Lighting by Tarquin and Callum
Pile of limestone and haematite boulders.
Lighting by Tarquin and Callum Detail of the haematite rocks.
 The top of the big rift.
Modelling by Callum, lighting by Tarquin, Vince and Pete
The top of the big rift.
Modelling by Callum, lighting by Tarquin, Vince and Pete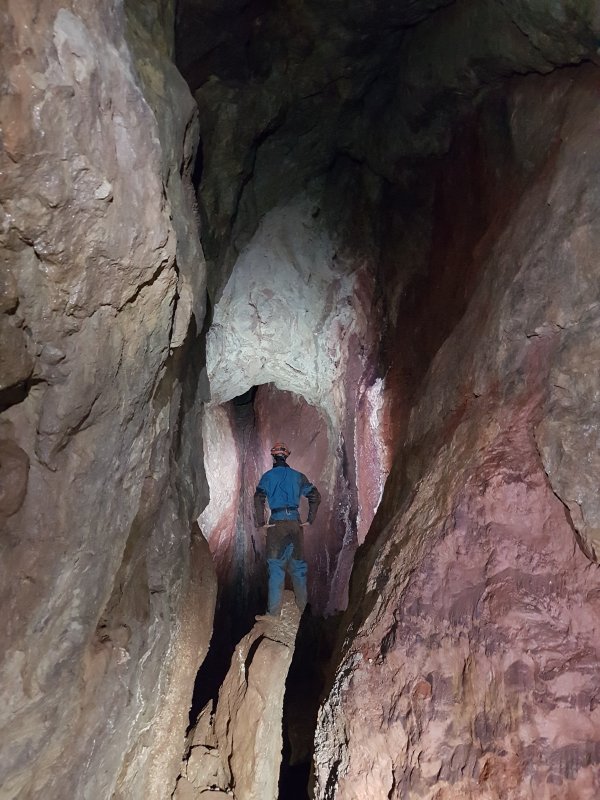 From here, you can see the huge aven at the high point of the ceiling. This was climbed for 15 metres, but the passage at the top closed down after just 25 metres in more Tea Green Marl fill.
Modelling by Callum, lighting by Tarquin, Vince, Callum and Pete
From here, you can see the huge aven at the high point of the ceiling. This was climbed for 15 metres, but the passage at the top closed down after just 25 metres in more Tea Green Marl fill.
Modelling by Callum, lighting by Tarquin, Vince, Callum and Pete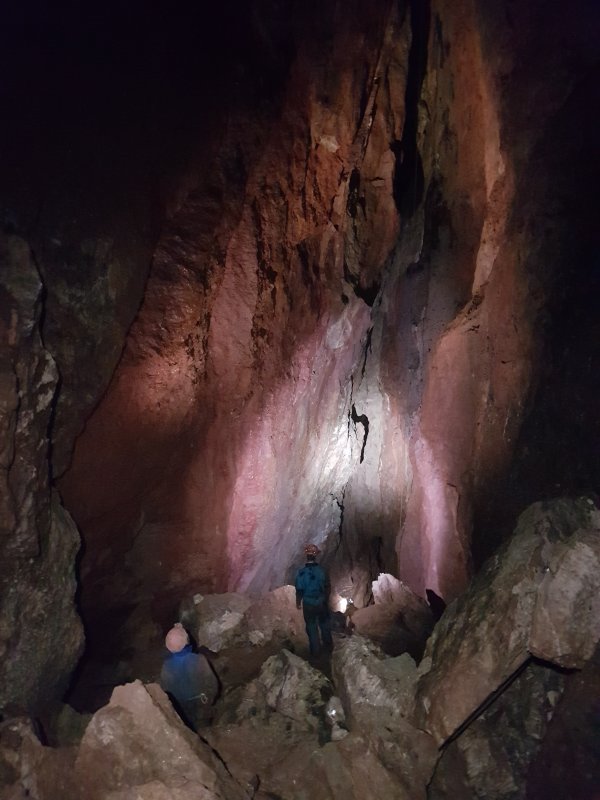 Looking down the middle portion of the big rift, with the way in on the left. Here you can see the huge scale of the place, with Pete in the distance.
Modelling by Vince, Callum and Pete, lighting by Tarquin, Vince, Callum and Pete
Looking down the middle portion of the big rift, with the way in on the left. Here you can see the huge scale of the place, with Pete in the distance.
Modelling by Vince, Callum and Pete, lighting by Tarquin, Vince, Callum and Pete The bottom part of the rift, which abruptly ends, without any obvious passage, or anywhere obvious to dig. There is a climb down needed to see the bottom, and visits are discouraged, to protect the vulnerable mud formations. We were allowed to visit for the photography.
Modelling by Callum and Pete, lighting by Tarquin, Callum and Pete
The bottom part of the rift, which abruptly ends, without any obvious passage, or anywhere obvious to dig. There is a climb down needed to see the bottom, and visits are discouraged, to protect the vulnerable mud formations. We were allowed to visit for the photography.
Modelling by Callum and Pete, lighting by Tarquin, Callum and Pete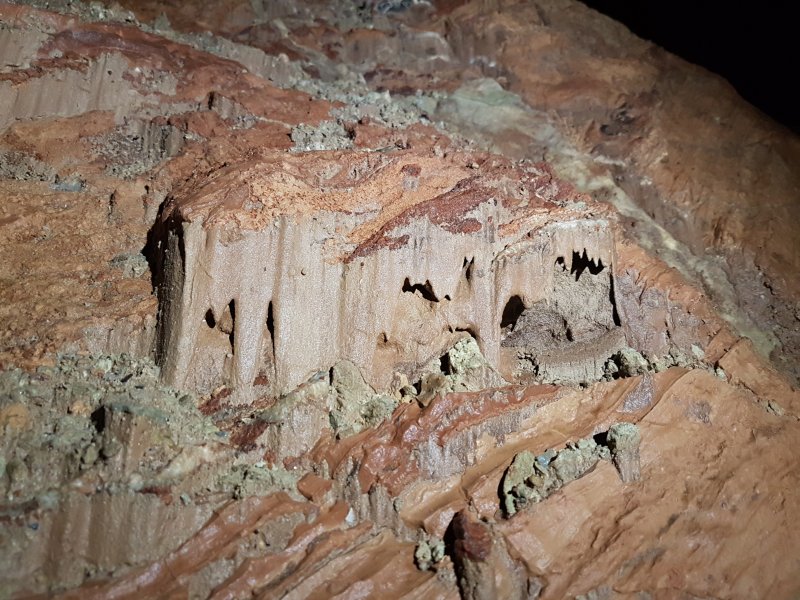 Mud drapes beside the climb. These are exactly where you want to put your feet while climbing.
 Mud drapes by the climb.
 Mud drapes by the climb.
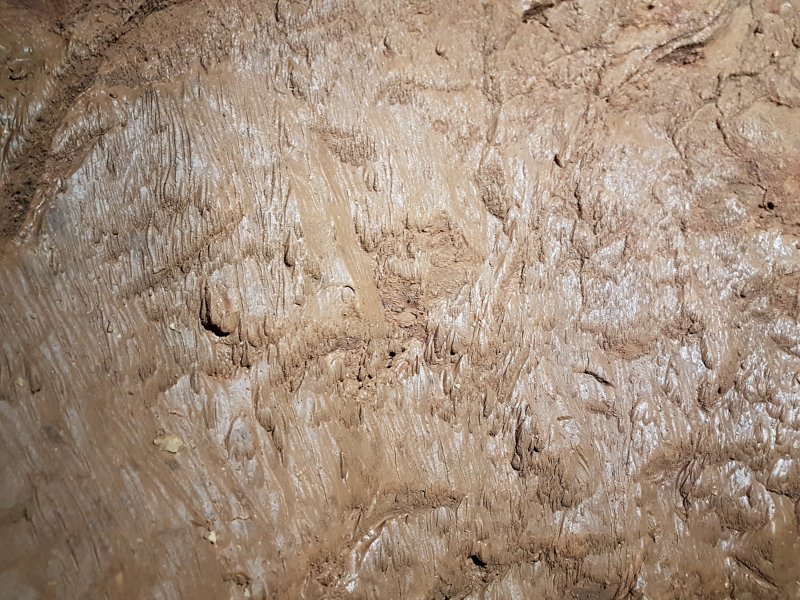 Mud formations.
 Mud formations.
 Mud formations.
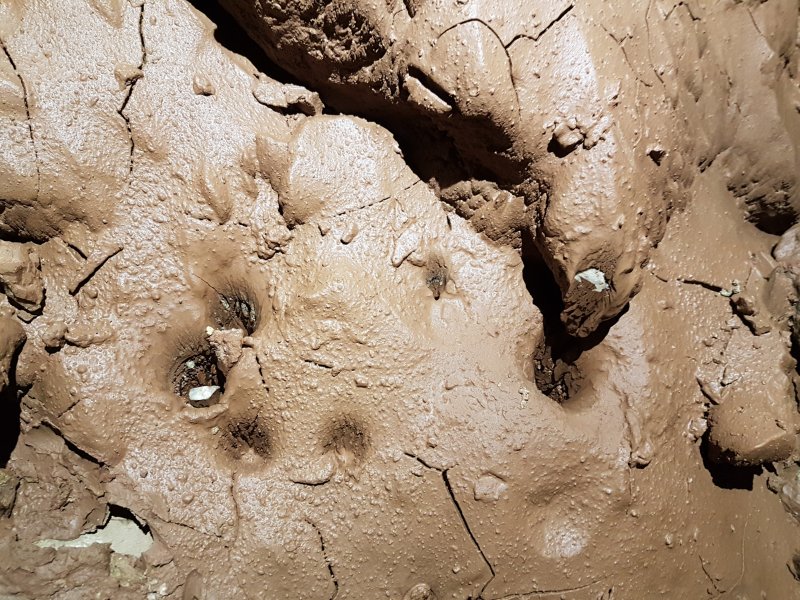 Mud formations with drip pockets.
 The bottom of the rift is dominated by a forest of hoodoos. Even if it were an obvious place to dig (that depression in the floor looks like the bottom of a pool, not a soakaway), it would be criminal to dig here.
Modelling by Pete
The bottom of the rift is dominated by a forest of hoodoos. Even if it were an obvious place to dig (that depression in the floor looks like the bottom of a pool, not a soakaway), it would be criminal to dig here.
Modelling by Pete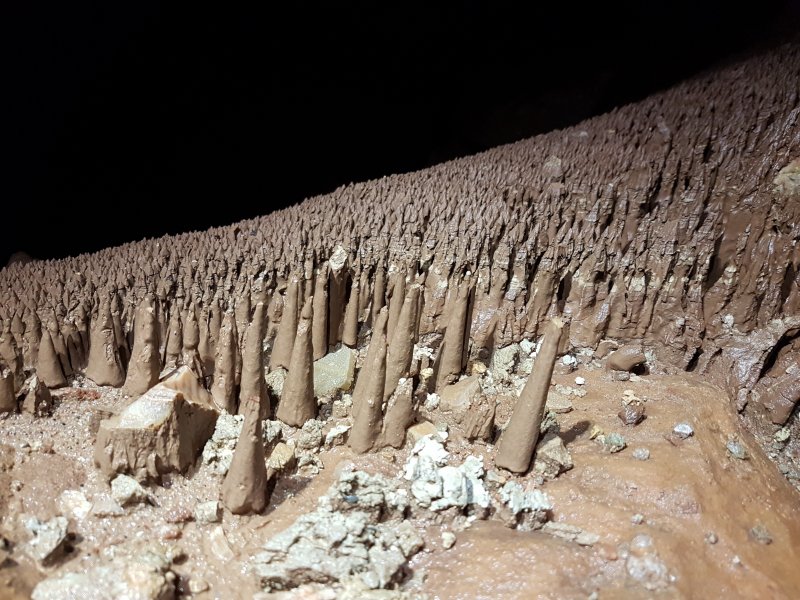 Hoodoos. Each capped with a tiny pebble, protecting the tower of mud from being washed away like the mud around it.
Lighting by Tarquin and Pete
Hoodoos. Each capped with a tiny pebble, protecting the tower of mud from being washed away like the mud around it.
Lighting by Tarquin and Pete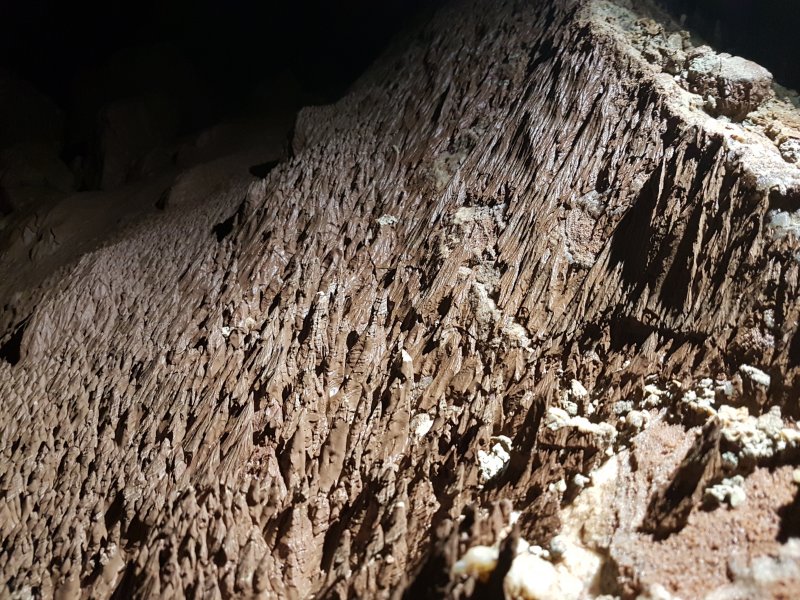 Hoodoos.
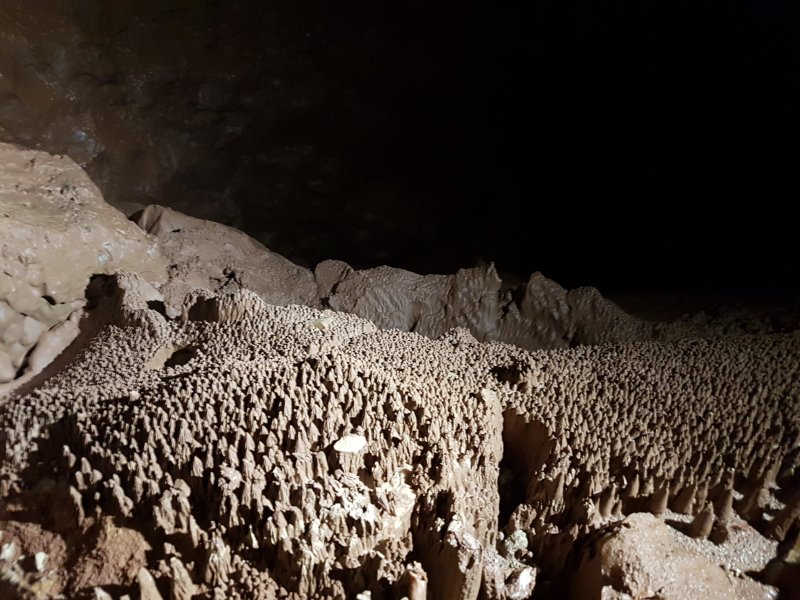 Hoodoos.
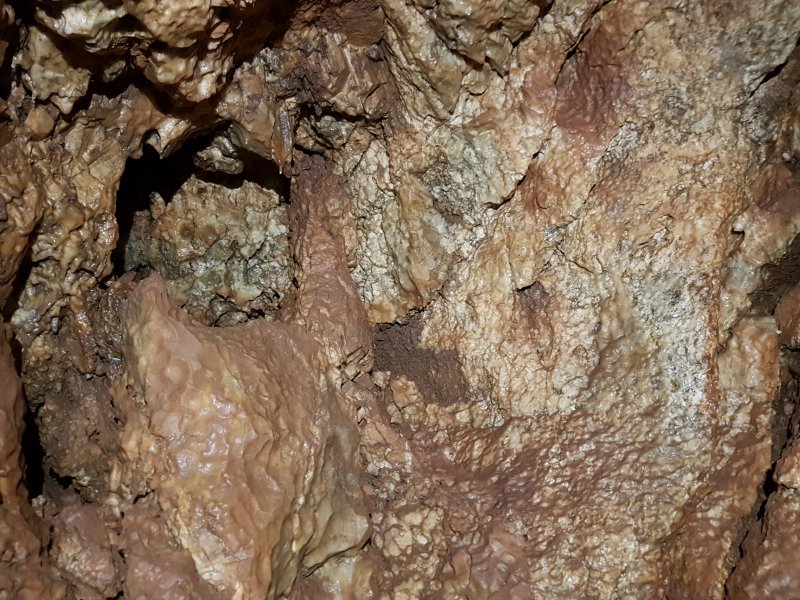 Heading out through the round trip, where there is more crystal growth evidence of hydrothermal activity.
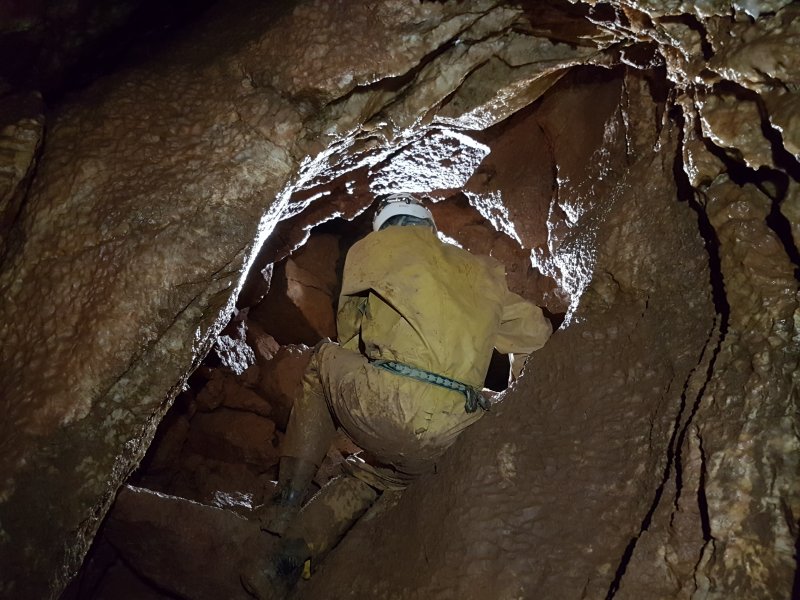 The return branch starts fairly small.
Modelling by Pete, lighting by Tarquin, Pete and Calum
The return branch starts fairly small.
Modelling by Pete, lighting by Tarquin, Pete and Calum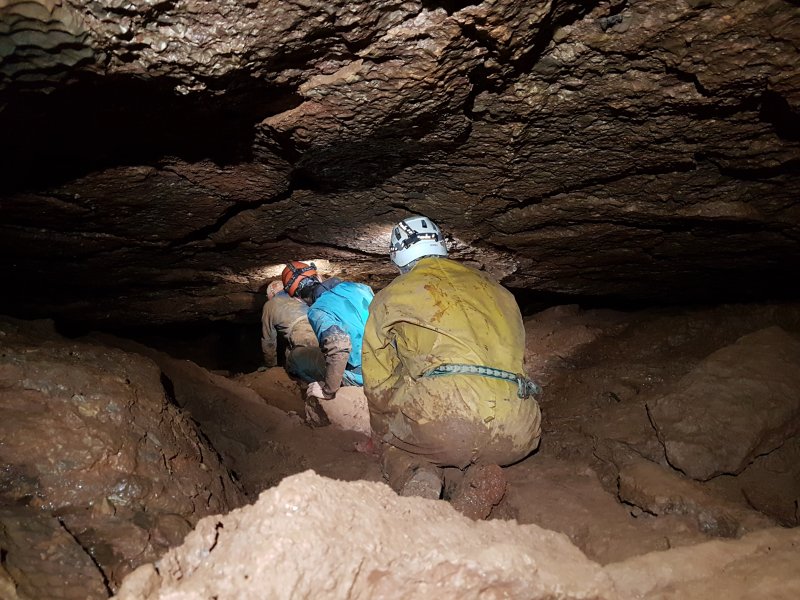 It then becomes a wide bedding.
Modelling by Pete, Callum and Vince, lighting by Tarquin, Pete, Callum and Vince
It then becomes a wide bedding.
Modelling by Pete, Callum and Vince, lighting by Tarquin, Pete, Callum and Vince Stal in the return passage, with insects flying through the picture.
Modelling by a bunch of winged creatures
Stal in the return passage, with insects flying through the picture.
Modelling by a bunch of winged creatures Cryostal in the return passage. The texture is clearly visible, particularly the larger beads.
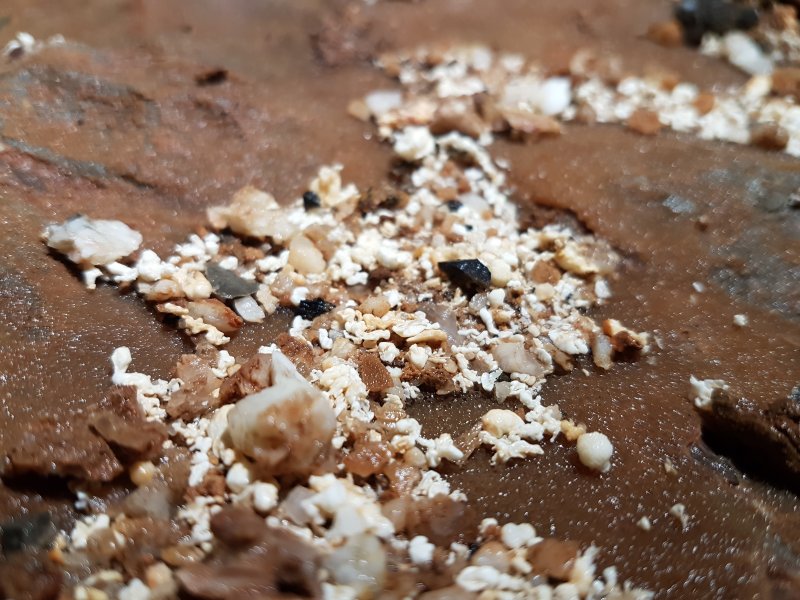 Cryostal in the return passage.
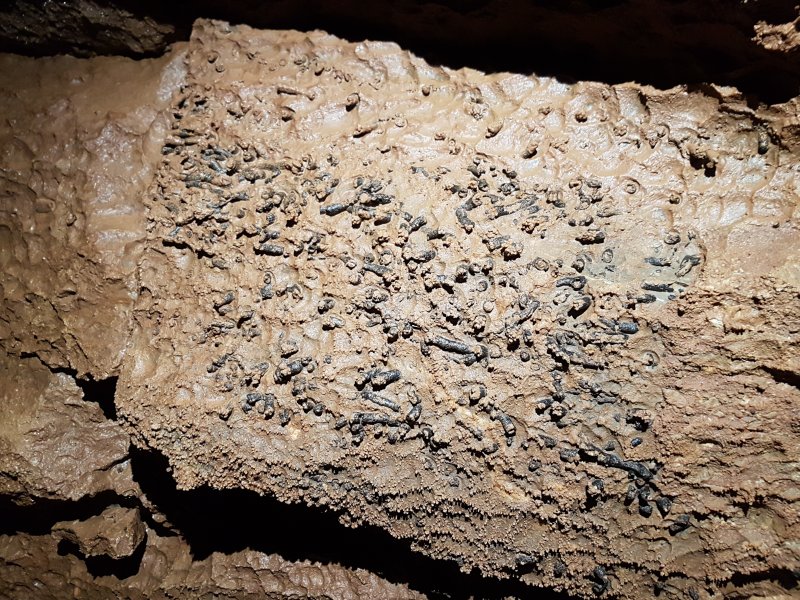 Fossil coral, probably the common Lithostrotion.
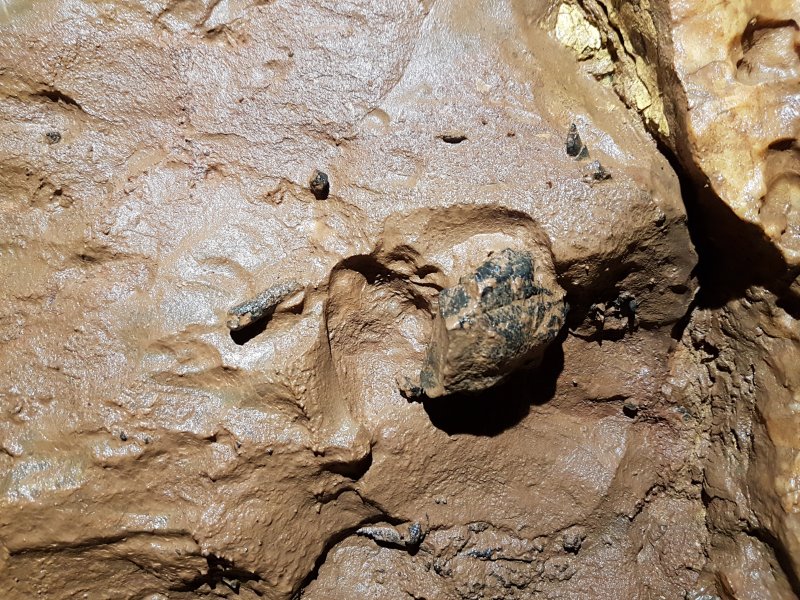 Large chunks of broken coral, probably a horn coral or similar rugose coral, with some smaller Lithostrotion pieces.
 More chunks of large coral fossil.
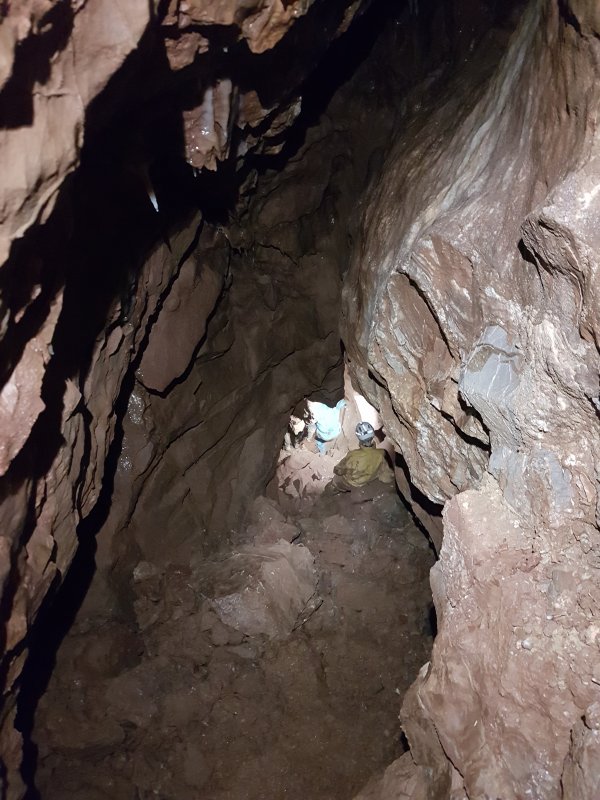 The passage ends back at the chamber at the start of Land Of Hope And Glory. From there, we head down into the new digs. The passage descends steeply, running parallel to the bottom of the big rift. The hope is that this will reach a way on, and avoid destroying mud formations.
Modelling by Pete and Callum, lighting by Tarquin, Pete and Callum
The passage ends back at the chamber at the start of Land Of Hope And Glory. From there, we head down into the new digs. The passage descends steeply, running parallel to the bottom of the big rift. The hope is that this will reach a way on, and avoid destroying mud formations.
Modelling by Pete and Callum, lighting by Tarquin, Pete and Callum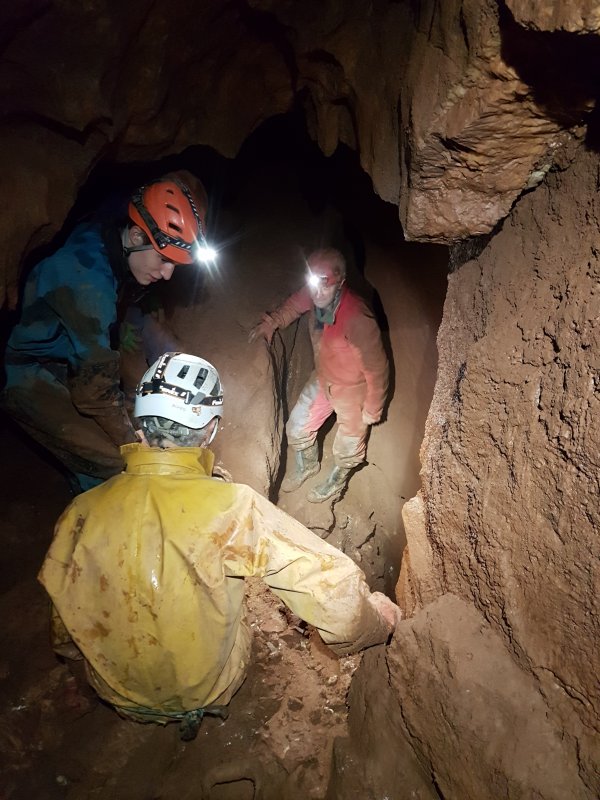 The dig splits into an upper and lower level, running parallel to each other. Another mammoth amount of mud removal is taking place here, much like the previous digs. We helped a small amount, while marvelling at the dry stone wall construction for spoil.
Modelling by Pete, Callum, Jake and parts of Vince, lighting by Tarquin, Pete, Callum, Jake and Vince
The dig splits into an upper and lower level, running parallel to each other. Another mammoth amount of mud removal is taking place here, much like the previous digs. We helped a small amount, while marvelling at the dry stone wall construction for spoil.
Modelling by Pete, Callum, Jake and parts of Vince, lighting by Tarquin, Pete, Callum, Jake and Vince Efforts were being concentrated on the upper tube, which is currently filled with mud.
Modelling by Nick, lighting by Tarquin and Nick
Efforts were being concentrated on the upper tube, which is currently filled with mud.
Modelling by Nick, lighting by Tarquin and Nick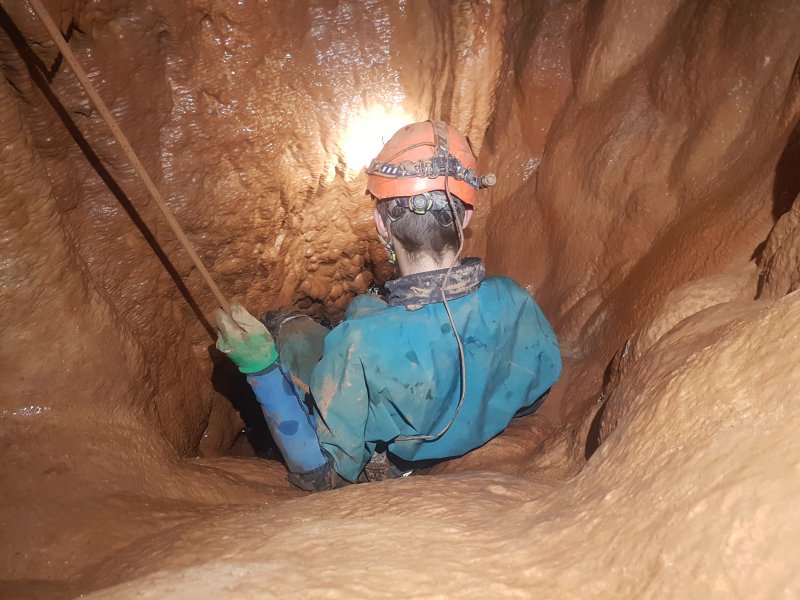 We returned for a later trip, this time taking the other route from the top chamber in Wookey 20. This starts as an obvious funnel of calcite, requiring a handline to keep control.
Modelling by Callum, lighting by Tarquin and Callum
We returned for a later trip, this time taking the other route from the top chamber in Wookey 20. This starts as an obvious funnel of calcite, requiring a handline to keep control.
Modelling by Callum, lighting by Tarquin and Callum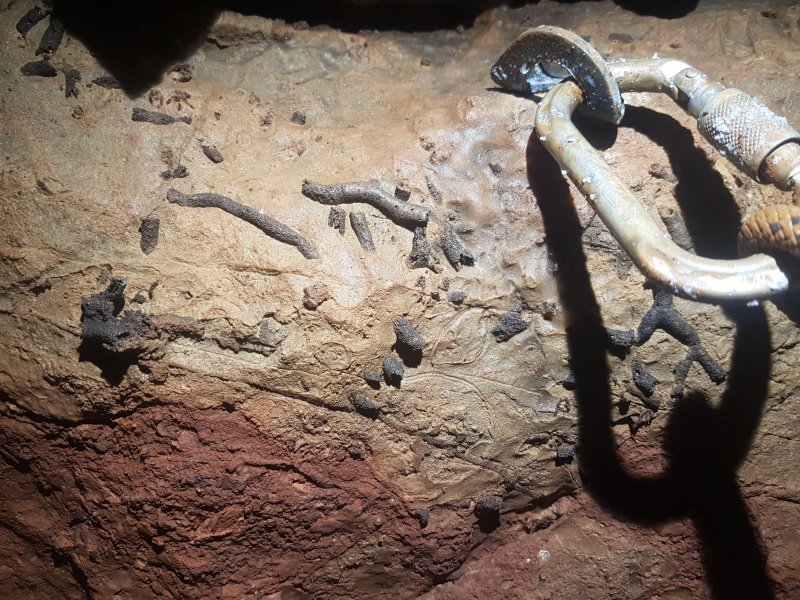 Lithostrotion fossils on the climb.
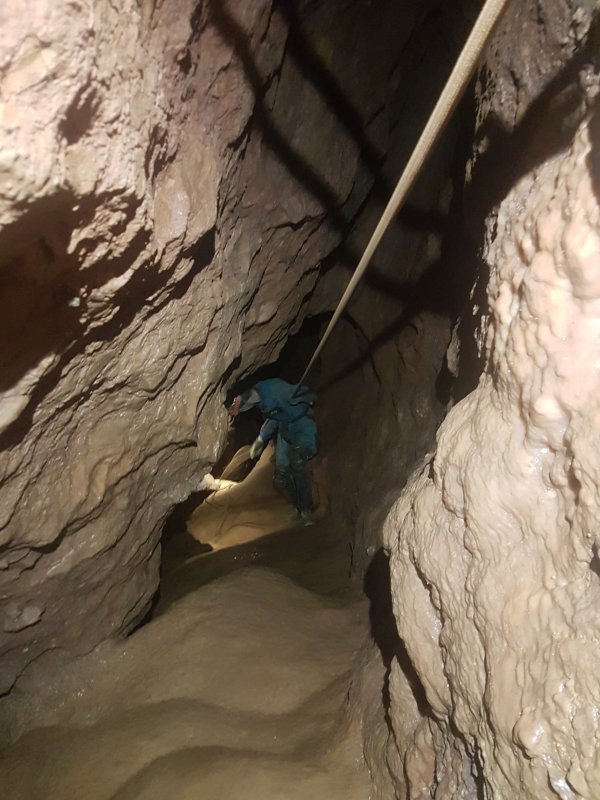 The route continues extremely steeply, with the rope rebelaying a few times.
Modelling by Callum, lighting by Tarquin, Callum and Vince
The route continues extremely steeply, with the rope rebelaying a few times.
Modelling by Callum, lighting by Tarquin, Callum and Vince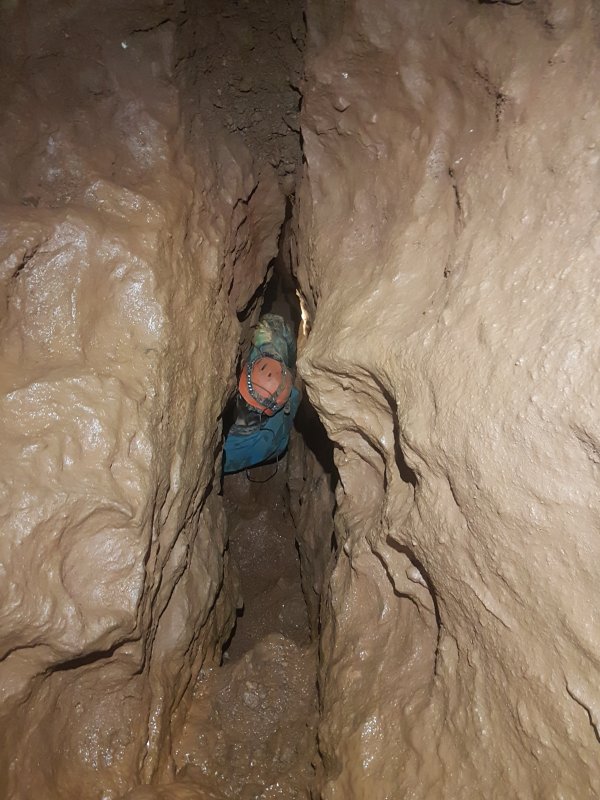 The route then becomes a lot harder, and this appears to be the old end of the passage, where the dry diggers started their dig.
Modelling by Callum, lighting by Tarquin and Callum
The route then becomes a lot harder, and this appears to be the old end of the passage, where the dry diggers started their dig.
Modelling by Callum, lighting by Tarquin and Callum The slot continues.
Modelling and lighting by Tarquin and Callum
The slot continues.
Modelling and lighting by Tarquin and Callum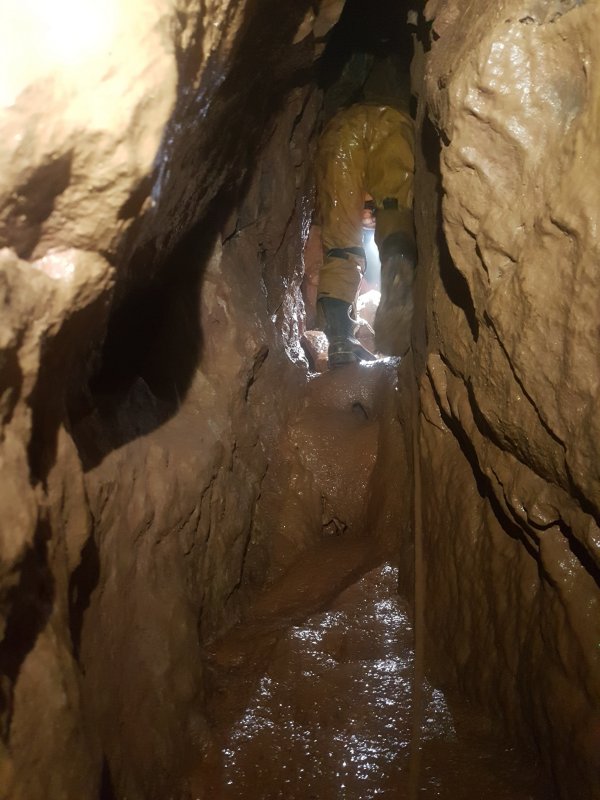 Descending the slots.
Modelling by Pete, lighting by Tarquin and Pete
Descending the slots.
Modelling by Pete, lighting by Tarquin and Pete The last drop of the upper set, which is uncomfortably tight. The ladder is hard to use in such a narrow, slimy space, but in the past, they used to climb back up this without a ladder at all, because it was apparently more grippy back then. How on earth?!
Modelling by Pete, lighting by Tarquin and Pete
The last drop of the upper set, which is uncomfortably tight. The ladder is hard to use in such a narrow, slimy space, but in the past, they used to climb back up this without a ladder at all, because it was apparently more grippy back then. How on earth?!
Modelling by Pete, lighting by Tarquin and Pete The breakthrough gave access to this muddy descent, which drops down to Wookey 23¾. The sump in that section seems to carry the downstream water from Wookey 24, and take it through to the main downstream cave, presumably the Wookey 22 upstream sump. The descent to that sump is supposed to be harder than the route to Wookey 24, so it needs more time than we had available.
 Instead, we scramble up cemented digging spoil, and head through a dig into Beginner's Luck. This dig connected Wookey 20 and Wookey 24, and gave dry cavers access to a huge load of passage. The largest piece of unconnected dry cave is now Wookey 22-23.
Modelling by Callum
Instead, we scramble up cemented digging spoil, and head through a dig into Beginner's Luck. This dig connected Wookey 20 and Wookey 24, and gave dry cavers access to a huge load of passage. The largest piece of unconnected dry cave is now Wookey 22-23.
Modelling by Callum Beginner's Luck, a wide bedding that looks really promising downhill but goes nowhere. This was found from the bottom up, in Wookey 24, so technically, this is now Wookey 24. However, it is not the grand piece of Wookey 24 that everyone wants to see. Instead, we head up the bedding through a ruckle.
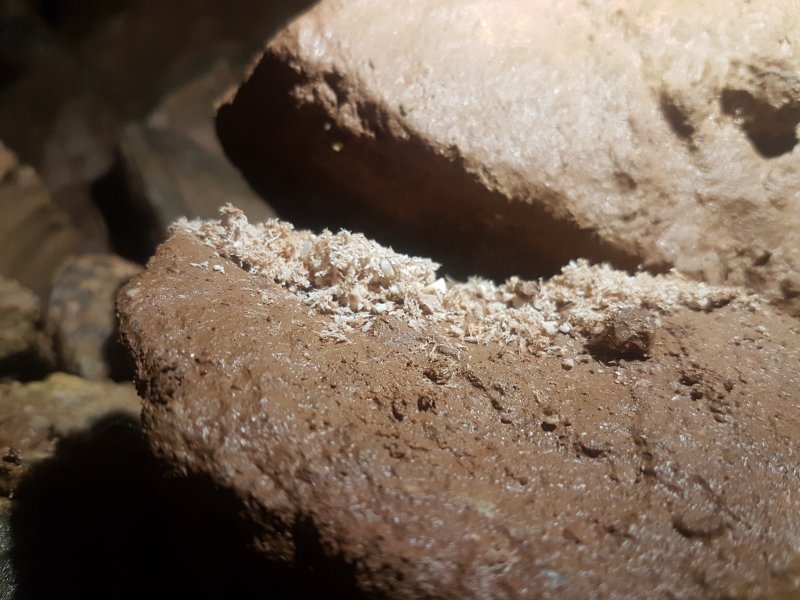 Fine, wispy cryostal in Beginner's Luck, under your feet as you climb through the ruckle. Somehow, it has survived.
 Drip splashes in Beginner's Luck.
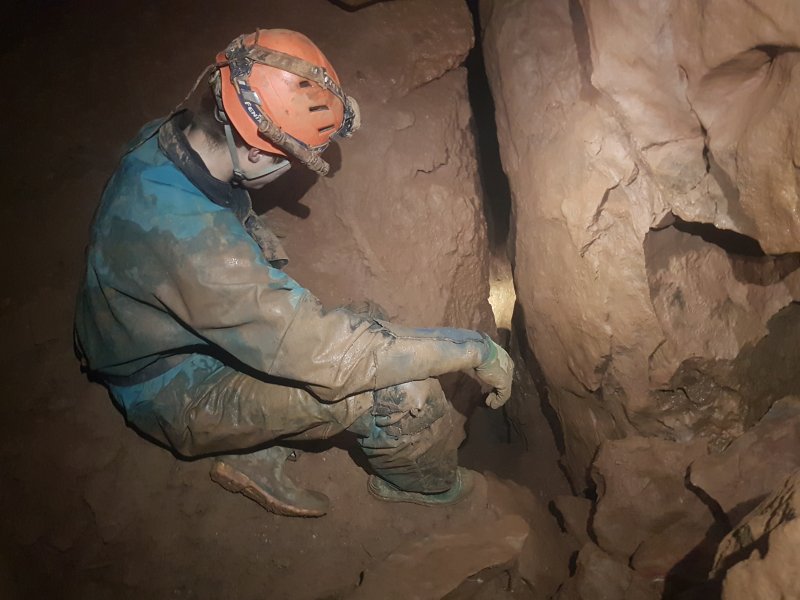 The way onwards returns to the familiar ridiculous slot dimensions.
Modelling by Callum and Vince, lighting by Tarquin, Callum and Vince
The way onwards returns to the familiar ridiculous slot dimensions.
Modelling by Callum and Vince, lighting by Tarquin, Callum and Vince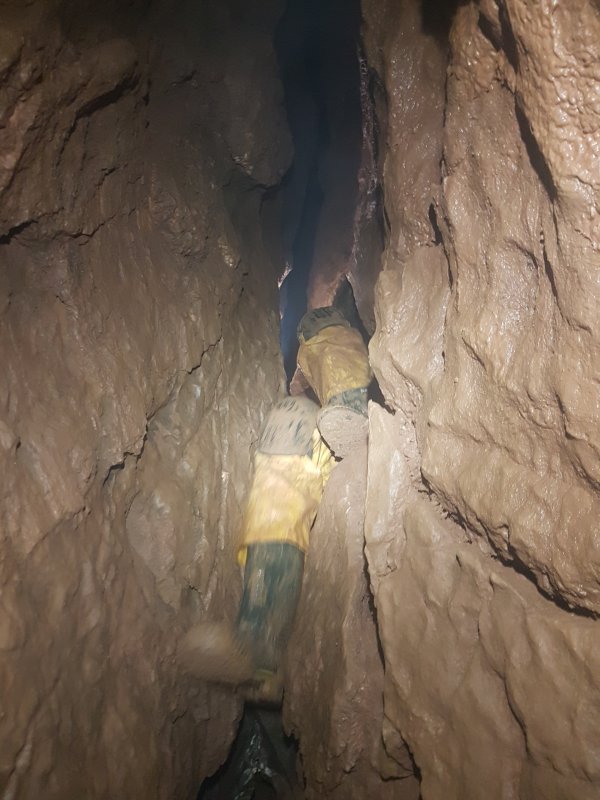 Even the easy parts of the route are like a contortionist's puzzle.
Modelling by Pete, lighting by Tarquin and Pete
Even the easy parts of the route are like a contortionist's puzzle.
Modelling by Pete, lighting by Tarquin and Pete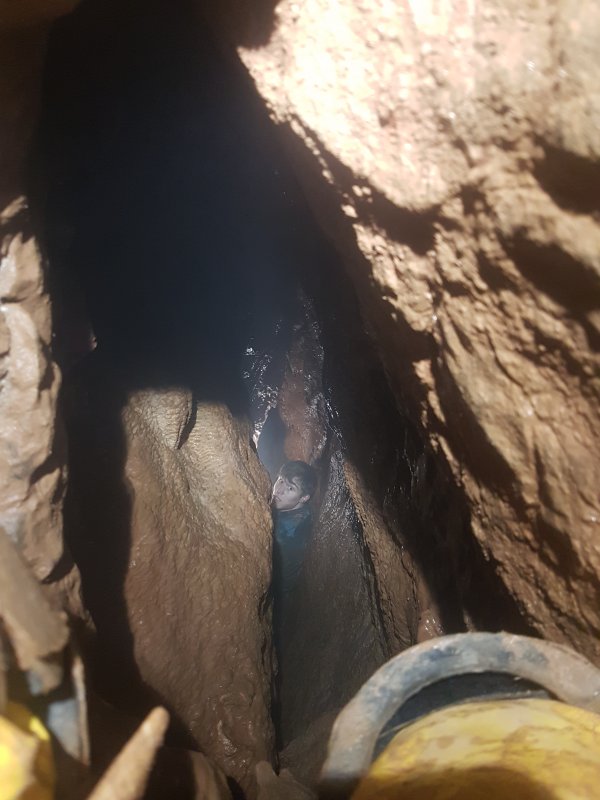 The tightest part of the route looks like it will be irreversible when seen from the top. However, you do not need to remove your helmet.
Modelling by Tarquin's legs and Callum, lighting by Tarquin, Callum and Vince
The tightest part of the route looks like it will be irreversible when seen from the top. However, you do not need to remove your helmet.
Modelling by Tarquin's legs and Callum, lighting by Tarquin, Callum and Vince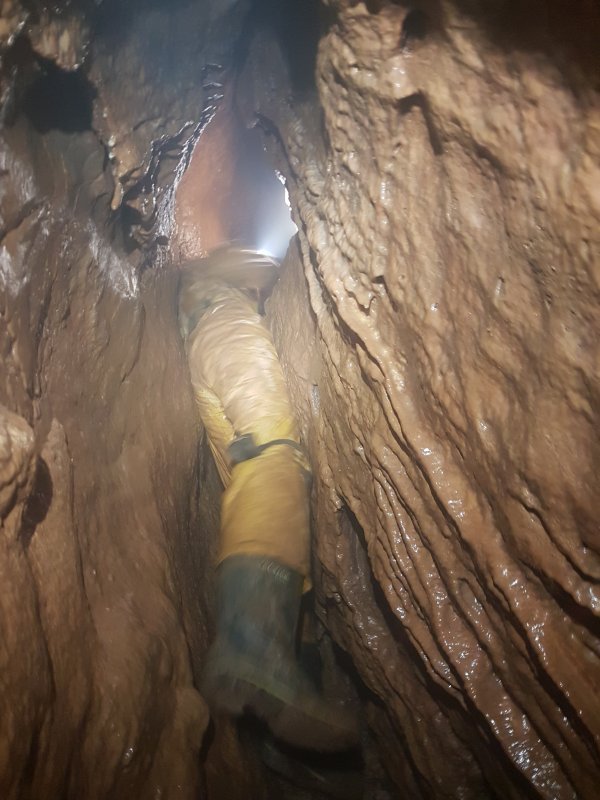 You have to find the widest part, but it is actually a lot easier than it looks on the return, as there are some holds in convenient places. I had stated on the way in that this was so hard that I would not want to return again, but retracted that statement after getting back out. This passage was originally explored from below, using rock removal techniques to expand it.
Modelling by Pete, lighting by Tarquin and Pete
You have to find the widest part, but it is actually a lot easier than it looks on the return, as there are some holds in convenient places. I had stated on the way in that this was so hard that I would not want to return again, but retracted that statement after getting back out. This passage was originally explored from below, using rock removal techniques to expand it.
Modelling by Pete, lighting by Tarquin and Pete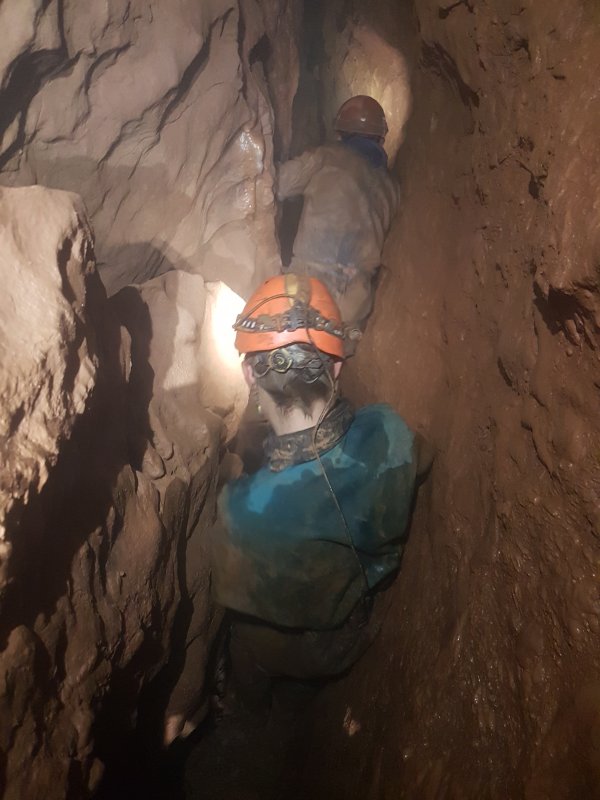 It then becomes just an awkward rift instead of a nightmare.
Modelling by Callum and Vince, lighting by Tarquin, Callum and Vince
It then becomes just an awkward rift instead of a nightmare.
Modelling by Callum and Vince, lighting by Tarquin, Callum and Vince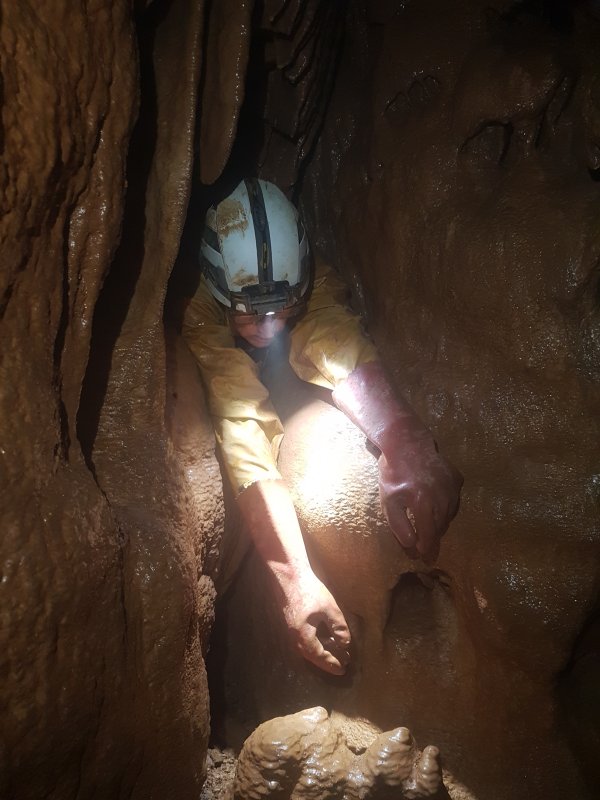 Wriggling through the awkward parts.
Modelling by Pete, lighting by Tarquin and Pete
Wriggling through the awkward parts.
Modelling by Pete, lighting by Tarquin and Pete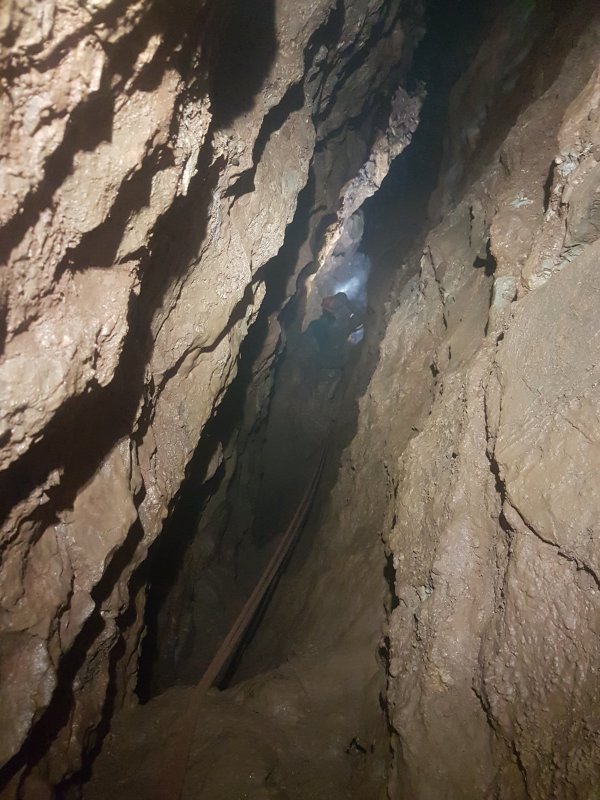 The final descent is assisted by a rope, and it is clear that something very big has appeared in front.
Modelling by Callum and Vince, lighting by Tarquin, Callum and Vince
The final descent is assisted by a rope, and it is clear that something very big has appeared in front.
Modelling by Callum and Vince, lighting by Tarquin, Callum and Vince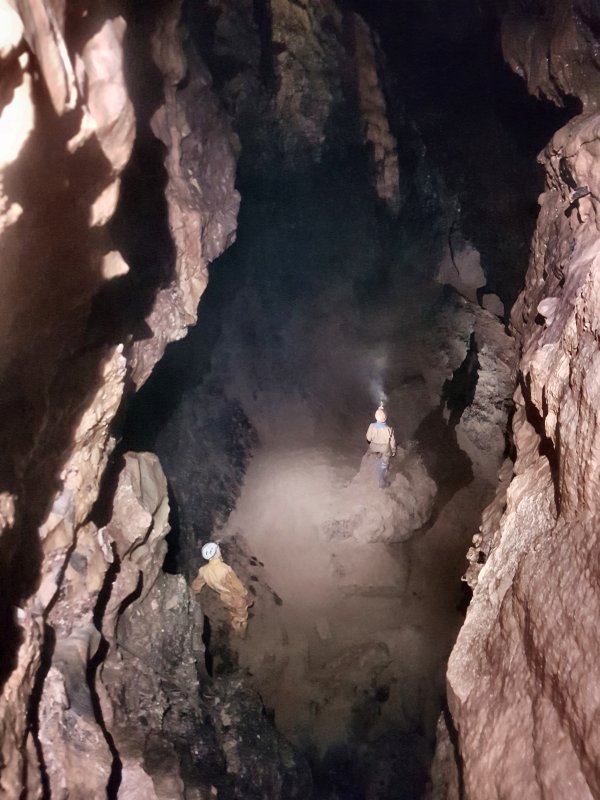 Wookey 24 appears as a grand passage. Avoiding the last drop, the route passes through a crack in the left wall, and drops into the upstream rift. The water enters the large passage from the left, runs below boulders and flows out beneath the camera, onwards towards Wookey 23¾. The fog is unavoidable, as the chamber is very humid indeed, even in these low water conditions.
Modelling by Pete and Vince, lighting by Tarquin, Pete, Vince and Callum
Wookey 24 appears as a grand passage. Avoiding the last drop, the route passes through a crack in the left wall, and drops into the upstream rift. The water enters the large passage from the left, runs below boulders and flows out beneath the camera, onwards towards Wookey 23¾. The fog is unavoidable, as the chamber is very humid indeed, even in these low water conditions.
Modelling by Pete and Vince, lighting by Tarquin, Pete, Vince and Callum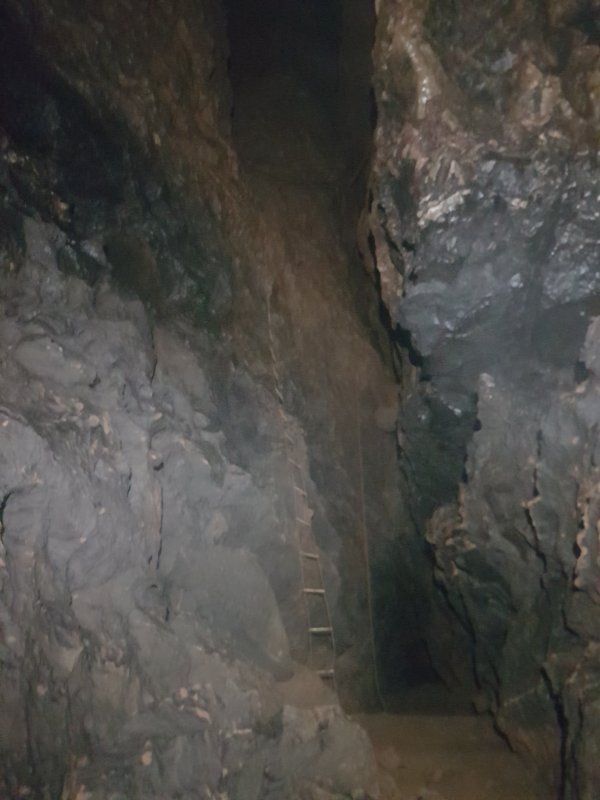 Up in the wall to the left is a ladder route that avoids the swim in the main river upstream, reaching the upstream passage more easily. However, it takes a lot of time, and we didn't have any.
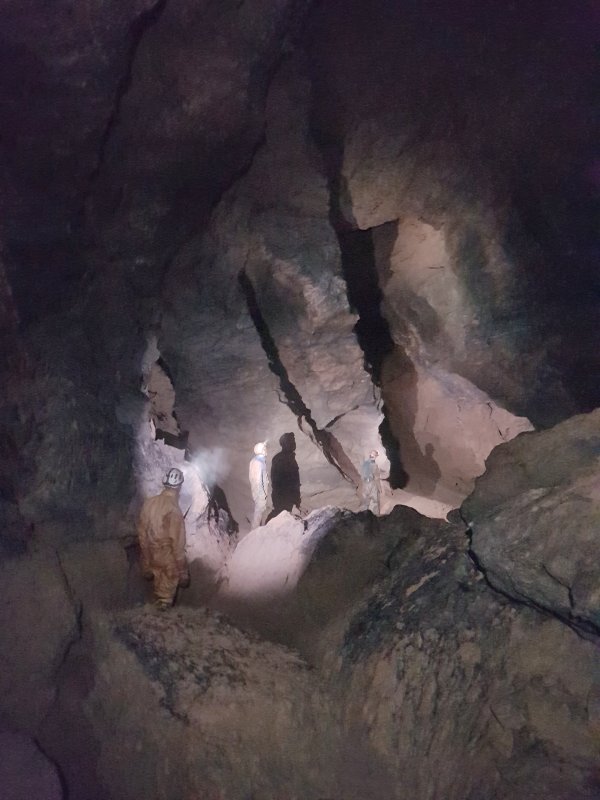 Wookey 24's "fossil" passage is simply enormous compared with everything up until this point.
Modelling by Pete, Vince and Callum, lighting by Tarquin, Pete, Vince and Callum
Wookey 24's "fossil" passage is simply enormous compared with everything up until this point.
Modelling by Pete, Vince and Callum, lighting by Tarquin, Pete, Vince and Callum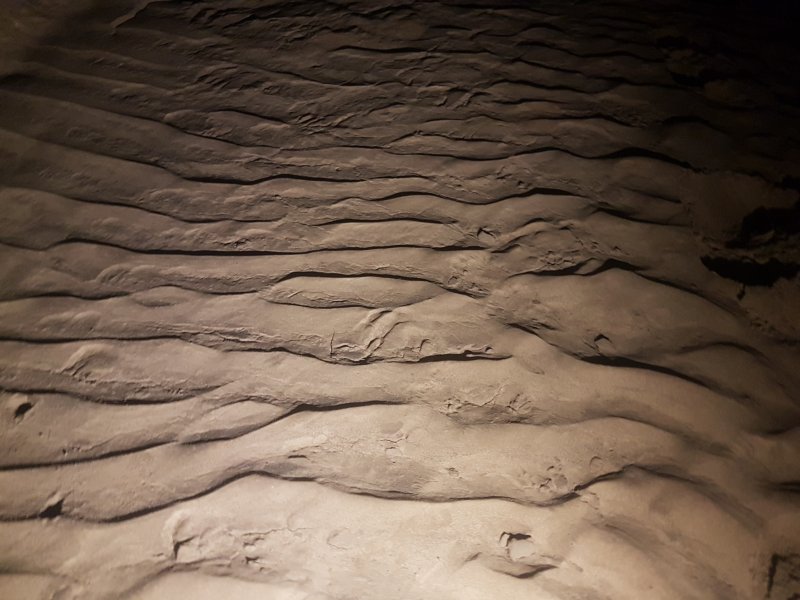 Fresh sand ripples. There were no footprints here, and there was a flood scum line high up on the wall. This place floods, really seriously, turning the normally static sumps through to Wookey 23-22 into an active overflow channel.
 The last section of passage before the sump.
Modelling by Pete, Vince and Callum, lighting by Tarquin, Pete, Vince and Callum
The last section of passage before the sump.
Modelling by Pete, Vince and Callum, lighting by Tarquin, Pete, Vince and Callum The static sump leading through to Wookey 23. This is the original route into Wookey 24, and for divers, it is still the preferred method, avoiding those insane rifts.
 Drip pockets near the sump, that have somehow survived the flooding.
 Mud formations near the sump, which appear to be stained with manganese.
 The upstream passage is much narrower, completely lacking the grandure. It begins as a traverse over a slot.
Modelling by Pete, Callum and Vince, lighting by Tarquin, Pete, Callum and Vince
The upstream passage is much narrower, completely lacking the grandure. It begins as a traverse over a slot.
Modelling by Pete, Callum and Vince, lighting by Tarquin, Pete, Callum and Vince The water charges off under the boulders of the larger passage.
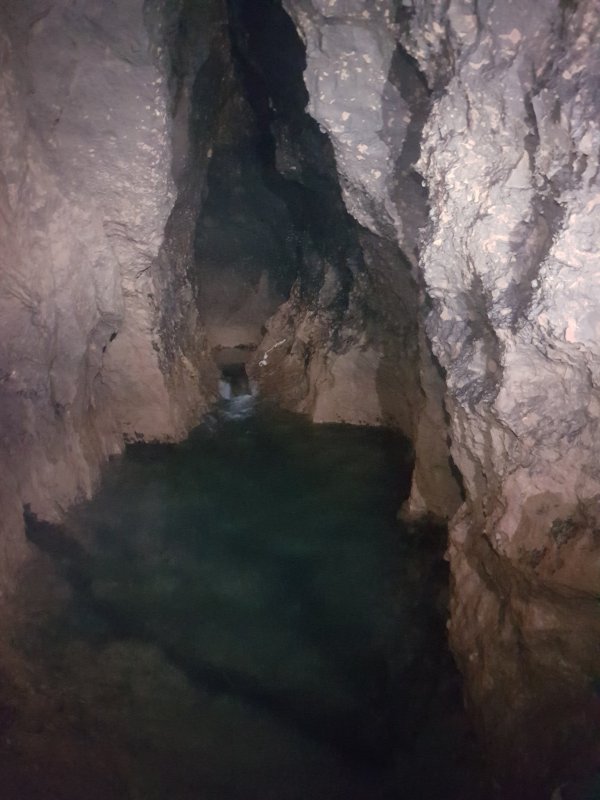 The water emerges from a deep pool at Sting Corner. The current here is very strong, and swimming is required further upstream. This can be quite challenging, especially for divers who have to do so with all of their diving equipment. Sadly, we had completely run out of time, and needed to head out. Amazingly, this short distance had taken us more time than all of Land Of Hope And Glory.
Lighting by Tarquin, Pete, Callum and Vince
The water emerges from a deep pool at Sting Corner. The current here is very strong, and swimming is required further upstream. This can be quite challenging, especially for divers who have to do so with all of their diving equipment. Sadly, we had completely run out of time, and needed to head out. Amazingly, this short distance had taken us more time than all of Land Of Hope And Glory.
Lighting by Tarquin, Pete, Callum and Vince