Yorkshire Dales trip 15/11/2019 to 17/11/2019
Unless otherwise stated, camera, setups, lighting, edits and gallery effects by Tarquin. Modelling and lighting at various points will be Helen Langford, Celestine Crabbe, Helen Stewart, Malcolm Stewart, Phill Thomas, Ali Garmin, Pete Bolt and Jules Carter.
This was a short trip to the Yorkshire Dales caving region (which, incidentally, also includes Lancashire and Cumbria, so it should really be the Northern Dales, but I digress...), with some fellow club members. The trips shown here are Aquamole Pot, Christmas Pot and Lancaster Hole. The last of these was my main destination.
 View from Wharfe near Austwick, towards Thwaite Scars.
 Kingsdale, one of the classic Yorkshire Dales karst valleys, and home to the Kingsdale Master Cave. On the left is Gragareth (627 metres), on the right side is Whernside (736 metres) with its Scales Moor making up the right side of the valley. On the distant right is Ingleborough (724 metres). Kingsdale Master Cave contains all of the longest sumps in the UK, passing under the valley to join the caves on both sides. On the left are the famous pull-through caves of Swinsto Hole and Simpsons Pot, their lower Valley Entrance and Keld Head resurgence, the non-pull-throughs of Rowten Hole, Aquamole Pot, Jingling Caves, the non-connected Marble Steps Pot, The Mohole, Jingling Pot, Craftman's Pot, Slanting Cave and Yordas Cave. On the right are Illusion Pot, Crescent Pot, Lord's Top Dig, King Pot and Brown Hill Pot (parts of the master cave), Broken Finger Pot, Growling Hole, Spectacle and Vespers Pots and Heron Pot. A lot of choice.
 Whernside, dodging the random rainclouds. The other team were heading into an abortive trip into Vespers Pot, abandoned after it proved to be far more demanding, and far tighter than hoped.
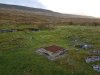 Entrance to Aquamole Pot. This seems like an unexpected location for a cave, while the nearby tree sits in the entrance to the much more obvious Jingling Pot. Aquamole was originally found from below by cave divers ("aqua moles") diving the sumps of the Kingsdale Master Cave. They explored it all the way to just below the surface, and then mined an entrance to join it. Amazingly, these caves are so close to each other, and very closely related, but Jingling Pot has stubbornly refused to be connected to the main system.
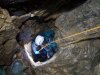 Rigging the first pitch, immediately below the bricked entrance shaft. This was clearly enlarged with some form of chemical persuasion, and is still quite awkwardly tight, especially with the extra ropes left in place. Each of my companions took turns rigging, with me supervising. Not that I consider myself all that experienced at rigging, as I tend to derig rather than rig, but hey.
Modelling by Helen Langford and Tarquin's wellies, lighting by Tarquin and Helen Langford
Rigging the first pitch, immediately below the bricked entrance shaft. This was clearly enlarged with some form of chemical persuasion, and is still quite awkwardly tight, especially with the extra ropes left in place. Each of my companions took turns rigging, with me supervising. Not that I consider myself all that experienced at rigging, as I tend to derig rather than rig, but hey.
Modelling by Helen Langford and Tarquin's wellies, lighting by Tarquin and Helen Langford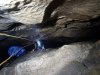 The first pitch is a series of tight rebelays, with at least one being shown as a Y-hang on the rigging topo, but actually having only one hanger. The tight rift makes these very awkward to pass.
Modelling by Helen Langford, lighting by Tarquin and Helen Langford
The first pitch is a series of tight rebelays, with at least one being shown as a Y-hang on the rigging topo, but actually having only one hanger. The tight rift makes these very awkward to pass.
Modelling by Helen Langford, lighting by Tarquin and Helen Langford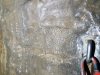 Fossil at a rebelay.
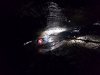 Final drop of the first pitch.
Modelling by Celestine, lighting by Helen Langford, Celestine and Helen Stewart
Final drop of the first pitch.
Modelling by Celestine, lighting by Helen Langford, Celestine and Helen Stewart Rigging the top of the second pitch. This is shown as a rebelay, but is actually a set of two re-Y-hangs.
Modelling by Celestine, lighting by Tarquin and Celestine
Rigging the top of the second pitch. This is shown as a rebelay, but is actually a set of two re-Y-hangs.
Modelling by Celestine, lighting by Tarquin and Celestine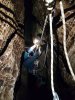 Rigging the second and third Y-hangs.
Modelling by Celestine, lighting by Tarquin and Celestine
Rigging the second and third Y-hangs.
Modelling by Celestine, lighting by Tarquin and Celestine The main hang of Aquamole Pot's second pitch.
Modelling by Helen Langford, lighting by Celestine, Helen Langford and Helen Stewart
The main hang of Aquamole Pot's second pitch.
Modelling by Helen Langford, lighting by Celestine, Helen Langford and Helen Stewart The next section of cave is a short stream passage, beginning with a short crawl, where it takes serious effort to remain dry. Typical West Kingsdale.
Modelling by Celestine, lighting by Tarquin and Celestine
The next section of cave is a short stream passage, beginning with a short crawl, where it takes serious effort to remain dry. Typical West Kingsdale.
Modelling by Celestine, lighting by Tarquin and Celestine Fourth Pitch, with a poor set-up for the pitch head, causing a rope rub. A traverse hanger could have avoided this problem.
Modelling by Celestine, lighting by Tarquin and Celestine
Fourth Pitch, with a poor set-up for the pitch head, causing a rope rub. A traverse hanger could have avoided this problem.
Modelling by Celestine, lighting by Tarquin and Celestine Fourth Pitch
Modelling by Helen Langford, lighting by Celestine, Helen Langford and Helen Stewart
Fourth Pitch
Modelling by Helen Langford, lighting by Celestine, Helen Langford and Helen Stewart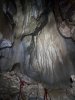 Stal covered wall of the pitch.
Lighting by Tarquin and Celestine
Stal covered wall of the pitch.
Lighting by Tarquin and Celestine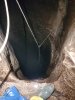 The final pitch is Aquamole Aven, the one found by the divers. This pitch is impressively large compared with the others, with a choice of either a traverse - small drop - big drop, or high traverse and big free hang. I started the rigging, but the rest of the team were already cold from rigging the earlier pitches, and did not want to risk standing at the bottom of a splattery big pitch in the cold, waiting for each other person to ascend. The water was not very high, but still needed all three deviations to keep clear of the spray. Personally, I was rather happy not to have to contend with such a large shaft, with the rope disappearing into the darkness below, so Celestine derigged the cave while I hauled the rope bags up to the others, and we beat a hasty retreat.
Modelling by Tarquin's welly
The final pitch is Aquamole Aven, the one found by the divers. This pitch is impressively large compared with the others, with a choice of either a traverse - small drop - big drop, or high traverse and big free hang. I started the rigging, but the rest of the team were already cold from rigging the earlier pitches, and did not want to risk standing at the bottom of a splattery big pitch in the cold, waiting for each other person to ascend. The water was not very high, but still needed all three deviations to keep clear of the spray. Personally, I was rather happy not to have to contend with such a large shaft, with the rope disappearing into the darkness below, so Celestine derigged the cave while I hauled the rope bags up to the others, and we beat a hasty retreat.
Modelling by Tarquin's welly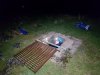 Emerging into the bitter cold. With rain and wintery winds, this was not a place to hang around.
Modelling by Celestine, lighting by Tarquin and Celestine
Emerging into the bitter cold. With rain and wintery winds, this was not a place to hang around.
Modelling by Celestine, lighting by Tarquin and Celestine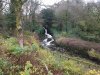 Waterfall on Clapham Beck.
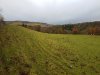 View over Clapdale Wood.
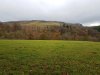 Thwaite Scars, a 408 metre high branch of Ingleborough.
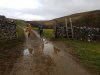 Clapdale. Most visitors walk up the valley bottom, but this route over the top bypasses a private section of the path for which a fee must be paid. The views are also much better up here.
Modelling by Malcolm and Helen Langford
Clapdale. Most visitors walk up the valley bottom, but this route over the top bypasses a private section of the path for which a fee must be paid. The views are also much better up here.
Modelling by Malcolm and Helen Langford Descending into Clapdale.
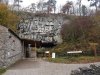 Ingleborough Cave, one of several show caves in this area, and a fossil resurgence for the Gaping Gill system. The sign claims that this is "the best showcave in Britain", but I have to wonder by what measure they get to make that claim; there are several others which would no doubt like to say the same thing about themselves. As voted for by residents of Clapham, maybe? But if they claim it themselves, then it must be true, right? Surely the best showcave should have a dinosaur park.
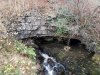 Clapham Beck Head, the current resurgence for Gaping Gill. This is a divers' cave, which joins Ingleborough Cave somewhere upstream.
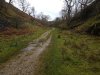 The valley is largely dry from here, with only tiny springs from little local drainage caves.
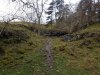 Foxholes, a set of smaller caves in a side alcove.
 Mouth of Trow Gill, a short gorge.
 Trow Gill is one of the most memorable features of the walk up onto the plateau. The large alcove on the left is Trow Gill Cave, which is not really much of a cave at all, just an alcove.
Modelling by Malcolm, Celestine, Helen Stewart, Phill and Helen Langford
Trow Gill is one of the most memorable features of the walk up onto the plateau. The large alcove on the left is Trow Gill Cave, which is not really much of a cave at all, just an alcove.
Modelling by Malcolm, Celestine, Helen Stewart, Phill and Helen Langford The upper valley through Clapham Bottoms.
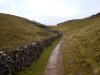 Northern style dry stone walls. The fence posts occasionally swap sides so that they don't have to be dug deep, as the wall will support them.
Modelling by some random walkers
Northern style dry stone walls. The fence posts occasionally swap sides so that they don't have to be dug deep, as the wall will support them.
Modelling by some random walkers Gaping Gill (or Gaping Ghyll), the tallest partially-surface waterfall in England, and a very deep hole dropping into the largest cave chamber in the UK. The shaft is about 98 metres, while the Fell Beck river falls down a small cascade immediately above it as well. The river remains underground from here until Clapham Beck Head. The shaft was first partially descended in 1842, then completely descended in 1895, each time on handmade rope ladders. Ingleborough's summit would be visible on the right, if the clouds were higher.
Modelling by Helen Langford, Malcolm, Helen Stewart, Phill, Celestine, and some random walkers
Gaping Gill (or Gaping Ghyll), the tallest partially-surface waterfall in England, and a very deep hole dropping into the largest cave chamber in the UK. The shaft is about 98 metres, while the Fell Beck river falls down a small cascade immediately above it as well. The river remains underground from here until Clapham Beck Head. The shaft was first partially descended in 1842, then completely descended in 1895, each time on handmade rope ladders. Ingleborough's summit would be visible on the right, if the clouds were higher.
Modelling by Helen Langford, Malcolm, Helen Stewart, Phill, Celestine, and some random walkers A stroll over the moorland reaches Grange Rigg Pot, marked by a major stream, and two boggy streams joining in the sink. Grange Rigg is the longest fragment of the Gaping Gill system that has not yet been connected to the main system.
Modelling by Malcolm and Helen Langford
A stroll over the moorland reaches Grange Rigg Pot, marked by a major stream, and two boggy streams joining in the sink. Grange Rigg is the longest fragment of the Gaping Gill system that has not yet been connected to the main system.
Modelling by Malcolm and Helen Langford Crossing the moorland over the Grange Rigg system, looking towards Clapham Bottoms.
Modelling by Helen Langford, Phill, a truncated Celestine and Helen Stewart
Crossing the moorland over the Grange Rigg system, looking towards Clapham Bottoms.
Modelling by Helen Langford, Phill, a truncated Celestine and Helen Stewart The shakehole containing Christmas Pot, just beyond Malcolm (in yellow).
Modelling by Malcolm and Helen Langford
The shakehole containing Christmas Pot, just beyond Malcolm (in yellow).
Modelling by Malcolm and Helen Langford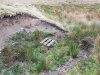 There are two entrances in the shakehole. This is the wrong one. Wonder where it goes.
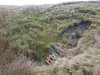 This one is the entrance to Christmas Pot.
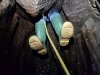 The top of Christmas Pot is quite tight, with a squeeze onto a pitch head.
Modelling by Celestine
The top of Christmas Pot is quite tight, with a squeeze onto a pitch head.
Modelling by Celestine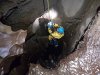 Rigging the pitch puts you in the firing line, as loose stones await at the top, to be hurled down by any false moves with a tackle bag. Malcolm did a good job of simultaneously rigging and dodging the shrapnel.
Modelling by Malcolm, lighting by Tarquin and Malcolm
Rigging the pitch puts you in the firing line, as loose stones await at the top, to be hurled down by any false moves with a tackle bag. Malcolm did a good job of simultaneously rigging and dodging the shrapnel.
Modelling by Malcolm, lighting by Tarquin and Malcolm The first pitch is actually several drops, with the last one being the largest. An aven here may well be related to that second entrance in the shakehole.
Modelling by Celestine, lighting by Tarquin and Celestine
The first pitch is actually several drops, with the last one being the largest. An aven here may well be related to that second entrance in the shakehole.
Modelling by Celestine, lighting by Tarquin and Celestine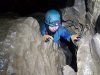 The passage at the bottom is very typical for Grange Rigg; awkward. Tough work. It is basically a choked rift, with a very obvious route through it. Without SRT gear, this would be fairly easy, but the SRT gear acts like multiple anchors hooking on every passing rock.
Modelling by Celestine, lighting by Tarquin and Celestine
The passage at the bottom is very typical for Grange Rigg; awkward. Tough work. It is basically a choked rift, with a very obvious route through it. Without SRT gear, this would be fairly easy, but the SRT gear acts like multiple anchors hooking on every passing rock.
Modelling by Celestine, lighting by Tarquin and Celestine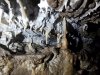 Small formations in the crawl. This is good for Yorkshire, right?
 Nearing the end of the awkward passage.
Modelling by Celestine, lighting by Tarquin and Celestine
Nearing the end of the awkward passage.
Modelling by Celestine, lighting by Tarquin and Celestine Above the second pitch is a very awkward little pitch, which could be either a pitch or a climb, and still be just as bad. The keyhole shape is only just large enough to pass through with SRT gear on, requiring a small levitation act, very similar to Slit Pot in Simpson's Pot. The natural belays before it are rather far away (everything close is loose), so it uses too much rope to rig. If rigged as a pitch, far more rope is needed than the rigging guide would suggest.
Modelling by Malcolm, lighting by Tarquin and Malcolm
Above the second pitch is a very awkward little pitch, which could be either a pitch or a climb, and still be just as bad. The keyhole shape is only just large enough to pass through with SRT gear on, requiring a small levitation act, very similar to Slit Pot in Simpson's Pot. The natural belays before it are rather far away (everything close is loose), so it uses too much rope to rig. If rigged as a pitch, far more rope is needed than the rigging guide would suggest.
Modelling by Malcolm, lighting by Tarquin and Malcolm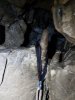 The main belay for the pitch is this stalagmite, which is not a bad natural belay, but it is very easy to unhook the rope from it while passing through the keyhole.
 There are enough ledges to climb it, but it is still awkwardly narrow.
Modelling by Celestine and Helen Langford, lighting by Tarquin, Celestine, Helen Langford and Phill
There are enough ledges to climb it, but it is still awkwardly narrow.
Modelling by Celestine and Helen Langford, lighting by Tarquin, Celestine, Helen Langford and Phill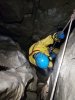 Just free climb it!
Modelling by Malcolm, lighting by Tarquin and Malcolm
Just free climb it!
Modelling by Malcolm, lighting by Tarquin and Malcolm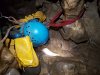 The second pitch is certainly no better.
Modelling by Malcolm, lighting by Tarquin and Malcolm
The second pitch is certainly no better.
Modelling by Malcolm, lighting by Tarquin and Malcolm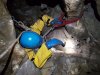 This is most definitely not an easy pitch head.
Modelling by Malcolm, lighting by Tarquin and Malcolm
This is most definitely not an easy pitch head.
Modelling by Malcolm, lighting by Tarquin and Malcolm Some pictures tell a story.
Modelling by Malcolm, lighting by Tarquin and Malcolm
Some pictures tell a story.
Modelling by Malcolm, lighting by Tarquin and Malcolm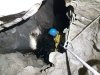 Adjusting the pitch head to use only a single hang, the deviation proved to be pointless.
Modelling by Malcolm, lighting by Tarquin and Malcolm
Adjusting the pitch head to use only a single hang, the deviation proved to be pointless.
Modelling by Malcolm, lighting by Tarquin and Malcolm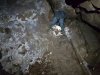 The pitch then opens out to a comfortable size.
Modelling by Celestine, lighting by Tarquin and Celestine
The pitch then opens out to a comfortable size.
Modelling by Celestine, lighting by Tarquin and Celestine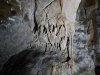 Formations on the second pitch.
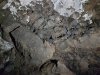 One of the walls is basically just a load of cobbles and rocks held together by mud.
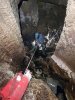 The third pitch is immediately afterwards, made up from a few drops down into a larger passage.
Modelling by Celestine, lighting by Tarquin, Celestine and Malcolm
The third pitch is immediately afterwards, made up from a few drops down into a larger passage.
Modelling by Celestine, lighting by Tarquin, Celestine and Malcolm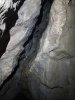 At the bottom, we reach the Grange Rigg stream, and the main passage of Grange Rigg Pot. Upstream is supposed to be a very tough passage, which is also flood prone, giving a 6 hour through trip. If not for the recent rain, we would have been heading out that way instead.
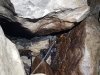 Material, spray can and rope, which had somehow been washed into here from Grange Rigg. Clearly this area sees some powerful flooding.
 This part of the cave is known for its formations, which are quite admirable for Yorkshire. These look very similar to Ogof Marros in West Wales, or Upper Flood Swallet in Mendip.
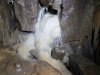 Flowstone.
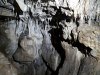 The formations seem to relate to a specific bedding plane.
 Stalactite and broken stalagmite.
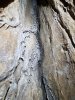 Helictites. Actual helictites, in Yorkshire.
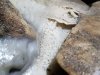 Crystal pool.
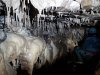 The formations all have a lot of lumps, and a rather gritty texture, that appears to be the faster growing kind of stal.
Modelling by Celestine, lighting by Tarquin and Celestine
The formations all have a lot of lumps, and a rather gritty texture, that appears to be the faster growing kind of stal.
Modelling by Celestine, lighting by Tarquin and Celestine Still, it is quite attractive.
 Straw detail.
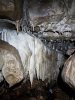 Flowstone fingers.
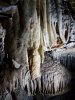 Broken curtains.
Lighting by Celestine
Broken curtains.
Lighting by Celestine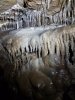 Straws and flowstone.
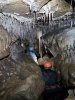 A profusion of straws and the largest column.
Modelling by Helen Stewart and Celestine, lighting by Tarquin, Helen Stewart and Celestine
A profusion of straws and the largest column.
Modelling by Helen Stewart and Celestine, lighting by Tarquin, Helen Stewart and Celestine Column and translucent curtain.
Modelling by Helen Stewart, lighting by Tarquin and Helen Stewart
Column and translucent curtain.
Modelling by Helen Stewart, lighting by Tarquin and Helen Stewart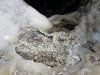 More little crystal pools.
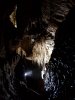 Backlit straws.
Modelling by Helen Stewart's nose, lighting by Tarquin and Helen Stewart
Backlit straws.
Modelling by Helen Stewart's nose, lighting by Tarquin and Helen Stewart Formations in the rift with the backlit straws.
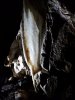 Translucent curtain, nearly pure white.
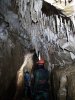 Definitely not bad at all for Yorkshire.
Modelling by Helen Stewart and Celestine, lighting by Tarquin, Helen Stewart and Celestine
Definitely not bad at all for Yorkshire.
Modelling by Helen Stewart and Celestine, lighting by Tarquin, Helen Stewart and Celestine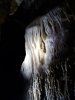 Flowstone curtains.
 Pure white crystal pools, tucked out of sight in an undercut.
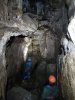 The largest passage in Grange Rigg Pot that we saw.
Modelling by Helen Stewart and Celestine, lighting by Tarquin, Helen Stewart and Celestine
The largest passage in Grange Rigg Pot that we saw.
Modelling by Helen Stewart and Celestine, lighting by Tarquin, Helen Stewart and Celestine Basic stalactite and stalagmite.
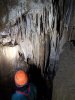 Stal in the large passage.
Modelling by Helen Stewart, lighting by Tarquin and Helen Stewart
Stal in the large passage.
Modelling by Helen Stewart, lighting by Tarquin and Helen Stewart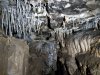 Stal continues at roof level, while the floor drops.
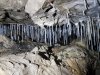 The stal in the roof ends as the roof begins to descend. We have finally left that pretty bedding behind.
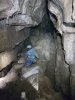 The passage ends at a fossil section.
Modelling by Celestine, lighting by Tarquin, Helen Stewart and Celestine
The passage ends at a fossil section.
Modelling by Celestine, lighting by Tarquin, Helen Stewart and Celestine Stal column at the end of the fossil section.
Lighting by Tarquin and Celestine
Stal column at the end of the fossil section.
Lighting by Tarquin and Celestine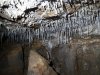 An undercut on the side of the fossil section contains some more straws.
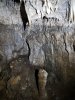 Old tide mark on the stal.
 A hole down through the boulders with a beautiful rope rub (yay!) gives access back to the stream below the fossil level. The drop could be climbed if needed, but ropes are needed below here anyway, so it makes sense to use a rope.
Modelling by Malcolm, lighting by Tarquin and Malcolm
A hole down through the boulders with a beautiful rope rub (yay!) gives access back to the stream below the fossil level. The drop could be climbed if needed, but ropes are needed below here anyway, so it makes sense to use a rope.
Modelling by Malcolm, lighting by Tarquin and Malcolm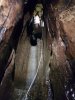 Immediately below is Grange Rigg's Fifth Pitch, which again feels like it is on the limit of being free climbable, with difficulty.
Modelling by Malcolm, lighting by Tarquin and Malcolm
Immediately below is Grange Rigg's Fifth Pitch, which again feels like it is on the limit of being free climbable, with difficulty.
Modelling by Malcolm, lighting by Tarquin and Malcolm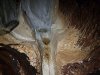 Side pitch with attractive rock colours.
 Grange Rigg's Sixth Pitch is just around the next corner, with a dubiously placed flake belay that makes dismounting at the top rather awkward.
Modelling by Malcolm, lighting by Tarquin, Malcolm and Celestine
Grange Rigg's Sixth Pitch is just around the next corner, with a dubiously placed flake belay that makes dismounting at the top rather awkward.
Modelling by Malcolm, lighting by Tarquin, Malcolm and Celestine The large passage below ends abruptly at a large, ascending choke, with boulders referred to as the Grand Piano. I searched for the way down through the choke, but it seemed perilously tight, and not particularly stable. On returning to the surface, we were told that it had recently collapsed, blocking access to the flood-prone Drainpipe, final sump, and impressively tall Pinnacle Hall. It is a shame, as Pinnacle Hall does sound impressive. Routes over the choke did not provide any other way on.
Modelling by Malcolm, lighting by Tarquin and Malcolm
The large passage below ends abruptly at a large, ascending choke, with boulders referred to as the Grand Piano. I searched for the way down through the choke, but it seemed perilously tight, and not particularly stable. On returning to the surface, we were told that it had recently collapsed, blocking access to the flood-prone Drainpipe, final sump, and impressively tall Pinnacle Hall. It is a shame, as Pinnacle Hall does sound impressive. Routes over the choke did not provide any other way on.
Modelling by Malcolm, lighting by Tarquin and Malcolm I derigged the cave, and we returned to the surface, with Celestine doing a sterling job of carting tackle bags through the awkward passages. Derigging the first pitch was a fun game of trying not to knock stones on each other, but we all returned to surface without incident.
Modelling by Celestine and Malcolm, lighting by Tarquin, Celestine and Malcolm
I derigged the cave, and we returned to the surface, with Celestine doing a sterling job of carting tackle bags through the awkward passages. Derigging the first pitch was a fun game of trying not to knock stones on each other, but we all returned to surface without incident.
Modelling by Celestine and Malcolm, lighting by Tarquin, Celestine and Malcolm A weird rock among the club rushes.
Modelling by an infamous grouse
A weird rock among the club rushes.
Modelling by an infamous grouse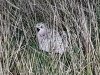 A female grouse.
Modelling by Harriet, that's her name, you know
A female grouse.
Modelling by Harriet, that's her name, you know A young common frog in Clapdale.
Modelling by Celestine and Flyswatter
A young common frog in Clapdale.
Modelling by Celestine and Flyswatter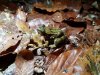 Hopping off across the leaves
Modelling by Flyswatter
Hopping off across the leaves
Modelling by Flyswatter Heading towards Bullpot Farm. On the left is the small rise of Hoggs Hill, in the cloud are Crag Hill (682 metres) and Great Coum (687 metres), and on the right is Gragareth. Bullpot Farm sits at the head of a small valley on the left, while the larger valley between the orange and maroon patches is Ease Gill, the divide between Cumbria and Lancashire, and home to all of the Easegill Caverns entrances. Between them is a small dry valley containing Lancaster Hole. The orange patch between Ease Gill and Bullpot Farm is known as Casterton Fell (the word Fell is applied to slopes and ridges of a mountain, rather than the mountain itself), while the purple patch to the right of Ease Gill is known as Leck Fell, home to Pippikin Pot, Lost John's and Notts Pot, while its right edge is renamed to Ireby Fell, home to Ireby Fell Cavern, Marble Steps Pot, Large Pot and Rift Pot, with the border between Lancashire and North Yorkshire being between Ireby Fell Cavern and Marble Steps Pot. With the exception of Marble Steps Pot, all of those are connected to make the Three Counties System. Hydrologically, they are known to connect to the Kingsdale Master Cave in the next valley, but the connection has not yet been made.
 Bullpot Farm, home to the Red Rose Cave and Pothole Club. On the left are Castle Knott (538 metres), Calf Top (610 metres) and Barkin Top (just under 600 metres). In the middle and right are Crag Hill and Great Coum.
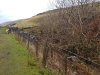 Bull Pot, a separate cave not yet connected to the main system. Known for being an SRT training cave, but decorated with a lot of surface mud for its whole length.
Modelling by Malcolm and Helen Stewart
Bull Pot, a separate cave not yet connected to the main system. Known for being an SRT training cave, but decorated with a lot of surface mud for its whole length.
Modelling by Malcolm and Helen Stewart Limekilns in the dry valley below Bull Pot.
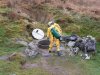 Entrance to Lancaster Hole, the first cave found in the Easegill area, with the subsequent connections to various Ease Gill sinks rapidly making it one of the longest (and currently the longest) caves in the UK.
Modelling by Ali and Pete
Entrance to Lancaster Hole, the first cave found in the Easegill area, with the subsequent connections to various Ease Gill sinks rapidly making it one of the longest (and currently the longest) caves in the UK.
Modelling by Ali and Pete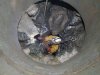 Cramped Y-hang at the top of the 34 metre entrance shaft. This can get quite overloaded with ropes - 4 on our way in - and in such a confined space, it is like swimming in a plate of spaghetti. It is much more easy with just a single rope like this.
Modelling by Pete, lighting by Tarquin and Pete
Cramped Y-hang at the top of the 34 metre entrance shaft. This can get quite overloaded with ropes - 4 on our way in - and in such a confined space, it is like swimming in a plate of spaghetti. It is much more easy with just a single rope like this.
Modelling by Pete, lighting by Tarquin and Pete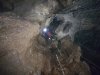 Lancaster Hole's 34 metre shaft.
Modelling by Jules, lighting by Tarquin, Pete, Jules and Sol
Lancaster Hole's 34 metre shaft.
Modelling by Jules, lighting by Tarquin, Pete, Jules and Sol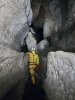 The main way on into the system.
Modelling by Pete, lighting by Tarquin and Pete
The main way on into the system.
Modelling by Pete, lighting by Tarquin and Pete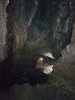 Bridge Hall, with the bridge ahead.
Modelling by Pete, lighting by Tarquin and Pete
Bridge Hall, with the bridge ahead.
Modelling by Pete, lighting by Tarquin and Pete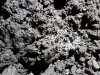 One of the main reasons for wanting to visit this cave (apart from trying to refresh my memory of a fantastic system), was to search for cryostal, since none had been found in Yorkshire, and this was the most likely cave to have any. This was my first possible find, beneath a boulder in Bridge Hall above Kath's Way. This could also be decomposing gypsum, or spent carbide, which plagues this system. Vast amounts of time was wasted examining carbide dumps. However, this could possibly be the right stuff.
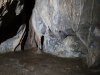 A climb up behind the bridge reaches a smaller passage, with some formations.
 Muddy stalagmite. A bit late for that tape, sadly.
 Curtains in a short crawl.
Lighting by Pete
Curtains in a short crawl.
Lighting by Pete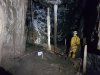 The ceiling lifts to reveal The Colonnades, iconic formations. These even have a sign, explaining the purpose of conservation tapes.
Modelling by Pete, lighting by Tarquin and Pete
The ceiling lifts to reveal The Colonnades, iconic formations. These even have a sign, explaining the purpose of conservation tapes.
Modelling by Pete, lighting by Tarquin and Pete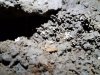 Immediately before them, some deposits in the mud appear to be more possible cryostal. Once again, these could be any number of other deposits. The humid atmosphere in these northern caves means that the fluffy mud has a damp appearance, and any cryostal may be damaged by condensation. But at least the mud shows that ice has had its effects here, and the passage predates at least one ice age.
 The colonnades are very impressive columns, surprisingly tall and elegantly thin.
Modelling by Pete, lighting by Tarquin and Pete
The colonnades are very impressive columns, surprisingly tall and elegantly thin.
Modelling by Pete, lighting by Tarquin and Pete Shorter stalagmites.
Modelling by Pete, lighting by Tarquin and Pete
Shorter stalagmites.
Modelling by Pete, lighting by Tarquin and Pete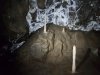 Still growing, a column and some wannabes.
Lighting by Tarquin and Pete
Still growing, a column and some wannabes.
Lighting by Tarquin and Pete A shorter set of colonnades.
Modelling by Pete, lighting by Tarquin and Pete
A shorter set of colonnades.
Modelling by Pete, lighting by Tarquin and Pete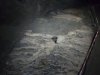 Crystal pools below.
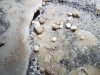 Even cave pearls. For Yorkshire, this is definitely an impressively decorated cave.
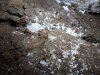 White deposits. This appears to be gypsum, but mashed into the floor by the numerous visitors. This system has seen very heavy traffic, to the point that cryostal deposits would be lucky to survive.
 A final column just before the end.
Modelling by Pete
A final column just before the end.
Modelling by Pete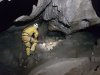 Bill Taylor's Passage, shortly after the junction with Kath's Way.
Modelling by Pete, lighting by Tarquin and Pete
Bill Taylor's Passage, shortly after the junction with Kath's Way.
Modelling by Pete, lighting by Tarquin and Pete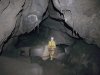 The start of Montague East Passage and the start of The High Level Route's Main Line of large passages, looking down the 80 foot pitch to the Master Cave. Over the top is the start of Montague West Passage.
Modelling by Pete, lighting by Tarquin and Pete
The start of Montague East Passage and the start of The High Level Route's Main Line of large passages, looking down the 80 foot pitch to the Master Cave. Over the top is the start of Montague West Passage.
Modelling by Pete, lighting by Tarquin and Pete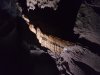 Curtain at the junction.
Lighting by Pete
Curtain at the junction.
Lighting by Pete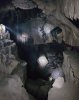 The vast opening of Fall Pot, where Cow Pot enters from the ceiling, and the passage floor drops down to the Master Cave (main drain). The big boulder at the bottom of the picture is the size of a reasonably large room, with the way on being to stoop beneath it. It took three wide angle photographs to produce this stitched picture, with four lights involved in each part of it. The actual Master Cave river is even further down below the boulders, while our route continues down to the boulders then back up a series of climbs into the continuation of the fossil level. Within the last few years, extreme flooding had affected all of the lower parts of the passage, and much of the route had been coated in damp mud.
Modelling by Ali and Pete, lighting by Tarquin, Helen Langford, Ali and Pete
The vast opening of Fall Pot, where Cow Pot enters from the ceiling, and the passage floor drops down to the Master Cave (main drain). The big boulder at the bottom of the picture is the size of a reasonably large room, with the way on being to stoop beneath it. It took three wide angle photographs to produce this stitched picture, with four lights involved in each part of it. The actual Master Cave river is even further down below the boulders, while our route continues down to the boulders then back up a series of climbs into the continuation of the fossil level. Within the last few years, extreme flooding had affected all of the lower parts of the passage, and much of the route had been coated in damp mud.
Modelling by Ali and Pete, lighting by Tarquin, Helen Langford, Ali and Pete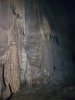 Stal on the climbs down into Fall Pot.
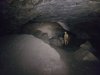 Montague East continues as a big fossil passage, much like Agen Allwedd (and found in the same era). The foot traffic has been very heavy, without being confined to a narrow route, so between the humid atmosphere, the damp mud, and the human influence, we were starting to lose hope of finding any good cryogenic deposits here.
Modelling by Pete, lighting by Tarquin and Pete
Montague East continues as a big fossil passage, much like Agen Allwedd (and found in the same era). The foot traffic has been very heavy, without being confined to a narrow route, so between the humid atmosphere, the damp mud, and the human influence, we were starting to lose hope of finding any good cryogenic deposits here.
Modelling by Pete, lighting by Tarquin and Pete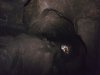 Despite being shallow passages, and definitely predating at least one ice age, the phreatic shape has survived.
Modelling by Pete, lighting by Tarquin and Pete
Despite being shallow passages, and definitely predating at least one ice age, the phreatic shape has survived.
Modelling by Pete, lighting by Tarquin and Pete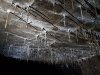 Straws on a fracture grid on the ceiling.
Lighting by Tarquin and Pete
Straws on a fracture grid on the ceiling.
Lighting by Tarquin and Pete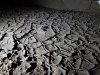 Beautifully cracked mud floor. Sadly this is created by slowly evaporating water, meaning that ice is less likely to have influence here.
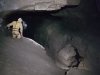 The top of Stake Pot, another vast chasm dropping into the Master Cave. The unofficial ropes are most welcome, as the wet mud has made the climbs treacherous.
Modelling by Pete, lighting by Tarquin and Pete
The top of Stake Pot, another vast chasm dropping into the Master Cave. The unofficial ropes are most welcome, as the wet mud has made the climbs treacherous.
Modelling by Pete, lighting by Tarquin and Pete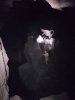 Climbing back up into the upper level. The chasm is large enough to dwarf the Main Line's passages.
Modelling by Pete, lighting by Tarquin and Pete
Climbing back up into the upper level. The chasm is large enough to dwarf the Main Line's passages.
Modelling by Pete, lighting by Tarquin and Pete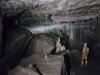 The straws begin immediately after Stake Pot.
Modelling by Pete, lighting by Tarquin and Pete
The straws begin immediately after Stake Pot.
Modelling by Pete, lighting by Tarquin and Pete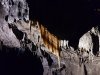 Curtain above Stake Pot.
Modelling by Pete, lighting by Tarquin and Pete
Curtain above Stake Pot.
Modelling by Pete, lighting by Tarquin and Pete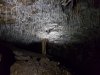 Straws and the triple column formation.
Lighting by Tarquin and Pete
Straws and the triple column formation.
Lighting by Tarquin and Pete The triple column formation.
Modelling by Pete, lighting by Tarquin and Pete
The triple column formation.
Modelling by Pete, lighting by Tarquin and Pete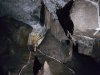 First formation of Bob's Boss.
Modelling by Pete, lighting by Tarquin and Pete
First formation of Bob's Boss.
Modelling by Pete, lighting by Tarquin and Pete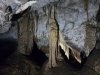 The other two parts of Bob's Boss.
Lighting by Tarquin and Pete
The other two parts of Bob's Boss.
Lighting by Tarquin and Pete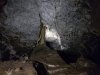 Far end of Bob's Boss.
Lighting by Tarquin and Pete
Far end of Bob's Boss.
Lighting by Tarquin and Pete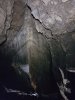 Flowstone and curtain.
Lighting by Tarquin and Pete
Flowstone and curtain.
Lighting by Tarquin and Pete Curtain.
Lighting by Pete
Curtain.
Lighting by Pete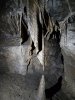 Curtain formation.
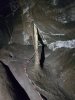 Curtain column.
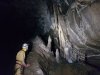 Fantastically striped curtain and stalactites. This is likely to be manganese staining.
Modelling by Pete, lighting by Tarquin and Pete
Fantastically striped curtain and stalactites. This is likely to be manganese staining.
Modelling by Pete, lighting by Tarquin and Pete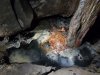 Richly coloured formation on the other side. This is the Painter's Palette, likely to be a mix of calcite, manganese, iron oxide (ochre) and mud. These colours are not enhanced, and are even better in person.
Lighting by Tarquin and Pete
Richly coloured formation on the other side. This is the Painter's Palette, likely to be a mix of calcite, manganese, iron oxide (ochre) and mud. These colours are not enhanced, and are even better in person.
Lighting by Tarquin and Pete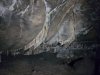 Smaller curtains.
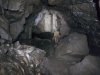 Large passage before the twin pits.
Modelling by Pete, lighting by Tarquin and Pete
Large passage before the twin pits.
Modelling by Pete, lighting by Tarquin and Pete Stained flowstone.
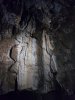 Calcite flows on the walls.
Lighting by Tarquin and Pete
Calcite flows on the walls.
Lighting by Tarquin and Pete Formations.
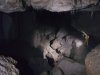 Traversing around Scylla, a deep hole down to the Master Cave.
Modelling by Pete, lighting by Tarquin and Pete
Traversing around Scylla, a deep hole down to the Master Cave.
Modelling by Pete, lighting by Tarquin and Pete Charybdis, another hole down to the Master Cave. The unofficial ropes are not essential, but very welcome.
Modelling by Pete, lighting by Tarquin and Pete
Charybdis, another hole down to the Master Cave. The unofficial ropes are not essential, but very welcome.
Modelling by Pete, lighting by Tarquin and Pete Looking down Charybdis into the Master Cave.
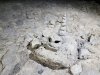 Some caver humour.
Lighting by Tarquin and Pete
Some caver humour.
Lighting by Tarquin and Pete The High Level Route at the point where there are holes down to the Master Cave at Oxbow Corner. We have the breakdown I was hoping for, but everything here is still too damp.
Modelling by Pete, lighting by Tarquin and Pete
The High Level Route at the point where there are holes down to the Master Cave at Oxbow Corner. We have the breakdown I was hoping for, but everything here is still too damp.
Modelling by Pete, lighting by Tarquin and Pete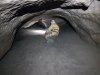 The crawls just before the Diamond Hall junction.
Modelling by Pete, lighting by Tarquin and Pete
The crawls just before the Diamond Hall junction.
Modelling by Pete, lighting by Tarquin and Pete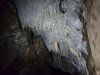 Some lovely straw formations.
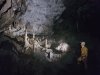 Formations at the start of Oakes Cavern.
Modelling by Pete, lighting by Tarquin and Pete
Formations at the start of Oakes Cavern.
Modelling by Pete, lighting by Tarquin and Pete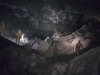 Oakes Cavern, one of the big caverns of the High Level Route.
Modelling by Ali, Pete and Jules, lighting by Tarquin, Helen Langford, Ali, Pete and Jules
Oakes Cavern, one of the big caverns of the High Level Route.
Modelling by Ali, Pete and Jules, lighting by Tarquin, Helen Langford, Ali, Pete and Jules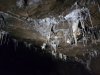 Formations like Dan yr Ogof's Candlewax Formations, in the entrance to Long's Passage.
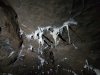 Candlewax style formations.
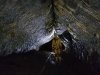 Minarets, one of the most iconic passages in the whole cave.
Modelling by Pete
Minarets, one of the most iconic passages in the whole cave.
Modelling by Pete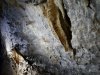 The walls are absolutely covered in these curtains.
Lighting by Pete
The walls are absolutely covered in these curtains.
Lighting by Pete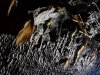 Curtains.
Lighting by Pete
Curtains.
Lighting by Pete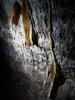 Most are naturally muddied and broken, but the effect is superb.
Lighting by Pete
Most are naturally muddied and broken, but the effect is superb.
Lighting by Pete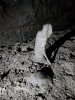 Stalagmite shaped like an old man with a cane.
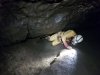 Minarets is split into three walking sections, with these low crawls between them. These are notable as they are the first time we have had to do a flat out crawl for the entire trip.
Modelling by Pete, lighting by Tarquin and Pete
Minarets is split into three walking sections, with these low crawls between them. These are notable as they are the first time we have had to do a flat out crawl for the entire trip.
Modelling by Pete, lighting by Tarquin and Pete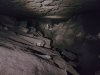 Cornes Cavern, one of the widest pieces of cave on our route. This is very reminiscent of Draenen's Big Country in its size, shape and dryness, and my reaction on seeing it was "if this were Draenen, there would be cryostal somewhere in here, probably in the middle of the passage, just up ahead over there".
Modelling by Pete, lighting by Tarquin and Pete
Cornes Cavern, one of the widest pieces of cave on our route. This is very reminiscent of Draenen's Big Country in its size, shape and dryness, and my reaction on seeing it was "if this were Draenen, there would be cryostal somewhere in here, probably in the middle of the passage, just up ahead over there".
Modelling by Pete, lighting by Tarquin and Pete Sure enough, exactly where I had pointed, there was a boulder covered in a very clear sprinking of cryostal. Tired of examining countless piles of carbide, and sweeping back and forth across the passages for the last kilometre to check under each boulder, this was a really welcome discovery.
 The texture is a little unusual; rather than little beads, it is all sharper pieces, like the stone chips used for pebble dash. Perhaps they have been affected by condensation. But at least it is here, very clearly, unambigously. This is not spent carbide, and it is not decomposing gypsum. It is cryogenic.
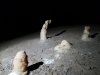 Another stalagmite that looks like a hunched old man. With accompanying carbide. I expect nothing less in here.
 Formations at the start of Snail Cavern.
Modelling by Pete, lighting by Tarquin and Pete
Formations at the start of Snail Cavern.
Modelling by Pete, lighting by Tarquin and Pete Formations at the start of Snail Cavern.
Modelling by Pete, lighting by Tarquin and Pete
Formations at the start of Snail Cavern.
Modelling by Pete, lighting by Tarquin and Pete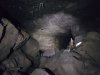 Snail Cavern, one of the larger caverns. The caverns are really just passage. But in a dull candle or carbide light, it probably looks like a much wider space.
Modelling by Pete, lighting by Tarquin and Pete
Snail Cavern, one of the larger caverns. The caverns are really just passage. But in a dull candle or carbide light, it probably looks like a much wider space.
Modelling by Pete, lighting by Tarquin and Pete A pile of boulders then signifies the passage being renamed to Monster Cavern; again, this is just a part of the passage, not a separate cavern.
Modelling by Pete, lighting by Tarquin and Pete
A pile of boulders then signifies the passage being renamed to Monster Cavern; again, this is just a part of the passage, not a separate cavern.
Modelling by Pete, lighting by Tarquin and Pete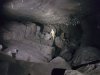 Monster Cavern is supposed to be the largest of the caverns, but it definitely does not appear to be.
Modelling by Pete, lighting by Tarquin and Pete
Monster Cavern is supposed to be the largest of the caverns, but it definitely does not appear to be.
Modelling by Pete, lighting by Tarquin and Pete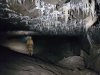 Main Line Terminus. Although this is supposed to be the end of the High Level Route, the large fossil levels continue beyond this confusing junction. The description here is totally wrong, and so is the old survey that I was carrying. The description talks about passages coming in from the right, which is what happens at the next junction instead. The old survey shows this as a simple T-junction. There is actually one passage ahead, three on the left, and none on the right. It took us some double and triple checking back down the passage to be certain that the survey was wrong.
Modelling by Pete, lighting by Tarquin and Pete
Main Line Terminus. Although this is supposed to be the end of the High Level Route, the large fossil levels continue beyond this confusing junction. The description here is totally wrong, and so is the old survey that I was carrying. The description talks about passages coming in from the right, which is what happens at the next junction instead. The old survey shows this as a simple T-junction. There is actually one passage ahead, three on the left, and none on the right. It took us some double and triple checking back down the passage to be certain that the survey was wrong.
Modelling by Pete, lighting by Tarquin and Pete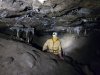 The passage on the left is well decorated, but ends in digs.
Modelling by Pete, lighting by Tarquin and Pete
The passage on the left is well decorated, but ends in digs.
Modelling by Pete, lighting by Tarquin and Pete The way on along the high level passages to Stop Pot is the second passage to the left, which also is well decorated.
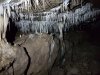 More straws. We had found what we were looking for, and I was suffering from an energy crash after such an exhaustive search, so we decided that with the survey showing us lies, it would be better to head back instead of trying to reach Straw Chamber and Gypsum Caverns. Another day, another day.
 View from Wharfe near Austwick, towards Thwaite Scars.
 Kingsdale, one of the classic Yorkshire Dales karst valleys, and home to the Kingsdale Master Cave. On the left is Gragareth (627 metres), on the right side is Whernside (736 metres) with its Scales Moor making up the right side of the valley. On the distant right is Ingleborough (724 metres). Kingsdale Master Cave contains all of the longest sumps in the UK, passing under the valley to join the caves on both sides. On the left are the famous pull-through caves of Swinsto Hole and Simpsons Pot, their lower Valley Entrance and Keld Head resurgence, the non-pull-throughs of Rowten Hole, Aquamole Pot, Jingling Caves, the non-connected Marble Steps Pot, The Mohole, Jingling Pot, Craftman's Pot, Slanting Cave and Yordas Cave. On the right are Illusion Pot, Crescent Pot, Lord's Top Dig, King Pot and Brown Hill Pot (parts of the master cave), Broken Finger Pot, Growling Hole, Spectacle and Vespers Pots and Heron Pot. A lot of choice.
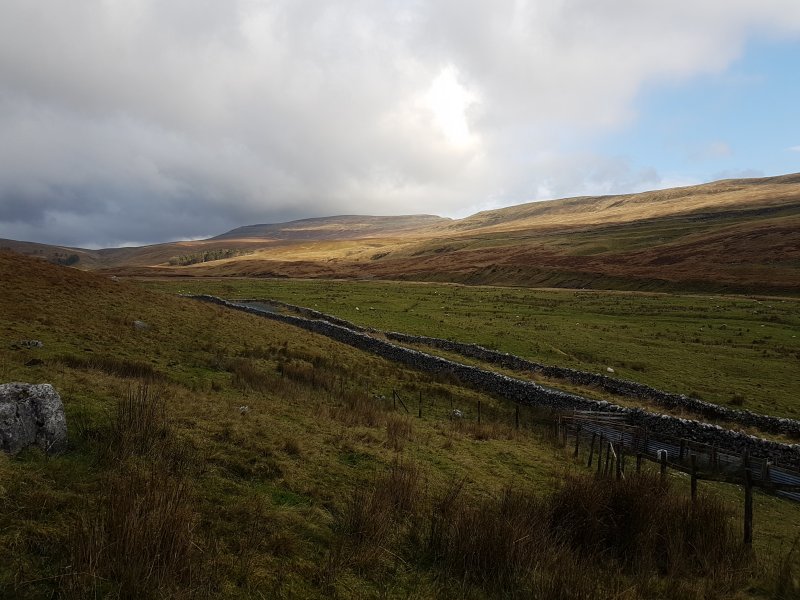 Whernside, dodging the random rainclouds. The other team were heading into an abortive trip into Vespers Pot, abandoned after it proved to be far more demanding, and far tighter than hoped.
 Entrance to Aquamole Pot. This seems like an unexpected location for a cave, while the nearby tree sits in the entrance to the much more obvious Jingling Pot. Aquamole was originally found from below by cave divers ("aqua moles") diving the sumps of the Kingsdale Master Cave. They explored it all the way to just below the surface, and then mined an entrance to join it. Amazingly, these caves are so close to each other, and very closely related, but Jingling Pot has stubbornly refused to be connected to the main system.
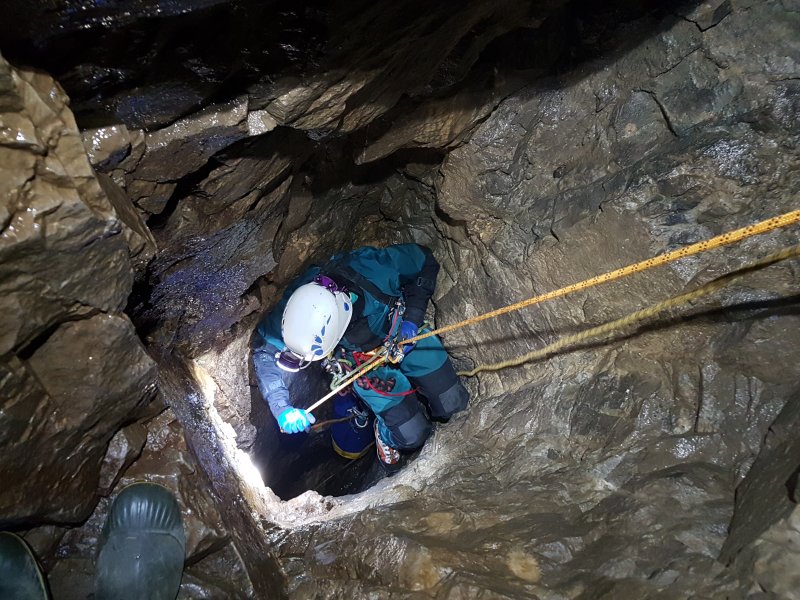 Rigging the first pitch, immediately below the bricked entrance shaft. This was clearly enlarged with some form of chemical persuasion, and is still quite awkwardly tight, especially with the extra ropes left in place. Each of my companions took turns rigging, with me supervising. Not that I consider myself all that experienced at rigging, as I tend to derig rather than rig, but hey.
Modelling by Helen Langford and Tarquin's wellies, lighting by Tarquin and Helen Langford
Rigging the first pitch, immediately below the bricked entrance shaft. This was clearly enlarged with some form of chemical persuasion, and is still quite awkwardly tight, especially with the extra ropes left in place. Each of my companions took turns rigging, with me supervising. Not that I consider myself all that experienced at rigging, as I tend to derig rather than rig, but hey.
Modelling by Helen Langford and Tarquin's wellies, lighting by Tarquin and Helen Langford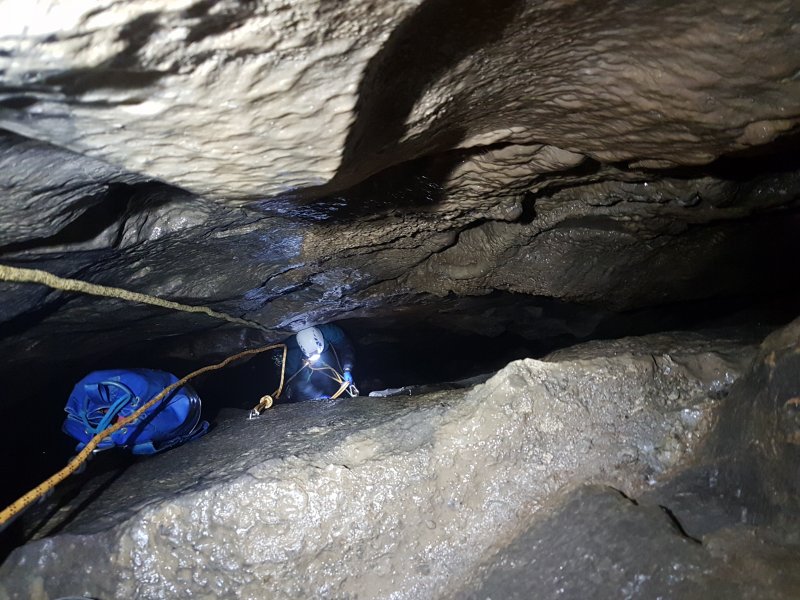 The first pitch is a series of tight rebelays, with at least one being shown as a Y-hang on the rigging topo, but actually having only one hanger. The tight rift makes these very awkward to pass.
Modelling by Helen Langford, lighting by Tarquin and Helen Langford
The first pitch is a series of tight rebelays, with at least one being shown as a Y-hang on the rigging topo, but actually having only one hanger. The tight rift makes these very awkward to pass.
Modelling by Helen Langford, lighting by Tarquin and Helen Langford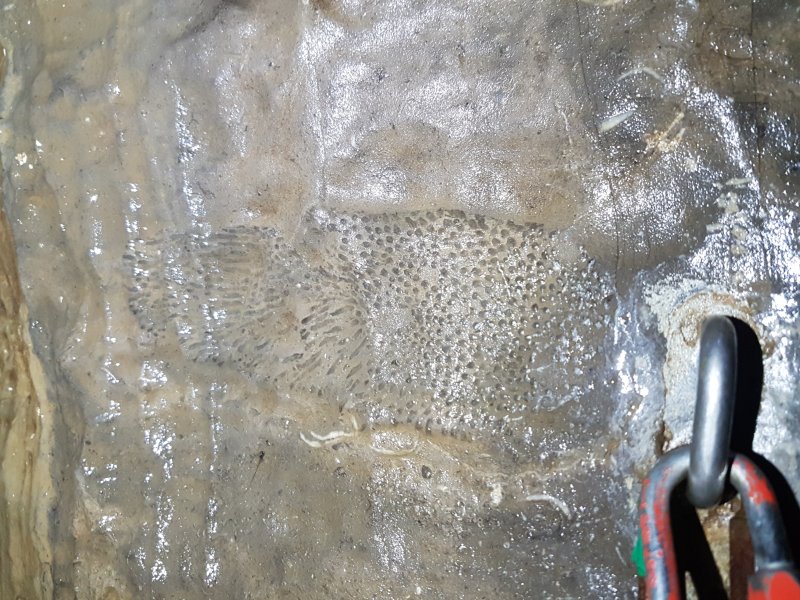 Fossil at a rebelay.
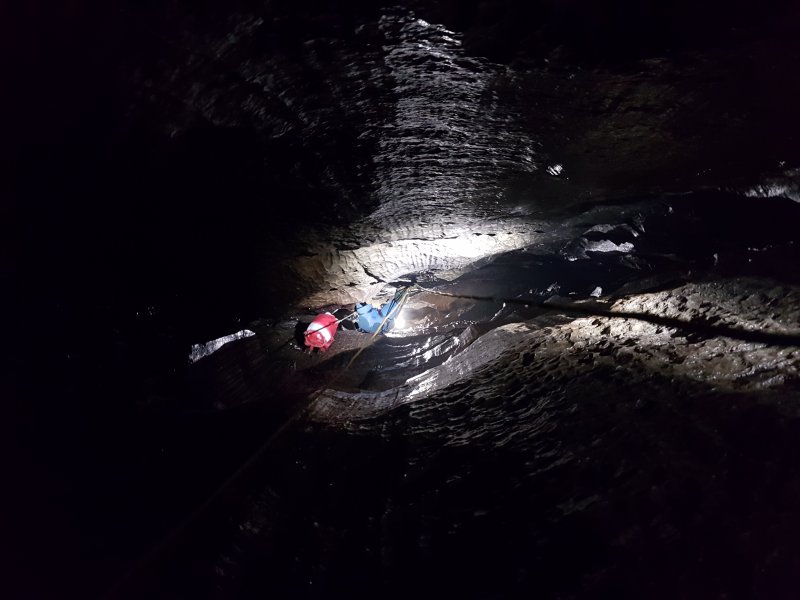 Final drop of the first pitch.
Modelling by Celestine, lighting by Helen Langford, Celestine and Helen Stewart
Final drop of the first pitch.
Modelling by Celestine, lighting by Helen Langford, Celestine and Helen Stewart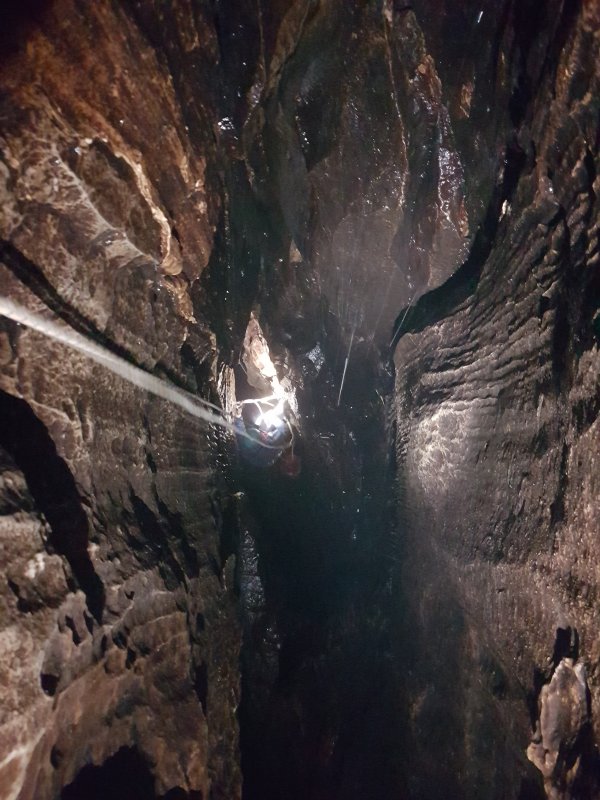 Rigging the top of the second pitch. This is shown as a rebelay, but is actually a set of two re-Y-hangs.
Modelling by Celestine, lighting by Tarquin and Celestine
Rigging the top of the second pitch. This is shown as a rebelay, but is actually a set of two re-Y-hangs.
Modelling by Celestine, lighting by Tarquin and Celestine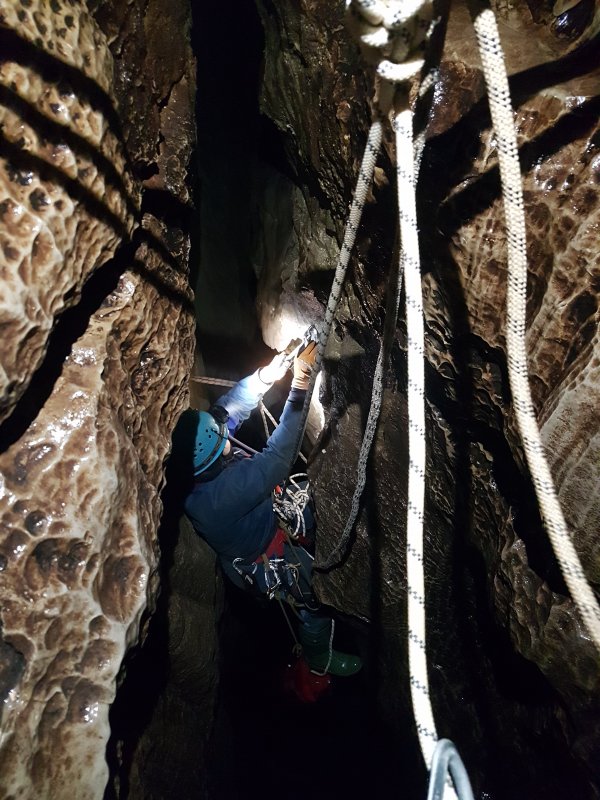 Rigging the second and third Y-hangs.
Modelling by Celestine, lighting by Tarquin and Celestine
Rigging the second and third Y-hangs.
Modelling by Celestine, lighting by Tarquin and Celestine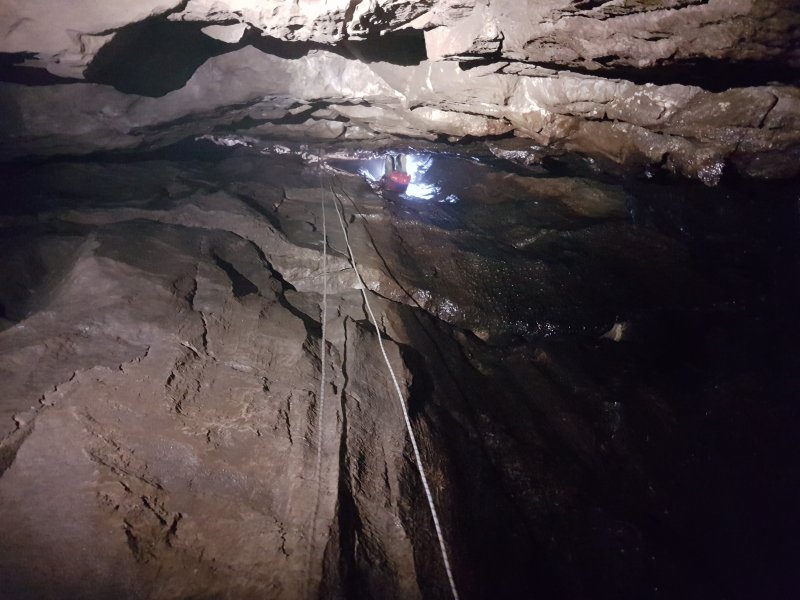 The main hang of Aquamole Pot's second pitch.
Modelling by Helen Langford, lighting by Celestine, Helen Langford and Helen Stewart
The main hang of Aquamole Pot's second pitch.
Modelling by Helen Langford, lighting by Celestine, Helen Langford and Helen Stewart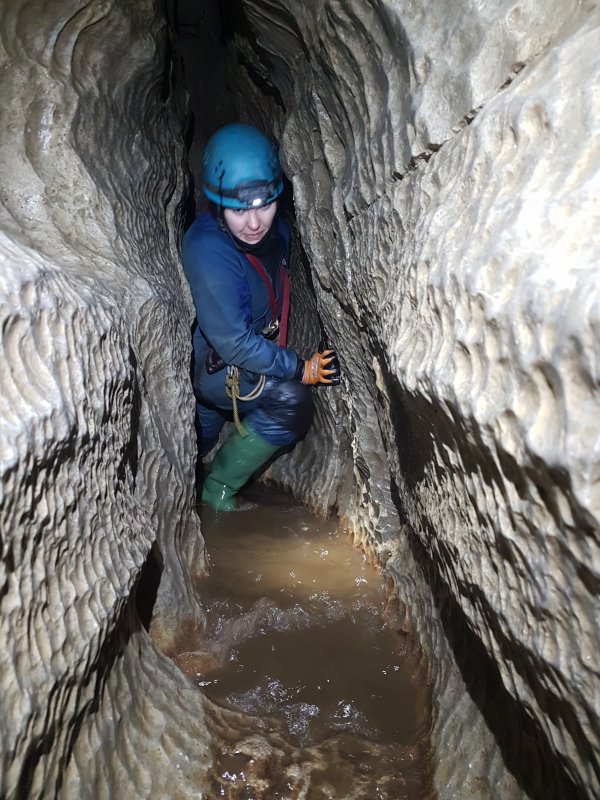 The next section of cave is a short stream passage, beginning with a short crawl, where it takes serious effort to remain dry. Typical West Kingsdale.
Modelling by Celestine, lighting by Tarquin and Celestine
The next section of cave is a short stream passage, beginning with a short crawl, where it takes serious effort to remain dry. Typical West Kingsdale.
Modelling by Celestine, lighting by Tarquin and Celestine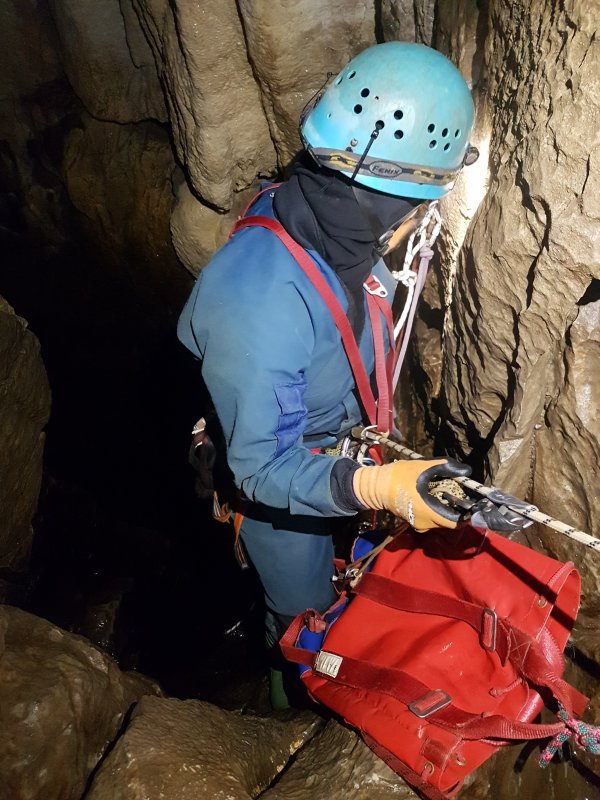 Fourth Pitch, with a poor set-up for the pitch head, causing a rope rub. A traverse hanger could have avoided this problem.
Modelling by Celestine, lighting by Tarquin and Celestine
Fourth Pitch, with a poor set-up for the pitch head, causing a rope rub. A traverse hanger could have avoided this problem.
Modelling by Celestine, lighting by Tarquin and Celestine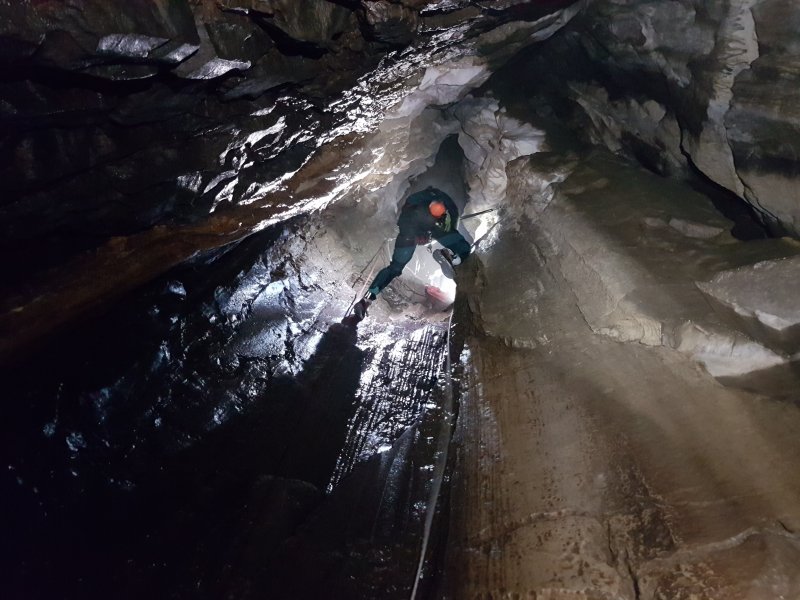 Fourth Pitch
Modelling by Helen Langford, lighting by Celestine, Helen Langford and Helen Stewart
Fourth Pitch
Modelling by Helen Langford, lighting by Celestine, Helen Langford and Helen Stewart Stal covered wall of the pitch.
Lighting by Tarquin and Celestine
Stal covered wall of the pitch.
Lighting by Tarquin and Celestine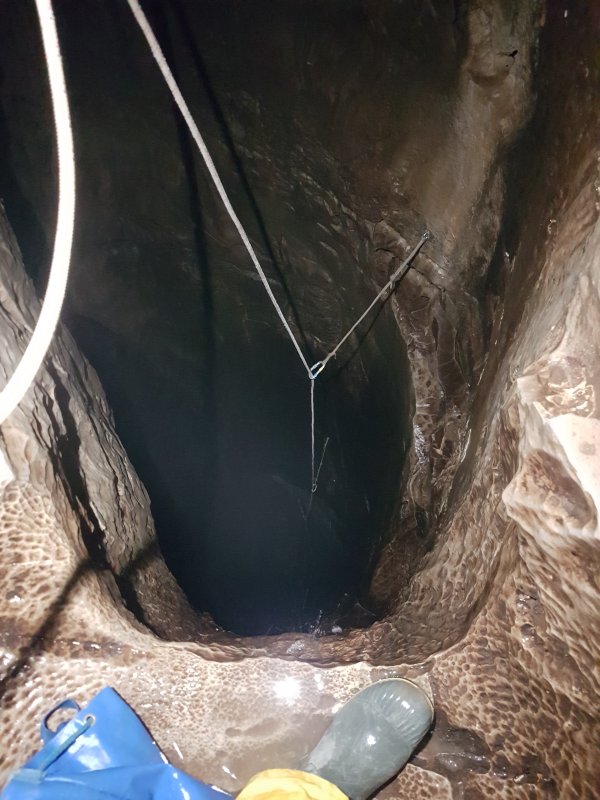 The final pitch is Aquamole Aven, the one found by the divers. This pitch is impressively large compared with the others, with a choice of either a traverse - small drop - big drop, or high traverse and big free hang. I started the rigging, but the rest of the team were already cold from rigging the earlier pitches, and did not want to risk standing at the bottom of a splattery big pitch in the cold, waiting for each other person to ascend. The water was not very high, but still needed all three deviations to keep clear of the spray. Personally, I was rather happy not to have to contend with such a large shaft, with the rope disappearing into the darkness below, so Celestine derigged the cave while I hauled the rope bags up to the others, and we beat a hasty retreat.
Modelling by Tarquin's welly
The final pitch is Aquamole Aven, the one found by the divers. This pitch is impressively large compared with the others, with a choice of either a traverse - small drop - big drop, or high traverse and big free hang. I started the rigging, but the rest of the team were already cold from rigging the earlier pitches, and did not want to risk standing at the bottom of a splattery big pitch in the cold, waiting for each other person to ascend. The water was not very high, but still needed all three deviations to keep clear of the spray. Personally, I was rather happy not to have to contend with such a large shaft, with the rope disappearing into the darkness below, so Celestine derigged the cave while I hauled the rope bags up to the others, and we beat a hasty retreat.
Modelling by Tarquin's welly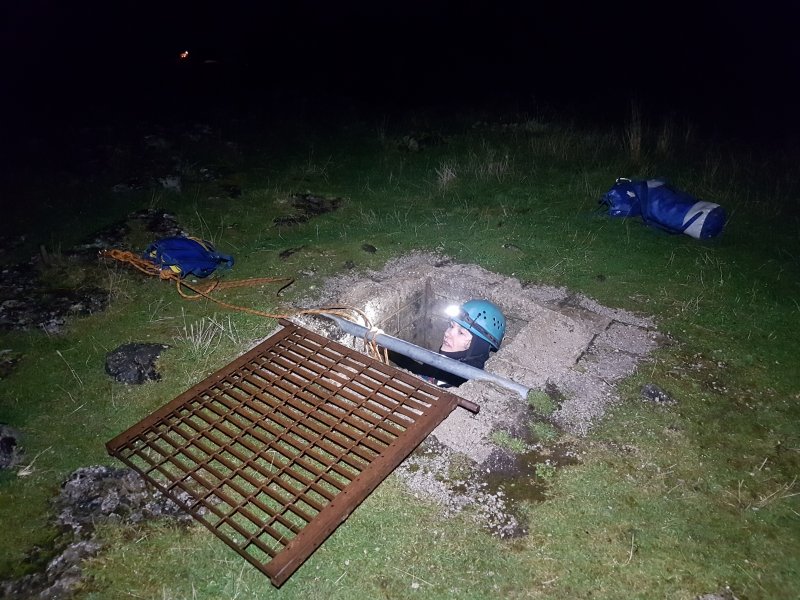 Emerging into the bitter cold. With rain and wintery winds, this was not a place to hang around.
Modelling by Celestine, lighting by Tarquin and Celestine
Emerging into the bitter cold. With rain and wintery winds, this was not a place to hang around.
Modelling by Celestine, lighting by Tarquin and Celestine Waterfall on Clapham Beck.
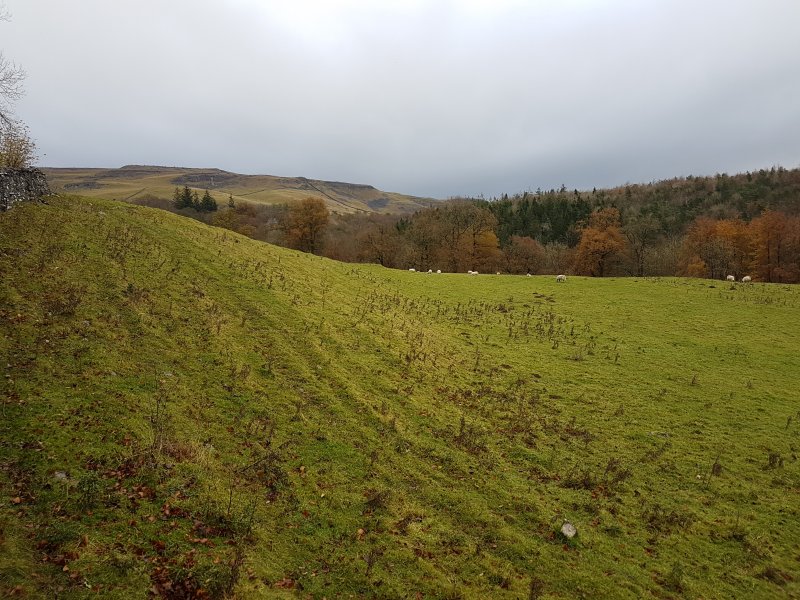 View over Clapdale Wood.
 Thwaite Scars, a 408 metre high branch of Ingleborough.
 Clapdale. Most visitors walk up the valley bottom, but this route over the top bypasses a private section of the path for which a fee must be paid. The views are also much better up here.
Modelling by Malcolm and Helen Langford
Clapdale. Most visitors walk up the valley bottom, but this route over the top bypasses a private section of the path for which a fee must be paid. The views are also much better up here.
Modelling by Malcolm and Helen Langford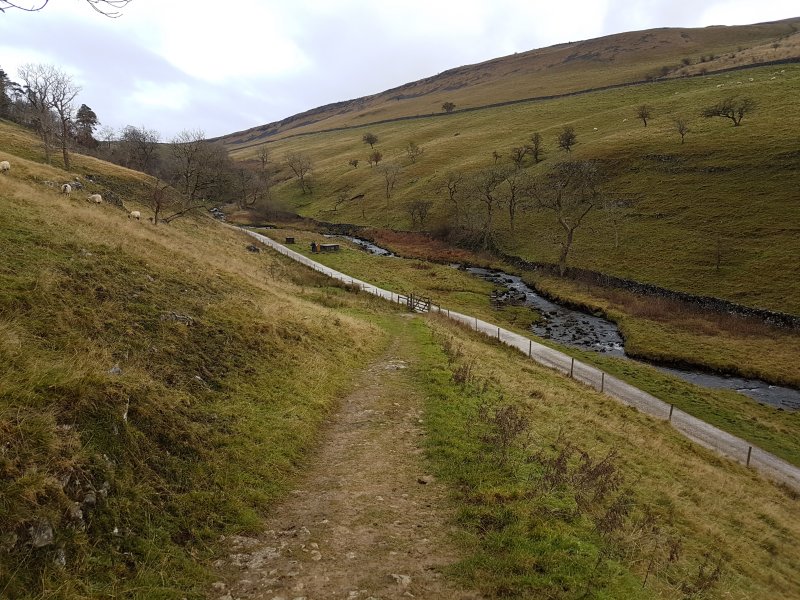 Descending into Clapdale.
 Ingleborough Cave, one of several show caves in this area, and a fossil resurgence for the Gaping Gill system. The sign claims that this is "the best showcave in Britain", but I have to wonder by what measure they get to make that claim; there are several others which would no doubt like to say the same thing about themselves. As voted for by residents of Clapham, maybe? But if they claim it themselves, then it must be true, right? Surely the best showcave should have a dinosaur park.
 Clapham Beck Head, the current resurgence for Gaping Gill. This is a divers' cave, which joins Ingleborough Cave somewhere upstream.
 The valley is largely dry from here, with only tiny springs from little local drainage caves.
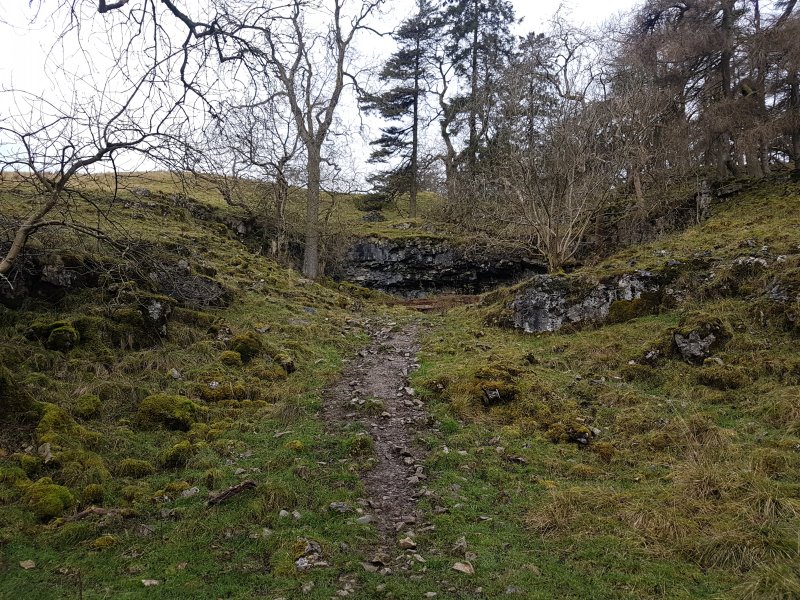 Foxholes, a set of smaller caves in a side alcove.
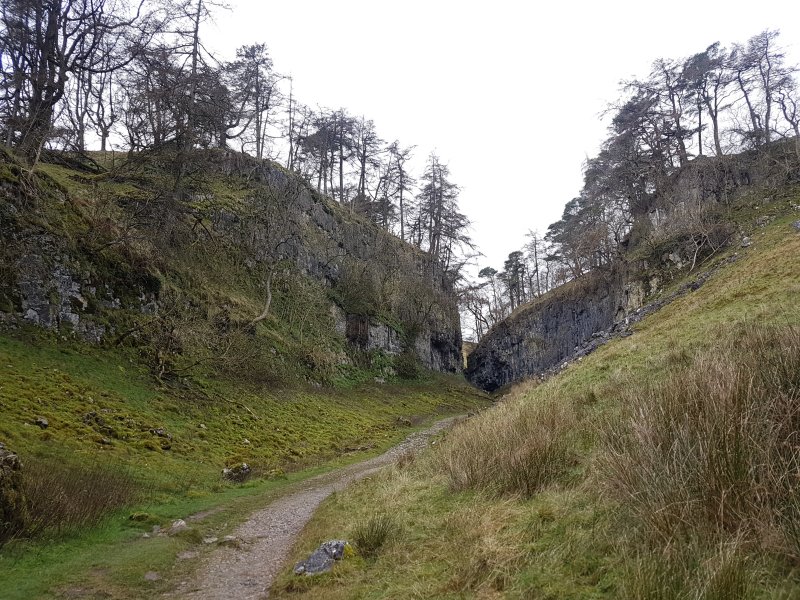 Mouth of Trow Gill, a short gorge.
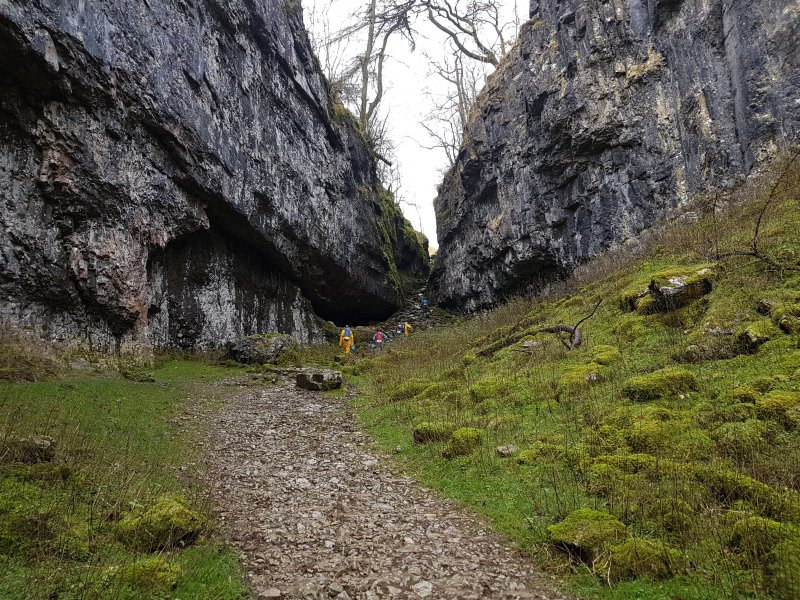 Trow Gill is one of the most memorable features of the walk up onto the plateau. The large alcove on the left is Trow Gill Cave, which is not really much of a cave at all, just an alcove.
Modelling by Malcolm, Celestine, Helen Stewart, Phill and Helen Langford
Trow Gill is one of the most memorable features of the walk up onto the plateau. The large alcove on the left is Trow Gill Cave, which is not really much of a cave at all, just an alcove.
Modelling by Malcolm, Celestine, Helen Stewart, Phill and Helen Langford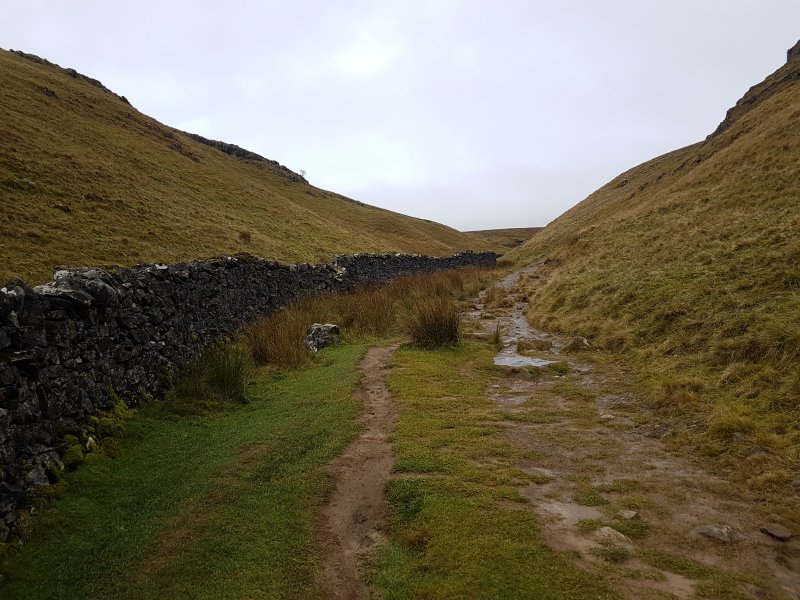 The upper valley through Clapham Bottoms.
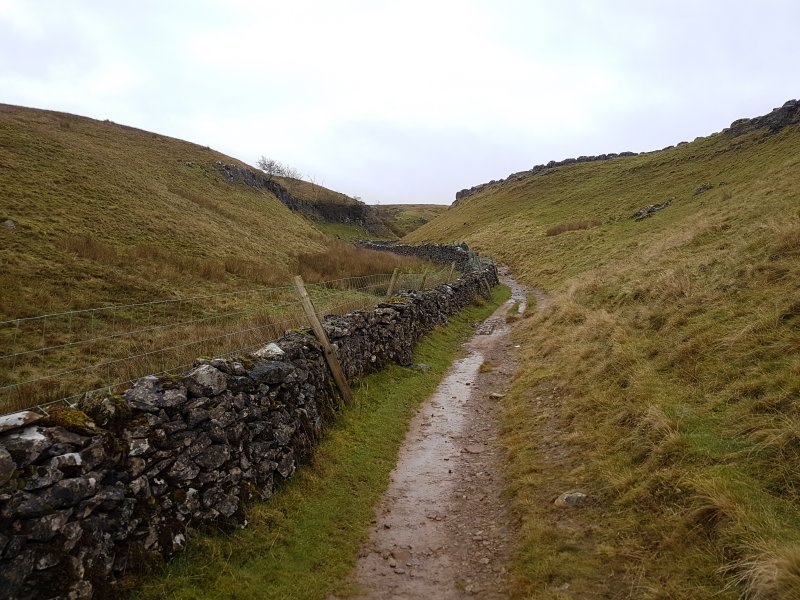 Northern style dry stone walls. The fence posts occasionally swap sides so that they don't have to be dug deep, as the wall will support them.
Modelling by some random walkers
Northern style dry stone walls. The fence posts occasionally swap sides so that they don't have to be dug deep, as the wall will support them.
Modelling by some random walkers Gaping Gill (or Gaping Ghyll), the tallest partially-surface waterfall in England, and a very deep hole dropping into the largest cave chamber in the UK. The shaft is about 98 metres, while the Fell Beck river falls down a small cascade immediately above it as well. The river remains underground from here until Clapham Beck Head. The shaft was first partially descended in 1842, then completely descended in 1895, each time on handmade rope ladders. Ingleborough's summit would be visible on the right, if the clouds were higher.
Modelling by Helen Langford, Malcolm, Helen Stewart, Phill, Celestine, and some random walkers
Gaping Gill (or Gaping Ghyll), the tallest partially-surface waterfall in England, and a very deep hole dropping into the largest cave chamber in the UK. The shaft is about 98 metres, while the Fell Beck river falls down a small cascade immediately above it as well. The river remains underground from here until Clapham Beck Head. The shaft was first partially descended in 1842, then completely descended in 1895, each time on handmade rope ladders. Ingleborough's summit would be visible on the right, if the clouds were higher.
Modelling by Helen Langford, Malcolm, Helen Stewart, Phill, Celestine, and some random walkers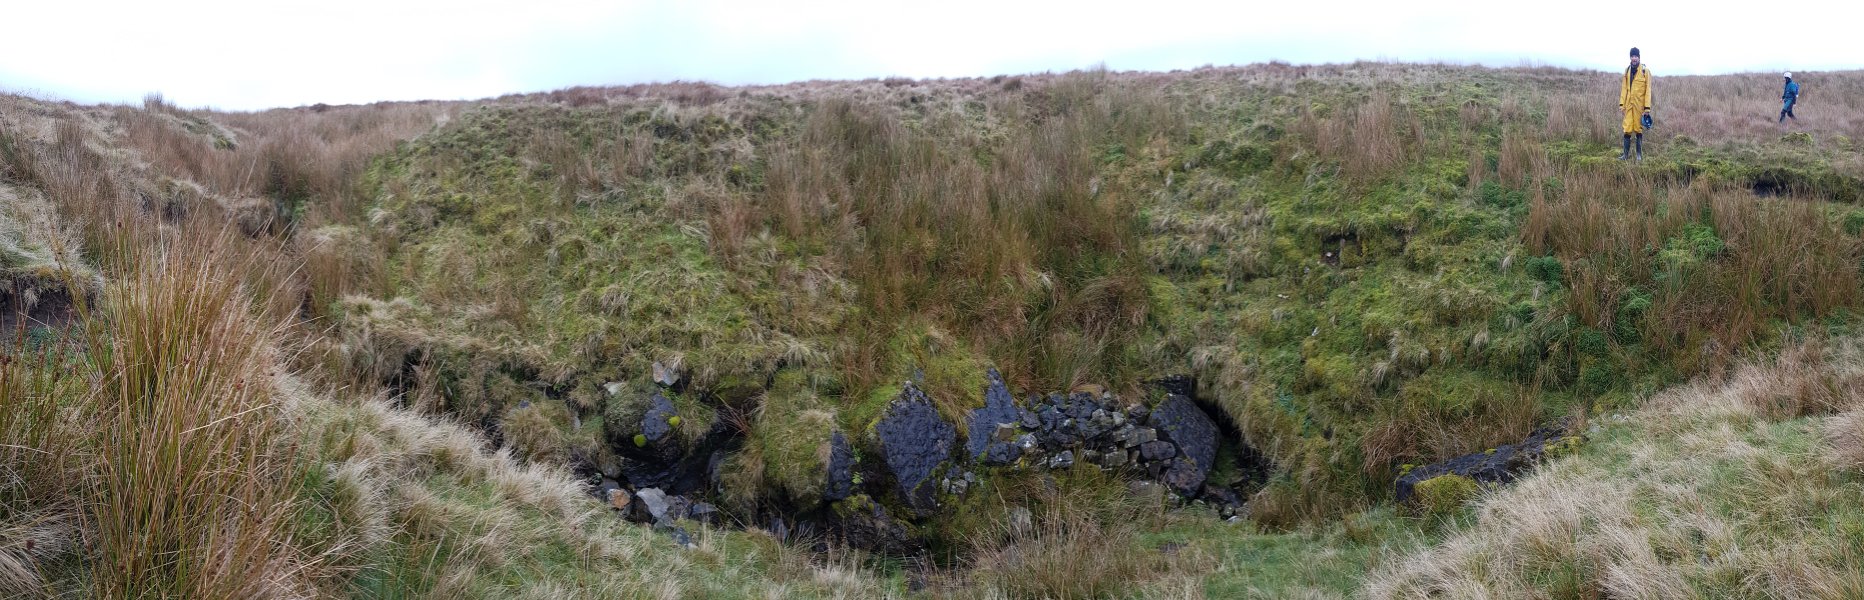 A stroll over the moorland reaches Grange Rigg Pot, marked by a major stream, and two boggy streams joining in the sink. Grange Rigg is the longest fragment of the Gaping Gill system that has not yet been connected to the main system.
Modelling by Malcolm and Helen Langford
A stroll over the moorland reaches Grange Rigg Pot, marked by a major stream, and two boggy streams joining in the sink. Grange Rigg is the longest fragment of the Gaping Gill system that has not yet been connected to the main system.
Modelling by Malcolm and Helen Langford Crossing the moorland over the Grange Rigg system, looking towards Clapham Bottoms.
Modelling by Helen Langford, Phill, a truncated Celestine and Helen Stewart
Crossing the moorland over the Grange Rigg system, looking towards Clapham Bottoms.
Modelling by Helen Langford, Phill, a truncated Celestine and Helen Stewart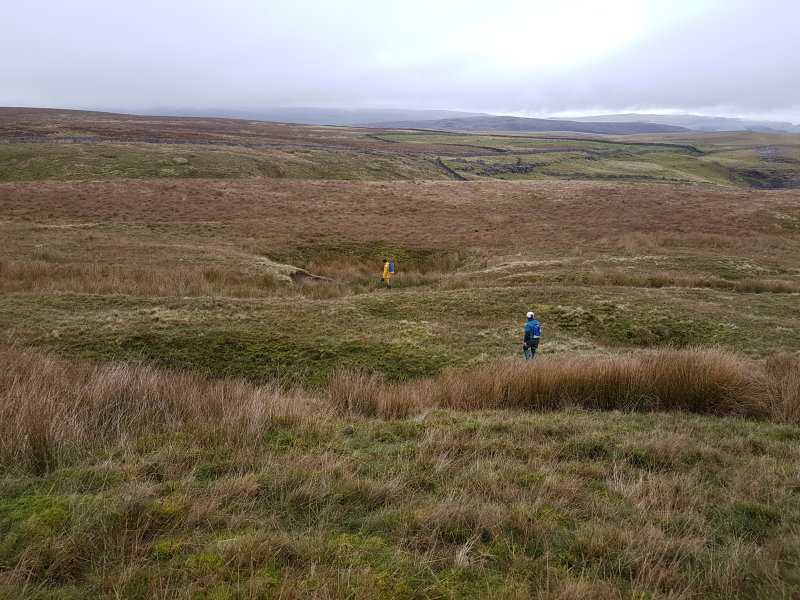 The shakehole containing Christmas Pot, just beyond Malcolm (in yellow).
Modelling by Malcolm and Helen Langford
The shakehole containing Christmas Pot, just beyond Malcolm (in yellow).
Modelling by Malcolm and Helen Langford There are two entrances in the shakehole. This is the wrong one. Wonder where it goes.
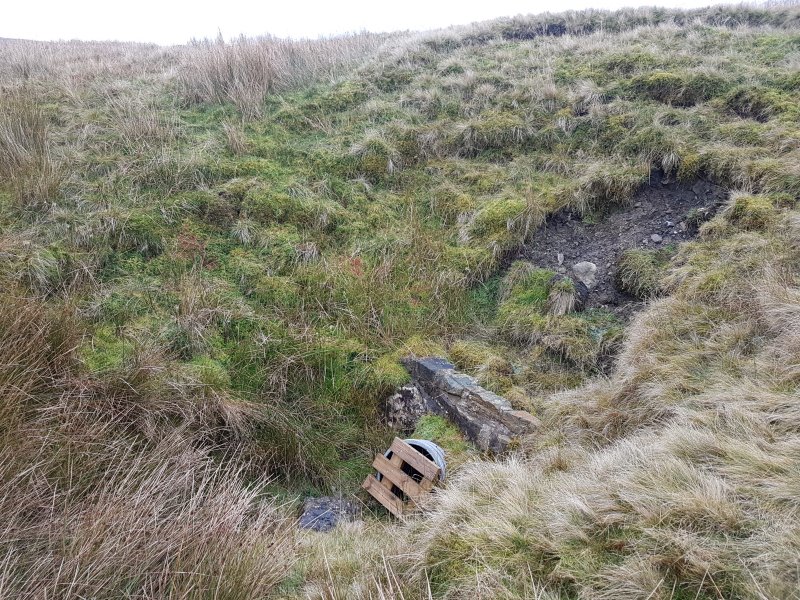 This one is the entrance to Christmas Pot.
 The top of Christmas Pot is quite tight, with a squeeze onto a pitch head.
Modelling by Celestine
The top of Christmas Pot is quite tight, with a squeeze onto a pitch head.
Modelling by Celestine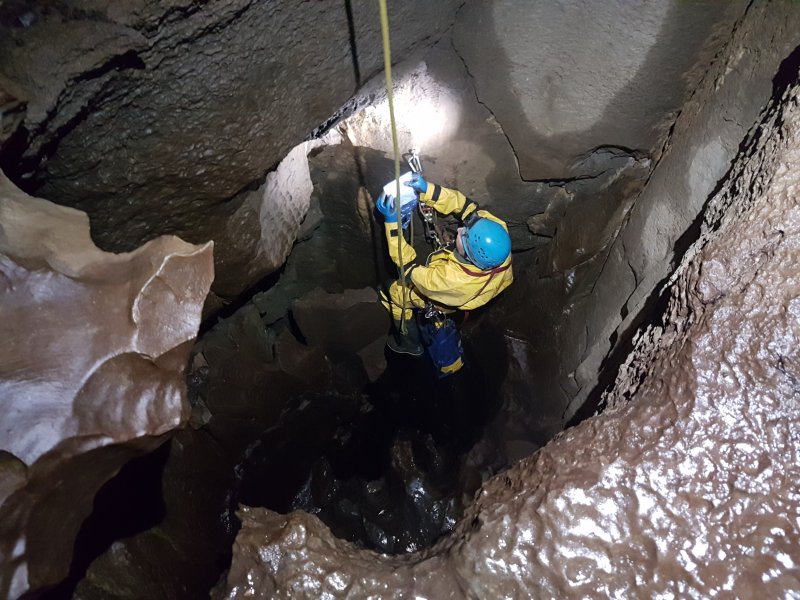 Rigging the pitch puts you in the firing line, as loose stones await at the top, to be hurled down by any false moves with a tackle bag. Malcolm did a good job of simultaneously rigging and dodging the shrapnel.
Modelling by Malcolm, lighting by Tarquin and Malcolm
Rigging the pitch puts you in the firing line, as loose stones await at the top, to be hurled down by any false moves with a tackle bag. Malcolm did a good job of simultaneously rigging and dodging the shrapnel.
Modelling by Malcolm, lighting by Tarquin and Malcolm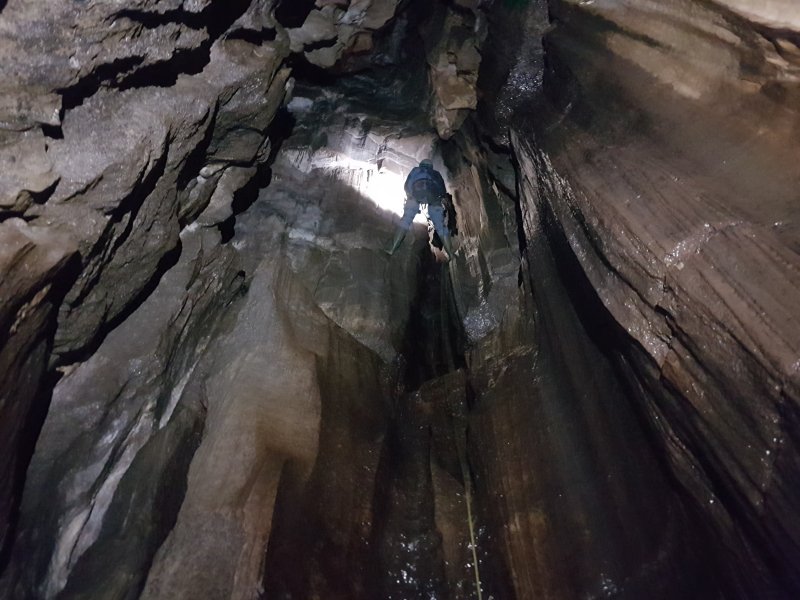 The first pitch is actually several drops, with the last one being the largest. An aven here may well be related to that second entrance in the shakehole.
Modelling by Celestine, lighting by Tarquin and Celestine
The first pitch is actually several drops, with the last one being the largest. An aven here may well be related to that second entrance in the shakehole.
Modelling by Celestine, lighting by Tarquin and Celestine The passage at the bottom is very typical for Grange Rigg; awkward. Tough work. It is basically a choked rift, with a very obvious route through it. Without SRT gear, this would be fairly easy, but the SRT gear acts like multiple anchors hooking on every passing rock.
Modelling by Celestine, lighting by Tarquin and Celestine
The passage at the bottom is very typical for Grange Rigg; awkward. Tough work. It is basically a choked rift, with a very obvious route through it. Without SRT gear, this would be fairly easy, but the SRT gear acts like multiple anchors hooking on every passing rock.
Modelling by Celestine, lighting by Tarquin and Celestine Small formations in the crawl. This is good for Yorkshire, right?
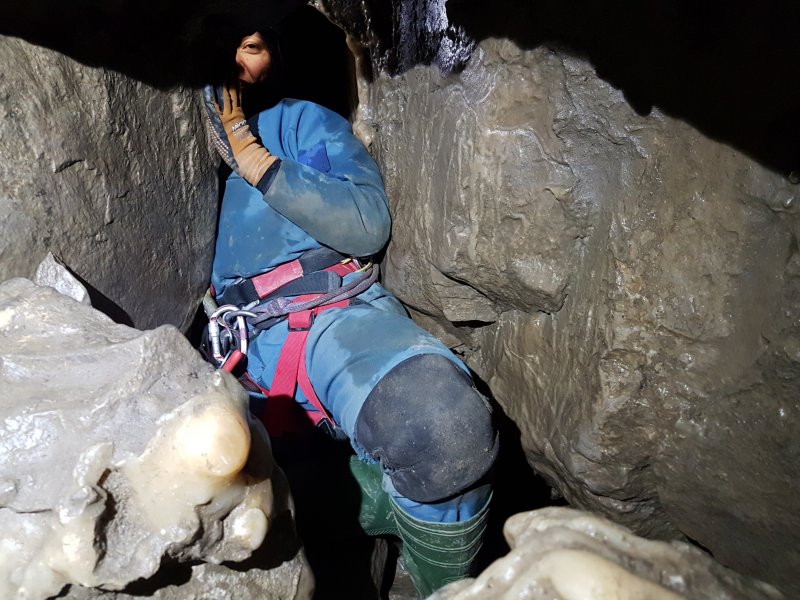 Nearing the end of the awkward passage.
Modelling by Celestine, lighting by Tarquin and Celestine
Nearing the end of the awkward passage.
Modelling by Celestine, lighting by Tarquin and Celestine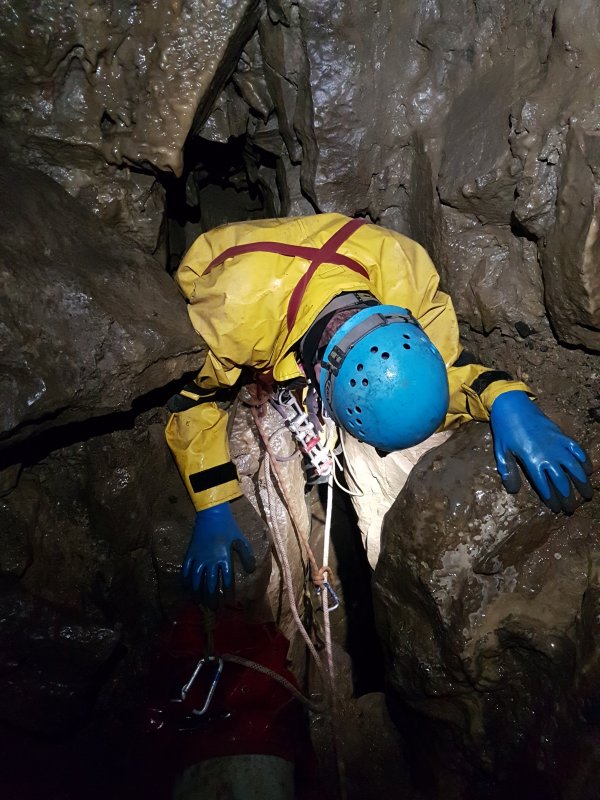 Above the second pitch is a very awkward little pitch, which could be either a pitch or a climb, and still be just as bad. The keyhole shape is only just large enough to pass through with SRT gear on, requiring a small levitation act, very similar to Slit Pot in Simpson's Pot. The natural belays before it are rather far away (everything close is loose), so it uses too much rope to rig. If rigged as a pitch, far more rope is needed than the rigging guide would suggest.
Modelling by Malcolm, lighting by Tarquin and Malcolm
Above the second pitch is a very awkward little pitch, which could be either a pitch or a climb, and still be just as bad. The keyhole shape is only just large enough to pass through with SRT gear on, requiring a small levitation act, very similar to Slit Pot in Simpson's Pot. The natural belays before it are rather far away (everything close is loose), so it uses too much rope to rig. If rigged as a pitch, far more rope is needed than the rigging guide would suggest.
Modelling by Malcolm, lighting by Tarquin and Malcolm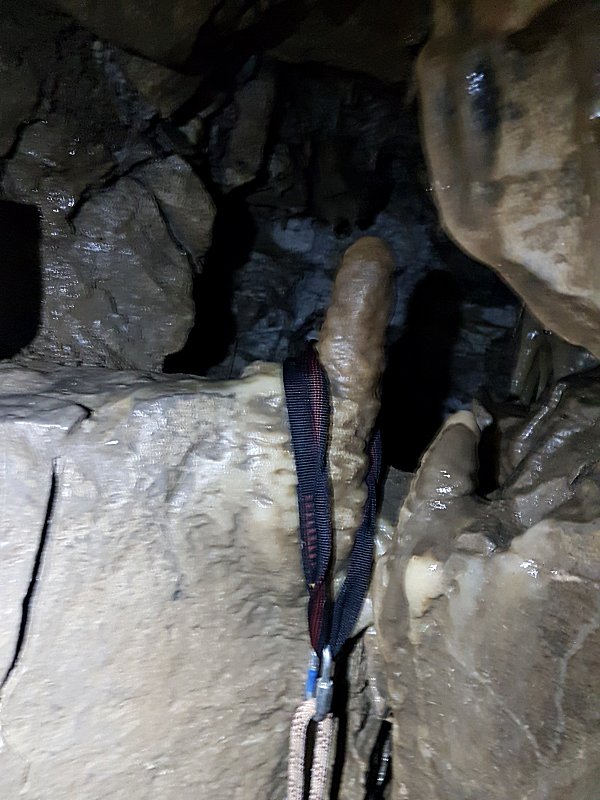 The main belay for the pitch is this stalagmite, which is not a bad natural belay, but it is very easy to unhook the rope from it while passing through the keyhole.
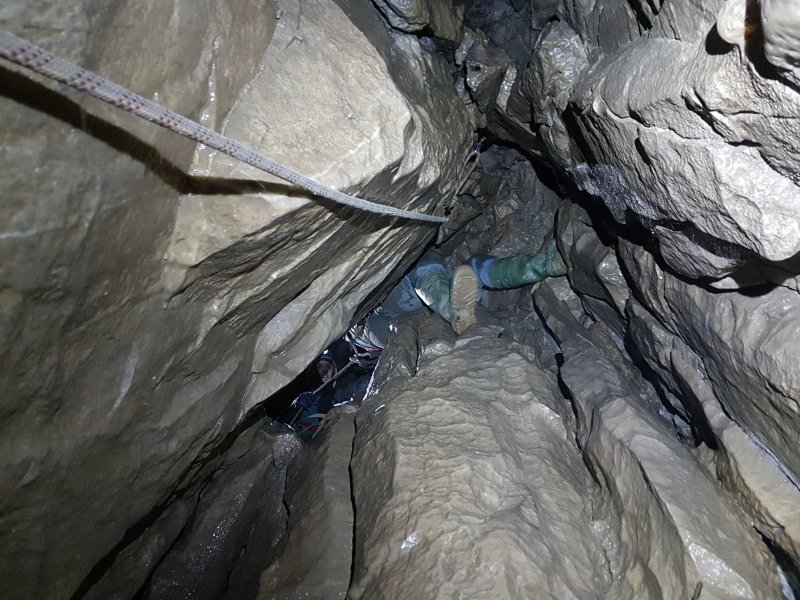 There are enough ledges to climb it, but it is still awkwardly narrow.
Modelling by Celestine and Helen Langford, lighting by Tarquin, Celestine, Helen Langford and Phill
There are enough ledges to climb it, but it is still awkwardly narrow.
Modelling by Celestine and Helen Langford, lighting by Tarquin, Celestine, Helen Langford and Phill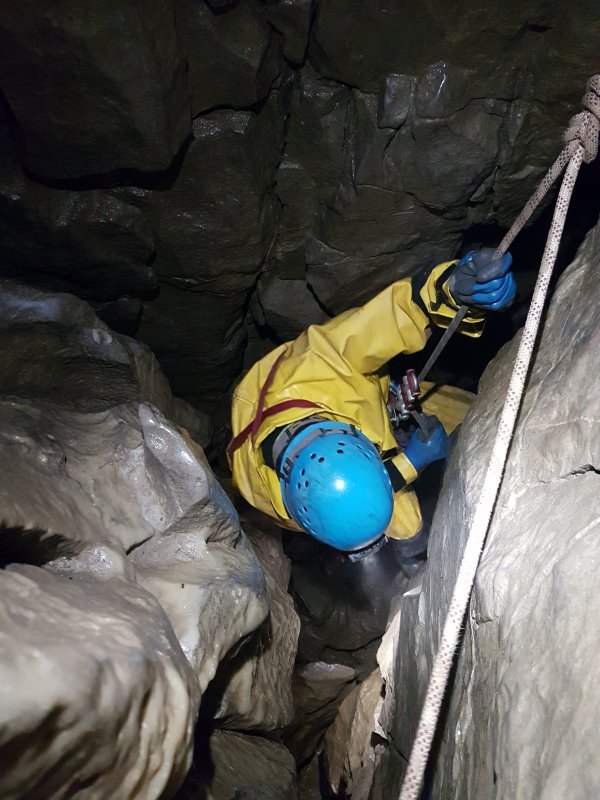 Just free climb it!
Modelling by Malcolm, lighting by Tarquin and Malcolm
Just free climb it!
Modelling by Malcolm, lighting by Tarquin and Malcolm The second pitch is certainly no better.
Modelling by Malcolm, lighting by Tarquin and Malcolm
The second pitch is certainly no better.
Modelling by Malcolm, lighting by Tarquin and Malcolm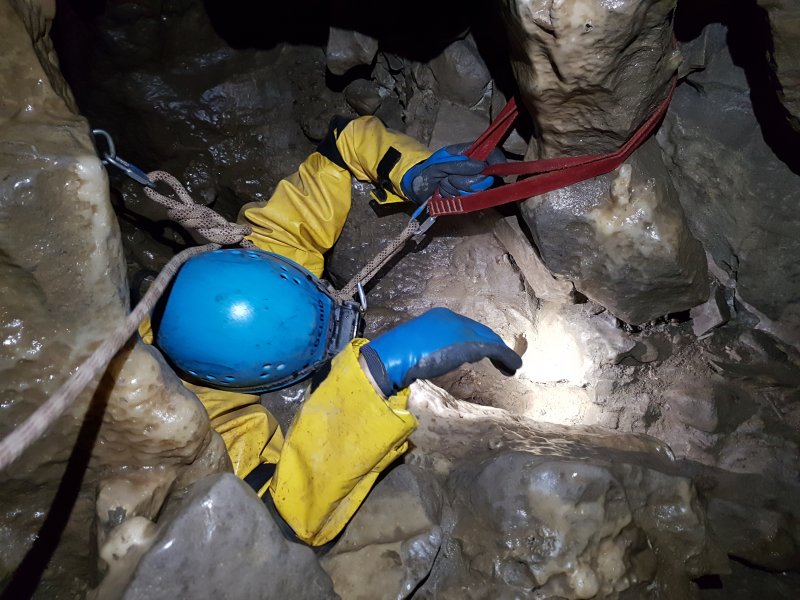 This is most definitely not an easy pitch head.
Modelling by Malcolm, lighting by Tarquin and Malcolm
This is most definitely not an easy pitch head.
Modelling by Malcolm, lighting by Tarquin and Malcolm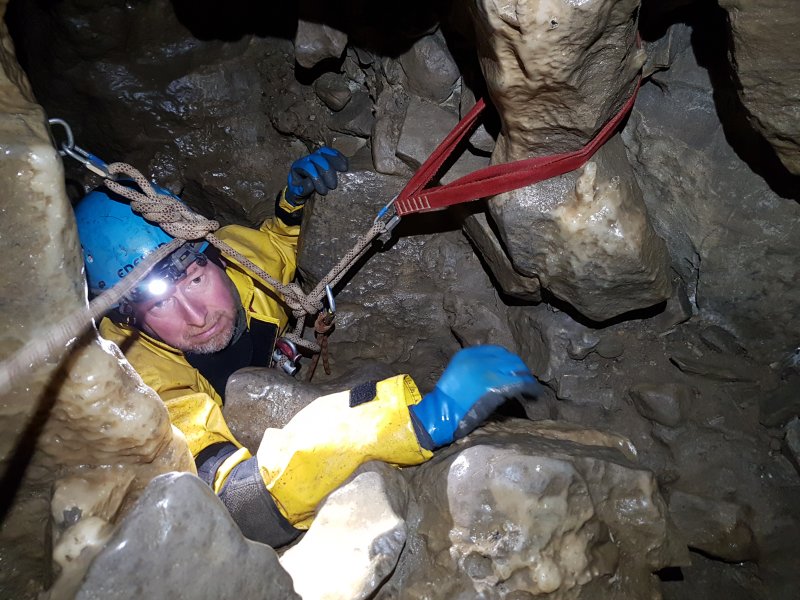 Some pictures tell a story.
Modelling by Malcolm, lighting by Tarquin and Malcolm
Some pictures tell a story.
Modelling by Malcolm, lighting by Tarquin and Malcolm Adjusting the pitch head to use only a single hang, the deviation proved to be pointless.
Modelling by Malcolm, lighting by Tarquin and Malcolm
Adjusting the pitch head to use only a single hang, the deviation proved to be pointless.
Modelling by Malcolm, lighting by Tarquin and Malcolm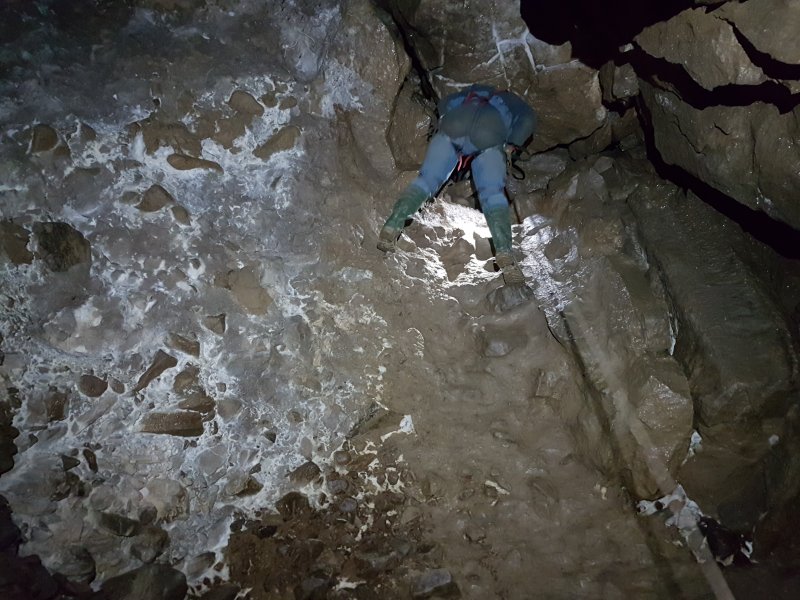 The pitch then opens out to a comfortable size.
Modelling by Celestine, lighting by Tarquin and Celestine
The pitch then opens out to a comfortable size.
Modelling by Celestine, lighting by Tarquin and Celestine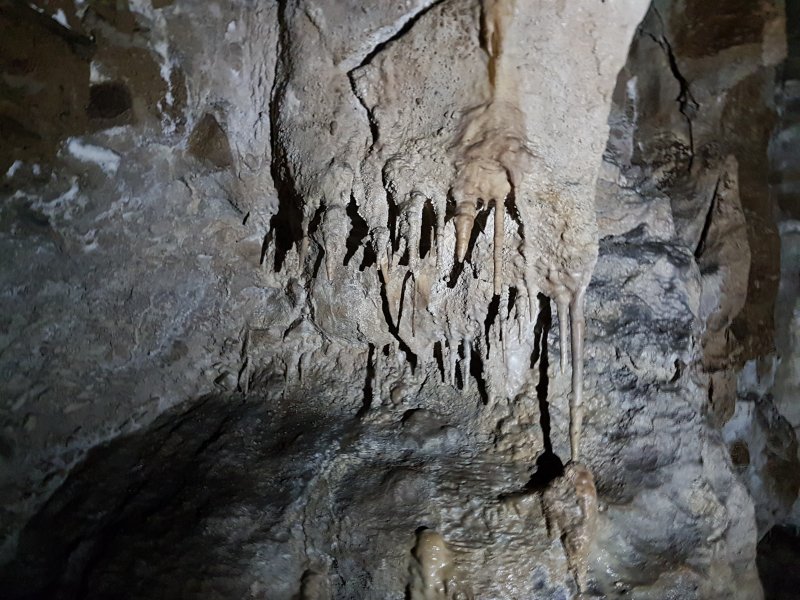 Formations on the second pitch.
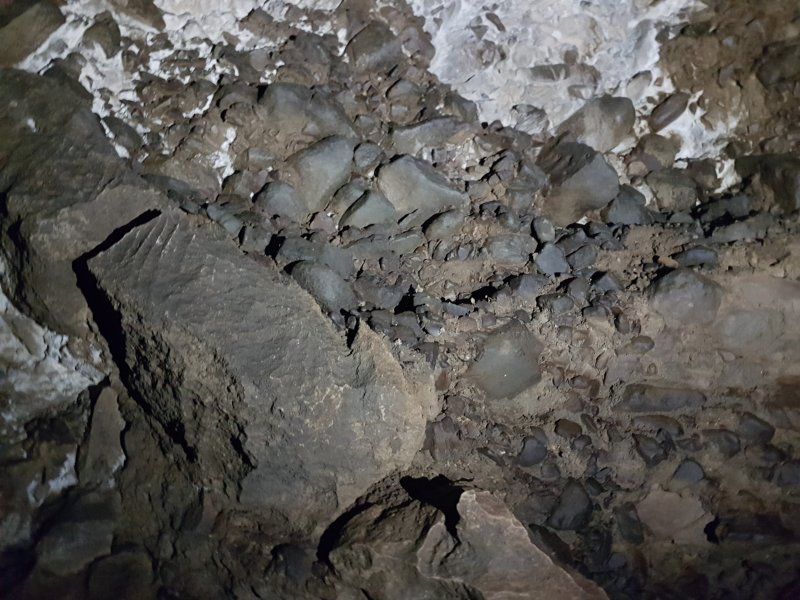 One of the walls is basically just a load of cobbles and rocks held together by mud.
 The third pitch is immediately afterwards, made up from a few drops down into a larger passage.
Modelling by Celestine, lighting by Tarquin, Celestine and Malcolm
The third pitch is immediately afterwards, made up from a few drops down into a larger passage.
Modelling by Celestine, lighting by Tarquin, Celestine and Malcolm At the bottom, we reach the Grange Rigg stream, and the main passage of Grange Rigg Pot. Upstream is supposed to be a very tough passage, which is also flood prone, giving a 6 hour through trip. If not for the recent rain, we would have been heading out that way instead.
 Material, spray can and rope, which had somehow been washed into here from Grange Rigg. Clearly this area sees some powerful flooding.
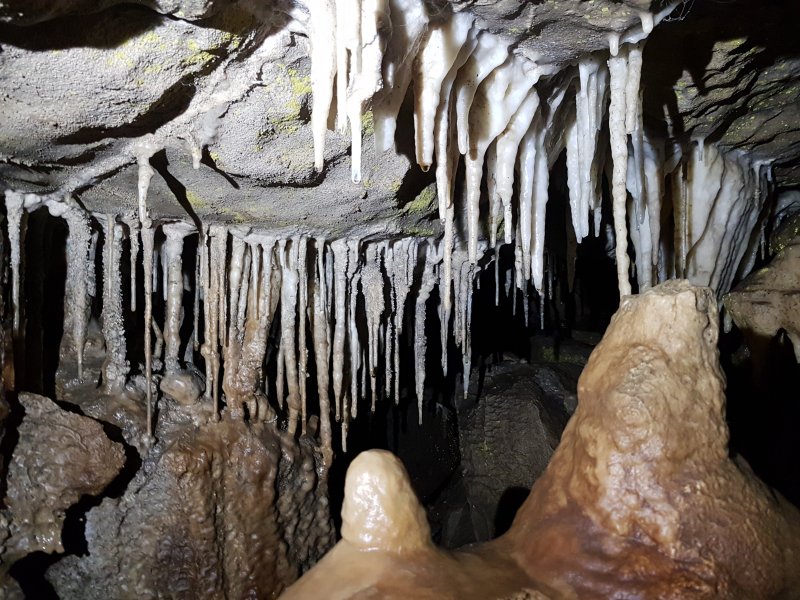 This part of the cave is known for its formations, which are quite admirable for Yorkshire. These look very similar to Ogof Marros in West Wales, or Upper Flood Swallet in Mendip.
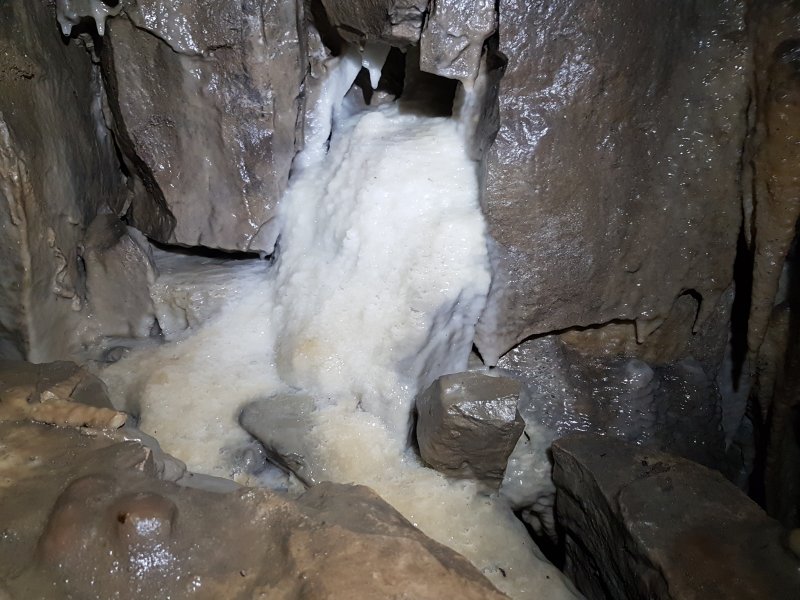 Flowstone.
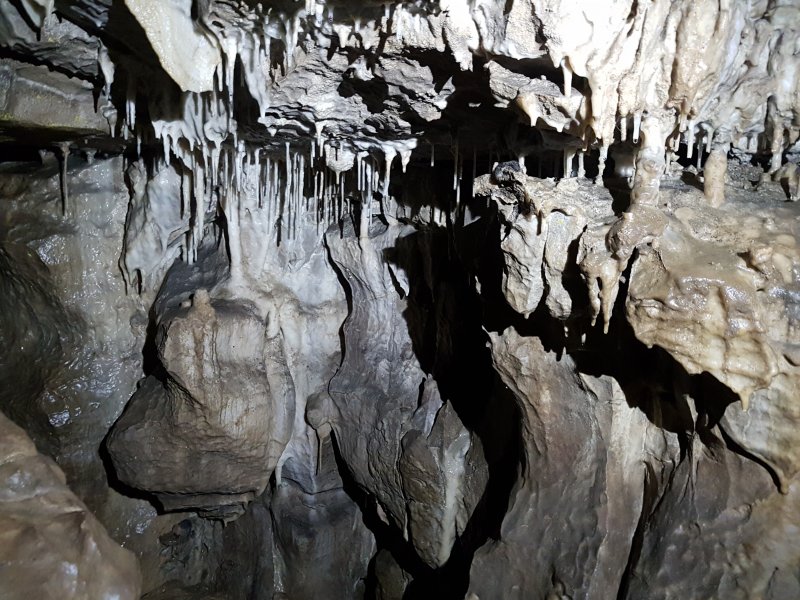 The formations seem to relate to a specific bedding plane.
 Stalactite and broken stalagmite.
 Helictites. Actual helictites, in Yorkshire.
 Crystal pool.
 The formations all have a lot of lumps, and a rather gritty texture, that appears to be the faster growing kind of stal.
Modelling by Celestine, lighting by Tarquin and Celestine
The formations all have a lot of lumps, and a rather gritty texture, that appears to be the faster growing kind of stal.
Modelling by Celestine, lighting by Tarquin and Celestine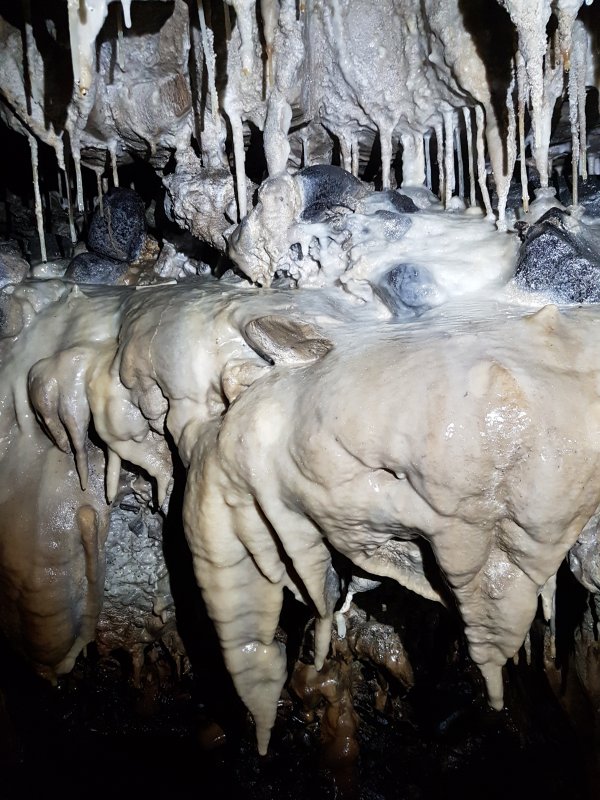 Still, it is quite attractive.
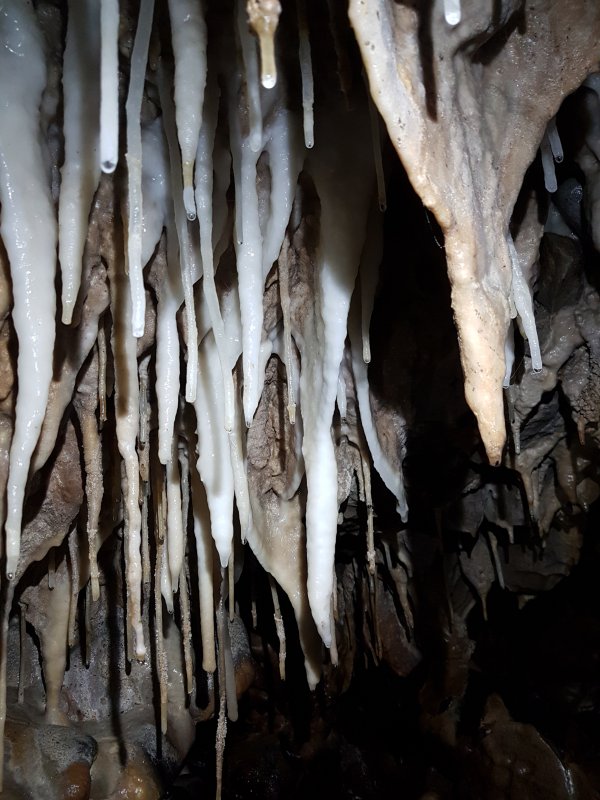 Straw detail.
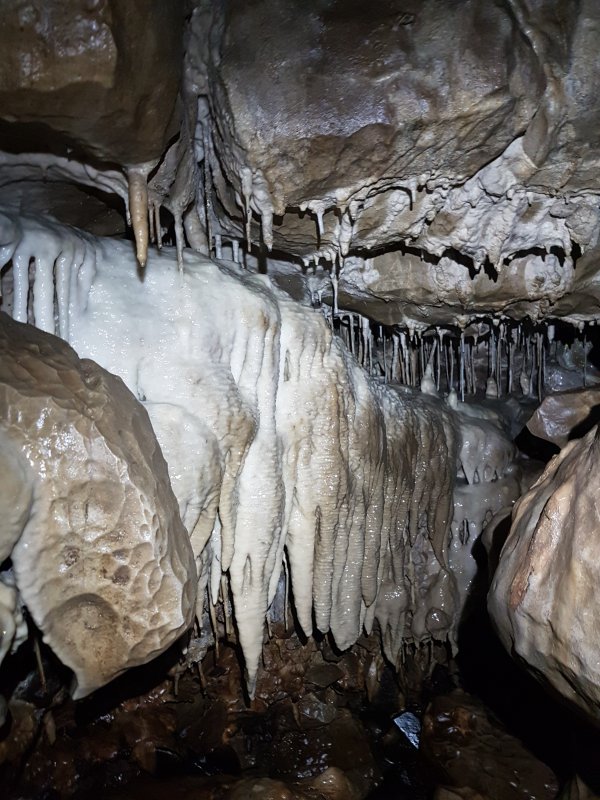 Flowstone fingers.
 Broken curtains.
Lighting by Celestine
Broken curtains.
Lighting by Celestine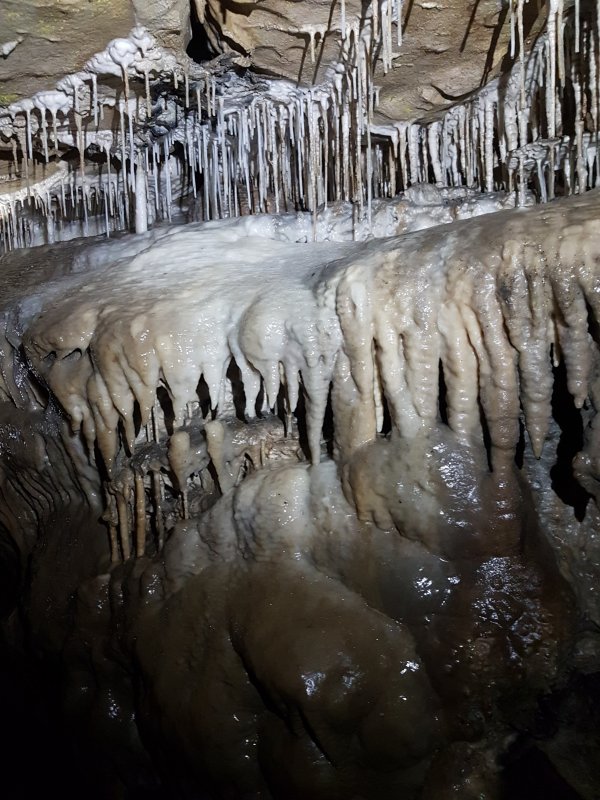 Straws and flowstone.
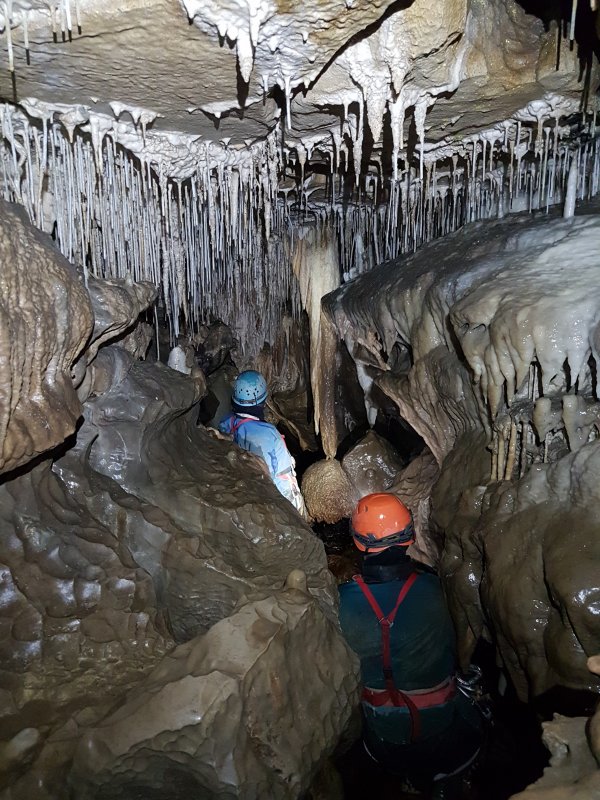 A profusion of straws and the largest column.
Modelling by Helen Stewart and Celestine, lighting by Tarquin, Helen Stewart and Celestine
A profusion of straws and the largest column.
Modelling by Helen Stewart and Celestine, lighting by Tarquin, Helen Stewart and Celestine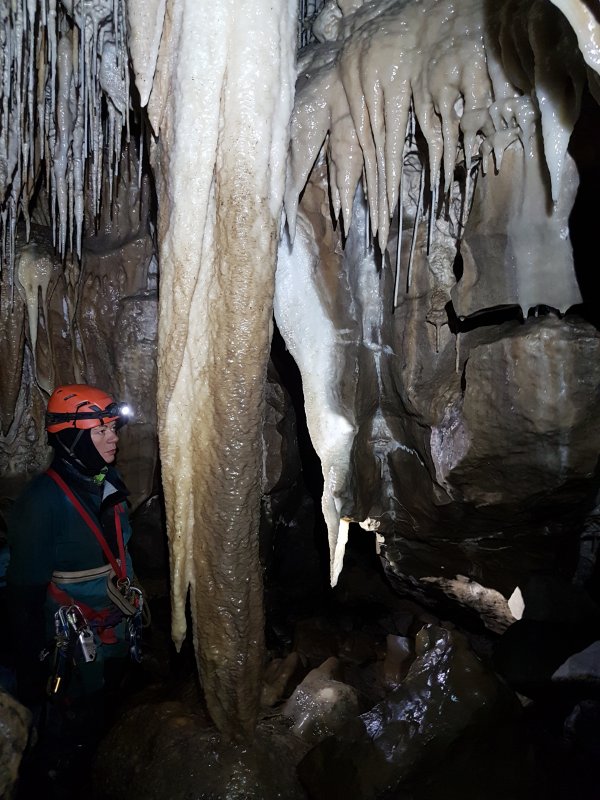 Column and translucent curtain.
Modelling by Helen Stewart, lighting by Tarquin and Helen Stewart
Column and translucent curtain.
Modelling by Helen Stewart, lighting by Tarquin and Helen Stewart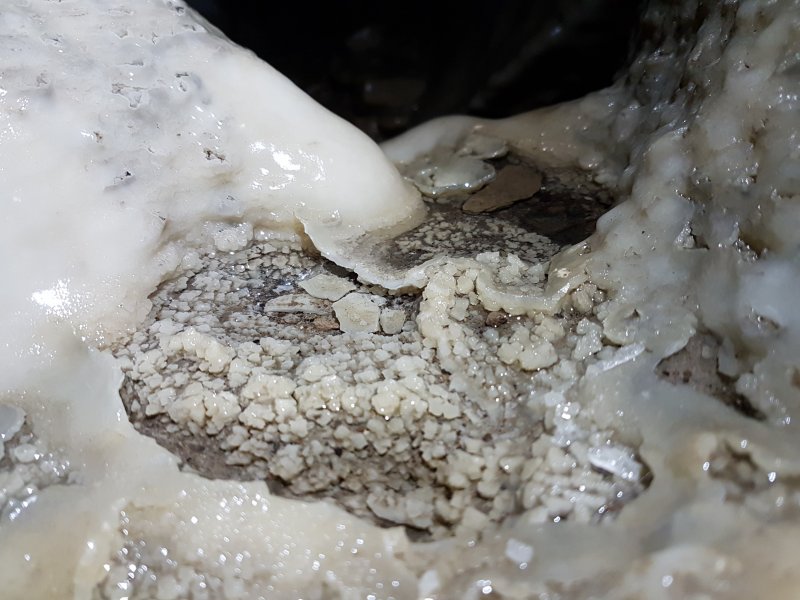 More little crystal pools.
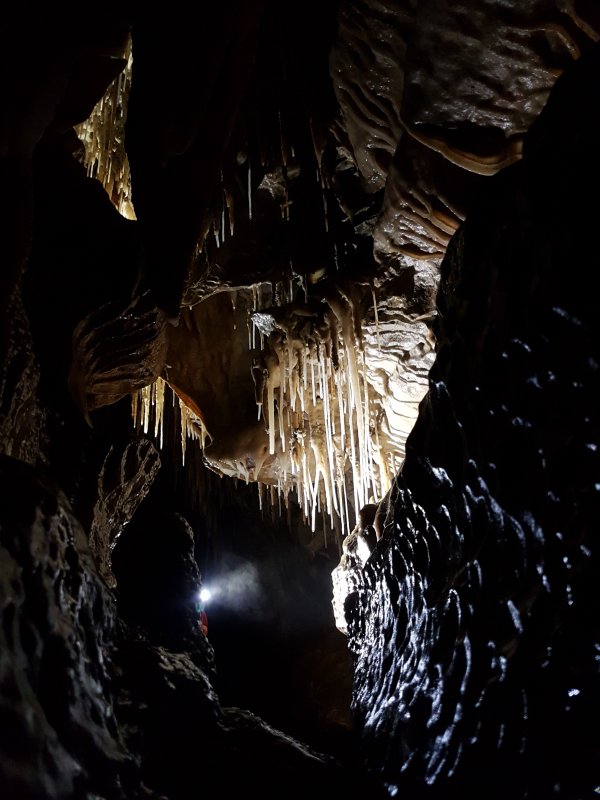 Backlit straws.
Modelling by Helen Stewart's nose, lighting by Tarquin and Helen Stewart
Backlit straws.
Modelling by Helen Stewart's nose, lighting by Tarquin and Helen Stewart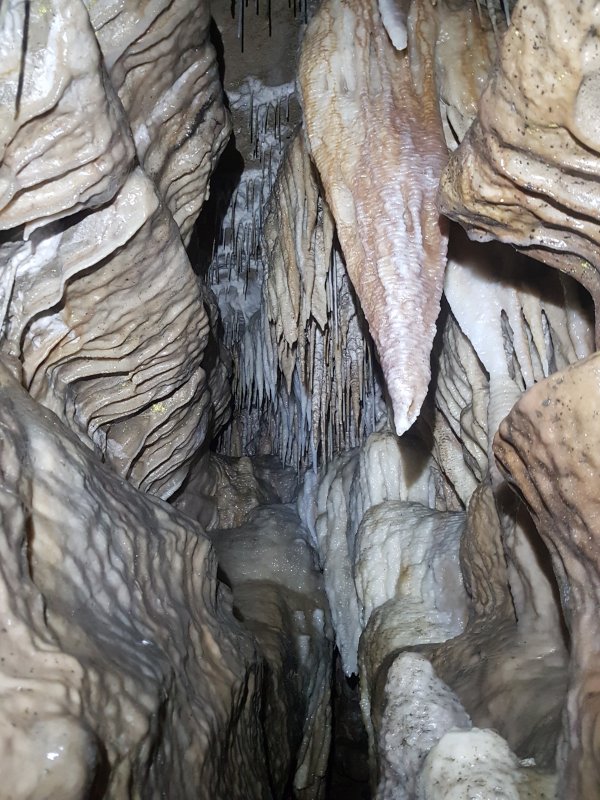 Formations in the rift with the backlit straws.
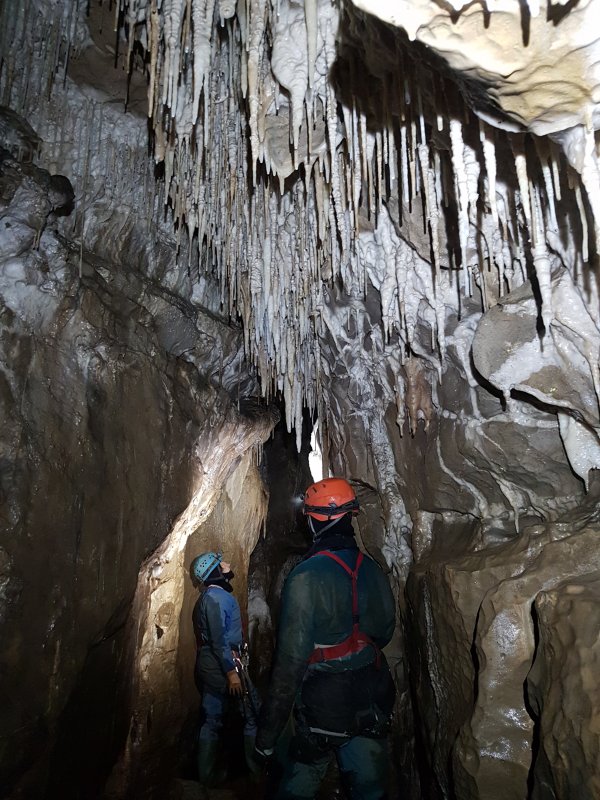 Definitely not bad at all for Yorkshire.
Modelling by Helen Stewart and Celestine, lighting by Tarquin, Helen Stewart and Celestine
Definitely not bad at all for Yorkshire.
Modelling by Helen Stewart and Celestine, lighting by Tarquin, Helen Stewart and Celestine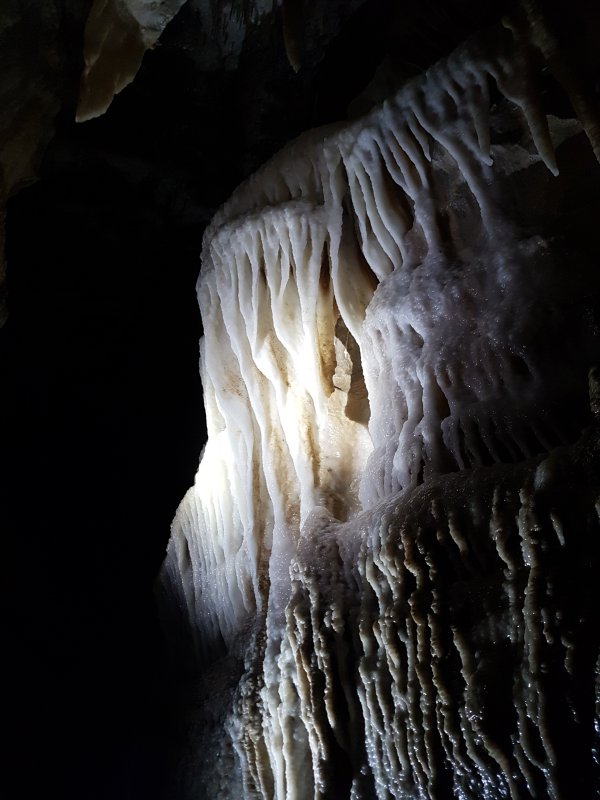 Flowstone curtains.
 Pure white crystal pools, tucked out of sight in an undercut.
 The largest passage in Grange Rigg Pot that we saw.
Modelling by Helen Stewart and Celestine, lighting by Tarquin, Helen Stewart and Celestine
The largest passage in Grange Rigg Pot that we saw.
Modelling by Helen Stewart and Celestine, lighting by Tarquin, Helen Stewart and Celestine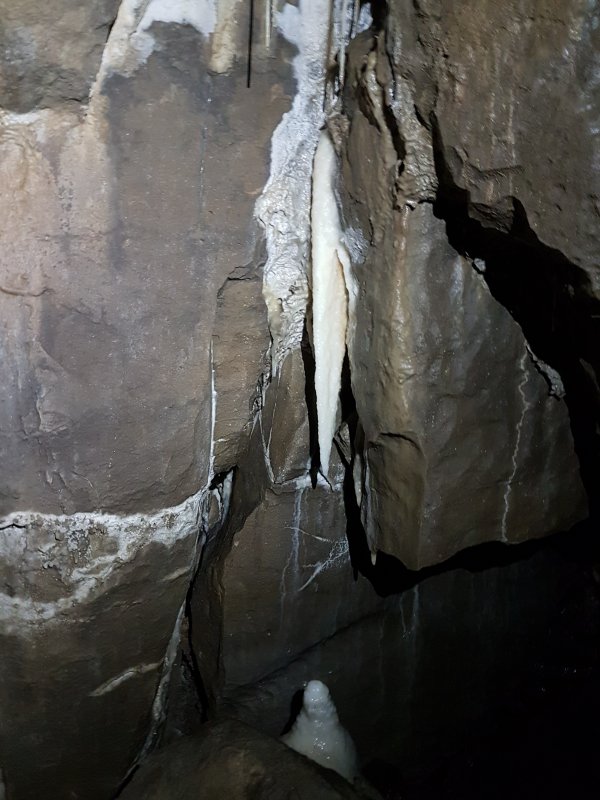 Basic stalactite and stalagmite.
 Stal in the large passage.
Modelling by Helen Stewart, lighting by Tarquin and Helen Stewart
Stal in the large passage.
Modelling by Helen Stewart, lighting by Tarquin and Helen Stewart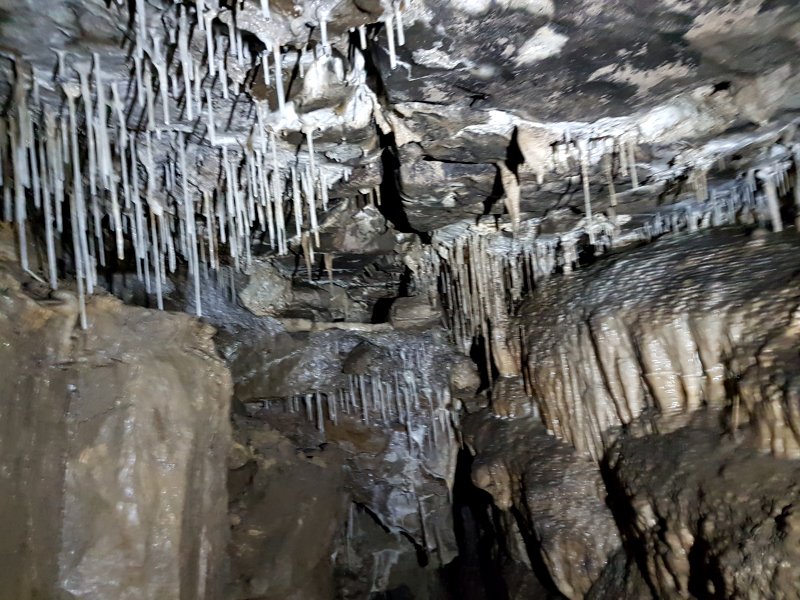 Stal continues at roof level, while the floor drops.
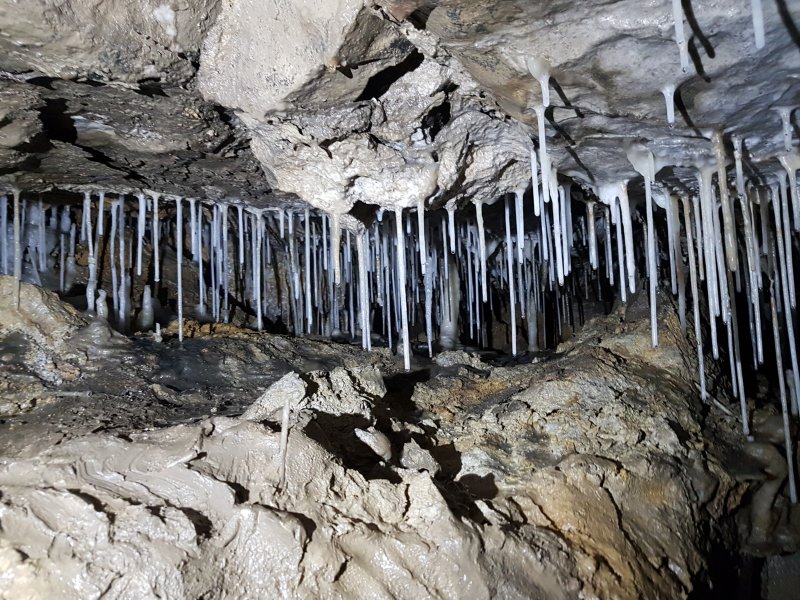 The stal in the roof ends as the roof begins to descend. We have finally left that pretty bedding behind.
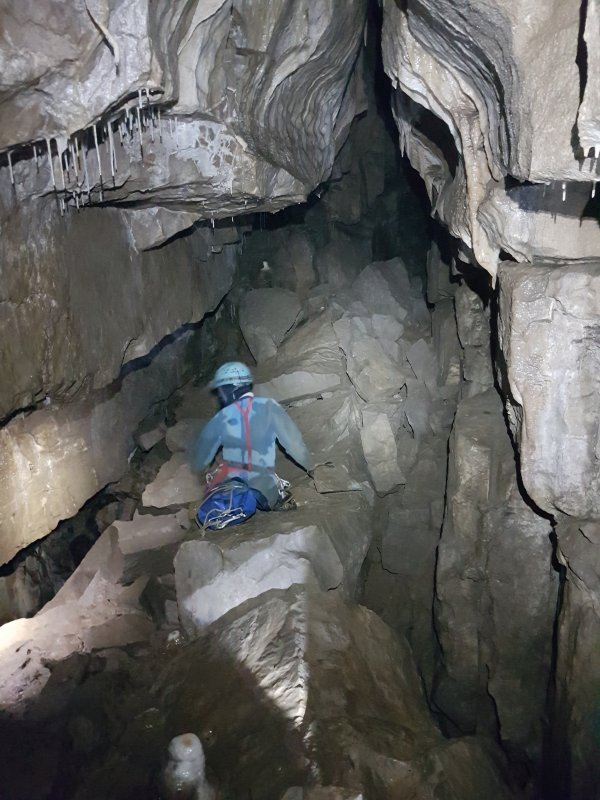 The passage ends at a fossil section.
Modelling by Celestine, lighting by Tarquin, Helen Stewart and Celestine
The passage ends at a fossil section.
Modelling by Celestine, lighting by Tarquin, Helen Stewart and Celestine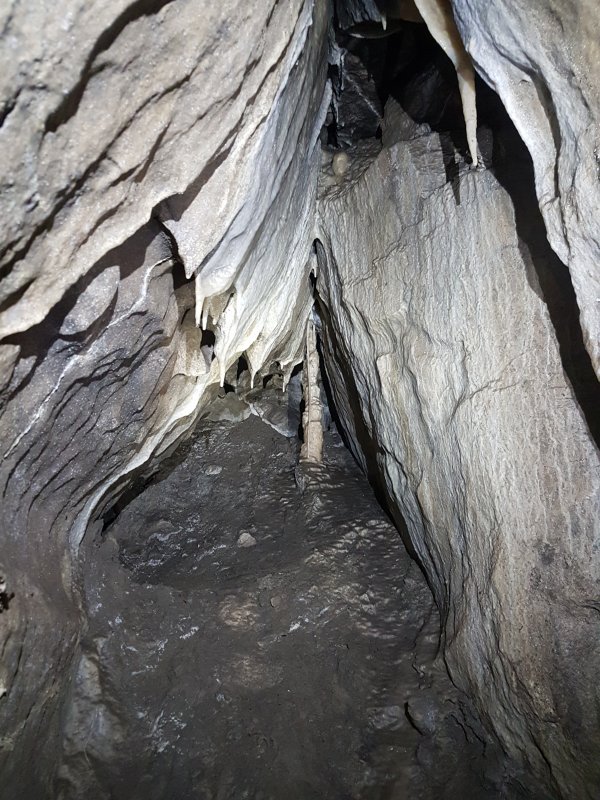 Stal column at the end of the fossil section.
Lighting by Tarquin and Celestine
Stal column at the end of the fossil section.
Lighting by Tarquin and Celestine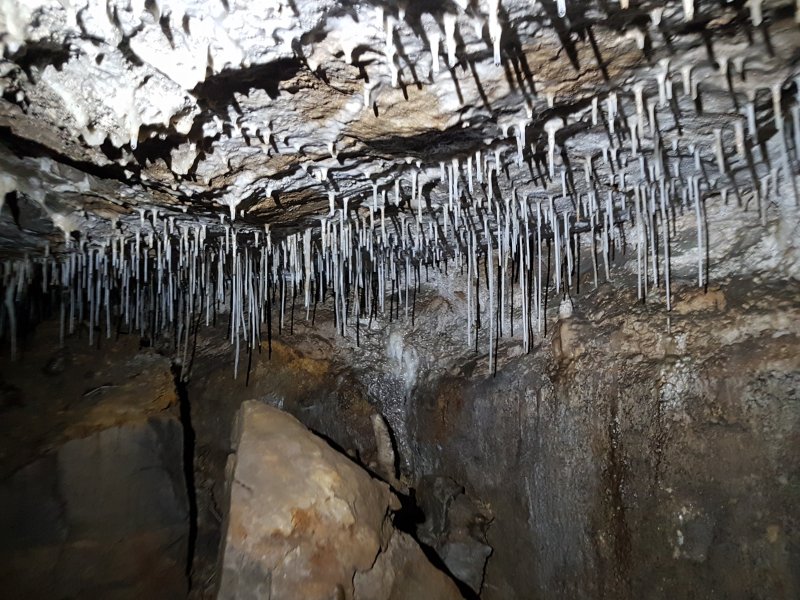 An undercut on the side of the fossil section contains some more straws.
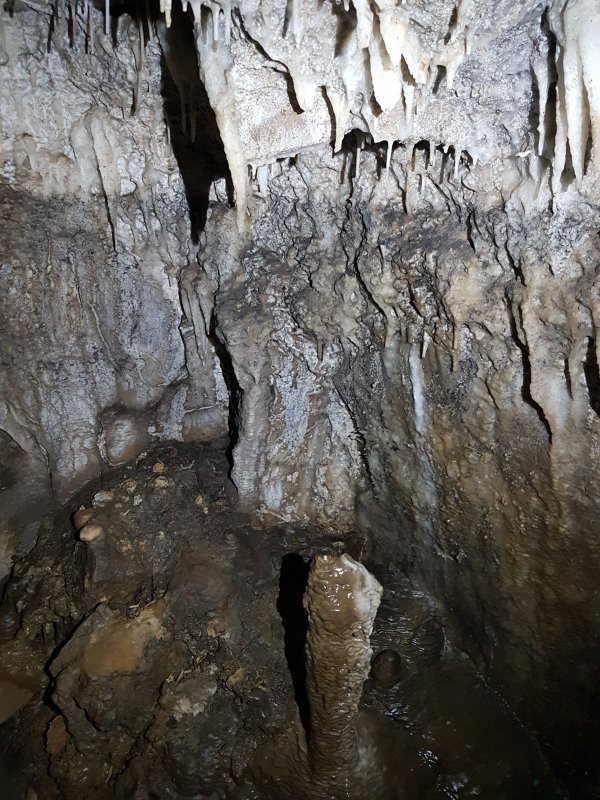 Old tide mark on the stal.
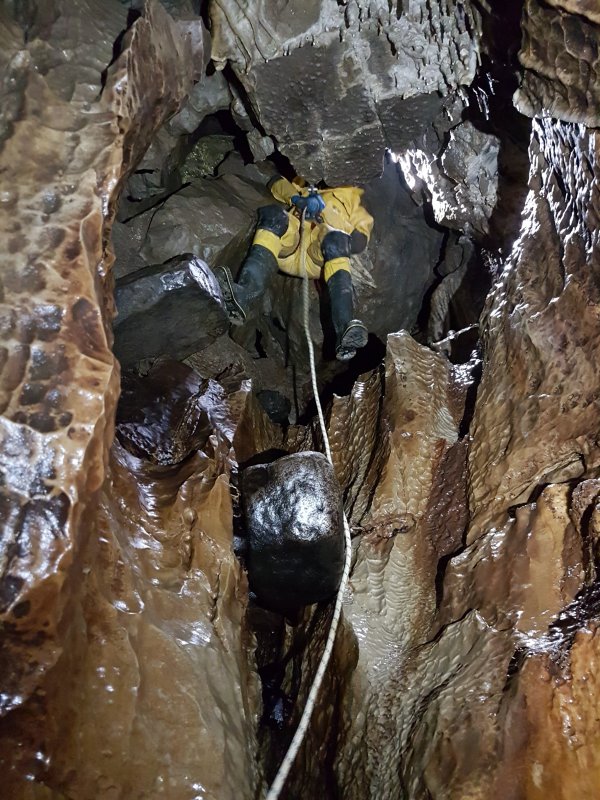 A hole down through the boulders with a beautiful rope rub (yay!) gives access back to the stream below the fossil level. The drop could be climbed if needed, but ropes are needed below here anyway, so it makes sense to use a rope.
Modelling by Malcolm, lighting by Tarquin and Malcolm
A hole down through the boulders with a beautiful rope rub (yay!) gives access back to the stream below the fossil level. The drop could be climbed if needed, but ropes are needed below here anyway, so it makes sense to use a rope.
Modelling by Malcolm, lighting by Tarquin and Malcolm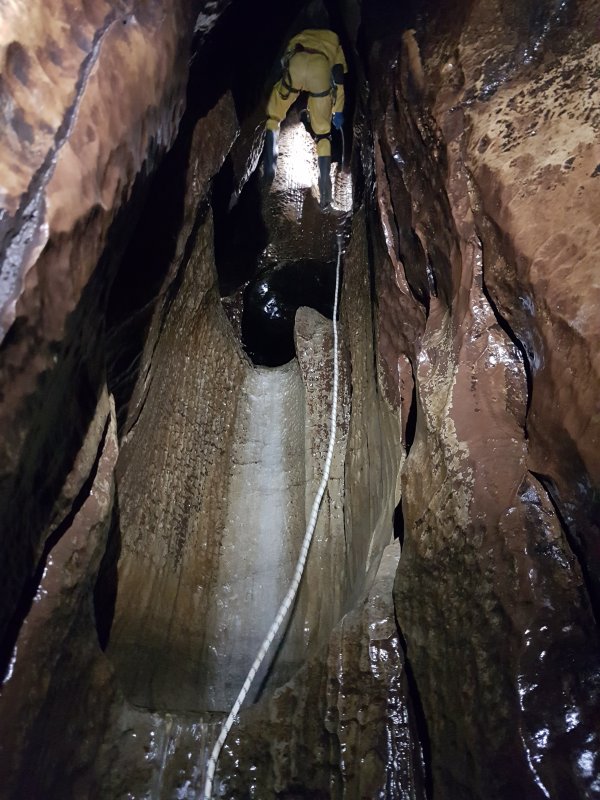 Immediately below is Grange Rigg's Fifth Pitch, which again feels like it is on the limit of being free climbable, with difficulty.
Modelling by Malcolm, lighting by Tarquin and Malcolm
Immediately below is Grange Rigg's Fifth Pitch, which again feels like it is on the limit of being free climbable, with difficulty.
Modelling by Malcolm, lighting by Tarquin and Malcolm Side pitch with attractive rock colours.
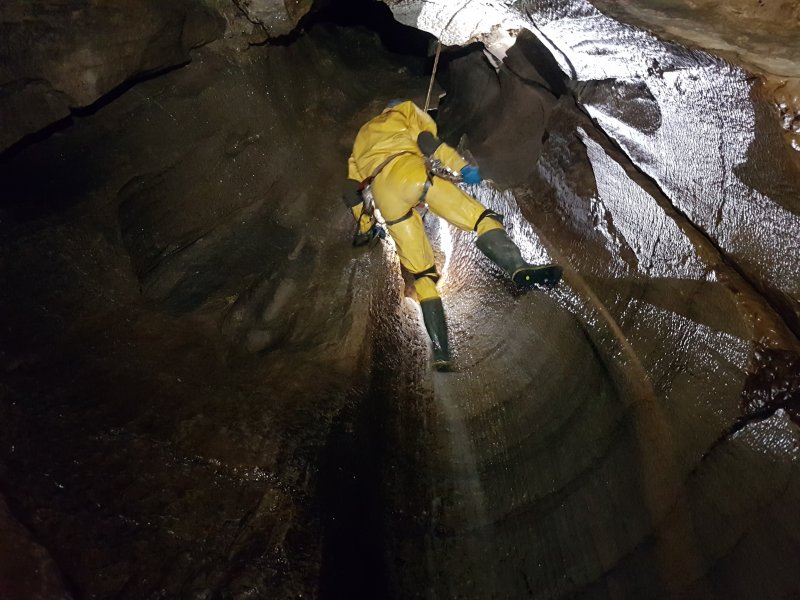 Grange Rigg's Sixth Pitch is just around the next corner, with a dubiously placed flake belay that makes dismounting at the top rather awkward.
Modelling by Malcolm, lighting by Tarquin, Malcolm and Celestine
Grange Rigg's Sixth Pitch is just around the next corner, with a dubiously placed flake belay that makes dismounting at the top rather awkward.
Modelling by Malcolm, lighting by Tarquin, Malcolm and Celestine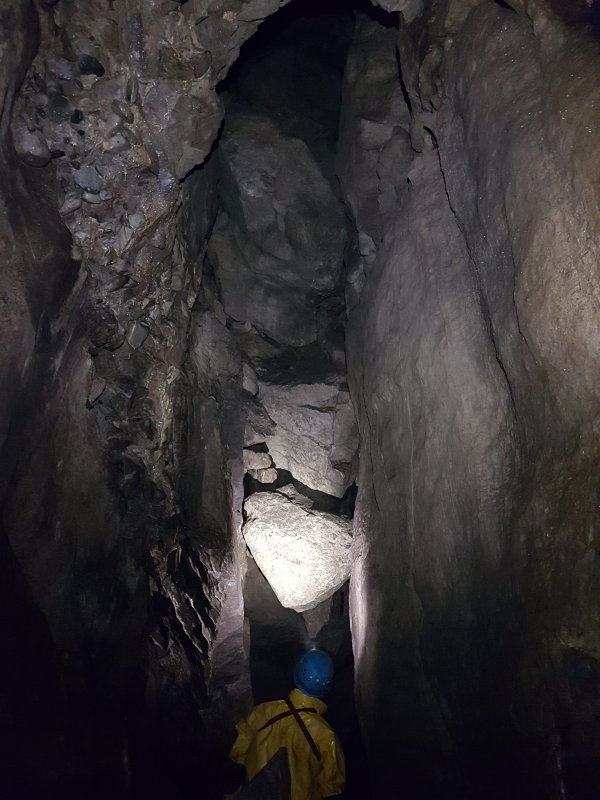 The large passage below ends abruptly at a large, ascending choke, with boulders referred to as the Grand Piano. I searched for the way down through the choke, but it seemed perilously tight, and not particularly stable. On returning to the surface, we were told that it had recently collapsed, blocking access to the flood-prone Drainpipe, final sump, and impressively tall Pinnacle Hall. It is a shame, as Pinnacle Hall does sound impressive. Routes over the choke did not provide any other way on.
Modelling by Malcolm, lighting by Tarquin and Malcolm
The large passage below ends abruptly at a large, ascending choke, with boulders referred to as the Grand Piano. I searched for the way down through the choke, but it seemed perilously tight, and not particularly stable. On returning to the surface, we were told that it had recently collapsed, blocking access to the flood-prone Drainpipe, final sump, and impressively tall Pinnacle Hall. It is a shame, as Pinnacle Hall does sound impressive. Routes over the choke did not provide any other way on.
Modelling by Malcolm, lighting by Tarquin and Malcolm I derigged the cave, and we returned to the surface, with Celestine doing a sterling job of carting tackle bags through the awkward passages. Derigging the first pitch was a fun game of trying not to knock stones on each other, but we all returned to surface without incident.
Modelling by Celestine and Malcolm, lighting by Tarquin, Celestine and Malcolm
I derigged the cave, and we returned to the surface, with Celestine doing a sterling job of carting tackle bags through the awkward passages. Derigging the first pitch was a fun game of trying not to knock stones on each other, but we all returned to surface without incident.
Modelling by Celestine and Malcolm, lighting by Tarquin, Celestine and Malcolm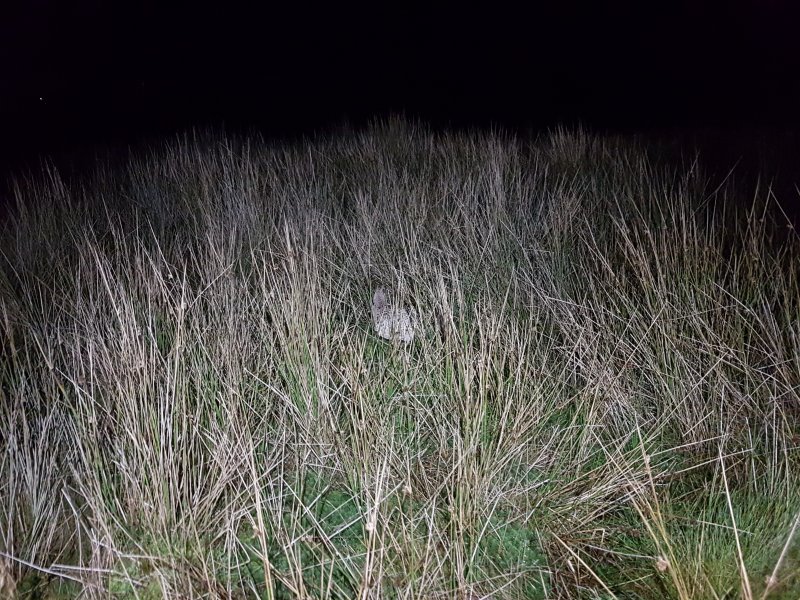 A weird rock among the club rushes.
Modelling by an infamous grouse
A weird rock among the club rushes.
Modelling by an infamous grouse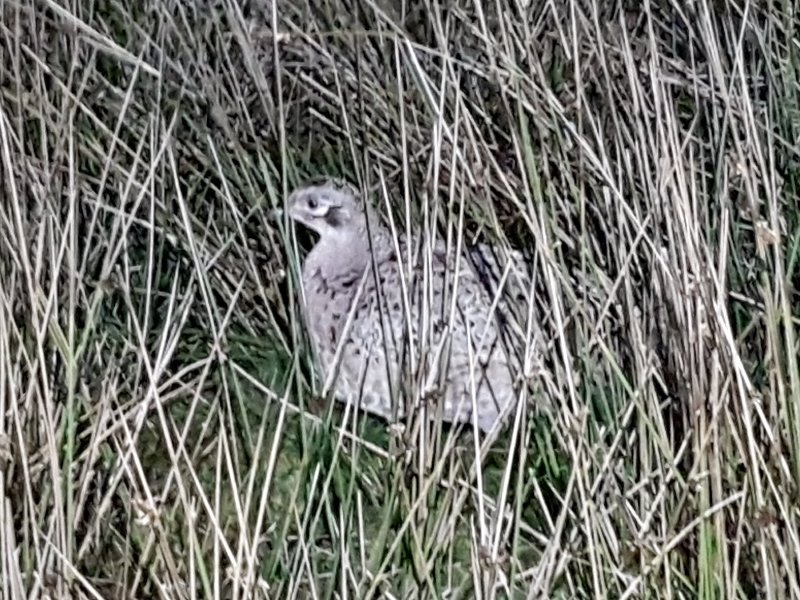 A female grouse.
Modelling by Harriet, that's her name, you know
A female grouse.
Modelling by Harriet, that's her name, you know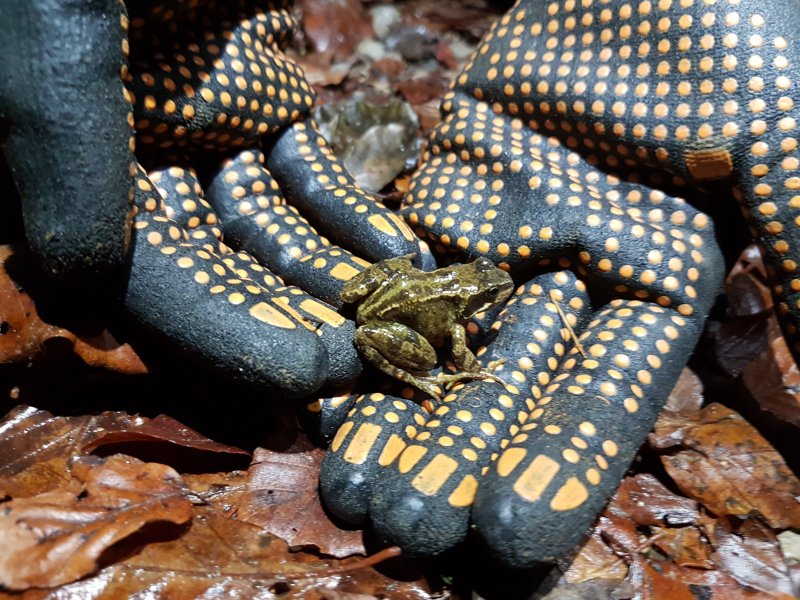 A young common frog in Clapdale.
Modelling by Celestine and Flyswatter
A young common frog in Clapdale.
Modelling by Celestine and Flyswatter Hopping off across the leaves
Modelling by Flyswatter
Hopping off across the leaves
Modelling by Flyswatter Heading towards Bullpot Farm. On the left is the small rise of Hoggs Hill, in the cloud are Crag Hill (682 metres) and Great Coum (687 metres), and on the right is Gragareth. Bullpot Farm sits at the head of a small valley on the left, while the larger valley between the orange and maroon patches is Ease Gill, the divide between Cumbria and Lancashire, and home to all of the Easegill Caverns entrances. Between them is a small dry valley containing Lancaster Hole. The orange patch between Ease Gill and Bullpot Farm is known as Casterton Fell (the word Fell is applied to slopes and ridges of a mountain, rather than the mountain itself), while the purple patch to the right of Ease Gill is known as Leck Fell, home to Pippikin Pot, Lost John's and Notts Pot, while its right edge is renamed to Ireby Fell, home to Ireby Fell Cavern, Marble Steps Pot, Large Pot and Rift Pot, with the border between Lancashire and North Yorkshire being between Ireby Fell Cavern and Marble Steps Pot. With the exception of Marble Steps Pot, all of those are connected to make the Three Counties System. Hydrologically, they are known to connect to the Kingsdale Master Cave in the next valley, but the connection has not yet been made.
 Bullpot Farm, home to the Red Rose Cave and Pothole Club. On the left are Castle Knott (538 metres), Calf Top (610 metres) and Barkin Top (just under 600 metres). In the middle and right are Crag Hill and Great Coum.
 Bull Pot, a separate cave not yet connected to the main system. Known for being an SRT training cave, but decorated with a lot of surface mud for its whole length.
Modelling by Malcolm and Helen Stewart
Bull Pot, a separate cave not yet connected to the main system. Known for being an SRT training cave, but decorated with a lot of surface mud for its whole length.
Modelling by Malcolm and Helen Stewart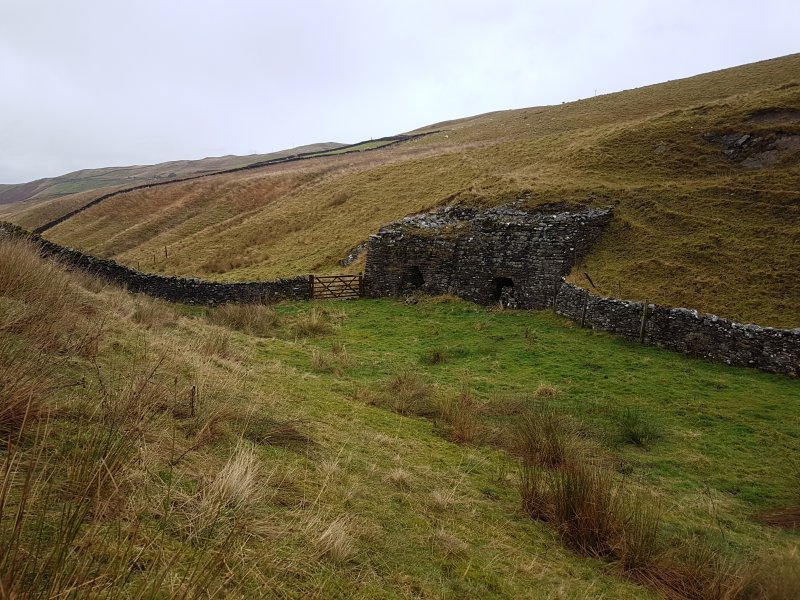 Limekilns in the dry valley below Bull Pot.
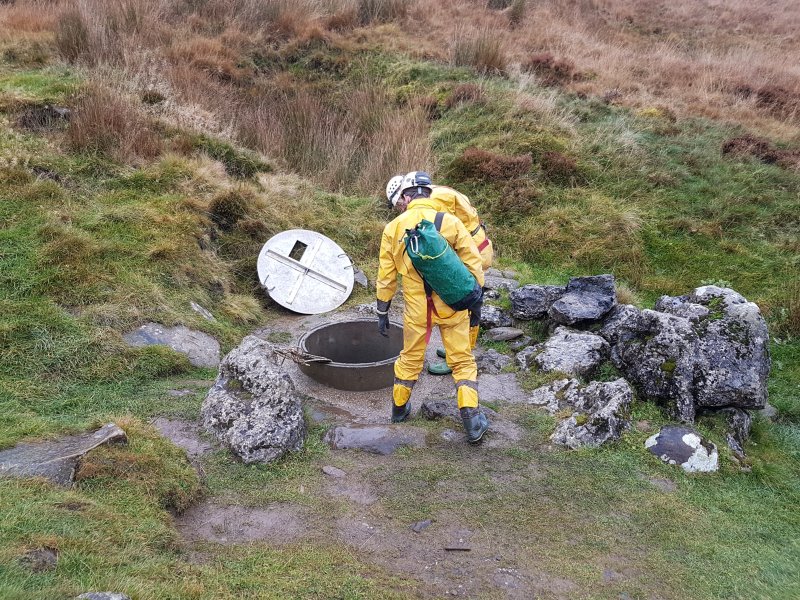 Entrance to Lancaster Hole, the first cave found in the Easegill area, with the subsequent connections to various Ease Gill sinks rapidly making it one of the longest (and currently the longest) caves in the UK.
Modelling by Ali and Pete
Entrance to Lancaster Hole, the first cave found in the Easegill area, with the subsequent connections to various Ease Gill sinks rapidly making it one of the longest (and currently the longest) caves in the UK.
Modelling by Ali and Pete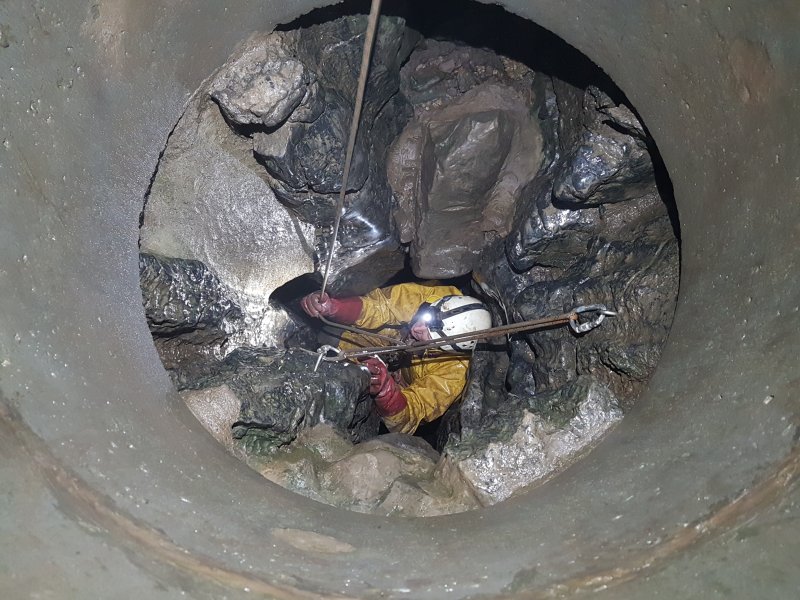 Cramped Y-hang at the top of the 34 metre entrance shaft. This can get quite overloaded with ropes - 4 on our way in - and in such a confined space, it is like swimming in a plate of spaghetti. It is much more easy with just a single rope like this.
Modelling by Pete, lighting by Tarquin and Pete
Cramped Y-hang at the top of the 34 metre entrance shaft. This can get quite overloaded with ropes - 4 on our way in - and in such a confined space, it is like swimming in a plate of spaghetti. It is much more easy with just a single rope like this.
Modelling by Pete, lighting by Tarquin and Pete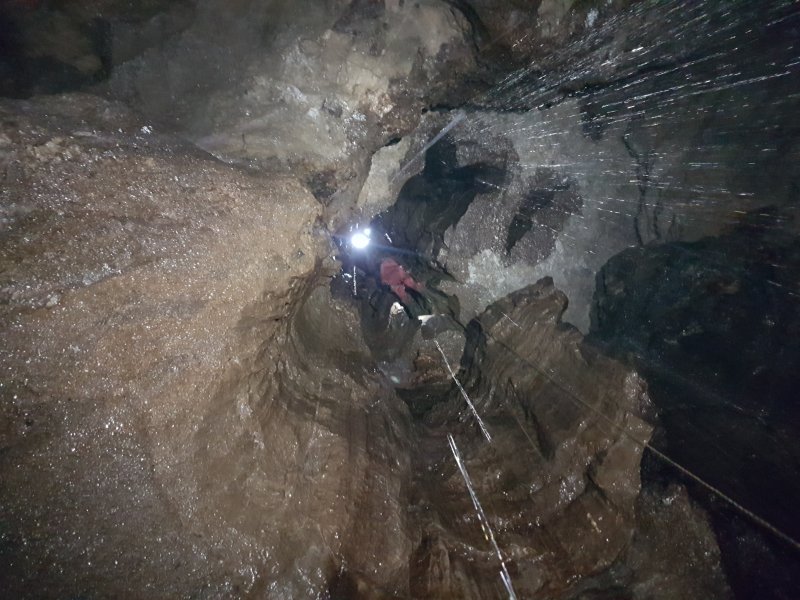 Lancaster Hole's 34 metre shaft.
Modelling by Jules, lighting by Tarquin, Pete, Jules and Sol
Lancaster Hole's 34 metre shaft.
Modelling by Jules, lighting by Tarquin, Pete, Jules and Sol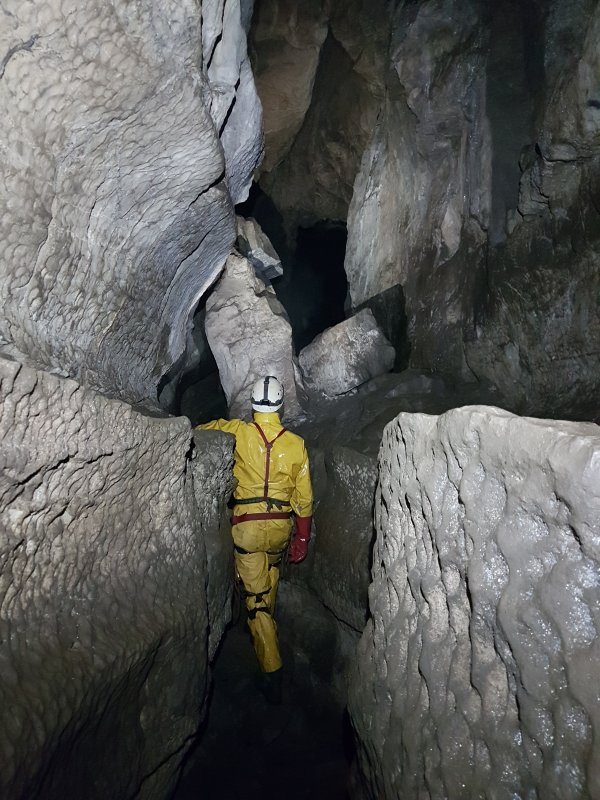 The main way on into the system.
Modelling by Pete, lighting by Tarquin and Pete
The main way on into the system.
Modelling by Pete, lighting by Tarquin and Pete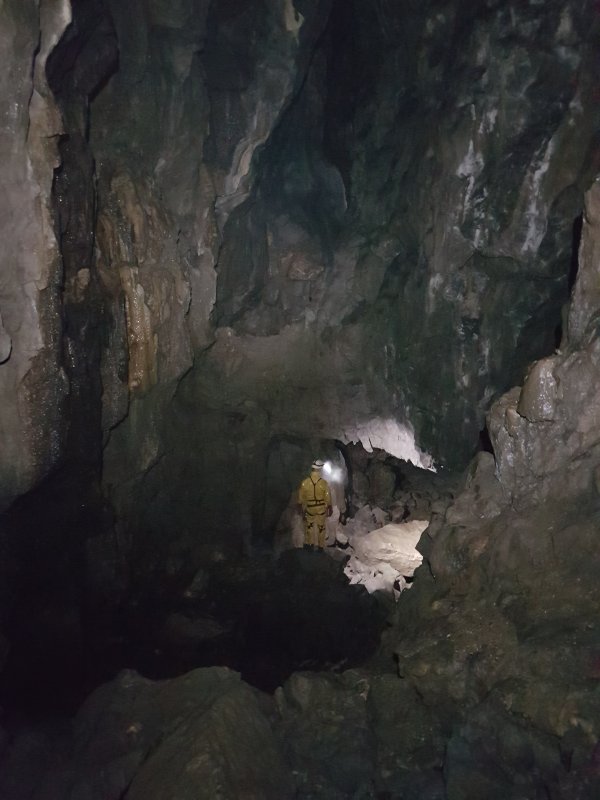 Bridge Hall, with the bridge ahead.
Modelling by Pete, lighting by Tarquin and Pete
Bridge Hall, with the bridge ahead.
Modelling by Pete, lighting by Tarquin and Pete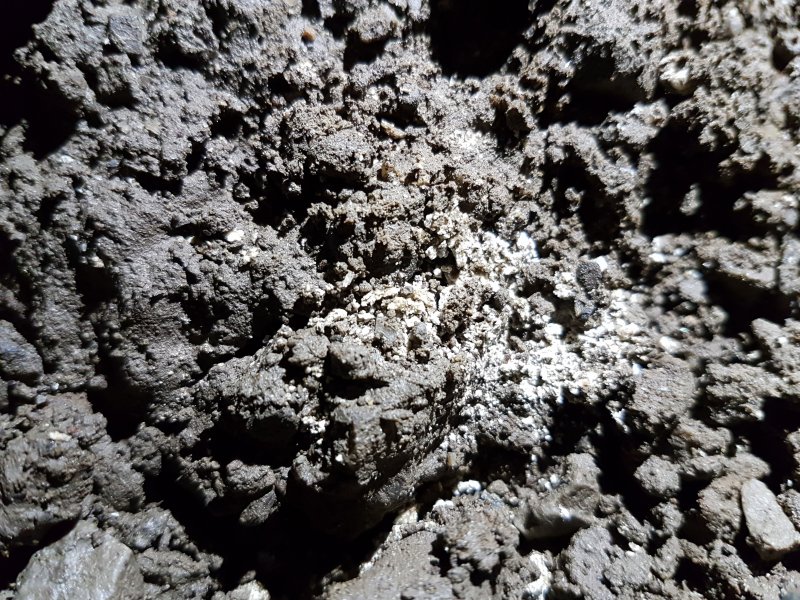 One of the main reasons for wanting to visit this cave (apart from trying to refresh my memory of a fantastic system), was to search for cryostal, since none had been found in Yorkshire, and this was the most likely cave to have any. This was my first possible find, beneath a boulder in Bridge Hall above Kath's Way. This could also be decomposing gypsum, or spent carbide, which plagues this system. Vast amounts of time was wasted examining carbide dumps. However, this could possibly be the right stuff.
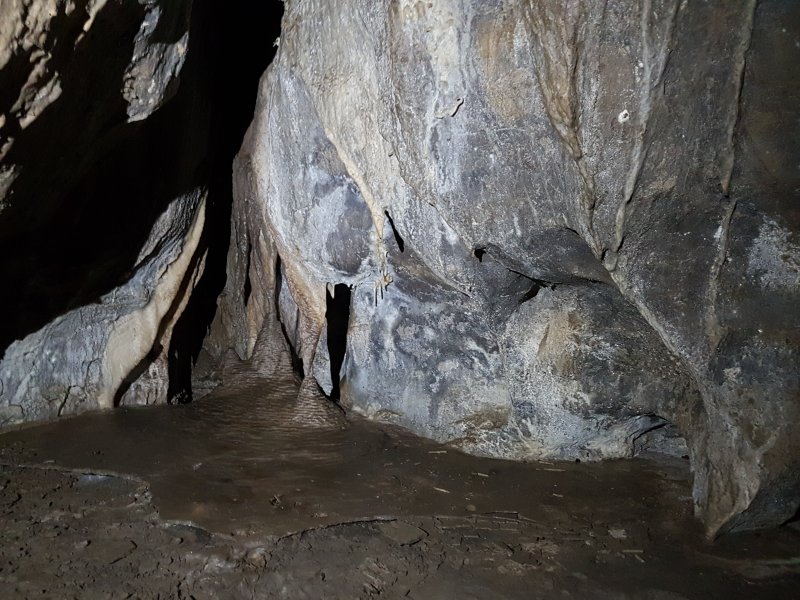 A climb up behind the bridge reaches a smaller passage, with some formations.
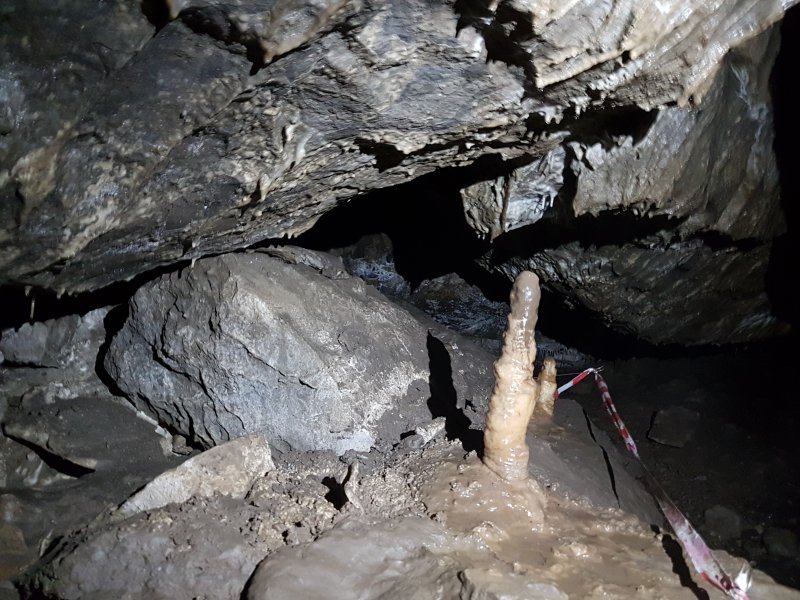 Muddy stalagmite. A bit late for that tape, sadly.
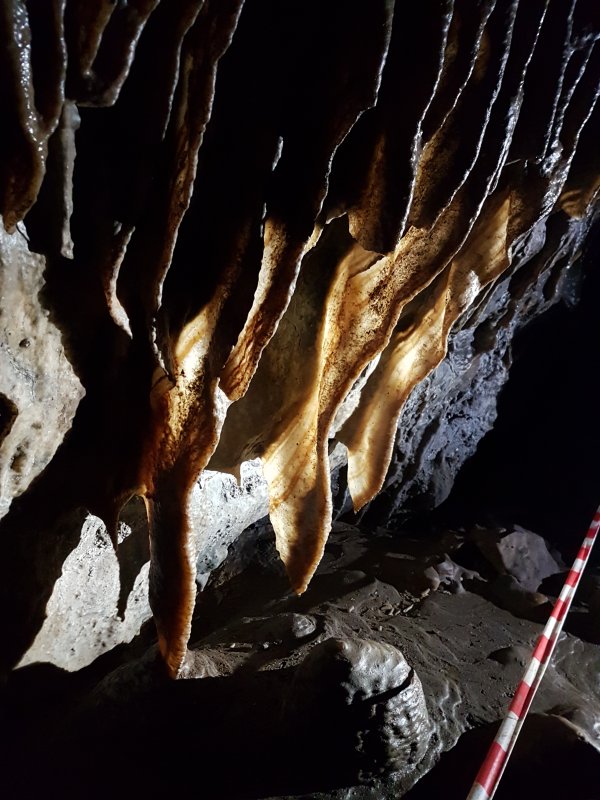 Curtains in a short crawl.
Lighting by Pete
Curtains in a short crawl.
Lighting by Pete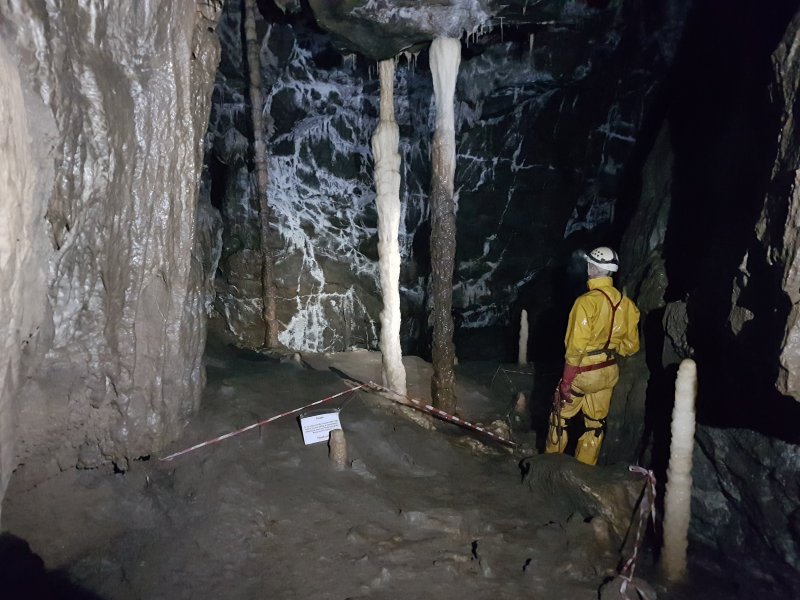 The ceiling lifts to reveal The Colonnades, iconic formations. These even have a sign, explaining the purpose of conservation tapes.
Modelling by Pete, lighting by Tarquin and Pete
The ceiling lifts to reveal The Colonnades, iconic formations. These even have a sign, explaining the purpose of conservation tapes.
Modelling by Pete, lighting by Tarquin and Pete Immediately before them, some deposits in the mud appear to be more possible cryostal. Once again, these could be any number of other deposits. The humid atmosphere in these northern caves means that the fluffy mud has a damp appearance, and any cryostal may be damaged by condensation. But at least the mud shows that ice has had its effects here, and the passage predates at least one ice age.
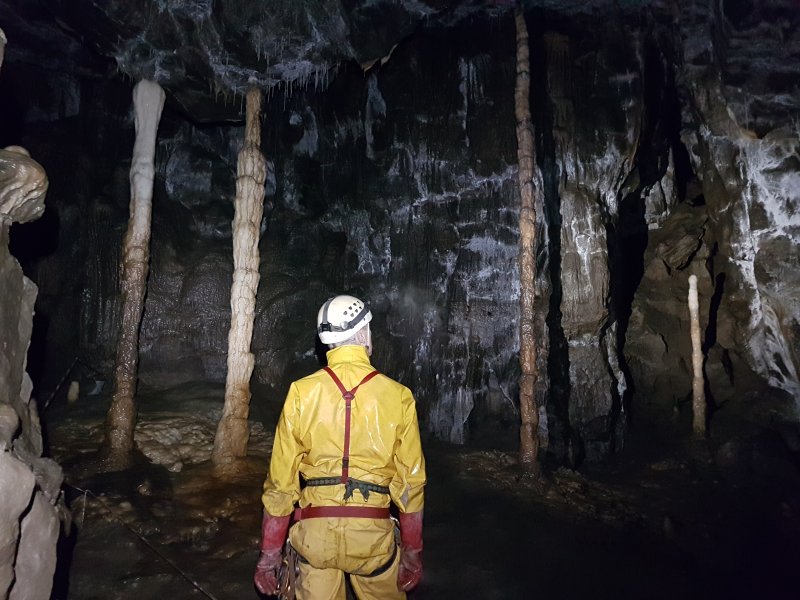 The colonnades are very impressive columns, surprisingly tall and elegantly thin.
Modelling by Pete, lighting by Tarquin and Pete
The colonnades are very impressive columns, surprisingly tall and elegantly thin.
Modelling by Pete, lighting by Tarquin and Pete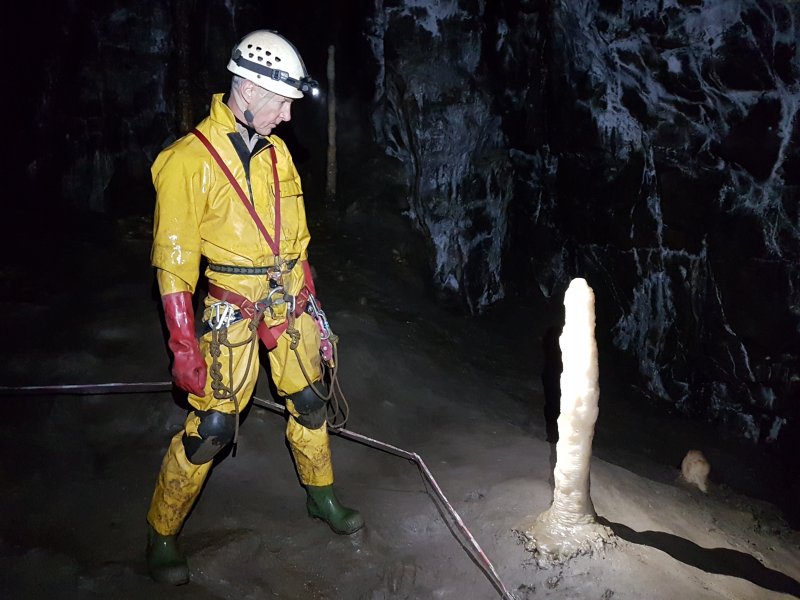 Shorter stalagmites.
Modelling by Pete, lighting by Tarquin and Pete
Shorter stalagmites.
Modelling by Pete, lighting by Tarquin and Pete Still growing, a column and some wannabes.
Lighting by Tarquin and Pete
Still growing, a column and some wannabes.
Lighting by Tarquin and Pete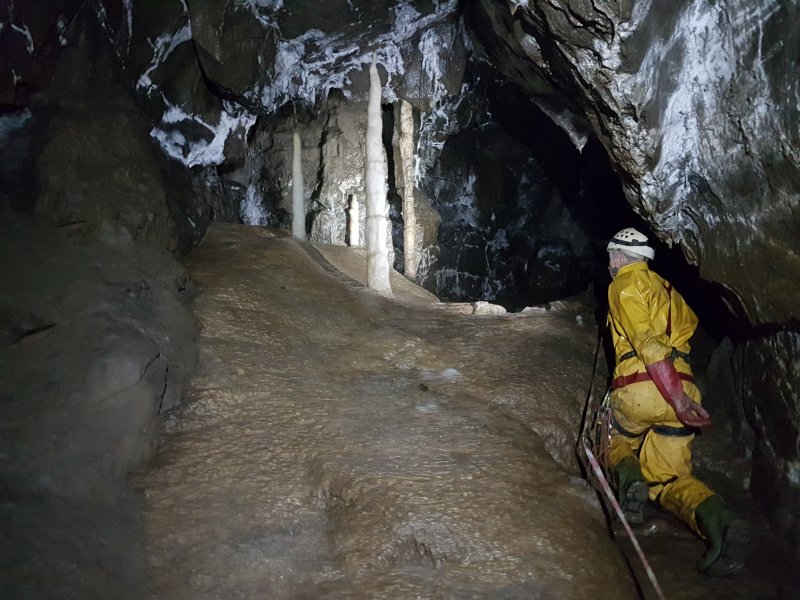 A shorter set of colonnades.
Modelling by Pete, lighting by Tarquin and Pete
A shorter set of colonnades.
Modelling by Pete, lighting by Tarquin and Pete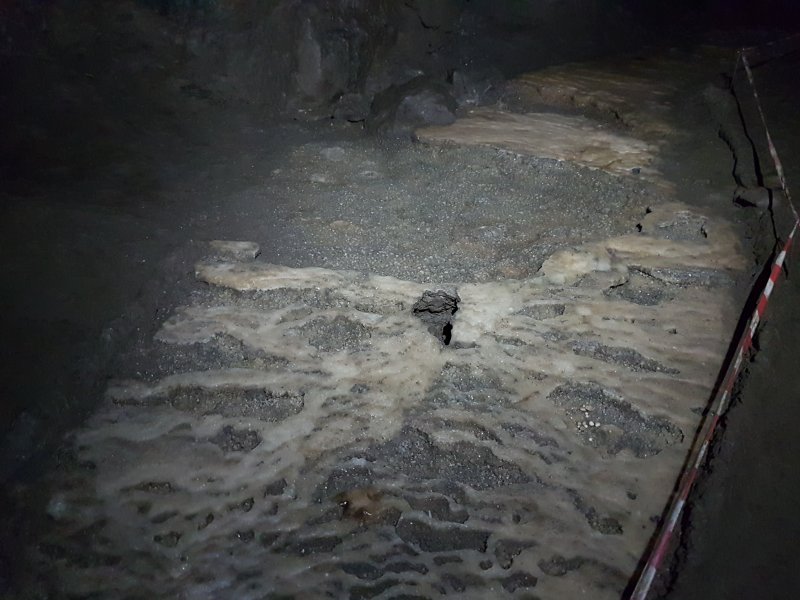 Crystal pools below.
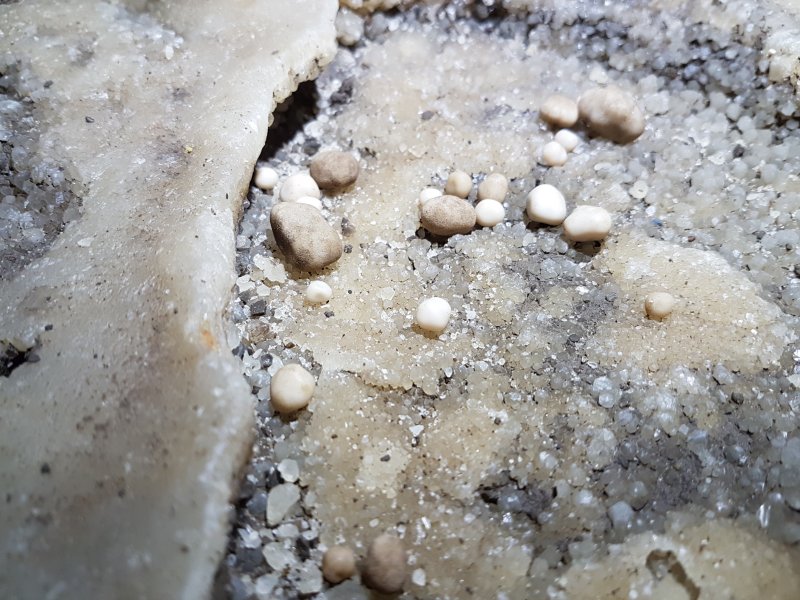 Even cave pearls. For Yorkshire, this is definitely an impressively decorated cave.
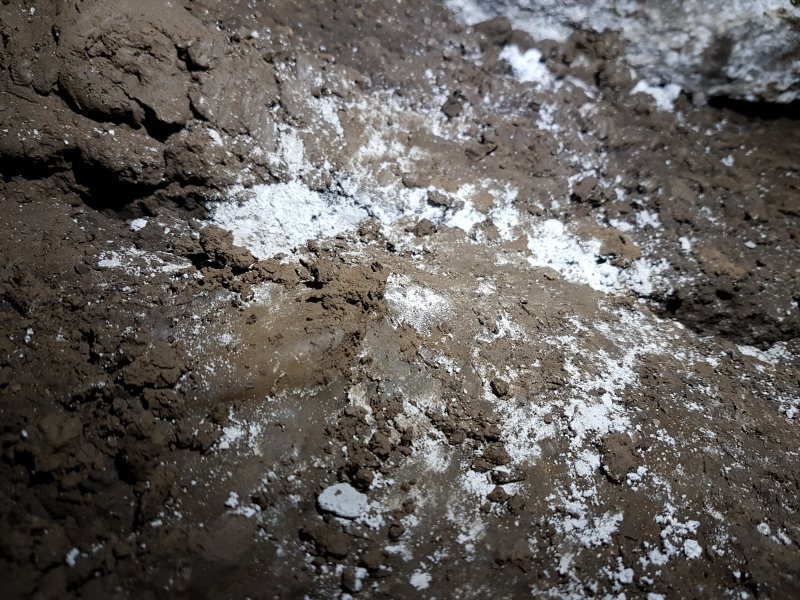 White deposits. This appears to be gypsum, but mashed into the floor by the numerous visitors. This system has seen very heavy traffic, to the point that cryostal deposits would be lucky to survive.
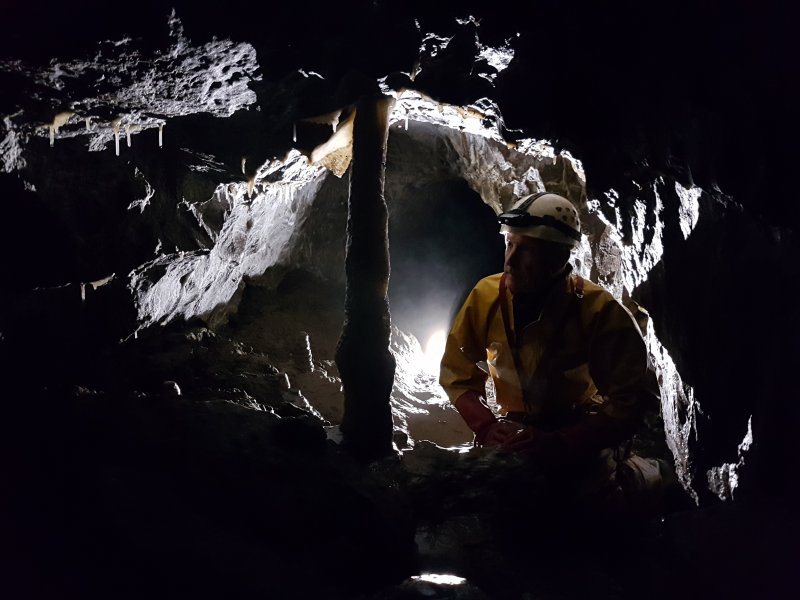 A final column just before the end.
Modelling by Pete
A final column just before the end.
Modelling by Pete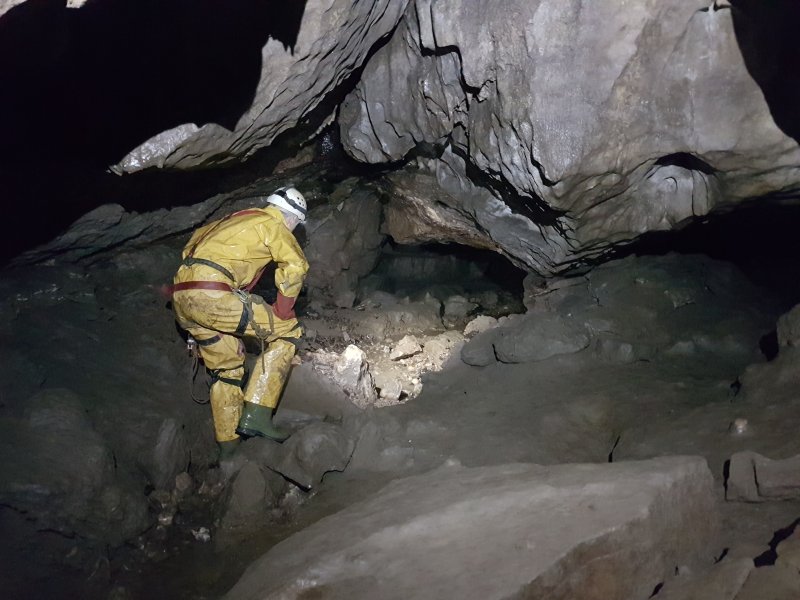 Bill Taylor's Passage, shortly after the junction with Kath's Way.
Modelling by Pete, lighting by Tarquin and Pete
Bill Taylor's Passage, shortly after the junction with Kath's Way.
Modelling by Pete, lighting by Tarquin and Pete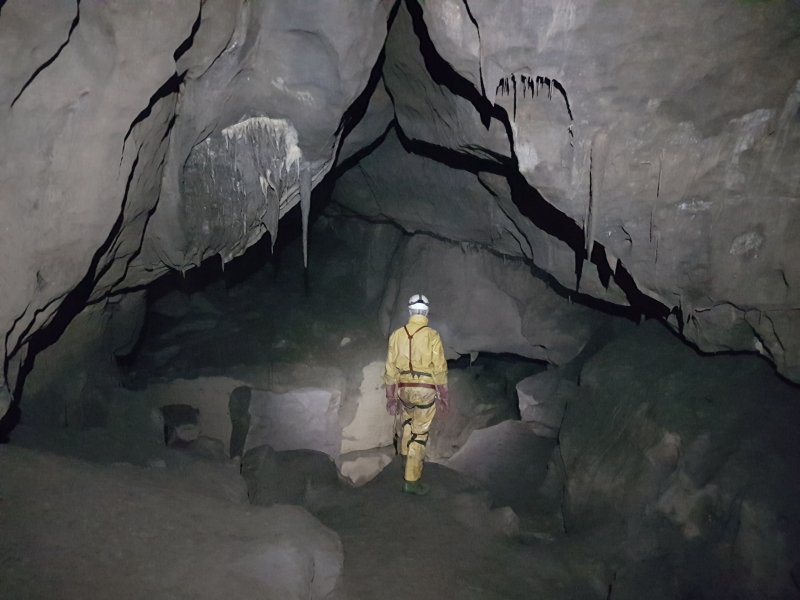 The start of Montague East Passage and the start of The High Level Route's Main Line of large passages, looking down the 80 foot pitch to the Master Cave. Over the top is the start of Montague West Passage.
Modelling by Pete, lighting by Tarquin and Pete
The start of Montague East Passage and the start of The High Level Route's Main Line of large passages, looking down the 80 foot pitch to the Master Cave. Over the top is the start of Montague West Passage.
Modelling by Pete, lighting by Tarquin and Pete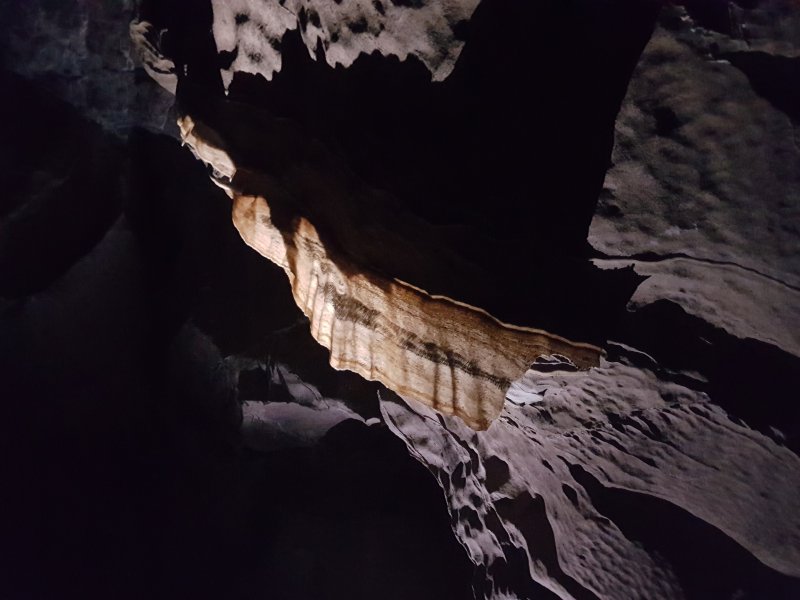 Curtain at the junction.
Lighting by Pete
Curtain at the junction.
Lighting by Pete The vast opening of Fall Pot, where Cow Pot enters from the ceiling, and the passage floor drops down to the Master Cave (main drain). The big boulder at the bottom of the picture is the size of a reasonably large room, with the way on being to stoop beneath it. It took three wide angle photographs to produce this stitched picture, with four lights involved in each part of it. The actual Master Cave river is even further down below the boulders, while our route continues down to the boulders then back up a series of climbs into the continuation of the fossil level. Within the last few years, extreme flooding had affected all of the lower parts of the passage, and much of the route had been coated in damp mud.
Modelling by Ali and Pete, lighting by Tarquin, Helen Langford, Ali and Pete
The vast opening of Fall Pot, where Cow Pot enters from the ceiling, and the passage floor drops down to the Master Cave (main drain). The big boulder at the bottom of the picture is the size of a reasonably large room, with the way on being to stoop beneath it. It took three wide angle photographs to produce this stitched picture, with four lights involved in each part of it. The actual Master Cave river is even further down below the boulders, while our route continues down to the boulders then back up a series of climbs into the continuation of the fossil level. Within the last few years, extreme flooding had affected all of the lower parts of the passage, and much of the route had been coated in damp mud.
Modelling by Ali and Pete, lighting by Tarquin, Helen Langford, Ali and Pete Stal on the climbs down into Fall Pot.
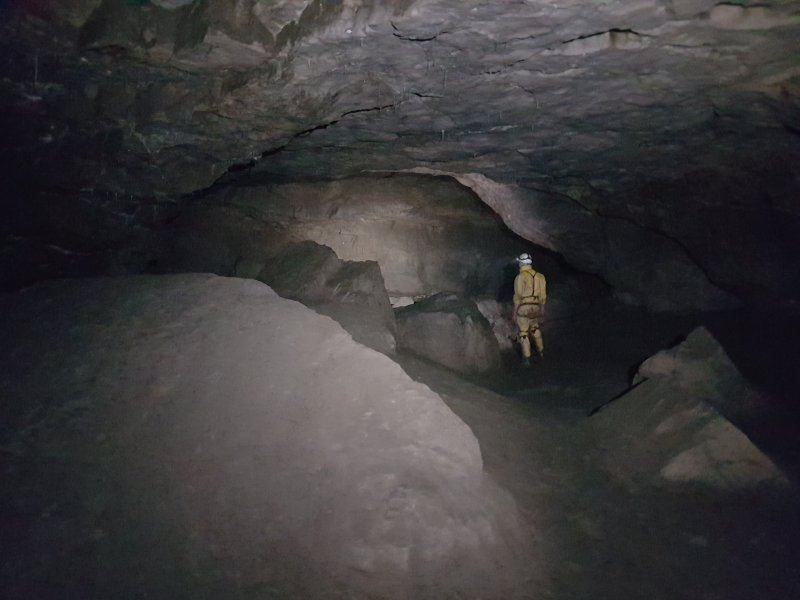 Montague East continues as a big fossil passage, much like Agen Allwedd (and found in the same era). The foot traffic has been very heavy, without being confined to a narrow route, so between the humid atmosphere, the damp mud, and the human influence, we were starting to lose hope of finding any good cryogenic deposits here.
Modelling by Pete, lighting by Tarquin and Pete
Montague East continues as a big fossil passage, much like Agen Allwedd (and found in the same era). The foot traffic has been very heavy, without being confined to a narrow route, so between the humid atmosphere, the damp mud, and the human influence, we were starting to lose hope of finding any good cryogenic deposits here.
Modelling by Pete, lighting by Tarquin and Pete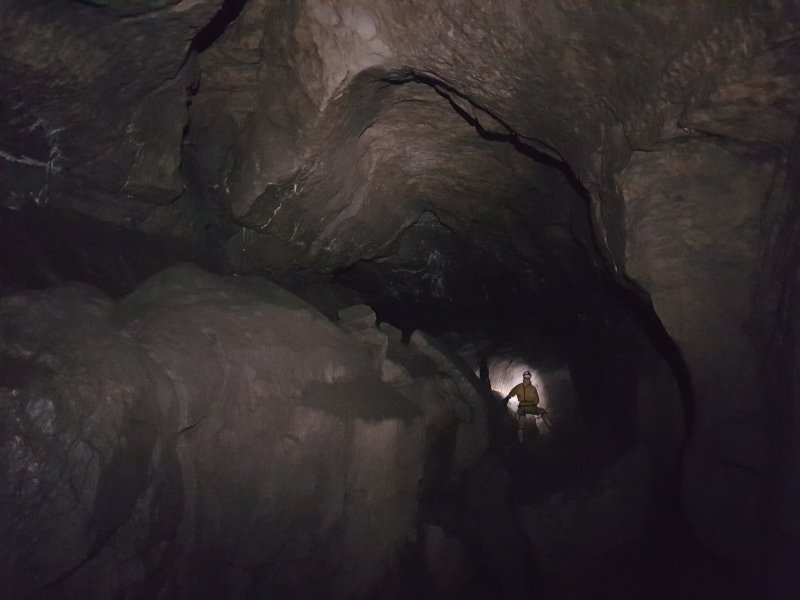 Despite being shallow passages, and definitely predating at least one ice age, the phreatic shape has survived.
Modelling by Pete, lighting by Tarquin and Pete
Despite being shallow passages, and definitely predating at least one ice age, the phreatic shape has survived.
Modelling by Pete, lighting by Tarquin and Pete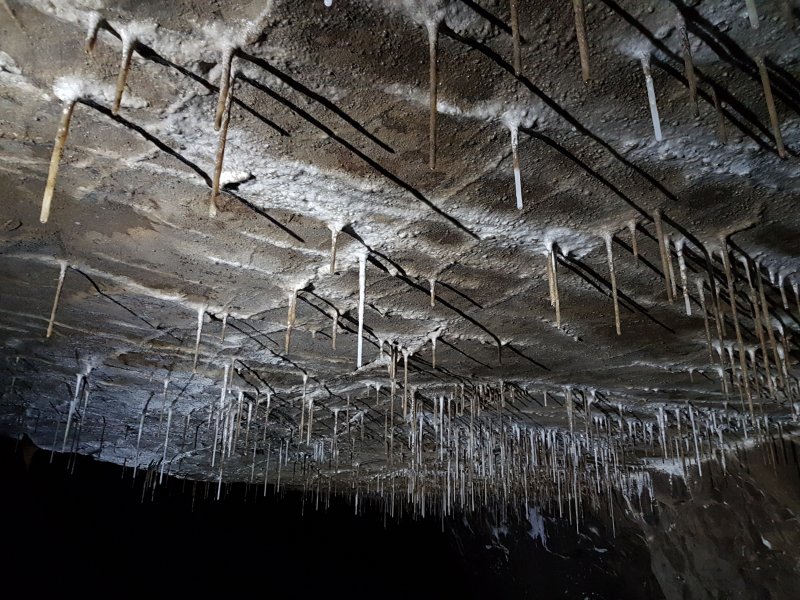 Straws on a fracture grid on the ceiling.
Lighting by Tarquin and Pete
Straws on a fracture grid on the ceiling.
Lighting by Tarquin and Pete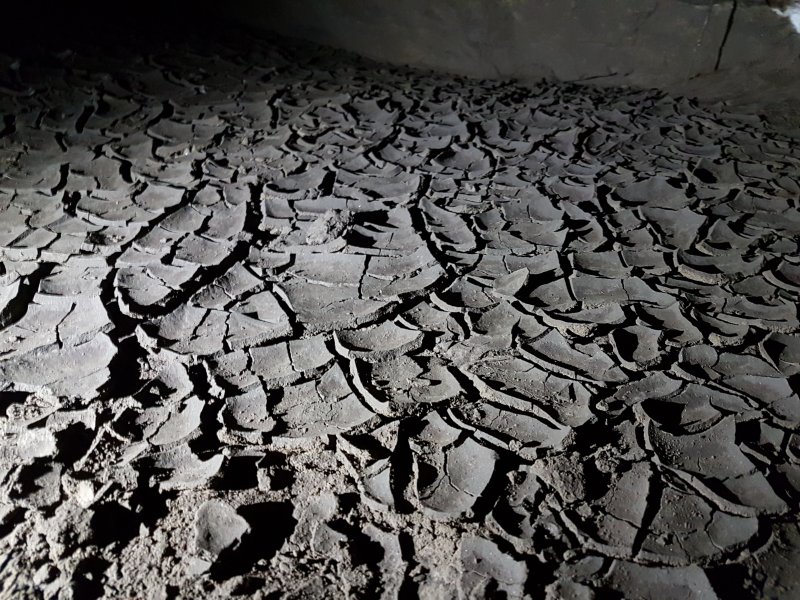 Beautifully cracked mud floor. Sadly this is created by slowly evaporating water, meaning that ice is less likely to have influence here.
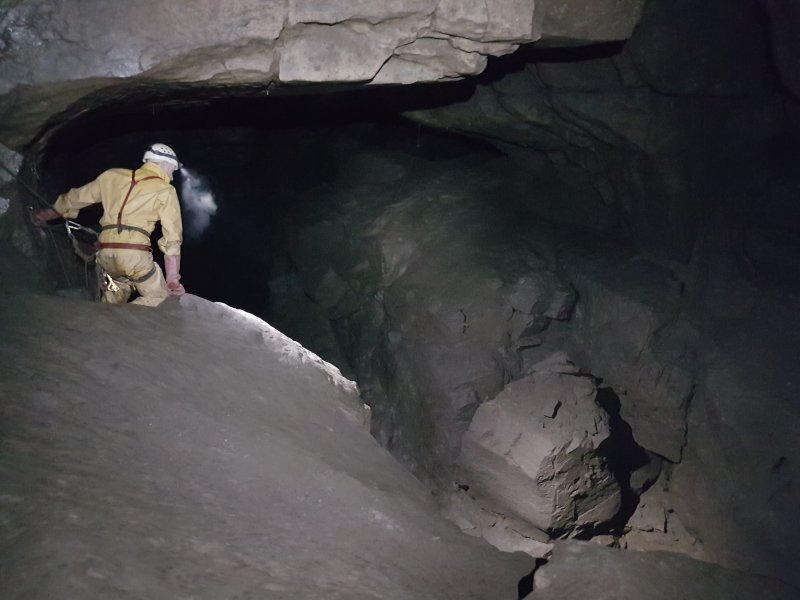 The top of Stake Pot, another vast chasm dropping into the Master Cave. The unofficial ropes are most welcome, as the wet mud has made the climbs treacherous.
Modelling by Pete, lighting by Tarquin and Pete
The top of Stake Pot, another vast chasm dropping into the Master Cave. The unofficial ropes are most welcome, as the wet mud has made the climbs treacherous.
Modelling by Pete, lighting by Tarquin and Pete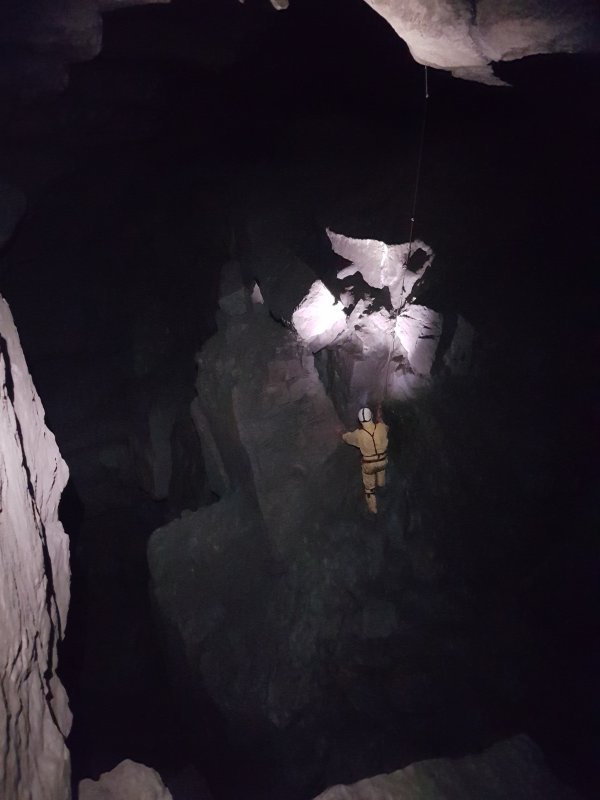 Climbing back up into the upper level. The chasm is large enough to dwarf the Main Line's passages.
Modelling by Pete, lighting by Tarquin and Pete
Climbing back up into the upper level. The chasm is large enough to dwarf the Main Line's passages.
Modelling by Pete, lighting by Tarquin and Pete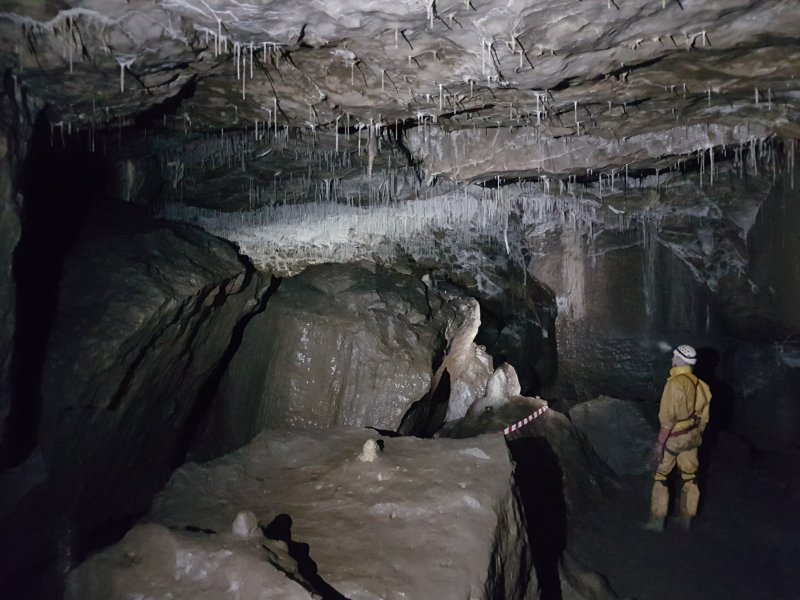 The straws begin immediately after Stake Pot.
Modelling by Pete, lighting by Tarquin and Pete
The straws begin immediately after Stake Pot.
Modelling by Pete, lighting by Tarquin and Pete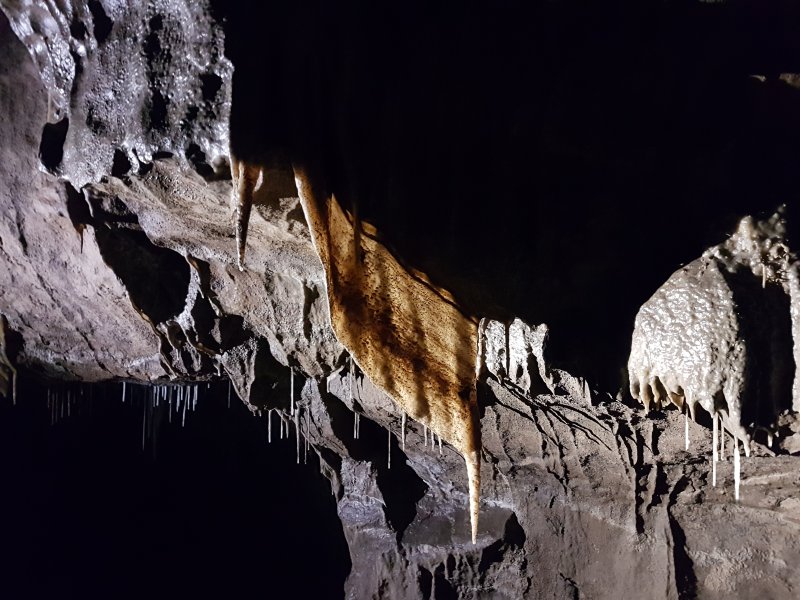 Curtain above Stake Pot.
Modelling by Pete, lighting by Tarquin and Pete
Curtain above Stake Pot.
Modelling by Pete, lighting by Tarquin and Pete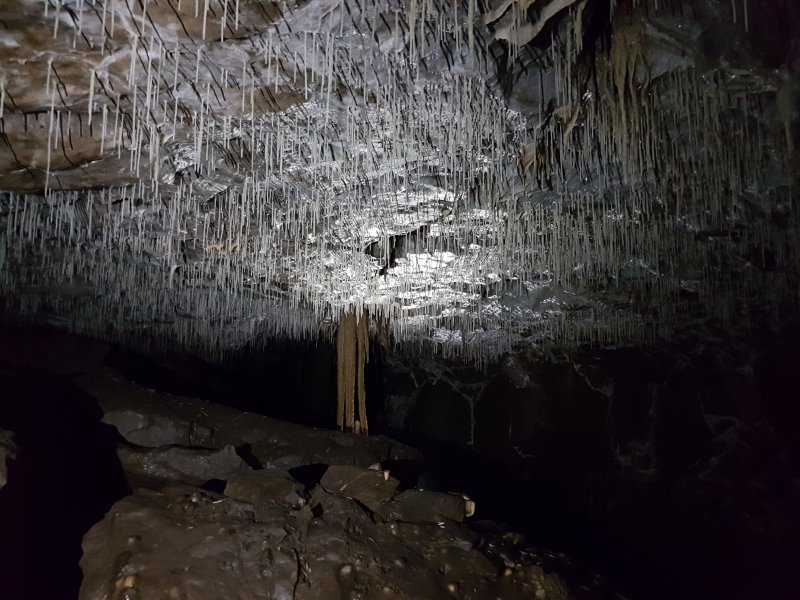 Straws and the triple column formation.
Lighting by Tarquin and Pete
Straws and the triple column formation.
Lighting by Tarquin and Pete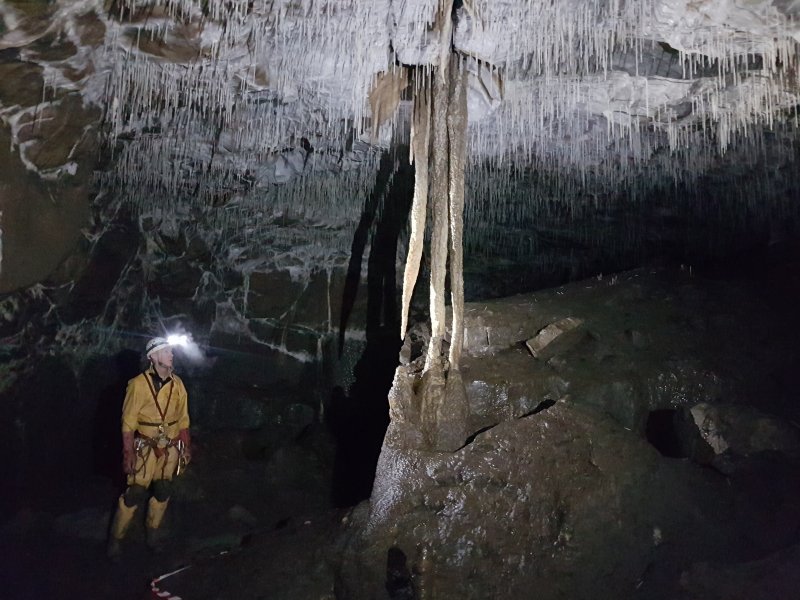 The triple column formation.
Modelling by Pete, lighting by Tarquin and Pete
The triple column formation.
Modelling by Pete, lighting by Tarquin and Pete First formation of Bob's Boss.
Modelling by Pete, lighting by Tarquin and Pete
First formation of Bob's Boss.
Modelling by Pete, lighting by Tarquin and Pete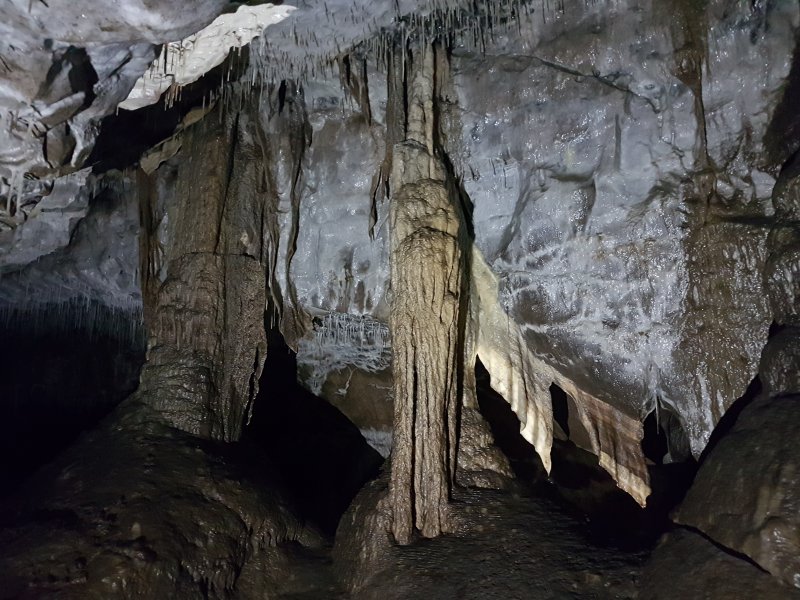 The other two parts of Bob's Boss.
Lighting by Tarquin and Pete
The other two parts of Bob's Boss.
Lighting by Tarquin and Pete Far end of Bob's Boss.
Lighting by Tarquin and Pete
Far end of Bob's Boss.
Lighting by Tarquin and Pete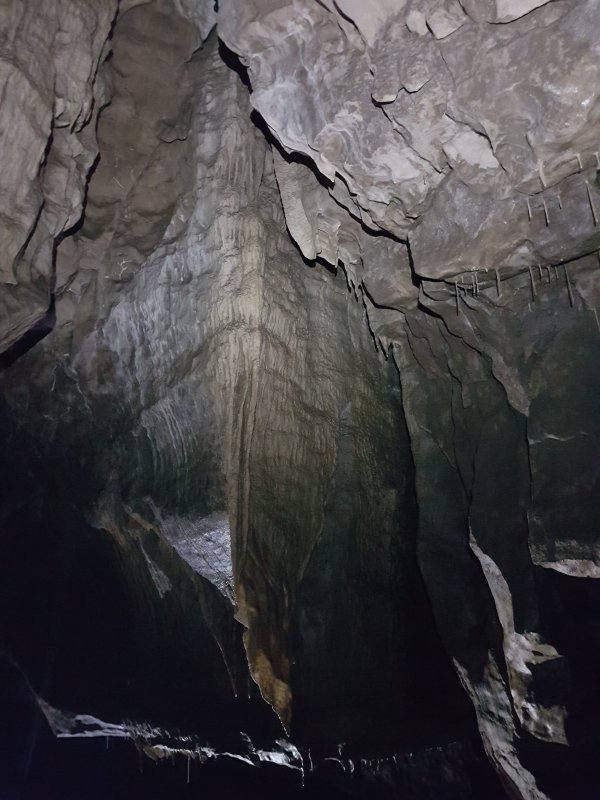 Flowstone and curtain.
Lighting by Tarquin and Pete
Flowstone and curtain.
Lighting by Tarquin and Pete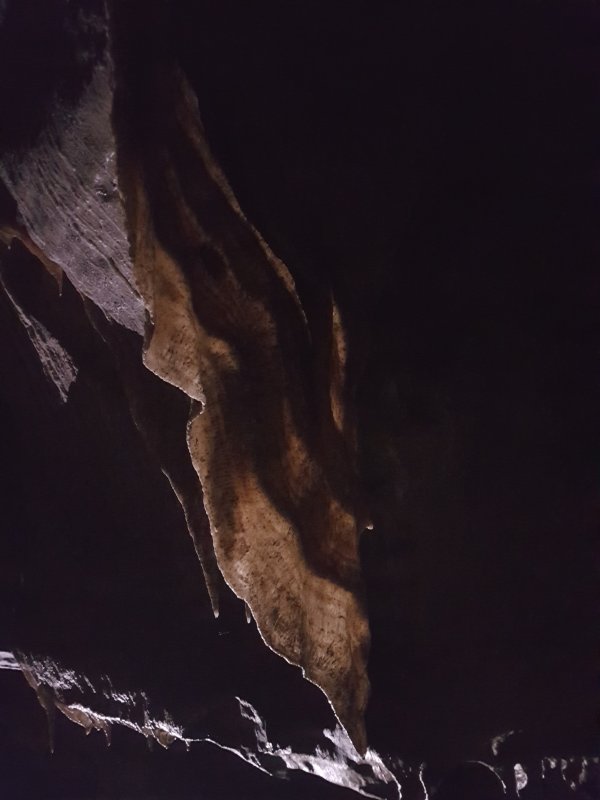 Curtain.
Lighting by Pete
Curtain.
Lighting by Pete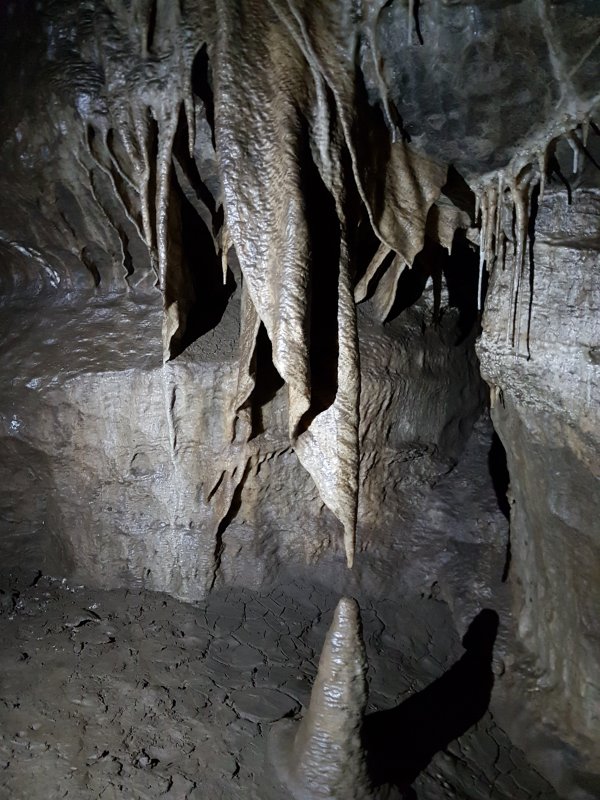 Curtain formation.
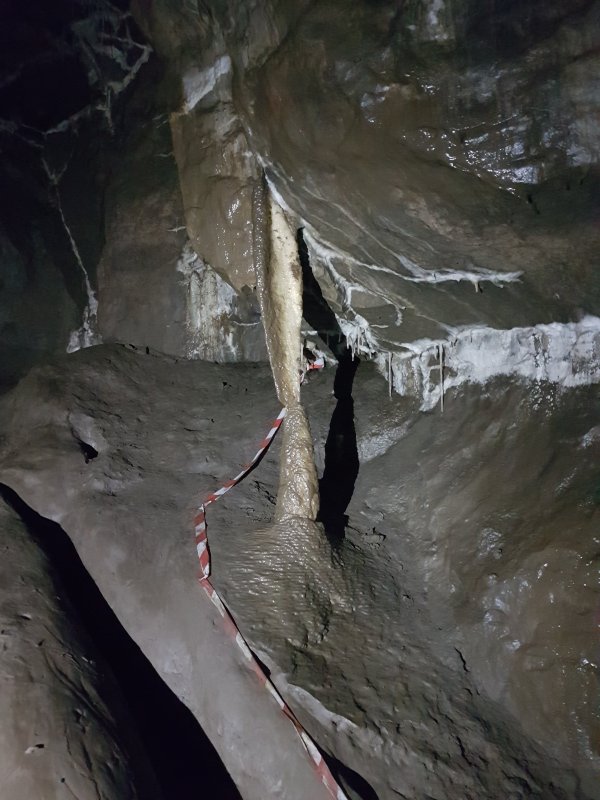 Curtain column.
 Fantastically striped curtain and stalactites. This is likely to be manganese staining.
Modelling by Pete, lighting by Tarquin and Pete
Fantastically striped curtain and stalactites. This is likely to be manganese staining.
Modelling by Pete, lighting by Tarquin and Pete Richly coloured formation on the other side. This is the Painter's Palette, likely to be a mix of calcite, manganese, iron oxide (ochre) and mud. These colours are not enhanced, and are even better in person.
Lighting by Tarquin and Pete
Richly coloured formation on the other side. This is the Painter's Palette, likely to be a mix of calcite, manganese, iron oxide (ochre) and mud. These colours are not enhanced, and are even better in person.
Lighting by Tarquin and Pete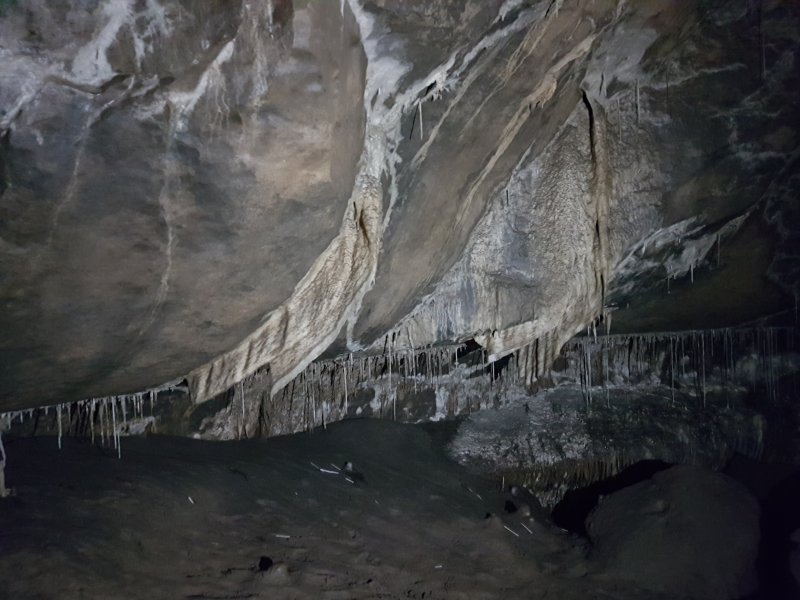 Smaller curtains.
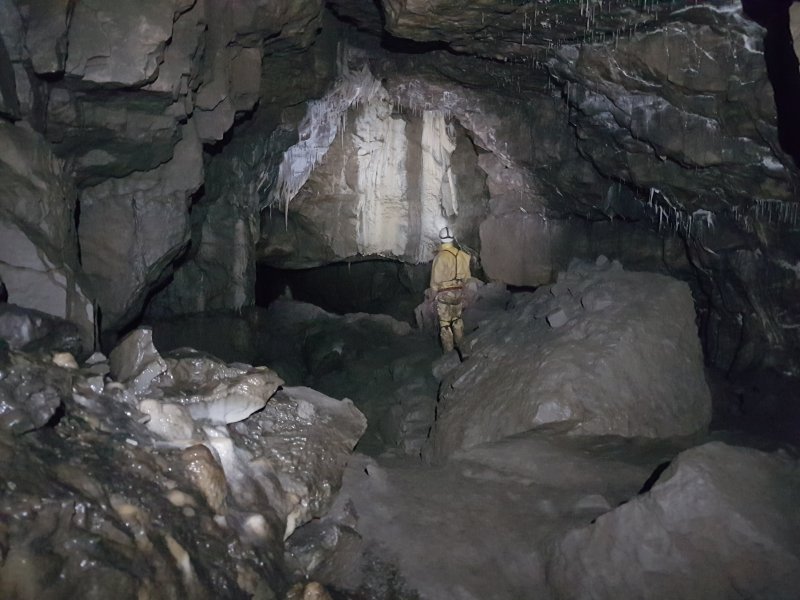 Large passage before the twin pits.
Modelling by Pete, lighting by Tarquin and Pete
Large passage before the twin pits.
Modelling by Pete, lighting by Tarquin and Pete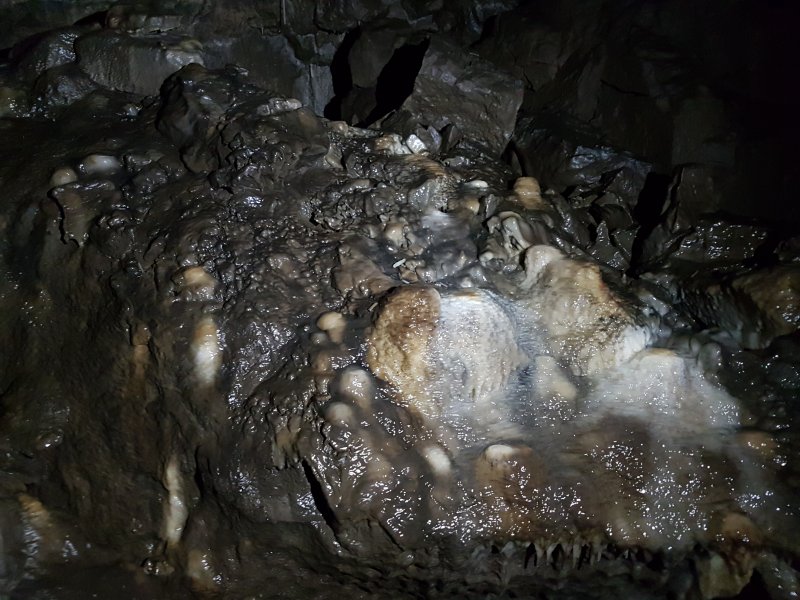 Stained flowstone.
 Calcite flows on the walls.
Lighting by Tarquin and Pete
Calcite flows on the walls.
Lighting by Tarquin and Pete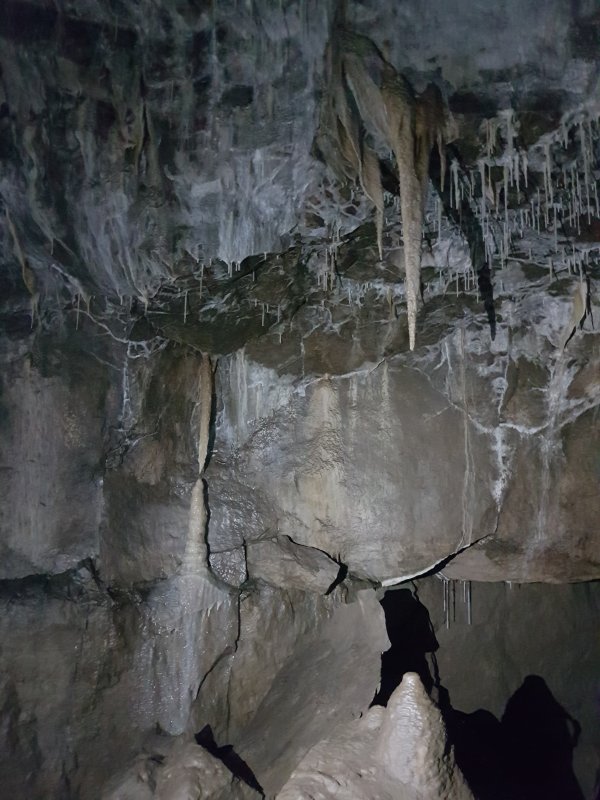 Formations.
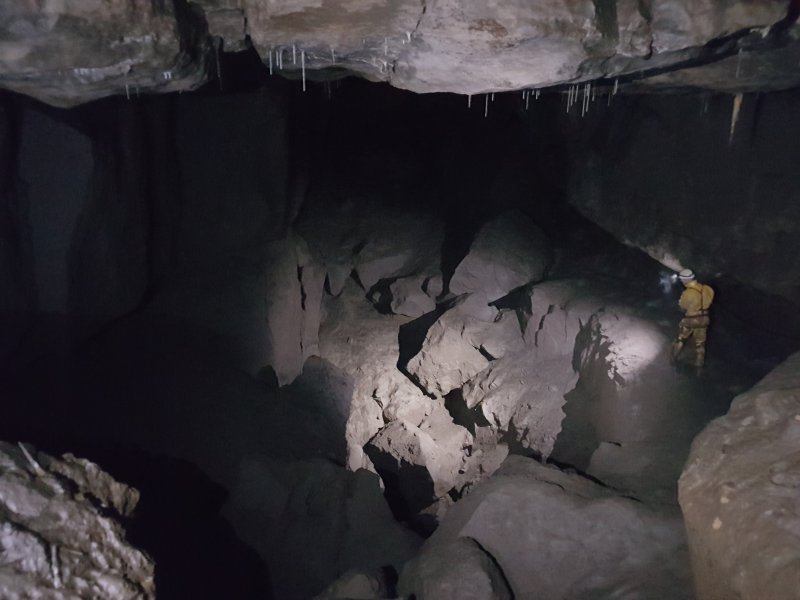 Traversing around Scylla, a deep hole down to the Master Cave.
Modelling by Pete, lighting by Tarquin and Pete
Traversing around Scylla, a deep hole down to the Master Cave.
Modelling by Pete, lighting by Tarquin and Pete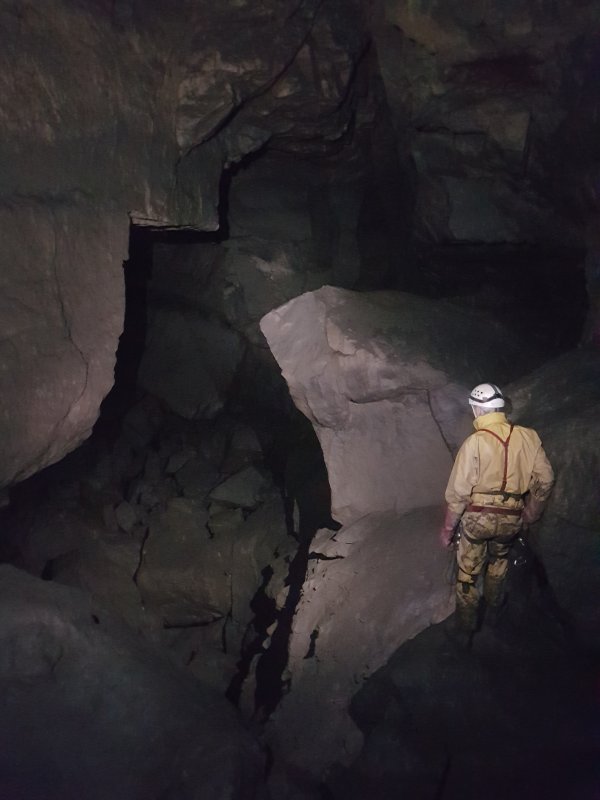 Charybdis, another hole down to the Master Cave. The unofficial ropes are not essential, but very welcome.
Modelling by Pete, lighting by Tarquin and Pete
Charybdis, another hole down to the Master Cave. The unofficial ropes are not essential, but very welcome.
Modelling by Pete, lighting by Tarquin and Pete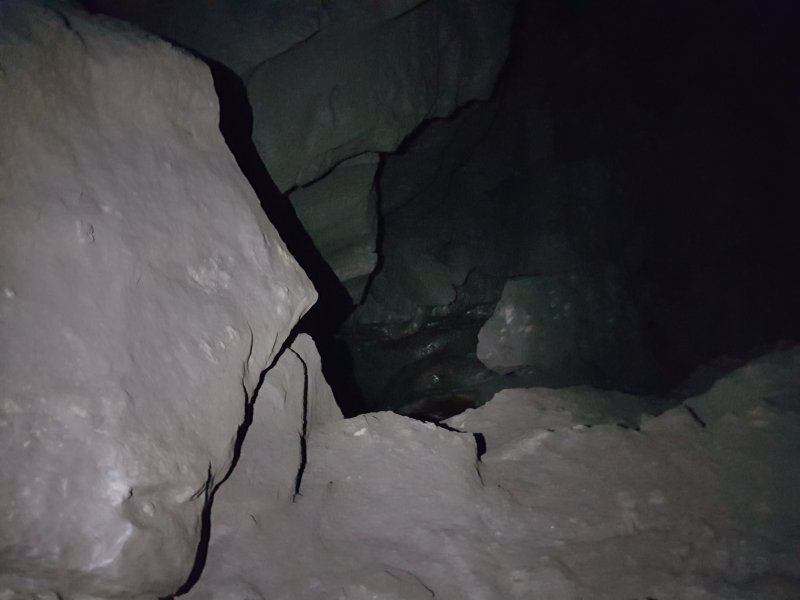 Looking down Charybdis into the Master Cave.
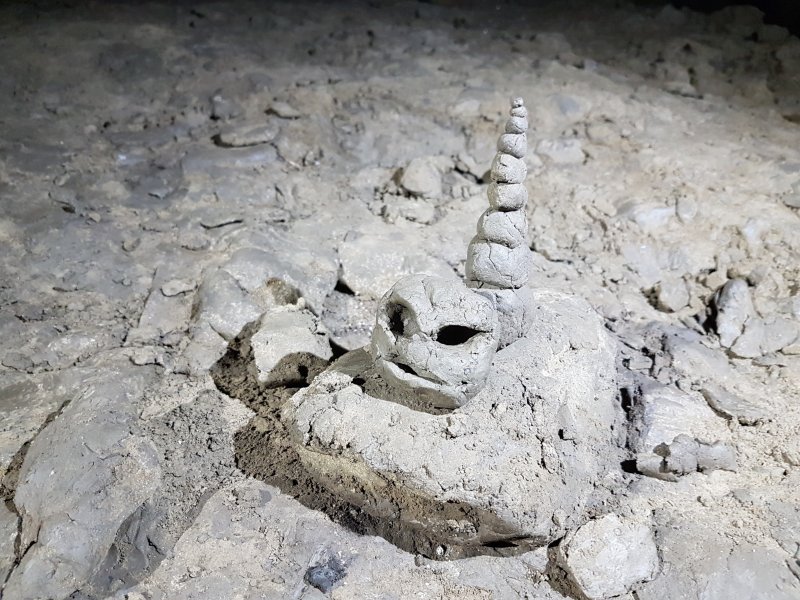 Some caver humour.
Lighting by Tarquin and Pete
Some caver humour.
Lighting by Tarquin and Pete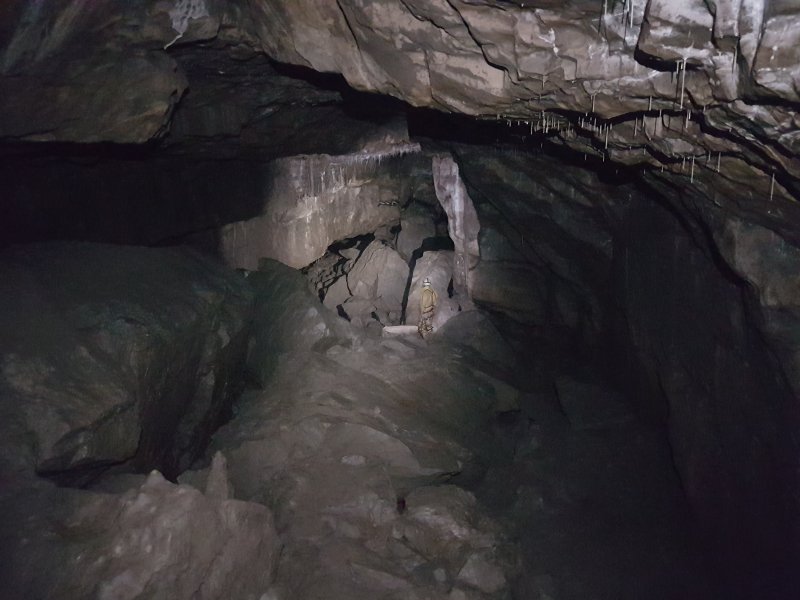 The High Level Route at the point where there are holes down to the Master Cave at Oxbow Corner. We have the breakdown I was hoping for, but everything here is still too damp.
Modelling by Pete, lighting by Tarquin and Pete
The High Level Route at the point where there are holes down to the Master Cave at Oxbow Corner. We have the breakdown I was hoping for, but everything here is still too damp.
Modelling by Pete, lighting by Tarquin and Pete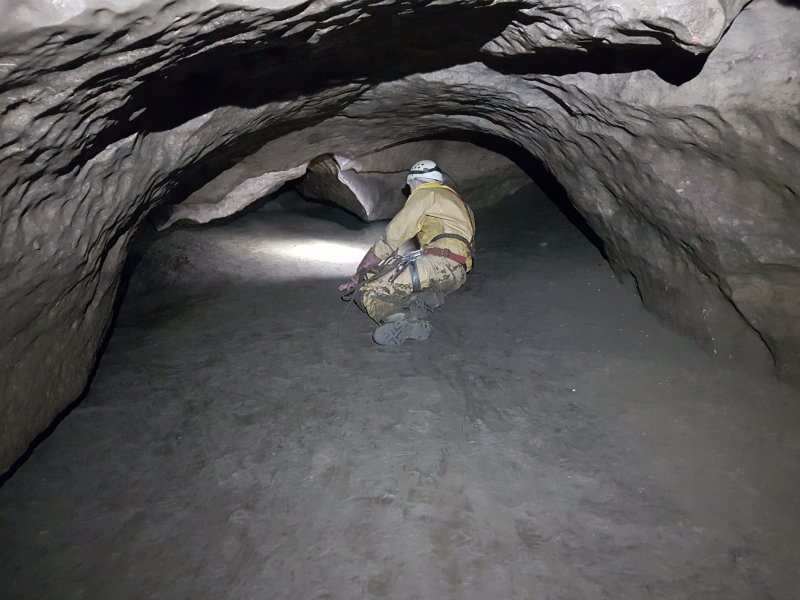 The crawls just before the Diamond Hall junction.
Modelling by Pete, lighting by Tarquin and Pete
The crawls just before the Diamond Hall junction.
Modelling by Pete, lighting by Tarquin and Pete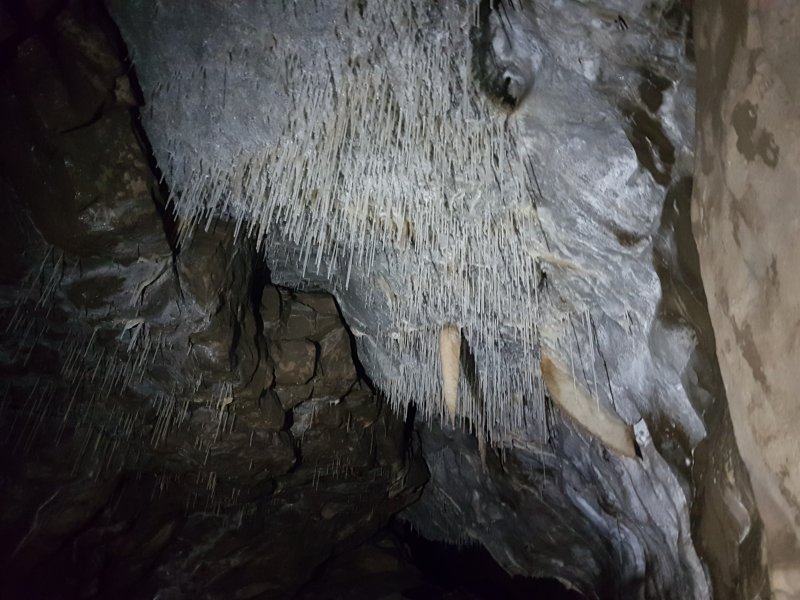 Some lovely straw formations.
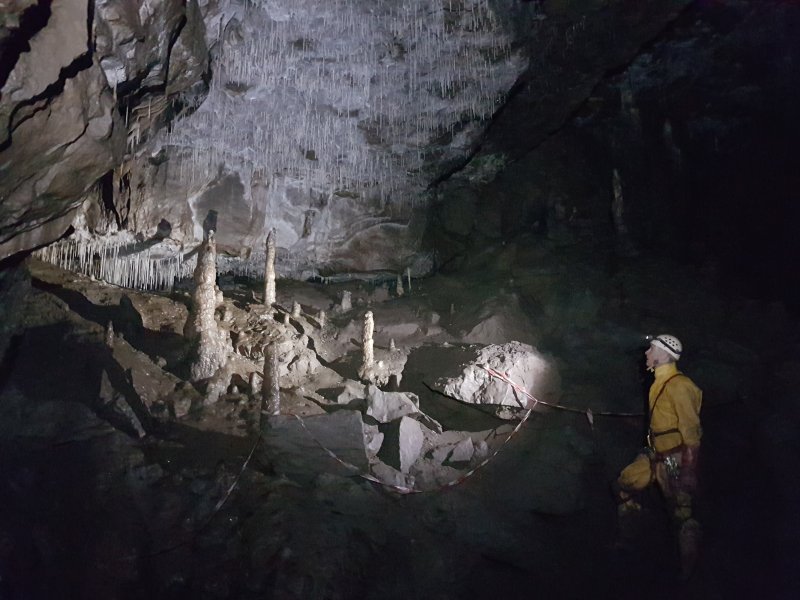 Formations at the start of Oakes Cavern.
Modelling by Pete, lighting by Tarquin and Pete
Formations at the start of Oakes Cavern.
Modelling by Pete, lighting by Tarquin and Pete Oakes Cavern, one of the big caverns of the High Level Route.
Modelling by Ali, Pete and Jules, lighting by Tarquin, Helen Langford, Ali, Pete and Jules
Oakes Cavern, one of the big caverns of the High Level Route.
Modelling by Ali, Pete and Jules, lighting by Tarquin, Helen Langford, Ali, Pete and Jules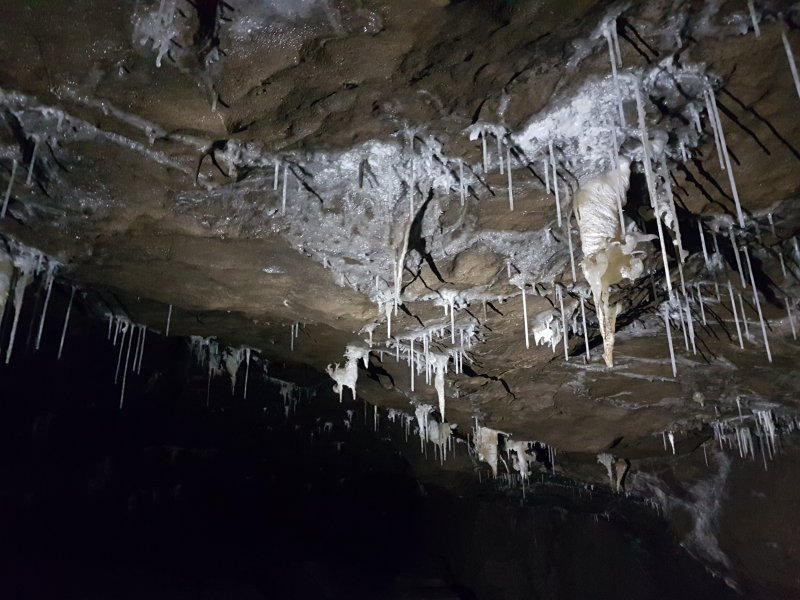 Formations like Dan yr Ogof's Candlewax Formations, in the entrance to Long's Passage.
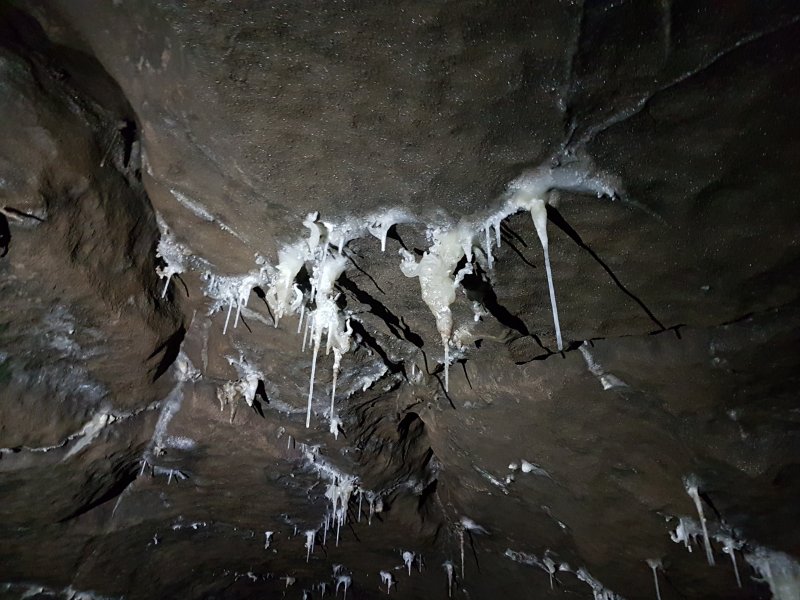 Candlewax style formations.
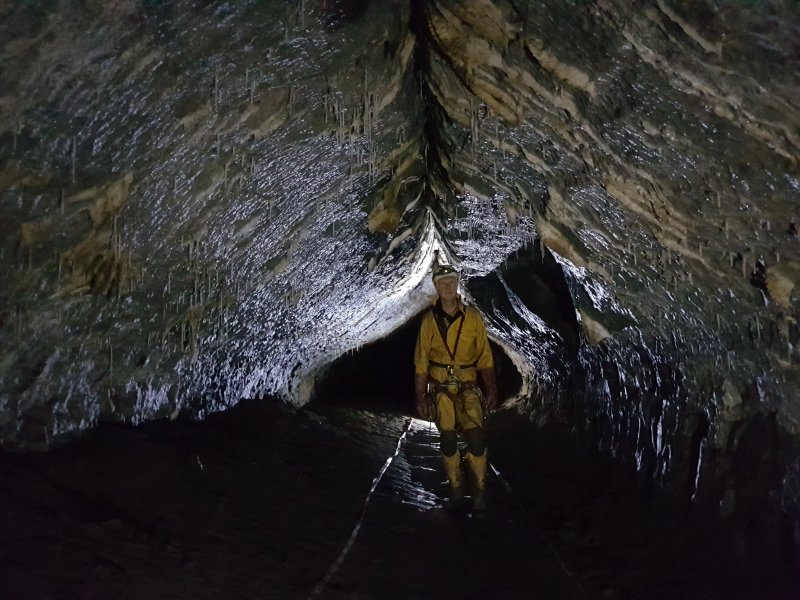 Minarets, one of the most iconic passages in the whole cave.
Modelling by Pete
Minarets, one of the most iconic passages in the whole cave.
Modelling by Pete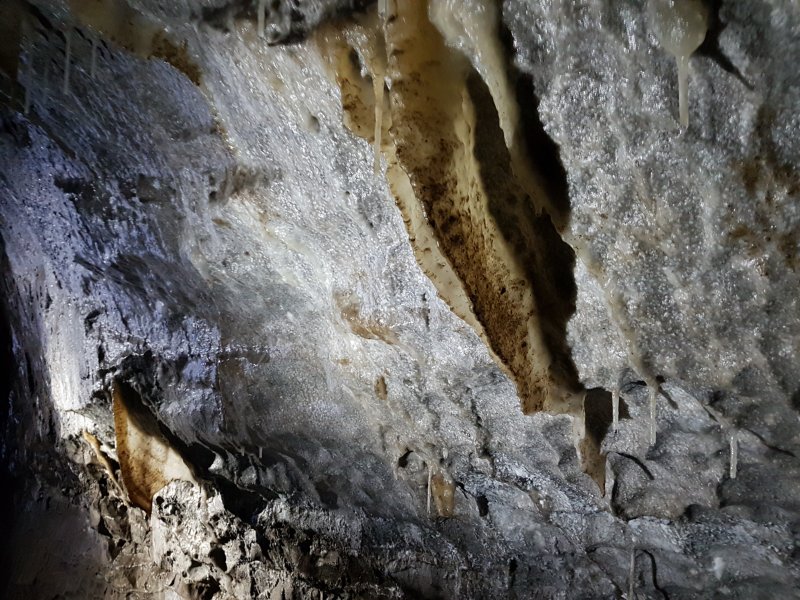 The walls are absolutely covered in these curtains.
Lighting by Pete
The walls are absolutely covered in these curtains.
Lighting by Pete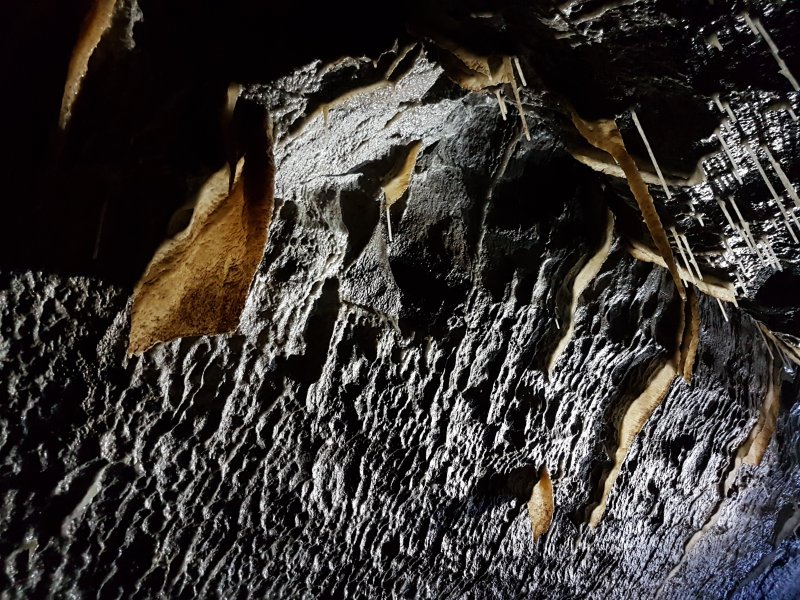 Curtains.
Lighting by Pete
Curtains.
Lighting by Pete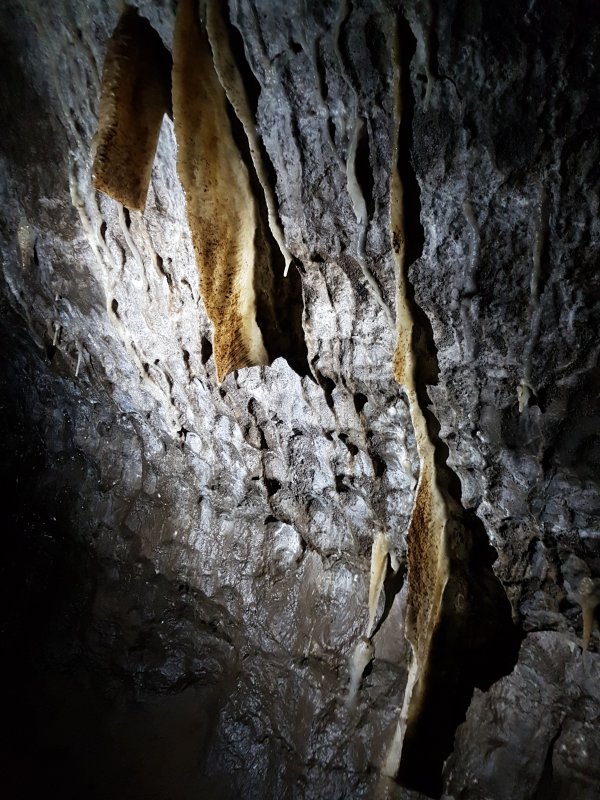 Most are naturally muddied and broken, but the effect is superb.
Lighting by Pete
Most are naturally muddied and broken, but the effect is superb.
Lighting by Pete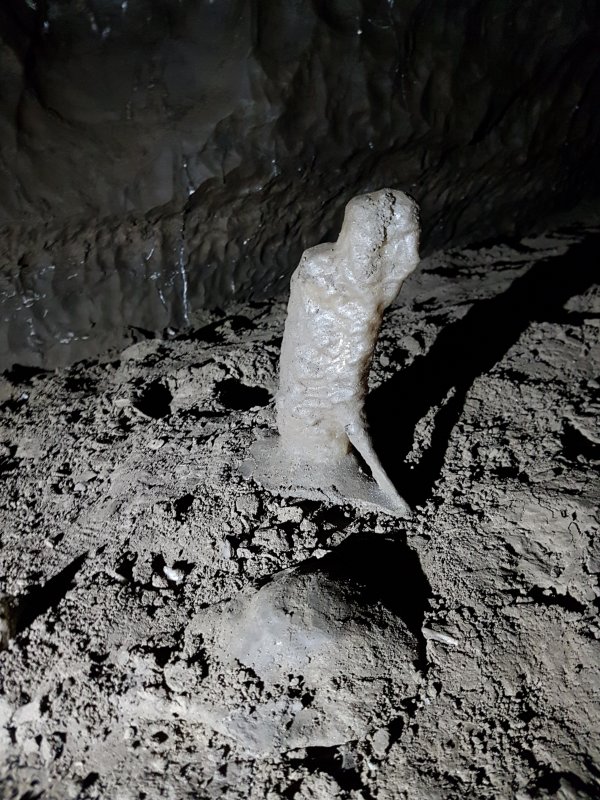 Stalagmite shaped like an old man with a cane.
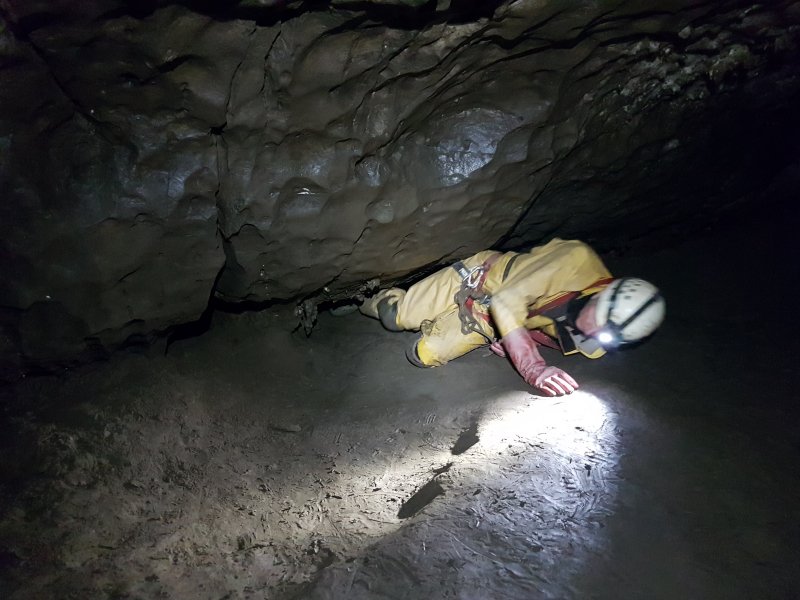 Minarets is split into three walking sections, with these low crawls between them. These are notable as they are the first time we have had to do a flat out crawl for the entire trip.
Modelling by Pete, lighting by Tarquin and Pete
Minarets is split into three walking sections, with these low crawls between them. These are notable as they are the first time we have had to do a flat out crawl for the entire trip.
Modelling by Pete, lighting by Tarquin and Pete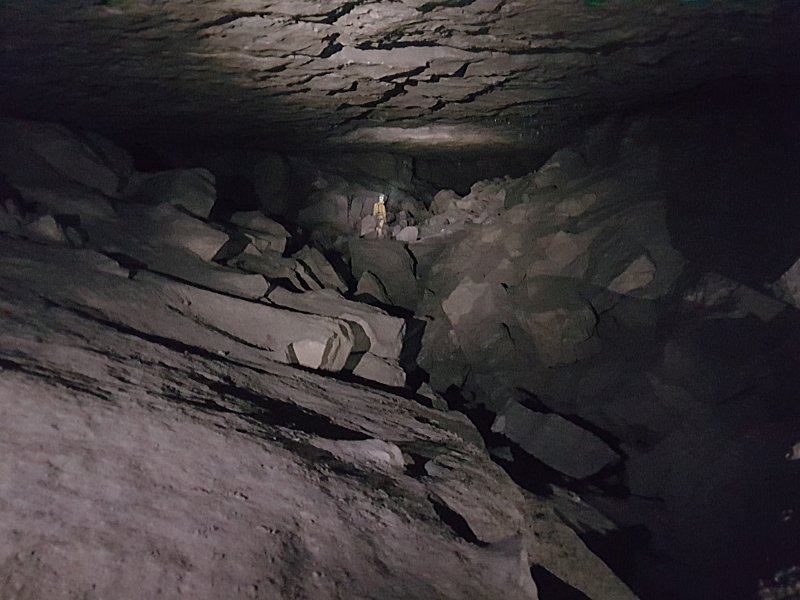 Cornes Cavern, one of the widest pieces of cave on our route. This is very reminiscent of Draenen's Big Country in its size, shape and dryness, and my reaction on seeing it was "if this were Draenen, there would be cryostal somewhere in here, probably in the middle of the passage, just up ahead over there".
Modelling by Pete, lighting by Tarquin and Pete
Cornes Cavern, one of the widest pieces of cave on our route. This is very reminiscent of Draenen's Big Country in its size, shape and dryness, and my reaction on seeing it was "if this were Draenen, there would be cryostal somewhere in here, probably in the middle of the passage, just up ahead over there".
Modelling by Pete, lighting by Tarquin and Pete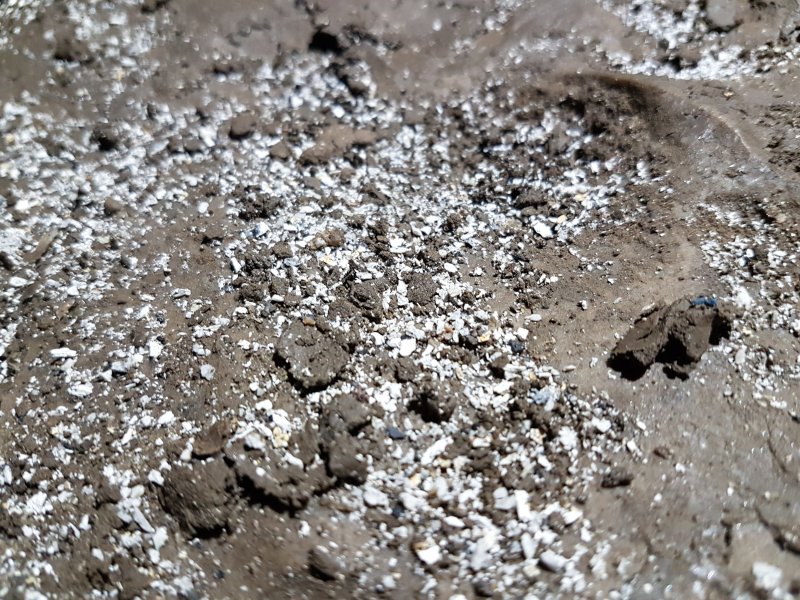 Sure enough, exactly where I had pointed, there was a boulder covered in a very clear sprinking of cryostal. Tired of examining countless piles of carbide, and sweeping back and forth across the passages for the last kilometre to check under each boulder, this was a really welcome discovery.
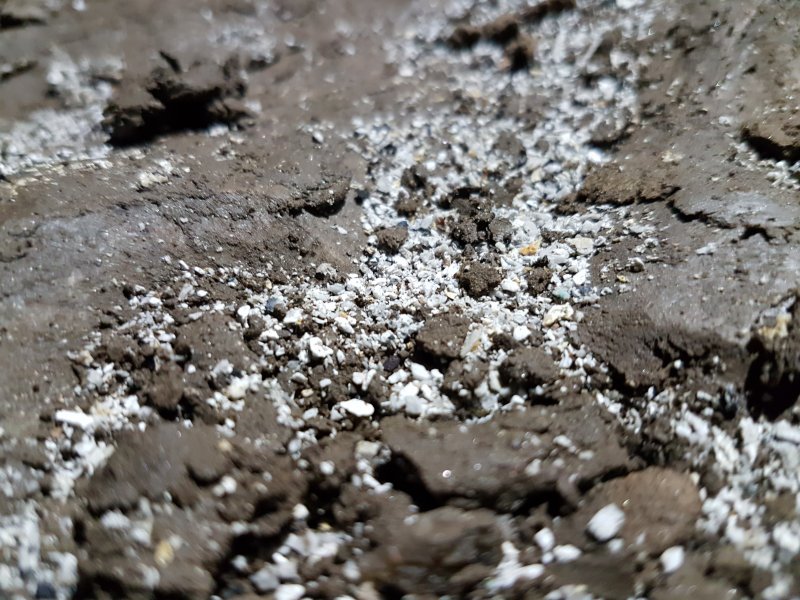 The texture is a little unusual; rather than little beads, it is all sharper pieces, like the stone chips used for pebble dash. Perhaps they have been affected by condensation. But at least it is here, very clearly, unambigously. This is not spent carbide, and it is not decomposing gypsum. It is cryogenic.
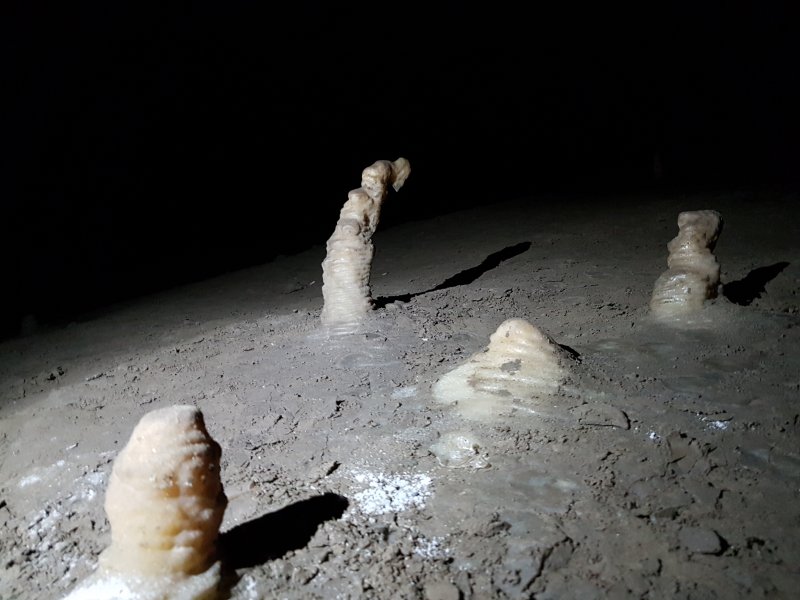 Another stalagmite that looks like a hunched old man. With accompanying carbide. I expect nothing less in here.
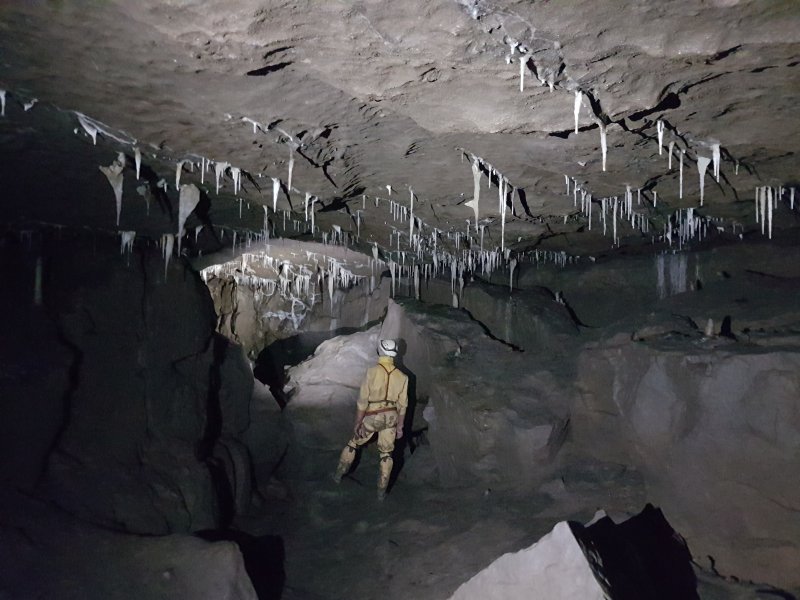 Formations at the start of Snail Cavern.
Modelling by Pete, lighting by Tarquin and Pete
Formations at the start of Snail Cavern.
Modelling by Pete, lighting by Tarquin and Pete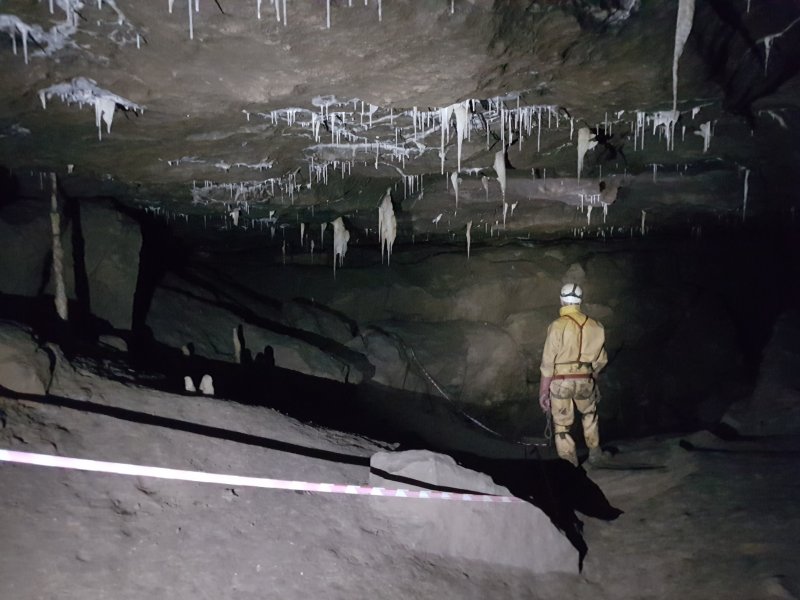 Formations at the start of Snail Cavern.
Modelling by Pete, lighting by Tarquin and Pete
Formations at the start of Snail Cavern.
Modelling by Pete, lighting by Tarquin and Pete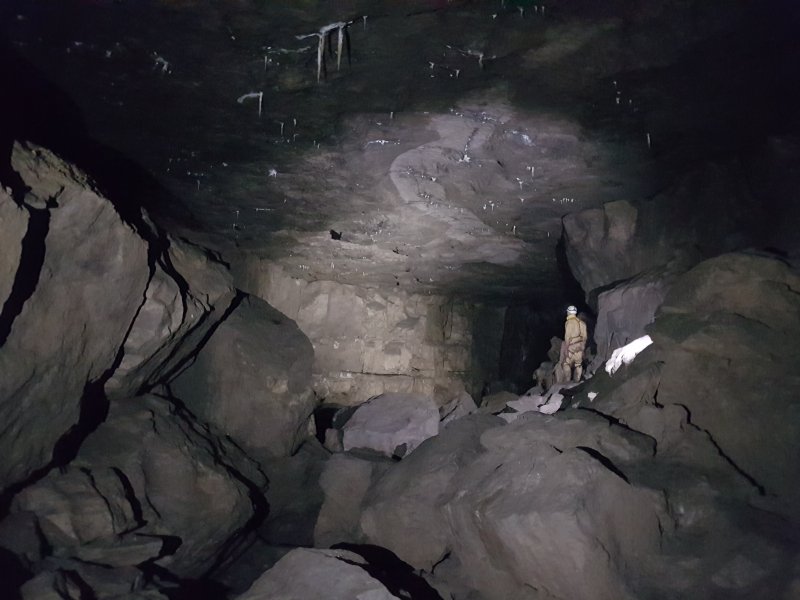 Snail Cavern, one of the larger caverns. The caverns are really just passage. But in a dull candle or carbide light, it probably looks like a much wider space.
Modelling by Pete, lighting by Tarquin and Pete
Snail Cavern, one of the larger caverns. The caverns are really just passage. But in a dull candle or carbide light, it probably looks like a much wider space.
Modelling by Pete, lighting by Tarquin and Pete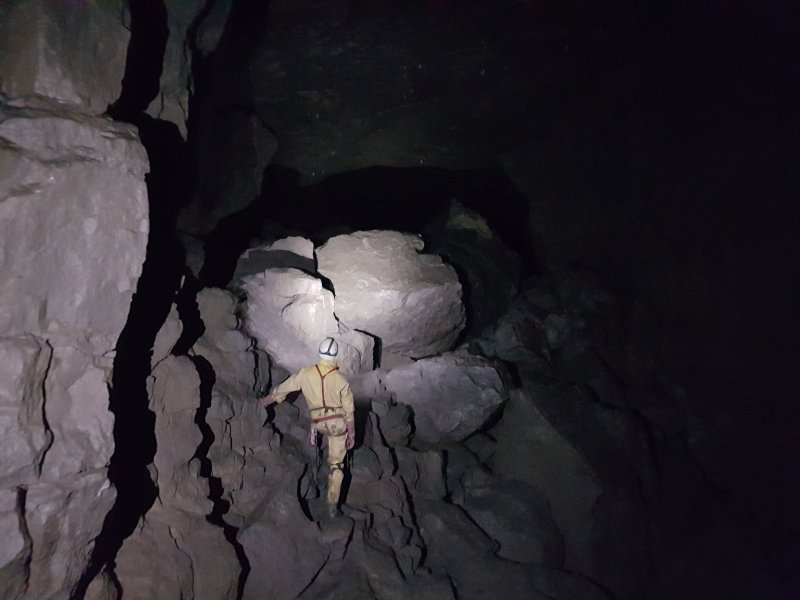 A pile of boulders then signifies the passage being renamed to Monster Cavern; again, this is just a part of the passage, not a separate cavern.
Modelling by Pete, lighting by Tarquin and Pete
A pile of boulders then signifies the passage being renamed to Monster Cavern; again, this is just a part of the passage, not a separate cavern.
Modelling by Pete, lighting by Tarquin and Pete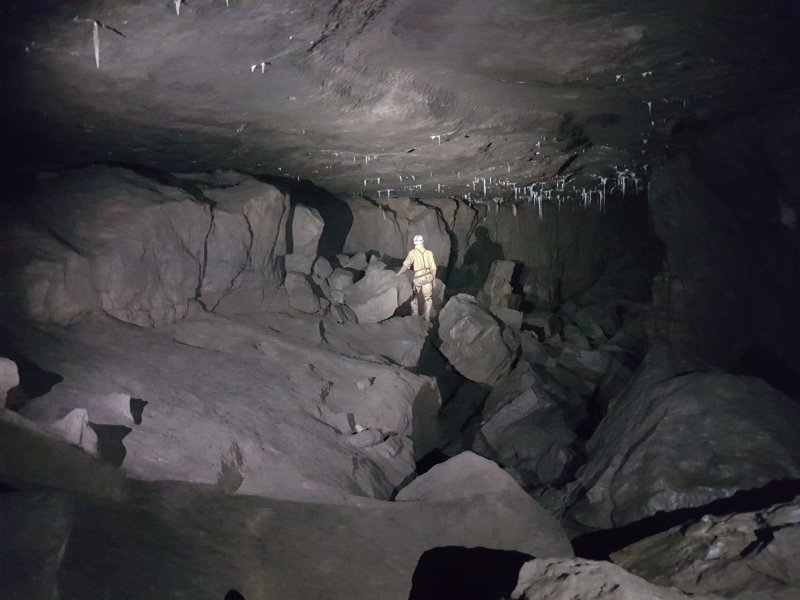 Monster Cavern is supposed to be the largest of the caverns, but it definitely does not appear to be.
Modelling by Pete, lighting by Tarquin and Pete
Monster Cavern is supposed to be the largest of the caverns, but it definitely does not appear to be.
Modelling by Pete, lighting by Tarquin and Pete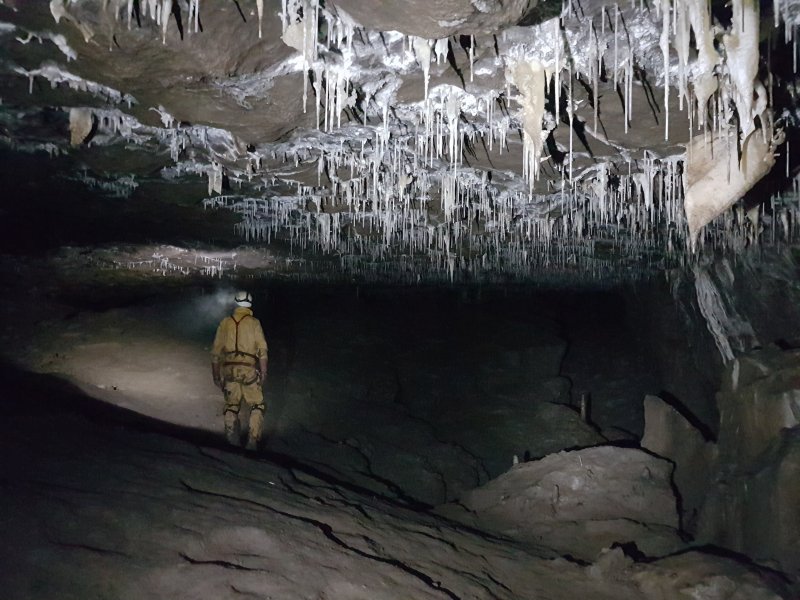 Main Line Terminus. Although this is supposed to be the end of the High Level Route, the large fossil levels continue beyond this confusing junction. The description here is totally wrong, and so is the old survey that I was carrying. The description talks about passages coming in from the right, which is what happens at the next junction instead. The old survey shows this as a simple T-junction. There is actually one passage ahead, three on the left, and none on the right. It took us some double and triple checking back down the passage to be certain that the survey was wrong.
Modelling by Pete, lighting by Tarquin and Pete
Main Line Terminus. Although this is supposed to be the end of the High Level Route, the large fossil levels continue beyond this confusing junction. The description here is totally wrong, and so is the old survey that I was carrying. The description talks about passages coming in from the right, which is what happens at the next junction instead. The old survey shows this as a simple T-junction. There is actually one passage ahead, three on the left, and none on the right. It took us some double and triple checking back down the passage to be certain that the survey was wrong.
Modelling by Pete, lighting by Tarquin and Pete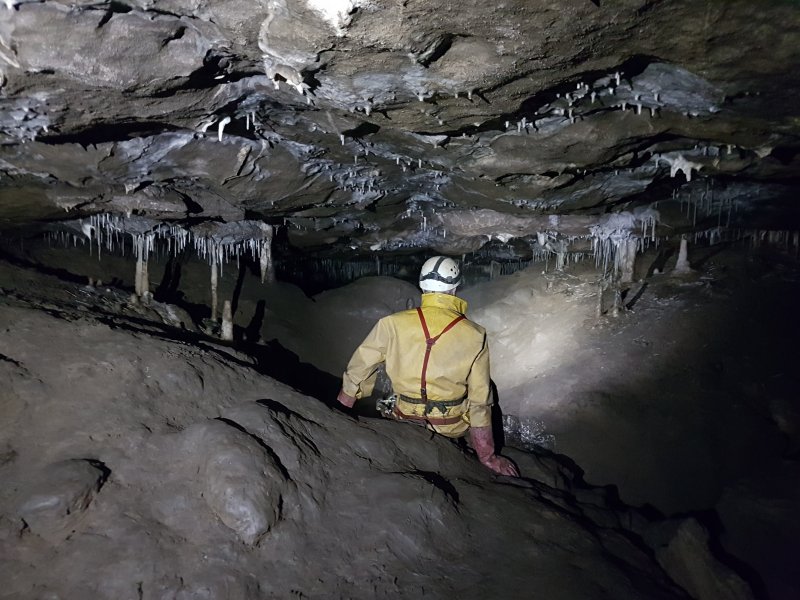 The passage on the left is well decorated, but ends in digs.
Modelling by Pete, lighting by Tarquin and Pete
The passage on the left is well decorated, but ends in digs.
Modelling by Pete, lighting by Tarquin and Pete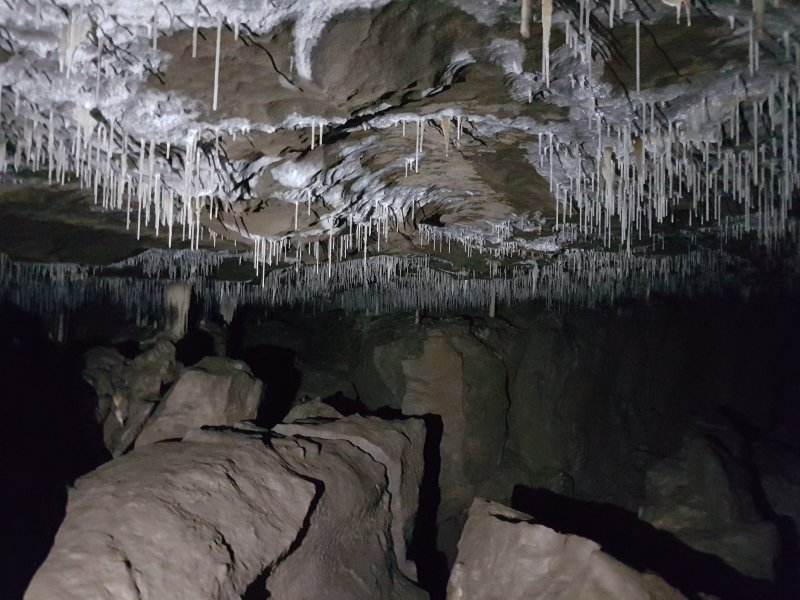 The way on along the high level passages to Stop Pot is the second passage to the left, which also is well decorated.
 More straws. We had found what we were looking for, and I was suffering from an energy crash after such an exhaustive search, so we decided that with the survey showing us lies, it would be better to head back instead of trying to reach Straw Chamber and Gypsum Caverns. Another day, another day.