Yorkshire Dales trip 30/09/2022 to 02/10/2022
Unless otherwise stated, camera, setups, lighting, edits and gallery effects by Tarquin. Modelling and lighting at various points will be Gwenllian Tawy, Dinny Davies and Jack Overhill.
This was a trip to visit two of the most popular entrances to Ease Gill Caverns, part of the Three Counties System, as well as the nearby F'ing Hopeless Pot. Despite their popularity, I had not visited either Ease Gill entrance before, and F'Ing Hopeless Pot is a resonably recent discovery with spectacular formations. As a result, this is intentionally going to be a big gallery. Both trips were done in wet conditions, but not flood.
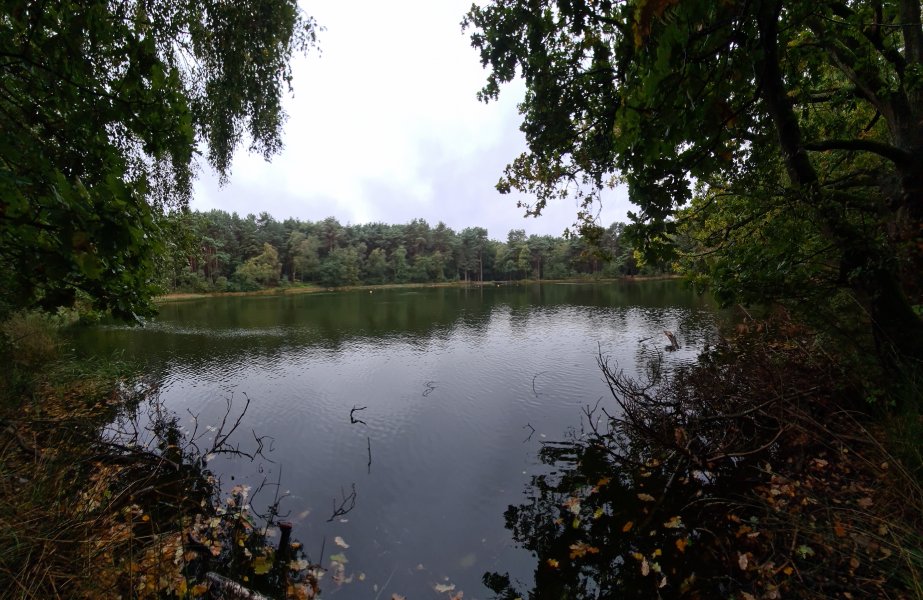
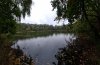 Reeking Hole near Sandiway in Cheshire (no, I didn't see a cat, but I did see a faint grin in the sky). This rather humorously named lake is sadly behind a fence and access it not permitted except to scouts. It is anyone's guess why the scouting association would have a reeking hole, but completely understandable that they would want to prevent others from getting close to it.
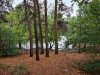 Trees at Reeking Hole.
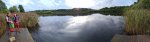 A quick swim at Hatchmere before setting off for the Dales. The temperature was definitely cold enough to make you gasp for air, but not terrible since you could feel your skin afterwards.
Modelling by Dinny and Gwenllian
A quick swim at Hatchmere before setting off for the Dales. The temperature was definitely cold enough to make you gasp for air, but not terrible since you could feel your skin afterwards.
Modelling by Dinny and Gwenllian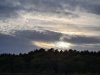 Sunset at Hatchmere.
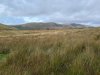 Castle Knott (538 metres) and Calf Top (610 metres), from Bullpot Farm.
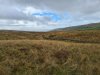 The view from Casterton Fell down the dry valley that contains Lancaster Hole. In the distant background is the Forest Of Bowland, topping out at Ward's Stone (561 metres), while on the right is Barbon Low Fell (437 metres).
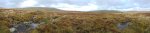 Crossing Casterton Fell towards Howe Gill. Left to right are Great Coum (687 metres), Green Hill (628 metres), Gragareth (627 metres), Forest Of Bowland, Barbon Low Fell, Castle Knott and Calf Top. Ease Gill is the valley between the camera and the mountains on the left. The border between Cumbria (left and right) and Lancashire runs down Ease Gill. The mountains on the left form the border between Lancashire and Yorkshire, with the Three Counties System running below all three counties.
Modelling by Jack and Dinny
Crossing Casterton Fell towards Howe Gill. Left to right are Great Coum (687 metres), Green Hill (628 metres), Gragareth (627 metres), Forest Of Bowland, Barbon Low Fell, Castle Knott and Calf Top. Ease Gill is the valley between the camera and the mountains on the left. The border between Cumbria (left and right) and Lancashire runs down Ease Gill. The mountains on the left form the border between Lancashire and Yorkshire, with the Three Counties System running below all three counties.
Modelling by Jack and Dinny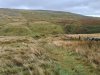 Descending into Ease Gill just upstream of Howe Gill. County Pot lies in the middle of the picture, on the near bank of Ease Gill.
Modelling by Jack and Dinny
Descending into Ease Gill just upstream of Howe Gill. County Pot lies in the middle of the picture, on the near bank of Ease Gill.
Modelling by Jack and Dinny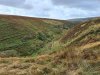 Looking downstream along Ease Gill. Howe Gill joins from the right of the photograph.
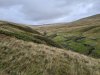 Looking upstream along Ease Gill, towards Great Coum and Green Hill. Top Sink lies in the distant left, where the stream finally swings over to the right.
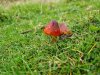 A pair of blackening waxcaps keeping each other close.
 Top Sink's entrance. This entrance is the highest one (furthest upstream) in Ease Gill.
Modelling by Jack
Top Sink's entrance. This entrance is the highest one (furthest upstream) in Ease Gill.
Modelling by Jack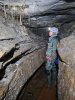 Start of Top Sink.
Modelling by Gwenllian, lighting by Tarquin and Gwenllian
Start of Top Sink.
Modelling by Gwenllian, lighting by Tarquin and Gwenllian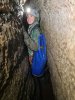 Awkwardly narrow rift.
Modelling by Gwenllian, lighting by Tarquin and Gwenllian
Awkwardly narrow rift.
Modelling by Gwenllian, lighting by Tarquin and Gwenllian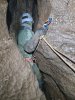 Top of Walrus Pot.
Modelling by Gwenllian, lighting by Tarquin and Gwenllian
Top of Walrus Pot.
Modelling by Gwenllian, lighting by Tarquin and Gwenllian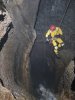 Walrus Pot.
Modelling by Dinny, lighting by Tarquin and Dinny
Walrus Pot.
Modelling by Dinny, lighting by Tarquin and Dinny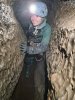 Pi r2, a twisty passage between the pitches. The name is sometimes written as π r2, or incorrectly as Pie R2.
Modelling by Gwenllian, lighting by Tarquin and Gwenllian
Pi r2, a twisty passage between the pitches. The name is sometimes written as π r2, or incorrectly as Pie R2.
Modelling by Gwenllian, lighting by Tarquin and Gwenllian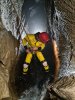 Penknife Pitch.
Modelling by Dinny, lighting by Tarquin, Dinny and Jack
Penknife Pitch.
Modelling by Dinny, lighting by Tarquin, Dinny and Jack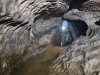 Bradshaw's Passage.
Modelling by Gwenllian, lighting by Tarquin and Gwenllian
Bradshaw's Passage.
Modelling by Gwenllian, lighting by Tarquin and Gwenllian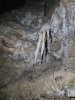 Limerick Passage stal.
Lighting by Tarquin and Gwenllian
Limerick Passage stal.
Lighting by Tarquin and Gwenllian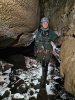 One of the many passages at Limerick Junction.
Modelling by Gwenllian, lighting by Tarquin and Dinny
One of the many passages at Limerick Junction.
Modelling by Gwenllian, lighting by Tarquin and Dinny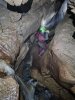 Limerick Passage. I think.
Modelling by Jack, lighting by Tarquin, Gwenllian and Jack
Limerick Passage. I think.
Modelling by Jack, lighting by Tarquin, Gwenllian and Jack Traversing over the river at the Bridge Of Sighs.
Modelling by Gwenllian and Dinny, lighting by Tarquin, Gwenllian and Dinny
Traversing over the river at the Bridge Of Sighs.
Modelling by Gwenllian and Dinny, lighting by Tarquin, Gwenllian and Dinny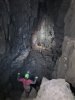 Nagasaki chamber. We searched this for cryogenic deposits, but the whole chamber is covered in relatively recent alluvial deposits, and it is unlikely that anything cryogenic could have survived here.
Modelling by Jack, Dinny and Gwenllian, lighting by Tarquin, Jack, Dinny and Gwenllian
Nagasaki chamber. We searched this for cryogenic deposits, but the whole chamber is covered in relatively recent alluvial deposits, and it is unlikely that anything cryogenic could have survived here.
Modelling by Jack, Dinny and Gwenllian, lighting by Tarquin, Jack, Dinny and Gwenllian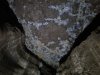 Ceiling of Nagasaki above Rock Of Ages.
Lighting by Tarquin and Jack
Ceiling of Nagasaki above Rock Of Ages.
Lighting by Tarquin and Jack On the way to Easter Grotto.
 The start of Easter Grotto, with its spectacular straws.
Modelling by Gwenllian and Dinny, lighting by Tarquin, Gwenllian and Dinny
The start of Easter Grotto, with its spectacular straws.
Modelling by Gwenllian and Dinny, lighting by Tarquin, Gwenllian and Dinny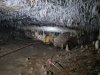 Main part of Easter Grotto.
Modelling by Dinny and Jack, lighting by Tarquin, Dinny, Jack and Gwenllian
Main part of Easter Grotto.
Modelling by Dinny and Jack, lighting by Tarquin, Dinny, Jack and Gwenllian Easter Grotto straws.
Lighting by Tarquin and Dinny
Easter Grotto straws.
Lighting by Tarquin and Dinny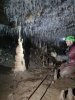 Column with a phallus.
Modelling by Jack, lighting by Tarquin and Jack
Column with a phallus.
Modelling by Jack, lighting by Tarquin and Jack Second half of Easter Grotto.
 Stalagmites in the second part of Easter Grotto.
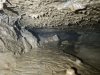 Crawl linking Easter Grotto and Gypsum Caverns. It gets low enough that SRT gear is a nuisance, but it can be left on.
Modelling by Jack
Crawl linking Easter Grotto and Gypsum Caverns. It gets low enough that SRT gear is a nuisance, but it can be left on.
Modelling by Jack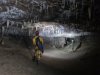 The Palace, the start of Gypsum Caverns.
Modelling by Dinny, Gwenllian and Jack, lighting by Tarquin, Dinny, Gwenllian and Jack
The Palace, the start of Gypsum Caverns.
Modelling by Dinny, Gwenllian and Jack, lighting by Tarquin, Dinny, Gwenllian and Jack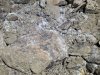 A very small deposit of gypsum, but enough to earn the name.
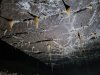 Ceiling of Gypsum Cavern.
Lighting by Jack
Ceiling of Gypsum Cavern.
Lighting by Jack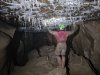 Gypsum Cavern, the long part of Gypsum Caverns.
Modelling by Jack, lighting by Tarquin and Jack
Gypsum Cavern, the long part of Gypsum Caverns.
Modelling by Jack, lighting by Tarquin and Jack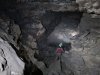 The passage leading to Holbeck Junction.
Modelling by Jack, lighting by Tarquin and Jack
The passage leading to Holbeck Junction.
Modelling by Jack, lighting by Tarquin and Jack Straw Chamber.
Modelling by Jack, lighting by Tarquin, Jack and Dinny
Straw Chamber.
Modelling by Jack, lighting by Tarquin, Jack and Dinny The start of Dry Dock Passage.
Modelling by Jack, lighting by Tarquin and Jack
The start of Dry Dock Passage.
Modelling by Jack, lighting by Tarquin and Jack Flood scum downstream of Straw Chamber.
Modelling by Jack, lighting by Tarquin and Jack
Flood scum downstream of Straw Chamber.
Modelling by Jack, lighting by Tarquin and Jack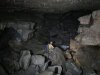 Below Stop Pot.
Modelling by Dinny, lighting by Tarquin, Gwenllian and Dinny
Below Stop Pot.
Modelling by Dinny, lighting by Tarquin, Gwenllian and Dinny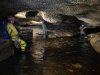 Eureka Junction.
Modelling by Dinny, Gwenllian and Jack, lighting by Tarquin, Dinny, Gwenllian and Jack
Eureka Junction.
Modelling by Dinny, Gwenllian and Jack, lighting by Tarquin, Dinny, Gwenllian and Jack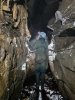 Lower Pierce's Passage.
Modelling by Gwenllian, lighting by Tarquin, Gwenllian and Dinny
Lower Pierce's Passage.
Modelling by Gwenllian, lighting by Tarquin, Gwenllian and Dinny We visited a side passage that I think leads to Whiteline Chamber.
Modelling by Jack
We visited a side passage that I think leads to Whiteline Chamber.
Modelling by Jack It features a very attractive twin waterfall.
Modelling by Jack, lighting by Tarquin and Jack
It features a very attractive twin waterfall.
Modelling by Jack, lighting by Tarquin and Jack Up a 5 metre pitch to reach the link between Poetic Justice and Platypus Junction.
Modelling by Gwenllian, lighting by Tarquin and Gwenllian
Up a 5 metre pitch to reach the link between Poetic Justice and Platypus Junction.
Modelling by Gwenllian, lighting by Tarquin and Gwenllian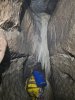 Heading downstream after the chimney towards Platypus Junction.
Modelling by Dinny, lighting by Tarquin and Dinny
Heading downstream after the chimney towards Platypus Junction.
Modelling by Dinny, lighting by Tarquin and Dinny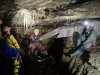 Platypus Junction, with Jack making friends with the platypus.
Modelling by Dinny, Jack and Gwenllian, lighting by Tarquin, Dinny and Gwenllian
Platypus Junction, with Jack making friends with the platypus.
Modelling by Dinny, Jack and Gwenllian, lighting by Tarquin, Dinny and Gwenllian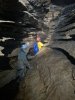 The razors of Razor Passage.
Modelling by Gwenllian and Dinny, lighting by Tarquin, Gwenllian and Dinny
The razors of Razor Passage.
Modelling by Gwenllian and Dinny, lighting by Tarquin, Gwenllian and Dinny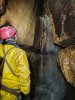 Rope climb in Mushroom Passage (I think).
Modelling by Dinny, lighting by Tarquin, Gwenllian and Dinny
Rope climb in Mushroom Passage (I think).
Modelling by Dinny, lighting by Tarquin, Gwenllian and Dinny A tricky climb that has no holds.
Modelling by Dinny
A tricky climb that has no holds.
Modelling by Dinny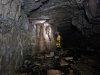 Climb out of Broadway leading to County Pot.
Modelling by Gwenllian and Dinny, lighting by Tarquin, Gwenllian and Dinny
Climb out of Broadway leading to County Pot.
Modelling by Gwenllian and Dinny, lighting by Tarquin, Gwenllian and Dinny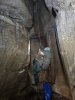 Pitch leading out of County Pot.
Modelling by Gwenllian, lighting by Tarquin and Gwenllian
Pitch leading out of County Pot.
Modelling by Gwenllian, lighting by Tarquin and Gwenllian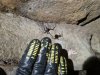 Female European cave spider.
Modelling by Penelope
Female European cave spider.
Modelling by Penelope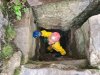 Entrance of County Pot.
Modelling by Dinny, lighting by Sol and Dinny
Entrance of County Pot.
Modelling by Dinny, lighting by Sol and Dinny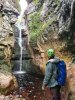 Cow Dub waterfall, where a couple of us took a traditional, cold swim. The water sinks into the plunge pool and is next seen in an inlet to Mushroom Passage.
Modelling by Jack
Cow Dub waterfall, where a couple of us took a traditional, cold swim. The water sinks into the plunge pool and is next seen in an inlet to Mushroom Passage.
Modelling by Jack View from Barbon Low Fell. Castle Knott, Calf Top, Great Coum, Green Hill, Gragareth and Barbon Low Fell's Brownthwaite ridge.
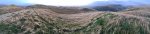 Wind blown grass on Barbon Low Fell, as soft as a plush toy. Castle Knott and Calf Top to the right.
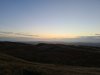 Afterglow from Barbon Low Fell. The distant hills are Hutton Roof Crags (274 metres) and Farleton Knott (265 metres).
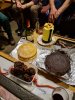 Red Rose cake competition, where cakes had to relate to caving, either in their obvious shape, or in their name. The tackle bag in the back was clearly impressive, while the drag tray near the camera should not be overlooked.
 Breakfast time for the cows. Bullpot Farm may not be an active farm any more, but the area is still farmed.
Modelling by Dairy Herd
Breakfast time for the cows. Bullpot Farm may not be an active farm any more, but the area is still farmed.
Modelling by Dairy Herd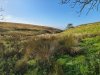 The valley leading down from Bullpot Farm.
 View from Leck Fell, the same place as you normally park for Notts Pot, Lost John's and Boxhead. This is a very busy piece of hillside. Forest Of Bowland, Hutton Roof Crags, Farleton Knott, Barbon Low Fell and Castle Knott.
Modelling by Tarquin's shadow
View from Leck Fell, the same place as you normally park for Notts Pot, Lost John's and Boxhead. This is a very busy piece of hillside. Forest Of Bowland, Hutton Roof Crags, Farleton Knott, Barbon Low Fell and Castle Knott.
Modelling by Tarquin's shadow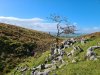 Lonely tree.
 A little further away than most of them is the entrance to F'ing Hopeless Pot. While this new discovery is currently an isolated cave, no doubt it relates closely to the others in the area, and is likely to be connected to them at some point.
Modelling by a cast of the photographer
A little further away than most of them is the entrance to F'ing Hopeless Pot. While this new discovery is currently an isolated cave, no doubt it relates closely to the others in the area, and is likely to be connected to them at some point.
Modelling by a cast of the photographer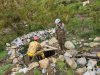 Entrance of F'ing Hopeless Pot, where a significant amount of spoil has been removed and neatly stacked.
Modelling by Dinny and Gwenllian
Entrance of F'ing Hopeless Pot, where a significant amount of spoil has been removed and neatly stacked.
Modelling by Dinny and Gwenllian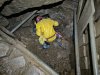 Bottom of the scaffolded dig.
Modelling by Dinny, lighting by Tarquin and Dinny
Bottom of the scaffolded dig.
Modelling by Dinny, lighting by Tarquin and Dinny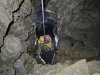 Tim's Pitch.
Modelling by Dinny, lighting by Tarquin, Dinny and Gwenllian
Tim's Pitch.
Modelling by Dinny, lighting by Tarquin, Dinny and Gwenllian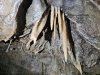 Stalactites below Tim's Pitch.
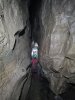 Between the pitches.
Modelling by Jack, lighting by Tarquin and Jack
Between the pitches.
Modelling by Jack, lighting by Tarquin and Jack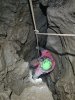 Frank's Pitch.
Modelling by Jack, lighting by Tarquin and Jack
Frank's Pitch.
Modelling by Jack, lighting by Tarquin and Jack Formations below Frank's Pitch.
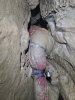 Awkward rift after Frank's Pitch
Modelling by Jack
Awkward rift after Frank's Pitch
Modelling by Jack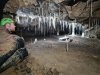 Formations before Geoff's Pitch.
Modelling by Jack, lighting by Tarquin and Jack
Formations before Geoff's Pitch.
Modelling by Jack, lighting by Tarquin and Jack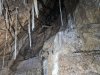 Strange helictite, made from a layer of calcited mud.
Lighting by Tarquin and Jack
Strange helictite, made from a layer of calcited mud.
Lighting by Tarquin and Jack Geoff's Pitch
Modelling by Jack, lighting by Tarquin and Jack
Geoff's Pitch
Modelling by Jack, lighting by Tarquin and Jack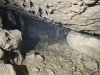 Low section of Streamway Of Merit, just before the squeeze. The squeeze is not really a squeeze, but bags might need to be removed from belts.
Modelling by Jack, lighting by Tarquin and Jack
Low section of Streamway Of Merit, just before the squeeze. The squeeze is not really a squeeze, but bags might need to be removed from belts.
Modelling by Jack, lighting by Tarquin and Jack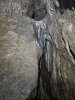 Straws in the Streamway Of Merit.
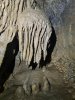 Formations.
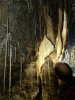 Triple curtains. The cave starts to show the impressive quality of its formations.
Modelling by Jack, lighting by Tarquin and Jack
Triple curtains. The cave starts to show the impressive quality of its formations.
Modelling by Jack, lighting by Tarquin and Jack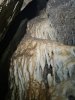 Flowstone.
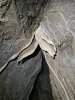 Small curtains.
 Straws.
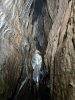 Formations.
Lighting by Tarquin and Jack
Formations.
Lighting by Tarquin and Jack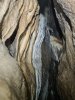 Flowstone.
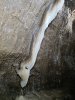 Curtain.
Lighting by Tarquin and Jack
Curtain.
Lighting by Tarquin and Jack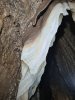 Multiple translucent curtains.
Lighting by Jack, Gwenllian and Dinny
Multiple translucent curtains.
Lighting by Jack, Gwenllian and Dinny Crystal Pools.
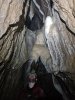 Formations above the rift.
Modelling by Jack
Formations above the rift.
Modelling by Jack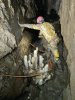 The Apostles. Getting past these is awkward, and you have to lean over them to keep your balance. A handrail on the opposite wall would help avoid accidents.
Modelling by Dinny, lighting by Tarquin, Gwenllian, Jack and Dinny
The Apostles. Getting past these is awkward, and you have to lean over them to keep your balance. A handrail on the opposite wall would help avoid accidents.
Modelling by Dinny, lighting by Tarquin, Gwenllian, Jack and Dinny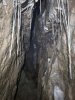 Dead end side passage at The Apostles.
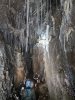 Above The Apostles.
Modelling by Gwenllian, lighting by Tarquin, Jack, Gwenllian and Dinny
Above The Apostles.
Modelling by Gwenllian, lighting by Tarquin, Jack, Gwenllian and Dinny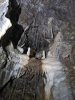 Decorated alcove. In this area is a very difficult bolted climb up into Whitehall chamber, with the Lady Of The Lake column above a crystal pool. This is not left rigged, since the Gate-Keeper straw column would need to be passed, and is extremely vulnerable.
 Crystal pool under the wall.
Lighting by Tarquin, Jack and Gwenllian
Crystal pool under the wall.
Lighting by Tarquin, Jack and Gwenllian Crystal pool.
Lighting by Tarquin, Jack and Gwenllian
Crystal pool.
Lighting by Tarquin, Jack and Gwenllian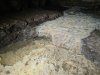 Crystal pool.
Lighting by Tarquin and Jack
Crystal pool.
Lighting by Tarquin and Jack Helictites.
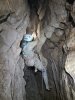 At this point, Streamway Of Merit chokes, leaving two ways on. Down to the right is a route through the choke into Speechless Passage. Overhead, however, is the originally bolted pitch called Squealing Pig Climb. This gets very tight at the top, and is quite awkward to ascend or descend.
Modelling by Gwenllian, lighting by Tarquin, Jack and Gwenllian
At this point, Streamway Of Merit chokes, leaving two ways on. Down to the right is a route through the choke into Speechless Passage. Overhead, however, is the originally bolted pitch called Squealing Pig Climb. This gets very tight at the top, and is quite awkward to ascend or descend.
Modelling by Gwenllian, lighting by Tarquin, Jack and Gwenllian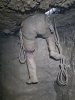 Above Squealing Pig Climb is another awkward climb, using a slippery muddied rope.
Modelling by Jack
Above Squealing Pig Climb is another awkward climb, using a slippery muddied rope.
Modelling by Jack Muddy dig.
Modelling by Jack, lighting by Tarquin and Jack
Muddy dig.
Modelling by Jack, lighting by Tarquin and Jack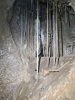 Straws in the dig.
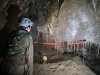 Straws.
Modelling by Gwenllian, lighting by Tarquin, Gwenllian and Jack
Straws.
Modelling by Gwenllian, lighting by Tarquin, Gwenllian and Jack Formations.
 Bottom of Eggshell Chamber.
Modelling by Dinny and Gwenllian, lighting by Tarquin, Jack, Dinny and Gwenllian
Bottom of Eggshell Chamber.
Modelling by Dinny and Gwenllian, lighting by Tarquin, Jack, Dinny and Gwenllian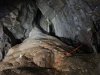 The enormous calcite bank in Eggshell Chamber.
Modelling by Jack, lighting by Tarquin, Dinny, Gwenllian and Jack
The enormous calcite bank in Eggshell Chamber.
Modelling by Jack, lighting by Tarquin, Dinny, Gwenllian and Jack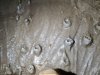 Raised calcited drip pockets.
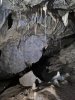 End of Eggshell Chamber. There is no way on.
Lighting by Tarquin and Jack
End of Eggshell Chamber. There is no way on.
Lighting by Tarquin and Jack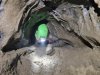 Squeeze leading to Levelling-Up, starting as a side passage just after the last dig. This one is actually a squeeze.
Modelling by Jack, lighting by Tarquin and Jack
Squeeze leading to Levelling-Up, starting as a side passage just after the last dig. This one is actually a squeeze.
Modelling by Jack, lighting by Tarquin and Jack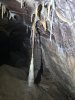 Straw column.
 Side passage off the route to Levelling-Up. This is taped off, for unknown reasons. It seems to reach a drop down into Streamway Of Merit.
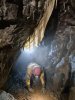 Beautifully translucent curtain.
Modelling by Dinny, lighting by Tarquin, Gwenllian, Dinny and Jack
Beautifully translucent curtain.
Modelling by Dinny, lighting by Tarquin, Gwenllian, Dinny and Jack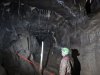 Stalagmite in the chamber at the start of Levelling-Up.
Modelling by Jack, lighting by Tarquin, Dinny and Jack
Stalagmite in the chamber at the start of Levelling-Up.
Modelling by Jack, lighting by Tarquin, Dinny and Jack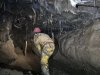 Start of the main Levelling-Up passage.
Modelling by Dinny, lighting by Tarquin, Jack and Dinny
Start of the main Levelling-Up passage.
Modelling by Dinny, lighting by Tarquin, Jack and Dinny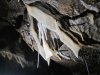 Curtains.
 Long straws.
Modelling by Jack and Dinny's legs, lighting by Tarquin and Jack
Long straws.
Modelling by Jack and Dinny's legs, lighting by Tarquin and Jack Immature helictites.
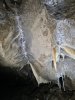 Immature helictites.
 Straws and sand.
 Lowering to a crawl.
Modelling by Jack, Dinny and essence of Gwenllian, lighting by Tarquin, Jack, Dinny and Gwenllian
Lowering to a crawl.
Modelling by Jack, Dinny and essence of Gwenllian, lighting by Tarquin, Jack, Dinny and Gwenllian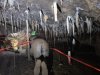 Levelling-Up now becomes one of the best decorated passages in the cave, where you crawl between and below the formations.
Modelling by Jack and Dinny, lighting by Tarquin, Jack and Dinny
Levelling-Up now becomes one of the best decorated passages in the cave, where you crawl between and below the formations.
Modelling by Jack and Dinny, lighting by Tarquin, Jack and Dinny Curtains.
 Textured mud, probably wormcasts.
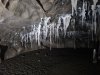 The stalactites gain a liberal covering of helictites.
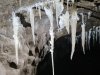 Detail of the helictites.
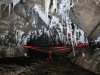 The end of Levelling-Up is taped off to protect the impressive helictites. The passage ends around the next bend. This is the most likely place to connect with other Leck Fell caves, specifically Pinocchio Pot and Ireby Fell Cavern. However, it is not worth damaging the formations just to make a connection.
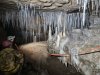 Passing through the choke into Speechless Passage, the first obvious set of formations is Speechless Grotto, one of the best decorated parts of the cave.
Modelling by Dinny and Gwenllian, lighting by Tarquin, Dinny and Gwenllian
Passing through the choke into Speechless Passage, the first obvious set of formations is Speechless Grotto, one of the best decorated parts of the cave.
Modelling by Dinny and Gwenllian, lighting by Tarquin, Dinny and Gwenllian Speechless Grotto.
Lighting by Tarquin, Dinny and Gwenllian
Speechless Grotto.
Lighting by Tarquin, Dinny and Gwenllian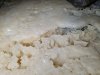 Large calcite crystals.
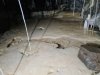 Crystal pools.
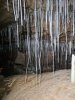 Straws.
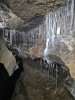 Speechless Passage. The boulder obstacles here make it difficult to pass without touching the formations, but it is possible.
Lighting by Tarquin and Jack
Speechless Passage. The boulder obstacles here make it difficult to pass without touching the formations, but it is possible.
Lighting by Tarquin and Jack Speechless Passage.
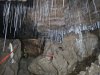 Start of Ironmongers chamber.
Modelling by Dinny, lighting by Tarquin and Dinny
Start of Ironmongers chamber.
Modelling by Dinny, lighting by Tarquin and Dinny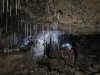 Ironmongers.
Modelling by Jack, lighting by Tarquin and Jack
Ironmongers.
Modelling by Jack, lighting by Tarquin and Jack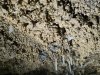 Textured calite and mud.
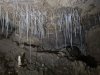 Ironmongers choke, the end of Speechless Passage.
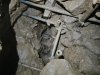 To the side of the choke is a scaffolded route through it, passing through the choked floor of Eggshell Chamber, leading into Clueless.
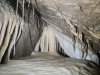 Curtains below Eggshell Chamber.
 Awkwardly narrow route.
Modelling by Dinny, lighting by Tarquin and Dinny
Awkwardly narrow route.
Modelling by Dinny, lighting by Tarquin and Dinny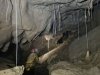 The cave now loses most of its formations, but there are a few straws.
Modelling by Dinny, lighting by Tarquin, Gwenllian and Dinny
The cave now loses most of its formations, but there are a few straws.
Modelling by Dinny, lighting by Tarquin, Gwenllian and Dinny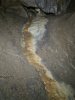 Flowstone river.
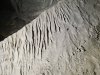 Surge marks in the mud.
 A very muddy stalagmite boss, whose steep slope is the only way on.
Modelling by Jack, lighting by Tarquin and Jack
A very muddy stalagmite boss, whose steep slope is the only way on.
Modelling by Jack, lighting by Tarquin and Jack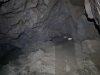 The cave then enlarges to become Clueless, then funnels into a series of crawls with a low chamber. This ends at Covid Crawl, the end of the cave.
Modelling by Tarquin's shadow and Gwenllian, lighting by Tarquin, Jack and Gwenllian
The cave then enlarges to become Clueless, then funnels into a series of crawls with a low chamber. This ends at Covid Crawl, the end of the cave.
Modelling by Tarquin's shadow and Gwenllian, lighting by Tarquin, Jack and Gwenllian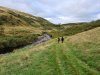 Walking up through Leck Beck valley.
Modelling by Gwenllian and Dinny
Walking up through Leck Beck valley.
Modelling by Gwenllian and Dinny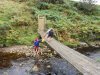 Crossing the river using a broken bridge. As if a locked door would stop someone.
Modelling by Gwenllian and Dinny
Crossing the river using a broken bridge. As if a locked door would stop someone.
Modelling by Gwenllian and Dinny Leck Beck.
Modelling by Dinny and Gwenllian
Leck Beck.
Modelling by Dinny and Gwenllian Waterfall in Leck Beck. By now, the river has all of the water from the Casterton Fell, Ease Gill, Leck Fell and most of the Ireby Fell caves.
 Swimming not bathing. I have no idea who these people are. Certainly none of us would take up the challenge to swim to the far wall and back across the current. Of course not.
Modelling by some randoms
Swimming not bathing. I have no idea who these people are. Certainly none of us would take up the challenge to swim to the far wall and back across the current. Of course not.
Modelling by some randoms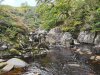 Upstream along Leck Beck. The cave resurgence at Leck Beck Head is over 1 km upstream.
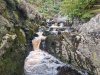 Leck Beck cascades.
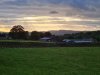 Sunset and streamers over Leck, looking towards Whittington.
 Reeking Hole near Sandiway in Cheshire (no, I didn't see a cat, but I did see a faint grin in the sky). This rather humorously named lake is sadly behind a fence and access it not permitted except to scouts. It is anyone's guess why the scouting association would have a reeking hole, but completely understandable that they would want to prevent others from getting close to it.
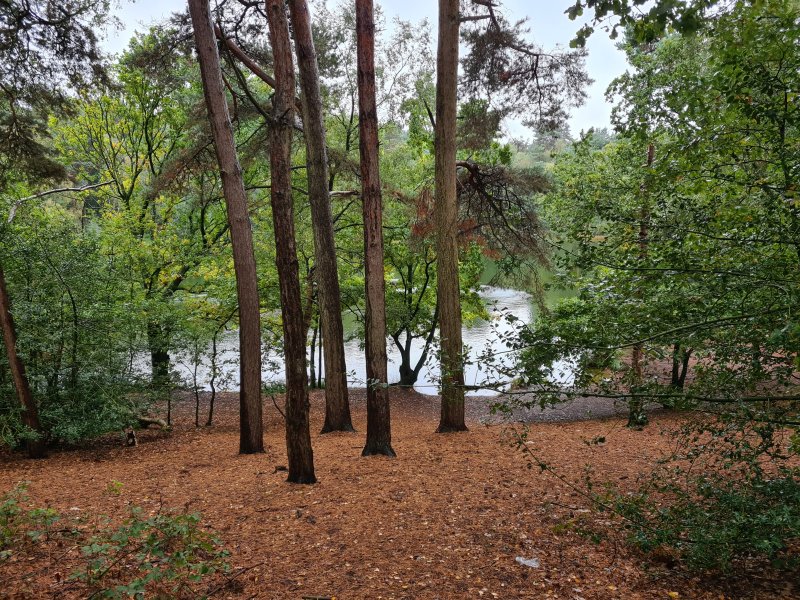 Trees at Reeking Hole.
 A quick swim at Hatchmere before setting off for the Dales. The temperature was definitely cold enough to make you gasp for air, but not terrible since you could feel your skin afterwards.
Modelling by Dinny and Gwenllian
A quick swim at Hatchmere before setting off for the Dales. The temperature was definitely cold enough to make you gasp for air, but not terrible since you could feel your skin afterwards.
Modelling by Dinny and Gwenllian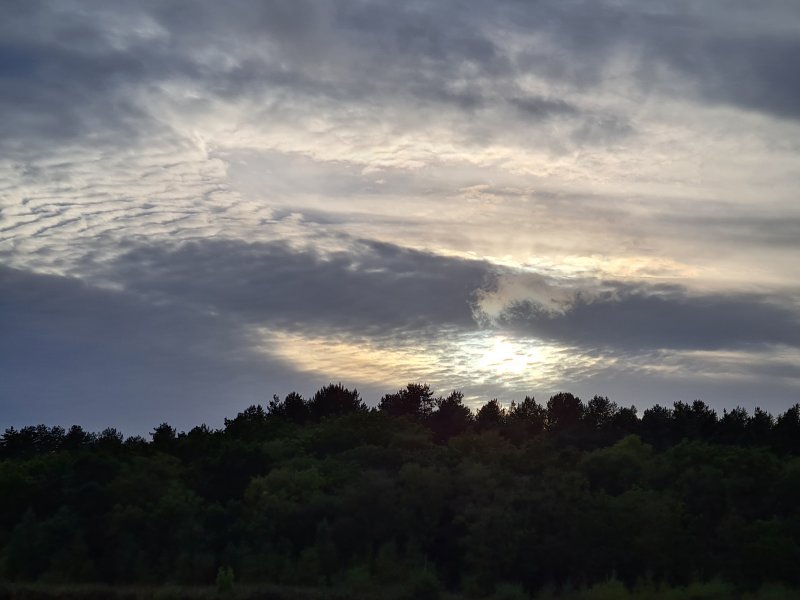 Sunset at Hatchmere.
 Castle Knott (538 metres) and Calf Top (610 metres), from Bullpot Farm.
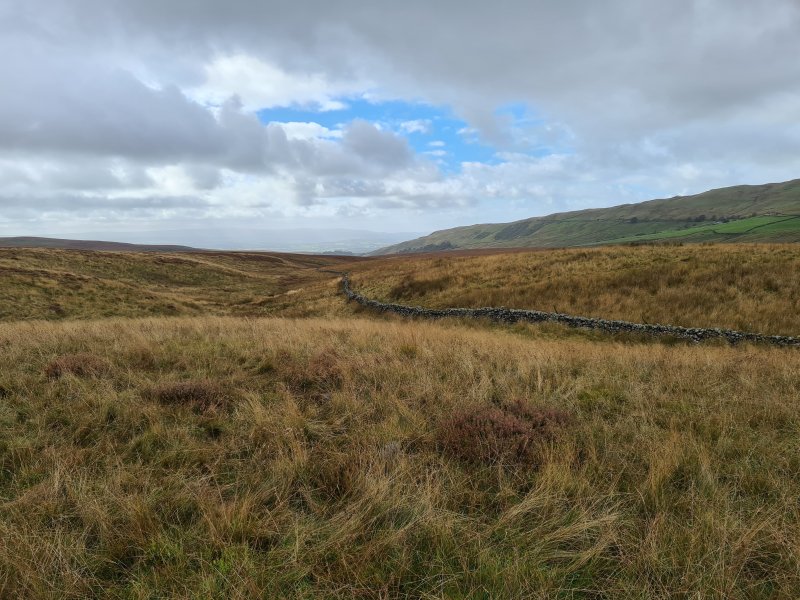 The view from Casterton Fell down the dry valley that contains Lancaster Hole. In the distant background is the Forest Of Bowland, topping out at Ward's Stone (561 metres), while on the right is Barbon Low Fell (437 metres).
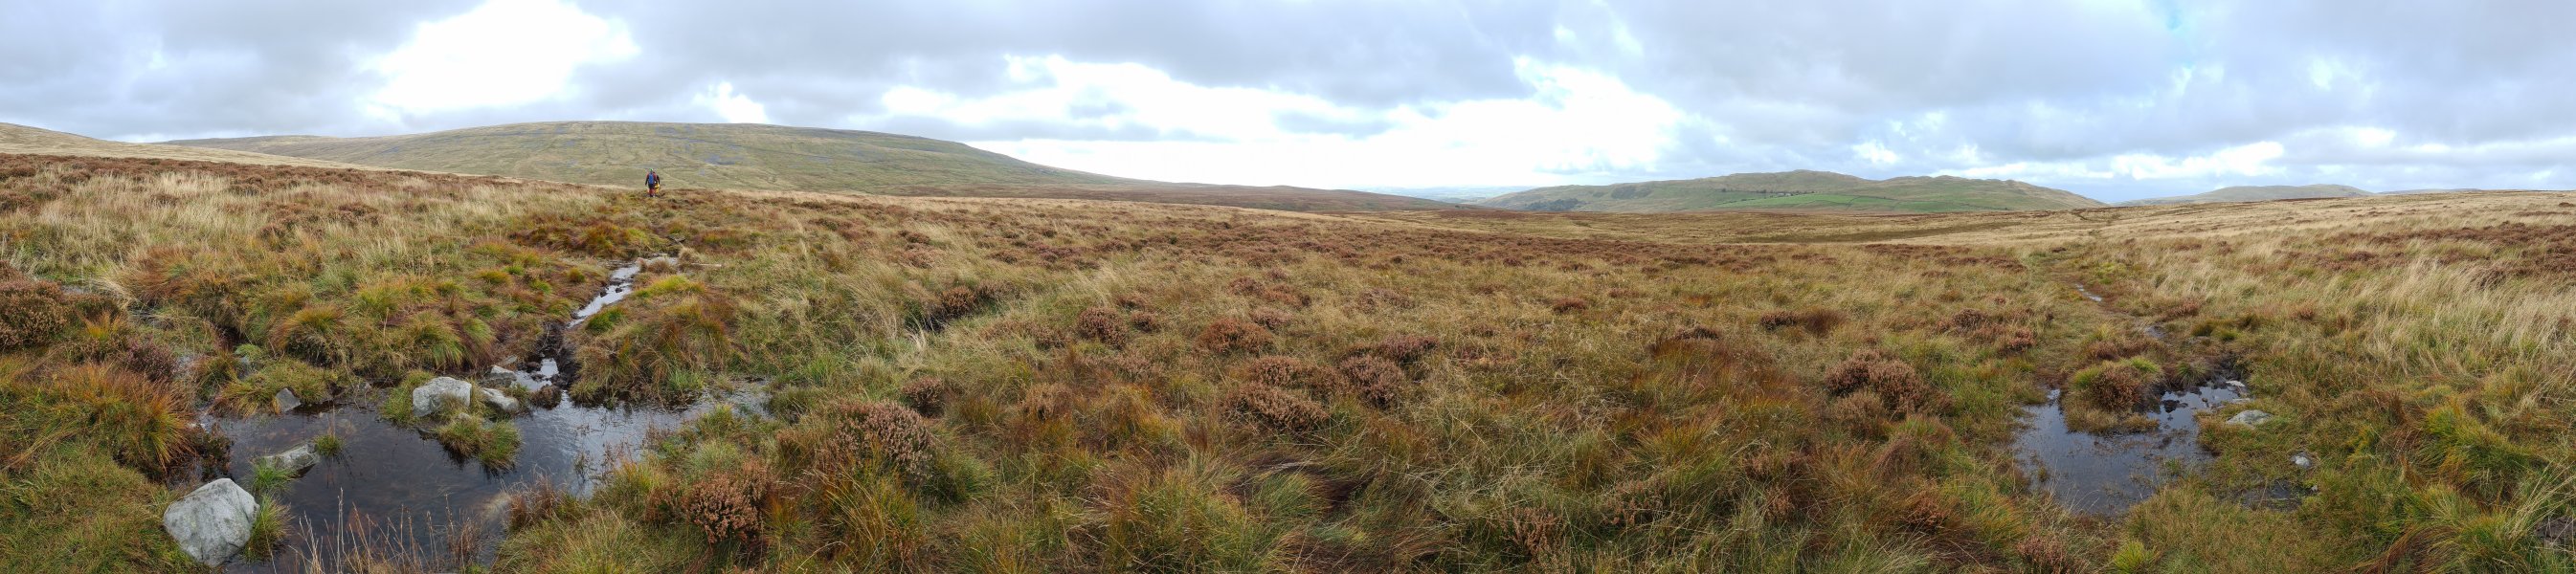 Crossing Casterton Fell towards Howe Gill. Left to right are Great Coum (687 metres), Green Hill (628 metres), Gragareth (627 metres), Forest Of Bowland, Barbon Low Fell, Castle Knott and Calf Top. Ease Gill is the valley between the camera and the mountains on the left. The border between Cumbria (left and right) and Lancashire runs down Ease Gill. The mountains on the left form the border between Lancashire and Yorkshire, with the Three Counties System running below all three counties.
Modelling by Jack and Dinny
Crossing Casterton Fell towards Howe Gill. Left to right are Great Coum (687 metres), Green Hill (628 metres), Gragareth (627 metres), Forest Of Bowland, Barbon Low Fell, Castle Knott and Calf Top. Ease Gill is the valley between the camera and the mountains on the left. The border between Cumbria (left and right) and Lancashire runs down Ease Gill. The mountains on the left form the border between Lancashire and Yorkshire, with the Three Counties System running below all three counties.
Modelling by Jack and Dinny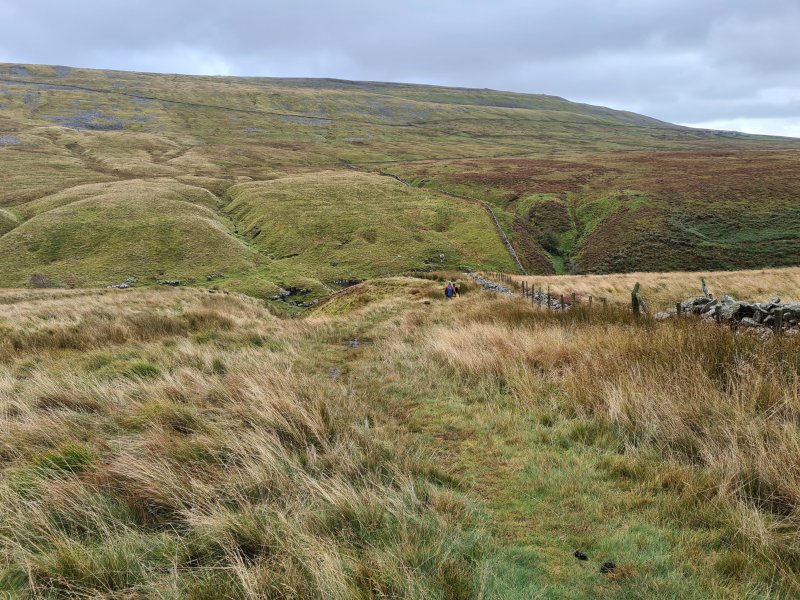 Descending into Ease Gill just upstream of Howe Gill. County Pot lies in the middle of the picture, on the near bank of Ease Gill.
Modelling by Jack and Dinny
Descending into Ease Gill just upstream of Howe Gill. County Pot lies in the middle of the picture, on the near bank of Ease Gill.
Modelling by Jack and Dinny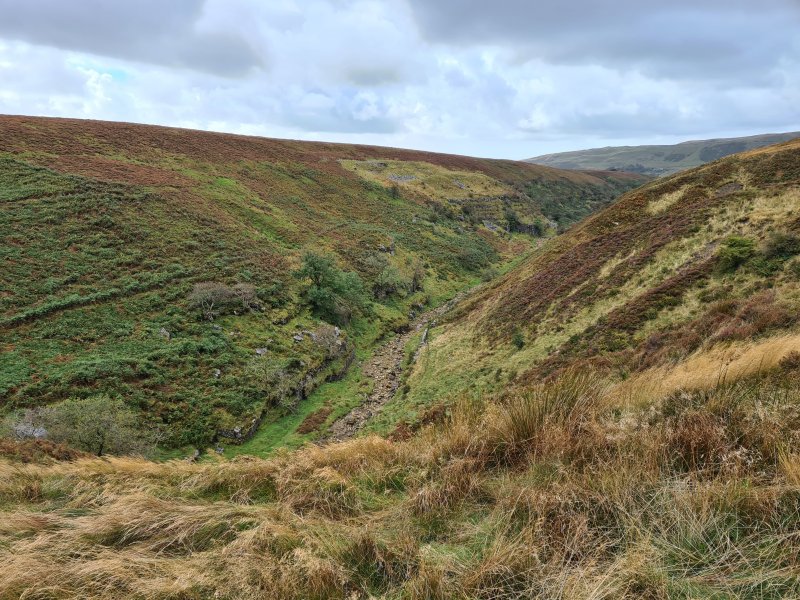 Looking downstream along Ease Gill. Howe Gill joins from the right of the photograph.
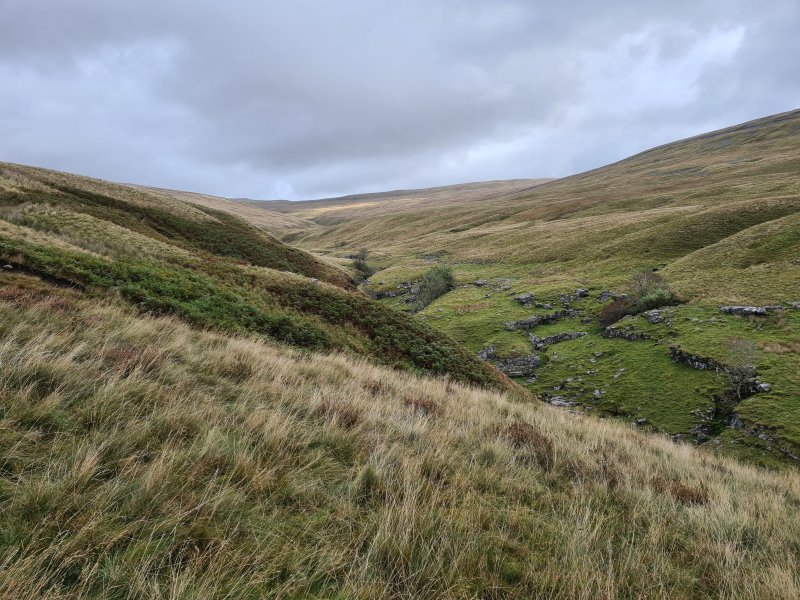 Looking upstream along Ease Gill, towards Great Coum and Green Hill. Top Sink lies in the distant left, where the stream finally swings over to the right.
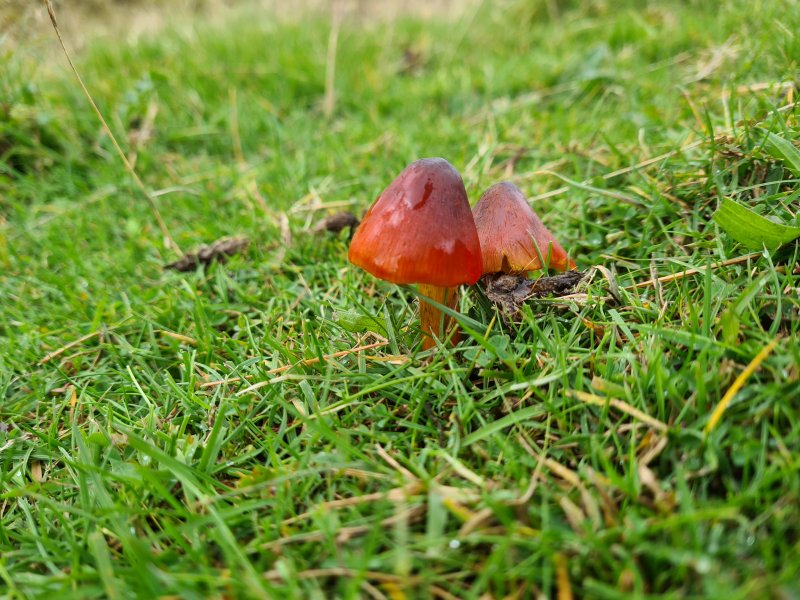 A pair of blackening waxcaps keeping each other close.
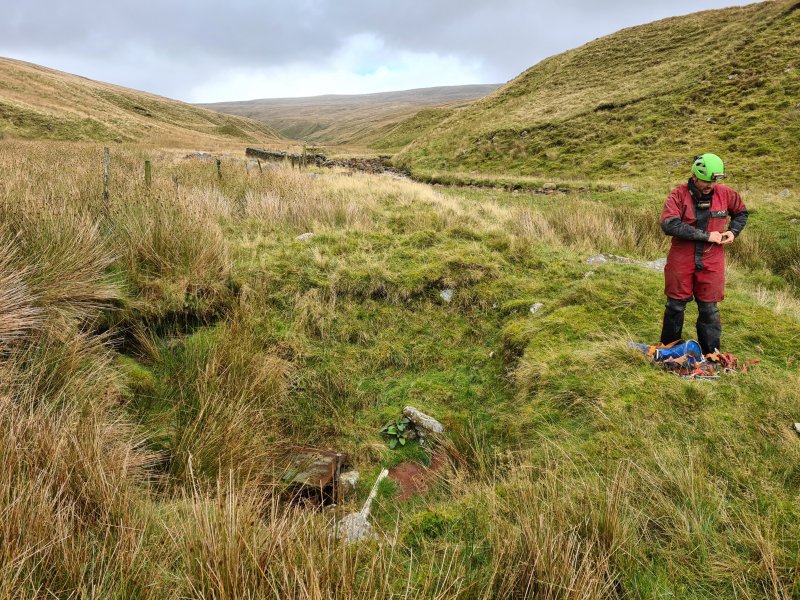 Top Sink's entrance. This entrance is the highest one (furthest upstream) in Ease Gill.
Modelling by Jack
Top Sink's entrance. This entrance is the highest one (furthest upstream) in Ease Gill.
Modelling by Jack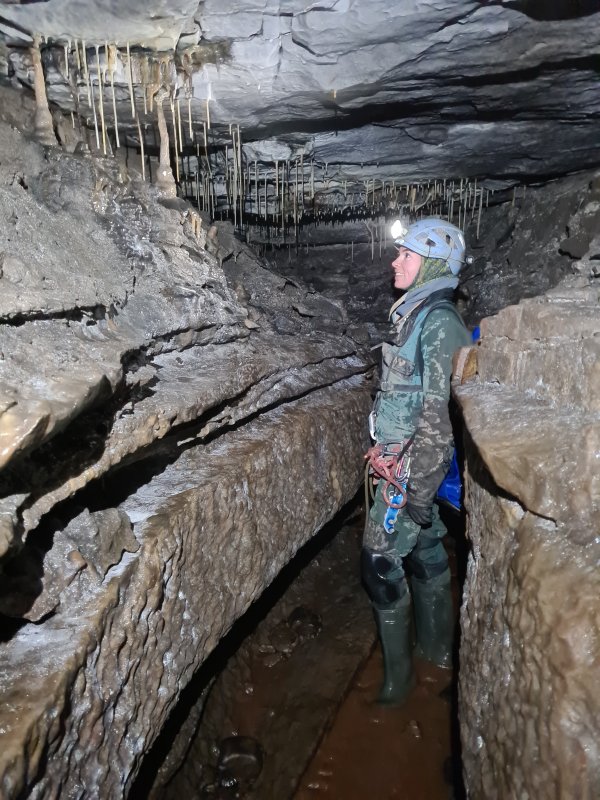 Start of Top Sink.
Modelling by Gwenllian, lighting by Tarquin and Gwenllian
Start of Top Sink.
Modelling by Gwenllian, lighting by Tarquin and Gwenllian Awkwardly narrow rift.
Modelling by Gwenllian, lighting by Tarquin and Gwenllian
Awkwardly narrow rift.
Modelling by Gwenllian, lighting by Tarquin and Gwenllian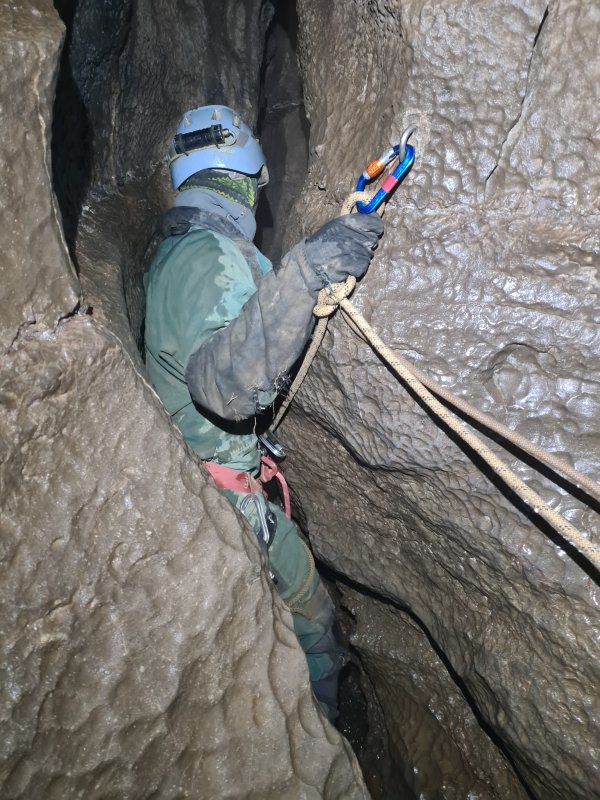 Top of Walrus Pot.
Modelling by Gwenllian, lighting by Tarquin and Gwenllian
Top of Walrus Pot.
Modelling by Gwenllian, lighting by Tarquin and Gwenllian Walrus Pot.
Modelling by Dinny, lighting by Tarquin and Dinny
Walrus Pot.
Modelling by Dinny, lighting by Tarquin and Dinny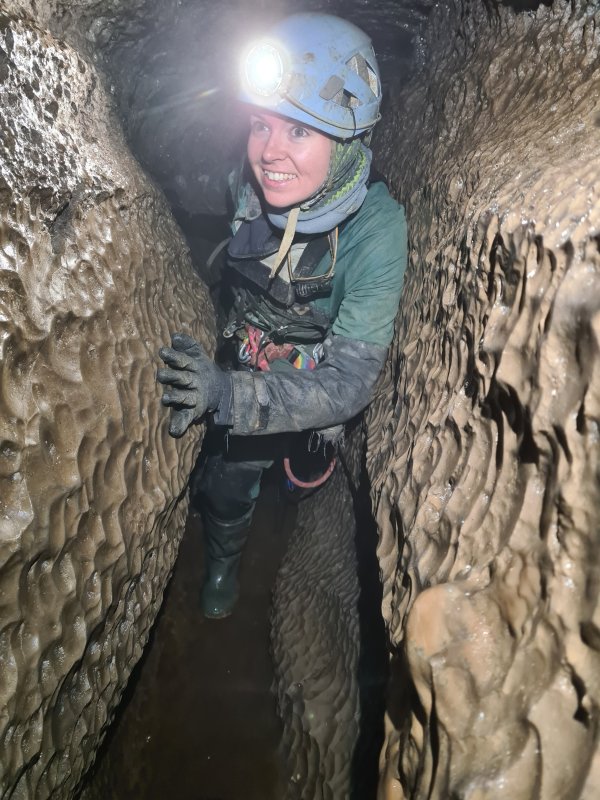 Pi r2, a twisty passage between the pitches. The name is sometimes written as π r2, or incorrectly as Pie R2.
Modelling by Gwenllian, lighting by Tarquin and Gwenllian
Pi r2, a twisty passage between the pitches. The name is sometimes written as π r2, or incorrectly as Pie R2.
Modelling by Gwenllian, lighting by Tarquin and Gwenllian Penknife Pitch.
Modelling by Dinny, lighting by Tarquin, Dinny and Jack
Penknife Pitch.
Modelling by Dinny, lighting by Tarquin, Dinny and Jack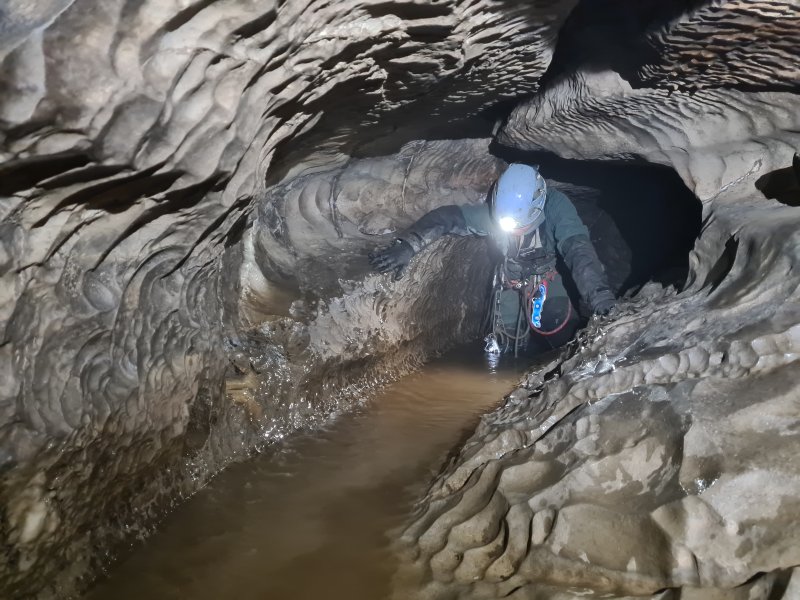 Bradshaw's Passage.
Modelling by Gwenllian, lighting by Tarquin and Gwenllian
Bradshaw's Passage.
Modelling by Gwenllian, lighting by Tarquin and Gwenllian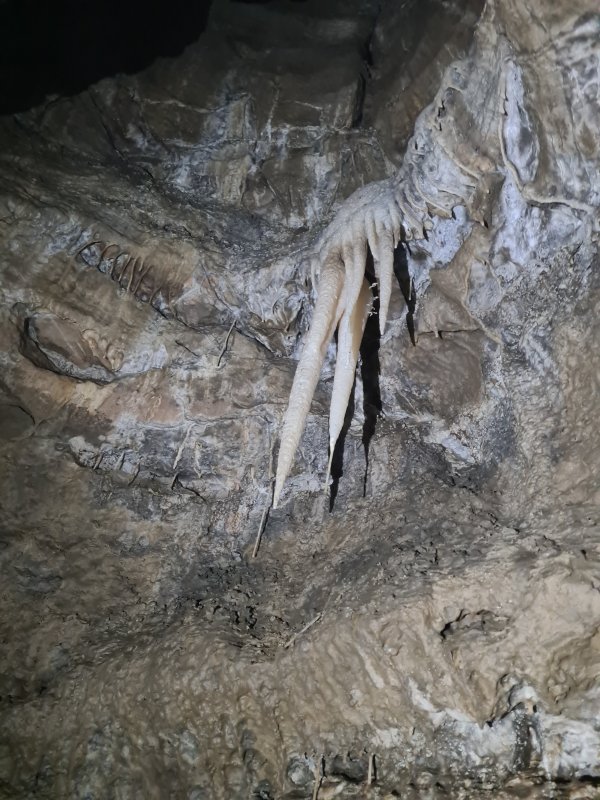 Limerick Passage stal.
Lighting by Tarquin and Gwenllian
Limerick Passage stal.
Lighting by Tarquin and Gwenllian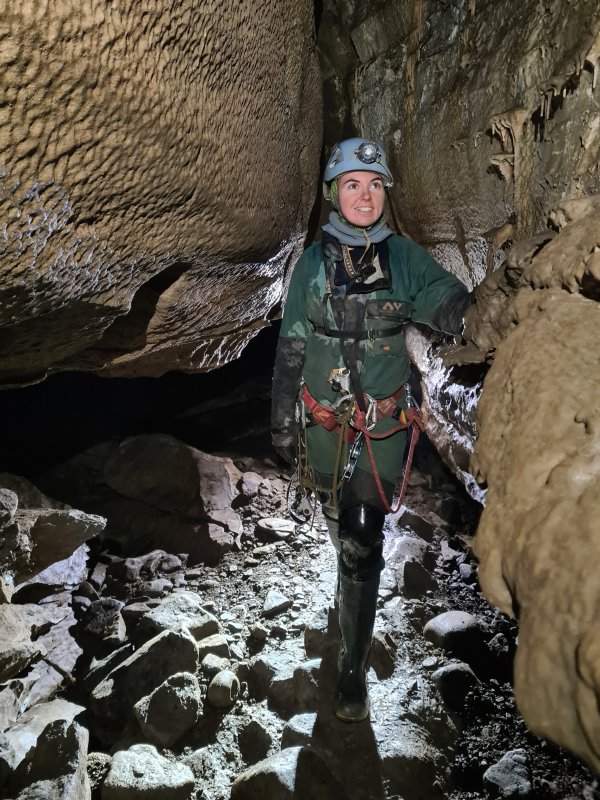 One of the many passages at Limerick Junction.
Modelling by Gwenllian, lighting by Tarquin and Dinny
One of the many passages at Limerick Junction.
Modelling by Gwenllian, lighting by Tarquin and Dinny Limerick Passage. I think.
Modelling by Jack, lighting by Tarquin, Gwenllian and Jack
Limerick Passage. I think.
Modelling by Jack, lighting by Tarquin, Gwenllian and Jack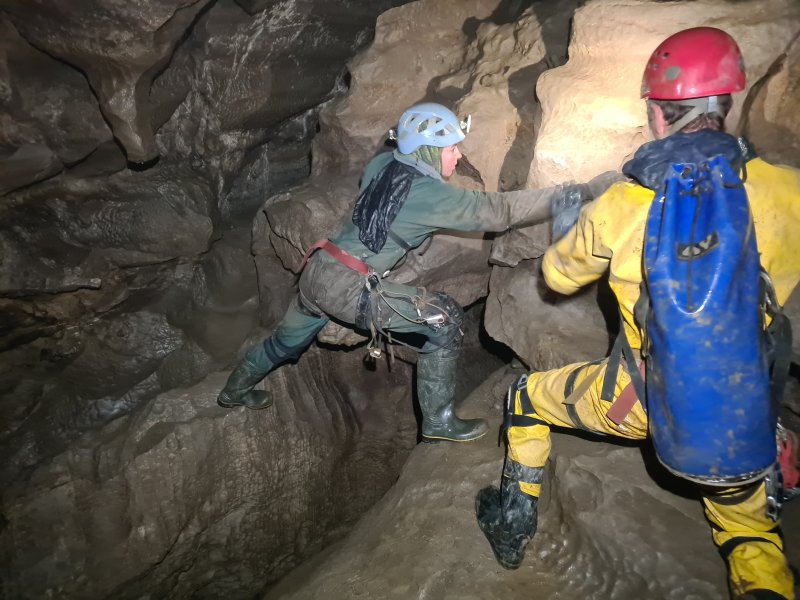 Traversing over the river at the Bridge Of Sighs.
Modelling by Gwenllian and Dinny, lighting by Tarquin, Gwenllian and Dinny
Traversing over the river at the Bridge Of Sighs.
Modelling by Gwenllian and Dinny, lighting by Tarquin, Gwenllian and Dinny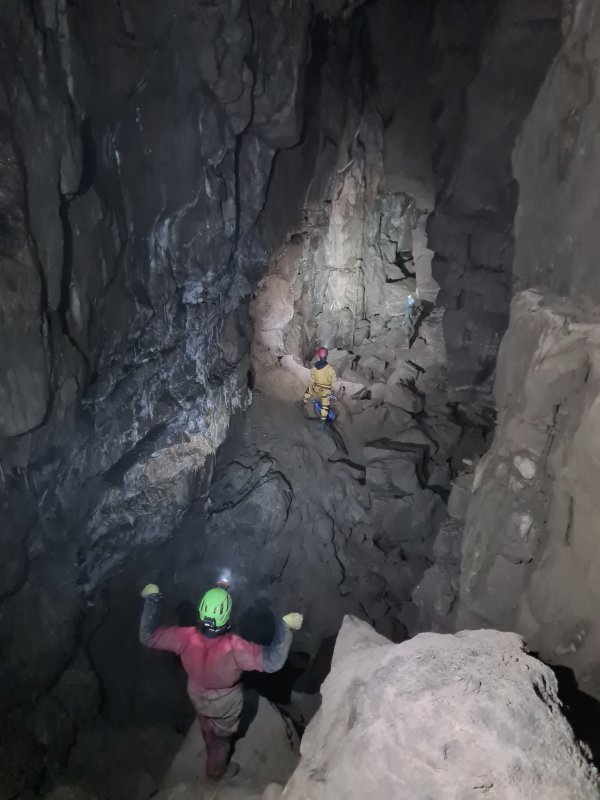 Nagasaki chamber. We searched this for cryogenic deposits, but the whole chamber is covered in relatively recent alluvial deposits, and it is unlikely that anything cryogenic could have survived here.
Modelling by Jack, Dinny and Gwenllian, lighting by Tarquin, Jack, Dinny and Gwenllian
Nagasaki chamber. We searched this for cryogenic deposits, but the whole chamber is covered in relatively recent alluvial deposits, and it is unlikely that anything cryogenic could have survived here.
Modelling by Jack, Dinny and Gwenllian, lighting by Tarquin, Jack, Dinny and Gwenllian Ceiling of Nagasaki above Rock Of Ages.
Lighting by Tarquin and Jack
Ceiling of Nagasaki above Rock Of Ages.
Lighting by Tarquin and Jack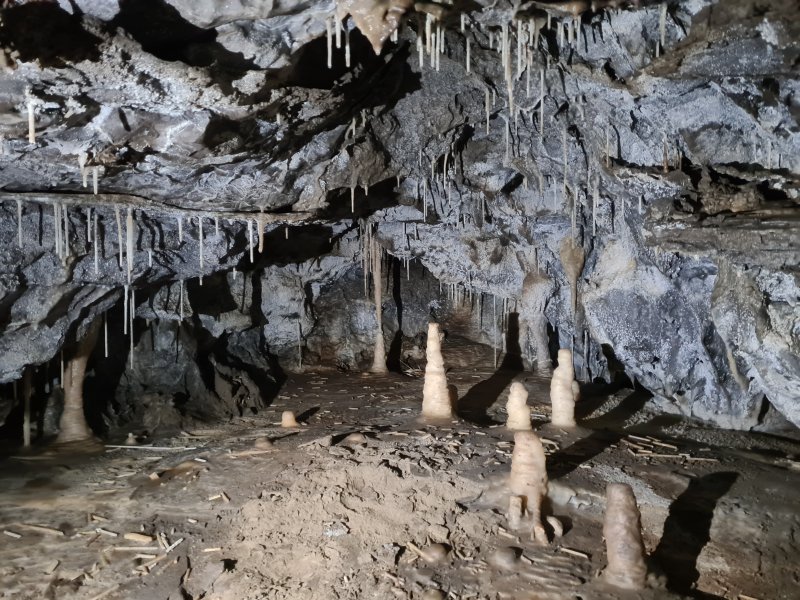 On the way to Easter Grotto.
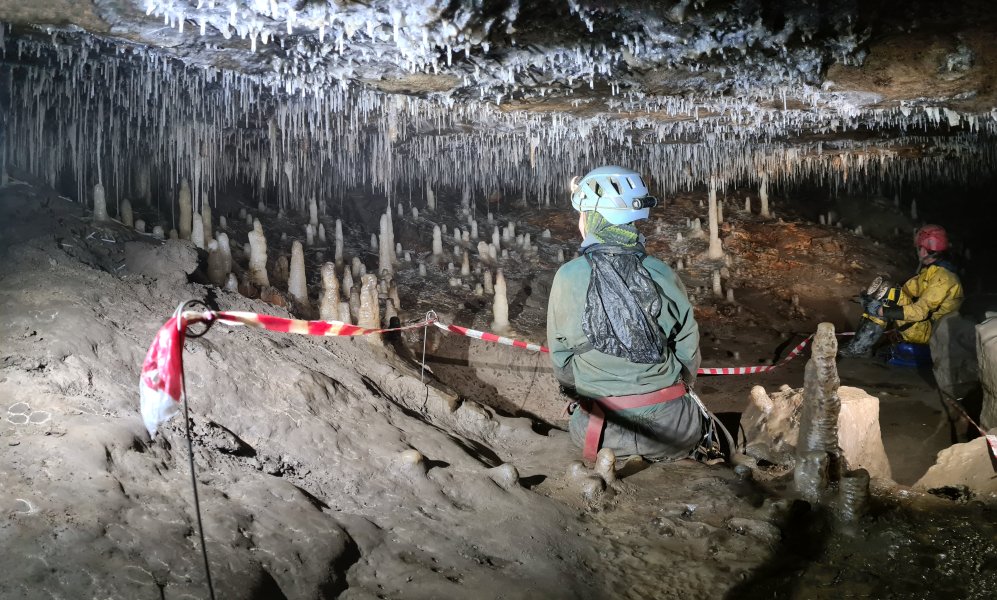 The start of Easter Grotto, with its spectacular straws.
Modelling by Gwenllian and Dinny, lighting by Tarquin, Gwenllian and Dinny
The start of Easter Grotto, with its spectacular straws.
Modelling by Gwenllian and Dinny, lighting by Tarquin, Gwenllian and Dinny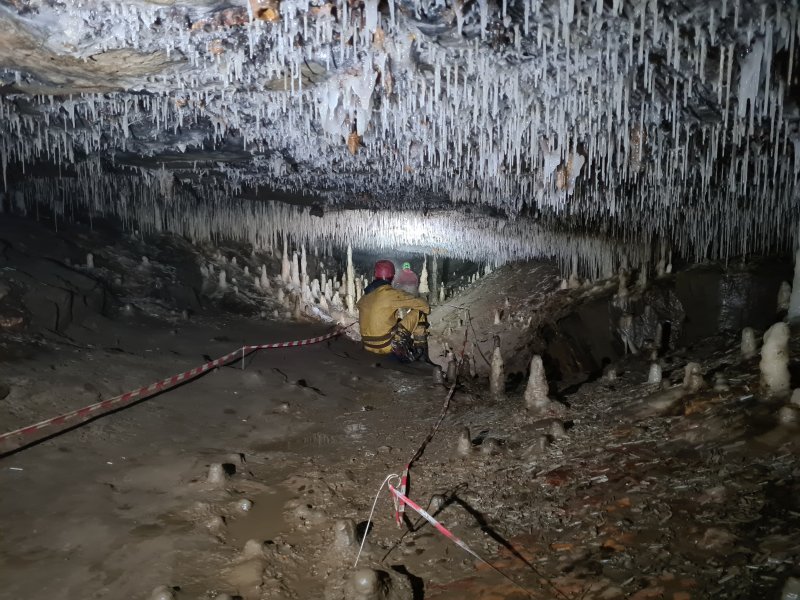 Main part of Easter Grotto.
Modelling by Dinny and Jack, lighting by Tarquin, Dinny, Jack and Gwenllian
Main part of Easter Grotto.
Modelling by Dinny and Jack, lighting by Tarquin, Dinny, Jack and Gwenllian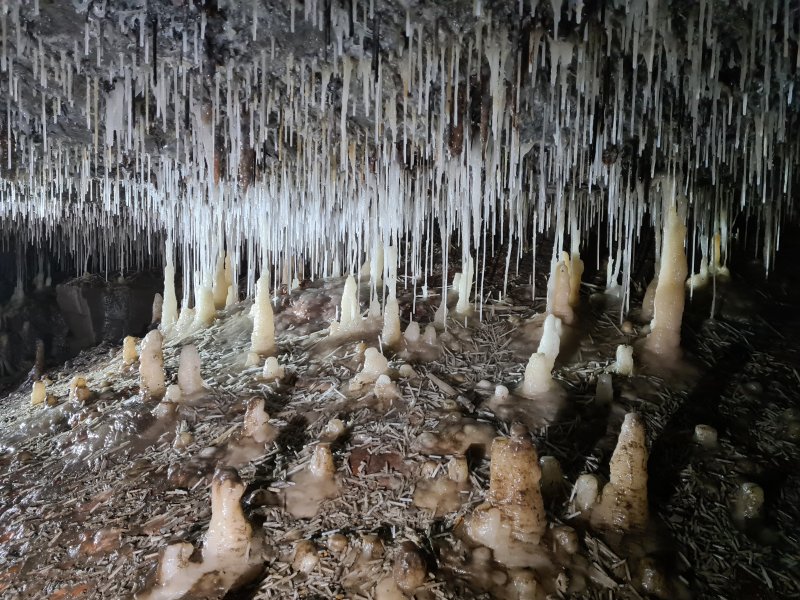 Easter Grotto straws.
Lighting by Tarquin and Dinny
Easter Grotto straws.
Lighting by Tarquin and Dinny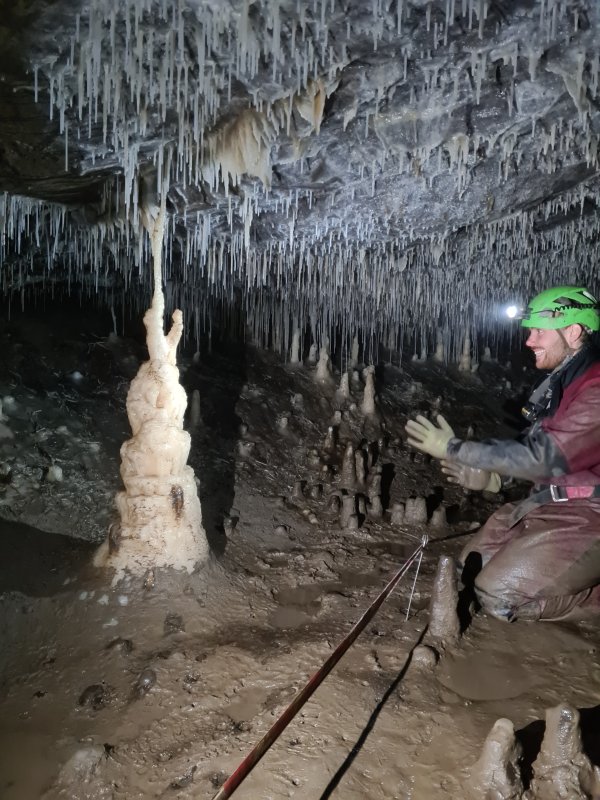 Column with a phallus.
Modelling by Jack, lighting by Tarquin and Jack
Column with a phallus.
Modelling by Jack, lighting by Tarquin and Jack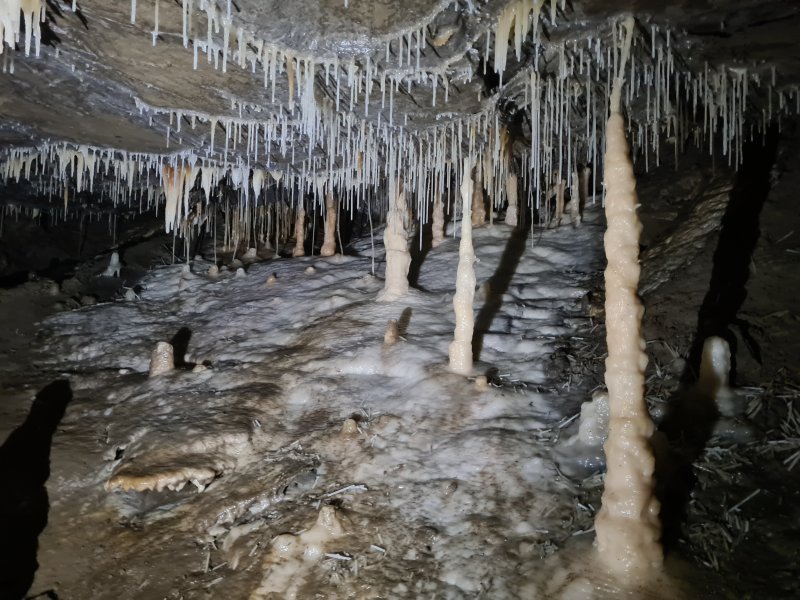 Second half of Easter Grotto.
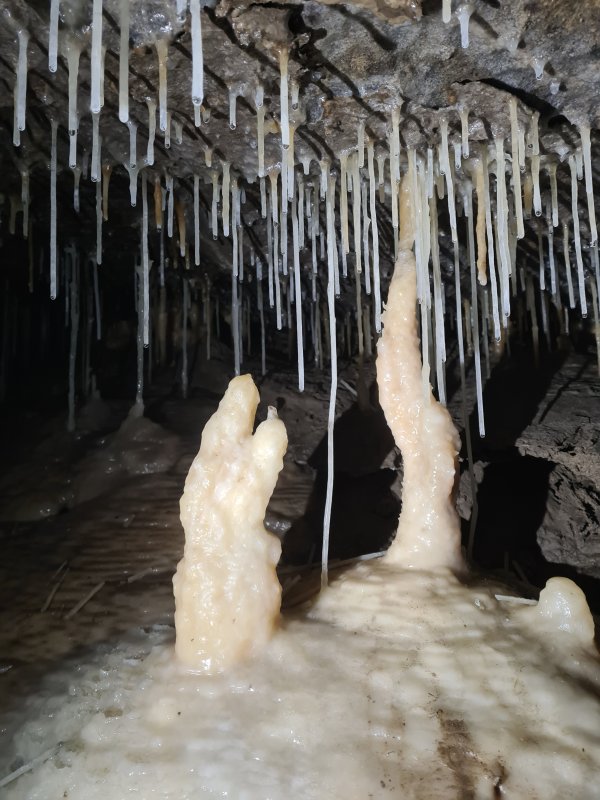 Stalagmites in the second part of Easter Grotto.
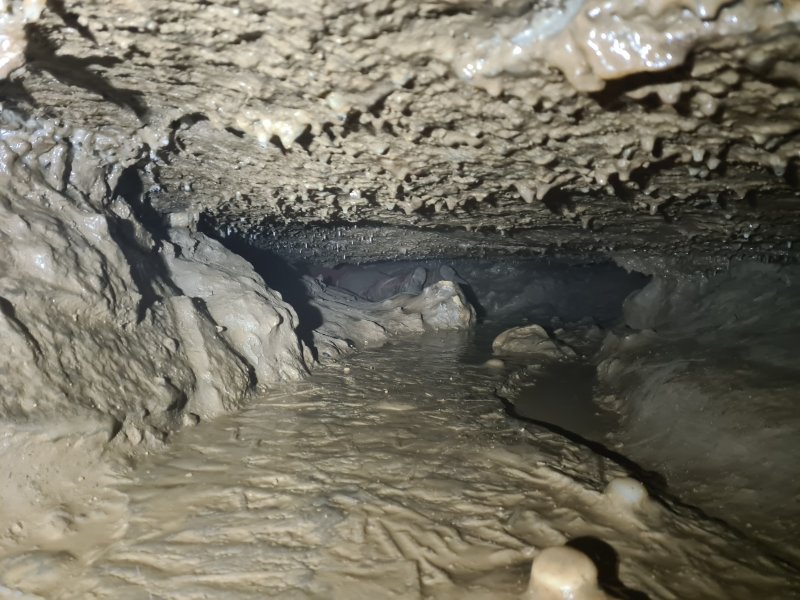 Crawl linking Easter Grotto and Gypsum Caverns. It gets low enough that SRT gear is a nuisance, but it can be left on.
Modelling by Jack
Crawl linking Easter Grotto and Gypsum Caverns. It gets low enough that SRT gear is a nuisance, but it can be left on.
Modelling by Jack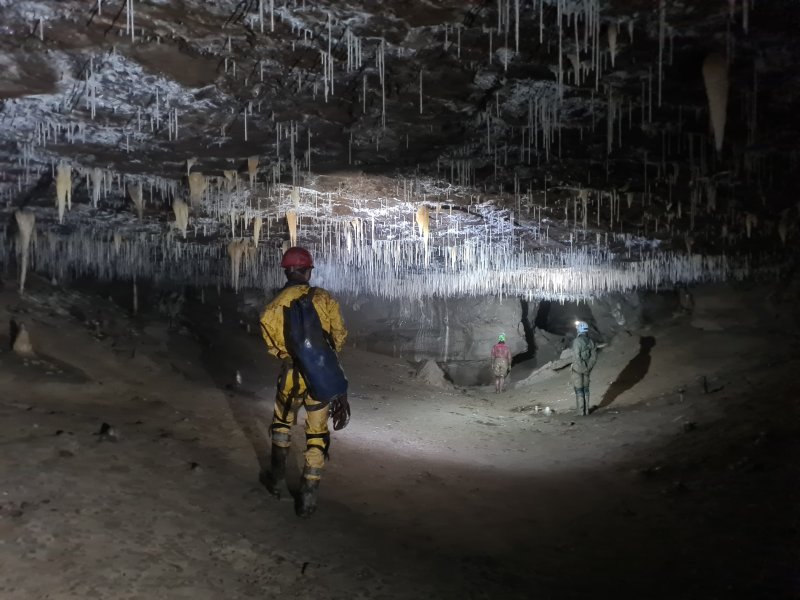 The Palace, the start of Gypsum Caverns.
Modelling by Dinny, Gwenllian and Jack, lighting by Tarquin, Dinny, Gwenllian and Jack
The Palace, the start of Gypsum Caverns.
Modelling by Dinny, Gwenllian and Jack, lighting by Tarquin, Dinny, Gwenllian and Jack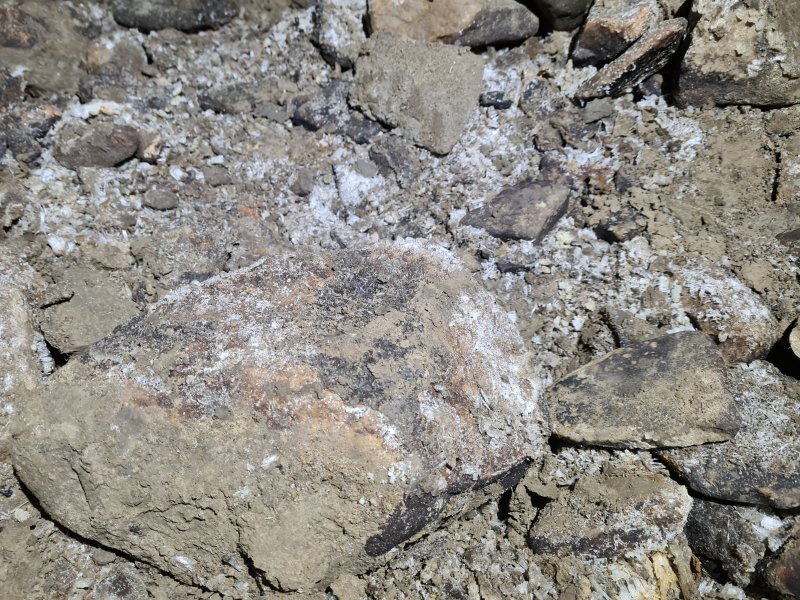 A very small deposit of gypsum, but enough to earn the name.
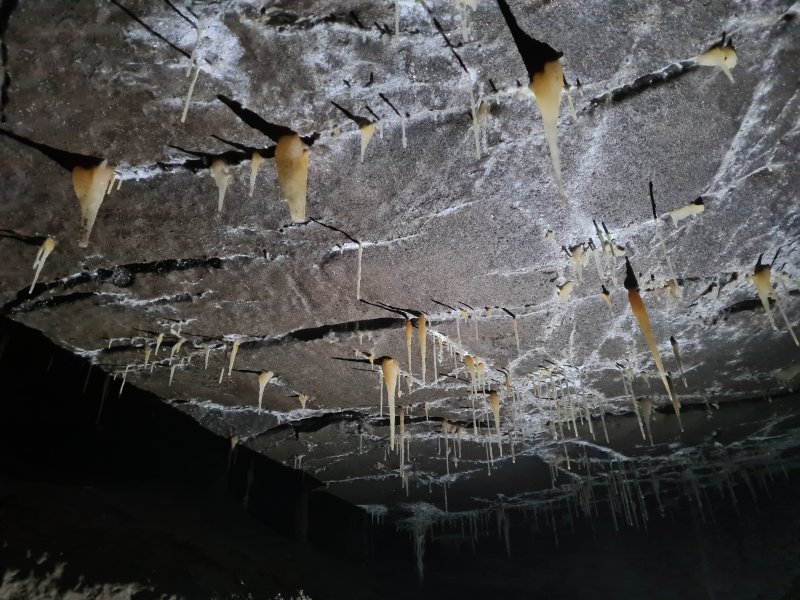 Ceiling of Gypsum Cavern.
Lighting by Jack
Ceiling of Gypsum Cavern.
Lighting by Jack Gypsum Cavern, the long part of Gypsum Caverns.
Modelling by Jack, lighting by Tarquin and Jack
Gypsum Cavern, the long part of Gypsum Caverns.
Modelling by Jack, lighting by Tarquin and Jack The passage leading to Holbeck Junction.
Modelling by Jack, lighting by Tarquin and Jack
The passage leading to Holbeck Junction.
Modelling by Jack, lighting by Tarquin and Jack Straw Chamber.
Modelling by Jack, lighting by Tarquin, Jack and Dinny
Straw Chamber.
Modelling by Jack, lighting by Tarquin, Jack and Dinny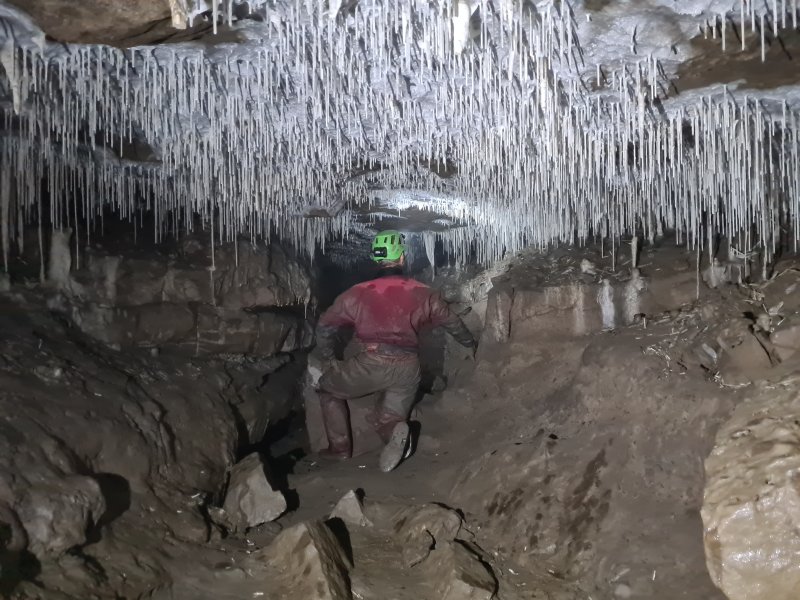 The start of Dry Dock Passage.
Modelling by Jack, lighting by Tarquin and Jack
The start of Dry Dock Passage.
Modelling by Jack, lighting by Tarquin and Jack Flood scum downstream of Straw Chamber.
Modelling by Jack, lighting by Tarquin and Jack
Flood scum downstream of Straw Chamber.
Modelling by Jack, lighting by Tarquin and Jack Below Stop Pot.
Modelling by Dinny, lighting by Tarquin, Gwenllian and Dinny
Below Stop Pot.
Modelling by Dinny, lighting by Tarquin, Gwenllian and Dinny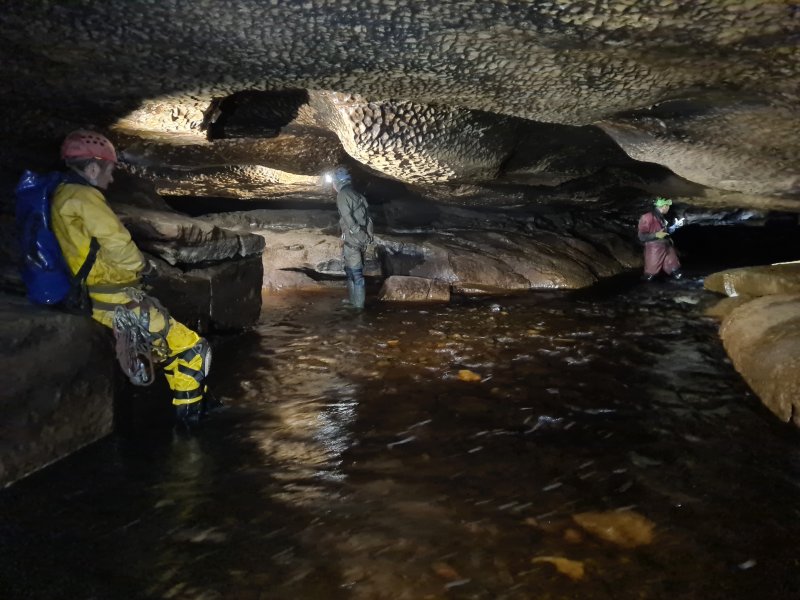 Eureka Junction.
Modelling by Dinny, Gwenllian and Jack, lighting by Tarquin, Dinny, Gwenllian and Jack
Eureka Junction.
Modelling by Dinny, Gwenllian and Jack, lighting by Tarquin, Dinny, Gwenllian and Jack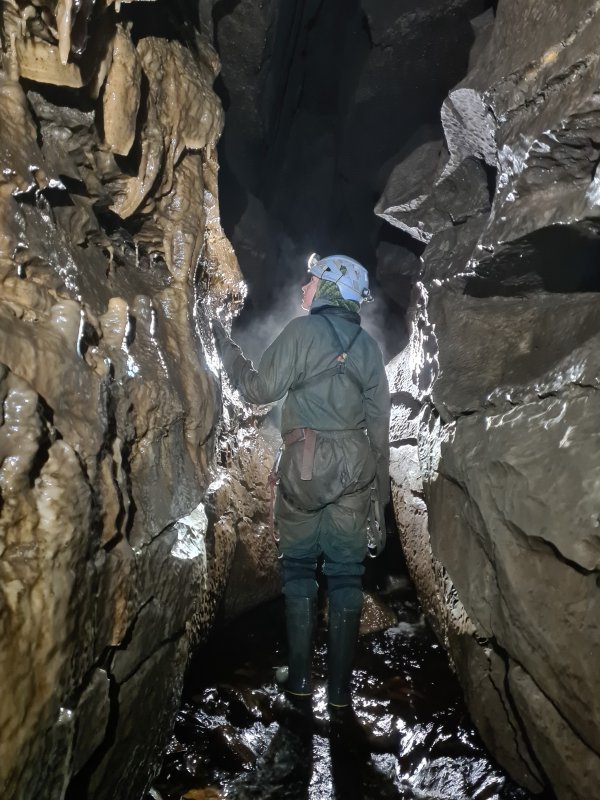 Lower Pierce's Passage.
Modelling by Gwenllian, lighting by Tarquin, Gwenllian and Dinny
Lower Pierce's Passage.
Modelling by Gwenllian, lighting by Tarquin, Gwenllian and Dinny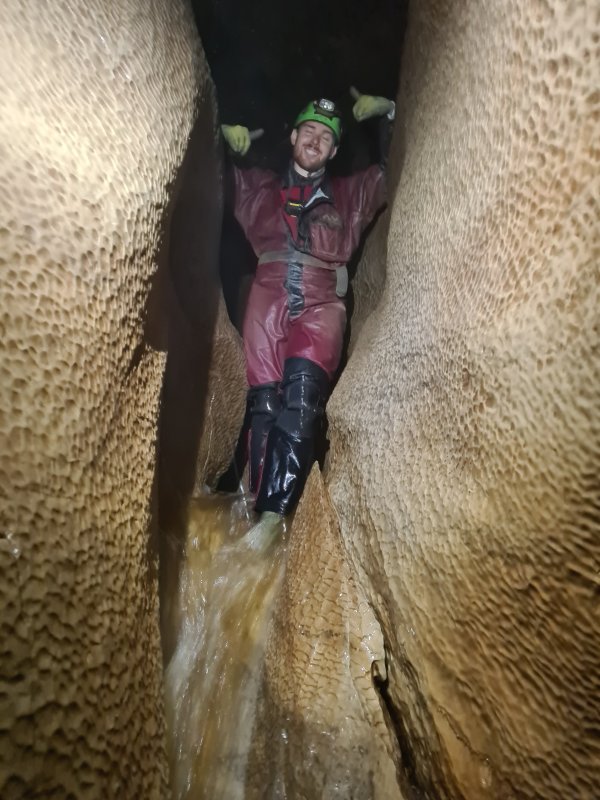 We visited a side passage that I think leads to Whiteline Chamber.
Modelling by Jack
We visited a side passage that I think leads to Whiteline Chamber.
Modelling by Jack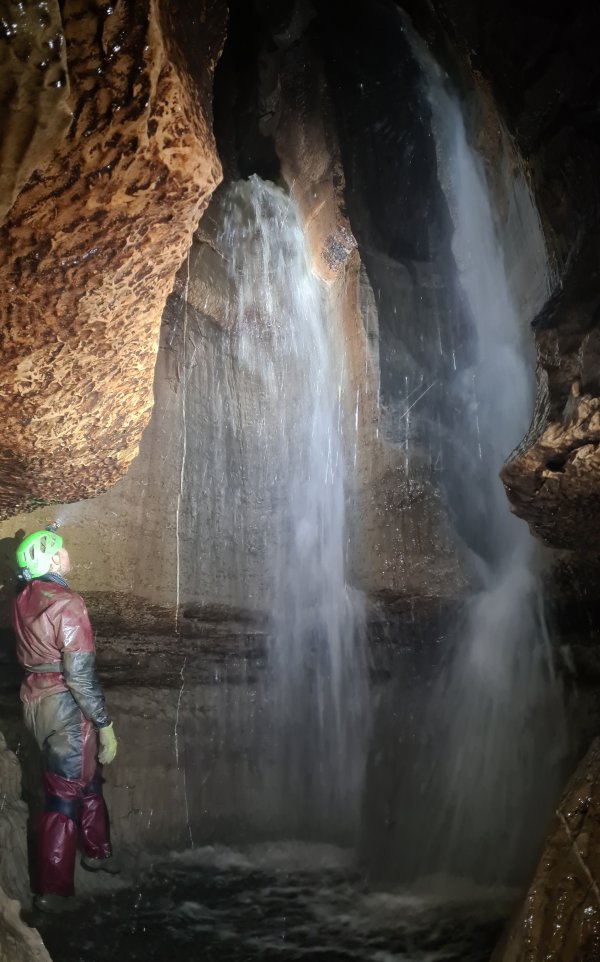 It features a very attractive twin waterfall.
Modelling by Jack, lighting by Tarquin and Jack
It features a very attractive twin waterfall.
Modelling by Jack, lighting by Tarquin and Jack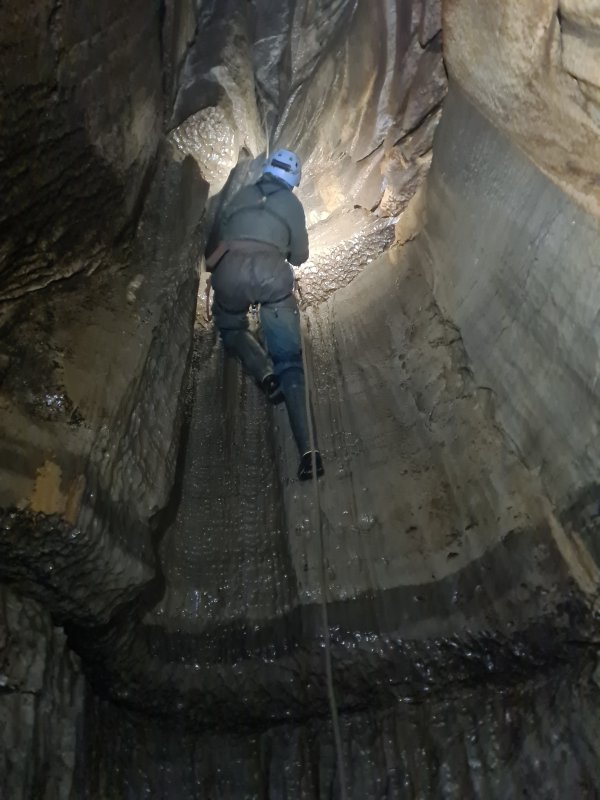 Up a 5 metre pitch to reach the link between Poetic Justice and Platypus Junction.
Modelling by Gwenllian, lighting by Tarquin and Gwenllian
Up a 5 metre pitch to reach the link between Poetic Justice and Platypus Junction.
Modelling by Gwenllian, lighting by Tarquin and Gwenllian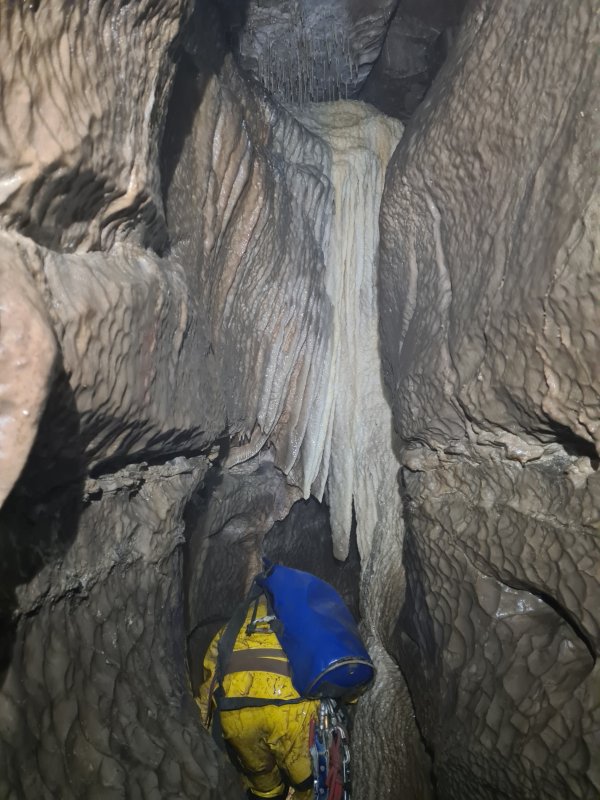 Heading downstream after the chimney towards Platypus Junction.
Modelling by Dinny, lighting by Tarquin and Dinny
Heading downstream after the chimney towards Platypus Junction.
Modelling by Dinny, lighting by Tarquin and Dinny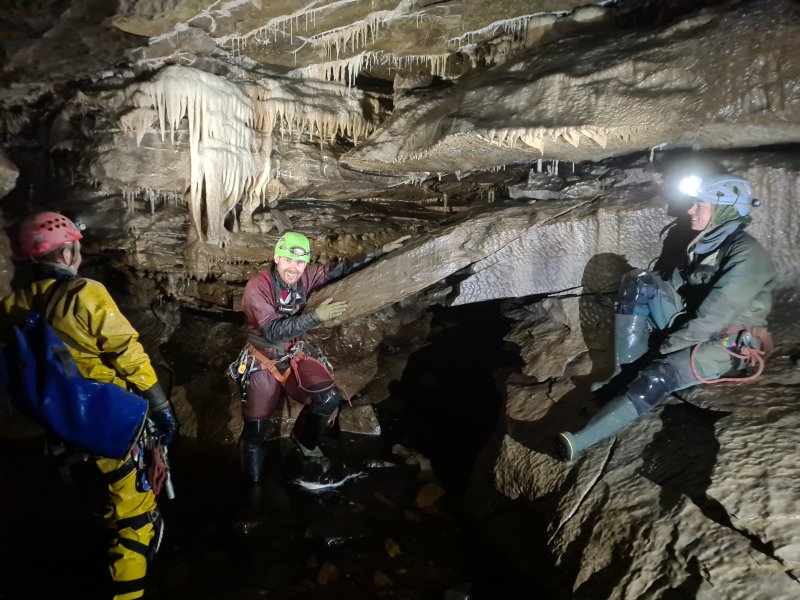 Platypus Junction, with Jack making friends with the platypus.
Modelling by Dinny, Jack and Gwenllian, lighting by Tarquin, Dinny and Gwenllian
Platypus Junction, with Jack making friends with the platypus.
Modelling by Dinny, Jack and Gwenllian, lighting by Tarquin, Dinny and Gwenllian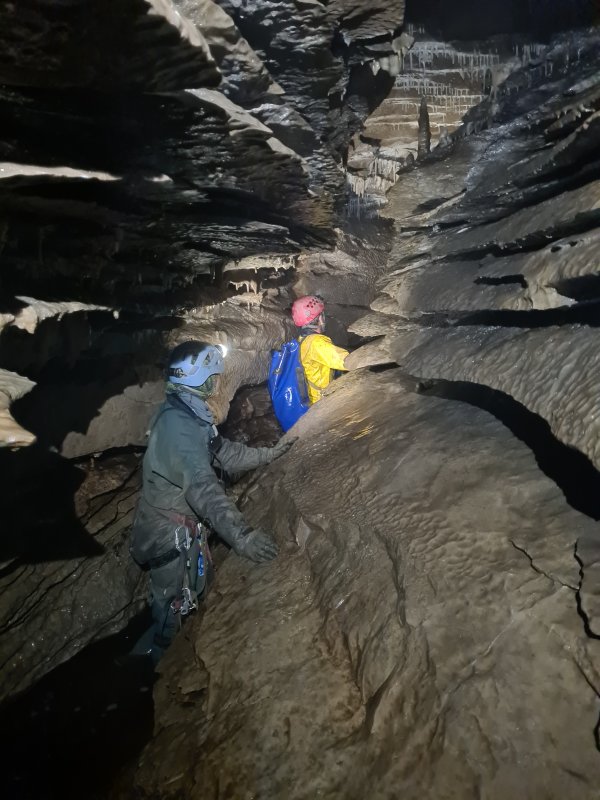 The razors of Razor Passage.
Modelling by Gwenllian and Dinny, lighting by Tarquin, Gwenllian and Dinny
The razors of Razor Passage.
Modelling by Gwenllian and Dinny, lighting by Tarquin, Gwenllian and Dinny Rope climb in Mushroom Passage (I think).
Modelling by Dinny, lighting by Tarquin, Gwenllian and Dinny
Rope climb in Mushroom Passage (I think).
Modelling by Dinny, lighting by Tarquin, Gwenllian and Dinny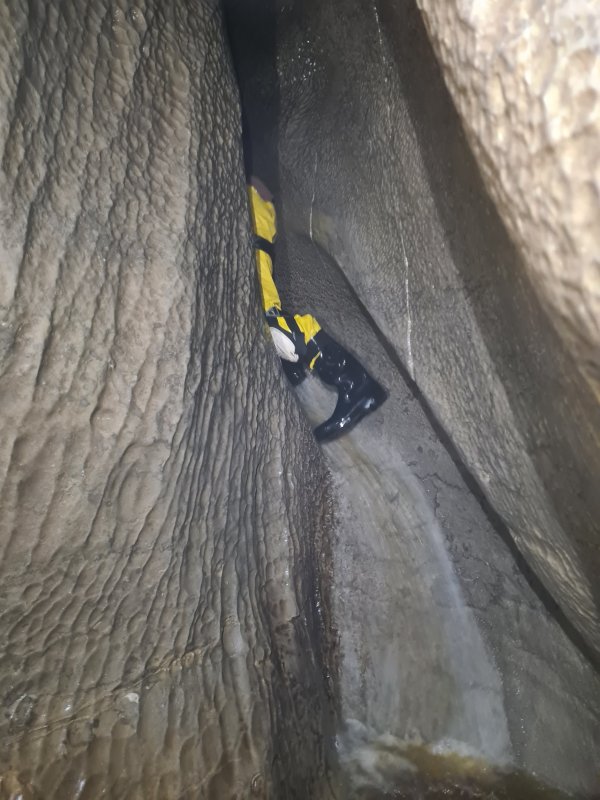 A tricky climb that has no holds.
Modelling by Dinny
A tricky climb that has no holds.
Modelling by Dinny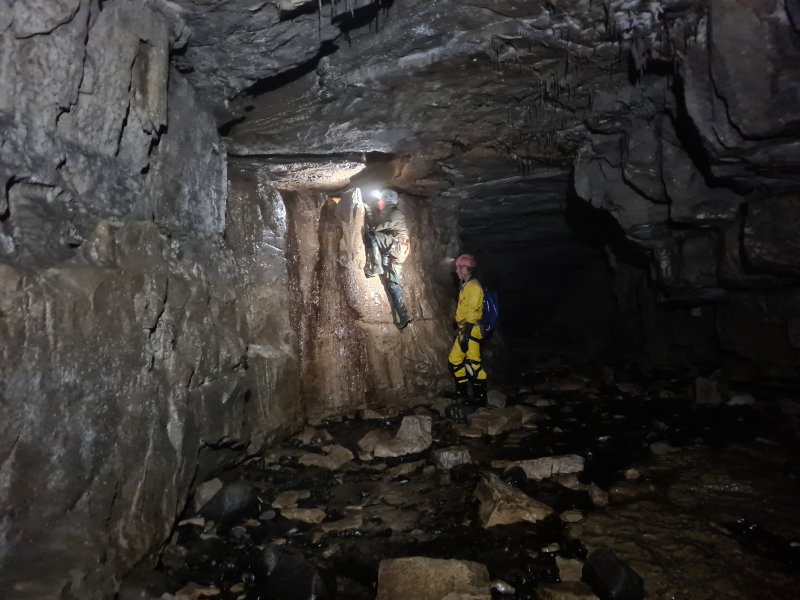 Climb out of Broadway leading to County Pot.
Modelling by Gwenllian and Dinny, lighting by Tarquin, Gwenllian and Dinny
Climb out of Broadway leading to County Pot.
Modelling by Gwenllian and Dinny, lighting by Tarquin, Gwenllian and Dinny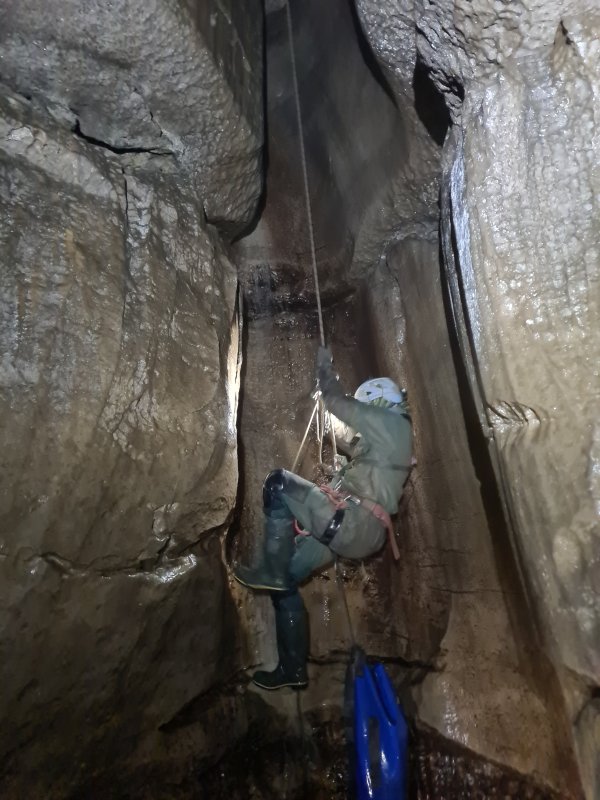 Pitch leading out of County Pot.
Modelling by Gwenllian, lighting by Tarquin and Gwenllian
Pitch leading out of County Pot.
Modelling by Gwenllian, lighting by Tarquin and Gwenllian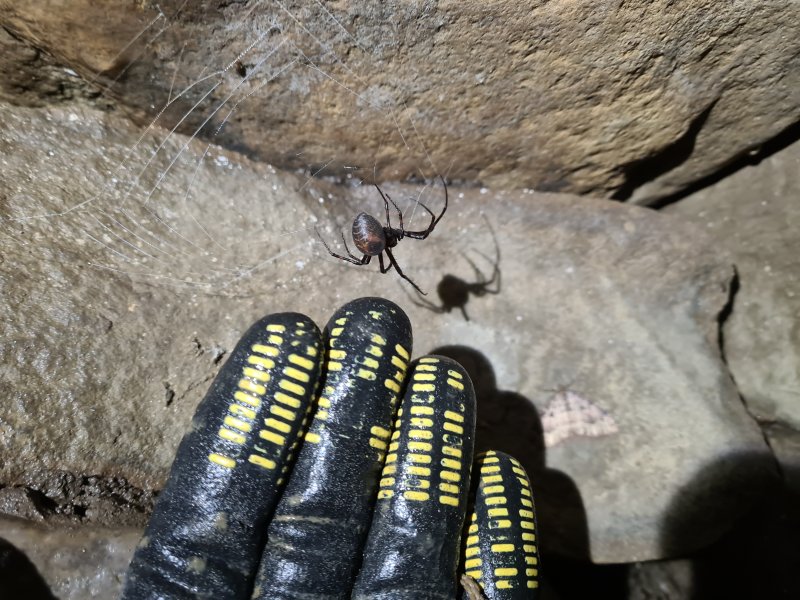 Female European cave spider.
Modelling by Penelope
Female European cave spider.
Modelling by Penelope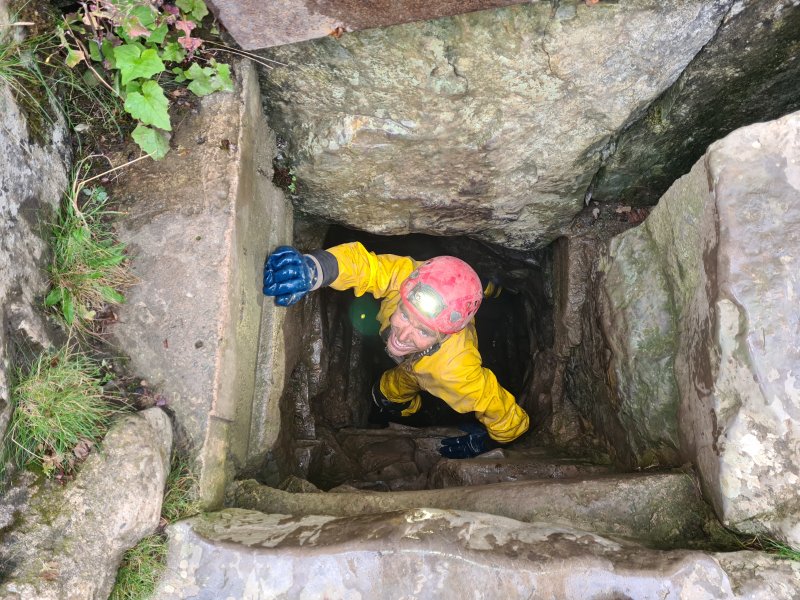 Entrance of County Pot.
Modelling by Dinny, lighting by Sol and Dinny
Entrance of County Pot.
Modelling by Dinny, lighting by Sol and Dinny Cow Dub waterfall, where a couple of us took a traditional, cold swim. The water sinks into the plunge pool and is next seen in an inlet to Mushroom Passage.
Modelling by Jack
Cow Dub waterfall, where a couple of us took a traditional, cold swim. The water sinks into the plunge pool and is next seen in an inlet to Mushroom Passage.
Modelling by Jack View from Barbon Low Fell. Castle Knott, Calf Top, Great Coum, Green Hill, Gragareth and Barbon Low Fell's Brownthwaite ridge.
 Wind blown grass on Barbon Low Fell, as soft as a plush toy. Castle Knott and Calf Top to the right.
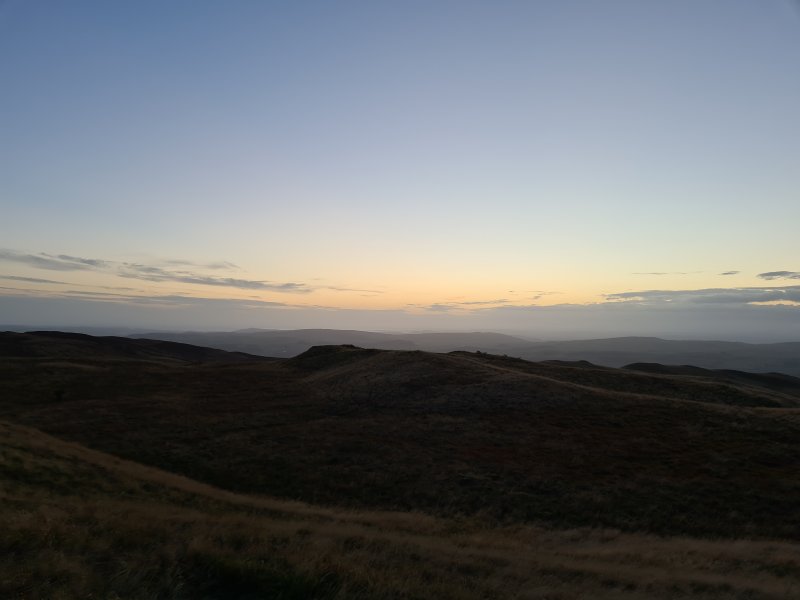 Afterglow from Barbon Low Fell. The distant hills are Hutton Roof Crags (274 metres) and Farleton Knott (265 metres).
 Red Rose cake competition, where cakes had to relate to caving, either in their obvious shape, or in their name. The tackle bag in the back was clearly impressive, while the drag tray near the camera should not be overlooked.
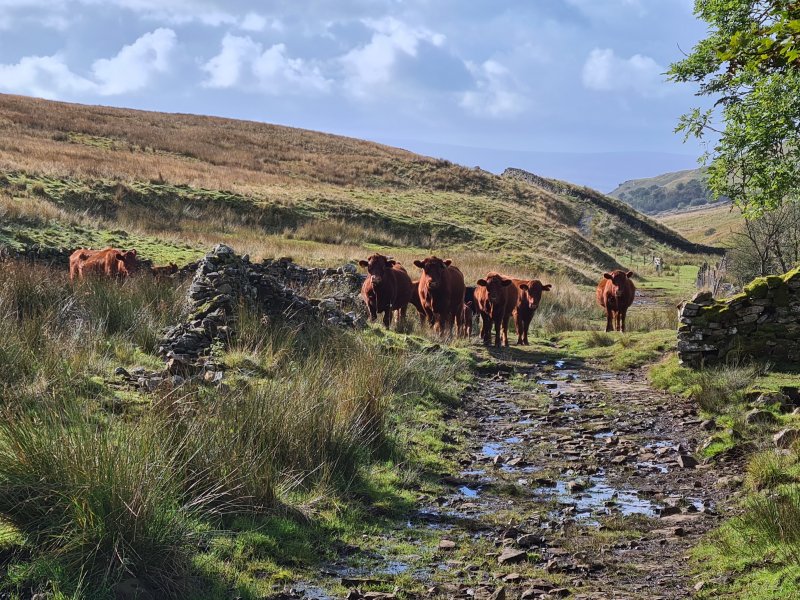 Breakfast time for the cows. Bullpot Farm may not be an active farm any more, but the area is still farmed.
Modelling by Dairy Herd
Breakfast time for the cows. Bullpot Farm may not be an active farm any more, but the area is still farmed.
Modelling by Dairy Herd The valley leading down from Bullpot Farm.
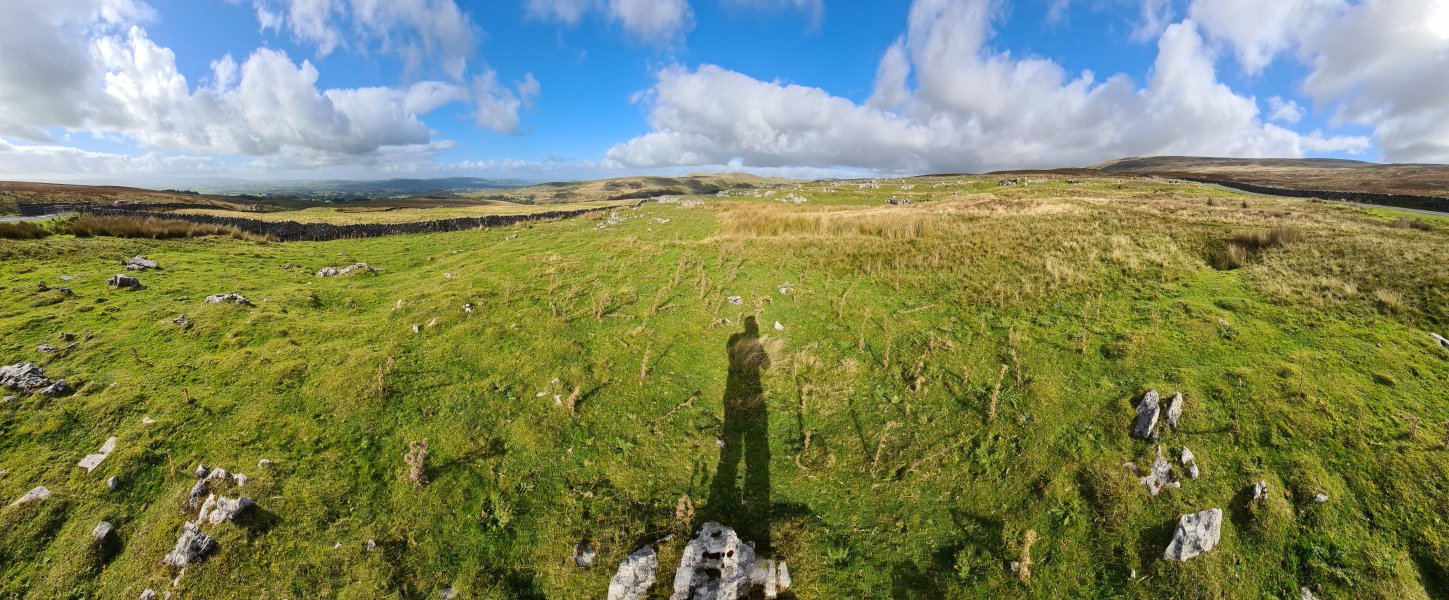 View from Leck Fell, the same place as you normally park for Notts Pot, Lost John's and Boxhead. This is a very busy piece of hillside. Forest Of Bowland, Hutton Roof Crags, Farleton Knott, Barbon Low Fell and Castle Knott.
Modelling by Tarquin's shadow
View from Leck Fell, the same place as you normally park for Notts Pot, Lost John's and Boxhead. This is a very busy piece of hillside. Forest Of Bowland, Hutton Roof Crags, Farleton Knott, Barbon Low Fell and Castle Knott.
Modelling by Tarquin's shadow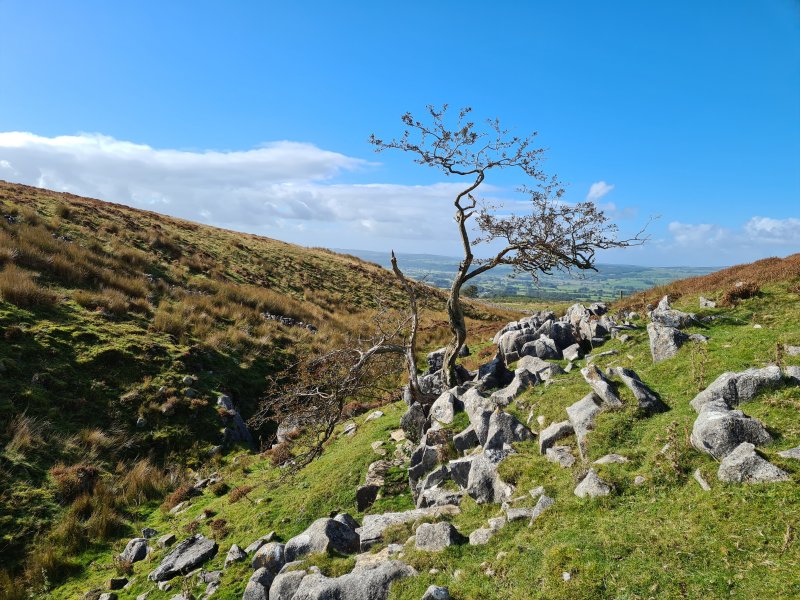 Lonely tree.
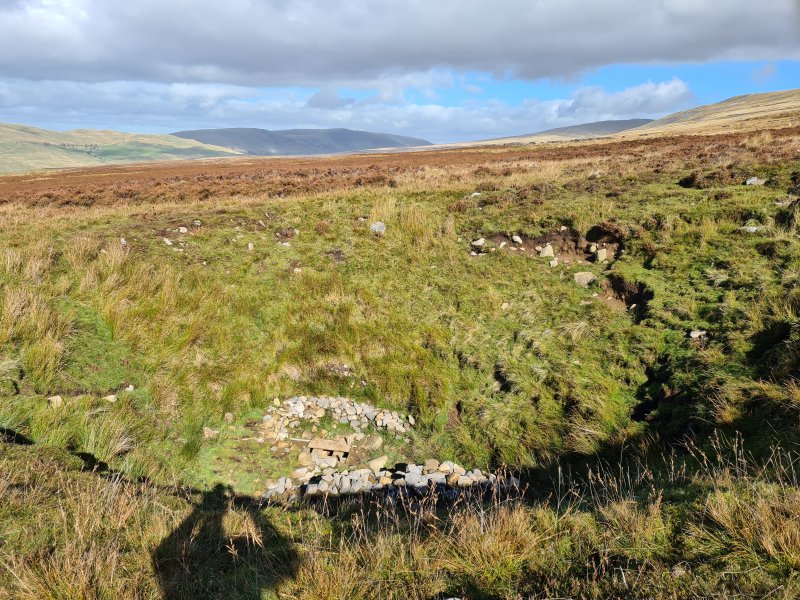 A little further away than most of them is the entrance to F'ing Hopeless Pot. While this new discovery is currently an isolated cave, no doubt it relates closely to the others in the area, and is likely to be connected to them at some point.
Modelling by a cast of the photographer
A little further away than most of them is the entrance to F'ing Hopeless Pot. While this new discovery is currently an isolated cave, no doubt it relates closely to the others in the area, and is likely to be connected to them at some point.
Modelling by a cast of the photographer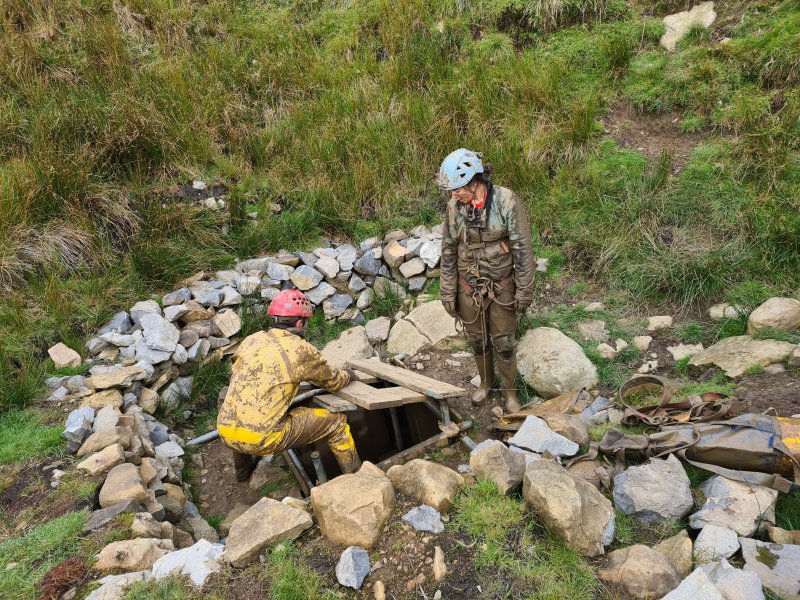 Entrance of F'ing Hopeless Pot, where a significant amount of spoil has been removed and neatly stacked.
Modelling by Dinny and Gwenllian
Entrance of F'ing Hopeless Pot, where a significant amount of spoil has been removed and neatly stacked.
Modelling by Dinny and Gwenllian Bottom of the scaffolded dig.
Modelling by Dinny, lighting by Tarquin and Dinny
Bottom of the scaffolded dig.
Modelling by Dinny, lighting by Tarquin and Dinny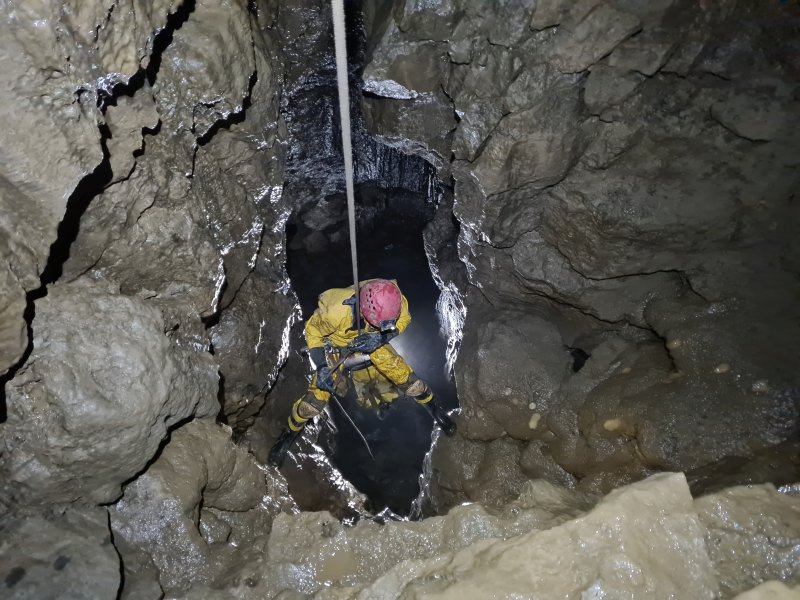 Tim's Pitch.
Modelling by Dinny, lighting by Tarquin, Dinny and Gwenllian
Tim's Pitch.
Modelling by Dinny, lighting by Tarquin, Dinny and Gwenllian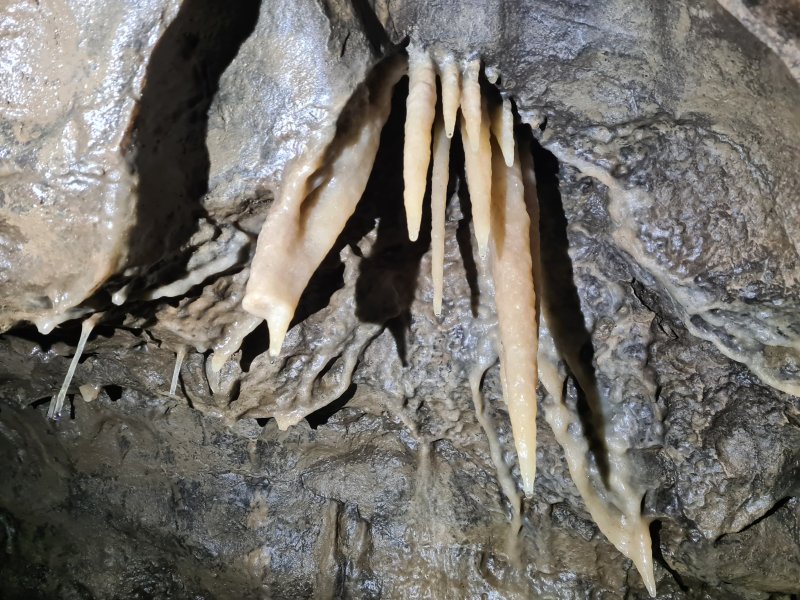 Stalactites below Tim's Pitch.
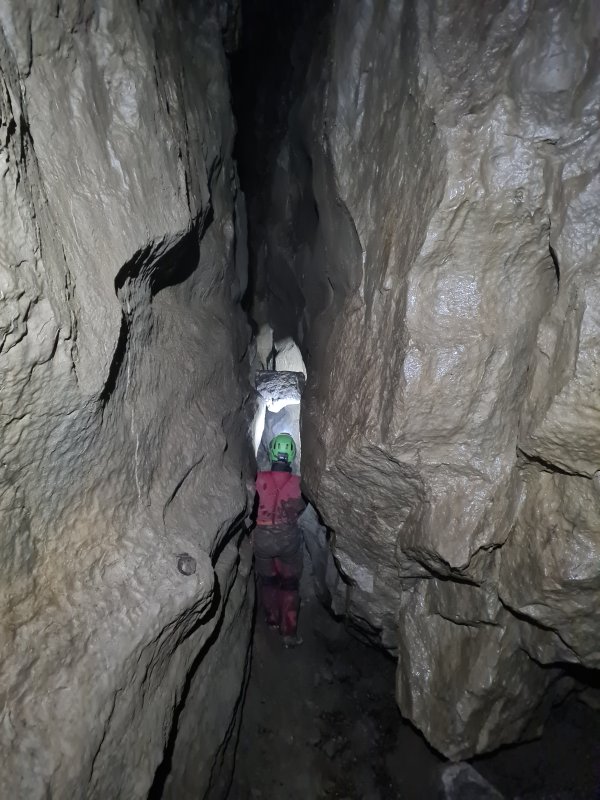 Between the pitches.
Modelling by Jack, lighting by Tarquin and Jack
Between the pitches.
Modelling by Jack, lighting by Tarquin and Jack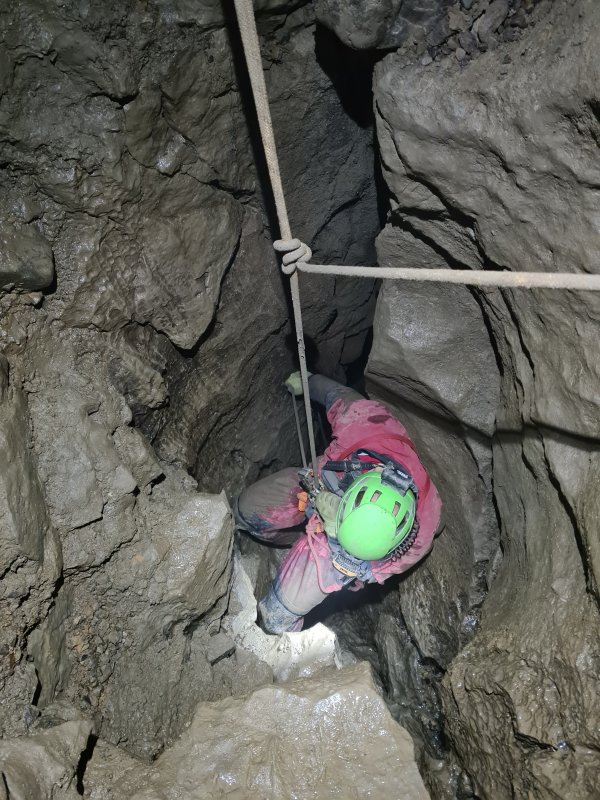 Frank's Pitch.
Modelling by Jack, lighting by Tarquin and Jack
Frank's Pitch.
Modelling by Jack, lighting by Tarquin and Jack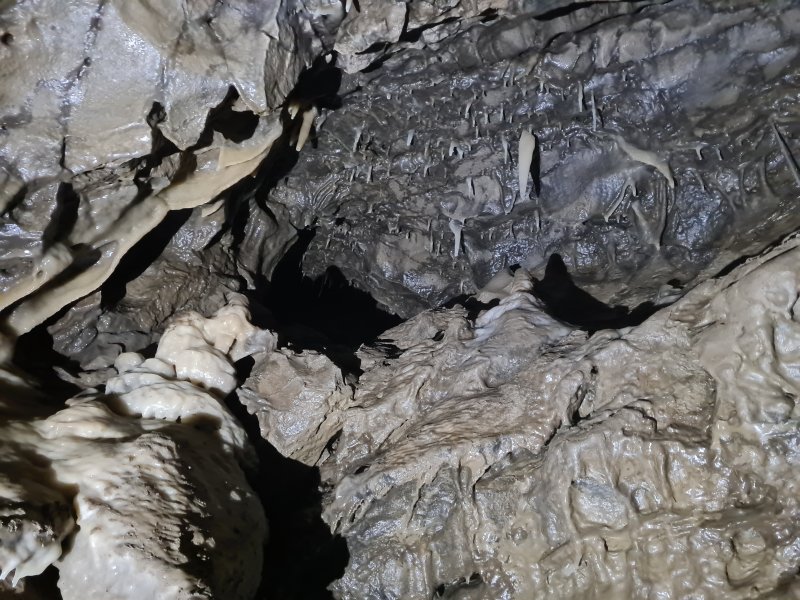 Formations below Frank's Pitch.
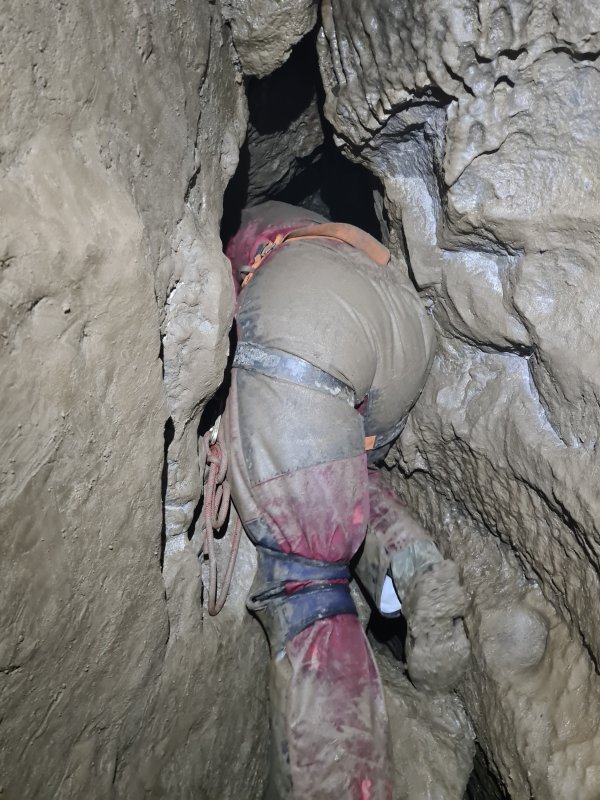 Awkward rift after Frank's Pitch
Modelling by Jack
Awkward rift after Frank's Pitch
Modelling by Jack Formations before Geoff's Pitch.
Modelling by Jack, lighting by Tarquin and Jack
Formations before Geoff's Pitch.
Modelling by Jack, lighting by Tarquin and Jack Strange helictite, made from a layer of calcited mud.
Lighting by Tarquin and Jack
Strange helictite, made from a layer of calcited mud.
Lighting by Tarquin and Jack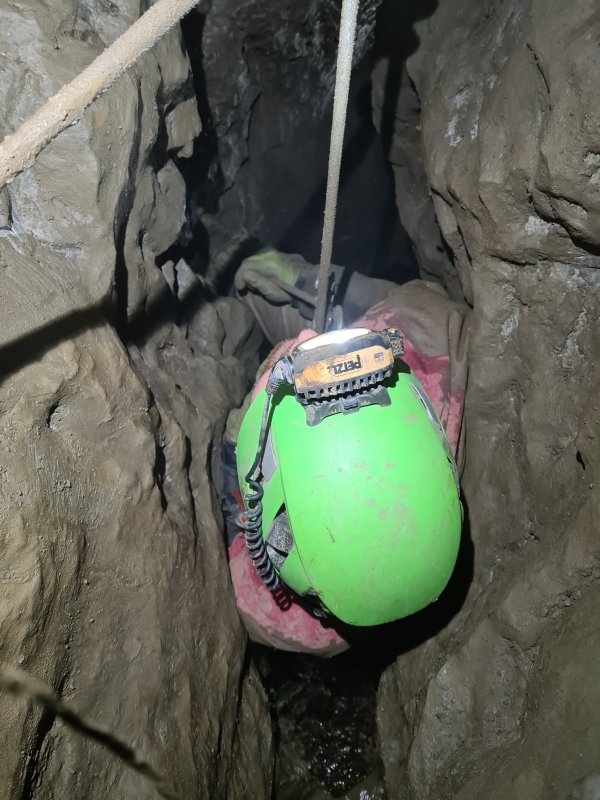 Geoff's Pitch
Modelling by Jack, lighting by Tarquin and Jack
Geoff's Pitch
Modelling by Jack, lighting by Tarquin and Jack Low section of Streamway Of Merit, just before the squeeze. The squeeze is not really a squeeze, but bags might need to be removed from belts.
Modelling by Jack, lighting by Tarquin and Jack
Low section of Streamway Of Merit, just before the squeeze. The squeeze is not really a squeeze, but bags might need to be removed from belts.
Modelling by Jack, lighting by Tarquin and Jack Straws in the Streamway Of Merit.
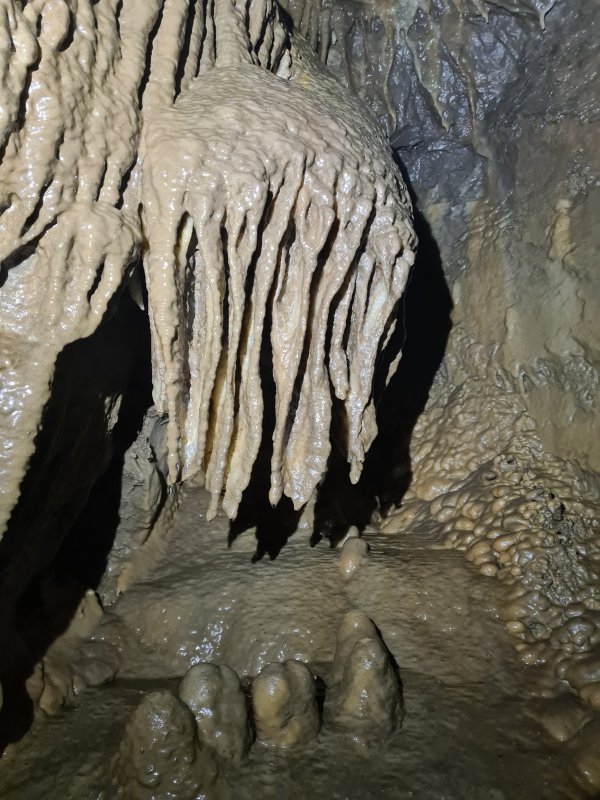 Formations.
 Triple curtains. The cave starts to show the impressive quality of its formations.
Modelling by Jack, lighting by Tarquin and Jack
Triple curtains. The cave starts to show the impressive quality of its formations.
Modelling by Jack, lighting by Tarquin and Jack Flowstone.
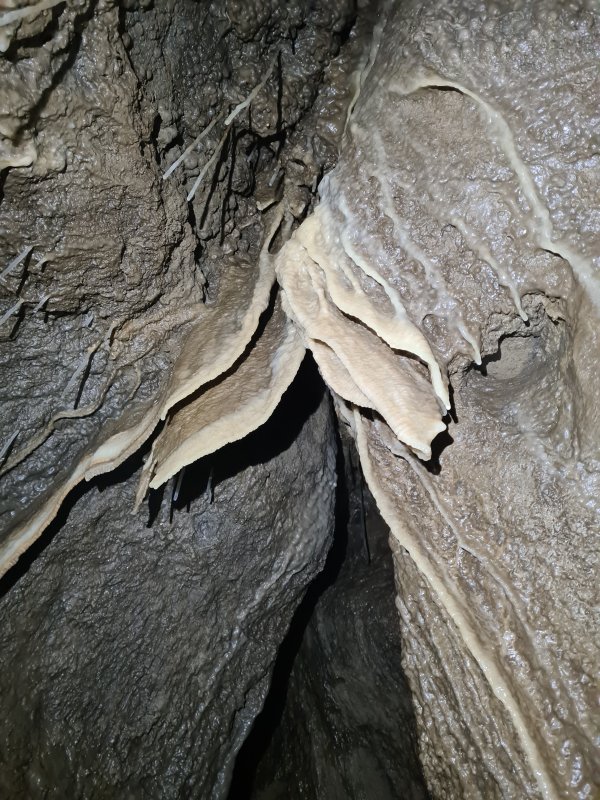 Small curtains.
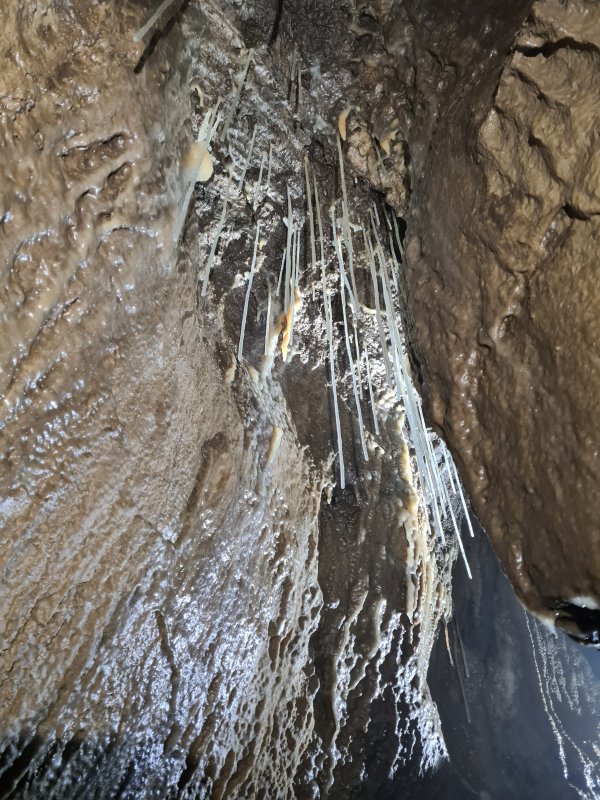 Straws.
 Formations.
Lighting by Tarquin and Jack
Formations.
Lighting by Tarquin and Jack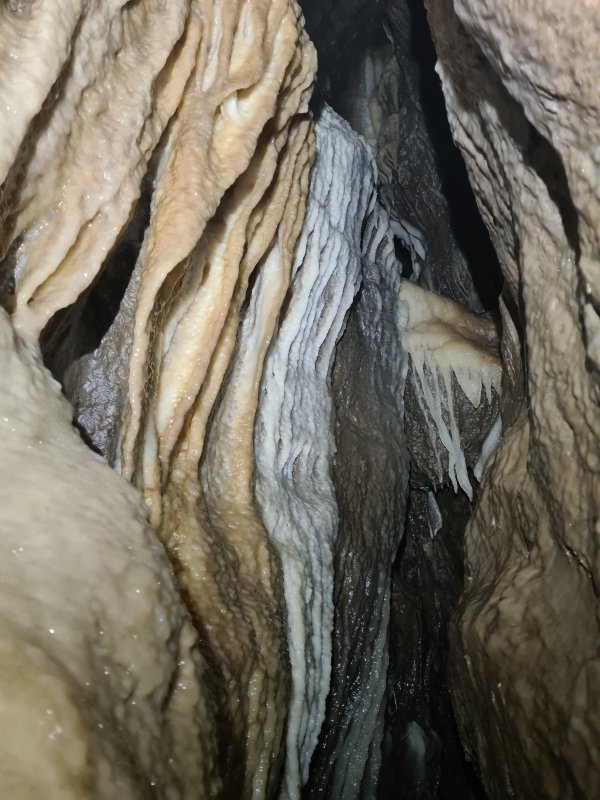 Flowstone.
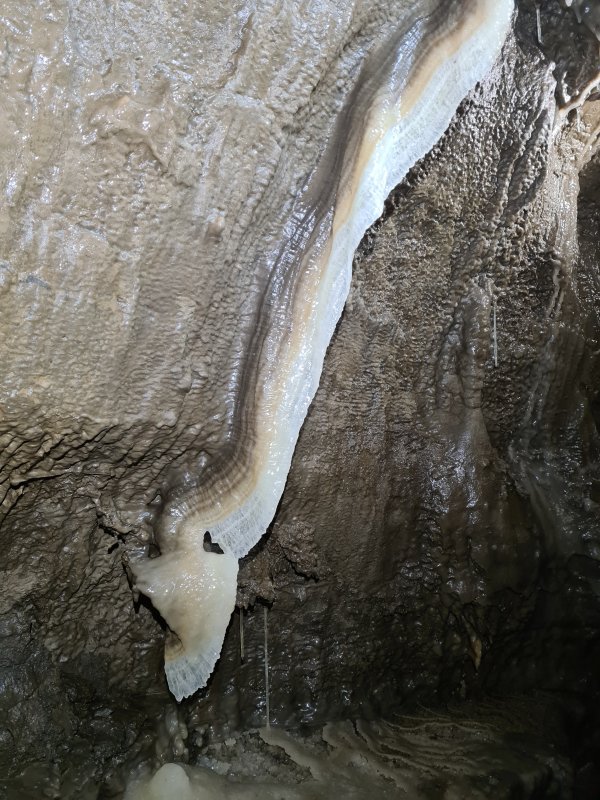 Curtain.
Lighting by Tarquin and Jack
Curtain.
Lighting by Tarquin and Jack Multiple translucent curtains.
Lighting by Jack, Gwenllian and Dinny
Multiple translucent curtains.
Lighting by Jack, Gwenllian and Dinny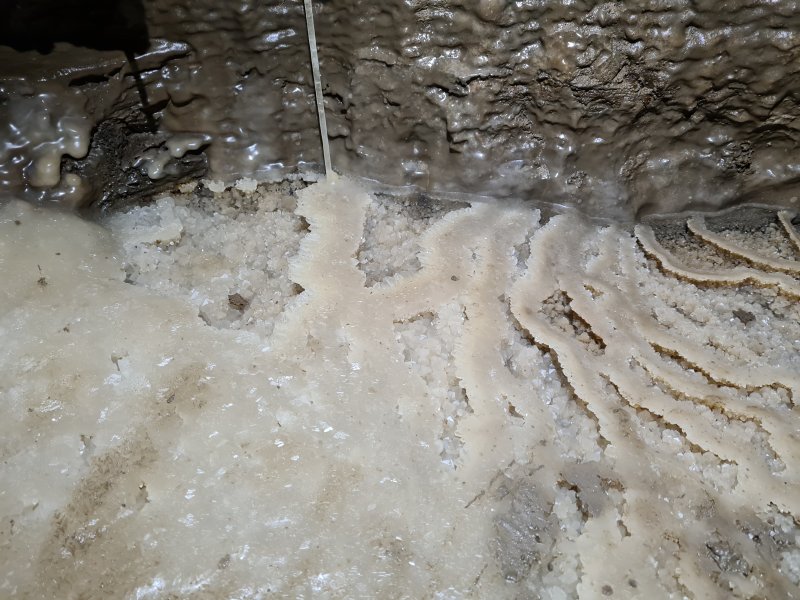 Crystal Pools.
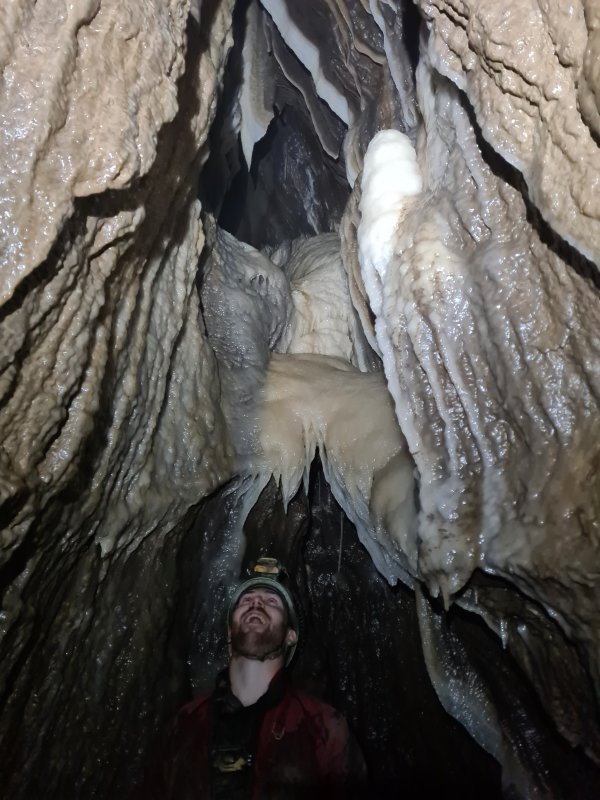 Formations above the rift.
Modelling by Jack
Formations above the rift.
Modelling by Jack The Apostles. Getting past these is awkward, and you have to lean over them to keep your balance. A handrail on the opposite wall would help avoid accidents.
Modelling by Dinny, lighting by Tarquin, Gwenllian, Jack and Dinny
The Apostles. Getting past these is awkward, and you have to lean over them to keep your balance. A handrail on the opposite wall would help avoid accidents.
Modelling by Dinny, lighting by Tarquin, Gwenllian, Jack and Dinny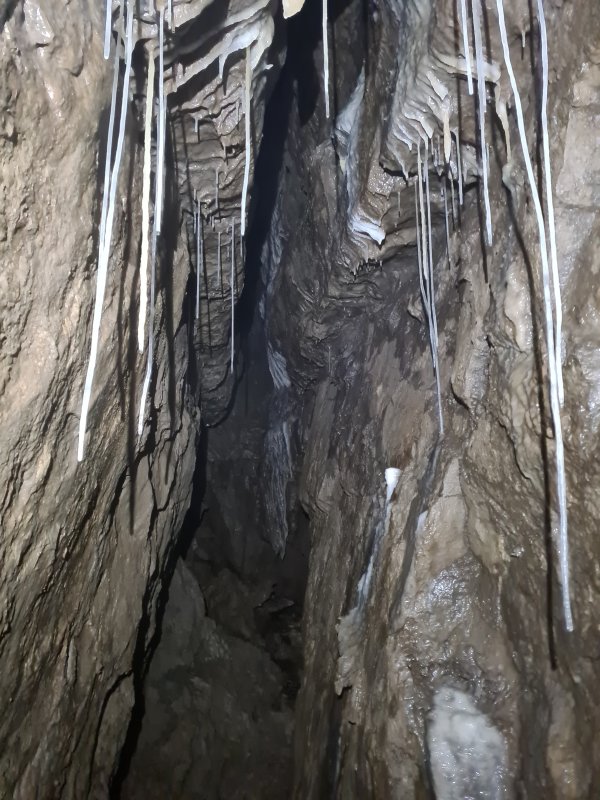 Dead end side passage at The Apostles.
 Above The Apostles.
Modelling by Gwenllian, lighting by Tarquin, Jack, Gwenllian and Dinny
Above The Apostles.
Modelling by Gwenllian, lighting by Tarquin, Jack, Gwenllian and Dinny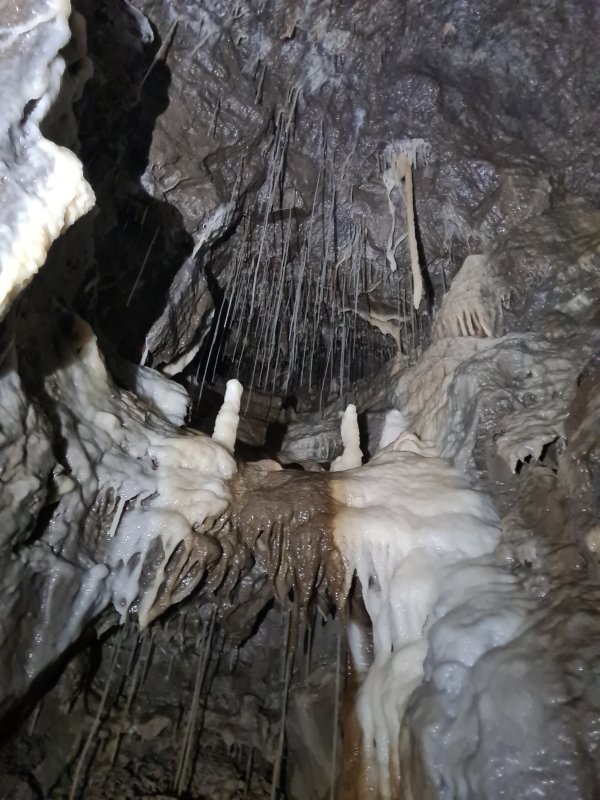 Decorated alcove. In this area is a very difficult bolted climb up into Whitehall chamber, with the Lady Of The Lake column above a crystal pool. This is not left rigged, since the Gate-Keeper straw column would need to be passed, and is extremely vulnerable.
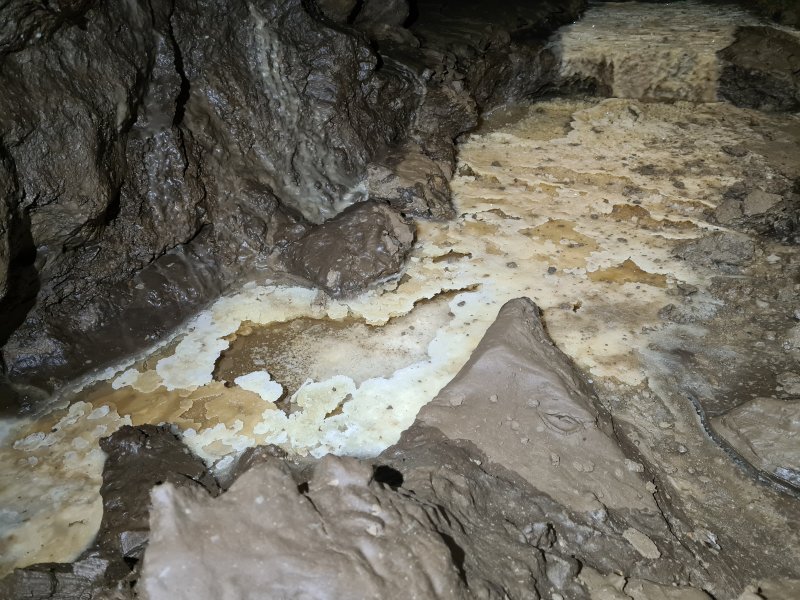 Crystal pool under the wall.
Lighting by Tarquin, Jack and Gwenllian
Crystal pool under the wall.
Lighting by Tarquin, Jack and Gwenllian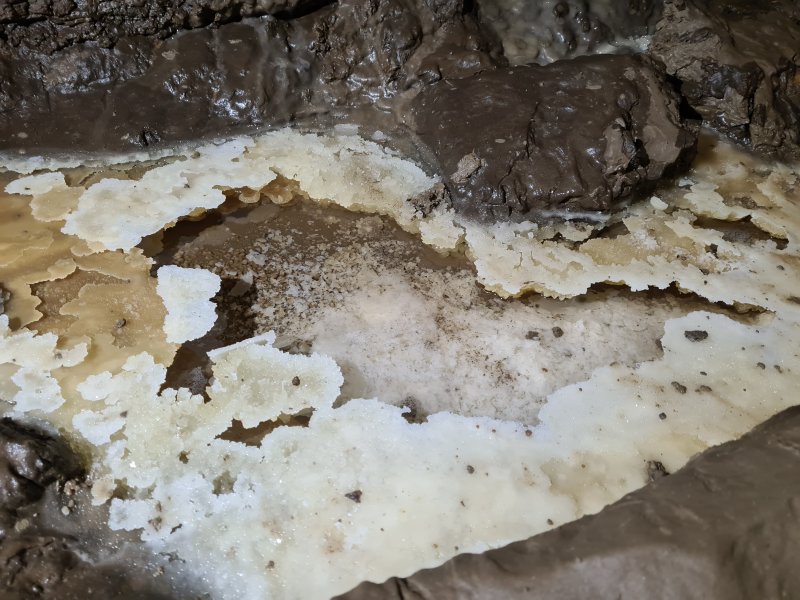 Crystal pool.
Lighting by Tarquin, Jack and Gwenllian
Crystal pool.
Lighting by Tarquin, Jack and Gwenllian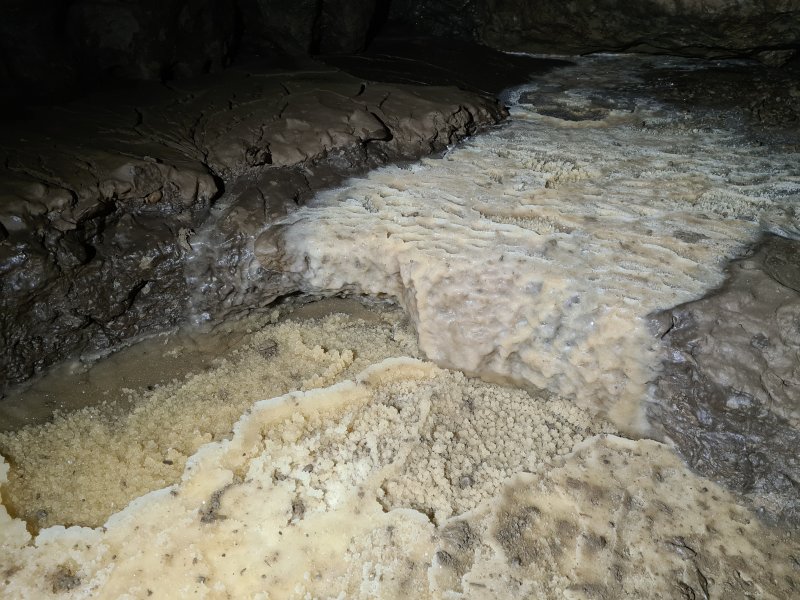 Crystal pool.
Lighting by Tarquin and Jack
Crystal pool.
Lighting by Tarquin and Jack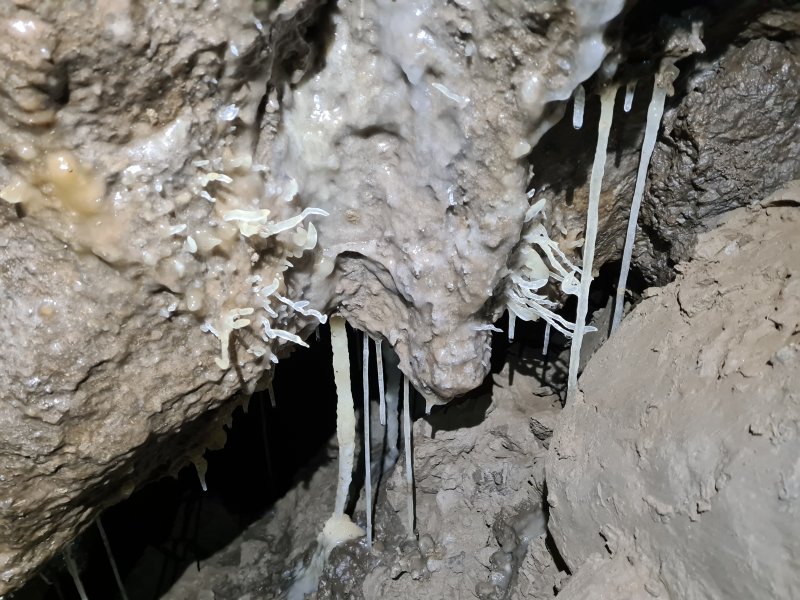 Helictites.
 At this point, Streamway Of Merit chokes, leaving two ways on. Down to the right is a route through the choke into Speechless Passage. Overhead, however, is the originally bolted pitch called Squealing Pig Climb. This gets very tight at the top, and is quite awkward to ascend or descend.
Modelling by Gwenllian, lighting by Tarquin, Jack and Gwenllian
At this point, Streamway Of Merit chokes, leaving two ways on. Down to the right is a route through the choke into Speechless Passage. Overhead, however, is the originally bolted pitch called Squealing Pig Climb. This gets very tight at the top, and is quite awkward to ascend or descend.
Modelling by Gwenllian, lighting by Tarquin, Jack and Gwenllian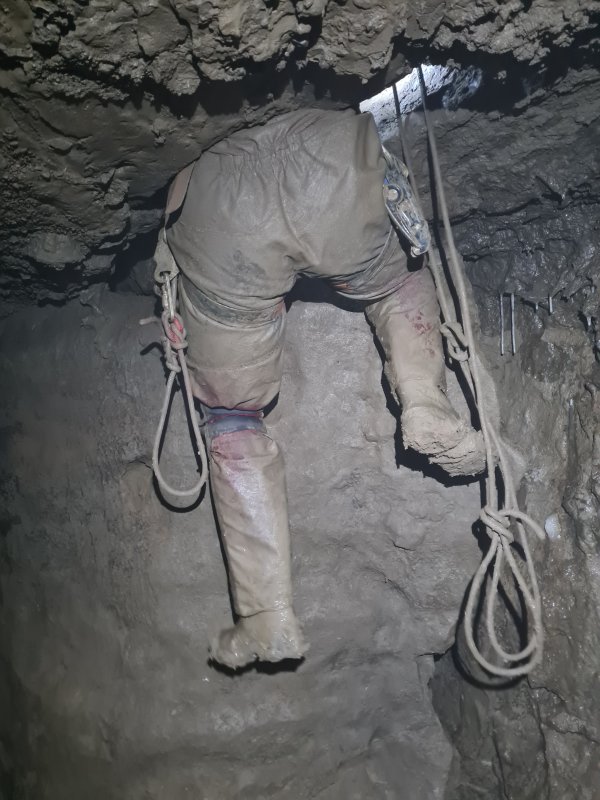 Above Squealing Pig Climb is another awkward climb, using a slippery muddied rope.
Modelling by Jack
Above Squealing Pig Climb is another awkward climb, using a slippery muddied rope.
Modelling by Jack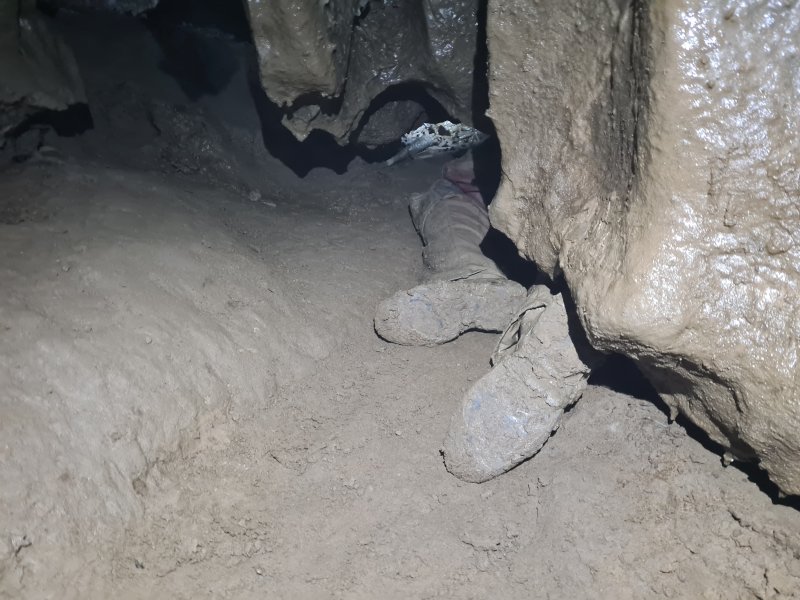 Muddy dig.
Modelling by Jack, lighting by Tarquin and Jack
Muddy dig.
Modelling by Jack, lighting by Tarquin and Jack Straws in the dig.
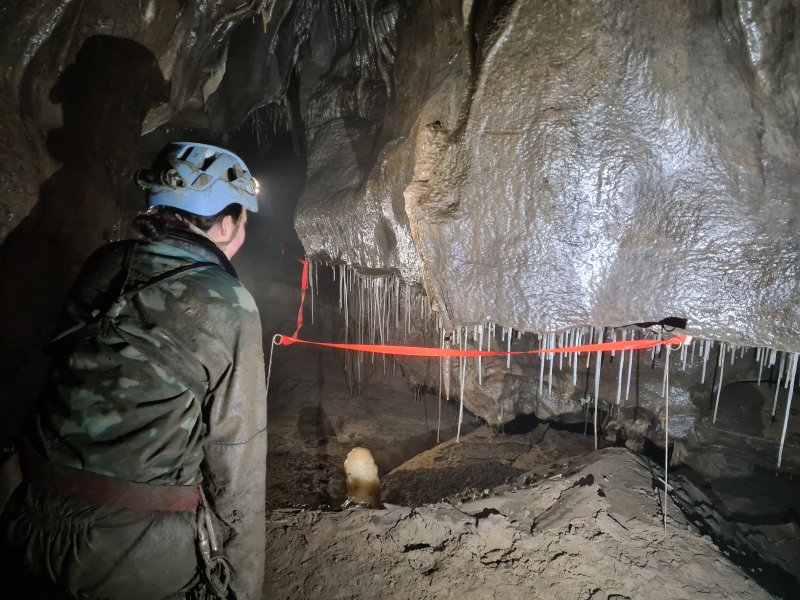 Straws.
Modelling by Gwenllian, lighting by Tarquin, Gwenllian and Jack
Straws.
Modelling by Gwenllian, lighting by Tarquin, Gwenllian and Jack Formations.
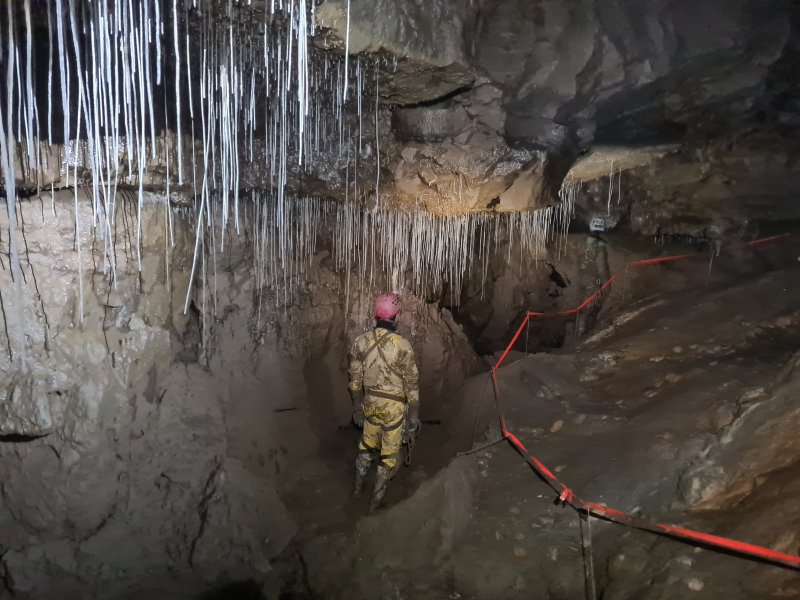 Bottom of Eggshell Chamber.
Modelling by Dinny and Gwenllian, lighting by Tarquin, Jack, Dinny and Gwenllian
Bottom of Eggshell Chamber.
Modelling by Dinny and Gwenllian, lighting by Tarquin, Jack, Dinny and Gwenllian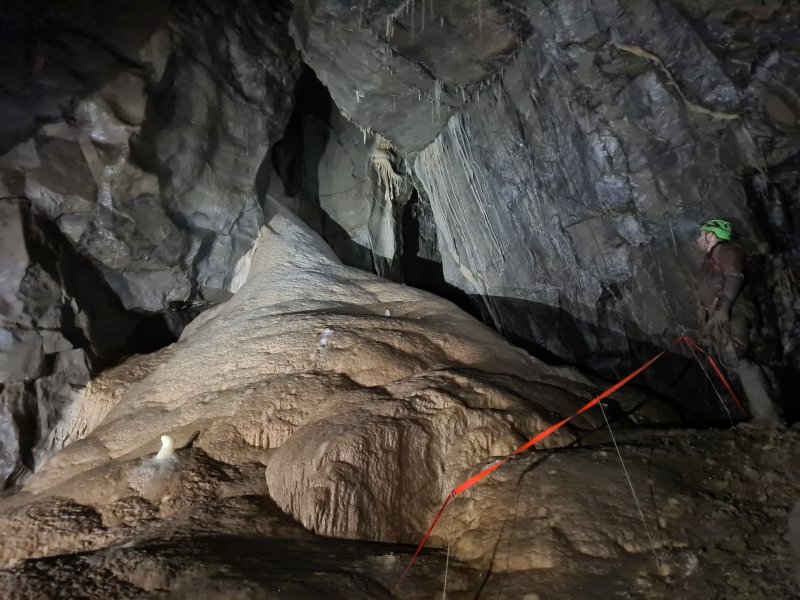 The enormous calcite bank in Eggshell Chamber.
Modelling by Jack, lighting by Tarquin, Dinny, Gwenllian and Jack
The enormous calcite bank in Eggshell Chamber.
Modelling by Jack, lighting by Tarquin, Dinny, Gwenllian and Jack Raised calcited drip pockets.
 End of Eggshell Chamber. There is no way on.
Lighting by Tarquin and Jack
End of Eggshell Chamber. There is no way on.
Lighting by Tarquin and Jack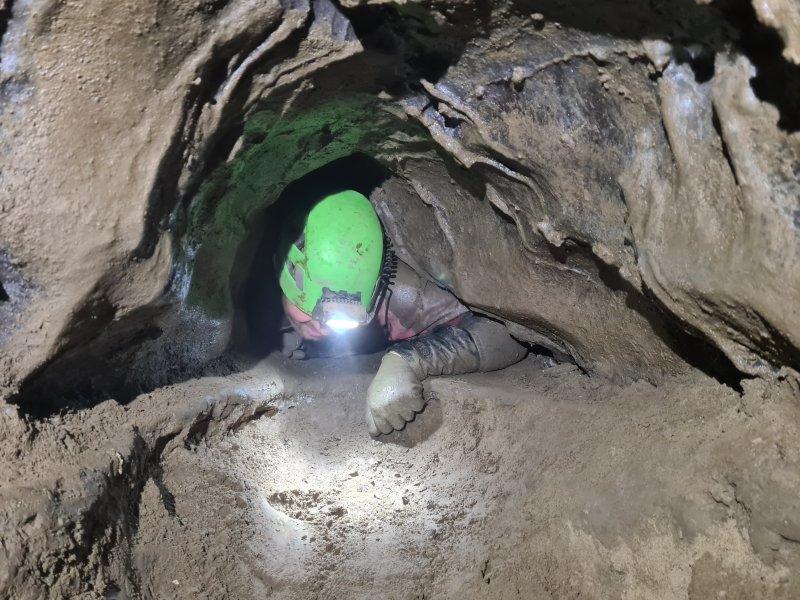 Squeeze leading to Levelling-Up, starting as a side passage just after the last dig. This one is actually a squeeze.
Modelling by Jack, lighting by Tarquin and Jack
Squeeze leading to Levelling-Up, starting as a side passage just after the last dig. This one is actually a squeeze.
Modelling by Jack, lighting by Tarquin and Jack Straw column.
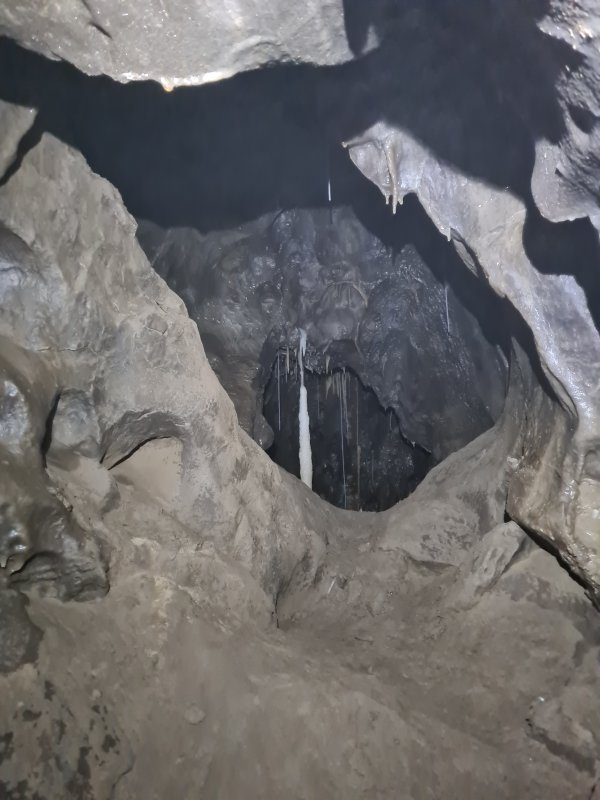 Side passage off the route to Levelling-Up. This is taped off, for unknown reasons. It seems to reach a drop down into Streamway Of Merit.
 Beautifully translucent curtain.
Modelling by Dinny, lighting by Tarquin, Gwenllian, Dinny and Jack
Beautifully translucent curtain.
Modelling by Dinny, lighting by Tarquin, Gwenllian, Dinny and Jack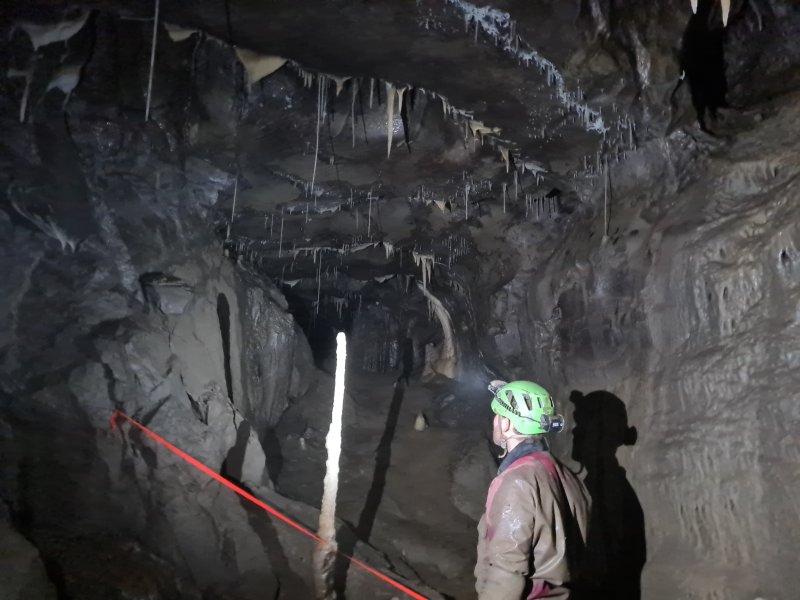 Stalagmite in the chamber at the start of Levelling-Up.
Modelling by Jack, lighting by Tarquin, Dinny and Jack
Stalagmite in the chamber at the start of Levelling-Up.
Modelling by Jack, lighting by Tarquin, Dinny and Jack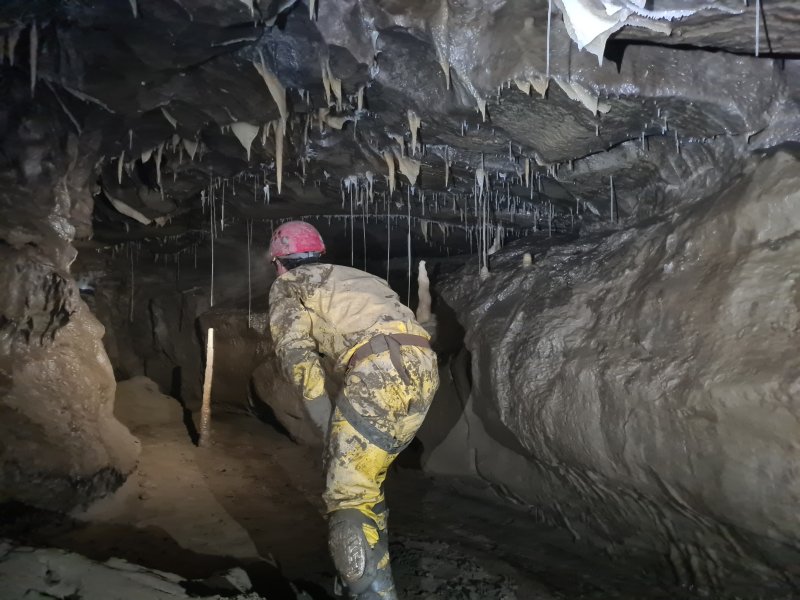 Start of the main Levelling-Up passage.
Modelling by Dinny, lighting by Tarquin, Jack and Dinny
Start of the main Levelling-Up passage.
Modelling by Dinny, lighting by Tarquin, Jack and Dinny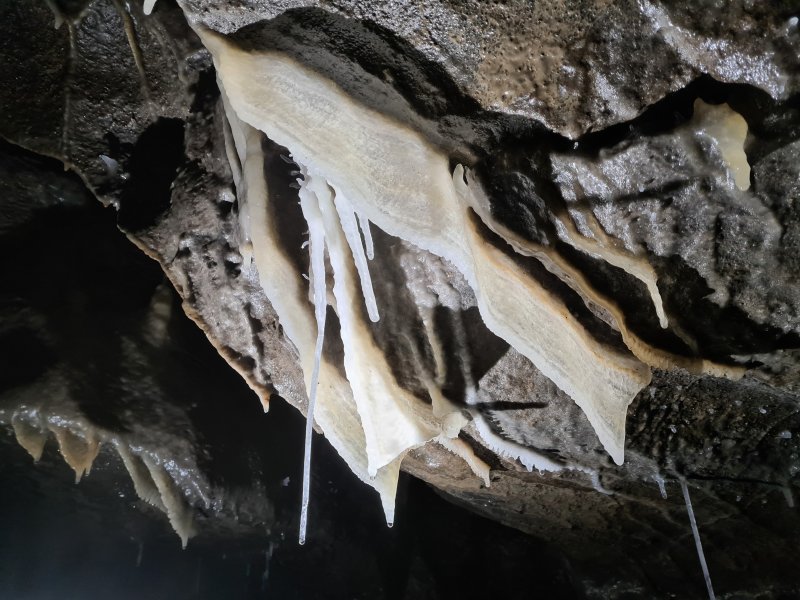 Curtains.
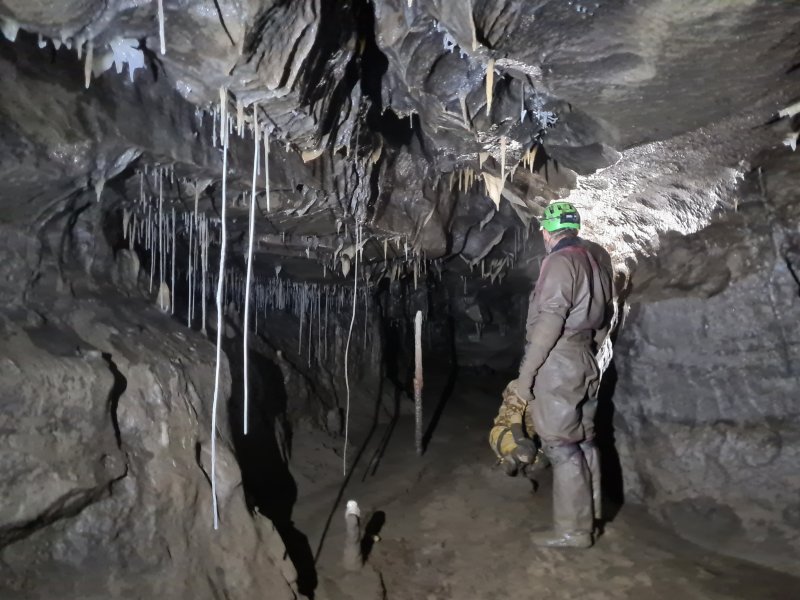 Long straws.
Modelling by Jack and Dinny's legs, lighting by Tarquin and Jack
Long straws.
Modelling by Jack and Dinny's legs, lighting by Tarquin and Jack Immature helictites.
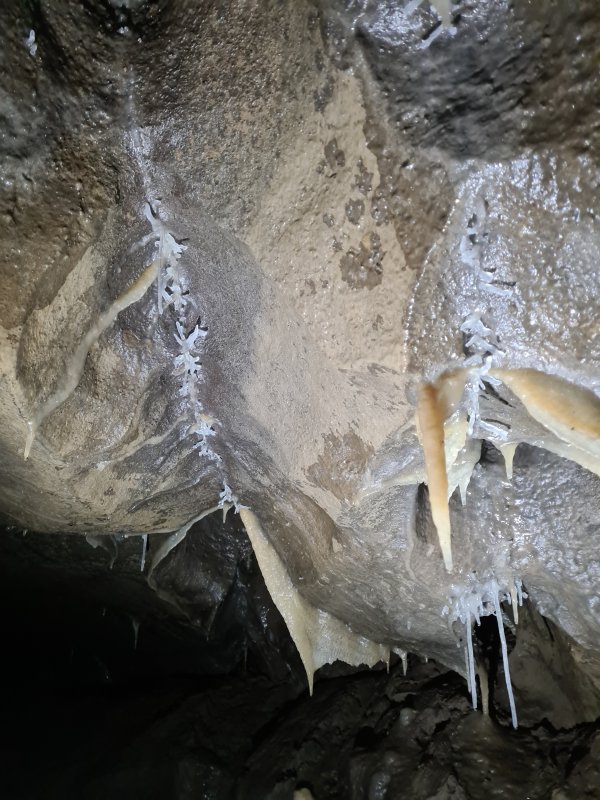 Immature helictites.
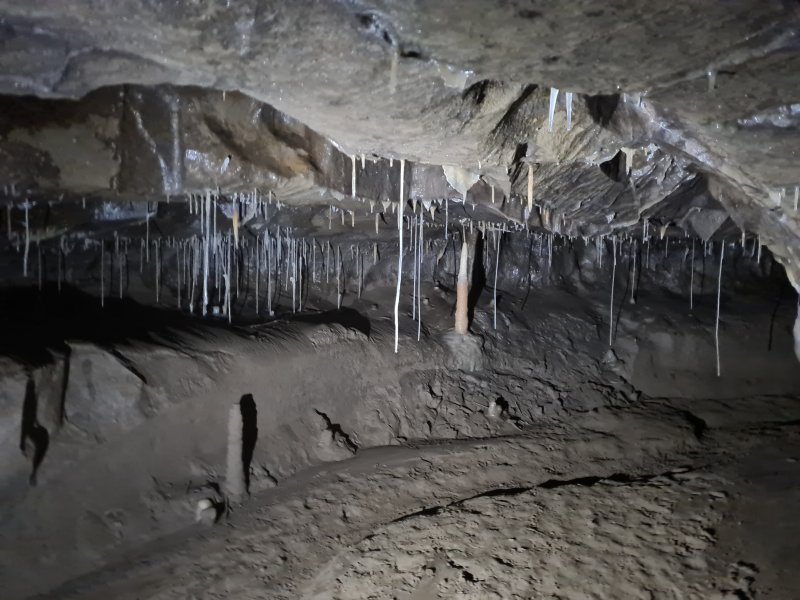 Straws and sand.
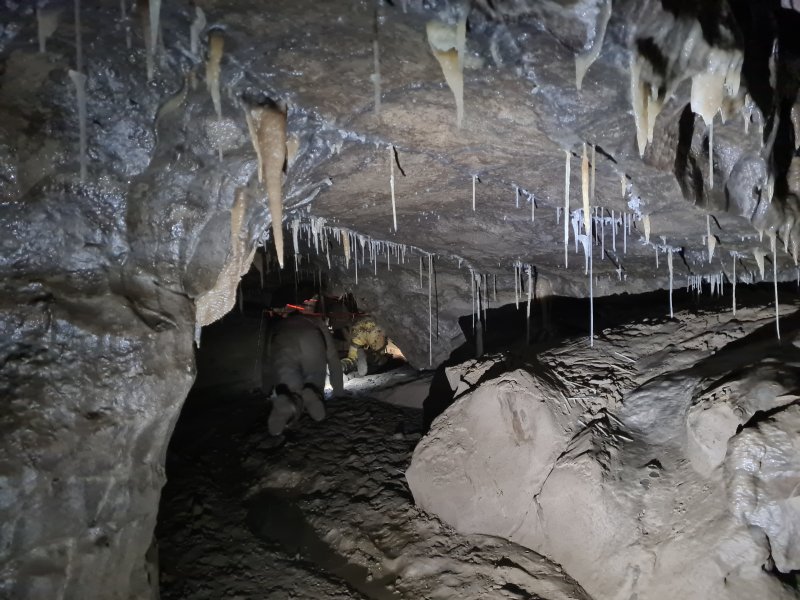 Lowering to a crawl.
Modelling by Jack, Dinny and essence of Gwenllian, lighting by Tarquin, Jack, Dinny and Gwenllian
Lowering to a crawl.
Modelling by Jack, Dinny and essence of Gwenllian, lighting by Tarquin, Jack, Dinny and Gwenllian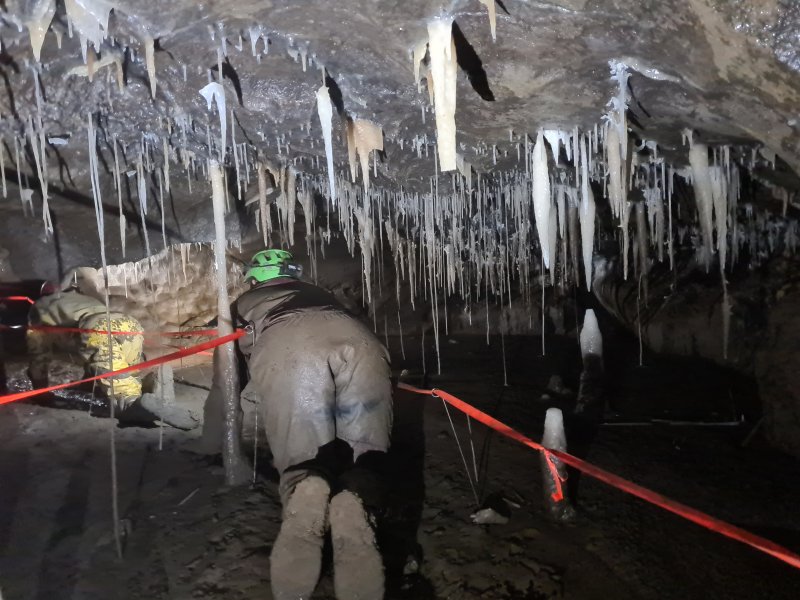 Levelling-Up now becomes one of the best decorated passages in the cave, where you crawl between and below the formations.
Modelling by Jack and Dinny, lighting by Tarquin, Jack and Dinny
Levelling-Up now becomes one of the best decorated passages in the cave, where you crawl between and below the formations.
Modelling by Jack and Dinny, lighting by Tarquin, Jack and Dinny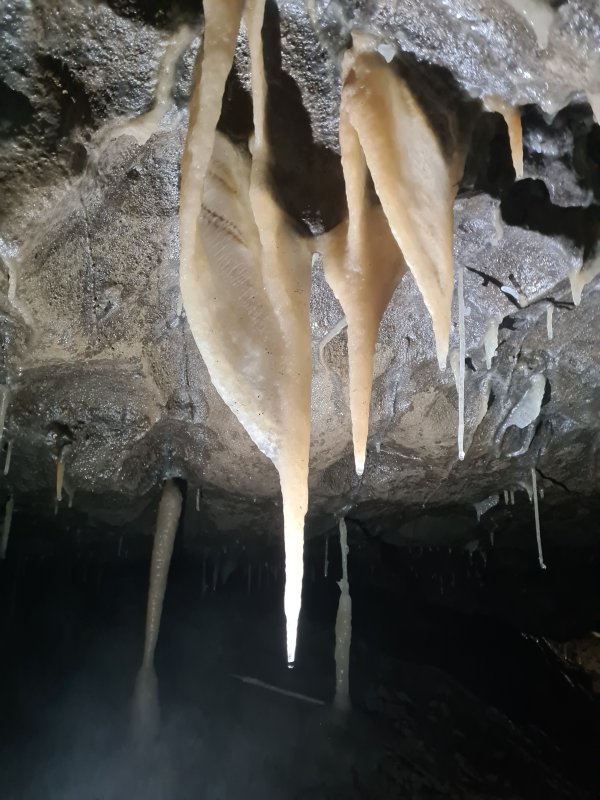 Curtains.
 Textured mud, probably wormcasts.
 The stalactites gain a liberal covering of helictites.
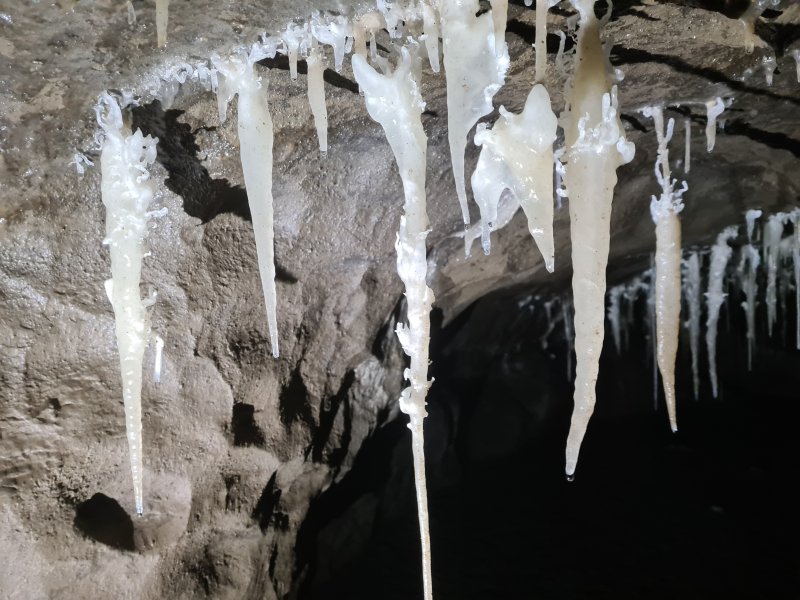 Detail of the helictites.
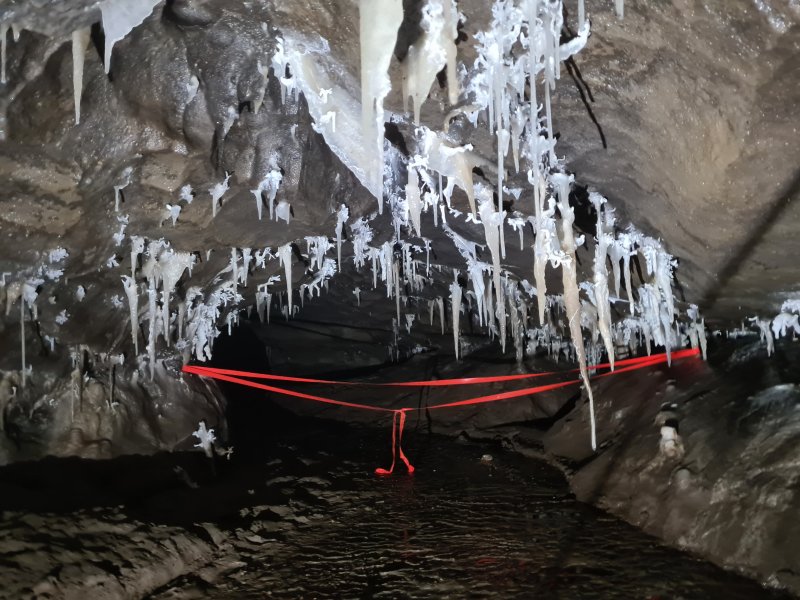 The end of Levelling-Up is taped off to protect the impressive helictites. The passage ends around the next bend. This is the most likely place to connect with other Leck Fell caves, specifically Pinocchio Pot and Ireby Fell Cavern. However, it is not worth damaging the formations just to make a connection.
 Passing through the choke into Speechless Passage, the first obvious set of formations is Speechless Grotto, one of the best decorated parts of the cave.
Modelling by Dinny and Gwenllian, lighting by Tarquin, Dinny and Gwenllian
Passing through the choke into Speechless Passage, the first obvious set of formations is Speechless Grotto, one of the best decorated parts of the cave.
Modelling by Dinny and Gwenllian, lighting by Tarquin, Dinny and Gwenllian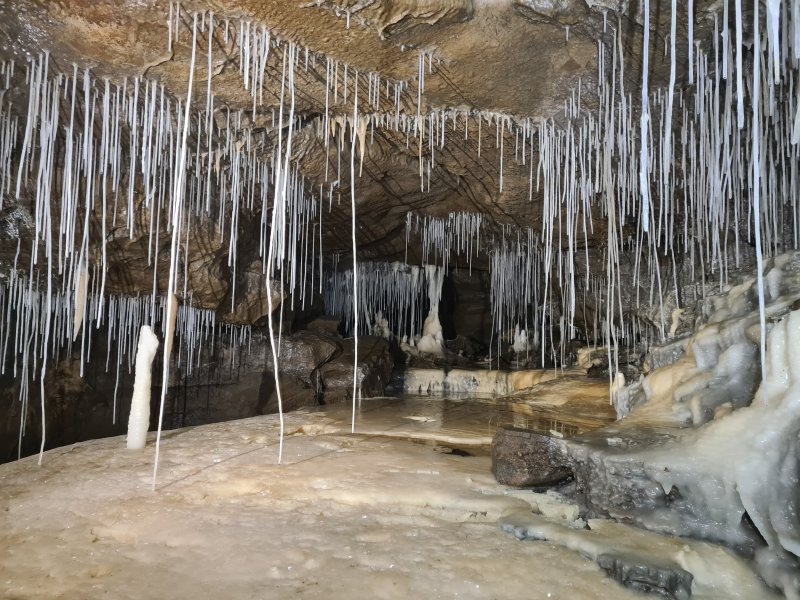 Speechless Grotto.
Lighting by Tarquin, Dinny and Gwenllian
Speechless Grotto.
Lighting by Tarquin, Dinny and Gwenllian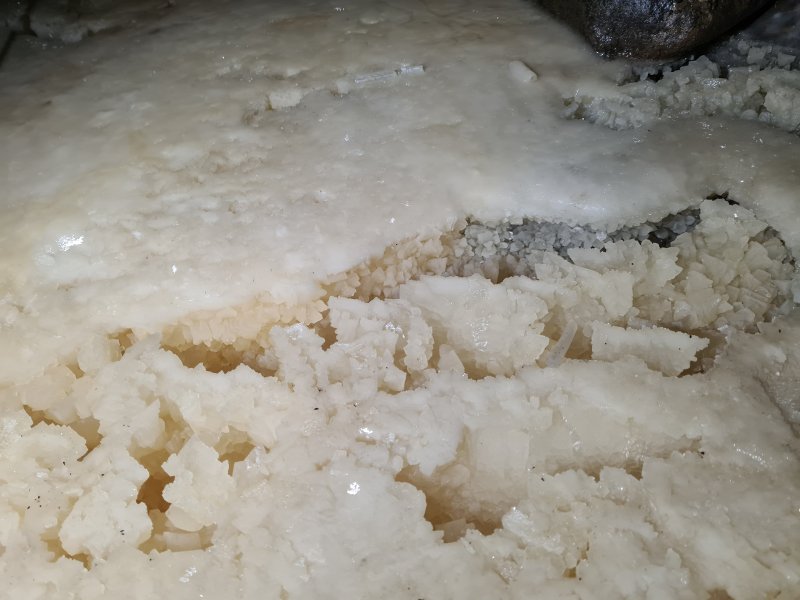 Large calcite crystals.
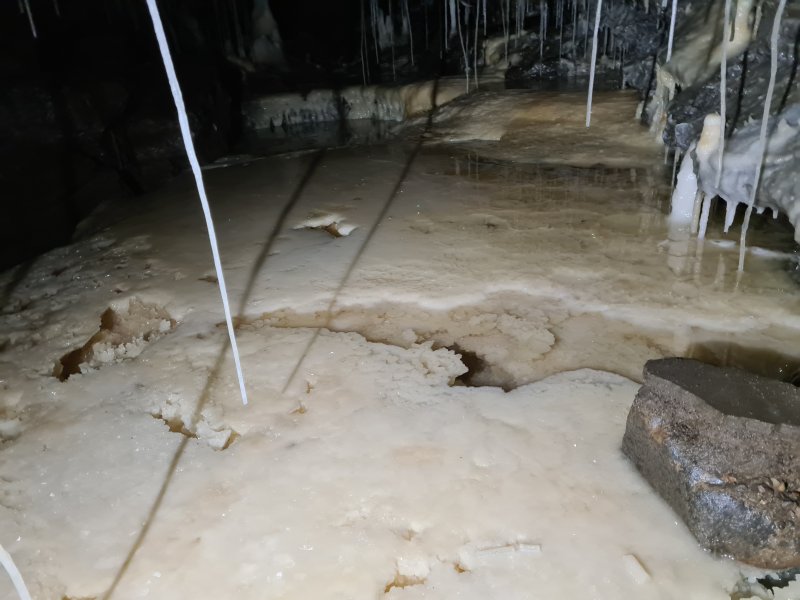 Crystal pools.
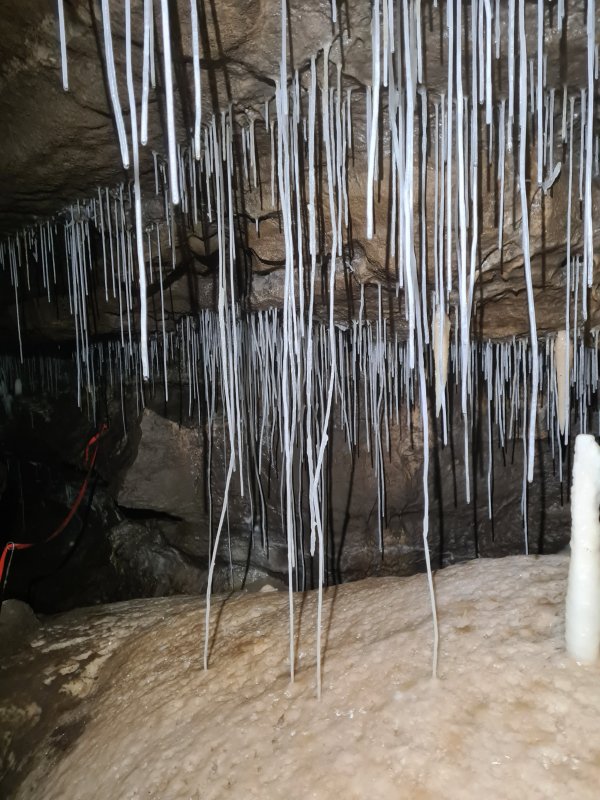 Straws.
 Speechless Passage. The boulder obstacles here make it difficult to pass without touching the formations, but it is possible.
Lighting by Tarquin and Jack
Speechless Passage. The boulder obstacles here make it difficult to pass without touching the formations, but it is possible.
Lighting by Tarquin and Jack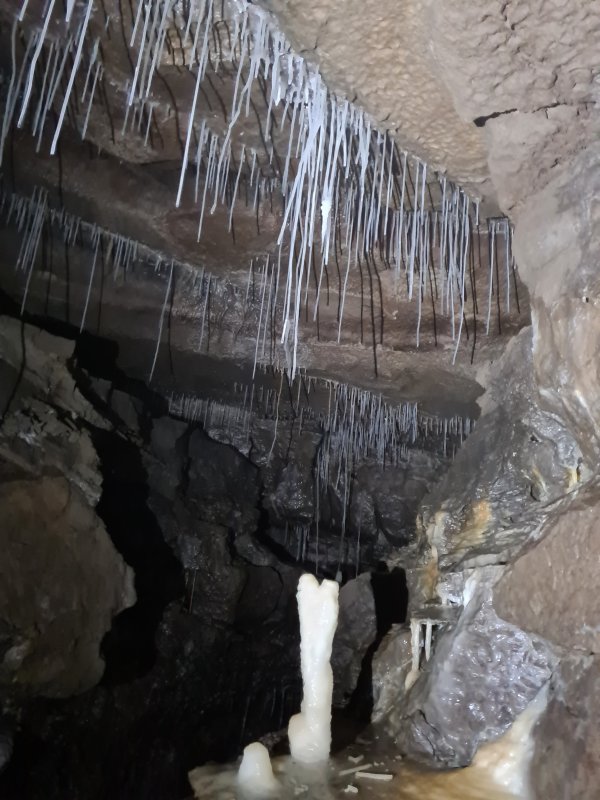 Speechless Passage.
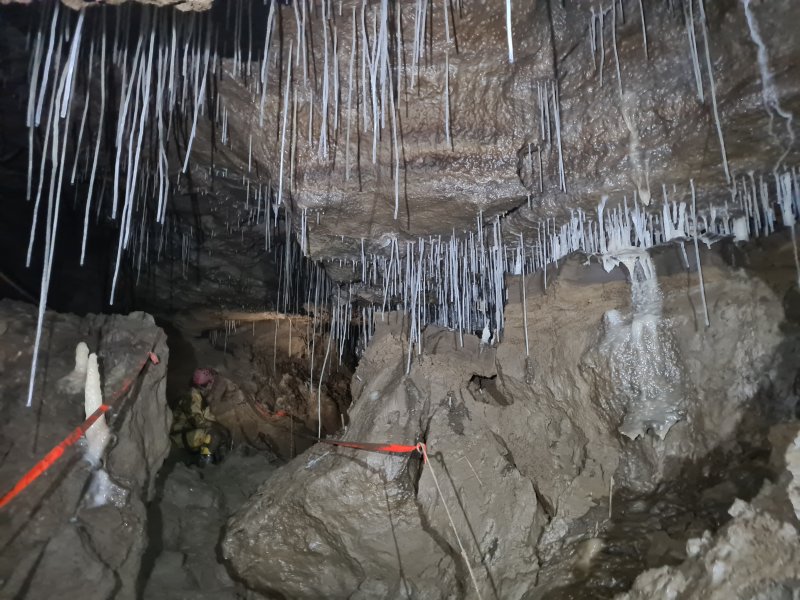 Start of Ironmongers chamber.
Modelling by Dinny, lighting by Tarquin and Dinny
Start of Ironmongers chamber.
Modelling by Dinny, lighting by Tarquin and Dinny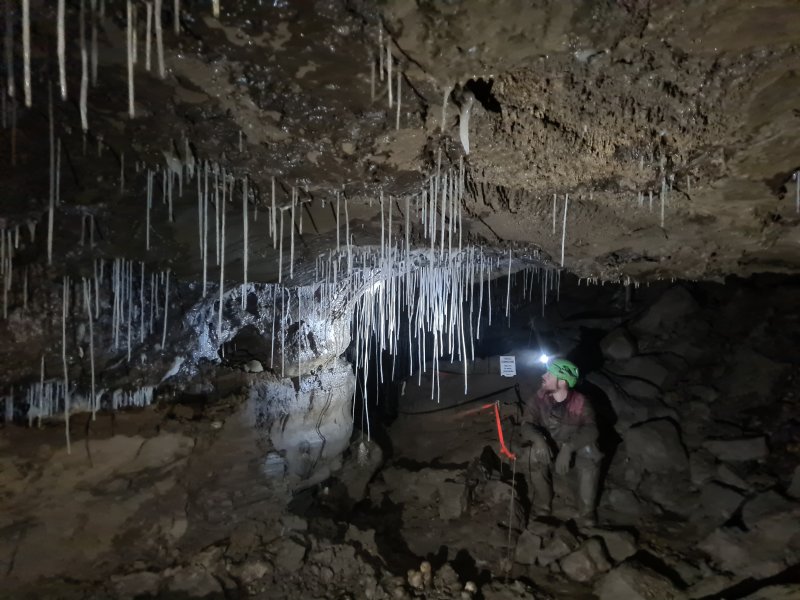 Ironmongers.
Modelling by Jack, lighting by Tarquin and Jack
Ironmongers.
Modelling by Jack, lighting by Tarquin and Jack Textured calite and mud.
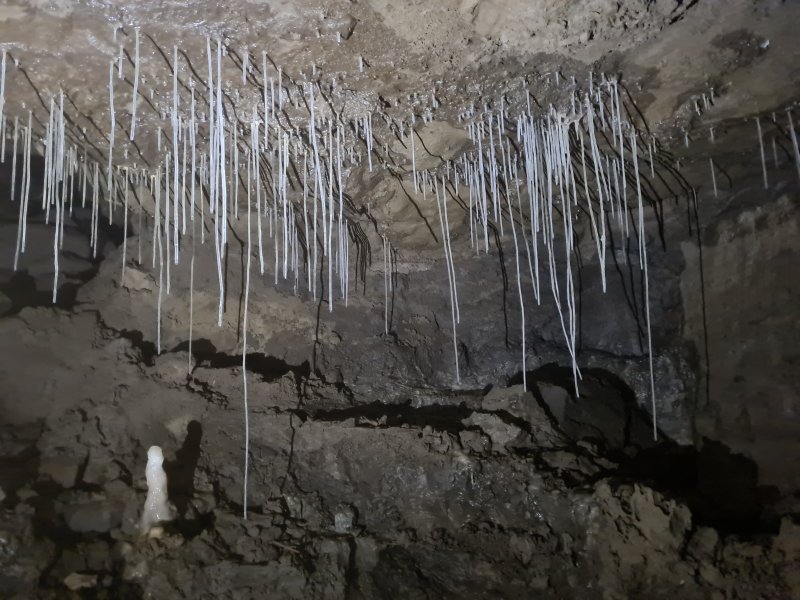 Ironmongers choke, the end of Speechless Passage.
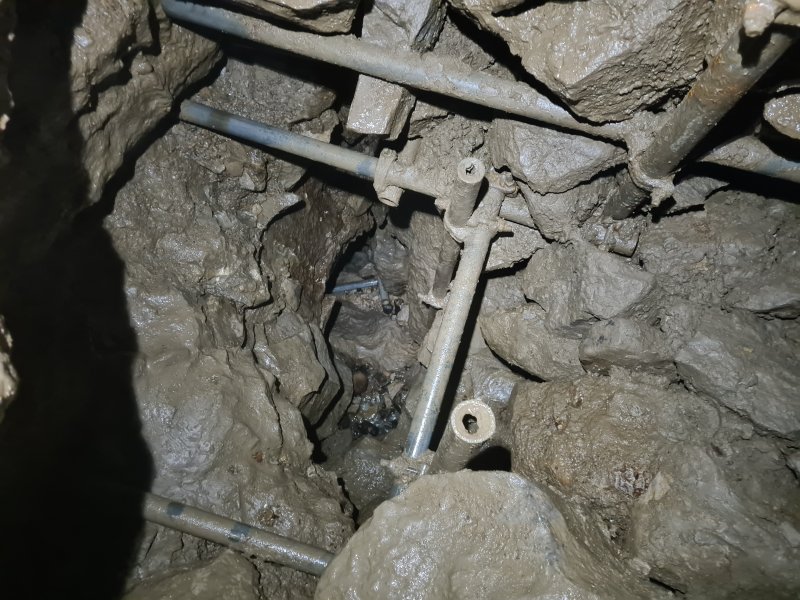 To the side of the choke is a scaffolded route through it, passing through the choked floor of Eggshell Chamber, leading into Clueless.
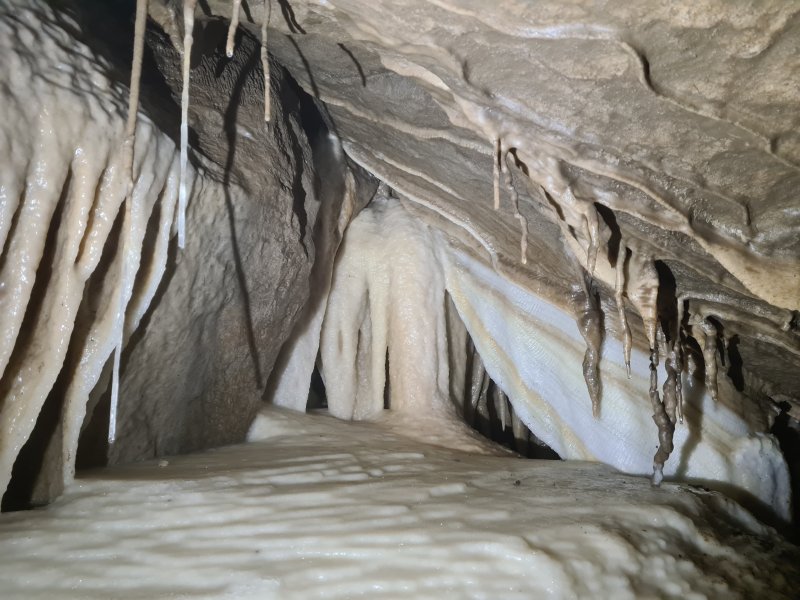 Curtains below Eggshell Chamber.
 Awkwardly narrow route.
Modelling by Dinny, lighting by Tarquin and Dinny
Awkwardly narrow route.
Modelling by Dinny, lighting by Tarquin and Dinny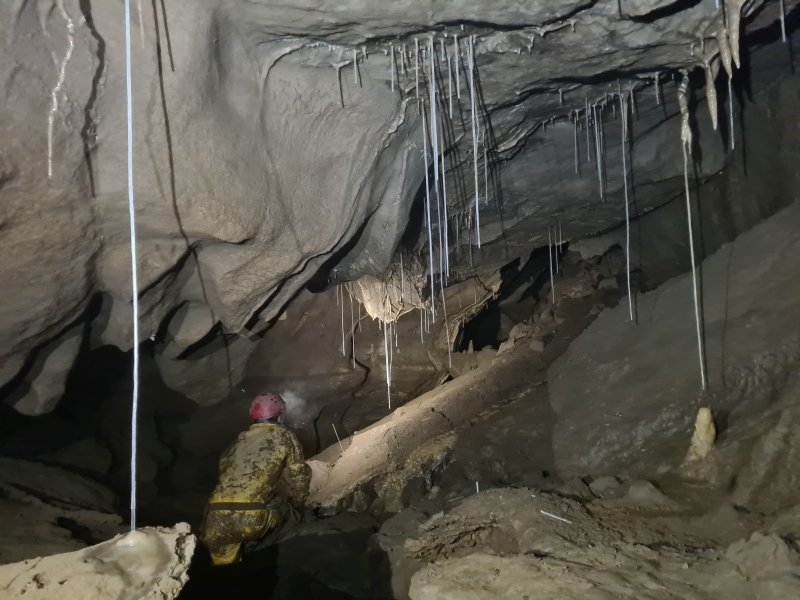 The cave now loses most of its formations, but there are a few straws.
Modelling by Dinny, lighting by Tarquin, Gwenllian and Dinny
The cave now loses most of its formations, but there are a few straws.
Modelling by Dinny, lighting by Tarquin, Gwenllian and Dinny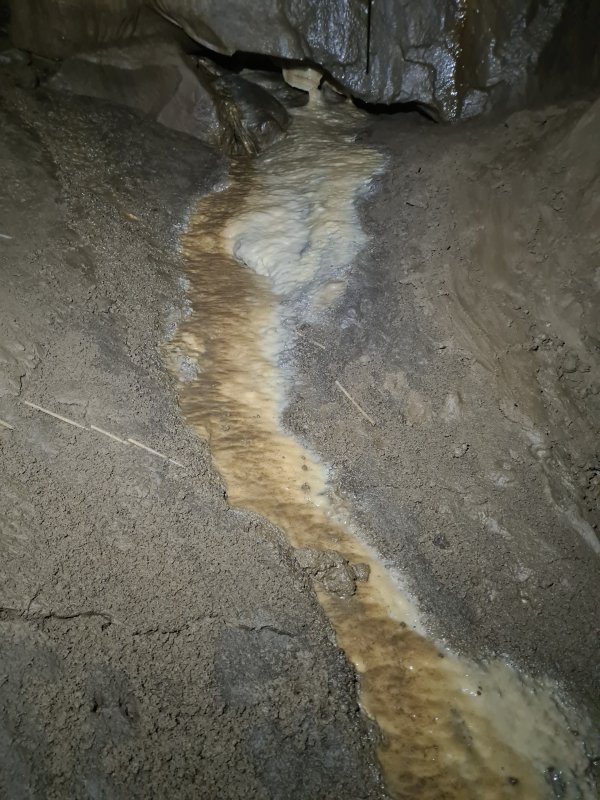 Flowstone river.
 Surge marks in the mud.
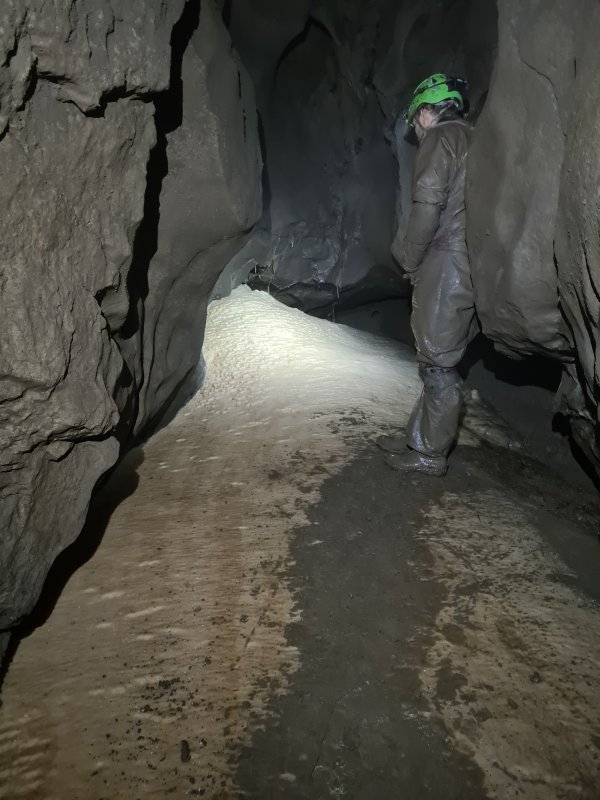 A very muddy stalagmite boss, whose steep slope is the only way on.
Modelling by Jack, lighting by Tarquin and Jack
A very muddy stalagmite boss, whose steep slope is the only way on.
Modelling by Jack, lighting by Tarquin and Jack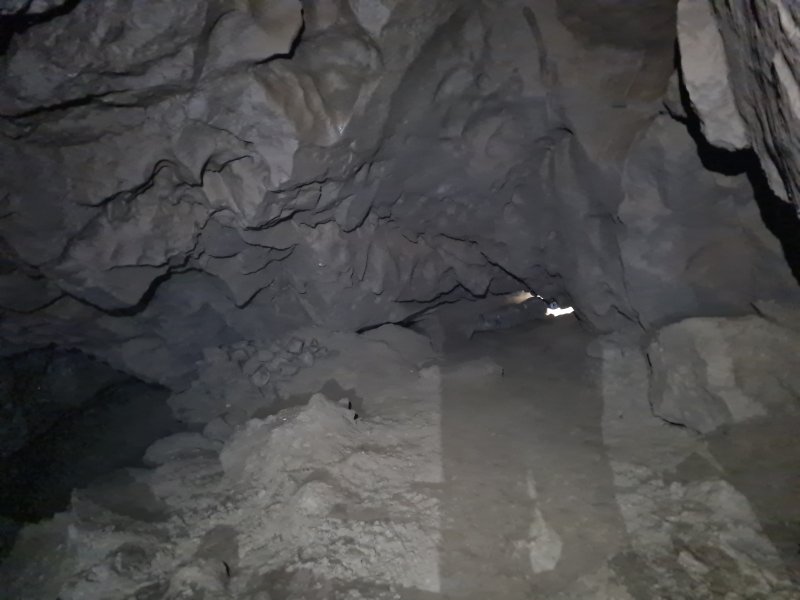 The cave then enlarges to become Clueless, then funnels into a series of crawls with a low chamber. This ends at Covid Crawl, the end of the cave.
Modelling by Tarquin's shadow and Gwenllian, lighting by Tarquin, Jack and Gwenllian
The cave then enlarges to become Clueless, then funnels into a series of crawls with a low chamber. This ends at Covid Crawl, the end of the cave.
Modelling by Tarquin's shadow and Gwenllian, lighting by Tarquin, Jack and Gwenllian Walking up through Leck Beck valley.
Modelling by Gwenllian and Dinny
Walking up through Leck Beck valley.
Modelling by Gwenllian and Dinny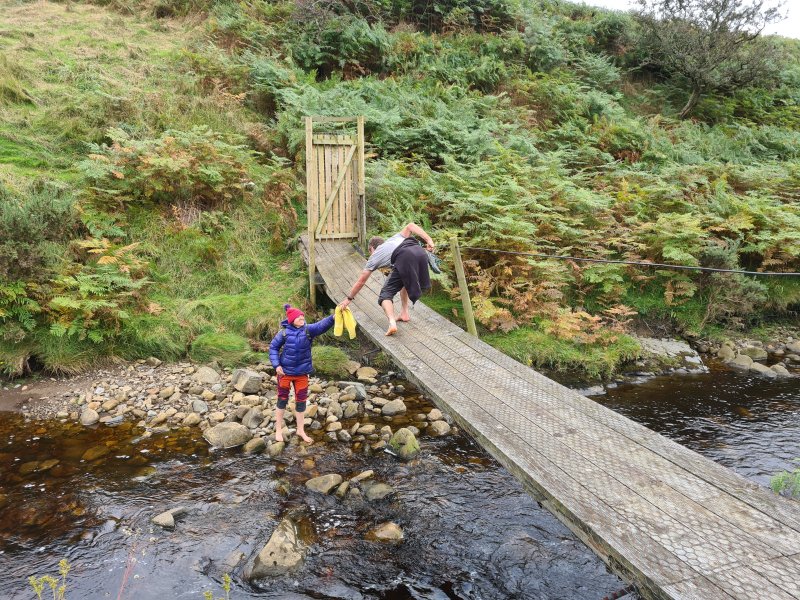 Crossing the river using a broken bridge. As if a locked door would stop someone.
Modelling by Gwenllian and Dinny
Crossing the river using a broken bridge. As if a locked door would stop someone.
Modelling by Gwenllian and Dinny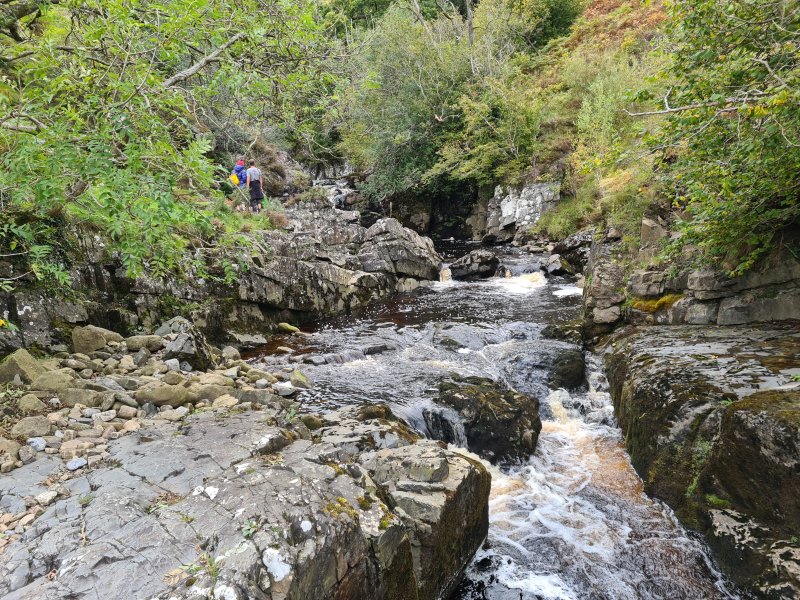 Leck Beck.
Modelling by Dinny and Gwenllian
Leck Beck.
Modelling by Dinny and Gwenllian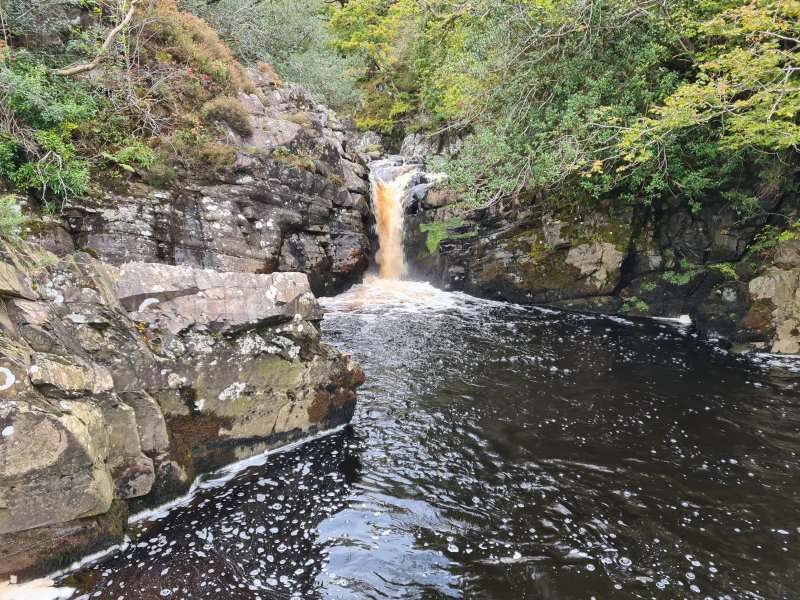 Waterfall in Leck Beck. By now, the river has all of the water from the Casterton Fell, Ease Gill, Leck Fell and most of the Ireby Fell caves.
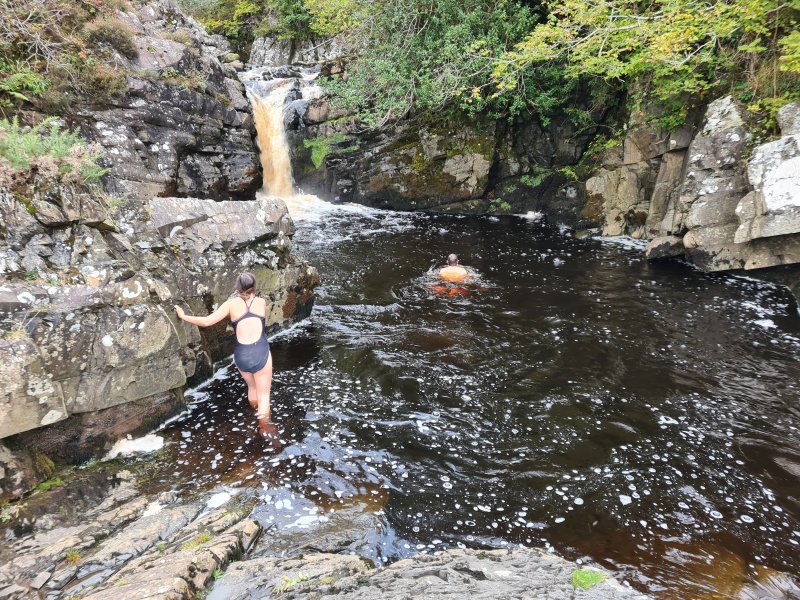 Swimming not bathing. I have no idea who these people are. Certainly none of us would take up the challenge to swim to the far wall and back across the current. Of course not.
Modelling by some randoms
Swimming not bathing. I have no idea who these people are. Certainly none of us would take up the challenge to swim to the far wall and back across the current. Of course not.
Modelling by some randoms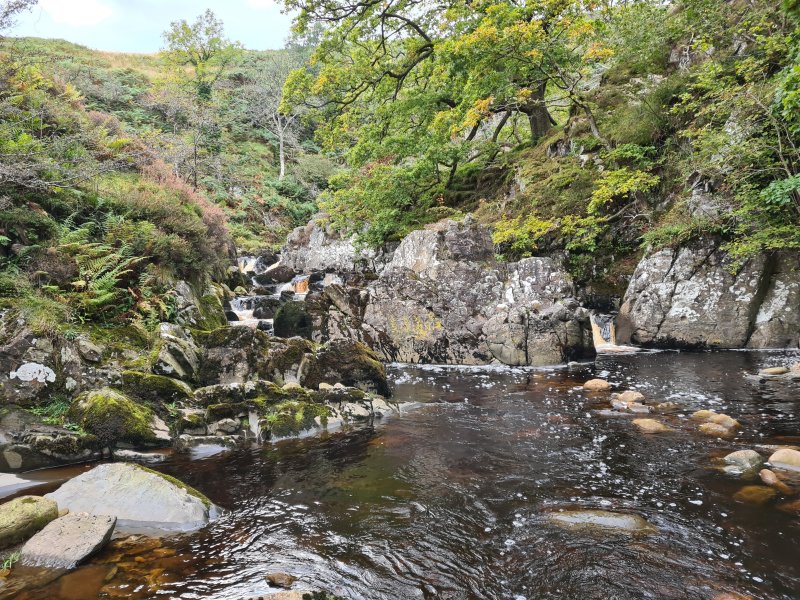 Upstream along Leck Beck. The cave resurgence at Leck Beck Head is over 1 km upstream.
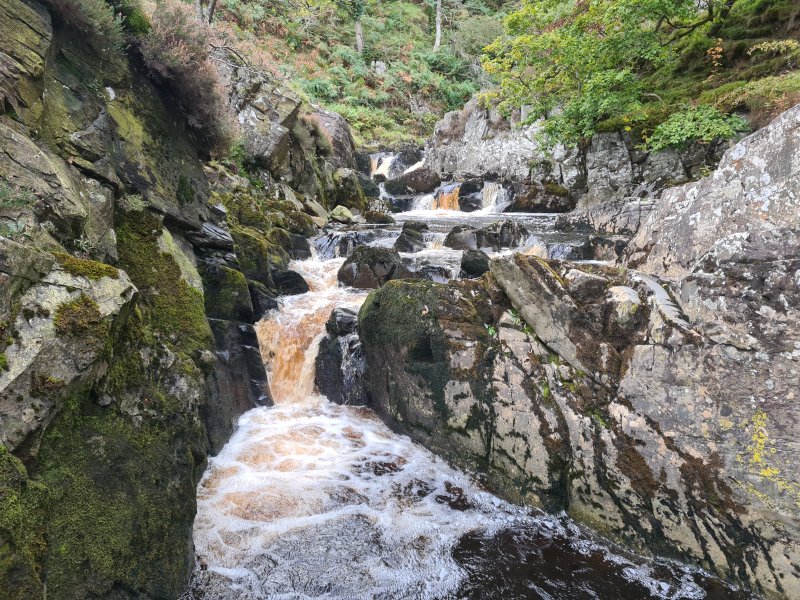 Leck Beck cascades.
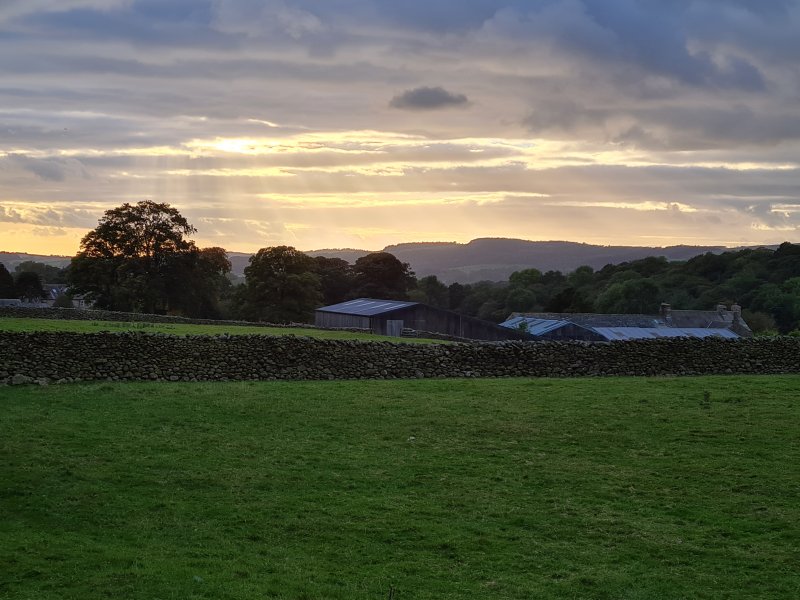 Sunset and streamers over Leck, looking towards Whittington.