 The aquarium in its final setup.
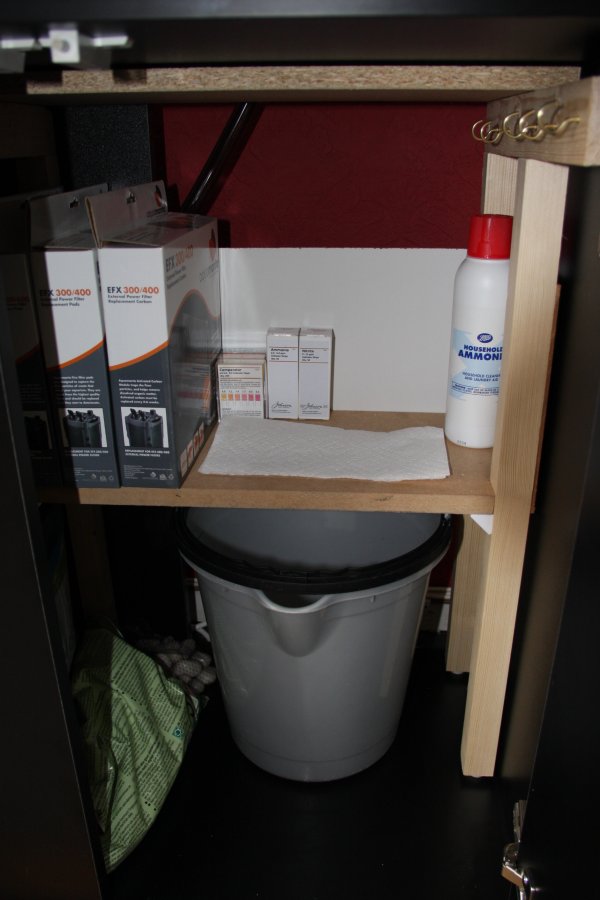 The free standing shelf.
Bringing deserts and tropics into the northern temperate.
We are certainly not experts, but have successfully run a number of tanks/aquariums, of which our two most recent are a small tropical tank for tetras, and a larger coldwater tank for danios, minnows and fantails. These prevented us from keeping some of the more extravagant tropical fish, which are too large to fit in the smaller tank, but need warmer temperatures than the bigger tank. This page documents our most ambitious tank, designed to cater to the larger tropical fish. It's nothing compared with some of the more advanced marine setups, but it's something within reach. The information is provided here mainly so that others who are interested can see how to recreate some of the parts that they may want to copy. Yes, there's a lot of text, but each section also has pictures, if that's all you're here for.
The tank was set up as a tropical freshwater tank, with the conditions and layout designed to suit the needs of its intended inhabitants. The places to hide, the sand for digging, the planting around the edges with open space in the middle, the mix of tall grasses and broadleafed plants, the expanses of rock surface, the water depth, the aeration and other water conditions. All of these help to provide an environment suited to the specific community of fish.
Our nearest suppliers are all members of the ubiquitous Maidenhead Aquatics franchise, so many items were purchased from their shops.
First things first, the tank. We chose the AquaTropic Pro 1200 (120 cm x 65 cm x 43 cm external, approximately 116 cm x 41 cm x 54 cm internal). When filled, it holds a maximum of 253 litres of water (56 Imperial gallons, 67 US gallons), though the substrate and ornaments leave it with a usable volume of about 230 litres. It comes with a cabinet, Aquamanta EFX 300 filter and Interpet Deltatherm 300Watt heater (though due to a thermostat failure, that was replaced with a SuperFish Combi-Heater 300 W heater). It has holes in the top for the intake and outlet, and does not have any inbuilt pipes that get in the way of any backing sculpture. The relatively large size - significantly larger than most beginner tanks - is intended to allow a variety of different species to be kept in their ideal numbers. It also makes it easier to keep the chemical balances stable. To reduce algae growth, we replaced one of the Anubias T5 10000K white lights supplied with the tank, with an Arcadia T5 Plant Pro light. An additional couple of red Aqua-Brite LED lights powered through a 4-Way USB Power Hub allow us to watch the nocturnal pleco.
It would have been possible to buy a lower cost tank, such as the Fluval Roma 240 or Aqua One EuroStyle 100 or Aquience 1000R (the Juwel Rio 240 was in the same price bracket as the AquaTropic Pro tanks). However, these either did not satisfy the dimensions we were looking for, or had badly placed fittings that prevented the sculpture from being placed correctly. Maidenhead Aquatics also offer custom-sized aquariums with elegant cabinets, but the cost of these is significantly higher, and the openings in the top of the tanks were far too small to allow any large sculptures.
The substrate is Unipac's Tana Aqua Sand, and needed about 14 kg to cover the bottom of the aquarium to a depth of 2.5 cm (not including the area occupied by the sculpture). 4 litres (roughly 5 kg) of JBL Aquabasis Plus was also laid under the areas that would be planted, as well as around the cliff-ledge plants. No doubt it will not remain in place very well...
The tank was put through a fishless cycle to prepare the filter bacteria before stocking with fish. Although it is possible to use rotting fish flakes or rotting prawn meat to start the cycle off, it was quicker to bypass the rotting stage, and just put ammonia directly into the water. The tap water was conditioned and seeded using the reliable Nutrafin Aqua Plus and Cycle. (We did initially try JBL FilterStart instead of Nutrafin Cycle, without any significant effect.) The cycle took 25 days in total.
Note that the ammonia is much stronger than the instructions expected, and even with only a quarter of the stated dose, it was nearly four times the required value, and was enough to kill off a set of plants. Oops. With the ammonia in the bottle at 9.5% w/w solution, it needs only 1.05 ml to get about 1 ppm in a tank of 100 litres. The form below calculates how much of the ammonia solution needs to be added:
For testing the cycle, we had test strips for pH, ammonia and nitrites, multi-test strips for just about everything, and a testing kit. The testing kit is the most reliable, but needs the chlorine test from the multi-test strips, and does not have a high enough range of nitrite and nitrate detection to match what we encountered during the initial cycle. The nitrite and multi-test strips offered better ranges for nitrite and nitrate respectively. The dedicated ammonia and pH test strips were too inaccurate to be of any use, and typically gave wildly incorrect readings. Alternatively, the JBL test kits are by far the most accurate we have used, but are quite slow to show results, and do not have enough range on the nitrite test to cope with the values we experienced. Their 6in1 test strips give a high enough range on the nitrite, and could be used to compliment the test kits.
Several other minor parts were needed, of course, such as thermometer, light timer. On hot days when cooling is needed, a small fan can be hung above the tank on hooks. Power for the tank is supplied through a surge protected extension lead, with the light timer powering a double-socket extension lead for the two light plugs (it's not advisable to have an extension cable powering an extension cable, but the total power usage is well within the limits).
The cabinet doors needed door buffers to make them close more gently, and the feet needed plastic wedges (old credit cards...) to level them out, but other than that, the cabinet seems good enough. To make best use of the space in the cabinet, we built a very basic free standing shelf, with legs made from 34mm x 34mm timber, a shelf and lid made from MDF and chipboard scraps (with the shelf held to the legs using rigid joints), back and side panels for the shelf made from hardboard scraps, rubber cushioning feet, and thin strips of timber extending forwards to allow hooks to be added to it. It is sized to leave a small gap all the way around it to avoid it shaking due to the filter and air pump vibrations, and is not attached to the cabinet to avoid damaging it. It is probably the ugliest shelf in existence, but it serves the purpose, and it is hidden from view in in the cabinet.
The mountain ornament is the Clearstream Aquatics "rock strata & caves" ornament. There are several similar variations - ours is the one with the code HHB016. Whatever that means.
The cichlid cave is the Clearstream Aquatics "cichlid cave sm" ornament, code HSY079S.
The other mountains are simply pieces of "elephant skin" rocks, from Maidenhead Aquatics. They also supplied the cobble stones. The quartz pebbles were sourced from a garden centre.
The volcano is the Arcadia Classica Aqua-Brite Volcano Aeration Ornament, which comes complete with its own air stone. Along with that, we picked up a red Aqua-Brite LED light, which fits inside the volcano to light it up, and is powered through a remote controllable switch. Air is supplied by a TetraTec APS300 air pump, which is regarded as one of the quietest pumps available (though "quiet" is a relative term). Air pipe, suction cups and Hagen Elite Aquarium Airline Check Valve were obtained separately.
To make the air pump even quieter, there are suggestions to put it on a sponge or hang it from elastic to reduce the transfer of vibration. In this case though, it is the body of the pump that shakes and makes the sound. Another suggestion was to suspend it in a jar by its wire with a small hole letting in the air. However, that does not work well with such a large pump, and would not allow enough air in to keep the pump cool. In our case, it was better to construct a box with a simple labyrinth shape. The pieces of scrap chipboard are screwed together, with old carpet stapled to the inside. It has rubber cushioning feet, a hinged lid, and a drawbolt/toggle latch. The shape reduces the sound significantly, with the carpet preventing reflected sound from travelling around the corners of the labyrinth, and with the gap also allowing plenty of air in. For louder pumps, the labyrinth could be made to turn more corners, and extra carpeting (or even acoustic carpeting) could be added.
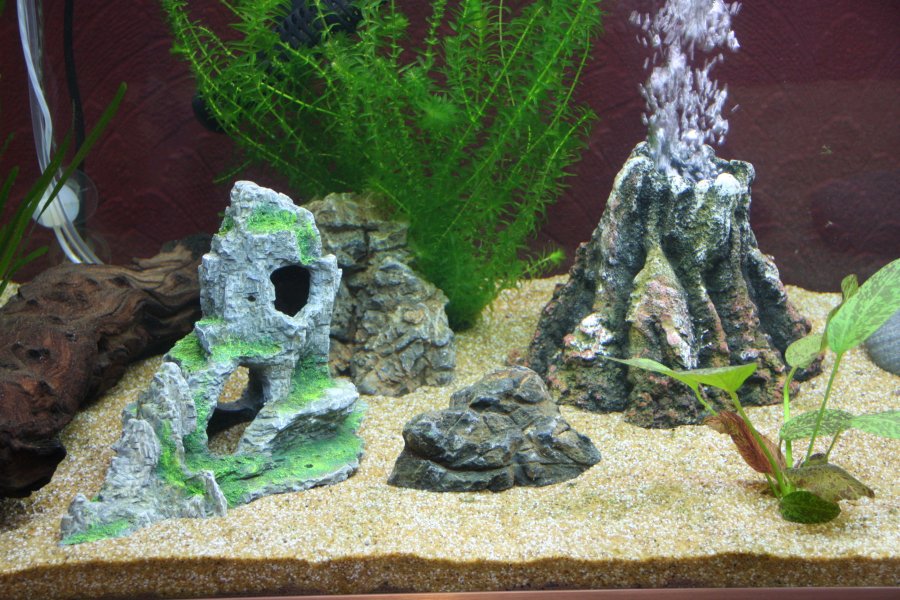 The rocks and mountain ornaments.
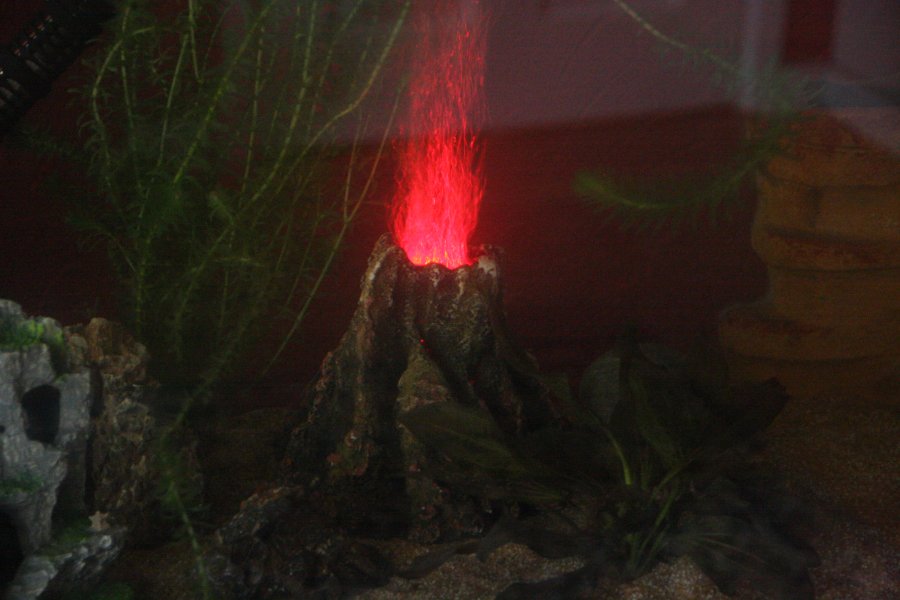 The volcano at night. Sorry about the digital noise - it does look better than the picture shows, but the camera does not appreciate such low light.
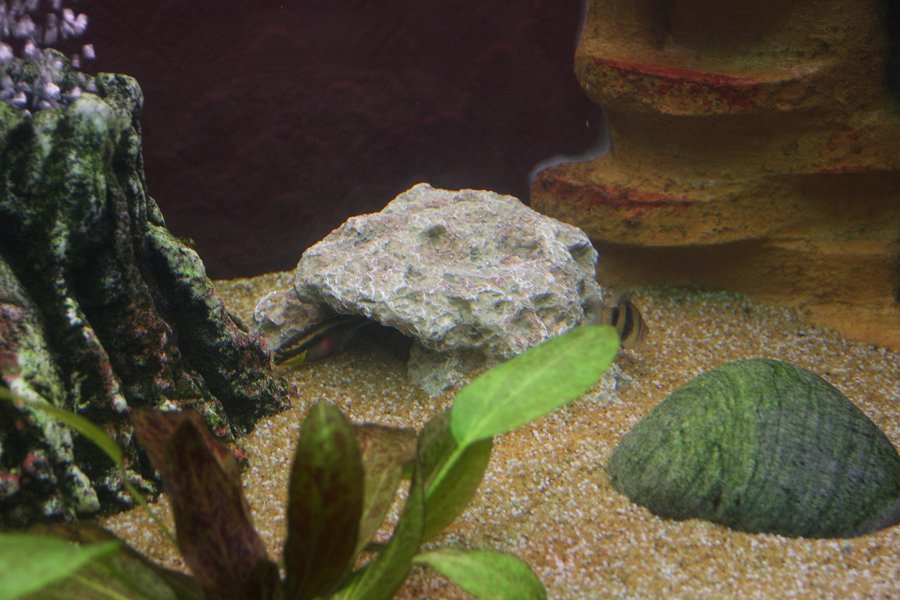 In attempt to stop the male kribensis from trying to use the volcano as a spawning cave, we added the cichlid cave a couple of months after the initial setup.
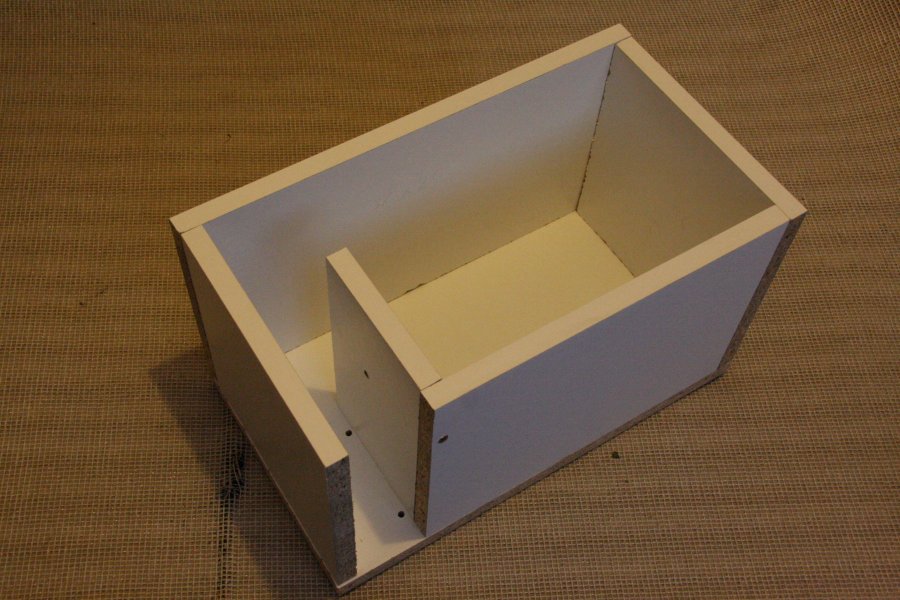 The base of the sound-proof box, showing the shape of the simple labyrinth.
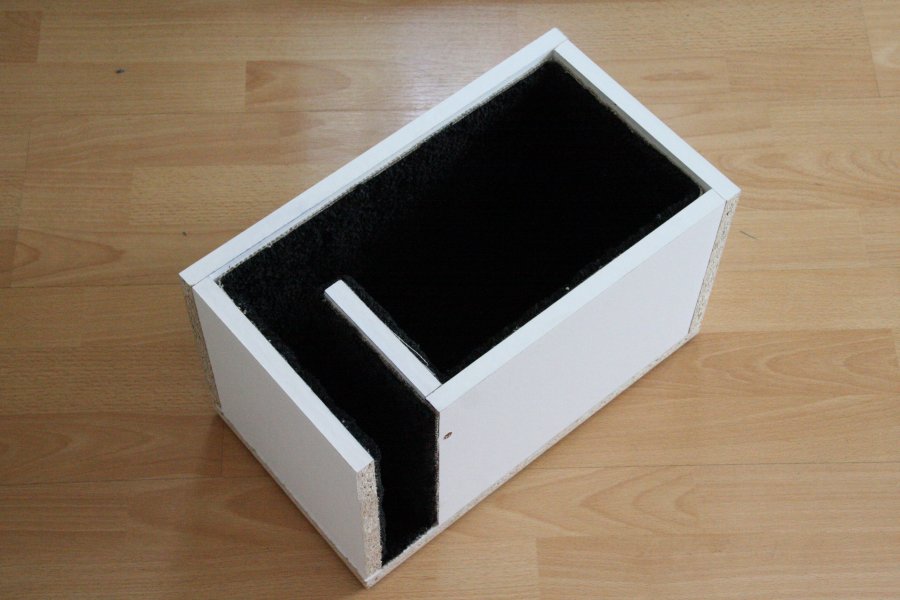 With carpet attached using heavy duty staples.
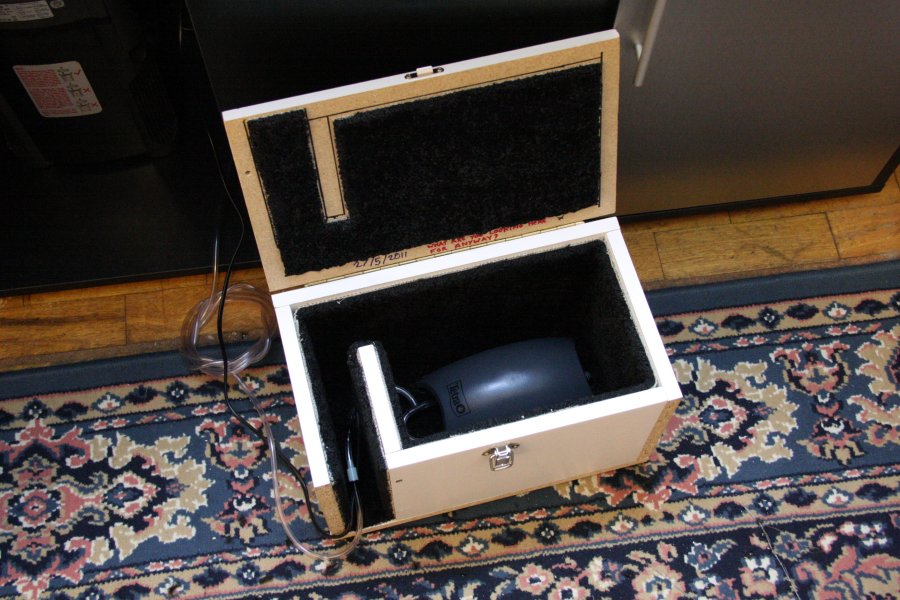 With a lid attached, showing how the wires and pipes exit the box. Later, a small ribbon was screwed to the left side of the lid and box - this prevents the lid opening too far and damaging the hinge. When the lid is closed, this lid strap falls into the labyrinth channel above the pipes
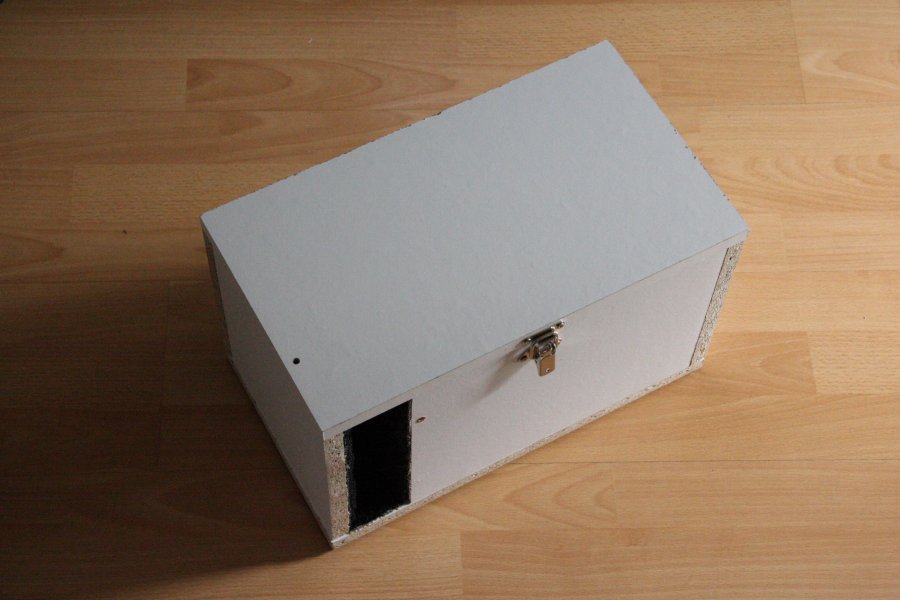 Closed and buckled.
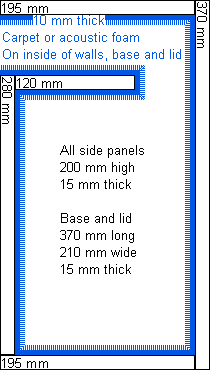 Schematic building plan, in case you wanted to make your own.
Because we can't all make our own moulded polycarbonate ornaments...
The sculpted rock backing is by far the biggest experiment in the tank, and was custom made to suit the tank. The procedure for making it was taken from a series of instructional videos; 1 2 3 4 5 6 7. Essentially, it is layers of styrofoam cut to shape, glued together, melted slightly, and coated with coloured cement. The process took just over 5 weeks from the delivery of the tank, to having the sculpture completed, installed, and ready for the tank to be filled. Most of that time was spent waiting for various glues and coatings to dry.
The sculpture is intended to be 37.5 cm high (needing 15 layers of styrofoam), 44 cm long and 39 cm wide, shaped so that it fits through the openings in the top of the tank. 3 sheets of 60 cm x 125 cm x 2.5 cm styrofoam were used. It intentionally covers less than half of the tank, to provide different environments in different parts of the tank - it could be made in several pieces that cover the whole back, if needed. The design is loosely based on the features of Jabal Al Qarah and the Tweig Escarpment on the Arabian Peninsula.
Cement/mortar (used to coat the sculpture) is one of the least fish-friendly materials, creating an extremely high pH - as strong as bleach. It's not something you want to put in a fish tank. Even after curing, it can still leach toxic chemicals for several months. No matter which option you use, having cement in the tank requires carefully monitoring and adjusting the pH for several months. The options are:
We went with the last option, sourcing our aquarium cement from the German company Zoo Zajak. Around 0.5 kg of raw material was needed for the three layers covering the sculpture, with 1.1 kg used in total, including test pieces and the wasted cement that was thrown away after preparing too much. The shipping cost was surprisingly low, and the language barrier provided only a little entertainment. It certainly helped to have friends who could ask the special-case questions in German, and translate the answers, and for that we are most grateful. The answers are included below.
According to the instructions, it does not need any additional sand, and can be dried in 24 hours at room temperature, after which it needs to be immersed in a fresh water bath for 2 days to remove excess lime. According to the supplier, however, it is best dried slowly over 5 days (with wet towels keeping it humid for the first 3), to improve the strength. To avoid upsetting very sensitive fish, after drying it should ideally be cured in a bath of weak ascorbic acid or citric acid at about pH 5-6 for anywhere between a few hours and a few days (depending on the thickness of cement). After that, it would need 2-10 days of fresh water baths (changing the water once per day) to remove any remaining chemicals. It's best if curing can be done outside the tank to allow any acid-damaged areas to be re-applied before placing it into the aquarium. We put it in a large plastic box and used an empty filter to sprinkle the acidic water over it - it's also possible to hold the sculpture underwater using netting (though the netting may damage the surface) or just push it underwater using the box's lid.
The cement is dyed using buff, red and black cement dyes from Wickes. (These can also be added to white acrylic paint to allow for touching up damaged parts, but need to be mixed much darker as the cement will darken when immersed or coated with sealant.) After curing and drying, some acrylic paint was used to produce the white, as it is not possible to produce pure white cement that is safe for aquariums.
The cement does not stick as well as you might hope in such thin layers (it is designed to be used as the sculpture material itself, not to coat a sculpture), so we found it useful to apply a sealant afterwards, to prevent it from flaking or crumbling off, or being bitten off by destructive fish. Pond sealant sounds like the right thing to use, but the solvent melts the polystyrene wherever it manages to seep through the cement. The best approach is to paint it with a clear, cold curing epoxy resin such as the Vosschemie Glosscoat, even if it does seem expensive. It needs to be mixed in relatively large amounts (200+80 grams minimum) and stirred for at least 5 minutes before application, or it will not generate enough heat for it to cure properly. It only gives 30 minutes for application - after that, any remaining resin in the mixing pot will suddenly become excessively hot, and cure in a matter of seconds. Once applied, it should be left to cure for a whopping 8 days at room temperature, or as little as 6 hours in front of a 50°C heater (anything above 70°C can damage the styrofoam).
The sculpture was glued using clear aquarium silicone sealant, available from most fish tank suppliers, requiring just under one 310 ml tube to hold it together, and another 310 ml tube to hold it into the tank and bead the edges. Pretty much any aquarium-safe brand will do. It's worth noting that even with 0.5 kg of cement and 150 g of epoxy resin pulling it down, the buoyancy of the styrofoam still produces several kg of upward force that the silicone has to counteract. In our case, this is a little under 13 kg of upward force. No matter how accurate the shape may be, the gap between the sculpture and glass can become significantly wide in places, so using an entire tube to hold it in place feels justified. Beading is painstaking with such complex edges (why oh why didn't we keep the edges straight?), laboriously pushing the silicone into place with wet fingers. In theory leaks in the silicone (or epoxy) should not be a problem, but it is possible to fix any leaks after the tank is filled by using an underwater setting silicone (though this is significantly whiter than regular silicone once cured). Since the messy silicone and styrofoam could be seen from outside the side of the tank, the outside was covered up with some aquarium background film, facing outwards and held in place with blu-tack.
Several tools were needed to make the sculpture, including: coloured permanent markers, modelling knife, blow torch, (silicone) cartridge gun, set square (with a hard edge for cutting against), a pair of clamps, sandpaper and a wire brush for keying surfaces, a heater for the epoxy, fan for the silicone, and copious quantities of kitchen towels. To apply the cement, some paint brushes and makeup sponges were used, as well as a spray bottle of water. The epoxy required a few disposable brushes. Ideally, the glass should be cleaned with vinegar before siliconing, and some white spirit can help to remove accidental drips of silicone from the aquarium glass. Other things to consider are surfaces for cutting, gluing and melting, protective gloves, pots/jugs for mixing cement and epoxy, paint remover for the brushes, and the partridge that is still stuck in that pear tree after 12 rounds.
 The first few layers of styrofoam, not yet siliconed together.
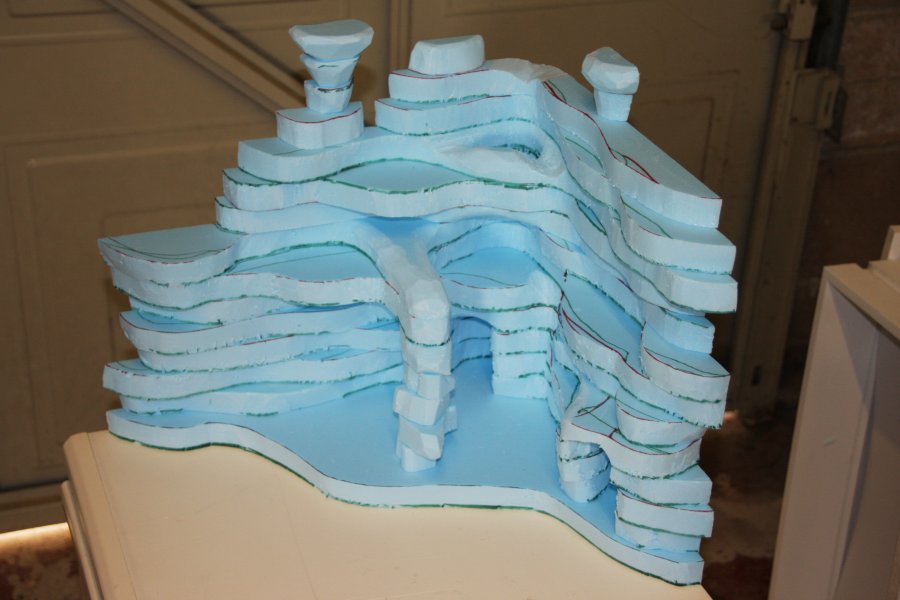 All layers cut to shape, but still not siliconed.
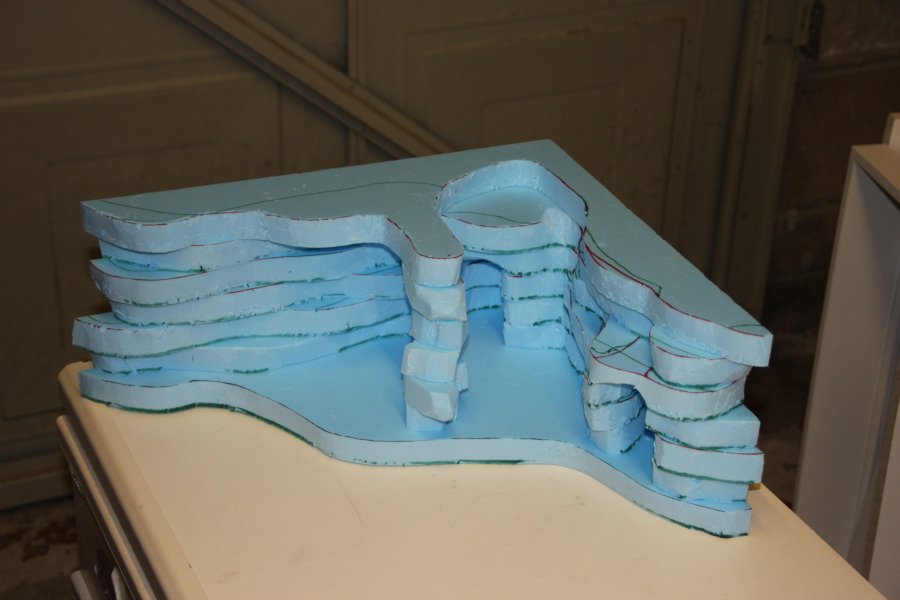
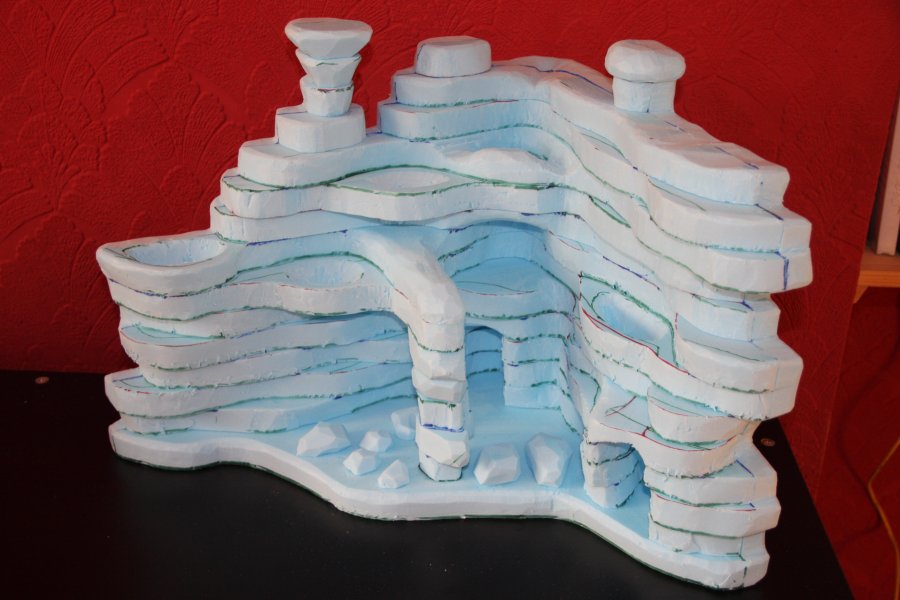 After siliconing to each other and the back panels, with the back panels cut to shape afterwards. The planting ledges have also been scooped out, some rocks have been added, and some of the sharp edges have been smoothed.
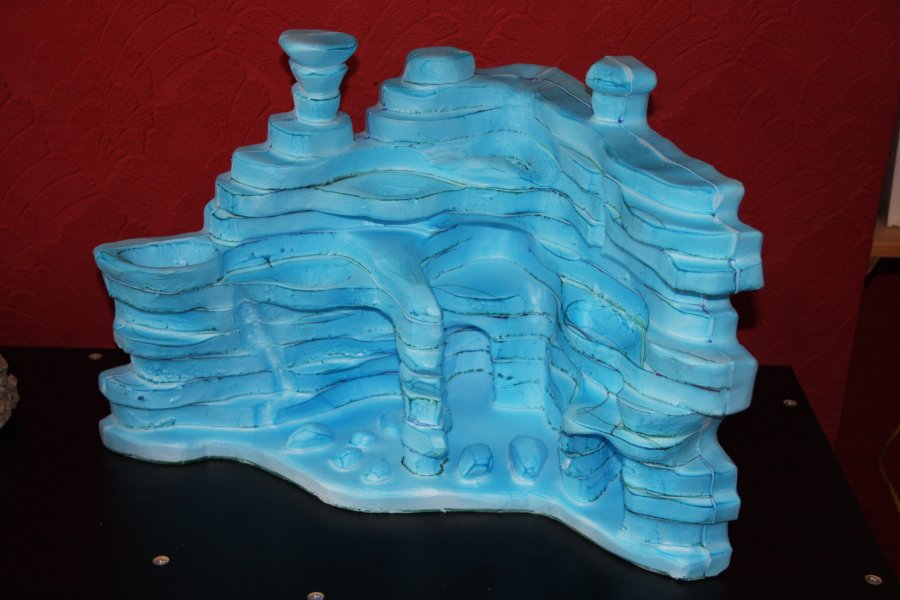 After melting to produce smoother edges. Some simulated drainage channels were cut out beforehand.
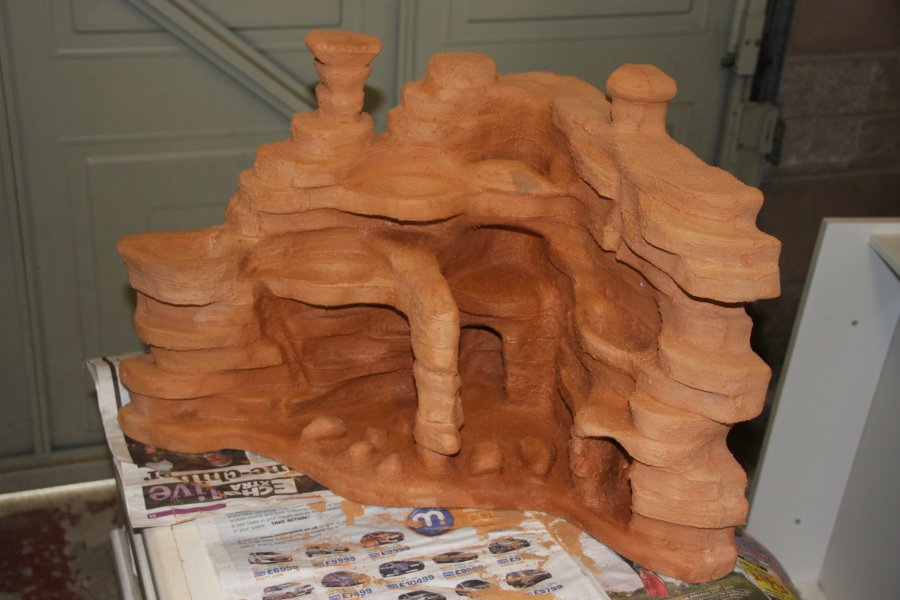 The base layer of cement, dyed a little too dark with a buff and red mix - very similar to the colour of cave mud, which absorbs too much light.
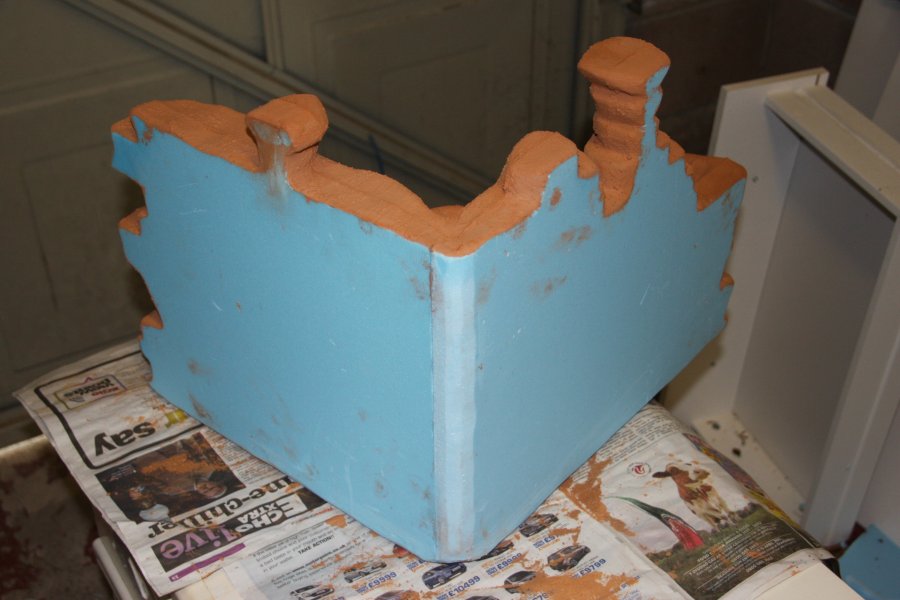 The back is kept as clean as possible to make siliconing easier.
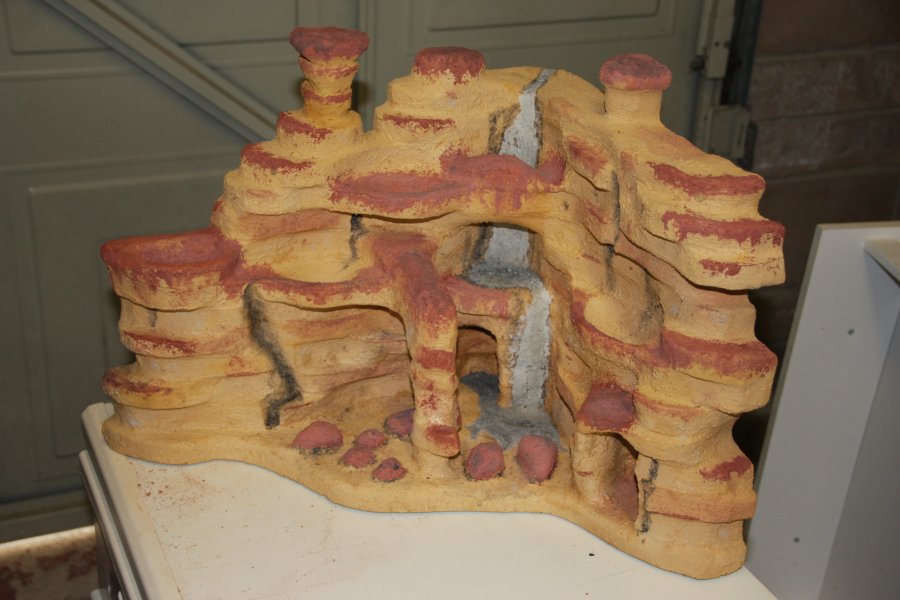 After a lighter second layer (mostly buff and a little red), caliche and water stain details were added as a third layer with red and black cement dyes. The water is made from some lightly black dyed cement and some plain cement.
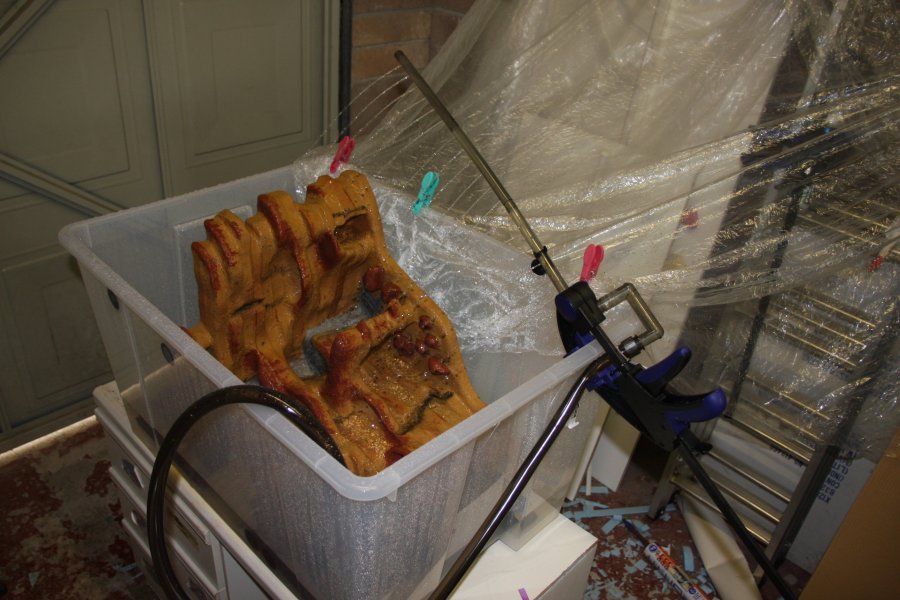 Curing in the acid bath for a couple of hours.
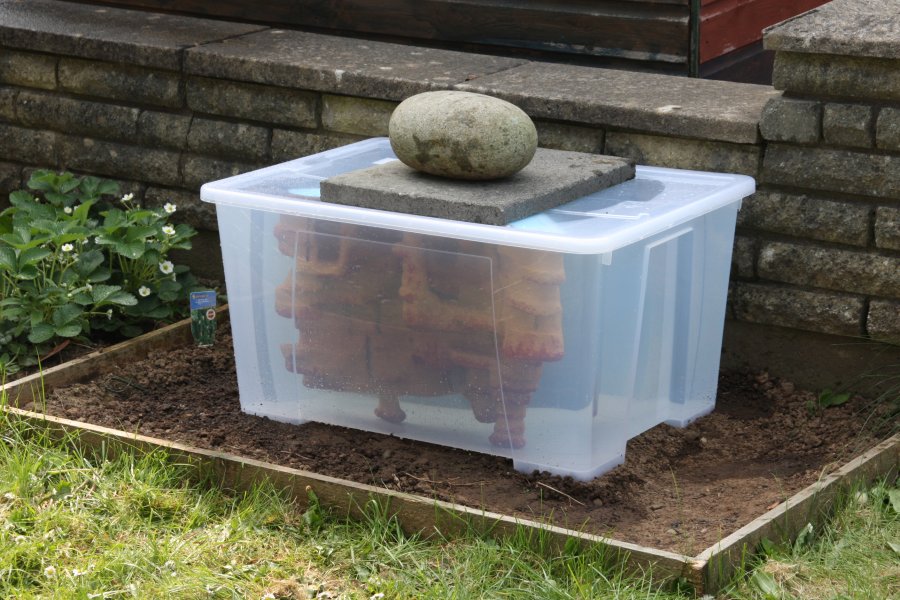 Then a couple of days in a water bath.
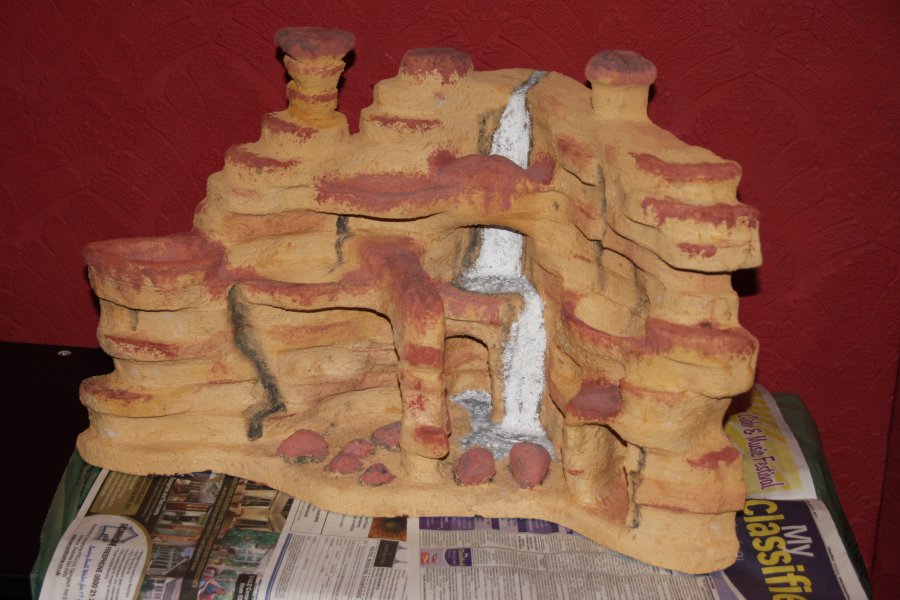 The waterfall looks much better with white acrylic paint.
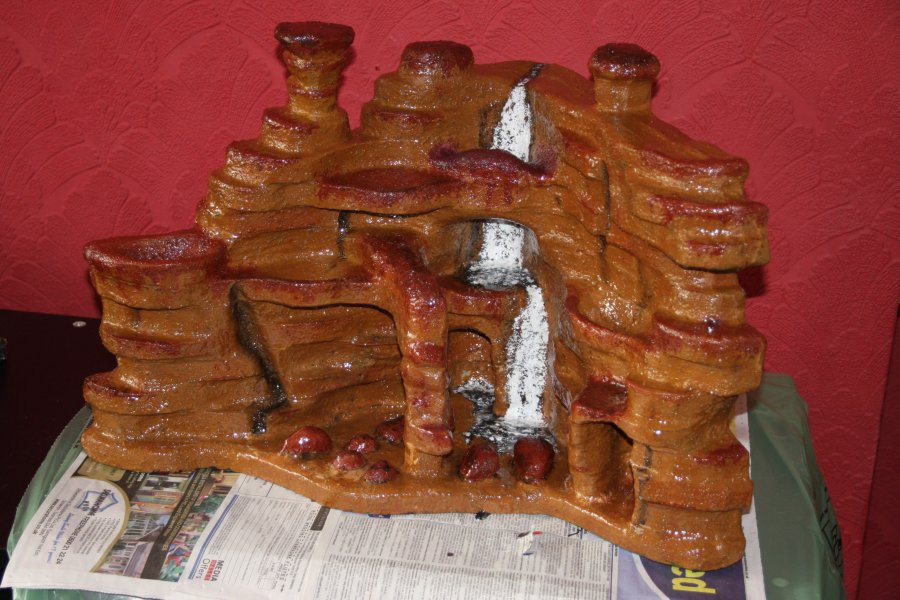 Coated with epoxy. Although it looks very dark now, most of the brightness will return once it is immersed in water. It would have been better to use two coats, to avoid the odd little leaks around sharp granules, which need patching to avoid releasing streams of bubbles into the water.
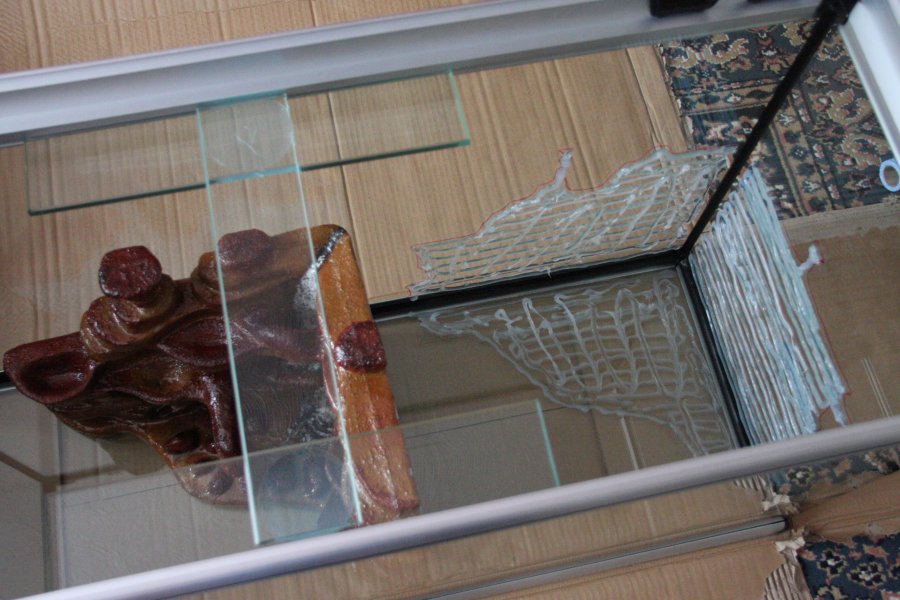 Silicone applied to the tank. It seems like a lot but remember that the silicone does not stick very well to the styrofoam, even with its surface scratched to make it stick better. Not taking any chances here.
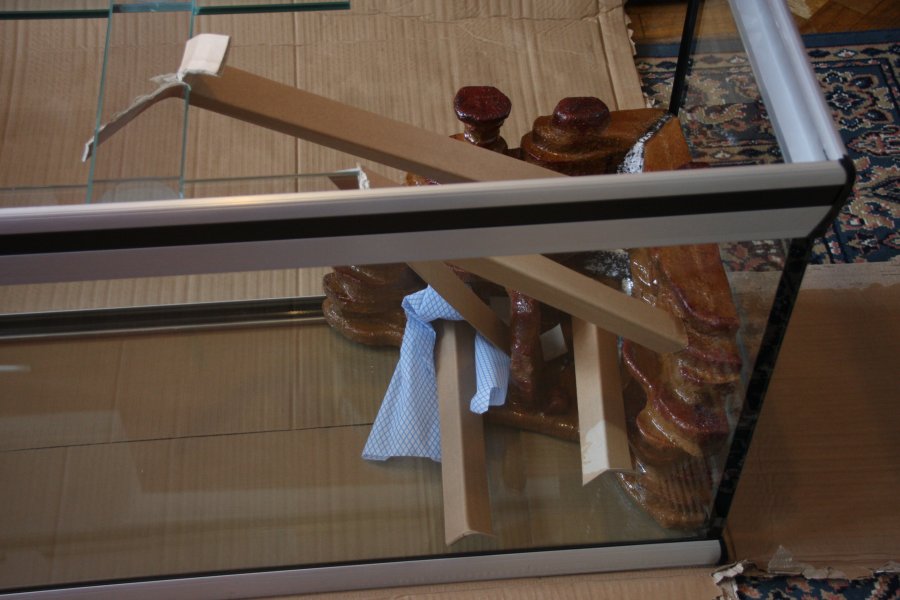 The sculpture is then pressed very firmly into place, and wedged in with thick but slightly flexible cardboard from the tank's packaging. Some cloths were used as padding to avoid damage from the cardboard struts.
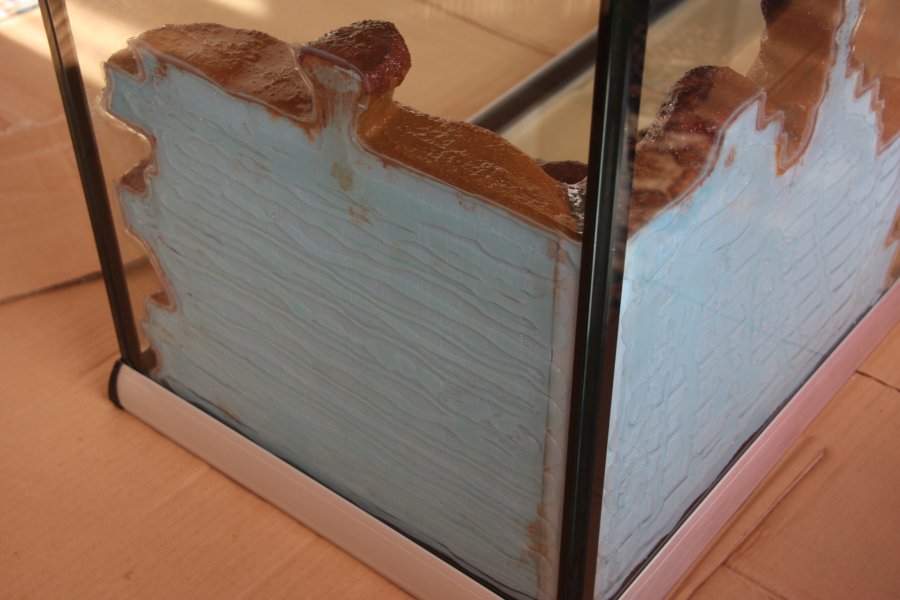 The silicone gluing and beading after setting.
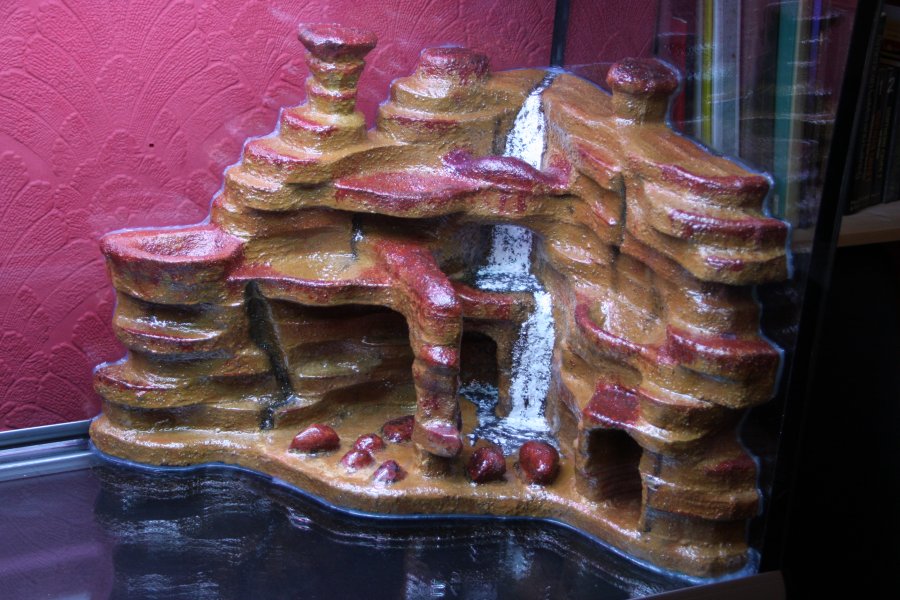 Ready for filling.
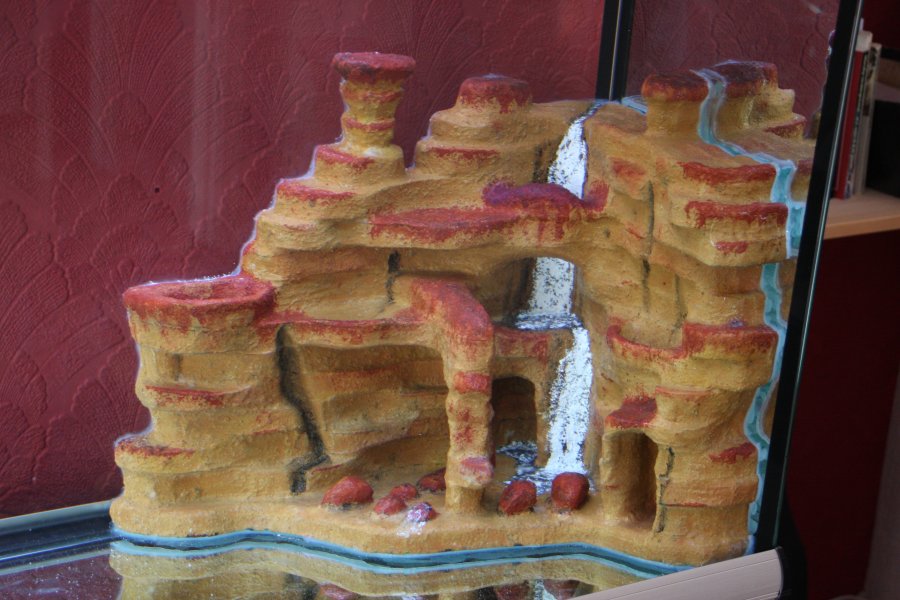 Filled with water, which distorts the shape due to the lens effect (the design of the sculpture intentionally catered to this, to ensure that all the important parts remained visible even with the water affecting it).
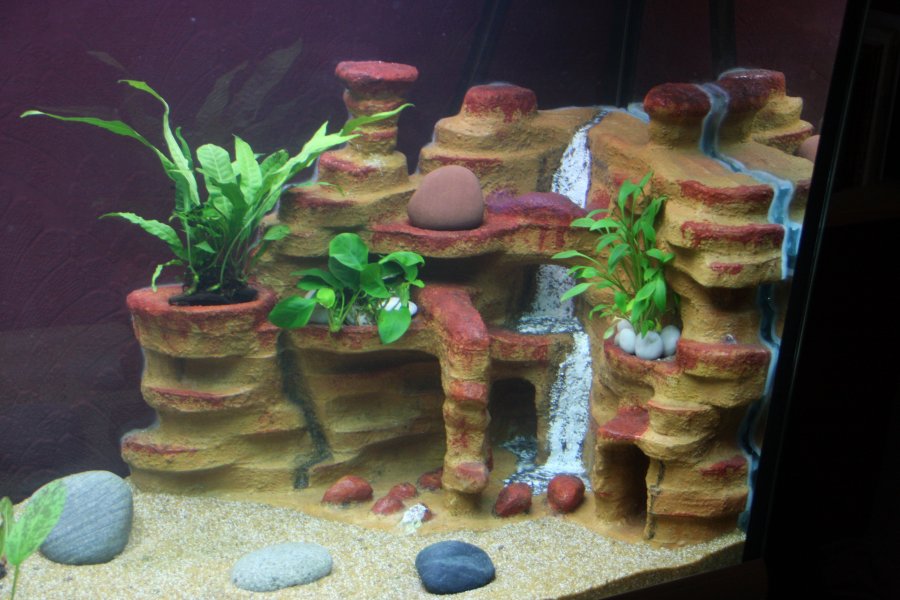 Planted up in the final setup.
To aid in the choice of fish, we used the book An Essential Guide to Choosing Your Tropical Freshwater Fish (ISBN 13-978 1902389 95 0). The final choice was:
After the fishless cycle, the filter bacteria were converting 2 ml of ammonia (9.5% concentration) every 24 hours. At that rate, we could almost have stocked the tank at once. To be on the safe side, we added 5 fish at first, and another 5 after a week. In between, to sustain the bacteria, we steadily increased the amount of daily food so that by the time the second set of fish arrived, there was no extra amount of food needed to supply them. Technically this would count as overfeeding for a week, but we needed to retain the bacteria that had built up in the filter, and it helps to avoid the shock when additional fish are added. In most of the subsequent cases, the percentage change in population would be relatively low, so the overfeeding approach is not needed.
In most cases, the fish were obtained from Maidenhead Aquatics. The only exception is the tiger plec, which was obtained from the specialist shop Aquabatic.
 Three wagtail swordtails were included among the first fish we added. This is one of the two female swordtails. Swordtails are livebearers, meaning that unlike most fish, the female does not lay eggs; instead she hatches the eggs inside herself, and gives birth to live young. Unlike humans, there is no placenta, and the young do not gain any sustenance directly from their mother.
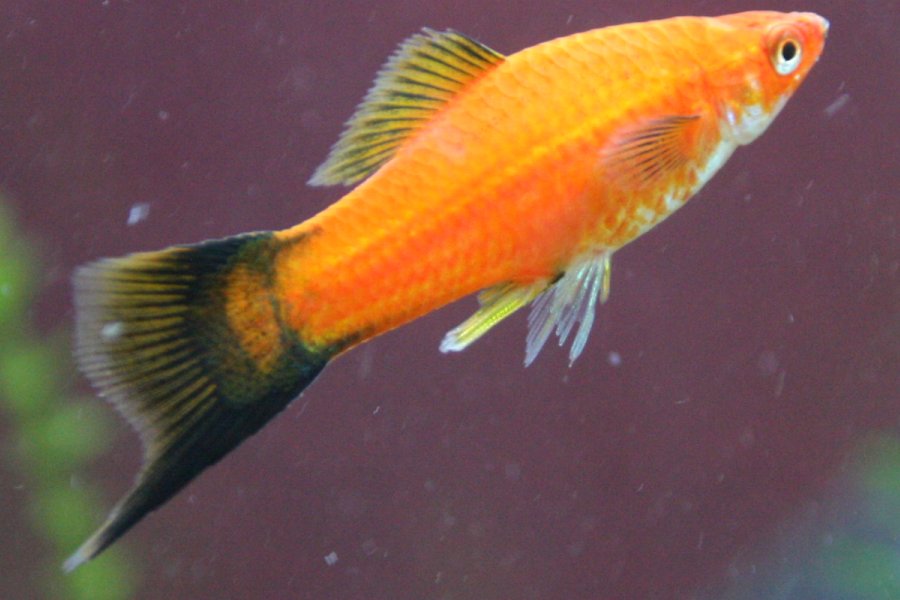 The male swordtail, with his characteristic tail. The sword grows much longer as he ages - about three times as long as in this picture. In order to fertilise the female, the male's anal fin spines wrap around in a circle to form a tube - this gonopodium is effectively a penis, and is used to delever his sperm to the female's genital opening.
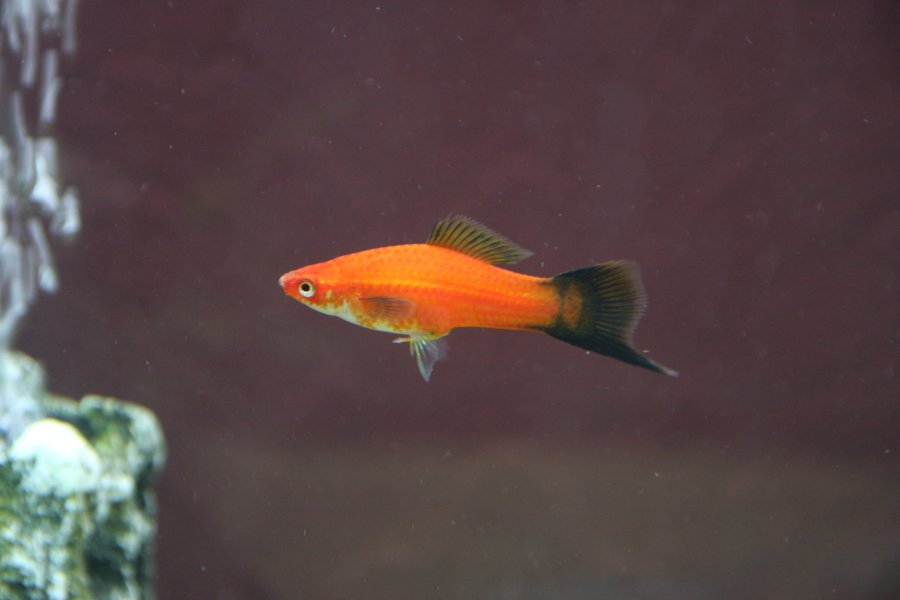 He occasionally wags it around like a dog's tail, but during mating will point it directly forwards, to direct its tip into her genital opening. Male livebearers can be quite relentless in their pursuit of females, so having more females than males helps to prevent the male from stressing a single female to death.
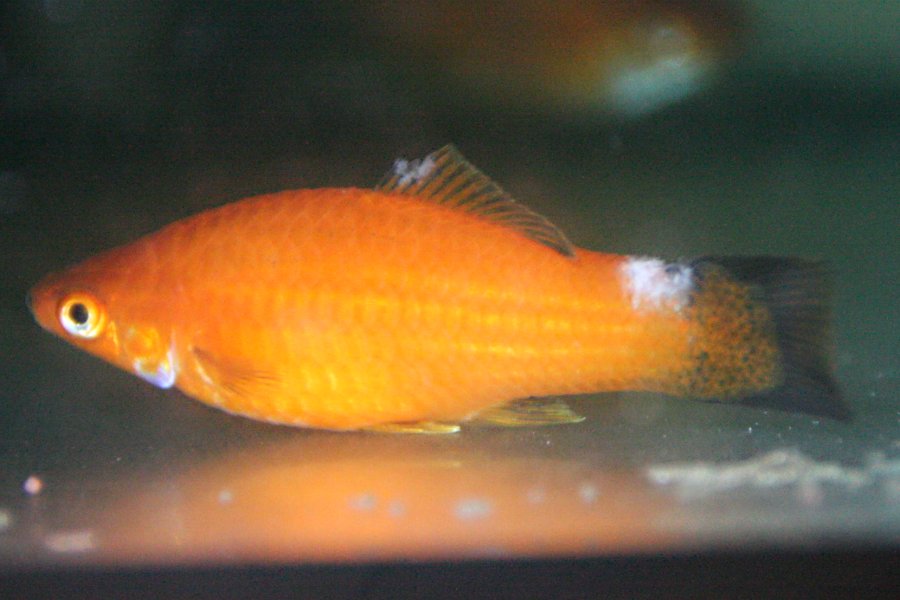 After just over a week, all three swordtails started showing columnaris symptoms. As this was the initial stocking, we had not quarantined the fish, but were on the look out for disease. The swordtails were immediately moved into a hospital tank, and treated with courses of different dedicated medications, which all failed to save one of the females from this resistant strain. She died after about a month, once the infection rotted all the way through to her spine. The supplier medicated their tank after we notified them, but their strongest medication also failed, and most of their own stock was lost.
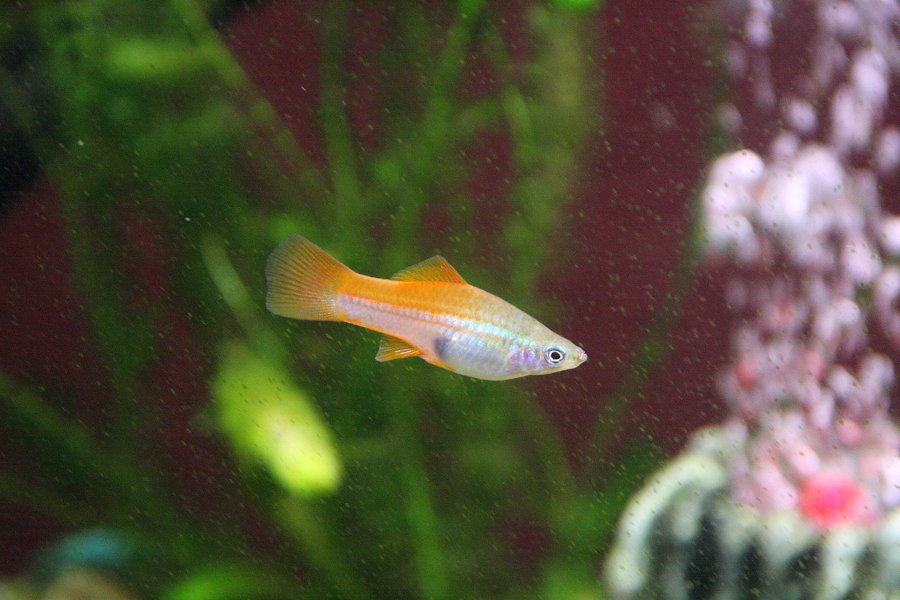 Some time later (after the initial stocking), we added a replacement female; a pineapple swordtail. She was quarantined for a week first, and was only added to the tank after showing no problems. We would have waited even longer, but needed the quarantine tank for other purposes.
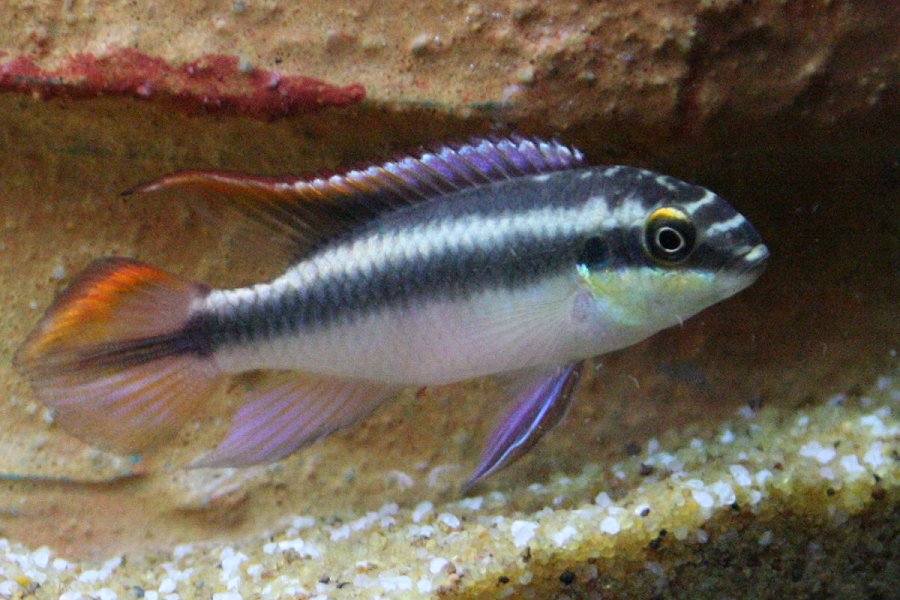 Also in the first introduction were the kribensis. This is the male. He had been almost grey in the shop, surrounded by others. Once in our tank, he immediately perked up and assumed his dominant colours. They will become even more bold as he ages. These are very curious and intelligent fish, taking only a couple of weeks to learn to recognise their owners individually.
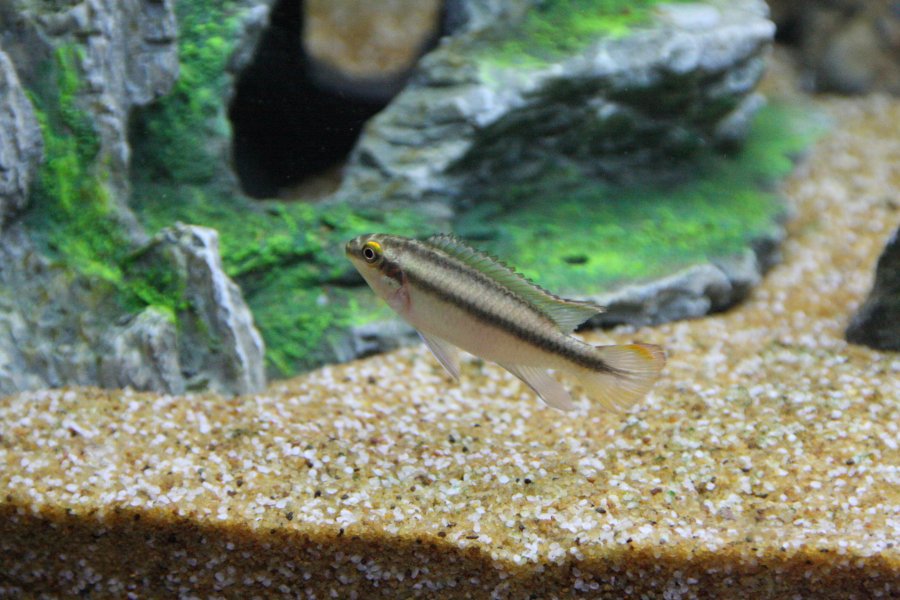 At the same time, we got what we were told was a female - after all, it does not have the long dorsal or anal fins. However, this was a juvenile male, which can be identified because his pelvic fins (just beneath the almost invisible pectoral fins) are pointed, not curved.
 There was a day of standoffs, which we mistakenly thought were part of a male-female bonding ritual. When swimming past each other, they would stare at each other, with the larger male curving his tail sideways so that it could be seen by the fish in front.
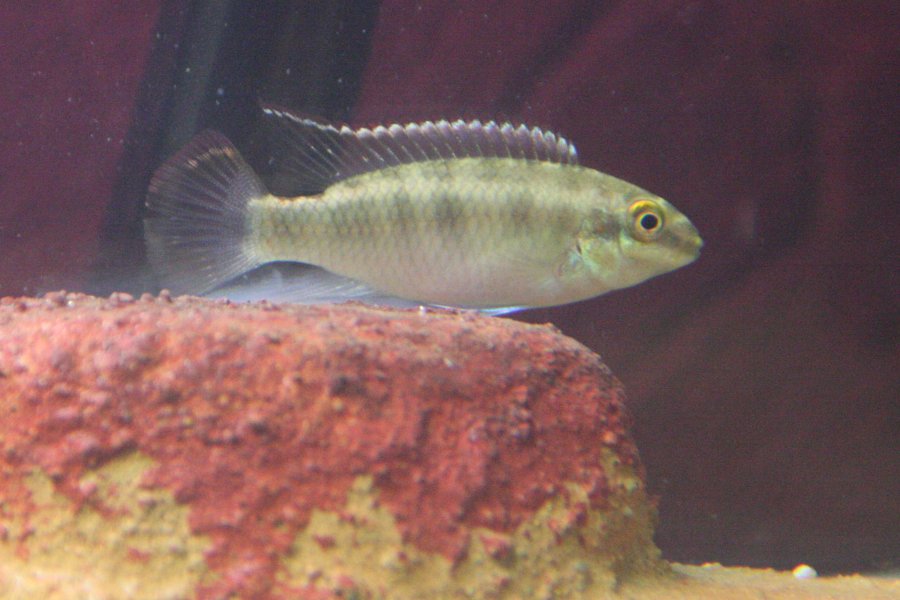 The younger male lost, and donned his omega-male colours. After a few days of chasing on sight and aggressive nipping attempts, he was relegated to hiding wherever he could, trying not to be seen. We returned him for a proper female, and were told how better to identify them.
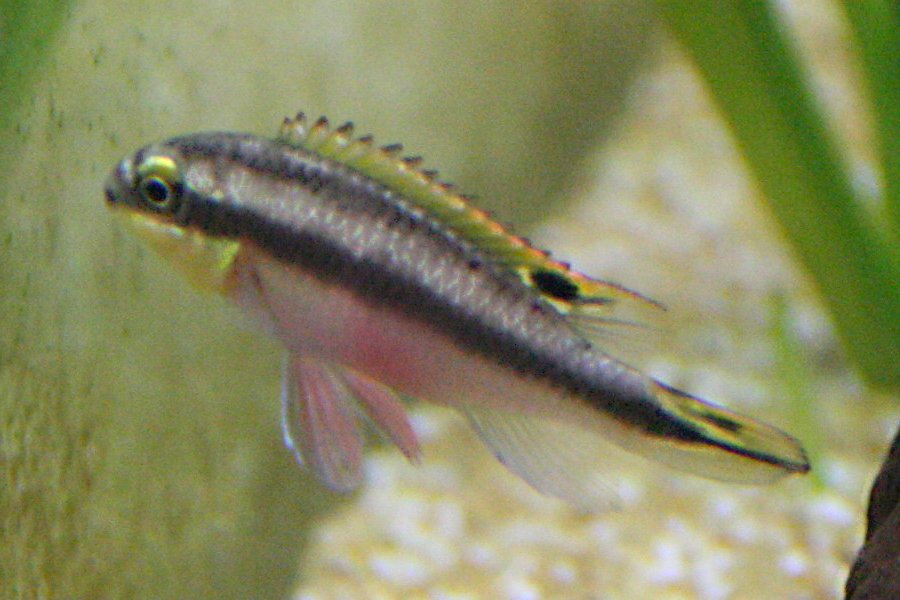 This is our replacement female. Her pelvic fins are clearly curved, while those of a male are pointed. Her dorsal, anal and tail fins are curved like those of a juvenile male. She is a different variety with slightly different colours and spotted patterns - these cannot be used to distinguish male from female.
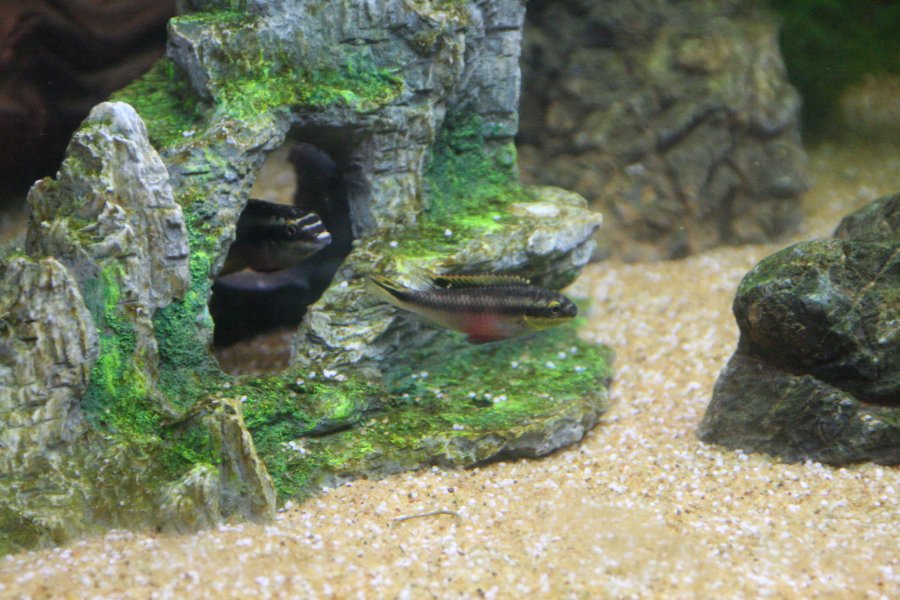 Immediately, she also donned her colours, raised her fins, and attempted to lure the male. He mistook her for a male and spent a while chasing her before realising she was a female. The chasing continued for a while but became less aggressive - presumably a demonstration of what a good protector he would be for any offspring. This lasted for an hour or so.
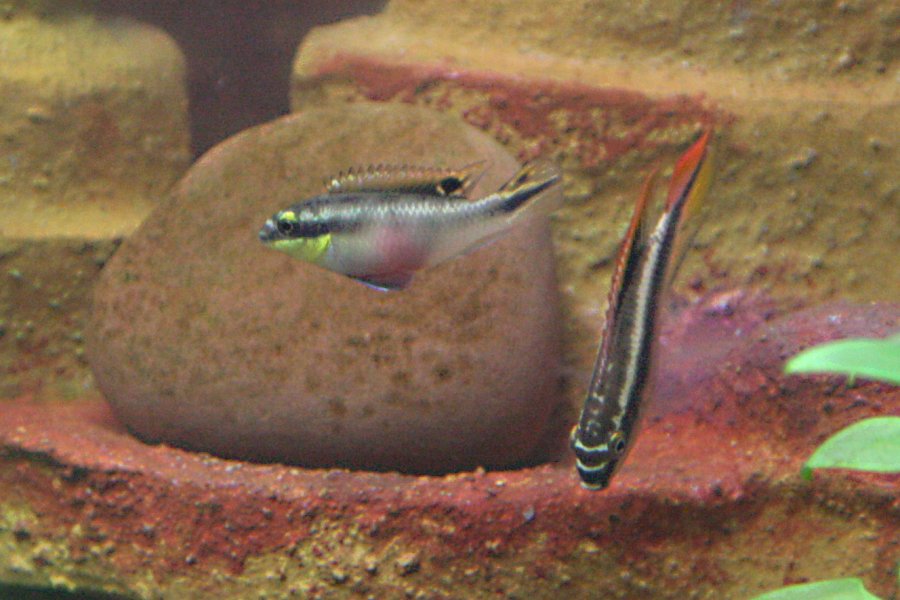 The female kribensis assumes a very obvious shape, holding her pelvic fins down to accentuate her pink glowing belly, and raising her tail to present her underbelly. This is the most obvious sign that she is receptive to bonding.
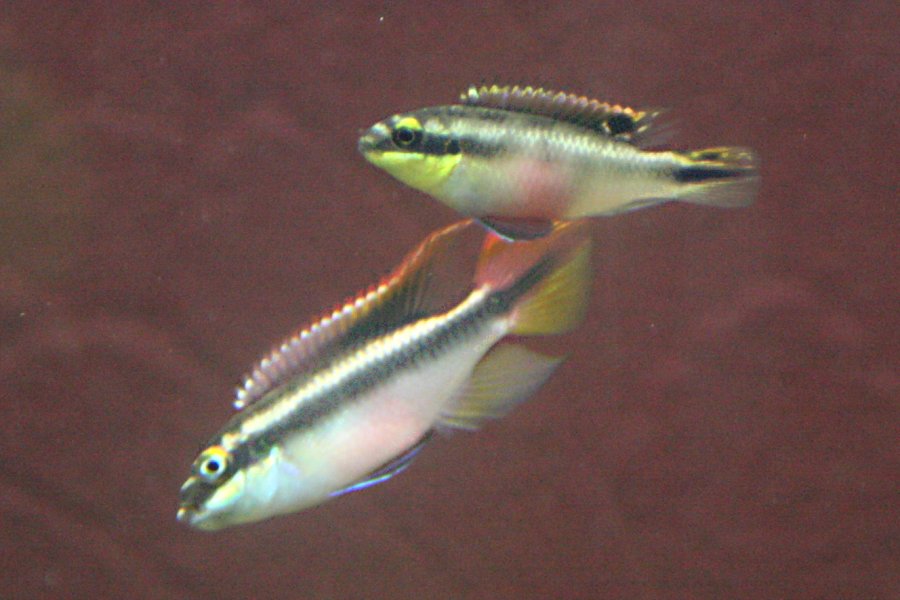 The male fluttered his fins and sometimes his whole body, trying to tempt her away from what he thought was the other male's territory, or sometimes aggressively chased her towards his cave. For the first day, he would not allow her to be in the cave at the same time as him, but insisted that she guard the cave while he went out in search of the other male.
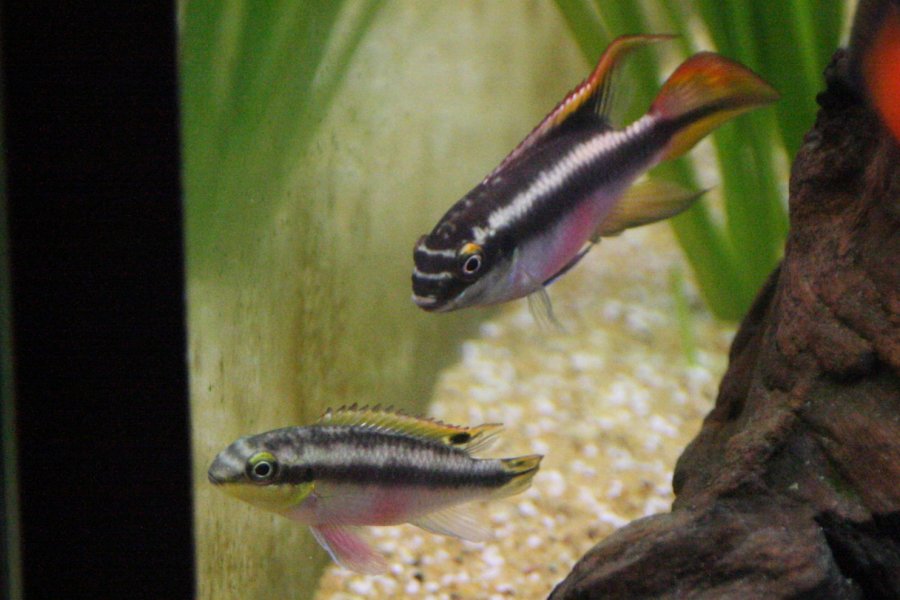 The bonding took about 12 hours, including a night spent sleeping in an alcove together. In theory it can last their entire life. Each morning, he seems to forget who she is for a moment and the chasing and fluttering starts again. Afterwards, they settle down to swimming around each other occasionally, flushing their bellies pink, and fluttering as they swim past.
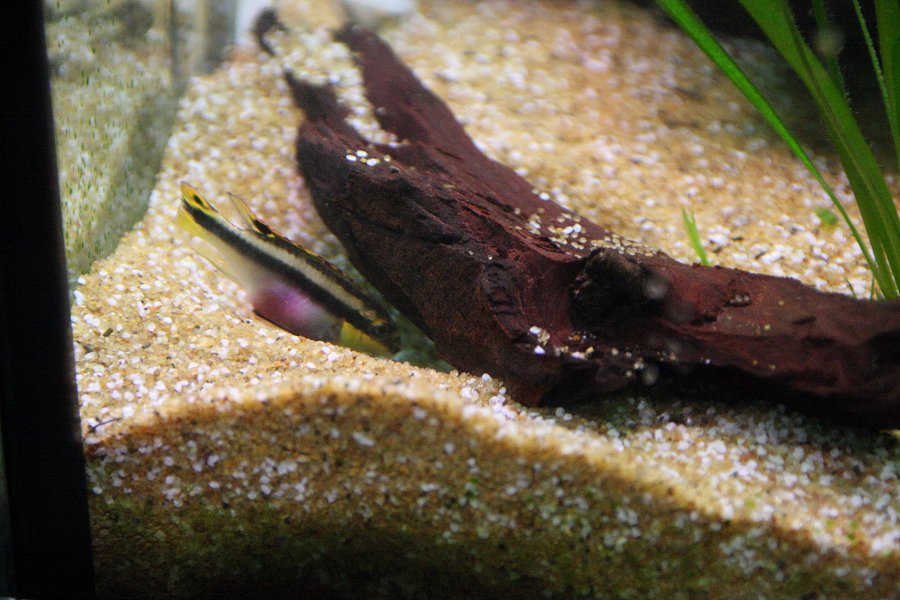 Just a couple of weeks after bonding (after the rubies were added), the kribensis began their breeding ritual, digging a hole in the sand. The female did the majority of the work, digging a hole beneath a piece of bog wood, to which she would attach eggs. It seems our cave ornament was deemed too large for this purpose. She did try to persuade the male to help by shuddering before entering the hole, but the male seemed more interested in watching or wandering around the tank. By this stage, these young kribensis had already learned to recognise each of their owners separately; after I had to replace the bogwood when she undermined it too badly, the pair threatened only me for interfering, only allowing me to be their friend again after a number of days.
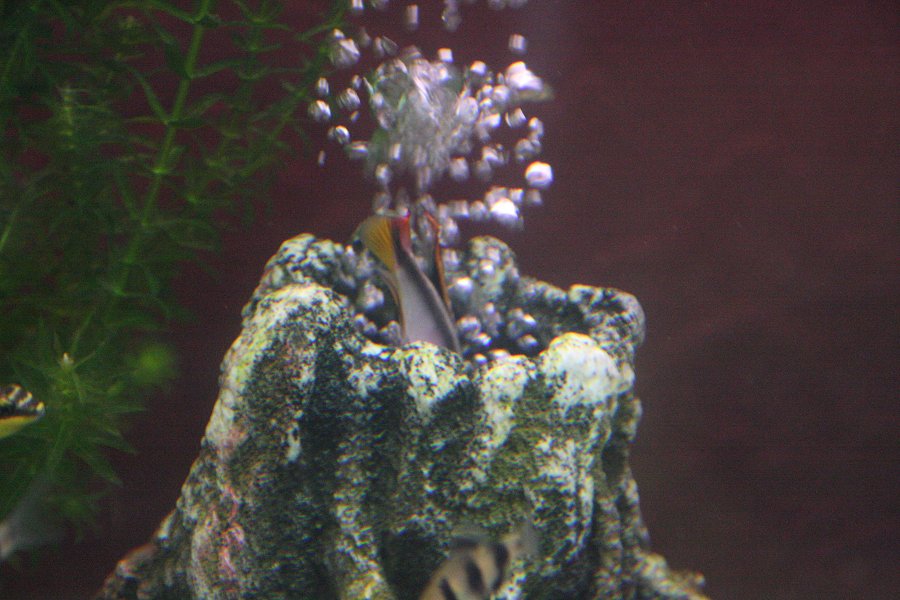 The male had rather stupidly thought that the female would accept the volcano instead. He would shudder in order to persuade her to join him, then dive into the volcano, where he would attempt some excavations. The female quickly realised that the bubbles would be far too dangerous for the children, but the male had the typical masculine approach to danger, and continued to try. Once the female started taking her own digging seriously, she would collect the male from the volcano, and make him stand guard.
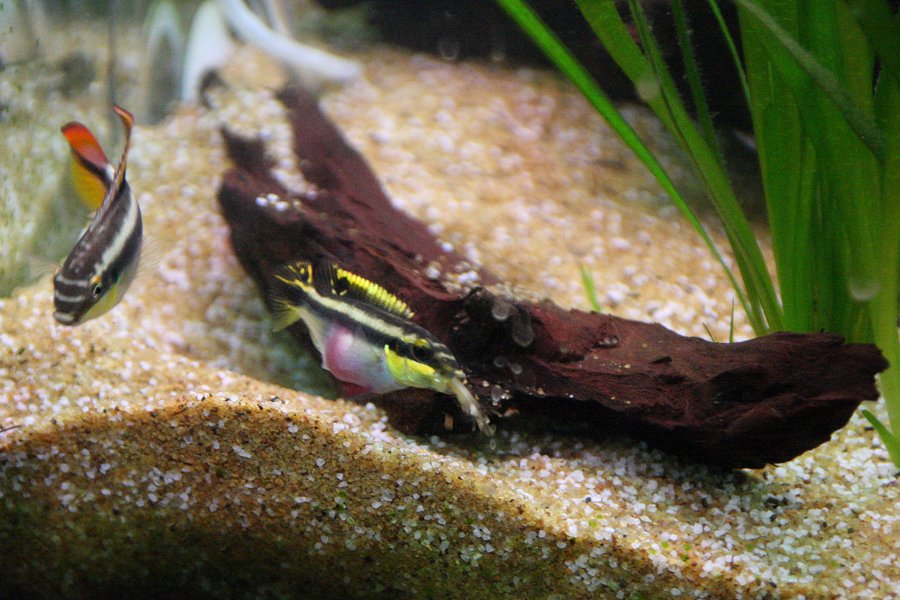 The female digs in the sand, sucking it into her mouth, carrying it out in her bulging cheeks, and spitting it into a pile outside. The male remains on guard. If they do breed, . These are very dedicated parents. Once the fry reach 6 months, they need to be removed to avoid the tank becoming a kribensis war zone.
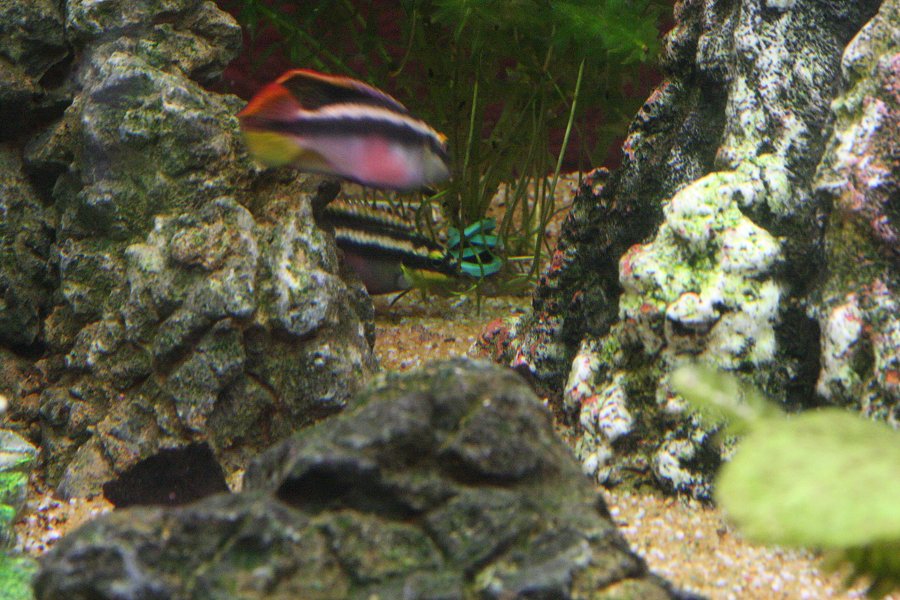 After under 4 weeks, the kribensis hatched their first brood, with 9 fry (broods get larger with subsequent tries). At first, they appeared to be just specks of dirt, as big as a couple of grains of sand, with a faint striped tail.
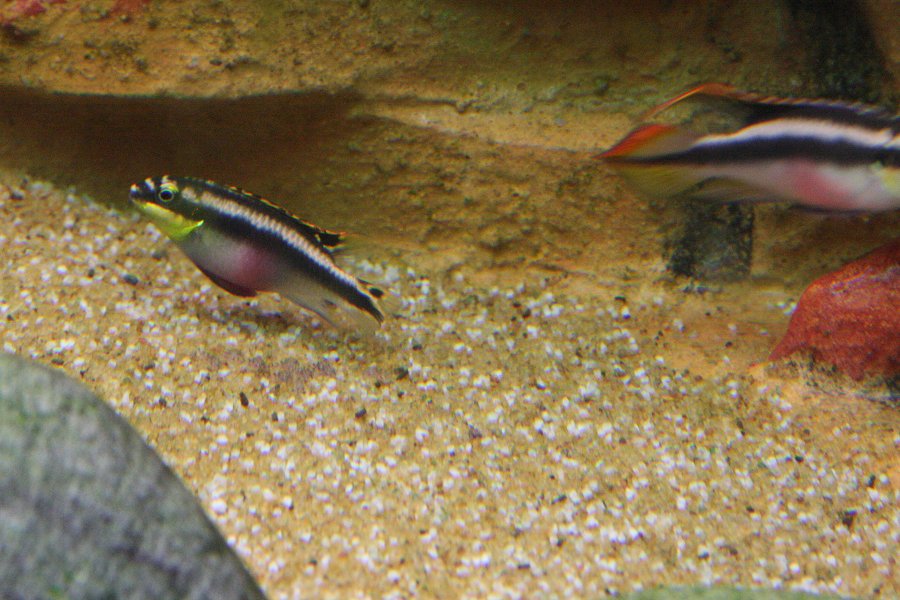 The parents herd them on short tours around the nearby parts of the tank. The fry move only when the parents are near them, and instantly stop if the parents get too far away. The parents can make their bodies do a sudden little jump sideways as a command to follow them.
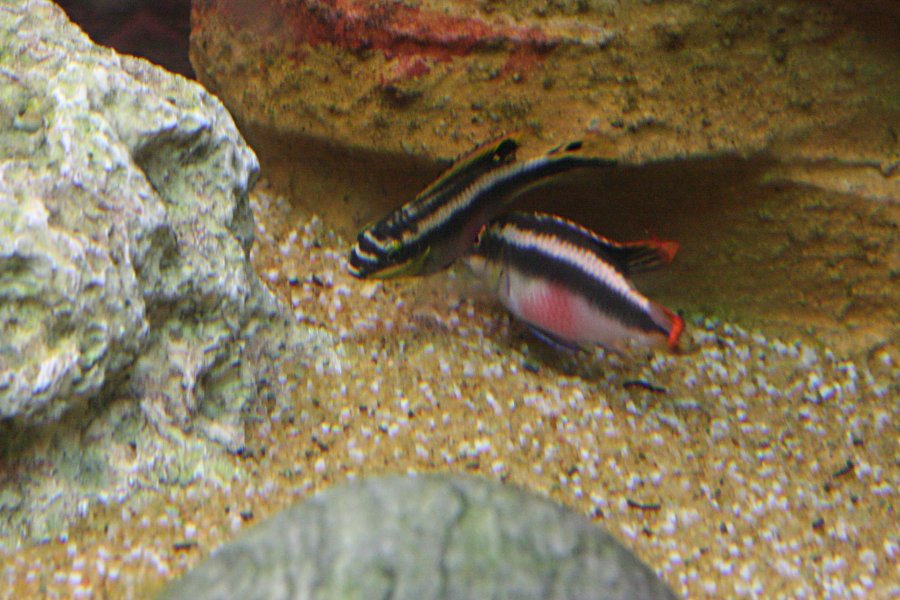 In general, the male valiantly fends off other fish, while the female raises the fry for a month or two after hatching, guarding them from predators. She will even protect them in her mouth if they are startled. The parents do sometimes swap roles, rubbing their bodies under the belly of the other as a way of saying that they will take over the babysitting. The male occasionally forgets his duties, so the female finds him and pecks at his side to remind him to come back and help.
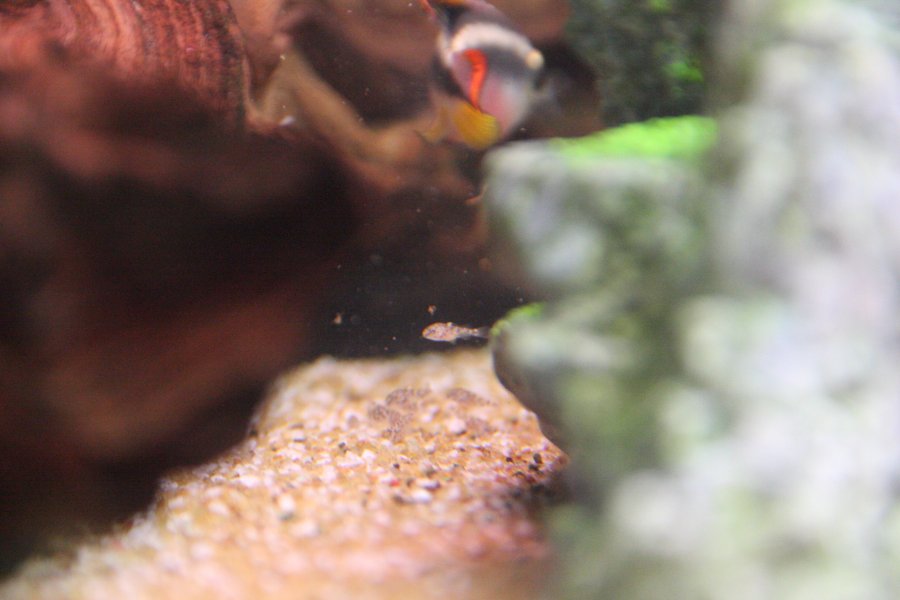 Within a week, the fry were large enough to see their fins and eyes, and after just under 2 weeks they earned their red bellies, and spent most of the day on tours of the tank. When one was killed, the distraught parents desperately tried to revive it by nudging it and blowing water over it. When that failed they became angry and upset, much like a human would. They even tried to console each other by gently moving their mouths on each other's bodies. Such complex behaviour for such a small fish.
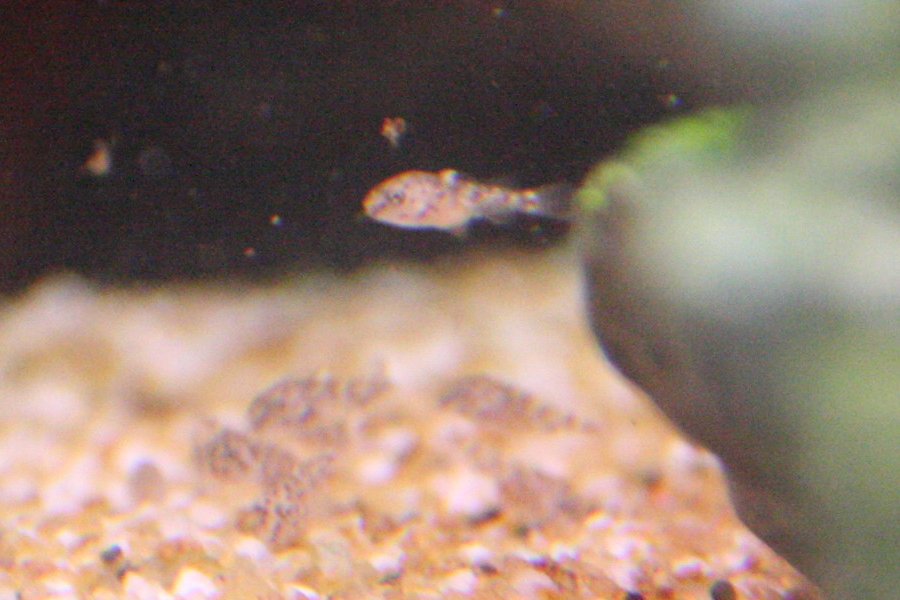 It would be nice if the camera could see them better, but these fry are less than 5 mm long, and the lens effect of the water makes it very hard for the camera to focus well enough. Our eyes could not do much better. The Fry are fed several times a day, with powdered food mixed with water in a syringe. This is squirted only into the cave to avoid other fish taking advantage. The mother kribensis soon learned to recognise the syringe when it was held outside the tank, and would quickly take the fry back to the cave.
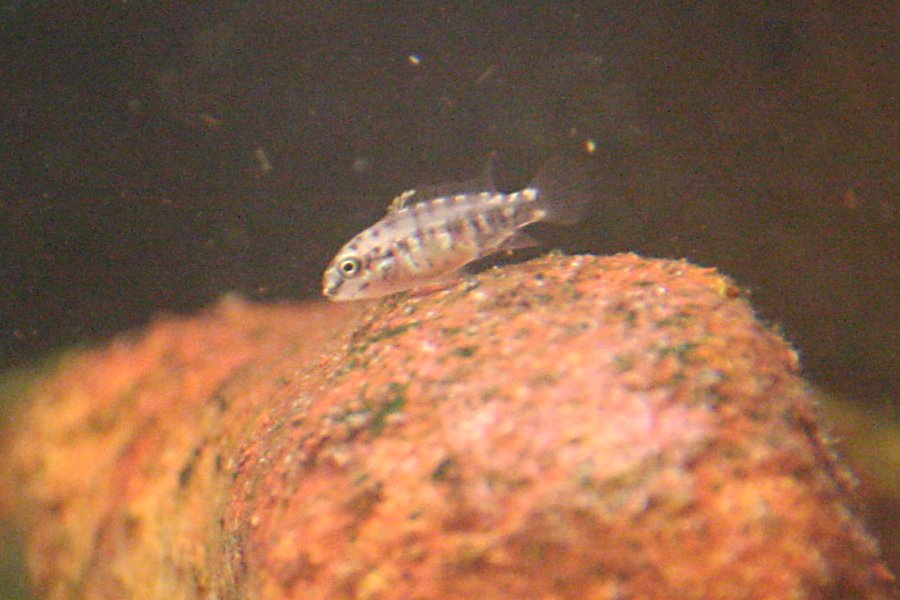 At 25 days old the gill covers had started to become reflective, and by 1 month old the fry looked like miniature versions of their parents, with their speckled sides beginning to turn into stripes. Their bodies were just under 1 cm long, with their tails taking the total length to just over 1 cm. The parents were leaving them alone for significant periods of time, while they got on with their occasional arguments and bonding. Over the next few weeks, the fry became completely independent, and even started setting up their own tiny territories. The parents began the digging ritual again when the fry were 2.5 months old, but failed to produce another brood on this occasion.
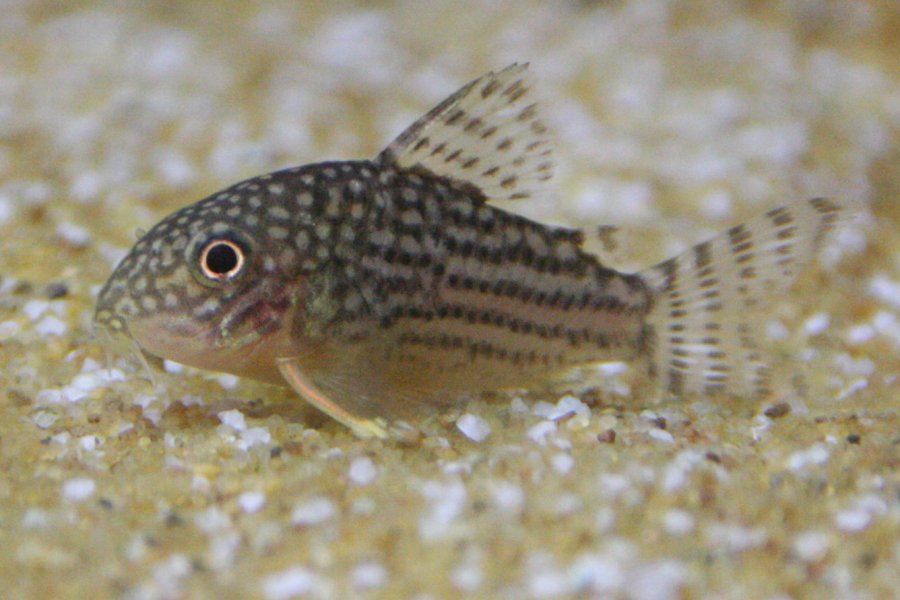 The second week's additions were the Sterba's corydoras. These are quirky little armoured catfish (they have bony plates instead of scales) with venomous spines on their dorsal fin, adipose fin, pectoral fins and both sides of their mouth. They can inflict painful stings when attacked.
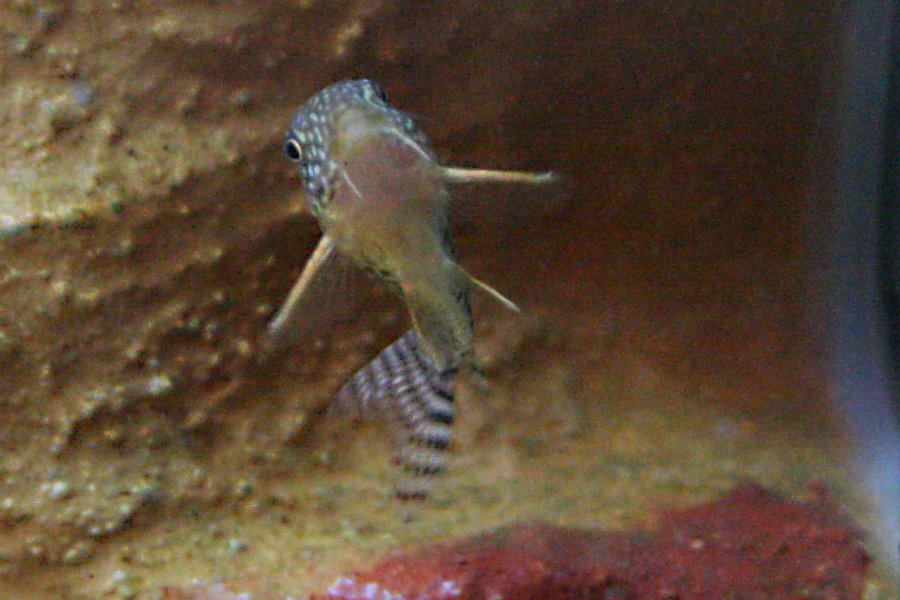 They spend much of their lives digging through the sand for food remains, and make a reasonable alternative to shrimp. They are not good for controlling algae, but there are other fish for that. As a catchy trick, their eyes can rapidly rotate to look down on the sand for a moment, giving the impression that they are winking.
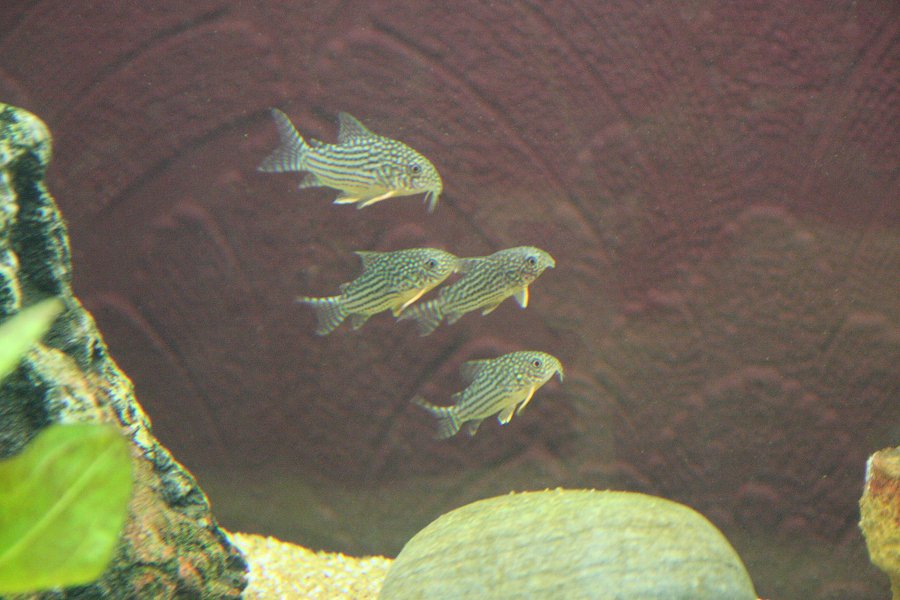 Whenever they are not on the sand, they are wiggling comically up the walls of the tank, usually as a small shoal. Their bizarre movements can sometimes disturb other fish, but add some drama to the tank.
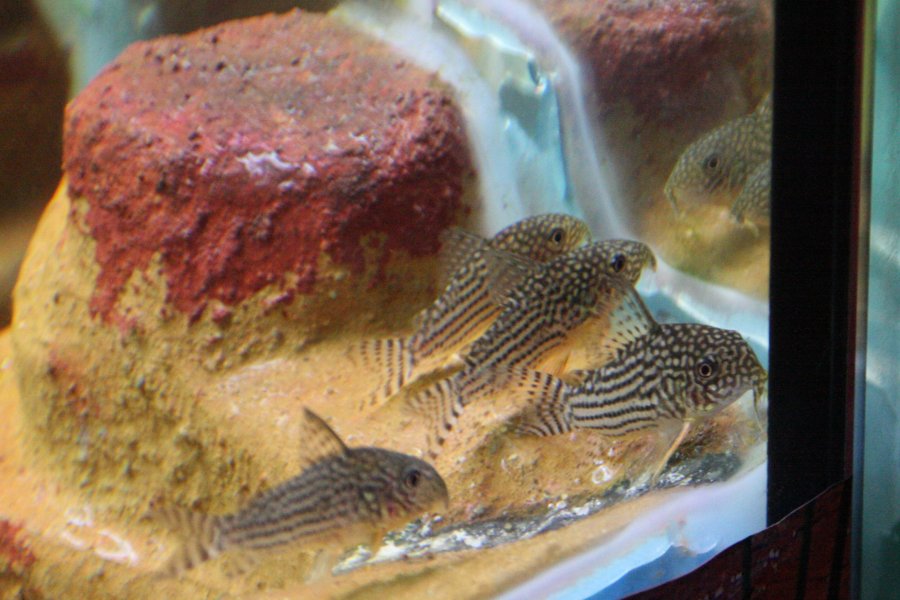 One unique feature of corydoras is their approach to reproduction. The male positions his genital opening over the female's mouth so that they form a 'T' shape. The female effectively performs a oral sex on the male, drinking his semen. This is then passed through her intestines rapidly and ejected at the same time as her eggs are ejected from the nearby genital opening. She then catches the now-fertilised eggs in her pelvic fins, which she carries to wherever she wishes to place them. Apparently it is a rare event in an aquarium, however.
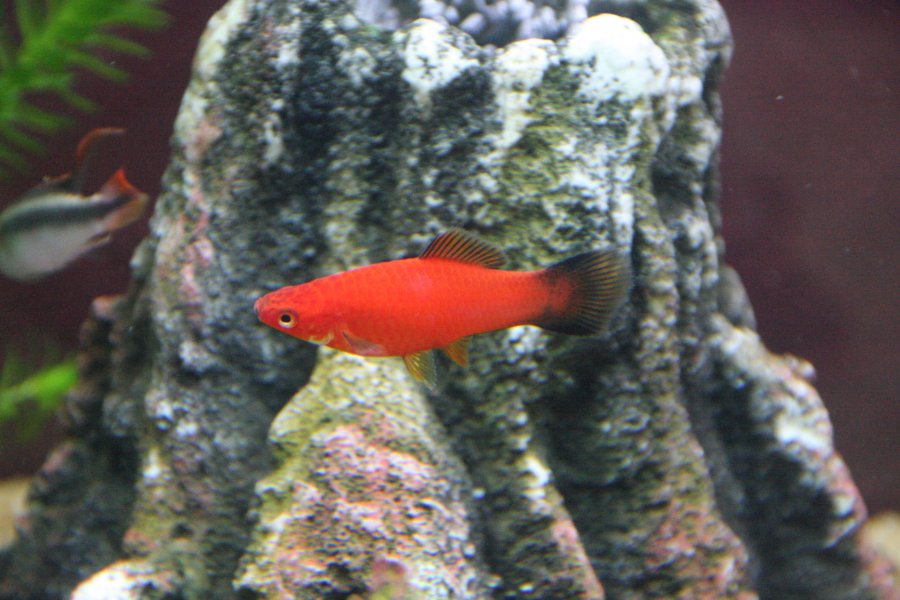
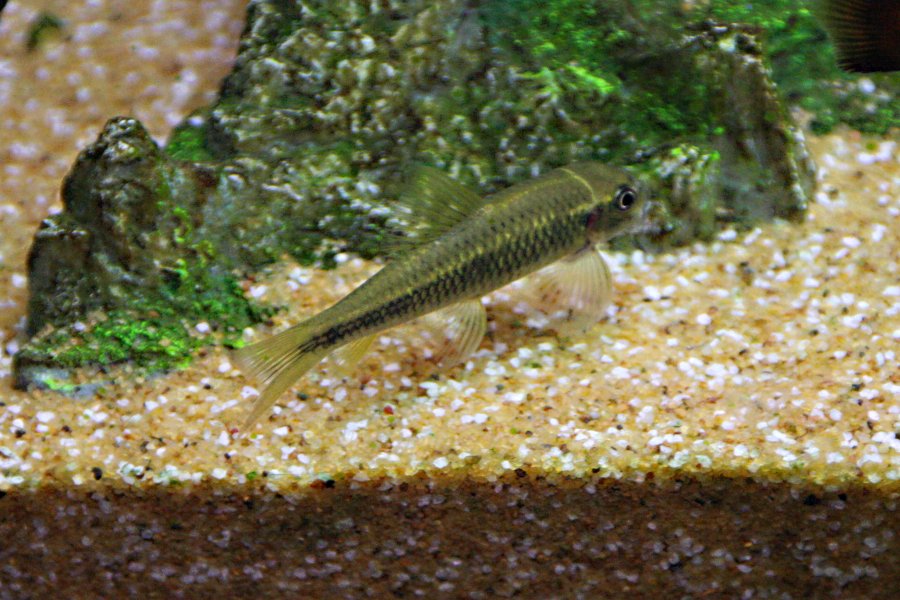 Our Sri Lanka garra showing off its best colours. It had spent the last 4 months sharing our cold water tank with another garra. They are territorial, and this garra had lost the contest to rule that tank, so it got to move into this much bigger tank instead. Fortunately, the Sri Lanka garra is one of the few that thrives in tropical temperatures. It was moved in just under a week after the corydoras to try to control the algae.
 The garra uses its mouth pad to suck onto surfaces, and bite off the algae. It can clear a heavily coated 100 litre aquarium in less than a week (though it cannot remove green spot algae). In the wild, it is known to climb waterfalls, cleaning the algae off rock surfaces. It will compete for algae in the tank with the plec, but is diurnal while the plec is nocturnal, so they can be fed their own additional food at different times.
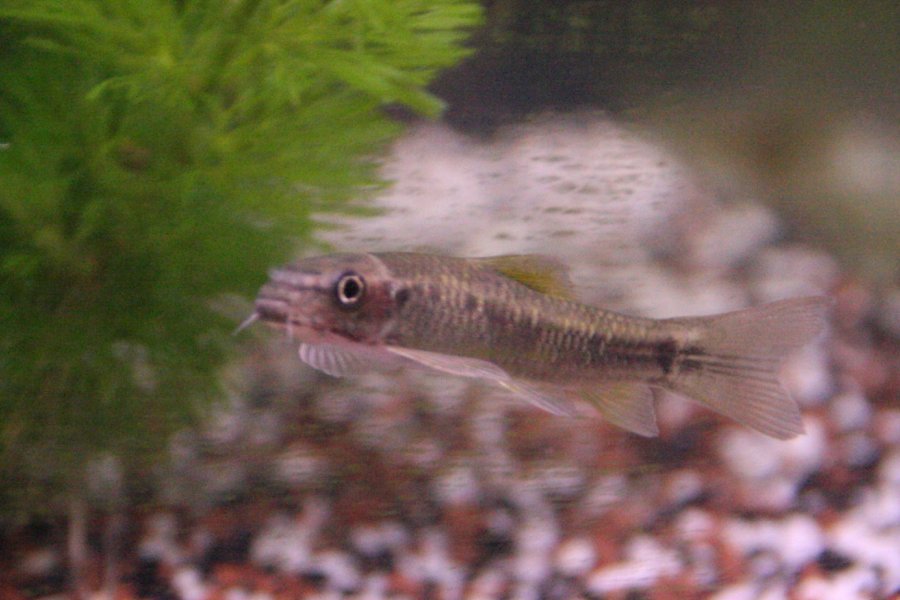 Depending on its mood, it can become much lighter, as shown here in its old tank.
 It can sometimes become light enough to lose its stripe completely, or display just a faint line.
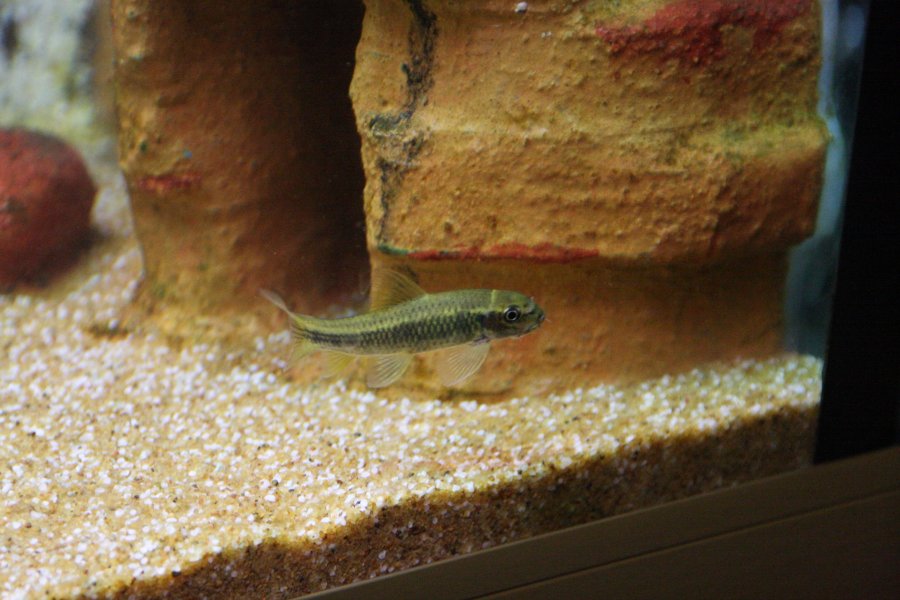 It can also lose the colour from just its fins like this (sometimes even the dorsal fin, which normally retains a yellow-green tint).
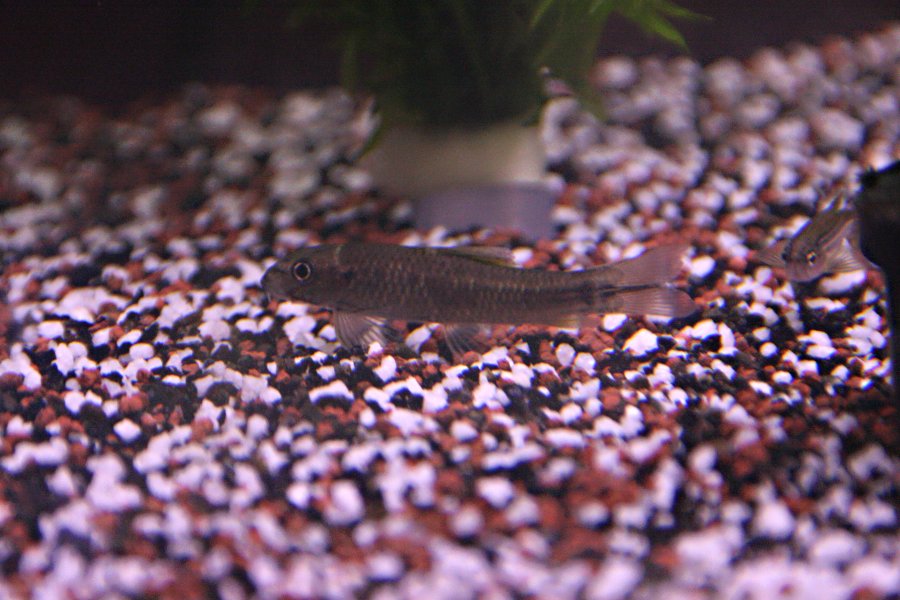 Or as shown here in its old tank, turn its entire body almost black, with its stripe nearly invisible. These are not attempts at camouflage, but a response to changes in mood, sleep patterns or temperature. Although this makes it difficult to identify, it usually still has the distinctive stripe extending all the way to the edge of the tail fin (unlike the cambodgiensis), and is the only garra to have these bold patterns change so significantly depending only on mood (not just the time of day).
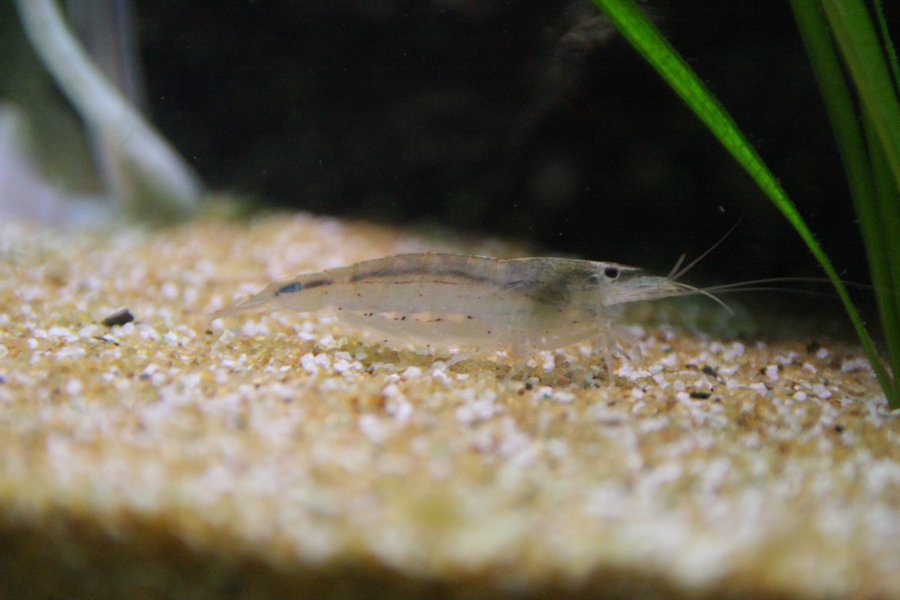 To keep control of the algae growing on the narrow-leaved plants, there is nothing better than the trusty and peaceful Amano shrimp, so we added half a dozen a day after the garra. They are hard working and fairly tough, and although they compete a little with the corydoras for scraps in the sand, there's more than enough algae on the plants and crevices that the corydoras, garra and plec will not eat. They will also eat regular fish food, and unlike the garra and plec, will even patiently clean the algae from individual grains of sand.
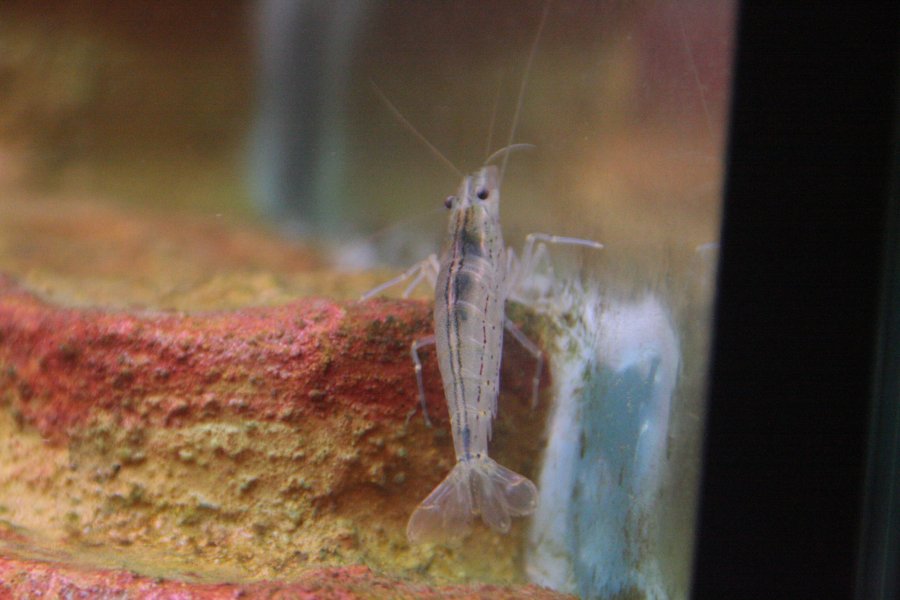 Although they have tiny claws on 4 of their legs, these are used for picking up food, and are not effective as defensive weapons. We intentionally chose large Amano shrimps so that they can defend themselves against the relatively large fish, but they may still be considered food by fully grown fish. Given the shorter lifespan of the Amano shrimps, they would not be around once the fish reach such a size.
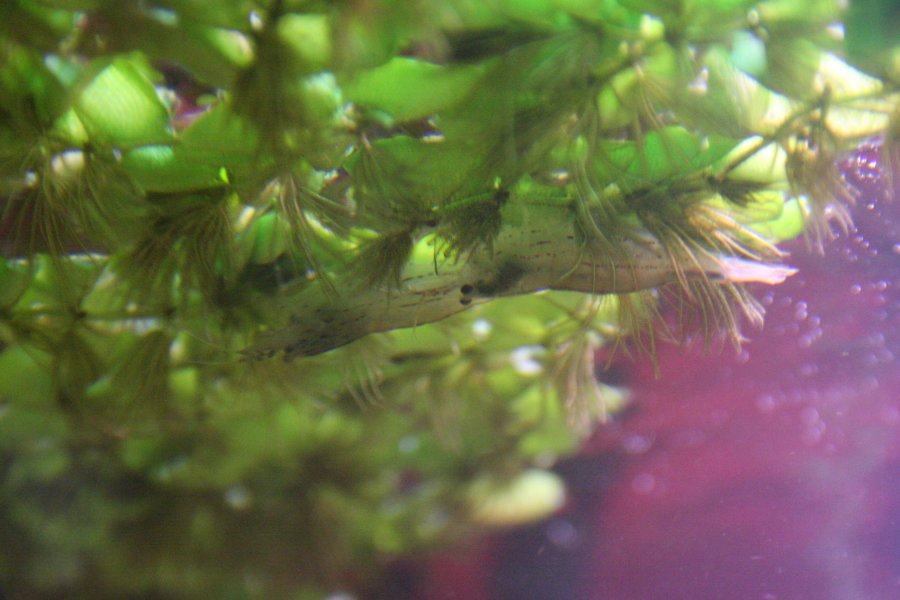 As they can swim quite capably using their tail and the pleopods (fin-like legs) hidden inside it, they will clean just about everywhere they can reach, even in the roots of floating plants. They consume more waste than they produce, and from our experience with our other tanks, they are able to clean the tank more effectively than we can. Their only significant drawback is that (like snails) most medications will kill them, so they need to be moved into a quarantine tank whenever the main tank is being medicated.
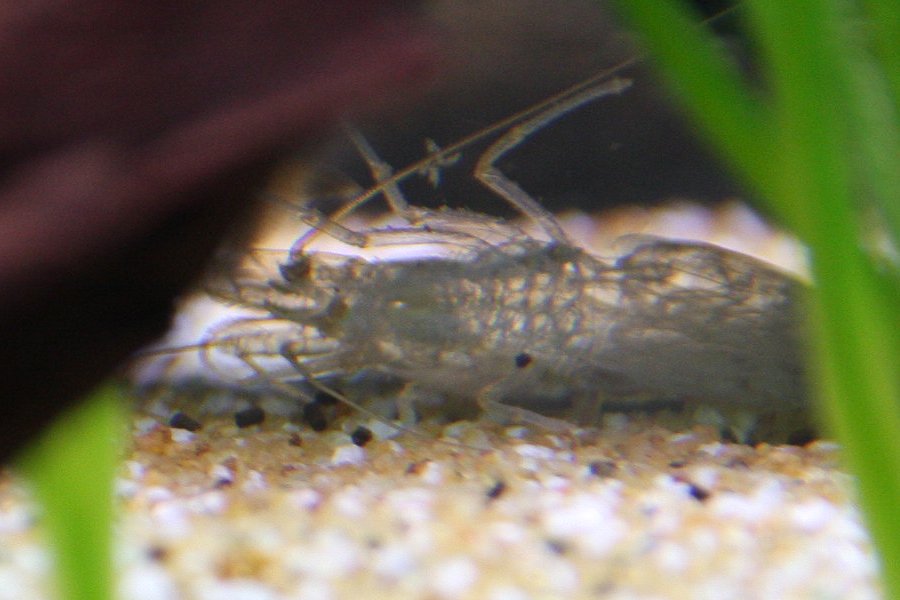 Being crustaceans, as often as they feel the need to, they will shed their skin in order to grow. These are left in the tank, to be eaten by the shrimps to reabsorb the nutrients.
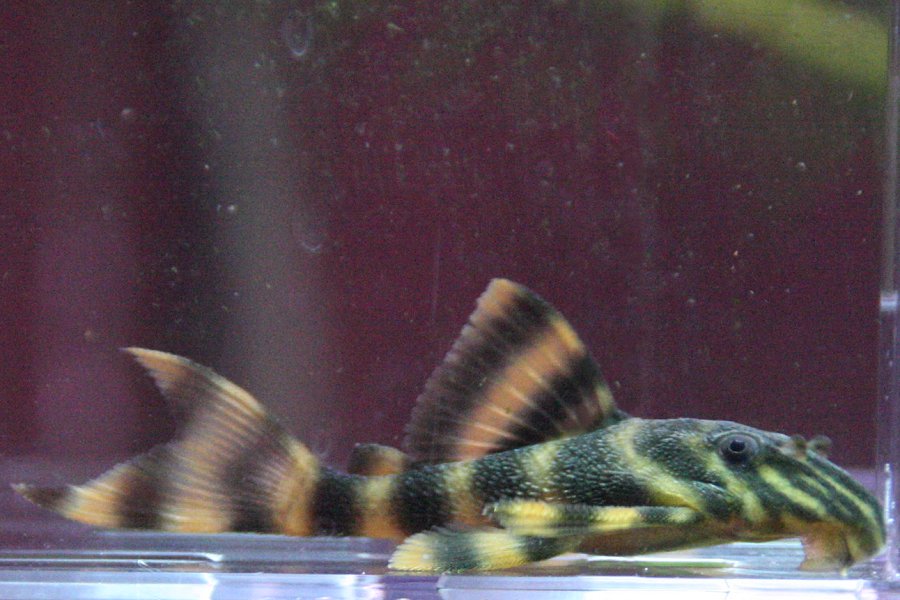 The beautifully striped tiger plec was added a day after the shrimps, and is one of the most difficult of the fish in this tank to keep, as it requires a specialised diet. It chews through bog wood (a rare fish that can actually digest it, though it does not obtain much nutrition from it) and large quantities of courgette, lettuce and carrot. For as long as plecs remain small, they should also scrape vast quantities of algae from hard surfaces, if it is available. Ours prefers not to eat much algae.
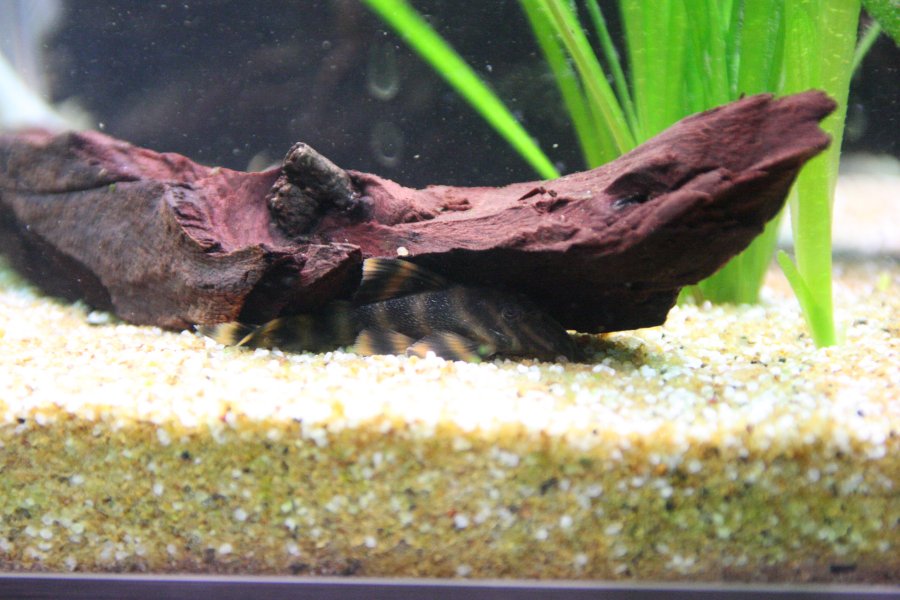 Like most plecs/plecos, it is afraid of its own shadow - if there is enough light to cast a shadow, the fish hides out of sight, emerging at night to feed. This can make plecs somewhat frustrating as they may only occasionally be visible. Ours took about a month to start coming out of hiding while the lights were on, but still only for short periods, and never far from a hiding place. Like the corydoras, it is an armoured catfish, but its armour is not quite as dangerous.
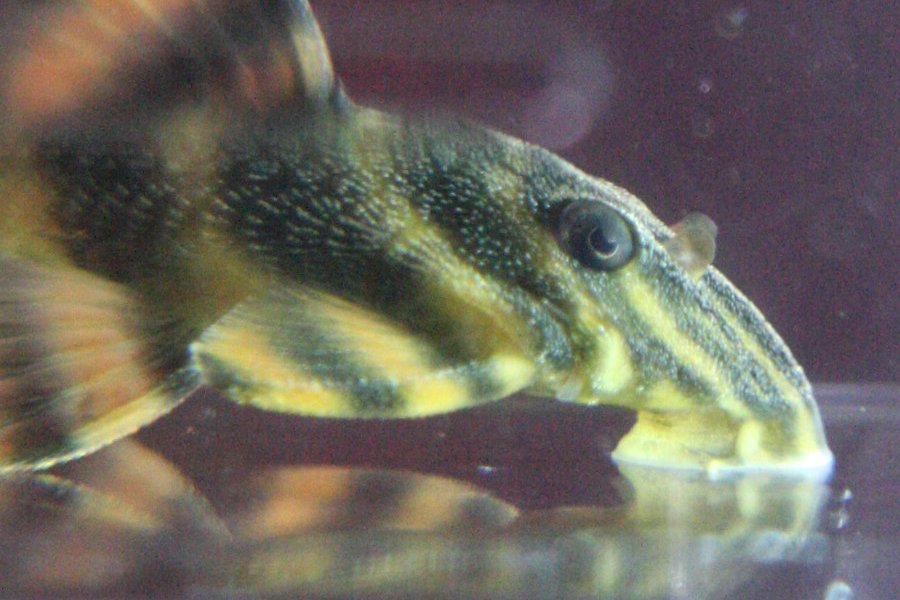 Plecs are suckermouth catfish, and use their powerful lip suction to cling to surfaces while feeding or hiding, rarely swimming freely. They have an omega-shaped iris to protect their sensitive eyes from sunlight, and small defensive spines on their gill flaps under their eyes. Their eyes cannot see red light very well, which can be used to watch them at night - ours may hide as soon as the red lights are switched on, but it soon comes back out again and ignores the lights.
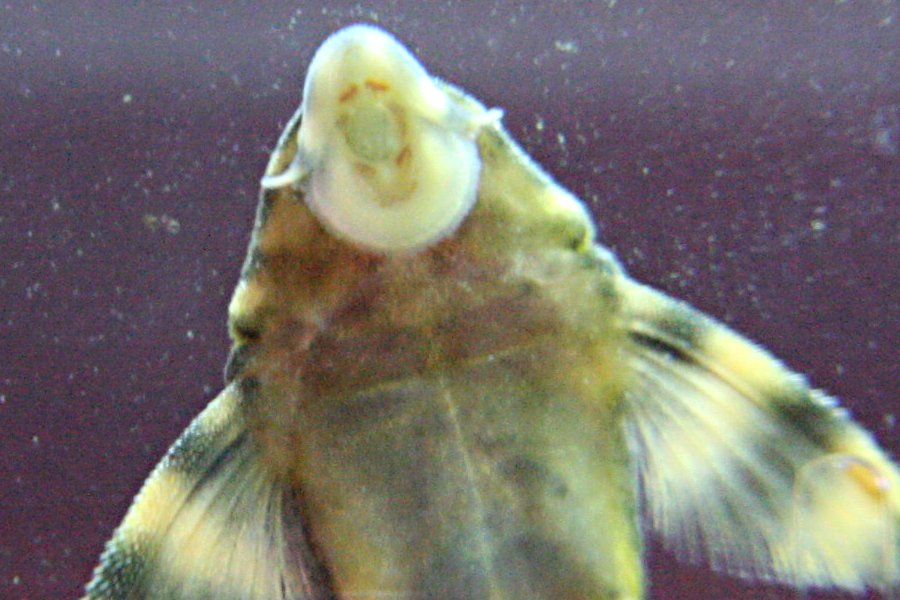 With several hundred plec species, many with almost identical patterns, these fish are identified by obscure things like their teeth, and the location where they were found. The teeth of this species show that it is a panaque (related to the royal plec, but much smaller).
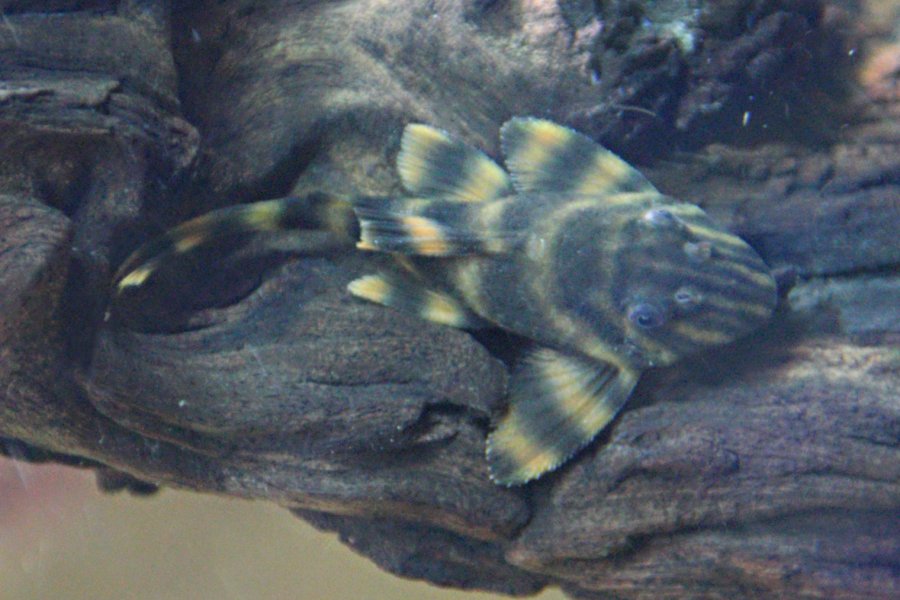 One other feature is their ability to change colour. This is done for camouflage, with the yellow stripes almost turning black when the fish is surrounded by dark surfaces, or becoming bright yellow when on a light surface. They also lower their dorsal and tail fins when trying to sleep or hide, making themselves even less conspicuous. Another hidden feature is that many plecs - including the tiger - can also breathe air directly from the surface, using their stomach as a lung.
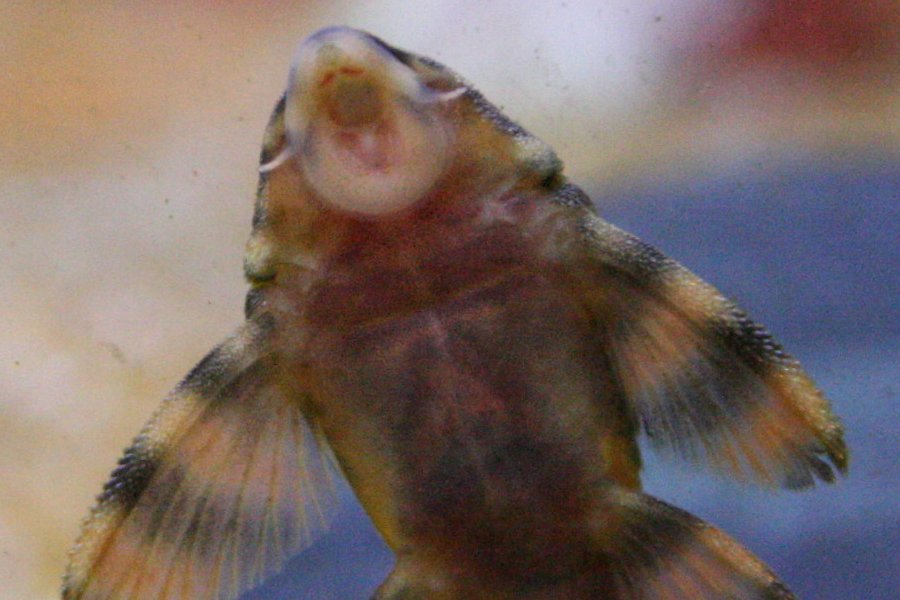 Cleaning algae at night time. Larger plec species are even known to leave scratch marks in the glass, and chew through more fragile ornaments. Once they grow to full size, they produce too much waste to be considered a useful way to manage algae, so they have to be kept for their aesthetics and quirky characters.
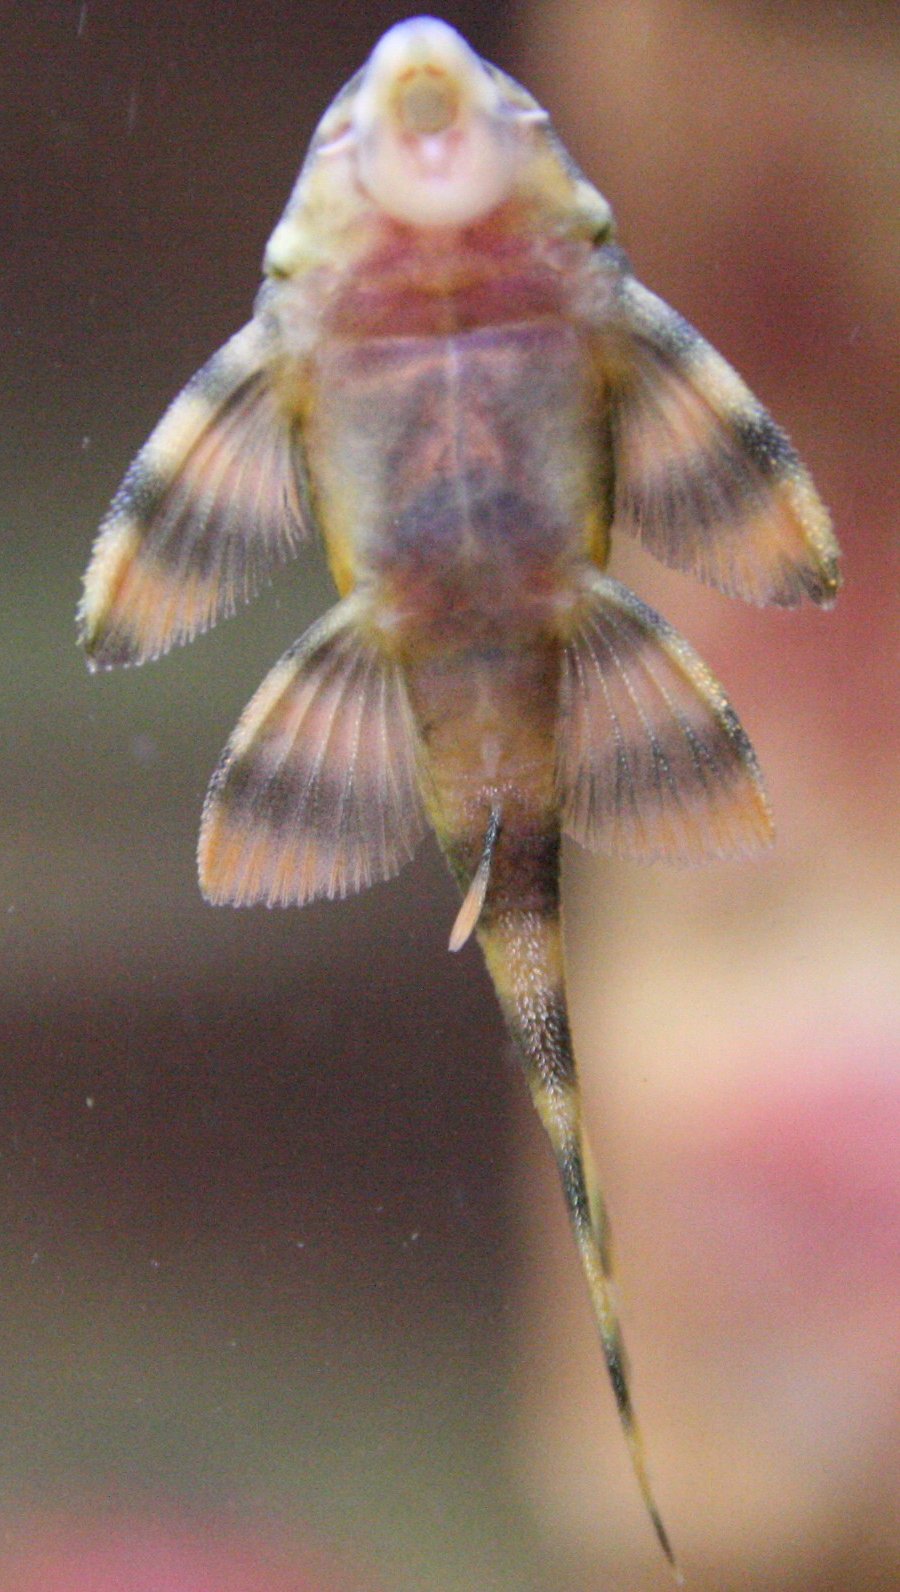 Complete view of the tiger plec's underside.
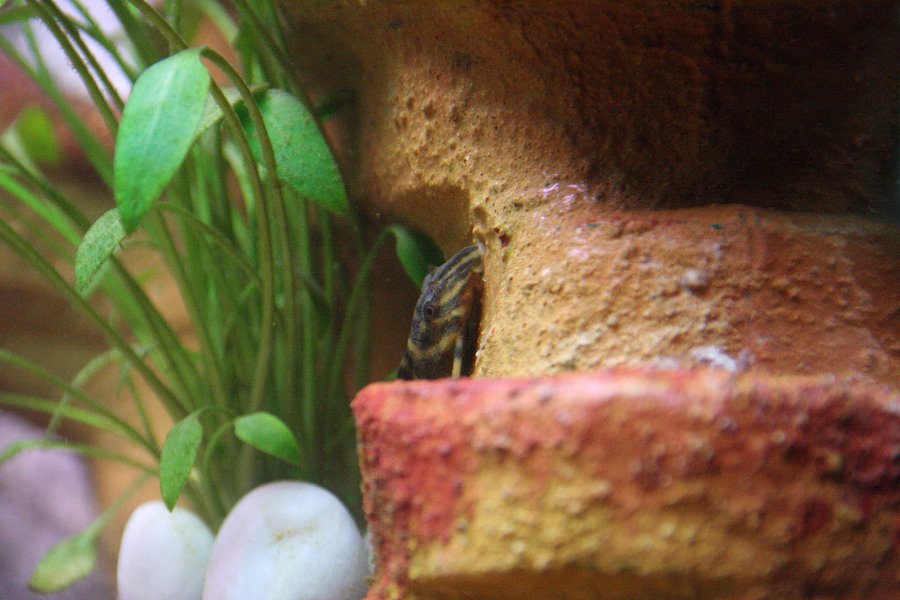 Attempting to hide when caught cleaning the sculpture.
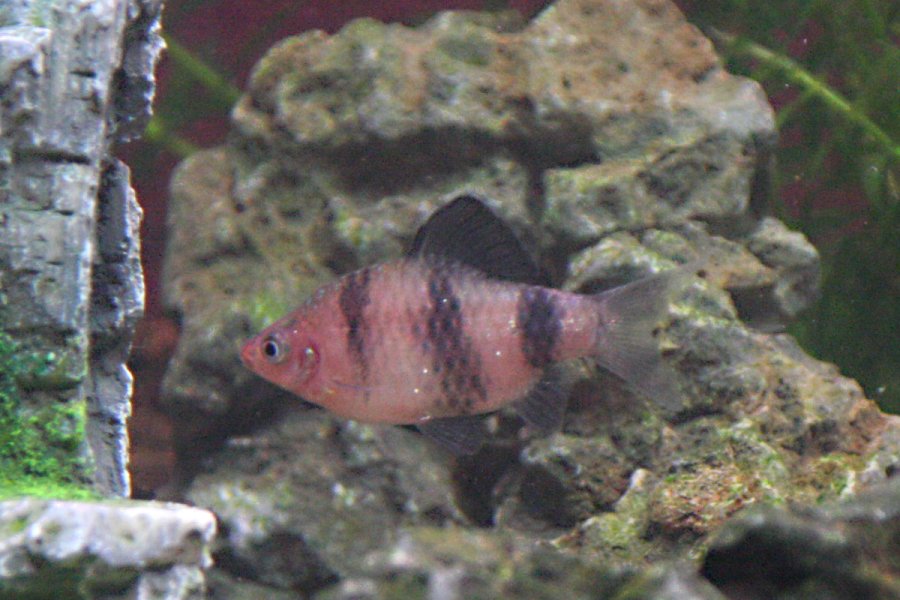 The black ruby barbs were picked up just under a week later. Their glistening scales carry an obvious striped pattern, like tiger barbs, but they are much less likely to nip fins. Much of their time is spent darting rapidly around the tank, chasing each other. As a defensive move, they can jolt their entire body sideways by far more than its own length, in the blink of an eye - this can make them extremely hard to catch or photograph.
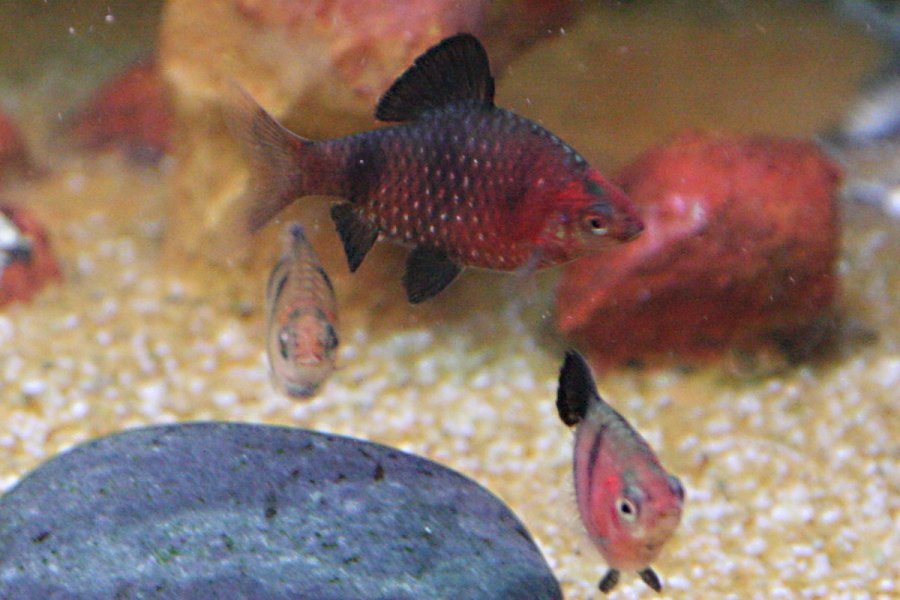 The name comes from the male fish. In breeding season, or whenever they feel like it, the males change colour quite significantly. The stripes almost disappear as the body becomes black, and the head becomes a rich red-purple (hence "black" and "ruby"). The dorsal, anal and pelvic fins are black from root to tip in all seasons.
 However, the males are also quite confusing, as they frequently lose their colouring almost completely, when resting or stressed, which can make them hard to identify. Females can also do this when stressed, so there can be very little distinction between the genders. The normally black fins can become almost transparent, with just a hint of dark patterning at the tips in the males.
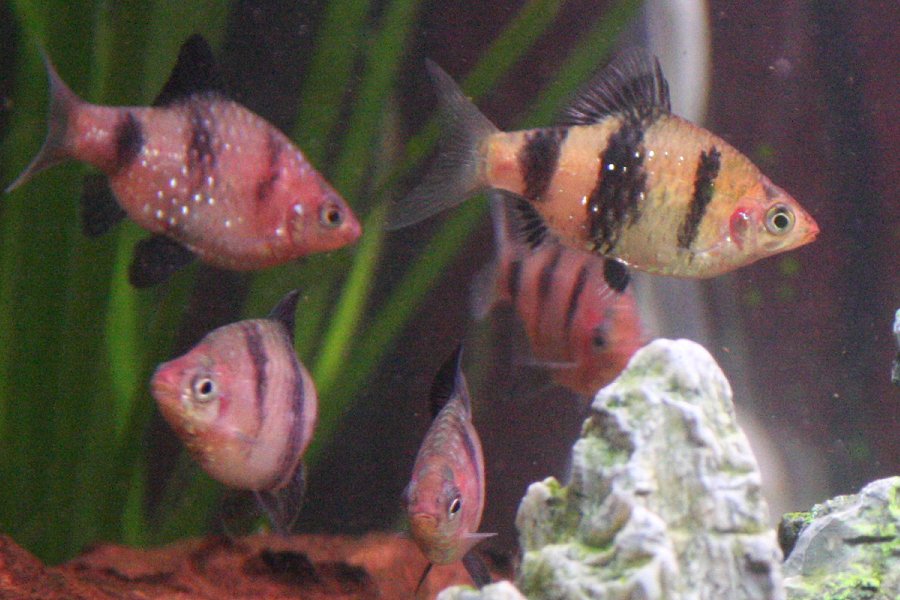 In females, the stripes are more clearly defined, with strong black stripes on a silvery orange background. They also seem to have quite distinctive fins; the dorsal, anal and pelvic fins are black where they join the body, but become transparent near the tips.
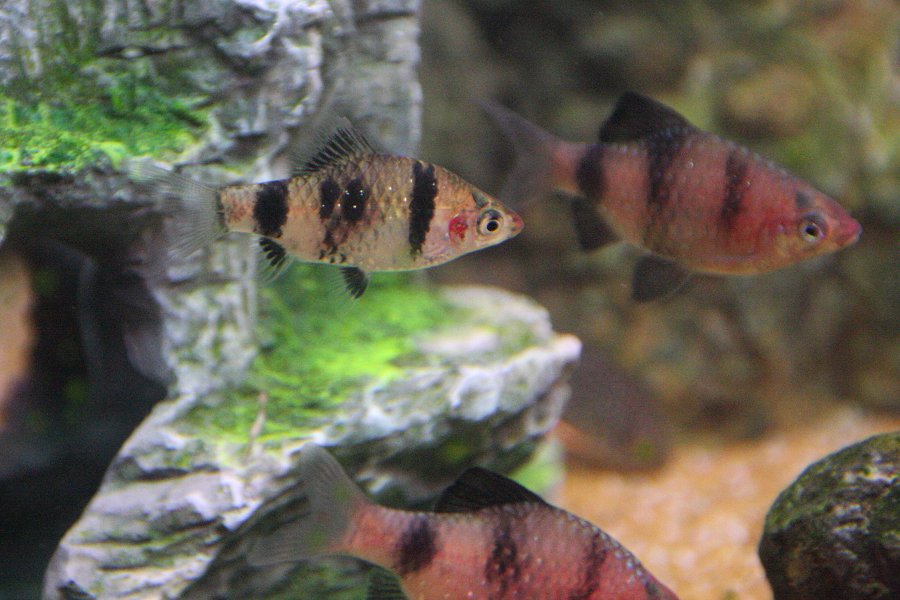 To make matters harder, young males do not show the breeding colours until they are settled in a tank, and can look like females. As a result, the shop initially gave us 5 males and 1 female. By the next day, the bickering males were easily identifiable, so we swapped three for females. The fins still appear to be different even at a young age (something the shops are not often aware of), so we were able to pick up what we hope are three younger females.
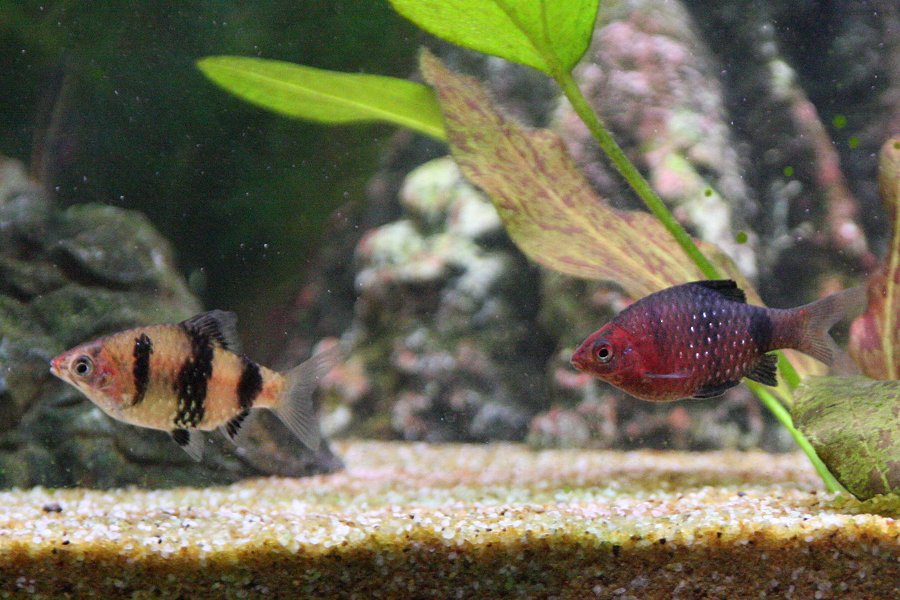 Having a higher number of females than males should reduce the male fighting and the pressure on the females. This in turn makes the fish more inclined to shoal together peacefully, without harassing other members of the community. They will still serve as dither fish for the kribensis; they will be seen as a potential threat, which makes the kribensis work together to protect their young, instead of fighting each other.
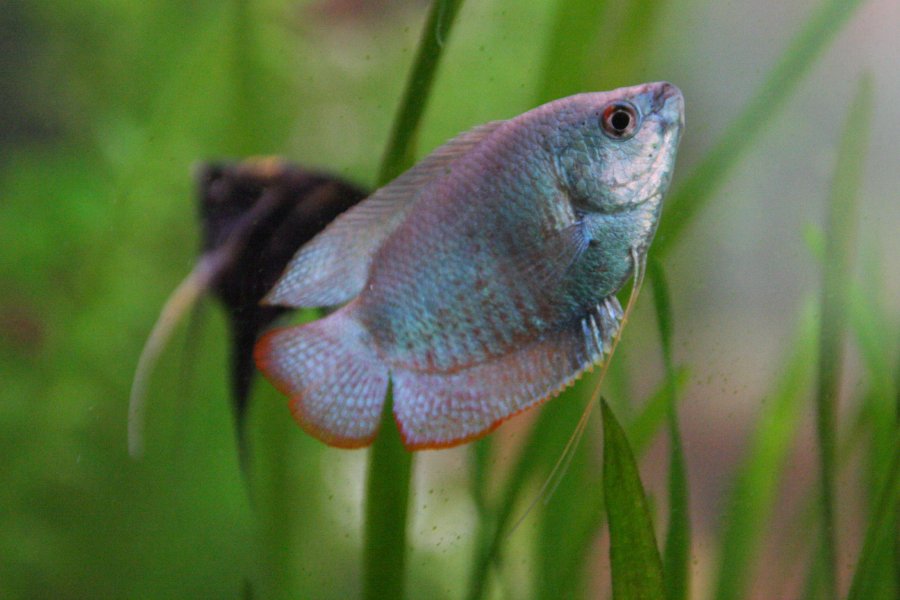 Just under a week later, we added the dwarf gouramis. These are some of the more peaceful gourami species (more so than the popular blue gouramis), which can happily live alongside angelfish. This male can be identified by his pointed dorsal fin, and red bands, which are less obvious in this cobalt blue variety. The red will become a little more intense as he ages, but never as strong as with a regular dwarf gourami.
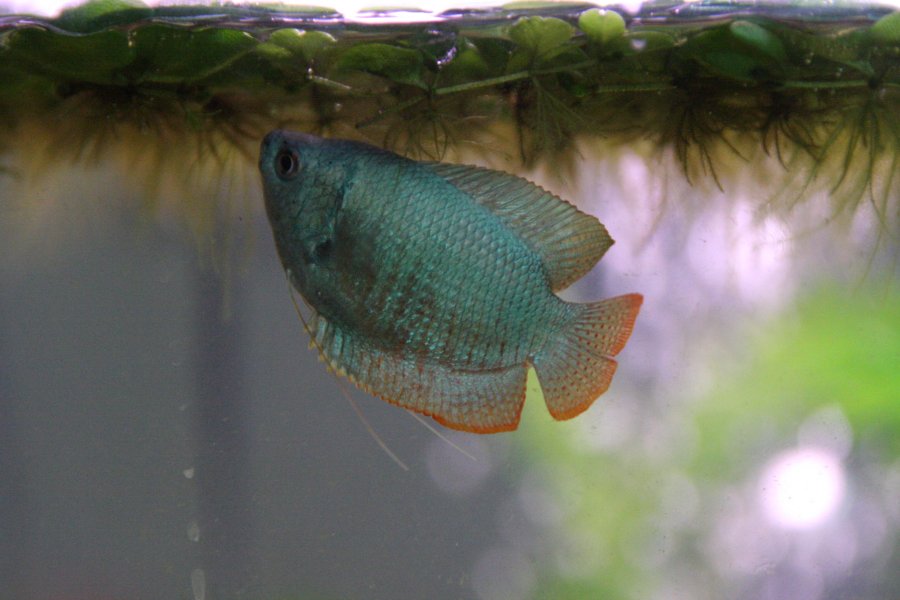 Gouramis are labyrinth fish. Part of their gills are modified into the labyrinth organ which can function like a lung, allowing them to breathe from the surface in stagnant water, or whenever they choose to. They can even spit water at prey insects, in the same way as archerfish, to knock them out of the air and into the water. When breeding, the male builds a floating nest of bubbles attached to plants, which contains the eggs. He can become quite territorial when protecting a nest, but will not protect the fry.
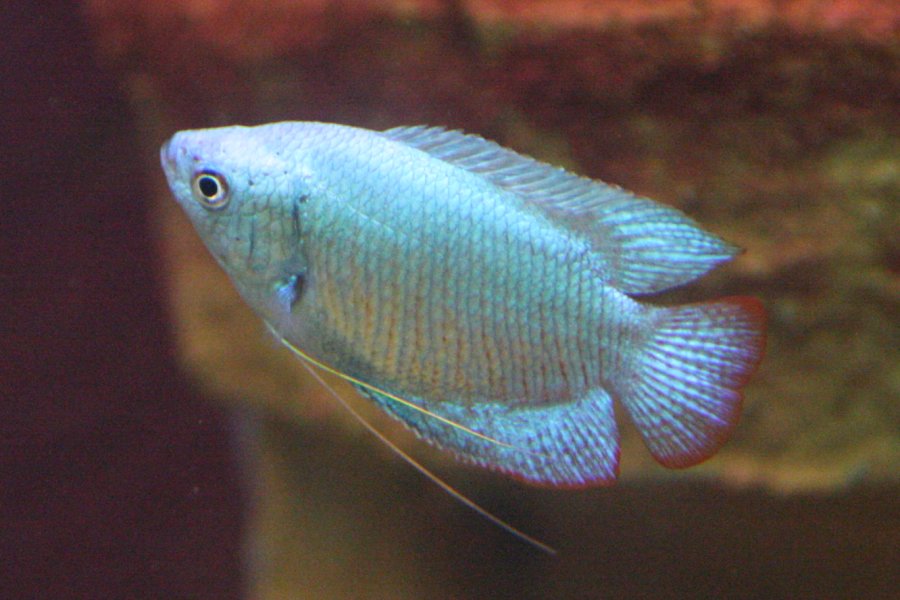 His colour does not rapidly change, but different lighting and viewing angles can make him seem to change from plain blue to red-and-blue stripes. Both males and females have long, sensitive pelvic fins that act as feelers. These are slightly yellower on the male.
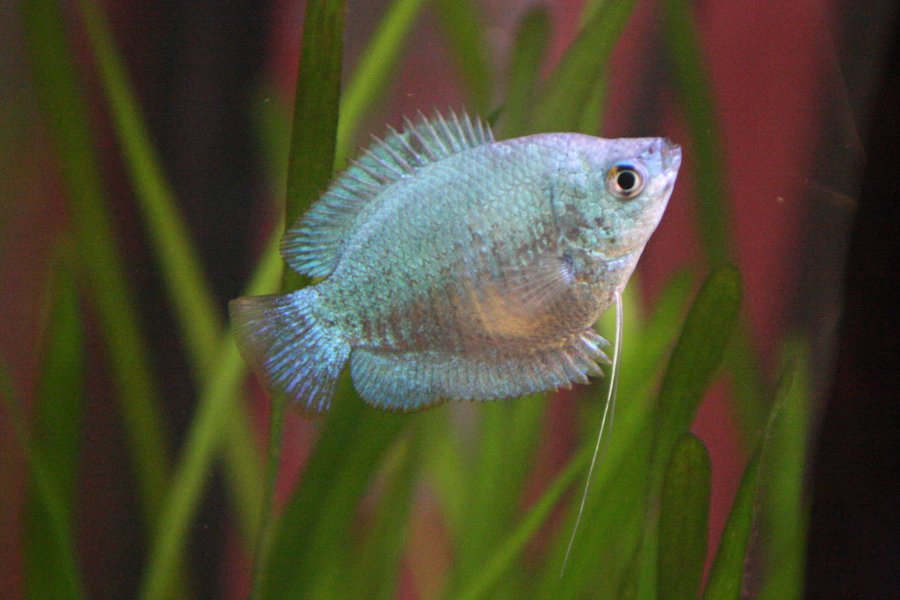 Having more females than males reduces competitive aggression, so we included a couple of females. They can be easily identified by their lack of red stripes, their fuller bellies and their curved dorsal fins.
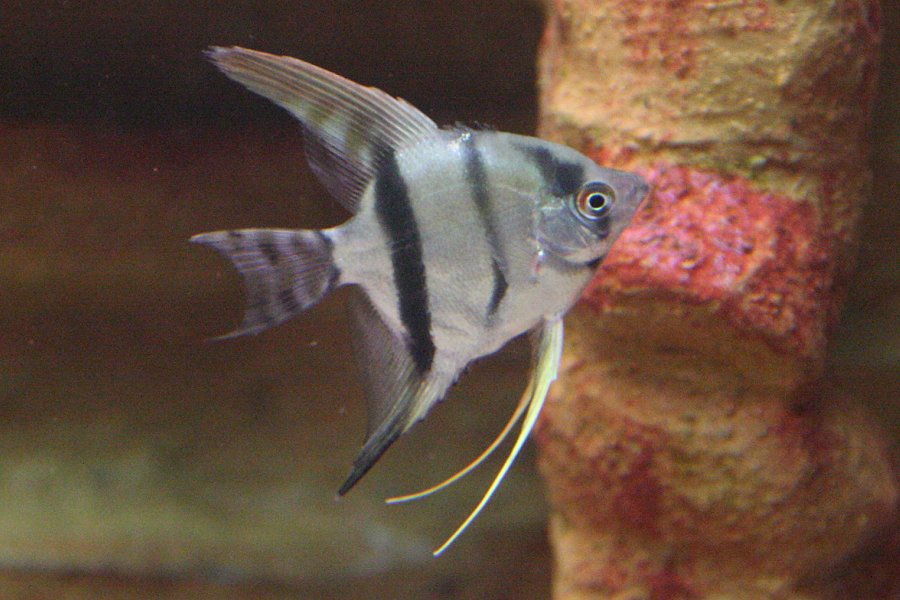 On the same day, we added four angelfish. All are the scalare ("ska lah ray") species, which is the only freshwater species that likes neutral pH. The pictured angel carries the wild-type stripes, which would have intensified a little as it aged, but never as much as its wild ancestors. Wild-types can be one of the less common varieties available, despite being the natural one.
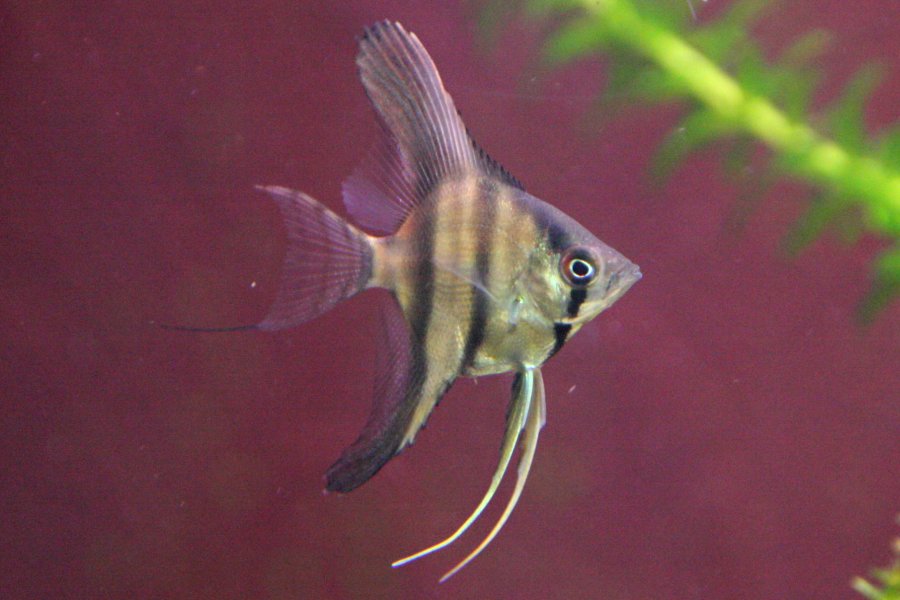 Sadly, our first wild-type got a little too inquisitive with a cory, and got stabbed in the gill, causing it to die before the end of its first night. We managed to find a replacement that had even better wild colourings, and whose fins were in better condition. This one lost a fight with the gold marble after a month, and died from its injuries.
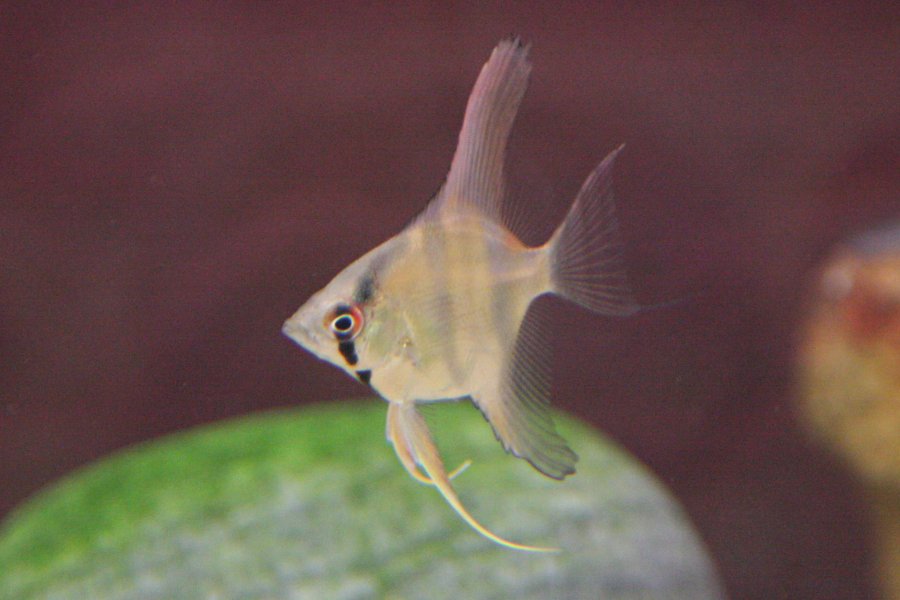 The best wild-types can even choose to lose their stripes when resting or stressed, or just depending on their mood. Even in the previous picture, only the stripe over the eye was properly dark. The others were partly faded, but can become completely black when the fish wants.
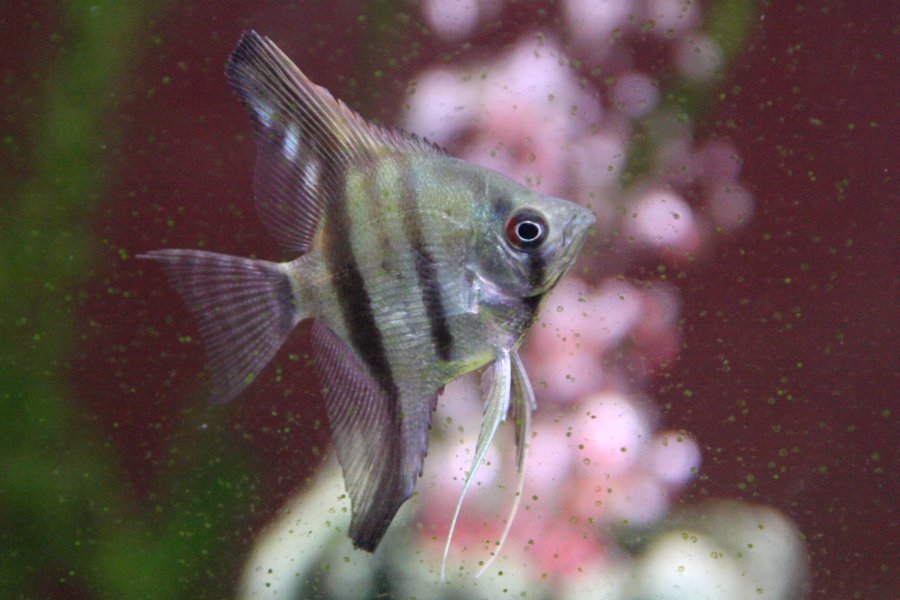 We replaced it with a couple of almost identical angels which were a little larger than the gold marble, and therefore less vulnerable. The colours can become even more defined as they age, and the pearlscale effect (like wrinkled tinfoil on their bodies) should intensify.
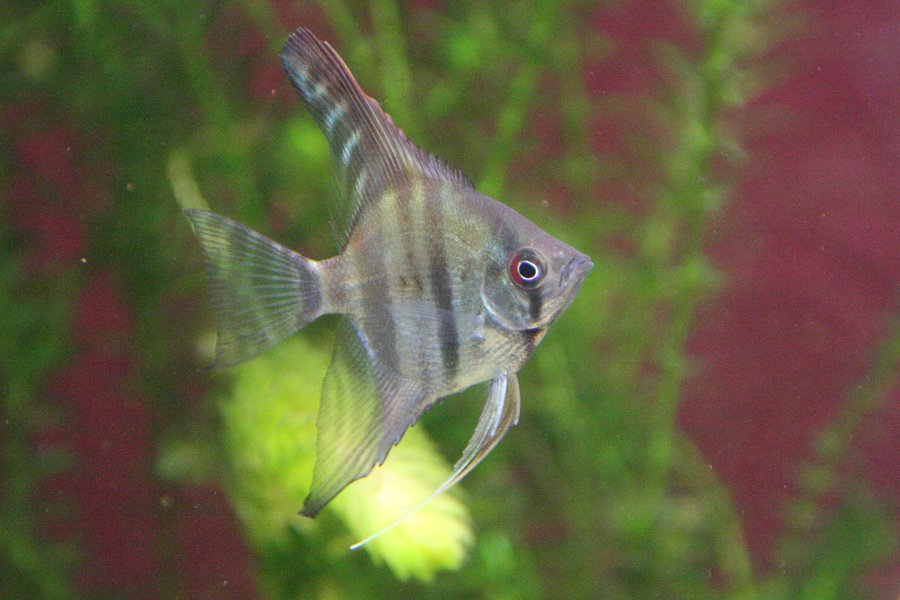 These two wild-types seem quite determined to dominate the others, but it remains to be seen which ones eventually end up as the dominant pair.
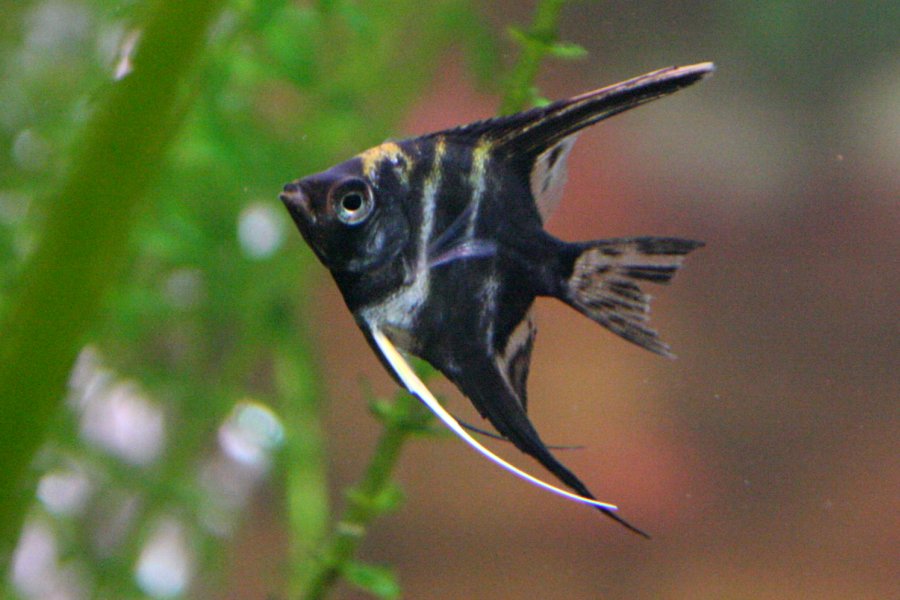 This is a selectively bred marble angelfish, the most commonly available variety. This particular one has enough yellow to be called a gold marble. The varieties are all compatible, and the fish view each other as the same type. All of them have the exceptionally beautiful angelfish shape, which makes up for their potentially aggressive tendencies. Despite being quite small, this one may have been a little too aggressive though, and is almost certainly guilty of killing our second wild-type. It later lost another fight for dominance, and died from its injuries.
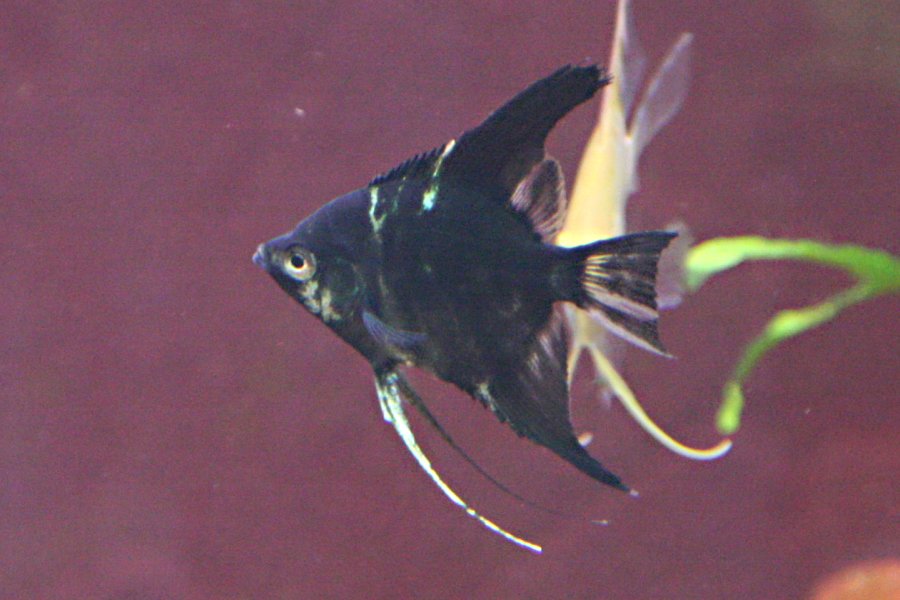 The other marble angel was almost completely black, and was possibly a cross with the black angel variety. These fish are all very young, but should grow up to become one of the most intelligent freshwater fish, recognising their owners, and shying away from strangers. They do not show as much curiosity as the kribensis (who investigate everything in detail), but even at this very young age, they respond to faces and hand movements. Sadly, all of the commercial breeding has reduced their instincts somewhat, making them very poor parents. More sadly, this fish was killed in a fight for dominance after about 2 months.
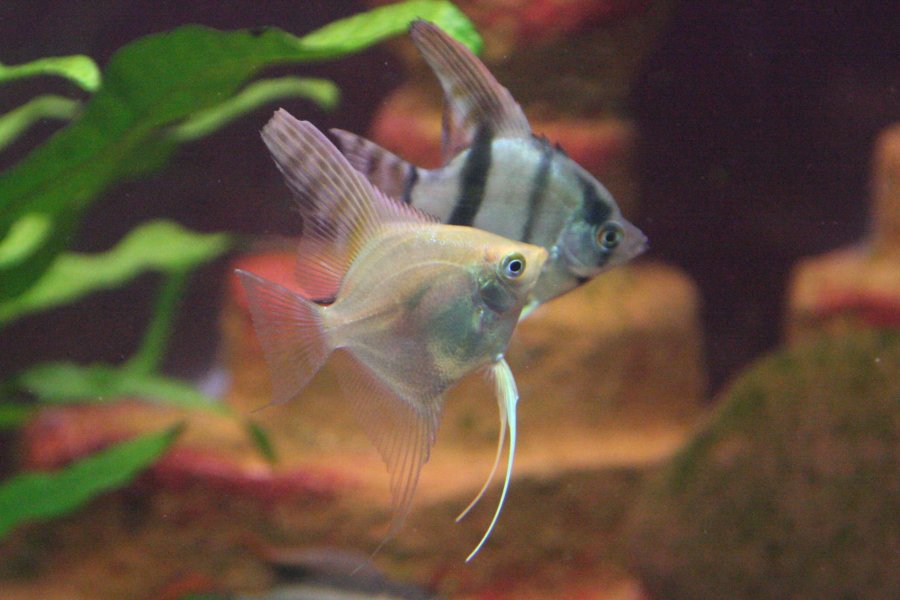 The last angel of the initial stock is the ghost variety (or a very pale gold variety), completely lacking in dark stripes. The only remaining stripes are faint yellow on the fins. It's almost impossible to tell which of the angels are male or female, so we have no idea if it will become possible for them to breed in future.
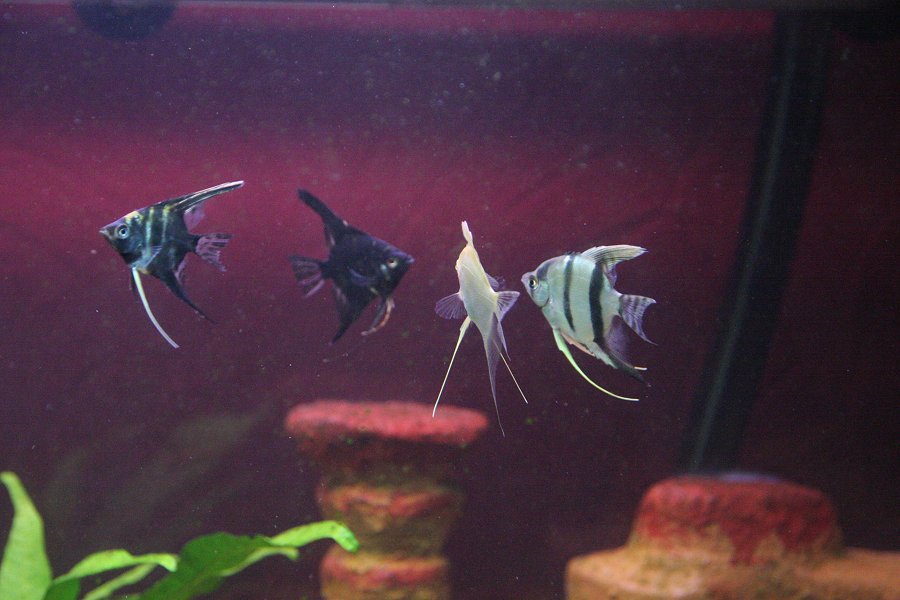 When young, angelfish like to swim in a loose shoal. When they reach breeding age, a pair may form and aggressively defend a territory while attempting to breed. It's even possible for one adult to assume ownership of the entire tank. In this case, one or more of them will need to be rehoused. Due to their large adult size, they can kill or severely damage other angels, and must be treated with respect.
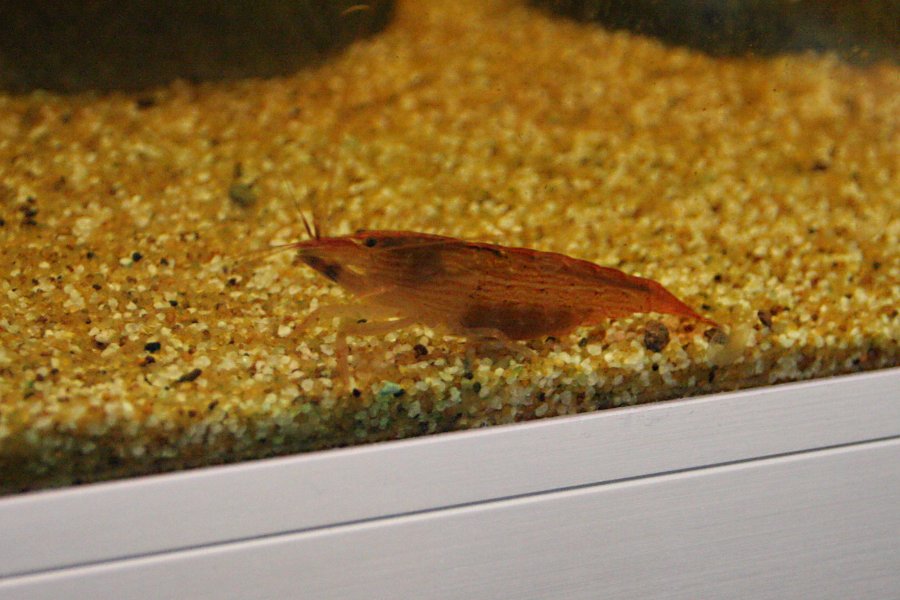 The last addition were the two bamboo shrimps. This one is clearly a mature female, with the adult colours, and carrying a clutch of eggs under her tail - the eggs will not hatch in this fresh water. These shrimp could not be added until the tank was around 6 months old, as they need enough food particles to be suspended in the water column, especially plankton.
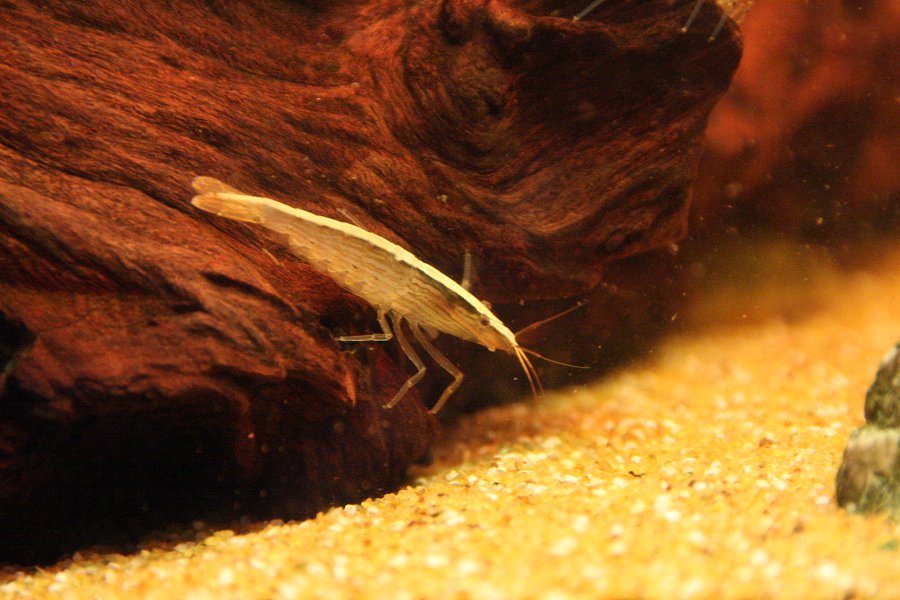 This smaller shrimp is probably also female, judging by the length of its legs. It is significantly whiter, and is probably a juvenile. Both carry the distinctively bright white stripe down their backs. Unlike the Amano shrimps, they do not use clawed arms to collect food, and when walking (or swimming at impressive speed), they carry their arms beside their mouths, making it look like they have none.
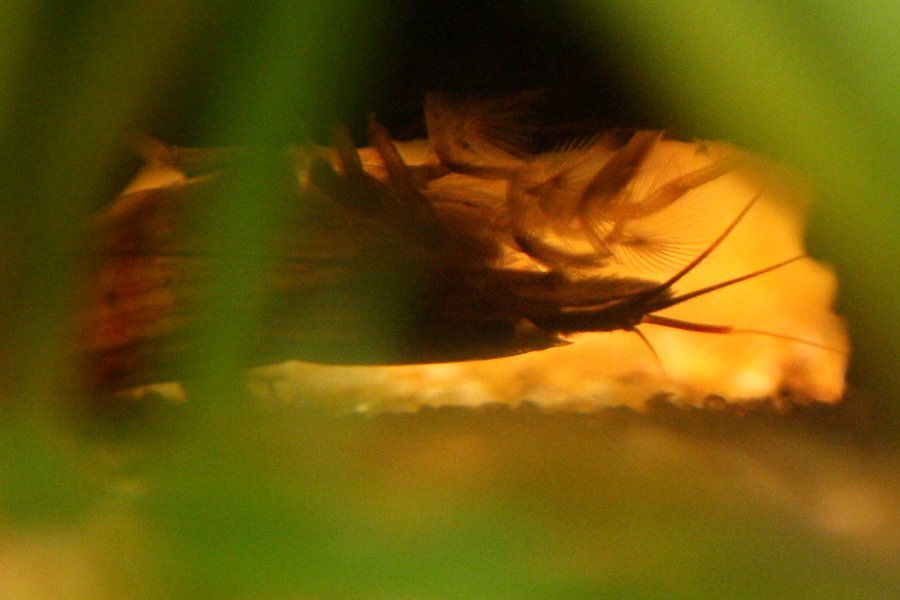 Their hands are modified into fans which they use to filter food from the water current, before passing it to their mouths. They apparently prefer to do this in front of the strongest current they can find. Hopefully, once they settle in more, they will start doing this in the open (such as on the top of the sculpture, which was placed beneath the filter outlets especially for these shrimps).
The tree is made from a Java fern attached to a conveniently shaped piece of bog wood. Initially it is tied in place with thread until it has had a chance to root itself. Most other plants are either held in place with thread, or buried in the substrate and underlying plant feed, and held down if needed with pebbles. The Java fern tree is the only plant to survive the high ammonia levels, so even though it looks a little unhappy, we did not want to remove it. Hopefully it will recover fully.
The plants are as follows:
The plants were selected to make the fish feel more comfortable, and help to reduce the unwanted nitrates, maintaining good water quality. Several of the faster growing plants also help to hide various pieces of hardware. There could be more (a moss carpet would be nice on the left) but it would then need a dedicated CO2 source.
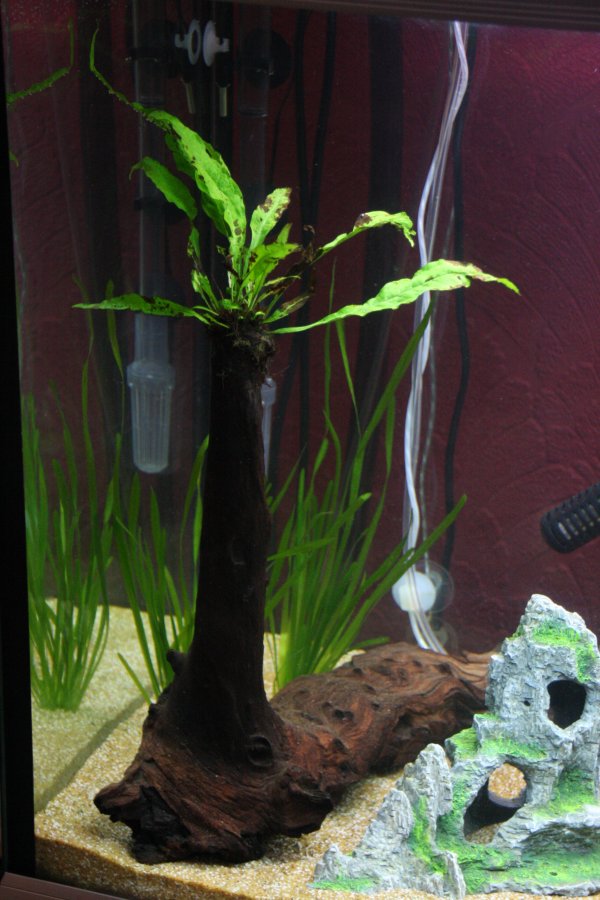 The Java fern tree. Behind it are two vals bunches which should grow tall enough to hide most of the pipes. The vals also spread rapidly, growing new shoots from spreading roots, which need to be removed if they spread too far.The elodea sits between the mountains, largely hiding the heater. It is one of the most frustrating plants, as the base regularly rots and falls out of the binding, leaving the strands floating around the tank. Loosely wrapping elastic bands around the bunch of stalks helps delay this effect, but regular pruning and re-binding is still required, if nothing else, to take account of the rapid growth rate.
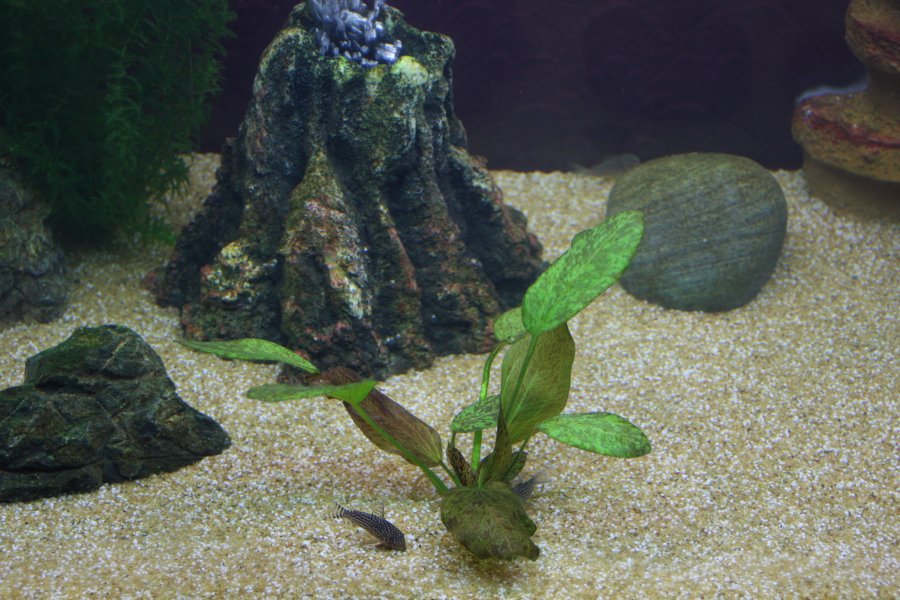 This echinodorus variety is relatively low growing (unlike the popular sword plants) so it should not block the view of the volcano, even once it fills out.Java fern, dwarf anubias and willisii crypt on the planting ledges of the sculpture.
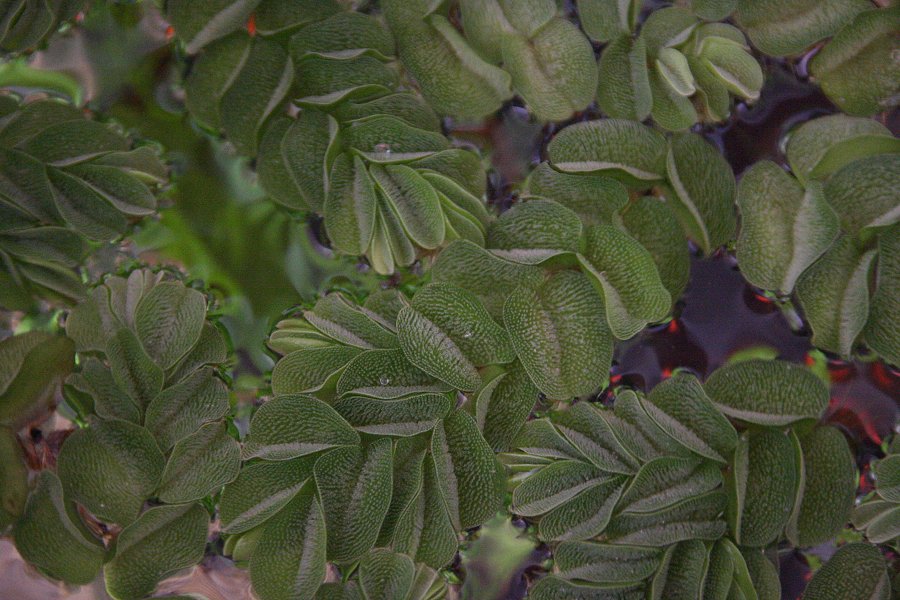 Floating watermoss (not even remotely moss-like), a floating plant with hairy leaves that repel water, causing it to bead up and roll off. The plants are formed as little clusters of leaves, with each cluster sharing a stem and root bunches.
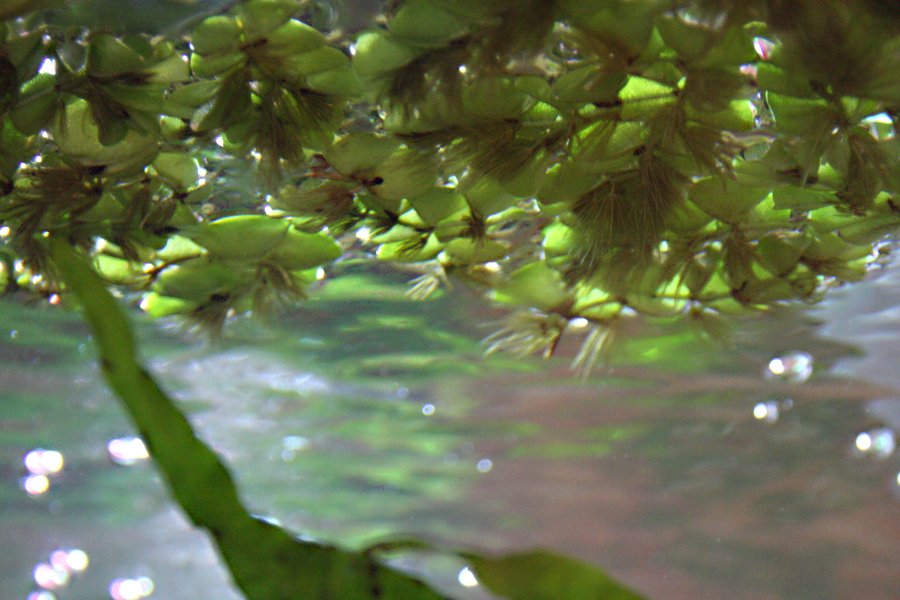 These are particularly useful for bubble nesting fish (like the dwarf gourami) to help support their floating nests. They float in the current, congregating above our Java fern tree. Sadly, despite reproducing like crazy at first, the plants started to sink and rot after a couple of months, and always made cleaning difficult. They were removed and replaced with floating plastic immitation plants - not as nice, but easier to work with.