Ogof Draenen Underworld Series trip 09/11/2025
Unless otherwise stated, camera, setups, lighting, edits and gallery effects by Tarquin. Modelling and lighting at various points will be Helen Marshall and Gareth Farr.
 Spiderweb and exuvia (shed skin) of the extremely rare Porrhomma rosenhaueri at Cairn Junction.
Modelling by Coeswen's old clothes, lighting by Tarquin and Gareth
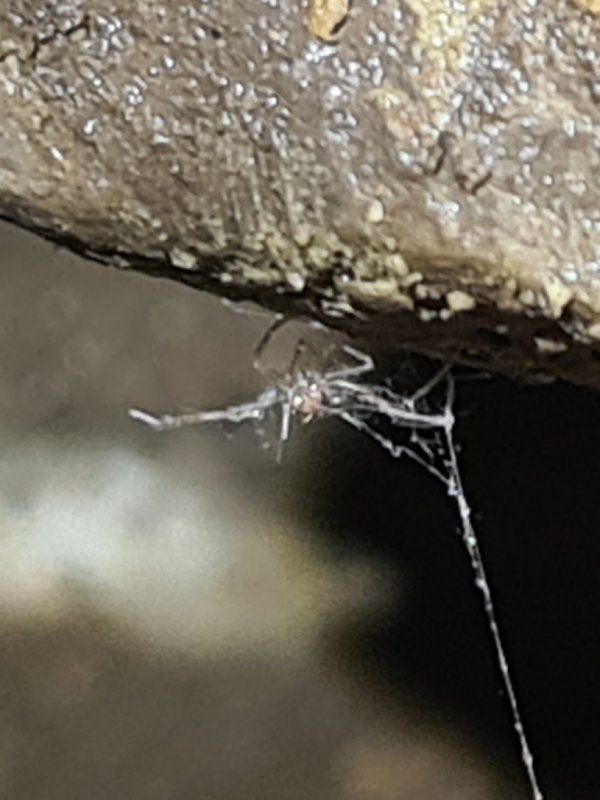
Spiderweb and exuvia (shed skin) of the extremely rare Porrhomma rosenhaueri at Cairn Junction.
Modelling by Coeswen's old clothes, lighting by Tarquin and Gareth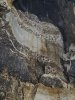 Fluting on the aven in Megadrive North.
 Fluting below the aven in Megadrive North.
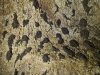 Vermiculations on the wall of the aven. These are clumps of soil or detritus, which are made by a combination of evaporating water, and the results of bacterial colonies that consume the sulphur and nitrites in the detritus.
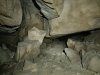 Undercut on the left side at the end of Megadrive North.
 The undercut hides a short side passage which is crawling sized, ending in a dig.
 A more obvious rift on the left wall a short distance before the end is Fear Of Flying.
Lighting by Tarquin and Helen
A more obvious rift on the left wall a short distance before the end is Fear Of Flying.
Lighting by Tarquin and Helen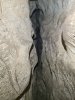 Fear Of Flying starts with a crazy thrutching traverse, and has further climbs.
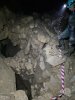 Down to the left at the start of the final chamber in Megadrive North is a trench. It is not safe to descend here, but can be accessed immediately below Fear Of Flying. It chokes below Megadrive North, but tucked under its wall is an undercut; the way into Underworld Series.
Modelling by Helen, lighting by Tarquin and Helen
Down to the left at the start of the final chamber in Megadrive North is a trench. It is not safe to descend here, but can be accessed immediately below Fear Of Flying. It chokes below Megadrive North, but tucked under its wall is an undercut; the way into Underworld Series.
Modelling by Helen, lighting by Tarquin and Helen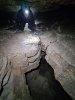 The undercut leads to Lemming Pot, three holes down into Underworld Passage, the first of which can be climbed into the start of Underworld Passage.
Modelling by Helen, lighting by Tarquin, Helen and Gareth
The undercut leads to Lemming Pot, three holes down into Underworld Passage, the first of which can be climbed into the start of Underworld Passage.
Modelling by Helen, lighting by Tarquin, Helen and Gareth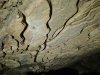 Anastomosis above Lemming Pot.
Lighting by Tarquin and Helen
Anastomosis above Lemming Pot.
Lighting by Tarquin and Helen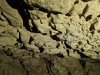 Anastomosis above Lemming Pot.
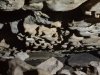 Anastomosis above Lemming Pot.
Lighting by Helen
Anastomosis above Lemming Pot.
Lighting by Helen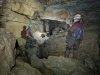 Start of Underworld Passage.
Modelling by Gareth and Helen, lighting by Tarquin, Gareth and Helen
Start of Underworld Passage.
Modelling by Gareth and Helen, lighting by Tarquin, Gareth and Helen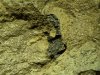 Damaged fossil dorsal spine of a Ctenacanthus proto-shark in the ceiling of Underworld Passage.
Lighting by Tarquin and Gareth
Damaged fossil dorsal spine of a Ctenacanthus proto-shark in the ceiling of Underworld Passage.
Lighting by Tarquin and Gareth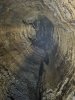 Echoing aven in Underworld Passage. This appears to be significantly more than 10 metres high, and perhaps closer to 20.
Lighting by Tarquin and Gareth
Echoing aven in Underworld Passage. This appears to be significantly more than 10 metres high, and perhaps closer to 20.
Lighting by Tarquin and Gareth Coloured rocks at the base of the aven. Black is manganese staining. Grey is limestone. Yellow is likely to be dolomatised limestone, or millstone grit (Twrch sandstone).
 Underworld Passage.
Modelling by Gareth and Helen, lighting by Tarquin, Gareth and Helen
Underworld Passage.
Modelling by Gareth and Helen, lighting by Tarquin, Gareth and Helen Top of the 22 metre pitch down to Underworld I (which the Chelsea survey mistakenly calls Under Underworld). The pitch looks absolutely enormous from here, with the bottom being quite invisible. The passage at the bottom is large but often low, and contains small streams and a few formations. It is at the perfect height to be the upstream end of White Arch Passage, but is too small, and pointing in the wrong direction, as well as looking quite different. Many of the boulders in this photograph are loose due to a lack of visitors, and great care must be taken when stepping on them. Gareth fell victim to a particularly evil one, which caused him to fall and badly bruise one buttock.
Modelling by Helen and Gareth, lighting by Tarquin, Helen and Gareth
Top of the 22 metre pitch down to Underworld I (which the Chelsea survey mistakenly calls Under Underworld). The pitch looks absolutely enormous from here, with the bottom being quite invisible. The passage at the bottom is large but often low, and contains small streams and a few formations. It is at the perfect height to be the upstream end of White Arch Passage, but is too small, and pointing in the wrong direction, as well as looking quite different. Many of the boulders in this photograph are loose due to a lack of visitors, and great care must be taken when stepping on them. Gareth fell victim to a particularly evil one, which caused him to fall and badly bruise one buttock.
Modelling by Helen and Gareth, lighting by Tarquin, Helen and Gareth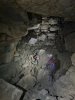 Underworld Passage ends in a massive choke, about 40 metres below surface. This is at the same height as the upper bench of Lamb and Fox Chamber, but pointing in totally the wrong direction. It could potentially be related to the inlet passage producing the waterfall in Lamb and Fox Chamber, but is not the source of its stream. To the right of the camera is a deep crater containing a blind pitch.
Modelling by Gareth and Helen, lighting by Tarquin, Gareth and Helen
Underworld Passage ends in a massive choke, about 40 metres below surface. This is at the same height as the upper bench of Lamb and Fox Chamber, but pointing in totally the wrong direction. It could potentially be related to the inlet passage producing the waterfall in Lamb and Fox Chamber, but is not the source of its stream. To the right of the camera is a deep crater containing a blind pitch.
Modelling by Gareth and Helen, lighting by Tarquin, Gareth and Helen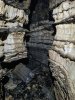 Inlet to the right of the blind pitch crater, which has attractive shelving that is highly friable.
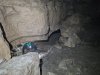 The undercut at the start of Underworld Passage that leads into Underworld II.
Modelling by Helen, lighting by Tarquin, Helen and Gareth
The undercut at the start of Underworld Passage that leads into Underworld II.
Modelling by Helen, lighting by Tarquin, Helen and Gareth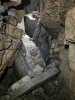 Climb down through loose boulders into Underworld II. The ones in the floor below the camera slipped and caused Gareth to fall a second time, bruising his other buttock. It helps to have a matching pair.
Modelling by Gareth, lighting by Tarquin and Gareth
Climb down through loose boulders into Underworld II. The ones in the floor below the camera slipped and caused Gareth to fall a second time, bruising his other buttock. It helps to have a matching pair.
Modelling by Gareth, lighting by Tarquin and Gareth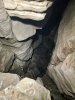 The climb down to the stream in Underworld II. This has aging spits for an optional handline, which we did not use it on my last visit to this area. This time, we chose not to continue to the top of the pitches below.
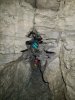 Tucked into the wall at the start of Underworld Passage is this awkward rift, which links to Faded Love, Blue Eyes Cryin' and Anastomosis Passage on the other side of Megadrive North. It is the easiest way to visit the first two of them. The challenge is to work out which level allows you to progress through the first few metres of the rift, and is quite entertaining. After this, it becomes easier. Gareth's buttocks did not want to play, so he went out to Megadrive North to wait for us.
Modelling by Helen, lighting by Tarquin and Helen
Tucked into the wall at the start of Underworld Passage is this awkward rift, which links to Faded Love, Blue Eyes Cryin' and Anastomosis Passage on the other side of Megadrive North. It is the easiest way to visit the first two of them. The challenge is to work out which level allows you to progress through the first few metres of the rift, and is quite entertaining. After this, it becomes easier. Gareth's buttocks did not want to play, so he went out to Megadrive North to wait for us.
Modelling by Helen, lighting by Tarquin and Helen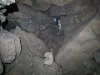 The rift becomes a crawl, ending in this chamber. To the left (as seen here) is the connection to Anastomosis Passage, but the climb up to it is quite tricky, and immediately enters a squeeze, so while this route can be used to make a small round trip, it is not really worth it. Behind the camera is the crawl to Faded Love, while in the floor below the camera is the drop down to Blue Eyes Cryin'.
Modelling by Helen, lighting by Tarquin and Helen.
The rift becomes a crawl, ending in this chamber. To the left (as seen here) is the connection to Anastomosis Passage, but the climb up to it is quite tricky, and immediately enters a squeeze, so while this route can be used to make a small round trip, it is not really worth it. Behind the camera is the crawl to Faded Love, while in the floor below the camera is the drop down to Blue Eyes Cryin'.
Modelling by Helen, lighting by Tarquin and Helen.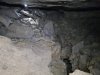 Dropping down through rocks into Blue Eyes Cryin'. The start of the passage has this cleft in the floor, which contains a tiny stream.
Modelling by Helen, lighting by Tarquin and Helen.
Dropping down through rocks into Blue Eyes Cryin'. The start of the passage has this cleft in the floor, which contains a tiny stream.
Modelling by Helen, lighting by Tarquin and Helen.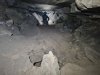 Blue Eyes Cryin' starts with a sandy floor.
Modelling by Helen, lighting by Tarquin and Helen.
Blue Eyes Cryin' starts with a sandy floor.
Modelling by Helen, lighting by Tarquin and Helen. Blue Eyes Cryin' has a distinctive cleft anastomosis in the ceiling.
Lighting by Tarquin and Helen
Blue Eyes Cryin' has a distinctive cleft anastomosis in the ceiling.
Lighting by Tarquin and Helen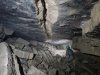 The end of Blue Eyes Cryin' is rocky, and chokes below Faded Love.
Modelling by Helen, lighting by Tarquin and Helen.
The end of Blue Eyes Cryin' is rocky, and chokes below Faded Love.
Modelling by Helen, lighting by Tarquin and Helen.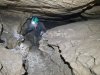 The crawl from the chamber to Faded Love.
Modelling by Helen, lighting by Tarquin and Helen.
The crawl from the chamber to Faded Love.
Modelling by Helen, lighting by Tarquin and Helen.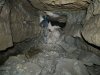 Faded Love then becomes significantly larger.
Modelling by Helen, lighting by Tarquin and Helen.
Faded Love then becomes significantly larger.
Modelling by Helen, lighting by Tarquin and Helen. Drip pocket in Faded Love.
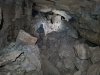 The largest part of Faded Love, where Blue Eyes Cryin' ends below the floor to the right of the camera.
Modelling by Helen, lighting by Tarquin and Helen.
The largest part of Faded Love, where Blue Eyes Cryin' ends below the floor to the right of the camera.
Modelling by Helen, lighting by Tarquin and Helen. Faded Love ends abruptly in a choke, about 40 metres below surface, but with a quarry face not too far ahead which is 10 metres above it. There is no prospect for further development here. The passage is too low to be related directly to Siambre Ddu Passage, even though it points towards it.
Modelling by Helen, lighting by Tarquin and Helen.
Faded Love ends abruptly in a choke, about 40 metres below surface, but with a quarry face not too far ahead which is 10 metres above it. There is no prospect for further development here. The passage is too low to be related directly to Siambre Ddu Passage, even though it points towards it.
Modelling by Helen, lighting by Tarquin and Helen.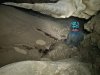 We returned to Megadrive North to find Gareth had decided to leave the cave. So we rushed a visit into Anastomosis Passage. It begins in an obvious undercut with guano deposits.
Modelling by Helen, lighting by Tarquin and Helen.
We returned to Megadrive North to find Gareth had decided to leave the cave. So we rushed a visit into Anastomosis Passage. It begins in an obvious undercut with guano deposits.
Modelling by Helen, lighting by Tarquin and Helen.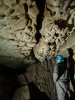 The anastomosis that gives Anastomosis Passage its name begins immediately.
Modelling by Helen.
The anastomosis that gives Anastomosis Passage its name begins immediately.
Modelling by Helen.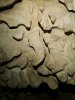 Detail of the anastomosis in Anastomosis Passage. These channels are the early cave formation, when it was a phreatic maze of tiny channels. The cave then developed below them, and the original channels somehow managed to survive, being a little rounded off, but not destroyed, even though most of the passage development is phreatic.
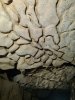 The oxbow at the start of Anastomosis passage has the best example of anastomosis.
Lighting by Tarquin and Helen
The oxbow at the start of Anastomosis passage has the best example of anastomosis.
Lighting by Tarquin and Helen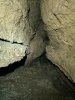 A clamber over a boulder pile then gives a choice of routes. Dropping down a hole to the left gains the original way on, into a short stub of passage.
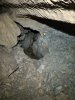 Doubling back to the left is the squeeze and climb down into Faded Love and Blue Eyes Cryin'.
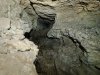 To the left of the passage stub, a small inlet turns into a long, straight crawl.
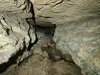 Getting lower.
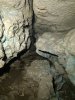 The passage then gets narrow, forcing a wallow in the muddy stream. It ends in a low turning space, which looks much more inviting on the survey than it really is.
 At the rock pile, the right branch of Anastomosis Passage quickly ends at a choke, where a route has been forced up through the boulders.
Modelling by Helen, lighting by Tarquin and Helen.
At the rock pile, the right branch of Anastomosis Passage quickly ends at a choke, where a route has been forced up through the boulders.
Modelling by Helen, lighting by Tarquin and Helen.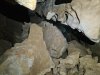 This gains a larger passage, running under Megadrive North, which is not on the survey. It is initially quite shattered, with a bedding heading back under the edge of Megadrive North, seen to the left here. This looks unstable, so we left it alone, but it went a long way back.
Modelling by Helen, lighting by Tarquin and Helen.
This gains a larger passage, running under Megadrive North, which is not on the survey. It is initially quite shattered, with a bedding heading back under the edge of Megadrive North, seen to the left here. This looks unstable, so we left it alone, but it went a long way back.
Modelling by Helen, lighting by Tarquin and Helen.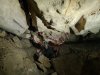 The ceiling ahead becomes stable and much whiter, but soon ends at a choke, presumably below the floor of Megadrive North.
Modelling by Helen, lighting by Tarquin and Helen.
The ceiling ahead becomes stable and much whiter, but soon ends at a choke, presumably below the floor of Megadrive North.
Modelling by Helen, lighting by Tarquin and Helen.
 Spiderweb and exuvia (shed skin) of the extremely rare Porrhomma rosenhaueri at Cairn Junction.
Modelling by Coeswen's old clothes, lighting by Tarquin and Gareth
Spiderweb and exuvia (shed skin) of the extremely rare Porrhomma rosenhaueri at Cairn Junction.
Modelling by Coeswen's old clothes, lighting by Tarquin and Gareth Fluting on the aven in Megadrive North.
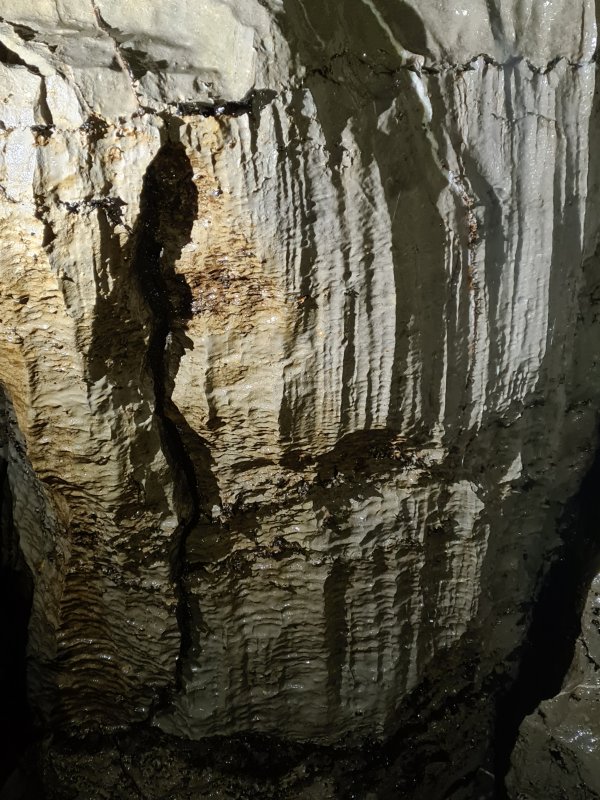 Fluting below the aven in Megadrive North.
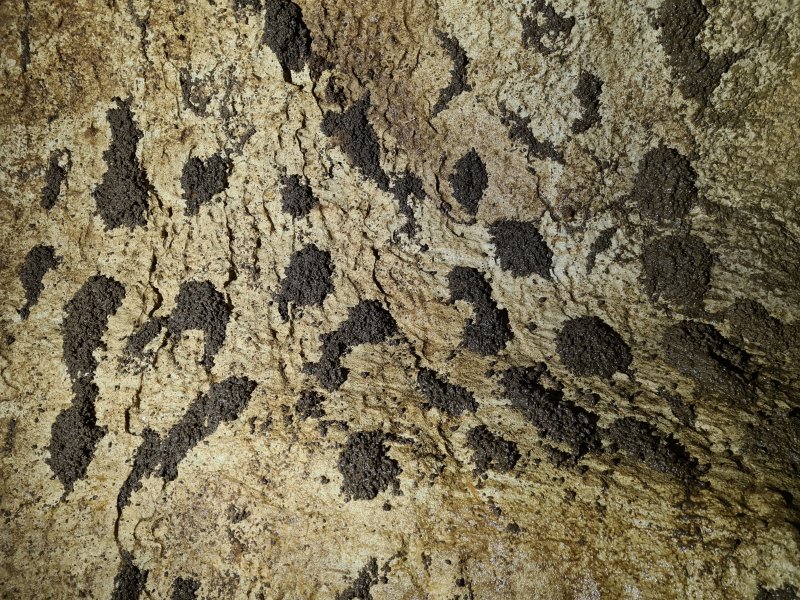 Vermiculations on the wall of the aven. These are clumps of soil or detritus, which are made by a combination of evaporating water, and the results of bacterial colonies that consume the sulphur and nitrites in the detritus.
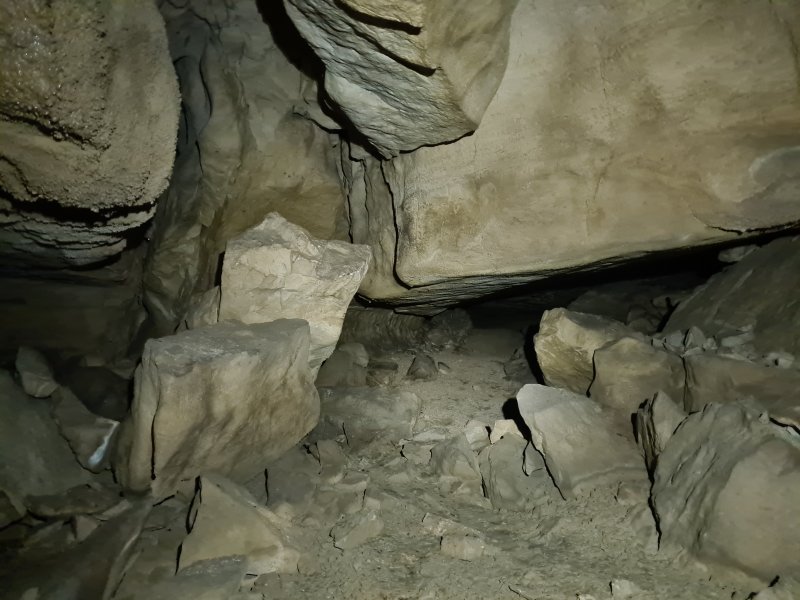 Undercut on the left side at the end of Megadrive North.
 The undercut hides a short side passage which is crawling sized, ending in a dig.
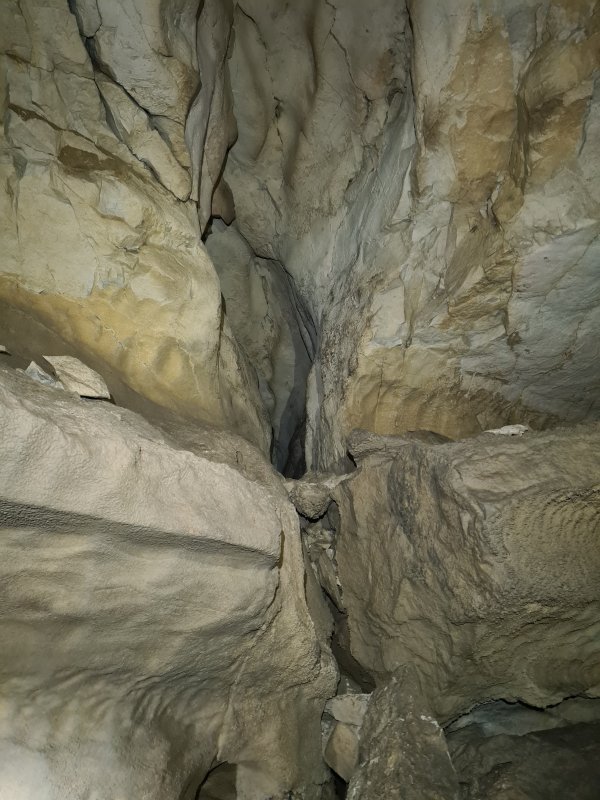 A more obvious rift on the left wall a short distance before the end is Fear Of Flying.
Lighting by Tarquin and Helen
A more obvious rift on the left wall a short distance before the end is Fear Of Flying.
Lighting by Tarquin and Helen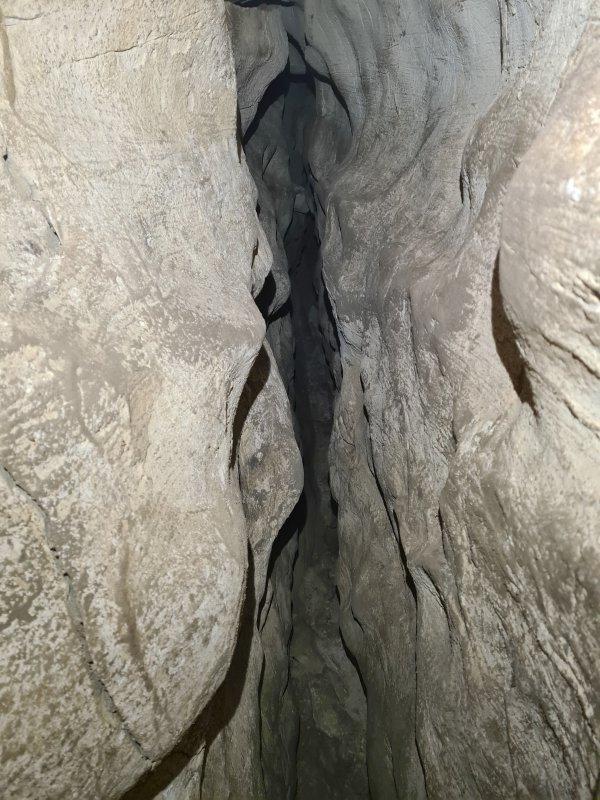 Fear Of Flying starts with a crazy thrutching traverse, and has further climbs.
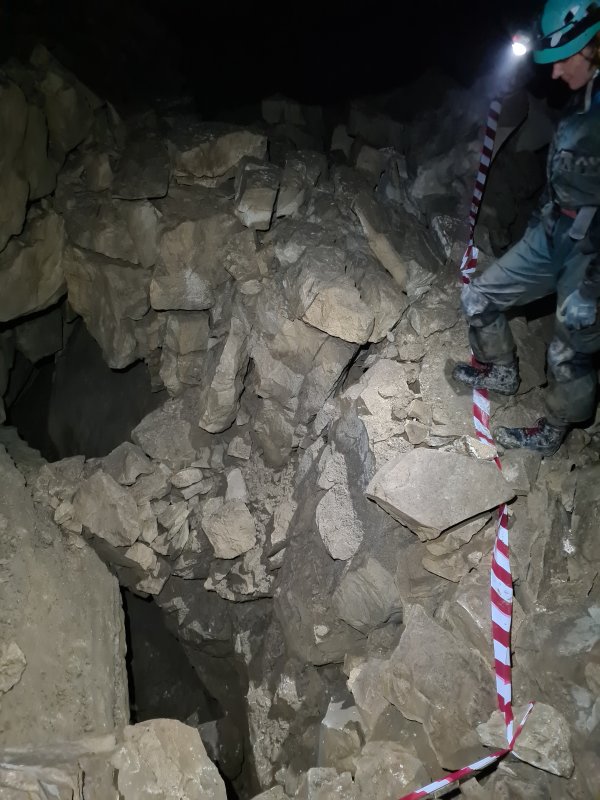 Down to the left at the start of the final chamber in Megadrive North is a trench. It is not safe to descend here, but can be accessed immediately below Fear Of Flying. It chokes below Megadrive North, but tucked under its wall is an undercut; the way into Underworld Series.
Modelling by Helen, lighting by Tarquin and Helen
Down to the left at the start of the final chamber in Megadrive North is a trench. It is not safe to descend here, but can be accessed immediately below Fear Of Flying. It chokes below Megadrive North, but tucked under its wall is an undercut; the way into Underworld Series.
Modelling by Helen, lighting by Tarquin and Helen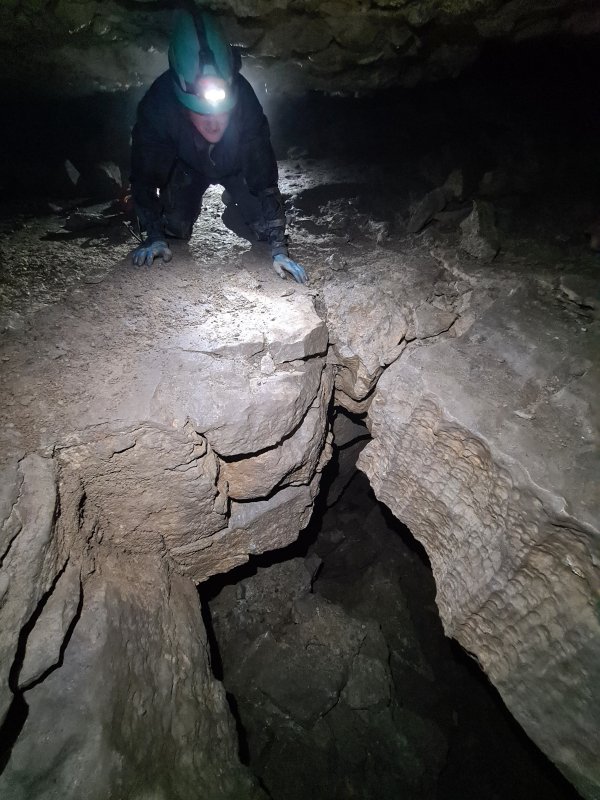 The undercut leads to Lemming Pot, three holes down into Underworld Passage, the first of which can be climbed into the start of Underworld Passage.
Modelling by Helen, lighting by Tarquin, Helen and Gareth
The undercut leads to Lemming Pot, three holes down into Underworld Passage, the first of which can be climbed into the start of Underworld Passage.
Modelling by Helen, lighting by Tarquin, Helen and Gareth Anastomosis above Lemming Pot.
Lighting by Tarquin and Helen
Anastomosis above Lemming Pot.
Lighting by Tarquin and Helen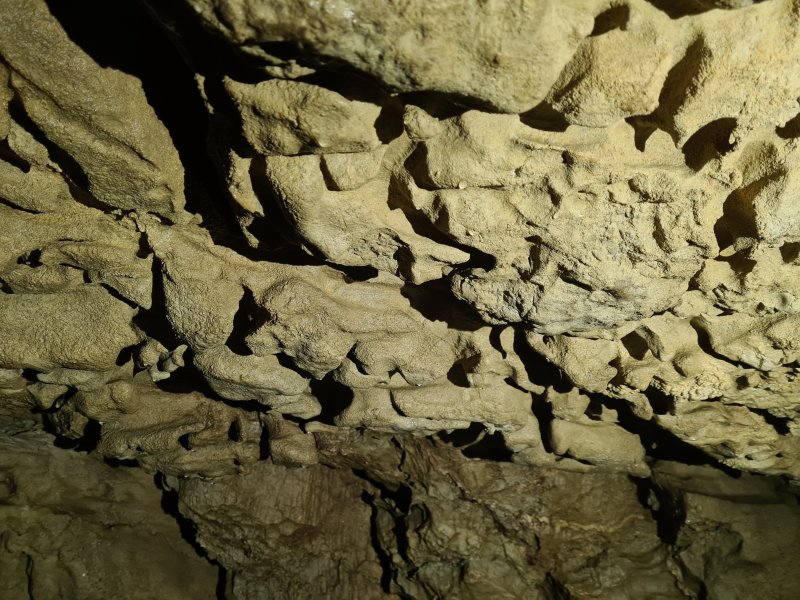 Anastomosis above Lemming Pot.
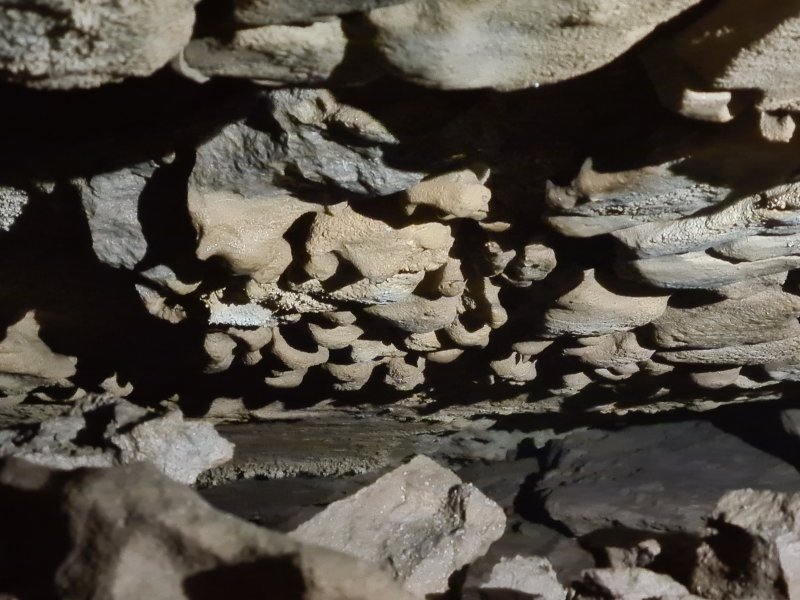 Anastomosis above Lemming Pot.
Lighting by Helen
Anastomosis above Lemming Pot.
Lighting by Helen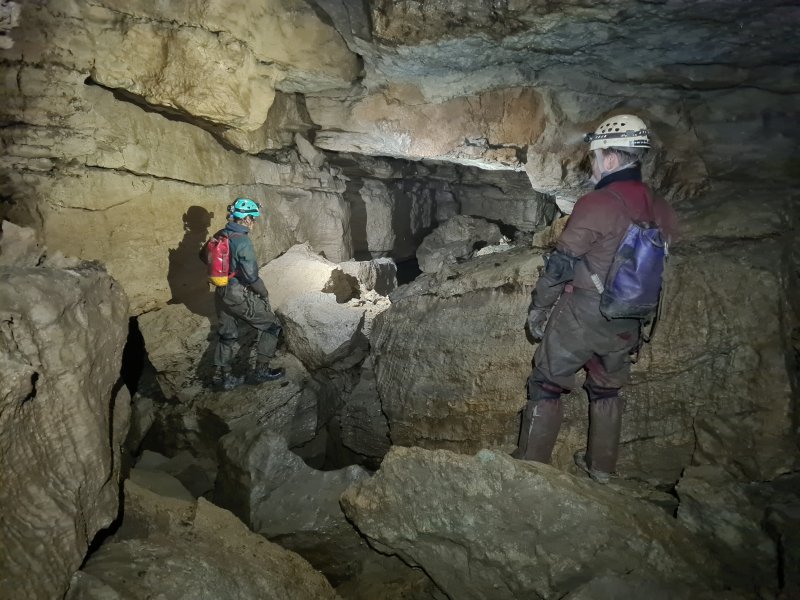 Start of Underworld Passage.
Modelling by Gareth and Helen, lighting by Tarquin, Gareth and Helen
Start of Underworld Passage.
Modelling by Gareth and Helen, lighting by Tarquin, Gareth and Helen Damaged fossil dorsal spine of a Ctenacanthus proto-shark in the ceiling of Underworld Passage.
Lighting by Tarquin and Gareth
Damaged fossil dorsal spine of a Ctenacanthus proto-shark in the ceiling of Underworld Passage.
Lighting by Tarquin and Gareth Echoing aven in Underworld Passage. This appears to be significantly more than 10 metres high, and perhaps closer to 20.
Lighting by Tarquin and Gareth
Echoing aven in Underworld Passage. This appears to be significantly more than 10 metres high, and perhaps closer to 20.
Lighting by Tarquin and Gareth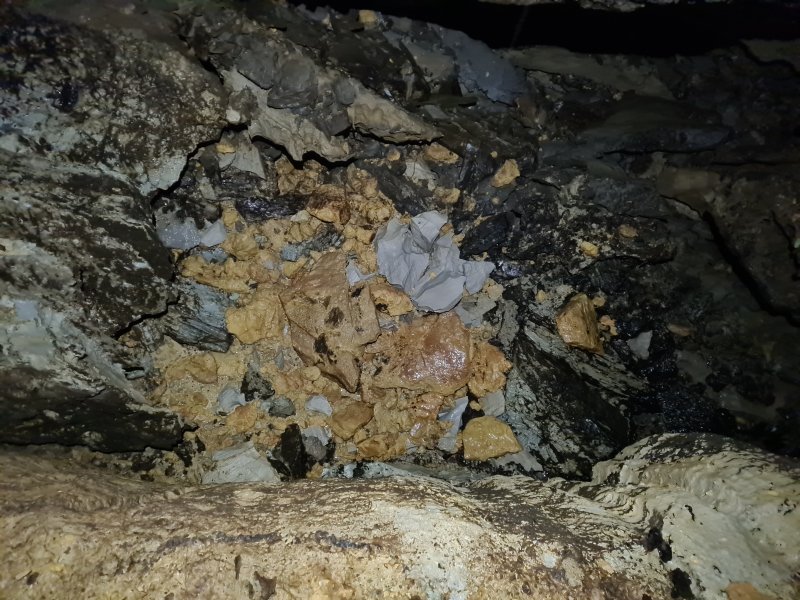 Coloured rocks at the base of the aven. Black is manganese staining. Grey is limestone. Yellow is likely to be dolomatised limestone, or millstone grit (Twrch sandstone).
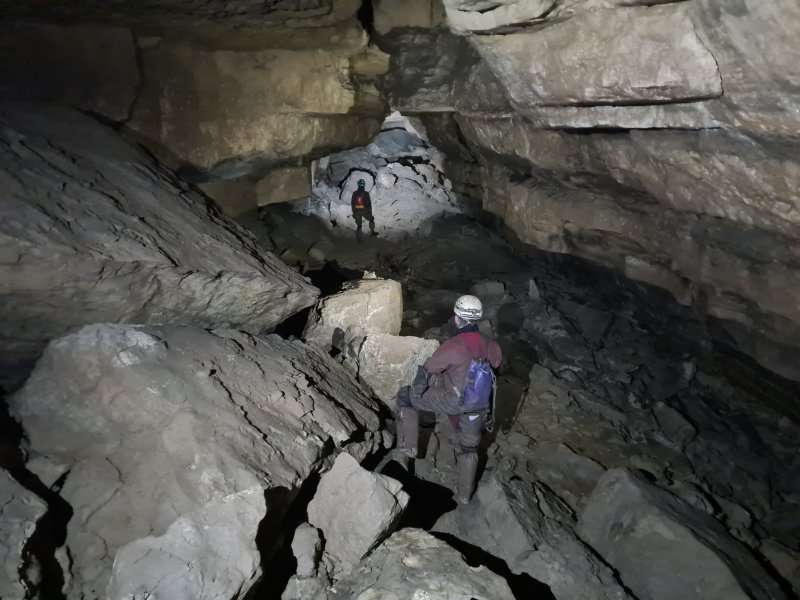 Underworld Passage.
Modelling by Gareth and Helen, lighting by Tarquin, Gareth and Helen
Underworld Passage.
Modelling by Gareth and Helen, lighting by Tarquin, Gareth and Helen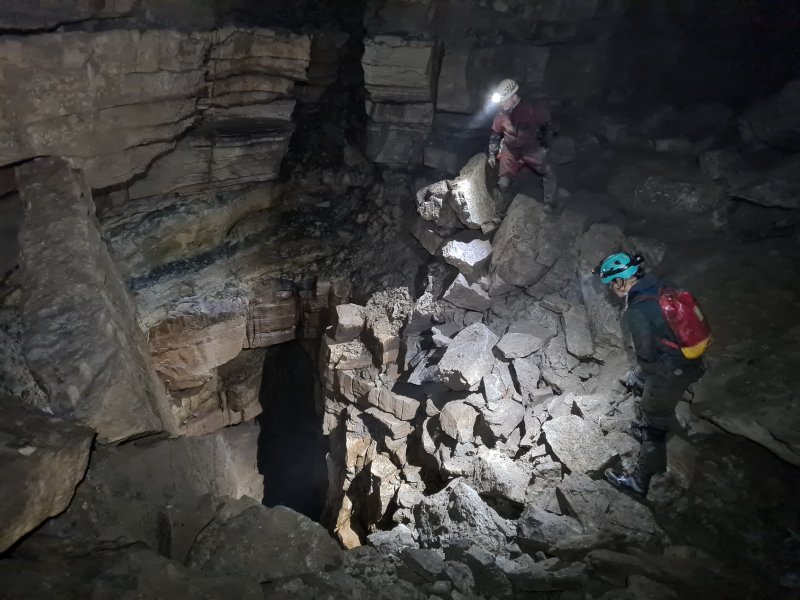 Top of the 22 metre pitch down to Underworld I (which the Chelsea survey mistakenly calls Under Underworld). The pitch looks absolutely enormous from here, with the bottom being quite invisible. The passage at the bottom is large but often low, and contains small streams and a few formations. It is at the perfect height to be the upstream end of White Arch Passage, but is too small, and pointing in the wrong direction, as well as looking quite different. Many of the boulders in this photograph are loose due to a lack of visitors, and great care must be taken when stepping on them. Gareth fell victim to a particularly evil one, which caused him to fall and badly bruise one buttock.
Modelling by Helen and Gareth, lighting by Tarquin, Helen and Gareth
Top of the 22 metre pitch down to Underworld I (which the Chelsea survey mistakenly calls Under Underworld). The pitch looks absolutely enormous from here, with the bottom being quite invisible. The passage at the bottom is large but often low, and contains small streams and a few formations. It is at the perfect height to be the upstream end of White Arch Passage, but is too small, and pointing in the wrong direction, as well as looking quite different. Many of the boulders in this photograph are loose due to a lack of visitors, and great care must be taken when stepping on them. Gareth fell victim to a particularly evil one, which caused him to fall and badly bruise one buttock.
Modelling by Helen and Gareth, lighting by Tarquin, Helen and Gareth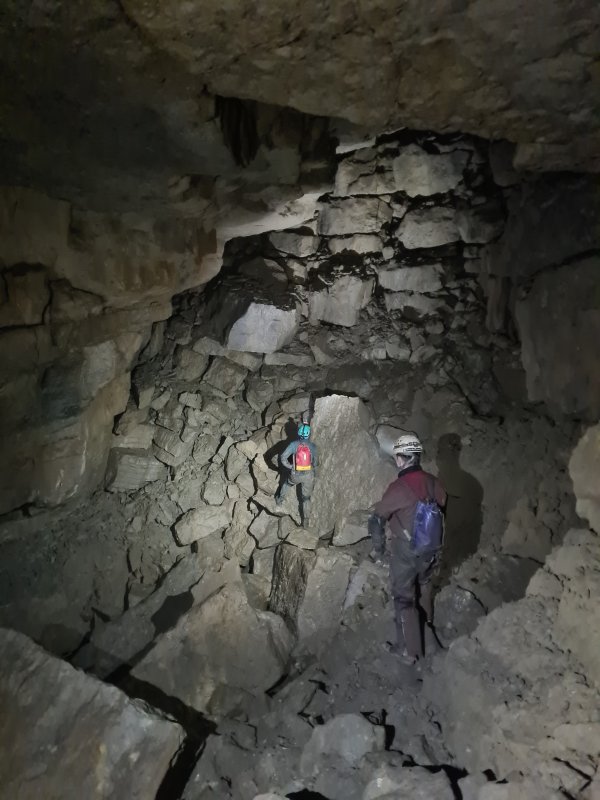 Underworld Passage ends in a massive choke, about 40 metres below surface. This is at the same height as the upper bench of Lamb and Fox Chamber, but pointing in totally the wrong direction. It could potentially be related to the inlet passage producing the waterfall in Lamb and Fox Chamber, but is not the source of its stream. To the right of the camera is a deep crater containing a blind pitch.
Modelling by Gareth and Helen, lighting by Tarquin, Gareth and Helen
Underworld Passage ends in a massive choke, about 40 metres below surface. This is at the same height as the upper bench of Lamb and Fox Chamber, but pointing in totally the wrong direction. It could potentially be related to the inlet passage producing the waterfall in Lamb and Fox Chamber, but is not the source of its stream. To the right of the camera is a deep crater containing a blind pitch.
Modelling by Gareth and Helen, lighting by Tarquin, Gareth and Helen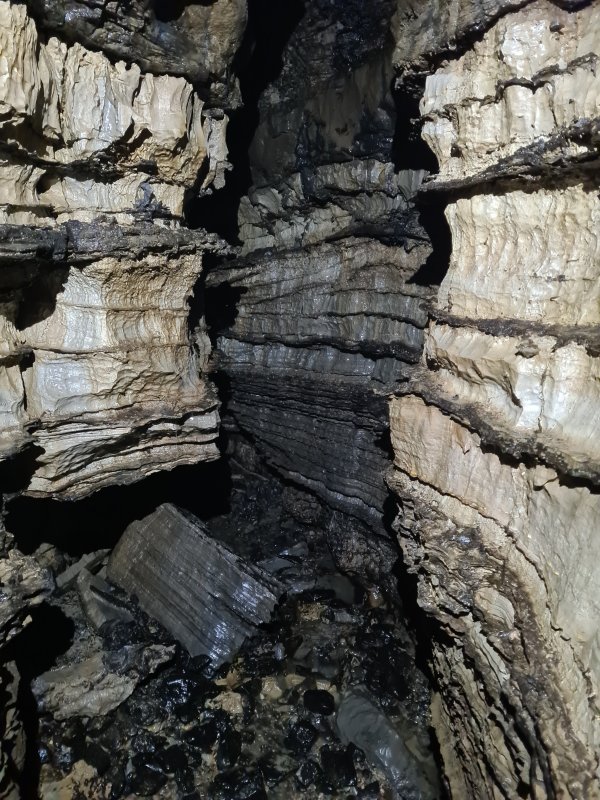 Inlet to the right of the blind pitch crater, which has attractive shelving that is highly friable.
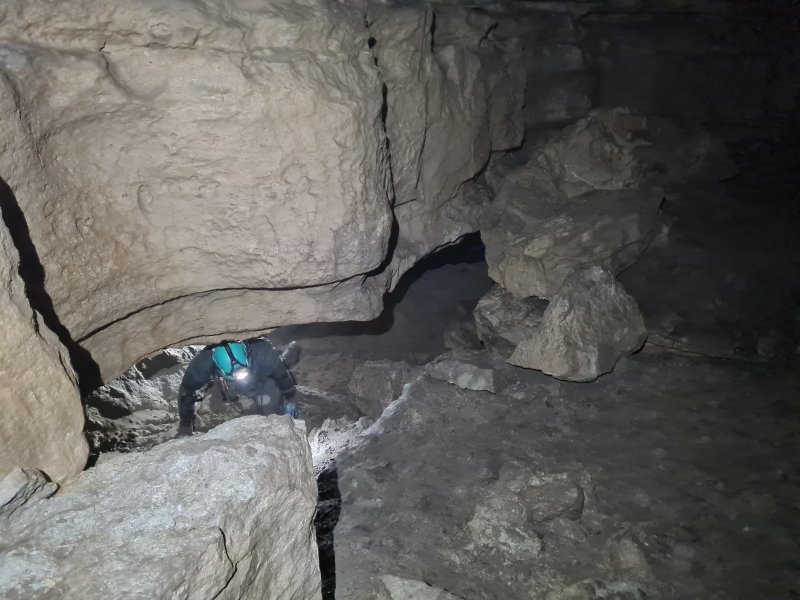 The undercut at the start of Underworld Passage that leads into Underworld II.
Modelling by Helen, lighting by Tarquin, Helen and Gareth
The undercut at the start of Underworld Passage that leads into Underworld II.
Modelling by Helen, lighting by Tarquin, Helen and Gareth Climb down through loose boulders into Underworld II. The ones in the floor below the camera slipped and caused Gareth to fall a second time, bruising his other buttock. It helps to have a matching pair.
Modelling by Gareth, lighting by Tarquin and Gareth
Climb down through loose boulders into Underworld II. The ones in the floor below the camera slipped and caused Gareth to fall a second time, bruising his other buttock. It helps to have a matching pair.
Modelling by Gareth, lighting by Tarquin and Gareth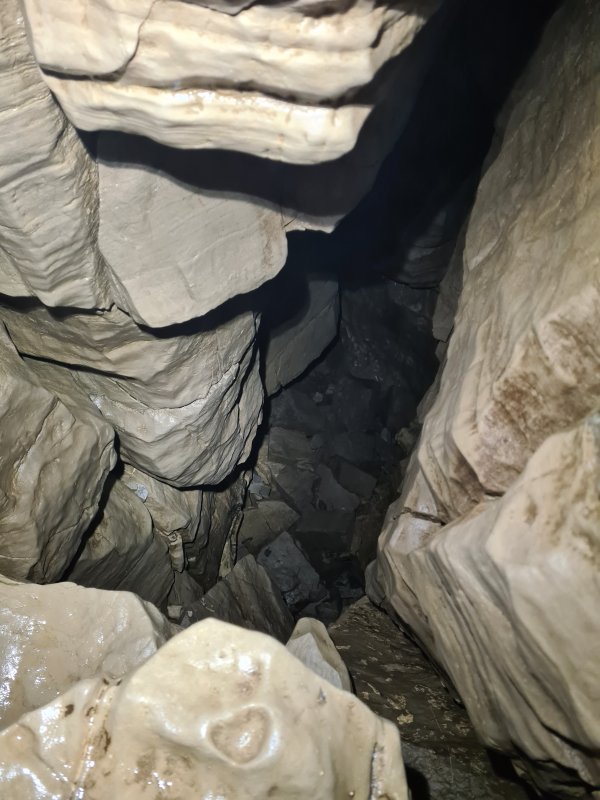 The climb down to the stream in Underworld II. This has aging spits for an optional handline, which we did not use it on my last visit to this area. This time, we chose not to continue to the top of the pitches below.
 Tucked into the wall at the start of Underworld Passage is this awkward rift, which links to Faded Love, Blue Eyes Cryin' and Anastomosis Passage on the other side of Megadrive North. It is the easiest way to visit the first two of them. The challenge is to work out which level allows you to progress through the first few metres of the rift, and is quite entertaining. After this, it becomes easier. Gareth's buttocks did not want to play, so he went out to Megadrive North to wait for us.
Modelling by Helen, lighting by Tarquin and Helen
Tucked into the wall at the start of Underworld Passage is this awkward rift, which links to Faded Love, Blue Eyes Cryin' and Anastomosis Passage on the other side of Megadrive North. It is the easiest way to visit the first two of them. The challenge is to work out which level allows you to progress through the first few metres of the rift, and is quite entertaining. After this, it becomes easier. Gareth's buttocks did not want to play, so he went out to Megadrive North to wait for us.
Modelling by Helen, lighting by Tarquin and Helen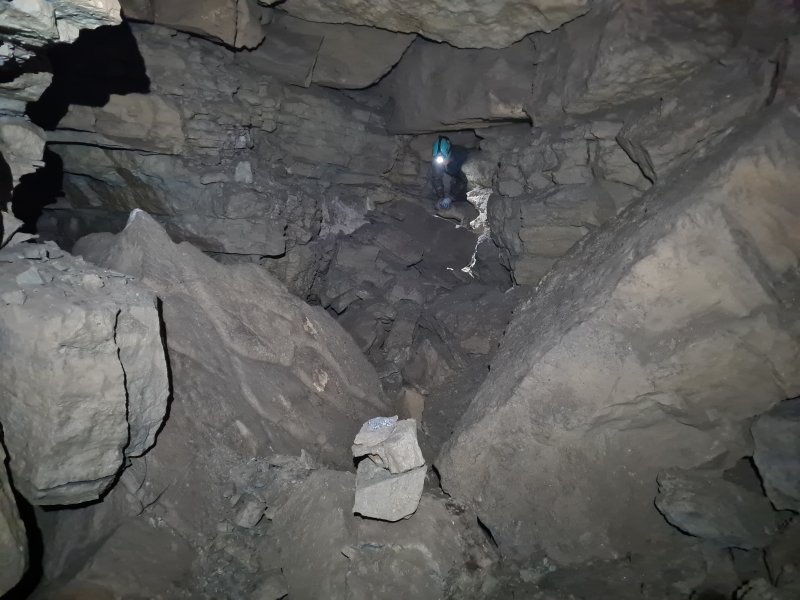 The rift becomes a crawl, ending in this chamber. To the left (as seen here) is the connection to Anastomosis Passage, but the climb up to it is quite tricky, and immediately enters a squeeze, so while this route can be used to make a small round trip, it is not really worth it. Behind the camera is the crawl to Faded Love, while in the floor below the camera is the drop down to Blue Eyes Cryin'.
Modelling by Helen, lighting by Tarquin and Helen.
The rift becomes a crawl, ending in this chamber. To the left (as seen here) is the connection to Anastomosis Passage, but the climb up to it is quite tricky, and immediately enters a squeeze, so while this route can be used to make a small round trip, it is not really worth it. Behind the camera is the crawl to Faded Love, while in the floor below the camera is the drop down to Blue Eyes Cryin'.
Modelling by Helen, lighting by Tarquin and Helen.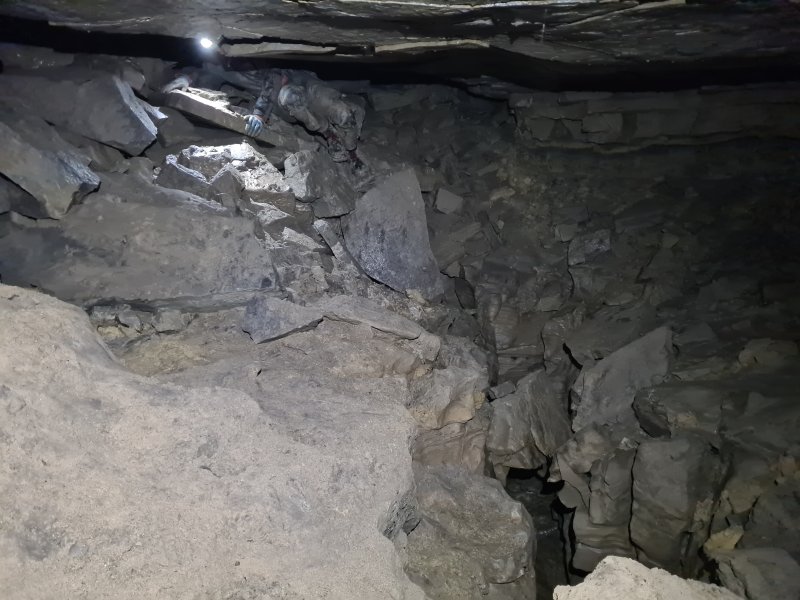 Dropping down through rocks into Blue Eyes Cryin'. The start of the passage has this cleft in the floor, which contains a tiny stream.
Modelling by Helen, lighting by Tarquin and Helen.
Dropping down through rocks into Blue Eyes Cryin'. The start of the passage has this cleft in the floor, which contains a tiny stream.
Modelling by Helen, lighting by Tarquin and Helen. Blue Eyes Cryin' starts with a sandy floor.
Modelling by Helen, lighting by Tarquin and Helen.
Blue Eyes Cryin' starts with a sandy floor.
Modelling by Helen, lighting by Tarquin and Helen.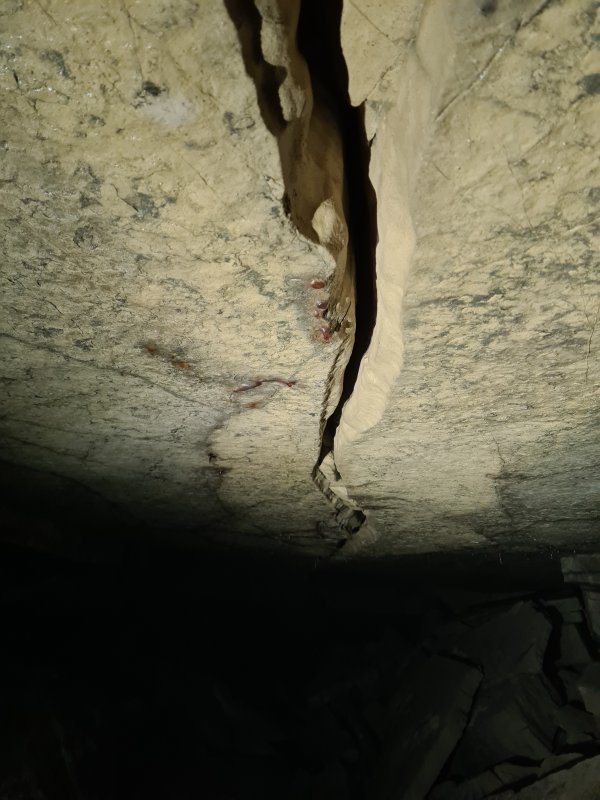 Blue Eyes Cryin' has a distinctive cleft anastomosis in the ceiling.
Lighting by Tarquin and Helen
Blue Eyes Cryin' has a distinctive cleft anastomosis in the ceiling.
Lighting by Tarquin and Helen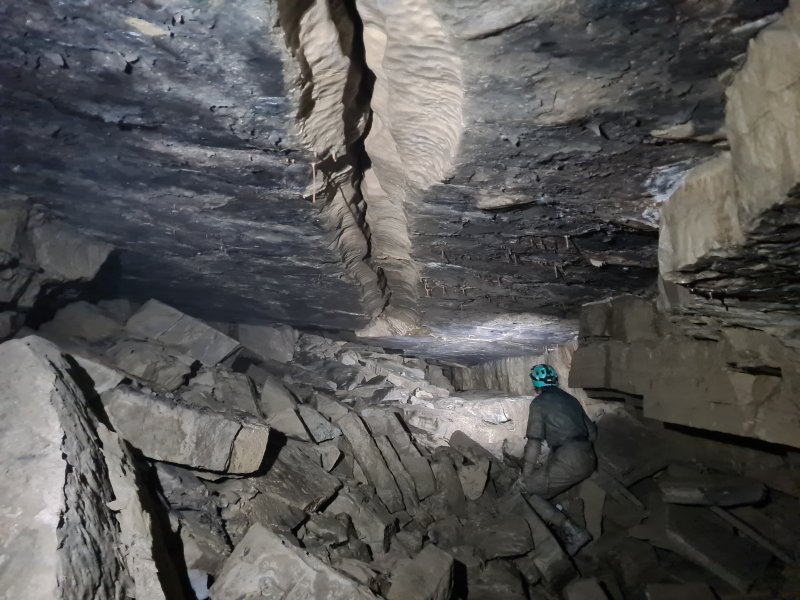 The end of Blue Eyes Cryin' is rocky, and chokes below Faded Love.
Modelling by Helen, lighting by Tarquin and Helen.
The end of Blue Eyes Cryin' is rocky, and chokes below Faded Love.
Modelling by Helen, lighting by Tarquin and Helen.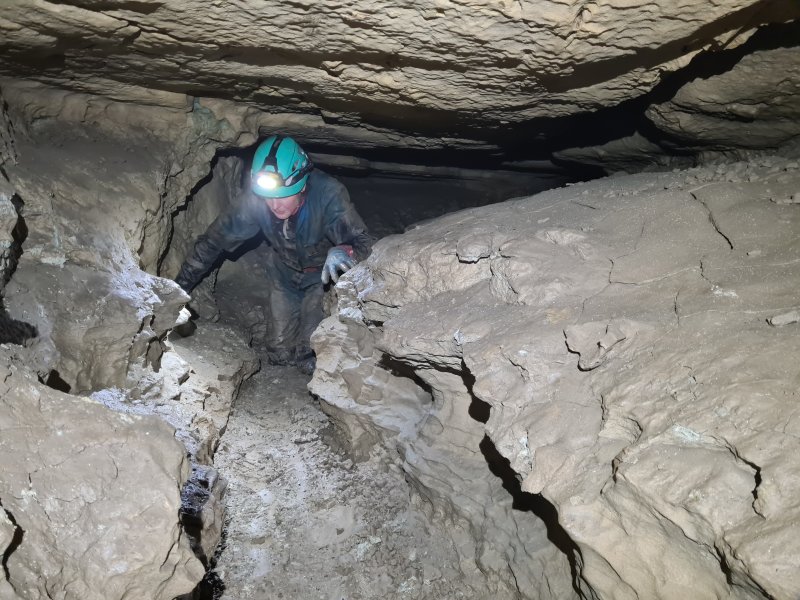 The crawl from the chamber to Faded Love.
Modelling by Helen, lighting by Tarquin and Helen.
The crawl from the chamber to Faded Love.
Modelling by Helen, lighting by Tarquin and Helen.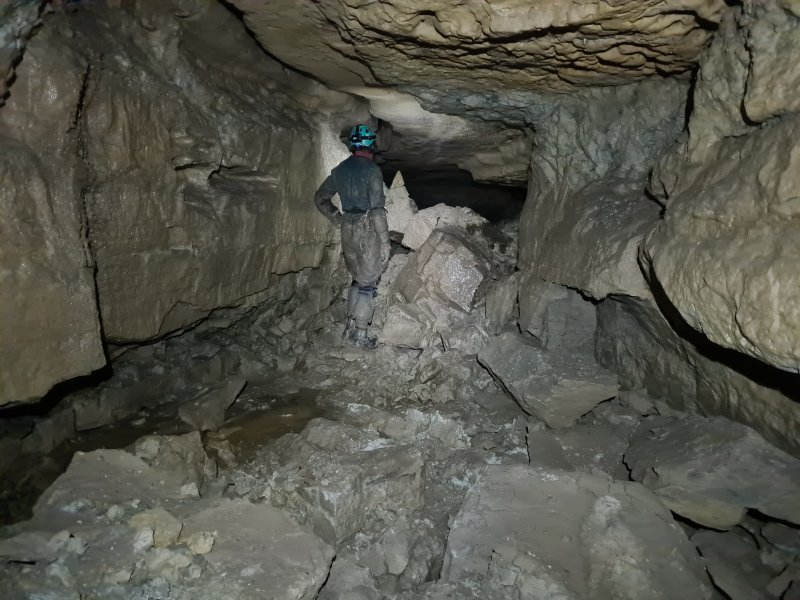 Faded Love then becomes significantly larger.
Modelling by Helen, lighting by Tarquin and Helen.
Faded Love then becomes significantly larger.
Modelling by Helen, lighting by Tarquin and Helen.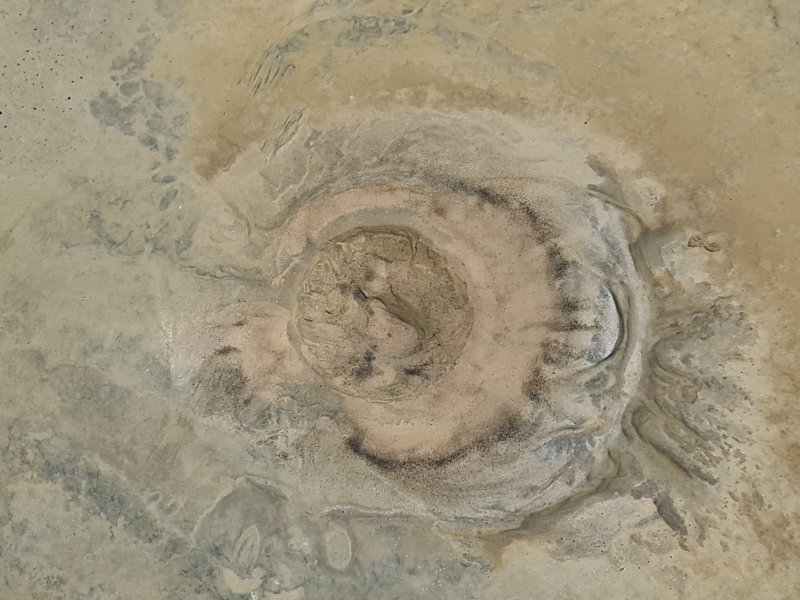 Drip pocket in Faded Love.
 The largest part of Faded Love, where Blue Eyes Cryin' ends below the floor to the right of the camera.
Modelling by Helen, lighting by Tarquin and Helen.
The largest part of Faded Love, where Blue Eyes Cryin' ends below the floor to the right of the camera.
Modelling by Helen, lighting by Tarquin and Helen.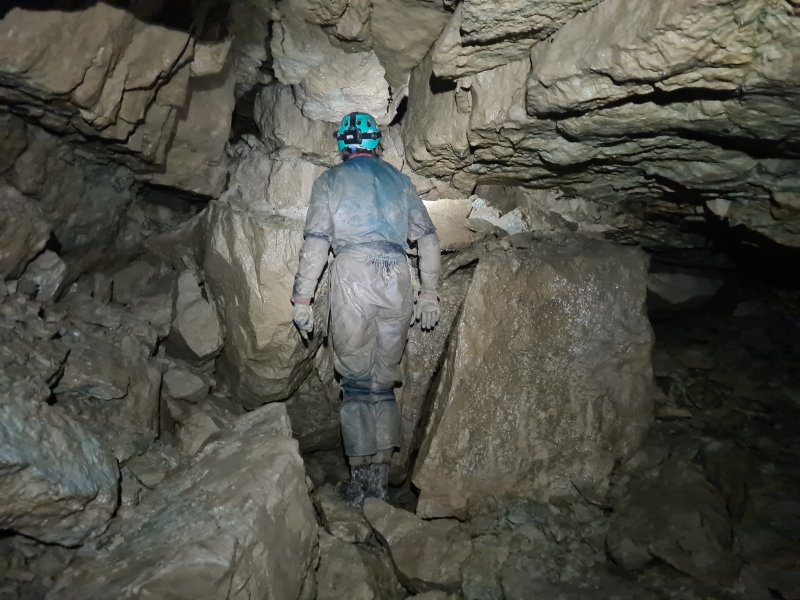 Faded Love ends abruptly in a choke, about 40 metres below surface, but with a quarry face not too far ahead which is 10 metres above it. There is no prospect for further development here. The passage is too low to be related directly to Siambre Ddu Passage, even though it points towards it.
Modelling by Helen, lighting by Tarquin and Helen.
Faded Love ends abruptly in a choke, about 40 metres below surface, but with a quarry face not too far ahead which is 10 metres above it. There is no prospect for further development here. The passage is too low to be related directly to Siambre Ddu Passage, even though it points towards it.
Modelling by Helen, lighting by Tarquin and Helen.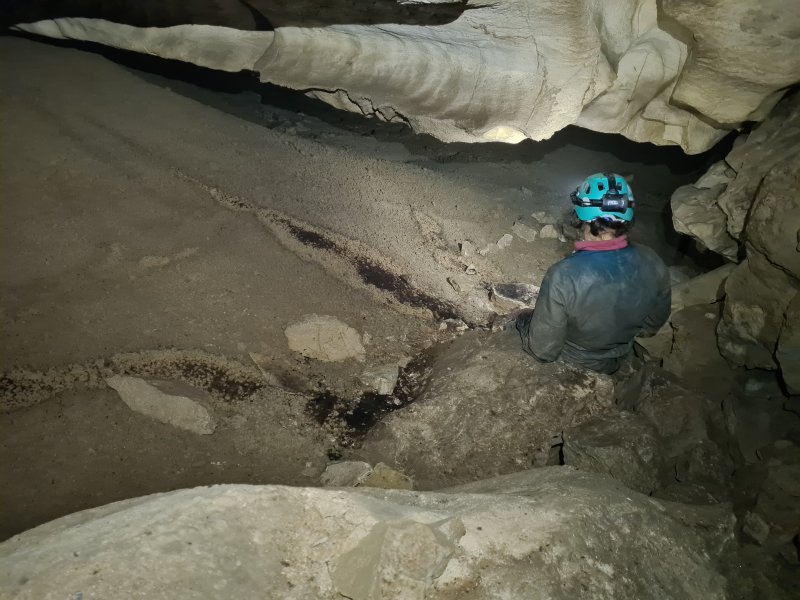 We returned to Megadrive North to find Gareth had decided to leave the cave. So we rushed a visit into Anastomosis Passage. It begins in an obvious undercut with guano deposits.
Modelling by Helen, lighting by Tarquin and Helen.
We returned to Megadrive North to find Gareth had decided to leave the cave. So we rushed a visit into Anastomosis Passage. It begins in an obvious undercut with guano deposits.
Modelling by Helen, lighting by Tarquin and Helen.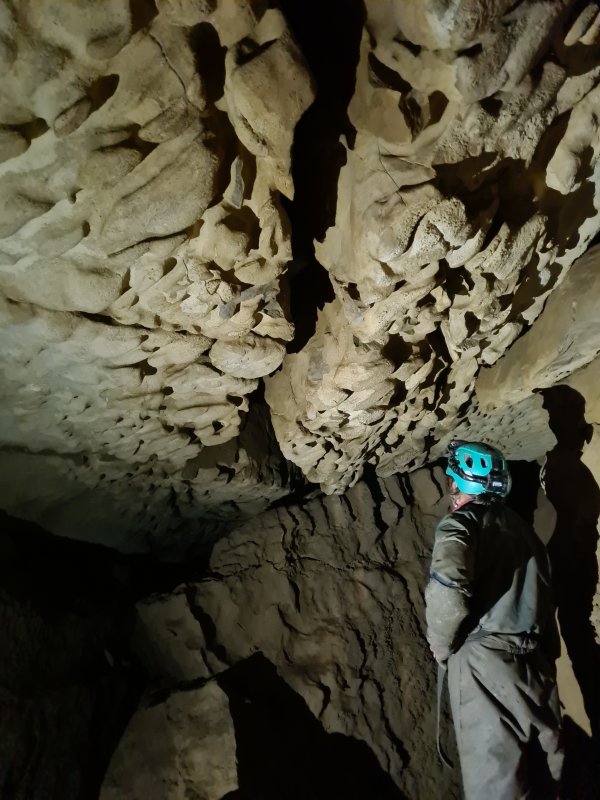 The anastomosis that gives Anastomosis Passage its name begins immediately.
Modelling by Helen.
The anastomosis that gives Anastomosis Passage its name begins immediately.
Modelling by Helen.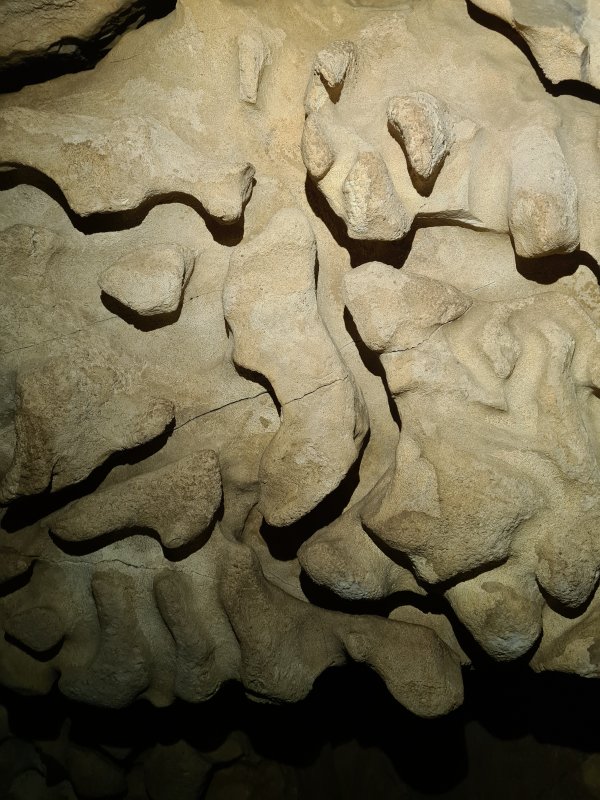 Detail of the anastomosis in Anastomosis Passage. These channels are the early cave formation, when it was a phreatic maze of tiny channels. The cave then developed below them, and the original channels somehow managed to survive, being a little rounded off, but not destroyed, even though most of the passage development is phreatic.
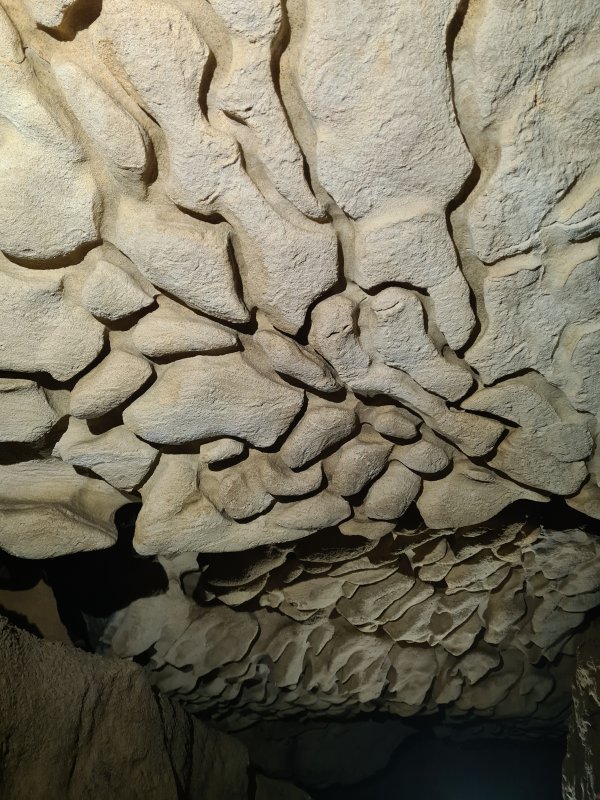 The oxbow at the start of Anastomosis passage has the best example of anastomosis.
Lighting by Tarquin and Helen
The oxbow at the start of Anastomosis passage has the best example of anastomosis.
Lighting by Tarquin and Helen A clamber over a boulder pile then gives a choice of routes. Dropping down a hole to the left gains the original way on, into a short stub of passage.
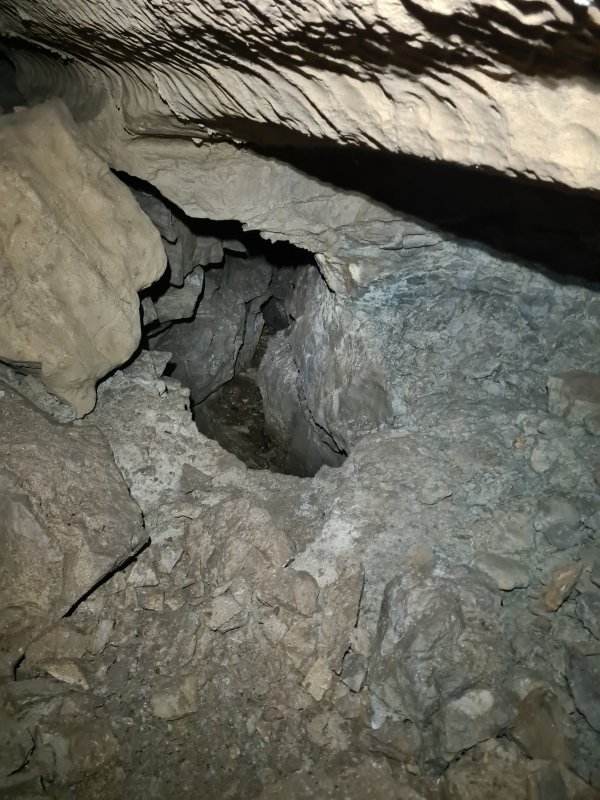 Doubling back to the left is the squeeze and climb down into Faded Love and Blue Eyes Cryin'.
 To the left of the passage stub, a small inlet turns into a long, straight crawl.
 Getting lower.
 The passage then gets narrow, forcing a wallow in the muddy stream. It ends in a low turning space, which looks much more inviting on the survey than it really is.
 At the rock pile, the right branch of Anastomosis Passage quickly ends at a choke, where a route has been forced up through the boulders.
Modelling by Helen, lighting by Tarquin and Helen.
At the rock pile, the right branch of Anastomosis Passage quickly ends at a choke, where a route has been forced up through the boulders.
Modelling by Helen, lighting by Tarquin and Helen.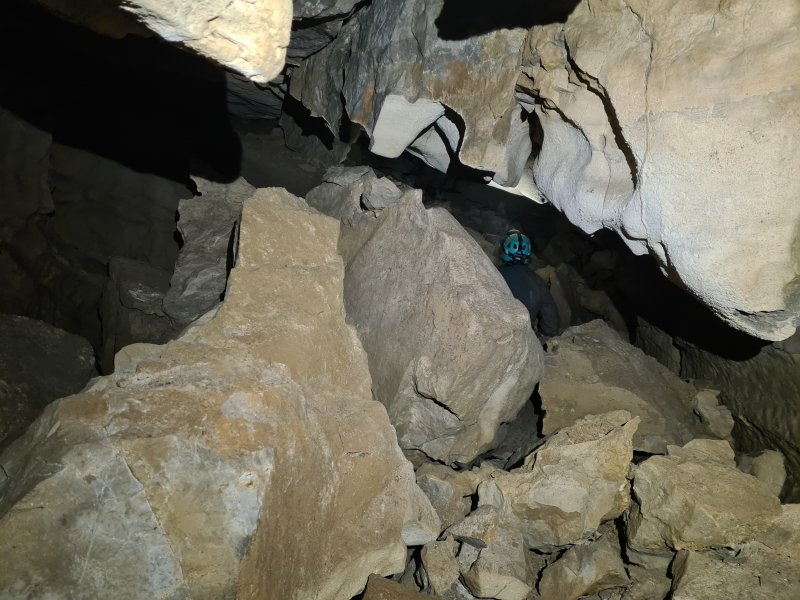 This gains a larger passage, running under Megadrive North, which is not on the survey. It is initially quite shattered, with a bedding heading back under the edge of Megadrive North, seen to the left here. This looks unstable, so we left it alone, but it went a long way back.
Modelling by Helen, lighting by Tarquin and Helen.
This gains a larger passage, running under Megadrive North, which is not on the survey. It is initially quite shattered, with a bedding heading back under the edge of Megadrive North, seen to the left here. This looks unstable, so we left it alone, but it went a long way back.
Modelling by Helen, lighting by Tarquin and Helen.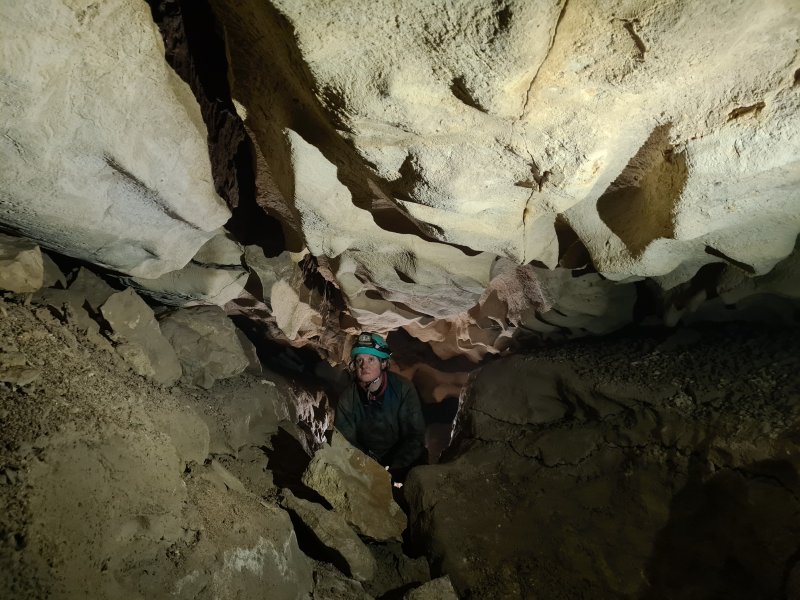 The ceiling ahead becomes stable and much whiter, but soon ends at a choke, presumably below the floor of Megadrive North.
Modelling by Helen, lighting by Tarquin and Helen.
The ceiling ahead becomes stable and much whiter, but soon ends at a choke, presumably below the floor of Megadrive North.
Modelling by Helen, lighting by Tarquin and Helen.