Ogof Draenen Realm of Baron von Carno trips 25/04/2021 and 09/05/2021
Unless otherwise stated, camera, setups, lighting, edits and gallery effects by Tarquin. Modelling and lighting at various points will be Pete Bolt, Gareth Davies and Dickon Morris.
These trips covered the first major section of this extensive series, with the main purpose of the trips being to learn all of the passages, for the purpose of writing the description. We therefore visited a lot of side passages that you would ignore on a normal caving trip. The first visit was used as a refresher for the shortcut to Nevill Hall, and the second for the round trip and side passages. The gallery is presented in a more logical order.
 The first trip was originally intended to be a visit to Saint Giles Series. This is the start of the duck in Y Gwter Fawr, which is named either Breadfruit Boulevard or Brownout On Breadfruit Boulevard (depending on which article you read). At this point it is just a wet crawl.
Modelling by Pete, lighting by Tarquin and Pete
The first trip was originally intended to be a visit to Saint Giles Series. This is the start of the duck in Y Gwter Fawr, which is named either Breadfruit Boulevard or Brownout On Breadfruit Boulevard (depending on which article you read). At this point it is just a wet crawl.
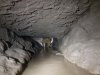
Modelling by Pete, lighting by Tarquin and Pete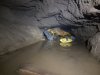 It then lowers to the main part of the duck, a 20 metre flat out crawl in the stream, where you get a wet ear. Sadly, it had silted too tight after less than 10 metres in, and will need digging back open unless it gets cleared by some flooding. So we left a handwritten note to redirect any callout, and headed into The Realm Of Baron Von Carno.
Modelling by Pete, lighting by Tarquin and Pete
It then lowers to the main part of the duck, a 20 metre flat out crawl in the stream, where you get a wet ear. Sadly, it had silted too tight after less than 10 metres in, and will need digging back open unless it gets cleared by some flooding. So we left a handwritten note to redirect any callout, and headed into The Realm Of Baron Von Carno.
Modelling by Pete, lighting by Tarquin and Pete Cracked mud in Violate Passage, just beyond the climb up into the southern rift. The round trip has been started.
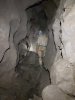 Violate Passage soon becomes walking sized.
Modelling by Pete, lighting by Tarquin and Pete
Violate Passage soon becomes walking sized.
Modelling by Pete, lighting by Tarquin and Pete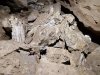 Calcite blocks at the junction of Violate Passage and The Stream Of Running Commentary.
 Violate Passage beyond the junction with The Stream Of Running Commentary.
Modelling by Pete, lighting by Tarquin and Pete
Violate Passage beyond the junction with The Stream Of Running Commentary.
Modelling by Pete, lighting by Tarquin and Pete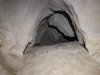 Fastrack Membership, a low oxbow bypassing a crawl in Violate Passage. It does not save any crawling.
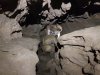 The last section of stooping height passage for a while in Violate Passage.
Modelling by Pete, lighting by Tarquin and Pete
The last section of stooping height passage for a while in Violate Passage.
Modelling by Pete, lighting by Tarquin and Pete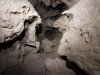 Violate Passage's crawl. This is rejoined by Fastrack Membership before passing through a squeeze.
Lighting by Tarquin and Pete
Violate Passage's crawl. This is rejoined by Fastrack Membership before passing through a squeeze.
Lighting by Tarquin and Pete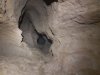 Violate's ongoing crawl with very sticky mud, beyond the squeeze.
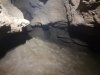 Violate Passage's crawl then enlarges before it rejoins The Stream Of Running Commentary.
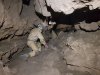 The start of The Stream Of Running Commentary, which is dry, with boulders almost blocking the way at one point.
Modelling by Pete, lighting by Tarquin and Pete
The start of The Stream Of Running Commentary, which is dry, with boulders almost blocking the way at one point.
Modelling by Pete, lighting by Tarquin and Pete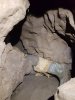 The passage narrows, and passes through this Z bend. It is not a squeeze, but it certainly feels as awkward as one.
Modelling by Pete
The passage narrows, and passes through this Z bend. It is not a squeeze, but it certainly feels as awkward as one.
Modelling by Pete You have to rotate half way through so that you can turn the tight corners at each end. Face the inside of each corner.
Modelling by Pete, lighting by Tarquin and Pete
You have to rotate half way through so that you can turn the tight corners at each end. Face the inside of each corner.
Modelling by Pete, lighting by Tarquin and Pete Start of the stream in The Stream Of Running Commentary, which is definitely not inspiring at this point. The water flows out through a dig, reappearing near the start of Violate Passage.
Modelling by Pete, lighting by Tarquin and Pete
Start of the stream in The Stream Of Running Commentary, which is definitely not inspiring at this point. The water flows out through a dig, reappearing near the start of Violate Passage.
Modelling by Pete, lighting by Tarquin and Pete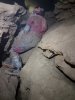 Becoming a little easier.
Modelling by Gareth, lighting by Tarquin and Gareth
Becoming a little easier.
Modelling by Gareth, lighting by Tarquin and Gareth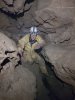 An early part of The Stream Of Running Commentary.
Modelling by Pete, lighting by Tarquin and Dickon
An early part of The Stream Of Running Commentary.
Modelling by Pete, lighting by Tarquin and Dickon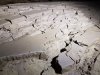 Mud formations.
 Mud formations.
 The passage briefly becomes a crawl - the only crawl along its entire length.
Modelling by Pete and Dickon, lighting by Tarquin, Pete and Dickon
The passage briefly becomes a crawl - the only crawl along its entire length.
Modelling by Pete and Dickon, lighting by Tarquin, Pete and Dickon The first side passage on the left, which is a tight alternative route to The Red Baron, joining the normal route shortly after its start. The passage is an inlet, and the water appears to come from the end of Passendale, but the connection to it is blocked below the floor of a large chamber in The Realm Of Baron Von Carno. The amount of water here is minimal, and is certainly not the main outflow from Passendale.
 Upstream from the junction, The Stream Of Running Commentary is now larger.
Modelling by Gareth, lighting by Tarquin and Gareth
Upstream from the junction, The Stream Of Running Commentary is now larger.
Modelling by Gareth, lighting by Tarquin and Gareth The next side passage on the left is the main route to The Red Baron, The Last Post and Passendale. It is an obvious keyhole requiring a small clamber up into the top. Not far at all up ahead, it splits into the four squeeze route and low crawl route, with the previous side passage joining at the same time. We would end up accessing this area later by a totally different route.
Modelling by Gareth, lighting by Tarquin and Gareth
The next side passage on the left is the main route to The Red Baron, The Last Post and Passendale. It is an obvious keyhole requiring a small clamber up into the top. Not far at all up ahead, it splits into the four squeeze route and low crawl route, with the previous side passage joining at the same time. We would end up accessing this area later by a totally different route.
Modelling by Gareth, lighting by Tarquin and Gareth More mud formations in The Stream Of Running Commentary.
 Upstream of the junction, The Stream Of Running Commentary becomes much more grand.
Modelling by Pete and Gareth, lighting by Tarquin, Dickon, Pete and Gareth
Upstream of the junction, The Stream Of Running Commentary becomes much more grand.
Modelling by Pete and Gareth, lighting by Tarquin, Dickon, Pete and Gareth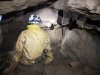 At a cross roads, Violate Passage joins from the right.
Modelling by Pete, lighting by Tarquin, Gareth and Pete
At a cross roads, Violate Passage joins from the right.
Modelling by Pete, lighting by Tarquin, Gareth and Pete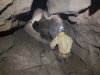 On the left at the cross roads is a side passage that can also be used as a route to The Red Baron. However, it is a very inconvenient route, and not usually used. We decided to take a cursory look, and ended up being very much side tracked.
Modelling by Pete, lighting by Tarquin and Pete
On the left at the cross roads is a side passage that can also be used as a route to The Red Baron. However, it is a very inconvenient route, and not usually used. We decided to take a cursory look, and ended up being very much side tracked.
Modelling by Pete, lighting by Tarquin and Pete After a low crawl, the side passage gets bigger again, and appears to end in two rifts. However, tucked under the left wall seen in this picture is a crawl into the link to The Red Baron.
 Crawling through the link passage.
Modelling by Gareth, lighting by Tarquin and Gareth
Crawling through the link passage.
Modelling by Gareth, lighting by Tarquin and Gareth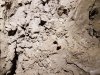 Cryostal in the link passage.
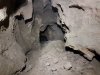 The link pops out in the side of the low crawl route to The Red Baron. It's not really that low, just awkward, as seen here in the southern direction where it connects to the four squeeze route. At the junction itself, it is stooping height. Yay!
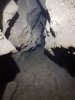 In the northern direction it gets a bit more awkward, starting narrow, then with a very low section.
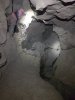 The low crawl route then pops out in the side of the four squeeze route. At this point, the four squeeze route is an ample sized streamway. We headed downstream, away from The Red Baron.
Modelling by Gareth, lighting by Tarquin and Gareth
The low crawl route then pops out in the side of the four squeeze route. At this point, the four squeeze route is an ample sized streamway. We headed downstream, away from The Red Baron.
Modelling by Gareth, lighting by Tarquin and Gareth Another side passage on the left, which soon becomes too low.
Modelling by Gareth, lighting by Tarquin and Gareth
Another side passage on the left, which soon becomes too low.
Modelling by Gareth, lighting by Tarquin and Gareth The junction with Passendale - the low crawl seen on the left here when looking upstream.
Modelling by Gareth, lighting by Tarquin and Gareth
The junction with Passendale - the low crawl seen on the left here when looking upstream.
Modelling by Gareth, lighting by Tarquin and Gareth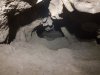 The continuing downstream passage (behind the camera in the last picture) is much lower, passing through four squeezes to reach The Stream Of Running Commentary. I am told that for most of that distance it is comfortable, and in spite of the squeezes it is supposed to be better than the low crawl route that we had just done.
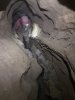 The way to Passendale soon becomes an uncomfortable rift.
Modelling by Gareth, lighting by Tarquin and Gareth
The way to Passendale soon becomes an uncomfortable rift.
Modelling by Gareth, lighting by Tarquin and Gareth This then lowers to a crawl with a lot of gypsum.
Modelling by Gareth, lighting by Tarquin and Gareth
This then lowers to a crawl with a lot of gypsum.
Modelling by Gareth, lighting by Tarquin and Gareth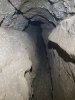 After a junction, the way to Passendale then becomes coated in much more gypsum, requiring care not to brush it off the walls.
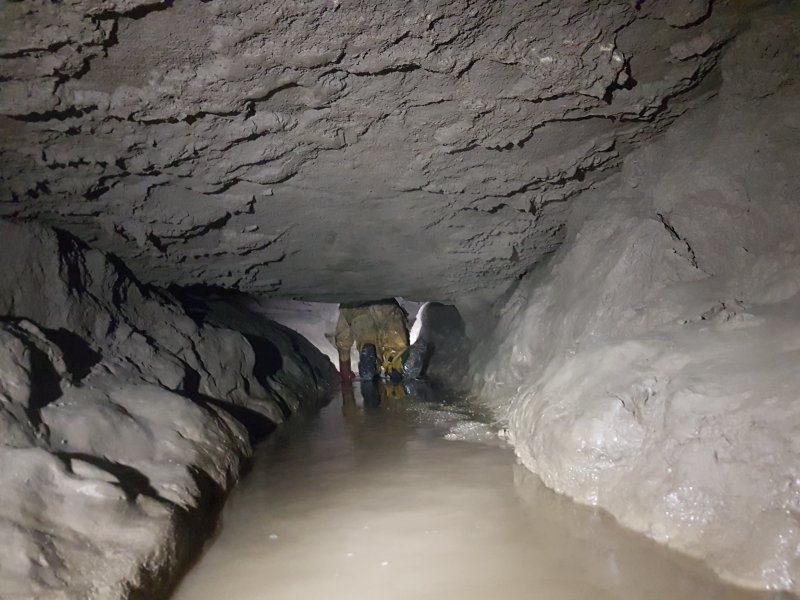
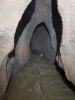 It then reaches the junction with Passendale. To the left is downstream, with increasingly deep, glutinous mud. This passage must not be underestimated. It splits in two with both branches passing through seasonal sumps, and the left one ending below the chamber in The Realm Of Baron Von Carno. The right branch is the original way into Nevill Hall, and flooded while the surveying team were first surveying this area. During their exit, rainfall had caused the water to rise, and it could be seen visibly rising very quickly as the team raced to get out before it filled the passage. The passage sumped behind them and remained sumped all winter after that. It is seen here in spring flood conditions after persistent heavy rain.
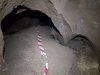 Upstream, the passage starts as a crawl over mud.
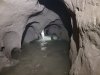 Upstream Passendale soon becomes a low arch forcing crouching in the stream.
Modelling by Gareth, lighting by Tarquin and Gareth
Upstream Passendale soon becomes a low arch forcing crouching in the stream.
Modelling by Gareth, lighting by Tarquin and Gareth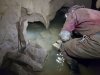 The upstream direction ends at a sump. Above this, a climb up and pitch down regains the stream, where a side passage passes through another seasonal sump to connect to Nevill Hall. We returned to rejoin the rest of the team who had no idea just how far we had gone from The Stream Of Running Commentary.
Modelling by Gareth, lighting by Tarquin and Gareth
The upstream direction ends at a sump. Above this, a climb up and pitch down regains the stream, where a side passage passes through another seasonal sump to connect to Nevill Hall. We returned to rejoin the rest of the team who had no idea just how far we had gone from The Stream Of Running Commentary.
Modelling by Gareth, lighting by Tarquin and Gareth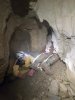 Back in The Stream Of Running Commentary, an aven connects into The Realm Of Baron Von Carno (the passage, not the series) but it cannot be free climbed, and a nearby climbable aven is choked.
Modelling by Pete and part of Gareth, lighting by Tarquin and Pete
Back in The Stream Of Running Commentary, an aven connects into The Realm Of Baron Von Carno (the passage, not the series) but it cannot be free climbed, and a nearby climbable aven is choked.
Modelling by Pete and part of Gareth, lighting by Tarquin and Pete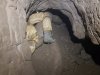 After a couple of meanders, the passage abruptly closes to an eyehole over rocks (ahead-right), and a side hole to the left at this point ascends a steep rubble slope into The Realm Of Baron Von Carno.
Modelling by Pete, lighting by Tarquin and Pete
After a couple of meanders, the passage abruptly closes to an eyehole over rocks (ahead-right), and a side hole to the left at this point ascends a steep rubble slope into The Realm Of Baron Von Carno.
Modelling by Pete, lighting by Tarquin and Pete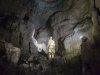 The rubble slope emerges in the floor of this chamber, part of The Realm Of Baron Von Carno (passage). The passage extends up a slope to the left, to end in a chamber above Passendale (with no connection). Ahead is the way to the end of the passage, and the route into Aces High. We did not go any further up this passage.
Modelling by Gareth and Pete, lighting by Tarquin, Dickon, Gareth and Pete
The rubble slope emerges in the floor of this chamber, part of The Realm Of Baron Von Carno (passage). The passage extends up a slope to the left, to end in a chamber above Passendale (with no connection). Ahead is the way to the end of the passage, and the route into Aces High. We did not go any further up this passage.
Modelling by Gareth and Pete, lighting by Tarquin, Dickon, Gareth and Pete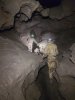 Continuing upstream through the eyehole over rocks, The Stream Of Running Commentary enlarges back to its grand size.
Modelling by Pete and Dickon, lighting by Tarquin, Pete and Dickon
Continuing upstream through the eyehole over rocks, The Stream Of Running Commentary enlarges back to its grand size.
Modelling by Pete and Dickon, lighting by Tarquin, Pete and Dickon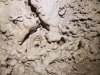 Drip pockets at the start of a side passage on the left, which has both a lower and upper alternative, neither of which go far.
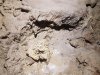 Partial drip splash formation.
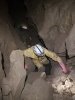 Immediately after the side passage, The Stream Of Running Commentary's keyhole slot fills with rubble, and a climb is needed to continue along it.
Modelling by Pete and Dickon, lighting by Tarquin, Pete and Dickon
Immediately after the side passage, The Stream Of Running Commentary's keyhole slot fills with rubble, and a climb is needed to continue along it.
Modelling by Pete and Dickon, lighting by Tarquin, Pete and Dickon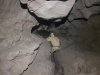 Continuing along the tube at the top of the passage.
Modelling by Pete, lighting by Tarquin and Pete
Continuing along the tube at the top of the passage.
Modelling by Pete, lighting by Tarquin and Pete A side passage on the left, which looks like it might be significant.
Modelling by Pete and Gareth, lighting by Tarquin, Dickon, Pete and Gareth
A side passage on the left, which looks like it might be significant.
Modelling by Pete and Gareth, lighting by Tarquin, Dickon, Pete and Gareth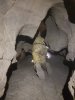 The side passage is much less impressive than it first looks, requiring stooping or crawling for its whole length.
Modelling by Pete, lighting by Tarquin and Pete
The side passage is much less impressive than it first looks, requiring stooping or crawling for its whole length.
Modelling by Pete, lighting by Tarquin and Pete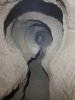 The side passage passes a tight bedding on one side, and continues even smaller, eventually becoming too tight. It points towards known passage, and is unlikely to be productive.
Modelling by Gareth
The side passage passes a tight bedding on one side, and continues even smaller, eventually becoming too tight. It points towards known passage, and is unlikely to be productive.
Modelling by Gareth The Stream Of Running Commentary continues to a climb down at a junction. At this junction, the southern round trip finally leaves the stream, and follows Kababarama Drama instead. The stream continues left, while two passages ahead are ways into Kababarama Drama.
Modelling by Pete and Gareth, lighting by Tarquin and Gareth
The Stream Of Running Commentary continues to a climb down at a junction. At this junction, the southern round trip finally leaves the stream, and follows Kababarama Drama instead. The stream continues left, while two passages ahead are ways into Kababarama Drama.
Modelling by Pete and Gareth, lighting by Tarquin and Gareth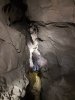 Upstream along The Stream Of Running Commentary, the passage narrows down and becomes much more awkward, and really not so worthy of the effort. It is possible to continue either at stream level, or in the keyhole at the top of the rift. The top route eventually pinches out, requiring a descent to join the lower route.
Modelling by Pete, lighting by Tarquin, Gareth and Pete
Upstream along The Stream Of Running Commentary, the passage narrows down and becomes much more awkward, and really not so worthy of the effort. It is possible to continue either at stream level, or in the keyhole at the top of the rift. The top route eventually pinches out, requiring a descent to join the lower route.
Modelling by Pete, lighting by Tarquin, Gareth and Pete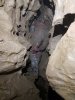 The lower level of the passage, remaining awkwardly narrow with rock projections getting in the way.
Modelling by Gareth, lighting by Tarquin and Gareth
The lower level of the passage, remaining awkwardly narrow with rock projections getting in the way.
Modelling by Gareth, lighting by Tarquin and Gareth After 100 metres, the passage chokes.
Modelling by Gareth, lighting by Tarquin and Gareth
After 100 metres, the passage chokes.
Modelling by Gareth, lighting by Tarquin and Gareth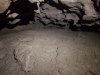 A chimney up an aven at the end reaches a middle level running back over the passage and the choke, with these mud formations.
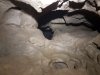 Over the choke, a very narrow hole up under the left wall requires a difficult shuffle upwards to reach the end of The Realm Of Baron Von Carno (passage). It looks almost impossible from below, being barely wide enough to fit, and having very few holds, but it can be done - Dickon was the only one of our team to actually try it. It would be easier downwards, as long as you know you can fit before you start. This does not make a good round trip, because of this rift.
 The Kababarama Drama junction has two options. The passage on the right is just a side passage, and passes beneath Kababarama Drama without connecting to anything.
Modelling by Gareth, lighting by Tarquin and Gareth
The Kababarama Drama junction has two options. The passage on the right is just a side passage, and passes beneath Kababarama Drama without connecting to anything.
Modelling by Gareth, lighting by Tarquin and Gareth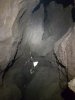 Not difficult, but it does need a couple of little climbs.
Modelling by Gareth, lighting by Tarquin and Gareth
Not difficult, but it does need a couple of little climbs.
Modelling by Gareth, lighting by Tarquin and Gareth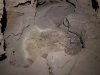 Sculpted mud in the base of an aven.
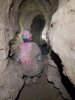 It is a shame that it does not connect at the end, because it is nicer than the proper route.
Modelling by Gareth, lighting by Tarquin and Gareth
It is a shame that it does not connect at the end, because it is nicer than the proper route.
Modelling by Gareth, lighting by Tarquin and Gareth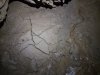 Mud formations.
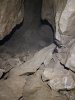 A rocky patch of the passage.
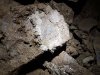 Cryostal on the rocks. As often happens, this has been exposed by drips, which suggests that a lot more hides under the mud elsewhere.
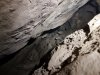 The passage ends at a choke, very close to another part of Kababarama Drama.
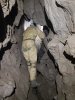 From the junction of The Stream Of Running Commentary and Kababarama Drama, the way on is the left-hand passage into Kababarama Drama. This immediately splits again, with a side passage to the left starting with this awkward rift.
Modelling by Pete, lighting by Tarquin and Pete
From the junction of The Stream Of Running Commentary and Kababarama Drama, the way on is the left-hand passage into Kababarama Drama. This immediately splits again, with a side passage to the left starting with this awkward rift.
Modelling by Pete, lighting by Tarquin and Pete The passage soon gains a better floor, with a very narrow side passage ahead.
Modelling by Pete, lighting by Tarquin and Pete
The passage soon gains a better floor, with a very narrow side passage ahead.
Modelling by Pete, lighting by Tarquin and Pete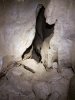 A narrow rift on the right joins another side passage.
Lighting by Tarquin and Pete
A narrow rift on the right joins another side passage.
Lighting by Tarquin and Pete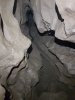 At the next split, a narrow rift continues until it pinches out.
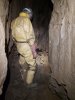 The other branch is bigger, but soon ends.
Modelling by Pete, lighting by Tarquin and Pete
The other branch is bigger, but soon ends.
Modelling by Pete, lighting by Tarquin and Pete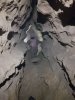 The main route continues past the side passage as the largest of the passages. However, the way on is actually in the ceiling of this passage, into the narrow rift, which looks utterly ridiculous in this picture.
Modelling by Gareth, lighting by Tarquin and Gareth
The main route continues past the side passage as the largest of the passages. However, the way on is actually in the ceiling of this passage, into the narrow rift, which looks utterly ridiculous in this picture.
Modelling by Gareth, lighting by Tarquin and Gareth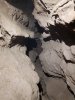 The passage ahead rapidly shrinks to a squeeze sized rift, which soon ends after a connection with the previous side passage.
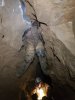 Climbing into the rift in the ceiling. This has no footholds, and it really helps to have a good climber who can act as a step for the others to stand on, then climb up without help. It might also be possible to attach a ladder somewhere above, but we did not look for belay points.
Modelling by Gareth and Pete, lighting by Tarquin, Gareth and Pete
Climbing into the rift in the ceiling. This has no footholds, and it really helps to have a good climber who can act as a step for the others to stand on, then climb up without help. It might also be possible to attach a ladder somewhere above, but we did not look for belay points.
Modelling by Gareth and Pete, lighting by Tarquin, Gareth and Pete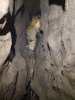 The upper part of the climb also has very few holds, but is possible with a little wheel spinning.
Modelling by Pete, lighting by Tarquin and Pete
The upper part of the climb also has very few holds, but is possible with a little wheel spinning.
Modelling by Pete, lighting by Tarquin and Pete Looking down the climb. It would be a lot easier downwards, but some of the squeezes are significantly harder in that direction, and realistically, the direction that we are going is the better one.
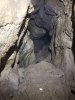 A side passage at the top of the climb passes through a narrow section.
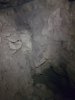 It ends in a small chamber.
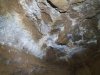 The ceiling of the chamber.
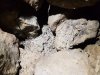 Cryostal in the chamber.
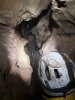 The way on from the top of the climb is an obvious rift.
Modelling by Pete, Gareth and Dickon's helmet, lighting by Tarquin, Pete, Gareth and Dickon
The way on from the top of the climb is an obvious rift.
Modelling by Pete, Gareth and Dickon's helmet, lighting by Tarquin, Pete, Gareth and Dickon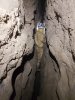 The bottom of the rift becomes the only part wide enough to get through, but it is very narrow indeed at its start. Normal sized cavers would definitely prefer to continue along the rift, and drop down at a point wide enough to do so. This squeeze is very committing; it is not tight, but trying to get vertically up this rift would prove extremely challenging. If you go through here, you now have to complete the loop, or you have to somehow get yourself back up through this squeeze.
Modelling by Pete, lighting by Tarquin and Pete
The bottom of the rift becomes the only part wide enough to get through, but it is very narrow indeed at its start. Normal sized cavers would definitely prefer to continue along the rift, and drop down at a point wide enough to do so. This squeeze is very committing; it is not tight, but trying to get vertically up this rift would prove extremely challenging. If you go through here, you now have to complete the loop, or you have to somehow get yourself back up through this squeeze.
Modelling by Pete, lighting by Tarquin and Pete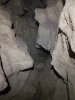 The passage splits with an eyehole at head height ahead and this large passage to the left. The eyehole is the way on.
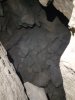 The side passage soon reaches a climb down into a larger passage which does not look easy to free climb. The passage ends soon ahead.
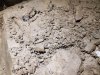 Cryostal on the boulders in the side passage.
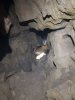 The eyehole passage starts off as a crawl.
Modelling by Pete, lighting by Tarquin and Pete
The eyehole passage starts off as a crawl.
Modelling by Pete, lighting by Tarquin and Pete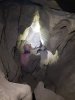 The passage threatens to get bigger.
Modelling by Gareth, lighting by Tarquin and Gareth
The passage threatens to get bigger.
Modelling by Gareth, lighting by Tarquin and Gareth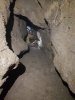 But then at a junction with a dead end passage on the right, it gets smaller again. A crawl on your side, but not a squeeze.
Modelling by Pete, lighting by Tarquin and Pete
But then at a junction with a dead end passage on the right, it gets smaller again. A crawl on your side, but not a squeeze.
Modelling by Pete, lighting by Tarquin and Pete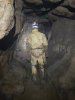 This suddenly enlarges to become one of the largest passages in Kababarama Drama.
Modelling by Pete, lighting by Tarquin and Pete
This suddenly enlarges to become one of the largest passages in Kababarama Drama.
Modelling by Pete, lighting by Tarquin and Pete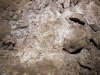 White deposit at a boulder pile in the large passage. This might be cryogenic, but is very fine, so it might just be a light coloured mud. The boulder pile sits above the choke at the end of the right branch of Kababarama Drama.
 A roof tube appears to be a connection with an insanely tight squeeze seen later.
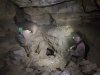 The large passage abruptly ends, with all ways on ahead closing down immediately.
Modelling by Gareth and Dickon, lighting by Tarquin, Pete, Gareth and Dickon
The large passage abruptly ends, with all ways on ahead closing down immediately.
Modelling by Gareth and Dickon, lighting by Tarquin, Pete, Gareth and Dickon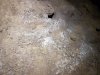 White powder deposit on the boulders. This might have some cryogenic origin, but is missing the white beads that are normally seen with cryostal. Instead there are some clumps of powder.
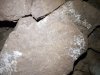 Deposits on the boulders.
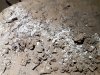 Deposits on the boulders.
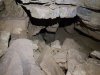 A short stub of passage on the left at the end which appears to be a way on, but is only short.
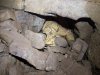 The actual way on is a crawl on the left just before it.
Modelling by Pete, lighting by Tarquin and Gareth
The actual way on is a crawl on the left just before it.
Modelling by Pete, lighting by Tarquin and Gareth Ceiling of the crawl, which has a lot of selenite/gypsum. Maybe this is the source of that white powder.
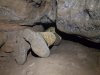 The crawl passes through a tight squeeze. Right arm first, left arm tucked under your chest. It feels a bit unnatural, but it works here.
Modelling by Pete
The crawl passes through a tight squeeze. Right arm first, left arm tucked under your chest. It feels a bit unnatural, but it works here.
Modelling by Pete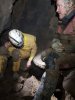 Chamber after the squeeze, which has a choked aven. The way on is under the wall by their feet.
Modelling by Gareth and Pete, lighting by Tarquin, Gareth and Pete
Chamber after the squeeze, which has a choked aven. The way on is under the wall by their feet.
Modelling by Gareth and Pete, lighting by Tarquin, Gareth and Pete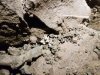 Cryostal in the chamber.
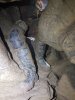 Clambering down the hole from the chamber.
Modelling by Gareth, lighting by Tarquin, Gareth and Pete
Clambering down the hole from the chamber.
Modelling by Gareth, lighting by Tarquin, Gareth and Pete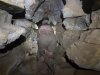 At last, a much better crawl.
Modelling by Gareth, lighting by Tarquin and Gareth
At last, a much better crawl.
Modelling by Gareth, lighting by Tarquin and Gareth Mud formations in the crawl.
 The crawl emerges under the wall in a tall rift. I had failed to spot this when trying to follow the loop in reverse on the first trip, despite standing in front of it, and looking for a passage.
Modelling by Gareth's wellies and Dickon, lighting by Tarquin, Gareth and Dickon
The crawl emerges under the wall in a tall rift. I had failed to spot this when trying to follow the loop in reverse on the first trip, despite standing in front of it, and looking for a passage.
Modelling by Gareth's wellies and Dickon, lighting by Tarquin, Gareth and Dickon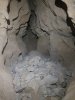 The rift closes down to the right just past a pile of fallen rocks. To the left it also closes down quickly.
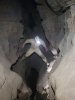 When we visited this passage in the opposite direction, we had traversed over the rift, continuing on the far side.
Modelling by Pete, lighting by Tarquin and Pete
When we visited this passage in the opposite direction, we had traversed over the rift, continuing on the far side.
Modelling by Pete, lighting by Tarquin and Pete On the far side (to the left when following the round trip) at ceiling level, a narrow rift leads up through a rubble choke.
Modelling by Pete, lighting by Tarquin and Pete
On the far side (to the left when following the round trip) at ceiling level, a narrow rift leads up through a rubble choke.
Modelling by Pete, lighting by Tarquin and Pete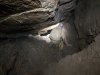 A slightly wider passage beyond the rift.
Modelling by Pete, lighting by Tarquin and Pete
A slightly wider passage beyond the rift.
Modelling by Pete, lighting by Tarquin and Pete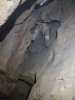 At the end, a climb down lands in a dead end chamber.
Modelling by Pete, lighting by Tarquin and Pete
At the end, a climb down lands in a dead end chamber.
Modelling by Pete, lighting by Tarquin and Pete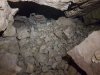 Alcoves give false hope everwhere, but there is no way on down here.
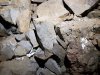 Some fine cryostal rafts in the dead end chamber.
 Part way down the climb, an insanely narrow rift passes through a ridiculous squeeze into a crawl. This appears to link to the roof tube in the large passage in Kababarama Drama. We were not feeling small enough to fit, and even so, posting yourself into this squeeze - while levitating above the climb - would prove very challenging indeed.
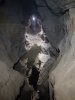 The way on is at the top of the rift to the right. This passes over a hole where rocks drop into the rift below, and then through a crawl into the big stuff.
Modelling by Pete, lighting by Tarquin and Pete
The way on is at the top of the rift to the right. This passes over a hole where rocks drop into the rift below, and then through a crawl into the big stuff.
Modelling by Pete, lighting by Tarquin and Pete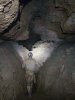 To the left is a passage that becomes too tight, nearly connecting with Indigo Rift. But the obvious way on is ahead into a diamond shaped passage, traversing over a deep rift. The passage has no name on the survey, despite being a major conduit, but is presumably part of Kababarama Drama.
Modelling by Pete, lighting by Tarquin and Pete
To the left is a passage that becomes too tight, nearly connecting with Indigo Rift. But the obvious way on is ahead into a diamond shaped passage, traversing over a deep rift. The passage has no name on the survey, despite being a major conduit, but is presumably part of Kababarama Drama.
Modelling by Pete, lighting by Tarquin and Pete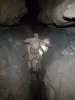 Climbing up to a junction with a dead end phreas rising up to the left.
Modelling by Pete, lighting by Tarquin and Pete
Climbing up to a junction with a dead end phreas rising up to the left.
Modelling by Pete, lighting by Tarquin and Pete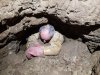 The way on is a squeeze down to the right. This is not particularly tight, but needs you to work out how to arrange your shoulders into the squeeze to get through. It is possible in both directions, but is substantially harder on the way up. You do not normally need to remove your helmet. It lands in a tall rift which also has no name on the survey, but I refer to it as the southern rift, which repeatedly drops and climbs steeply.
Modelling by Pete, lighting by Tarquin and Pete
The way on is a squeeze down to the right. This is not particularly tight, but needs you to work out how to arrange your shoulders into the squeeze to get through. It is possible in both directions, but is substantially harder on the way up. You do not normally need to remove your helmet. It lands in a tall rift which also has no name on the survey, but I refer to it as the southern rift, which repeatedly drops and climbs steeply.
Modelling by Pete, lighting by Tarquin and Pete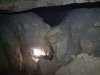 After passing over the climb down to the end of the round trip, continuing ahead rises through a grotto to a rocky collapse. From here onwards, this is no longer a round trip, so we have to return to the climb down to leave the series.
Modelling by Pete, lighting by Tarquin and Pete
After passing over the climb down to the end of the round trip, continuing ahead rises through a grotto to a rocky collapse. From here onwards, this is no longer a round trip, so we have to return to the climb down to leave the series.
Modelling by Pete, lighting by Tarquin and Pete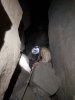 Down in the floor is the first rope climb, dropping into a taller passage.
Modelling by Pete, lighting by Tarquin and Pete
Down in the floor is the first rope climb, dropping into a taller passage.
Modelling by Pete, lighting by Tarquin and Pete The passage then shrinks again, requiring a couple of short traverses to get past boulders.
Modelling by Pete, lighting by Tarquin and Pete
The passage then shrinks again, requiring a couple of short traverses to get past boulders.
Modelling by Pete, lighting by Tarquin and Pete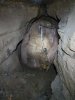 A beautiful phreas that would not look out of place in OFD. The floor is covered in cryostal.
Modelling by Pete, lighting by Tarquin and Pete
A beautiful phreas that would not look out of place in OFD. The floor is covered in cryostal.
Modelling by Pete, lighting by Tarquin and Pete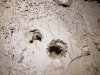 Drip pockets in the phreas.
 The passage immediately closes down to a narrow rift that ends, and the way on is a thrutchy climb above the rift. It really deserves a rope.
Modelling by Pete, lighting by Tarquin and Pete
The passage immediately closes down to a narrow rift that ends, and the way on is a thrutchy climb above the rift. It really deserves a rope.
Modelling by Pete, lighting by Tarquin and Pete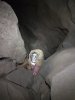 The passage soon reaches a second rope climb down.
Modelling by Pete, lighting by Tarquin and Pete
The passage soon reaches a second rope climb down.
Modelling by Pete, lighting by Tarquin and Pete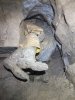 The passage used to end at this choke, but after the flooding incident, the survey showed that the dry passages on the far side of Passendale were on the other side of the choke. So some determined effort was put into passing the choke, making it much safer to access Nevill Hall, irrespective of flooding.
Modelling by Pete
The passage used to end at this choke, but after the flooding incident, the survey showed that the dry passages on the far side of Passendale were on the other side of the choke. So some determined effort was put into passing the choke, making it much safer to access Nevill Hall, irrespective of flooding.
Modelling by Pete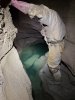 Once through the choke, a side passage on the right drops down to a very deep sump pool, with an obvious continuing passage. The survey shows a loop here with a chamber, but does not show a sump. It is possible that there is a higher level loop (there is an alcove at water level on the right that might be a passage), but is this perhaps seasonally dry? This is seen here after several weeks of drought.
Modelling by Pete, lighting by Tarquin and Pete
Once through the choke, a side passage on the right drops down to a very deep sump pool, with an obvious continuing passage. The survey shows a loop here with a chamber, but does not show a sump. It is possible that there is a higher level loop (there is an alcove at water level on the right that might be a passage), but is this perhaps seasonally dry? This is seen here after several weeks of drought.
Modelling by Pete, lighting by Tarquin and Pete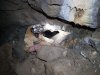 After passing through boulders in a crater, the next side passage down on the right is the original way in, via Passendale. It drops to a sandy crawl with a blind hole to water on the right. After crawling under a low arch, it enlarges, before closing down ahead.
Modelling by Pete, lighting by Tarquin and Pete
After passing through boulders in a crater, the next side passage down on the right is the original way in, via Passendale. It drops to a sandy crawl with a blind hole to water on the right. After crawling under a low arch, it enlarges, before closing down ahead.
Modelling by Pete, lighting by Tarquin and Pete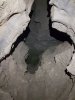 A slippery climb down on the right lands in water. This can vary in depth depending on flooding conditions, as this whole area sits just above the water table.
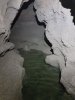 To the right ends immediately, with a lot of fresh mud formations.
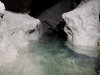 To the left is a crawl, which becomes a lower crawl with only enough air space to keep one ear dry, when seen in drought conditions like this. The mud on the walls looks lovely, but the floor becomes glutinous very quickly as you crawl through it. This is the seasonal sump which nearly ended the exploration of this area.
 The final climb down, which lands at the start of Nevill Hall. This one deserves a rope, but can be climbed without one - the lower part needs you to tack further along the passage to find footholds.
Modelling by Pete, lighting by Tarquin and Pete
The final climb down, which lands at the start of Nevill Hall. This one deserves a rope, but can be climbed without one - the lower part needs you to tack further along the passage to find footholds.
Modelling by Pete, lighting by Tarquin and Pete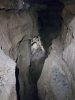 Looking into Nevill Hall from the top of the climb.
Modelling by Pete, lighting by Tarquin and Pete
Looking into Nevill Hall from the top of the climb.
Modelling by Pete, lighting by Tarquin and Pete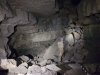 The first chamber of Nevill Hall, named after the hospital in Abergavenny. On the left here is a major side passage, while the main way on is ahead.
Modelling by Pete, lighting by Tarquin and Pete
The first chamber of Nevill Hall, named after the hospital in Abergavenny. On the left here is a major side passage, while the main way on is ahead.
Modelling by Pete, lighting by Tarquin and Pete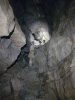 The side passage is a very large phreas carrying a very small stream, which runs into a choke. There is this loose climb up over the choke into a chamber with several digs and avens, that is very close to Pixie Meadows in Saint Giles Series. The stream probably supplies the lower level streamway in Pixie Meadows.
Modelling by Pete, lighting by Tarquin and Pete
The side passage is a very large phreas carrying a very small stream, which runs into a choke. There is this loose climb up over the choke into a chamber with several digs and avens, that is very close to Pixie Meadows in Saint Giles Series. The stream probably supplies the lower level streamway in Pixie Meadows.
Modelling by Pete, lighting by Tarquin and Pete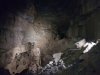 The main way on is ahead into the second chamber of Nevill Hall, which is rotationally symmetrical to the first part. Under the right wall (left wall seen here), there is a wriggle past boulders into a side passage.
Modelling by Pete, lighting by Tarquin and Pete
The main way on is ahead into the second chamber of Nevill Hall, which is rotationally symmetrical to the first part. Under the right wall (left wall seen here), there is a wriggle past boulders into a side passage.
Modelling by Pete, lighting by Tarquin and Pete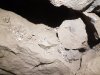 Cryostal in the crawl.
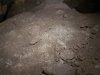 Mud covered cryostal covering the floor of a low chamber in the crawl.
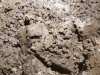 Mud covered cryostal.
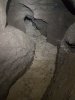 Stream of mini gours, which look like a combination of flowstone and mud, in the low chamber.
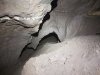 A hole down on one side dropped into water. The hole gurgled constantly, and clearly has a fairly large amount of water passing through the passages beyond it. An eyehole above gave a view into a rift that presumably can be reached through that puddle, but this was visited during flood conditions, and it would not be safe to enter it. This passage is supposed to connect to the upstream end of Passendale.
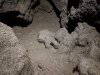 Very fresh mud formations in an alcove in the low chamber. This passage clearly floods much more severely than it was during this visit. Presumably the water will be at its highest during winter floods.
 Beyond Nevill Hall, the large passage closes down, and a passage ahead-left regains it via this climb down, landing on a huge pile of gypsum.
Modelling by Pete, lighting by Tarquin and Pete
Beyond Nevill Hall, the large passage closes down, and a passage ahead-left regains it via this climb down, landing on a huge pile of gypsum.
Modelling by Pete, lighting by Tarquin and Pete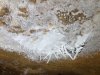 Helictites at the head of the climb.
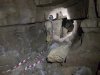 The ongoing passage is a very comfortable size.
Modelling by Pete, lighting by Tarquin and Pete
The ongoing passage is a very comfortable size.
Modelling by Pete, lighting by Tarquin and Pete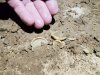 Very large cryostal cups in the passage.
Modelling by Pete
Very large cryostal cups in the passage.
Modelling by Pete Traverse up the left wall leading to the end of the passage. This reaches a pitch down with a climb up to a perched sump beyond it, which was being dug many years ago. It is probably sourced from water in The Last Post.
Modelling by Pete, lighting by Tarquin and Pete
Traverse up the left wall leading to the end of the passage. This reaches a pitch down with a climb up to a perched sump beyond it, which was being dug many years ago. It is probably sourced from water in The Last Post.
Modelling by Pete, lighting by Tarquin and Pete Beneath the traverse is a blind alcove containing some superb mud formations.
 Mud formations beneath the traverse.
 Mud formations beneath the traverse.
 Mud formations beneath the traverse.
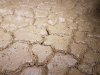 Mud formations beneath the traverse.
 The first trip was originally intended to be a visit to Saint Giles Series. This is the start of the duck in Y Gwter Fawr, which is named either Breadfruit Boulevard or Brownout On Breadfruit Boulevard (depending on which article you read). At this point it is just a wet crawl.
Modelling by Pete, lighting by Tarquin and Pete
The first trip was originally intended to be a visit to Saint Giles Series. This is the start of the duck in Y Gwter Fawr, which is named either Breadfruit Boulevard or Brownout On Breadfruit Boulevard (depending on which article you read). At this point it is just a wet crawl.
Modelling by Pete, lighting by Tarquin and Pete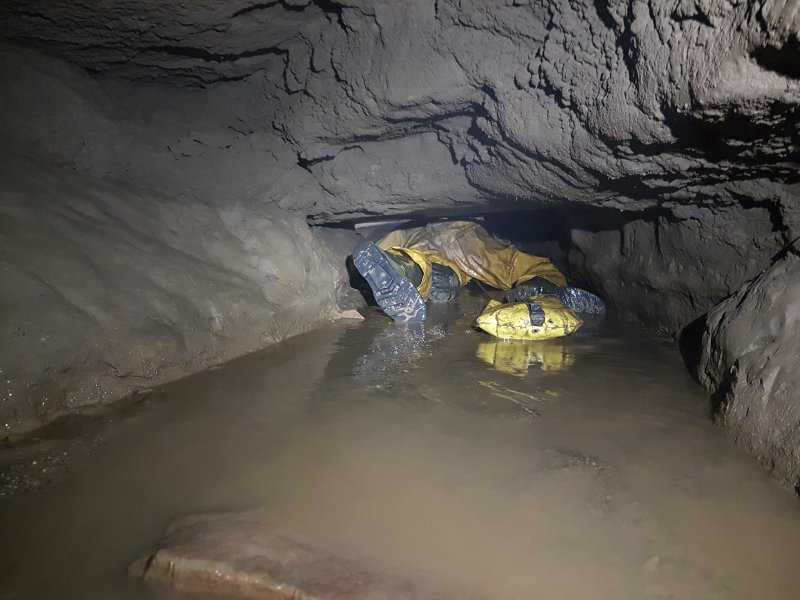 It then lowers to the main part of the duck, a 20 metre flat out crawl in the stream, where you get a wet ear. Sadly, it had silted too tight after less than 10 metres in, and will need digging back open unless it gets cleared by some flooding. So we left a handwritten note to redirect any callout, and headed into The Realm Of Baron Von Carno.
Modelling by Pete, lighting by Tarquin and Pete
It then lowers to the main part of the duck, a 20 metre flat out crawl in the stream, where you get a wet ear. Sadly, it had silted too tight after less than 10 metres in, and will need digging back open unless it gets cleared by some flooding. So we left a handwritten note to redirect any callout, and headed into The Realm Of Baron Von Carno.
Modelling by Pete, lighting by Tarquin and Pete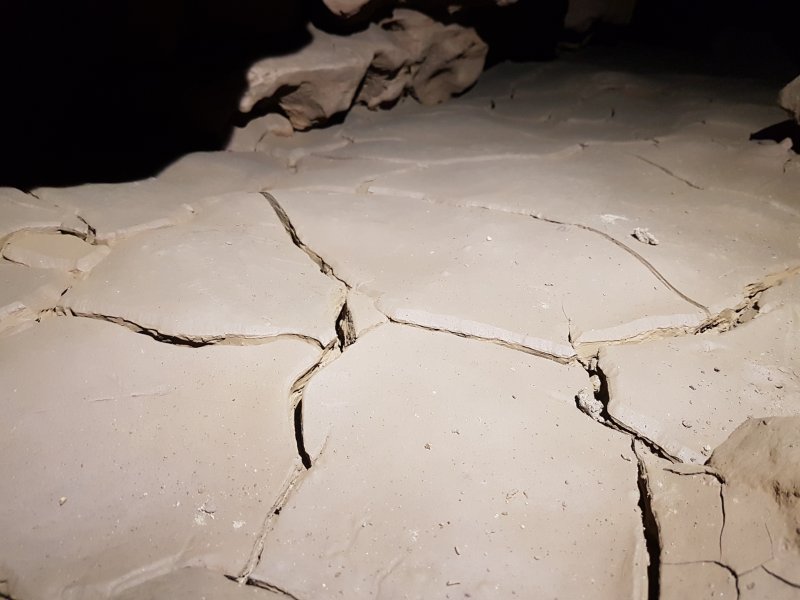 Cracked mud in Violate Passage, just beyond the climb up into the southern rift. The round trip has been started.
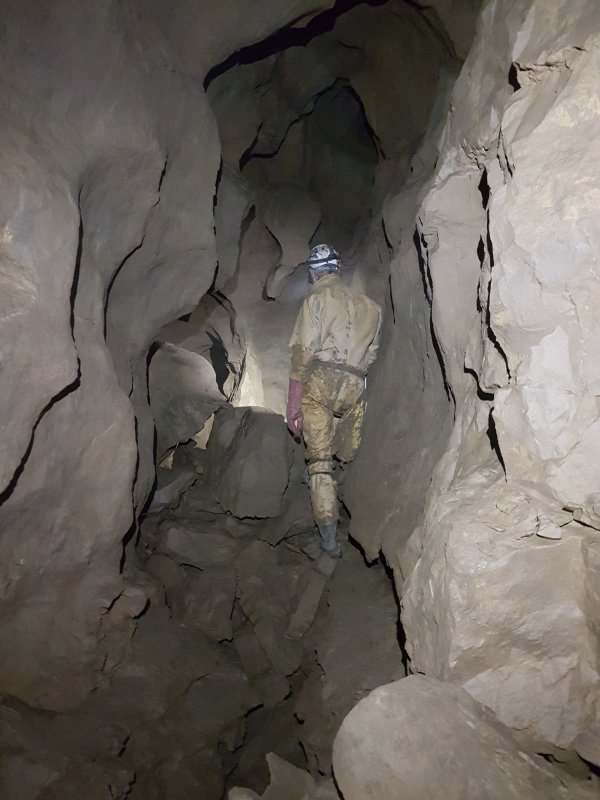 Violate Passage soon becomes walking sized.
Modelling by Pete, lighting by Tarquin and Pete
Violate Passage soon becomes walking sized.
Modelling by Pete, lighting by Tarquin and Pete Calcite blocks at the junction of Violate Passage and The Stream Of Running Commentary.
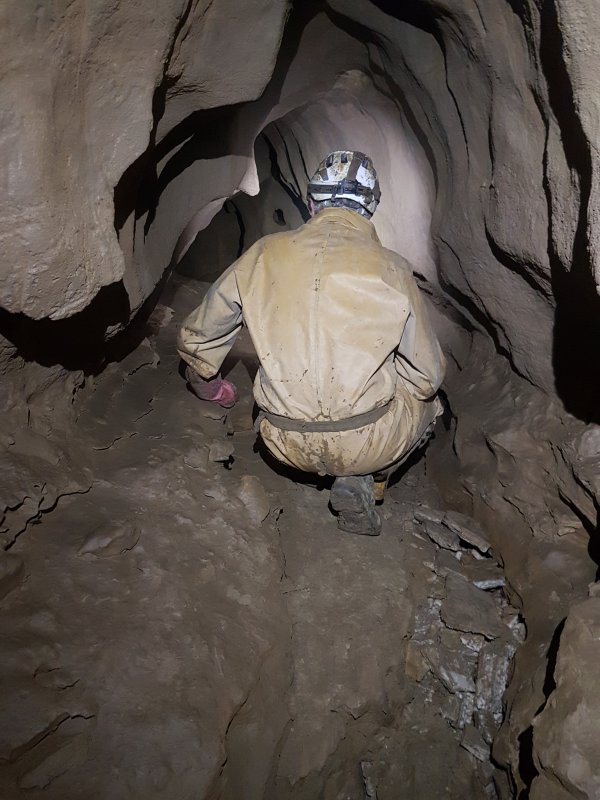 Violate Passage beyond the junction with The Stream Of Running Commentary.
Modelling by Pete, lighting by Tarquin and Pete
Violate Passage beyond the junction with The Stream Of Running Commentary.
Modelling by Pete, lighting by Tarquin and Pete Fastrack Membership, a low oxbow bypassing a crawl in Violate Passage. It does not save any crawling.
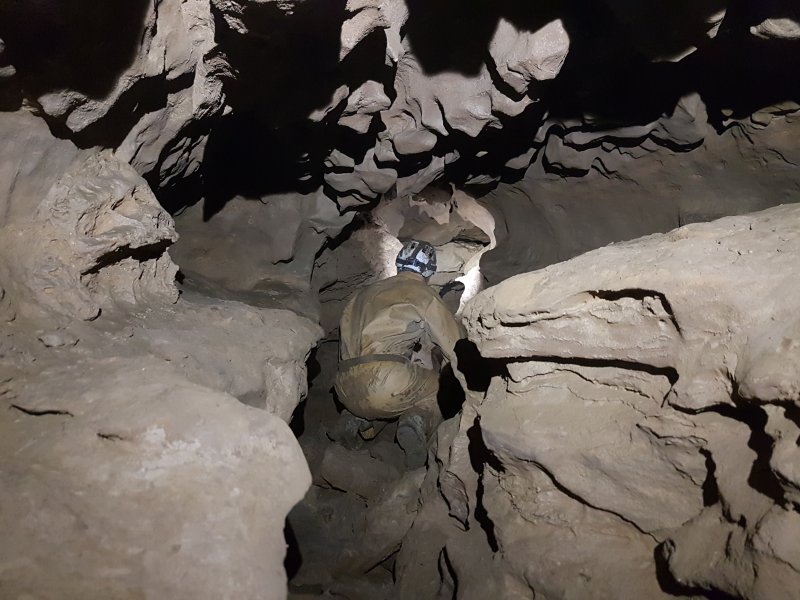 The last section of stooping height passage for a while in Violate Passage.
Modelling by Pete, lighting by Tarquin and Pete
The last section of stooping height passage for a while in Violate Passage.
Modelling by Pete, lighting by Tarquin and Pete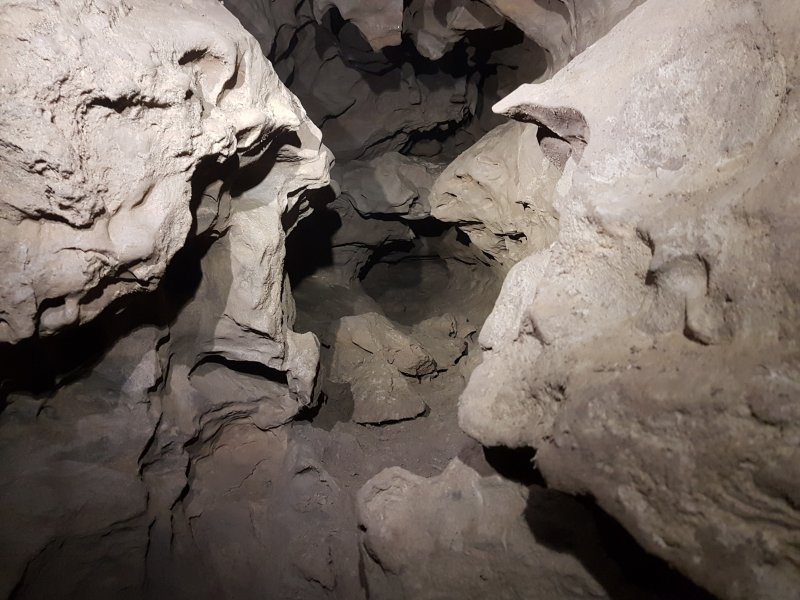 Violate Passage's crawl. This is rejoined by Fastrack Membership before passing through a squeeze.
Lighting by Tarquin and Pete
Violate Passage's crawl. This is rejoined by Fastrack Membership before passing through a squeeze.
Lighting by Tarquin and Pete Violate's ongoing crawl with very sticky mud, beyond the squeeze.
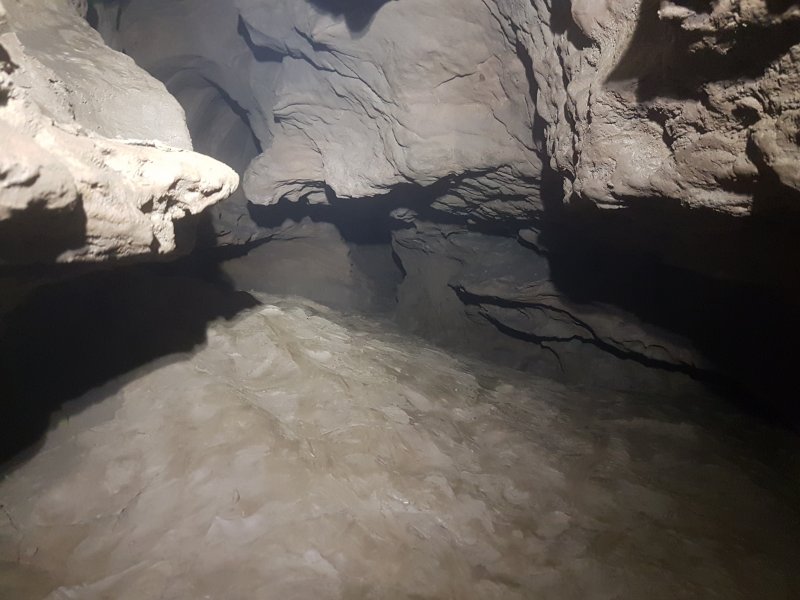 Violate Passage's crawl then enlarges before it rejoins The Stream Of Running Commentary.
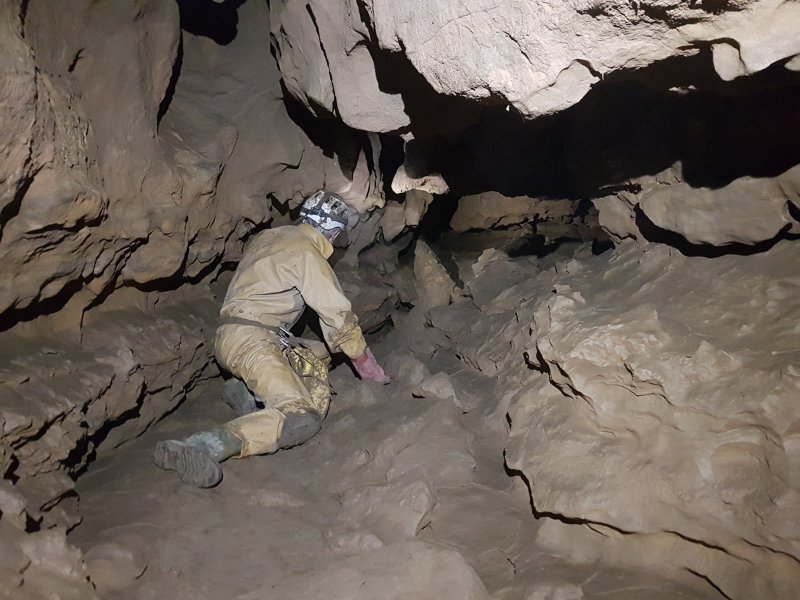 The start of The Stream Of Running Commentary, which is dry, with boulders almost blocking the way at one point.
Modelling by Pete, lighting by Tarquin and Pete
The start of The Stream Of Running Commentary, which is dry, with boulders almost blocking the way at one point.
Modelling by Pete, lighting by Tarquin and Pete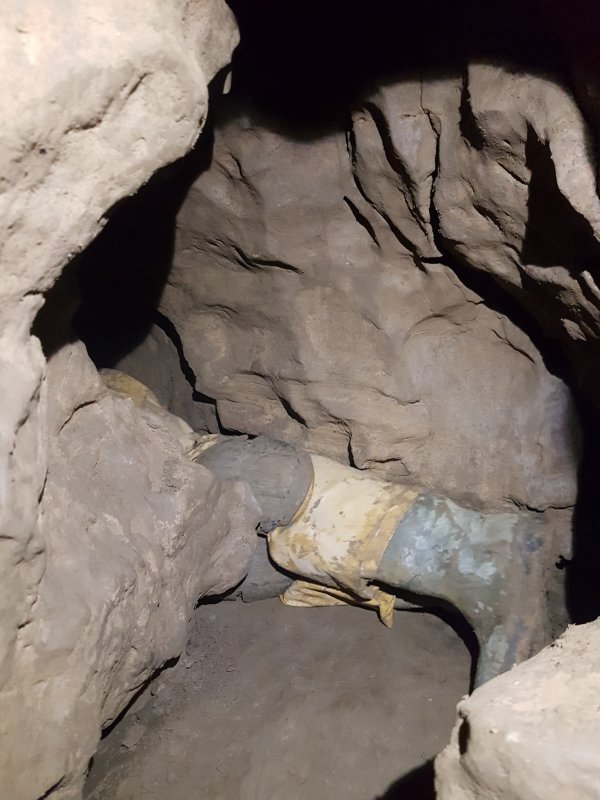 The passage narrows, and passes through this Z bend. It is not a squeeze, but it certainly feels as awkward as one.
Modelling by Pete
The passage narrows, and passes through this Z bend. It is not a squeeze, but it certainly feels as awkward as one.
Modelling by Pete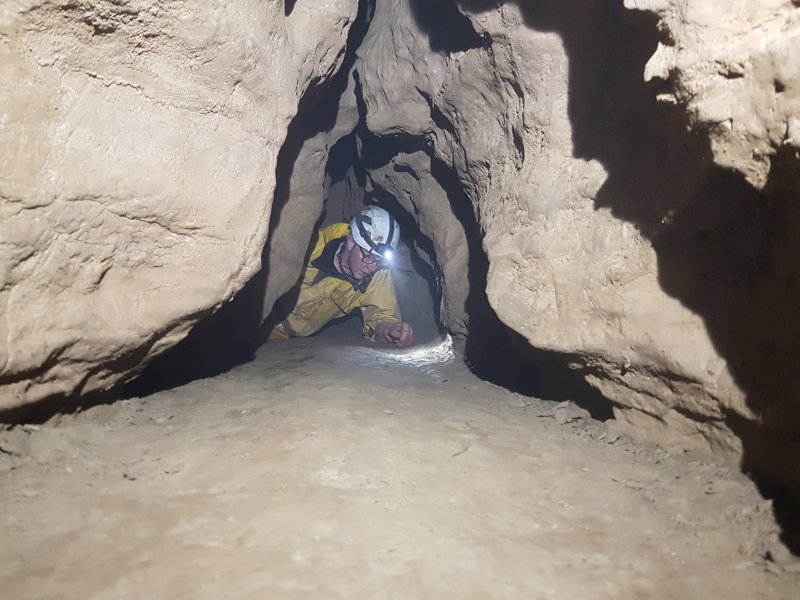 You have to rotate half way through so that you can turn the tight corners at each end. Face the inside of each corner.
Modelling by Pete, lighting by Tarquin and Pete
You have to rotate half way through so that you can turn the tight corners at each end. Face the inside of each corner.
Modelling by Pete, lighting by Tarquin and Pete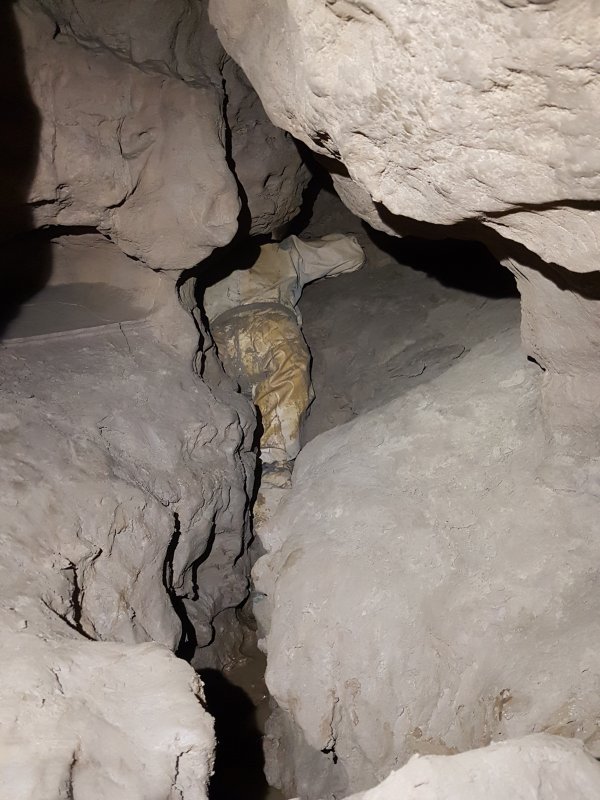 Start of the stream in The Stream Of Running Commentary, which is definitely not inspiring at this point. The water flows out through a dig, reappearing near the start of Violate Passage.
Modelling by Pete, lighting by Tarquin and Pete
Start of the stream in The Stream Of Running Commentary, which is definitely not inspiring at this point. The water flows out through a dig, reappearing near the start of Violate Passage.
Modelling by Pete, lighting by Tarquin and Pete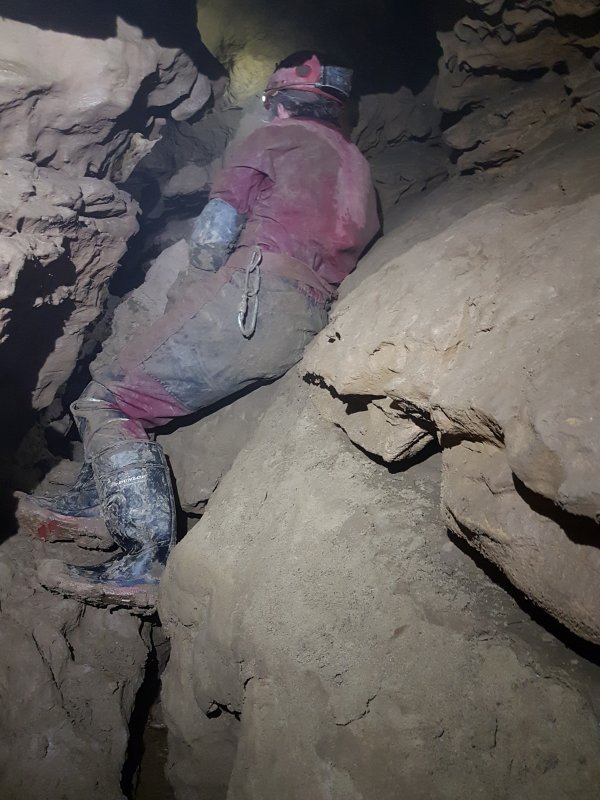 Becoming a little easier.
Modelling by Gareth, lighting by Tarquin and Gareth
Becoming a little easier.
Modelling by Gareth, lighting by Tarquin and Gareth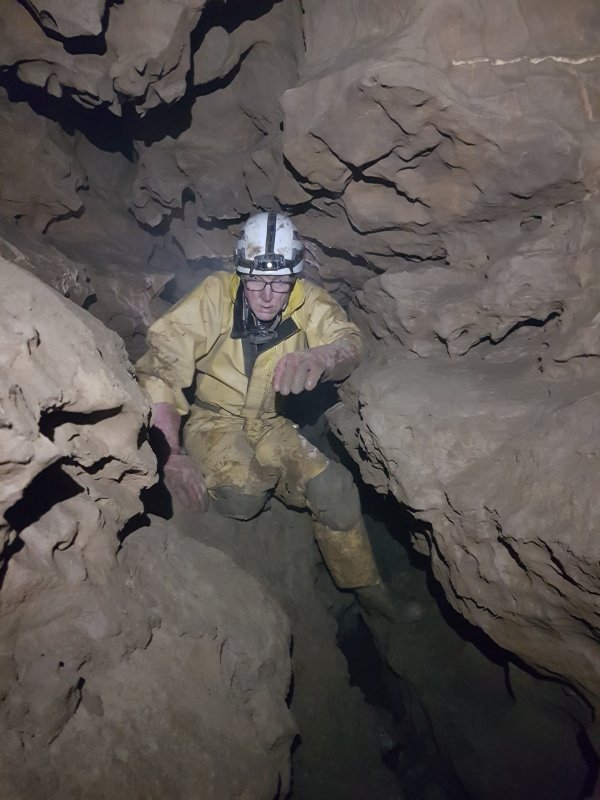 An early part of The Stream Of Running Commentary.
Modelling by Pete, lighting by Tarquin and Dickon
An early part of The Stream Of Running Commentary.
Modelling by Pete, lighting by Tarquin and Dickon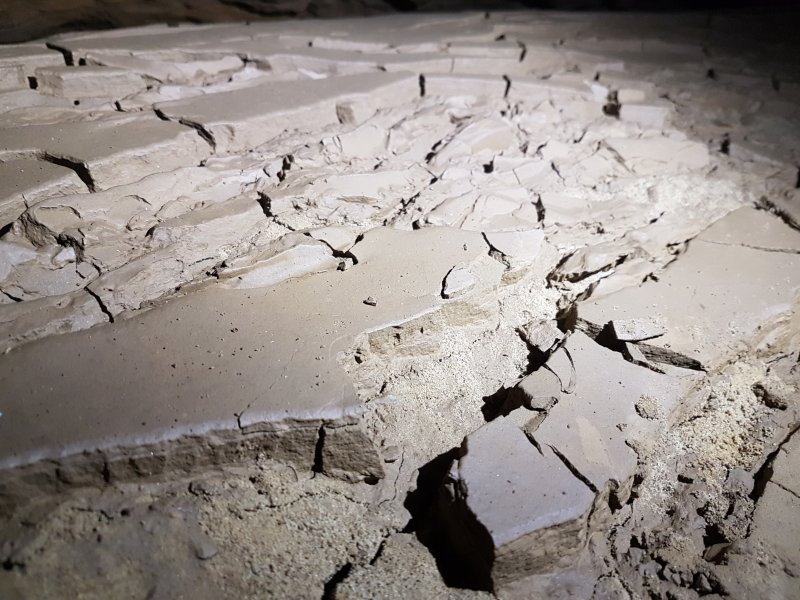 Mud formations.
 Mud formations.
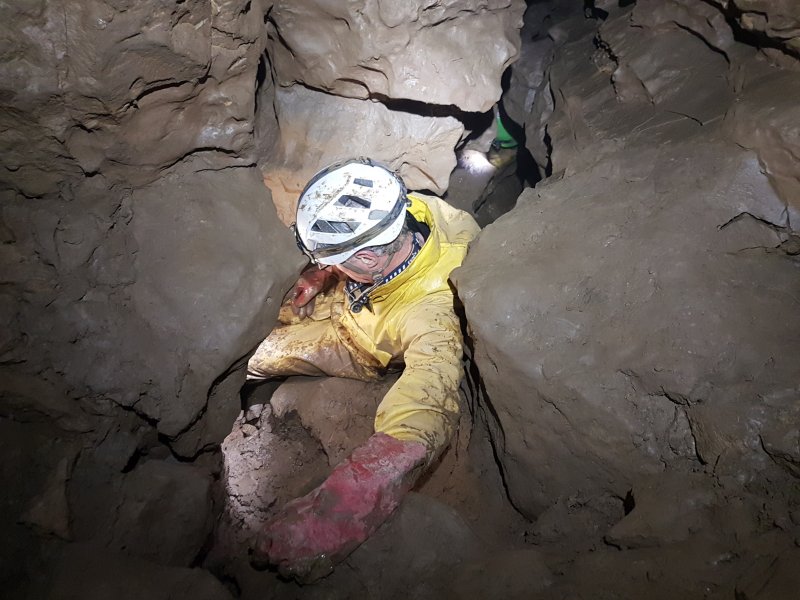 The passage briefly becomes a crawl - the only crawl along its entire length.
Modelling by Pete and Dickon, lighting by Tarquin, Pete and Dickon
The passage briefly becomes a crawl - the only crawl along its entire length.
Modelling by Pete and Dickon, lighting by Tarquin, Pete and Dickon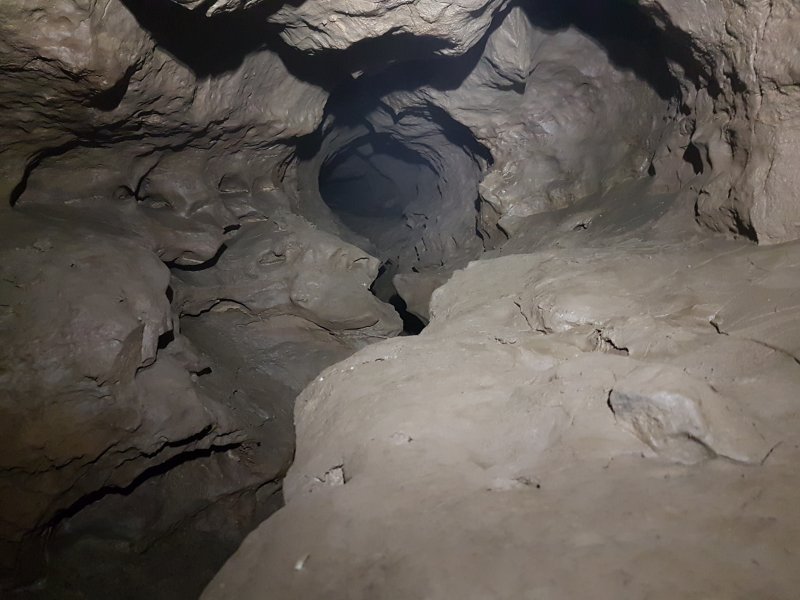 The first side passage on the left, which is a tight alternative route to The Red Baron, joining the normal route shortly after its start. The passage is an inlet, and the water appears to come from the end of Passendale, but the connection to it is blocked below the floor of a large chamber in The Realm Of Baron Von Carno. The amount of water here is minimal, and is certainly not the main outflow from Passendale.
 Upstream from the junction, The Stream Of Running Commentary is now larger.
Modelling by Gareth, lighting by Tarquin and Gareth
Upstream from the junction, The Stream Of Running Commentary is now larger.
Modelling by Gareth, lighting by Tarquin and Gareth The next side passage on the left is the main route to The Red Baron, The Last Post and Passendale. It is an obvious keyhole requiring a small clamber up into the top. Not far at all up ahead, it splits into the four squeeze route and low crawl route, with the previous side passage joining at the same time. We would end up accessing this area later by a totally different route.
Modelling by Gareth, lighting by Tarquin and Gareth
The next side passage on the left is the main route to The Red Baron, The Last Post and Passendale. It is an obvious keyhole requiring a small clamber up into the top. Not far at all up ahead, it splits into the four squeeze route and low crawl route, with the previous side passage joining at the same time. We would end up accessing this area later by a totally different route.
Modelling by Gareth, lighting by Tarquin and Gareth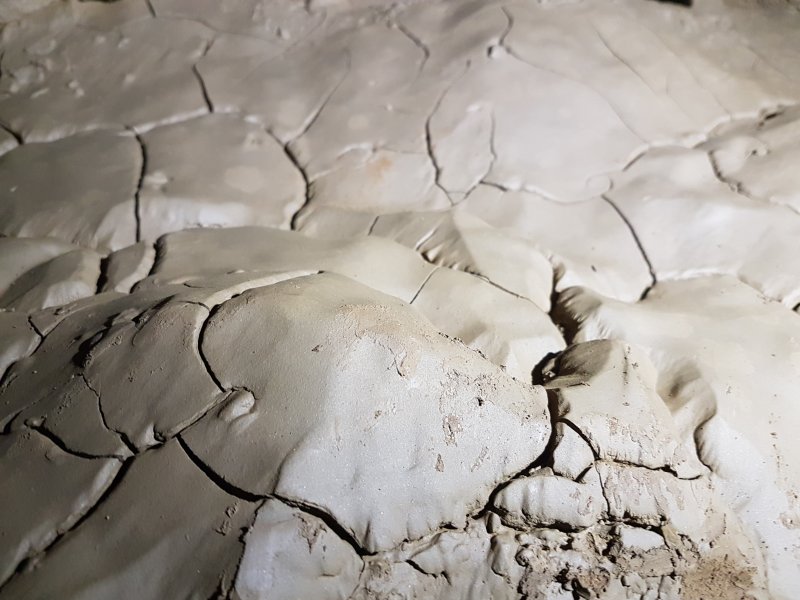 More mud formations in The Stream Of Running Commentary.
 Upstream of the junction, The Stream Of Running Commentary becomes much more grand.
Modelling by Pete and Gareth, lighting by Tarquin, Dickon, Pete and Gareth
Upstream of the junction, The Stream Of Running Commentary becomes much more grand.
Modelling by Pete and Gareth, lighting by Tarquin, Dickon, Pete and Gareth At a cross roads, Violate Passage joins from the right.
Modelling by Pete, lighting by Tarquin, Gareth and Pete
At a cross roads, Violate Passage joins from the right.
Modelling by Pete, lighting by Tarquin, Gareth and Pete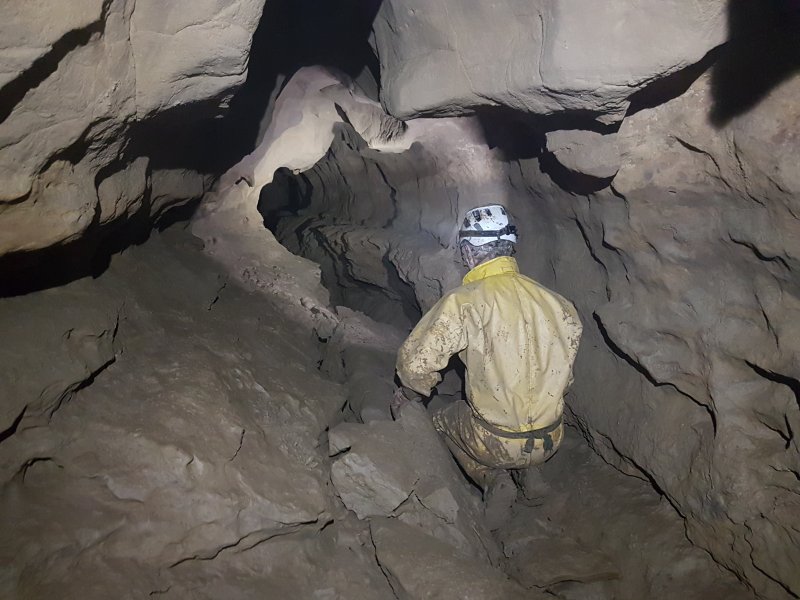 On the left at the cross roads is a side passage that can also be used as a route to The Red Baron. However, it is a very inconvenient route, and not usually used. We decided to take a cursory look, and ended up being very much side tracked.
Modelling by Pete, lighting by Tarquin and Pete
On the left at the cross roads is a side passage that can also be used as a route to The Red Baron. However, it is a very inconvenient route, and not usually used. We decided to take a cursory look, and ended up being very much side tracked.
Modelling by Pete, lighting by Tarquin and Pete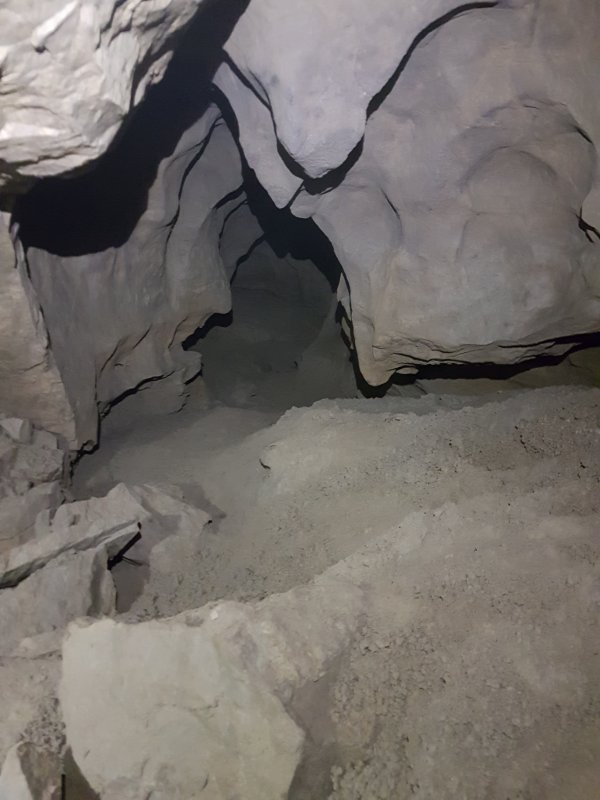 After a low crawl, the side passage gets bigger again, and appears to end in two rifts. However, tucked under the left wall seen in this picture is a crawl into the link to The Red Baron.
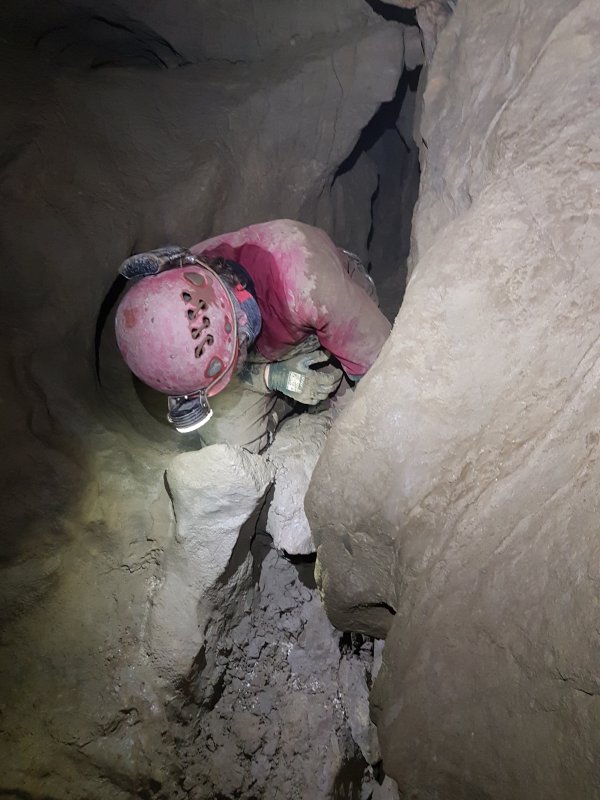 Crawling through the link passage.
Modelling by Gareth, lighting by Tarquin and Gareth
Crawling through the link passage.
Modelling by Gareth, lighting by Tarquin and Gareth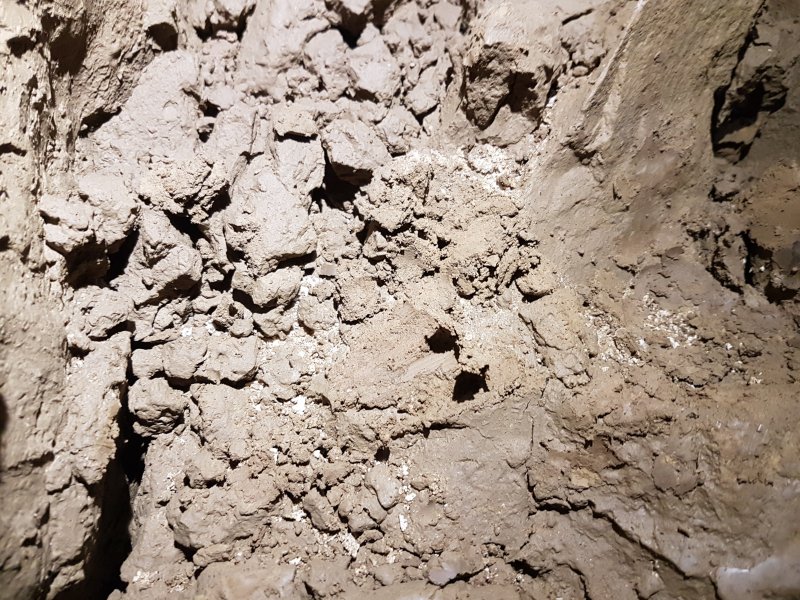 Cryostal in the link passage.
 The link pops out in the side of the low crawl route to The Red Baron. It's not really that low, just awkward, as seen here in the southern direction where it connects to the four squeeze route. At the junction itself, it is stooping height. Yay!
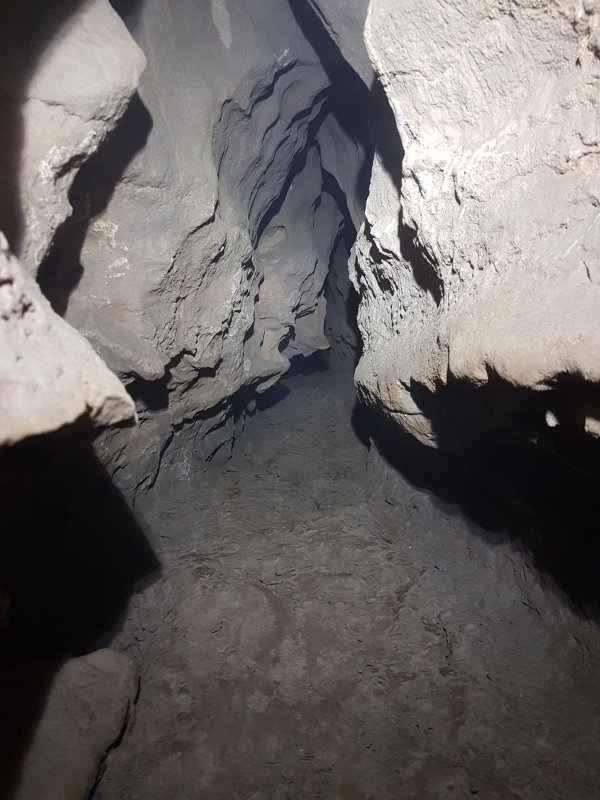 In the northern direction it gets a bit more awkward, starting narrow, then with a very low section.
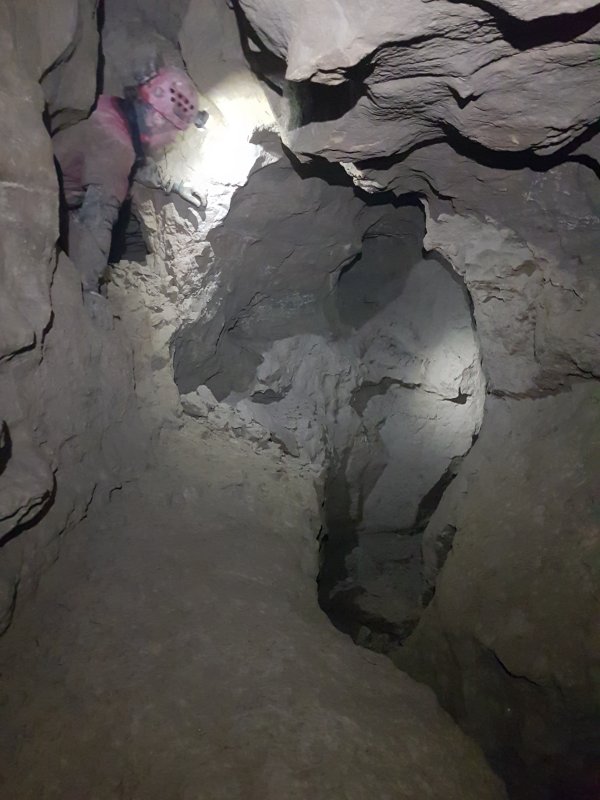 The low crawl route then pops out in the side of the four squeeze route. At this point, the four squeeze route is an ample sized streamway. We headed downstream, away from The Red Baron.
Modelling by Gareth, lighting by Tarquin and Gareth
The low crawl route then pops out in the side of the four squeeze route. At this point, the four squeeze route is an ample sized streamway. We headed downstream, away from The Red Baron.
Modelling by Gareth, lighting by Tarquin and Gareth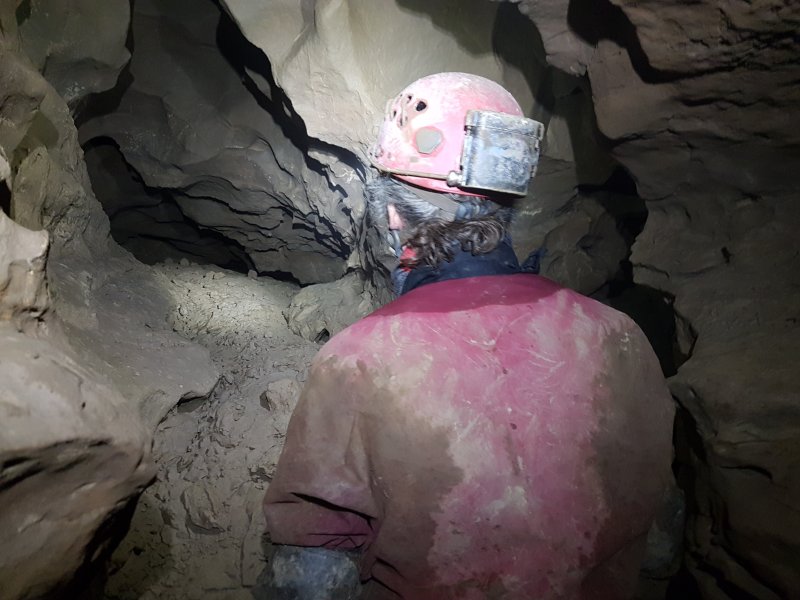 Another side passage on the left, which soon becomes too low.
Modelling by Gareth, lighting by Tarquin and Gareth
Another side passage on the left, which soon becomes too low.
Modelling by Gareth, lighting by Tarquin and Gareth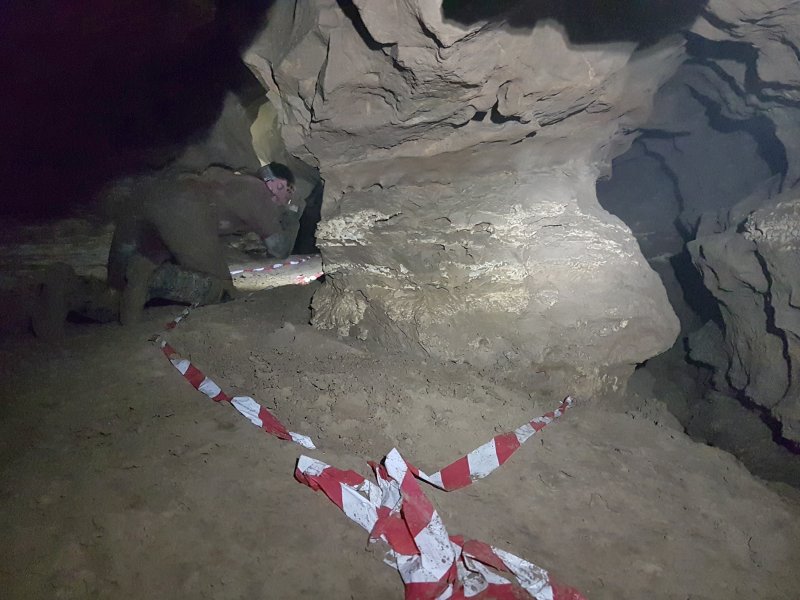 The junction with Passendale - the low crawl seen on the left here when looking upstream.
Modelling by Gareth, lighting by Tarquin and Gareth
The junction with Passendale - the low crawl seen on the left here when looking upstream.
Modelling by Gareth, lighting by Tarquin and Gareth The continuing downstream passage (behind the camera in the last picture) is much lower, passing through four squeezes to reach The Stream Of Running Commentary. I am told that for most of that distance it is comfortable, and in spite of the squeezes it is supposed to be better than the low crawl route that we had just done.
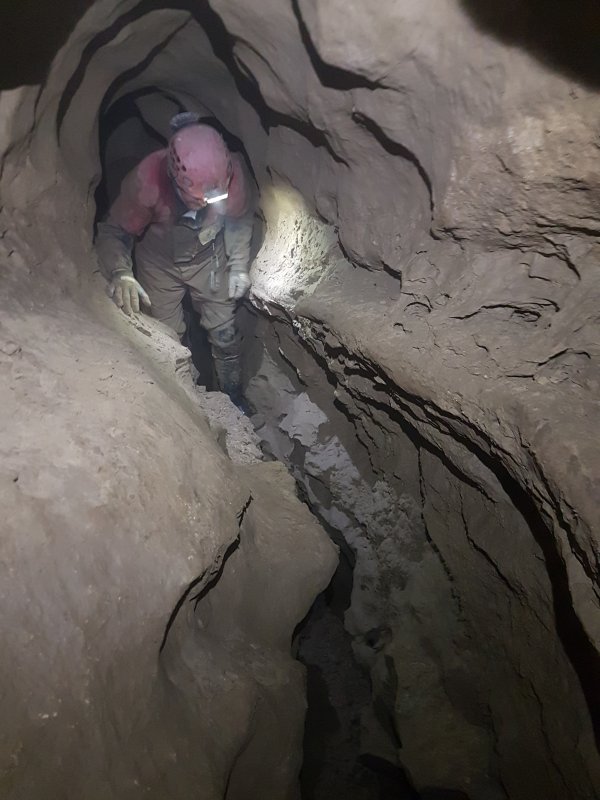 The way to Passendale soon becomes an uncomfortable rift.
Modelling by Gareth, lighting by Tarquin and Gareth
The way to Passendale soon becomes an uncomfortable rift.
Modelling by Gareth, lighting by Tarquin and Gareth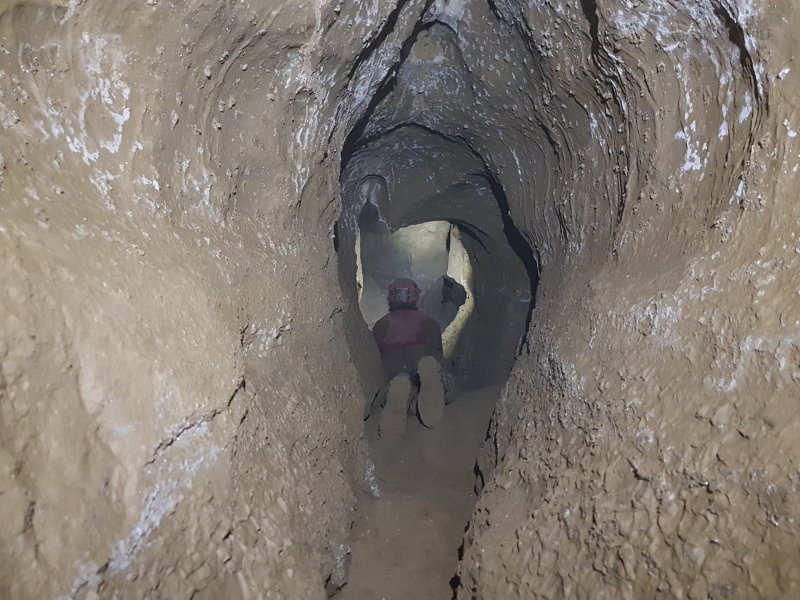 This then lowers to a crawl with a lot of gypsum.
Modelling by Gareth, lighting by Tarquin and Gareth
This then lowers to a crawl with a lot of gypsum.
Modelling by Gareth, lighting by Tarquin and Gareth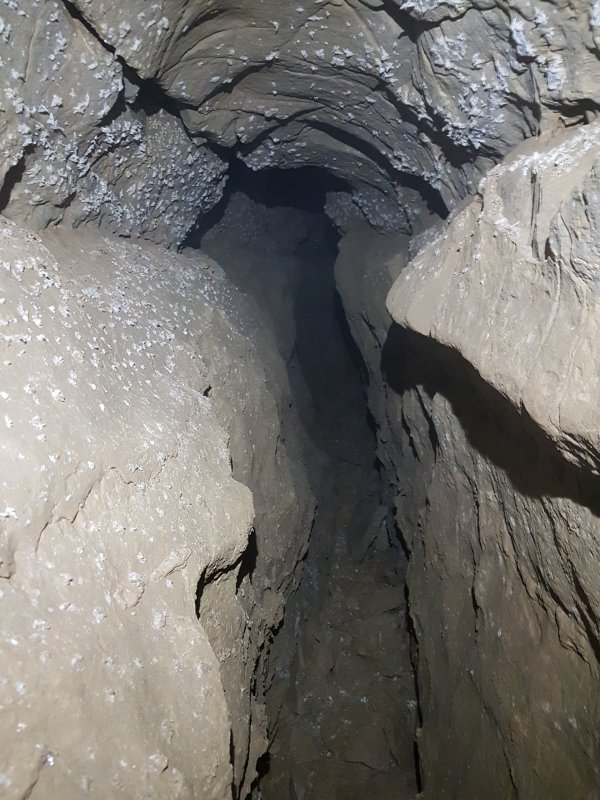 After a junction, the way to Passendale then becomes coated in much more gypsum, requiring care not to brush it off the walls.
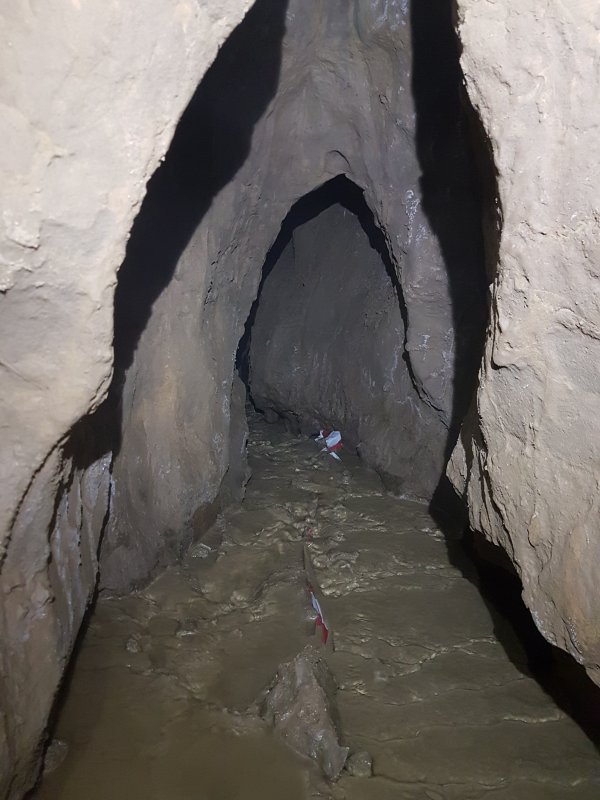 It then reaches the junction with Passendale. To the left is downstream, with increasingly deep, glutinous mud. This passage must not be underestimated. It splits in two with both branches passing through seasonal sumps, and the left one ending below the chamber in The Realm Of Baron Von Carno. The right branch is the original way into Nevill Hall, and flooded while the surveying team were first surveying this area. During their exit, rainfall had caused the water to rise, and it could be seen visibly rising very quickly as the team raced to get out before it filled the passage. The passage sumped behind them and remained sumped all winter after that. It is seen here in spring flood conditions after persistent heavy rain.
 Upstream, the passage starts as a crawl over mud.
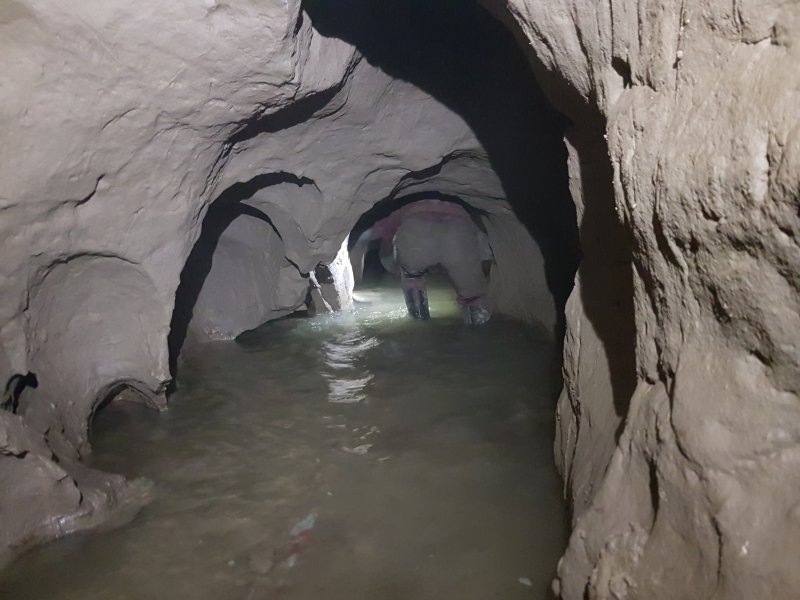 Upstream Passendale soon becomes a low arch forcing crouching in the stream.
Modelling by Gareth, lighting by Tarquin and Gareth
Upstream Passendale soon becomes a low arch forcing crouching in the stream.
Modelling by Gareth, lighting by Tarquin and Gareth The upstream direction ends at a sump. Above this, a climb up and pitch down regains the stream, where a side passage passes through another seasonal sump to connect to Nevill Hall. We returned to rejoin the rest of the team who had no idea just how far we had gone from The Stream Of Running Commentary.
Modelling by Gareth, lighting by Tarquin and Gareth
The upstream direction ends at a sump. Above this, a climb up and pitch down regains the stream, where a side passage passes through another seasonal sump to connect to Nevill Hall. We returned to rejoin the rest of the team who had no idea just how far we had gone from The Stream Of Running Commentary.
Modelling by Gareth, lighting by Tarquin and Gareth Back in The Stream Of Running Commentary, an aven connects into The Realm Of Baron Von Carno (the passage, not the series) but it cannot be free climbed, and a nearby climbable aven is choked.
Modelling by Pete and part of Gareth, lighting by Tarquin and Pete
Back in The Stream Of Running Commentary, an aven connects into The Realm Of Baron Von Carno (the passage, not the series) but it cannot be free climbed, and a nearby climbable aven is choked.
Modelling by Pete and part of Gareth, lighting by Tarquin and Pete After a couple of meanders, the passage abruptly closes to an eyehole over rocks (ahead-right), and a side hole to the left at this point ascends a steep rubble slope into The Realm Of Baron Von Carno.
Modelling by Pete, lighting by Tarquin and Pete
After a couple of meanders, the passage abruptly closes to an eyehole over rocks (ahead-right), and a side hole to the left at this point ascends a steep rubble slope into The Realm Of Baron Von Carno.
Modelling by Pete, lighting by Tarquin and Pete The rubble slope emerges in the floor of this chamber, part of The Realm Of Baron Von Carno (passage). The passage extends up a slope to the left, to end in a chamber above Passendale (with no connection). Ahead is the way to the end of the passage, and the route into Aces High. We did not go any further up this passage.
Modelling by Gareth and Pete, lighting by Tarquin, Dickon, Gareth and Pete
The rubble slope emerges in the floor of this chamber, part of The Realm Of Baron Von Carno (passage). The passage extends up a slope to the left, to end in a chamber above Passendale (with no connection). Ahead is the way to the end of the passage, and the route into Aces High. We did not go any further up this passage.
Modelling by Gareth and Pete, lighting by Tarquin, Dickon, Gareth and Pete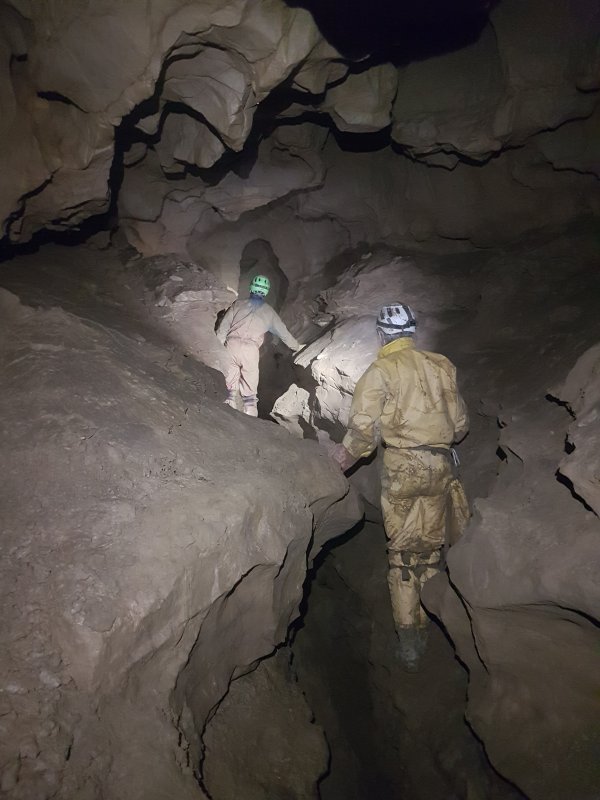 Continuing upstream through the eyehole over rocks, The Stream Of Running Commentary enlarges back to its grand size.
Modelling by Pete and Dickon, lighting by Tarquin, Pete and Dickon
Continuing upstream through the eyehole over rocks, The Stream Of Running Commentary enlarges back to its grand size.
Modelling by Pete and Dickon, lighting by Tarquin, Pete and Dickon Drip pockets at the start of a side passage on the left, which has both a lower and upper alternative, neither of which go far.
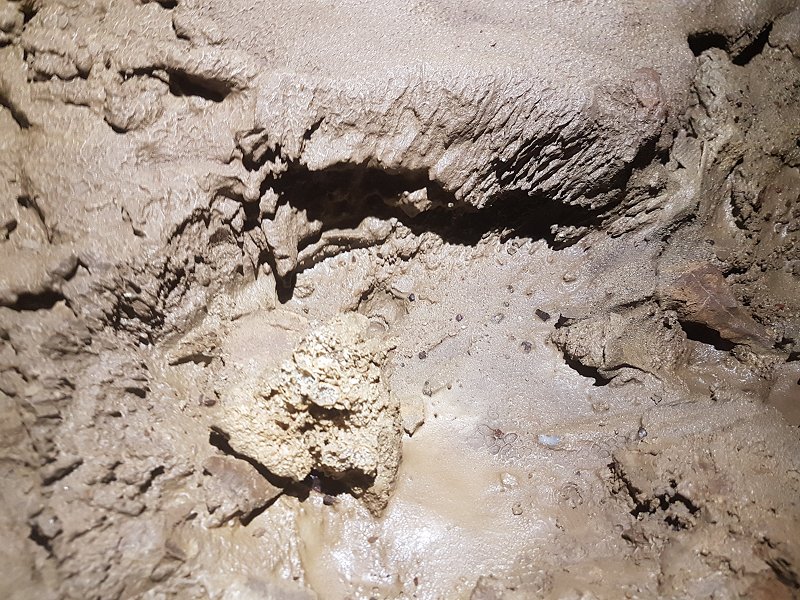 Partial drip splash formation.
 Immediately after the side passage, The Stream Of Running Commentary's keyhole slot fills with rubble, and a climb is needed to continue along it.
Modelling by Pete and Dickon, lighting by Tarquin, Pete and Dickon
Immediately after the side passage, The Stream Of Running Commentary's keyhole slot fills with rubble, and a climb is needed to continue along it.
Modelling by Pete and Dickon, lighting by Tarquin, Pete and Dickon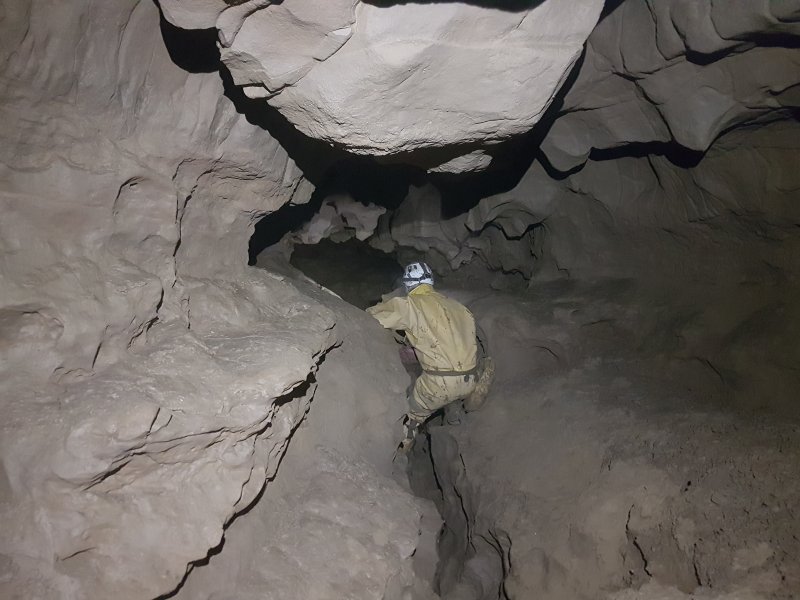 Continuing along the tube at the top of the passage.
Modelling by Pete, lighting by Tarquin and Pete
Continuing along the tube at the top of the passage.
Modelling by Pete, lighting by Tarquin and Pete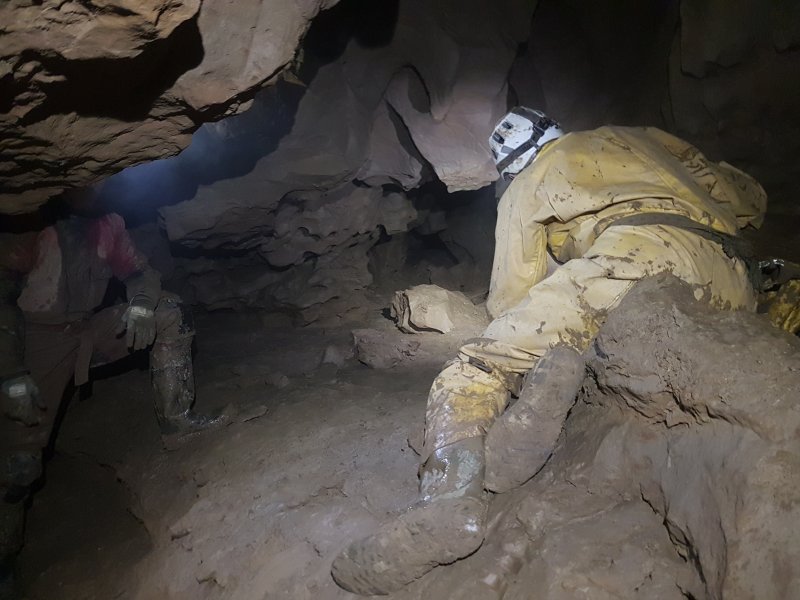 A side passage on the left, which looks like it might be significant.
Modelling by Pete and Gareth, lighting by Tarquin, Dickon, Pete and Gareth
A side passage on the left, which looks like it might be significant.
Modelling by Pete and Gareth, lighting by Tarquin, Dickon, Pete and Gareth The side passage is much less impressive than it first looks, requiring stooping or crawling for its whole length.
Modelling by Pete, lighting by Tarquin and Pete
The side passage is much less impressive than it first looks, requiring stooping or crawling for its whole length.
Modelling by Pete, lighting by Tarquin and Pete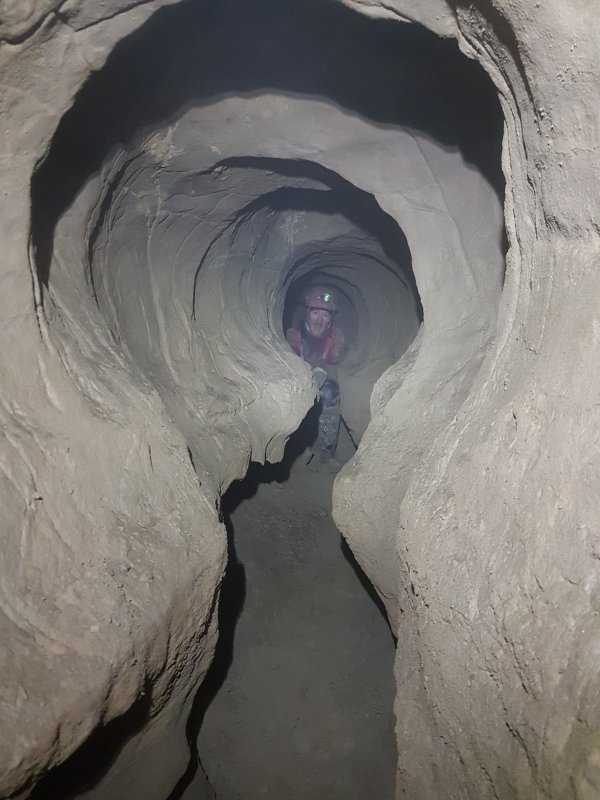 The side passage passes a tight bedding on one side, and continues even smaller, eventually becoming too tight. It points towards known passage, and is unlikely to be productive.
Modelling by Gareth
The side passage passes a tight bedding on one side, and continues even smaller, eventually becoming too tight. It points towards known passage, and is unlikely to be productive.
Modelling by Gareth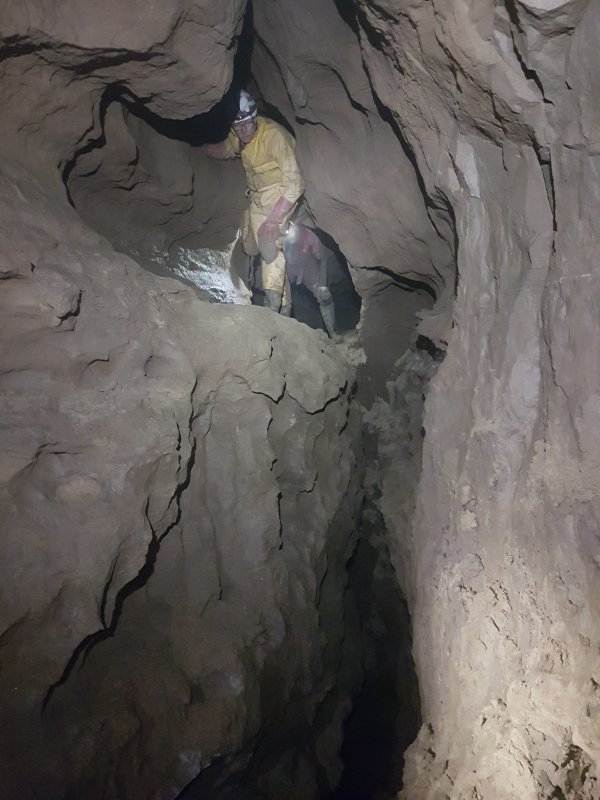 The Stream Of Running Commentary continues to a climb down at a junction. At this junction, the southern round trip finally leaves the stream, and follows Kababarama Drama instead. The stream continues left, while two passages ahead are ways into Kababarama Drama.
Modelling by Pete and Gareth, lighting by Tarquin and Gareth
The Stream Of Running Commentary continues to a climb down at a junction. At this junction, the southern round trip finally leaves the stream, and follows Kababarama Drama instead. The stream continues left, while two passages ahead are ways into Kababarama Drama.
Modelling by Pete and Gareth, lighting by Tarquin and Gareth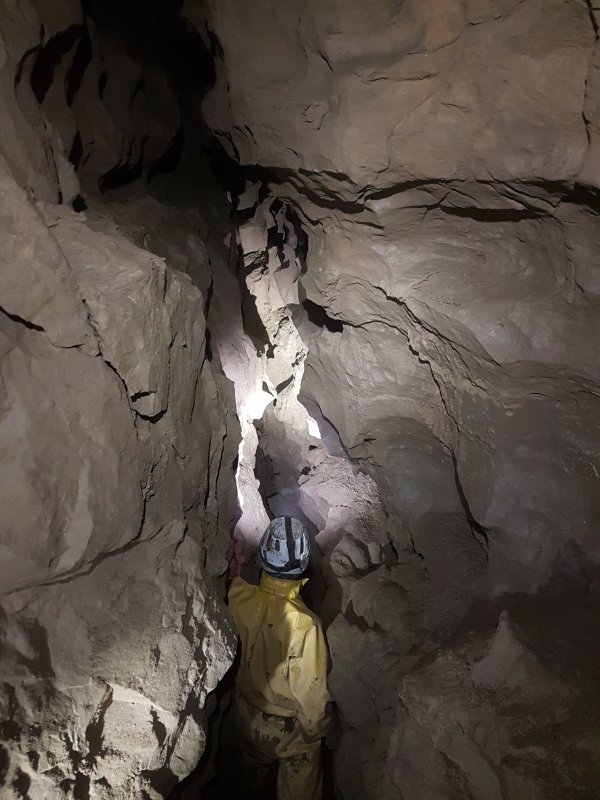 Upstream along The Stream Of Running Commentary, the passage narrows down and becomes much more awkward, and really not so worthy of the effort. It is possible to continue either at stream level, or in the keyhole at the top of the rift. The top route eventually pinches out, requiring a descent to join the lower route.
Modelling by Pete, lighting by Tarquin, Gareth and Pete
Upstream along The Stream Of Running Commentary, the passage narrows down and becomes much more awkward, and really not so worthy of the effort. It is possible to continue either at stream level, or in the keyhole at the top of the rift. The top route eventually pinches out, requiring a descent to join the lower route.
Modelling by Pete, lighting by Tarquin, Gareth and Pete The lower level of the passage, remaining awkwardly narrow with rock projections getting in the way.
Modelling by Gareth, lighting by Tarquin and Gareth
The lower level of the passage, remaining awkwardly narrow with rock projections getting in the way.
Modelling by Gareth, lighting by Tarquin and Gareth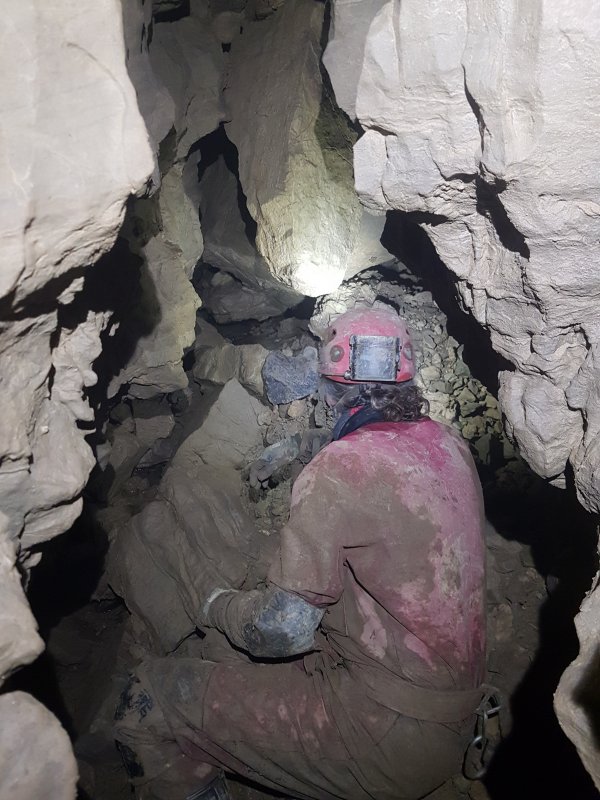 After 100 metres, the passage chokes.
Modelling by Gareth, lighting by Tarquin and Gareth
After 100 metres, the passage chokes.
Modelling by Gareth, lighting by Tarquin and Gareth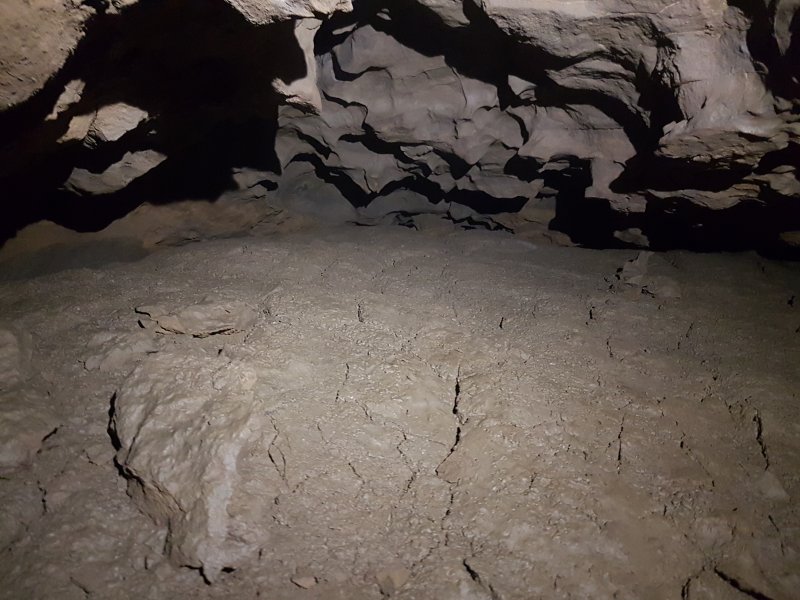 A chimney up an aven at the end reaches a middle level running back over the passage and the choke, with these mud formations.
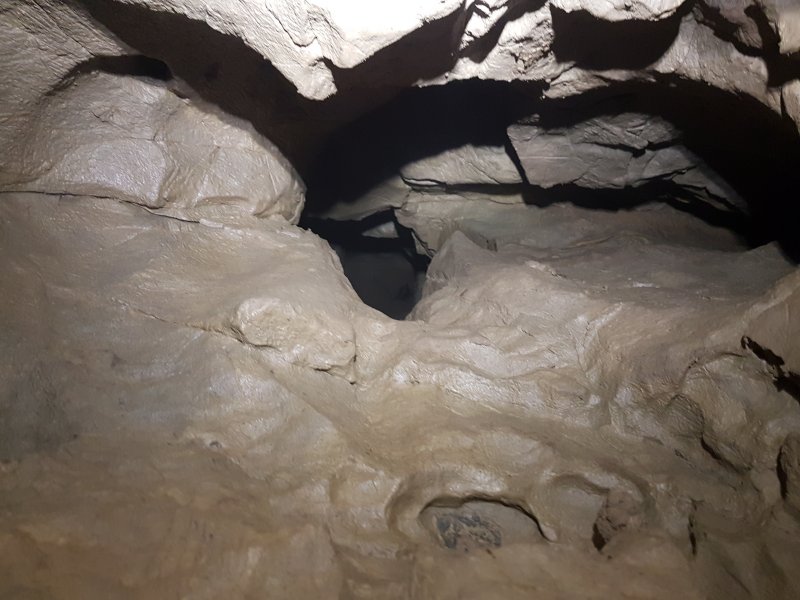 Over the choke, a very narrow hole up under the left wall requires a difficult shuffle upwards to reach the end of The Realm Of Baron Von Carno (passage). It looks almost impossible from below, being barely wide enough to fit, and having very few holds, but it can be done - Dickon was the only one of our team to actually try it. It would be easier downwards, as long as you know you can fit before you start. This does not make a good round trip, because of this rift.
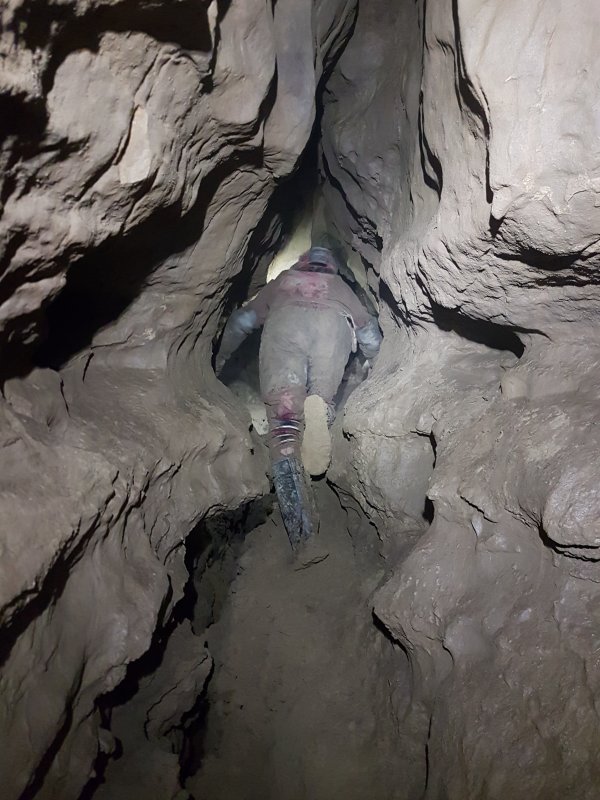 The Kababarama Drama junction has two options. The passage on the right is just a side passage, and passes beneath Kababarama Drama without connecting to anything.
Modelling by Gareth, lighting by Tarquin and Gareth
The Kababarama Drama junction has two options. The passage on the right is just a side passage, and passes beneath Kababarama Drama without connecting to anything.
Modelling by Gareth, lighting by Tarquin and Gareth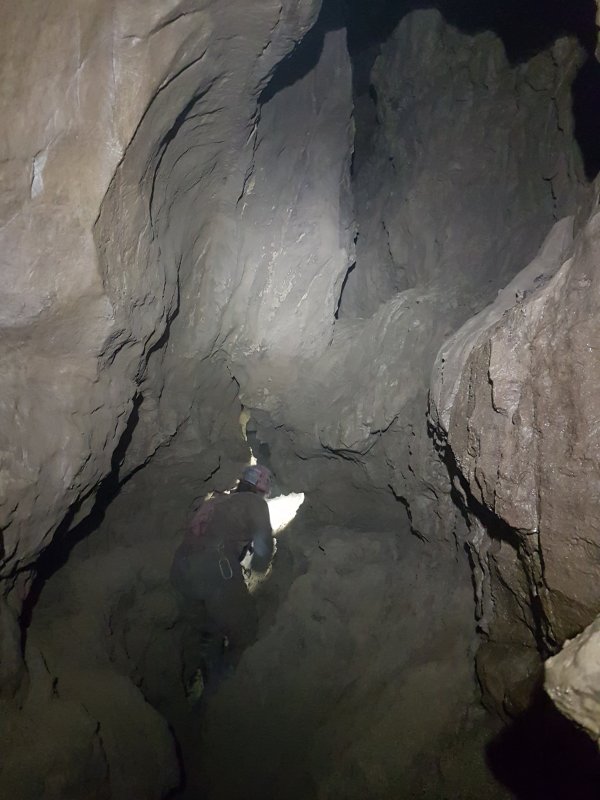 Not difficult, but it does need a couple of little climbs.
Modelling by Gareth, lighting by Tarquin and Gareth
Not difficult, but it does need a couple of little climbs.
Modelling by Gareth, lighting by Tarquin and Gareth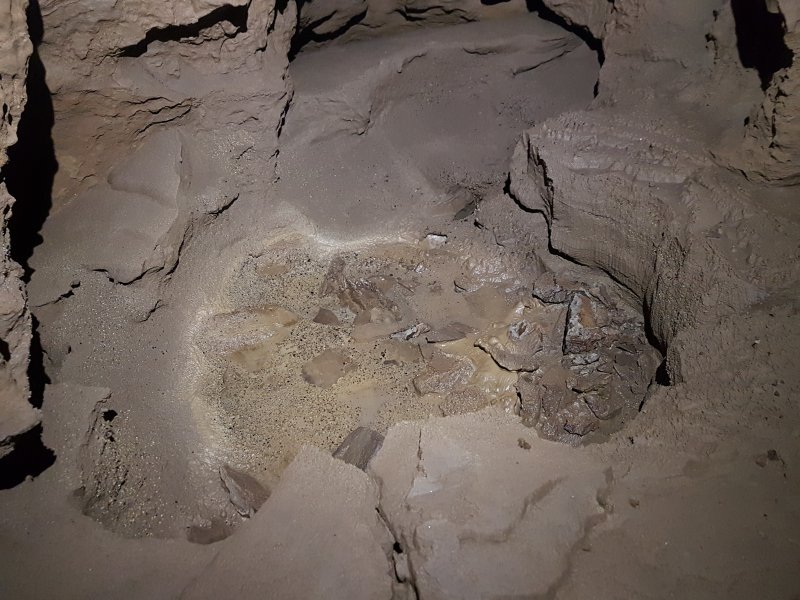 Sculpted mud in the base of an aven.
 It is a shame that it does not connect at the end, because it is nicer than the proper route.
Modelling by Gareth, lighting by Tarquin and Gareth
It is a shame that it does not connect at the end, because it is nicer than the proper route.
Modelling by Gareth, lighting by Tarquin and Gareth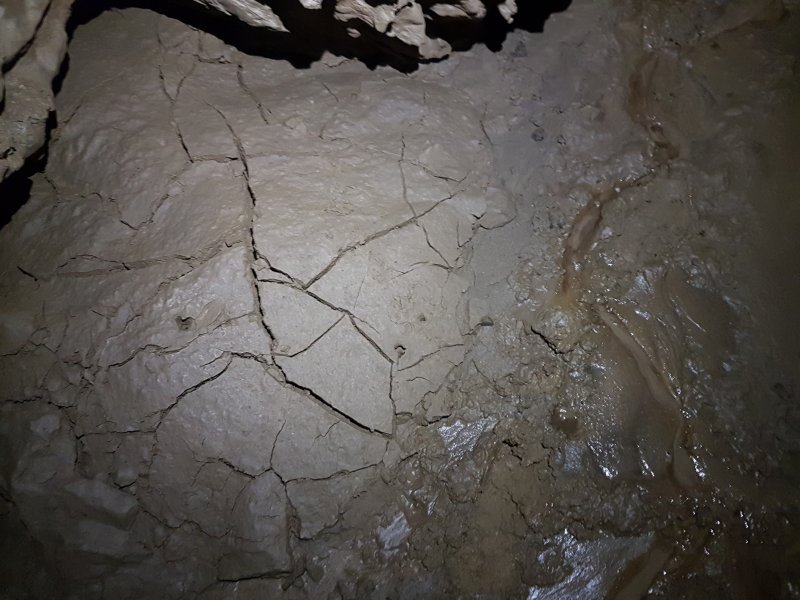 Mud formations.
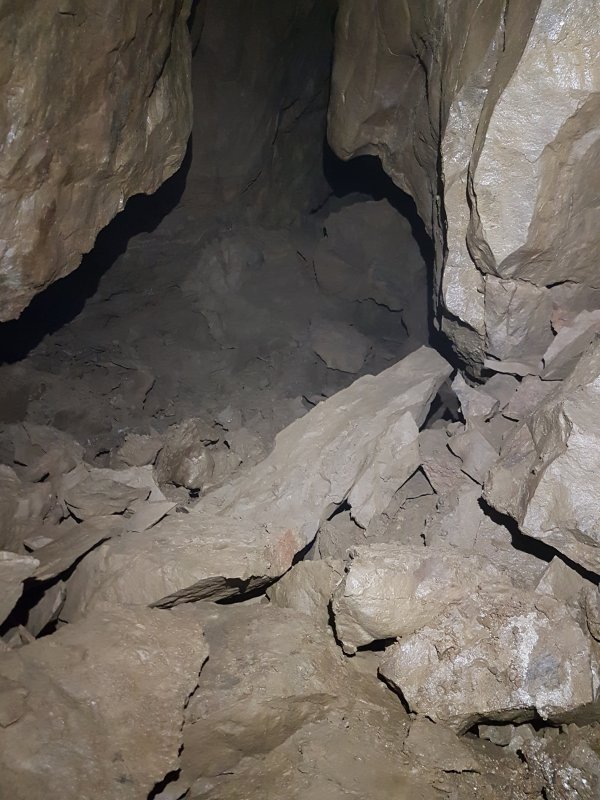 A rocky patch of the passage.
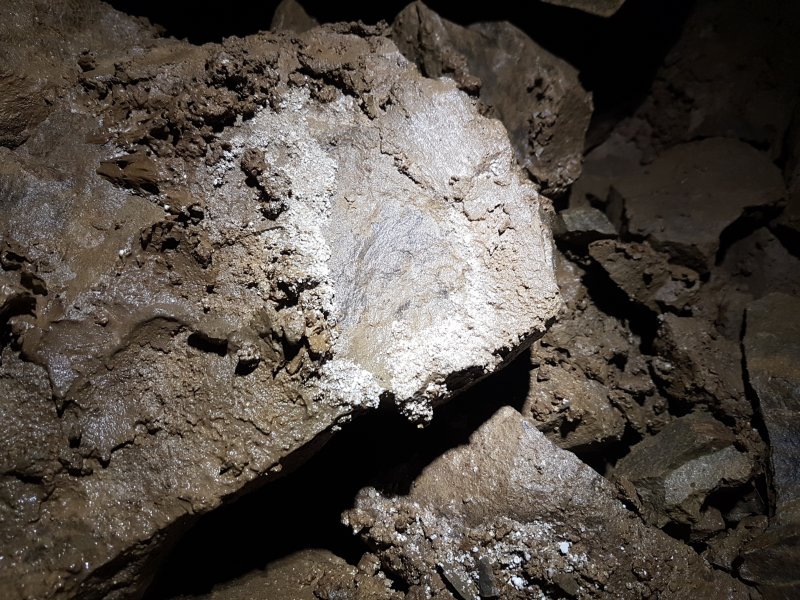 Cryostal on the rocks. As often happens, this has been exposed by drips, which suggests that a lot more hides under the mud elsewhere.
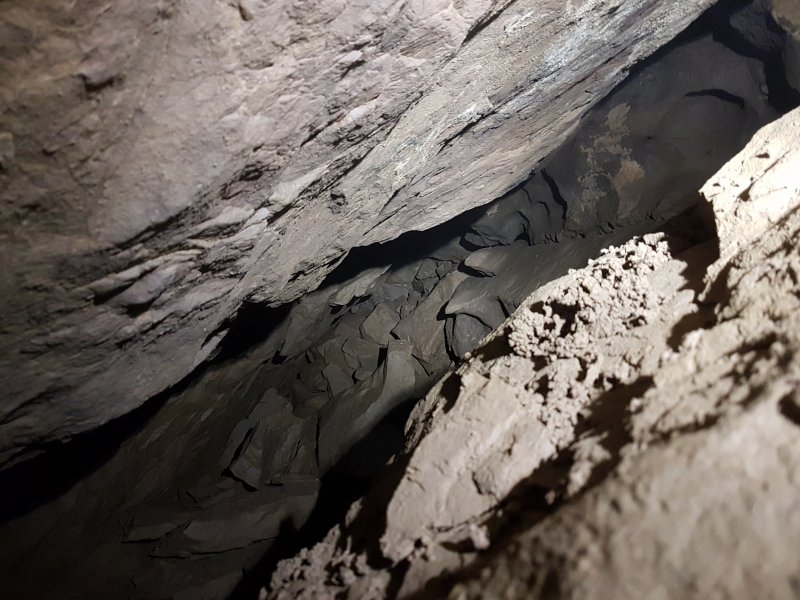 The passage ends at a choke, very close to another part of Kababarama Drama.
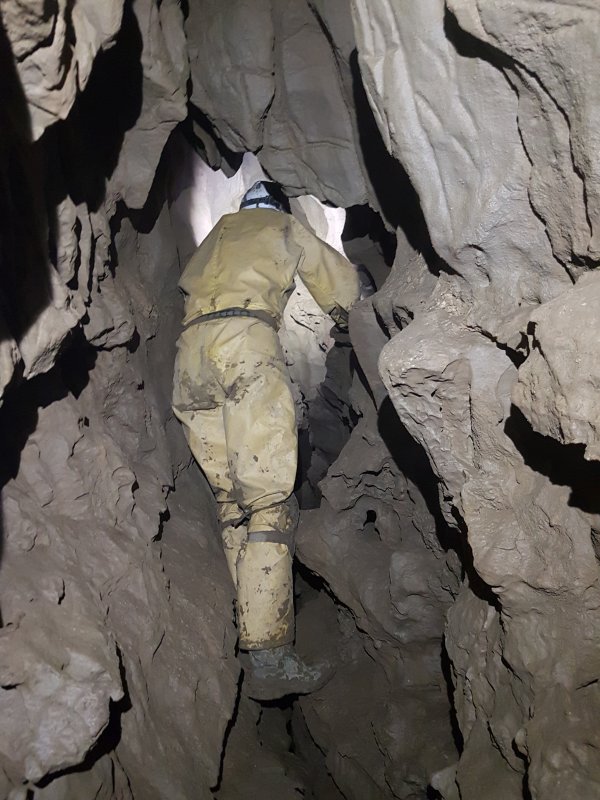 From the junction of The Stream Of Running Commentary and Kababarama Drama, the way on is the left-hand passage into Kababarama Drama. This immediately splits again, with a side passage to the left starting with this awkward rift.
Modelling by Pete, lighting by Tarquin and Pete
From the junction of The Stream Of Running Commentary and Kababarama Drama, the way on is the left-hand passage into Kababarama Drama. This immediately splits again, with a side passage to the left starting with this awkward rift.
Modelling by Pete, lighting by Tarquin and Pete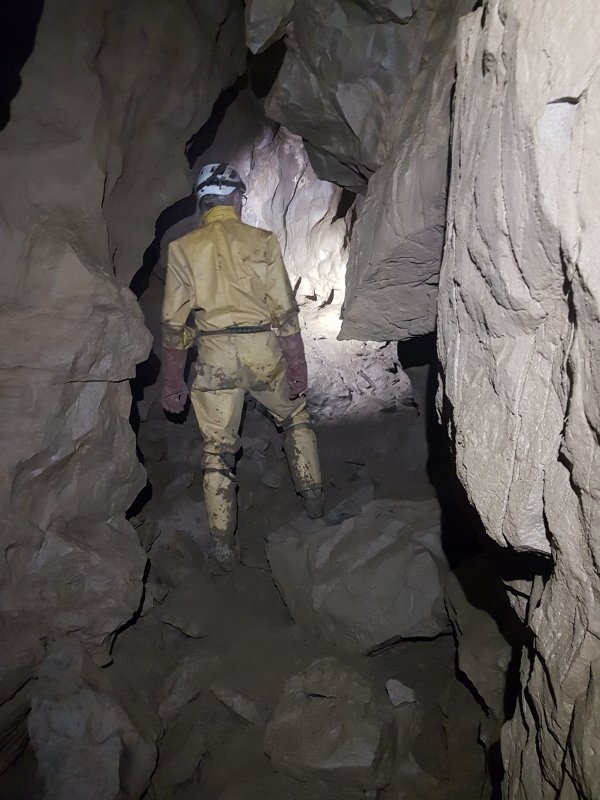 The passage soon gains a better floor, with a very narrow side passage ahead.
Modelling by Pete, lighting by Tarquin and Pete
The passage soon gains a better floor, with a very narrow side passage ahead.
Modelling by Pete, lighting by Tarquin and Pete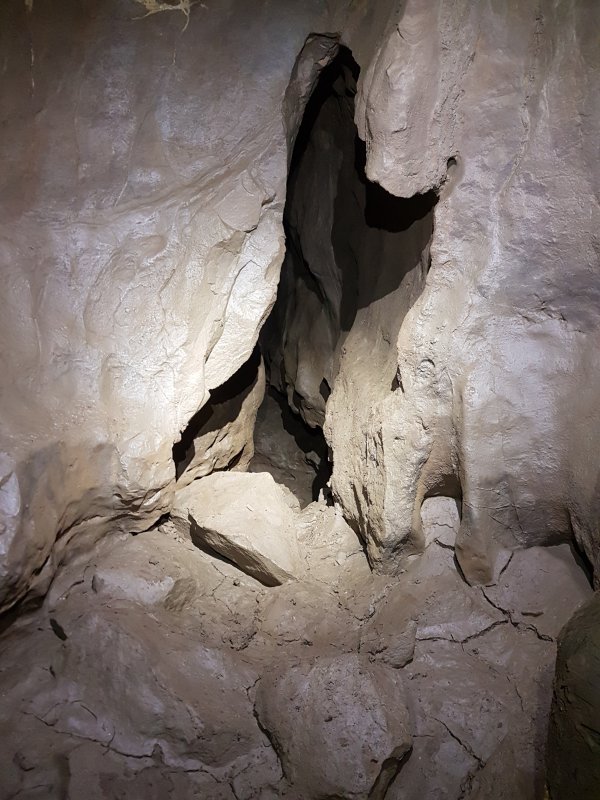 A narrow rift on the right joins another side passage.
Lighting by Tarquin and Pete
A narrow rift on the right joins another side passage.
Lighting by Tarquin and Pete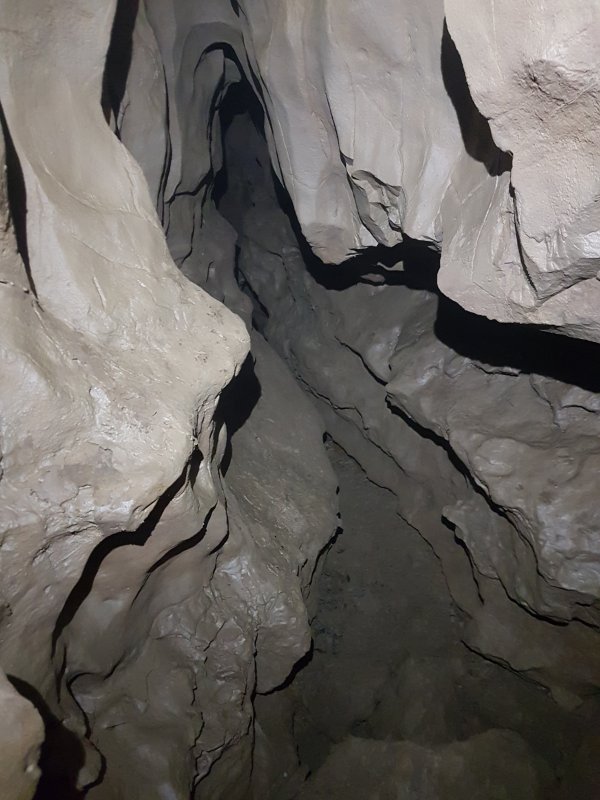 At the next split, a narrow rift continues until it pinches out.
 The other branch is bigger, but soon ends.
Modelling by Pete, lighting by Tarquin and Pete
The other branch is bigger, but soon ends.
Modelling by Pete, lighting by Tarquin and Pete The main route continues past the side passage as the largest of the passages. However, the way on is actually in the ceiling of this passage, into the narrow rift, which looks utterly ridiculous in this picture.
Modelling by Gareth, lighting by Tarquin and Gareth
The main route continues past the side passage as the largest of the passages. However, the way on is actually in the ceiling of this passage, into the narrow rift, which looks utterly ridiculous in this picture.
Modelling by Gareth, lighting by Tarquin and Gareth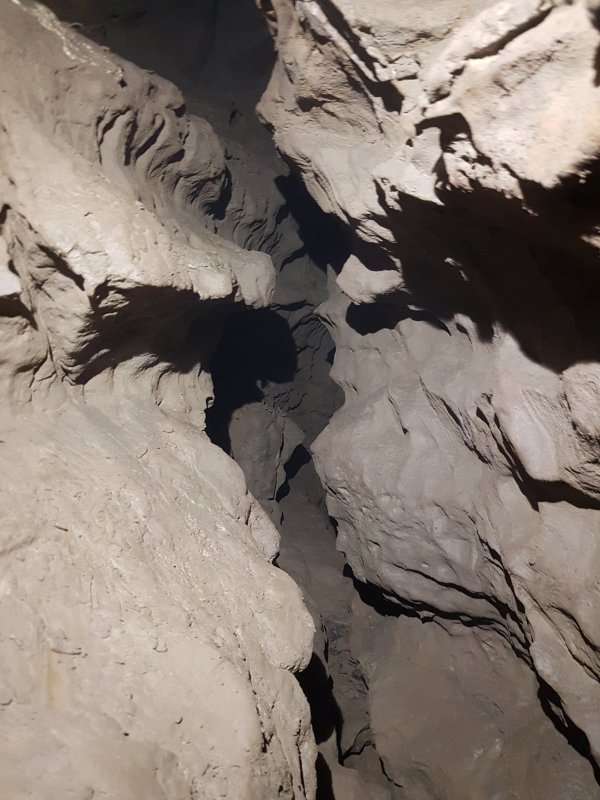 The passage ahead rapidly shrinks to a squeeze sized rift, which soon ends after a connection with the previous side passage.
 Climbing into the rift in the ceiling. This has no footholds, and it really helps to have a good climber who can act as a step for the others to stand on, then climb up without help. It might also be possible to attach a ladder somewhere above, but we did not look for belay points.
Modelling by Gareth and Pete, lighting by Tarquin, Gareth and Pete
Climbing into the rift in the ceiling. This has no footholds, and it really helps to have a good climber who can act as a step for the others to stand on, then climb up without help. It might also be possible to attach a ladder somewhere above, but we did not look for belay points.
Modelling by Gareth and Pete, lighting by Tarquin, Gareth and Pete The upper part of the climb also has very few holds, but is possible with a little wheel spinning.
Modelling by Pete, lighting by Tarquin and Pete
The upper part of the climb also has very few holds, but is possible with a little wheel spinning.
Modelling by Pete, lighting by Tarquin and Pete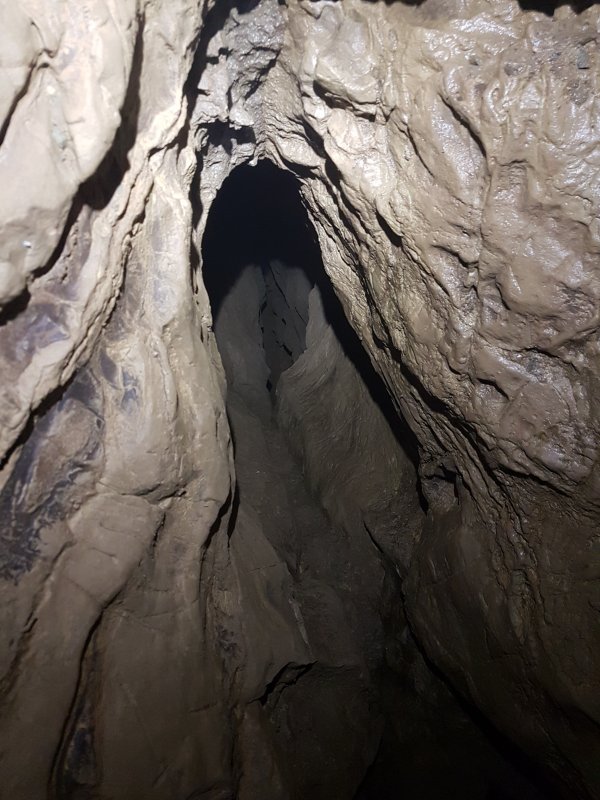 Looking down the climb. It would be a lot easier downwards, but some of the squeezes are significantly harder in that direction, and realistically, the direction that we are going is the better one.
 A side passage at the top of the climb passes through a narrow section.
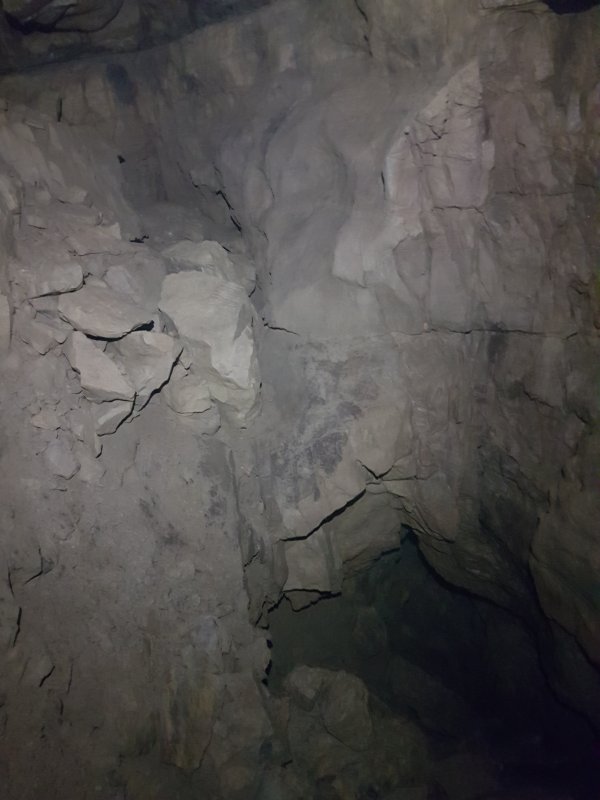 It ends in a small chamber.
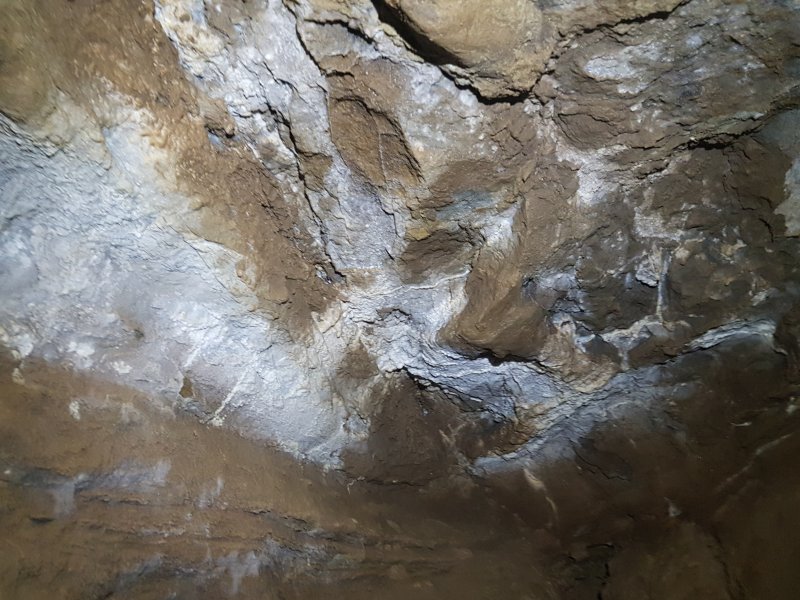 The ceiling of the chamber.
 Cryostal in the chamber.
 The way on from the top of the climb is an obvious rift.
Modelling by Pete, Gareth and Dickon's helmet, lighting by Tarquin, Pete, Gareth and Dickon
The way on from the top of the climb is an obvious rift.
Modelling by Pete, Gareth and Dickon's helmet, lighting by Tarquin, Pete, Gareth and Dickon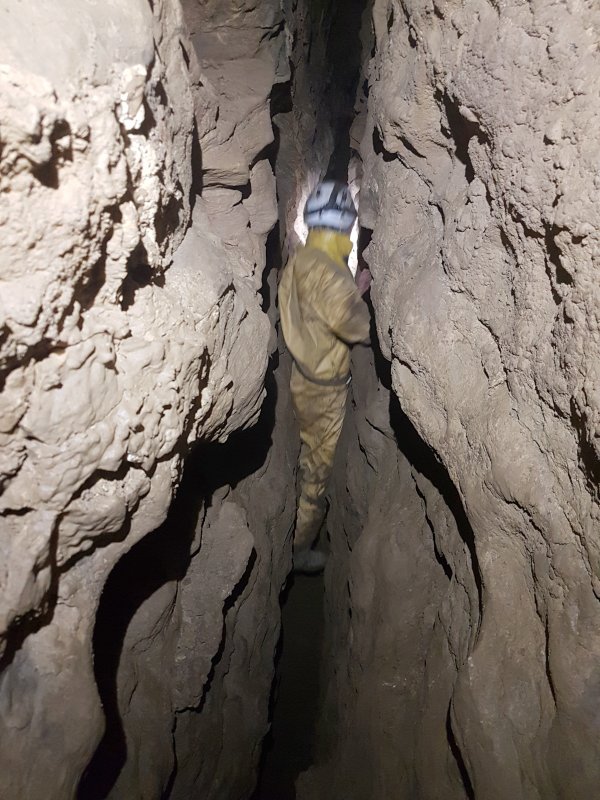 The bottom of the rift becomes the only part wide enough to get through, but it is very narrow indeed at its start. Normal sized cavers would definitely prefer to continue along the rift, and drop down at a point wide enough to do so. This squeeze is very committing; it is not tight, but trying to get vertically up this rift would prove extremely challenging. If you go through here, you now have to complete the loop, or you have to somehow get yourself back up through this squeeze.
Modelling by Pete, lighting by Tarquin and Pete
The bottom of the rift becomes the only part wide enough to get through, but it is very narrow indeed at its start. Normal sized cavers would definitely prefer to continue along the rift, and drop down at a point wide enough to do so. This squeeze is very committing; it is not tight, but trying to get vertically up this rift would prove extremely challenging. If you go through here, you now have to complete the loop, or you have to somehow get yourself back up through this squeeze.
Modelling by Pete, lighting by Tarquin and Pete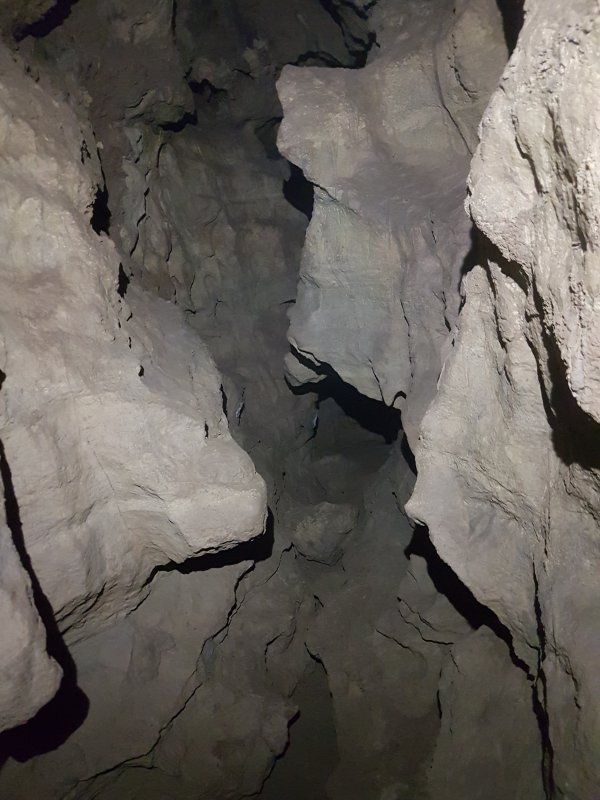 The passage splits with an eyehole at head height ahead and this large passage to the left. The eyehole is the way on.
 The side passage soon reaches a climb down into a larger passage which does not look easy to free climb. The passage ends soon ahead.
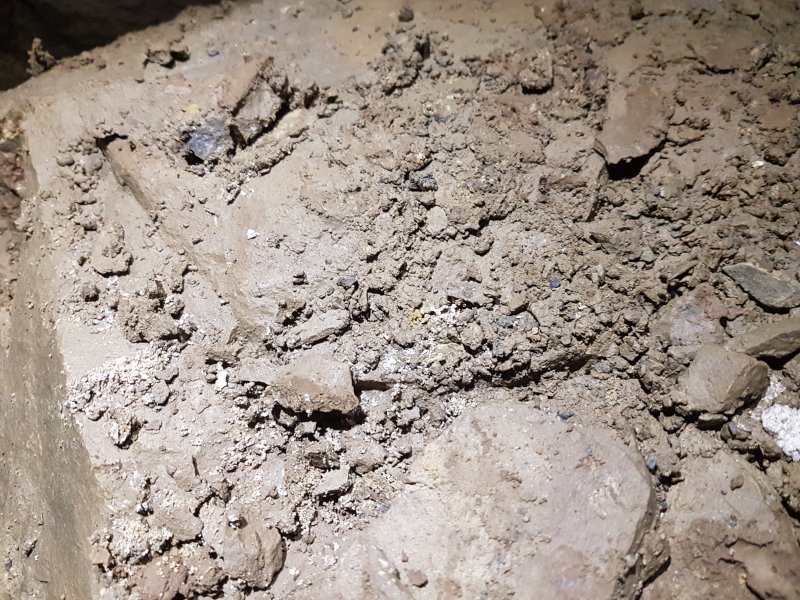 Cryostal on the boulders in the side passage.
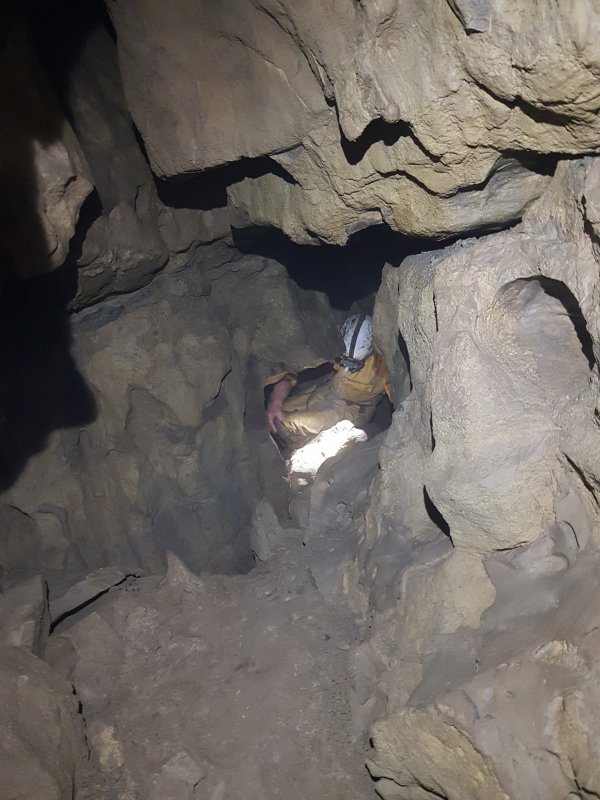 The eyehole passage starts off as a crawl.
Modelling by Pete, lighting by Tarquin and Pete
The eyehole passage starts off as a crawl.
Modelling by Pete, lighting by Tarquin and Pete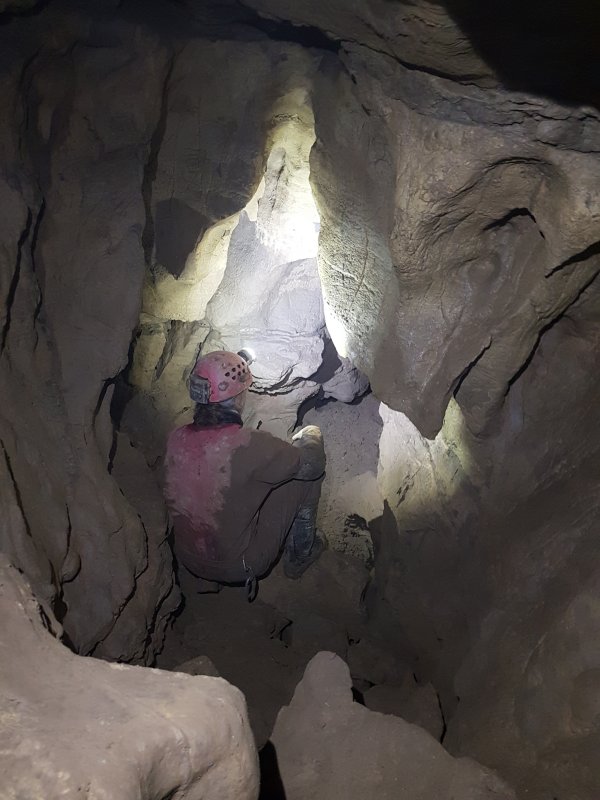 The passage threatens to get bigger.
Modelling by Gareth, lighting by Tarquin and Gareth
The passage threatens to get bigger.
Modelling by Gareth, lighting by Tarquin and Gareth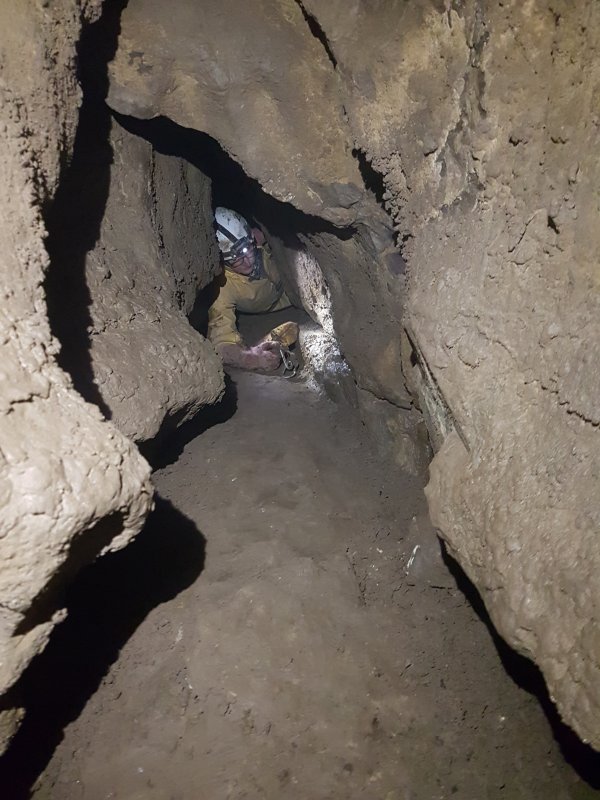 But then at a junction with a dead end passage on the right, it gets smaller again. A crawl on your side, but not a squeeze.
Modelling by Pete, lighting by Tarquin and Pete
But then at a junction with a dead end passage on the right, it gets smaller again. A crawl on your side, but not a squeeze.
Modelling by Pete, lighting by Tarquin and Pete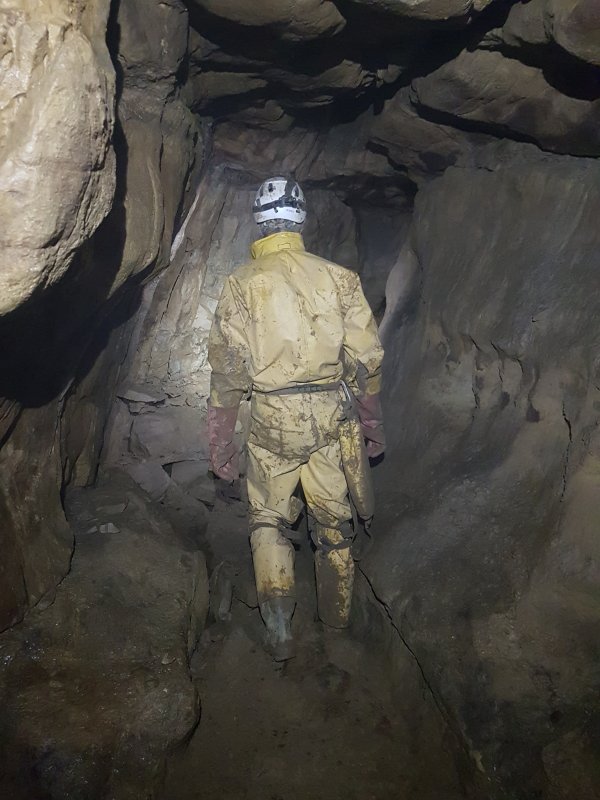 This suddenly enlarges to become one of the largest passages in Kababarama Drama.
Modelling by Pete, lighting by Tarquin and Pete
This suddenly enlarges to become one of the largest passages in Kababarama Drama.
Modelling by Pete, lighting by Tarquin and Pete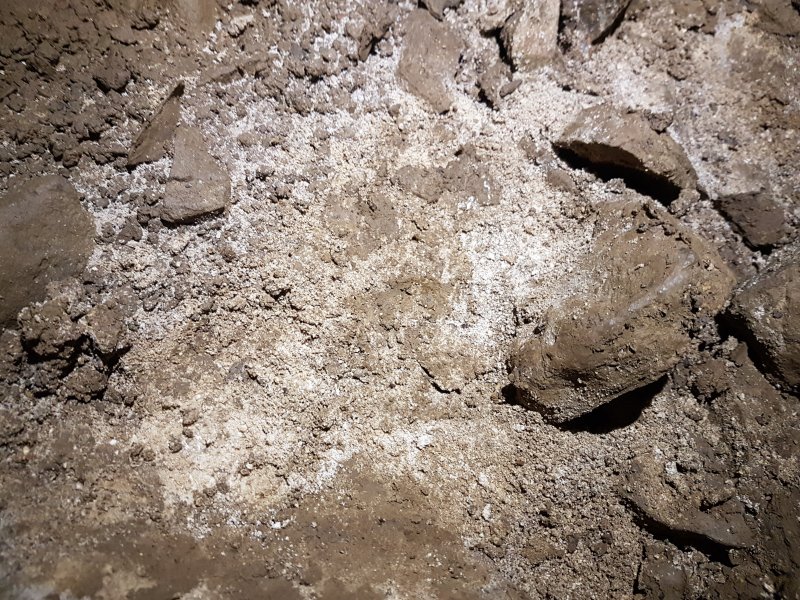 White deposit at a boulder pile in the large passage. This might be cryogenic, but is very fine, so it might just be a light coloured mud. The boulder pile sits above the choke at the end of the right branch of Kababarama Drama.
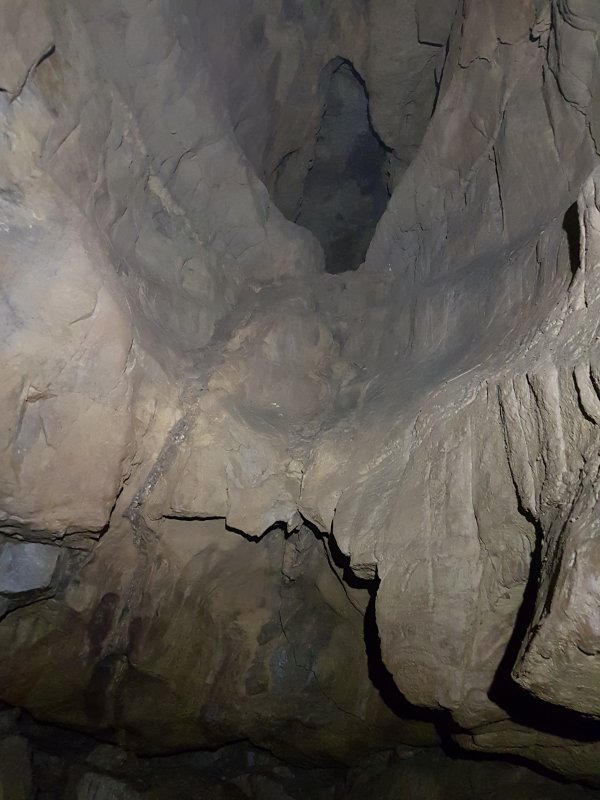 A roof tube appears to be a connection with an insanely tight squeeze seen later.
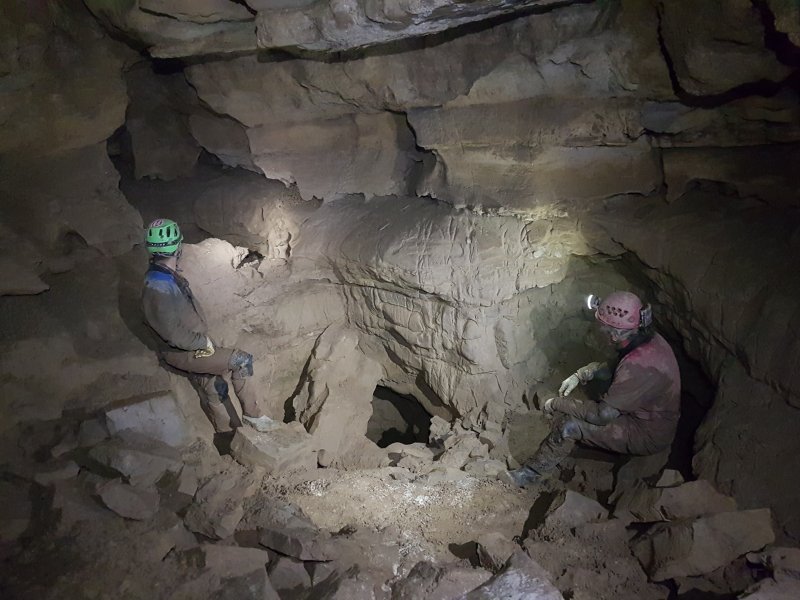 The large passage abruptly ends, with all ways on ahead closing down immediately.
Modelling by Gareth and Dickon, lighting by Tarquin, Pete, Gareth and Dickon
The large passage abruptly ends, with all ways on ahead closing down immediately.
Modelling by Gareth and Dickon, lighting by Tarquin, Pete, Gareth and Dickon White powder deposit on the boulders. This might have some cryogenic origin, but is missing the white beads that are normally seen with cryostal. Instead there are some clumps of powder.
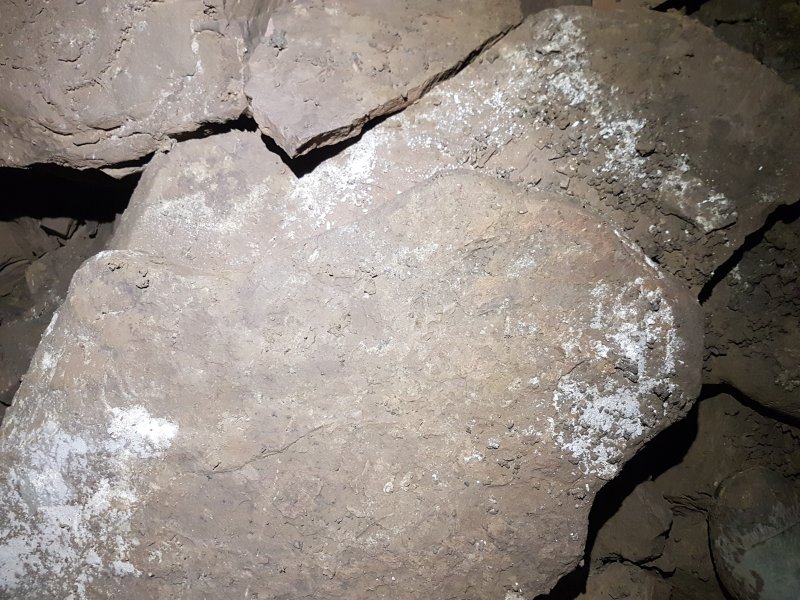 Deposits on the boulders.
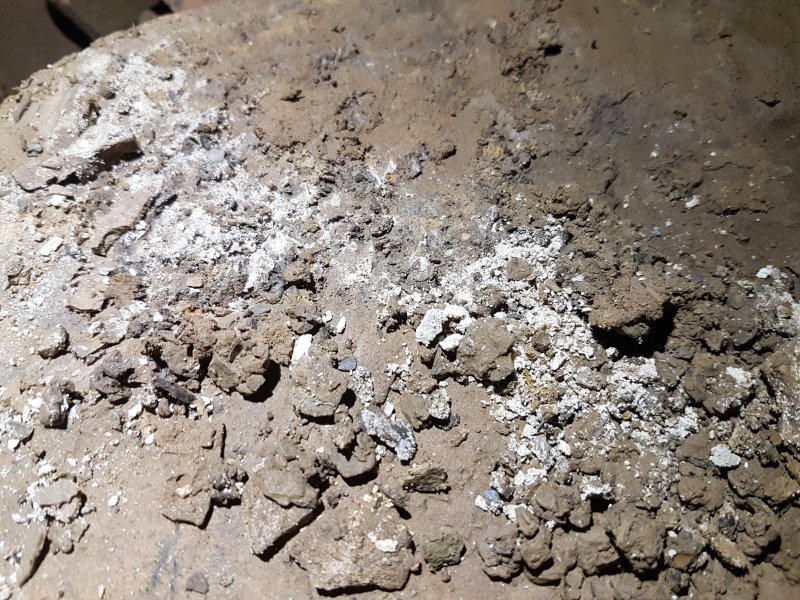 Deposits on the boulders.
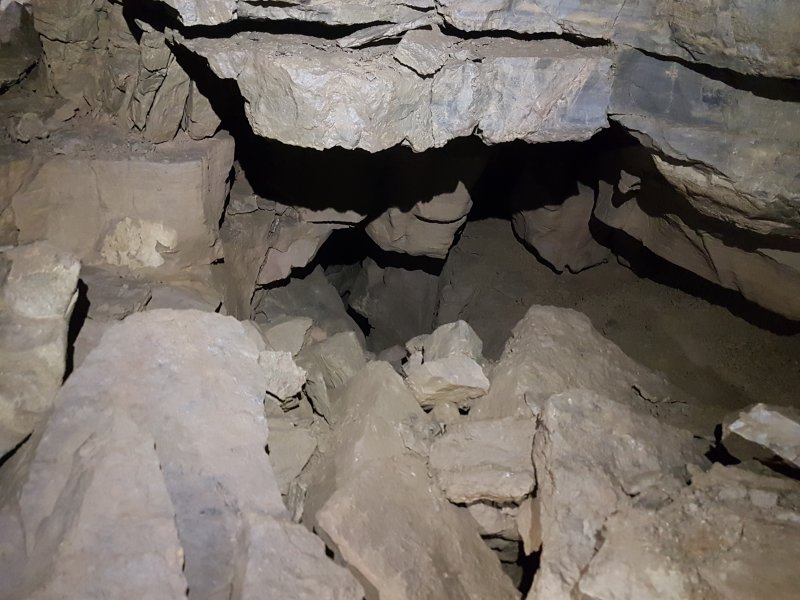 A short stub of passage on the left at the end which appears to be a way on, but is only short.
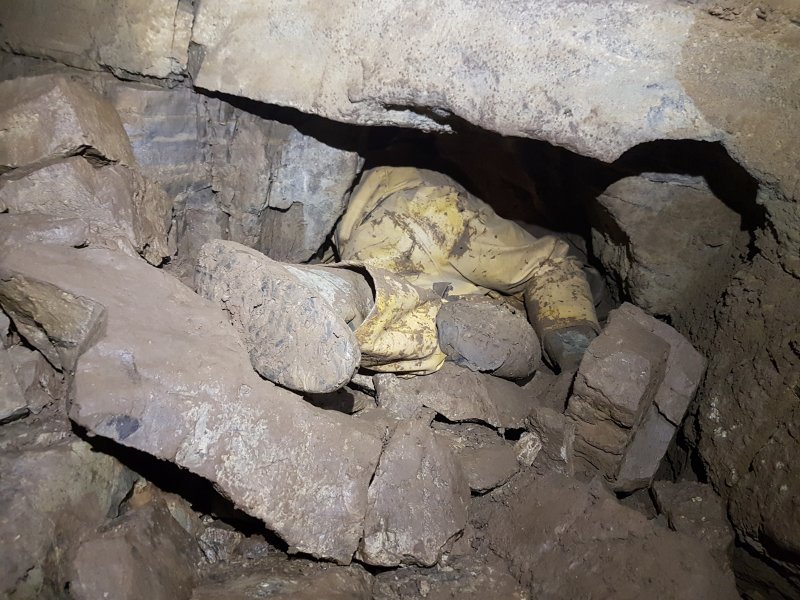 The actual way on is a crawl on the left just before it.
Modelling by Pete, lighting by Tarquin and Gareth
The actual way on is a crawl on the left just before it.
Modelling by Pete, lighting by Tarquin and Gareth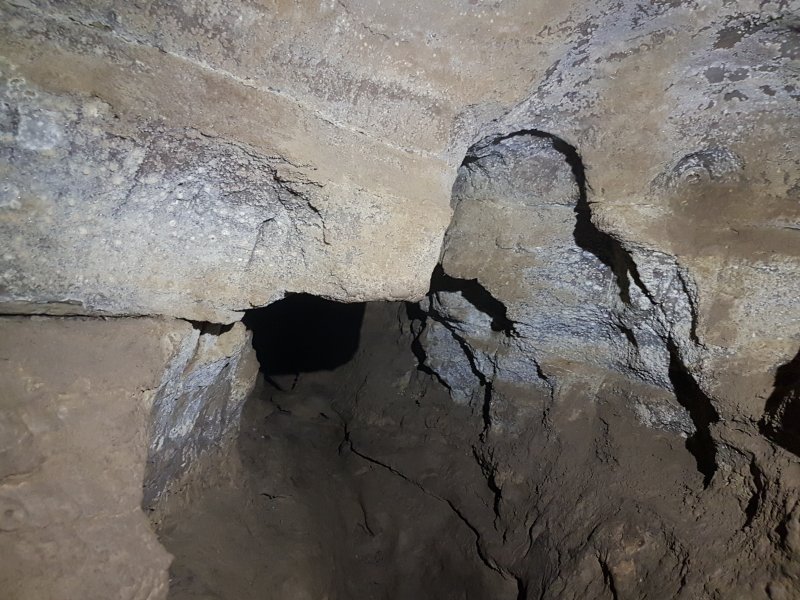 Ceiling of the crawl, which has a lot of selenite/gypsum. Maybe this is the source of that white powder.
 The crawl passes through a tight squeeze. Right arm first, left arm tucked under your chest. It feels a bit unnatural, but it works here.
Modelling by Pete
The crawl passes through a tight squeeze. Right arm first, left arm tucked under your chest. It feels a bit unnatural, but it works here.
Modelling by Pete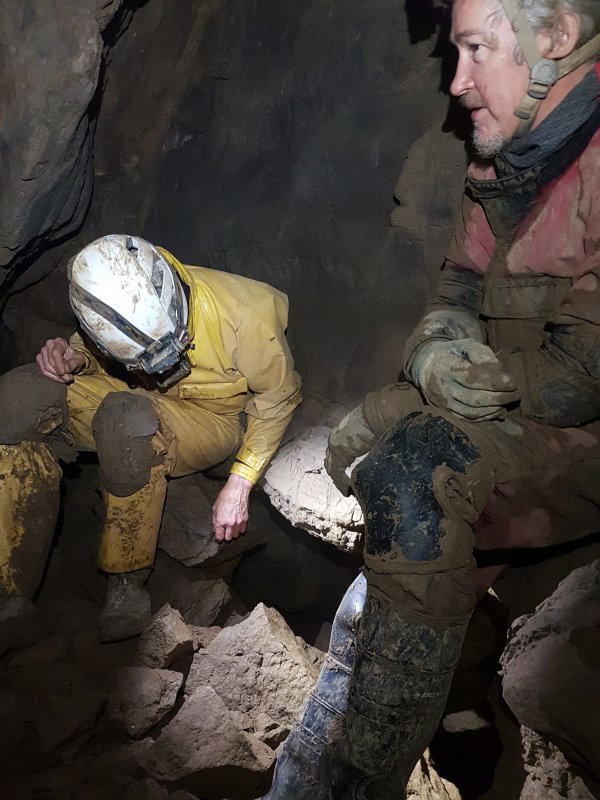 Chamber after the squeeze, which has a choked aven. The way on is under the wall by their feet.
Modelling by Gareth and Pete, lighting by Tarquin, Gareth and Pete
Chamber after the squeeze, which has a choked aven. The way on is under the wall by their feet.
Modelling by Gareth and Pete, lighting by Tarquin, Gareth and Pete Cryostal in the chamber.
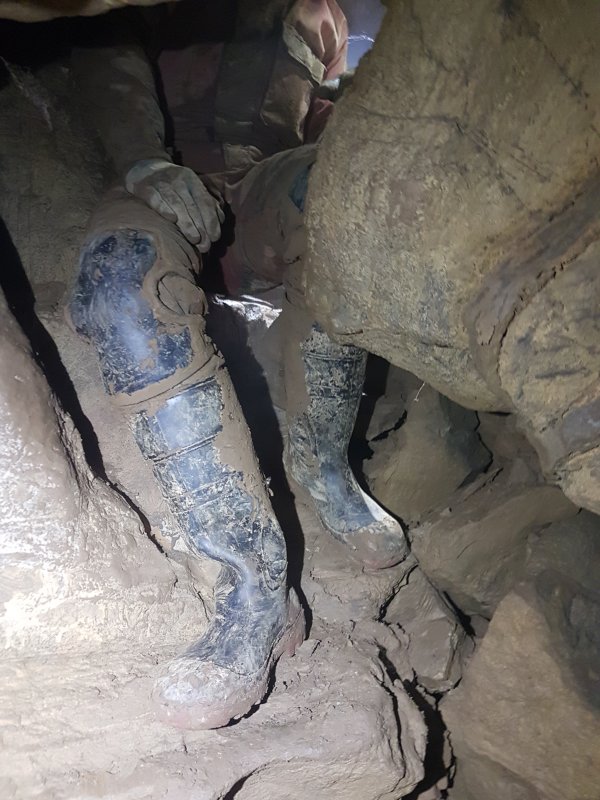 Clambering down the hole from the chamber.
Modelling by Gareth, lighting by Tarquin, Gareth and Pete
Clambering down the hole from the chamber.
Modelling by Gareth, lighting by Tarquin, Gareth and Pete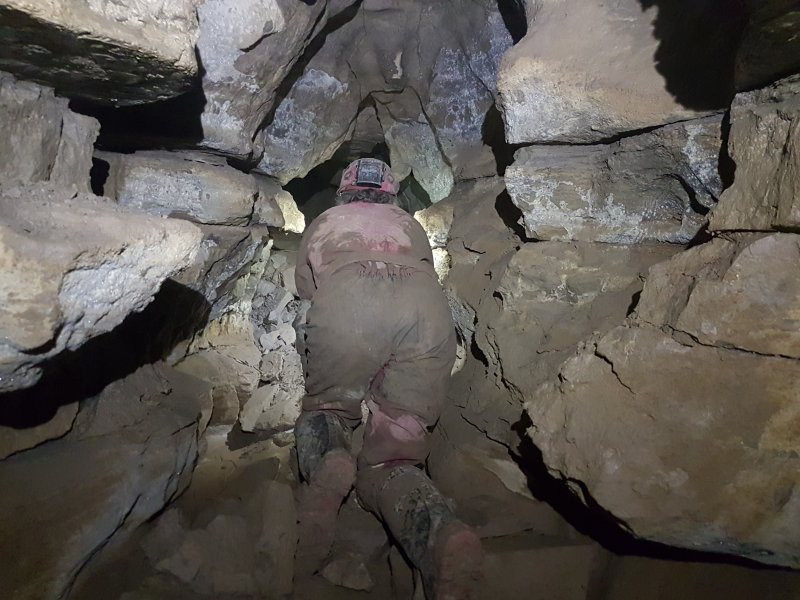 At last, a much better crawl.
Modelling by Gareth, lighting by Tarquin and Gareth
At last, a much better crawl.
Modelling by Gareth, lighting by Tarquin and Gareth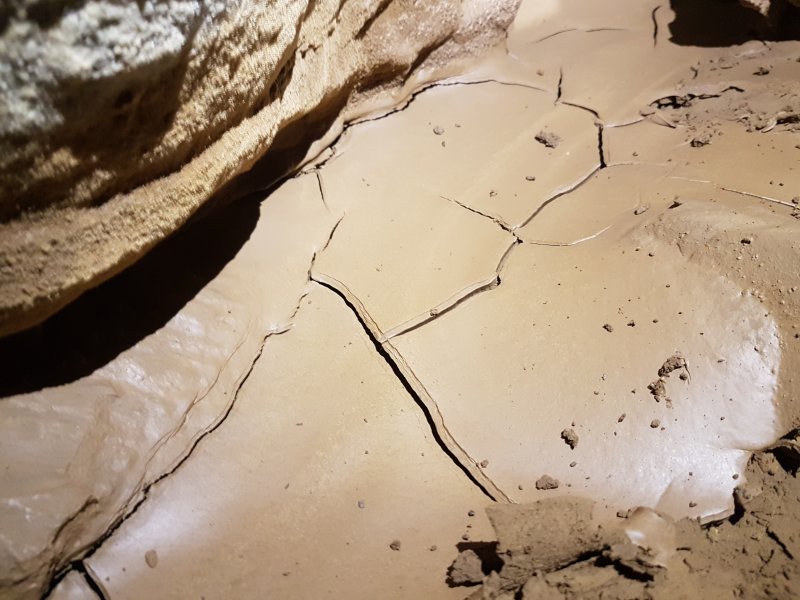 Mud formations in the crawl.
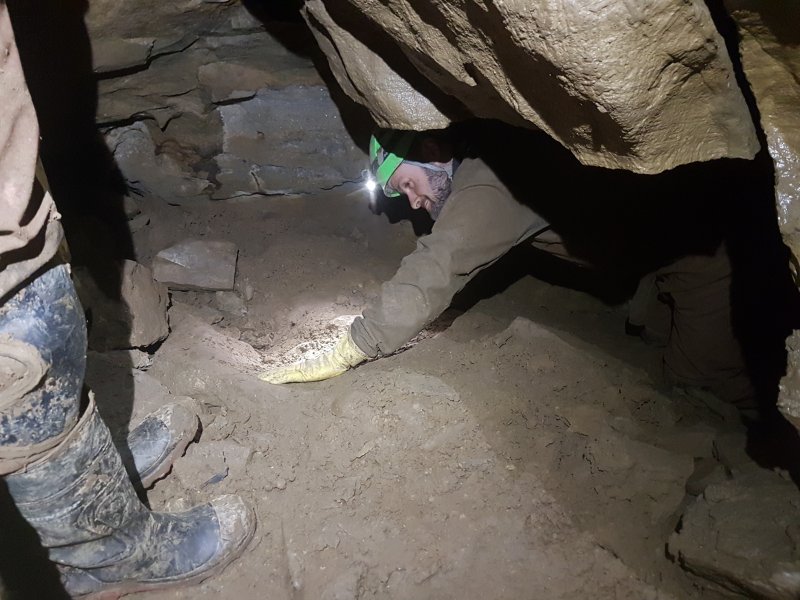 The crawl emerges under the wall in a tall rift. I had failed to spot this when trying to follow the loop in reverse on the first trip, despite standing in front of it, and looking for a passage.
Modelling by Gareth's wellies and Dickon, lighting by Tarquin, Gareth and Dickon
The crawl emerges under the wall in a tall rift. I had failed to spot this when trying to follow the loop in reverse on the first trip, despite standing in front of it, and looking for a passage.
Modelling by Gareth's wellies and Dickon, lighting by Tarquin, Gareth and Dickon The rift closes down to the right just past a pile of fallen rocks. To the left it also closes down quickly.
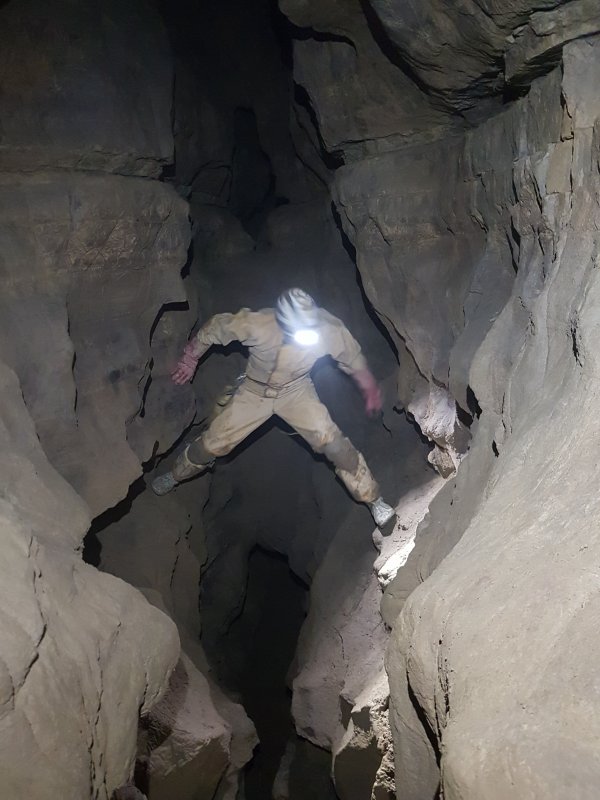 When we visited this passage in the opposite direction, we had traversed over the rift, continuing on the far side.
Modelling by Pete, lighting by Tarquin and Pete
When we visited this passage in the opposite direction, we had traversed over the rift, continuing on the far side.
Modelling by Pete, lighting by Tarquin and Pete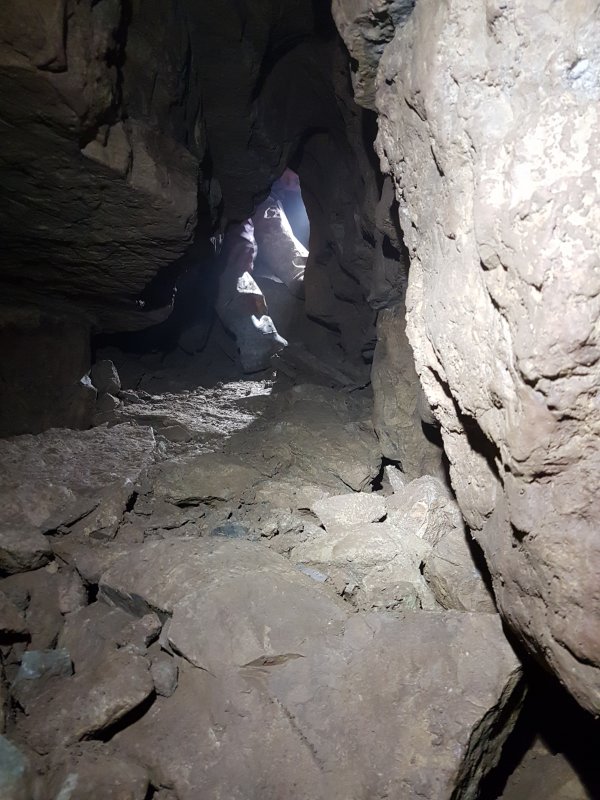 On the far side (to the left when following the round trip) at ceiling level, a narrow rift leads up through a rubble choke.
Modelling by Pete, lighting by Tarquin and Pete
On the far side (to the left when following the round trip) at ceiling level, a narrow rift leads up through a rubble choke.
Modelling by Pete, lighting by Tarquin and Pete A slightly wider passage beyond the rift.
Modelling by Pete, lighting by Tarquin and Pete
A slightly wider passage beyond the rift.
Modelling by Pete, lighting by Tarquin and Pete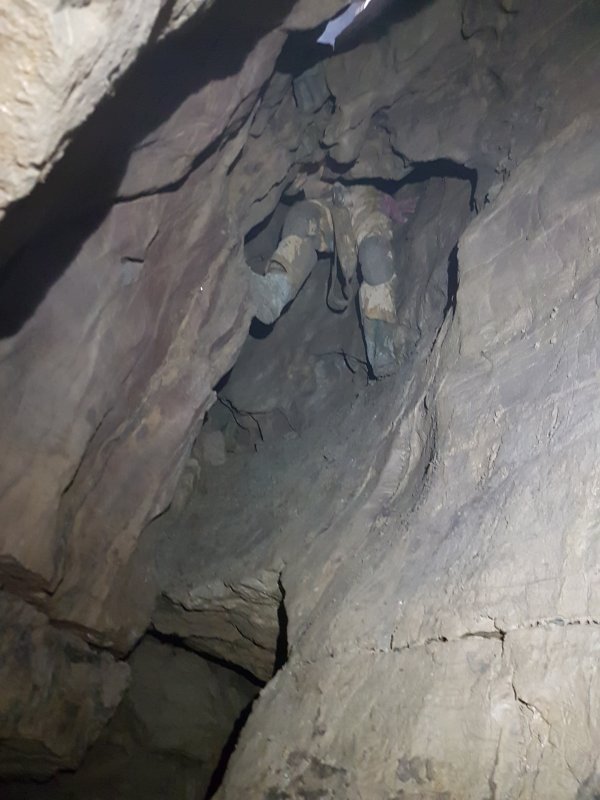 At the end, a climb down lands in a dead end chamber.
Modelling by Pete, lighting by Tarquin and Pete
At the end, a climb down lands in a dead end chamber.
Modelling by Pete, lighting by Tarquin and Pete Alcoves give false hope everwhere, but there is no way on down here.
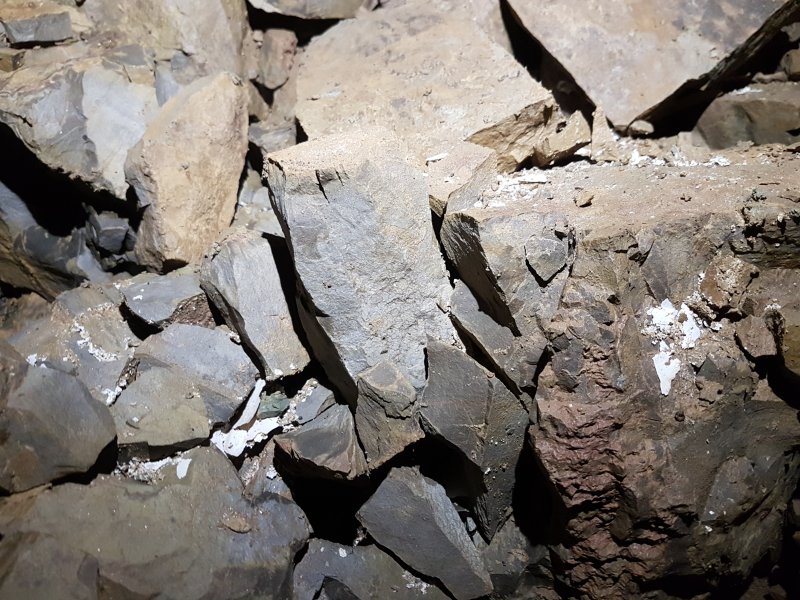 Some fine cryostal rafts in the dead end chamber.
 Part way down the climb, an insanely narrow rift passes through a ridiculous squeeze into a crawl. This appears to link to the roof tube in the large passage in Kababarama Drama. We were not feeling small enough to fit, and even so, posting yourself into this squeeze - while levitating above the climb - would prove very challenging indeed.
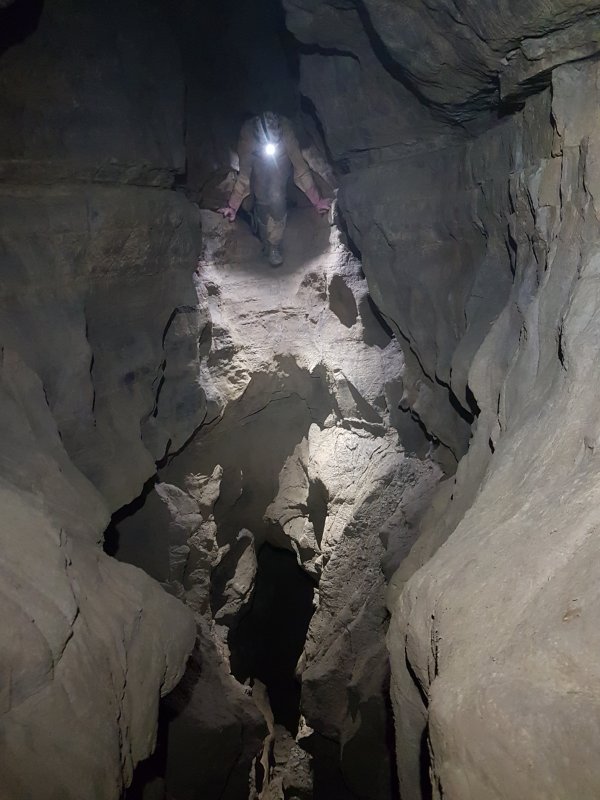 The way on is at the top of the rift to the right. This passes over a hole where rocks drop into the rift below, and then through a crawl into the big stuff.
Modelling by Pete, lighting by Tarquin and Pete
The way on is at the top of the rift to the right. This passes over a hole where rocks drop into the rift below, and then through a crawl into the big stuff.
Modelling by Pete, lighting by Tarquin and Pete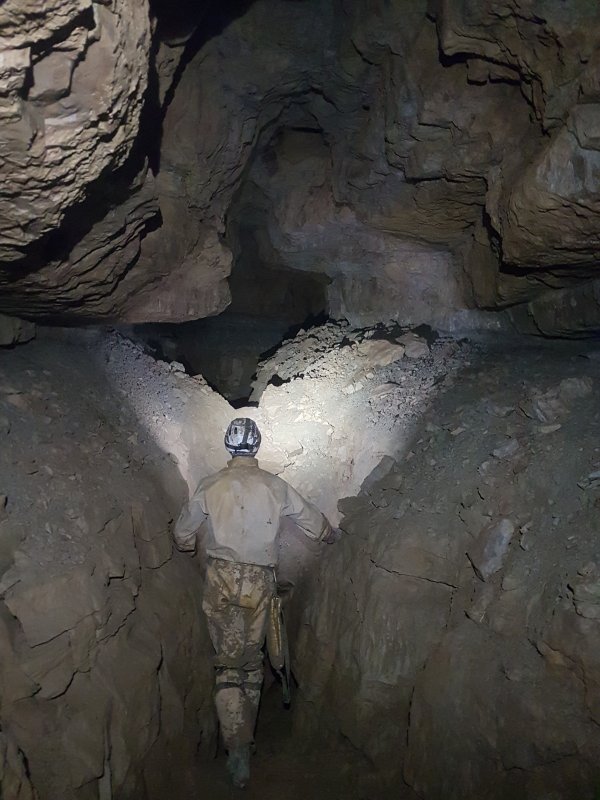 To the left is a passage that becomes too tight, nearly connecting with Indigo Rift. But the obvious way on is ahead into a diamond shaped passage, traversing over a deep rift. The passage has no name on the survey, despite being a major conduit, but is presumably part of Kababarama Drama.
Modelling by Pete, lighting by Tarquin and Pete
To the left is a passage that becomes too tight, nearly connecting with Indigo Rift. But the obvious way on is ahead into a diamond shaped passage, traversing over a deep rift. The passage has no name on the survey, despite being a major conduit, but is presumably part of Kababarama Drama.
Modelling by Pete, lighting by Tarquin and Pete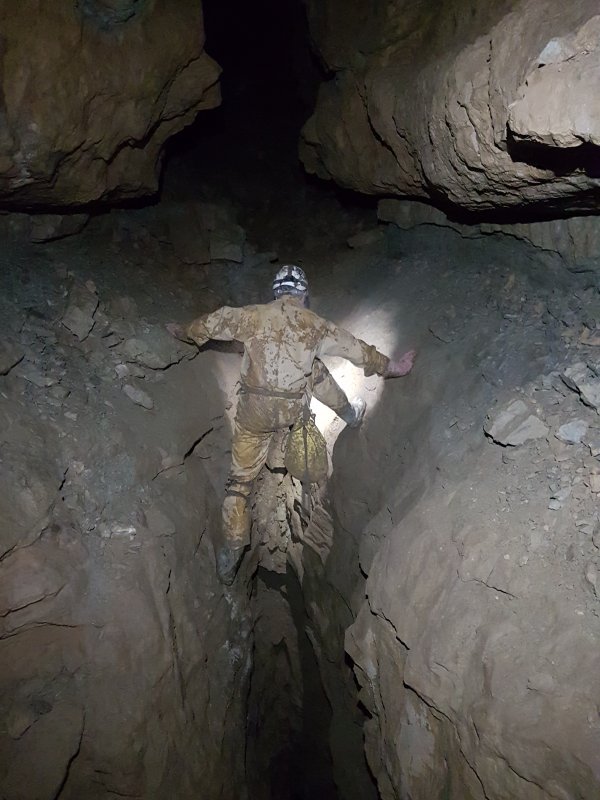 Climbing up to a junction with a dead end phreas rising up to the left.
Modelling by Pete, lighting by Tarquin and Pete
Climbing up to a junction with a dead end phreas rising up to the left.
Modelling by Pete, lighting by Tarquin and Pete The way on is a squeeze down to the right. This is not particularly tight, but needs you to work out how to arrange your shoulders into the squeeze to get through. It is possible in both directions, but is substantially harder on the way up. You do not normally need to remove your helmet. It lands in a tall rift which also has no name on the survey, but I refer to it as the southern rift, which repeatedly drops and climbs steeply.
Modelling by Pete, lighting by Tarquin and Pete
The way on is a squeeze down to the right. This is not particularly tight, but needs you to work out how to arrange your shoulders into the squeeze to get through. It is possible in both directions, but is substantially harder on the way up. You do not normally need to remove your helmet. It lands in a tall rift which also has no name on the survey, but I refer to it as the southern rift, which repeatedly drops and climbs steeply.
Modelling by Pete, lighting by Tarquin and Pete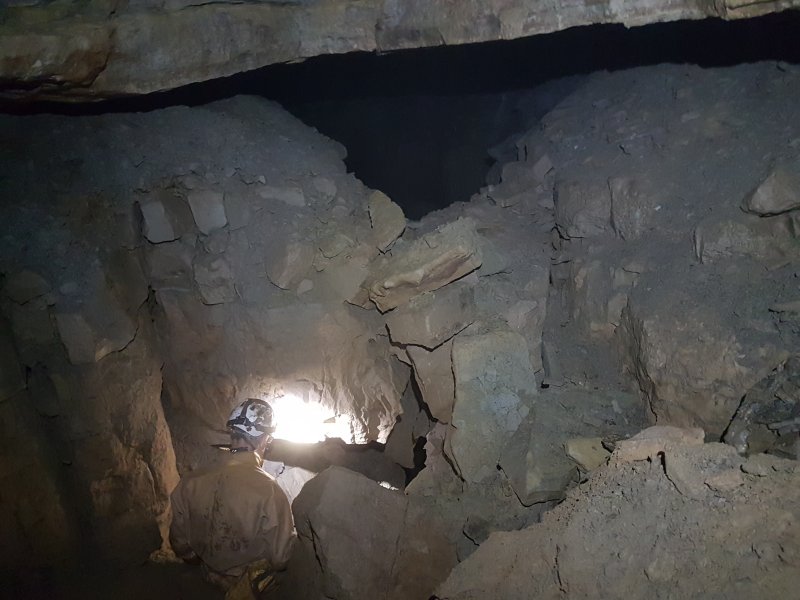 After passing over the climb down to the end of the round trip, continuing ahead rises through a grotto to a rocky collapse. From here onwards, this is no longer a round trip, so we have to return to the climb down to leave the series.
Modelling by Pete, lighting by Tarquin and Pete
After passing over the climb down to the end of the round trip, continuing ahead rises through a grotto to a rocky collapse. From here onwards, this is no longer a round trip, so we have to return to the climb down to leave the series.
Modelling by Pete, lighting by Tarquin and Pete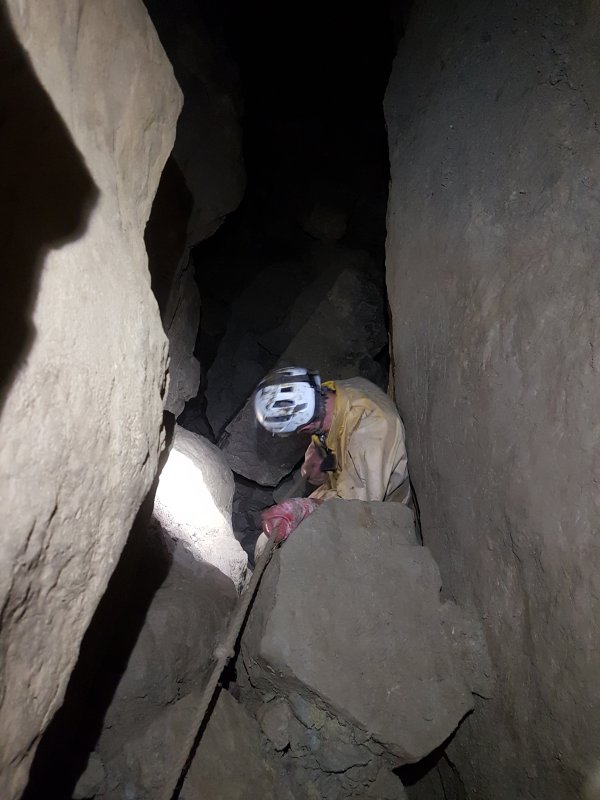 Down in the floor is the first rope climb, dropping into a taller passage.
Modelling by Pete, lighting by Tarquin and Pete
Down in the floor is the first rope climb, dropping into a taller passage.
Modelling by Pete, lighting by Tarquin and Pete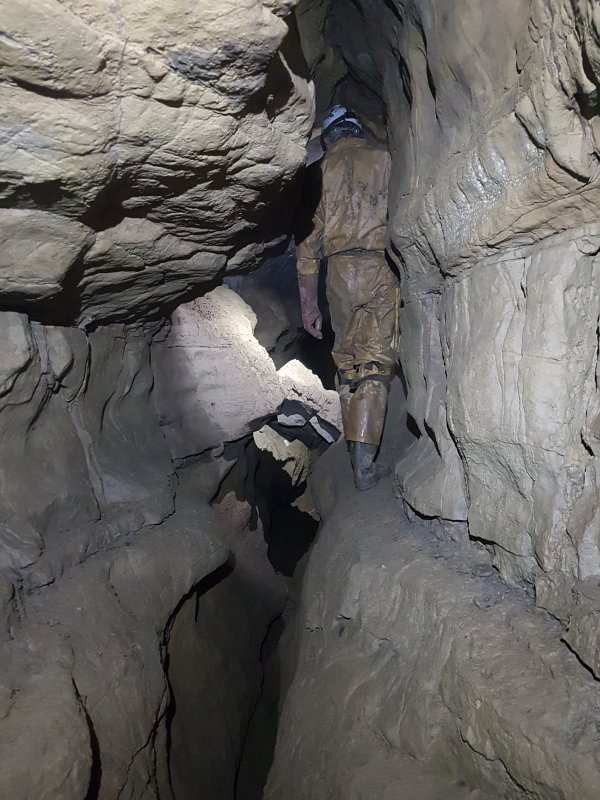 The passage then shrinks again, requiring a couple of short traverses to get past boulders.
Modelling by Pete, lighting by Tarquin and Pete
The passage then shrinks again, requiring a couple of short traverses to get past boulders.
Modelling by Pete, lighting by Tarquin and Pete A beautiful phreas that would not look out of place in OFD. The floor is covered in cryostal.
Modelling by Pete, lighting by Tarquin and Pete
A beautiful phreas that would not look out of place in OFD. The floor is covered in cryostal.
Modelling by Pete, lighting by Tarquin and Pete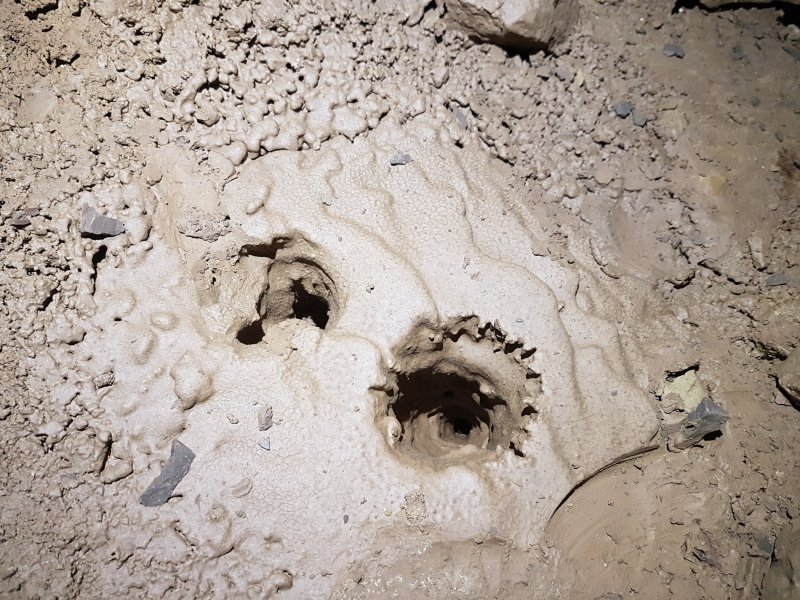 Drip pockets in the phreas.
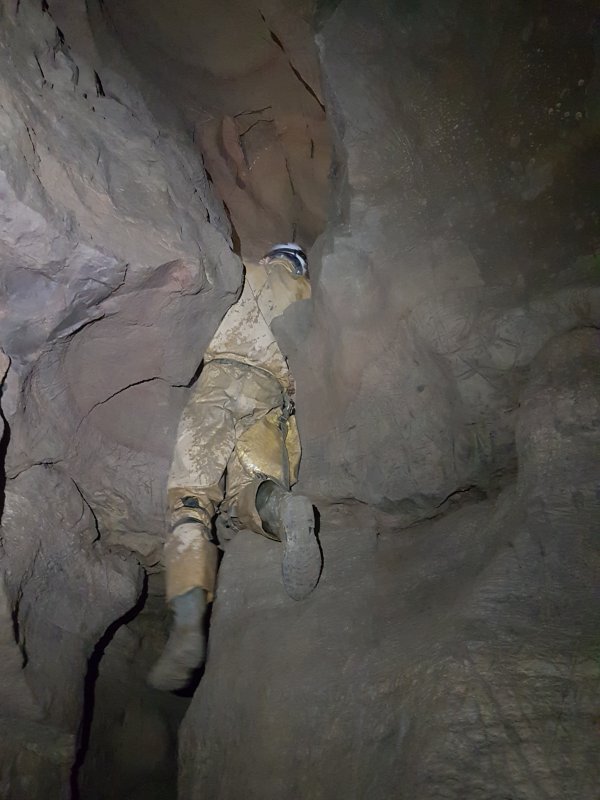 The passage immediately closes down to a narrow rift that ends, and the way on is a thrutchy climb above the rift. It really deserves a rope.
Modelling by Pete, lighting by Tarquin and Pete
The passage immediately closes down to a narrow rift that ends, and the way on is a thrutchy climb above the rift. It really deserves a rope.
Modelling by Pete, lighting by Tarquin and Pete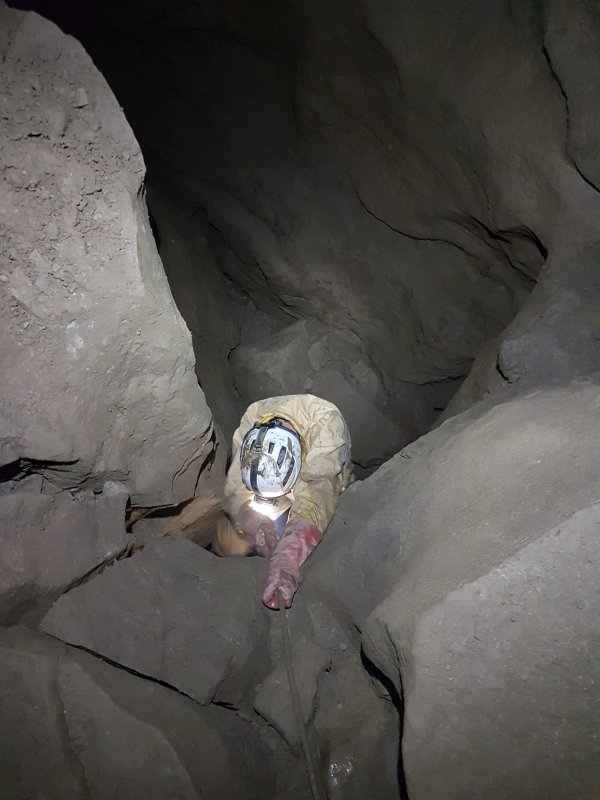 The passage soon reaches a second rope climb down.
Modelling by Pete, lighting by Tarquin and Pete
The passage soon reaches a second rope climb down.
Modelling by Pete, lighting by Tarquin and Pete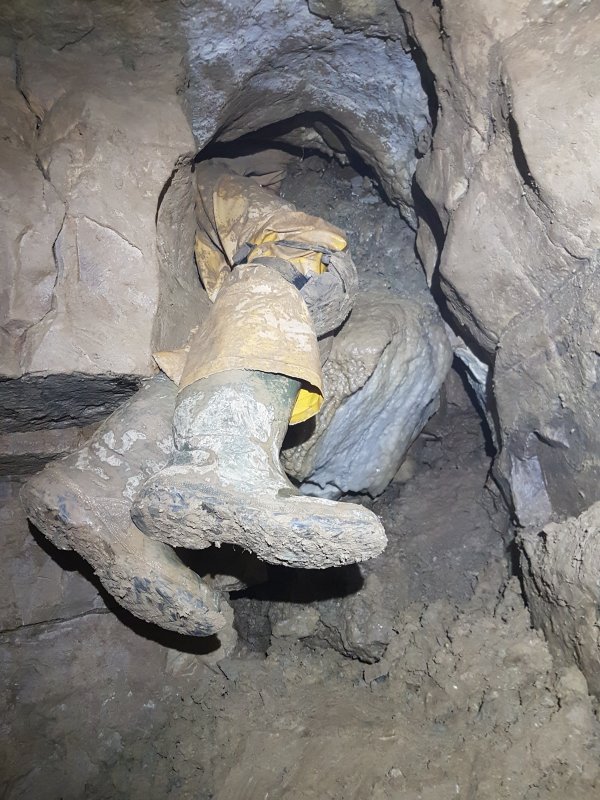 The passage used to end at this choke, but after the flooding incident, the survey showed that the dry passages on the far side of Passendale were on the other side of the choke. So some determined effort was put into passing the choke, making it much safer to access Nevill Hall, irrespective of flooding.
Modelling by Pete
The passage used to end at this choke, but after the flooding incident, the survey showed that the dry passages on the far side of Passendale were on the other side of the choke. So some determined effort was put into passing the choke, making it much safer to access Nevill Hall, irrespective of flooding.
Modelling by Pete Once through the choke, a side passage on the right drops down to a very deep sump pool, with an obvious continuing passage. The survey shows a loop here with a chamber, but does not show a sump. It is possible that there is a higher level loop (there is an alcove at water level on the right that might be a passage), but is this perhaps seasonally dry? This is seen here after several weeks of drought.
Modelling by Pete, lighting by Tarquin and Pete
Once through the choke, a side passage on the right drops down to a very deep sump pool, with an obvious continuing passage. The survey shows a loop here with a chamber, but does not show a sump. It is possible that there is a higher level loop (there is an alcove at water level on the right that might be a passage), but is this perhaps seasonally dry? This is seen here after several weeks of drought.
Modelling by Pete, lighting by Tarquin and Pete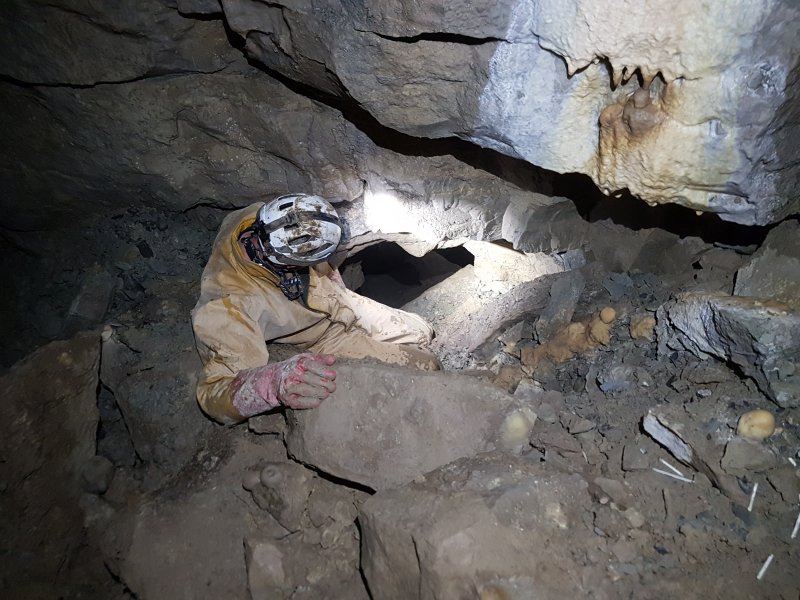 After passing through boulders in a crater, the next side passage down on the right is the original way in, via Passendale. It drops to a sandy crawl with a blind hole to water on the right. After crawling under a low arch, it enlarges, before closing down ahead.
Modelling by Pete, lighting by Tarquin and Pete
After passing through boulders in a crater, the next side passage down on the right is the original way in, via Passendale. It drops to a sandy crawl with a blind hole to water on the right. After crawling under a low arch, it enlarges, before closing down ahead.
Modelling by Pete, lighting by Tarquin and Pete A slippery climb down on the right lands in water. This can vary in depth depending on flooding conditions, as this whole area sits just above the water table.
 To the right ends immediately, with a lot of fresh mud formations.
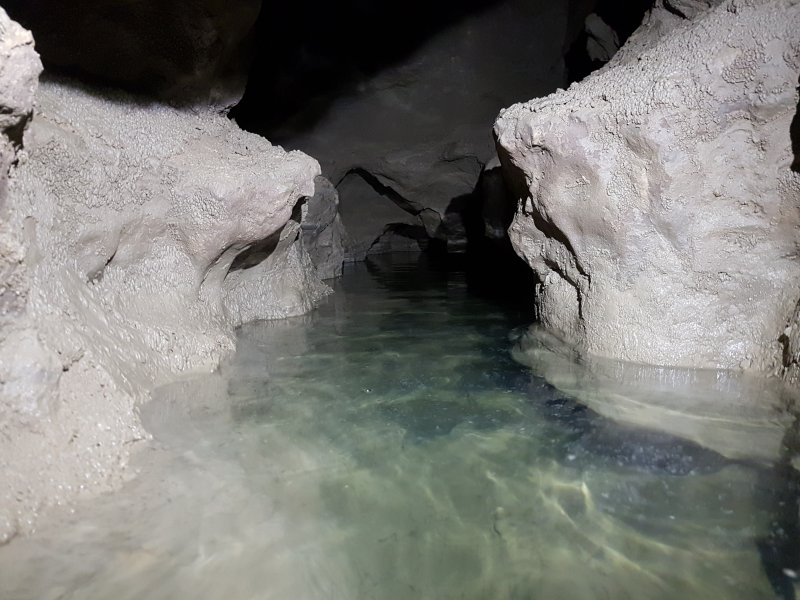 To the left is a crawl, which becomes a lower crawl with only enough air space to keep one ear dry, when seen in drought conditions like this. The mud on the walls looks lovely, but the floor becomes glutinous very quickly as you crawl through it. This is the seasonal sump which nearly ended the exploration of this area.
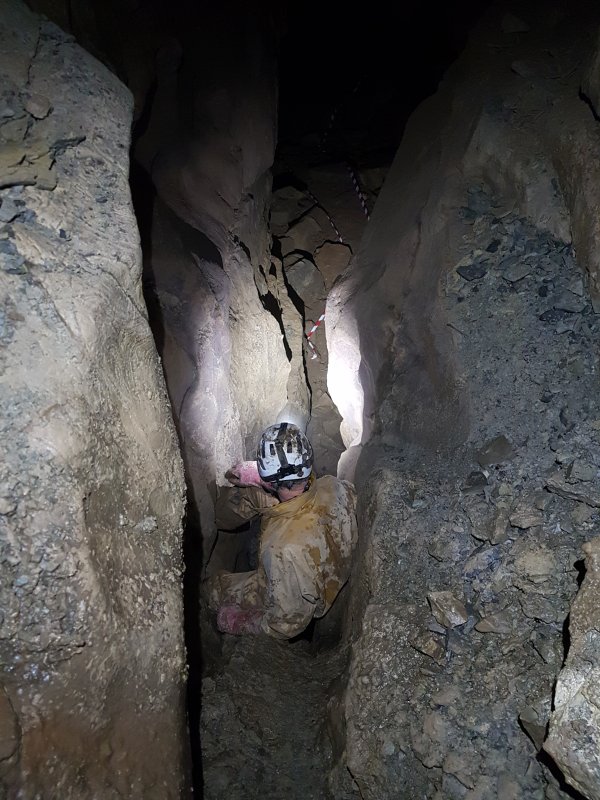 The final climb down, which lands at the start of Nevill Hall. This one deserves a rope, but can be climbed without one - the lower part needs you to tack further along the passage to find footholds.
Modelling by Pete, lighting by Tarquin and Pete
The final climb down, which lands at the start of Nevill Hall. This one deserves a rope, but can be climbed without one - the lower part needs you to tack further along the passage to find footholds.
Modelling by Pete, lighting by Tarquin and Pete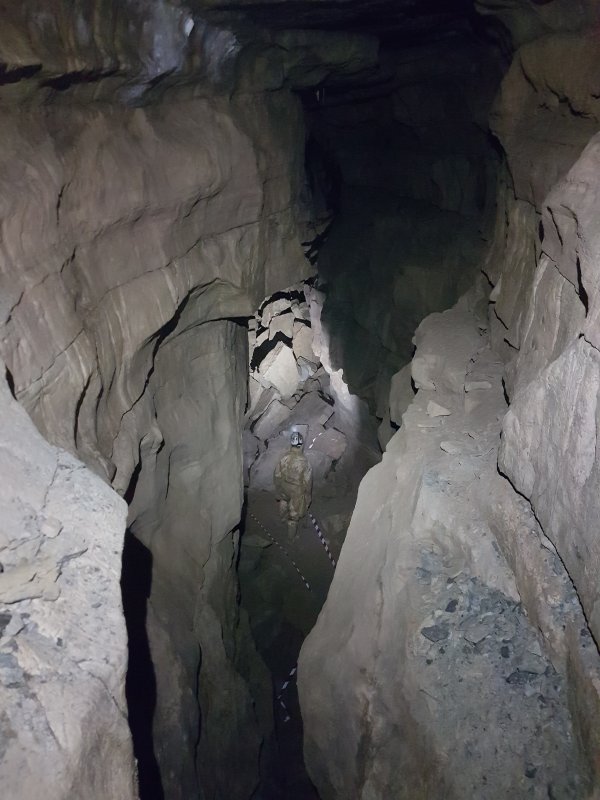 Looking into Nevill Hall from the top of the climb.
Modelling by Pete, lighting by Tarquin and Pete
Looking into Nevill Hall from the top of the climb.
Modelling by Pete, lighting by Tarquin and Pete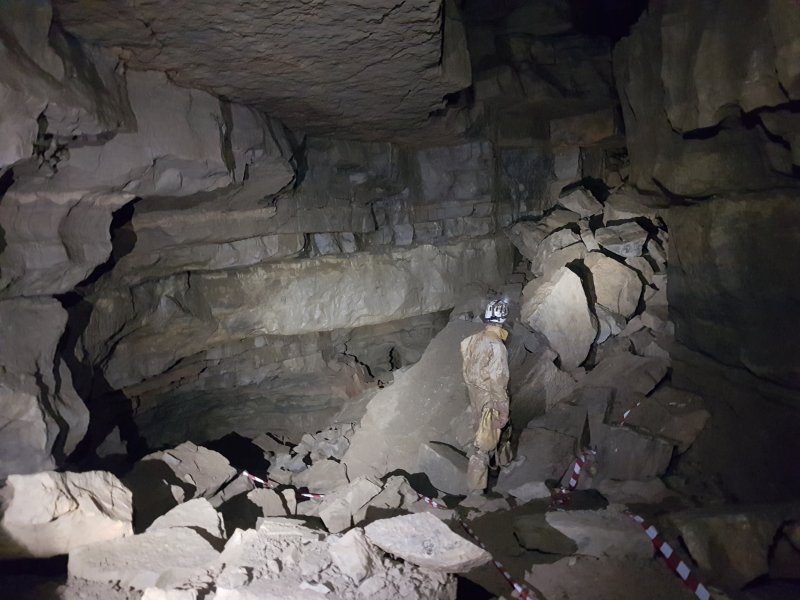 The first chamber of Nevill Hall, named after the hospital in Abergavenny. On the left here is a major side passage, while the main way on is ahead.
Modelling by Pete, lighting by Tarquin and Pete
The first chamber of Nevill Hall, named after the hospital in Abergavenny. On the left here is a major side passage, while the main way on is ahead.
Modelling by Pete, lighting by Tarquin and Pete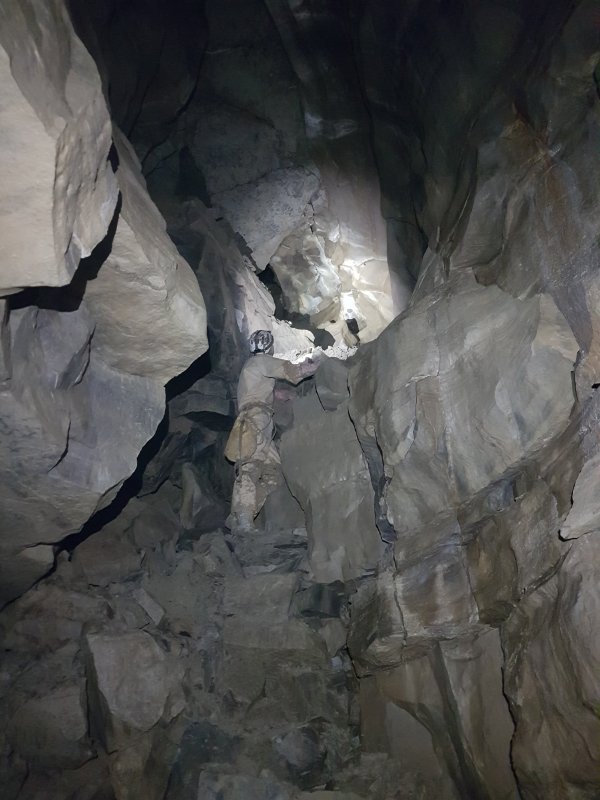 The side passage is a very large phreas carrying a very small stream, which runs into a choke. There is this loose climb up over the choke into a chamber with several digs and avens, that is very close to Pixie Meadows in Saint Giles Series. The stream probably supplies the lower level streamway in Pixie Meadows.
Modelling by Pete, lighting by Tarquin and Pete
The side passage is a very large phreas carrying a very small stream, which runs into a choke. There is this loose climb up over the choke into a chamber with several digs and avens, that is very close to Pixie Meadows in Saint Giles Series. The stream probably supplies the lower level streamway in Pixie Meadows.
Modelling by Pete, lighting by Tarquin and Pete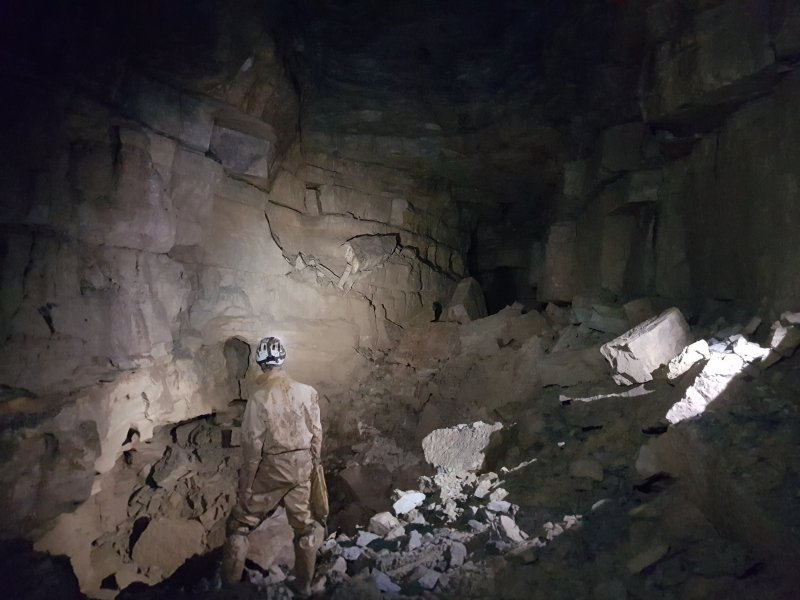 The main way on is ahead into the second chamber of Nevill Hall, which is rotationally symmetrical to the first part. Under the right wall (left wall seen here), there is a wriggle past boulders into a side passage.
Modelling by Pete, lighting by Tarquin and Pete
The main way on is ahead into the second chamber of Nevill Hall, which is rotationally symmetrical to the first part. Under the right wall (left wall seen here), there is a wriggle past boulders into a side passage.
Modelling by Pete, lighting by Tarquin and Pete Cryostal in the crawl.
 Mud covered cryostal covering the floor of a low chamber in the crawl.
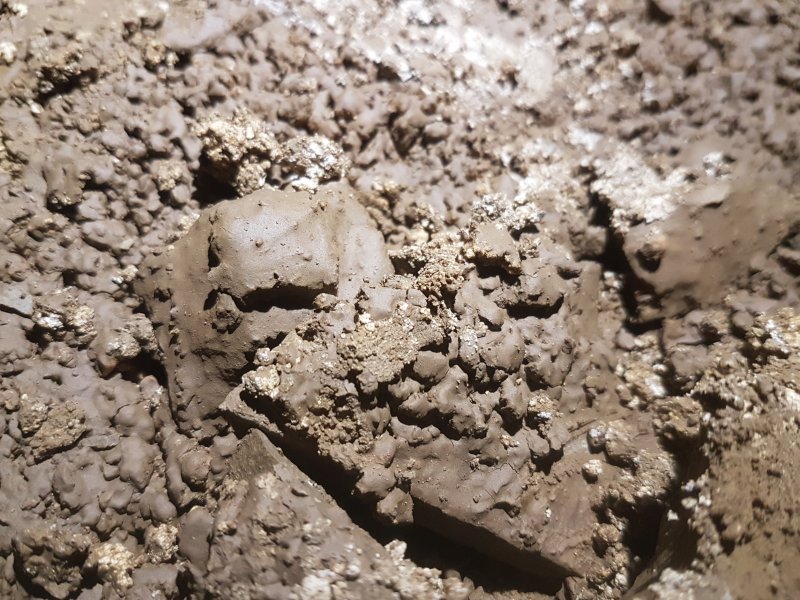 Mud covered cryostal.
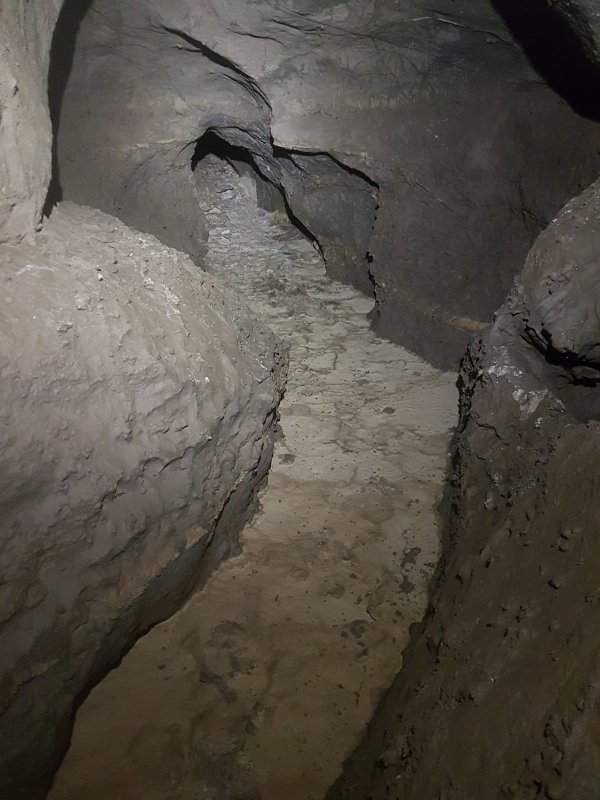 Stream of mini gours, which look like a combination of flowstone and mud, in the low chamber.
 A hole down on one side dropped into water. The hole gurgled constantly, and clearly has a fairly large amount of water passing through the passages beyond it. An eyehole above gave a view into a rift that presumably can be reached through that puddle, but this was visited during flood conditions, and it would not be safe to enter it. This passage is supposed to connect to the upstream end of Passendale.
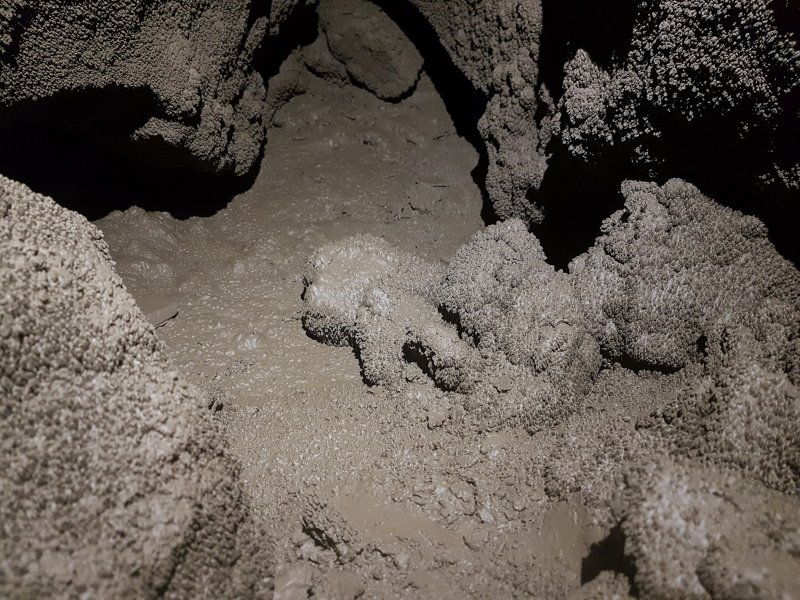 Very fresh mud formations in an alcove in the low chamber. This passage clearly floods much more severely than it was during this visit. Presumably the water will be at its highest during winter floods.
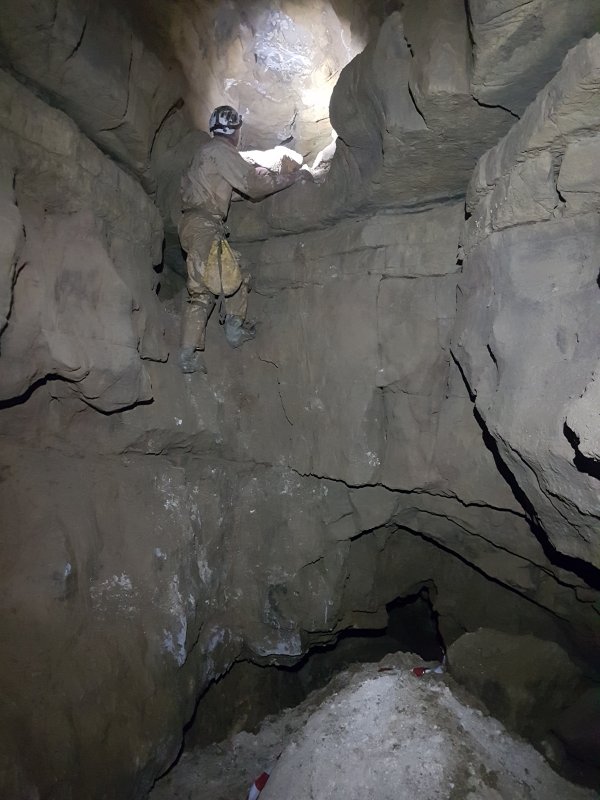 Beyond Nevill Hall, the large passage closes down, and a passage ahead-left regains it via this climb down, landing on a huge pile of gypsum.
Modelling by Pete, lighting by Tarquin and Pete
Beyond Nevill Hall, the large passage closes down, and a passage ahead-left regains it via this climb down, landing on a huge pile of gypsum.
Modelling by Pete, lighting by Tarquin and Pete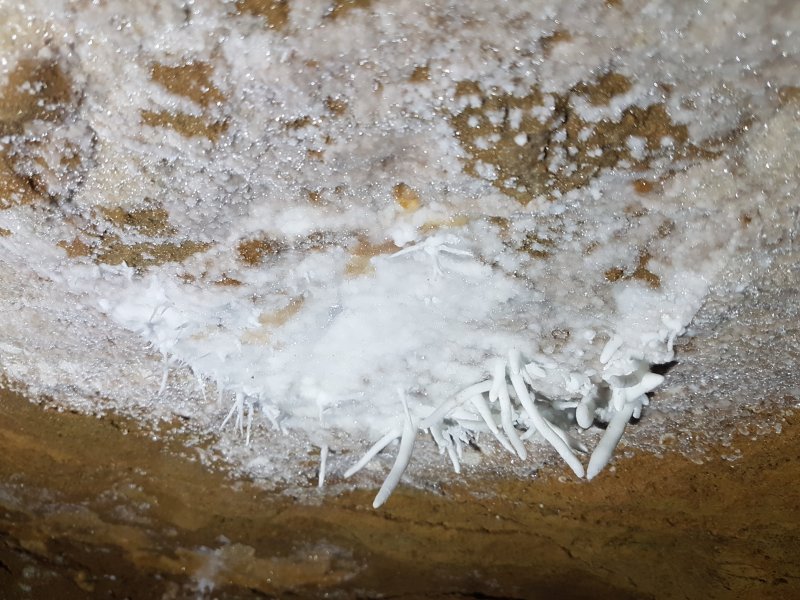 Helictites at the head of the climb.
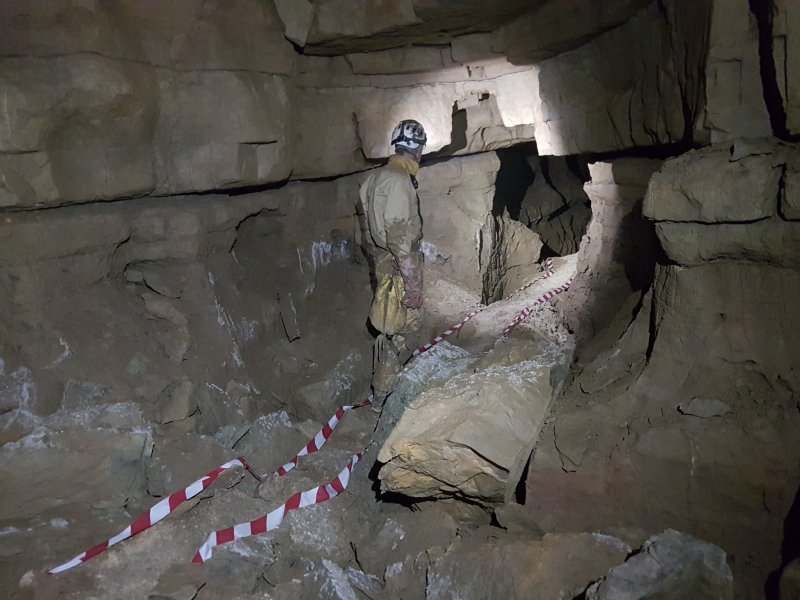 The ongoing passage is a very comfortable size.
Modelling by Pete, lighting by Tarquin and Pete
The ongoing passage is a very comfortable size.
Modelling by Pete, lighting by Tarquin and Pete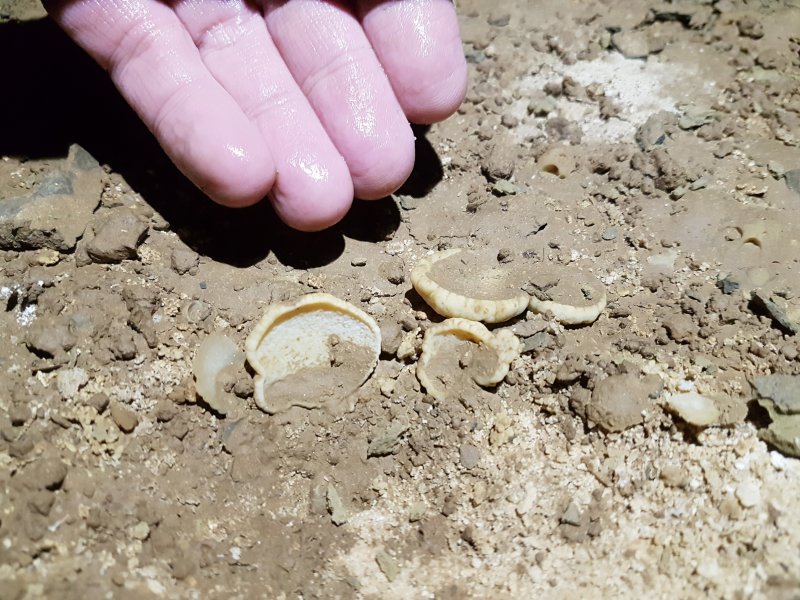 Very large cryostal cups in the passage.
Modelling by Pete
Very large cryostal cups in the passage.
Modelling by Pete Traverse up the left wall leading to the end of the passage. This reaches a pitch down with a climb up to a perched sump beyond it, which was being dug many years ago. It is probably sourced from water in The Last Post.
Modelling by Pete, lighting by Tarquin and Pete
Traverse up the left wall leading to the end of the passage. This reaches a pitch down with a climb up to a perched sump beyond it, which was being dug many years ago. It is probably sourced from water in The Last Post.
Modelling by Pete, lighting by Tarquin and Pete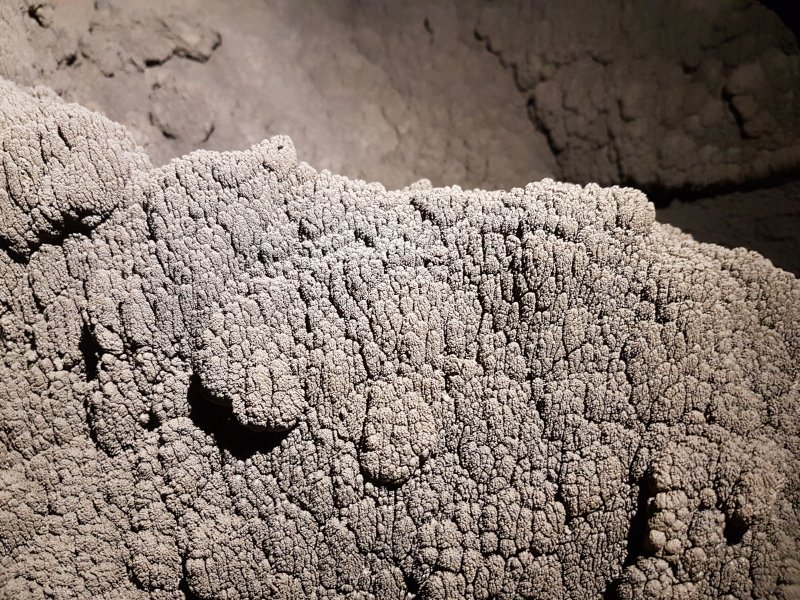 Beneath the traverse is a blind alcove containing some superb mud formations.
 Mud formations beneath the traverse.
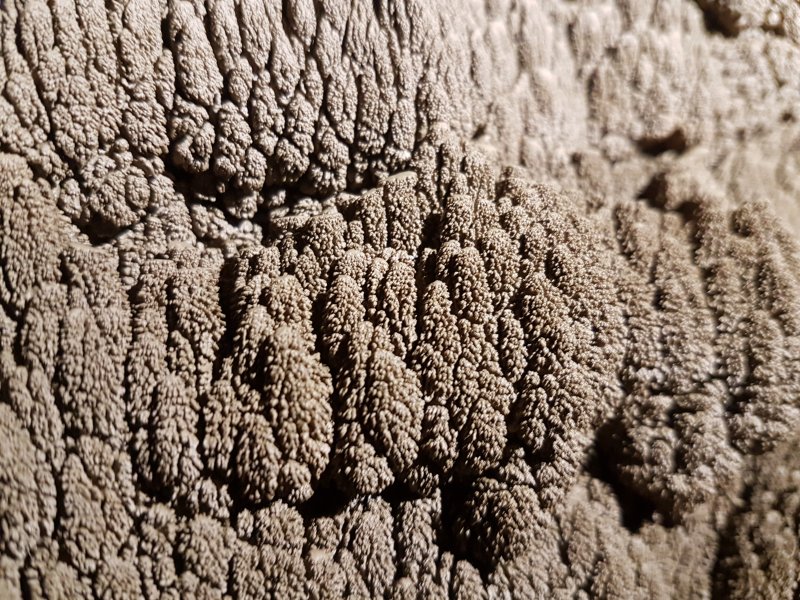 Mud formations beneath the traverse.
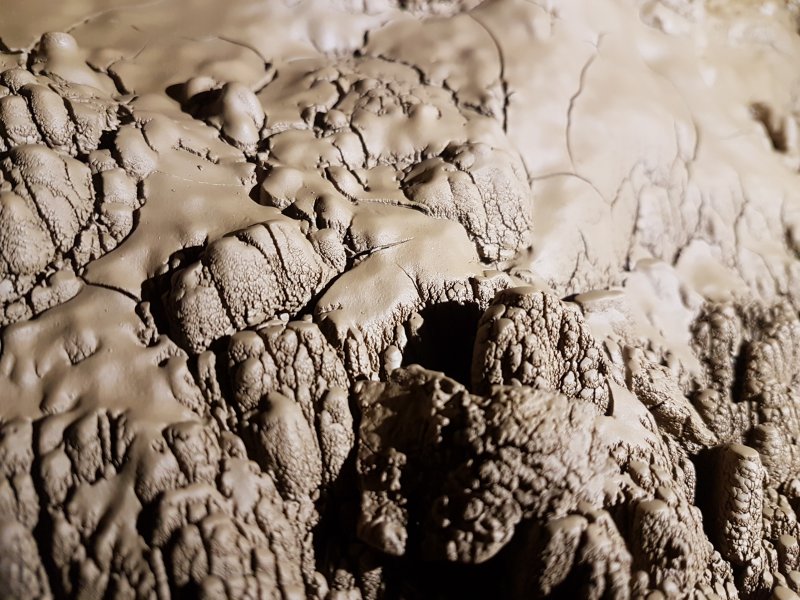 Mud formations beneath the traverse.
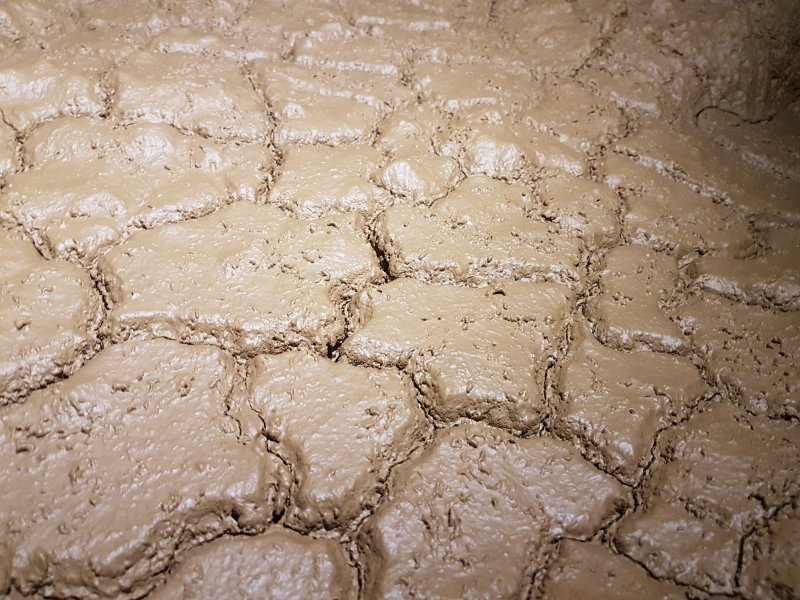 Mud formations beneath the traverse.