Ogof Ffynnon Ddu Crevasse and OFD III trips 03/09/2022, 16/04/2024 and 04/05/2025
This gallery details three attempts to reach this end of the cave, with the first intentionally stopping at The Crevasse. The second was an attempt to learn what equipment was needed to reach OFD III, but having no idea exactly what was needed, which caused the trip to be abandoned half way down The Crevasse. The third was a properly prepared trip which reached the end, which has been described as being like an Alpine expedition. We used relatively minimal SRT gear, abseling with Italian hitches on a belay belt, traversing with cows tails, and using ascenders for safety with handlines.
23 years previously, I had done this route with only a rope on The Chasm and The Crevasse, and before that, people had done The Crevasse without a rope at all. However, the route is becoming worn smooth, and ropes are now almost essential, as a slip would prove fatal at these heights. For The Chasm, we abseiled on a 17 metre rope, configured for pull-through; this leaves the pitch head without any backup. Climbing out the other side of The Chasm used the handline which was already in situ (I have previously done it without a rope, but it is quite hard). Poached Egg needed a 10 metre rope for the traverse (we have often done this without a rope, but Claire has been thrown off it when a handhold gave way, and was badly injured, so a rope is a good idea). For The Crevasse, we abseiled the top section with a 30 metre rope on that and the traverse, and used a 10 metre ladder with 20 metre lifeline on the second section. The 17 metre rope was then used as a lifeline on a little climb. We took the 17 metre and a 30 metre rope for The Traverses, which were taken with us to the end, but could just as easily have been left in situ. One person needed to traverse with a lifeline (or nothing, if bold enough). The first section needed the 17 metre rope. The middle section had no ropes for most of it, even though it would have been welcomed, because there is nothing to rig from, but the 17 metre rope was somewhat needlessly used at its end. The intimidatingly wide section at the end needed the 30 metre. Rigging on The Traverses was all done using boulders as naturals, some of which would be more psychological than functional. No slings were used, but The Crevasse needed 10 carabiners for the rope, ladders and lifeline, and Poached Egg needed 2. Additional carabiners were needed for lifeline attachment and belaying. Therefore in total we used:
- The Chasm climb down (optional route):
- 17 m pull-through rope.
- The Chasm climb up (optional route):
- In-situ aid handline.
- Poached Egg:
- Optional 10 m rope. Optional 2 carabiners
- The Crevasse:
- 30 m rope (abseil and traverse), 10 m ladder, 20 m lifeline, 10 carabiners (plus personal gear).
- Small climb:
- 17 m lifeline reused.
- The Traverses first section:
- 17 m lifeline/traverse rope reused.
- The Traverses middle section:
- Optional 17 m lifeline/traverse rope reused.
- The Traverses first section:
- 30 m traverse rope.
Unless otherwise stated, camera, setups, lighting, edits and gallery effects by Tarquin. Modelling and lighting at various points will be Steph Andrews, Pete Bolt, John Roe, Claire Vivian and Si Lowis.
 A less common (but still relatively normal) type of cave dwelling spider near Top Entrance, Tegenaria silvestris. This is a very close relative of the house spider, and while it is similarly patterned, it is much smaller, and does not like being in houses. It appears to be female.
Modelling by Sylvia
A less common (but still relatively normal) type of cave dwelling spider near Top Entrance, Tegenaria silvestris. This is a very close relative of the house spider, and while it is similarly patterned, it is much smaller, and does not like being in houses. It appears to be female.
Modelling by Sylvia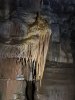 The Octopus, one of the formations at The Wedding Cake.
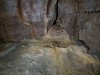 Crystal pools in Chasm Passage.
 Anastomosis (very early passage channels) in Chasm Passage. This is one of the finest examples you will see in Britain, and formed when the boulder was the floor of a bedding plane.
Lighting by Tarquin and Si
Anastomosis (very early passage channels) in Chasm Passage. This is one of the finest examples you will see in Britain, and formed when the boulder was the floor of a bedding plane.
Lighting by Tarquin and Si An early part of Chasm Passage, where the echo is excellent.
Modelling by Pete, lighting by Tarquin and Pete
An early part of Chasm Passage, where the echo is excellent.
Modelling by Pete, lighting by Tarquin and Pete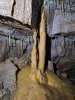 Columns in Chasm Passage.
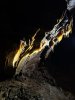 Honey colloured curtains in Chasm Passage
Lighting by Pete
Honey colloured curtains in Chasm Passage
Lighting by Pete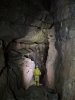 The head of the pitch in Chasm Passage.
Modelling by Pete, lighting by Tarquin and Pete
The head of the pitch in Chasm Passage.
Modelling by Pete, lighting by Tarquin and Pete The pitch in Chasm Passage, which is 8 metres high. We rigged it as a pull-through, using carabiners with an Italian hitch to abseil down using belay belts instead of harnesses. When we did this route in 2002, my brother and I did not know that there are 2 easy routes to this area (we only knew about the Wall Of Death route, which is ludicrously dangerous without a rope), but we had also rigged this as a pull-though, since we needed the rope on The Crevasse. My brother then free climbed this pitch on the way out, and rigged the rope for me.
Modelling by John, Claire and Si, lighting by Tarquin, Steph, John, Claire and Si
The pitch in Chasm Passage, which is 8 metres high. We rigged it as a pull-through, using carabiners with an Italian hitch to abseil down using belay belts instead of harnesses. When we did this route in 2002, my brother and I did not know that there are 2 easy routes to this area (we only knew about the Wall Of Death route, which is ludicrously dangerous without a rope), but we had also rigged this as a pull-though, since we needed the rope on The Crevasse. My brother then free climbed this pitch on the way out, and rigged the rope for me.
Modelling by John, Claire and Si, lighting by Tarquin, Steph, John, Claire and Si Textured crust on the wall, which may be moonmilk, or may be a calcite wicking formation.
Lighting by Tarquin and Steph
Textured crust on the wall, which may be moonmilk, or may be a calcite wicking formation.
Lighting by Tarquin and Steph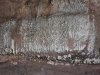 Detail of the texture.
Lighting by Tarquin and Steph
Detail of the texture.
Lighting by Tarquin and Steph Down in The Chasm, where the passage becomes even taller. The very slimy climb down into Swamp Creek is down in the floor, providing yet another route into this area, but far harder than the others.
Modelling by Steph, lighting by Tarquin and Steph
Down in The Chasm, where the passage becomes even taller. The very slimy climb down into Swamp Creek is down in the floor, providing yet another route into this area, but far harder than the others.
Modelling by Steph, lighting by Tarquin and Steph The climb out of The Chasm can be done without a rope, and we had done so in 2002, but it is a very difficult climb, as it tries to throw you off, and has very slippery holds. It is called a pitch on the survey. Fortunately, there was a handline left in situ, which is not official.
Modelling by Steph, lighting by Tarquin and Steph
The climb out of The Chasm can be done without a rope, and we had done so in 2002, but it is a very difficult climb, as it tries to throw you off, and has very slippery holds. It is called a pitch on the survey. Fortunately, there was a handline left in situ, which is not official.
Modelling by Steph, lighting by Tarquin and Steph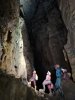 Chasm Passage has several tall sections, but around the climb up, several avens connect to Bagpipe Chamber. This attractive section also has an aven link to Nyth Brân Series.
Modelling by John, Claire, Steph and Si, lighting by Tarquin, John, Claire, Steph and Si
Chasm Passage has several tall sections, but around the climb up, several avens connect to Bagpipe Chamber. This attractive section also has an aven link to Nyth Brân Series.
Modelling by John, Claire, Steph and Si, lighting by Tarquin, John, Claire, Steph and Si Chasm Passage, at the junction with the passage leading to Poached Egg and The Crevasse. High up in the ceiling is where the Wall Of Death hole falls into the passage.
Modelling by Steph, lighting by Tarquin and Steph
Chasm Passage, at the junction with the passage leading to Poached Egg and The Crevasse. High up in the ceiling is where the Wall Of Death hole falls into the passage.
Modelling by Steph, lighting by Tarquin and Steph Calcited alcove near Poached Egg.
 Looking back up Poached Egg, where instead of climbing directly down, the route is to traverse along the wall towards the camera.
Modelling by Steph, lighting by Tarquin and Steph
Looking back up Poached Egg, where instead of climbing directly down, the route is to traverse along the wall towards the camera.
Modelling by Steph, lighting by Tarquin and Steph Crystal pool in the passage leading to The Crevasse.
 Crystal pool.
 Formations before The Crevasse.
Modelling by Steph, lighting by Tarquin and Steph
Formations before The Crevasse.
Modelling by Steph, lighting by Tarquin and Steph Formations before The Crevasse.
Modelling by Steph, lighting by Tarquin and Steph
Formations before The Crevasse.
Modelling by Steph, lighting by Tarquin and Steph The Crevasse, a 22 metre pitch which can be partly descended to Pendulum Passage, or traversed over to reach The Traverses leading to OFD III.
Modelling by Steph, lighting by Tarquin and Steph
The Crevasse, a 22 metre pitch which can be partly descended to Pendulum Passage, or traversed over to reach The Traverses leading to OFD III.
Modelling by Steph, lighting by Tarquin and Steph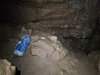 The old rig at The Crevasse, which relied on a natural and some unofficial brackets. The lower sections relied on even worse anchors that were in need of replacing. On the second trip, I used this as a handline, but found climbing back up surprisingly hard (not helped by my nerves), and actually ended up prusiking back up with improvised gear. On the third trip, we climbed up, using ascenders for safety and as handholds.
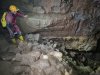 In 2025, this was changed to a set of resin anchors, no longer relying on old anchors for anything.
Modelling by John, lighting by Tarquin and John
In 2025, this was changed to a set of resin anchors, no longer relying on old anchors for anything.
Modelling by John, lighting by Tarquin and John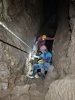 The top section of The Crevasse. This used to be free climbable down to the traverse ledges, but the bottom section is a 22 metre pitch down to Pendulum Passage. For a while, there was a handline left in-situ, and this caused a lot of traffic to smooth out all the climbing holds. This might now be usable with a handline, but a slip here would result in a very serious fall, and it is not worth the risk. We abseiled using Italian hitches.
Modelling by Steph and John, lighting by Tarquin, Steph and John
The top section of The Crevasse. This used to be free climbable down to the traverse ledges, but the bottom section is a 22 metre pitch down to Pendulum Passage. For a while, there was a handline left in-situ, and this caused a lot of traffic to smooth out all the climbing holds. This might now be usable with a handline, but a slip here would result in a very serious fall, and it is not worth the risk. We abseiled using Italian hitches.
Modelling by Steph and John, lighting by Tarquin, Steph and John The traverse ledge leads to a rocky platform with a second pitch down to the passage leading to OFD III. We used a ladder here to avoid having to carry full SRT gear. The pitch lands on a wedged boulder, and directly under the boulder (on its OFD III side) is a somewhat tricky climb down into Pendulum Passage, providing an alternative route into this area if needed.
Modelling by Steph and John, lighting by Tarquin, Steph and John
The traverse ledge leads to a rocky platform with a second pitch down to the passage leading to OFD III. We used a ladder here to avoid having to carry full SRT gear. The pitch lands on a wedged boulder, and directly under the boulder (on its OFD III side) is a somewhat tricky climb down into Pendulum Passage, providing an alternative route into this area if needed.
Modelling by Steph and John, lighting by Tarquin, Steph and John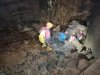 The pitch lands in a big passage, which reaches this wide swirl chamber, where Wreakin Roadway joins from the left. The way on is down a funnel in the floor, using a squeeze downwards to bypass a drop.
Modelling by John, Steph, Claire and Si, lighting by Tarquin, John, Steph, Claire and Si
The pitch lands in a big passage, which reaches this wide swirl chamber, where Wreakin Roadway joins from the left. The way on is down a funnel in the floor, using a squeeze downwards to bypass a drop.
Modelling by John, Steph, Claire and Si, lighting by Tarquin, John, Steph, Claire and Si Flowstone in the floor of the swirl chamber, stained by iron and manganese.
 There now seem to be a couple of levels which can be used to progress, but the upper level traverse appears to be the main way on.
Modelling by Steph, lighting by Tarquin and Steph
There now seem to be a couple of levels which can be used to progress, but the upper level traverse appears to be the main way on.
Modelling by Steph, lighting by Tarquin and Steph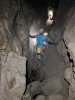 The traverse turns around an awkward corner, which makes you assume you need to sit on the sloping wall, but it is actually easier to sit on the other wall, with feet on the sloping wall.
Modelling by Steph, Claire and Si, lighting by Tarquin, Steph, Claire and Si
The traverse turns around an awkward corner, which makes you assume you need to sit on the sloping wall, but it is actually easier to sit on the other wall, with feet on the sloping wall.
Modelling by Steph, Claire and Si, lighting by Tarquin, Steph, Claire and Si Sand formations in the traverse level.
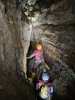 The next obstacle is a climb up, which has very few holds, and the holds that do exist are slippery. It is made easier by some tatt, but a lifeline is a good idea.
Modelling by Si and John, lighting by Tarquin, Claire, Si and John
The next obstacle is a climb up, which has very few holds, and the holds that do exist are slippery. It is made easier by some tatt, but a lifeline is a good idea.
Modelling by Si and John, lighting by Tarquin, Claire, Si and John Stalagmites with nipples, under the climb.
 Using the limited holds.
Modelling by Steph and a very tiny hint of John, lighting by Tarquin, Steph and John
Using the limited holds.
Modelling by Steph and a very tiny hint of John, lighting by Tarquin, Steph and John Highly textured flowstone.
 Inlet pools with textured flowstone.
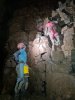 Climbing up at The Shambles. For some people, this climb is intimidating, mainly because it looks very loose. The lowest part does need care to avoid overbalancing, but most of it is not too bad.
Modelling by Steph, Claire and Si, lighting by Tarquin, Steph, Claire and Si
Climbing up at The Shambles. For some people, this climb is intimidating, mainly because it looks very loose. The lowest part does need care to avoid overbalancing, but most of it is not too bad.
Modelling by Steph, Claire and Si, lighting by Tarquin, Steph, Claire and Si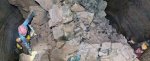 The Shambles (seen here on the way out) is a very narrow jumble of rocks blocking a meander, with climbs on either side to cross the rocks. Incidentally, "shambles" may commonly mean "jumbled mess", but it originally referred the part of a medieval town where all the slaughterhouses and butchers' shops were, which often looked quite disordered and messy, with significant quantities of blood and waste products from animal slaughtering. Try not to replicate that part here. (The word originally meant a bench, from the Latin word for a stool, since the benches were where a butcher would display the meat they had prepared.)
Modelling by John, Steph, Tarquin's toes, Claire and Si, lighting by Tarquin, John, Steph, Claire and Si
The Shambles (seen here on the way out) is a very narrow jumble of rocks blocking a meander, with climbs on either side to cross the rocks. Incidentally, "shambles" may commonly mean "jumbled mess", but it originally referred the part of a medieval town where all the slaughterhouses and butchers' shops were, which often looked quite disordered and messy, with significant quantities of blood and waste products from animal slaughtering. Try not to replicate that part here. (The word originally meant a bench, from the Latin word for a stool, since the benches were where a butcher would display the meat they had prepared.)
Modelling by John, Steph, Tarquin's toes, Claire and Si, lighting by Tarquin, John, Steph, Claire and Si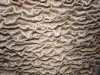 Rippled flowstone at the top of a couple of climbs.
 The Traverses then start. The first is the worst for most people. The ledge on the left is great, with a little step half way to catch out the unwary. However, there are almost no handholds, with the wall on the left very well polished. It has a couple of tiny flakes and an equally tiny stalactite that can be pinched. Taller and braver cavers can lean over the gap and stare down into the abyss. Even with a bright light, it is almost impossible to see the bottom, which is about 25 metres down.
Modelling by Steph and Si's light, lighting by Tarquin, Steph and Si
The Traverses then start. The first is the worst for most people. The ledge on the left is great, with a little step half way to catch out the unwary. However, there are almost no handholds, with the wall on the left very well polished. It has a couple of tiny flakes and an equally tiny stalactite that can be pinched. Taller and braver cavers can lean over the gap and stare down into the abyss. Even with a bright light, it is almost impossible to see the bottom, which is about 25 metres down.
Modelling by Steph and Si's light, lighting by Tarquin, Steph and Si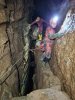 Feeling for a handhold. It is actually the little stalactite below her hand. It is actually possible to abseil down and walk along the bottom to the far end of The Traverses, but there is nowhere to climb back up again. For rigging, there are currently no anchors, so this is all rigged from boulders, and the first person has no traverse line, but can be belayed.
Modelling by Claire and John, lighting by Tarquin, Claire and John
Feeling for a handhold. It is actually the little stalactite below her hand. It is actually possible to abseil down and walk along the bottom to the far end of The Traverses, but there is nowhere to climb back up again. For rigging, there are currently no anchors, so this is all rigged from boulders, and the first person has no traverse line, but can be belayed.
Modelling by Claire and John, lighting by Tarquin, Claire and John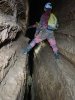 The middle section of the travserses start after a little ledge of jammed rocks. This fairly lengthy section has nothing useful to attach a rope to, so it is done without one. The gap is very defnitely wide enough to fit down, and disappears into the darkness, so this section can be quite intimidating.
Modelling by Si and John, lighting by Tarquin, Si and John
The middle section of the travserses start after a little ledge of jammed rocks. This fairly lengthy section has nothing useful to attach a rope to, so it is done without one. The gap is very defnitely wide enough to fit down, and disappears into the darkness, so this section can be quite intimidating.
Modelling by Si and John, lighting by Tarquin, Si and John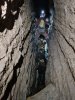 The middle section of The Traverses ends with a part that is a little easier, and actually has a jammed rock to use for rigging. The floor ramps up steeply from about 15 metres depth all the way up to form a large resting spot of boulders.
Modelling by Si and John, lighting by Tarquin, Si and John
The middle section of The Traverses ends with a part that is a little easier, and actually has a jammed rock to use for rigging. The floor ramps up steeply from about 15 metres depth all the way up to form a large resting spot of boulders.
Modelling by Si and John, lighting by Tarquin, Si and John The last traverse looks the widest, and is where all of the classic photographs are taken by profesional photographers. Most of the time, these are done with someone staying too high, leaning over the drop, and making it look as dramatic as possible, and the lighting is done in a way that hides the lower ledge. The reality is that this one is not as bad as the first. The floor feels closer (though it still funnels a very long way down). The traverse starts with a climb down the calcited rocks to the lower ledge.
Modelling by Steph, lighting by Tarquin, Steph and Claire
The last traverse looks the widest, and is where all of the classic photographs are taken by profesional photographers. Most of the time, these are done with someone staying too high, leaning over the drop, and making it look as dramatic as possible, and the lighting is done in a way that hides the lower ledge. The reality is that this one is not as bad as the first. The floor feels closer (though it still funnels a very long way down). The traverse starts with a climb down the calcited rocks to the lower ledge.
Modelling by Steph, lighting by Tarquin, Steph and Claire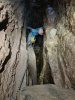 The ledge of the last traverse is actually quite large, and even though it slopes, it is easy enough to maintain balance with the opposite wall.
Modelling by Steph, lighting by Tarquin, Steph and Claire
The ledge of the last traverse is actually quite large, and even though it slopes, it is easy enough to maintain balance with the opposite wall.
Modelling by Steph, lighting by Tarquin, Steph and Claire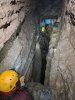 As an alternative, it is possible to bridge over the gap, though it is quite wide at the start.
Modelling by John and Steph, lighting by Tarquin, John, Steph and Claire
As an alternative, it is possible to bridge over the gap, though it is quite wide at the start.
Modelling by John and Steph, lighting by Tarquin, John, Steph and Claire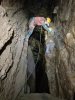 By the end, it gets much narrower.
Modelling by Claire, lighting by Tarquin and Claire
By the end, it gets much narrower.
Modelling by Claire, lighting by Tarquin and Claire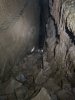 The traverses end at a steep ramp with a Climb.
Modelling by Steph and John, lighting by Tarquin, Steph, Claire and John
The traverses end at a steep ramp with a Climb.
Modelling by Steph and John, lighting by Tarquin, Steph, Claire and John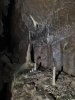 Stal on a shelf.
 The passage then gets very tall again, and the route descends down to the bottom.
Modelling by Steph, Si and John, lighting by Tarquin, Steph, Si and John
The passage then gets very tall again, and the route descends down to the bottom.
Modelling by Steph, Si and John, lighting by Tarquin, Steph, Si and John However, it then abruptly chokes, and the way on is down a stupid little hole in the floor. This zig-zags down a climb made for tall people, down a rift.
Modelling by Steph, lighting by Tarquin and Steph
However, it then abruptly chokes, and the way on is down a stupid little hole in the floor. This zig-zags down a climb made for tall people, down a rift.
Modelling by Steph, lighting by Tarquin and Steph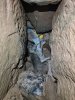 The way on passes under the choke, then up a squeeze through rocks.
Modelling by Steph
The way on passes under the choke, then up a squeeze through rocks.
Modelling by Steph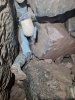 This part of the squeeze is particularly tight, and tries to wedge you between rocks, without good holds to push off.
Modelling by Steph, lighting by Tarquin and John
This part of the squeeze is particularly tight, and tries to wedge you between rocks, without good holds to push off.
Modelling by Steph, lighting by Tarquin and John Even smaller cavers find this one tight, mainly because of the wedge shape. It is easy to walk past this squeeze on the way out, but the passage chokes immediately, so it is obvious.
Modelling by Claire, lighting by Tarquin and Claire
Even smaller cavers find this one tight, mainly because of the wedge shape. It is easy to walk past this squeeze on the way out, but the passage chokes immediately, so it is obvious.
Modelling by Claire, lighting by Tarquin and Claire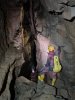 The passage passes the ridiculously tall climb up to the Paul Allan Series, then descends steeply past some formations.
Modelling by John and Si, lighting by Tarquin, John and Si
The passage passes the ridiculously tall climb up to the Paul Allan Series, then descends steeply past some formations.
Modelling by John and Si, lighting by Tarquin, John and Si Flowstone and curtains in the tall section after the Paul Allan Series.
Lighting by Tarquin, Claire and Steph
Flowstone and curtains in the tall section after the Paul Allan Series.
Lighting by Tarquin, Claire and Steph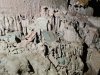 Beginnings of hoodoos.
 The next obstacle is one of the most horrifying, but by this stage, the nerves have already reached wherever they are going to reach. The hole is not actually the worst part. That shadow under the boulders is not a shadow. It is an empty space. Those boulders are floating in the air, held there by nothing. Boulders rest on boulders, glued together by mud and luck, levitating over empty space. The fact that the hole is there shows that the boulders do not have to remain there. 12 metres down below are their friends, who used to be up here with them at some point in history. To get to the edge of the hole, you weave a path over those boulders to the left of the leaning slab, knowing that there is a blank gap under your feet. All while trying to forget what happened in this cave in 2021, when someone stepped on boulders over a hole.
Modelling by Claire and John, lighting by Tarquin, Steph, Claire and John
The next obstacle is one of the most horrifying, but by this stage, the nerves have already reached wherever they are going to reach. The hole is not actually the worst part. That shadow under the boulders is not a shadow. It is an empty space. Those boulders are floating in the air, held there by nothing. Boulders rest on boulders, glued together by mud and luck, levitating over empty space. The fact that the hole is there shows that the boulders do not have to remain there. 12 metres down below are their friends, who used to be up here with them at some point in history. To get to the edge of the hole, you weave a path over those boulders to the left of the leaning slab, knowing that there is a blank gap under your feet. All while trying to forget what happened in this cave in 2021, when someone stepped on boulders over a hole.
Modelling by Claire and John, lighting by Tarquin, Steph, Claire and John Just switch off your mind, step on the tiny remnant of calcited false floor, hang on to the little stalagmite like it can cope with a shock load, and step over to the other platform of levitating rocks. By contrast, this is the safe bit. Pretend you don't know what is under the camera right now. This piece of cave really is an experience.
Modelling by Steph and John, lighting by Tarquin, Steph and Johns
Just switch off your mind, step on the tiny remnant of calcited false floor, hang on to the little stalagmite like it can cope with a shock load, and step over to the other platform of levitating rocks. By contrast, this is the safe bit. Pretend you don't know what is under the camera right now. This piece of cave really is an experience.
Modelling by Steph and John, lighting by Tarquin, Steph and Johns A helictite on the ledge, which has bounced off the wall.
 The ledge is largely made from a calcite false floor. The holes are windows through to other parts of the false floor.
Modelling by Steph, lighting by Tarquin and Steph
The ledge is largely made from a calcite false floor. The holes are windows through to other parts of the false floor.
Modelling by Steph, lighting by Tarquin and Steph Concreted cave pearls on the false floor.
 Sand forming the underside of the false floor.
Lighting by Tarquin and Steph
Sand forming the underside of the false floor.
Lighting by Tarquin and Steph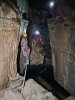 The next obstacle is Maypole Bridge, a scaffolding bar suspended a few metres off the floor. The heights are not as extreme as before, but this still feels ridiculous. However, this is actually no different than the scaffolding bars over the pots in OFD I Main Streamway, without the water, except that it must have been very difficult to actually get here. It is fairly easy to climb down to the right to reach the streamway, but upstream is a powerful 3 metre waterfall called Niagara, with a 4 metre waterfall above it. Downstream is a short streamway reaching the downstream sump (on the other side of which would be Top Waterfall, but it does not appear to have been connected - there must be some dry passage in between, since there is a 19 metre height difference).
Modelling by Claire, John and Si, lighting by Tarquin, Steph, Claire, John and Si
The next obstacle is Maypole Bridge, a scaffolding bar suspended a few metres off the floor. The heights are not as extreme as before, but this still feels ridiculous. However, this is actually no different than the scaffolding bars over the pots in OFD I Main Streamway, without the water, except that it must have been very difficult to actually get here. It is fairly easy to climb down to the right to reach the streamway, but upstream is a powerful 3 metre waterfall called Niagara, with a 4 metre waterfall above it. Downstream is a short streamway reaching the downstream sump (on the other side of which would be Top Waterfall, but it does not appear to have been connected - there must be some dry passage in between, since there is a 19 metre height difference).
Modelling by Claire, John and Si, lighting by Tarquin, Steph, Claire, John and Si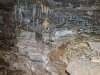 Layered formation in the other side of Maypole Bridge.
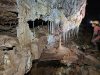 Grotto beyond Maypole Bridge.
Modelling by Claire and Steph's toes, lighting by Tarquin, Steph, Claire and John
Grotto beyond Maypole Bridge.
Modelling by Claire and Steph's toes, lighting by Tarquin, Steph, Claire and John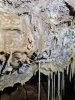 Helictites hiding among the straws.
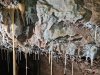 Helictites.
Lighting by Tarquin and Steph
Helictites.
Lighting by Tarquin and Steph Helictites.
Lighting by Tarquin and Steph
Helictites.
Lighting by Tarquin and Steph Botrioidal bumps on flowstone.
Lighting by Tarquin and Steph
Botrioidal bumps on flowstone.
Lighting by Tarquin and Steph Calcite bobbles. These do not appear to be cryogenic.
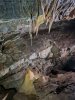 Grotto with a bell shaped stalagmite. Yes, a bell. That's what I said, and I'm sticking to it.
Lighting by Tarquin and Steph
Grotto with a bell shaped stalagmite. Yes, a bell. That's what I said, and I'm sticking to it.
Lighting by Tarquin and Steph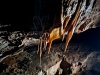 The translucent curtain.
Lighting by Steph
The translucent curtain.
Lighting by Steph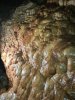 Coloured flowstone. Somewhere around here, the first upper level starts, which becomes three stacked layers.
Lighting by Steph.
Coloured flowstone. Somewhere around here, the first upper level starts, which becomes three stacked layers.
Lighting by Steph.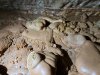 Botyoids covering a crystal pool.
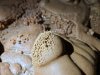 Botryoids.
 A grand section then signals the point where the route joins the river, which is down the gaps at the end.
Modelling by Claire, Si and John, lighting by Tarquin, Claire, Si and John
A grand section then signals the point where the route joins the river, which is down the gaps at the end.
Modelling by Claire, Si and John, lighting by Tarquin, Claire, Si and John An early part of the river, where we headed only in the upstream direction. Downstream would have quickly reached the waterfalls.
Modelling by Claire, lighting by John and Claire
An early part of the river, where we headed only in the upstream direction. Downstream would have quickly reached the waterfalls.
Modelling by Claire, lighting by John and Claire Small cascade.
Modelling by Steph, lighting by Tarquin, John and Claire
Small cascade.
Modelling by Steph, lighting by Tarquin, John and Claire The lip of the cascades is adorned with small rock protrusions that look like fossilised worms. They are probably decomposed fossil corals.
Lighting by Tarquin and John
The lip of the cascades is adorned with small rock protrusions that look like fossilised worms. They are probably decomposed fossil corals.
Lighting by Tarquin and John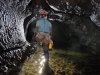 Tubular section of streamway. The first set of upper passages ends somewhere above here.
Modelling by Steph, lighting by Tarquin and John
Tubular section of streamway. The first set of upper passages ends somewhere above here.
Modelling by Steph, lighting by Tarquin and John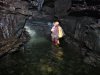 Just before The Wee, where another side passage has left overhead, becoming a series of very high level passages below Hot Air Mine.
Modelling by John and Claire, lighting by Tarquin, John and Claire
Just before The Wee, where another side passage has left overhead, becoming a series of very high level passages below Hot Air Mine.
Modelling by John and Claire, lighting by Tarquin, John and Claire The Wee, a very distinctive inlet sourced from the passages above.
Lighting by Tarquin and John
The Wee, a very distinctive inlet sourced from the passages above.
Lighting by Tarquin and John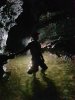 Streamway.
Modelling by Steph and hints of Si, lighting by Si
Streamway.
Modelling by Steph and hints of Si, lighting by Si Formations above the streamway. This seems to be the start of the next set of side passages, before the Cloister Cascade.
Modelling by John, lighting by Tarquin, Si, Steph and Claire
Formations above the streamway. This seems to be the start of the next set of side passages, before the Cloister Cascade.
Modelling by John, lighting by Tarquin, Si, Steph and Claire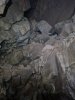 More insane hanging rocks above the streamway. This must be the set of passages leading to Gritstone Chokes.
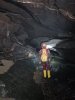 Junction with the upper passages.
Modelling by John, lighting by Tarquin and John
Junction with the upper passages.
Modelling by John, lighting by Tarquin and John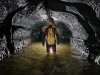 One of the most beautiful pieces of streamway in the cave, a phreatic arch with detailed scallops. This almost looks too perfect to be a cave, with the clefts almost making it look like the inside of a ribcage.
Modelling by John and hints of Si, lighting by John and Si
One of the most beautiful pieces of streamway in the cave, a phreatic arch with detailed scallops. This almost looks too perfect to be a cave, with the clefts almost making it look like the inside of a ribcage.
Modelling by John and hints of Si, lighting by John and Si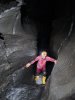 Parts of the upper streamway have the fun water slides seen in the lower parts of the cave.
Modelling by John, lighting by Tarquin and John
Parts of the upper streamway have the fun water slides seen in the lower parts of the cave.
Modelling by John, lighting by Tarquin and John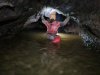 Nearing the end of the streamway, where it becomes a series of wet arches.
Modelling by Claire and a vague shadow of Si, lighting by Tarquin and Claire
Nearing the end of the streamway, where it becomes a series of wet arches.
Modelling by Claire and a vague shadow of Si, lighting by Tarquin and Claire This section gets very low, and flood scum clearly shows it can sump. However, the survey makes it appear possible to bypass if needed. Another level above this ends at the gritstone chokes.
Modelling by John, lighting by Tarquin and John
This section gets very low, and flood scum clearly shows it can sump. However, the survey makes it appear possible to bypass if needed. Another level above this ends at the gritstone chokes.
Modelling by John, lighting by Tarquin and John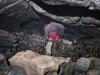 Just before the end are a series of awkward little climbs. One climb up into a roof tube bypasses the final piece of streamway.
Modelling by John and the edge of Steph, lighting by Tarquin and Steph
Just before the end are a series of awkward little climbs. One climb up into a roof tube bypasses the final piece of streamway.
Modelling by John and the edge of Steph, lighting by Tarquin and Steph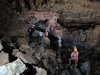 The large passage of Smith's Armoury then starts abruptly, very different from the cave before it, but probably more similar to the upper levels, which it is clearly related to.
Modelling by Claire, Steph and John, lighting by Tarquin, Si, Claire, Steph and John
The large passage of Smith's Armoury then starts abruptly, very different from the cave before it, but probably more similar to the upper levels, which it is clearly related to.
Modelling by Claire, Steph and John, lighting by Tarquin, Si, Claire, Steph and John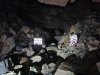 The end of the cave is signed only by a very broken road sign, that seems to have no comedic reference. Its reason for being here was completely lost on us.
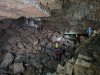 Smith's Armoury, named after the fictional cave character Smith, who was responsible for throwing rocks at cavers. Presumably his other name is "Gravity". This is quite an anticlimactic end to the cave.
Modelling by Si, Clare, John and Steph, lighting by Tarquin, Si, Clare, John and Steph
Smith's Armoury, named after the fictional cave character Smith, who was responsible for throwing rocks at cavers. Presumably his other name is "Gravity". This is quite an anticlimactic end to the cave.
Modelling by Si, Clare, John and Steph, lighting by Tarquin, Si, Clare, John and Steph Straws in the ceiling of Smith's Armoury.
 The heavily choked bedding at the end of Smith's Armoury. This seems far too severe to find a way through, but there is a little hollow on the right.
Modelling by Claire, lighting by Tarquin and Claire
The heavily choked bedding at the end of Smith's Armoury. This seems far too severe to find a way through, but there is a little hollow on the right.
Modelling by Claire, lighting by Tarquin and Claire The left side is quite intimidatingly crushed, with the rock visibly shattered from the pressure. Something big happened here.
 Our route out (on all three trips) took us back to Chasm, then via a shortcut to Salubrious Passage. Distorted stal column in the passages leading between Chasm Passage and Salubrious Passage.
 Crystal pool.
 Tiny column of helictites, just before the passage joins Salubrious Passage.
 Being greeted by the mountains as we reached surface. Carreg Cadno (538 metres) and its Carreg Lwyd outcrop, Hirfynydd (481 metres), Mynydd y Drum, Mynydd Marchywel, Mynydd Allt-y-grug, Cribarth, Penlle'rcastell, Carreg Goch (558 metres), Garreg Las (635 metres), Fan Hir (761 metres), Moel Feity (591 metres) and Cefn Cul (562 metres).
Modelling by Tarquin's shadow, Claire, John, Si and Steph
Being greeted by the mountains as we reached surface. Carreg Cadno (538 metres) and its Carreg Lwyd outcrop, Hirfynydd (481 metres), Mynydd y Drum, Mynydd Marchywel, Mynydd Allt-y-grug, Cribarth, Penlle'rcastell, Carreg Goch (558 metres), Garreg Las (635 metres), Fan Hir (761 metres), Moel Feity (591 metres) and Cefn Cul (562 metres).
Modelling by Tarquin's shadow, Claire, John, Si and Steph
 A less common (but still relatively normal) type of cave dwelling spider near Top Entrance, Tegenaria silvestris. This is a very close relative of the house spider, and while it is similarly patterned, it is much smaller, and does not like being in houses. It appears to be female.
Modelling by Sylvia
A less common (but still relatively normal) type of cave dwelling spider near Top Entrance, Tegenaria silvestris. This is a very close relative of the house spider, and while it is similarly patterned, it is much smaller, and does not like being in houses. It appears to be female.
Modelling by Sylvia The Octopus, one of the formations at The Wedding Cake.
 Crystal pools in Chasm Passage.
 Anastomosis (very early passage channels) in Chasm Passage. This is one of the finest examples you will see in Britain, and formed when the boulder was the floor of a bedding plane.
Lighting by Tarquin and Si
Anastomosis (very early passage channels) in Chasm Passage. This is one of the finest examples you will see in Britain, and formed when the boulder was the floor of a bedding plane.
Lighting by Tarquin and Si An early part of Chasm Passage, where the echo is excellent.
Modelling by Pete, lighting by Tarquin and Pete
An early part of Chasm Passage, where the echo is excellent.
Modelling by Pete, lighting by Tarquin and Pete Columns in Chasm Passage.
 Honey colloured curtains in Chasm Passage
Lighting by Pete
Honey colloured curtains in Chasm Passage
Lighting by Pete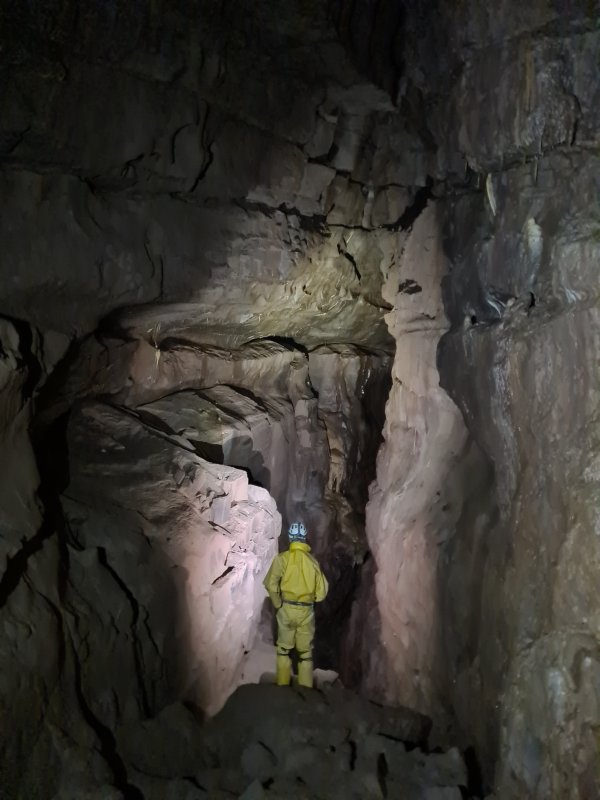 The head of the pitch in Chasm Passage.
Modelling by Pete, lighting by Tarquin and Pete
The head of the pitch in Chasm Passage.
Modelling by Pete, lighting by Tarquin and Pete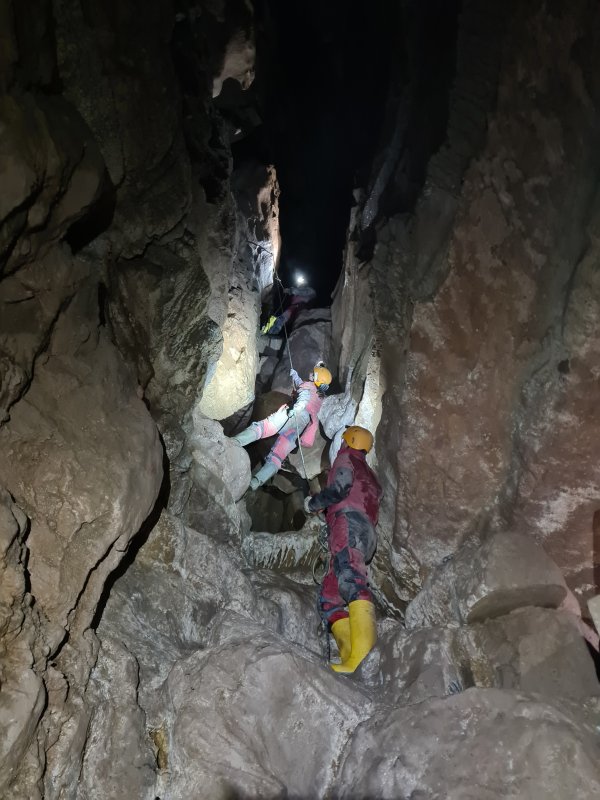 The pitch in Chasm Passage, which is 8 metres high. We rigged it as a pull-through, using carabiners with an Italian hitch to abseil down using belay belts instead of harnesses. When we did this route in 2002, my brother and I did not know that there are 2 easy routes to this area (we only knew about the Wall Of Death route, which is ludicrously dangerous without a rope), but we had also rigged this as a pull-though, since we needed the rope on The Crevasse. My brother then free climbed this pitch on the way out, and rigged the rope for me.
Modelling by John, Claire and Si, lighting by Tarquin, Steph, John, Claire and Si
The pitch in Chasm Passage, which is 8 metres high. We rigged it as a pull-through, using carabiners with an Italian hitch to abseil down using belay belts instead of harnesses. When we did this route in 2002, my brother and I did not know that there are 2 easy routes to this area (we only knew about the Wall Of Death route, which is ludicrously dangerous without a rope), but we had also rigged this as a pull-though, since we needed the rope on The Crevasse. My brother then free climbed this pitch on the way out, and rigged the rope for me.
Modelling by John, Claire and Si, lighting by Tarquin, Steph, John, Claire and Si Textured crust on the wall, which may be moonmilk, or may be a calcite wicking formation.
Lighting by Tarquin and Steph
Textured crust on the wall, which may be moonmilk, or may be a calcite wicking formation.
Lighting by Tarquin and Steph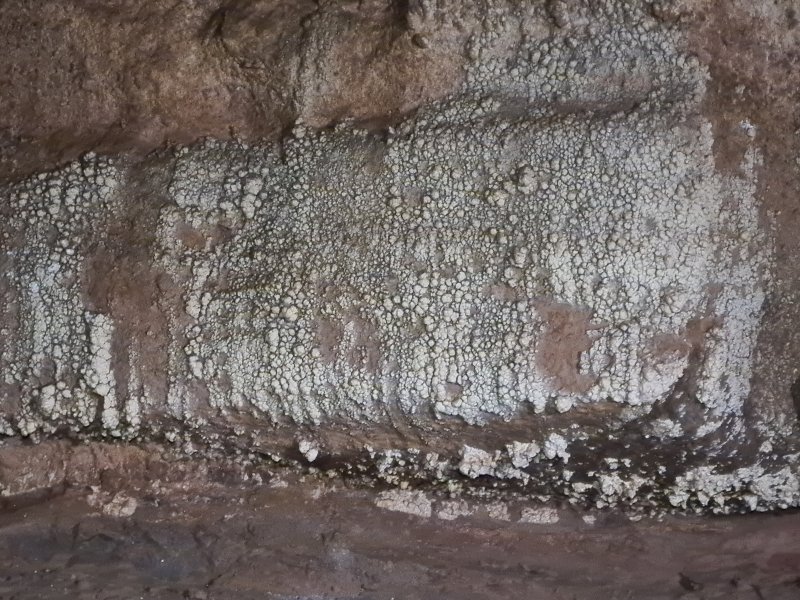 Detail of the texture.
Lighting by Tarquin and Steph
Detail of the texture.
Lighting by Tarquin and Steph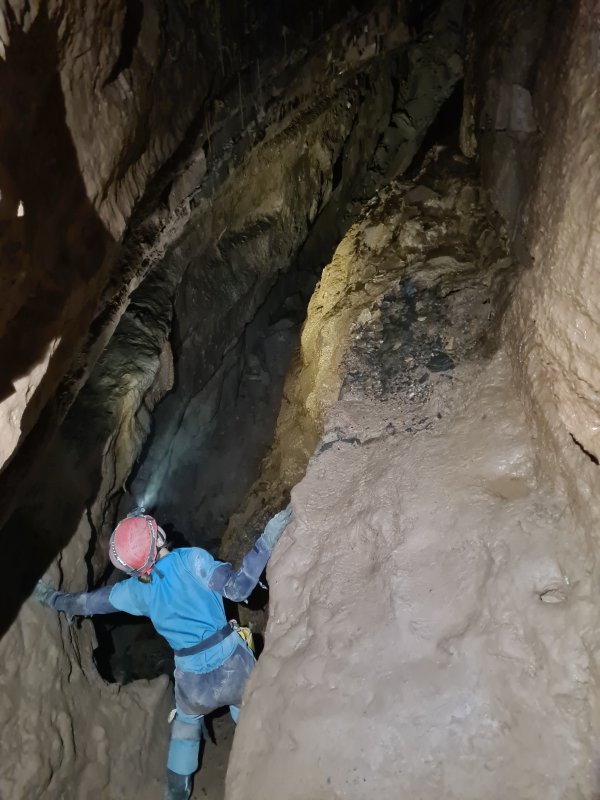 Down in The Chasm, where the passage becomes even taller. The very slimy climb down into Swamp Creek is down in the floor, providing yet another route into this area, but far harder than the others.
Modelling by Steph, lighting by Tarquin and Steph
Down in The Chasm, where the passage becomes even taller. The very slimy climb down into Swamp Creek is down in the floor, providing yet another route into this area, but far harder than the others.
Modelling by Steph, lighting by Tarquin and Steph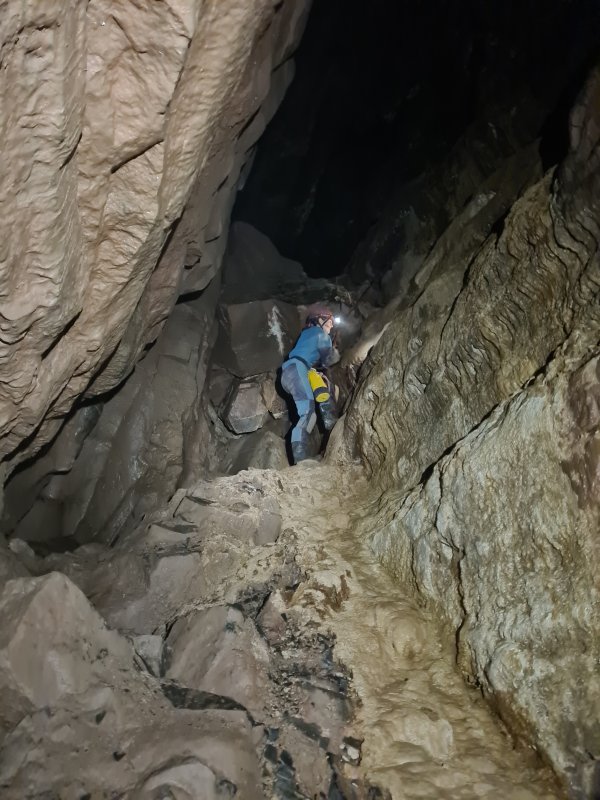 The climb out of The Chasm can be done without a rope, and we had done so in 2002, but it is a very difficult climb, as it tries to throw you off, and has very slippery holds. It is called a pitch on the survey. Fortunately, there was a handline left in situ, which is not official.
Modelling by Steph, lighting by Tarquin and Steph
The climb out of The Chasm can be done without a rope, and we had done so in 2002, but it is a very difficult climb, as it tries to throw you off, and has very slippery holds. It is called a pitch on the survey. Fortunately, there was a handline left in situ, which is not official.
Modelling by Steph, lighting by Tarquin and Steph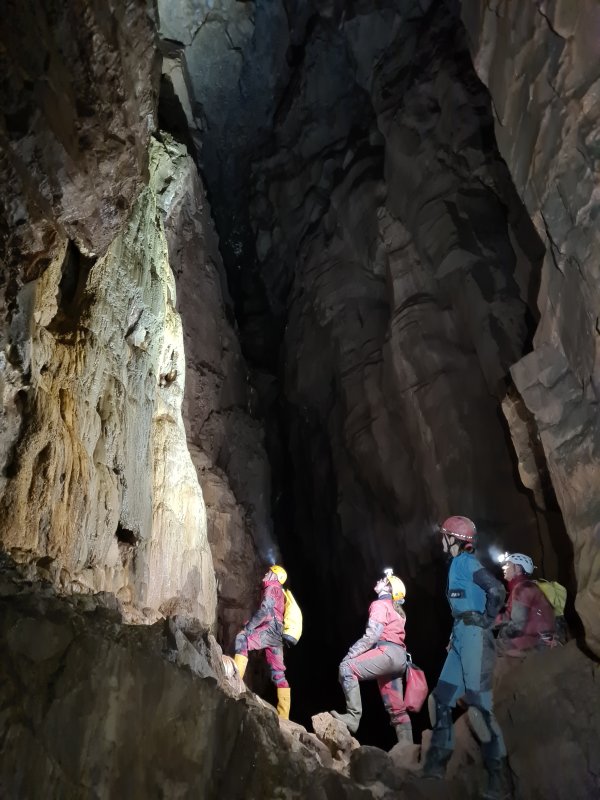 Chasm Passage has several tall sections, but around the climb up, several avens connect to Bagpipe Chamber. This attractive section also has an aven link to Nyth Brân Series.
Modelling by John, Claire, Steph and Si, lighting by Tarquin, John, Claire, Steph and Si
Chasm Passage has several tall sections, but around the climb up, several avens connect to Bagpipe Chamber. This attractive section also has an aven link to Nyth Brân Series.
Modelling by John, Claire, Steph and Si, lighting by Tarquin, John, Claire, Steph and Si Chasm Passage, at the junction with the passage leading to Poached Egg and The Crevasse. High up in the ceiling is where the Wall Of Death hole falls into the passage.
Modelling by Steph, lighting by Tarquin and Steph
Chasm Passage, at the junction with the passage leading to Poached Egg and The Crevasse. High up in the ceiling is where the Wall Of Death hole falls into the passage.
Modelling by Steph, lighting by Tarquin and Steph Calcited alcove near Poached Egg.
 Looking back up Poached Egg, where instead of climbing directly down, the route is to traverse along the wall towards the camera.
Modelling by Steph, lighting by Tarquin and Steph
Looking back up Poached Egg, where instead of climbing directly down, the route is to traverse along the wall towards the camera.
Modelling by Steph, lighting by Tarquin and Steph Crystal pool in the passage leading to The Crevasse.
 Crystal pool.
 Formations before The Crevasse.
Modelling by Steph, lighting by Tarquin and Steph
Formations before The Crevasse.
Modelling by Steph, lighting by Tarquin and Steph Formations before The Crevasse.
Modelling by Steph, lighting by Tarquin and Steph
Formations before The Crevasse.
Modelling by Steph, lighting by Tarquin and Steph The Crevasse, a 22 metre pitch which can be partly descended to Pendulum Passage, or traversed over to reach The Traverses leading to OFD III.
Modelling by Steph, lighting by Tarquin and Steph
The Crevasse, a 22 metre pitch which can be partly descended to Pendulum Passage, or traversed over to reach The Traverses leading to OFD III.
Modelling by Steph, lighting by Tarquin and Steph The old rig at The Crevasse, which relied on a natural and some unofficial brackets. The lower sections relied on even worse anchors that were in need of replacing. On the second trip, I used this as a handline, but found climbing back up surprisingly hard (not helped by my nerves), and actually ended up prusiking back up with improvised gear. On the third trip, we climbed up, using ascenders for safety and as handholds.
 In 2025, this was changed to a set of resin anchors, no longer relying on old anchors for anything.
Modelling by John, lighting by Tarquin and John
In 2025, this was changed to a set of resin anchors, no longer relying on old anchors for anything.
Modelling by John, lighting by Tarquin and John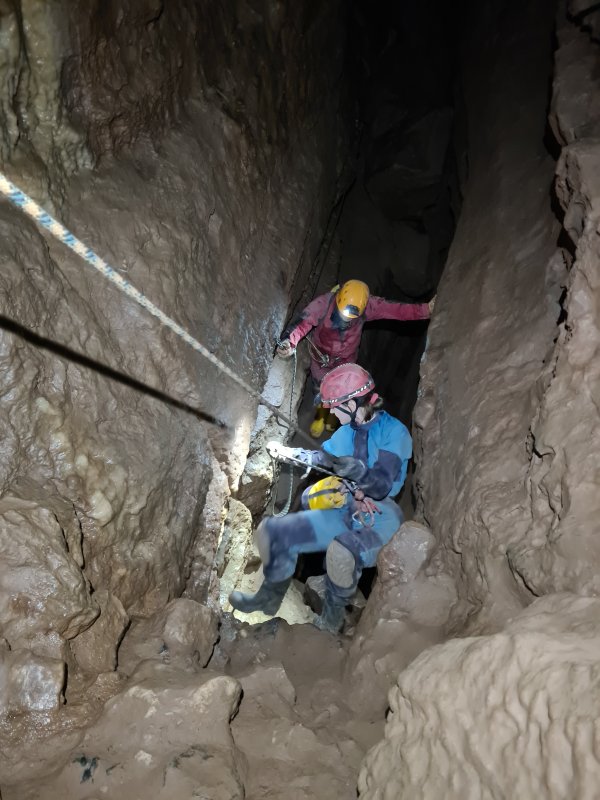 The top section of The Crevasse. This used to be free climbable down to the traverse ledges, but the bottom section is a 22 metre pitch down to Pendulum Passage. For a while, there was a handline left in-situ, and this caused a lot of traffic to smooth out all the climbing holds. This might now be usable with a handline, but a slip here would result in a very serious fall, and it is not worth the risk. We abseiled using Italian hitches.
Modelling by Steph and John, lighting by Tarquin, Steph and John
The top section of The Crevasse. This used to be free climbable down to the traverse ledges, but the bottom section is a 22 metre pitch down to Pendulum Passage. For a while, there was a handline left in-situ, and this caused a lot of traffic to smooth out all the climbing holds. This might now be usable with a handline, but a slip here would result in a very serious fall, and it is not worth the risk. We abseiled using Italian hitches.
Modelling by Steph and John, lighting by Tarquin, Steph and John The traverse ledge leads to a rocky platform with a second pitch down to the passage leading to OFD III. We used a ladder here to avoid having to carry full SRT gear. The pitch lands on a wedged boulder, and directly under the boulder (on its OFD III side) is a somewhat tricky climb down into Pendulum Passage, providing an alternative route into this area if needed.
Modelling by Steph and John, lighting by Tarquin, Steph and John
The traverse ledge leads to a rocky platform with a second pitch down to the passage leading to OFD III. We used a ladder here to avoid having to carry full SRT gear. The pitch lands on a wedged boulder, and directly under the boulder (on its OFD III side) is a somewhat tricky climb down into Pendulum Passage, providing an alternative route into this area if needed.
Modelling by Steph and John, lighting by Tarquin, Steph and John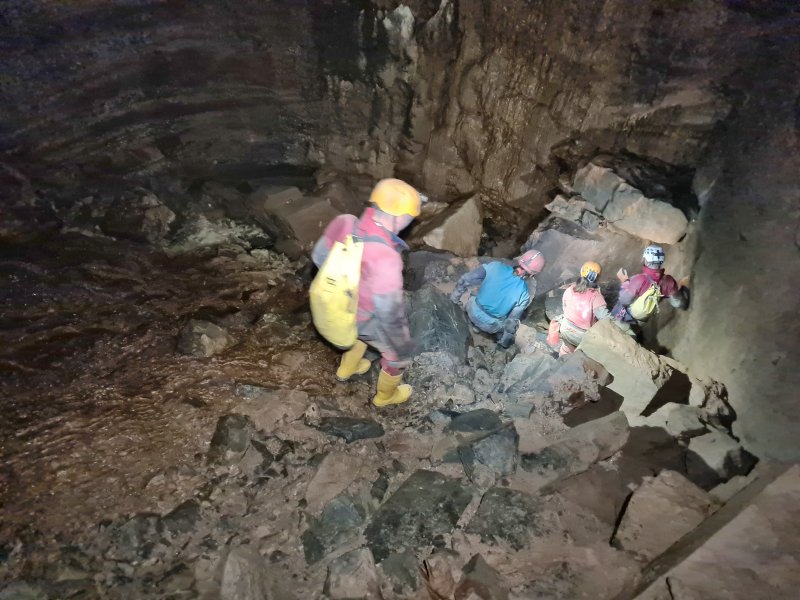 The pitch lands in a big passage, which reaches this wide swirl chamber, where Wreakin Roadway joins from the left. The way on is down a funnel in the floor, using a squeeze downwards to bypass a drop.
Modelling by John, Steph, Claire and Si, lighting by Tarquin, John, Steph, Claire and Si
The pitch lands in a big passage, which reaches this wide swirl chamber, where Wreakin Roadway joins from the left. The way on is down a funnel in the floor, using a squeeze downwards to bypass a drop.
Modelling by John, Steph, Claire and Si, lighting by Tarquin, John, Steph, Claire and Si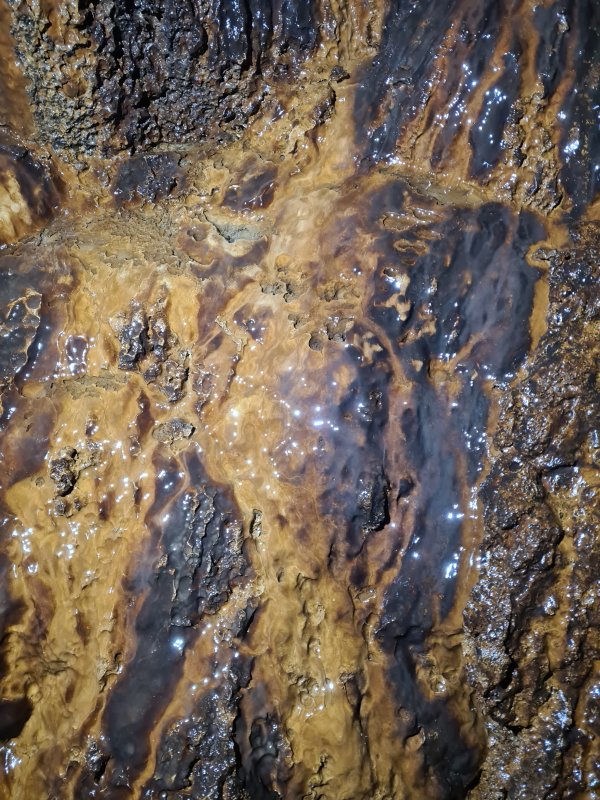 Flowstone in the floor of the swirl chamber, stained by iron and manganese.
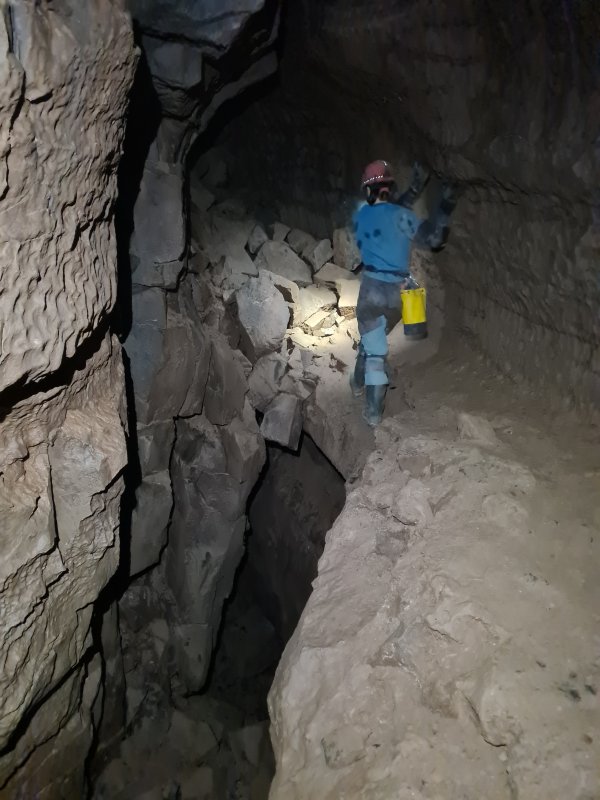 There now seem to be a couple of levels which can be used to progress, but the upper level traverse appears to be the main way on.
Modelling by Steph, lighting by Tarquin and Steph
There now seem to be a couple of levels which can be used to progress, but the upper level traverse appears to be the main way on.
Modelling by Steph, lighting by Tarquin and Steph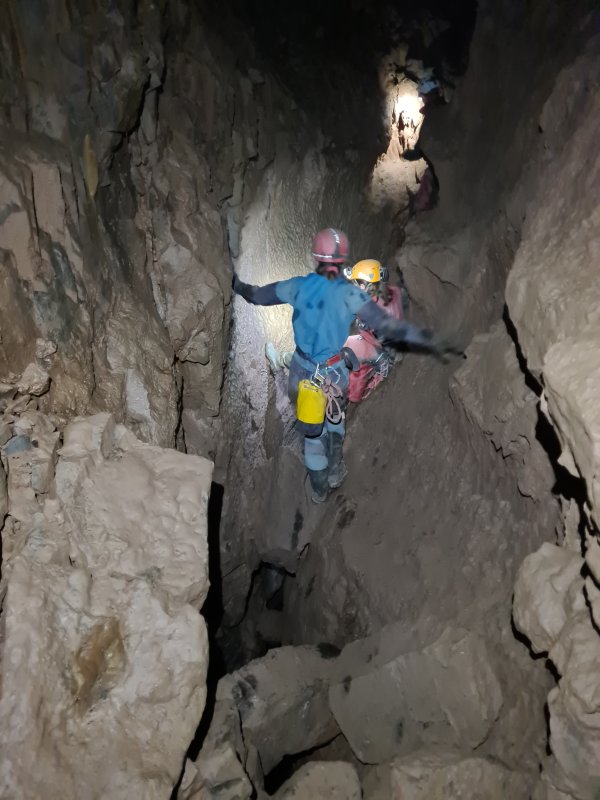 The traverse turns around an awkward corner, which makes you assume you need to sit on the sloping wall, but it is actually easier to sit on the other wall, with feet on the sloping wall.
Modelling by Steph, Claire and Si, lighting by Tarquin, Steph, Claire and Si
The traverse turns around an awkward corner, which makes you assume you need to sit on the sloping wall, but it is actually easier to sit on the other wall, with feet on the sloping wall.
Modelling by Steph, Claire and Si, lighting by Tarquin, Steph, Claire and Si Sand formations in the traverse level.
 The next obstacle is a climb up, which has very few holds, and the holds that do exist are slippery. It is made easier by some tatt, but a lifeline is a good idea.
Modelling by Si and John, lighting by Tarquin, Claire, Si and John
The next obstacle is a climb up, which has very few holds, and the holds that do exist are slippery. It is made easier by some tatt, but a lifeline is a good idea.
Modelling by Si and John, lighting by Tarquin, Claire, Si and John Stalagmites with nipples, under the climb.
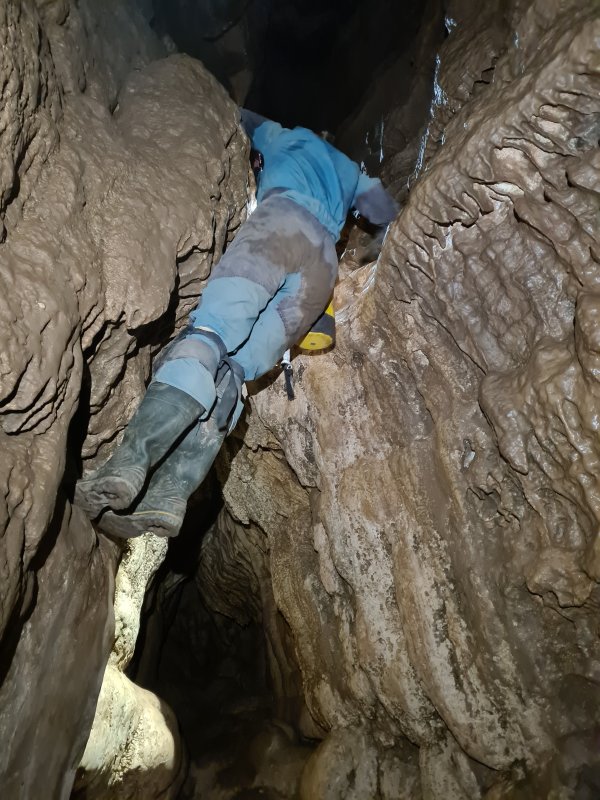 Using the limited holds.
Modelling by Steph and a very tiny hint of John, lighting by Tarquin, Steph and John
Using the limited holds.
Modelling by Steph and a very tiny hint of John, lighting by Tarquin, Steph and John Highly textured flowstone.
 Inlet pools with textured flowstone.
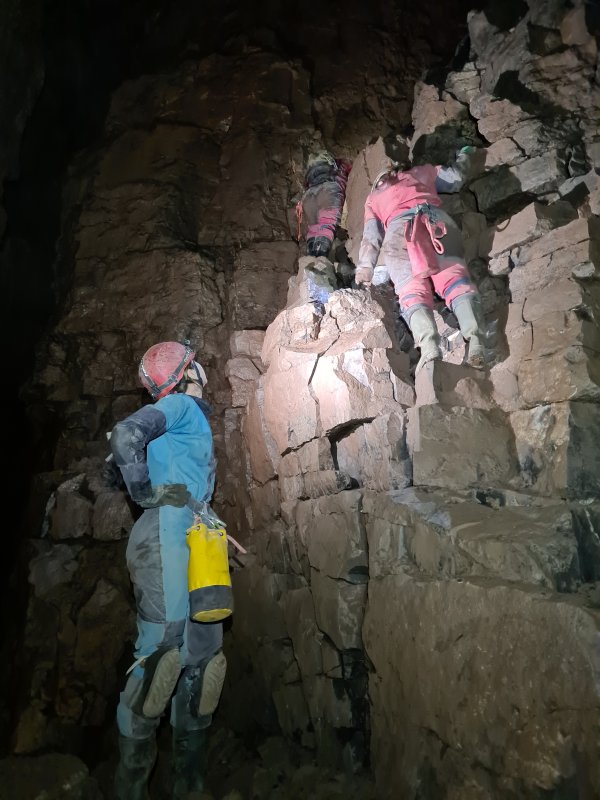 Climbing up at The Shambles. For some people, this climb is intimidating, mainly because it looks very loose. The lowest part does need care to avoid overbalancing, but most of it is not too bad.
Modelling by Steph, Claire and Si, lighting by Tarquin, Steph, Claire and Si
Climbing up at The Shambles. For some people, this climb is intimidating, mainly because it looks very loose. The lowest part does need care to avoid overbalancing, but most of it is not too bad.
Modelling by Steph, Claire and Si, lighting by Tarquin, Steph, Claire and Si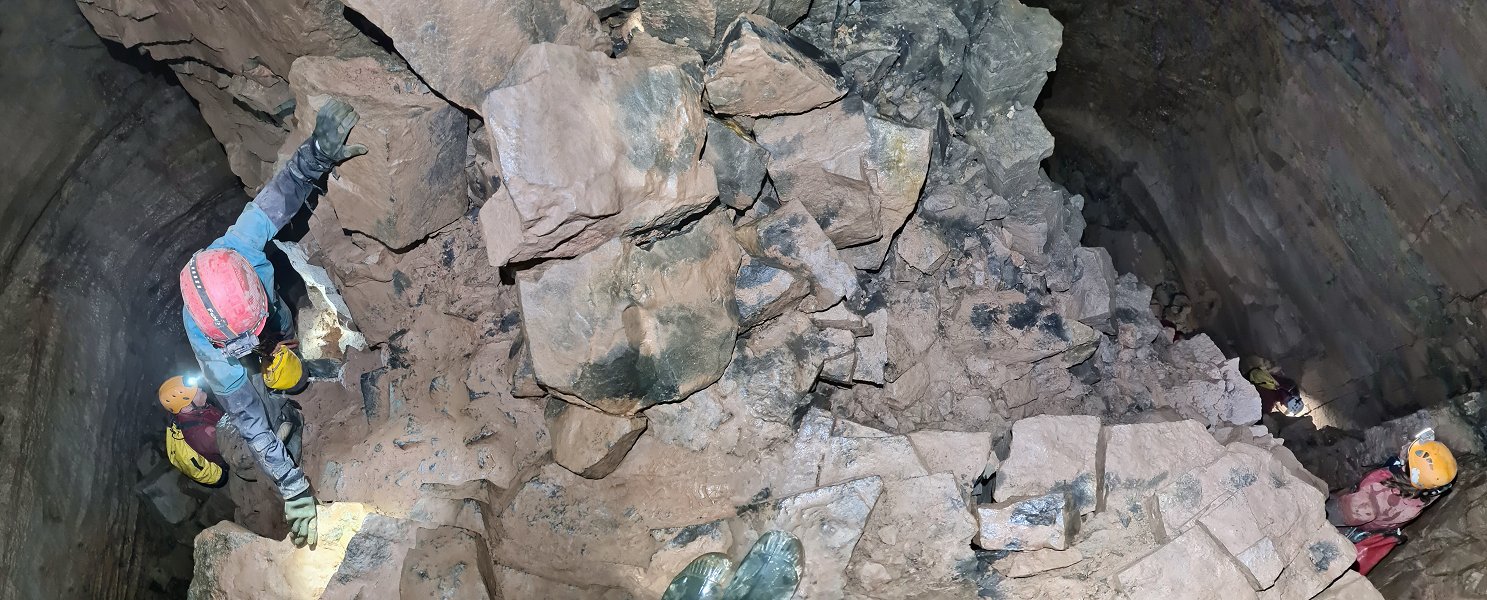 The Shambles (seen here on the way out) is a very narrow jumble of rocks blocking a meander, with climbs on either side to cross the rocks. Incidentally, "shambles" may commonly mean "jumbled mess", but it originally referred the part of a medieval town where all the slaughterhouses and butchers' shops were, which often looked quite disordered and messy, with significant quantities of blood and waste products from animal slaughtering. Try not to replicate that part here. (The word originally meant a bench, from the Latin word for a stool, since the benches were where a butcher would display the meat they had prepared.)
Modelling by John, Steph, Tarquin's toes, Claire and Si, lighting by Tarquin, John, Steph, Claire and Si
The Shambles (seen here on the way out) is a very narrow jumble of rocks blocking a meander, with climbs on either side to cross the rocks. Incidentally, "shambles" may commonly mean "jumbled mess", but it originally referred the part of a medieval town where all the slaughterhouses and butchers' shops were, which often looked quite disordered and messy, with significant quantities of blood and waste products from animal slaughtering. Try not to replicate that part here. (The word originally meant a bench, from the Latin word for a stool, since the benches were where a butcher would display the meat they had prepared.)
Modelling by John, Steph, Tarquin's toes, Claire and Si, lighting by Tarquin, John, Steph, Claire and Si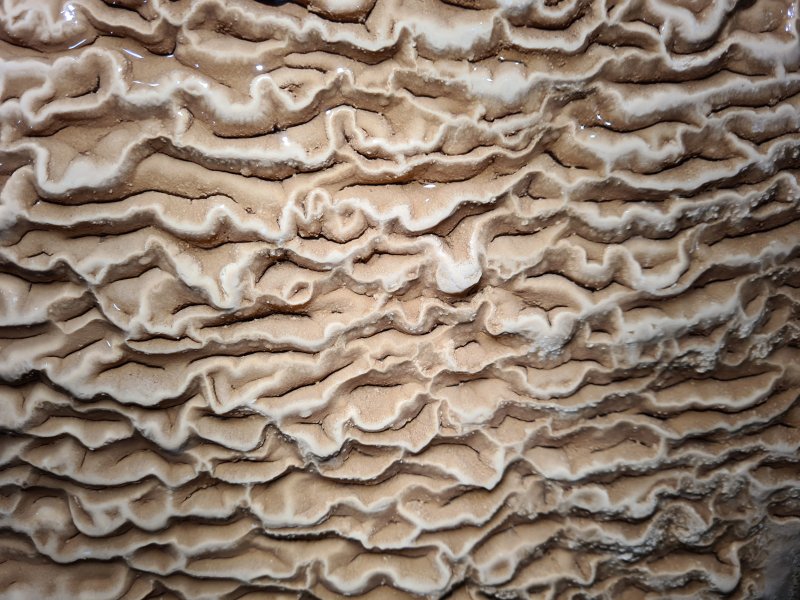 Rippled flowstone at the top of a couple of climbs.
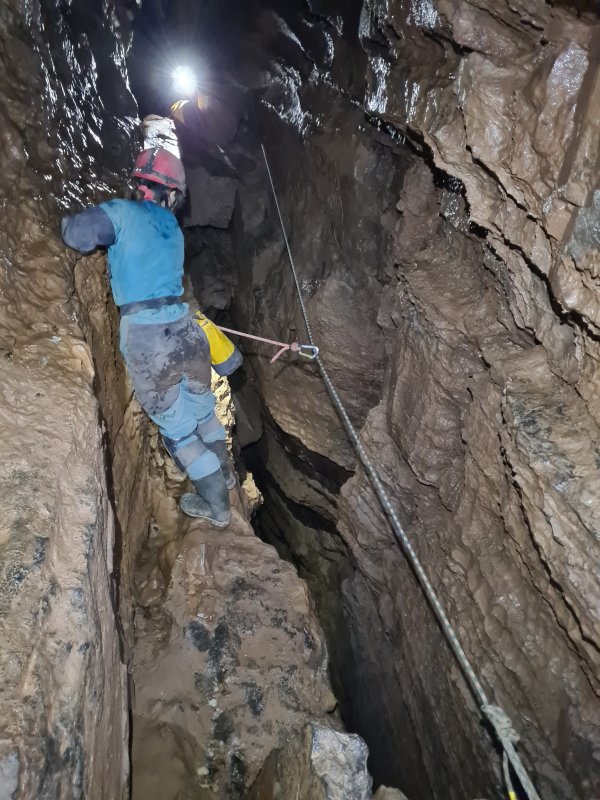 The Traverses then start. The first is the worst for most people. The ledge on the left is great, with a little step half way to catch out the unwary. However, there are almost no handholds, with the wall on the left very well polished. It has a couple of tiny flakes and an equally tiny stalactite that can be pinched. Taller and braver cavers can lean over the gap and stare down into the abyss. Even with a bright light, it is almost impossible to see the bottom, which is about 25 metres down.
Modelling by Steph and Si's light, lighting by Tarquin, Steph and Si
The Traverses then start. The first is the worst for most people. The ledge on the left is great, with a little step half way to catch out the unwary. However, there are almost no handholds, with the wall on the left very well polished. It has a couple of tiny flakes and an equally tiny stalactite that can be pinched. Taller and braver cavers can lean over the gap and stare down into the abyss. Even with a bright light, it is almost impossible to see the bottom, which is about 25 metres down.
Modelling by Steph and Si's light, lighting by Tarquin, Steph and Si Feeling for a handhold. It is actually the little stalactite below her hand. It is actually possible to abseil down and walk along the bottom to the far end of The Traverses, but there is nowhere to climb back up again. For rigging, there are currently no anchors, so this is all rigged from boulders, and the first person has no traverse line, but can be belayed.
Modelling by Claire and John, lighting by Tarquin, Claire and John
Feeling for a handhold. It is actually the little stalactite below her hand. It is actually possible to abseil down and walk along the bottom to the far end of The Traverses, but there is nowhere to climb back up again. For rigging, there are currently no anchors, so this is all rigged from boulders, and the first person has no traverse line, but can be belayed.
Modelling by Claire and John, lighting by Tarquin, Claire and John The middle section of the travserses start after a little ledge of jammed rocks. This fairly lengthy section has nothing useful to attach a rope to, so it is done without one. The gap is very defnitely wide enough to fit down, and disappears into the darkness, so this section can be quite intimidating.
Modelling by Si and John, lighting by Tarquin, Si and John
The middle section of the travserses start after a little ledge of jammed rocks. This fairly lengthy section has nothing useful to attach a rope to, so it is done without one. The gap is very defnitely wide enough to fit down, and disappears into the darkness, so this section can be quite intimidating.
Modelling by Si and John, lighting by Tarquin, Si and John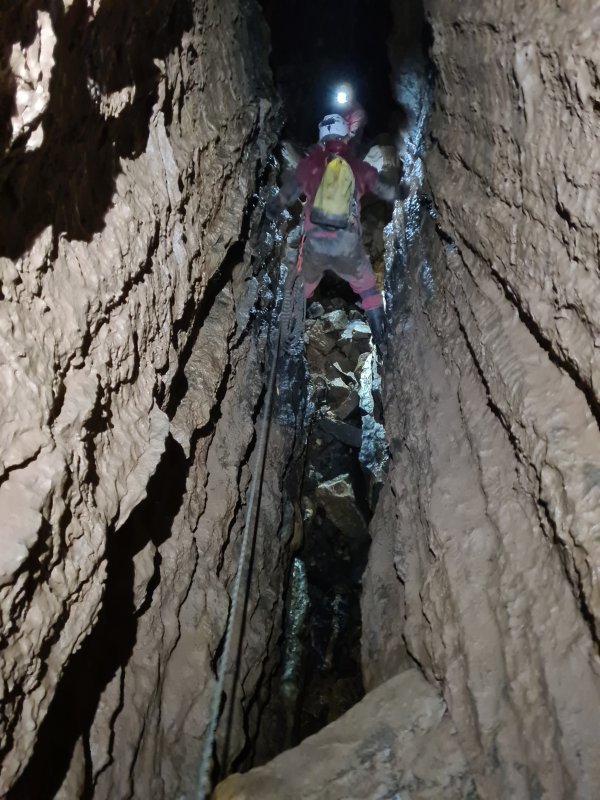 The middle section of The Traverses ends with a part that is a little easier, and actually has a jammed rock to use for rigging. The floor ramps up steeply from about 15 metres depth all the way up to form a large resting spot of boulders.
Modelling by Si and John, lighting by Tarquin, Si and John
The middle section of The Traverses ends with a part that is a little easier, and actually has a jammed rock to use for rigging. The floor ramps up steeply from about 15 metres depth all the way up to form a large resting spot of boulders.
Modelling by Si and John, lighting by Tarquin, Si and John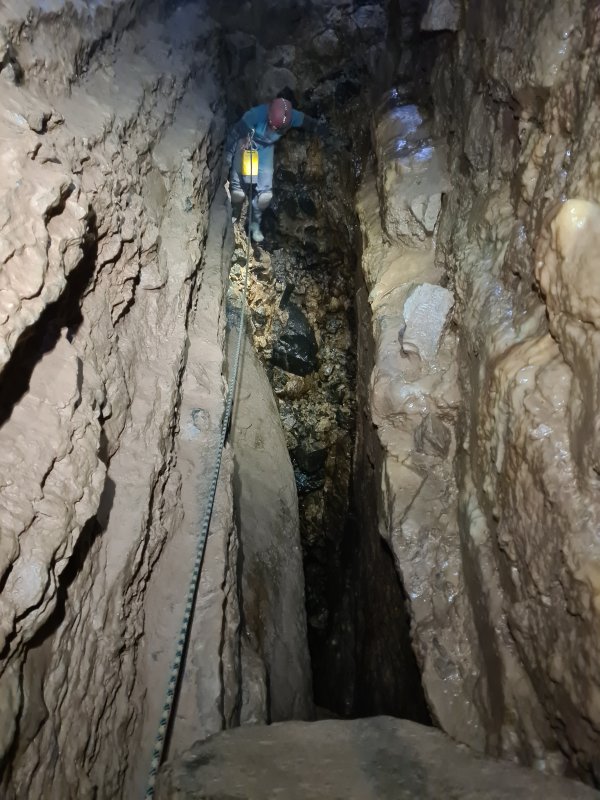 The last traverse looks the widest, and is where all of the classic photographs are taken by profesional photographers. Most of the time, these are done with someone staying too high, leaning over the drop, and making it look as dramatic as possible, and the lighting is done in a way that hides the lower ledge. The reality is that this one is not as bad as the first. The floor feels closer (though it still funnels a very long way down). The traverse starts with a climb down the calcited rocks to the lower ledge.
Modelling by Steph, lighting by Tarquin, Steph and Claire
The last traverse looks the widest, and is where all of the classic photographs are taken by profesional photographers. Most of the time, these are done with someone staying too high, leaning over the drop, and making it look as dramatic as possible, and the lighting is done in a way that hides the lower ledge. The reality is that this one is not as bad as the first. The floor feels closer (though it still funnels a very long way down). The traverse starts with a climb down the calcited rocks to the lower ledge.
Modelling by Steph, lighting by Tarquin, Steph and Claire The ledge of the last traverse is actually quite large, and even though it slopes, it is easy enough to maintain balance with the opposite wall.
Modelling by Steph, lighting by Tarquin, Steph and Claire
The ledge of the last traverse is actually quite large, and even though it slopes, it is easy enough to maintain balance with the opposite wall.
Modelling by Steph, lighting by Tarquin, Steph and Claire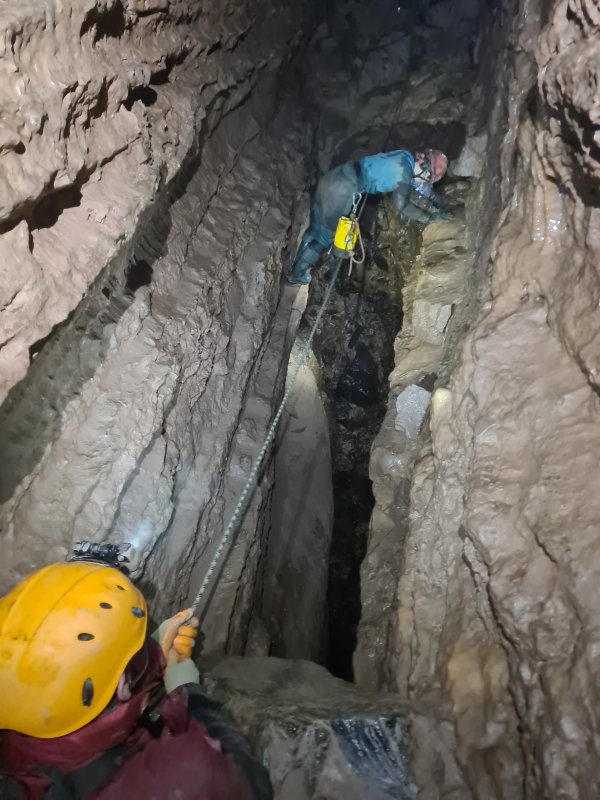 As an alternative, it is possible to bridge over the gap, though it is quite wide at the start.
Modelling by John and Steph, lighting by Tarquin, John, Steph and Claire
As an alternative, it is possible to bridge over the gap, though it is quite wide at the start.
Modelling by John and Steph, lighting by Tarquin, John, Steph and Claire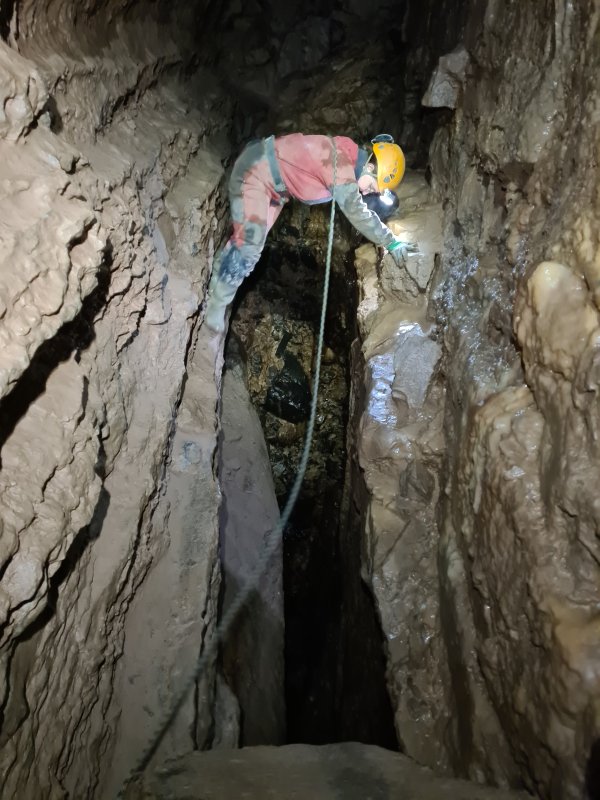 By the end, it gets much narrower.
Modelling by Claire, lighting by Tarquin and Claire
By the end, it gets much narrower.
Modelling by Claire, lighting by Tarquin and Claire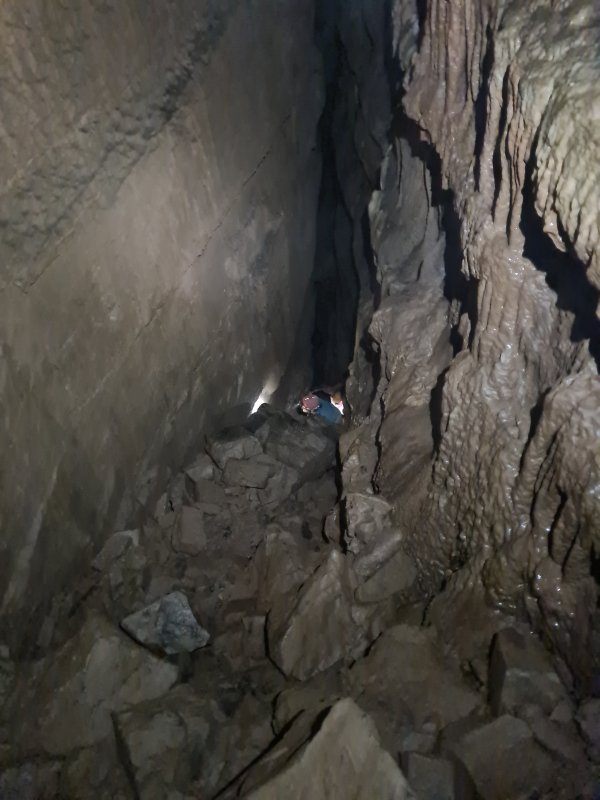 The traverses end at a steep ramp with a Climb.
Modelling by Steph and John, lighting by Tarquin, Steph, Claire and John
The traverses end at a steep ramp with a Climb.
Modelling by Steph and John, lighting by Tarquin, Steph, Claire and John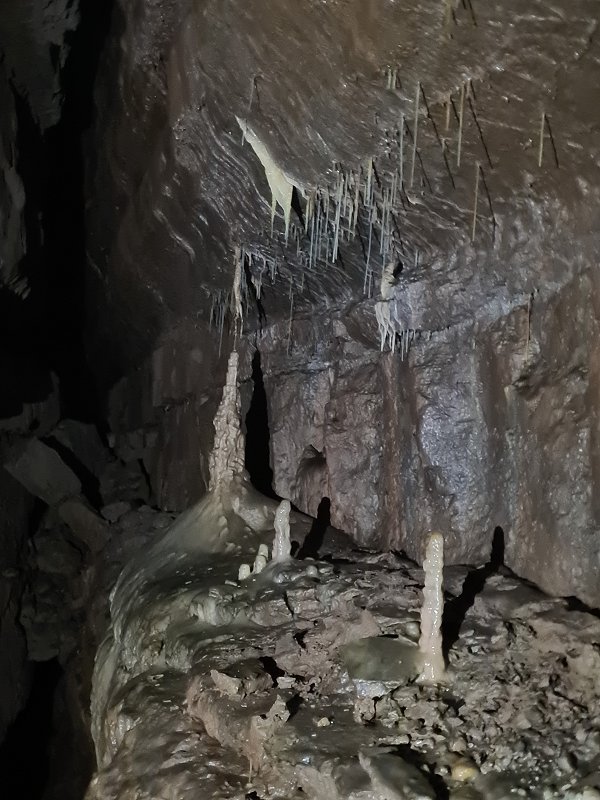 Stal on a shelf.
 The passage then gets very tall again, and the route descends down to the bottom.
Modelling by Steph, Si and John, lighting by Tarquin, Steph, Si and John
The passage then gets very tall again, and the route descends down to the bottom.
Modelling by Steph, Si and John, lighting by Tarquin, Steph, Si and John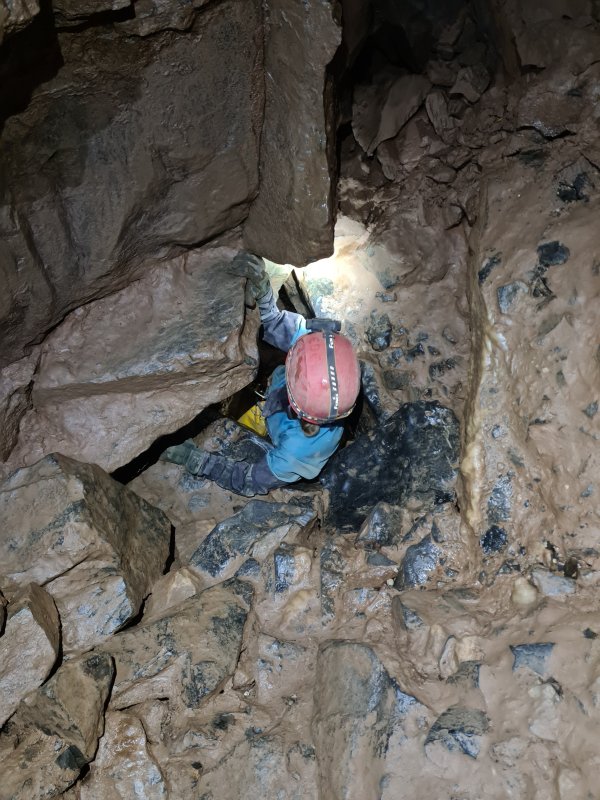 However, it then abruptly chokes, and the way on is down a stupid little hole in the floor. This zig-zags down a climb made for tall people, down a rift.
Modelling by Steph, lighting by Tarquin and Steph
However, it then abruptly chokes, and the way on is down a stupid little hole in the floor. This zig-zags down a climb made for tall people, down a rift.
Modelling by Steph, lighting by Tarquin and Steph The way on passes under the choke, then up a squeeze through rocks.
Modelling by Steph
The way on passes under the choke, then up a squeeze through rocks.
Modelling by Steph This part of the squeeze is particularly tight, and tries to wedge you between rocks, without good holds to push off.
Modelling by Steph, lighting by Tarquin and John
This part of the squeeze is particularly tight, and tries to wedge you between rocks, without good holds to push off.
Modelling by Steph, lighting by Tarquin and John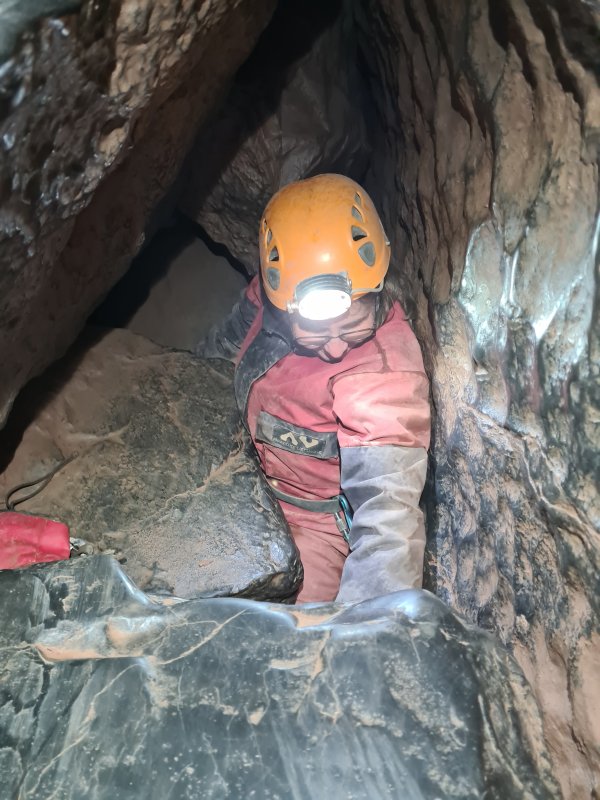 Even smaller cavers find this one tight, mainly because of the wedge shape. It is easy to walk past this squeeze on the way out, but the passage chokes immediately, so it is obvious.
Modelling by Claire, lighting by Tarquin and Claire
Even smaller cavers find this one tight, mainly because of the wedge shape. It is easy to walk past this squeeze on the way out, but the passage chokes immediately, so it is obvious.
Modelling by Claire, lighting by Tarquin and Claire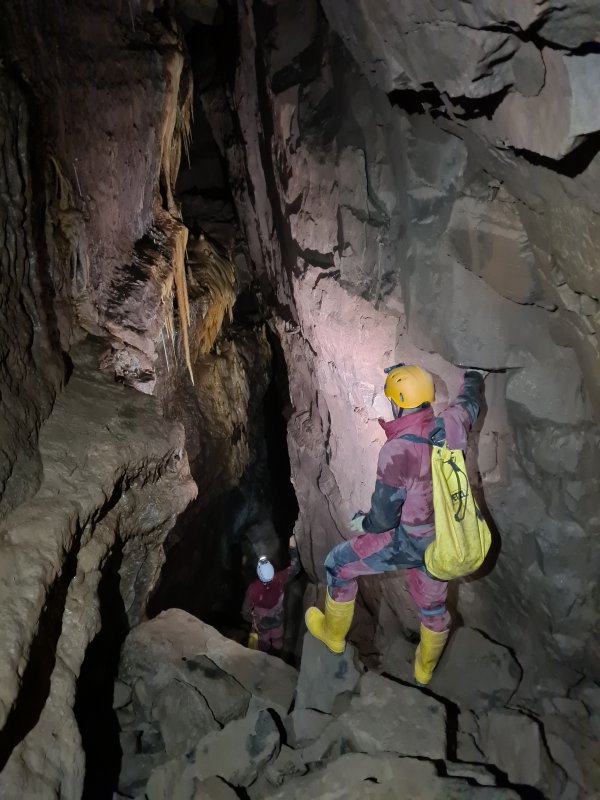 The passage passes the ridiculously tall climb up to the Paul Allan Series, then descends steeply past some formations.
Modelling by John and Si, lighting by Tarquin, John and Si
The passage passes the ridiculously tall climb up to the Paul Allan Series, then descends steeply past some formations.
Modelling by John and Si, lighting by Tarquin, John and Si Flowstone and curtains in the tall section after the Paul Allan Series.
Lighting by Tarquin, Claire and Steph
Flowstone and curtains in the tall section after the Paul Allan Series.
Lighting by Tarquin, Claire and Steph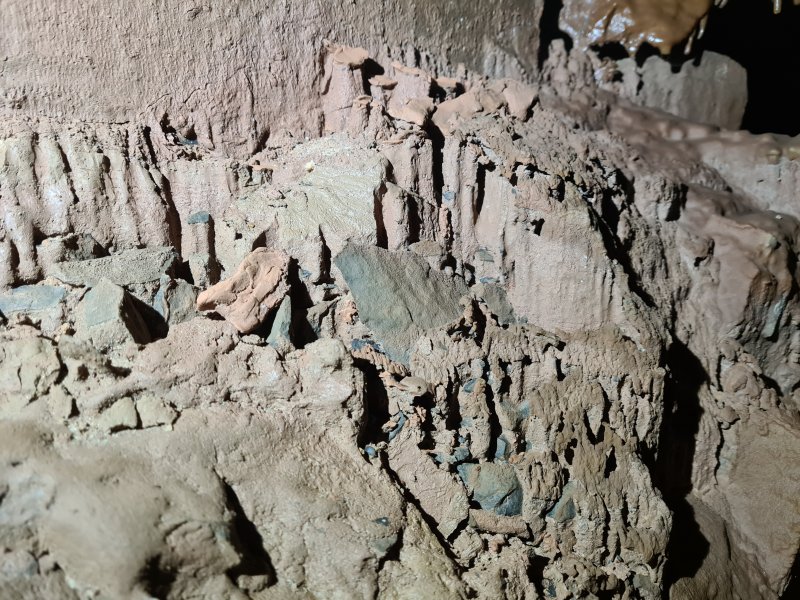 Beginnings of hoodoos.
 The next obstacle is one of the most horrifying, but by this stage, the nerves have already reached wherever they are going to reach. The hole is not actually the worst part. That shadow under the boulders is not a shadow. It is an empty space. Those boulders are floating in the air, held there by nothing. Boulders rest on boulders, glued together by mud and luck, levitating over empty space. The fact that the hole is there shows that the boulders do not have to remain there. 12 metres down below are their friends, who used to be up here with them at some point in history. To get to the edge of the hole, you weave a path over those boulders to the left of the leaning slab, knowing that there is a blank gap under your feet. All while trying to forget what happened in this cave in 2021, when someone stepped on boulders over a hole.
Modelling by Claire and John, lighting by Tarquin, Steph, Claire and John
The next obstacle is one of the most horrifying, but by this stage, the nerves have already reached wherever they are going to reach. The hole is not actually the worst part. That shadow under the boulders is not a shadow. It is an empty space. Those boulders are floating in the air, held there by nothing. Boulders rest on boulders, glued together by mud and luck, levitating over empty space. The fact that the hole is there shows that the boulders do not have to remain there. 12 metres down below are their friends, who used to be up here with them at some point in history. To get to the edge of the hole, you weave a path over those boulders to the left of the leaning slab, knowing that there is a blank gap under your feet. All while trying to forget what happened in this cave in 2021, when someone stepped on boulders over a hole.
Modelling by Claire and John, lighting by Tarquin, Steph, Claire and John Just switch off your mind, step on the tiny remnant of calcited false floor, hang on to the little stalagmite like it can cope with a shock load, and step over to the other platform of levitating rocks. By contrast, this is the safe bit. Pretend you don't know what is under the camera right now. This piece of cave really is an experience.
Modelling by Steph and John, lighting by Tarquin, Steph and Johns
Just switch off your mind, step on the tiny remnant of calcited false floor, hang on to the little stalagmite like it can cope with a shock load, and step over to the other platform of levitating rocks. By contrast, this is the safe bit. Pretend you don't know what is under the camera right now. This piece of cave really is an experience.
Modelling by Steph and John, lighting by Tarquin, Steph and Johns A helictite on the ledge, which has bounced off the wall.
 The ledge is largely made from a calcite false floor. The holes are windows through to other parts of the false floor.
Modelling by Steph, lighting by Tarquin and Steph
The ledge is largely made from a calcite false floor. The holes are windows through to other parts of the false floor.
Modelling by Steph, lighting by Tarquin and Steph Concreted cave pearls on the false floor.
 Sand forming the underside of the false floor.
Lighting by Tarquin and Steph
Sand forming the underside of the false floor.
Lighting by Tarquin and Steph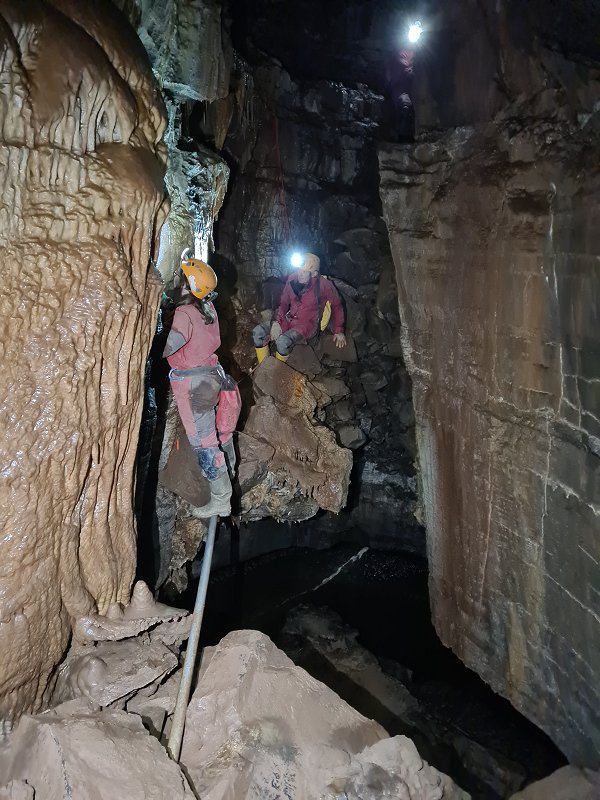 The next obstacle is Maypole Bridge, a scaffolding bar suspended a few metres off the floor. The heights are not as extreme as before, but this still feels ridiculous. However, this is actually no different than the scaffolding bars over the pots in OFD I Main Streamway, without the water, except that it must have been very difficult to actually get here. It is fairly easy to climb down to the right to reach the streamway, but upstream is a powerful 3 metre waterfall called Niagara, with a 4 metre waterfall above it. Downstream is a short streamway reaching the downstream sump (on the other side of which would be Top Waterfall, but it does not appear to have been connected - there must be some dry passage in between, since there is a 19 metre height difference).
Modelling by Claire, John and Si, lighting by Tarquin, Steph, Claire, John and Si
The next obstacle is Maypole Bridge, a scaffolding bar suspended a few metres off the floor. The heights are not as extreme as before, but this still feels ridiculous. However, this is actually no different than the scaffolding bars over the pots in OFD I Main Streamway, without the water, except that it must have been very difficult to actually get here. It is fairly easy to climb down to the right to reach the streamway, but upstream is a powerful 3 metre waterfall called Niagara, with a 4 metre waterfall above it. Downstream is a short streamway reaching the downstream sump (on the other side of which would be Top Waterfall, but it does not appear to have been connected - there must be some dry passage in between, since there is a 19 metre height difference).
Modelling by Claire, John and Si, lighting by Tarquin, Steph, Claire, John and Si Layered formation in the other side of Maypole Bridge.
 Grotto beyond Maypole Bridge.
Modelling by Claire and Steph's toes, lighting by Tarquin, Steph, Claire and John
Grotto beyond Maypole Bridge.
Modelling by Claire and Steph's toes, lighting by Tarquin, Steph, Claire and John Helictites hiding among the straws.
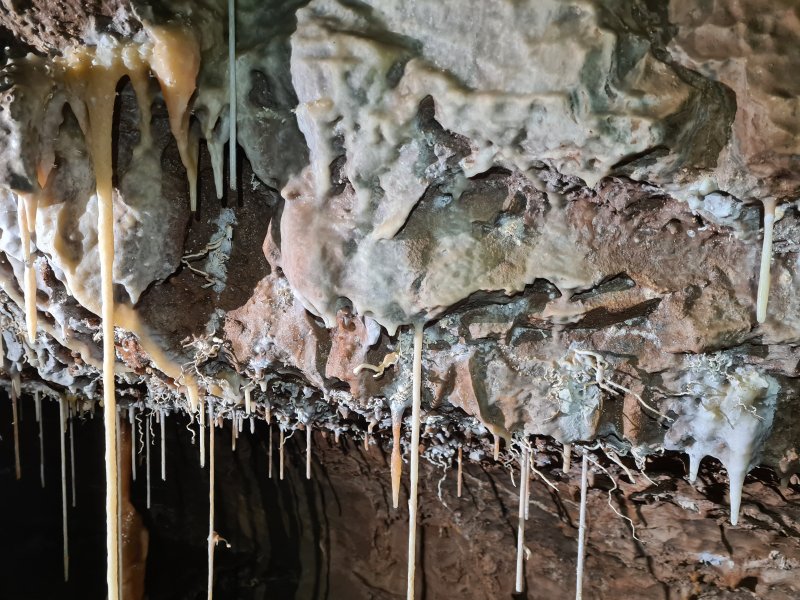 Helictites.
Lighting by Tarquin and Steph
Helictites.
Lighting by Tarquin and Steph Helictites.
Lighting by Tarquin and Steph
Helictites.
Lighting by Tarquin and Steph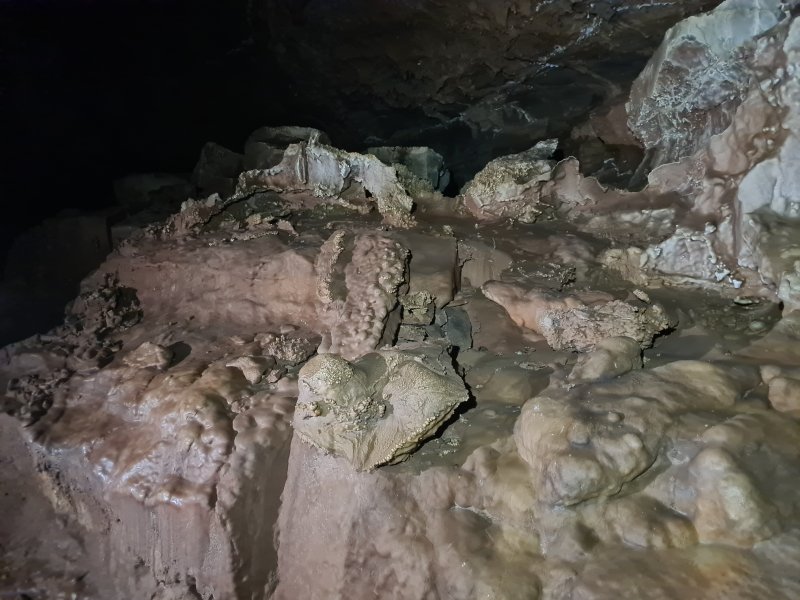 Botrioidal bumps on flowstone.
Lighting by Tarquin and Steph
Botrioidal bumps on flowstone.
Lighting by Tarquin and Steph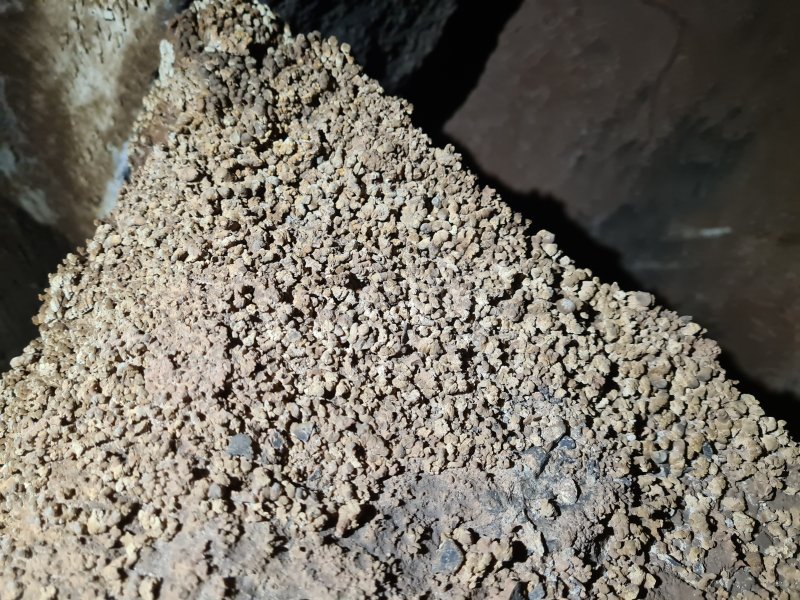 Calcite bobbles. These do not appear to be cryogenic.
 Grotto with a bell shaped stalagmite. Yes, a bell. That's what I said, and I'm sticking to it.
Lighting by Tarquin and Steph
Grotto with a bell shaped stalagmite. Yes, a bell. That's what I said, and I'm sticking to it.
Lighting by Tarquin and Steph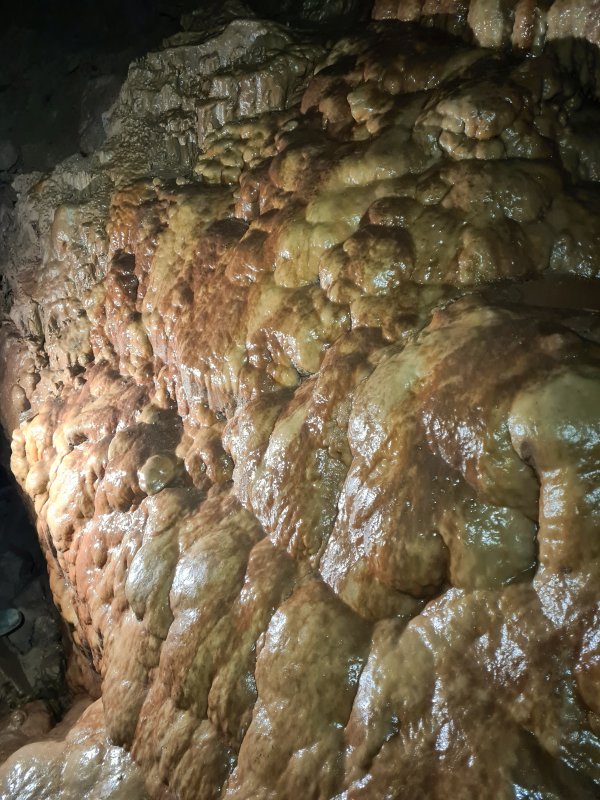 Coloured flowstone. Somewhere around here, the first upper level starts, which becomes three stacked layers.
Lighting by Steph.
Coloured flowstone. Somewhere around here, the first upper level starts, which becomes three stacked layers.
Lighting by Steph.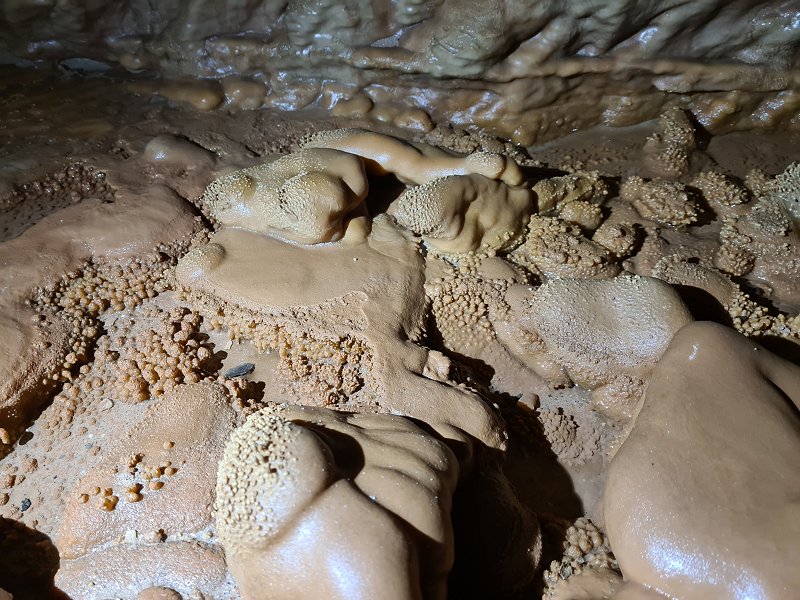 Botyoids covering a crystal pool.
 Botryoids.
 A grand section then signals the point where the route joins the river, which is down the gaps at the end.
Modelling by Claire, Si and John, lighting by Tarquin, Claire, Si and John
A grand section then signals the point where the route joins the river, which is down the gaps at the end.
Modelling by Claire, Si and John, lighting by Tarquin, Claire, Si and John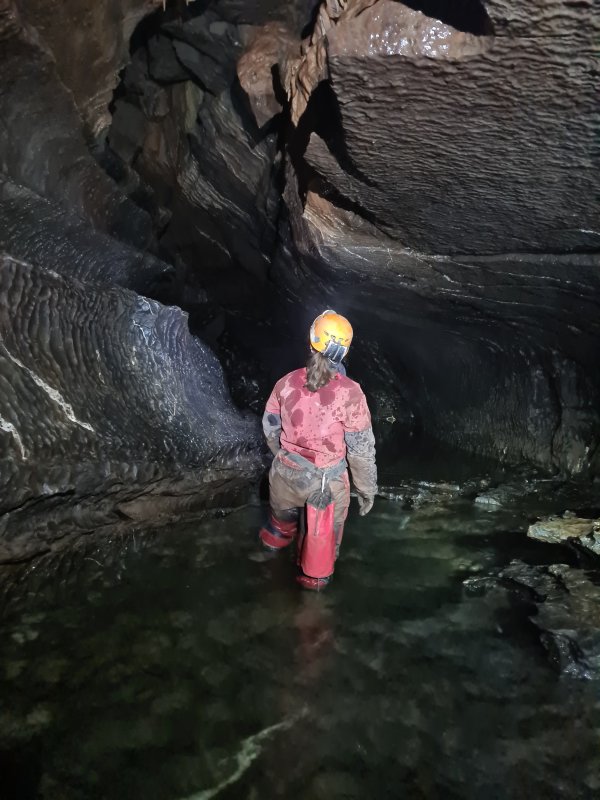 An early part of the river, where we headed only in the upstream direction. Downstream would have quickly reached the waterfalls.
Modelling by Claire, lighting by John and Claire
An early part of the river, where we headed only in the upstream direction. Downstream would have quickly reached the waterfalls.
Modelling by Claire, lighting by John and Claire Small cascade.
Modelling by Steph, lighting by Tarquin, John and Claire
Small cascade.
Modelling by Steph, lighting by Tarquin, John and Claire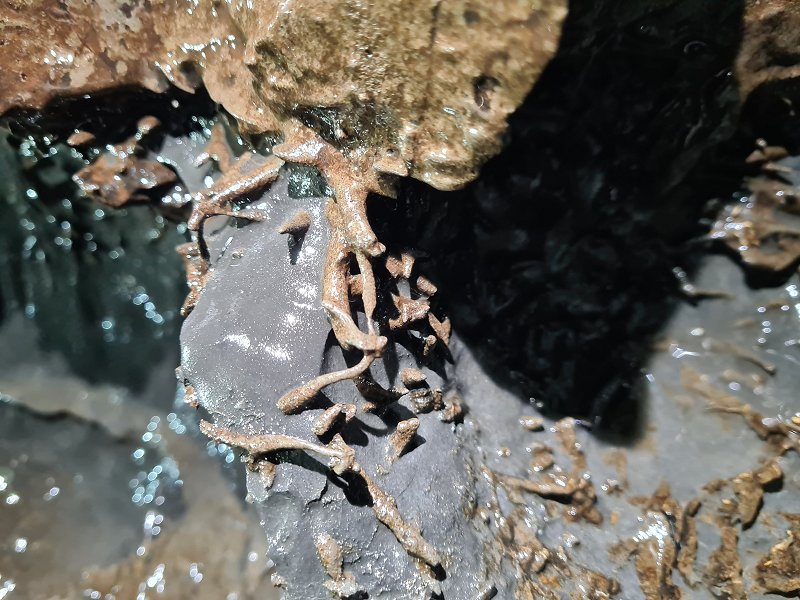 The lip of the cascades is adorned with small rock protrusions that look like fossilised worms. They are probably decomposed fossil corals.
Lighting by Tarquin and John
The lip of the cascades is adorned with small rock protrusions that look like fossilised worms. They are probably decomposed fossil corals.
Lighting by Tarquin and John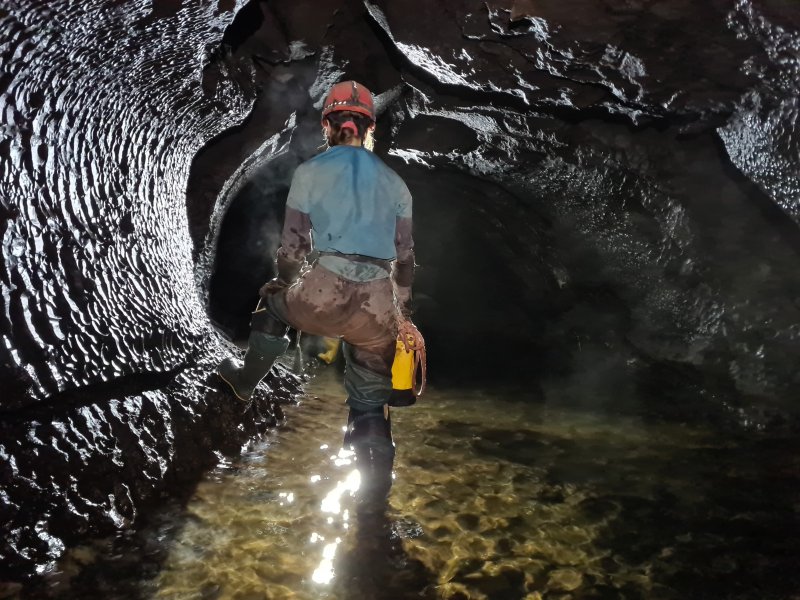 Tubular section of streamway. The first set of upper passages ends somewhere above here.
Modelling by Steph, lighting by Tarquin and John
Tubular section of streamway. The first set of upper passages ends somewhere above here.
Modelling by Steph, lighting by Tarquin and John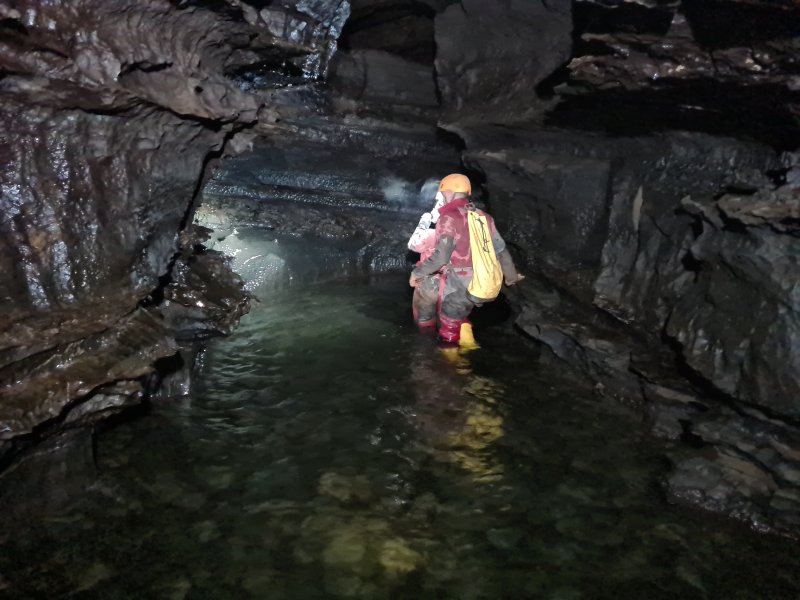 Just before The Wee, where another side passage has left overhead, becoming a series of very high level passages below Hot Air Mine.
Modelling by John and Claire, lighting by Tarquin, John and Claire
Just before The Wee, where another side passage has left overhead, becoming a series of very high level passages below Hot Air Mine.
Modelling by John and Claire, lighting by Tarquin, John and Claire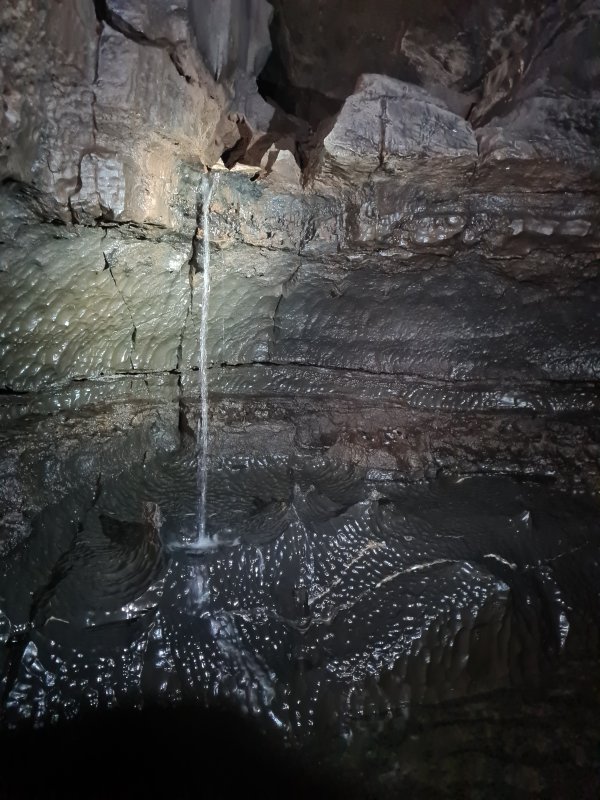 The Wee, a very distinctive inlet sourced from the passages above.
Lighting by Tarquin and John
The Wee, a very distinctive inlet sourced from the passages above.
Lighting by Tarquin and John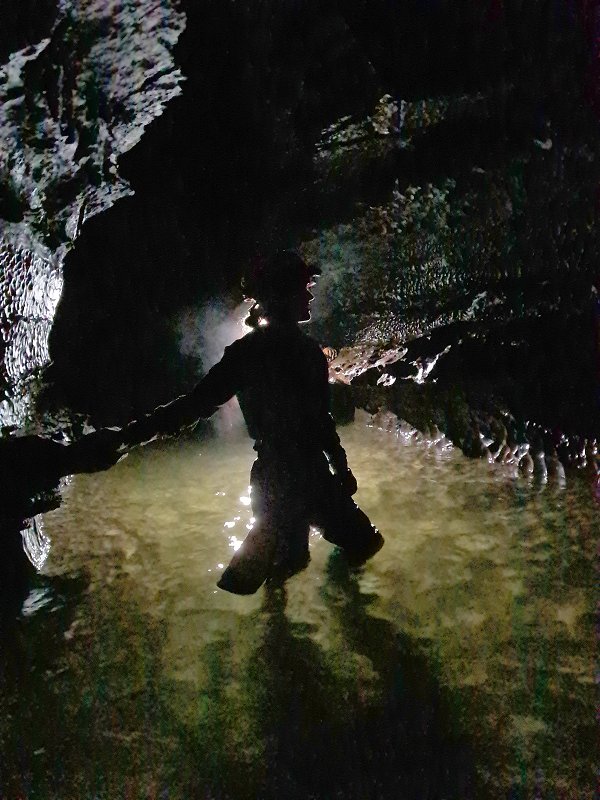 Streamway.
Modelling by Steph and hints of Si, lighting by Si
Streamway.
Modelling by Steph and hints of Si, lighting by Si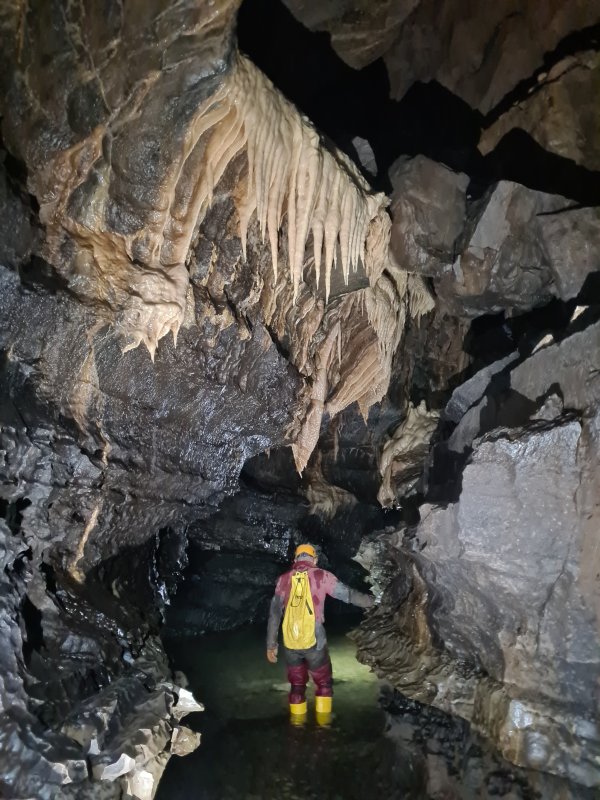 Formations above the streamway. This seems to be the start of the next set of side passages, before the Cloister Cascade.
Modelling by John, lighting by Tarquin, Si, Steph and Claire
Formations above the streamway. This seems to be the start of the next set of side passages, before the Cloister Cascade.
Modelling by John, lighting by Tarquin, Si, Steph and Claire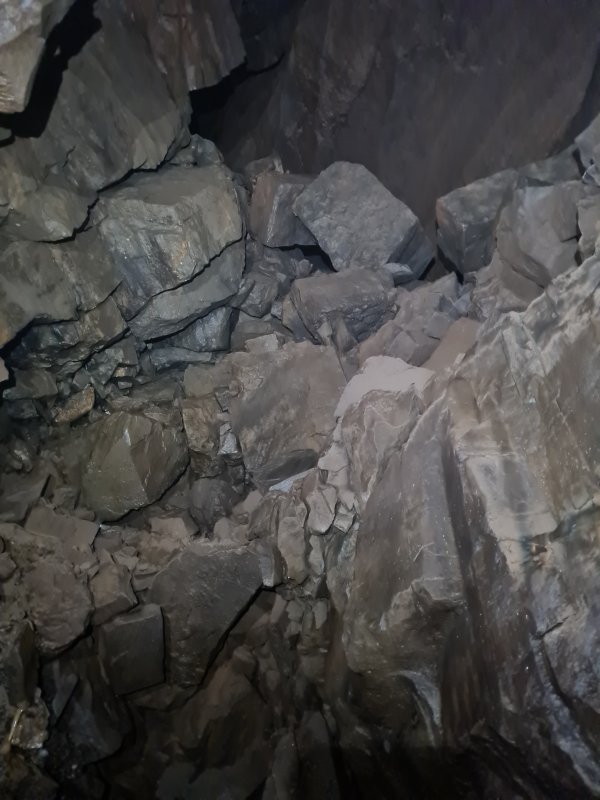 More insane hanging rocks above the streamway. This must be the set of passages leading to Gritstone Chokes.
 Junction with the upper passages.
Modelling by John, lighting by Tarquin and John
Junction with the upper passages.
Modelling by John, lighting by Tarquin and John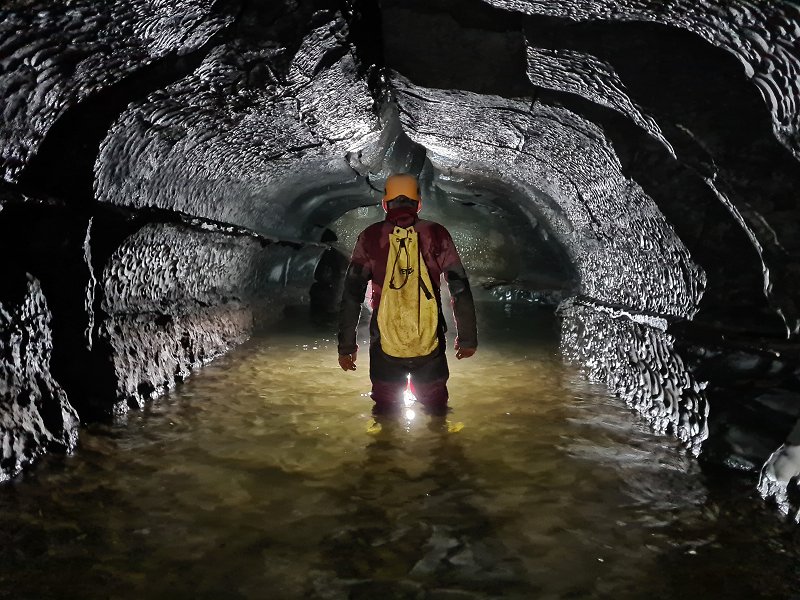 One of the most beautiful pieces of streamway in the cave, a phreatic arch with detailed scallops. This almost looks too perfect to be a cave, with the clefts almost making it look like the inside of a ribcage.
Modelling by John and hints of Si, lighting by John and Si
One of the most beautiful pieces of streamway in the cave, a phreatic arch with detailed scallops. This almost looks too perfect to be a cave, with the clefts almost making it look like the inside of a ribcage.
Modelling by John and hints of Si, lighting by John and Si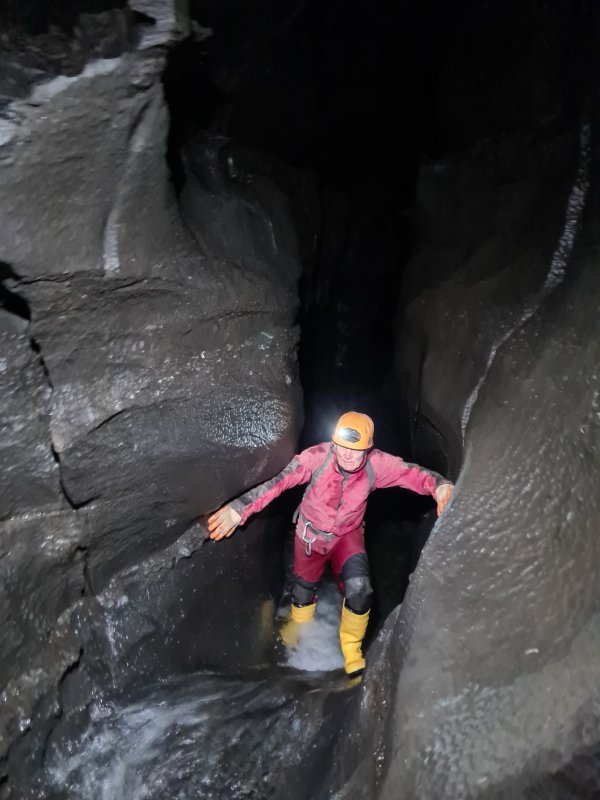 Parts of the upper streamway have the fun water slides seen in the lower parts of the cave.
Modelling by John, lighting by Tarquin and John
Parts of the upper streamway have the fun water slides seen in the lower parts of the cave.
Modelling by John, lighting by Tarquin and John Nearing the end of the streamway, where it becomes a series of wet arches.
Modelling by Claire and a vague shadow of Si, lighting by Tarquin and Claire
Nearing the end of the streamway, where it becomes a series of wet arches.
Modelling by Claire and a vague shadow of Si, lighting by Tarquin and Claire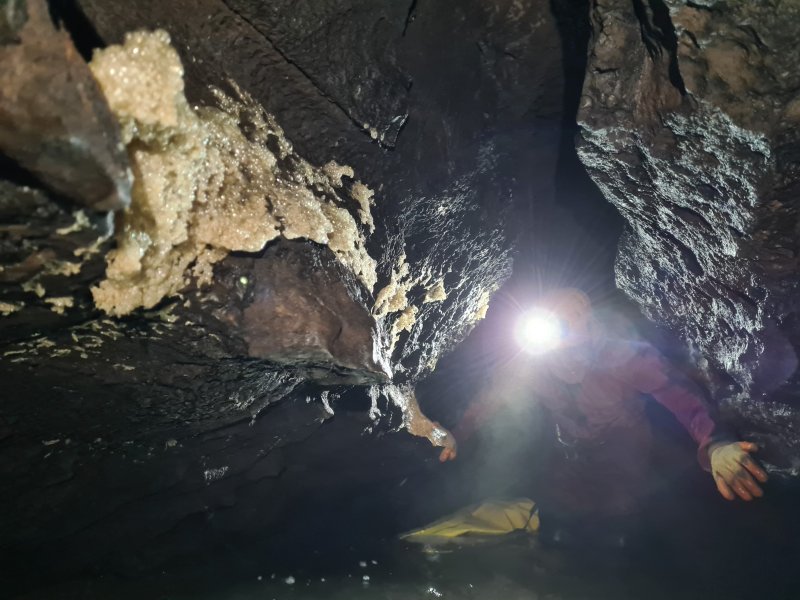 This section gets very low, and flood scum clearly shows it can sump. However, the survey makes it appear possible to bypass if needed. Another level above this ends at the gritstone chokes.
Modelling by John, lighting by Tarquin and John
This section gets very low, and flood scum clearly shows it can sump. However, the survey makes it appear possible to bypass if needed. Another level above this ends at the gritstone chokes.
Modelling by John, lighting by Tarquin and John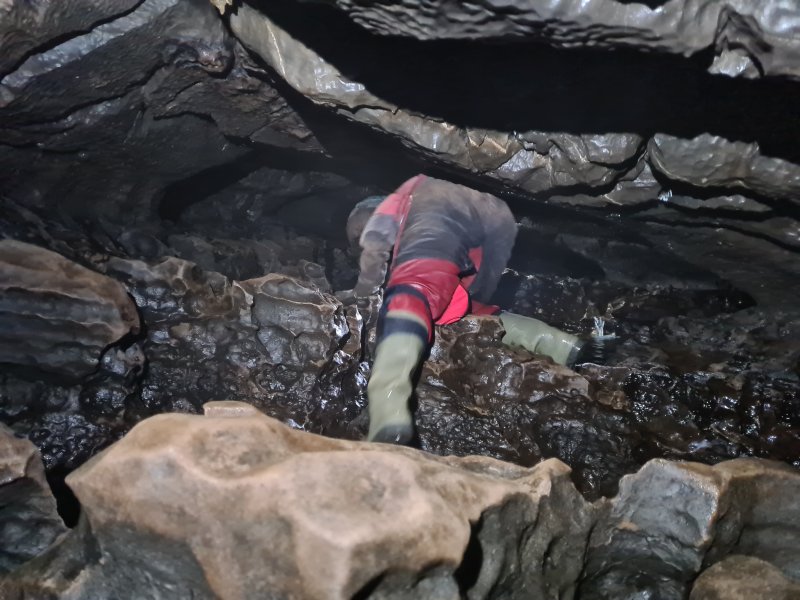 Just before the end are a series of awkward little climbs. One climb up into a roof tube bypasses the final piece of streamway.
Modelling by John and the edge of Steph, lighting by Tarquin and Steph
Just before the end are a series of awkward little climbs. One climb up into a roof tube bypasses the final piece of streamway.
Modelling by John and the edge of Steph, lighting by Tarquin and Steph The large passage of Smith's Armoury then starts abruptly, very different from the cave before it, but probably more similar to the upper levels, which it is clearly related to.
Modelling by Claire, Steph and John, lighting by Tarquin, Si, Claire, Steph and John
The large passage of Smith's Armoury then starts abruptly, very different from the cave before it, but probably more similar to the upper levels, which it is clearly related to.
Modelling by Claire, Steph and John, lighting by Tarquin, Si, Claire, Steph and John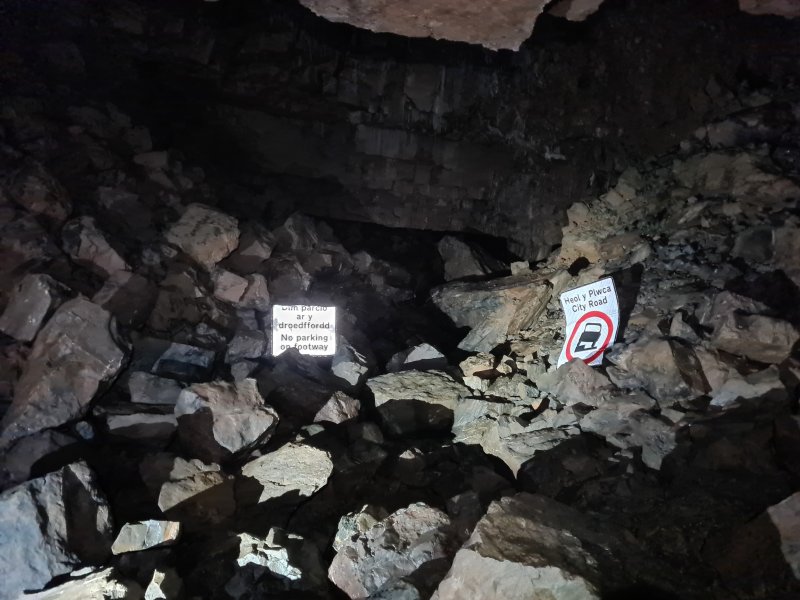 The end of the cave is signed only by a very broken road sign, that seems to have no comedic reference. Its reason for being here was completely lost on us.
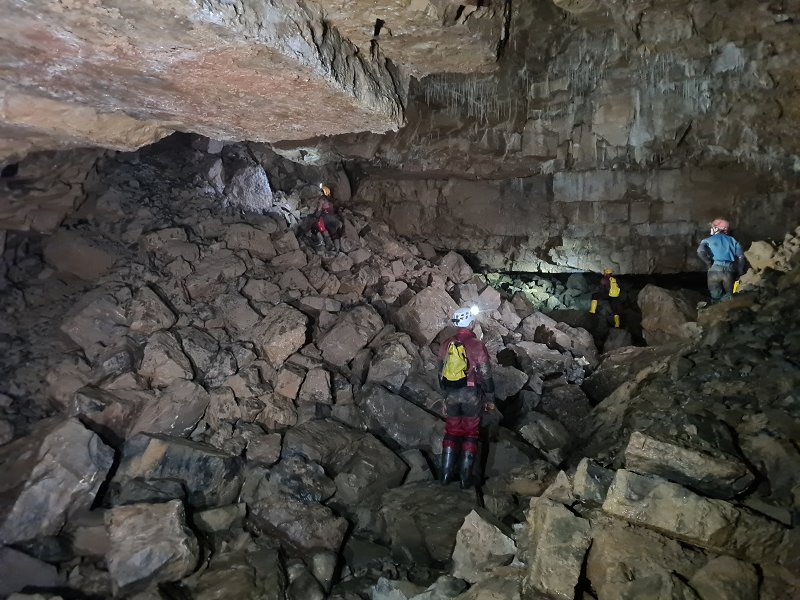 Smith's Armoury, named after the fictional cave character Smith, who was responsible for throwing rocks at cavers. Presumably his other name is "Gravity". This is quite an anticlimactic end to the cave.
Modelling by Si, Clare, John and Steph, lighting by Tarquin, Si, Clare, John and Steph
Smith's Armoury, named after the fictional cave character Smith, who was responsible for throwing rocks at cavers. Presumably his other name is "Gravity". This is quite an anticlimactic end to the cave.
Modelling by Si, Clare, John and Steph, lighting by Tarquin, Si, Clare, John and Steph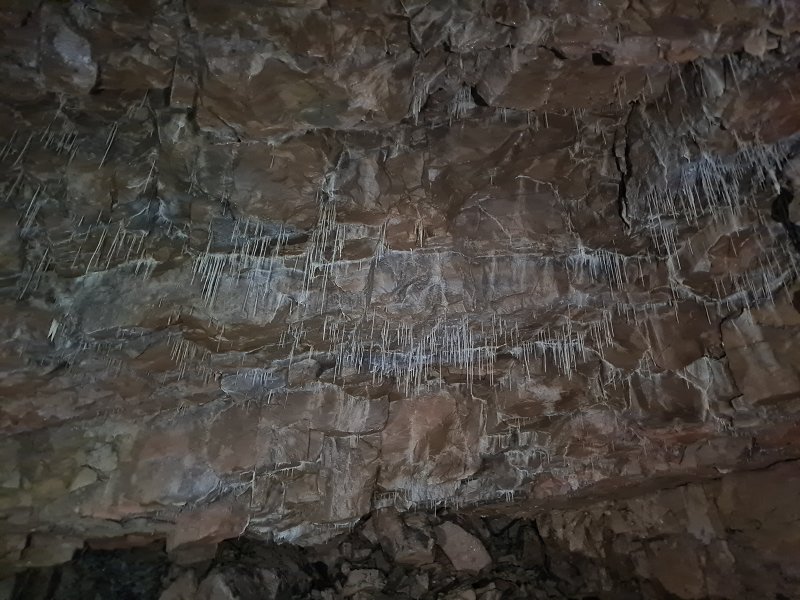 Straws in the ceiling of Smith's Armoury.
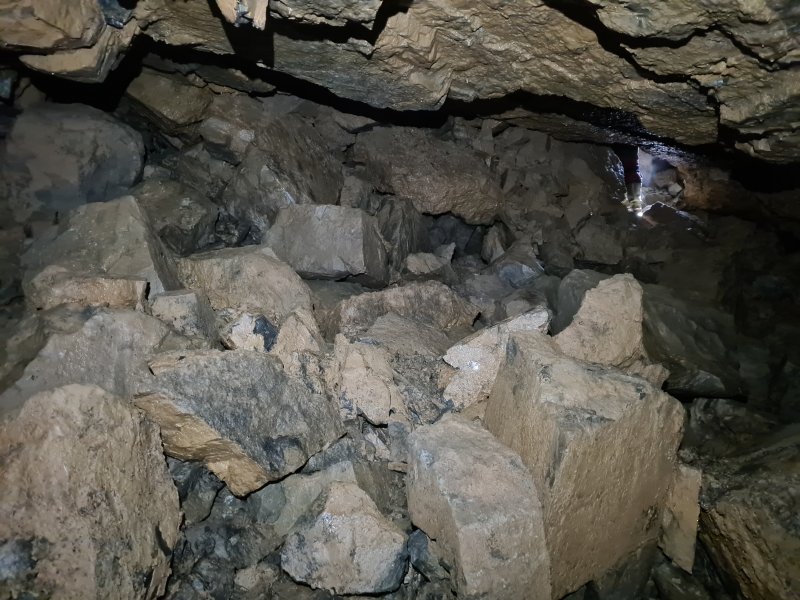 The heavily choked bedding at the end of Smith's Armoury. This seems far too severe to find a way through, but there is a little hollow on the right.
Modelling by Claire, lighting by Tarquin and Claire
The heavily choked bedding at the end of Smith's Armoury. This seems far too severe to find a way through, but there is a little hollow on the right.
Modelling by Claire, lighting by Tarquin and Claire The left side is quite intimidatingly crushed, with the rock visibly shattered from the pressure. Something big happened here.
 Our route out (on all three trips) took us back to Chasm, then via a shortcut to Salubrious Passage. Distorted stal column in the passages leading between Chasm Passage and Salubrious Passage.
 Crystal pool.
 Tiny column of helictites, just before the passage joins Salubrious Passage.
 Being greeted by the mountains as we reached surface. Carreg Cadno (538 metres) and its Carreg Lwyd outcrop, Hirfynydd (481 metres), Mynydd y Drum, Mynydd Marchywel, Mynydd Allt-y-grug, Cribarth, Penlle'rcastell, Carreg Goch (558 metres), Garreg Las (635 metres), Fan Hir (761 metres), Moel Feity (591 metres) and Cefn Cul (562 metres).
Modelling by Tarquin's shadow, Claire, John, Si and Steph
Being greeted by the mountains as we reached surface. Carreg Cadno (538 metres) and its Carreg Lwyd outcrop, Hirfynydd (481 metres), Mynydd y Drum, Mynydd Marchywel, Mynydd Allt-y-grug, Cribarth, Penlle'rcastell, Carreg Goch (558 metres), Garreg Las (635 metres), Fan Hir (761 metres), Moel Feity (591 metres) and Cefn Cul (562 metres).
Modelling by Tarquin's shadow, Claire, John, Si and Steph