Agen Allwedd Inner and Outer Circles trip 28/08/2022
Unless otherwise stated, camera, setups, lighting, edits and gallery effects by Tarquin. Modelling and lighting at various points will be Will Pargeter and Alex Pargeter.
I have already photographed parts of this series on trips to Sand Caverns and the Inner and Outer Circles. However, there are some very significant parts of the cave that were missed, and others that were simply not photographed. This gallery picks up some extras.
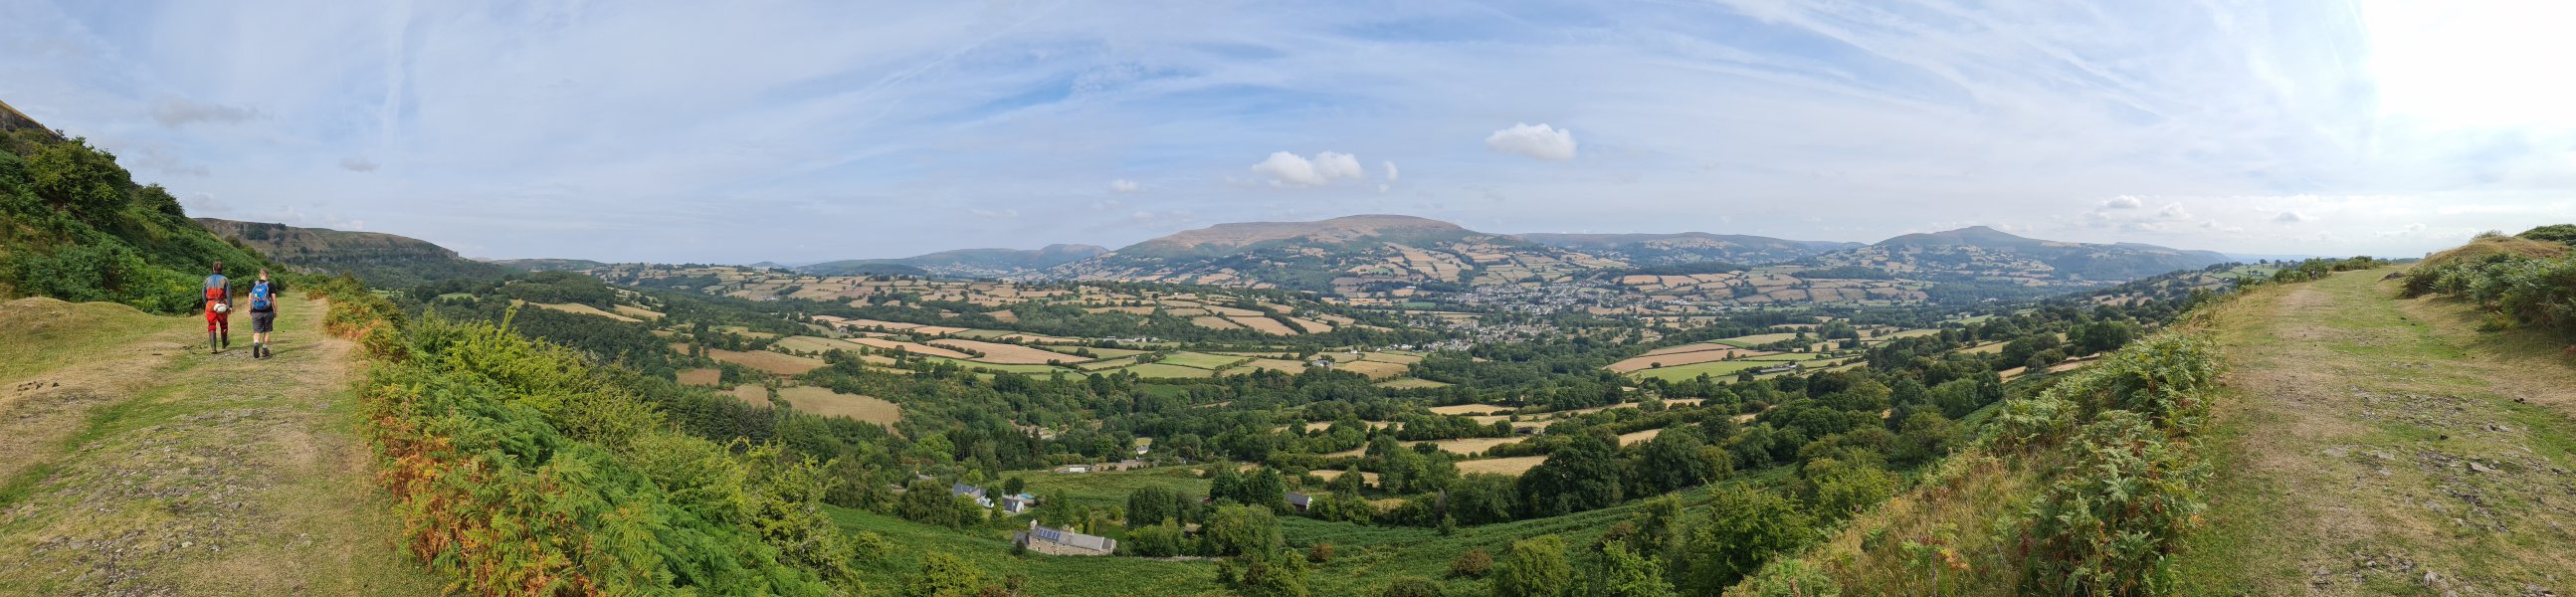
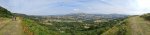 The always-spectacular view from the Hafod tranroad. Mynydd Llangatwg (530 metres) and Tor y Foel (551 metres) on the left, then the Black Mountains: Mynydd Llangorse (515 metres), Mynydd Troed (609 metres), Pen Allt-mawr (719 metres), Pen Cerrig-calch (701 metres), Pen Gwyllt Meirch (over 580 metres), Crug Mawr (550 metres), the Sugar Loaf (596 metres) and Ysgyryd Fawr (486 metres).
Modelling by Will and Alex
The always-spectacular view from the Hafod tranroad. Mynydd Llangatwg (530 metres) and Tor y Foel (551 metres) on the left, then the Black Mountains: Mynydd Llangorse (515 metres), Mynydd Troed (609 metres), Pen Allt-mawr (719 metres), Pen Cerrig-calch (701 metres), Pen Gwyllt Meirch (over 580 metres), Crug Mawr (550 metres), the Sugar Loaf (596 metres) and Ysgyryd Fawr (486 metres).
Modelling by Will and Alex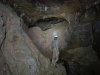 Helictite Chamber, above the start of Turkey Streamway. There is a sobering line drawn on one of the boulders here, showing the level of flood water, at least 4 metres above the boulder wriggle that you need to do in Turkey Streamway.
Modelling by Will, lighting by Tarquin and Will
Helictite Chamber, above the start of Turkey Streamway. There is a sobering line drawn on one of the boulders here, showing the level of flood water, at least 4 metres above the boulder wriggle that you need to do in Turkey Streamway.
Modelling by Will, lighting by Tarquin and Will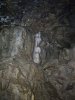 Formations in Helictite Chamber. There are no obvious helictites.
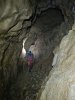 At the point where Sand Caverns is entered from Hawkin's Horror, a scramble up to the right reaches the southeastern branch of the passage.
Modelling by Will, lighting by Tarquin and Will
At the point where Sand Caverns is entered from Hawkin's Horror, a scramble up to the right reaches the southeastern branch of the passage.
Modelling by Will, lighting by Tarquin and Will A muddy alcove sitting far above the floor of the passage. There is no way on from here.
 Flowstone at the start of the passage.
Modelling by Will, lighting by Tarquin and Will
Flowstone at the start of the passage.
Modelling by Will, lighting by Tarquin and Will Crystal pool.
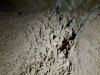 Hoodoos.
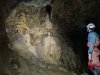 Formations.
Modelling by Will, lighting by Tarquin and Will
Formations.
Modelling by Will, lighting by Tarquin and Will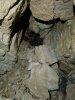 The passage ends in a choke. This is almost certainly related to Turkey Chamber, which sits on the other side of the choke.
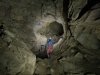 The normal direction along Sand Caverns passes a slope up to a balcony on the left. This has a viewpoint looking back over the start of Sand Caverns.
Modelling by Will, lighting by Tarquin and Will
The normal direction along Sand Caverns passes a slope up to a balcony on the left. This has a viewpoint looking back over the start of Sand Caverns.
Modelling by Will, lighting by Tarquin and Will A side passage off the balcony is the start of Frozen River Passage, whose floor for its entire length is made from flowstone (OFD has a similarly named passage, with the same reason for its name).
Modelling by Will, lighting by Tarquin and Will
A side passage off the balcony is the start of Frozen River Passage, whose floor for its entire length is made from flowstone (OFD has a similarly named passage, with the same reason for its name).
Modelling by Will, lighting by Tarquin and Will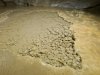 Crystal pool in the flowstone.
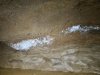 Small helictites on the wall of Frozen River Passage.
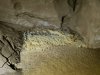 Dry crystal pool.
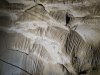 Surge marks on the wall of Frozen River Passage.
 Grotto at the end of Frozen River Passage.
Lighting by Will
Grotto at the end of Frozen River Passage.
Lighting by Will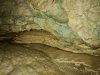 Dried crystal pool with circular islands. The islands are similar to the Pork Pies in Upper Flood Swallet.
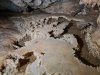 Crystal pool.
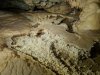 Crystal pools.
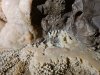 Crystals at the edge of the pool.
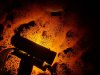 Shining a light through the translucent calcite floor produces an effect similar to lava.
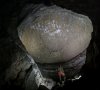 Dome Of St. Pauls, my favourite piece of the entire series. The flat ceiling is created by successive collapses called a chimney failure, exposing the thinly interbedded limestones and shales of the overlying Llanelly Shales. The rippled texture seems almost like scales, and the fracture suggests that this is a dragon's egg, that is about to hatch. The ceiling is much higher and much larger than the photograph makes it look, with the dome being about 20 metres in its larger diameter. It is not possible to stand someone up in the ceiling for scale, and the slopes on either side provide nowhere to position a camera to see it better, so it is one of those places that looks a lot better in person. This picture is a 2 dimensional panorama made up from 16 photographs, automatically stitched with multiple manual corrections. It took several attempts to get right, and I am very grateful to Will for standing still for so long, allowing it to be taken.
Modelling by Will, lighting by Tarquin and Will
Dome Of St. Pauls, my favourite piece of the entire series. The flat ceiling is created by successive collapses called a chimney failure, exposing the thinly interbedded limestones and shales of the overlying Llanelly Shales. The rippled texture seems almost like scales, and the fracture suggests that this is a dragon's egg, that is about to hatch. The ceiling is much higher and much larger than the photograph makes it look, with the dome being about 20 metres in its larger diameter. It is not possible to stand someone up in the ceiling for scale, and the slopes on either side provide nowhere to position a camera to see it better, so it is one of those places that looks a lot better in person. This picture is a 2 dimensional panorama made up from 16 photographs, automatically stitched with multiple manual corrections. It took several attempts to get right, and I am very grateful to Will for standing still for so long, allowing it to be taken.
Modelling by Will, lighting by Tarquin and Will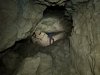 Midsummer Passage, just before it chokes. The way on is to stay high until there is no other choice (the distance in this photograph), then drop down a slot to the left, through the mess of boulders.
Modelling by Will's little teapot, lighting by Tarquin and Will
Midsummer Passage, just before it chokes. The way on is to stay high until there is no other choice (the distance in this photograph), then drop down a slot to the left, through the mess of boulders.
Modelling by Will's little teapot, lighting by Tarquin and Will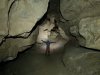 After the choke.
Modelling by Will, lighting by Tarquin and Will
After the choke.
Modelling by Will, lighting by Tarquin and Will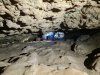 The passage then becomes depressingly low for quite a way, even though the survey still makes it look big.
Modelling by Will, lighting by Tarquin and Will
The passage then becomes depressingly low for quite a way, even though the survey still makes it look big.
Modelling by Will, lighting by Tarquin and Will The passage then grows large again, and invitingly heads off into the distance. The way on, however, is down a very small slot behind the boulder on the right.
Modelling by Will, lighting by Tarquin and Will
The passage then grows large again, and invitingly heads off into the distance. The way on, however, is down a very small slot behind the boulder on the right.
Modelling by Will, lighting by Tarquin and Will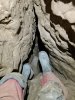 Top of the squeeze into Coal Cellar. It is normal to face the right wall.
Modelling by portions of Tarquin
Top of the squeeze into Coal Cellar. It is normal to face the right wall.
Modelling by portions of Tarquin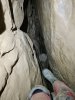 After sloping downwards, the slot below becomes too narrow, and the way on is to remain high (a one-armed press-up) and land on top of the next rock, and slide down beyond it.
Modelling by a partial Tarquin
After sloping downwards, the slot below becomes too narrow, and the way on is to remain high (a one-armed press-up) and land on top of the next rock, and slide down beyond it.
Modelling by a partial Tarquin Looking back through the same part of the squeeze.
Modelling by Will's wellies, lighting by Tarquin and Will
Looking back through the same part of the squeeze.
Modelling by Will's wellies, lighting by Tarquin and Will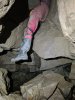 Dropping down boulders in Coal Cellar Passage.
Modelling by Will
Dropping down boulders in Coal Cellar Passage.
Modelling by Will The early part of Coal Cellar Passage is generally too low to walk, and very frustrating, with a lot of little boulder obstacles. It is certainly the hardest passage on the route, and proves to be a great workout.
Modelling by Will, lighting by Tarquin and Will
The early part of Coal Cellar Passage is generally too low to walk, and very frustrating, with a lot of little boulder obstacles. It is certainly the hardest passage on the route, and proves to be a great workout.
Modelling by Will, lighting by Tarquin and Will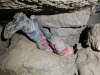 The passage gets smaller and almost chokes, and the way on is to wriggle under a slab on the left side of the passage
Modelling by a degree of Will
The passage gets smaller and almost chokes, and the way on is to wriggle under a slab on the left side of the passage
Modelling by a degree of Will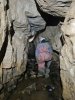 Coal Cellar then starts to get easier. That is a relative term.
Modelling by Will, lighting by Tarquin and Will
Coal Cellar then starts to get easier. That is a relative term.
Modelling by Will, lighting by Tarquin and Will The passage becomes a narrow rift, with a lot of little obstacles, such as this awkward scramble over boulders without convenient holds, or enough space to use them.
Modelling by Will, lighting by Tarquin and Will
The passage becomes a narrow rift, with a lot of little obstacles, such as this awkward scramble over boulders without convenient holds, or enough space to use them.
Modelling by Will, lighting by Tarquin and Will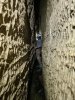 Even the parts without obstacles are frustratingly narrow.
Modelling by Will, lighting by Tarquin and Will
Even the parts without obstacles are frustratingly narrow.
Modelling by Will, lighting by Tarquin and Will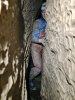 A very narrow section, where you have to continually work out which height you can actually move through.
Modelling by Will
A very narrow section, where you have to continually work out which height you can actually move through.
Modelling by Will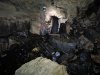 A side passage on the left enters Stal Bridge Chamber. The black rocks are manganese stained from the inlet aven above.
Modelling by Will, lighting by Tarquin and Will
A side passage on the left enters Stal Bridge Chamber. The black rocks are manganese stained from the inlet aven above.
Modelling by Will, lighting by Tarquin and Will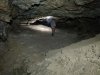 Stal Bridge Chamber is a fragment of larger passage (without an obvious stal bridge).
Modelling by Will, lighting by Tarquin and Will
Stal Bridge Chamber is a fragment of larger passage (without an obvious stal bridge).
Modelling by Will, lighting by Tarquin and Will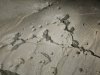 Drip pockets in Stal Bridge Chamber.
Lighting by Tarquin and Will
Drip pockets in Stal Bridge Chamber.
Lighting by Tarquin and Will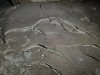 Cracked mud.
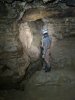 Stal Bridge Chamber ends where it drops back into Coal Cellar Passage's rift. This could have been used to bypass some of the narrow rift, if you noticed the entry point on the way.
Modelling by Will, lighting by Tarquin and Will
Stal Bridge Chamber ends where it drops back into Coal Cellar Passage's rift. This could have been used to bypass some of the narrow rift, if you noticed the entry point on the way.
Modelling by Will, lighting by Tarquin and Will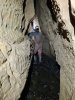 Coal Cellar Passage then becomes much more comfortable and wide.
Modelling by Will, lighting by Tarquin and Will
Coal Cellar Passage then becomes much more comfortable and wide.
Modelling by Will, lighting by Tarquin and Will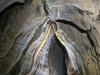 Mini curtains in Coal Cellar Passage.
Lighting by Tarquin and Will
Mini curtains in Coal Cellar Passage.
Lighting by Tarquin and Will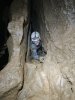 The next side passage on the left is the crawl into Twin Aven Chamber. This is already muddier than anything else on this trip, but it is only the beginning.
Modelling by Will, lighting by Tarquin and Will
The next side passage on the left is the crawl into Twin Aven Chamber. This is already muddier than anything else on this trip, but it is only the beginning.
Modelling by Will, lighting by Tarquin and Will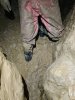 The passage gets much, much more muddy, to the point that it feels like it will go over your boots. So you try to traverse over it, and slip in anyway.
Modelling by Will's muddy legs, lighting by Tarquin and Will
The passage gets much, much more muddy, to the point that it feels like it will go over your boots. So you try to traverse over it, and slip in anyway.
Modelling by Will's muddy legs, lighting by Tarquin and Will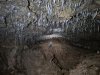 A very muddy climb then reaches Twin Aven Chamber, with its straw-covered ceiling.
Modelling by Will, lighting by Tarquin and Will
A very muddy climb then reaches Twin Aven Chamber, with its straw-covered ceiling.
Modelling by Will, lighting by Tarquin and Will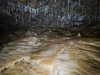 Flowstone-covered bank, which someone has managed to stand on.
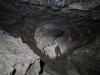 Twin Aven Chamber continues in one direction, remaining very large.
Modelling by Will, lighting by Tarquin and Will
Twin Aven Chamber continues in one direction, remaining very large.
Modelling by Will, lighting by Tarquin and Will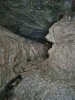 Twin Aven Chamber ends at a black choke called Coal Cellar. The water comes from Pwll y Pasg, a rare example of water passing from the Dowlais limestone through the Llanelly Shales. To reach the choke, there is a distinct hazard.
Lighting by Tarquin and Will
Twin Aven Chamber ends at a black choke called Coal Cellar. The water comes from Pwll y Pasg, a rare example of water passing from the Dowlais limestone through the Llanelly Shales. To reach the choke, there is a distinct hazard.
Lighting by Tarquin and Will The mud is a trap, very deep indeed, and glutious enough to take your boots off you. I have seen my father lose a boot here, and a fellow caver lay in the mud and reached down the full length of their arm through the mud to retrieve it.
Modelling by Tarquin
The mud is a trap, very deep indeed, and glutious enough to take your boots off you. I have seen my father lose a boot here, and a fellow caver lay in the mud and reached down the full length of their arm through the mud to retrieve it.
Modelling by Tarquin The mud patch is long, and there is no way to jump over it, so reaching the end of the passage is something of a rite of passage. I have done it before, and have no desire to do it again.
 The always-spectacular view from the Hafod tranroad. Mynydd Llangatwg (530 metres) and Tor y Foel (551 metres) on the left, then the Black Mountains: Mynydd Llangorse (515 metres), Mynydd Troed (609 metres), Pen Allt-mawr (719 metres), Pen Cerrig-calch (701 metres), Pen Gwyllt Meirch (over 580 metres), Crug Mawr (550 metres), the Sugar Loaf (596 metres) and Ysgyryd Fawr (486 metres).
Modelling by Will and Alex
The always-spectacular view from the Hafod tranroad. Mynydd Llangatwg (530 metres) and Tor y Foel (551 metres) on the left, then the Black Mountains: Mynydd Llangorse (515 metres), Mynydd Troed (609 metres), Pen Allt-mawr (719 metres), Pen Cerrig-calch (701 metres), Pen Gwyllt Meirch (over 580 metres), Crug Mawr (550 metres), the Sugar Loaf (596 metres) and Ysgyryd Fawr (486 metres).
Modelling by Will and Alex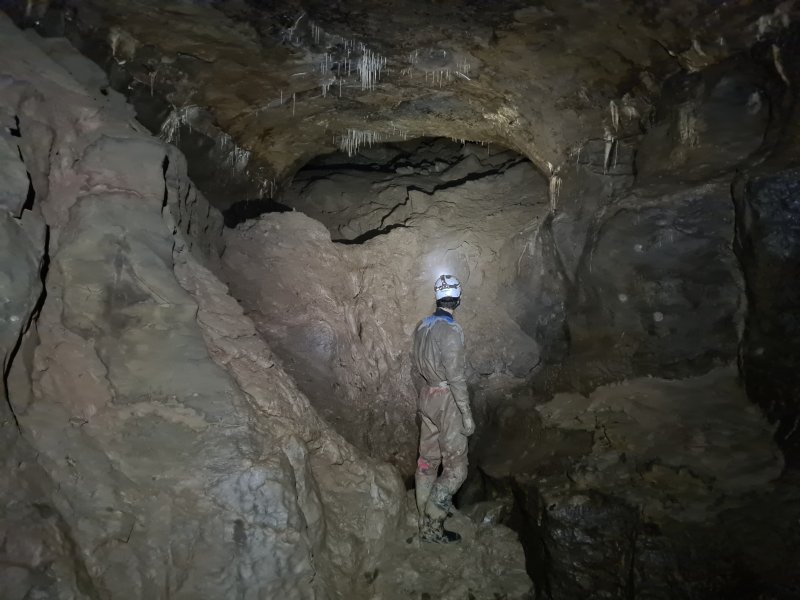 Helictite Chamber, above the start of Turkey Streamway. There is a sobering line drawn on one of the boulders here, showing the level of flood water, at least 4 metres above the boulder wriggle that you need to do in Turkey Streamway.
Modelling by Will, lighting by Tarquin and Will
Helictite Chamber, above the start of Turkey Streamway. There is a sobering line drawn on one of the boulders here, showing the level of flood water, at least 4 metres above the boulder wriggle that you need to do in Turkey Streamway.
Modelling by Will, lighting by Tarquin and Will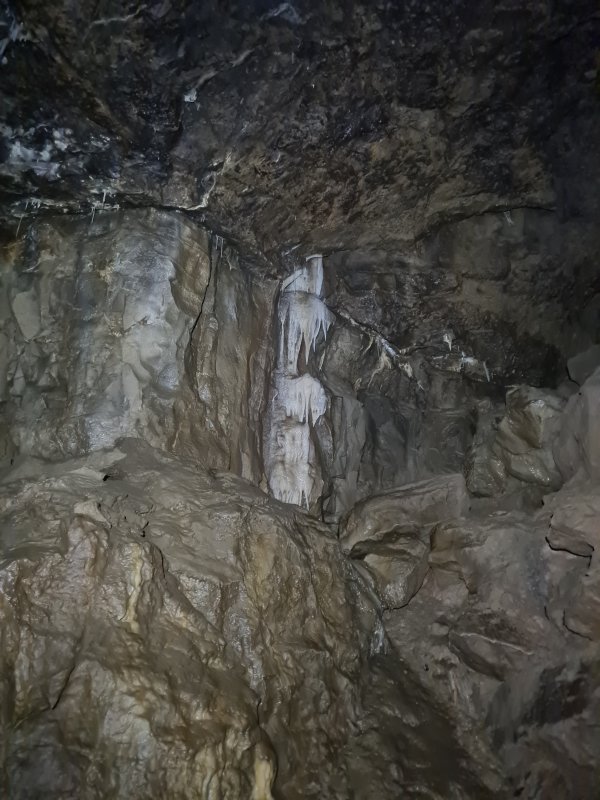 Formations in Helictite Chamber. There are no obvious helictites.
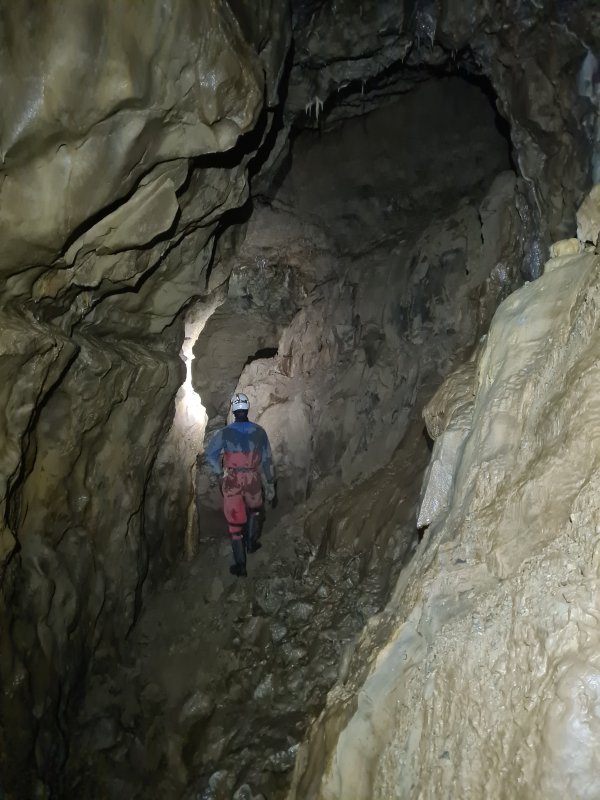 At the point where Sand Caverns is entered from Hawkin's Horror, a scramble up to the right reaches the southeastern branch of the passage.
Modelling by Will, lighting by Tarquin and Will
At the point where Sand Caverns is entered from Hawkin's Horror, a scramble up to the right reaches the southeastern branch of the passage.
Modelling by Will, lighting by Tarquin and Will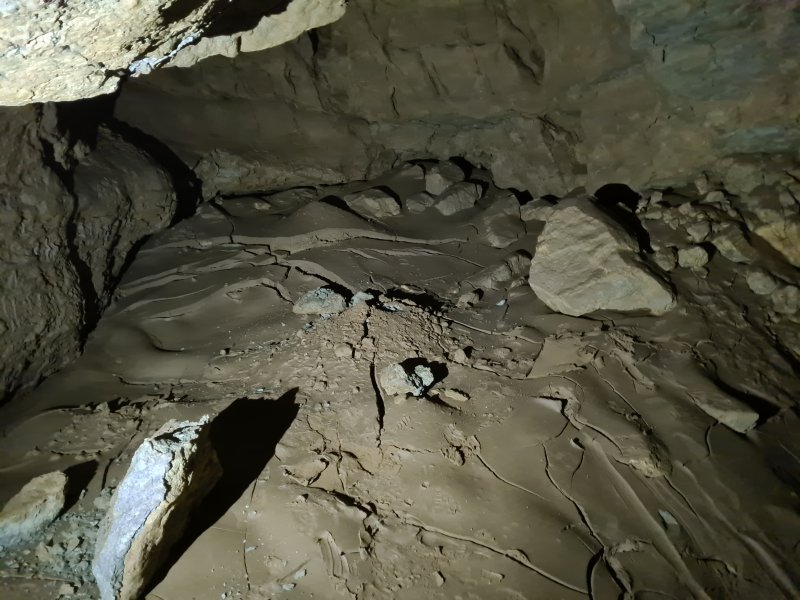 A muddy alcove sitting far above the floor of the passage. There is no way on from here.
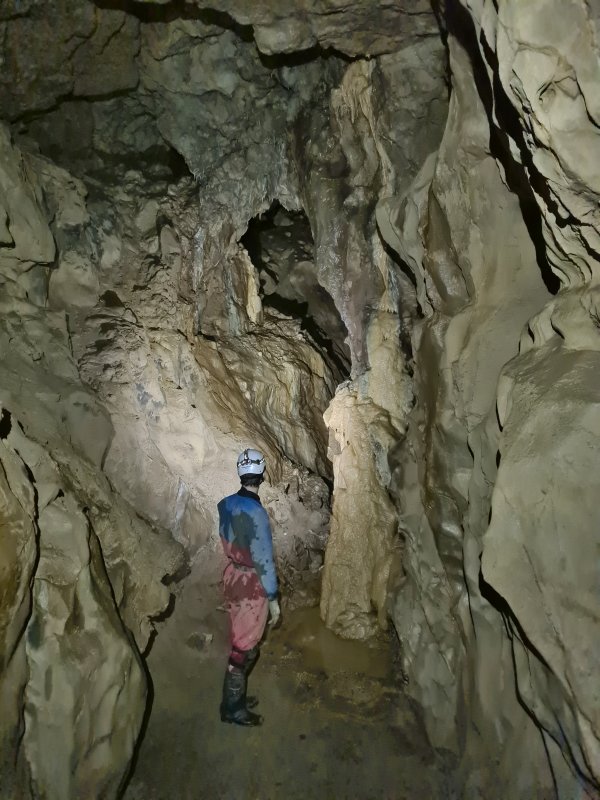 Flowstone at the start of the passage.
Modelling by Will, lighting by Tarquin and Will
Flowstone at the start of the passage.
Modelling by Will, lighting by Tarquin and Will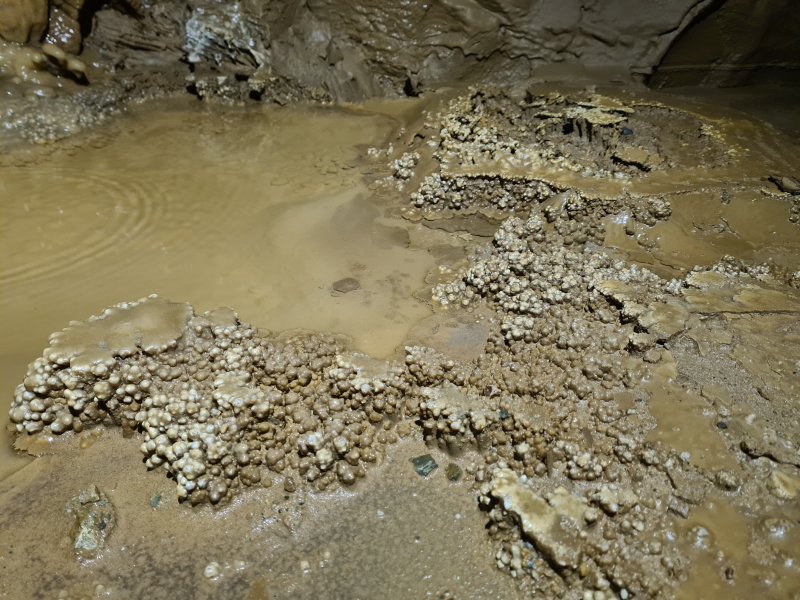 Crystal pool.
 Hoodoos.
 Formations.
Modelling by Will, lighting by Tarquin and Will
Formations.
Modelling by Will, lighting by Tarquin and Will The passage ends in a choke. This is almost certainly related to Turkey Chamber, which sits on the other side of the choke.
 The normal direction along Sand Caverns passes a slope up to a balcony on the left. This has a viewpoint looking back over the start of Sand Caverns.
Modelling by Will, lighting by Tarquin and Will
The normal direction along Sand Caverns passes a slope up to a balcony on the left. This has a viewpoint looking back over the start of Sand Caverns.
Modelling by Will, lighting by Tarquin and Will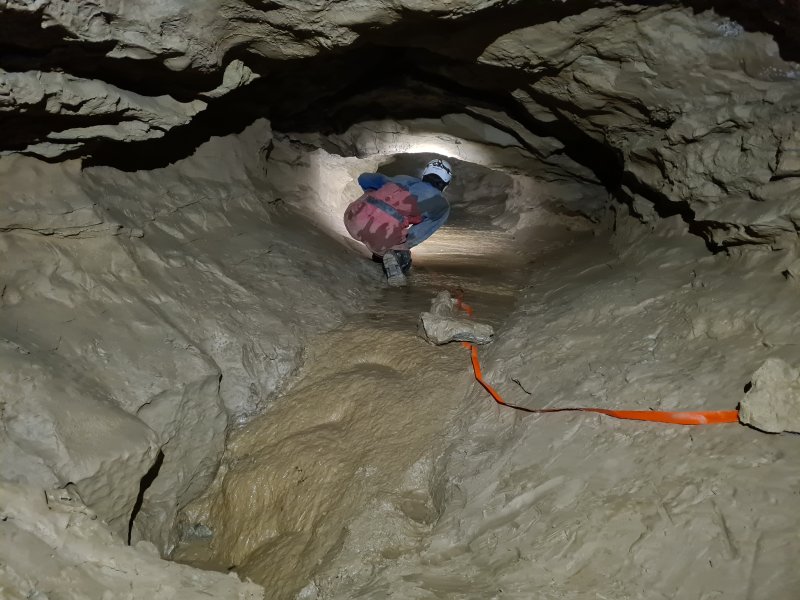 A side passage off the balcony is the start of Frozen River Passage, whose floor for its entire length is made from flowstone (OFD has a similarly named passage, with the same reason for its name).
Modelling by Will, lighting by Tarquin and Will
A side passage off the balcony is the start of Frozen River Passage, whose floor for its entire length is made from flowstone (OFD has a similarly named passage, with the same reason for its name).
Modelling by Will, lighting by Tarquin and Will Crystal pool in the flowstone.
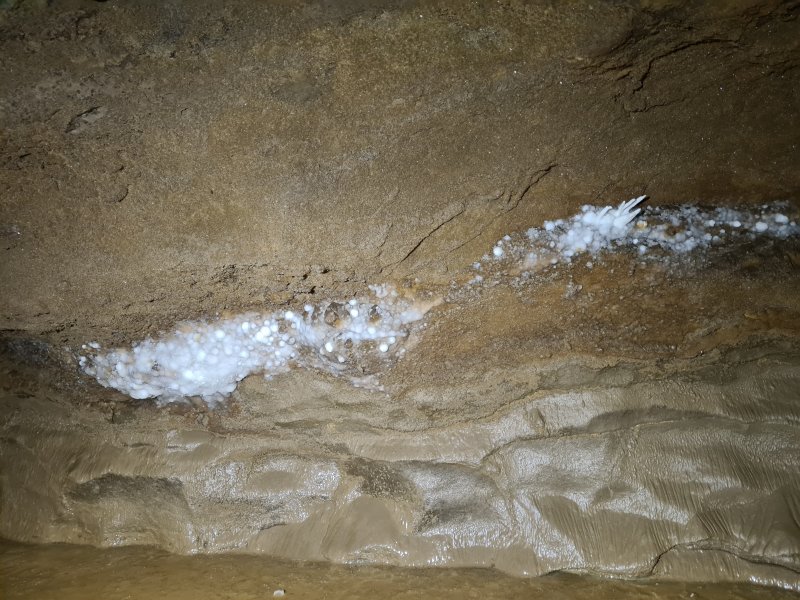 Small helictites on the wall of Frozen River Passage.
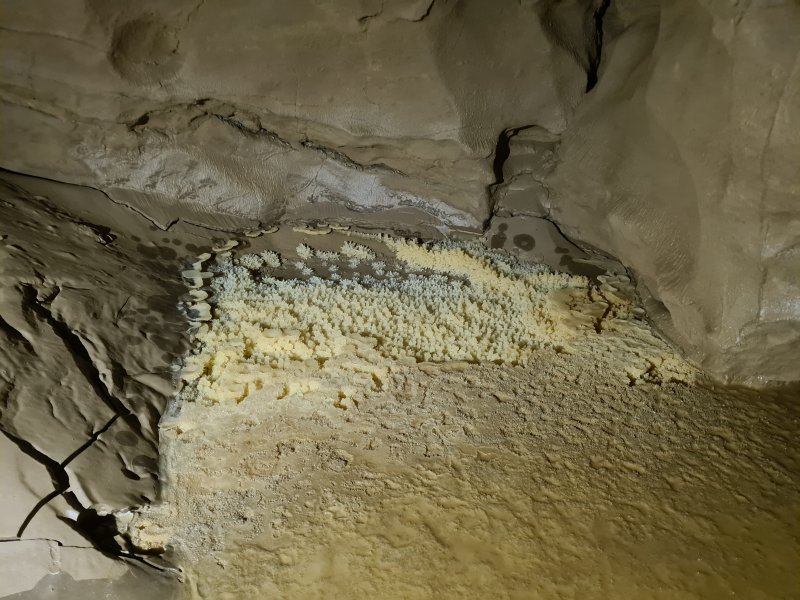 Dry crystal pool.
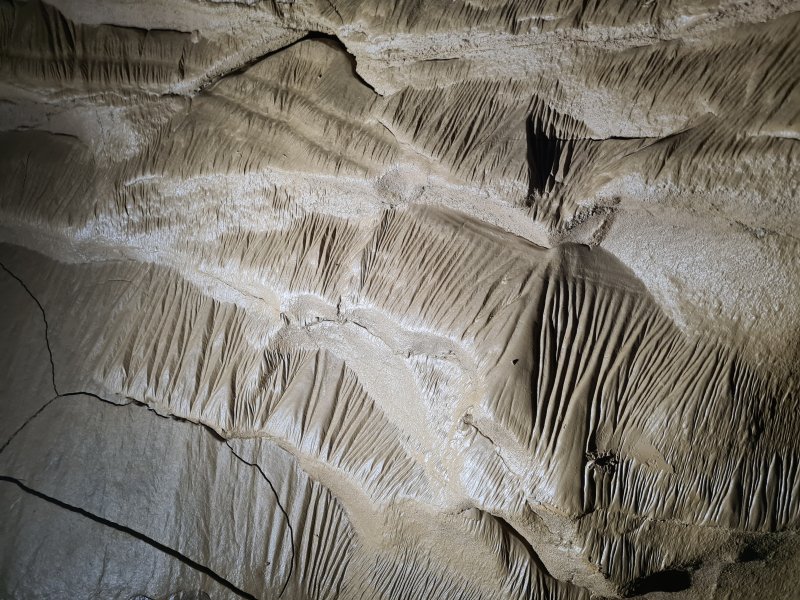 Surge marks on the wall of Frozen River Passage.
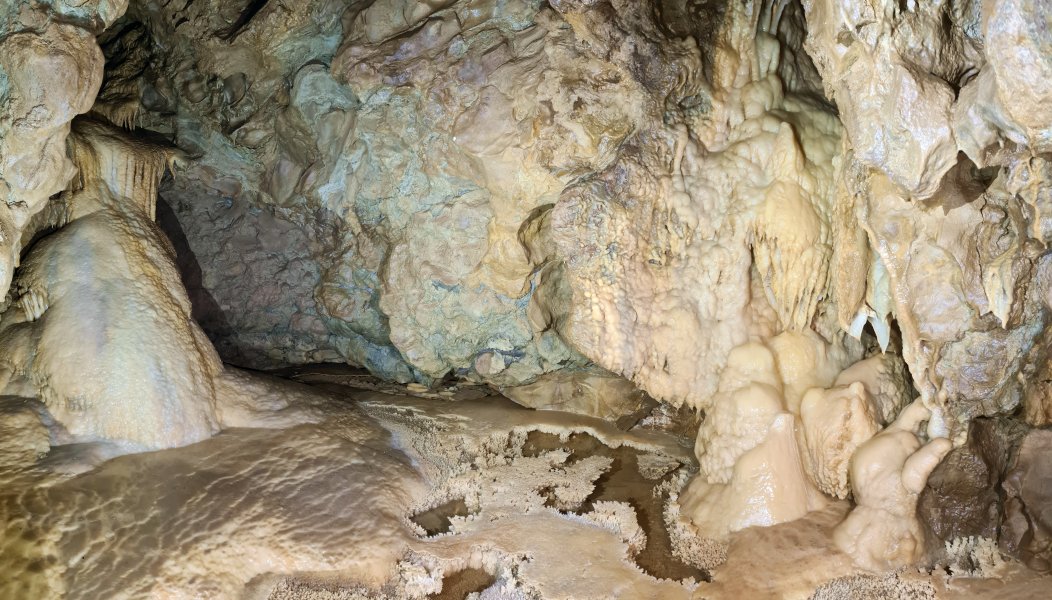 Grotto at the end of Frozen River Passage.
Lighting by Will
Grotto at the end of Frozen River Passage.
Lighting by Will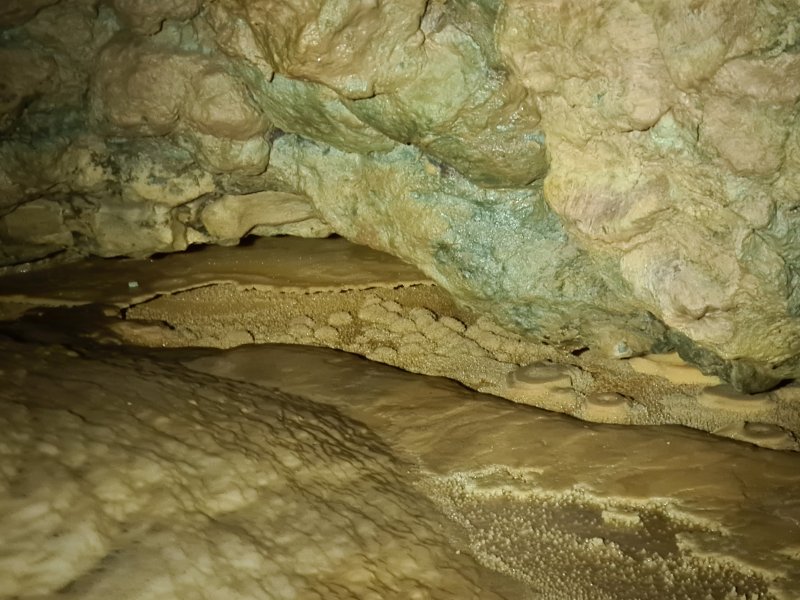 Dried crystal pool with circular islands. The islands are similar to the Pork Pies in Upper Flood Swallet.
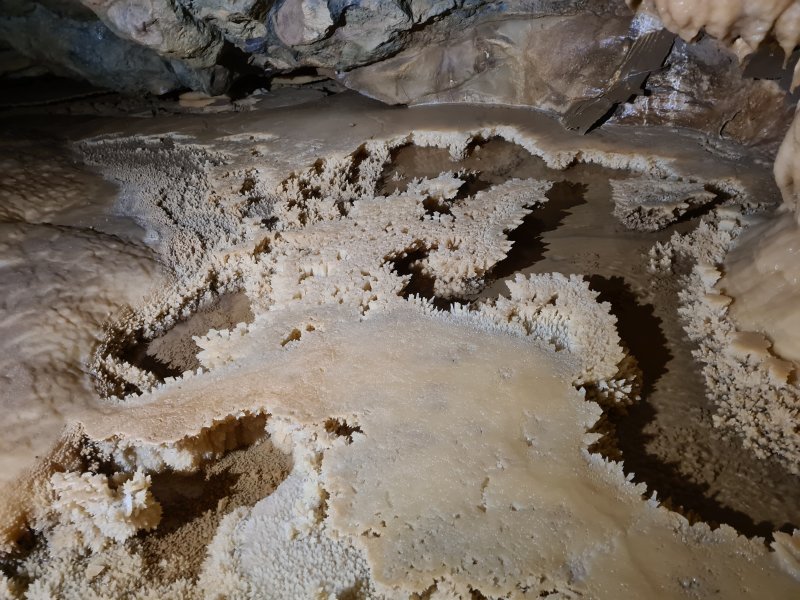 Crystal pool.
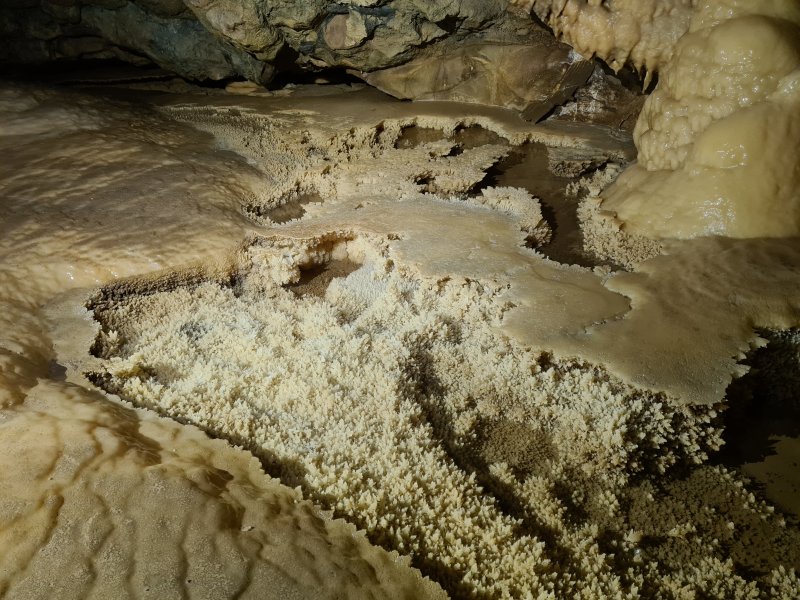 Crystal pools.
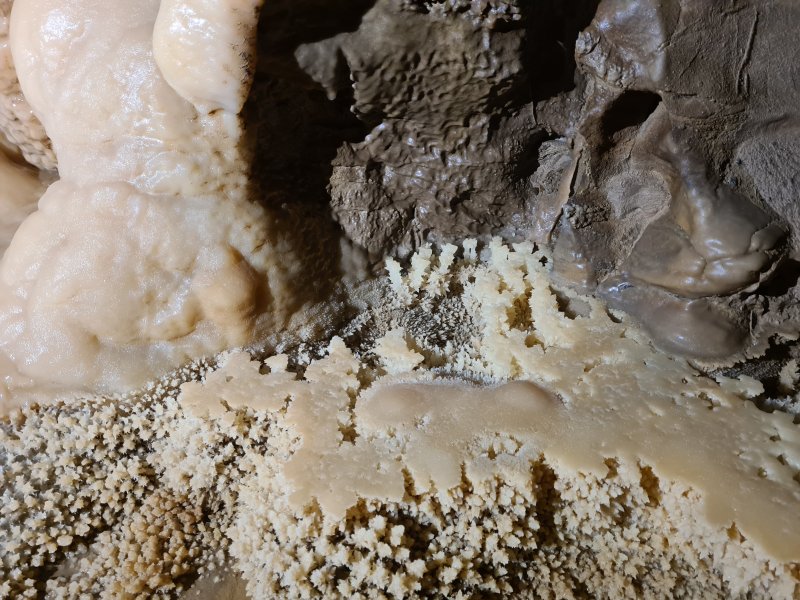 Crystals at the edge of the pool.
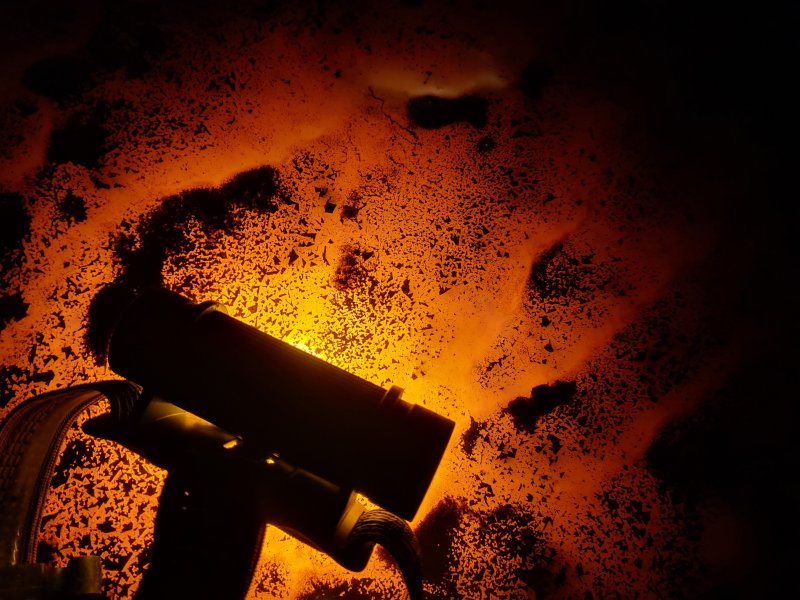 Shining a light through the translucent calcite floor produces an effect similar to lava.
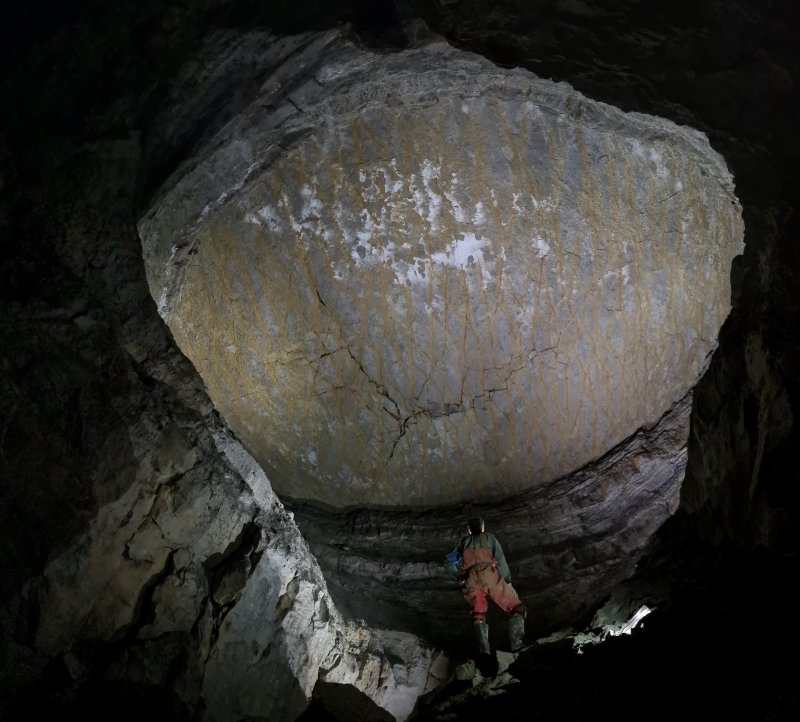 Dome Of St. Pauls, my favourite piece of the entire series. The flat ceiling is created by successive collapses called a chimney failure, exposing the thinly interbedded limestones and shales of the overlying Llanelly Shales. The rippled texture seems almost like scales, and the fracture suggests that this is a dragon's egg, that is about to hatch. The ceiling is much higher and much larger than the photograph makes it look, with the dome being about 20 metres in its larger diameter. It is not possible to stand someone up in the ceiling for scale, and the slopes on either side provide nowhere to position a camera to see it better, so it is one of those places that looks a lot better in person. This picture is a 2 dimensional panorama made up from 16 photographs, automatically stitched with multiple manual corrections. It took several attempts to get right, and I am very grateful to Will for standing still for so long, allowing it to be taken.
Modelling by Will, lighting by Tarquin and Will
Dome Of St. Pauls, my favourite piece of the entire series. The flat ceiling is created by successive collapses called a chimney failure, exposing the thinly interbedded limestones and shales of the overlying Llanelly Shales. The rippled texture seems almost like scales, and the fracture suggests that this is a dragon's egg, that is about to hatch. The ceiling is much higher and much larger than the photograph makes it look, with the dome being about 20 metres in its larger diameter. It is not possible to stand someone up in the ceiling for scale, and the slopes on either side provide nowhere to position a camera to see it better, so it is one of those places that looks a lot better in person. This picture is a 2 dimensional panorama made up from 16 photographs, automatically stitched with multiple manual corrections. It took several attempts to get right, and I am very grateful to Will for standing still for so long, allowing it to be taken.
Modelling by Will, lighting by Tarquin and Will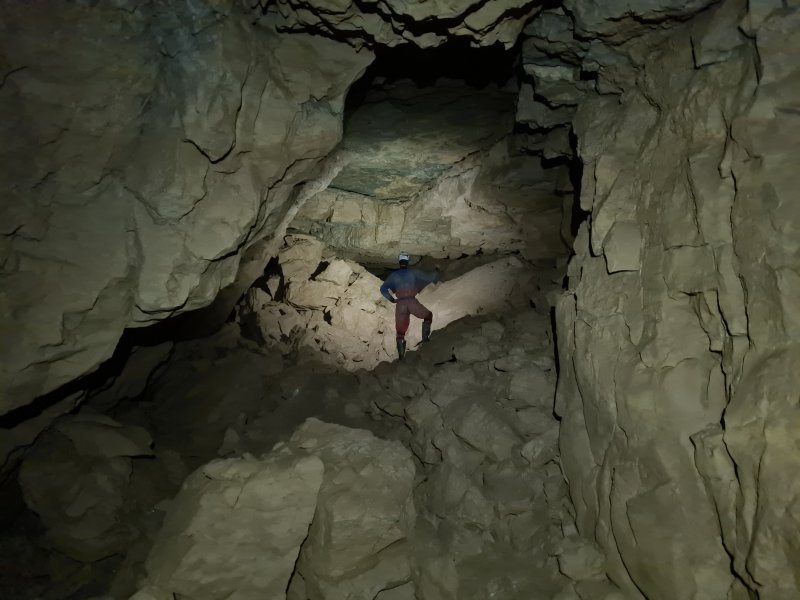 Midsummer Passage, just before it chokes. The way on is to stay high until there is no other choice (the distance in this photograph), then drop down a slot to the left, through the mess of boulders.
Modelling by Will's little teapot, lighting by Tarquin and Will
Midsummer Passage, just before it chokes. The way on is to stay high until there is no other choice (the distance in this photograph), then drop down a slot to the left, through the mess of boulders.
Modelling by Will's little teapot, lighting by Tarquin and Will After the choke.
Modelling by Will, lighting by Tarquin and Will
After the choke.
Modelling by Will, lighting by Tarquin and Will The passage then becomes depressingly low for quite a way, even though the survey still makes it look big.
Modelling by Will, lighting by Tarquin and Will
The passage then becomes depressingly low for quite a way, even though the survey still makes it look big.
Modelling by Will, lighting by Tarquin and Will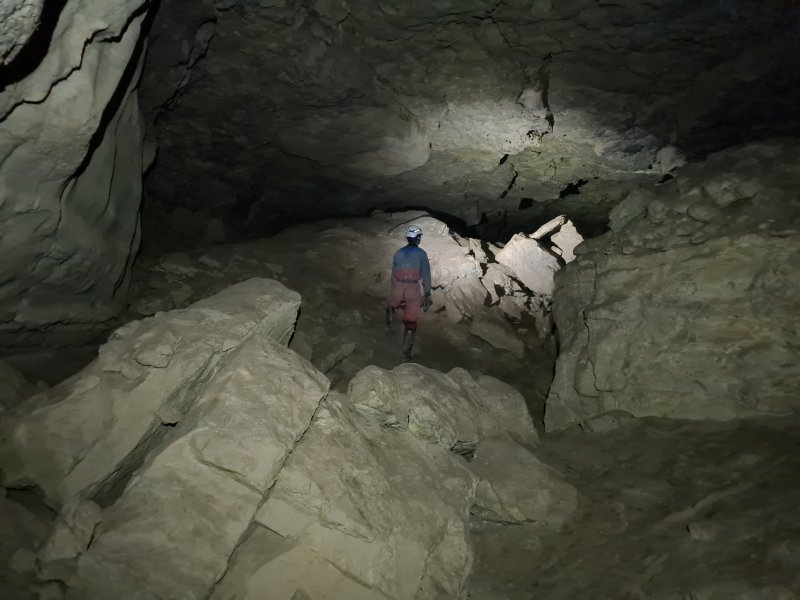 The passage then grows large again, and invitingly heads off into the distance. The way on, however, is down a very small slot behind the boulder on the right.
Modelling by Will, lighting by Tarquin and Will
The passage then grows large again, and invitingly heads off into the distance. The way on, however, is down a very small slot behind the boulder on the right.
Modelling by Will, lighting by Tarquin and Will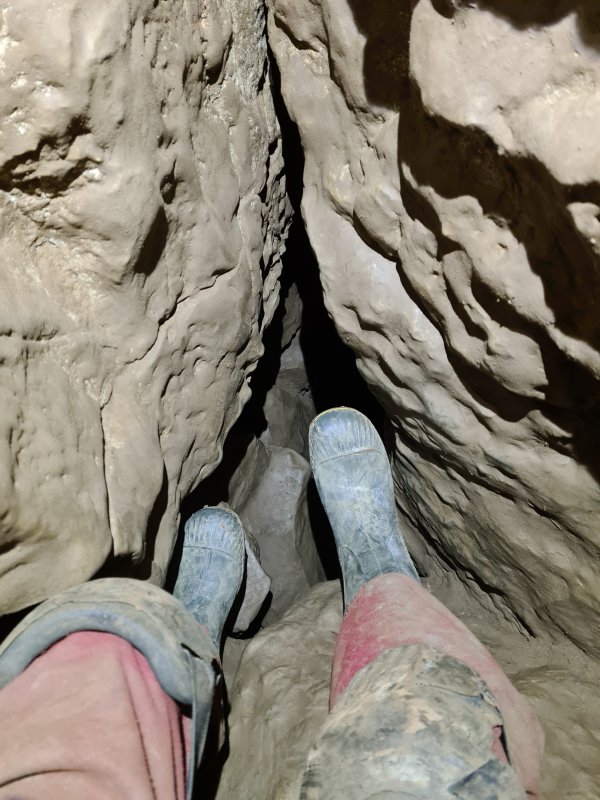 Top of the squeeze into Coal Cellar. It is normal to face the right wall.
Modelling by portions of Tarquin
Top of the squeeze into Coal Cellar. It is normal to face the right wall.
Modelling by portions of Tarquin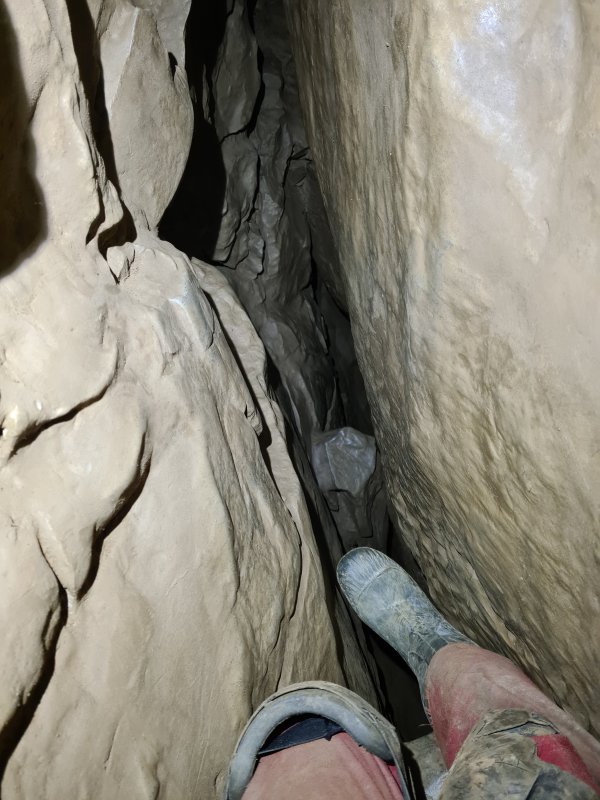 After sloping downwards, the slot below becomes too narrow, and the way on is to remain high (a one-armed press-up) and land on top of the next rock, and slide down beyond it.
Modelling by a partial Tarquin
After sloping downwards, the slot below becomes too narrow, and the way on is to remain high (a one-armed press-up) and land on top of the next rock, and slide down beyond it.
Modelling by a partial Tarquin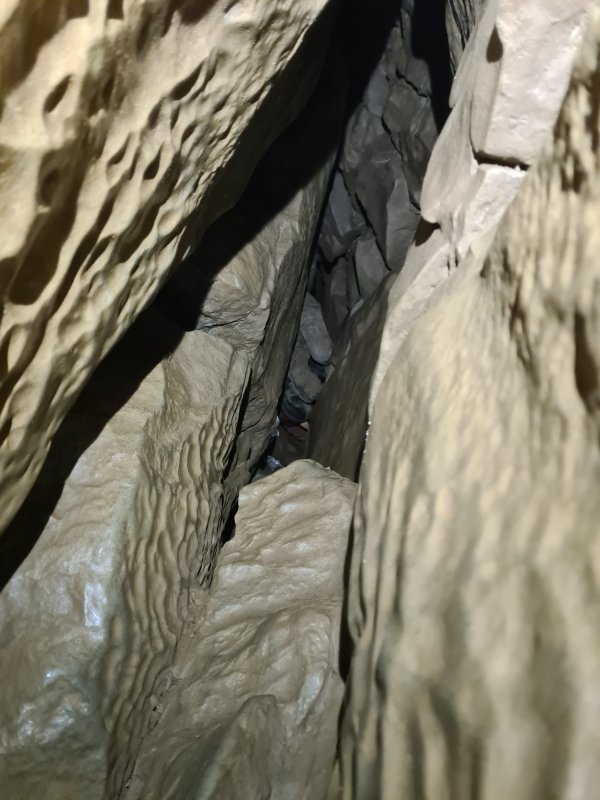 Looking back through the same part of the squeeze.
Modelling by Will's wellies, lighting by Tarquin and Will
Looking back through the same part of the squeeze.
Modelling by Will's wellies, lighting by Tarquin and Will Dropping down boulders in Coal Cellar Passage.
Modelling by Will
Dropping down boulders in Coal Cellar Passage.
Modelling by Will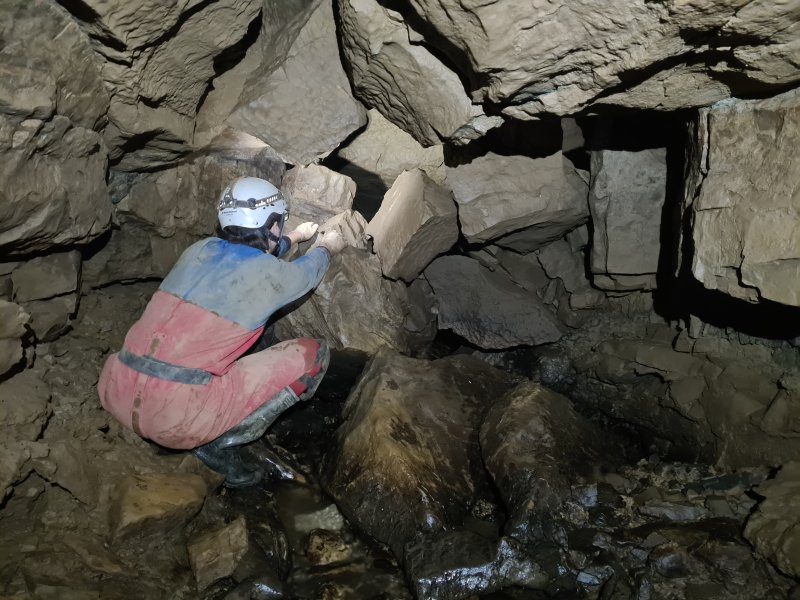 The early part of Coal Cellar Passage is generally too low to walk, and very frustrating, with a lot of little boulder obstacles. It is certainly the hardest passage on the route, and proves to be a great workout.
Modelling by Will, lighting by Tarquin and Will
The early part of Coal Cellar Passage is generally too low to walk, and very frustrating, with a lot of little boulder obstacles. It is certainly the hardest passage on the route, and proves to be a great workout.
Modelling by Will, lighting by Tarquin and Will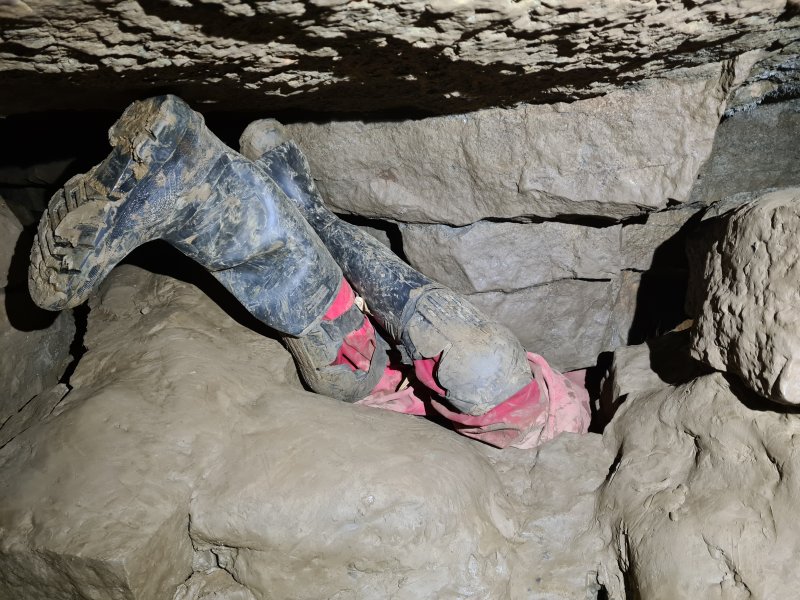 The passage gets smaller and almost chokes, and the way on is to wriggle under a slab on the left side of the passage
Modelling by a degree of Will
The passage gets smaller and almost chokes, and the way on is to wriggle under a slab on the left side of the passage
Modelling by a degree of Will Coal Cellar then starts to get easier. That is a relative term.
Modelling by Will, lighting by Tarquin and Will
Coal Cellar then starts to get easier. That is a relative term.
Modelling by Will, lighting by Tarquin and Will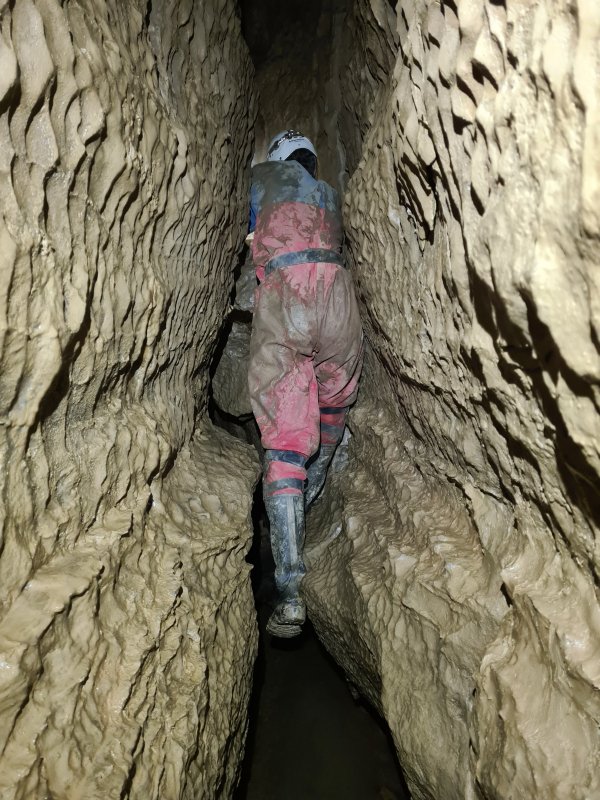 The passage becomes a narrow rift, with a lot of little obstacles, such as this awkward scramble over boulders without convenient holds, or enough space to use them.
Modelling by Will, lighting by Tarquin and Will
The passage becomes a narrow rift, with a lot of little obstacles, such as this awkward scramble over boulders without convenient holds, or enough space to use them.
Modelling by Will, lighting by Tarquin and Will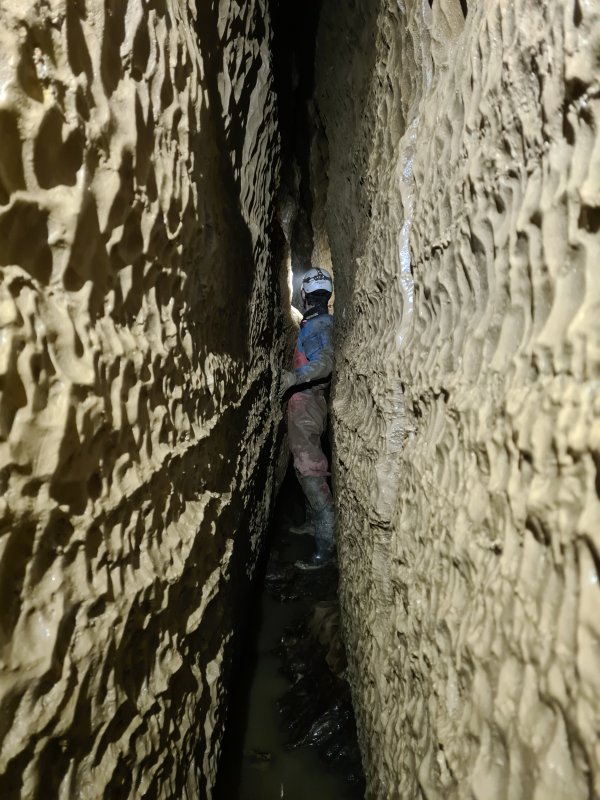 Even the parts without obstacles are frustratingly narrow.
Modelling by Will, lighting by Tarquin and Will
Even the parts without obstacles are frustratingly narrow.
Modelling by Will, lighting by Tarquin and Will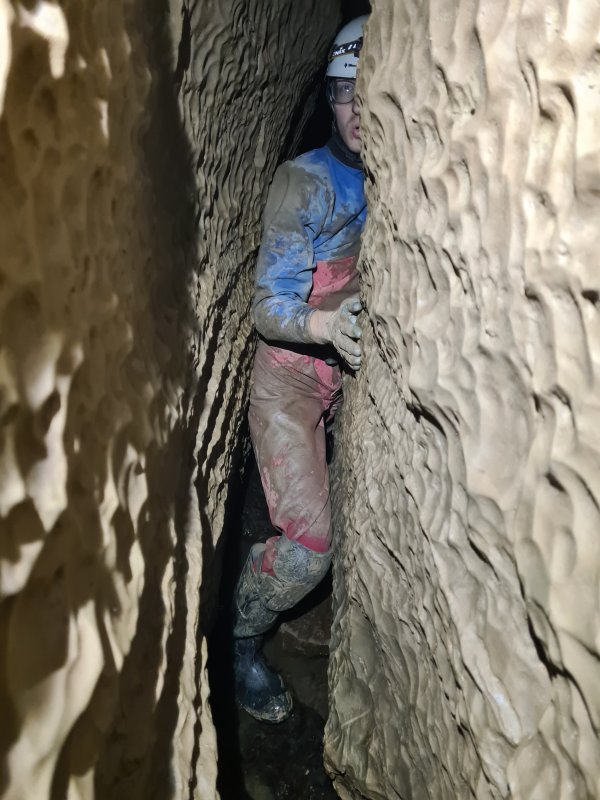 A very narrow section, where you have to continually work out which height you can actually move through.
Modelling by Will
A very narrow section, where you have to continually work out which height you can actually move through.
Modelling by Will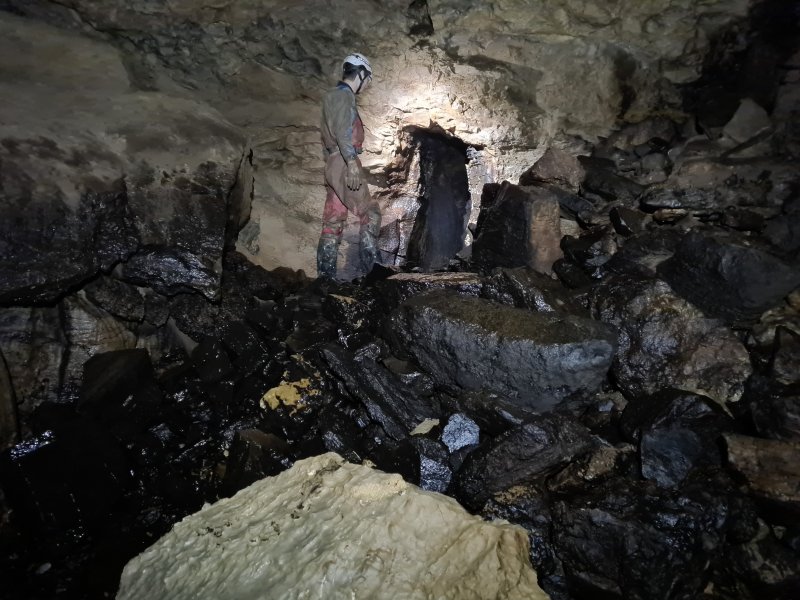 A side passage on the left enters Stal Bridge Chamber. The black rocks are manganese stained from the inlet aven above.
Modelling by Will, lighting by Tarquin and Will
A side passage on the left enters Stal Bridge Chamber. The black rocks are manganese stained from the inlet aven above.
Modelling by Will, lighting by Tarquin and Will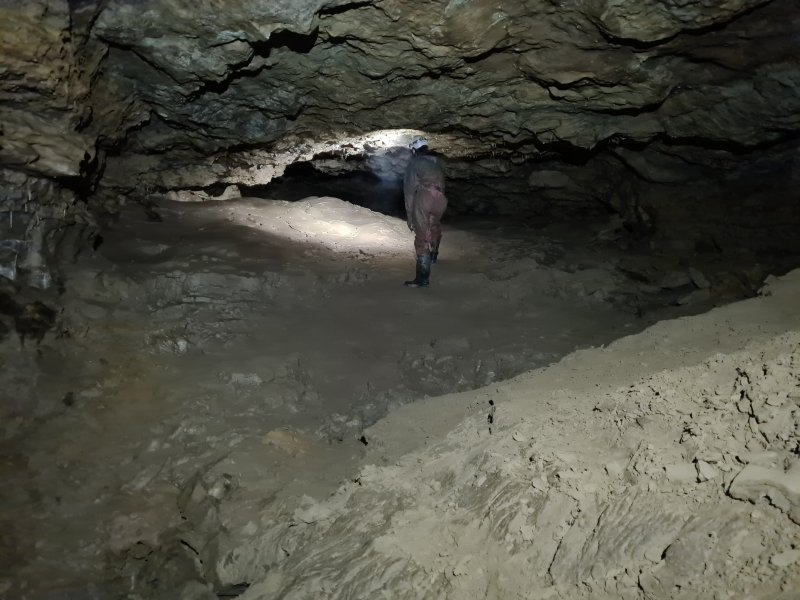 Stal Bridge Chamber is a fragment of larger passage (without an obvious stal bridge).
Modelling by Will, lighting by Tarquin and Will
Stal Bridge Chamber is a fragment of larger passage (without an obvious stal bridge).
Modelling by Will, lighting by Tarquin and Will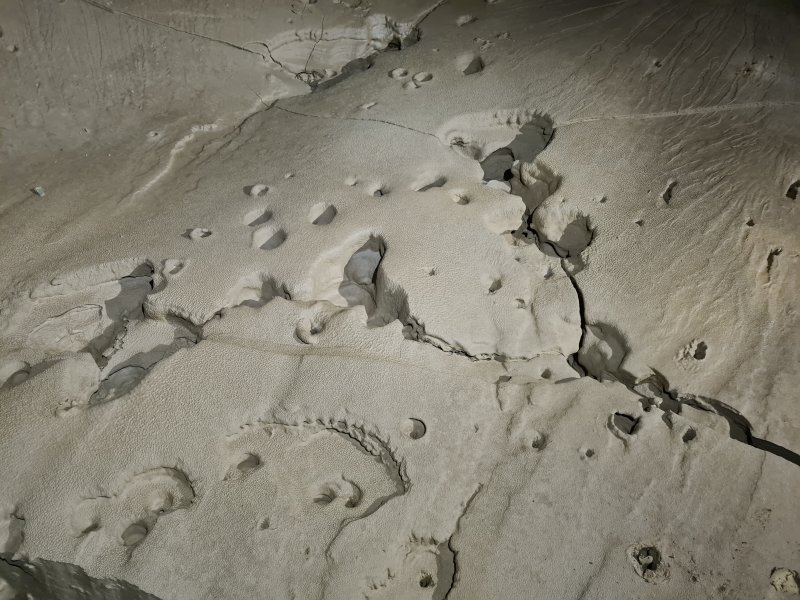 Drip pockets in Stal Bridge Chamber.
Lighting by Tarquin and Will
Drip pockets in Stal Bridge Chamber.
Lighting by Tarquin and Will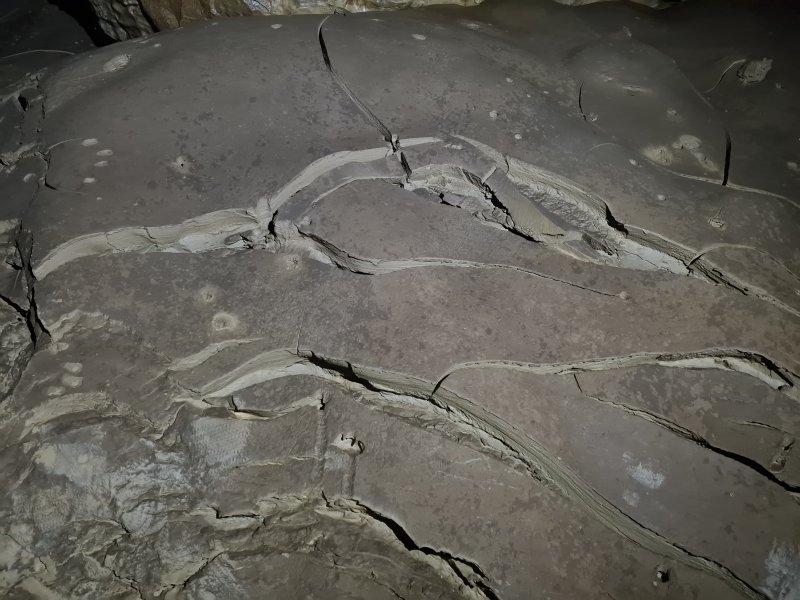 Cracked mud.
 Stal Bridge Chamber ends where it drops back into Coal Cellar Passage's rift. This could have been used to bypass some of the narrow rift, if you noticed the entry point on the way.
Modelling by Will, lighting by Tarquin and Will
Stal Bridge Chamber ends where it drops back into Coal Cellar Passage's rift. This could have been used to bypass some of the narrow rift, if you noticed the entry point on the way.
Modelling by Will, lighting by Tarquin and Will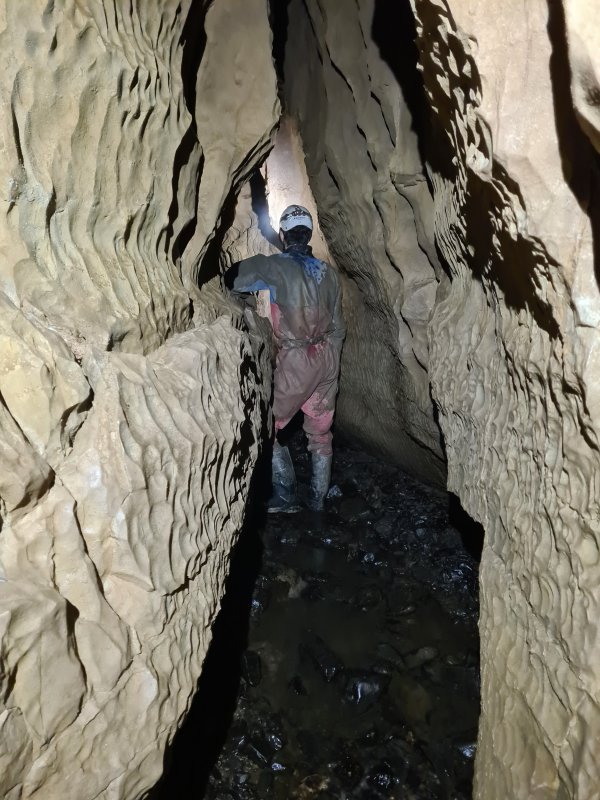 Coal Cellar Passage then becomes much more comfortable and wide.
Modelling by Will, lighting by Tarquin and Will
Coal Cellar Passage then becomes much more comfortable and wide.
Modelling by Will, lighting by Tarquin and Will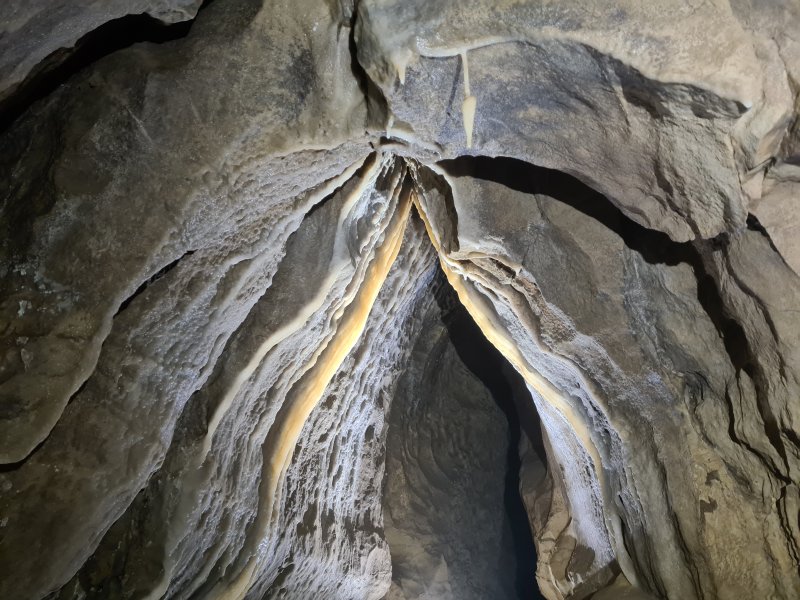 Mini curtains in Coal Cellar Passage.
Lighting by Tarquin and Will
Mini curtains in Coal Cellar Passage.
Lighting by Tarquin and Will The next side passage on the left is the crawl into Twin Aven Chamber. This is already muddier than anything else on this trip, but it is only the beginning.
Modelling by Will, lighting by Tarquin and Will
The next side passage on the left is the crawl into Twin Aven Chamber. This is already muddier than anything else on this trip, but it is only the beginning.
Modelling by Will, lighting by Tarquin and Will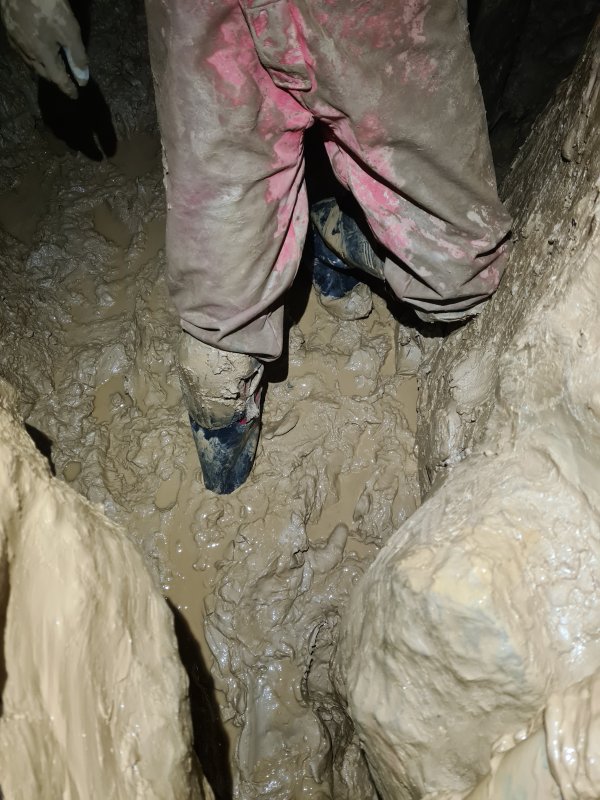 The passage gets much, much more muddy, to the point that it feels like it will go over your boots. So you try to traverse over it, and slip in anyway.
Modelling by Will's muddy legs, lighting by Tarquin and Will
The passage gets much, much more muddy, to the point that it feels like it will go over your boots. So you try to traverse over it, and slip in anyway.
Modelling by Will's muddy legs, lighting by Tarquin and Will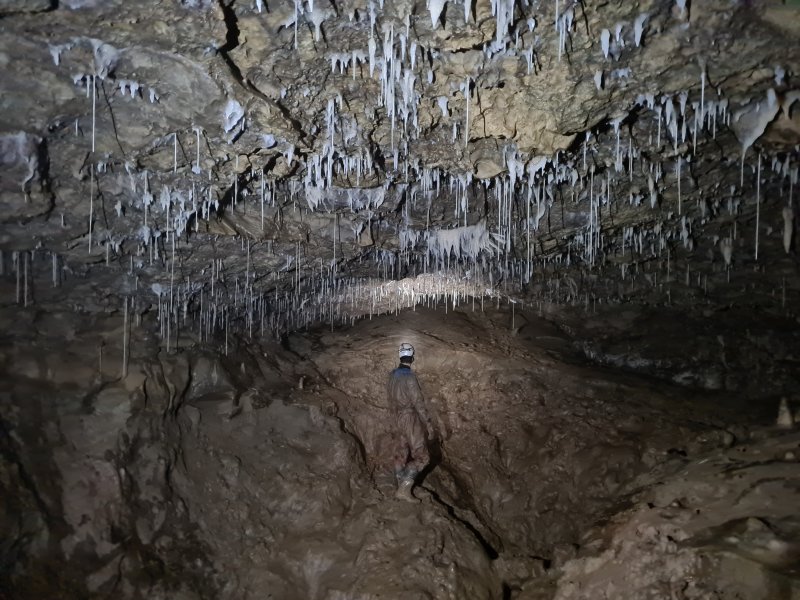 A very muddy climb then reaches Twin Aven Chamber, with its straw-covered ceiling.
Modelling by Will, lighting by Tarquin and Will
A very muddy climb then reaches Twin Aven Chamber, with its straw-covered ceiling.
Modelling by Will, lighting by Tarquin and Will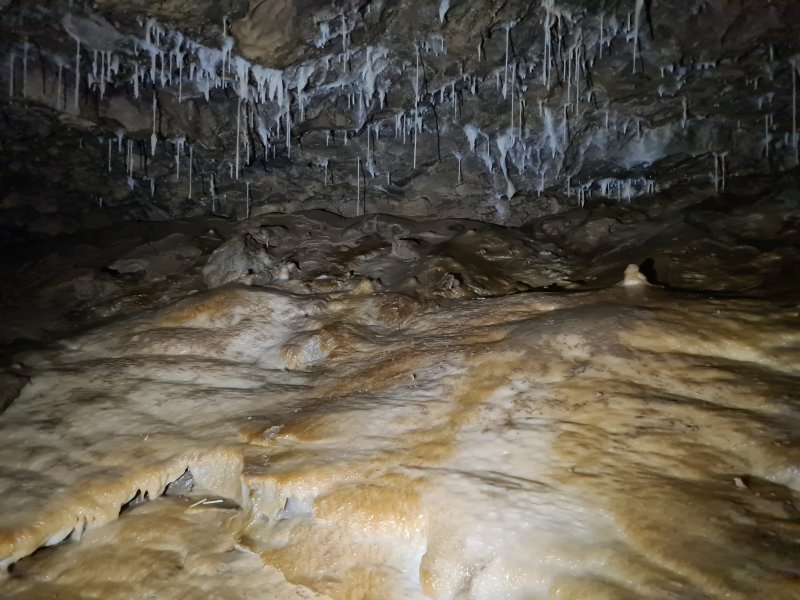 Flowstone-covered bank, which someone has managed to stand on.
 Twin Aven Chamber continues in one direction, remaining very large.
Modelling by Will, lighting by Tarquin and Will
Twin Aven Chamber continues in one direction, remaining very large.
Modelling by Will, lighting by Tarquin and Will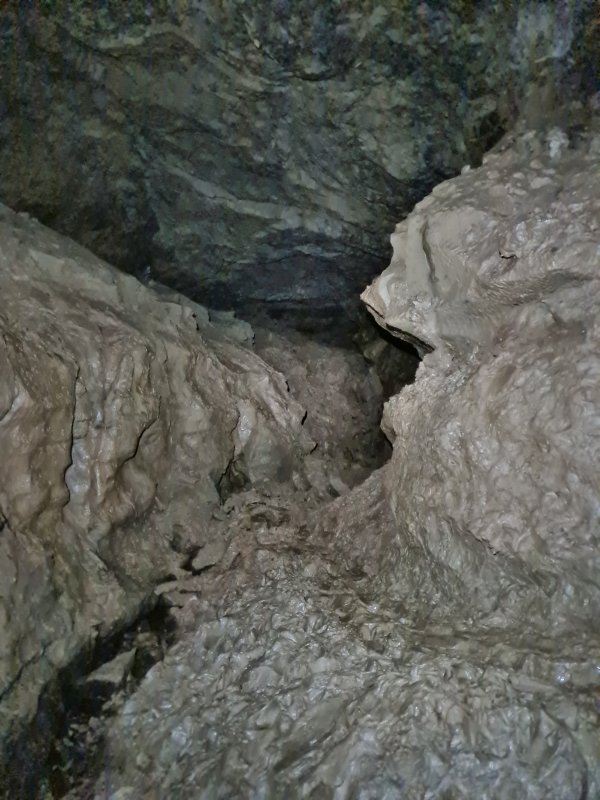 Twin Aven Chamber ends at a black choke called Coal Cellar. The water comes from Pwll y Pasg, a rare example of water passing from the Dowlais limestone through the Llanelly Shales. To reach the choke, there is a distinct hazard.
Lighting by Tarquin and Will
Twin Aven Chamber ends at a black choke called Coal Cellar. The water comes from Pwll y Pasg, a rare example of water passing from the Dowlais limestone through the Llanelly Shales. To reach the choke, there is a distinct hazard.
Lighting by Tarquin and Will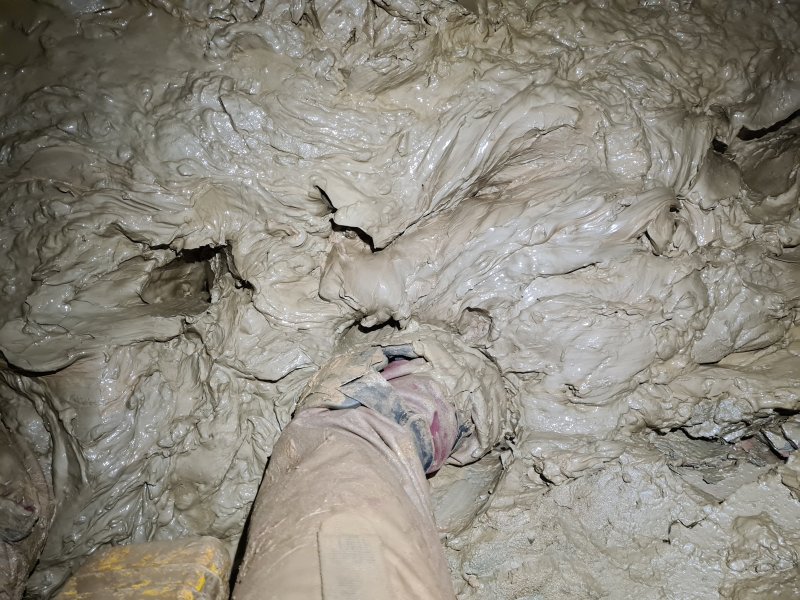 The mud is a trap, very deep indeed, and glutious enough to take your boots off you. I have seen my father lose a boot here, and a fellow caver lay in the mud and reached down the full length of their arm through the mud to retrieve it.
Modelling by Tarquin
The mud is a trap, very deep indeed, and glutious enough to take your boots off you. I have seen my father lose a boot here, and a fellow caver lay in the mud and reached down the full length of their arm through the mud to retrieve it.
Modelling by Tarquin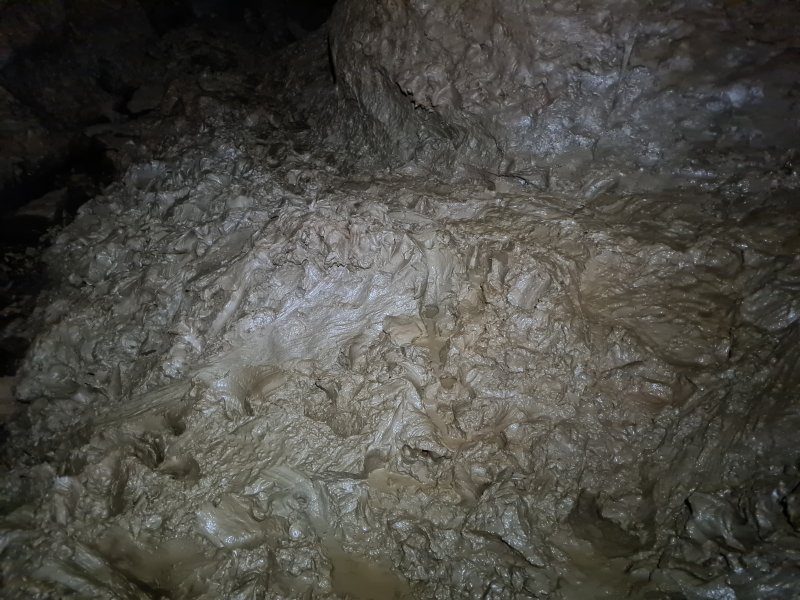 The mud patch is long, and there is no way to jump over it, so reaching the end of the passage is something of a rite of passage. I have done it before, and have no desire to do it again.