Ogof Draenen Last Post trip 02/07/2022
Unless otherwise stated, camera, setups, lighting, edits and gallery effects by Tarquin. Modelling and lighting at various points will be Pete Bolt and Gareth Davies.
The Last Post is a part of the extensive Realm of Baron von Carno series, and is worthy of being a tourist destination, with its share of grand passages, cryostal and calcite formations. This trip was used to write the final part of the the description of the series. We therefore visited a lot of side passages that you would ignore on a normal caving trip. The entire trip took only 8 hours, including a lot of photography, and ferreting in silly side passages. However, it is a fairly demanding part of the cave, and despite its moderate length, the trip proved to be quite tiring.
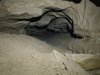 The dead end passage that you end up in, if you miss the four squeeze route.
 The eyehole that is the first of the four squeezes. It is not actually a squeeze, and is not even tight, but the corner can prove awkward for taller cavers. It drops into a passage that may carry a stream in wet conditions, but was dry thanks to a lengthy dry spell, in spite of rain overnight.
Modelling by portions of Gareth and Pete
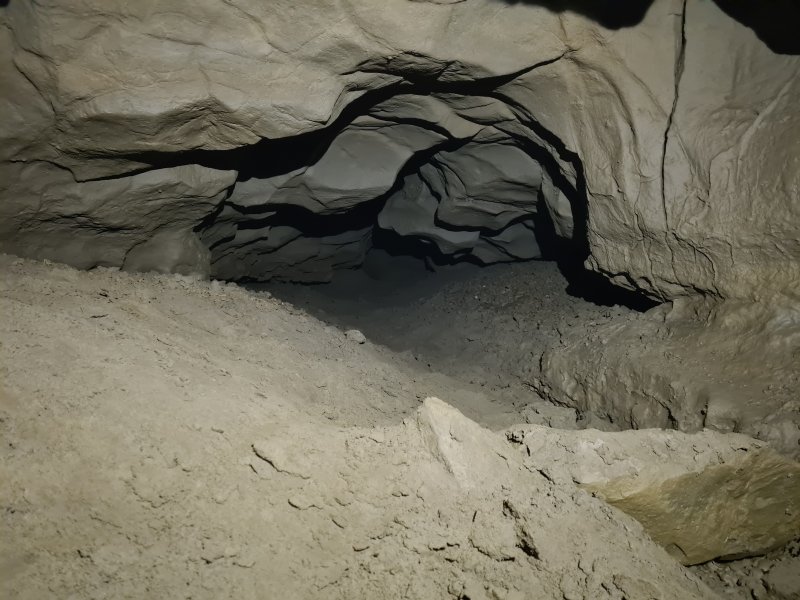
The eyehole that is the first of the four squeezes. It is not actually a squeeze, and is not even tight, but the corner can prove awkward for taller cavers. It drops into a passage that may carry a stream in wet conditions, but was dry thanks to a lengthy dry spell, in spite of rain overnight.
Modelling by portions of Gareth and Pete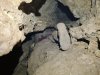 The second squeeze, which is much easier in the keyhole slot, and fairly tight where Gareth's leg is.
Modelling by Gareth, lighting by Tarquin and Gareth
The second squeeze, which is much easier in the keyhole slot, and fairly tight where Gareth's leg is.
Modelling by Gareth, lighting by Tarquin and Gareth The fourth squeeze, which is also not particularly tight, but proved very awkward with a tackle bag. The slot in the floor prevents the use of a drag cord, so it must be pushed in front of you.
Modelling by Gareth
The fourth squeeze, which is also not particularly tight, but proved very awkward with a tackle bag. The slot in the floor prevents the use of a drag cord, so it must be pushed in front of you.
Modelling by Gareth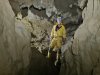 A large zig-zag in the canyon beyond the four squeezes.
Modelling by Pete, lighting by Tarquin and Gareth
A large zig-zag in the canyon beyond the four squeezes.
Modelling by Pete, lighting by Tarquin and Gareth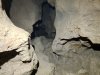 The side passage at the zig-zag, which looks very big on the survey, but is actually just a low crawl, with a couple of blind avens.
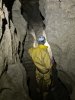 The passage just before The Red Baron, which is much wider than it looks on the survey.
Modelling by Pete, lighting by Tarquin and Pete
The passage just before The Red Baron, which is much wider than it looks on the survey.
Modelling by Pete, lighting by Tarquin and Pete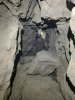 The southern branch of The Red Baron, which is significantly smaller than the northern branch. Although it points towards a side passage in The Realm Of Baron Von Carno, it is at the wrong height to have developed as an inlet to that passage, and so it is likely to have originally connected to the smaller passages around The Stream Of Running Commentary.
Modelling by Gareth, lighting by Tarquin and Gareth
The southern branch of The Red Baron, which is significantly smaller than the northern branch. Although it points towards a side passage in The Realm Of Baron Von Carno, it is at the wrong height to have developed as an inlet to that passage, and so it is likely to have originally connected to the smaller passages around The Stream Of Running Commentary.
Modelling by Gareth, lighting by Tarquin and Gareth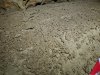 Mud formations in the southern branch of The Red Baron.
 The north trending rift, heading of the southern branch of The Red Baron. This is only short, and very tight, so we decided to leave it alone.
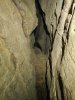 The climb into the final rift at the southern branch of The Red Baron. This was distinctly lacking in holds, and very tight, so we decided to leave it alone too. The rift points towards a side passage in The Realm Of Baron Von Carno, but does not actually connect to it.
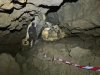 Start of the northern branch of The Red Baron, a much more comfortable passage.
Modelling by Gareth and Pete, lighting by Tarquin, Gareth and Pete
Start of the northern branch of The Red Baron, a much more comfortable passage.
Modelling by Gareth and Pete, lighting by Tarquin, Gareth and Pete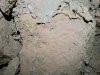 Possiby the reason for the passage's name is the slightly red tinted rocks in the passage (and some earlier passages), which is much more dramatic when you see it underground, after staring at mud coated rocks for so long. This is presumably caused by iron minerals.
 Much of the passage is traversing, with this being the most comfortable traverse.
Modelling by Gareth and Pete, lighting by Tarquin, Gareth and Pete
Much of the passage is traversing, with this being the most comfortable traverse.
Modelling by Gareth and Pete, lighting by Tarquin, Gareth and Pete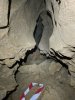 The side passage to the right, just before the taped-off oxbows in The Red Baron. This is just a low crawl, pointing back towards the southern branch's rift.
 Impossibly narrow rift into a side passage after the oxbows.
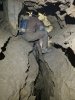 The Red Baron, after the oxbows.
Modelling by Gareth, lighting by Tarquin and Gareth
The Red Baron, after the oxbows.
Modelling by Gareth, lighting by Tarquin and Gareth The side passage can be accessed a little later via an eyehole on the left. It is the only substantial side passage on the left side of this part of The Red Baron, and looks impressive on the survey, but it is a low crawl, not worthy of the attention.
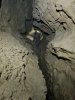 The Red Baron's canyon beyond the side passage.
Modelling by Gareth, lighting by Tarquin and Gareth
The Red Baron's canyon beyond the side passage.
Modelling by Gareth, lighting by Tarquin and Gareth Tiny hoodoos in The Red Baron.
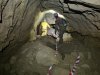 The Red Baron, shortly before the side passage that connects to Aces High.
Modelling by Gareth and Pete, lighting by Tarquin, Gareth and Pete
The Red Baron, shortly before the side passage that connects to Aces High.
Modelling by Gareth and Pete, lighting by Tarquin, Gareth and Pete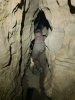 The narrow rift leading to Aces High, which supplies the water to The Red Baron. The rift starts as an awkward traverse, soon becoming a crawl in the stream, which was a feeble trickle at this point.
Modelling by Gareth, lighting by Tarquin, Pete and Gareth
The narrow rift leading to Aces High, which supplies the water to The Red Baron. The rift starts as an awkward traverse, soon becoming a crawl in the stream, which was a feeble trickle at this point.
Modelling by Gareth, lighting by Tarquin, Pete and Gareth After a corner, the passage enlarges, and becomes a more comfortable shape.
Modelling by Pete, lighting by Tarquin and Pete
After a corner, the passage enlarges, and becomes a more comfortable shape.
Modelling by Pete, lighting by Tarquin and Pete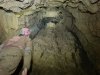 The aven climbing up into Aces High. This was originally bolted, gaining passage in both directions, at 8 metres up. Aces High was explored from this end, and then finally connected back to The Realm Of Baron Von Carno (passage) via a dig. During the exploration, this pitch was left rigged, but SRT gear needed to be brought all the way in to here.
Modelling by Gareth, lighting by Tarquin and Gareth
The aven climbing up into Aces High. This was originally bolted, gaining passage in both directions, at 8 metres up. Aces High was explored from this end, and then finally connected back to The Realm Of Baron Von Carno (passage) via a dig. During the exploration, this pitch was left rigged, but SRT gear needed to be brought all the way in to here.
Modelling by Gareth, lighting by Tarquin and Gareth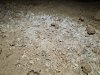 Meagre cryostal deposit at the base of the aven. The more impressive deposit is at the top.
 The passage beyond the aven splits into choked inlets. The right branch is longer, and has this tiny crostal deposit.
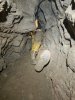 Beyond the inlet, The Red Baron is briefly a narrow wriggle.
Modelling by Pete, lighting by Tarquin and Pete
Beyond the inlet, The Red Baron is briefly a narrow wriggle.
Modelling by Pete, lighting by Tarquin and Pete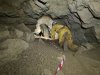 Beyond the wriggle, the passage is much smaller than before, with a couple of low arches that require flat out crawling.
Modelling by Pete, lighting by Tarquin and Pete
Beyond the wriggle, the passage is much smaller than before, with a couple of low arches that require flat out crawling.
Modelling by Pete, lighting by Tarquin and Pete Cryostal in the crawl.
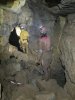 The passage then reaches a junction. The way in from The Red Baron can be seen on the right here, and the way on is ahead. Behind the camera is a significant side passage.
Modelling by Gareth and Pete, lighting by Tarquin, Gareth and Pete
The passage then reaches a junction. The way in from The Red Baron can be seen on the right here, and the way on is ahead. Behind the camera is a significant side passage.
Modelling by Gareth and Pete, lighting by Tarquin, Gareth and Pete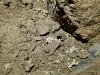 Cryostal at the junction.
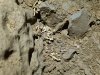 Cryostal at the junction.
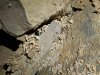 Cryostal at the junction.
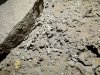 Cryostal in the side passage. This was not taped during our visit, and progress along the side passage required a lot of care to avoid the deposits.
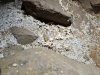 Cryostal in the side passage.
 Drip pockets in the side passage.
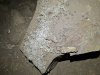 Cryostal before the first narrow spot in the side passage.
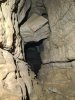 The survey shows that the passage ends as a chain of small chambers with narrow rifts between them. The first rift, up a little climb, was guarded by a mousetrap boulder. We decided not to go any further, not least because even reaching this rift required stepping across mud and cryostal formations, following the very faint remains of the footprints of the original explorers. The passage really needs to be taped to make the path more obvious, but we had none to hand.
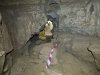 The passage leading towards The Last Post.
Modelling by Pete, lighting by Tarquin and Pete
The passage leading towards The Last Post.
Modelling by Pete, lighting by Tarquin and Pete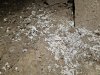 Cryostal in the passage leading towards The Last Post.
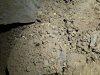 The passage then reaches a chamber with a choke, and three different ways to reach the way on. The floor has another cryostal deposit.
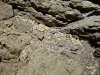 Cryostal in the chamber.
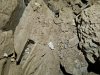 Cryostal in the chamber.
 From the chamber, passages down and up to the left unite at the higher level, passing up through this vertical squeeze into a bedding. On one side is a loose route back down to the chamber, but on the other side is a bedding crawl, which is the way on.
Modelling by Gareth
From the chamber, passages down and up to the left unite at the higher level, passing up through this vertical squeeze into a bedding. On one side is a loose route back down to the chamber, but on the other side is a bedding crawl, which is the way on.
Modelling by Gareth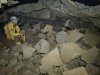 The bedding crawl, seen on the left here, enters the side of this much larger passage, which heads in both directions. The junction is not obvious, so some red and white tape has been hung over the bedding crawl. The survey does not make it clear where the name The Last Post starts, whether it applies to this impressive passage, or whether this is considered part of The Red Baron, but discussions with the surveyors/explorers suggest that this is the start of The Last Post. Therefore, that is what I call it in the description. We started by heading northwards, behind the camera.
Modelling by Pete and Gareth, lighting by Tarquin, Pete and Gareth
The bedding crawl, seen on the left here, enters the side of this much larger passage, which heads in both directions. The junction is not obvious, so some red and white tape has been hung over the bedding crawl. The survey does not make it clear where the name The Last Post starts, whether it applies to this impressive passage, or whether this is considered part of The Red Baron, but discussions with the surveyors/explorers suggest that this is the start of The Last Post. Therefore, that is what I call it in the description. We started by heading northwards, behind the camera.
Modelling by Pete and Gareth, lighting by Tarquin, Pete and Gareth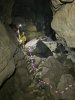 The northern branch of The Last Post immediately reaches a large junction, seen here from the side passage on the right. In the picture, the passage to the right is the continuing northern branch of The Last Post, and the passage to the left is the way in. The depression in the floor sits directly above the chokes and loose chambers at the end of The Red Baron.
Modelling by Gareth and Pete, lighting by Tarquin, Gareth and Pete
The northern branch of The Last Post immediately reaches a large junction, seen here from the side passage on the right. In the picture, the passage to the right is the continuing northern branch of The Last Post, and the passage to the left is the way in. The depression in the floor sits directly above the chokes and loose chambers at the end of The Red Baron.
Modelling by Gareth and Pete, lighting by Tarquin, Gareth and Pete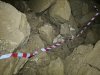 The junction is covered with a very extensive cryostal deposit.
 Cryostal at the junction.
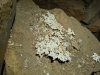 Very large pieces of cryostal. The two large conjoined pieces are each about 10 cm across.
 Cryostal at the junction.
 Cryostal at the junction.
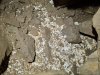 Cryostal at the junction. A large blob is visible in the top right.
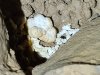 The large blob is roughly the size and shape of a piece of popcorn.
 The passage then immediately reduces in size to become a narrow traverse.
Modelling by Gareth, lighting by Tarquin and Pete
The passage then immediately reduces in size to become a narrow traverse.
Modelling by Gareth, lighting by Tarquin and Pete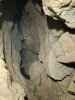 The rift ends at a 6 metre climb down to a very short piece off passage, that sits above a choke in Aces High, without any actual connection. The climb is very tight, and the bottom section bells out without many holds. We did not risk climbing down, as even though the survey claims it to be a climb, it looked far too easy to fall, and be unable to climb back up.
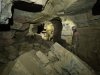 The main passage of The Last Post continuing northwards.
Modelling by Gareth and Pete, lighting by Tarquin, Gareth and Pete
The main passage of The Last Post continuing northwards.
Modelling by Gareth and Pete, lighting by Tarquin, Gareth and Pete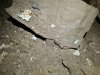 Very large cryostal flakes in the northern branch of The Last Post.
 The two largest flakes. The larger one is about 9 cm long.
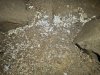 Cryostal in the passage.
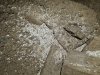 Cryostal in the passage.
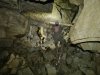 The passage turns a couple of right bends, and abruptly ends at a choked chamber. The grand passage ends, and the source of its size is not seen again. There must be a large, ongoing passage hidden by the choke. Although it appears to have very little decoration in this picture, this is actually a grotto of a sort.
Modelling by Gareth and Pete, lighting by Tarquin, Gareth and Pete
The passage turns a couple of right bends, and abruptly ends at a choked chamber. The grand passage ends, and the source of its size is not seen again. There must be a large, ongoing passage hidden by the choke. Although it appears to have very little decoration in this picture, this is actually a grotto of a sort.
Modelling by Gareth and Pete, lighting by Tarquin, Gareth and Pete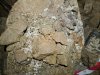 The cryostal deposit in the grotto is extensive, to the point that even though the path tries to wander through it, it is impossible to avoid stepping on some.
 Cryostal at the start of the chamber.
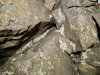 Cryostal at the start of the chamber.
 Cryostal with modern stalagmite flow on it.
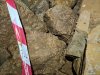 The cryostal in the middle of the chamber has a more golden, flaky appearance, like corn flakes.
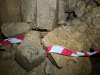 Cryostal in the middle of the chamber.
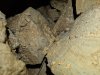 Cryostal in the middle of the chamber.
 Stalagmites in the grotto.
 Stalagmite flow.
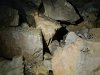 Stalagmites at the back of the chamber. There is an aven here with a passage linking back to before the bends, but it is taped off.
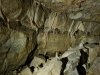 Stal on one wall.
 Flowstone.
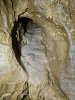 Flowstone.
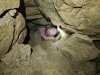 On the left side of the chamber is a steeply descending route, which drops down through a squeeze. This is reasonably tight, but can be passed in a seated position, facing the sloping ceiling.
 The squeeze emerges in a phreatic passage, heading northwards. This is certainly not large enough to be responsible for forming the chamber. The passage has not been taped, but it really needs it.
Modelling by Pete, lighting by Tarquin and Pete
The squeeze emerges in a phreatic passage, heading northwards. This is certainly not large enough to be responsible for forming the chamber. The passage has not been taped, but it really needs it.
Modelling by Pete, lighting by Tarquin and Pete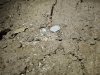 Cryostal in the passage.
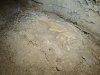 Calcite splatter formation.
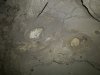 The passage reaches a junction with these mud and calcite drip pocket formations.
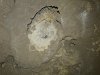 Detail of the drip formations.
 Cryostal at the junction.
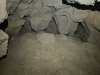 From the junction, the northwards trending passage marks the northern-most point of the entire cave. It ends almost immediately like this, with a crown-shaped rock formation to mark your achievement at having reached it. The right-hand spike of the crown is a very narrow rift, and the passage can be seen to continue for a few metres, to where it seems to enlarge again. This has never been dug.
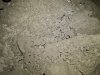 From the junction, the passage to the left is much longer, but has these extremely vulnerable cryostal formations on the floor, coated in mud. They just look like mud flakes, and are easy to miss, but they are right where you want to put your feet.
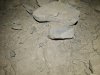 Cryostal near the flakes.
 Though it initially feels like it heads northeast, the passage actually heads southeast, back towards known cave. Most of it is walking, with a couple of low arches.
Modelling by Gareth, lighting by Tarquin and Gareth.
Though it initially feels like it heads northeast, the passage actually heads southeast, back towards known cave. Most of it is walking, with a couple of low arches.
Modelling by Gareth, lighting by Tarquin and Gareth.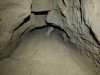 The passage ends abruptly at a low crawl, which immediately becomes too low. This points towards a silted alcove in the other branch of The Last Post.
Modelling by Gareth
The passage ends abruptly at a low crawl, which immediately becomes too low. This points towards a silted alcove in the other branch of The Last Post.
Modelling by Gareth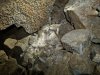 Instead, we headed in the other direction along The Last Post, which is much more impressive. The first corner has a blind side passage, and this large pile of cryostal. The knobbly textured rock is exposed stylolites, a pressure effect causing the limestone to dissolve, leaving behind only the sediments that were inside the limestone. This forms a weakness, where the limestone can split apart, dropping the rock from the ceiling.
Lighting by Tarquin, Pete and Gareth
Instead, we headed in the other direction along The Last Post, which is much more impressive. The first corner has a blind side passage, and this large pile of cryostal. The knobbly textured rock is exposed stylolites, a pressure effect causing the limestone to dissolve, leaving behind only the sediments that were inside the limestone. This forms a weakness, where the limestone can split apart, dropping the rock from the ceiling.
Lighting by Tarquin, Pete and Gareth Cryostal.
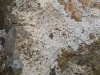 Cryostal.
Lighting by Tarquin, Gareth and Pete
Cryostal.
Lighting by Tarquin, Gareth and Pete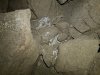 The passage narrows to a rift, where the cryostal continues.
 Cryostal.
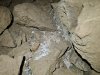 Cryostal.
 At a junction, the passage ahead chokes, and the way on is this narrower rift to the left, which bypasses the choke.
Modelling by Pete, lighting by Tarquin and Pete
At a junction, the passage ahead chokes, and the way on is this narrower rift to the left, which bypasses the choke.
Modelling by Pete, lighting by Tarquin and Pete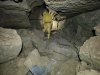 The rift breaks out into this unexpectedly large chamber. The previous passage's choke forms the right wall of this chamber. Through the choked floor is a visual connection to another passage, which explains where the size comes from, and how come the passages leading out of this chamber are so small. The obvious rift ahead immediately pinches out, and the way on is in the left wall beside it.
Modelling by Pete, lighting by Tarquin and Pete
The rift breaks out into this unexpectedly large chamber. The previous passage's choke forms the right wall of this chamber. Through the choked floor is a visual connection to another passage, which explains where the size comes from, and how come the passages leading out of this chamber are so small. The obvious rift ahead immediately pinches out, and the way on is in the left wall beside it.
Modelling by Pete, lighting by Tarquin and Pete Cryostal in the middle chamber.
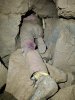 The way out of the chamber is a narrow crawl in the left wall of the chamber. When you look at it, you question if the way on could really be that small. Yes, that's it! We spent some time gardening rocks out of it, to make the worst part a lot easier.
Modelling by Gareth, lighting by Tarquin and Gareth
The way out of the chamber is a narrow crawl in the left wall of the chamber. When you look at it, you question if the way on could really be that small. Yes, that's it! We spent some time gardening rocks out of it, to make the worst part a lot easier.
Modelling by Gareth, lighting by Tarquin and Gareth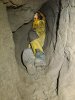 The start of the crawl is the narrowest part. When we got here, the bottom of this was large rocks, which made it even smaller.
Modelling by Pete, lighting by Tarquin and Pete
The start of the crawl is the narrowest part. When we got here, the bottom of this was large rocks, which made it even smaller.
Modelling by Pete, lighting by Tarquin and Pete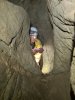 Near the end is a perfectly placed narrow rift in the floor, with a blind hole. It is the perfect place to accidentally throw the tackle bags and cameras that you have been throwing ahead of you. They are almost impossible to reach if you do so. This is how the crawl ends, a lot larger than the start.
Modelling by Pete, lighting by Tarquin and Pete
Near the end is a perfectly placed narrow rift in the floor, with a blind hole. It is the perfect place to accidentally throw the tackle bags and cameras that you have been throwing ahead of you. They are almost impossible to reach if you do so. This is how the crawl ends, a lot larger than the start.
Modelling by Pete, lighting by Tarquin and Pete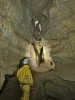 The crawl emerges at the top of a climb, which proved to be quite tricky on the way up, with very few holds where you need them. Pete fell off the top of the climb, landing on the platform in front of his chest in this picture, about to nose-dive further down. He was stopped only because I had stood on the ledge in case he wanted me to act as a foothold, and I managed to push him back onto the ledge. Treat this one with caution. At floor level is a low passage heading back under the climb, the top of which can be seen at the bottom of this picture.
Modelling by Pete and Gareth, lighting by Tarquin, Pete and Gareth
The crawl emerges at the top of a climb, which proved to be quite tricky on the way up, with very few holds where you need them. Pete fell off the top of the climb, landing on the platform in front of his chest in this picture, about to nose-dive further down. He was stopped only because I had stood on the ledge in case he wanted me to act as a foothold, and I managed to push him back onto the ledge. Treat this one with caution. At floor level is a low passage heading back under the climb, the top of which can be seen at the bottom of this picture.
Modelling by Pete and Gareth, lighting by Tarquin, Pete and Gareth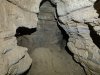 Heading back under the climb is this passage, with distinctively etched walls. It starts off as a low crawl, but most of it is stooping sized. It ends at a choke with a visual connection up into the previous chamber.
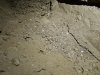 Meagre cryostal deposit at the end of the etched passage
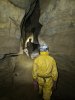 The climb lands at the start of this grand rift passage. It is possible that the name The Last Post should start at this point. Either way, this passage is a suitable reward for having made it this far, and there are no further obstacles before the end.
Modelling by Pete and Gareth, lighting by Tarquin, Pete and Gareth
The climb lands at the start of this grand rift passage. It is possible that the name The Last Post should start at this point. Either way, this passage is a suitable reward for having made it this far, and there are no further obstacles before the end.
Modelling by Pete and Gareth, lighting by Tarquin, Pete and Gareth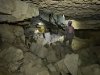 At a corner, the passage intersects a fault, and becomes much wider.
Modelling by Gareth and Pete, lighting by Tarquin, Gareth and Pete
At a corner, the passage intersects a fault, and becomes much wider.
Modelling by Gareth and Pete, lighting by Tarquin, Gareth and Pete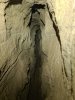 To the right is an incredibly tight rift, the widest parts of which are about 8 inches (20 cm). Someone has been crazy enough to push this for 25 metres.
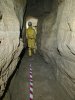 The Last Post then shrinks back to a smaller rift.
Modelling by Pete, lighting by Tarquin and Pete
The Last Post then shrinks back to a smaller rift.
Modelling by Pete, lighting by Tarquin and Pete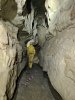 Getting taller.
Modelling by Pete, lighting by Tarquin, Gareth and Pete
Getting taller.
Modelling by Pete, lighting by Tarquin, Gareth and Pete Drip pockets.
 Calcite flow.
 Just as the passage starts to grow, a low side passage on the left descends to a blind chamber, which is taped off to protect the mud floor. This is the silt-filled continuation of the major side passage (with the mousetrap) at the end of The Red Baron.
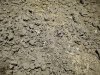 Cryostal in the blind chamber.
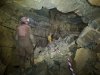 The Last Post rapidly grows to a very grand size.
Modelling by Gareth and Pete, lighting by Tarquin, Gareth and Pete
The Last Post rapidly grows to a very grand size.
Modelling by Gareth and Pete, lighting by Tarquin, Gareth and Pete Stalactites in the grotto at the start of the passage.
Lighting by Tarquin, Gareth and Pete
Stalactites in the grotto at the start of the passage.
Lighting by Tarquin, Gareth and Pete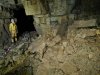 The grotto contains a large patch of flowstone with some small stalagmites (labelled as "bosses" on the survey).
Modelling by Pete, lighting by Tarquin and Gareth
The grotto contains a large patch of flowstone with some small stalagmites (labelled as "bosses" on the survey).
Modelling by Pete, lighting by Tarquin and Gareth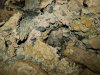 Redissolved calcite in the grotto.
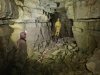 The Last Post, after the first grotto.
Modelling by Gareth and Pete, lighting by Tarquin, Gareth and Pete
The Last Post, after the first grotto.
Modelling by Gareth and Pete, lighting by Tarquin, Gareth and Pete Continuing very grand, with the second grotto on the left.
Modelling by Gareth and Pete, lighting by Tarquin, Gareth and Pete
Continuing very grand, with the second grotto on the left.
Modelling by Gareth and Pete, lighting by Tarquin, Gareth and Pete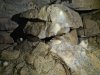 Stalagmites and frilled edges in the grotto.
Lighting by Tarquin and Gareth
Stalagmites and frilled edges in the grotto.
Lighting by Tarquin and Gareth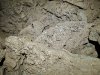 Cryostal at the grotto.
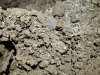 Cryostal at the grotto.
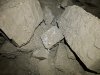 Mud and cryostal formations at a junction in a narrow section.
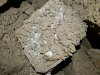 Mud and cryostal formations.
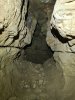 The side passage at the junction is an oxbow, which rejoins at a drop.
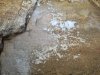 Tiny anthodites in the oxbow.
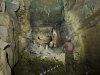 The Last Post ends at this grotto, a great way to sign off.
Modelling by Gareth and Pete, lighting by Tarquin, Gareth and Pete
The Last Post ends at this grotto, a great way to sign off.
Modelling by Gareth and Pete, lighting by Tarquin, Gareth and Pete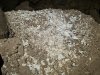 Cryostal at the grotto.
 Stalagmite bank.
Lighting by Tarquin, Gareth and Pete
Stalagmite bank.
Lighting by Tarquin, Gareth and Pete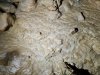 Streak patterns in the flowstone.
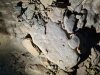 Textured patterns in the flowstone.
 Calcite coated flakes.
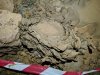 Mud flakes.
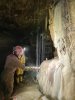 The real highlight of the grotto is this inlet, with the brilliant white coating on the walls. The water turned out to be drinkable, by the way.
Modelling by Gareth and Pete, lighting by Tarquin, Gareth and Pete
The real highlight of the grotto is this inlet, with the brilliant white coating on the walls. The water turned out to be drinkable, by the way.
Modelling by Gareth and Pete, lighting by Tarquin, Gareth and Pete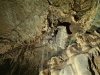 The water pours in from a bizarre conical formation called The Bugle. The strangely ornate calcite coating has also caught the stalactite in front of it. The source of the water is not known, but it seemd to be different from the fault that sources all of the other inlets in this part of the series. Perhaps The Bugle is industrial pollution from the former limestone quarrying and calcining that took place on the mountain.
Lighting by Tarquin and Gareth
The water pours in from a bizarre conical formation called The Bugle. The strangely ornate calcite coating has also caught the stalactite in front of it. The source of the water is not known, but it seemd to be different from the fault that sources all of the other inlets in this part of the series. Perhaps The Bugle is industrial pollution from the former limestone quarrying and calcining that took place on the mountain.
Lighting by Tarquin and Gareth Pool below The Bugle.
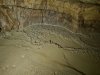 Former crystal pools in the grotto.
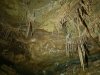 Stalactites near the end of the grotto.
 Stalagmites at the end of the grotto.
 The beautiful end of the grotto. The floor is a calcite flow, so the passage is taped off.
Modelling by Gareth, lighting by Tarquin and Gareth
The beautiful end of the grotto. The floor is a calcite flow, so the passage is taped off.
Modelling by Gareth, lighting by Tarquin and Gareth The calcite floor, with its streams edged by raised calcite. There is a single set of footprints continuing around the corner, but the passage ends just 40 metres ahead. The survey shows a couple of calcite steps before the calcite blocks the passage, but the explorers assured me that there is nothing at all worth damaging this floor for, so the passage is best left alone, and enjoyed from here. The passage is separated from the end of Nevill Hall by a little over 100 metres, and it is most likely that it would just connect with the static sump there. Its water probably joins the water seen in Passendale.
 The dead end passage that you end up in, if you miss the four squeeze route.
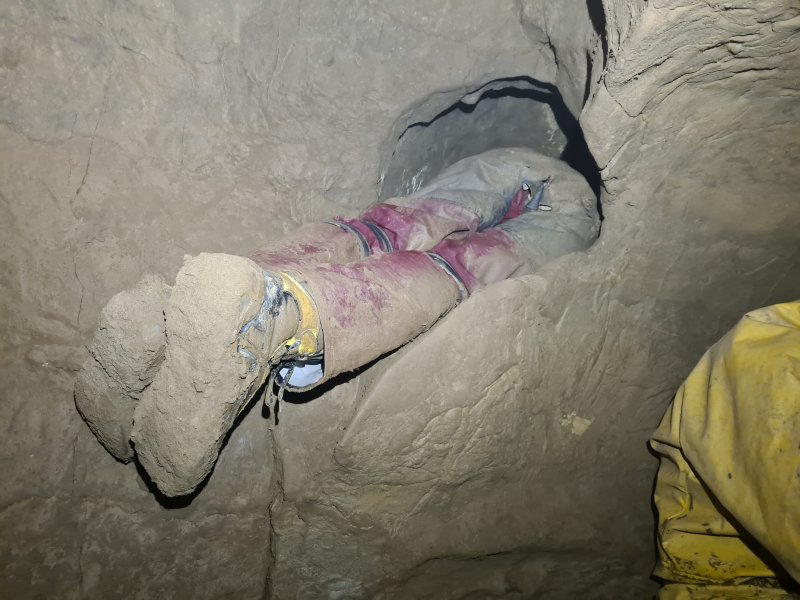 The eyehole that is the first of the four squeezes. It is not actually a squeeze, and is not even tight, but the corner can prove awkward for taller cavers. It drops into a passage that may carry a stream in wet conditions, but was dry thanks to a lengthy dry spell, in spite of rain overnight.
Modelling by portions of Gareth and Pete
The eyehole that is the first of the four squeezes. It is not actually a squeeze, and is not even tight, but the corner can prove awkward for taller cavers. It drops into a passage that may carry a stream in wet conditions, but was dry thanks to a lengthy dry spell, in spite of rain overnight.
Modelling by portions of Gareth and Pete The second squeeze, which is much easier in the keyhole slot, and fairly tight where Gareth's leg is.
Modelling by Gareth, lighting by Tarquin and Gareth
The second squeeze, which is much easier in the keyhole slot, and fairly tight where Gareth's leg is.
Modelling by Gareth, lighting by Tarquin and Gareth The fourth squeeze, which is also not particularly tight, but proved very awkward with a tackle bag. The slot in the floor prevents the use of a drag cord, so it must be pushed in front of you.
Modelling by Gareth
The fourth squeeze, which is also not particularly tight, but proved very awkward with a tackle bag. The slot in the floor prevents the use of a drag cord, so it must be pushed in front of you.
Modelling by Gareth A large zig-zag in the canyon beyond the four squeezes.
Modelling by Pete, lighting by Tarquin and Gareth
A large zig-zag in the canyon beyond the four squeezes.
Modelling by Pete, lighting by Tarquin and Gareth The side passage at the zig-zag, which looks very big on the survey, but is actually just a low crawl, with a couple of blind avens.
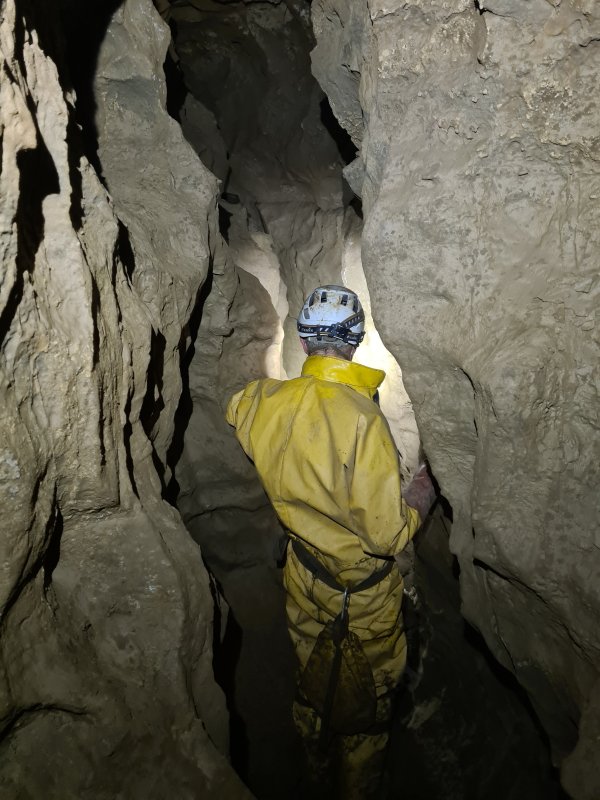 The passage just before The Red Baron, which is much wider than it looks on the survey.
Modelling by Pete, lighting by Tarquin and Pete
The passage just before The Red Baron, which is much wider than it looks on the survey.
Modelling by Pete, lighting by Tarquin and Pete The southern branch of The Red Baron, which is significantly smaller than the northern branch. Although it points towards a side passage in The Realm Of Baron Von Carno, it is at the wrong height to have developed as an inlet to that passage, and so it is likely to have originally connected to the smaller passages around The Stream Of Running Commentary.
Modelling by Gareth, lighting by Tarquin and Gareth
The southern branch of The Red Baron, which is significantly smaller than the northern branch. Although it points towards a side passage in The Realm Of Baron Von Carno, it is at the wrong height to have developed as an inlet to that passage, and so it is likely to have originally connected to the smaller passages around The Stream Of Running Commentary.
Modelling by Gareth, lighting by Tarquin and Gareth Mud formations in the southern branch of The Red Baron.
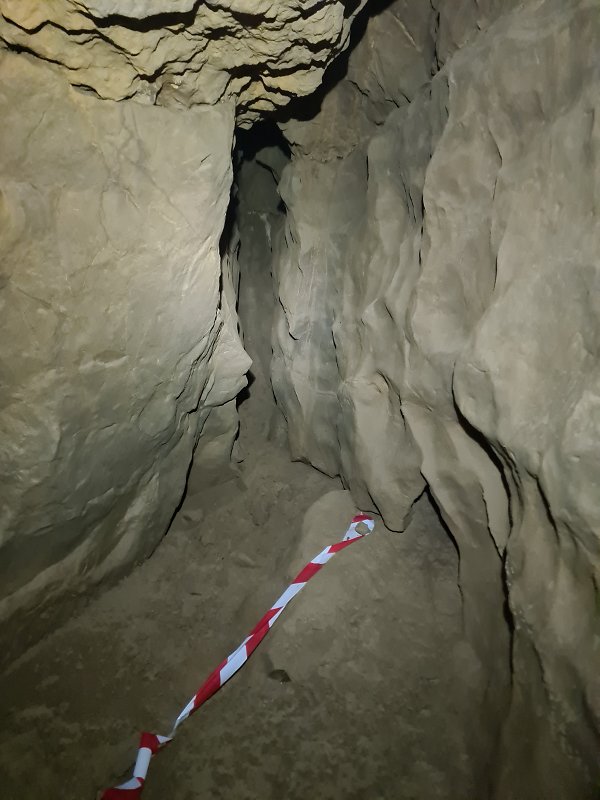 The north trending rift, heading of the southern branch of The Red Baron. This is only short, and very tight, so we decided to leave it alone.
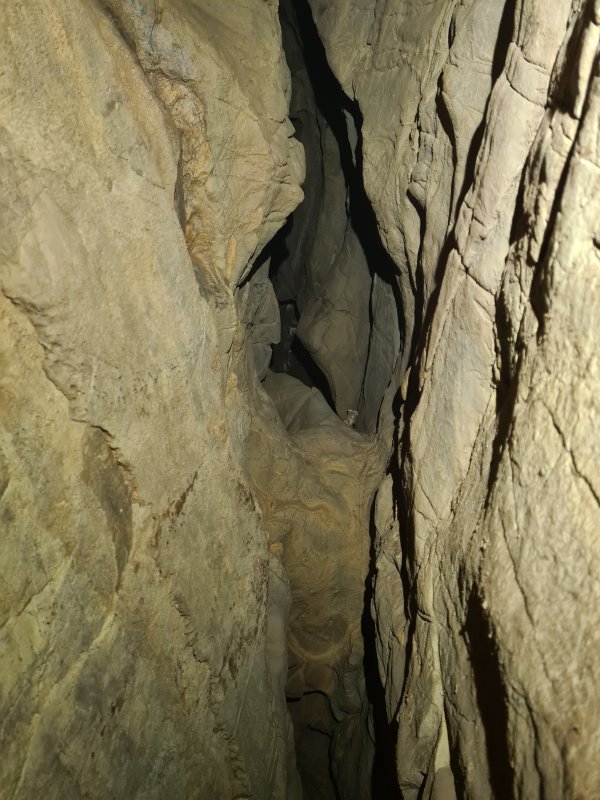 The climb into the final rift at the southern branch of The Red Baron. This was distinctly lacking in holds, and very tight, so we decided to leave it alone too. The rift points towards a side passage in The Realm Of Baron Von Carno, but does not actually connect to it.
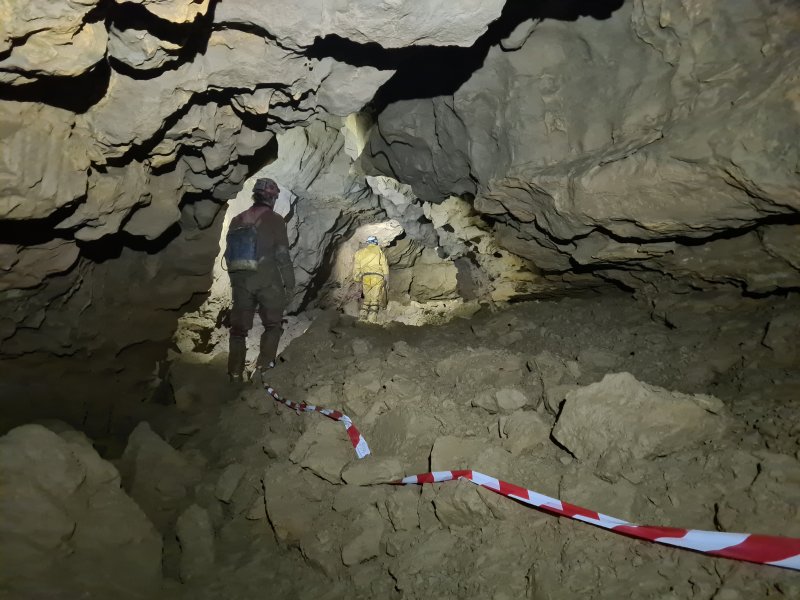 Start of the northern branch of The Red Baron, a much more comfortable passage.
Modelling by Gareth and Pete, lighting by Tarquin, Gareth and Pete
Start of the northern branch of The Red Baron, a much more comfortable passage.
Modelling by Gareth and Pete, lighting by Tarquin, Gareth and Pete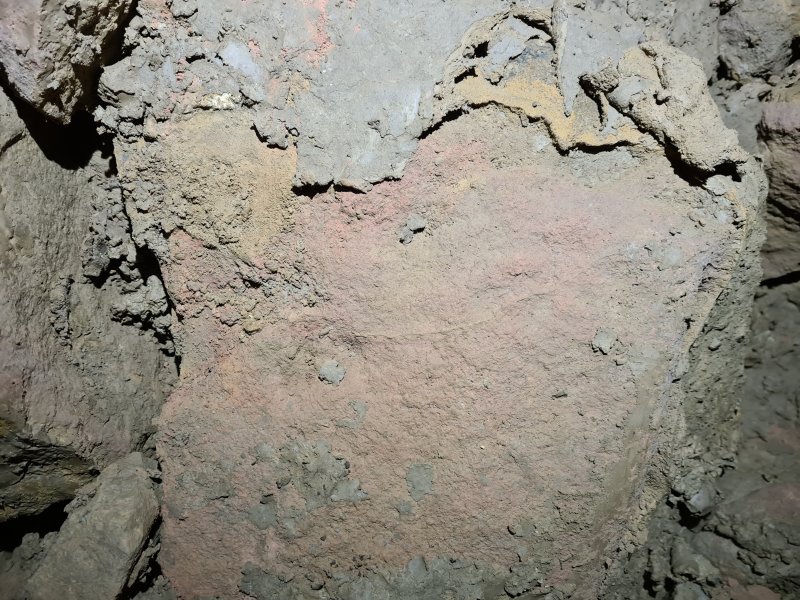 Possiby the reason for the passage's name is the slightly red tinted rocks in the passage (and some earlier passages), which is much more dramatic when you see it underground, after staring at mud coated rocks for so long. This is presumably caused by iron minerals.
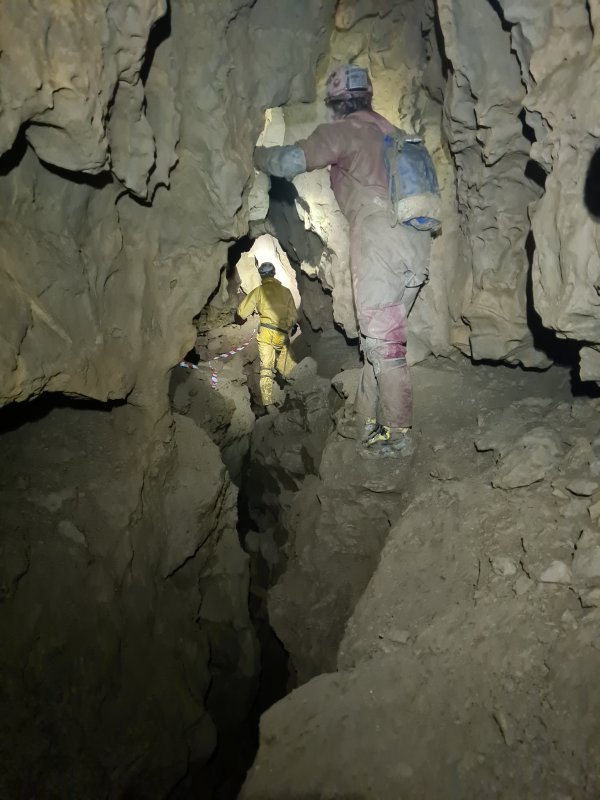 Much of the passage is traversing, with this being the most comfortable traverse.
Modelling by Gareth and Pete, lighting by Tarquin, Gareth and Pete
Much of the passage is traversing, with this being the most comfortable traverse.
Modelling by Gareth and Pete, lighting by Tarquin, Gareth and Pete The side passage to the right, just before the taped-off oxbows in The Red Baron. This is just a low crawl, pointing back towards the southern branch's rift.
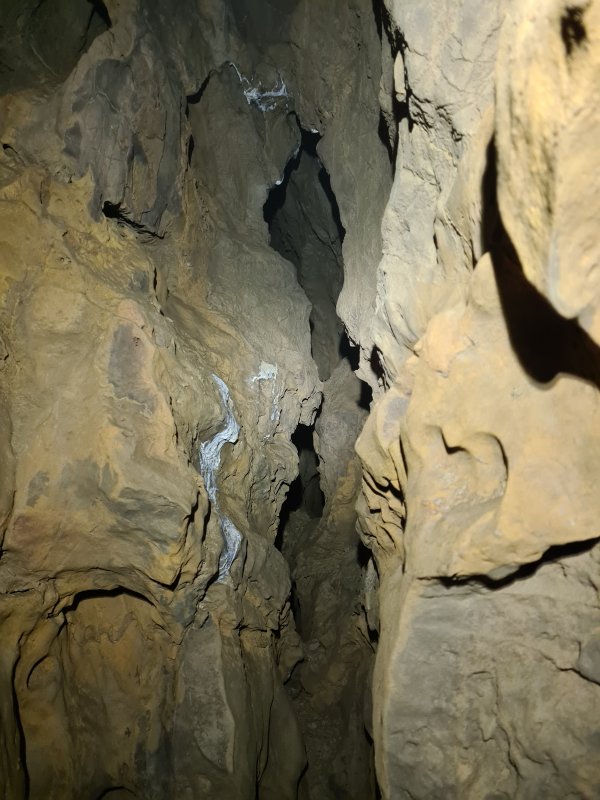 Impossibly narrow rift into a side passage after the oxbows.
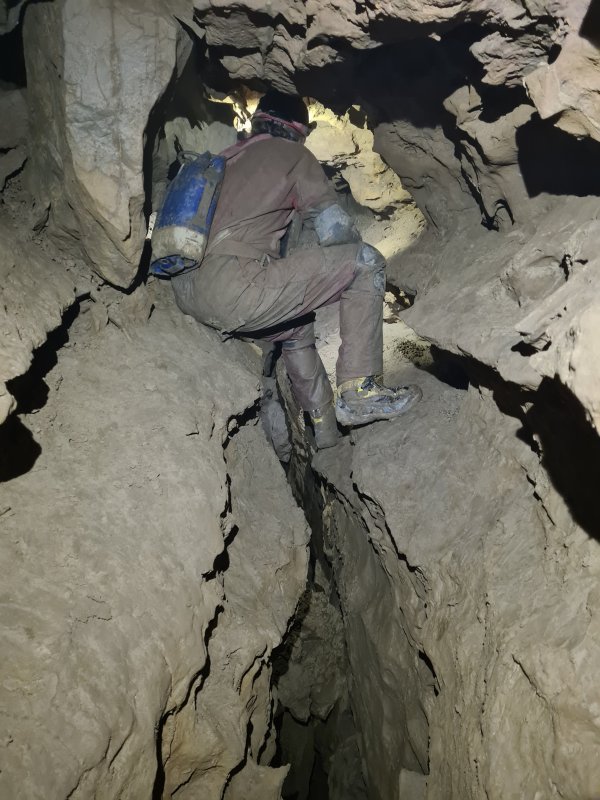 The Red Baron, after the oxbows.
Modelling by Gareth, lighting by Tarquin and Gareth
The Red Baron, after the oxbows.
Modelling by Gareth, lighting by Tarquin and Gareth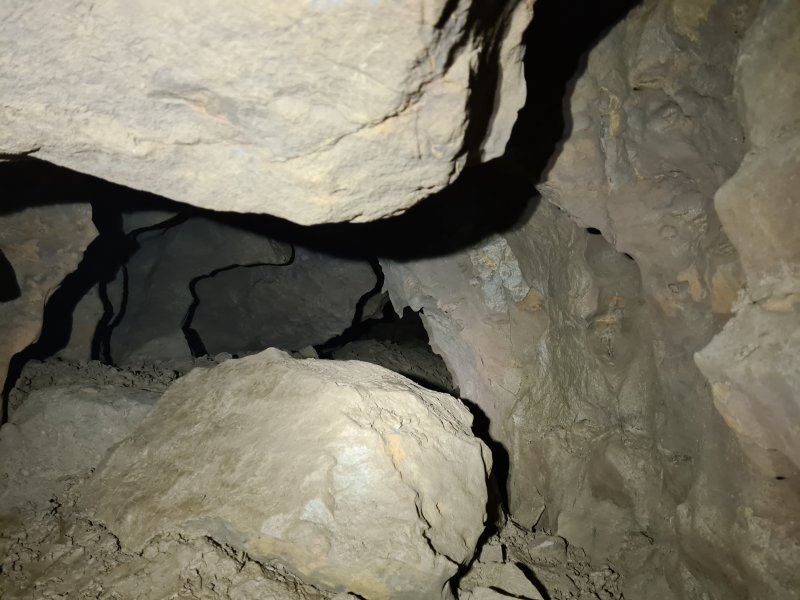 The side passage can be accessed a little later via an eyehole on the left. It is the only substantial side passage on the left side of this part of The Red Baron, and looks impressive on the survey, but it is a low crawl, not worthy of the attention.
 The Red Baron's canyon beyond the side passage.
Modelling by Gareth, lighting by Tarquin and Gareth
The Red Baron's canyon beyond the side passage.
Modelling by Gareth, lighting by Tarquin and Gareth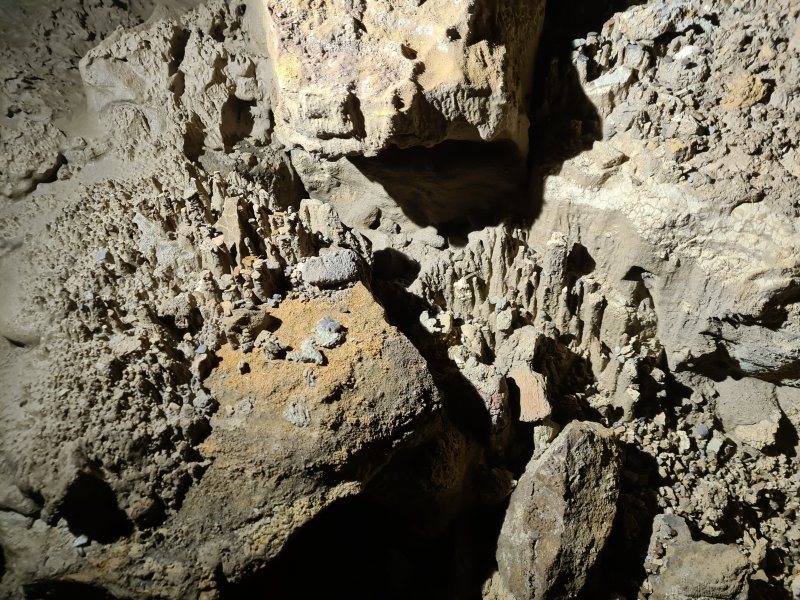 Tiny hoodoos in The Red Baron.
 The Red Baron, shortly before the side passage that connects to Aces High.
Modelling by Gareth and Pete, lighting by Tarquin, Gareth and Pete
The Red Baron, shortly before the side passage that connects to Aces High.
Modelling by Gareth and Pete, lighting by Tarquin, Gareth and Pete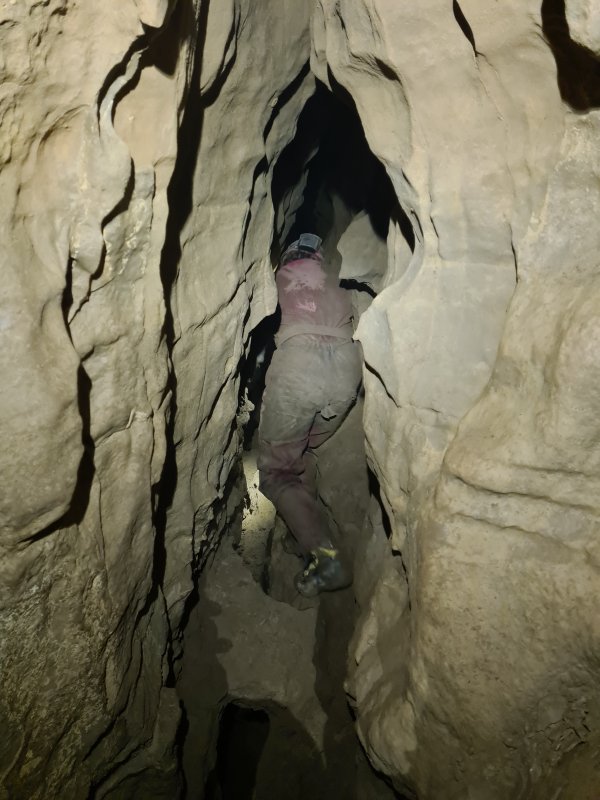 The narrow rift leading to Aces High, which supplies the water to The Red Baron. The rift starts as an awkward traverse, soon becoming a crawl in the stream, which was a feeble trickle at this point.
Modelling by Gareth, lighting by Tarquin, Pete and Gareth
The narrow rift leading to Aces High, which supplies the water to The Red Baron. The rift starts as an awkward traverse, soon becoming a crawl in the stream, which was a feeble trickle at this point.
Modelling by Gareth, lighting by Tarquin, Pete and Gareth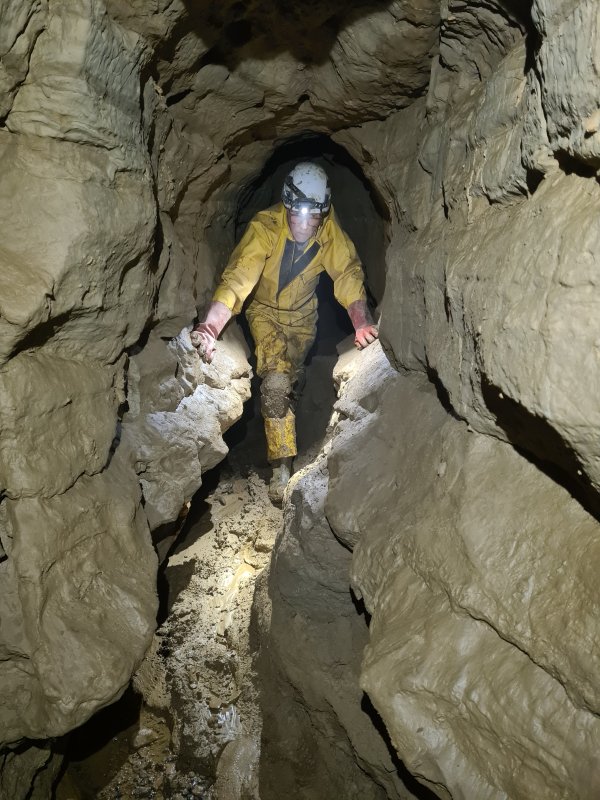 After a corner, the passage enlarges, and becomes a more comfortable shape.
Modelling by Pete, lighting by Tarquin and Pete
After a corner, the passage enlarges, and becomes a more comfortable shape.
Modelling by Pete, lighting by Tarquin and Pete The aven climbing up into Aces High. This was originally bolted, gaining passage in both directions, at 8 metres up. Aces High was explored from this end, and then finally connected back to The Realm Of Baron Von Carno (passage) via a dig. During the exploration, this pitch was left rigged, but SRT gear needed to be brought all the way in to here.
Modelling by Gareth, lighting by Tarquin and Gareth
The aven climbing up into Aces High. This was originally bolted, gaining passage in both directions, at 8 metres up. Aces High was explored from this end, and then finally connected back to The Realm Of Baron Von Carno (passage) via a dig. During the exploration, this pitch was left rigged, but SRT gear needed to be brought all the way in to here.
Modelling by Gareth, lighting by Tarquin and Gareth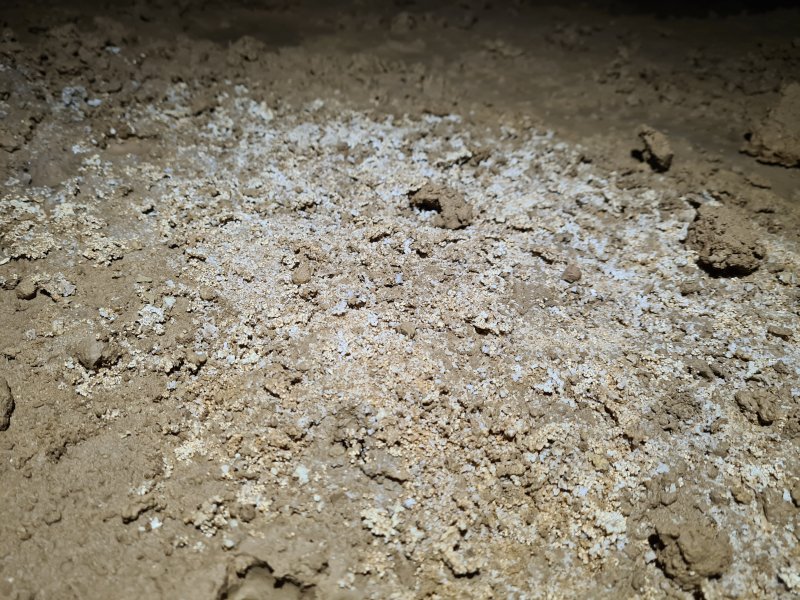 Meagre cryostal deposit at the base of the aven. The more impressive deposit is at the top.
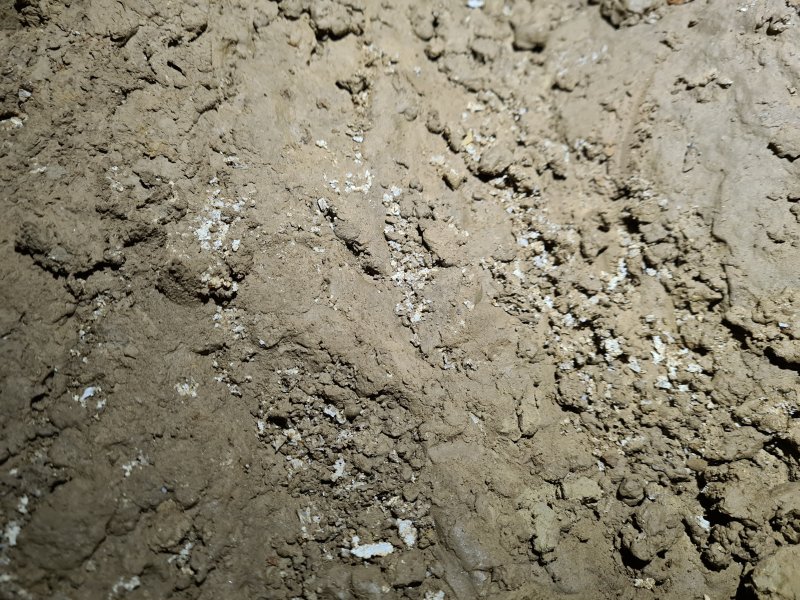 The passage beyond the aven splits into choked inlets. The right branch is longer, and has this tiny crostal deposit.
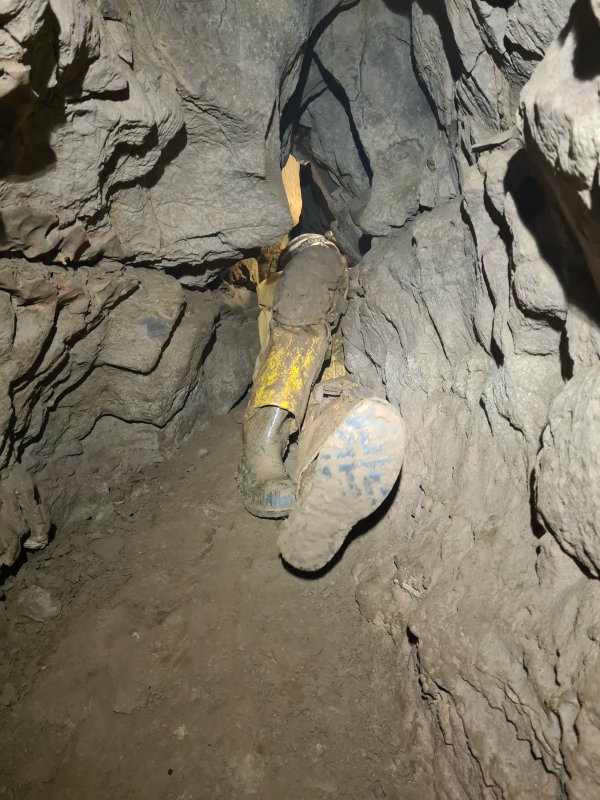 Beyond the inlet, The Red Baron is briefly a narrow wriggle.
Modelling by Pete, lighting by Tarquin and Pete
Beyond the inlet, The Red Baron is briefly a narrow wriggle.
Modelling by Pete, lighting by Tarquin and Pete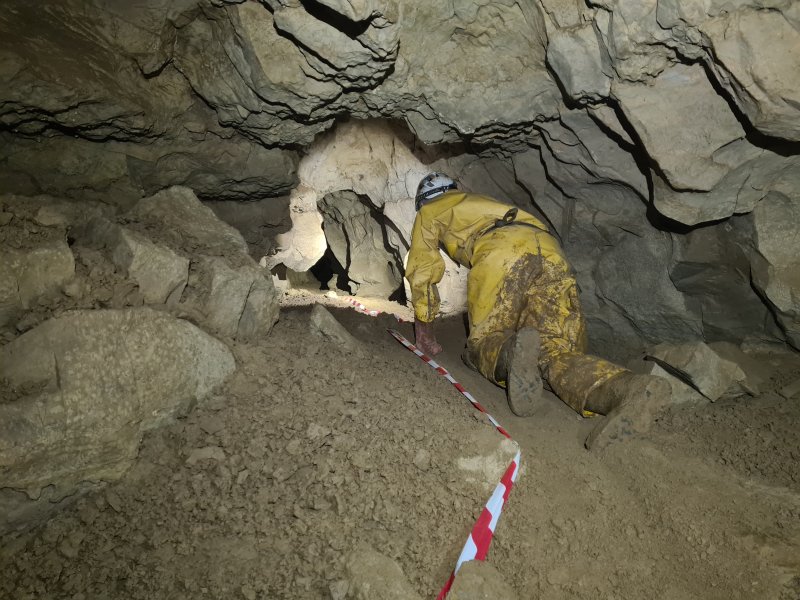 Beyond the wriggle, the passage is much smaller than before, with a couple of low arches that require flat out crawling.
Modelling by Pete, lighting by Tarquin and Pete
Beyond the wriggle, the passage is much smaller than before, with a couple of low arches that require flat out crawling.
Modelling by Pete, lighting by Tarquin and Pete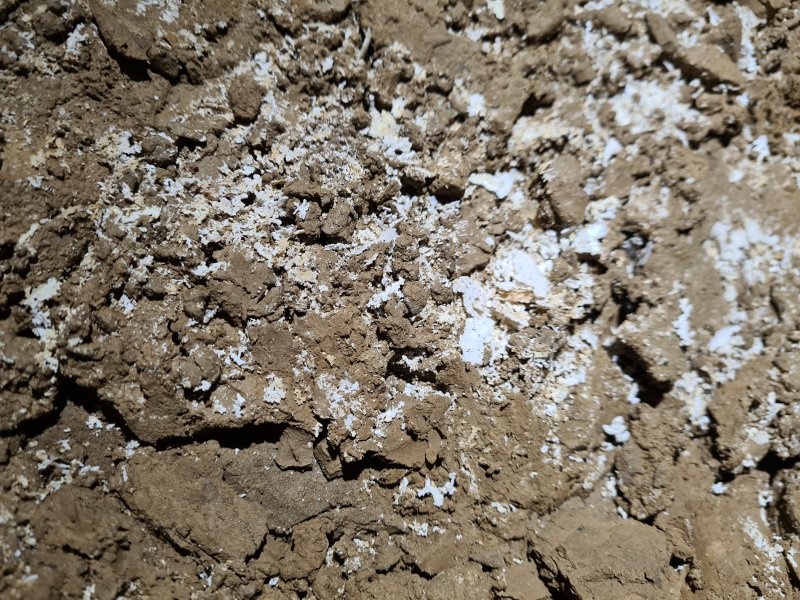 Cryostal in the crawl.
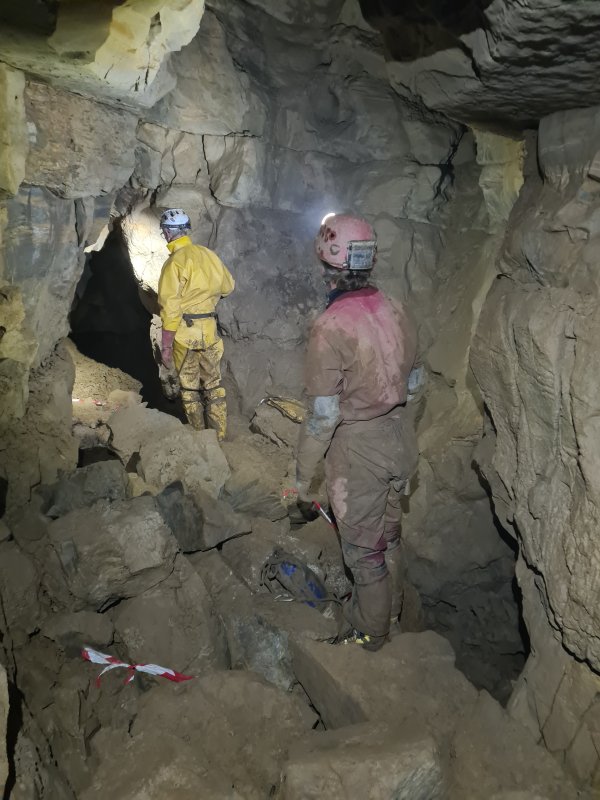 The passage then reaches a junction. The way in from The Red Baron can be seen on the right here, and the way on is ahead. Behind the camera is a significant side passage.
Modelling by Gareth and Pete, lighting by Tarquin, Gareth and Pete
The passage then reaches a junction. The way in from The Red Baron can be seen on the right here, and the way on is ahead. Behind the camera is a significant side passage.
Modelling by Gareth and Pete, lighting by Tarquin, Gareth and Pete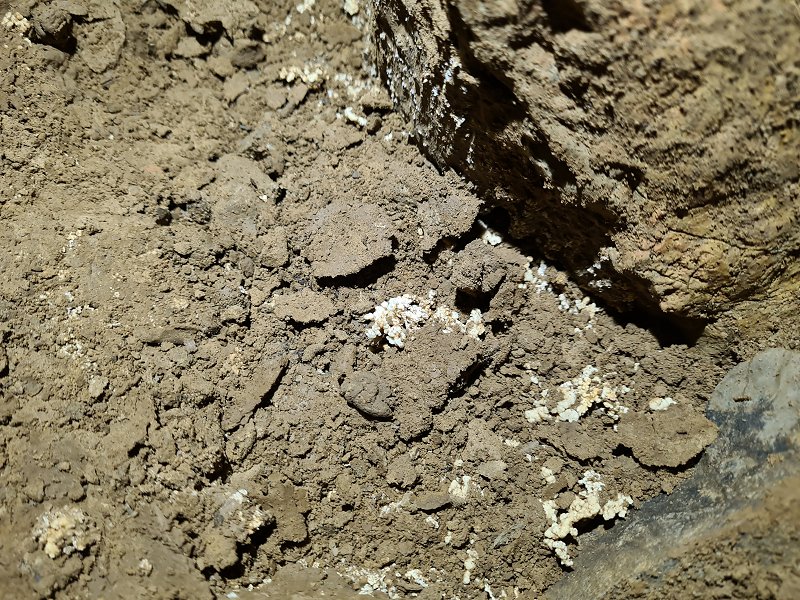 Cryostal at the junction.
 Cryostal at the junction.
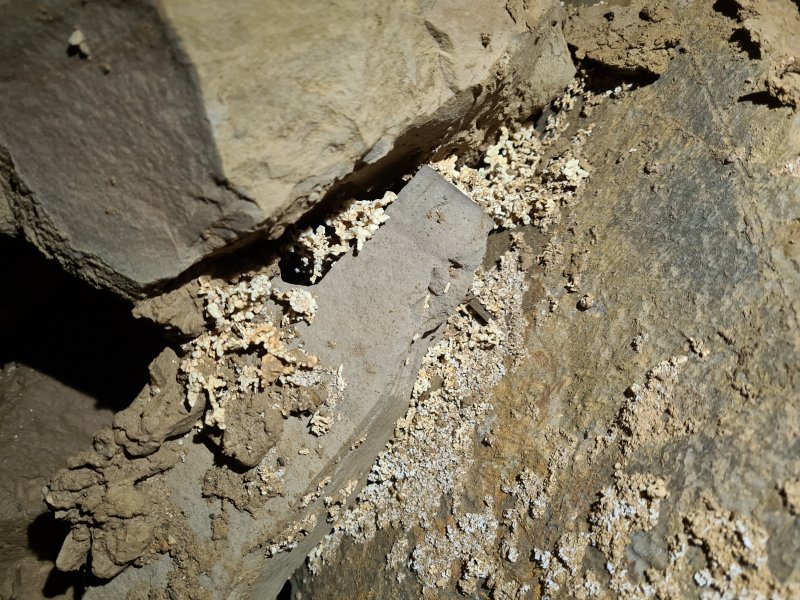 Cryostal at the junction.
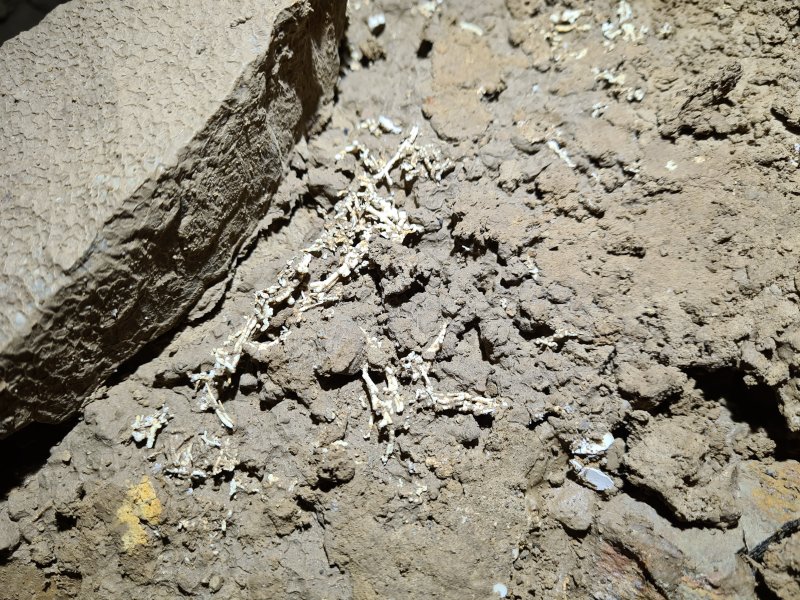 Cryostal in the side passage. This was not taped during our visit, and progress along the side passage required a lot of care to avoid the deposits.
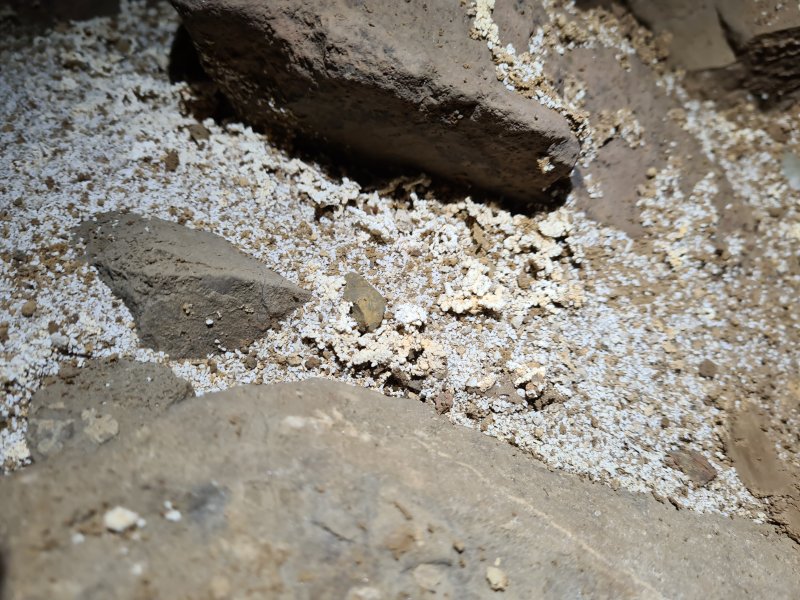 Cryostal in the side passage.
 Drip pockets in the side passage.
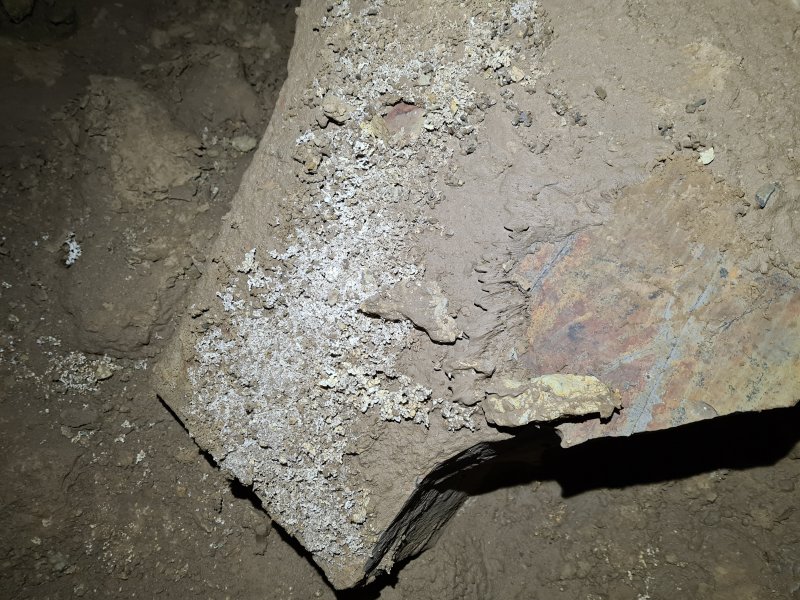 Cryostal before the first narrow spot in the side passage.
 The survey shows that the passage ends as a chain of small chambers with narrow rifts between them. The first rift, up a little climb, was guarded by a mousetrap boulder. We decided not to go any further, not least because even reaching this rift required stepping across mud and cryostal formations, following the very faint remains of the footprints of the original explorers. The passage really needs to be taped to make the path more obvious, but we had none to hand.
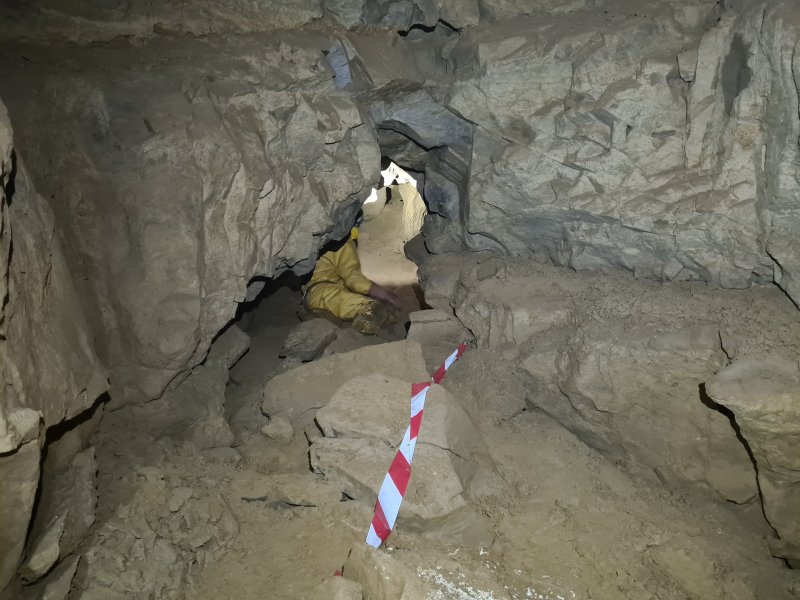 The passage leading towards The Last Post.
Modelling by Pete, lighting by Tarquin and Pete
The passage leading towards The Last Post.
Modelling by Pete, lighting by Tarquin and Pete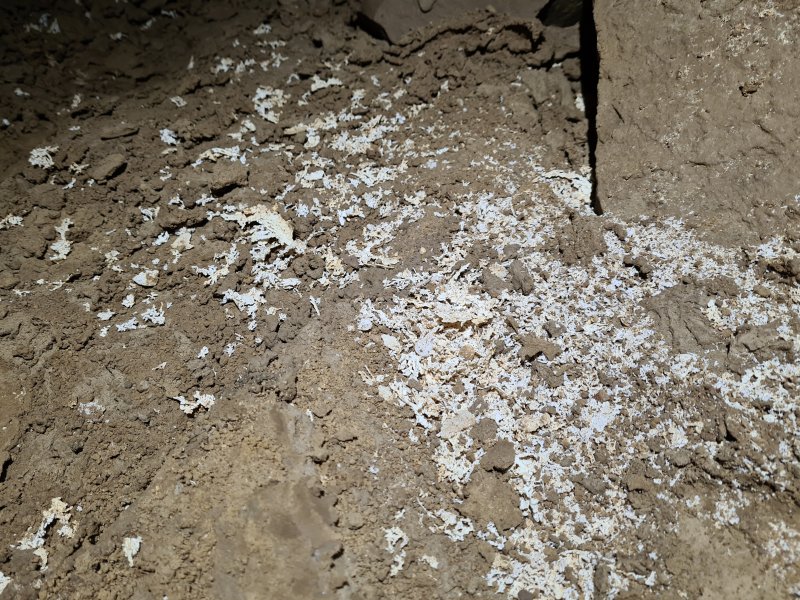 Cryostal in the passage leading towards The Last Post.
 The passage then reaches a chamber with a choke, and three different ways to reach the way on. The floor has another cryostal deposit.
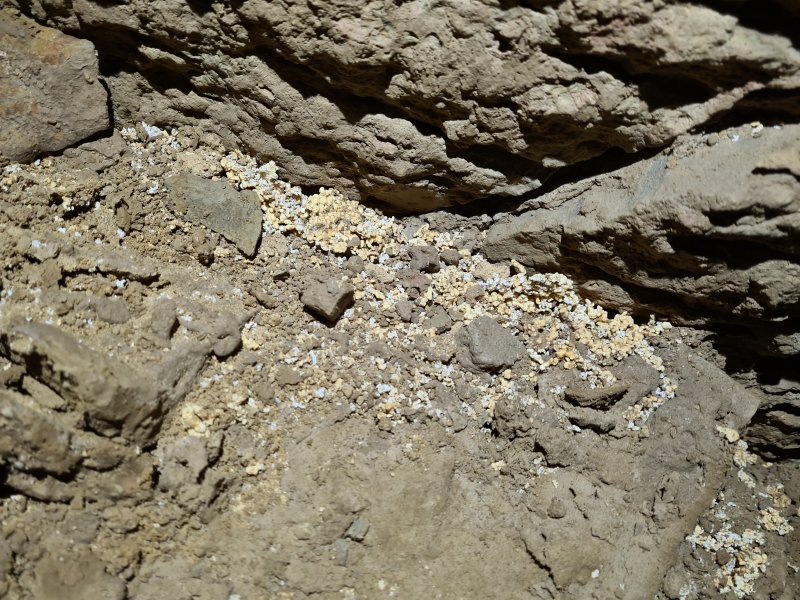 Cryostal in the chamber.
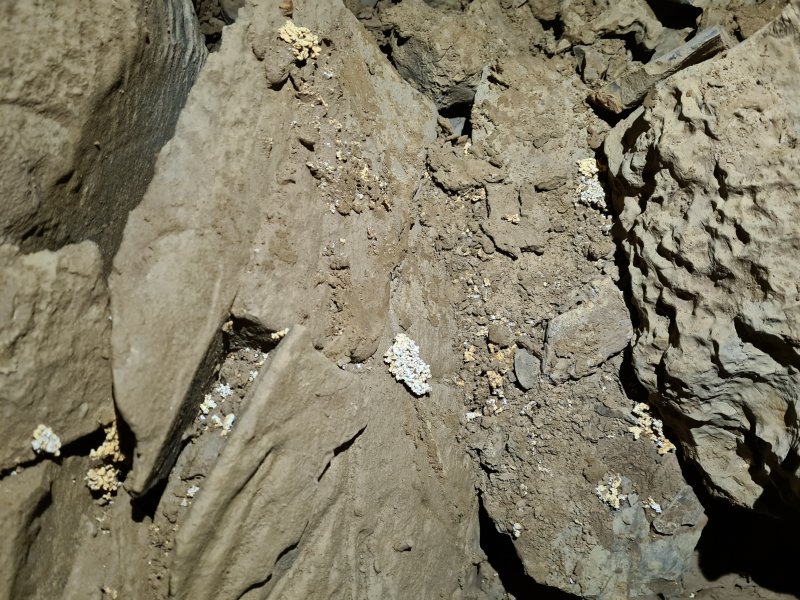 Cryostal in the chamber.
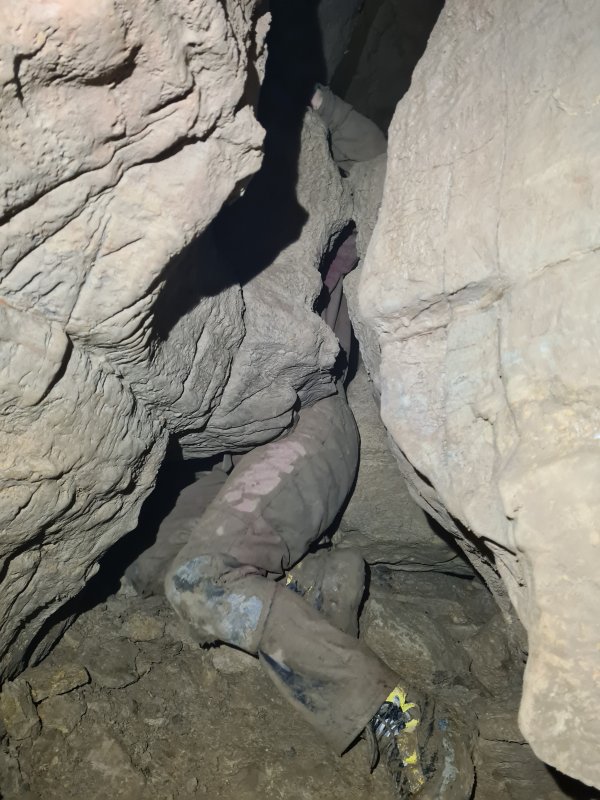 From the chamber, passages down and up to the left unite at the higher level, passing up through this vertical squeeze into a bedding. On one side is a loose route back down to the chamber, but on the other side is a bedding crawl, which is the way on.
Modelling by Gareth
From the chamber, passages down and up to the left unite at the higher level, passing up through this vertical squeeze into a bedding. On one side is a loose route back down to the chamber, but on the other side is a bedding crawl, which is the way on.
Modelling by Gareth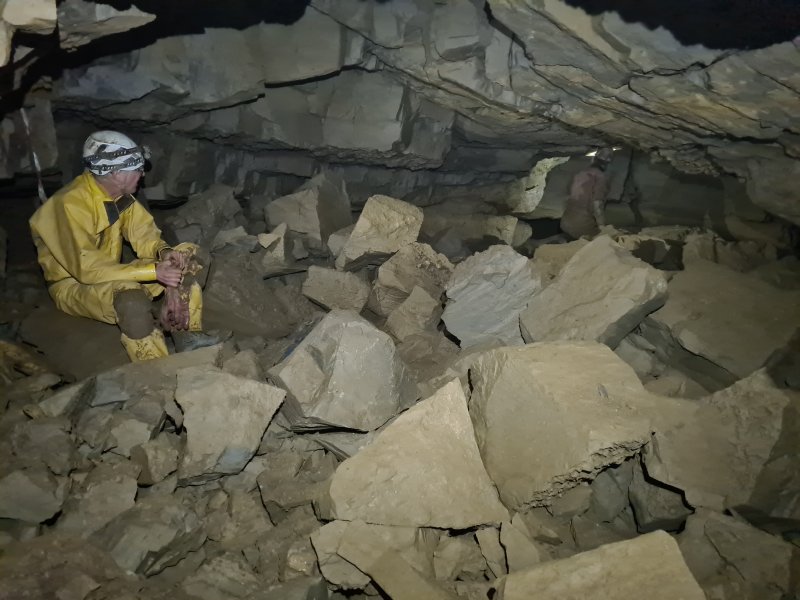 The bedding crawl, seen on the left here, enters the side of this much larger passage, which heads in both directions. The junction is not obvious, so some red and white tape has been hung over the bedding crawl. The survey does not make it clear where the name The Last Post starts, whether it applies to this impressive passage, or whether this is considered part of The Red Baron, but discussions with the surveyors/explorers suggest that this is the start of The Last Post. Therefore, that is what I call it in the description. We started by heading northwards, behind the camera.
Modelling by Pete and Gareth, lighting by Tarquin, Pete and Gareth
The bedding crawl, seen on the left here, enters the side of this much larger passage, which heads in both directions. The junction is not obvious, so some red and white tape has been hung over the bedding crawl. The survey does not make it clear where the name The Last Post starts, whether it applies to this impressive passage, or whether this is considered part of The Red Baron, but discussions with the surveyors/explorers suggest that this is the start of The Last Post. Therefore, that is what I call it in the description. We started by heading northwards, behind the camera.
Modelling by Pete and Gareth, lighting by Tarquin, Pete and Gareth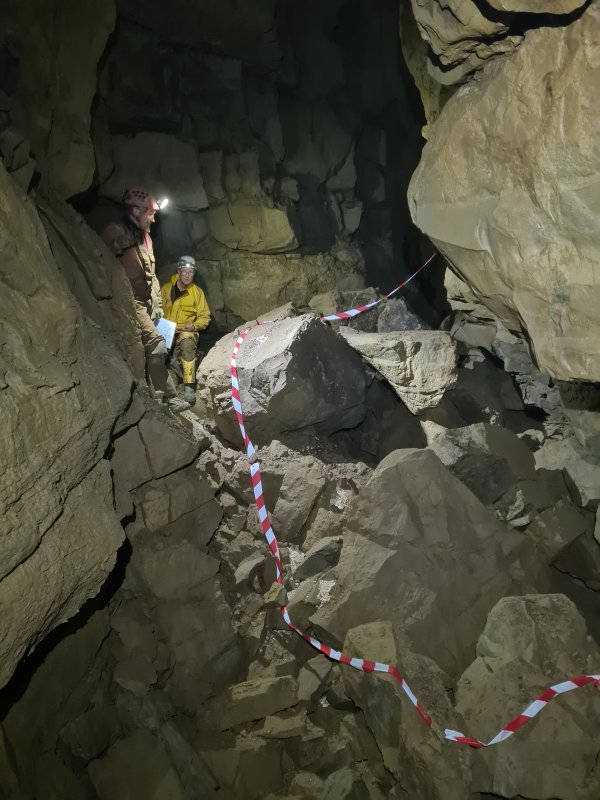 The northern branch of The Last Post immediately reaches a large junction, seen here from the side passage on the right. In the picture, the passage to the right is the continuing northern branch of The Last Post, and the passage to the left is the way in. The depression in the floor sits directly above the chokes and loose chambers at the end of The Red Baron.
Modelling by Gareth and Pete, lighting by Tarquin, Gareth and Pete
The northern branch of The Last Post immediately reaches a large junction, seen here from the side passage on the right. In the picture, the passage to the right is the continuing northern branch of The Last Post, and the passage to the left is the way in. The depression in the floor sits directly above the chokes and loose chambers at the end of The Red Baron.
Modelling by Gareth and Pete, lighting by Tarquin, Gareth and Pete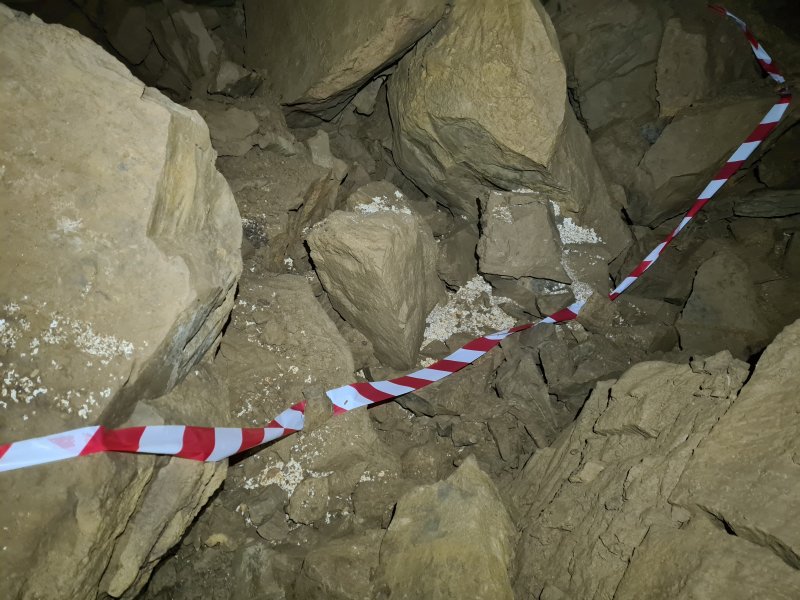 The junction is covered with a very extensive cryostal deposit.
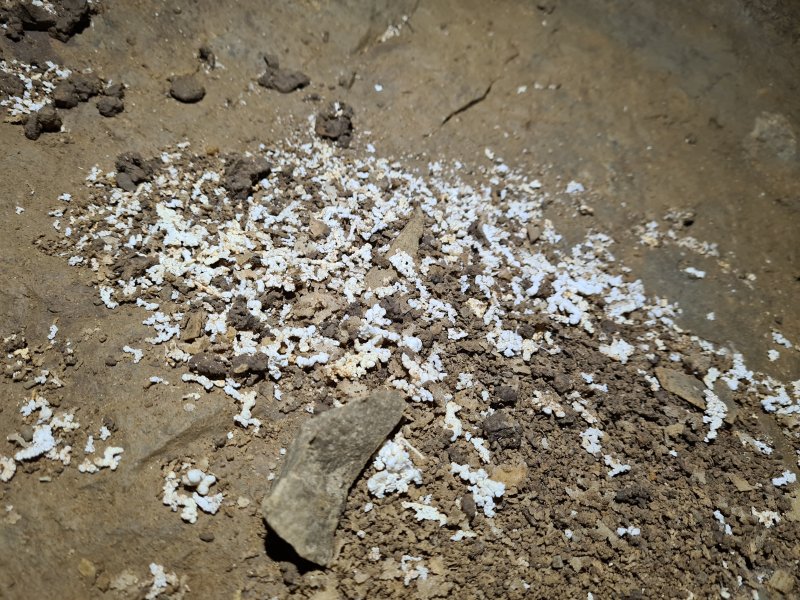 Cryostal at the junction.
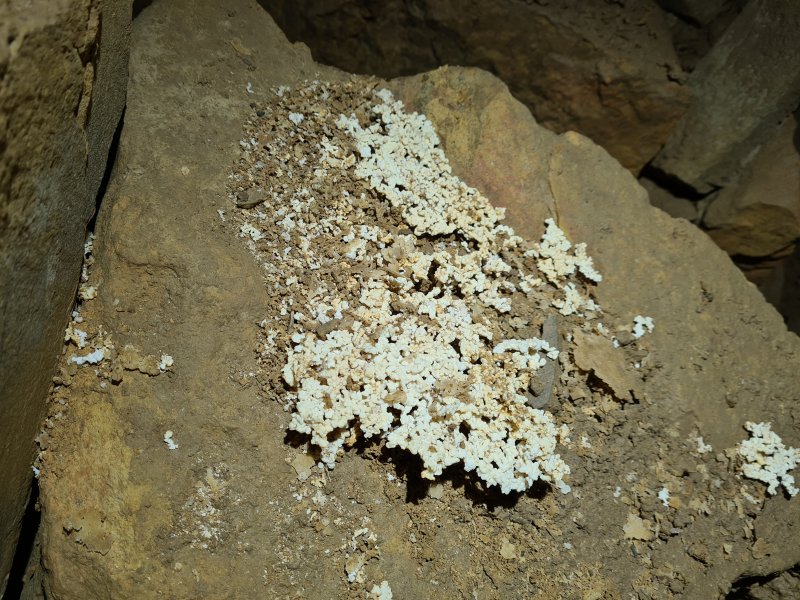 Very large pieces of cryostal. The two large conjoined pieces are each about 10 cm across.
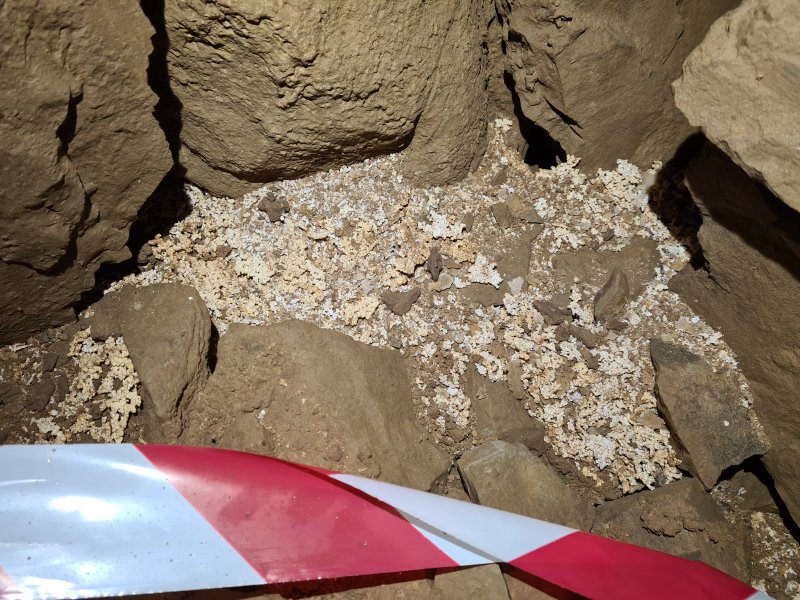 Cryostal at the junction.
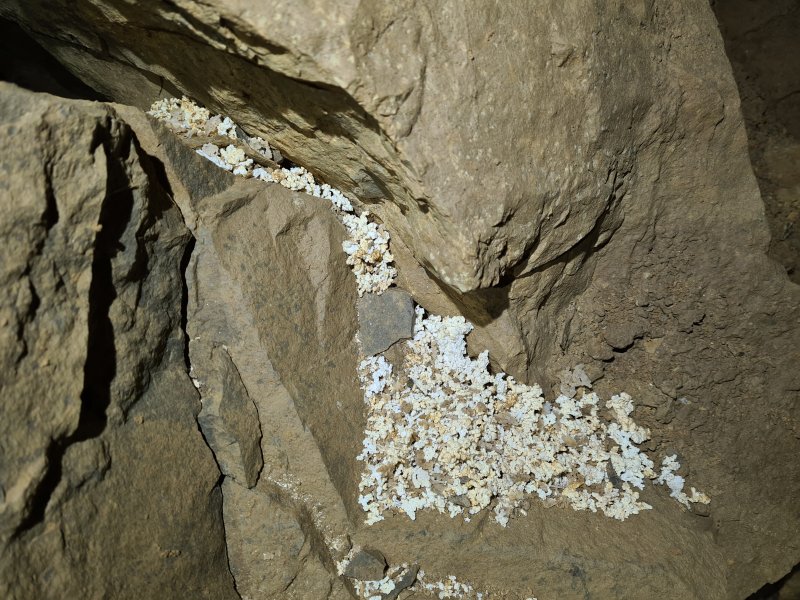 Cryostal at the junction.
 Cryostal at the junction. A large blob is visible in the top right.
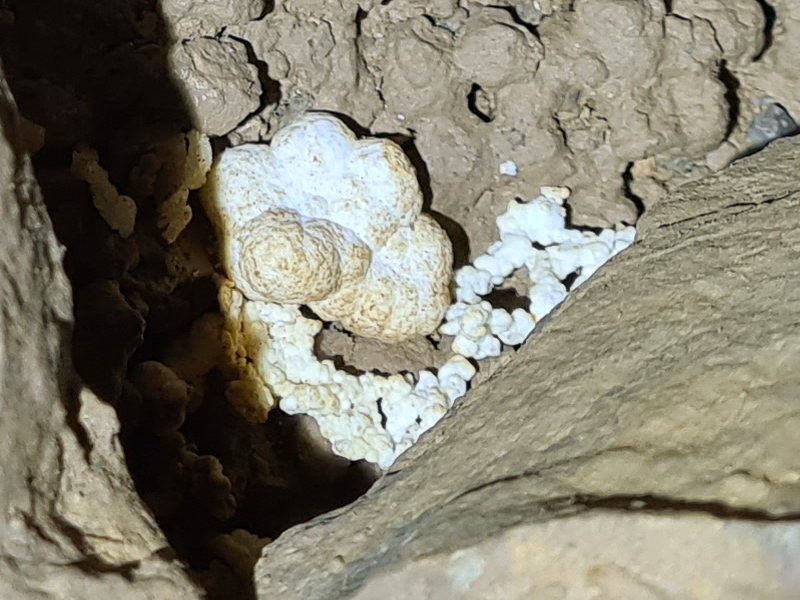 The large blob is roughly the size and shape of a piece of popcorn.
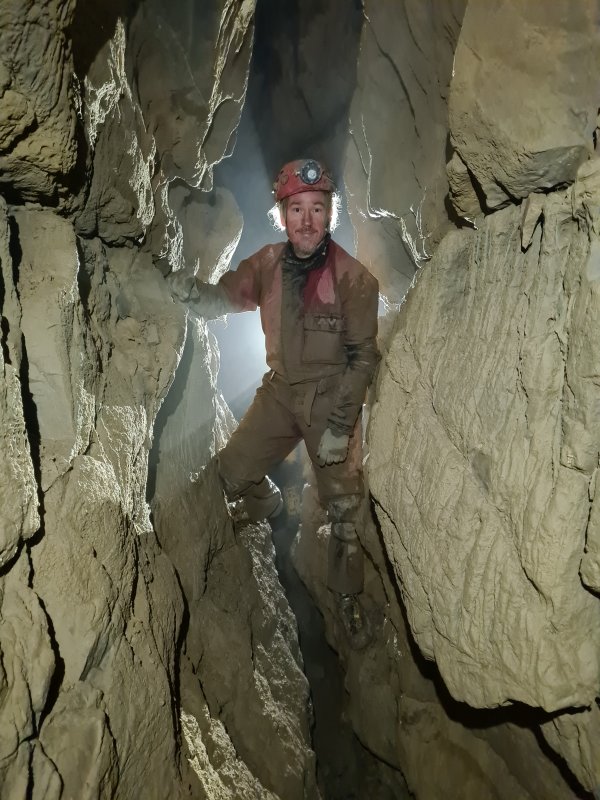 The passage then immediately reduces in size to become a narrow traverse.
Modelling by Gareth, lighting by Tarquin and Pete
The passage then immediately reduces in size to become a narrow traverse.
Modelling by Gareth, lighting by Tarquin and Pete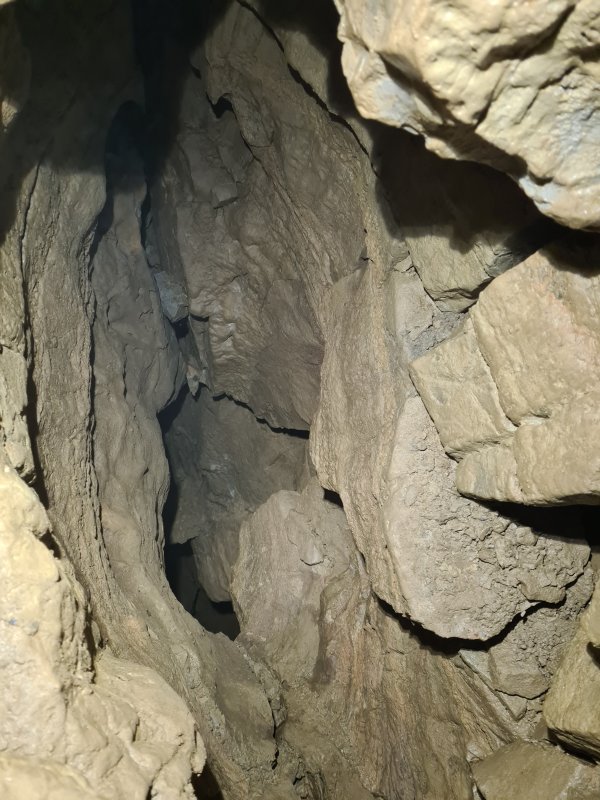 The rift ends at a 6 metre climb down to a very short piece off passage, that sits above a choke in Aces High, without any actual connection. The climb is very tight, and the bottom section bells out without many holds. We did not risk climbing down, as even though the survey claims it to be a climb, it looked far too easy to fall, and be unable to climb back up.
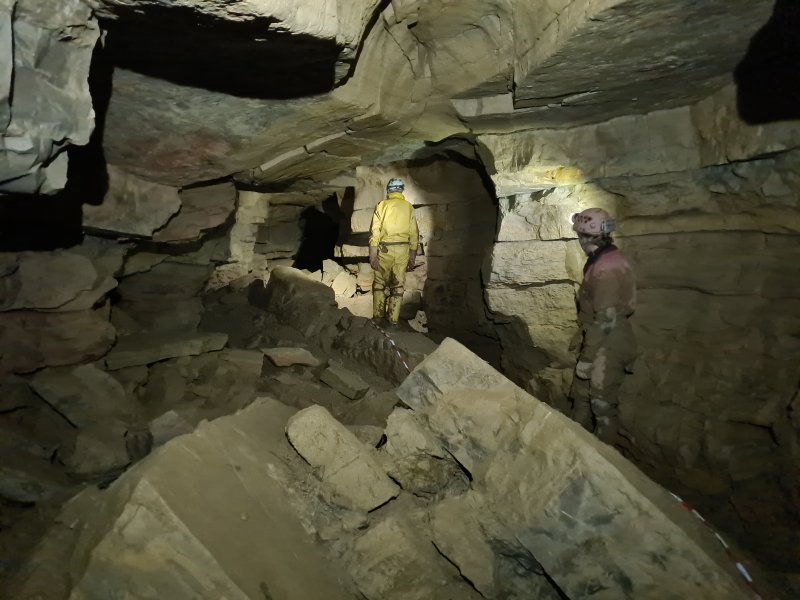 The main passage of The Last Post continuing northwards.
Modelling by Gareth and Pete, lighting by Tarquin, Gareth and Pete
The main passage of The Last Post continuing northwards.
Modelling by Gareth and Pete, lighting by Tarquin, Gareth and Pete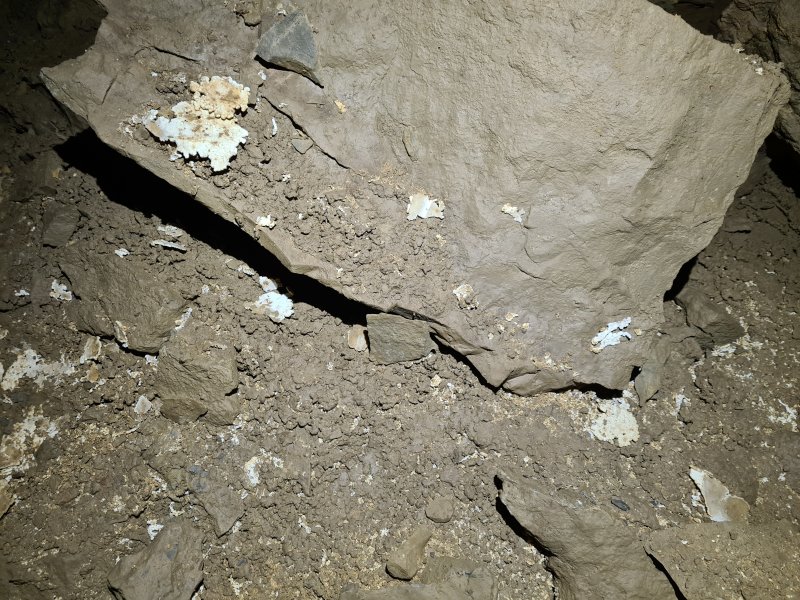 Very large cryostal flakes in the northern branch of The Last Post.
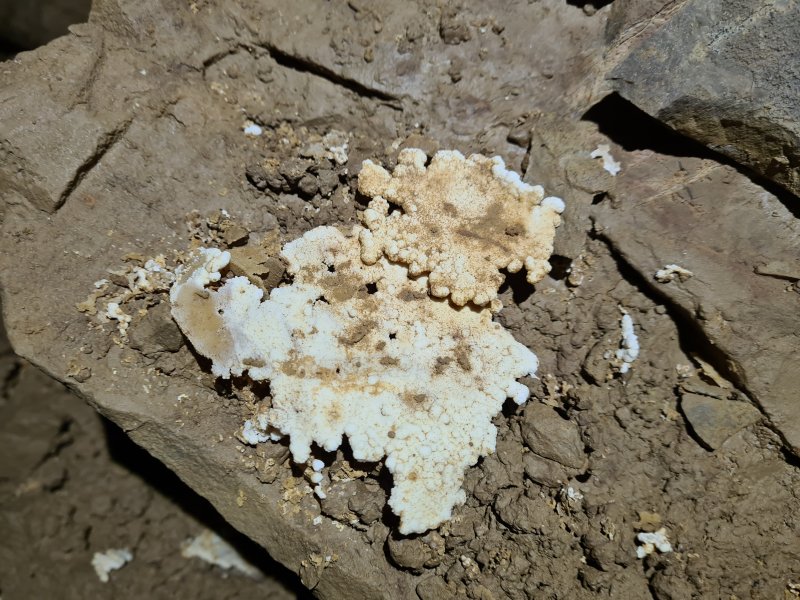 The two largest flakes. The larger one is about 9 cm long.
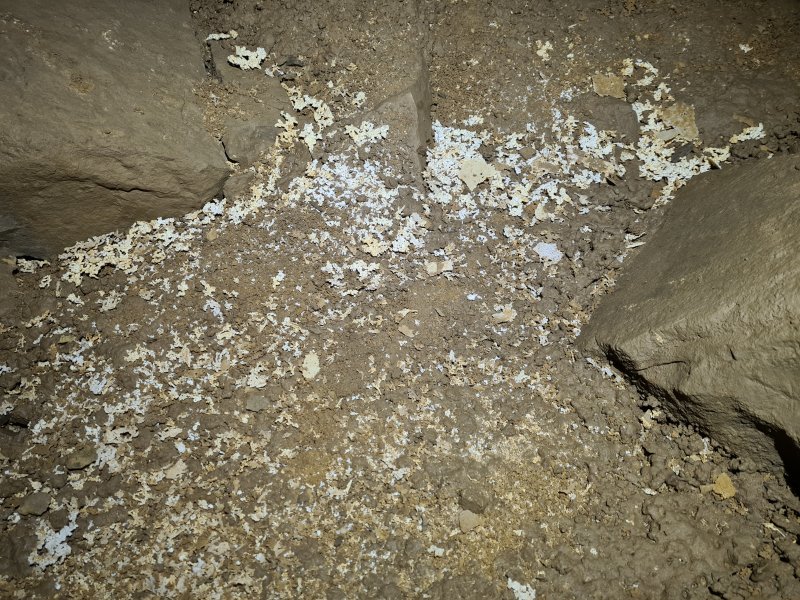 Cryostal in the passage.
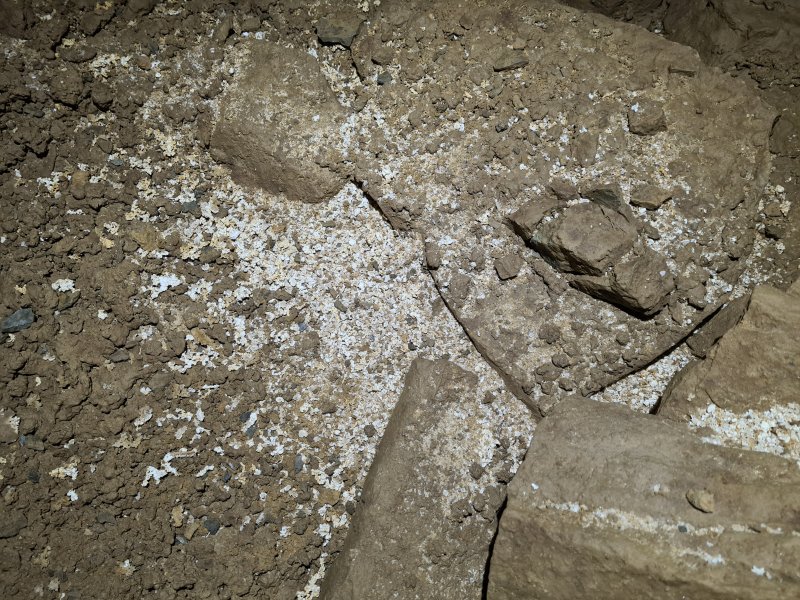 Cryostal in the passage.
 The passage turns a couple of right bends, and abruptly ends at a choked chamber. The grand passage ends, and the source of its size is not seen again. There must be a large, ongoing passage hidden by the choke. Although it appears to have very little decoration in this picture, this is actually a grotto of a sort.
Modelling by Gareth and Pete, lighting by Tarquin, Gareth and Pete
The passage turns a couple of right bends, and abruptly ends at a choked chamber. The grand passage ends, and the source of its size is not seen again. There must be a large, ongoing passage hidden by the choke. Although it appears to have very little decoration in this picture, this is actually a grotto of a sort.
Modelling by Gareth and Pete, lighting by Tarquin, Gareth and Pete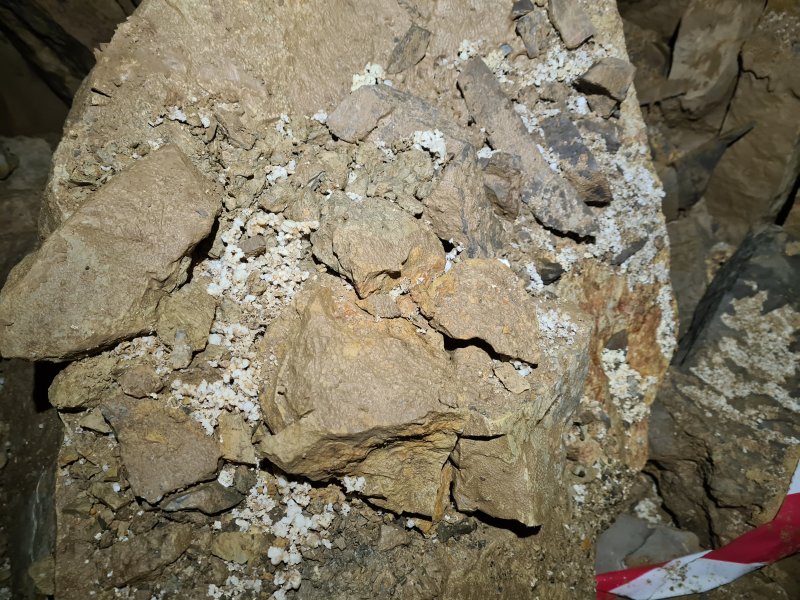 The cryostal deposit in the grotto is extensive, to the point that even though the path tries to wander through it, it is impossible to avoid stepping on some.
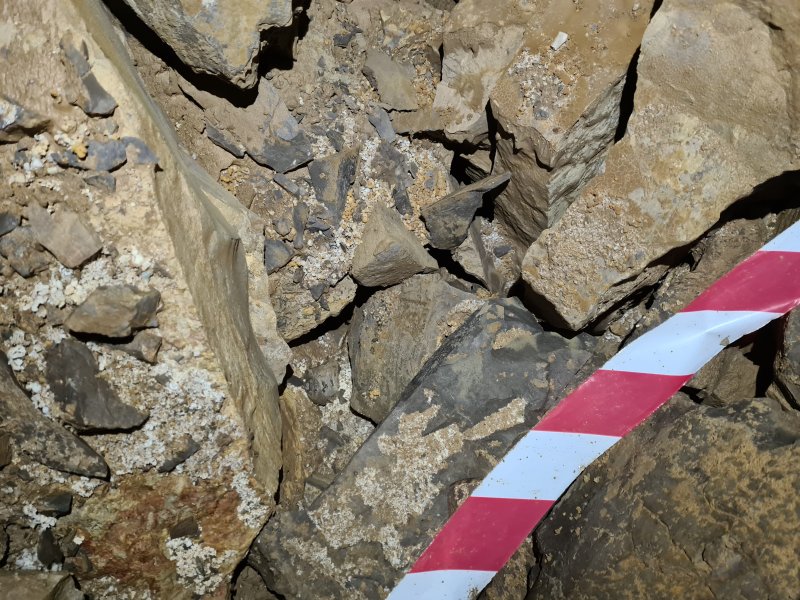 Cryostal at the start of the chamber.
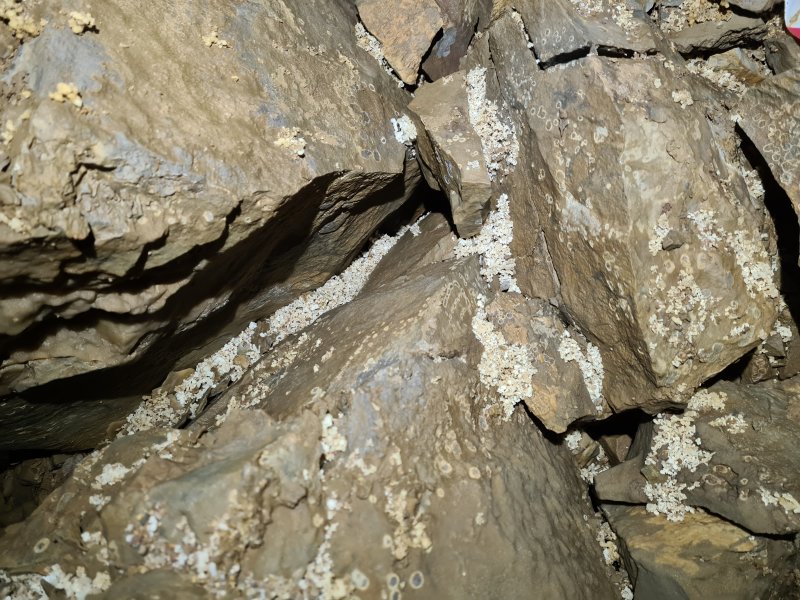 Cryostal at the start of the chamber.
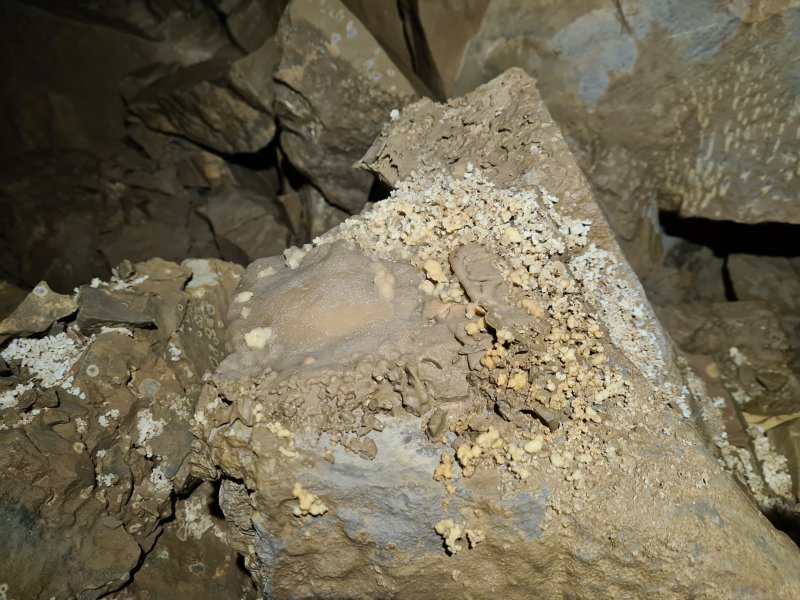 Cryostal with modern stalagmite flow on it.
 The cryostal in the middle of the chamber has a more golden, flaky appearance, like corn flakes.
 Cryostal in the middle of the chamber.
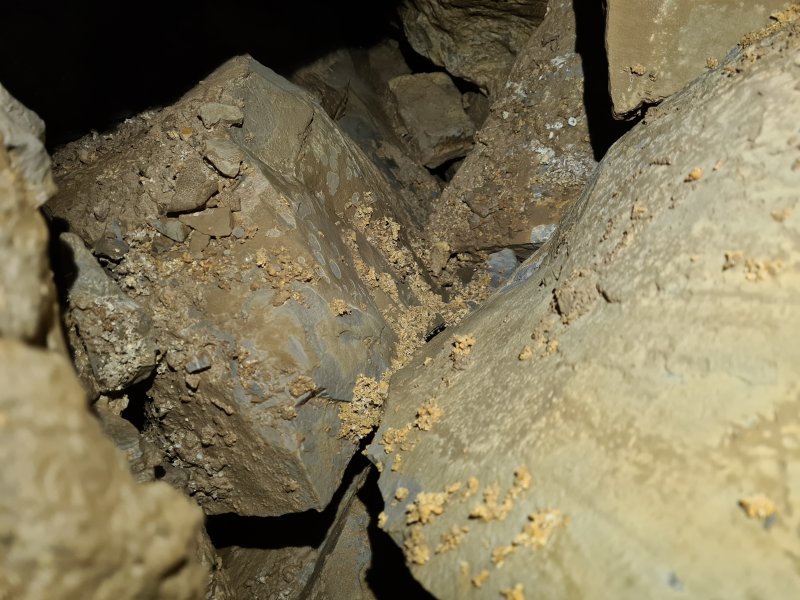 Cryostal in the middle of the chamber.
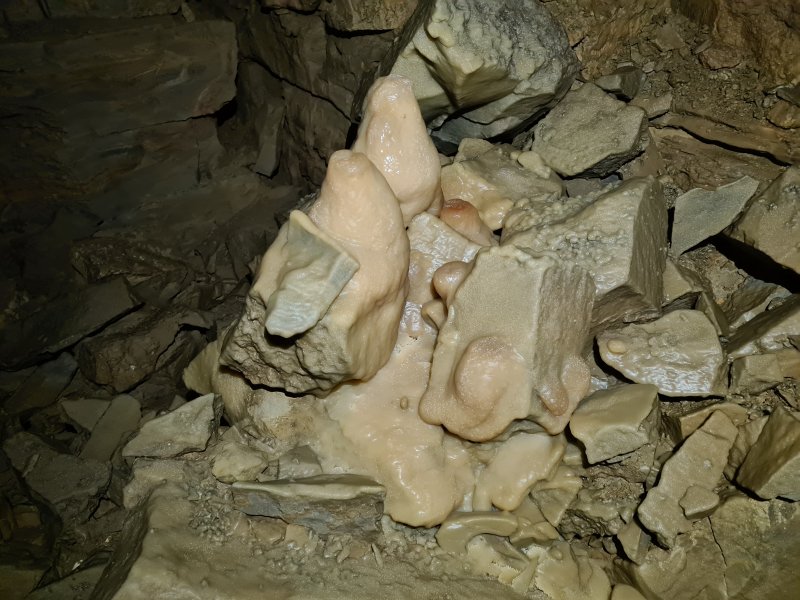 Stalagmites in the grotto.
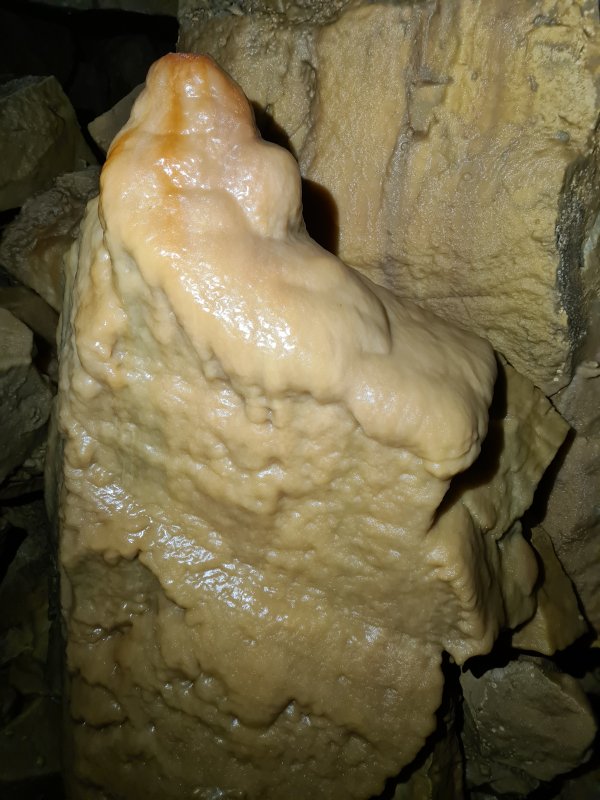 Stalagmite flow.
 Stalagmites at the back of the chamber. There is an aven here with a passage linking back to before the bends, but it is taped off.
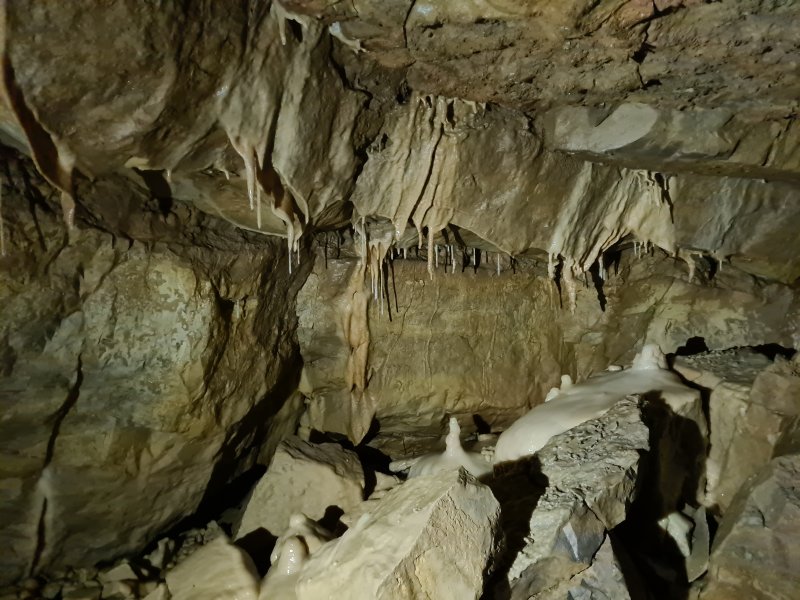 Stal on one wall.
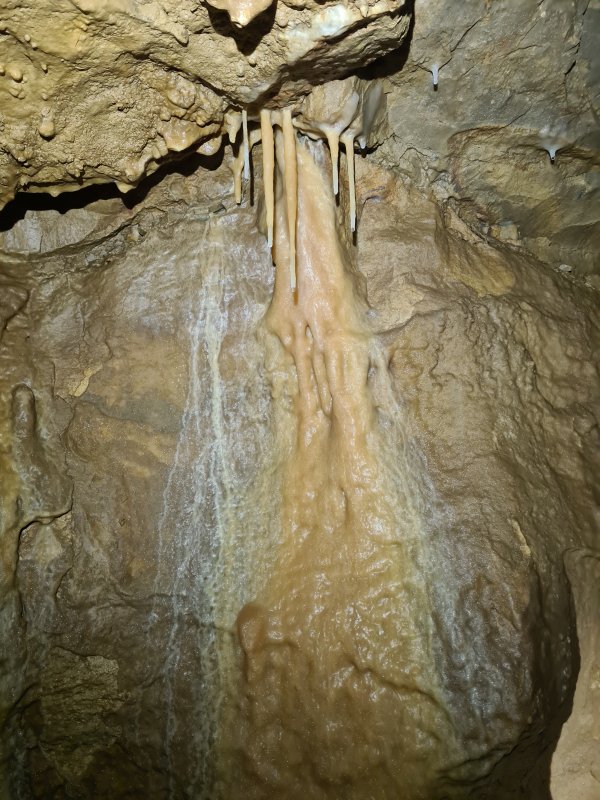 Flowstone.
 Flowstone.
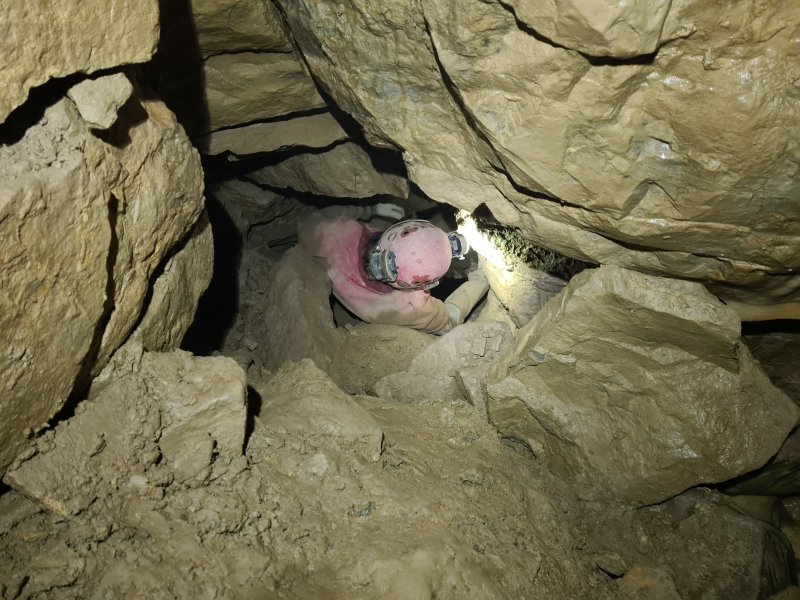 On the left side of the chamber is a steeply descending route, which drops down through a squeeze. This is reasonably tight, but can be passed in a seated position, facing the sloping ceiling.
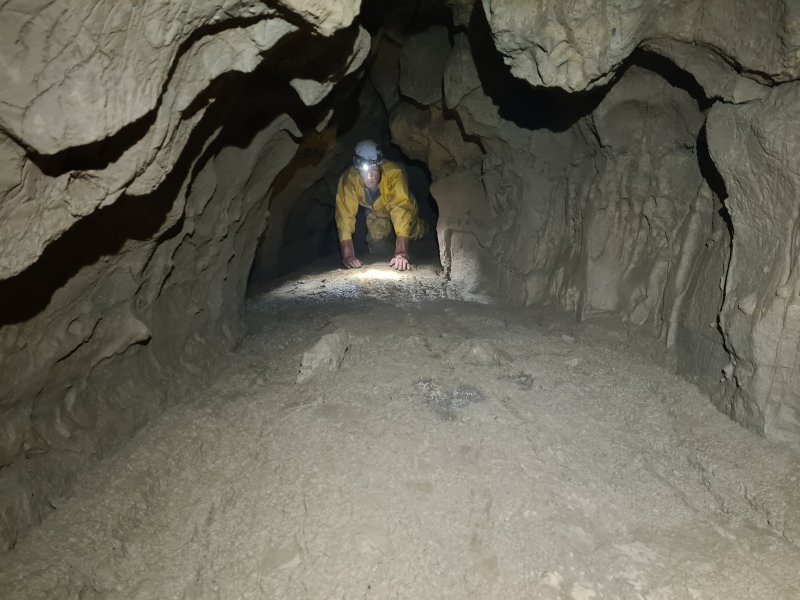 The squeeze emerges in a phreatic passage, heading northwards. This is certainly not large enough to be responsible for forming the chamber. The passage has not been taped, but it really needs it.
Modelling by Pete, lighting by Tarquin and Pete
The squeeze emerges in a phreatic passage, heading northwards. This is certainly not large enough to be responsible for forming the chamber. The passage has not been taped, but it really needs it.
Modelling by Pete, lighting by Tarquin and Pete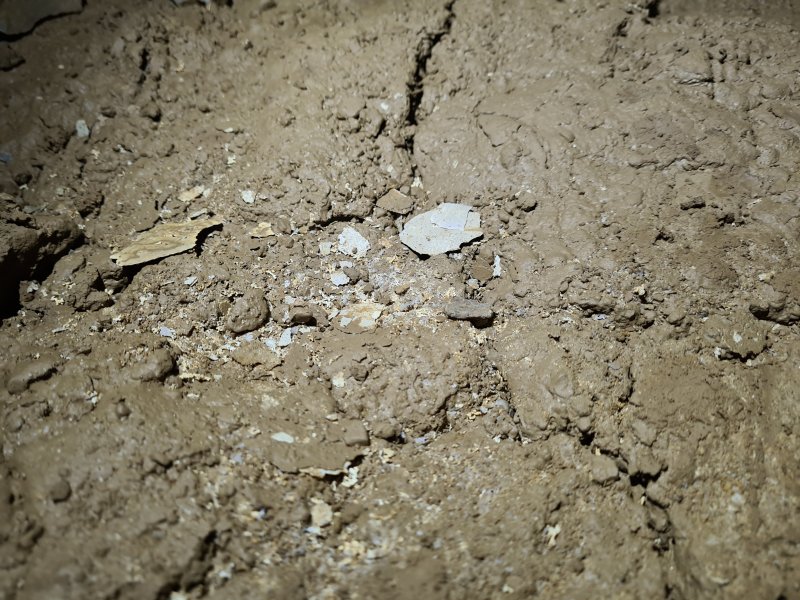 Cryostal in the passage.
 Calcite splatter formation.
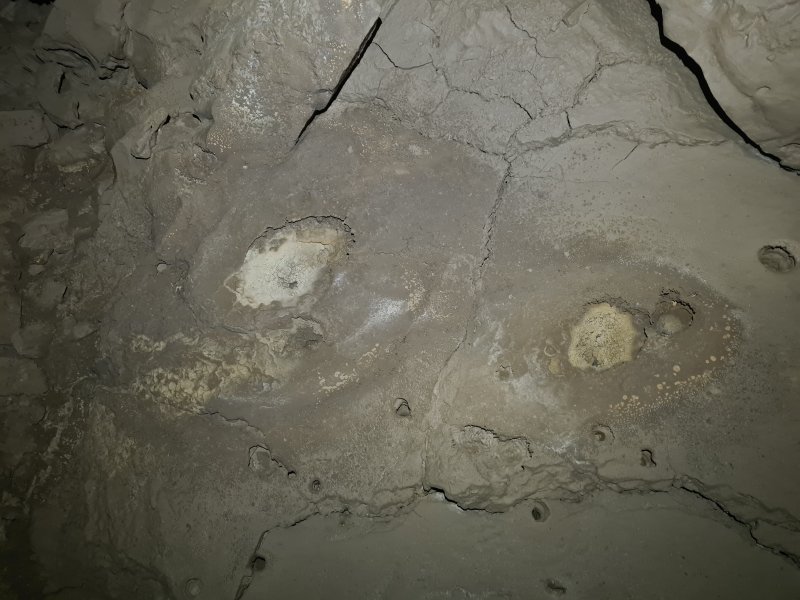 The passage reaches a junction with these mud and calcite drip pocket formations.
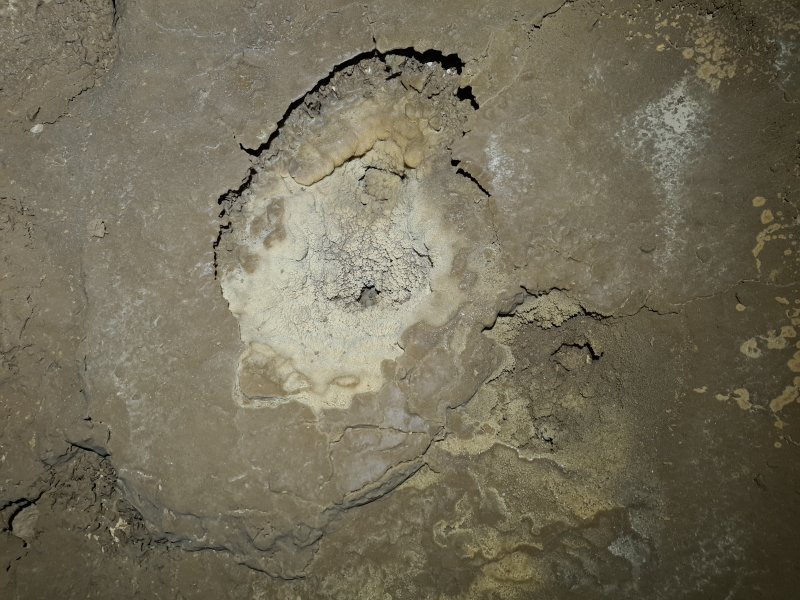 Detail of the drip formations.
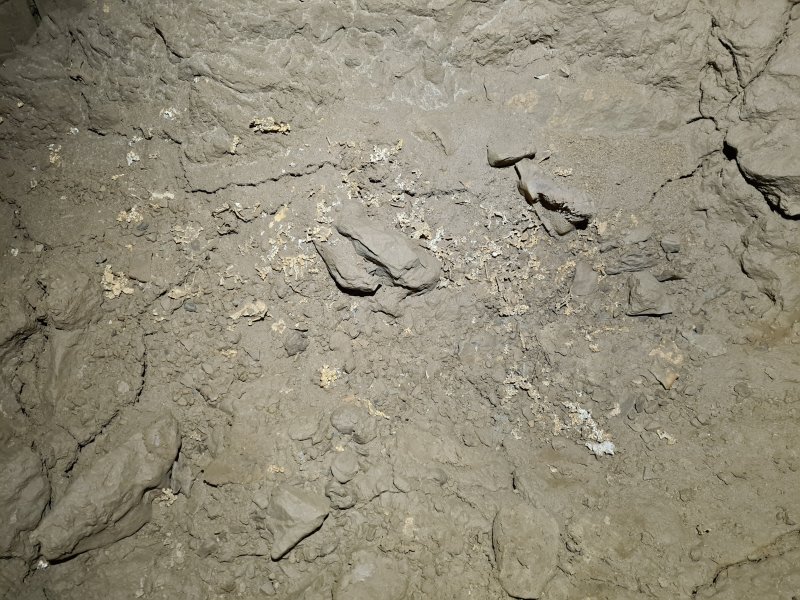 Cryostal at the junction.
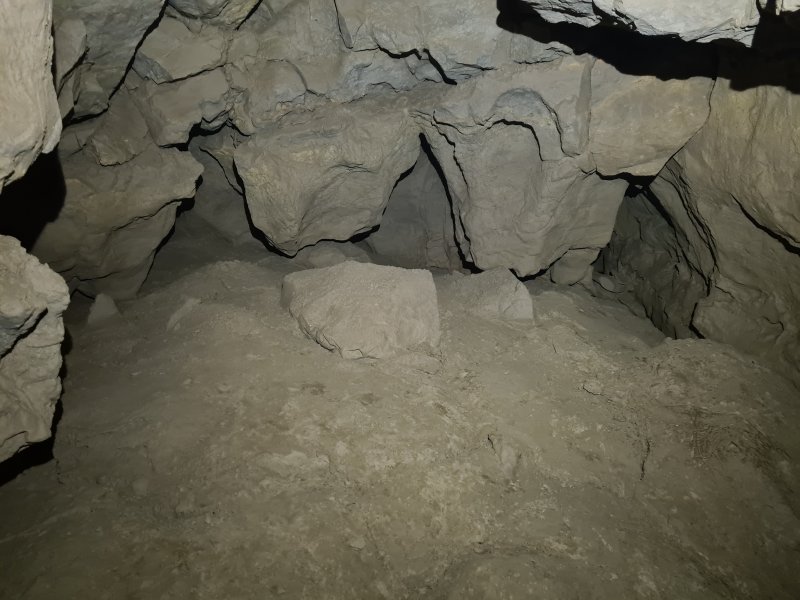 From the junction, the northwards trending passage marks the northern-most point of the entire cave. It ends almost immediately like this, with a crown-shaped rock formation to mark your achievement at having reached it. The right-hand spike of the crown is a very narrow rift, and the passage can be seen to continue for a few metres, to where it seems to enlarge again. This has never been dug.
 From the junction, the passage to the left is much longer, but has these extremely vulnerable cryostal formations on the floor, coated in mud. They just look like mud flakes, and are easy to miss, but they are right where you want to put your feet.
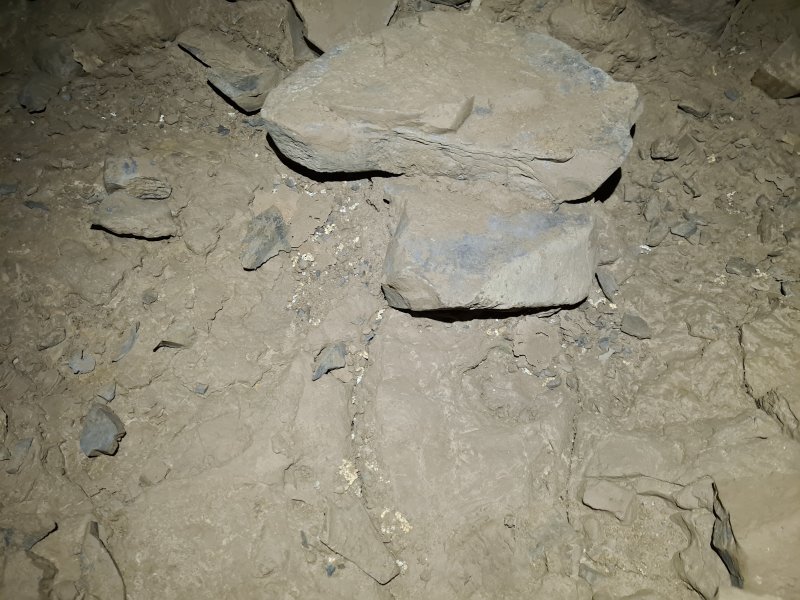 Cryostal near the flakes.
 Though it initially feels like it heads northeast, the passage actually heads southeast, back towards known cave. Most of it is walking, with a couple of low arches.
Modelling by Gareth, lighting by Tarquin and Gareth.
Though it initially feels like it heads northeast, the passage actually heads southeast, back towards known cave. Most of it is walking, with a couple of low arches.
Modelling by Gareth, lighting by Tarquin and Gareth.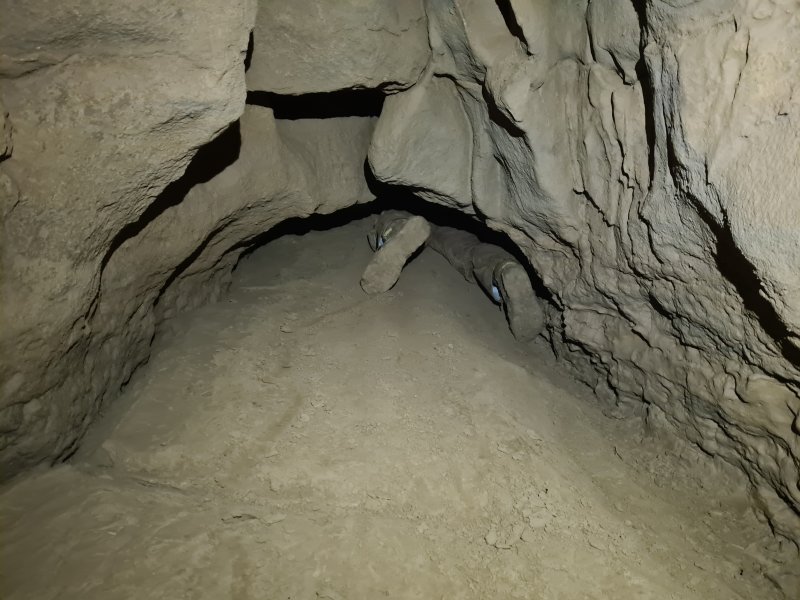 The passage ends abruptly at a low crawl, which immediately becomes too low. This points towards a silted alcove in the other branch of The Last Post.
Modelling by Gareth
The passage ends abruptly at a low crawl, which immediately becomes too low. This points towards a silted alcove in the other branch of The Last Post.
Modelling by Gareth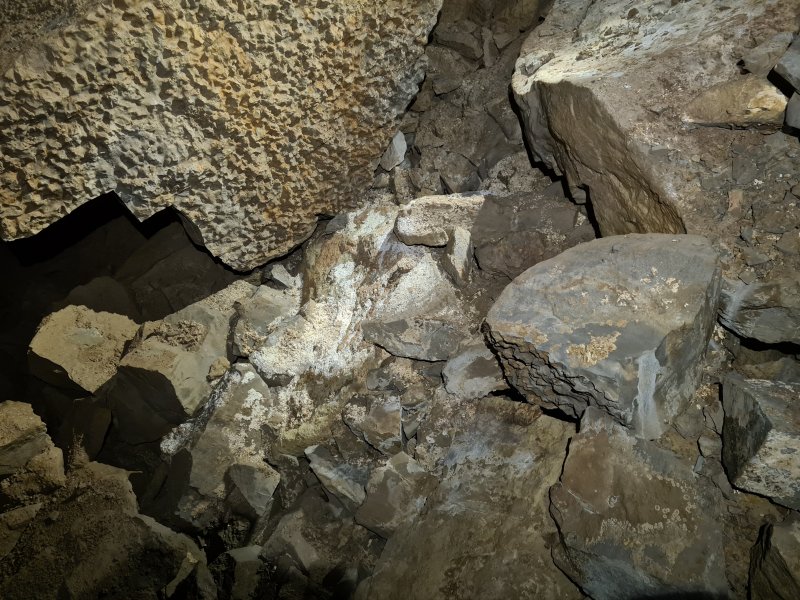 Instead, we headed in the other direction along The Last Post, which is much more impressive. The first corner has a blind side passage, and this large pile of cryostal. The knobbly textured rock is exposed stylolites, a pressure effect causing the limestone to dissolve, leaving behind only the sediments that were inside the limestone. This forms a weakness, where the limestone can split apart, dropping the rock from the ceiling.
Lighting by Tarquin, Pete and Gareth
Instead, we headed in the other direction along The Last Post, which is much more impressive. The first corner has a blind side passage, and this large pile of cryostal. The knobbly textured rock is exposed stylolites, a pressure effect causing the limestone to dissolve, leaving behind only the sediments that were inside the limestone. This forms a weakness, where the limestone can split apart, dropping the rock from the ceiling.
Lighting by Tarquin, Pete and Gareth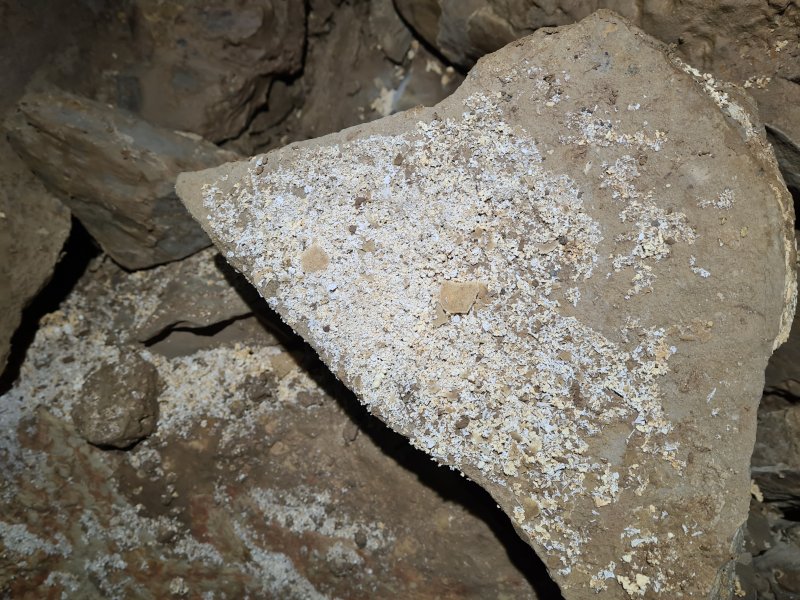 Cryostal.
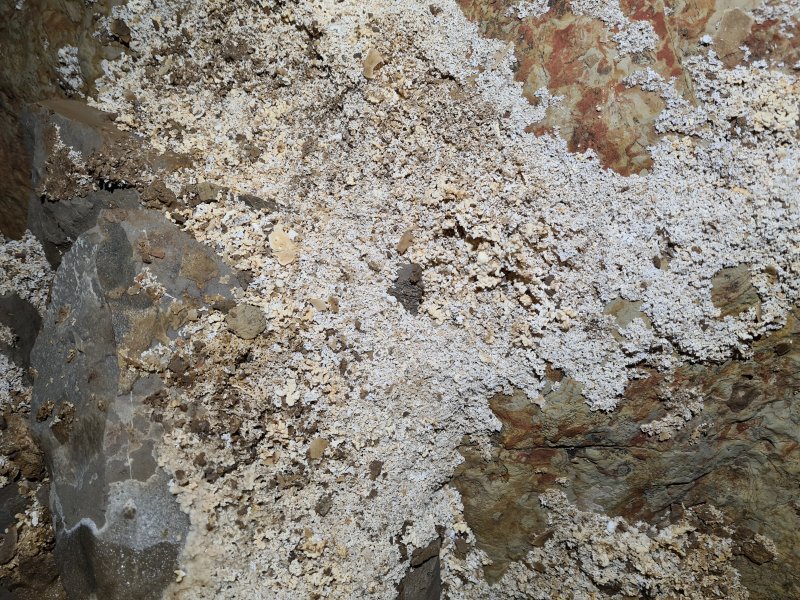 Cryostal.
Lighting by Tarquin, Gareth and Pete
Cryostal.
Lighting by Tarquin, Gareth and Pete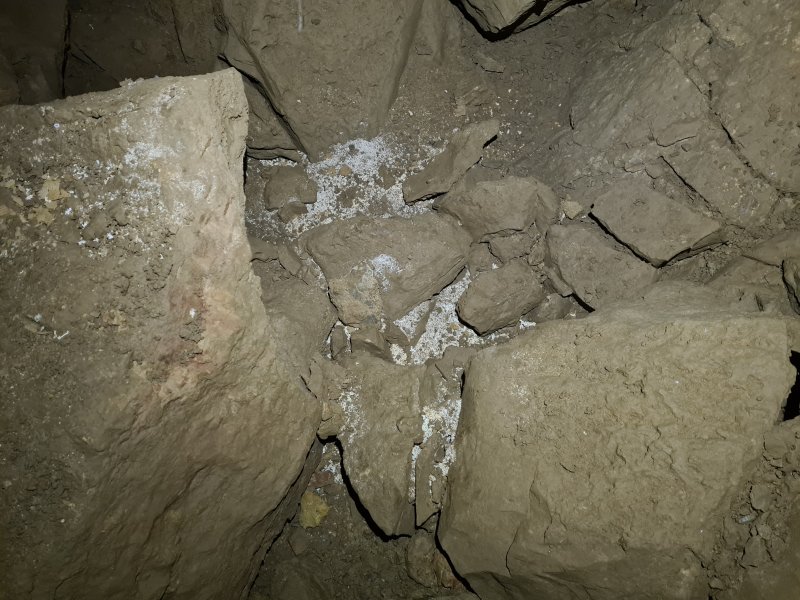 The passage narrows to a rift, where the cryostal continues.
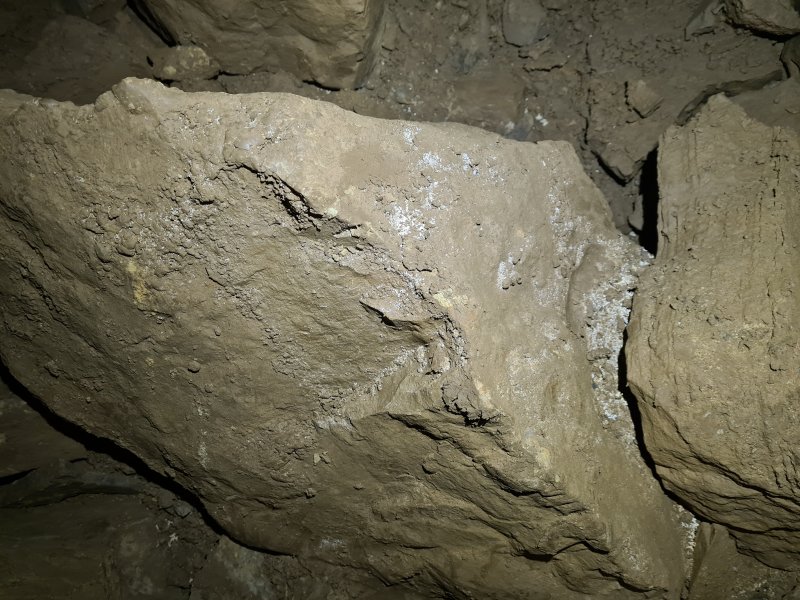 Cryostal.
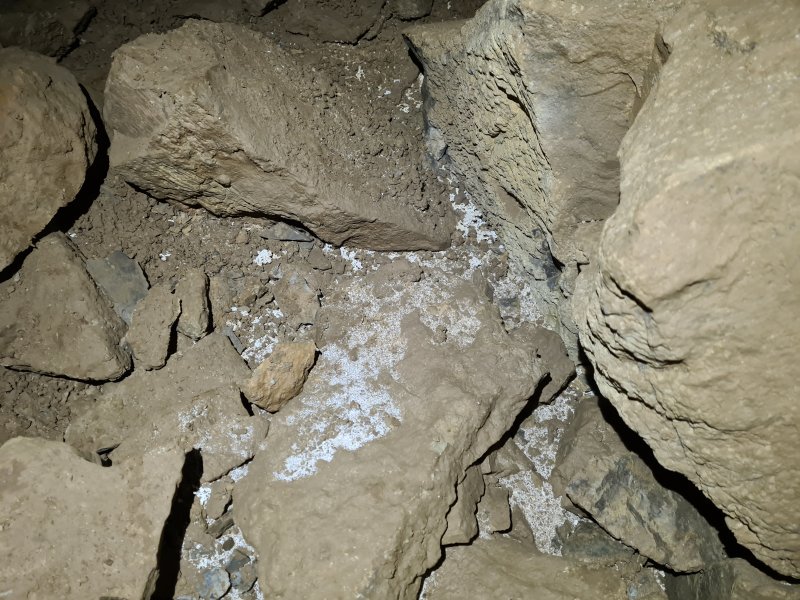 Cryostal.
 At a junction, the passage ahead chokes, and the way on is this narrower rift to the left, which bypasses the choke.
Modelling by Pete, lighting by Tarquin and Pete
At a junction, the passage ahead chokes, and the way on is this narrower rift to the left, which bypasses the choke.
Modelling by Pete, lighting by Tarquin and Pete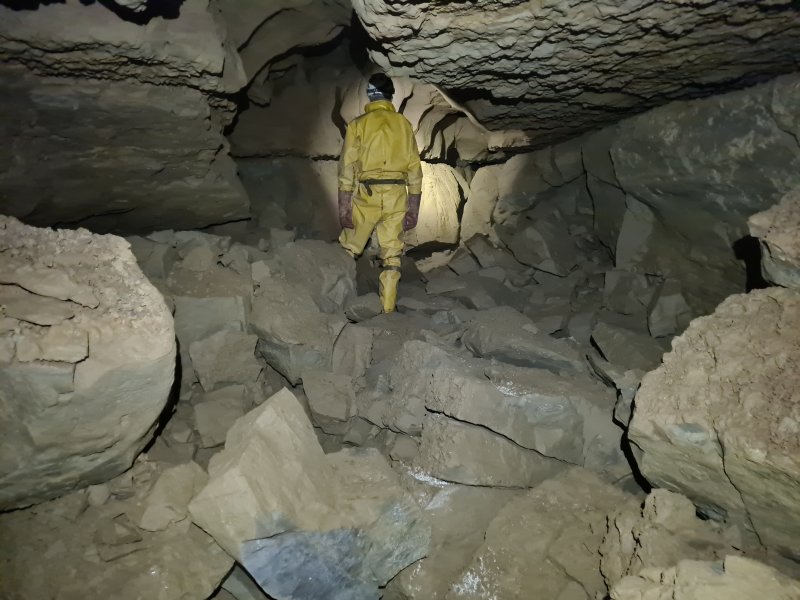 The rift breaks out into this unexpectedly large chamber. The previous passage's choke forms the right wall of this chamber. Through the choked floor is a visual connection to another passage, which explains where the size comes from, and how come the passages leading out of this chamber are so small. The obvious rift ahead immediately pinches out, and the way on is in the left wall beside it.
Modelling by Pete, lighting by Tarquin and Pete
The rift breaks out into this unexpectedly large chamber. The previous passage's choke forms the right wall of this chamber. Through the choked floor is a visual connection to another passage, which explains where the size comes from, and how come the passages leading out of this chamber are so small. The obvious rift ahead immediately pinches out, and the way on is in the left wall beside it.
Modelling by Pete, lighting by Tarquin and Pete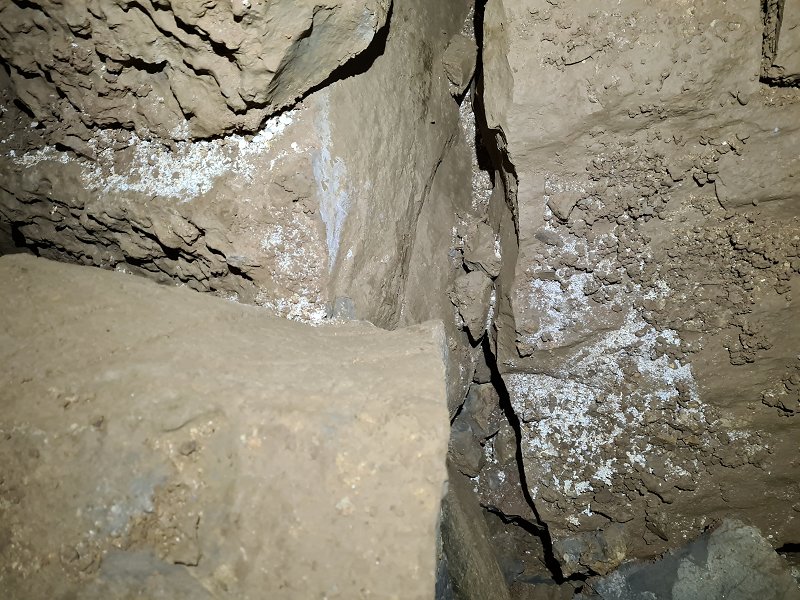 Cryostal in the middle chamber.
 The way out of the chamber is a narrow crawl in the left wall of the chamber. When you look at it, you question if the way on could really be that small. Yes, that's it! We spent some time gardening rocks out of it, to make the worst part a lot easier.
Modelling by Gareth, lighting by Tarquin and Gareth
The way out of the chamber is a narrow crawl in the left wall of the chamber. When you look at it, you question if the way on could really be that small. Yes, that's it! We spent some time gardening rocks out of it, to make the worst part a lot easier.
Modelling by Gareth, lighting by Tarquin and Gareth The start of the crawl is the narrowest part. When we got here, the bottom of this was large rocks, which made it even smaller.
Modelling by Pete, lighting by Tarquin and Pete
The start of the crawl is the narrowest part. When we got here, the bottom of this was large rocks, which made it even smaller.
Modelling by Pete, lighting by Tarquin and Pete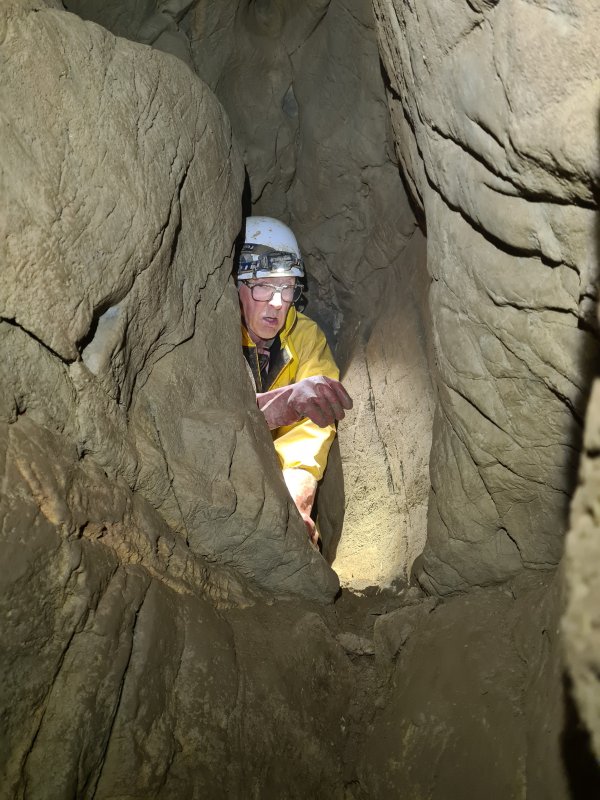 Near the end is a perfectly placed narrow rift in the floor, with a blind hole. It is the perfect place to accidentally throw the tackle bags and cameras that you have been throwing ahead of you. They are almost impossible to reach if you do so. This is how the crawl ends, a lot larger than the start.
Modelling by Pete, lighting by Tarquin and Pete
Near the end is a perfectly placed narrow rift in the floor, with a blind hole. It is the perfect place to accidentally throw the tackle bags and cameras that you have been throwing ahead of you. They are almost impossible to reach if you do so. This is how the crawl ends, a lot larger than the start.
Modelling by Pete, lighting by Tarquin and Pete The crawl emerges at the top of a climb, which proved to be quite tricky on the way up, with very few holds where you need them. Pete fell off the top of the climb, landing on the platform in front of his chest in this picture, about to nose-dive further down. He was stopped only because I had stood on the ledge in case he wanted me to act as a foothold, and I managed to push him back onto the ledge. Treat this one with caution. At floor level is a low passage heading back under the climb, the top of which can be seen at the bottom of this picture.
Modelling by Pete and Gareth, lighting by Tarquin, Pete and Gareth
The crawl emerges at the top of a climb, which proved to be quite tricky on the way up, with very few holds where you need them. Pete fell off the top of the climb, landing on the platform in front of his chest in this picture, about to nose-dive further down. He was stopped only because I had stood on the ledge in case he wanted me to act as a foothold, and I managed to push him back onto the ledge. Treat this one with caution. At floor level is a low passage heading back under the climb, the top of which can be seen at the bottom of this picture.
Modelling by Pete and Gareth, lighting by Tarquin, Pete and Gareth Heading back under the climb is this passage, with distinctively etched walls. It starts off as a low crawl, but most of it is stooping sized. It ends at a choke with a visual connection up into the previous chamber.
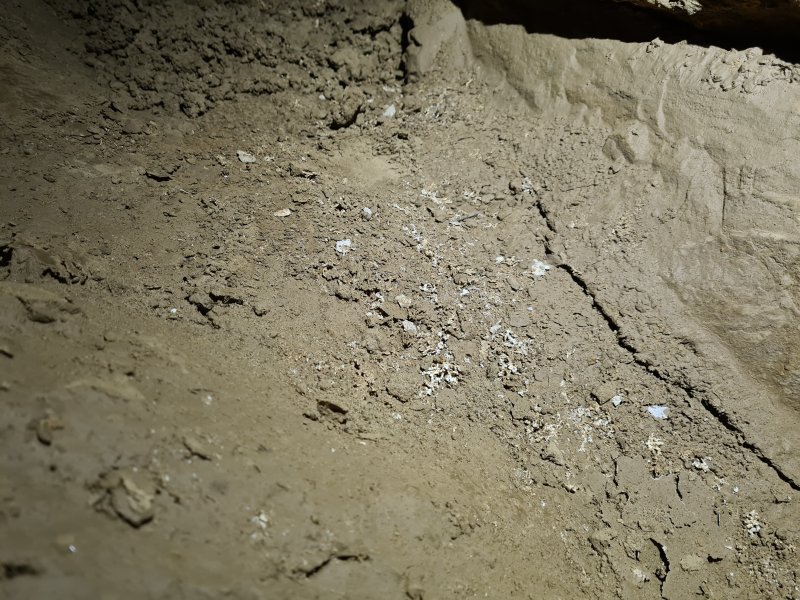 Meagre cryostal deposit at the end of the etched passage
 The climb lands at the start of this grand rift passage. It is possible that the name The Last Post should start at this point. Either way, this passage is a suitable reward for having made it this far, and there are no further obstacles before the end.
Modelling by Pete and Gareth, lighting by Tarquin, Pete and Gareth
The climb lands at the start of this grand rift passage. It is possible that the name The Last Post should start at this point. Either way, this passage is a suitable reward for having made it this far, and there are no further obstacles before the end.
Modelling by Pete and Gareth, lighting by Tarquin, Pete and Gareth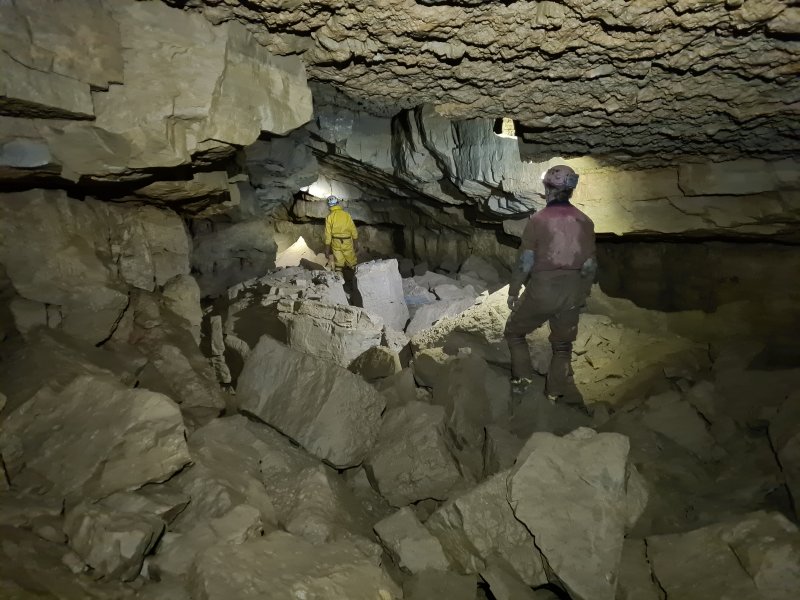 At a corner, the passage intersects a fault, and becomes much wider.
Modelling by Gareth and Pete, lighting by Tarquin, Gareth and Pete
At a corner, the passage intersects a fault, and becomes much wider.
Modelling by Gareth and Pete, lighting by Tarquin, Gareth and Pete To the right is an incredibly tight rift, the widest parts of which are about 8 inches (20 cm). Someone has been crazy enough to push this for 25 metres.
 The Last Post then shrinks back to a smaller rift.
Modelling by Pete, lighting by Tarquin and Pete
The Last Post then shrinks back to a smaller rift.
Modelling by Pete, lighting by Tarquin and Pete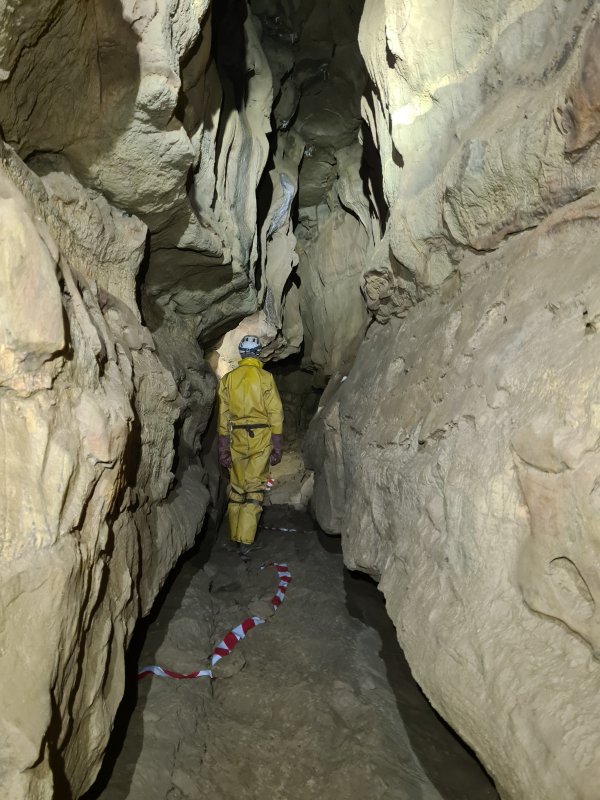 Getting taller.
Modelling by Pete, lighting by Tarquin, Gareth and Pete
Getting taller.
Modelling by Pete, lighting by Tarquin, Gareth and Pete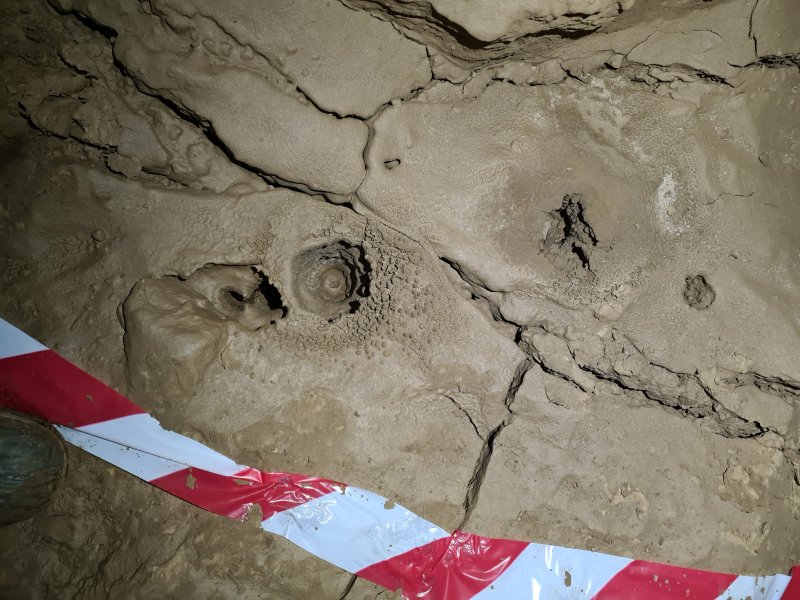 Drip pockets.
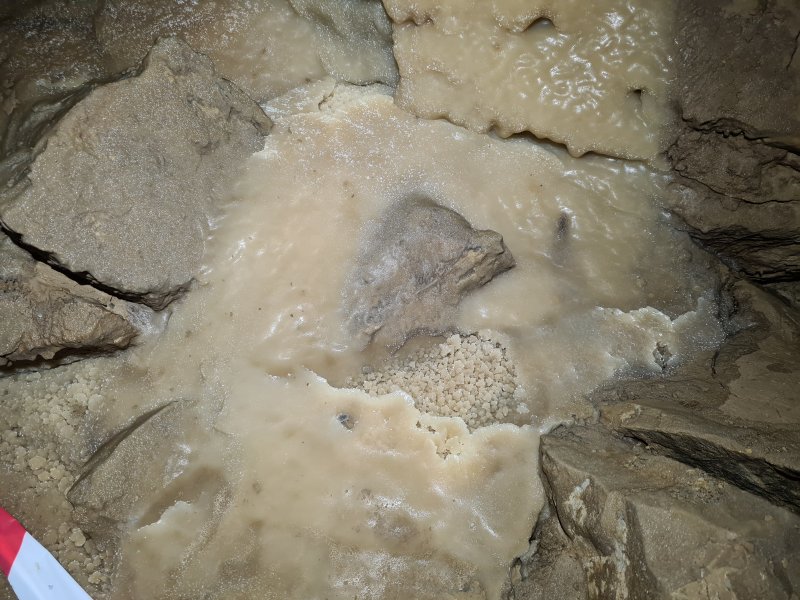 Calcite flow.
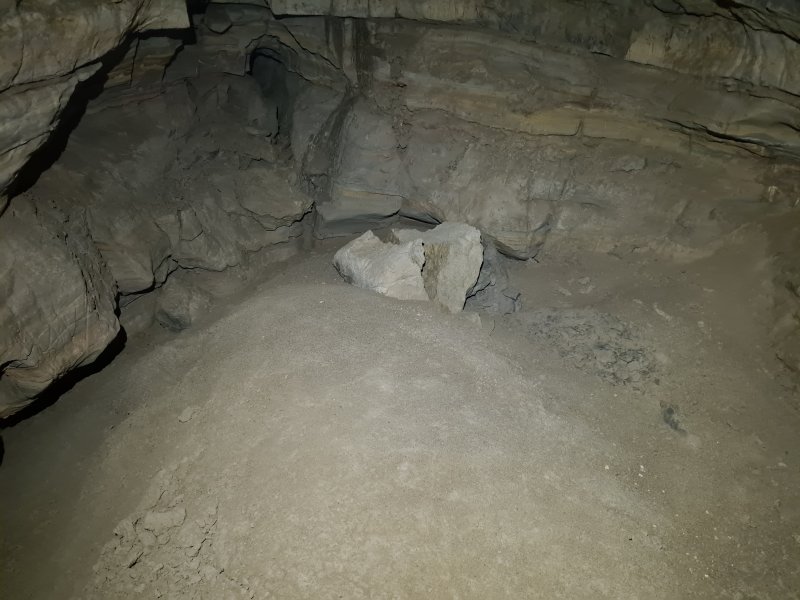 Just as the passage starts to grow, a low side passage on the left descends to a blind chamber, which is taped off to protect the mud floor. This is the silt-filled continuation of the major side passage (with the mousetrap) at the end of The Red Baron.
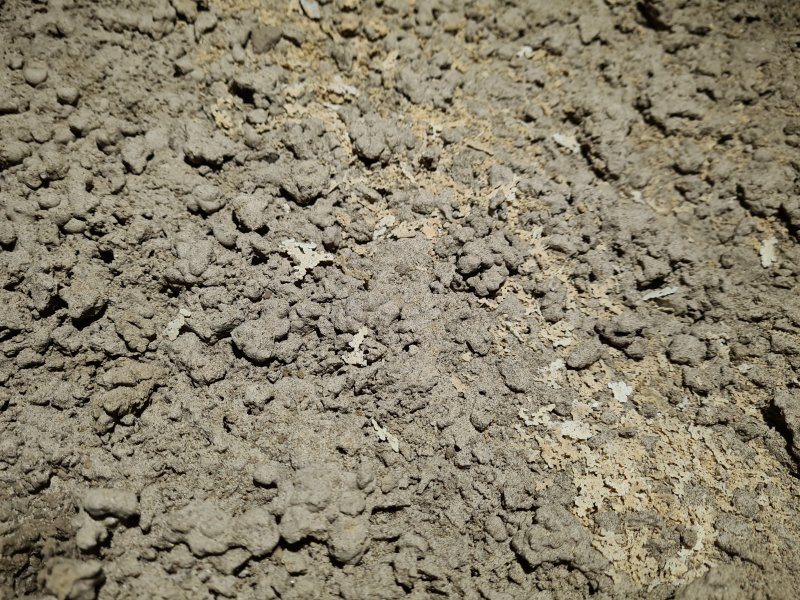 Cryostal in the blind chamber.
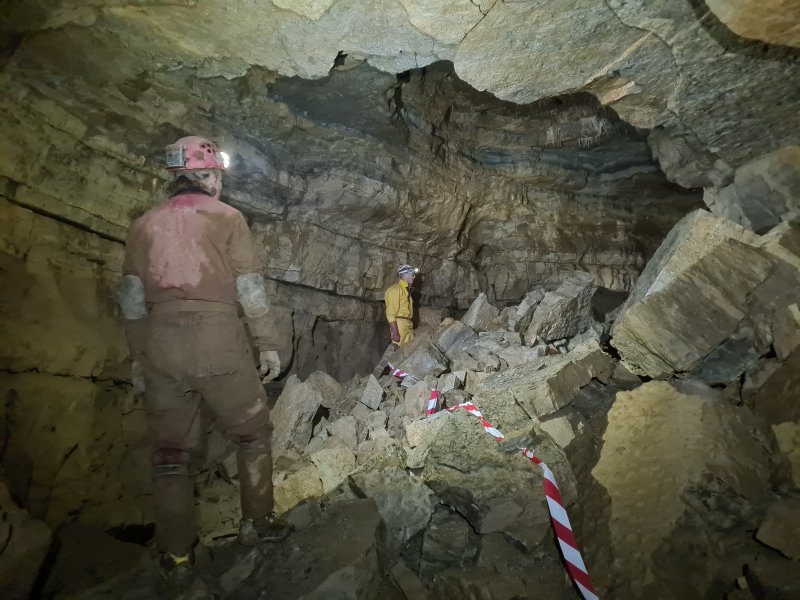 The Last Post rapidly grows to a very grand size.
Modelling by Gareth and Pete, lighting by Tarquin, Gareth and Pete
The Last Post rapidly grows to a very grand size.
Modelling by Gareth and Pete, lighting by Tarquin, Gareth and Pete Stalactites in the grotto at the start of the passage.
Lighting by Tarquin, Gareth and Pete
Stalactites in the grotto at the start of the passage.
Lighting by Tarquin, Gareth and Pete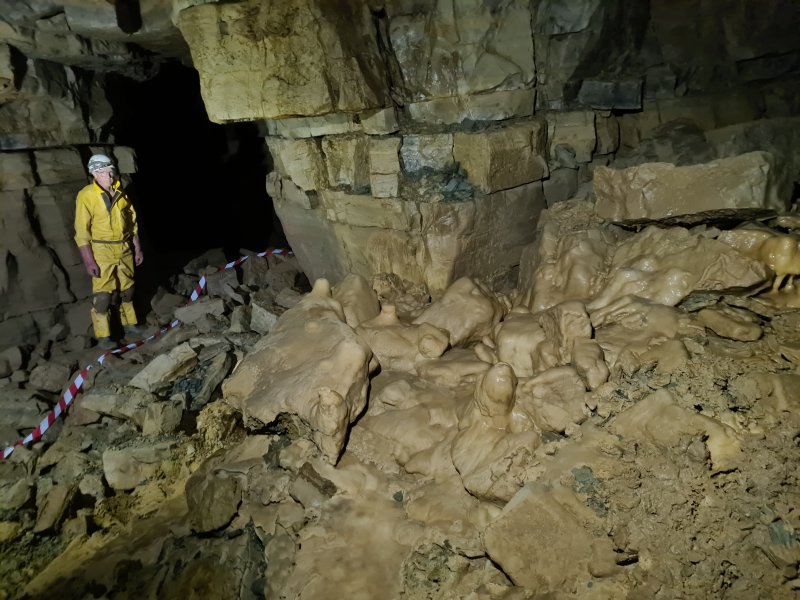 The grotto contains a large patch of flowstone with some small stalagmites (labelled as "bosses" on the survey).
Modelling by Pete, lighting by Tarquin and Gareth
The grotto contains a large patch of flowstone with some small stalagmites (labelled as "bosses" on the survey).
Modelling by Pete, lighting by Tarquin and Gareth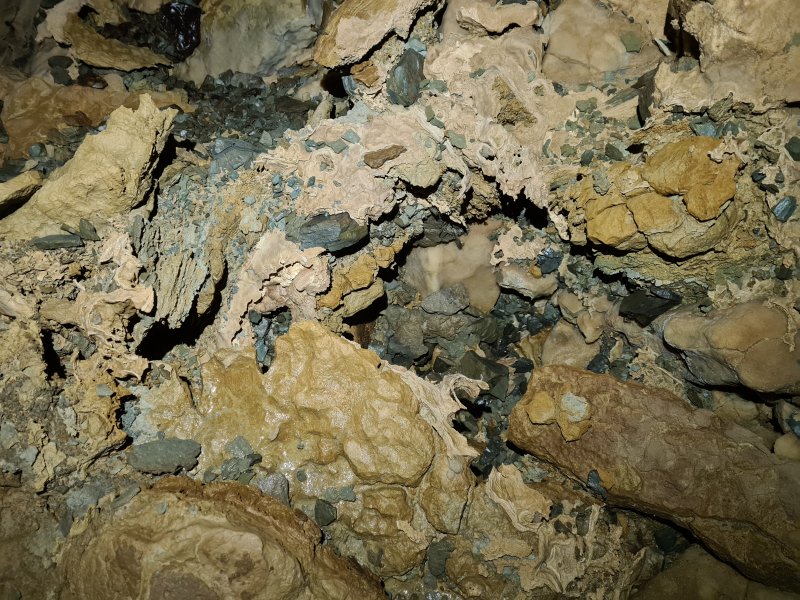 Redissolved calcite in the grotto.
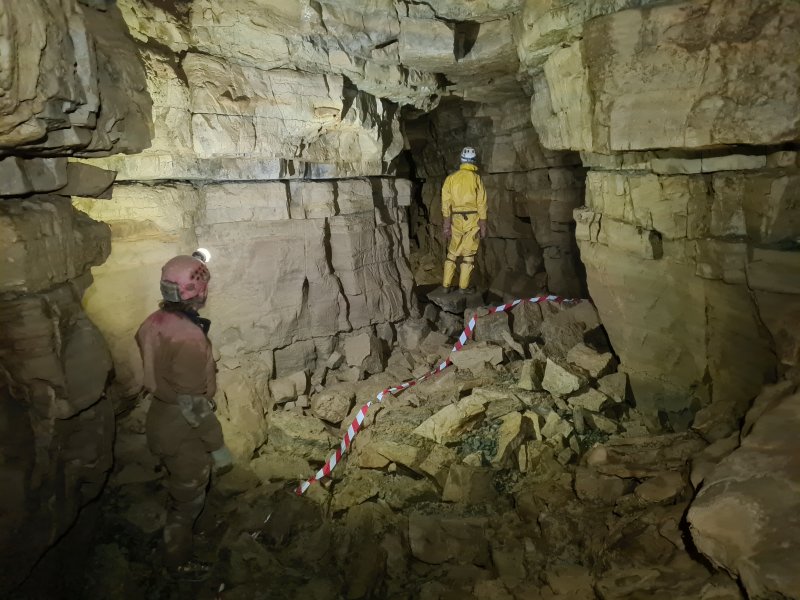 The Last Post, after the first grotto.
Modelling by Gareth and Pete, lighting by Tarquin, Gareth and Pete
The Last Post, after the first grotto.
Modelling by Gareth and Pete, lighting by Tarquin, Gareth and Pete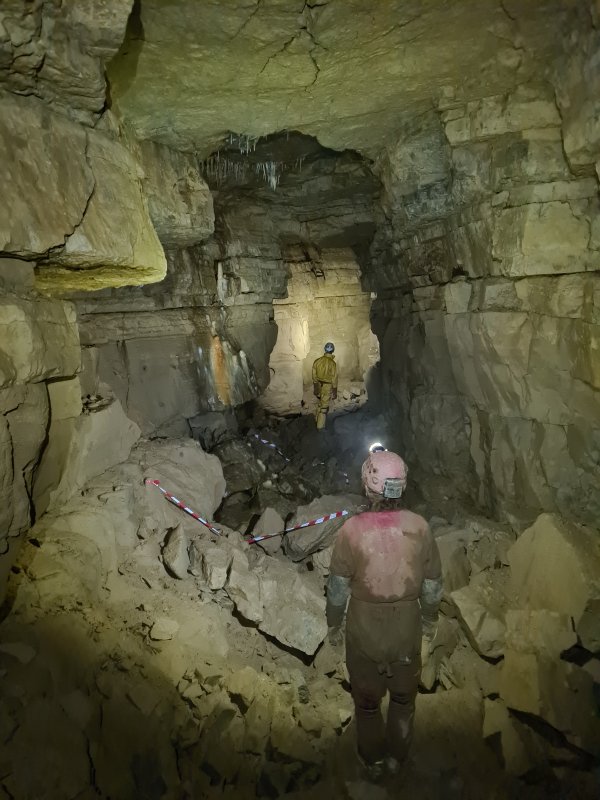 Continuing very grand, with the second grotto on the left.
Modelling by Gareth and Pete, lighting by Tarquin, Gareth and Pete
Continuing very grand, with the second grotto on the left.
Modelling by Gareth and Pete, lighting by Tarquin, Gareth and Pete Stalagmites and frilled edges in the grotto.
Lighting by Tarquin and Gareth
Stalagmites and frilled edges in the grotto.
Lighting by Tarquin and Gareth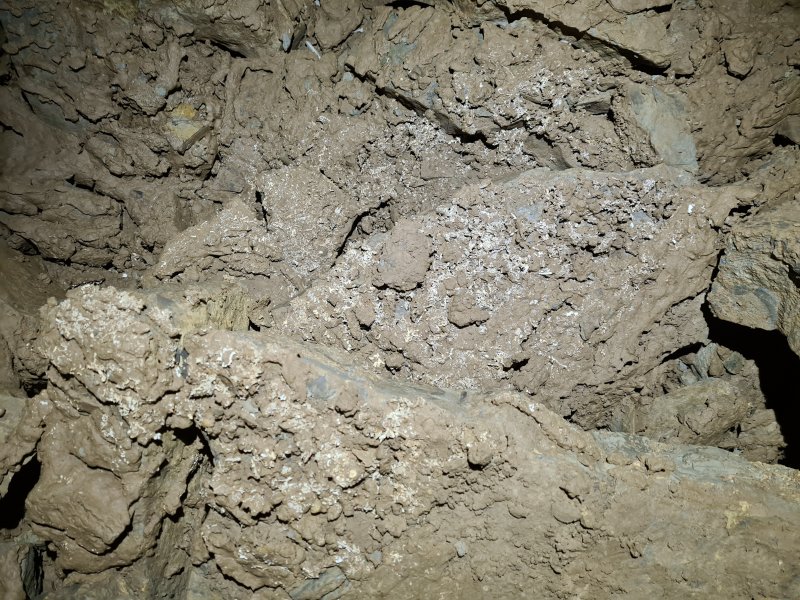 Cryostal at the grotto.
 Cryostal at the grotto.
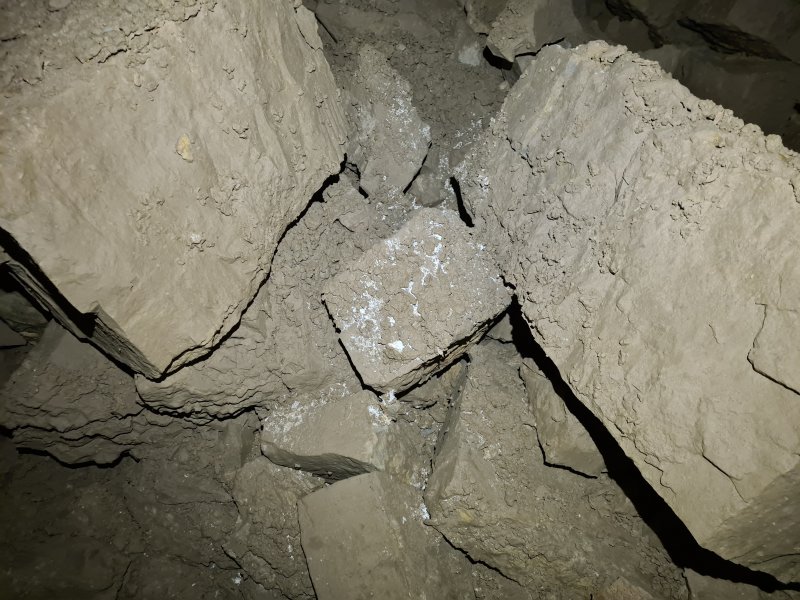 Mud and cryostal formations at a junction in a narrow section.
 Mud and cryostal formations.
 The side passage at the junction is an oxbow, which rejoins at a drop.
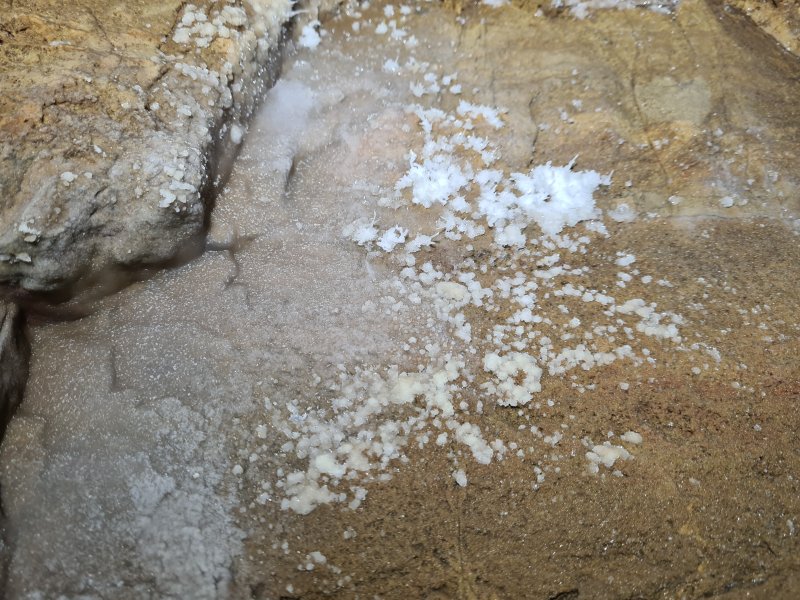 Tiny anthodites in the oxbow.
 The Last Post ends at this grotto, a great way to sign off.
Modelling by Gareth and Pete, lighting by Tarquin, Gareth and Pete
The Last Post ends at this grotto, a great way to sign off.
Modelling by Gareth and Pete, lighting by Tarquin, Gareth and Pete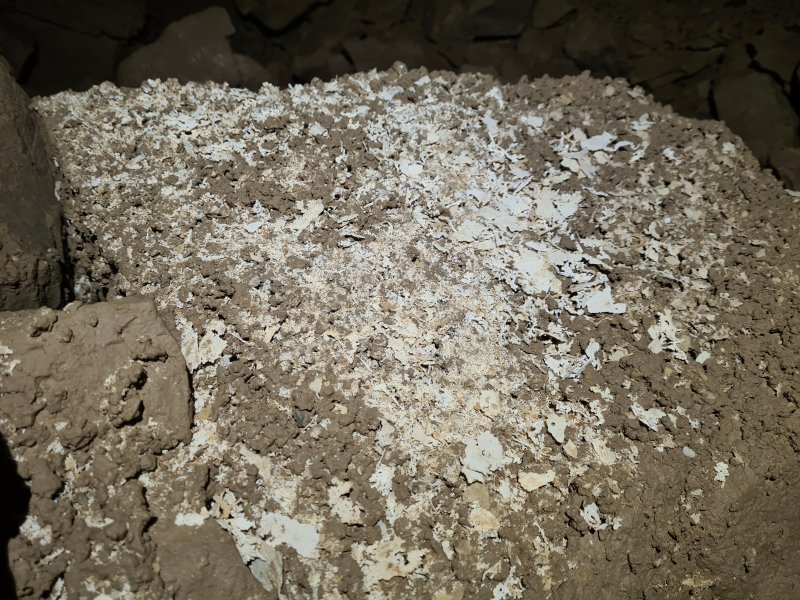 Cryostal at the grotto.
 Stalagmite bank.
Lighting by Tarquin, Gareth and Pete
Stalagmite bank.
Lighting by Tarquin, Gareth and Pete Streak patterns in the flowstone.
 Textured patterns in the flowstone.
 Calcite coated flakes.
 Mud flakes.
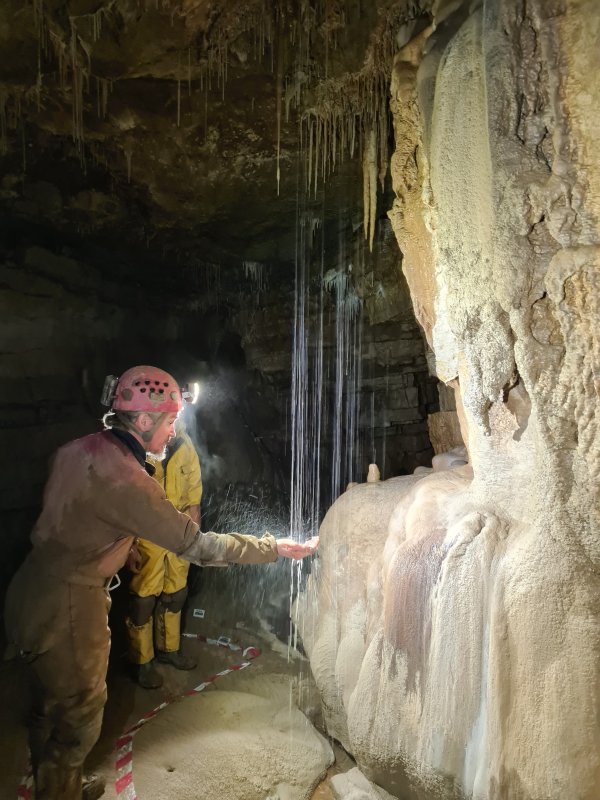 The real highlight of the grotto is this inlet, with the brilliant white coating on the walls. The water turned out to be drinkable, by the way.
Modelling by Gareth and Pete, lighting by Tarquin, Gareth and Pete
The real highlight of the grotto is this inlet, with the brilliant white coating on the walls. The water turned out to be drinkable, by the way.
Modelling by Gareth and Pete, lighting by Tarquin, Gareth and Pete The water pours in from a bizarre conical formation called The Bugle. The strangely ornate calcite coating has also caught the stalactite in front of it. The source of the water is not known, but it seemd to be different from the fault that sources all of the other inlets in this part of the series. Perhaps The Bugle is industrial pollution from the former limestone quarrying and calcining that took place on the mountain.
Lighting by Tarquin and Gareth
The water pours in from a bizarre conical formation called The Bugle. The strangely ornate calcite coating has also caught the stalactite in front of it. The source of the water is not known, but it seemd to be different from the fault that sources all of the other inlets in this part of the series. Perhaps The Bugle is industrial pollution from the former limestone quarrying and calcining that took place on the mountain.
Lighting by Tarquin and Gareth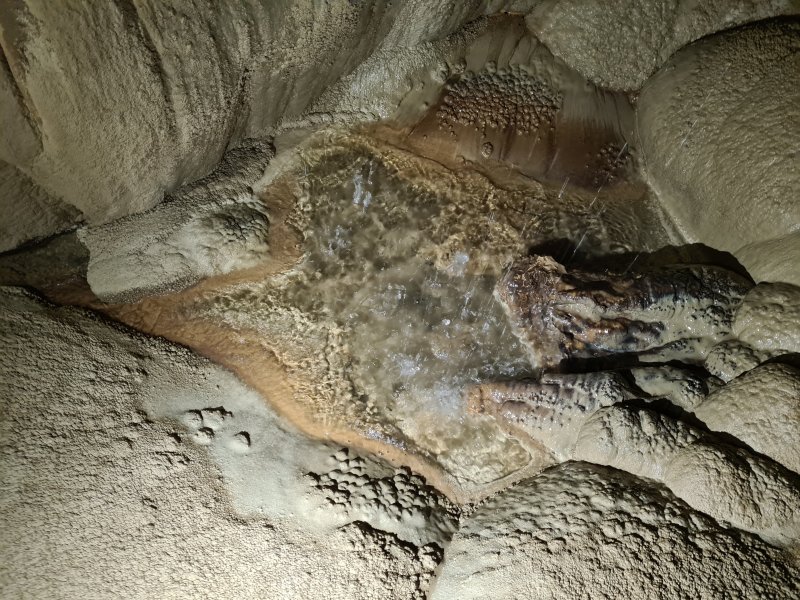 Pool below The Bugle.
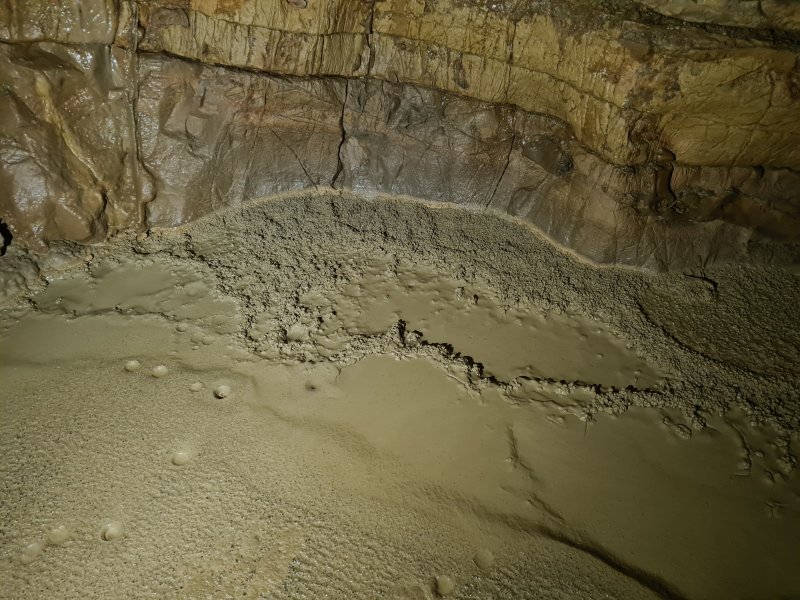 Former crystal pools in the grotto.
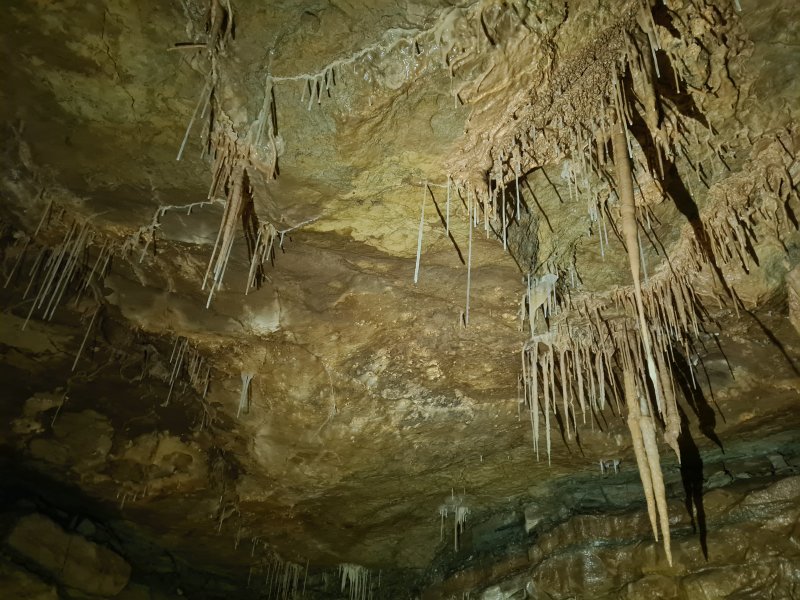 Stalactites near the end of the grotto.
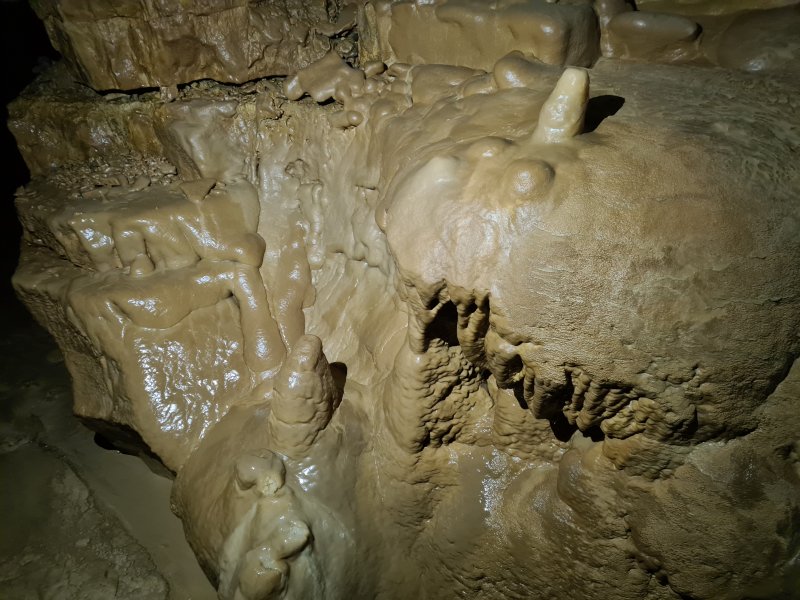 Stalagmites at the end of the grotto.
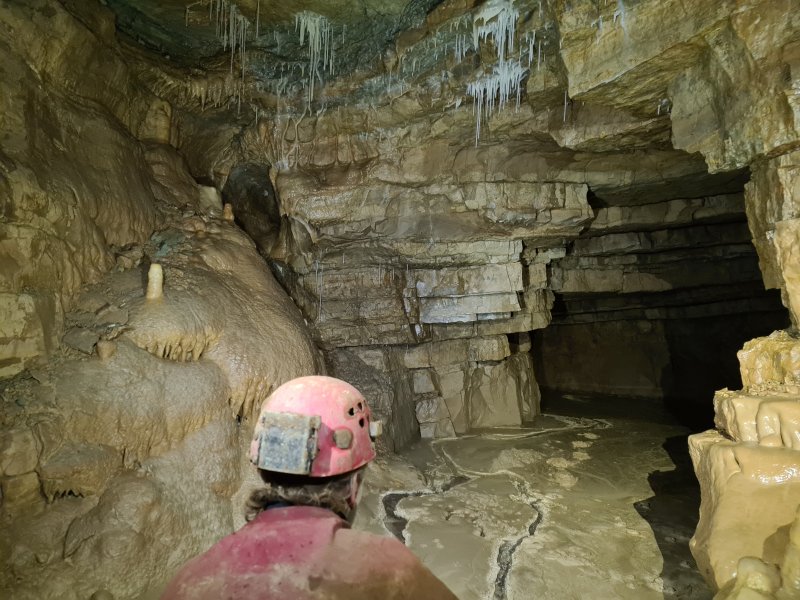 The beautiful end of the grotto. The floor is a calcite flow, so the passage is taped off.
Modelling by Gareth, lighting by Tarquin and Gareth
The beautiful end of the grotto. The floor is a calcite flow, so the passage is taped off.
Modelling by Gareth, lighting by Tarquin and Gareth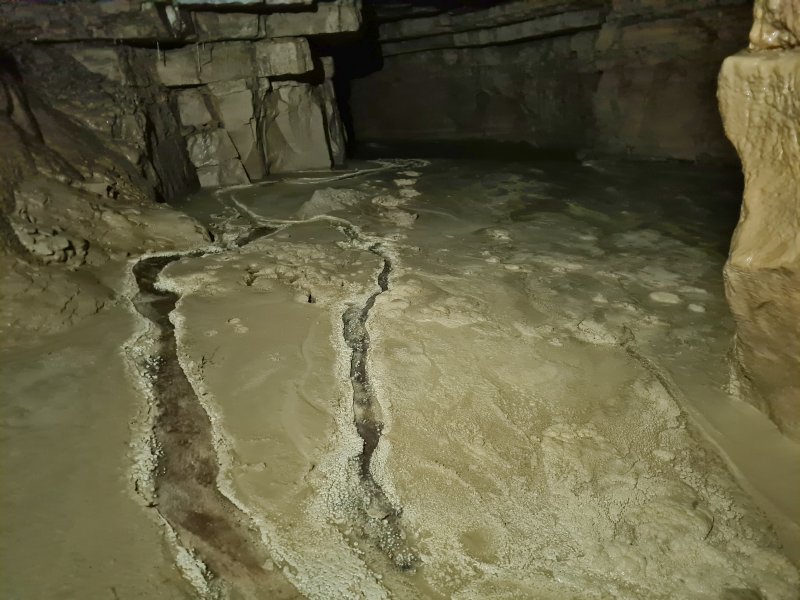 The calcite floor, with its streams edged by raised calcite. There is a single set of footprints continuing around the corner, but the passage ends just 40 metres ahead. The survey shows a couple of calcite steps before the calcite blocks the passage, but the explorers assured me that there is nothing at all worth damaging this floor for, so the passage is best left alone, and enjoyed from here. The passage is separated from the end of Nevill Hall by a little over 100 metres, and it is most likely that it would just connect with the static sump there. Its water probably joins the water seen in Passendale.