We would like to thank Clive Westlake for providing the pictures that you will find links to
throughout the description, or which can be viewed in their own gallery.
Updates
Last updated: 7-June-2026
If any other Draenen cavers would like to submit passage descriptions, pictures, or corrections, please get in touch!
Location
Pwll Du, Gwent, South Wales, U.K.
Length
Last official length 66'120 metres, as of December 1999 (survey discontinued).
Current estimated length 70'000 metres.
Depth
177 metres
Entrance grid reference
SO 2467:1176
Entrance altitude
362 metres
From the road from Blaenavon to Abergavenny, take the road to the left, just before
the Keeper's Pond (or on the right, just after the Keeper's Pond when coming from
Abergavenny). Park on the roadside verges after just over 1 km, next to a ruined redbrick
building on the left, or in a layby shortly after passing the first house on the right (which
was once the Lamb and Fox public house). Note that the long established concrete parking area
opposite the public house is no longer available, as of 2019.
From here, continue down the road towards the Pwll Du Adventure Centre, a white building
on the right side of the road. A stream starts at the adventure centre, running downhill to its left, cutting through a coal tip.
Cross the stile into the stream's fenced enclosure, then ford the stream, and follow it downhill to a fence.
Cross the fence then proceed, to the right of the stream, down an obvious but very steep path.
This leads directly to the entrance, a small gated phreatic tube at the foot of a small outcrop.
Access
The cave is gated. Access is controlled by the Pwll Du Cave Management Group
and should be applied for by writing to the access officer.
Applications are rarely refused. The access officer may be contacted by email
using the details on the committee site.
The gate is located at the entrance to the cave, and uses a keyed lock.
A log book (for logging trips and for recording damage to the cave or information of scientific
interest) is placed at Cairn Junction, at the end of the Entrance Series.
Please do use the log book and sign-in; remember, your life or that of a friend could
depend on it!
Note that the use and digging of
other entrances is prohibited by the landowner and the cave management group.
Use of other entrances puts the conservation of the cave at risk, and risks access being
denied completely to all cavers.
Pwll Du Cave Management Group
This group, formally constituted on October 13 1996, and comprising representatives
of clubs involved with Ogof Draenen together with the Cambrian Caving Council, will
administer future access to the cave and conservation policy.
Fixed Aids
Although there are many fixed aids such as handlines, ladders and hangers in the cave, the Pwll Du Cave Management Group wish to stress
that only a few of these are officially maintained by the group. Cavers should treat all other fixed aids as unmaintained or suspect.
The use of any fixed aids is done at the user's own risk. The following list of fixed aids are maintained by the Pwll Du Cave Management Group:
Eco hangers and knotted rope on the 4 m roped climb in the Entrance Series
Eco hangers, chain, metal ladder and looped lifeline at Balcony Pitch
Conservation
All visitors to Ogof Draenen are requested to respect the marker tapes which have
been laid in many parts of the cave, as these are there to help protect the formations
and occasionally the floor, in order to preserve the cave environment. However, due to
the rate of exploration in the cave, it is not always possible to keep up with the taping
and some calcite and gypsum formations, mud formations and guano deposits are
currently unprotected. Visitors in unfamiliar territory or new extensions should be alert
to this fact and exercise an appropriate level of care.
Ogof Draenen is also inhabited by bats. It is a criminal offence to interfere with bats
(note that this would include photographing them without a license, or remaining in a roosting
area long enough to change the temperature significantly),
so please avoid them wherever possible. Furthermore, please note that the use of
hexamine for heating and cooking produces harmful by-products (read the packaging!)
which can disturb, or even poison bats. Thus, although the use of hexamine in the cave
is not prohibited, any disturbance or harm caused to the bats would be considered a
criminal offence, so please avoid using it.
As in the nearby Llangattock caves, the use of carbide and the smoking of cigarettes in
Ogof Draenen is prohibited.
Flooding Characteristics
Most of Ogof Draenen can be passed during high water conditions, with the following known exceptions:
The ducks in Agent Blorenge and Y Gwter Fawr can sump in wet weather.
The section of the Beyond A Choke streamway before the chokes (downstream from Tea Junction) can become
hazardous in high water, and so can the narrow section upstream from The Confluence.
The eastern extremities of Blorens Inlet can become very "sporting" after
heavy rain but Blorenge Inlet appears not to change very much.
In Dollimore Series, the normally ankle-to-knee depth water in Out Of The Blue
can become chest deep very rapidly, with less than a day of rainfall, and Into The Black
can pond up to completely cover the mud banks around Yellow Van Passage.
Passendale's seasonal sumps and muddy crawls flood rapidly, and remain sumped during winter.
Following several days of rain, a few hours worth of heavy rain will cause serious
flooding throughout the early portion of the cave:
The 4m roped climb in the entrance series becomes a waterfall with a significant
volume of water that can prove challenging to climb. The flat out crawl and wet hole
in the entrance stream can also become quite intimidating.
However, the entire entrance series can be passed, including that climb, although it is extremely unpleasant.
In Upstream Passage, the water can be seen to rise a few cms a minute, causing the low
crawls at its upstream end to become challenging, though they are unlikely to sump.
The choke connecting Ogof Tarddiad Pwll Du to Waterfall Series turns into a nearly constant
curtain of water, that must be blindly crawled through, without dislodging rocks.
White Arch Passage has several sections that can become deep enough to require wading,
or even swimming. The current is not usually very strong in these deep sections.
It is important to note that even closely related parts of the cave can flood at different
times from each other, even if their streams originate in similar places. The roped climb in
the entrance can be in flood while the entrance crawl is relatively normal, and White Arch may
be in flood while the Entrance Series is completey normal.
Ogof Draenen is the second longest cave in Great Britain and contains some of the
largest cave passage in the country including, in War of the Worlds and Dollimore Series, what is probably
the second largest passage in Britain. It is also very complex in places. Visitors are
strongly advised to carry a survey and this description, or to go with someone who
knows the cave well. There are also many loose boulders to traverse and the
danger these pose is often heightened by a slick covering of mud. For this reason
the cave can prove very tiring. The cave is not suitable for novices.
As the cave is extended, it is obviously becoming possible to do longer and longer
trips. The duration of some of these trips should not be underestimated; not only
can they prove extremely tiring, but serious consideration should be given to the
need for extra lamp batteries. There are now several reports of inward bound cavers
donating spare lights/batteries to outward bound cavers!
Roughly speaking, the cave is shaped like a letter "K" (although from the survey
the shape appears more like a lower case "h"), with the backbone aligned
northwest-southeast and the entrance at the junction of the
two arms with the backbone. The cave may therefore be conveniently divided into six
"areas" - the main routes through these areas are highlighted:
Following the small entrance passage, a climb down in the floor is reached
after a few metres. This descends down to two scaffolded shafts. From the bottom
of these, a low crawl leads off. The crawl widens into a small
enlargement and a stream is seen at the far end of this. The stream is followed
through a flat-out crawl, and down a tight, wet, hole in the floor where a further drop
lands at the head of an 8 m deep scaffolded shaft. At the bottom of this shaft is a
chamber. From the chamber, two passages lead off: 1) a tall rift straight ahead, and
2) a low crawl to the right (the usual route).
1) The rift is a traverse, Darling Rifts, with several oxbows and short side passages leading off.
Unofficial handlines (present as of July 2023) assist parts of the traverse. Just before the rift
closes down, after about 75 m, is a final traverse with a fixed handline (present as of April 2024), ending at a junction, where ahead soon closes down.
An obvious descent down a rift in the floor to the left is the climb down to Bing Bang Pitch, while just after it, doubling back on the right is Pitch Bypass.
Pitch Bypass is a rift with a few awkward climbs. Oxbows in the roof have a connection back to Darling Rifts.
Where the rift widens, a passage to the right becomes a low bedding leading into Spare Rib, but this is not the usual route.
Continuing along the rift reaches a substantial chamber, where Spare Rib enters from the right as a cascade,
and the usual way on is down into a stooping height bedding ahead-left. At this point, it has joined the usual
route, normally accessed via Spare Rib.
The climb down to Big Bang Pitch is assisted by a fixed
handline (present as of April 2024). This leads down to a chamber with a stream running down the opposite
wall and disappearing in the funnel of boulders in the floor. On entering the chamber, routes under or around a large boulder to the right gain a large side passage to
the right, which can be followed to the top of the 15 m Big Bang Pitch (hangers and a tether are placed above
the pitch, backup to a large slab, deviation part way down).
At the pitch head, the lower passage to the left is Psammodus Passage, while ahead, a rift passage is Gyracanthus Loop.
Gyracanthus Loop is an oxbow containing many fossil dorsal spines of proto-sharks (Ctenacanthus), which appear as black
objects with a U-shaped cross-section protruding from the walls. Psammodus Passage has an intricate proto-shark fossil tucked in
the bedding to the right, before Gyracanthus Loop re-enters from the right. To the left is a climb up into another short oxbow.
Ahead, Psammodus Passage turns sharply left to reach a choke. Just before the choke, below a tall aven, a passage to the left becomes a low crawl,
leading back through a choke into the chamber before the pitch.
Other loose shark fossils collected from the floor of these passages were identified as the spine of
Gyracanthus, and the tooth plate of Psammodus. The samples of the Gyracanthus spine and
Psammodus tooth plate are located in the
National Museum Cardiff,
available for viewing on request - advance booking required. For further details,
see the BCRA publication "Cave Science", Vol 30 (1) pp 33 - 36.
Big Bang Pitch comes out in the roof of the large Upstream Passage, which is
littered with boulders for almost its entire length. A stream runs under the
boulders. The usual way on is downstream (when facing the hangers at the top
of the pitch this would be to the left - in the direction of a large mud and sand slope).
Not too far on a cairn is seen. This is Cairn Junction. The side passage to the right
is the other way in via Pitch Bypass.
2) The crawl is only a few metres long and leads very quickly into an enlargement.
Ahead reconnects with the floor of Darling Rifts. In
the floor on the left side of the enlargement, there is a short, awkward rift which doubles back on
itself, becoming a low wriggle to regain the stream in the more spacious Spare Rib. A dead-end side passage leads off
to the right, ascending tight climbs to end at a choke. Tucked under the wall to the right just
after it is a miserable flat out crawl in the stream, which gains 40 metres of passage.
Spare Rib is followed downstream until, after two small cascades, it
disappears in the floor of a chamber. A large boulder blocks the view of the
main part of the chamber.
From here three passages lead off: 1) to the left of the chamber a rift is the other
end of the Pitch Bypass passage from Darling Rifts, 2) straight ahead and along
a high rift is a comfortable oxbow to the third passage (although this route is slower and rarely used)
with a few holes down into it (one such hole, which requires an awkward climb down, contains some formations which would
easily be damaged by the passage of cavers overhead, so please take care if using
this route), and 3) a stoop/crawl to the right (the second passage follows
approximately the same path as this passage). The usual route is to start along the crawl,
then switch to the high rift at a taped-off formation.
The second and third passages, which are the continuation of Pitch Bypass, can be followed into a larger passage and this can
then be followed to two climbs, a 4 m roped climb and a further, unroped, but
smaller one. Shortly after, a climb up some boulders leads immediately to Cairn
Junction.
Strawberry Passage
Cavers are requested not to enter Strawberry Passage, and to take extreme care if
they do visit it, in order to protect the formations, some of which are in very
vulnerable positions. Some sections of passage have not yet been taped.
Starting from the top of an awkward slope above the 4 m roped climb in the entrance
series, the 30 m Overpass bolt traverse begins on the left-hand wall then passes to the right-hand
wall to cross over the top of Cairn Junction and enter Strawberry Passage. Depending
on how the traverse is rigged, as much as 50 m of rope and 15 hangers may be required.
From there it may be desirable to rig a 15 m ladder landing beside the cairn as the
traverse is somewhat exposed.
Strawberry Passage begins as a slope up into a narrow rift. Early on, a crawl under
the right-hand wall bypasses a taped off oxbow, and a climb up and down is required
later. Tapes mark where sediment deposits and stal are in vulnerable positions, please
pay attention to them. After about 150 m of narrow but generally walking sized rift,
there is a selection of very fine stalactites and helictites, tucked in an undercut.
Less than 100 m further on, a junction is met with a larger passage.
To the left, a taped route through a smooth but cracked mud floor quickly reaches a
dig, after passing a rift to the right. The rift, Quality Street, passes an awkward
oxbow to the left before reaching a 2 m drop. A traverse over this protects the mud floor,
reaching a climb down a few metres beyond. The passage continues as a winding rift with
thick layers of glutinous mud on the walls. It has not been taped and so extreme care
must be taken not to damage the stal flows. In the floor, an orange calcite 'stream'
meanders gently, before filling the floor at a low section. Carefully stepping over it,
there is an oxbow that bypasses this section, but as all that lies beyond is a narrowing
passage covered in glutinous mud, it may be better to stop here.
To the right at the junction with the larger passage, the main way on continues with a
smooth cracked mud floor, passing several sections where dried crystal pools with unusual
crystal growth and calcite 'streams' cross the passage. Passing these requires careful
stepping between taped sections, without dropping mud on the formations. The problem is
made worse by the large amounts of damp mud that sticks to cavers' boots. Beyond this, a
drop down to the left reaches an inlet aven, Strawberry Falls, and a short section of streamway, which feeds
one of the inlets in Gilwern Passage. Continuing past the drop down, avens all choke before
a pool containing The Strawberries is reached. The Strawberries are a unique formation made
from hundreds of small red-orange balls of calcite, forming on the bottom of the pool
instead of the usual calcite crystals. The pool fills the entire passage and continuing
along the low and narrow passage ahead would destroy The Strawberries, so it has been left
un-entered, with a tantalising view into the passage ahead, enlarging to walking size again.
There may be hope for a bypass, but until one is found, the passage must be left unpushed.
Cairn Junction to Tea Junction
From Cairn Junction the large passage continues downstream to the right, passing
by several side passages and oxbows, up and down fairly easy climbs and through
some shallow pools to the enormous, boulder-littered, Tea Junction. Here, a large,
although out of sight stream enters from a very large passage to the left.
From the first right turn on the way downstream to Tea Junction from Cairn Junction,
a large side passage on the left, which soon lowers to an easy crawl, can be taken.
After about 50 m a hole down to the right is the Wonderbra Bypass whilst the crawl
continues ahead. Wonderbra Bypass is a quick and much easier route than the
streamway, which emerges further downstream under a very large rock bridge,
where turning left quickly reaches Tea Junction. Avoiding the hole down, the crawl continues straight ahead as Beer Challenge
to a junction. Straight ahead closes down past a squeeze, but right leads along the
low Carpet Crawl into White Arch Passage, 150 m upstream
from Tea Junction - the way to Lamb and Fox Chamber is to the left.
When aiming for White Arch Passage, Carpet Crawl can take a little less time than
going via Wonderbra Bypass and Tea Junction, as well as being much quicker than the stream route, and makes a refreshing
change for the boulder-weary caver! Most visitors use the Wonderbra Bypass when heading towards the
Beyond A Choke streamway, Gilwern Passage or The Score, and most visitors use Beer Challenge/Carpet Crawl when heading
up White Arch Passage.
2. The North
Upstream Passage
Heading upstream from Cairn Junction, to the left, the large passage leads past a
noisy inlet on the left and over a large dried mud bank to more large passage.
About 50 m further on from the mud bank, Big Bang Pitch can be seen entering
from the roof. The large passage continues past this, to a loose ruckle which is
passed at the top on the right. At this point, a dead-end side passage leads off on the right,
a narrow crawl for 30 m ending at a 7 m climb down with no way on. The ruckle is short and the large passage is
regained on the other side. The large passage ends after a further 100 m of
stream passage, where an inlet showers in from above and some formations can
be seen in an alcove to the right.
The way on now becomes a 3 m high but much
narrower passage. Some 40 m along here the main Upstream Passage turns right, but
ahead an originally-laddered 7 m climb (a looped rope is in place as of September 2017, which
can be used with a karabiner as a pull-through rope, a climbing belay, or a cordelette) leads to
a 300 m long side passage called Ladder Passage. Ladder Passage starts small
and passes through a 25 m long low crawl called The Trouble With Monica, before a climb up doubles back into a larger passage with
several proto-shark tooth plate fossils, which ends at a choke.
Upstream Passage continues to the right at the junction with Ladder Passage, past an
inlet, and then becomes a short crawl. This ends at a sharp turn to the right at which
point the roof once again rises to standing height. Just past here, a stream enters
from under the left wall. This can be regained by climbing into a narrow rift to the left.
This is the start of the Waterfall Series.
Upstream Passage continues beyond the way into Waterfall Series as a narrow rift,
which soon widens into a more attractive passage, ending at The Fly Cemetery choke with several stal adornments.
Shortly after the passage widens, a side rift on the left can be followed until it splits into
an upper passage ahead-left, and a lower passage ahead-right. Both passages pass through squeezes,
with the lower one only passable by extremely small cavers (despite looking larger at first).
The upper passage starts with its squeeze, which is not passable by persons of more than average build,
but could potentially be dug larger. The two passages rejoin a short distance up ahead, and
the ongoing rift is a little larger. At the next split, the lower passage ahead-right closes
down completely, while the one ahead-left becomes awkwardly narrow, turning right at a
sharp bend. A short distance further on, a larger passage appears in the floor, but is blind.
Traversing over it reaches a climb down into a larger passage with a sand and rock floor, Pen-y-Galchen Passage.
This can be followed for 150 m to a final choke, passing an extremely tight oxbow on the left, leading
between the final two corners.
Waterfall Series to Knees Up Mother Brown
At the start of the rift the only way on is to leave the stream and proceed up a series
of tight climbs until the stream is regained. The initial climb up into the rift had an unofficial
fixed handline in 2026, but can be climbed without it. Following a short section of stream
passage, a further climb over the stream, which had an unofficial fixed ladder in 2026,
leads to a waterfall. A fixed ladder and lifeline were in-situ in 2026, but these are unofficial.
(If the ladder is not available, the climb overhangs slightly and has few footholds but can be
free-climbed with some difficulty if needed. It may be beneficial to send
the better climbers up first, and use a 10 m belay line for weaker climbers.)
From the top of the watefall, the stream can be followed for 75 m to an inlet aven, and a
choke just beyond it. The choke has been shored substantially, but is still quite unstable. This
leads after quite a long crawl through the choke to more stable passage, which emerges at the
Ogof Tarddiad Pwll Du entrance. Note that the access via that route was not officially agreed, and
not applied for correctly with NRW, and the entrance should therefore not be used. The shameful
response from Caving Wales was simply to refuse to cooperate with NRW, and claim that everything is fine.
Cavers should avoid using the entrance, to avoid causing access problems with NRW in future. This description will
avoid sending people through the entrance unless the situation with NRW is resolved properly. Note that the choke
is extremely wet in very wet weather, described as crawling through a curtain of water.
About 30 m along the last section of stream passage (from the top of the waterfall) a
small tube on the left enters a smaller inlet passage, which is the main way on. This passes several boulder
obstacles before entering an enlarged junction from which several ways lead off. The main way
on is almost directly above the way in, and is a dry passage. All of the other passages end quickly
in chokes, except one to the left, which regains the stream. The stream, Waterfall Passage, has very little to offer
despite being 175 m long, starting low and requiring several crawls in the stream early on,
while a narrow ascent of the rift accesses awkward traversing ledges from about half way along.
Where it lowers just before its terminal choke, a crawl to the right also ends at the choke.
From the enlarged junction, the main way on leads to a very
slippery climb up, which had an unofficial fixed ladder and handline in 2026 (it is
also possible to free-climb with some difficulty if needed). A belay may be useful for weaker
climbers. At the top two passages lead off. The one over the top of the aforementioned junction, to the left when facing the rope belay at the top,
ends after 40 m at a short loop, with side passages immediately pinching out or filling with mud.
The other direction, to the right when facing the rope belay at the top of the climb, is the way on (which officially has no name, but may be mistakenly
marked on some surveys as Outcast Passage, after a club that helped survey it). The way on passes by some gypsum
formations and under some low sections before reaching a sharp right hand bend.
The obvious route on at the same level becomes blocked with mud after 50 m. Instead a climb up on the
right at the right-hand bend is the real way on. This reaches a series of crawls after 40 m.
The first crawl is of varying height and ends after 70 m at a relatively easy squeeze up a slope. The
larger passage that leads on from here is short lived as a junction is met with a short crawling passage
to the left, and two passages above each other ahead. The upper passage ahead quickly becomes very tight and chokes after 20 m, but
not before it passes over a visual hole into the lower passage. The lower passage ahead, which is crawling sized, is
the way on, with some holes into the upper passage, followed by another squeeze up a slope. After some 40 m it becomes a rift of stooping proportions.
The rift is followed for over 200 m, through some small complexes (though the way on
is usually obvious), and over some easy traverses. Below the traverses is a small stream flowing in a low, muddy oxbow, connecting to an earlier part of the passage.
After the traverses, a climb up is forced into a somewhat larger passage.
This is choked in both directions and so after following it to the left for a short distance, the continuation of
the rift on the other side of the passage must be taken to another climb up. This leads
into a much larger passage, known as Knees Up Mother Brown to the left and Yes Passage to the right.
If planning to follow both, it is best to go left into Knees Up Mother Brown first,
to avoid tracking mud into it from Yes Passage.
Knees Up Mother Brown and beyond
Knees Up Mother Brown is a phreatic passage with a flat roof and sand floor for most of its length, with the floor trench ending almost immediately. This
makes it possible to run the 200 m (to the left) from its junction with Waterfall
Series to its junction with Lost River Passage. Turning right on entering Lost River
Passage leads past old formations and a few oxbows to reach a chamber with a meagre amount of cryostal on the floor, as well as
some haematite flakes. Most side passages end immediately, but on the right, a low crawl swings left and reaches a squeeze up or squeeze under a boulder,
into another chamber. To the left is a small oxbow. Ahead is a larger passage with a cracked mud floor; the lost river of Lost River. This is not taped, and great
care must be taken to avoid damaging it. The oxbow re-enters from the left part way along, but the passage quickly ends in a climb up to a rift that becomes too
tight, after a total of 100 m from the first chamber in Lost River.
Turning left at the junction of Knees Up Mother Brown and Lost River Passage, a low passage to the left quickly ends, but
scrambling up a small slope up enters 6th Heaven
Chamber, with its fine collections of aragonite formations. To the right here, a low
passage enters a choke, while straight ahead, a climb through a rock window
enters another chamber which also contains a few aragonite formations.
Turning right into Yes Passage (at the junction where Knees Up Mother Brown was to the left) sees the passage roof
progressively lower to crawling height after just over 75 m. The crawl lasts for a
further 175 m. At this point, the sand on the floor turns to wet mud and the passage
enlarges to stooping height. A few metres ahead a low, muddy bedding can be seen at
head height ahead-left, while Yes Passage swings right and follows the edge of a choke
which makes up its left wall, before becoming too tight. The muddy bedding enters an enlargement in the base
of the choke. Here a route ahead and then up through the choke to the right enters the low, but wide, Padlock
Passage. To the right the passage chokes with rocks, but to the left a taped route
leads over boulders and under some low sections to a steep ramp down. At the bottom
of the ramp, the passage becomes much larger and after 50 m a deep pit develops
in the floor. Some 50 m further on the passage appears to choke. This marks the
start of Bolder Land.
Bolder Land
Warning: this whole section of cave is VERY loose and should be treated with the
utmost care and respect.
Just before the end of Padlock Passage, the way into Bolder Land is either a slot between large boulders
in the floor in the middle of the passage, or a beding to the right then a tight hole between boulders.
These enter a calcited passage within the choke running in the same
direction as Padlock Passage before entering a loose chamber. The way on is to
cross over to the left and take another small passage continuing in the same direction within the choke. This reaches
a squeeze up into a small enlargement. A climb up then leads into a loose section of passage continuing in the same direction,
staying up at roof level over a blind lower route. The route quickly enlarges
into a short section of large passage which also contains a deep but blind pit in the floor to the right. Ahead there are two
ways on.
Ahead is loose and requires a lot of faith. This route is not advised!
A better route is low and to the left. This enters a large undercut with the upper route
entering from the right, and a 5 m pit at its far end. The way on is to crawl round to the
left of the pit on a ledge and then climb up at the head of the pit. This requires
the use of a boulder that is supported by a badly shattered wall, the source of the passage's name. Take extreme care!
The passage continues as a shattered rift with wedged rocks above which must be carefully avoided.
Early on is a climb down to the floor of the rift, avoiding the use of any unstable rocks.
The going then becomes a little easier, with several undercuts to the left. Many pits
also exist in the floor and in the undercuts, one of which has a low route leading back
into a previous undercut. There are several areas with fine cryostal deposits, particularly in
the undercuts, many of which have not been taped (please exercise care).
At various points, it has proto-shark fossil spines (like the
ones in Raiders Passage and the Entrance Series) visible in the walls, the most
northerly known in the cave. The wedged rocks continue, with a fine gravity-defying arch at one point.
After just over 100 m, the passage narrows
and starts to wind. A climb must then be made over a boulder pile. The climb back
down lands at the head of a 6 m deep pit.
The passage now turns right and takes on a phreatic style before reaching a small
boulder pile at a corner to the right. At this point the passage enters the overlying
millstone grit which has infiltrated the lower limestone beds. Ahead, in a lower section, a junction is met. The way on is up to the left
where it reaches another junction. Here the only real way on is to the right.
An area is soon reached where the only possible way on is under
a shattered roof to the left. This enters a chamber with the continuation under the wall
to the right. Ultimately this enters a terminal chamber filled with red sand run-in.
3. The South
The Beyond A Choke streamway
When following the Round Trip or Long Round Trip, follow this section in reverse, starting at the junction with Agent Blorenge.
From Tea Junction, the streamway continues downstream to the right. After around
50 m of huge passage, a higher passage leads off ahead up a large slope. This is
Gilwern Passage, and is the way to the Galería Garimpeiros Extensions and Saint Giles Series. The Beyond A Choke streamway continues to the left.
Beyond A Choke streamway starts big and wide over boulders but narrows after a
hole down through boulders to the streambed is reached, just beyond a traverse along the right wall. Although the large
passage continues up an easy climb ahead, this is not used as it requires a 10 m
pitch to regain the stream.
After about 750 m of easy walking passage (along the streambed), interspersed
by a few easy climbs, cascades and many pools (some up to 2 m deep), some
very obvious stalactites and stalagmites are seen up to the right, with the largest stalagmite being The Sentinel. Just past here,
two chokes are encountered in quick succession. Both may be passed via semi-obvious
muddied routes starting about 4 m up each.
Beyond the chokes, the passage is narrower than before, and soon passes over a boulder pile.
A short traverse on ledges is then required while the stream flows in a narrow slot. This ends at a right bend and a small cascade.
On the far side of the plunge pool, the passage turns left again, and the main way on is to continue at stream level.
An alternative climb up the wall ahead at the left bend can be used to access a higher route continuing downstream on wedged boulders.
After some distance along these boulders, an exposed climb up the right wall, which will need ropes to lasso rock projections for
assistance, leads into A Bit Of A Dive. This narrow passage goes for 250 m to the Parrot Sump (25 m long, -2.4 m depth).
Beyond that, in A Bit More Of A Dive, are a couple of climbs and a crawl, before it enlarges to pass over static Parrot Sump 2 after 80 m. A few more climbs pass below Arse On Aven,
to reach Parrot Sump 3 (4.5 m long), 150 m beyond Parrot Sump. 50 m after Parrot Sump 3, the passage rises to its end, but Parrot Sump 4
starts on the right near the end. This has been pushed for 30 m at a maximum depth of -6 m.
Continuing at stream level past a very slippery rock called The Soap Bar, another 300 m downstream is a junction called The Confluence, where the Agent Blorenge streamway, the far end of the
"Round Trip", enters from the left.
Beyond A Choke streamway continues past this
for another 1.6 km. The majority of the passage is very comfortable, and up to 5 m wide.
One of the tall sections has a rock flake called The Rhino at thigh height on the right.
After 850 m, the roof lowers to give the impression that the passage is about to sump.
However, the ceiling lifts again, and the passage continues through many areas with pools up to waist deep. One pool on a
corner to the right, about 300 m after the section with a low ceiling, is about 2 m deep,
and normally requires a very short swim on the right, or a careful wade on the left.
The deep pools then end, and the passage continues with more rocky patches. Its final end is in the
Rifleman's Chamber, where a boulder pile is reached with a high mud slope to the
left. At the top of the slope, a balcony gives a view back up the stream passage.
At the far side of the balcony on the right, a laddered route up through a choke enters a higher
level, loose chamber with no way on. This is the present limit of the downstream
cave. From here, the water flows south for over 7 km to the Snatchwood Bridge and
Pontnewynydd risings.
The only significant side passage after Agent Blorenge is Fallout, a 100 m long sandy
passage up a tricky climb on the left immediately before the section with the low ceiling.
The Score
This is usually entered via Back Passage (see Tea Junction to Lamb and Fox Chamber
in section 5 below), but was originally accessed from the Beyond A Choke
streamway, providing the opportunity for a round trip. However, the original route in
is taped off to protect its vulnerable gypsum formations.
Back Passage leads, via 70 m of flat-out crawling, into a chamber at the start of
Crystal Cruncher Passage. To the left is a squeeze into an oxbow which ends wide to
the left, and loops back into Crystal Cruncher Passage via a crawl to the right.
The main way on in Crystal Cruncher Passage is ahead into the obvious passage, soon
passing large amounts of gypsum formations.
After 190 m of comfortable crawling/stooping, passing a small dig on the right,
a wide side passage to the right reaches a dig, and the way on is to the left.
The passage becomes walking/stooping height and more sculpted with even more crystal deposits than before, lowering again over the next 75 m.
At this point, it passes the short Crystal Crawl and another side
passage on the left, then swings right after 50 m through a crawl to enter the main passage of The Score.
To the right it descends a slope and enlarges before ending in mud fill, while to the left, the main way on
continues crawling sized. After 25 m, the mud floor descends, and the passage becomes
walking sized. 50 m further on, the alternative route in via Oo Crawl joins from the
right, which is taped off at this end.
Beyond this, the passage enlarges to over 7 m square, passing several side passages and many
large "palm tree" gypsum formations on the walls. After 130 m, the roof lowers
to just over standing height and the passage changes to a large, oval phreatic tube.
In general, the side passages at floor level are quite long, while those higher up are usually only a few metres long.
The first side passage on the left is A Bit On The Side, a 40 m crawl.
The first side passage on the right, Extra-Marital Sex, is 150 m long. It passes through a rock obstacle and crawl,
then has two squeezes interrupting the passage beyond. The
second, Suicide Squeeze, is long and extremely tight, without any reward on the other side, and is only
passable by the smallest of cavers. Other side passages ahead and left where the main passage lowers, both end quickly.
Continuing along the main passage, the roof quickly rises again as the passage
enters a chamber. To the left and right are small side passages, with the one on the right being the
50 m long Shit Hole or Twll Baw. The way on is up a
small climb ahead, from where a low passage gains a short section of the larger passage.
In the floor, a taped off passage back under the way in re-enters the previous chamber through a tight squeeze.
Ahead, however, the way on reduces to a narrow crawl after 30 m, where hidden down to the right is a very low bedding which ends
after passing below the crawl. The crawl soon enters a larger section, which swings right
and reduces in size again, to reach a junction. To the left closes down while
to the right is One Night Stand.
This continues as a narrow passage with a 30 m crawl at its start,
and reaches a squeeze after 100 m. The 2 m long squeeze is only passable by small cavers,
and starts as a body sized tube, ending after a step up into a bedding passage. The bedding is decorated with small stal
columns and helictites, which need to be carefully avoided. Within less than 50 m,
the passage ends, with a view through a hole to some calcite formations; The White Wormery.
About 260 m back from the first choke (about 20 minutes from Tea Junction) in the
Beyond A Choke streamway, a 10 m climb can be made up a muddied stal alcove
and ascending rift on the left (facing downstream) into Over The Top. This large passage leads upstream over
a hole in the floor down to the streamway and continues for 110 m, passing a crawl
at head height on the right, to another hole in the floor to the stream. Over The Top
ends after about another 150 m.
The crawl on the right, Oo Crawl, is about 275 m long. Very tight to start with, it
becomes slightly larger after about 75 m.
A further 100 m on, the roof rises to standing height with a few low sections.
This section of standing passage is increasingly well decorated with vulnerable gypsum formations.
It ends after 100 m where it enters the main passage of The Score.
The final 20 m has some very large star shaped gypsum
crystal formations referred to as palm trees, but these are extremely close to passing cavers,
and could easily be destroyed (exercise care). Oo Crawl is taped off to protect these
formations. Similar formations can be seen in much less vulnerable positions within the
main passage of The Score.
4. The Northwest (Gilwern Passage and beyond)
The Beyond A Choke streamway to Forever Changed
Climbing the slope from the point at which the start of the Beyond A Choke
streamway swings left enters Gilwern Passage. This is fault-controlled (by the
same fault that controls most of the Beyond A Choke streamway) and is therefore
remarkably straight throughout. It is beautifully decorated, and great care must be
taken in some places to avoid damage, particularly by the splashing of mud, to the
formations. These are mainly gypsum crystals, which extensively cover both walls
of the passage for almost its entire length, and calcite formations which, although
not as abundant, are equally as beautiful.
From the top of the slope, Gilwern
Passage turns right with the short R.I.P. Passage behind the tapes on the left.
It quickly becomes a crawl over mud banks, just after
some formations, but it is possible to stoop in a channel on the right after a few
metres. After about 30 m, the passage enlarges at a tricky sand slide. About 20 m
further on, a large crystal pool and flowstone formation, Giles' Shirt, is seen to the right. Here the
passage lowers after a climb up but soon opens up again as an inlet comes in
from high on the left. The water disappears. Then, after a comfortable 150 m long
straight stretch, the largest section of passage in Gilwern Passage, and a right turn,
another inlet comes out of an aven. The stream from this aven flows north along
Gilwern Passage, in the opposite direction to the Beyond A Choke streamway, marking
the start of the major north-flowing streamway.
Gilwern Passage is then followed, past some protected formations, for a seemingly
endless 750 m. This section starts as a walk in the stream but soon becomes a
more uncomfortable walk over boulders. At the end of this section, it turns sharply left,
while Morgannwg Passage continues up an easy climb ahead. Gilwern Passage then turns sharply
right, and ends at the foot of a more difficult climb, where the water disappears under
a low arch to the left, with the low arch being the main way on.
The water can be followed through the low arch to a
slight enlargement with a dry crawl ahead. This crawl is very short and leads to a
climb up boulders into a (stable) choke where the roof is made from boulders in the
floor of Old Illtydian's Chamber. Once at the top of the climb, the way on is through
two adjoining squeezes (one of which will prove impassable to persons of more
than average build) into another enlargement. The low arch straight ahead is the
way on. The roof now becomes solid and covered in bunches of gypsum. This the
start of Forever Changed, the initial passage of the Galería Garimpeiros
Extensions.
The climb up into Morgannwg Passage quickly reaches a junction. Morgannwg Passage
continues ahead at the junction, but to the left instead reaches another junction.
To the left here is the more difficult climb down into the end of Gilwern Passage,
and a climb up ahead-right leads to the large, but dead end, Old Illtydian's Chamber.
Morgannwg Passage soon gains an inlet stream, at a crystal pool with (mostly sunken) calcite rafts.
The 175 m passage beyond is taped off to protect the rafts and crystal pools, and cavers are
requested not to proceed any further. The first three crystal pools require very difficult traverses,
with it being nearly impossible to avoid dropping mud, dirt, and gypsum into the pool.
The third pool can be partly bypassed using an oxbow, with a blind side passage having some rafts.
A short, dry section then reaches the fourth pool at a corner, which has many small calcite rafts,
and requires a very tricky traverse at high level over the pool. The passage then loses its water,
soon requiring a very awkward, narrow traverse at roof level, followed by a narrow ascent to a choke,
where a squeeze regains the passage. This passes a too-low oxbow on the left and a short side passage on the right,
and ends at a total calcite blockage, with no prospects.
Forever Changed to Hearts of Olden Glory (The Galería Garimpeiros Extensions)
Forever Changed carries the Gilwern Passage streamway but this disappears to
the left when the passage begins to enlarge.
Forever Changed now becomes lower and progress is made by crawling over
large dried mud banks. This only lasts for a short distance and the passage gets
larger again when the stream re-enters from a sump on the left. Here the passage
gets very muddy and the taped path generally follows the stream through knee
deep mud. Fairly soon a high level passage comes in from the left and the whole
passage gets larger again.
Ahead at this point a 1 m tall, gnome-style stalagmite, the Guardian, is seen ahead
under a pure white curtain-stalactite, while a multitude of straws decorate the walls.
After this the roof lowers again and the path leaves the stream to wander between
some 1 m long straws. The path then follows the stream again for a short distance
to a junction where another streamway, carrying a larger stream, enters from a
somewhat smaller passage straight ahead. The combined streams then flow off
to the left, along a lower but wider passage to become the Y Gwter Fawr streamway, the way to Saint Giles Series.
Continuing ahead (upstream) the Hearts Of Olden Glory streamway takes on a
superb, echoey, phreatic style to a sharp right hand bend. Here the phreatic style
continues ahead (the way to Another World), while the stream swings right and the passage takes on a more
rifty style as it continues. A side passage on the right ends after some distance
having passed through a chamber.
At the point where the side passage leads off, the stream passage swings back
to the left. It continues with the rifty style for about 100 m to a choke. Here a high
level passage leads off on the left. This is the end of the loop from Another World, that will be mentioned later.
At the bottom of the boulders, a route has been forced for some distance through the
choke, but this ends in boulders. Near the top of the choke, a squeeze sized rift on
the right turns left and enters the bottom of a boulder chamber, with cryostal
on the boulders. Ahead chokes.
To the left enters a small solutional chamber with a short, blind passage on the right,
which has some rather poor cryostal on the floor.
Another World
Continuing ahead at the sharp right hand bend in the Hearts Of Olden Glory
streamway, a phreatic passage called Sons Of The Pioneers soon leads to a crawl. This, in turn, ends at a
short climb up by some slightly muddied stal. At the top of the climb is a chamber with some columns.
An obvious arched passage leading off to the right from the chamber can be followed
to a decorated junction. The main way on here is straight
ahead, but to the left a passage doubles back, The Green Grovel. This passes by a tall stalagmite
and stalactite, with straws decorating the walls (great care must be taken). The
passage reaches a small drop from where a very tight crawl on the right can be followed
for 100 m to where it branches. Both branches close down shortly afterwards.
Back at the main way on, the passage starts about a 1 m high but very quickly
opens up into a well decorated chamber, Another World. A dead end side passage ahead is taped off to protect the formations.
The way on from the chamber is to the left. This large passage continues with a with a dried up streambed in the floor, passing three
side passages on the right. The first is an oxbow back to the decorated side passage, the second is small and very short, while the
third is a small passage that leads off low and to the right at a boulder obstacle. The third side passage winds its way to the high level passage
mentioned earlier near the choke at the end of the Hearts Of Olden Glory streamway.
The main way on then reaches a Y-junction with the way to Indigo Rift ahead-left.
Indigo Rift
From the Y-junction in Another World, the right fork follows a mature rift to a large cross rift where the passage to the left enters
the left fork from the Y-junction, and to the right branches again but each direction is blind.
From the Y-junction in Another World, the left fork is the main way on, immediately becoming an almost perfectly circular mud-floored passage.
This soon becomes more straight-walled with a rounded roof, and chokes after 40 m.
Though only short, this passage has 5 avens. The first is at the Y-junction, where a climb up on the left leads
to a flat-out crawl that will be mentioned later. The second aven is to the right part way along the passage, the third is a little further on in the middle
of the passage, and the fourth aven is tucked into a rift which doubles back under the right wall.
The fifth aven, which is the usual way on, is accessed by crawling under the right wall just before the end into a
narrow rift to the right.
The fourth aven's rift splits off to the right here, but the main way on
is to crawl ahead in the rift, followed by a climb up the fifth aven.
The second, third and fourth avens, however, unite in a large chamber with two ways leading off, a low
passage to the left, which is the flat-out crawl to the first aven, and to the
right is the start of the much more obvious Indigo Rift.
The fifth aven is a slippery climb up a rift, emerging in the floor of Indigo Rift just
after its start, with the way on being to continue in the same direction.
Progress along Indigo Rift is made by traversing high up on very
friable ledges coated in a thin layer of slippery black mud. Immediately after the fifth aven joins
Indigo Rift, a descent back down into the floor, with some wooden stemples, is the way
into The Realm of Baron Von Carno. Traversing along Indigo Rift, however, many other holes can be seen
in the floor. Soon, a large one is reached. This has been bolted to gain access to a
series of small passages that will be mentioned later. Indigo Rift continues after a
climb up over this hole. The going slowly becomes easier after this until, after
some distance, a junction is reached. A flat-out crawl to the left enters a dead-end
enlargement, straight ahead is a small, winding passage with a few side passages,
while to the right leads to a loose choke. Down a small hole to the left before this
choke, leads to a series of small passages containing a dry streamway that heads back
underneath Indigo Rift. It ends at a pitch with an aven up into the already mentioned
bolted hole in Indigo Rift. A few metres
down from the top of the bolted hole is a difficult way into The Realm of Baron
Von Carno, but is not the usual way in.
The Realm Of Baron Von Carno
This 5 km series passes very close to the end of Indigo Rift, Lost River Passage in
Waterfall Series, and Pixie Meadows in Saint Giles. Some crawls and climbs are required to access it, but the series itself
is of very varied character, with impressively large passages, traverses, canyons, low crawls and canals.
Many passages have admirable mud, gypsum and cryostal formations, as well as calcite formations in the most distant parts.
Several loops are possible, and navigation can be challenging.
This extensive series can be effectively divided into three regions, which are described in the following sections.
Violate Passage to Kababarama Drama and Nevill Hall
The main way into this series from Indigo Rift begins as a slippery climb down, using
a series of wooden stemples as footholds (present as of April 2022). These are not
officially maintained, and may rot over time, so a handline or ladder may be desired
- an unofficial handline (present as of April 2022) is in place for this purpose. This gives access to the
obvious Violate Passage on the left. The passage soon passes over a blind hole in the floor where
a stream flows out. To the right just afterwards, a side passage has a very tight squeeze connection
with the bolted hole in Indigo Rift. Violate passage continues upstream ahead.
A junction is soon reached. The inlet to the left soon closes down, while Violate
Passage continues dry ahead. After an awkward, tight climb, the passage passes through a
double squeeze. Immediately afterwards, a climb overhead reaches the southern rift, which is the
end of the Kababarama Drama loop route, and a shortcut to Nevill Hall that does not require any tight squeezes.
Violate Passage continues ahead, and is the usual way on.
The climb up to the southern rift is quite difficult, with no rope or handholds for
the bottom 4 m. The top 6 m has a handline (present as of May 2021).
Nevill Hall can also be visited via the loop from Kababarama Drama, which includes some squeezes and another difficult climb.
Continuing along Violate Passage, the crawl soon becomes a walking sized passage that curves to the right, with several blind side passages.
After a sharp left bend, it reaches a junction of low stooping sized passages with some calcite rocks in the floor. Violate Passage
is ahead and The Stream Of Running Commentary, which is the usual way on, is to the left. Violate Passage
soon reaches a junction with the smaller Fastrack Membership oxbow on the right, and Violate
Passage ahead. Fastrack Membership starts as a crawl, has short side passages on the right,
left, right and right again, then after 50 m, a squeeze
sized passage on the left rejoins Violate Passage, with the way on to the right.
Violate Passage shrinks to crawling size for about 50 m before Fastrack Membership rejoins from the right.
It then passes through a squeeze and returns to crawling sized over sticky mud. It rejoins The Stream Of Running Commentary after another 40 m,
at a crossroads.
The Stream Of Running Commentary begins dry. After 50 m and a couple of boulder obstacles, the passage shrinks at a tight zig-zag.
Beyond this, the stream is met, with downstream to the left ending very quickly, and the way on being upstream to the right.
After 50 m of progressively larger passage, it reduces to a crawl then ascends to the left to reach a larger junction with the main way on to the right.
To the left, a keyhole shaped passage, which sometimes carries a stream, reaches a T-junction after 20 m.
The passage to the right is walking sized, and ascends a small climb beside an inlet to reach a junction with the route into The Red Baron, but is not the normal way into that area.
The passage to the left at the T-junction lowers to a crawl before ending very close to The Realm Of Baron Von Carno (passage).
A crawling sized tube on the right near its start splits, with both branches becoming too tight.
From the junction with the keyhole shaped passage, The Stream Of Running Commentary continues ahead-right, starting awkward but slowly increasing in size.
After 40 m, another keyhole shaped side passage ahead-left is the usual way into The Red Baron, while the stream continues to the right,
still increasing in size to become a fine canyon, needing traversing on the wide ledges.
Another 20 m upstream is a crossroads, where The Stream Of Running Commentary continues ahead, and Violate Passage rejoins from the right. To the left is another way to The Red
Baron, but this route is not normally used. It soon reduces to a small crawl, then enlarges and turns right then left into a very small chamber,
where the passage ahead splits into two dead-end branches. Under the left wall of the chamber is an ascending passage which continues past a side passage on the left,
to reach a junction with the low crawling Red Baron route. The way to Red Baron would be to the right.
15 m further upstream along The Stream Of Running Commentary from the crossroads, the way on is ahead, but near a rubble slope is an aven into the
main passage of The Realm Of Baron Von Carno. This cannot be free climbed. Continuing ahead,
after a couple of bends with dead end side passages, the passage doubles back hard to the left and shrinks in size at a boulder obstruction.
A free-climbable hole up to the left is the way into The Realm Of Baron Von Carno (passage), the way to Aces High.
The Stream Of Running Commentary continues ahead through a hole over the boulders.
A little further upstream, there is a 30 m long dead-end side passage on the left with upper and lower levels, while
ahead, the bottom of the passage fills with boulders. The way on is to climb to the top
level ahead, and continue upstream in a keyhole shaped passage with mudbanks. A side passage on the left can be followed along a stoop/crawl
to a split where to the right closes down, and ahead pinches out after 20 m. In The Stream Of Running Commentary, the
passage reaches a step down to a junction. The streamway continues to the left as a very narrow rift, while
there are two passages ahead; the left-hand passage is the start of Kababarama Drama, the main way on.
The right-hand passage is 80 m long, passing through some smaller sections with mud formations, to reach an area which splits into chokes.
The stream continues as a more demanding rift, where the top level is a little wider at first but eventually closes down, and
at stream level remains awkward but navigable, soon regaining its water. It ends at an inlet choke after another 100 m.
Climbing up in an alcove to the right just before the end reaches an upper level with a blind passage to the right.
Continuing over the stream's choke in the upper level, a hole tucked into the left wall ascends a very awkward, narrow rift, to reach the end of the
main passage of The Realm Of Baron Von Carno, but this is not the usual route into here.
Kababarama Drama is quite a challenging area. It quickly passes a 100 m long side passage to the left.
This side passage starts as an awkward rift traverse, but soon gains a more comfortable floor. It swings right with a dead end side passage ahead, and then left at a junction.
To the right, a narrow rift joins a later side passage in the main route, while to the left reaches a junction with both branches soon closing down.
In the main passage of Kababarama Drama, ahead, a step up reaches the top of a small step back down.
Ahead soon becomes a very tight passageway, ending after 30 m, having been joined by a passage from the first side passage.
Immediately before the step down, a very tricky 4 m climb up into the rift overhead gains the way on. This climb has very few holds,
especially for the bottom 2 m, and it may help to send a good climber up with a ladder and tether, assuming they can find something to attach it to.
At the top, the way on is ahead, passing a short side passage to the right. The way on soon enlarges until it
reaches a committing squeeze into the lower portion of the rift. This is more easily tackled by continuing along the upper portion of the rift and dropping down
where the rift is wide enough - it is not tight, but reversing this would be more challenging. It turns
sharp left shortly afterwards where the passage ahead pinches out. The way on soon reaches a junction where the way
on at head height ahead reduces in size, and to the left is a short side passage reaching a climb down into a dead end larger passage.
The way on remains crawling sized with a few small enlargements, passing a tight blind passage on the right at a left bend,
until it suddenly becomes a comfortably walking sized, square passage.
After a sharp right bend with a choke ahead, the way on continues large, passing under a roof tube, until a crawl is seen at floor level
on the left, which is the way on. Ahead, the passage immediately increases in size and then abruptly closes down, with short side passages ahead and on the left.
The way on starts low, and soon passes through a tight squeeze, which may be passed with the usual right-arm-first approach.
The passage then enters a small chamber with a choked aven on the left. The way on is down a climb to the right,
into a comfortable crawling sized passage, which soon emerges in the bottom of a tall rift, where the way on is up to the right.
Alternatively, to the left and right at floor level in the tall rift close down. Up to the left in the tall rift, the passage climbs through a small hole into a
larger passage heading to the left. At its end, a hole in the floor drops down a tricky blind climb, passing a very tight squeeze
part way down which links back to the roof tube in the previous large passage. Back in the tall rift, the way on is to climb
up to the top of the rift on the right, into a crawl over a hole to enter a much larger passage.
A passage to the left becomes small and ends close to the end of Indigo Rift,
but the way on is ahead, into the large, diamond-shaped passage, which is the start of the southern rift (its official name is not known).
After passing some cryostal on the floor, there are a series of traverses and climbs over a deep trench.
When the trench ends, a large passage up to the left quickly ends, while the way on is an awkward, tight squeeze
down to the right. The squeeze is much more challenging in the opposite direction. This emerges at the start of a tall rift, with a series of steep slopes below some stal,
with cryostal on the walls. Immediately after the slopes, a 10 m deep hole in the floor is the climb down
to Violate Passage, the end of the Kababarama Drama loop. The first 6 m is aided by a fixed handline (present
as of May 2021) while the bottom 4 m has neither rope nor handholds, but can be descended by chimneying.
The way to Nevill Hall starts with a traverse over the hole to Violate Passage (in the
direction heading away from the route back to Indigo Rift). After passing
through a small grotto, a 5 m rope climb down (present as of May 2021) starting between boulders is followed
by two short traverses then walking passage containing cryostal deposits. This ends at a free-climb up, followed by another 5 m rope climb
down (present as of May 2021). The continuing passage climbs up through a small choke, ending in a chamber with cryostal on the boulders.
To the right, a side passage drops steeply down to a junction, where to the left ends after 20 m, and to the right is a seasonally sumped loop with a small enlargement.
The main way on from the chamber is ahead through boulders in the bottom of a crater, then up a slope
to reach a less obvious junction.
Dropping down a hole to the right beside some small formations is the way to Passendale's main seasonal sump connection.
This lands in a walking height passage. Down to the right is a blind hole. Ahead, a crawl under the left wall reaches
a larger section of passage where ahead ends at mud fill, and down to the right is the awkward climb down to Passendale. This may be a deep canal or a dry passage,
depending on seasonal flow. To the right soon ends, but to the left the ceiling lowers as the main seasonal sump starts. See the next section for further details,
accessed from the far side.
The way to Nevill Hall is ahead from the less obvious junction, down then up slopes to reach a 4 m climb down.
This is followed by Nevill Hall, the largest chamber by area in the series. To the left is a large passage with a small stream, that ends in
a collapse chamber after 50 m, just beyond a loose climb up. Ahead is the second part of
Nevill Hall, where a passage behind boulders on the right enters a low chamber with flowstone, and a very muddy hole on the right reaches a seasonal sump connection to Passendale.
The way on ahead from the second part of Nevill Hall remains large, with some cryostal deposits.
After 30 m, the floor dips down to mud fill, and the way on is into a passage ahead-left. This soon reaches another climb down bypassing extensive gypsum
snowdrifts, with the way on climbing up to a passage with substantial cryostal cups. 40 m beyond that is a chamber with impressive mud formations
below a large boulder in the floor at the far end. A roped traverse (present as of April 2021) in the chamber
reaches the head of an 8 m pitch with more mud formations. The pitch is unrigged, and
the passage ends shortly afterwards at a climb up to a perched sump. If needed, all of the climbs along this route can be done
with difficulty, without needing ropes, but equipment is needed for the final pitch.
The Red Baron and The Last Post
The usual way into The Red Baron drops down a boulder climb, to reach a junction after 15 m. The usual way on is ahead,
which contains four squeezes, but the route to the right may alternatively be used, which
requires a longer low crawl. To the left is an alternative route back to an earlier part of The Stream Of
Running Commentary. The route to the right immediately lowers to a low crawl for about 15 m, then becomes stooping sized.
This passes a side passage on the right, which connects to an alternative route back to The Stream Of
Running Commentary. It then shrinks to crawling size again and passes a blind side passage on the right.
After 25 m, it turns sharply left, and joins the main route to The Red Baron, with the
way to that passage being to the right.
The four squeeze route quickly reaches a junction.
The passage on the left immediately closes down, and the way on is a rift to the right, lowering to stooping, then crawling.
After 10 m, where the passage turns left, the way on is a less obvious eyehole at ceiling height to the right, while the larger passage to the left soon closes down.
The eyehole is the first of the four squeezes. None are really tight enough to be called a squeeze, but they are awkward.
The eyehole drops to a junction where the only way on is to the left, which sometimes carries a stream.
The second squeeze is a keyhole which is most easily passed in the keyhole's slot, the third is just a narrow section, and the fourth is a wriggle
that is a few metres long, the most difficult. The passage then enlarges, and passes through an oval tube, where it then forks.
The way to The Red Baron is ahead-right, while ahead-left is the way to Passendale.
The way to Passendale is crawling sized with a lot of gypsum and mud formations, and meanders for 50 m to a junction. Down ahead closes down,
while a rift to the right continues with more gypsum formations. After 25 m, it drops slightly to a junction. To the right leads upstream through
a low arch to a sump, above which a climb up followed by a 3 m pitch down lead to a seasonal
sump, which connects to Nevill Hall. To the left, downstream, is the very muddy Passendale (pronounced "passion dale"). After
20 m is a junction. Ahead is a flood-prone wallow in muddy water which ends at a choke after 50 m. To the
right soon reaches the main seasonal sump connection ending at a climb up to the passage leading to Nevill Hall. All of the
seasonal sumps and low passages in Passendale are extremely flood prone, and cannot be free dived. The water
can rise within minutes to completely block the passageways. This area should be avoided except in drought conditions.
Continuing towards The Red Baron from the four squeeze route, the passage quickly becomes a relatively tall canyon.
Three side passages are passed, all at head height on the right. The first is only short. The second is the low crawl route rejoining.
The third, at a wide-zig-zag, is a crawl which closes down after 30 m.
The canyon continues to enlarge, and traversing up on the ledges is sometimes required.
50 m beyond the junction with Passendale, it ascends into a much larger passage; The Red Baron, where the way on is ahead-left.
To the right in The Red Baron is walking sized for 15 m, where a narrow rift on the left closes down after 20 m,
while to the right shrinks in size to reach the bottom of a very tricky climb up the narrow rift. The rift at the top ends after 30 m.
The way on in The Red Baron is much larger, but soon becomes a narrower canyon where traverses are required.
The passage soon passes a crawling sized rift on the right which closes down after 20 m.
The Red Baron then passes a series of oxbows on the left which are taped off.
There is then a choice of crawling ahead or an easier narrow rift ahead-left, which quickly rejoin.
The traversing then resumes. A hole that is soon passed at head height on the left is a low
crawl which becomes too tight after 30 m. The Red Baron soon enlarges to a more comfortable size,
and reaches a more significant junction, where the way on along The Red Baron is ahead.
The canyon in the floor, however, turns off to the right and becomes an awkward rift, which may carry the stream, depending on water levels.
After 50 m, beyond a corner, this becomes a more comfortable passage. 40 m further on, an 8 m aven is the original way
into Aces High. This was originally bolted up, but no equipment is left in situ, as it can now
be reached via an alternative route. At the bottom of the aven, where there is a small cryostal deposit, the passage ahead soon divides,
with each branch ending quickly in chokes, each of which issues a stream.
The continuing passage of The Red Baron rapidly decreases to a narrow wriggle to regain the larger passage.
This continues as a comfortable, arched crawl with a couple of brief flat out sections, passing a short side rift to the left at one pont,
to rise up to a junction after 30 m. From here onwards, there are many cryostal deposits, and several have not been taped,
please exercise care. To the left, a side passage with several cryostal deposits passes through narrow sections to end after 30 m.
Ahead-right remains large, soon reaching a chamber with an cryostal deposit on the floor.
To the left is a side passage that connects to the way on, but cannot be safely free-climbed. Ahead chokes immediately. Over to the right is a
climb up an aven that passes through a choked section to connect to the way on, but this should be avoided as it means crossing over cryostal deposits.
The way on is up a steeply ascending passage ahead-left. This rises to a balcony with a view down to a previous side passage on the left.
From the balcony, a crawl to the right reaches a squeeze up into a low bedding. To the right passes through a choked section
to drop back down to the chamber, but this should be avoided as it requires crossing cryostal deposits.
In the bedding, the way on is a low crawl to the left, which emerges in the side of a large passage,
the start of The Last Post, which heads in both directions. (It is advisable at this
point to check the route used to enter this passage, as the junction is not obvious on the return.)
To the right, The Last Post heads northwards, immediately reaching a large junction covered with extensive cryostal deposits.
To the right passes a badly shattered wall where care is required. The passage then shrinks to a narrow rift, which reaches the head of a 6 m climb down into a short, blind passage.
The climb is challenging, and it might be better to treat it as a pitch. The end is above Aces High but
there is no connection. From the junction with the extensive cryostal deposits, the northwards branch of The Last Post continues ahead, with a great many more cryostal deposits.
After 40 m, having passed a high level oxbow, the passage turns right to enter
a decorated chamber, where the taped route cannot avoid the cryostal deposits; please take care. The chamber has a connection to the high level oxbow.
On the left side of the chamber, a steeply descending passage passes through a squeeze to reach an arched passage. This passes many mud and calcite drip formations to reach a junction.
Ahead, a very short passage reaches the northernmost point of the cave, where there is a visual continuation into a narrow rift.
At the junction, the side passage to the left passes many more cryostal flake formations that are coated in mud, and hard to see, care required.
The passage is mostly walking sized, but ends as a silted crawl after about 30 m.
From the start of The Last Post, the way to the left is wide but relatively low. After 15 m is an enlargement with more cryostal deposits,
where the way on to the right is much narrower. It soon reaches a junction, where the passage ahead soon ends.
The way on from the junction is a narrow rift on the left, which quickly enters a chamber with loose boulders, take care.
Two passages lead on from far end of the chamber. The passage ahead immediately ends, while the way on is a very narrow crawl on the left.
Only the first few metres are particularly narrow, after which it passes over a blind rift in the floor, to end at a climb down into a much larger passage after 20 m.
Though only 2.5 m high, the climb can prove challenging on the return, as it has very few holds.
Doubling back at floor level under the climb, a low, wide crawl soon becomes a stooping sized passage with striped walls, ending at a choke with cryostal,
and a visual connection back up into the previous chamber.
The way on from the climb is the obvious large rift passage ahead.
At a sharp bend to the left, the passage significantly increases in width, quickly passing a side passage on the right;
a perilously tight rift which has been forced for 25 m.
The Last Post then becomes narrow again, widening again after about 20 m.
Where it widens is a blind, narrow rift on the left, after which, a low side passage on the left quickly reaches a blind chamber with a meagre cryostal deposit.
Immediately afterwards, the passage assumes very grand proportions, starting with two decorated sections
with stalagmite and flowstone formations, and yet more cryostal. It then briefly narrows and turns a corner to reach a junction.
A side passage on the left, behind some mud and cryostal formations, oxbows back to an earlier part of the passage.
The Last Post continues ahead, immediately reaching the best grotto in the series, adorned with stalactites,
a large stalagmite bank, and flowstone formations on each wall. A conical stalactite formation called The Bugle pours water into the passage.
The final 45 m of passage is taped off to protect its calcite floor. It soon becomes too low to follow.
The Realm Of Baron Von Carno and Aces High
The hole up from The Stream Of Running Commentary enters a large chamber, the start of The Realm Of Baron Von Carno passage, at the top of a loose climb - take care.
A second hole drops back down to The Stream Of Running Commentary, and cannot be free climbed.
When facing away from the wall with the holes down, there are two passages leading off at the top of boulder ramps, with the main way on being ahead-right.
The passage up the ramp ahead-left soon lowers to a short crawl into a chamber, where a flat out crawl between formations
(take care) reaches a much larger chamber with a pile of gypsum on the floor. The passage ahead-left ends in mud fill, and a low passage on the left pinches out.
An aven above the first chamber (rope present as of July 2021) reaches a passage that links to the second chamber's aven, and ends 25 m beyond it, with a short side passage near its start.
From the chamber at the start of The Realm Of Baron Von Carno (passage), the passage up the ramp ahead-right
begins reasonably large with some cryostal deposits. After a dribbling inlet, it passes through a narrow section
to reach a balcony overlooking a large chamber at a junction, probably the largest chamber by volume in the series. A climb down rubble (take care) reaches the floor of the chamber, where there are cryostal deposits on a ledge.
To the left is a narrow passage that ends almost immediately. In the ceiling ahead is a series of roof tubes, accessed via a climb (this
was rigged with an unofficial belay line as of April 2022, but the ladder was not usable).
The obvious way on from the chamber is the large passage up to the right, which soon passes some formations in an alcove on the right, as it swings to the left.
After a narrow section, a short side passage is passed low on the right, while
ahead soon reaches a substantial junction where some more cryostal deposits are taped off on the floor.
The passage ahead passes some formations and becomes very narrow, passing through a small chamber then becoming very tight before it ends. From the junction,
the way on is to the right. 15 m further on, at an obvious junction just after a clamber down, the slanting rift to the left is the way to Aces High.
The Realm Of Baron Von Carno continues to the right at this point, ending at a choke after 40 m.
About 10 m before the end, a climb gains a stooping sized rift overhead, which can be followed to a choke after 10 m. A crawl under the wall
to the right reaches the top of a very narrow rift descent to the end of The Stream Of Running Commentary.
This can be used to create a round trip, but the descent is uncomfortably tight.
The way to Aces High is a stooping sized rift, which splits in two after 20 m, with the right passage ending immediately in a phreatic dome.
The left passage splits again after less than 10 m. The left branch temporarily becomes very tight and soon ends, while the right
branch is the way on. This enlarges, then passes through a low crawl, which marks the official start of Aces High.
After a short enlargement is a narrow crawl, which is easier than it looks, and soon enlarges.
The passage then reaches a climb down to a T-junction; it is very easy to miss this junction on the return. To the right is narrow, and ends after 30 m.
To the left is a crawl which soon becomes more comfortable, and reaches a junction with a much taller passage after 20 m, with cryostal deposits at the junction.
The main way on into Aces High's wide loop is to the left, which immediately becomes a crawl under a low arch.
To the right at the junction, however, is the longest side passage in Aces High.
It starts fairly narrow, soon reaching a climb down into a much larger canyon-style passage, which is the continuation of The Stream Of Running Commentary (though it is dry for its first half).
The climb is easy to miss on the return.
To the left soon ends at a choke with a visible connection up into the largest chamber in Aces High (mentioned later).
To the right, the passage has many mud formations and cryostal deposits.
After a narrow section, it enlarges again at a junction with a side passage on the left, which is the source of the stream, though it cannot be seen here.
Continuing ahead, the route is generally to stay up at ceiling level, while there are several deep rifts in the floor,
where a stream can be briefly seen, but not followed for long. After briefly enlarging, the route is along a roof bedding,
and through a squeeze, to emerge over a 6 m deep pit in the floor, which is blind. The passage then becomes a rift,
ending at a choke after 15 m. This is the other side of The Stream Of Running Commentary's terminal choke.
The side passage which is the source of the canyon-style passage's stream can be accessed via a tricky climb, where it then passes under a loose ceiling to reach a junction.
To the left, a narrow rift reaches a climb back down into the earlier canyon-style passage. To the right at the junction ends quickly.
Ahead-left is an awkward rift with a mouse skeleton in the floor. The rift ends in a chamber, where narrow passages to the left end quickly,
and to the right gains a stream before quickly ending in a low area, with a poised rock wedged in the ceiling (take care!).
A passage up an aven in the low area ends quickly.
Back at the main way on into Aces High's wide loop, beyond the low arch is a junction with a much larger passage, the start of the wide loop.
The main way on is ahead-left, but the passage to the right is the most impressive in Aces High.
The passage to the right passes many cryostal deposits, then up a climb and down another climb, into a large chamber, the largest in Aces High.
On the floor is an impressive cryostal deposit. To the right are short side passages, and an alcove with a visual connection down into the canyon-style side passage.
To the left is an obvious, large passage, and an almost invisible side passage under the left wall.
The large passage soon passes two taped off side passages on the left, each with a cracked mud floor.
Beyond them, the passage then passes a gritstone choke, while the floor becomes quite muddy.
The large passage shrinks and ends below an unstable ceiling (take care!).
Down to the left at its end, a tight slot enters an uncomfortably narrow rift, which can be followed for 30 m to a tricky climb down into a larger passage.
This is far more easy to access from the other side, and therefore the narrow rift is not recommended as an access route.
The almost-invisible side passage under the left wall of the wide loop's chamber starts as a rocky slope down into a larger passage, with mud formations and cryostal deposits.
It soon passes a side passage to the right, which is the back of the passages with a cracked mud floor mentioned earlier.
Continuing ahead instead, it narrows significantly, and after a right-angled bend, it quickly becomes too narrow, with a visual connection up into the uncomfortably narrow rift.
From the start of the wide loop, the main way on ahead-left passes many impressive cryostal deposits.
There is an almost invisible side rift tucked under the left wall part way along, which ends quickly.
After a left-right S-bend with an alcove on the left, the passage then passes through a narrow section where it is easiest to crawl, followed by another crawl.
After this, the passage turns sharply right.
Almost invisible here, there is a side passage up a 2 m climb to the left, which is the way to the smaller loop, and the connection to The Red Baron.
Continuing past the climb, the passage immediately turns sharply left, where a tricky climb in the ceiling gains the end of the wide loop's uncomfortably narrow rift.
Continuing past the two side passages, the passage soon gets more awkward, passing through an eyehole, to end at a dig after 40 m.
The climb leading to the smaller loop is a little tricky, and is followed immediately by a small descent into a narrow rift.
This soon becomes much easier, passing a tiny side passage on the right, and reaches a T-junction after 15 m.
The way on is to the right, but the passage to the left soon reaches a junction, where to the right ascends into a small, blind chamber,
and ahead starts low, enlarging to crawling sized, to reach a low dig after 20 m.
The main way on passes over a rock bridge, then reaches a junction in a chamber. To the left ends very soon after a climb up.
To the right soon reaches another junction in a taller section.
The passage on the left is an awkward oxbow, with mud formations that need to be carefully avoided (these can be more easily seen from the far end of the oxbow).
The way on is a rift with a short crawl, and soon reaches a major junction, at the start of the smaller loop.
Ahead is the head of the 8 m pitch down to The Red Baron's side passage, but it has traditionally not been rigged from this side,
and traversing over it without protection is not advised.
To the left at the junction, behind a large boulder, is the second part of the junction, with three side passages.
Ahead-right is the main way on.
To the left is the other end of the oxbow with mud formations.
Ahead is a narrow rift, but this is accessed instead by heading into the oxbow, and then turning right into the rift. The rift soon turns left into a dead-end 20 m crawl.
The main way on from the junction is a low crawl over sand, reaching a junction after 15 m. To the left is a very narrow crawl, which splits into narrow branches that soon end.
Ahead is the largest of the small loop's side passages, passing under a rock flake, and ending after 15 m at a choke below the floor of a side passage in The Last Post.
To the right, behind an enormous poised boulder, is a deep crater, with a ledge of boulders to the right that can be used to skirt it, and continue around the smaller loop.
The crater sits above the end of The Red Baron's side passage, but there is no connection.
Above it is narrow side passage on the left (accessed from an alcove next to it), which passes over a deep hole to end quickly.
The passage beyond the crater ends quickly at floor level.
However, at ceiling level is a small passage to the right, passing through a squeeze and low crawl to reach a large junction.
To the left are three side passages that all end very quickly.
To the right, a walking-sized passage quickly reaches the head of the 8 m pitch down to The Red Baron's side passage.
It was originally rigged from this side, but the original spit anchors should be considered unsafe.
The pitch is not left rigged, and is not normally used as a route, but was the original way into Aces High.
Traversing over the pitch would close the small loop, but traversing over it without protection is not advised.
The Y Gwter Fawr Streamway (Breadfruit Boulevard and Saint Giles Series)
The downstream passage of Y Gwter Fawr continues for a short distance past
some straws and around a few bends to a low, wet crawl. This opens up after a
short distance in a chamber. The way on from here is along another wet crawl
which was once, and sometimes still is, a very muddy and intimidating duck; Brownout on Breadfruit Boulevard. This
is about 30 m long, gradually lowering before becoming slightly higher about half
way along, and is the start of Breadfruit Boulevard (Chapter 1).
Once out of the duck, the passage enlarges to stooping size with mud banks but
this quickly becomes a short crawl. Following this the passage returns to stooping
size with crawls over mud banks and enlarges progressively over 300 m to become
over 10 m wide and 15 m high. At this point, however, the passage chokes at the April Fool Choke. Just
before the choke, an inlet to the right can be followed for 10 m to a fork. To the right
can be followed further than to the left but neither are longer than 30 m.
The route through the April Fool Choke begins at the top on the right and climbs steeply to a
loose but level passage. This is Saint Giles Passage at the start of Saint Giles
Series. This enlarges over 20 m to become 7 m high and 15 m wide. Some 30 m
ahead, a side passage to the right is the start of the Lamb And Flag Passages.
Beyond the passage descends a steep and very loose slope (take care) to regain
the stream. The passage at this point is about 10 m square with large mud banks
although these quickly give way to boulders. The passage then becomes
progressively higher (perhaps as much as 20 m high) with several boulder obstacles.
At one point, a large boulder spans the passage giving a choice of routes, over or
under. Immediately on the other side of this, two holes to the right enter Clerical Error.
This passage is not to be followed to protect its floor of dried crystal pools, which
can be seen from its start. Ahead,
the lofty passage continues to a rise up boulders. At the top, the passage is more
square-shaped. About 20 m along here, the taped route splits. To the left, a laddered
climb up a stal bank is the route into the Dyar Straits Streamway, while a further 20 m
ahead leads to another split in the route. To the right here is The Wiggly Business,
while to the left, the passage becomes much lower and arched. This quickly opens
out to its former size, passing a crystal pool containing some cave pearls, and
continues to enlarge.
Ahead the passage contains some deep pools of water and mud (these are easily
avoided by narrow ledges to the left, just above the water) and ends after 200 m in the
well decorated Passion Fruit Chamber. Here the way on fills with mud with the only
notable side passage being 40 m before the end, a narrow rift 50 m long.
The Wiggly Business begins as a low arched passage and continues for 350 m as
sections of passage, similarly sized, intersected by many squeezes and small chokes.
The last of these chokes breaks into 130 m of larger passage, a possible continuation
of Saint Giles Passage from Passion Fruit Chamber, which is well decorated with
crystal pools and other calcite formations.
Lamb And Flag Passages
The initial section of the Lamb And Flag Passages is 3 m square but quickly becomes a
tall rift. Two routes can then be followed, along the floor or 3 m above. The lower of
these two options is the start of Lamb Passage, which contains a stream, whilst the upper is Flag Passage.
These quickly become separate but follow a similar path. At a point about 100 m along
either, they rejoin, with Lamb Passage entering from below through a choke in the floor
of Flag Passage.
Flag Passage then continues past a crossroads with side passages
on either side, the one to the right probably being the way to Blue Crocodile Passage (to be confirmed).
At the next junction it continues ahead-left to reach a major
junction of routes. To the left passes through a choke after 60 m, and ends in silt
fill after another 50 m. To the right leads to a dig at roof level after 15 m,
to enter Pixie Meadows. Beyond the dig, a cairn marks
the location of a calcited climb on the right into Keyhole, while a crawl ahead reaches
the head of a 4.5 m pitch, rigged from 2 bolts above the pitch. At the bottom, a larger passage continuing in the same direction
as before reaches a junction after 45 m. The passage to the right soon becomes a
canal with deep water, which finally sumps after a 4 metre duck with very little airspace.
The passage to the left ends after 30 m in a small stream passage.
The calcited climb is about 6 m tall, and reaches a phreatic passage. After 20 m,
this reaches a junction with Keyhole. Downstream Keyhole leads to the right for 50 m
to a choked rift. Upstream Keyhole leads to the left for 25 m, passing low digs on
either side, to end at a tight rift.
The route to Blue Crocodile Passage passes through a squeeze into Blue Crocodile Passage.
50 m further on, at a choke, a hole in the floor descends a rift to reach an aven.
A squeeze leads into a side chamber, where a descent through rocks in the floor reaches a
way back into Saint Giles Passage, near the April Fool Choke.
Dyar Straits Streamway
At the top of the ladder climb, an oval tube 1 m high reaches a small step down after 5 m. The
way on from here is to continue in the same direction, feet first, along a much smaller
tube to reach a drop down. This is aided by a fixed handline and is the top of a 7 m
descent down a narrow rift to reach the Dyar Straits stream, which is also known as the Sanitizer Streamway. This rift is very awkward on the return
and should not be attempted by tired or inexperienced cavers. The stream can be
followed upstream for 10 m to reach a choke in the floor of Saint Giles Passage, the
source of the stream. Downstream the stream descends steeply, but without any
cascades, to end after 300 m of narrow, zig-zagging streamway, in a very low, silted
sump. This is the present limit of the downstream cave. From here, the water
flows west for 400 m to resurge in a small cave under a limekiln beside Cwm Dyar
(referred to as Clydach South Resurgences No 1 in The Caves of Clydach - Tony Oldham).
The passage is decorated throughout its length with both new and very old formations
(though none are particularly memorable) and has two main side passages, both of
which are to the right. The second of these, The Land Of Mr Ugg, which is about 200 m along the streamway, reaches
a tight and awkward rift passage which has not been pushed to a conclusion!
5. The East and the "Round Trip" route
This section contains the description of the "Round Trip", followed by the
descriptions of some of the major side passages and minor series encountered en-route,
followed by the series leading into the southeast area and finally the "Long Round Trip".
Tea Junction to Lamb and Fox Chamber
To the left at Tea Junction is White Arch Passage. This boulder strewn passage is
the obvious upstream end of the Beyond A Choke streamway although it is not
called so. After about 45 m, Back Passage (the first significant side passage, just after
a blind alcove that can be mistaken for a side passage) leads off up a
small slope to the right, and is the way into The Score.
Back Passage begins as a rift, and soon lowers to a bedding crawl.
Shortly after Back Passage is a larger side passage to the right, which begins as a fairly wide bedding plane which quickly becomes a crawl.
This passes through a narrow section and ends after 70 m with a visual connection to Crystal Cruncher's oxbow in The Score, just after a squeeze.
White Arch Passage continues upstream to reach a hairpin bend to the right, and immediately afterwards, Carpet Crawl enters from up a
slope to the left (the left-most of the two passages at the top of the slope). Shortly after this, a shattered
climb down is reached, which can be bypassed around the right side of the pillar that nearly fills the passage.
The passage continues for another 100 m of large streamway, to where the next significant side passage is seen as a 2 m high opening on
the right on the outside edge of a left bend, called Flood Overflow Passage. This leads to a very muddy, tight,
streamway known as Typically Tropical. This is about 100 m long in the upstream direction (to the left) and
passes under Raiders Passage, and is some 50 m long and rather lower
downstream (to the right). Both directions end in sumps, with the downstream sump's water
quickly emerging from a sump tucked under the wall in White Arch Passage.
Shortly after passing the side passage, White Arch Passage enters a passage-chamber after passing
through an impressive arch (although the author fails to understand the origin of the
adjective white!). The passage then turns left and continues for a further 100 m to
where a large boulder choke is reached. A way can be found through at the top
right hand side of the choke into the lower end of the enormous Lamb and Fox
Chamber, with its house-sized boulders.
Lamb and Fox Chamber
Lamb and Fox Chamber has two dead end, low level, side passages next to the way out
of the choke, one to the right, and one some distance away to the left. The passage to the right is about 100 m of crawl. The passage to the left,
Humpty Dumpty Passage, can be followed through a small choke to a pitch (10 m) and a traverse to an aven (5 m) each leading
to short sections of stream passage. Beware of friable rock around the pitches in Humpty Dumpty passage,
falls have occurred here; a handline or ladder is essential, especially for the bottom 3 m of the pitch.
High on the left in the chamber is a cascading inlet, even higher above which a rift
passage can be followed past a large bedding plane to the right to a choke. Just
before the choke, a low passage to the left can be followed to a series of climbs
down, leading to a passage containing a stream which can be followed until it emerges
in the north wall of Lamb and Fox Chamber where the stream becomes the cascading inlet.
The bedding plane also has a dead-end inlet, and an oxbow leading back into Lamb and Fox Chamber.
The cascading inlet has been used as a drinking water source, though the water has not been
tested for purity. A water collection container is often left at the bottom of the cascade (to the
left as you enter the chamber) for this purpose, but this is not an official aid, and cavers
should bring a bottle for collecting water if needed.
The way on from Lamb and Fox Chamber is up the boulders and over to the far right hand side of the chamber,
at the top of a climb up a cairn, and is a high level rift perched on a ledge on the right
hand wall of the chamber.
Indiana Highway
The high level rift (at the top of the cairn) from Lamb and Fox Chamber
begins as a stooping height passage, but soon gets higher before a large bedding plane
crosses in the floor below, with the way on continuing on the other side.
To the right in the bedding plane is the start of Raiders Passage. To the left in the bedding plane,
a climb down enters a chamber with a large 25 cm long fossil in the roof on the left, and a flat out
crawl on the far side on the left, which leads back into Lamb and Fox Chamber. The crawl is 40 m long,
and is inhabited by bats, so should not be entered. A very small passage to its right, Guano Crawl, which is also
important for bats so should not be entered, connects with
the bottom of the traverse further down Indiana Highway after over 50 m.
The usual way on is either to traverse
over the bedding plane, or to drop down into it then climb back up into the continuing rift at the
other side.
The continuing rift - Indiana Highway - is easy at first, a stooping-standing passage with a dried mud
floor. After a short distance, the rift from the side passage in Raiders Passage
(described later) is seen on the right. The way on continues past this, down and up
some slopes, before the floor drops away, and the main traverse begins. This continues
for a considerable distance. At one point, the normal walking ledges disappear, and a crawl
to the left bypasses an awkward corner. Immediately after this, a rope is reached. This is a safety
line across a 20 m deep shaft, Lost Crusade, in the floor.
Indiana Highway continues over the shaft to a breakdown chamber.
Two passages lead off; to the right is the Canyon (described
later), while straight ahead a climb up boulders leads to crawls around a long curve to the left
on exposed ledges either side of a trench in the floor. Alternatively, the crawls can be bypassed by climbing down into the trench at its start, then back up at its end. At the end of the crawls is a
large junction between Megadrive (ahead and to the right) and Megadrive North (ahead
and to the left), with Megadrive being the way on for the Round Trip and the southeast area of the cave.
A squeeze down past boulders on the left near the start of the trench enters a series of trench oxbows connecting to Megadrive North.
Lost Crusade is not the usual way on, but may be descended using a 30 m rope, rigged from a pair of spits
at the bottom of the Indiana Highway rift, using a traverse P-hanger as a backup. A third, less trustworthy spit further out
over the hole can be used to add a deviation, to avoid a rope rub at the lip of the hole; this can also be
used if rigging directly from one of the traverse P-hangers. In flood conditions, a waterfall pours into
the shaft from a secondary hole in Indiana Highway, but the normal descent should avoid it.
At the bottom of the shaft, an awkwardly narrow passage, Destiny, heads back underneath Indiana Highway, accessed via a climb up.
This passes over a blind pit to reach a small chamber. To the right is a crawl, passing through a narrow slot
directly onto the head of a 5 m pitch. The pitch requires a ladder rather than a rope,
rigged from a pair of spits in the small chamber, using a long tether to reach the head of the pitch.
The pitch reaches a climb down into a tall rift, which carries a stream in flood conditions.
The rift shrinks and passes beneath some loose boulder obstacles (take care!), ending in a small chamber.
The chamber has a loose hole in the floor, straws, and some cave pearls just before its end.
Megadrive to Saint David's Hall
From the Megadrive and Megadrive North junction, turning right heads along a low,
impressively wide bedding passage, the Megadrive. This quickly becomes much
higher. After 100 m, the larger Siambre Ddu Passage doubles back on the left (note: it is
easy to accidentally follow this passage on the way out if not doing the "Round
Trip"). This can be followed for 150 m to a large choke with two avens (one part
way into the choke).
The Megadrive soon becomes more diamond-shaped and continues for some
distance getting higher and wider (in some places it is large enough to hold three
buses!), until the passage shrinks in size at an obvious corner. Here the passage
takes a sharp left turn before continuing as a much smaller passage, The Nunnery.
This starts as a low, very draughty crawl but soon opens up to become more
square-shaped. After a short distance, Going Square leads off to the right at Windy Junction and The
Nunnery takes on a shape more reminiscent of a mine.
The next passage along The Nunnery is Perseverance II on the right. This is the
usual way on. The Nunnery continues past this junction however, and another
passage on the right (the original flat-out crawl route into Perseverance I), until an echoing chamber, The Chapel,
is reached beyond a dangerous looking choke. Here the passage continues after
a scramble down to the left but terminates after about 5 m in another loose choke
which is very close to the surface (this choke was dug to construct a second entrance,
but this was then filled in and sealed, and must not be used - the construction of entrances
here is prohibited by the landowner and the cave management group).
Perseverance II is a crawl for the first 70 m, becoming a larger
square passage just before some calcite formations. The main way on is to continue along the larger passage, but behind the formations on the right, the
tight Hoo Hoo Crawl leads, after much squeezing and tight crawling to Going
Square. Continuing along Perseverance II, the square
shape soon turns right and gives way to a round, sandy floored, passage, initially stooping height.
This passes a rift leading into The Rabbit Run on the right at its initial left bend.
Shortly afterwards, Perseverance I
(the way to the Long Round Trip and the southeast area of the cave) leads off to the right.
The sandy passage of Perseverance II continues ahead (the way on for the Round Trip) until the floor suddenly falls into The Arms
Park from the 8 m high Balcony Pitch (a fixed ladder has been installed).
Two passages lead off from the bottom of the pitch, while a 7 m pitch up on the far side
(originally maypoled but a cord was in place for rigging a pullthrough rope in 2017) leads to Erection Series. Erection Series is a 100 m
long passage with its terminal choke that is very close to the surface. An oxbow on its left side has a pit
requiring a 6 m pitch down, a 10 m pitch up, and a climb down to complete the oxbow.
In Arms Park, the passage ahead-right (as seen from the head of Balcony Pitch) at floor level leads for 100 m
to a point where a way on is through a bedding to the right. This ends after 50 m in
an area of breakdown near The Chapel and under Erection Series.
The way on from The Arms Park is the left hand passage (as seen from the head of Balcony Pitch), The Players' Tunnel. Starting low down, this
quickly leads into an enlargement, with the way on down a hole through boulders to
the left. Continuing along a large boulder-strewn passage for some distance leads to
the enormous Saint David's Hall beyond an easily passed boulder ruckle. This chamber
contains innumerable numbers of boulders on the floor but has a perfectly flat roof.
Saint David's Hall to the Beyond A Choke streamway (the "Round Trip Connection")
When using this section to access Life on Mars or Crystal Maze via the Beyond A Choke streamway, follow this section in reverse.
From Saint David's Hall, there are two ways on, and both may be used for
the Round Trip. The original and usual route is Squirrel Rifts, while Agent Blorenge II
is an alternative option.
At the far end of Saint David's Hall, a low passage called Game Over (originally named Swallow Series) leads off, for about 100 m.
At its start, a route on the right leads down through the choke in the floor of the
chamber into the end of Agent Blorenge II. This starts impressively wide, and carries
a significant stream under the boulders. It can be followed for 250 m,
through some surprisingly large sections of passage. After passing some oxbows, the
roof lowers to stooping height, and the passage passes under an aven into a blind rift,
before ending at a sump.
Just before the passage lowers to stooping height, a tricky climb up to a
ledge on the left, with the main holds tucked into a cleft on the left, enters a steeply ascending, narrow rift,
leading up to a junction with the Squirrel Rifts main route. The main way on is
to the right, which quickly reaches the chamber where the way to the "Round Trip
Connection" is to the left, and Wooden Spoon Passage is to the right.
From Saint David's Hall, a short crawl high up amongst the boulders
on the left gains the main way on, through the complex and misleading Squirrel Rifts.
All of the significant side passages in this area are either oxbows
or enter Upper Rift & beyond (see that section for details),
with the first hole on the left leading directly into Agent Blorenge III.
After a right turn about 25 m along the passage, the way on follows the largest
passage until it reaches a junction with a large cross rift after about 250 m, where
there is both a high and a low level continuing ahead. At
many points along this section of passage, the route turns sharp corners, often giving the impression
that the passage is heading in the 'wrong' direction. At the last right turn before the cross rift, in a wider section, a hole ahead drops into
Upper Rift & beyond, and is the preferred route into that area. To the right in the cross rift reaches an awkward hole down which
connects with the end of Game Over. The way on from the junction
is into the cross rift to the left. Almost immediately, this rift continues ahead as the pitch route into Upper Rift,
while the main way on is down a sloping hole to the right (or a second hole immediately
after it).
From here on the way on becomes more obvious, quickly passing through a keyhole-shaped
section. A right turn followed by a climb up boulders leads to more keyhole-shaped passage,
with many short, dead-end side passages. Only two side passages are of any size, the first heading
to the right and containing some chocked boulders at its start. The second significant side passage, Sparrow,
is down an obvious hole to the left just after a climb down. The hole to Sparrow descends a climb and a funnel of rocks, before leading through two eyeholes where a stream can be heard in a blind side rift, to reach a junction. To the left closes down while to the right soon reaches a junction with a stream passage to the left and a dry passage ahead. The stream passage soon passes through a wider section to become a narrow rift which soon ends after an awkward climb, while the dry passage passes through an enlargement where a crawl diagonally opposite soon reaches Sparrow's terminal chamber with a too-tight rift on the opposite wall, and a bat skeleton on the mud floor.
Back in Squirrel Rifts, after 150 m since the junction with Upper Rift, in a section with old stal decorations in the roof,
another short side passage leads off to the left while the main way turns to the right, then back to the
left in a funnel of boulders. Shortly afterwards, some rifts on the left lead into the
"Round Trip Connection" and Haggis Basher Number One, but are not the usual route.
The first ascends a climb before turning right in an enlargement and passing down and up climbs to reach the pitch down to Haggis Basher Number One.
The second reaches an enlargement and passes through a squeeze to the left, eventually passing a side passage reaching the Round Trip Connection on the right, before connecting to the first route just before the pitch.
The main passage finally terminates after a further 25 m in a chamber with the large
Wooden Spoon Passage to the right and a smaller one to the left (the usual way to the "Round Trip Connection"). Two corners before this
chamber, a steeply descending rift on the right leads to a tricky climb down into Agent Blorenge II, and the alternative
route from Saint David's Hall. The main holds for the tricky climb are tucked into a cleft on the right. (When heading upstream in Agent Blorenge II, the way through the choke
into Saint David's Hall starts at the top of the choke, to the right of its middle, and heads to the right within the choke.)
Back at the chamber in Squirrel Rifts, the main way on is to the left. After 35 m, it turns right and develops a deep trench in the floor, which is the usual way on.
On the way to the trench, the passage passes an alternative hole down on the right which connects with the bottom of the first Round Trip Connection climb, as well as an oxbow on the right, while to the left at the corner connects with the alternative route from Squirrel Rifts into Haggis Basher Number One, where the way to its pitch is to the right.
At the bottom of the trench, a passage doubles back beneath the way in, to another hole down, where continuing ahead above the hole only leads back up to the passage above the first climb. On the left above this second hole,
a low alcove contains one of the routes into Life On Mars,
while dropping down the hole reaches a narrow rift doubling back again towards the same
direction as the passage above had been heading (the "Round Trip Connection").
The rift becomes crawling height and narrows to pass through a squeeze into Haggis Basher Number One,
a relatively large passage which heads in both directions and carries a small stream.
The main way on is downstream to the right, and the alternative route mentioned earlier enters from an aven above the junction.
When following the Long Round Trip, follow the next paragraph in reverse.
To the left in Haggis Basher Number One leads past good formations to a choke. The choke can be passed by way of a hole
on the left, most of the way up it. Ducking under a large boulder then gains Haggis
Basher Number Two. This can be followed for 60m, past some formations and
a short inlet, to a chamber and choke. Immediately to the left in the chamber, a low
crawl is the connection to Interesting Times, and the Long Round Trip.
To the right in Haggis Basher Number One, the passage remains large. After 20 m, a
ramp on the left leads to Life On Mars. About 40 m further
on along Haggis Basher Number One is a boulder pile, whose awkward climb down can be bypassed using an oxbow to the left.
Immediately afterwards, it reaches a junction with a large stream passage. The large Sump Inlet passage leads off on the right but this soon sumps (the
other end of the Agent Blorenge II sump), with a 50 m long side passage to the
right passing over an airbell in the sump. The main way on continues downstream ahead, as
Far Agent Blorenge, a big gravel-floored streamway. It passes several oxbows and the 150 m long
gypsum decorated Crystal Mole passage to the right, to a point where the water disappears
down a rift to the right. The way on is a crawl ahead into a chamber, where the stream
enters from a small rift to the right. From the chamber there is also the downstream passage of Agent Blorenge to the right, and a crawl ahead
over sand. If negotiating the Round Trip then either route can be followed.
The stream route, however, is faster and less exhausting, and reconnects with the
other route after 80 m at a small cascade, just after a traversing section,
where the way on is downstream.
At this point, a climb up into a rift on the left instead (the end of the alternative route), and
a traverse over a hole reaches an inlet, where the crawl into Crystal Maze is on the right,
opposite the inlet.
Around 30 m along the alternative crawl ("Chocolate Blorenge"), a smaller passage
ahead-right is the way on, while the larger passage ahead closes down.
30 m further on, the smaller passage enlarges to standing height. A
climb overhead to the right leads into 40 m of passage which ends above the stream route, while the main route continues ahead below.
Immediately after this, an inlet enters from the right. Opposite the inlet, a crawl to
the left leads to Crystal Maze, POB Passage and The Swim. Continuing ahead past the inlet,
a junction is reached almost immediately. To the left, a stooping-sized passage can be followed for over 20 m, while
ahead, the main way on leads along a traverse over a hole, which reaches a climb down to the junction with the stream route at a cascade.
From the junction of the routes at the cascade, the way on is downstream, but almost
immediately becomes an extremely tight rift. The tight rift can be bypassed by an eyehole and climb down to the
left, where the ongoing streamway immediately enters The Sewer, a 30 m long, 1.5 m high passage half full of
water.
Beyond this, the way on leads along a very narrow traverse that ends at an awkward climb
that looks easy from the top. A 10m doubled handline is advised, looped over a small
spike of rock 3 m off the floor at the first available route down the climb (this
was rigged with an unofficial handline as of September 2017).
Almost immediately afterwards is another climb down to the Second Sewer. This is shorter than the first but
begins with a duck, Duck À La Blorange, where it is possible to keep your head dry. A difficult chimney
up the tight rift immediately above the duck reaches a higher level bypass. Downstream
from here leads down a series of small cascades and exposed climbs, characteristic of
this end of Agent Blorenge, to the Beyond A Choke streamway (see that section for details) at The Confluence. Upstream from here leads
to Tea Junction, and the end of the Round Trip.
Raiders Passage
Raiders Passage starts off as a bedding crawl, and soon develops a very deep rift in the floor,
requiring a crawl along the ledges on either side of the rift. It has only two significant side
passages, both of which are at the level of the bedding plane. The first side passage is almost immediately
on the left, and is usually taped off, but the historic tapes are there to remind visitors to be careful
of bats, not to deny current access. Shortly afterwards, the bedding stops following the rift, and turns
left into a flat out crawl, becoming the second side passage. Both side passages end up in the same place,
but the first is the larger and easier of the two, being initially walking sized.
After a short crawl, it reaches a junction with some enormous deposits of bat guano ahead.
To the right, the second side passage joins from a wide undercut. A narrow
rift on the left next to the guano deposits quickly leads to Indiana Highway. The larger passage ahead-right
is the continuation of the side passage, where the meandering rift in the ceiling often allows walking,
avoiding crawling through the beddings. The passage enlarges and continues for about 100 m, but eventually
comes to a dead end. Back around 10 m is a long, flat-out crawl over sand to the right, passing through
Flash Squeeze, which is no longer a squeeze. This leads to two chambers, the upper one of which has a vocal
connection with a rift in Canyon West, but the connection is too narrow.
The main Raiders Passage is, however, down into the rift in the floor at the
start of the second side passage mentioned above. The usual descent location is shortly
before the bedding crawl turns left and stops following the rift, where there are some obvious small ledges
which can be used for climbing, and a large boulder to land on. The climb can be quite tricky
on the way back up, but there are no good attachment points for a rope or ladder,
so a stronger climber may be needed to assist weaker climbers.
While it may look possible to descend earlier, the rift bells out at the
bottom for most of its length (except at its start), and this will result in a fall. Back under the way in, the rift
ends beneath Indiana Highway, so the way on is to continue away from Indiana Highway.
Raiders Passage, like the series past Big Bang Pitch, contains many fossil shark spines up to 25 cm long.
The passage immediately obtains a solid roof and enlarges (up to 3 m high and
2 m wide). After about 75 m of phreatic style, Raiders Passage takes a sharp left
bend in a larger section of passage. Immediately after this corner, a fossil spine about 25 cm
long (the largest in the passage) can be seen on the wall to the right.
For about 400 m from here, the passage becomes more shattered, necessitating a few
climbs and stoops, with occasional short oxbows in the ceiling.
The passage displays a distinctive orange and white colouration on either side and has an
unconformity in the roof. Many fossil pectoral and dorsal spines, large piles of bat guano (up to
3 m long, 1 m wide and 0.5 m high!) and gypsum "cornflakes" can be seen along
here before the passage splits in two. To the right a low passage (the usual way on) becomes flat-out
before entering the other passage, while, to the left, the larger passage continues up
a small climb. When the two passages join, the phreatic style again takes over. The fossils increase
in abundance, with occasional Ctenacanthus teeth and Psammodus grinding tooth plates, making this
the richest area for seeing these fossils in their natural setting.
The passage continues for a further 400 m until it joins a larger and higher passage.
To the left closes down very quickly, while to the right leads along an almost
perfectly straight rift, past a short, large side passage to the left, to a hairpin bend to the left.
On the bend, a large fossil can be seen passing through a flake of rock on the left.
From here, the passage becomes noticeably phreatic, with a bright white ceiling, without a significant number of fossils.
After about 200 metres, it lowers to a crawl, and appears to fill up with mud at a corner. This can be
crawled over to access another section of large phreatic passage with a small
oxbow to where it also appears to close down. Ahead, a rift ends at a dig doubling back on the left.
This branches, with the way ahead immediately closing down, and a hole up to the right reaching a small dolomite chamber.
To the left chokes with mud, but to the right leads to a dig. This passes through numerous crawls and U-bends,
separated by small chambers and standing spaces. While the first chamber has attractive mud formations,
the crawls beyond it become progressively more awkward, with some squeezes, and the little chambers become
progressively less rewarding, until you either give up in frustration, or reach the end of Raiders Passage.
A sad end to a very fine passage.
The Canyon Passages
At the start of the Canyon a smaller rift passage quickly leads off on the left. This
is Canyon East, which is a canyon style passage. Meanwhile the larger passage ahead-right leads into
a chamber. To the right here is the other end of the Northern Loop from Megadrive North, to the
left immediately drops back into Canyon East, while ahead-left, a beautifully sculpted
passage with a white ceiling leads to a series of three oxbows with four passages leading off. Two of these
are dead end rifts on the right (one of which is assumed to connect with the end of the side
passage in Raiders Passage), one is off an oxbow on the left, and the most obvious one of which is the more smoothly sculpted Canyon
West. The easiest way to get to that passage is to take the option to the right at each of the large oxbow junctions,
then after passing a pile of bat guano 2 m by 1.5 m in size - the largest in the UK - take each left instead.
From here, there are no further side passages until the Canyon passages join.
Canyon East is joined by a roof passage from Canyon West at it start, but is then
very straightforward with no side passages, though there are a couple of roof oxbows.
The two Canyon passages join after 350 m (along either passage), with Canyon East joining from
floor level and Canyon West joining from roof level. The combined passage continues as a tall,
somewhat keyhole shaped, passage. 30 m after they join, a sloping route up the wall on the
left reaches Big Mole Passage on a balcony at roof level. The Canyon continues for a considerable
distance, sometimes needing scrambling over rocks, and sometimes being easier on the wall ledges.
After 200 m, a narrow rift up a climb into the roof on the right ends quickly.
The Canyon becomes much wider for a brief time after a right bend, where the draught is lost
(presumably joining Wooden Spoon Passage which ends 25 m below the floor). 150 m further on, the
passage splits into an upper level on the left, and a lower level on the right. The upper level
on the left is very hard to reach from this direction, so is usually approached from its other end.
If trying to reach the end of The Canyon, the easiest route is to take a narrow rift to the left,
hidden below the upper level. If trying to reach Tractortracks, the easiest route is to take the
lower level on the right.
The rift on the left passes a very tricky chimney up to the left into the upper level, then descends
to become the lowest level rift. After 60 m, it passes below a difficult chimney up to the
Tractortracks junction, which is best avoided (confusingly, it is also backwards due to a zig-zag
- continuing ahead at the top of the climb leads back to the split-junction of the levels). 25 m on along the lowest level,
another hole in the roof to the left rejoins the upper level. 10 m further on along the lowest level it reaches a
major T-junction. To the right rises up a slope and doubles back to the right to reach the end of
the upper level. To the left is the way on, remaining level then doubling back to the right through a crawl.
This soon reaches a junction with roof oxbows ahead. The way on is to remain in the rift, starting on the left then zig-zaging, then taking
a narrow rift to the right at a junction. This passes a few digs before the main way on also ends at a dig.
The way towards Tractortracks starts as a crawl (this was the lower level to the right at the split in The Canyon), ascending to a walking passage, now at the higher level.
This passes over a tricky hole down to the lowest level, then ascends a rubble slope (with an unnecessary
unofficial rope in 2020) to a junction.
On the left is a rift doubling back to the split-junction of the levels (the climb down at the end is very difficult).
On the right wall of that rift, at its start, clearly visible from the junction, is a climb up into Tractortracks
(with an unnecessary unofficial rope in 2020). Ahead at the junction is the continuing upper level. This soon passes
over another hole down to the lowest level, which can be free climbed with care, before it reaches a junction
with a tight rift. To the left closes down, but to the right reaches a slope down to the lowest level.
Tractortracks starts as a stooping passage, but soon reaches a squeeze. The stooping-walking passage continues
on the far side, soon gaining a lot of gypsum flower formations. After 130 m, the gypsum ends, and the passage becomes
a comfortable hands and knees crawl (this point is 35 m above Far Agent Blorenge, having completely crossed the
middle of the Round Trip). After 30 m, it pops into the side of a wider passage. To the left closes down, but
to the right soon descends through a low crawl to a small chamber. A climb up into the continuing passage soon passes
through a low U-bend into another enlargement. A small hole on the left soon reaches a very abrupt dig face.
Big Mole is a hands and knees crawl for about 60 m. After that, it becomes lower,
passing through a squeeze. It remains fairly narrow for another 50 m, ending at a low dig doubling
back on the left. The dig starts with a squeeze on a sharp bend, and is quite difficult to reverse.
Megadrive North and Underworld Series
Megadrive North begins wide with a deep rift in the floor and can be followed for
200 m, through a shattered section part way along, to a choke. For most of its length, the
rift in the floor meanders through 15 m wide beddings to the right, while
occasionally crossing the taped path through the main part of the passage.
After about 40 m, one of the undercuts on the right contains the downstream end of Black Beetle
(mentioned later), while a hole down in the trench on the left after 65 m enters a series of oxbows formed in the
undercuts. About 100 m along Megadrive North, just before a 15 m waterfall in the middle of the
passage, a triangular shaped passage (point upwards) can be seen to the left.
This is Northern Loop, which can be followed through a zig-zagging section, beginning with a sharp corner
to the left, to reach the Canyon.
The choke at the end of Megadrive North is in a chamber with several other routes
leading off. To the right, Anastomosis Passage begins in an undercut with guano deposits.
This can be followed to a short oxbow where the ceiling is covered with anastomoses,
with the route to the right being a rift and the route to the left being a crawl at head
height. Where these two routes join, two routes again lead off hidden behind a boulder pile.
Ahead-right, an obvious rift passage reaches a choke where a hole up reaches a short
continuation with a white ceiling and a wide bedding to one side. From the boulder pile,
a climb down to the left drops down into the main part of Anastomosis Passage. To the right
here ends quickly, doubling back to the left reaches a squeeze onto a climb into the chamber
at the start of Blue Eyes Cryin' and Faded Love (both mentioned later), while ahead-left,
a small stream passage can be followed upstream for 50 m, becoming increasingly small, to
reach gravel fill in a turning space.
Near the end of the chamber at the end of Megadrive North, a low bedding on the left has
a narrow side passage ending at a dig. Near the start of the chamber, a rift up a climb on
the left wall is Fear Of Flying, 75 m of passage starting with a demanding rift traverse,
and containing several little climbs and short branches.
At the point of entry to the chamber at the end of Megadrive North, a trench passes
from the centre of the passage to the left. The climb down into this is loose so
should not be used. About 10 m beyond this, however, a second section of trench directly
below Fear Of Flying can be descended easily. To the left chokes beneath Megadrive North
after 20 metres, but a low bedding plane at floor level on its right side (to the left when
facing the choke at the end of Megadrive North) can be followed to a small enlargement.
In the enlargement, three holes known as Lemming Pot drop down in the floor
(the one directly ahead (the right-most of the three) should be the easiest to descend, having a boulder pile
beneath it) into a large chamber. This is the start of Underworld Passage and
Underworld Series. To the right here, the large passage continues, passing a
bedding to the left almost immediately, and a large echoing aven slightly further on, followed by a significant inlet.
It then passes a 22 metre pitch to the right, followed shortly by a blind pot on the right
and a small inlet on the right which chokes after 20 m. The passage ends shortly afterwards at a
large crater and boulder choke, 100 m from its initial chamber.
The 22 m pitch in Underworld Passage drops down to the right (backup to a solid boulder, there is
a bolt rebelay 3 m down on the near side of the pitch).
This enters Underworld I, which may be incorrectly marked as Under Underworld on
some surveys. At the bottom, the stream that sprays (in most
conditions) down the pitch flows North-West through a very muddy grovel, to reach
a choke after 20 m. About 5 m before the end, the masochistic can follow a very
low and exceedingly muddy passage for 50 m. Half way along on the left is a
small chamber with a blind 10 m aven.
Heading in the other direction along Underworld I, 100 m of wide,
crawling/stooping passage enters a decorated chamber. To the left, the passage
shrinks slightly to reach an inlet choke, just beyond a calcite floor. Ahead, a
smaller decorated passage reaches an impenetrable sump after 35 m, just beyond
a small stal grill, while to the right, a hole down enters a torturous 150 m long
streamway, with several old formations, to reach a totally silted sump. Water in this
passage would almost certainly back up in flood.
The bedding to the left in Underworld Passage reaches a crater, which can be
descended in stages through boulders to reach a well-washed passage. This leads to a 5 m climb
down to a stream (the same one seen in the early portion of Underworld Passage,
Blue Eyes Cryin' and Anastomosis Passage), Underworld II. Almost immediately, two 5 m pitches
are met in quick succession. The first having spit bolt holes above the pitch and the
second probably having the same (although none were found on a reconnaissance
trip). At the bottom, 30 m of very tight streamway reaches a too tight section.
In the chamber at the start of Underworld Passage, a route can be forced (with care)
through boulders to the left to reach a blind undercut. The stream below issues from Blue Eyes Cryin', although
there is no physical link. Ahead in the chamber, holes through boulders in the floor
reach the stream again in another blind undercut. Above these holes, a short and narrow rift
with phreatic shelves, which is initially quite awkward, can be followed for 20 m to
a chamber. To the right, a short section of passage reaches the climb up to the squeeze
into Anastomosis Passage, which is quite awkward. Ahead is
a continuation of the narrow rift and down a hole in the floor, just to the left of the
previously mentioned passage, is Blue Eyes Cryin'. This consists of 50 m of stooping
height, but wide, passage beginning with a trench in the floor containing a stream and
ending in a choke. The continuation of the narrow rift, Faded Love, is a crawl that
gradually enlarges over 50 m before breaking into a short section of larger passage terminating in a choke. The
choke at the end of Blue Eyes Cryin' is in the floor at the start of this section of passage,
suggesting that these two are in fact one and the same passage.
Black Beetle
Black Beetle has two access points, but is generally easiest to navigate when accessed from Siambre Ddu Passage.
A short distance before the end of Siambre Ddu Passage are two low beddings to the right. These are
sometimes taped off to prevent casual visitors, but may still be accessed with care to avoid damage to
the mud floor. The bedding further from the choke is easiest, and is soon joined by the other. The
combined passage follows a narrow rift in the floor before entering a wider section. This has a large
choke to the left (this can be ascended for a long way, but is not stable, and visits are not advised),
and several too-tight holes around the perimeter. A slot in the floor reaches Black Beetle, with its
fairly significant streamway, which runs in wet weather.
The slot is quite tight, and lands on top of a boulder pile which should be treated with care. An
extra step down reaches the downstream passage, while a hole to the side (to the right when approaching
the slot from Siambre Ddu Passage) is the upstream passage. The upstream passage starts small and requires
crawling in the stream in several places. It reaches a choke after 40 m.
In the downstream passage, a small inlet to the right reaches a muddy chamber after 10 m. All ways off are
choked, or have too-tight connections back up to the bedding in Siambre Ddu Passage. 10 m further downstream,
a roof tube reaches a choke after 15 m. The downstream passage continues for another 100 m with
some rock obstacles, before the stream flows out under the right wall. Following the stream back into
a larger passage, to the left is an inlet which reaches a choke after 25 m. To the right soon loses the stream,
and a dry passage to the left here enters the side of an undercut in Megadrive North.
Going Square
Going Square begins walking/stooping height and reaches a crawl after 60 m.
This enters a chamber with short side passages to the left and right, and one
heading back under the crawl. The way on is through another crawl ahead-left.
About 15 m ahead, a hole down to the right enters an oxbow that lowers to
a crawl. This will be mentioned later. To the left, a passage behind rocks leads
through a very tight section (Hoo Hoo Crawl) into Perseverance II. Continuing ahead,
after 30 m, a short slope down reaches a junction where a squeeze to the left enters
the small passage from the side passages in Perseverance I, and ahead is the way to
the connection with Fault Chambers. To the right is the continuation of Going Square.
About 30 m further on is another junction. To the left is a short side passage
while Going Square continues to the right. Ducking under a rock arch, an enlargement
is reached where a crawl to the right is the oxbow mentioned earlier. Turning left
here, the passage decreases in size to become stooping/crawling height. Ahead, a
crawl in the floor to the right ends in shale fill after 40 m. The way on passes a
short side passage to the right and after about another 50 m enters a chamber. There
are many side passages leading off the chamber, none of which are longer than about
20 m. This complex area is over the middle portion of the Squirrel Rifts.
The way to the connection with Fault Chambers reaches a junction after 40 m.
Clambering into the rift ahead, an awkward climb down in the floor enters Rift
Chamber in Fault Chambers, ducking out from under the wall. This climb has few
handholds or footholds near the top and a very tricky landing. A 10 m handline may
prove useful on the return, although finding a secure belay point may prove very
difficult. To the left at the junction, a narrow passage becomes a traverse before
the floor drops 10 m into a pitch. This can be more easily accessed from a side passage
in Sugar Cube Chamber in Perseverance I. Either route drops 10 m to the floor, where a
further awkward climb down reaches a series of small, very muddy passages and a slippery
traverse.
To the right at the junction in Going Square, the main way on is Fault Rifts.
This begins as crawls separated by short standing sections, one of which has a
short dead-end passage to the left. After several standing sections, one has a
natural rock bridge to the left. Continuing through eyeholes ahead, the passage
branches several times, each route ending after less than 20 m. The way on is
to climb onto the rock bridge (this may be more easily reached by crawling under
it and then climbing up the other side). The way on is to traverse to the left
into an eyehole, running parallel to the way in.
Once through the eyehole, a climb ahead reaches a junction. Ahead-right is the awkward climb up from Rift
Chamber, while back to the right is a further junction. To the right, a crawl
under a choke reaches a clamber down to the head of an awesome pitch, where water
sprays in from 10 m above and lands over 20 m below. The pitch lies almost directly
above the small streamway in Tube Surprise. To the left at the junction, a chamber has
a short side passage to the right and a crawl over a slab ahead. The crawl reaches
a junction with a rift where to the left, a short passage has some short side
passages. Above at the junction, a very tight ascent in a rift for 5 m reaches
Headache. This enlarges and ends after less than 50 m. Passages to the right along
here enter a parallel passage where to the right enters the other side of the pitch
mentioned earlier, about the same distance off the floor, and to the left reaches a
30 m pitch, this time above the first inlet in Upper Rift.
Upper Rift & Beyond
From Squirrel Rifts, Upper Rift's pitch route can be followed through three tight squeezes to a 10 m pitch.
The bottom is more easily reached by taking the preferred route, on the wide right bend in
Squirrel rifts just before the junction with Upper Rift's pitch route.
The preferred route starts as a tight hole down (very difficult to ascend, and quite committing), quickly reaching a sandy junction with a wider passage.
To the right is Downstream passage, which chokes after 35 m, with Ben's Link entering up on the left after 10 m.
To the left is Upstream Passage (not to be confused with the identically named
passage in the northern part of the system) which soon reaches a junction with the way on to the right, and the sandy Tube (that is its name!) on the left.
Upstream Passage soon offers a choice of a flat-out crawl in the stream or a traverse above.
Eventually, it passes through a squeeze on a corner at roof level into Upper Rift. To the left, the route leads over
a traverse to end too tight. To the right, the rift descends a climb, and passes Ben's Link on the right,
to end at the foot of the 10 m pitch, where an inlet enters.
Tube begins as the last sandy slope on the left, and takes the left branch when it immediately splits above the slope.
The passage can be followed through some small sections to where it enters a walking height pasage, where
the way on is to the right, followed by a left at the next junction.
Near the end of the passage, a hole on the right enters Tube Surprise. This
passes several short side passages as it winds its way
for 75 m to a junction with a passage to the right containing a small streamway.
Continuing ahead reaches a choke after 40 m. A route through the choke enters a larger
passage, Agent Blorenge III.
Unlike the other Agent Blorenges, Agent Blorenge III does not contain a stream. It can
be followed for about 30 m to a rift on the left which, after 20 m, enters the Squirrel
Rifts main route before the initial right turn.
Wooden Spoon Passage
Beginning at the chamber in Squirrel Rifts, the 300 m long Wooden Spoon Passage starts walking sized to the right, and passes down and up
rocky slopes before lowering to crawling size with some layered mud banks, passing a side passage to the left.
A lowering passage to the left is the start of a tight double oxbow, while the main route continues to the right,
becoming an awkward rift passing over some inconveniently placed stal. The double oxbow rejoins as a larger passage
down a step to the left, where there is also a short side passage down a crawling-sized hole in the floor.
The main passage continues until it appears to end, with a low crawl continuing over a mudbank to the right.
The low crawl splits in two, with both branches ending in a series of digs.
Life On Mars
In the alcove above the Round Trip Connection, a narrow rift to the left leads via narrow climbs up and down, to end after 15 m.
Shortly before the end, a 4 m climb overhead gains a higher level continuing in the same direction.
After 10 m, it drops down a climb into a wide rift, the main passage of Squirrel Rifts II.
A side passage to the left leads to a window over the junction of Haggis Basher Number One and the
Round Trip Connection. Just a few metres ahead in the wide rift, a side passage to the right is the
alternative way in from Haggis Basher Number One, while the main passage continues ahead above some wedged rocks.
Alternatively, a climb up the ramp from Haggis Basher Number One leads to a crawl on the left after 10 m.
The crawl quickly leads to a traverse along a rift (the same rift is seen from the bottom in the initial Squirrel Rifts II side passage).
After 20 m, the traverse swings right and gains a solid floor. Almost immediately, a passage to the left reaches a window
looking over the Haggis Basher Number One ramp, while ahead enters a larger passage. To the left is the alternative way in from
the Round Trip Connection, while to the right is the main passage of Squirrel Rifts II, above some wedged rocks.
The main passage of Squirrel Rifts II starts as a very small crawl, which is a little larger than it first appears.
After 20 m, it briefly becomes a larger passage, with the main way on continuing ahead.
Where it enlarges, a passage on the right is the initial side passage of Squirrel Rifts II.
The initial side passage of Squirrel Rifts II has a side passage to the right, which passes through a squeeze (beneath the traverse in the alternative way in
from Haggis Basher Number One) to end at a view over the Haggis Basher Number One ramp.
Continuing ahead along the initial side passage of Squirrel Rifts II passes through a squeeze to reach a junction,
where to the left degenerates after 25 m, and ahead passes through several squeezes before it also degenerates after 60 m.
The main way on through Squirrel Rifts II continues ahead at the junction, soon becoming a short crawl, and passing a small side passage
on the left (which may not be noticed). It passes diagonally through an enlargement before entering a standing-height rift to continue to the right.
Soon afterwards is another short side passage on the left. The continuing passage then reaches a T-junction,
some 75 m after the initial side passage, with the main way on being to the right.
To the left, however, a side passage can be followed for over 100 m, starting with a large chamber
(with the floor forming the choke between Haggis Basher Numbers One and Two).
A climb up the stal on the far side of the chamber reaches a well decorated grotto with elaborate anthodites,
and large stalagmites. At the far end, a very awkward squeeze down through the calcite floor reaches a
continuation of the grotto. The squeeze is not tight, but turning the corner may prove impossible for tall cavers.
The continuation reaches a 5 m pitch down, rigged from stalagmites, with an awkwardly narrow section at the top. At the bottom, a side passage ahead-left is 50 m long,
while the way on is up a small climb into a short rift ahead, followed immediately by a 5 metre climb up into a higher level above.
The higher level contains more stal decorations including a large stalagmite, soon reaching a bolt traverse at roof level, rigged
from spits on the right wall, starting just after some flowstone which almost blocks the passage at floor level.
Shortly afterwards is a traverse over a hole down, followed by a 5 metre pitch to a lower level, where each branch soon ends.
Continuing along the main way through Squirrel Rifts II, the passage appears to end after 40 m, but shortly before the end,
a climb up in the roof leads to a higher level continuing in the same direction, which soon enters a large chamber with stal and
cryostal protected by tape to the right. Continuing ahead, the passage soon drops down a step to end just beyond a taped off gypsum
snowdrift. Just before the step down, a 4 metre climb above reaches Life On Mars. This can either be entered through a narrow squeeze
to the right shortly before the top, or by climbing to the top then dropping down to the right, bypassing the squeeze.
From here, Life On Mars begins as a series of domed chambers, with distinctive solutional etching. The way on is initially quite
obvious, passing through low sections between the chambers. Just after passing below a natural rock bridge, a passage down to the left
is the main way on, but the passage ahead can also be followed, passing through a low dig, and swinging down to the right to
reach another chamber, which is blind at its far end. To the right at the point of entry, however, a narrow rift passes through a squeeze and down a small climb
(tricky on the return, climbing up into the squeeze), to a wriggle around boulders leading into another chamber. All ways on soon
degenerate and become too small, with a low passage on the right at the far end being the longest.
The main way on starts crawling sized and soon enters a standing-height enlargement. Passages ahead-left and through
an eyehole ahead immediately join and end, while the way on is a rift up ahead-right. Immediately, it splits, with a low
passage on the left being one branch, and the continuing rift being the other. The left branch soon passes a too-tight
connection to the other branch to the right, with its way on being to the left. This zig-zags repeatedly, via an awkward
section where the level must be carefully chosen in the rift, before passing some proto-shark fossil spines, and entering
a large domed chamber. Ascending the chamber, it is best to take the undercut ahead-left to reach the next chamber, rather
than heading directly to the left, as the roof is loose. A narrow passage at the far end of the chamber soon reaches a climb
down to a bedding with stal decorations, where the way on closes down.
The right branch soon reaches the first traverse, requiring a sideways thrutch along the widest part of the rift,
some distance above the floor. At the end, a hole at floor level to the right gains the next traverse. This passes
through an eyehole and turns right into the final traverse. These three traverses are very demanding, and require a
great deal of effort to avoid slipping down the rift. The third is the tightest, only a little wider than squeezing size.
The passage then becomes more normally awkward, with occasional ascents over jammed rocks, before suddenly entering a large
domed chamber, with the way on to the right. This then descends into a large domed section, which has some short side
passages at the far end.
On the right at the far end is an archway into the next domed chamber, which has a short side passage to the right
which may be followed by mistake on the way out. To the left is the end of the chamber, where there is a very low side
passage, while to the right of this passage is the way into the continuation of the domed chambers.
This passes through an enlargement to reach the final chamber, with its obvious terminal boulder choke.
Crystal Maze
(With thanks to Tim Francis, MCG, for corrections.)
This begins with 90 m of crawling and thrutching to reach a step down at a dry cascade.
Just after this, a junction is reached with the normal way on up a ledge to the left,
while the rift continues to the right through some crawls as an alternative oxbow into
Pontypool Or Bust (POB) Passage.
Following the normal way on, the passage swings right through a low enlargement to
reach an obvious junction of crawling-sized passages, with The Swim on the left, and Pontypool Or Bust Passage on the right.
The Swim quickly enters a sandy floored chamber containing the Hanging Basket
helictite formation. To the left passes through another chamber before ending in mud fill.
To the right lowers to a sand swim which ends at a dig after 50 m.
Pontypool Or Bust Passage can be followed for over 100 m, with the oxbow back to the Crystal Maze entrance passage on the right,
and a few other blind side passages. Just before
the end is an awkward squeeze leading to the small SOB Chamber. A tight squeeze and crawl
then enters a larger chamber. On the other side, 20 m of crawling then reaches a
smaller chamber, and final dig which continues for about 75 m.
Perseverance I and Fault Chambers
This area is the key to several major series, including the Long Round Trip, and the entire southeast area of the cave.
From the side passage in Perseverance II, Perseverance I begins as a walking sized passage, though the
roof lowers a few times over the first 50 metres. Several side passages are passed in quick succession.
The first are a series of avens. Next is an oxbow to the left, which may be inhabited by bats
in winter (please respect any tapes). A side passage on the right at the first left bend, the Rabbit Run,
leads back into Perseverance II, passing a dead end side passage on the left, and another side
passage on the left which enters Going Square after some very tight crawling.
Shortly after the Perseverance I oxbow rejoins, a passage hidden in an alcove to the left climbs up to a
balcony looking back over the passage, where a stooping passage becomes a tighter flat-out crawl leading
back to the Nunnery (the original way in). A side passage in the crawl connects to the avens at the start of Perseverance I.
Continuing along the larger main passage of Perseverance I, a hairpin bend to the right marks a dramatic increase in passage size,
where there is a dead end side passage and oxbow ahead. This is followed by a scramble up boulders
into Sugar Cube Chamber with The Sugar Cube boulder jammed in the ceiling, at the other end
of which is an inlet at a left bend, with a side passage ahead at the bend.
The inlet is often used as a drinking water source, though the water has not been
tested for purity, and unofficial water collection bucket and bottles are normally in place there.
Warning: in 2017, a loose pillar of stacked rocks on the left wall at the corner immediately
before the inlet has visibly moved, and several of the large rocks are liable to fall if touched.
On the other side of the inlet (to the left), a short climb leads to the top end of the
large Fault Chambers. High on the left here a smaller inlet enters that eventually
makes its way, along with the water from the other inlet, into Agent Blorenge II. The
Fault Chambers are a series of large chambers with a dip of about 30 degrees. The
lower chamber, accessed through the large opening at the bottom of the boulder
slope in the first chamber, is called Rift Chamber. Two other main side passages
lead off Fault Chambers, Elliptic Passage at the top end of the chambers, opposite
and slightly lower than the way in (the usual way on), and Fault Rifts at the far end of Rift Chamber.
The first part of fault rifts is a tall rift passage which quickly reaches an 8 m
climb up to a platform. The climb is unprotected and slightly awkward, so the more
usual route in is via Going Square. For this reason, the rest of the route is
described as part of that section.
Elliptic Passage and beyond
Elliptic Passage can be followed for some 300 m of 4 m high and up to 5 m wide
passage, passing several short side passages, to a boulder ruckle. About two-thirds
of the way along this a muddy crawl low down on the left is the start of the route
into the Wyvern Extensions, and the Long Round Trip. The ruckle can be easily passed through a walking-sized
hole to the right. Past this, a short section of passage leads to a real choke. A side
passage on the left here (Lucky Thirteen Passage), accessed by following the left edge of the choke, leads to a
hole down to the right in a small chamber. This enters a further small chamber after
a few metres of crawling. The way on from here is to the right along a crawling, later
walking, passage which leads after about 100 m to a larger passage at Big Beauty
Junction.
The Wyvern Extensions - Wessex Series
Wyvern Hall and the Main Route
(With thanks to Reading Uni CC and Mark Helmore, Wessex Cave Club, for corrections.)
From Elliptic Passage, the initial passage leads north as a muddy crawl. This ends
after a few metres at a small climb down. From the bottom of the climb, a few side
passages lead off (the ones on the right enter a small complex) but the way on is straight ahead into Dead Bat Passage. This quickly lowers to a flat-out
crawl. The passage becomes walking size after 30 m where some short side passages lead
off. One of these on the left, containing a small stal flow, is the main way on.
The route ahead, however, soon enters a 5 m diameter chamber at the top
of a 4 m climb up boulders. To the right in the chamber, the complex side passages rejoin, while
ahead-right, a slot between boulders enters an undercut. To the left in the undercut
passes through a double squeeze to reach a junction where the passage ahead ends almost immediately.
To the left at the junction remains low until it enters the Dragon's Lair chamber, but this is not the normal route into it.
To the right at the junction becomes an unpleasant crawl, normally partially filled with water, before reaching another junction with a larger passage. To the left closes down,
while to the right passes through a chamber to reach a junction at a low chamber. To the right
are two routes into a blind chamber, with a blind side passage to the right in the right-hand option.
To the left at the low chamber, a tight, damp crawl reaches two scaffolded climbs up to the Ogof Drws Cefn
entrance. Use of this entrance is strictly prohibited by the landowner and the cave
management group. This area is also a very active bat roost, so should be avoided, as the bats
regularly roost in the very low passages, and can be injured by passing cavers.
The side passage on the left 5 m before the climb up into the chamber, beside the
small stal flow (not the one at the foot of the boulder climb into the chamber), can be
followed along 20 m of stooping-crawling passage to a point
where it enters a wider area with the roof at standing height. Ahead, this enlargement
enters a further large, but low, chamber with a flat roof, the Dragon's Lair.
To the right here chokes with the alternative route in tucked into an alcove immediately on the right,
while to the left lowers before a slope down is reached. The slope enters a large, but
low, chamber with some straws in the roof, Wyvern Hall. The taped route here splits in
two. To the right it enters a hole down through boulders to a stream (but the stream
cannot be followed), whilst to the left leads round to the left of the chamber. Where
the taped route turns right, an inlet enters from a 4 m high, 4 m wide, passage on the
left, partly obscured behind some large boulders, which is the main way on. The taped route continues past this to enter another high level chamber,
which chokes below the floor of Fault Chambers.
The inlet can be followed for about 50 m to a chamber, Soup Dragon's Kitchen, with the only way on (of any real
significance) being a stoop/crawl to the right, which is the start of the Wyvern Extensions Main Route and its complex of rifts.
The Main Route soon passes through a relatively easy squeeze, The Trowel, to a seeming dead end after
some 40 m.
From here the way on is a climb up an aven above. At the top of the climb, the
route doubles back over the top of the climb. This enters a somewhat larger rift with
the way on in a narrow rift to the left, which passes a cross-rift then joins a parallel
rift to the right. A short, tight drop must be negotiated before the passage becomes a short crawl.
At the end of the crawl, a junction is met. To the right a climb down enters a tall
chamber known as The Garden. In The Garden a tight rift rising to the right can be
followed to enter Awe Chasm 13m off the floor (see the section on Republican Plot),
whilst a hole in the floor enters the start of Gore Blimey (a part of Republican Plot)
and has become the more common route into here (see the same section). To the left at the junction just
before the climb into The Garden, the passage passes over a small depression in the
floor and along a rift to the left into a chamber with several ways off, an area known
as Isotonic Weirdways. An aven at
the first junction in the second side passage to the left here can be free-climbed
(with care) to enter Pasta Best (again, see the section on Republican Plot). Most of
the other routes lead to the same place but the easiest route is straight across the
chamber and under a stooping height arch. This enters a further chamber. To the
immediate left and right, the other routes from the last chamber enter, whilst the
two main ways on from the chamber are both further off to the right. A route into
Pasta Best (see the same section as before) is located in a slot under a wall to the
left whilst directly ahead, a crawl heads towards Elliptic Passage before closing down.
The two main ways on both begin as rifts and are beside each other. The left-hand route
quickly reaches a 7 m climb down into The Land Down Under, whilst the right-hand one is the Wyvern Extensions Main Route, which
continues as a comfortable sand-floored rift, and is the way on for the Long Round Trip.
The rift passes many cross rifts and side passages but the way on remains obvious until
it reaches a clamber between boulders, Psychology Rock. Here, the passage turns slightly to the left,
after which a tight trench develops in the floor, which descends to a junction with a
cross rift, Timney's Turn. The way on is to the right where the rift passes over some holes in the
floor to Republican Plot (these are dangerously slippery and should not be used). After
crossing the first hole a rift to the left must be taken. This quickly reaches a crossroads.
A right turn here reaches a further junction where the Main Route continues to the left.
To the right instead is a side passage which quickly enters a chamber. Continuing across
the chamber, the rift ahead/right loops back into the Wyvern Extensions Main Route, while the
rift ahead has a small side rift to the left. This can be followed round to the right
in a low passage. The height increases at a turn left as the passage passes over a
blind hole in the floor (beware, don't fall!). Across the hole, a low passage to the
right can be followed to a second hole down. This can be free climbed to enter
Presidential Mayhem (a part of Republican Plot), but is not the normal route into that area.
The passage continues above the hole, to connect with a side passage from the Wyvern Extensions Main Route
shortly before Psychology Rock.
Back at the junction in the Wyvern Extensions Main Route, ahead is a slope up and
to the left is the continuation of the original rift. At the next crossroads, the
Main Route turns right, but to the left reaches a 12 metre climb up to a blind,
decorated chamber called Afternoon Delights.
The Main Route then meets another junction after just over 50 m. To the right another slope
up connects to the slope up at the earlier junction. To the left the obvious way on is
taped off to protect the stal flows down its walls. This taped section is bypassed by
taking a narrow rift ahead and then taking a very narrow, ascending rift to the left, to
emerge in a higher level rift. Doubling back to the right, a side rift passes close to Headache in Fault Rifts,
then connects with the earlier passage that loops back to the Wyvern Extensions Main Route.
Ahead-left, the way on regains the Main Route rift just beyond the taped off section, with the way on ahead-right. (It is advisable at this
point to check the route used to enter this rift as it can be confusing on the return.)
Alternatively, a lower passage continuing on the other side of the Main Route oxbows back to the Afternoon Delights crossroads.
The continuation of the Main Route soon enters an enlargement/chamber with a side passage
to the left. This side passage forms a series of oxbows totalling around 200 m in length, and reconnecting
with the Main Route later. The Main Route continues
ahead-right over a short traverse.
This passes some side passages before entering a larger section of passage where the side
passages enter from the left. This larger section is short lived and enters a low passage
to the right. This passes through a crawl before regaining the rift at a junction. To the
left oxbows over a pit in the floor into the larger section of passage, opposite the way
into the low passage (this route is taped off in the larger passage). Ahead, the way on
soon enters Ponderosa chamber (also known as Cairn Chamber), where some stal is almost encircled by tape in the floor. Ahead the way
on soon closes down. Two passages to the left - the second of which is easier - unite to become Dragon's Teeth, which can be followed for 20 m to a small
enlargement with a pitch on the opposite side, The Didgeredoo. This enters Interesting Times
(see below), and is the way on for the Long Round Trip.
In Ponderosa, two passages double back to the right, one
above the other. These unite at the higher level to become Mark's Garage.
This can be followed through a section containing delicately
positioned stal (take care), Nothing, to where it branches after 30 m.
The right branch ends after 70 m.
The left branch reaches a very loose 4 metre pitch, Death on a Twizzle Stick, dropping to 25 m of passage.
The following section can be very confusing on the return and it is advisable to continually
check the route of entry on the way in.
Also in Ponderosa, a passage to the right (to the left of Mark's Garage) enters a cross rift after a few metres, called Come Back You Bastard. To
the right, this enters Mark's Garage at the lower level, while to the left is the
way on.
This enters a small chamber after just over 20 m. Up ahead quickly becomes a flat
out crawl past delicate formations (Pond Life) and passes through a tight squeeze
to enter The Whitehouse (also incorrectly referred to as Anthodite Chamber). This chamber contains large
amounts of anthodites (aragonite crystals crossed with helictites) in the roof and an
impressive 3 m high stalagmite boss in the floor.
In the small chamber, a passage to the left, Pond Passage, can be
followed for about 100 m of crawling and stooping. After 65 m, it drops down to the left through a crawl,
then after some zig-zags, enters a more shattered area with
some very small cryostal flake formations, ending soon afterwards. Just before the cryostal, a hole down to the left reaches a 0.5 m
high narrow rift to the left, while further back from the stal, a low passage to the left is
the 'Easier Route'.
The Easier Route swings left and passes through a tight section before enlarging,
turning right and ducking under an arch to join the other route in an enlargement, where the way on is to the left.
The alternative narrow rift route can be followed for over 20 m of tight passage of a similar nature to
reach an aven, which can be climbed to reach a larger passage, where the Easier Route joins from
the left.
The larger passage (which has a badly shattered ceiling) passes through a
shattered section before entering Yanto's Grotto (also known as the Blue Room).
This chamber contains unusual blue formations over a large amount of one wall. To the
left here, a climb up over boulders (not recommended) and a route under them unite before passing through a hole
low in the right wall into a section of passage with a fine collection of anthodites. This passes through
a smaller hole (take care to avoid damaging the anthodites) to reach a dig, with an
awkward climb up above it into a roof passage. To the right this
contains the 50 cm blue Coldfinger stalactite and 20 cm blue stalagmite formations, the
largest blue formations in the cave, while a climb up into the top portion of the passage accesses the route to the
left. This reaches a climb down into an enlargement where the only possible way on is
being dug. To avoid damaging the Coldfinger, it is best to view it from the point of
entry into the roof passage; the passage closes down completely just beyond it.
Republican Plot
The hole from The Garden (see the section on the Wyvern Extensions Main Route) descends through
relatively stable boulders to reach a short drop into a passage. To the left is a sandy
crawl which leads into Presidential Mayhem while to the right, the passage quickly
enlarges into a tall streamway, Gore Blimey. As the passage is enlarging a sandy crawl to the right is
the route into Awe Chasm. Just beyond this, an inlet enters from the right, and about 10 m
further on flows out to the left, where the passage ahead closes down.
Shortly before this point, a passage to the right above a constriction is about 30 m
long. A rift further on almost connects with the 30 m long side passage. A rift even
further on, opposite where the stream flows out, is about 20 m long and connects through
an extremely awkward and tight constriction to the 30 m long side passage.
The stream can be followed downstream along a 50 m traverse. The route passes through some
old stal and later a crawl which can be bypassed (only on the way in) by dropping down to
floor level and taking the stream route to the left. Where the traverse ends, there are some
short side passages to the left and ahead, but the stream route turns right and passes
through a complex section and a tall chamber before it becomes too tight. A passage in
the roof to the right of the chamber can be followed through two chambers to where it
becomes impassable.
The route into Awe Chasm begins as a crawl, but the floor drops quickly to give a standing
height rift. Ahead, a tight rift passage can be followed to make a tight loop with the
inlet. To the right, the way on turns left and ascends slightly to enter an enlargement.
Only the passage ahead left can be followed far. This quickly passes an outlet which passes
back under the passage but becomes too tight. The water re-enters at the inlet. Just beyond
this outlet, the source of the stream is entered, a 40 m high fluted aven, Awe Chasm.
Several routes lead off from Awe Chasm. Up ahead, a slope of rocks can be ascended to a
further slope but is blind. Up ahead/right, an undercut is blind. To the left is Blessed
Pork Scratchings. Almost directly above the way in, an almost invisible rift is the end of
the tight rift from The Garden in the Wyvern Extensions Main Route. Beside and above that is
another more obvious rift. This is Pasta Best. At the same height as the rift from Pasta
Best, but oposite the way in, another rift also enters Pasta Best. High in the roof, a
stream enters but is too tight. Awe Chasm cannot be
free-climbed.
Blessed Pork Scratchings is a well decorated passage and has formations in extremely
vulnerable positions so great care must be taken. After about 10 m, the taped route
ends and if you must procede, step in the footprints of the original explorers to prevent
damage to the delicate mud floor. The passage ends after 50 m in a choke which lies below
Headache in Fault Rifts, but which has been intentionally left unconnected to protect the
formations.
The sandy crawl into Presidential Mayhem emerges into a larger passage. Passages to the left and
above end in a chamber and chokes, and passages in the wall ahead are blind.
The way on is to the right, becoming a 15 m traverse with a stream in the bottom.
The floor steadily rises to become a sandy passage, turning left then right into a rift.
To the right, some openings enter a short oxbow. A few metres along the rift, a
squeeze between rocks on the left enters the original part of Republican Plot. Ahead, a short
section of passage ends under an aven which may be free climbed into one of the Wyvern Extensions Main Route's side passages
(described above).
The original part of Republican Plot opens up quickly to stooping height. Ahead/right
a crystal adorned passage cannot be followed far. Ahead/left, the way on continues past
the taped off Inviolate oxbow to the left, two short side passages to the right and a hole up to the
left into the Wyvern Extensions Main Route before it enters a decorated section. Please take
extreme care as the stal is in a very vulnerable position. The way into The Land Down
Under is blocked off just after a 1 m high column, Ice Cold In Alex. Please do not pass
this formation as there is nothing to see beyond.
Pasta Best was originally reached by bolting up from the tight rift in Awe Chasm but as there are other
routes into Pasta Best, it is unlikely that any fixed aids will be left. The slot under
the wall of the chamber containing the climb into The Land Down Under (in the Wyvern Extensions
Main Route) is narrow but quickly enters a somewhat larger passage. The obvious route passes
unstable boulder slopes up to the left, before narrowing down to reach a tight crawl which
can be passed to enter a blind chamber.
The free-climb into Pasta Best emerges in a rock floored, stooping height passage. Back
over the climb, a loose but low enlargement is blind. A passage to the left when facing
this enlargement can be followed to reach the top of a loose boulder slope. Two routes on
below here reach the tops of the loose boulder slopes in the other part of Pasta Best.
The other route from the free-climb initially heads away from the Wyvern Extensions Main Route
and swings left to enter a decorated chamber. The formations have not yet been taped so
please take care not to damage any. To the left in the chamber, a narrow rift reaches a
pitch back into the Wyvern Extensions Main Route, just after the climb down into The Garden. To
the right in the chamber, a tight rift eventually doubles back to the left to make an
extremely tight connection with Awe Chasm, over 20 m from the floor. Diagonally across
the chamber, a climb over some boulders drops down into a rift passage. The rift descends
quickly (spits are in place for bolts) to the head of a 20 m drop down the second half of
Awe Chasm. This drop can be descended without getting too wet, although no fixed aids are
likely to be left.
The 7 m climb down (the Didgeredon't) into The Land Down Under is aided by a fixed handline
(as of May 2022) and reaches a small chamber with one passage leading off ahead, as
well as two holes in the floor to the left. The holes lead down to a short section of
intermittent streamway which heads towards Soup Dragon's Kitchen for 75 m without connecting to it, but the passage is a better prospect. This route begins by enlarging
to walking size although large amounts of stalagmite flow and columns must be carefully avoided.
The passage then lowers before a grill of stalagmites block the way into a passage to the left.
To the right of this passage, a narrow rift is the best route on. This quickly enlarges, passing
a route back to the left to the other side of the grill, before entering a small, decorated chamber.
Two passages lead off from the chamber. Across on the far right-hand side of the chamber,
a short section of passage leads to a 2.5 m column. The route here is taped off but is
accessible from the far side so please do not cross the tape to see what might lie around
the next corner! To the left from the decorated chamber a walking height passage passes a
very delicate set of straws and columns (pass with extreme care!) and over a hole in the
floor to a very small stream to reach a junction. To the right will be described below, while
to the left reaches a corner to the left to the stream. The passage now continues as a tall
rift, passing several formations, before it becomes more arched and finally ends at the Barite
Choke.
A flat out crawl beginning between some formations on the right at the first left turn along this last section enlarges
quickly and can be followed for over 100 m through many large sections, with several side passages on the right which end
below some oxbows in the Wyvern Extensions Main Route.
Meanwhile, passages on the left before Barite Choke oxbow back to the side passages behind the stalagmite grill.
The passage to the right mentioned above can be followed to a small decorated chamber from
which the way on continues as a very well decorated passage where great care must be taken
to avoid damage to the formations, including a crystal pool called The Billabong.
This eventually reaches a flat out crawl into a chamber. Ahead-right a further
chamber-enlargement is entered. To the right, a passage containing a small stream can be
followed, passing through a few tight traverses, to reach the 2.5 m column mentioned earlier.
In both of the last two chambers, small holes to the left enter a larger side passage - the hole from
the second chamber passes through an extremely tight squeeze.
This side passage can be followed to the right for about 70 m, passing several side passages
and oxbows, to a very tight section. Beyond this, a slope up enters an area of cross rifts but
all routes close down within 20 m. One of the side passages on the right, about 30 m along, has a
connection back to the passage with the stalagmite grill, as well as some oxbows of its own.
Interesting Times and The Long Round Trip
The Didgeredoo pitch drops from the Wyvern Extensions Main Route down into Interesting
Times. It is in two main sections, each about 10 m, with a 2 m climb in between. These
are aided by a fixed handline (as of May 2022). The pitch is very tight and ascending
it is almost impossible without the aid of a rope and ascending gear (jammers or prussik
loops minimum) - allow at least 15-30 minutes for each person to ascend. There are loose
chockstones near the top, these should not be relied upon, despite their convenient
position. Check if the handline is still in place before attempting this trip.
At the bottom, two walking sized routes lead off. The first of these would be ahead when
facing the head of the first section of the Didgeredoo pitch, the second would be to the
left (when facing into this second route, the Didgeredoo pitch should enter on the left
side of the passage), and is the usual way on.
The first route soon enters a small chamber, and immediately degenerates into a few silted
rifts. One ahead-left from the point of entry has about 100 m of passage with a loop, and
one ahead-right from the point of entry can be followed for about 30 m via a larger section.
Where it ends, a roof climb reaches a short continuation.
The second route (the main way on) from the bottom of the Didgeredoo pitch soon turns left twice,
passing entrances to a side passage on the right at each turn, before it enters a small chamber with several alcoves
on both sides. A tight squeeze in the final alcove to the right enters a 100 m long side passage,
with several side passages of its own. The main way on, however, is the
obvious passage on the opposite side of the chamber, which quickly lowers at a junction where some bat bones are taped off, and a short
side passage is ahead-right. The way on to the left at the junction then reaches another junction with more bat bones, where both routes
can be used, but the left one is best, to avoid a stalagmite in the right passage.
After the passages rejoin, the way on passes through two relatively easy squeezes, to reach a stooping
section. After this, it passes through a crawl with a shallow keyhole slot in the floor, to reach a
small rock bridge. At this point, a side passage to the right is the way on for the Long Round Trip.
Continuing ahead over the bridge instead, the passage soon splits into several passages and oxbows containing rock pillars and chokes
(affectionately known as the Land of a Thousand Pillocks). Following the main way through these for about 50 m,
the passage then turns left and lowers over rock slabs, before rising again, and turning right to end at a choke.
A small passage on the left has a hole to the right, passing through a smaller section to reach a
low chamber and terminal choke.
The small, tubular side passage to the right at the rock bridge enlarges into a small chamber, with the way on
being the walking sized passage on the opposite side. Passing some formations, the way on is to the
right at a junction, becoming another crawl alongside some stal. This passes some raised drip pocket formations, referred to
as the 'mushroom' formations, in a sandy section. After passing through a rocky S-bend, it enlarges and reaches a
junction.
Attractive stal columns adorn the passage ahead-right, but the passage beyond them soon ends in a low, sandy crawl.
Instead, the way on is to the left at the junction. This starts as a rift, then enlarges as it passes
a low side passage to the right, and becomes a flat out crawl over a mudbank ahead. The low, wide passage ahead
soon ends, and the way on instead drops into a hole on the right, which then swings left. When the passage splits, the way
on is through a squeeze ahead-right. At the next junction, the way on is to continue ahead, which emerges in the chamber
at the end of Haggis Basher Number Two, with the way out immediately to the right.
Haggis Basher can then be followed to rejoin the normal Round Trip.
The scope for further developments in this area is significant as there are still many side
passages that have not been dug.
6. The Southeast
The Lucky Thirteen Extensions
Gone With The Wind
To the right from Big Beauty Junction quickly leads to a chamber on the other side
of the Elliptic Passage choke, while to the left leads into Gone With The Wind. This begins as a 2 m
high phreatic arch with a sandy floor and continues like this for about 100 m, to an area with many
gypsum "cornflakes" decorating the roof, walls and floor. Here, the passage
becomes more square-shaped and the sandy floor gives way to a rocky one. Gone
With The Wind ends after a further 150 m, where the passage ducks down under a
low shattered arch (pass with care). This is the start of the Midwinter Chambers,
and is the usual route to Dollimore Series, Sleepcrawler Series and War Of The Worlds.
Within its first 35 m, Gone
With The Wind passes two blind alcoves tucked into undercuts on the left,
followed by a
walking-sized alcove on the left, where the small Station Thirteen Passage
leads off (the usual route to Gone In The Years and Big Country).
Note; the choke near Big Beauty Junction has a good water supply, and the floor at the start of Gone With The wind
is soft sand, making this a good camping location for long term digging trips.
Midwinter Chambers and Going Somewhere
Midwinter Chambers consist of a succession of chambers separated by short
crawls over rocks and gravel. The rock in this area is in thin, slate-like, layers. This
results in a very loose passage roof! Much of the Midwinter Chambers are adorned
with hanging "forests" of gypsum crystals or large mounds of "snowflake"-like
gypsum on the floor. After about 100 m of these chambers, the arched passage of
Going Somewhere leads off to the left, and is the usual route to Dollimore Series,
Sleepcrawler Series and War Of The Worlds, but the Midwinter Chambers continue to the
right. These are much as before, and reach what was once a seeming end after about
75 m. A hole to the right here now enters the Northern end of Upbeat in Hexamine
Highways. Also at this point, a dead-end passage doubles back to the left but a flat out
crawl in the floor leads through a few small chambers into a somewhat larger
chamber. On the far side of the chamber, a low passage on the right is Hexamine
Highway. This passes some short side passages before a 1.5 m step up enters a
shattered, crawling sized passage. At the end of the crawl, a hole down to the left
enters a squeeze, marking the start of Hexamine Highways.
Going Somewhere takes a right turn past a side passage straight ahead after just
over 10 m. The roof lowers before rising again not much further on. The way on
turns a few corners with the roof lowering and rising on several occasions before the
passage then turns a corner to the left, passing some short side passages on the
right called Sign Of The Beast, and enters a larger passage after a further 30 m. This is Snowball
Passage. To the left is the alternative way out via Rogered Senseless and Gone in
the Years South, while to the right leads along the main part of Snowball Passage.
Hexamine Highways
Once through the tight squeeze, the passage becomes somewhat larger than before
but this is short lived as the passage passes over some gypsum in the floor, The Hexamine Block, and then
ascends a steep rubble slope into a narrow, shattered passage. After a short distance
this opens up again and it is necessary to slide down a small rock slope under a
toppled stack, The Leaning Tower Of Pisa. The passage then gradually enlarges and
passes a short side passage to the right. Ahead, a step up is reached. At this point a
tight tube heads off to the left while Heartbeat continues ahead. The tight tube enters a
larger passage which passes through the easy Dismantled Choke and a tighter section before
reaching a junction, Walls Too Good To Be True. To the left is Worm Hole Series while to the right enters a larger
passage after 20 m, Death By Kangadile, which heads to the right. This passes Top Hat Passage on the left
before reaching a dug out crawl after 30 m. The crawl ends in a dig where a severe
lack of oxygen makes digging hazardous.
Top Hat Passage is 60 m of walking-crawling passage, passing through the Top Hat Turnon squeeze after 30 m, and
ending at a very tight squeeze and choke. This is very close to Pick-A-Stix Aven in the
Last Sandwich.
For the first 60 m, Worm Hole Series consists of several small chambers and walking sized
passages, intersected by tight crawls. About half way along, it passes small side passages
on the right, and at about 45 m along, a side passage on the left ends close to Exodus.
Between those two sets of side passages is a wormpile-like fossil in the roof.
Near its end, it has a proto-shark fossil spine (like the ones in Raiders Passage and the Entrance Series)
visible in the ceiling, which is one of the most southerly known in the cave.
The main passage then drops into a lower level. The lower level is blind back beneath the crawl, but
continuing in the same direction that the crawl had been heading, the lower level soon passes a choke
to reach a much larger chamber. Facing into the chamber, two passages ahead lead into a blind chamber.
From the chamber, the only way on is to the left along the crawling sized Bee Keeper's Passage,
which has some honeycomb-shaped fossils. After 15 m, it passes through a squeeze into Satan's Knockout,
passing a blind side passage to the left. This passes through more squeezes into a rift, ending
too tight after 30 m, close to Pick-A-Stix Aven in the Last Sandwich.
Heartbeat passes through a squeeze to reach a T-junction. To the right, a walking
sized passage lowers and passes through a squeeze before reaching a T-junction
after 40 m, Crunch Corner. To the left here is Downbeat while to the right is Upbeat. Upbeat passes
several boulder obstacles to reach a junction after 40 m. To the right closes down,
while to the left passes an oxbow before becoming very shattered. This smaller
passage reaches a loose hole up into the Southern end of Midwinter Chambers after
50 m having passed several side passages and oxbows. This route into Midwinter
Chambers is loose so care must be taken if using it.
Downbeat continues in a straight line, with several roof tube oxbows, to reach a chamber after 50 m,
Camp Coffee (with The Bed on the left). A side passage
to the right here, The Toothpaste Tube, has been dug inconclusively. Across the chamber, an unentered
oxbow with multiple rock bridges is Draebridge Rift, while to its right, a crawling
sized passage can be followed for 70 m through a tight section into Trunk Passage, a low enlargement
with anastomosis on the ceiling. A side passage on the left shortly after here, Squat Martian, becomes too tight.
Continuing past Squat Martian, a further tight section and a small chamber lead to the final dig, Channel 4.
Climbing up above Crunch Corner, a small roof tube, The Gerbil Run, leads off. Early on this reaches a
very tight, 5 m long squeeze before becoming small crawling sized, and it is possible
to turn around if needed. It passes some small gypsum formations,
The Frozen Gerbils, before swinging left, and reducing in size. 10 m along here, it
then passes through a tight squeezing section, into a larger passage; Submission Passage.
Ahead-left, the passage passes a delicate calcite raft formation, Gerbil Heaven, before
ending in a chamber with helictite decorations. To the right in Submission Passage,
a squeeze enters the continuation of the large passage. This passes over a pit in the
floor, and ends after about 60 m, passing some short side passages.
Warning: the squeezes in The Gerbil Run are exceptionally tight, and even
small cavers will find them uncomfortably awkward. It is important that you ensure you can get
through before entering each squeeze, as it is not possible to back out when you are part way
through them.
Gone In The Years
Station Thirteen Passage leads from the alcove in Gone With The Wind,
through crawling-stooping passage, with a choice of upper and lower oxbows early on.
At a junction later on, the way on continues as a crawl to the left,
while to the right is a short side passage. After 100 m,
Station Thirteen Passage reaches the large passage of Gone In The Years, which leads left and right. To
the left is Gone In The Years North and to the right is Gone In The Years South.
Gone In The Years North reaches a choke after 75 m, passing an oxbow into Gone In The Years
South on the right almost immediately, and a few other side passages later on.
At the choke, a short side passage can be accessed through a tight eyehole on the right.
A small stream flows out of the choke and down an impassable hole in the
floor, joined by another stream from an aven. By following the small stream that flows through the choke upstream,
the choke is quickly passed. Once through, following a small passage to the right
and then taking a crawl to the left regains the somewhat larger passage, with the main way on ahead.
On the left, an arched side passage can be followed through a series of crawls,
ending just after a choke, with a dead-end chamber above the choke.
The main way on passes under some low arches before it reaches a junction,
where the way on continues to the left, to reach another junction.
To the left, a low arch enters a 50 m long crawling-sized side passage which ends abruptly at a blind rift,
while the larger passage to the right is the way on. This passes
over a rubble bank into a continuation of the passage with a side
passage on the right which oxbows to a side passage two junctions back. The way on is straight ahead over a further
rubble bank into a chamber at the start of the Big Country Extensions.
Gone In The Years South also continues past a few side passages to a crawling-sized
tube. This is quite short. Large passage then continues for about 250 m,
passing some oxbows to the right, to where it splits into two.
The upper passage to the right is a walking-stooping passage over
boulders, while the lower passage is flat-out. These two passages are about
100 m long each and eventually join through a hole through boulders at a choke.
The passage then splits, with the one on the left being the 75 m long high-level
Gone In The Head, and the one on the right being the much longer, low-level Rogered Senseless.
Rogered Senseless passes a short side passage to the right, then passes through a
5 m long tight crawl and can be followed for about 400 m through
larger passage with an undulating floor to where it enters the even larger Snowball
Passage.
Gone In The Head is mostly crawling sized with a lot of gypsum, and passes through
several squeezes. It has further tight connections to Rogered Senseless.
Snowball Passage
This is named after a large (football-sized!) ball of gypsum near its start. At the
point of entry from Rogered Senseless, Going Somewhere leads off to the right, whilst the small hole to the
left is the original, but less commonly used route, into Sleepcrawler Series. Snowball Passage is more commonly
entered via Going Somewhere, where the usual way on is to the right, with the original way into Sleepcrawler
Series being a hole in one of the alcoves opposite.
Snowball Passage is about 100 m of large boulder passage. The Snowball formation is soon seen on the right,
where there are short side passages on both sides. The taped route soon passed through an oxbow down to the left,
before rejoining the large passage. It then passes a series of crawls on the left called The Pentangle. The Pentangle
reaches a junction with dead end side passages ahead and left, where to the right reaches choice of routes into an enlargement.
Back up to the right rejoins Snowball Passage, ahead all routes close down, while to the left a low crawl chokes beneath
the floor of Don't Go Skiing. Beyond The Pentangle, Snowball passage passes under a balcony. Immediately afterwards, a slot to the right is the start of Exodus,
the way to Dollimore Series. Snowball
Passage continues ahead up a rocky slope, becoming lower, and soon passing a small side passage down to the left called The Fly Trap.
The passage soon splits, with the left branch ascending to a choke. A small alcove to the left of the choke
passes down through the edge of the choke (proceed with care!) and enters the end of the Black Run, the usual way into Sleepcrawler Series.
The smaller right branch reaches a junction. To the right loops back round into Snowball Passage,
20 m back from the choke and a few metres above the floor at the top of the balcony (many people find
this loop confusing and visiting cavers should take care not go back on themselves when following it).
The passage to the left is I Buried It In The Sand. This becomes a very tight crawl after 30 m which reaches
a junction with the slightly larger Upper Sandwich. Left closes down, but to the right passes through a small crawl before dropping down
a very loose climb (take care) which funnels down into a larger passage.
A traverse ahead reaches a hole down into the Last Sandwich. A hole in the floor at the start of I Buried It In The Sand drops into a crawl.
Back under the way in soon ends, while in the other direction, a narrow crawl covered in large gypsum
flowers leads to a drop down into Upper Sandwich above the junction with Last Sandwich.
Exodus leads to a reasonably large, gypsum-decorated passage.
This continues for about 50 m (passing a section known as Mayhem
of Pillars) to where the Last Sandwich (the way to Dollimore Series) leads off to
the left. 10 m further on, Exodus splits into three at Southern Cross. To the
right fills with mud after about 50 m, very close to Worm Hole Series in Hexamine
Highways, whilst both to the left and ahead lead to dead ends after about 15 m.
Last Sandwich
The Last Sandwich is a smaller passage than Exodus, with a few low crawls over sand and rocks.
During the first 150 m, a few side passages are
encountered, the most notable ones being on both the right (Upper Sandwich) and left after about 50 m; the one on the left soon ends, but Upper Sandwich connects to I Buried It In The Sand, which enters the loop at the end of Snowball Passage. At
the 150 mark, a junction is met. To the right enters the loose Pick-A-Stix aven
where a small passage at the top chokes close to Worm Hole Series and Top Hat
Passage in Hexamine Highways, while to the left, the Last Sandwich continues
more as a stooping/standing passage with fewer crawls. This passes several side
passages but the main way on is always the way straight ahead. After a long 150 m,
the passage passes through a tighter crawling section. Shortly afterwards, it dips down into
a U-bend gravel squeeze, which then slopes back up to emerge in the
floor of a 1 m high, 2 m wide passage with the only way on ahead. This is the start
of Dollimore Series.
The main side passage on the right about 100 m after the junction with
Pick-A-Stix aven, can be followed for 150 m to an end, close to Pisspot Passage in Dollimore Series. The much shorter passage on the left
at the same point is known as Little Hedgehogs.
The Big Country Extensions
Many of the passages in the Big Country Extensions are well decorated and so
great care must be taken. This is especially true of Poetic Justice.
The Route Into Big Country
The initial chamber of the Big Country Extensions (see the section on Gone In The
Years North above) has two ways off, either of which may be used to reach the main way on, but the
Right Hand Side is generally easier.
The Right Hand Side is a passage under an arch to the right, while the
Left Hand Side is hidden behind boulders ahead-left, and passes over boulder obstacles to
join the Right Hand Side in a chamber. The Right Hand Side passage swings left through a crawl,
passing an oxbow to the left, to reach a large balcony, with an even larger chamber down a climb to the left.
The main way on is down the climb (at the right edge of the balcony) into the chamber,
at the bottom of which a passage leads back under the climb into Three Amigos!
Several side passages also lead off around the balcony and chamber.
Ahead and right at the balcony (from the point of entry), three passages join and
continue to reach an inlet waterfall, whose water disappears and is next seen in a Big Country
side passage - the water must not be used for drinking. To its right is a deep rift,
which can be climbed down with care, but is blind. Just after the deep rift, a side passage to
the right reduces to a very small crawl, ending after 50 m at a dig. Continuing below the waterfall,
the passage splits into three, with the left and centre routes ending quickly, and the right one being a
stooping sized tube which passes through a choke into a large, dead-end chamber.
The waterfall cannot be safely free climbed. At the top is a chamber
with a short inlet to the right, and a larger inlet ahead which closes down and ends in a choke, with a side
inlet up a pitch to the right ending in a very long, muddy wallow in the stream.
An aven above the waterfall was once the site of the unofficial Twll Du entrance,
which has been closed. The construction of entrances here is prohibited by the landowner, the
managers of the overlying heritage site and the cave management group.
Back at the balcony and facing into the chamber, to the right of the climb down, two low passages in alcoves
join to become a flat out crawl. This passes a passage to the left and continues to reach a junction.
To the left is blind, while to the right ends at a choke below the floor of the earlier dead-end chamber.
Back in the chamber below the balcony, a large passage to the right ends abruptly,
where a low passage to the right reaches the previous flat out crawl.
Meanwhile, the Left Hand Side passage enters from ahead in the chamber.
Three Amigos! starts as a 30 m long chamber, at the start of which an inlet
enters from the left, where the water appears to come from the blind rift in Right Hand Side.
The water has suffered from pollution from a car dumped in a sufrace shakehole, and must not be used
for drinking. Where the chamber narrows down, short side passages
lead off ahead and to the left, while Three Amigos! turns right before
turning left into another chamber. On the left is a decorated alcove. Directly across
the chamber, two side passages lead off, the right-hand of which is larger and well-decorated,
and either of which can be used to reach Nervous Breakdown. To the right of these
passages, a further decorated passage is the way on, which can be followed through some crawls and
stoops to a stooping-walking-sized passage. After 30 m from the chamber, it passes an alternative crawl
into Big Country on the right, which is longer and larger than the usual route with a few
flat-out sections and climbs, but which is taped off to protect
its formations, which are in very vulnerable positions. The usual way on is to
continue ahead along the stooping-walking passage until it closes down, 50 m after the chamber.
A small tube on the right here, Slaughter Canyon, leads
along a flat-out crawl. After about 40 m, a tight awkward squeeze (larger cavers may
find it very difficult or impossible) called The Canyon is reached, in a keyhole shaped section. This is
followed by a further 50 m of crawling to emerge in the wall of a huge bouldery
passage, some 15 m wide and 7 m high, Big Country. This large passage, but
which is surpassed in size by War of the Worlds, MSAD and Into The Black(!), contains
one of the largest streams in the cave and heads in both directions.
The two passages that lead towards Nervous Breakdown join and become a single, decorated passage,
which reaches a narrow rift after 120 m. It is best to stop here, but continuing ahead, the rift
reaches a squeeze over a rock into Nervous Breakdown. Passing through an eyehole,
a second squeeze at head height to the left is tighter than the first, but may be bypassed with a crawl at floor level.
From here, there is a side passage ahead, while Nervous Breakdown swings right into a shattered passage,
which is about 75 m long in total, and typically crawling height.
The passage roof is often very loose and is best not touched. The walls are often similar.
After dropping through fallen slabs, it passes through a squeeze into a more
rifty style passage, but the shattered passage quickly returns,
with rocks referred to as the Sword Of Damocles, and the roof referred to as Damocles' museum. A committing head-first descent
into a rift then reaches the last few metres of breakdown passage, to a terminal choke.
The side passage ahead just after the bypassed squeeze ascends into a
more stable rift, First Man Standing. To the right ends in Nervous Breakdown's collapse, while to the
left reaches a low, wet section after 10 m, ending in a dig.
Warning: Nervous Breakdown is very loose, and should be treated with great care, or simply avoided.
Big Country
To the left leads upstream for over 100 m to a junction. Big Country continues to the left, ending in a choke after just 65 m.
At the junction, The Hangman's Creek is the large inlet ahead-right.
80 m along it, a 2 metre climb on the right enters Hangman's Oxbow, which leads to Blorenge Oxbow
via about 100 m of crawls and stoops, passing some side passages on the left, the last of which is about 80 m long.
The Hangman's Creek continues past Hangman's Oxbow, passing up through a hole into a large chamber. High on the left is a short side passage called Klondike,
just past it on the left is an inlet passage, and ahead is the continuation of The Hangman's Creek. The inlet on the left passes through
a choke into a blind chamber, with a continuation dropping back to the stream before ending in a choke.
The way ahead in The Hangman's Creek soon splits, with the stream on the right passing through a choke to end at another choke.
The passage on the left also carries a small stream, which emerges from a narrow rift. The continuing passage,
Hobo Humpin' Slobo Babe, soon splits in a small enlargement. A way on to the right passes through a squeeze
and degenerates into a series of crawls. A way on to the left in the enlargement reaches an aven with no way on at the top,
and about 30 m of passage at the bottom.
To the right from Slaughter Canyon, Big Country leads downstream. After 60 m, some stalagmites are seen on the left.
On the right side of the passage at this point, above the rubble bank, is the other end of the alternative crawl.
70 m further on, Big Country reaches a large junction. To the left is Blorenge Inlet (described later), while ahead-right
is the continuation of Big Country. About a further 50 m downstream a small side
passage leads off on the right. The side passage alternates between stooping and crawling size, before reaching an inlet on the right after 40 m.
The inlet quickly ends at a tight rift where falling water can be heard, with the water originating at the choke in Gone In The Years North.
Downstream is walking sized for 40 m to a junction with a larger passage carrying the stream from Right Hand Side and Three Amigos!
which is not safe for drinking. Upstream to the right passes through a loose section to a choke after 25 m,
with an undercut on the right also reaching the choke. Downstream to the left soon enlarges, with a grotto up to the right
(which can also be seen above at the point of entry), before shrinking after just 30 m at a dramatic sediment cliff.
Down to the right is a 10 m long, muddy rift, while above the cliff, the passage quickly ends as a sand filled bedding,
with a side bedding on the right also filling with sand. The water is next seen in another Big Country side passage.
Big Country continues beyond the side passage with its boulders giving way to wet
mud banks. After about 100 m, it enters a very large section with a boulder floor, where a lake forms in flood conditions.
Hidden behind rocks on the right, a drop down enters a large, mud-covered inlet passage
(carrying the water from the earlier side passage) nearly as big as Big Country itself, which ends after 80 m in mud fill,
passing a fault chamber on the left. Big Country continues large until, after a further 100 m, it finally closes down. A hole in the floor to the
right is the way on. Straight ahead, however, small hole dropping behind boulders on the right leads to a series of
small passages, Canyonland, which soon splits in two. The way ahead soon splits, with each branch soon ending.
The way to the left reaches a 6 m pitch down beside a waterfall, with a short passage to the right from the bottom.
The pitch can be climbed with care, but because of the friable rock, a ladder is recommended, rigged from the unofficial hanger above the pitch.
The hole down to the right leads immediately into a large arched stream passage,
the continuation of the Big Country streamway. To the right, upstream, passes over
several mud banks before choking after 100 m. To the left, downstream,
the passage widens and passes over similar mud banks and past muddied formations to reach
a wide area, where there is a series of small, flood prone side passages on the right.
The way on ahead passes under a muddy arch which sumps in flood.
Immediately afterwards, staying up to the left avoids a tricky climb up a mud bank.
On top of the mud banks, the passage remains low, and passes over a rocky patch into a much larger continuation of the
stream passage. Just before the rocks, a sandy alcove to the left enters a
short side passage, which has a stal covered oxbow on its left side and ends in a chamber
with helictites on the left, some cryostal deposits on the boulders, and a route back to the main passage through a choke on the right.
Beyond the rocky patch, the main passage becomes larger still as the roof rises
and the boulder floor rises to meet it, forming a large choke estimated at about 15 m
wide and high. At the top in roughly the middle of the choke, a rift heading
back towards the passage can be used to ascend to a chamber within the choke.
A further ascent through a hole leads up into a chamber above the choke. On the left,
an alcove has some fine anthodites. To their right, a hole up enters a rift above the anthodites, with no way on.
This is the present limit of the downstream cave. From here, the water
flows south for over 8 km to the Snatchwood Bridge and Pontnewynydd risings.
Blorenge Inlet
Blorenge Inlet carries a stream as large as the Beyond A Choke streamway but is
a rather smaller passage than Big Country. After 40 m, a large bedding
at head height on the left enters the start of Blorenge Oxbow. Blorenge Inlet
continues for 50 m, passing the small Flat Bat oxbow to the right,
to reach a junction, where Blorens Inlet (see below) enters from the right,
and Blorenge Inlet continues ahead-left. 20 m after the junction, the low Oxbow en Blorenge begins on the
right side of Blorenge Inlet, with several entrances back to Blorenge Inlet over the next 70 m.
Starting at the same point, several small passages on the left side of Blorenge Inlet
all connect to Blorenge Oxbow, with those after 70 m forming a maze of crawls connecting with Blorenge Oxbow.
After 175 m from the Blorens Inlet junction, the last side passage on the left
is the main exit from Blorenge Oxbow, just before a house-sized boulder which is lying in the stream.
Immediately afterwards, Blorenge Inlet ends at an ascending choke.
On the right side at the bottom of the choke, an ascent through loose boulders
reaches a slot down to the right into stable passage. Ahead soon closes down, but a tube to the left
reaches a hole up between boulders into Poetic Justice, offering
a possible round trip via Blorens Inlet (see below).
Blorenge Oxbow begins stooping to walking size, with large amounts of gypsum on the walls.
Just after a stal flow on the left, the oxbow splits in two, with a stream running in the left
branch. The left branch is taped off at first to protect the gypsum, but can be accessed more easily through the
next side passage on the left after another 45 m, where side passages on the right connect back to Blorenge Inlet.
The two branches then run parallel to each other, each being stooping size with occasional crawls,
with several bedding connections between them. At one point, the stream in the left branch flows in a rift,
with a larger oxbow to its right.
Part way along the left branch, a keyhole-shaped inlet on the left is the end of Hangman's Oxbow. Starting around 65 m along the right branch, side passages
to the right form a maze of crawls connecting back to Blorenge Inlet. 100 m along either branch,
they rejoin in a wide, low area. Side passages to the right are the last of the maze of crawls.
Continuing along the old main direction from the wide area, the passage turns sharp right after 30 m, with a
side passage to the left, before it rejoins Blorenge Inlet for the last time.
Blorens Inlet is a keyhole-shaped
and gypsum decorated inlet passage, with occasional oxbows and short side passages.
After 75 m, it passes a more substantial series of crawling-sized oxbows on the right
followed by some on the left, while the stream route remains walking sized.
About 200 m after its start, small side passages on each side form another set of oxbows,
while the stream route requires clambering and crawling over boulders above the stream.
Shortly afterwards, an ascent through rocky sand banks enters a substantial fault chamber,
where the short Mineral Passage leads off on the left, passing through a crawl to end at
an enlargement with green copper oxide and white barites crystals.
Blorens Inlet soon regains its stream ahead, and 10 m further on, a stooping sized phreatic passage
leads off on the left, Poetic Justice. Just beyond it, Blorens Inlet reaches a small chamber,
which is richly decorated with elaborate straw and helictite decorations, the finest in Big Country.
On the right, the stream emerges from a taped-off meander which it uses to bypass the main part of the chamber.
At the far end of the chamber, the continuing inlet is Boys From The Black Stuff, while a narrow rift on the left is taped off to protect formations but can be accessed
safely from Poetic Justice. Boys From The Black Stuff is a much smaller passage, typically crawling sized, and reaches a junction after 75 m.
The right branch passes through a choke and continues as a degenerating passage for a further 125 m,
before ending at a choke. The left-hand branch is a little larger, but ends after a similar distance.
Poetic Justice zig-zags a couple of times past short side passages before it reaches a junction with a narrow, walking-height rift on the right after 40 m.
The rift passes through a grotto with admirable helictite formations before ending at Boys From The Black Stuff, where it is taped off.
Poetic Justice continues to the left, past the end of the tight ring route (mentioned later) tucked into an undercut on the right,
and a series of oxbows on the left, to reach a much larger junction, where the Poetic Justice Extensions are ahead, starting as a chamber with cairns.
Poetic Justice continues walking-sized to the left at the junction before the chamber, past the series of
small oxbows up to the left, and a blind side passage on the right. It passes formations and an inlet aven to the left (on the same
fault as Mineral Passage) to reach a large fault chamber after 80 m.
In the floor on the left, a hole down through the rocks reaches a small tube heading
under the wall of the chamber to enter a small, stable passage,
where a right turn leads up then down through the loose choke into the end of Blorenge Inlet.
From the fault chamber, Poetic Justice continues down a slope and climb down to the right, dropping down into the second
section of Blorenge Inlet. When facing upstream, a rift passage up to the right is Tombstone. This ascends a sandy slope,
then up a climb into a crawl, following which an ascent up rocks leads to a large chamber. This has a choke at its far end,
and an extremely risky climb up an unstable rock pile on the left to reach a choked side passage.
Heading upstream in the second section of Blorenge Inlet is a cascade to the right, but a hole above a layered
sediment bank ahead reaches 20 m of passage. The cascade is the way on, and soon reaches a junction with Mn (Manganese) Mud Inlet
ahead, where Blorenge Inlet continues to the right. Blorenge Inlet becomes quite small, with an oxbow to the left,
and a couple of deep pools that can be passed with care to avoid a soaking. It enlarges again at a corner to the left where there
is a blind side passage to the right. The oxbow re-enters from the left, then short side passages
are passed on both sides with admirable mud formations, and finally an aven is passed on the right, before the passage ends at a large choke.
Mn Mud Inlet is walking sized to reach a junction. To the left reaches a
rift with glutinous mud, which soon ends in both directions. Mn Mud Inlet continues to the right, soon reaching a junction with the
stream emerging from a very small passage to the left, with deep, glutinous mud. The way on is ahead into a crawl, which loops around
to reach a chamber where the stream route emerges from under the left wall, and a flow of black manganese mud is on the right.
Crossing a deep mud patch reaches the final dig.
Poetic Justice Extensions starts as a chamber, with a low, wide passage
to the right, a rift passage to its right, and the short Swinging Climb passage up a pitch above.
The wide passage is the main way on, but the rift passage passes a couple of connections to the
wide passage on its left, before an awkward passage to the right reaches the tight ring route.
The wide passage turns right immediately after it starts, where there are a couple of chokes to the left,
and side passages to the right which are either oxbows, or connections to the rift passage.
It then passes another choke to the left after 15 m. This choke can be passed into a chamber,
where a low crawl to the right reaches a squeeze into Poetic Justice III, but this is
not the usual route into it. Staying in the wide passage, the next enlargement has three ways on,
and pillars making it look like there may be more. To the right is a rift connecting with the rift passage.
To the left is a passage passing through a very tight squeeze into Poetic Justice III.
Ahead, the usual way on is a crawling sized tube which turns left and climbs up to Poetic Justice III.
Poetic Justice III is a larger passage of stooping or crawling height. To the right from its usual point of entry,
it passes a low bedding to the left, which appears to be the route to Satanic Verses,
then a rift to the left which reaches a choke in the bedding. It then lowers and becomes a small passage
heading to the right, which turns sharply right through a squeeze over a boulder, after which a tight passage ahead soon ends.
A crawl to the left reaches an enlargement, where a small tube ahead zig zags to a final dig, and a low passage on the right
is the start of the tight ring route.
The low bedding leading to Satanic Verses reaches a climb up to a choke. A 7 metre crawl along a ledge beside the choke reaches
a small ascent to Satanic Verses. All side passages are extremely tight, and none can be followed far. However, one of them connects
with the third section of Blorenge Inlet (mentioned later). Satanic Verses contains stal in very vulnerable positions,
and is best not entered unless the stal can be protected in some way, such as being shielded with clean plastic sheeting.
To the left in Poetic Justice III passes squeeze connections to earlier passages, and under a blind aven, before it lowers to a crawl.
Initially this looks very small, but a larger option to the left can be used to reach a junction. To the left and ahead soon close down,
but a passage to the right passes through a tight squeeze to reach a short pitch down to the third section of Blorenge Inlet (a traverse
line and very corroded ladder were present as of April 2024). Downstream is only about 30 metres long, but upstream can be followed for
about 150 metres. There are a couple of side passages on the right after 10 m, and one of these is very tight, but connects with Satanic Verses.
Dollimore Series
MSAD
The passage from the Last Sandwich contains some gypsum crystals and reaches
a short crawl after 20 m. At the end of the crawl a hole up enters a wide area with
a steep boulder slope down into a 10 to 20 m square, boulder floored passage,
More Singing And Dancing (at least, this is the
"acceptable" name for the passage).
To the left, the
passage rises up a boulder slope before descending into a stream. The passage
continues 5 to 15 m high and wide, past several formations, and can be followed for over
400 m to a choke in the floor of The Reactor (see the section on Sleepcrawler Series).
The stream in this passage is assumed to be the one seen flowing in the passage
north of The Reactor. Just before the end of the passage, a spectacular Pagoda
formation can be seen to the left (confirmation of its name is being awaited, but
it is often referred to as the Snowy Christmas Tree). On the first right bend,
a climb up a cairn into a roof tube on the left gives access to 90 m of crawling.
To the
right along MSAD, the large passage can be followed for over 300 m to a junction
with a smaller passage to the left containing a stream, Out Of The Blue. This part of MSAD contains many sections of passage larger than War Of
The Worlds South but as it does not hold these dimensions for long enough, it is
difficult to ascertain which is the larger passage. The author's personal feeling is
that War Of The Worlds South should be considered as the larger. At the junction with Out Of The Blue,
MSAD is some 22 m wide and 15 m high, holding these dimensions for about 40 m.
At about 150 m along MSAD (Right), at a point just before the first 20 m by 10 m
opening (!!!) at the top of a boulder slope to the right, a passage to the right at
the base of the slope is the Clique. This mud-floored passage can be followed for about 40 m until it
degenerates into a series of choked rifts. The opening at the top of the slope is
the beginning of Screaming Like A Stuck Pig, a 5 by about 7 m passage that is
very remeniscent of Elliptic Passage. This runs parallel to the remaining 150 m
of MSAD with several openings or passages into it. The passage ends at a 15 m
pitch into the Hall Of The One (see later). About 5 m back from the pitch, a flat out
crawl to the right, about 3 m from the floor, enters the 300 m long Pisspot Passage, which has its own view
down the pitch to the left. A small continuation to the right becomes a narrow rift which turns right after 40 m,
to reach a junction after another 20 m. Ahead descends to mud fill, while the way on is to the left.
This becomes a flat out crawl, taking a parallel passage to the right when it becomes too small ahead.
At a junction, right drops down a climb to a blind rift, while the way on is ahead-left through a squeezing section,
which soon turns left then right, before reaching a much larger section of passage, where there is a side
passage to the left leading to Nicola's Grotto Landing. The larger passage is short lived, and the way on
becomes a narrow rift again, soon reaching a cleft on the left, which drops down a 6 metre pitch into a short side passage.
The pitch appears to be free climbable, and there are no available ways to safely rig it - the top is very loose and showers rocks down the pitch.
Above the pitch, the way on continues small, eventually ending after another 100 m in a choke,
aiming towards Hexamine Highways, and passing close to the Last Sandwich
side passage. The side passage to Nicola's Grotto Landing starts stooping/walking sized, taking a bedding ahead at the end.
The bedding passes through an awkward squeeze down into a rift to reach a chamber.
On the far side, a bedding crawl continues to reach Nicola's Grotto Landing.
To the right at the junction with Out Of The Blue, MSAD continues larger than before
and enters the second largest chamber in the cave, Hall Of The One, with several ways off.
The chamber is about 40 m long, 30 m wide including the landing (the lower part is 16 m wide), and between
15 and 20 m high - this is only 5 m wider than Lamb and Fox Chamber, but is
much larger in terms of open volume. To the right,
Screaming Like A Stuck Pig enters from 15 m up the wall, while to the left a route up
a boulder slope provides the main ways on. From the top of the boulder slope, a
climb up the scree slope to the right, keeping to the left of the large rock pinnacle (The One), reaches the Nicola's Grotto Landing and to the
left, another small slope up reaches a much smaller passage, Luck Of The Draw, while
ahead, a 4 m roped climb down enters Into The Black. Fine collections of helictites may be
seen via each of the last three ways on.
A small slope down quickly enters the stream passage, this being about 4 by 4 m,
roughly circular with a rift in the roof (occasionally, opposing mud banks give the
passage more of a diamond shape), dimensions which it holds for its entire 1.1 km
length. Over the first 400 m, many displays of straws and stalagmites are on view
with two areas of exceptional displays of helictites and straws. For the length of the
streamway, most of the walking is done on the streambed. This can become very
tiring and so trips to this area should not be underestimated. At the terminal choke,
a short side passage on the right is Farting Welly Rift.
Nicola's Grotto Landing & Passage
Please take great care when visiting this area not to damage the delicate formations.
From the Landing three passages lead off. To the left, a descending passage passes through
a series of rifts to a chamber with several digs, one of which connects via a 3D maze to Catlitter Crawl
in Dog-Leg Complex. Some distance over to the right, the walking-sized (Nicola's) Grotto
Passage reaches an area with some small formations. Passages to the left and right here
also end in digs. Ahead, a flat out crawl enters an enlargement with some much better
helictite formations, Nicola's Grotto. A passage continues to the left here and appears
to end at a choke. A route under the choke enters an area with yet more helictite
formations, these being somewhat dirtied. Ahead, 10 m of stooping passage enters another
grotto. This has a collection of some very fine helictite formations. The way on beyond
closes down so please do not enter the grotto, as the best view is from the point of entry.
At the far end of the landing, continuing beyond (Nicola's) Grotto Passage
reaches the bedding crawl which connects to Pisspot Passage.
Into The Black
The climb emerges at the top of a steep boulder slope in a large chamber, at the
bottom of which a further slope enters yet another adjoining large chamber.
Together, these chambers are equal in size to Hall Of The One. To the left, a
steep 20 m slope up boulders to the left reaches Dog-Leg Complex, while to the
right here a large passage containing both of the aforementioned streams leads
off. This passes spectacular sedimented mud banks and cliffs with the stream
flowing in between. On its 400 m journey to the Rock And Roll Choke, the passage passes many
smaller side passages, only two of which, situated about 100 m and 50 m before
the choke on the left, can be followed very far. The first (100 m before the choke),
Yellow Van Passage, begins as a 4 m square passage and enters a small
chamber after 20 m. Two ways lead off, a low passage to the right and a slope up
then down ahead. These two routes unite and continue as a large passage for
100 m to end at a draughting muddy choke. The second side passage, Testarosa Series, begins
small and branches several times, totalling 200 m of passage with several climbs.
The choke at the end of Into The Black is the current limit of the downstream cave.
From here, the water flows south for over 8 km to the Snatchwood Bridge and Pontnewynydd risings.
Dog-Leg Complex
The collections of helictites in Dog-Leg Complex are, alongside those in Luck Of
The Draw, amongst the finest in the British Isles and great care must be
exercised to avoid damaging them. A selection of photographs are available in our
Draenen gallery.
Once at the top of the slope from Into The Black, a gypsum
covered hole on the left is blind, but a climb up a rift to the right
reaches a level floor, the true start of Dog-Leg Complex. 10 m along from here,
it reaches a small enlargement, where a tall rift up a small climb to the right is the principal
way on. However, a hole at floor level ahead turns left and descends
into a deep rift to reach The Gobbler (see Luck Of The Draw). Along the 10
metre passage, a series of holes up to the left enter a slightly larger passage,
which can be followed round to the left to reach a
balcony over the climb up the rift. From here, a traverse to the right (beware, the
floor and wall to the right here are very loose and some form of protection is
essential) reaches a further balcony on the other side of the hole down. On the
far side of this balcony a large alcove through a 2 m high arch ahead houses a
small passage to the right, Positive Thumg. This can be followed through increasingly larger
passage to reach a junction with Luck Of The Draw.
The principal way on shrinks then reaches an enlargement after 10 m.
Passages up to the right and down ahead-right
offer apparent ways on but the real continuation is in fact through an inobvious
rift at head height back to the left. Within a few metres, this reaches a traverse
over blind holes in the floor. The traverse can be tricky, but is aided by an unofficial
handline as of 2020. On the far side of the traverse is an enlargement, with a
dead-end passage ahead. To the right, a
crawl can be followed to reach a much larger passage, Top Banana. To the
right leads to 300 m of passage passing over Into The Black (one of the passages
here, Catlitter Crawl, connects with a passage from Nicola's Grotto Landing).
In Top Banana, the taped route to the left swings right through an archway,
passes a blind side passage on the left, then reaches a climb up a
rift which can be followed to reach a decorated chamber, Top Spots. The taped
route turns left here into a flat out crawl. This turns a corner to the right near
its start in a small enlargement and ends at a climb up into a rift (this used to
be a very awkward squeeze, but the squeeze has been removed). Ahead-left in the rift
enters a chamber with four ways on.
Ahead, up a mud slope, a stooping height passage reaches a loose slope up,
followed by a crawl to reach a richly decorated chamber - one of the best decorated
chambers in the cave. It is possible to very carefully crawl beneath the first set of
formations to enter the centre of the chamber, where the taped route ends. Please take
great care to avoid muddying the formations, or simply view the chamber from the point
of entry instead, where there is a good view of it without passing any formations.
To the right in the four-way chamber, a 5 m squeeze enters 15 m of passage ending at a choke.
Also in the four-way chamber, ahead-right, a small passage containing some seriously tight squeezes enters
the other side of the decorated chamber. This route does leave many formations
very vulnerable however so, again, please do not use this route.
The other way on from the four-way chamber is an obvious one to the left,
beginning with a small climb up. This passes through a decorated chamber and
then a very well decorated section of passage to reach a left turn into a large
passage-chamber, Circus Maximus. At its far end, the roof on the left side is
decorated with a very fine selection of helictites. An obvious passage ahead at this end
of the chamber can be followed though a narrow rift to enter another helictite
decorated chamber. For the best view here, a passage to the left just before the
chamber can be followed round a corner to enter the chamber (please take great
care). From here, there is no way on.
To the right of the Circus maximus, also at its far end, a series of holes enter
Rainbow Canyon. An extremely tight passage to the left connects back to the final
decorated chamber, but to the right, the main way on runs parallel to Circus Maximus.
After 60 m the passage takes a hairpin bend to the left then
one to the right after a further 75 m, before the passage degenerates into a
series of small choked passages, with a final small chamber after 80 m. The longest side
passage is to the left at the right hairpin bend, which becomes too tight after 50 m.
Throughout its length, this passage is well decorated with mud, gypsum and calcite
formations. Please try to avoid damaging them.
The slope up from Hall Of The One is aided by an unofficial handline as of 2018, but can
normally be ascended and descended without needing a handline, if required.
Luck Of The Draw begins as a large bouldery passage, with liberal amounts of
damp mud. At its start, a complex of small oxbows lead off on the left. After 75 m, or 30 m beyond a series
of arches, a side passage on the right, Positive Thumg or Panda Hunting, enters the Dog-Leg Complex.
The main route is generally walking-sized and continues as such for over 1.2 km.
Early on there are many intricate calcite formations, starting with some helictites in the ceiling, after 150 m.
Just afterwards, at a bend to the left, some stalagmite and helictite formations on the right are The Pineapple Patch.
After about 1 km is a section
of passage containing what must surely rank amongst the finest collection of
helictites in the British Isles, Medusa'sChildren. An equally
impressive display of helictites can be found in Dog-Leg Complex. Approximately
100 m beyond this, a further chamber is encountered. This has an unusual
formation in the roof, the Lightbulb, as well as many helictites.
Some 100 m further on, Luck Of The Draw turns sharp right and lowers to a crawl,
swinging left then taking the right branch when the passage forks. At the next fork, there
is a standing height chamber to the right, which is the way to Cantankerous Surveyors' Passage,
while Luck Of The Draw continues to the left.
Although the crawl ends a short distance afterwards, it sets the scene for the next 700 m; a
mixture of crawls and stoops which get progressively lower! Relief is provided by
the occasional standing section, though these become less frequent over the last
350 m.
Beyond the crawls the passage becomes walking sized for some distance, and ends shortly after two small chambers, with a single side passage
on the left just after the crawls reaching a dig. All possible
continuations pinch out or end in mud fill. This part of the cave is unlikely to interest
any but the serious prospector or insane masochist!
Throughout its length, Luck Of The Draw has several side passages over 100 m in
length. A short side passage doubling back on the right before Positive Thumg is Negative Thumg.
A short side passage on the right after Positive Thumg is Glitz.
A side passage on the left after 130 m is Whinger, about 100 m in length.
The first major side passage is on the right behind The Pineapple Patch, taking great care
to pass the very delicately placed formations. This is the Gobbler, and is a
series of gypsum decorated chambers interlinked by rubbly crawls. Near its far
end, the earliest of the many real side passages to the right, Pomegranate, reaches a climb
down. From the bottom, 30 m of passage reaches the early portion of Dog-Leg
Complex.
The other principal side passages are situated around Lightbulb Chamber. To the
left about 100 m before Lightbulb Chamber is a passage which reaches a dig after
100 m. Just before entering Lightbulb Chamber a passage leads off to the right and
reaches another dig after some 30 m, whilst ahead, as the passage turns right out
of Lightbulb Chamber, is a more substantial side passage which enters a chamber
after 200 m. To the right and ahead from here are digable leads which are currently
being pushed.
Cantankerous Surveyors' Passage
Starting at the standing height chamber in Luck Of The Draw, a crawl in the floor
at the end of the chamber leads into a walking-sized passage after a few metres. The route takes a rift to the
right after about 15 m, which zig-zags and ends after 30 m in a much larger passage,
with unusual solutional features. To the right,
a walking-sized rift passes through a climb and some short crawls to end 15 m into
a crawling-sized phreatic tube. Ahead is a small oxbow while to the left the main route
continues large, passing a shortcut to Geryon's Lair via a slope on the left.
The main route reaches a choice of routes at a circular chamber up to the
right and an archway to the left, which is the main way on.
Immediately after the archway, a passage doubles back up a slope to the left. This
enters the Geryon's Lair chamber with a large and impressive helictite formation in the roof,
The Geryon. Several other routes off this chamber lead back to the main route.
The main and circular chamber routes rejoin 20 m after the archway. Several side passages on the
left reach a maze of small passages, while the main way on
turns right then left into Needle Passage, passing some more oxbows and short side passages on both sides.
Several small piles of gypsum are encountered, as well as a 40 m long side passage on the left.
At an obvious junction with a large oxbow and small side passage on the right,
a pile of gypsum in the floor contains The Needles, several selenite needles as much as 25 cm long.
25 m further on, the oxbow rejoins and the main way on reaches a chamber. To the right, a crawling
passage can be followed through a small constriction for 100 m. To the left, the
passage enters a further chamber after about 30 m where there is a side passage tucked in an alcove on the left,
and another way on is through an undercut ahead. This ends at a dig after 15 m.
Sleepcrawler Series & War Of The Worlds
Sleepcrawler Series
The small hole opposite Going Somewhere in Snowball Passage passes through
several squeezes and down some small climbs before, after some 100 m, it
enters a series of stoops and crawls, Don't Go Skiing, with a high level connection
to Red Chamber. The more usual method of entry is through the choke at the end of
Snowball Passage from where The Black Run heads off in an Easterly direction.
This reaches a choked area after 100 m where the way on is through a low section on the right,
which then swings to the left and lowers before entering Red Chamber. Hidden in an undercut to the right, a very low
passage with lots of gypsum crystals, Gypsum Link, oxbows into Lost In Space after 100 m, but this is not the usual route.
Heading straight across Red Chamber a crawl under the wall enters a wide but low
passage containing a large bank of gypsum. Here a small
hole to the left reaches a climb down into Don't Go Skiing. The wide passage reaches
a seeming end after 30 m but a hole through boulders to the left enters a short
series of passages, Sleepcrawler 3 (also referred to as being part of A Shallow Grave), while to the right another hole through boulders
enters a low passage, A Shallow Grave, which is the main way on.
The roof quickly rises to standing height and a chamber is reached. To the right here is the
end of the Gypsum Link oxbow to Red Chamber, and is easy to mistakenly follow on the way out.
To the left, a
short passage reaches a small ramp up boulders marking the start of Lost In Space, the main way on.
This can be followed for over 750 m, with each large section containing drifts of gypsum and cryostal.
When the passage enlarges after 25 m along here, a rift in the roof on the left is Tom Cat Alley,
which leads back into Gypsum Link (mentioned above). Over the first 500 m along Lost In Space, several
areas are met where the large passage is split into sections by low crawls and tight
squeezes, some of which are not obvious. One of these tight sections is located to the
left just before the passage chokes but regains the large passage quite quickly. A short
distance on, the taped route forces the caver to enter a smaller passage to the right,
containing several rock pillars. This regains the large passage at the bottom of a small
drop.
About 20 m from this drop, a climb overhead enters the way on as ahead chokes just
past some formations. The climb overhead enters a small passage to the left,
Intergalactic Overdraught. This turns many corners before it once again enters the larger
passage, which has more examples of cryostal. The passage now continues with fewer tight obstructions than before until,
30 m past a side passage up a loose climb on the left, it appears to close down, with a taped-off oxbow up the ramp of rocks ahead.
The passage up the loose climb on the left, Killer Tomato Crawl, is a demanding 350 m long crawl,
which is well decorated with gypsum. Cavers are requested not to enter the passage to protect the
gypsum floor and walls from damage. After 60 m there is a short, flat out section, after which gypsum crystals
cover the floor of the passage for much of its length. The piles of gypsum need to be carefully bridged
while flat-out crawling. After 100 m, there is a tight squeeze, followed by some awkward wriggles. After 150 m is a very large ball of
gypsum, similar to the Snowball but twice the diameter, known as the Killer Tomato. The passage is
taped off again at this point, as continuing would cause irreparable damage to the gypsum.
Several similar formations have already been seen along Snowball Passage and Lost In Space, so this particular one is not really
worth damaging the other formations for, and the passage is best left alone.
The passage beyond continues small, with more tight crawls, and a couple of climbs, before ending too tight after 200 m, close to Lost In Space.
Back in Intergalactic Overdraught, just before the final boulder slope which leads up to the taped-off oxbow, a low passage - one wall lined
with boulders - leads off to the left. This enters a passage much larger than before,
Cold Fusion Passage, where the oxbow reconnects from above. The passage passes by a large rock covered in gypsum, The Washing
Machine, and several gypsum, cryostal and stalactite formations on the right (The Camberwell Carrots), before it climbs up into a very wide area with more cryostal. Following
this, the passage shrinks and becomes very narrow. This narrow section ends where
a climb up boulders enters a huge, high-roofed chamber, The Reactor,
the largest in the cave (though originally thought to be second largest), some 50 m long, 32 m wide and as much as 20 m high.
To the right the fault-controlled flat wall is covered in pale green flowstone, while ahead
the end of the chamber lies some 60 m away with no way on. To the left, however, a large
alcoved section of chamber enters an area where the wall has peeled off to reveal a large
passage at the base of a 25 m high boulder slope. The boulder slope is very loose and
must be descended with care. At the base, the large passage, Destiny Inlet, can be followed for 100 m,
with the stream seen intermittently between the boulders, until it reaches the site of a
former camp. From here, a smaller passage provides the only way on, passing several old
formations, to reach a large corner to the right after 100 m. Just before this, a hole up
enters a passage that leads back to the top of the camp. This passage has a fine collection
of intricate helictites that are (and hopefully will remain so) in pristine condition, the High Camp Treasures. From the
corner, the taped route crosses over a large boulder and down a short climb to reach a
steep boulder ramp. The ramp makes a considerable climb before it reaches a large
junction. The huge passage to the right is War Of The Worlds (WOW) South, whilst the
somewhat smaller passage to the left is WOW North. These are both inlet passages. Just before the
junction, a short passage to the right (appearing as a double-alcove) contains some fine helictites.
War Of The Worlds
War Of The Worlds North enlarges over the first 75 m to become a very large passage,
although by no means as large as its southerly counterpart. After over 100 m, water
enters from a small inlet on the right to flow south, back along the passage. After a
further 150 m, the passage bends round to the right and soon ends at a large choke,
with the Dambuster Dig heading several metres into it.
At this point, a 2 m climb to the right enters Sendero Luminoso. This passage begins
crawling size and passes a few formations, but further along the passage, the
formations become much more intricate. Once the formations end, the passage lowers
to a 50 m sandy crawl before it finally chokes, some 200 m from its start.
War Of The Worlds South begins very large and almost immediately reaches a
junction, where the very obvious War Of The Worlds South continues to the right,
and a mud and boulder slope up to the left enters the fault controlled Golden
Handshake Rift (see below). At the junction,
War Of The Worlds South is an impressive 19 m wide and 15 m high, making it
Britain's second largest passage. It continues as such, along the same fault that
controls Golden Handshake Rift, for over 400 m, passing cryostal deposits on the right and some large helictites high on the left wall.
Beyond this the passage roof begins
to gradually lower until, having passed 3 muddy passages on the left (Soups Of The World), the passage
chokes.
The stream emerges from under the left wall, just before the choke. Above where the
stream emerges, a tight route can be forced to a climb down in a narrow rift. This can be
more easily gained by following the stream until the stream route becomes too tight.
At this point a crawl to the right gains the same narrow rift. The rift becomes lower and
enters a stream passage, Blood River, with the stream flowing from the left into an impassable rift on
the right.
Heading upstream, the passage turns right before a side passage enters on the right.
This only reaches a muddy aven. Continuing upstream, the way on is to follow the left
most stream. Other routes are passed to the right, some of these contain streams but
no way on. Two crawls in the stream are then necessary (Warning: this area is
rather loose) before Prisoners Of War is entered (see below).
For most of its 150 metre length, Golden Handshake Rift (formerly known as Menopause Rift)
has walls covered in gypsum crystals, which can easily be damaged by passing cavers,
so should be treated with great care. It soon passes down a somewhat tricky climb, and later turns
right at a junction to reach a rocky ascent reaching a stal formation and terminal choke.
Soups Of The World has three entry points along War Of The Worlds South, each
leading into areas with untouched mud deposits - great care
must be taken, and cavers should avoid passing through connections where the mud is undisturbed.
The first entry point is obvious and very wide, with a wet mud floor and mud
drip formations in the roof. Early on, a smaller passage on the left enters a wider section which ends in
muddy tubes ahead-left, and passes oxbows to reach a choke to the right. Continuing along
the wide passage soon reaches another choke, with a muddy side passage on the right entering a low chamber.
The way on ahead connects to the second entry point. The second entry point is an obvious tube leading
into a small enlargement which swings left. To the left is the connection with the first entry point,
while to the right it connects with the third entry point, but this connection has been left unentered.
The third entry point is a wider passage than the second, and ends almost immediately in mud fill, with
an unentered window on the left looking into the second entry point.
Prisoners Of War
Several passages in this series contain delicate mud deposits and have been taped off.
These are either oxbows or have no way on. Please respect the tapes and also avoid
areas which look as if they should have been taped but which have not been.
About 10 m beyond the crawls, two passages to the right (the second of which contains
a stream) unite and become Route 1. Ahead is Route 2.
Route 1 begins as a low, very muddy, streamway but quickly becomes walking-sized
before reaching a junction. To the right the stream inlet becomes impassable. To the
left the route becomes somewhat lower with two side passages to the left. These
enter Route 2 (see below).
The way on continues to where it gains a stream flowing in the opposite direction to
the last one. This stream brings with it some entertainment in the form of thick
glutinous mud! A rift on the left here also enters Route 2. The passage turns right and
then loses most of the stream to the right. From here the stream makes its way to
the earlier inlet in Route 1.
The passage now enters a chamber. To the left, another passage enters Route 2. To
the right is a black aven with some red "seaweed" patterns on the rocks. To the right
of this aven the way on continues through a cross rift with some mud lacework on the
rocks. The way on then becomes smaller and 100 m further on enters a low phreatic
area at a junction. The stream flows off to the right where it cannot be followed. To the
left, several small side passages are passed on the right (these are oxbows into the
passage about to be met) before a junction is met. To the left is where Route 2 enters.
To the right the passage lowers, passes the side passages mentioned above, and
enters a 5 m wide by 3 m high passage. This is the continuation of War Of The Worlds
South and is called Peace In Our Time. To the right chokes after 20 m having passed
some black avens. A pool below one of these contains some interesting black
doughnut-shaped mud formations. These are black versions of the 3rries in
Strawberry Passage. To the left the passage climbs up a loose slope (take care)
where it can be followed for 50 m through one low section to a choke.
Route 2 begins low and wet. 75 m along is an inlet to the right. Ahead is Route 3 but
it is recommended that one follows Route 2 along the trench in the inlet.
Route 3 soon enters a chamber at a choke. From here there are two routes on. These
are an obvious route up through the first section of choke and a hole up to the right.
The route up enters another chamber. On the right here is a shattered continuation.
This reaches a junction at a short climb up over a boulder with a passage to the right.
Up over the boulder a narrow route enters two further chambers. There is no way on
from here. The passage to the right reaches a junction with a very low passage to the
left and a scramble up ahead. This enters a chamber. To the right here is the
aforementioned hole up to the right at the start of the choke. To the left, a tantalising
way on is taped off. The only way on from here is the very low passage. This enters a
rift passage with a chamber to the right where Route 2 is met.
From the trench, Route 2 becomes larger with two side passages to the right. These
enter Route 1. The way on to the left becomes larger and enters a chamber where
Route 3 enters from the left. Up ahead is a secondary part of the chamber. The way on
from here is up to the right. This enters a wider area where the only real way on is
ahead. This becomes an easy traverse followed by a climb down to the left. At this
point a hole down to the right enters Route 1.
Continuing ahead, another hole entering
Route 1 is encountered. This enters Route 1 near the black aven. The passage turns
left at this second hole and quickly reaches a junction. Ahead a wide passage enters
the climb down to the left with many short side passages. To the right is very
complicated. The best route here is generally the left most choice of routes. This
ends at a junction in a smooth phreatic area. To the left chokes. To the right reaches
an aven with some more red "seaweed" markings on the rocks, Seaweed Aven. Ahead
a junction is reached. To the right quickly reaches the final connection with Route 1,
whilst to the left a small slope down enters Blue Blood Streamway, that is presumed
to be the source of the Out Of The Blue Streamway in Dollimore Series. To the right the
streamway narrows before choking. Several small passages on the left are oxbows
with tight side passages and avens. Heading left in Blue Blood Streamway reaches a
choke after 75 m. At the point of entry into Blue Blood Streamway a very muddy, narrow,
rift ahead enters an aven after 20 m.
Tackle
All major routes in the cave can normally be followed without needing tackle.
However, some routes rely on unofficial handlines and fixtures which are not officially
maintained, and visitors should consider bringing their own.
Whilst every care has been taken in the compilation of this cave description, neither
the author nor his fellow cavers can accept responsibility for loss or injury arising
from any errors, omissions or inaccuracies in this cave description.
Copyright & Reproduction
This description of Ogof Draenen is subject to copyright. The copyright resides with
the author, editor and some other contributors. You are welcome to download, store,
retransmit, print and distribute this document PROVIDED THAT (1) you do not do so
for any form of reward, financial or otherwise, and (2) all references to the author and
editor are retained or otherwise clearly acknowledged. Any infringement of these
conditions is an offence in the UK and also in most other countries.
Survey drawings are also subject to copyright and the copyright holder will be clearly
indicated. You must not reproduce a survey for any form of reward, financial or
otherwise, without the express permission of the copyright holder, personal use
excepted.
This document is designed to be printed for private use. Simply use your browser's
"print" function. For a nicely formatted table of contents, use
Prince, or download the PDF version of this document.
Sadly it has come to our attention that at least one individual has been circulating a
booklet which contains lengthy sections of this document together with surveys of
Ogof Draenen. This individual is in breach of the law of copyright and we would ask
them to cease their activity immediately. Should you come across this booklet, or
anything similar please contact us. Your co-operation in this matter is greatly
appreciated.
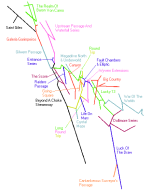
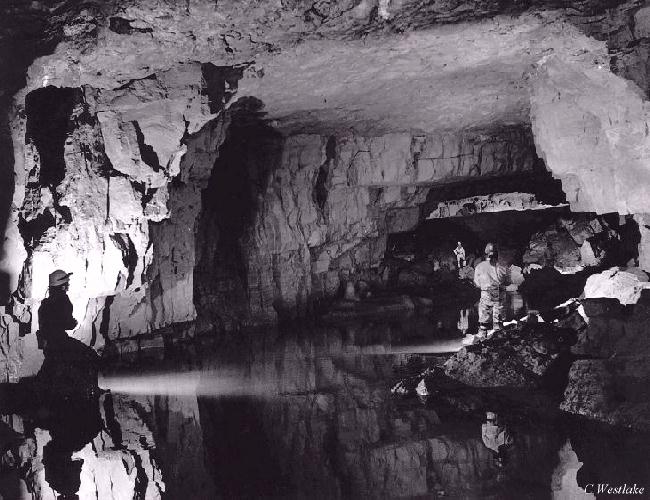
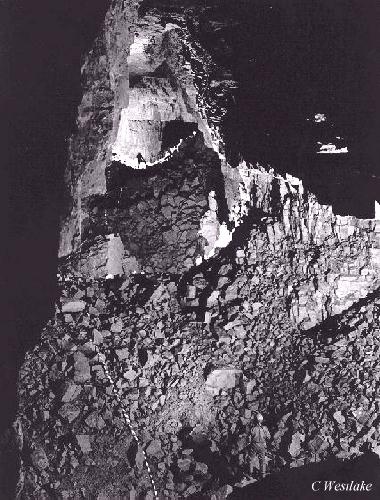
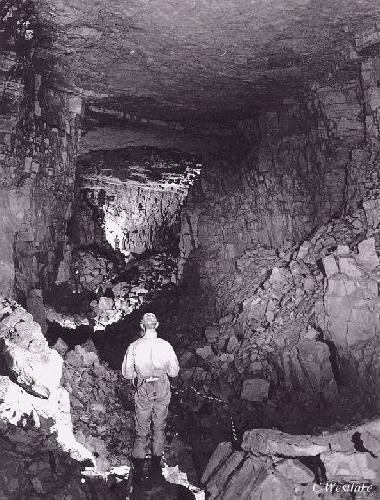
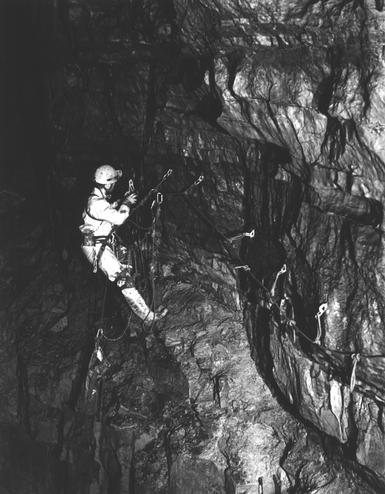
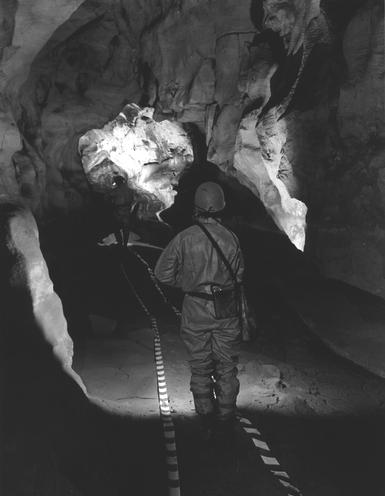
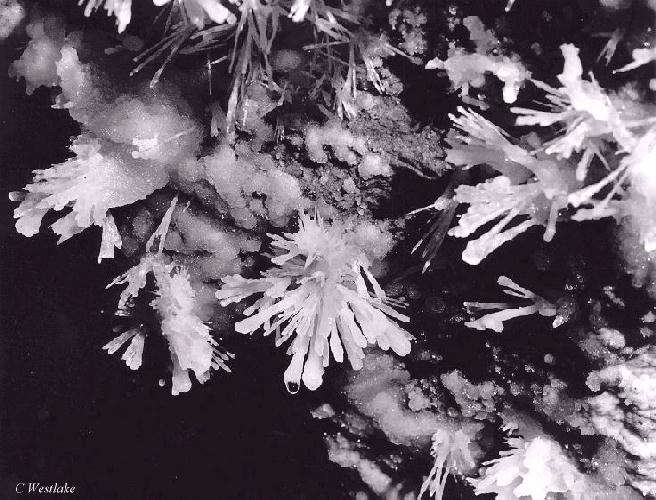
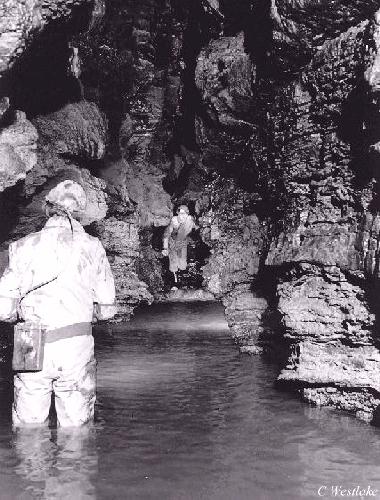
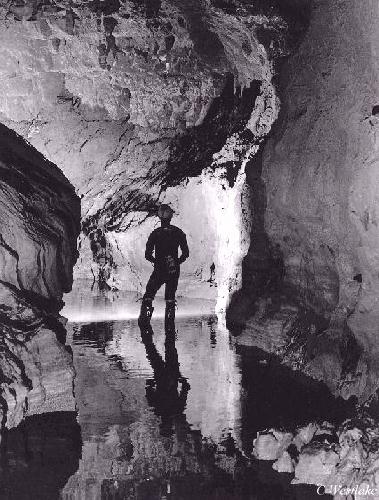
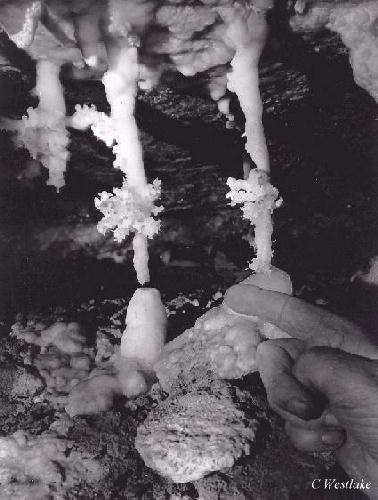
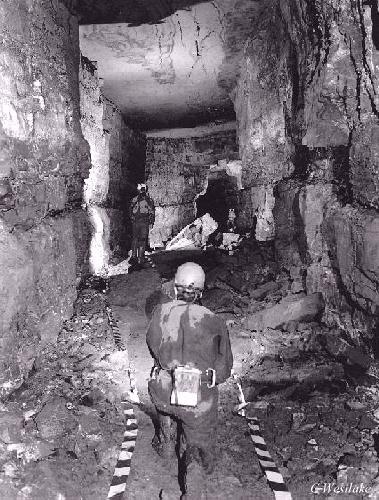
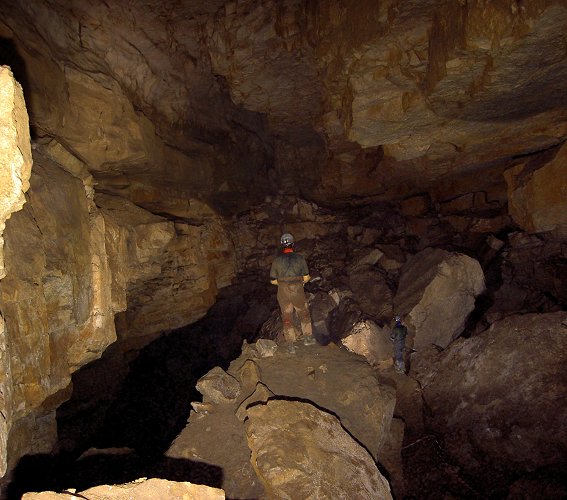
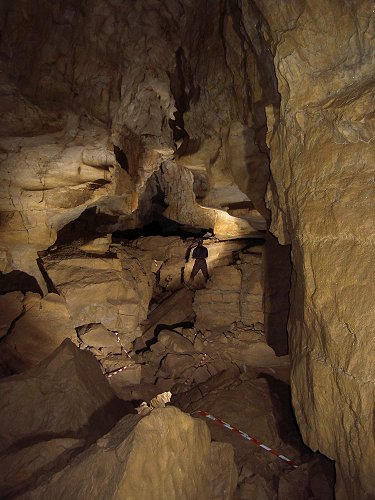
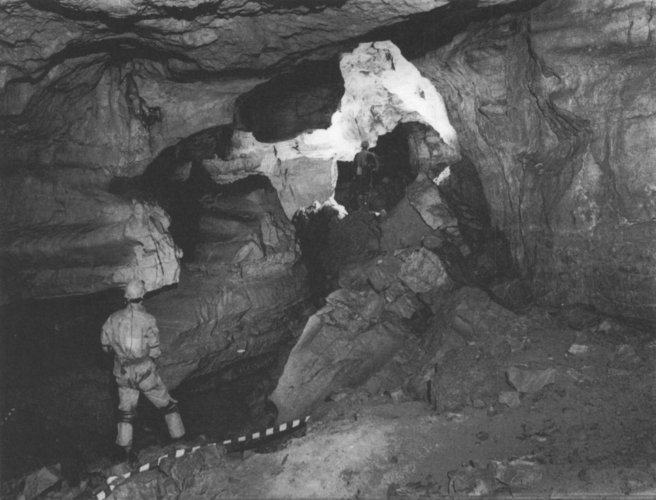
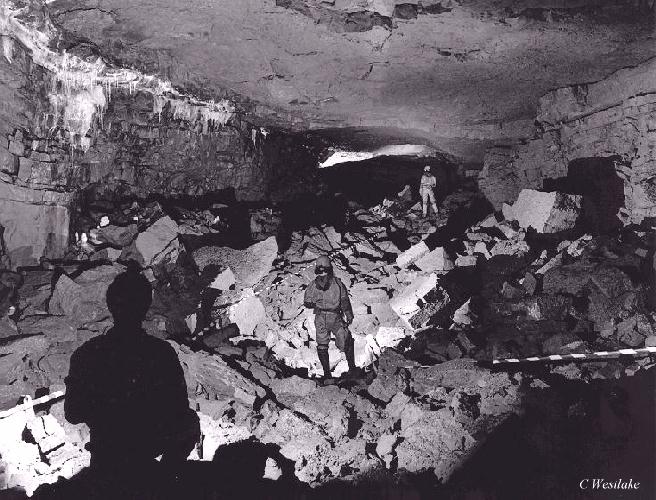
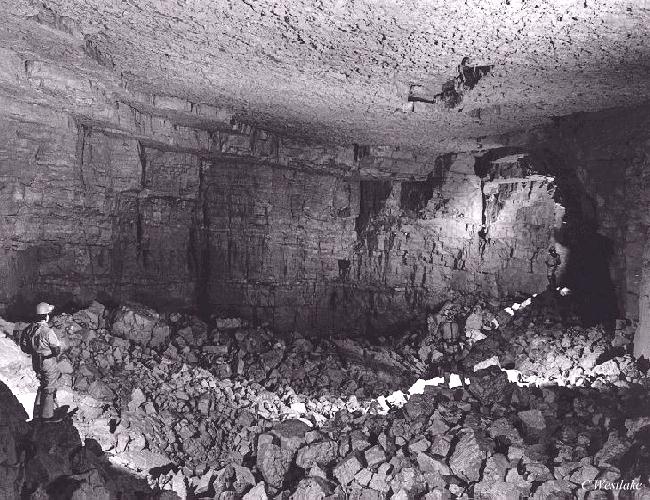
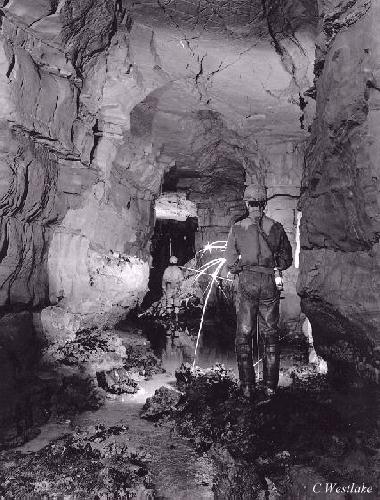
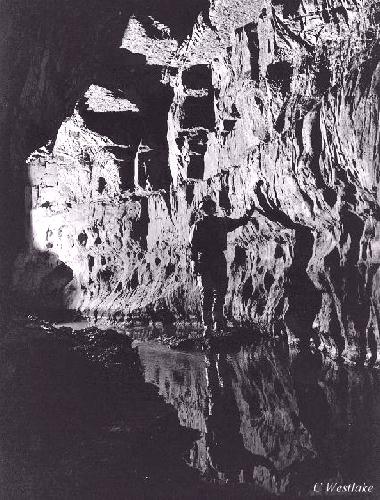
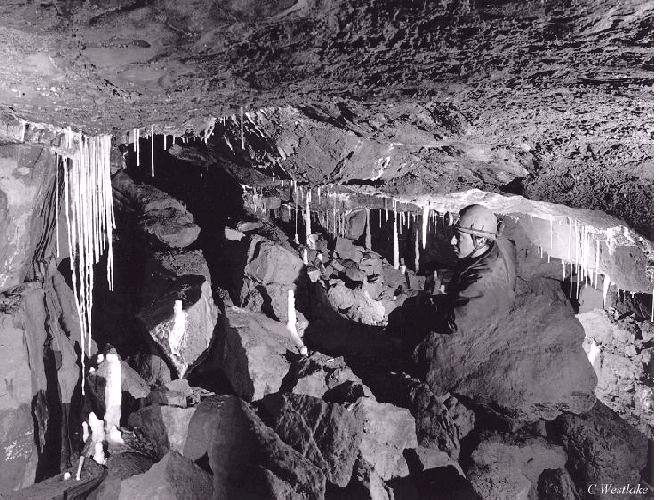
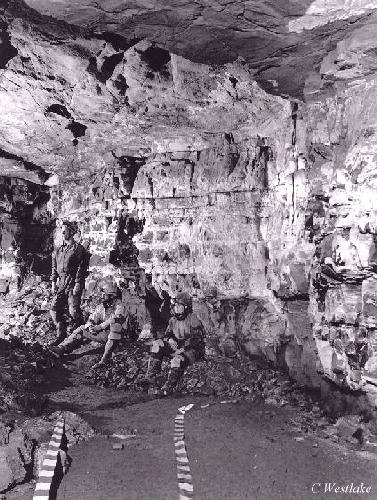
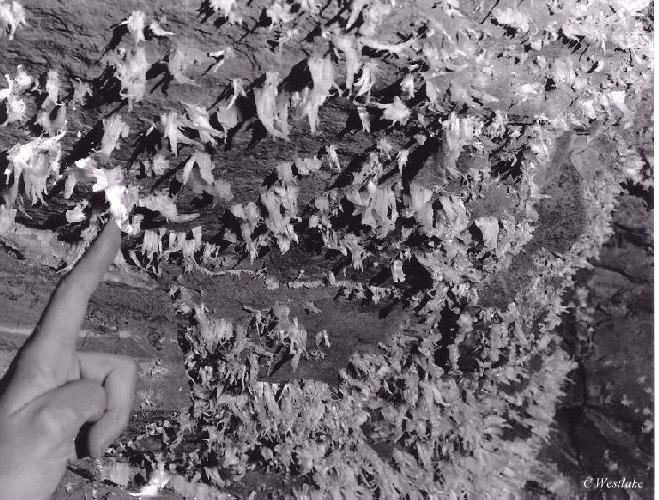
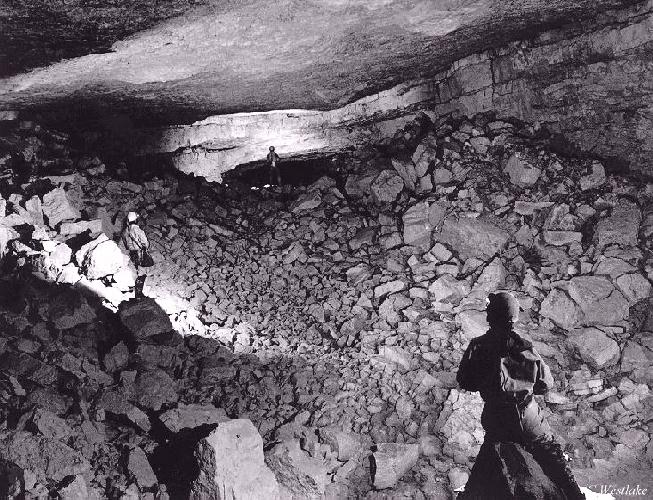
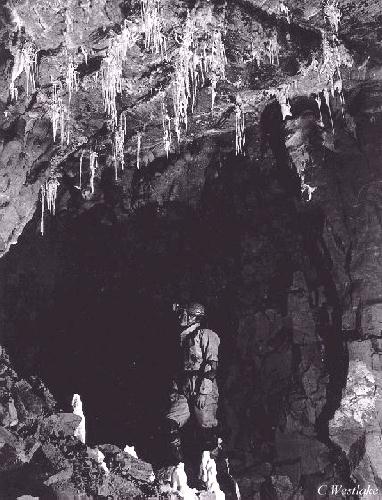
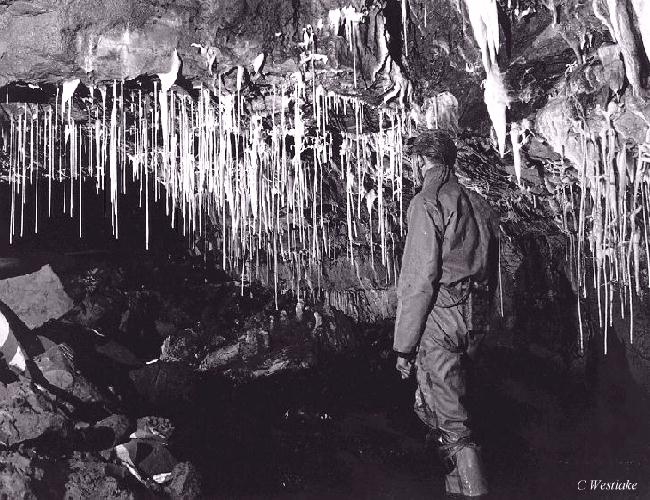
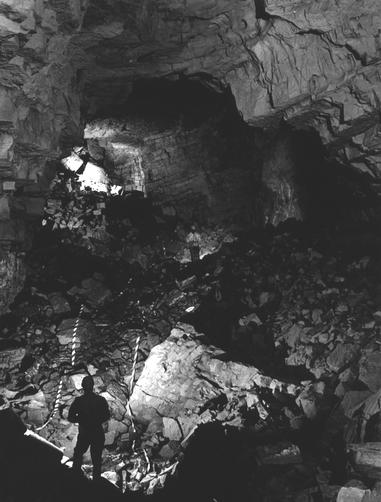
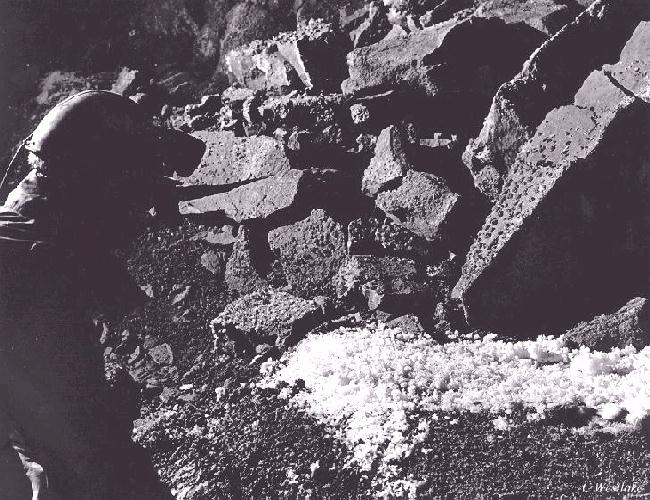
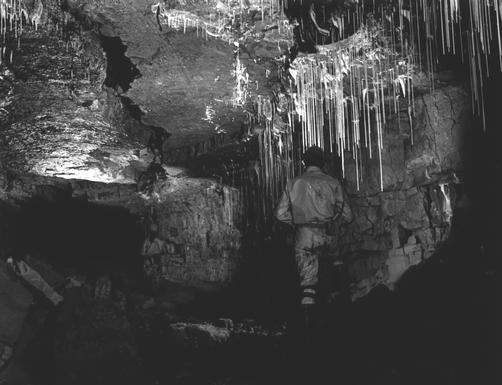
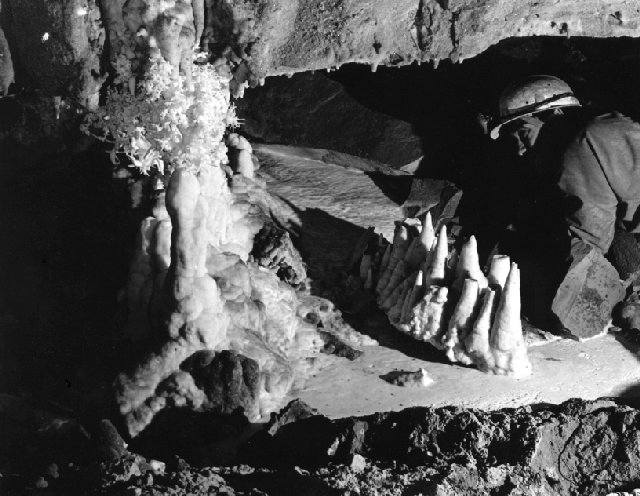
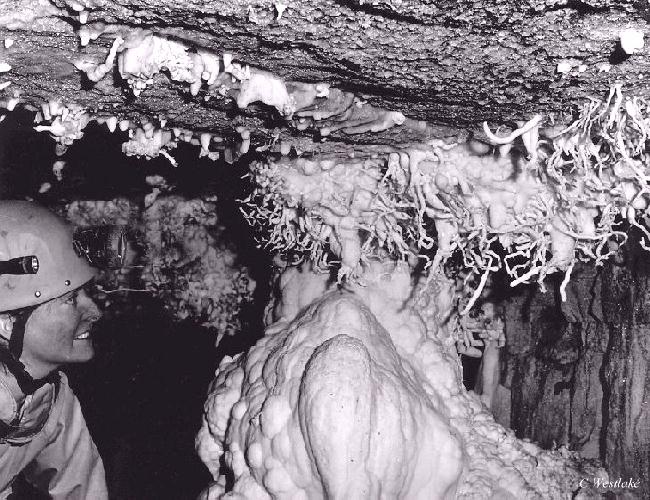
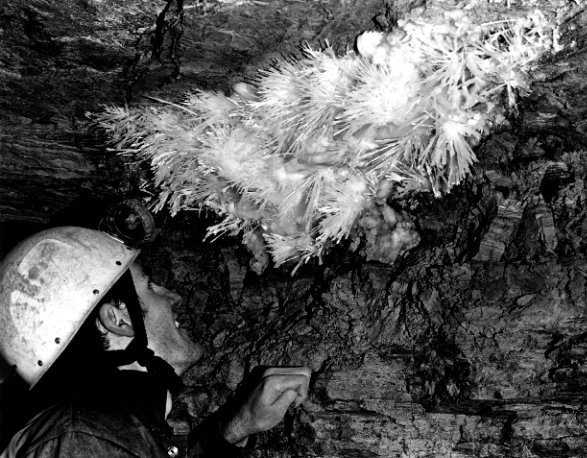
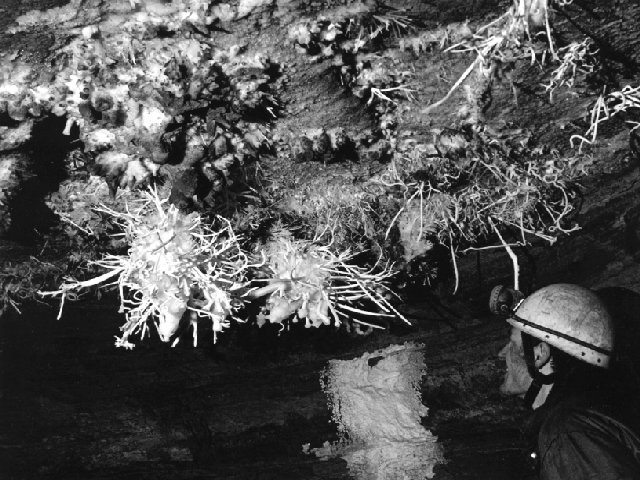
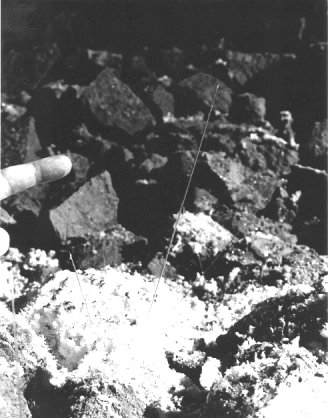
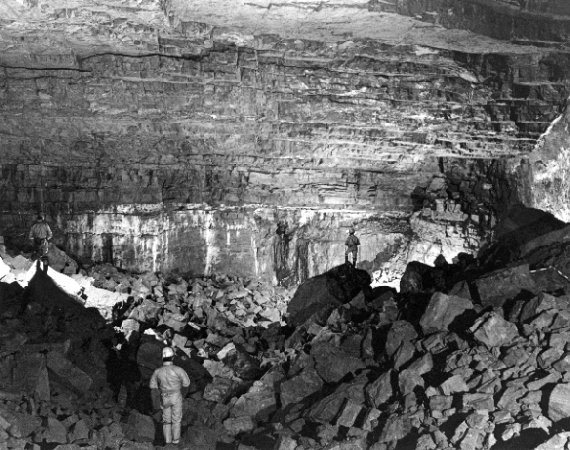
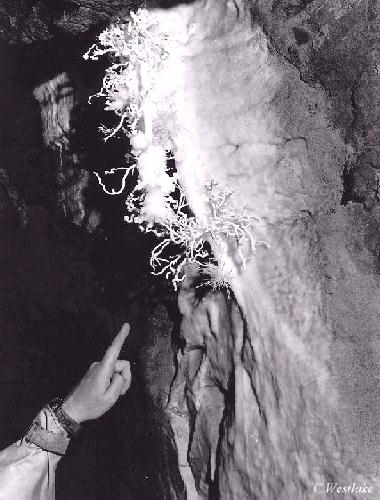
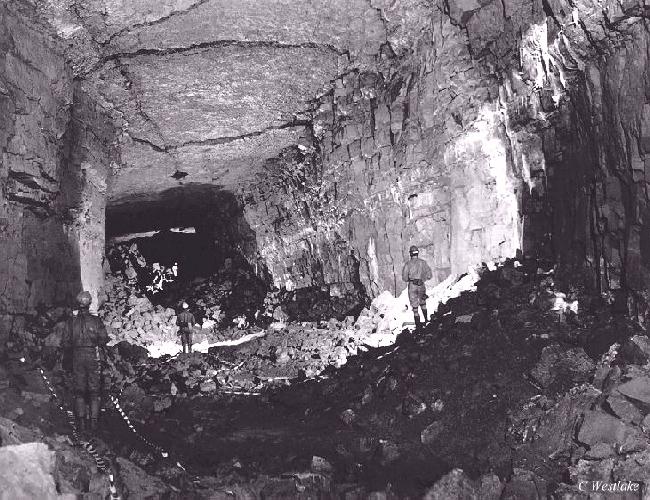