Ogof Draenen Dollimore Series trips 15/02/2020 and 22/02/2020
Unless otherwise stated, camera, setups, lighting, edits and gallery effects by Tarquin. Modelling and lighting at various points will be Helen Stewart, Celestine Crabbe, Phill Thomas, Adrian Paniwnyk and James Blake.
These two trips took place just two weeks apart. The first was during the height of Storm Dennis, the most serious storm of the 2019-2020 winter. The story of it was published in Descent magazine and the CSS newsletter, as it shows the effects of one of the most serious floods ever witnessed within Ogof Draenen since its exploration, which also caused unprecedented flooding in other caves in the area.
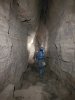 Elliptic Passage, key to the southeast end of the cave, with its beautifully striped rock.
Modelling by Celestine and Helen, lighting by Tarquin, Celestine and Helen
Elliptic Passage, key to the southeast end of the cave, with its beautifully striped rock.
Modelling by Celestine and Helen, lighting by Tarquin, Celestine and Helen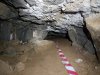 I Buried It In The Sand, a longer alternative route between Snowball Passage and the Last Sandwich. There is a lengthy flat out squeeze just to the left of this picture, which is the way to Snowball Passage.
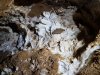 Incredible gypsum flowers with 15 cm long crystals, in a tiny shortcut linking Upper Sandwich to I Buried It In The Sand. These are in a very narrow squeeze, and photographing them is most definitely not easy - it was not possible to see the camera screen, so these were photographed blind. It is definitely not worth the effort to view them in person, but hopefully this photograph shows them well enough.
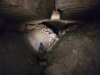 Heading upstream along MSAD, the direction usually ignored by visitors, but which contains the Snowy Christmas Tree formation. The boulders are relatively loose, and the taping is largely missing.
Modelling by Celestine, Phill, Helen and Adrian, lighting by Tarquin, Celestine, Phill, Helen and Adrian
Heading upstream along MSAD, the direction usually ignored by visitors, but which contains the Snowy Christmas Tree formation. The boulders are relatively loose, and the taping is largely missing.
Modelling by Celestine, Phill, Helen and Adrian, lighting by Tarquin, Celestine, Phill, Helen and Adrian Climb down into Into The Black from Hall Of The One.
Modelling by James and Helen, lighting by Tarquin, James and Helen
Climb down into Into The Black from Hall Of The One.
Modelling by James and Helen, lighting by Tarquin, James and Helen The large, early part of Into The Black, just after the junction with Dogleg Complex.
Modelling by James and Helen, lighting by Tarquin, James and Helen
The large, early part of Into The Black, just after the junction with Dogleg Complex.
Modelling by James and Helen, lighting by Tarquin, James and Helen Layered sand in Into The Black.
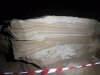 The layers appear to be periglacial rhythmites; laminates of mud with two different grain sizes. Each pair of layers show a change from slow flowing water in winter (fine silt), to faster flowing meltwater in summer (coarser sand).
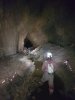 Later portion of Into The Black. The tapes here show signs of sand deposited by flooding, but the Storm Dennis flooding had not caused anything more than a little flood scum 60 cm up a rock.
Modelling by James and Helen, lighting by Tarquin, James and Helen
Later portion of Into The Black. The tapes here show signs of sand deposited by flooding, but the Storm Dennis flooding had not caused anything more than a little flood scum 60 cm up a rock.
Modelling by James and Helen, lighting by Tarquin, James and Helen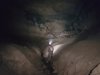 Rock And Roll Choke, one of the largest in the cave, which marks the end of the downstream cave for Dollimore Series, where the water flows south to the resurgence. The choke is known to make long-lasting rumbling sounds when poked. During severe floods, the water can pond here to over head depth, but Storm Dennis seemed not to have had much effect.
Modelling by James, lighting by Tarquin and James
Rock And Roll Choke, one of the largest in the cave, which marks the end of the downstream cave for Dollimore Series, where the water flows south to the resurgence. The choke is known to make long-lasting rumbling sounds when poked. During severe floods, the water can pond here to over head depth, but Storm Dennis seemed not to have had much effect.
Modelling by James, lighting by Tarquin and James Yellow Van Passage, a possible old bypass to the choke, but which ends in a choke of its own. This is the site of one of the longest running digs in the cave.
Modelling by James, lighting by Tarquin and James
Yellow Van Passage, a possible old bypass to the choke, but which ends in a choke of its own. This is the site of one of the longest running digs in the cave.
Modelling by James, lighting by Tarquin and James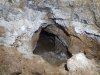 Gypsum filled hole on the ascent to Dog-Leg Complex. The passage closes down immediately, so the gypsum is not at risk.
 Start of the traverse in Dog-Leg Complex.
Modelling by Helen, lighting by Tarquin and Helen
Start of the traverse in Dog-Leg Complex.
Modelling by Helen, lighting by Tarquin and Helen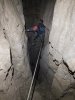 This can be quite fearsome for visitors as it has no real ledges, but in the early days of exploration, we had to cross this without any rope.
Modelling by Helen, lighting by Tarquin, Helen and James
This can be quite fearsome for visitors as it has no real ledges, but in the early days of exploration, we had to cross this without any rope.
Modelling by Helen, lighting by Tarquin, Helen and James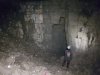 Top Banana, a fairly large chamber.
Modelling by James, lighting by Tarquin and James
Top Banana, a fairly large chamber.
Modelling by James, lighting by Tarquin and James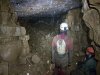 Top Spots, a decorated chamber.
Modelling by James and Helen, lighting by Tarquin, James and Helen
Top Spots, a decorated chamber.
Modelling by James and Helen, lighting by Tarquin, James and Helen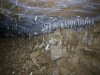 Straws in Top Spots.
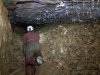 Crawl from Top Spots to Circus Maximus.
Modelling by James, lighting by Tarquin and James
Crawl from Top Spots to Circus Maximus.
Modelling by James, lighting by Tarquin and James The crawl ends at what used to be a very awkward squeeze, but this has been removed completely, and the passage is now relatively easy.
Modelling by James, lighting by Tarquin and James
The crawl ends at what used to be a very awkward squeeze, but this has been removed completely, and the passage is now relatively easy.
Modelling by James, lighting by Tarquin and James Passage towards one of the best decorated chambers in the cave.
Modelling by James, lighting by Tarquin and James
Passage towards one of the best decorated chambers in the cave.
Modelling by James, lighting by Tarquin and James The chamber has no official name. You used to have to stop at the entrance to the chamber, but a route (requiring great care) now leads into the chamber, allowing this panoramic view of some of the most detailed helictite formations. See the full Ogof Draenen gallery for individual photographs.
Modelling by James, lighting by Tarquin, Helen and James
The chamber has no official name. You used to have to stop at the entrance to the chamber, but a route (requiring great care) now leads into the chamber, allowing this panoramic view of some of the most detailed helictite formations. See the full Ogof Draenen gallery for individual photographs.
Modelling by James, lighting by Tarquin, Helen and James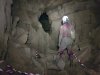 Returning to the old squeeze, the main way on is up a tricky climb, in the largest passage in Dog-Leg Complex.
Modelling by James, lighting by Tarquin and James
Returning to the old squeeze, the main way on is up a tricky climb, in the largest passage in Dog-Leg Complex.
Modelling by James, lighting by Tarquin and James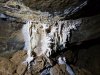 Formations before Circus Maximus.
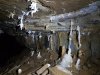 Formations before Circus Maximus.
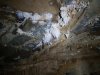 Formations before Circus Maximus.
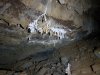 Formations before Circus Maximus.
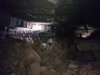 Circus Maximus, another large chamber, and one of the major destinations within the cave. Sadly, the formations here are quite a long way from the viewpoint, so they can be tricky to photograph, but they are absolutely superb in person.
Modelling by Helen and James, lighting by Tarquin, Helen and James
Circus Maximus, another large chamber, and one of the major destinations within the cave. Sadly, the formations here are quite a long way from the viewpoint, so they can be tricky to photograph, but they are absolutely superb in person.
Modelling by Helen and James, lighting by Tarquin, Helen and James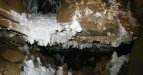 Just after Circus Maximus are some of the most impressive helictites within Dog-Leg Complex.
Lighting by Tarquin, Helen and James
Just after Circus Maximus are some of the most impressive helictites within Dog-Leg Complex.
Lighting by Tarquin, Helen and James The cramped conditions mean that these were taken on panorama settings, and the picture quality suffers as a result. See the full Ogof Draenen gallery for individual photographs.
 White Arch Passage, just upstream of Flood Overflow Passage. This picture was taken on the second trip. When we arrived at this location a week previously, the floor had been a deep pool here, with only the rocks on the left being out of water.
Modelling by James and Helen, lighting by Tarquin, James and Helen
White Arch Passage, just upstream of Flood Overflow Passage. This picture was taken on the second trip. When we arrived at this location a week previously, the floor had been a deep pool here, with only the rocks on the left being out of water.
Modelling by James and Helen, lighting by Tarquin, James and Helen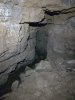 Water flowing into Flood Overflow Passage during Storm Dennis.
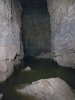 Downstream of Flood Overflow Passage, Storm Dennis had risen the water to over knee deep in the next section of White Arch Passage.
 Seen here a week later, the water cannot even be seen below the rocks. The top of the two rocks in the foreground, and the rock banks on the right and in the distance, can be identified in the previous picture.
Modelling by James and Helen, lighting by Tarquin, James and Helen
Seen here a week later, the water cannot even be seen below the rocks. The top of the two rocks in the foreground, and the rock banks on the right and in the distance, can be identified in the previous picture.
Modelling by James and Helen, lighting by Tarquin, James and Helen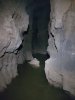 Waist deep water just upstream of the shattered pillar climb in White Arch Passage.
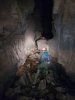 Seen in normal water conditions a week later. The rocks can be used to keep your shoes dry. The ledges and top of the rocks can be seen in the previous picture.
Modelling by Helen, lighting by Tarquin and Helen
Seen in normal water conditions a week later. The rocks can be used to keep your shoes dry. The ledges and top of the rocks can be seen in the previous picture.
Modelling by Helen, lighting by Tarquin and Helen Deep water on a corner. Fortunately, I had remembered which parts of the passage had the highest rocks, so was able to forge a route through here without having to swim, but any mistakes would lead to a deep dunking, as the water would be over our heads anywhere else.
Modelling by Phill, Celestine and Helen, lighting by Tarquin, Phill, Celestine and Helen
Deep water on a corner. Fortunately, I had remembered which parts of the passage had the highest rocks, so was able to forge a route through here without having to swim, but any mistakes would lead to a deep dunking, as the water would be over our heads anywhere else.
Modelling by Phill, Celestine and Helen, lighting by Tarquin, Phill, Celestine and Helen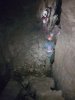 The same corner in normal conditions, with the river hidden below the rocks.
Modelling by Helen and James, lighting by Tarquin, Helen and James
The same corner in normal conditions, with the river hidden below the rocks.
Modelling by Helen and James, lighting by Tarquin, Helen and James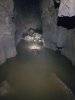 Just upstream of Carpet Crawl, White Arch Passage floods to its most extreme depth, requiring a swim across the pool. The deepest water is about 2 metres deep, and a few of our team had assistance to locate the floor on the other side. The flow was low enough that swimming upstream was still possible. This is the second time I had seen the passage this way, but with the rest of the cave flooding at the same time, this was certainly the most significant flooding I had seen.
Modelling by Adrian, lighting by Tarquin and Adrian
Just upstream of Carpet Crawl, White Arch Passage floods to its most extreme depth, requiring a swim across the pool. The deepest water is about 2 metres deep, and a few of our team had assistance to locate the floor on the other side. The flow was low enough that swimming upstream was still possible. This is the second time I had seen the passage this way, but with the rest of the cave flooding at the same time, this was certainly the most significant flooding I had seen.
Modelling by Adrian, lighting by Tarquin and Adrian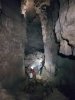 The same section seen in normal conditions. The distant caver is standing on the rocks that are neck deep during flooding.
Modelling by James and Helen, lighting by Tarquin, James and Helen
The same section seen in normal conditions. The distant caver is standing on the rocks that are neck deep during flooding.
Modelling by James and Helen, lighting by Tarquin, James and Helen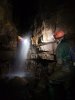 The normally-dry rope climb in the Entrance Series, the second time I had seen a waterfall here. Last time the water here had been more like a plughole, but none of the rest of the cave had been flooding - typical for how Draenen usually floods.
Modelling by Helen and Adrian, lighting by Tarquin, Helen and Adrian
The normally-dry rope climb in the Entrance Series, the second time I had seen a waterfall here. Last time the water here had been more like a plughole, but none of the rest of the cave had been flooding - typical for how Draenen usually floods.
Modelling by Helen and Adrian, lighting by Tarquin, Helen and Adrian Seen the previous summer, this is how it is supposed to look.
Modelling by Tim Ball and Stuart Bennett, lighting by Tarquin, Tim Ball, Stuart Bennett and Nigel Jones
Seen the previous summer, this is how it is supposed to look.
Modelling by Tim Ball and Stuart Bennett, lighting by Tarquin, Tim Ball, Stuart Bennett and Nigel Jones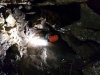 Exiting the wet crawl above the wet climb during the flood. This part is particularly unpleasant. Normally you get a wet belly and legs, but here it required a rotation in the water to keep your face dry, and a thorough soaking was inevitable.
Modelling by Helen, lighting by Tarquin and Helen
Exiting the wet crawl above the wet climb during the flood. This part is particularly unpleasant. Normally you get a wet belly and legs, but here it required a rotation in the water to keep your face dry, and a thorough soaking was inevitable.
Modelling by Helen, lighting by Tarquin and Helen
 Elliptic Passage, key to the southeast end of the cave, with its beautifully striped rock.
Modelling by Celestine and Helen, lighting by Tarquin, Celestine and Helen
Elliptic Passage, key to the southeast end of the cave, with its beautifully striped rock.
Modelling by Celestine and Helen, lighting by Tarquin, Celestine and Helen I Buried It In The Sand, a longer alternative route between Snowball Passage and the Last Sandwich. There is a lengthy flat out squeeze just to the left of this picture, which is the way to Snowball Passage.
 Incredible gypsum flowers with 15 cm long crystals, in a tiny shortcut linking Upper Sandwich to I Buried It In The Sand. These are in a very narrow squeeze, and photographing them is most definitely not easy - it was not possible to see the camera screen, so these were photographed blind. It is definitely not worth the effort to view them in person, but hopefully this photograph shows them well enough.
 Heading upstream along MSAD, the direction usually ignored by visitors, but which contains the Snowy Christmas Tree formation. The boulders are relatively loose, and the taping is largely missing.
Modelling by Celestine, Phill, Helen and Adrian, lighting by Tarquin, Celestine, Phill, Helen and Adrian
Heading upstream along MSAD, the direction usually ignored by visitors, but which contains the Snowy Christmas Tree formation. The boulders are relatively loose, and the taping is largely missing.
Modelling by Celestine, Phill, Helen and Adrian, lighting by Tarquin, Celestine, Phill, Helen and Adrian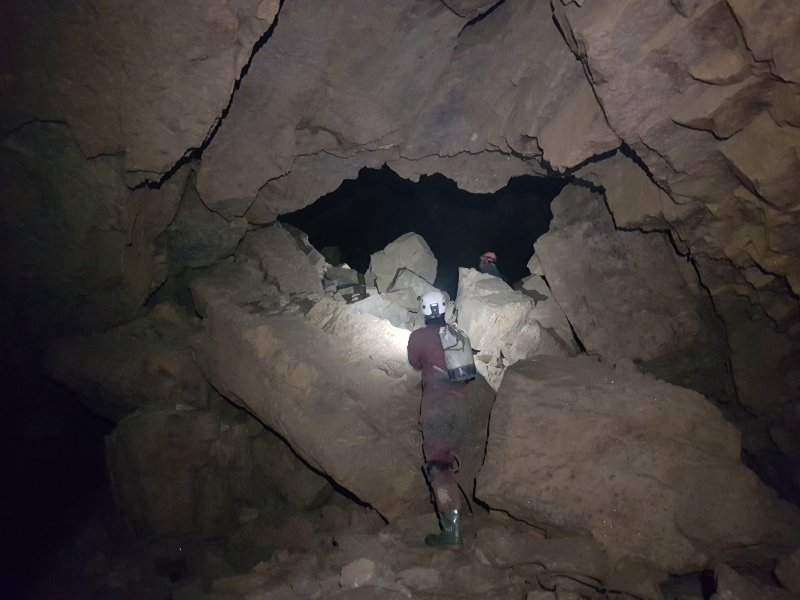 Climb down into Into The Black from Hall Of The One.
Modelling by James and Helen, lighting by Tarquin, James and Helen
Climb down into Into The Black from Hall Of The One.
Modelling by James and Helen, lighting by Tarquin, James and Helen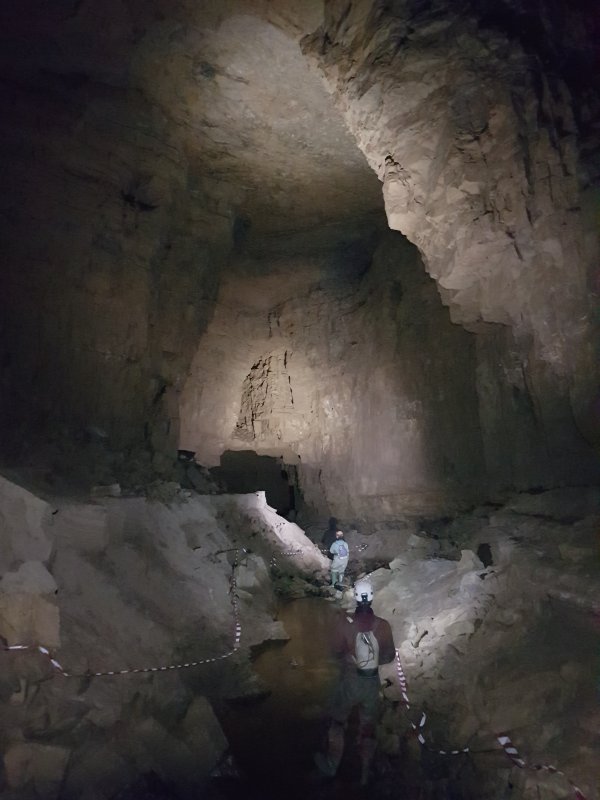 The large, early part of Into The Black, just after the junction with Dogleg Complex.
Modelling by James and Helen, lighting by Tarquin, James and Helen
The large, early part of Into The Black, just after the junction with Dogleg Complex.
Modelling by James and Helen, lighting by Tarquin, James and Helen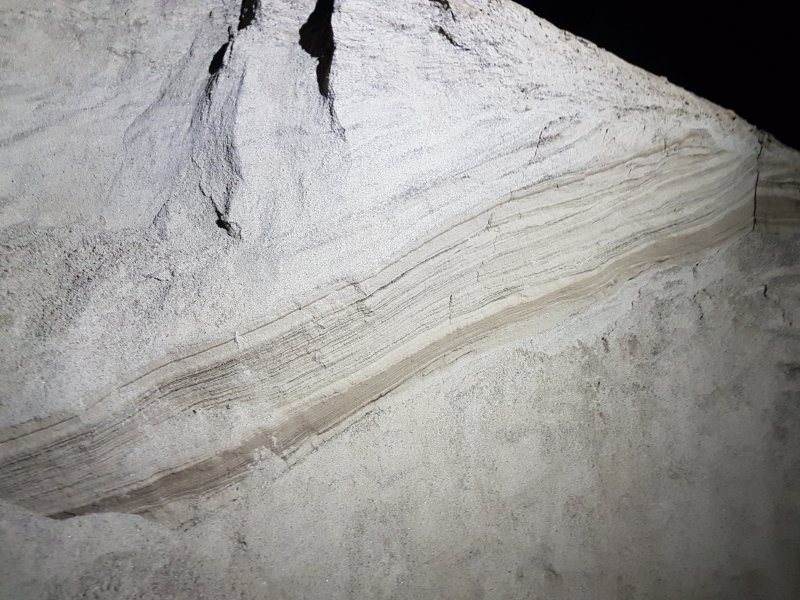 Layered sand in Into The Black.
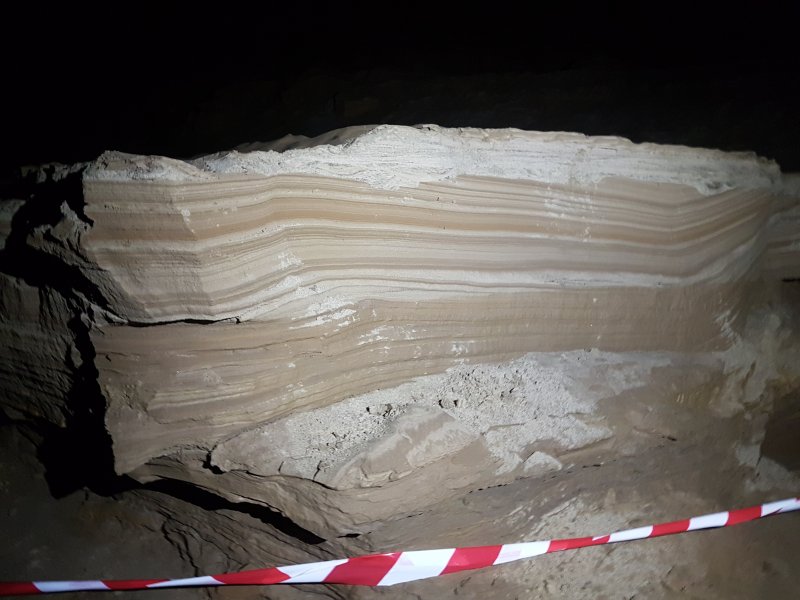 The layers appear to be periglacial rhythmites; laminates of mud with two different grain sizes. Each pair of layers show a change from slow flowing water in winter (fine silt), to faster flowing meltwater in summer (coarser sand).
 Later portion of Into The Black. The tapes here show signs of sand deposited by flooding, but the Storm Dennis flooding had not caused anything more than a little flood scum 60 cm up a rock.
Modelling by James and Helen, lighting by Tarquin, James and Helen
Later portion of Into The Black. The tapes here show signs of sand deposited by flooding, but the Storm Dennis flooding had not caused anything more than a little flood scum 60 cm up a rock.
Modelling by James and Helen, lighting by Tarquin, James and Helen Rock And Roll Choke, one of the largest in the cave, which marks the end of the downstream cave for Dollimore Series, where the water flows south to the resurgence. The choke is known to make long-lasting rumbling sounds when poked. During severe floods, the water can pond here to over head depth, but Storm Dennis seemed not to have had much effect.
Modelling by James, lighting by Tarquin and James
Rock And Roll Choke, one of the largest in the cave, which marks the end of the downstream cave for Dollimore Series, where the water flows south to the resurgence. The choke is known to make long-lasting rumbling sounds when poked. During severe floods, the water can pond here to over head depth, but Storm Dennis seemed not to have had much effect.
Modelling by James, lighting by Tarquin and James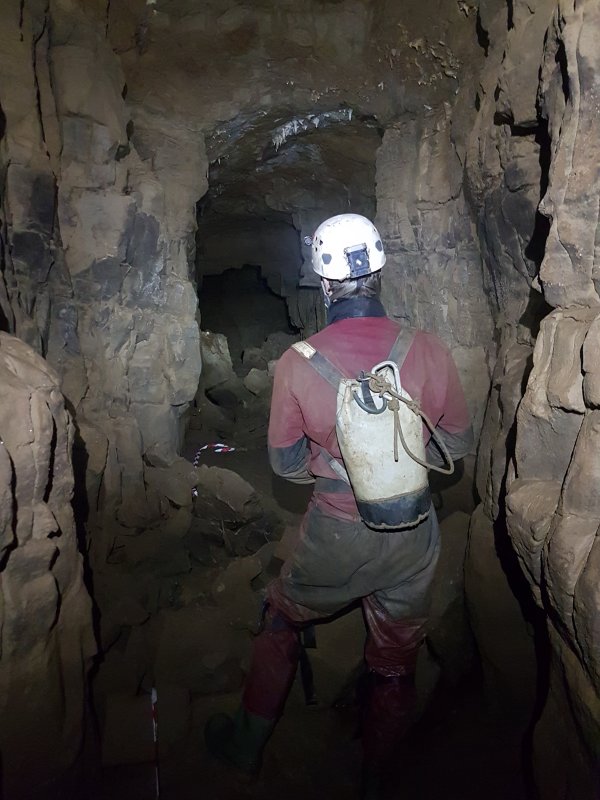 Yellow Van Passage, a possible old bypass to the choke, but which ends in a choke of its own. This is the site of one of the longest running digs in the cave.
Modelling by James, lighting by Tarquin and James
Yellow Van Passage, a possible old bypass to the choke, but which ends in a choke of its own. This is the site of one of the longest running digs in the cave.
Modelling by James, lighting by Tarquin and James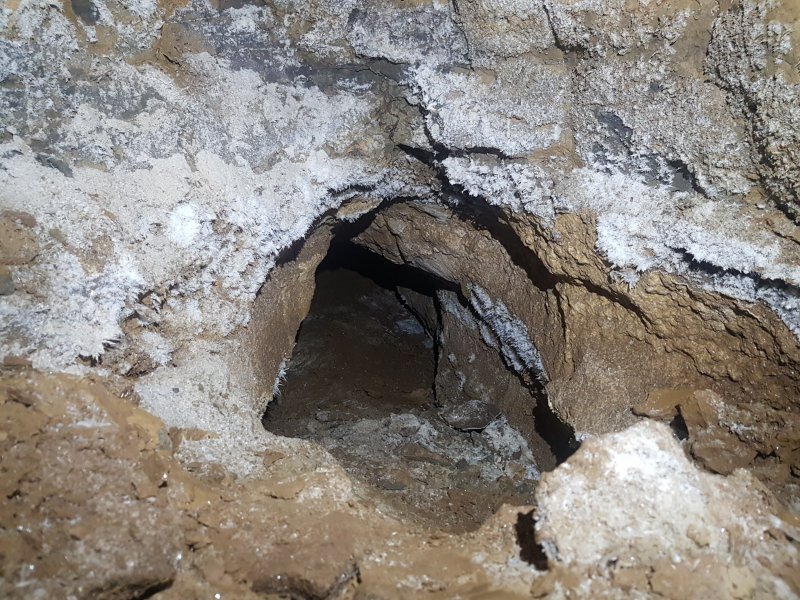 Gypsum filled hole on the ascent to Dog-Leg Complex. The passage closes down immediately, so the gypsum is not at risk.
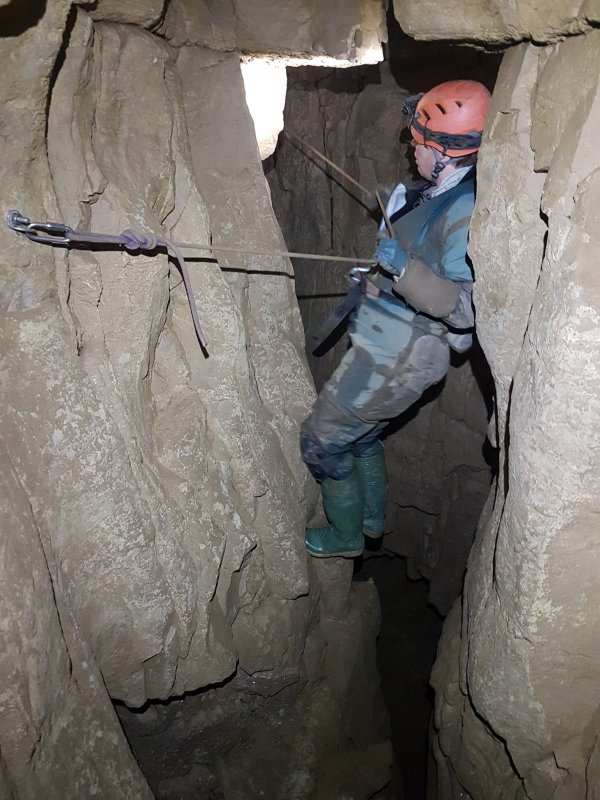 Start of the traverse in Dog-Leg Complex.
Modelling by Helen, lighting by Tarquin and Helen
Start of the traverse in Dog-Leg Complex.
Modelling by Helen, lighting by Tarquin and Helen This can be quite fearsome for visitors as it has no real ledges, but in the early days of exploration, we had to cross this without any rope.
Modelling by Helen, lighting by Tarquin, Helen and James
This can be quite fearsome for visitors as it has no real ledges, but in the early days of exploration, we had to cross this without any rope.
Modelling by Helen, lighting by Tarquin, Helen and James Top Banana, a fairly large chamber.
Modelling by James, lighting by Tarquin and James
Top Banana, a fairly large chamber.
Modelling by James, lighting by Tarquin and James Top Spots, a decorated chamber.
Modelling by James and Helen, lighting by Tarquin, James and Helen
Top Spots, a decorated chamber.
Modelling by James and Helen, lighting by Tarquin, James and Helen Straws in Top Spots.
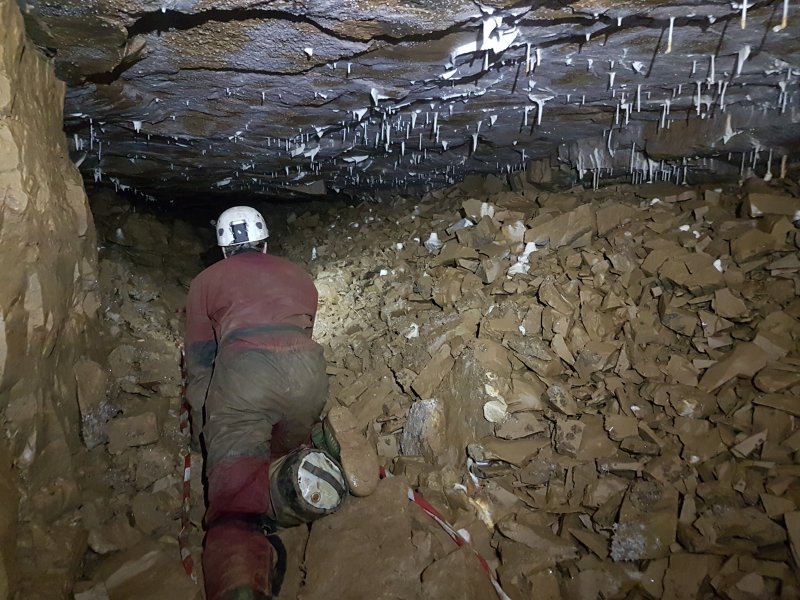 Crawl from Top Spots to Circus Maximus.
Modelling by James, lighting by Tarquin and James
Crawl from Top Spots to Circus Maximus.
Modelling by James, lighting by Tarquin and James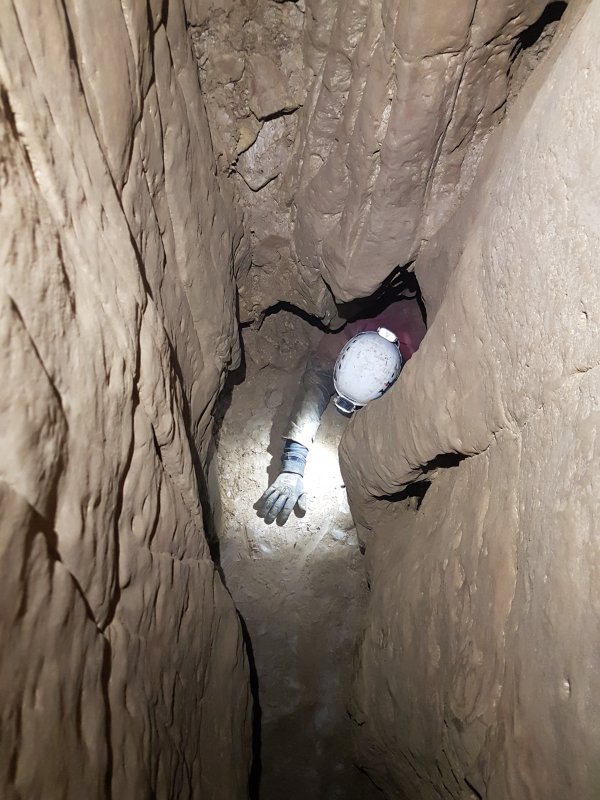 The crawl ends at what used to be a very awkward squeeze, but this has been removed completely, and the passage is now relatively easy.
Modelling by James, lighting by Tarquin and James
The crawl ends at what used to be a very awkward squeeze, but this has been removed completely, and the passage is now relatively easy.
Modelling by James, lighting by Tarquin and James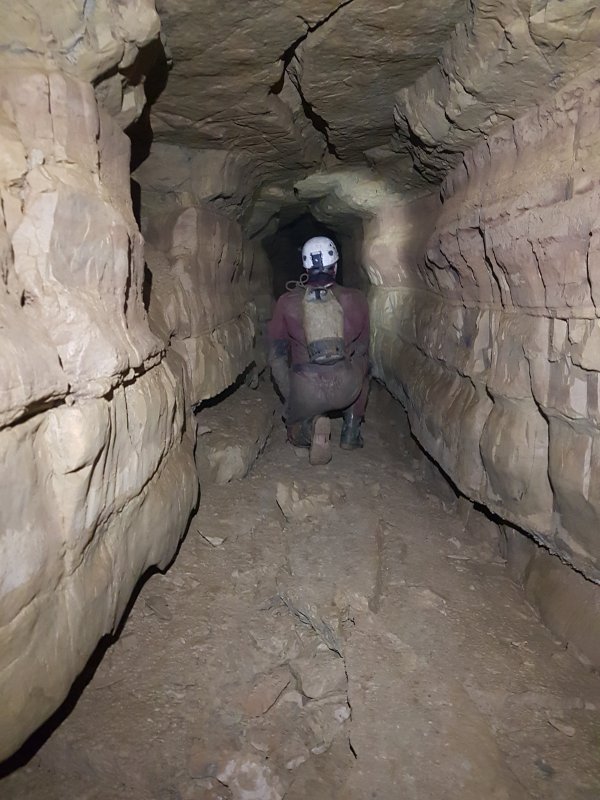 Passage towards one of the best decorated chambers in the cave.
Modelling by James, lighting by Tarquin and James
Passage towards one of the best decorated chambers in the cave.
Modelling by James, lighting by Tarquin and James The chamber has no official name. You used to have to stop at the entrance to the chamber, but a route (requiring great care) now leads into the chamber, allowing this panoramic view of some of the most detailed helictite formations. See the full Ogof Draenen gallery for individual photographs.
Modelling by James, lighting by Tarquin, Helen and James
The chamber has no official name. You used to have to stop at the entrance to the chamber, but a route (requiring great care) now leads into the chamber, allowing this panoramic view of some of the most detailed helictite formations. See the full Ogof Draenen gallery for individual photographs.
Modelling by James, lighting by Tarquin, Helen and James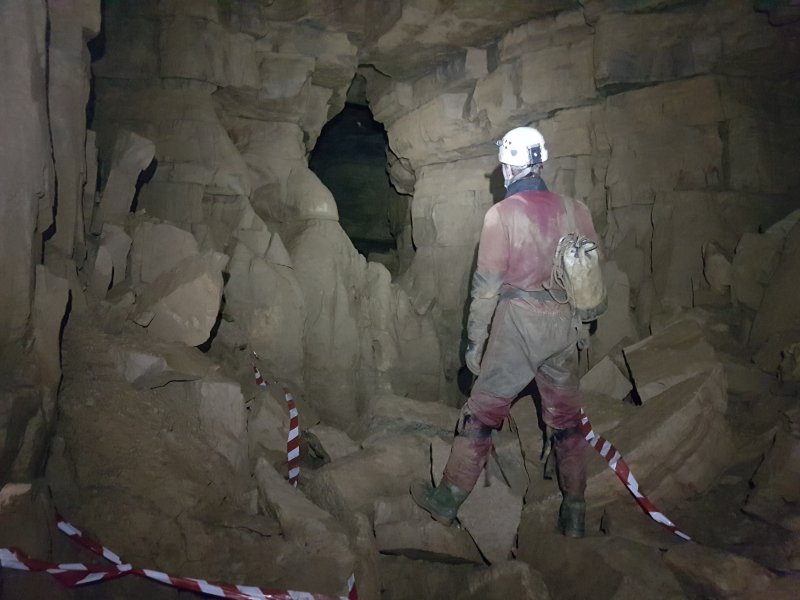 Returning to the old squeeze, the main way on is up a tricky climb, in the largest passage in Dog-Leg Complex.
Modelling by James, lighting by Tarquin and James
Returning to the old squeeze, the main way on is up a tricky climb, in the largest passage in Dog-Leg Complex.
Modelling by James, lighting by Tarquin and James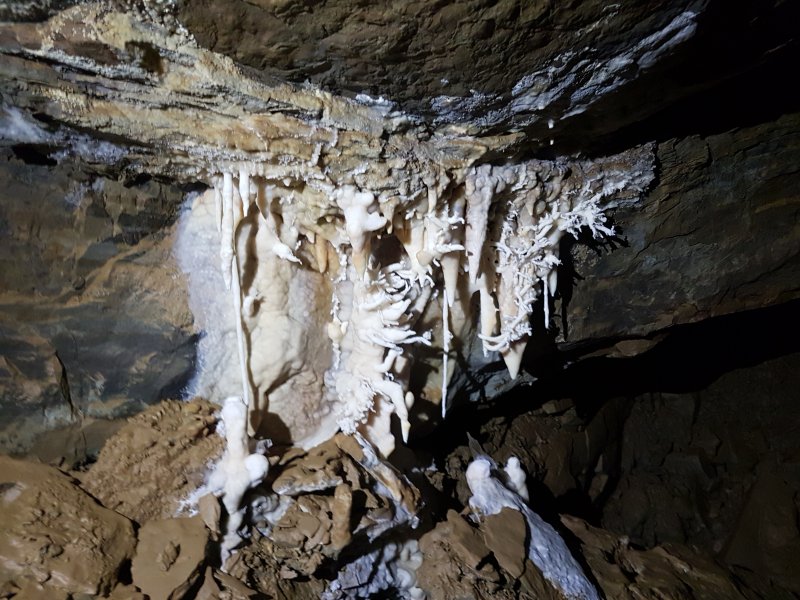 Formations before Circus Maximus.
 Formations before Circus Maximus.
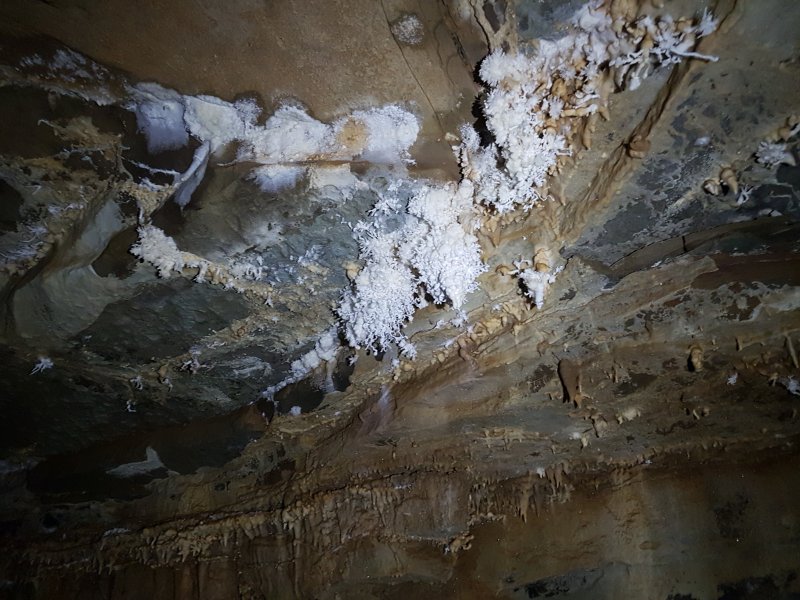 Formations before Circus Maximus.
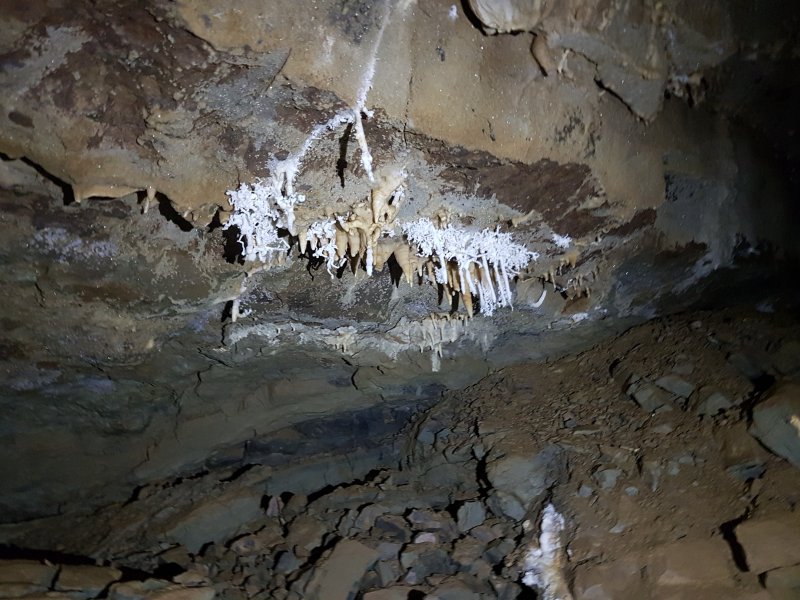 Formations before Circus Maximus.
 Circus Maximus, another large chamber, and one of the major destinations within the cave. Sadly, the formations here are quite a long way from the viewpoint, so they can be tricky to photograph, but they are absolutely superb in person.
Modelling by Helen and James, lighting by Tarquin, Helen and James
Circus Maximus, another large chamber, and one of the major destinations within the cave. Sadly, the formations here are quite a long way from the viewpoint, so they can be tricky to photograph, but they are absolutely superb in person.
Modelling by Helen and James, lighting by Tarquin, Helen and James Just after Circus Maximus are some of the most impressive helictites within Dog-Leg Complex.
Lighting by Tarquin, Helen and James
Just after Circus Maximus are some of the most impressive helictites within Dog-Leg Complex.
Lighting by Tarquin, Helen and James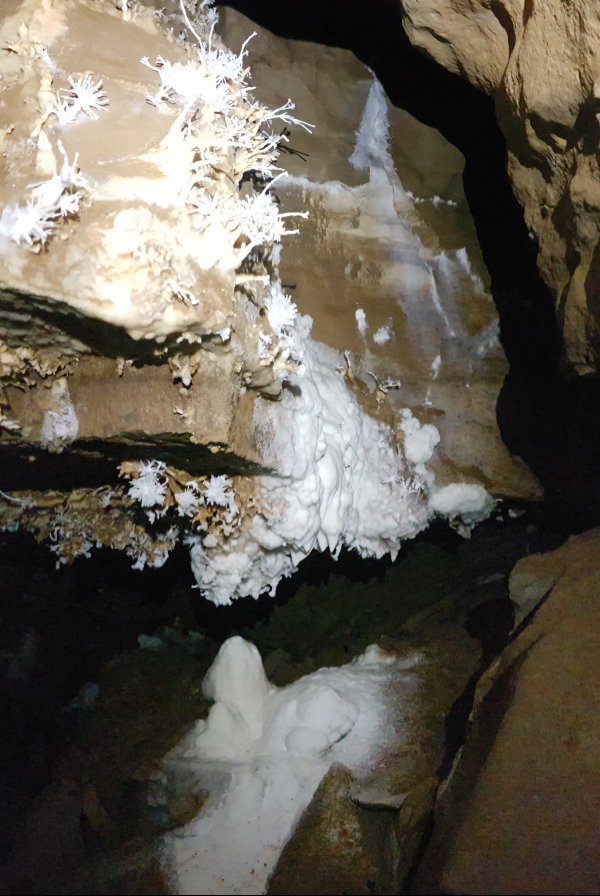 The cramped conditions mean that these were taken on panorama settings, and the picture quality suffers as a result. See the full Ogof Draenen gallery for individual photographs.
 White Arch Passage, just upstream of Flood Overflow Passage. This picture was taken on the second trip. When we arrived at this location a week previously, the floor had been a deep pool here, with only the rocks on the left being out of water.
Modelling by James and Helen, lighting by Tarquin, James and Helen
White Arch Passage, just upstream of Flood Overflow Passage. This picture was taken on the second trip. When we arrived at this location a week previously, the floor had been a deep pool here, with only the rocks on the left being out of water.
Modelling by James and Helen, lighting by Tarquin, James and Helen Water flowing into Flood Overflow Passage during Storm Dennis.
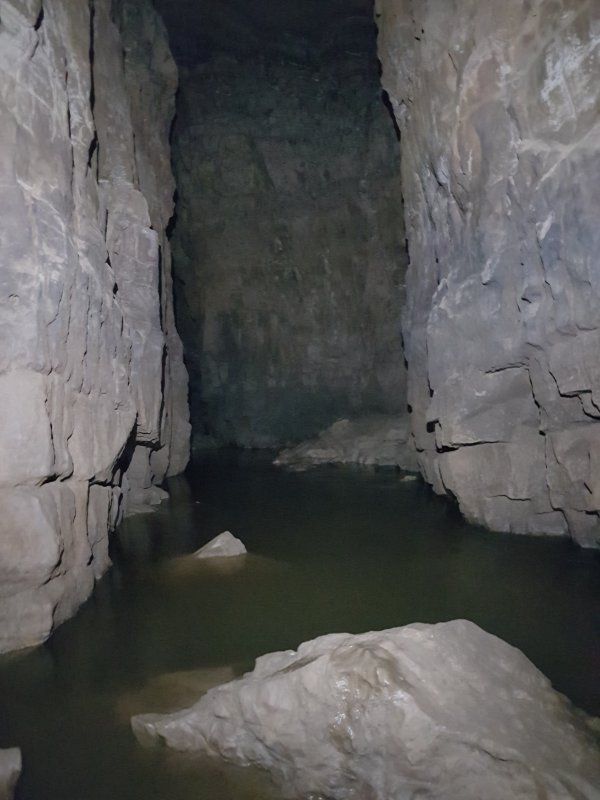 Downstream of Flood Overflow Passage, Storm Dennis had risen the water to over knee deep in the next section of White Arch Passage.
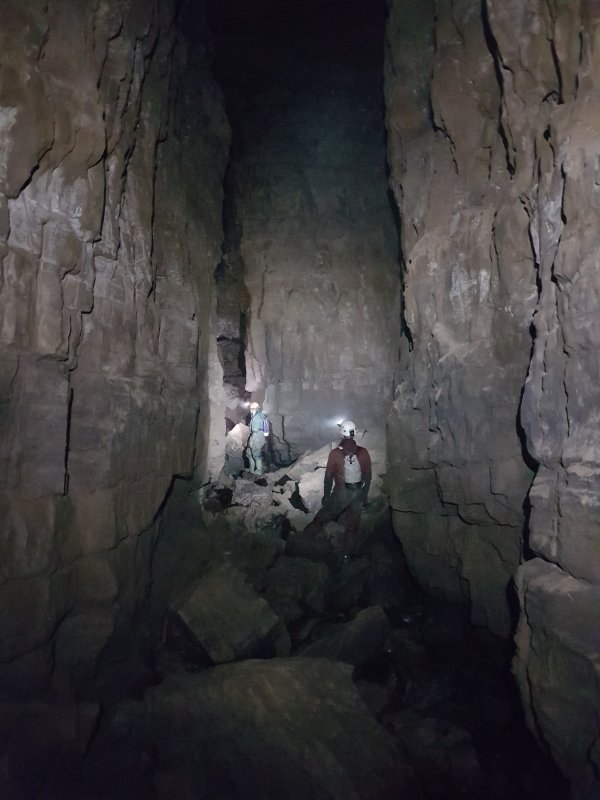 Seen here a week later, the water cannot even be seen below the rocks. The top of the two rocks in the foreground, and the rock banks on the right and in the distance, can be identified in the previous picture.
Modelling by James and Helen, lighting by Tarquin, James and Helen
Seen here a week later, the water cannot even be seen below the rocks. The top of the two rocks in the foreground, and the rock banks on the right and in the distance, can be identified in the previous picture.
Modelling by James and Helen, lighting by Tarquin, James and Helen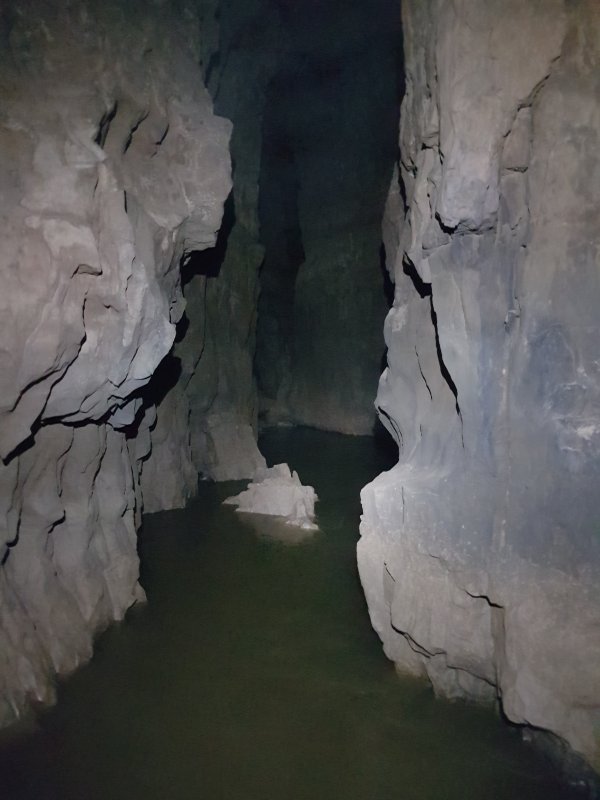 Waist deep water just upstream of the shattered pillar climb in White Arch Passage.
 Seen in normal water conditions a week later. The rocks can be used to keep your shoes dry. The ledges and top of the rocks can be seen in the previous picture.
Modelling by Helen, lighting by Tarquin and Helen
Seen in normal water conditions a week later. The rocks can be used to keep your shoes dry. The ledges and top of the rocks can be seen in the previous picture.
Modelling by Helen, lighting by Tarquin and Helen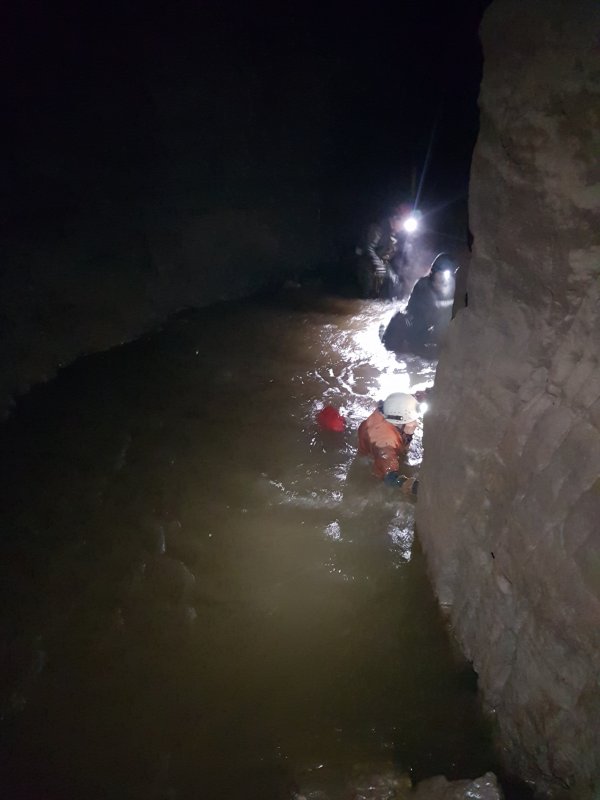 Deep water on a corner. Fortunately, I had remembered which parts of the passage had the highest rocks, so was able to forge a route through here without having to swim, but any mistakes would lead to a deep dunking, as the water would be over our heads anywhere else.
Modelling by Phill, Celestine and Helen, lighting by Tarquin, Phill, Celestine and Helen
Deep water on a corner. Fortunately, I had remembered which parts of the passage had the highest rocks, so was able to forge a route through here without having to swim, but any mistakes would lead to a deep dunking, as the water would be over our heads anywhere else.
Modelling by Phill, Celestine and Helen, lighting by Tarquin, Phill, Celestine and Helen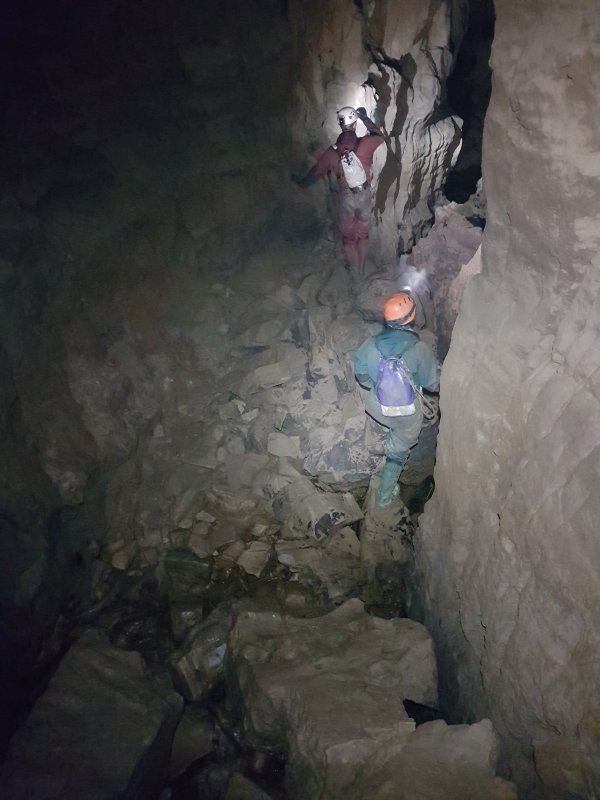 The same corner in normal conditions, with the river hidden below the rocks.
Modelling by Helen and James, lighting by Tarquin, Helen and James
The same corner in normal conditions, with the river hidden below the rocks.
Modelling by Helen and James, lighting by Tarquin, Helen and James Just upstream of Carpet Crawl, White Arch Passage floods to its most extreme depth, requiring a swim across the pool. The deepest water is about 2 metres deep, and a few of our team had assistance to locate the floor on the other side. The flow was low enough that swimming upstream was still possible. This is the second time I had seen the passage this way, but with the rest of the cave flooding at the same time, this was certainly the most significant flooding I had seen.
Modelling by Adrian, lighting by Tarquin and Adrian
Just upstream of Carpet Crawl, White Arch Passage floods to its most extreme depth, requiring a swim across the pool. The deepest water is about 2 metres deep, and a few of our team had assistance to locate the floor on the other side. The flow was low enough that swimming upstream was still possible. This is the second time I had seen the passage this way, but with the rest of the cave flooding at the same time, this was certainly the most significant flooding I had seen.
Modelling by Adrian, lighting by Tarquin and Adrian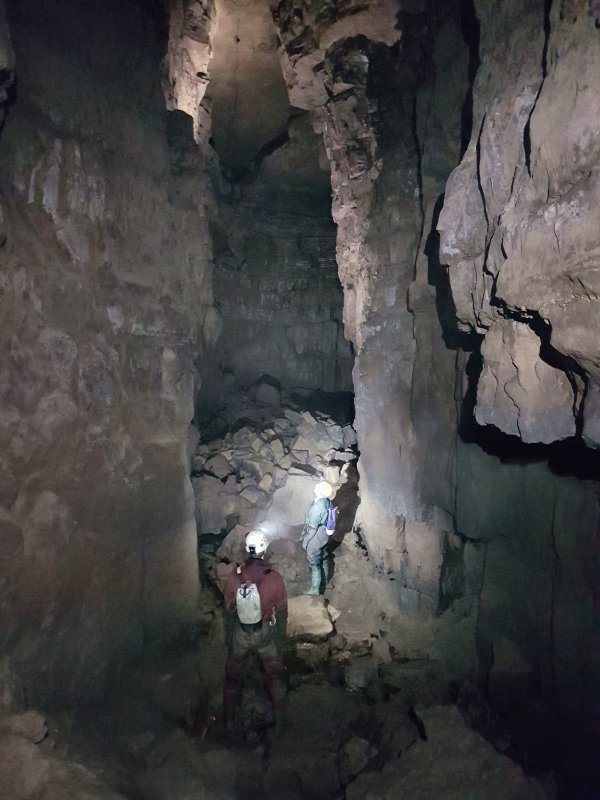 The same section seen in normal conditions. The distant caver is standing on the rocks that are neck deep during flooding.
Modelling by James and Helen, lighting by Tarquin, James and Helen
The same section seen in normal conditions. The distant caver is standing on the rocks that are neck deep during flooding.
Modelling by James and Helen, lighting by Tarquin, James and Helen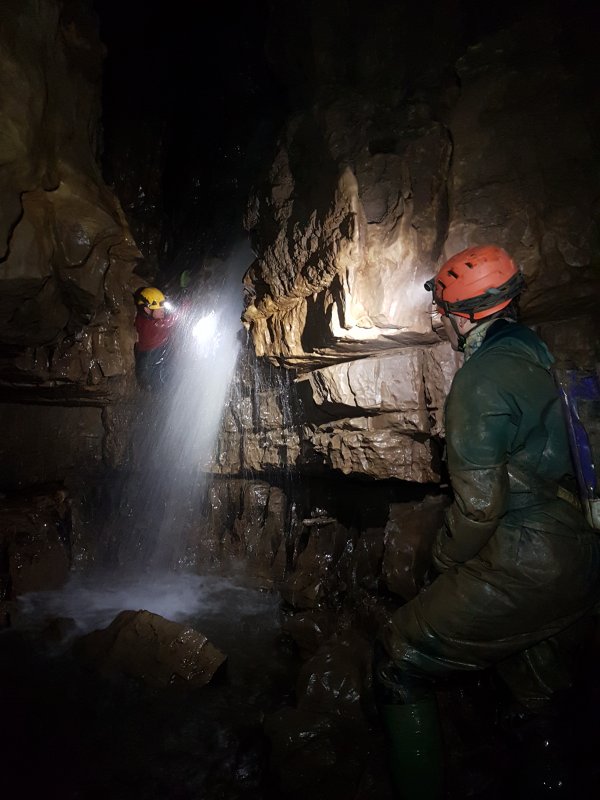 The normally-dry rope climb in the Entrance Series, the second time I had seen a waterfall here. Last time the water here had been more like a plughole, but none of the rest of the cave had been flooding - typical for how Draenen usually floods.
Modelling by Helen and Adrian, lighting by Tarquin, Helen and Adrian
The normally-dry rope climb in the Entrance Series, the second time I had seen a waterfall here. Last time the water here had been more like a plughole, but none of the rest of the cave had been flooding - typical for how Draenen usually floods.
Modelling by Helen and Adrian, lighting by Tarquin, Helen and Adrian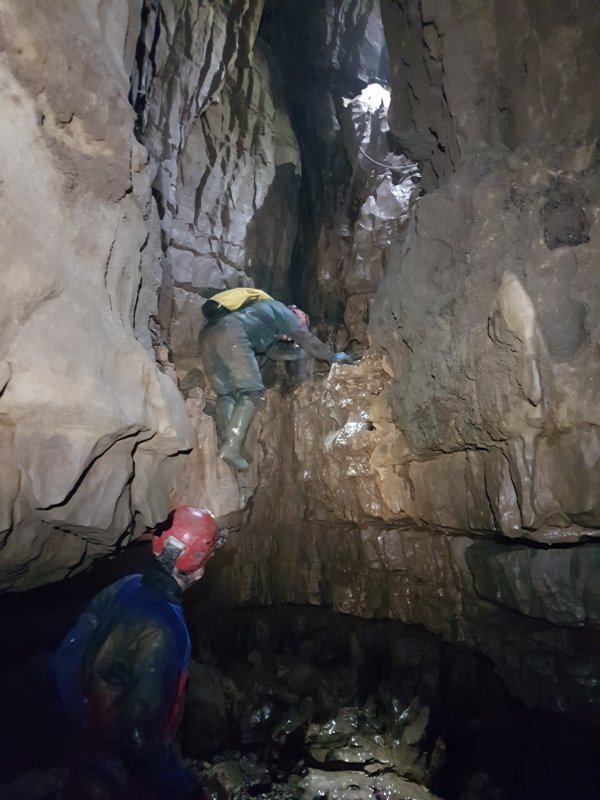 Seen the previous summer, this is how it is supposed to look.
Modelling by Tim Ball and Stuart Bennett, lighting by Tarquin, Tim Ball, Stuart Bennett and Nigel Jones
Seen the previous summer, this is how it is supposed to look.
Modelling by Tim Ball and Stuart Bennett, lighting by Tarquin, Tim Ball, Stuart Bennett and Nigel Jones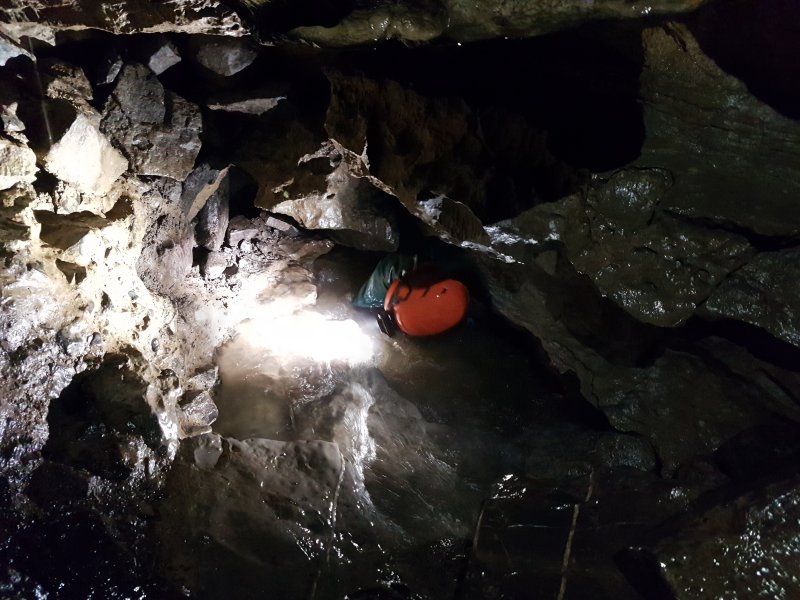 Exiting the wet crawl above the wet climb during the flood. This part is particularly unpleasant. Normally you get a wet belly and legs, but here it required a rotation in the water to keep your face dry, and a thorough soaking was inevitable.
Modelling by Helen, lighting by Tarquin and Helen
Exiting the wet crawl above the wet climb during the flood. This part is particularly unpleasant. Normally you get a wet belly and legs, but here it required a rotation in the water to keep your face dry, and a thorough soaking was inevitable.
Modelling by Helen, lighting by Tarquin and Helen